HOLIDAY DONATION DRIVE - SUPPORT MSW - DO YOUR PART TO KEEP THIS GREAT FORUM GOING!
×


JerryTodd
-
Posts
874 -
Joined
-
Last visited
Content Type
Profiles
Forums
Gallery
Events
Everything posted by JerryTodd
-
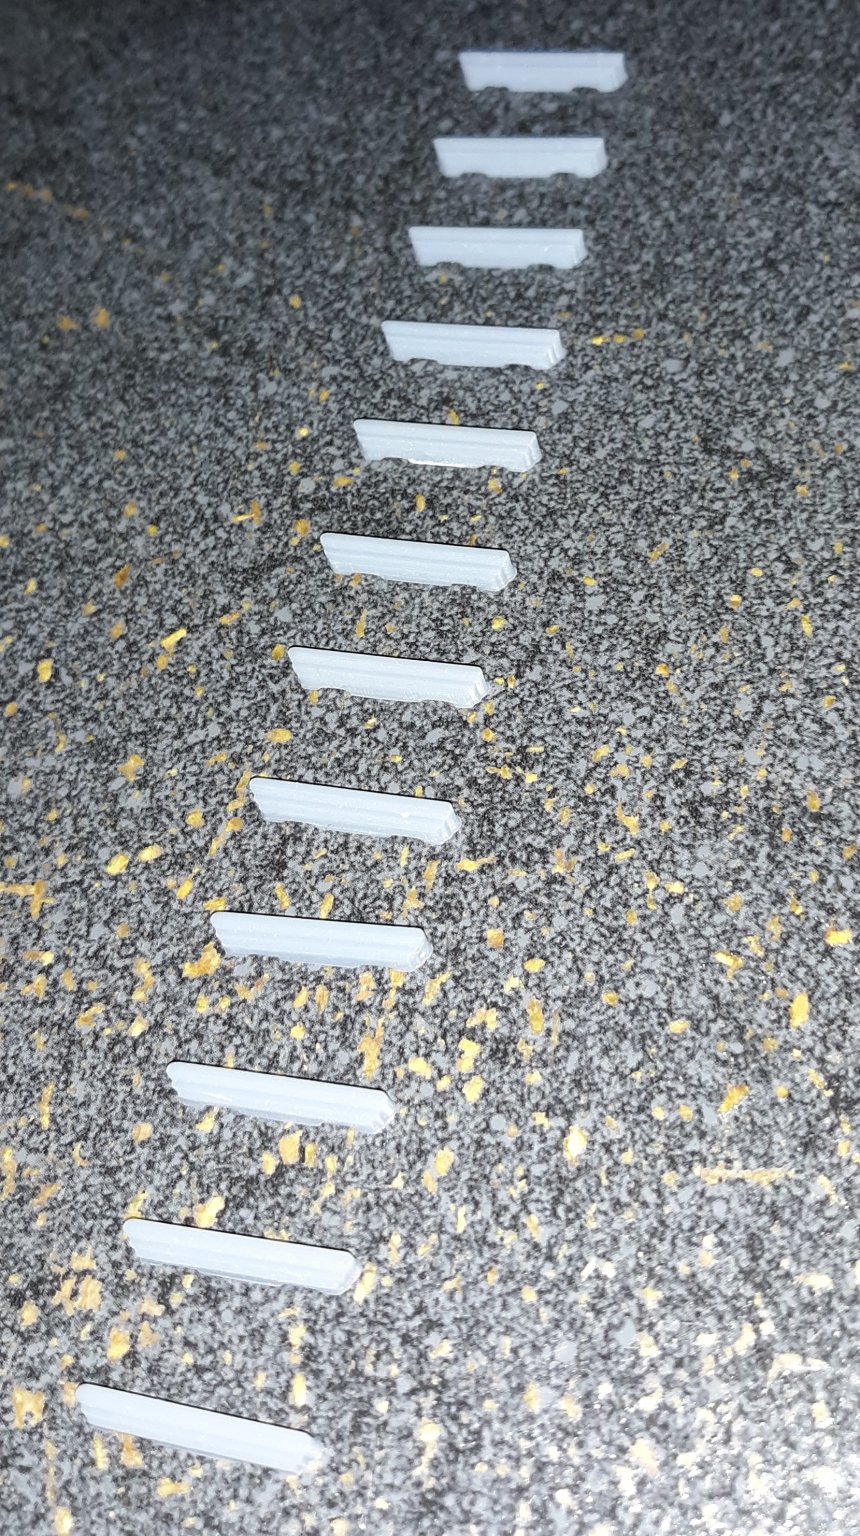
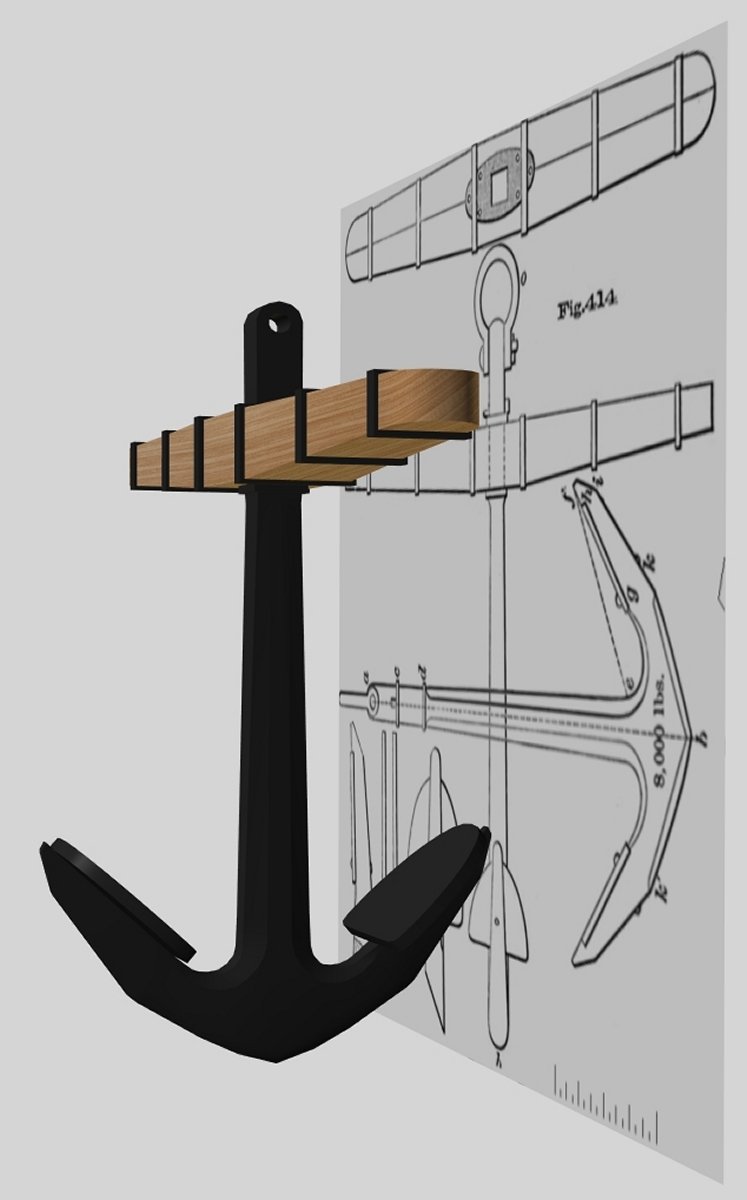
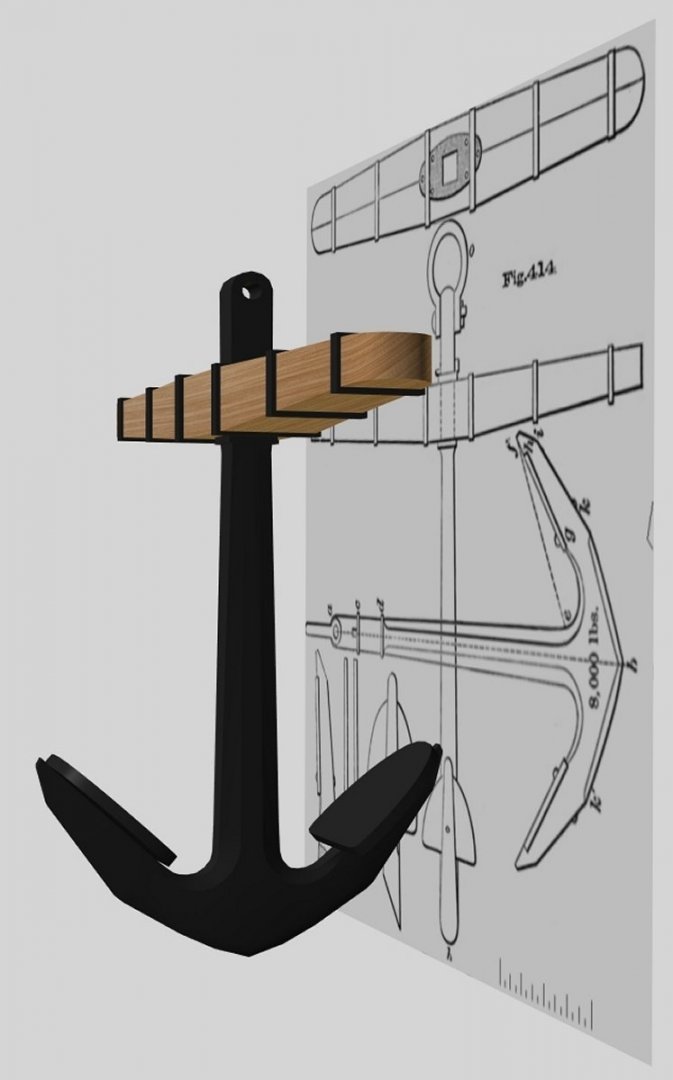
 After making the anchor I went on to make the boarding steps which will be about 2cm wide With that success, I set up to print an anchor overnight... That didn't turn out so well. Again, the supports didn't hold and in pulling loose, the fluke end of the anchor didn't print right. I'll get this support thing sorted eventually.
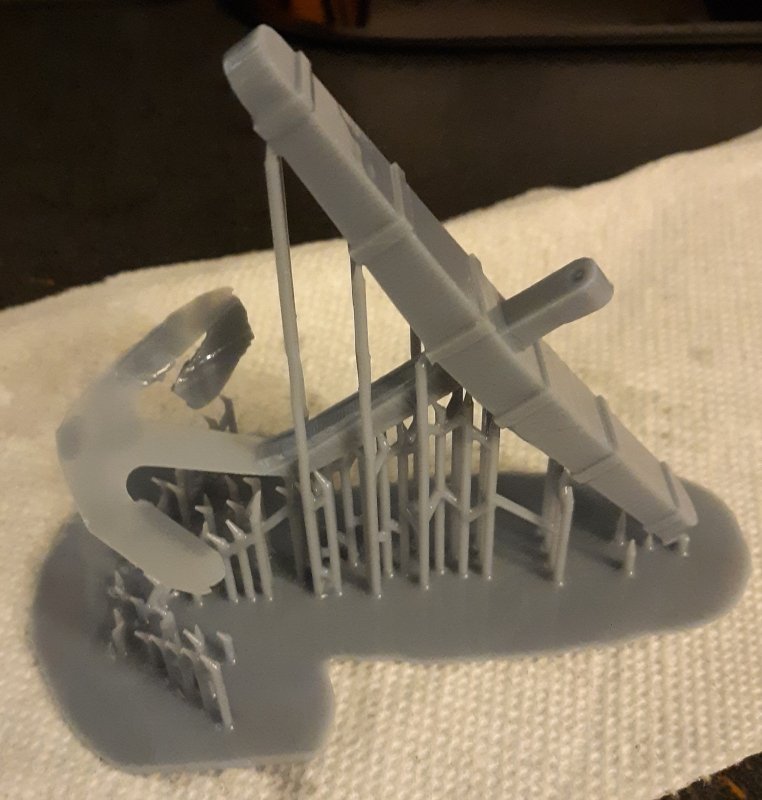

- 553 replies
-
- 3
-

-
- sloop of war
- constellation
- (and 3 more)
-
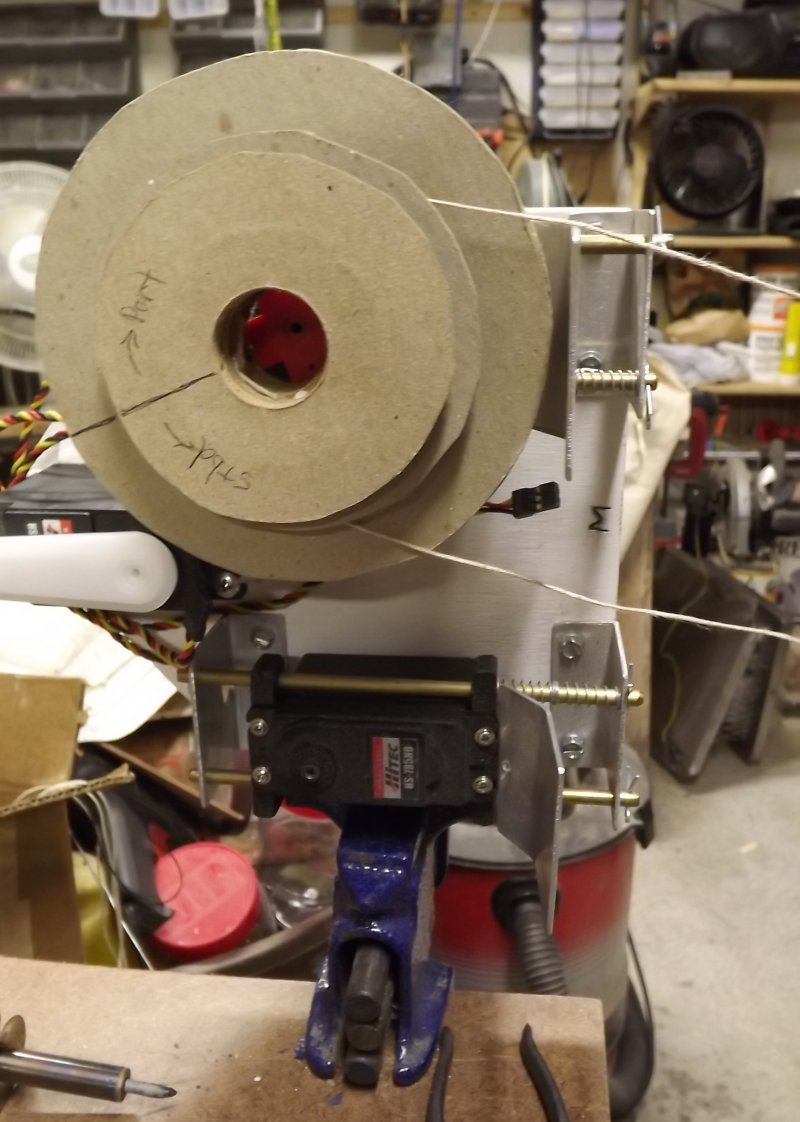
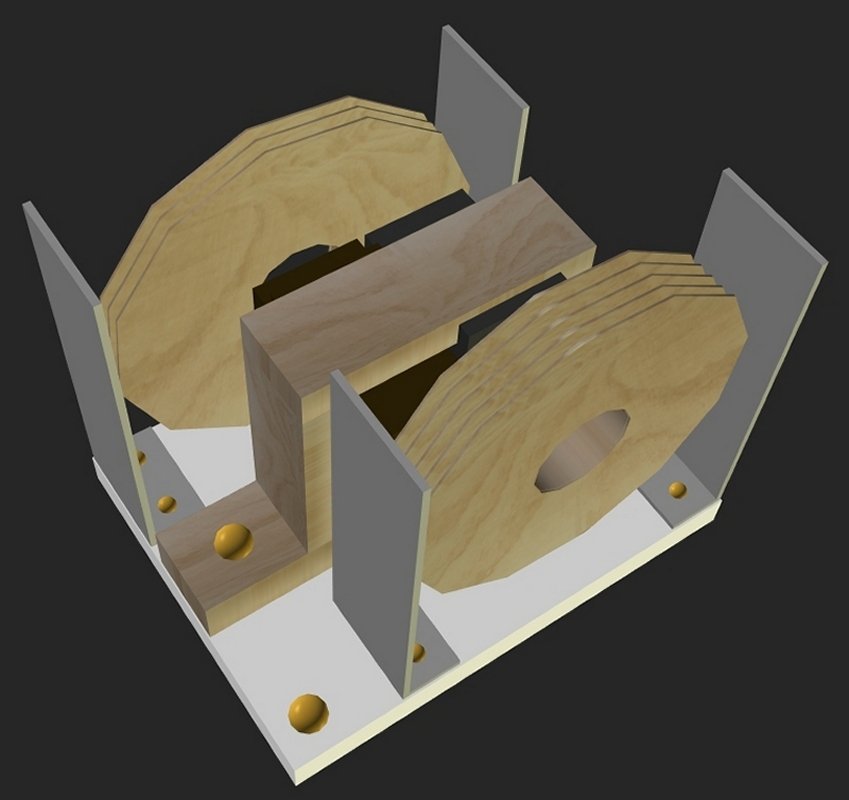
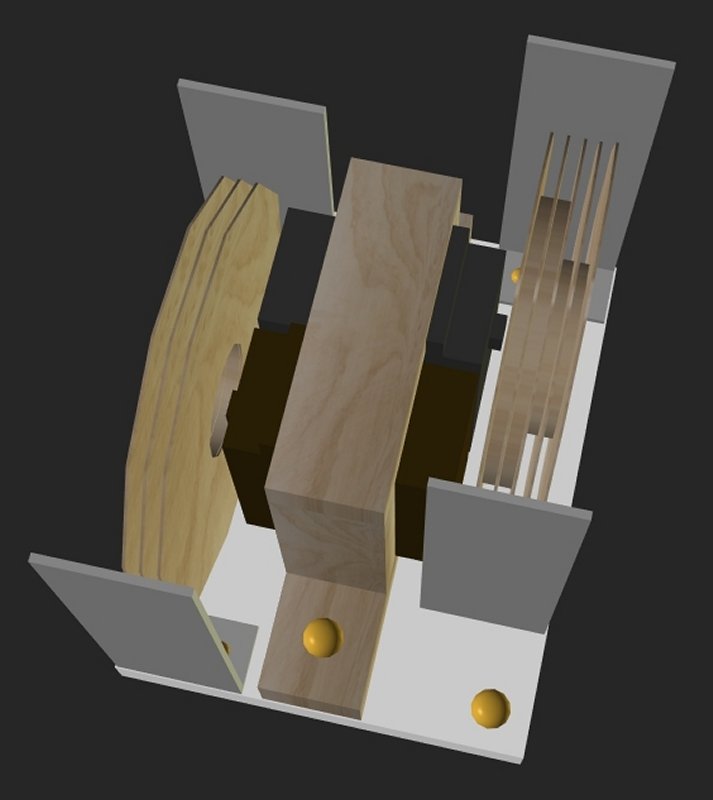
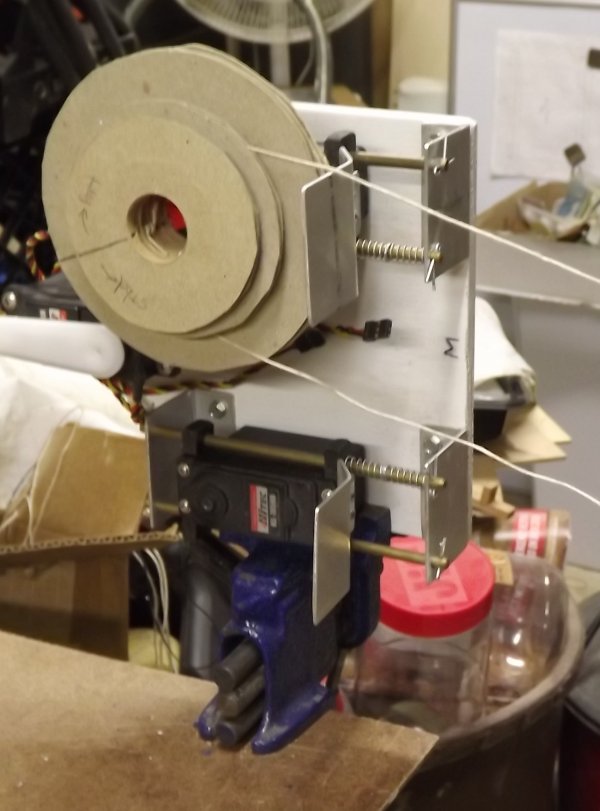
Experience with Constellation's yard bracing got me thinking that that wasn't the most efficient method I could go with. With the winch drums horizontal, even with the sliding servos and springs to maintain tension, some slack still develops and slack can lead to lines tangling, or slipping off their drum. To deal with that the drums have very wide flanges and guides to keep the lines in their place. When I got to trying to control Constellation's courses I could find no way to do it using her horizontal winch drums that wasn't more complicated than it was worth. With the winch drums mounted on their sides, the issue of slack isn't as pronounced as with them mounted horizontally. With proper guides, there's little chance of them slipping off their drum onto another and getting tangled. There's ways of dealing with any excessive slack. Al Lheureux basically used a version of this on his Rattlesnake For a brief moment in 2016, I gave the idea of turning the winches on their side a thought, What put me off the idea was the vertical space it seemed it would take up, and I let it go, but recently Timmo mentioned his brace controls in his frigate Enterprise build log, and I got to thinking about it again. Looking at the idea of vertical winches in 2016 Besides the issue of slack, it's controlling the tacks of the courses within the same winch system that really got me back to thinking of this again. A simple 3D model of two winch servos with drums mounted on their sides. Reducing the size of the flanges would further reduce the overall size of the unit. The tall gray things are aluminum sheet with holes to guide the braces onto their drums.
- 97 replies
-
- 3
-
-
- macedonian
- frigate
- (and 2 more)
-
Too tired from the checker-board pattern at work this week (off, on, off, on, etc) to clean up the last failed print and try again, I opted to make another 3D model, the anchors. Well, 1 model, but the ship gets 4 of them. The shackles I'll make from brass.
- 553 replies
-
- 4
-
-
- sloop of war
- constellation
- (and 3 more)
-
I've been considering mounting the winches on their sides in Macedonian. With the drums flat, or horizontal, any slack can result in the braces binding, tangling, or slipping off the drum which shouldn't be an issue with the drum mounted on its side. This may also make it easier to handle the course tacks as well, which I found to be pretty much impossible with "flat-drums."
- 28 replies
-
- 2
-
-
- frigate
- enterprize
- (and 2 more)
-
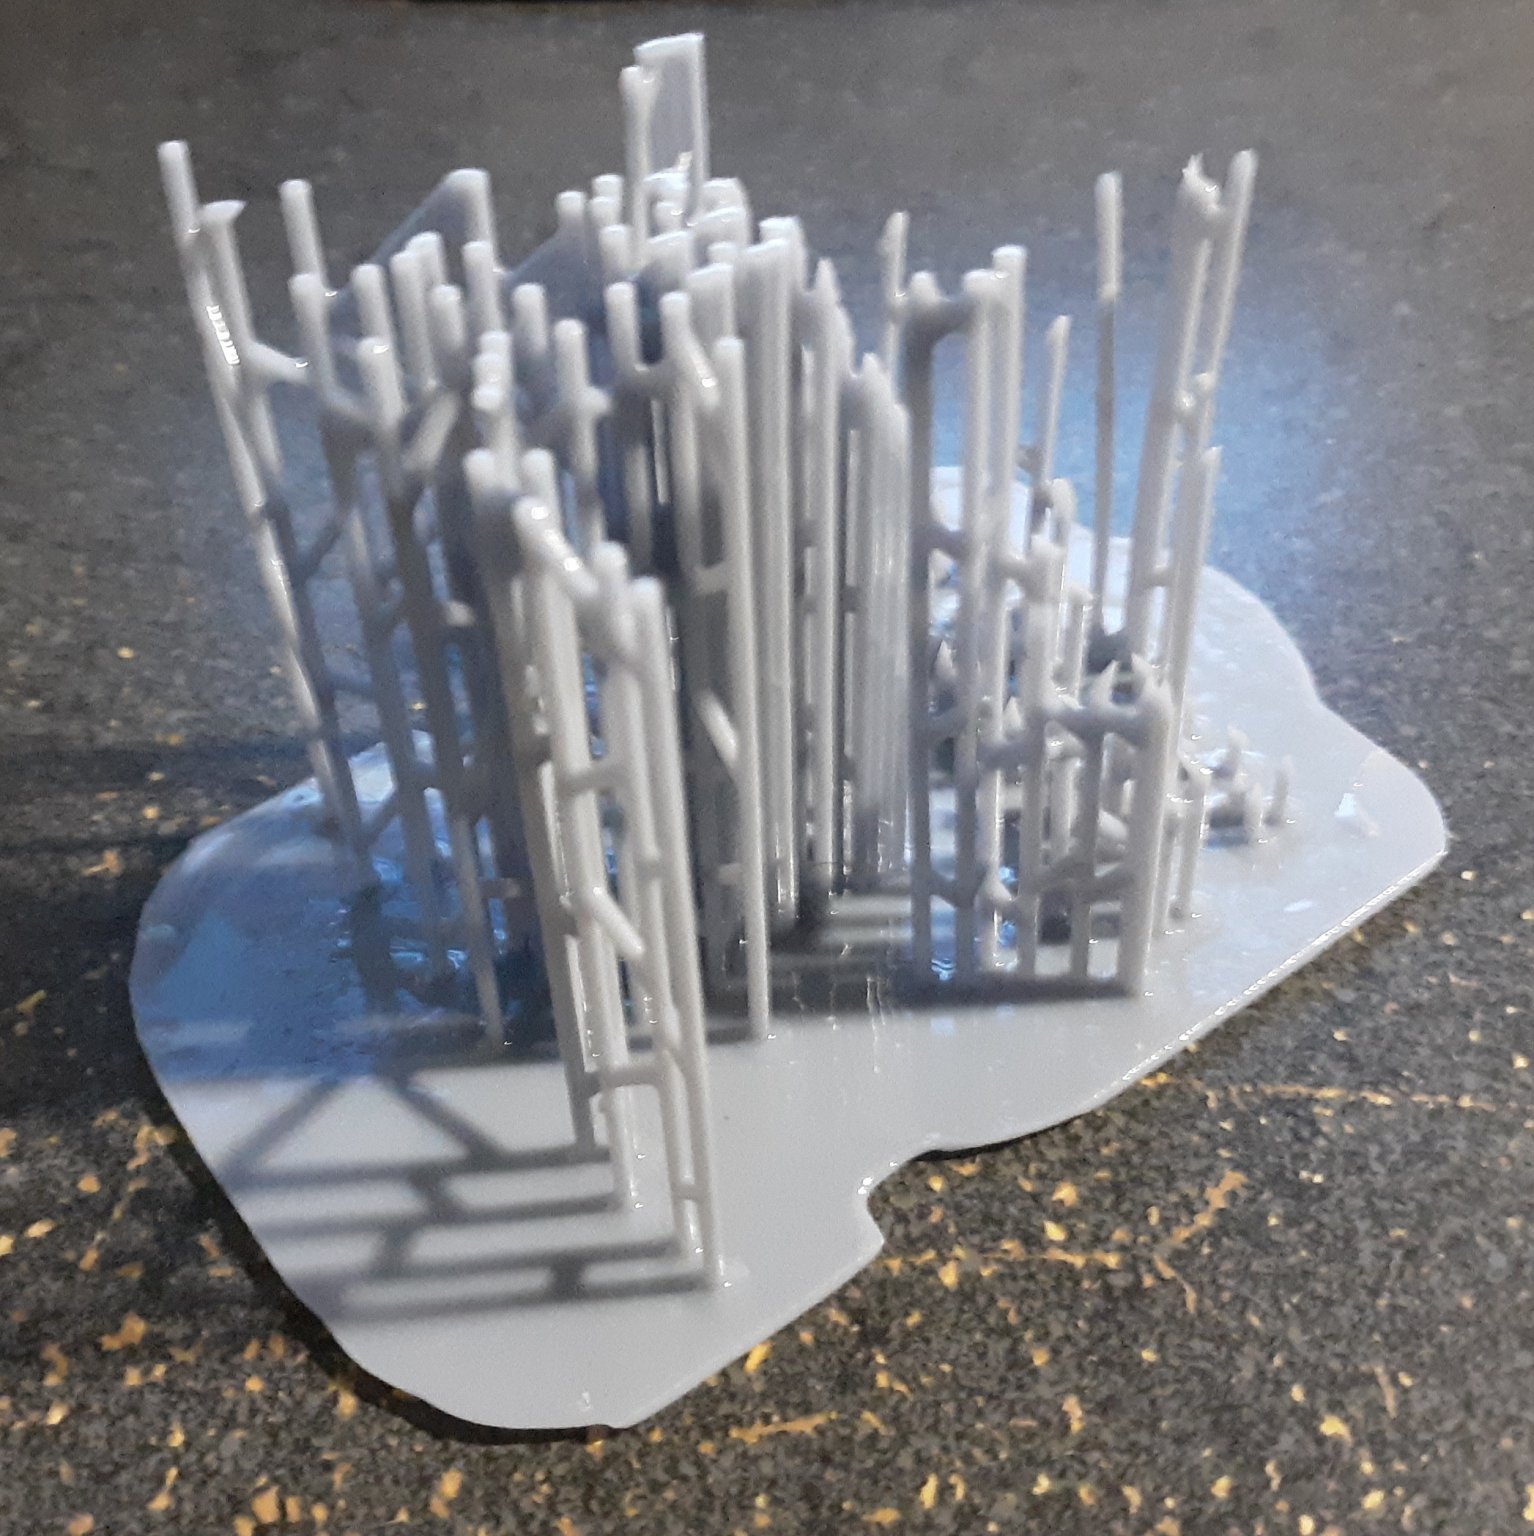
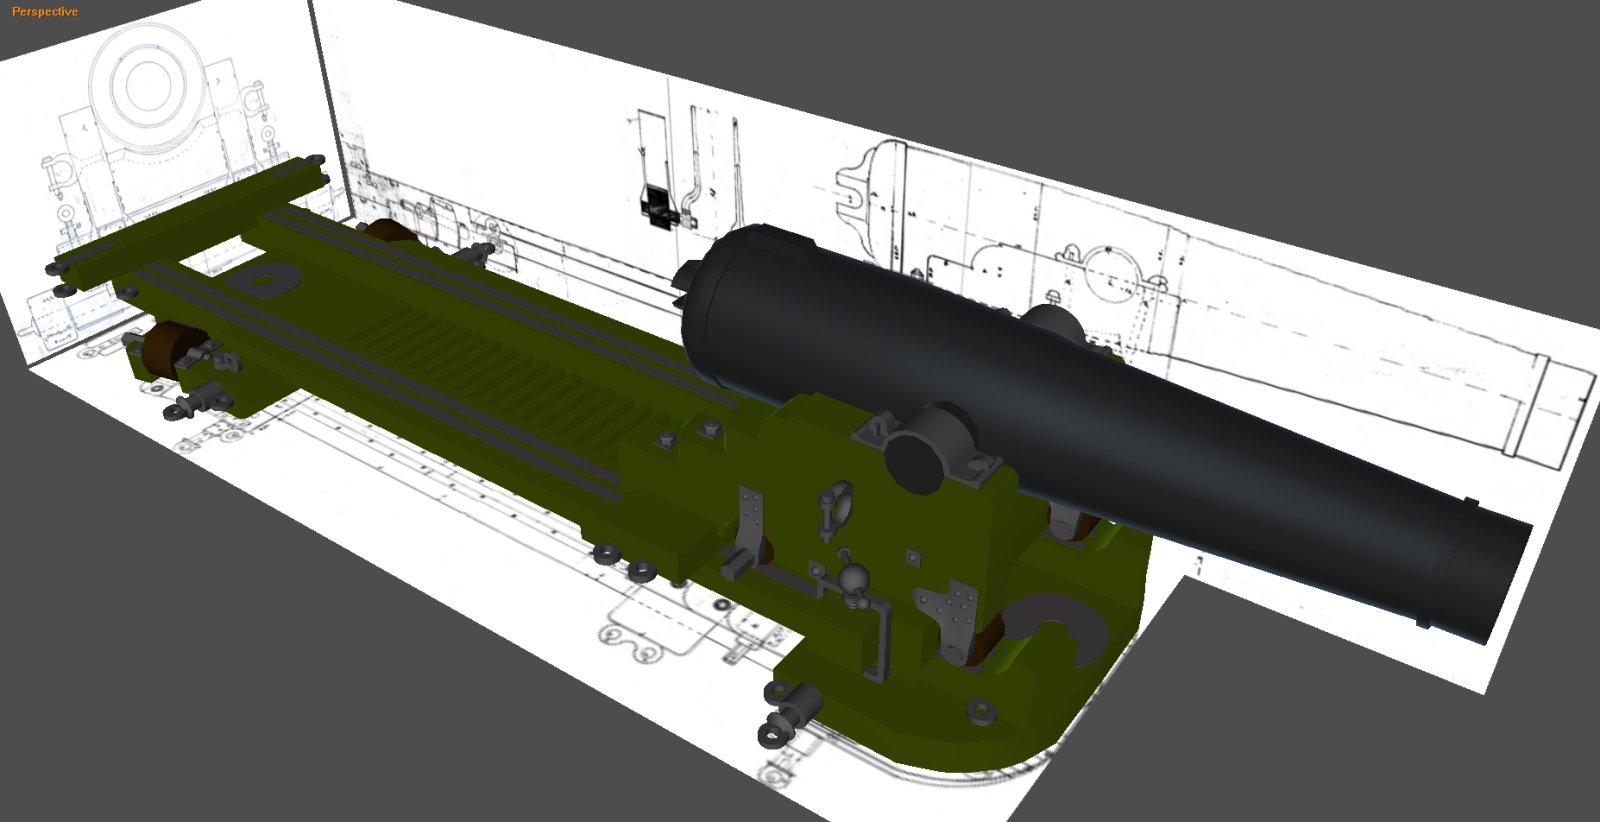
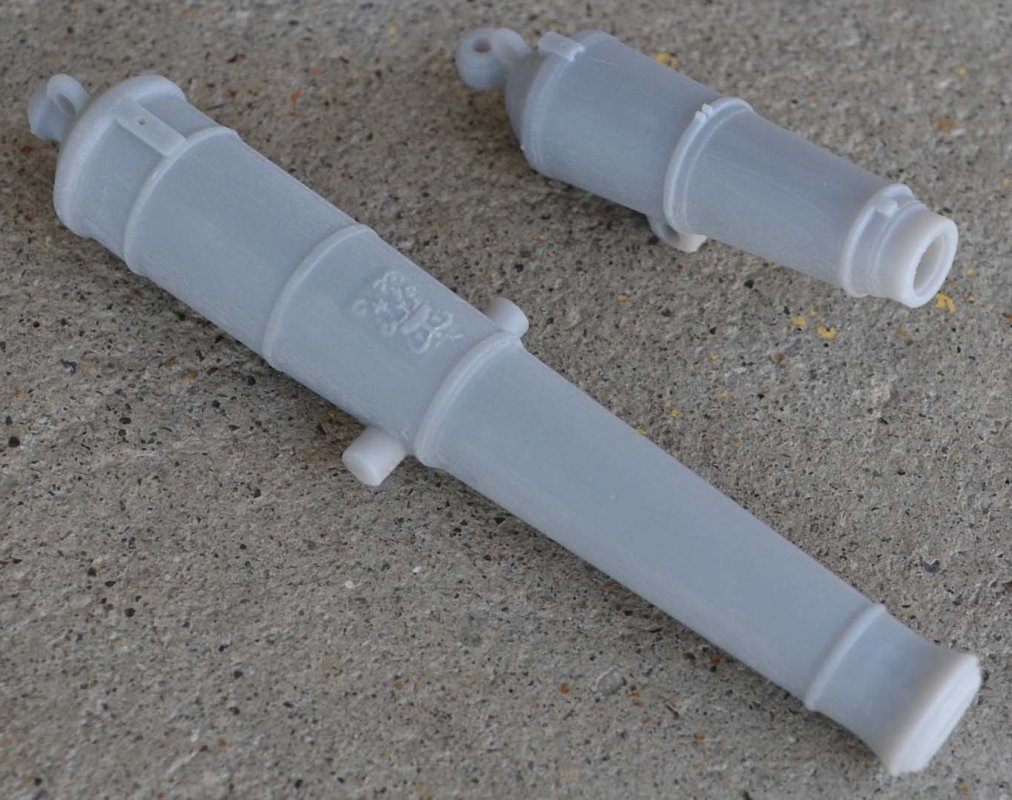
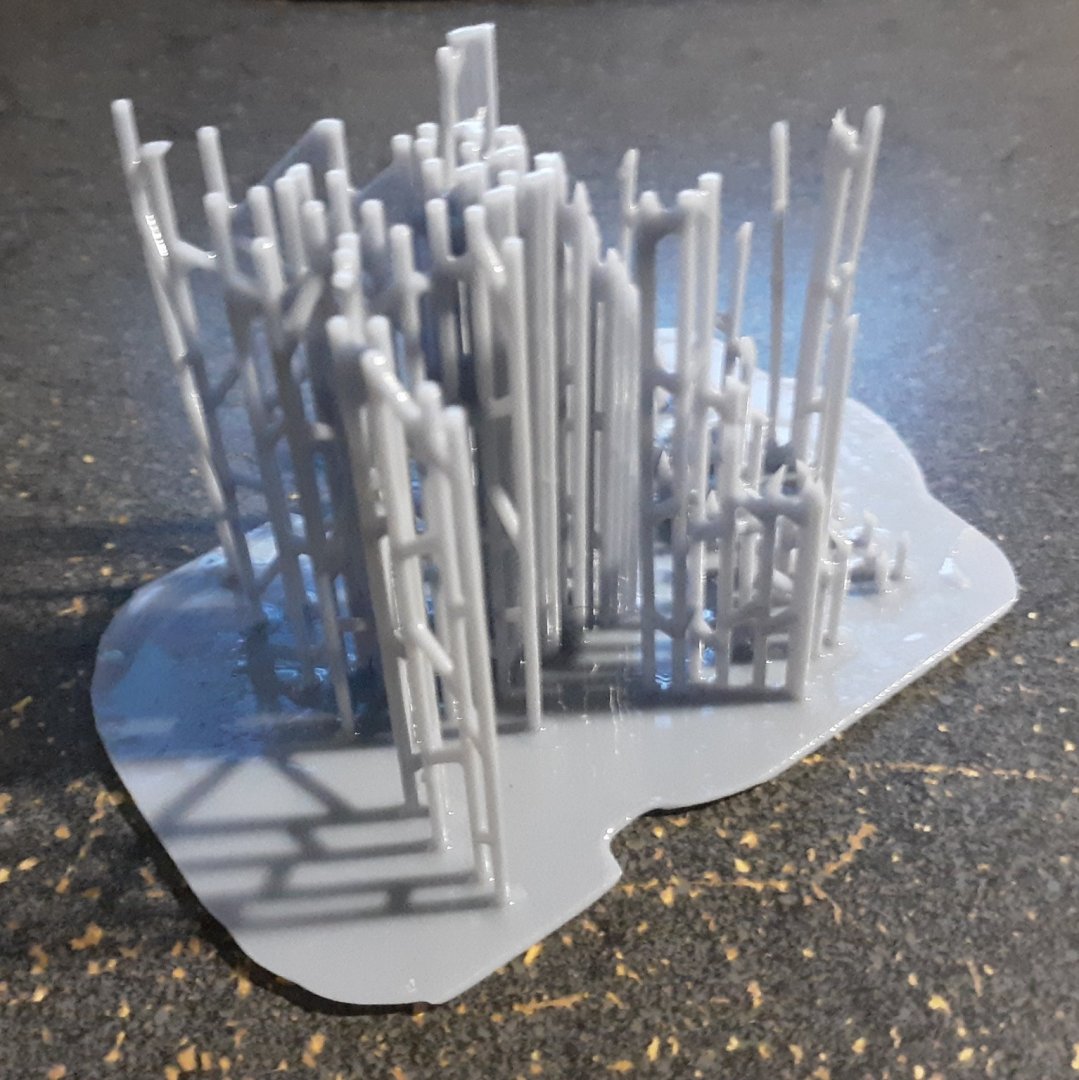
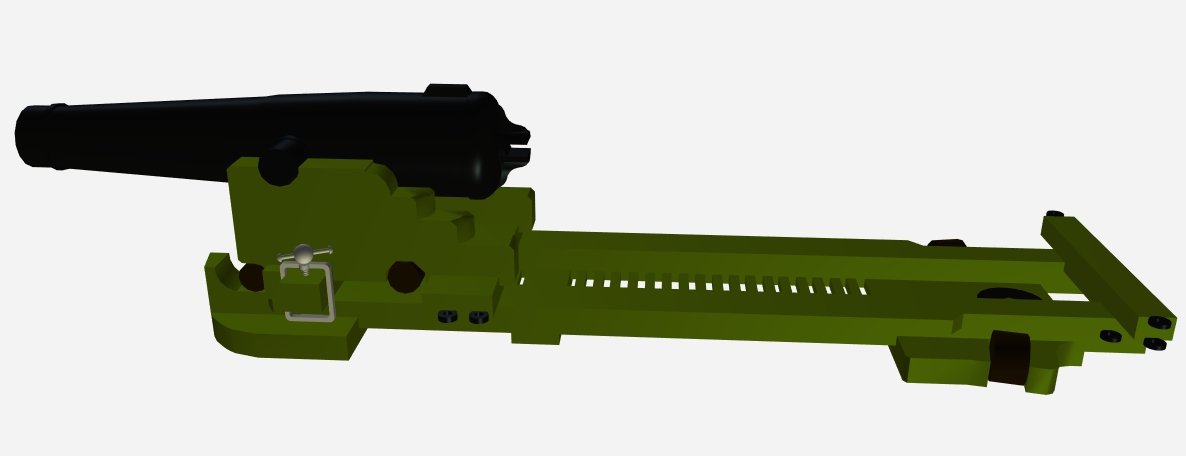
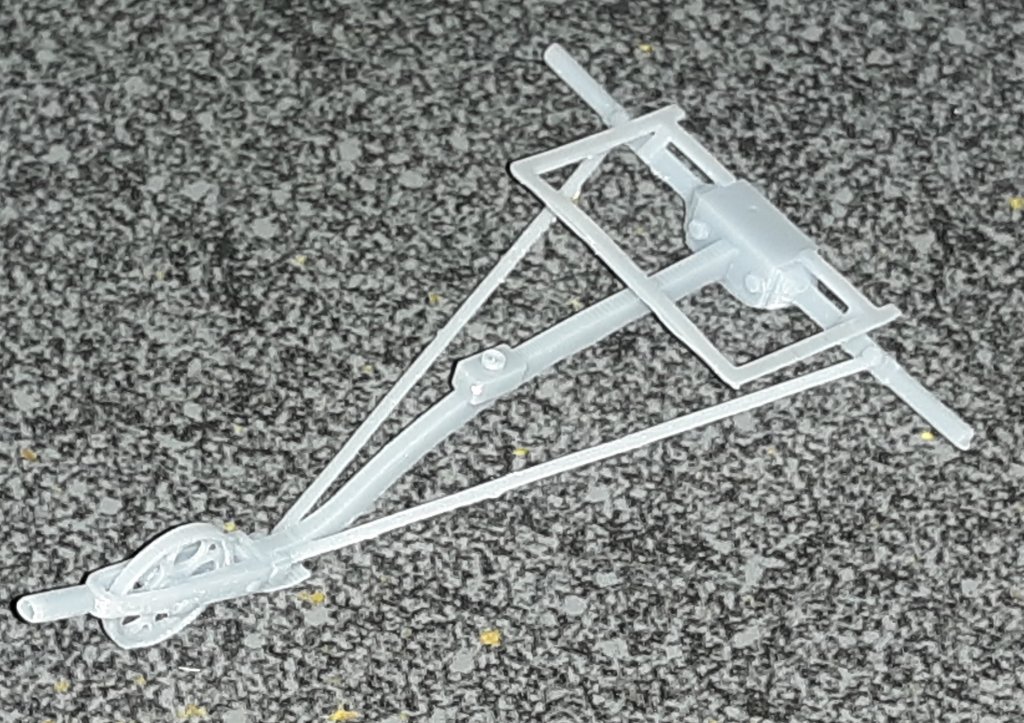
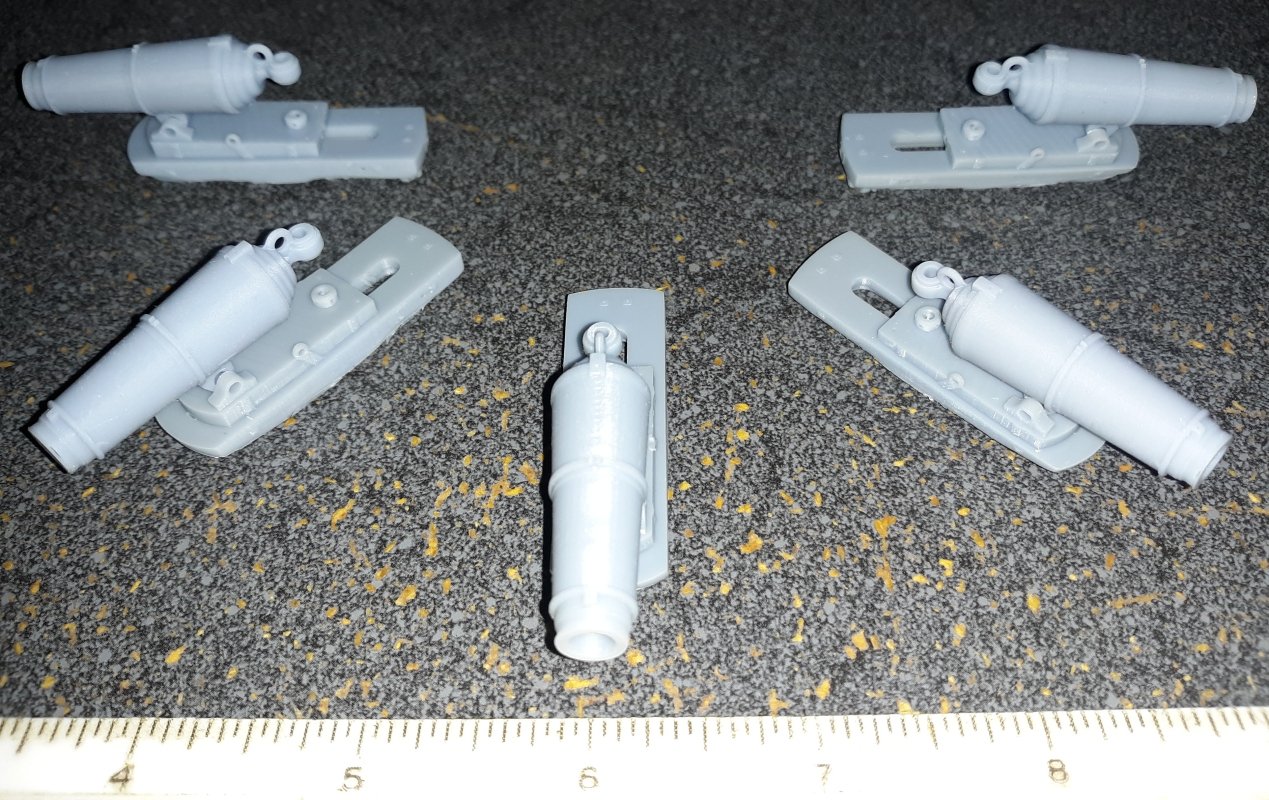
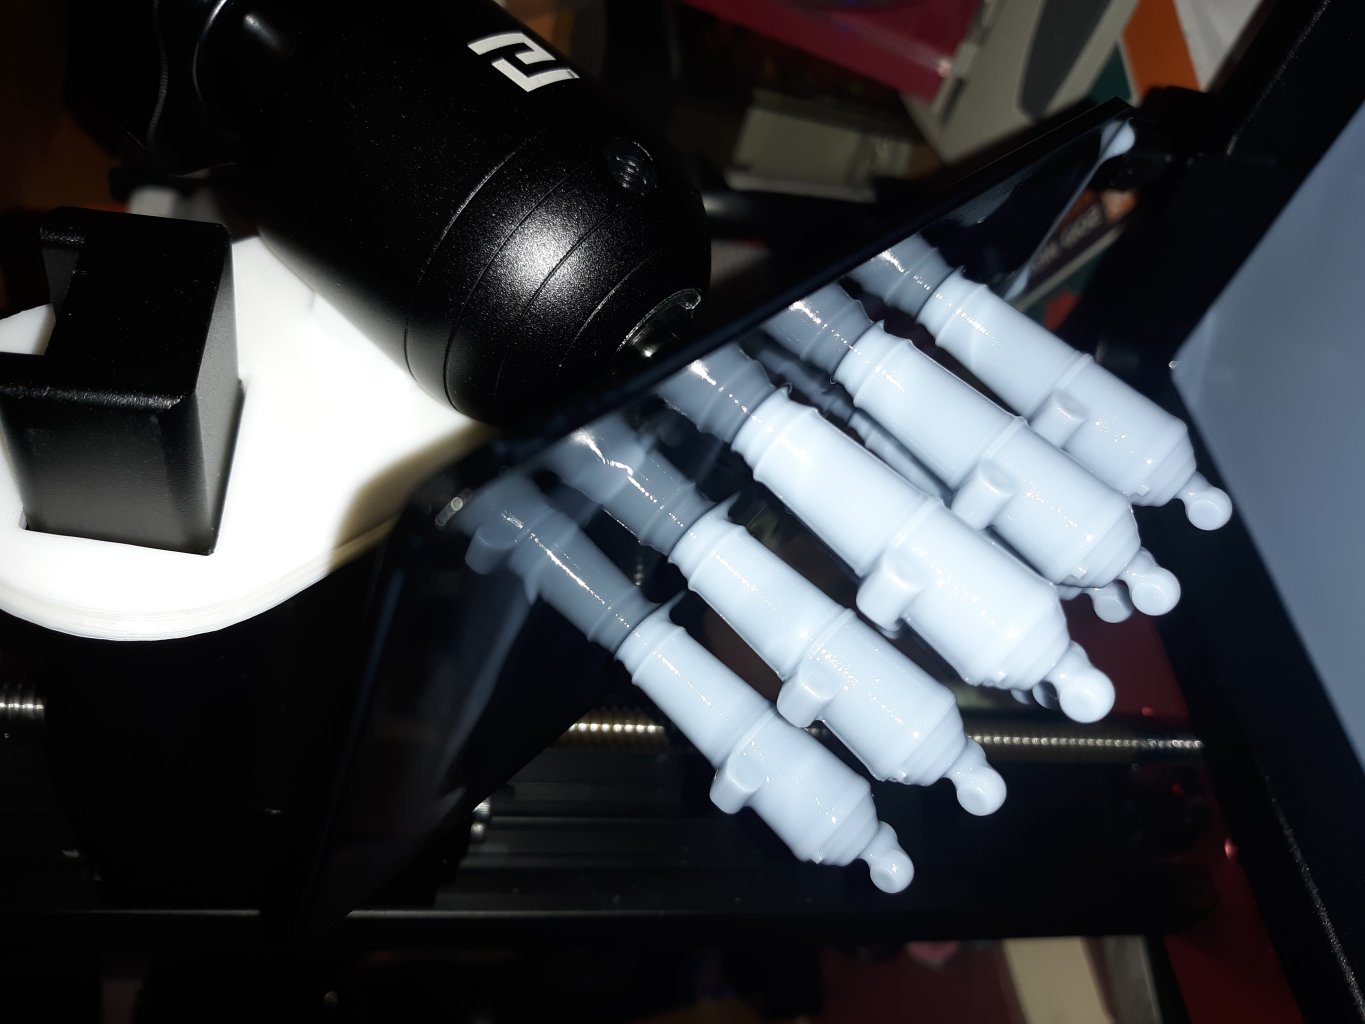
Here's the first attempt to print the pivot gun. I stopped it when I saw the gun had come loose and was becoming a blob. (I was tempted to let it finish, to see how it would turn out, but that would be a waste of resin.) There were definite issues with the end corner of the slide and the trucks of the carriage didn't come out at all, while the wrench and other details were perfect. I went back into the model and tweeked some things; raised some details to print better, made the barrel attach better to the elevation wedge, and some little things I over-looked. Two more tries weren't any better. Both pulled loose of the supports and basically nothing printed, except the supports, which came out beautifully. That odd shaped layer that looks like a base is the first few layers that are printed and are attached to the build plate that raises out of the resin vat as each layer is printed. Each layer is printed in what is basically a contour map of the model. If a part of the model, like say the fingers on a figures hand, start printing unconnected to a previously printed layer, there's nothing attaching them to the build plate to pull them up out of the resin; that's what the supports do, connect these otherwise floating bits, or "islands" to the rest of the model and/or the build plate. My problem seems to be the supports, and how they connect to the model as it prints, aren't strong enough against the suction of the part in the bottom of the resin vat, and the model separates from the supports as it's lifted, so all I get is supports and no gun. If I can get a handle on this, and get a full print, I can tell from that partial first try, it'll be a beauty of a model pivot gun. Here's the model in the software that the supports are added in, and that slices it into the layers that are printed. It's angle like that so it will fit into the space the printer has available, and the bottom of the pic is the end attached to the build plate, so it essentially prints upside down, mainly so liquid resin can escape from the bore of the gun.


- 553 replies
-
- 4
-
-
- sloop of war
- constellation
- (and 3 more)
-
The 3D model of the pivot gun is complete I think, I'll inspect it again to make sure. Now to see if I can manage to print it in one piece.
- 553 replies
-
- 4
-
-
- sloop of war
- constellation
- (and 3 more)
-
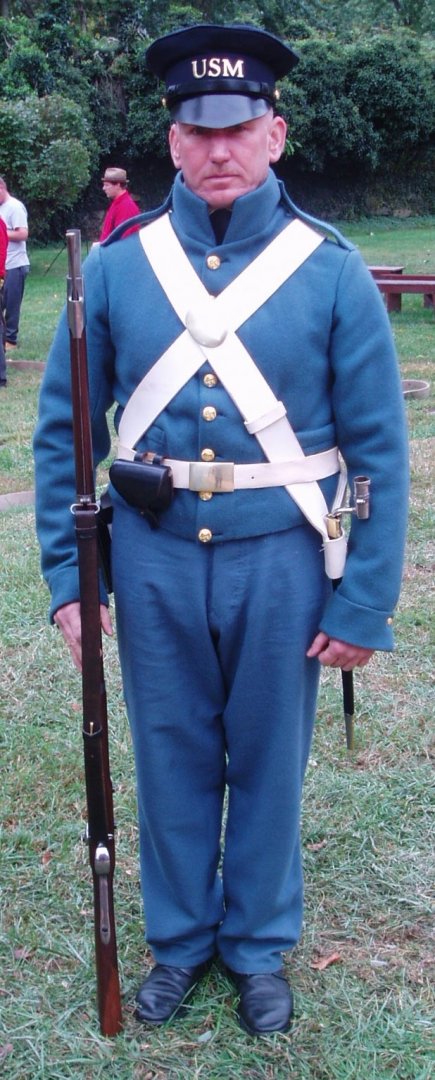
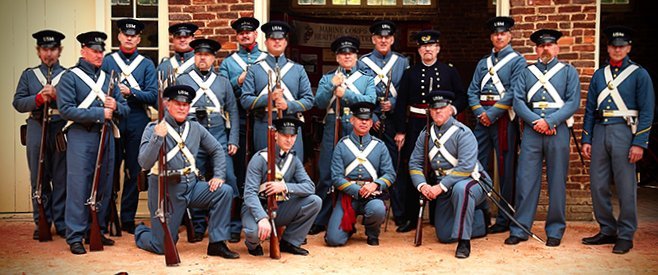
I'm aiming for the ship in 1856, so the crew figures, especially the Marines, will look different than Civil War period figures would. Think John Brown at Harpers Ferry time frame... I'm just gonna have to learn to do 3D model figures.
- 553 replies
-
- 2
-
-
- sloop of war
- constellation
- (and 3 more)
-
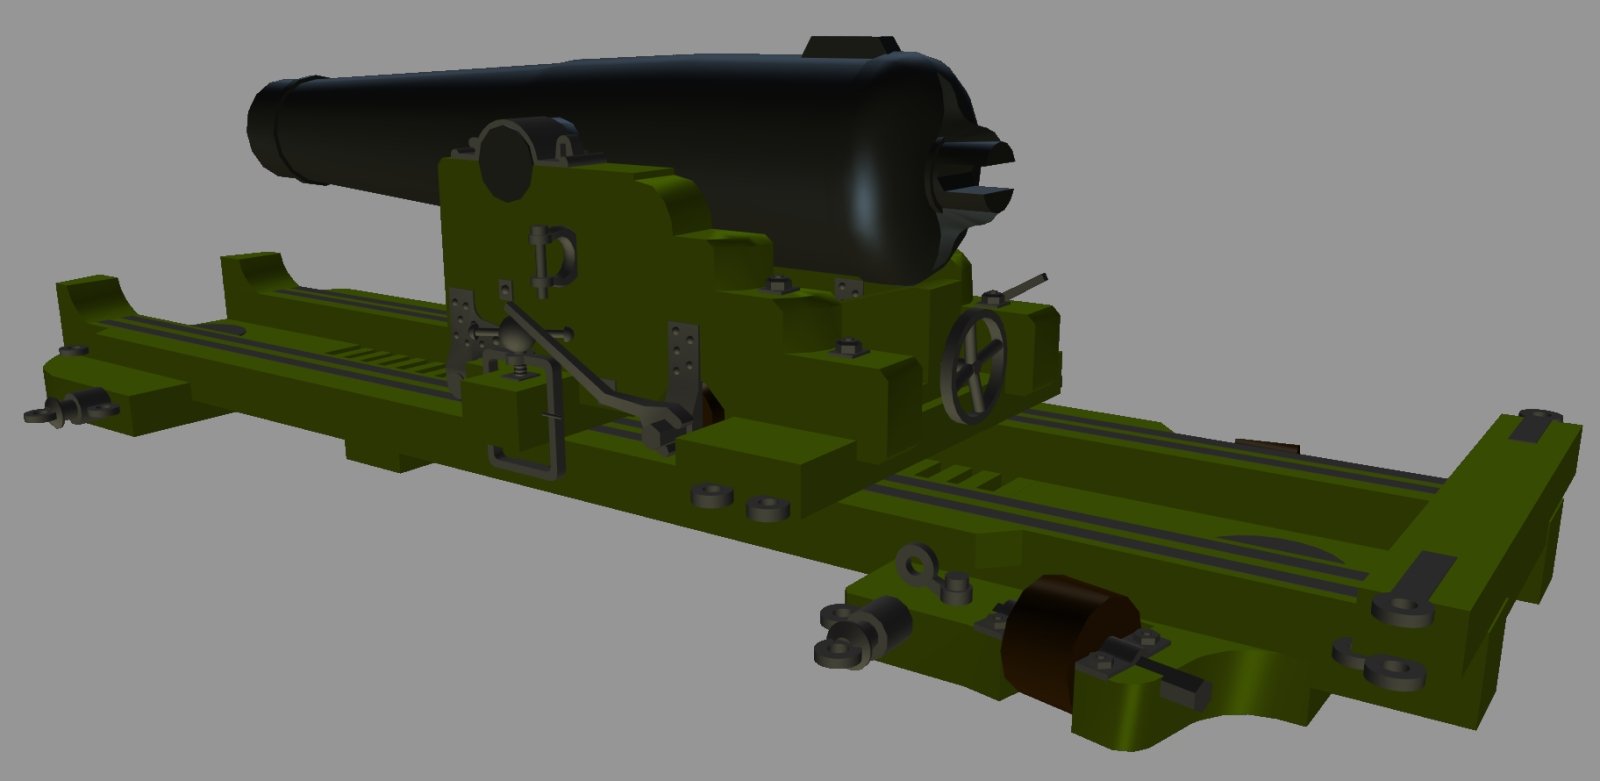
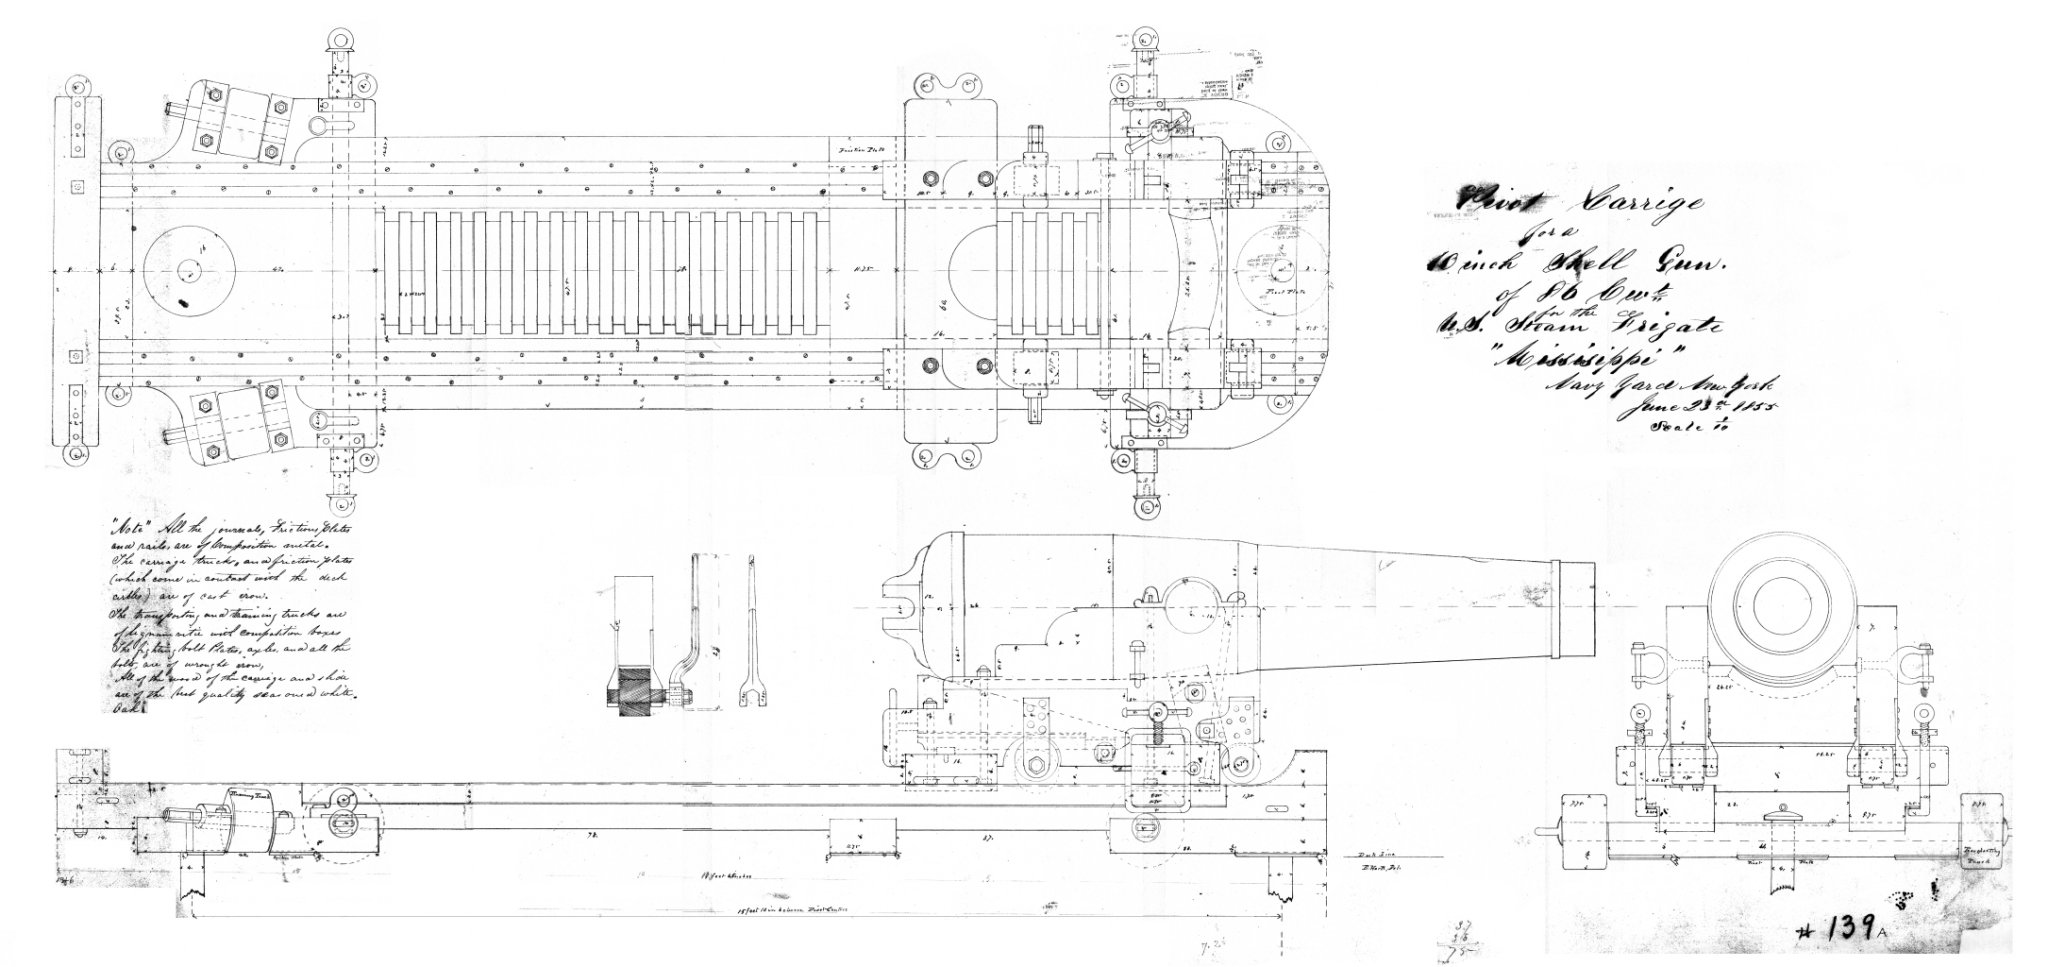
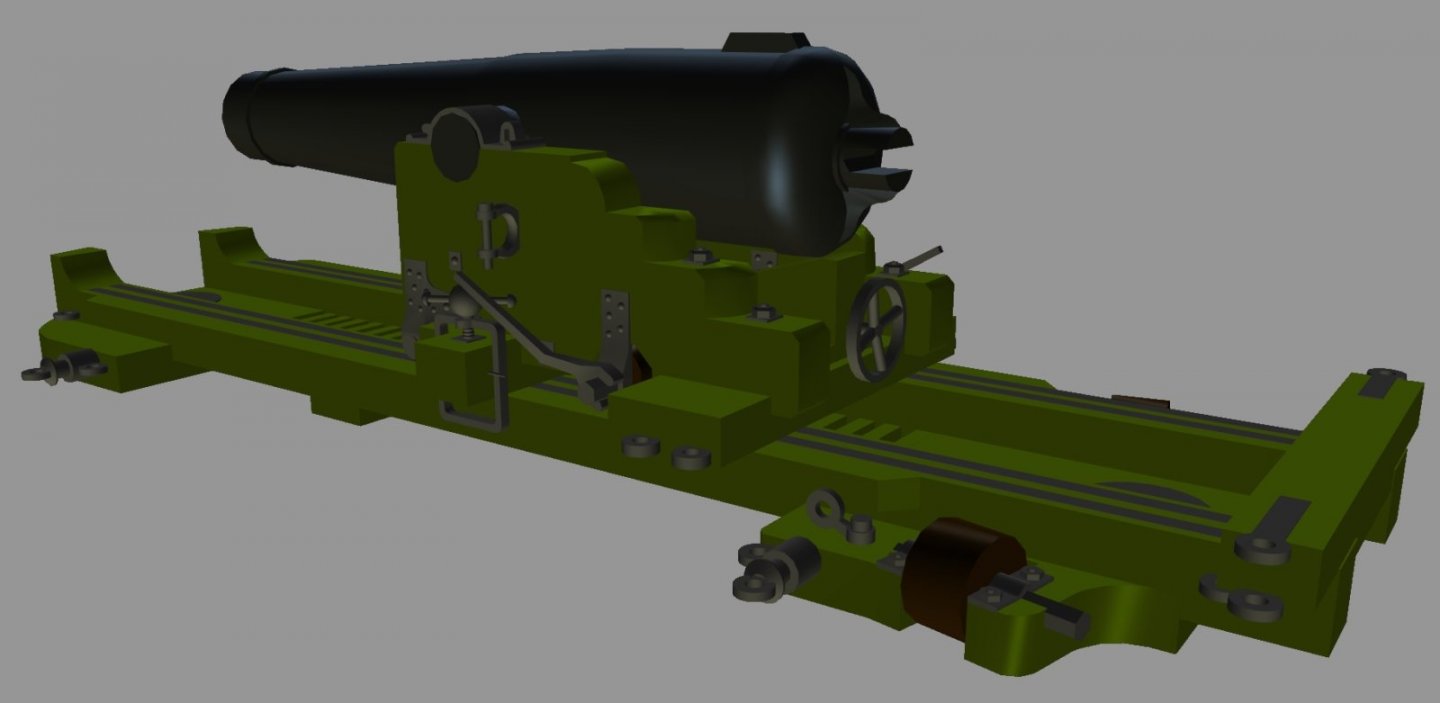
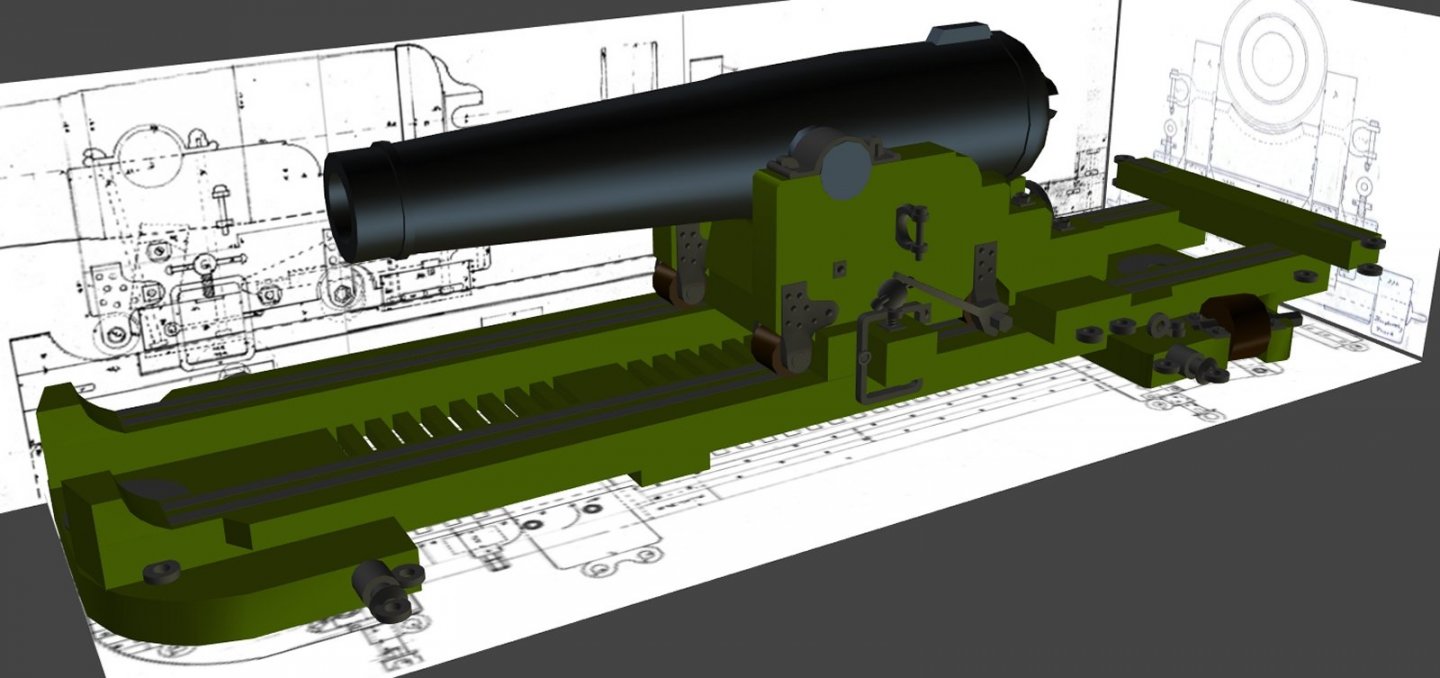
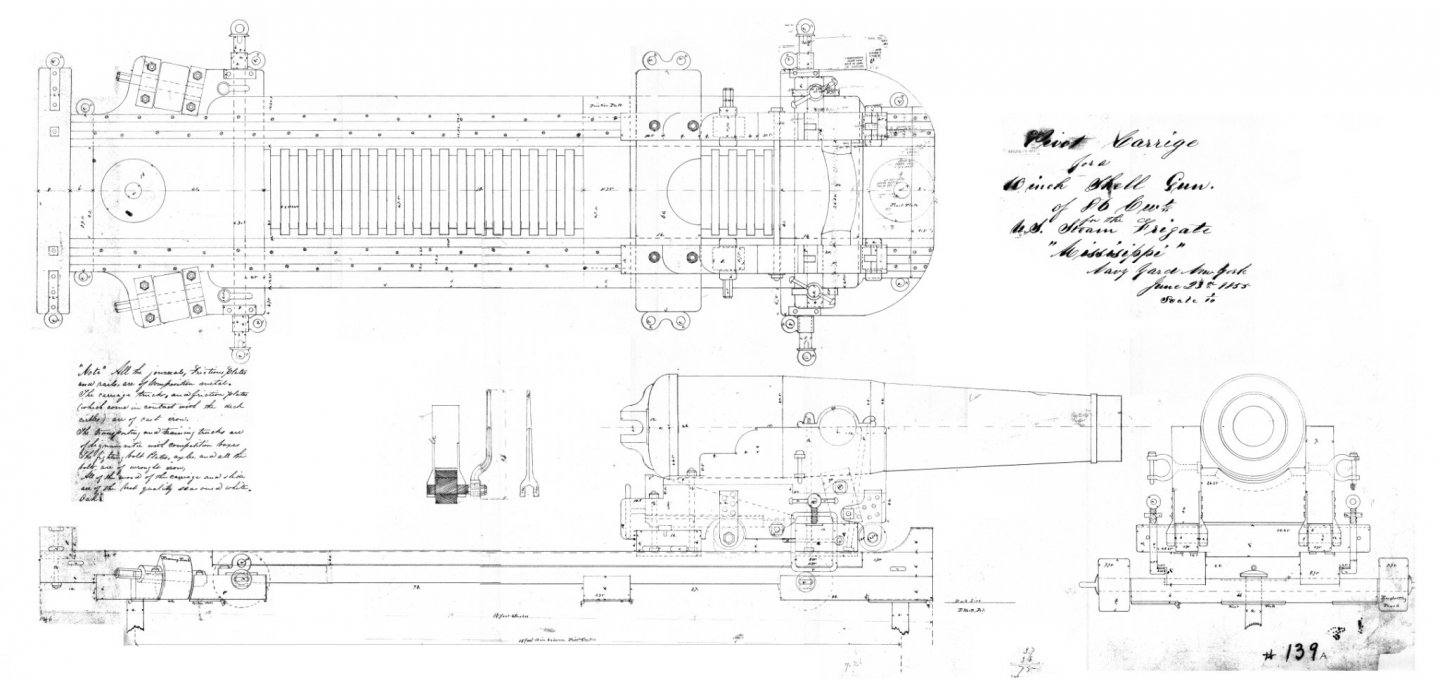
Continuing to detail the pivot gun 3D model; all that's left is the elevation wedge and associated hardware. The plans used are from the National Archives for a Pivot carriage for a 10" shell gun of 86 CWT for the US steam frigate Mississippi - June 23 1855. drawn in 1/10th scale, scanned and resized to 1:36 scale for Constellation. (click the pics to see them full size)

- 553 replies
-
- 2
-
-
- sloop of war
- constellation
- (and 3 more)
-
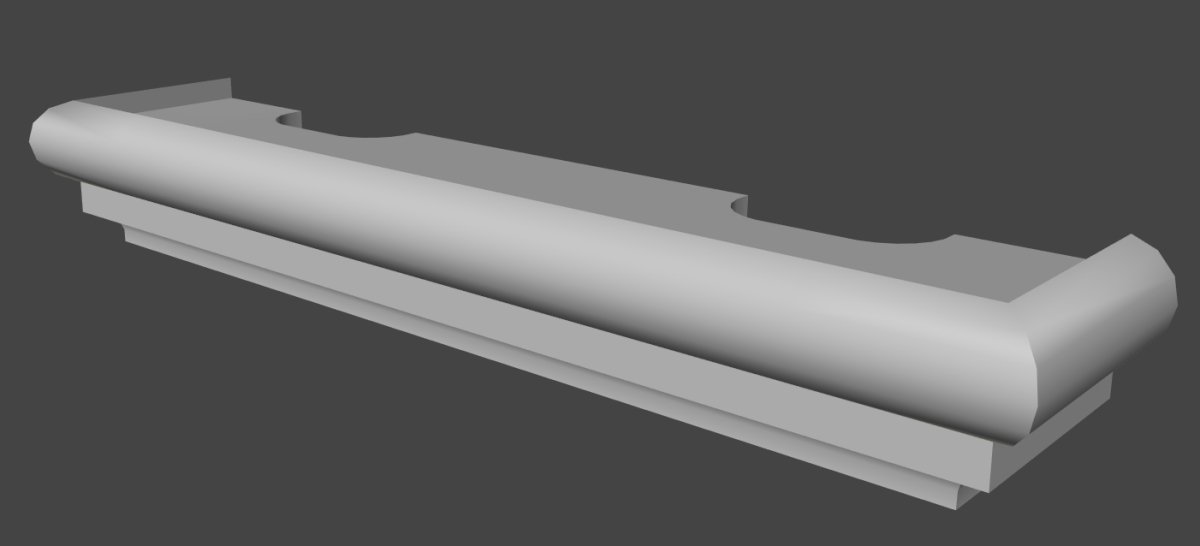
The howitzer's pretty much done, I'm just revisiting some details and fixing some surfaces that were the wrong way out. I started reworking my model of the 10" shell guns and their slides, correcting some things, fixing more backwards and missing surfaces, and mainly adding details; I want to print these in one piece if possible as they serve as handles for opening the hatches they're attached to. I also started modeling the boarding steps but don't have anything I care to show yet, these things are oddly elusive, and also hard to find anything about online.
- 553 replies
-
- 2
-
-
- sloop of war
- constellation
- (and 3 more)
-
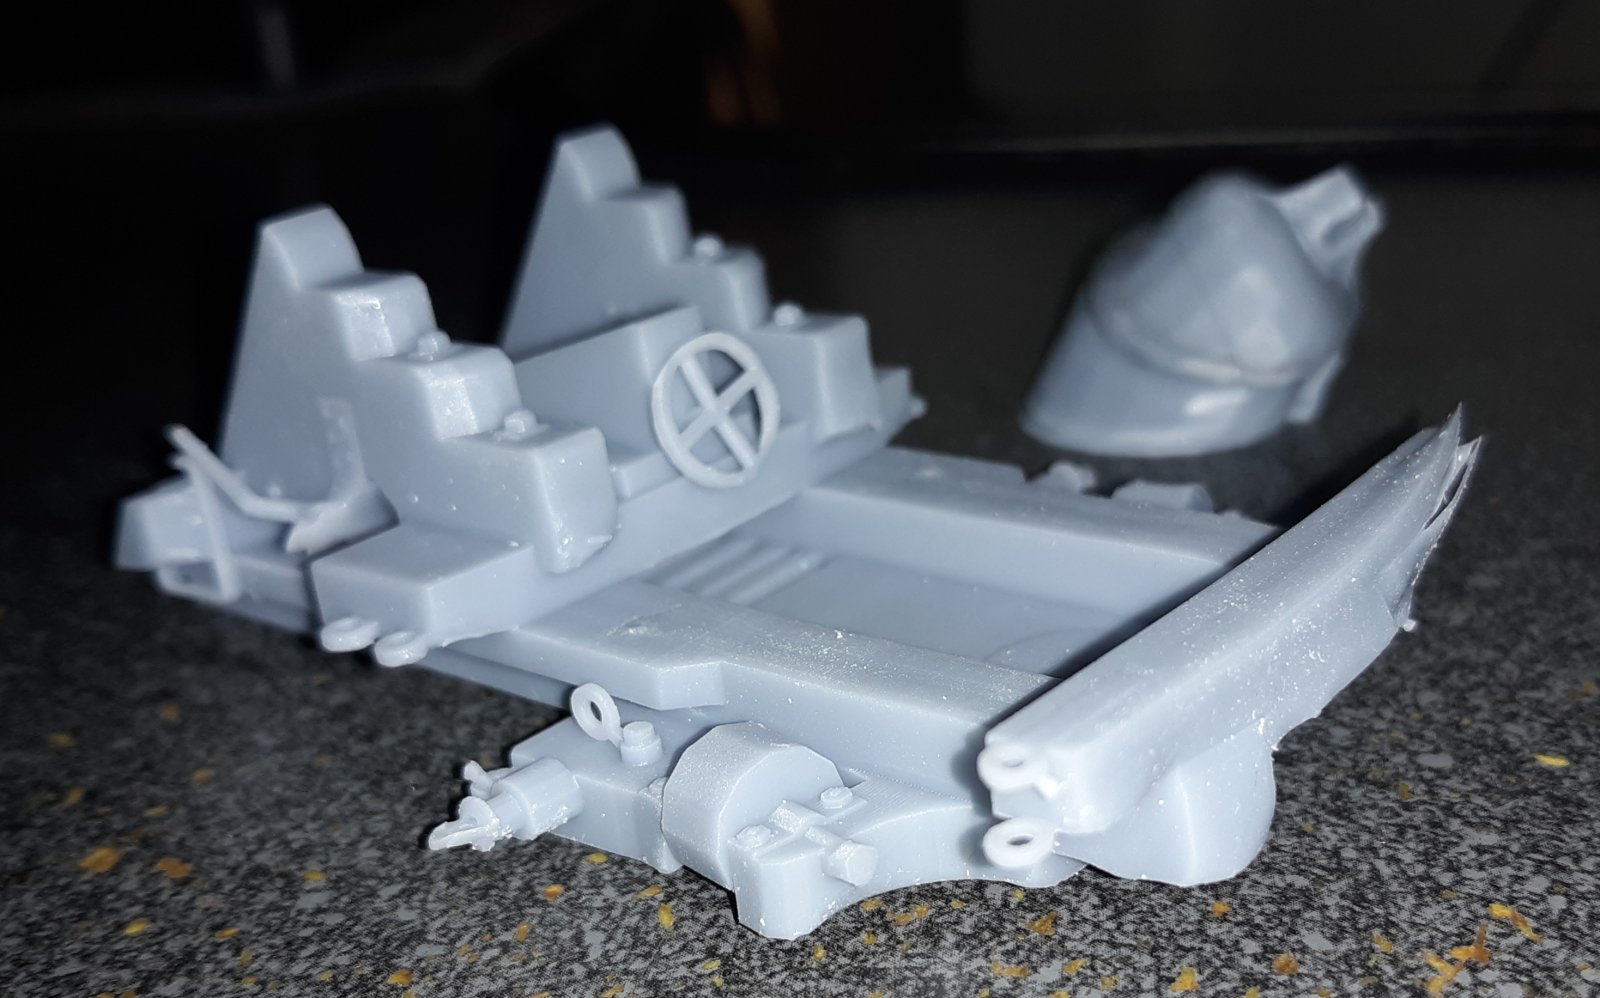
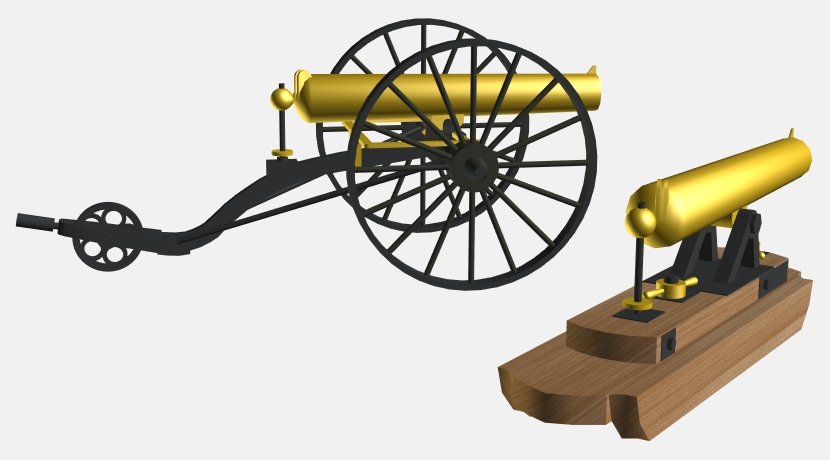
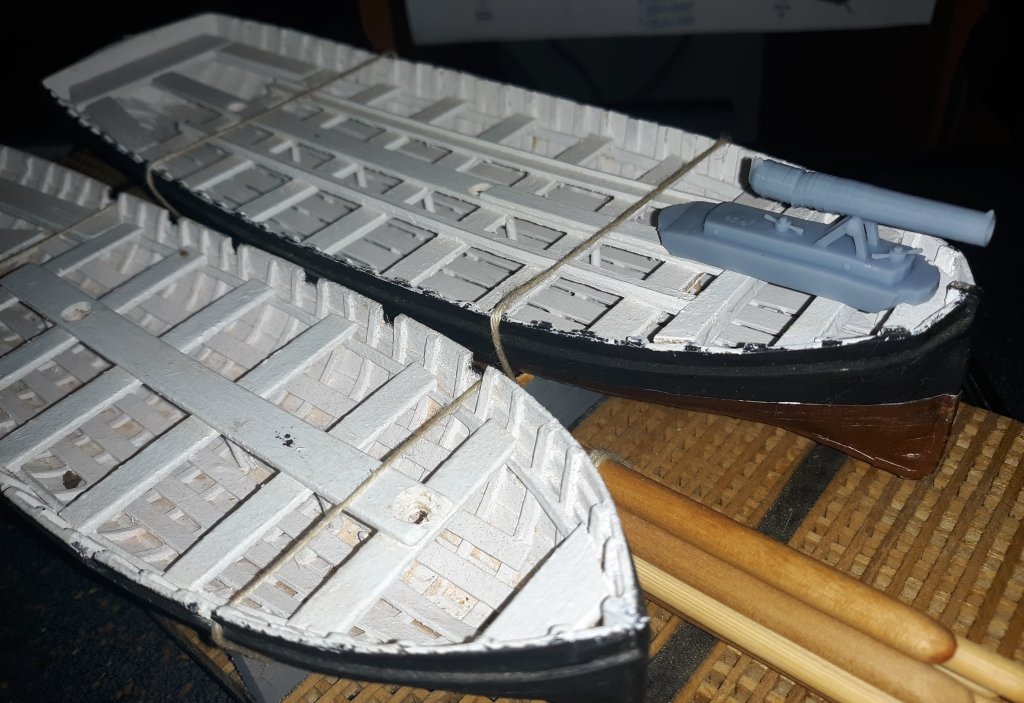
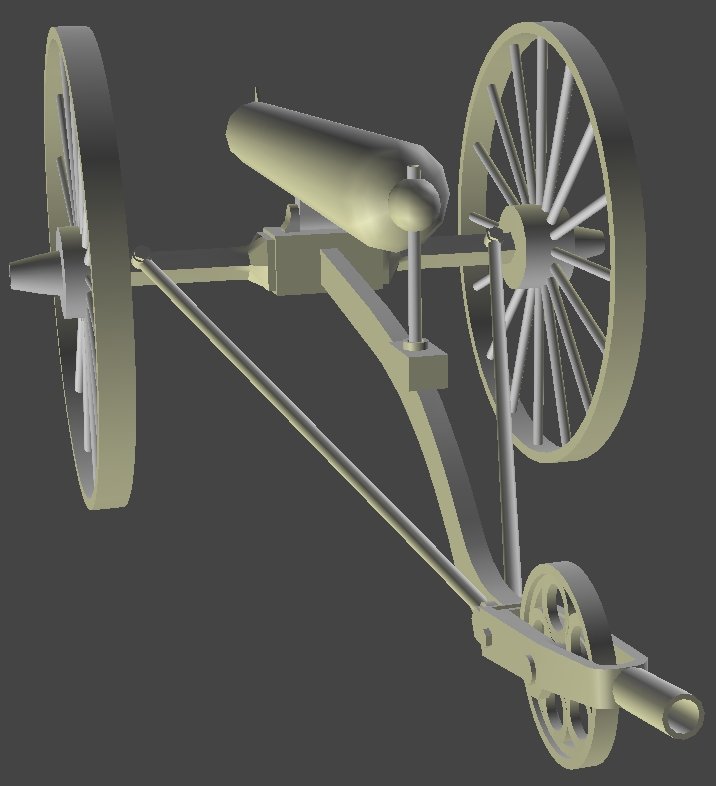
I modeled the boat sled and test printing it all find there's more work to do. I left some details out of the model, for instance, since I was going to print the sled with the barrel attached, I didn't model a hole for the trunnion pin (my name for it). The test print brought out some issues with printing, such as the elevation screw and wheel spokes not coming out. Basically it's all about supports and the angle the model's in as it prints, all of which is still rather new to me. Some details also need to be exaggerated a bit to show up at this size, like the supports on the ammo-box rail, and the iron plates under the nuts and the barrel supports.

- 553 replies
-
- 2
-
-
- sloop of war
- constellation
- (and 3 more)
-
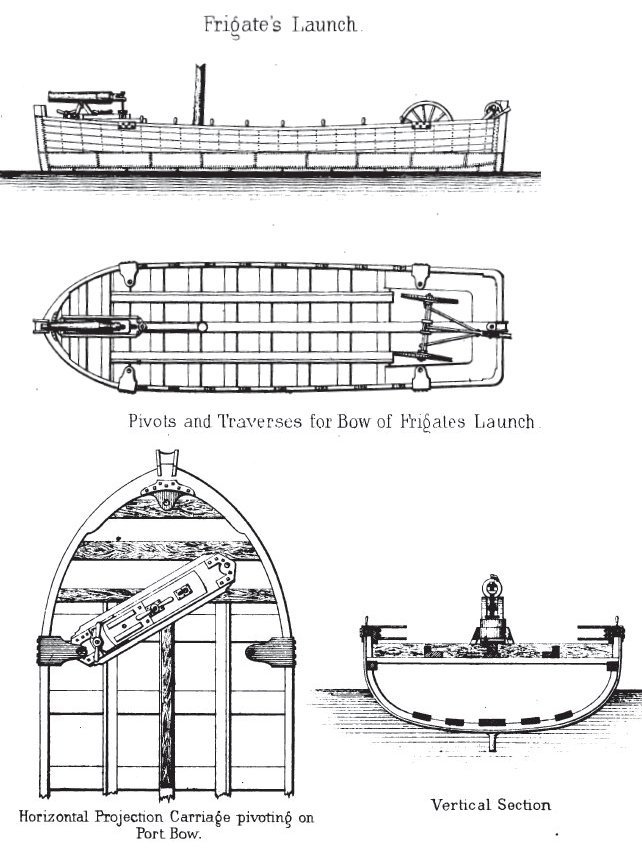
Pretty much. They got as big as 24 pounders, and down to 18 pounder, but launches in the 20-35 foot range carried the 12's. Still it's a howitzer, and doesn't equate to say a 12pdr Napoleon light artillery piece. This is meant mainly for lobbing case (shells) in high arc trajectories, almost like a mortar and doesn't have the power of a field piece. Still, it lives in the bow of the launch with the field carriage in the stern sheets, so it's a visible item on the model and needs to be made.
- 553 replies
-
- 1
-
-
- sloop of war
- constellation
- (and 3 more)
-
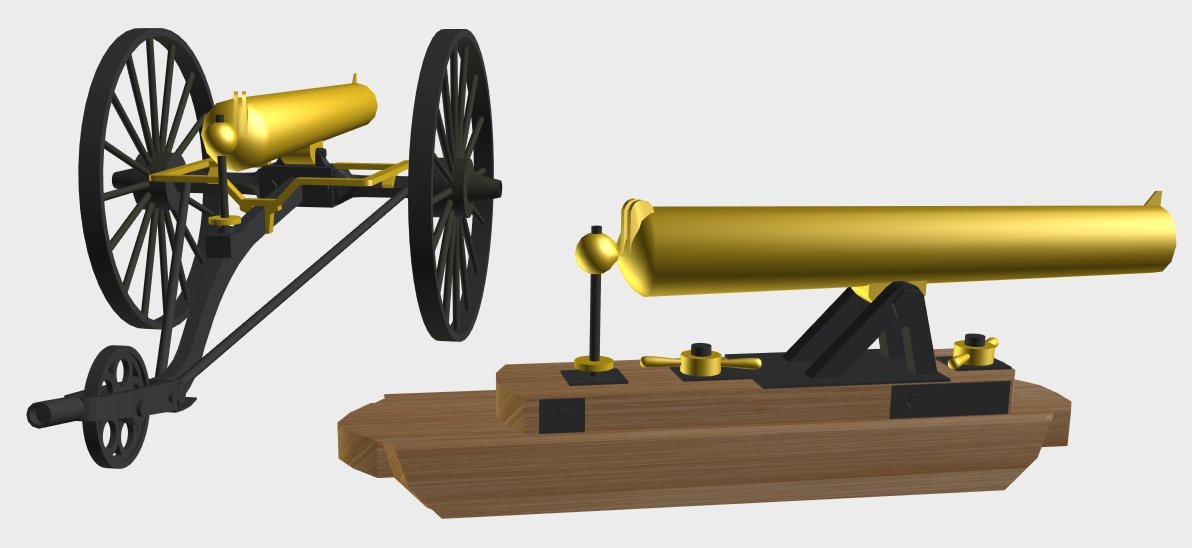
A few more details left. I put some color on it so it can compare to the real one in the prior post. There's the boat sled to be made yet, and the fittings for the boat where the pivot pins go.
- 553 replies
-
- 2
-
-
- sloop of war
- constellation
- (and 3 more)
-
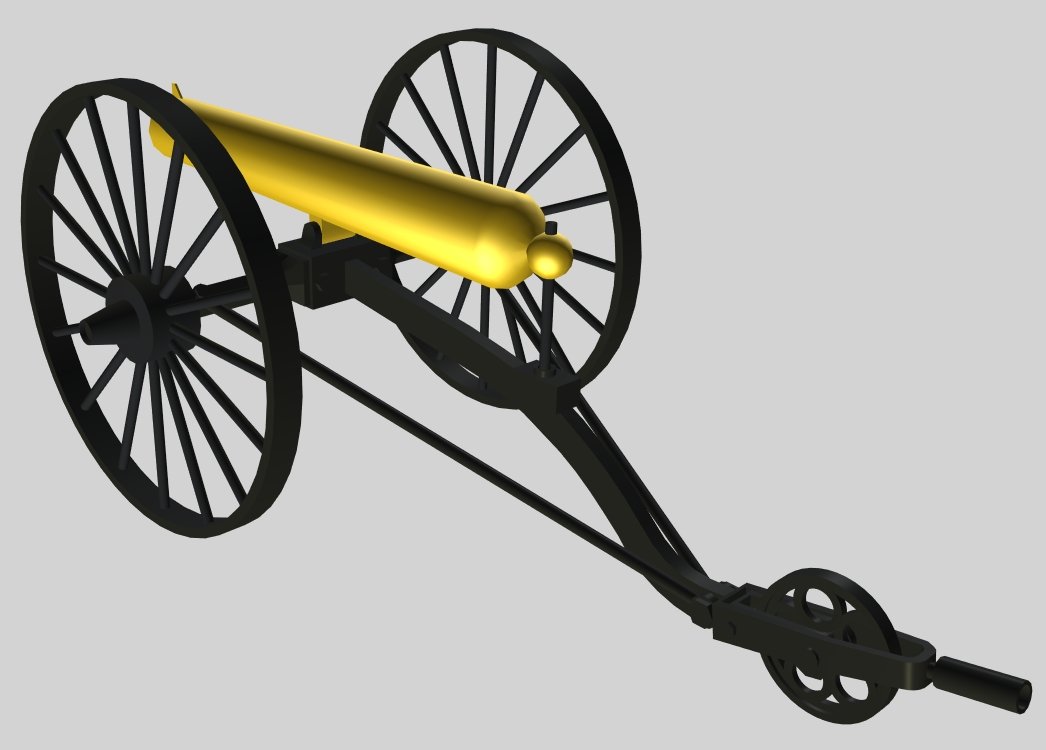
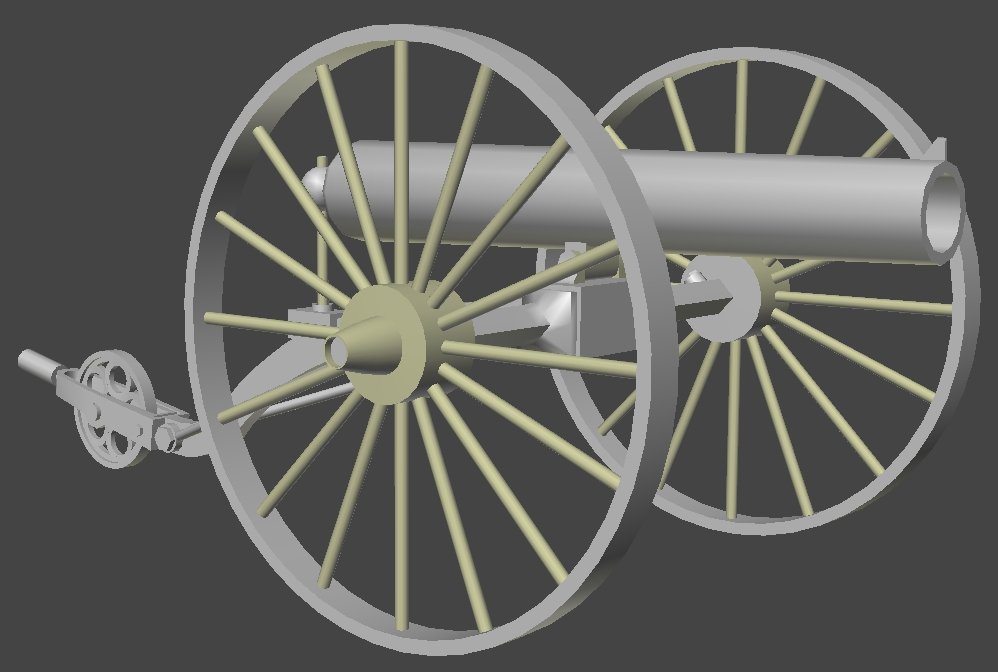
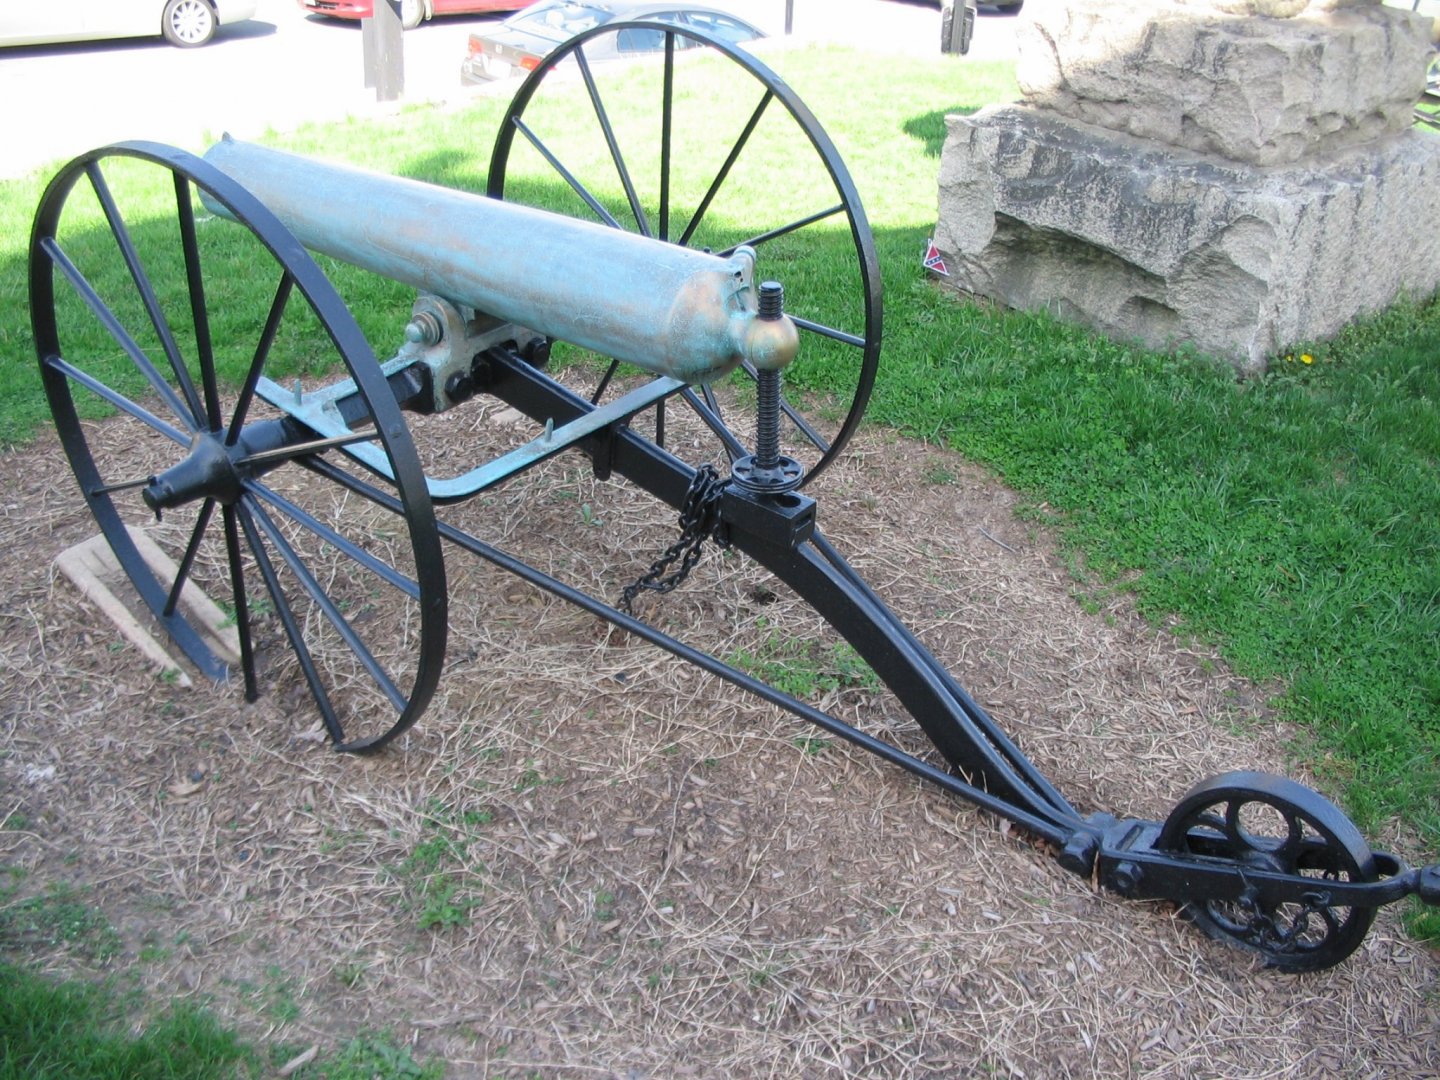
I think it's starting to come back to me... Anyway, a couple of days into it and I've made a bit of progress. It's not done yet There's a lot of variation in these guns; wooden wheels, irons wheels, 8, 10, 12, and 16 spoke wheels, different style hubs, with and without a bronze rack for limber boxes, and so forth; so mine's got a little of all of them to some degree. This is the actual gun I'm basing the model on, as it's the best pic of an original I've found.
- 553 replies
-
- 3
-
-
- sloop of war
- constellation
- (and 3 more)
-
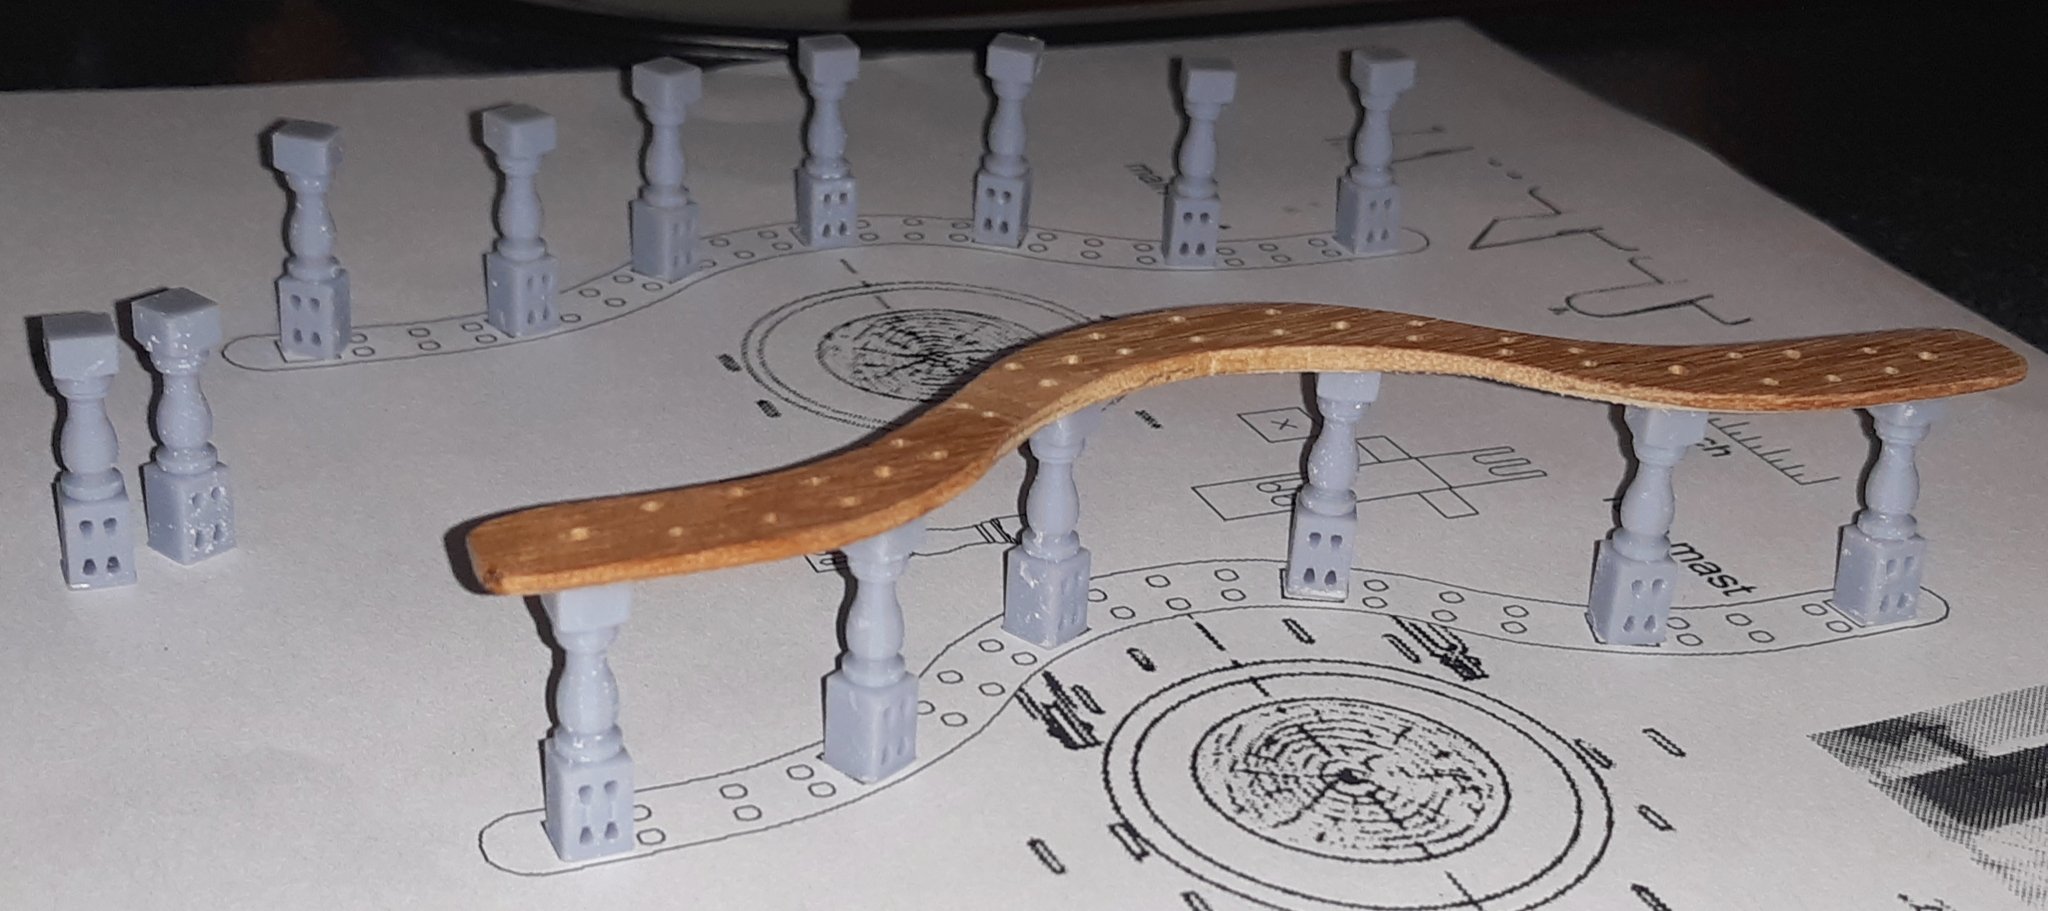
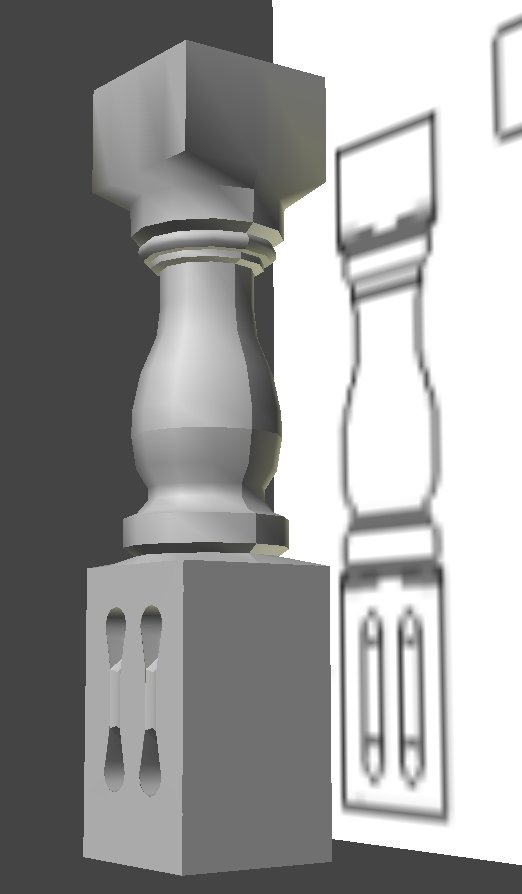
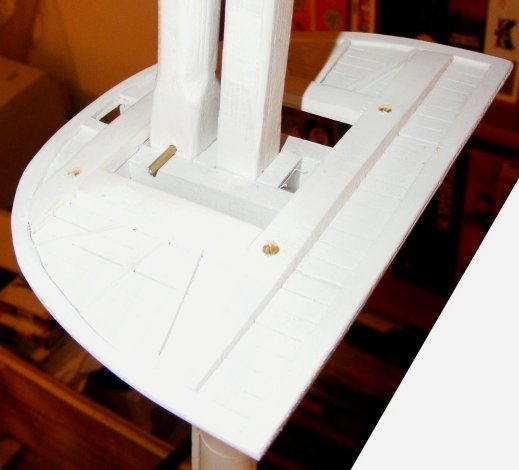
While the head decorations may elude me for the moment, the pin rail stanchions didn't seem so complicated to do in Anim8or, so after posting the last entry, I gave these a shot... I output the file to STL format and printed 15 of them (I need 13)

- 553 replies
-
- 3
-
-
- sloop of war
- constellation
- (and 3 more)
-
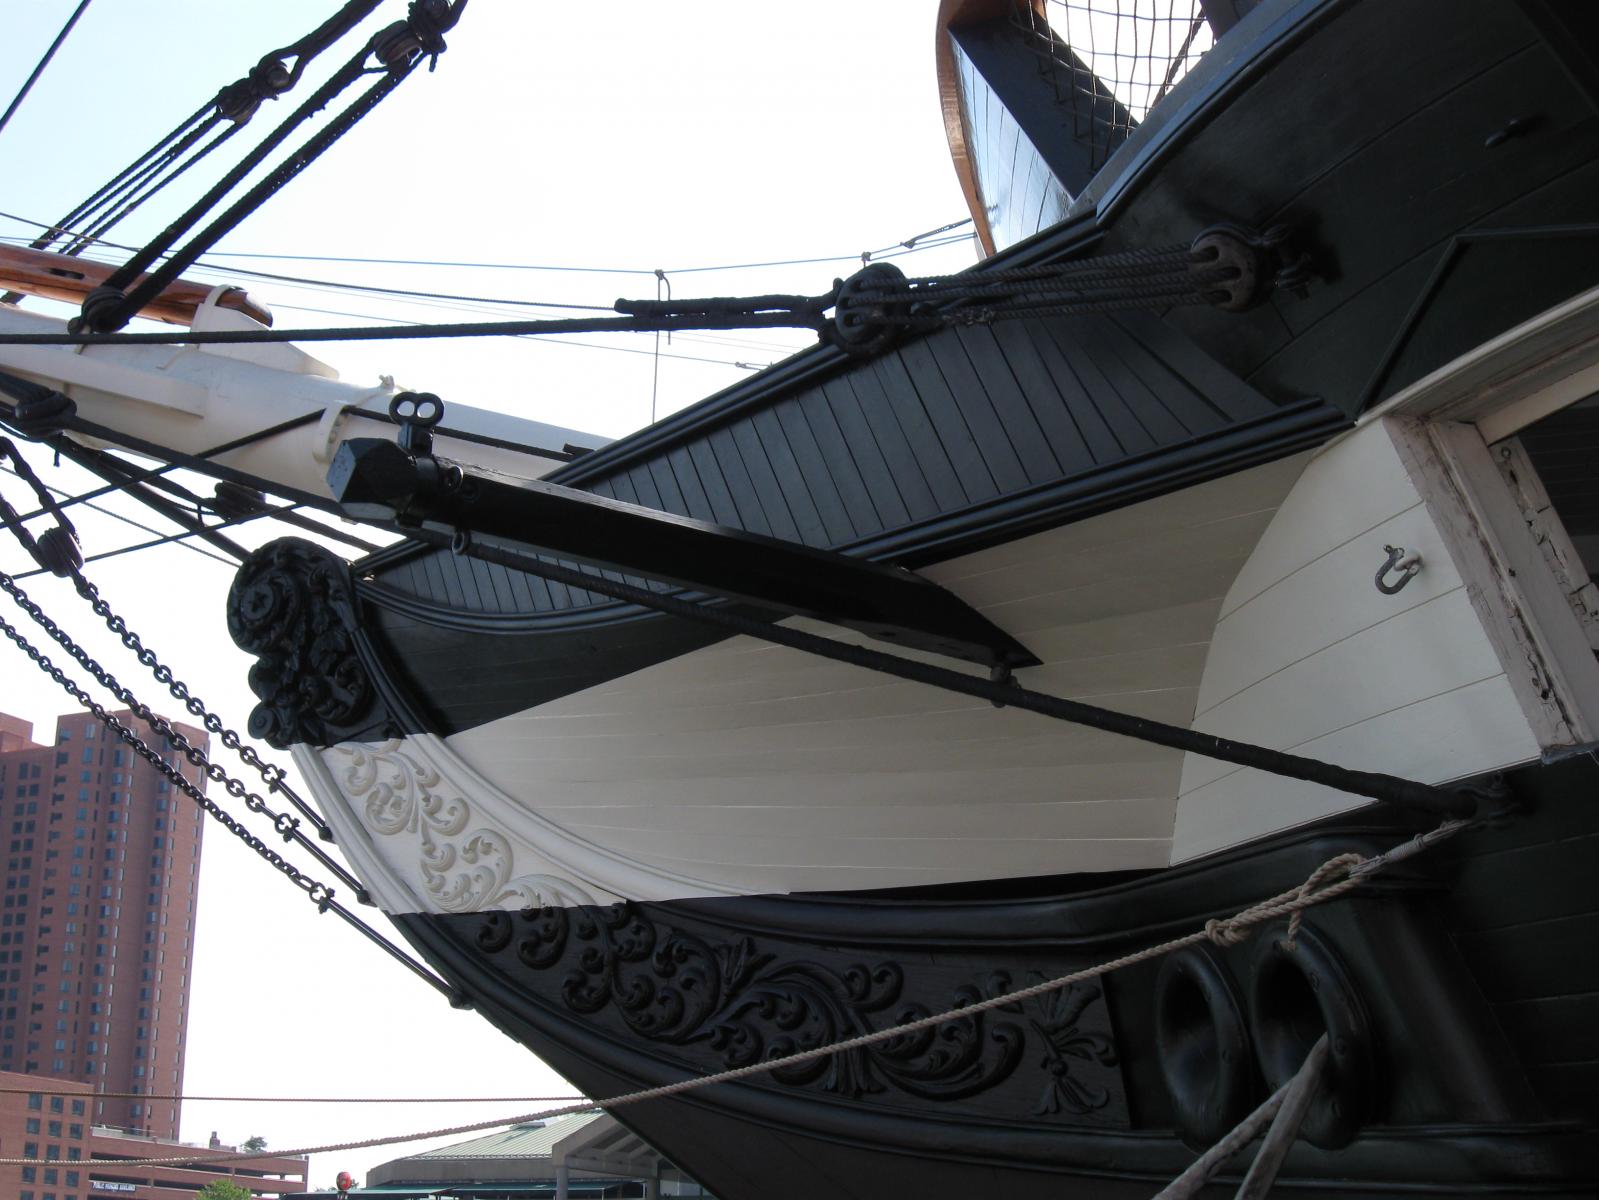
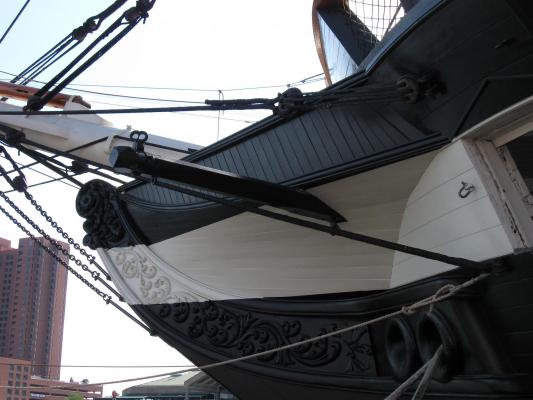
I can't say I've done anything for myself in the past year. Aside from purchasing a 3D printer and making some guns for Macedonian I haven't touched a model since Constellation's sailing in May 19. When I can find the time (and energy) to focus on it, I'm trying to find and learn some CAD software enough to make files to print; figures, parts, fittings, decorations, etc. Some aren't too difficult but some feel like they're beyond my skills. In the case of Constellation, the items I'd like to 3D print include, stanchions for the pin rails at the base of the masts, new pivot gun carriages with all the details included, binnacles, some 30 figures or so of 1850's sailors, Marines, and officers, fittings for the ships boats, maybe some shells for rigging blocks, and the decorative carvings on the bow. Using some old free software I used to make WWI aircraft with for an old flight sim/game called Anim8tor, I've been tediously trying my hand at the bow carvings. It's not going as I hoped which is why I'm trying to find software a bit more capable than this. Anim8tor is also difficult to get files scaled correctly as it's not really meant for that purpose. Trying to get closer to this... (click the pics to see them in detail) Obviously, I have a long long way to go. Macedonian's bow, stern, and quarter galleries, by comparison, are covered in carvings, filigree, columns, and the like, so getting the knack of this will go a long way in getting the details for that model moving forward as well. A big selling point for this, besides getting such detail I'm not able to get otherwise, is the reproducibility of the parts. These being operating models, there's always a risk of Macedonian's figurehead being knocked off and lost to some Rock Fish while sailing in the Chesapeake, and this way I can simply print another to replace it. If anyone has gone through this process and has some advise to offer, I'd appreciate not having to reinvent the wheel.

- 553 replies
-
- 3
-
-
- sloop of war
- constellation
- (and 3 more)
-
USS Columbus 1819 by threebs - 1/72 scale
JerryTodd replied to threebs's topic in - Build logs for subjects built 1801 - 1850
Sorry, I just saw you last post yesterday, and only now had time to sit and type something. Since I used to be working on something from the same general time frame, I've found your log very interesting - I say used to be because I haven't had time to cut the grass much less work on anything for me. When I do get to cut the grass, it'll be so far along that Green Peace will be out there protesting my destruction of the rain forest. Anyway, I'd like to see your other projects -
How do people use deadeyes on an RC yacht?
JerryTodd replied to M.R.Field's topic in RC Kits & Scratch building
My models lower mast stay in place, the topmast, t'gallant, etc, are held up by fids just as the actually vessel was, and the rig collapses down Addendum: how the topmasts are fidded on Constellation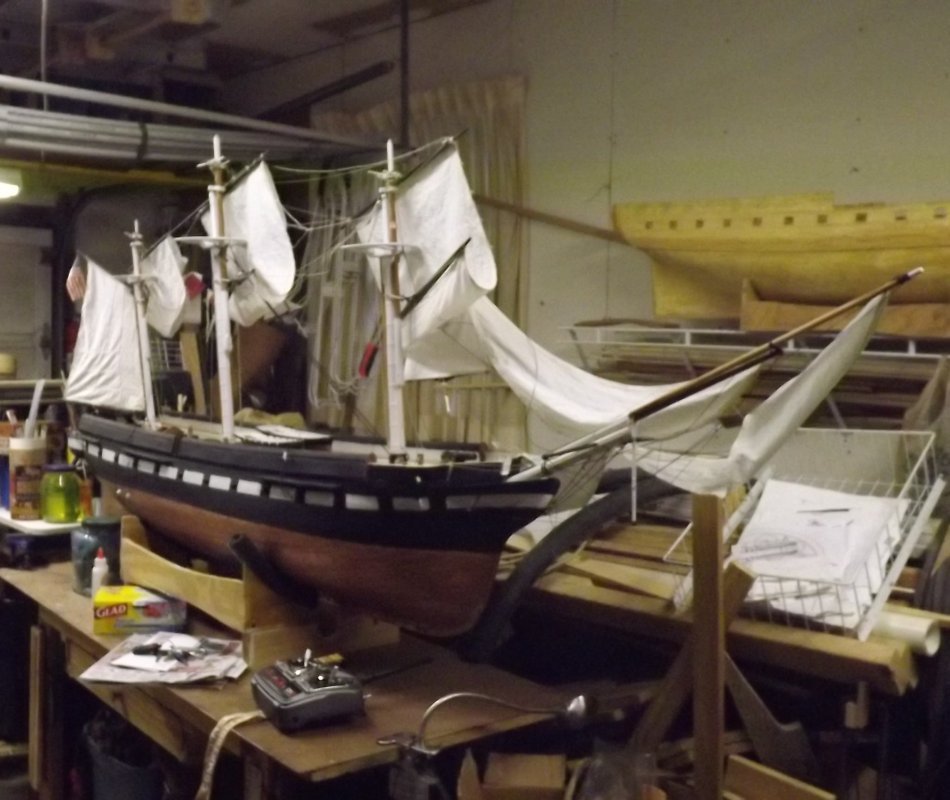
-
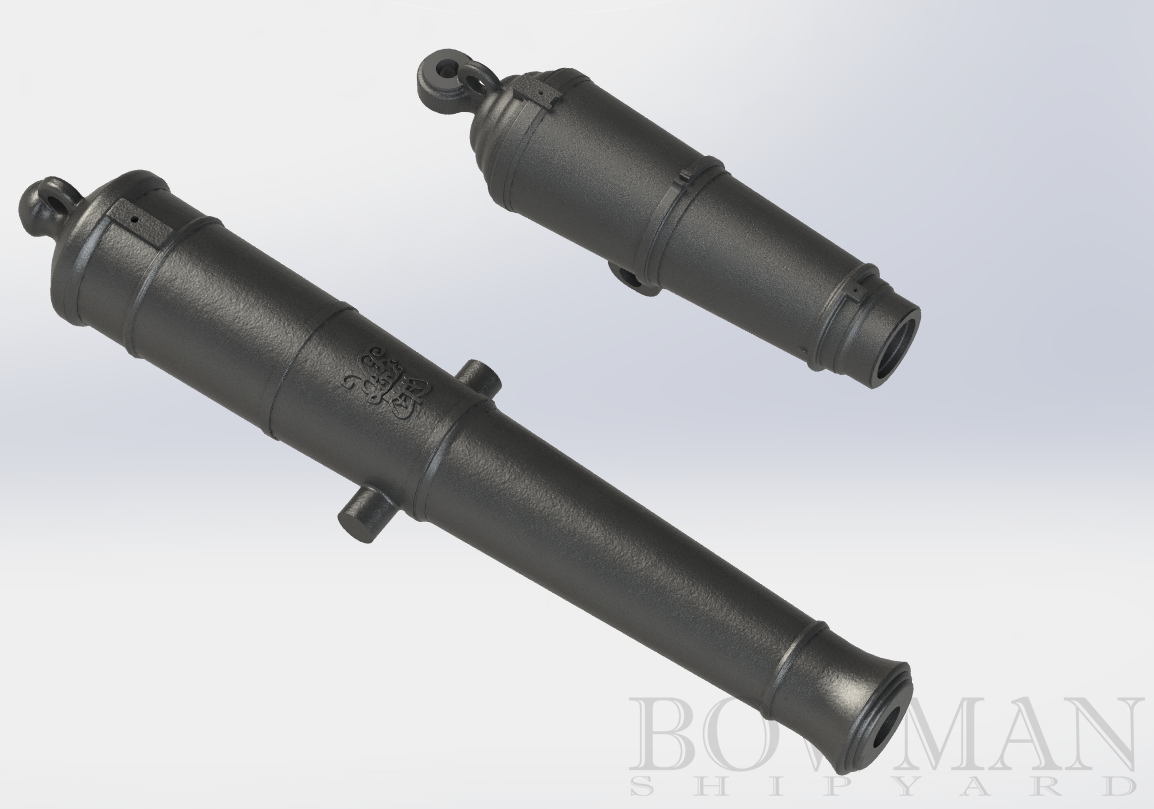
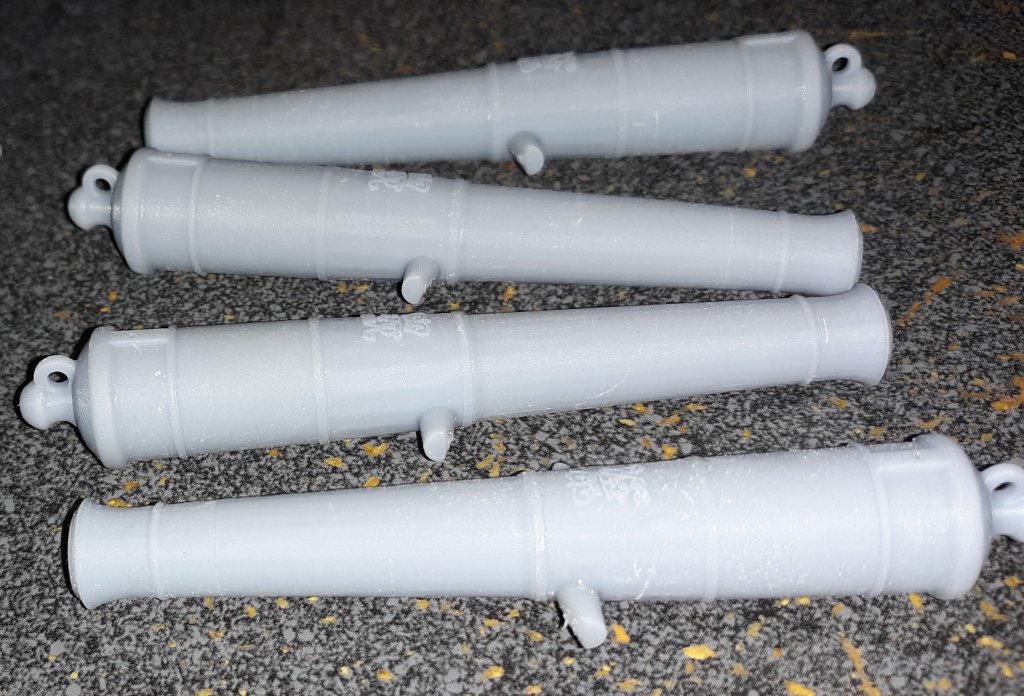
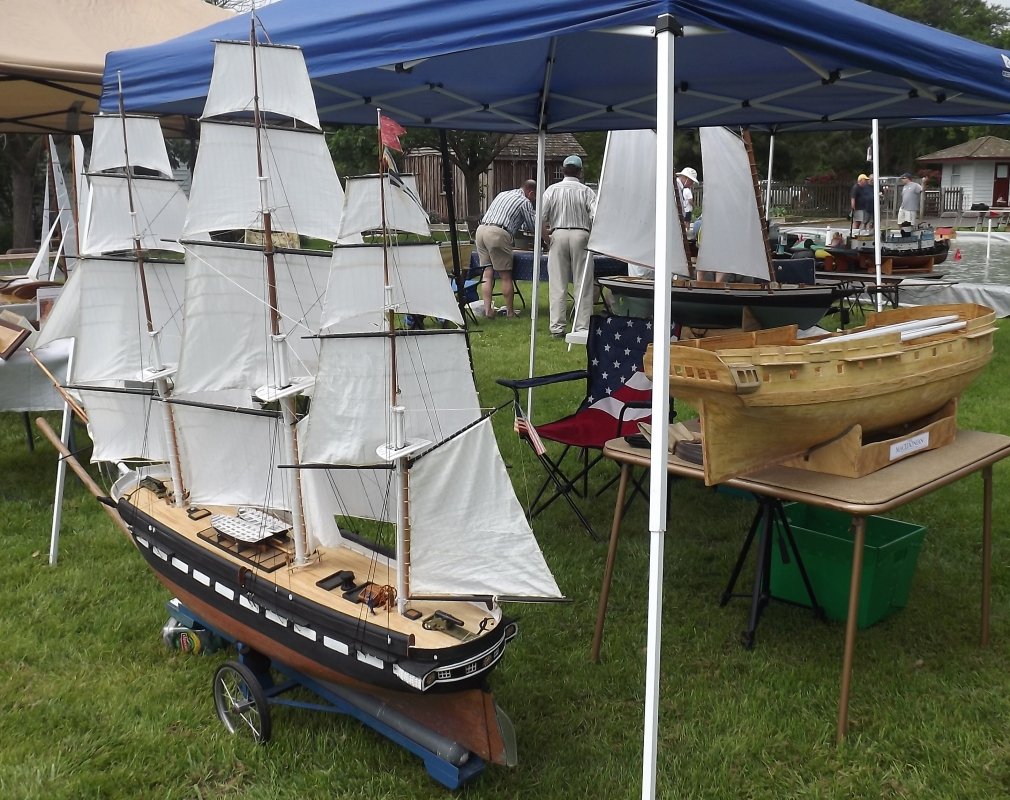
Altered the 3D model of the Blomefield pattern 18 pounders; raised the ER cartouche relief a little so it's easier to see, and widened the trunions, but the still print a bit misshapen. Again, back in May 19; all three models on display at the Chesapeake Bay Maritime Museum.
- 97 replies
-
- 5
-
-
- macedonian
- frigate
- (and 2 more)
-
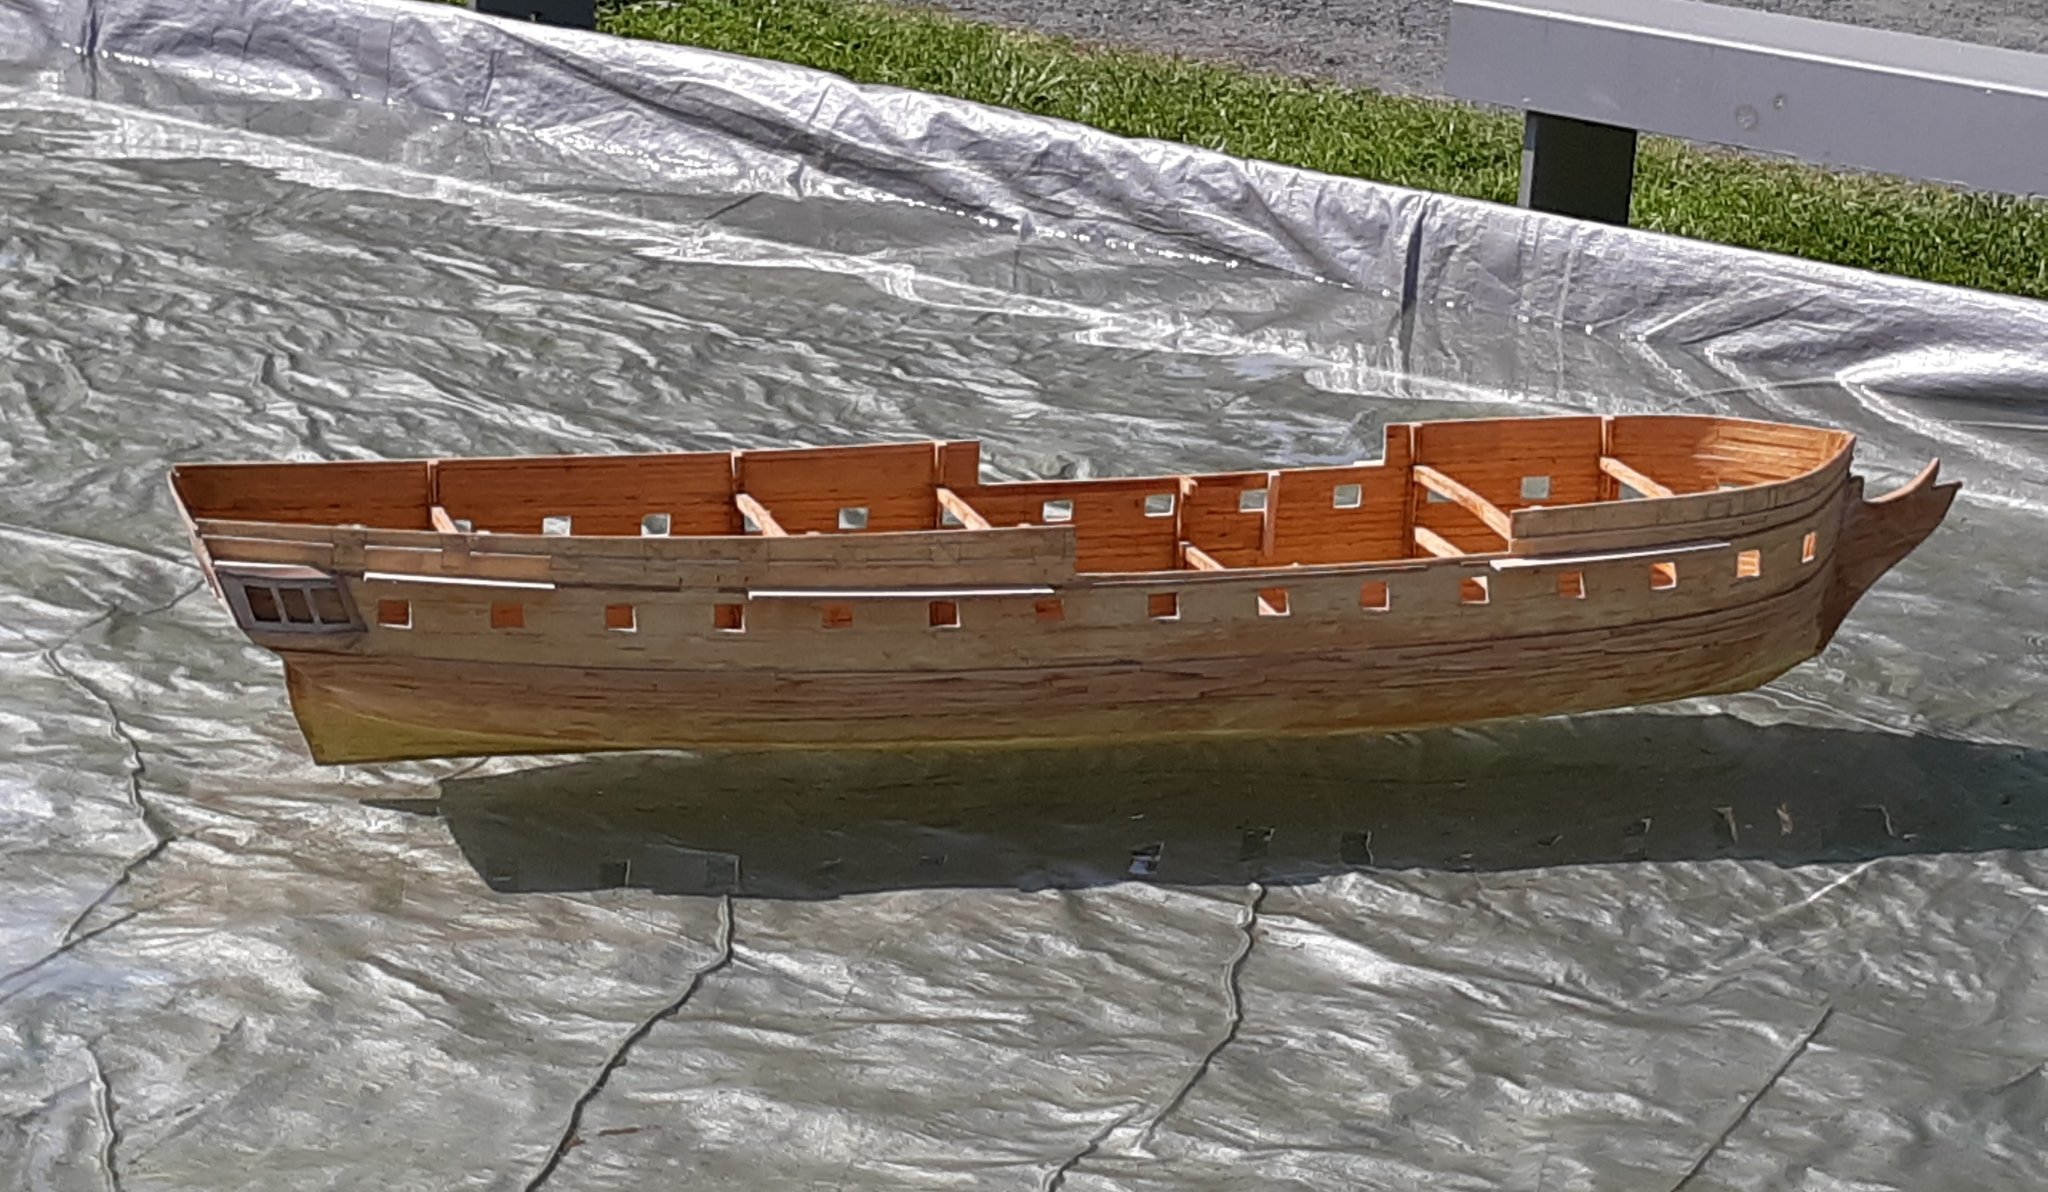
She did go for a swim last May. If work or this virus don't kill me, I hope to get the hull presentable this year; paint etc. As I intend to have the gundeck detailed, there'll be more to her than Constellation, but with that experience, a little easier - I hope.

- 97 replies
-
- 3
-
-
- macedonian
- frigate
- (and 2 more)
-
It's there, but is much less pronounced with thinner layers and not being round like what comes from a nozzle. It has a silk texture, like butterfly wings a bit like looking at a phonograph record at a low angle.
- 97 replies
-
- 1
-
-
- macedonian
- frigate
- (and 2 more)
-
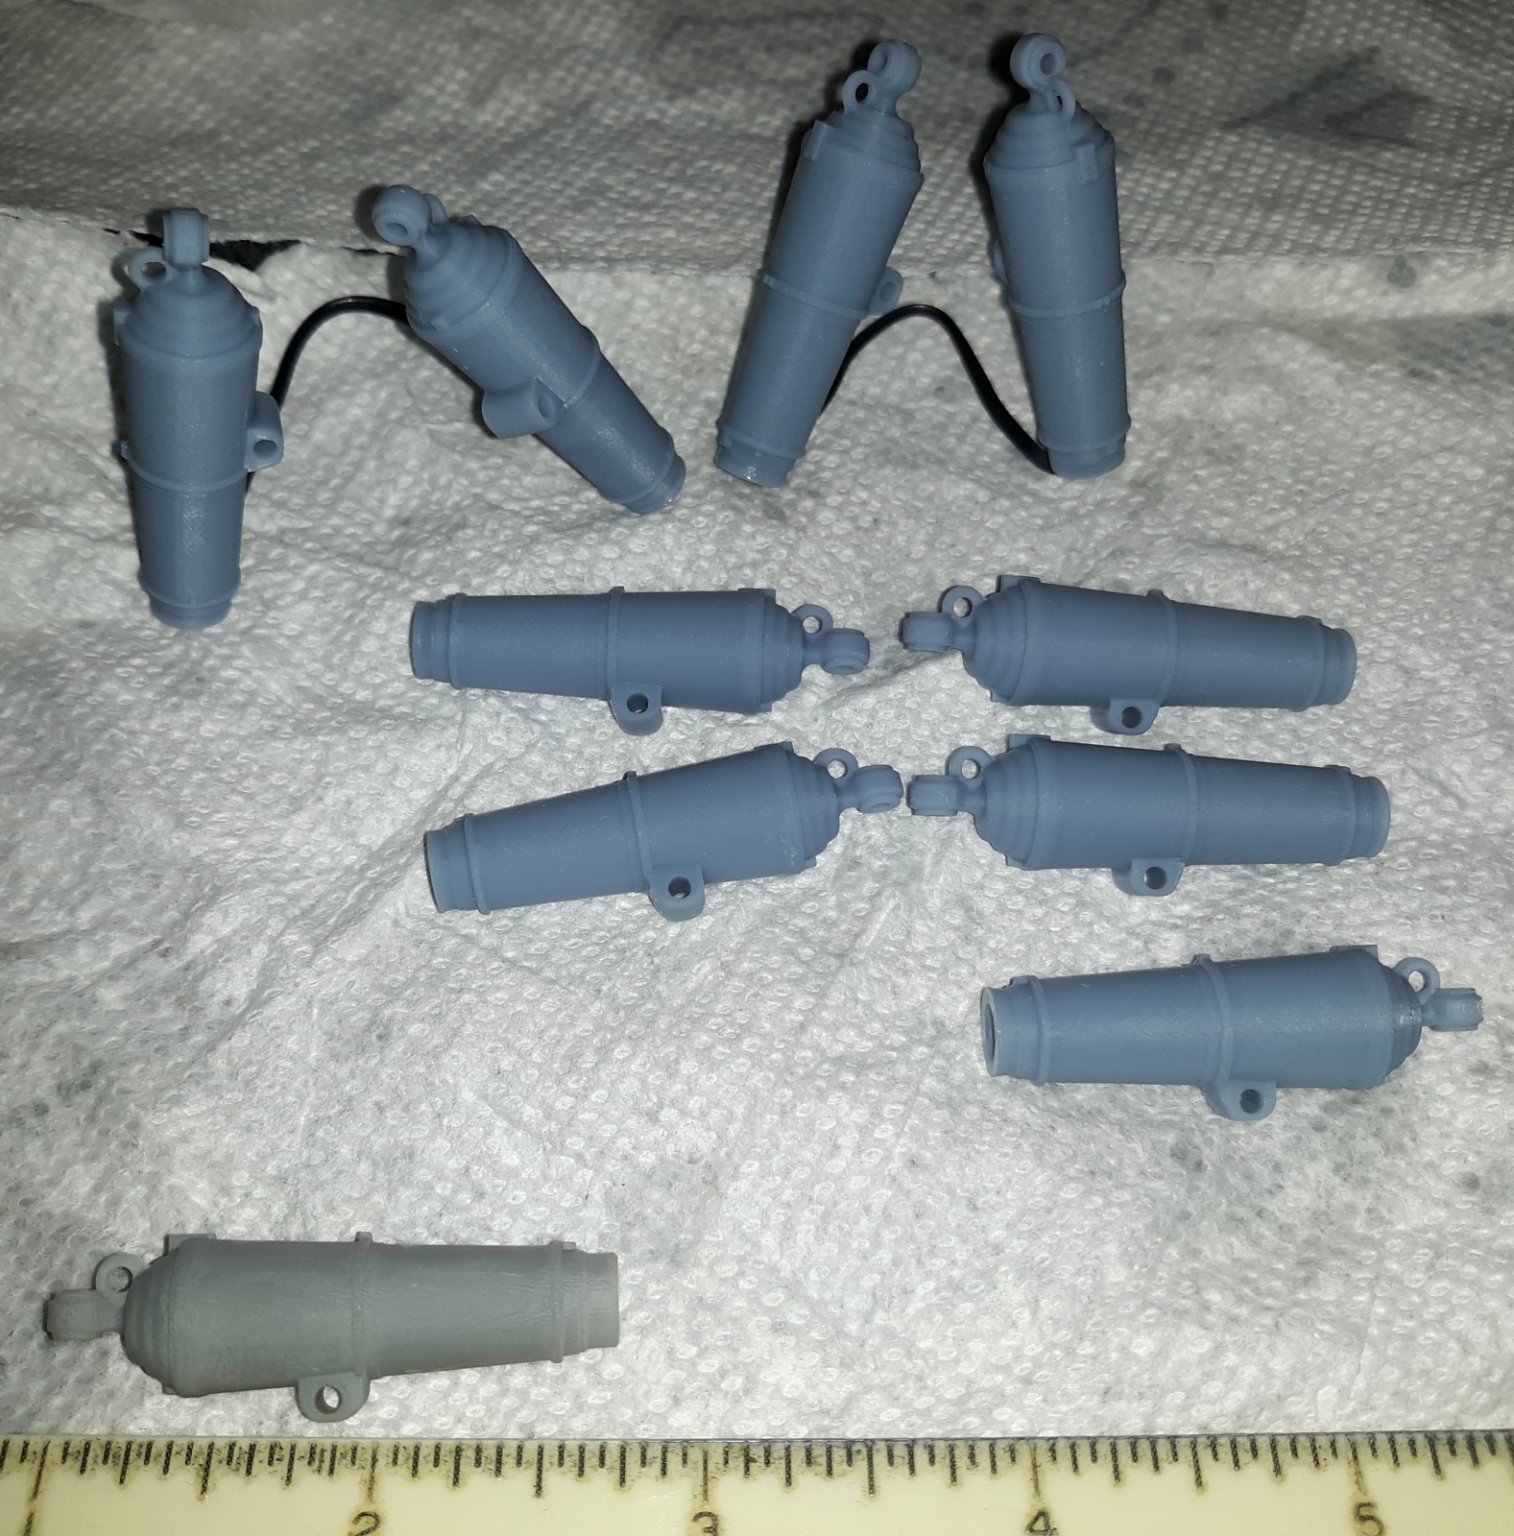
Since May the job has kept me away from my hobbies, or just too worn out to get anything done - I'm too old for this $#!+. But it has allowed me to splurge a little on something for myself, in the form of a 3D printer. I looked around for a long time, trying to make heads or tails of all the constantly changing stuff out there. I decided to go with a resin vat type because it offered better quality, more detailed prints than the filament types, and I'm not concerned with printing large items, but mostly parts for models. I got an Elegoo Mars for under $250 on Amazon after a few weeks of research narrowing it down. YouTube is chock full of reviews for this, and other printers of this type. My first print on the machine were 9 more carronades from the file the original set I had printed in 2012 came from, supplied by Tim Bowman who also sent me files for the 18 pounder Blomefields, carriages, and slides. You can't see the print in progress until near the end - and then only if it's a long enough item - to see how things are going, so it's a pretty nerve-racking process, especially the first time. Even when they're done they're covered in resin, hiding any details. After cleaning them in alcohol I was pleased as punch to find they were every bit as good as the 2012 prints. The slides didn't come out as well. One of the 6 I printed failed to release and looked like a Star Trek transporter accident, the other five were great on top, but the underside looked somewhat melted. I can fix them, so they're usable, but I need to learn more to get them to come out right. I built a wheel in 3D modeling software for a 4 foot RC schooner from scratch, but it's printing too thin to be of use, and it's underside isn't right, just like the carronade slides. While I fiddle with getting this wheel right, I'm working on the 3D models for <i>Constellation's</i> trail-boards, and Mac's figurehead.


- 97 replies
-
- 5
-
-
- macedonian
- frigate
- (and 2 more)
-
If you glass the hull, and resin it inside, you can build it of nearly anything you like, even cardboard. I gave some thought to building an Essex class (actually Ticonderoga) boat in 1:96 scale and if I hadn't come to my senses, I would have built the framing of 15/32" ply covered in 1/8" luan (doorskin), and wood strips for the rounded bits. Covered all that with 4oz glass cloth and poly resin outside, and a couple of coats of just resin inside. I build all my hulls this way, but a slab sided steel ship allows using sheet goods How I build My Hulls
-
As someone that's worked on these boats, you've done a beautiful job capturing one; albeit, a little cleaner than I remember