JerryTodd
-
Posts
879 -
Joined
-
Last visited
Content Type
Profiles
Forums
Gallery
Events
Everything posted by JerryTodd
-
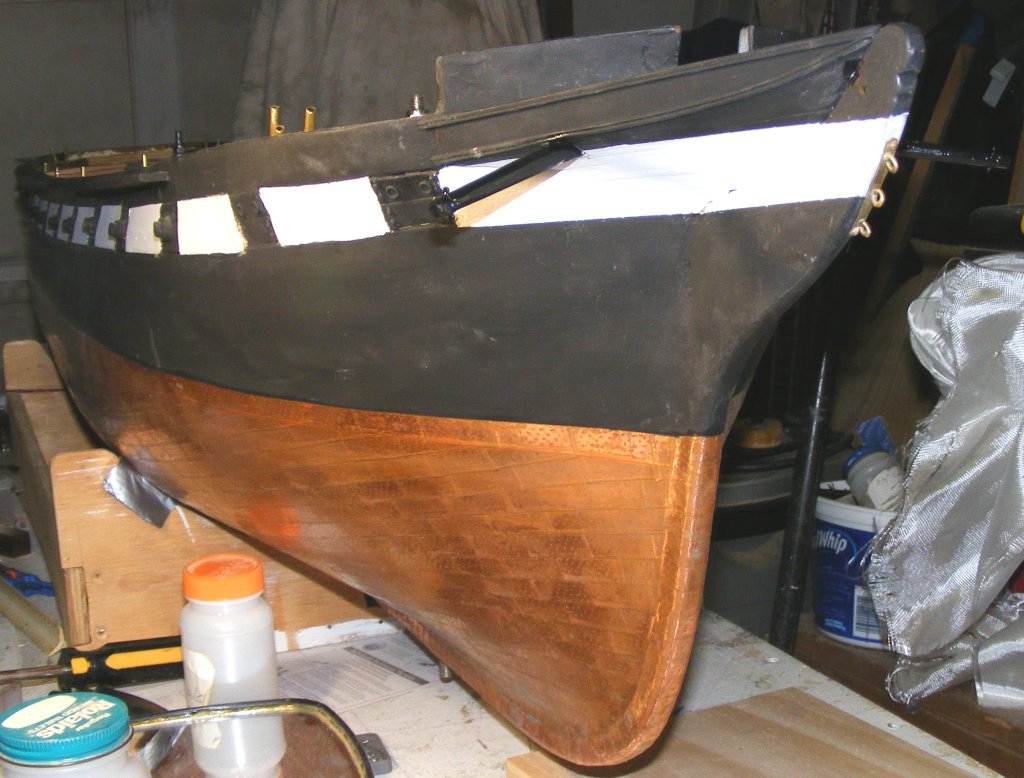
 Coppering only turns green OUT of the water, and most privateers probably weren't coppered - coppering's expensive and these boats were the Saturday Night Specials of the sea. (see page 208 of The Search for Speed Under Sail) Both Pride's and several other recreations/replicas use that bird-poop colored green bottom paint I guess cause it looks like copper gone green and dull copper/brown bottom paint must not be available. But it's more likely a privateer's bottom would be painted in the lime and tallow, or white bottom Chapelle points out.
 -
What size/scale are you looking for? There's a variety of braided line available in lots of colors, even camo, at hardware stores and such - parachute or para cord. I'm not sure how small that gets. I think there's some modern model yacht companies that sell smaller stuff. A quick search of "braided model yacht line" got me: http://www.cornwallmodelboats.co.uk/acatalog/cap-Dacron-Braided-Thread.html You use a few colored threads and do a round sennit to make stuff that's very small. http://www.wikihow.com/Make-a-4-or-8-Part-Round-Braid
-
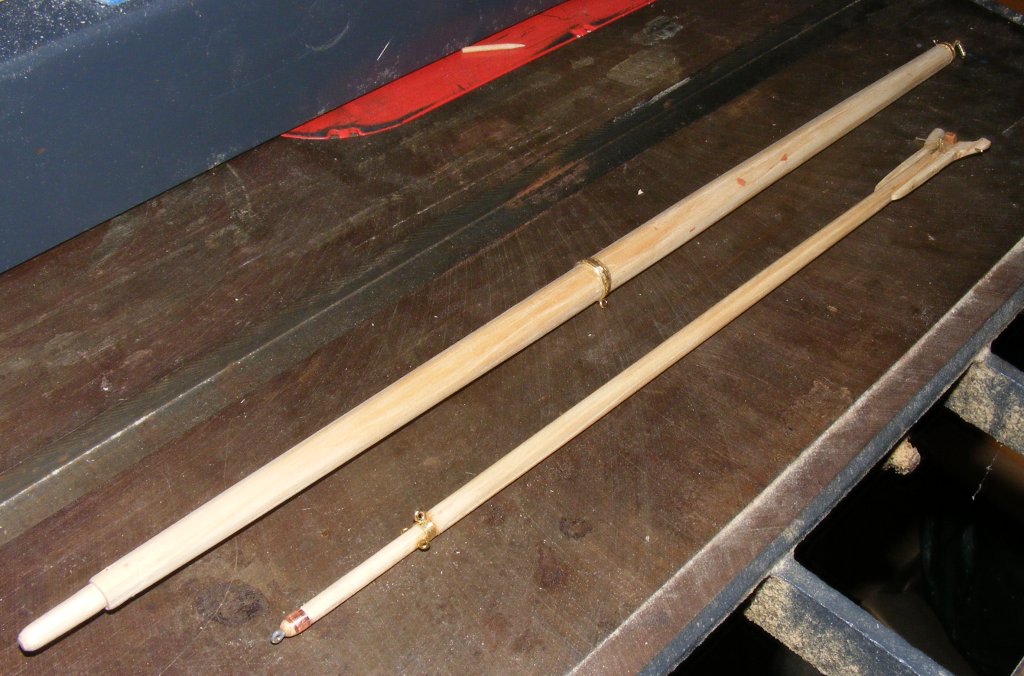
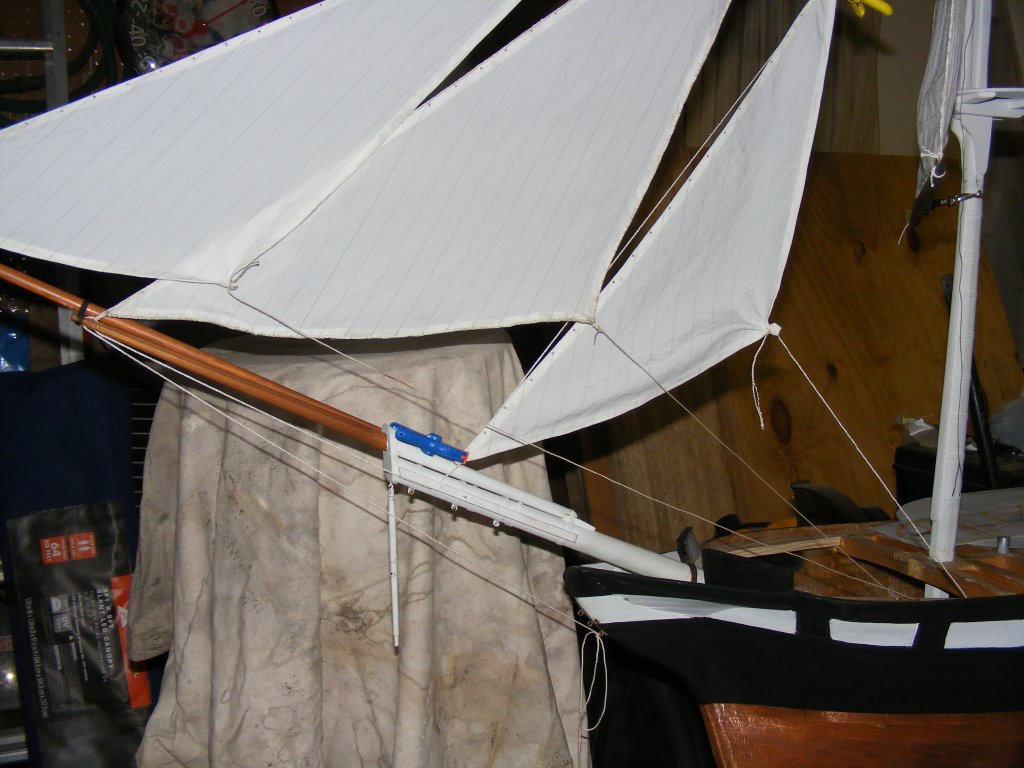
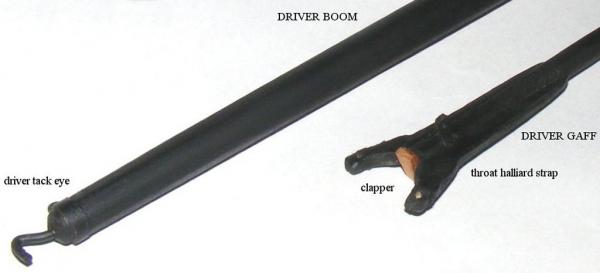
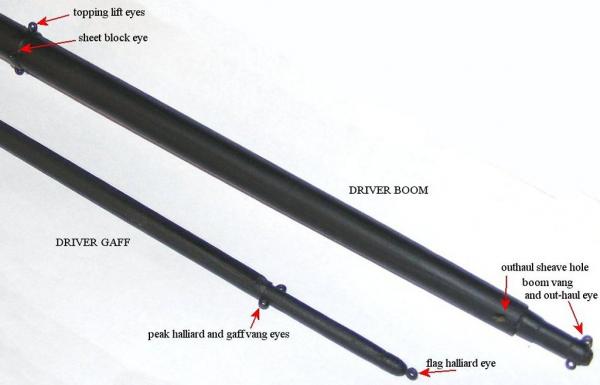
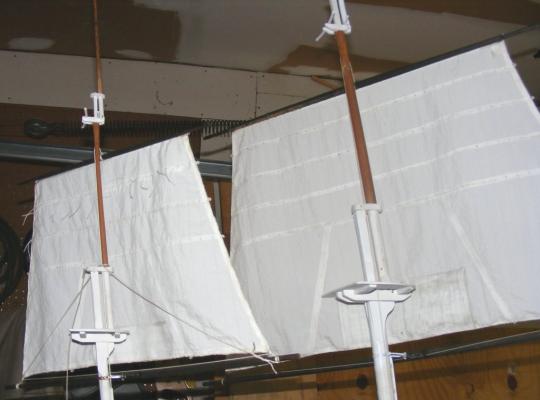
I was in the mood to do some planing over the weekend, and made the gaff and boom for the driver/spanker. These were made from some nice clear pine left over from a sea chest I made for someone. The hardware and other details were based on the usual examination of every image I can find, and the Text-Book of Seamanship by Luce. The blocks and guides for the steering cable were permanently epoxied in place, as were some oak blocks forward to give the chain-plate fasteners something to grip down-the-road. All this wood will get a coat of epoxy when I start laying the sub-deck, which, if the weather holds, should start this week, provided I don't wind up doing something for some one else.

- 553 replies
-
- 6
-

-
- sloop of war
- constellation
- (and 3 more)
-
Pennsylvania by threebs - 1/72 scale
JerryTodd replied to threebs's topic in - Build logs for subjects built 1801 - 1850
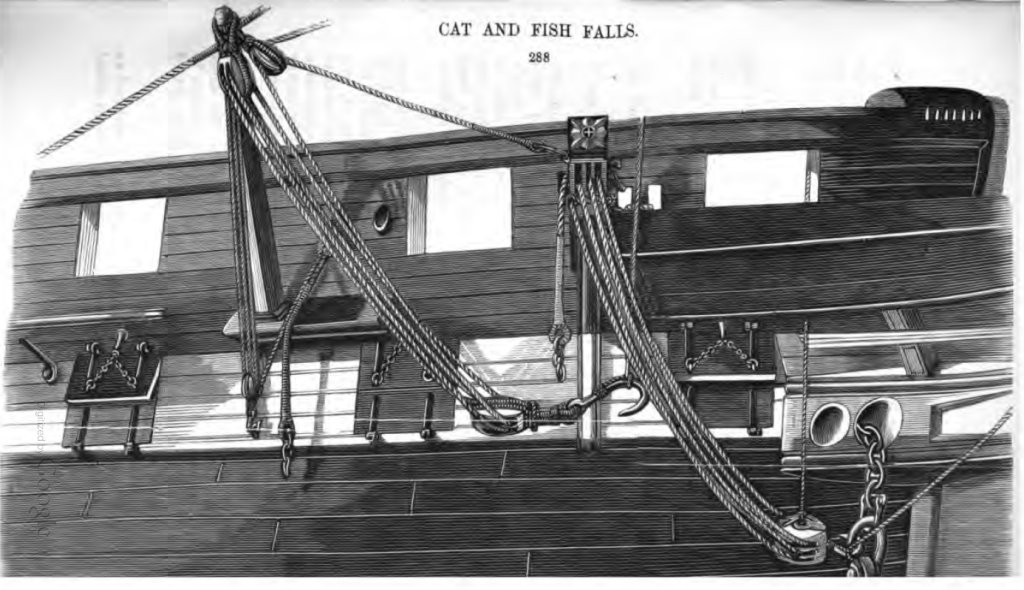
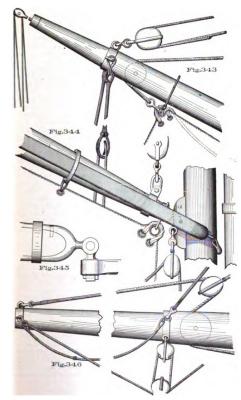
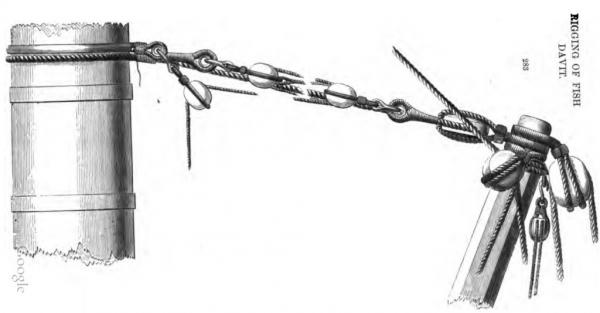
I did find some more fish davit references, not that it matters anymore They are from Nares Seamanship 1868 It would make for an interesting vignette
-
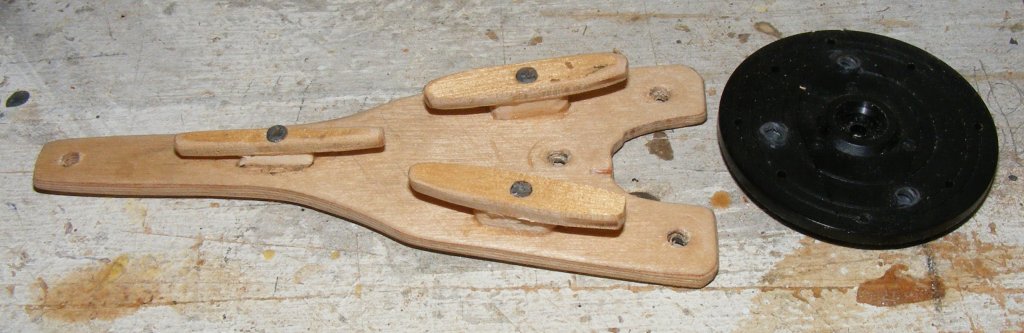
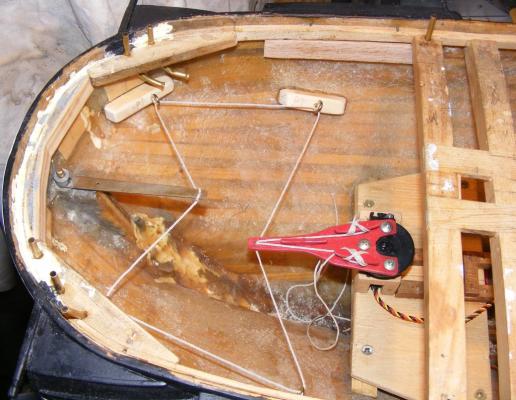
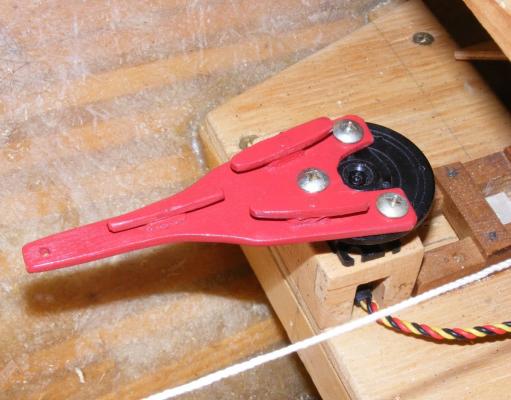
I resolved my issue with the driver sheet and the main brace being too close under the deck by routing the driver sheet along the edge of the inside of the hull. I set the tubes for the mains'l sheets. I think all that's left are the fore yard and fore tops'l yard brace fairleads. Before the sub-deck goes down, I need to put in the permanent guides for the rudder cable, which starts with pulling out the temps. I also mounted 3 cleats on the servo arm; 2 for the rudder cable that will allow easy adjustment, and the third for the line that will move the wheel when the arm moves. The three cleats are glued and cinch-nailed to the aircraft-ply arm. This was painted a nice red and remounted to the disk that attaches to the rudder servo. Moving forward, I installed the eyes in the boomkins. I wrapped the place where the iron band goes with some copper tape and drilled two holes at 90° to each other. I made an eye in two brass rods with my round-nose pliers, inserted these into the holes and made an eye in the other end on the boomkin. A bit of CA helps keep it from turning, though it was a very snug fit. This was repeated for the other side, and the boomkins then got a coat of paint. I was going to install the eyes in the hull for the boomkin guys, but after looking at every image and plan I have, I don't see any. Well, in one photo I think a see a wisp of what might be a boomkin guy, In all my images up to the 40's I can't see them. In pics from the 40's on - there aren't any guys at all! The model of her in the ship's visitor center doesn't have any guys, nor does the actual ship. Potter's 1:96 scale drawings and a copy of a magazine article on building a model based on Potter's plans - don't even have boomkins forward! McArdle's book on building her as the frigate, shows the aft boomkins 5 or 6 times, but has no forward boomkins at all - while the real ship he based his model on did have them (with no guys). I can deduce the best positions for the three guys, but it would be nice to know where the really were. You kit guys never have to worry about such things do you


- 553 replies
-
- 6
-
-
- sloop of war
- constellation
- (and 3 more)
-
Pennsylvania by threebs - 1/72 scale
JerryTodd replied to threebs's topic in - Build logs for subjects built 1801 - 1850
I was trying not to be that negative guy -
The lady of the house. She had something in the van she wanted out, and meant to put it in the garage. She forgot I told her not to open the door, until she heard a snapping sound.
-
All fixed Now, what was I doing before this distracted me?
- 553 replies
-
- 4
-
-
- sloop of war
- constellation
- (and 3 more)
-
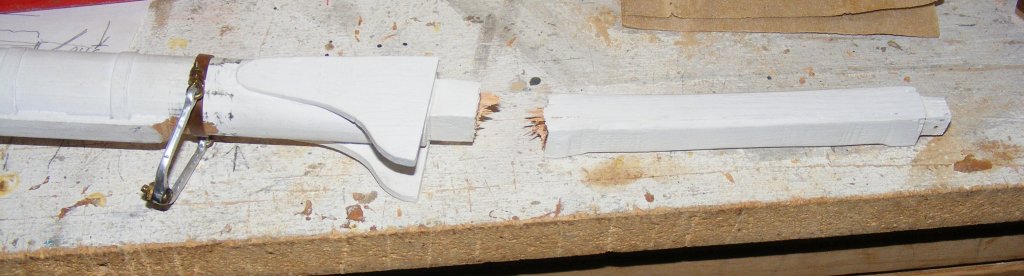
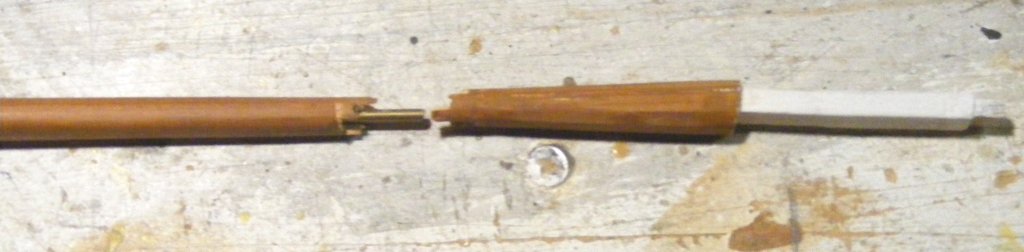
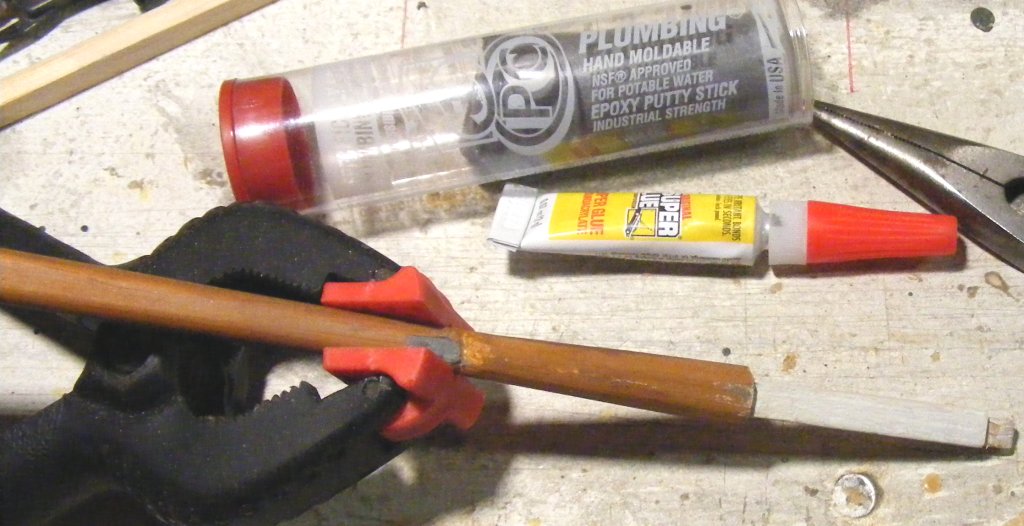
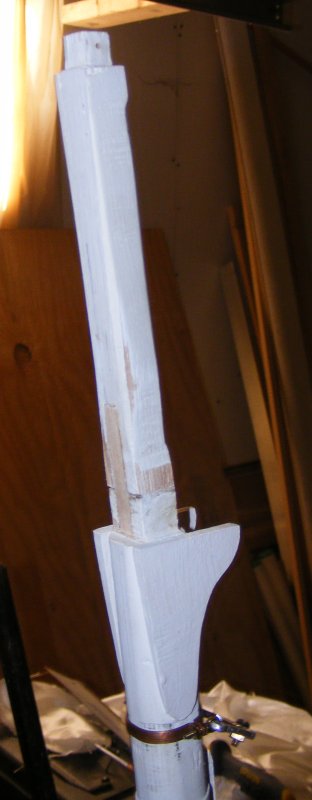
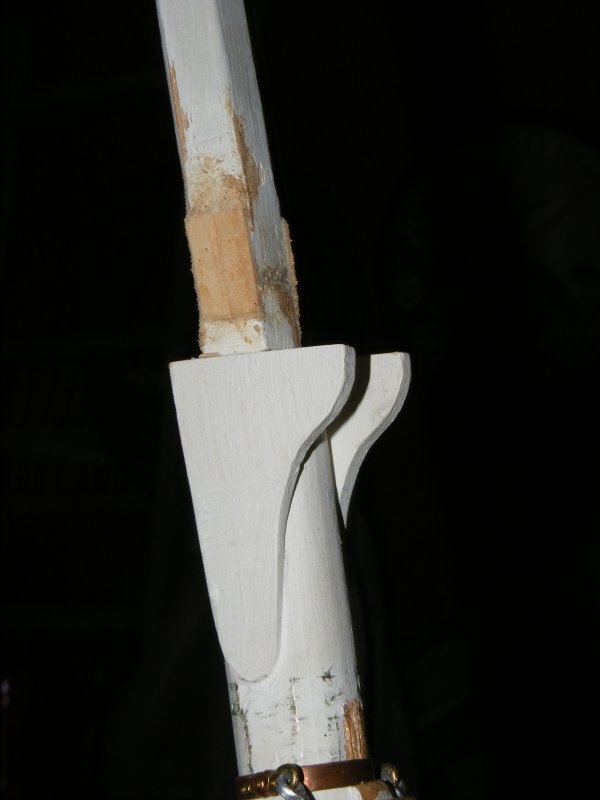
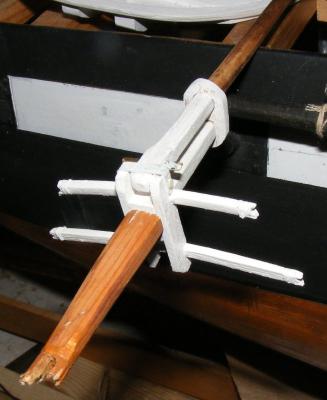
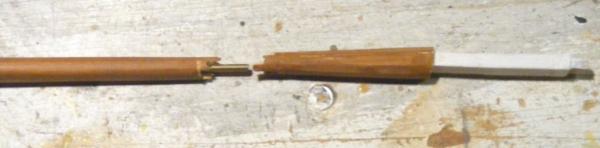
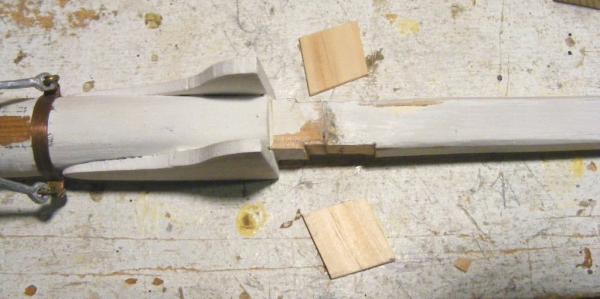
So, Saturday morning I go into the shop/garage to install the last of the fairlead tubes with the idea of starting to put down the sub deck on Sunday, when I notice the top of the mizzen topmast and it's t'gallant are lying on deck, and the main from the top up, is leaning at an odd angle. Turns out the model's on it's bench under the garage door, and she's taller than where the door goes when the rig's up. Hurricane Denise blew in and opened the garage door to put something in (despite being warned not to do that very thing). The door struck the mizzen and main before she realized what was happening, and then blew off to the church yard sale before I got up. Yes, I was upset, and the entire vocabulary of my sailing life came to the fore, but then I figured, feces takes place. So I set to making repairs, or replacements, as the case may be. The decapitated mizzen topmast. The severed head of mizzen topmast. Broke at the tops'l halliard sheave. A 2 inch brass rod reenforces the joint. The brass rod was CAed in and the joint got epoxy putty squeezed in. A little sanding and paint and it's all set. The sheared head of the mainmast. It got a 4" brass rod and epoxy putty too, but that didn't hold in the flat break across the main's end grain. The next day I put a pine Dutchman in the back side of the mast head. Today that was reenforced with pieces set in on either side with their grain running vertically and straddling the break. Just before the clamp went on. We'll see how it turns out tomorrow. It may get another piece set in on the front face. I had every intention of making a spare set of topmasts and some other spars - I just didn't expect to need them this soon. No, I didn't get upset with Madam Guillotine, I just summoned up my inner Jew and used the power of guilt - my mother would be so proud.


- 553 replies
-
- 4
-
-
- sloop of war
- constellation
- (and 3 more)
-
I think he's more concerned about the depth of the rudder, Qwert Actually, too deep of a rudder will cause cavitation - it will stall and be ineffective. You get more effect with waterline length near the surface. Take note of how schooners and yachts based on Grand Banks boats often have 1/2 heart shaped rudders with their greatest length at the waterline and coming to a point at the keel. You can see that on Friendship sloops, for example. Also, rudder throw beyond 30°-35° can cause drag enough to stall the boat, especially with fast rudder movements. Heck, I've done that in my 16 footer.
-
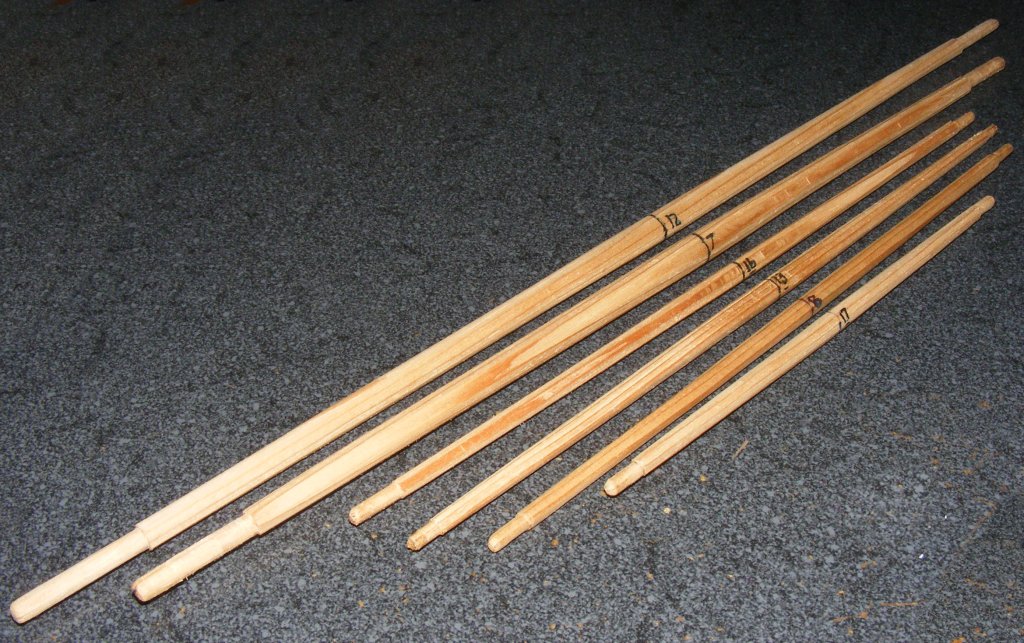
Thought I'd relax a little and make some spars. These have been rough cut ever since I first made the masts; today I shaped them; all the t'gallant and royal yards. The nice thing about this time period is that the yards are round over their entire length, all the details are "iron" bands and eyes. Macedonian's spars will be another story.

- 553 replies
-
- 3
-
-
- sloop of war
- constellation
- (and 3 more)
-
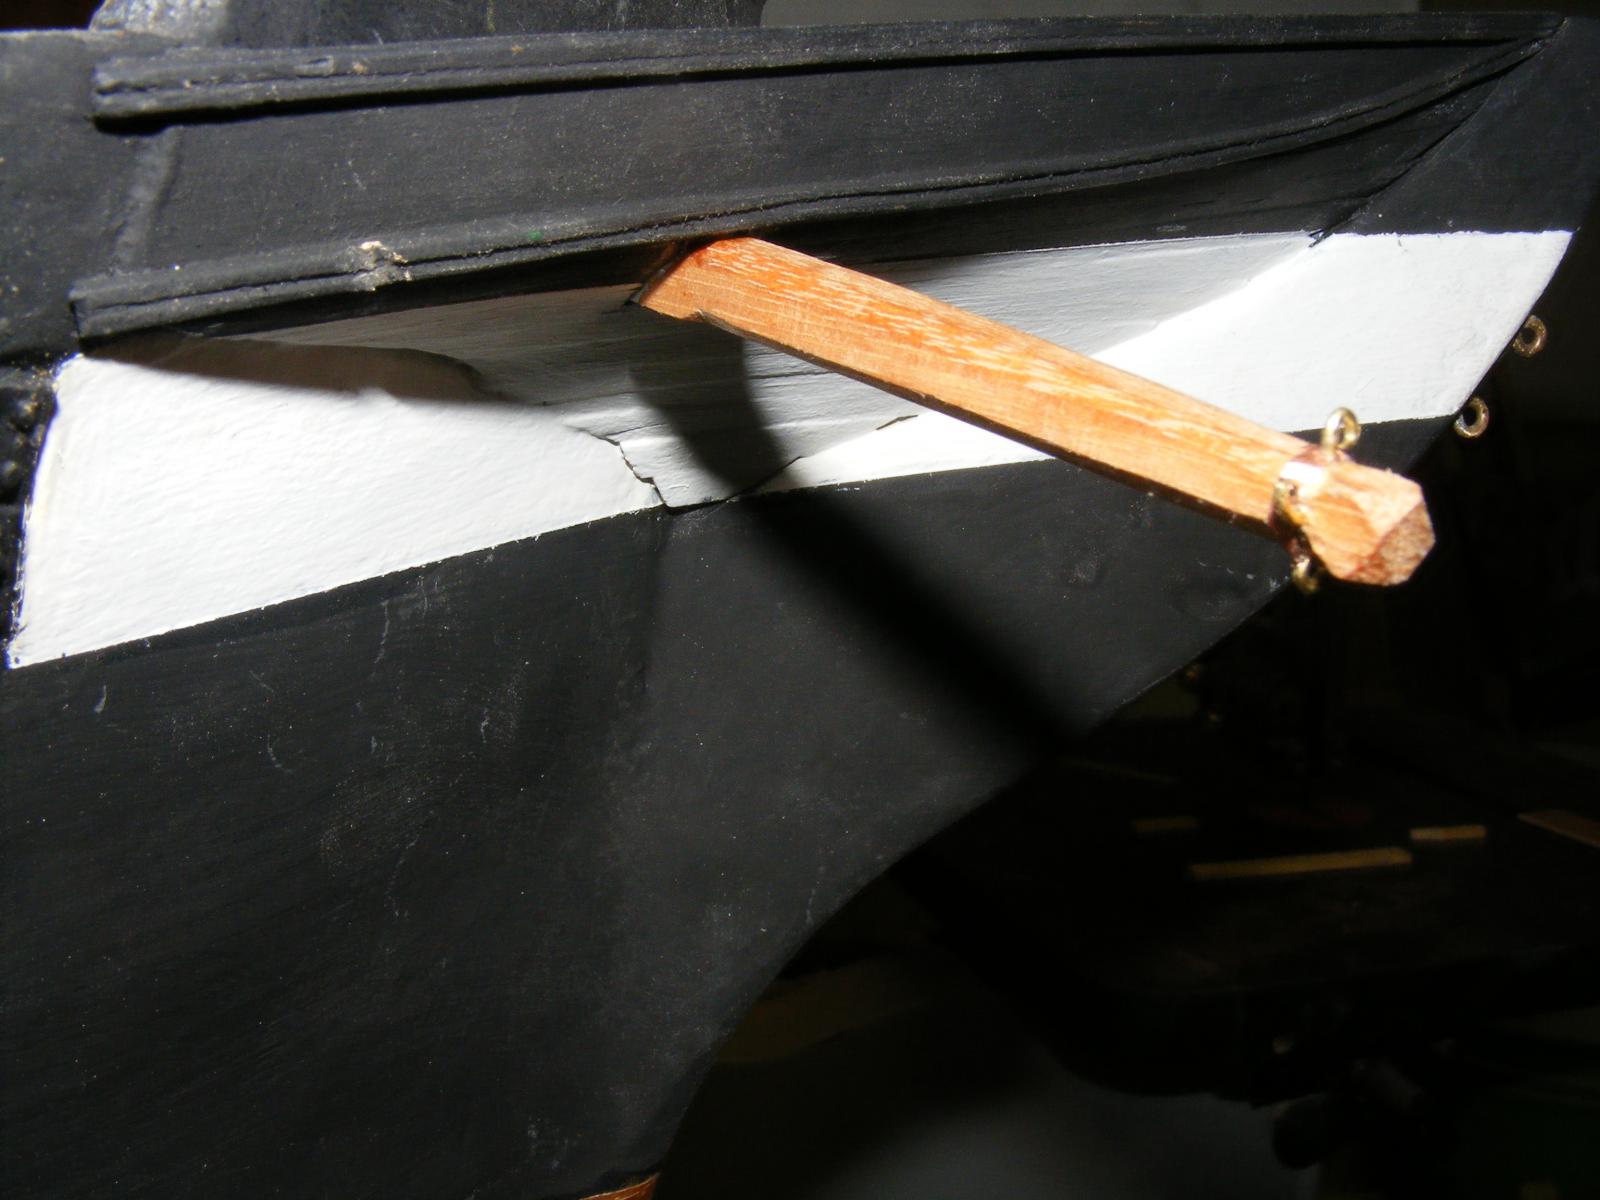
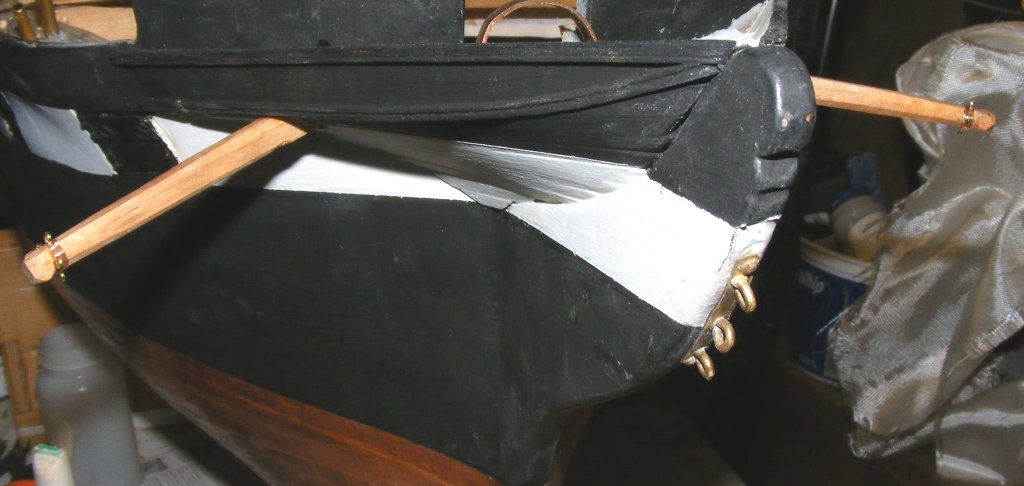
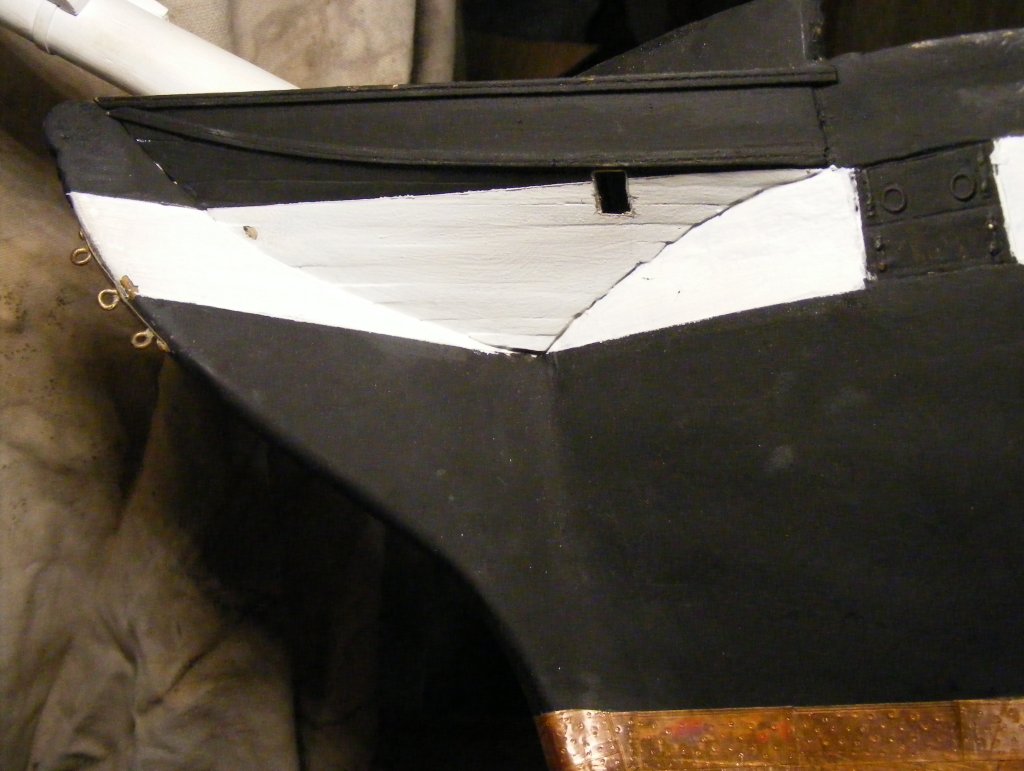
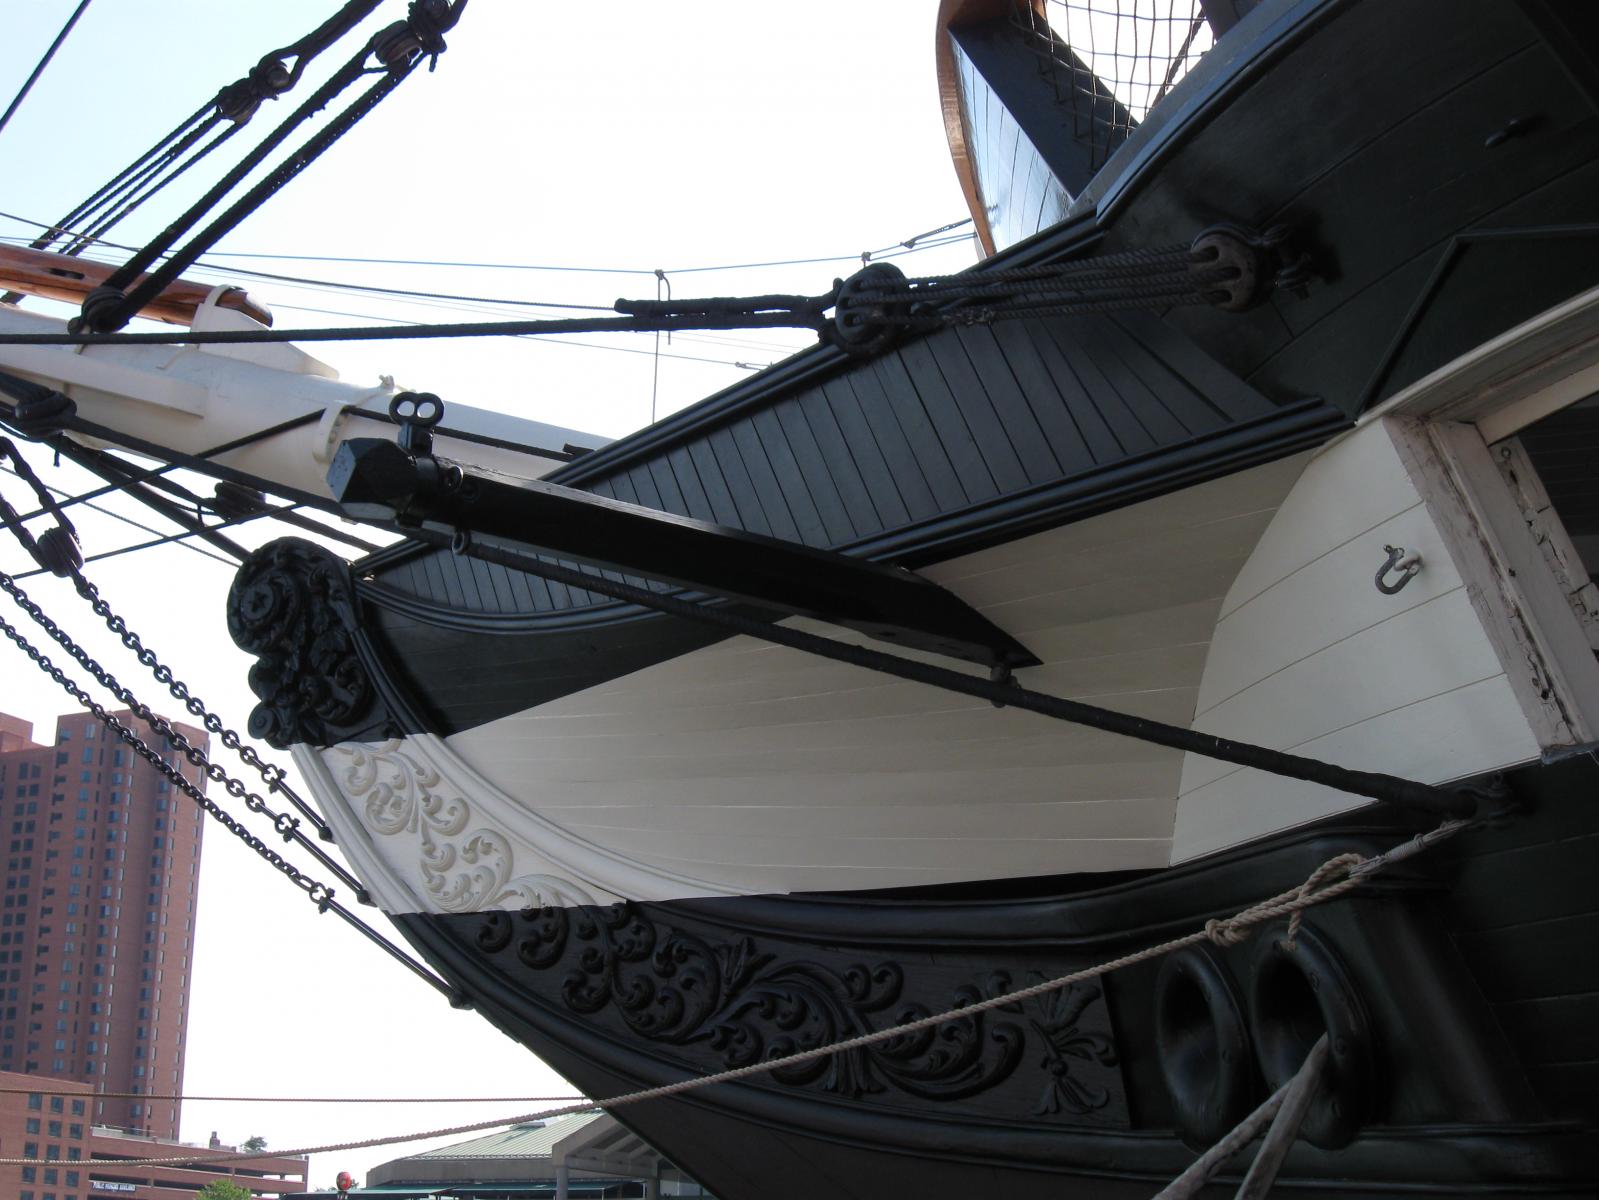
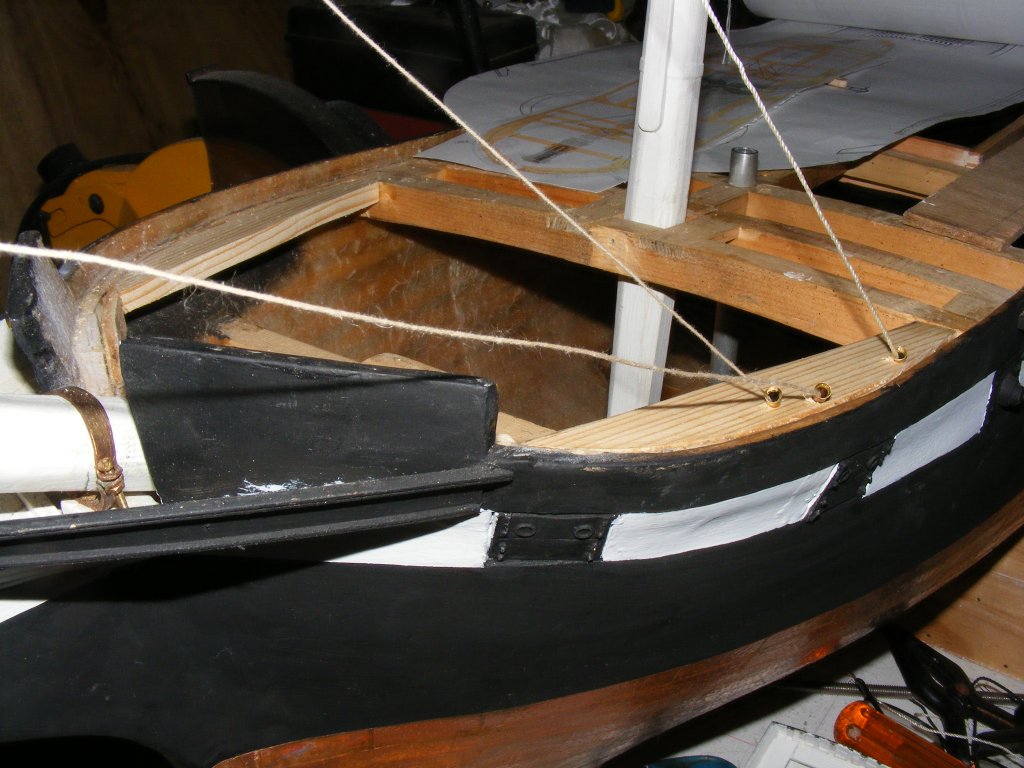
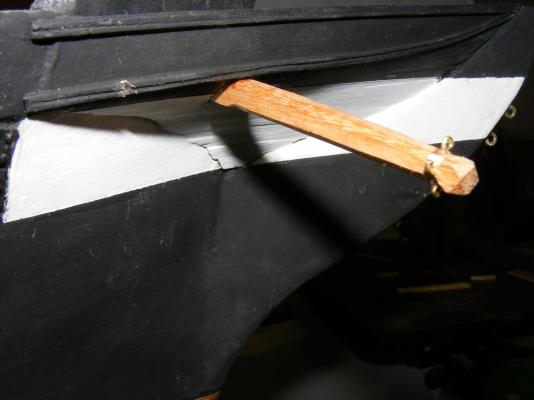
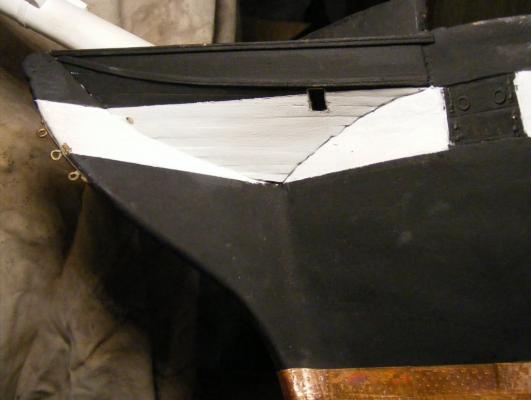
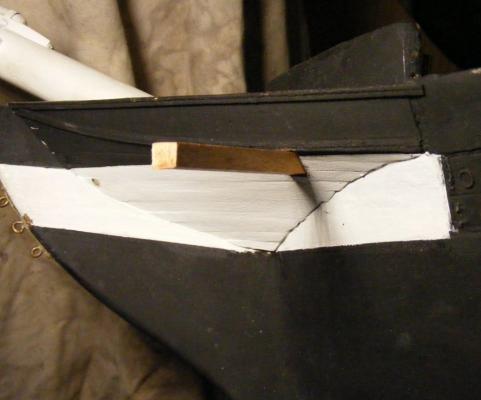
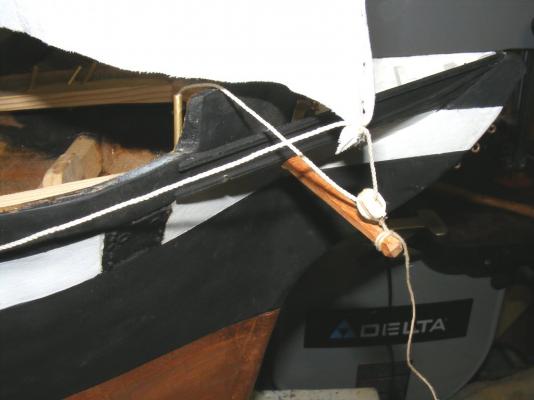
So now the fore boomkins are installed. I had the sticks rough cut from that mahoganyish pallet wood, I made the aft boomkins from. I had to get up the courage to cut a hole on either side of the head for them to go through. The first one was really tense, but the second one was less so, if not easier. I have no plan or measurements for these thing, or their position on the bow, so I stared a lot of photos. One photo was at an angle where I could measure the boomkin was 70% of the length of the top-rail of the head, back from the bow. I had to shape the boomkins. The tip is basically a cube with the corners knocked off. From there to the head planking it's 8-sided. Then it's square right to the hull. Once everything was shaped and fitted, I drilled a hole in the inside end and in the hull for a 1/16" brass rod. On the ship today, they're merely bolted to the hull-no bracket, socket, or anything like that. With everything checked for fit, I painted the portion inside the head white. When that dried I CAed the rod into the boomkin. I got some kneadable epoxy putty a while back and put a wad of it on the end of the boomkin that would attach to the hull, and a drop of CA on the brass rod, and installed them. They seem to line up nicely with the fores'l tacks.
- 553 replies
-
- 3
-
-
- sloop of war
- constellation
- (and 3 more)
-
The first link worked for me
-
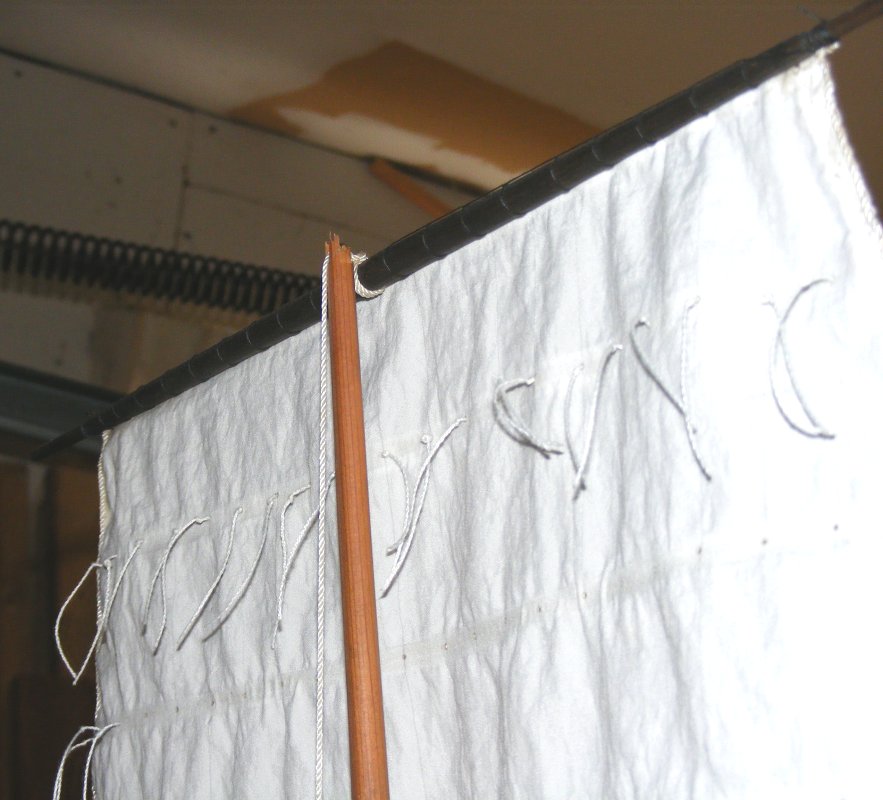
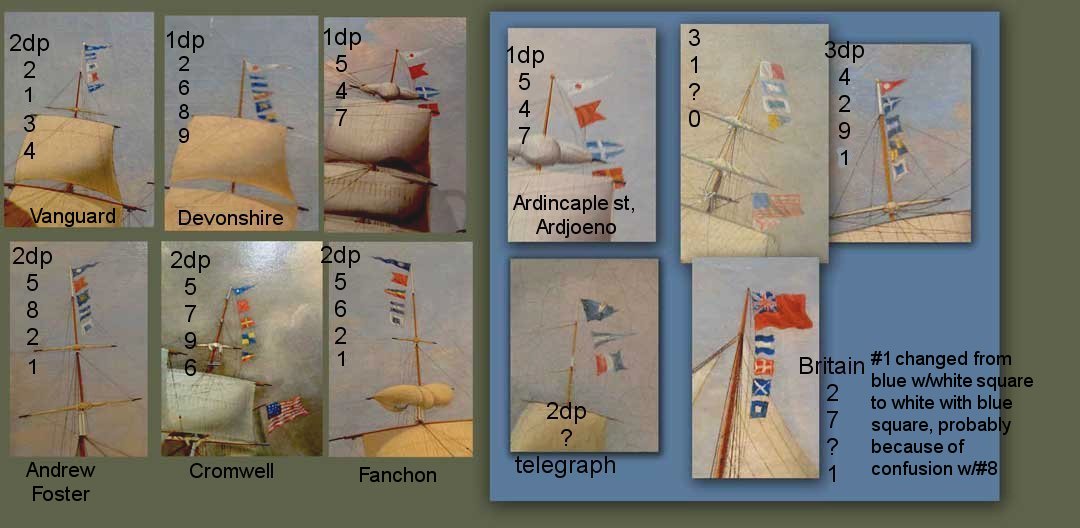
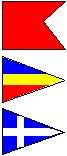
So, in another thread the subject of signal flags came up, renewing my hunt to figure out a signal in a painting of Constellation. I never got an answer, but I did find a resolution and I drew up all the flags I've be using on the model in scale. Well, what I do there I obviously must do here, so... Here, in 1:36 scale are the flags that will go on the Macedonian. The image may have been resized by the forum, but there it is just the same.

- 97 replies
-
- 2
-
-
- macedonian
- frigate
- (and 2 more)
-
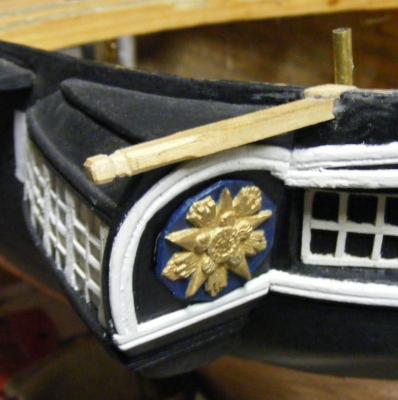
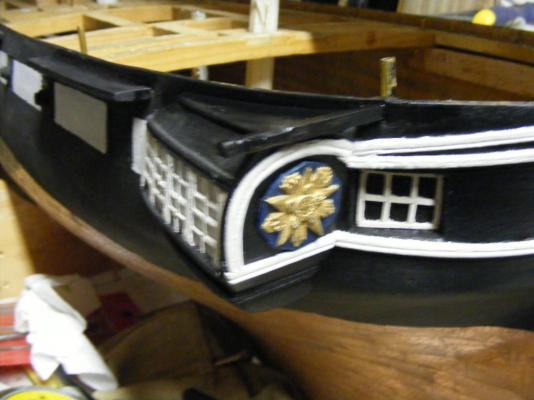
So, in another thread the subject of signal flags came up, renewing my hunt to figure out a signal in a painting of Constellation. I never got an answer, but I did find a resolution and I drew up all the flags I've be using on the model in scale. Well, what I do there I obviously must do here, so... Here, in 1:20 scale are the flags that will go on the Pride of Baltimore The image may have been resized by the forum, but there it is just the same. BTW: if you look back in the thread a bit you'll see that hideous black and yellow ovally thing is the Lord Baltimore badge Pride had pasted on her t'gallant. I wouldn't have put it there, but it was there when I sailed on her, so the model get one too. Scaled down to 1:20 didn't help it any.

- 79 replies
-
- 2
-
-
- pride of baltimore
- privateer
- (and 3 more)
-
Google "how to sail" and you'll find a plethora of sites that purport to show you how to make a boat and a bed-sheet move through the water in generally the way you want it to go. I know some real idiots that can sail, so how hard can it be? If you fly RC you can sail RC, just like if you drive a stick, you can drive an automatic. Square-rig is a bit much to start with, you don't learn to drive in a semi, but I PMed you some info for a couple of sloop kits that I built when I was a teenager and are still available. I think sailing's a bit more relaxed than flying - the consequences are usually a little less catastrophic.
- 553 replies
-
- 2
-
-
- sloop of war
- constellation
- (and 3 more)
-
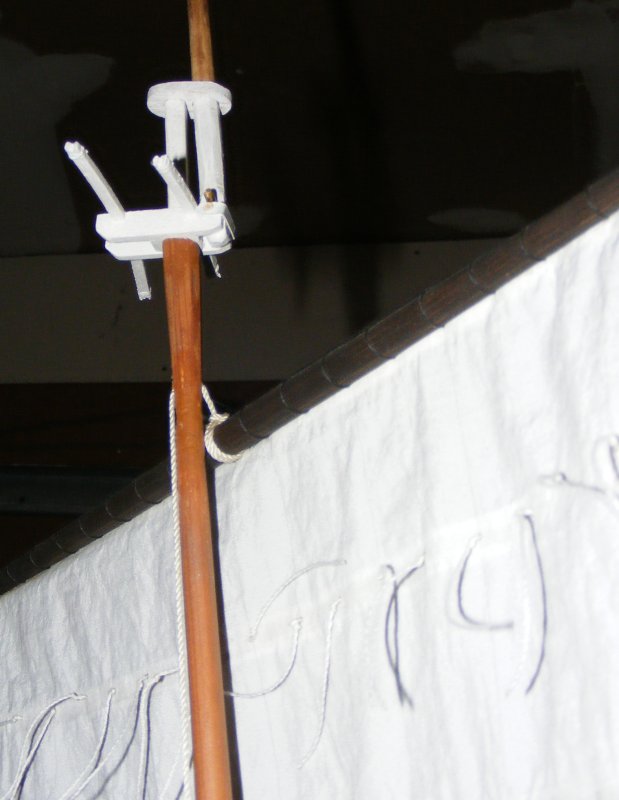
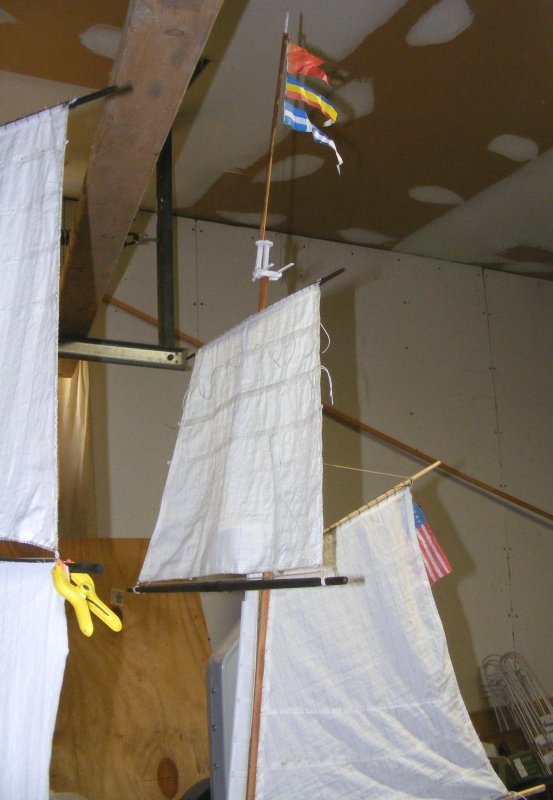
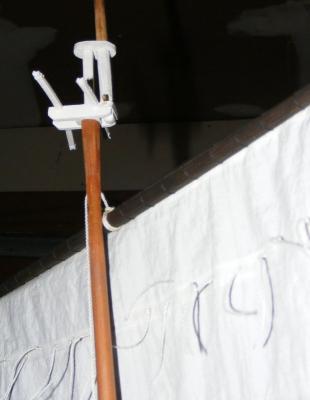
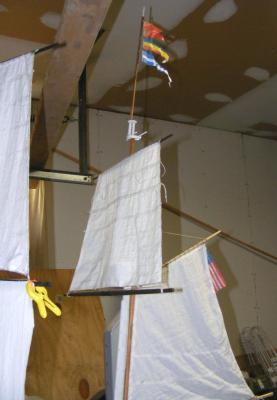
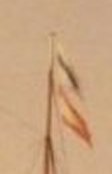
As I think I mentioned somewhere near the top of this thread, I'm building this model of the ship as she appeared when new, based mostly on a painting of her at Naples in 1856 by deSimone. That painting shows a signal hoist at the mizzen truck. That's something I'd like to include on the model except that I have no idea what the signal means. I cannot find those particular pennants in any signal system I've been able to find. One is a white pennant with a blue bar, the other looks like a white tapered swallow-tail with red borders top and bottom. Pennant, flag, burgee, or anything else; I cannot find those patterns in any flag set - including modern. I could just put that signal on the model anyway, but it may not really be appropriate. It could mean "Send a plumber!" or "My bottom is fouled" or "I have a lovely bunch of coconuts" Who knows? I don't. The possibilities are 1. it's a private US Navy signal. 2. It's a private Kingdom of Naples signal, or 3. deSimone just made it up. In another thread here on MSW, regarding signals, someone posted links to several editions of Captain Marryat's (RN) Code of Signals. The system assigns numbers to every warship of the major powers of the time, and all the merchant ships registered with Lloyd's. The Tenth edition, dated 1847 contains the number 564 for the American frigate Constellation. The next edition available online is dated 1855, but the French stopped publicly posting the list of their warships, so this and later editions no longer contain numbers for warships other than British. I'll assume the new sloop of war Constellation would take the number of the frigate she replaced, and not knowing what her private USN number was, or what the code in the painting was, etc etc etc - I'm going with Marryat's 10th edition. To that end, Marryat says; So, I drew up the hoist for 564 to 1:36 scale, printed it on the color printer, and hoisted it up on Constellation's mizzen. Yes, these are paper, I'll make a set from Supplex a bit later, I just wanted to see how it looked. Anyway, if anyone sees the model somewhere, and accesses the 1847 Marryat's on Google Books via their phone - they'll know what ship she is.


- 553 replies
-
- 4
-
-
- sloop of war
- constellation
- (and 3 more)
-
The 10th edition of Marryat's assigns every ship a number. The numbers are assigned in groups of 10,000 - 0-9999 with each group headed by a designator or some other grouping flag BTW: 3rd and 4th from the left of the top row in your collage are duplicates. I checked Marryat's 1847 and 1855 for the ID in your collage - neither book uses the number 3 designator pennant, it's probably a later code. Going by the 1847 book (warships aren't listed in the 55 edition because the French didn't want to play any more) I'll assume the sloop of war Constellation retained the number of the frigate she replaced; 564, so I'll fly this hoist from the model's mizzen head:

-
So close. My flags must be some private or military system, as I can't find either pennant in any system.
-
I've also had a terrible time finding information on signals outside of modern international, Napoleonic British, and some US Civil War era stuff. I've been trying to ID the hoist from a painting of Constellation at Naples in 1856, which I'm assuming is her "number" or ID, and intend to have it on my model. What I'm worried about is it could well be the signal that the heads are clogged for all I know.
-
I was looking, and expecting, to find the main tack going to a block on the fore channels, and then through the bulwark. My issue with that is that no such mechanism for getting it trough the bulwark is shown on the 1888 deck plan. The plan does show the fore sheet sheave assembly through the bulwark, which actually is set up for two lines, and another aft of the main mast, though I have no idea what that one is for. I just installed the tubes for the main tacks, and tried it out - it actually works quite well at that location. Now there's only 3 more tubes to install.
- 553 replies
-
- 1
-
-
- sloop of war
- constellation
- (and 3 more)
-
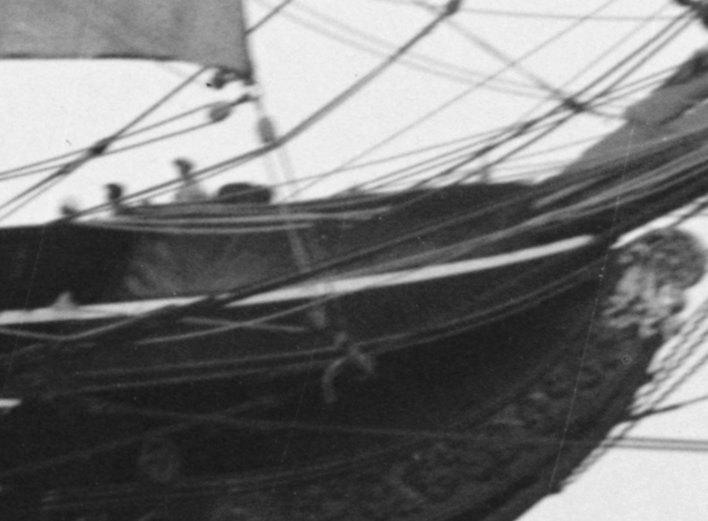
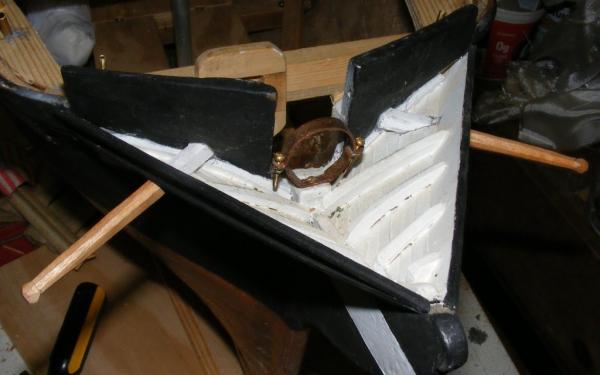
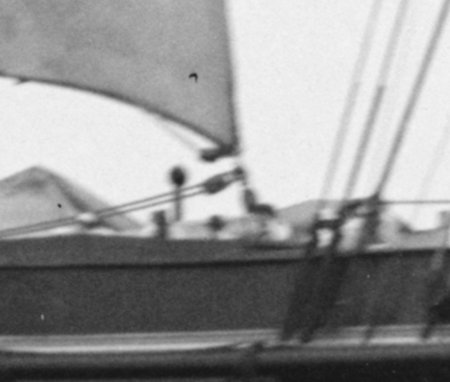
There's five more tubes to go; two for the main tacks, two for the fore tacks, and one for the driver sheet. There's potentially four more, for the fore and main trys'l sheets, but I'm not setting those unless I get more radio channels. They're close enough to my hatches that it wouldn't be difficult to add them later. I installed the aft boomkins. They're made of this hard mahoganyish stuff that came from some shipping pallets. They're glued where wood meets wood and two brass pins reenforce each of them, one into the hull, and one into the quarter gallery. A small gap where they pierce the hull got filled with epoxy putty. The main brace and main sheet both anchor here, and return to a block here, before coming inboard. BTW: Lee's calls these boomkins, but references the first mention of bumkins as 1680, and they're also referenced as bumpkins. I'm going with boomkins, Again, staring at photos, paintings, and picture of the ship today to figure out how they were attached, shaped, and their dimensions. The 1888 deck plan shows them at least, and that helped with dimensions, but the forward boomkins are another story. The paintings and earliest photos seem to back up the size and placement of the forward boomkins as they are on the ship today. Unfortunately they aren't something I can just walk up and measure, so this morning has been spent staring again, at photos from every source and angle, trying to extrapolate where they go, and how long they are. My best image with all sails set is fortunately a high res one as well. Here's a version that's about 14% of the size of the image I'm working with: From this image the main tack actually comes down to the deck inside the bulwarks almost at the foremast. The fore-tack goes through a hole in the forward bulwark For the fore and main courses on the model, if I set them, the tacks are the more important control lines. The sheets merely hold the sail back against the wind, but the tacks pull that windward clew forward when sailing on the wind. If it doesn't function, the sail will back. This attaches a lot of import to the forward boomkins, especially in being strong enough to be up to the job. Well, it's off to cut tubing and drill holes


- 553 replies
-
- 3
-
-
- sloop of war
- constellation
- (and 3 more)
-
Still working on the plumbing, added some blocking to support said plumbing; getting a little closer to permanent installation of the sub-deck. I also stared at two paintings and a series of photos of the ship with sails set to try to figure out where jibs sheet and where the tacks and sheets run. I think I've got it now.

- 553 replies
-
- 2
-
-
- sloop of war
- constellation
- (and 3 more)
-
Pennsylvania by threebs - 1/72 scale
JerryTodd replied to threebs's topic in - Build logs for subjects built 1801 - 1850
Is there a clinker boat on your menu? -
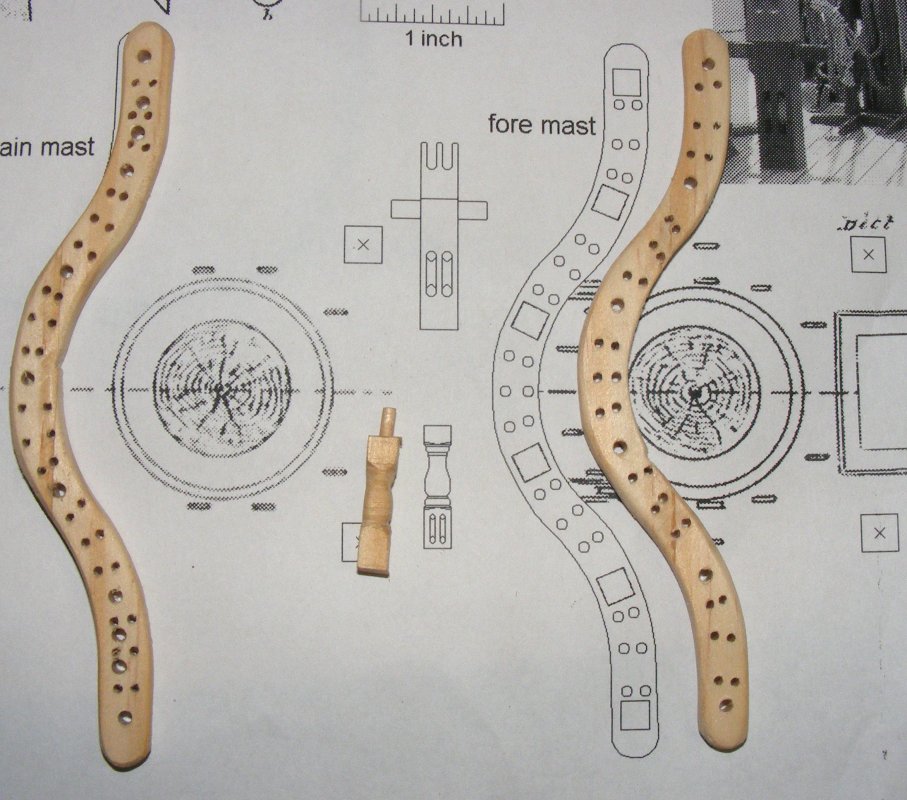
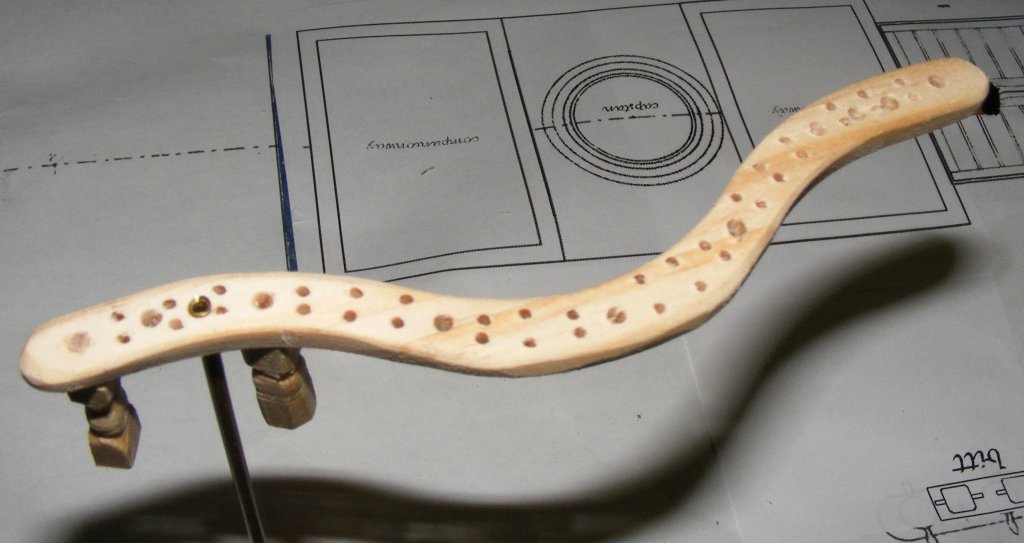
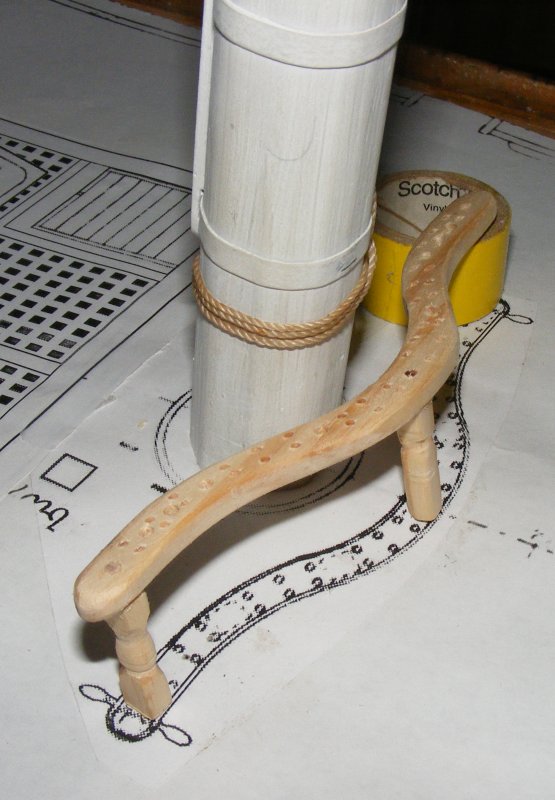
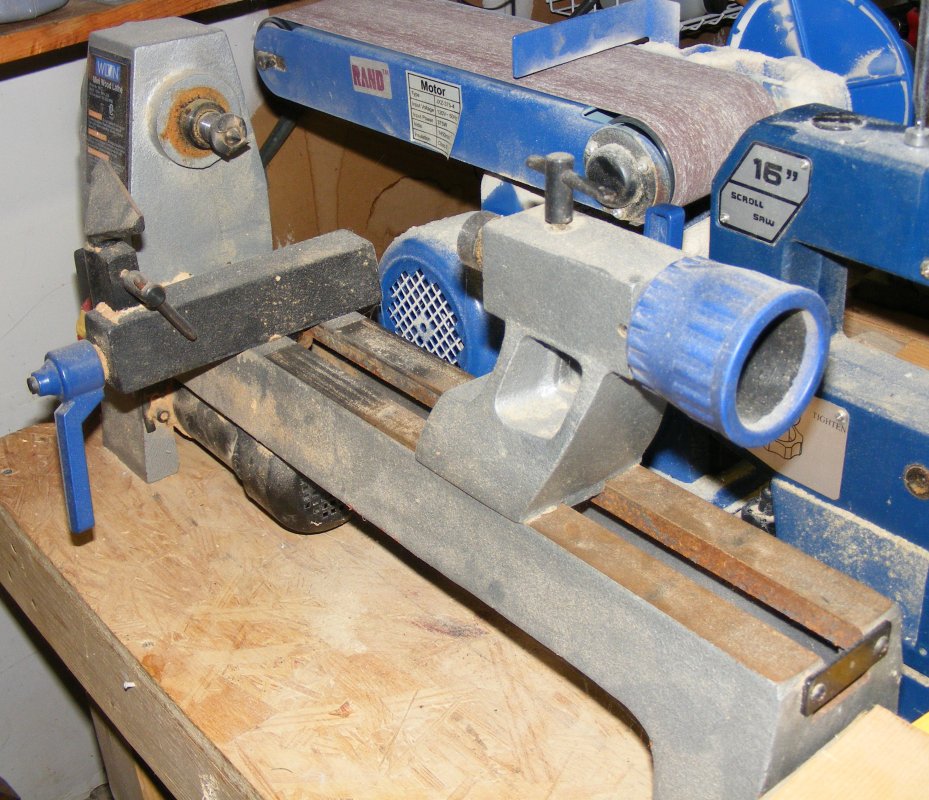
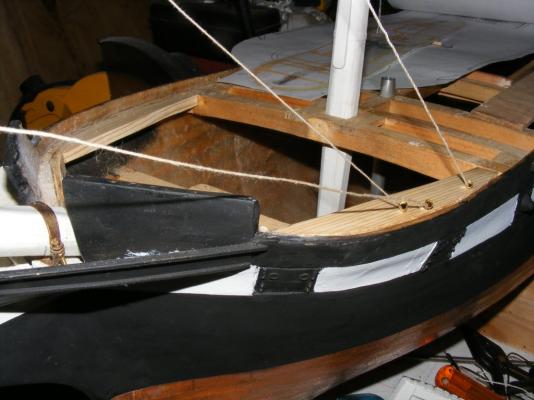
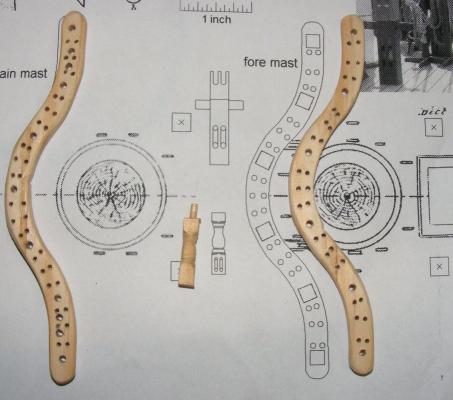
Since the pipes for the fore-corse and tops'l yard braces go through the main pin rail, I need to make the thing to get everything properly lined up. I recently made a sea chest for a reenactor participating in the event at Fort McHenry last weekend and have a bit of scrap "select" pine from it already cut to 3/16". I printed and pasted the paper patterns for both fore and main pin rails, cut them, and drilled them with 1/16" holes for the belaying pins. Some larger holes were drilled for the stanchions which will be fastened with wood dowels except for three or four that will have brass rod all the way through to the deck. Four additional holes were drilled in the main rail for the brace pipes. There's 13 total stanchions between the two pin rails all of which are turned and have two sheaves in their bases - they do not pivot. They are 3/16" square and about 3/4" long (changing for the deck camber) My lathe doesn't have a chuck; I have a big 4-jaw thing for it, but it requires shimming and balancing or it'll make the whole bench jump around the shop. So I took a shot at turning a couple of stanchions on my drill-press. That'll work, but I have to do one at a time rather than a stick of four or five. I also need to get together some implements to get a better and sharper finished turning. I did get some 1/16" ABS sheet to make the flanges for my new winch drums, being I can't find the set I made before I moved. Now I have to find my sheet of 1/8" plastic for the drums themselves - which I think is in my storage unit. I want to rig up the braces and test it all in operation before I epoxy everything down and lay the subdeck.


- 553 replies
-
- 3
-
-
- sloop of war
- constellation
- (and 3 more)