-
Posts
875 -
Joined
-
Last visited
Content Type
Profiles
Forums
Gallery
Events
Everything posted by JerryTodd
-
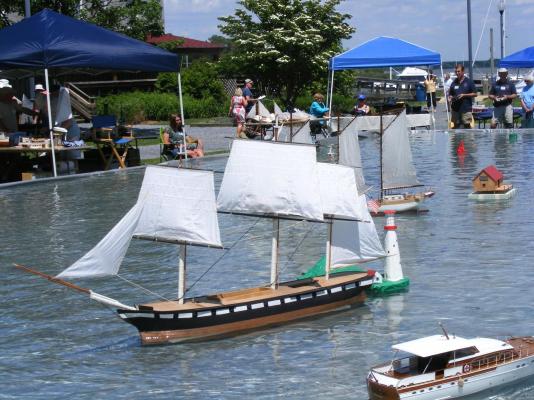
Thank you. She's been in the water five times now; the first two as a bare hull, and the last three under sail, albeit, jury-rigged. She'll very probably sail again before being completely finished, but her deck should be installed and with a little more sail set next time.
- 553 replies
-
- sloop of war
- constellation
-
(and 3 more)
Tagged with:
-
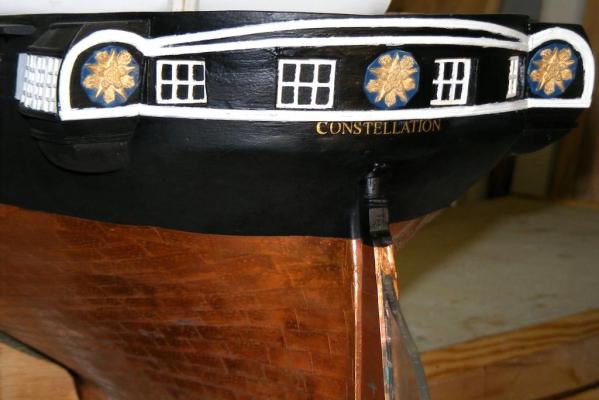
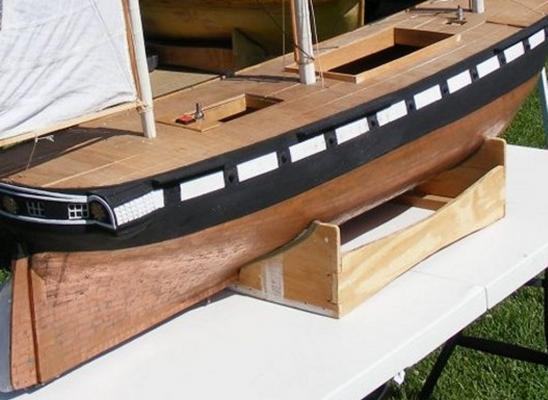
Ordered some gold 5mm Times Roman dry transfer letters from Letraset in the UK a month ago - they just arrived yesterday and I wasted no time getting Constellation's name installed on her stern. The clear coat hadn't dried so the hull looks a little glossy.
- 553 replies
-
- sloop of war
- constellation
-
(and 3 more)
Tagged with:
-
I've read and heard what you would call seaman's slang use terms like "He was a full tops'l taller than his comrades." But I never caught this particular reference. Never too old to learn I guess. Funny, I've read everything Forrester wrote except that one, guess I'm gonna have to slide over to Abe Books and hunt one down.
-
Sure it wasn't a t'gallant stays'l? What book? What period?
-
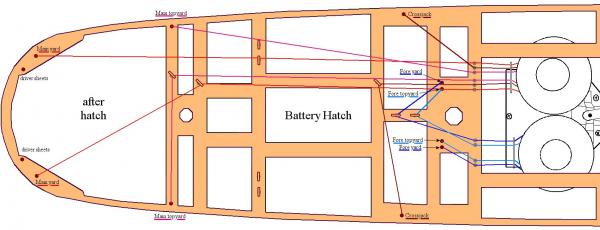
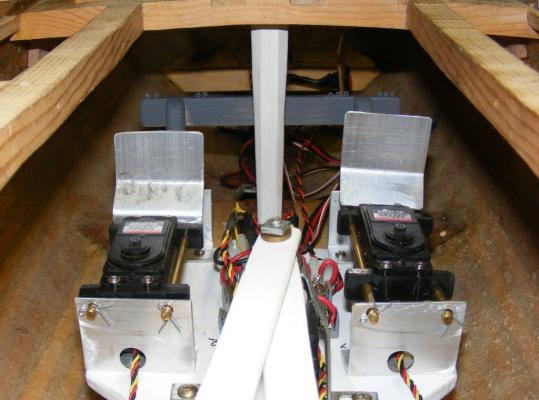
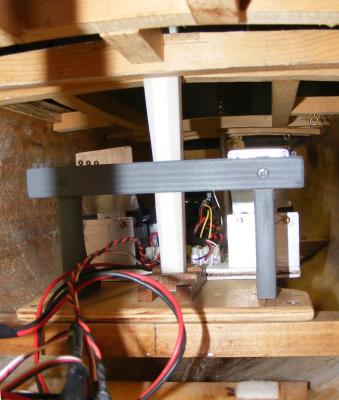
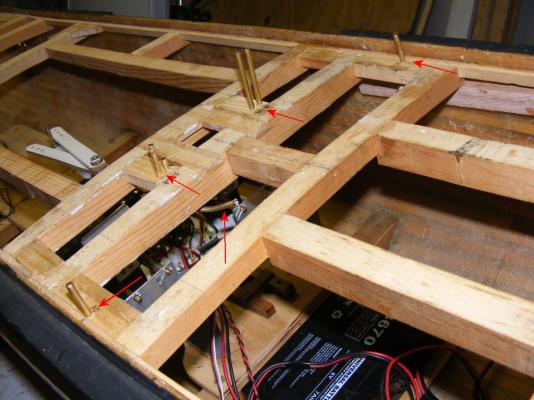
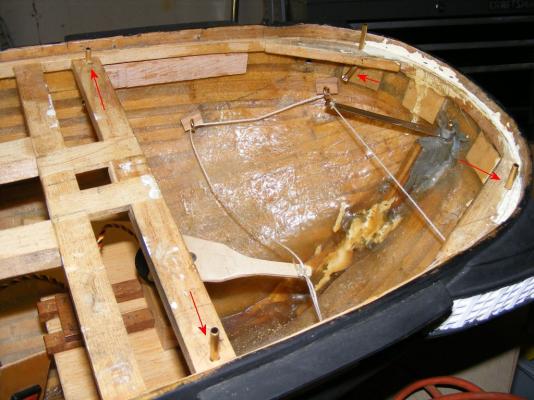
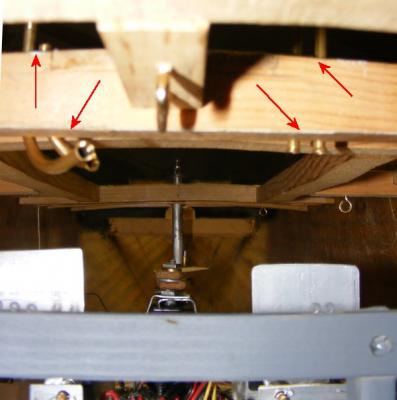
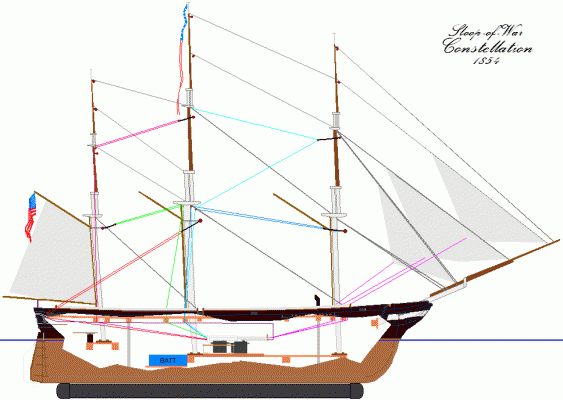
I've been working on routing the braces below deck so they don't tangle and interfere with each other; so they don't obstruct hatches and other operations, like the rudder; and in a layout that I can service the system when needed through the planned hatches without having to tear up the deck. That's the plan for this spaghetti puzzle I've been working on. Fore & Main brace diagram showing how braces are routed below decks. The port-side main brace will be rerouted so it doesn't obstruct the planned after hatch. The gray riding bit beyond the winch servos is the brace fairlead bitt, for want of a better name. The fairleads mounted on the winches keep the braces on the correct flange of the drum, the eyes on the bitt turn the braces to their through-deck destinations. View from aft. The bitt is made of white pine. The knees are glued and screwed to the deck, not the servo-tray. The cross beam is just screwed to the knees. Red arrows point out through-deck fairleads of brass tubing. Amidships are the foremast brace fairleads, and outboard are the crossjack fairleads. On either side aft are the main brace fairleads, and forward (left) are the main tops'l yard brace fairleads. The fore brace and the fore tops'l yard braces from inside the hull. The foremast winch is on the right of the image. The other winch operates the main and mizzen braces.
- 553 replies
-
- sloop of war
- constellation
-
(and 3 more)
Tagged with:
-
I get a lot of questions about the sails on my RC sailing models, a surprising number actually. Since answering requires repeating myself a lot, I decided to plop it all into a web page I can direct folks too. Sail Making I wouldn't mind some feedback, questions will help me fill in anything I missed.
-
This copper's been on since June of 2010. It's spend several hours in salt water and a couple of swims in fresh water. It's handled quite often by my grungy paws, and it's finally getting to where I want it to look.
-

Pennsylvania by threebs - 1/72 scale
JerryTodd replied to threebs's topic in - Build logs for subjects built 1801 - 1850
Sound's right, it looks like 3 x the diameter of the boom, which I imagine to be 6-8" But you only need a couple or 3 turns, which is about all the line they leave you up there for the job. real boat model boat -

Pennsylvania by threebs - 1/72 scale
JerryTodd replied to threebs's topic in - Build logs for subjects built 1801 - 1850
You know you have like 3 feet of lashing on those stuns'l booms -
This is detailed in the Constellation thread (see my signature for a link) It's photographed outside in bright sunlight after the sample had dried. One of Constellation's t'gallants is there for comparison. I think this gray will be good for Macedonian's sails.
- 97 replies
-
- macedonian
- frigate
-
(and 2 more)
Tagged with:
-
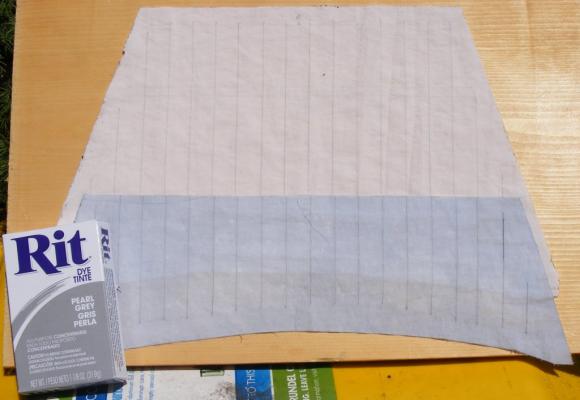
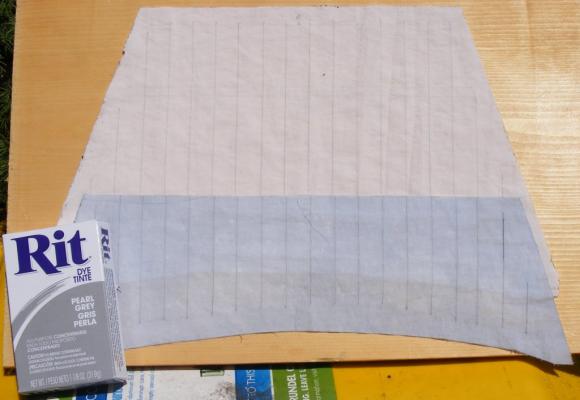
I've been meaning to do this for some time. I was in a craft store looking for modeling paint for the LST when I happened on a box of Rit Pearl Gray fabric dye. A lot of modelers dye their sails to "age" them. They use coffee, tea, wood stains, all of which are fine except they all tend toward the red/brown tints. Flax sails, and military sailing vessels used flax sails, tend to age into the grays. I was going to try a tiny bit of black dye, but finding a proper gray was fortuitous. Constellation's sails are made from white Supplex - bright white burn your retinas if you look too long white. I want to gray that brightness down a bit, not necessarily make them look 10 years on blockade duty off Ushant gray - that I'll save for Macedonian. So, I filled a 12oz cup with hot tap water, stirred in a teaspoon of dye, and lowered a scrap of Supplex into the mix. Stirred it around, took it out and placed it back in, and stirred it some more. I gave it a full 3 minutes on a timer, and here's what I got. This is photographed outside in bright sunlight after the sample had dried. One of Constellation's t'gallants is there for comparison. For Constellation and Pride I think I'll go for 1 minute in the vat, though I think this will be good for Macedonian and Gazela.
- 553 replies
-
- sloop of war
- constellation
-
(and 3 more)
Tagged with:
-
The Manila he refers to isn't the garbage sold under that name today.
-

Pride of Baltimore - question of a rope
JerryTodd replied to Shura's topic in Masting, rigging and sails
I'm not familiar with Pride II's set-up, but, there's several lines that might make-off at the jaws: The lower hoop lacing, needed because of the rake of the mast and because the main lowers as opposed to the fore which brails up. Gaff peak flag halliard, sometimes two, one each side The main's out-haul goes through the boom to a block and tackle which makes off here usually, if there isn't a cleat on the boom for it. Pride 1's main tops'l's tack made off here sometimes. Topping lifts don't normally make off here, but I've seen it done. -
Vicky is a static model, not a working ship
-
They're tarred, like it or not. Get up there and try to slop the shrouds and NOT do the rats. BTW: The lanyards are tarred too.
-
I'm not interested in anything to do with guns where I have to bring the boat back to shore to reload them each time I fire. I have a pile of sketches for multiple shot systems, the most promising based on a revolving cylinder firing light black powder loads (more for the smoke effect than sound) - but I'm not capable of the machining involved, nor can I afford to farm it out - so it's not on a back burner, it's not even on the stove.
- 553 replies
-
- sloop of war
- constellation
-
(and 3 more)
Tagged with:
-
Thank you David, if someone is getting something from all this, then this is worth the effort. The mast steps are in post #10
- 553 replies
-
- sloop of war
- constellation
-
(and 3 more)
Tagged with:
-
Fella's, she's been in the water a few times now, next time she gets wet she'll have t'gallants and another jib set. What I'm trying to get close to though is closing up the deck - that's a major milestone, because there's a lot I can't do until that step is taken. To that end I have to get the brass tubing fairleads that lead the sheets and braces through the deck installed - some of that needs to happen in conjunction with installation of portions of the sub-deck. The sub deck's underside will be painted with epoxy both to seal it and to glue it to the deck beams. There will be a removable section of deck under the pivot guns both fore and aft. The hatch aft gives me access to the rudder head and it's servo, the one forward gives access to the jib sheets. Anyway; once the subdeck is down I can lay the deck planking; which, BTW will be set down in 1 hour epoxy with blackening in it, and probably will be made of stained bass wood. After scraping the deck and sealing it, I can add waterways, cap rail, deck furniture, hatch coamings, and then the bulwarks Which will be made up something like this; Real rigging can then commence. For that I have to rebuild my ropewalk which was damaged in the flood as well cobble together a functional servicing rig. Remember my scale is 1:36 and this model sails, so my line has a few demands on it static models don't impart. I have a quantity of Dacron Polyester sail thread from a sail-maker's supply and have walked out some very nice line up to the diameters Constellation (and Macedonian) will need - the main stay is about 5/32" diameter, but I have a couple of miles more to make in various diameters to even get seriously started. Dacron line is really nice stuff too - not the slightest hint of fuzz! I also have a bit more than half of the chain plates to manufacture, and all the deadeye strops. In a nutshell, there's a long way to go, but there you have a basic outline of what's ahead and in what order.
- 553 replies
-
- sloop of war
- constellation
-
(and 3 more)
Tagged with:
-
Yesterday I made the mizzen t'gallant, a day or two before that the fore t'gallant. Everything's painted, including the tip of the flying jib-boom, which has been bare wood for years now
- 553 replies
-
- sloop of war
- constellation
-
(and 3 more)
Tagged with:
-
My cologne used to be Stockholm Tar, we called it "Old Spike"
- 227 replies
-
- cumberland
- 74 gun
-
(and 1 more)
Tagged with:
-
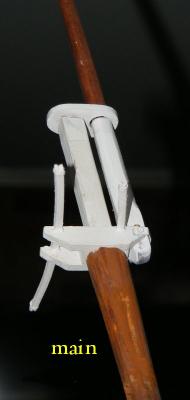
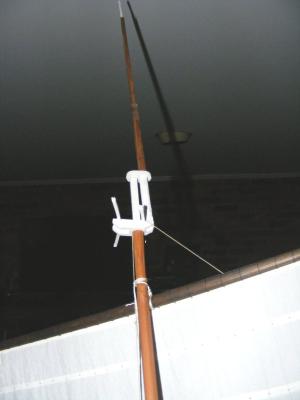
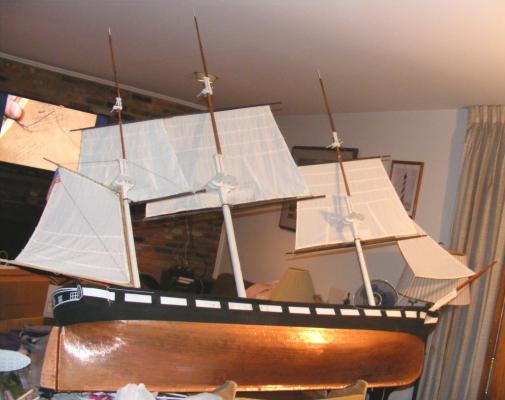
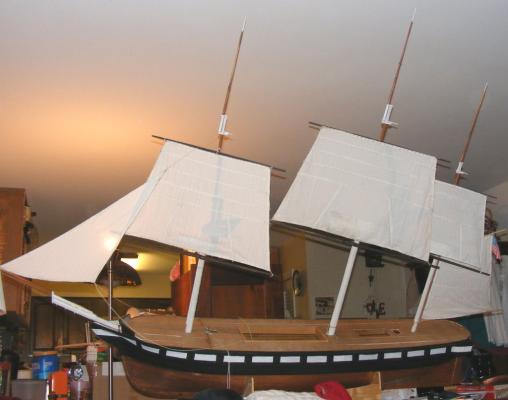
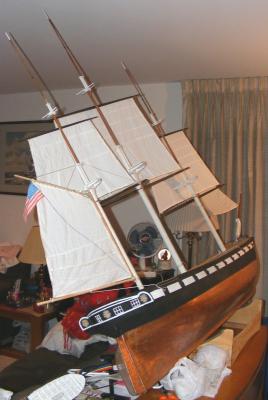
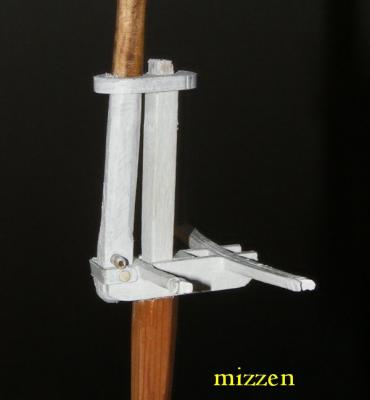
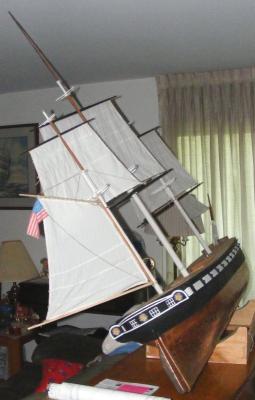
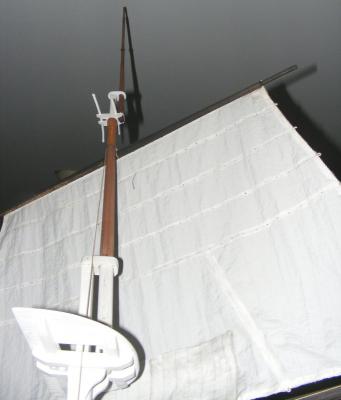
I decided to make a spar before I forgot how. While the shop's still a wreck, and she sits on a cabinet behind the couch, she's too high to fit under the ceiling with her new main t'gallant pole aloft, and has to crouch like she's lying over to a strong breeze. The doubling and truck got painted white, but I still have to make the cap, and of course, the fore and mizzen t'gallant masts.
- 553 replies
-
- sloop of war
- constellation
-
(and 3 more)
Tagged with:
-
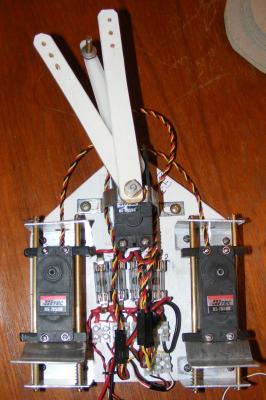
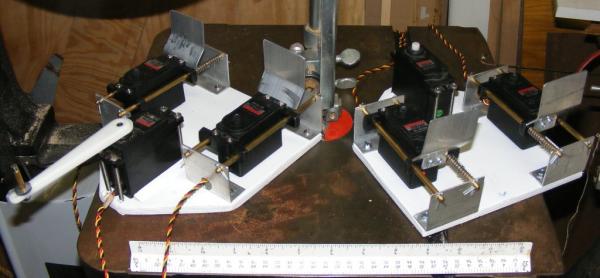
In reassembling the wiring and such, and testing everything before fastening it down, one of the winch servos just ran and ran. Assuming it was the servo, I swapped it out with another one and found the problem was I didn't have the plug seated and the signal line wasn't connected. That's one $45 servo still good, but it also demonstrated the ease of swapping out a servo with this set up: Unplug the servo; take off the winch drum; loosen 4 mounting screws, and out it comes. So, here's the servo tray with the wiring installed:
- 553 replies
-
- sloop of war
- constellation
-
(and 3 more)
Tagged with:
-
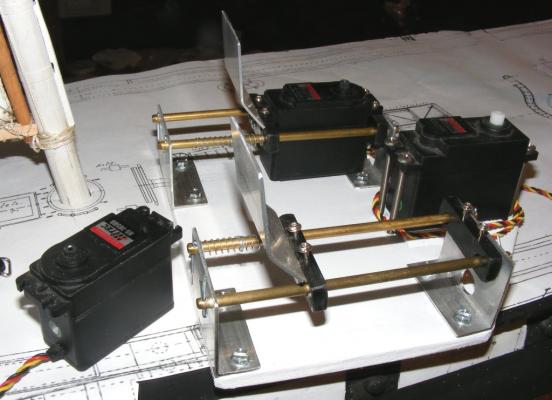
Painted the "trays" the servos are mounted on for both Constellation and Macedonian. The servos were remounted and cotter pins installed to hold the slide rods in place. Constellation's will get it's fuses, and other electrical items mounted, and holes drilled for it's mounting screws. The guide holes in the fairlead plates aren't drilled yet, I'm still trying to find the winch drums I made a while back to be sure the holes line up properly.
- 553 replies
-
- sloop of war
- constellation
-
(and 3 more)
Tagged with:
-
I'm on the last book of this Drinkwater series; "Ebb Tide" and I have to say I like the series. Like Hornblower Drinkwater doubts himself, feels guilt for the things he must do, the lives lost, etc; but he's resolute, knows his business, and doesn't pull punches when it gets down to it. As for the writing, I have to say Richard Woodman gets to the point much quicker than O'Brien ever did. Woodman writes like the sailor he is and I had no problem keeping track in my mind's chart just where things were relative to each other. If you like Hornblower or Aubrey/Maturin you'll certainly like Drinkwater. See, I can say positive things, I didn't mention once how much Bolitho sucks.
About us
Modelshipworld - Advancing Ship Modeling through Research
SSL Secured
Your security is important for us so this Website is SSL-Secured
NRG Mailing Address
Nautical Research Guild
237 South Lincoln Street
Westmont IL, 60559-1917
Model Ship World ® and the MSW logo are Registered Trademarks, and belong to the Nautical Research Guild (United States Patent and Trademark Office: No. 6,929,264 & No. 6,929,274, registered Dec. 20, 2022)
Helpful Links
About the NRG
If you enjoy building ship models that are historically accurate as well as beautiful, then The Nautical Research Guild (NRG) is just right for you.
The Guild is a non-profit educational organization whose mission is to “Advance Ship Modeling Through Research”. We provide support to our members in their efforts to raise the quality of their model ships.
The Nautical Research Guild has published our world-renowned quarterly magazine, The Nautical Research Journal, since 1955. The pages of the Journal are full of articles by accomplished ship modelers who show you how they create those exquisite details on their models, and by maritime historians who show you the correct details to build. The Journal is available in both print and digital editions. Go to the NRG web site (www.thenrg.org) to download a complimentary digital copy of the Journal. The NRG also publishes plan sets, books and compilations of back issues of the Journal and the former Ships in Scale and Model Ship Builder magazines.


