JerryTodd
-
Posts
873 -
Joined
-
Last visited
Content Type
Profiles
Forums
Gallery
Events
Everything posted by JerryTodd
-
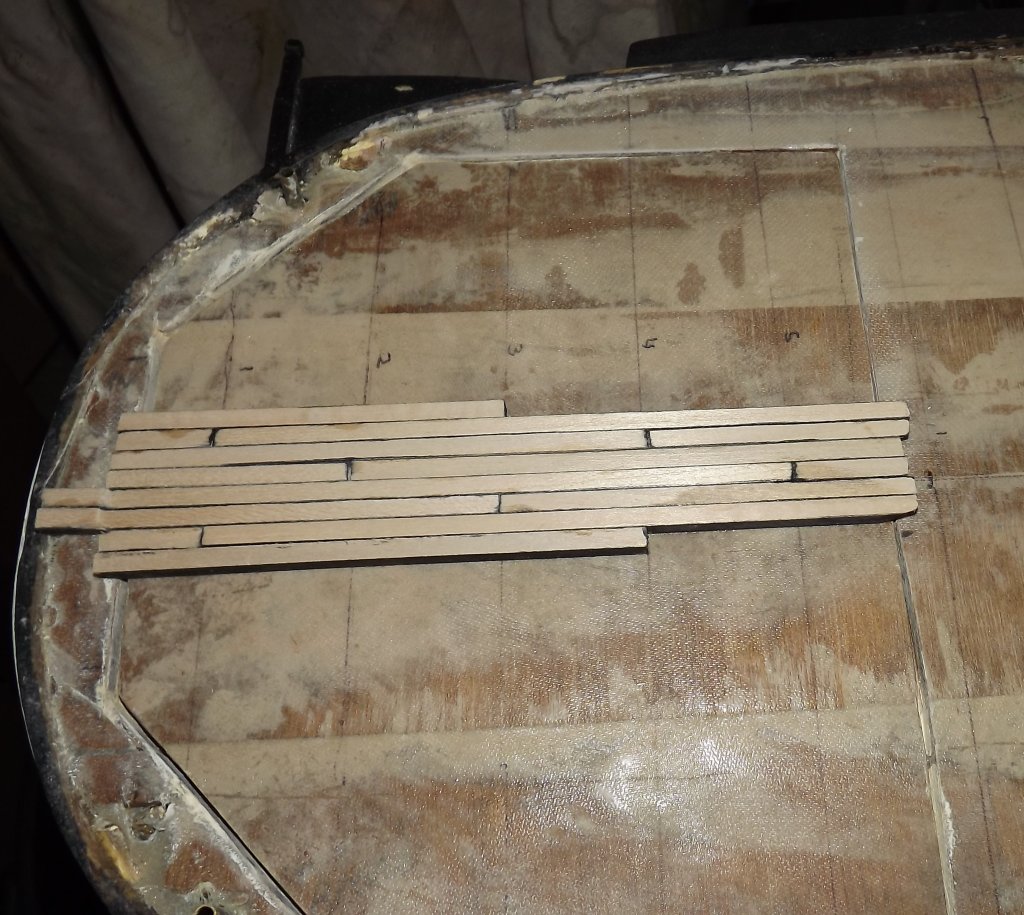
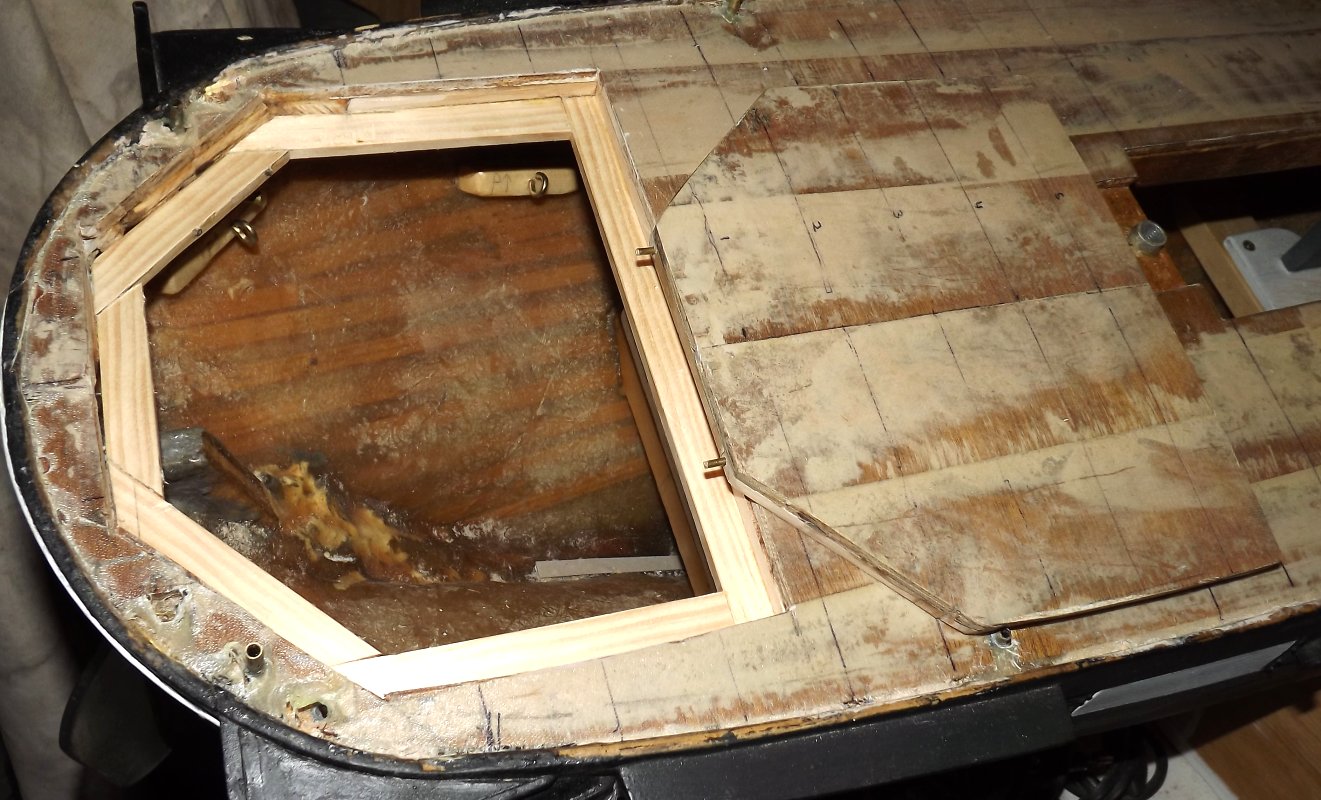
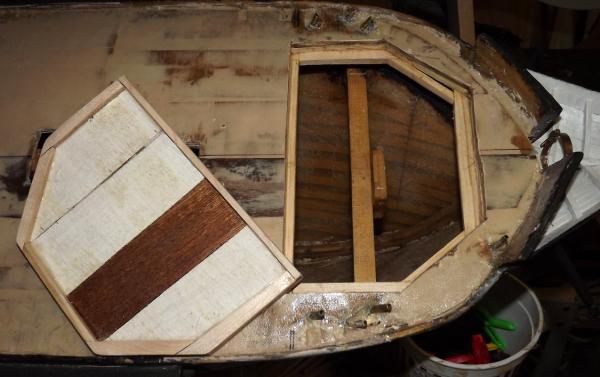
 Making some progress. The aft access hatch requires fitting nearly every piece and makes it a bit tedious, but it's going along... Monday Tuesday
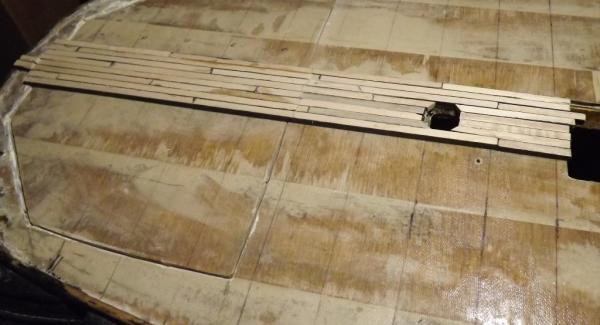
- 553 replies
-
- 6
-

-
- sloop of war
- constellation
- (and 3 more)
-
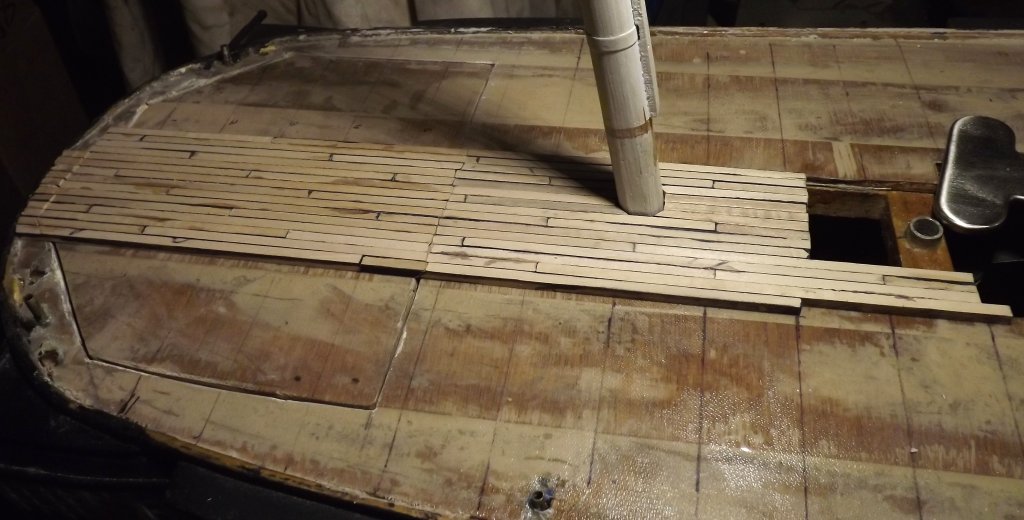
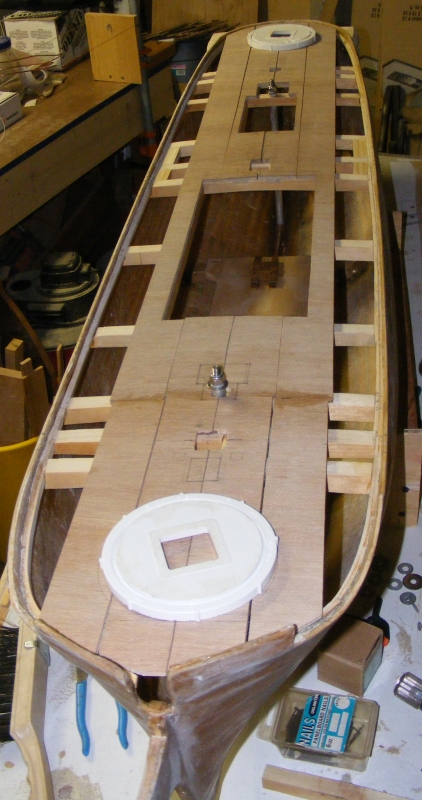
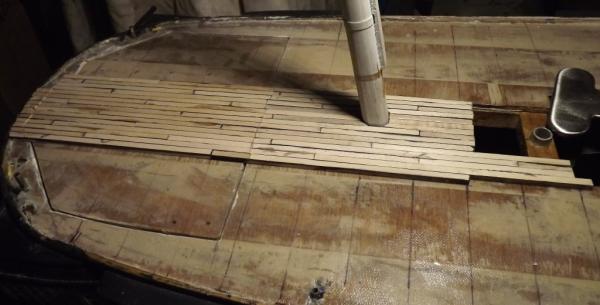
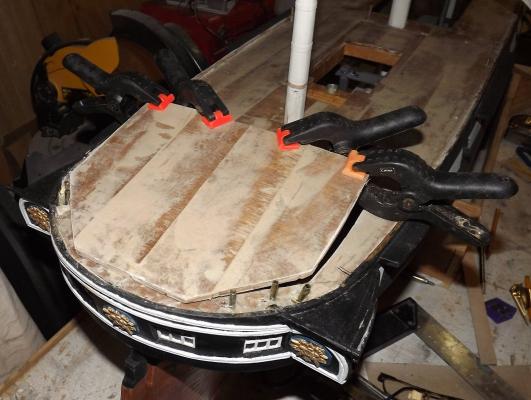
Finally Spring has arrived and I got into the shop to get some work done - most of it Civil War stuff for an upcoming event, but I at least got started on Constellation's deck! I'm using CA to glue the planks down to the fiberglass over plywood subdeck, and permanent marker for the plank seams. Once I get the area around this hatch done, it'll go pretty quick until I get to the forward such hatch. The aft pivot gun will be mounted on this hatch, and I'm thinking I'll make it so that twisting the gun carriage latches the hatch shut.

- 553 replies
-
- 5
-
-
- sloop of war
- constellation
- (and 3 more)
-
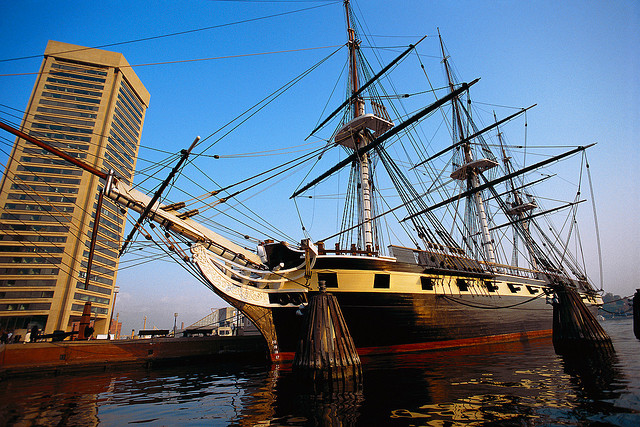
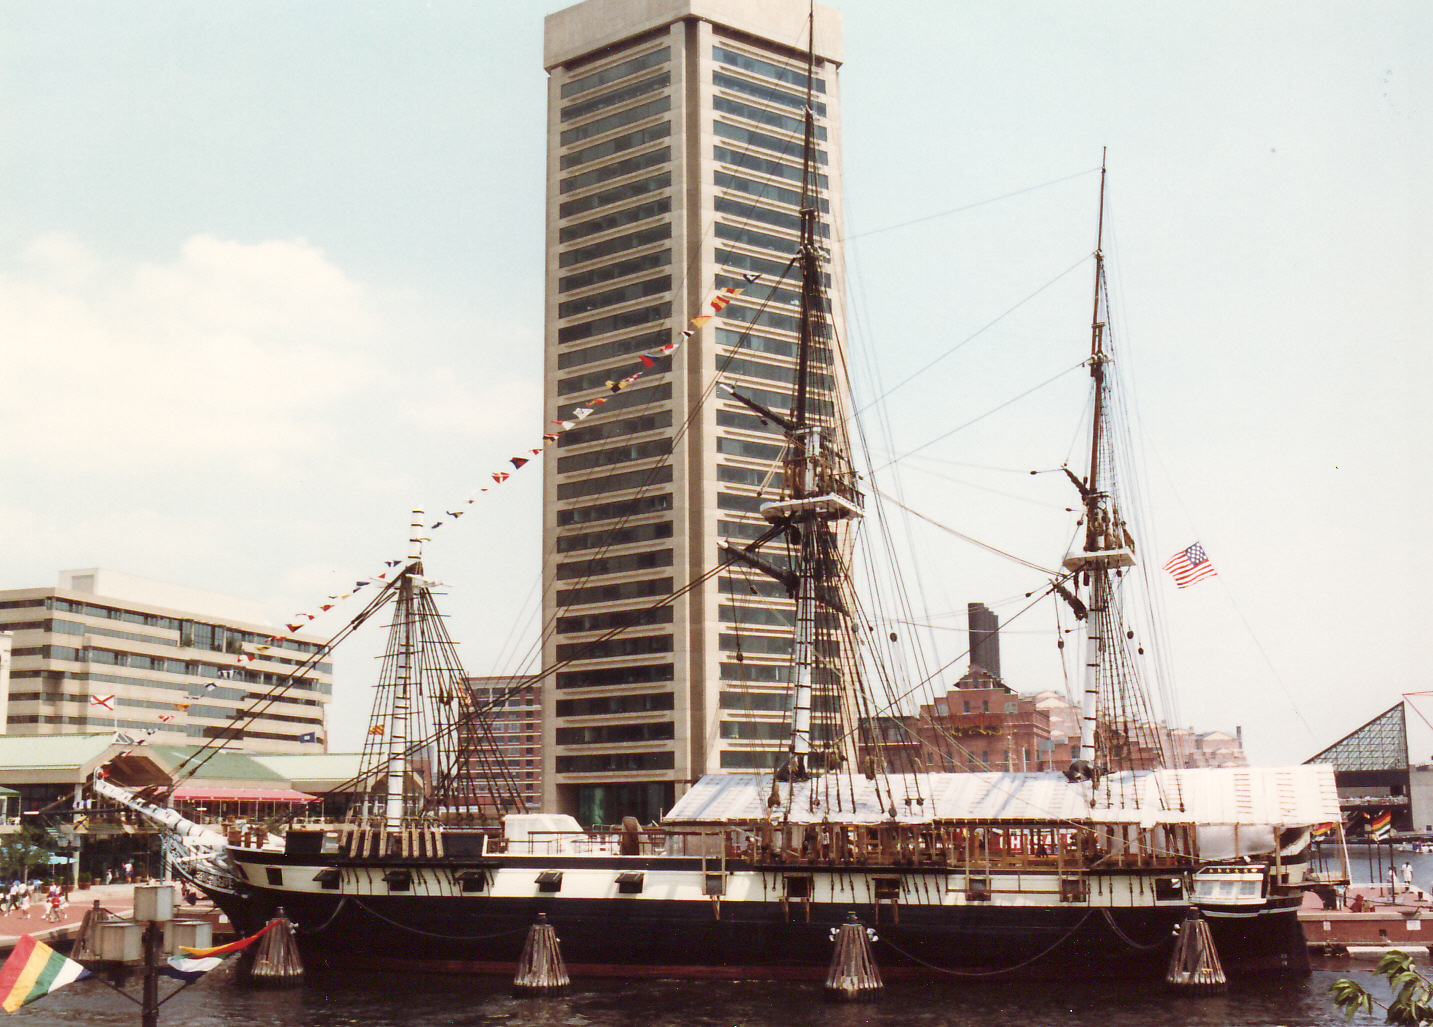
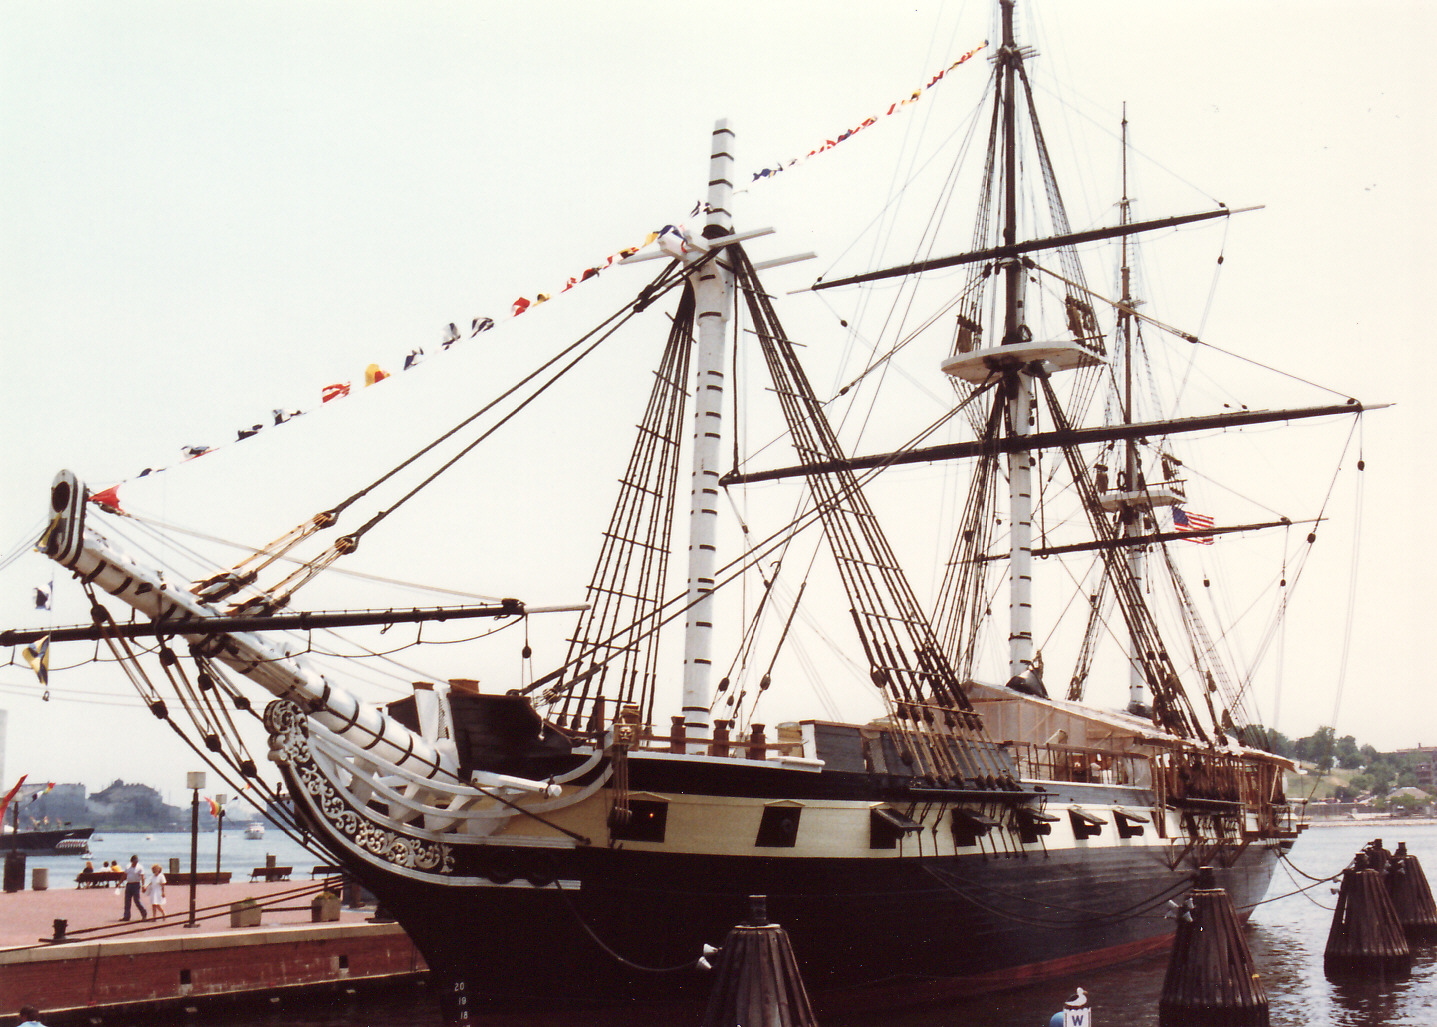
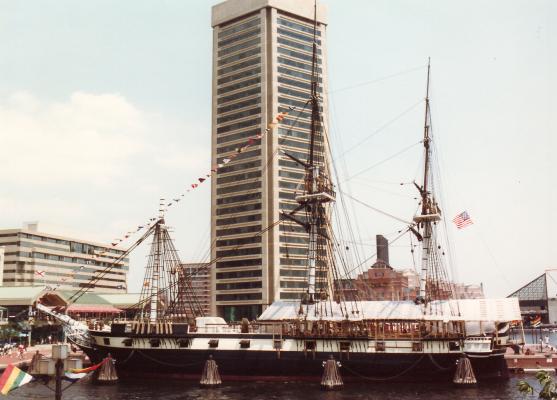
I assume you have the Artesia Latina kit which depicts the 1854 sloop of war being restored as a 1797 frigate. In that case, you might want to finish her as she appeared in Baltimore in those days... The gun strip was a sort-of cream color, not white.


-
Here at the end of March and it's still cold. We got one day that peeked at 70°f but it rained and rained and the next day it dropped to the 30's again. I gotta get some heat (and AC) into that garage. They say it's supposed to get into the 60's during the week, so maybe I can finally get back to work. Timmo; Constellation's ballasted with a 2" id PVC pipe filled with lead bird shot and weighing about 42 pounds. This is attached to the hull via two ss threaded rods through aluminum tubes in the hull. The tops of these rods are hidden by the stove-pipe forward and the cabin skylight aft. She'll also get about 15 pounds in lead-shot "bean-bags" inside the hull to bring her down to her lines and trim her. My drawing of the model at the beginning of this log shows the pipe at the bottom of the hull. This gets the weight as low as possible and being detachable, makes the model lighter and a bit easier to handle out of the water. Macedonian will be getting the same basic treatment though I might use a steel pipe instead of PVC to get the same weight in a shorter pipe.
- 553 replies
-
- 3
-
-
- sloop of war
- constellation
- (and 3 more)
-
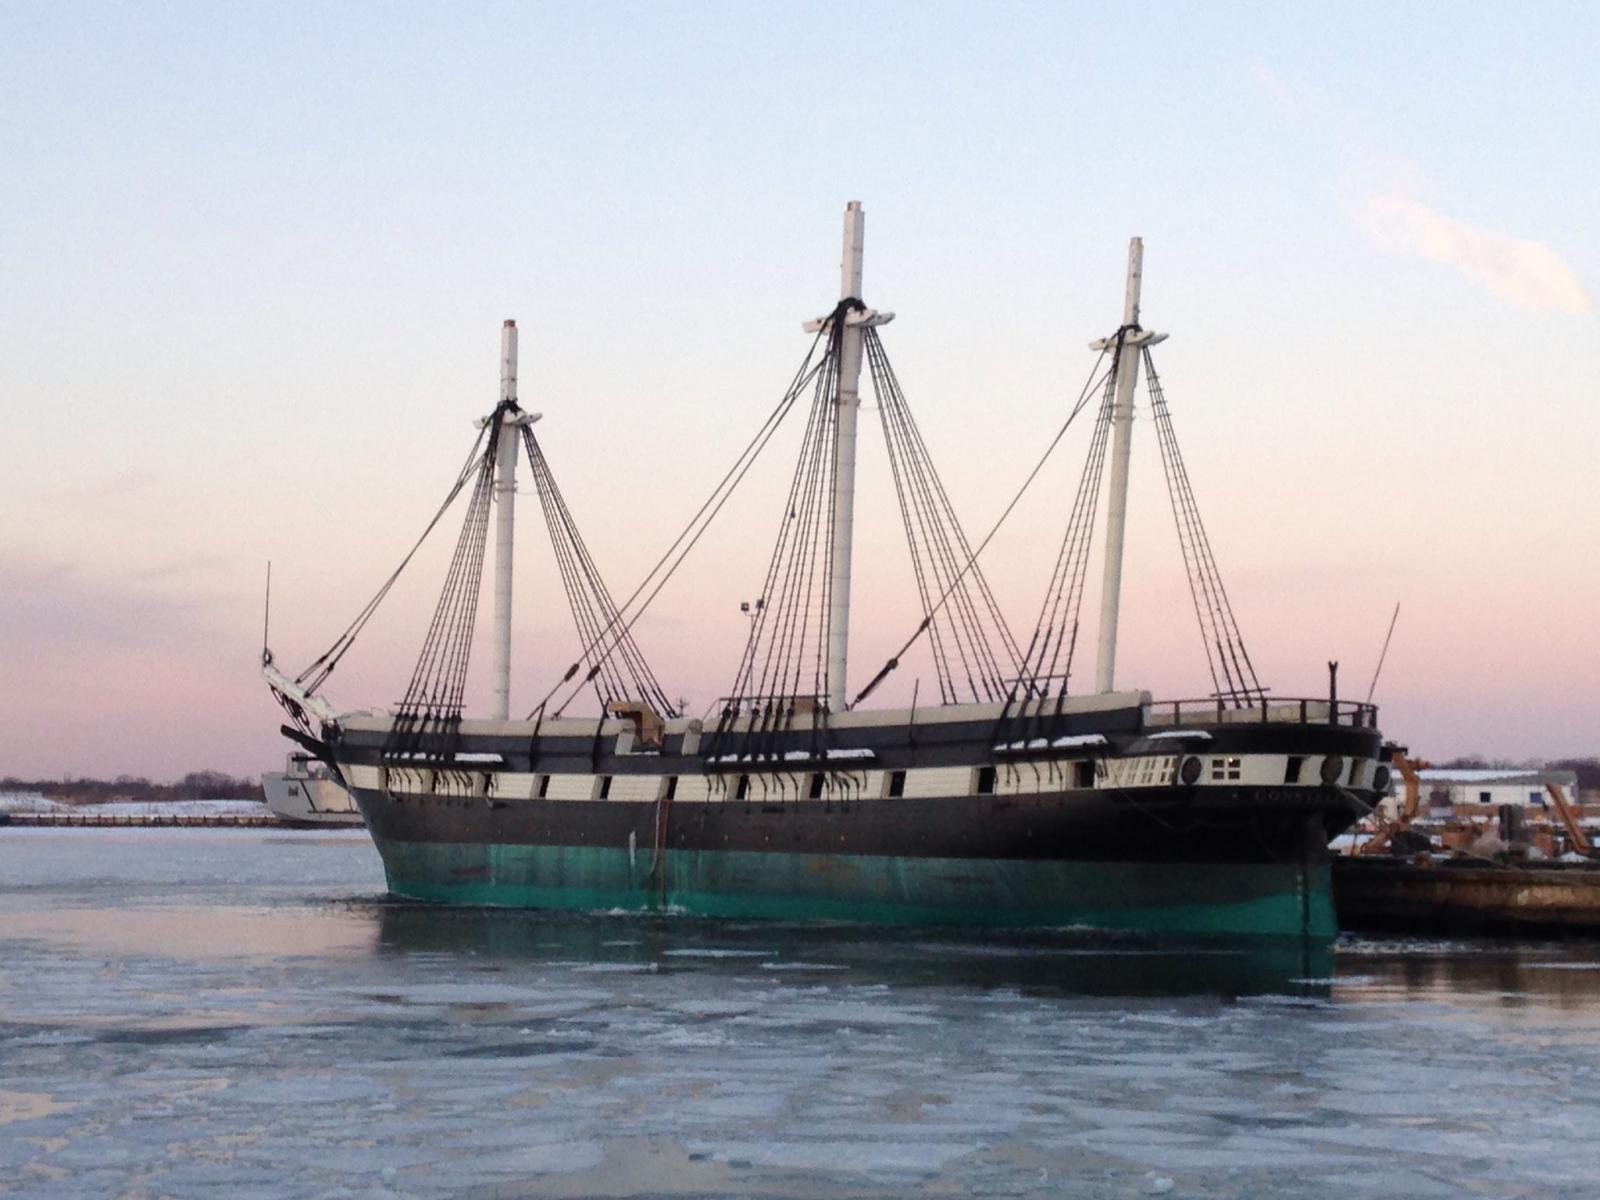
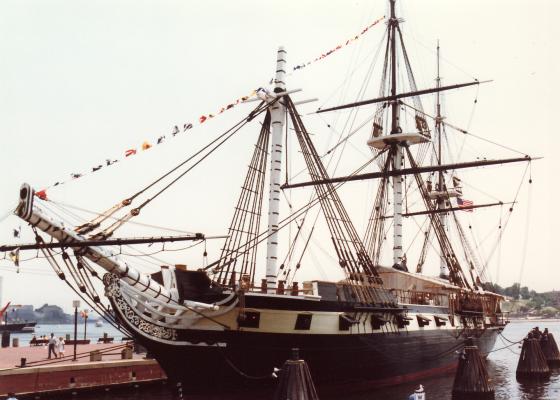
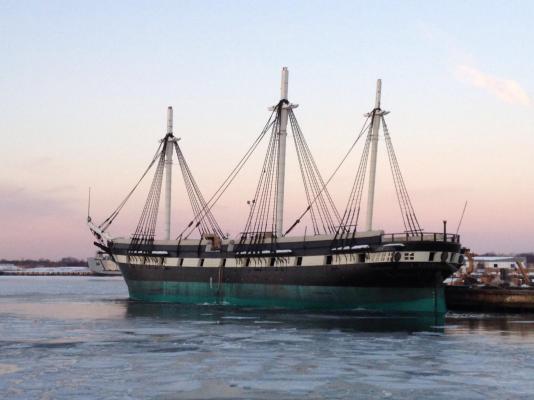
"Janniary was some cold hon!" said someone from Baltimore back when February started - I'll wager they've forgotten January now. It didn't get above freezing for more than 3 days this month past, and they weren't three days together. The average high for the month was 26° f and the average low was 19° - the coldest February for this region in recorded history. Today it's 26° f with rain, snow, and sleet, with more coming and a forecast low of 19° f - ie: an average day. My garage workshop doesn't have heat, so I've brought things I'd rather not have freezing into the house; glue, paint, batteries, etc. Hopefully it'll be warmer sooner than later and I can get back to work laying Constellation's deck - along with making a Civil War field desk, a folding table for the desk, a Rev War folding cot and stool, another sea chest, and three hanging shelves to go in the loo. I'm also extending a duct from an upstairs bath into the garage ceiling to blow in heat and AC so I can bear the summer and not be froze-out next winter. The real ship is back in the water hoping the ice will clear enough for her to be moved to where her rig will be set back up, and she'll go home. Feb 28, 2015 at Coast Guard Station Curtis Bay, Maryland.
- 553 replies
-
- 5
-
-
- sloop of war
- constellation
- (and 3 more)
-
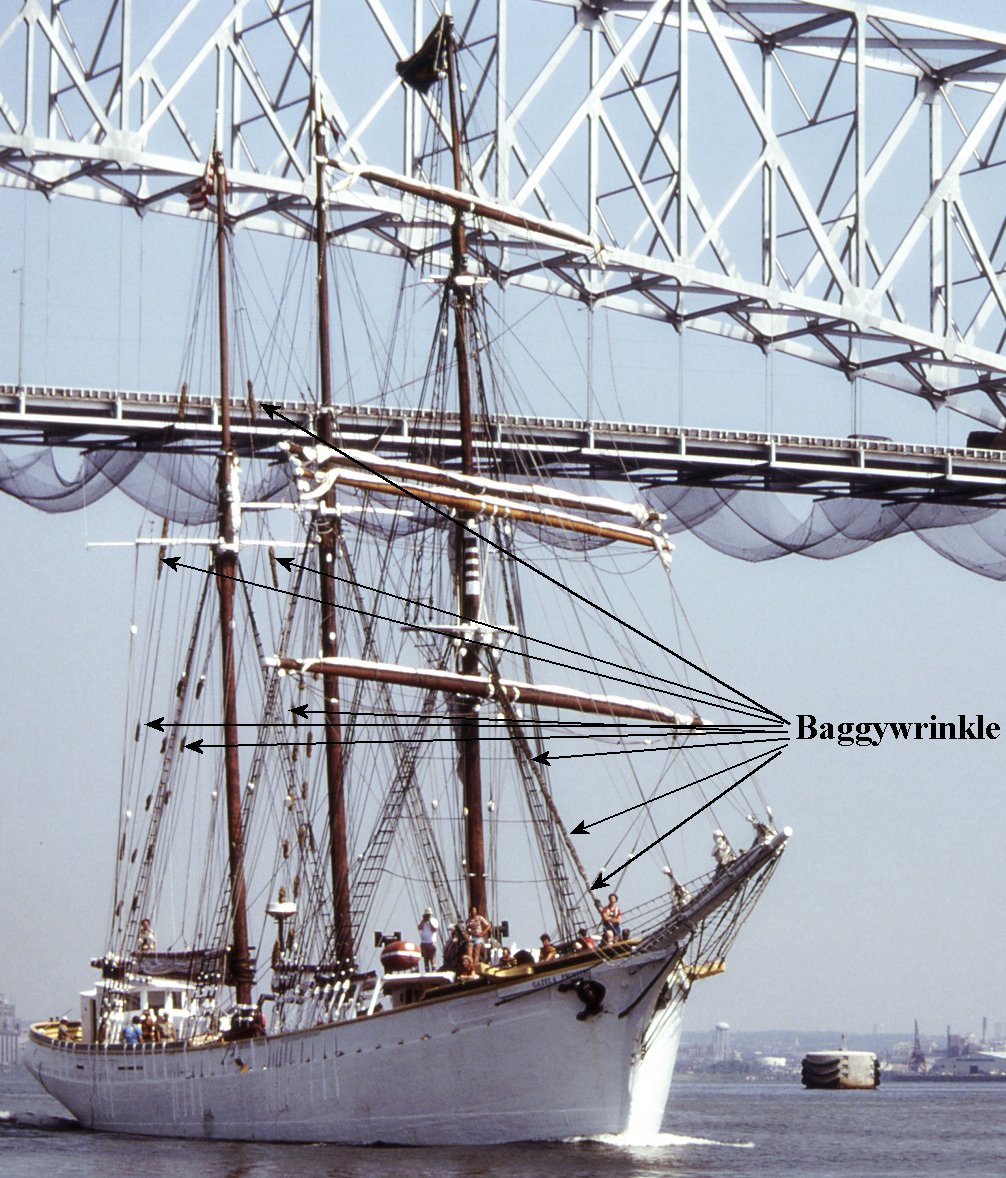
Found another picture of baggywrinkle...

-
It's been too cold in my, as yet, unheated shop to get anything done - so I'll watch you work
-
I pressed them from the front face so the dimples are pushed back when the plate is pressed to the hull. Mind you, this is thinner peel-n-stick copper at a much larger scale (1:36), and done with nothing near the precision of your work - I offer it only to show the result I got which compared well with actual copper plating I've installed and in photos.


- 3,618 replies
-
- 11
-
-
- young america
- clipper
- (and 1 more)
-
BUT the nails are flat headed and counter-sunk - not round headed rivets
- 3,618 replies
-
- 1
-
-
- young america
- clipper
- (and 1 more)
-
First off - they could be at other places besides the bow, such as very commonly at the quarters for the main brace block. They were set in place with guys (shrouds) to hold them there - permanently.
-
I hate to divert folks from the forum, but what this forum is to craftsmanship and quality, RCGroups is to RC - and there's no reason you can't frequent both - I do.
-
ALWAYS have a thumb-stall on the touch hole when anything is going in the barrel AND NEVER use water-proof fuse. Hands are a terrible thing to blow off.
-
At a distance new baggywrinkle tends to look a bit like fuzzy caterpillars or pipe-cleaners. It gets droopy with age and looks more like hair than fuzz. When I was on her in 78-79, Gazela Primeiro's entire forestay was baggywrinkled along with many spots on the backstays. We replaced a portion of it on the forestay and made it up just as shown in the diagram already posted. It's a bit like wrapping garland tightly around a rope - it takes a lot of it to cover any length and we had about a 6 foot section to replace. I don't see it on models very much, even the model of Gazela in Philly doesn't have a speck of it. I also seldom ever see it in paintings, but then most paintings of ships aren't done by someone that knows anything about ships.

-
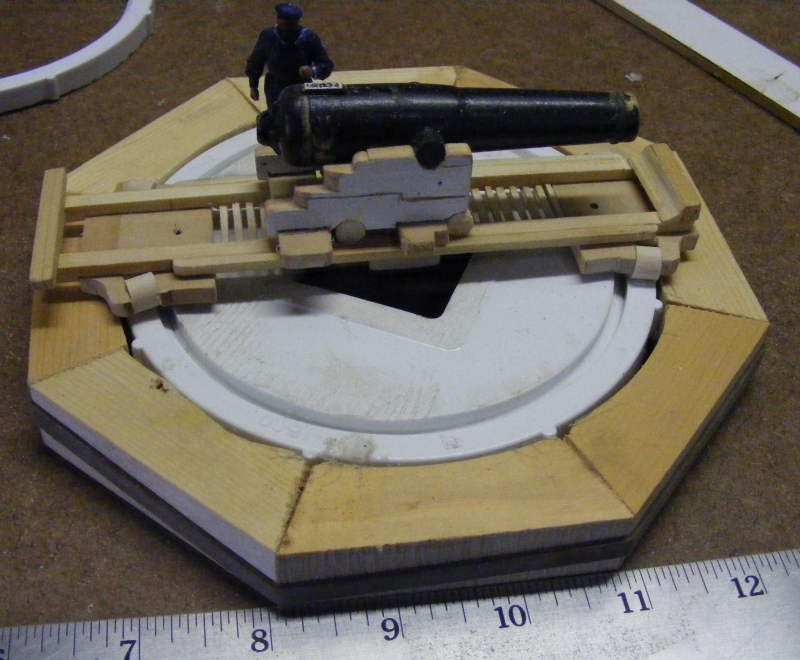
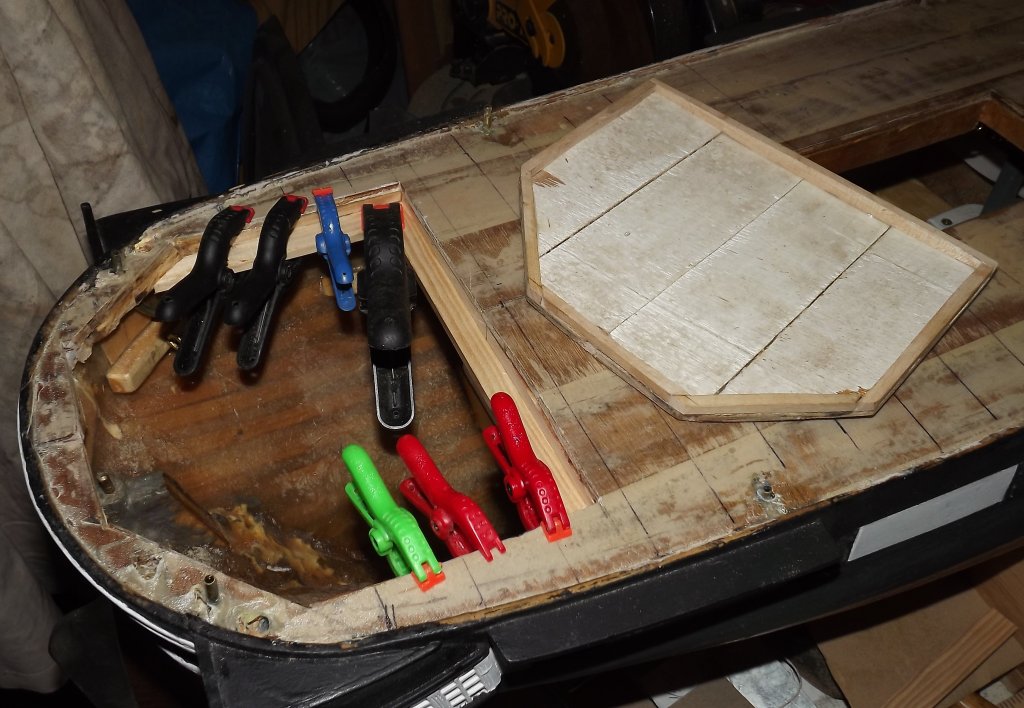
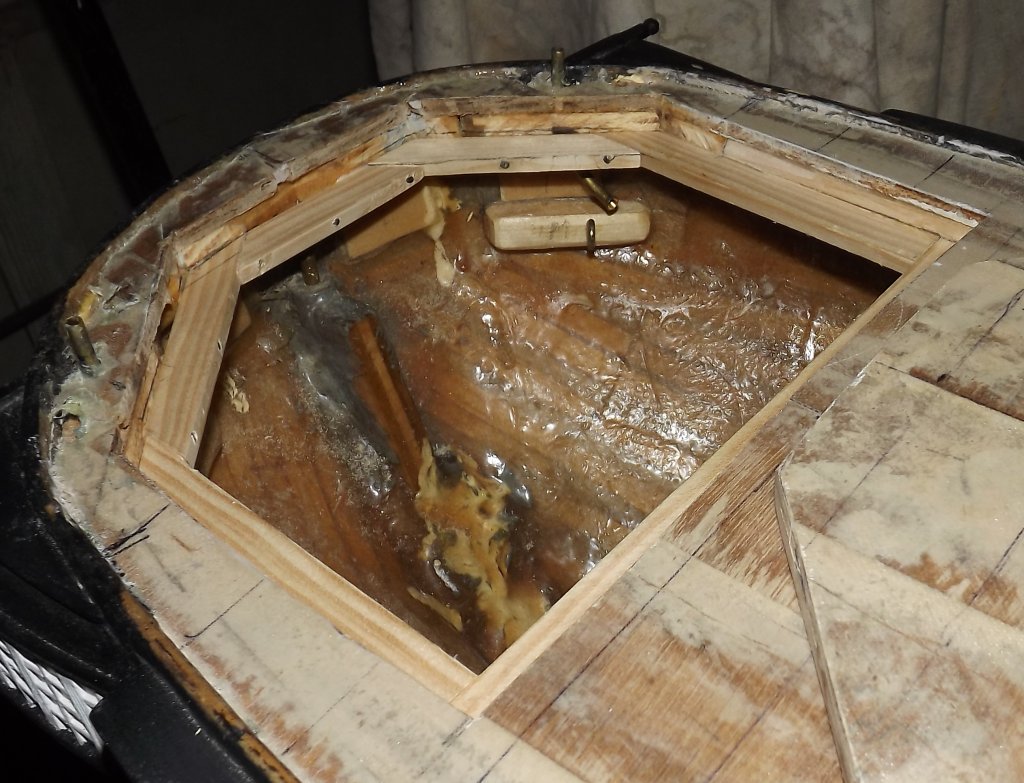
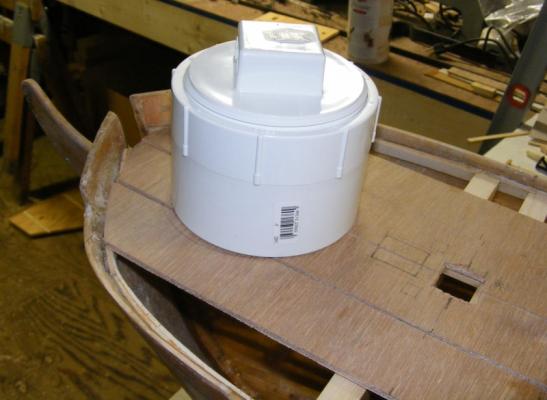
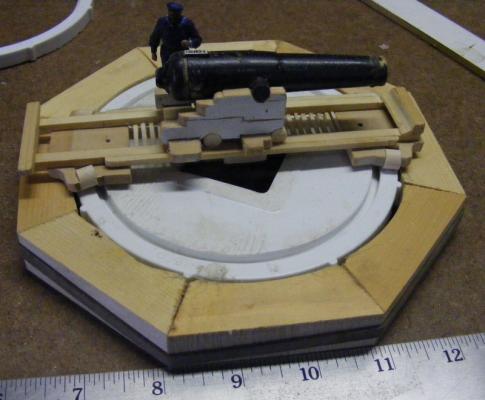
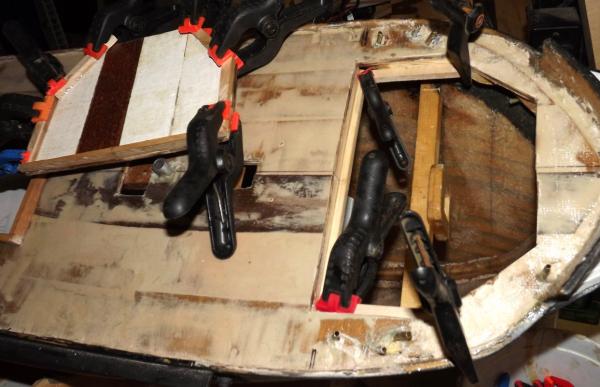
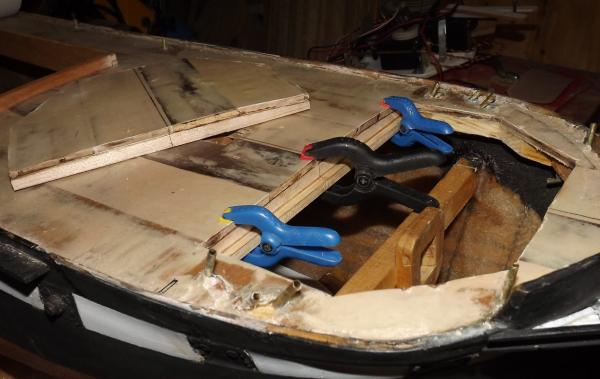
So, I stuck some pins in the aft hatch cover, and that seems like it'll do the job... and the forward hatch is framed out. This is a bit more complicated than it appears because of the blocking I installed for the through-deck fairleads that the hatches cut into to some degree and though incorporated into the hatch framing, still leave odd-shapes places that I need to fill in. What's interesting is, in the case of Constellation at least, I really could have waited to have the deck on and planked before installing the fairleads - there's none of them I can't get at through all these hatches. While the deck has some camber in it at the hatches, the framework underneath is flat, as is the ledge around it's opening. I could have framed this all out before laying the subdeck and it would have been more structurally sound and looked a lot less like Frankenstien's monster. I started down that road a long time ago when I intended to use PVC pipe caps for access hatches (these pics from 2009): I didn't got with that because the opening was too small for me to get at anything through it. Macedonian will benefit from this experience at least

- 553 replies
-
- 7
-
-
- sloop of war
- constellation
- (and 3 more)
-
I see what you mean, though I think it would require more accuracy than I built into it. I'm actually not all that concerned about it being water-tight. It'll be snug enough to keep out deck wash and there's nothing directly under either one that a few drips would hurt. I'm going to use some soft closed-cell foam on the ledge for the hatch to sit on. It should conform to any imperfections in my workmanship.
- 553 replies
-
- 3
-
-
- sloop of war
- constellation
- (and 3 more)
-
Amen brother My projects always seem to be about how I get something done I should have done before I carried on with something else, case in point, installing the daggerboard box for my Pride's fin keel. Part of the reason I document my projects publicly is to broadcast such mistakes as warnings to others that might be about to make the same ones, and so I don't forget on the next project - sort of like marking a minefield.
-
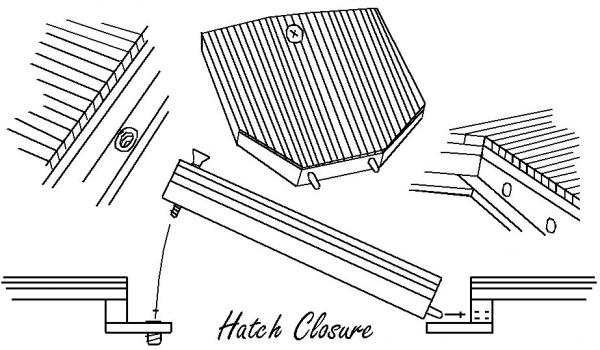
Framing continues. I think I'll close all the hatches up using a pair of pins at one end and a screw into a threaded insert at the other end. The maple framing of the hatch cover, 3/16" plywood, fiberglass, and 3/16" bass decking should make it stiff enough that a single screw will hold it against whatever seal I place in the opening. On these the pivot guns will serve as handles, the main hatch will have the boats on it, and the battery hatch will have the capstan.
- 553 replies
-
- 6
-
-
- sloop of war
- constellation
- (and 3 more)
-
Chopped out a hole forward... ...and began framing... This is starting to feel like a home improvement job. BTW: In looking for where the main sheet went, after seeing that thing with the main brace, I discovered that the main brace didn't lead to the chock at all, and the main sheet didn't go to the boomkin at all - the main sheet goes goes to the chock! The brace apparently goes aboard through the bulwark in some way, but the brace is the only line going to the boomkin.

- 553 replies
-
- 3
-
-
- sloop of war
- constellation
- (and 3 more)
-
Rope making question
JerryTodd replied to mtaylor's topic in Rope Making/Ropewalks's Discussions about Rope Making
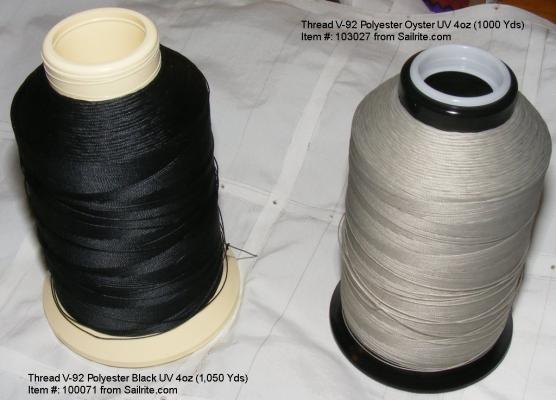
There's was an excel spreadsheet on MSW that had information of that nature - I thought. I experimented to get some idea of what I could get with the material I was using - Dacron sail thread . The thread counts in the image are per strand.
-
For Niagara built where lumber was plentiful, 20 - 30 foot planks 6 or 8 inches wide on average.
-
First off, if you use "scale length planks, they need not end on a bulkhead. You can always glue a block on the inside to steady the plank ends - a butt block. Your planks are going to bend and twist from bow to stern, and getting one plank to do that and controlling it while you get it glued down is a real pain you can avoid simply by using scale plank lengths. When you taper planks, or need to add stealers, that's also much easier to handle using scale plank lengths.
-
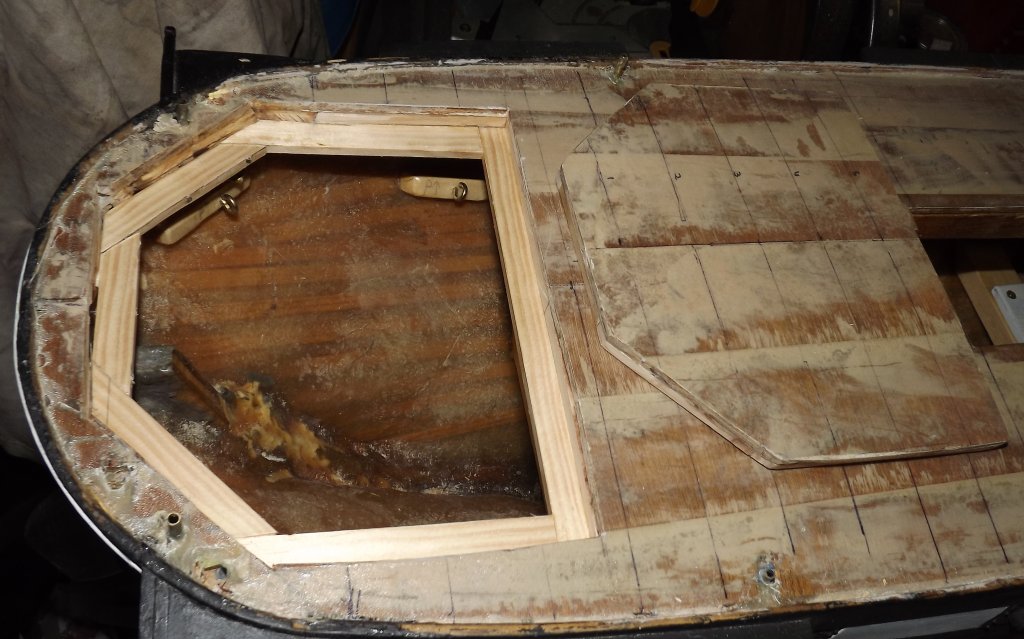
With one holiday's nonsense out of the way, and the weather a little warmer - I framed out the aft hatch opening. This thing has to be in place before I can start laying the deck, ditto the forward hatch.


- 553 replies
-
- 3
-
-
- sloop of war
- constellation
- (and 3 more)
-
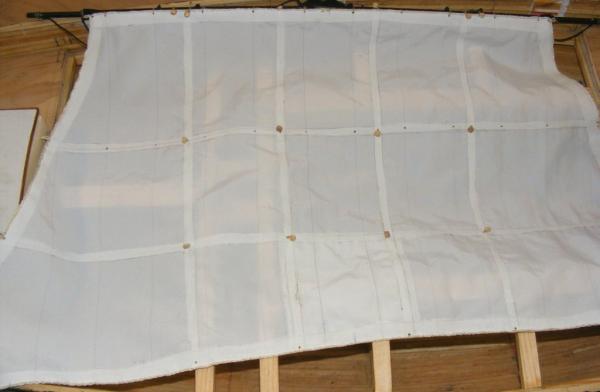
I start at the center of the head and work around the sail back to the center of the head. I overlap the ends a little and basically seize the ends together through the sail with stitching. Keep in mind; I work in larger scales on sails for working models. The bolt rope is stitched on in a short-hand version of how they are actually sewn on (I skip a couple of lays of the rope with each stitch). The bolt rope is also glued to the sail with fabric glue as I sew it on. The nylon line I used for the boltrope is soft enough that it basically crushes together under the stitching and looks like a short splice. This is the best image I could find where you can see the overlap at the head. You should be able to pick out the stitching which is a tanish color that matches the flax I've used to sew the real thing. This is a fore tops'l for a 1:20 scale Baltimore Clipper schooner. The sail is made of Supplex, the seams are drawn with a .03 permanent marker on both sides, offset slightly from each other. All tabling, hems, bands, etc are glued on with fabric glue. All holes are made with the tip of a hot soldering iron. Cringles are made by taking a turn around a round toothpick and seizing the eye to the sail at it's throat, and on either side. This is done on full size sails as well, but because my sails are driving working models, I don't want the boltrope slipping through a zig-zag stitch from a sewing machine and closing up the eyes and cringles. This sort of seizing is done every where something will attach or pull and every 4 or 5 scale feet along the bolt-rope as I sew it on. I have simplified things a lot, especially on Constellation where I've used a simple eye in the bolt-rope at the clews instead of the iron rings and hardware she probably would have had. BTW: While sewing on a bolt-rope, I've missed a cringle or screwed up in some other way that the easiet fix was to cut the line and pick up from there. Here I overlapped the bolt rope just as I did at the head. The first time I cut the three strands of the bolt rope at different lengths to taper it, but after that I didn't bother with tapering. Having sewn real bolt ropes to real sails, I'm happy enough with the appearance I get this way, and it's much much easier than trying to use a sewing machine.
-
USS Columbus 1819 by threebs - 1/72 scale
JerryTodd replied to threebs's topic in - Build logs for subjects built 1801 - 1850
You're going to have quite a squadron of fat boys around the house if you keep this up. You should consider a frigate or a razee, something more svelte for the next one.
-
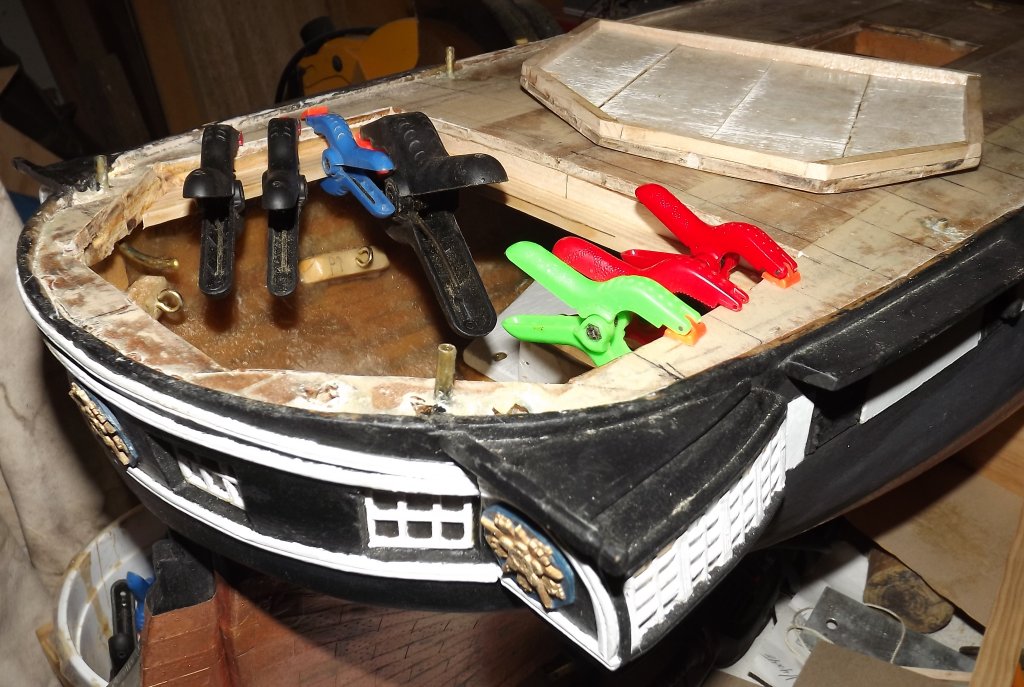
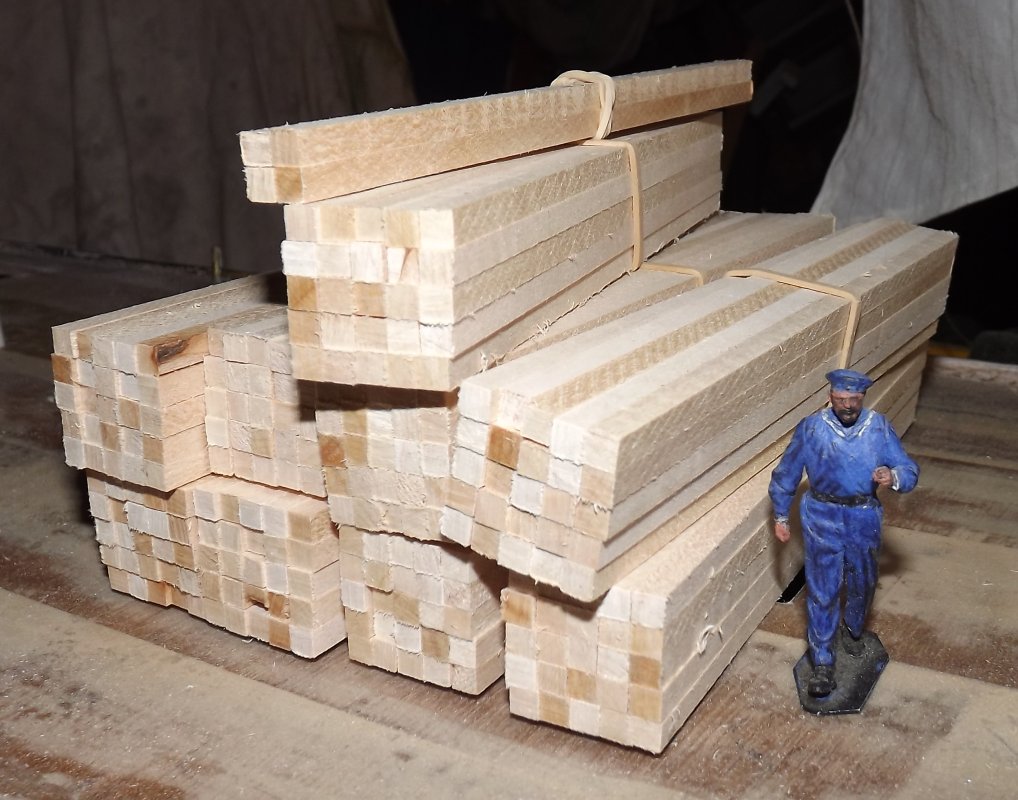
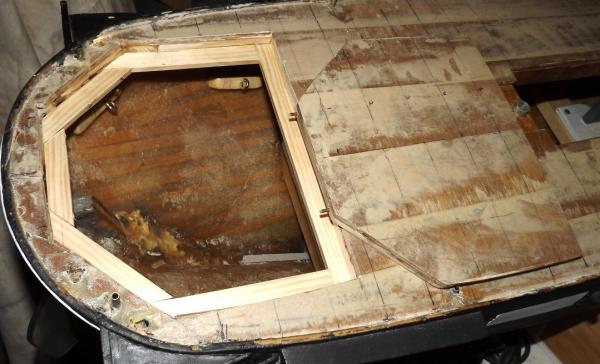
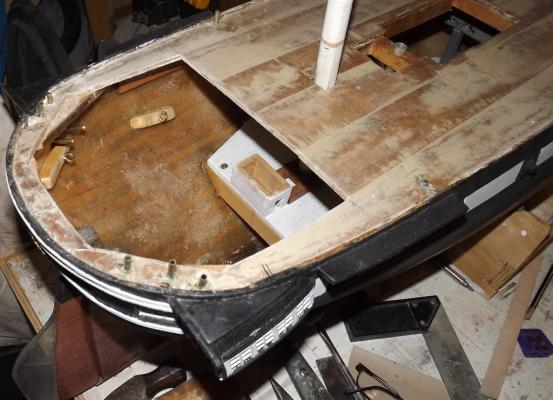
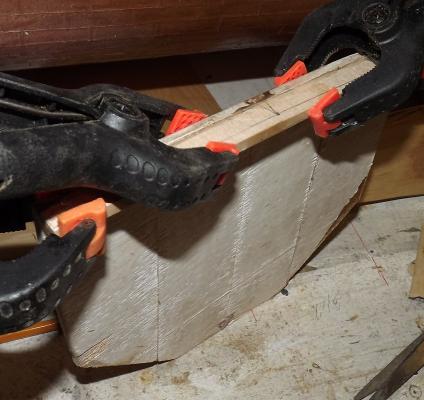
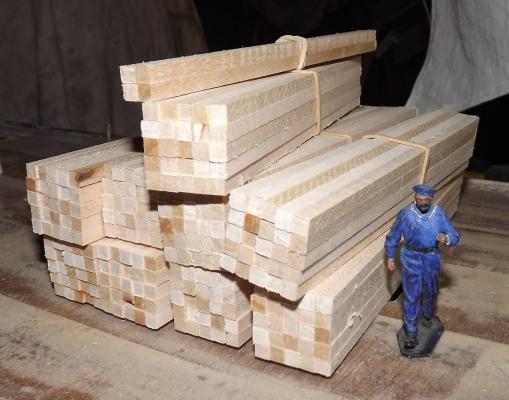
I gave milling the maple for deck planking a shot. I determined I needed 3/16" x 3/16" x 6-5/8" pieces. I rigged the table saw and had no problem ripping out 3/16" little boards from the 3/4" thick piece, but ripping that into 3/16" strips wasn't working for me - I just couldn't get it rigged where it felt safe, so I broke down and ordered a pile of 3/16" x 3/16" x 48" basswood strips. The stock for the deck planking arrived Saturday, and Sunday I cut it into 6-5/8" lengths. That got 7 pieces from each 4 foot length leaving a piece about 1-1/2" long for the scrap box. In all there's 234 planks. After sawing all that lumber, Ivan was upset to learn he had 5 more to cut. He was even more upset to learn he had 266 more after that! Unfortunately, that's not enough. Have I mentioned math is not my strong suit? I was playing with the idea of 1/4" wide planks and may have confused my calculations with that, but... The deck is 61" long and 12-1/4" wide at it's widest point. The ends are nearly half round and there' maybe two plank widths on either side of "bulge," ie: the deck is nearly rectangular, with rounded corners. 61" requires 9.2 planks end-to-end and 12-1/4" requires 67 3/16" planks across - that's 616.4 planks to cover the deck. But wait! There's a 14-1/4" x 6" main hatch and a 6" x 3-1/4" battery hatch opening. They add up to 104 planks I don't need. I estimate the "corners and other small hatches and openings will negate some 12 planks, so that's 616-116=500. That means I need 266 more planks beyond what I have! Time to order another 37 4 foot pieces - actually I ordered 40. In the meantime, I figured out and opened the aft hatch. The deck portion that was cut out got a cambered frame epoxied to it's forward edge. The rest of it will get framed in a similar manner. The perimeter of the hatch opening will also be framed with a small ledge for the hatch to sit on. This ledge will have some weather-strip material to keep water out. I'd like to make some sort of dead-bolt locking mechanism that uses the pivot gun as it's lever to latch the hatch down - but that may be more trouble than it's worth. If so, I'll simply fasten this hatch down with countersunk screws. The gun will still serve as a handle to lift out the hatch cover/deck section.
- 553 replies
-
- 6
-
-
- sloop of war
- constellation
- (and 3 more)