HOLIDAY DONATION DRIVE - SUPPORT MSW - DO YOUR PART TO KEEP THIS GREAT FORUM GOING! (Only 20 donations so far - C'mon guys!)
×


Ulises Victoria
-
Posts
1,790 -
Joined
-
Last visited
Content Type
Profiles
Forums
Gallery
Events
Everything posted by Ulises Victoria
-
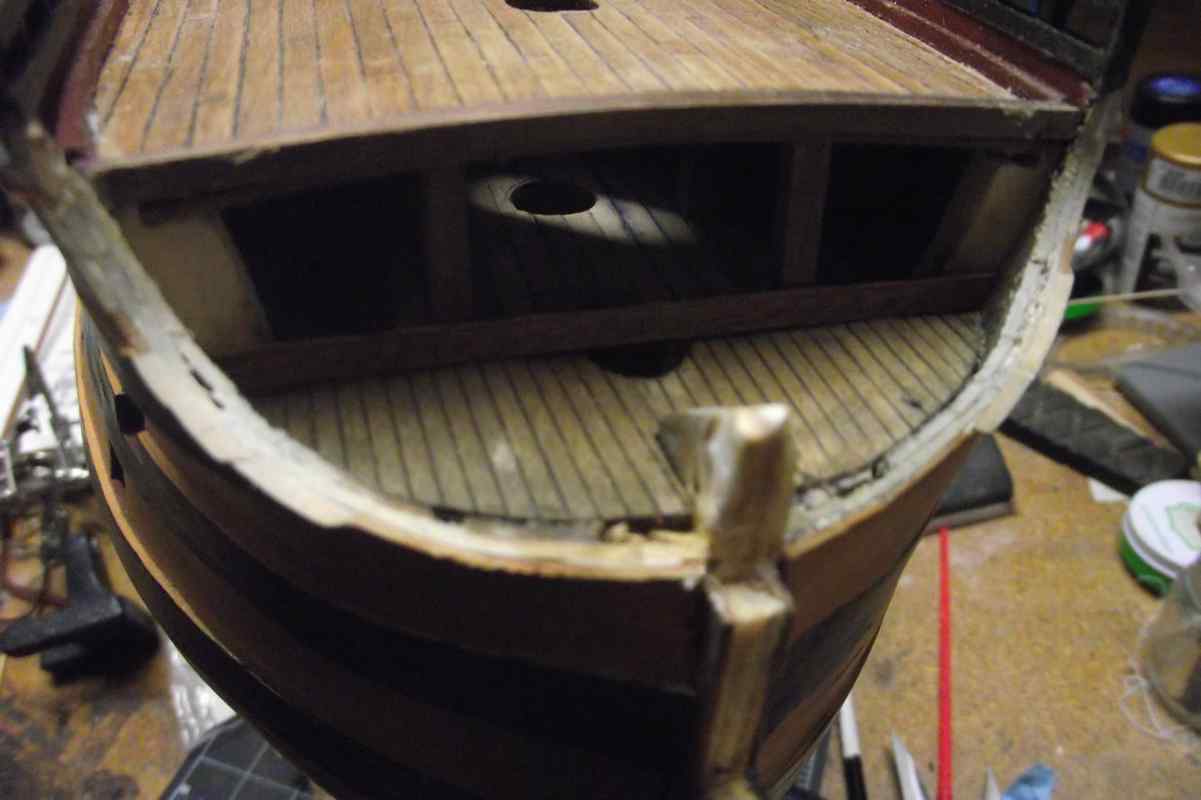
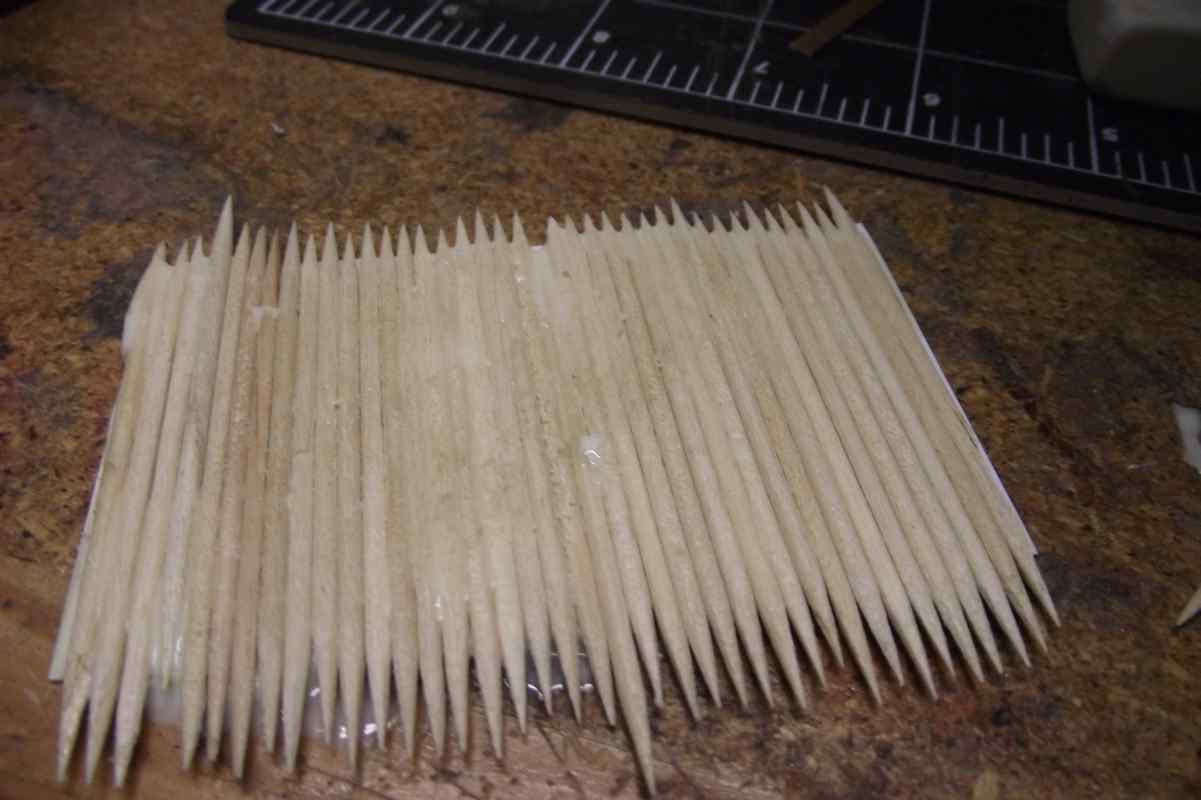
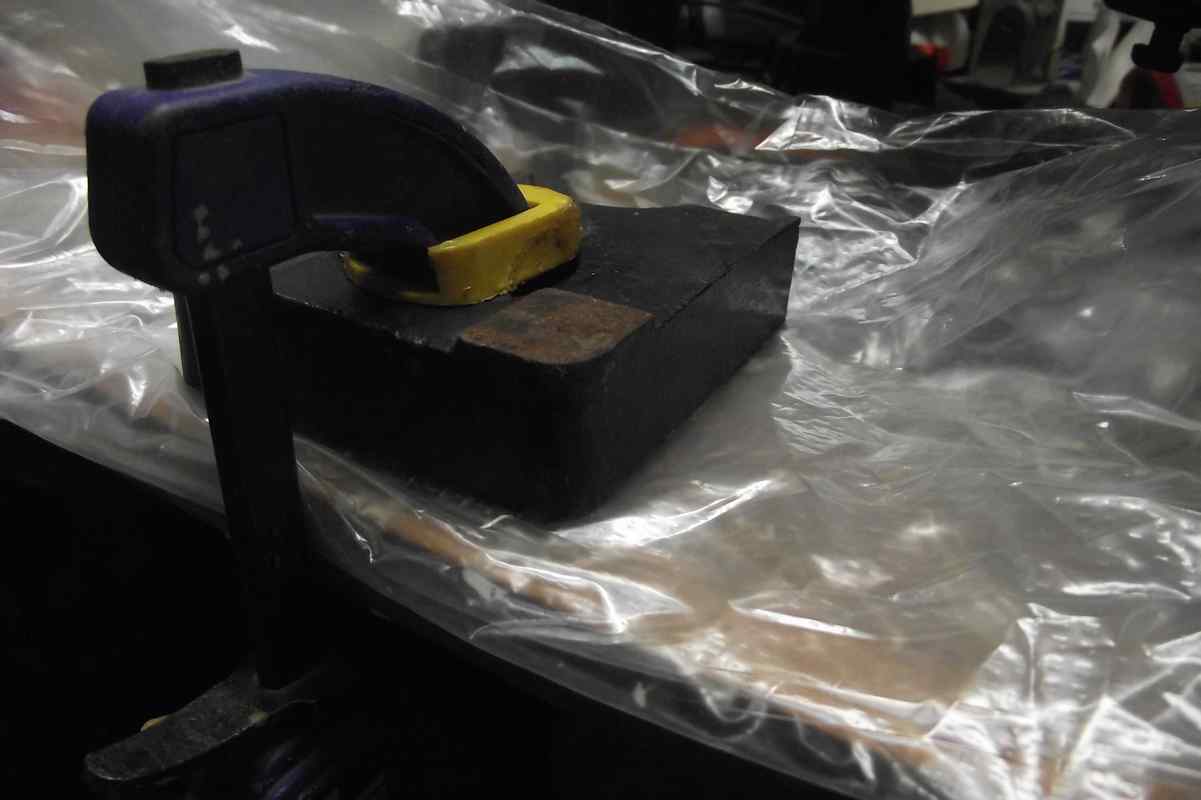
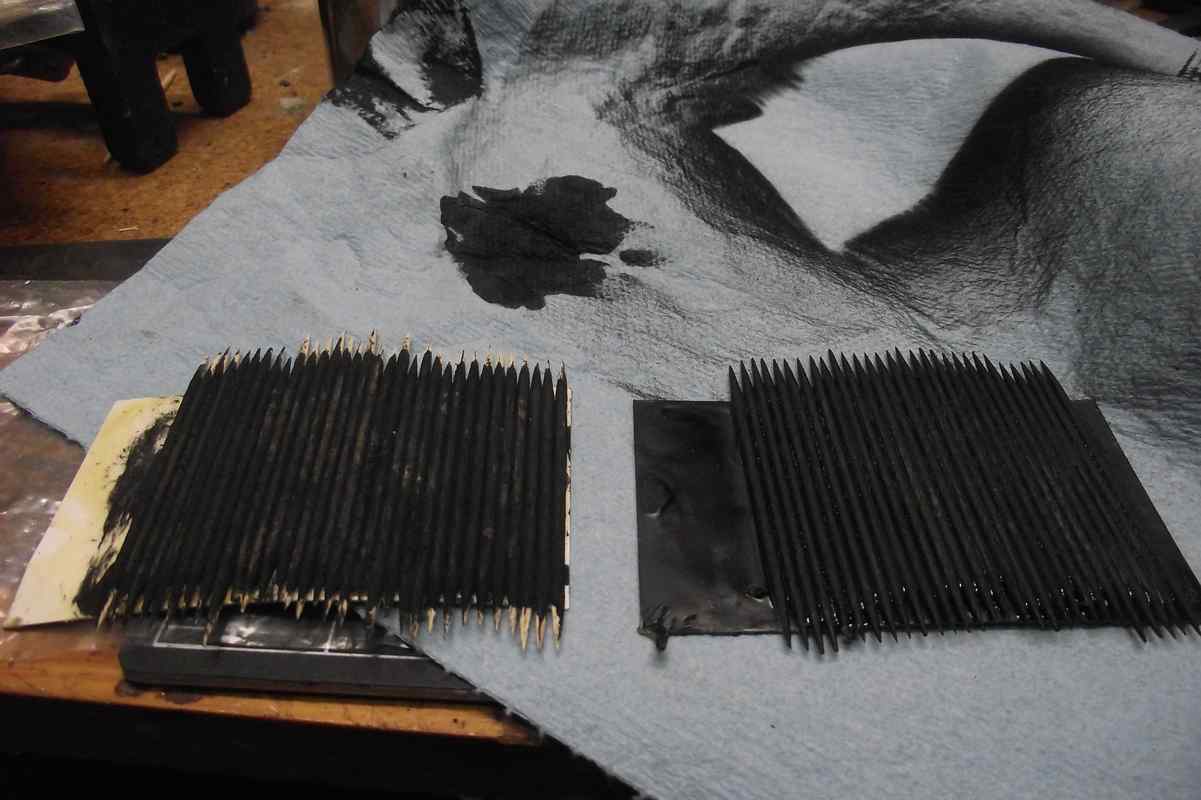
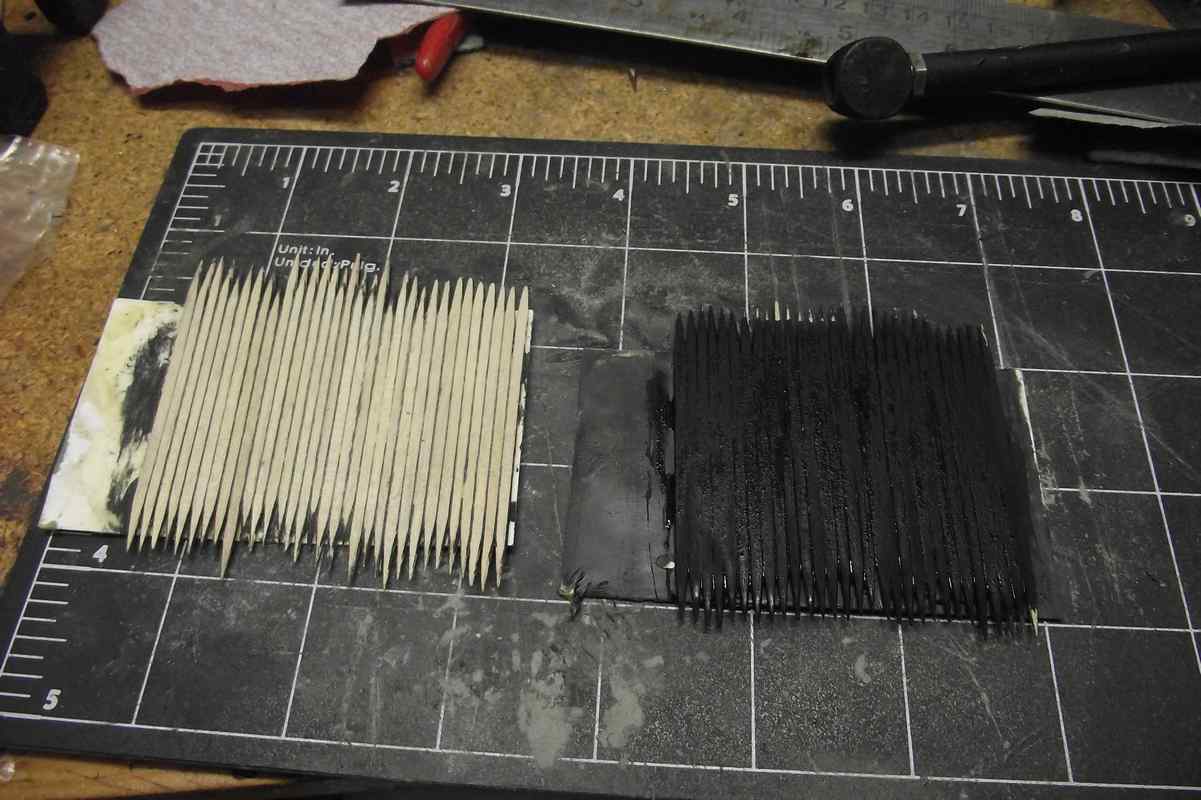
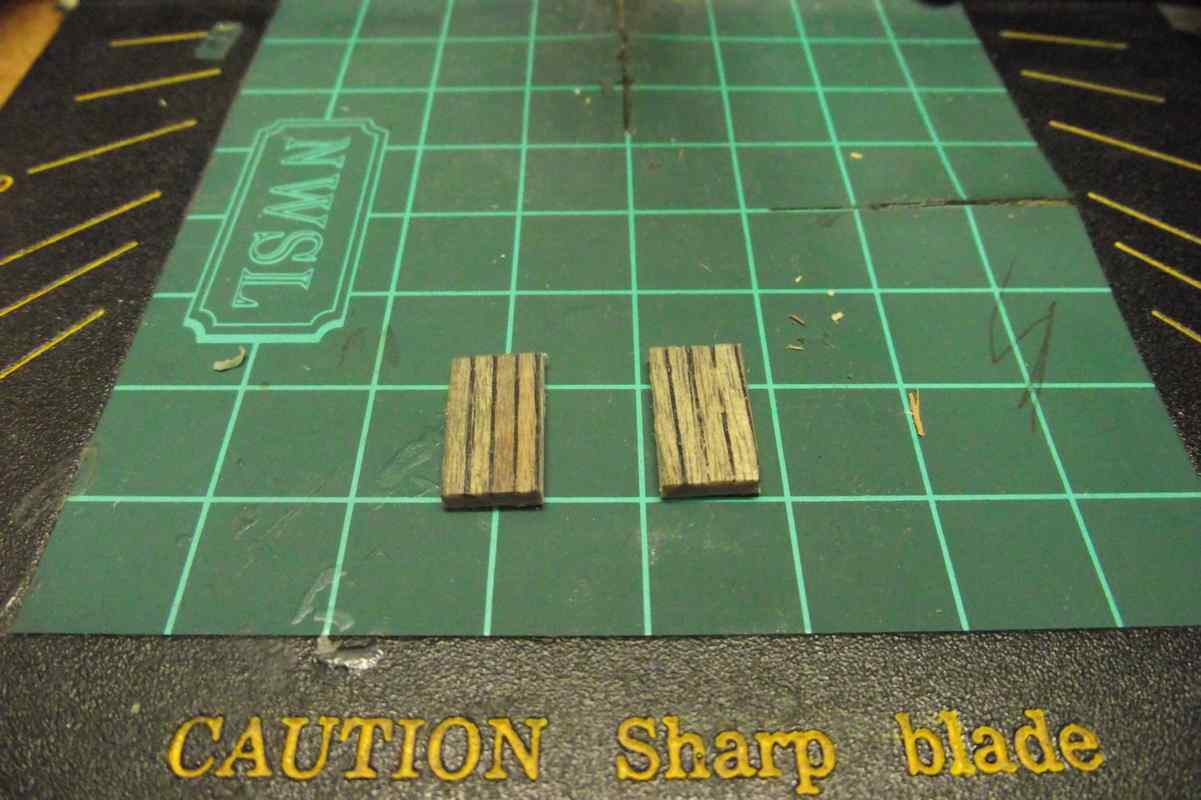
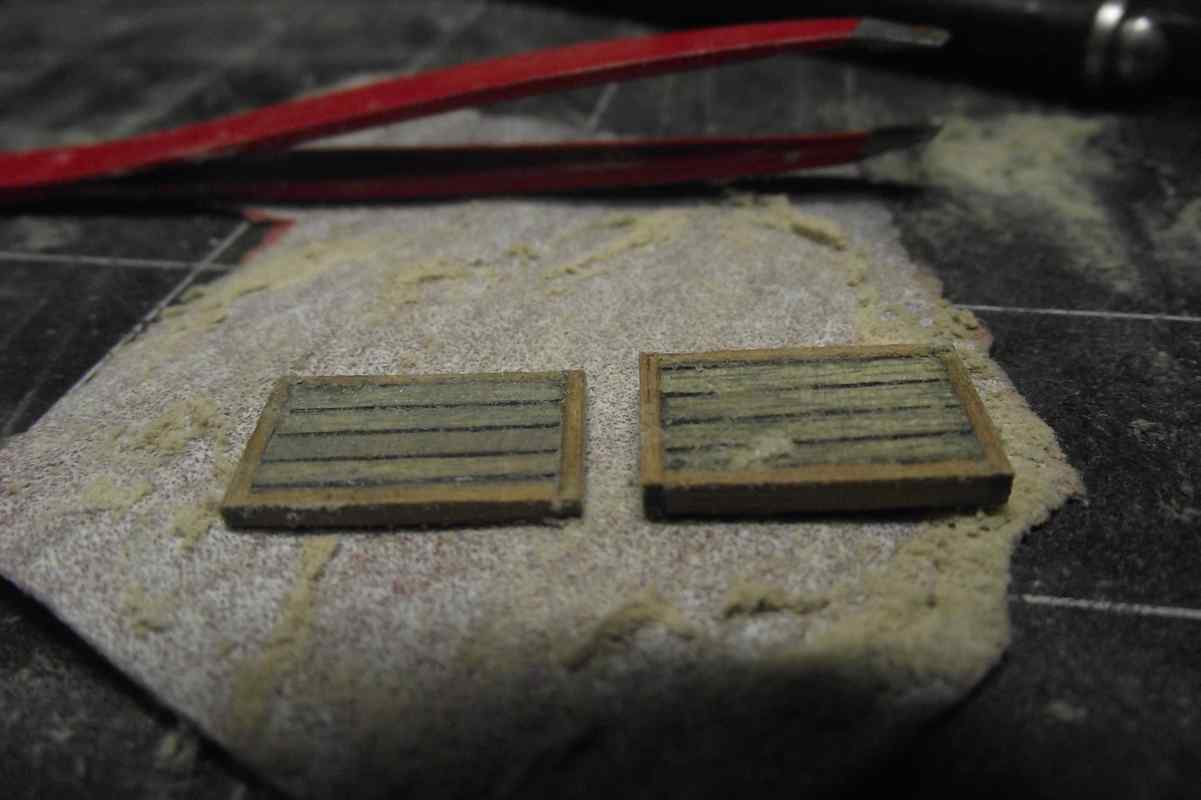
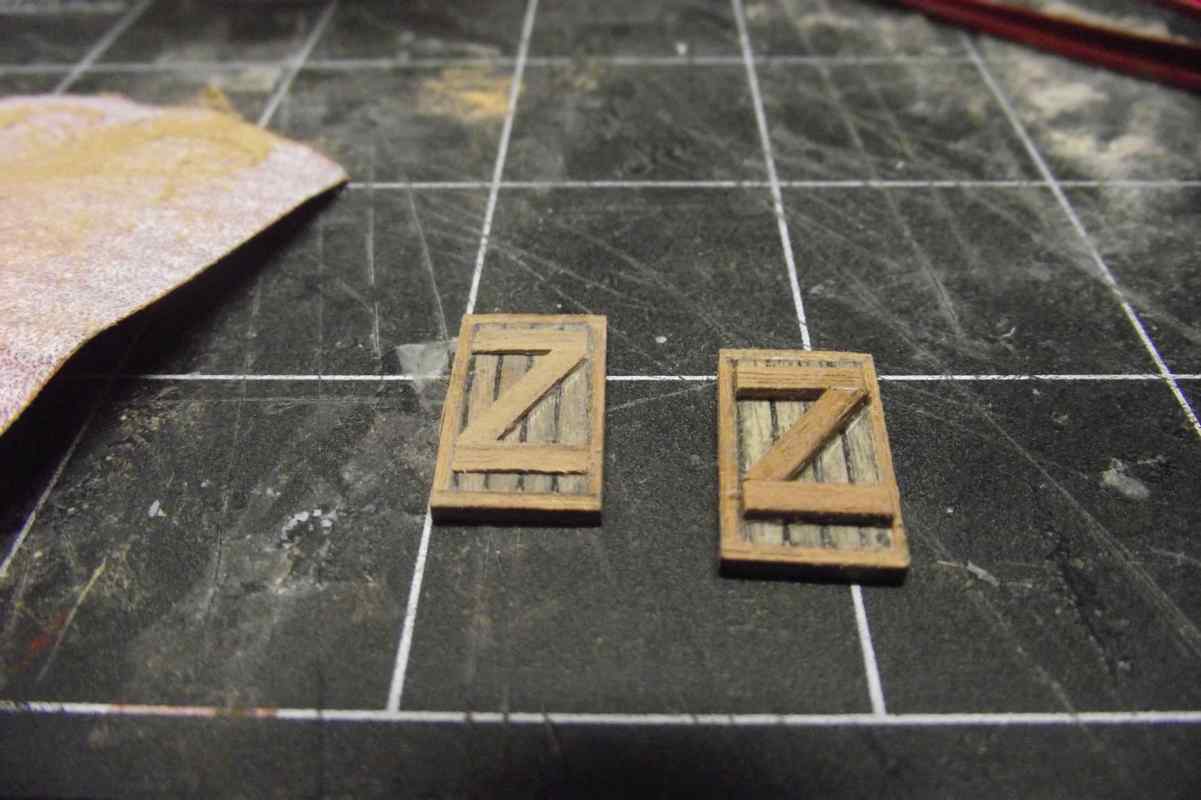
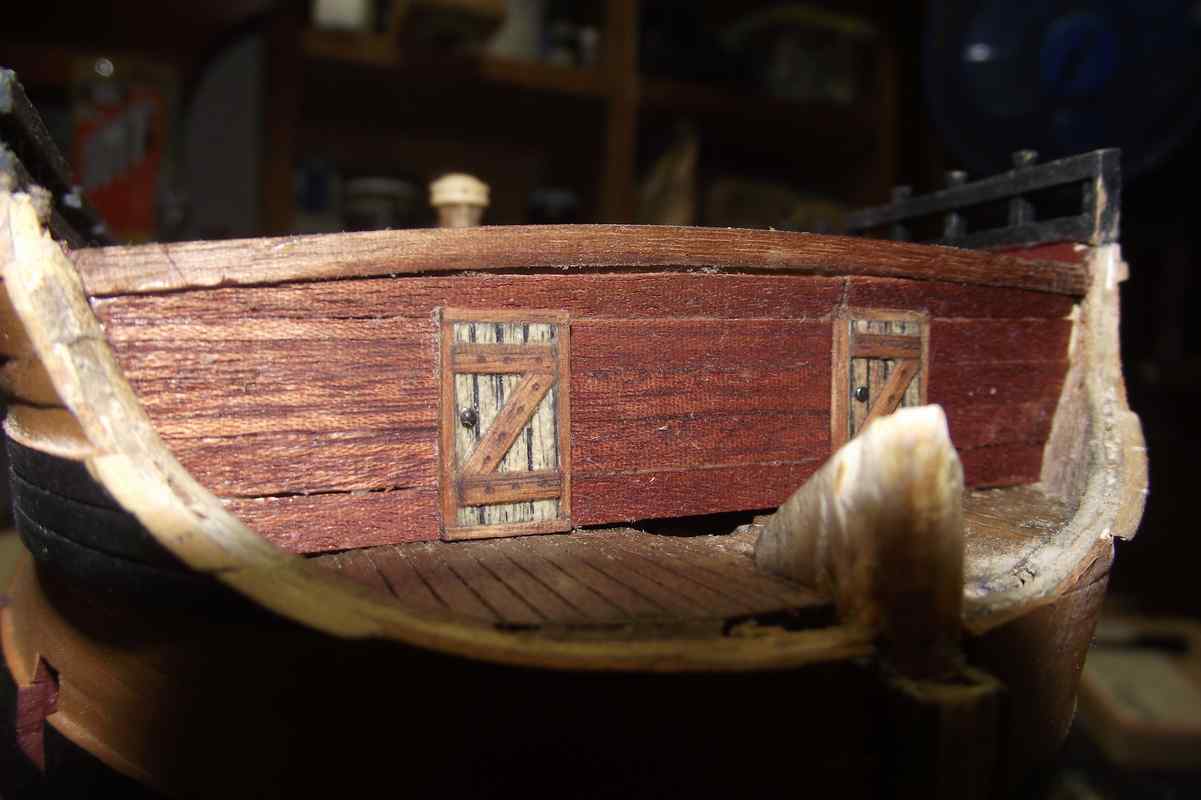
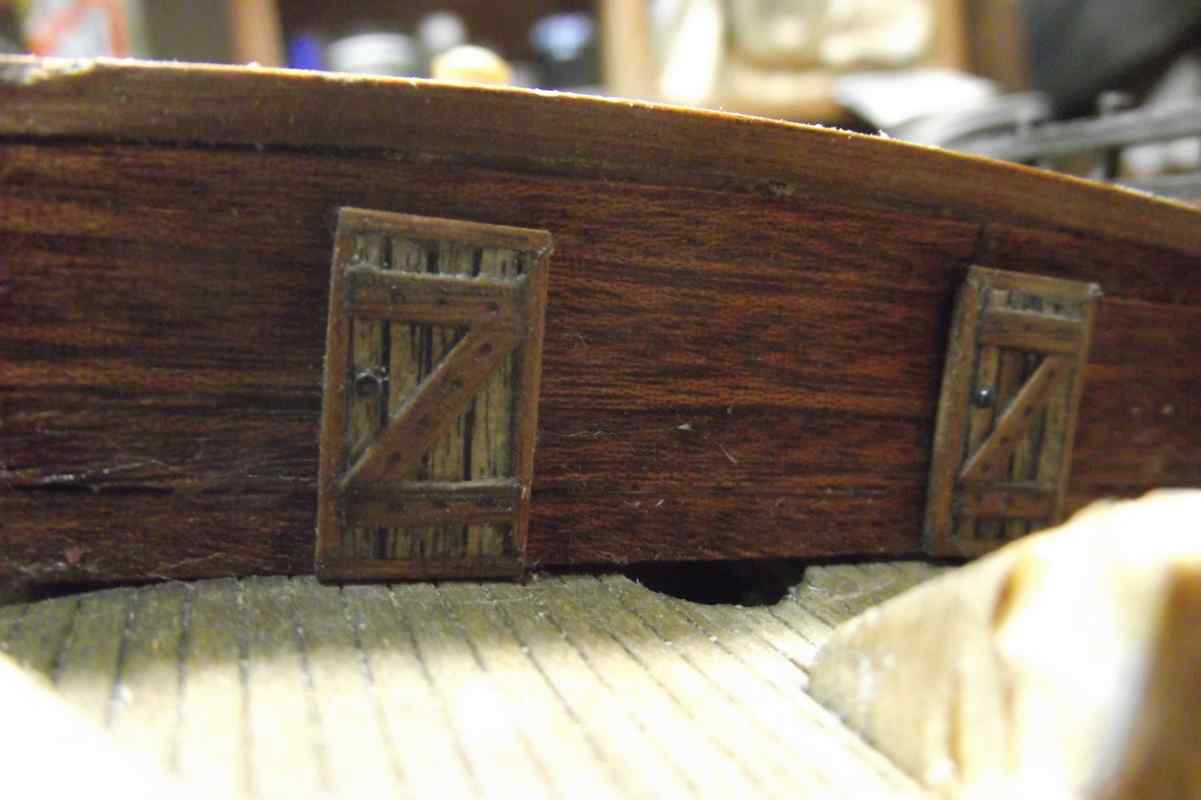
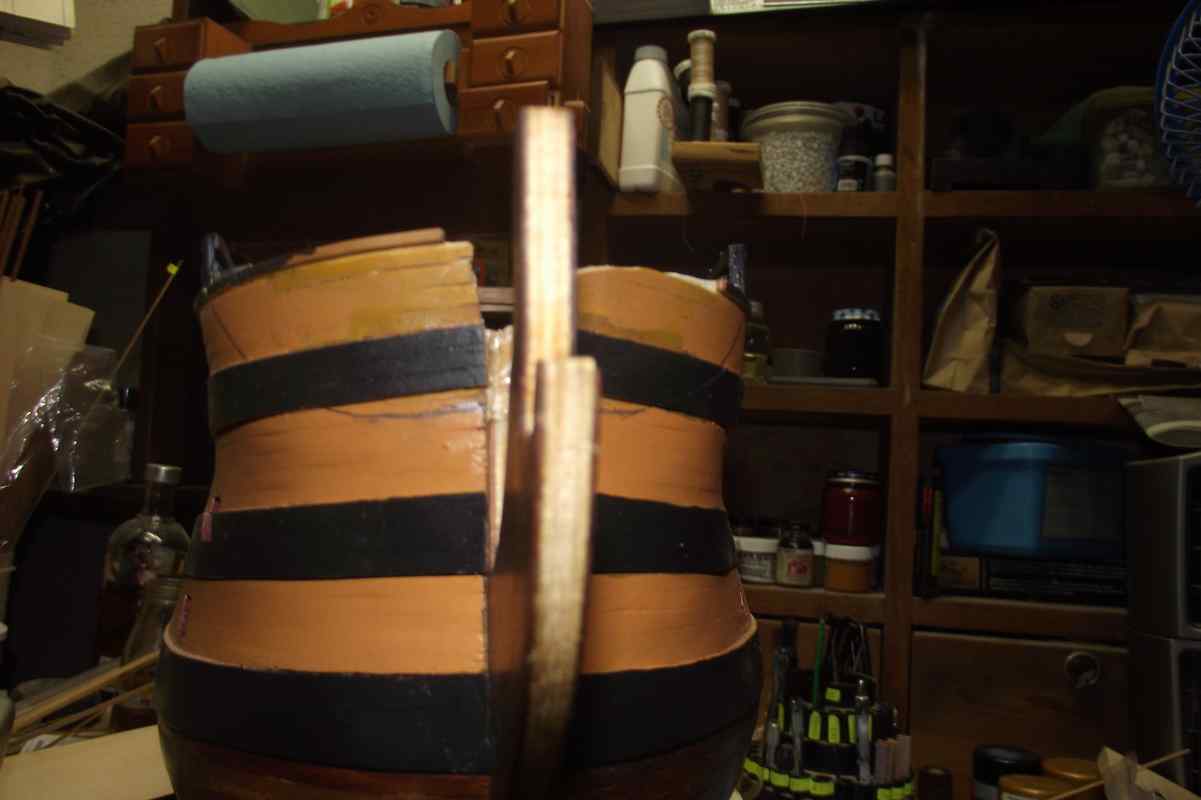
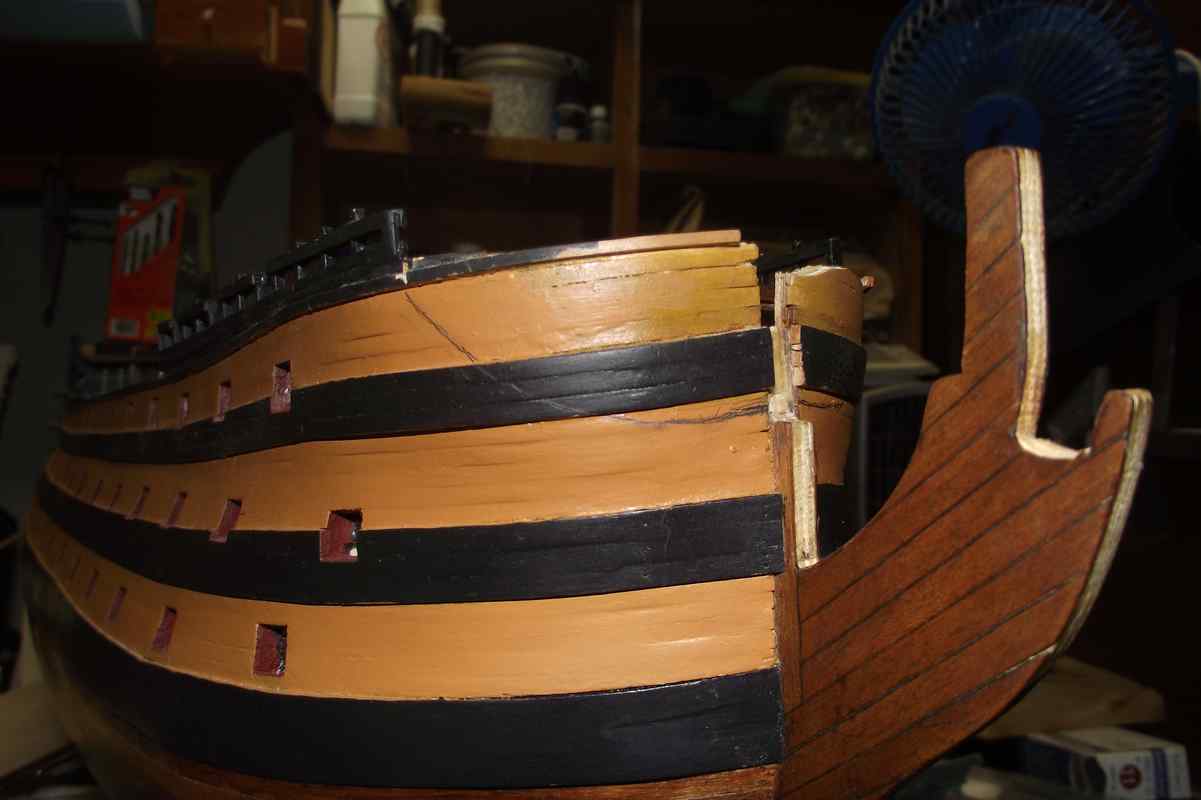
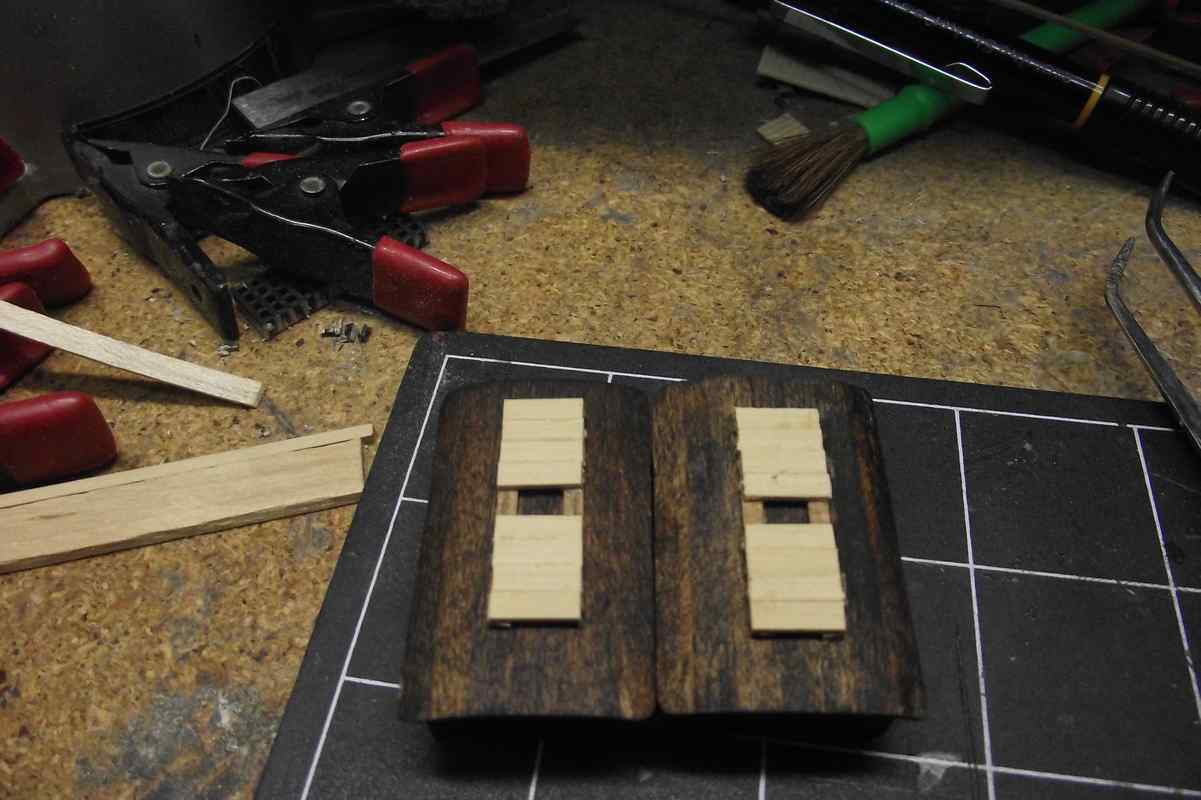
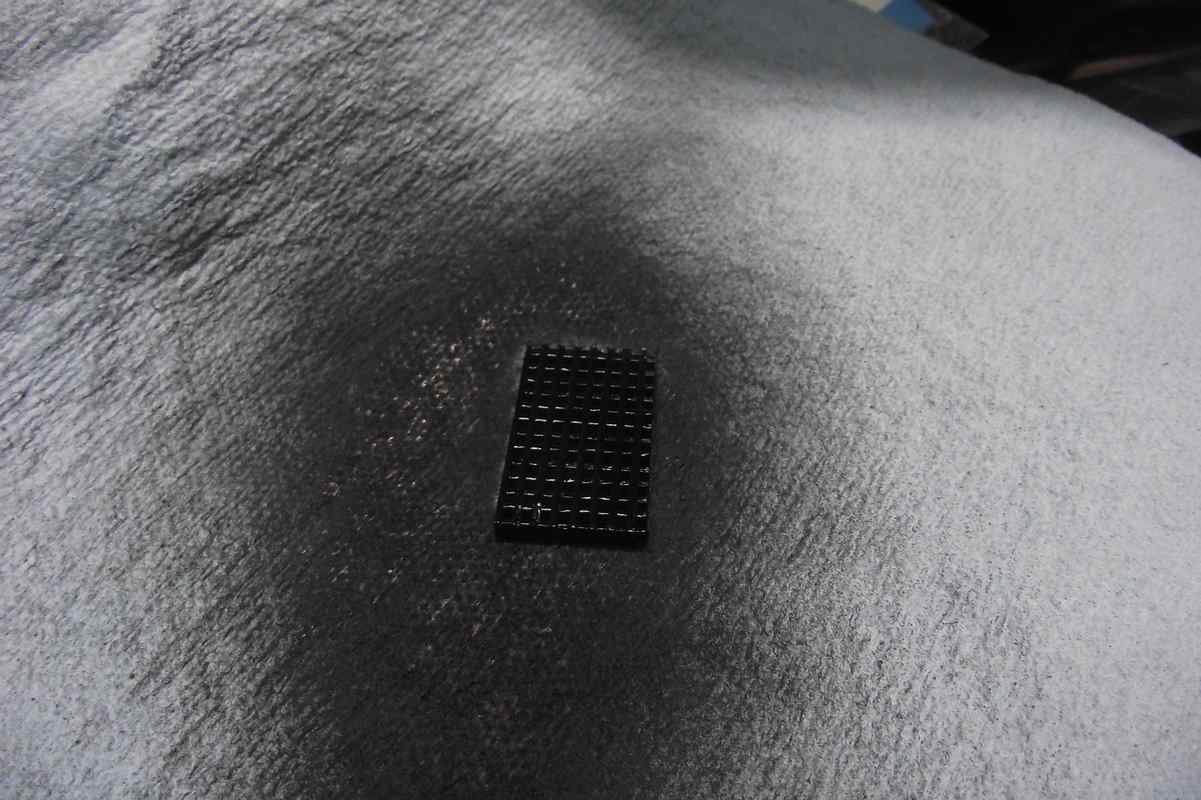
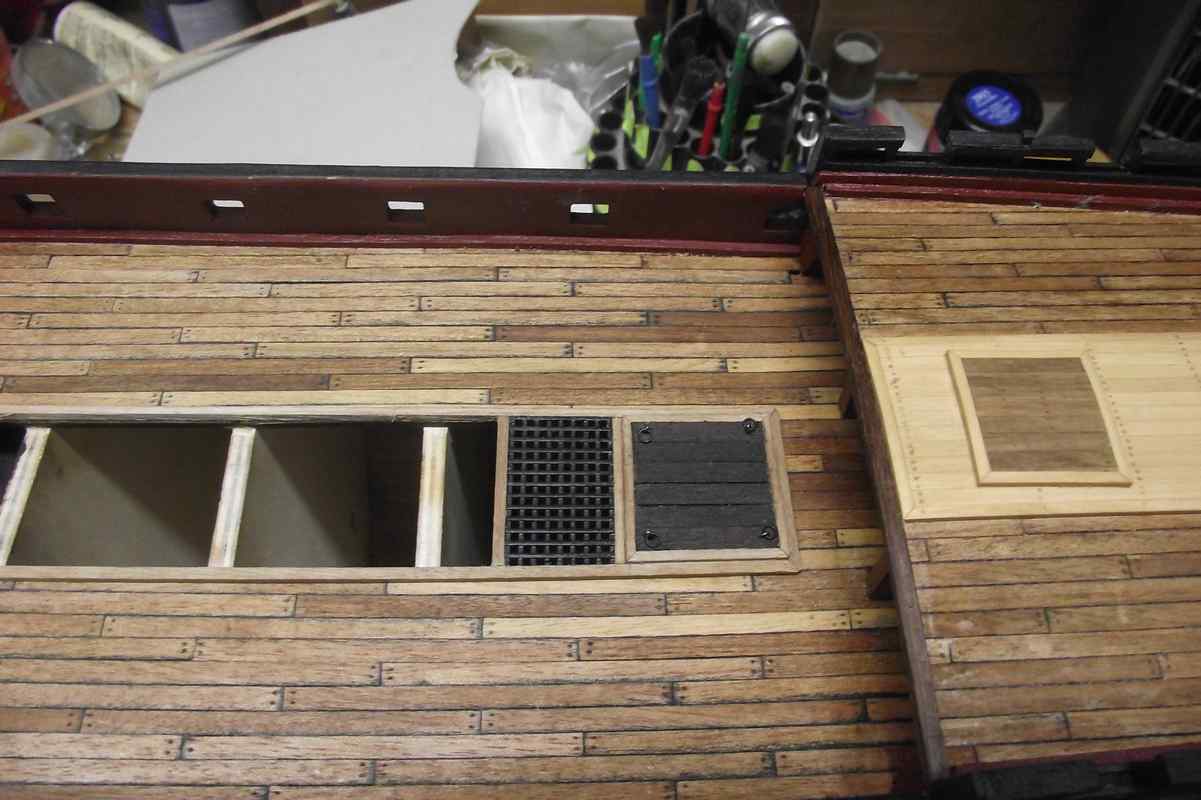
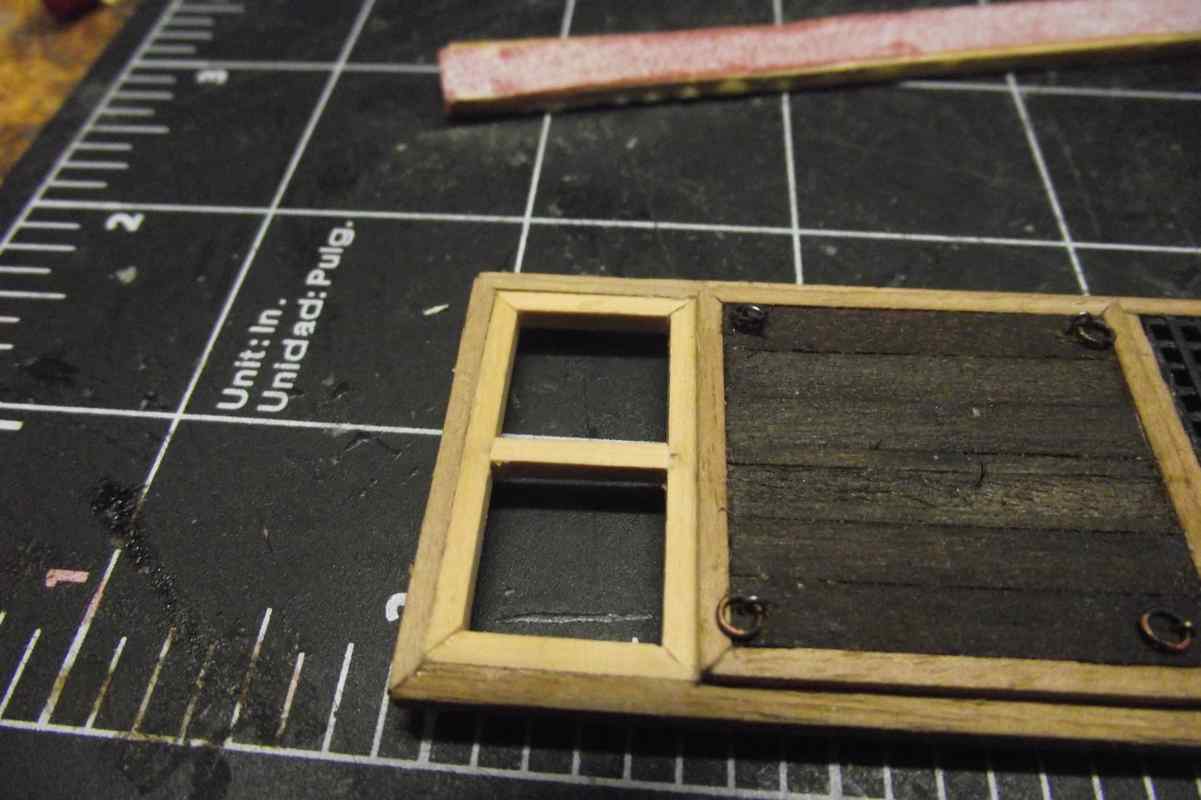
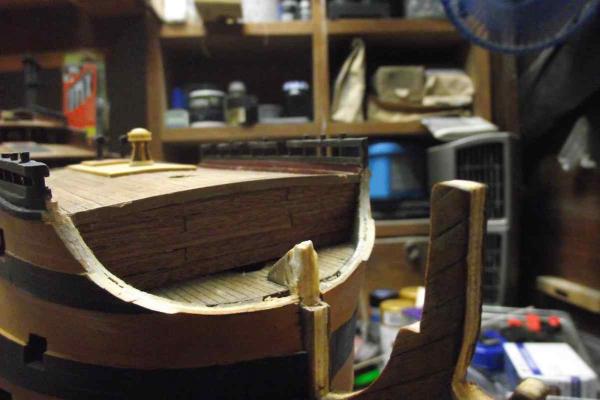
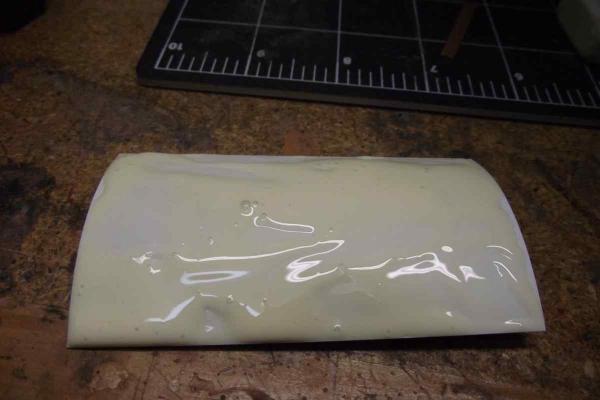
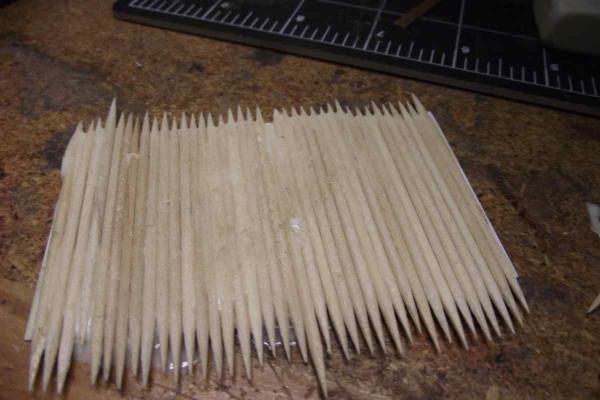
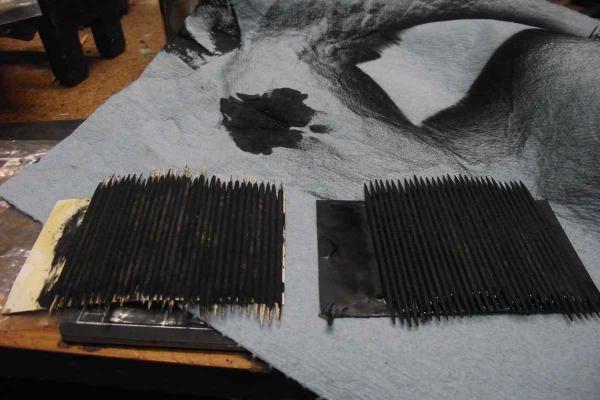
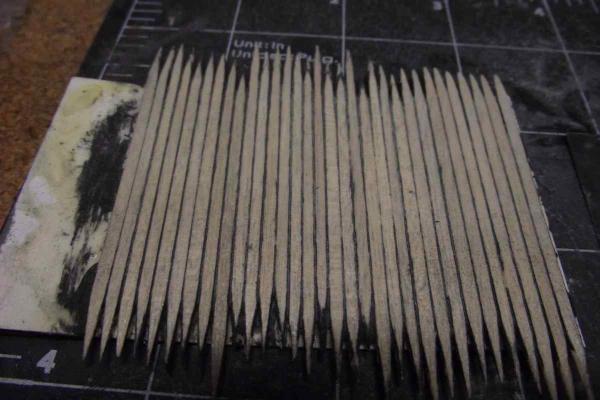
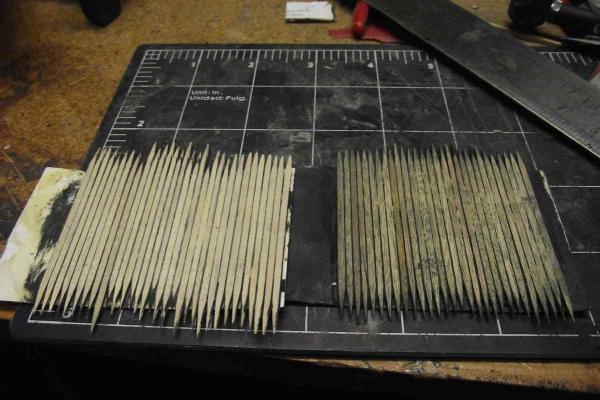
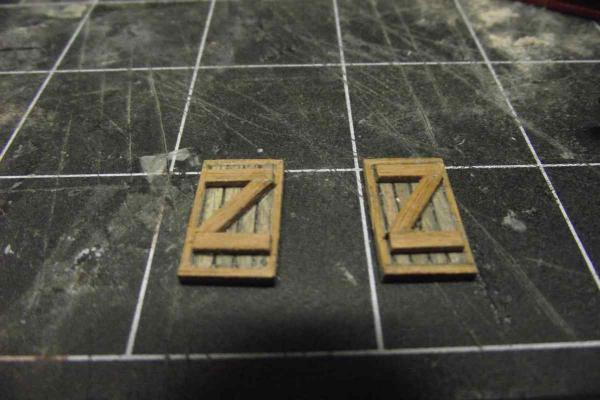
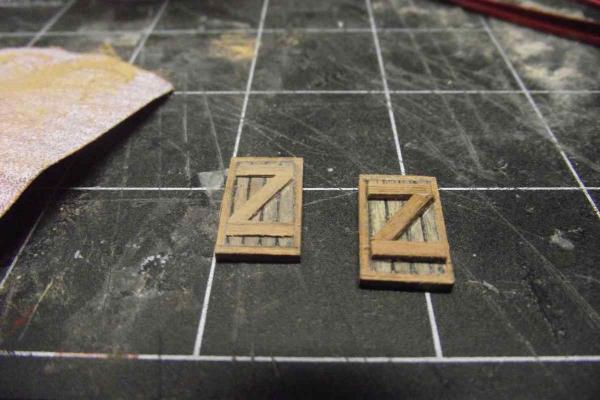
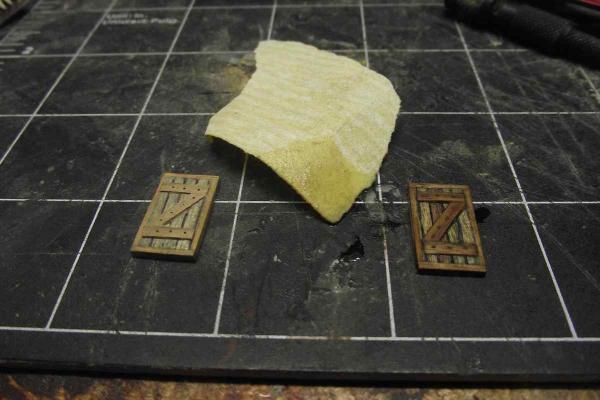
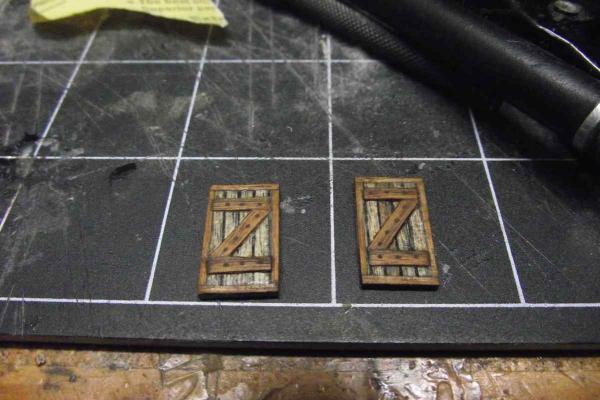
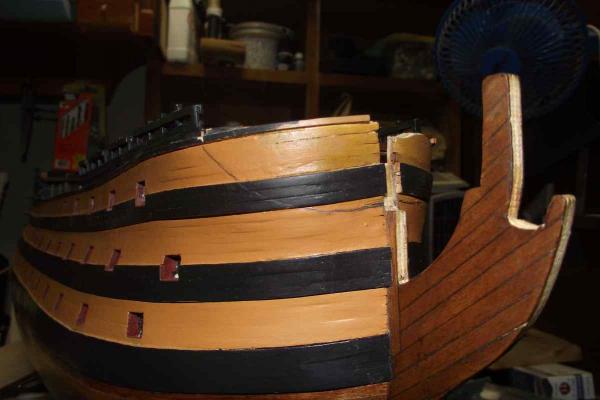
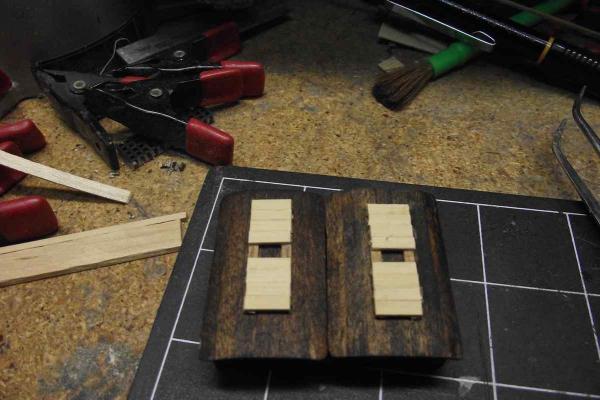
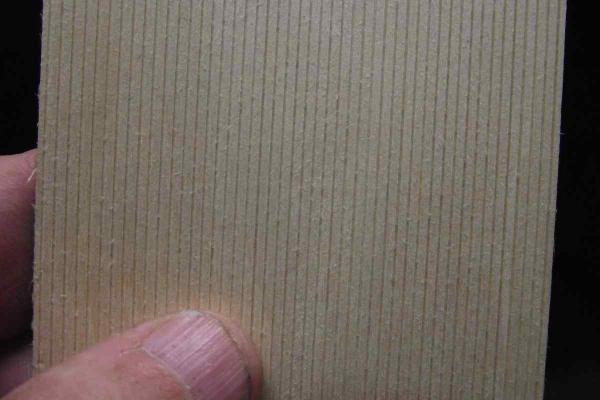
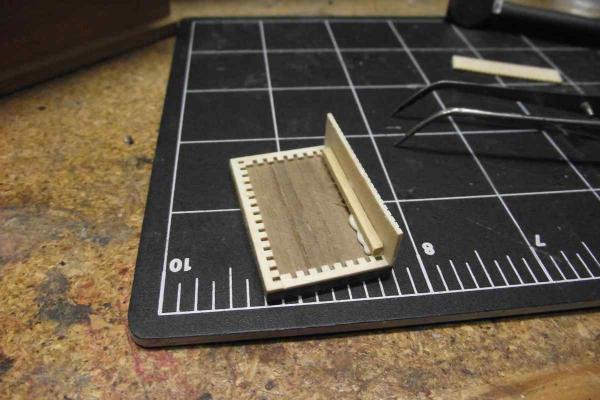
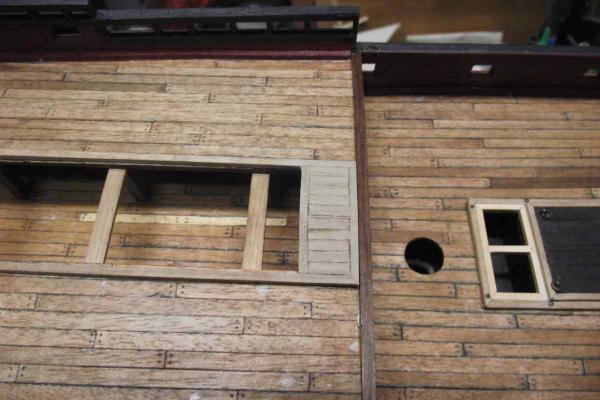
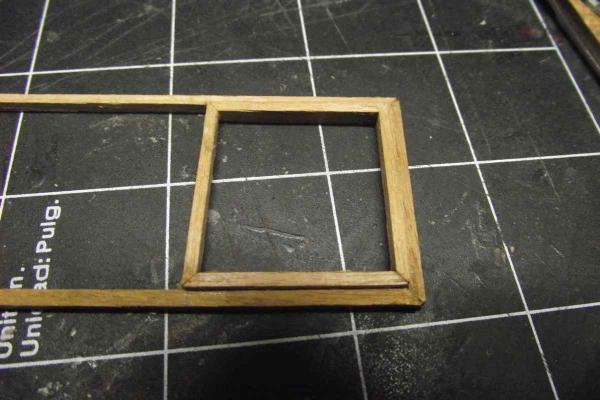
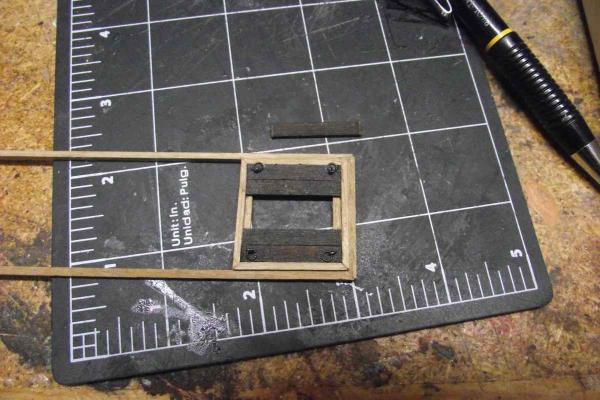
 Update and a mini-practicum. Hello all. A small update on working on the bow area of the ship. Although I described it before in another thread, I will post again here my method of making doors. I hope someone will benefit from it. Start of planking/closing this area. Here is how I make doors. Start by spreading glue on an old business card. (Go to your desk. I'm sure you will find dozens of business cards of people you don't even know who they are. Put them to good use. ) Now glue a line of ROUND toothpicks. Try to avoid the glue from squeezing through the sides of the toothpicks. The cleanliness of the area between them is critical. (NOTE: The photo here looks exactly the opposite to what I am trying to tell you to avoid. It is from a previous attempt. Clamp and let dry overnight. The wet card will try to bend like in the photo above. This will help to prevent that. When dry, paint with flat black paint. Here I used on the left milk paint, and on the right spray paint. I did not notice any difference by using either. Important: make sure the paint goes all the way between the toothpicks. When dry, sand down to about half of the toothpicks. The roundness of them will allow you to make the black line between them wider or thinner, depending on what you want. Here I made an experiment: after sanding both elements to about the same depth, I re-painted the one in the right to see if there was some difference after sanding it again. Here is the result. The one in the right is the re-painted one, which I like better. To me it has more "personality" Now cut to size Here I added frames and sanded down a bit to reduce thickness. Here I am sanding down the "Zs" to reduce thickness. Drill small holes on the wood. I put a drop of Boiled Linseed Oil on a piece of fine sandpaper. The dust will mix with the BLO and fill the holes. This will make the effect of plugs. Great for deck planking. Doors ready and in place. Thanks for visiting!!! Best regards. Ulises
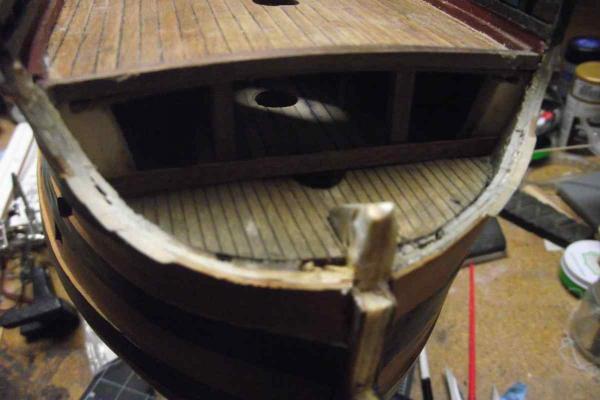


- 786 replies
-
- 12
-

-
- Royal Louis
- Finished
- (and 1 more)
-
What are the best detailed plastic models?
Ulises Victoria replied to Ray1981's topic in Plastic model kits
Hello. In my plastic days I built about every sailing ship that was worth it. Revell's 1/96 Constitution I built twice. Heller's 1/100 Victory (regarded sometime as "the best plastic ship kit in the market") is still displayed in my living room. This kit was improved using Corel's 1/98 Victory parts, which I tried to build in the 80's and never got to finish. One little ship that was a real pleasure to build was IMAI/ERTL Golden Hind. Don't think this is in production anymore. I have under my desk Heller's 1/100 Soleil Royale. This is in my "will-I-ever-build-plastic-again" list. In every one of these ships I substituted the plastic shrouds and ratlines with real thread and used cloth for the sails. -
Hello Don, and many thanks for the bunch of likes. I used a Dremel with a sanding drum attachment, so I didn't actually cut it, but sand it down.
- 786 replies
-
- 4
-
-
- Royal Louis
- Finished
- (and 1 more)
-
Excellent idea and realization. This, however forces you to put your shrouds before assembling of the upper parts of the mast. I always do my shrouds when the masts are completely assembled. (But that's just me ) Very nice idea nevertheless.
-
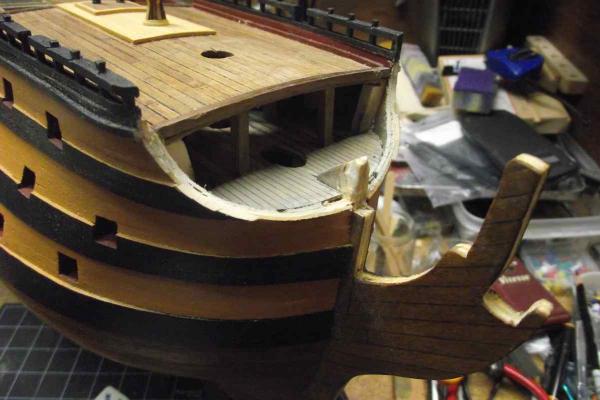
Mini-update. This is one step that I was postponing since I can't remember when. I wasn't too excited about it: Cut that section in the bow. Finally I'm over it! Still some finishing to do, but the main work is done. I had to move my ship temporarily to my pen turning workshop where I have and can use more noisy and dust making machinery.


- 786 replies
-
- 8
-
-
- Royal Louis
- Finished
- (and 1 more)
-
Thank you all: Sjors: Thanks for the compliment! Scott: 110 is number 2! JanV. Much obliged! Sailor: Please look at first picture in post #467. That's where they are placed. I have no other source of information regarding this particular ship, than the instructions.
- 786 replies
-
- 5
-
-
- Royal Louis
- Finished
- (and 1 more)
-
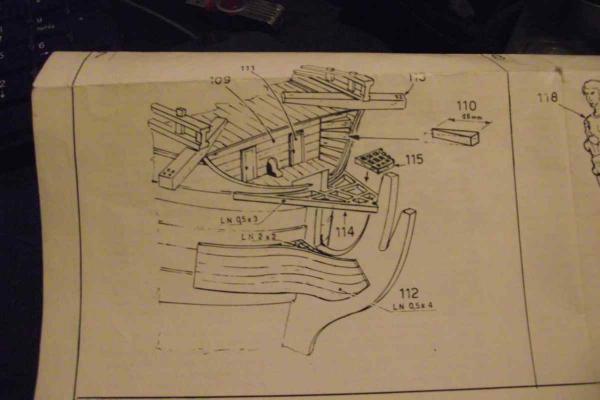
Thank you all for your comments and encouragement. What a GREAT Hobby this is!!!! Another small update. Working now on this part: Instructions call for the use of those plastic (Plastic!!! Blasphemy!!! ) windows. So I am taking some liberties here as well. This next step is scary!!! Especially 112! Thank you all. Best regards. Ulises


- 786 replies
-
- 11
-
-
- Royal Louis
- Finished
- (and 1 more)
-
Thank you very much for your comment, Michael! Indeed the Santísima (full ship) is already in my stash, however I feel more inclined towards older ships like Soleil Royale, or Sovereign of the Seas. That's why I say in my signature that at this moment, San Felipe could be my next project. I had the Royal Louis in my wish list for so many years. I just love this ship!!!
- 786 replies
-
- 6
-
-
- Royal Louis
- Finished
- (and 1 more)
-
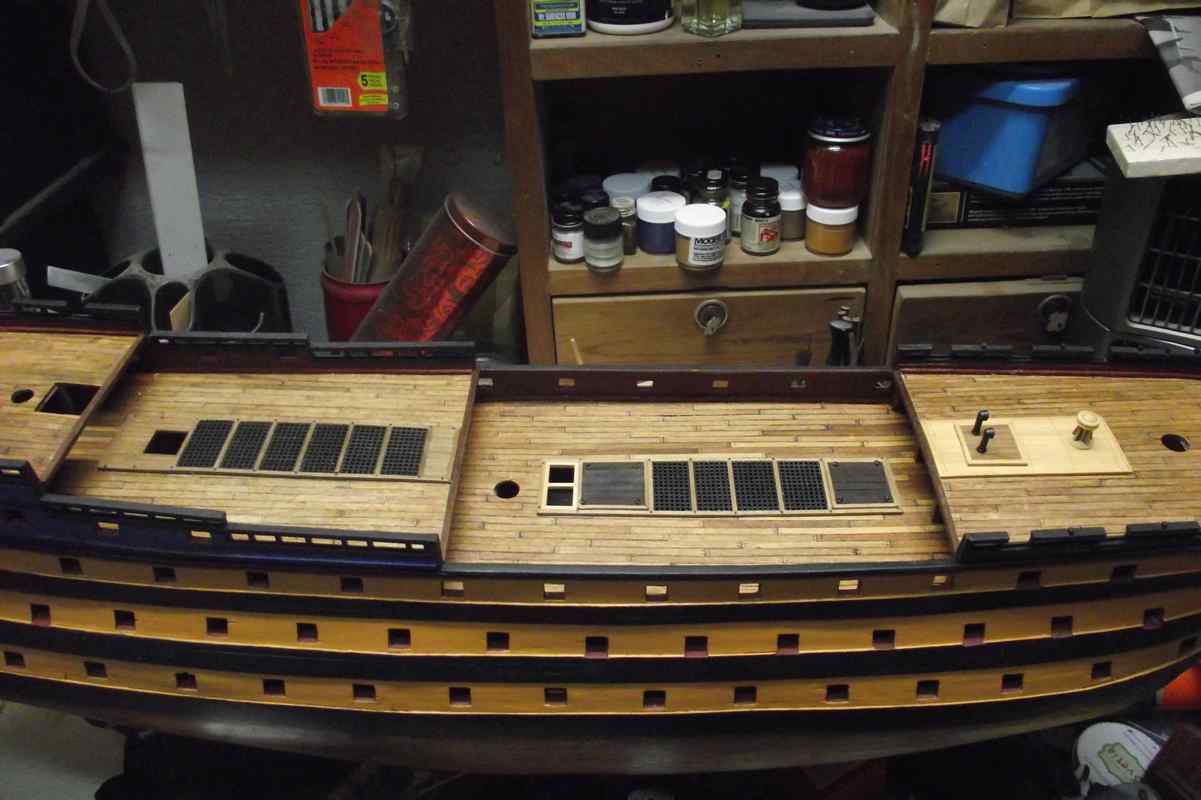
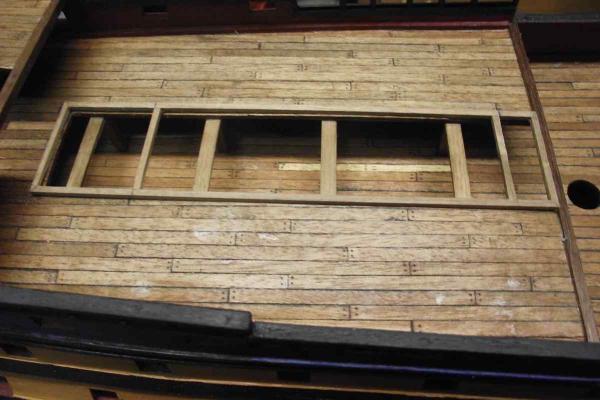
Another small update. The structures I was working on in the last post, are now done and fixed in place. Measurements are wrong somewhere. Instructions says to use 1 x 3 wood in the upper cover and shows 4 pieces of wood on each side. By doing so, the opening in the middle is a lot smaller than in the drawing. Oh well!!! No big deal! General view of deck at the moment.

- 786 replies
-
- 11
-
-
- Royal Louis
- Finished
- (and 1 more)
-
Highlight, right click, copy, go to where you want to paste, right click, paste. How do I copy and paste in this area? I'm a new member.
-
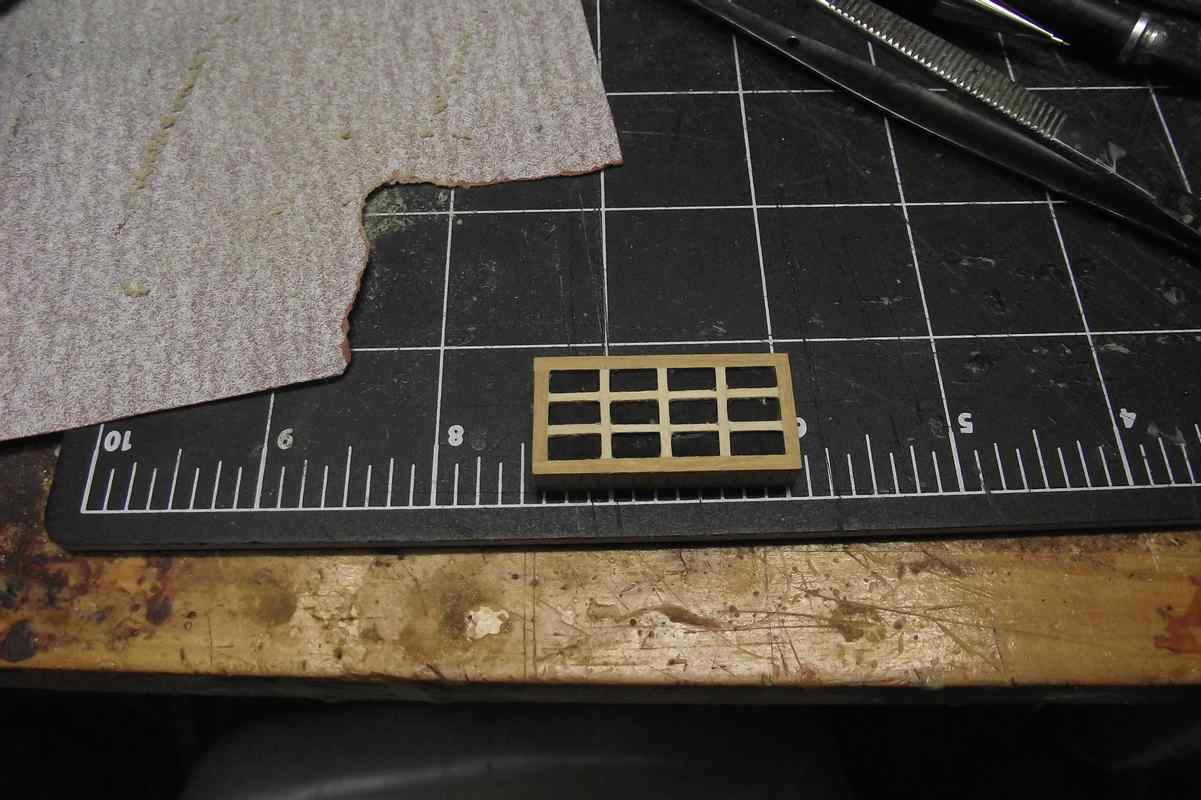
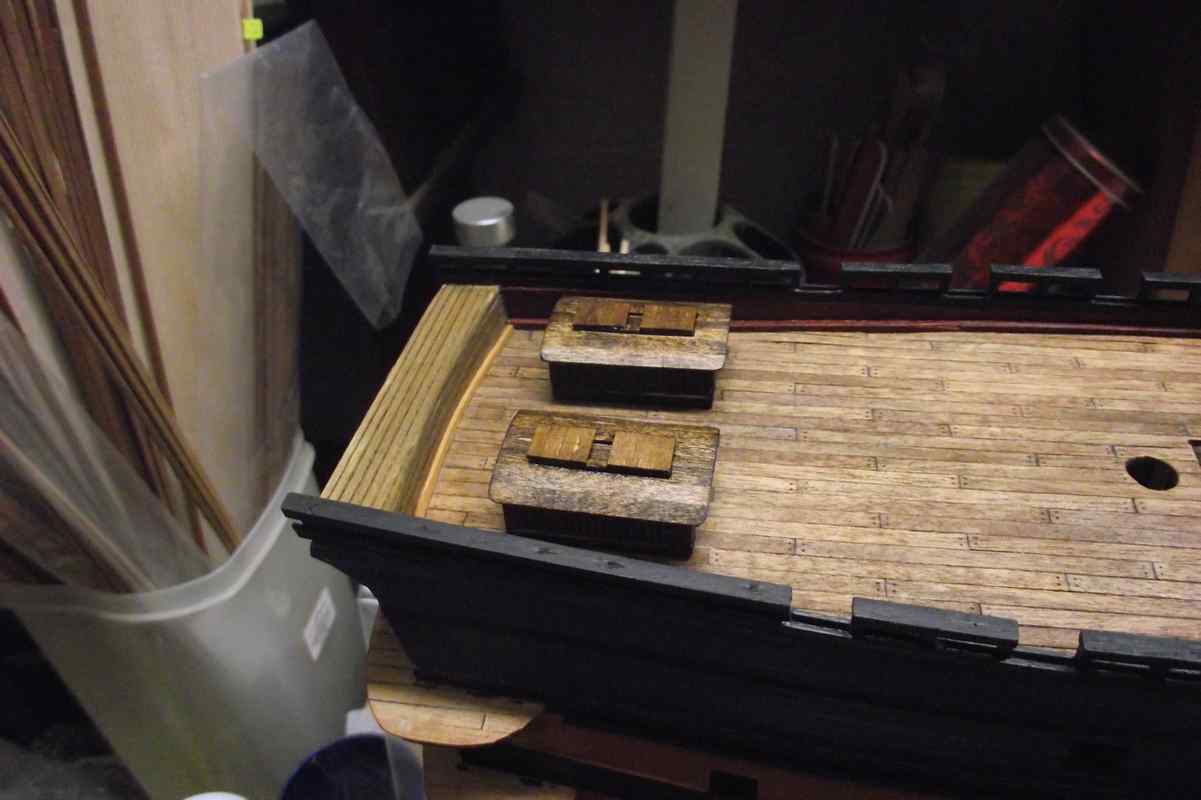
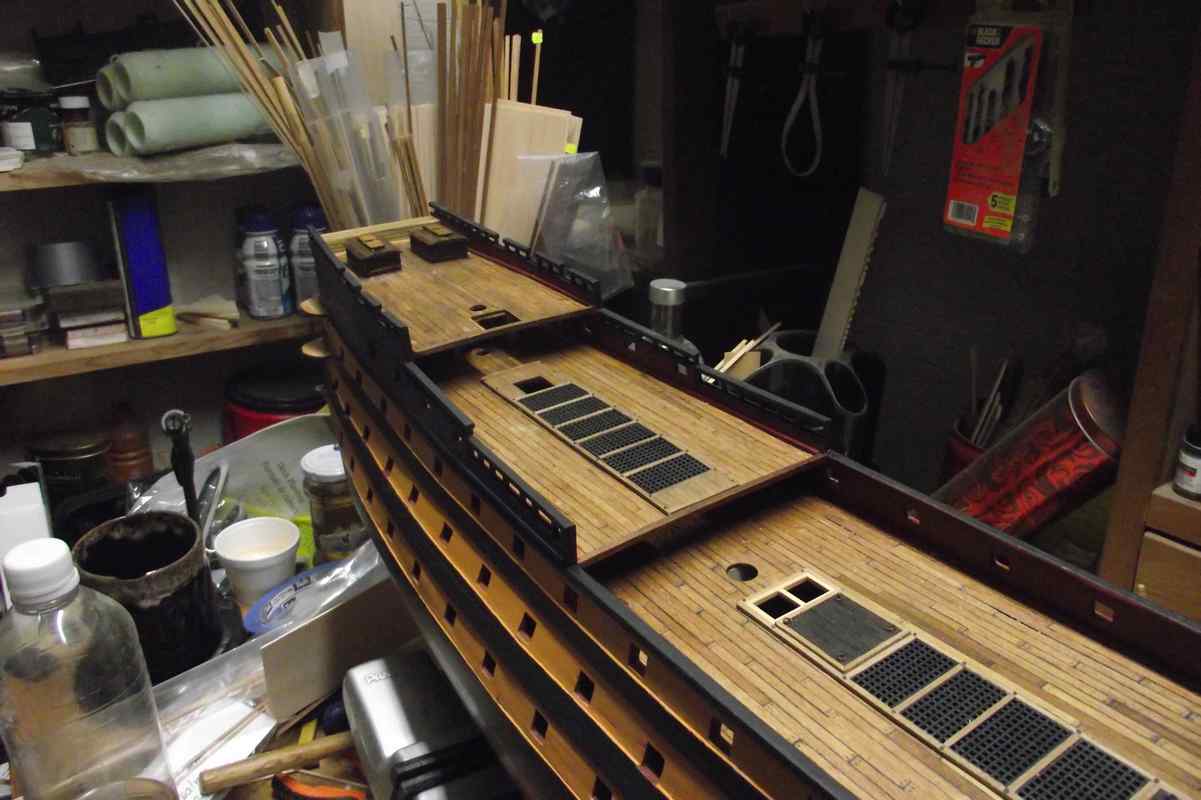
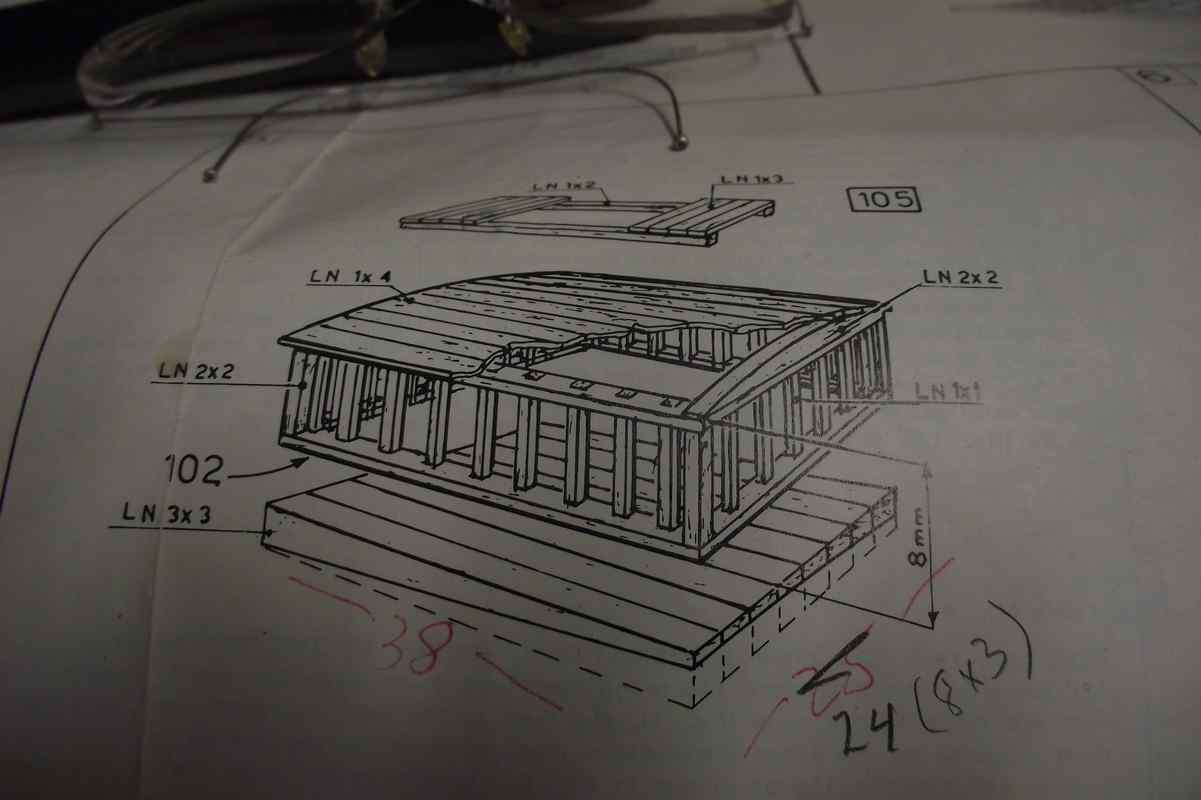
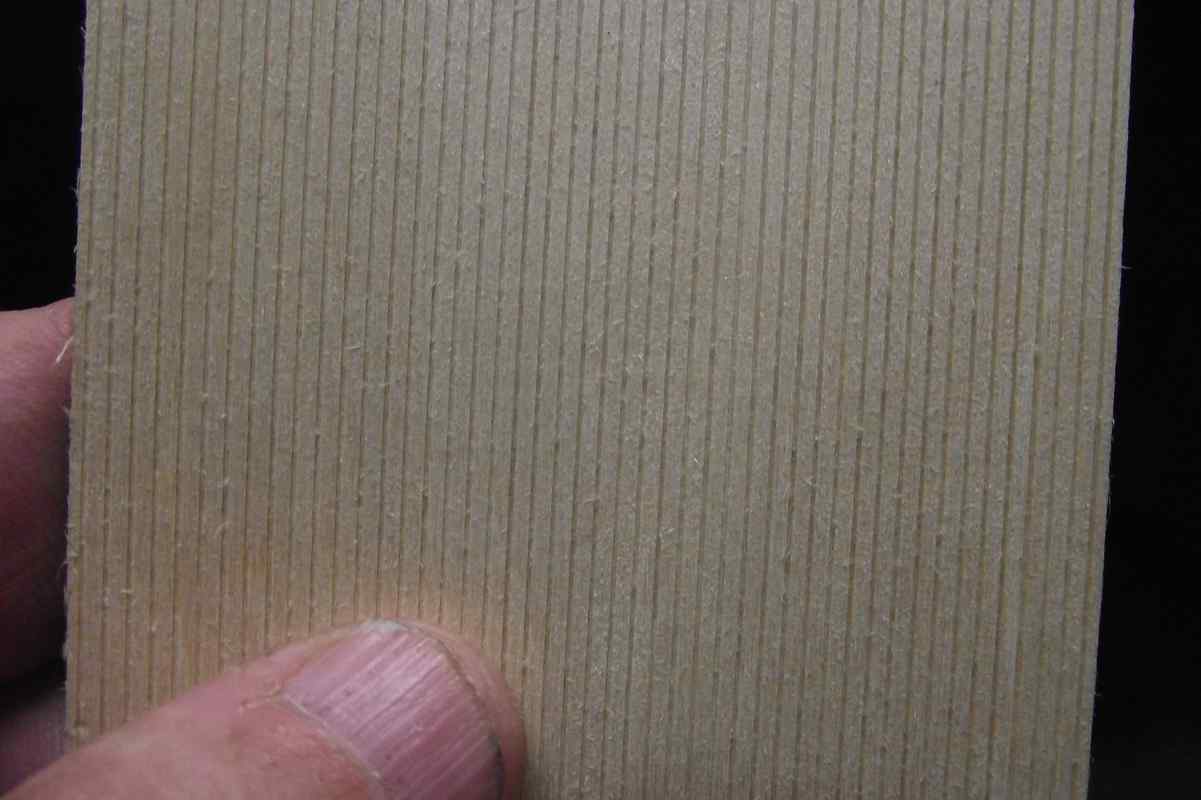
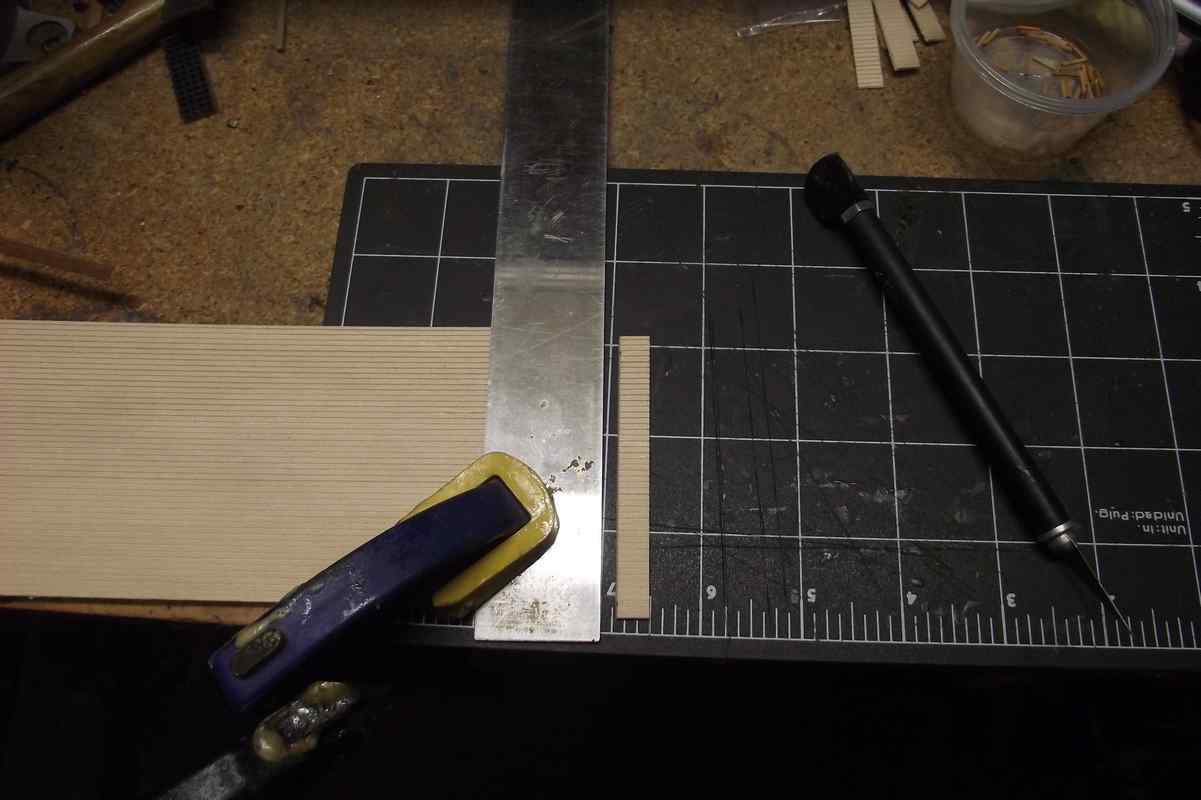
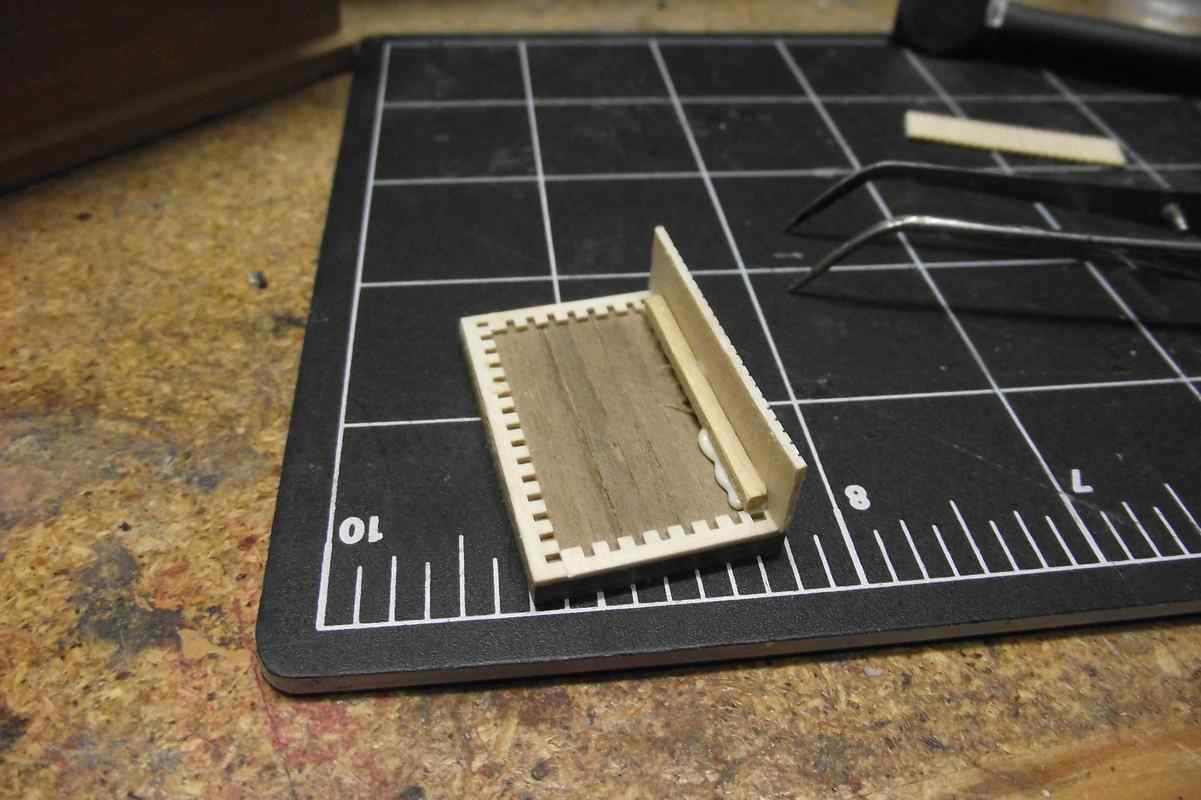
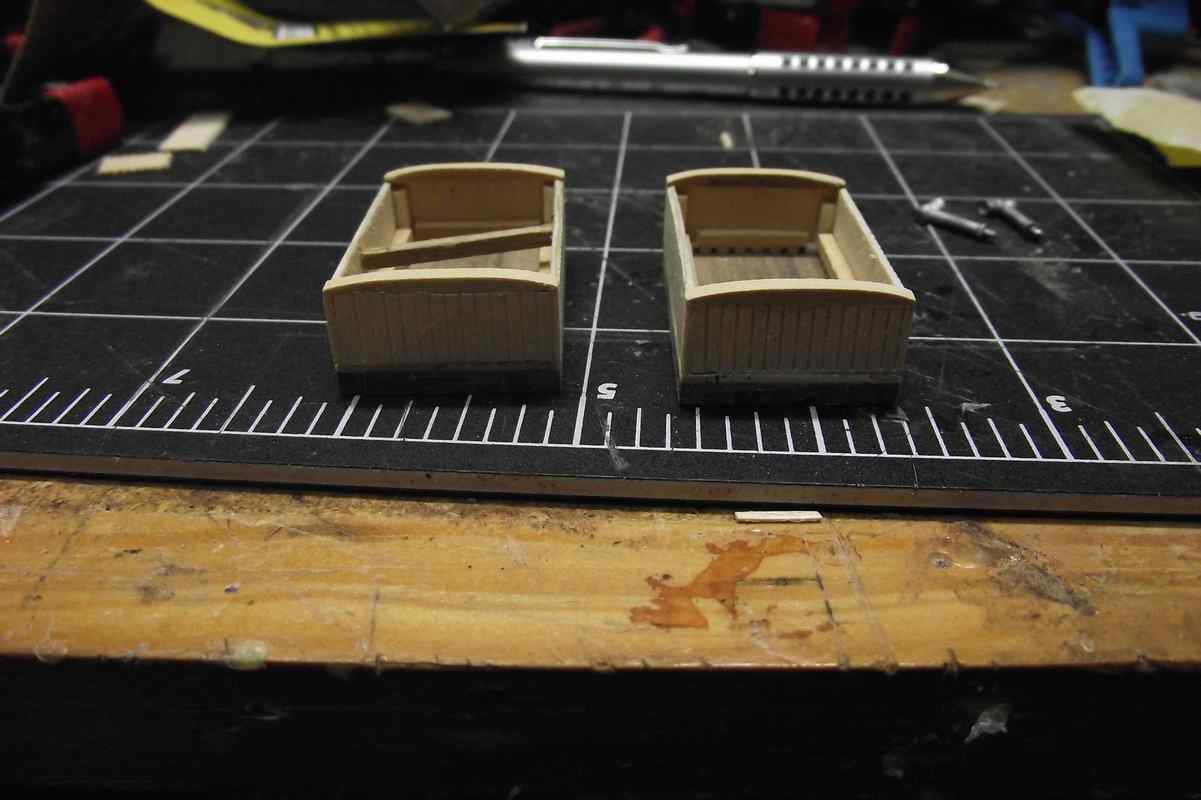
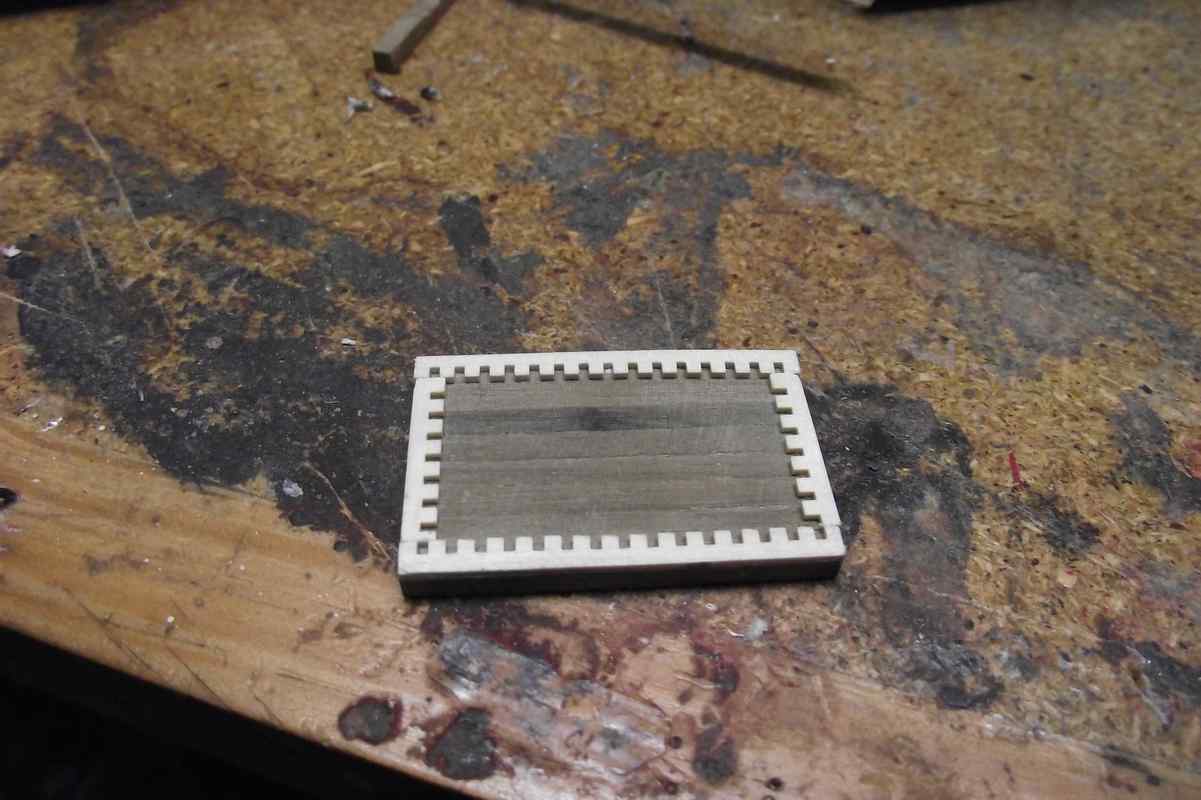
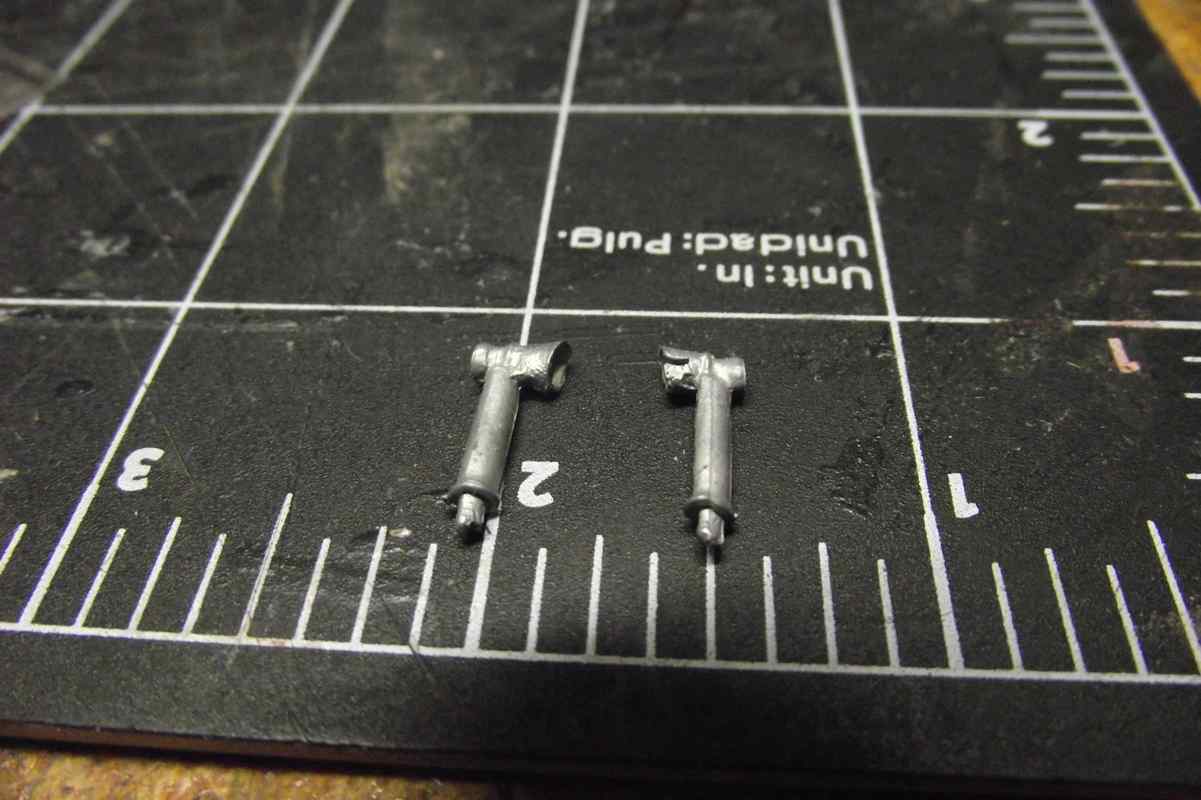
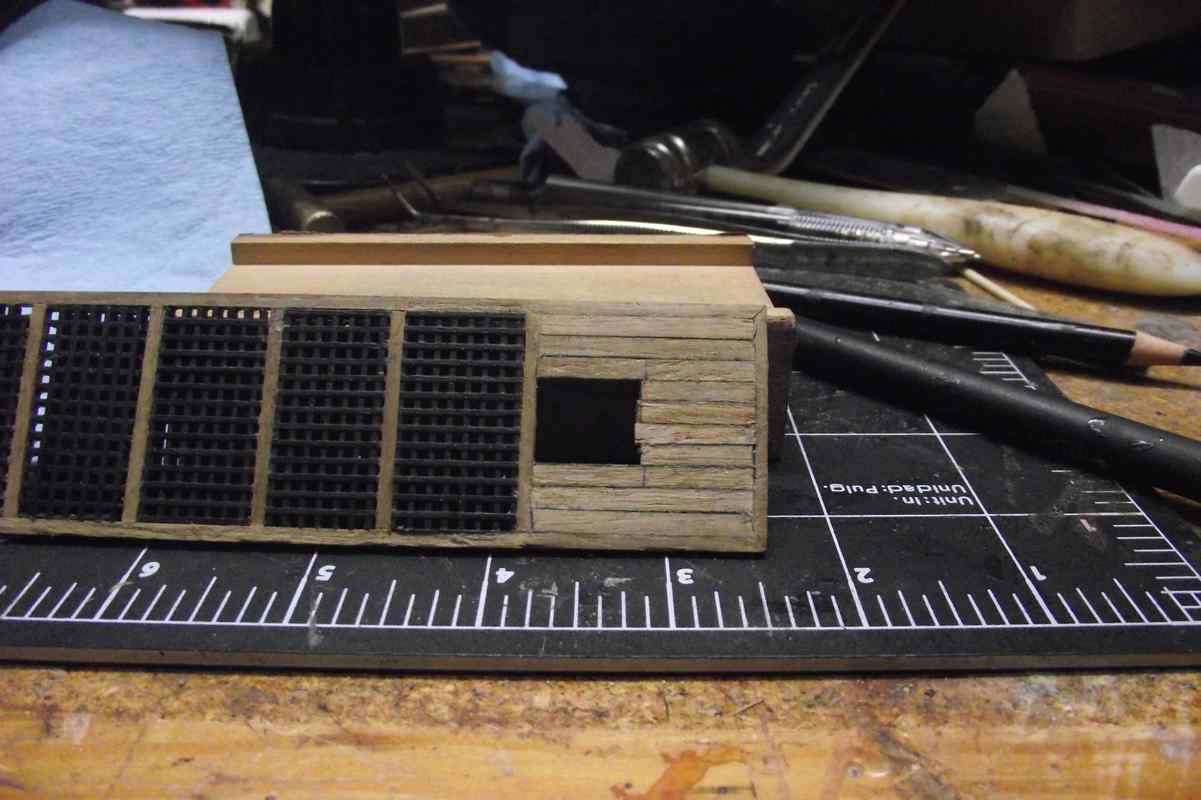
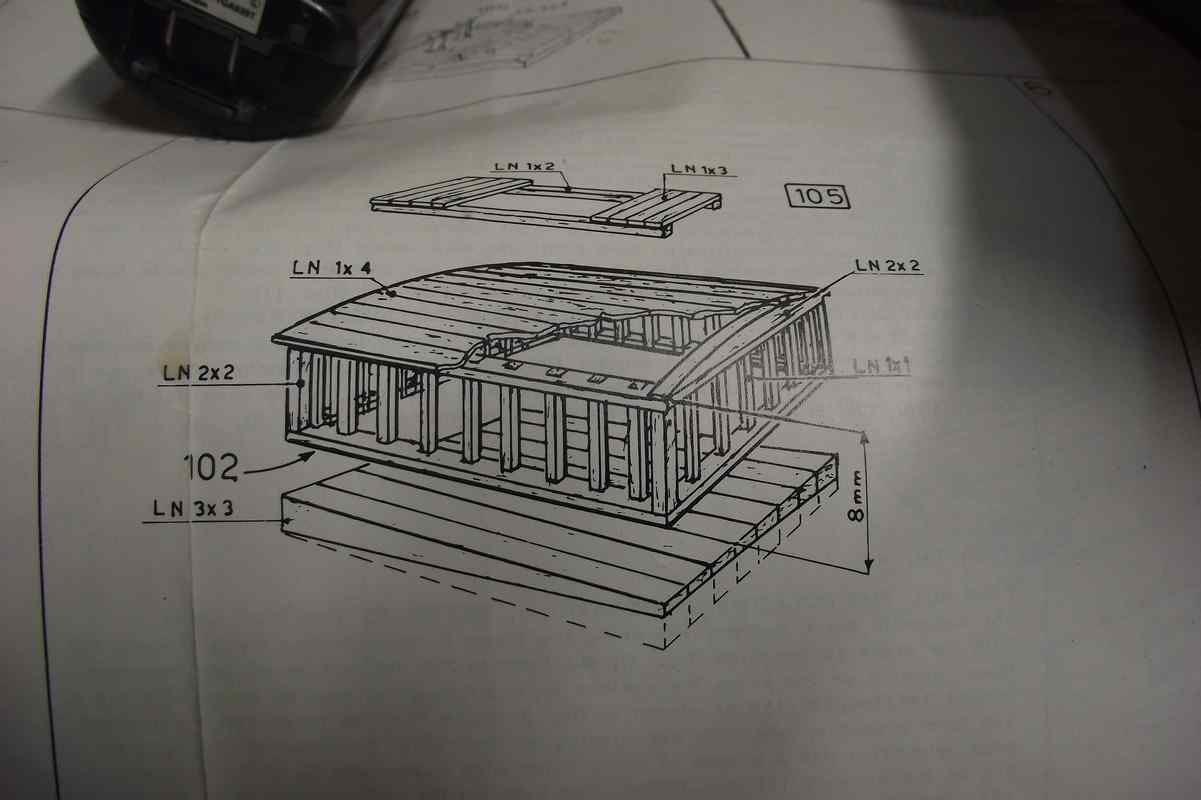
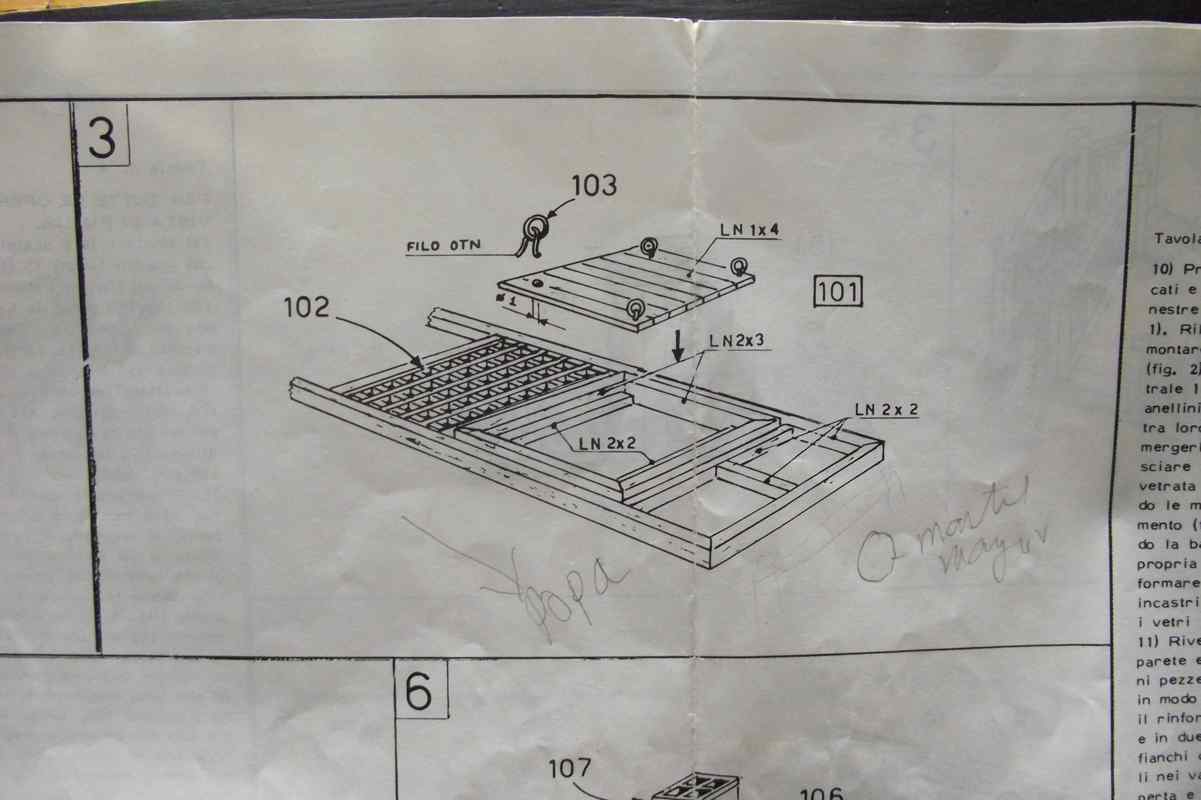
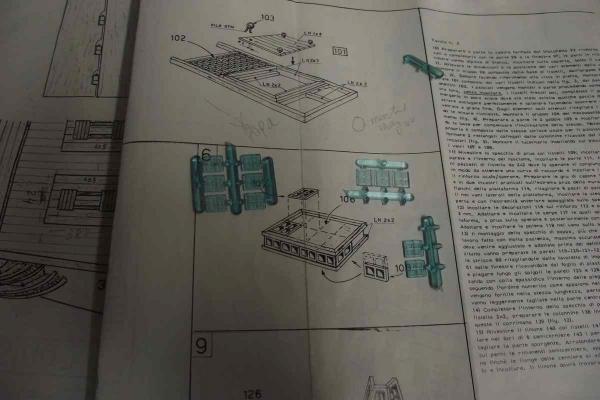
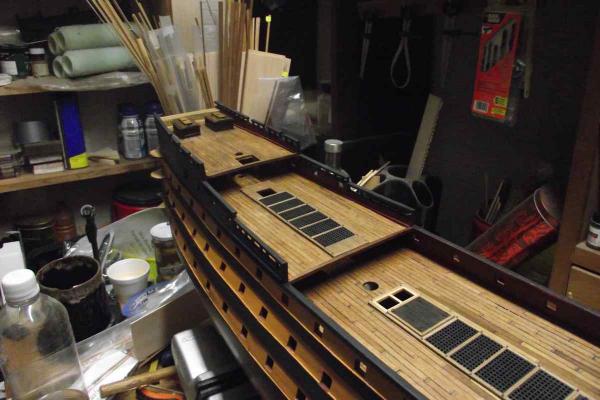
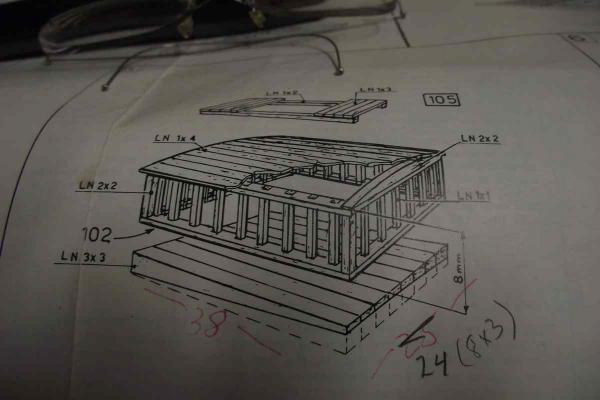
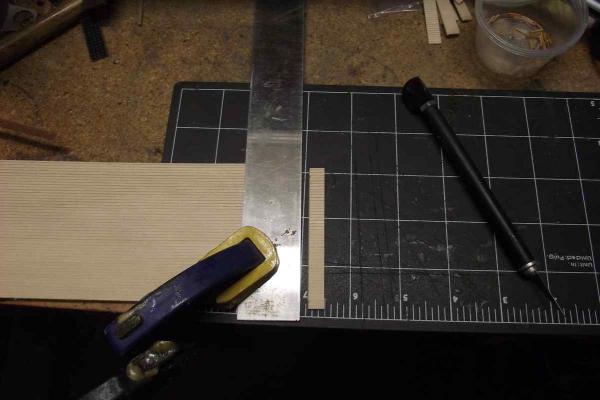
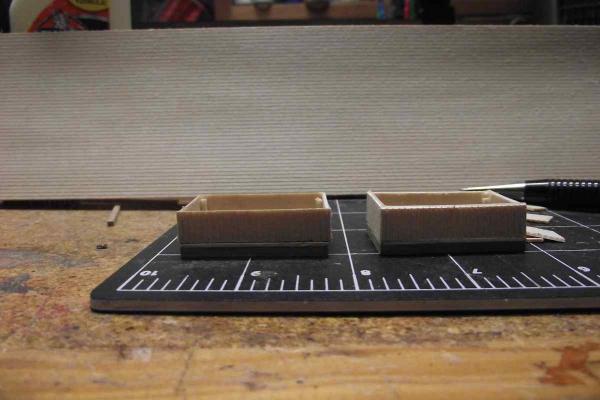
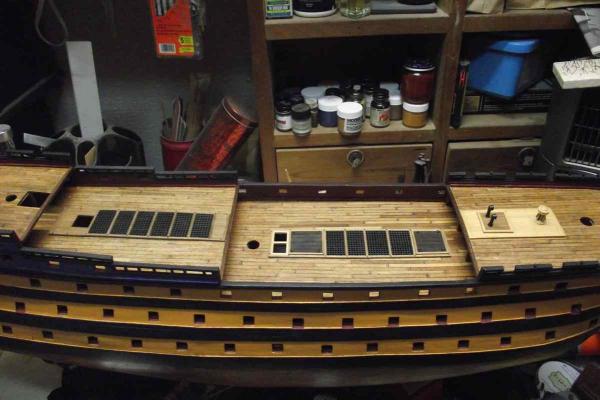
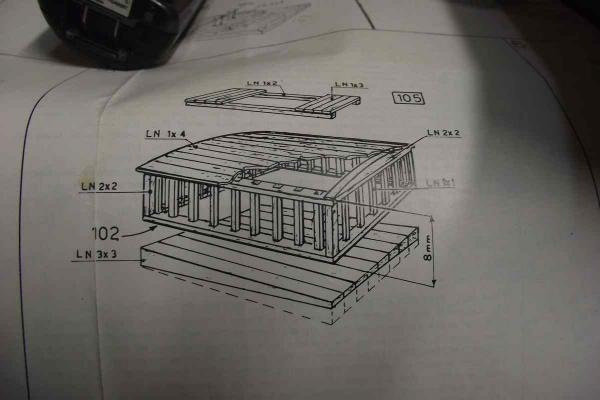
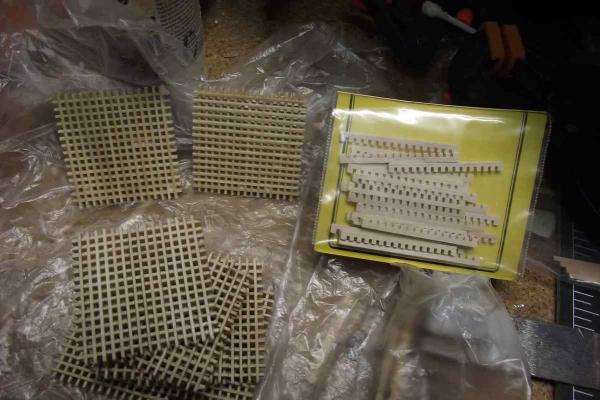
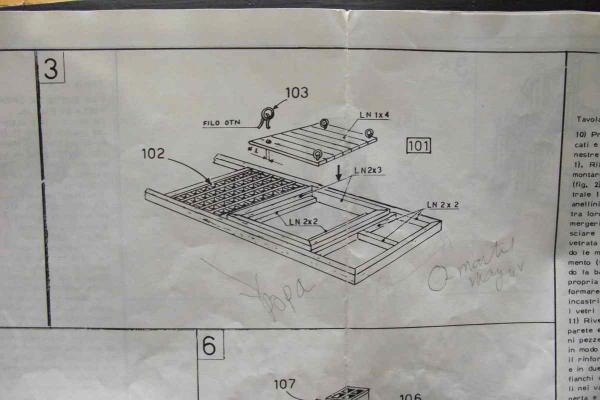
Hello all, another small update. These were the chimneys that came with the kit. These the ones I ordered later. They may be a bit bigger but I don't feel they look awkwardly big. General views of present state of the ship´s deck . I'm working on this part. Instructions say to glue together 8 pieces of 3x3 wood to make a platform and then glue on the edges pieces of the "combs" you use to make gratings. You then cut pieces of 1 x 1 x 8 and place them in the notches of the grating material, and then close the upper part with more gratings (see drawing). I tried to follow their instructions, but the 1 x 1 wood in the kit became impossible to work with. First it was not square at all, and then it split horribly when tried to cut it. So I choose to do it differently. Using these pre-scribed material, I cut 8mm stripes from it and started forming the walls. The piece of wood in the back is for you to see it and to hide the mess behind. This may or may not be accurate, but who can tell? The important thing is that I am very happy with the outcome. Will post again when they are finished.


- 786 replies
-
- 11
-
-
- Royal Louis
- Finished
- (and 1 more)
-
Thank you Cristi. Actually in my wish list are the Sovereign AND the Soleil. I built Corel's Vasa, but never built Le Soleil, although I have in my stash Heller's (Plastic) Soleil Royale, but I don't feel like building plastic again.
-
Hello. This kit has been in my wish list for so long time, but following your build and garym's comments make me wonder if it's really worth it. @ cristikc and garym: Generally speaking, if you were to buy a new kit, and you had the money and the knowledge you have now, would you buy this kit again??? Thank you. Ulises
-
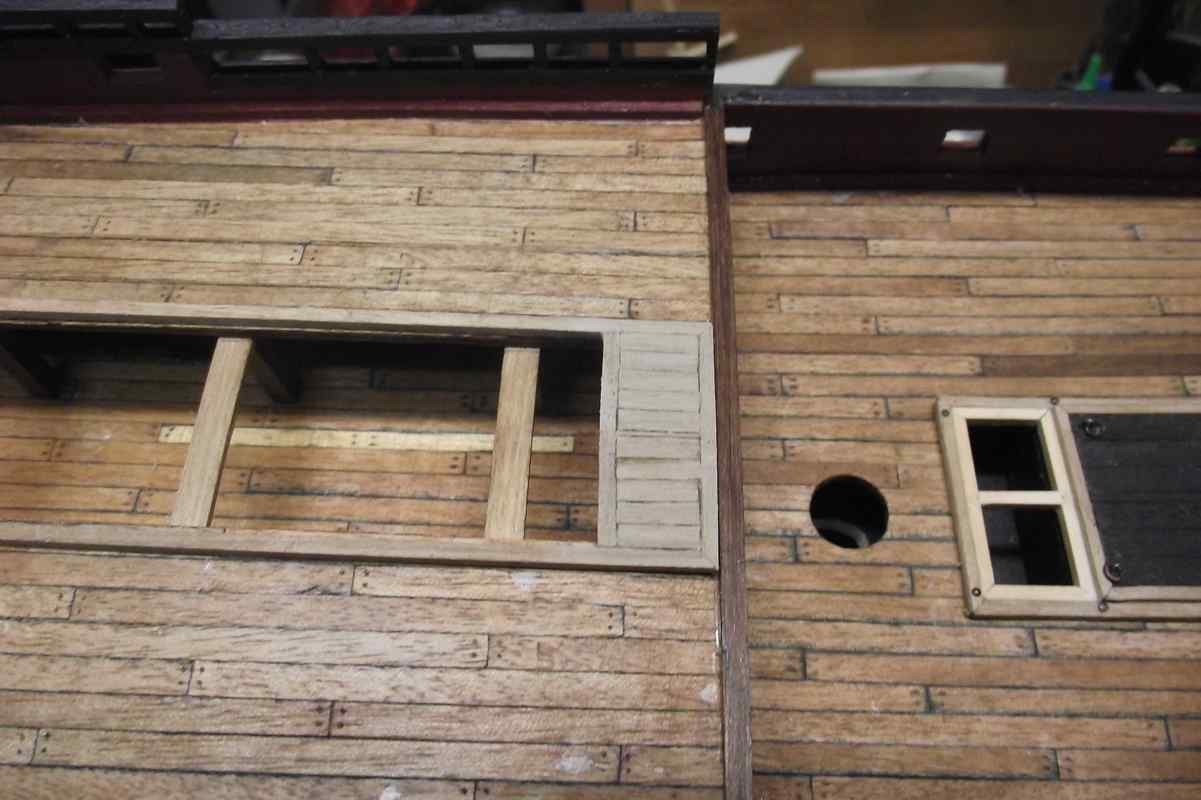
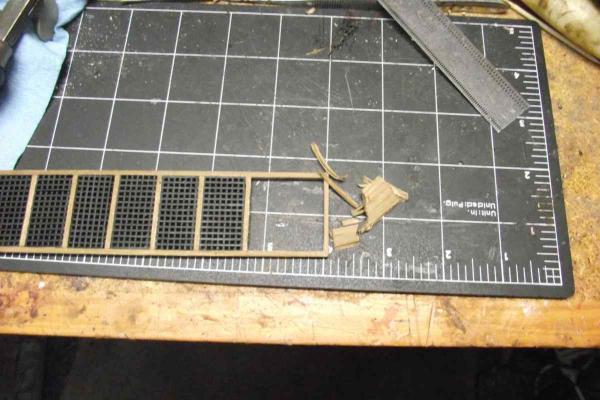
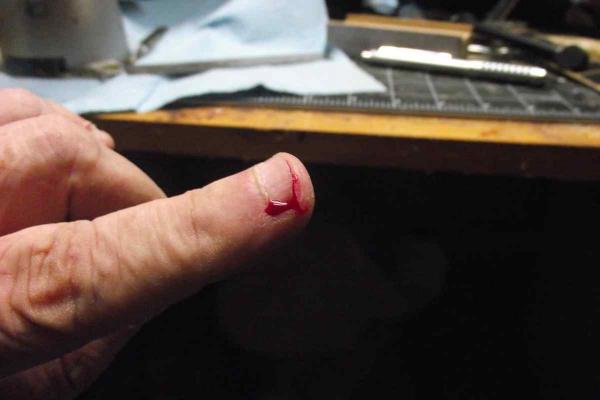
Update on the update. I followed Mark's tip and here is the thing "redux". The planks were very well glued. I was abraid to break the frame if tried too hard to unglue them, so I had to "carve" the planks out. This fix cost me blood, literally! Finished! Next step: No measures are given for the taper of the bottom of the lower platform. Thanks for watching, likes and tips!!! Ulises

- 786 replies
-
- 10
-
-
- Royal Louis
- Finished
- (and 1 more)
-
Thanks all. Mark... I didn't think of your option and seems it is the more feasible. Since the planks are glued to the frame only at the ends, I don't think there will be a mayor problem. In fact I may try to lift all the planks together and just rotate them. (Easier said than done, I know)
- 786 replies
-
- 5
-
-
- Royal Louis
- Finished
- (and 1 more)
-
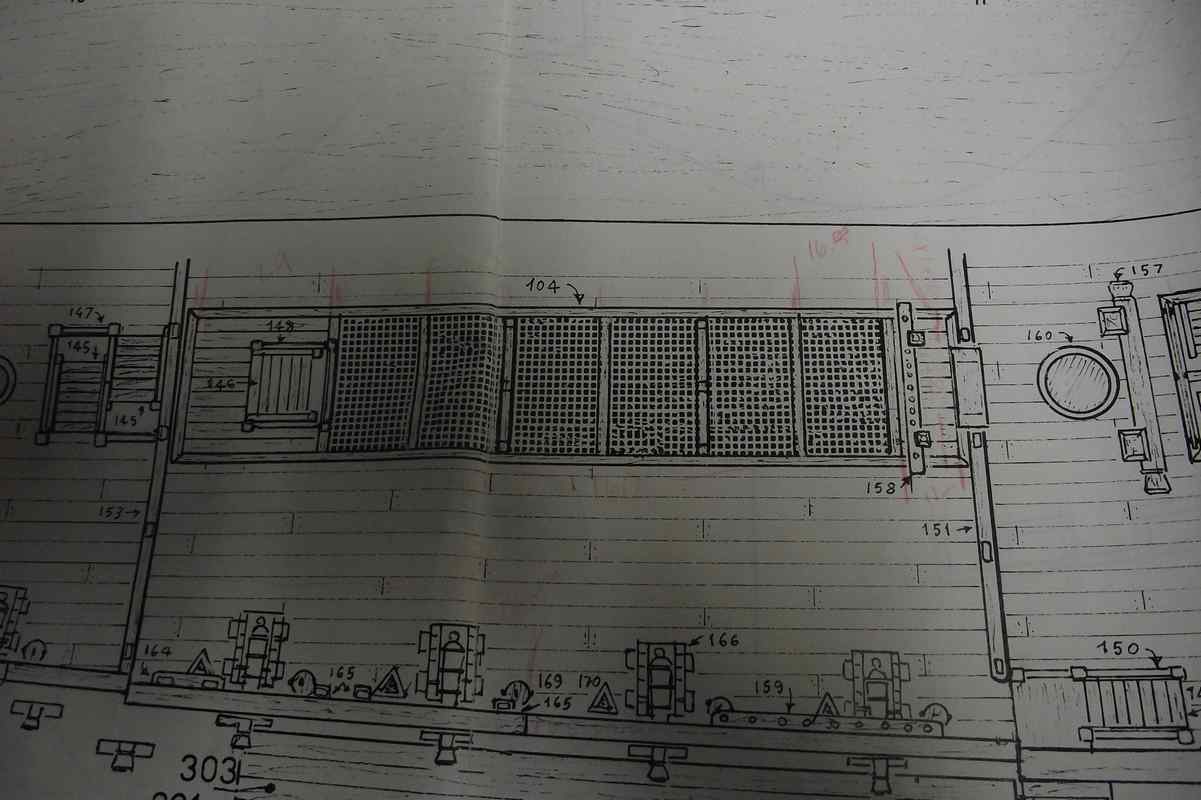
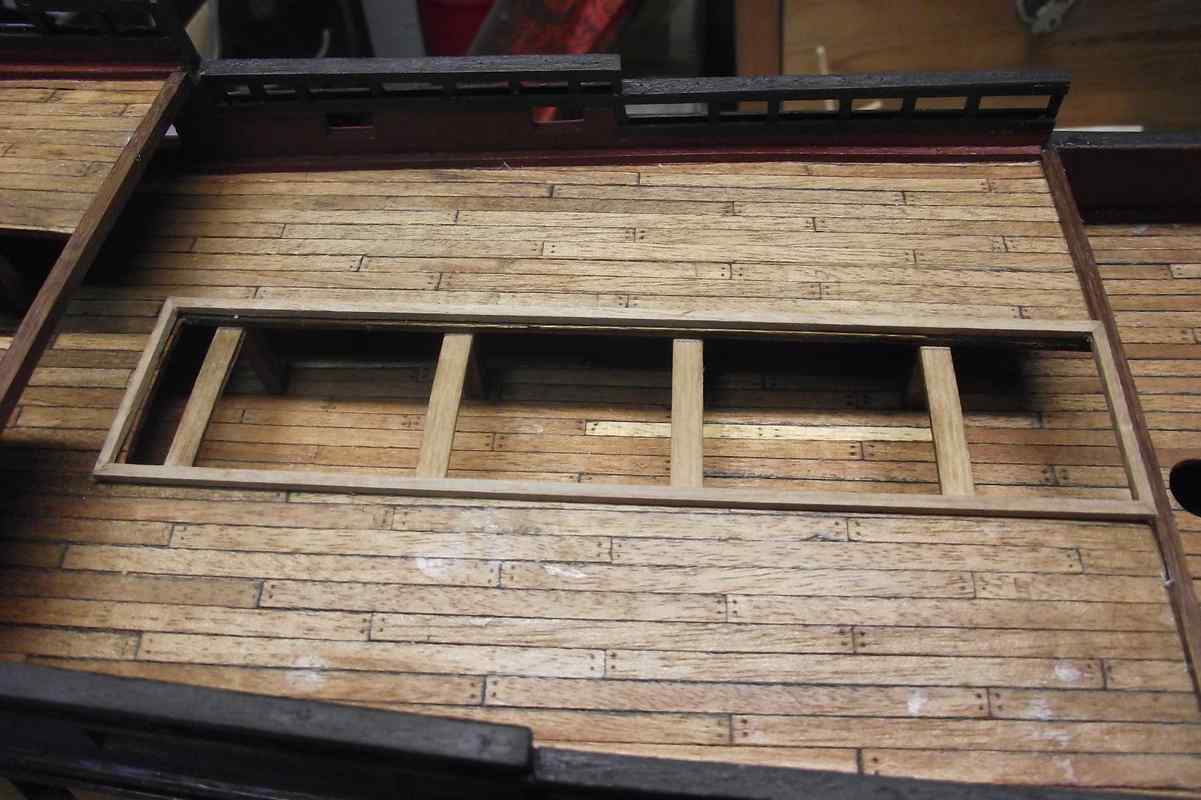
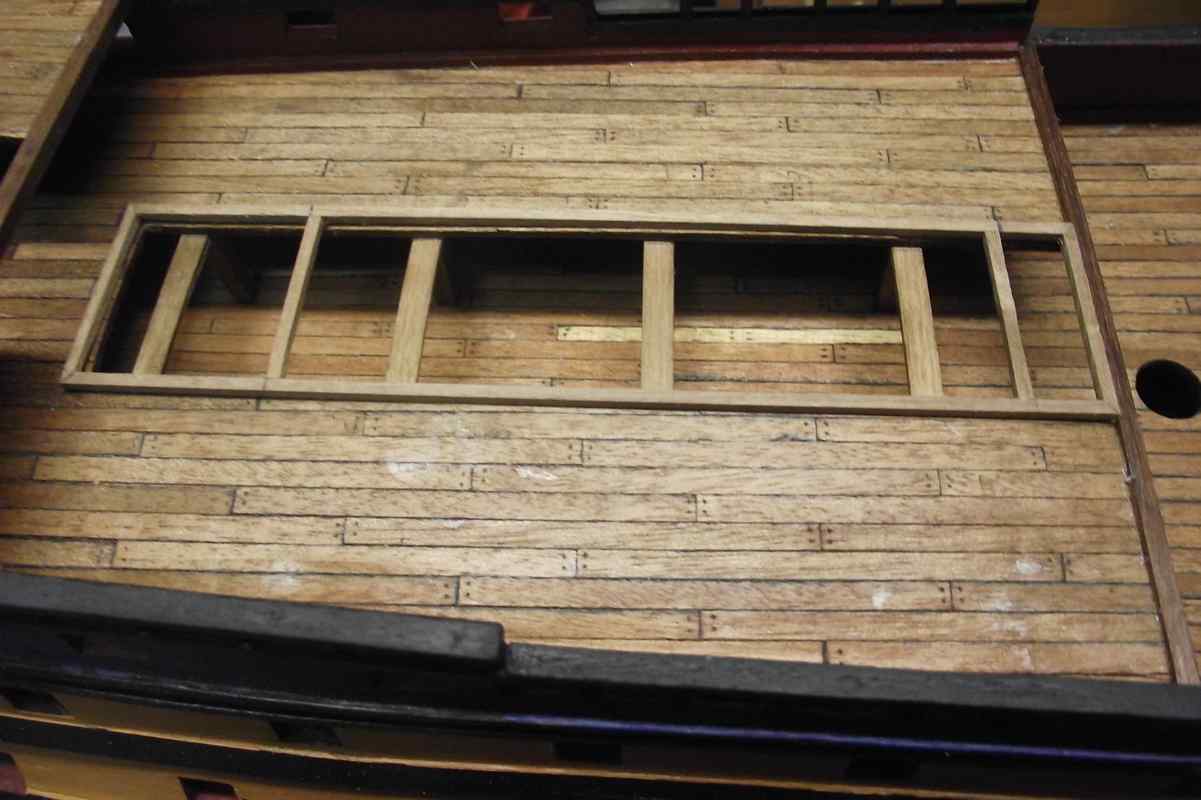
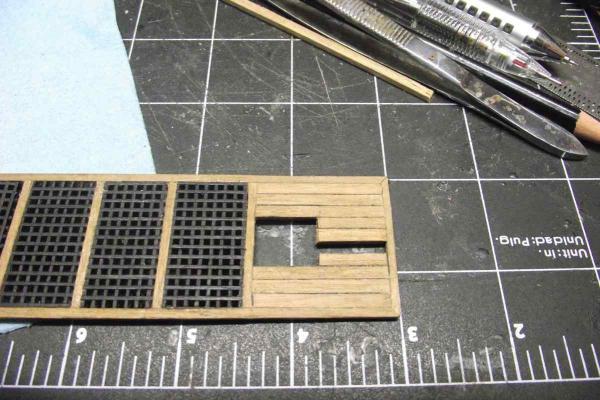
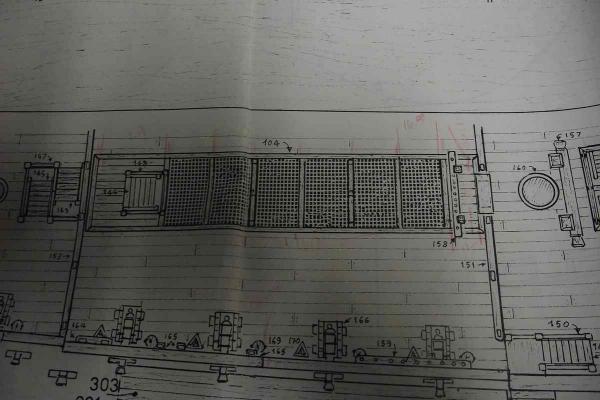
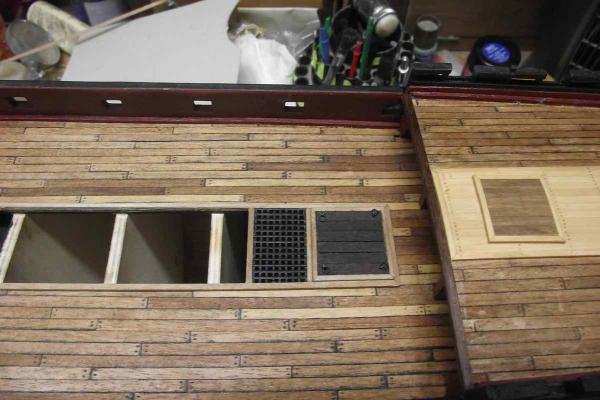
Embarrasing update: (Keep reading) Working this part: Here comes the embarrasing part and asking for advise. The opening at the far left should have been next to the grating, not the end of the frame. Options: Do it all again. Out of the question. I have no more gratings. "Invent" a small grating there and do the opening in the right place. "Invent" a hatch there " " " " " " " " " " " " " " " " " " " " " " " " " " " " " " " " "Cut, rotate and paste" Outer corners won't have a 45º angle of which I am most proud of. What would you do??? Thanks in advance. Ulises

- 786 replies
-
- 7
-
-
- Royal Louis
- Finished
- (and 1 more)
-
It all depends. Could be any of them, depending on the level of the weathering of the ship itself.
-
Thanks captgino, George, Sjors and Elijah. I'm glad you like the black gratings too!!!
- 786 replies
-
- 3
-
-
- Royal Louis
- Finished
- (and 1 more)
-
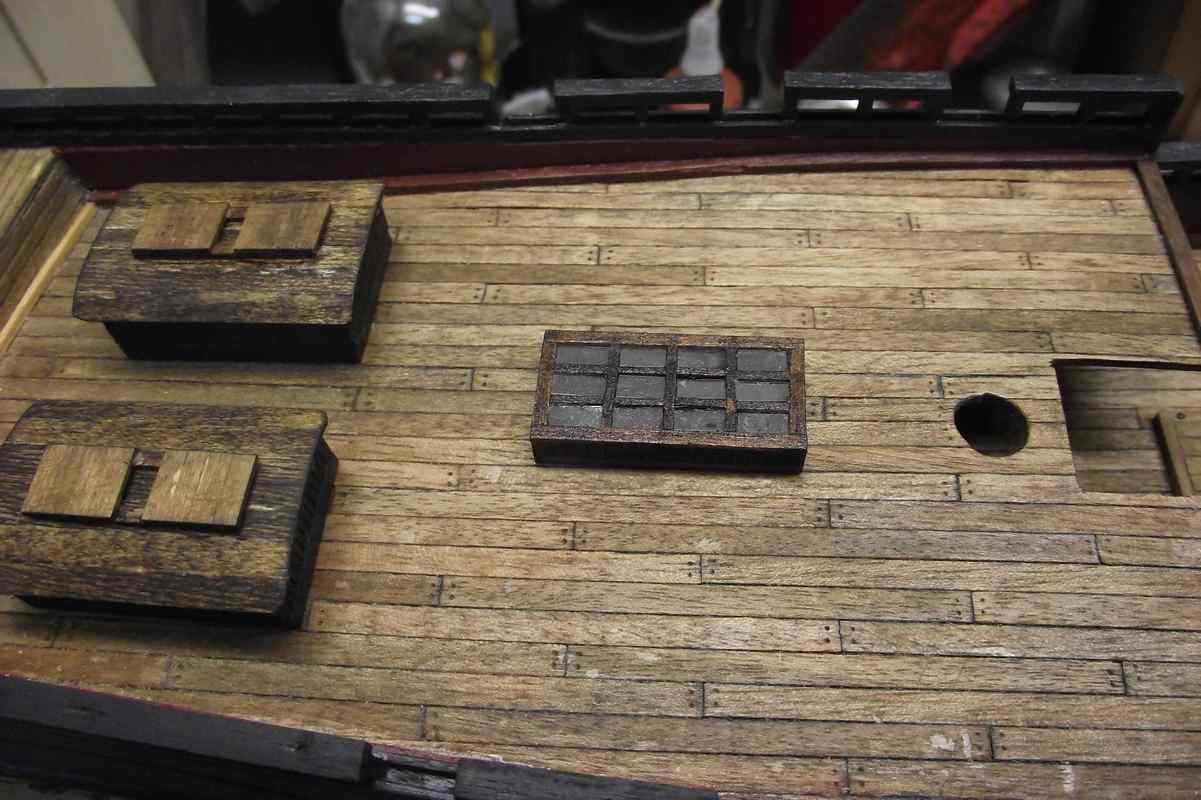
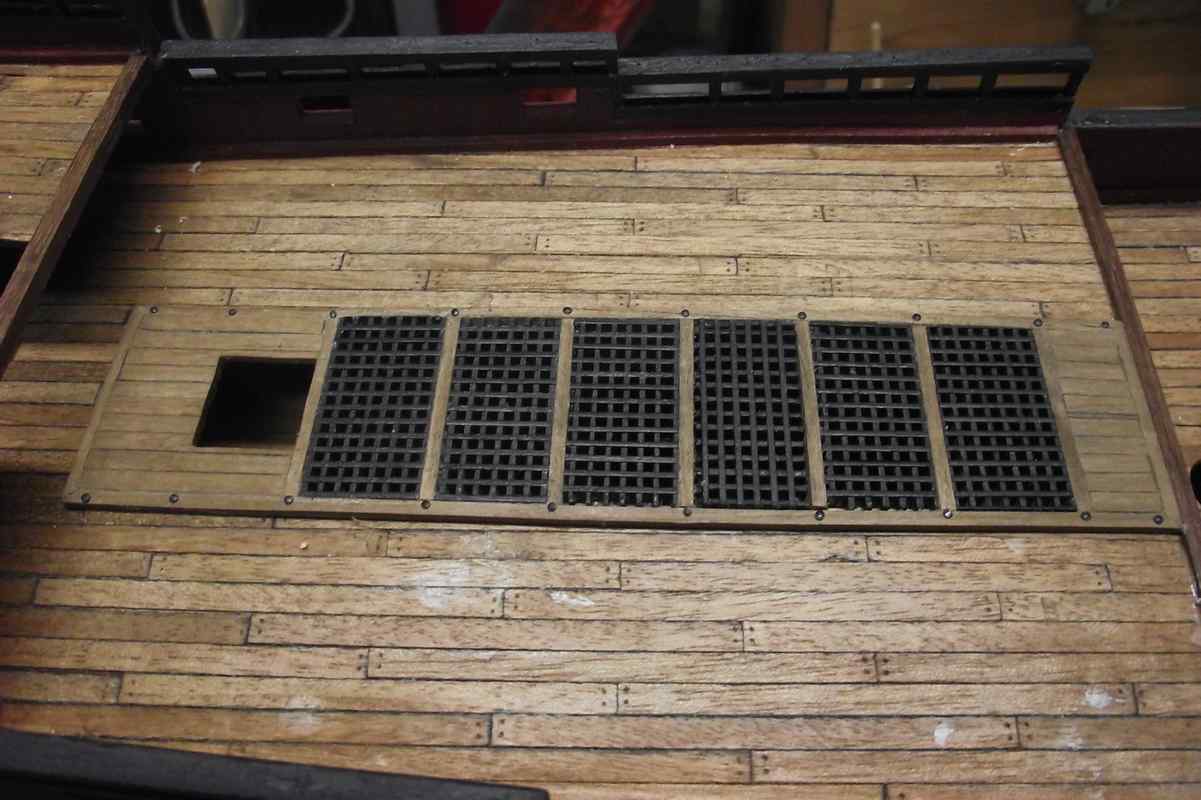
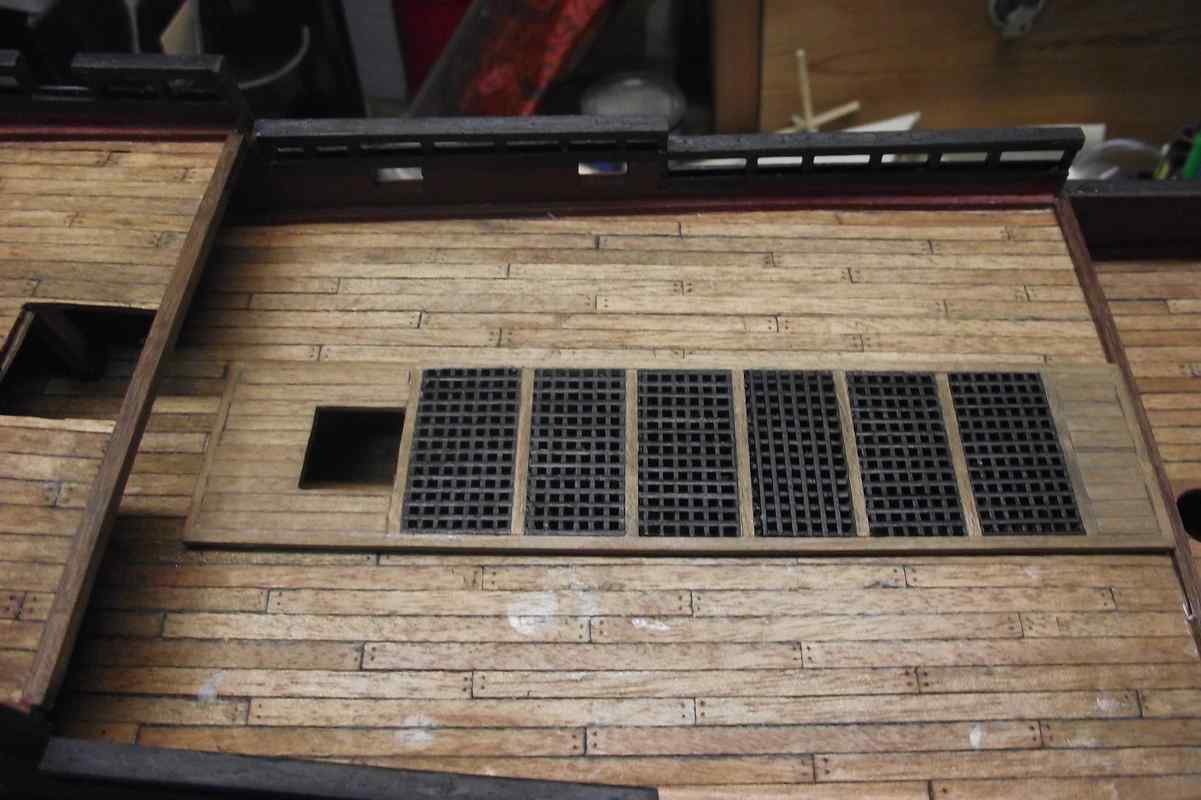
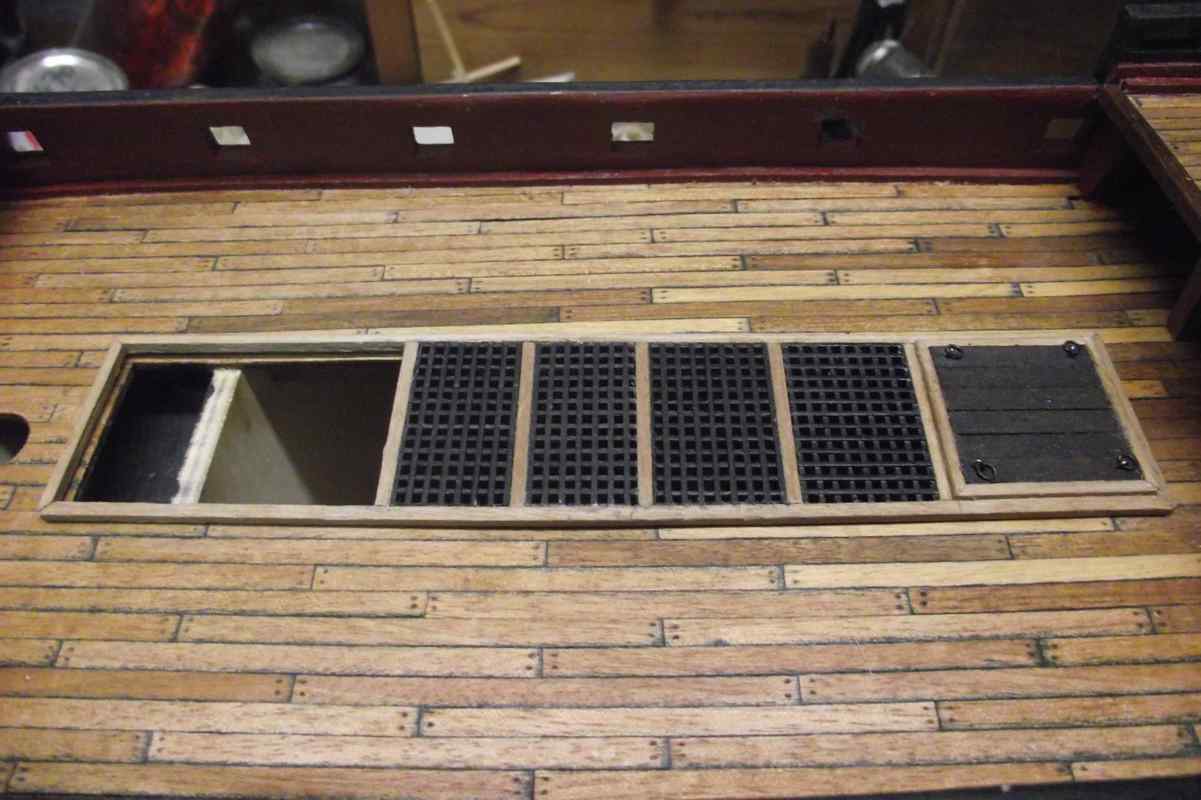
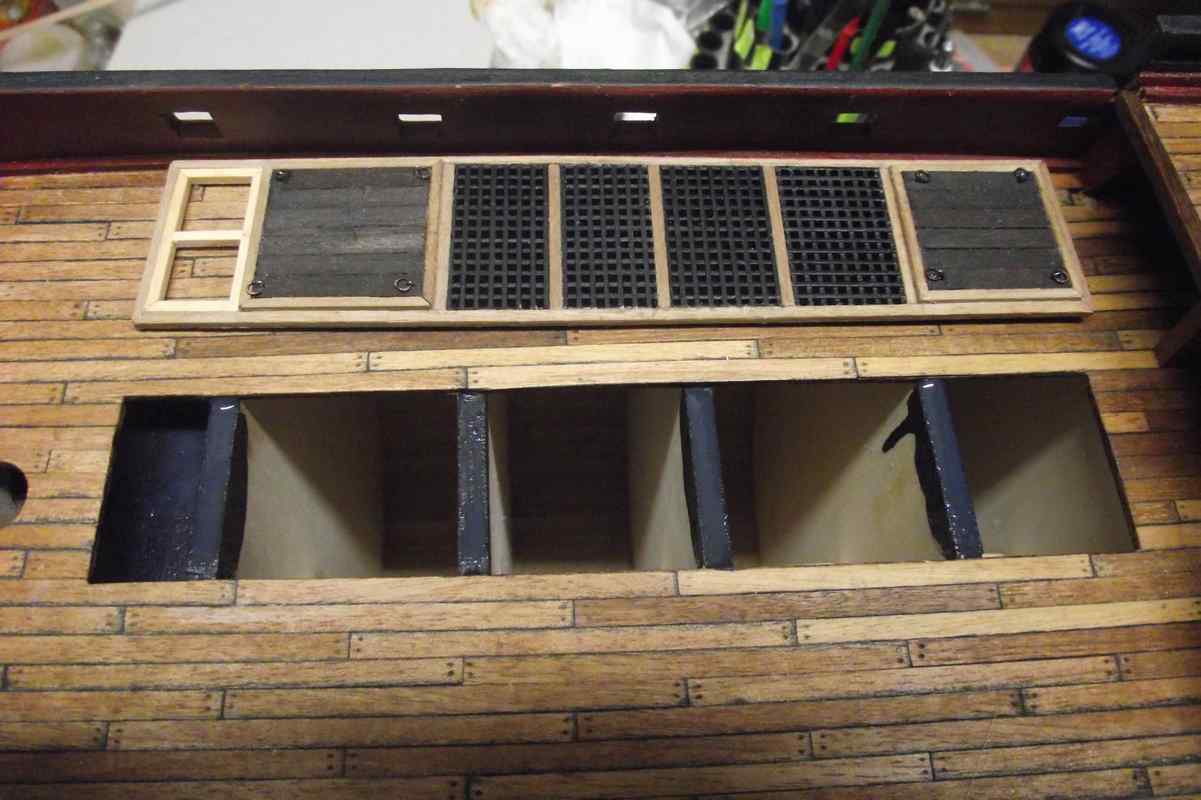
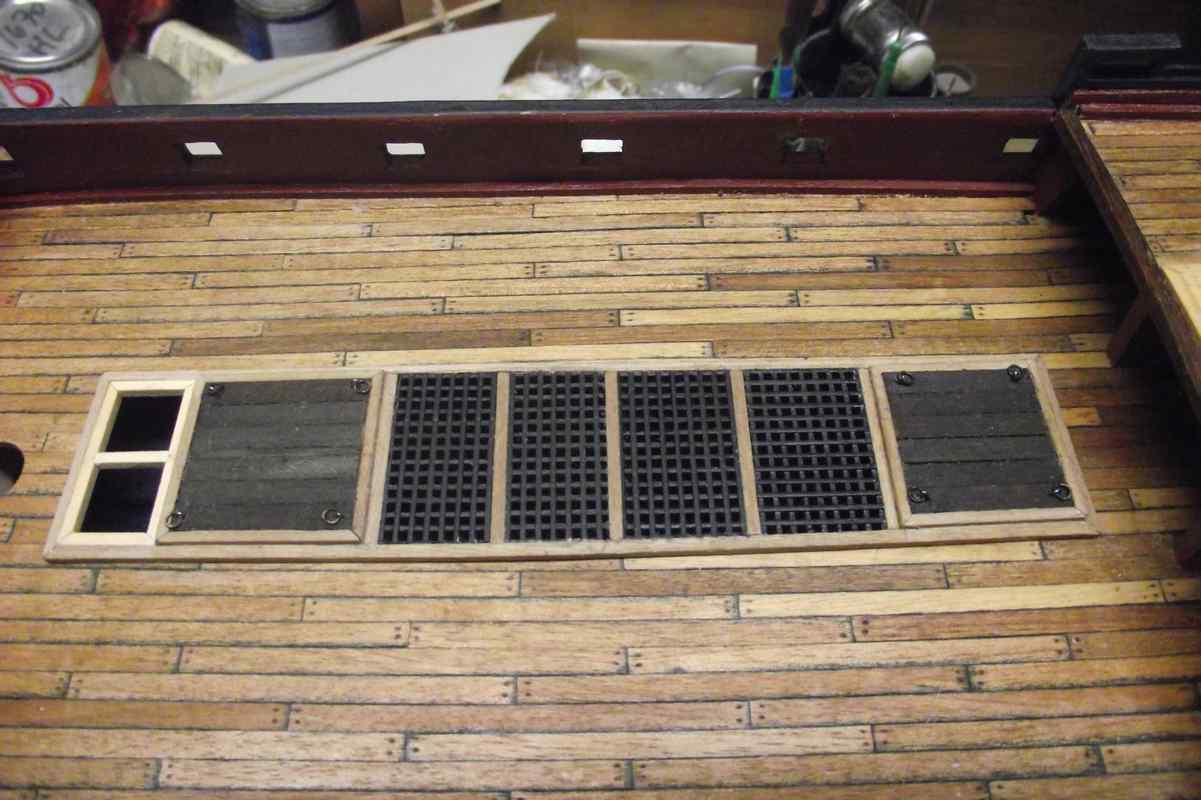
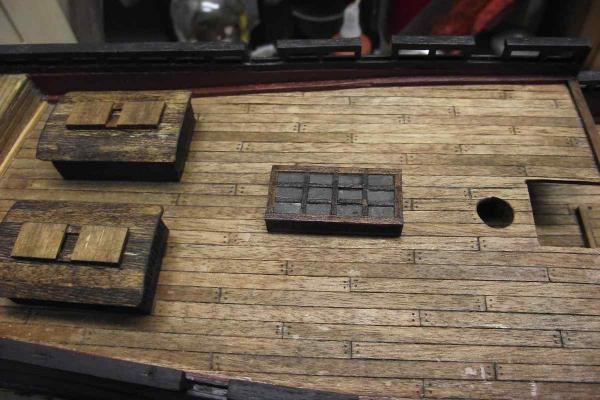
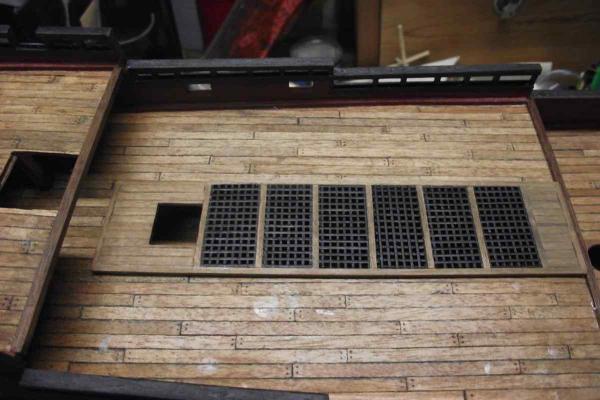
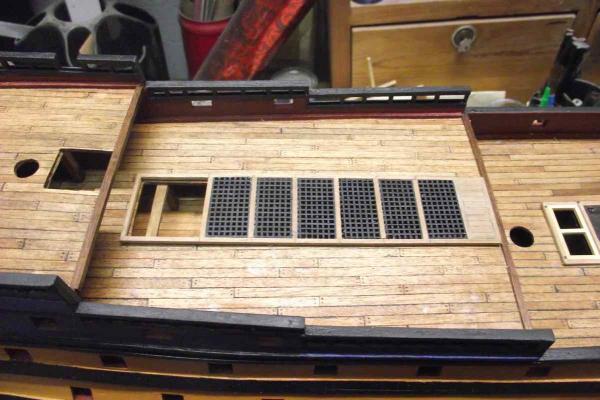
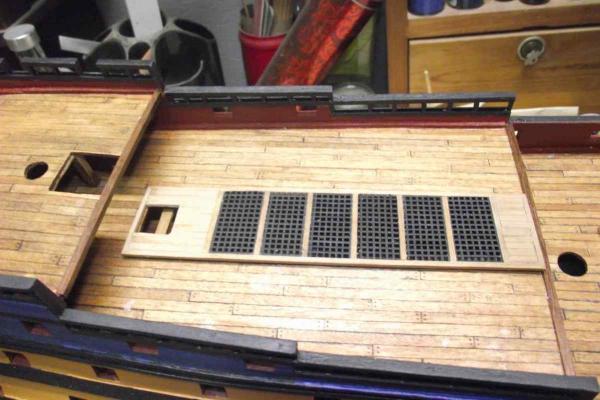
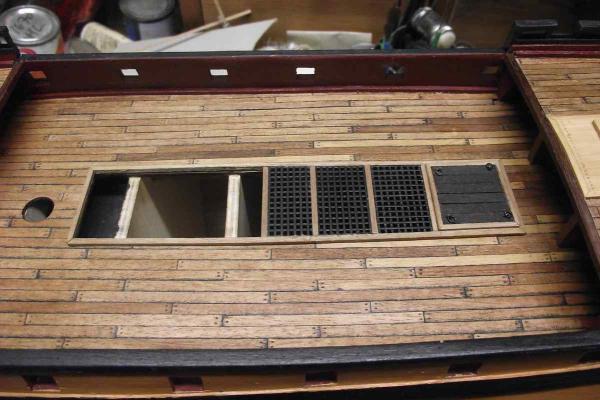
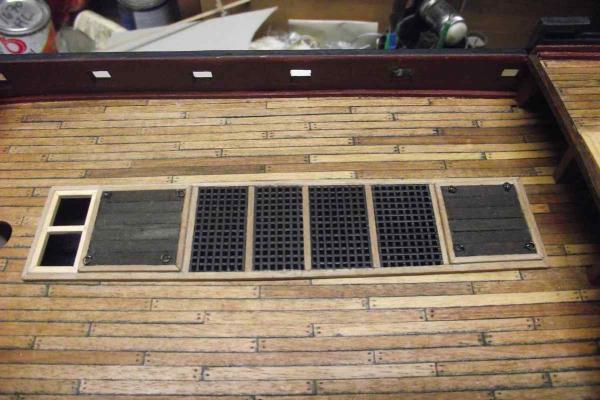
Update April 12 2016. BTW April 10 2014 was the day I started this build log, and April 11 actual work on my ship began. So today is exactly 2 years and one day that I started this ship. Central hatchway (whatever that means ) is completed except for a couple of ladders that go down at the stern side (left in the photos) opening. I don't like the kit supplied ladders so I will substitute them later. I decided to paint the gratings flat black. This may or may not be authentic or historically correct, but I really like how they look. BTW these gratings had to endure a heavy treatment of sawing and sanding to make them fit. So, the gluing technique I described before, really works. I painted the top of these bulkheads black to avoid them showing through the gratings. Hatchway dry fitted in place to check for correct fitting. All good! Thanks for watching, friends!!!


- 786 replies
-
- 13
-
-
- Royal Louis
- Finished
- (and 1 more)
-
Viv!!! How nice to see you back, linda. Hope to see more of your build soon. Abrazos!!!
-
Definitely the dried glue will prevent the stain to penetrate the wood. If it's too important, you may try to stain first and glue later, although the process of staining may disturb the unglued assembling of the gratings, which is the core of the technique. I may paint my gratings flat black, so it wouldn't matter here. Thanks for your comment!
- 786 replies
-
- 3
-
-
- Royal Louis
- Finished
- (and 1 more)
-
Thank you, my friend. Glad to know you found something useful!
- 786 replies
-
- 2
-
-
- Royal Louis
- Finished
- (and 1 more)
-
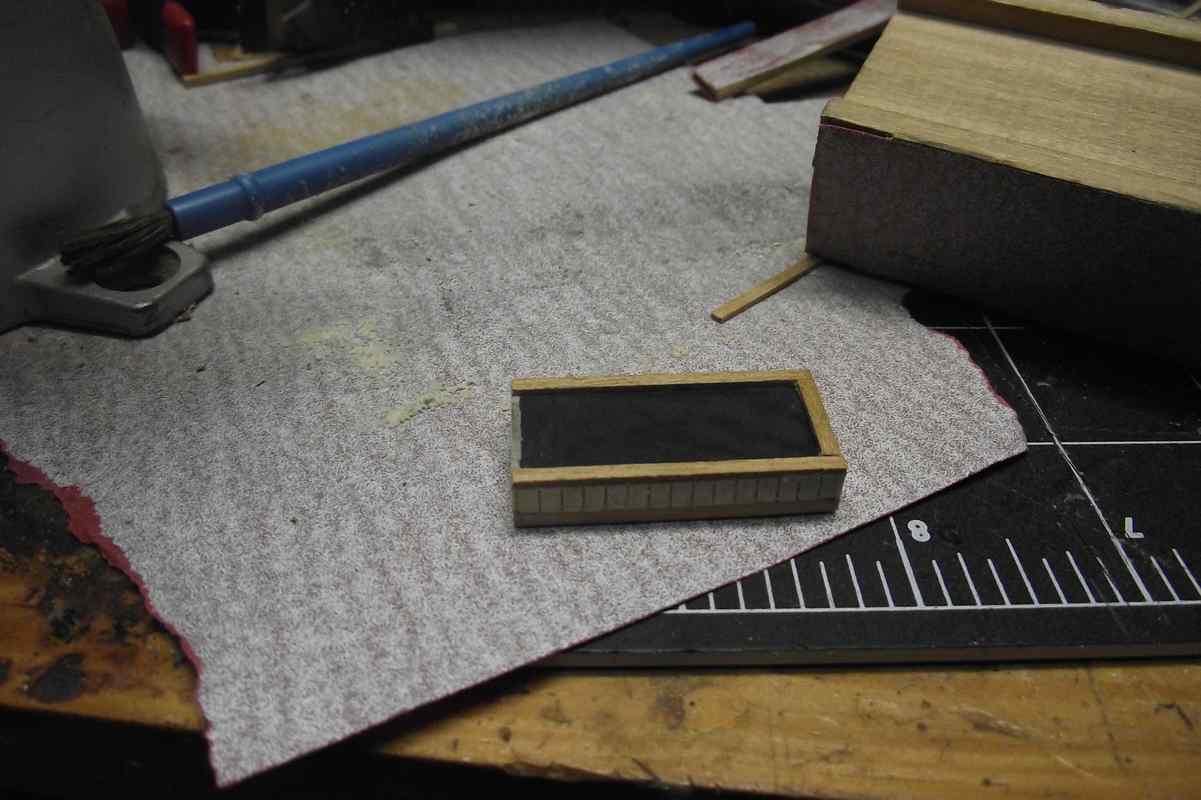
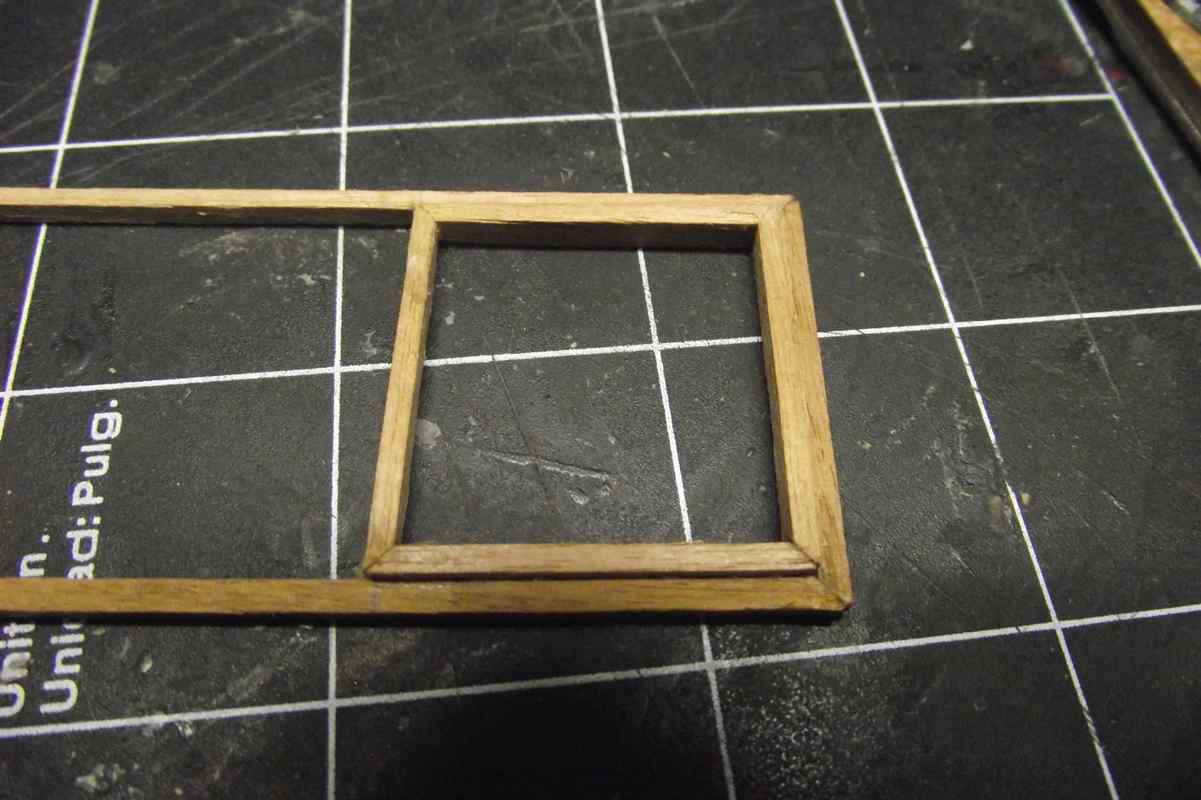
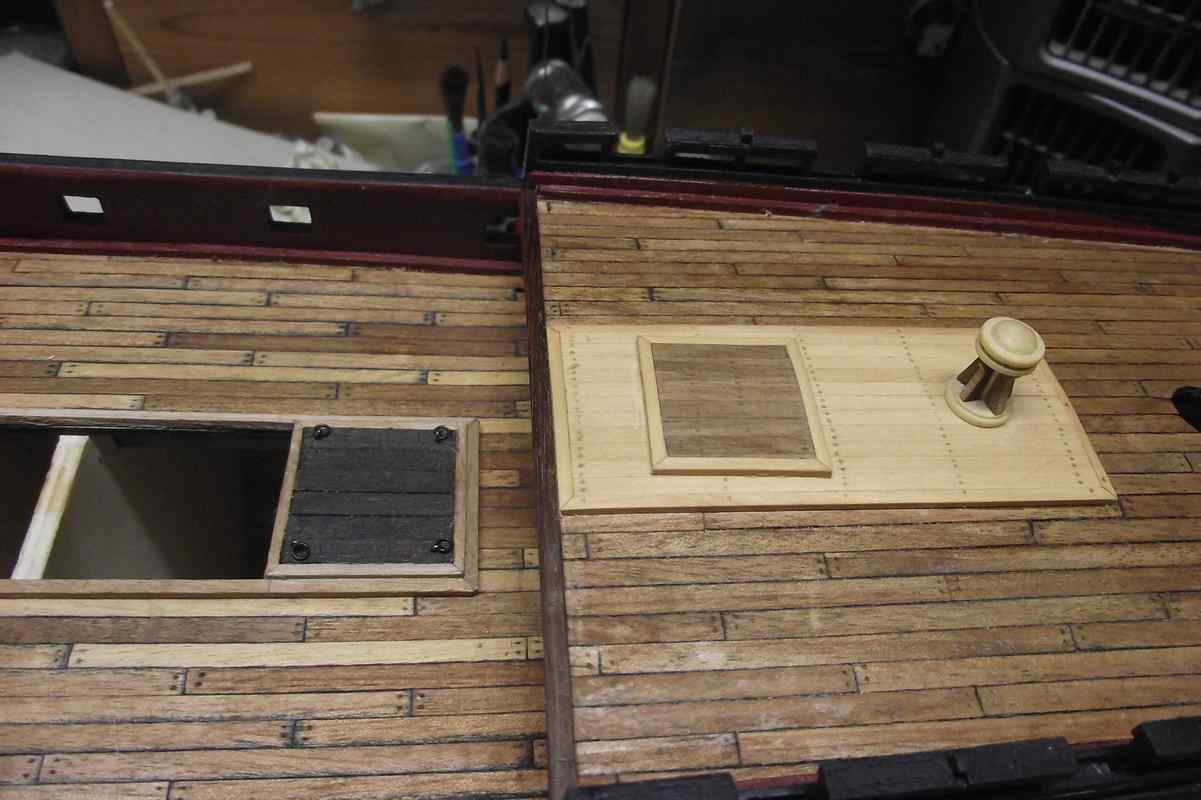
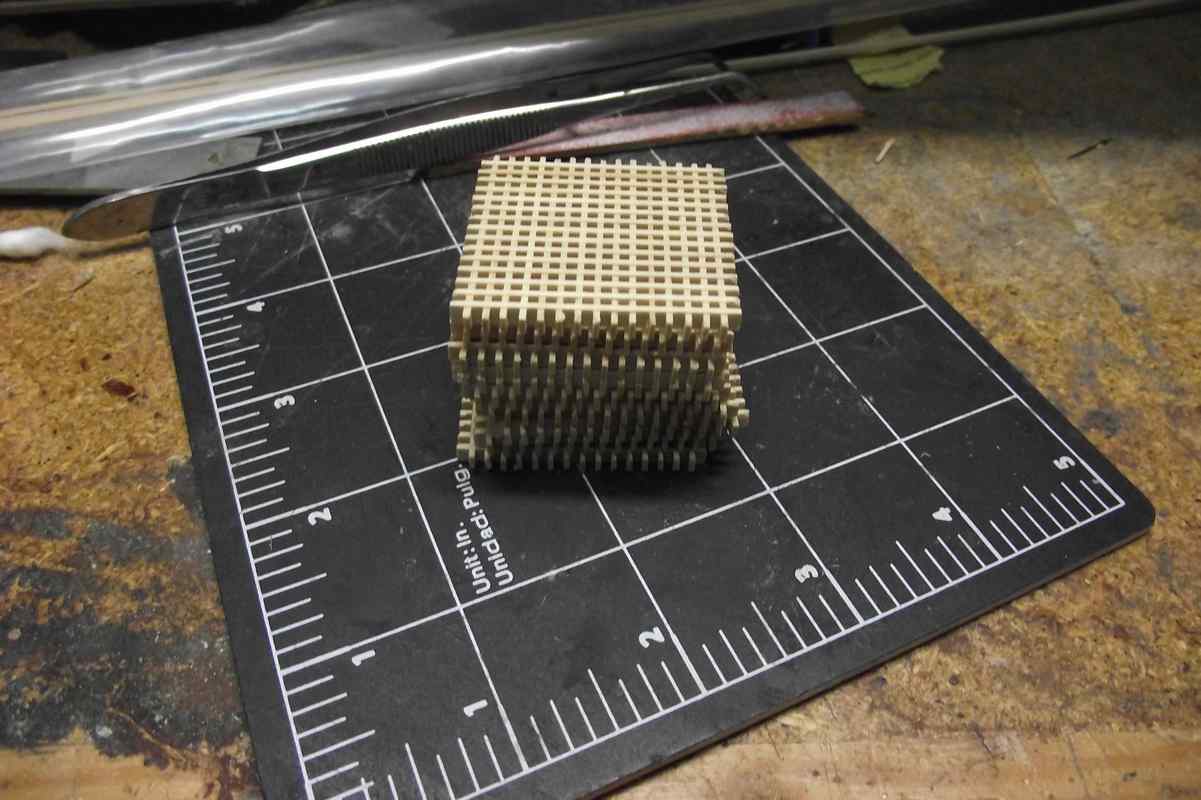
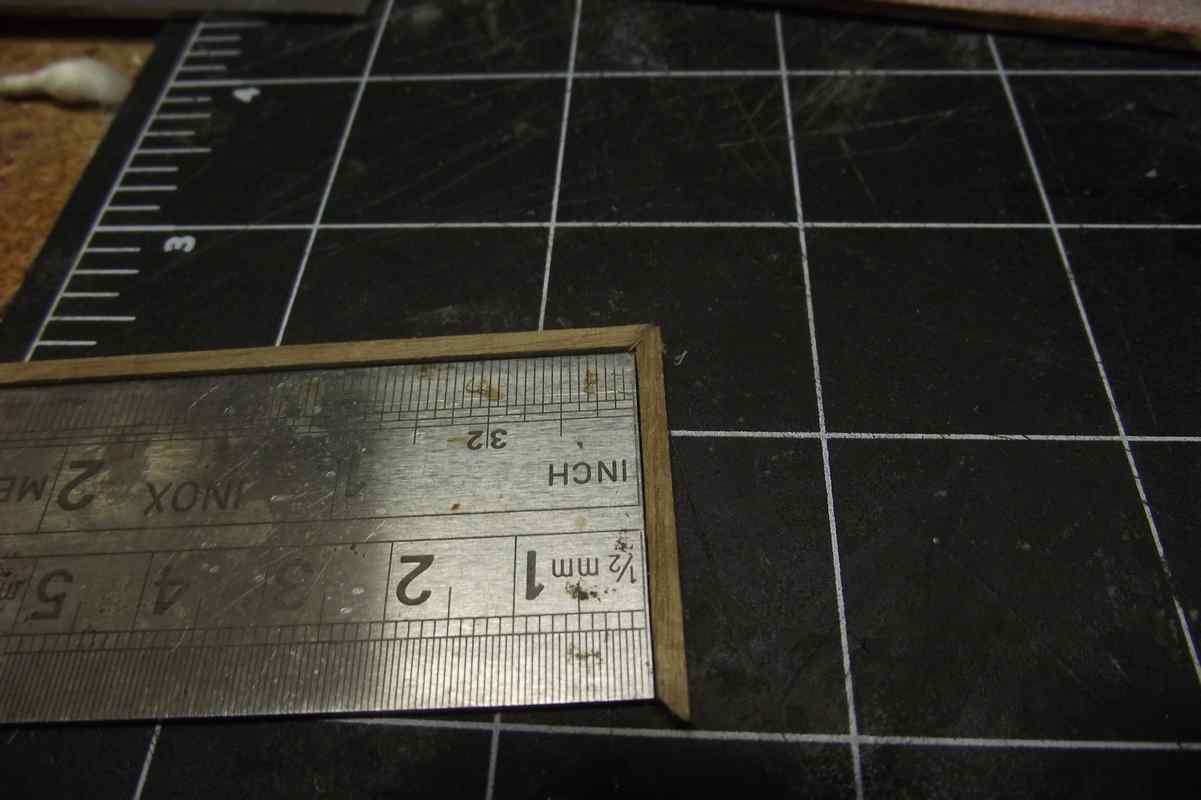
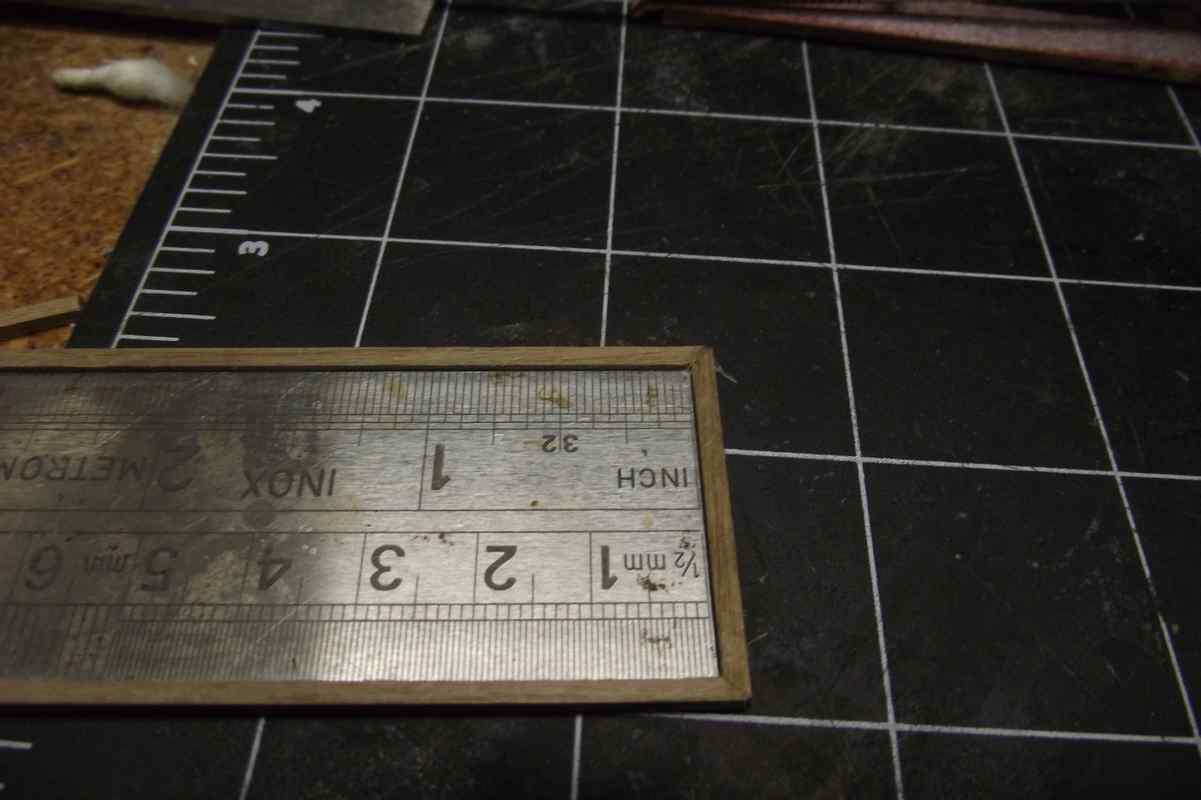
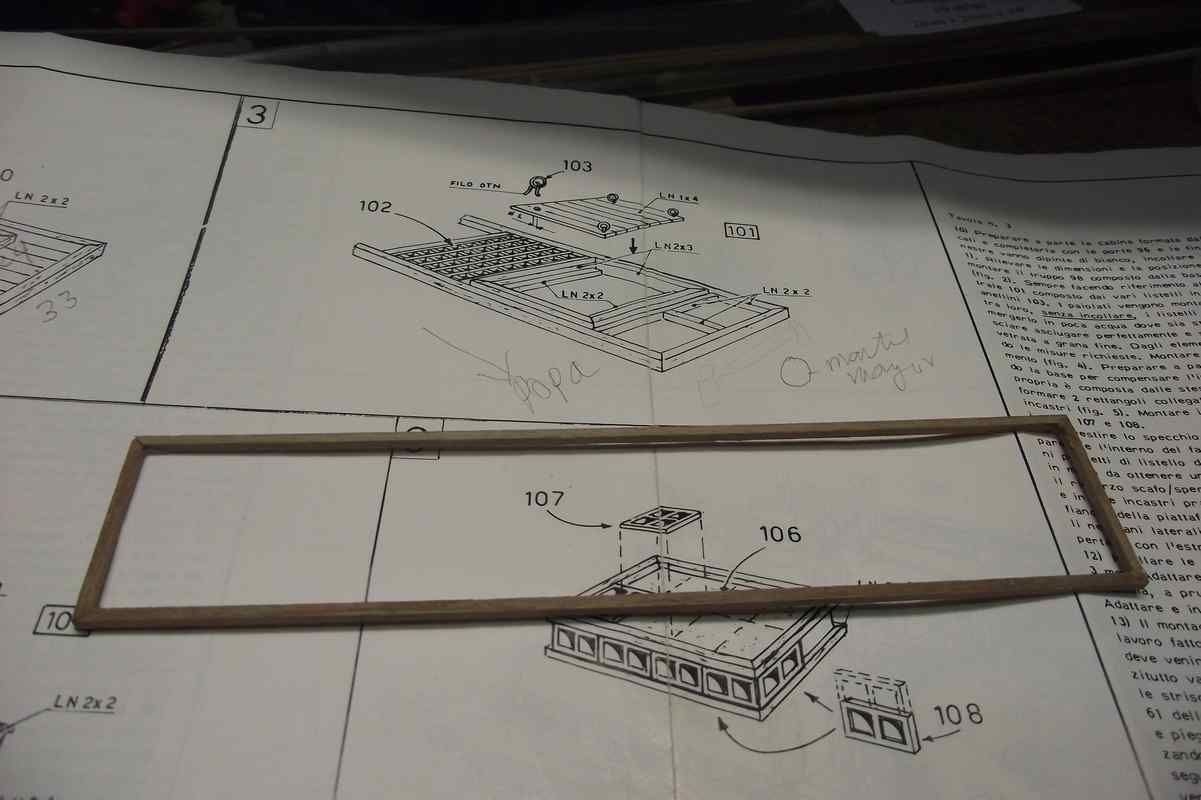
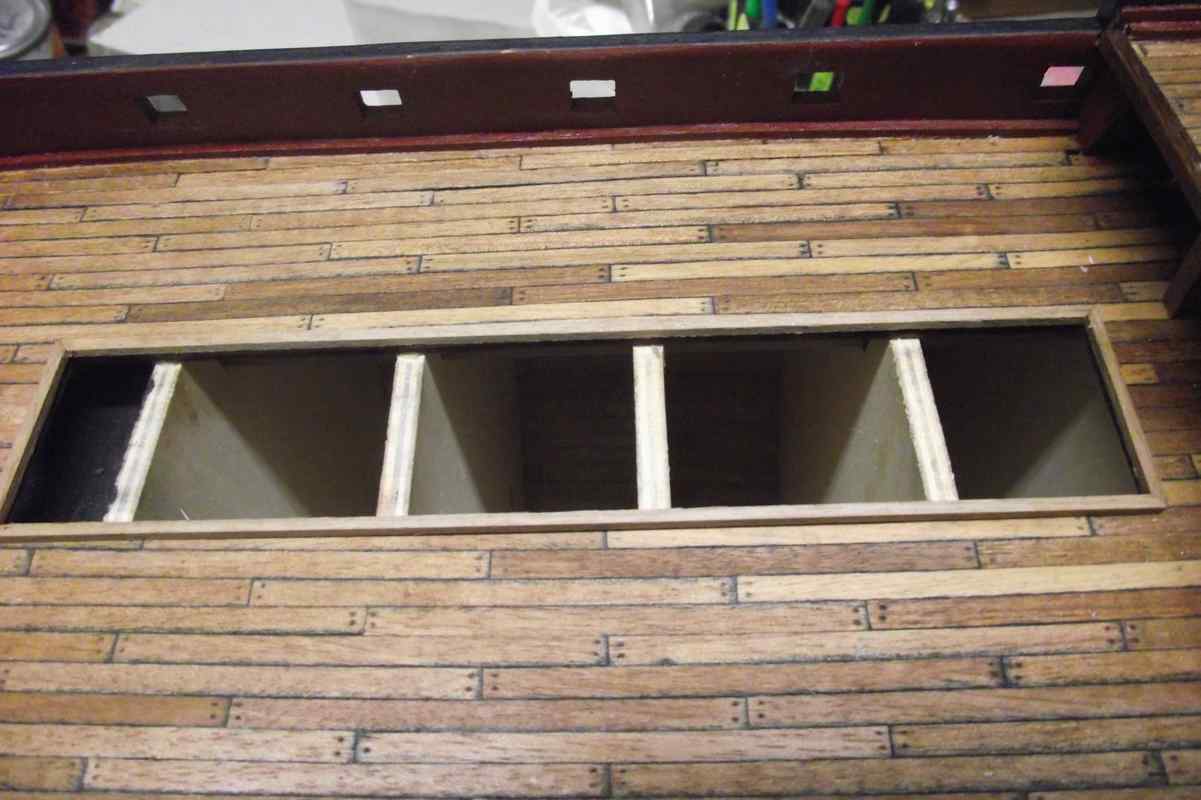
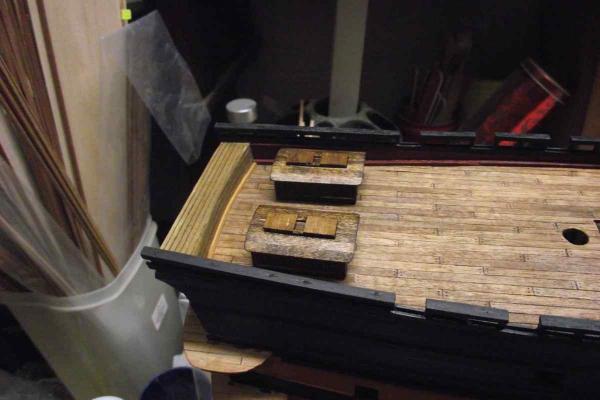
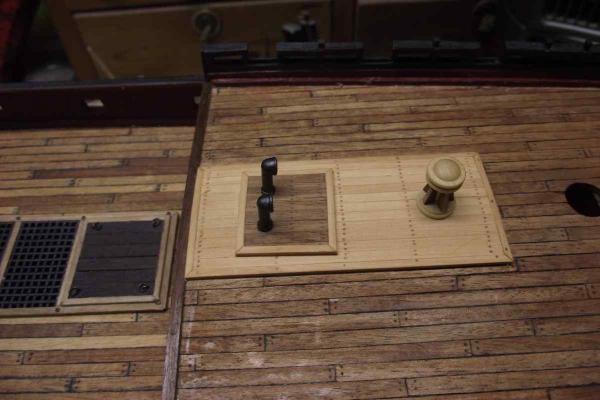
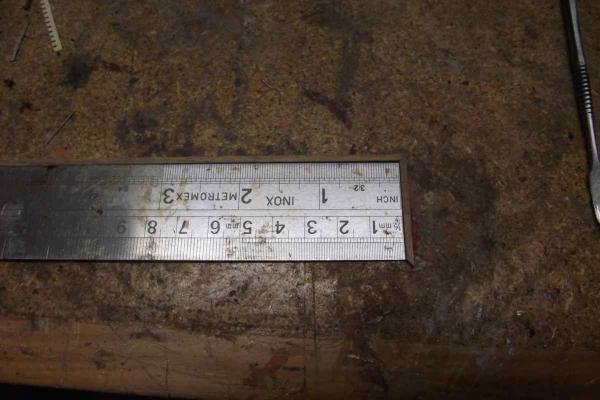
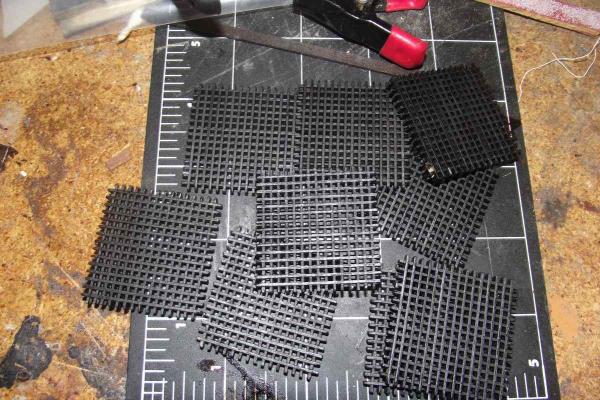
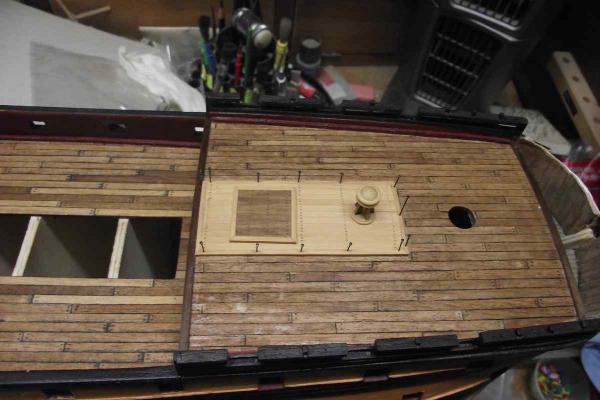
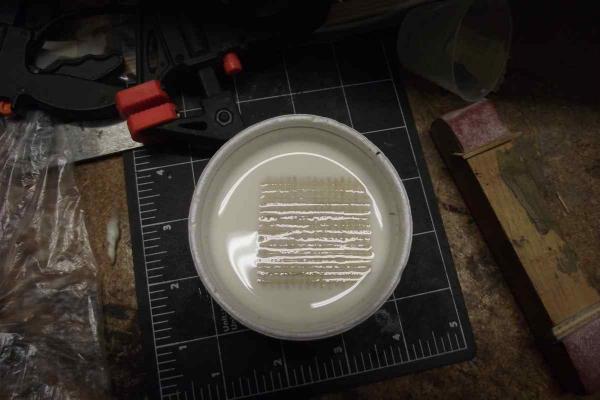
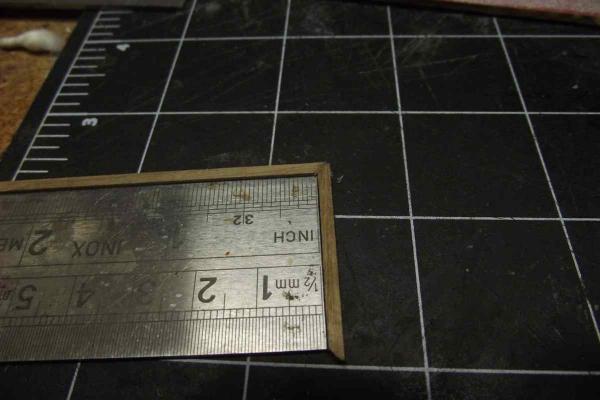
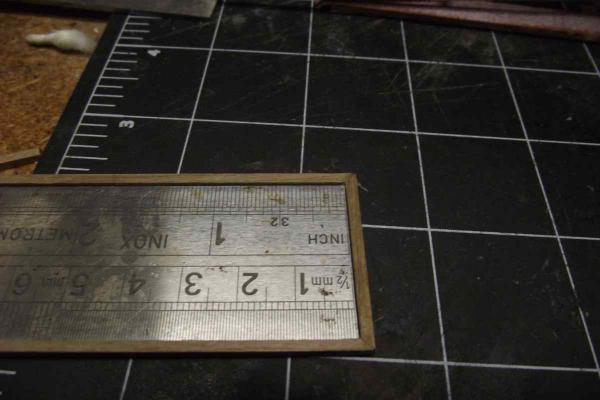
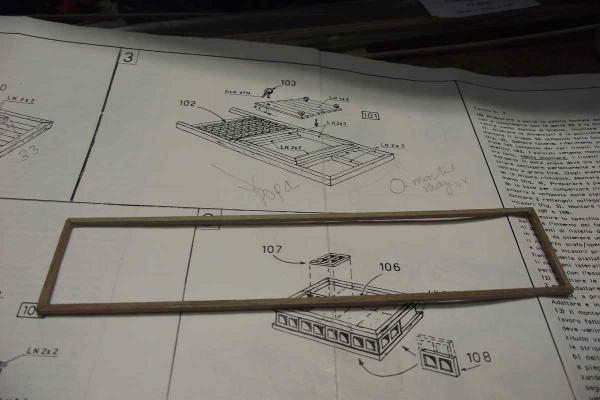
Another quick update: The platform I was working on almost finished. I say almost because it is missing the two chimneys that go on the darker square. The ones in the kit are just awful, so I ordered some replacements. Temporary nails are shown to hold the part while the glue dries. Work on the gratings continues A VERY important and necessary step when making these gratings: a good soak in strong diluted white or (better) wood glue. These parts will be cut to fit in their place. If they are not perfectly glued at every joint, they will fall apart. A good batch of gratings already made. These come from Model Shipways and are perfectly cut. Highly recommended. My experience tells me that the notches in kit supplied gratings are poorly cut, and this makes assembling them a nightmare. On with this next step. This is a 170 x 35 mm frame with a lot of work in the insides. Work on the frame starts. (Look ma', not afraid of 45º angles anymore. ) It was just a happy and fortunate coincidence that the width of my ruler was exactly the same as the width of the inside frame. Frame ready and just dry placed on its spot to check for fitting. Perfect fit. Thanks for watching guys!


- 786 replies
-
- 12
-
-
- Royal Louis
- Finished
- (and 1 more)