HOLIDAY DONATION DRIVE - SUPPORT MSW - DO YOUR PART TO KEEP THIS GREAT FORUM GOING! (Only 20 donations so far - C'mon guys!)
×


Ulises Victoria
-
Posts
1,790 -
Joined
-
Last visited
Content Type
Profiles
Forums
Gallery
Events
Everything posted by Ulises Victoria
-
 Woot! I'm definitely pulling a chair to the front row here! SR has been in my wish list for oh so long time!!! Thanks for sharing EJ
 -
Thank you Arthur! I agree with you about the blocks. They often are too large and even if you manage to get them the appropriate size, they would be impossible to handle.
- 786 replies
-
- 1
-

-
- Royal Louis
- Finished
- (and 1 more)
-
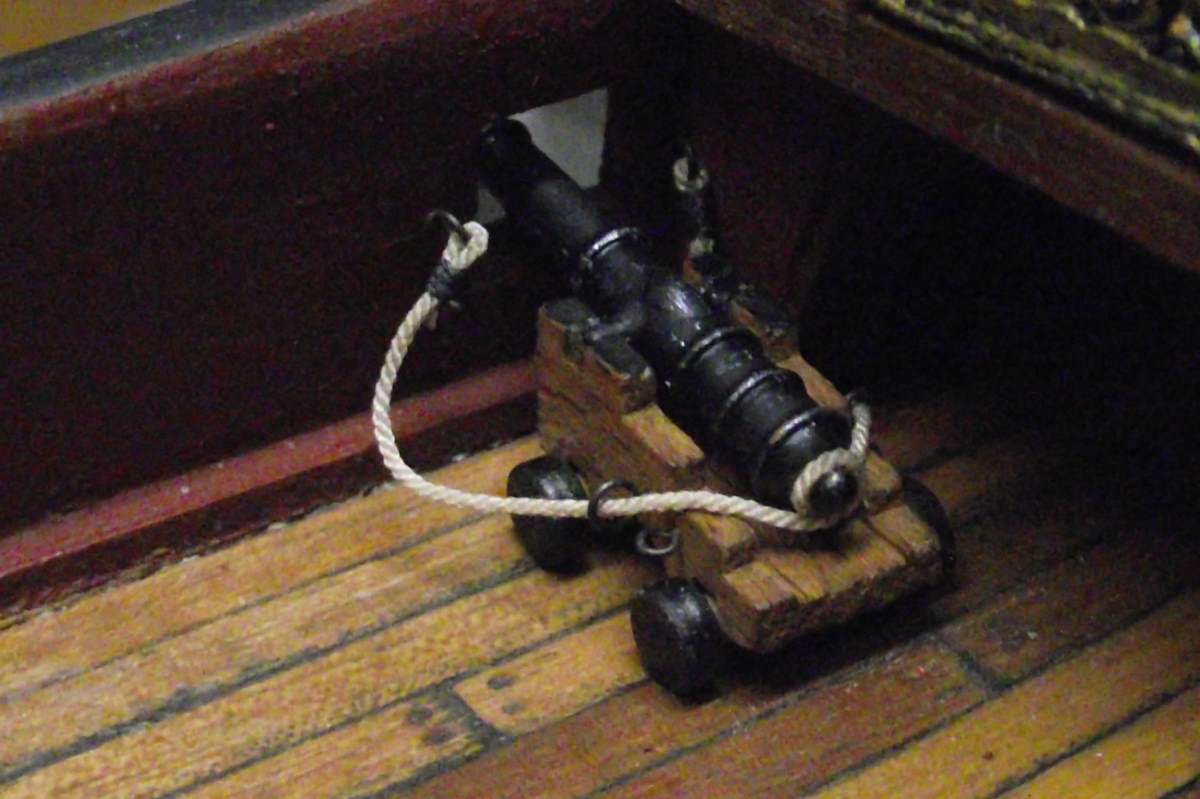
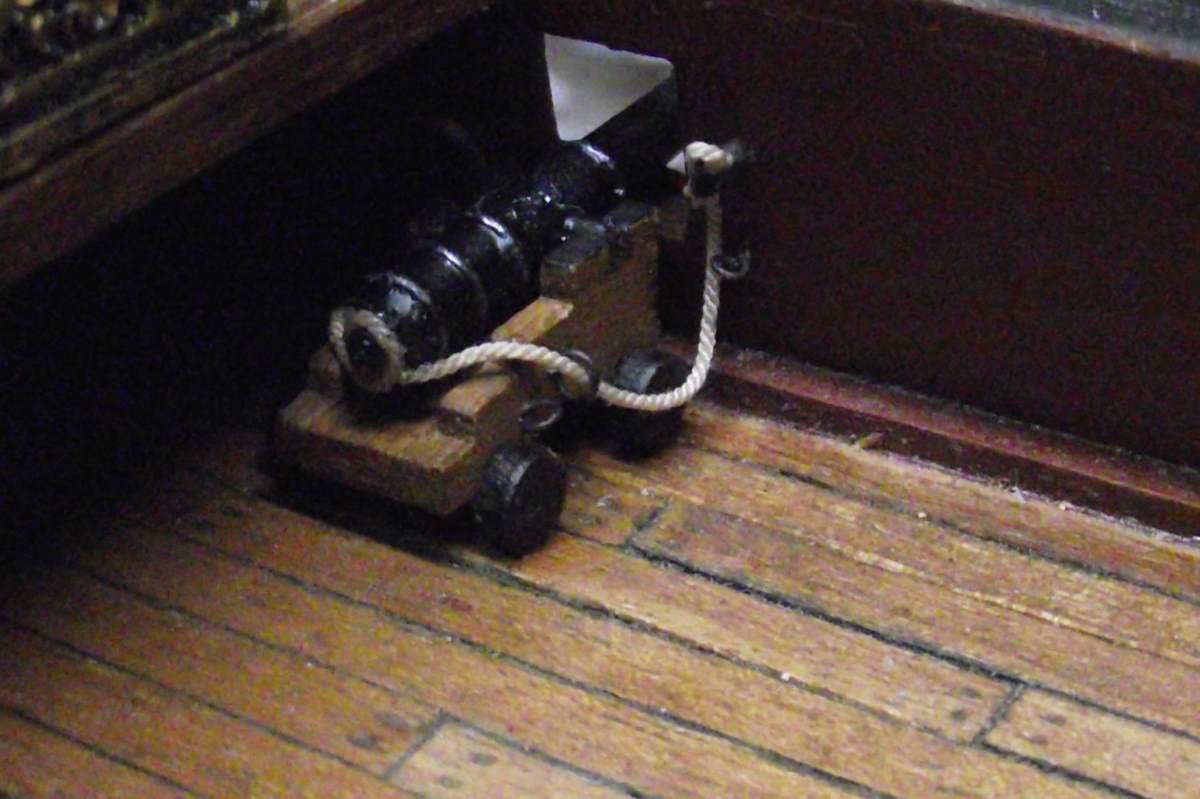
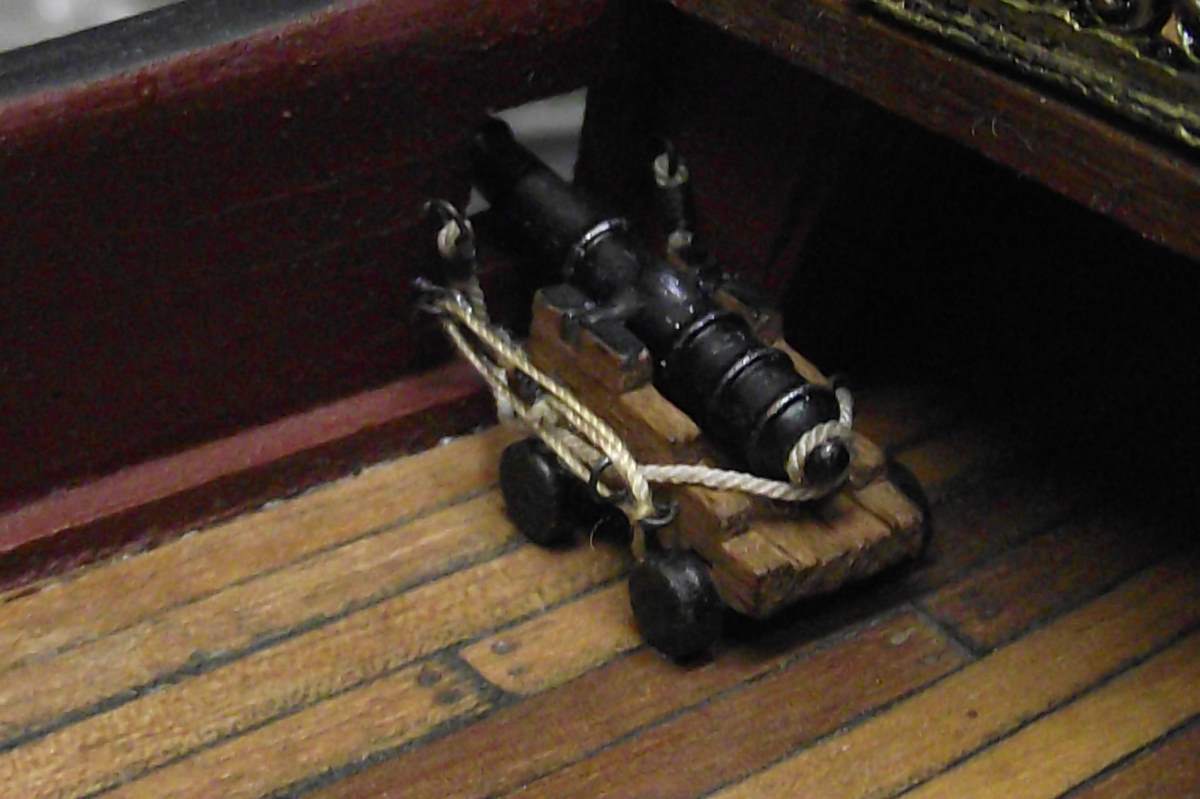
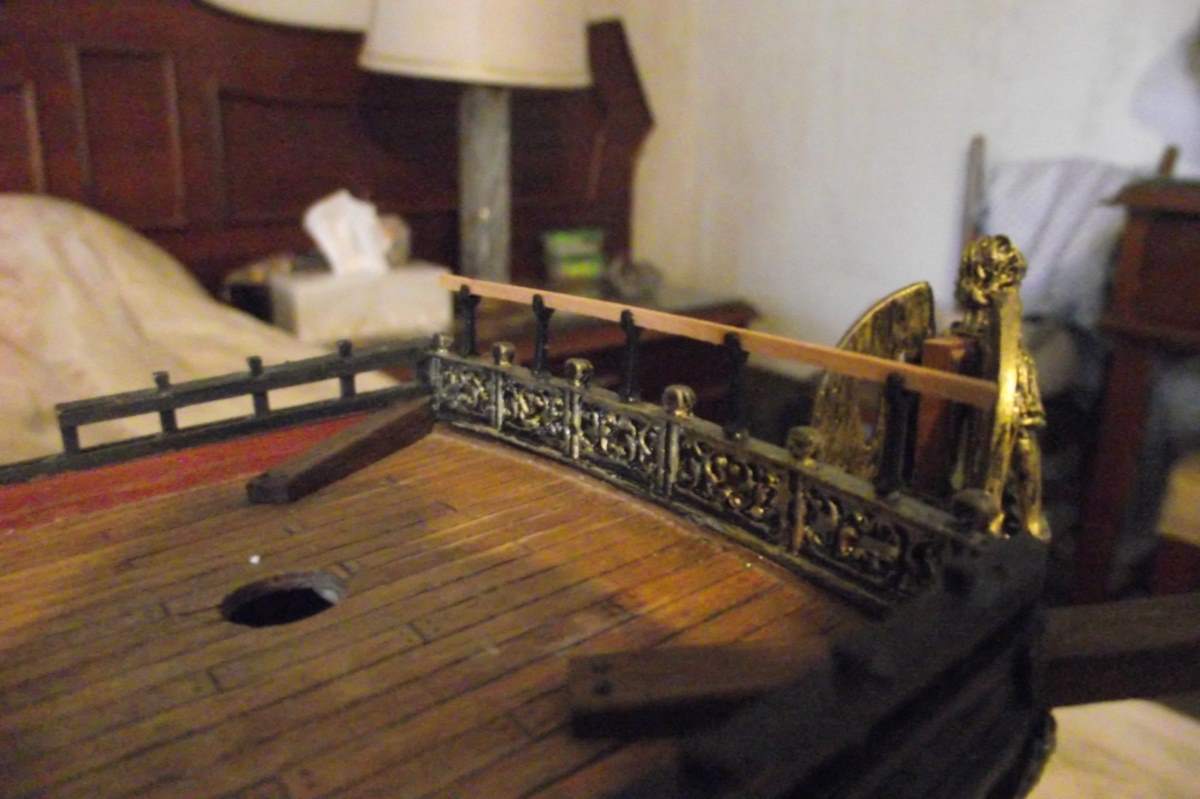
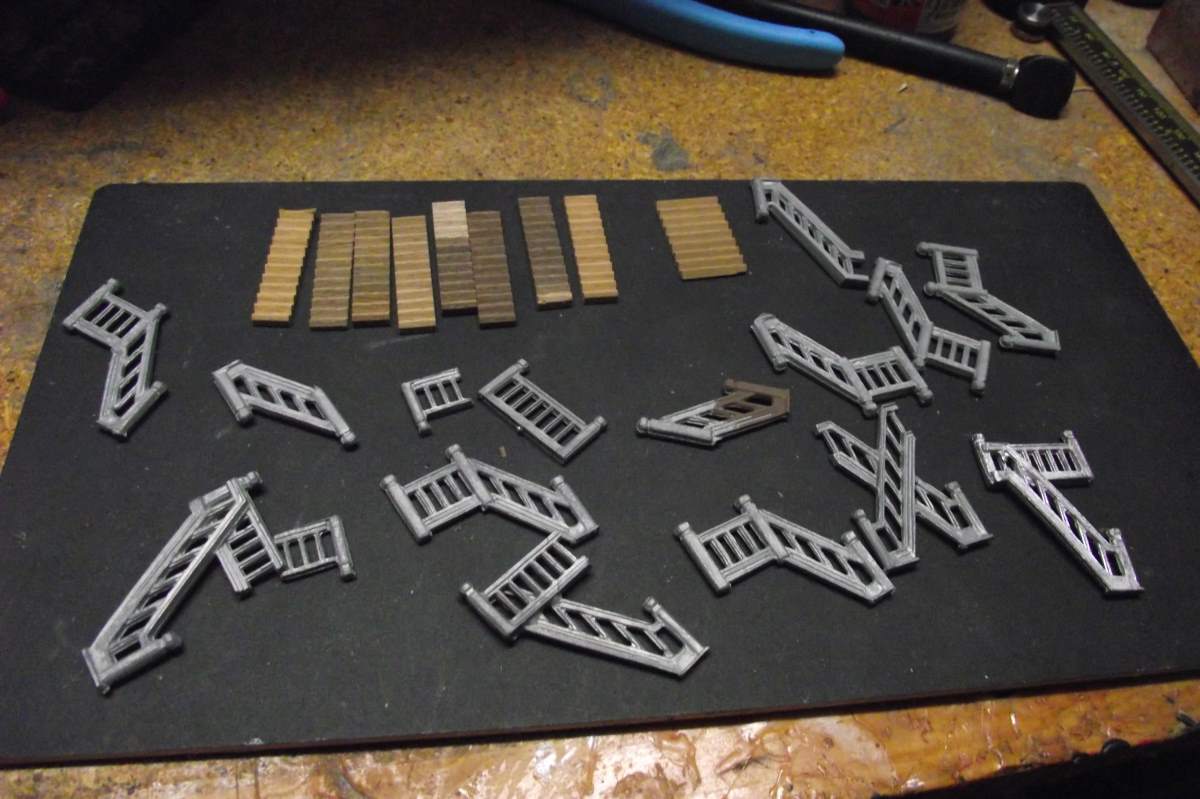
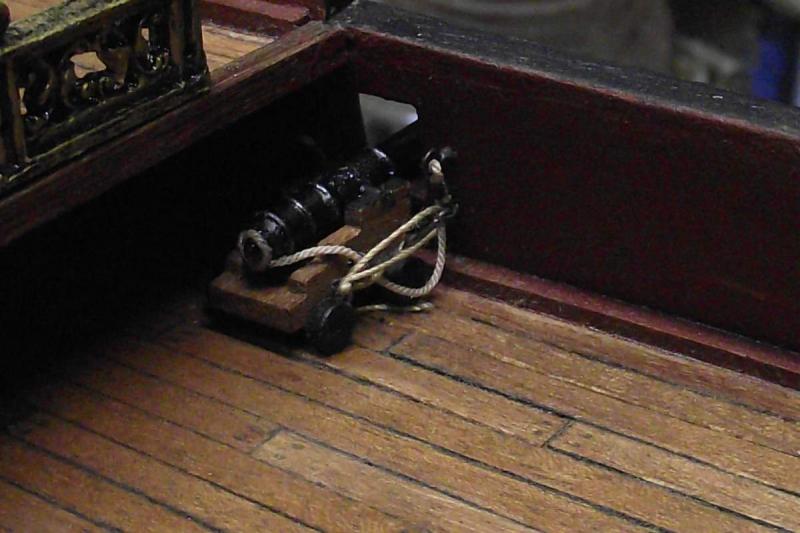
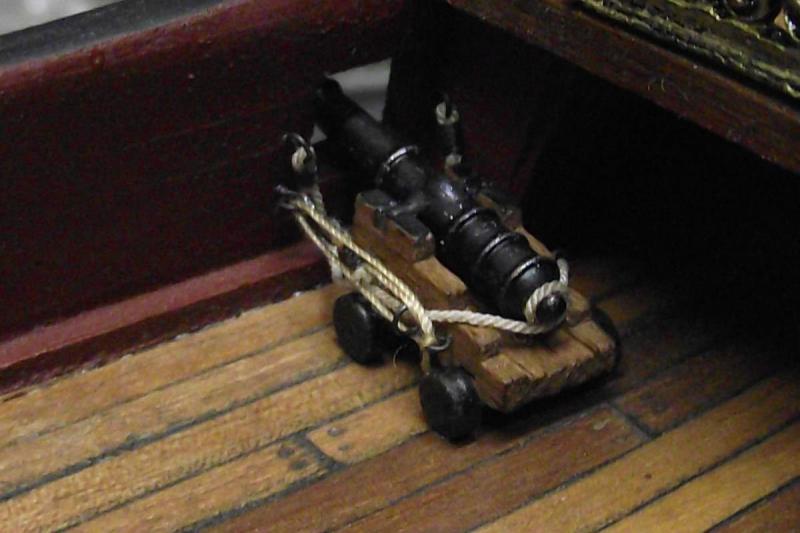
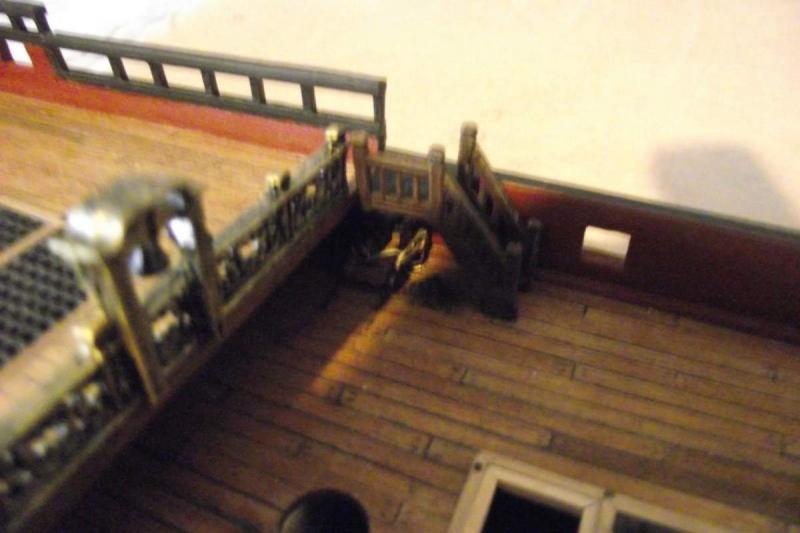
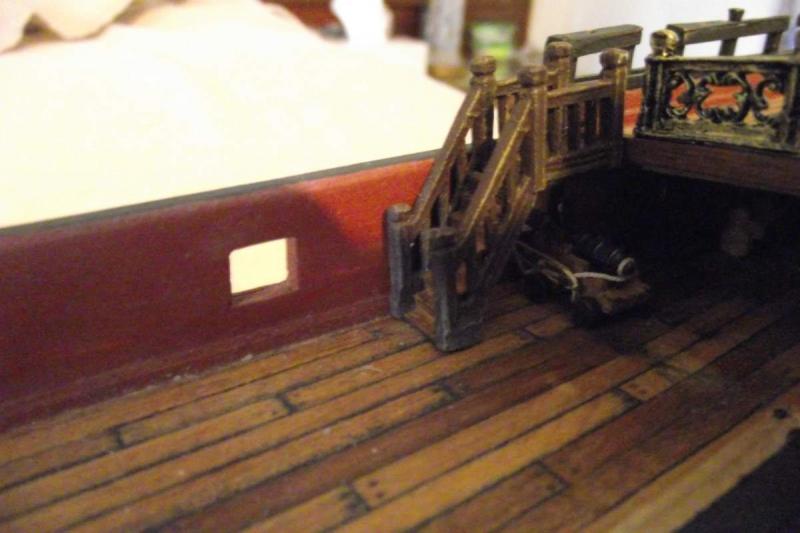
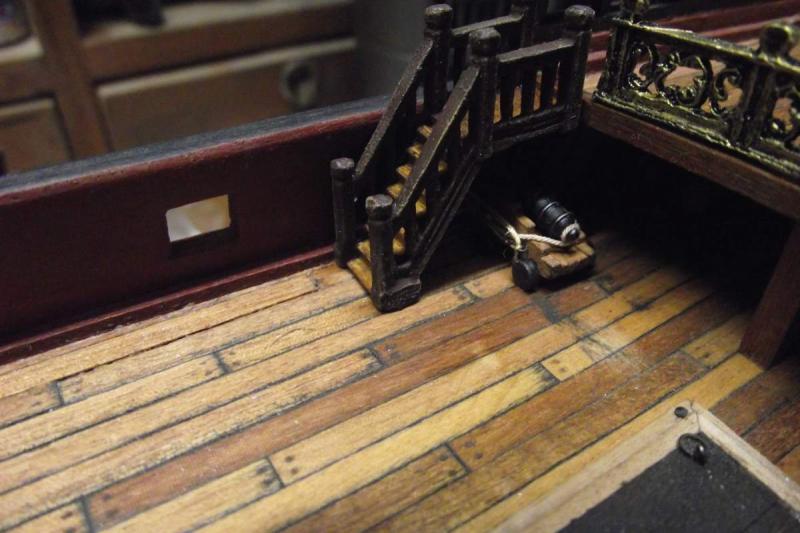
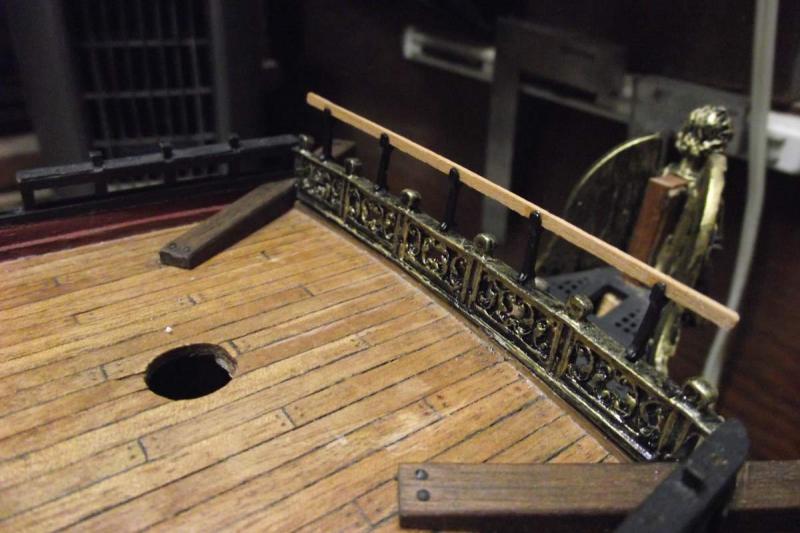
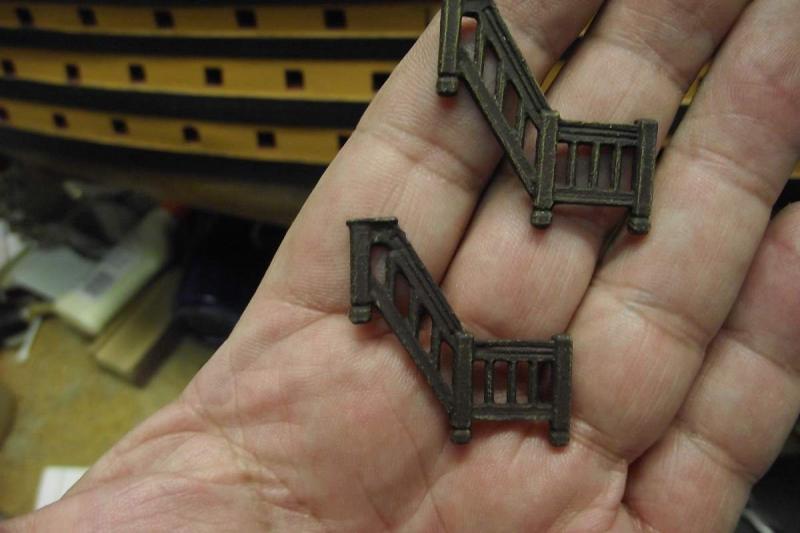
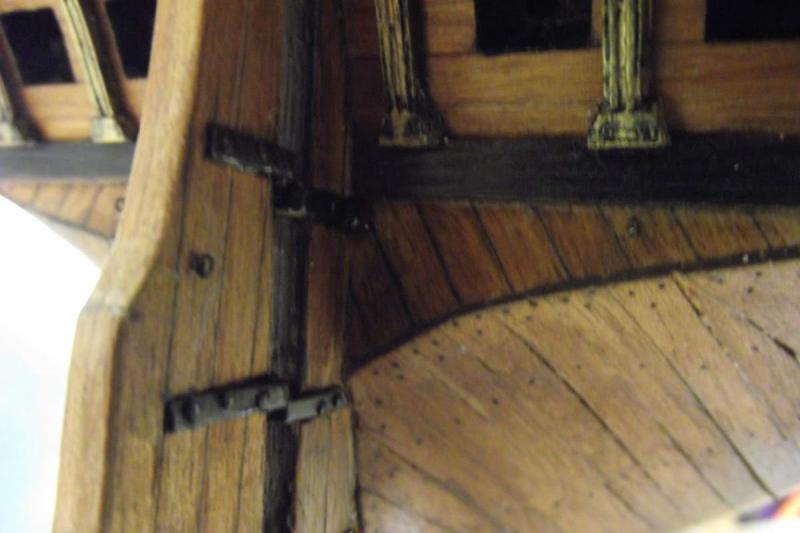
Christmas update! Hi all and welcome. I finished building and placing the several stairs that go from deck to deck. In those in the central deck, I (fortunately) realized that once placed, there was no chance to place and rig the cannons that go underneath, as you will see. So I had to build, place and rig four cannons that go under 4 stairs. Front handrail Above mentioned four stairs with cannons underneath. I wish a Merry Christmas and Happy New Year 2017 to all of you, friends!


- 786 replies
-
- 9
-
-
- Royal Louis
- Finished
- (and 1 more)
-
Cyanoacrylate (CA) Glue for Rigging
Ulises Victoria replied to EdT's topic in Masting, rigging and sails
Hello Ed. This is MY take on the matter. I NEVER use CA in my rigging, EXCEPT to stiffen the end of a rope and cut it in diagonal to make a kind of needle so I can insert it through a tight hole. Having said that, CA runs through the ropes making them take angles or straight lines where you don't want them, leaves an ugly shiny spot, makes the lines brittle, and it will be a mess when (not IF) you get your fingers glued together. I have used FLAT lacquer to secure my knots for years and I don't see myself changing. It doesn't have any of the drawbacks I mentioned before, plus is a lot cheaper. The next option is diluted white glue. As far as technical data, I don't have any... my opinion is based on experience only. Hope this helps make up your mind. Best regards Edit: I meant FLAT "Varnish" above. Sorry. -
Hello. I'm just responding to your post because the very same thing happened to me in the year 1982-83 when trying a Corel 1/98 Victory as my first ever attempt at wooden model ship building. It took me about 20 years to recover from the frustration! I am not familiar with the kits you mention so I can not advise your there. There will be hopefully some people more able to answer. Best of lucks.
-
Welcome Andrew. I can not but congratulate you and your dad for taking this endeavor. I hope you get bitten by the bug like most of us were at one time or another. I wish I had started at 9 like you. I'd be a mountain of knowledge these days. Best regards.
- 11 replies
-
- 1
-
-
- dinghy
- Midwest Products
- (and 1 more)
-
Johnnymike: It looks like your jig is intended to steam the whole plank. Most of the time only a small fraction of the plank needs to be bent, I use a tea kettler with excellent results. Just dip the wood through the spout.
-
Hello Johnny I have tied many many thousands of clove hitches to make ratlines and this "new" idea is going to be used when I reach that stage in my present build. Thank you!!!
-
Hello. I put them to spin in a drill at low speed and just hold a piece of sandpaper on the other end. HTH.
-
I would paint them flat black, and then a very very very light treatment with dry brush aluminum or silver. Key word here "VERY". If you want even more realism, a (again) very very very light dry brush treatment of brick red on the muzzle to simulate the stains left by the powder.
-
Hola Karl. Very clever your idea of the hydrant and the hoses. Good work!!!
-
Hola Karl. Acrylics. Its from a set of a Royal Louis Paint kit I bought from Model Expo some time ago. Saludos Oh, and thanks for your words!
- 786 replies
-
- 1
-
-
- Royal Louis
- Finished
- (and 1 more)
-
Hola Liberto. Saludos desde México. I have to say that you just set the bar so high, that many of us will never be able to equal your work. This is truly the work of a master. Mil felicidades, and keep posting photos. Saludos
-
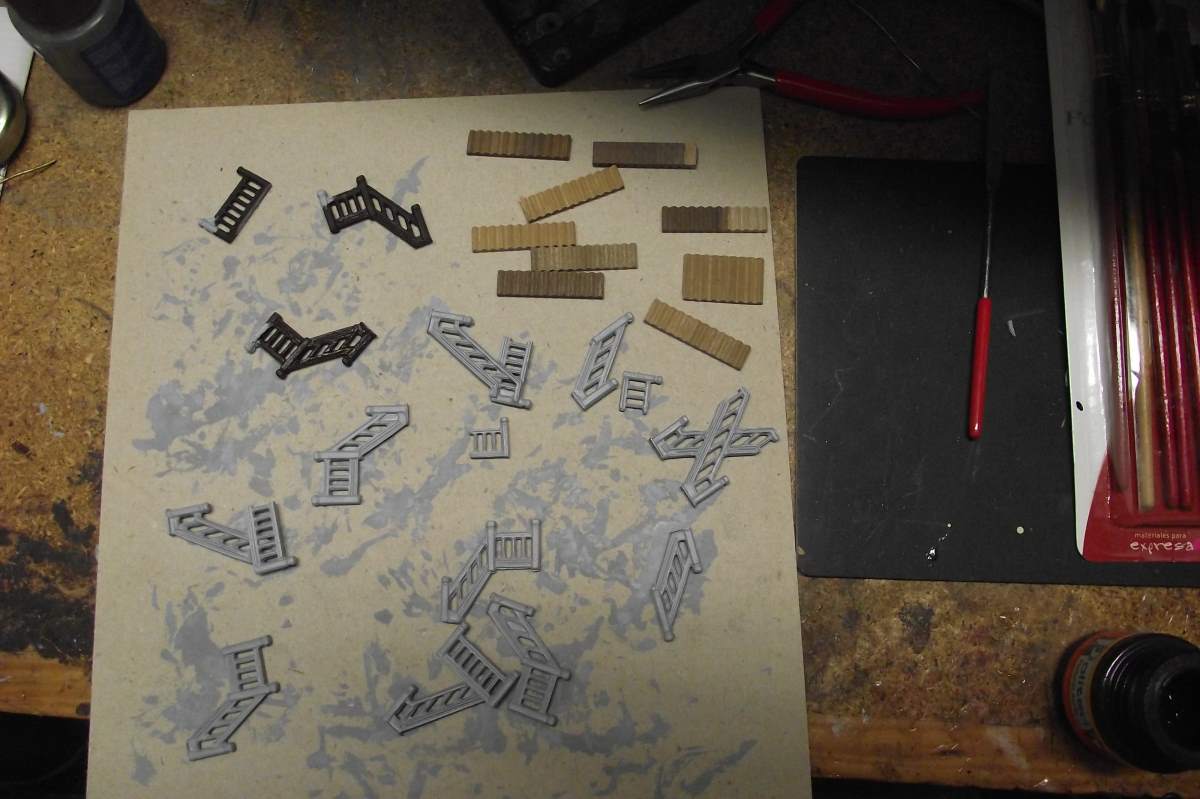
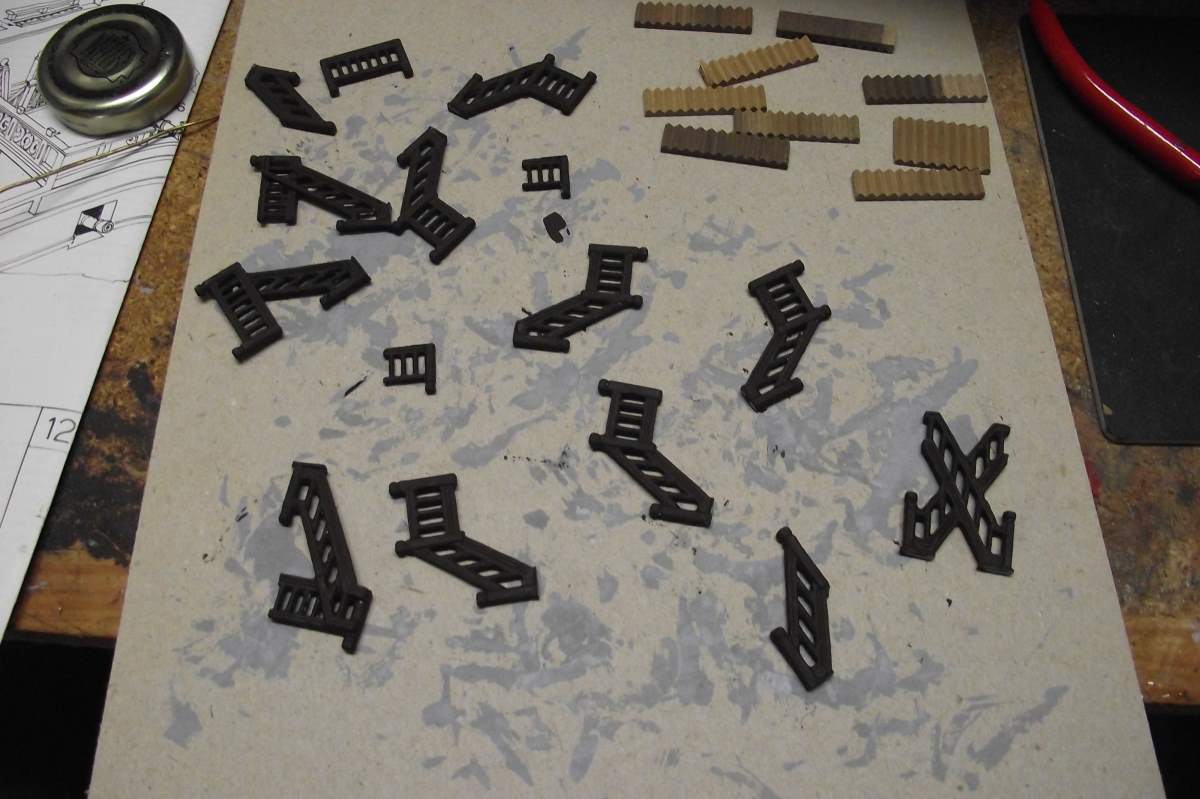
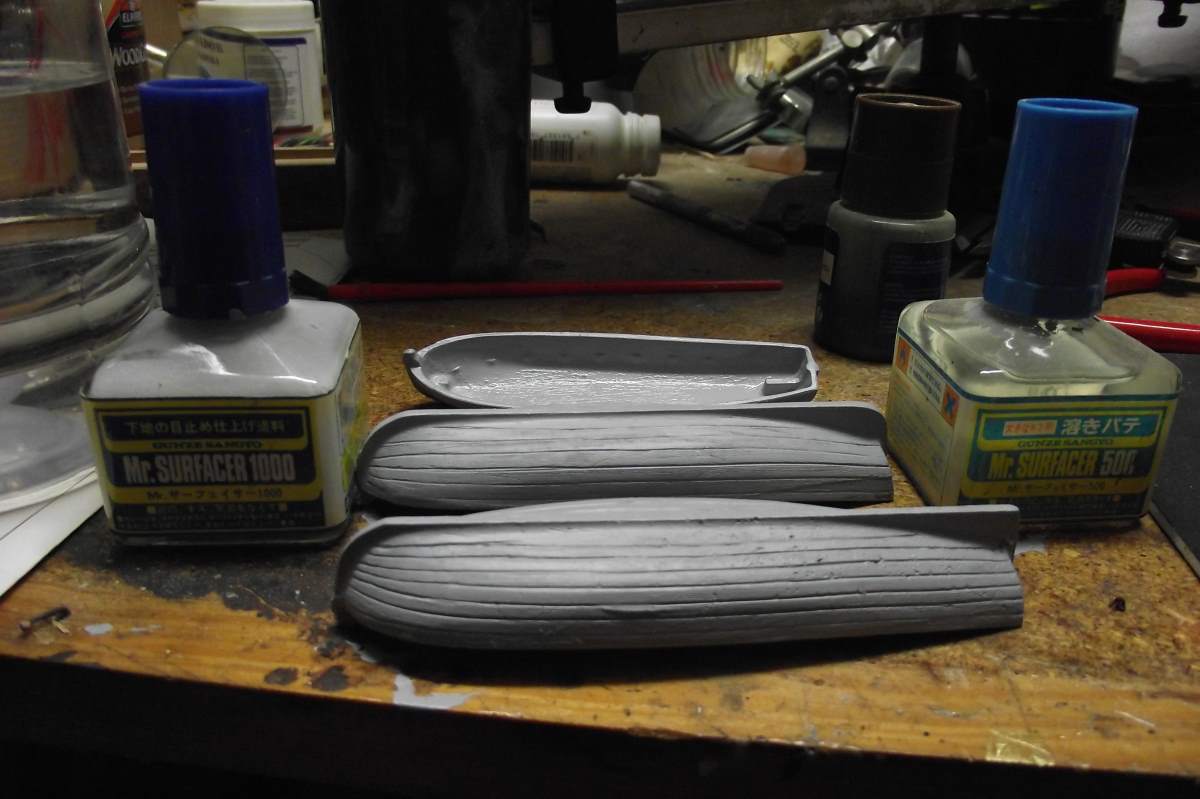
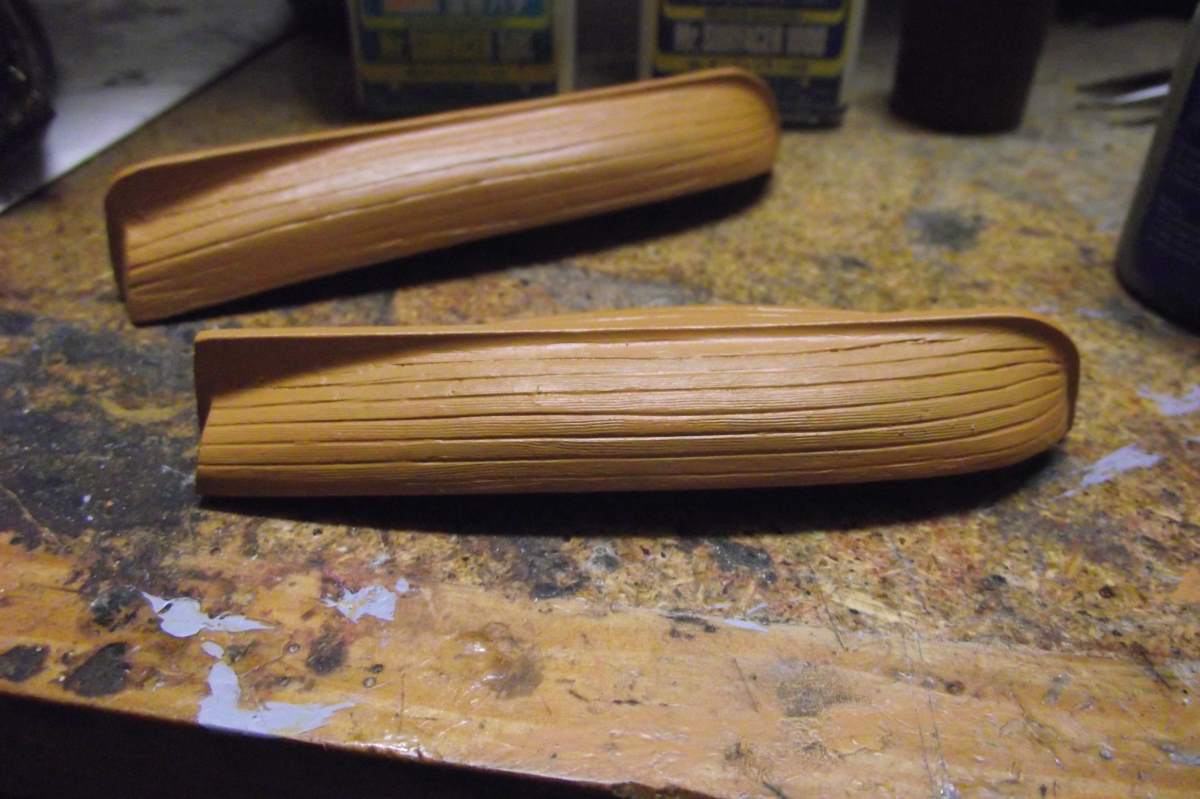
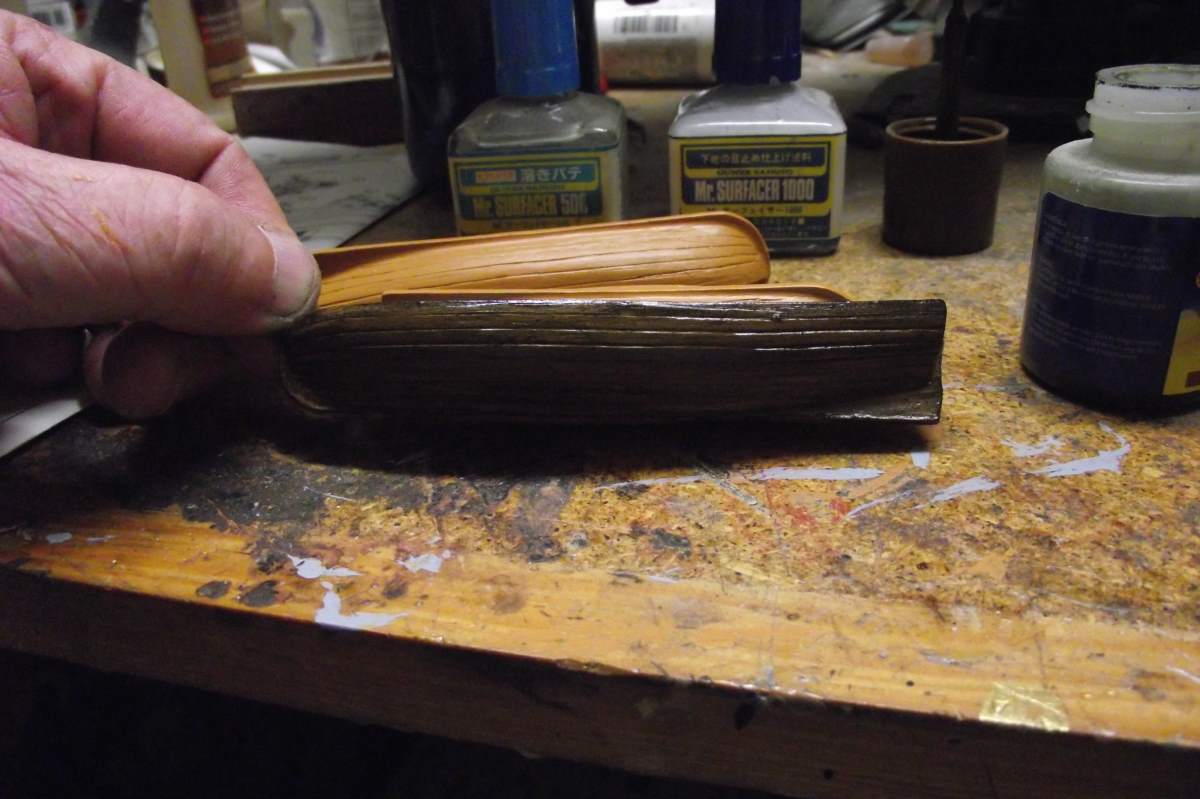
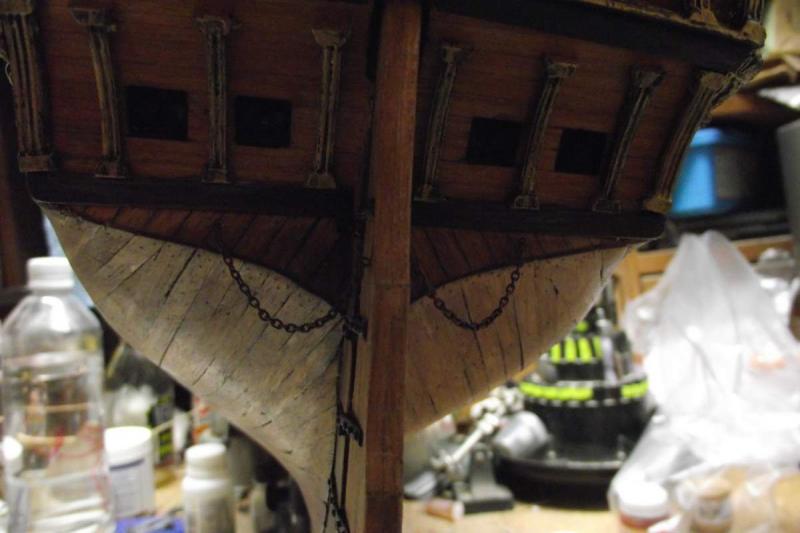
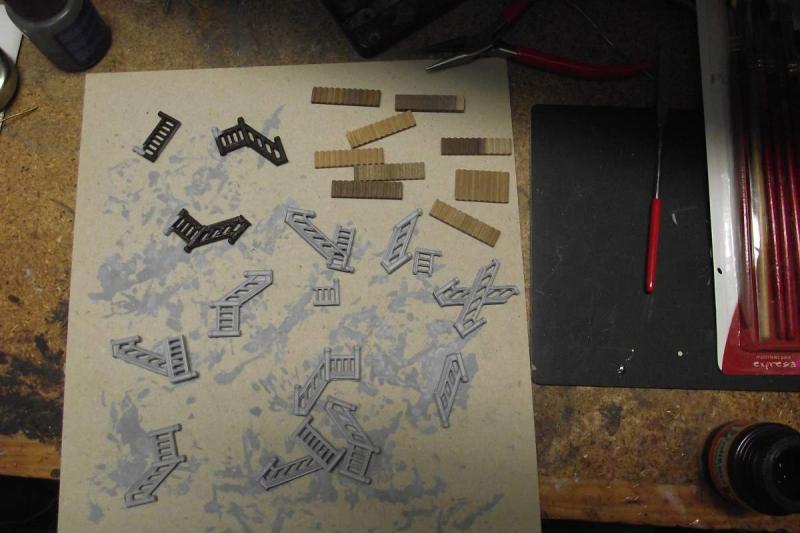
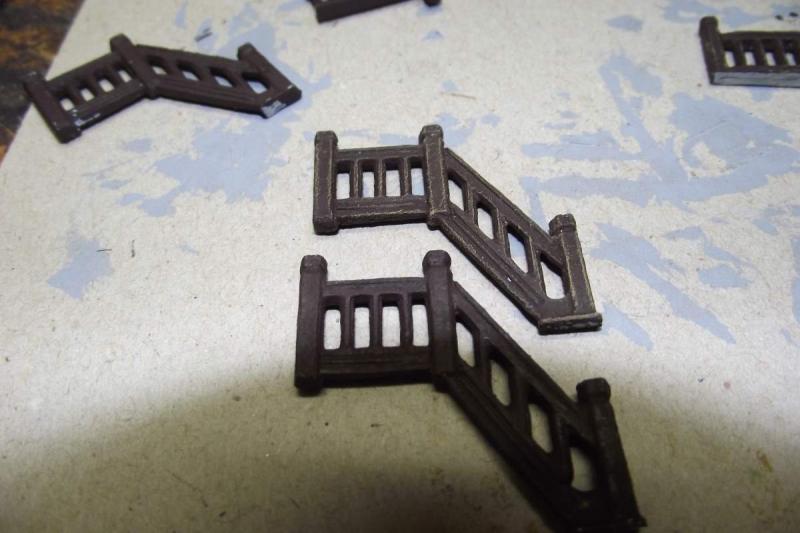
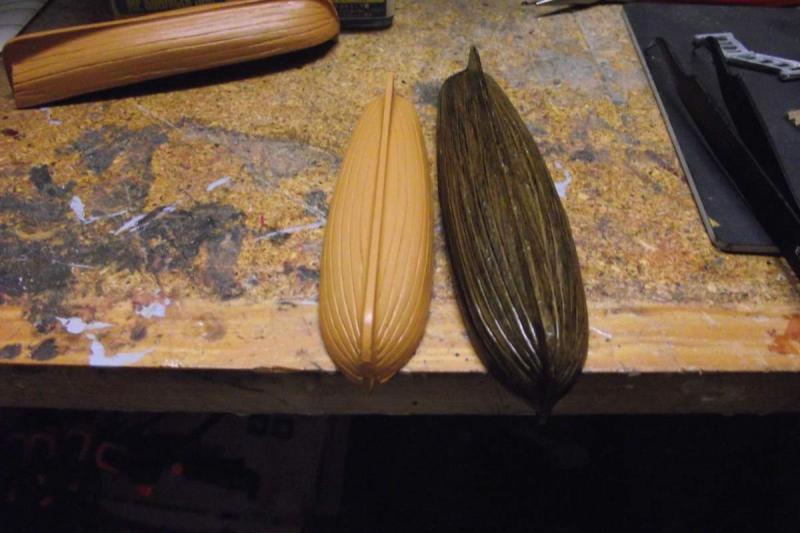
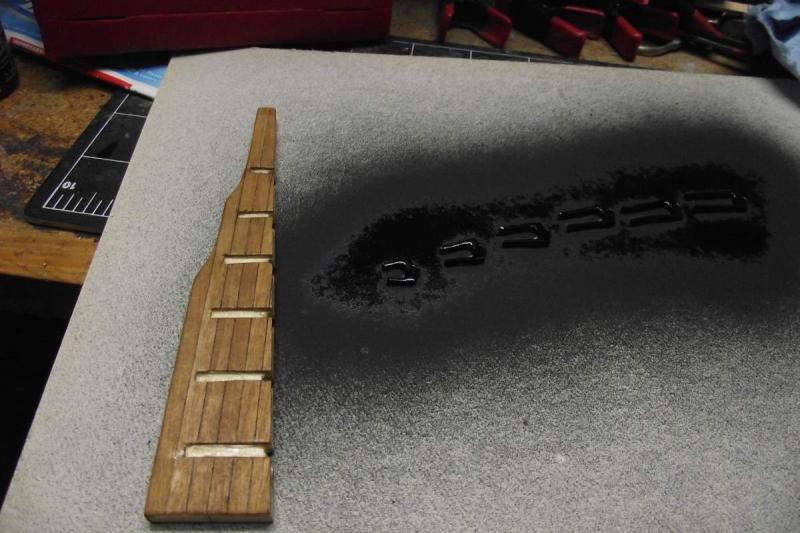
Work continues. This photo was supposed to be the last one in the previous update: making of the eyebolts and the chain attached to them. Update #1 Next. Start building all the stairs that go down between decks, with their respective handrails and supports. First step. File down all the mold joint marks and paint with Gunze Sangyo Mr. Surfacer 1000 as a primer. I painted these pieces with a dark brown color. They looked very dull, so I gave them a very light treatment with a lighter wood color paint using the dry brush technique. Can you tell the difference? Here they are all painted and dry brushed, ready to start assembly. Update #2 Since my attempt at making the ship's boats in wood turned out to be a big failure, I decided to take the challenge to another level, and use the metal ones included in the kit, but make them look like they were made of wood, (or at least as close as possible) So here is what I did. First a coat of primer: Then, paint them using the same ocher color I used on the hull After the paint is well dried, I started applying sepia india ink with a small brush. Continue rubbing with the brush without adding more ink, until the ink starts to dry and starts leaving streak marks. This is the final result. I will stop working on the boats now, until the time when I need to put them in place. This was like a little break! Thank you for visiting. Best regards to all.


- 786 replies
-
- 9
-
-
- Royal Louis
- Finished
- (and 1 more)
-
Hi Don, It fills me with joy when something I did helps somebody. Thank you very much for your kind words!
- 786 replies
-
- 3
-
-
- Royal Louis
- Finished
- (and 1 more)
-
Hola mi amigo! Your attention to detail is excellent! Also excellent is your work in general. Me cae que sí! Saludos
-
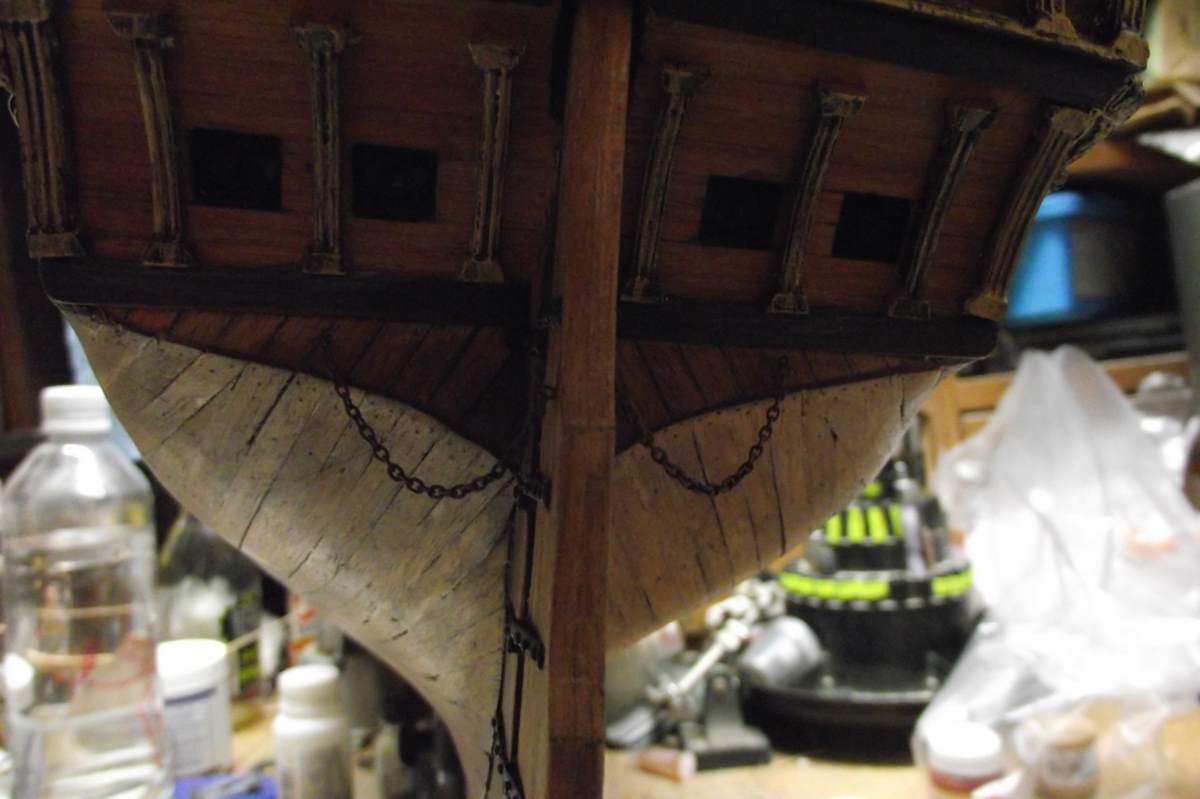
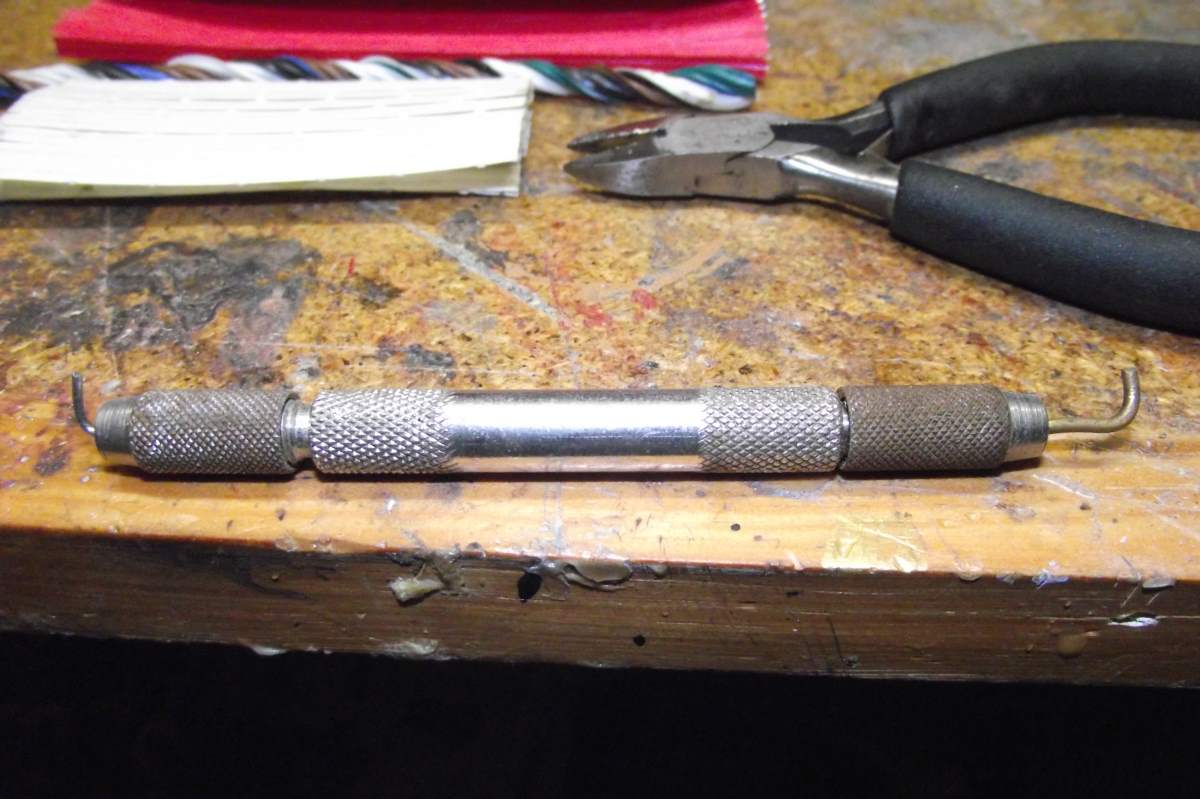
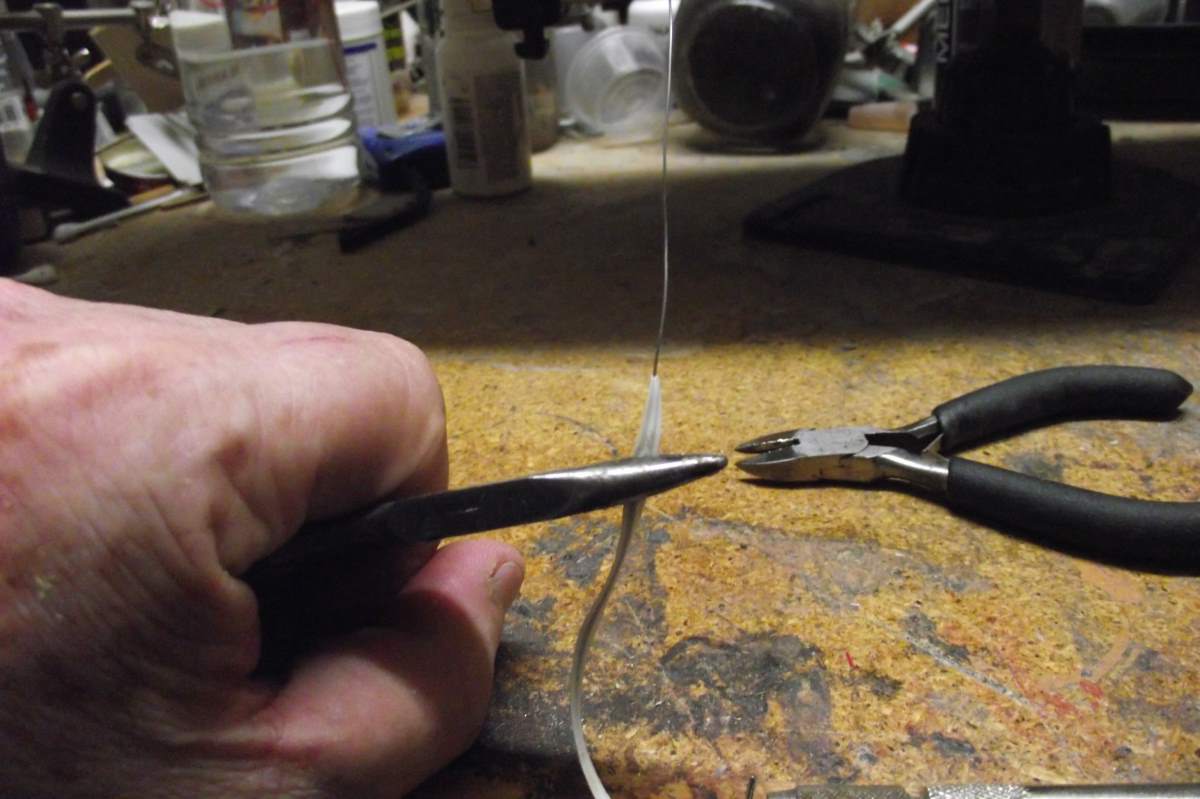
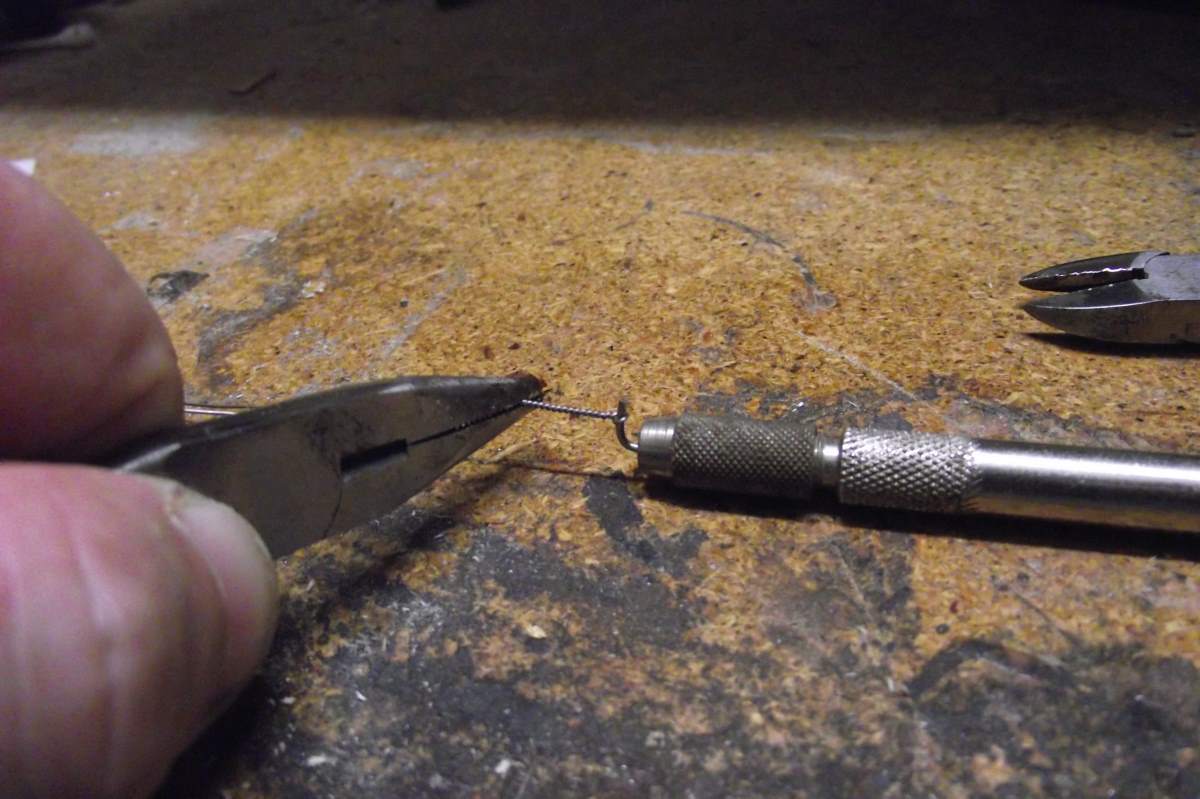
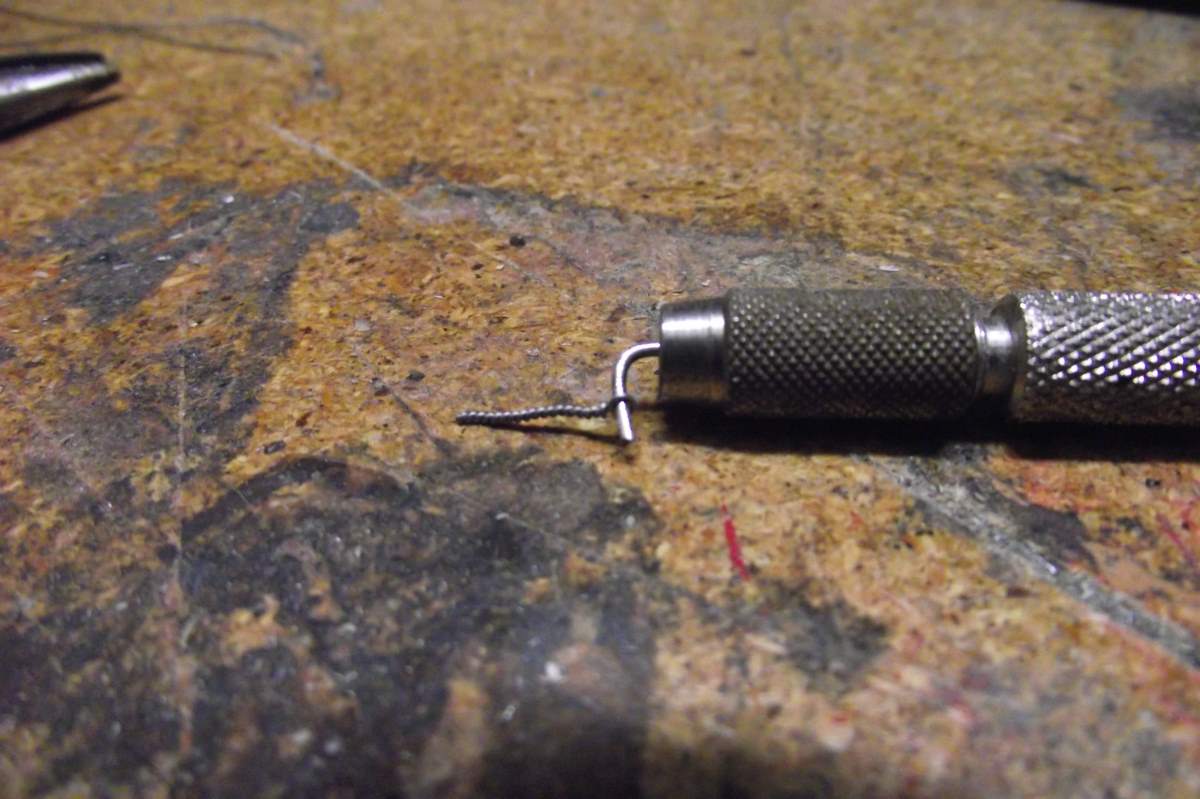
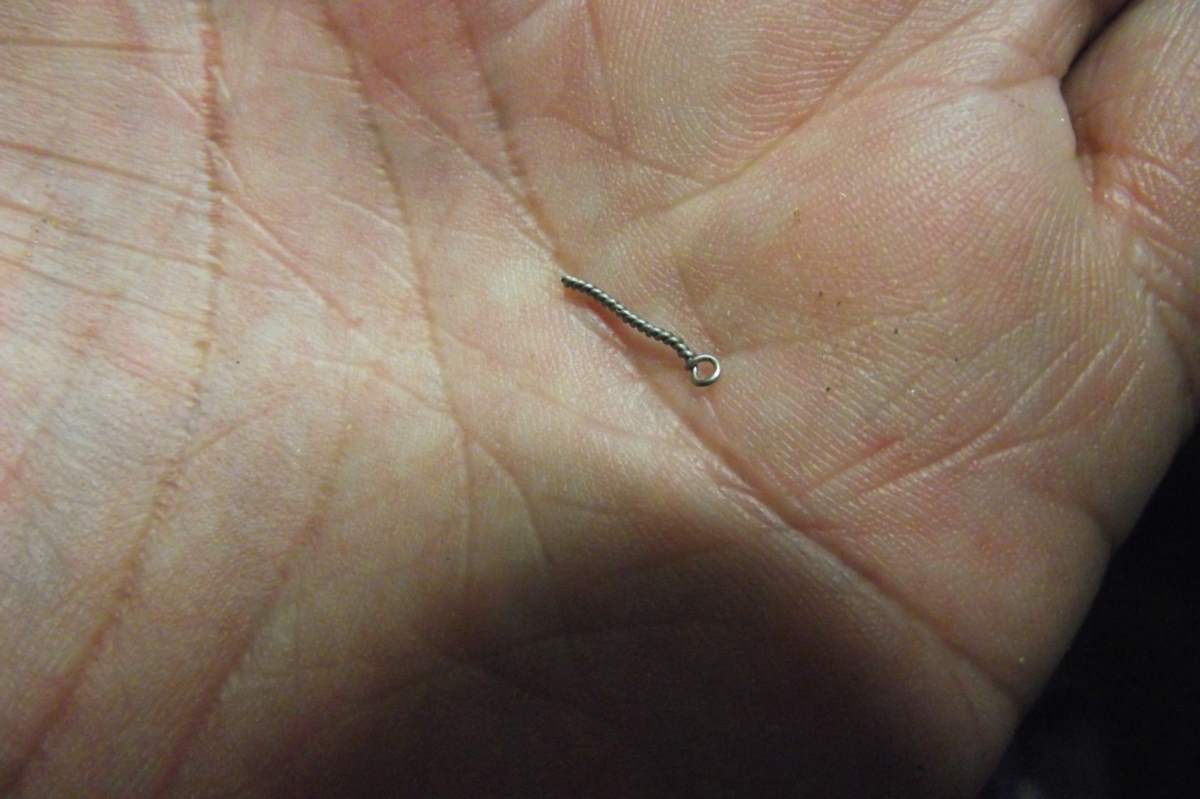
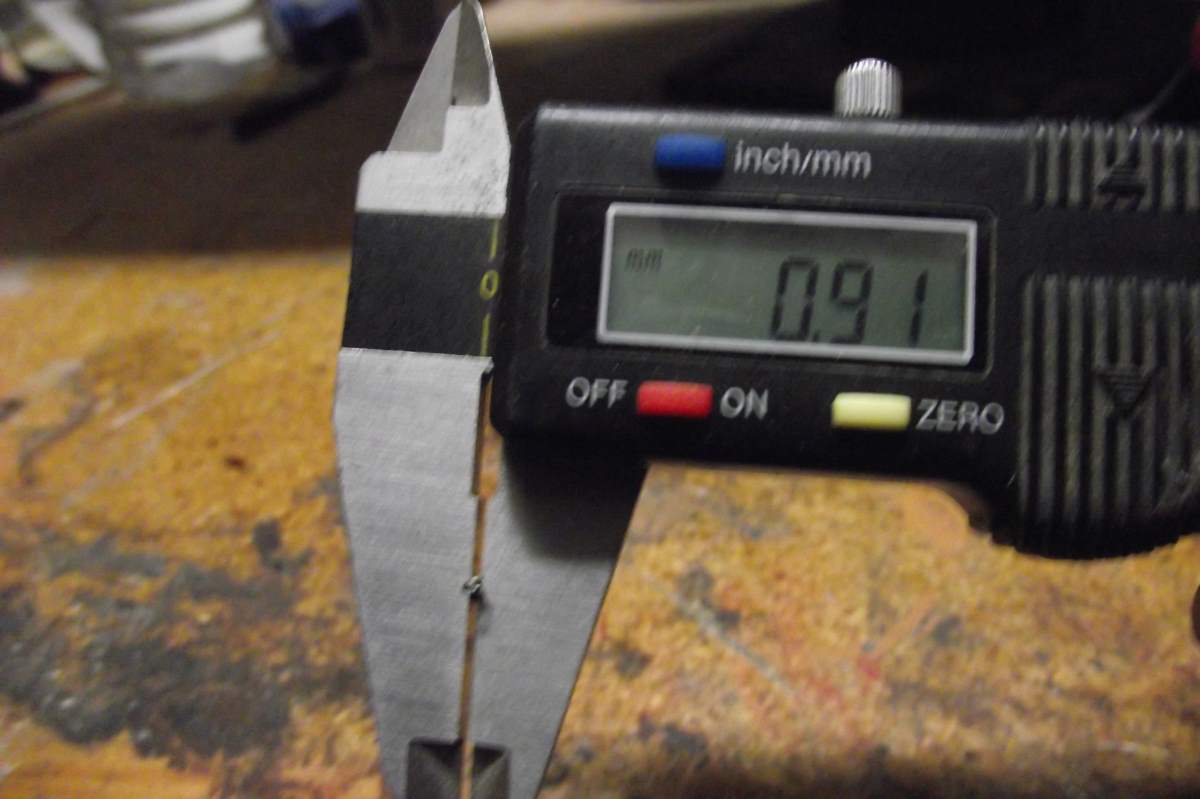
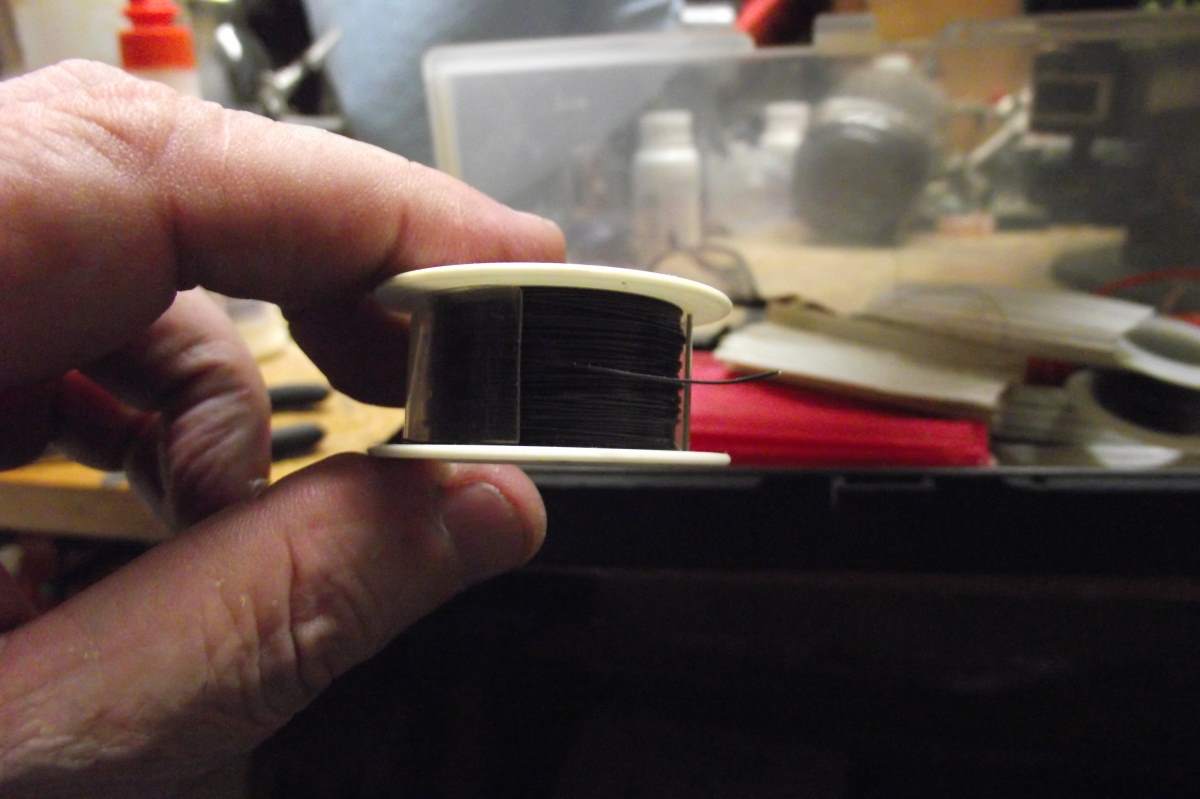
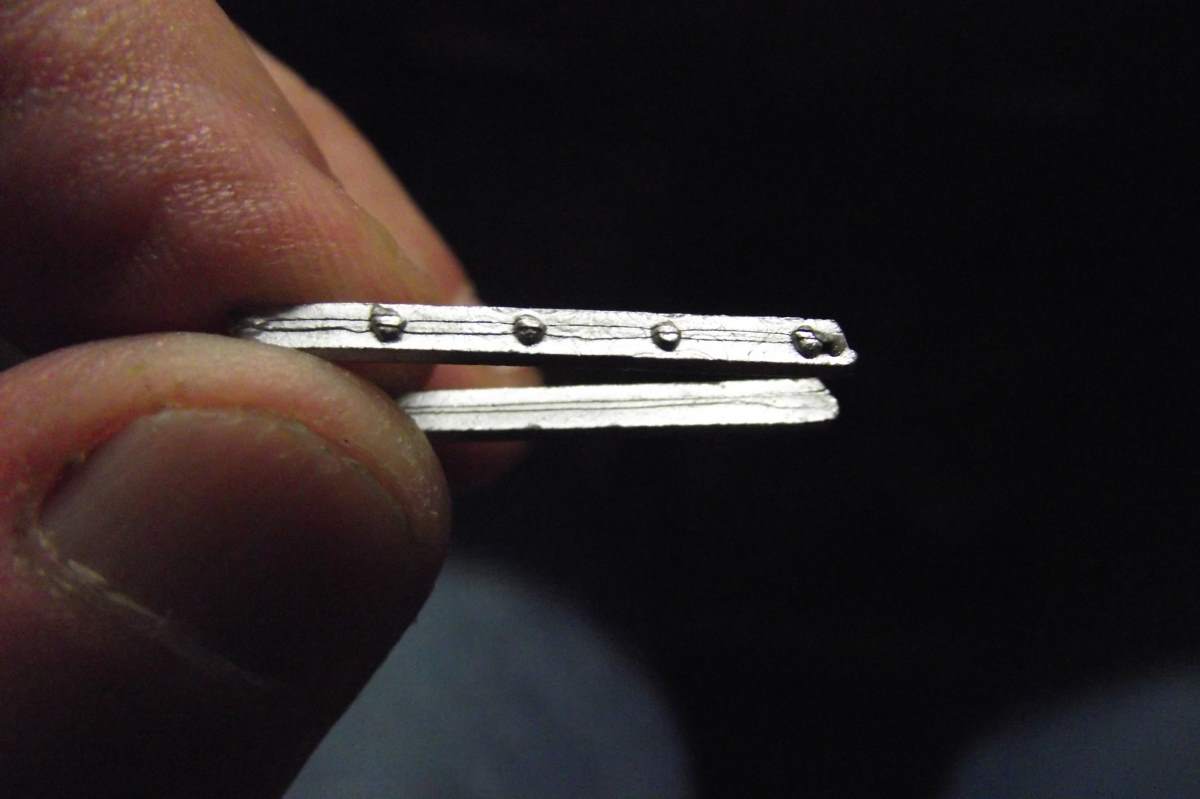
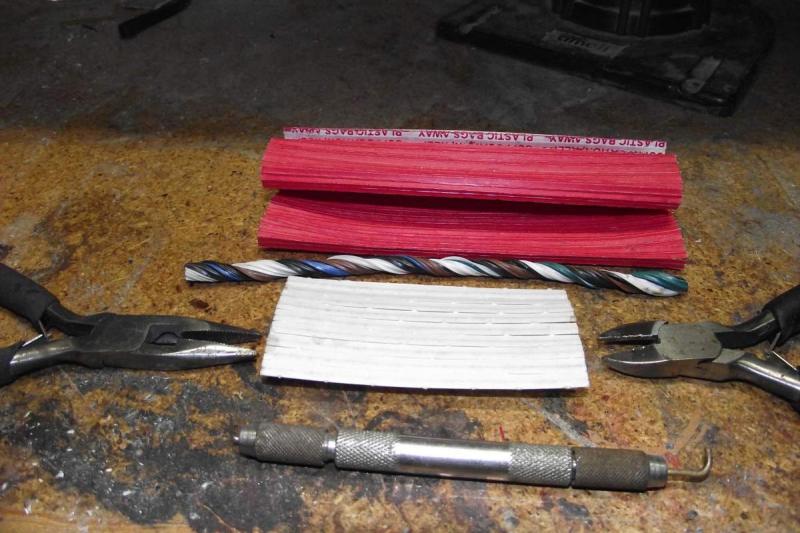
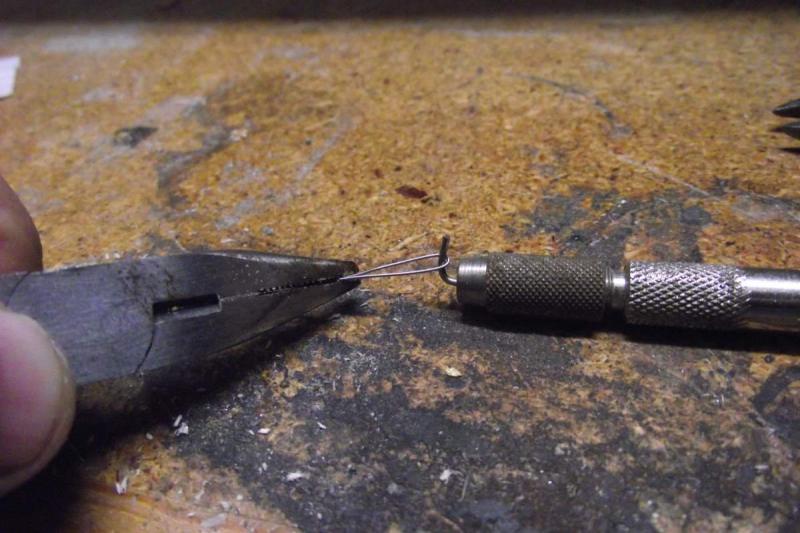
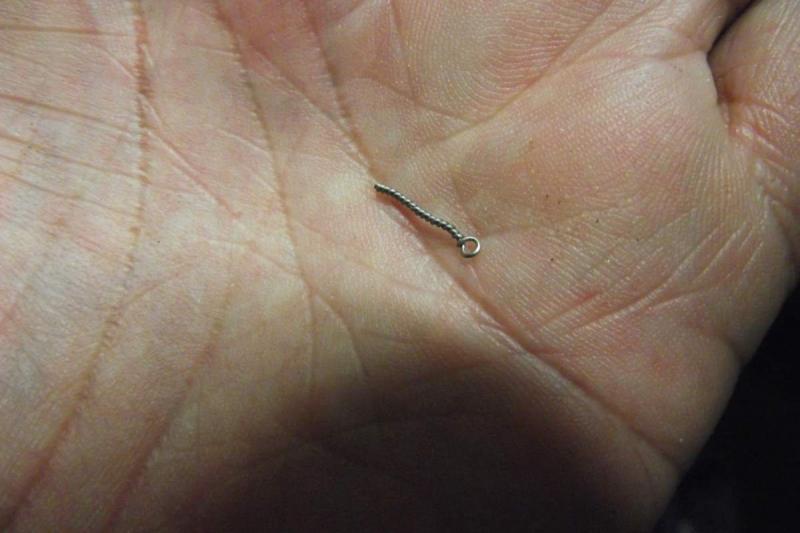
Mini-update. After doing a final check in my plans, I noticed I missed 4 small eyebolts: 2 on the rudder and 2 on the hull, for a chain that holds the rudder in the case this breaks during battle and prevents it from going to the bottom of the sea. So, since this is a very small update, I'm taking the opportunity to show how I make eyebolts. These usually come too big in kits, so long time ago I decided I'd make mine, no matter what kit. I hope this helps someone. This is my basic kit to make eyebolts Holding pliers, wire cutting pliers, plastic wrapped wire, and a small jig I designed. This jig I made from a two sided old drill bit handle to which I attached two wires of different diameter, to make different sized eyebolts. I first used the wire that comes in those little whatchamacallit plastic covered wires they use to close loaf bread bags and stuff. I later found a black colored wire which looked much better. Peel the wire, or cut from your source a length of it. Bend to an U shape and place it as showing in this pic, holding it with the pliers. Twist the handle, while pulling it at the same time. Twist until the wire breaks by itself. The twisted stem will provide additional mechanical grip. I measure the width of the stem to know what drill size will be adequate. Here they are in place. I used a black wire for the final eyebolts, different to the "silvery" one you see in the previous photos. By the way, I use two part epoxy to fix the eyebolts in place, instead of a cement I used to use before, which turned out to be a bad choice. (The figures in my Vasa started to fall off a few weeks ago.) Epoxy is my glue of choice when gluing dissimilar materials like metal to wood. Is it messy? Yes!, is it a big waste? Yes! Is it still the better choice? Yes! (My opinion, of course!) Thanks for visiting. I hope this post helps someone. Thank you all!!!


- 786 replies
-
- 8
-
-
- Royal Louis
- Finished
- (and 1 more)
-
@Nick... thank you very much. Yes, this is a big model. @Edwin. Thank you so much. I'm flattered, and I don't feel I deserve this much praise. I do what I can but I know I always make mistakes and I'm never fully satisfied with my work. I humbly appreciate it! Best wishes.
- 786 replies
-
- 3
-
-
- Royal Louis
- Finished
- (and 1 more)
-
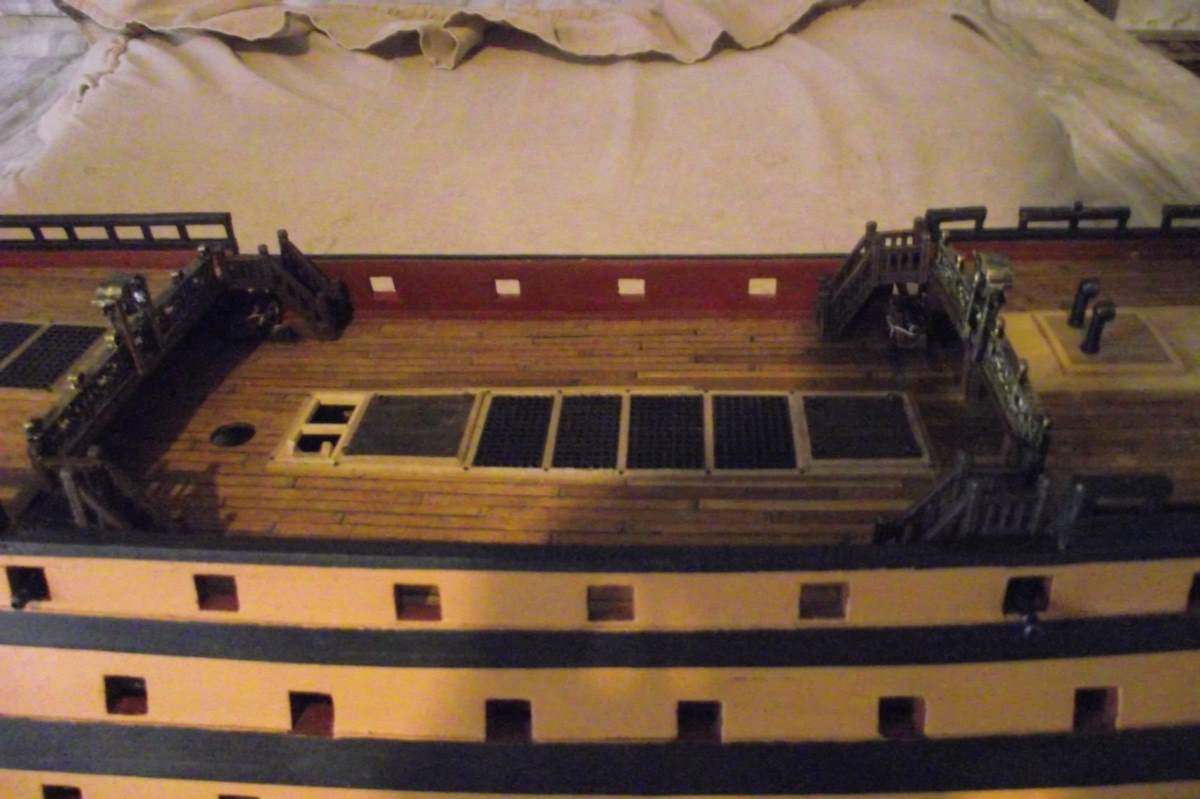
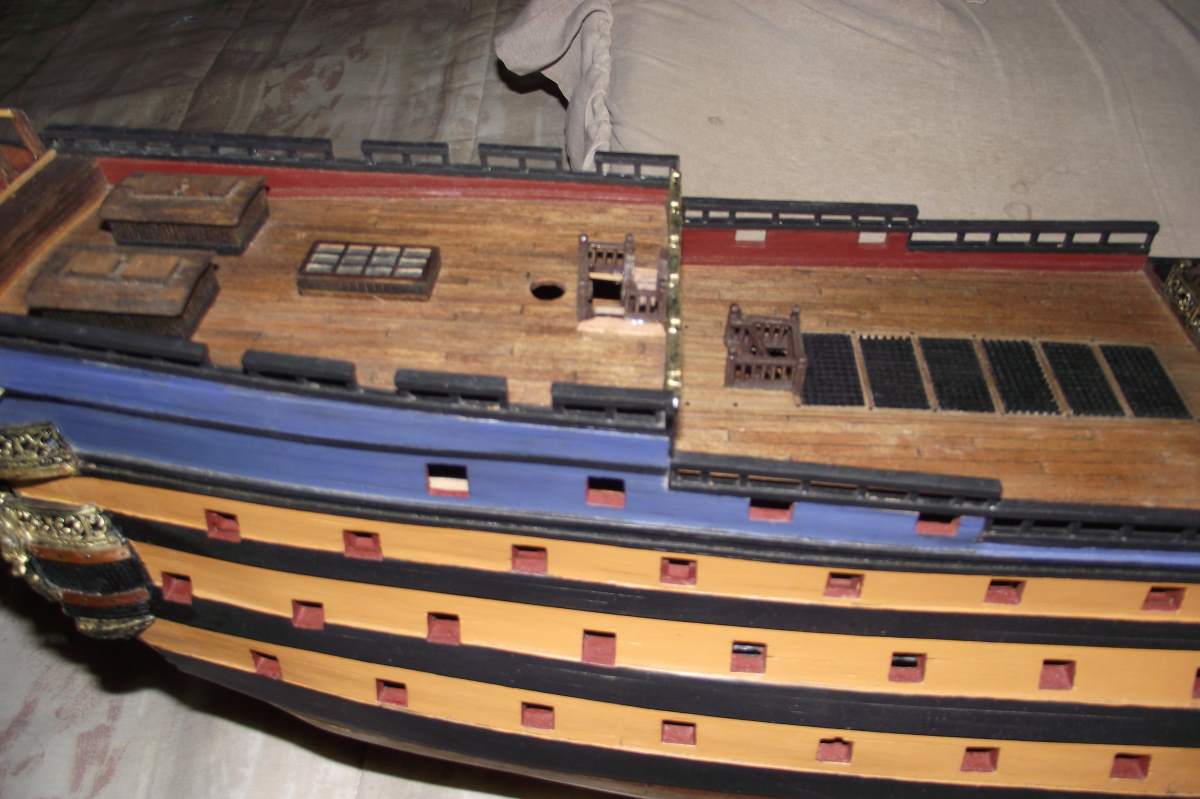
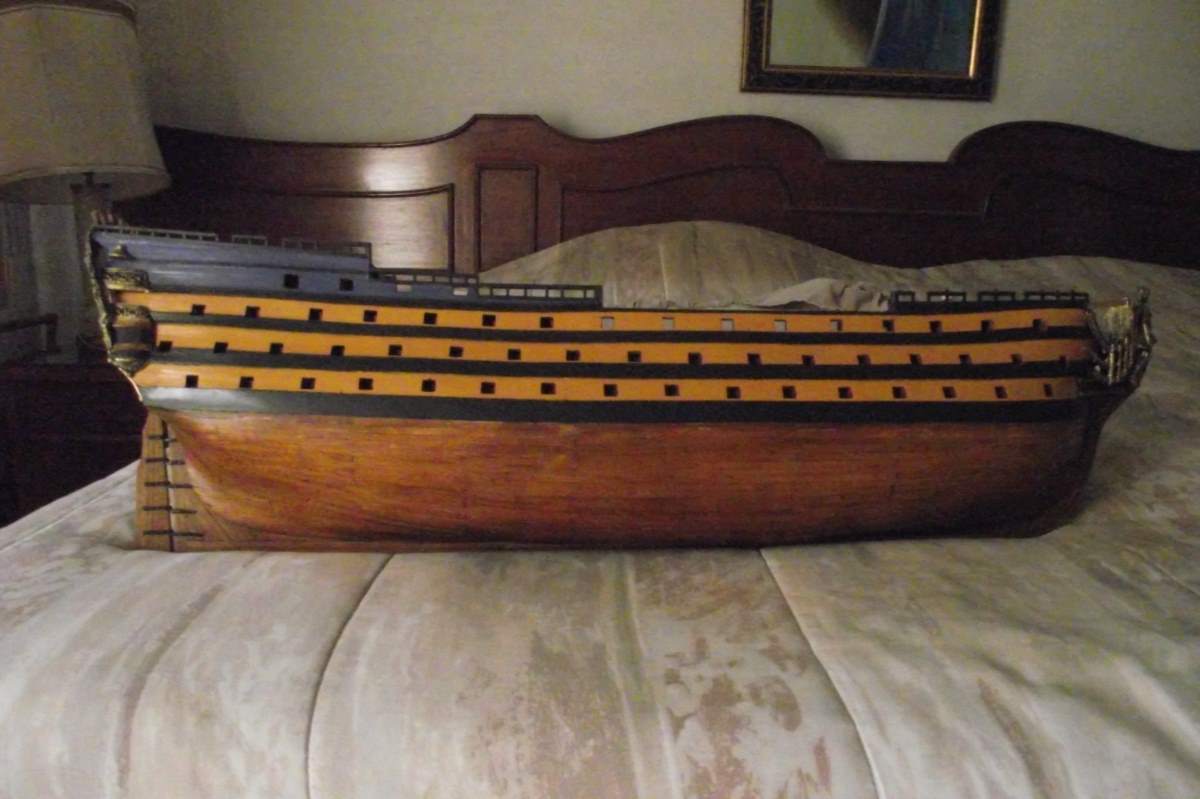
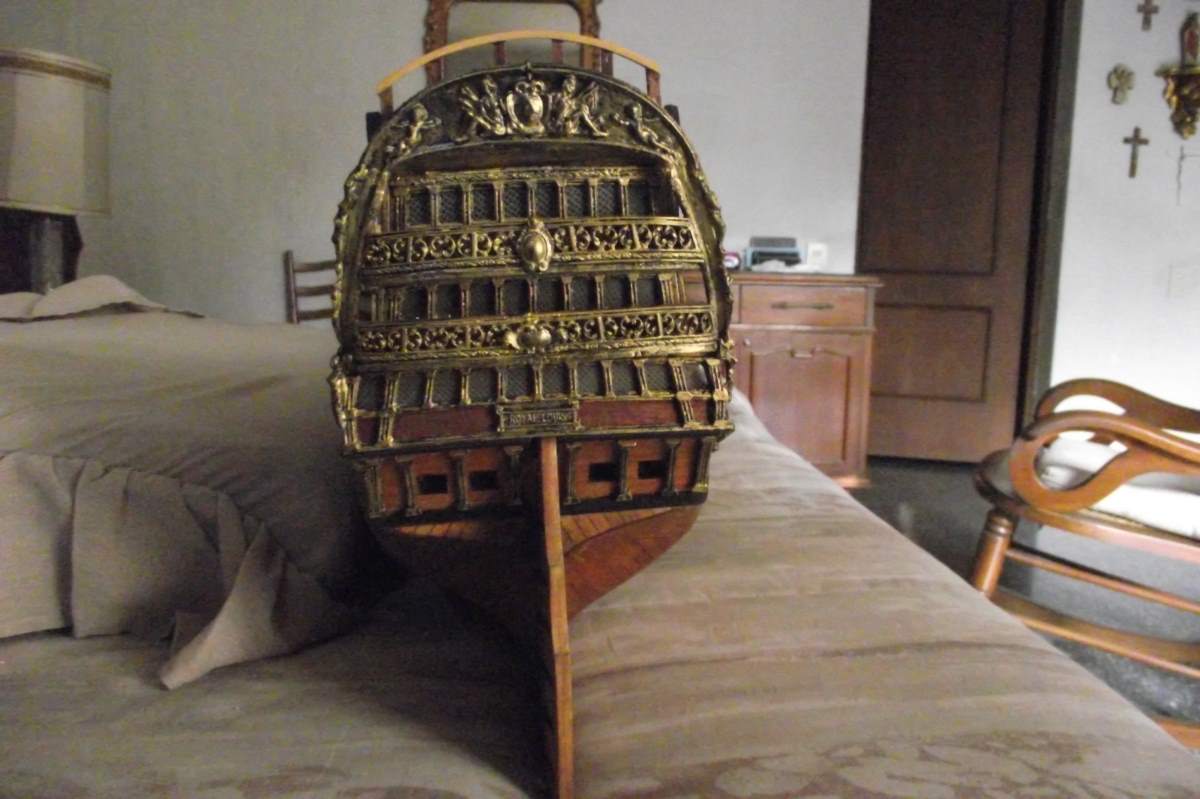
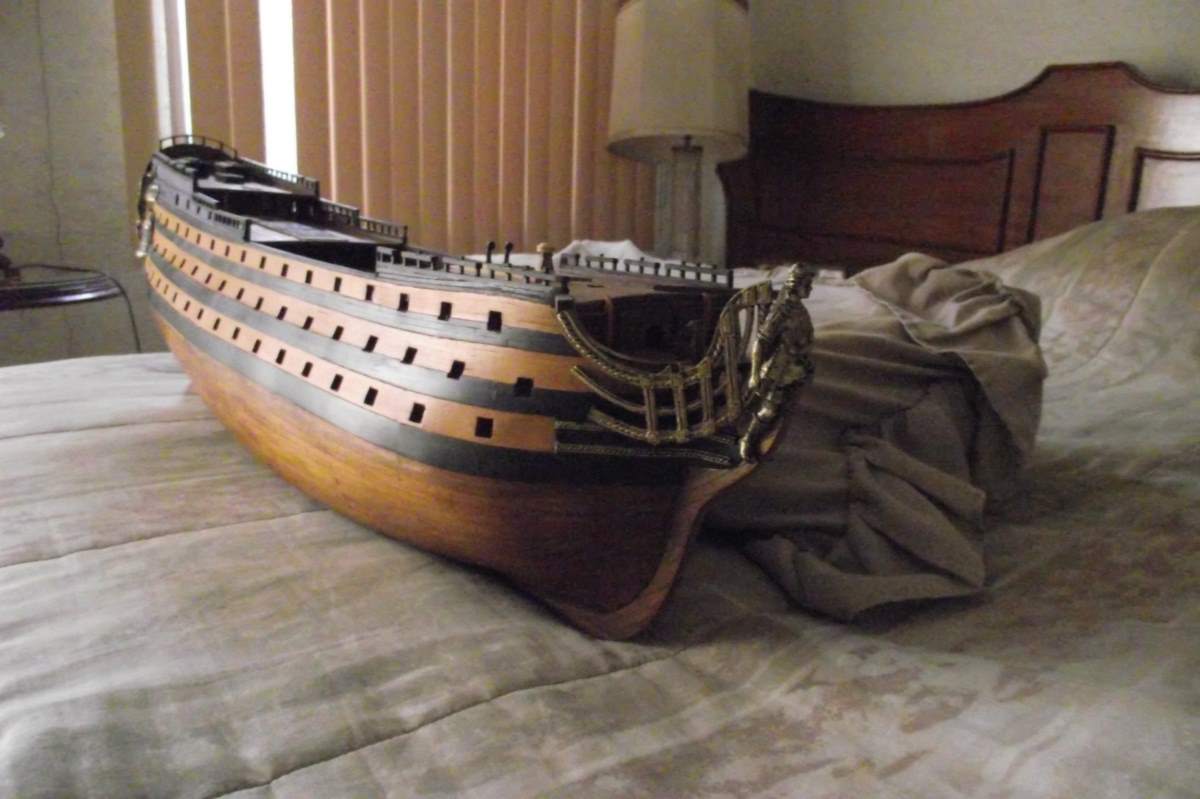
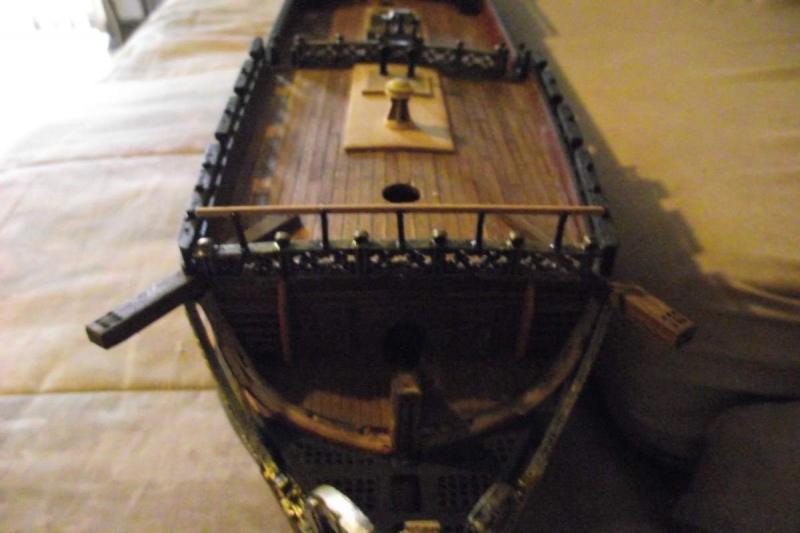
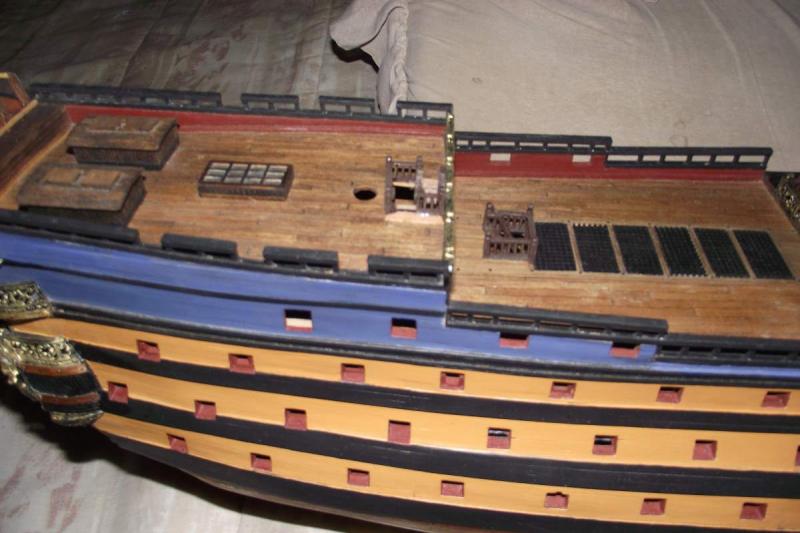
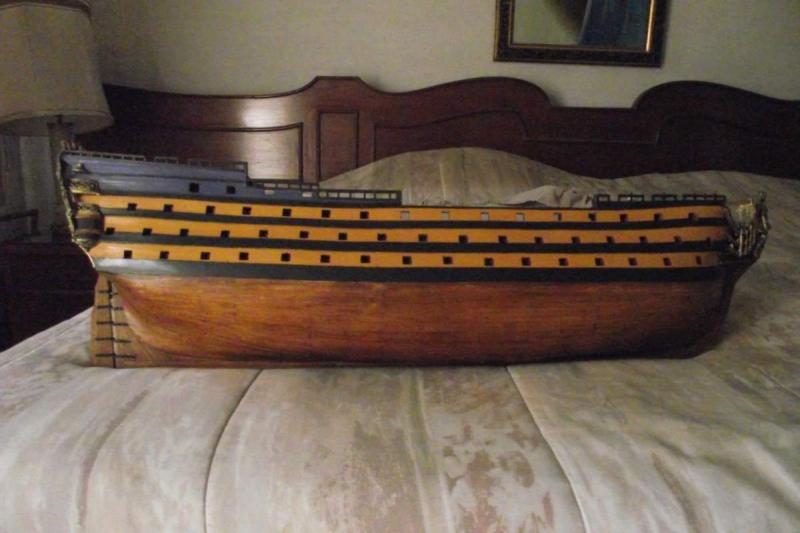
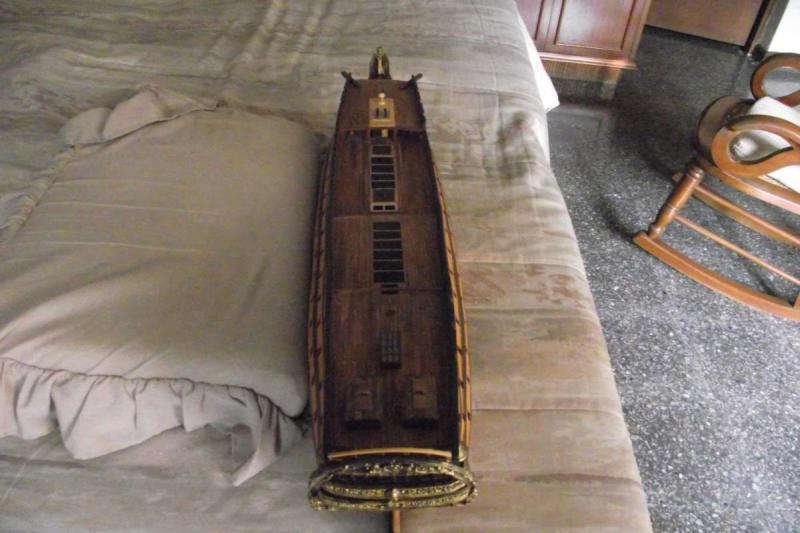
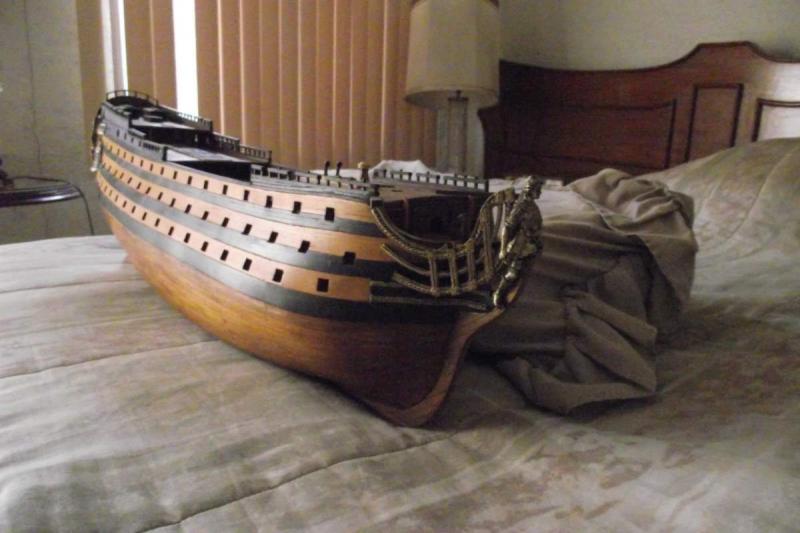
Hi all and thanks for visiting. I though I would post a general view of how this ship is coming along. I will start working on the deck fittings and furniture next. Best regards

- 786 replies
-
- 13
-
-
- Royal Louis
- Finished
- (and 1 more)
-
@Edwin. Thanks a lot. Yes, I am well! @Pat. Really appreciate it! @Arthur: Don't look too close. Thank you all for visiting, likes and comments. They are of big value to me!
- 786 replies
-
- 3
-
-
- Royal Louis
- Finished
- (and 1 more)
-
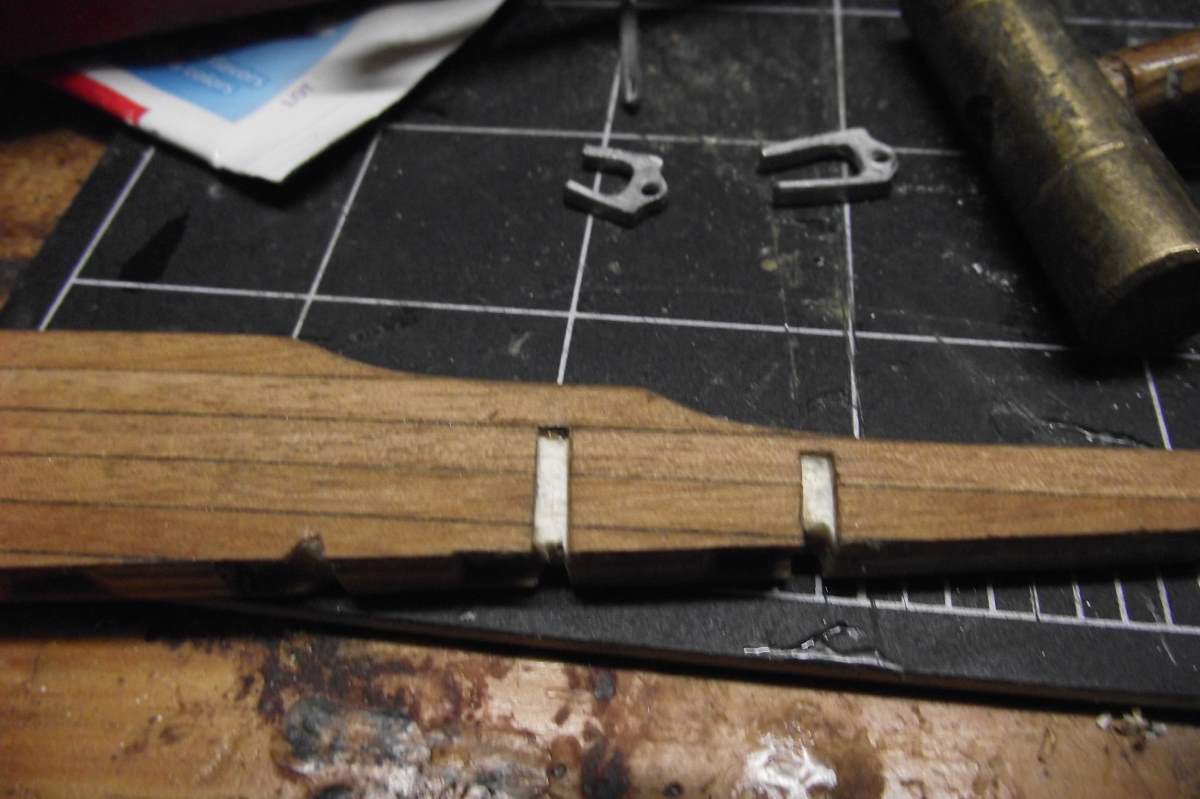
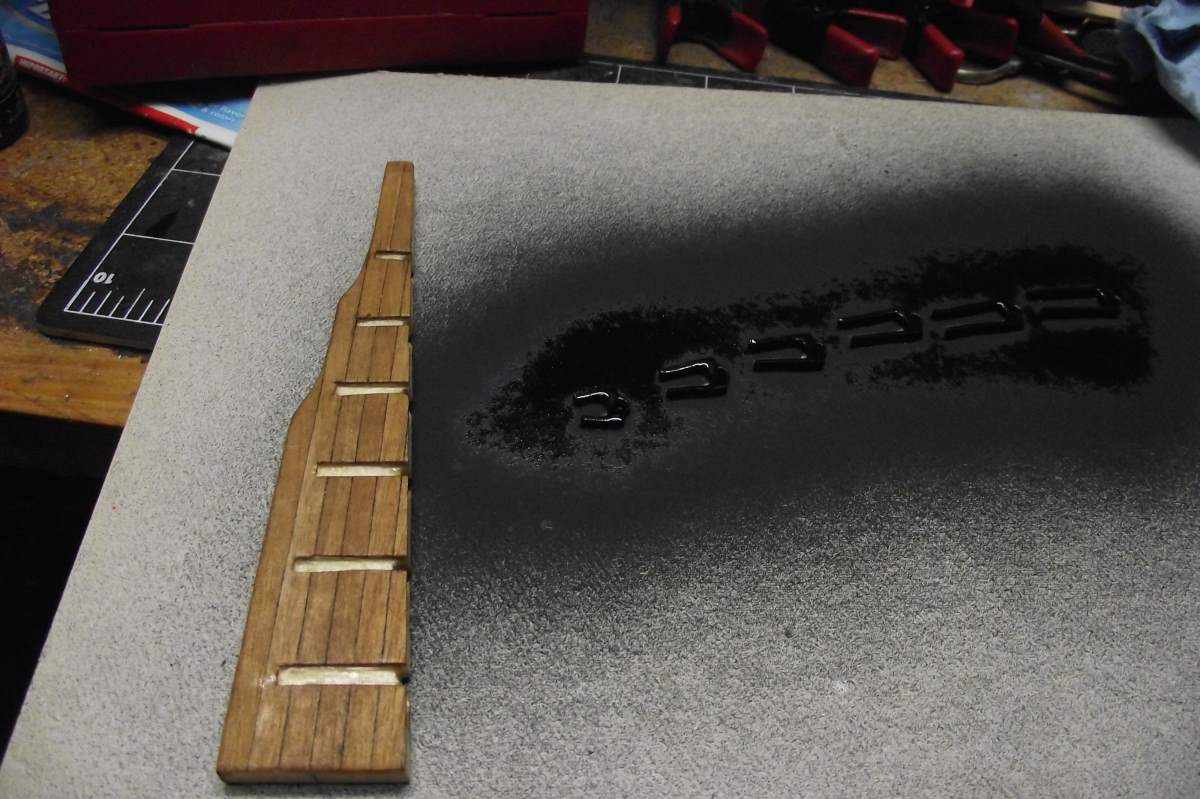
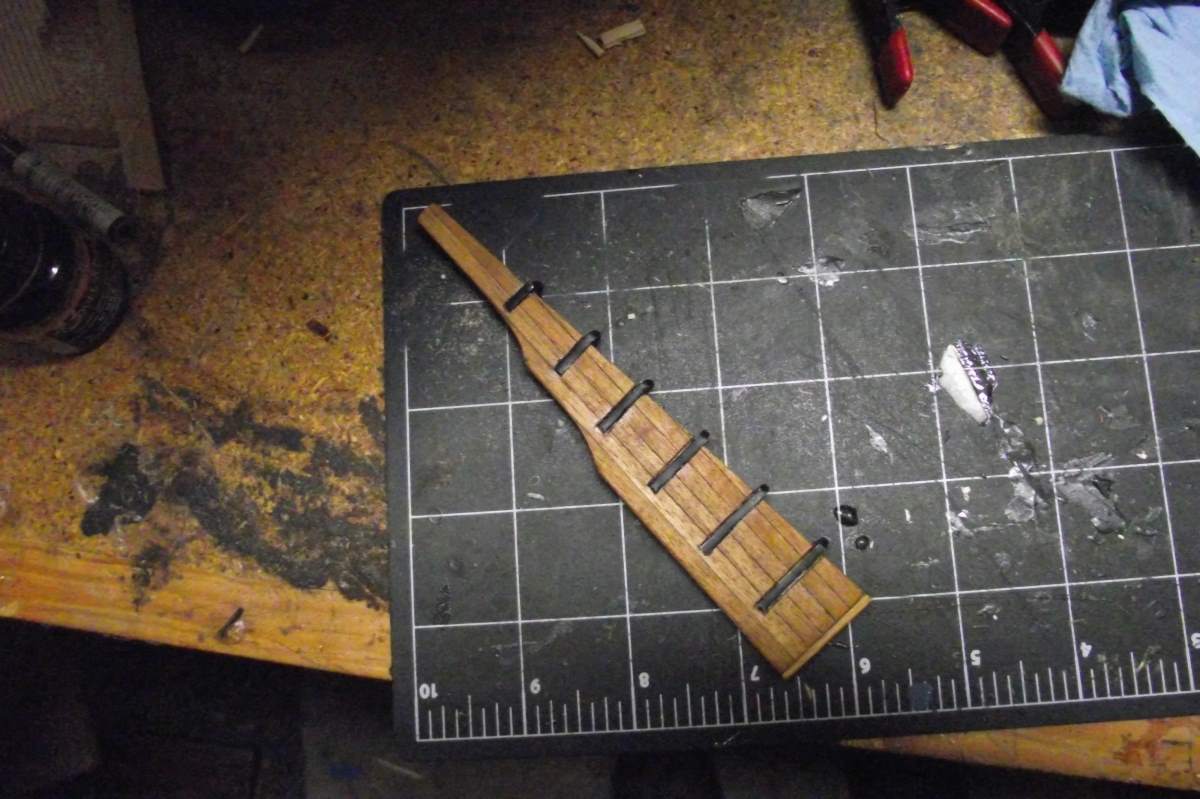
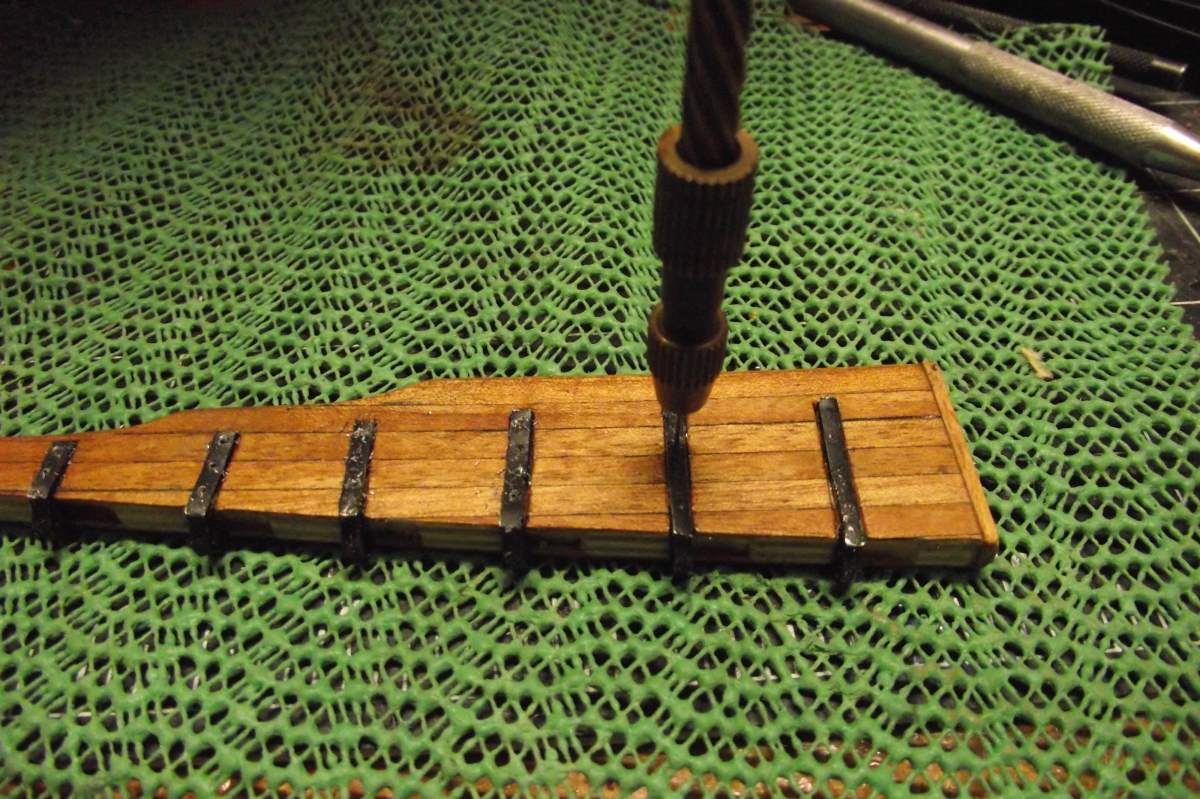
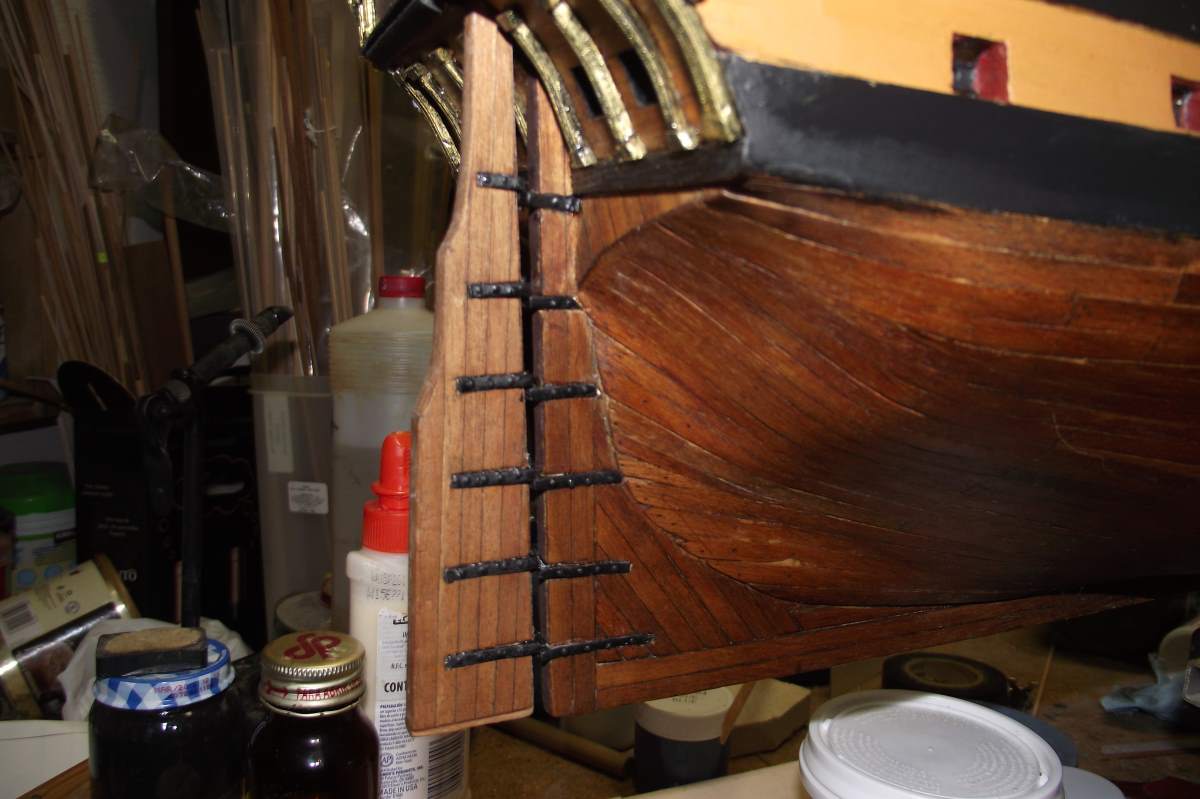
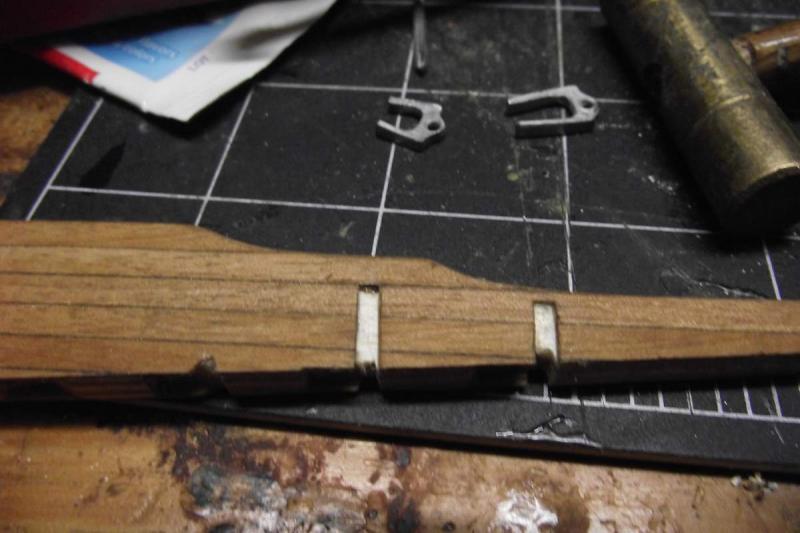
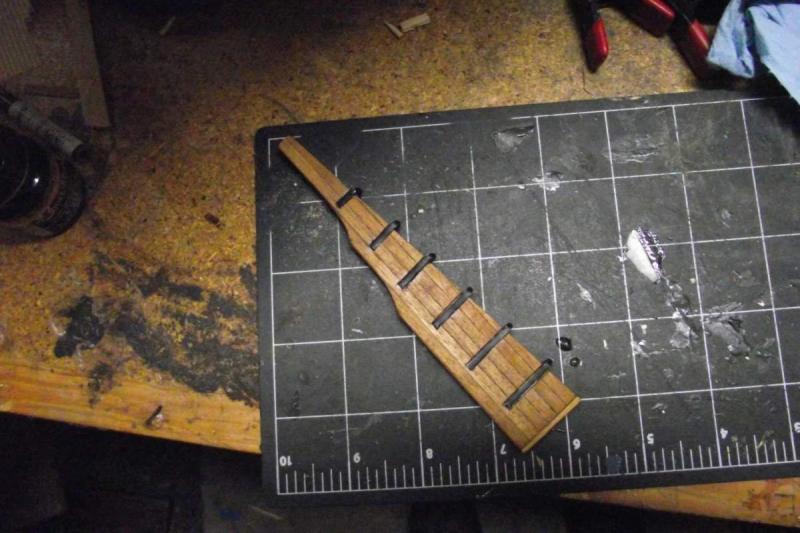
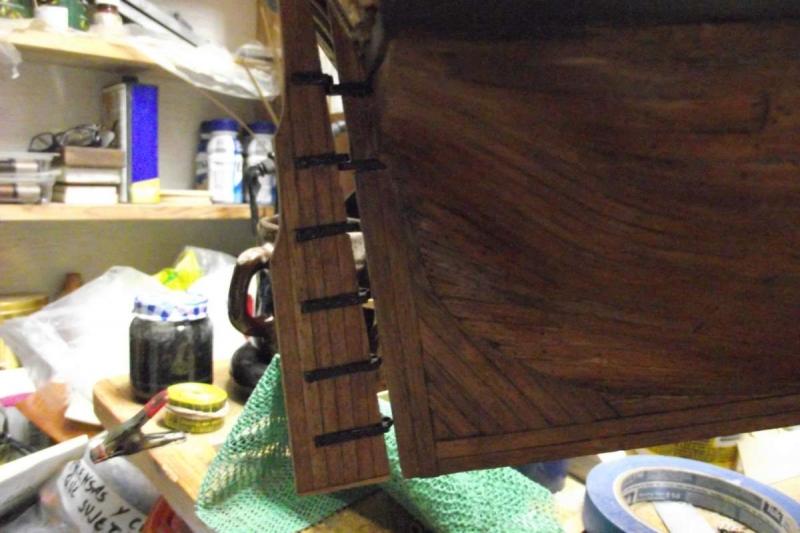
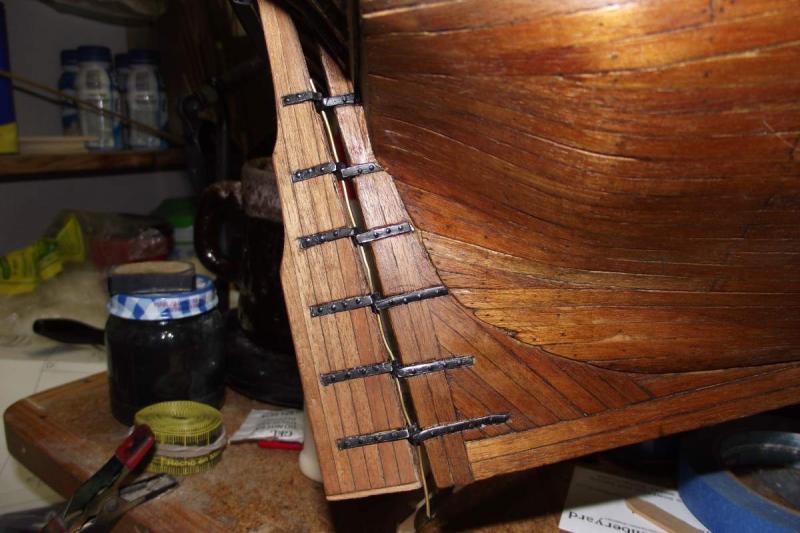
Update. Hello friends! Well I'm finally done with the rudder. It was something rather complicated for me because I had to carve the rudder and hull to accommodate the hinges, and I am not too proficient at this activity (yet). An important part is that with this I finish page number 3 of the plans/instructions. What's next is work mainly on the decks, and (gulp) cannons and (double gulp) cannon port lids. Not all the gunports have lids, thank God, but still there will be about 70 of them. So here we go: I didn't like these simulated head bolts in the hinges, ...so I filed them down. Starting the carving of the hinge's location Rudder hinges in place Drilling holes to place nail heads. I cut the head and about a 1mm stem. These are only decorative. They don't actually have any work as holding items. Work of measuring the correct placement of the hull hinges, to match the rudder hinges' holes. Testing for correct alignment. You can see a piece of brass wire going through the whole assembly to check for precise alignment. Here it is completed. Thanks for visiting. Best regards all.


- 786 replies
-
- 12
-
-
- Royal Louis
- Finished
- (and 1 more)
-
Hi, Les... No, I have not, and I have never seen the need to. I just sand my first planking with coarse sandpaper to make it a bit rough, so the second planking adheres better. I use wood glue and nothing else all the time. Dedicated wood glues, (Titebond, Elmer's, Gorilla) make a very strong bond when used on clean wood to clean wood. Never had a problem in my past 4 builds, or the completed hull planking in my present Royal Louis. Hope this helps. Best regards.
-
So glad to see you back, my dear. Remember that no matter how little you work on your ship, if you do it everyday, you will eventually finish it. Best wishes!!! Edit: Just caressing it doesn't count as work.
-
Viv!!! Long time no see dear. Thanks for visiting and your likes! Abrazos
- 786 replies
-
- 1
-
-
- Royal Louis
- Finished
- (and 1 more)