mikiek
-
Posts
2,229 -
Joined
-
Last visited
Content Type
Profiles
Forums
Gallery
Events
Everything posted by mikiek
-
 " I realized when I bent the bow end of the port garboard strake to fit into the rabbit it had the unintended effect of bending the tip upwards as well due to Obscure Geometry. So of course all the subsequent planking follow this upward curve. " The garboards should go in straight - no bending. Yes there will be a lot of twisting and turning but no bending. I you find that it is wanting to bend up at the bow most likely it is pushed too far forward. You should be able to lay the next strake on the top edge of the garboard and it should sit flush. I usually try to pin the garboard in place then lay the next strake on top just to see how the two will mesh. Then adjust and glue the GB. As you found out, if the GB is bending all subsequent sticks will want to bend as well.
 -
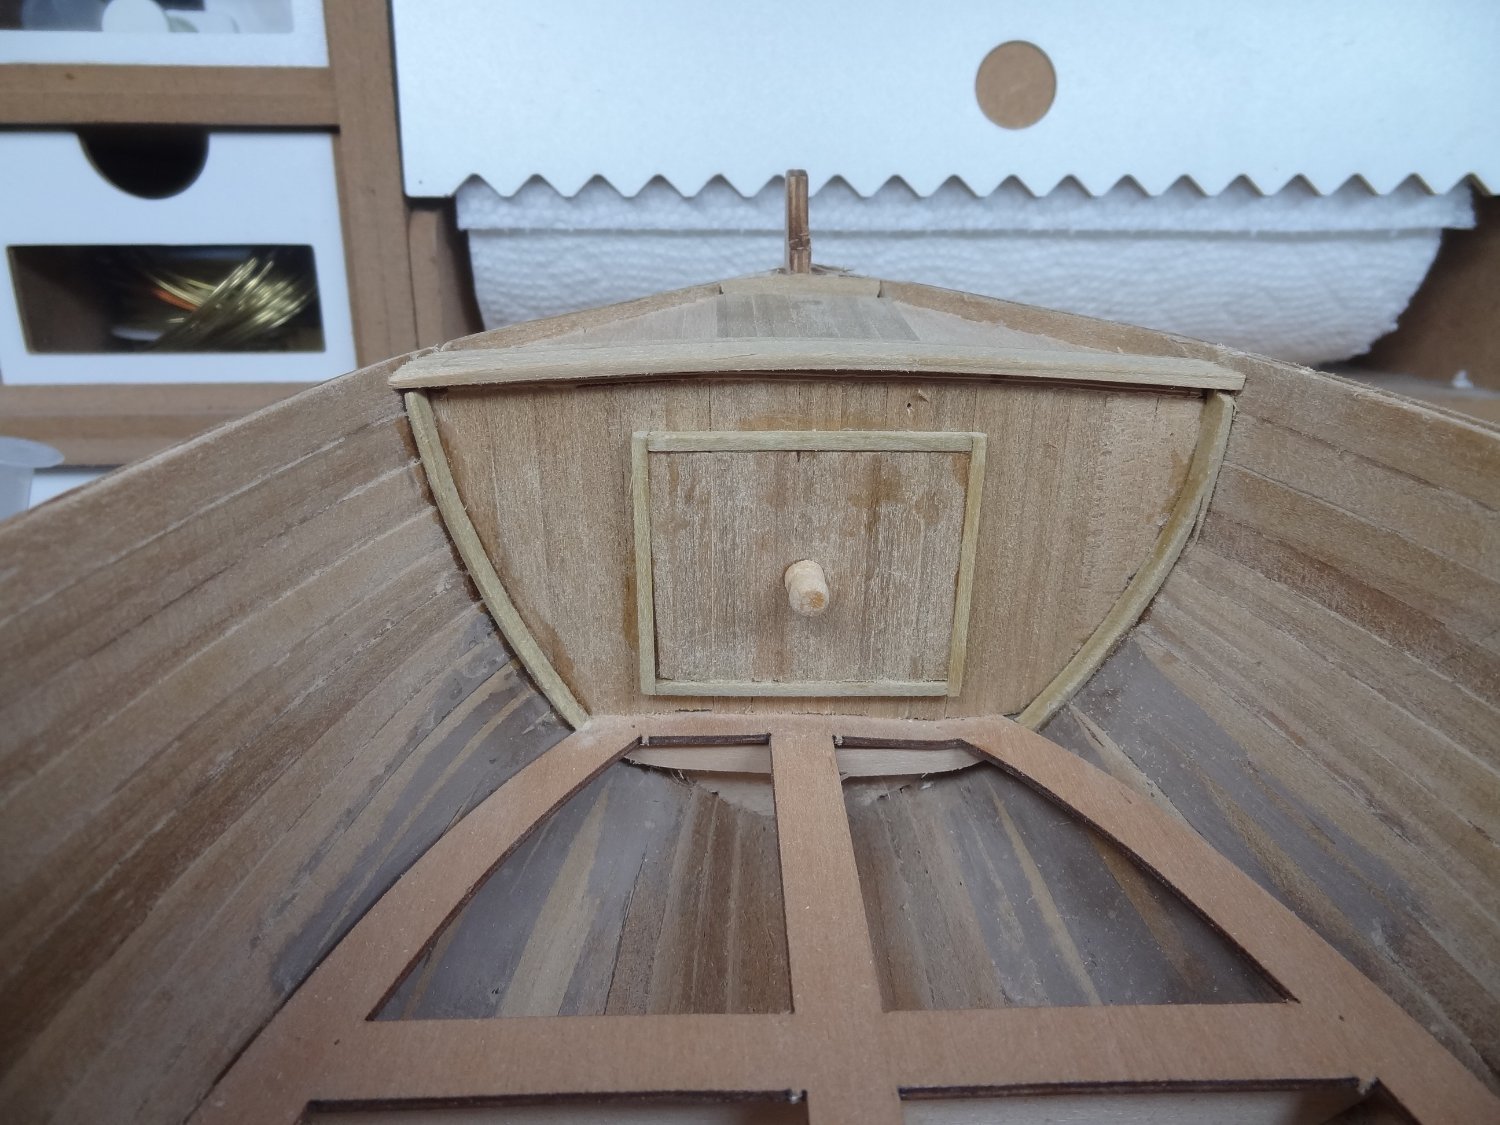
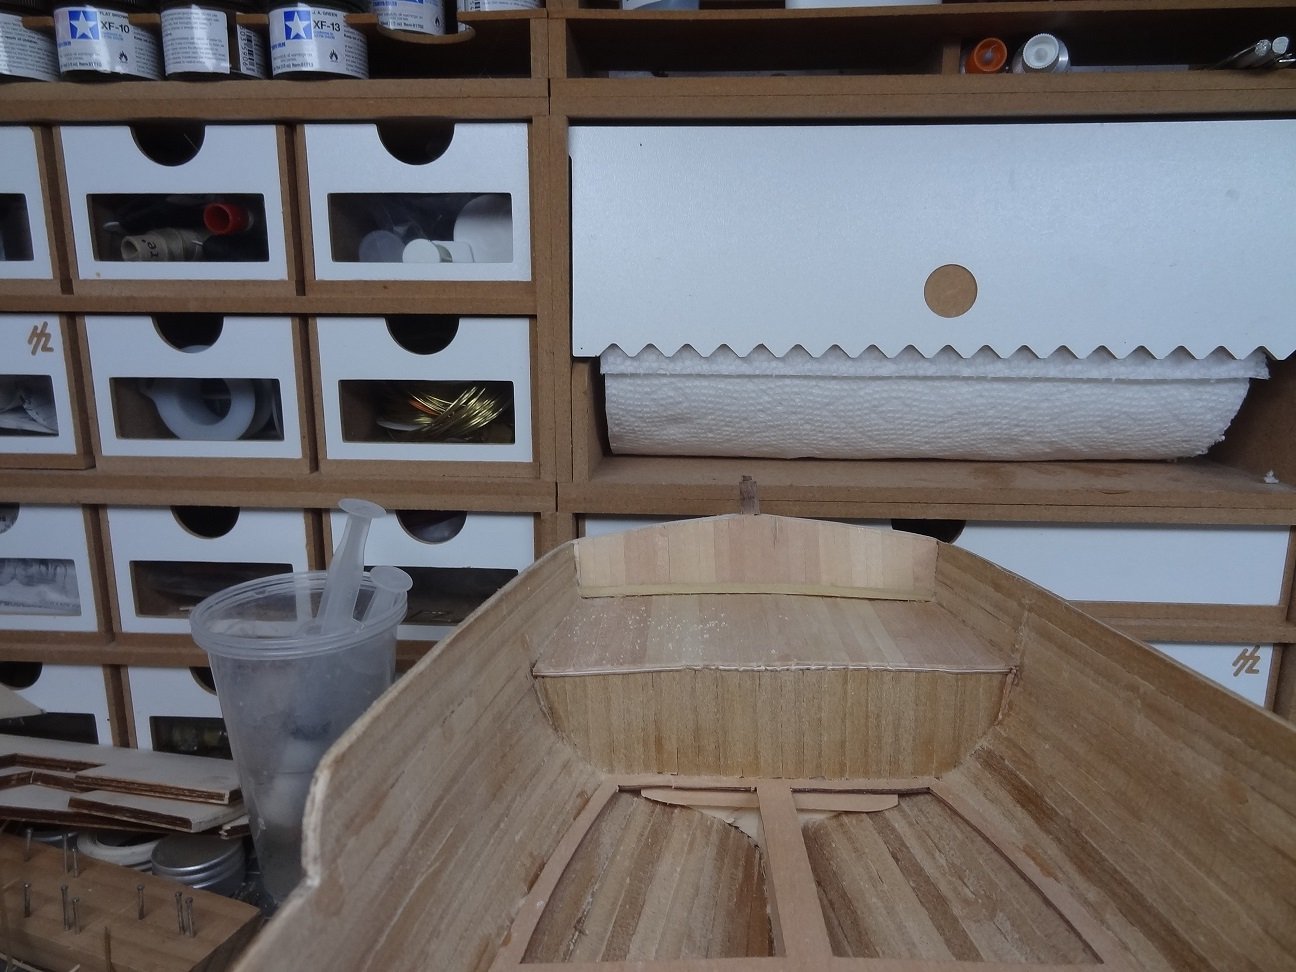
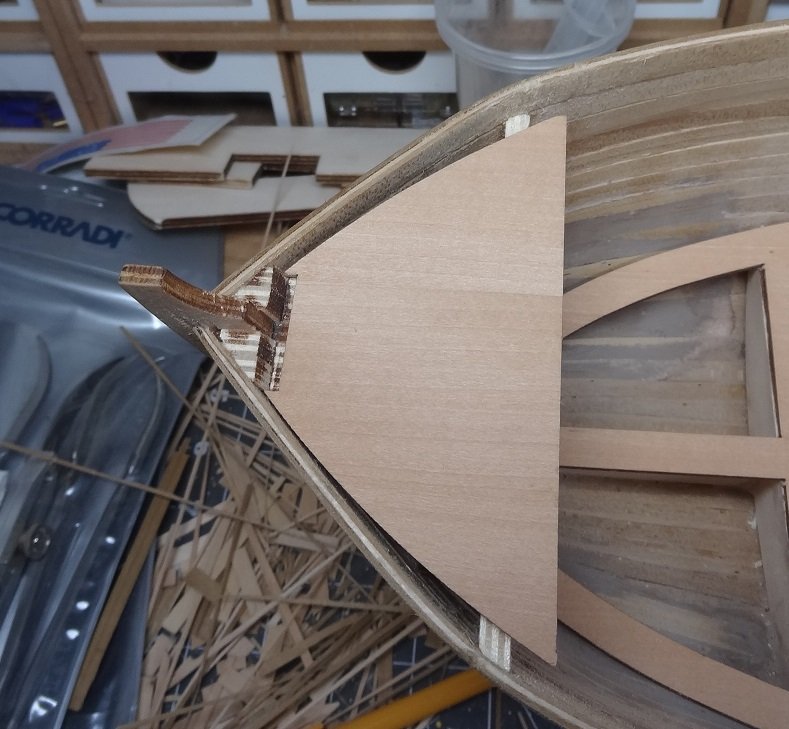
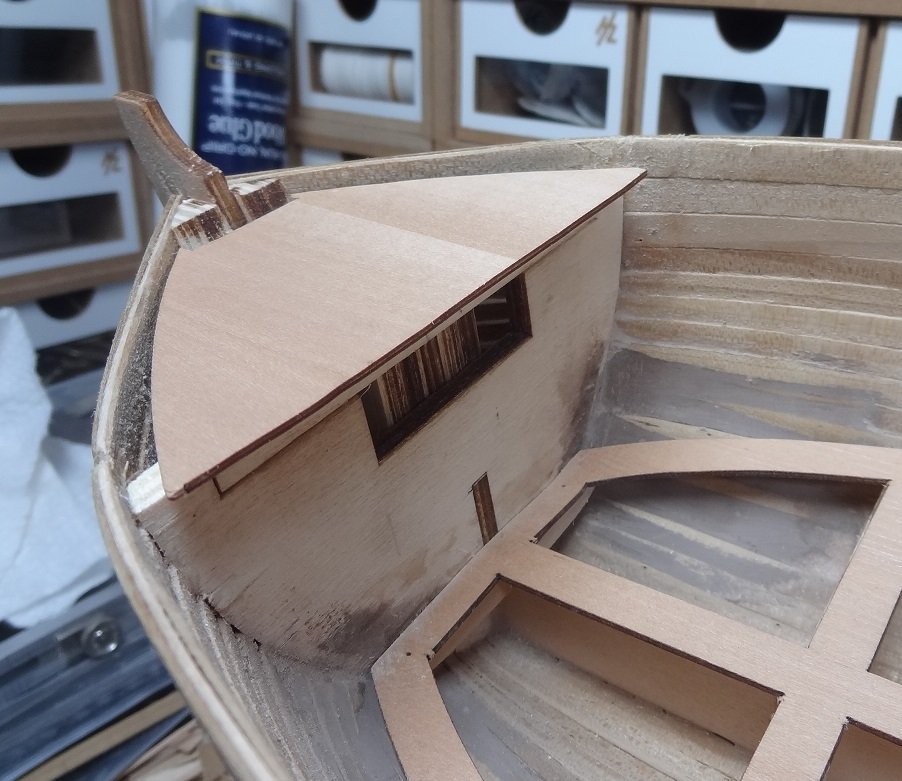
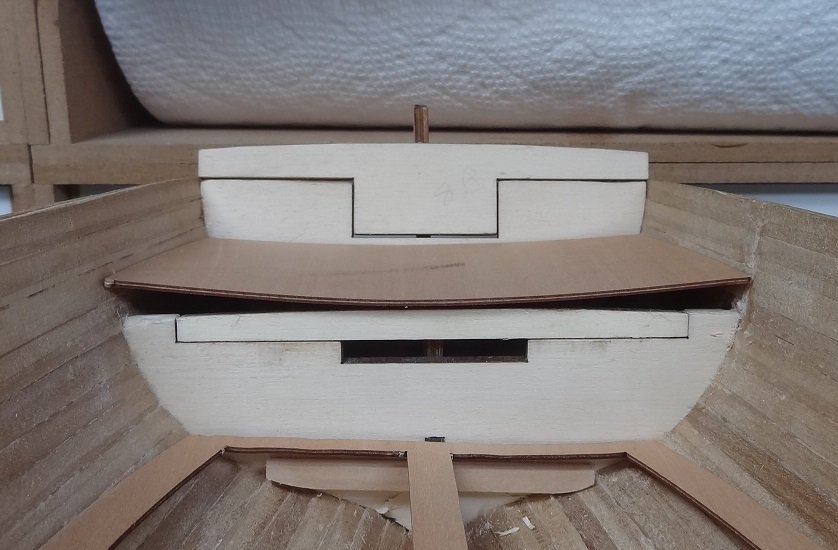
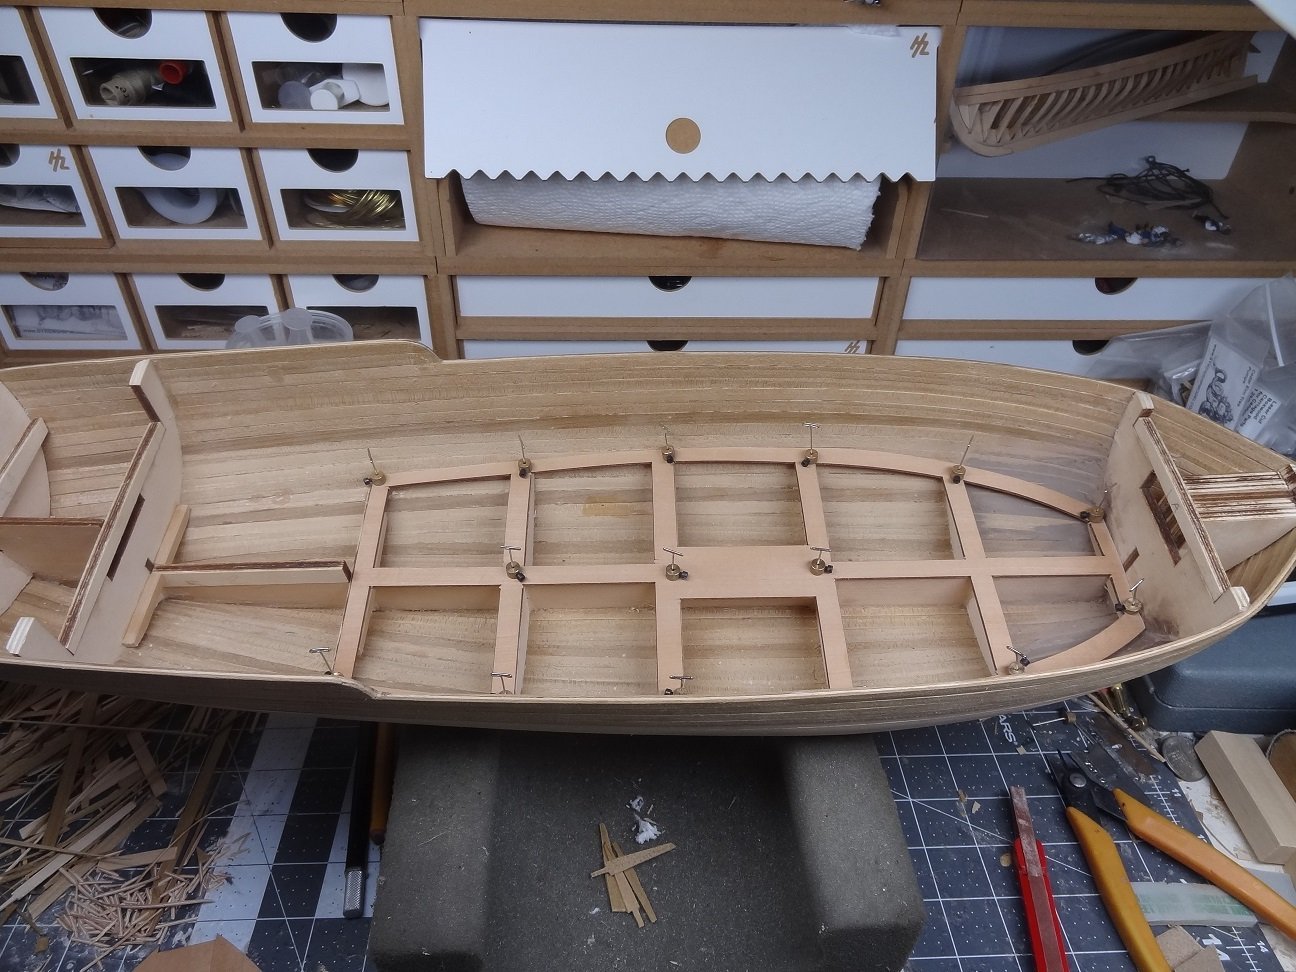
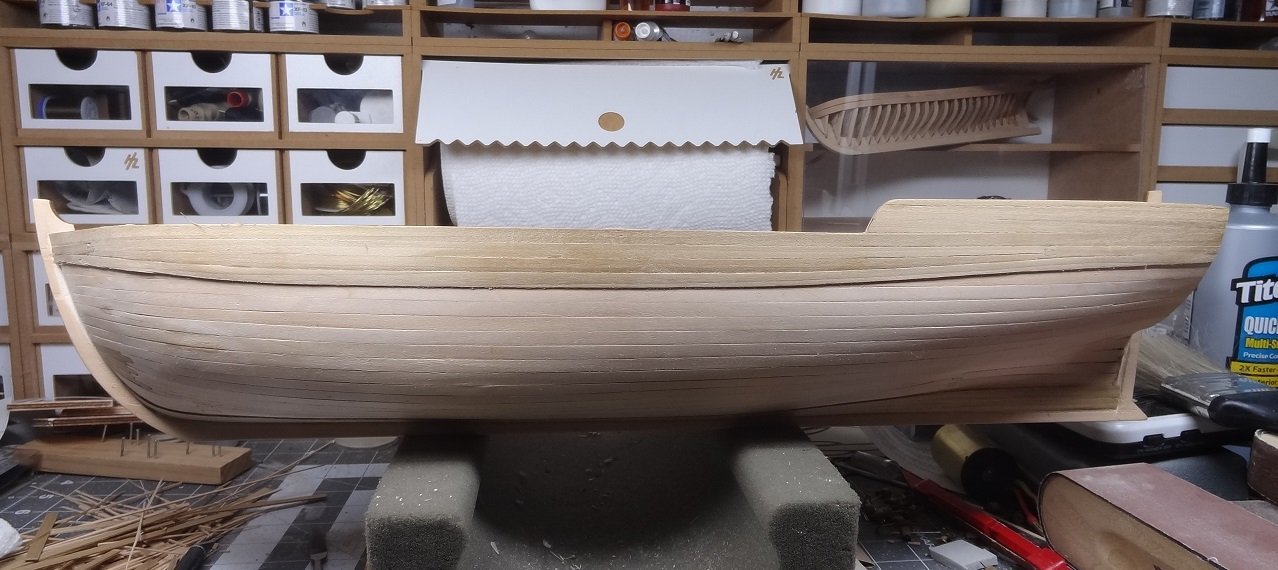
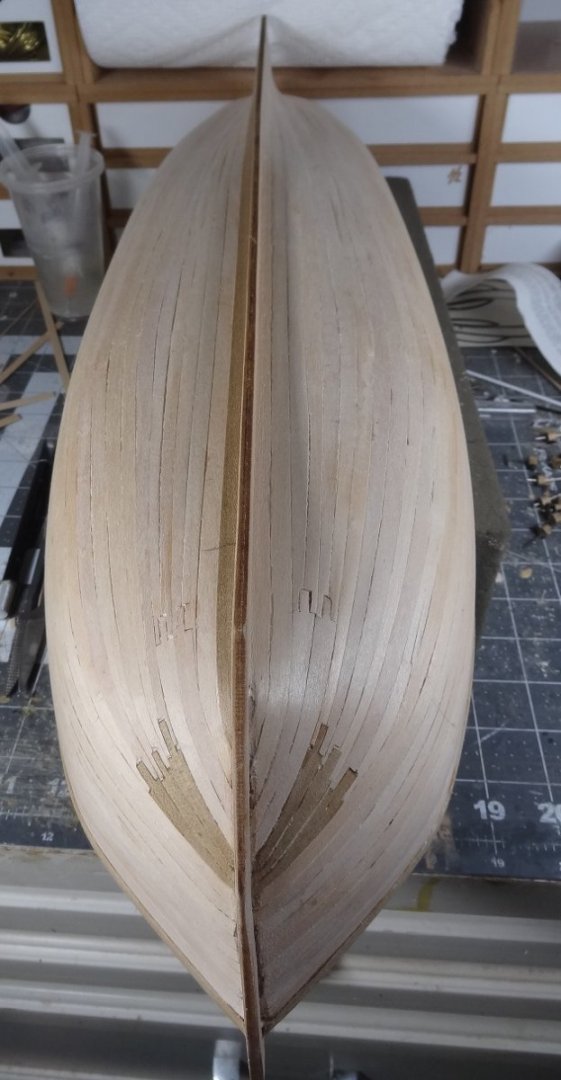
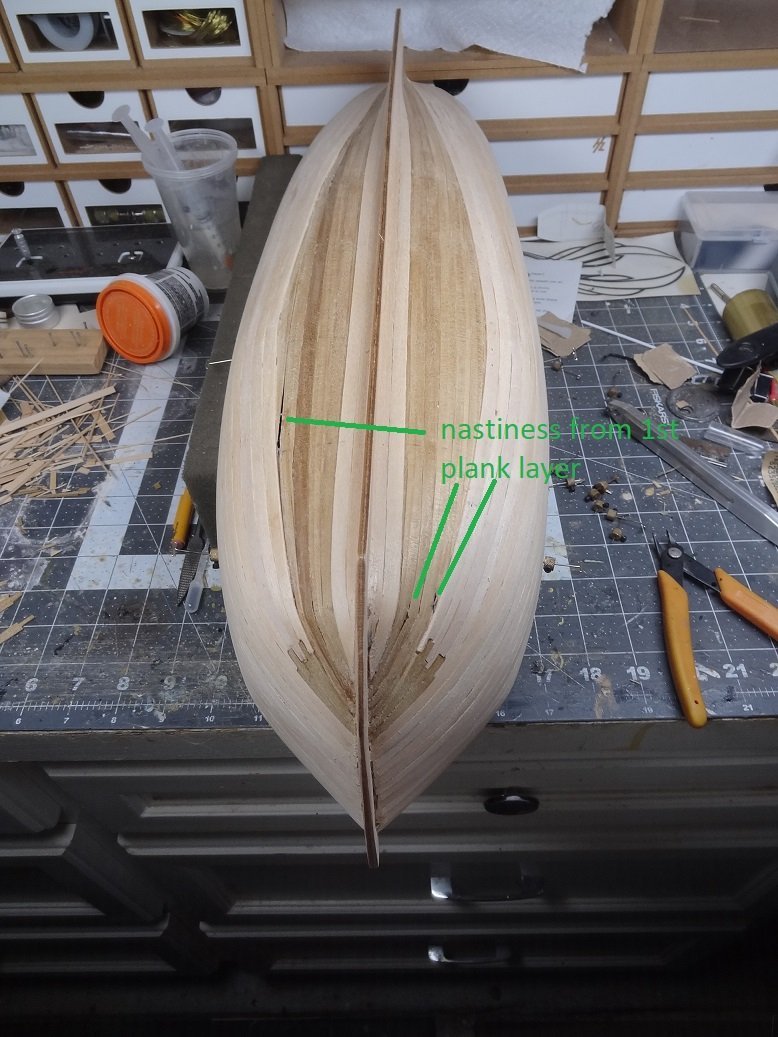
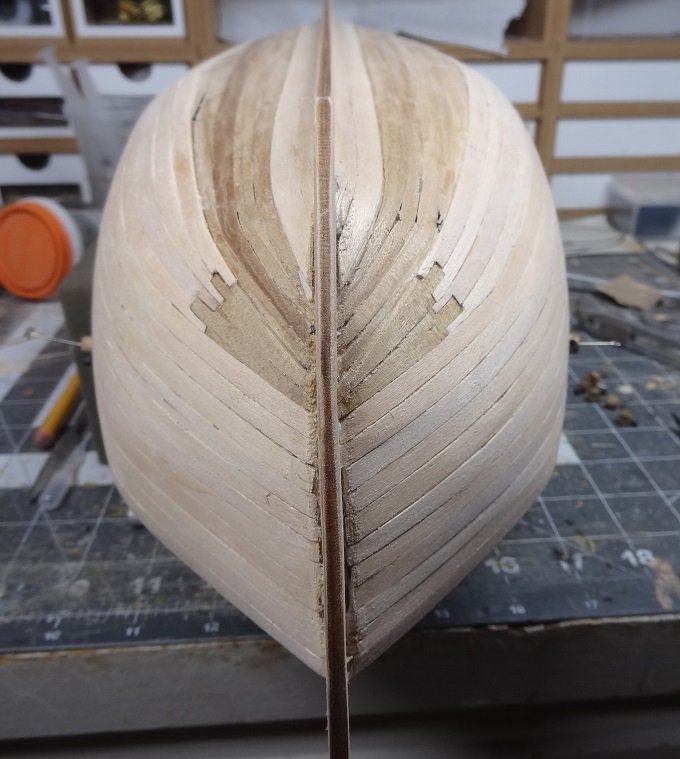
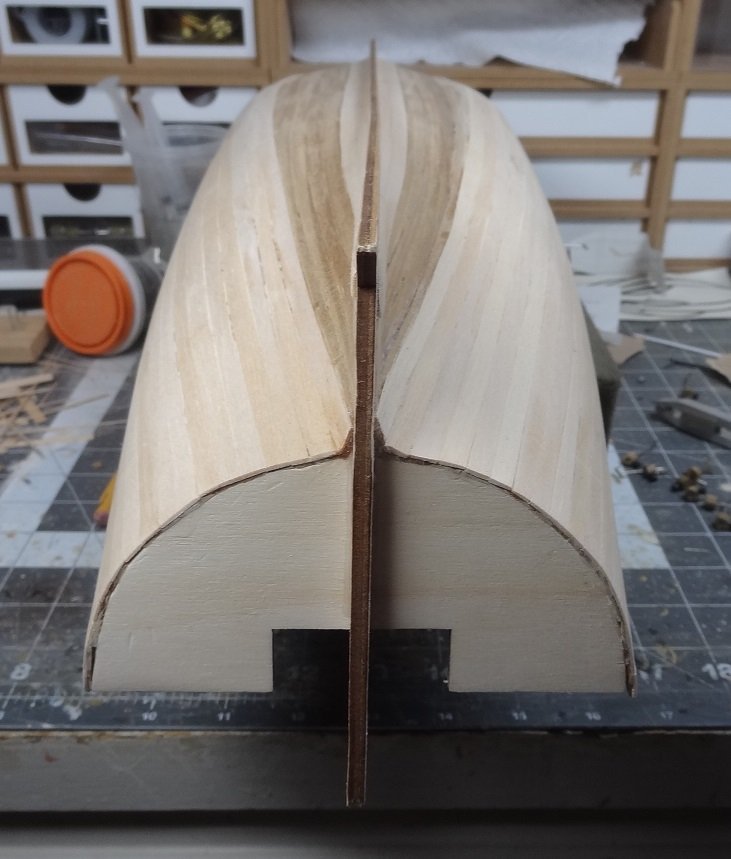
Still more going on with the hull interior. I will have to get back to the exterior very soon (see below). It has been fun working on the innards of the boat. A nice break from finishing the 3rd layer planking. A few pics of what has been done: The biggest problem I see is that the instructions (if you can call them that) specify limewood for a lot of the trim. This wood is hideously ugly and when laid on top of some shredded walnut looks absolutely pathetic. And somewhere down the line I expect the instructions to say "just paint all the limewood". I say this because the limewood pieces look totally hideous. They are going to have to be colored somehow and it would be way easier to paint them before they are glued to the build. I did finish off planking the transom and was about to trim up the edges when I realized that I can't do that until I complete the 3rd planking. So, sadly I will need to get back to the 3rd planking. Yup, I'm a procrastinator for sure, but the time has come. 😒


- 62 replies
-
- 1
-

-
- lancia armata
- panart
- (and 1 more)
-
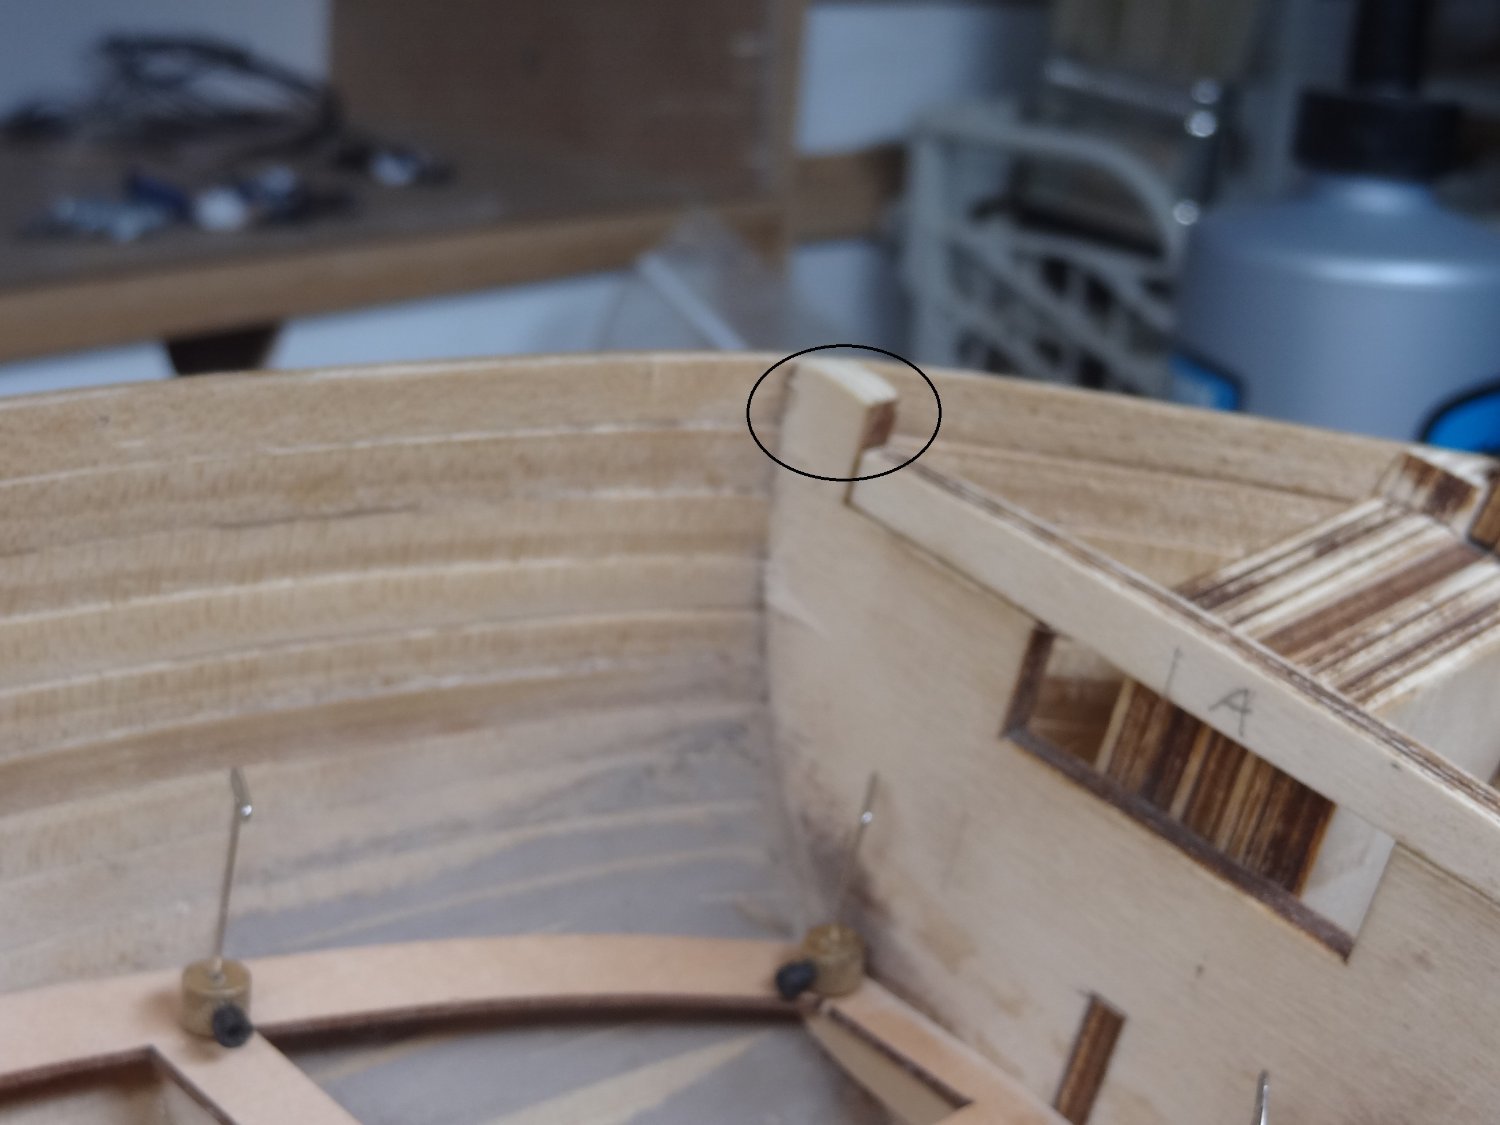
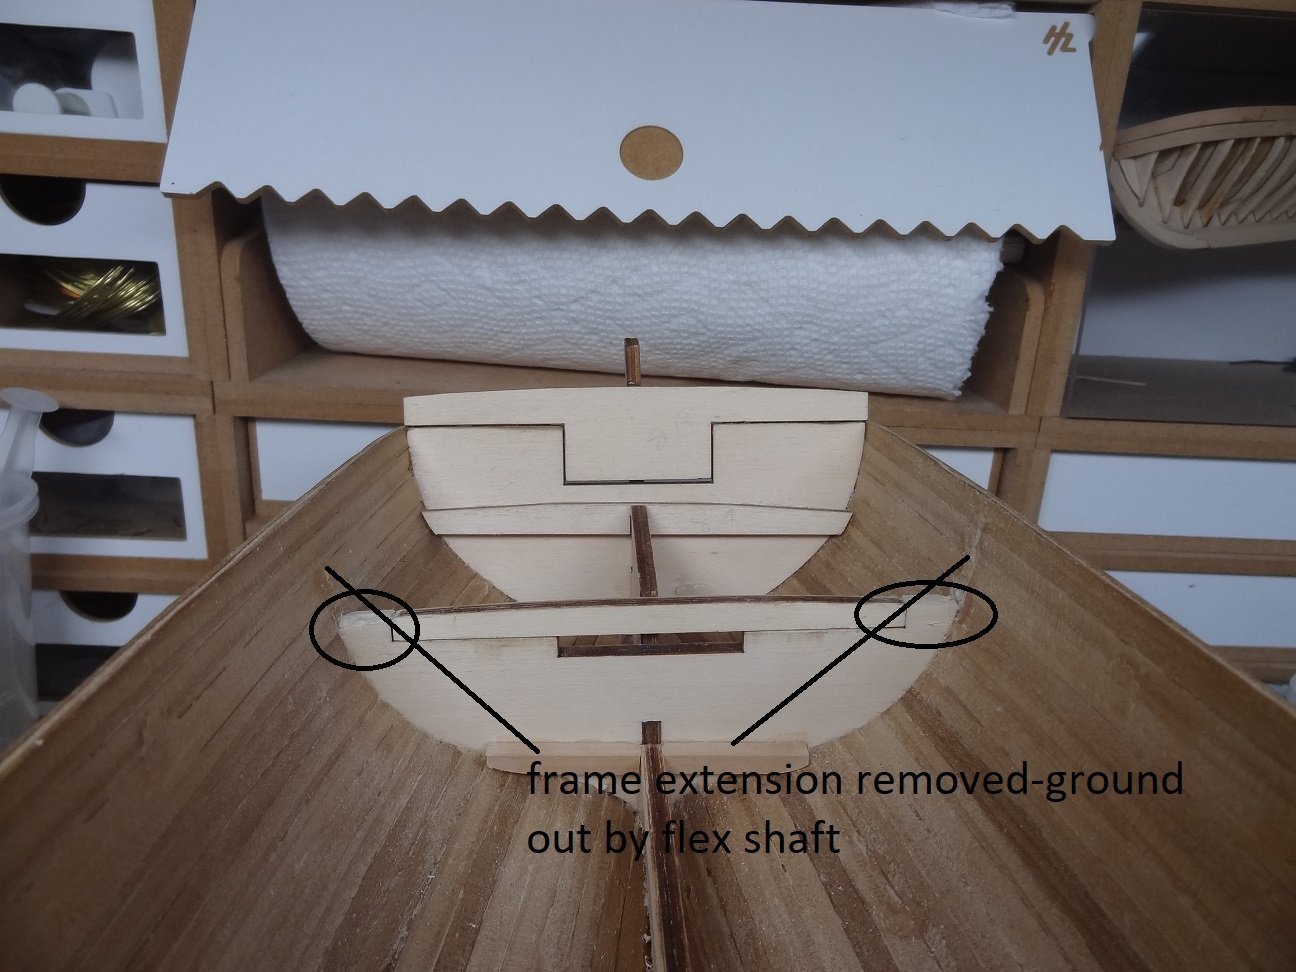
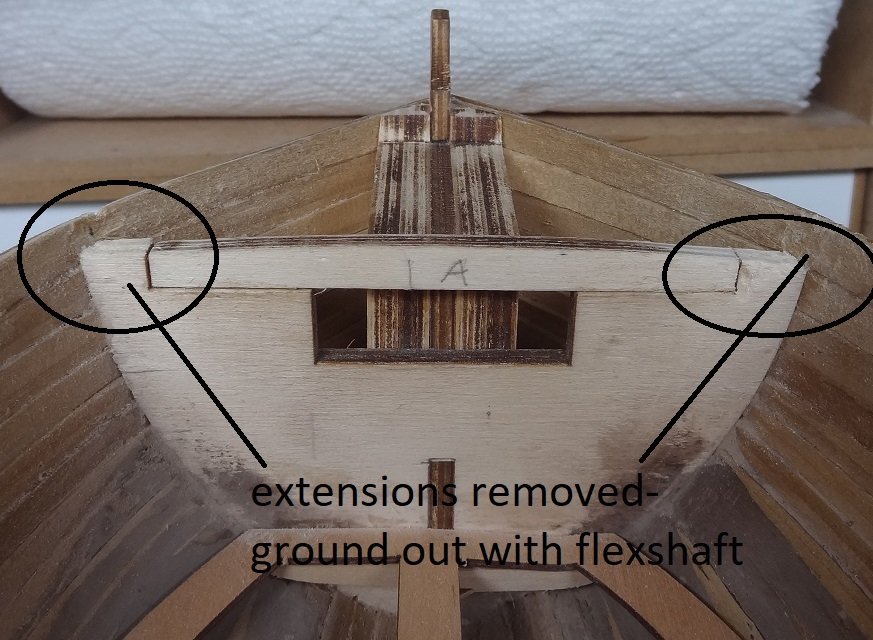
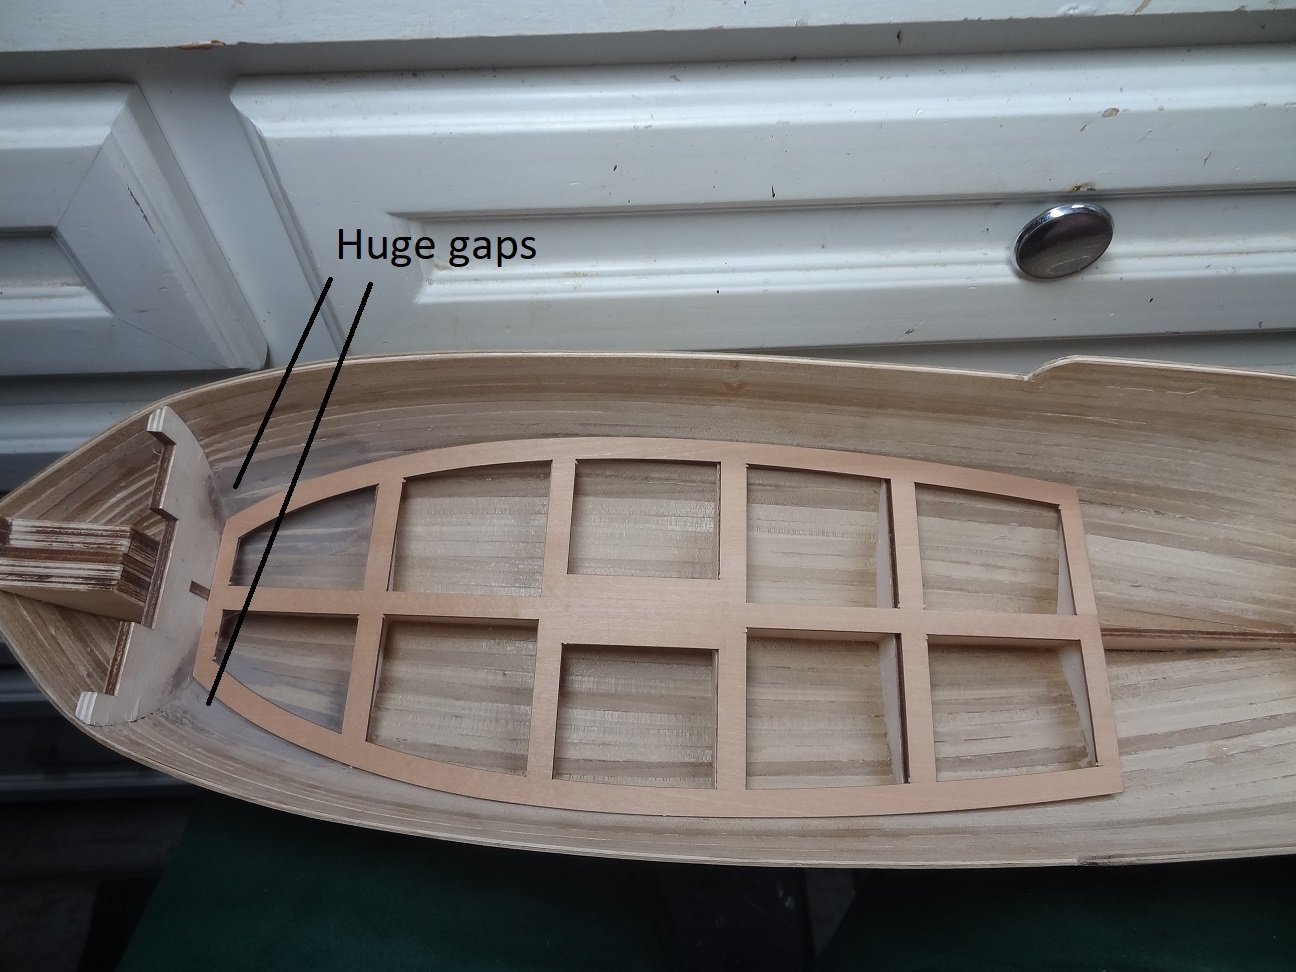
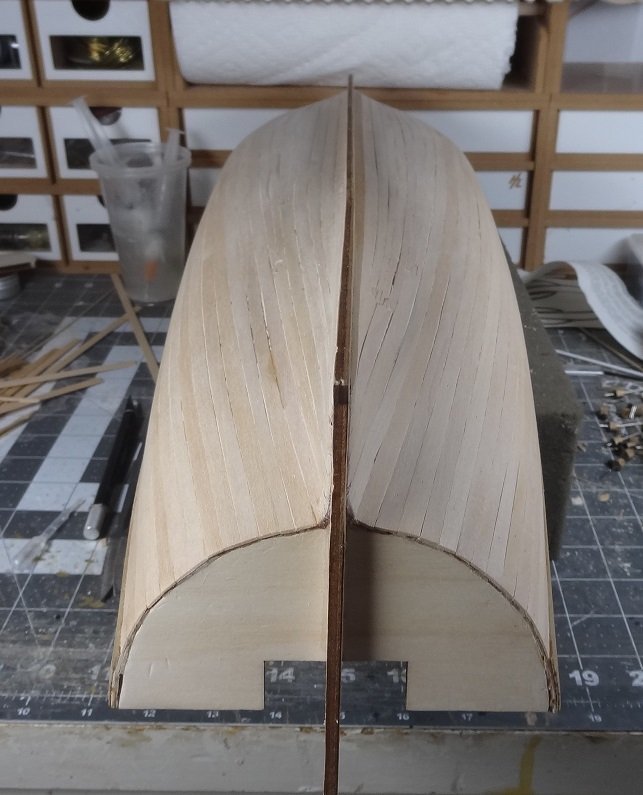
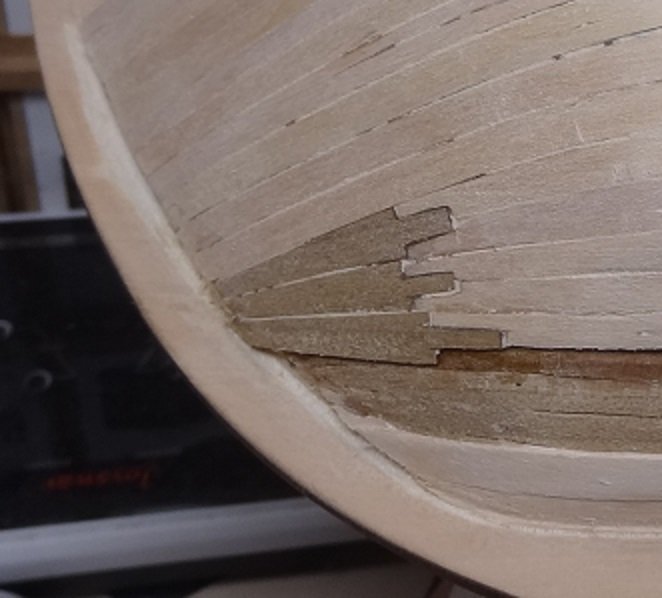
As stated above I had to grind out all the extensions. The planking at all those points, broke off easier than I had anticipated. It took a little sanding to remove all the crusty glue remains from the inner hull. As I have begun to apply the various deck base pieces a few pics will show how pathetic the fit actually is. Some I was able to sand down to make a reasonable fit. Others just simply suck. Most likely the deck planking will end up covering the big gaps. And then there are some frame pieces that have some sort of chunk taken out of them and then a separate piece that fills in the same chunk. This has happened on multiple occasions. I mean really WHY? How stupid can it get? My laziness has me working on the hull interior rather than finishing the 3rd hull layer. I discovered one big screw up this evening. While working on the interior I have been using wood from the same bundle that was supposed to be used for the final planking. WRONG! I kinda happened to remember that there was another bundle of sticks still remaining in the kit box. Some of those sticks are supposed to be used for all the decking planks. So I have been using the wrong sticks to plank all the decks. Hopefully I will have enough plank sticks to finish the hull. The fun never ends..... Apparently the editor has gone bonkers again. Not sure why the above pic has been embedded again. I can't delete it.
- 62 replies
-
- 2
-
-
- lancia armata
- panart
- (and 1 more)
-
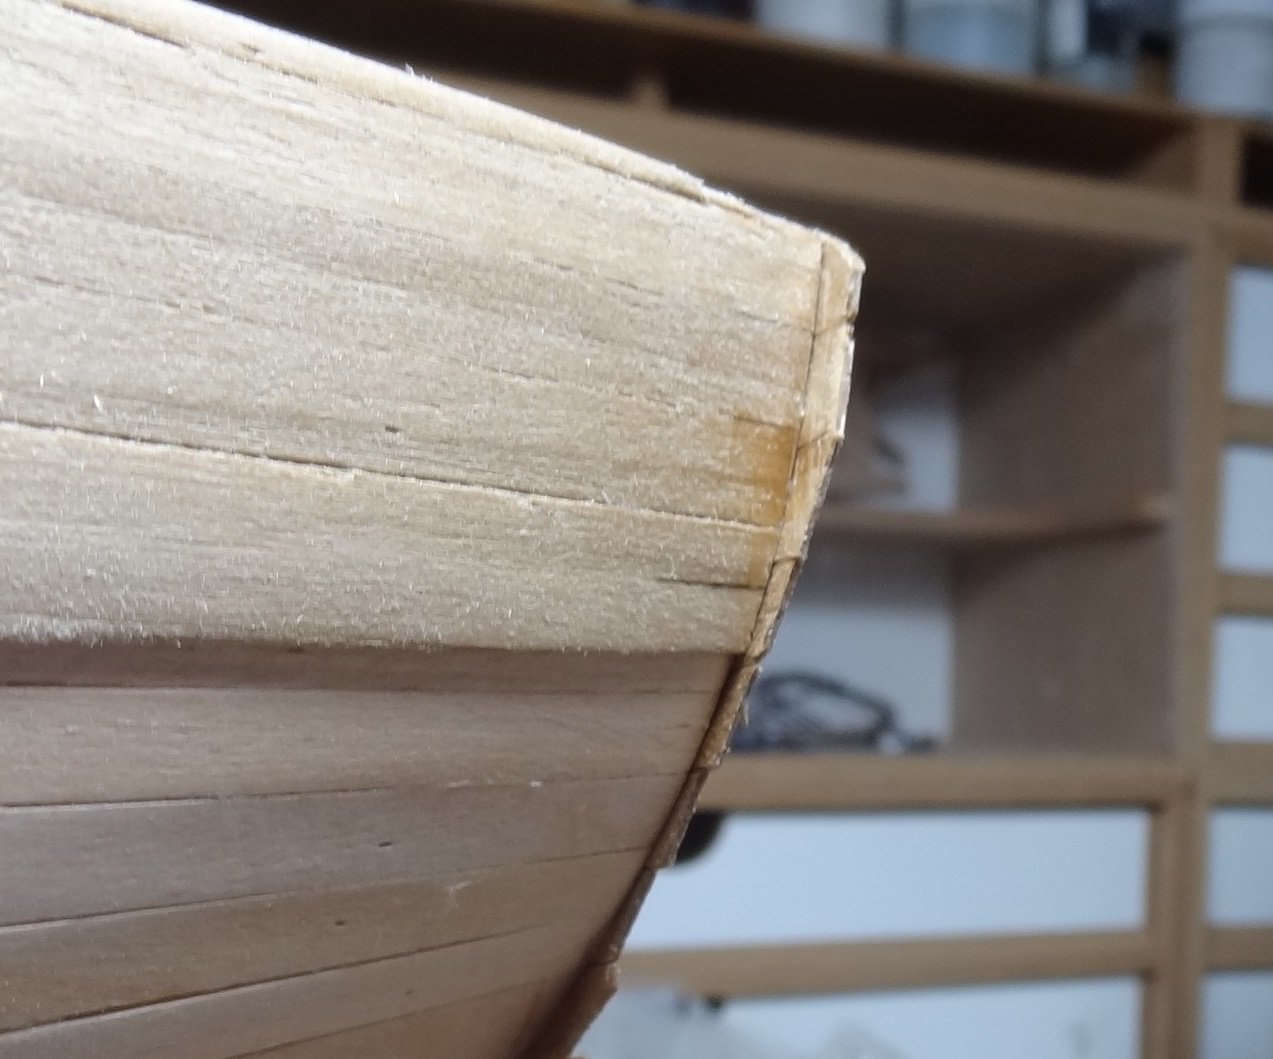
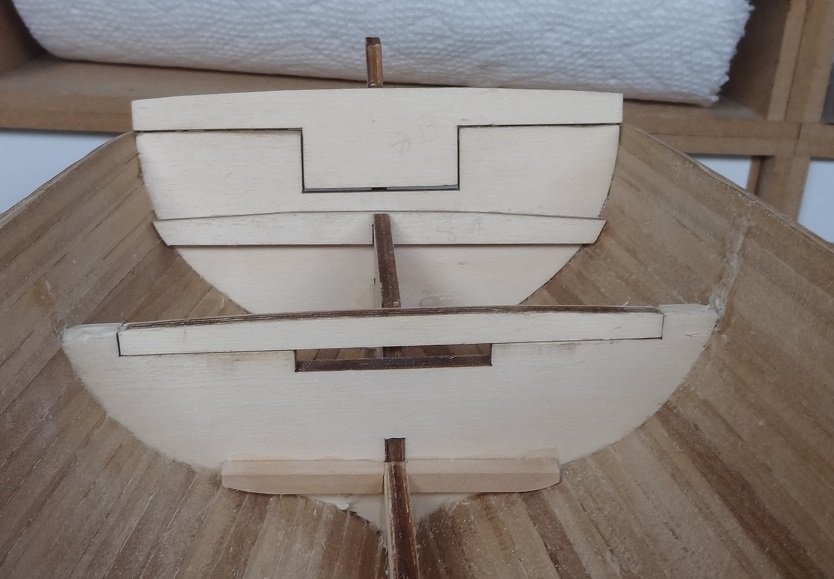
While still futzing with the 3rd plank layer, I have realized that I can start working on the interior components. There are 4 "deck" levels. Each has a base layer cut from a laser template. Every base will be be planked. Here is the biggest base. There is one serious problem that is coming up and I am not sure how to handle it. As I have mentioned from the start of this thread, most of the frames are breakaway, cut to allow for the top 2/3 of the frame to be broken off. You can see this in the above pic. You can also see that in the few remaining full frames (the 1st and the last) there is some extension at the sides. Well now surprise, all of the circled material needs to be removed. The problem is that it is all plywood. Thick stuff. It will not be removed with a knife. Given the position, it will also not be removed with some sort of handsaw. So WTF? The only thing I can think of is to break out the Foredom flex shaft and grind it all away. If anyone has a better idea please let me know. I guess I need to rag on Panart a bit more. According to plans, those frame extensions looked like they were going to be permanent and like a fool I glued plank strakes to them. Now not only do the extensions have to go, but all the strakes have to be unattached from them. Another pitiful design decision. I will already start to warn anyone - Panart kits are extremely difficult to work with. Materials are sub par, instructions/plans are really bad - they often contradict each other. If you are a beginner, I would look elsewhere for something to build.

- 62 replies
-
- 2
-
-
- lancia armata
- panart
- (and 1 more)
-
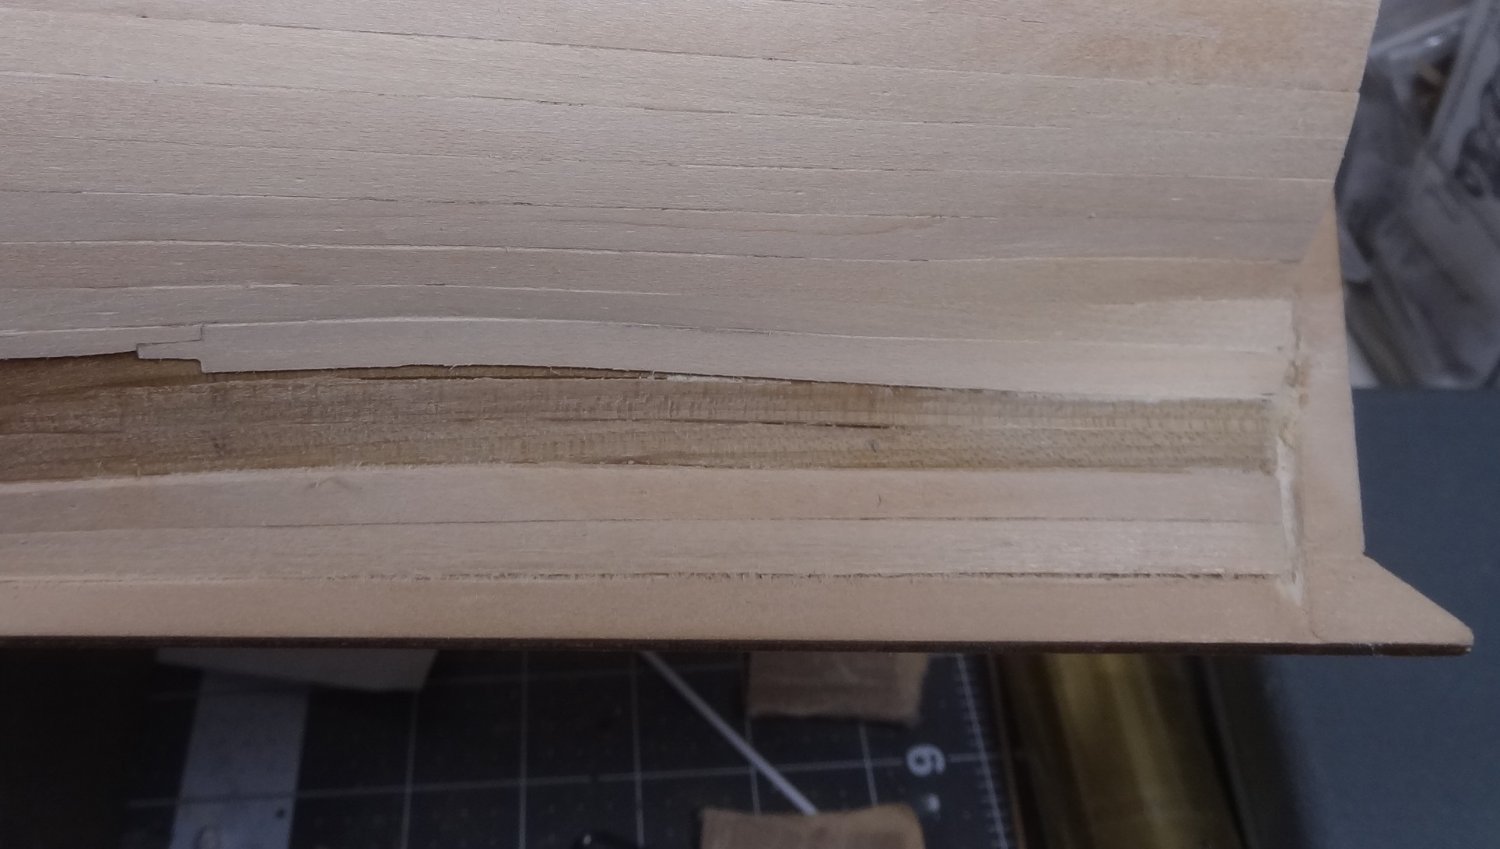
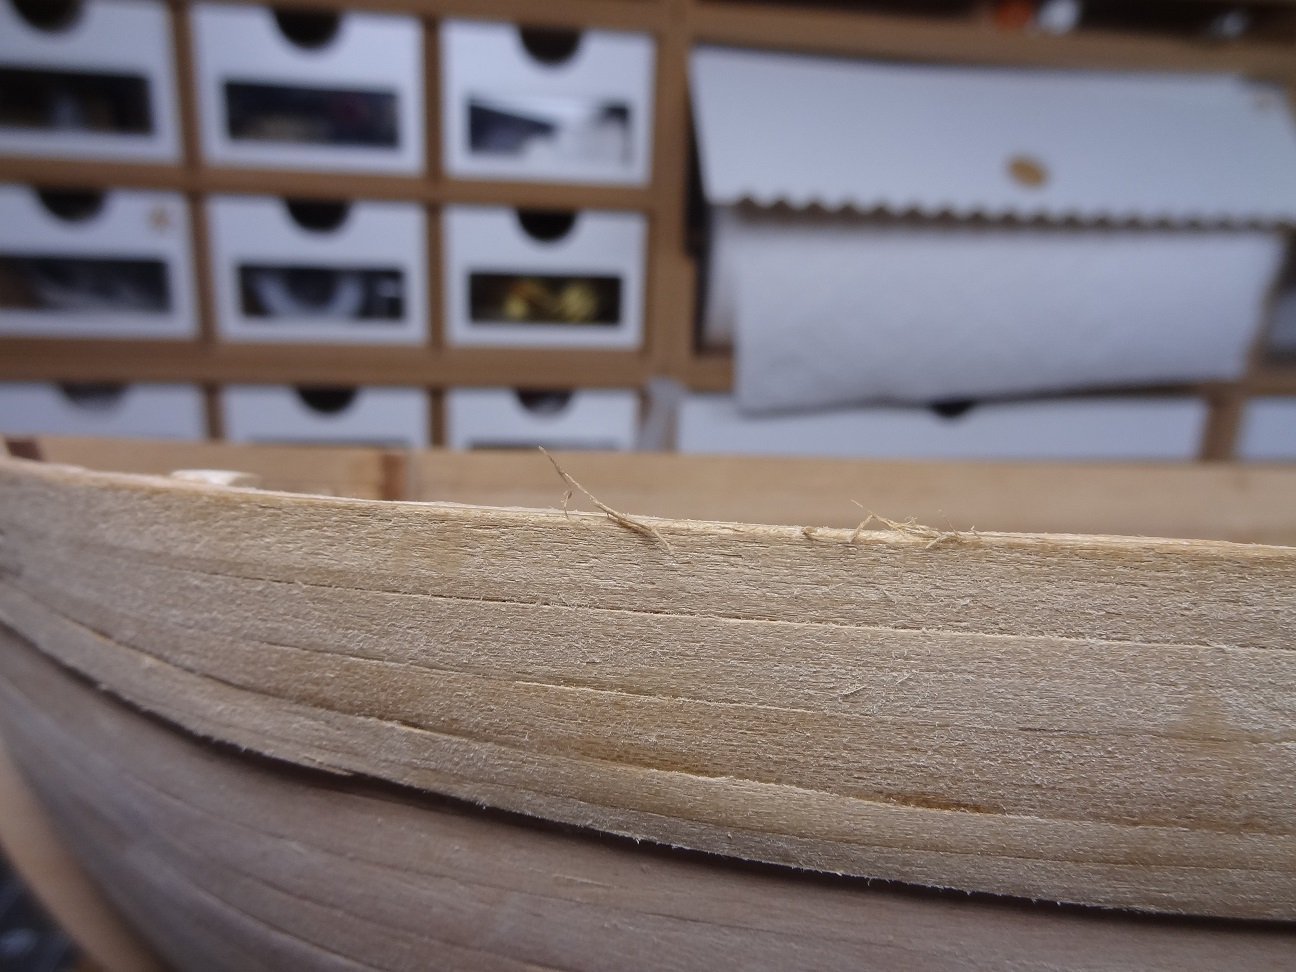
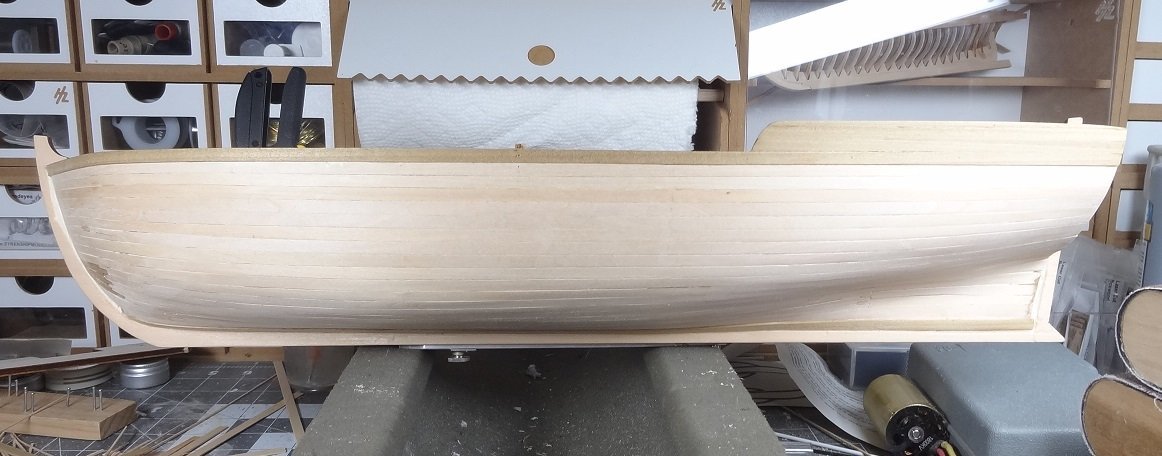
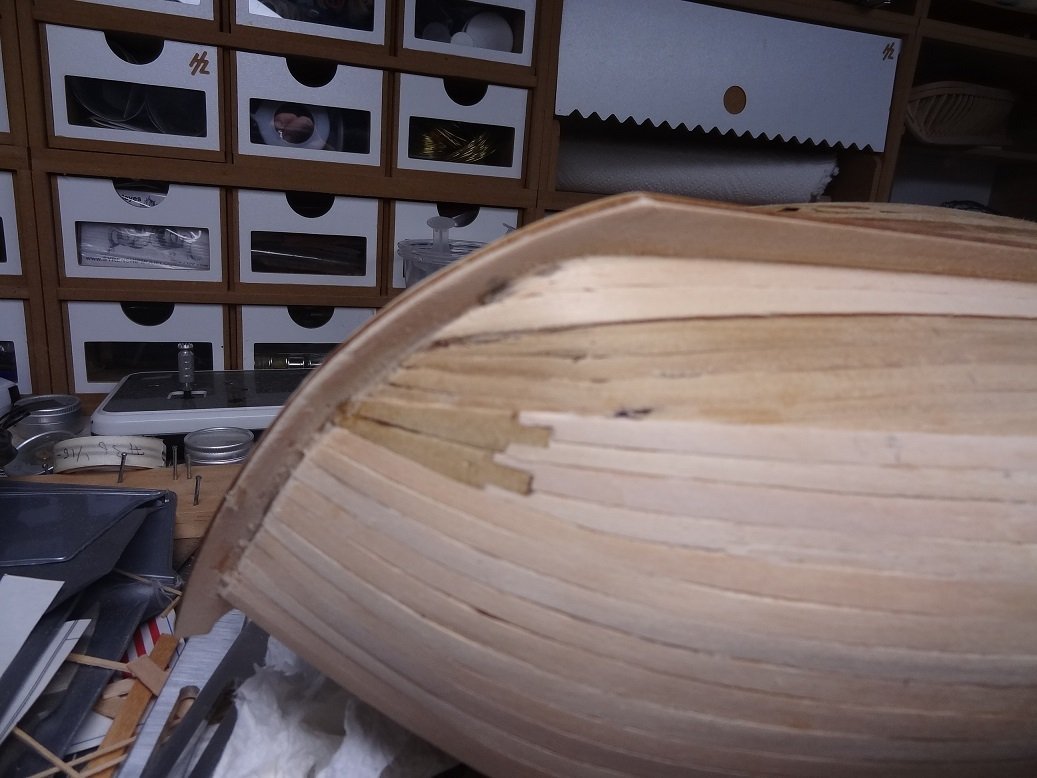
Still working on plank layer 3. Unlike the other layers, I am working strake by strake. Shaping a stick for starboard and then duplicating the same shape for a port stick. Honestly, while this is the suggested method for planking I am seeing some holes in this theory. Mainly, it is based on the fact that both hull sides are shaped identically. Obviously to me, at least in this build, that is not the case. I suspect that this is the same situation in a lot of builds. I have had to do additional shaping after a strake is glued, which means that the strake on one side probably doesn't match the strake on the other side. I have laid about 3 strakes down from the wale. Since then I have been working up from the garboard and have a total of 4 strakes up from the keel rabbet. As was my intention, there is a very mellow downward curve in the strakes below the wale. This will come into play much more as the lower and upper strakes get closer to each other. As with the 2nd layer, so far I have been totally eyeballing the strakes. No bands or dividers so far. I suspect that when I get down to a 2" - 2 1//2" space between the upper strakes and the lower, I will need to inject a single band and use the dividers to help shape the last few sticks. I still gotta gripe about the wood in this kit. It is really sad. I find it almost impossible to sand. It starts out feathered and frayed after cutting. But even sanding with 1000 grit sponge it just keeps splintering. The surface of the wood is totally destroyed, tons of flakes and feathers. I'm tempted to shoot a pic with a macro lense close up to show just how poor the wood is. Here you can see some of the splintering. This was after using 1000 grit sanding sponge. More splintering. Not just at the strake edge, but look closely at the 3 sticks. This was after using a 1500 grit sanding sponge. Nice downward curve on the upper strakes. Here you can see the pathetic irregular thickness of the plank sticks. I have a bunch of walnut stock which I could use and probably eliminate a lot of these problems. I am resisting using that stock because I still have this gut feeling that I may at some point just trash this entire build. Don't want to waste good wood for this project.
- 62 replies
-
- 3
-
-
- lancia armata
- panart
- (and 1 more)
-
Sparky - interesting thought. I do sometimes get so intense on one way of thinking that I overlook the obvious. After reading your suggestion I immediately jumped up and out to the shop to check it out. Sadly, flipping that deck base just made things worse. But I do appreciate your slap in the face to sometimes rethink things.
- 62 replies
-
- 1
-
-
- lancia armata
- panart
- (and 1 more)
-
Brass Blackening Building Time Survey
mikiek replied to Dave_E's topic in Metal Work, Soldering and Metal Fittings
All of these responses are a good reason to consider painting the parts black rather than trying to corrode them into a black condition. Much simpler and totally foolproof. -
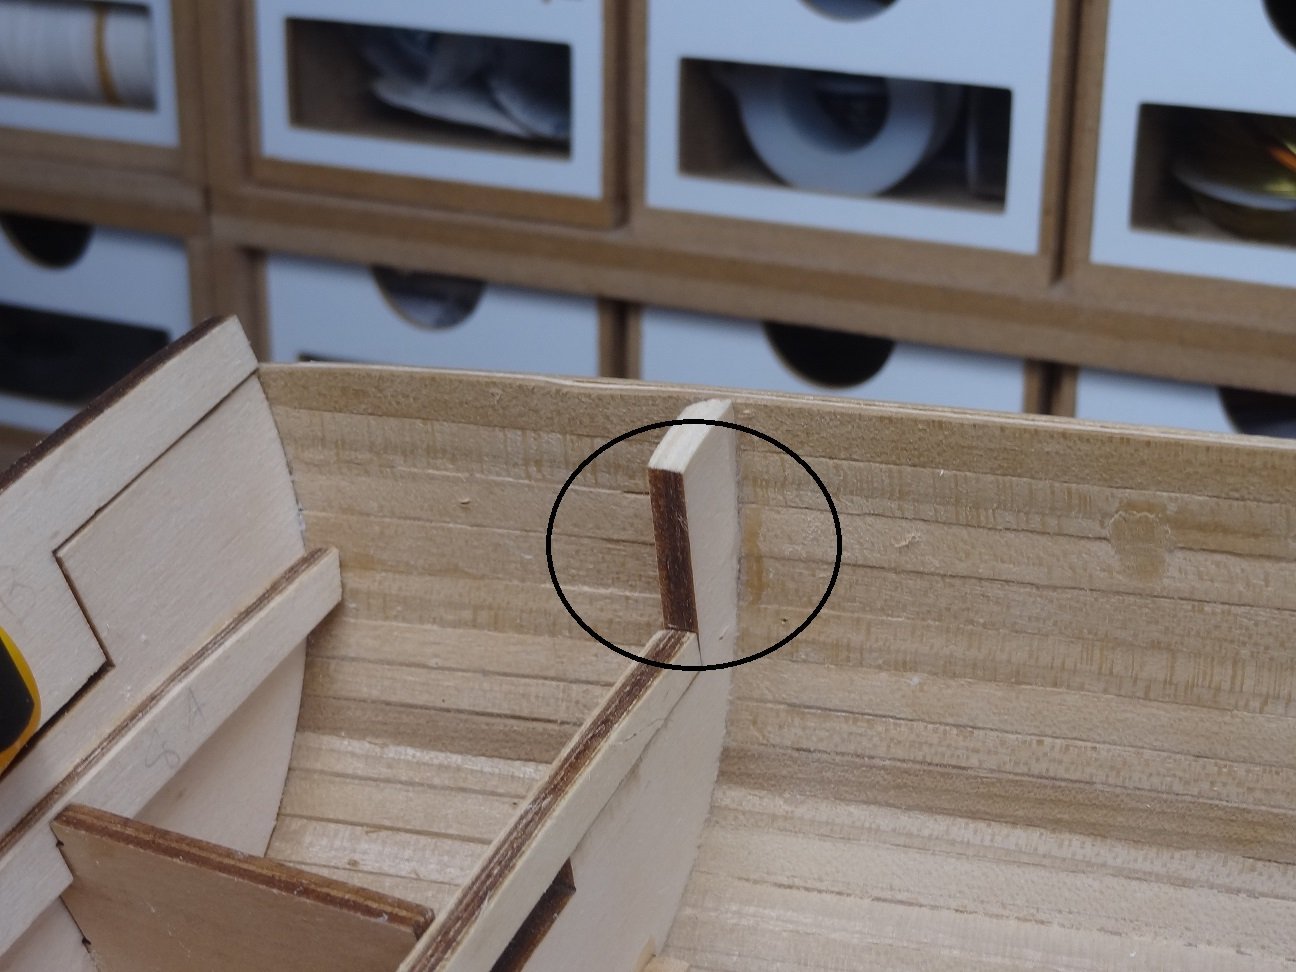
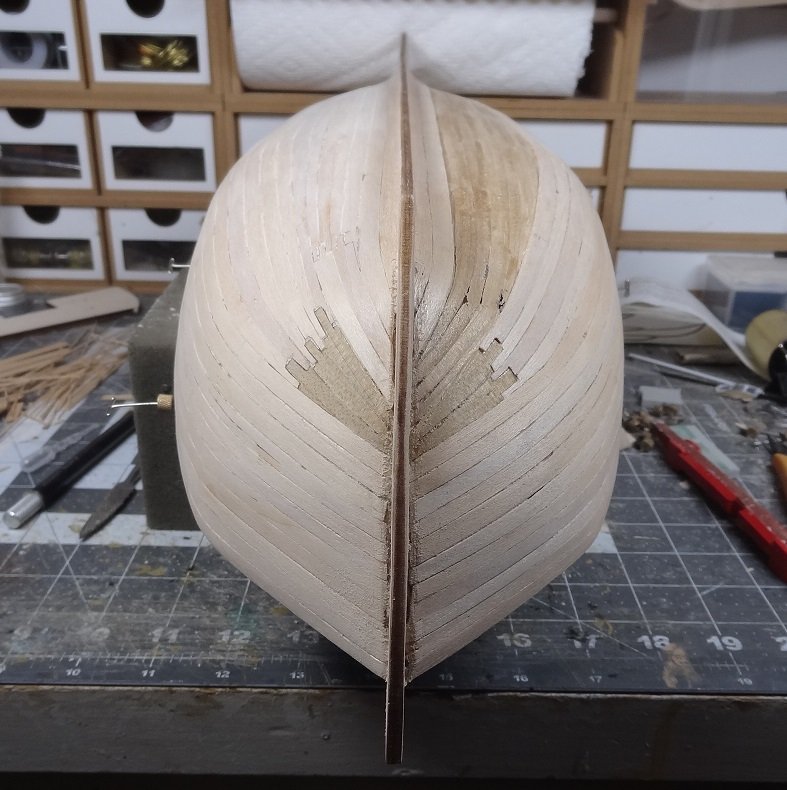
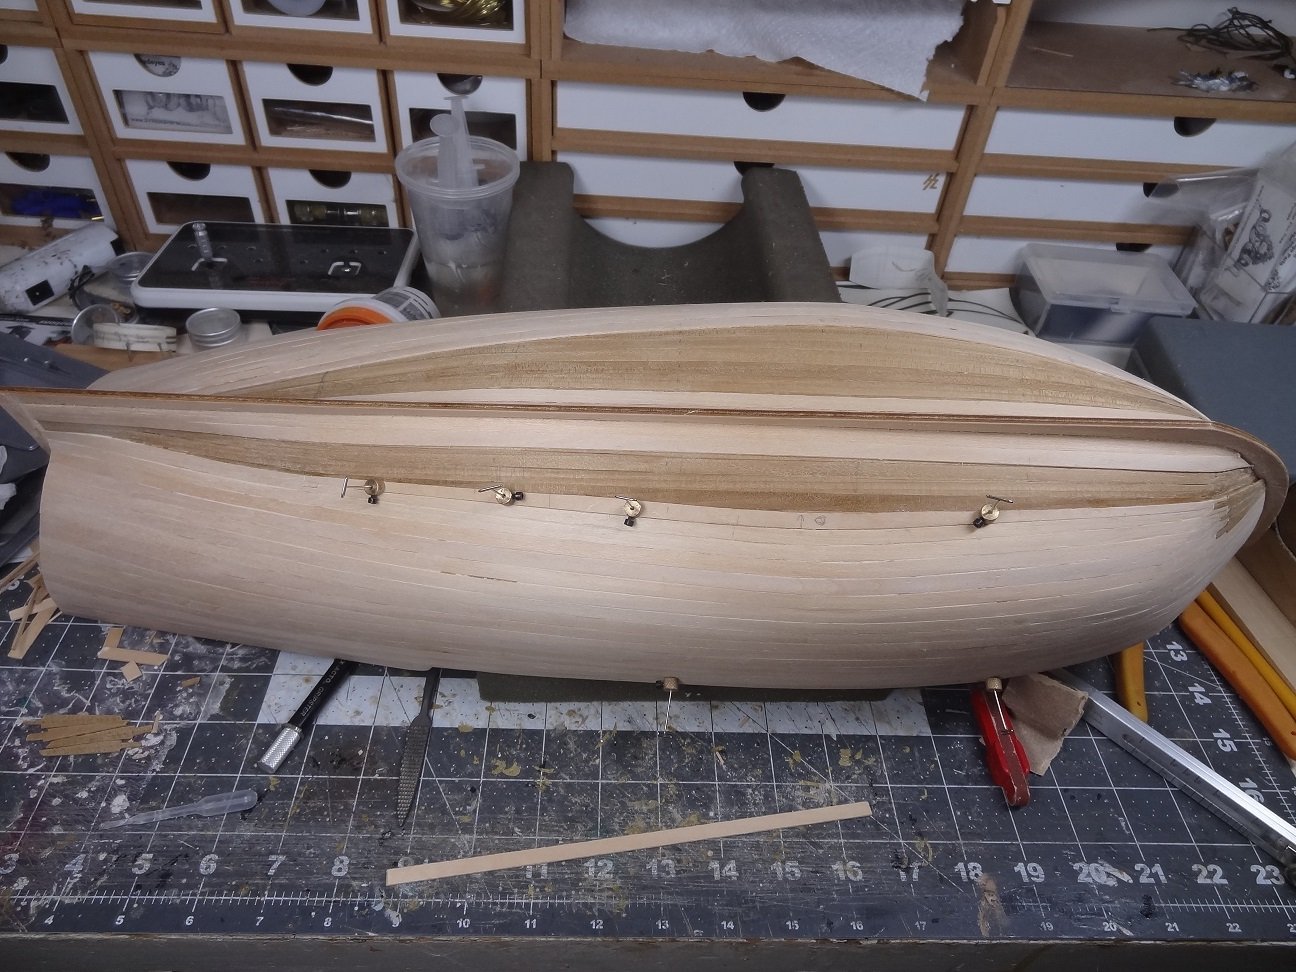
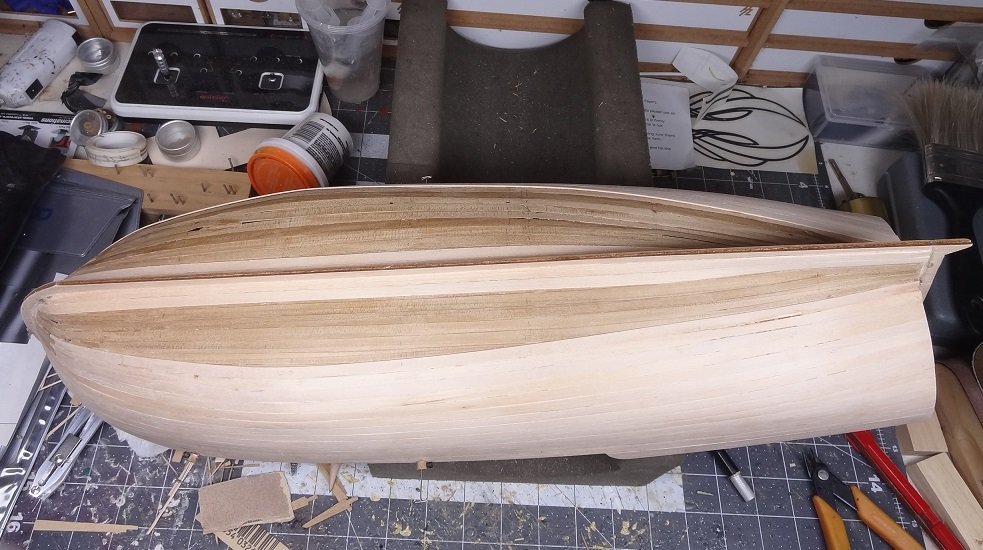
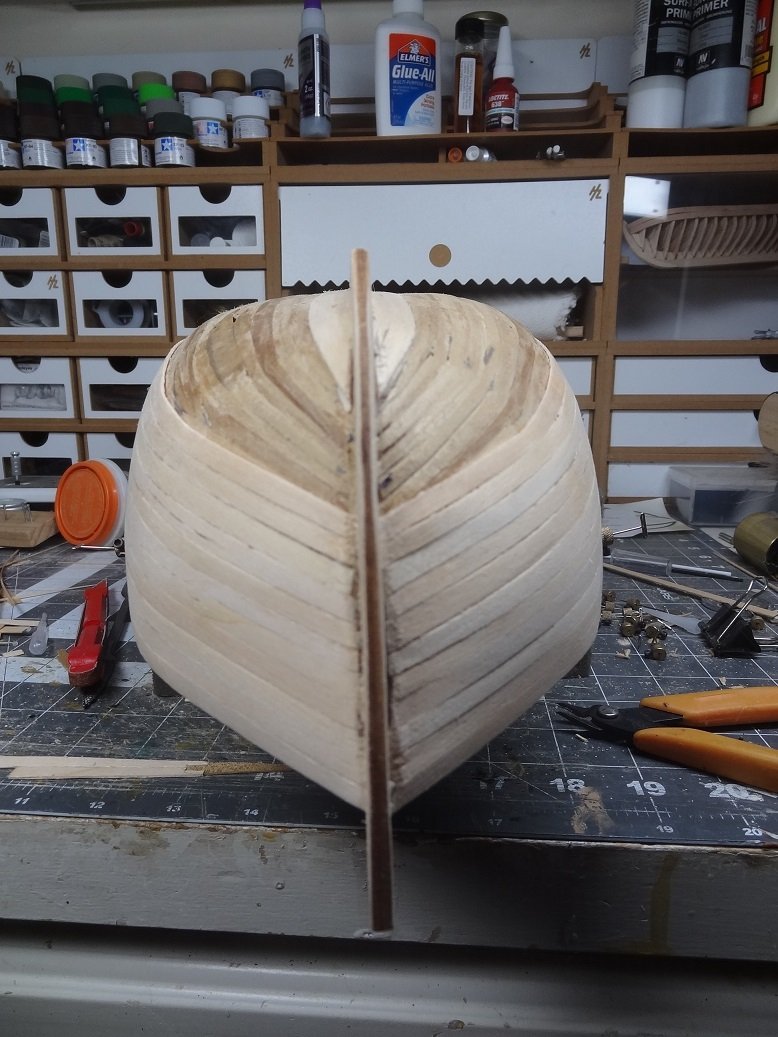
Taking an ambitious start on layer 3. I laid a wale on both sides. On layer 2, I had to deal with a planking curve that basically went upwards a little ways back from the bow. You can see some of that in previous posts. This ended up with a lot of bending which IMO never works out all that well. For layer 3, I decided to aggressively reverse that pattern. After the wale I immediately added a 1:2 stealer to start to bring that same curve downwards. The next few sticks will be individual, but given the number of stealers required for layer 2, I will be watching closely. It will probably require more stealers and those are much easier applied in the wide area directly below the wale. On layer 2 I think I waited too long. The stealers were added where the hull shape had lots of changes - down around in the deadwood. I have been bitching about the wood for this kit and I have to say it is only getting worse. The sticks for layer 3 are pathetic. Uneven trimming on the edges, extremely poor thickness dimensions and the overall quality (or lack of). When trying to cut or sand an edge a little off angle the sticks feather and fray to a ridiculous degree. I try to sand away some feathering and that only brings on more. The walnut sticks are garbage. Here's some images of where I am 1/2 of the first stealer - You can already see that the plank curve is working downwards rather than upwards like in the 2nd layer. As I mentioned above, each strake is being cut and shaped and the same strake on the opposite side is being duplicated. So far this has kept both sides of the boat in sync. Cisco - this is actually the proper way to use the pin clamps. You stab the pin in the substrate, and then use the edge of the knurly part to actually hold something down. This leaves no holes in the final layer. This works most of the time but there will be occasions where where you have to stab a pin in the final layer. The plank edge obviously still needs some shaping. But you can already see how we are initiating a curve downwards. This truly helps the overall layout of the strakes. That upwards bend of the curve on layer 2 really gave me a lot of grief, Looking forward, not sure what this piece is called but it is obviously not sitting square inside the hull. Major gaps on each side. Not sure if this is by design, or due to the inability to glue hull strakes to a frame which ends up compromising the hull shape. Richard, if you are still following, let me know if you experienced the same issue with your build. Have also been doing a ton of sanding on the inner planking. I thought a lot of it would be covered up, but you can see by the above pic that almost the entire inside hull will be visible. Bummer!


- 62 replies
-
- 1
-
-
- lancia armata
- panart
- (and 1 more)
-
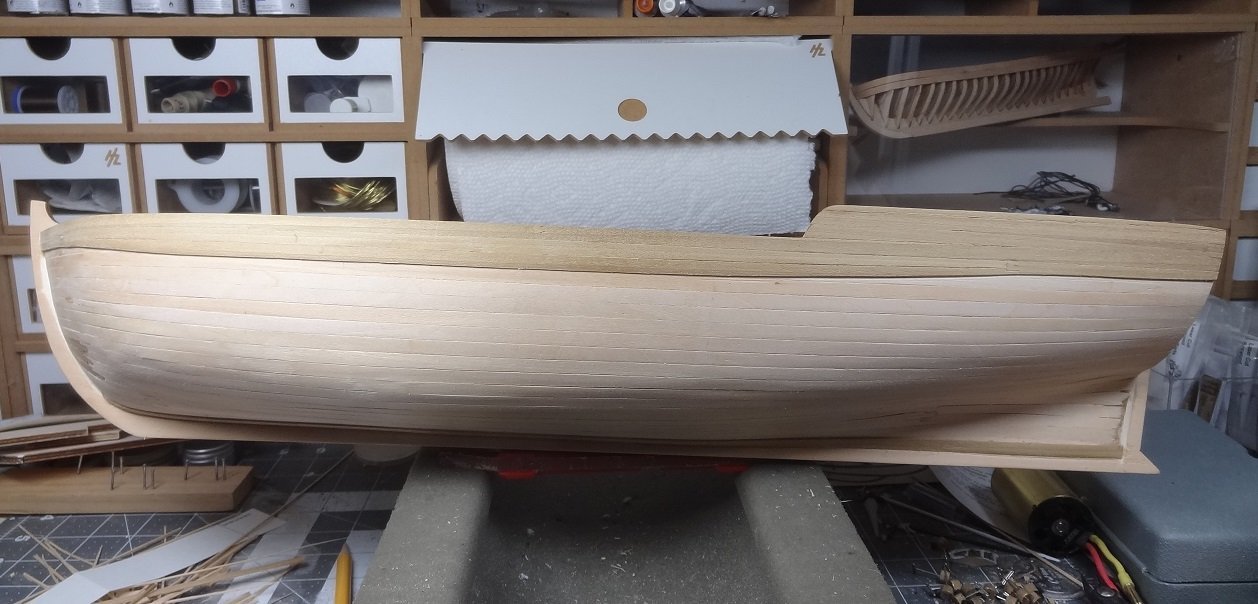
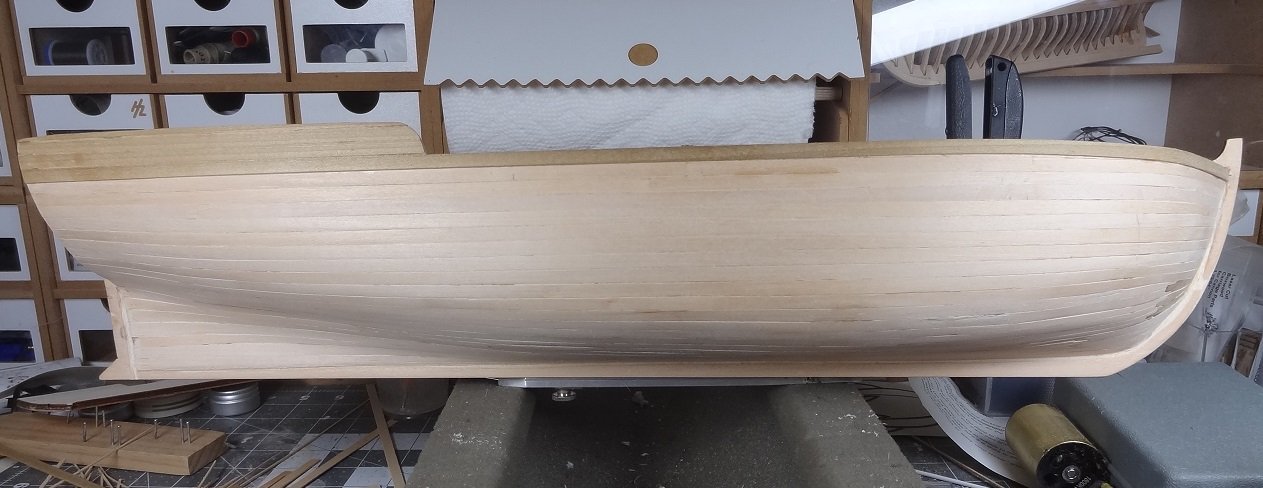
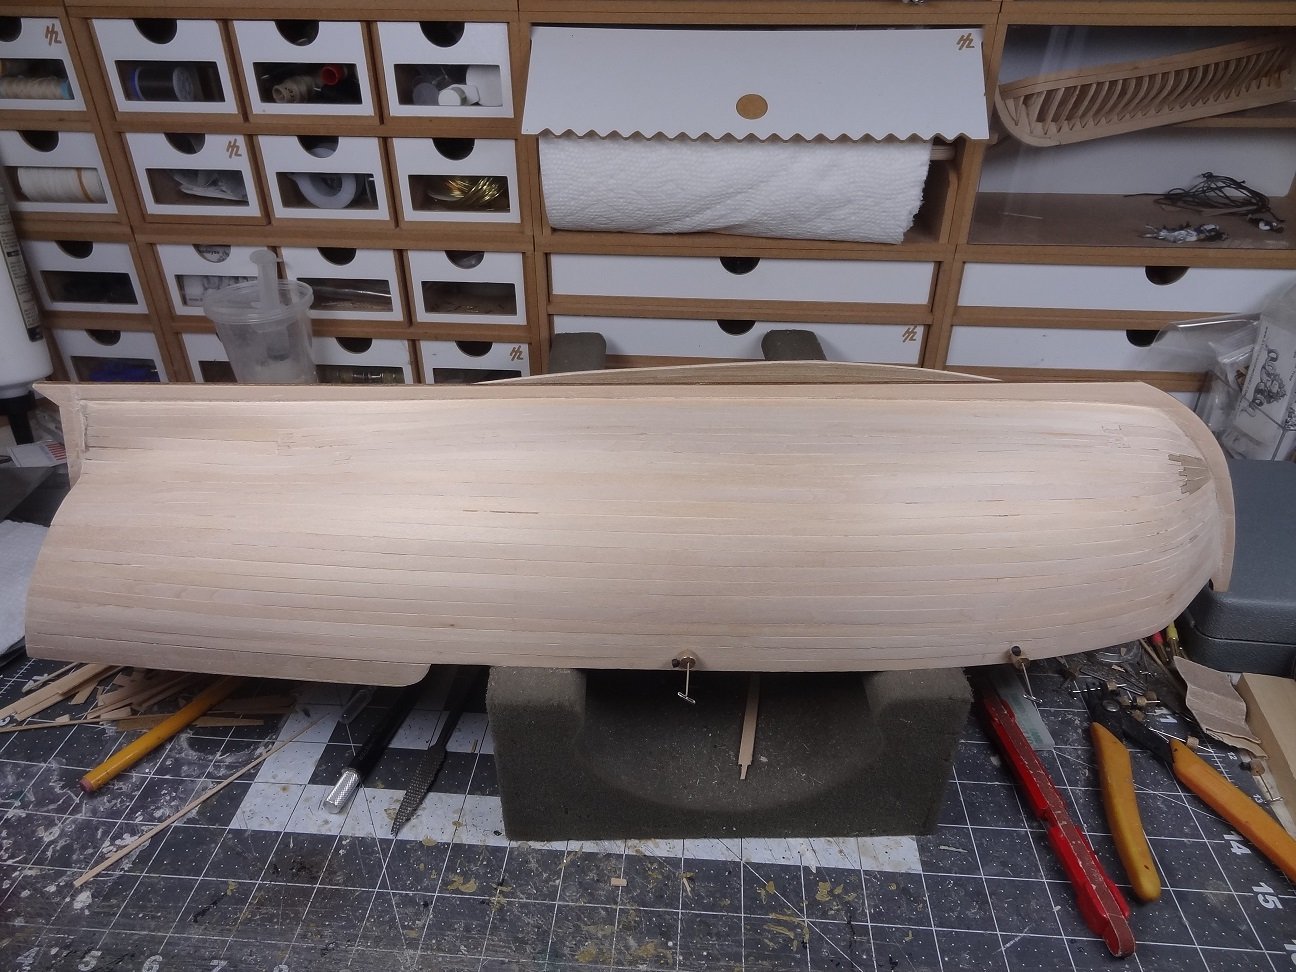
Well finally a milestone - the 2nd layer is complete! Strangely the starboard side layout did not match how I laid the port side. It was almost 1 stick wider at the stem. Given that I did this layer mostly by eye, I guess I shouldn't be too surprised. Also the poor quality of the stick edges surely contributed as well. It came out pretty good I guess. The hull is much sturdier now - feels like a real build now. It's starting to get heavy too. I think for layer 3 I'm gonna go back to laying a stick on one side, then doing the same stick on the other side. That way if things get off, they will be consistently off. I have also been working on widening and deepening the rabbet some more so the stick ends have a place to get buried. So now back to the walnut sticks. As you might see on the last pic I've already laid the port garboard. That laid out nicely so I guess I'm off to a good start.
- 62 replies
-
- 1
-
-
- lancia armata
- panart
- (and 1 more)
-
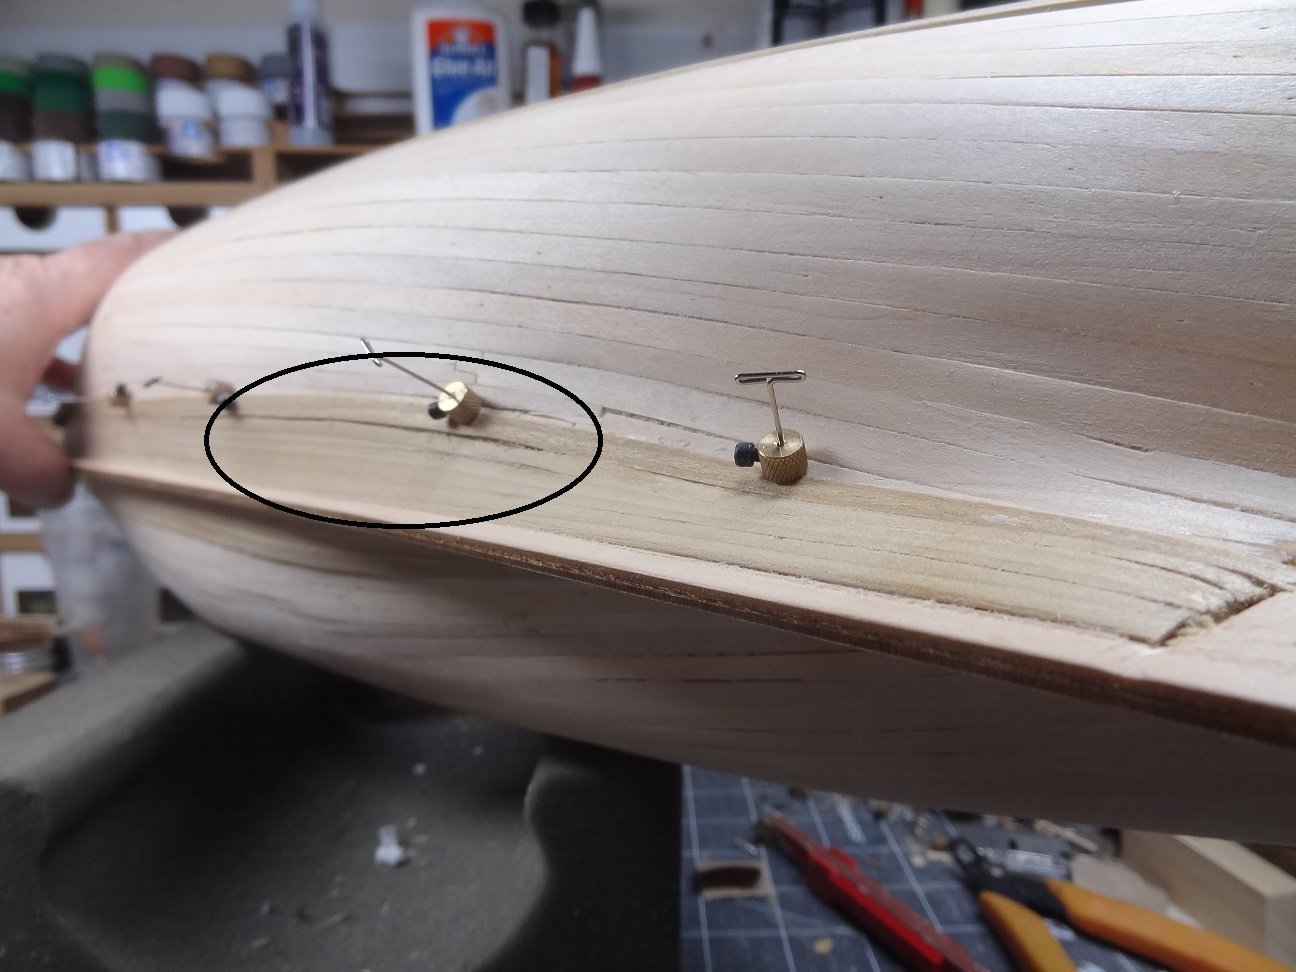
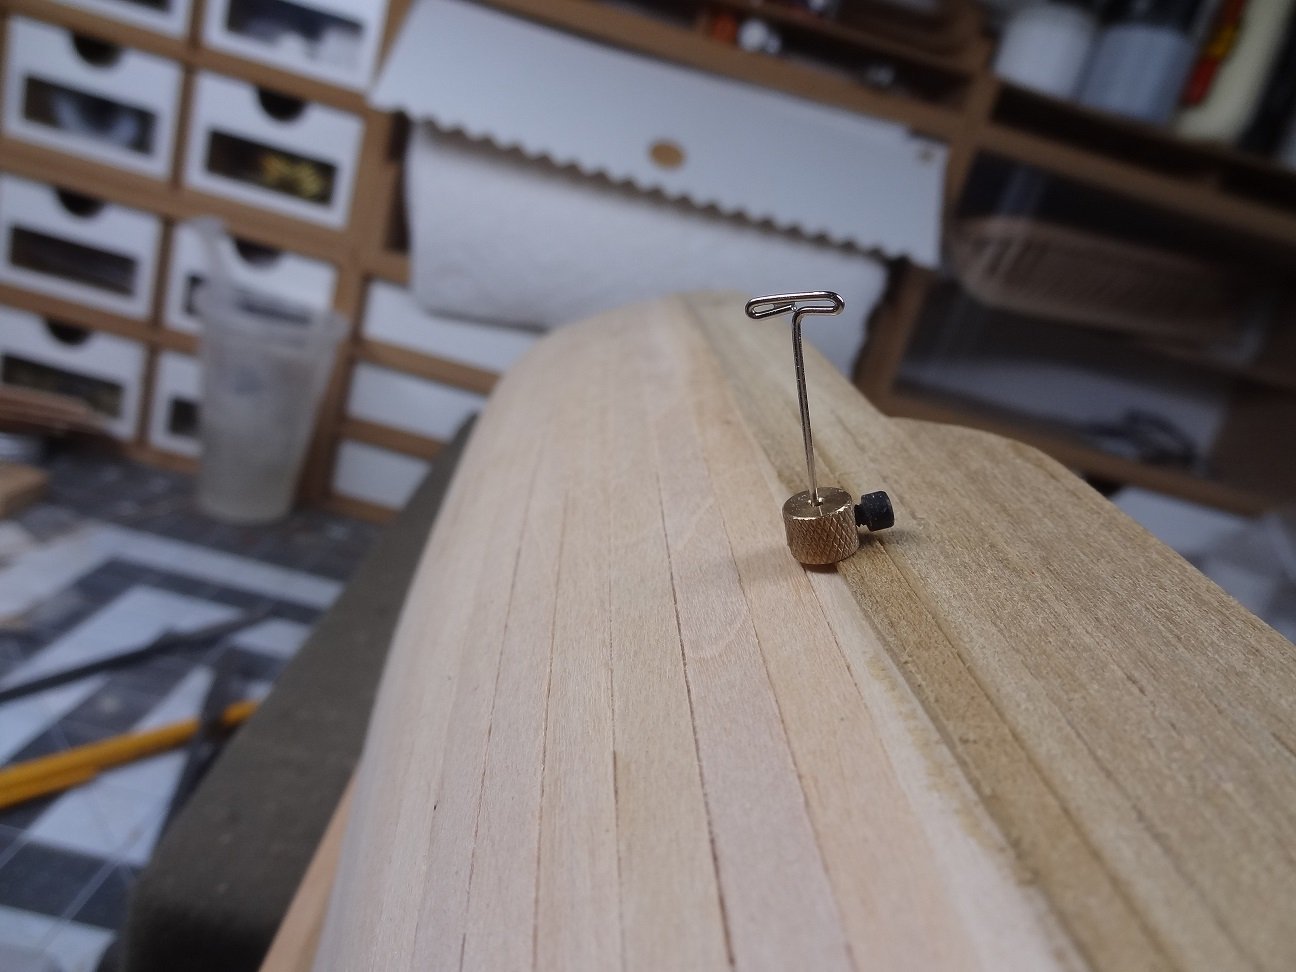
Hi Cisco - Those knurled clamps are pin clamps. I think I got them at Micro Mark. I didn't like them at first but they have really come into their own in my last few builds. Yup, they do leave holes but with some sanding some of the dust tends to fill them. The holes are more obvious on light colored wood. With that said I do use some CA for planking. Since this build is going with full strakes rather than planks, I try to glue about 1/4 to 1/3 of the stick at a time. I leave a space for a dot of CA. Then run a line of white glue for a couple of inches. The another space for a dot of CA, white glue, CA.....Then I add the CA dots and apply the stick. The CA acts like a nail to quickly hold the stick in place. This gives the white glue time to dry but allows me to keep going. I usually use the clamps when I can see the area where the white glue is is not laying perfectly flat to the substrate. Of course the process is different for a first or single layer. I use CA to glue sticks to frames and use white glue on the edges of the sticks.
- 62 replies
-
- 1
-
-
- lancia armata
- panart
- (and 1 more)
-
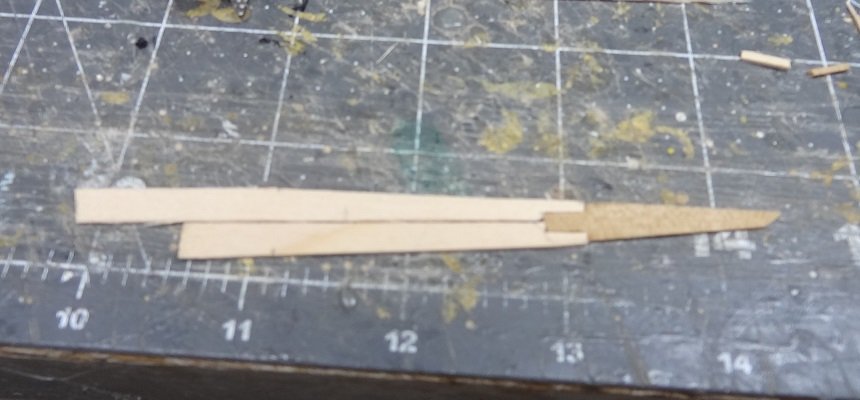
Another problem with dowels is the grain. Look closely. Typically the grain doesn't run from one end to the other like a piece of square stock. It goes all over the place. This can lead to your part warping and loosing straightness over time.
-
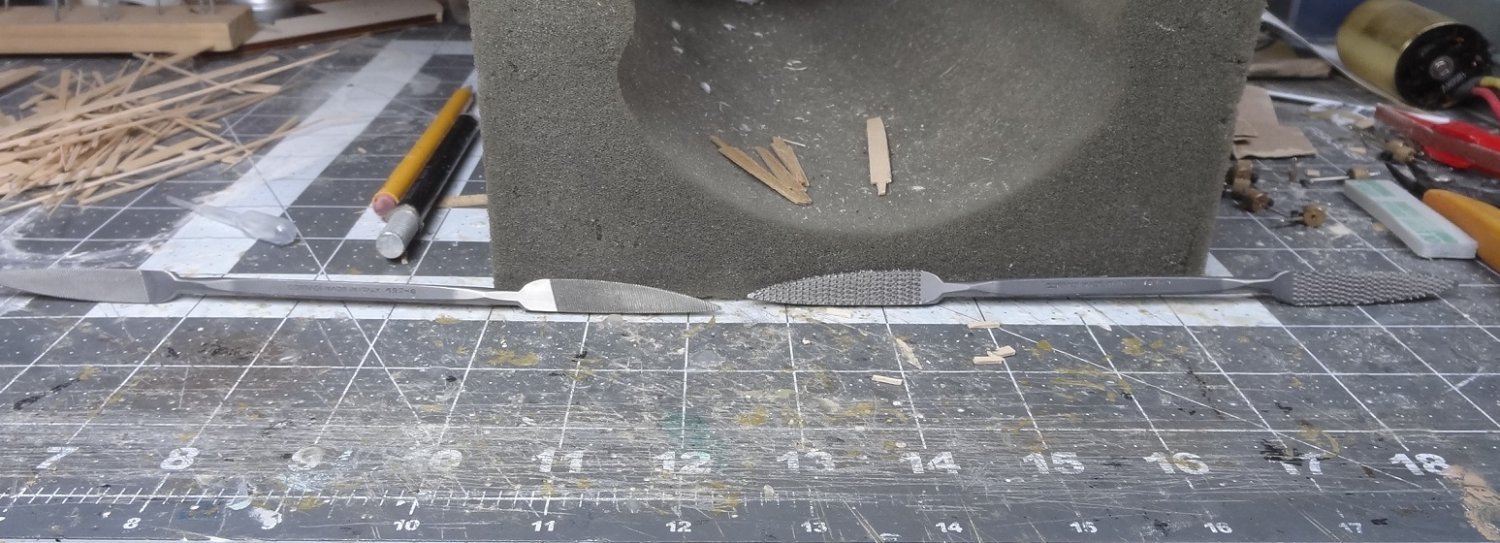
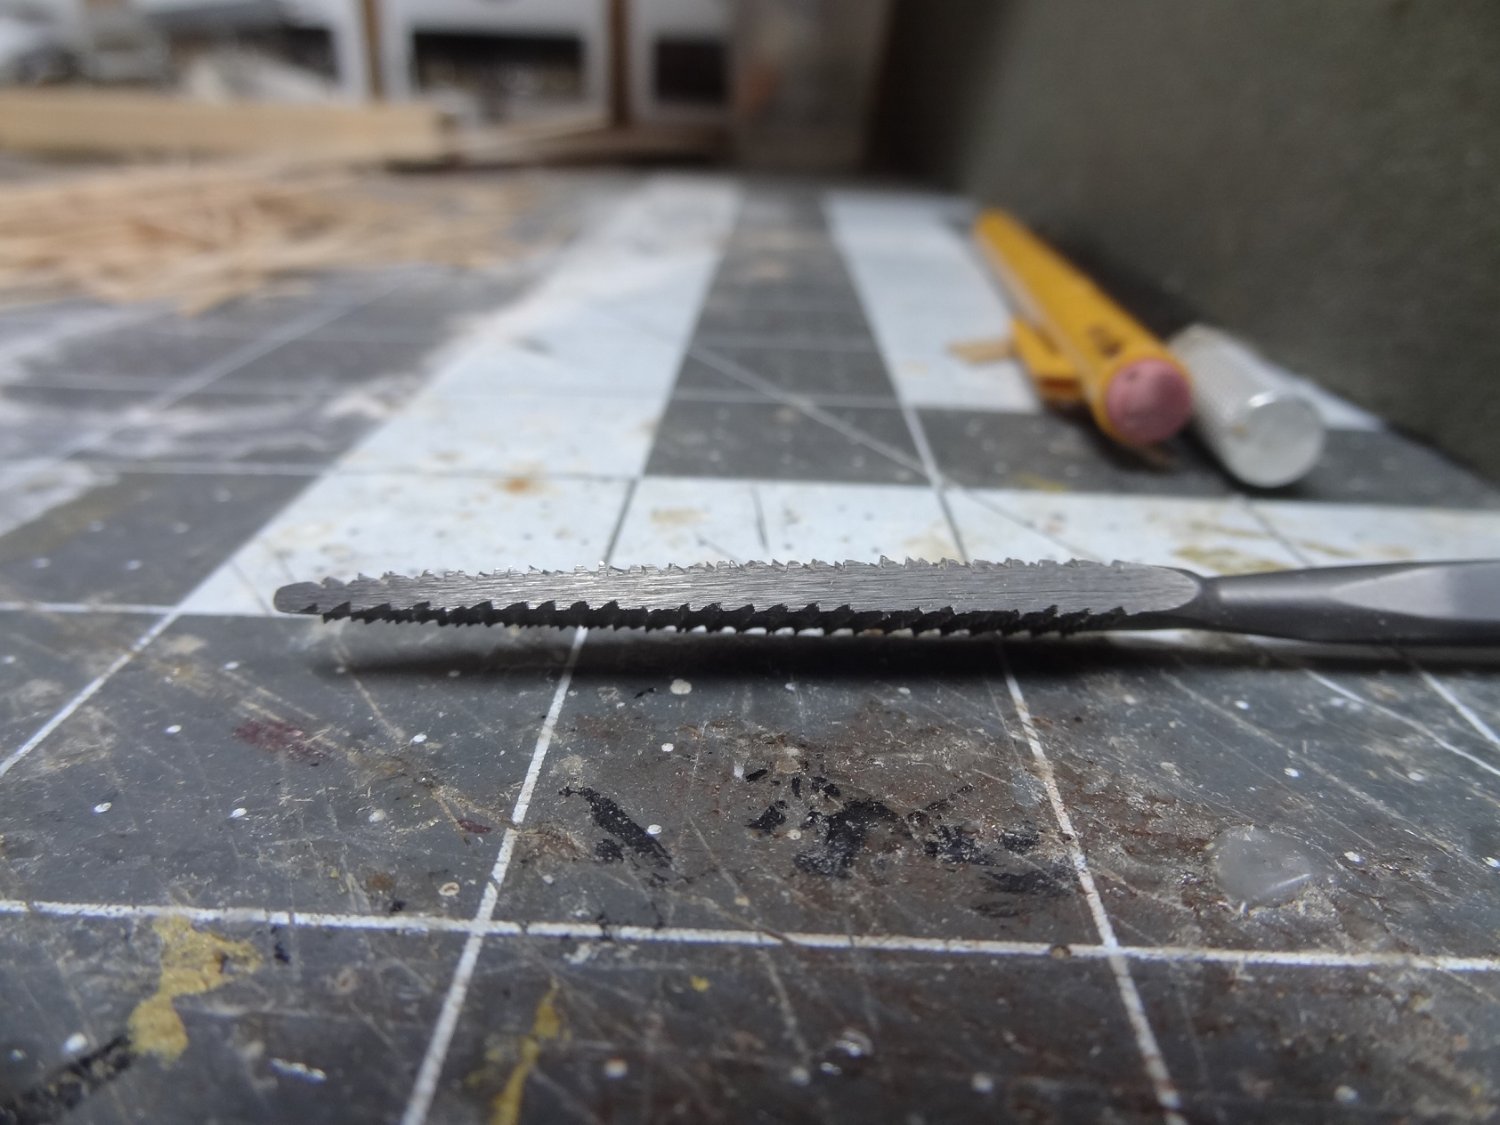
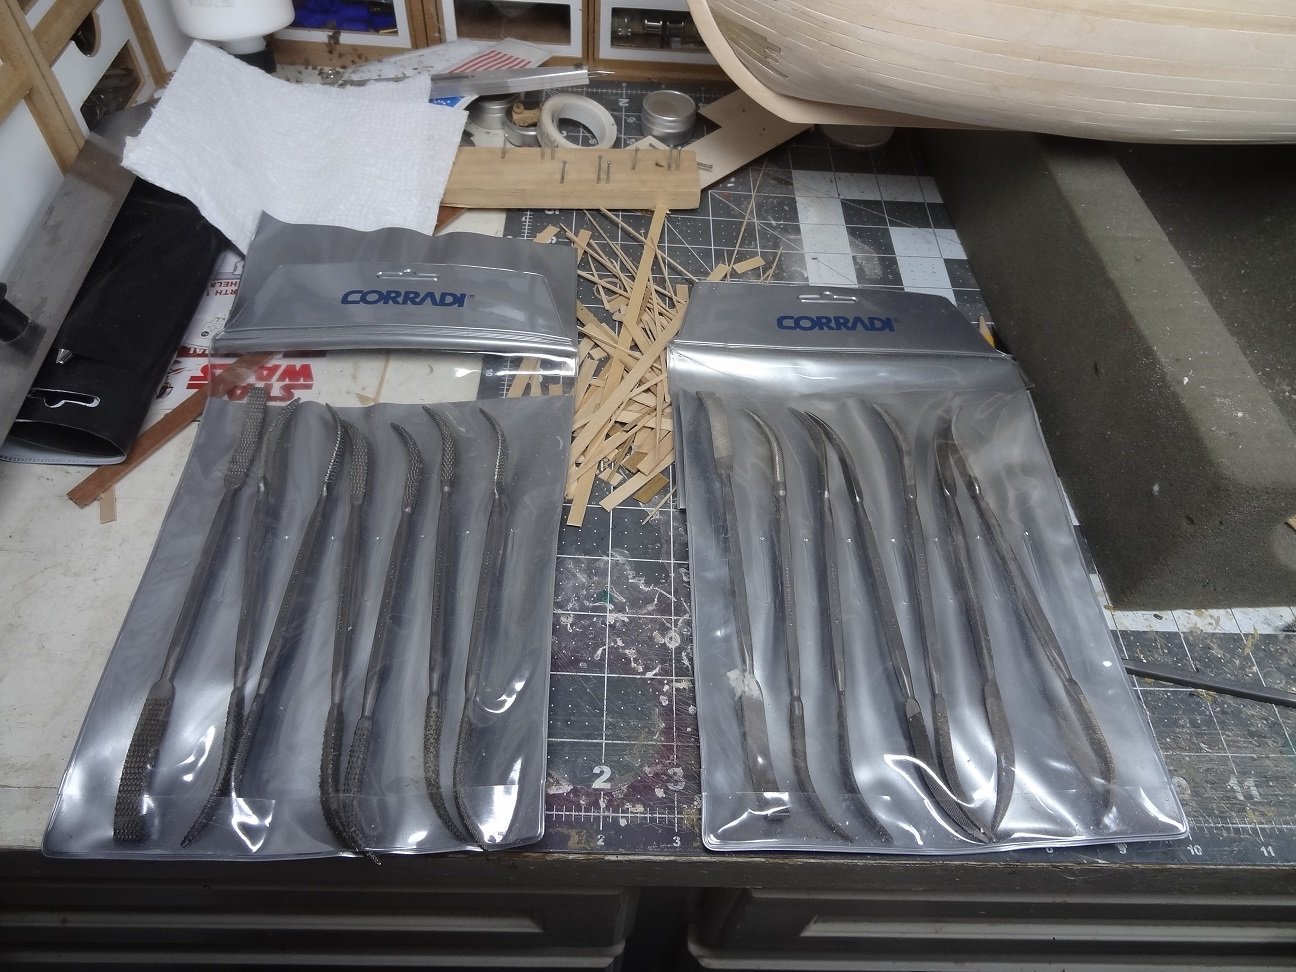
I'm still filling in the last starboard strakes but have done a lot of prep work for the 3rd plank layer. Mostly at the rabbet. Two things need to happen there - smooth down the edge of the 2nd layer (and 1st layer) garboard so that there is not such a severe angle into the rabbet groove. And deepen the rabbet a bit more. Almost all of this work has been accomplished using my Corradi file and rasp sets. Not sure I could have completed the work without them. This is not a Corradi commercial, nor am I affiliated with them in any way. But I could not have progressed without them. The shapes and edges of these files has been my savior. Some have somewhat of a knife edge (with teeth) on one edge and a flat surface on the other edge. This has allowed me to dig a deeper groove in some cases, and also shave the edges of strakes with no damage to the underlying material. Other tools are even rounded and pointed (haven't had the need for those yet). The two sets are not cheap. I don't know if there are any knockoffs. I doubt if the material and workmanship can be surpassed. I still don't know what metal/alloy is used. It is definitely not your basic cheap "stainless". I have owned the tools for about 4 years, they live in my garage (high humidity and summer temps) and there is no sign of corrosion. Two most used tools to this point. The shape and edges are the same. One is a rasp and one is a file. Here is the flat side of the rasp I have been using. This is very useful for rubbing up to a upper layer strake while not damaging the layer below. Keep the flat side on the lower layer. Again, no affiliation and I don't know if there are any cheaper alternatives. What I will say is that I will probably be able to pass these tools to my grandchildren and they even beyond that.


- 62 replies
-
- 1
-
-
- lancia armata
- panart
- (and 1 more)
-
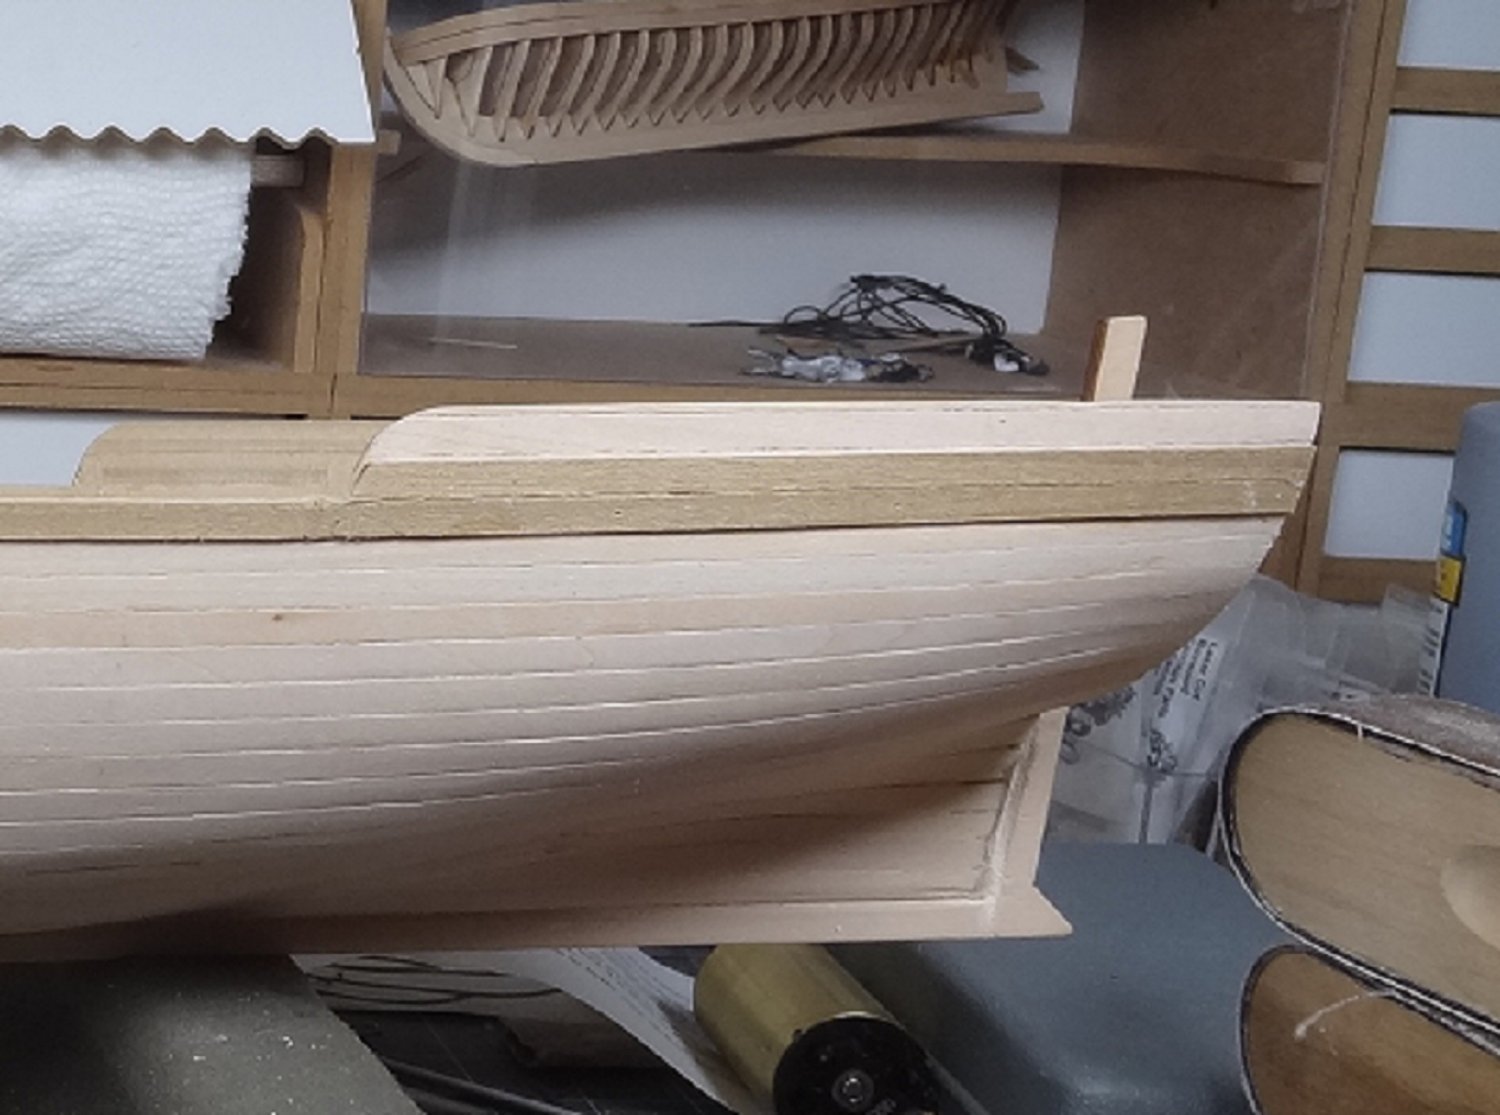
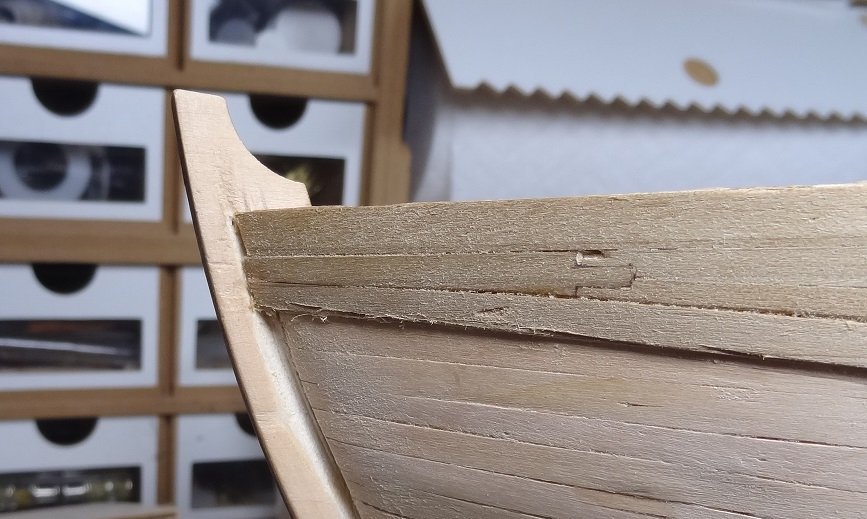
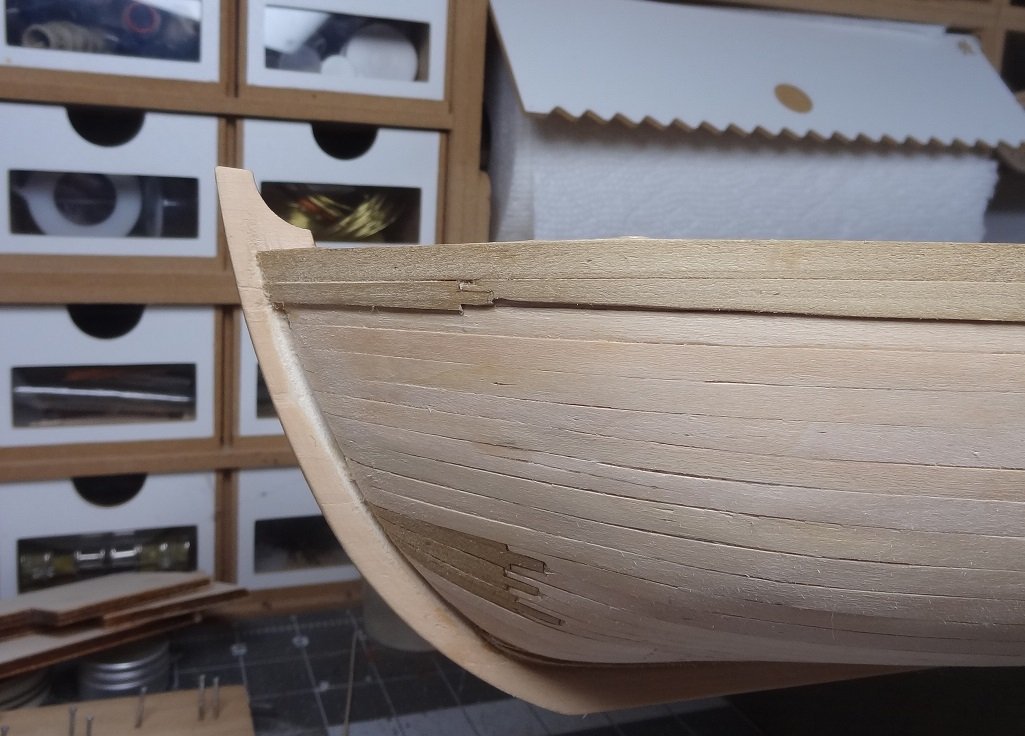
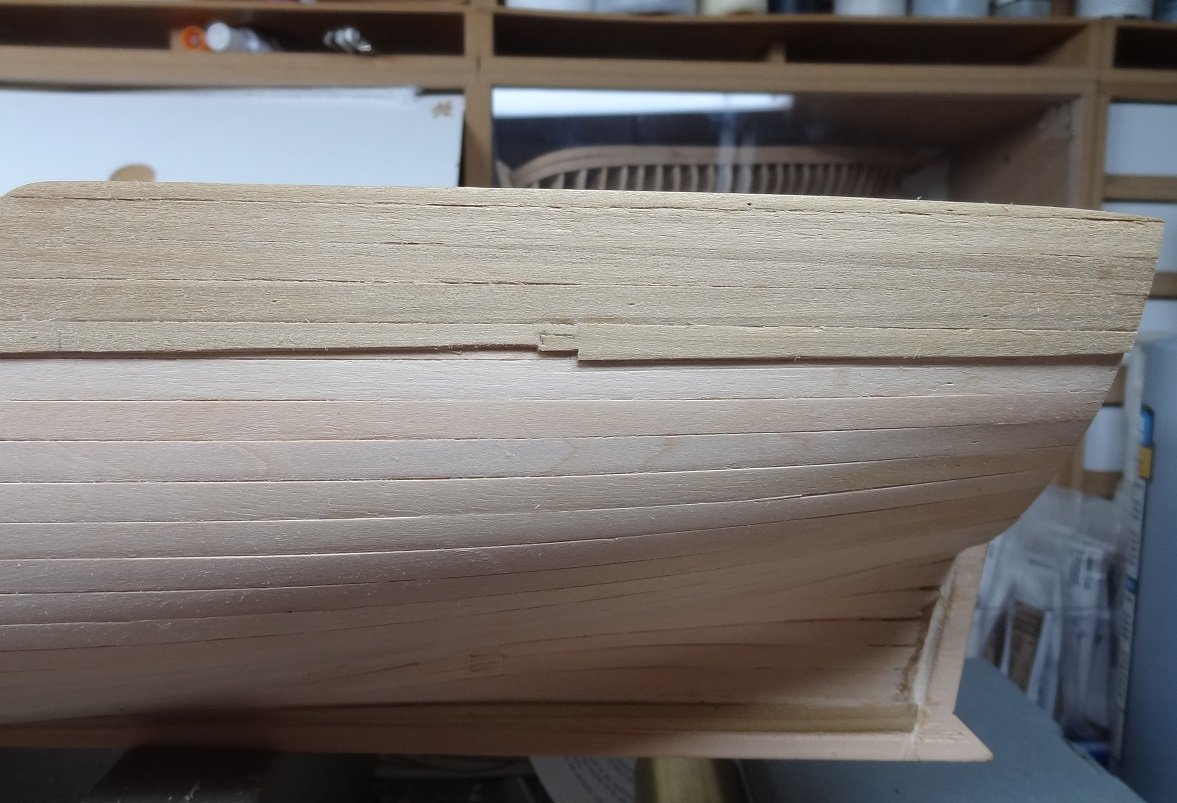
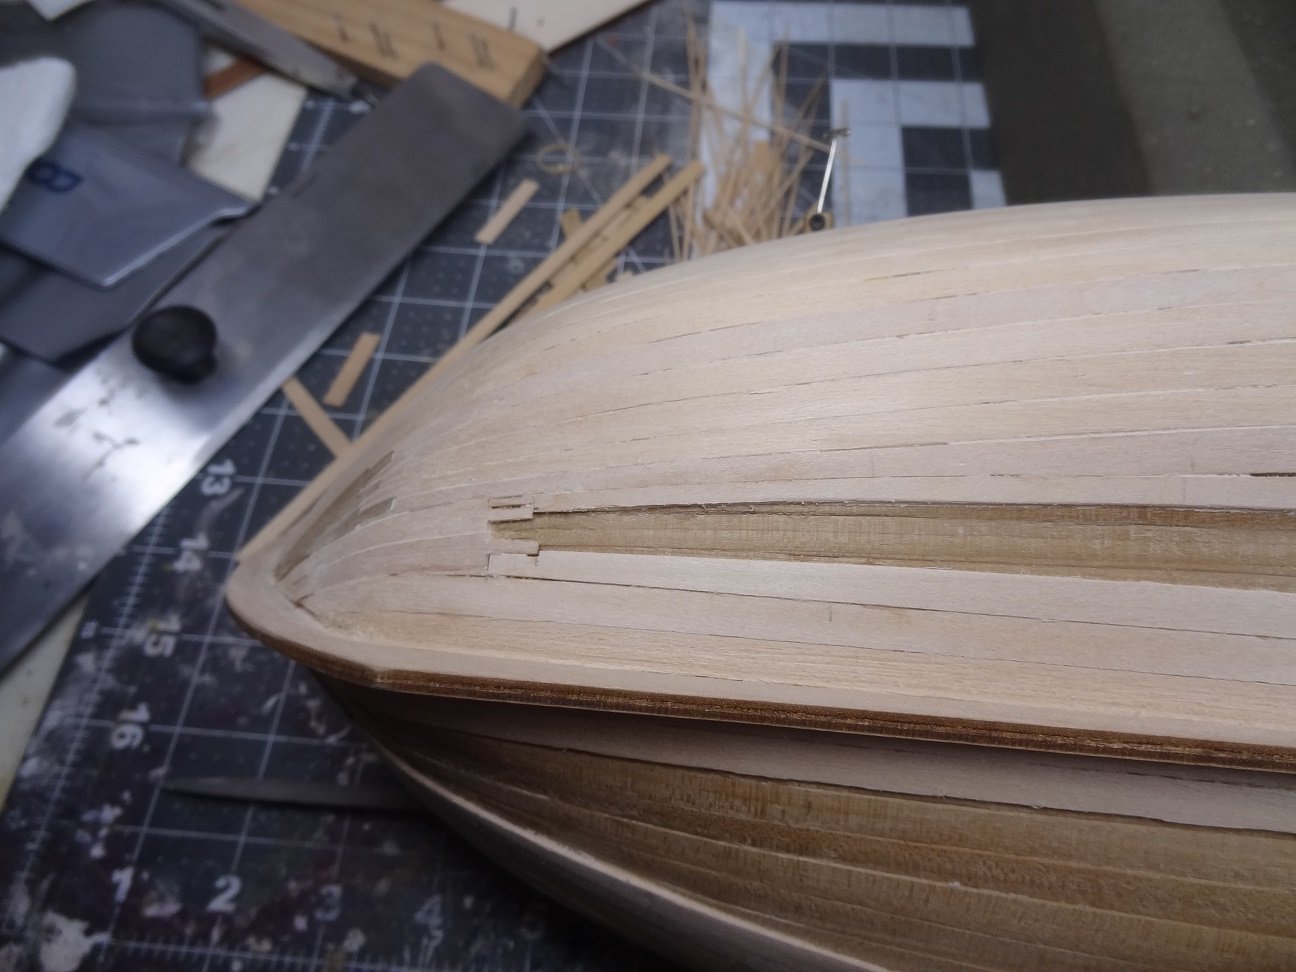
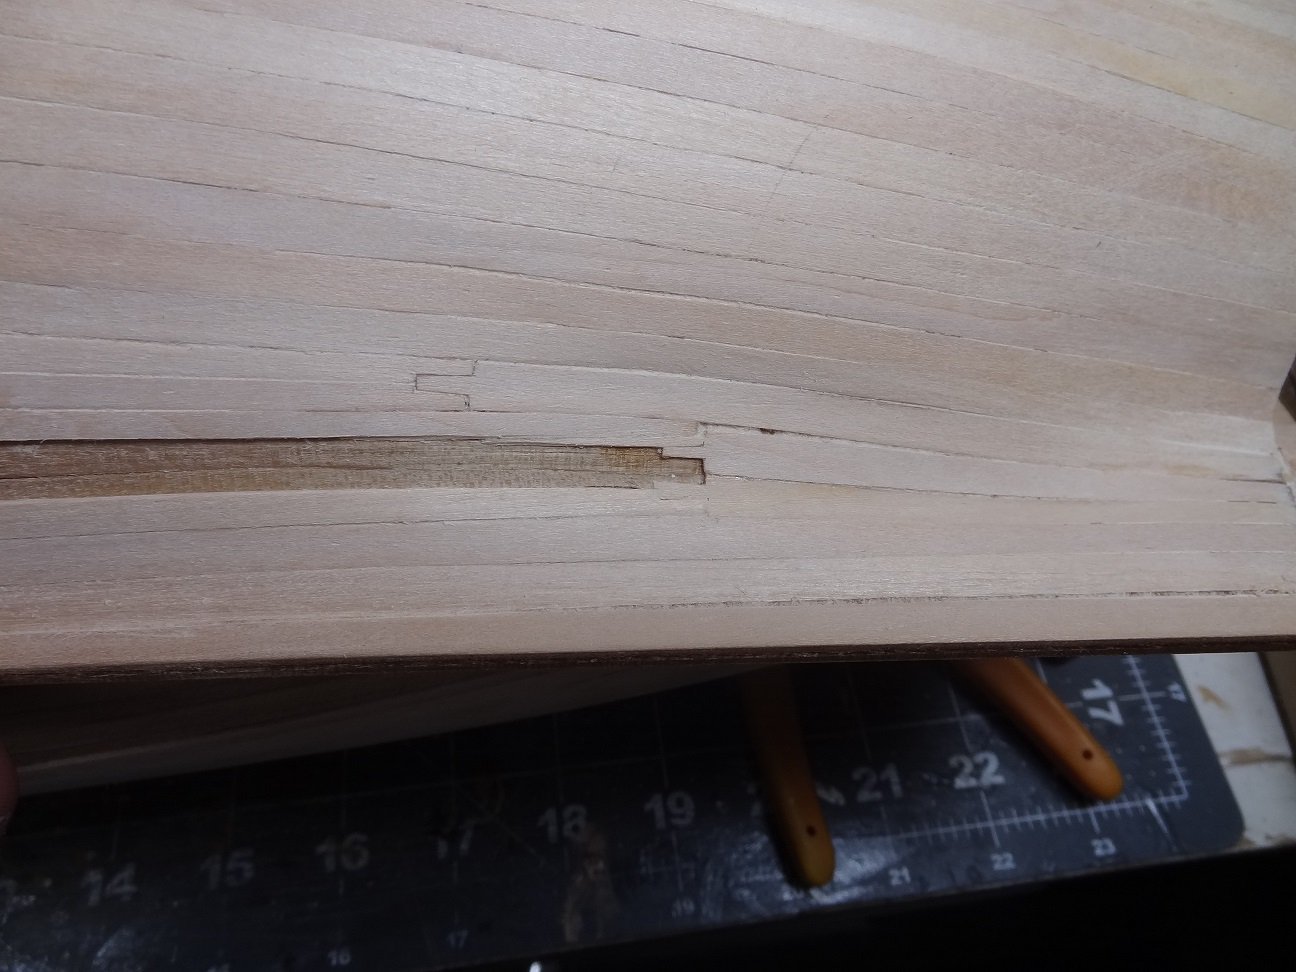
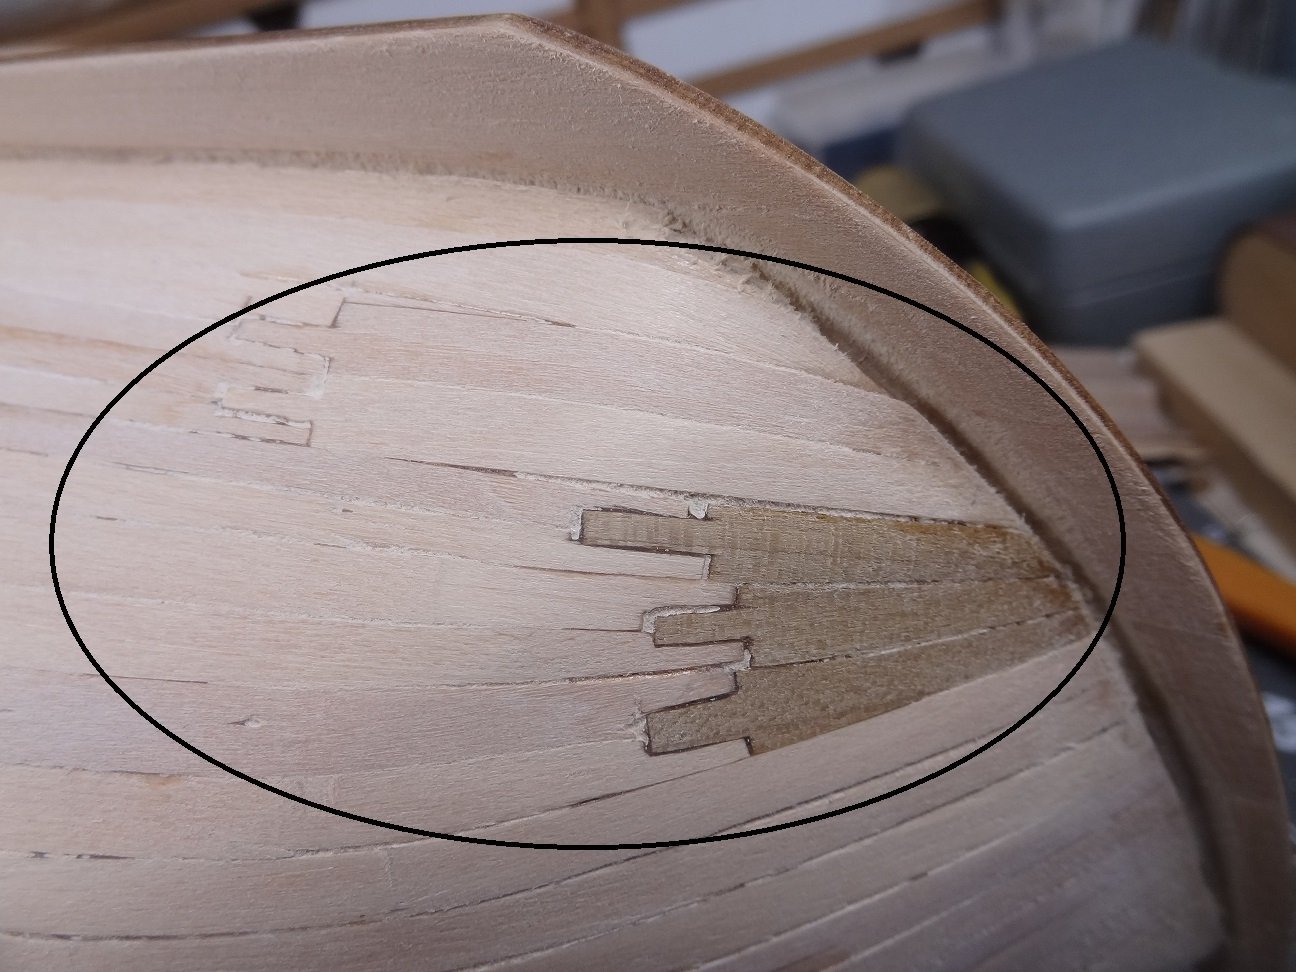
OK - working on a couple of fronts. 2nd layer portside is done. I'm now working on finishing the starboard 2nd layer. In addition (for some bizarre reason) I have also begun the 3rd layer planking. I laid the wale stick and then the couple of rear strakes (not sure of the proper term) above the wale. This turned up a new problem that will likely screw up all my plans for layer three. According to the specs - the limewood sticks used for the 2nd layer were supposed to be 6 mm in width. I found that claim to be unreasonable, as the sticks I measured were more like 5.8 - 5.9 after some lite sanding to square up the edges. The 3rd layer walnut sticks are also supposed to be 6mm, but from what I have seen they're not even close to that. I measured 6 sticks out of the bunch and the widest was 5.8mm. This is a total joke. Truly pathetic! In the image you can see the upper edge of the (3rd layer) walnut strake way under the limewood 2nd layer. Those are supposed to be the same width. They are off by a significant amount. A truly pathetic offering. I have had sticks be way off on width. Also way off on thickness which requires a ton of sanding. My 12 year old could have produced better sticks. Shame on PanArt!

- 62 replies
-
- 1
-
-
- lancia armata
- panart
- (and 1 more)
-
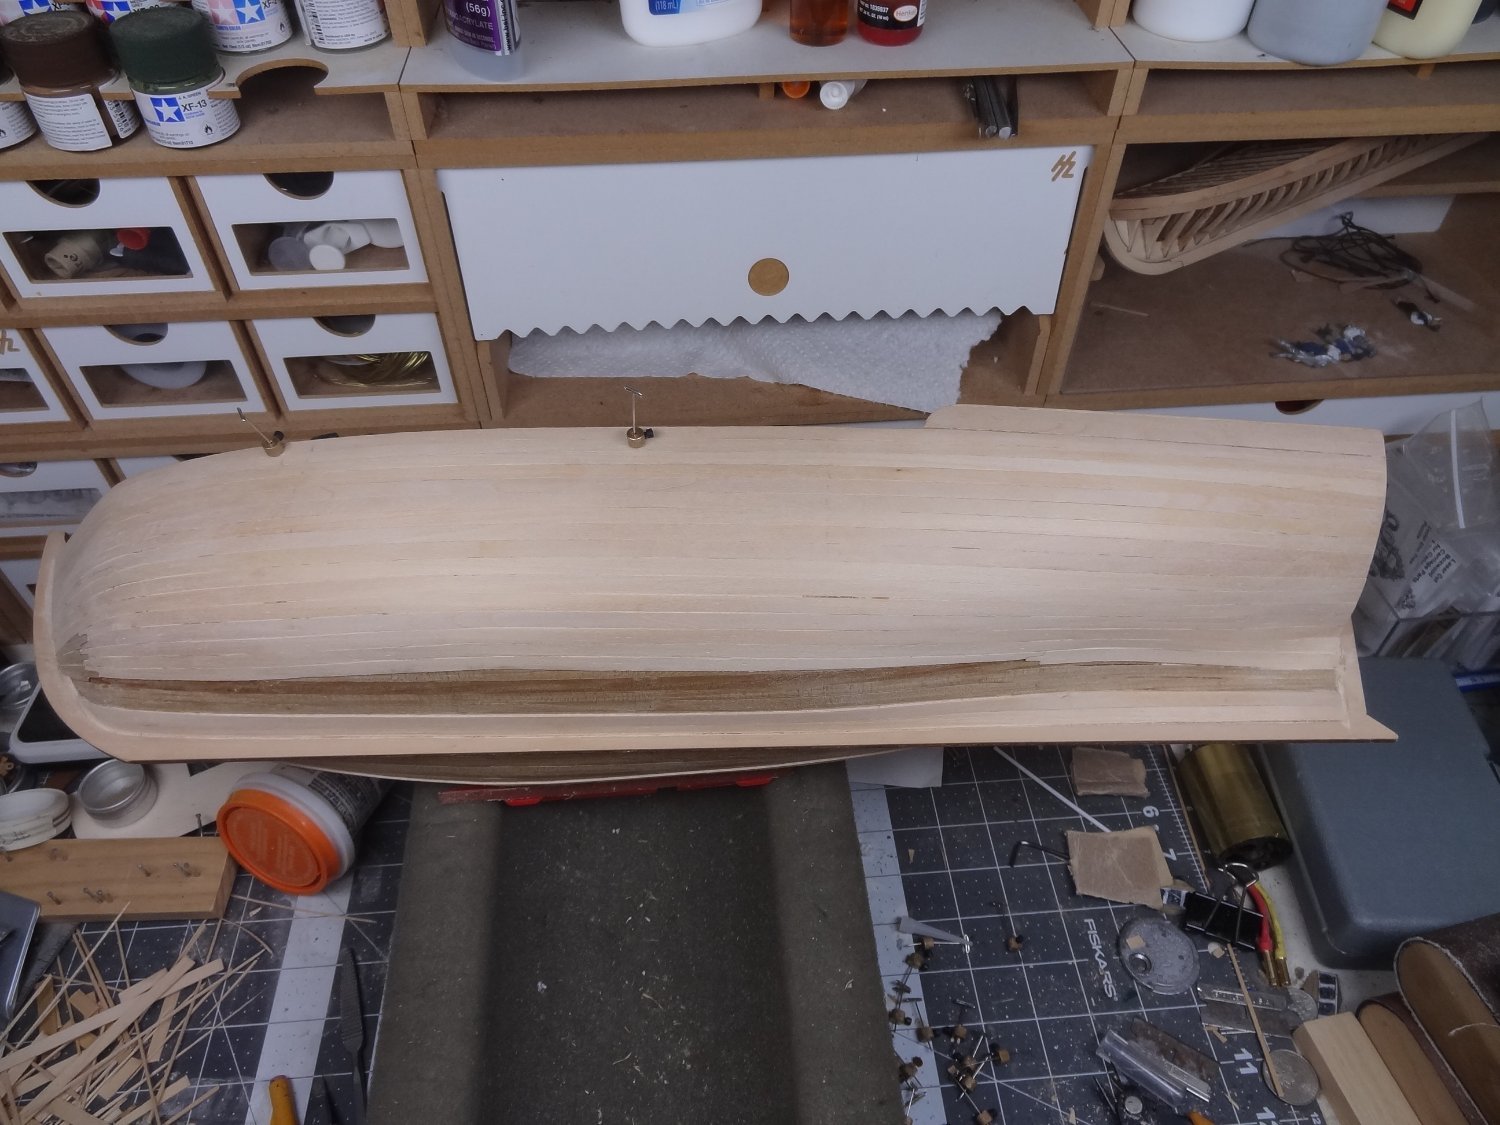
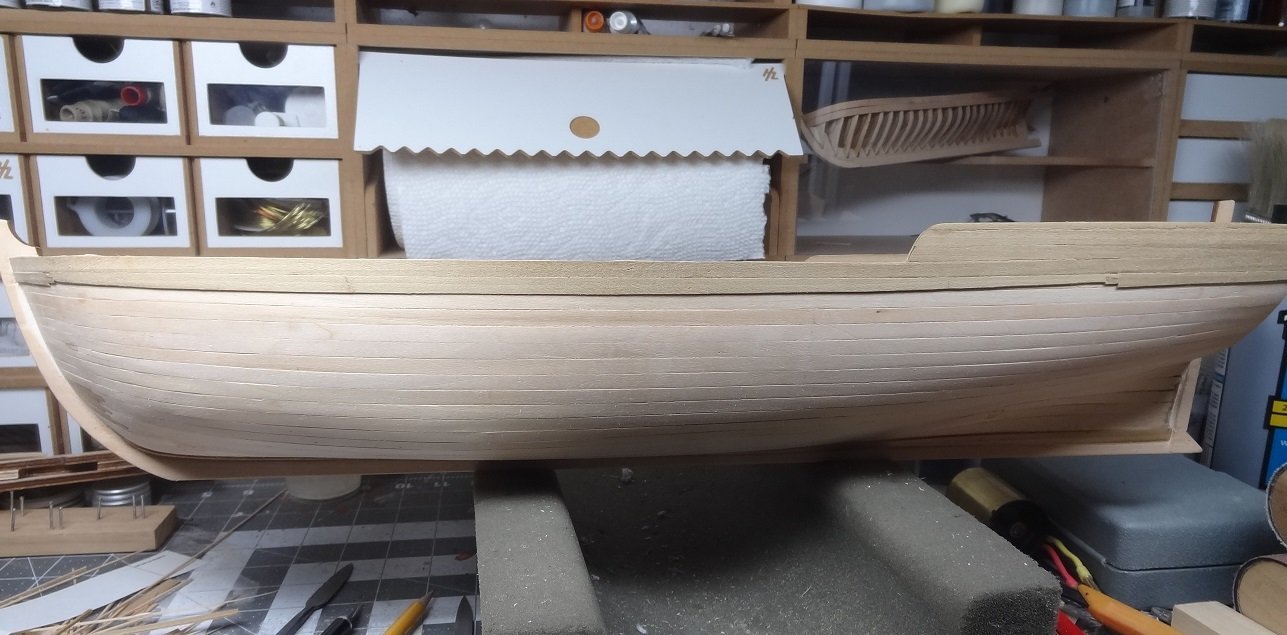
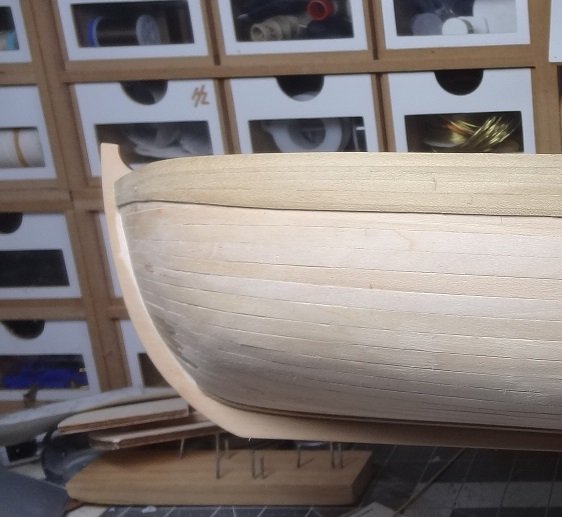
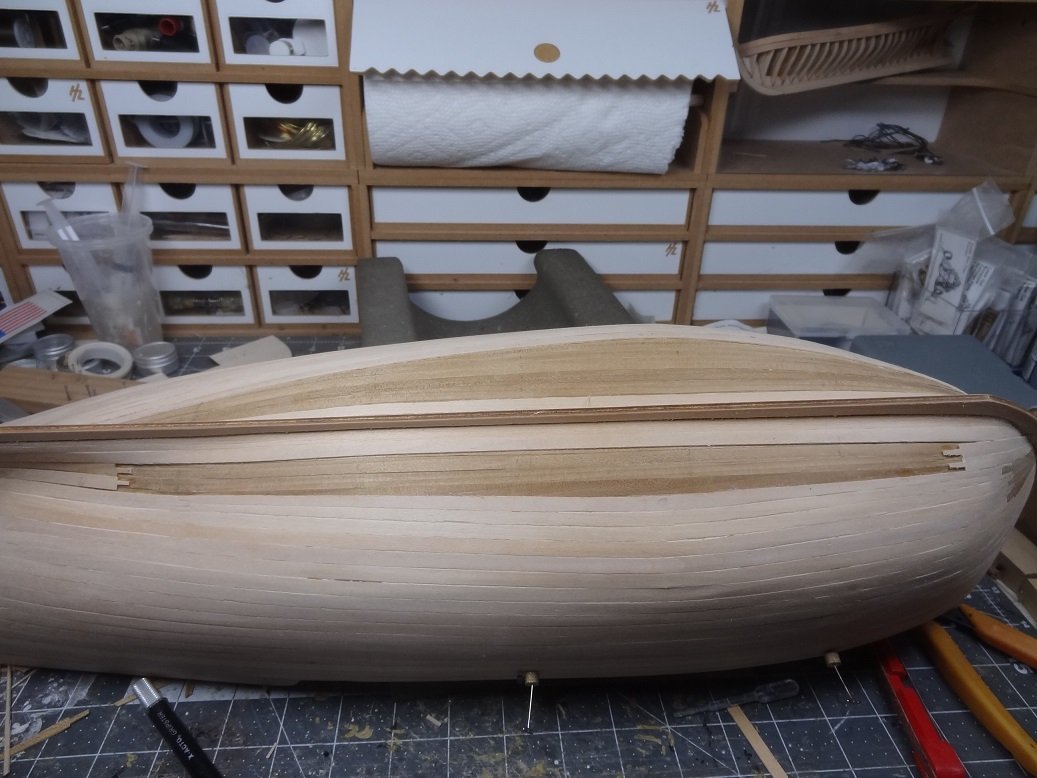
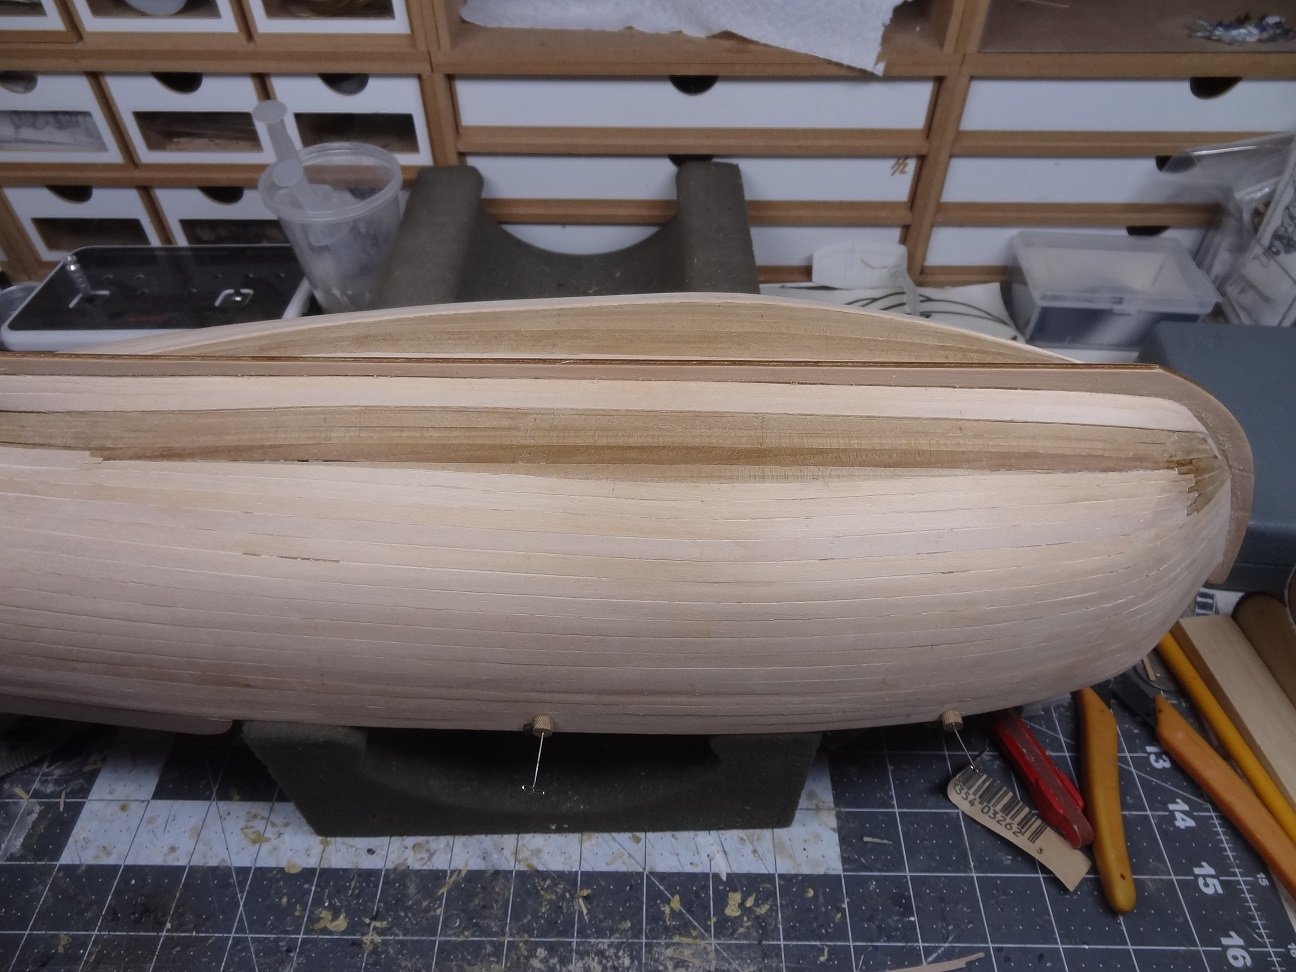
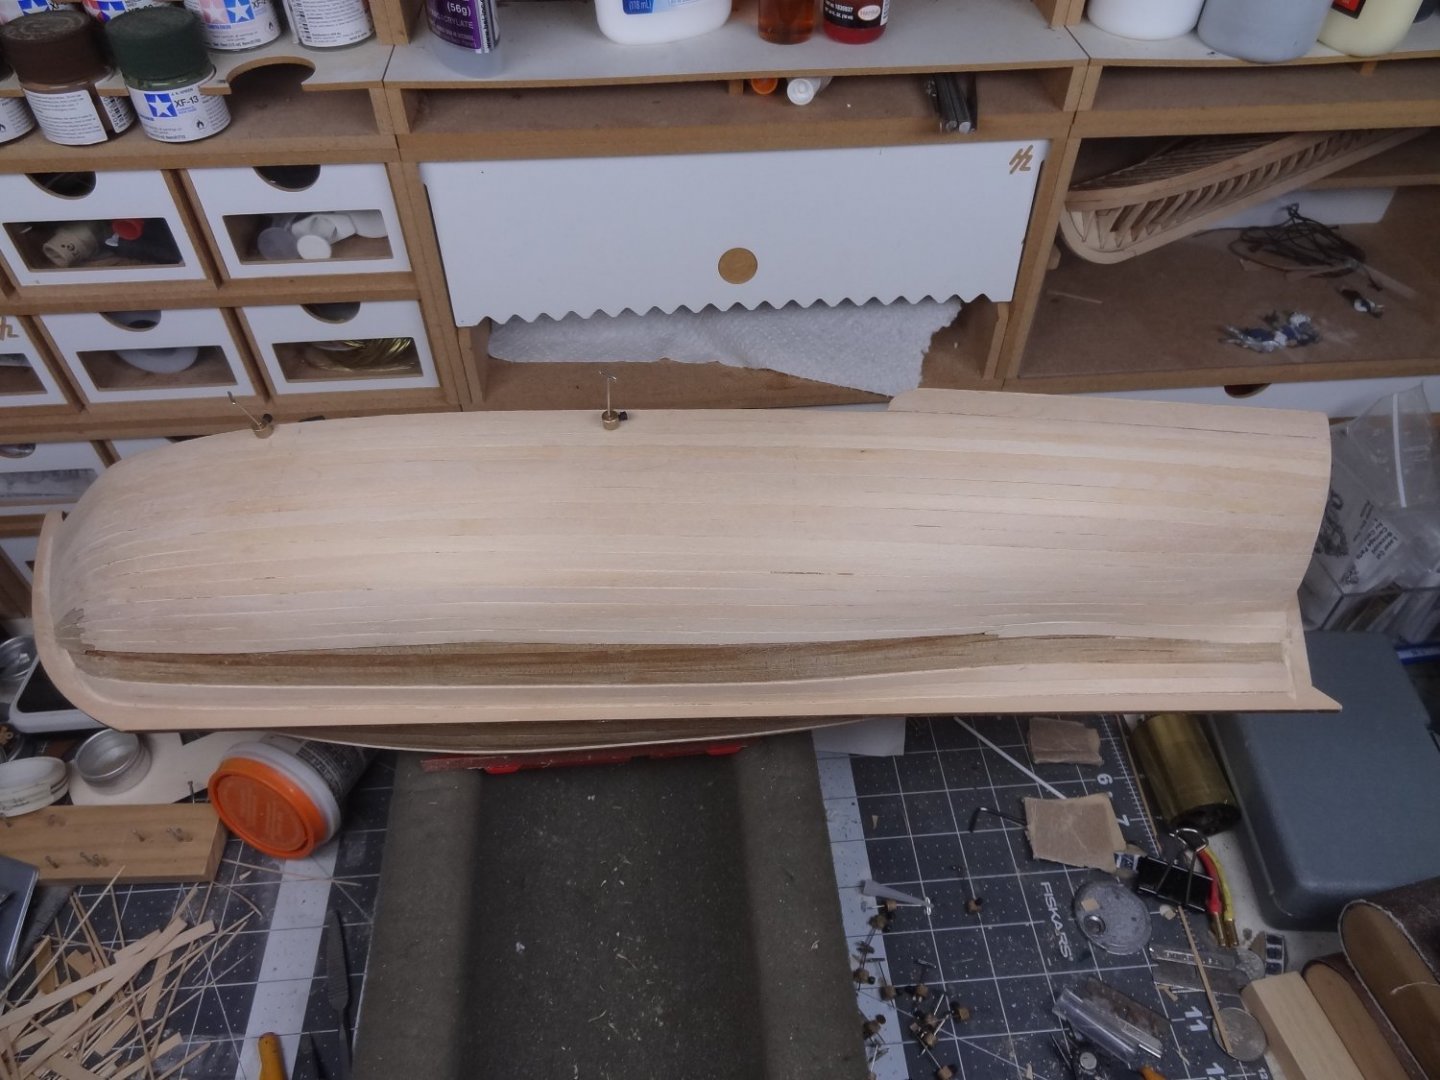
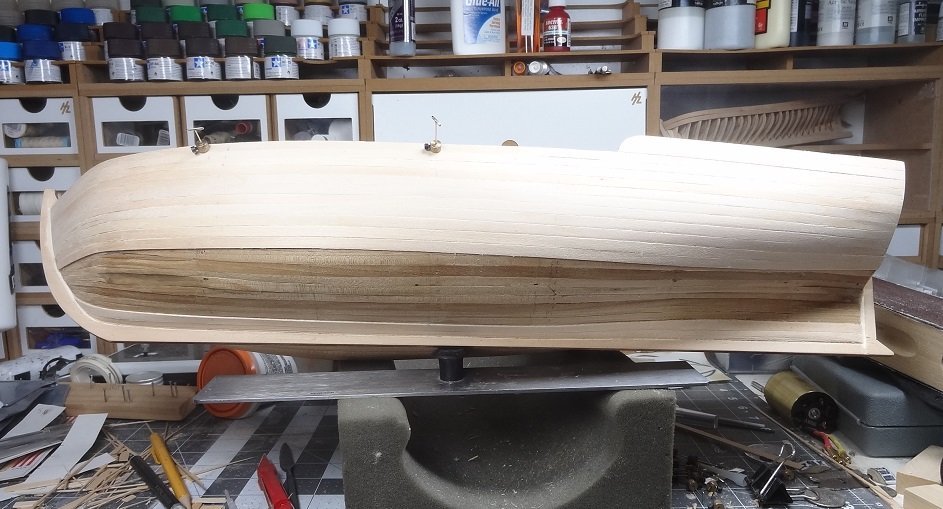
2nd layer portside is complete. It did bring out a few problems that I will have to deal with on layer 3. The most important, I had a few gaps in between strakes, especially the strakes that required a lot of shaping. I'm going to have to be much more accurate with the final layer. Still need to finish the starboard side. I have been debating whether to just match the portside planking or try to do a better job which will likely mean strakes at each end don't match up. As always, nothing matters on this layer. With some better strake shaping, the ugly curve at midship is smoothing out. It turns out I didn't need any sort of filler piece. Here's a few shots of the final planking. Big curve is smoothing out. Still need 3 full sticks to fill the widest space. This is what made me go to 3 final stealers rather than 2 stealers plus one full stick. 2 sticks left to fill in. You can see the bulge in the middle of this stick. This filled in the ugly curve in the planking. Space for 1 more stick. Port side finished! As you might see, I have already begun opening up the rabbet and the sticks close to it. Hopefully allowing the 3rd layer sticks to fill in to the rabbet edge. G'nite.
- 62 replies
-
- 1
-
-
- lancia armata
- panart
- (and 1 more)
-
I have hit a little bit of laziness the last few days. Just didn't feel like bending and shaping sticks for the final few strakes portside. I did make 1 executive decision - it's going to have to be stealer mania for the rest of this side. Both stem & stern. I did manage to work up the gumption to get those carved out and in place. The job was far from perfect, but as I keep saying, no one will see any of this layer. It was good practice. So I will end up with 5 stealers at the bow and 3 at the stern. Way more than I have ever had to use. The one lesson from this is to pay close attention to the curve mid-ship early on. Up to now my use of a stealer has always been a reactionary decision. One of those "Oh crap" moments. I think on the final layer I will be aggressive with stealers from the get-go. I'll lay 1 full width wale and the next strake will be a 1:2 stealer. That should start that mid ship curve downwards. Back to the moment, I have laid all the stealer starter pieces. Just need to lay the sticks in between them. And of course, repeat on starboard. Here's a few images. To figure out how long the stealer piece should be, lay as many scrap pieces as needed in the area. Slide those pieces forward/backward until they will not move any further. Your stealer piece needs to extend that far. Oops - missed the width a little bit. Stern & stem stealer pieces in place. In the last image you can see the mid ship bulging curve has been reduced somewhat. This was due to some aggressive shaping - leaving the stick full width at the curve and quickly narrowing down each end.I think a few more repetitions of this will fill in what could have been a big space after all the strakes were laid. Thanks to all that are following!

- 62 replies
-
- 1
-
-
- lancia armata
- panart
- (and 1 more)
-
Seizing was a way of "clamping" down a rope. Typically this was done by hand by certain seamen who were allowed to carry a small knife in their pack. Understandably, this was a limited few. So the seizing rope (sometimes twine) had to be thin enough to manage single handedly, but also strong enough to hold against sometimes awesome force (think the ropes holding a gun). It had to be thin enough to be easily cut, but also easily applied. You may be on the right track checking someones sewing basket. Another option many use is fly tying line. It's probably closer to scale for 1:64. That's what I use, but you must be careful of what you buy. Some tend to fray badly. I use UNI-Thread 6/0w. It comes in quite a few colors. Just be aware that it is not much thicker that a hair (which is probably about to scale). So make sure you have a good seizing process.
-
Suggested sites for purchasing wood model ship kits
mikiek replied to Capella's topic in Wood ship model kits
Cornwall Models for sure. Yes it is a Euro outfit. But the prices of the Euro made kits (which many are) can be almost half of the same kit bought in the US. You will pay a little more for shipping, But I have found the total cost to still be much less than the same kit bought from a US vendor. I haven't bought anything in a while, but I do remember their turnaround was impressive. I could order a kit Saturday nite and it would arrive by Weds. the next week. I've never found any US shop that could match that. As I said, I haven't bought any new kits is a while, but they were my go to vendor for any of the Euro made kits. -
Thank you Cisco. I did some of what you described on the last stick I showed. It's full width at that bend, but narrows down considerably towards each end. It did pull out a little bit of the curve
- 62 replies
-
- 1
-
-
- lancia armata
- panart
- (and 1 more)
-
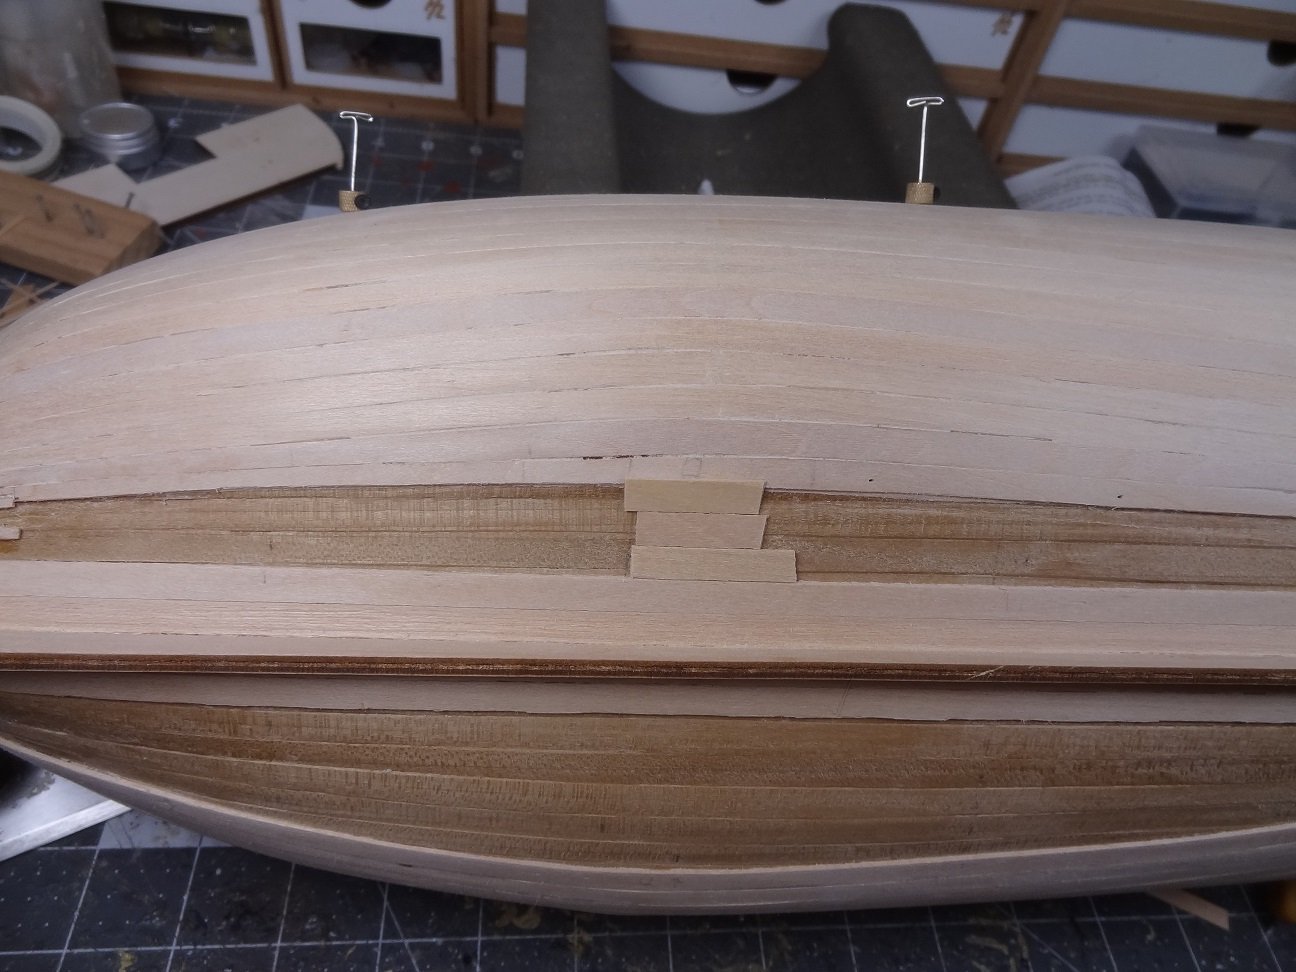
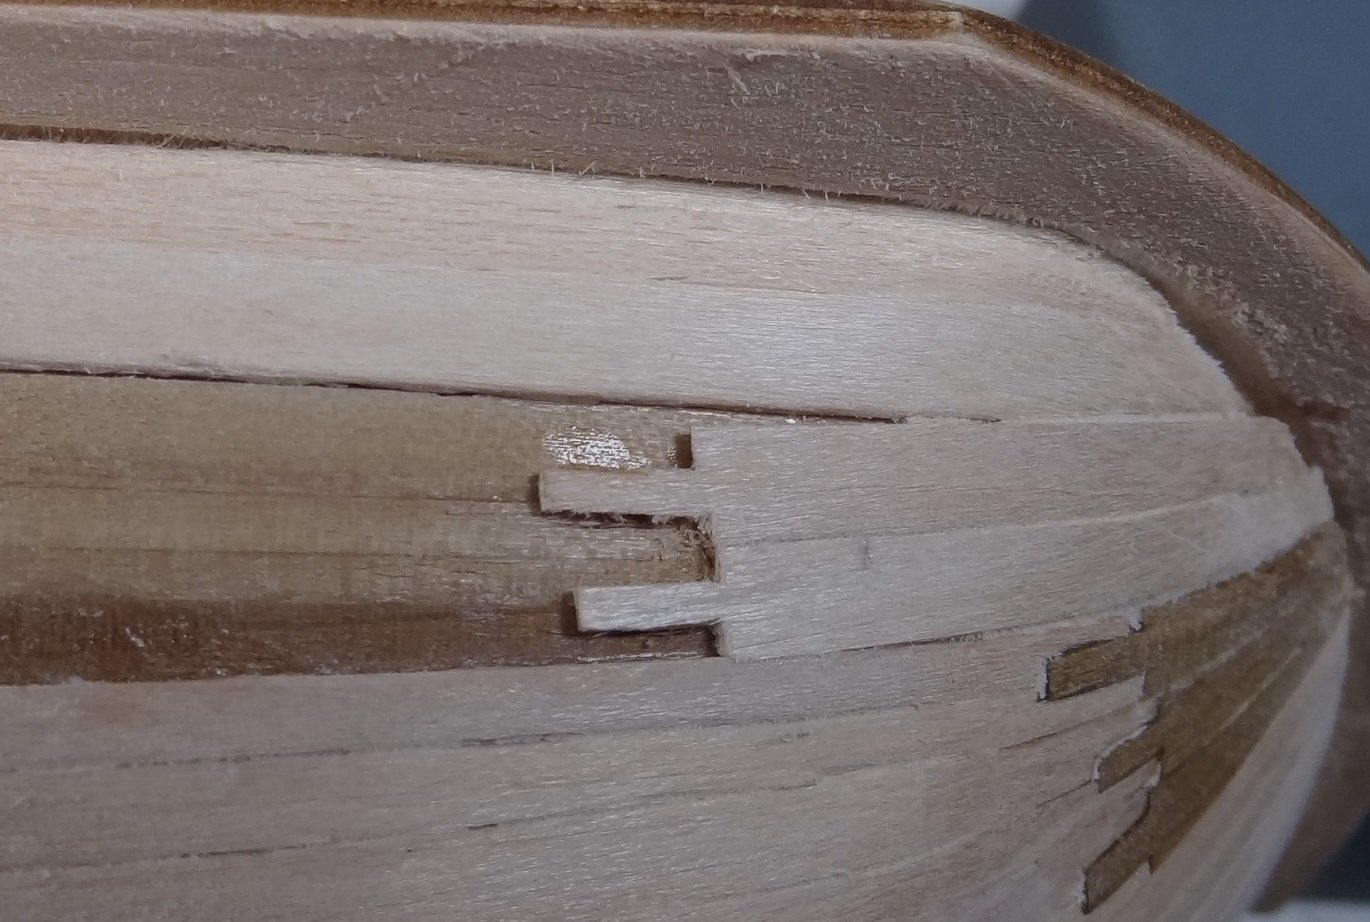
With a stealer at both ends this is now taking quite a bit longer. Each plank has to be shaped to fit at both ends with the goal being to close down the widest area (just a bit forward of mid ship) and still fit in at the bow & stern. I've showed a lot of pix of the final result of each strake installed. But have not yet shown a shaped strake before gluing. So here is the next stick, shaped but not yet glued. Here's where it needs to go. And here it is in place. At this point, the widest space is 3 1/2 sticks wide. Still thinking I will need a convex shaped piece to fill in any remaining space at that point. Will wait to see how things fall out.
- 62 replies
-
- 3
-
-
- lancia armata
- panart
- (and 1 more)
-
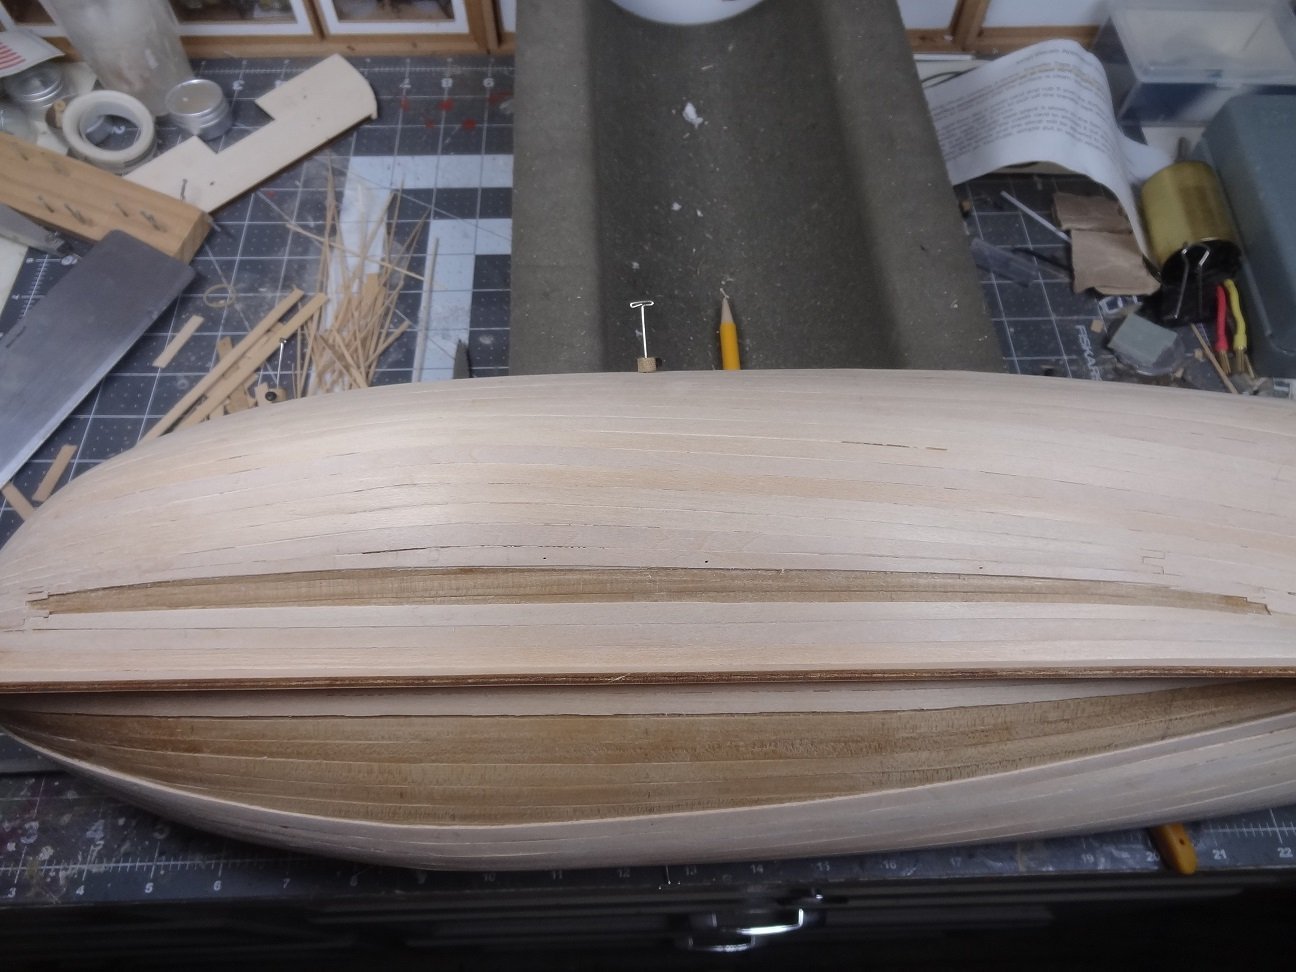
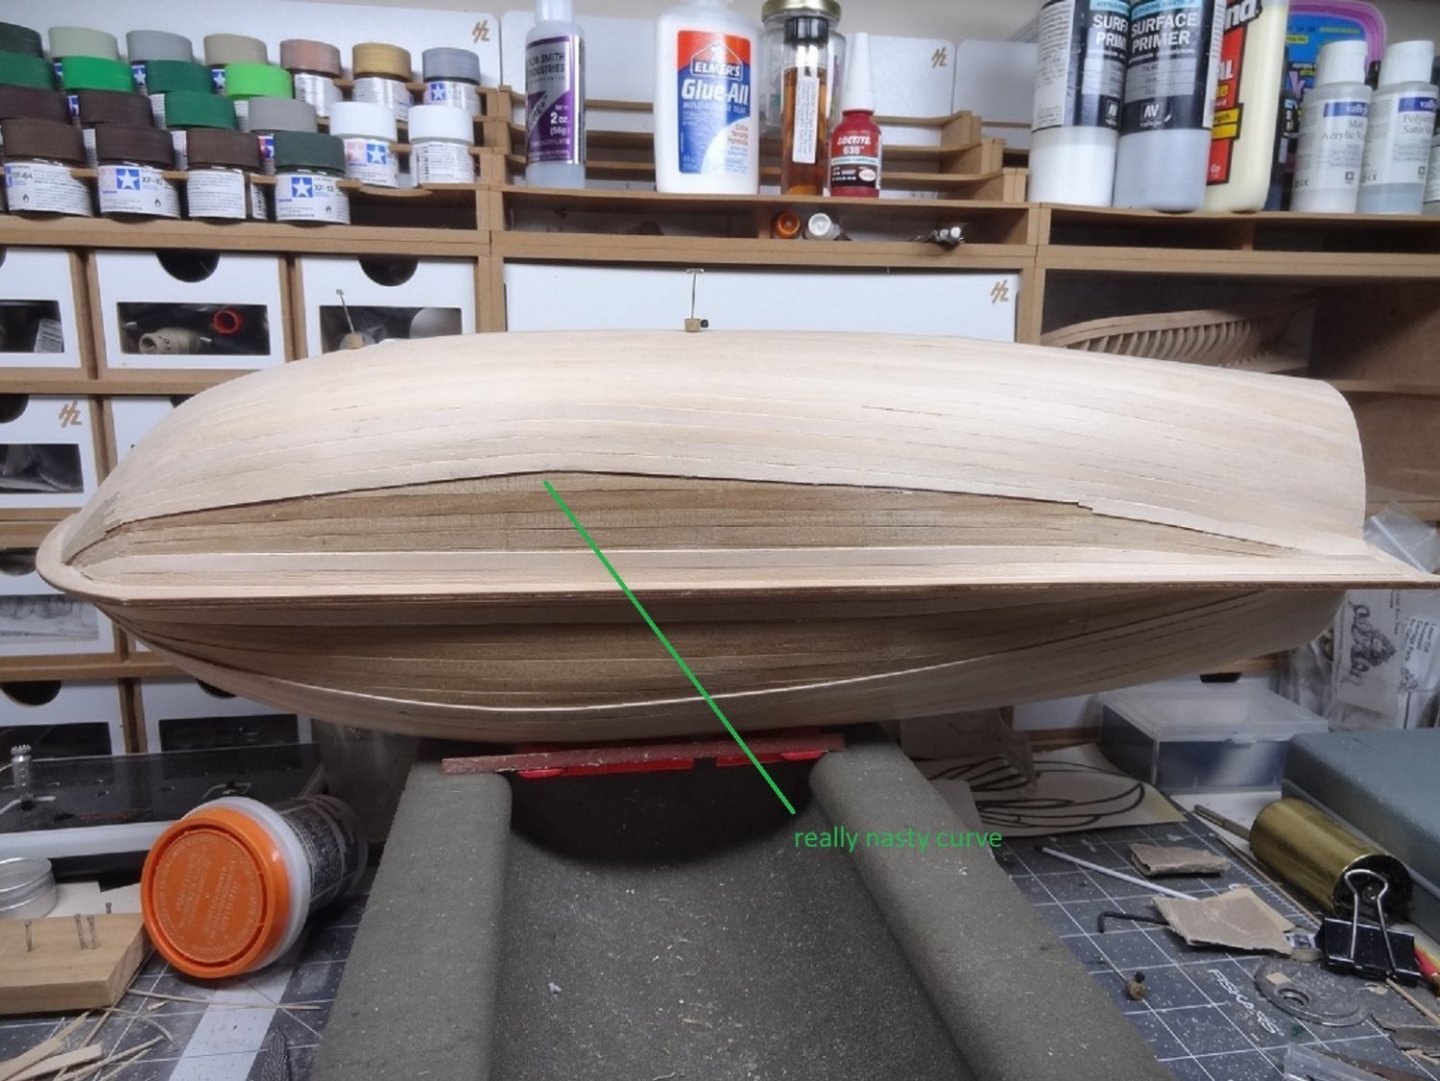
As claimed earlier, this is getting interesting. I did a little measuring. The widest unplanked area will require about 5 1/2 sticks to fill. The stern (and about 4" ahead of that) only has room for 3 sticks. The bow has room for about 3 narrowed down sticks. So I will have to continue the stealer routine at the bow (probably 2 more stealers and one shaved down stick) and also begin stealers at the stern. I am still using the same 1st stealer pieces at the bow. The stern will have a much longer stick that offers the same 2 to 1 ratio. A total of 3 sticks with the stealer fitting about 4" from the stern. Sorry if that sounds confusing. Hopefully a few pix will help. There is still a really nasty curve mid ship. I am thinking maybe to make a convex shaped piece to fill that in a little bit. I have been bending each strake to fit that curve, but it isn't going away. Bow stealers. Stern stealer. More to come. Thanks to all that are following....

- 62 replies
-
- 2
-
-
- lancia armata
- panart
- (and 1 more)
-
I wanted to get the port side caught up with starboard. Second verse, same as the first (just in reverse). Both sides look a little odd because the stealer piece is some walnut left from the 1st layer. Those sticks are a little wider than the 2nd layer limewood (7mm vs. 6mm) so it gave me a tad more to work with - I'll take anything I can get. The final layer is 6mm walnut and I have 1 stick of the 7mm walnut left. It will be close, but least it will all match. I've been doing this all by eyeball. No real plan and the dividers are out the window on this layer. I will need a better strategy for the final layer. It's about to get interesting. The widest remaining space for this layer is about 5 1/2 sticks. No way that's going to fit at the bow. Will have to continue the stealers - at least 2 more plus 1 final whole stick. The stern will be even wilder. There's a pretty narrow space about 3" up from the stern. Then it widens a little at the edge of the stern. Some serious shaping to come. Pardon me if this is not all that interesting, but I am kinda making notes to self so I remember everything when I begin the 3rd layer. I will say I am pretty happy with how the 2nd layer is turning out. The hull is much more solid now. It was pretty scary at the end of the 1st layer planking.
- 62 replies
-
- 3
-
-
- lancia armata
- panart
- (and 1 more)
-
Thank you Cisco - if you could see the 1st layer up close you might think differently😀 I didn't bend any planks on that layer and I think that was part of the problem. The other problem was trying to glue walnut sticks together using CA. It just didn't work, meaning I was having to glue and then pin sticks together with white glue. Then wait for the glue to dry. CA has always been my "nails" during planking. The 2nd layer has really straightened out and the hull is a lot more solid now. Thanks for looking in.
- 62 replies
-
- 2
-
-
- lancia armata
- panart
- (and 1 more)
-
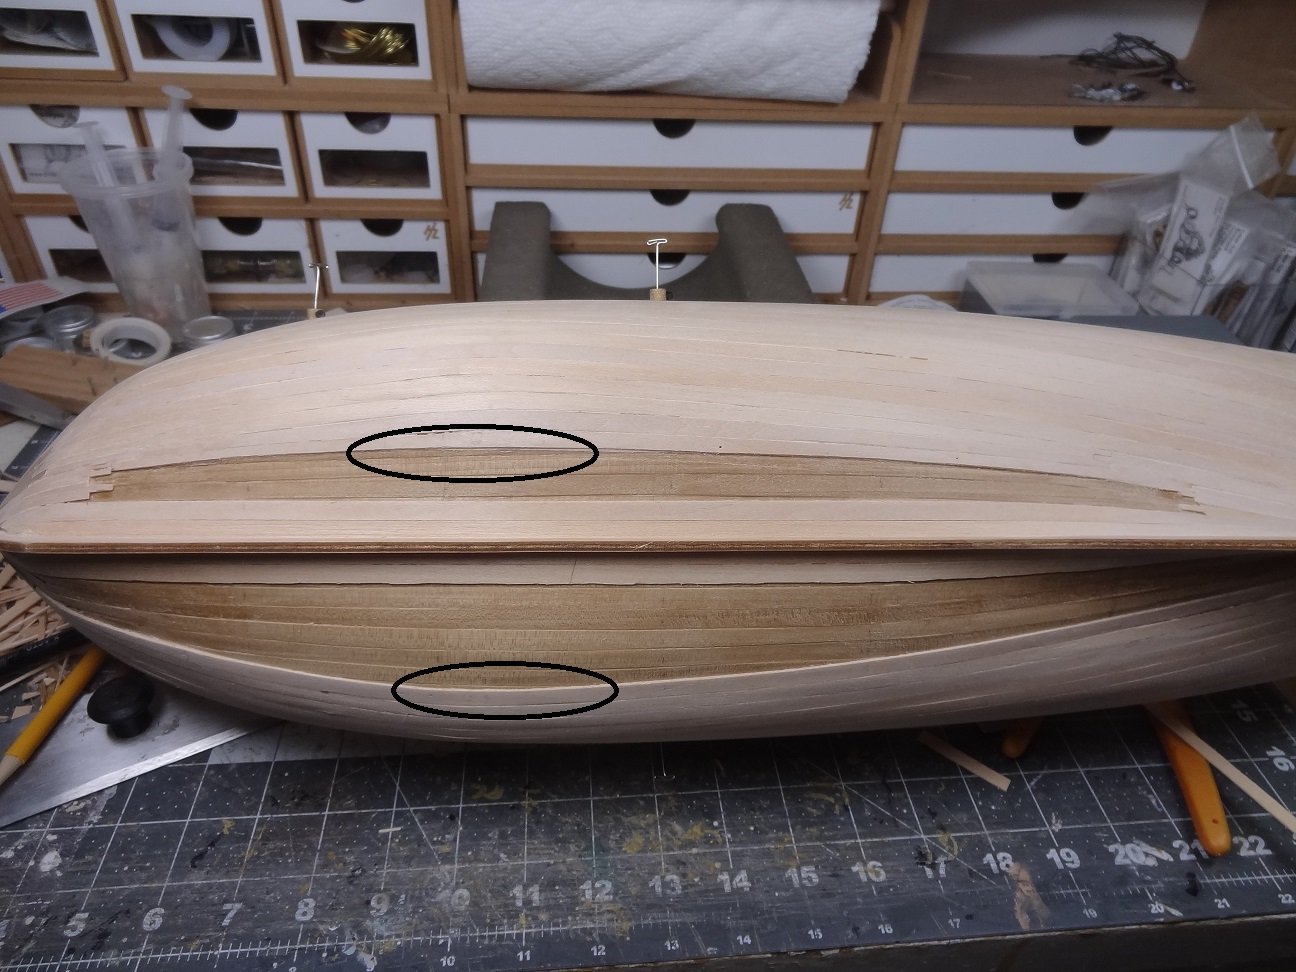
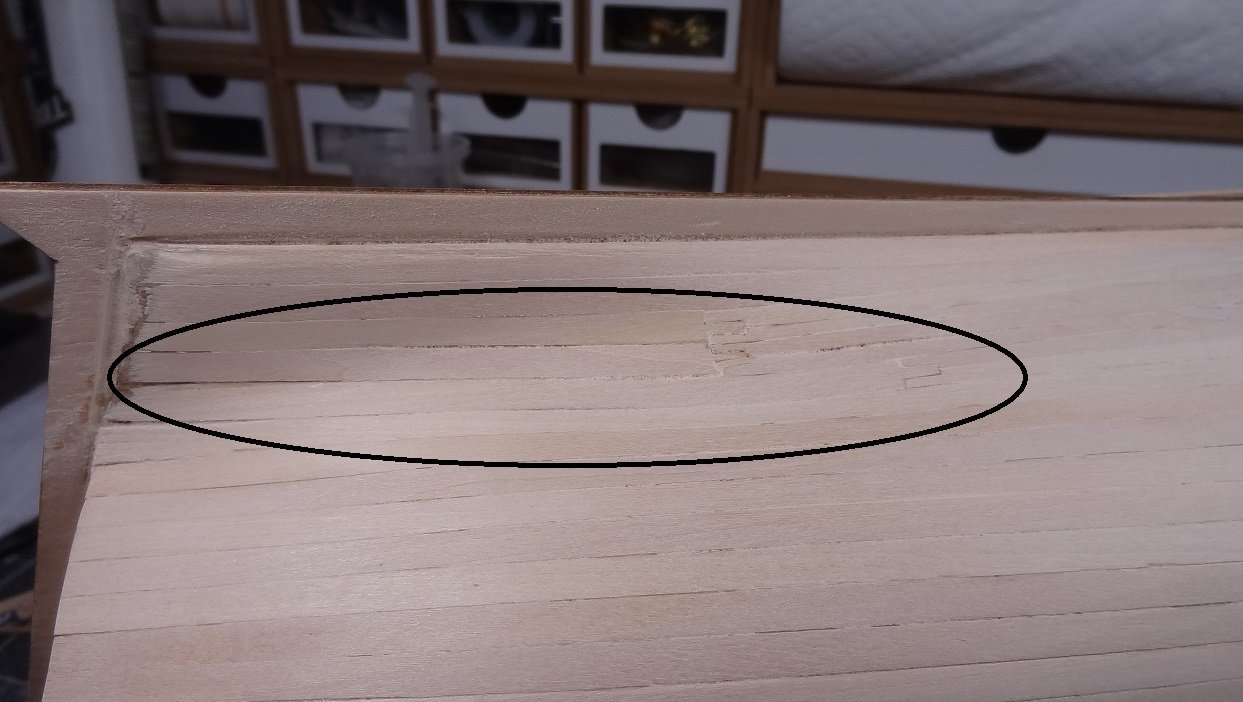
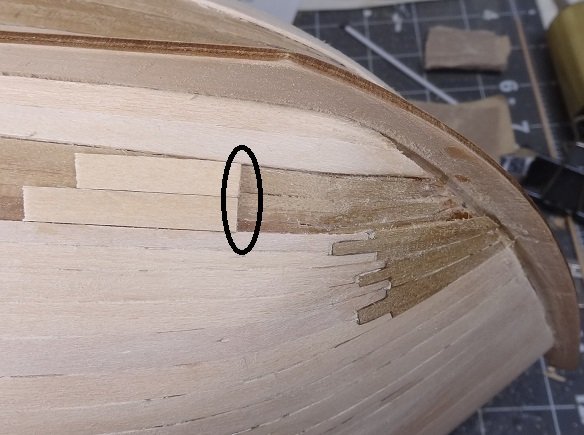
OK - so we are now really into stealers. Magically combining 1 stick into 2. There is a huge bulge just forward of mid-ship. Also very limited space at the bow.The bulge has to be filled without maxing out sticks at the stem. Once again, sorry for the poor focus, but I think you can see where this is headed. I'm getting down to some major shaping on the next few strakes. As can be seen here. I am starting to consider a short filler plank to even out the gap. Unfortunately, it could take 2 to really do the job. I am whittling down the count of sticks for this middle layer of planking. As long as there is no other requirement for these sticks, I should be OK. Crossing fingers 🤫 I am planning on repeating the identical planking on the other side, before finishing out this band. I have made a bunch of the single stealer starter planks to hopefully duplicate what I did on the starboard side.
- 62 replies
-
- 2
-
-
- lancia armata
- panart
- (and 1 more)
-
The editor went nuts, hopefully this will get posted. Continuing the 2nd of 3 plank layers for this build. As I have previously mentioned, the good thing with this layer is it will not be visible at all. This does give me opportunities to try things that I wouldn't do on an outer layer. My first screw up, after completion of the 1st band there are some pretty big misses midship. On the bow & stern the strakes landed exactly where I planned. However midship, there is almost a full plank (6mm) shortage. That is going to have to be filled somehow. Fortunately the dividers will help recalculate that space. The bigger screw up is not paying attention to the spacing at the bow. As you might see, midship will still require about 9-10 strakes, however at the bow there's room for about 4-5. Can you say filler planks? I did a prototype to turn 1 stick into 2. I apologize for the poor focusing, not sure what happened, but you get the idea. As I said, this started as a prototype but I may well just glue this into place and then extend additional sticks to the stern from there. I did make identical copies of the 3 pieces so I can do the same to both sides. Most likely there is going to be at least 2 sets of these needed. I have also taken one new step (at least for me). I am using Chuck's videos on planking a bow to handle the bow curvature of this build. Amazingly I have never needed to do this. With previous builds I have always been able to "strongarm" the planks/strakes into place. I missed this with the 1st layer and given the only gluing option was edge to edge (nothing glued to the frames) created a real mess. So on the 2nd layer I am actually bending strakes per the videos. The 2nd planking is looking a lot better. I probably could have done the same for this build, but given the limitations of the 1st plank layer, something needed to be done to improve the structural integrity of the hull. So I will not go into detail (view Chuck's planking vids for that) I did start edge bending at about the 9th strake - in hindsight way too late. There's gonna be some major adjustments before this layer is completed. Fortunately I can learn from it and no one else will see.
- 62 replies
-
- 3
-
-
- lancia armata
- panart
- (and 1 more)
-
Rereading some of my old posts - Joel, I miss ya man, I Miss Ya Man!