Search the Community
Showing results for tags 'occre'.
-
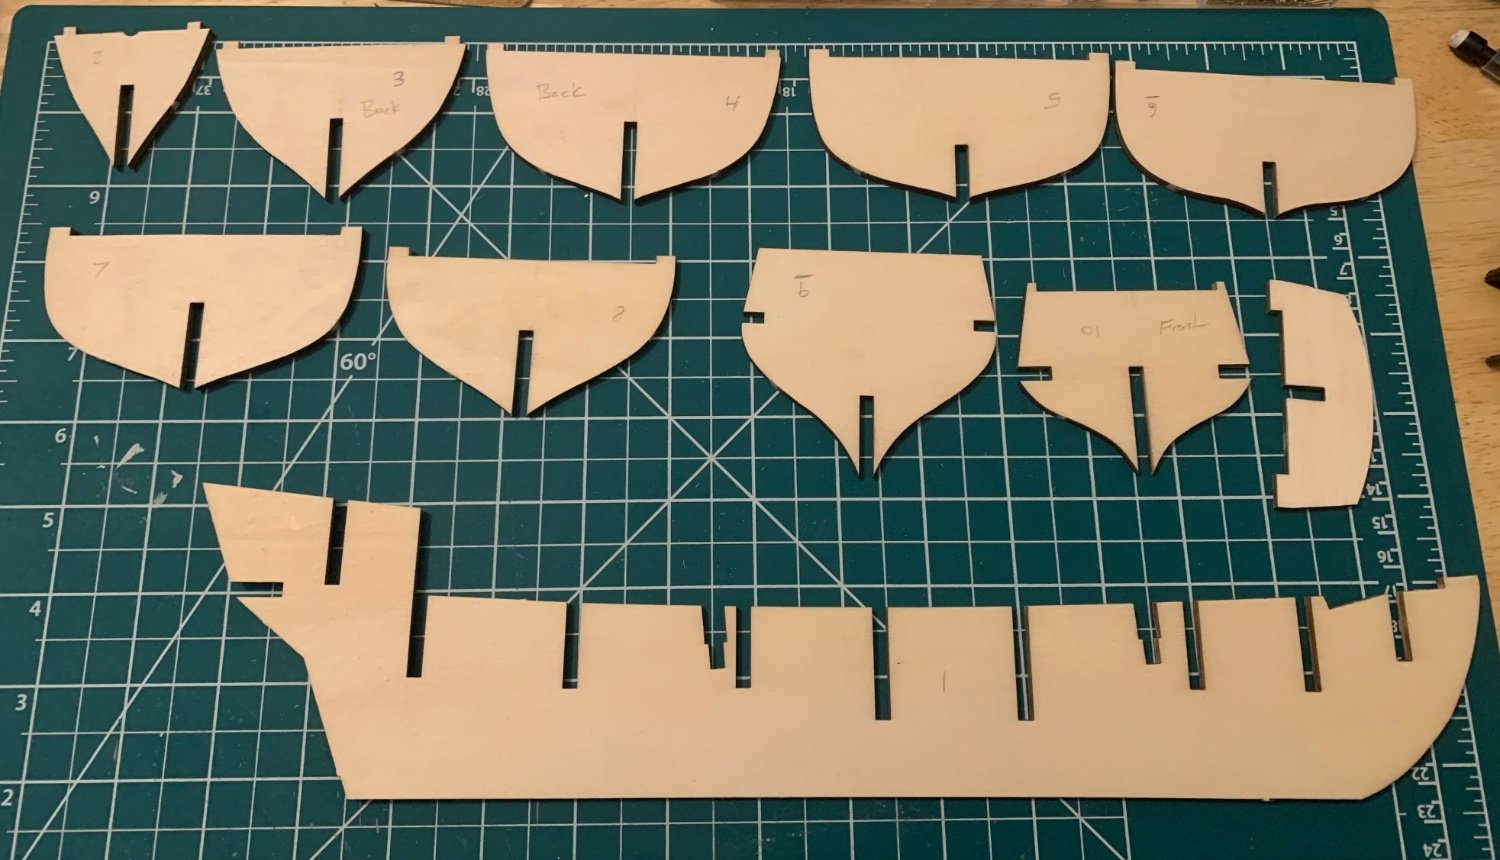
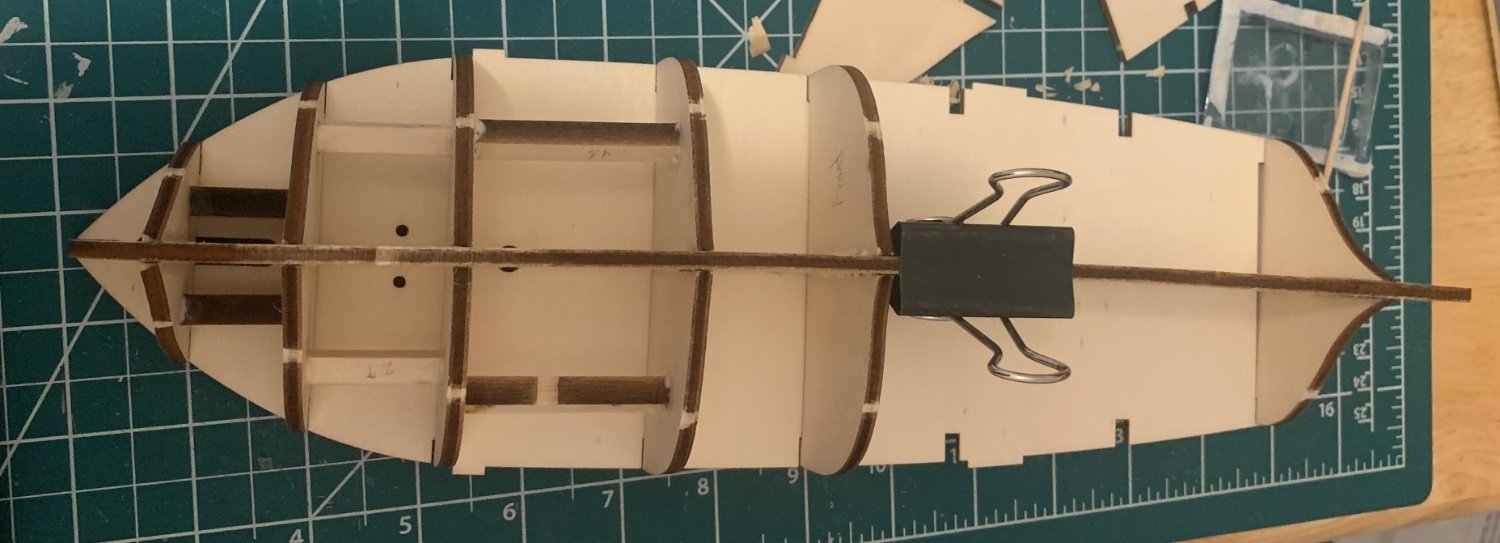
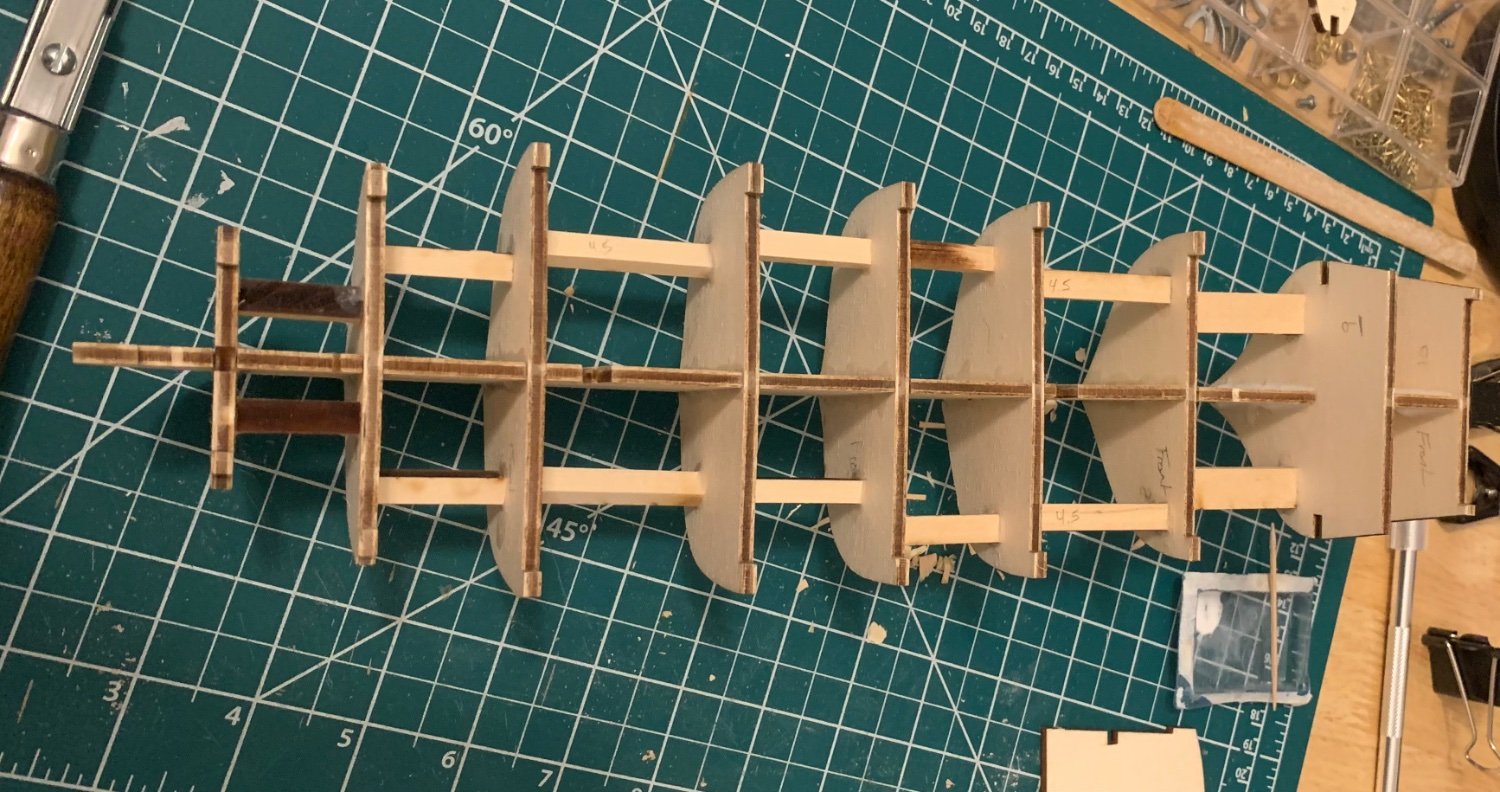
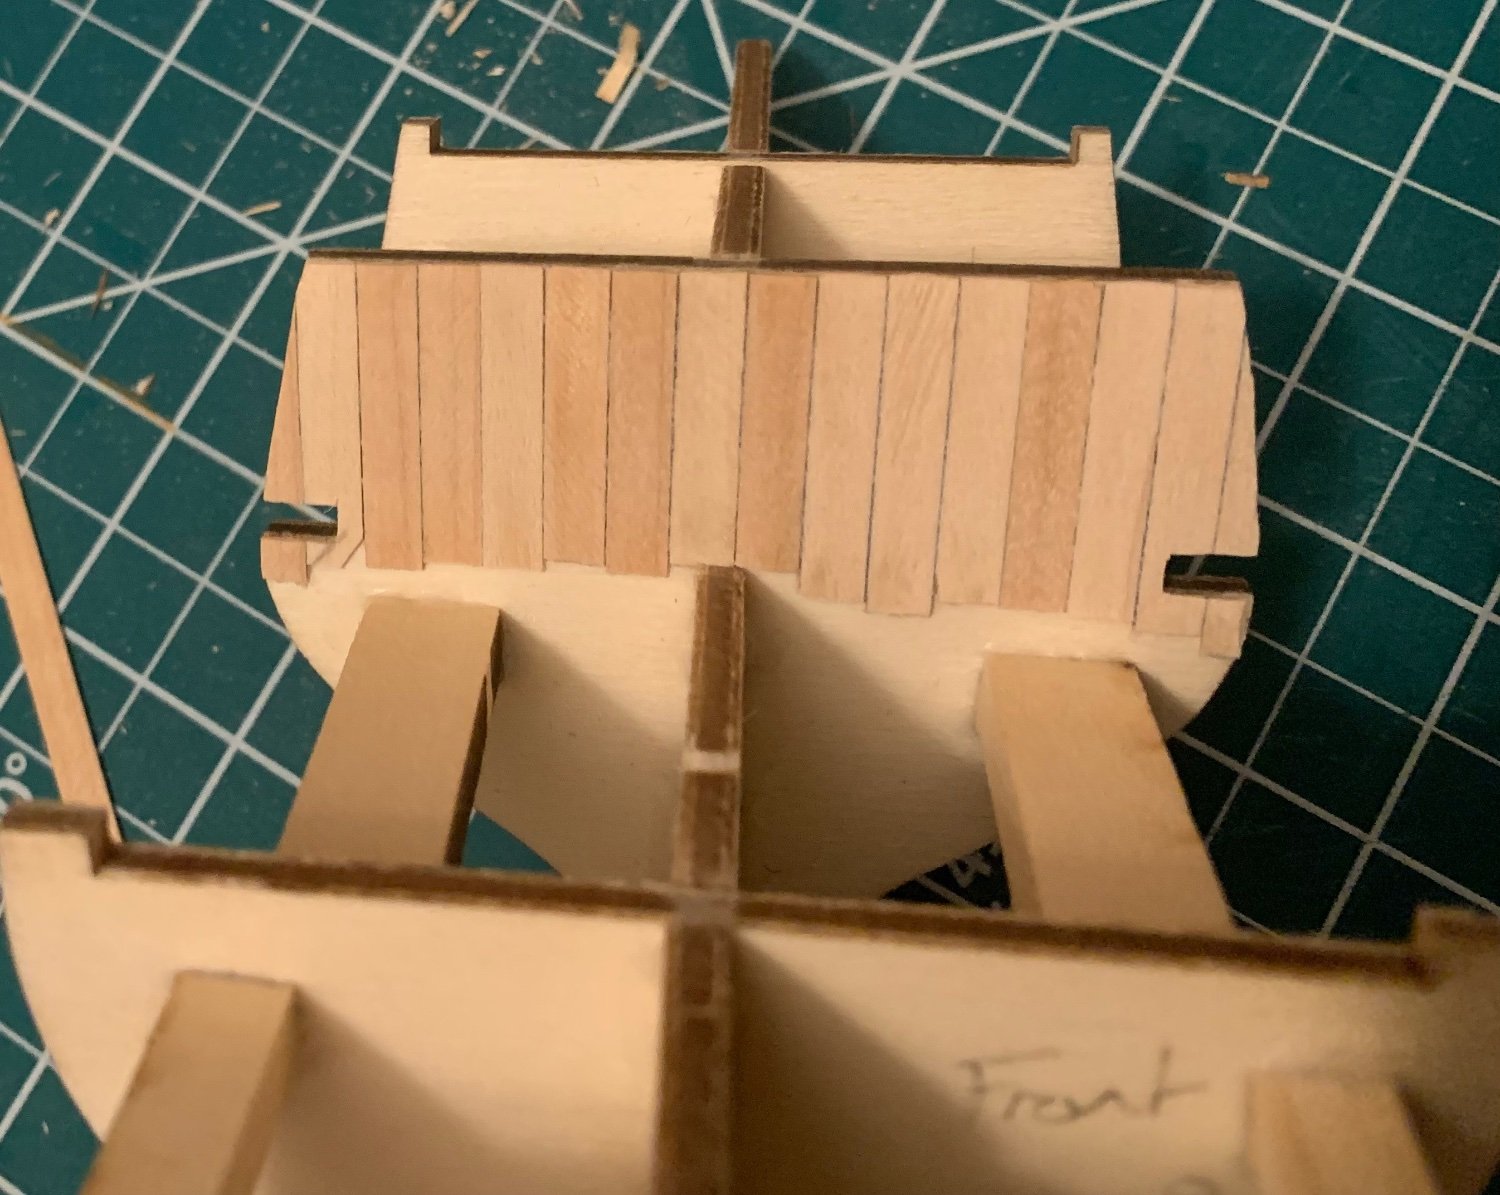
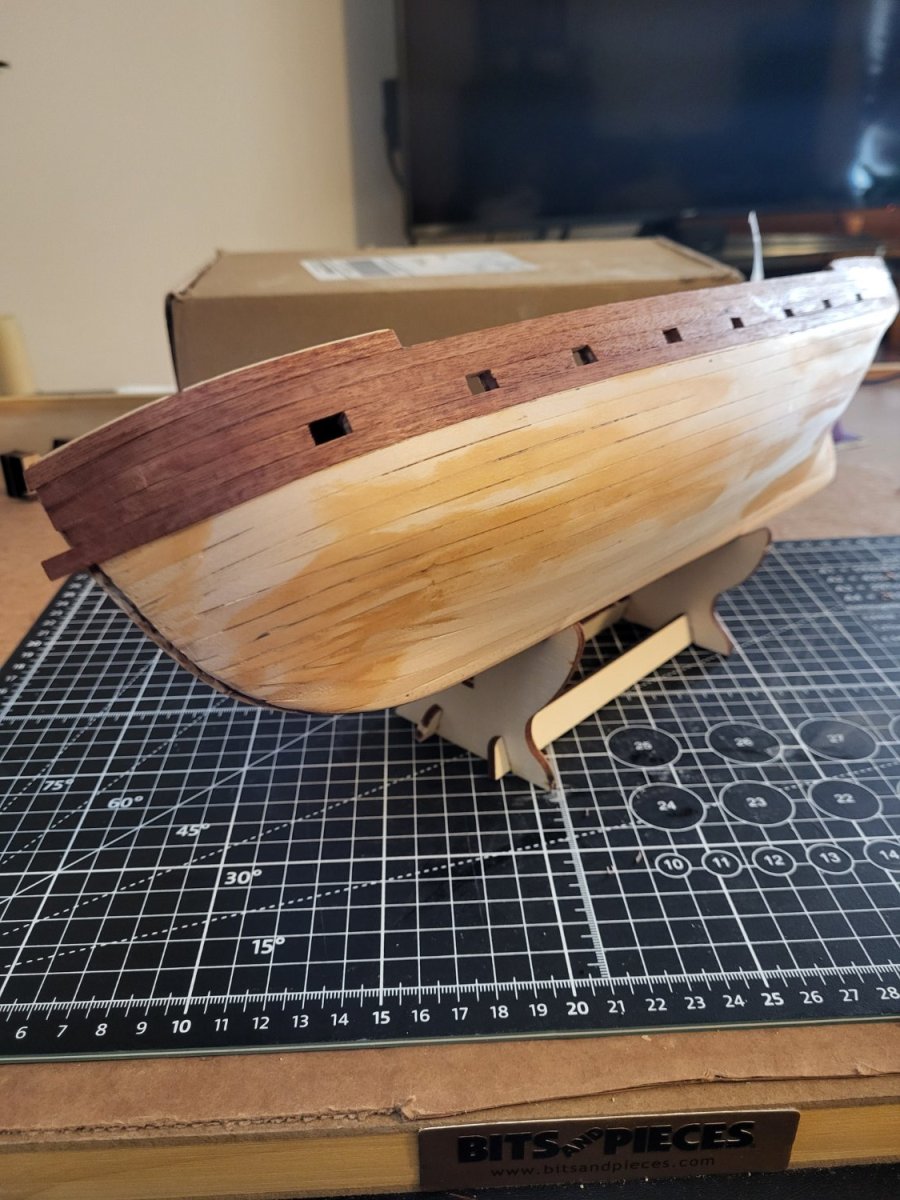
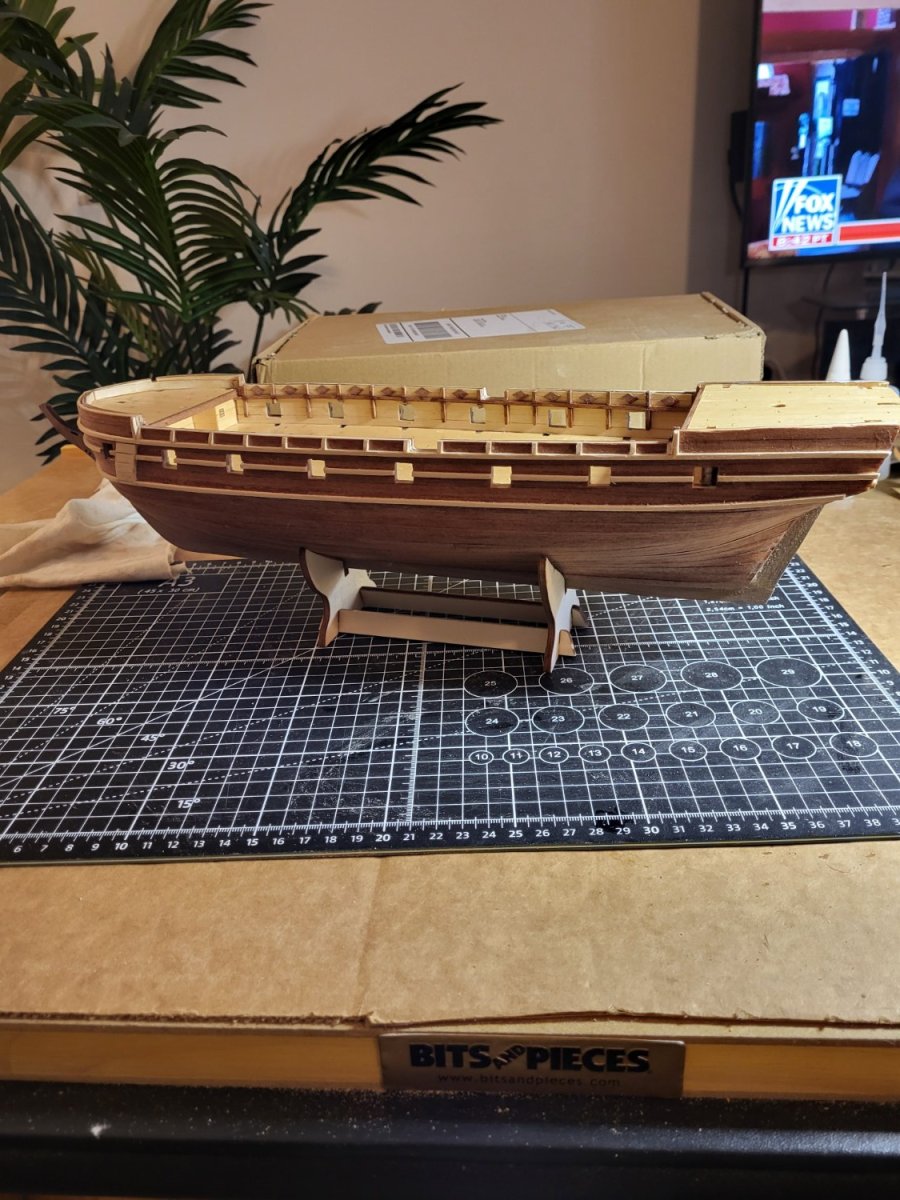
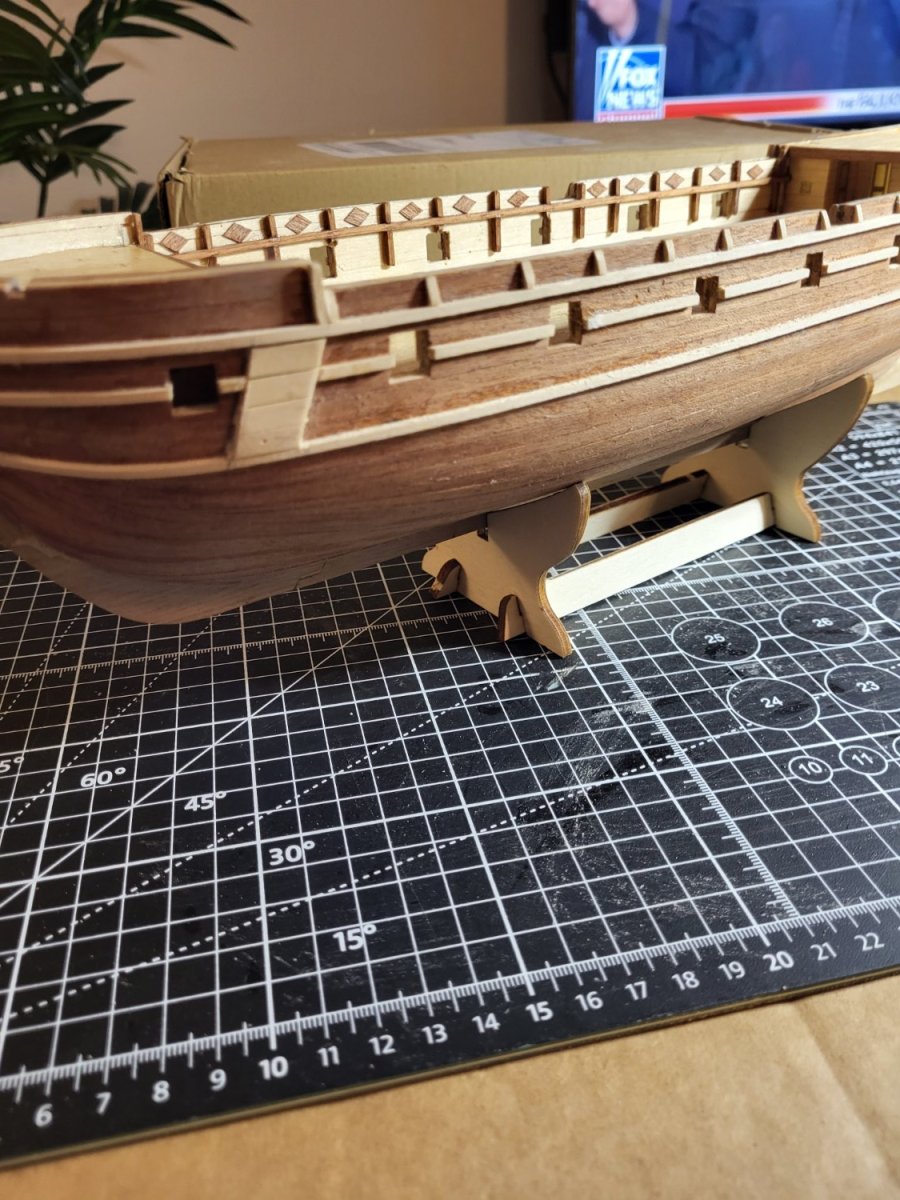
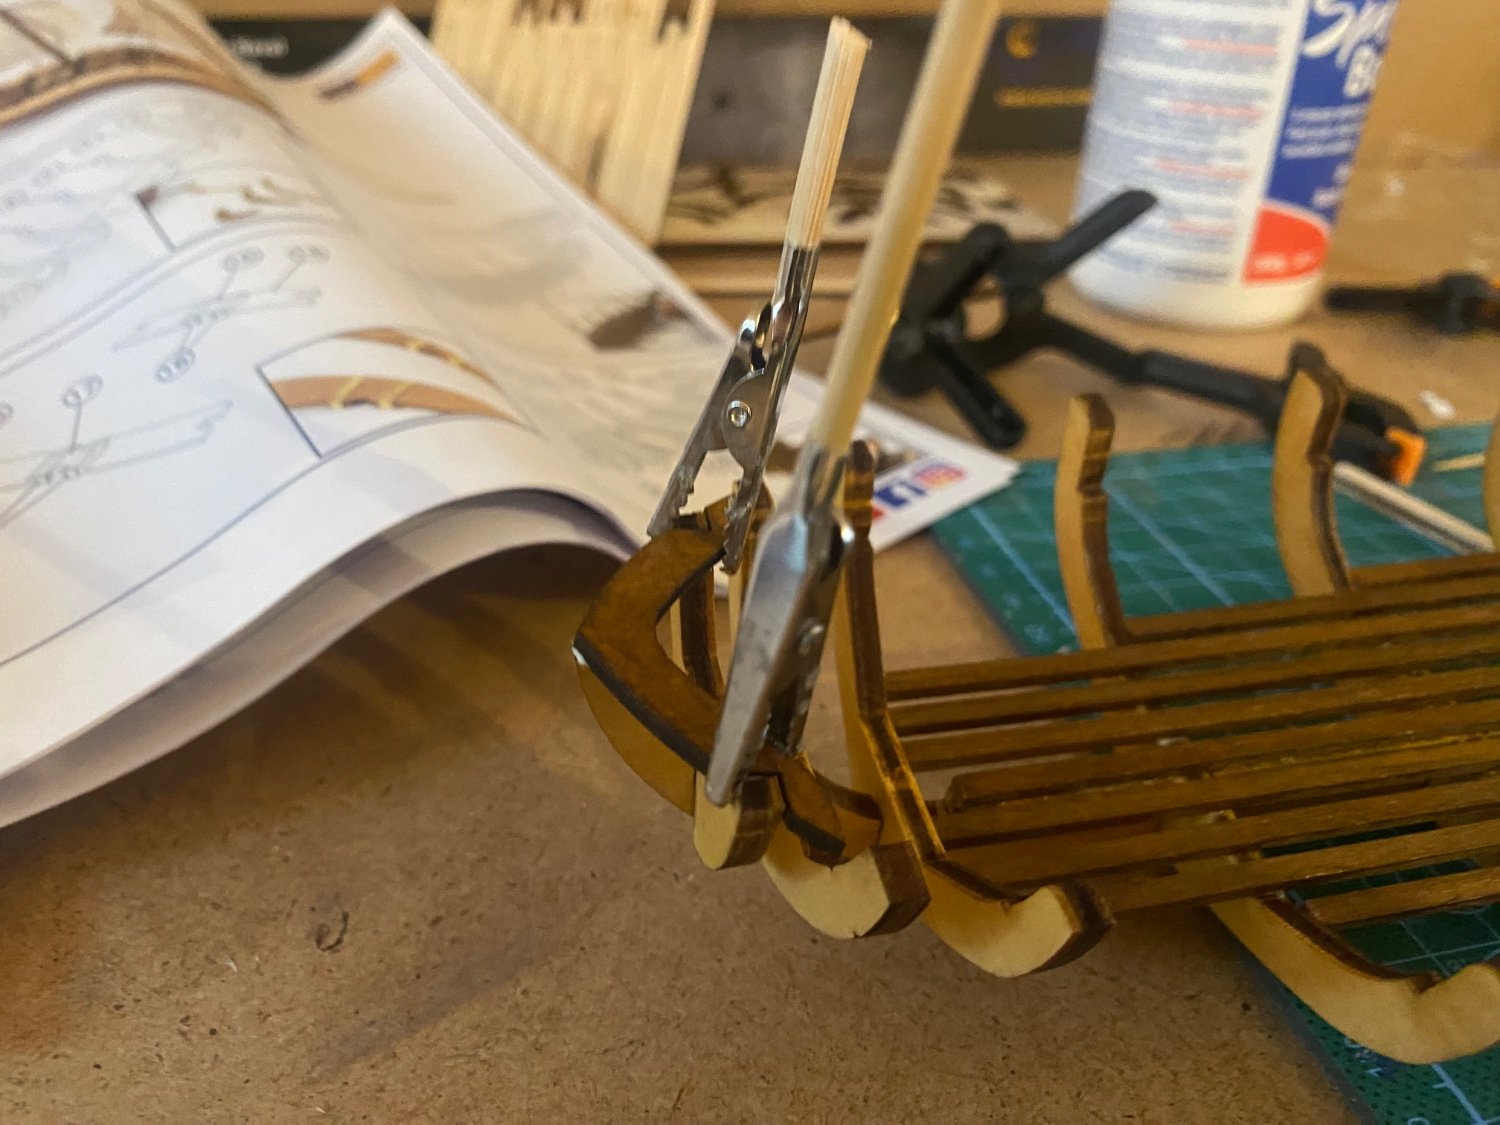
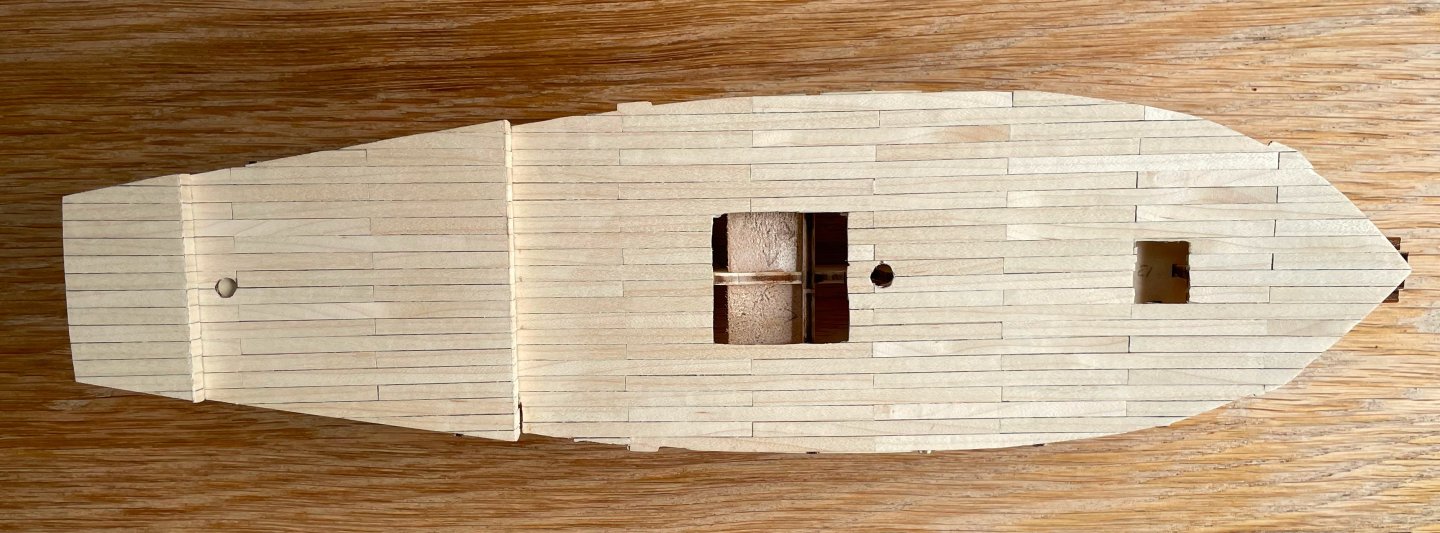
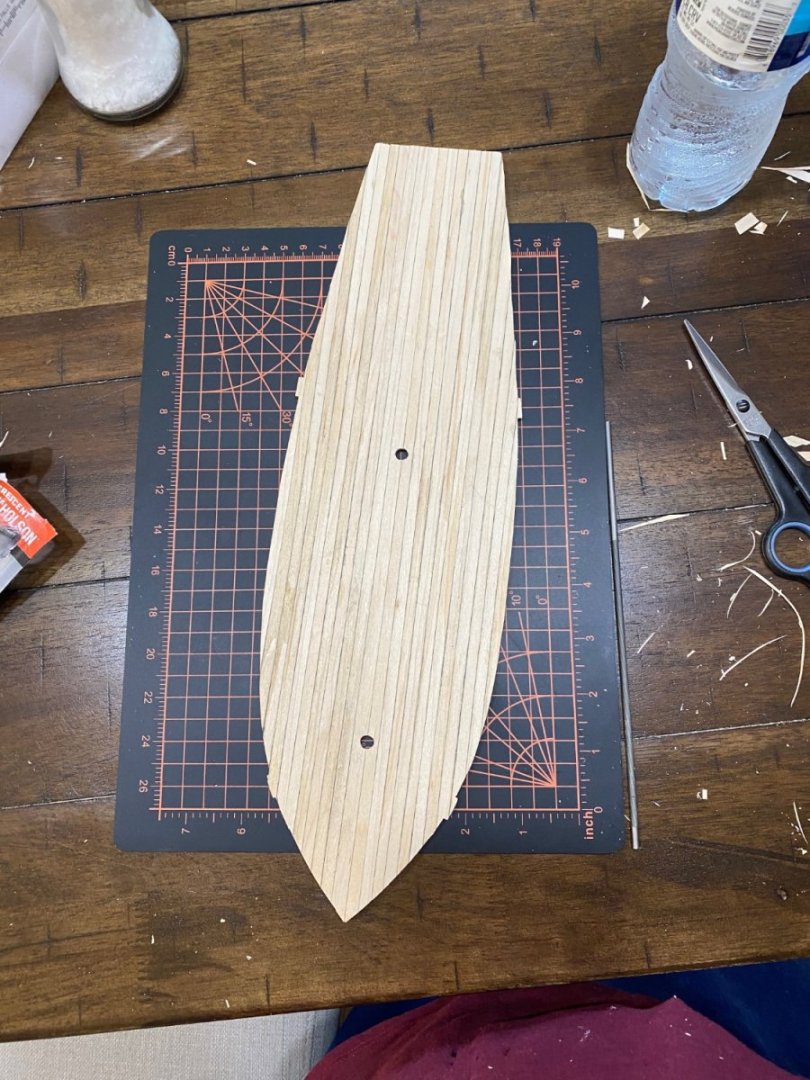
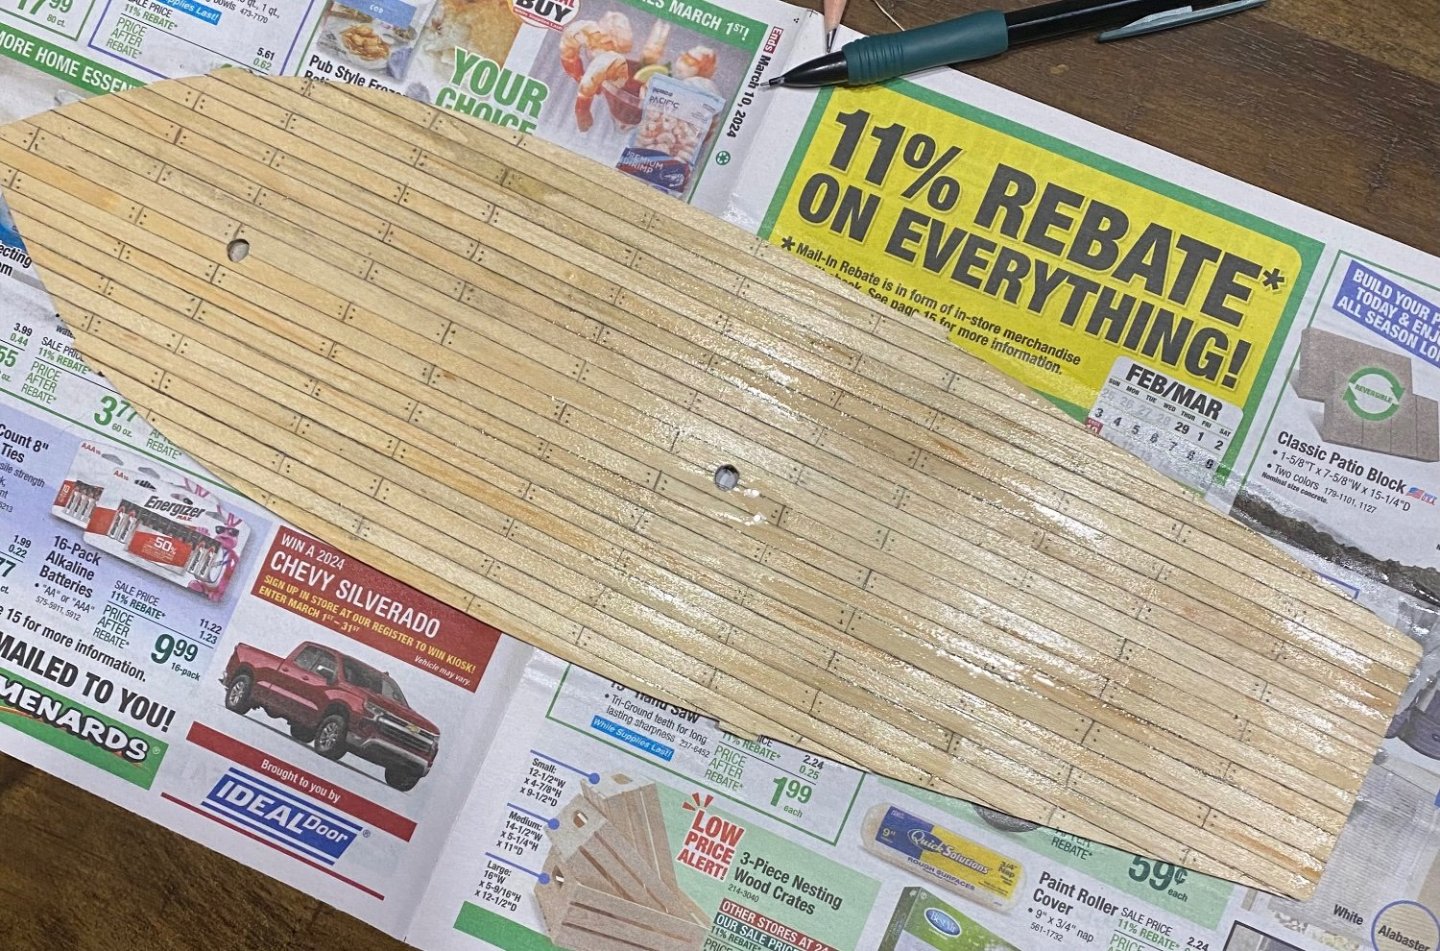
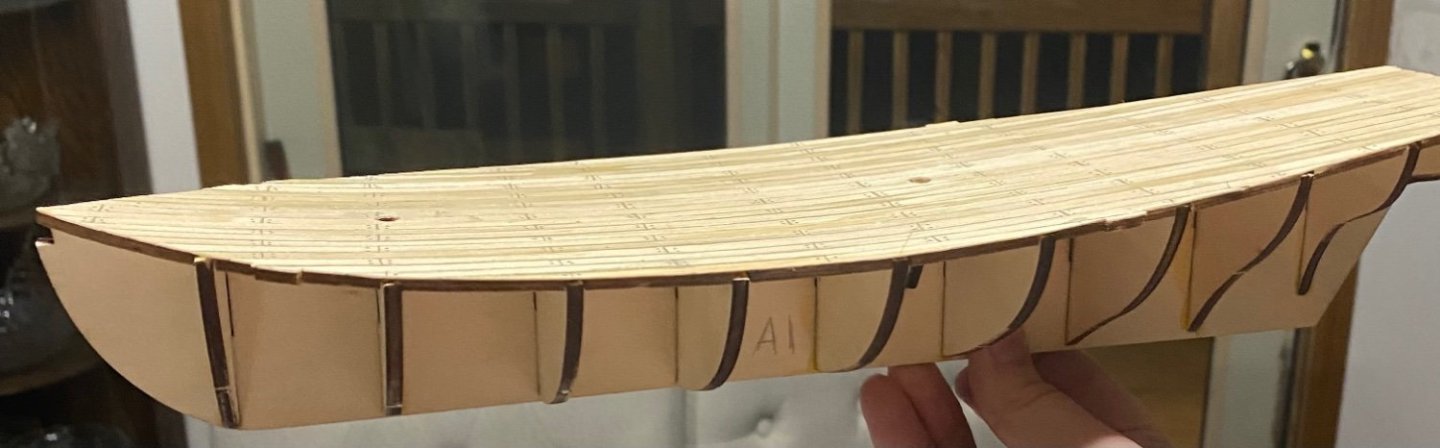
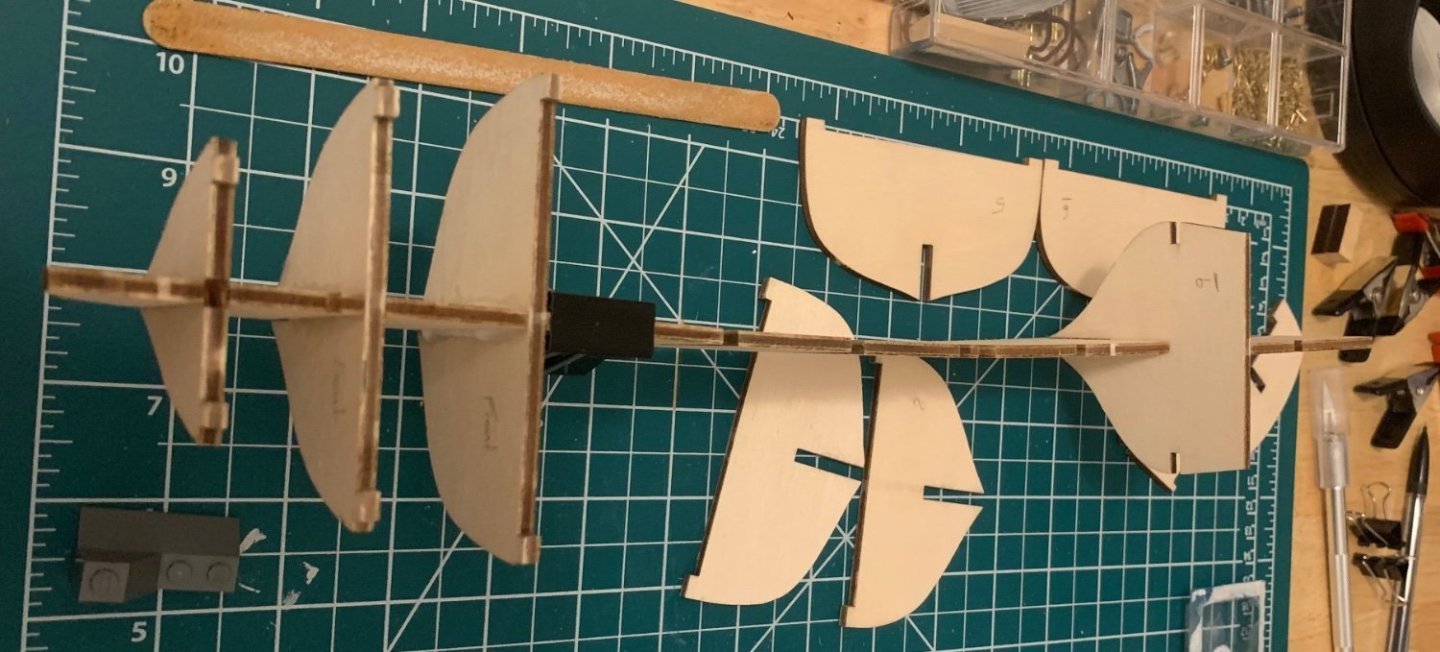
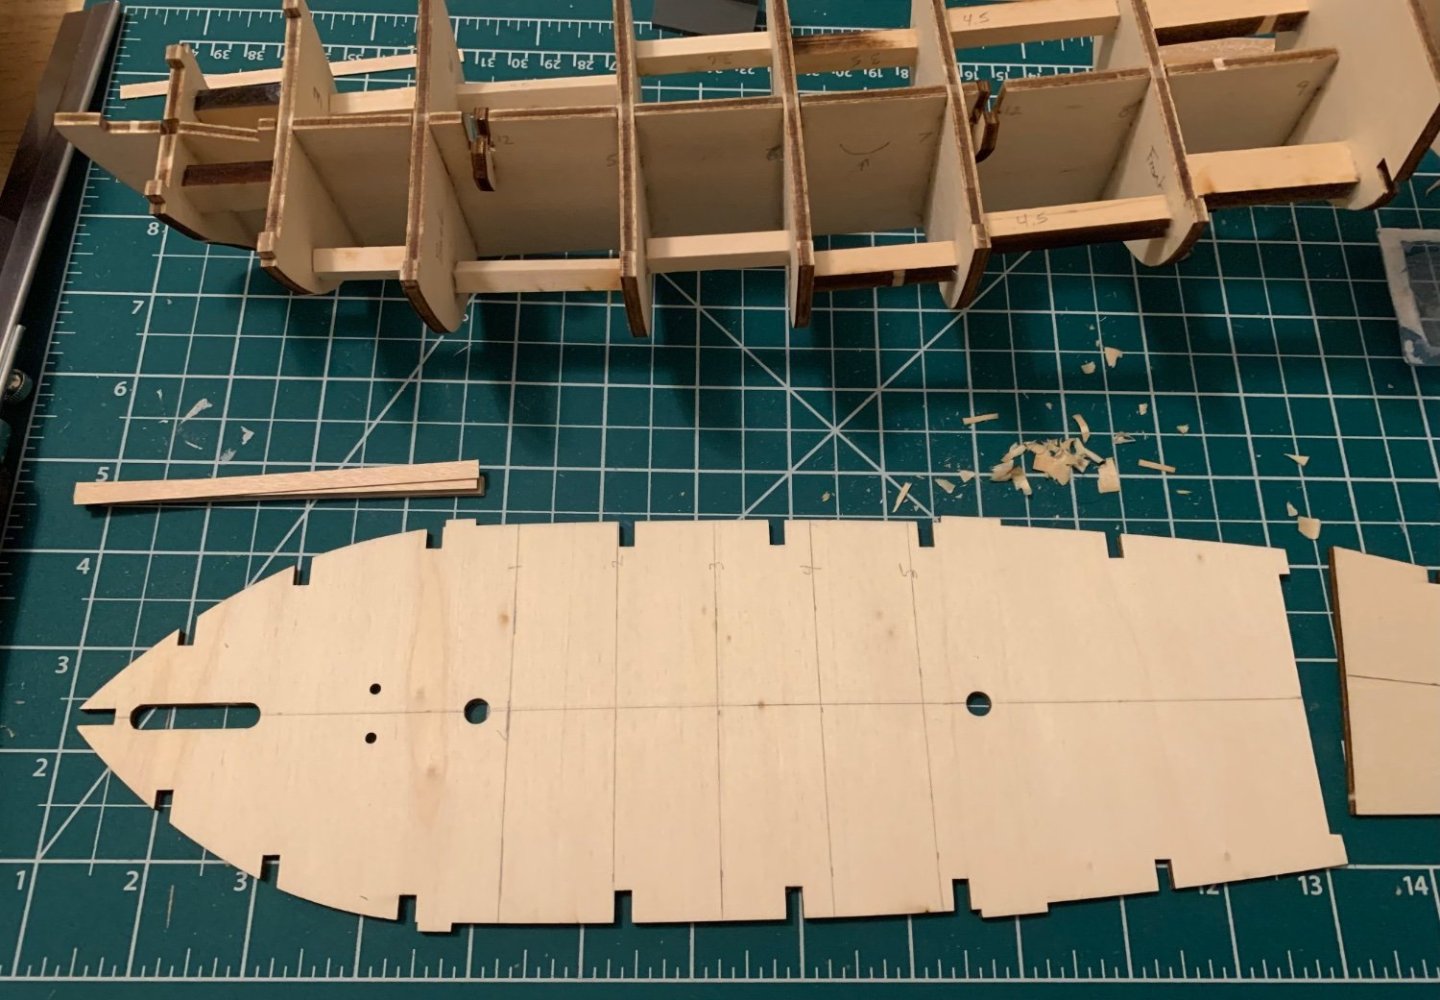
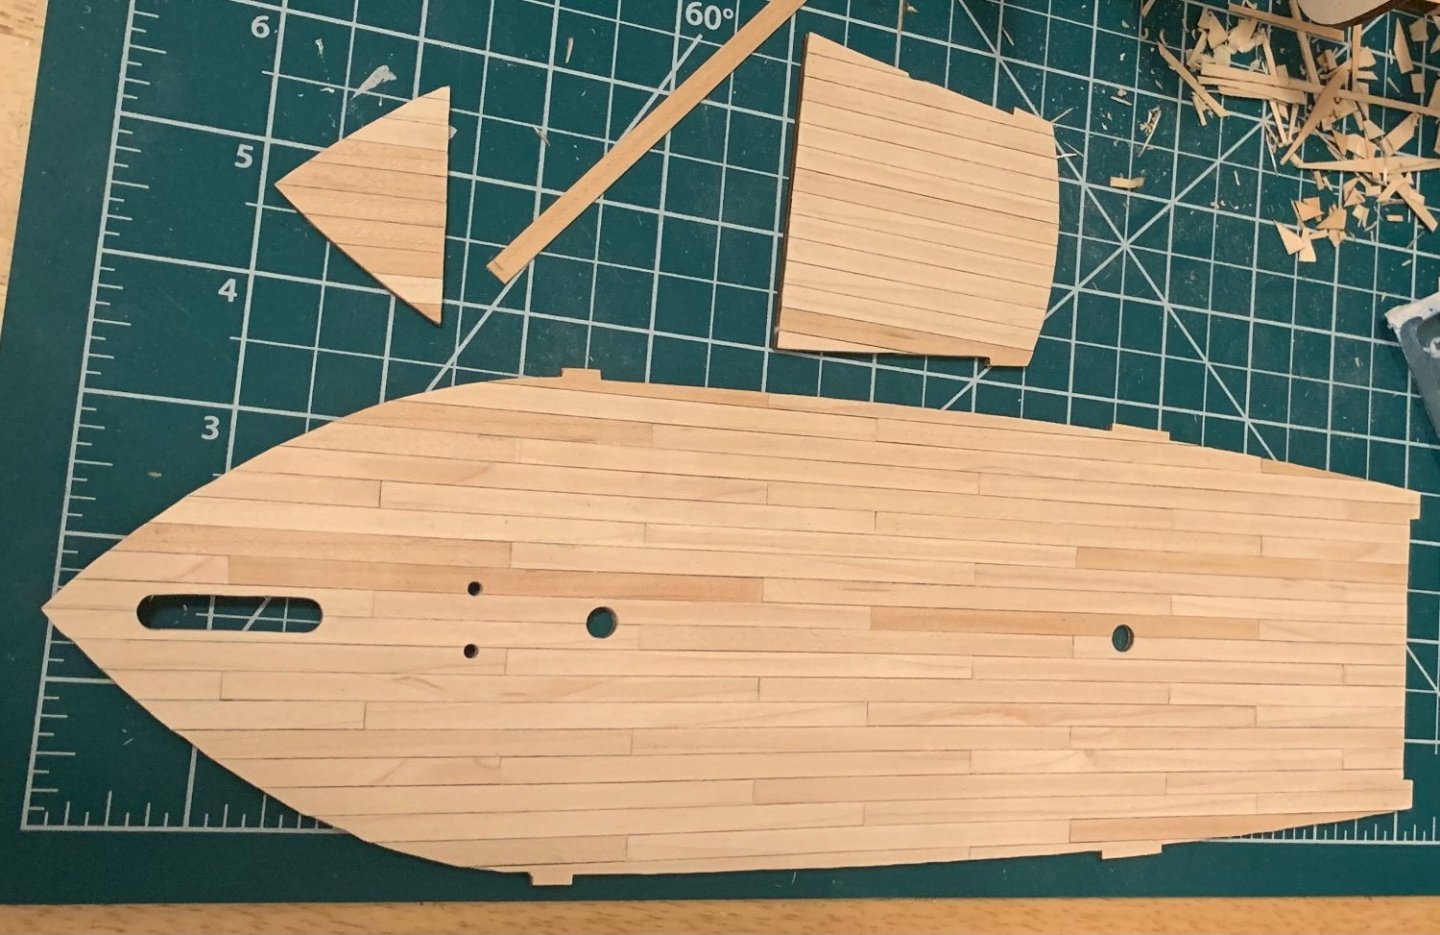
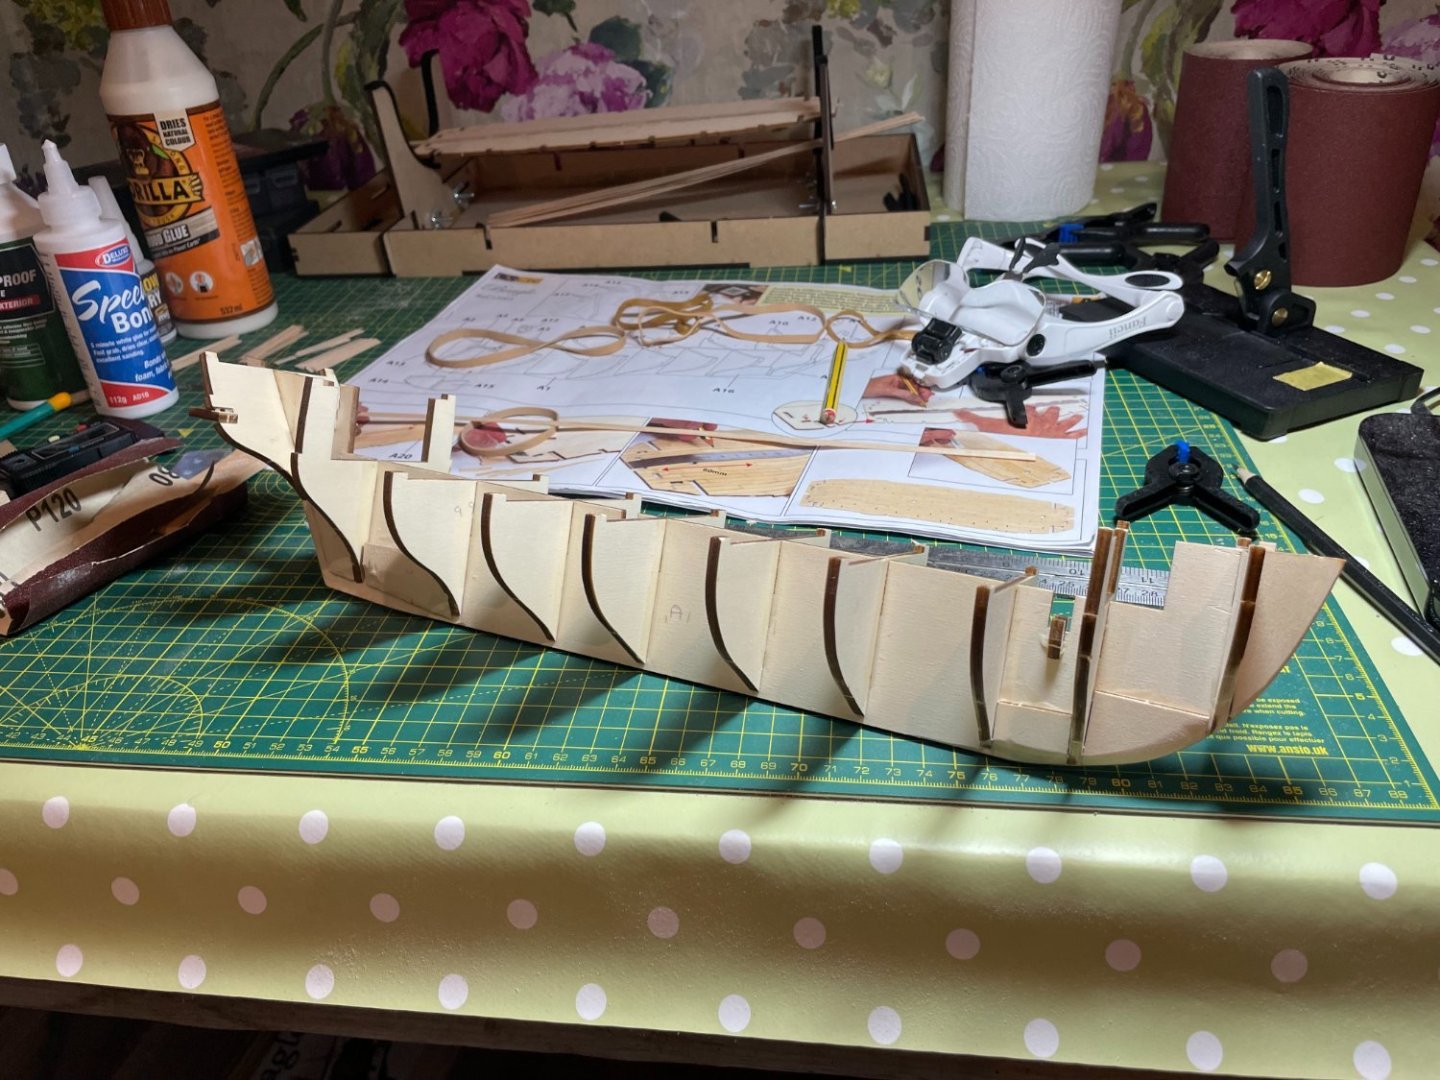
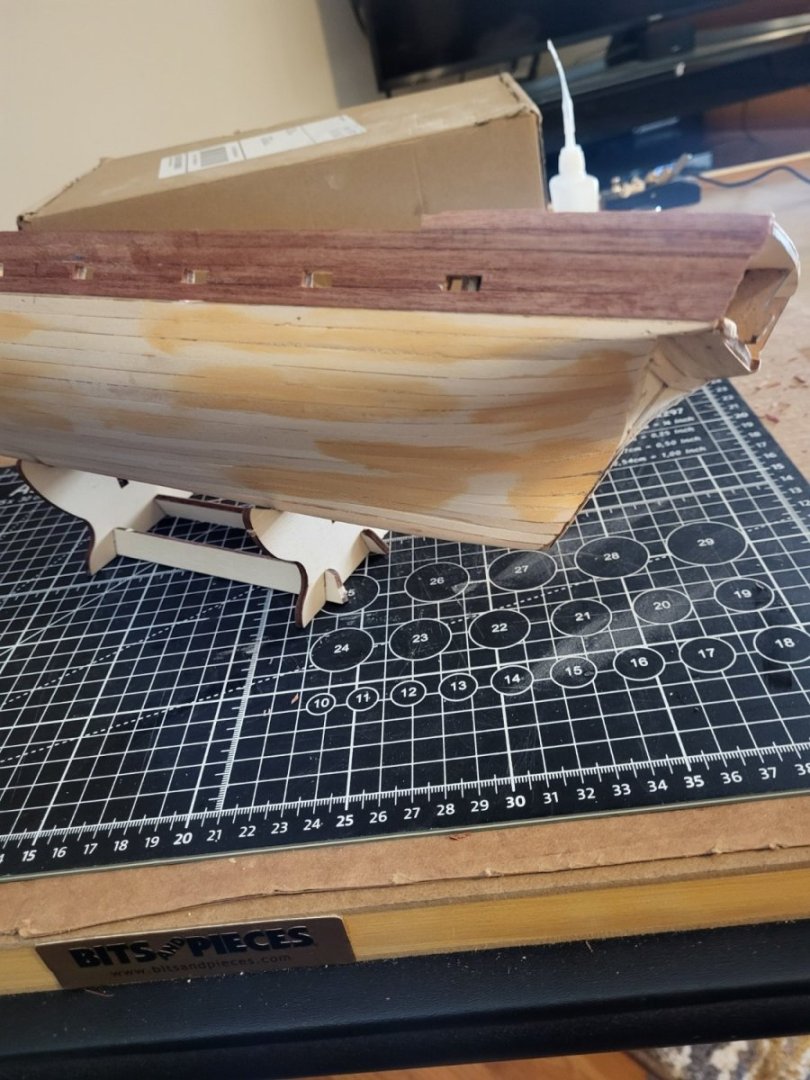
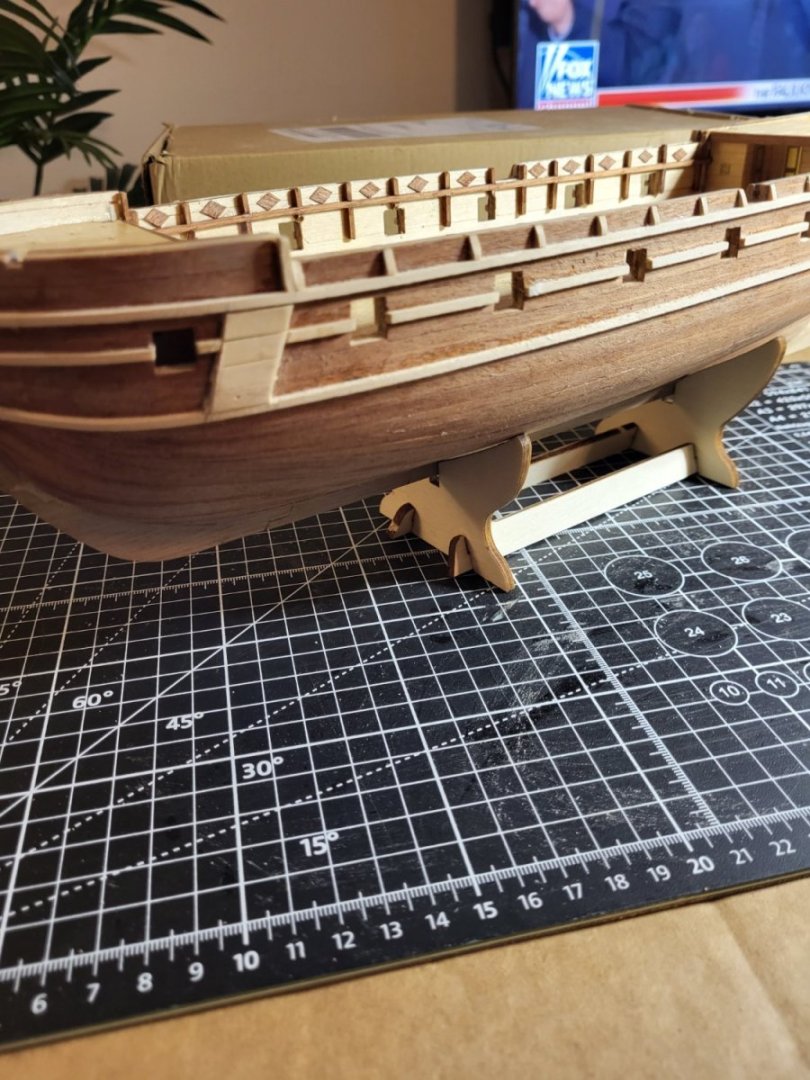
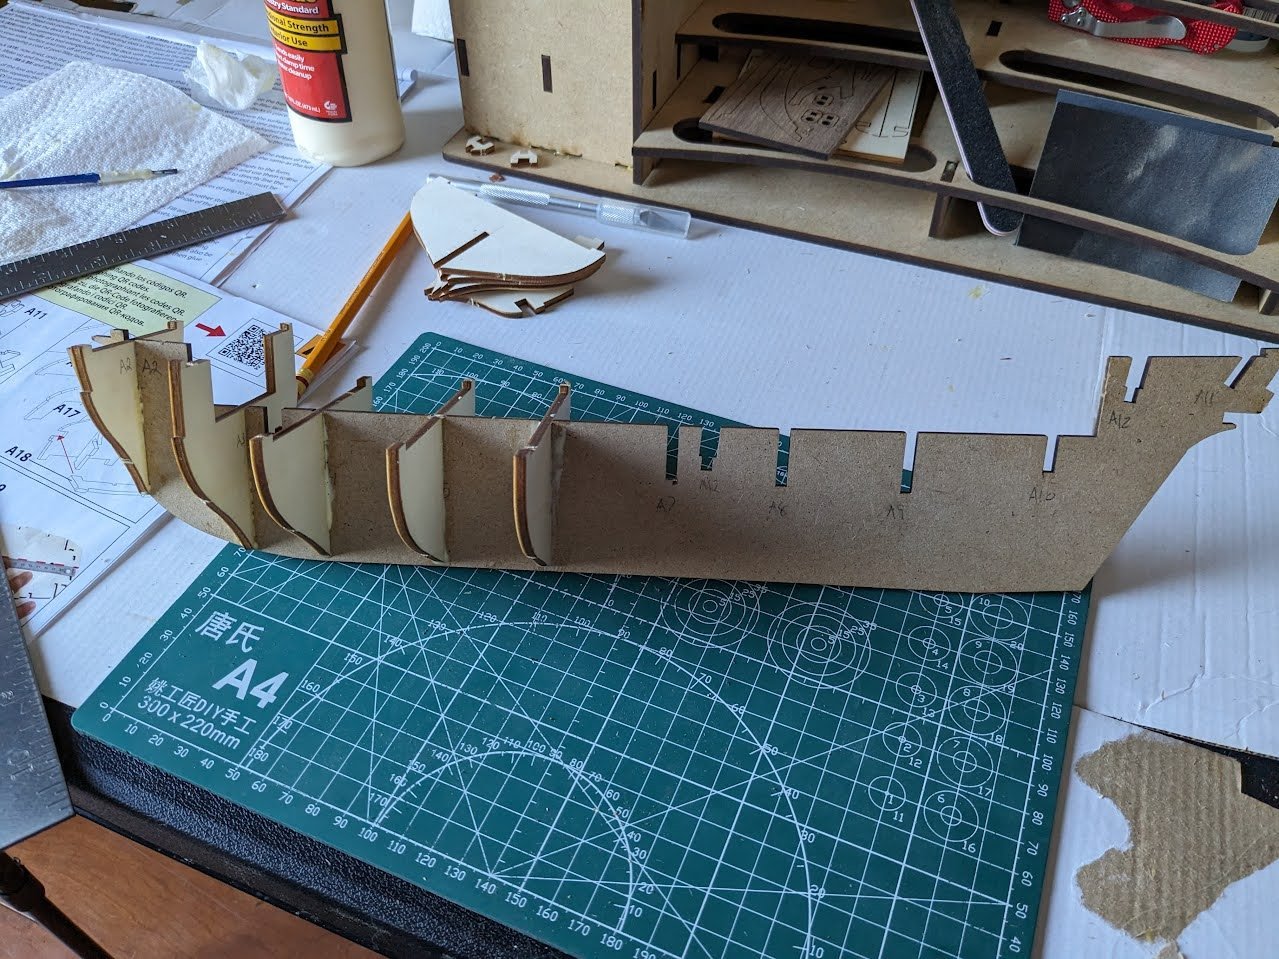
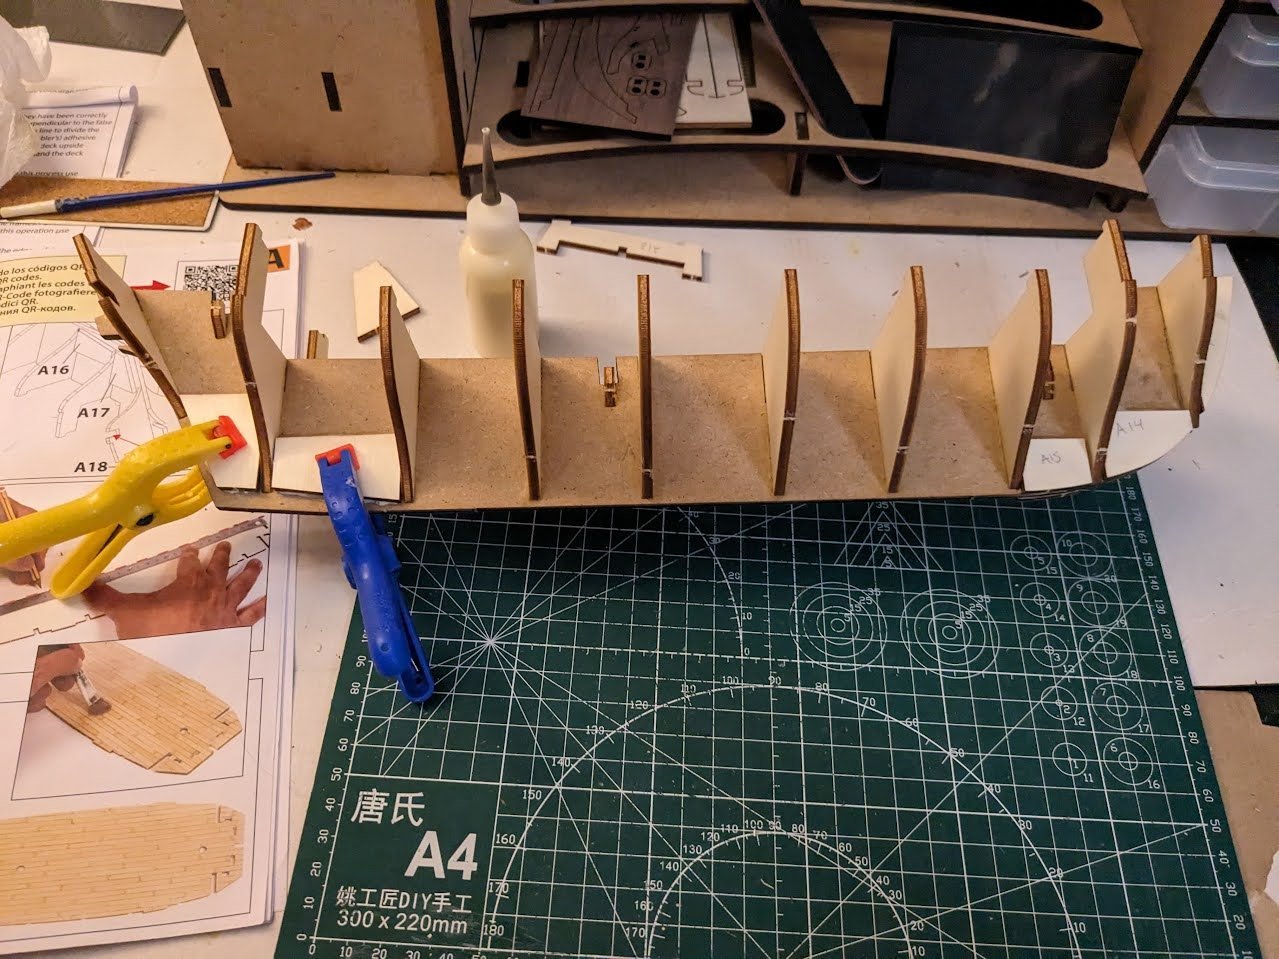
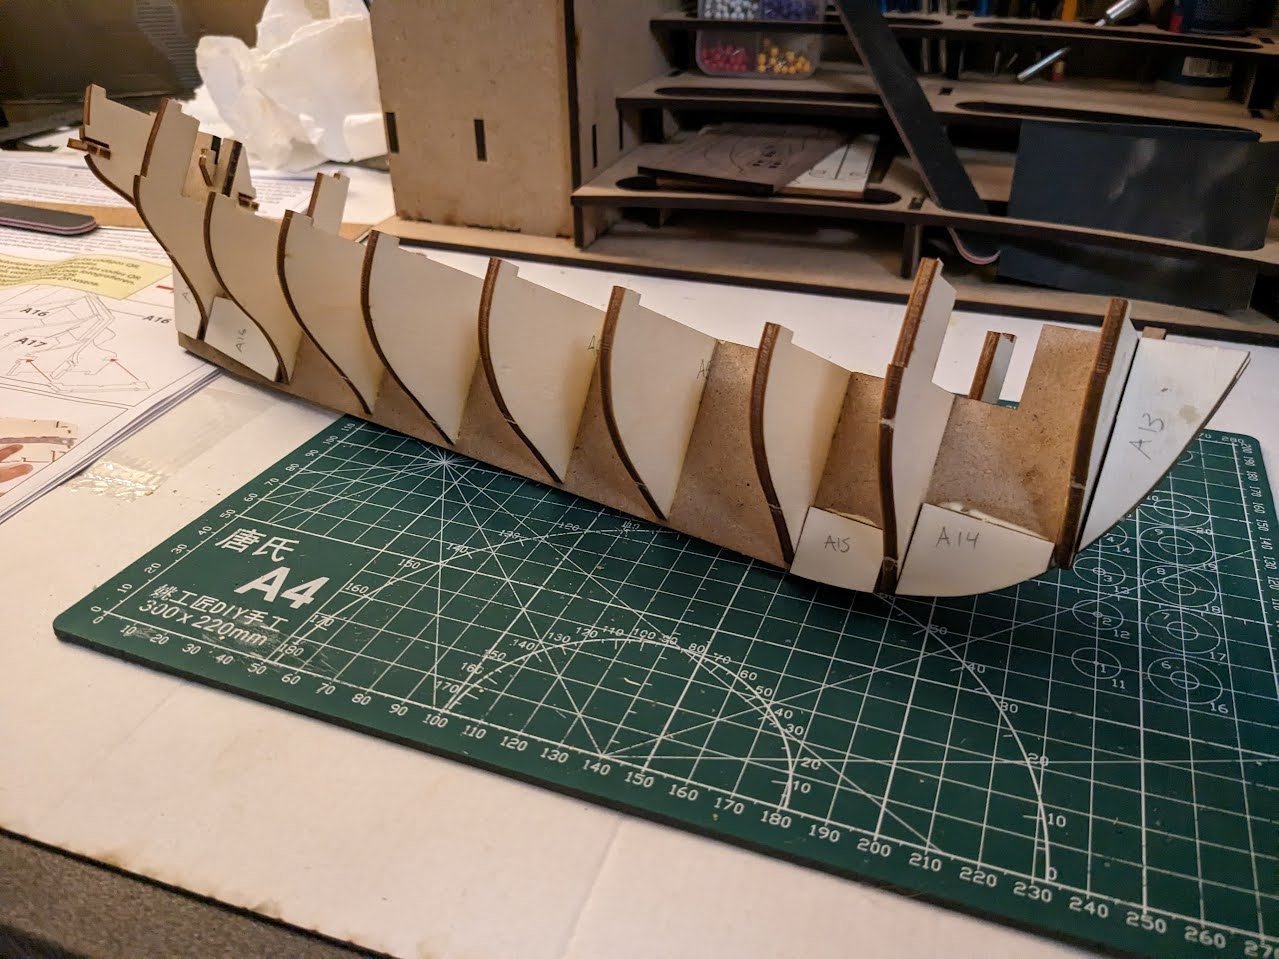
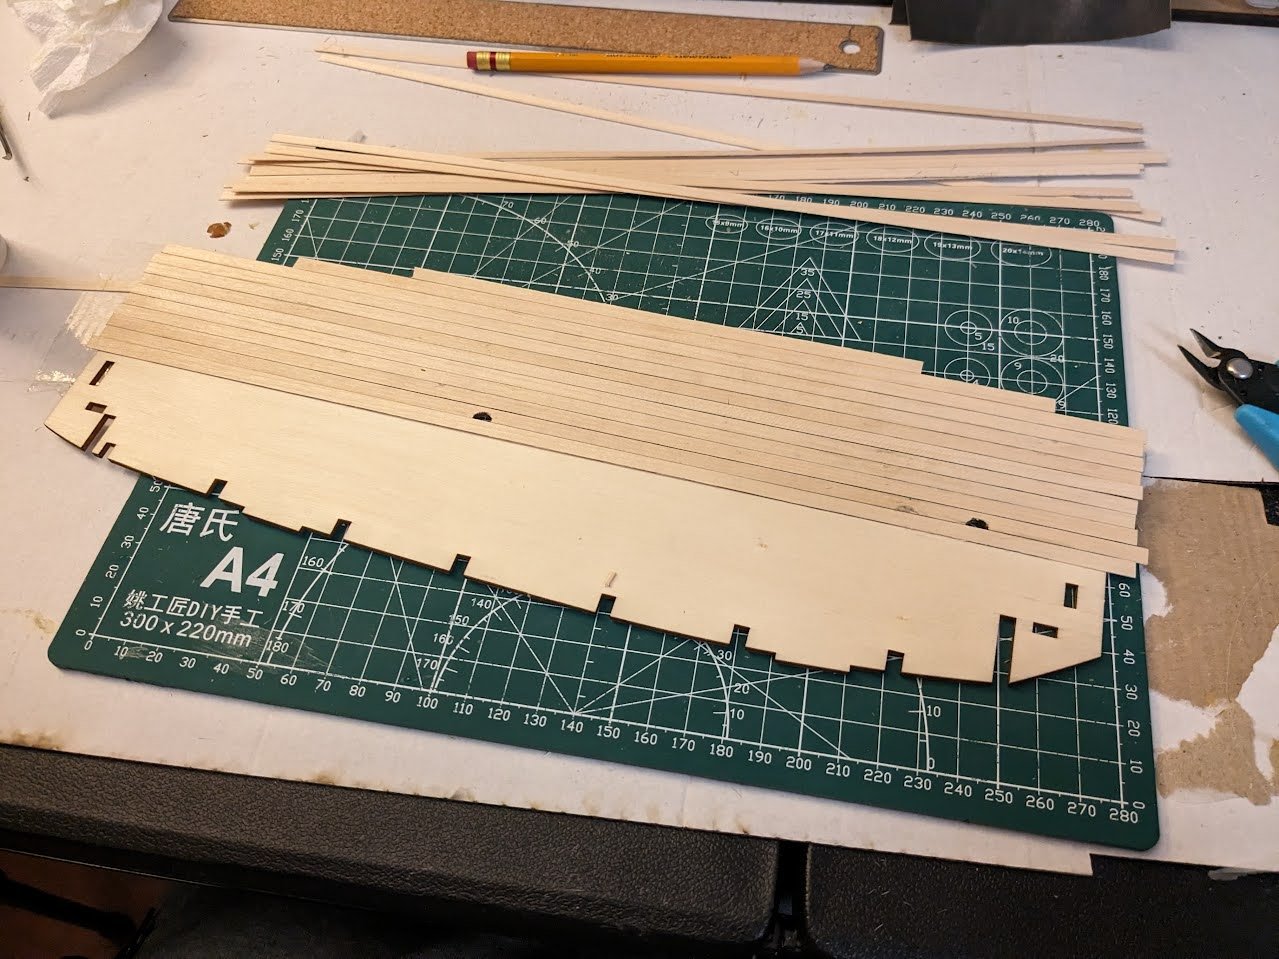
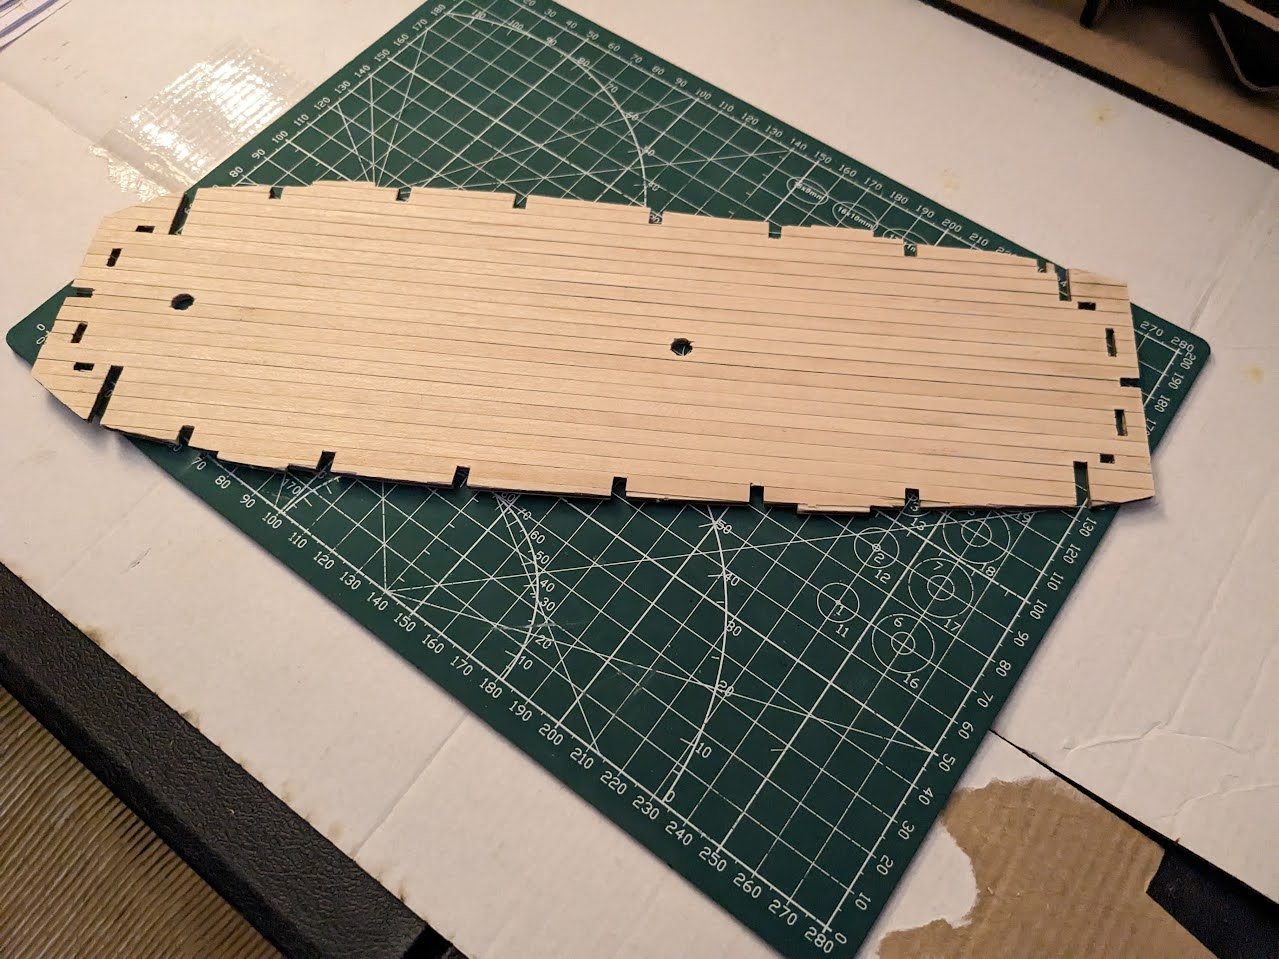
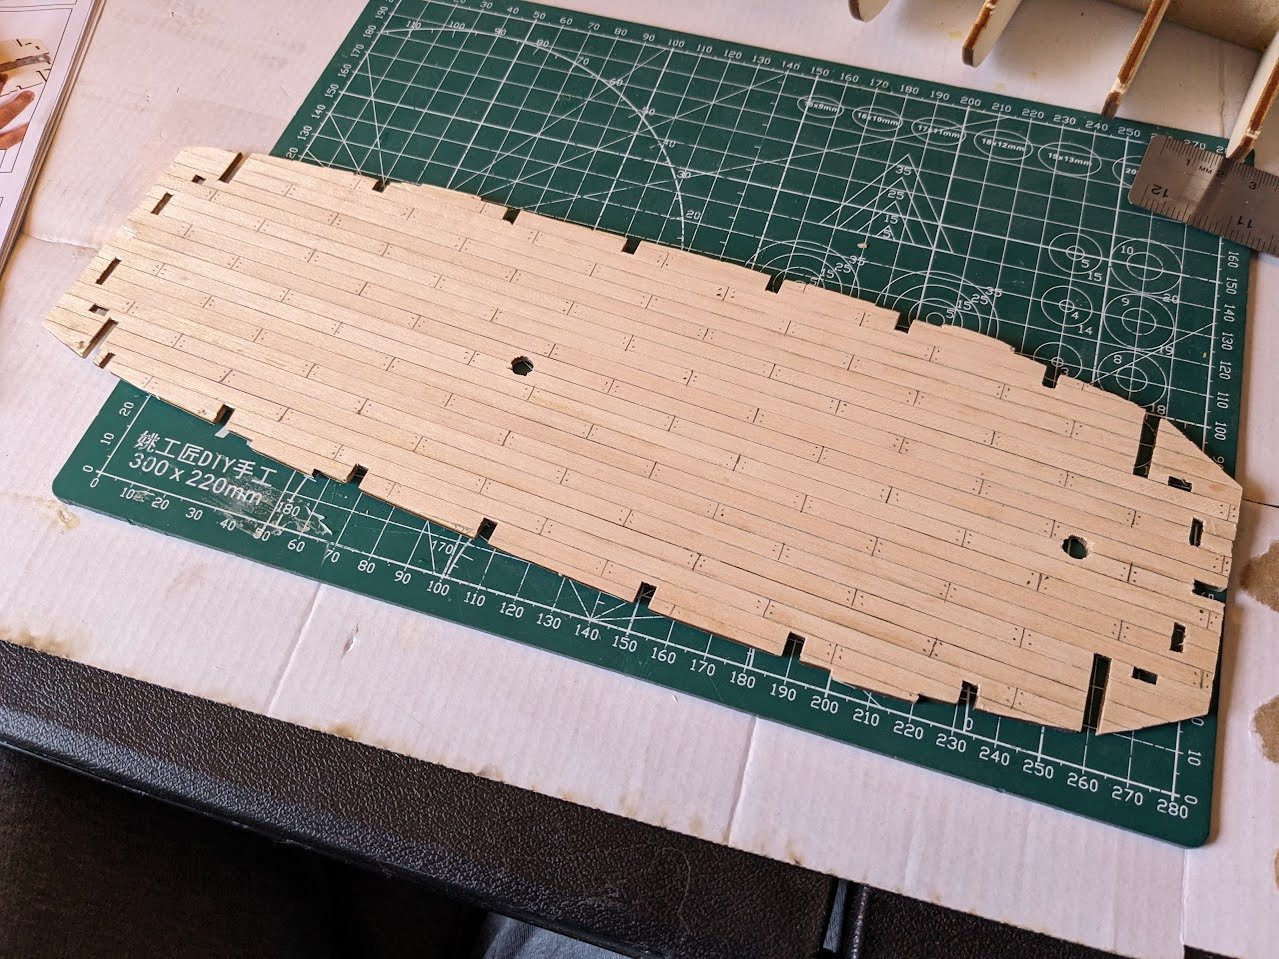
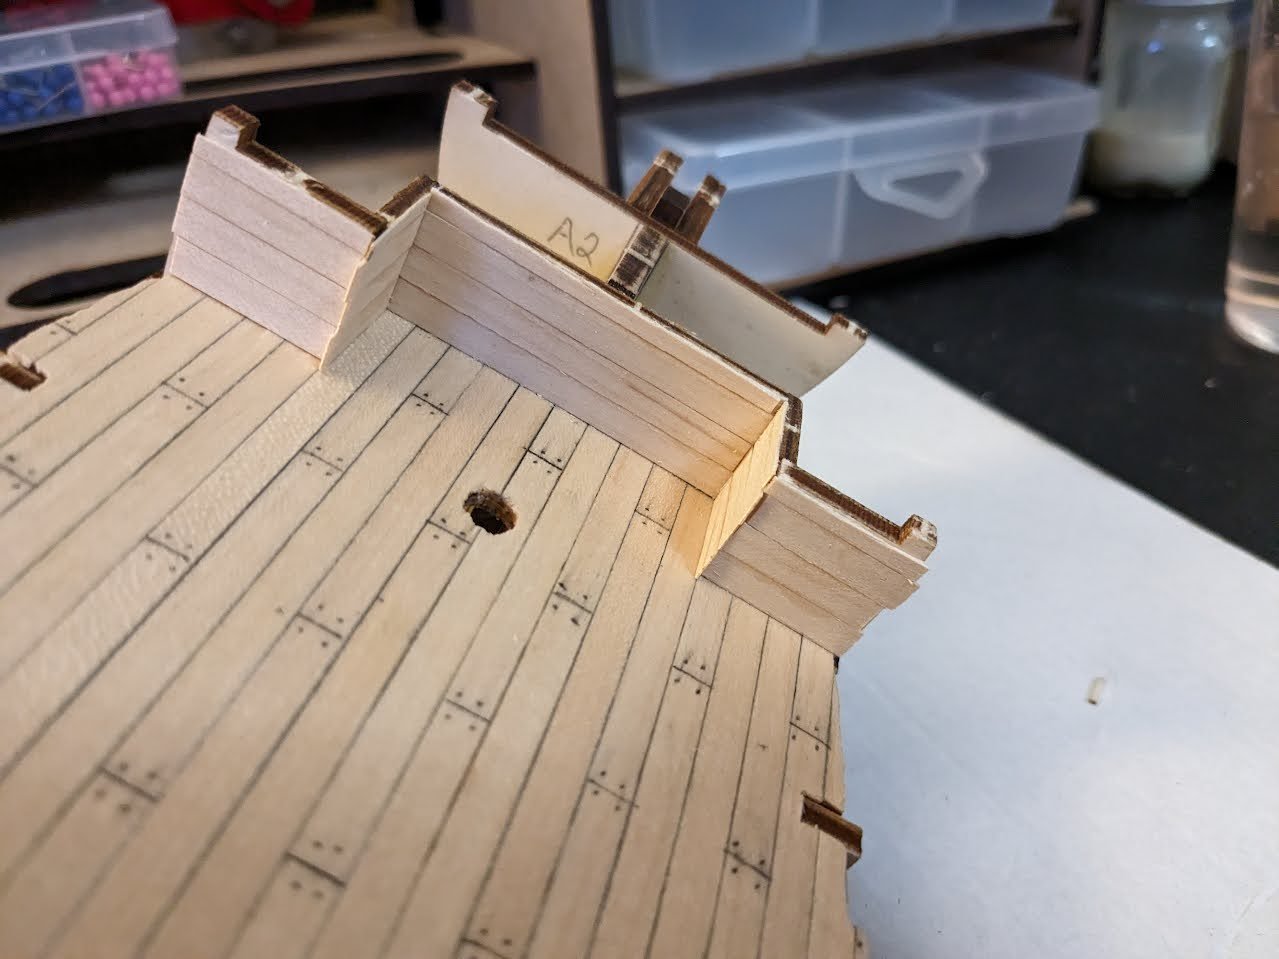
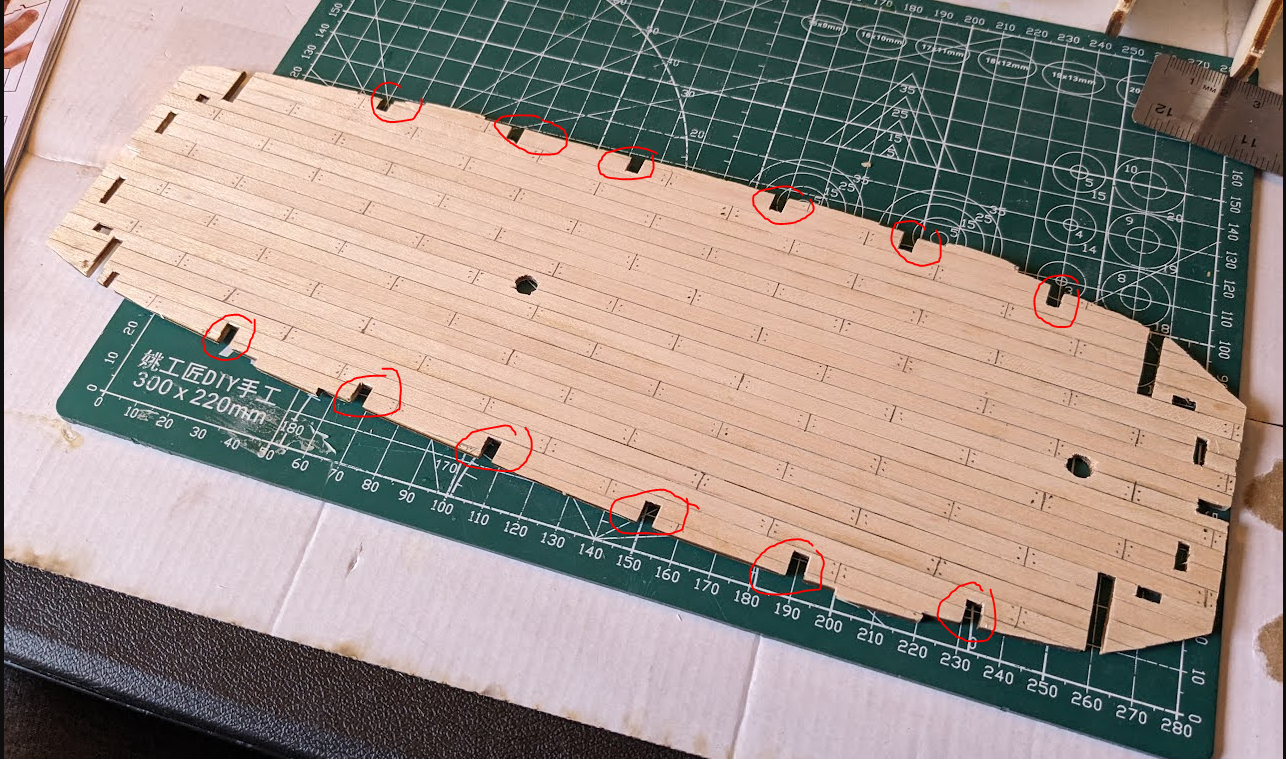
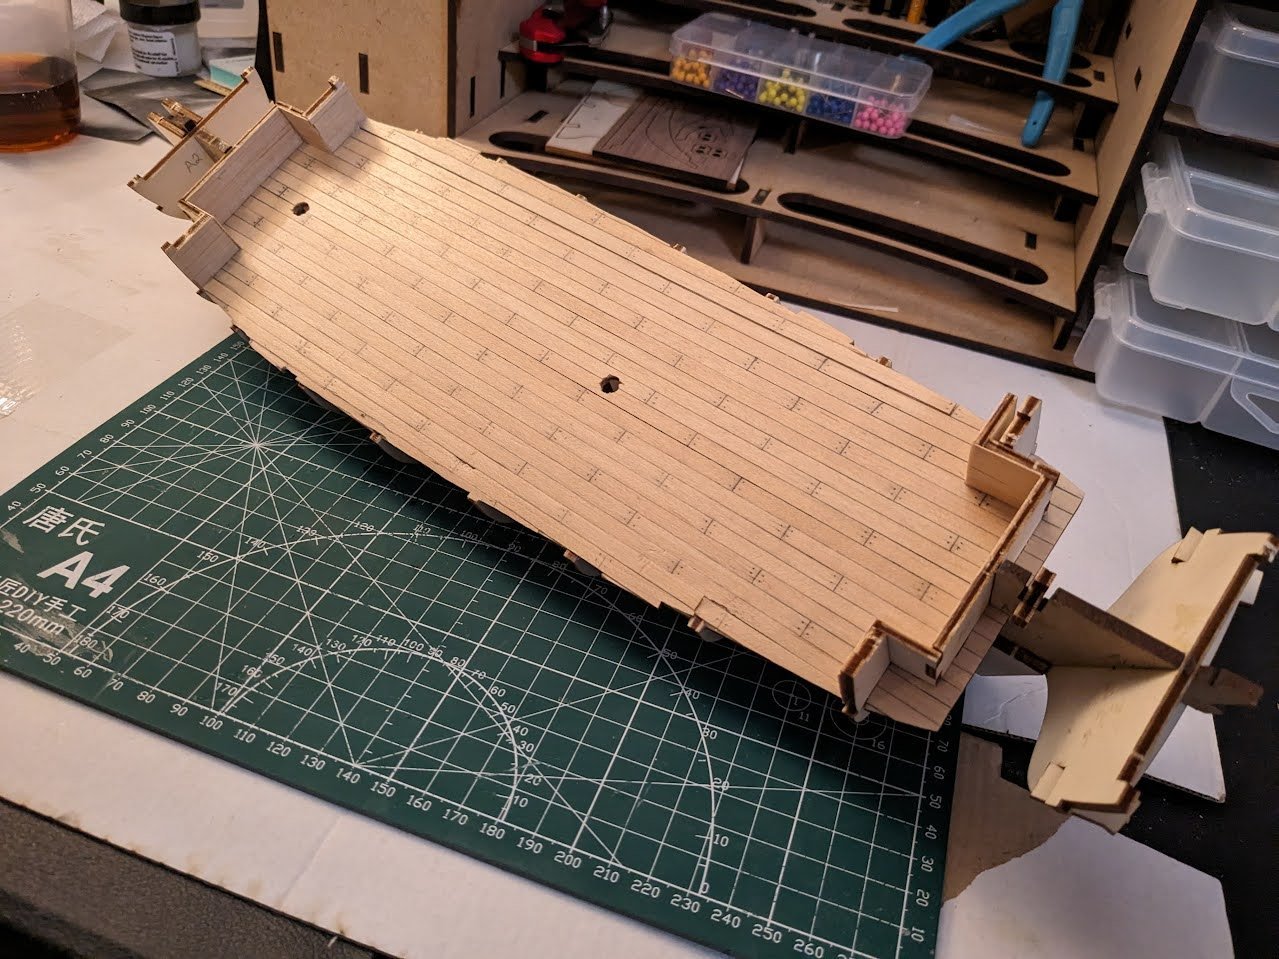
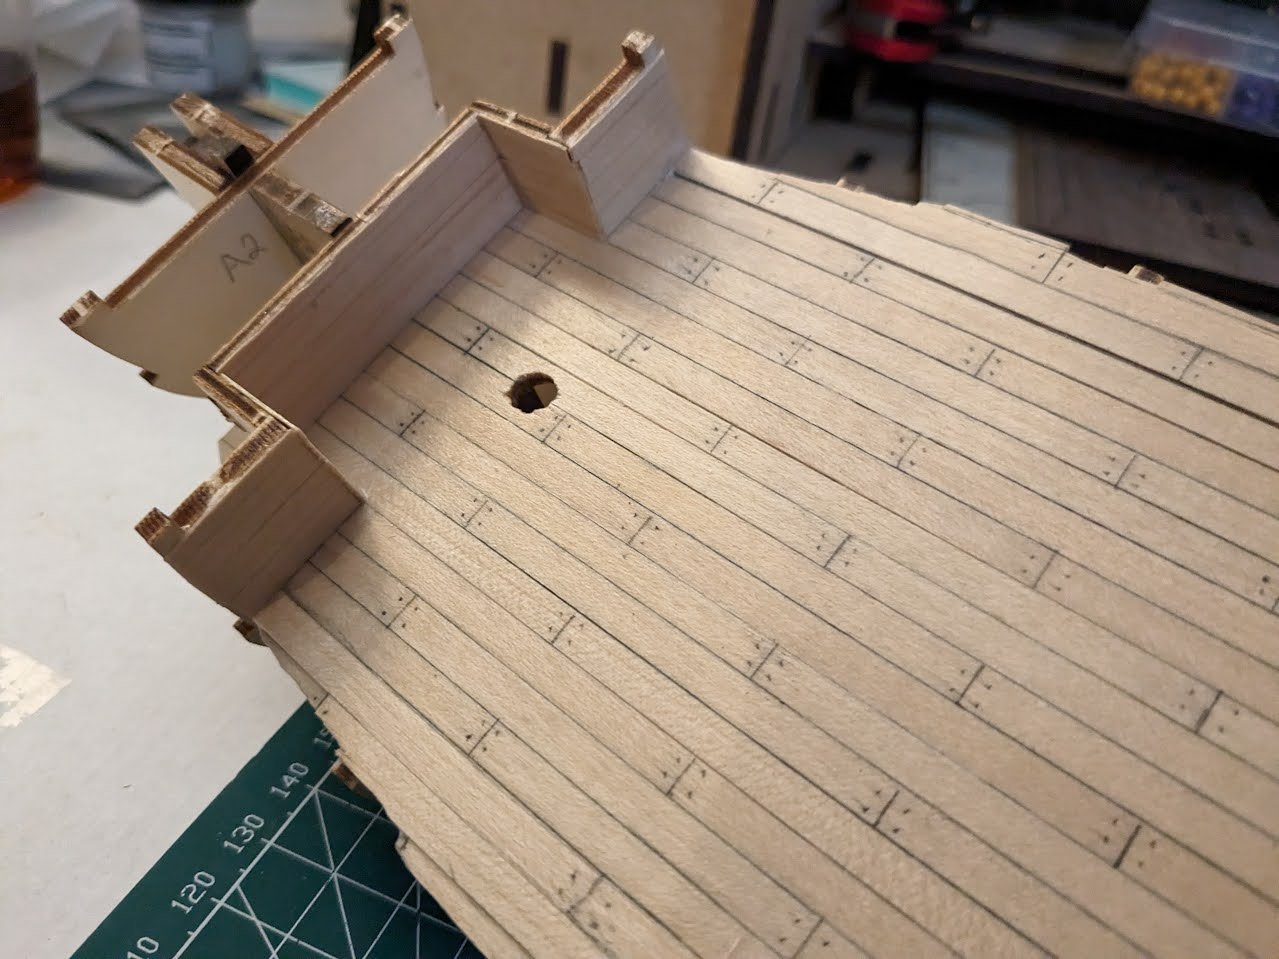
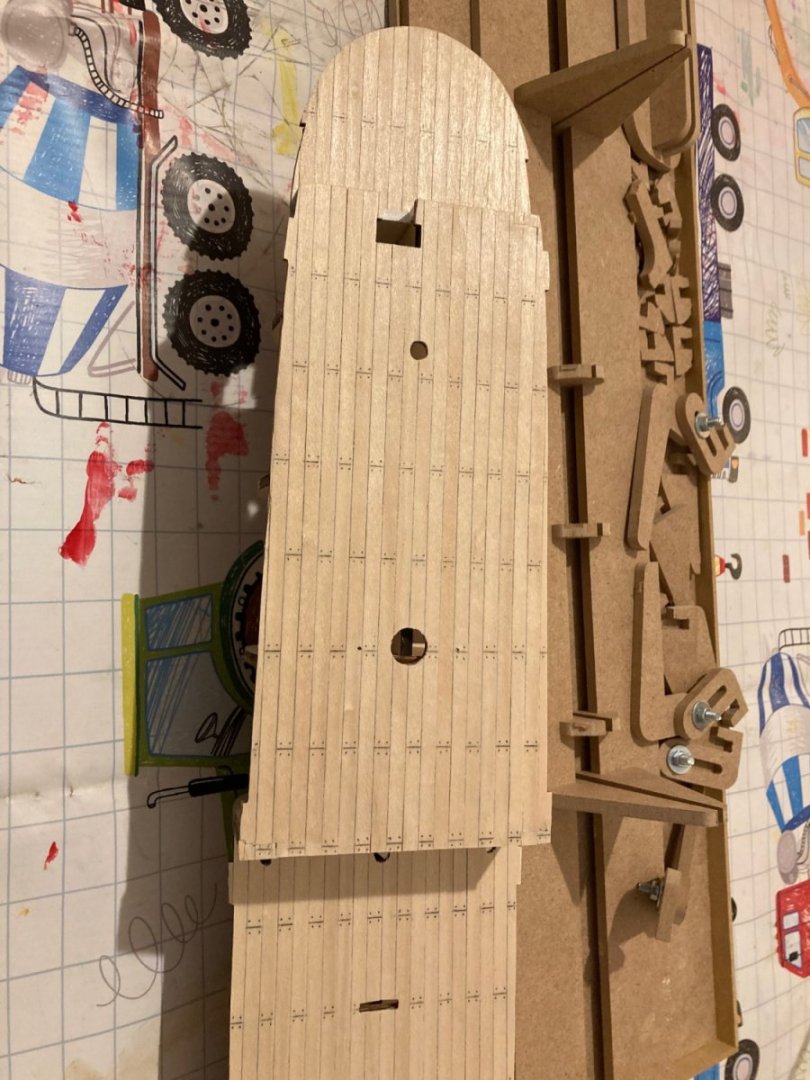
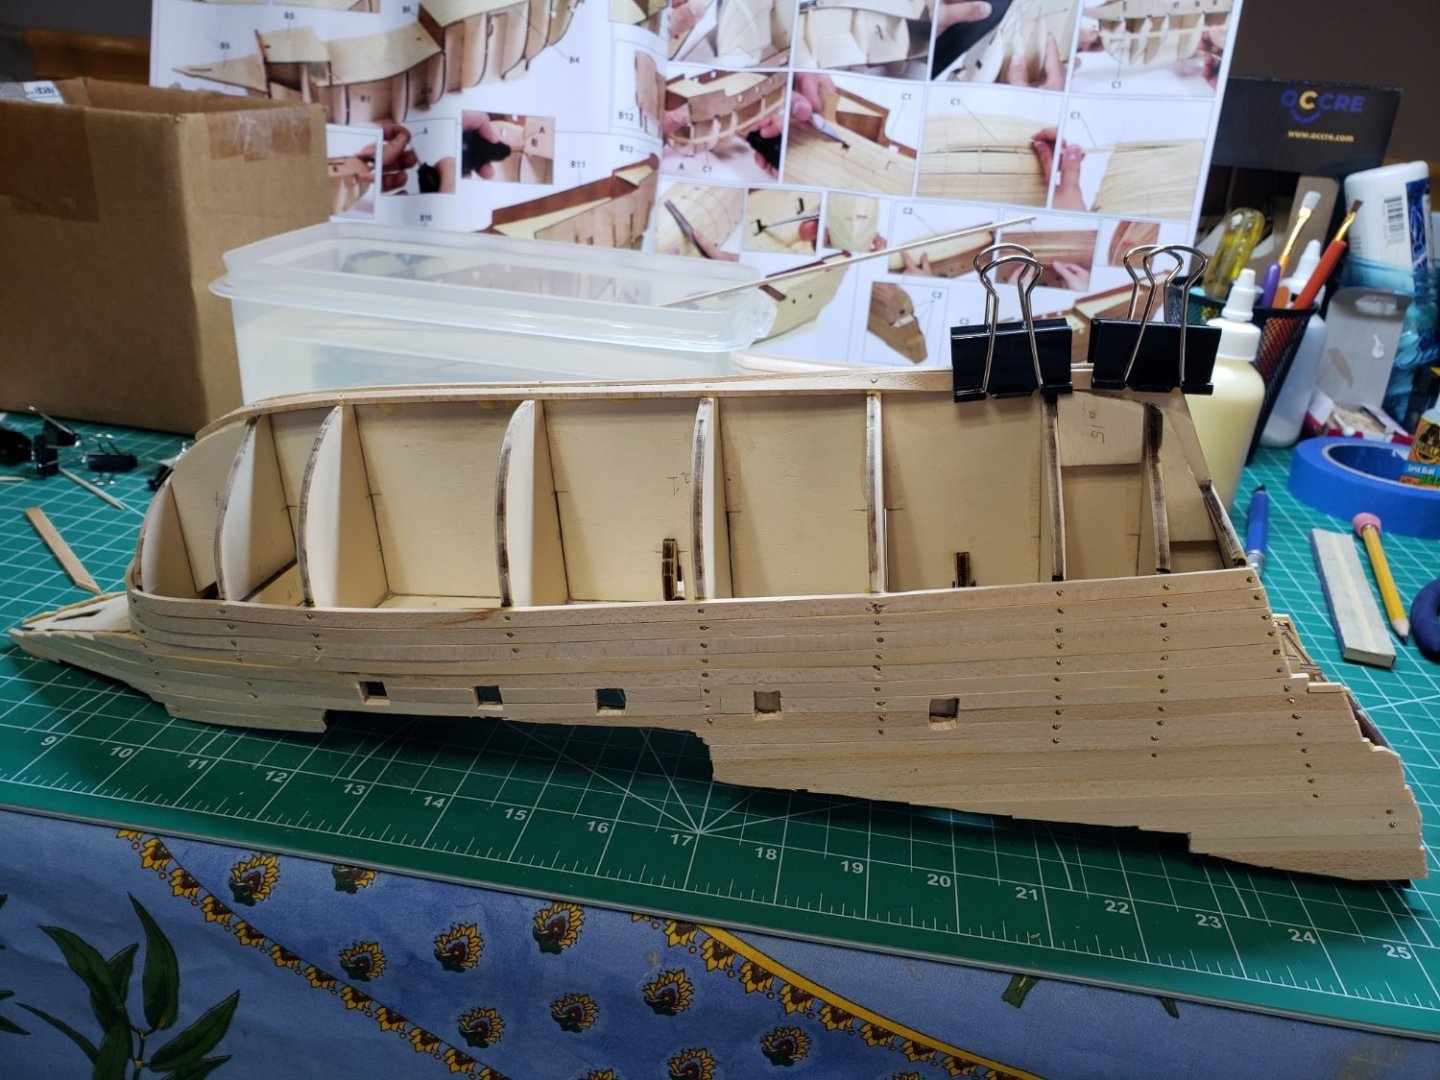
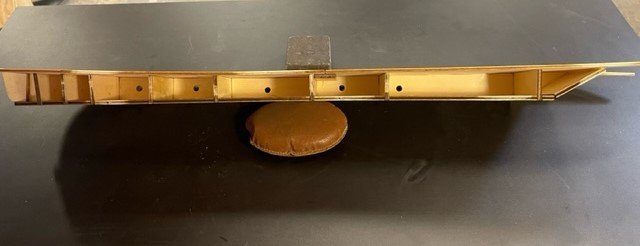
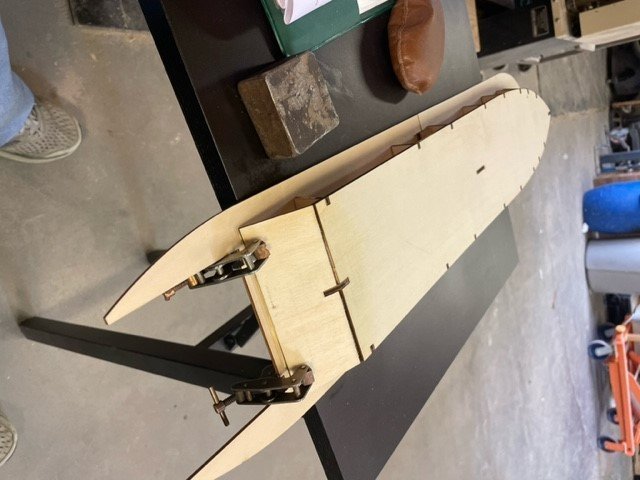
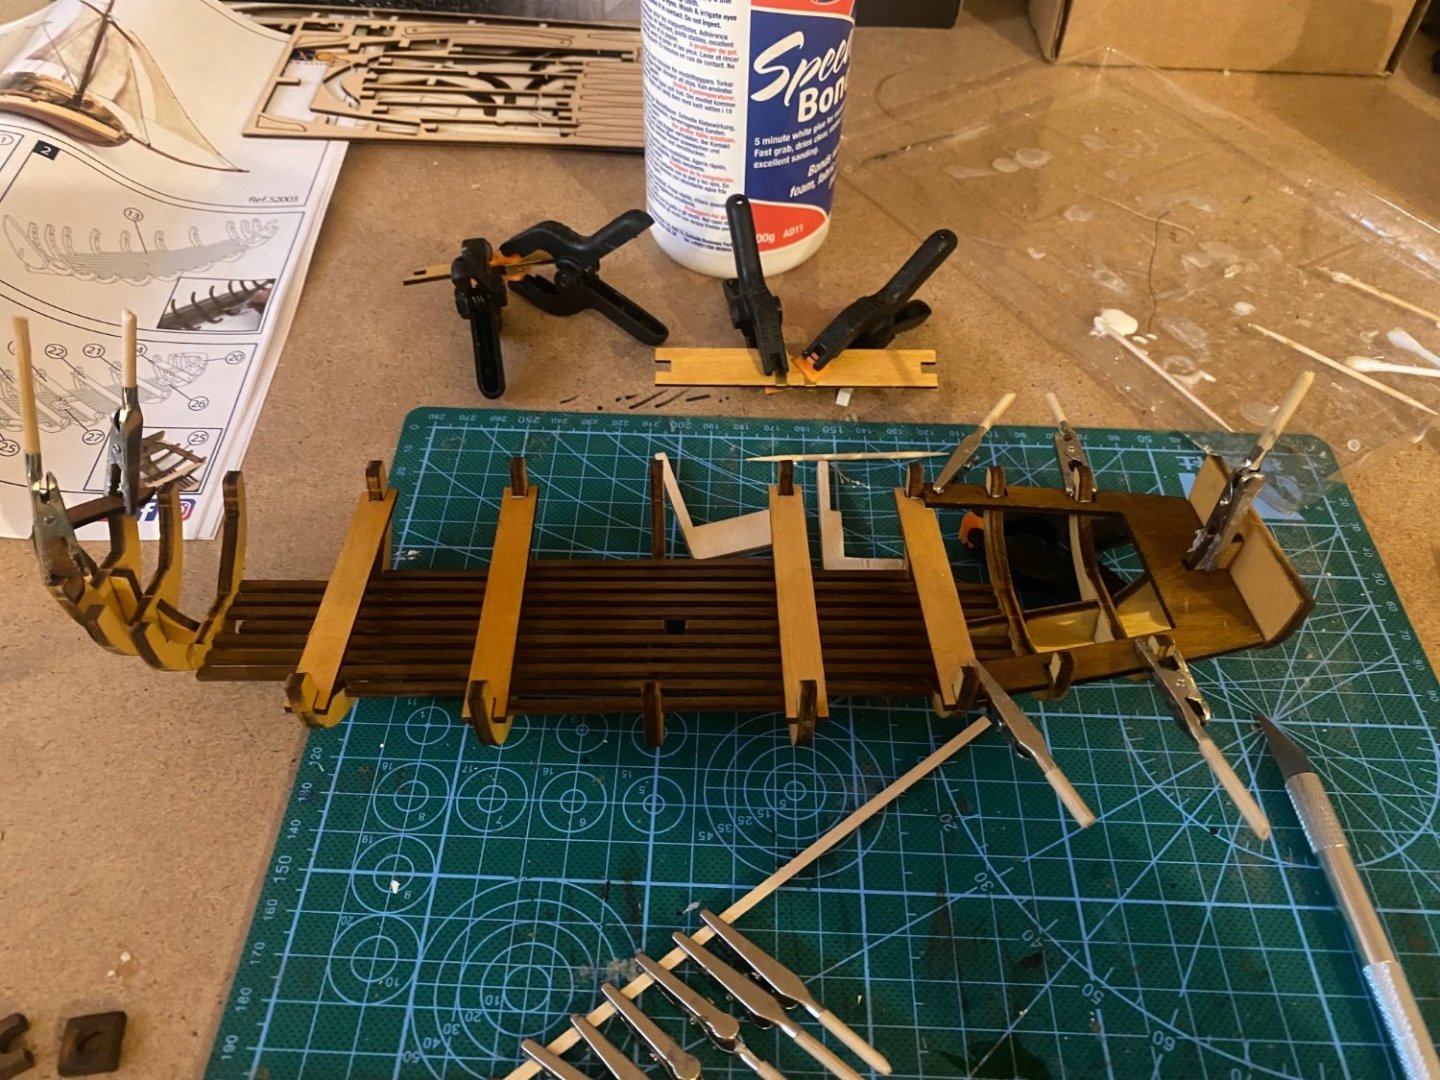
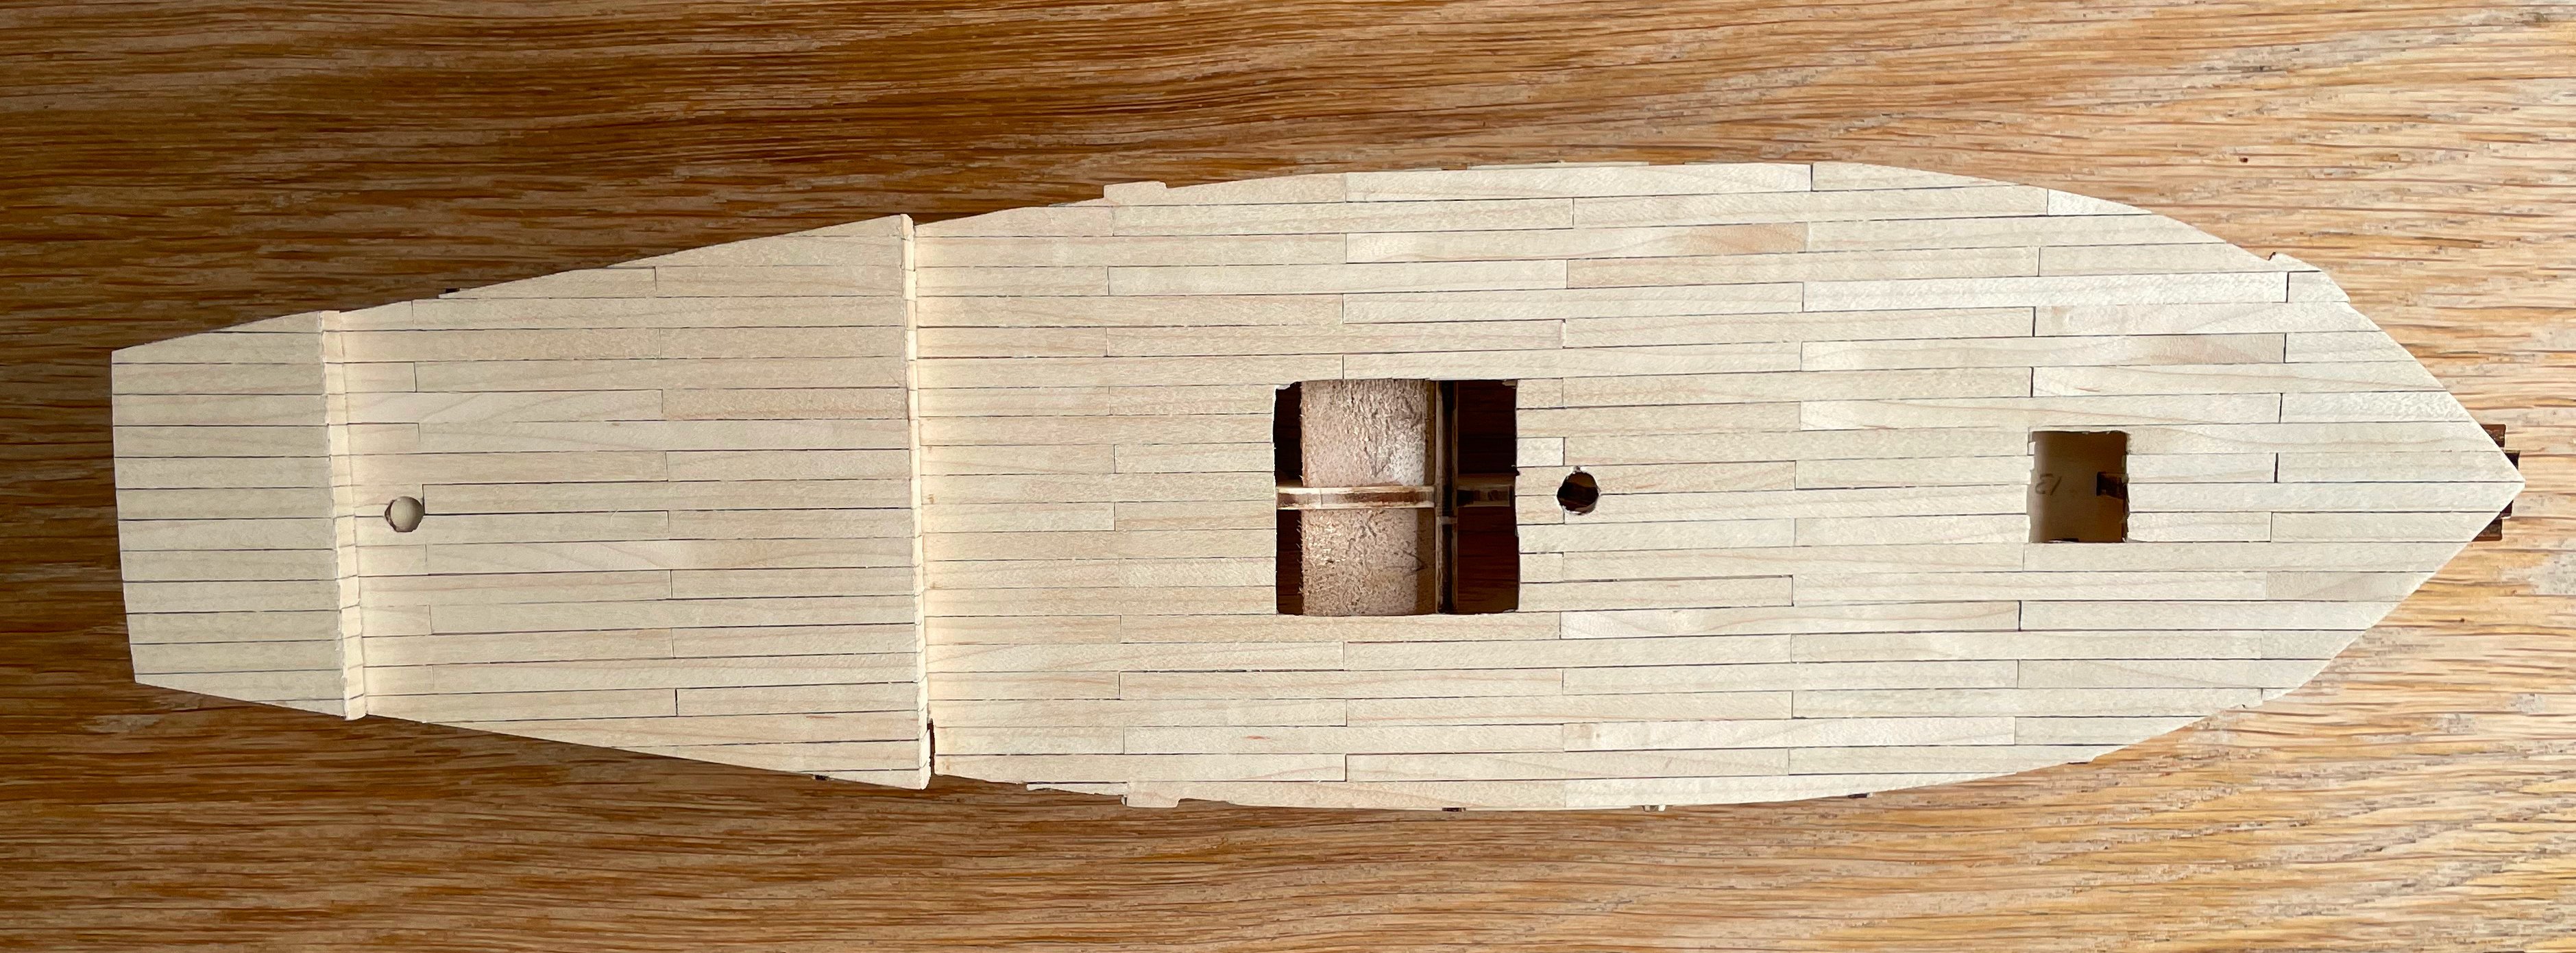
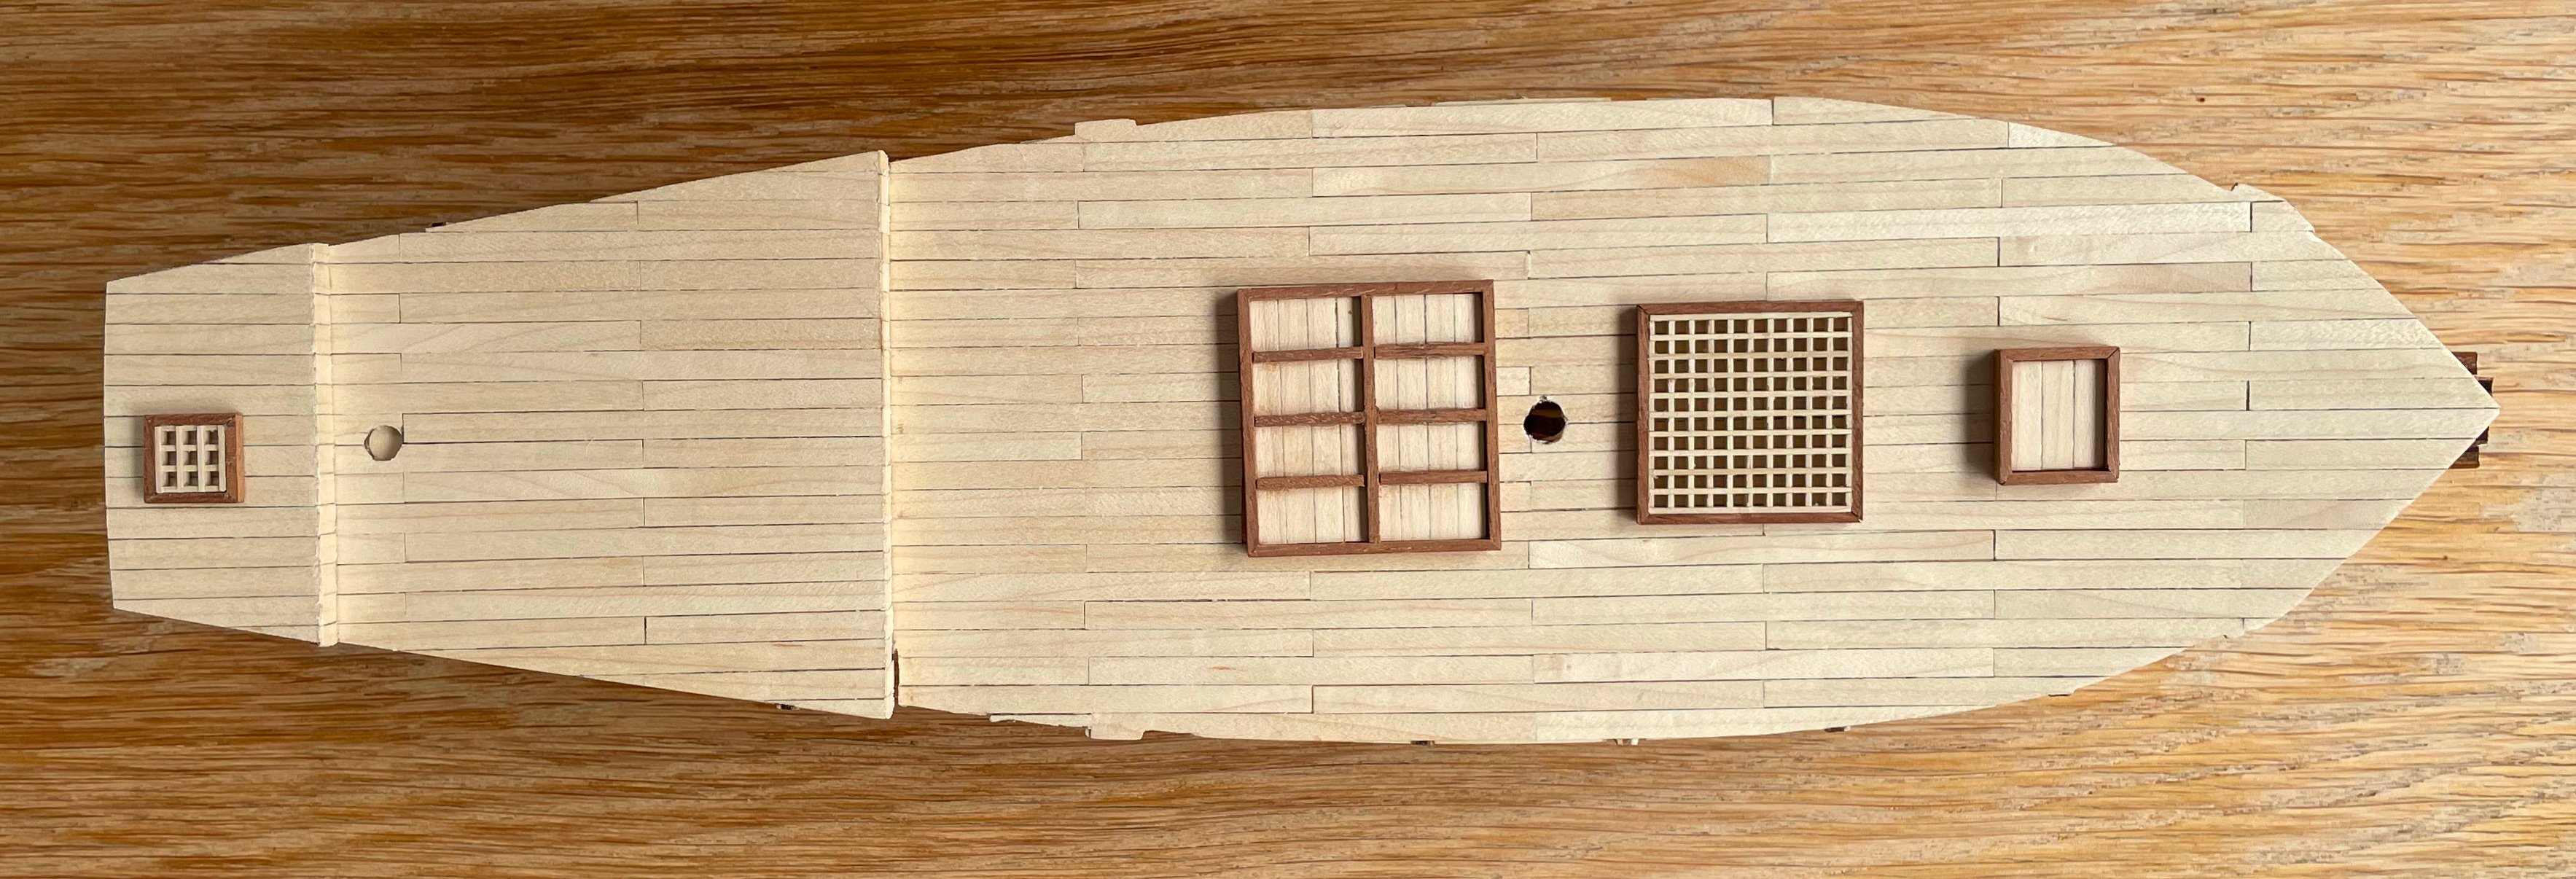
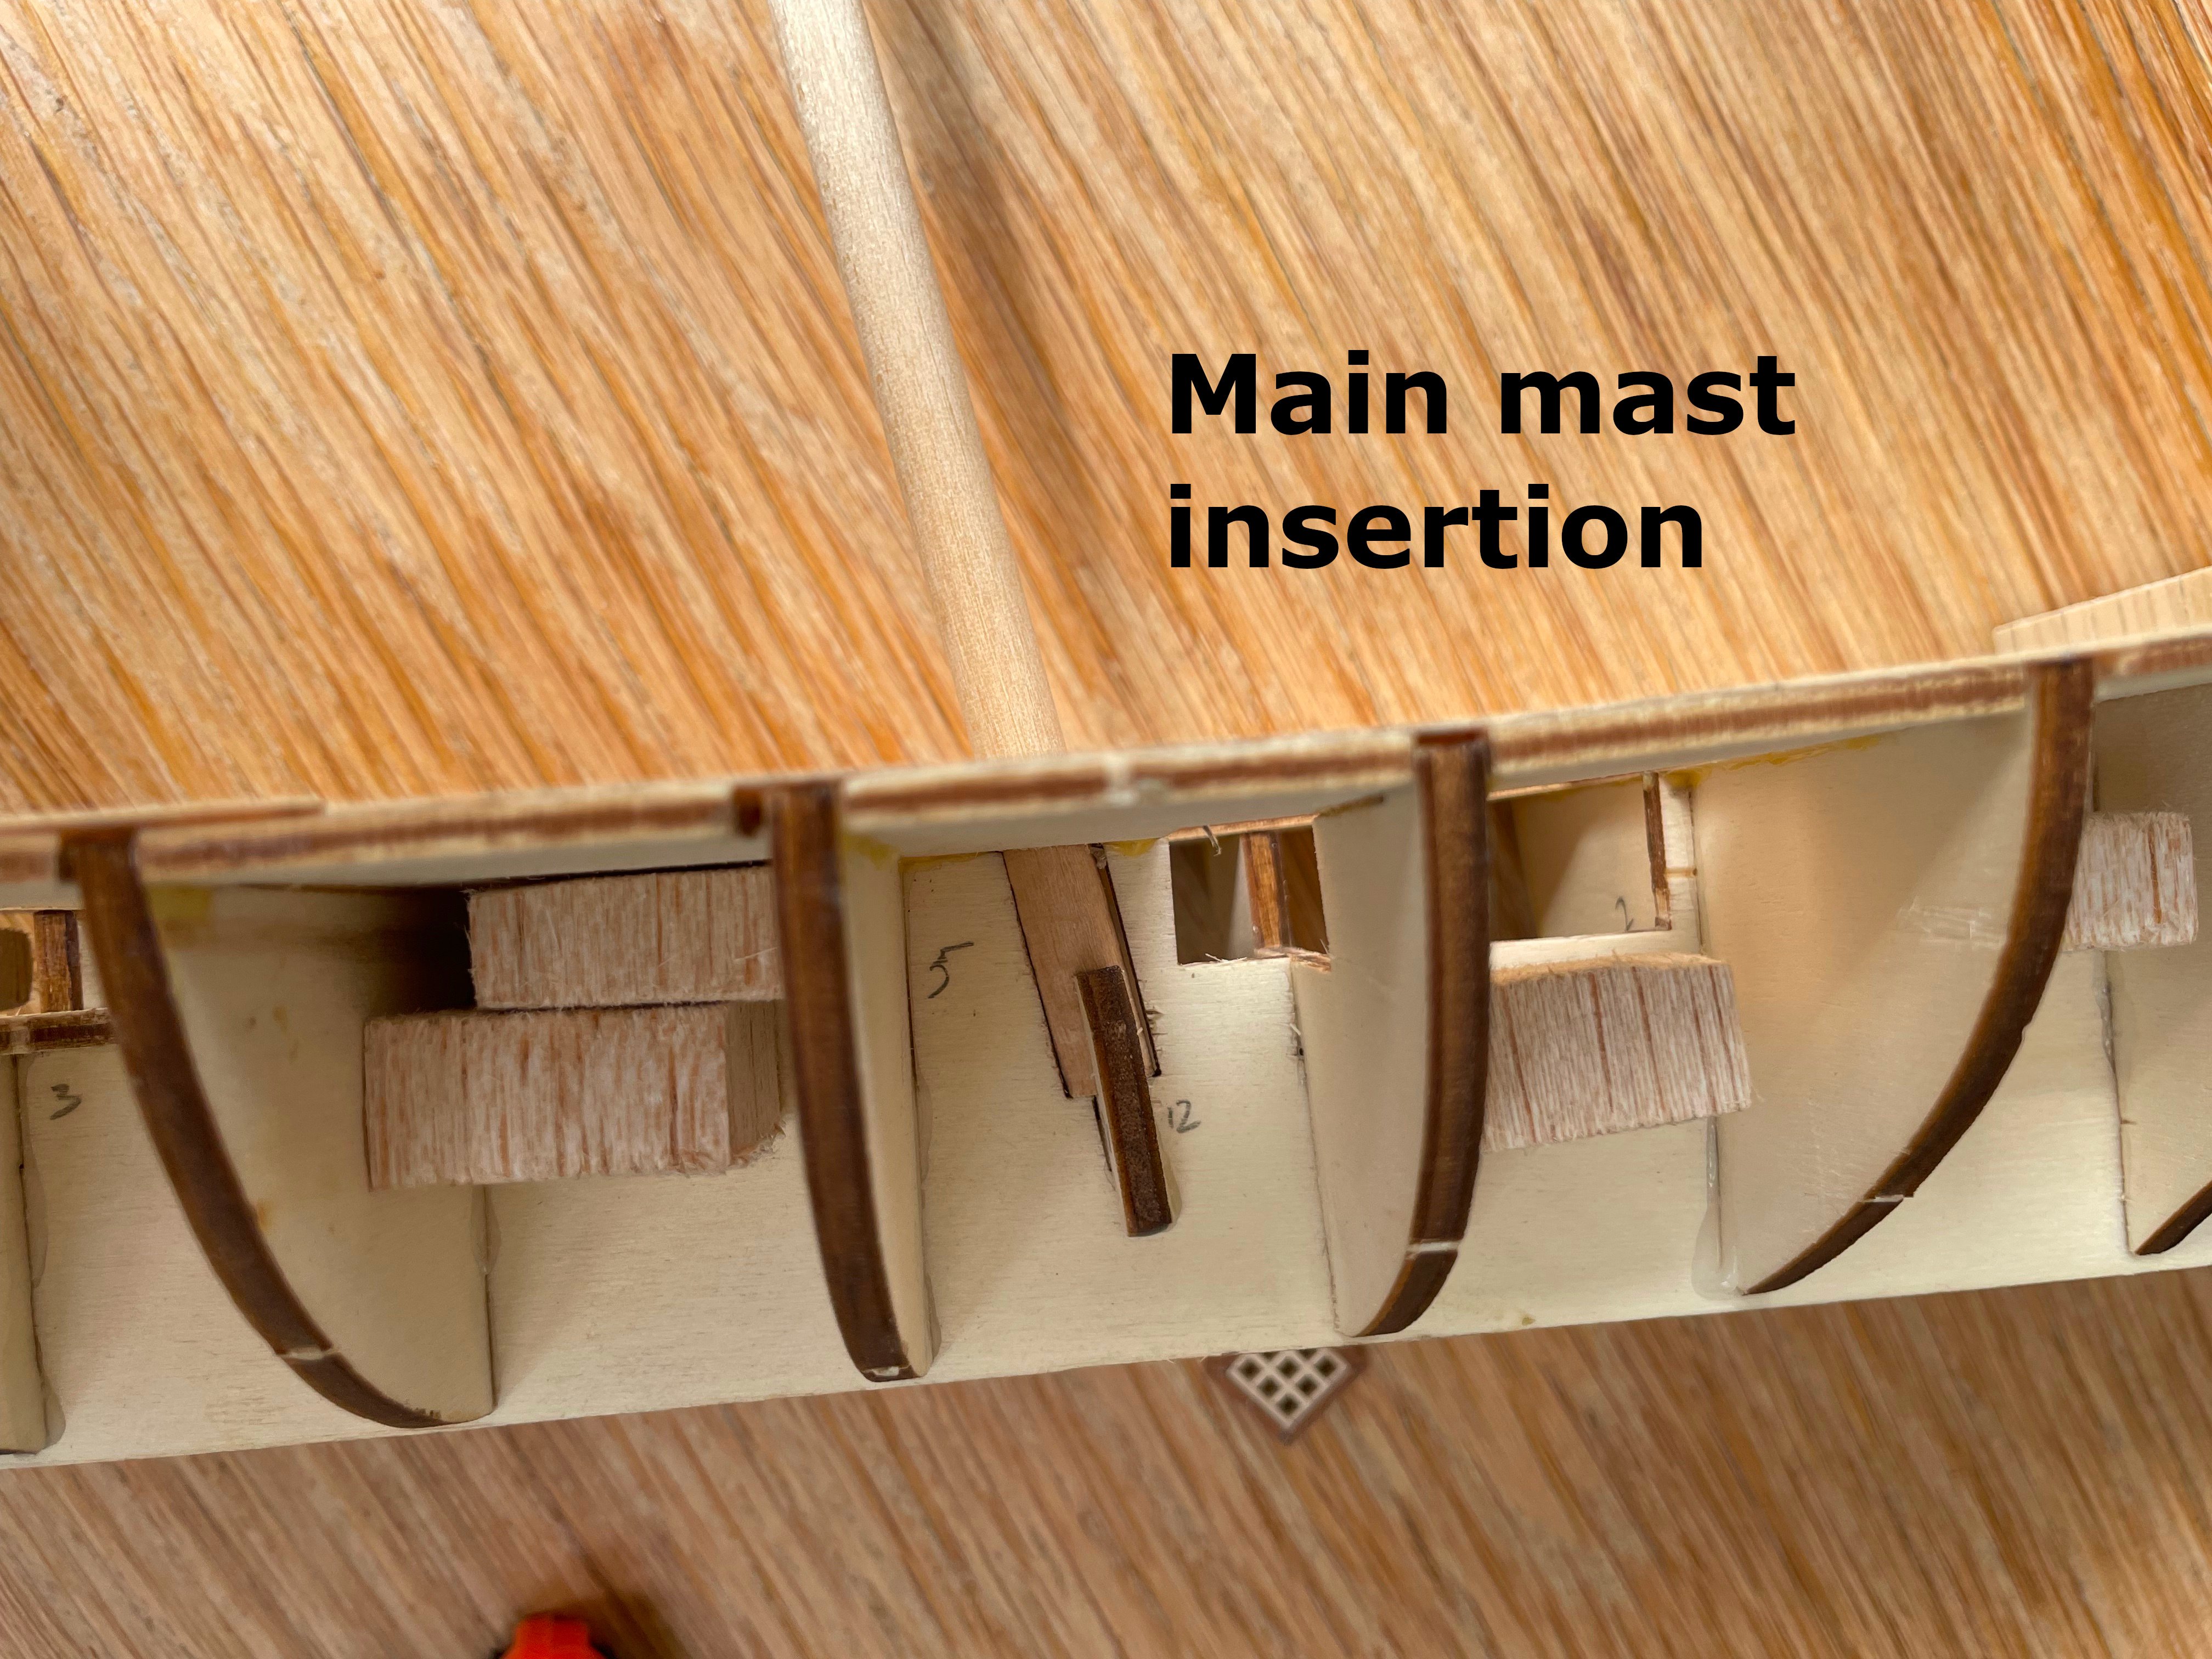
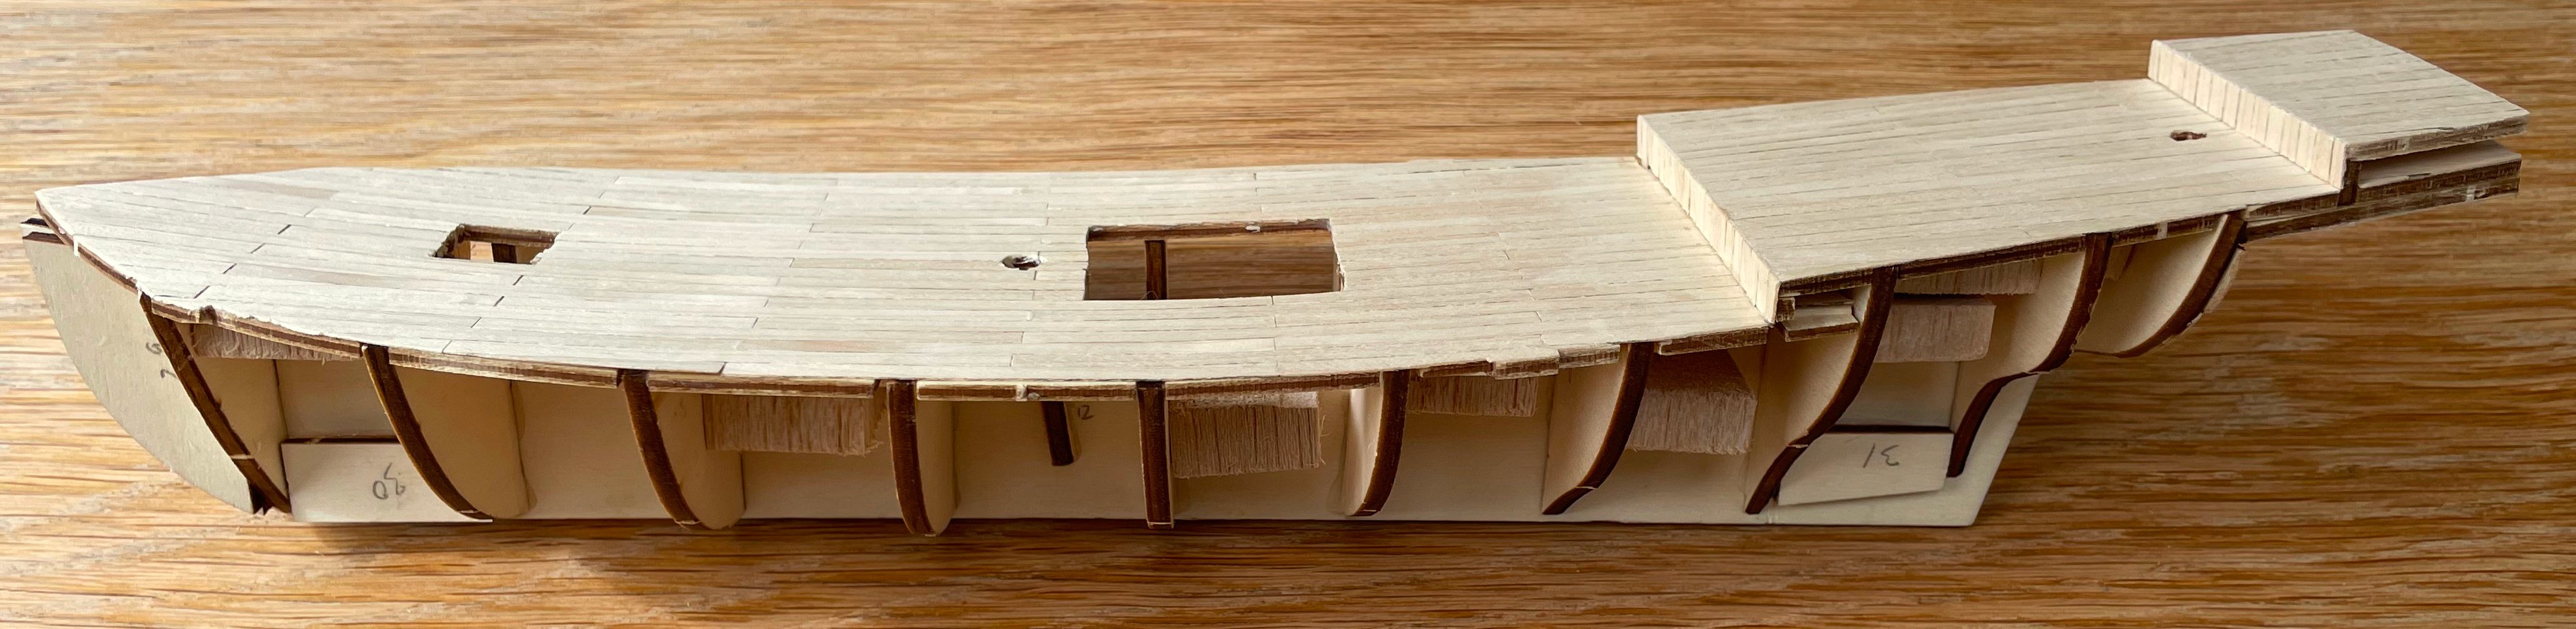
 I bought this kit during the OcCre Christmas sale for the whopping amount of €45, less than half the usual price, and it was going to be my first build. But since OcCre does not deliver in the UK, I had it delivered at friends in the Netherlands and was planning to pick it up during the Christmas holidays. However, my Christmas trip to the Netherlands did not happen, and I bought two other kits in the UK (Midwest's dinghy and AL's Bounty jolly boat) and those became my first builds instead. I was recently able to finally pick up the OcCre San Juan kit, but am already working on a different kit (Vanguard's Sherbourne) and have kind of lost interest in the San Juan. However, I have now arrived at the (for me) somewhat daunting 'planking phase' in the Sherbourne build, and I have been thinking of experimenting with a few new techniques. Since I don't want to ruin the Sherbourne, I have decided to try these planking techniques on the OcCre San Juan instead; it was a cheap purchase and I had more or less decided not to build it at all earlier, so there is no great loss if the planking experiments are a failure. Nevertheless, I will try and build the San Juan to the best of my abilities; if I am doing it anyway, I may just as well try to do it well. I worked on the kit for the past two days and am no ready to start faring the bulkheads, followed by first planking. Today, I will report on my experiences with this kit up to that point. I thought it might be useful to start my build log of this kit aimed at the novice ship modeller with a little comparison to two other beginner kits which I have worked on, and which have price points which are not too far apart, namely Artesania Latina's Bounty jolly boat and Vanguard's HM armed cutter Sherbourne. I hope this is allowed in a 'build log'; if not, I am happy to remove this comparison. But I felt it might be useful for other beginners out there, who are in the process of deciding on their first or second kit. The comparison: Vanguard clearly wins in terms of quality and quantity of materials provided but, for their price, the AL and OcCre kits are not bad OcCre is by far the worst of the three in terms of instructions, which is an important differentiation point in kits aimed at absolute beginners. Both AL and Vanguard offer very detailed instruction booklets, illustrating every single step with lots of text and photos. OcCre's kit is much more traditional: two pages of minimal instruction texts and a small, separate booklets with some photos. OcCres instructions are clear and to the point, but they provide limited guidance to someone who has never built a model boat before. As an aside, even though AL's instructions are very good, Vanguard's are even better. Vanguard is also the clear winner in terms of hull construction. Here, OcCre is particularly weak, as I will discuss. AL and OcCre's kits come with sails (of reasonable quality). Vanguard's does not. In terms of historical accuracy, Vanguard's kit is excellent, as expected. AL's kits is problematic in describing the jolly boat as Captain Bligh's vessel but as a model of a contemporary ship's boat, it is not terrible, I think. I believe that there are more serious problems with OcCre's kit, as I will discuss. I think that a beginner's kit ideally offers double plank-on-bulkhead construction. Both Vanguard's and OcCre's do, but AL's has only single planking, which makes getting a good result non-trivial for a beginner; I had to resort to painting the whole hull to hide my first-planking errors. In terms of pre-cut and pre-scored elements, Vanguard's kit is, again, the clear winner, making it considerably easier (and quicker) for a beginner to get a great result. OcCre's and AL's kits are more traditional, requiring more part constructions from basic elements. Not a problem in itself, of course. Overall conclusion: none of these kits is bad, but Vanguard's is the clear winner of this comparison, even though it is, admittedly, also the most expensive. OcCre's kit is, in my opinion, clearly the worst of the three. That said, I am still enjoying the build and at the €45 I paid for it, the kit is a bargain. Onto the actual build. As usual, the process starts with gluing the bulkheads into the false keel. The fit is quite loose, and there is a lot of potential 'wiggle' in the bulkheads, up to 20 degrees or so either way. To ensure that they are aligned at a 90 degree angle to the false keel, I decided to install square pieces of balsa wood (see picture below). All the deck planking - and there is a lot of it in this kit - is made with 5mm wide, 0.6mm thick limewood. At a scale of 1:70, that translates to a width of about 35cm (14 inches) which is, I believe, probably twice as wide as actual deck planking on a ship from this period (early nineteenth century). So, not particularly accurate, but since I don't have any other stock, I nevertheless used the strips provided. The instructions say to glue the strips full length onto the (several) decks and to suggest more realistic plank length by marking the strips with a pencil at appropriate points, and to suggest tree nails with that same pencil. Rather than do that, I cut the strips to an appropriate length and glued the now much shorter pieces onto the decks. To suggest caulking, I darkened the strips on one side and one end with a pencil. I decided not to make any tree nail marks as I suspect they would not have been visible at this scale (but am happy to be corrected on that). The instructions also say to plank the main deck before glueing it onto the false keel and bulkheads. I was worried, however, that that would make it difficult to sufficiently bend the deck to the curvature of the hull assembly and therefore opted to soak the deck first, then let it dry in place overnight, then glue it in place and only then glue the deck strips in place. After attaching the deck planks to the main deck and all other surfaces that require them, we get the picture below. At this stage, it becomes clear that the kit has some peculiarities / defects. First of all, the main deck did not properly fit the positions of the bulkheads, despite my best efforts to keep everything perfectly square. Not a major problem, as the attachment points between deck and bulkhead are hidden underneath the deck planking but had I followed the kit instructions and planked the deck before attaching it, I would have had a problem here. More problematic was that the holes in the main deck for fitting the support for the higher deck were too far forward. This left me with a gap in the deck planking, which I then had to fill, resulting in a visible repair. Secondly, the main deck has two openings looking down into the hull. These are present in the ply deck and, the instructions say, need to be cut out of again after the deck has been planked. The picture below shows them from above. The kit has two sets of grates, and one would think that those should be positioned over the holes, mimicking a peek into the hull. However, instead, the holes are covered by two closed constructions, so are entirely pointless - as is visible in the second picture below. The grates are positioned straight onto the deck, which is clearly visible through them; I plan to paint black underneath, to at least suggest an opening into the hold. The grates are too small to fit over the current holes, so that is not an option. Also, the small grate at the far back is positioned over a very shallow part of the ship (only about a foot or so deep, on the 'real' ship), and would have served no conceivable function. Everything points to a mistake in the design. Thirdly, the mizzen mast is positioned in this same, very shallow aft section and, therefore, has no support at its base at all. The pictures below show both main and mizzen mast inserted into the hull construction. Compare the depth of the main mast support with the total lack of it on the mizzen mast. I find it hard to believe that a mast would ever be positioned in such a shallow part of a ship, as even moderately strong winds would immediately endanger the structural integrity of both the mast and the aft section itself. I will have to decide what to do about this when the time comes to install the mast, but I think the current design is unrealistic. Again, I am happy to be corrected. The fact that a grating and a mast are positioned over/into this extremely shallow aft section also makes we wonder if the kit design originally had a much deeper section here. I have tried to find pictures of fellucas online, and could not find a ship with a similar protruding, thin aft deck. I don't know the historical basis (plans, pictures, descriptions?) for OcCre's design. Fourthly, and relatedly, I am not entirely convinced of the historical reality of the San Juan. I cannot find any information on the ship anywhere, except as referring to this kit. The kit description gives quite a grand history for this little coastal ship, claiming it was the first ship to revisit Spain's former American colonies after the (several) war(s) of independence when 'merchant marine ships all but disappeared from the peninsula, leaving only small coastal sailing boats behind to re-establish the routes to the Antilles.' I have been unable to verify this story and find it somewhat hard to believe that there were no more suitable vessels available for the Atlantic trade, either in Spain itself or through the charter of foreign vessels. The San Juan, if it resembled the kit design, hardly seems suitable for travel outside the Mediterranean sea - the traditional area of operation of feluccas. But, of course, I may be completely wrong here. Despite these misgivings, I will continue to work on this build, and hope to start the actual 'planking exercises' shortly.
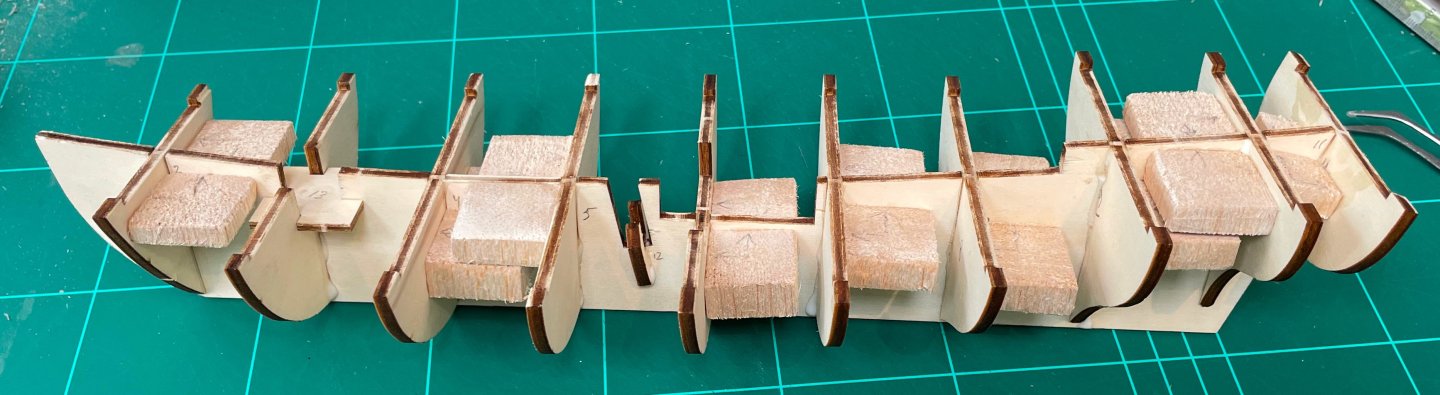


-
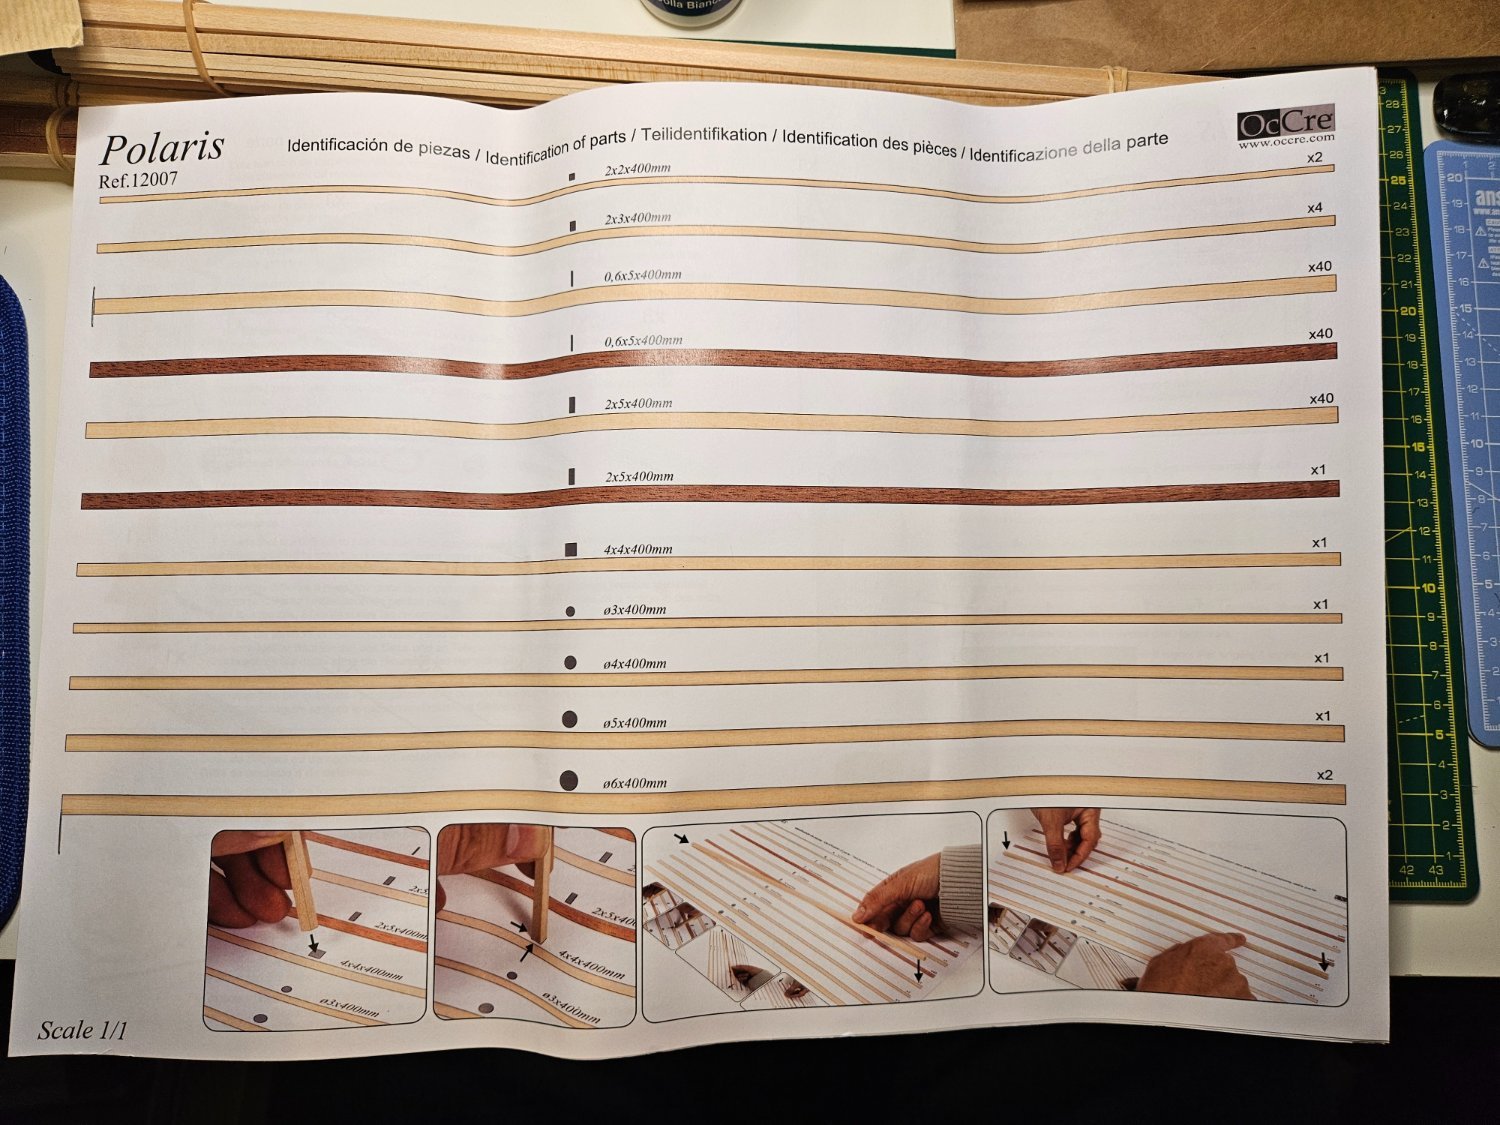
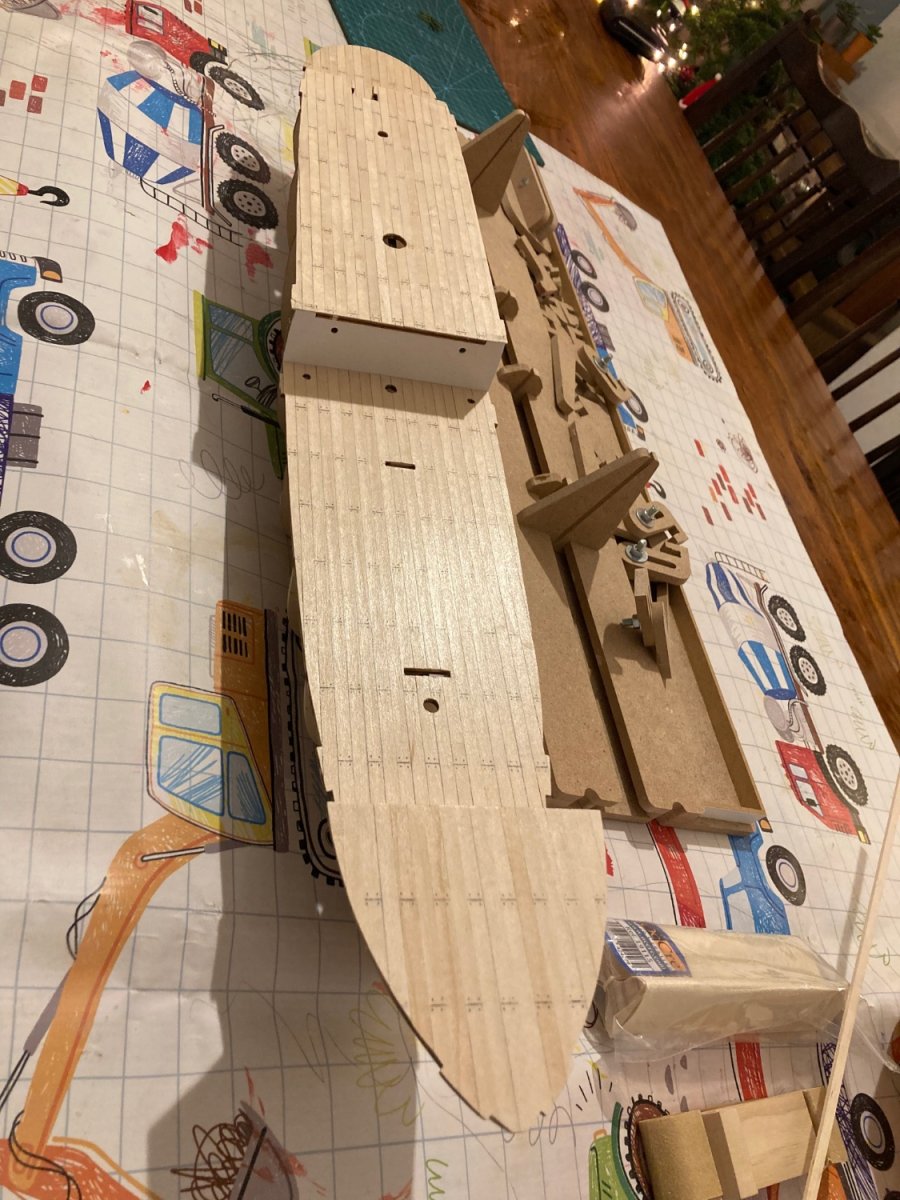
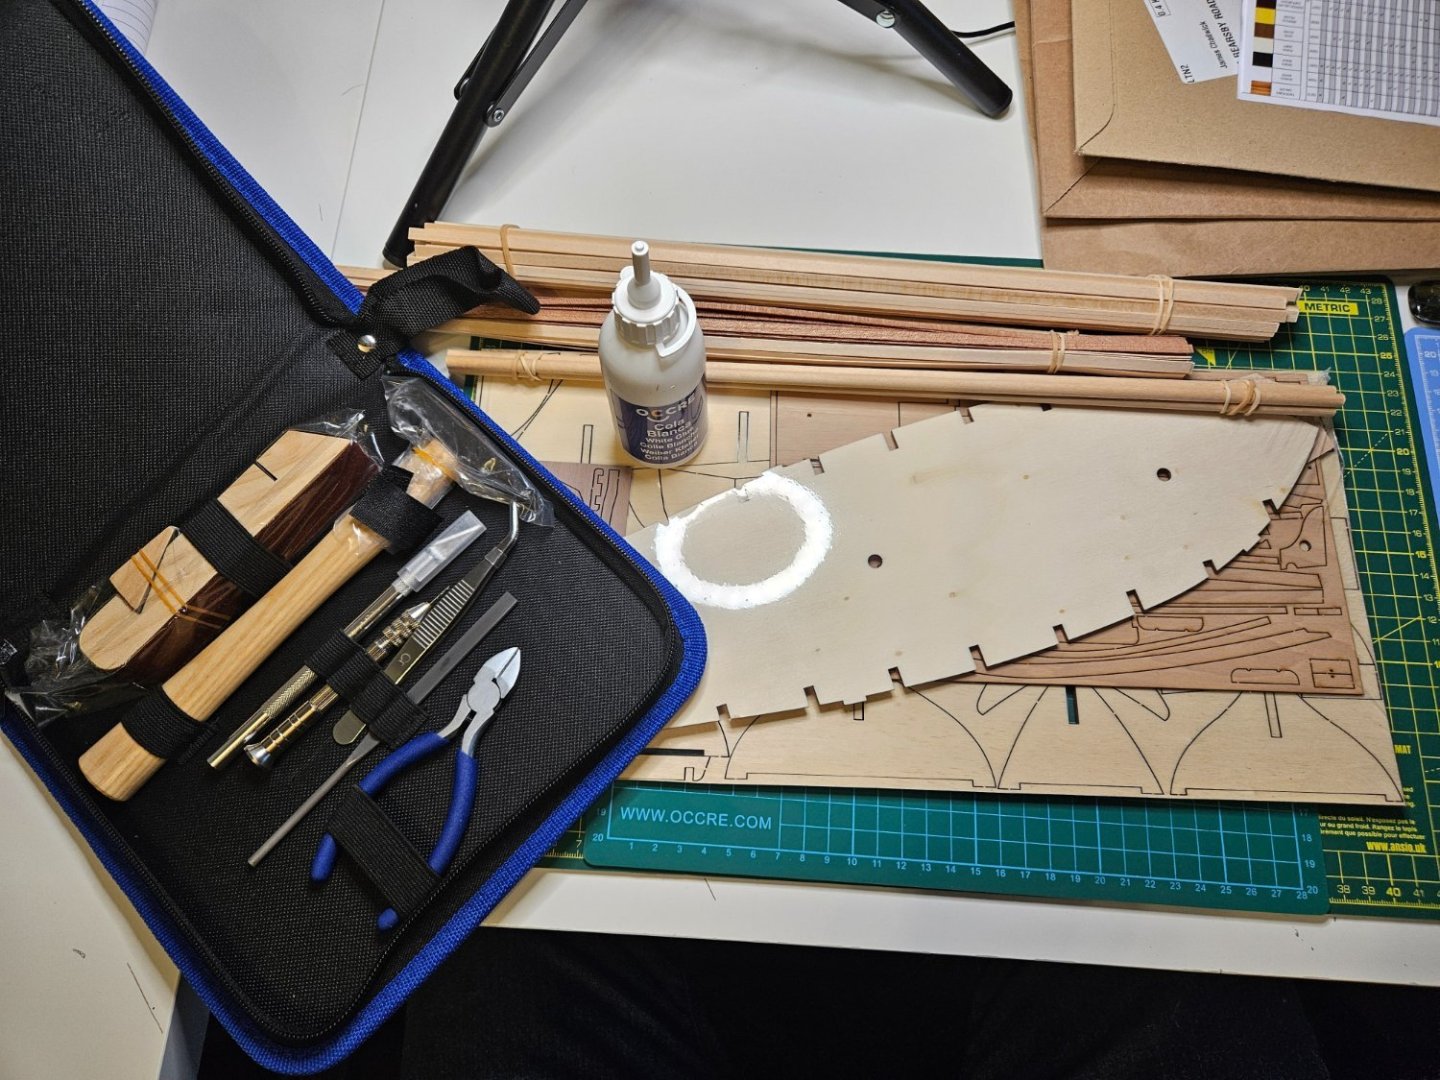
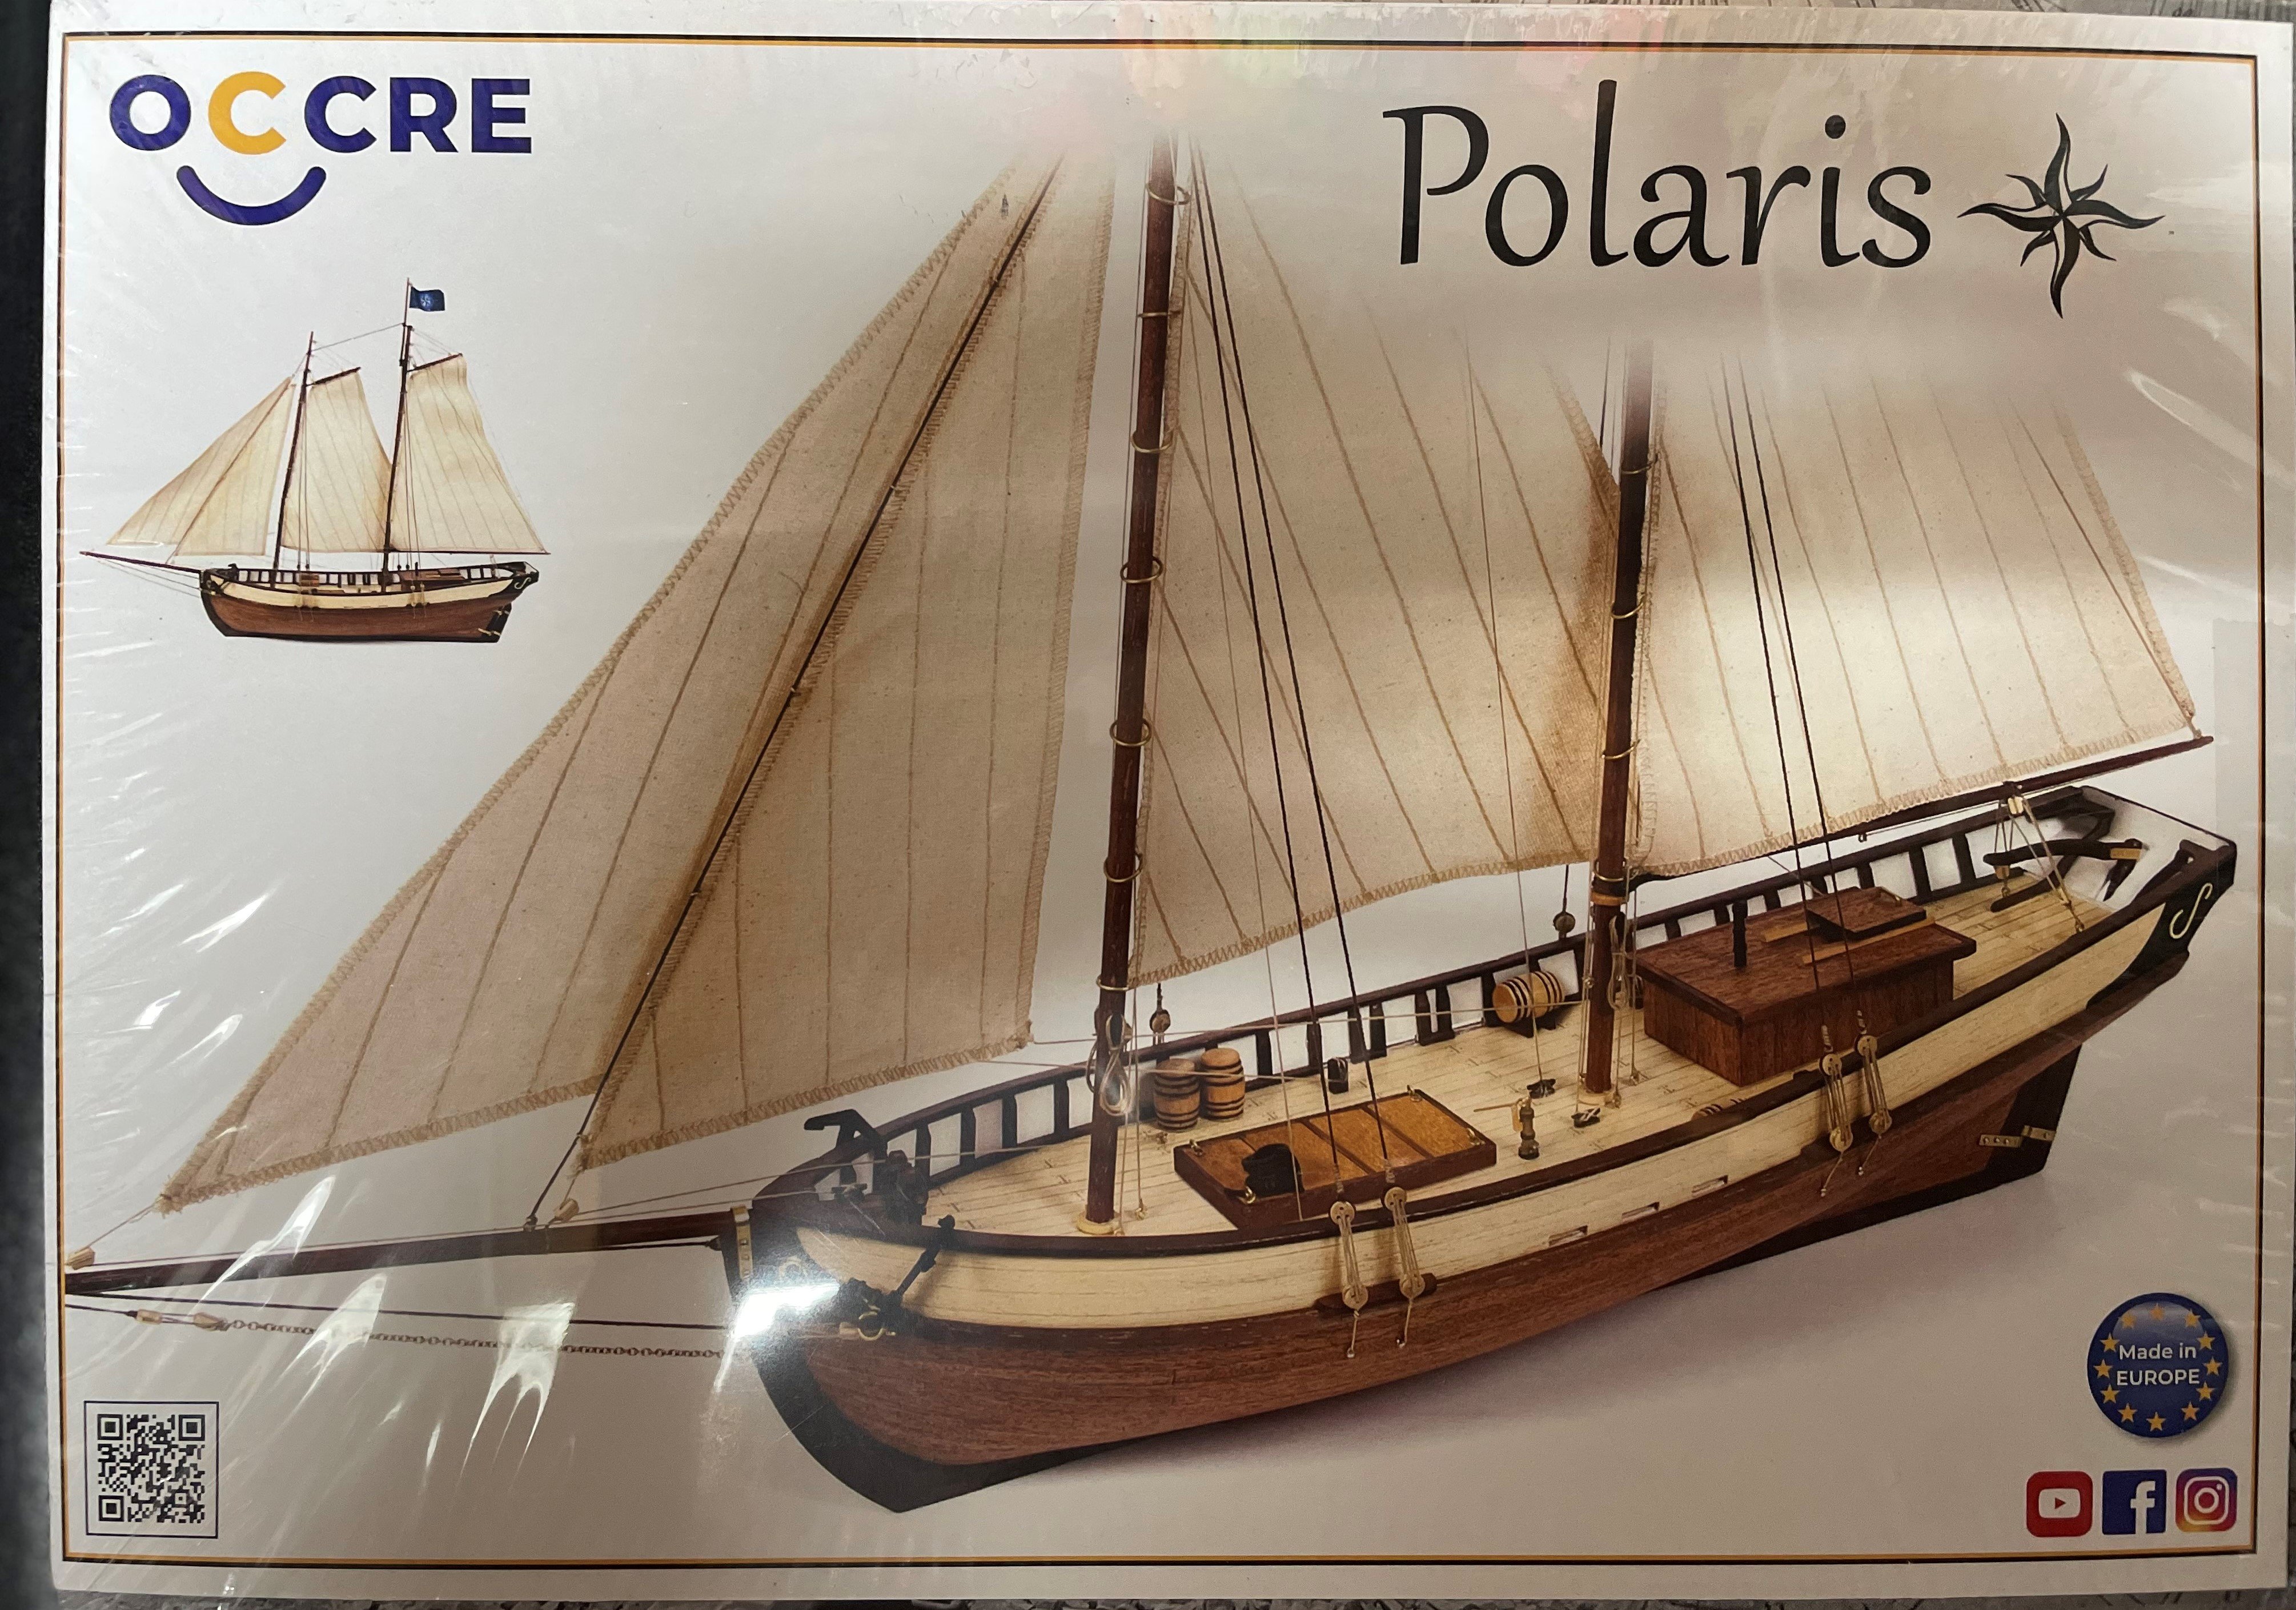
 Hello; Over the weekend, I began work on OcCre's Polaris. I choose this model as it appear to a good kit for a beginner. There was one for sale in the area that I purchased last week. I have looked over amazing build logs of this ship that have been book marked for future reference. It seems the place to start is a picture of the box. The following weekend, I opened the box and checked that all the pieces were present and counted. The false keel had a very small bend in the middle but didn't seem to be a bad as others have shared. After gluing the ribs in place, I learned two things; use less glue and buy white glue. Not shown in the picture are the corner pieces I used to square the ribs to the feel. They are were to big to glue more than rib at a time. While waiting for each rib to dry, I managed to get the deck plates marked up with a 7 HB pencil and marked the center line on the deck plate. Sunday was a trip to store to buy wood glue that dry's clear and some contact cement. Comments and critiques are welcomed. David
.thumb.JPG.a0e4a9c837e65b71d6ed91a0be5ba0c4.JPG)
.thumb.JPG.e7f06b48e02ce6a91fb34d258caa0e3b.JPG)
-
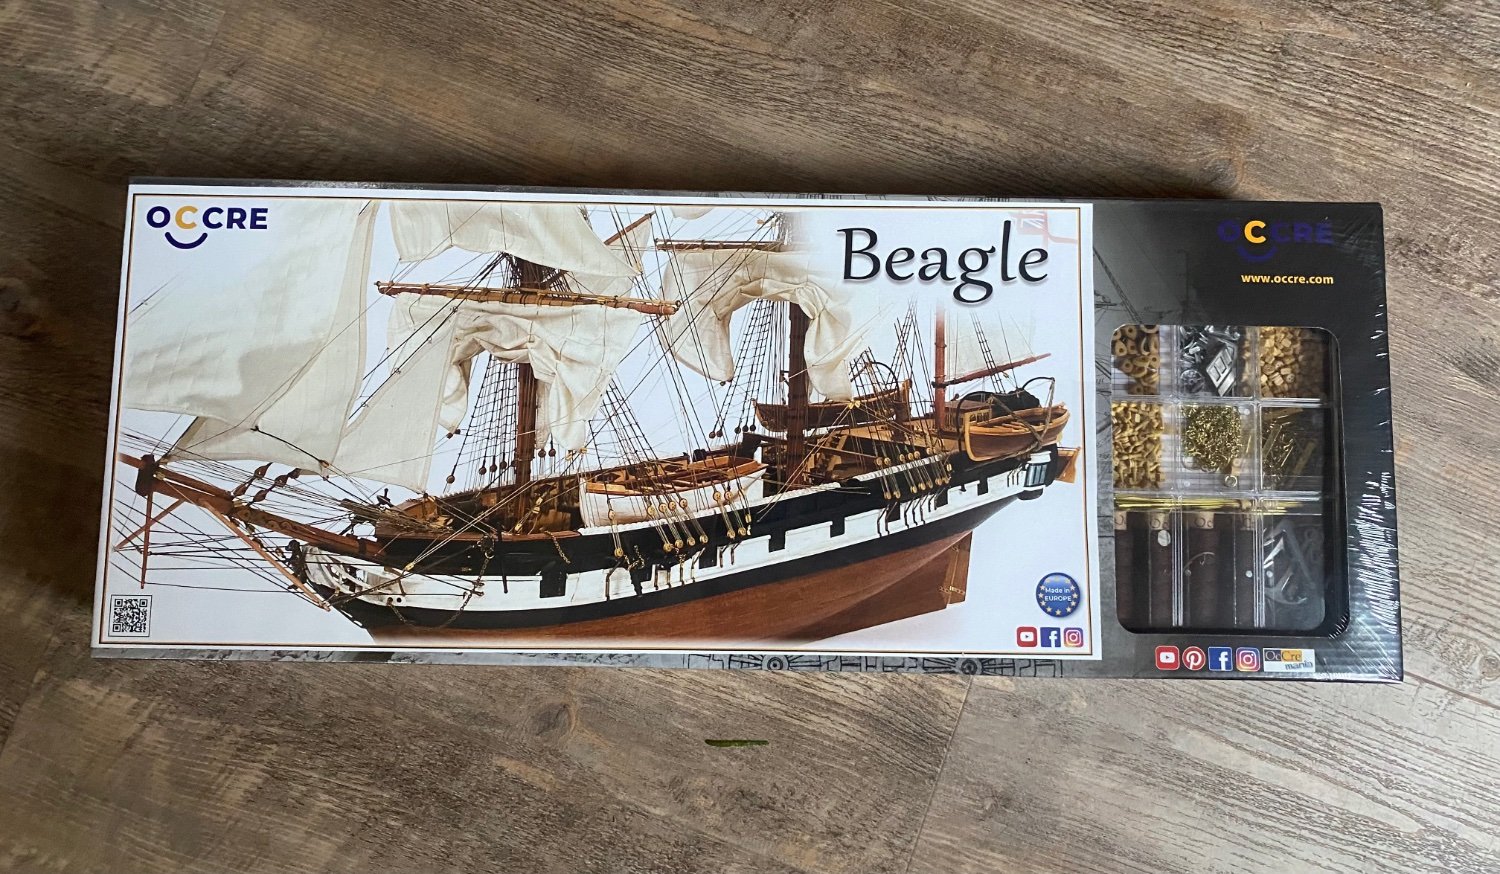
 I was given this model by my family as both my wife and sister in law volunteer at Down House which is a few miles down the road. Down House was the family home of Charles Darwin for 40 years and where he wrote "On the Origin of the Species" which was published in 1859.
 -
 Hello! so being new to the ship world and to modeling them, I thought the Polaris build from Occre was a completely random kit specifically designed to help you into the world of wooden models. I have since learned the Polaris WAS actually a real ship! And a steam one at that, so this kit is not completely accurate, from what I read this vessel was procured by the US Navy and was actually known as the USS Periwinkle prior to being an arctic expedition ship? That being said, I took a lot of artistic liberty. I have been learning some terminology in the nautical world, what parts and pieces are, how things work— but slowly. I have some learning disabilities so PLEASE don’t judge me too hard for sounding so basic with what I post! I know there’s measuring involved to make the strake planks accurate, Occre is very difficult in the sense that they just shrug and have you figure out how to hodgepodge the pieces. You’ll see I followed Occre’s instructions up to the second layer of planking, where I tried to fiddle with things a little to make it easier. anyway! I used a 90 degree ruler to make sure that the ribs were PERFECT, and of course they were! Until I tried to glue the deck on. Thankfully the wood glue I used it rather forgiving and a bit rubbery when it dries, so I could gently crack the ribs into place without breakage. I learned the cement I was used “contact glue” was garbage. I must have gotten a bad bottle because the planks didn’t stick to the wood very well. It was a frustrating process of using the glue I bought from Occre to get everything to lay down well AND HERE IS WHERE I MADE MY FIRST MASSIVE MISTAKE I followed the instructions TOO precisely. Using the varnish. That was a big whoops. It was after I applied the varnish I looked at other finished kits and saw that they stained the deck to get richer colors… Well, I guess I’ll be getting back to this—- and you can already tell what’s going to happen. All in all, I was feeling very proud and excited to be getting this far
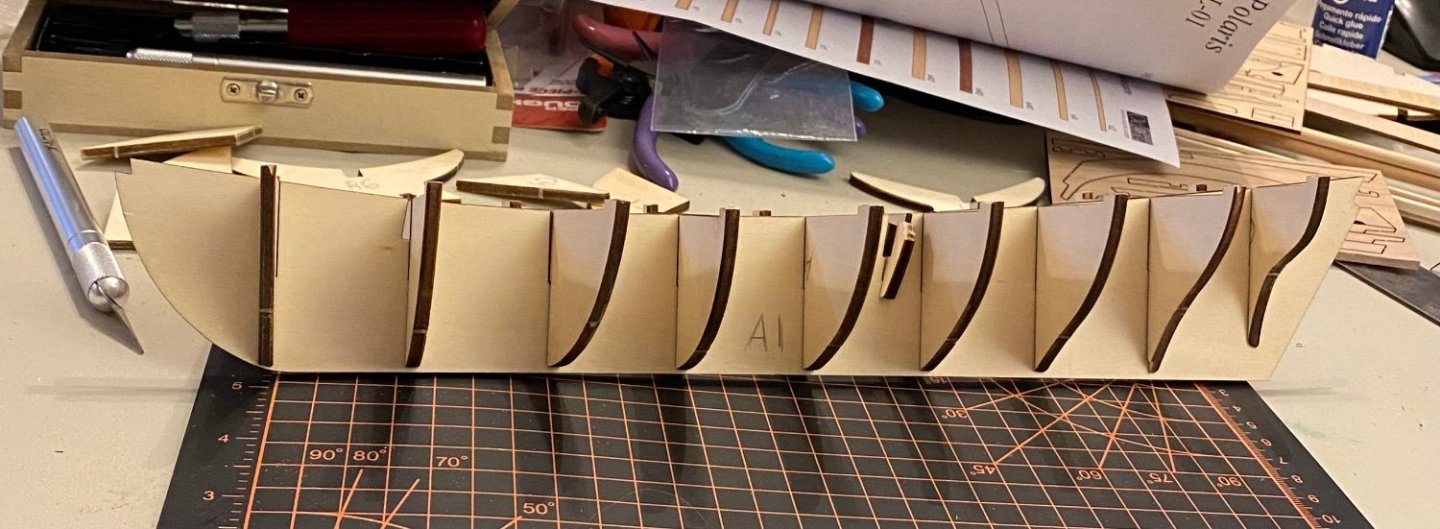

-
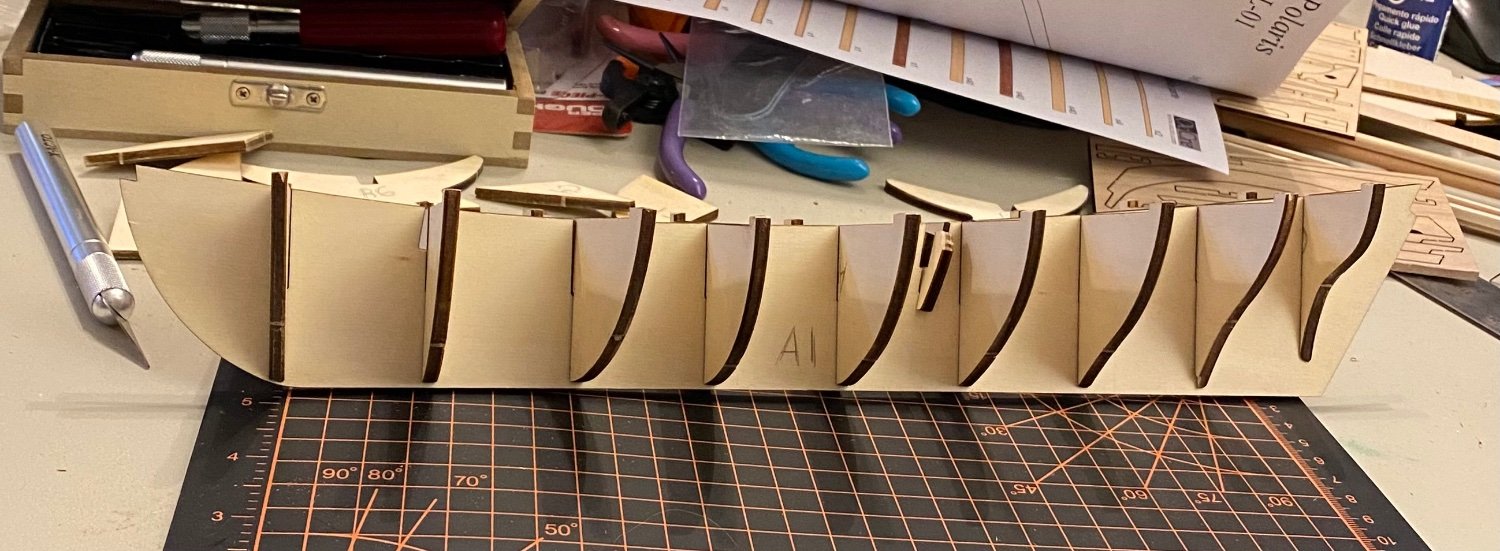
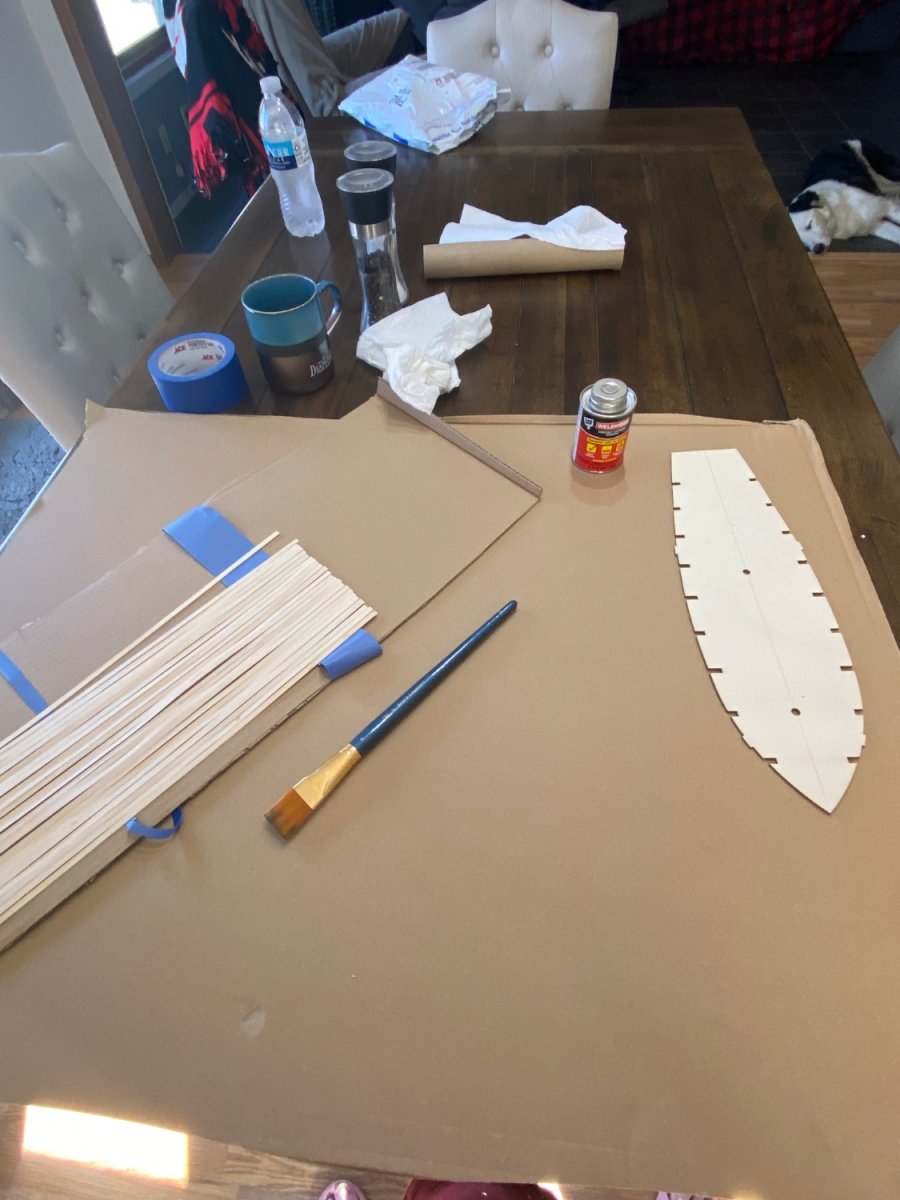
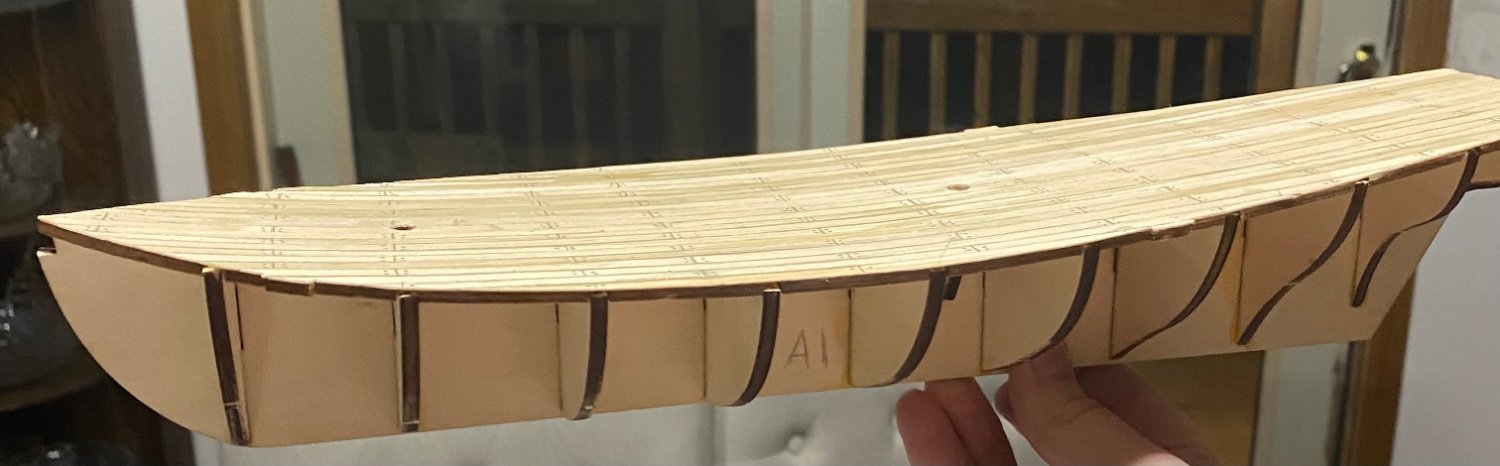
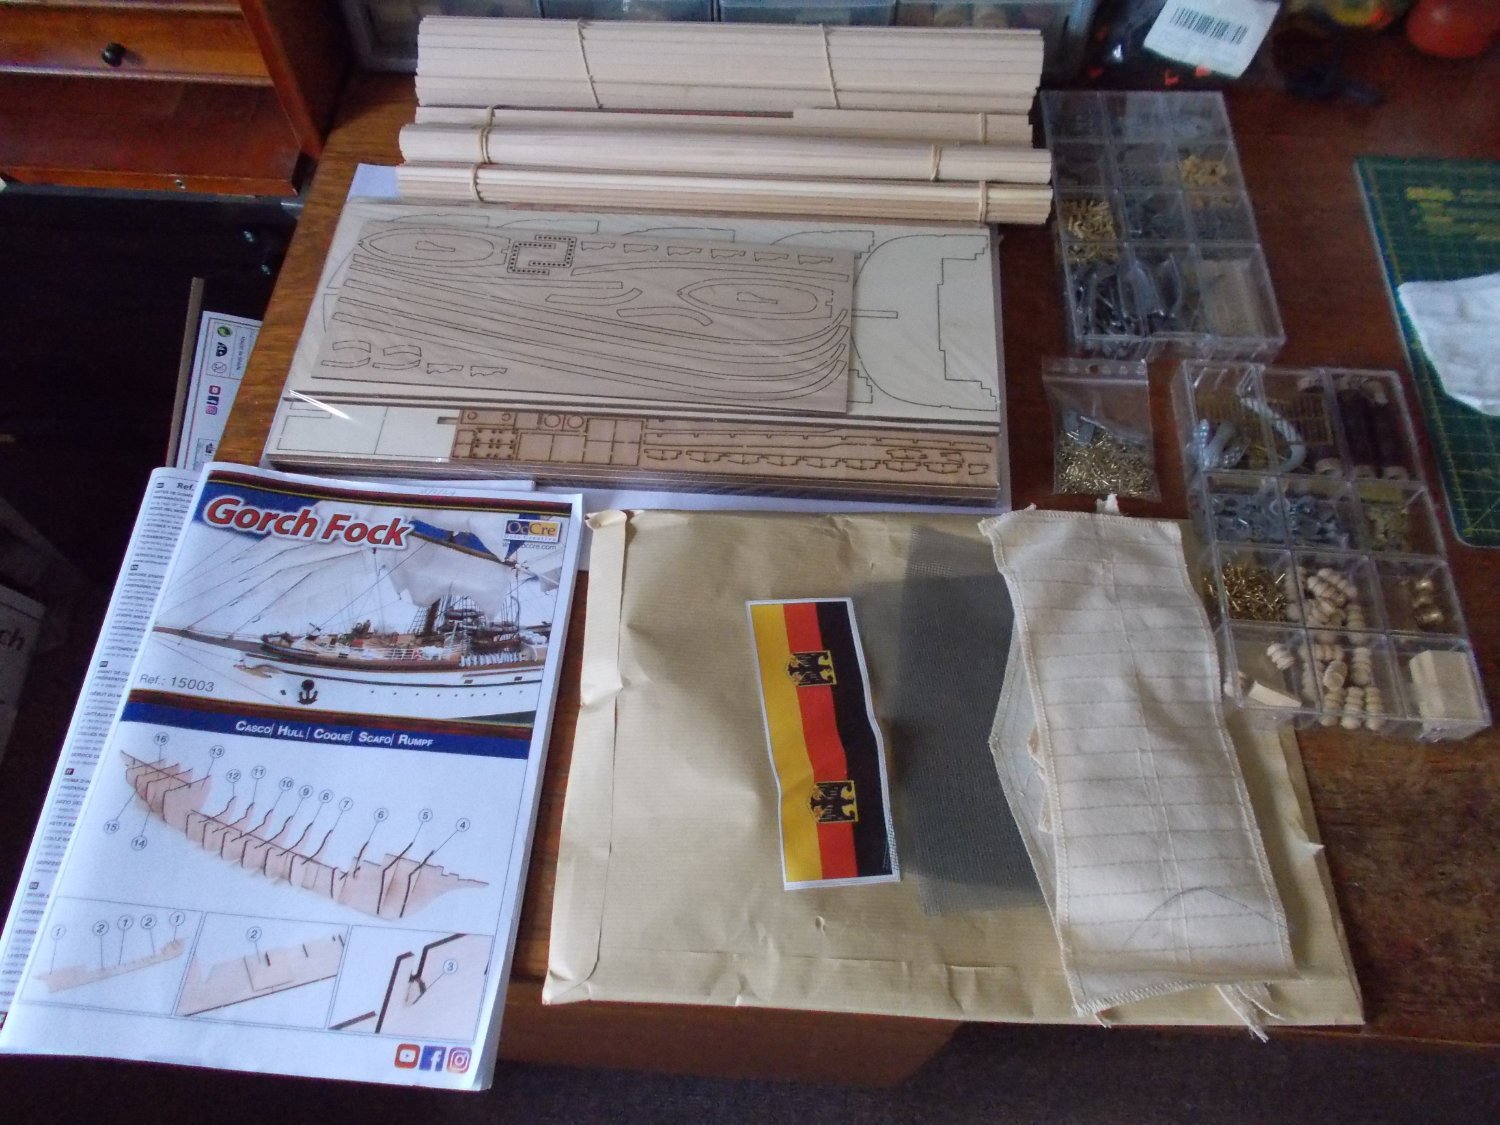
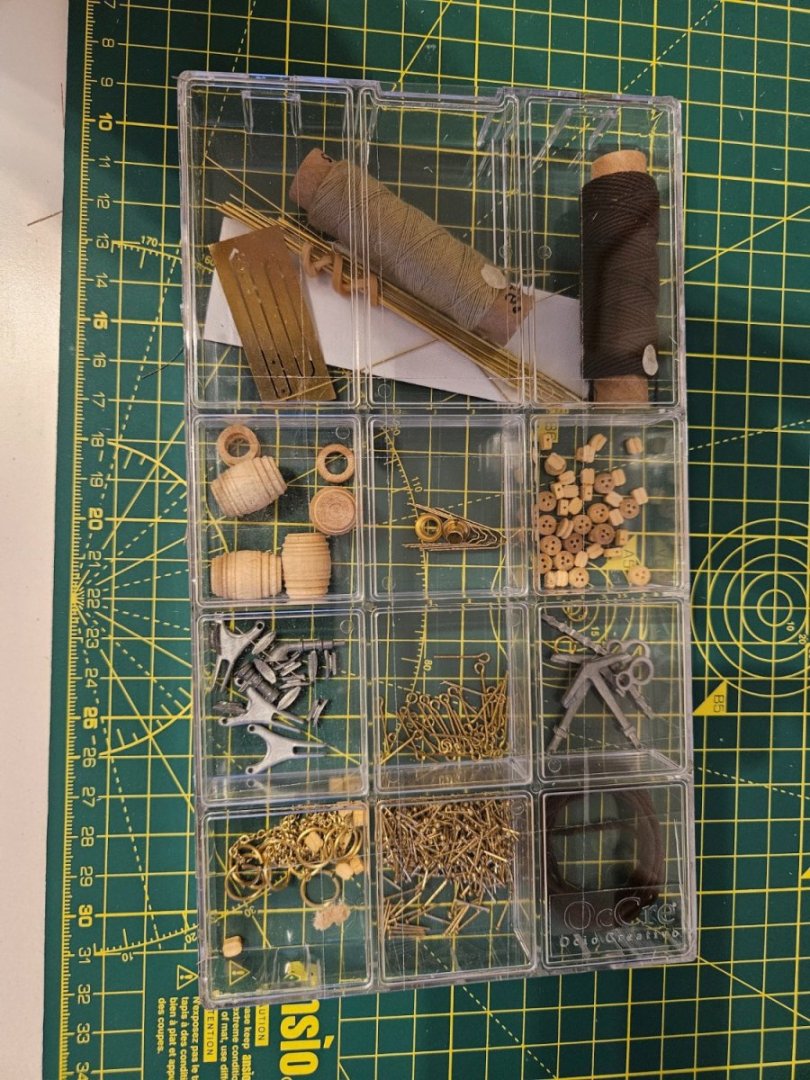
 It is ages since I tried to do a build log on this forum so I thought it was about time I did! I have made loads of models since my last but not done logs on any of them. I love the look of the tall ships and I have recently finished the Occre version of the Amerigo Vespucci with full lighting and loads of changes to the kit instructions to make her more like the real vessel. I am going to try and light the Gorch Fock as well although I wonder sometimes why I set myself these challenges. I can already see from the instructions that I will have to make a few alterations to the kit but otherwise I hope to build her more or less out of the box this time without looking too carefully at the real vessel. At first look the instructions are the usual Occre quality, the wood looks good and the fittings fine. I will change the navigation lights so that I can fit lights. I don't like the photo etched stanchions but changing them costs a lot as I know because I changed them on the AV so I will put up with them this time. The sails again are usual for Occre but to be honest they do look OK in the end. I made some for the AV as the kit didn't come with them but they didn't really come out better so I will stick with those provided. Let's see what else I find as I go along. For those who want to know this is what is in the box!
-
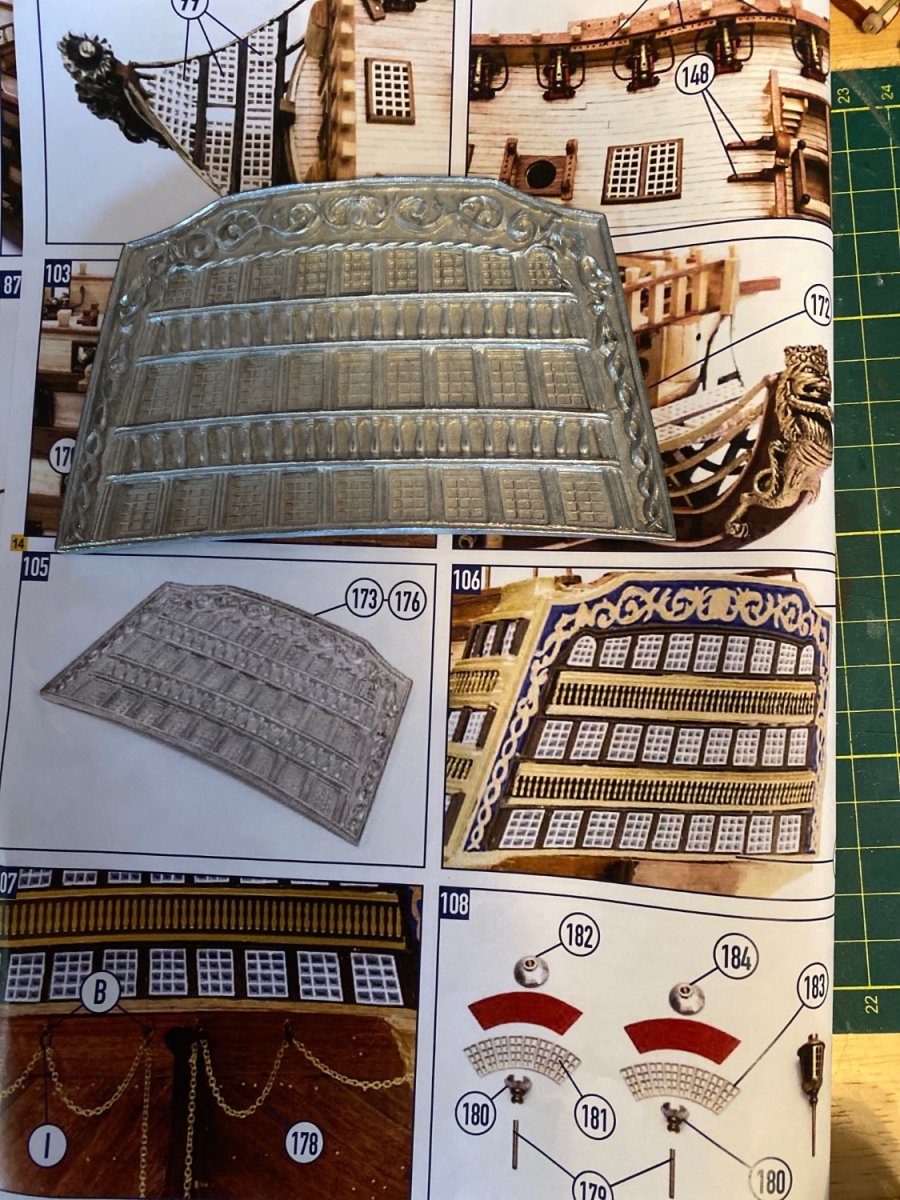
Hi all, I’ve been searching through various logs to find anyone who, in executing this model used the cast stern piece, pictured below. I’ve seen that several people have decided to build this from scratch (which I’d prefer not to do) but the challenges are: (1) the curvature isn’t quite right and I’m stumped on how to adjust it. (2) the painting of this is daunting, I can see several ways to approach it but none that seem to achieve the end results. Would appreciate any thoughts or suggestions.

-
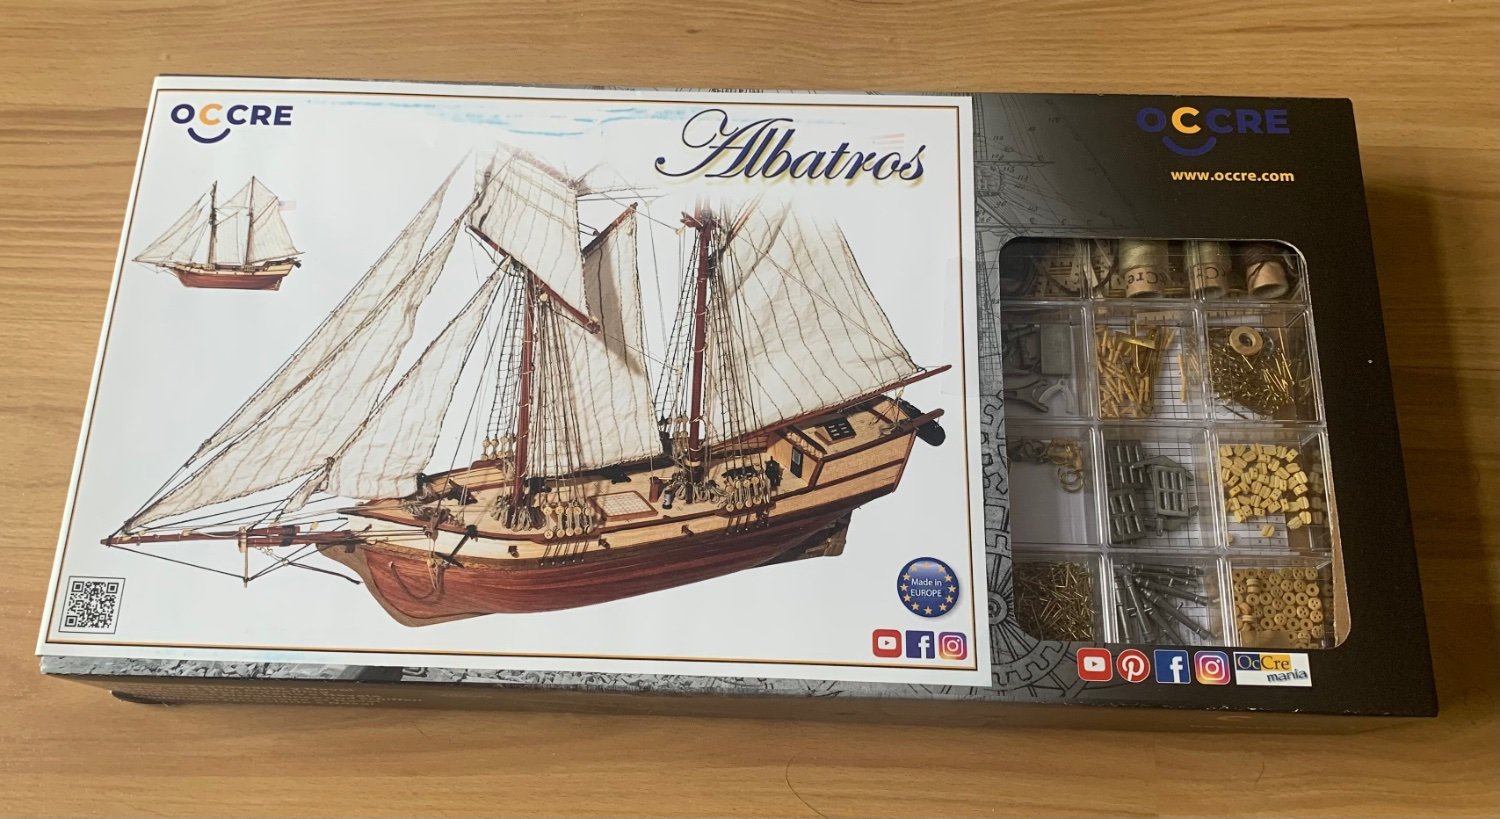
 It is not the first build log showing OcCre's Albatros but it is the very first wooden ship model I will build. To start with shipmodelling I have selected the Albatros as she should not be too tough to build and there is a series of YouTube videos showing the build step by step I can refer to when I need it. I have started this project at the end of November last year and already have spent some 60 hrs working on it before I have joined MSW a week ago. Therefore this log will be a rough wrap up of what I have done so far and then will join the actual stage of the build - rigging the guns. As I am not a native speaker I will have to translate some nautical terms from German to English and getting the photographs uploaded and resized first. Starting tomorrow I think that all posts will be done until sunday. You will see a lot of mistakes I think so any help and comments which will help me to improve my modelling skills are highly appreciated. Thanks in advance ... Kai
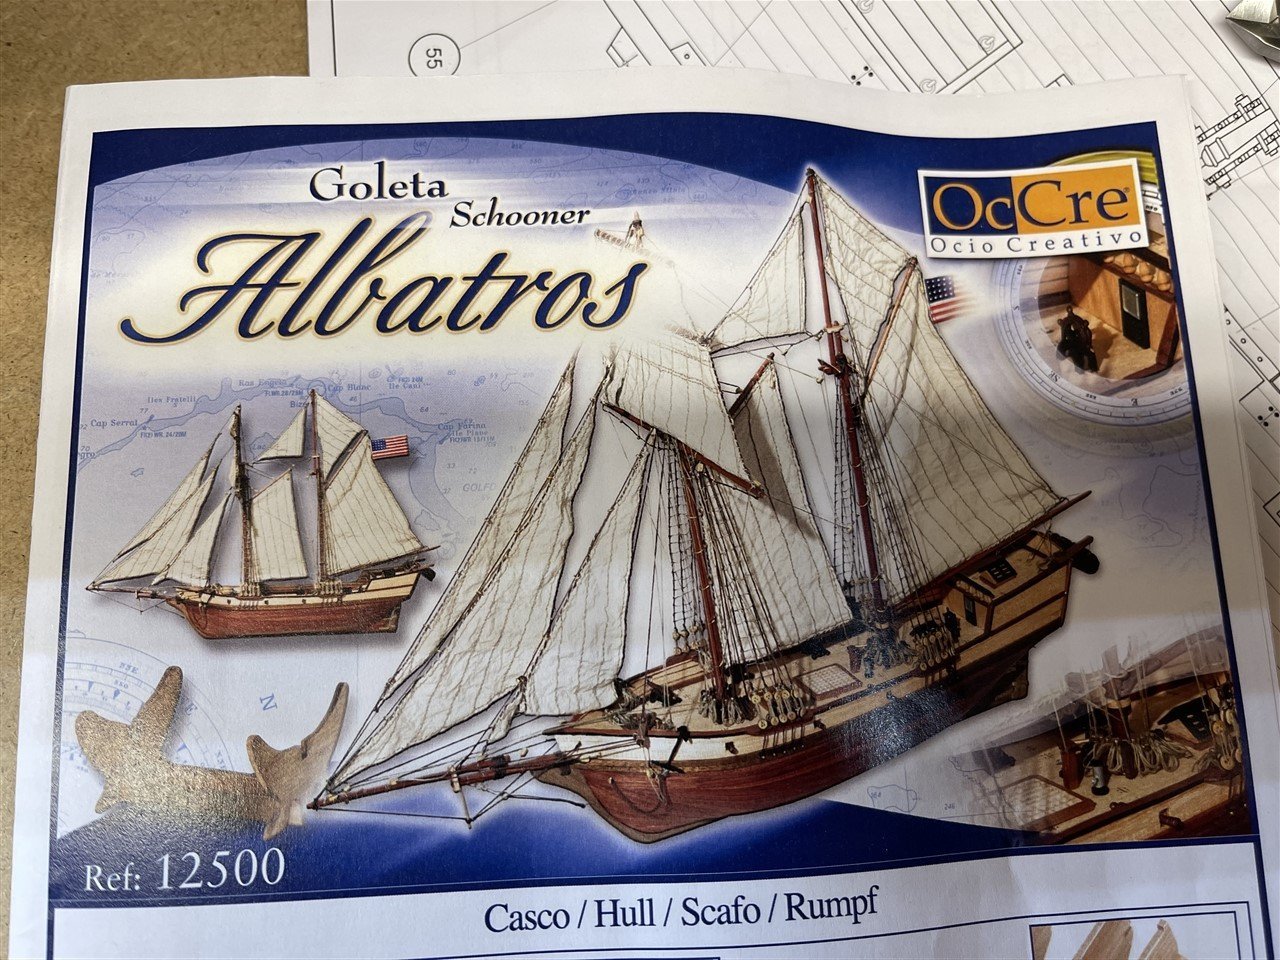
-
 Just opened my next project. I am going to attempt to build the OcCre Endeavour. This will be my first completely wooden model after years of building plastic. I see there numerous builds of this ship in the index and will look to each of them for help and advice.
 -
 Hi everyone, I just got done (kind of) with the shipwright series and decided to make a small step up and do the Polaris by OcCre. I botched the lobster smack and it’s now somewhere in our local landfill. I’ve never done a build log before and don’t really know all the part names and honestly will never figure out what side port is and if the front is aft or not lol. I’m sure this stuff will come, but for now I’m just enjoying building! I haven’t documented the process that well but here’s where I’m at. I’m getting a bit ahead of myself and have started putting together a couple things that go on the deck. Some of those little features are already on it. Hopefully that doesn’t cause probs for me later. id love for anyone to point out any places that need work. I’ll try to keep this updated, but I am a two job guy so my time is a bit limited. -Travis
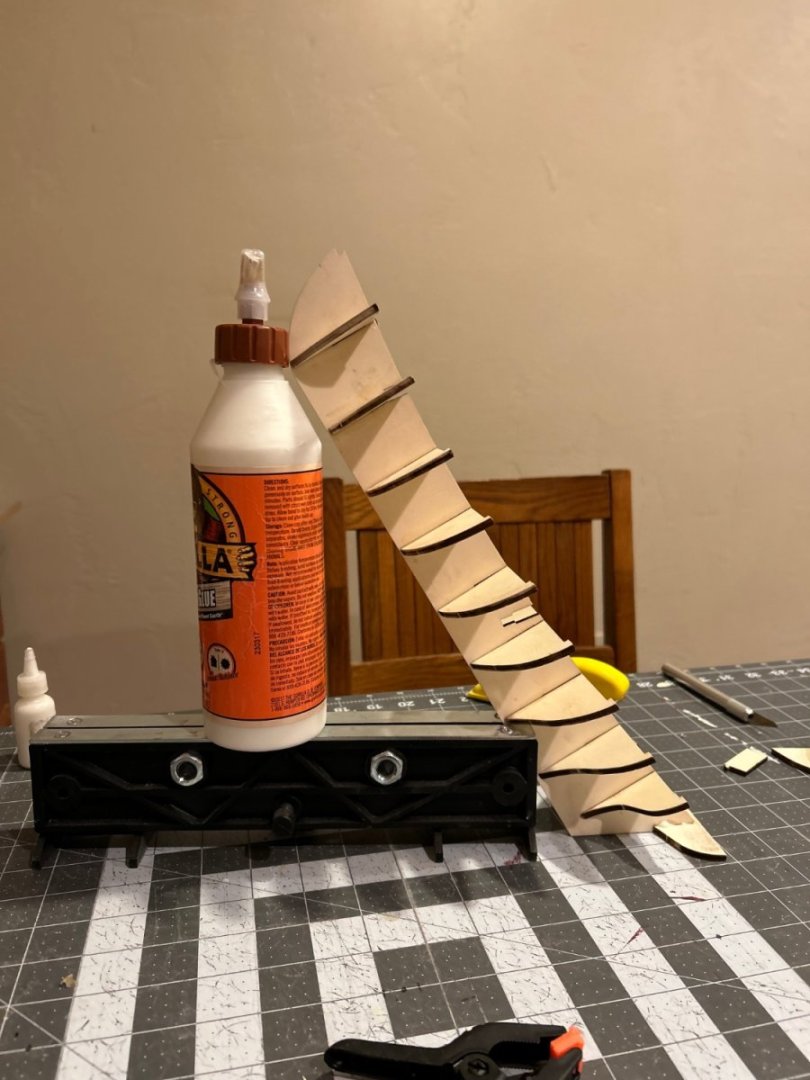


-
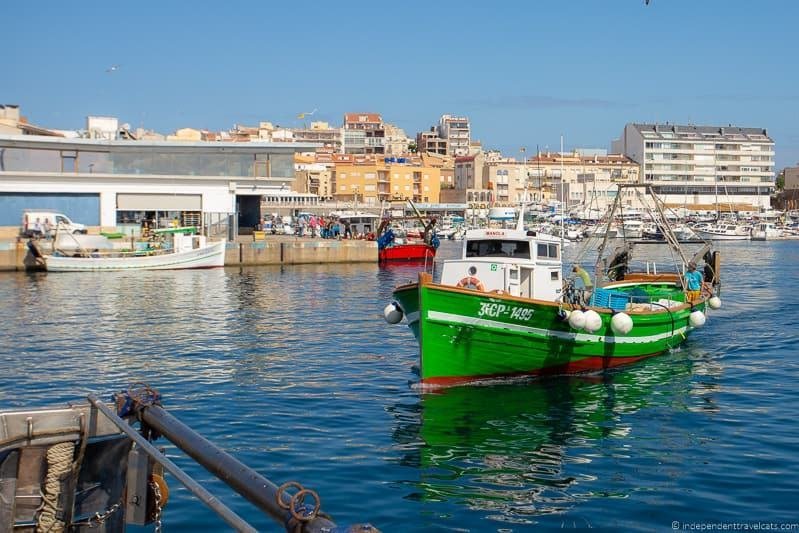
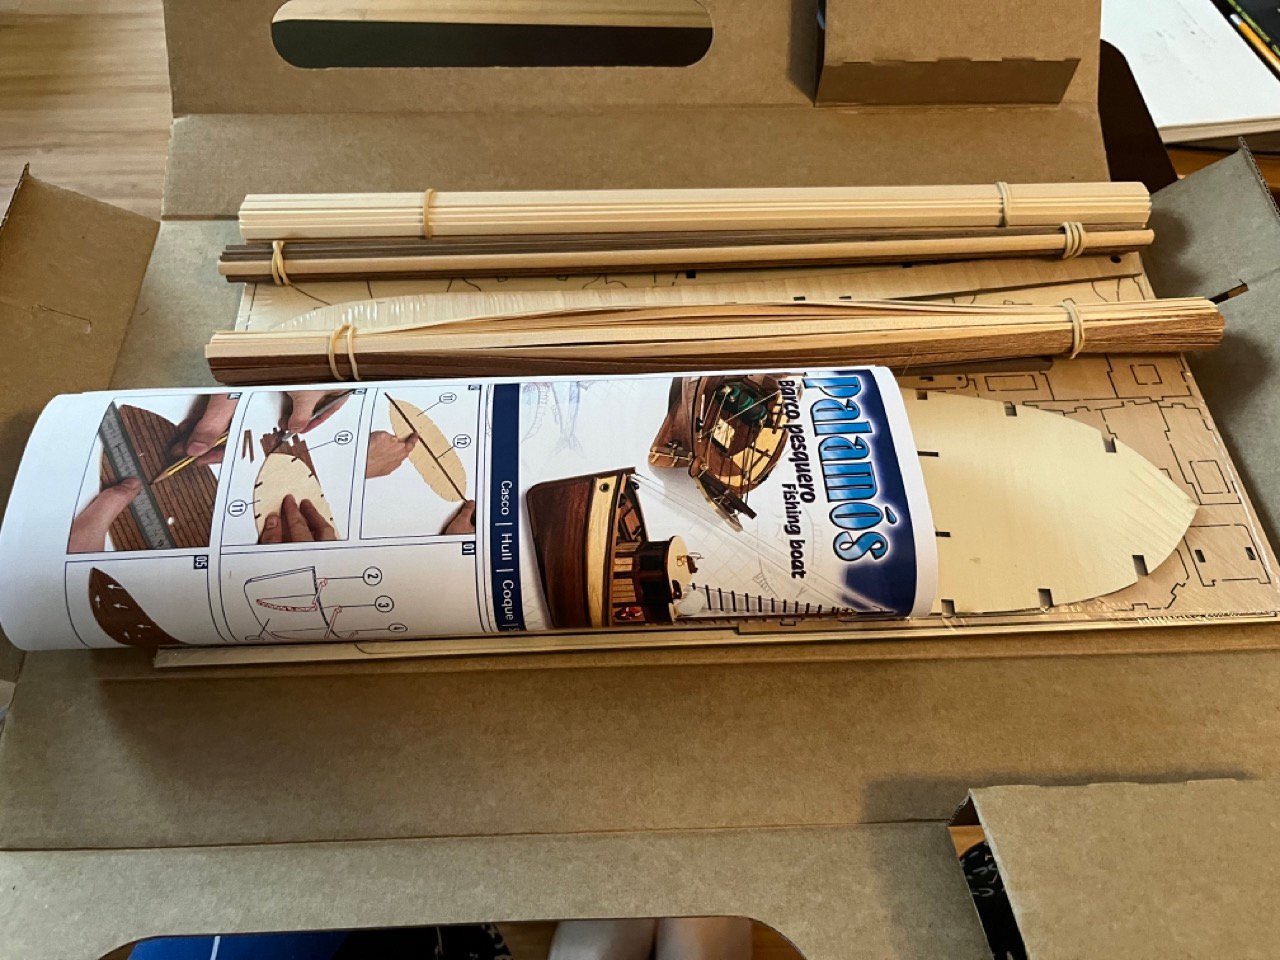
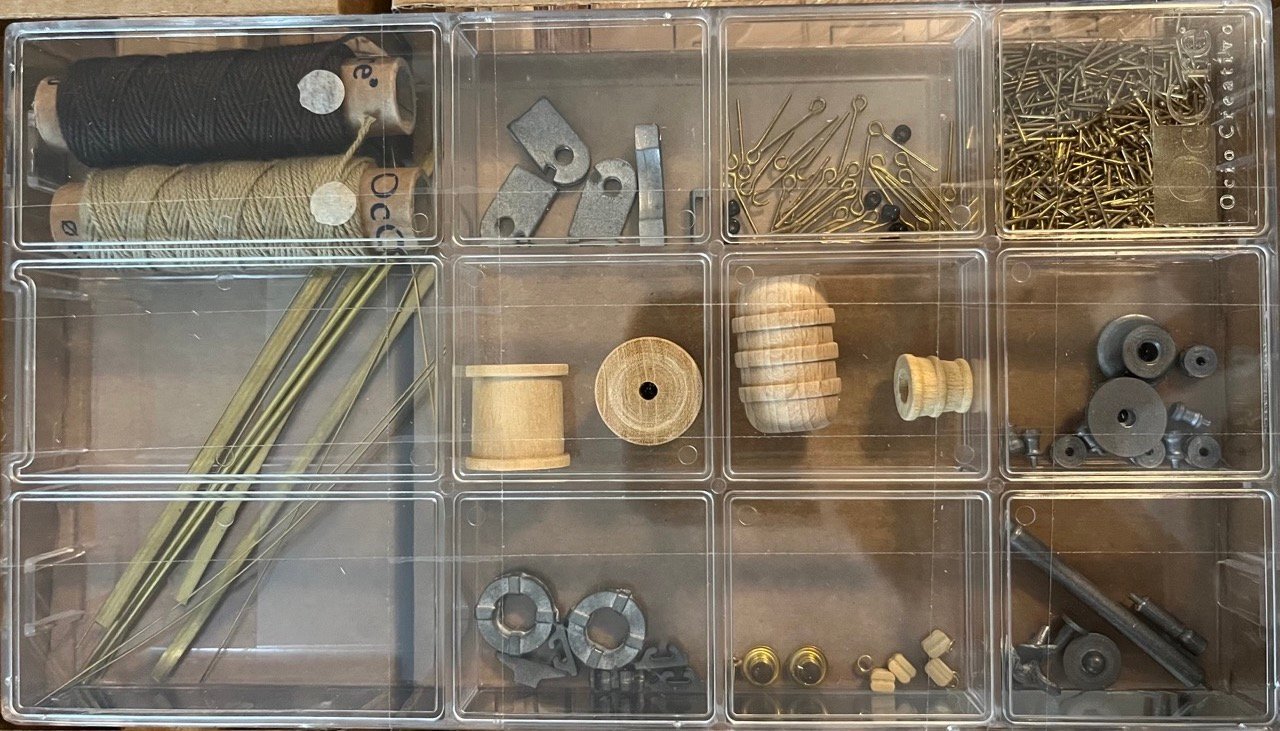
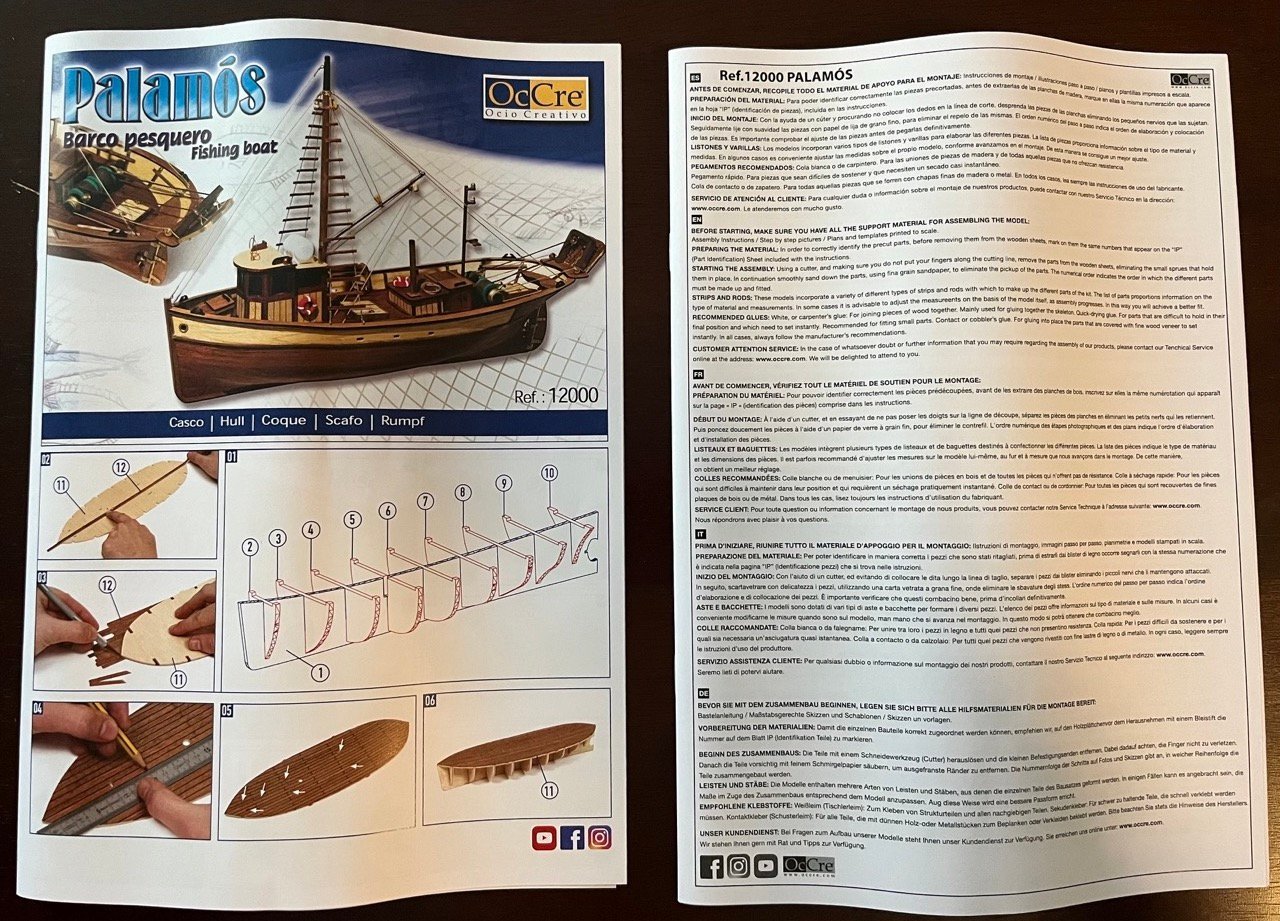
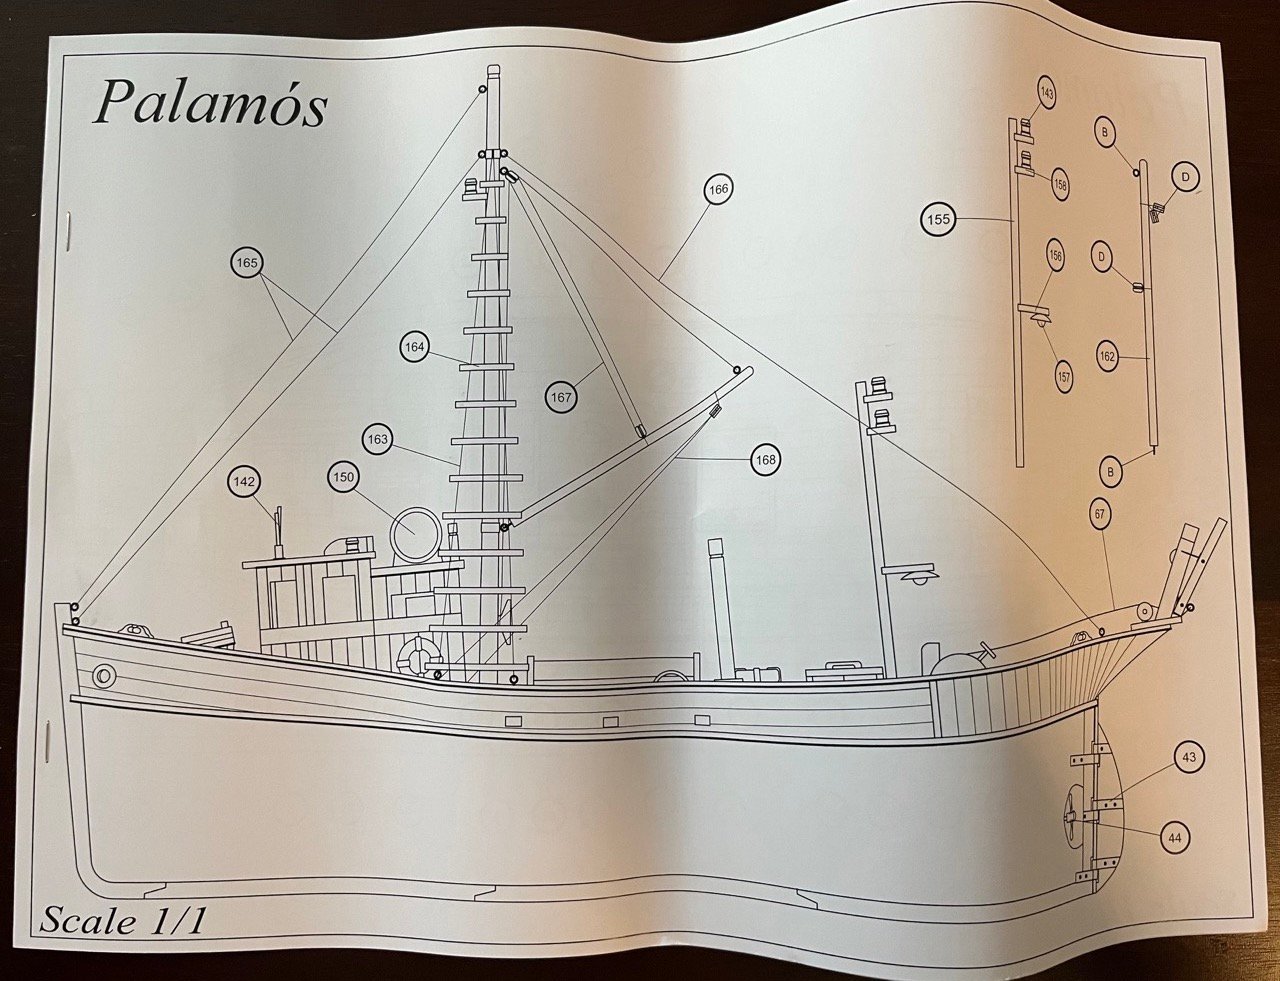
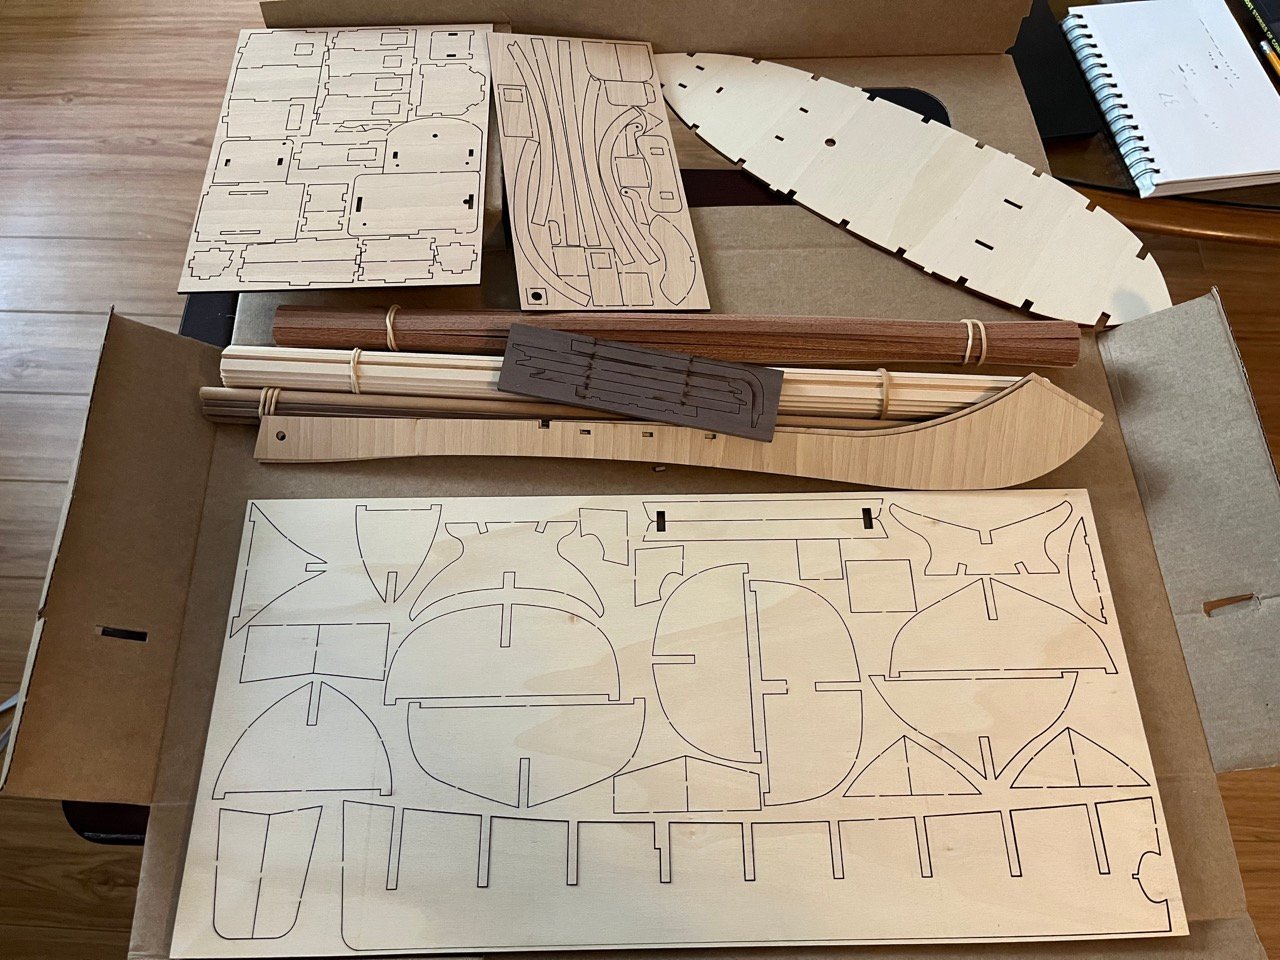
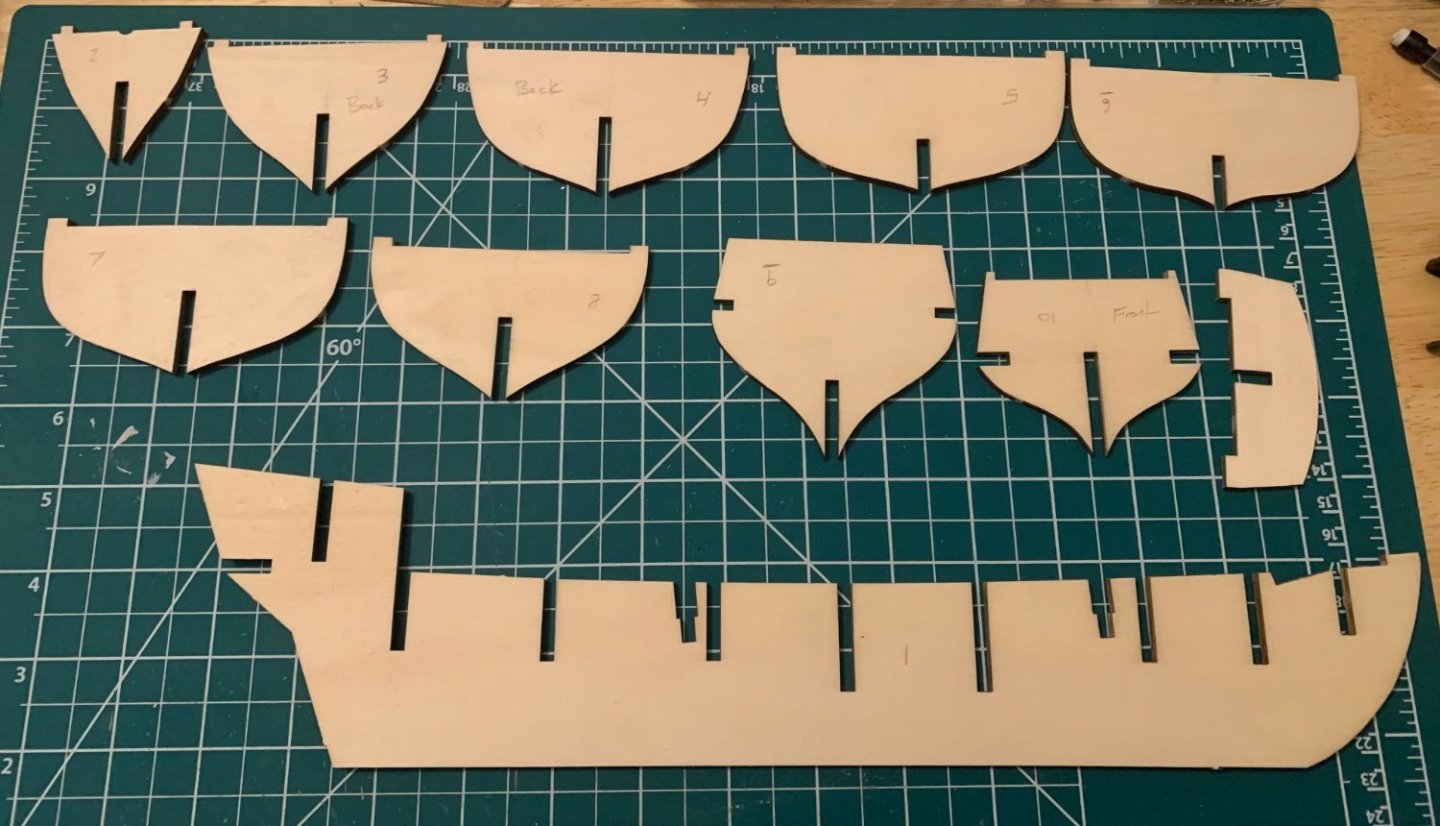
 For my fourth build after finishing the modelshipways series. I am going with the Palamos by Occre. It seems like a fairly good beginner build, I like trawlers and I managed to find it on clearance for $75. It appears that the boat isn't modeled after any particular fishing boat (at least as far as I could find) but rather is a general representation of fishing boats seen around Palamos Spain. I like the clean wood colors of the Occre model, but it looks like the real fishing boats were all painted bright colors. I am a bit torn on if I should paint the hull or leave the nice looking wood. Opening the box everything looks to be in good shape. There are 3 pages of 1/1 model scale drawings and separate instruction and photo reference booklets. There is also a paint chart that isn't photographed. I was planning on doing a parts inventory, but the way the parts list is labeled and references the instruction booklet photos, it would be quite time consuming and difficult. Upon comparing it to my previous builds, there are only a few sheets of wooden parts but all of the planking is with strips rather than laser cut strakes. All in all, it looks fairly well organized and should be a good build.
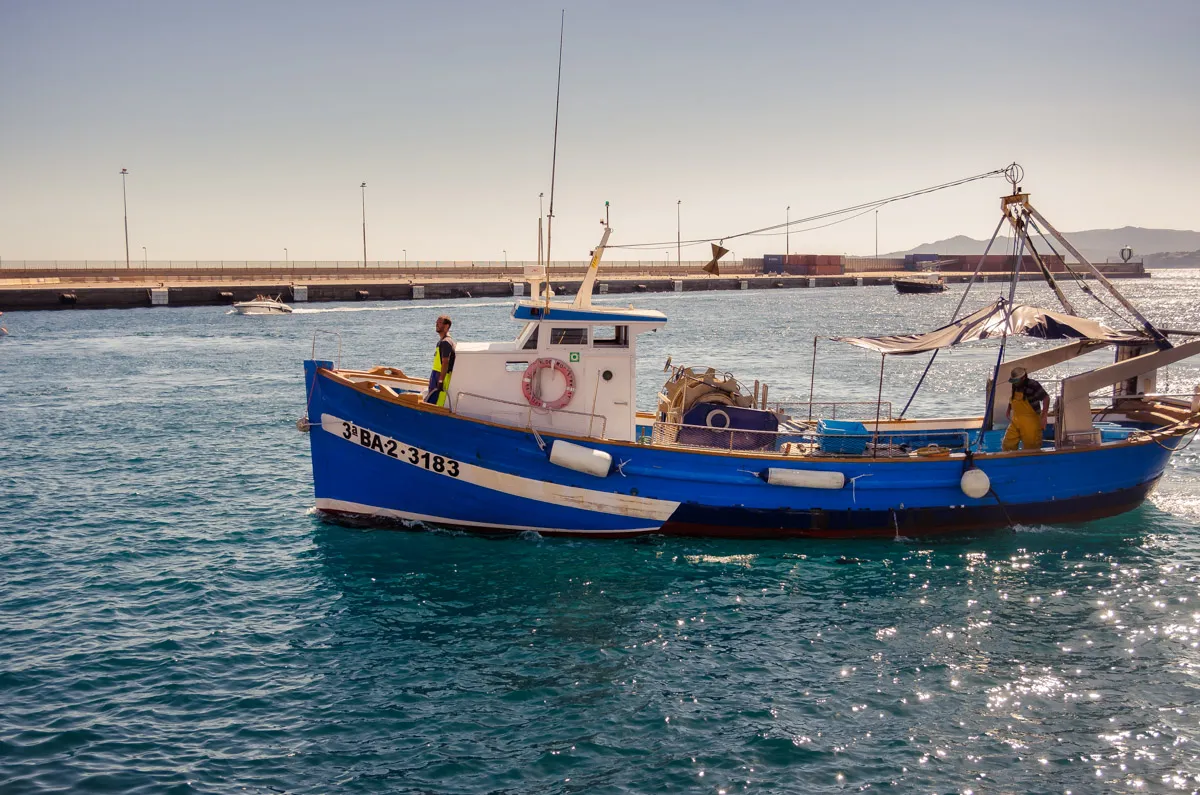

-
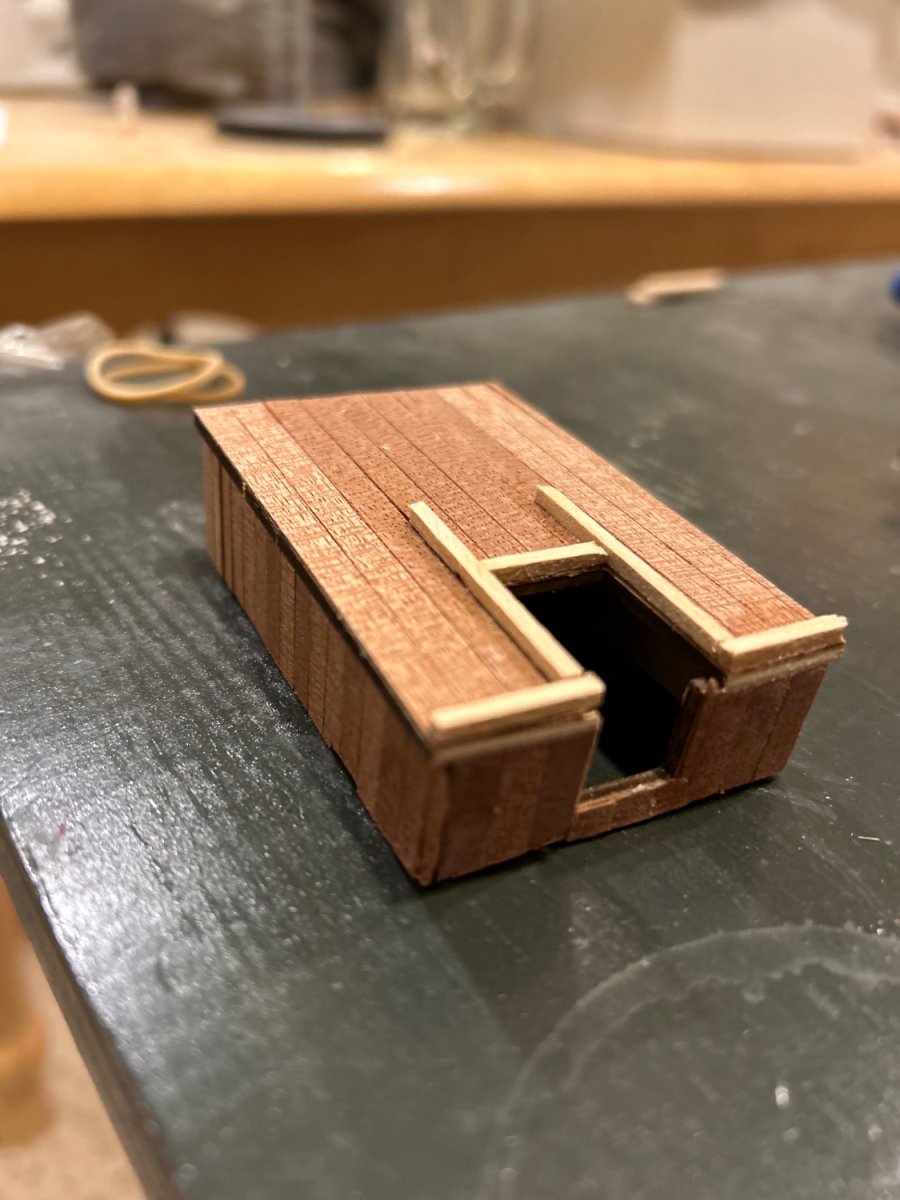
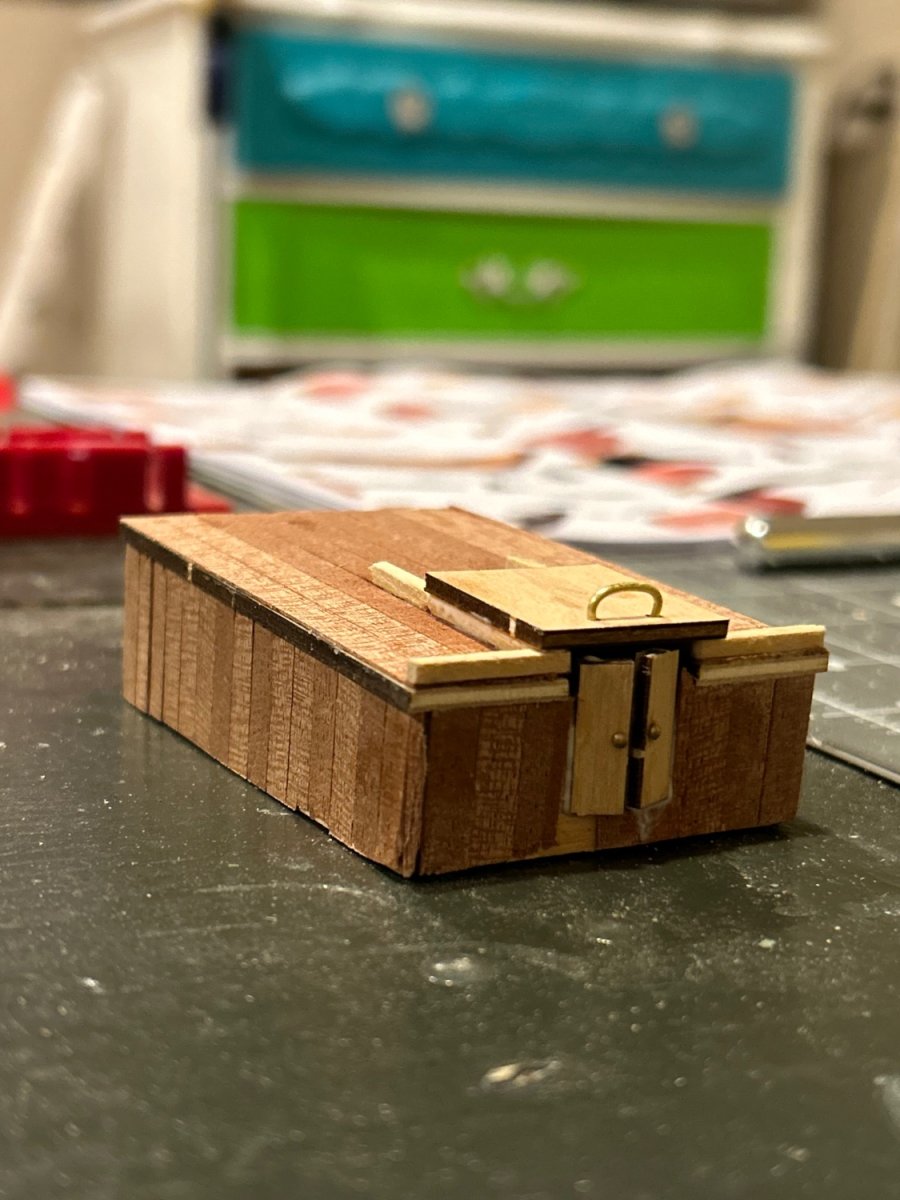
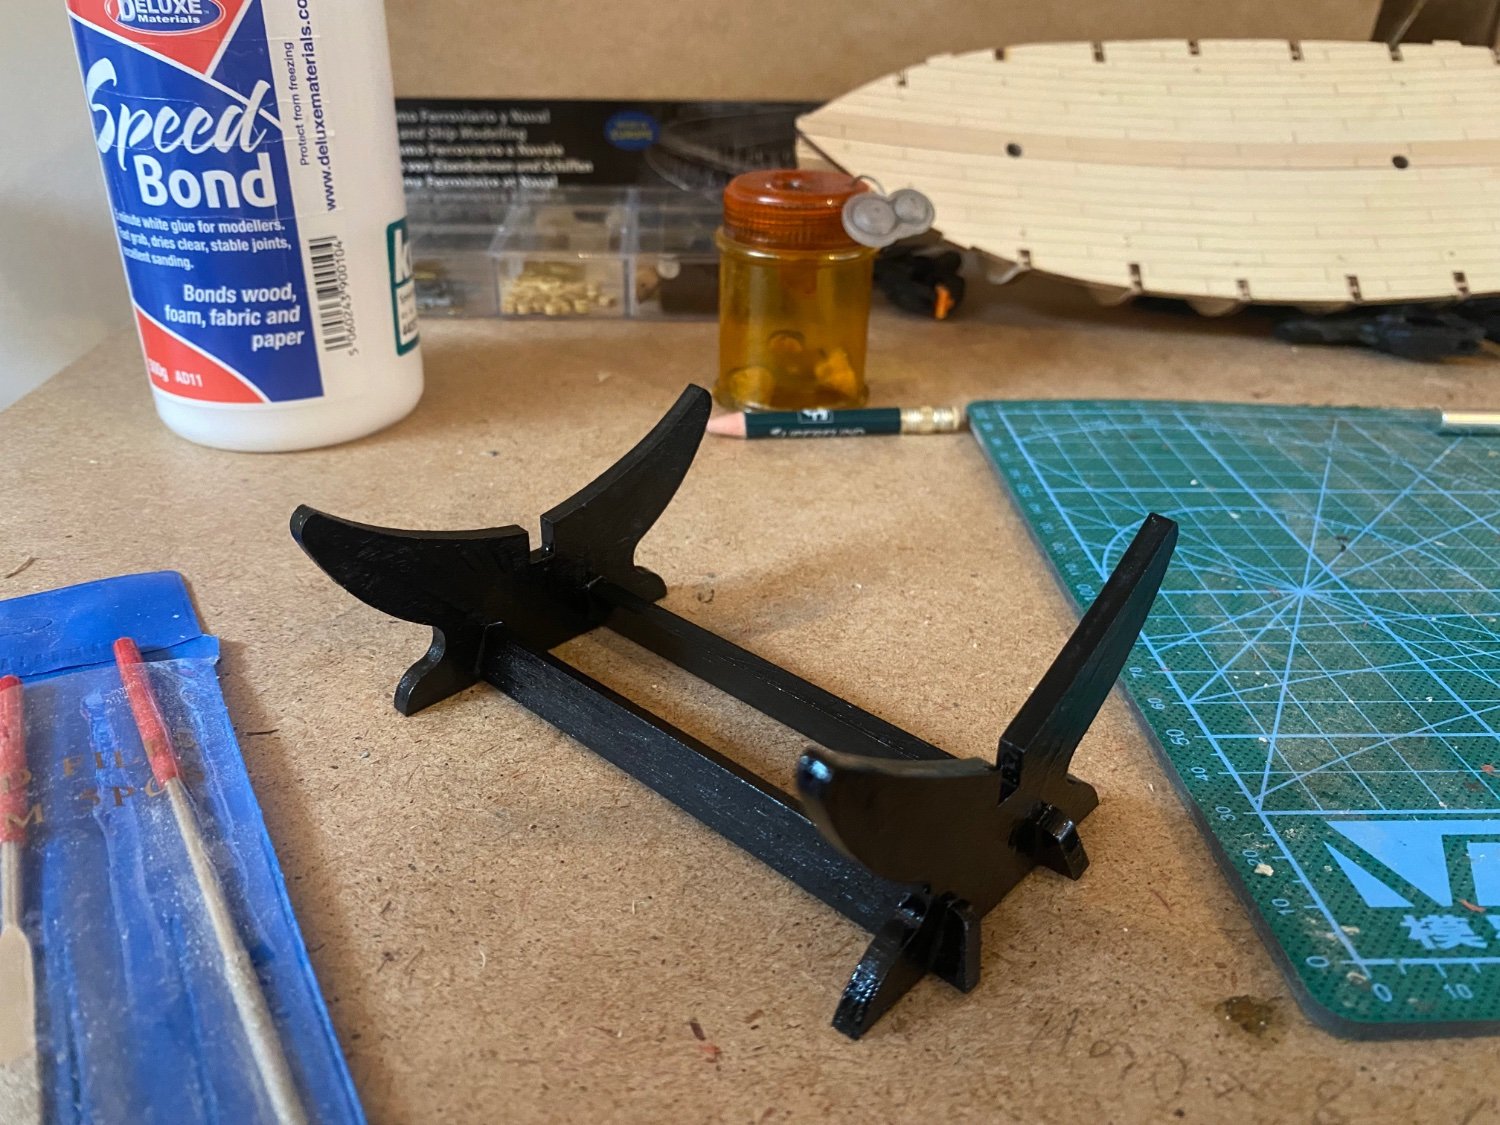
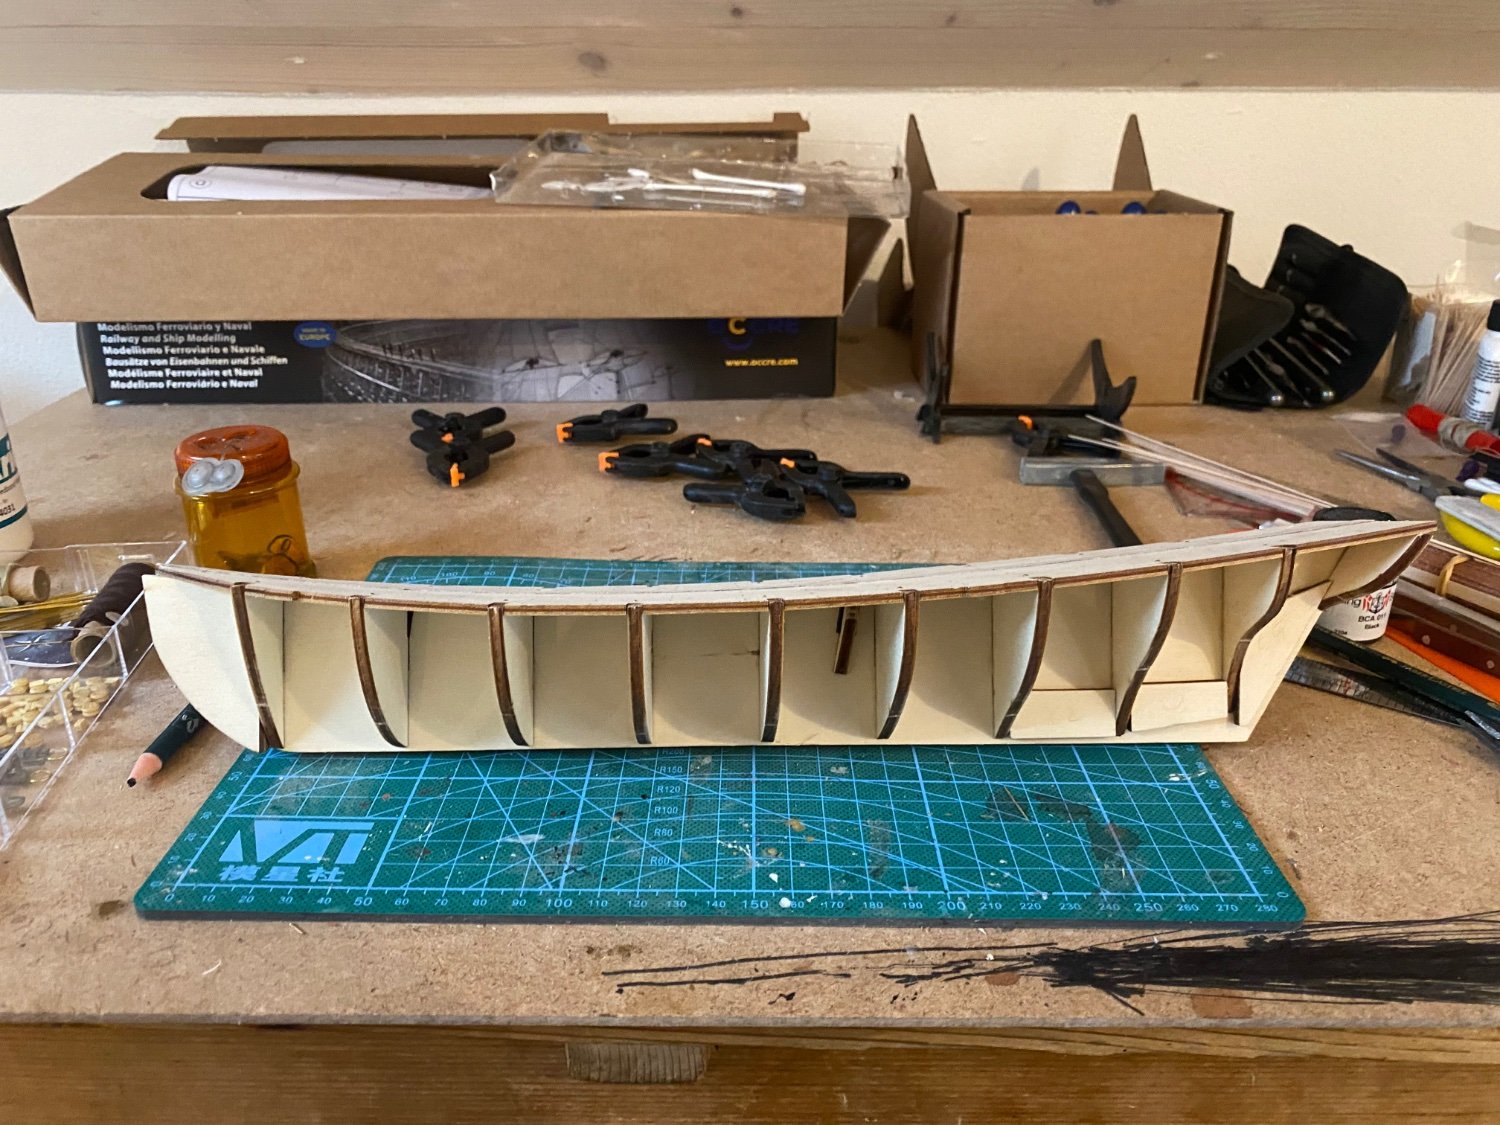
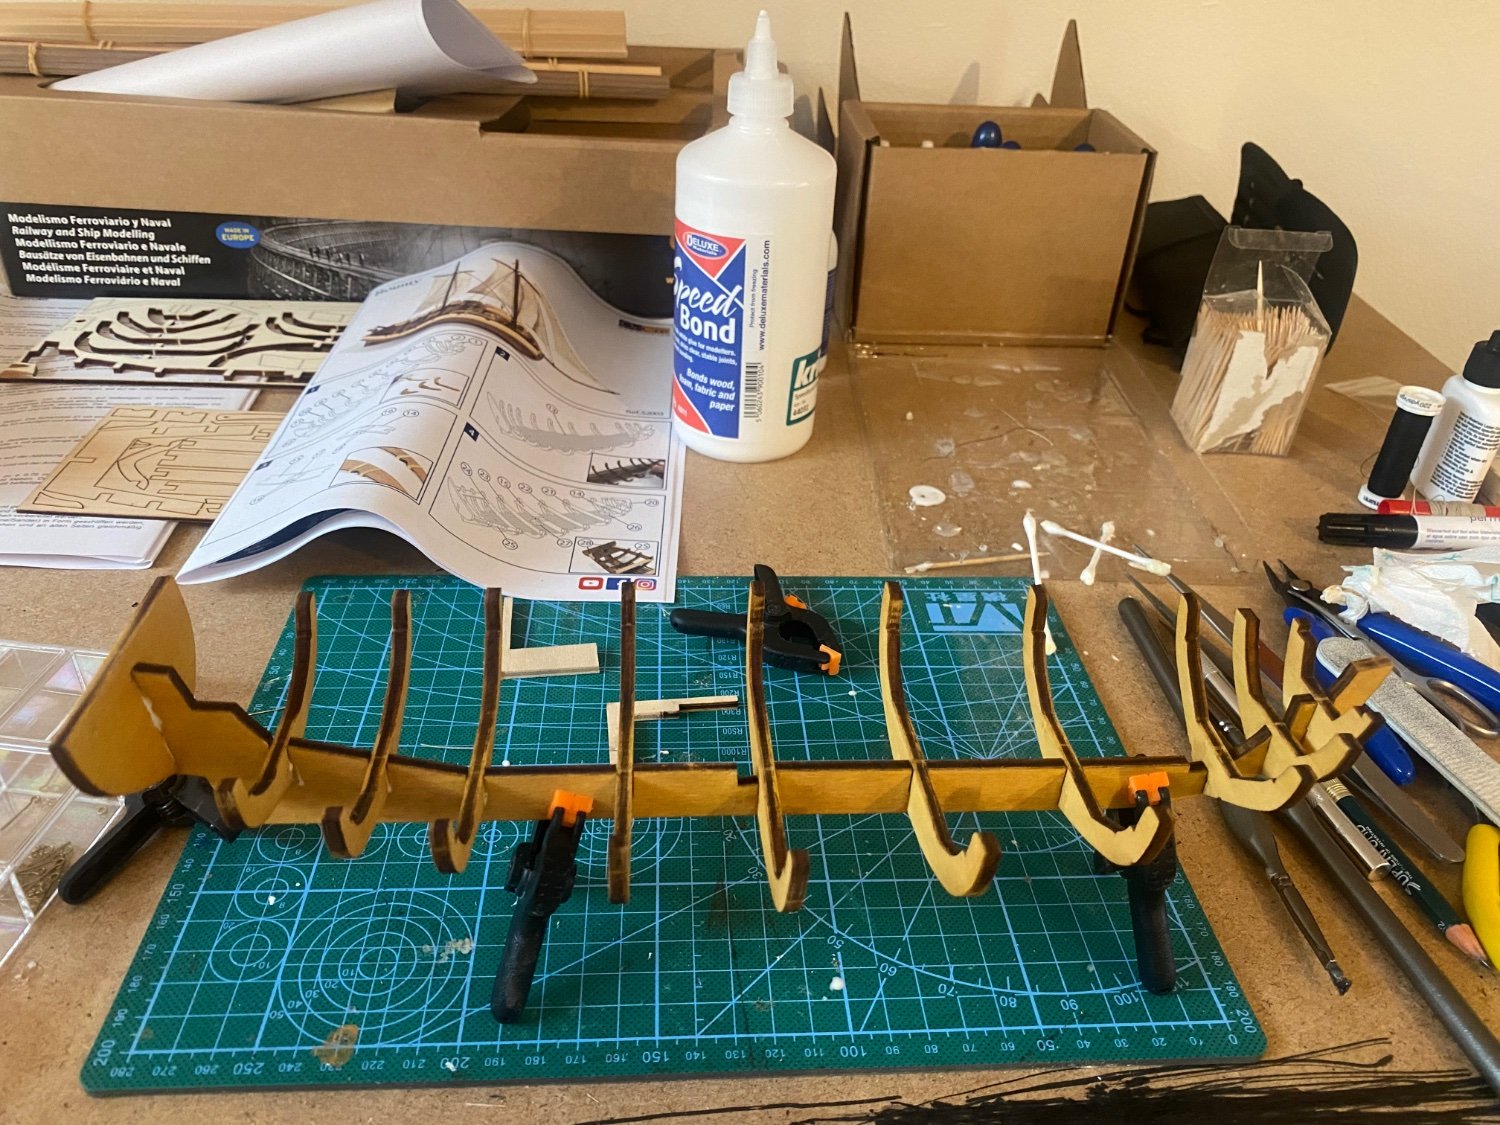
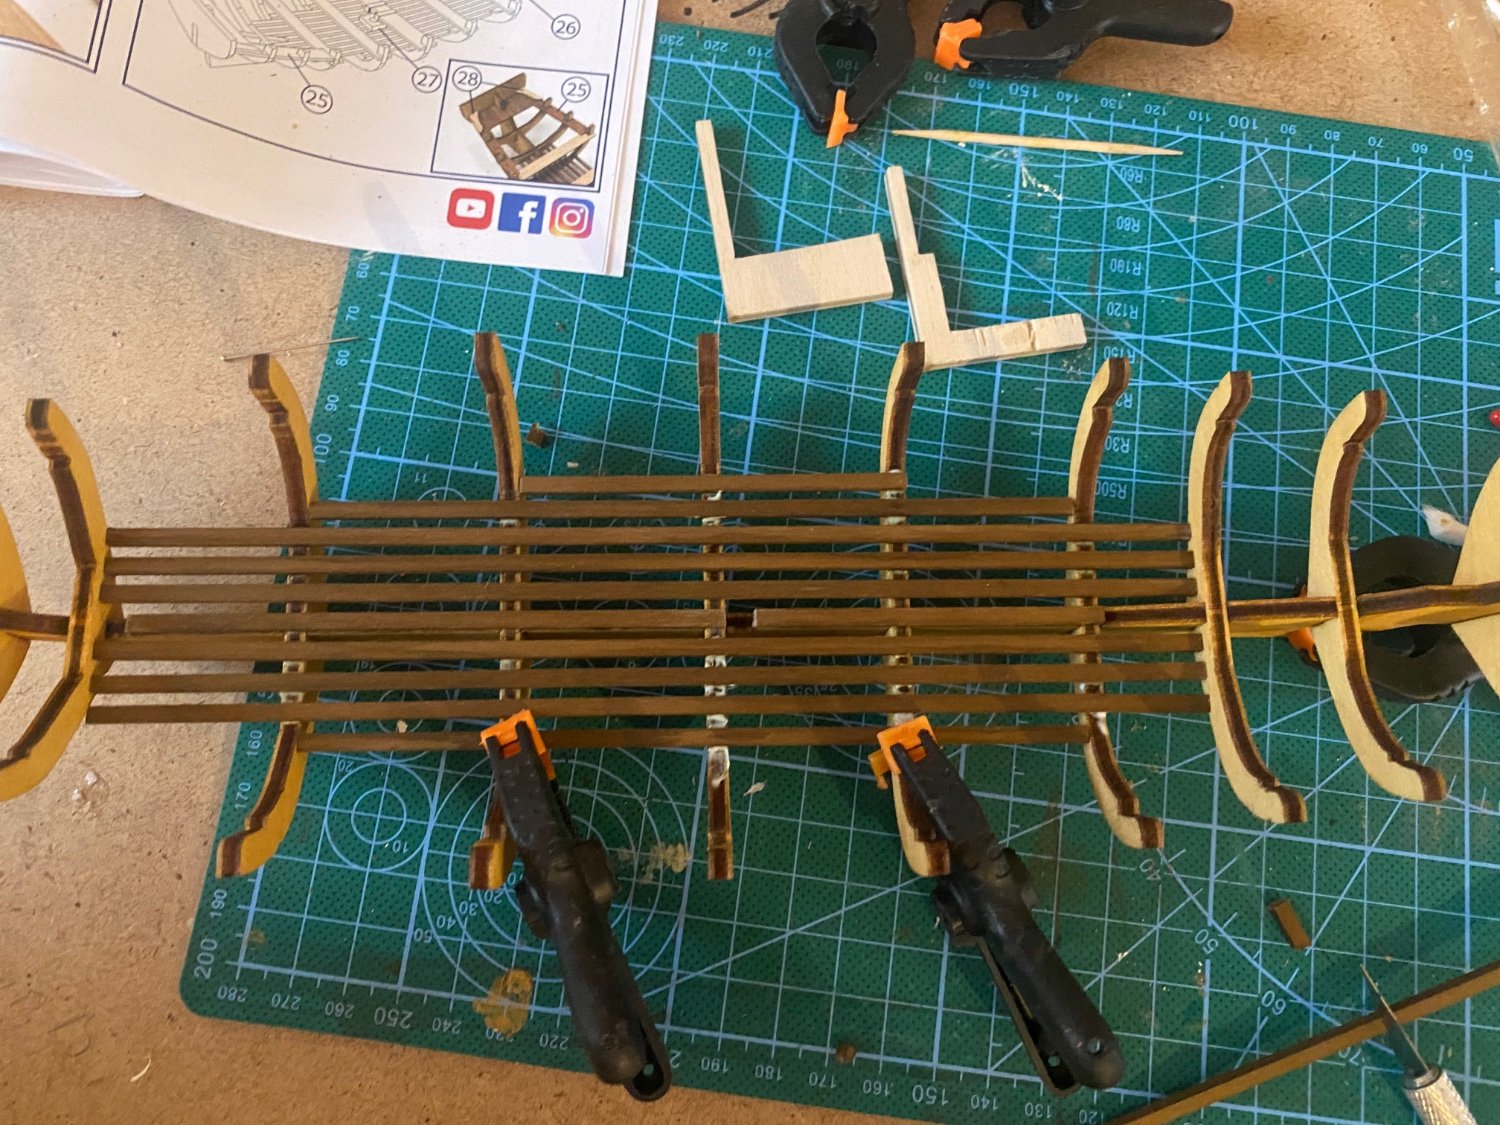
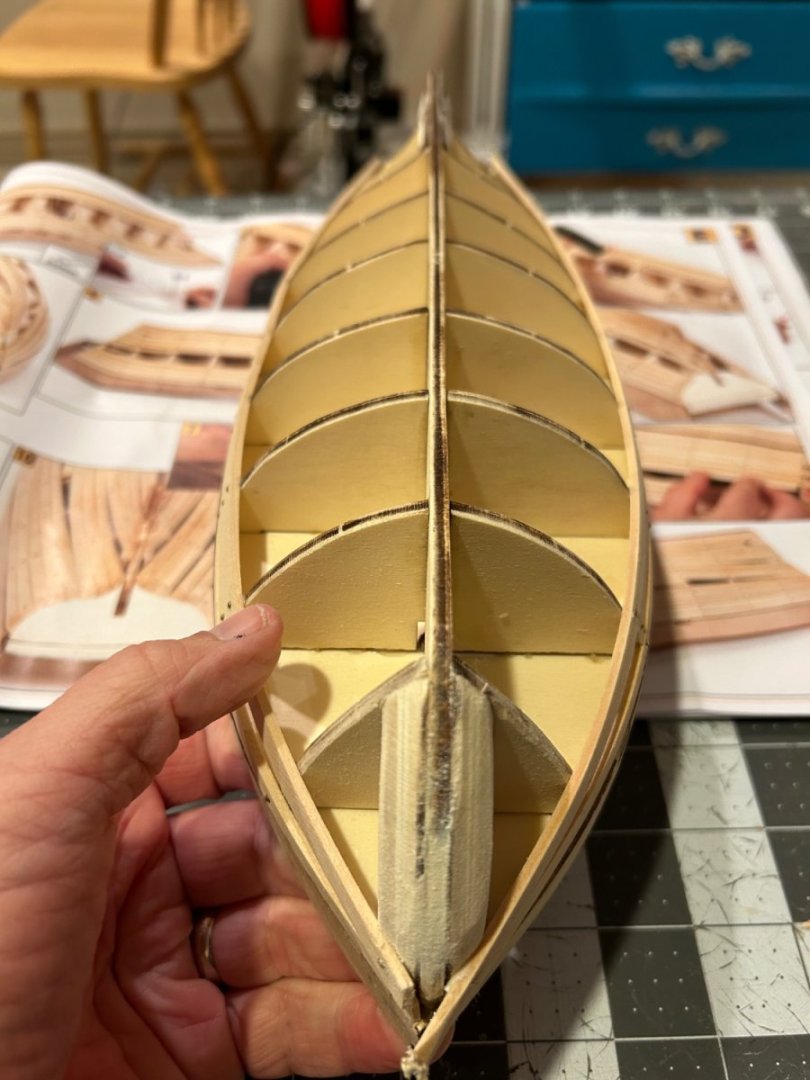
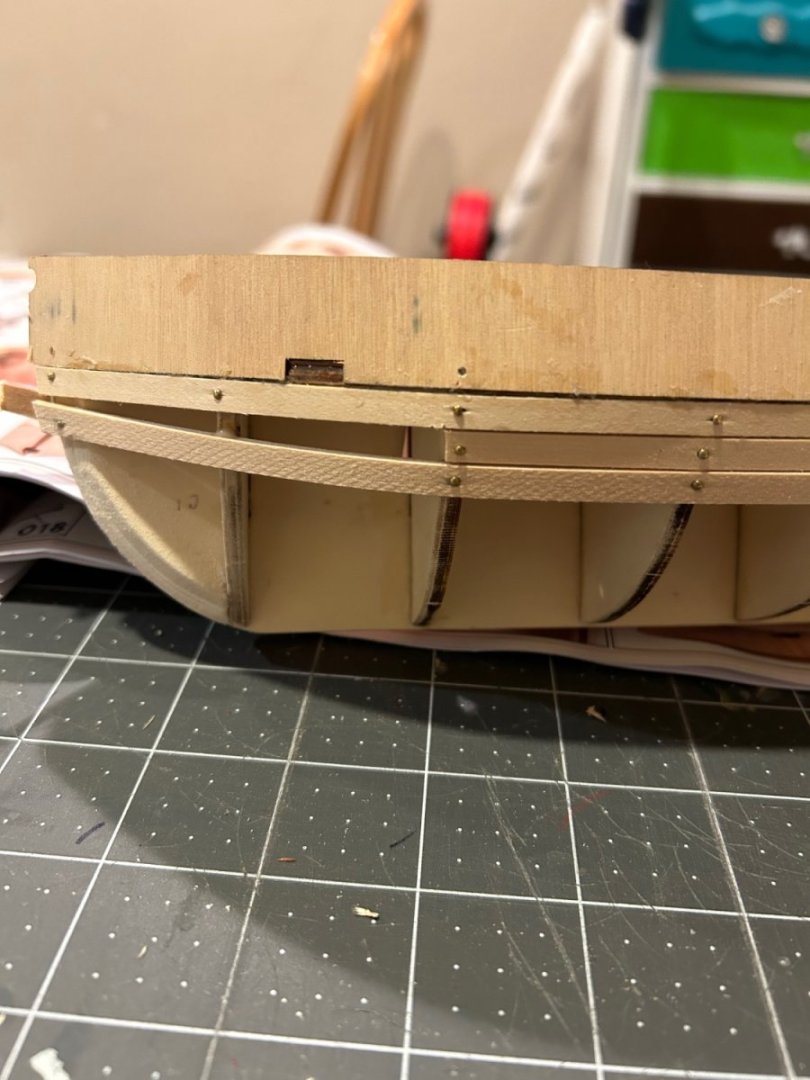
 Here we go again, beginning the next model in a journey toward learning this wonderful craft. I’m also continuing the trend of modeling something a little bit bigger with every new entry. The Albatros by OcCre. An American schooner which I do not believe is meant to directly represent any specific, actual ship. Still, a good deal larger than the smack I just finished before Christmas. The first step was to open the packaging and cut some parts free. I have to admit that I was a bit disappointed by the plywood. Maybe I was just spoiled by the previous kits but I’d gotten used to the solid wood. That didn’t stop me from plowing ahead and directly into my first challenge of the build. The central spine of the ship was curved, rather severely by my inexpert estimation. So I looked across other build logs here and found out a couple of things. This isn’t an uncommon occurrence, and the most recommended correction is to use a jig of some type to hold the spine straight. I decided to take a different approach. I glued the first few frames in as squarely as I could and then proceeded to add additional bracing between them. Here, I have the deck temporarily in place to hold things square while the glue on those braces dry. Doing it this way was a slow, meticulous process but resulted in what I think was a very satisfactory result. They may not be perfectly even, but everything was square and the deck will be flat. The braces will ultimately be hidden anyway. Next came planking of my deck. The instructions recommended drawing lines on the planks every 100 mm. I opted for every 4 inches, which allowed me to divide that 4-inch span into 4 equal parts. Doing that would allow me to get a 3-butt shift pattern of 1-4-2-3. From there I could cut my “planks” into 4-inch lengths, colour the edges with graphite to simulate tar caulking, and start planking away. A little bit of sanding flat and I got my 3 deck pieces ready to go. I’d also skipped the wall where the cabin door will eventually go, so planked that the same way. Which brings me to where I stand now. The next step in the instructions is to glue the main deck in place, but I’m considering staining it first. The big decision there will be to use the “oak” or the “pine” stain. I’m not sure which would have been the more typical wood to use, so I’ll probably end up staining a few scraps to see which I like better before committing to the actual piece. Im excited to have a ship to work on again and I’m ready to jump into this next adventure.


-
 This is my first ever build but it is something I have wanted to try for years so thought I would jump in the deep end despite reading lots of horror stories of those who have started something too complex for their first build. Anyway I started after Christmas after looking at some of the other build logs and thought I would share progress as a complete newbie.
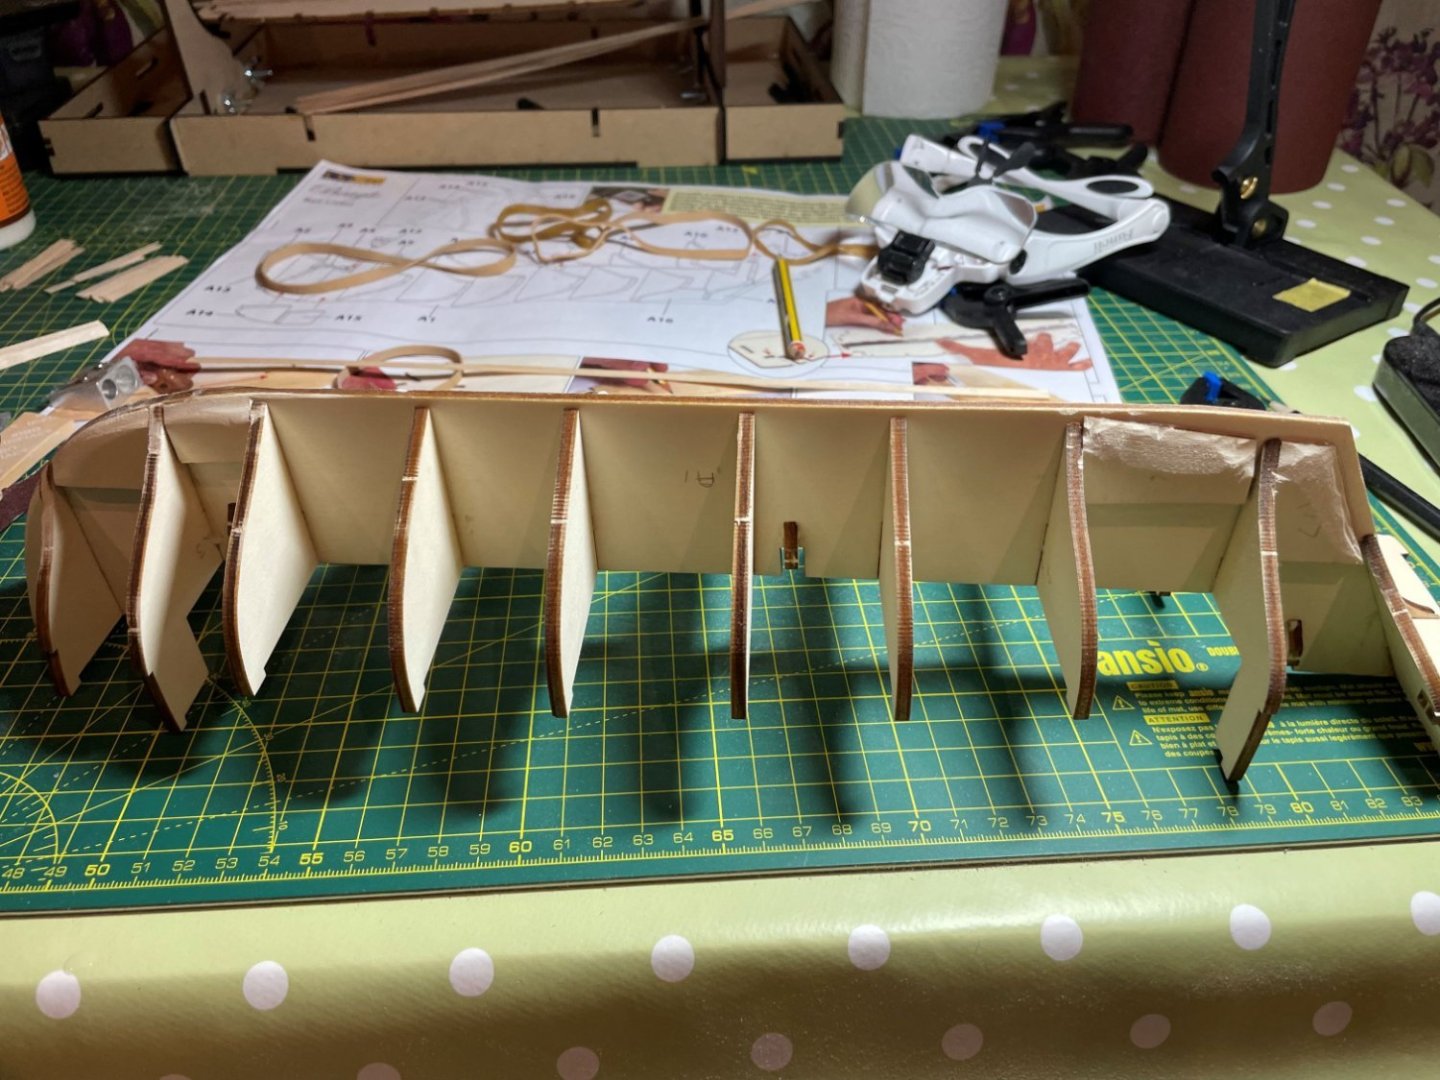
-
 Started my build in November 2023. Found this website and it has been a great help from many of your builds. And thanks for those that replied. Looking forward to this build more than ever. Will update my progress. Just starting to paint. Most of the build going forward looks quite intimidating! Sure will need help. My only comment on this model so far is the directions & plans are a real challenge.

-
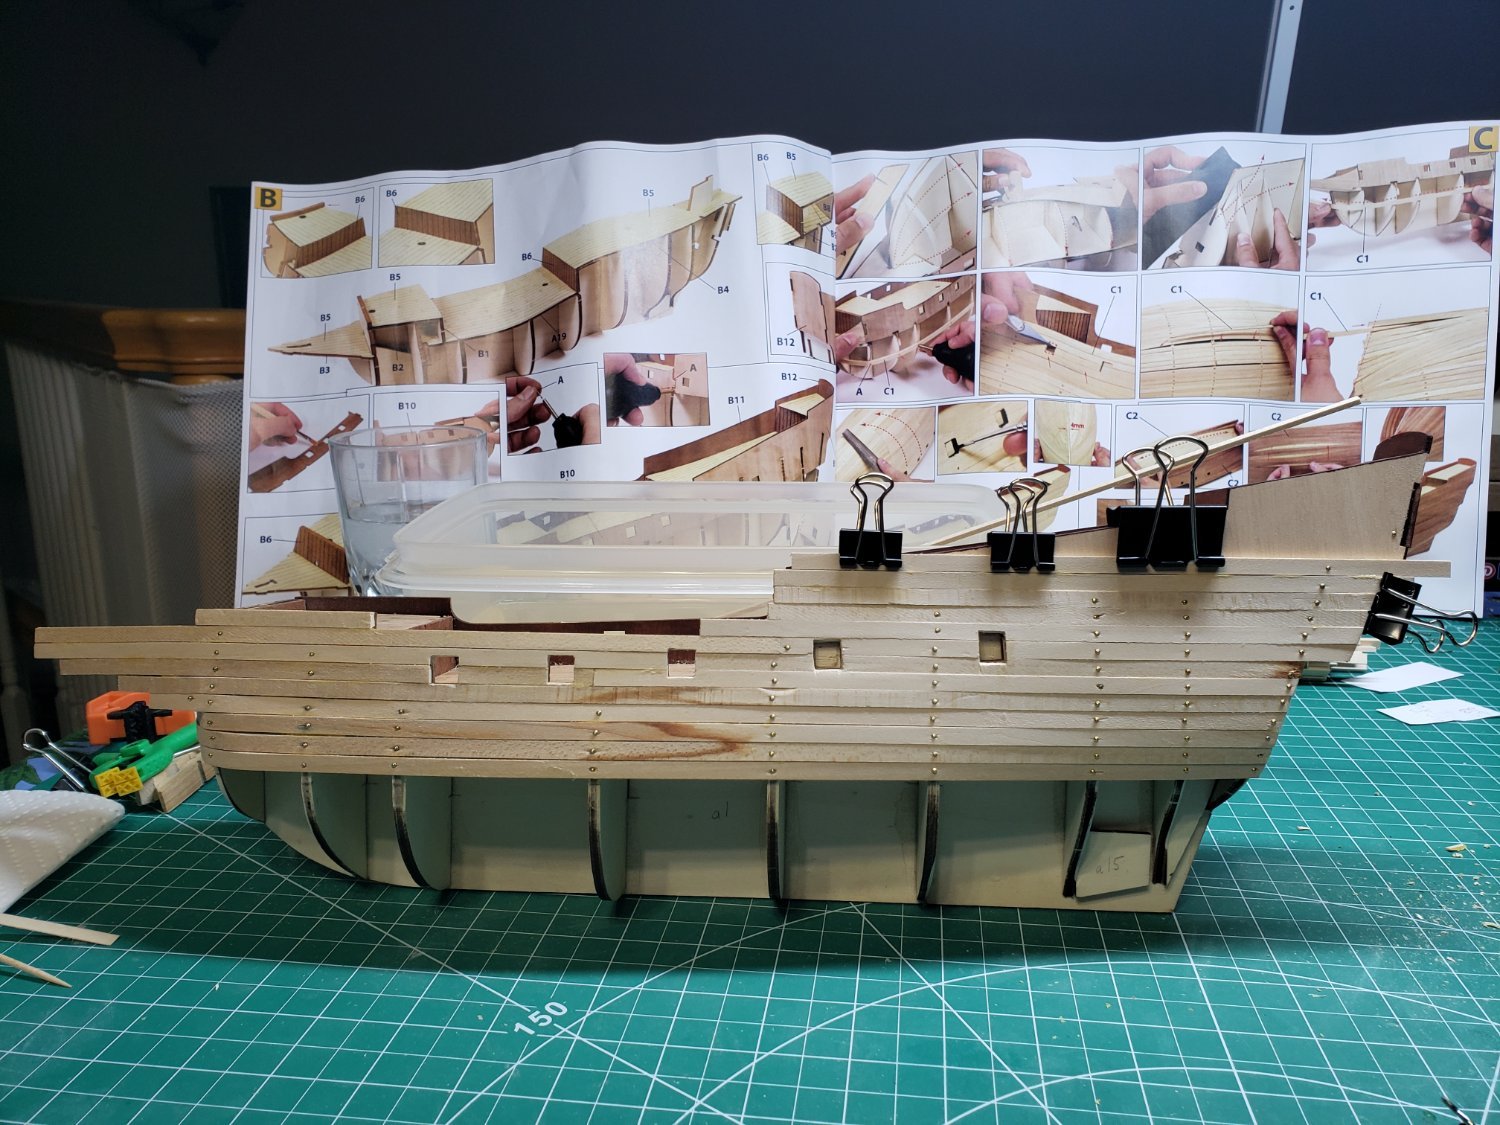
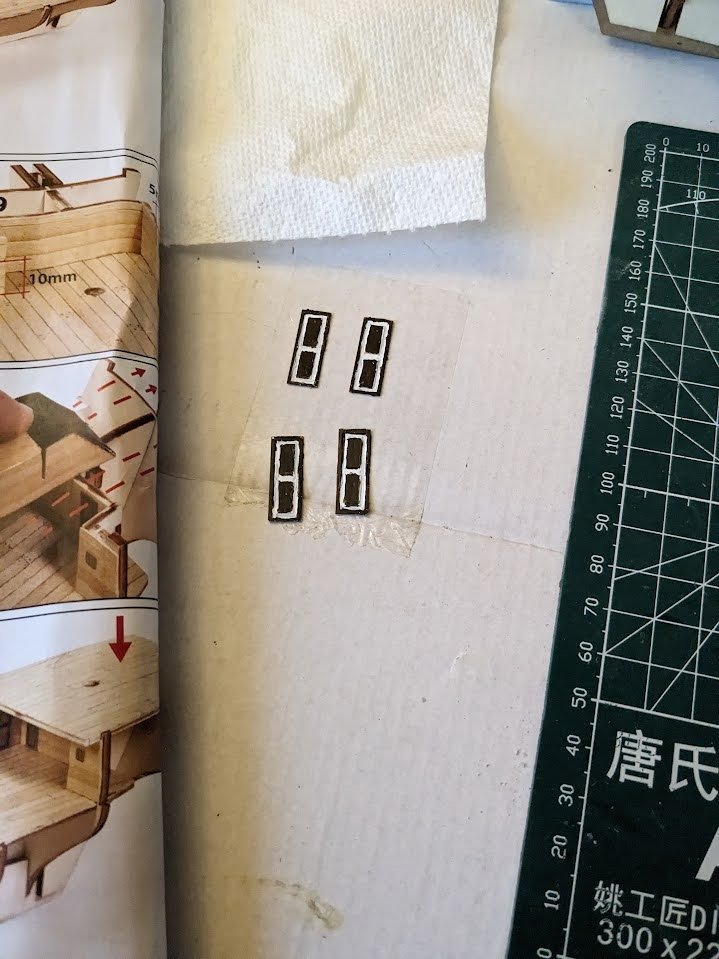
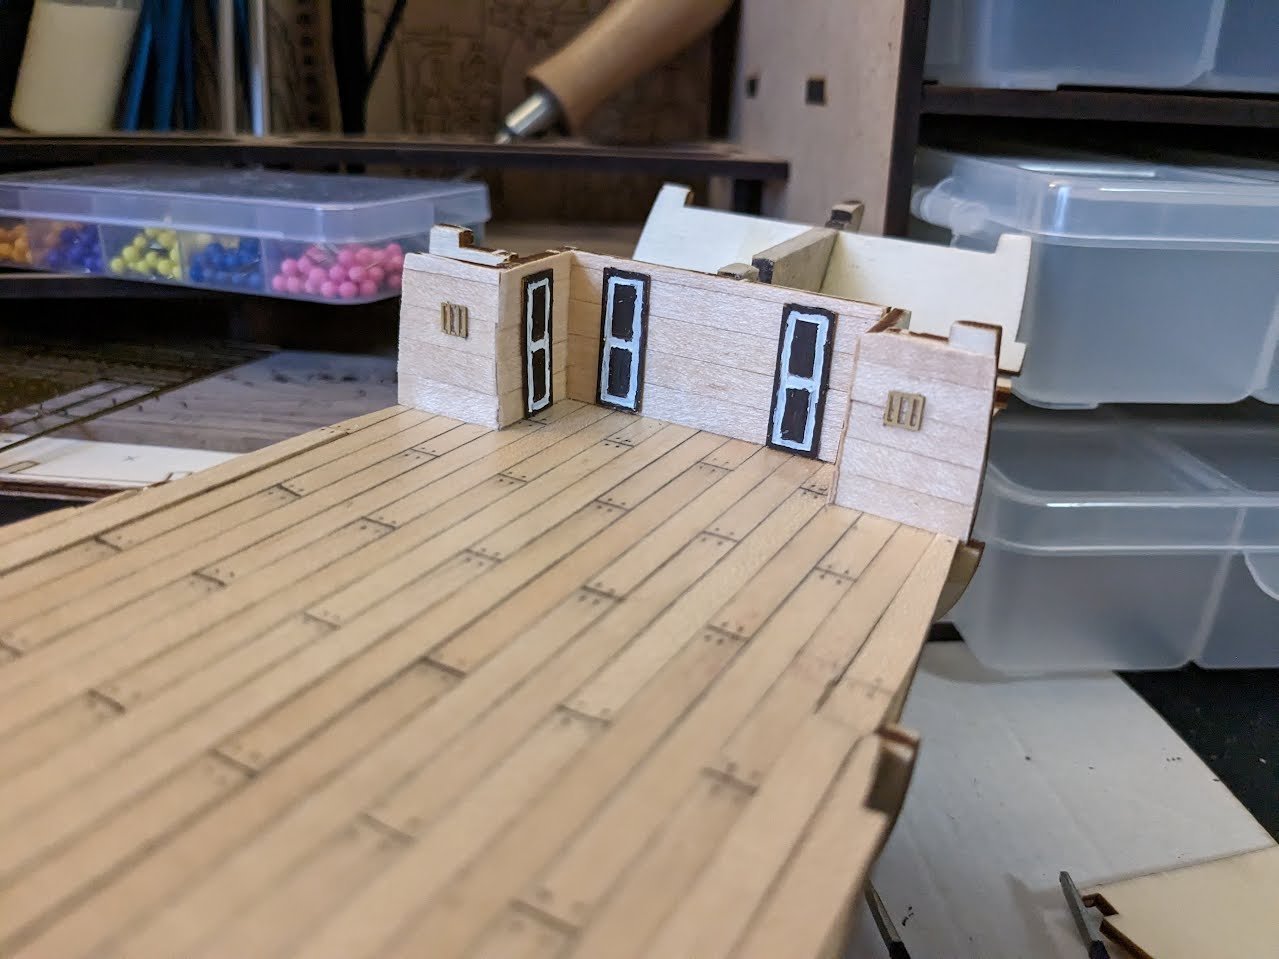
 Hello all, I got a start on my first wooden ship model over the weekend. I have had a great time so far, with a few frustrating moments created by myself, an injury at the dockyard and a realization I am terrible at small scale painting. I do have some modelling experience, I built quite a few plastic model airplanes, cars, and military equipment in my youth so I do know some techniques but it has been 20 years since my last model, and as I have found out wood is a completely different animal. I do have some questions on the paint colors, other than the picture on the box it doesn't seem like there is any guide in the instructions on what color parts should be painted. I bought a paint kit for HMS beagle from Model Expo, but I'm just not sure what colors should be used for, I could definitely use a hand explaining some of these colors I have never heard of. I'm still learning sailing/ship terminology so please be patient If I name something incorrect. Anyways here is my start on the HMS Beagle log. Here are the colors that came in my kit, any help on these would greatly be appreciated. Here is the assembly of the skeleton of the ship, nothing much to look at yet just lots of glue and making sure pieces are squared away. Once I had the frame glued together my next step was to start planking the deck. I used a pencil to line the boards, and then lined them at 60mm and added nails. I know the pencil caulking and nails are controversial, but I wanted to try the process out for myself and see how it looked. Veterans of this kit will notice a mistake I made at this point, I still wouldn't notice it for another night. The next day I started to assemble to fore and aft interior ship walls and started to add planks to the walls. After dinner I sat down and started to look over the instructions, I then noticed my deck looked "off" compared to the instructions, and it hit me that I got a little carried away trimming the deck cutouts. Maybe I shouldn't watch American Football Playoffs while I work on the model...... This is where the dock workers should have stopped for the night and started fresh the next morning. A little frustrated at my mistake I decided to try and see if I could pull up a few of the planks and replace them. The only tool I could find to fit the job of prying the piece up was a razor blade, I got one piece up without too much trouble and then started on the second piece. This is when the razor blade slipped out from the wood and straight into my right hand behind my thumb, it was a very deep cut. The dock medic quickly came over and we cleaned the wound and closed it up with some super glue, no workers comp granted for this dock worker. Getting back to the model I decided just adding planks on top of the old planks and sanding them down a bit was the safest solution. The spouse says you can hardly notice the mistake, but as most model builders know your own mistakes are the most obvious. I also finished planking the fore and aft walls, you can also see a closer view of my correction, not super noticeable from afar, but if you inspect closely you can see the extra wood. Next up was the doors. I wasn't a fan of the solid laser cut brass doors and couldn't find much info on what color the doors should be so I settled on using the American Walnut paint (not stain) that came with the kit and giving it a white outline to kind of match the ships color. I have not painted with material this small in a long time, and I understand why so many of you have magnifying glasses now. My doors look terrible, but I came to the conclusion that it was the best I personally could do with what I have, and to not spend too much time getting hung up on them. I'm still not satisfied and may come back to them, but I'm really not sure I will be able to do much better. That's all I have for now. If you read through all of that, I appreciate your time. I am new to the hobby so any advice, tips, hints are greatly appreciated. Being a new student is one of the most fun parts of a new hobby. My main lesson I've learned so far is you really need to pay attention to the instructions on these kits, and I am starting to follow other Beagle build logs to help along the way.
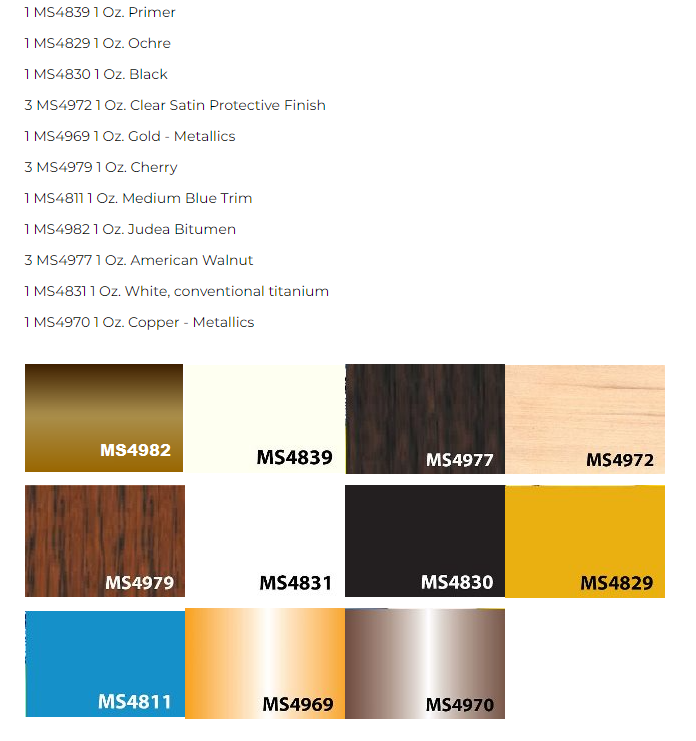


-
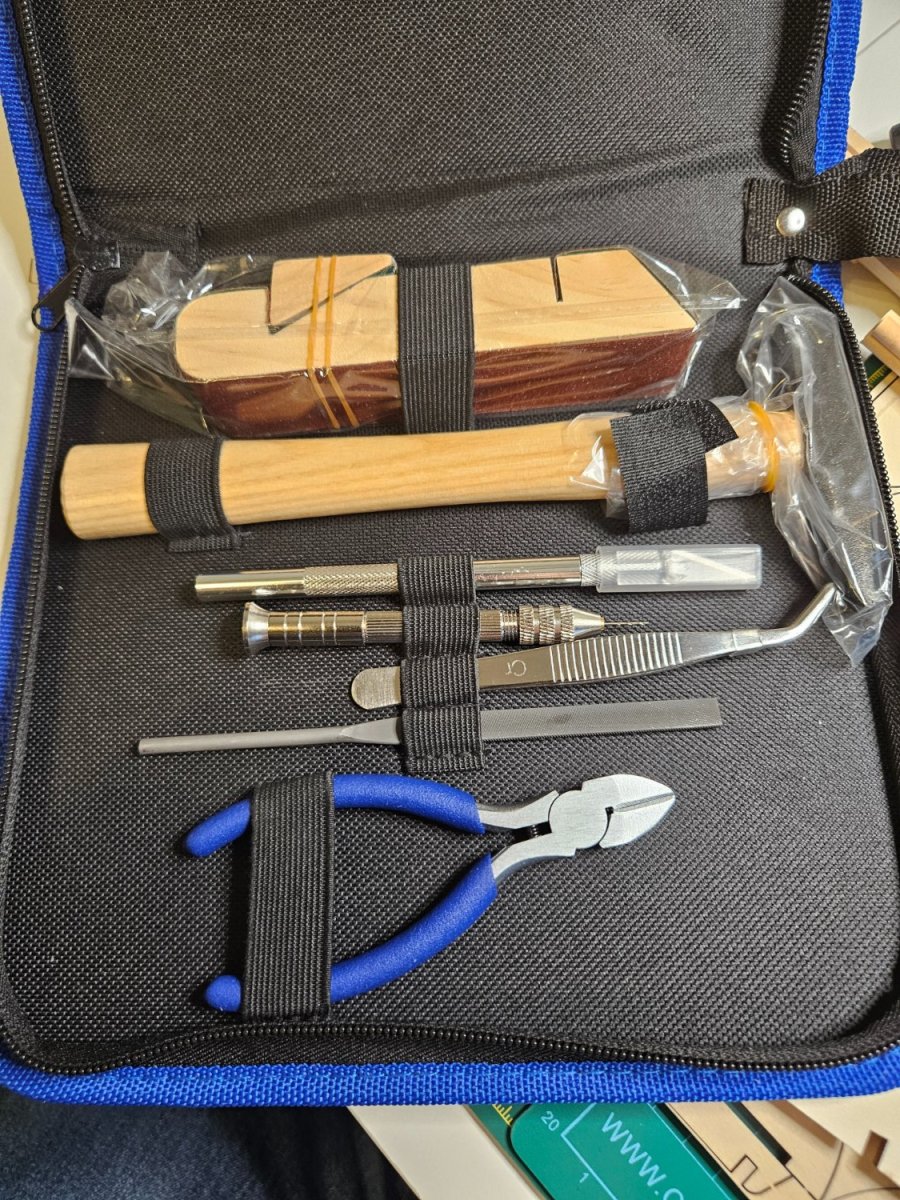
 Hi All, So my Polaris has arrived, along with the Occre Work Stand, starter kit tool pack and paints recommended by Cornwall Model Boats, who have been very helpful, which were quite a bit cheaper than the Occre paint set. I've also invested (a term I use often when explaining all the parcels arriving to my very understanding and supportive Wife) in some files, a pin pusher, sanding sticks, glues and filler. I suppose there will be other purchases along the way. It's coming with me to Brussels and I'll start her once I've finished my Airfix Titanic. I've been reading through Ilia's build log, what has completed a fantastic Polaris and I'm sure I'll be returning a lot for inspiration and tips!
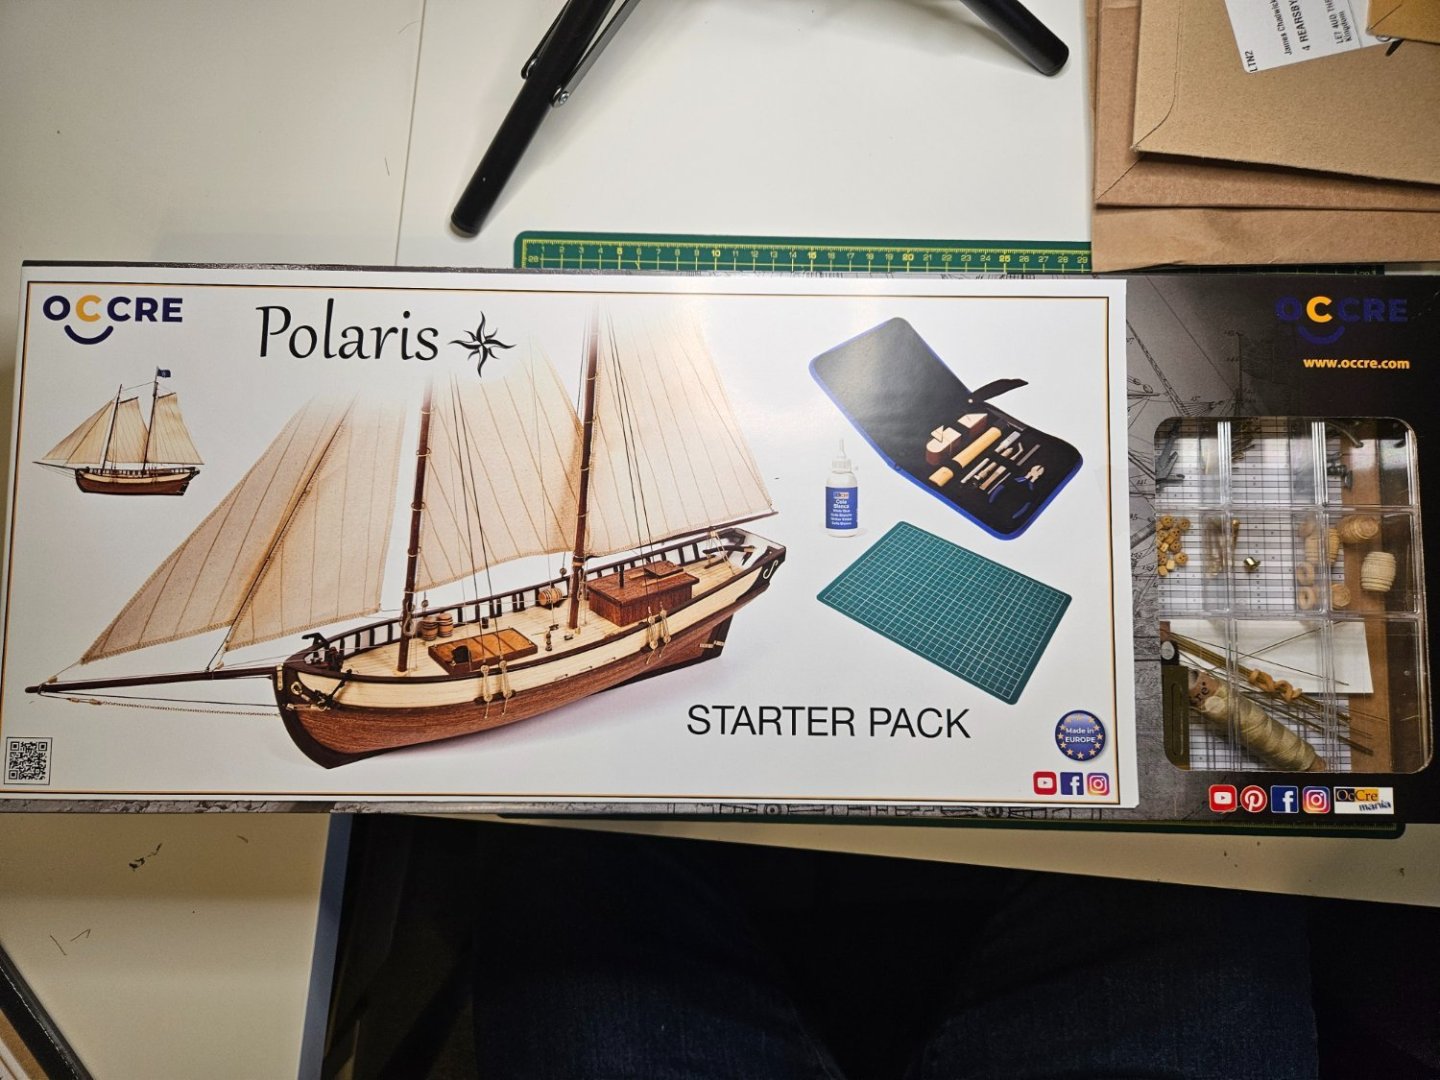


- 10 replies
-
- 4
-

-
- OcCre
- First Build
- (and 1 more)
-
 Thought I’d start a build log (hopefully right location!). Im a total newbie and already getting lots of great help so thanks to you all. I’ve been fascinated by Shackleton and his crew my whole life - my father was a BAS member and has the honour of painting Shackleton grave monument on South Georgia so it’s in the blood! I’ve had a lot of fun doing the bulkheads and the deck so far. Mucked up a small bit of decking I lovingly cut off only to discover it had to remain. I think it will get covered but I’ve done an ok job of patching it… I think anyway!

-
 Hello, everybody. I'm a first time ship builder starting out with the Buccaneer by Occre. So far, I'm really enjoying myself but have quickly come face to face with my lack of knowledge and experience about anything and everything relating to ships. The first planking is kicking my butt but I'm trying my hardest and not giving up. I do have a bit of experience building dollhouses and surprisingly that's been of great help to me so far. But, we'll see. I've only taken a few pics so far but I'll share more as I move forward. If any of you spot obvious mistakes that I'm making or have any suggestions how I might do a better job, I would love to hear from you. Thanks for reading and thanks for having me!
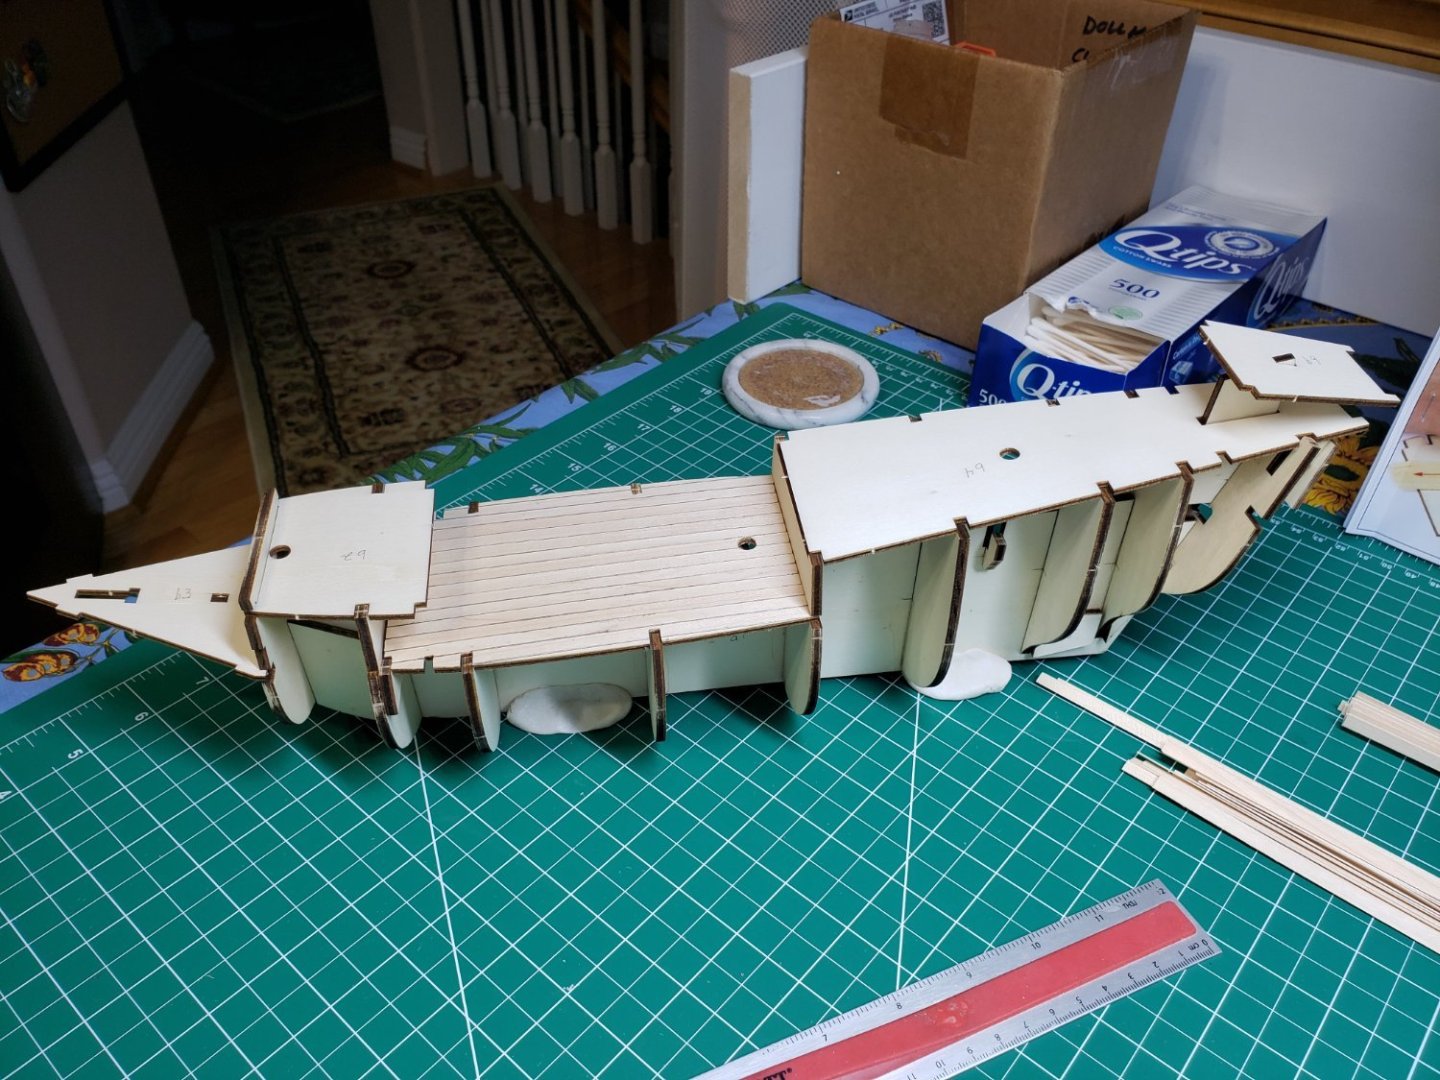

-
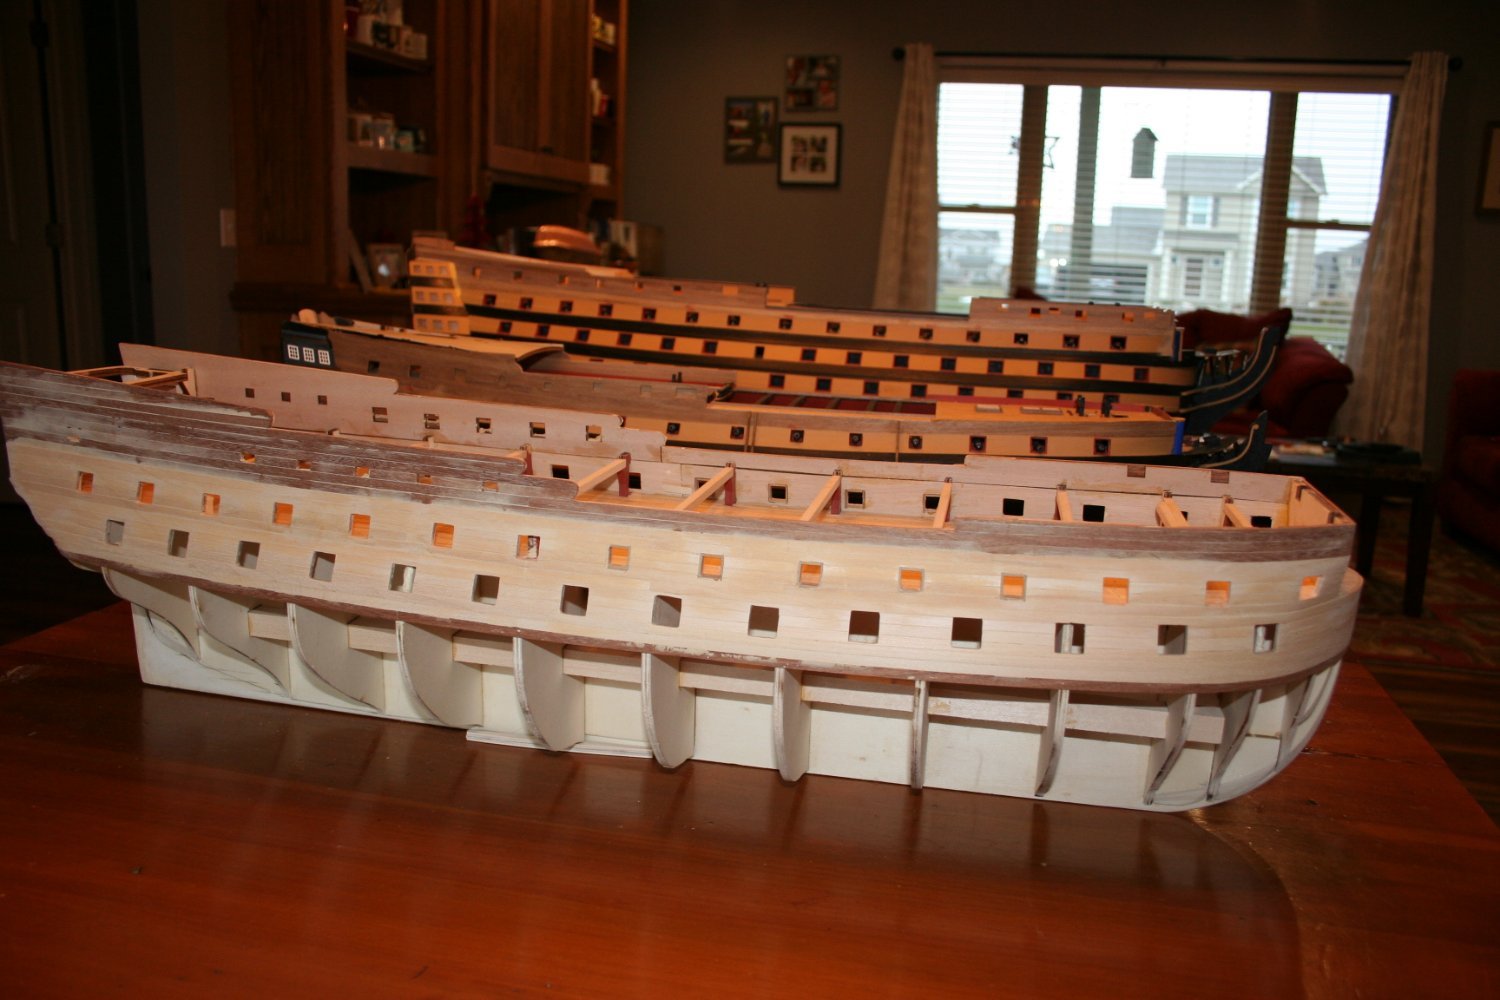
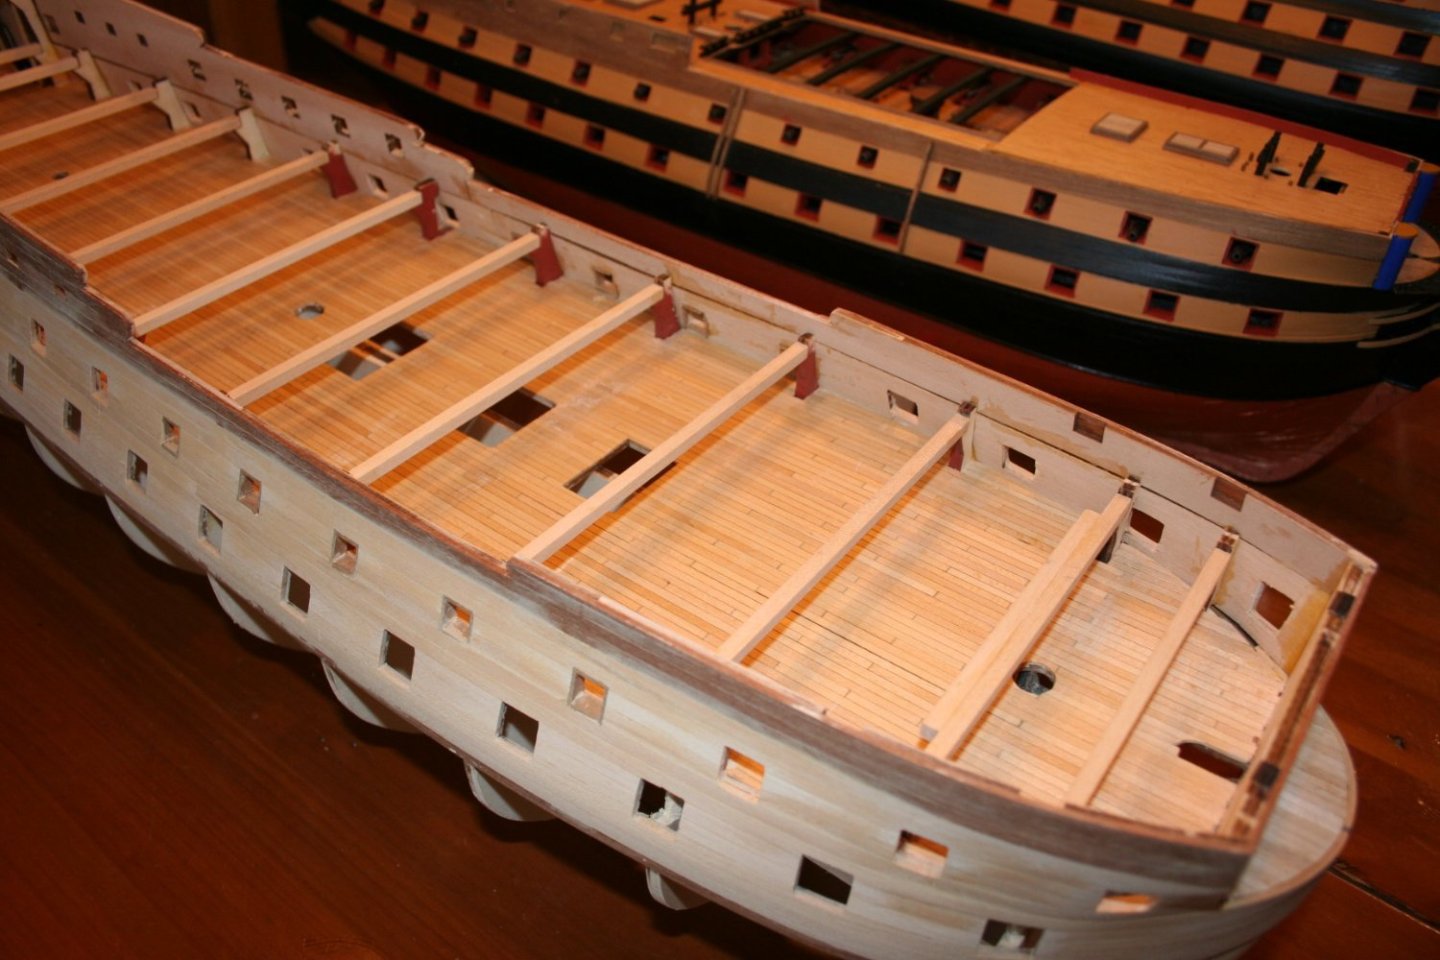
 Montanes pictured next to her old adversary HMS Vanguard. I did not follow the instructions religiously because I wanted to plank the sides and clear out the gunports while I had clear access behind them. I am slowly recovering from shooting myself in the foot. I thought that it would be cool to emphasize the planking ('lining strakes' according to OcCre) by rounding the edges slightly. In the event it did not look good and so I have applied filler. This has now been sanded with 60 grit and the sides are smooth to the touch. Probably a little more sanding is required and then the wales ('rubbing strakes' according to OcCre) will be fitted, followed by the gunport linings - these have been made up separately and are ready to be fitted. The deck planks were laid according to the instructions and, when each plank was laid, I ran a pencil around the edges. This resulted in 'caulking' that is much finer than I had achieved on other ships, where the edges of the planking had been blackened with a Sharpie before being fixed down.
-
 Hello All; I have just started this project and thought I'd share a few pictures and notes as I go along and requests for advice. As there are several excellent build logs already for this kit (see YouTube for a couple - Timelapse (model ships) and a series by John Alprantis from 3 years ago) so I don't believe another detailed step by step will add value to what is already out there. This is my second OcCre kit, I built the Candelaria last year to see if I liked their models and found that it was designed in a very similar manner to recent Latina kits. What I preferred with OcCre was that in addition to a printed set of pictures (AL wants you to download PDF from their website) they also provide a decent package of drawings. Neither company provides great written instructions (but other than the one Victory (Amati- Chris Watton) model I did, really who does). First off, while unpacking I discovered that one of the wooden part sheets had split and one part was broken; I reached out to OcCre about it and got immediate response and instructions on how to get a replacement. Below is my first couple of pictures (and my first oops) - a new record as I am about 3 days in.
 -
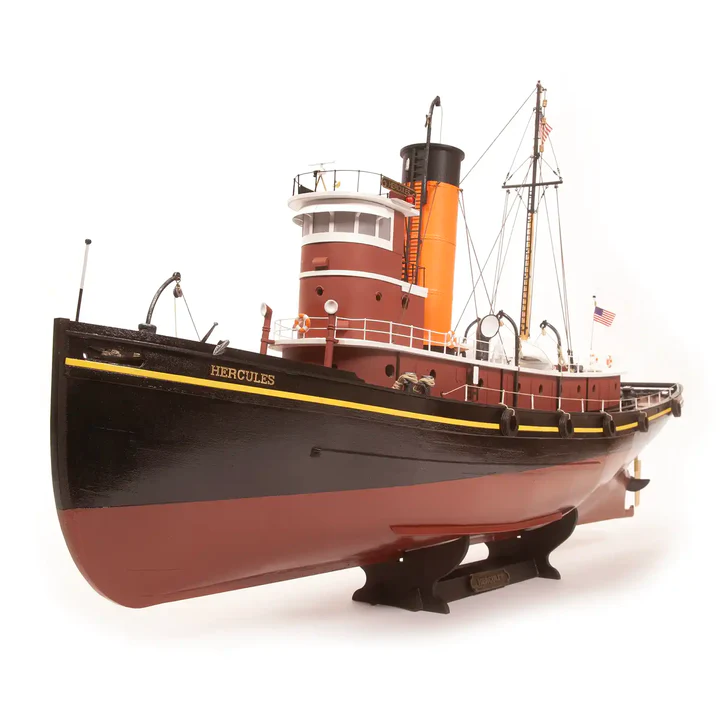
1/50 Hercules Tug boat by Occre product code 61002 Cornwall Model Boats retail at £247 from the Occre site Hercules Tugboat | Wooden Ship Model - OcCre Model Ship Hercules Tugboat Includes nameplate. Includes the basic wooden model display. Static model. With the possibility of making it RC -> it is shown in the instructions how to make it navigable. Hercules Tugboat model features Possibility of illuminating with the Led Light Kit Ref. 55010. Deck openings to access the RC and motorization mechanisms. Ultra-realistic casting. Step-by-step video tutorials. Instructions in 5 languages. HD photos step by step. Parts list with measurements and materials. IP sheet to identify the parts Scale plans. High-quality model. Lifetime warranty. Contains the following technical elements for Radio Control: Propeller / Prop shaft / Prop shaft horn with self-lubricating bearings / RC rudder blade with hull and servo anchoring mechanisms. Curiosities of the Hercules tug boat The Hercules is a steam tug built in 1907 for the San Francisco Shipowners and Merchants Tug Company, as part of its Red Stack Fleet. During the first part of her life, Hercules was an ocean tugboat. Due to the prevailing northwesterly winds, sailing ships often employed the Hercules on voyages north up the coast from San Francisco. On other occasions, the Hercules was used to tow barges to other West Coast ports and to Hawaii, and to transport equipment for the construction of the Panama Canal. In 1947, the Hercules and the tug Monarch were tasked with towing the hull of the battleship Oklahoma to San Francisco Bay for scrapping. However, 500 miles from Hawaii, she was hit by a powerful storm and the Oklahoma began to fill with water and sink. The Hercules was unable to break free until the last moment, narrowly avoiding being dragged to the bottom of the sea by the Oklahoma. In 1986 she was designated a National Historic Monument. She is now one of the San Francisco Maritime National Historical Park exhibits and is moored at the Hyde Street Pier. Technical sheet of the model Hercules Tugboat Scale: 1/50 Width: 163mm Height: 420mm Length: 915mm
- 8 replies
-
- 2
-
-
- kit review
- 1/50
- (and 4 more)
-
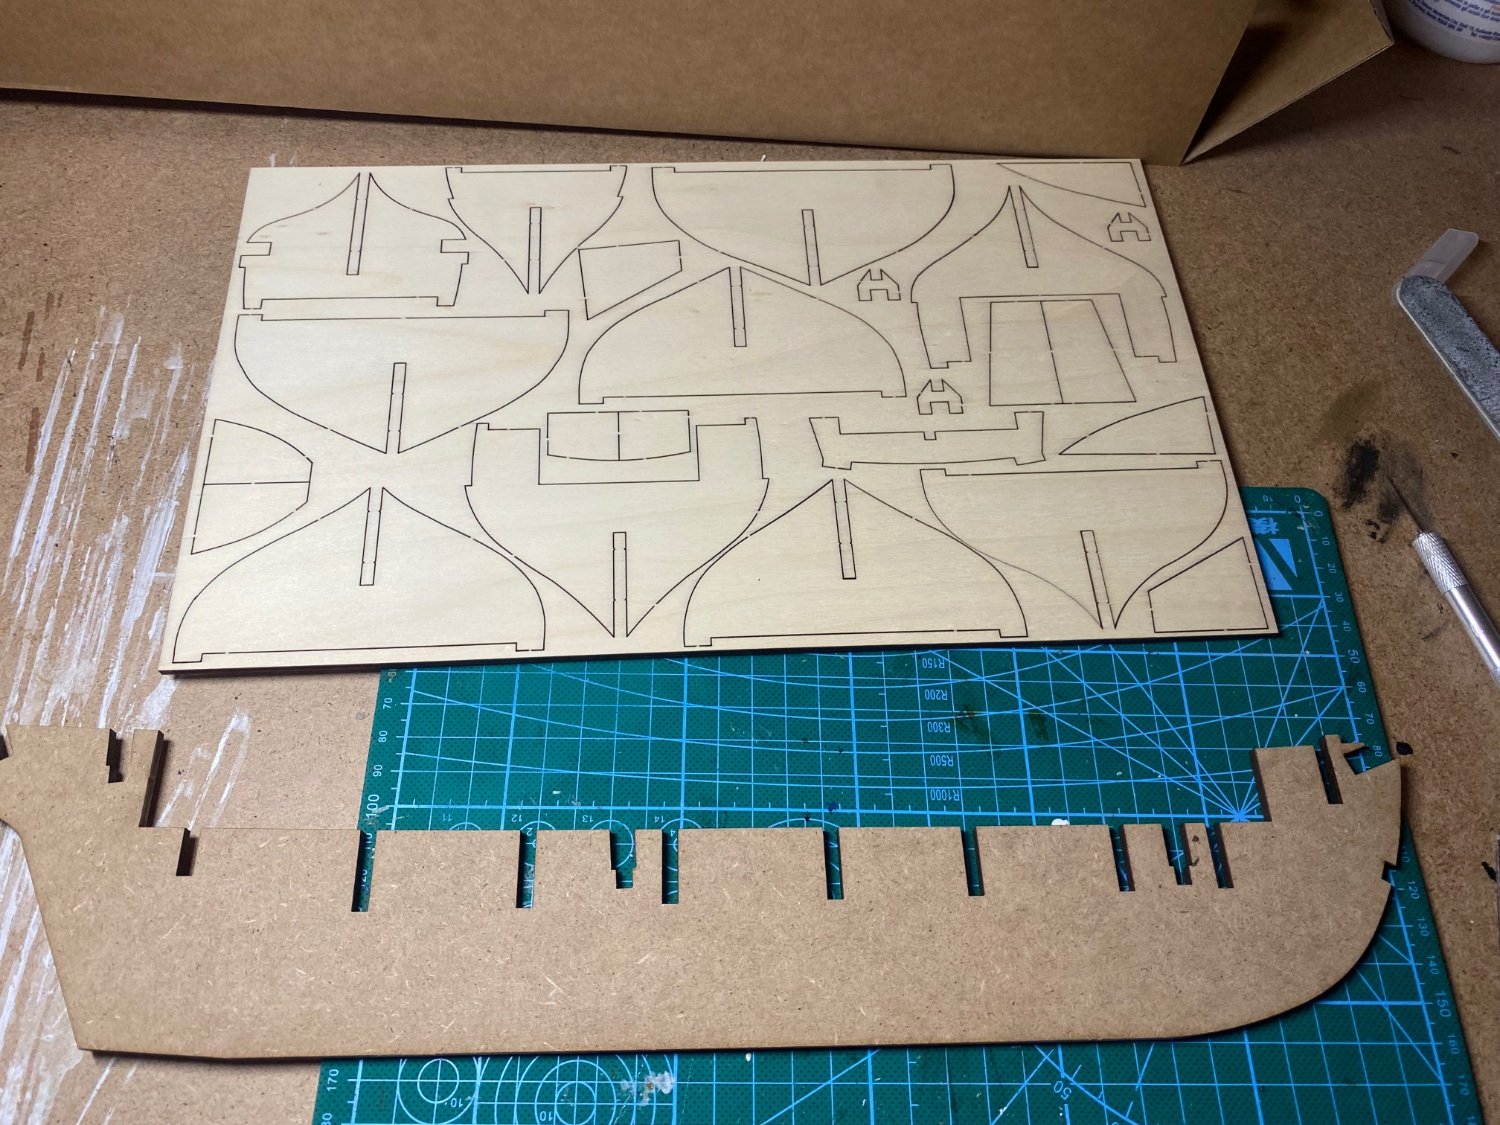
 After finishing my OcCre Polaris I wanted to go more advanced and chose the Beagle for my next model. I really like the look and also the historical background of Charles Darwin. There she is: Kiel is perfectly straight: doing the skelleton applied the deck before planking. I can fix it with some nails this way. cabin walls added, thats it for the start:


-
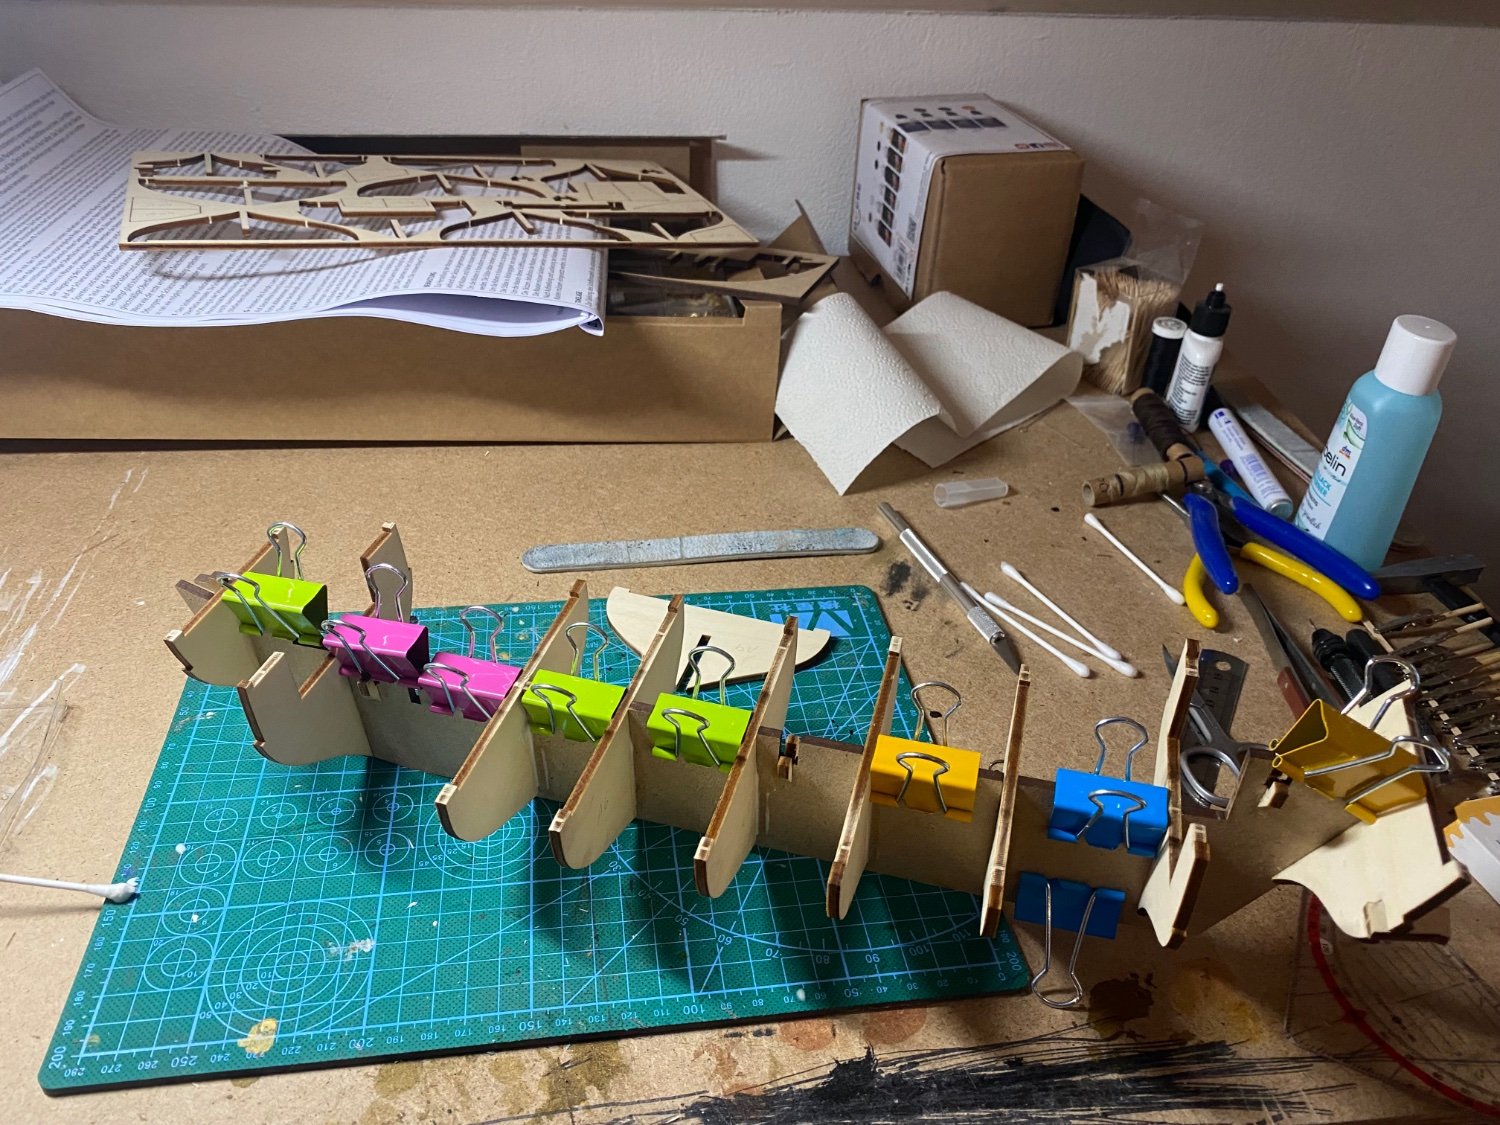
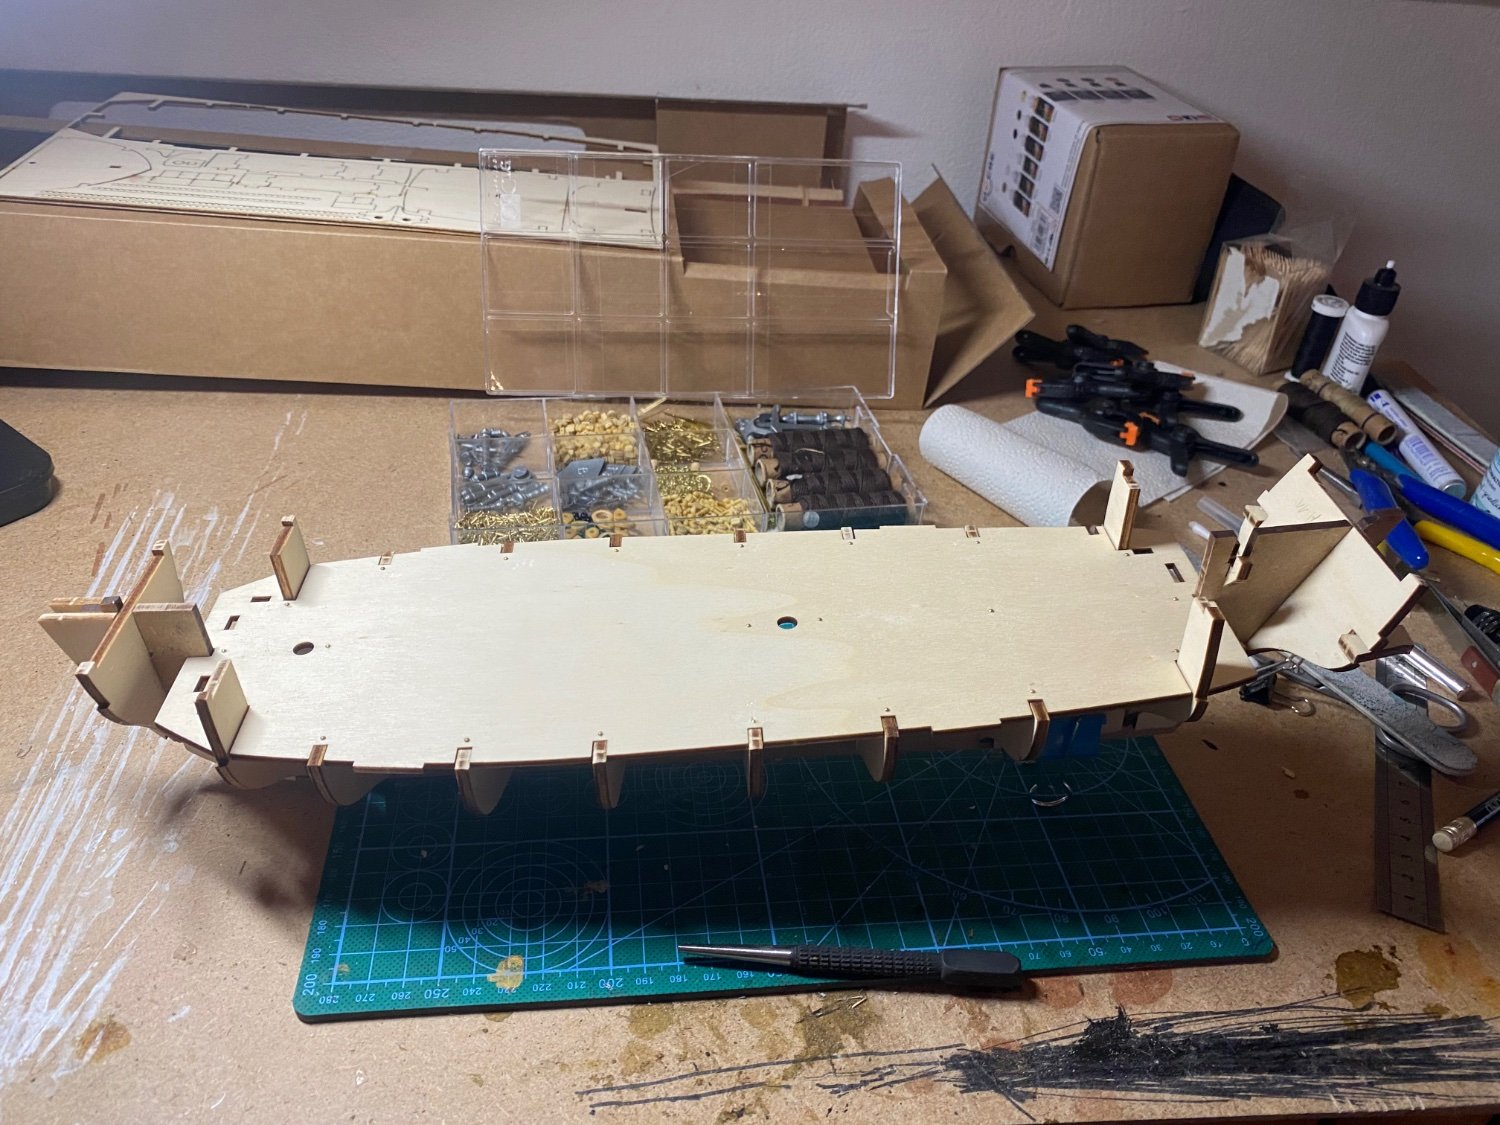
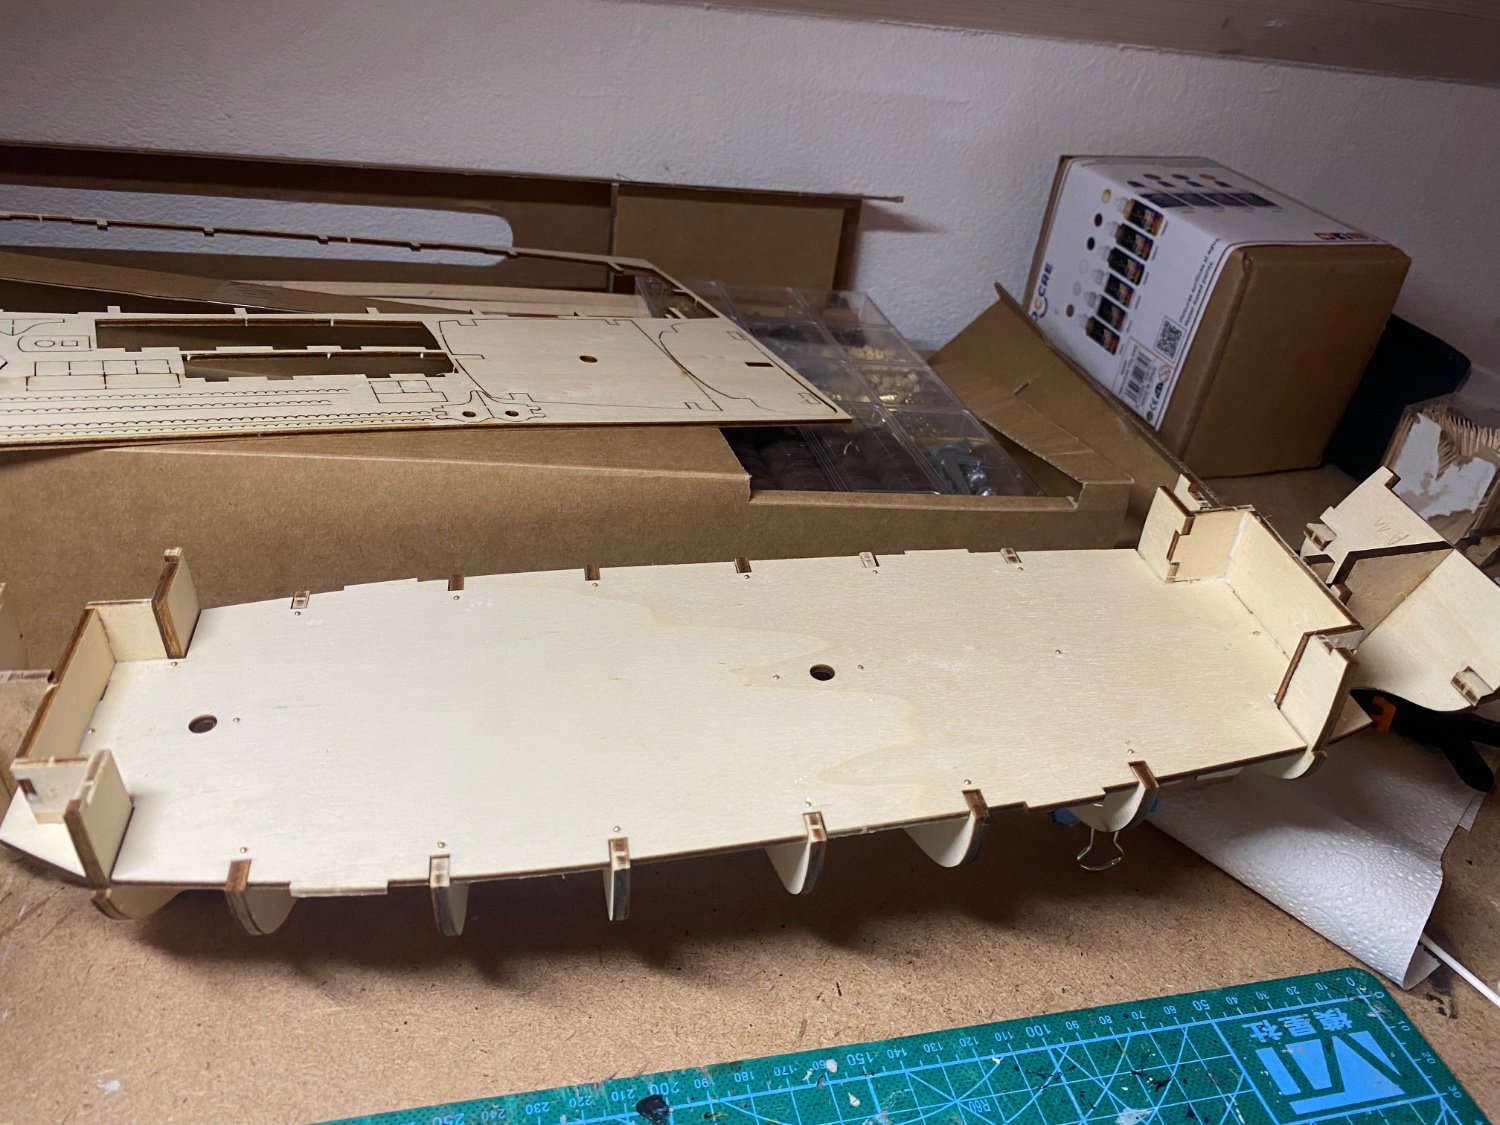
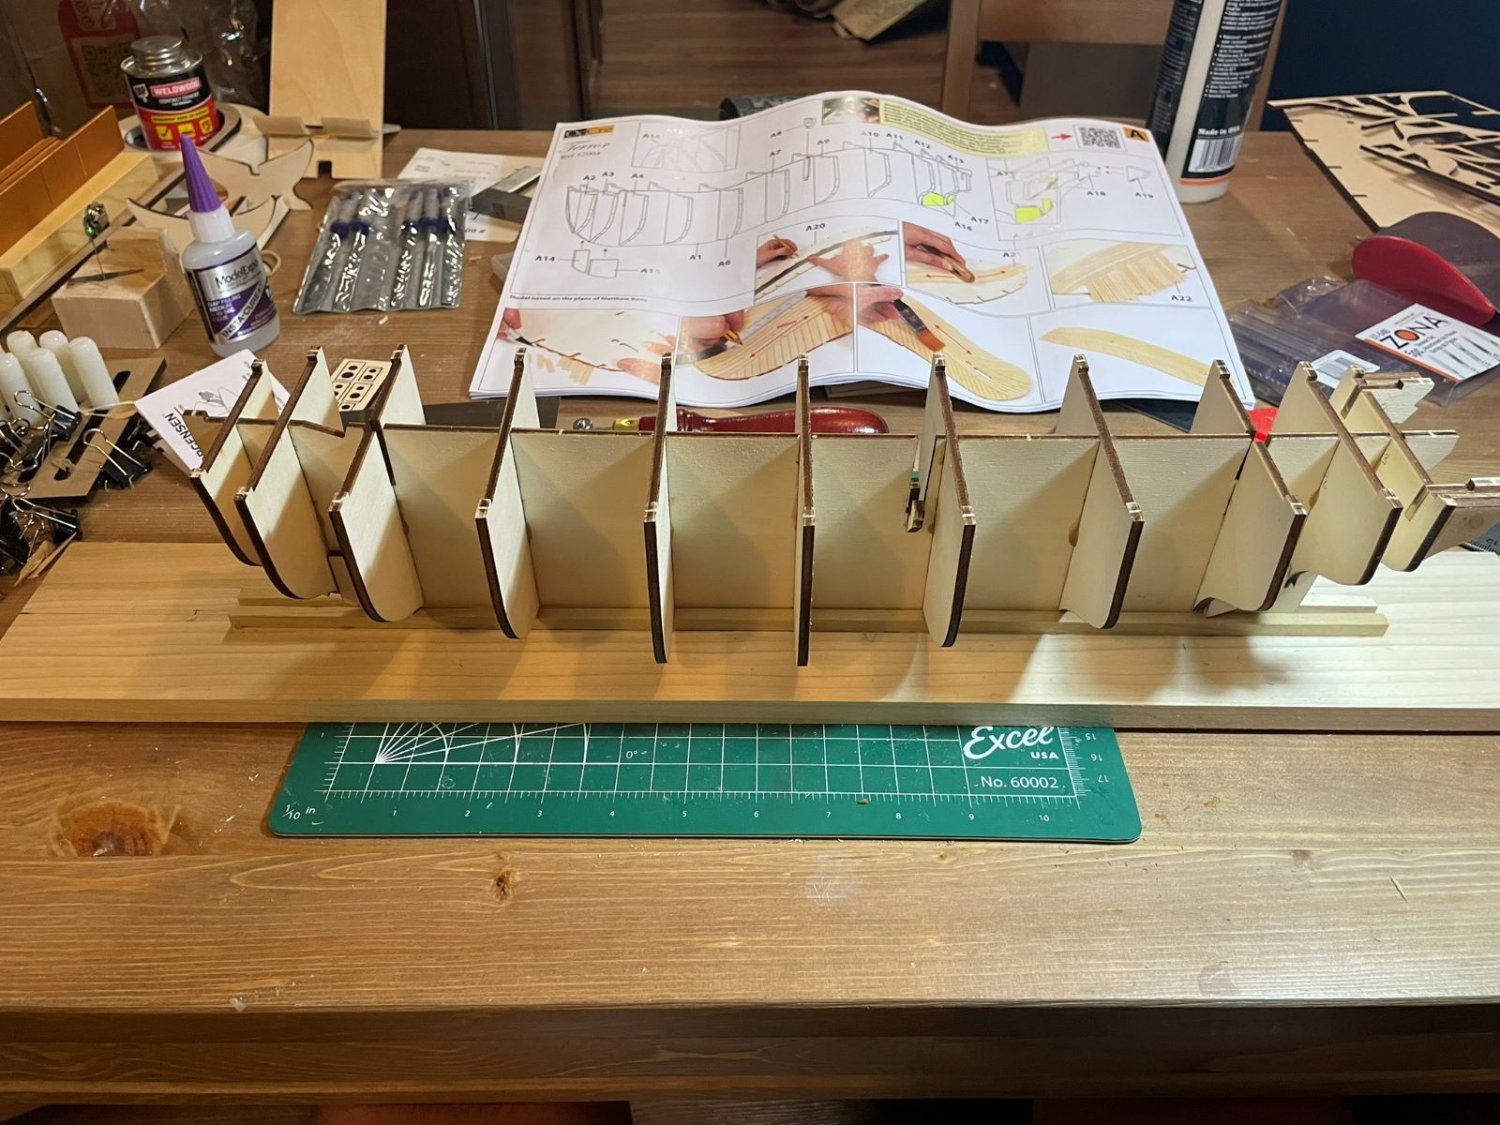
 Hello to all! The construction of the HMS Terror - Northwest Passage edition will be my first ever build log and model. My goal with this model is to somewhat accurately represent the ship as she was for her final expedition. I have been reading a lot of the previous build logs along with the now famous Blog and book by Mr. Betts for tips and ideas on the changes needed to accomplish this goal. I do want to point out that my intention is not to copy what others have done, but to research each aspect of the construction for accuracy as I follow the kit assembly instructions. Unfortunately I had a momentary lapse of reason and began installation of the deck planks prior to reviewing the available information only to realize that Terror had a total of 11 central strakes and not the 6 as depicted on the model. Since the strakes had already dried and I decided to proceed on with the understanding that I would be more diligent moving forward. So with out further ado here is my progress thus far.

-
After finishing the OcCre Bounty launch my next project already started: The OcCre 1:50 Polaris. Little bit bigger than the Bounty launch but same amount of sails. With this Model I will try a weathered look, let‘s see how this will work out. False kiel was perfectly straight out of the box this time. Scelleton is already done and the false deck is mounted with glue and the help of some nails. It is a little bit bended so the nails were useful and I would recommend everyone to apply the false deck first before planking it. In the instructions planking comes first. If you do so, you cant use nails to fix it to the scelleton. marked my planking pattern on the deck and started with 6 cm pieces planking. Also here I will do it different than the instructions. They use whole planks but I will use smaller pieces like it would be in reality. also glued the provided stand together and did the first two layers of Black colour. One more and clear coat will follow I guess.


-
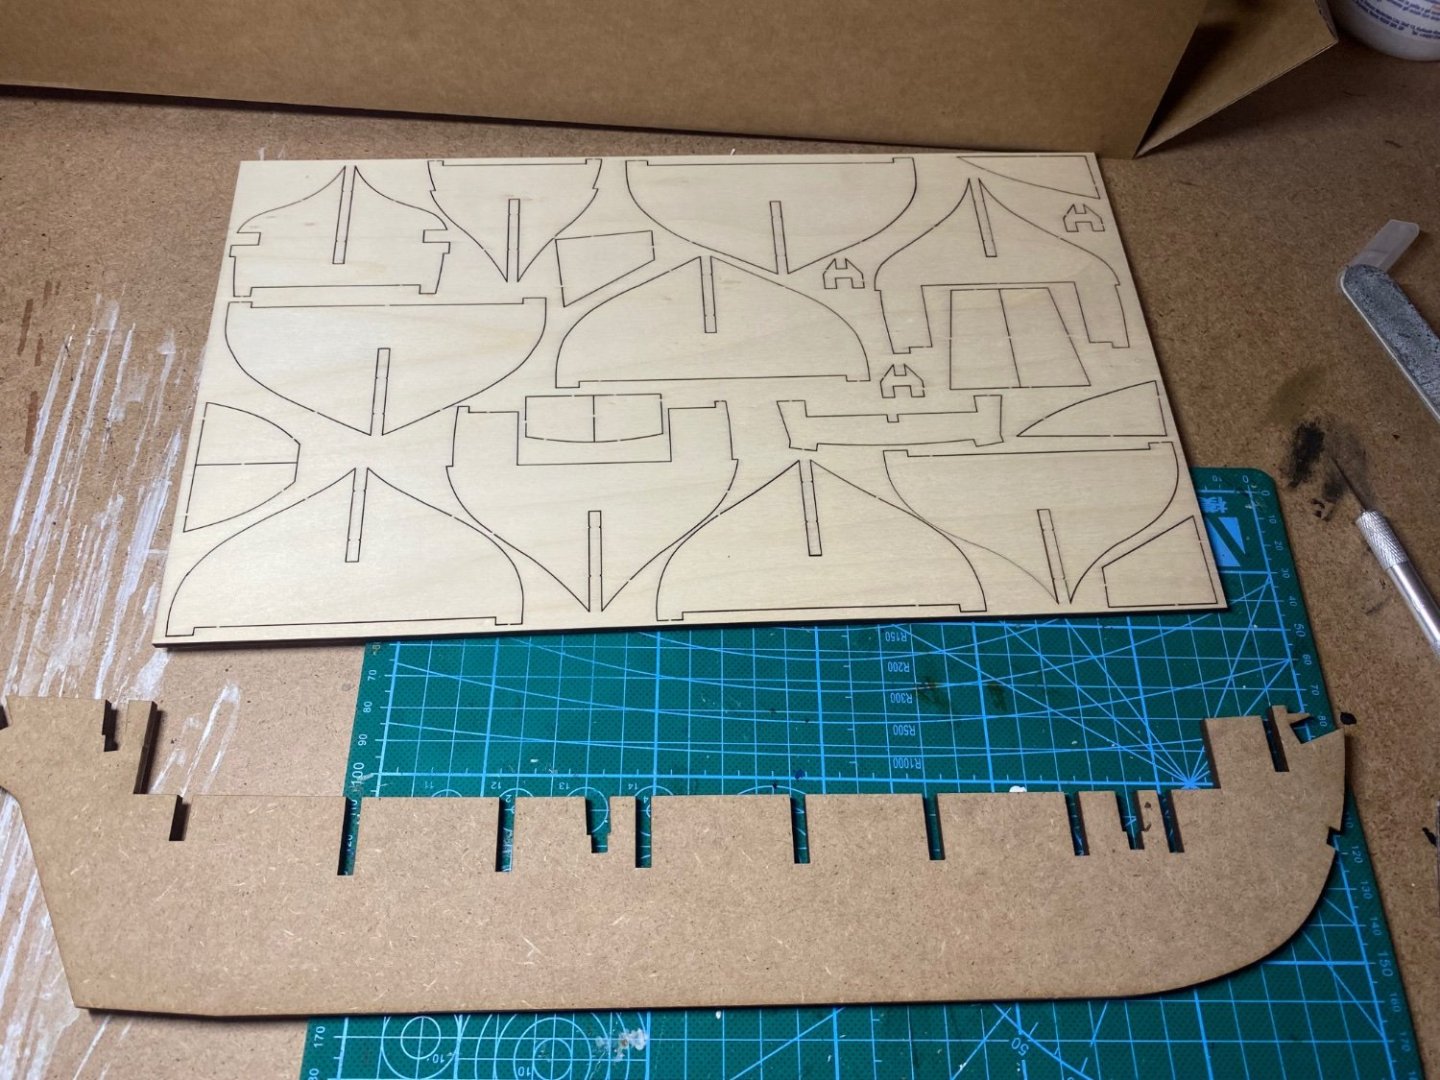
 Just started today with my river boat. So far so good for never building anything like this before. I've never assembled a laser cut kit before and everything seems to go together the way it's suppose to (so far). I do plan on lighting it and have drilled holes in places that I may need wiring. but for now this is what it looks like. Not much but it's a start.
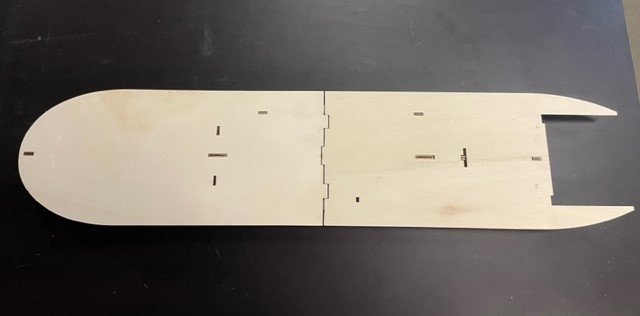
-
After the Endeavour J-Class my next little project will be the Occre Bounty boat 1:24. Not that big and beutiful like the Endeavour but the history behind it is fascinating… So let‘s start: false kiel is set. And damn it’s not plane, slight left bend, saw this after assembling. Lets hope this will not be a big problem later on. Really like the ocre colours to stain the wood! They look great. thats it for the beginning. Some kiel parts and stabilizers next and then the happy planking part begins…I find the Occre planks much thicker than the amati ones, will probably be harder to work with.


- 20 replies
-
- 3
-
-
- OcCre
- bounty launch
- (and 1 more)


.JPG.8c9d05c627edf60ad2b00c8ac5b9c6a3.JPG)
.JPG.db22e6df8fcacd851a340351145b1a3b.JPG)