


Von_Kossa
-
Posts
181 -
Joined
-
Last visited
Content Type
Profiles
Forums
Gallery
Events
Posts posted by Von_Kossa
-
-
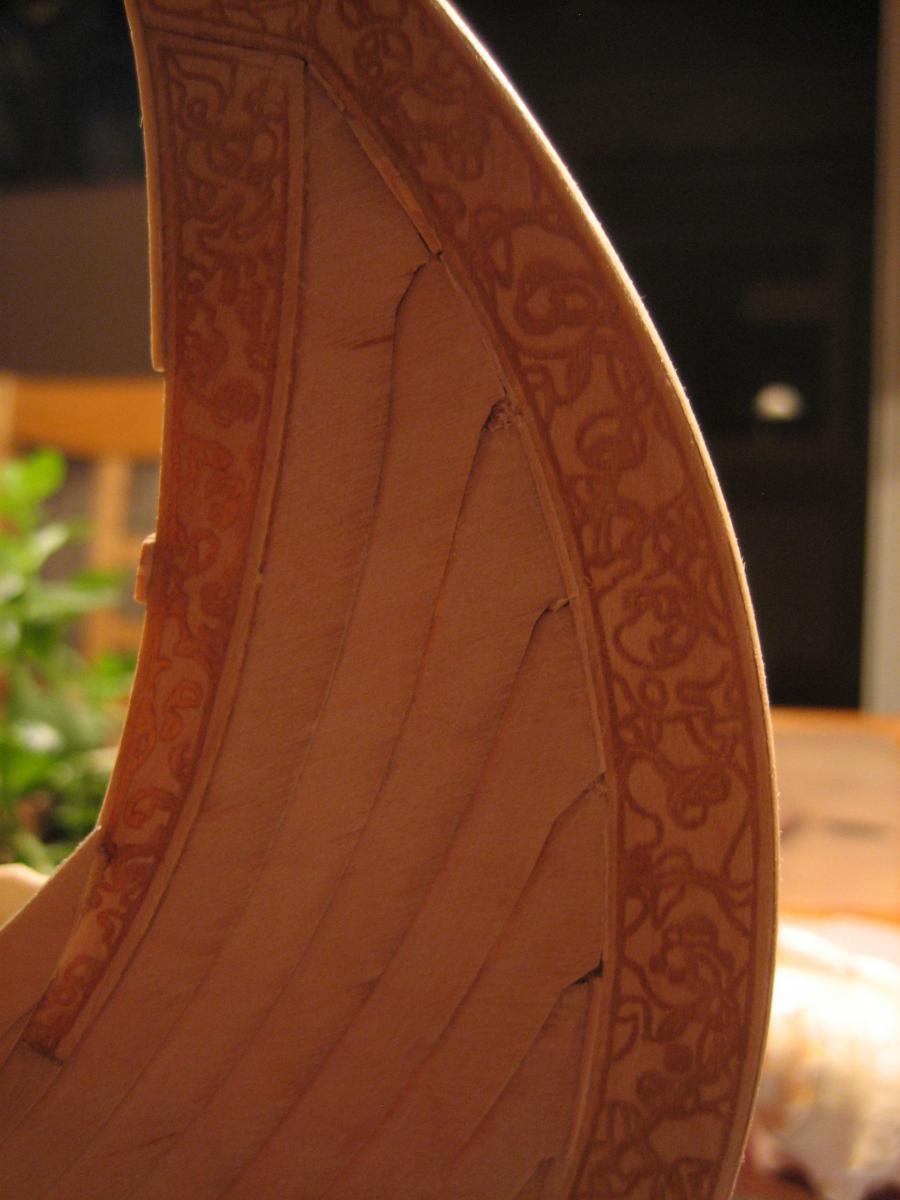
You mean the bump in the middle of the ship built into the mast construction?Is the deck really that wavy?
David B
-
I will now focus on attaching the nails and put some thought into what can be done with the bad areas after the staining, this troubles me a lot.
-
beautiful Build,
very nice work on planking and oars as well as the Fitting out Details..
Nils
Thank you Nils, but not nearly as beautiful as your work.
I am just a happy amateur working on the world record in longest time for building a modelship.
-
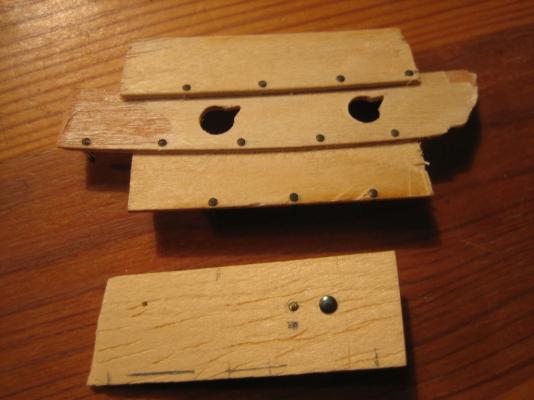
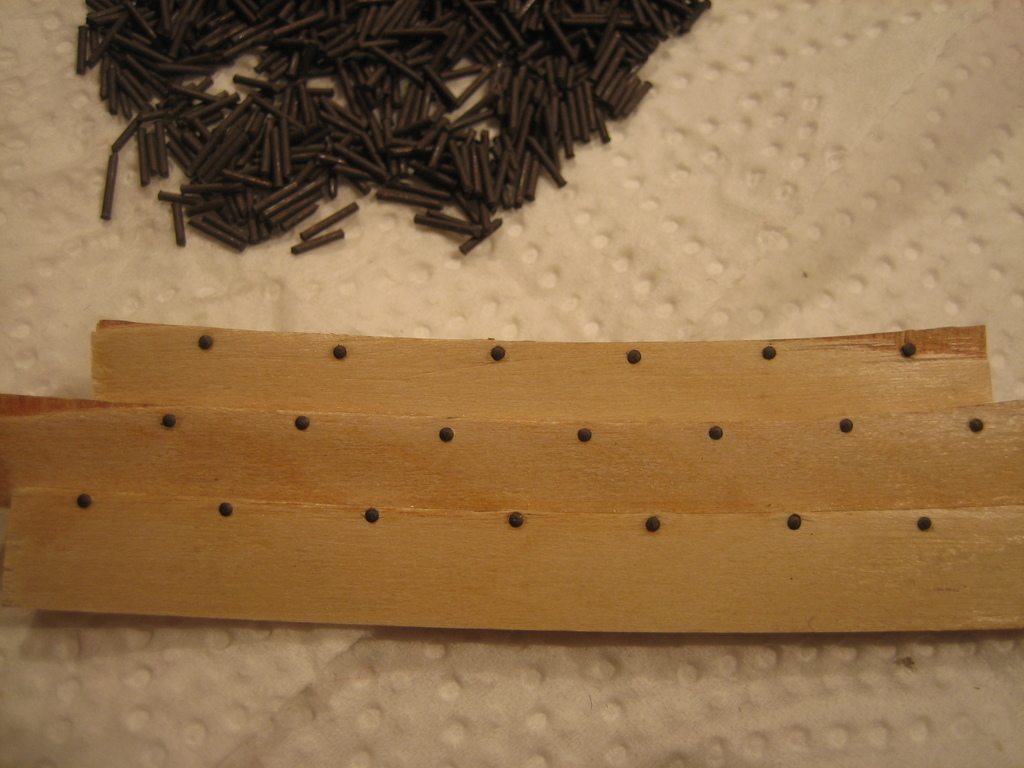
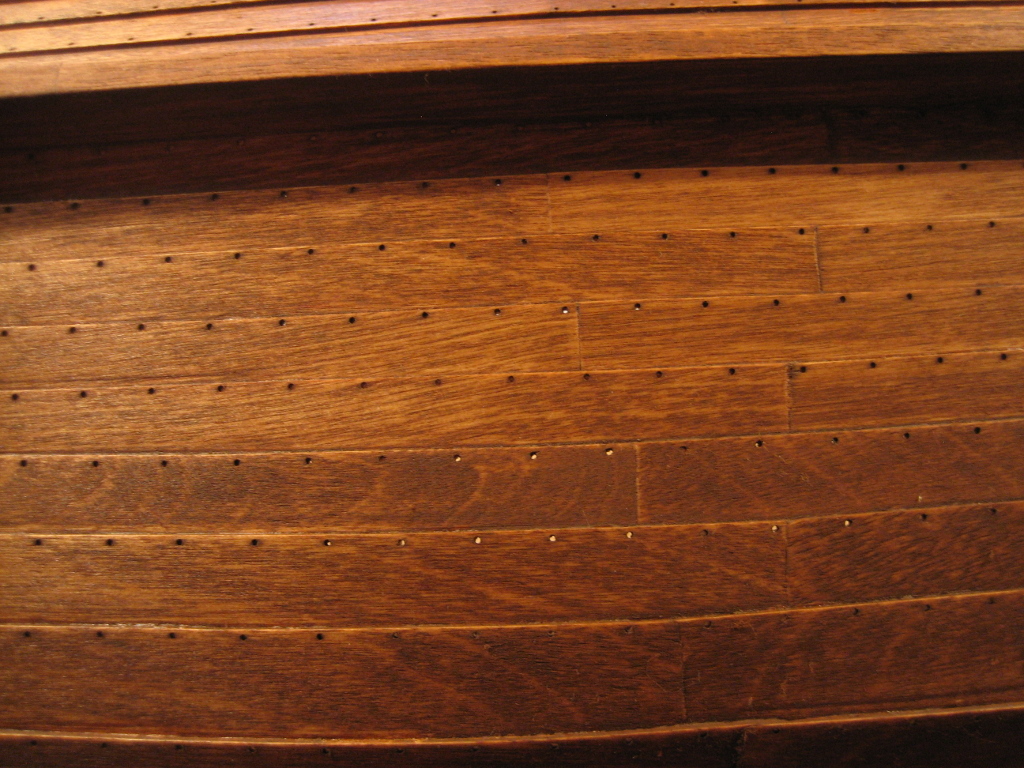
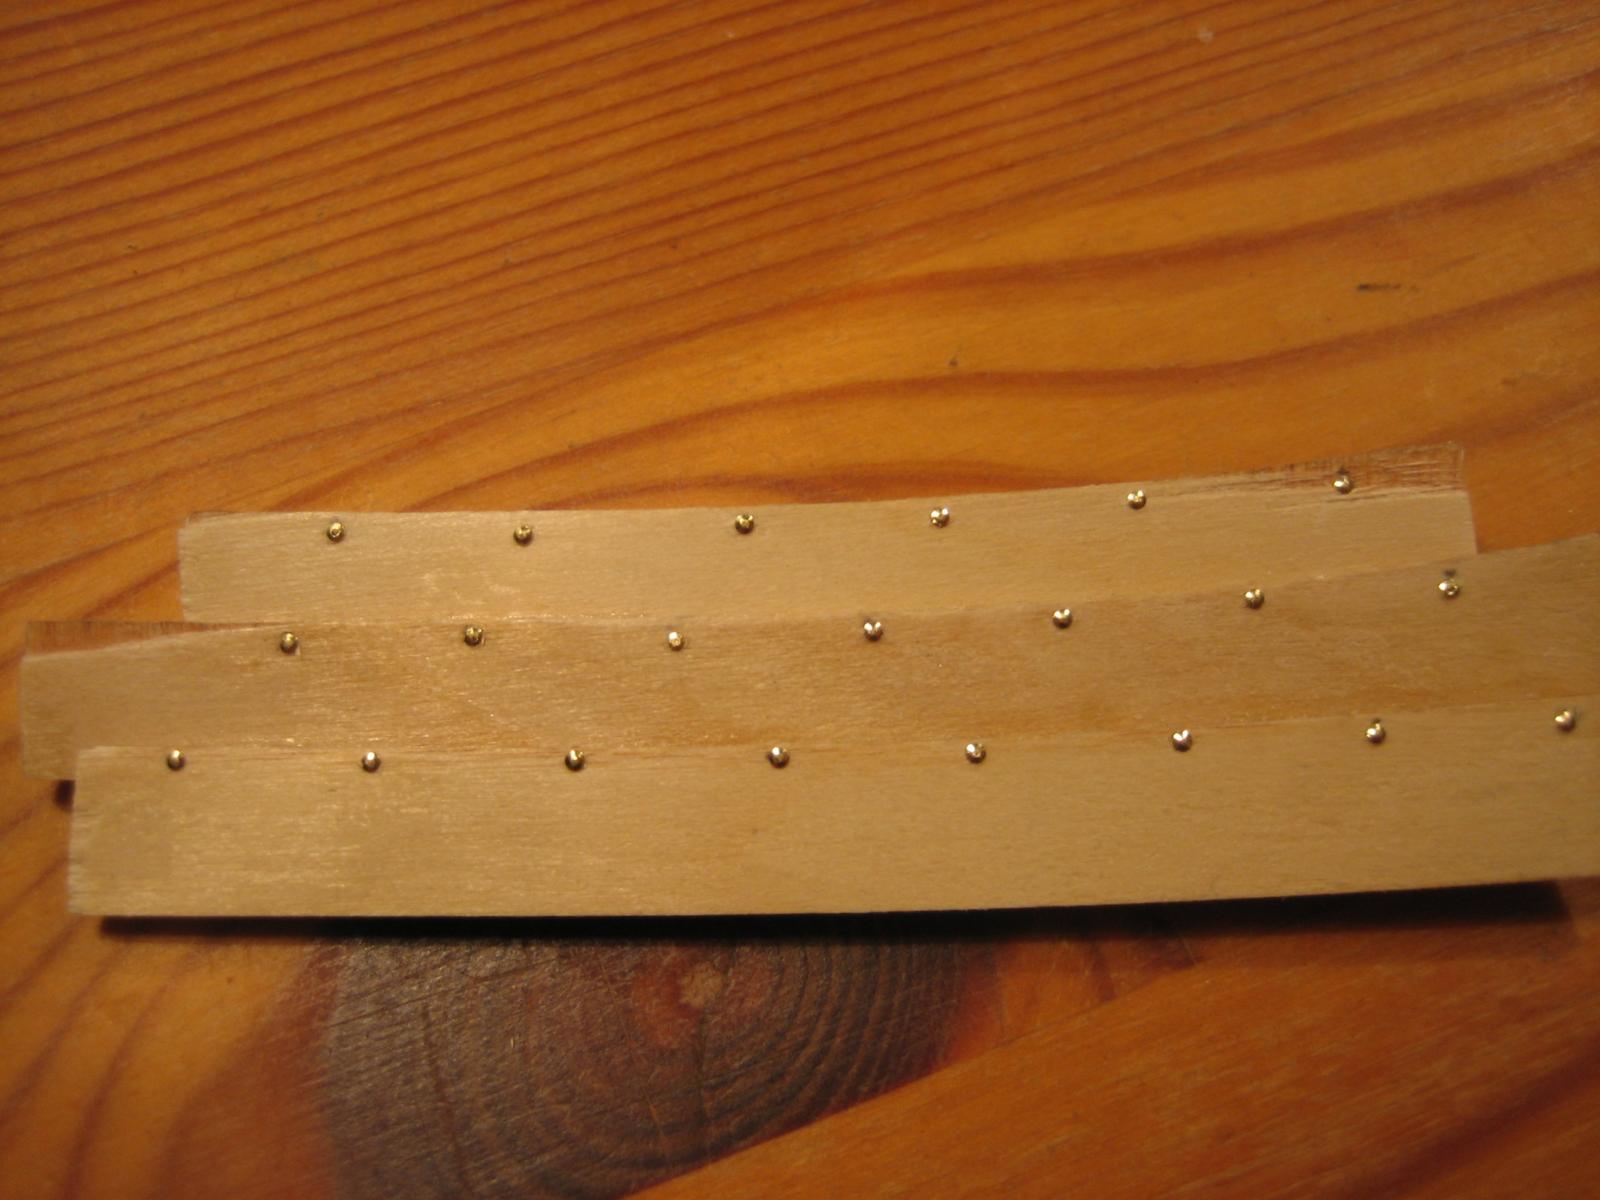
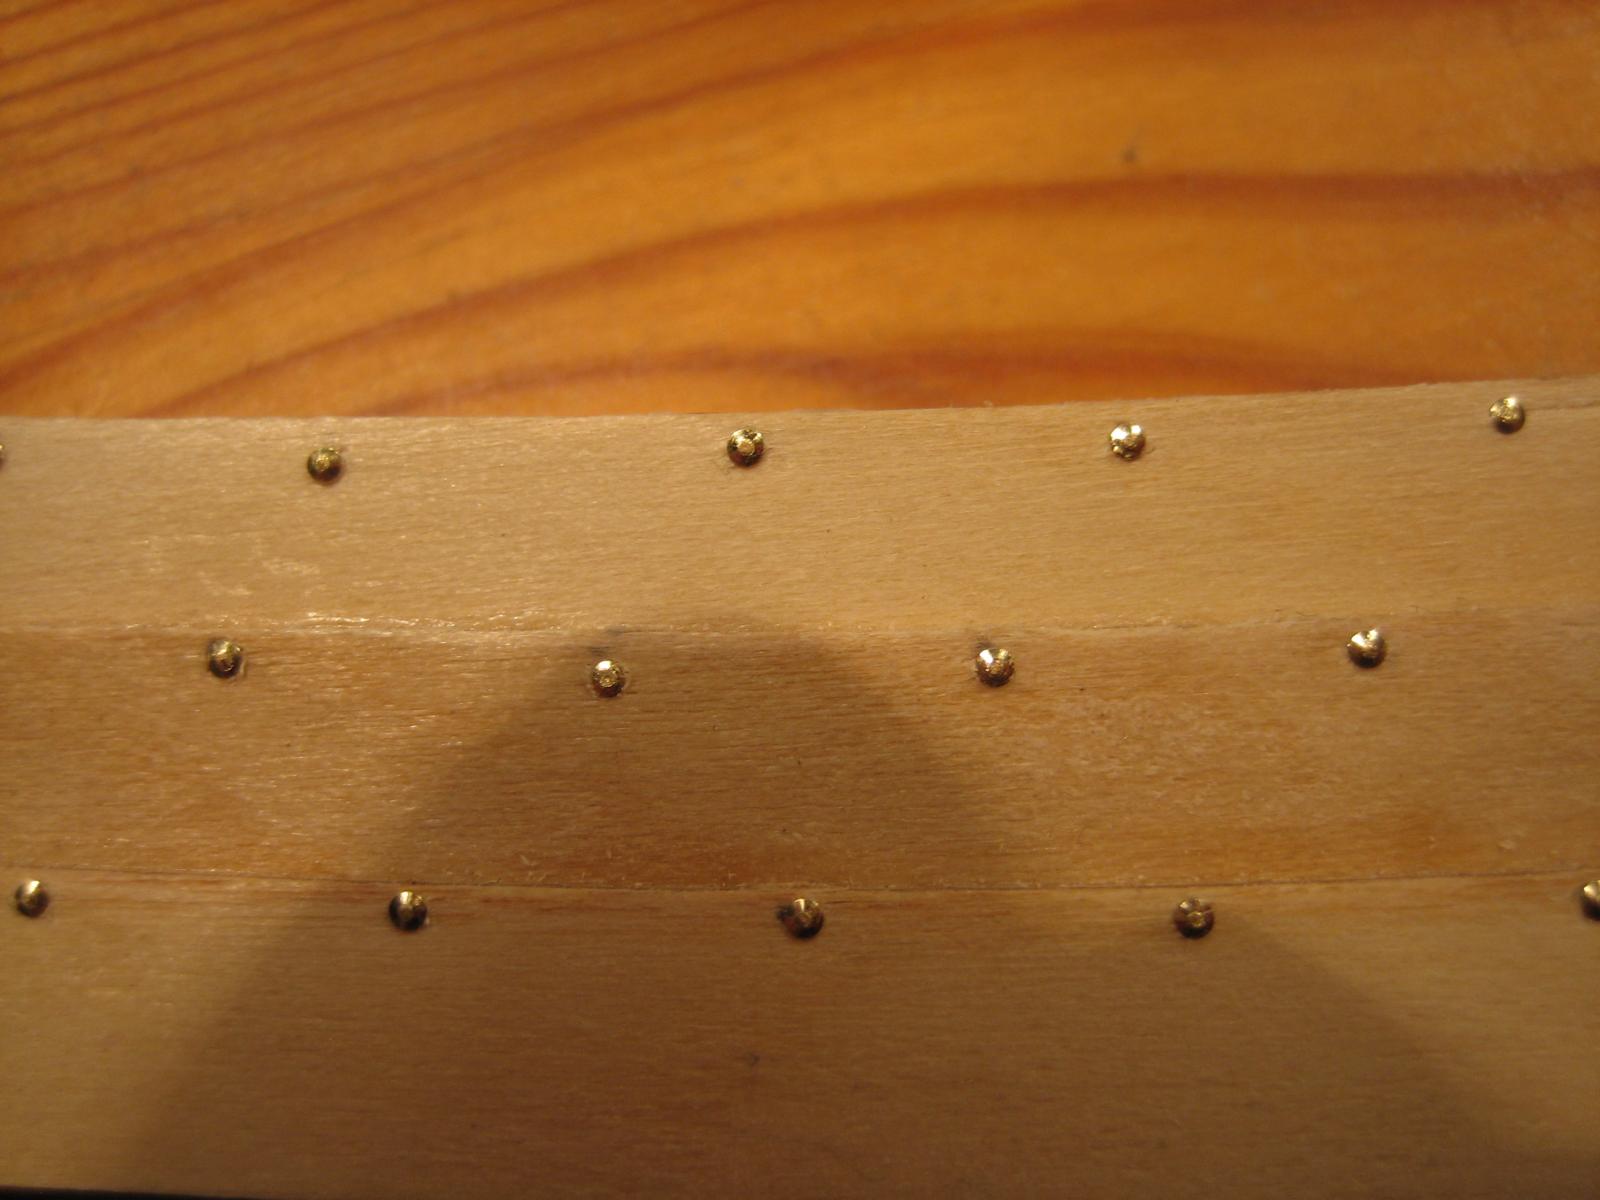
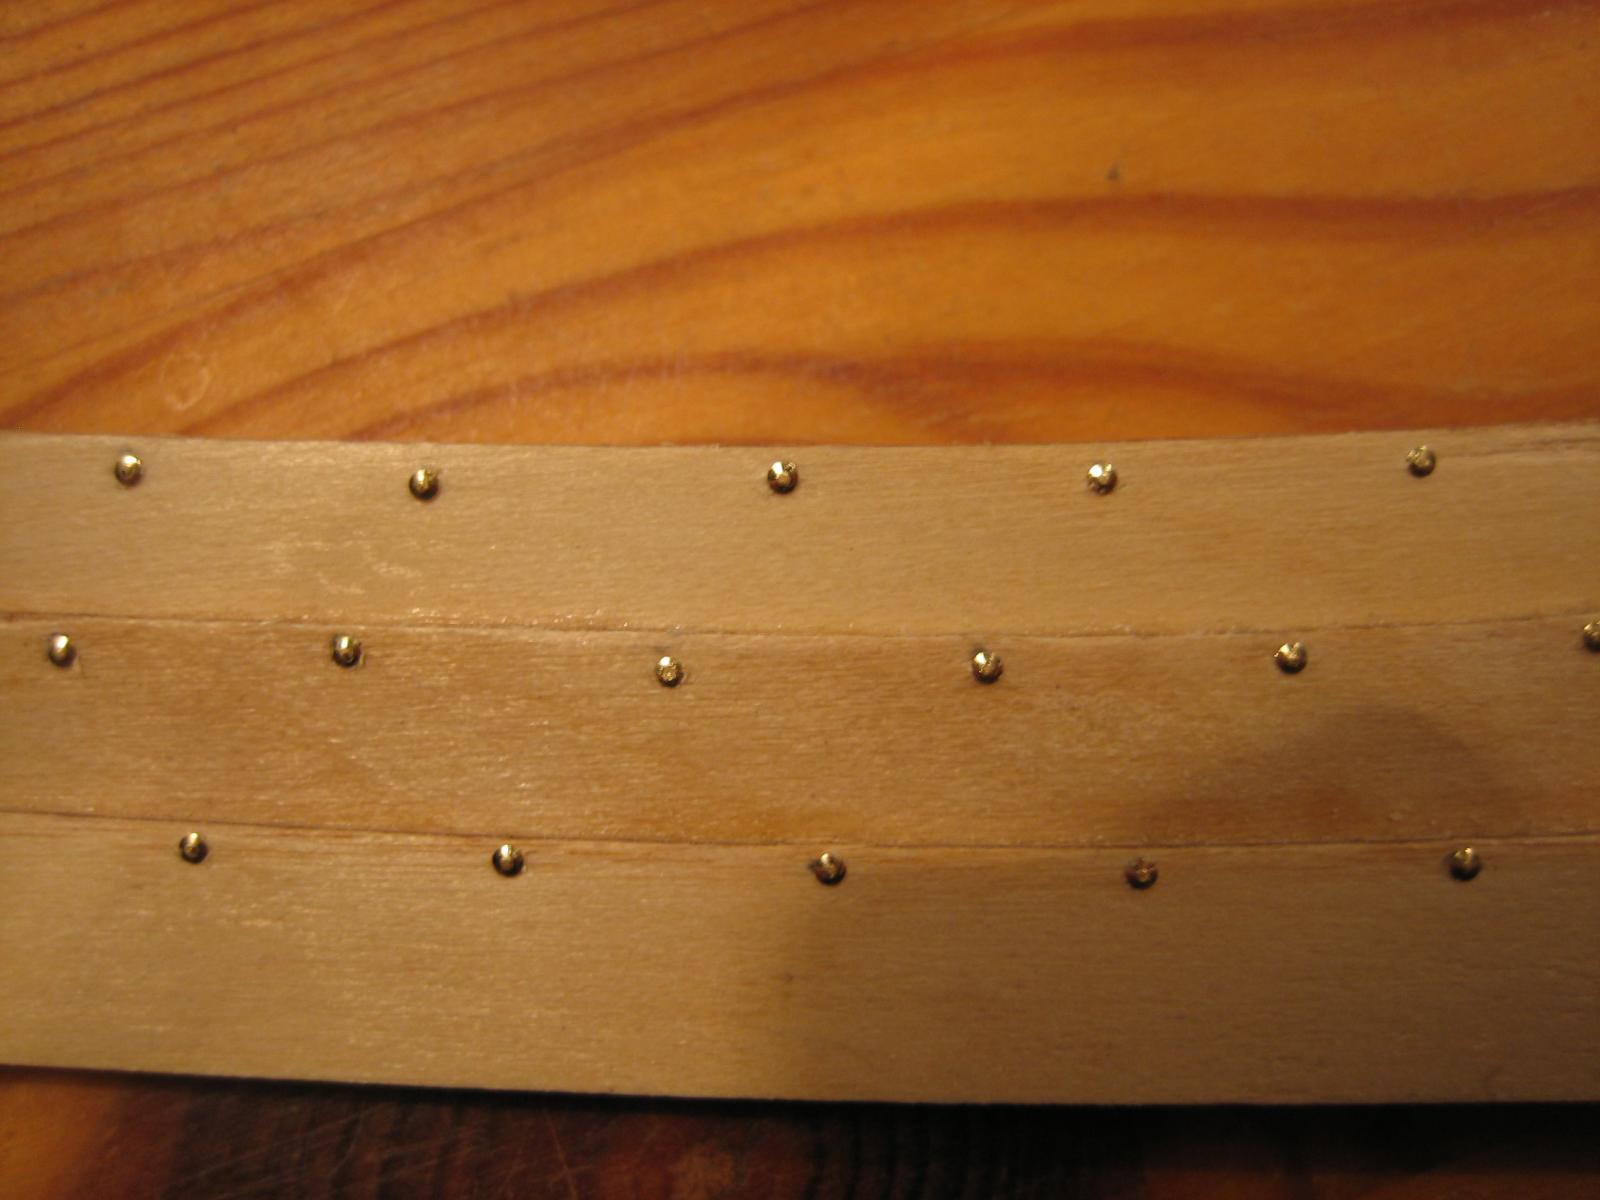
On the lower plank you can see the size difference between my nail and the nail i originally intended to use.
- Jack Panzeca and mtaylor
-
 2
2
-
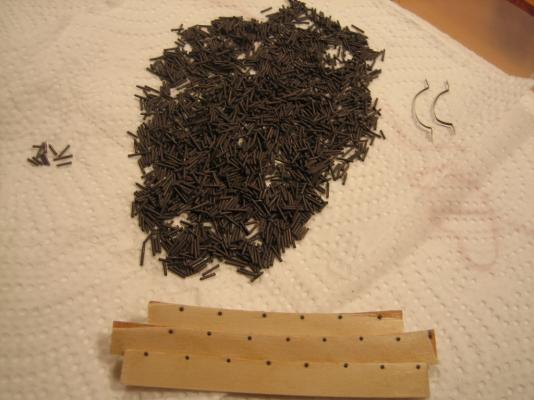
I have also marked, drilled, repaired, sanded, redrilled (don´t ask) with a larger drill, sanded again, repaired again for the 2500 holes. I have only one totally uninteresting picture of this.
The distance between the holes is 0,9 mm.

- Jack Panzeca, Vivian Galad, mtaylor and 1 other
-
4
-
And what is this?
If you look carefully you will see small drilled holes for the ropes holding the sail in the future.
And now you think... Is the man so mad that he shows pictures of some drilled holes?
And the answer to this is, well, yes. Because it took an ETERNITY to drill these holes because they weren´t drilled before the assembly of the ship. It took hours just to drill one hole with the weird thing i constructed to even be able to drill the holes. I had to turn the drill with a small nipper one quarter of a turn at a time.
So this is a warning to anyone building this ship in the future, drill the holes before its to late.


- Vivian Galad, mtaylor and Jack Panzeca
-
3
-


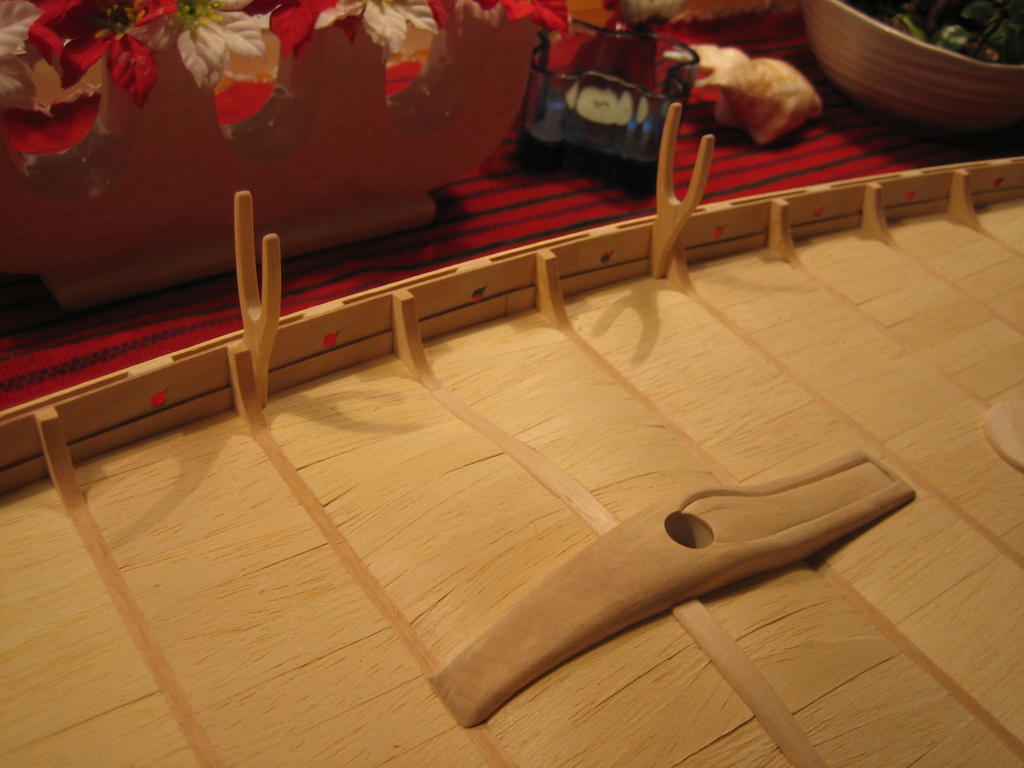
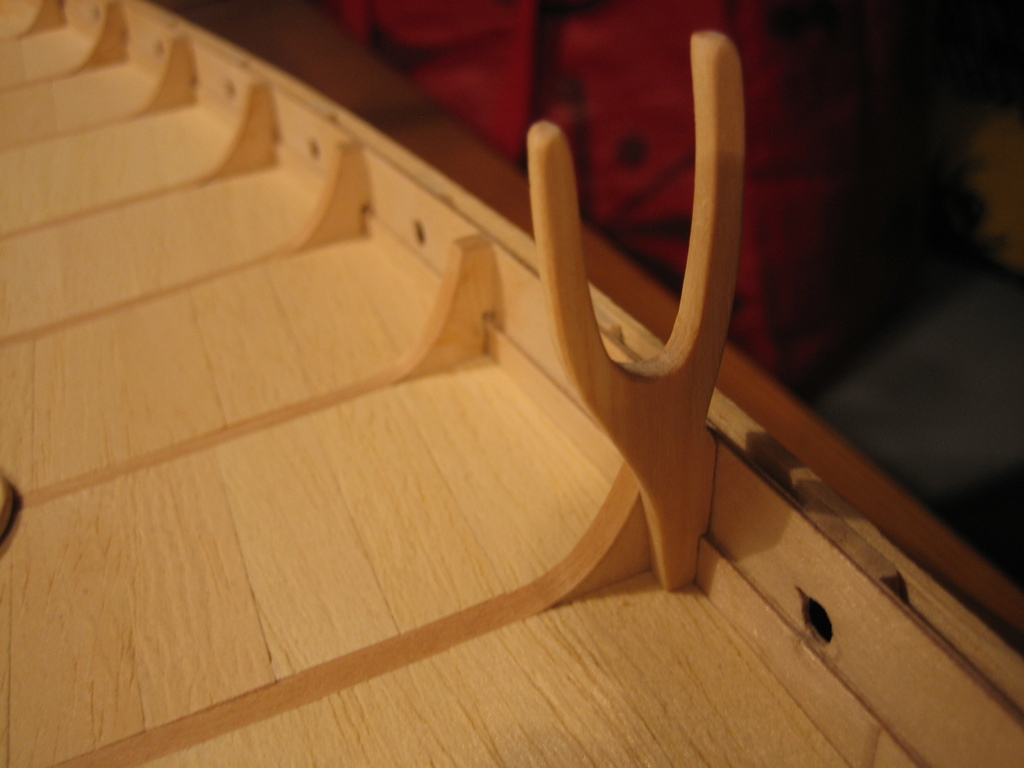
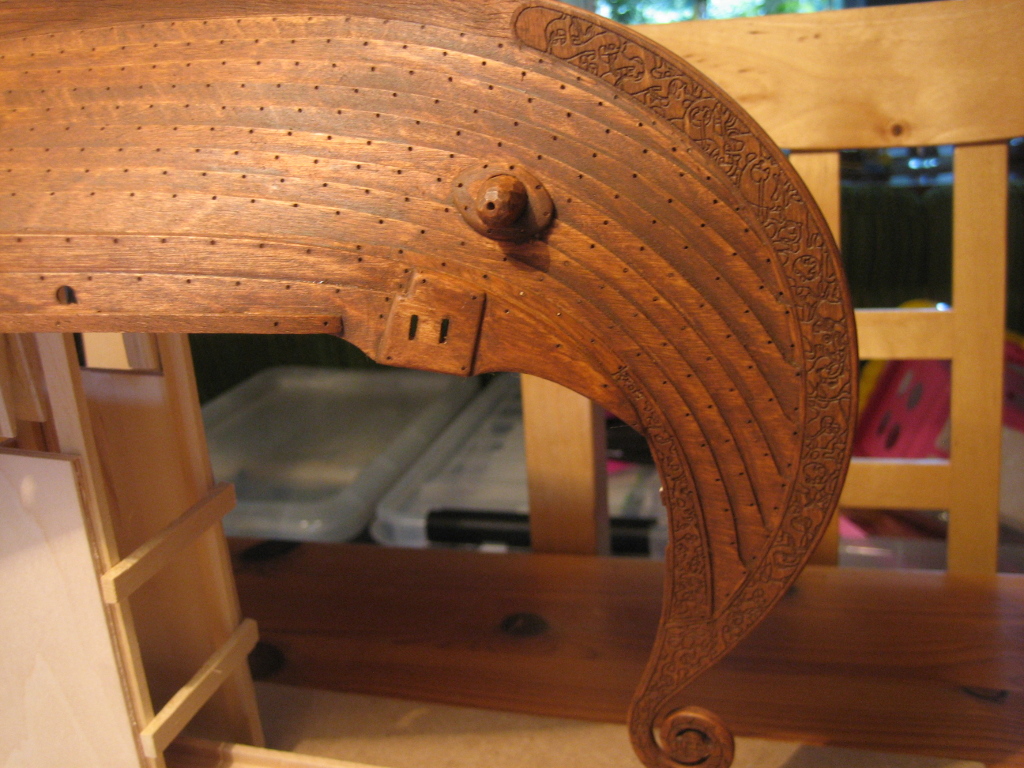
And this is the final result (also the third generation) of the now attached oar holders.
Some pictures will make you sea sick because i forgot to rotate them, sorry about that but sea sickness sort of comes with the territory.
- mtaylor and Jack Panzeca
-
2
-

The result after the construction and coloring result of 2500 nails.
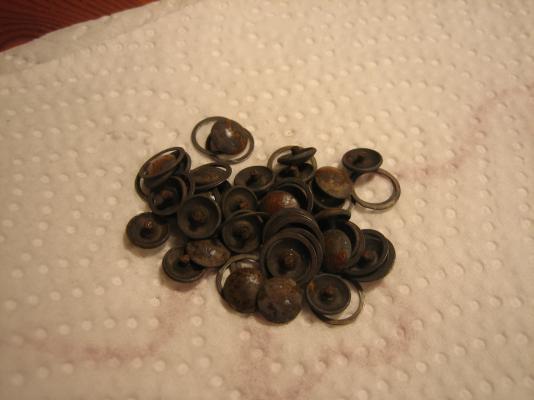
And what is this? well...
- Vivian Galad, Jack Panzeca and mtaylor
-
3
-
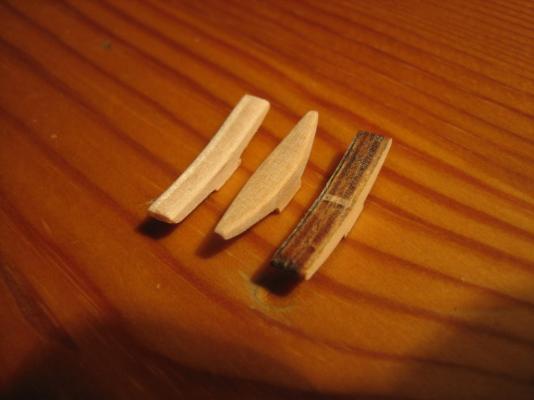

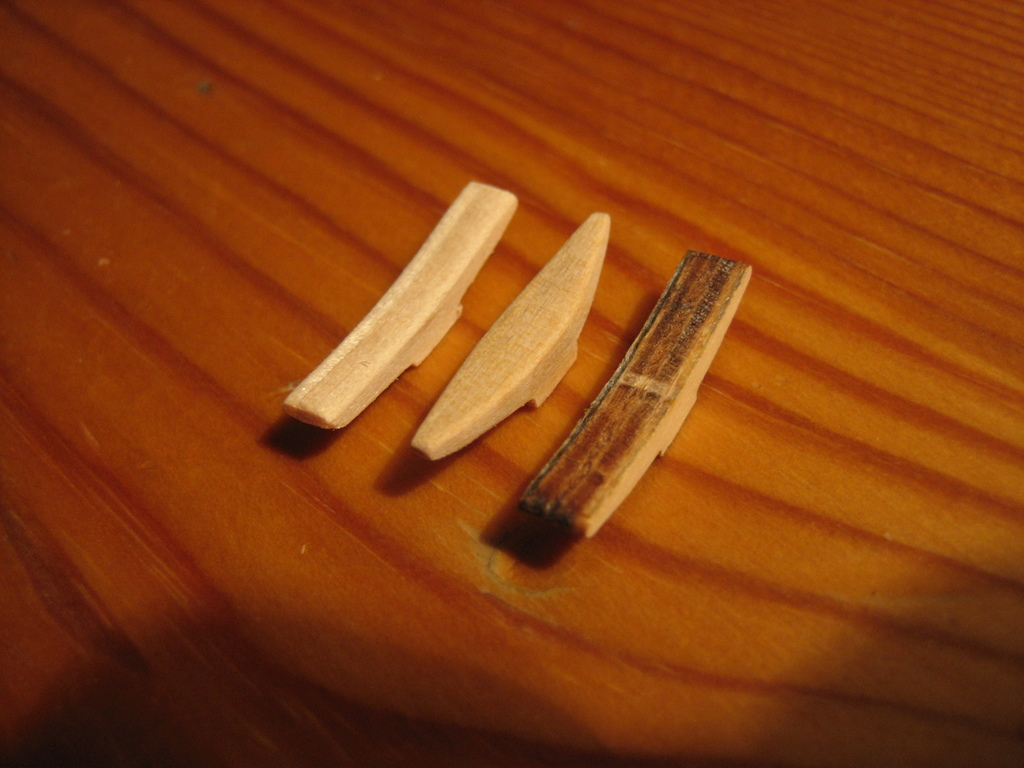
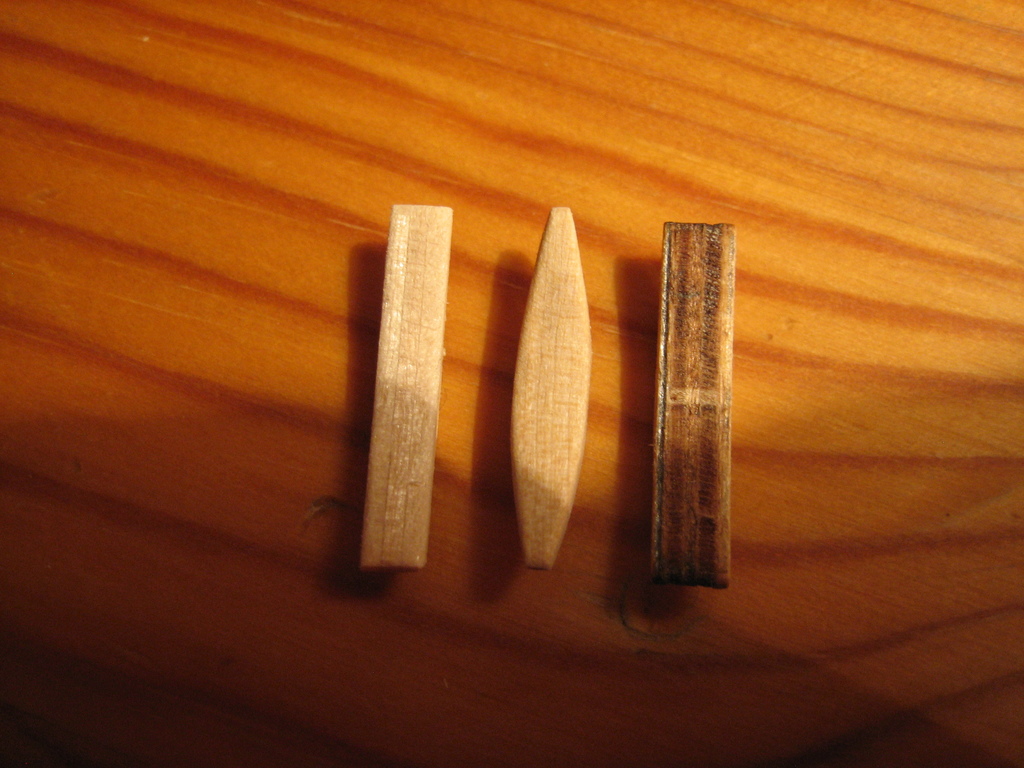
Three generations of the same part, i have a bad habbit of reworking my parts... The one in the middle is the one that ended up on the boat but i made it smaller after the photo was taken, was way to fat on this picture.
The attached end result.
- Jack Panzeca, Mirabell61 and mtaylor
-
3
-
In the coming posts i will try to show what i have been doing since autumn last year, slow progress but at least it is progress.
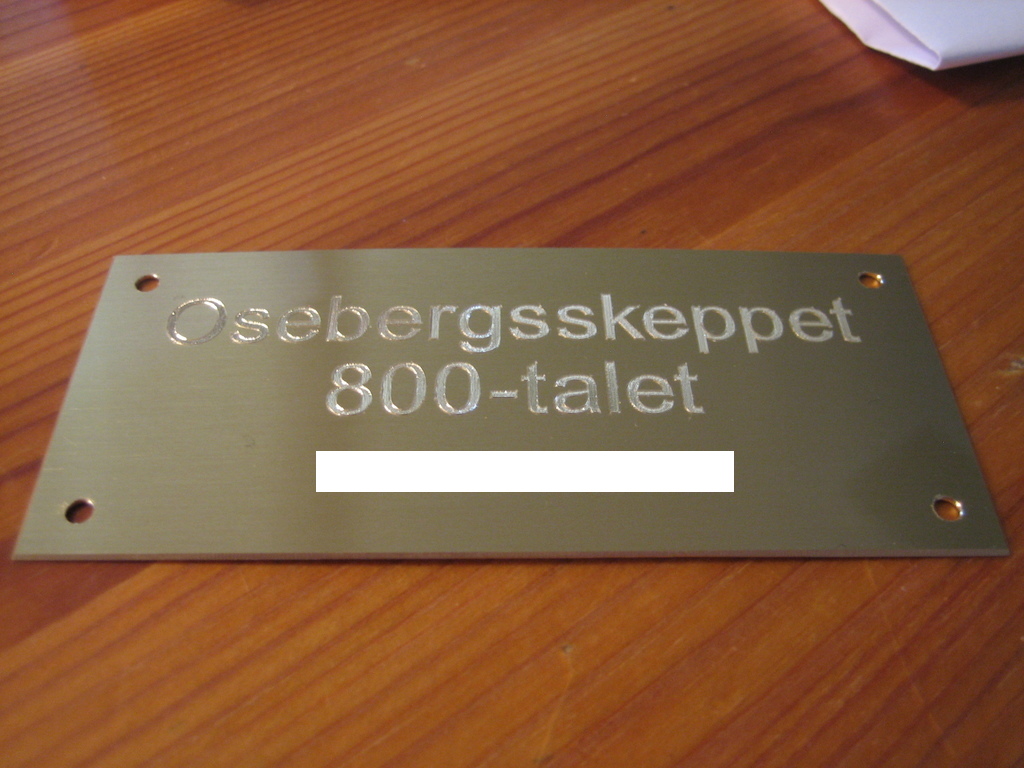
The sign of things to come...
The sign says "The Oseberg ship", 9th century.
I have masked out my name.
The sign is ordered and not made by me.

- Jack Panzeca and mtaylor
-
2
-
Thanks.Very beautiful. Glad you're still here.
The work with the 2500 drilling holes and the manufacturing of the same amount of nails took some time...
-
Nicely done what stain did you use?
David B
Thanks.
Brand: ZAR
Stain: Teak Natural
-
Just stained the outside of the ship. Keeping with the traditions i am a man with few words...


-
-
Found this information regarding poly coating. Seems like waterbased poly is preferred if you use oil based stain.
"Stains. If you plan to stain your wood, a trick that I learned, before you stain anything, rub it with denatured alcohol. This gives you a very good idea of how the wood will appear when a clear finish is applied. If you stain with a oil based product and then apply a oil based finish, there is the slight possibility that the color will "pull", that is lighten in some areas and darken in other areas. This is because the carries for the sealant is lifting the color from the same carrier that the color used. The way to avoid this is to use a water based color and oil based finish or the other way around."
-
Hi Von-Kossa,
The wipe on poly that I used is oil based, but be careful, MINWAX makes a water based version and it gets very bad reviews. Check post # 200 to see what the oil based can looks like. The water based version comes in a plastic bottle. The oil based type is very easy to apply. No lap marks.
I just finished fabricating the rest of the little bits, cleats, oar racks, wood rigging pieces (I do not know what to call them) and the rudder mounting bits. Pictures soon. Sail making next. I will use yours as a guide, thanks for the help.
Talk to you soon.
Thanks, i will look into it.
-
Hi again!

About the poly, did you use water or oil based poly? I have read about people using water based poly on oil based stain getting strange results, like the stain wiping of. Sounds scary.
-
Hello Cristi and Bill,
Thank you for dropping by and for the kind words, they are much appreciated. I enjoyed visiting both your logs.
Cristi I admire your ability to work more than one project at a time. I could never manage it.
Bill, happy that you are back in the shipyard.
I have been working on oars lately and real life has slowed my progress a little. Thanks again for looking in.
Also, thanks to all the "Likes" they really mean a lot.
The oars is something i have not worked on in a long time, probably i will remake them. How will you construct them?
-
-
Just checked my sandpaper.
I am using G180 extra fine. So i should be fine, i hope.
-
Your Ober looks terrific for your first ship. You have nothing to be ashamed about.
David B
Thank you for your kind words dgbot.
-
Hello My Friend,
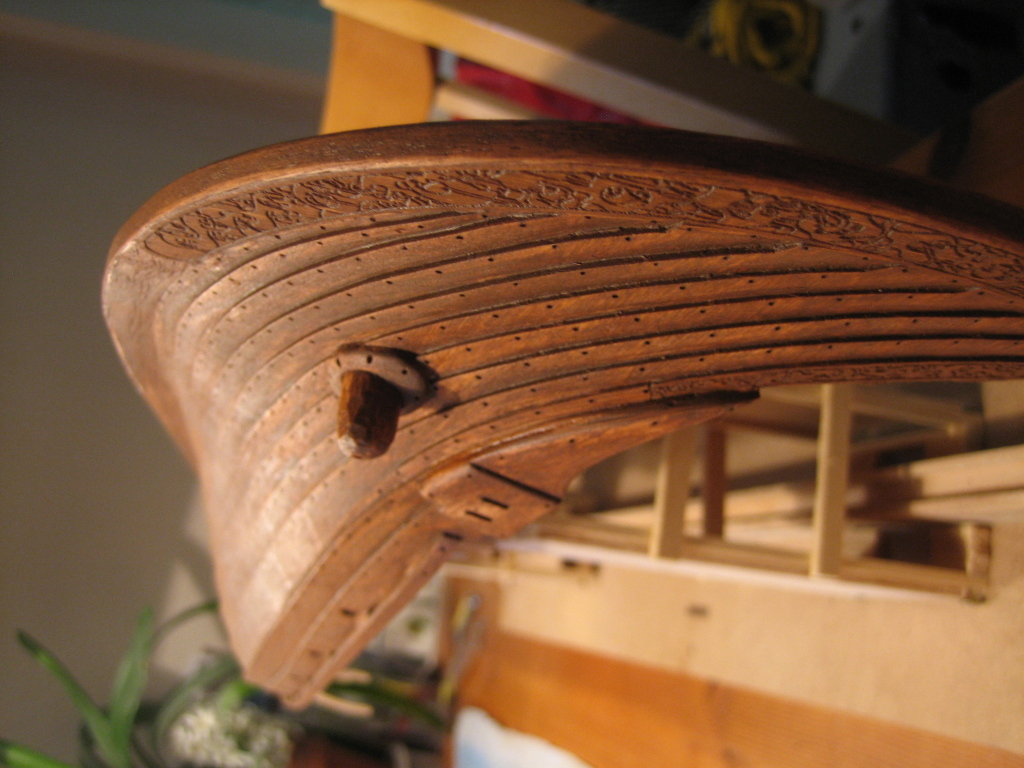
The oar holes look great.
I know that you are getting ready to stain and I wanted to tell you about something that I learned the hard way when I stained mine. I sanded everything in preparation for staining. The directions on the can made no mention of the grit to be used and I used 400 on the deck. It looked terrible, the stain would not soak into the wood. I went to the manufacturer's website and there it stated not to use greater than 180 grit. I sanded the deck back to bare wood with 180 sandpaper and tried again. It worked much better and the deck looks great.
This is a little like checking the care instructions after you buy the shirt.
Hang in there buddy, your build has always been an inspiration to me.
Thank you Jack. But not as great as your stained ship. It´s a beauty.
I haven´t thought about this with grit at all, thanks for the warning... It seems like we have the same standards for sandpapers, and I think I for the most of it have used 180. I will have to check this later.
For choice of stain brand i will use Zar, because it is the best brand i can find here in sweden. I will also go the oil stain way.
For the moment i think i will test:
Walnut or Modern Walnut
Teak natural
Black Walnut
Dark Mahogany
-
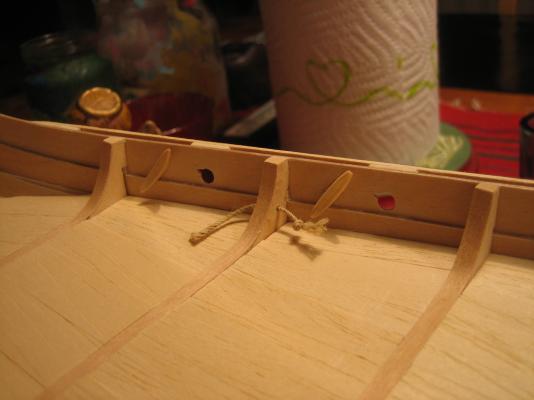
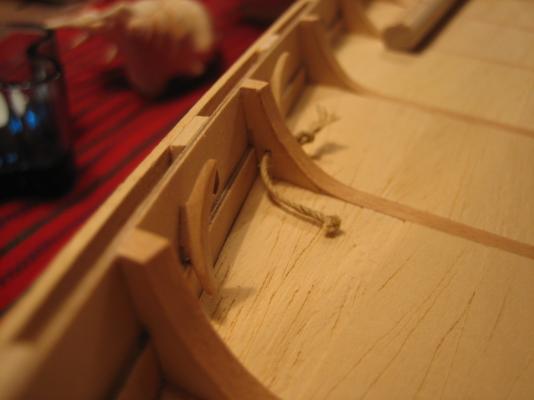
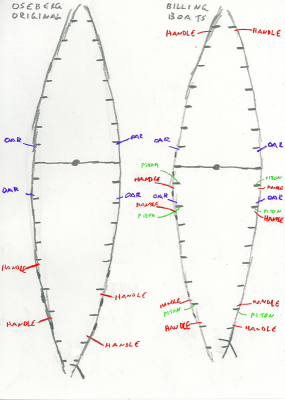
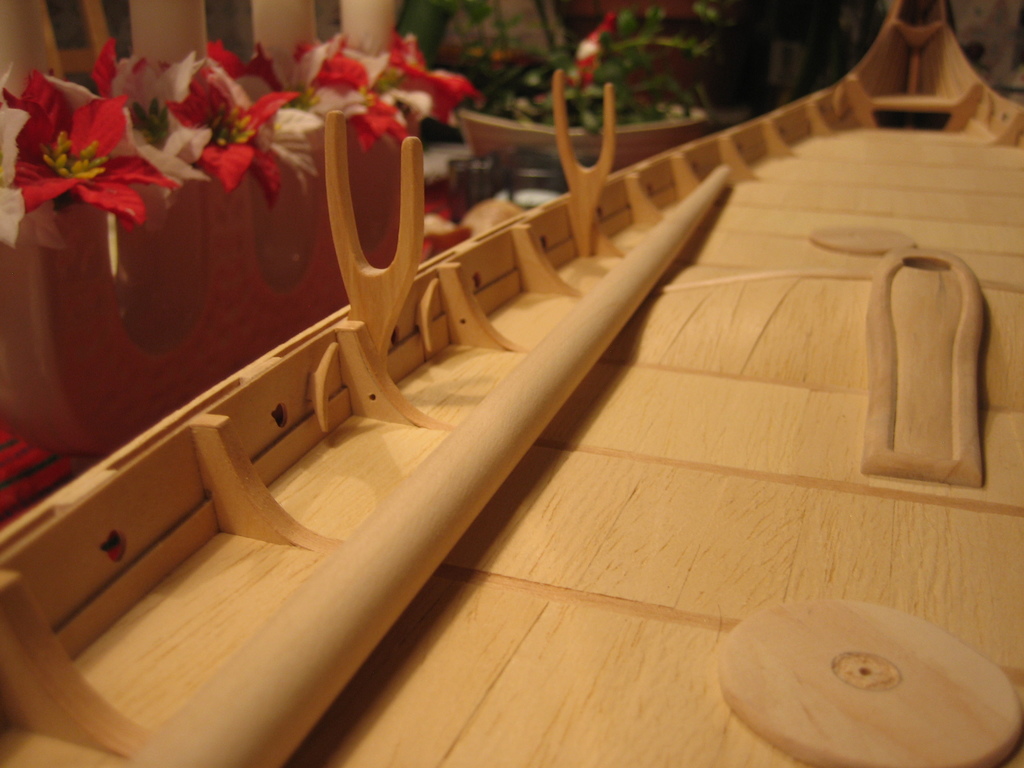
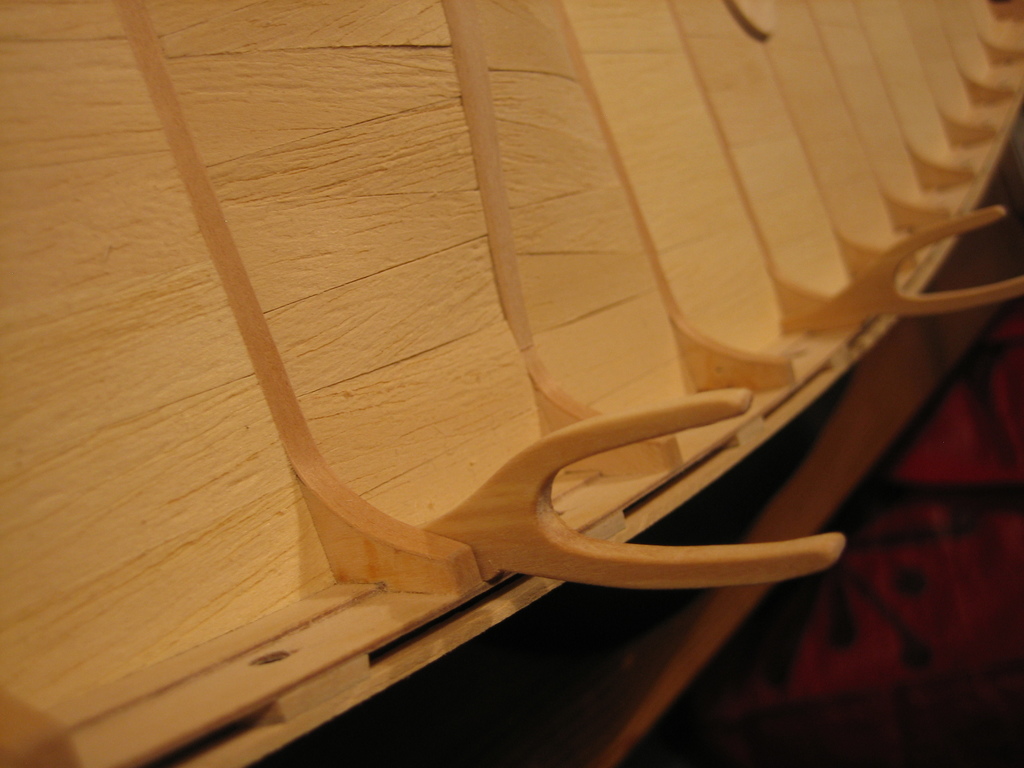
This is what i know about the handles for the sail rigging and oars so far.
-
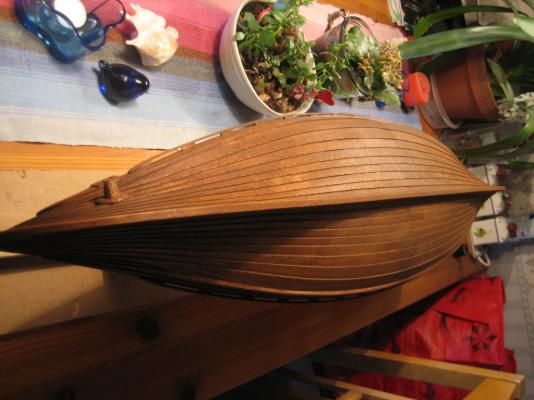
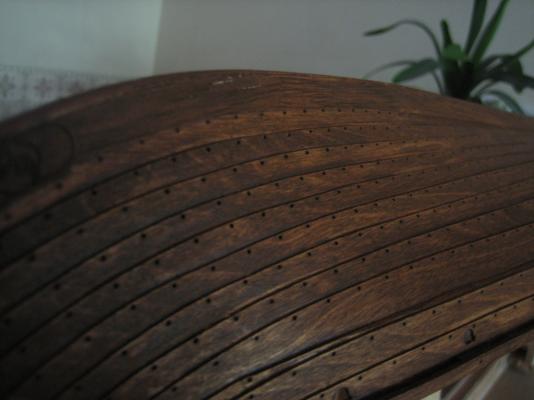
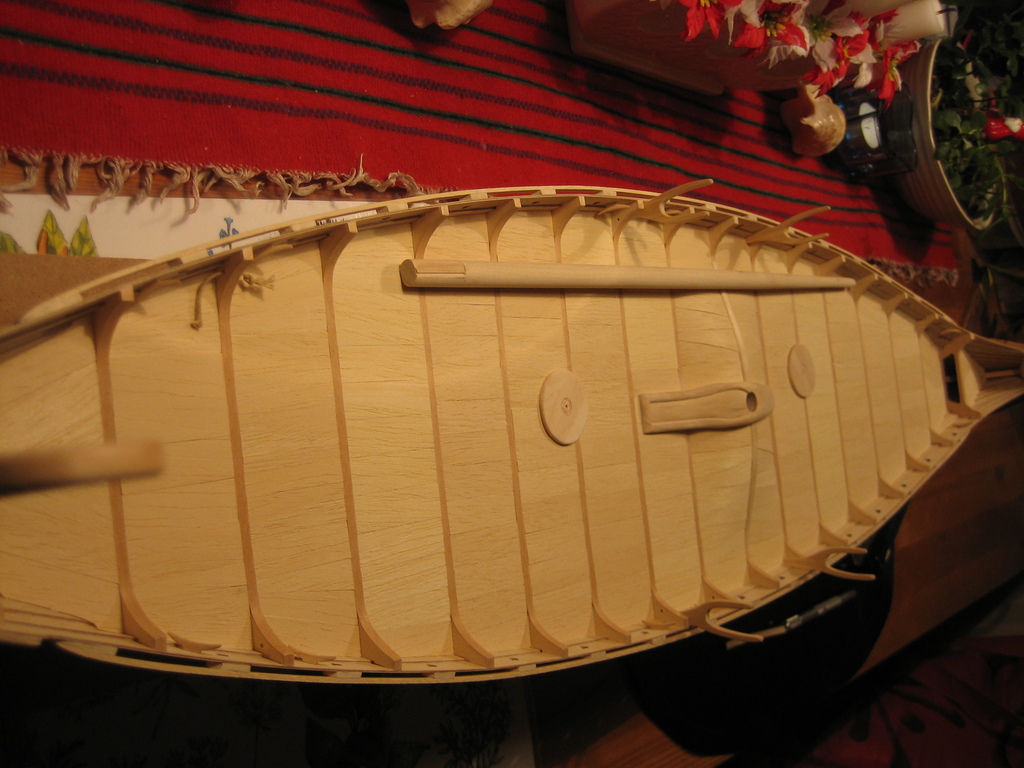
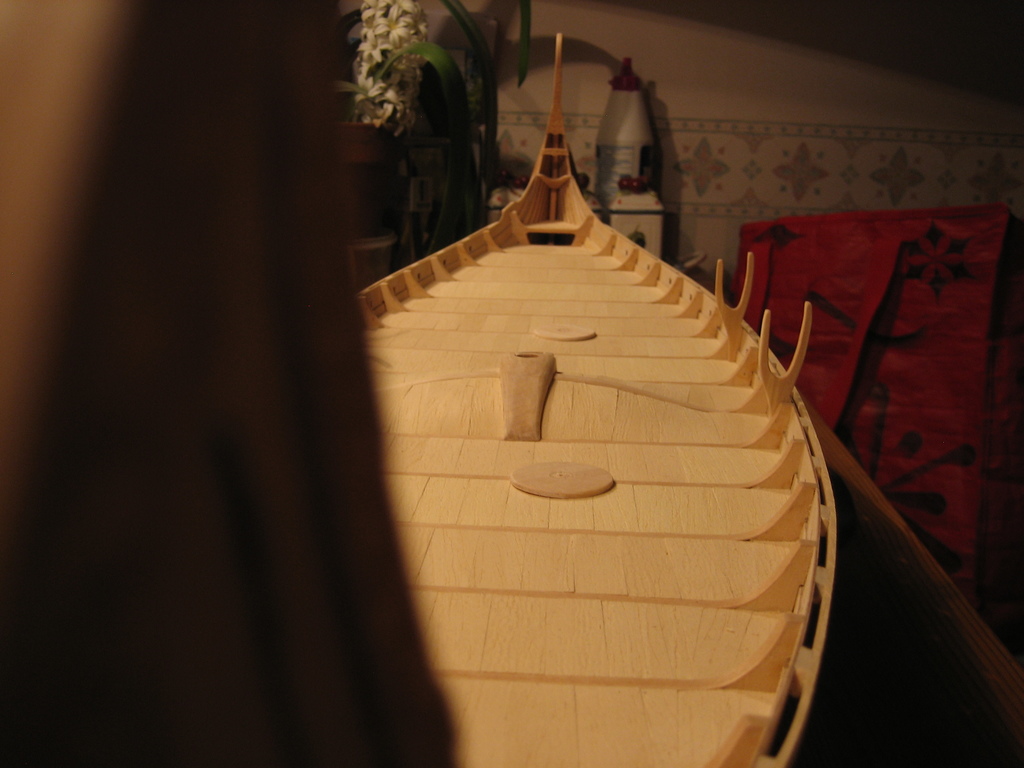
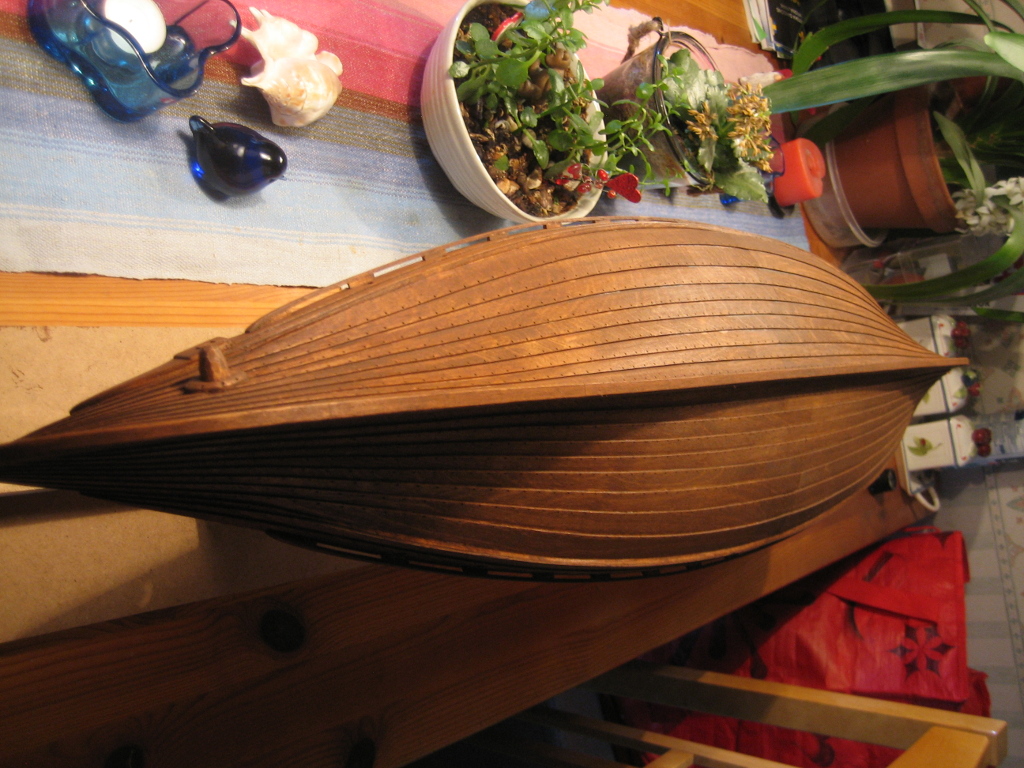
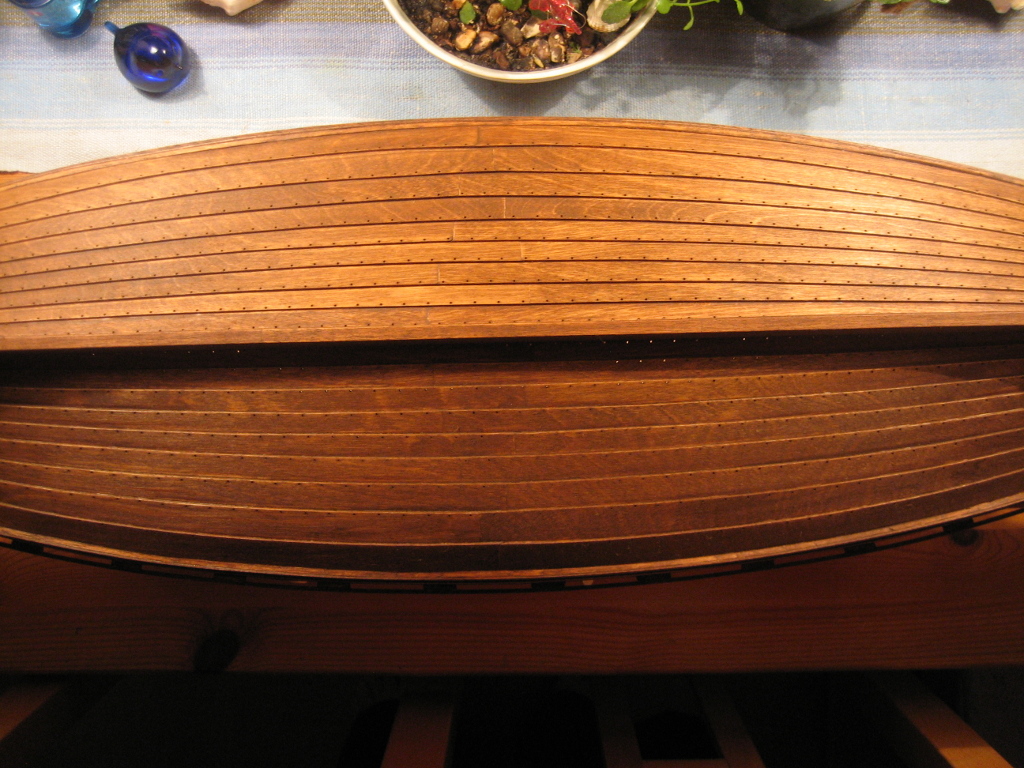
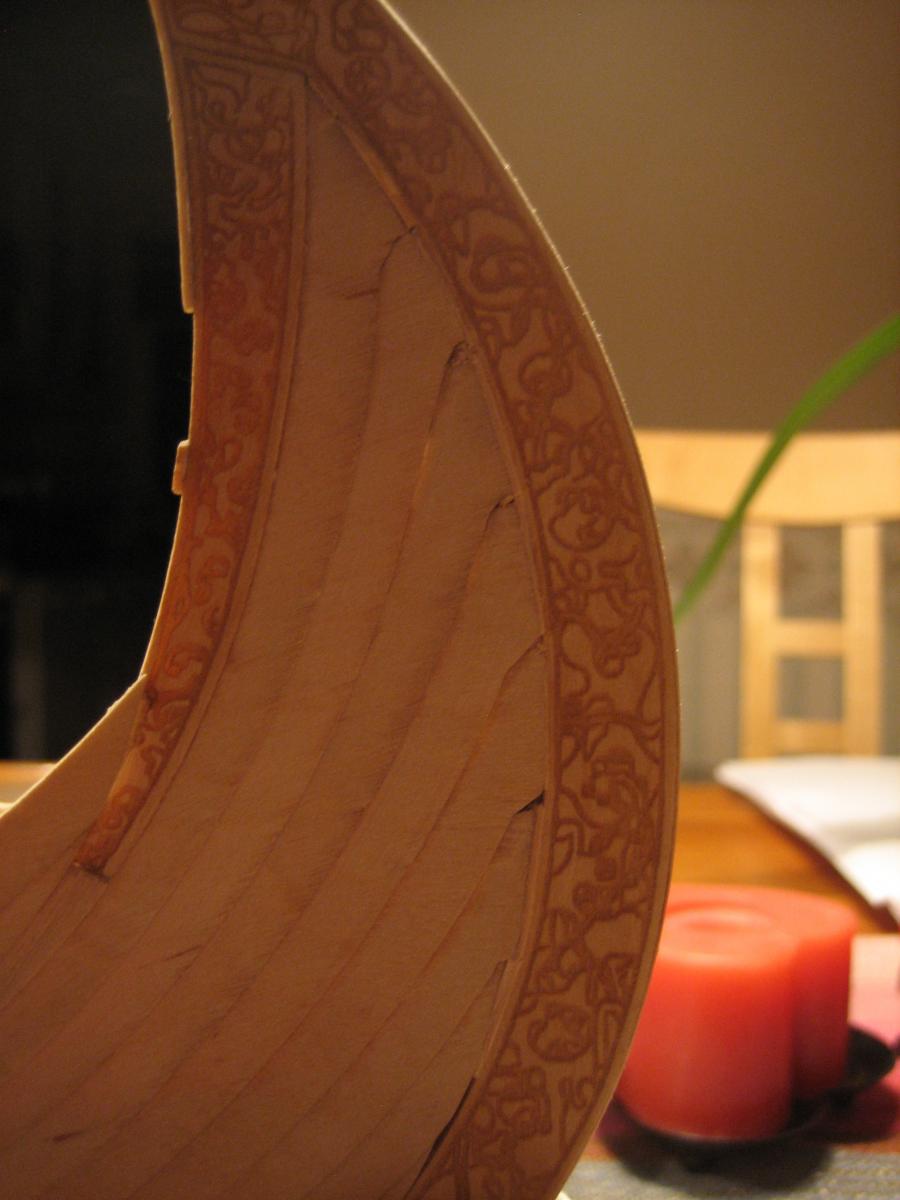
Love it, Von Kossa. If it wasn't for the pot plants in the background, you could almost convince me that we are looking down the deck of the ship in the museum. Great job!
Thank you, and i really mean it. I needed to hear this now because i really think my build sucks. The closer i get to the staining process the more i see all the faults, all the glue spots, all the faults all over it.
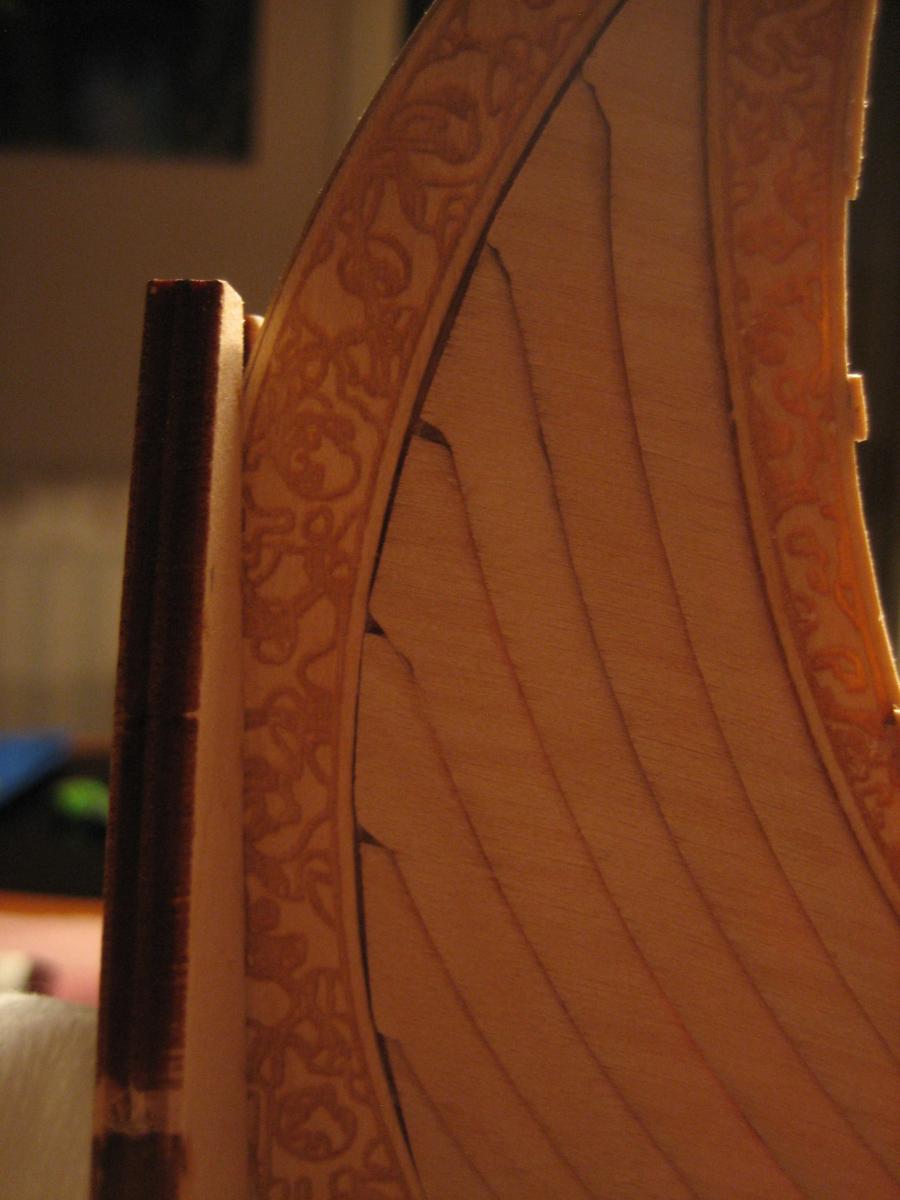
I have started to fill in the holes between the ornaments and the planks. Because i never sanded it down before i attached the ornaments.

As you can see here for example:
This is what i have achieved so far.


Oseberg ship by Von_Kossa - Billing Boats - Scale 1:25, 800 A.D (First wooden ship build)
in - Kit subjects built Up to and including 1500 AD
Posted
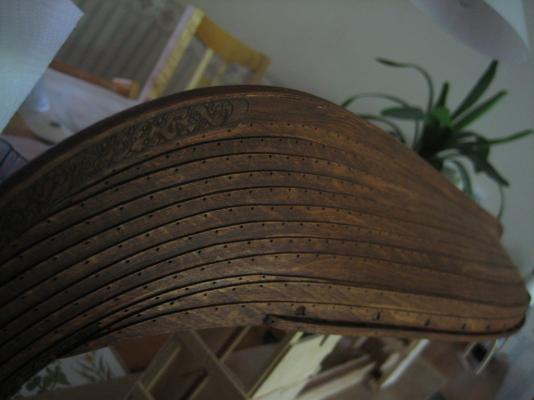
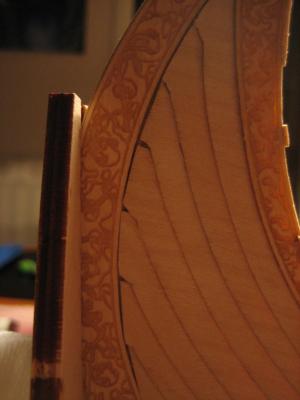
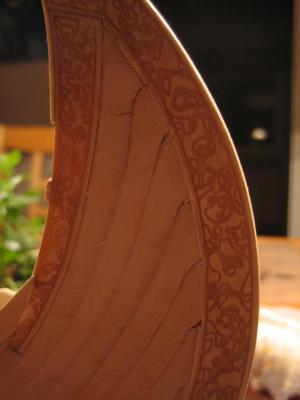
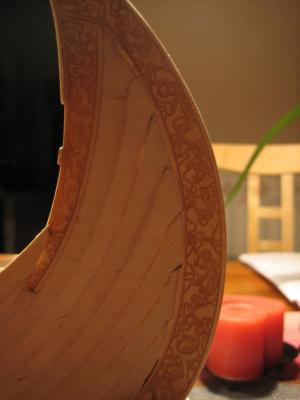
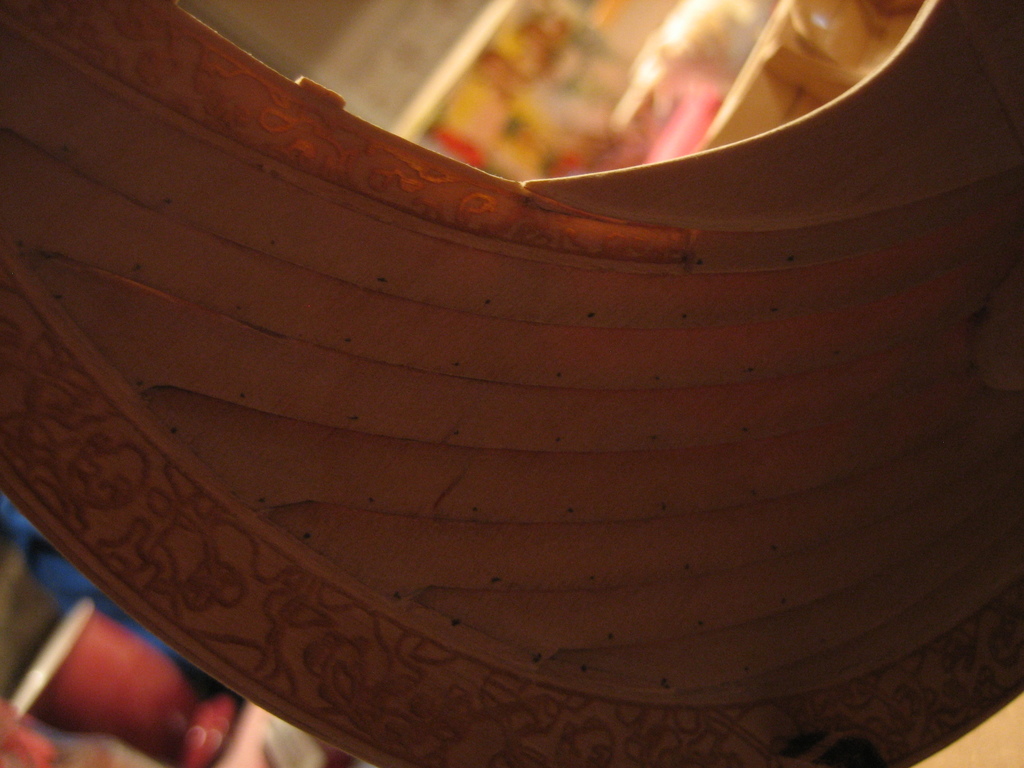
Short answer: Yes, but probably different on the original, this is very unclear to me how the bump were on the original and despite heavy research i have failed to get a definitive answer.
Long answer: I have seen two models in museums in Sweden, one from pictures in Munich, Germany and one from a museum in Bergen, Norway. Plus i have seen videos from a Oseberg replica. They have all the positive formed bump like my ship, only difference is the size of the bump.
Picture from Bergen.
Picture from Munich.
And now to the problem, the original resting in Oslo also have the bump skeleton construction seen here. But notice that the bump is negative and not positive. It "falls" from the beginning.
The thing i don´t understand is why do all the competent model makers in different museums around the world always construct the bump positive. Notice that it doesn´t fall from the beginning like on the original.
So why didn´t i do like on the original?
I failed to envision in my head how i should have laid out the planks against the negative bend. So i fell for the group pressure...
Excuse me for my bad english, i hope you can understand me.