


Von_Kossa
-
Posts
181 -
Joined
-
Last visited
Content Type
Profiles
Forums
Gallery
Events
Posts posted by Von_Kossa
-
-
Welcome to the club. Any questions just ask.

-
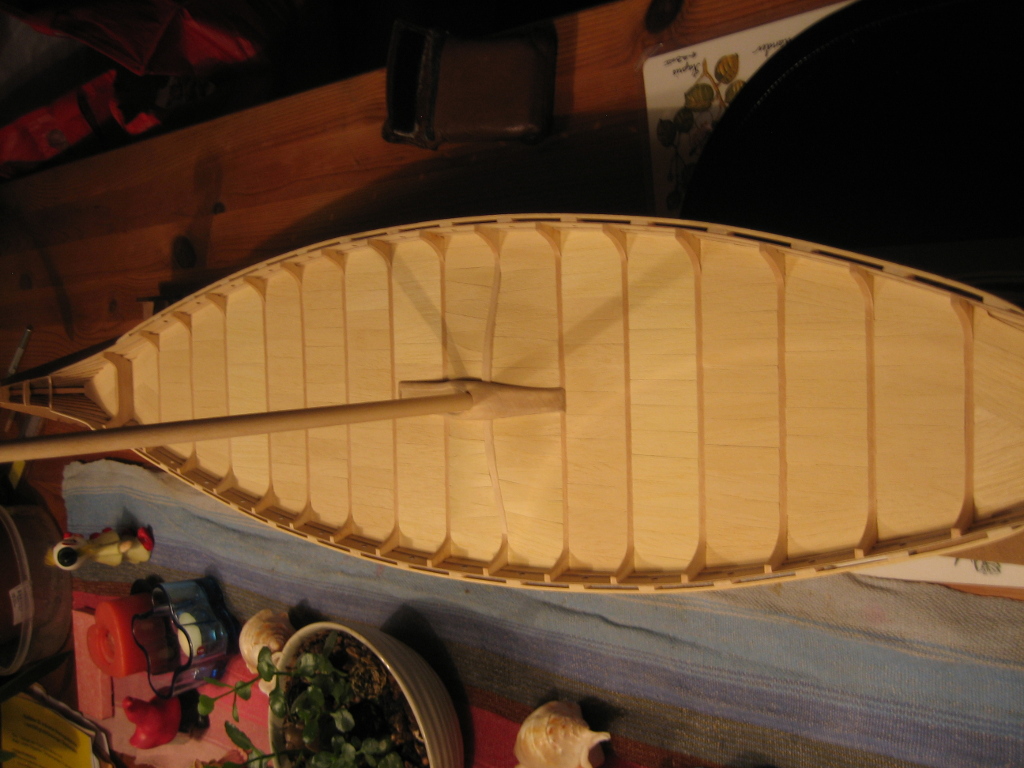
I love the way the deck finished up. I really like the pattern at the bow, stern and the mast foot. Keep it up, I need the guidance.
You are very welcome, I am glad that I could help. You certainly made good use of the wood.
Something strange i noticed with your parts is that they are all slightly brighter than mine, that forced me to rebuild entire sections because it looked really odd. I wonder if the staining will even it out, so they look the same as the rest, do you have any knowledge of this?
-
I forgot...
I also like to thank Jack Panzeca who sent me his deck parts, without you i could not have finished the deck.
- Aussie048 and Vivian Galad
-
 2
2
-
Superb work on deck. Neat to say the least.
Thank you Vivian and all of you who "liked" my post. Means a lot.
-
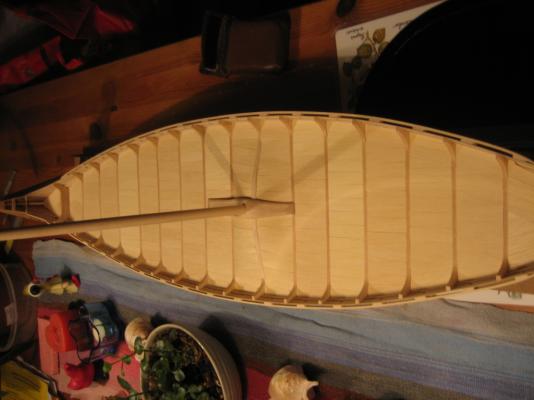
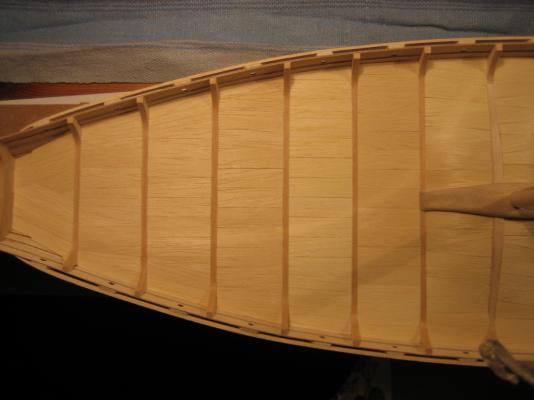
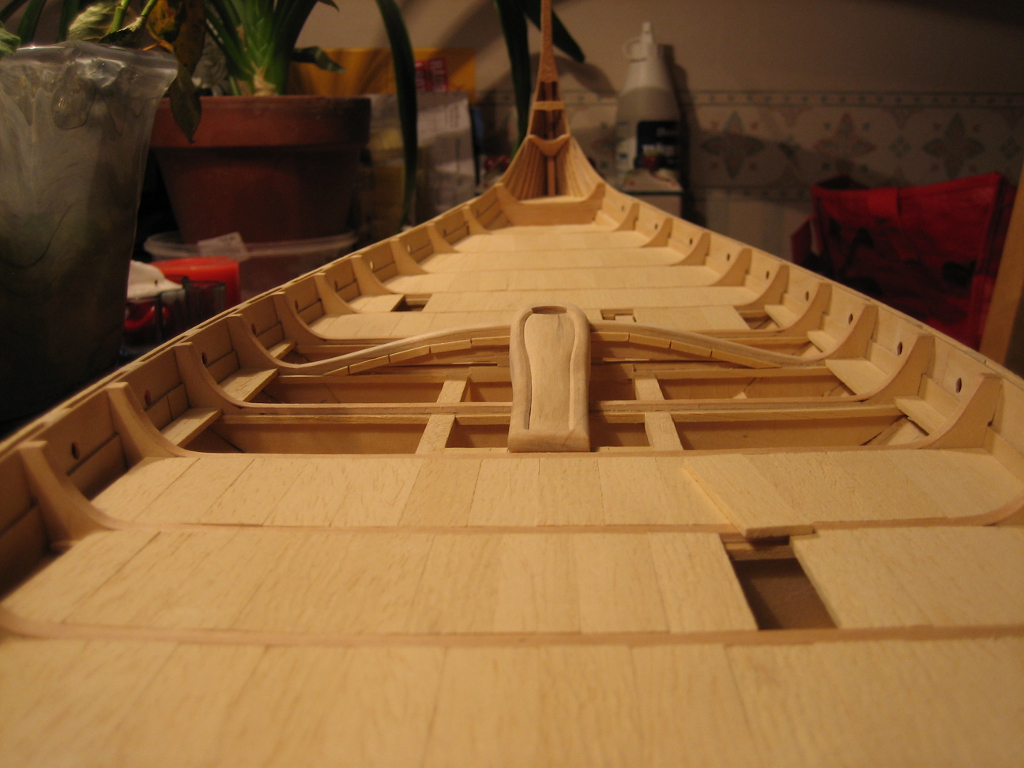
Update. Finished the deck... For now at least.


- shoule, yvesvidal, Jack Panzeca and 10 others
-
13
-
I am glad to see that your progress goes well.
Your approach with the veneer is something i also have thought about, the problem with this approach is the increased thickness and the look from the side of it.
But like you, i cannot see another solution.
I hope it goes as well for me as for you when i try this.
-
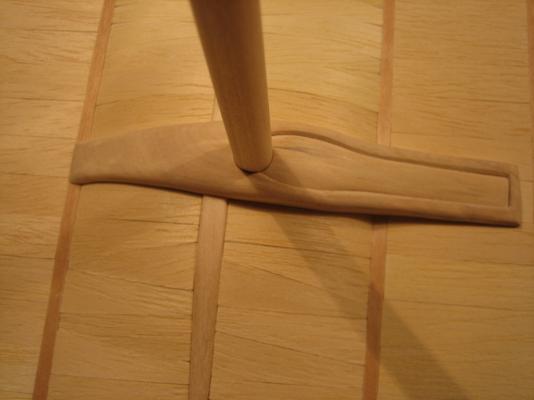
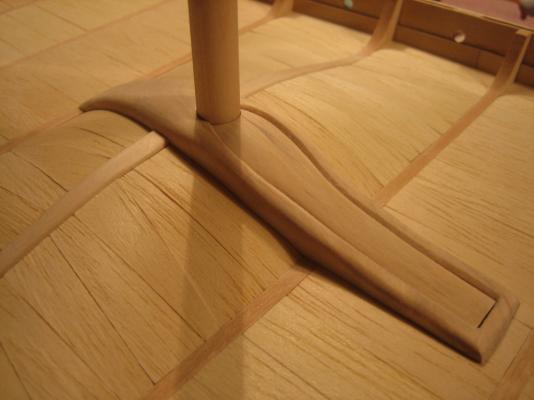
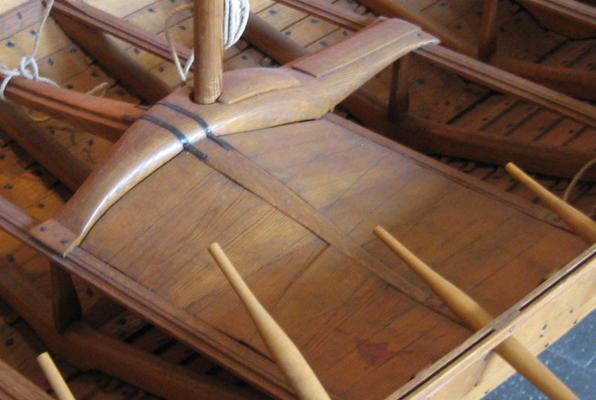
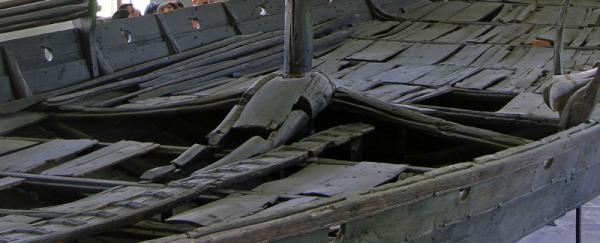
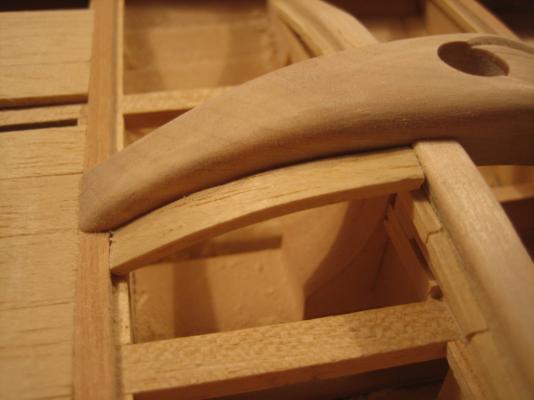
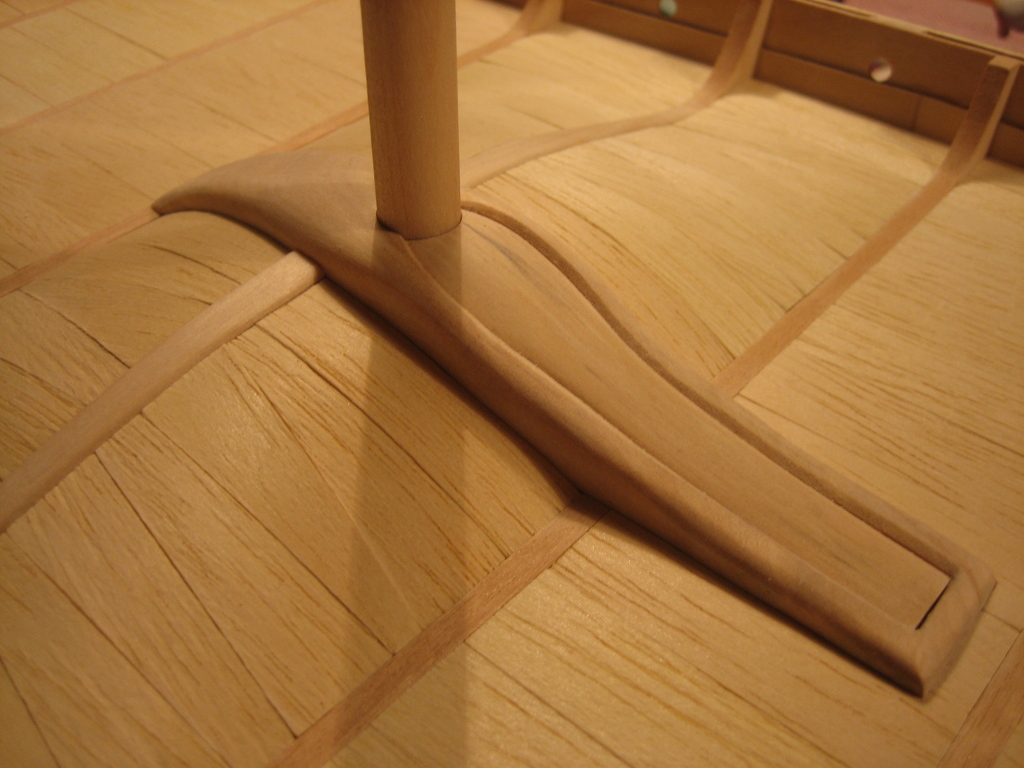
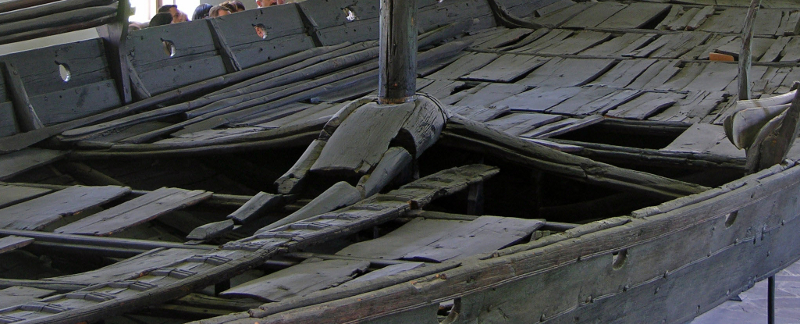
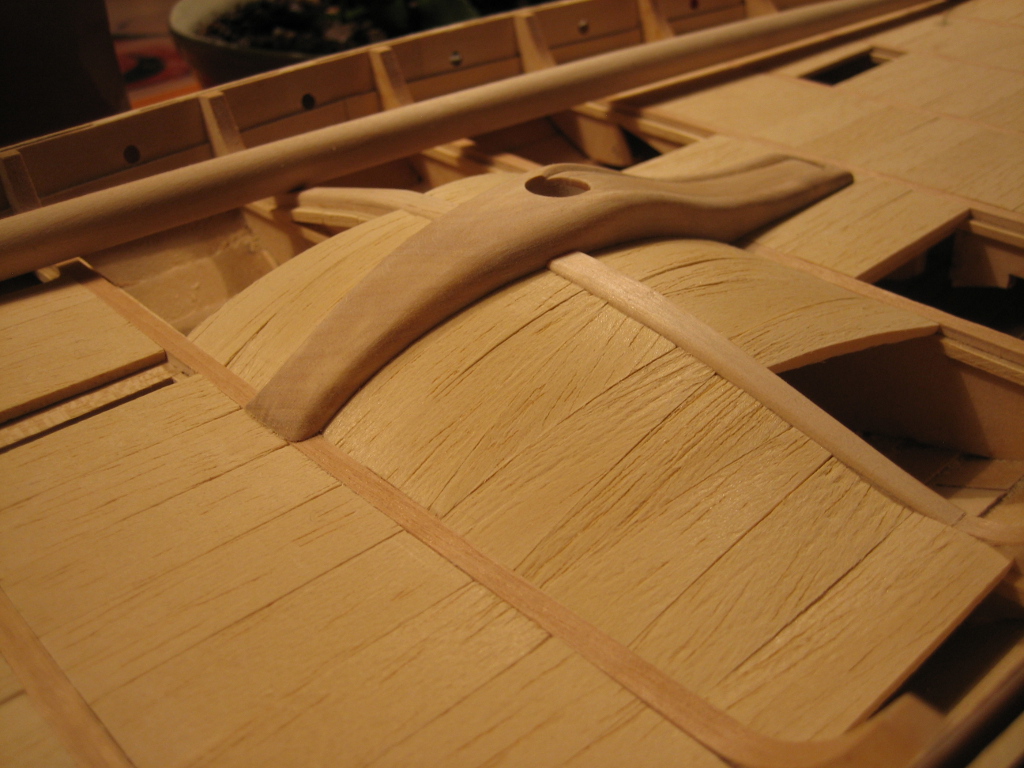
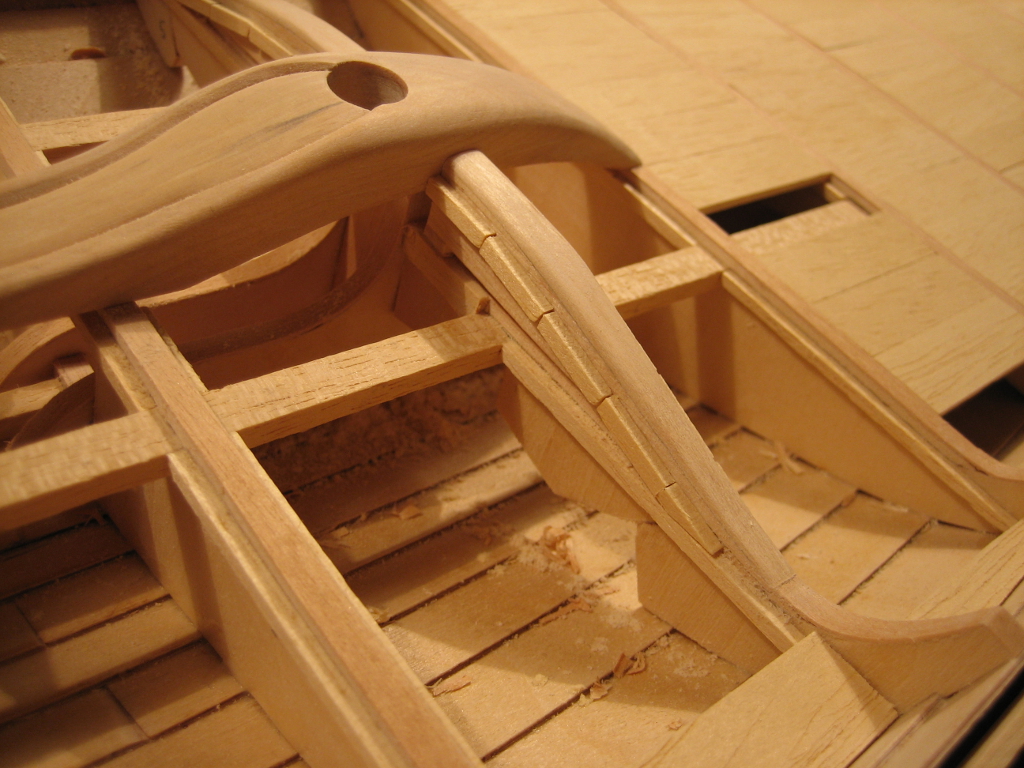
This is how it looks on the historical museum vs original in norway, notice the shape of the "wings", positive on the model but negative on the original.
- hexnut, Salty Sea Dog, Mirabell61 and 2 others
-
5
-
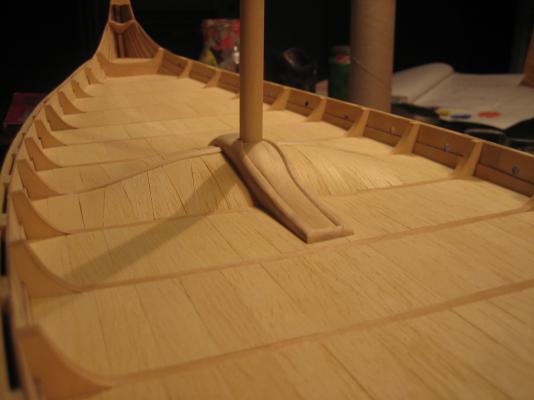
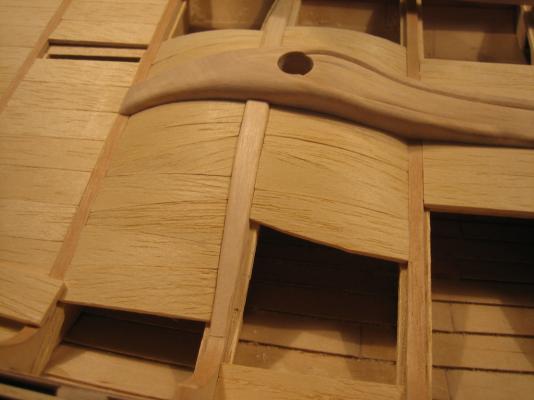
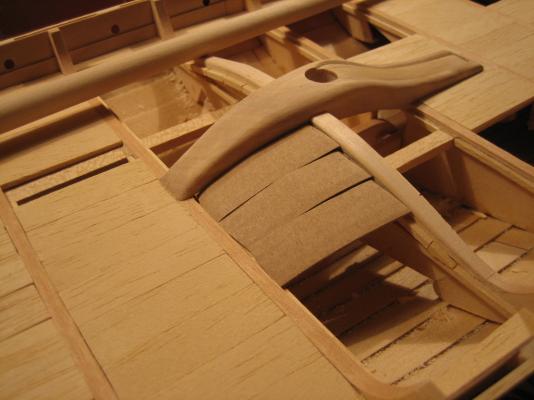
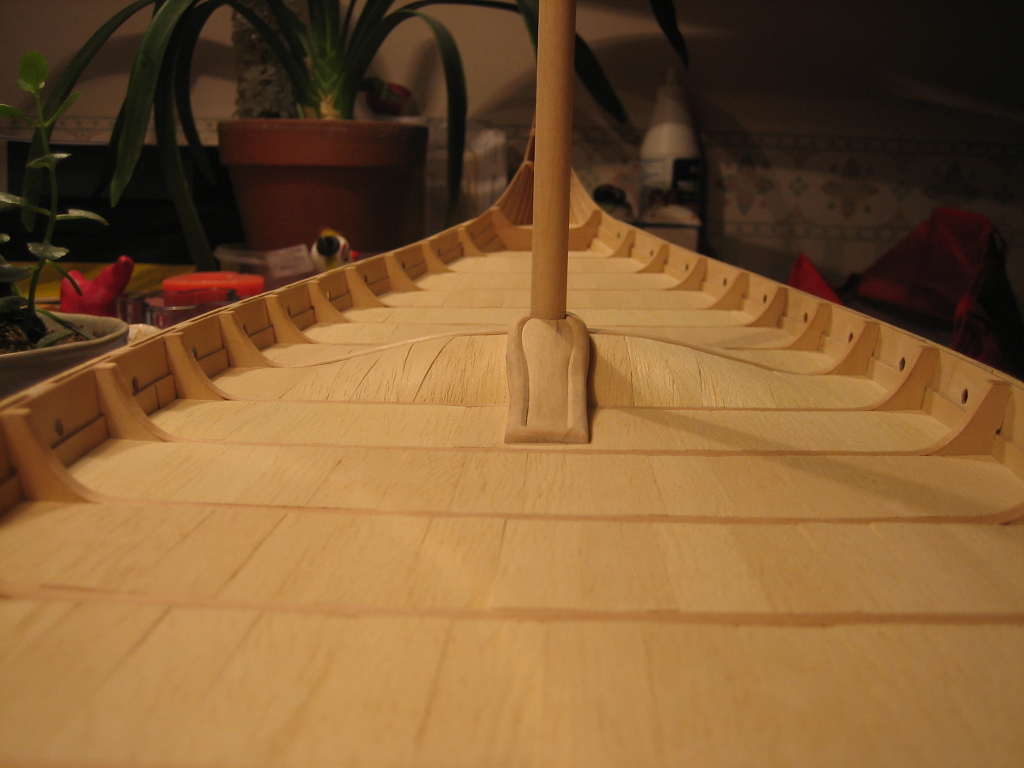
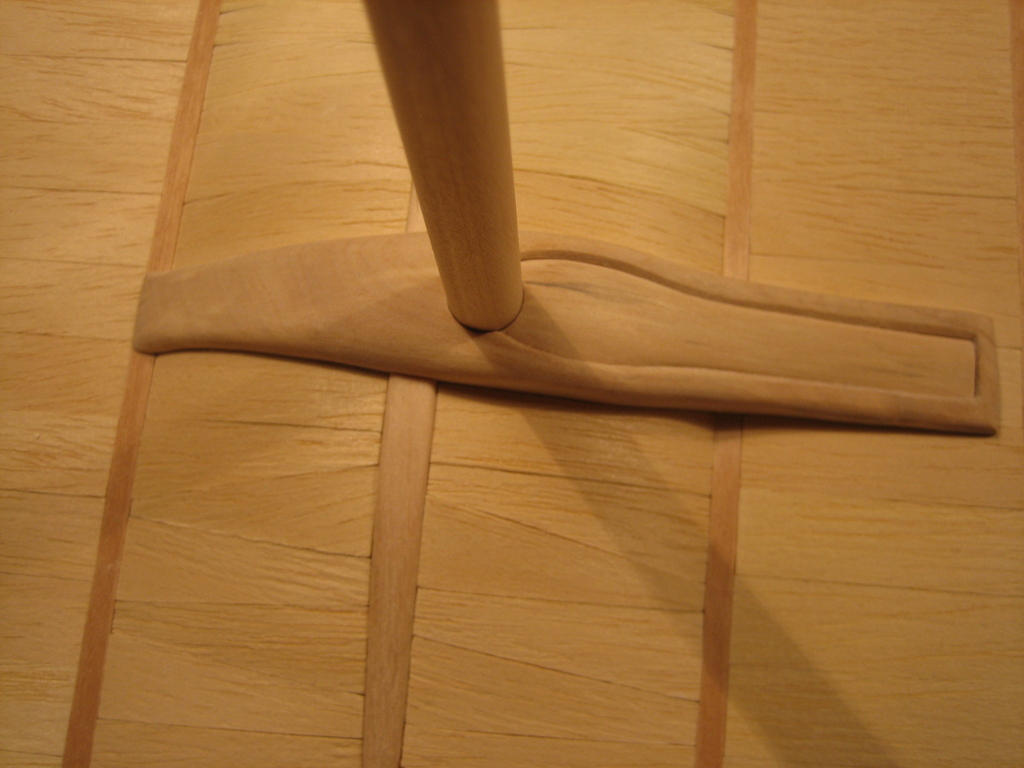
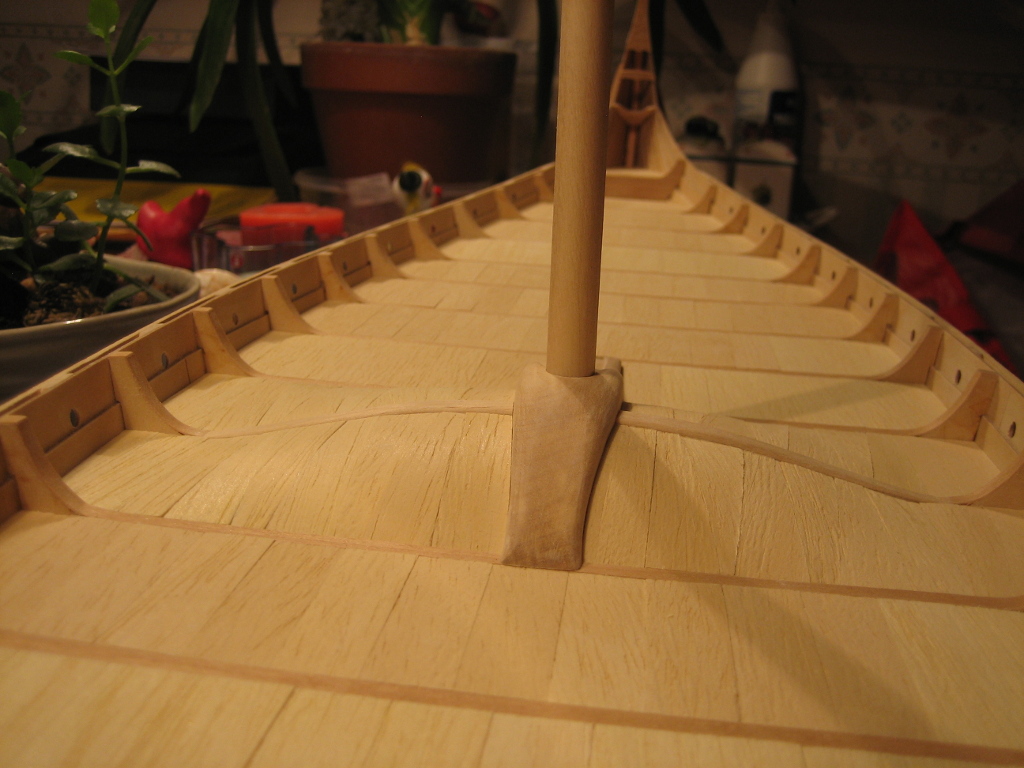
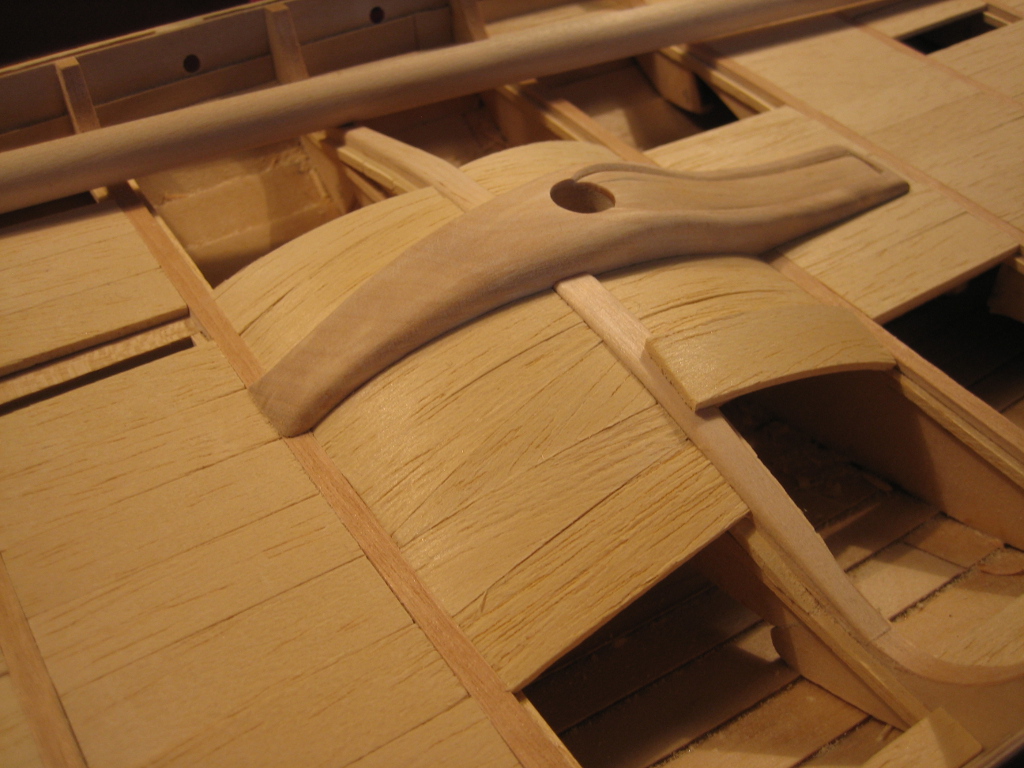
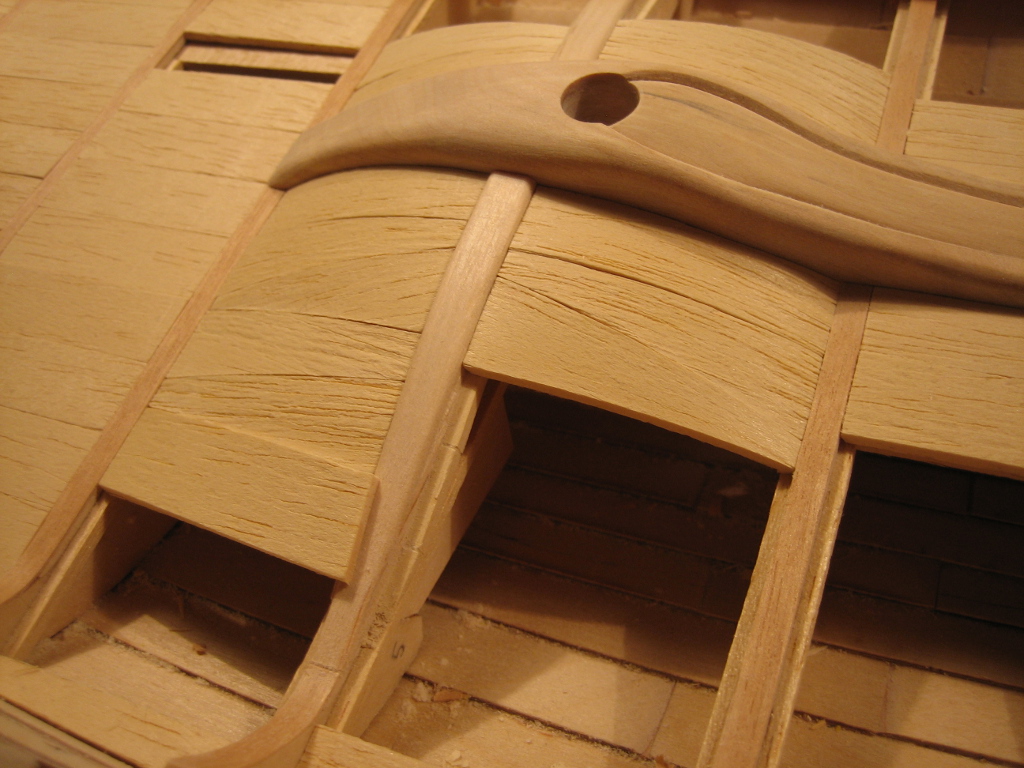
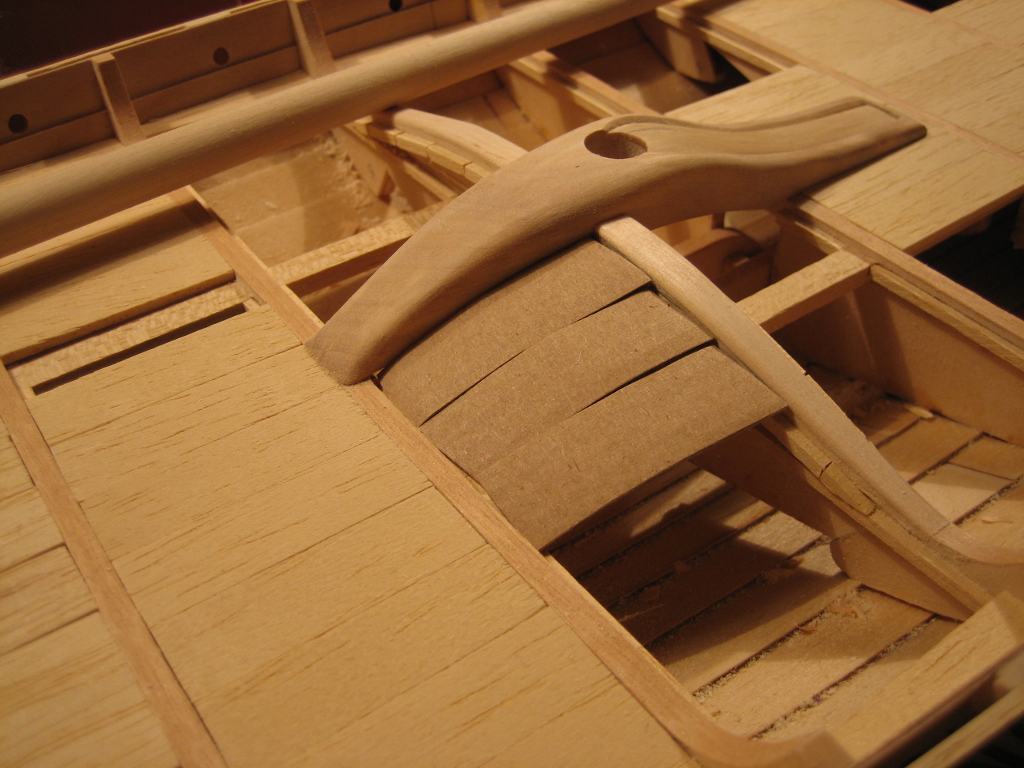
Update on the mast fish reconstruction. I am still trying to replicate the historical museums reconstruction of the mast fish and surrounding areas, i´m beginning to doubt the sanity in this approach. It do look a little bit weird... The "bump" looks too high, it was probably smaller on the original, also the shape of the wings holding the bump deck parts was negative on the original. But on the models in the historical museum and sea historical museum in sweden the wings was positive. I followed this approach because i could not envision it in my head how i would fit the deck parts... I assume the model builders had the same problem...
I would appreciate feedback on this.


-
I think tin would work. I´ve been using it - u´ll have just to blacken it.
Did you use tin foil or something thicker? How did you blacken it?
-
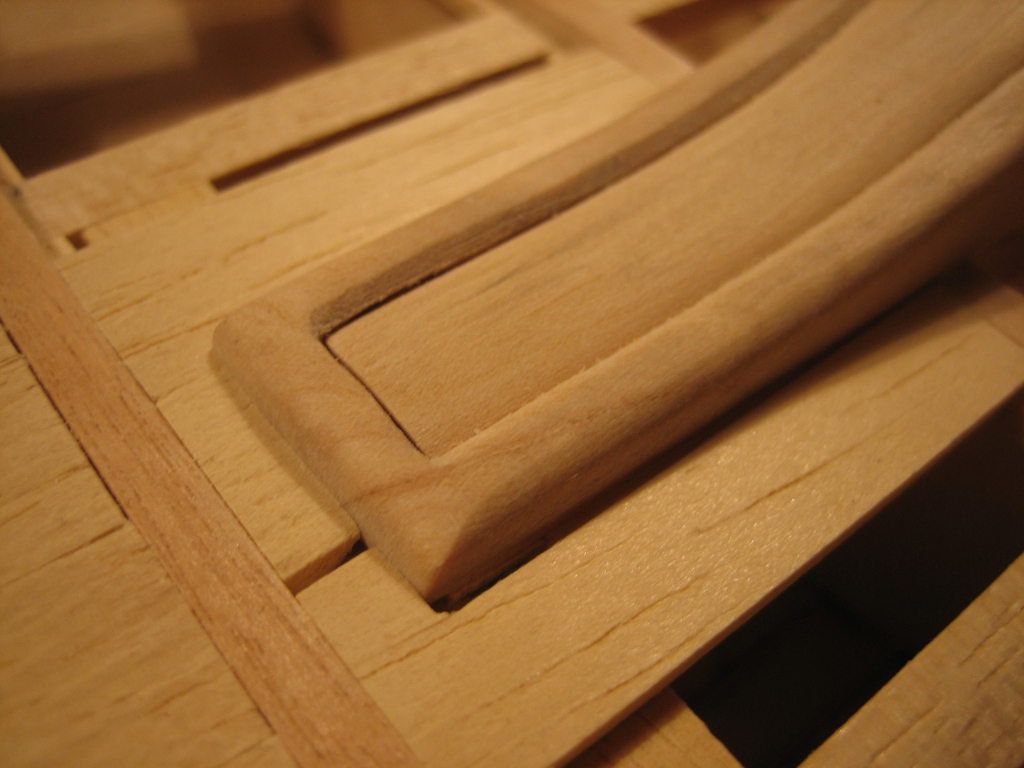
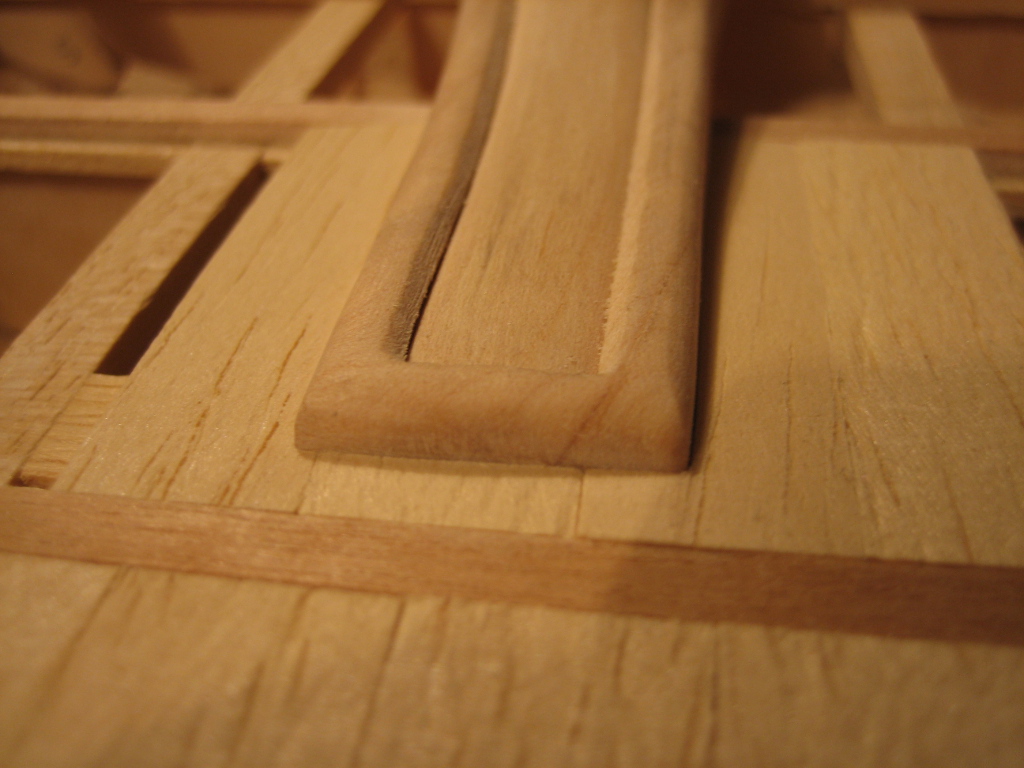
I had to cut back the planks in the curve to allow the scrollwork to fit. Better that than reduce the size of the scroll which is the most important visual detail.
Just watch it so you don´t cut away to much of the planks glued to the bulk. I was very scared doing that i can tell you.
-
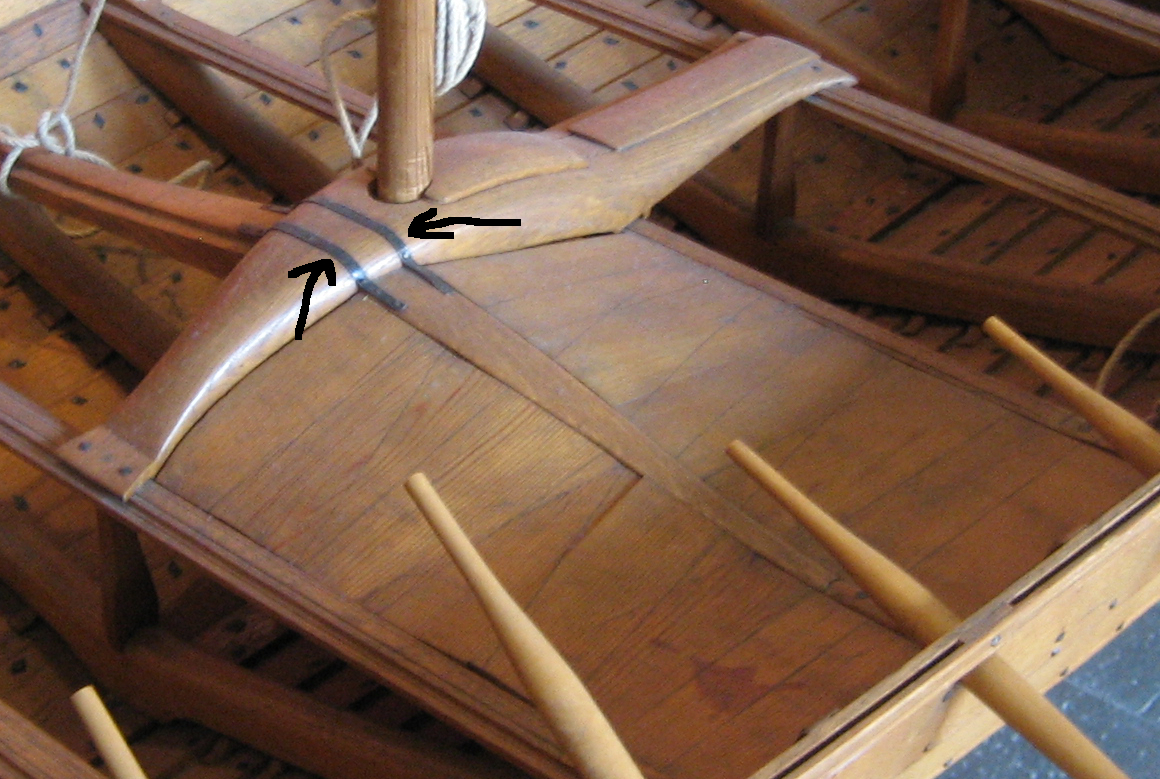
This picture is from a museum in Stockholm showing an interpretation of the Oseberg ship. I have made some very nice looking arrows pointing at two metal pieces holding the thingies (?) on the left and right of the mast fish in place. As you can see on the other picture from Oslo showing the real ship, the metal pieces is also present on the original.
I have tried to find some apropriate material to use for this on my own model, i have searched everywhere and i am starting to loose hope for finding anything usable. It has to be some metal which is so thin that you can easily shape it to fit.
Is there anyone out there who can tell me what i should be looking for?

- md1400cs and Mirabell61
-
2
-
Your package is on the way. I picked up a red oak plank and have started cutting it into deck planking. I am still a long way from needing it. Your deck is looking great. The mast fish is beautiful, definitely worth all the work that you put into it.
Thank you, nice looking oak plank you have there, will be very interesting to see your future deck.
-
The Obechi is on the way. I cut the bundle in half and put it in a small mailing tube. I will ship it in one hour.
Wonderful.
-
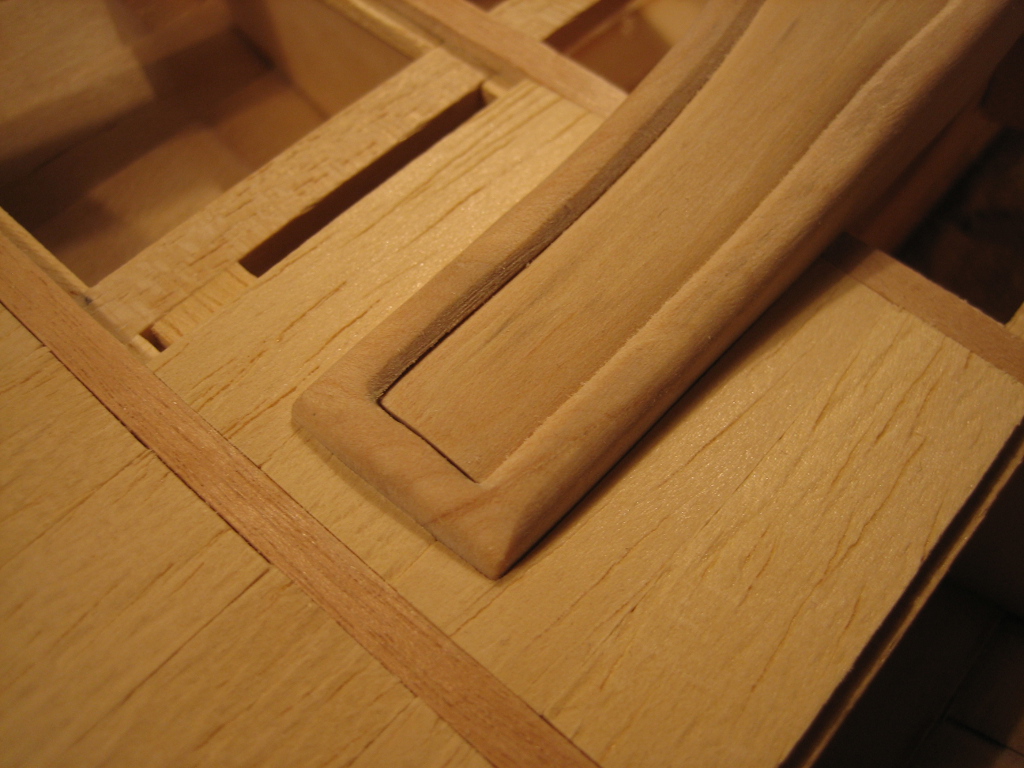
I stripped off the back layer of the inside piece of scrollwork with a scalpel blade so that it would lay flat with the rest of the scrollwork.
 Oseberg -03-04-2014 73.jpg Oseberg -03-05-2014 83.jpg
There is a spacer at the top of the scrollwork where it pinches together. It is sanded down and glued to the top of the structure. There is also a small spacer needed where the scrollwork meets.
Oseberg -03-03-2014 76.jpgOseberg -03-03-2014 77.jpgOseberg -03-04-2014 74.jpgAnother small piece cut to fit at the bottom of the scroll. Also, a full hull length spacer at the top of the hull planking to give the last two vertical planks a place to land. Obechi was specified but it would not take the bend without cracking so I used basswood. I soaked it and bent it with a curling iron.
Oseberg -03-04-2014 75.jpgOseberg -03-05-2014 71.jpgAdded the last two vertical planks.
Amazing work, and in such a short time! Keep it up!
The last two vertical planks was really hard to get into place, i failed miserably with those two, because of the shape of the planks, they bent upward in the middle of my ship. I probably should have modified them before gluing them on.
- angrybadger76 and WackoWolf
-
2
-
-
If Billing Boats cannot help let me know. I am not planning to use the Obechi deck planking on my model. I am cutting oak planks so I can send the whole bundle to you. It is a long way from Texas so it might take a week or two. If you need it let me know and I will ship right away.
Your planking looks great.
Hi!
I would be very grateful if you could help me with this. I have actually been in touch with Billing Boats and their suppliers, apparently the head owner of BB is sick in cancer and has recently been operated and if i understand it correctly it is only two other people working with the company because of this, his son and someone else. Because of this tragic situation the company is not working. The suppliers here in Sweden have not heard from them in three weeks.

Therefore like earlier mentioned i would be very happy if you could help me with this.
The bundle i need is as you already know:
No. 53, Dimensions: 1,8x12x610mm, Material: Obechi, Description: Deckstrips
As you know i cut them in smaller pieces so you do not need to send them as 610mm, you can cut them in half.
-
First testing with bent deck planks around mast fish. This will be harder than i first thought... I´m also running out of deck planks, will have to contact Billing Boats and see if they can supply me with more.


- Salty Sea Dog, WackoWolf, Keith_W and 2 others
-
5
-
-
I like the Minwax Gel Stain Walnut in my first tests out of the 3 other stains I tried. The goal is to get as close as possible to the real ship. I will glue a couple of scraps and see what the joints look like when stained. I will send pictures when I finish.
As usual thanks for your kind words and your help and support.
Well, this will surely be useful. It will be interesting to see how the stain reacts to the glue. Also i wonder if you get different results if you use water based stain or oil based stain.
Regarding the color of the original ship, it didnt look like it do in the museum. When it sailed it was most likely alot brighter but because of the age and where it has been it is now almost black, but it sure looks cool.
-
Please let me know if this is what you are looking for.
One problem I had was keeping the glue off of the outside surface where the planks overlapped. I applied the glue with a toothpick but when I clamped the planks out came the glue. I wiped it off immediately but I am still left with some sanding.
Oseberg -03-01-2014 50.jpgOseberg -03-01-2014 53.jpgOseberg -03-01-2014 58.jpgOseberg -03-01-2014 60.jpgOseberg -02-28-2014 51.jpgI am impressed. What else can i say. Keep it up!
I think we will have the same problems, when we will stain the ship. I also applied the stripes glue with a toothpick and also got glue all over the place.
You go first with the staining and i follow, what do you say?

-
I finished the lower part of the hull but had a little false start. On my first plank of the day I got the distance between the overlap of two planks about 2 mm too close and I did not notice until 3 planks later. I have always used water to loosen PVA glue but I heard alcohol mentioned on MSW and it sure works faster than water. Thanks for the tip.
I sure do like the lines of this ship. The Vikings must have been a tough bunch-crossing the ocean in an open boat.
Oseberg -02-27-2014 31.jpg Oseberg -02-27-2014 34.jpgOseberg -02-27-2014 33.jpgThe Oseberg was probably more of a ceremonial ship, or a ship only used in smaller lakes. They used larger longships or deeper going "knarr" ships for longer voyages.
But sure, they were still open.
Could you upload some closeup pictures from the side of your ship? I would like to compare it with my own. i would find it interesting to see how you tackled some of the stripe laying problems i had.
Congratulations by the way, it looks great!
-
I hate to ask a dumb question, but my Billings Boat instructions show the deck made from long strips. The width of each plank is about the same as yours; but the length is much longer. The instructions show one strip goes just over halfway and then a second one goes to the other end. Personally, I think your deck looks fantastic and I am considering doing the same thing (although I can't believe it will look as good as yours). What made you decide to do the deck like this?
In the instructions as you have noted they just lay out long strokes of strips across the ship, it´s called cheating.
The width of the strips is exactly like mine, 12 mm, i just cut them in smaller parts. I want the ship to be closer the real ship, therefore i built up the inside of it as close as i could to the original.
As you will notice Billing Boat have also cheated with the amount of bulk heads, so if you want to lay the deck as i have you will need to construct a large amount of bulkheads from scratch to get the correct length of the deck strips between the bulk heads.
Sorry for my bad english.
Good luck.
-
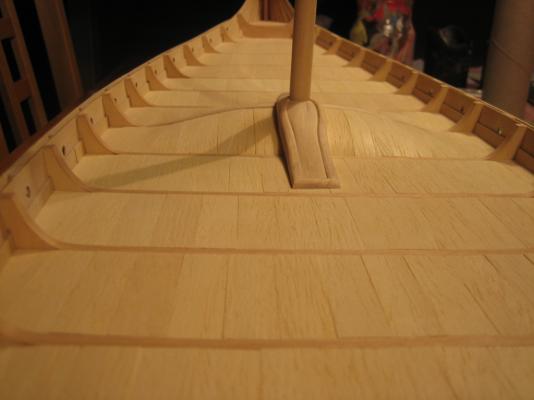
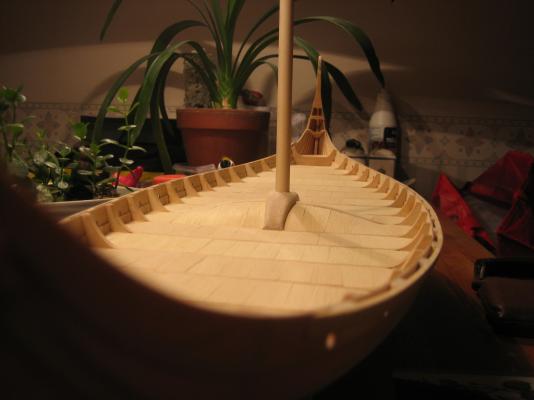
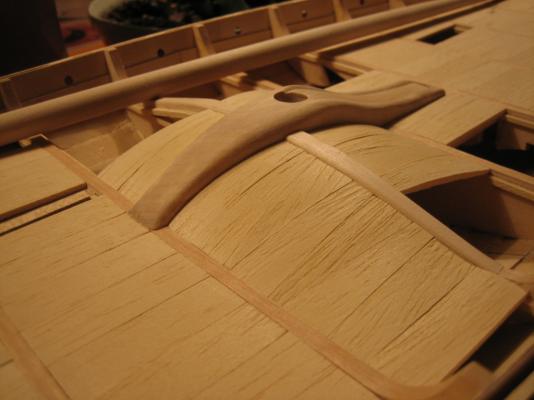
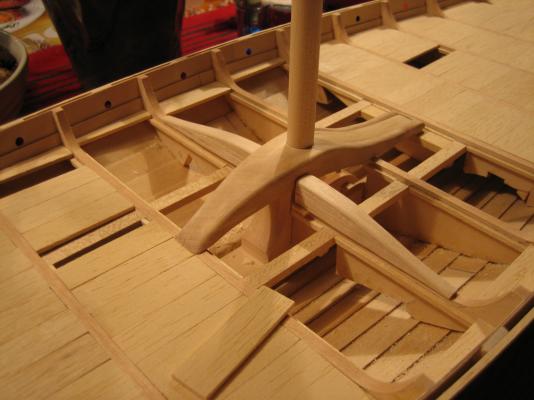
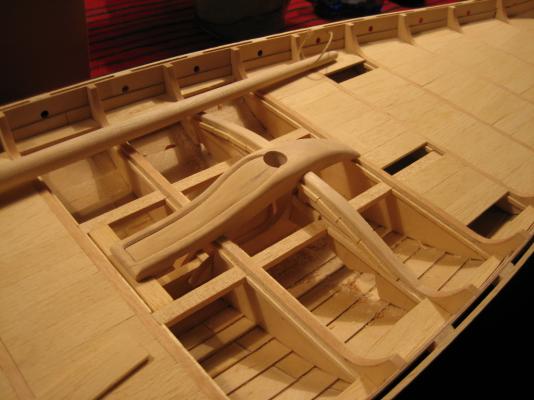
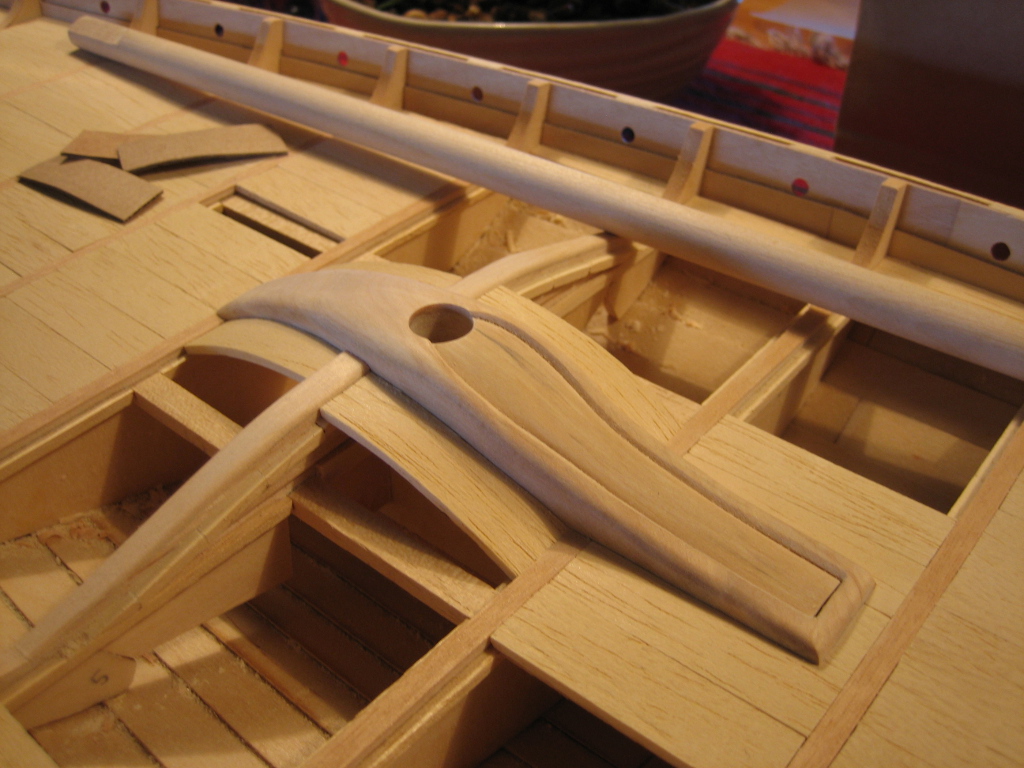
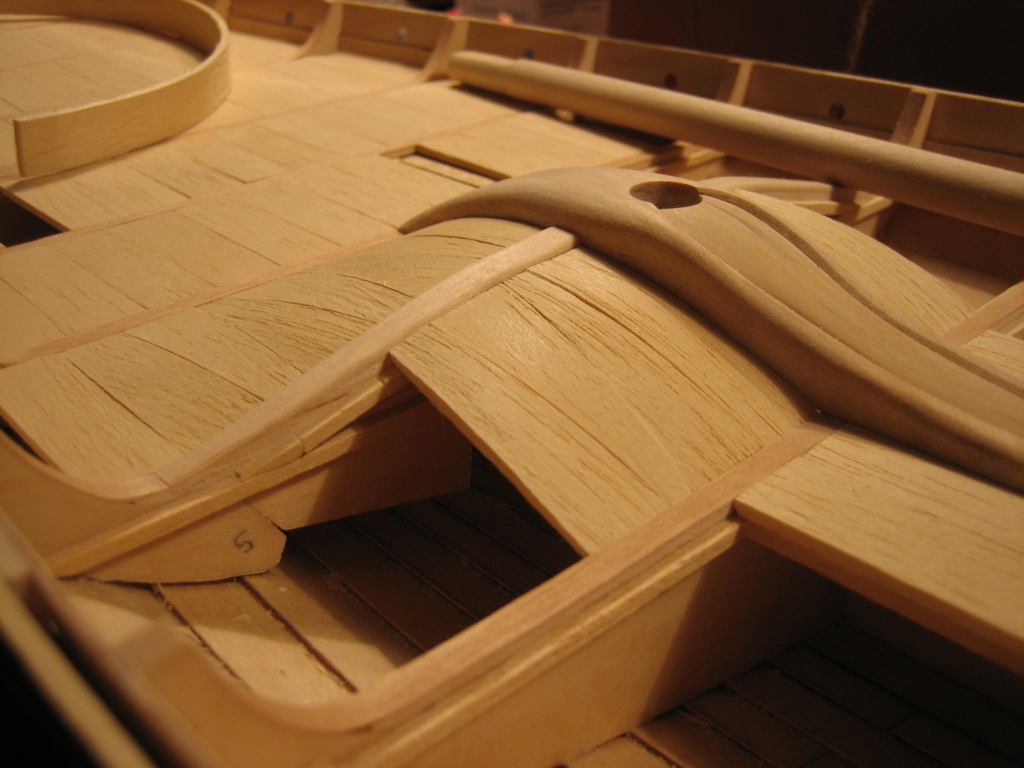
More work with the mast fish and surrounding areas.


- Aussie048, Mirabell61, Vivian Galad and 2 others
-
5
-
I got a start at the planking. It is 1mm laser cut plywood and bends easily. Each plank is overlapped about 1 mm and needs a little adjustment to get it just right at both ends. I did a little coarse sanding but it has a long way to go.
Nice work, and you are working fast too. You will catch up with me in no time.


Oseberg Viking Ship by Jack P - FINISHED - Billing Boats - 1/25 Scale - 9th Century - (Modified)
in - Kit subjects built Up to and including 1500 AD
Posted
Hello!
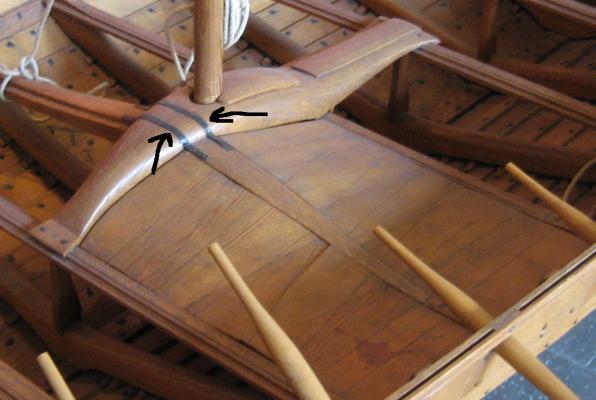
I am wondering, being, that i have sort of a interest in this subject. Are you planning to make a dent in the veneer so the scroll work patterns follow through with the veneer? See picture and enjoy the extremely beautiful arrows.
I have begun working with this also and i cannot make up my mind... If you don´t the veneer looks like just what it is, something glued upon, but if you dent it, maybe it will merge more with the scroll work... hmmm, or maybe not.
And your thought about this is?