HOLIDAY DONATION DRIVE - SUPPORT MSW - DO YOUR PART TO KEEP THIS GREAT FORUM GOING! (Only 68 donations so far out of 49,000 members - Can we at least get 100? C'mon guys!)
×


myxyzptlyk2003
-
Posts
172 -
Joined
-
Last visited
Content Type
Profiles
Forums
Gallery
Events
Everything posted by myxyzptlyk2003
-
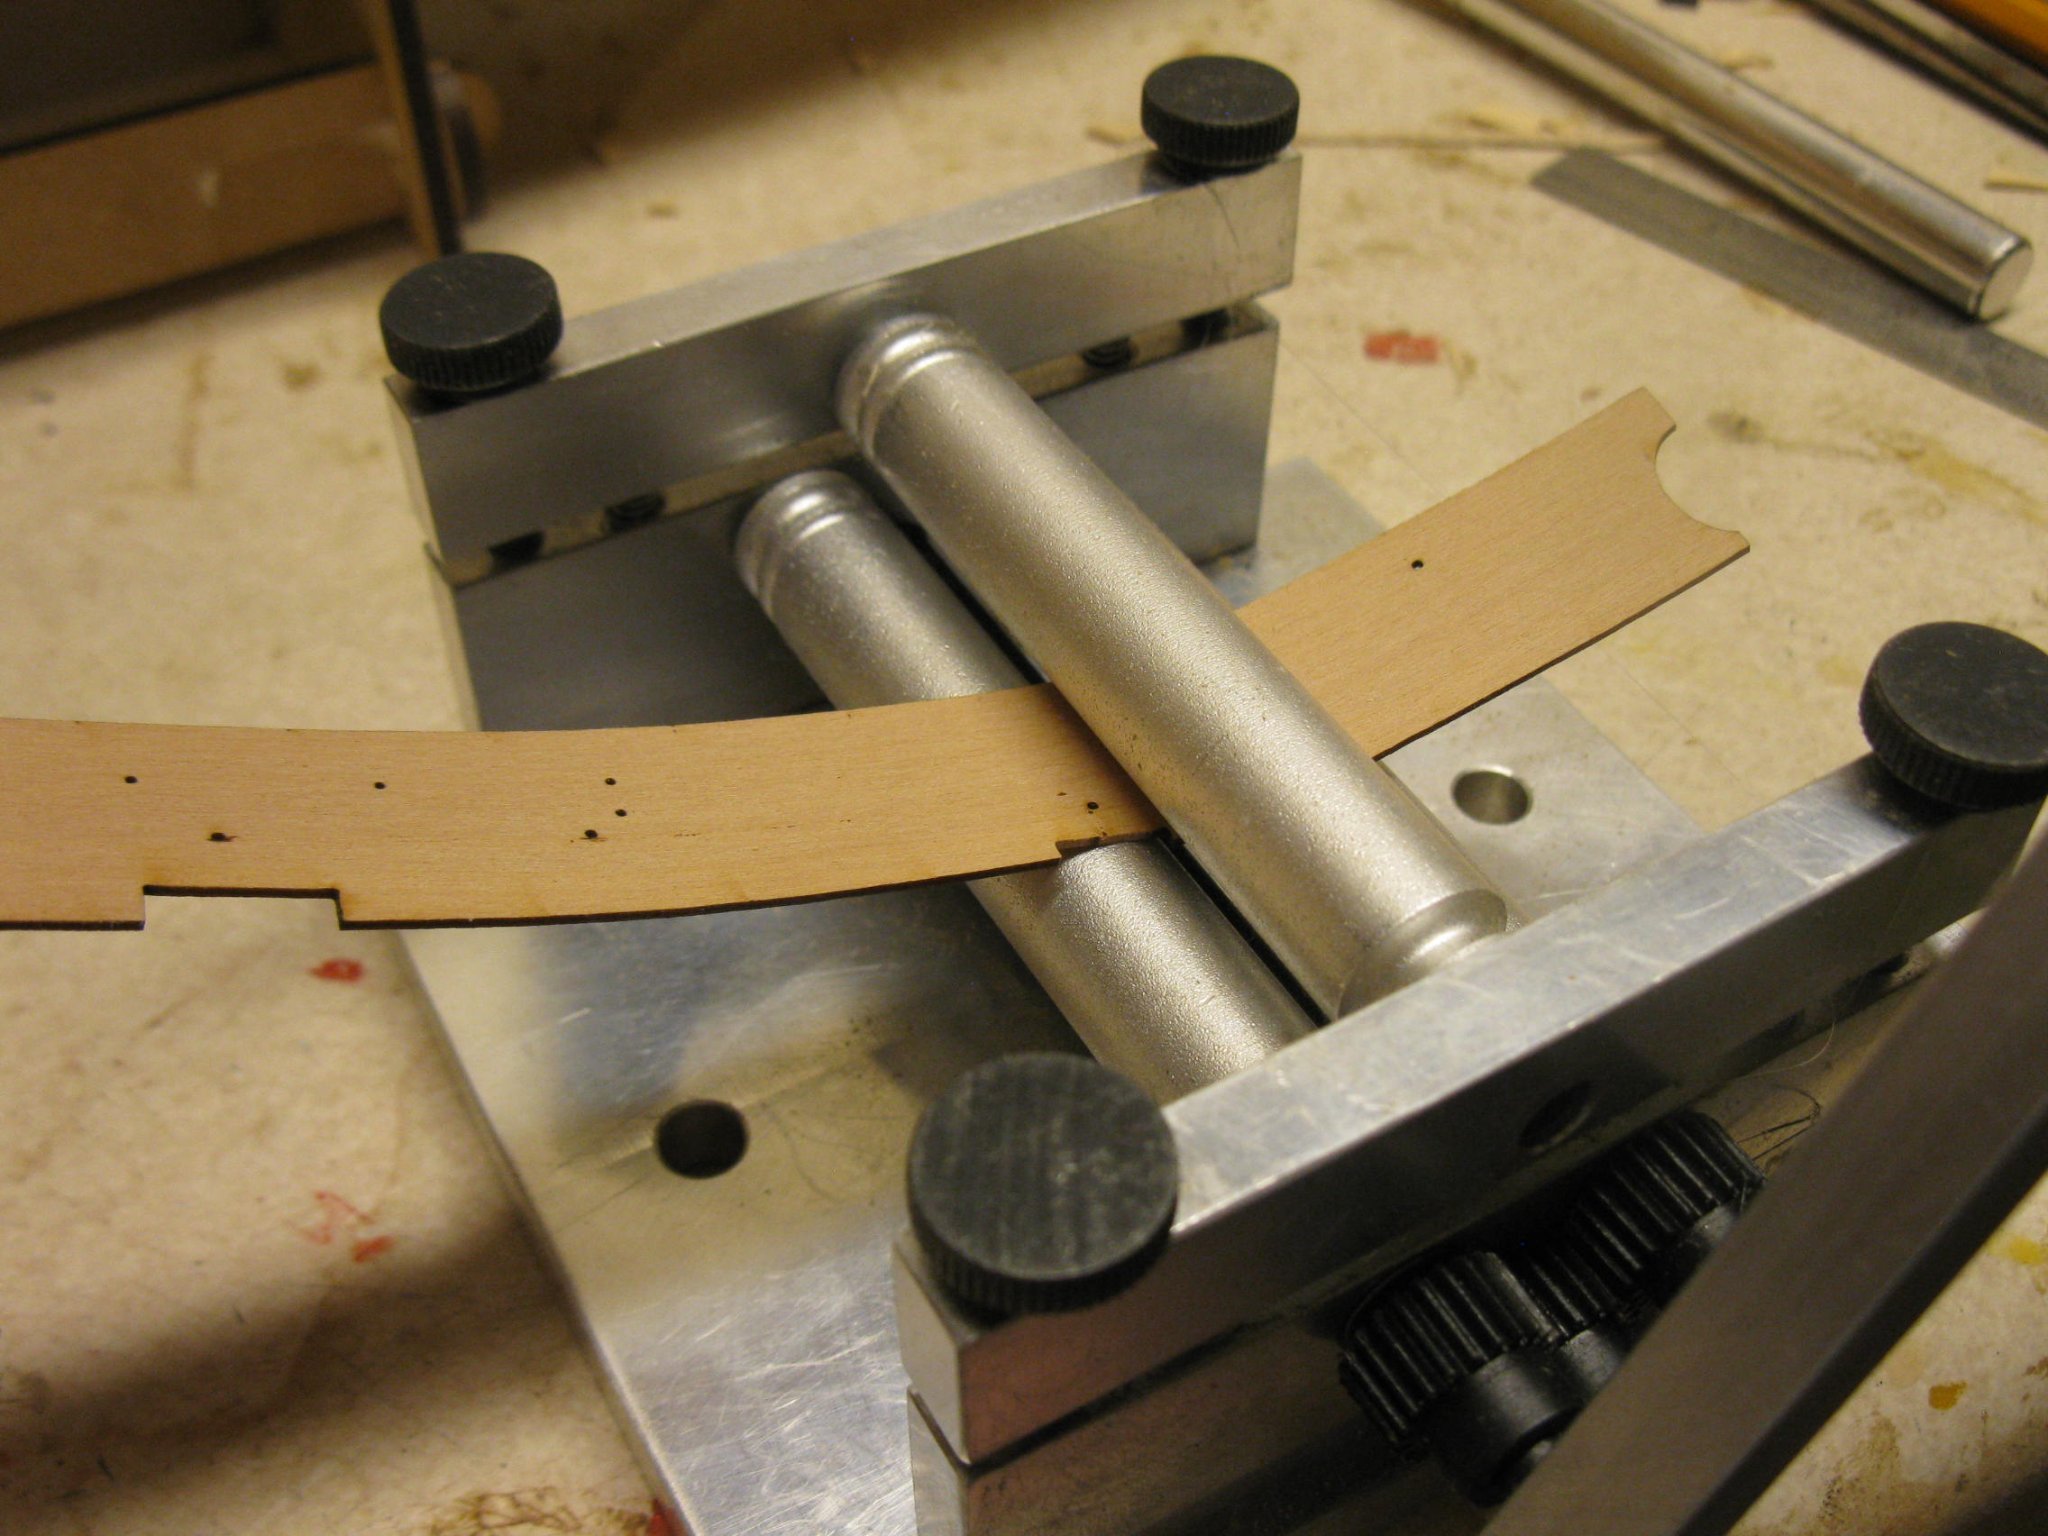
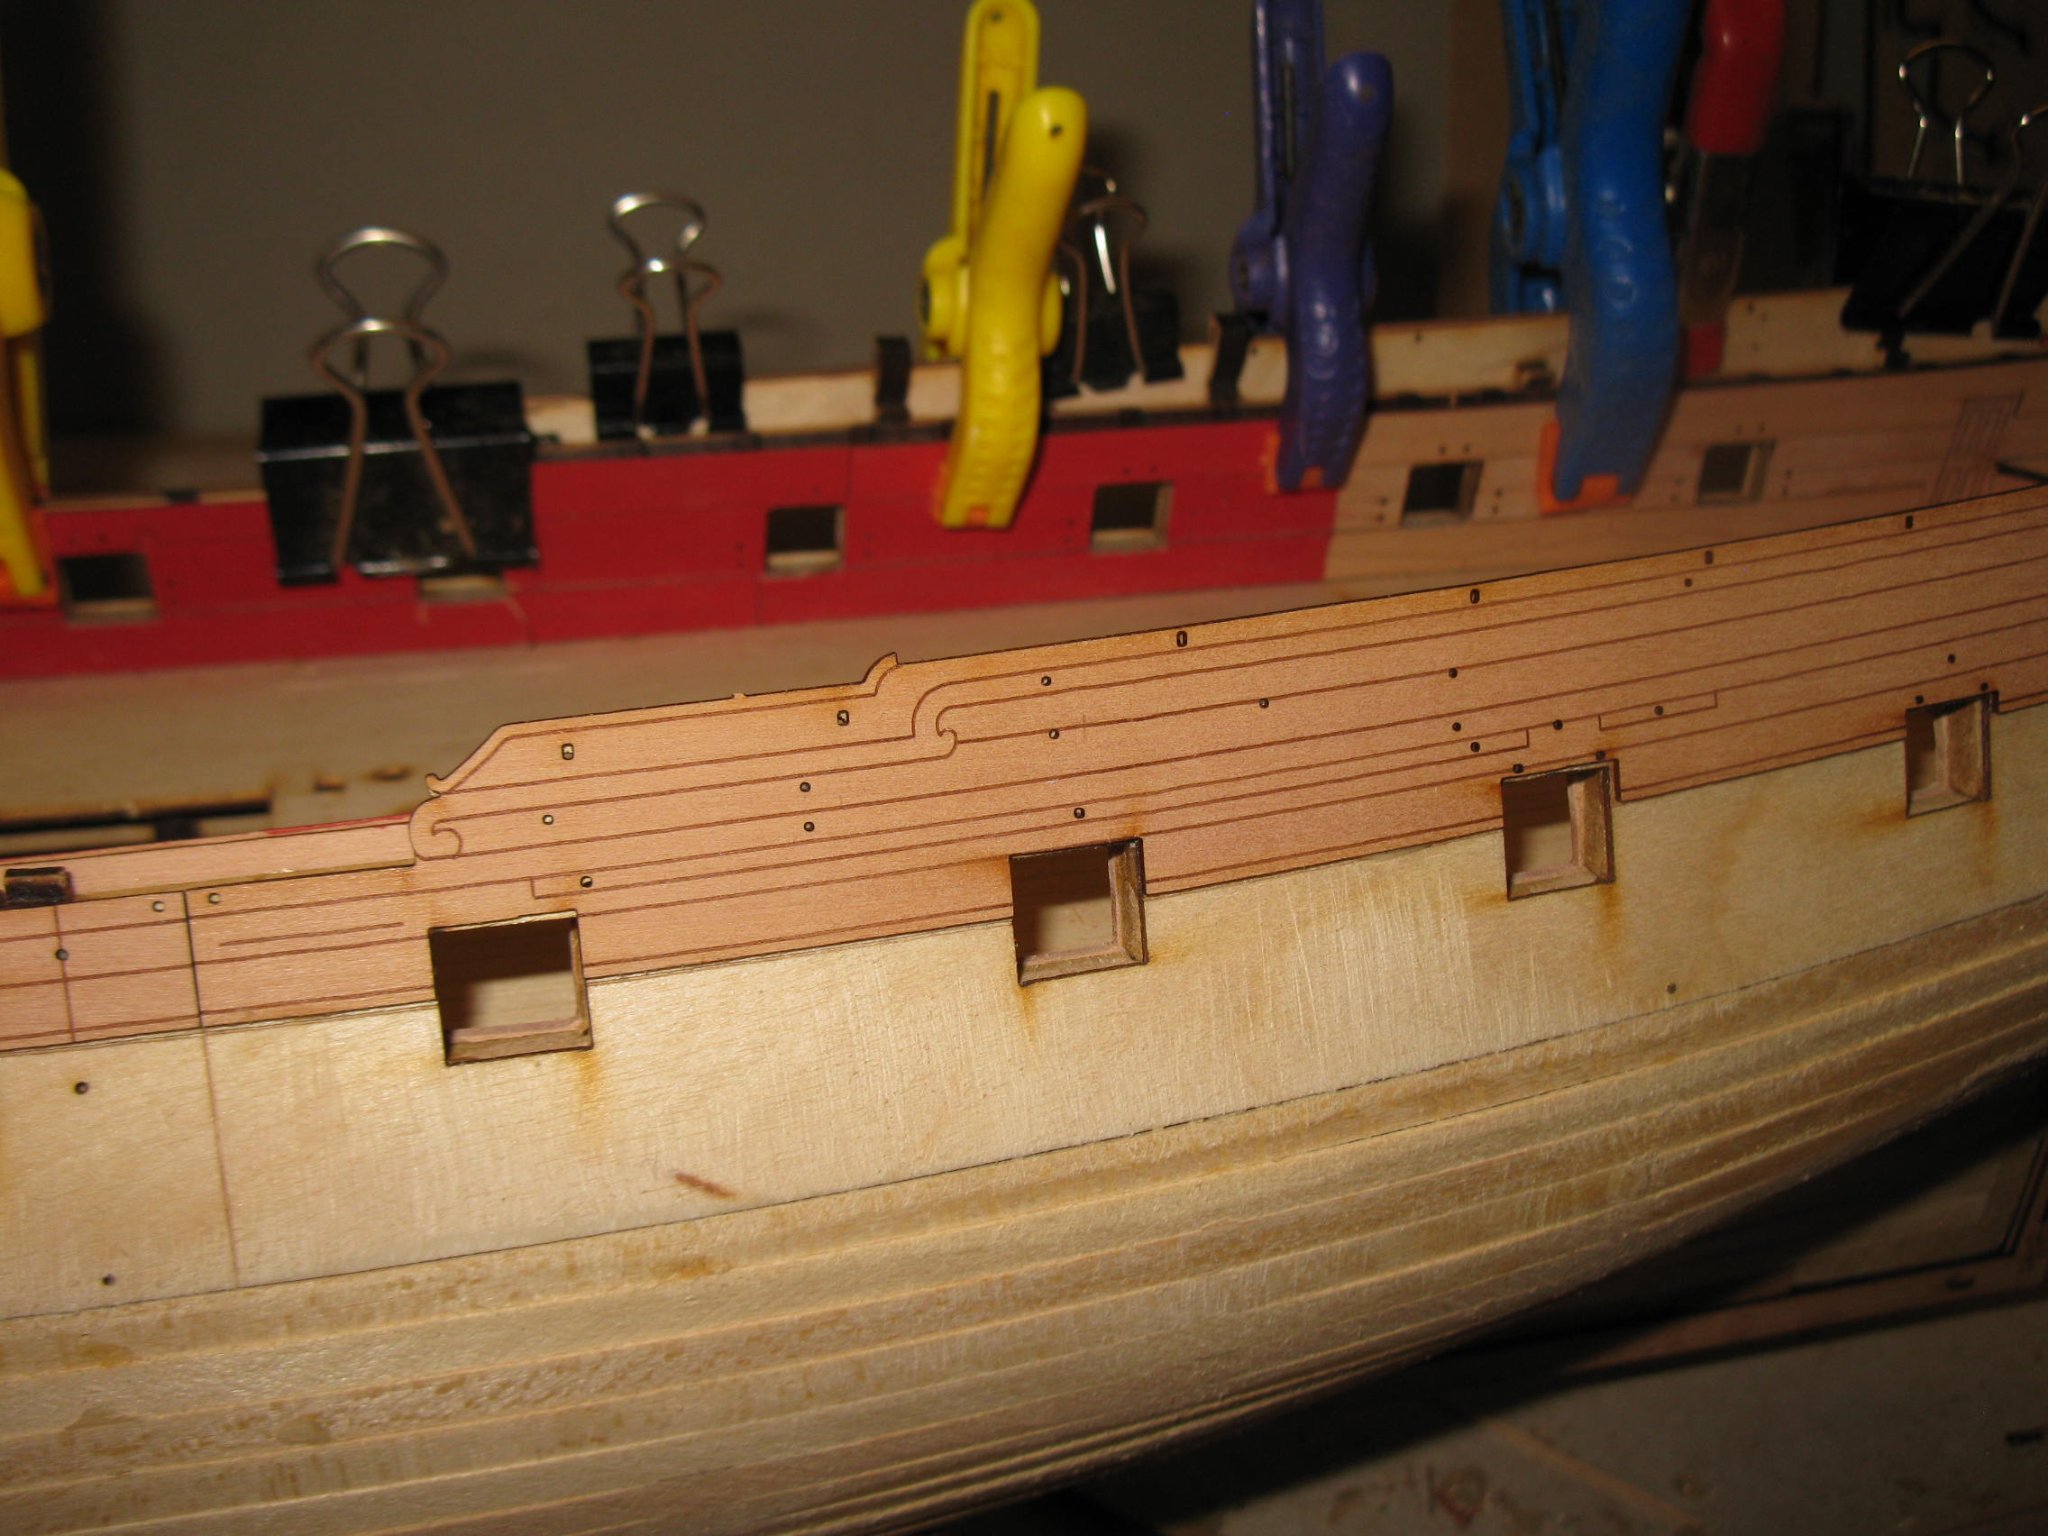
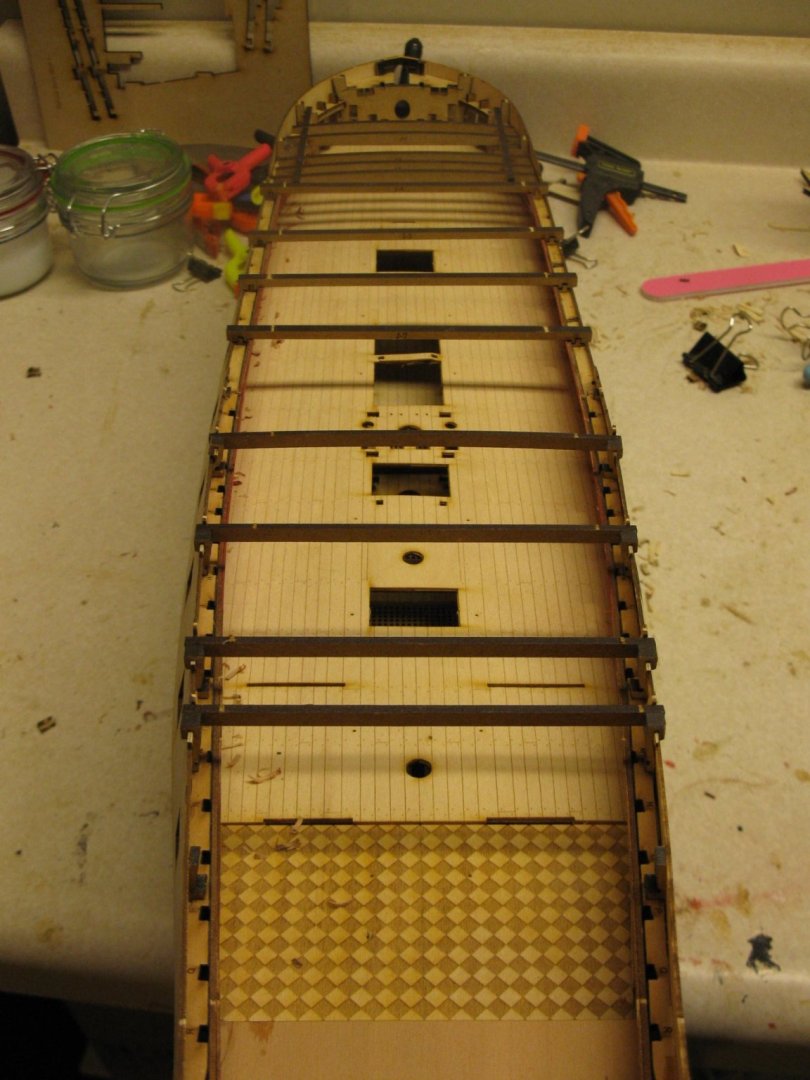
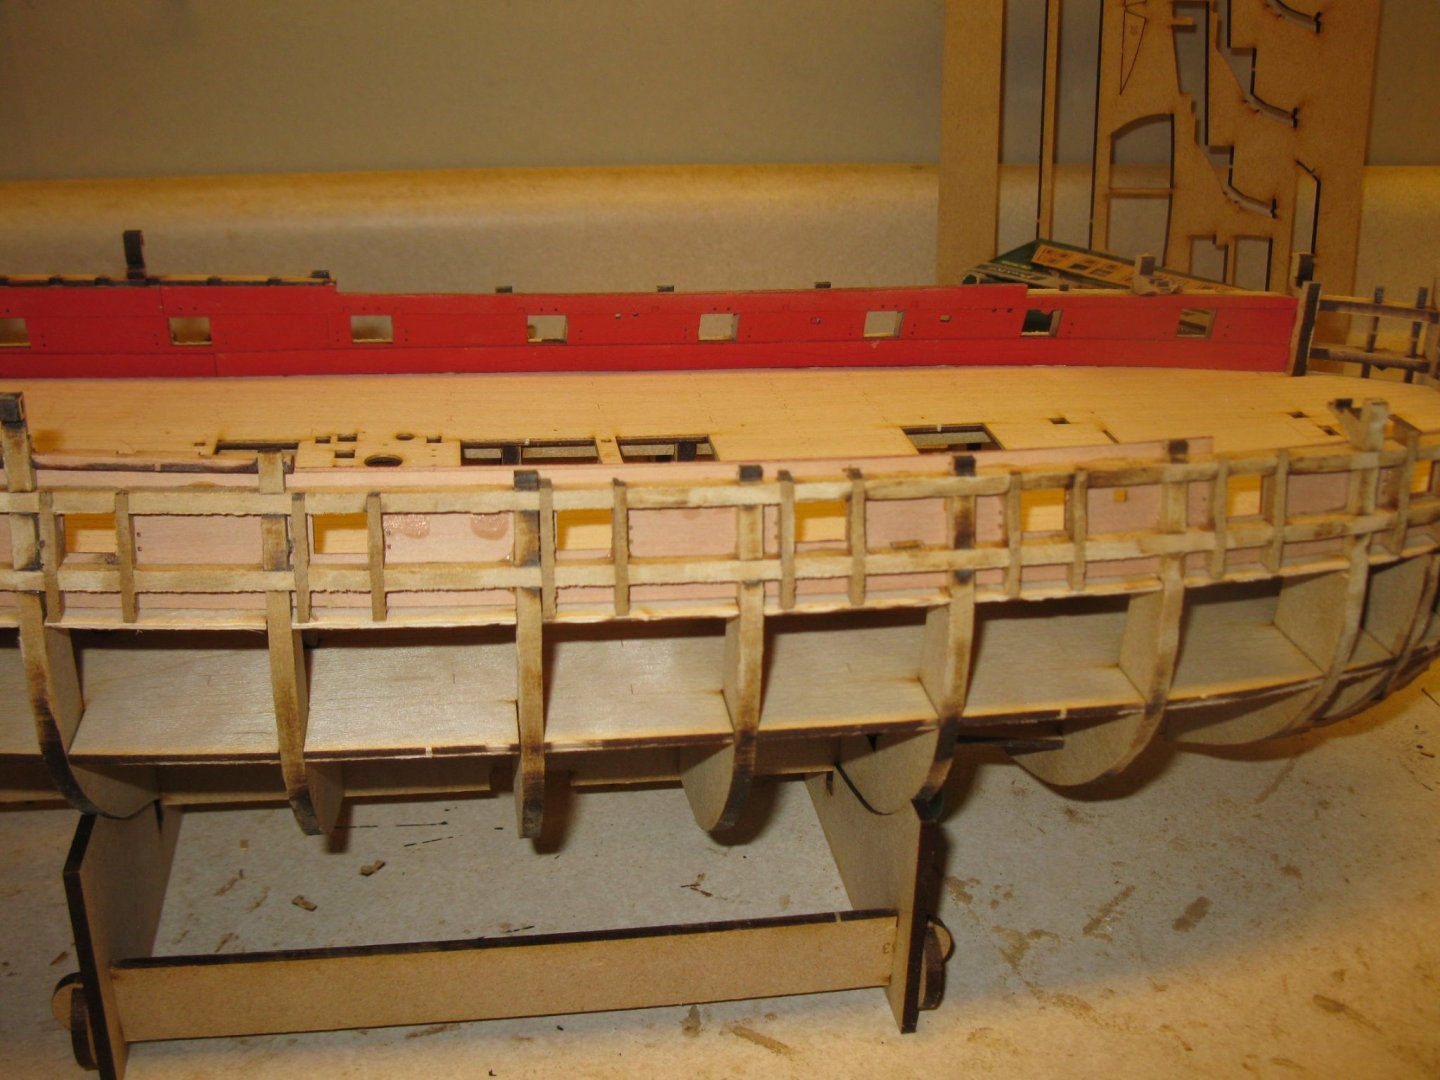
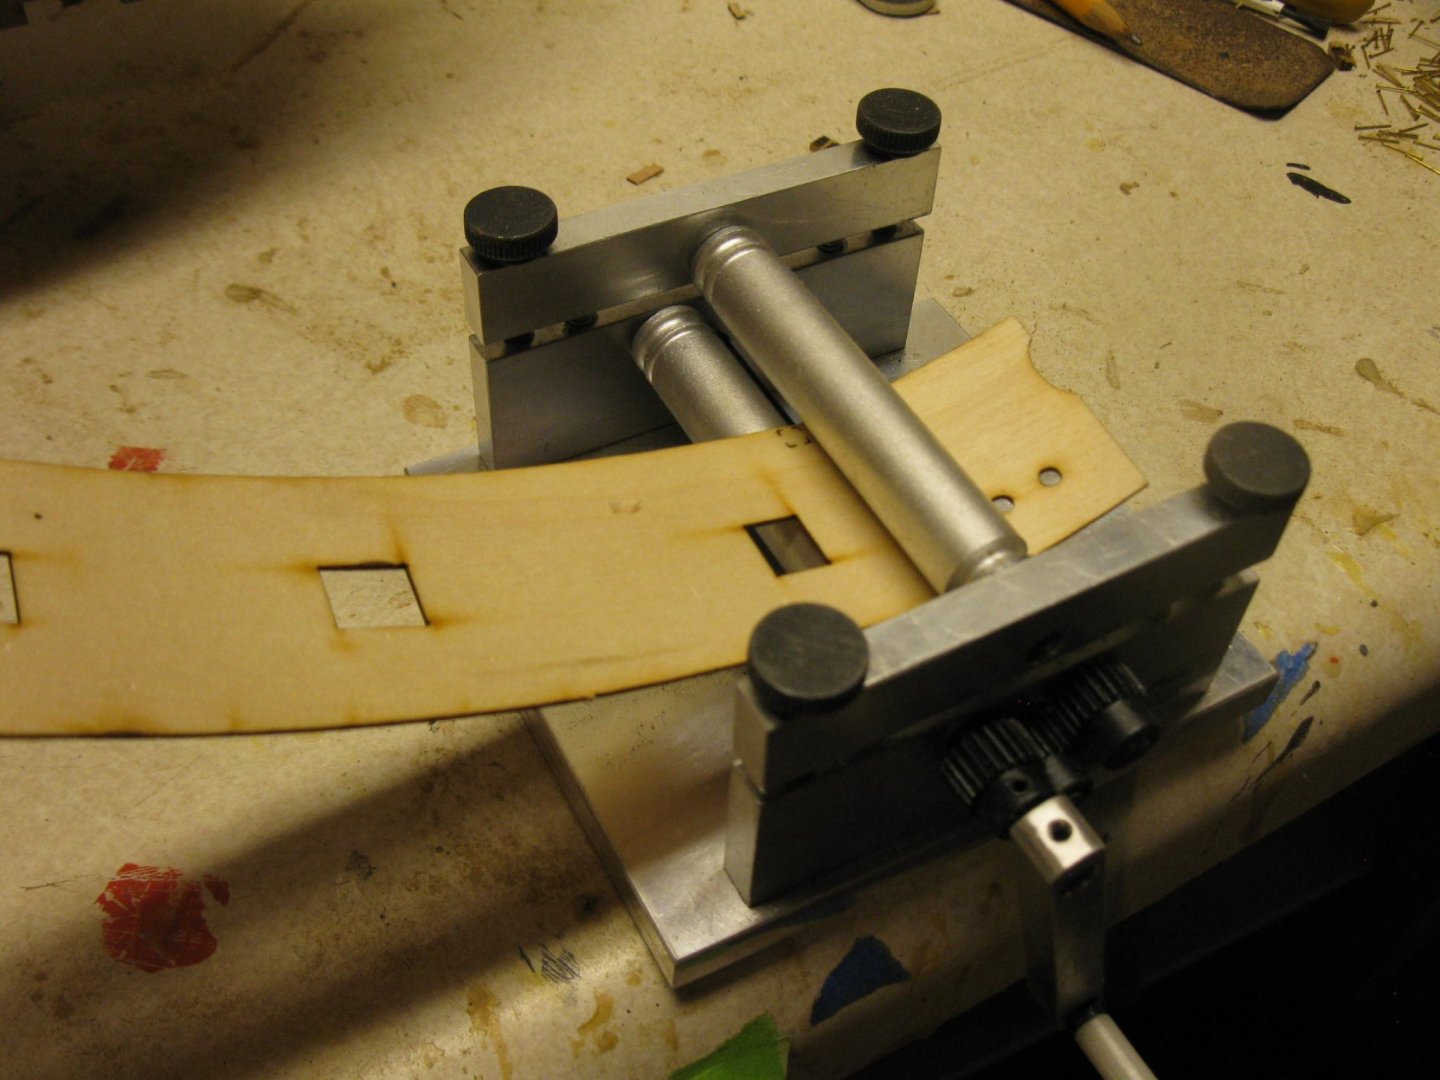
Here is the model with the upper patterns applied. They fit beautifully. And have dry fitted the lower patterns and again a perfect fit. You will see my bending of the upper pattern in the bending machine saving me the time of soaking and drying. The thickness of the wood for these pieces is about perfect for use in this machine. I am really loving the detail etched into all of these pieces. Next will be the lower patterns and then the counter pattern. Then on to the 2nd planking. That looks like my weekend project.


-
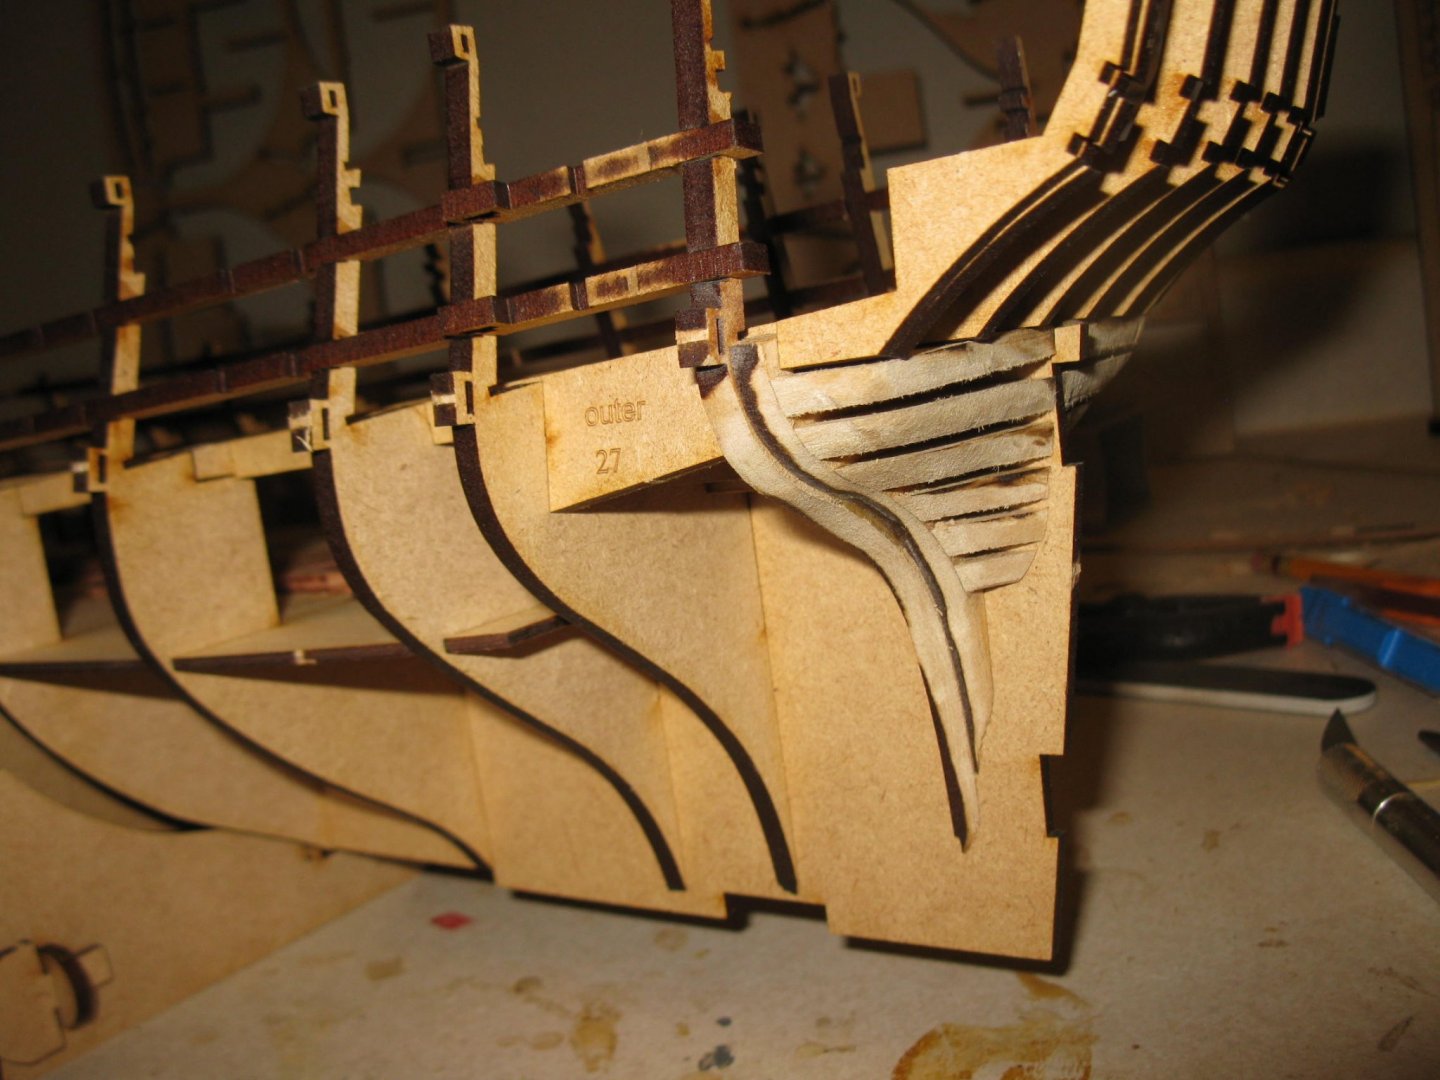
Got the prow, keel and sternpost out pieces applied. Those little tabs are excellent to help alignment. On to the upper planking patterns. Once again rather than soak the pieces I am running them through my bending machine rollers. Works beautifully on this material and give a perfect curve. And without having to wait for the drying of the wood. More pictures to follow after the planking patterns are applied. (tomorrow AM (UStime)?
-
Maybe this won't be an issue for most modelers but when gluing the outer patterns for the prow, keel and sternpost be sure you have the right side out. When I cut my pieces from the sheet, I had the sheet upside down so did not really notice the excellent markings on the one side which need to be showing on the outside. After building so many models I was used to the plain wood being on the outside. I kind of noticed my error by chance. I was doing the dry fit for the prow piece and happened to flip the piece and noticed I was almost doing it the wrong way. More and more I am appreciating this kit. I hope this is a complement for most people but this kit is very close to what building plastic ship kits is like. With the exception of the fairing and hull planking everything so far is putting premade parts together. I for one really enjoy that.
-
I do apologize for my picture quality. Certainly not up to the standards of most other posters. I don't have the lighting or background options others seem to have. But that being said, here are my latest. Prow, keel, sternpost and counter are all installed. I am strictly following the manual instructions. I am at step 155.
-
1st planking is complete. I don't worry too much about neatness at this stage as my 1st planking tends to be crap but I make up for it with wood filler and the 2nd planking will cover the bad stuff. Hope to have the keel, sternpost, bow and transom piece installed by next weekend. This thing called work keeps getting in the way of my model building.

-
Just a bit of light sanding of the lower hull and then I will start the first planking. I found that the forward spacing jig was a nice fit although I am not sure how necessary as during the attaching of the upper hull patterns the pieces came off continuously and in the end made no difference. The same can't be said of the aft spacers. J9 in particular required a tiny bit of force to spread the hull sides. The rest were nice tight fits.

-
Have the upper hull side patterns installed. I kind of surprised myself in that the cannon port openings aligned perfectly. I always expect I am off by a little and have to do some adjusting. This speaks to how well this kit is designed and produced. I will be planking the hull this weekend. I do note that the instruction manual states the 1st planking is in bag F36 but it really is in bag F43. Same thing with the 2nd planking. Instruction manual says F37 but really is in F44.
-
Chris I'll be installing the first planking on the Sphinx this weekend. The instructions say the planking is labeled F36. But the kit has them in a bag labeled F43. Same thing for the 2nd planking. Instructions say bag F37 but really in bag F44
-
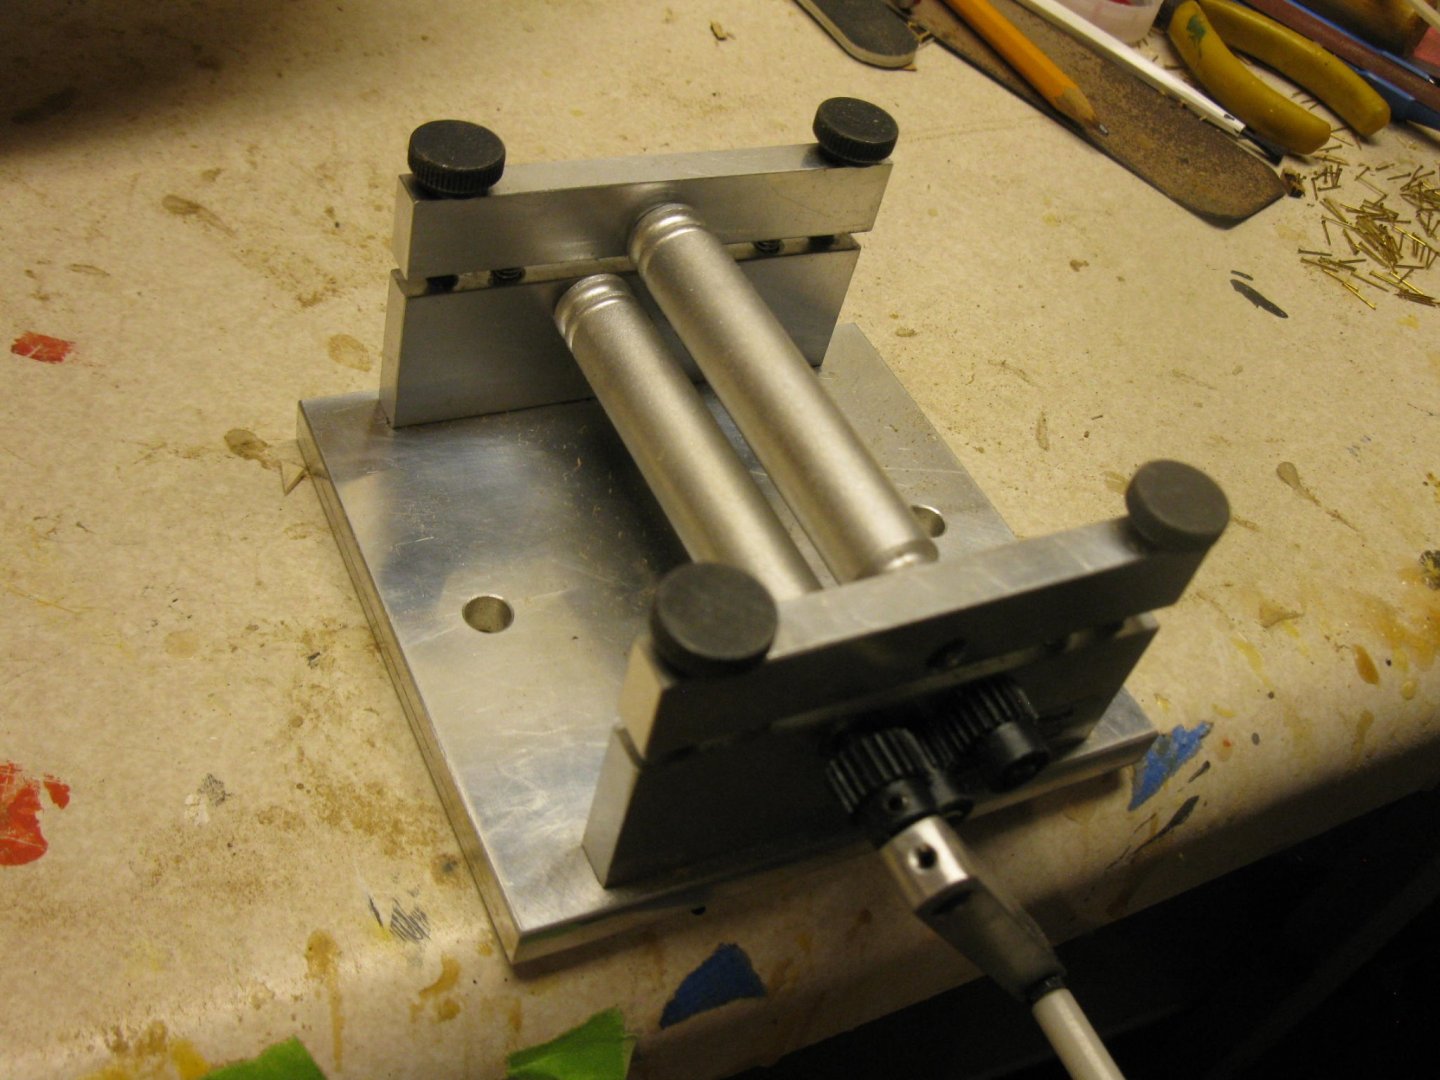
The device is called "bending machine" and sold by MicroMark here in the US.
-
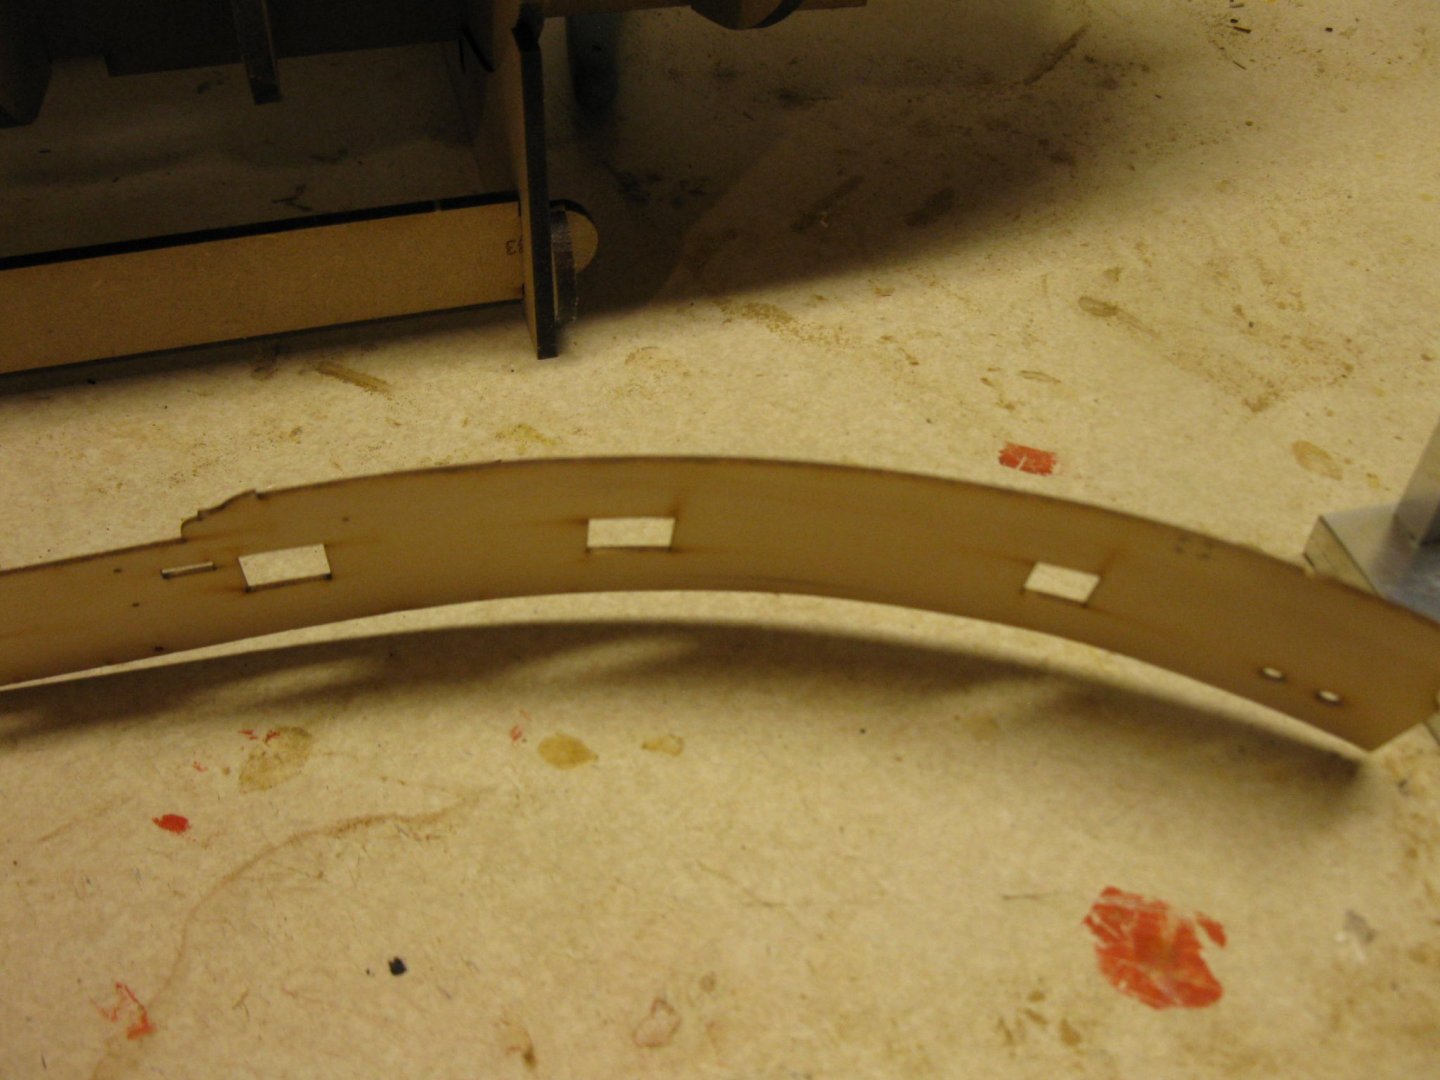
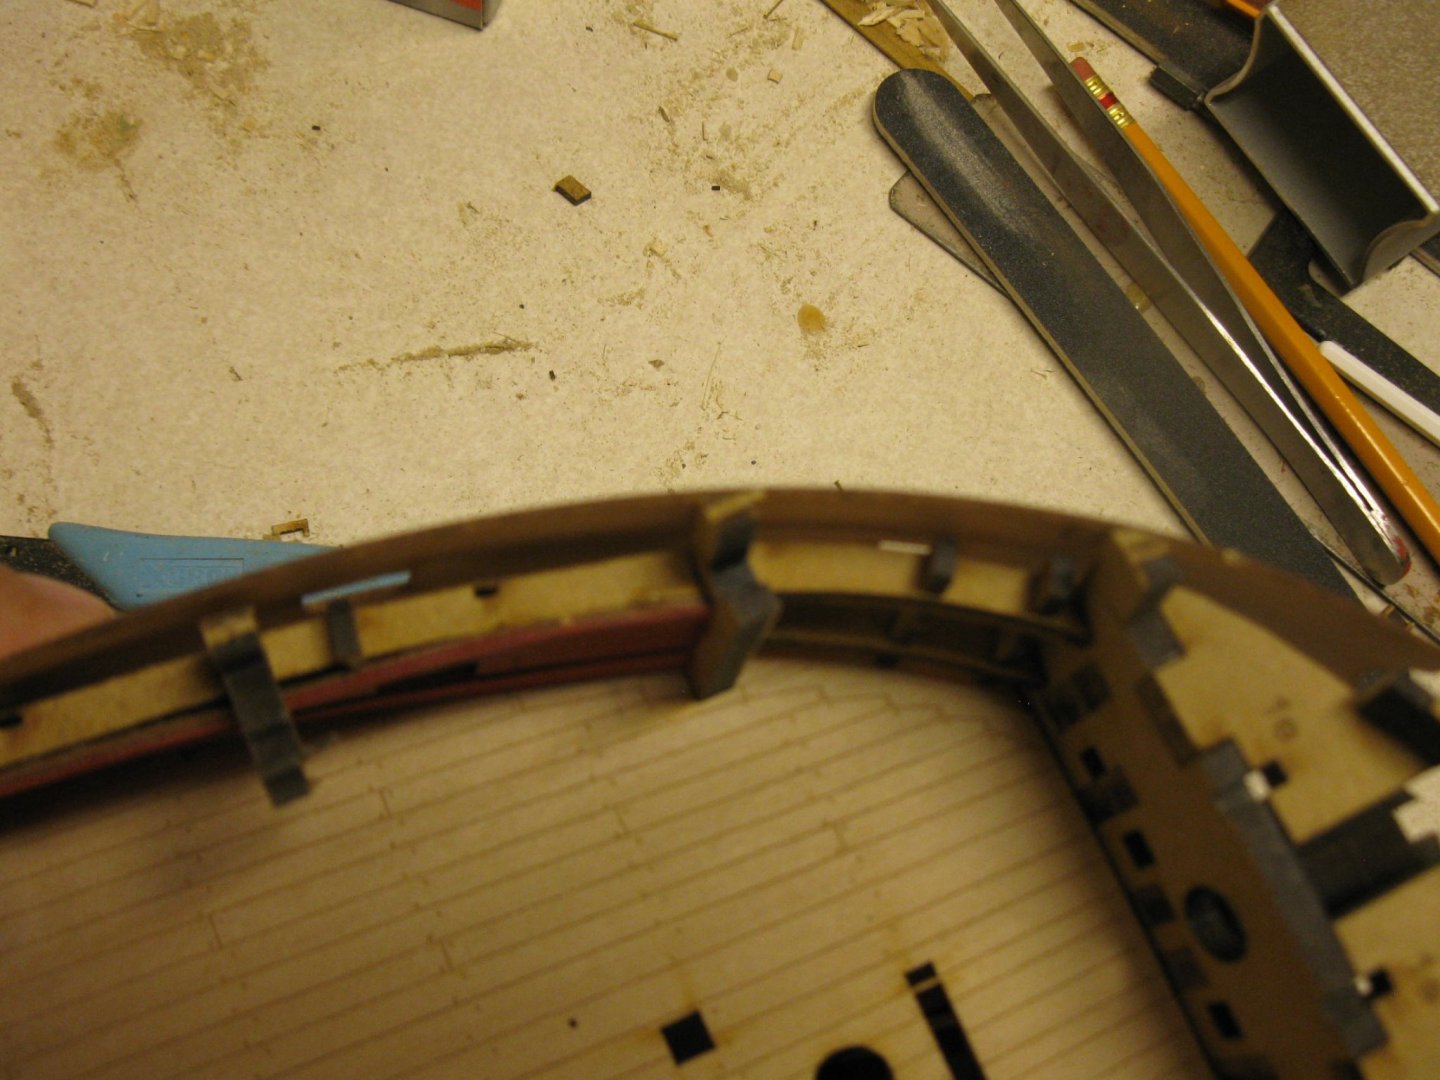
Hello all I've reached step 131. Getting ready to attach the upper hull side patterns. Construction to date has been very straightforward with parts fitting very well. With this step I am deviating a bit from the suggested method. I have this bending tool that will allow you to bend lots of types of wood without soaking in water or heating. (See the pictures. Note the second picture is the partially bent hull side pattern). To date I can bend just about any strip wood that is less than 2mm in thickness. I haven't tried anything thicker. For these side patterns you start at a point where you are just barely able to get the piece to flow through. After the first pass you tighten the upper screws just a bit. Maybe an 1/8th turn and then refeed the piece. After about 10-15 pass throughs the piece is bent perfectly. See the pictures. That last picture has the piece up against the hull without clamps. Fits perfectly. One word of caution with this device. Don't be in a hurry. If you tighten the screws too much you can cause the wood to break. In general with any plank bending for hulls it should take about 10-15 passthroughs to get the bend you need. This unit is so nice because you don't have to spend time soaking and drying wood.
-
Excellent. Thanks much for the info. Here in the states I found a matt finish acrylic varnish. So I'll give that one a try. I hope I can replicate at least some of the level of finish you have on your models. And here in Wisconsin, it is very hard to find a matt finish varnish in my area. Lots of gloss, semi gloss and satin. But hardly any matt finish.
- 355 replies
-
- 1
-

-
- vanguard models
- Sphinx
- (and 1 more)
-
James, When you talk about diluted glue or diluted varnish, what dilution are you talking about. one to one? or something else.
- 355 replies
-
- 1
-
-
- vanguard models
- Sphinx
- (and 1 more)
-
Chris I suspect you are right on this. I did notice that the outer edges of the deck are not snug on top of the bulkhead surfaces. That would indicate that the deck piece needed to be snugged up tighter. Given the slight curvature of the bulkhead and the flatness of the deck piece that seems to be what my issue was. Either way this is not going to cause any issues going forward. Have fitted the gun port frames. They went on very well. One word of caution to other builders. Some of upper sections of these frames are extremely fragile.
-
Sorry. Not on my build. Both halves when placed tightly up against the bulkheads overlapped by about 2mm. Basically, I don't think this is a very big thing. In all the kits I've built most have needed this kind of adjustment. And while I certainly can screw up things, in this case, I don't see how that would be possible as the open width between the bulkhead ears is established in the kit cutting and I made no adjustments In the near future I can take a close up picture showing the adjustments. You will see that the bulkhead slots are tight up against the bulkheads and the centerline of the two pieces meet perfectly after removing that bit from the slots
-
Just glued the gun deck on. I had to deepen the outboard bulkhead slots about 1-2 mm on each side. I used the center line of the model to determine how much to deepen each slot. Averages about 1.5mm each side.
-
Thanks Chris. That is just a tribute to the quality and buildability of the kit you produced!
-
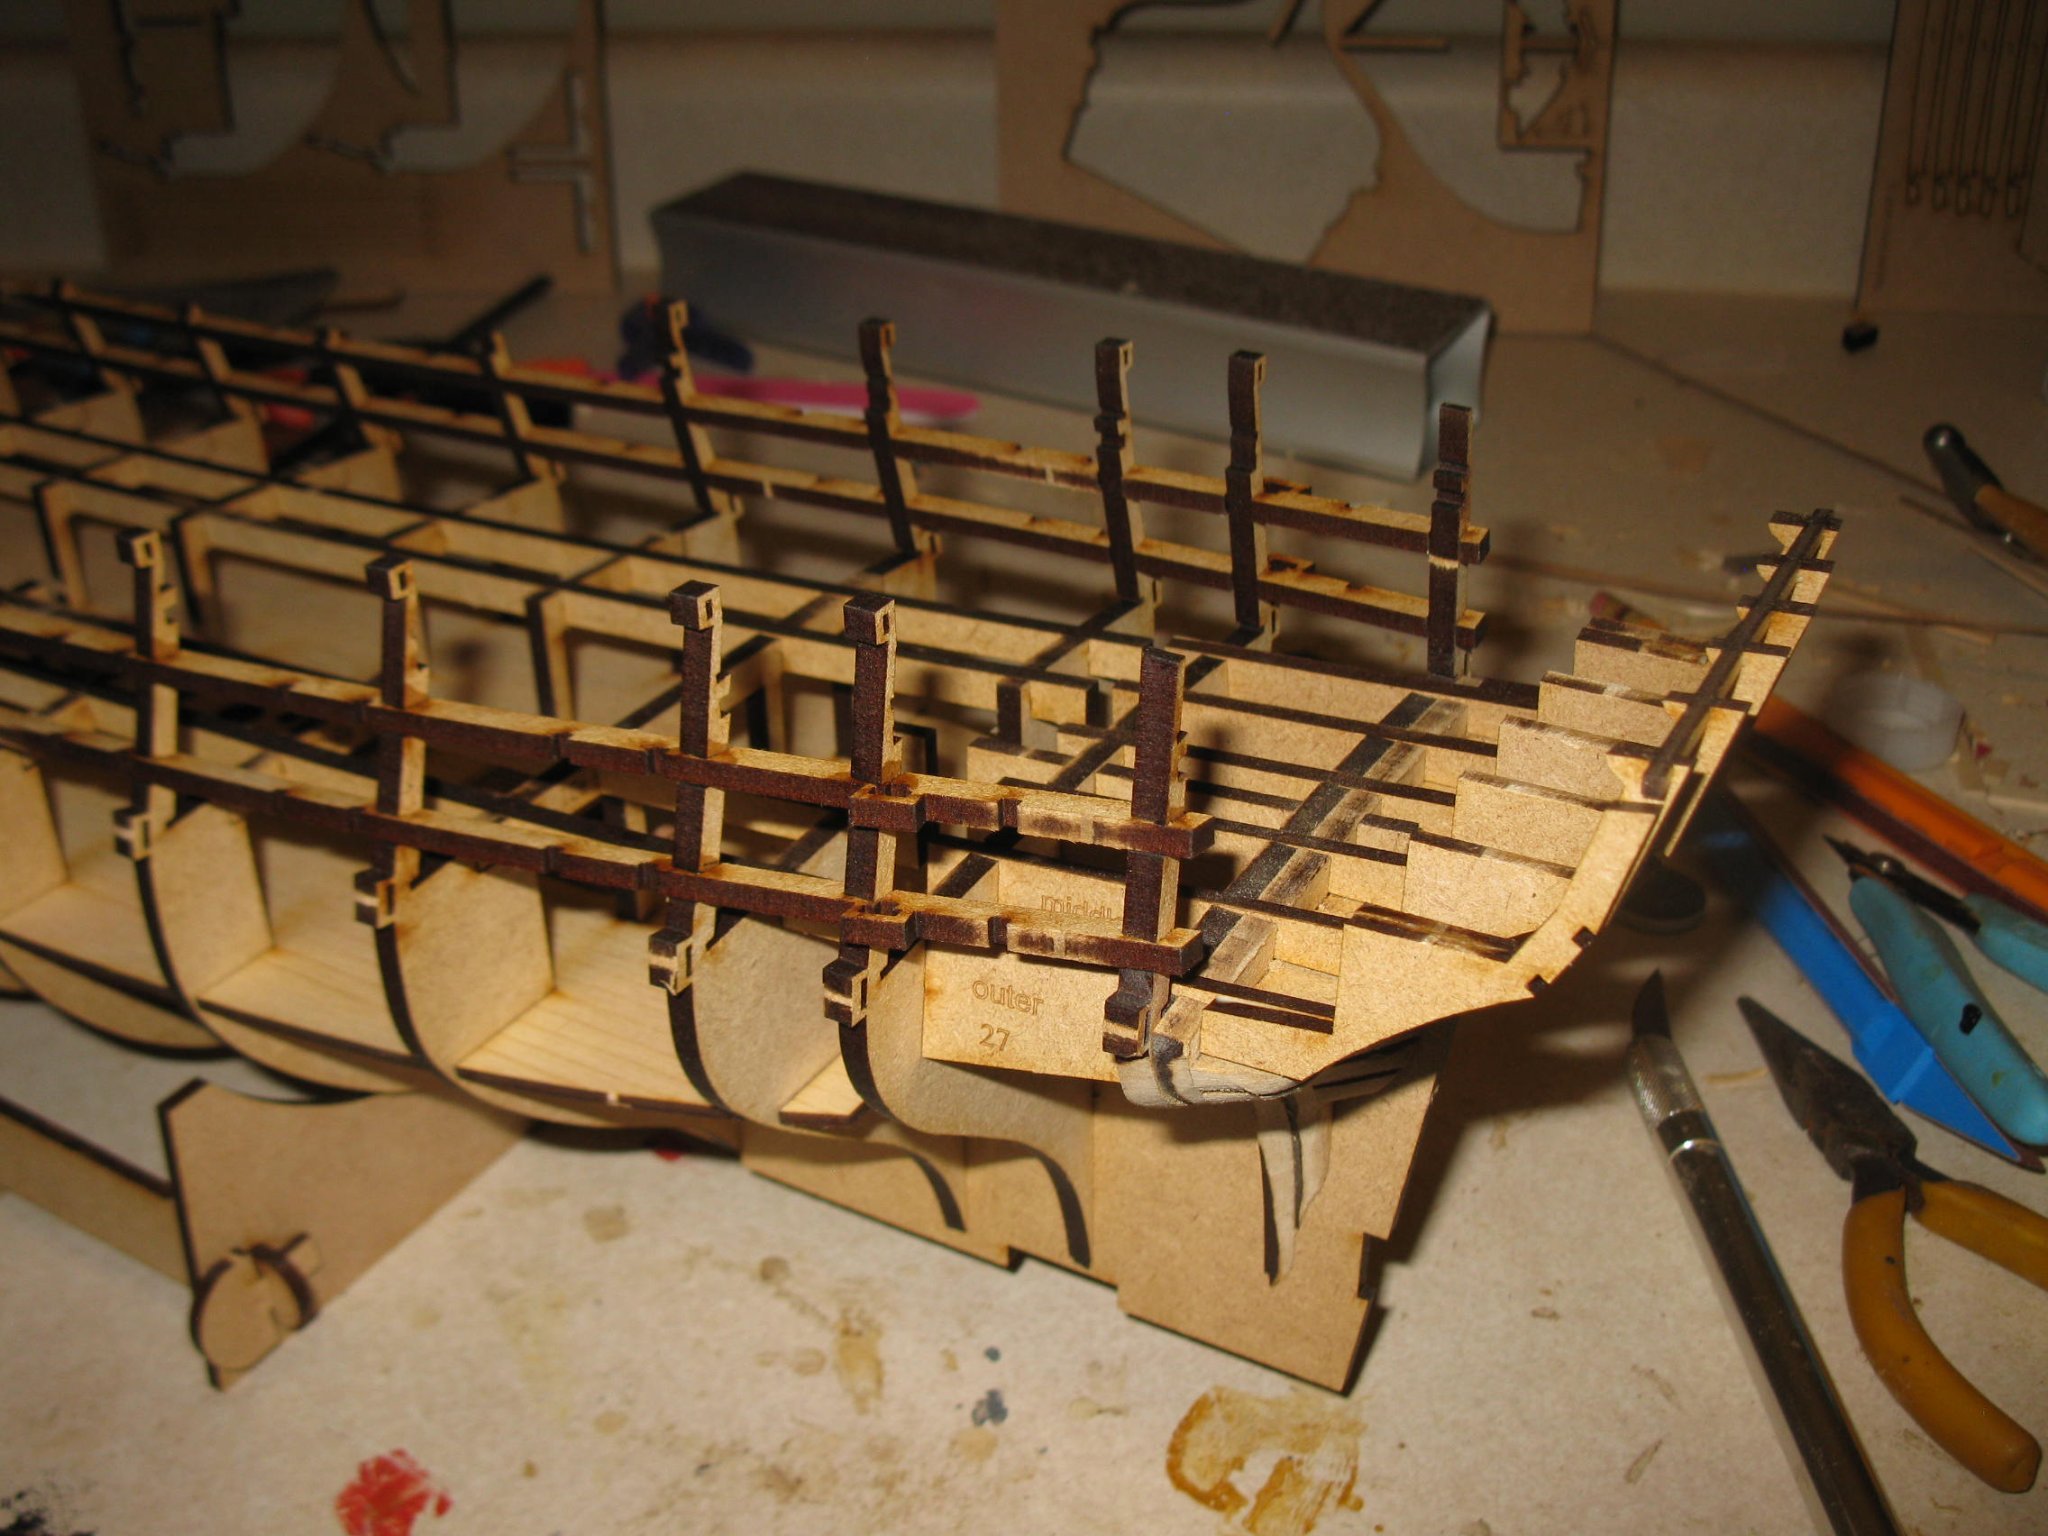
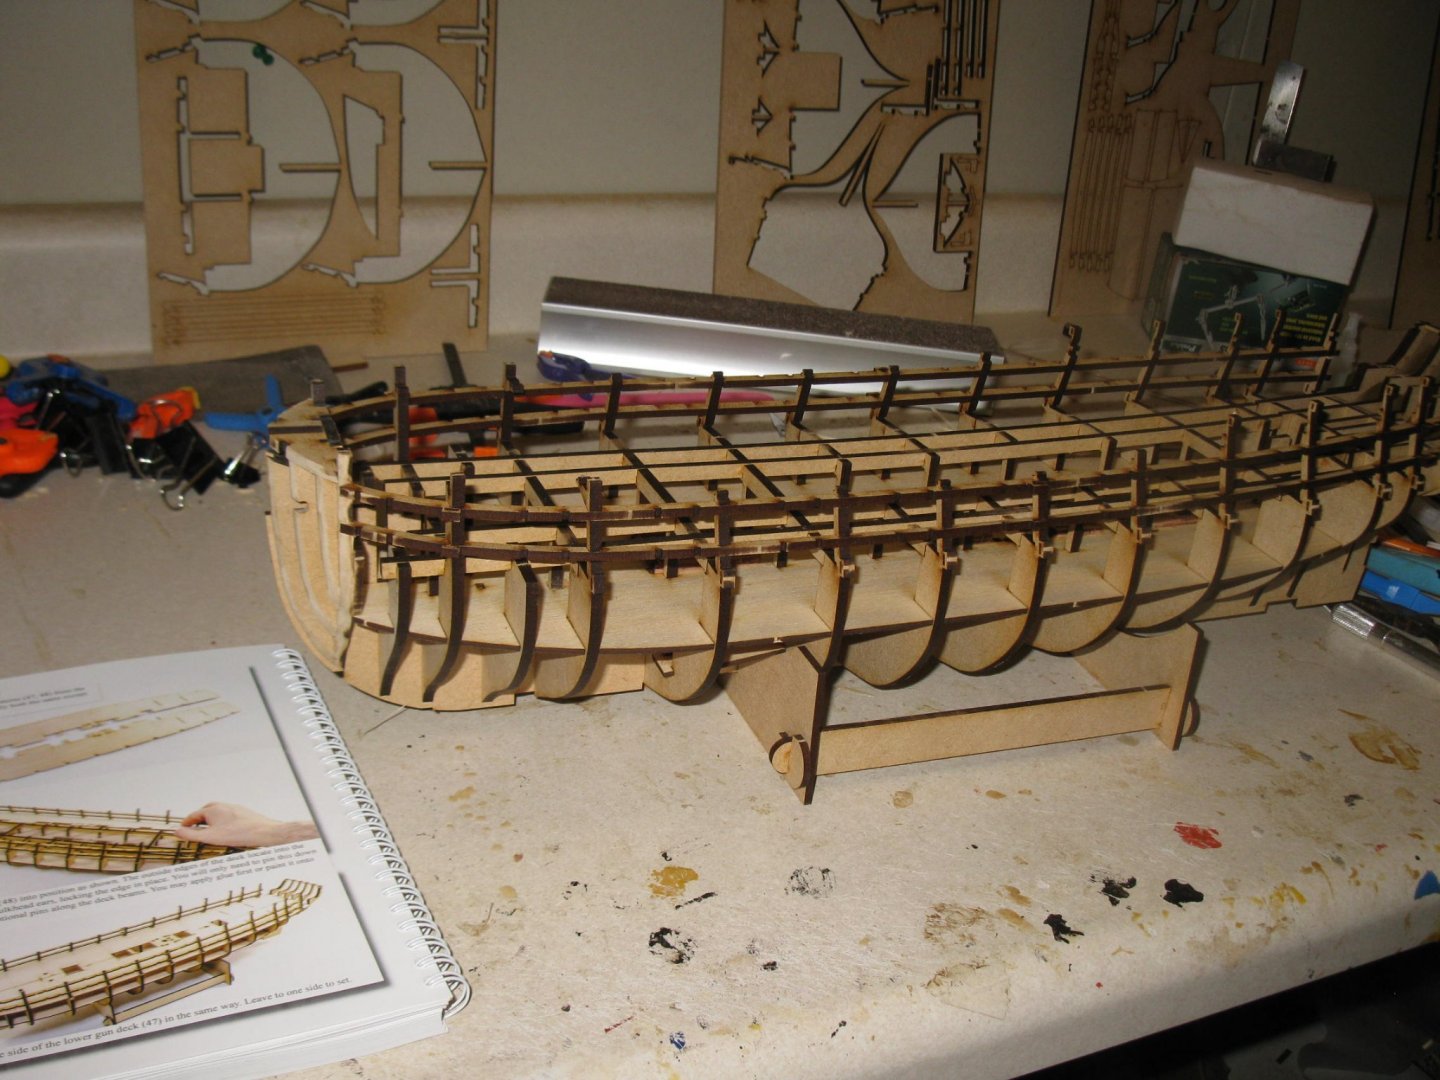
Hello fellow modelers This build log will not be nearly as detailed as the other excellent logs by others. But I do want to share some of my experiences with this excellent kit. Got the kit on Friday and went to work on it the next day. Construction is incredibly logical and straightforward. I think anyone who has built just one kit can tackle this one. The instructions are just so incredibly detailed. I can't thank James and Chris enough for producing this incredible kit. I am ready to start placing the gun deck halves. To this point I have only encountered very minor issues that were easily solved. Some points: 1. Some of the gun deck support beams needed trimming to their upright leg length in order to fit snuggly. 2. With the longitudinal deck beams be careful if you clean them up. They can be somewhat fragile. I was cleaning the top of my first one and it broke. No problem as the break was clean and did not affect the construction. Also these beams have a tendency to spring back up amidships. I would advise using a very fast setting glue or place some weights on the ship in order to prevent this while your glue sets. 3. The stern counter frames are a very tight fit (which is good). After slotting all the bulkheads and other pieces I got used to a perfect fit. I could have sanded the slots a bit but I chose to use a few light taps of a hobby hammer. Very snug fit but those parts aren't going anywhere now. I'm really looking forward to the placement of the Upper Hull Side Patterns. The instructions talk about soaking and bending over a can and letting it dry for a day. I am hoping my method will work well and allow construction to proceed without the soaking/drying process. I recently picked up nice wood bender that was recommended by someone on this forum. It's a bit pricey ($150US) but so far in my modeling experience it is a wonderful, must have tool. I have done a few passes through the tool with the Upper Hull Side Pattern and it is curving very nicely. Once I get to that step I'll provide some more detail and pictures.

-
I can't speak to the customs in Germany but I got the same message about the 10 days here in the US. But it was released 6 hours later so it is again on schedule for Friday delivery. Here's hoping the situation will be the same for you
-
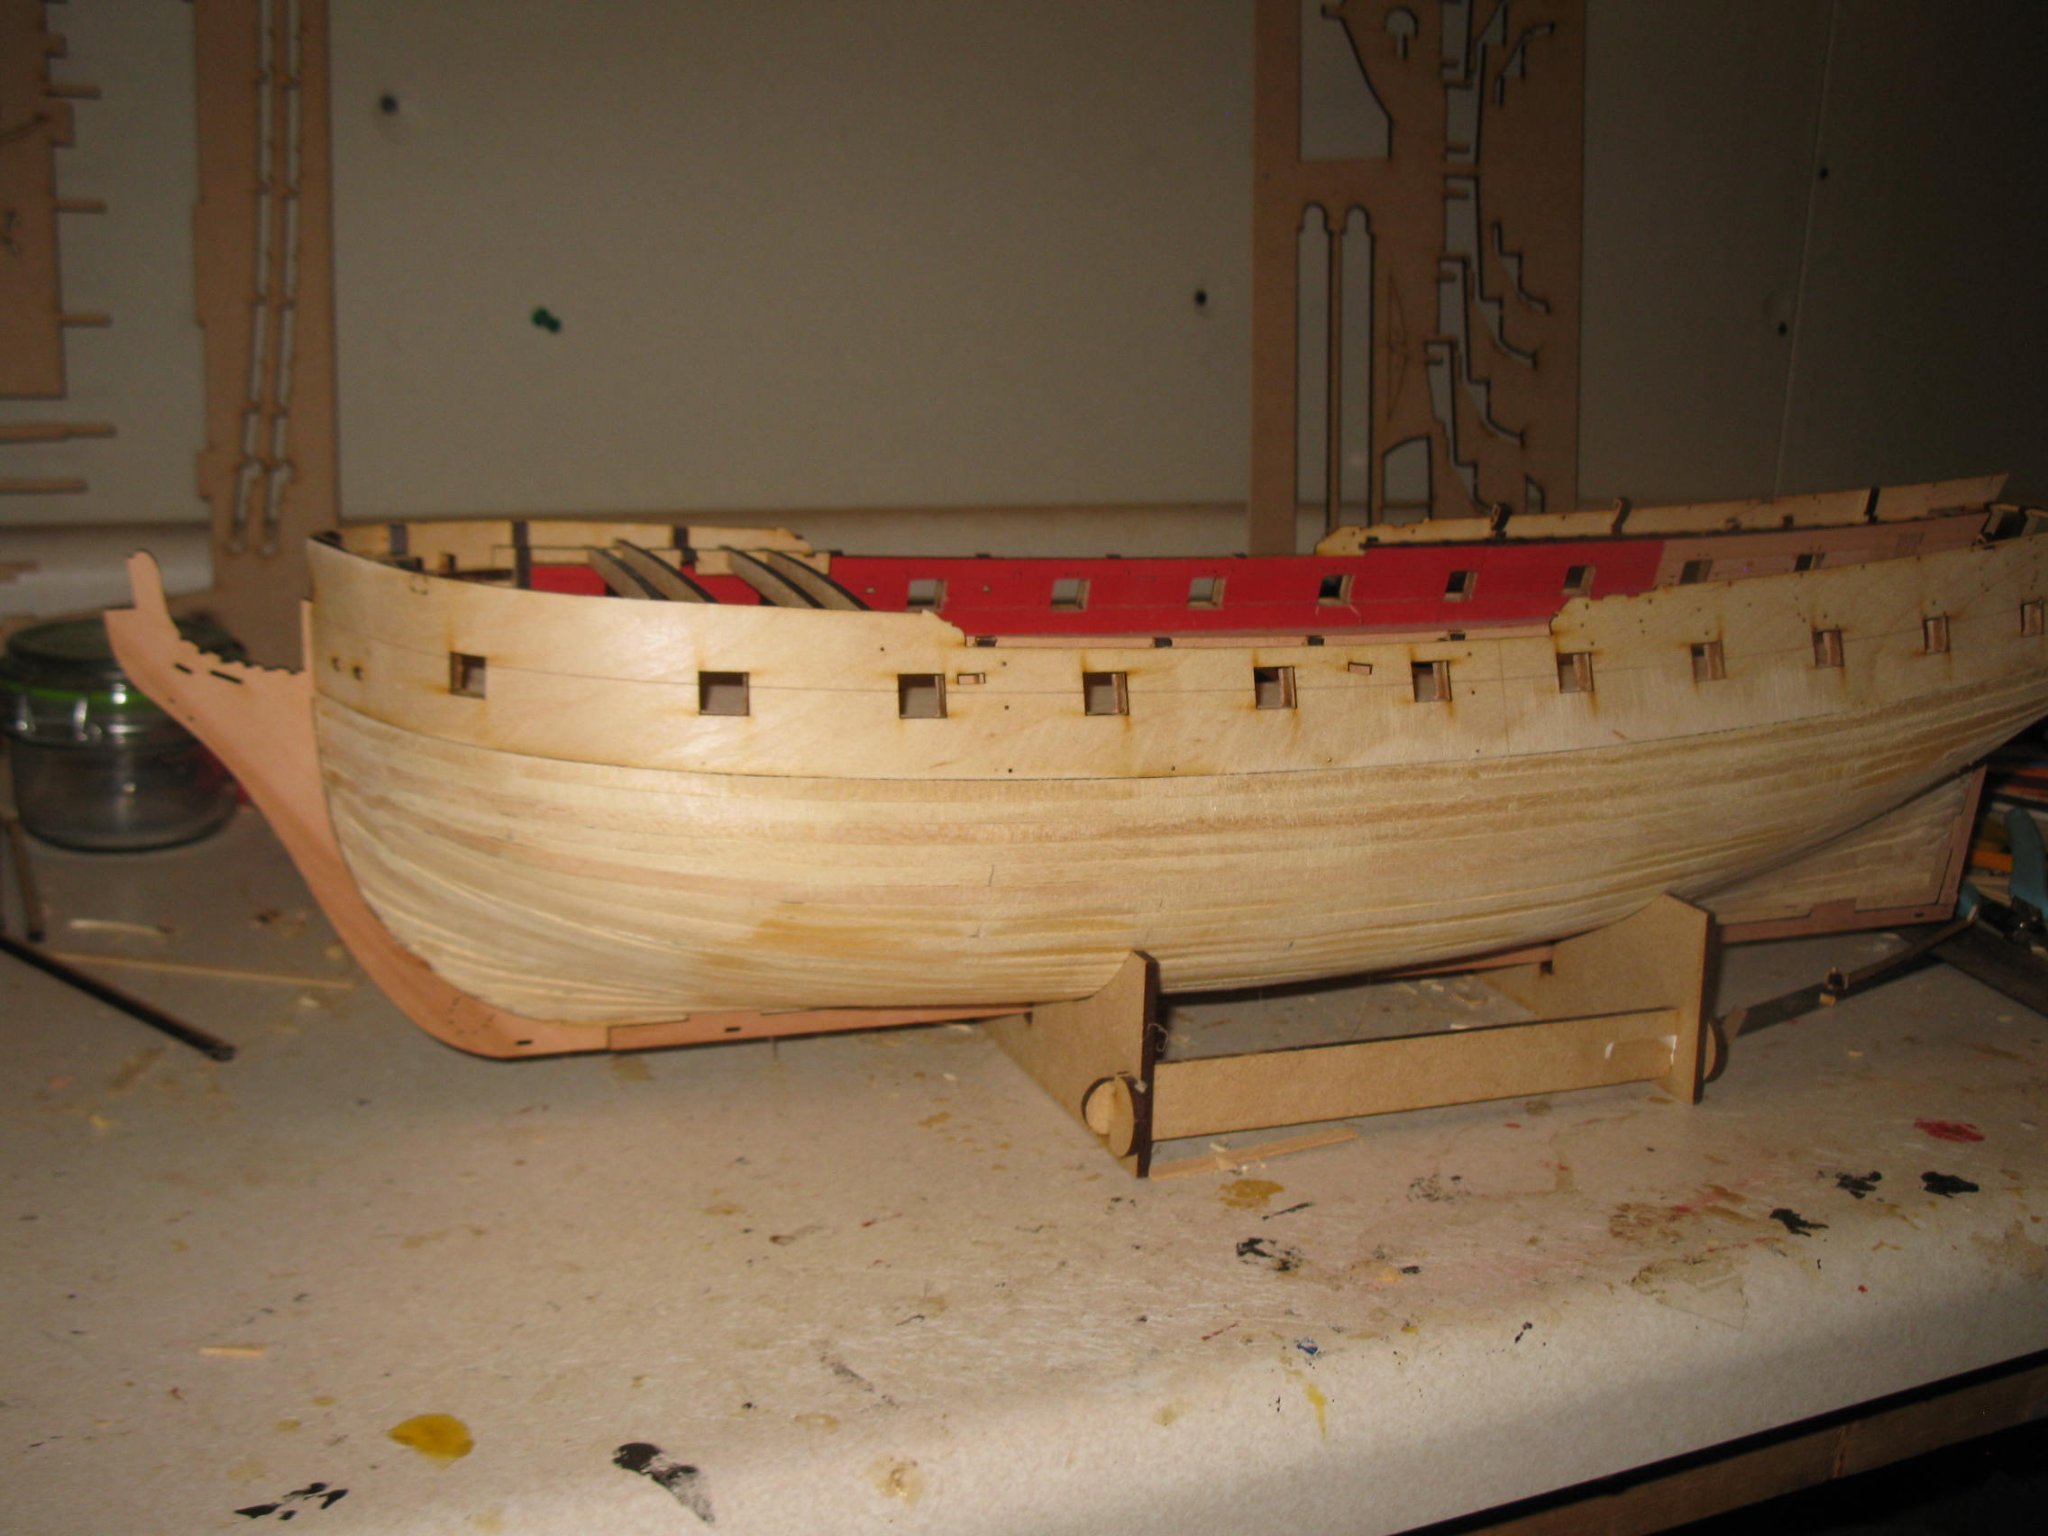
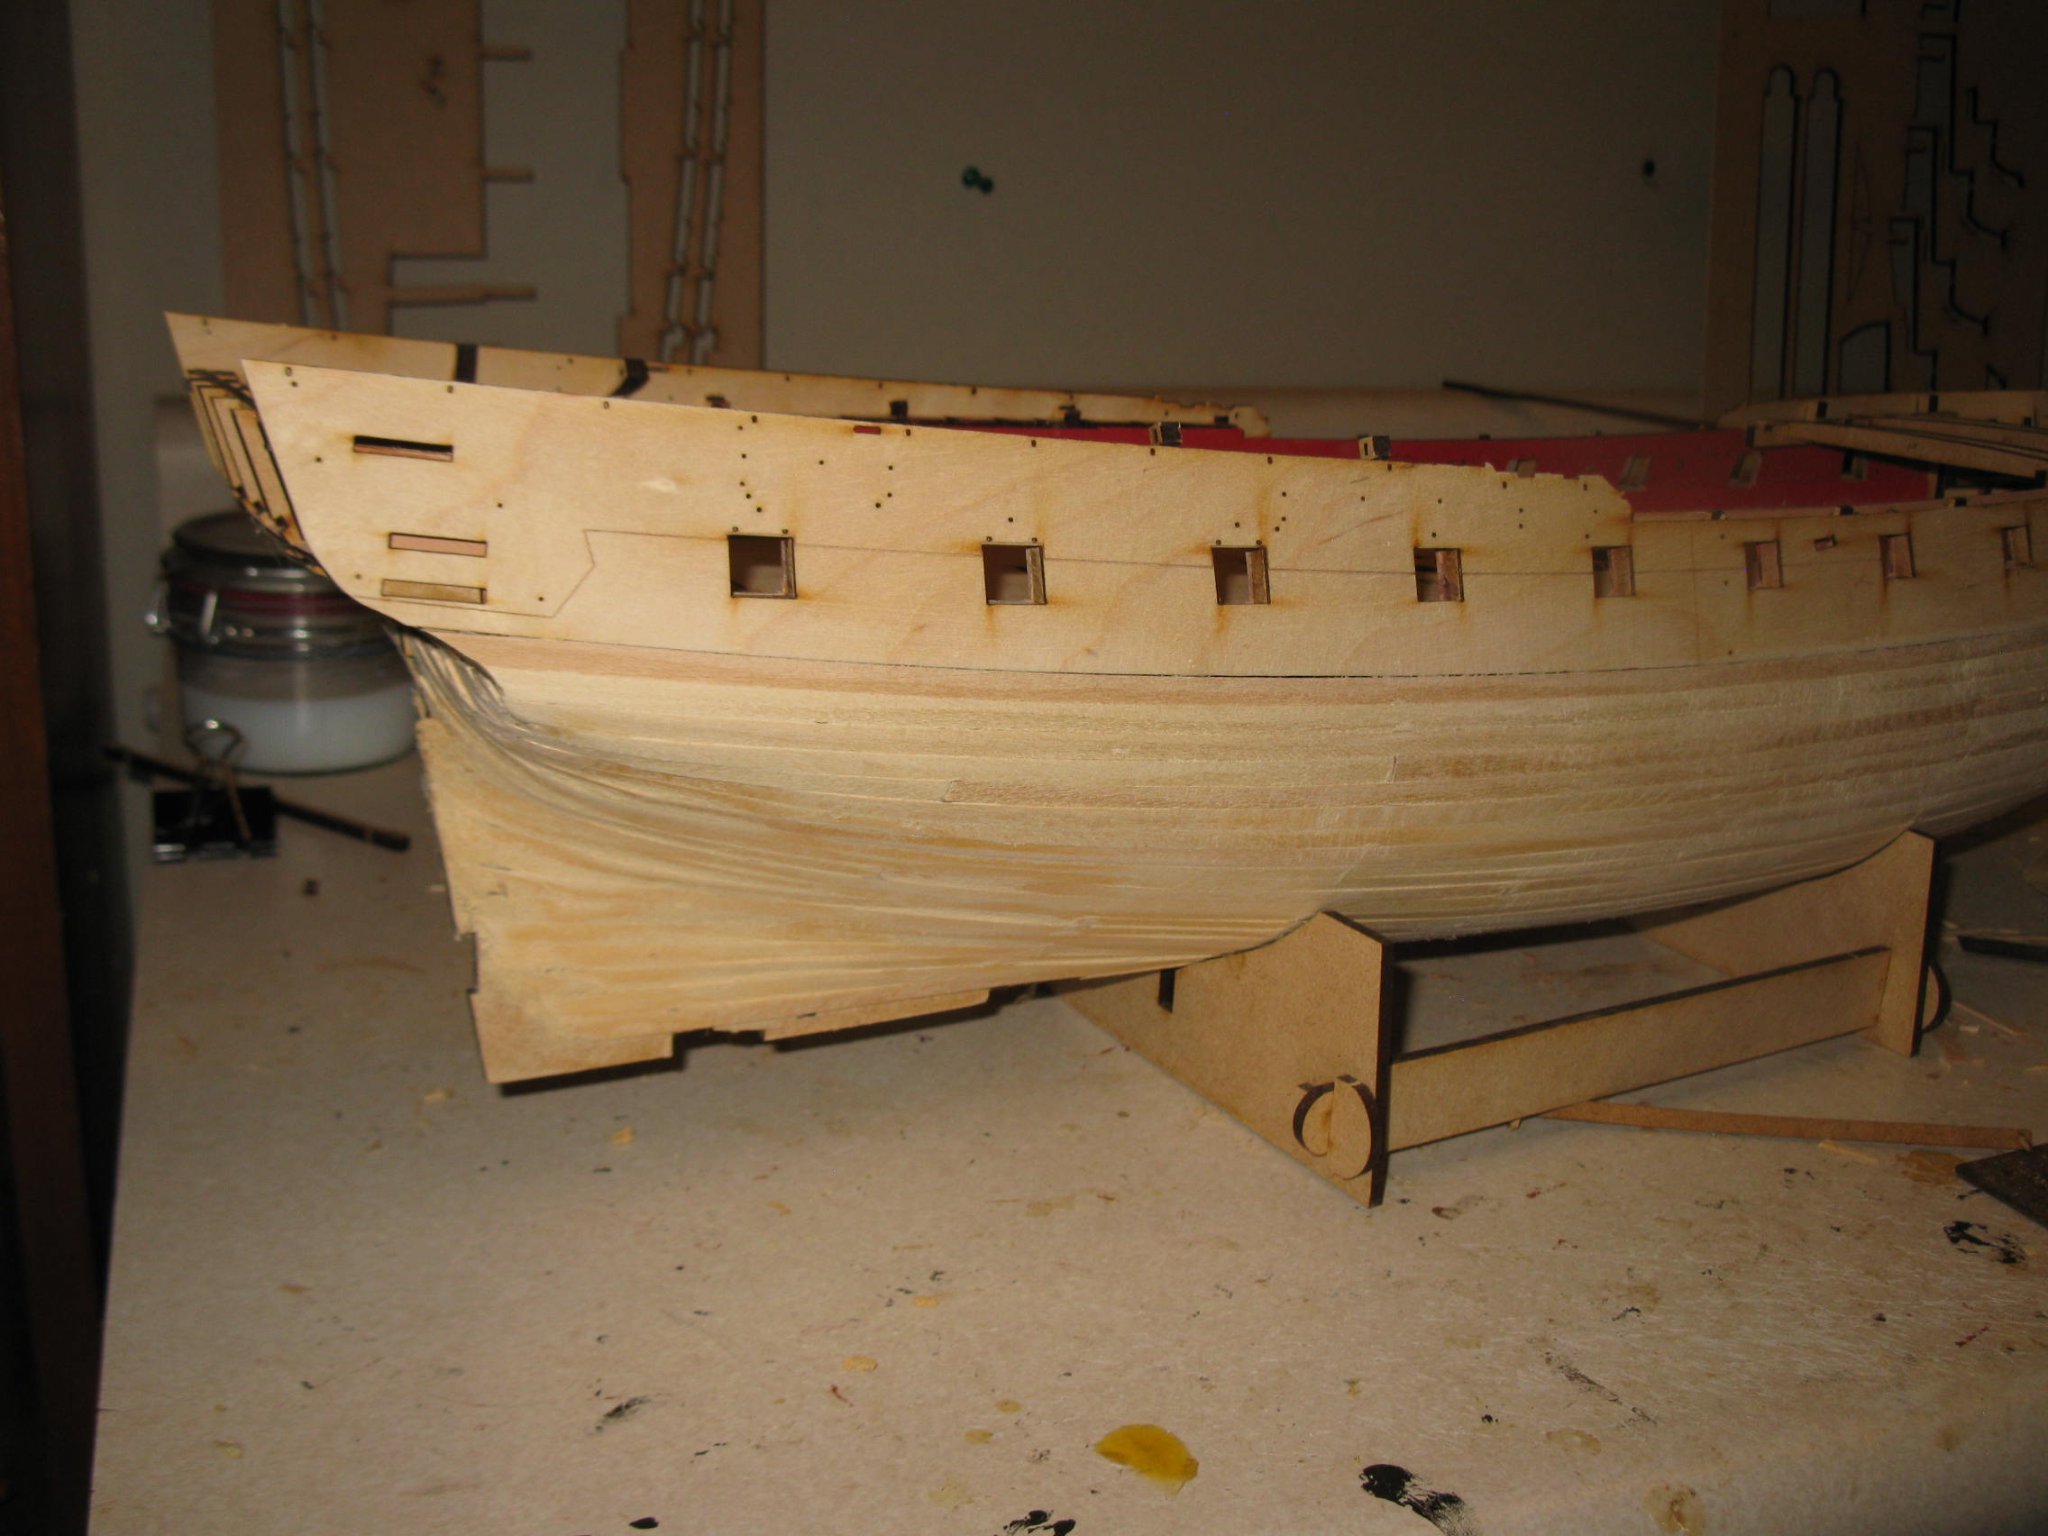
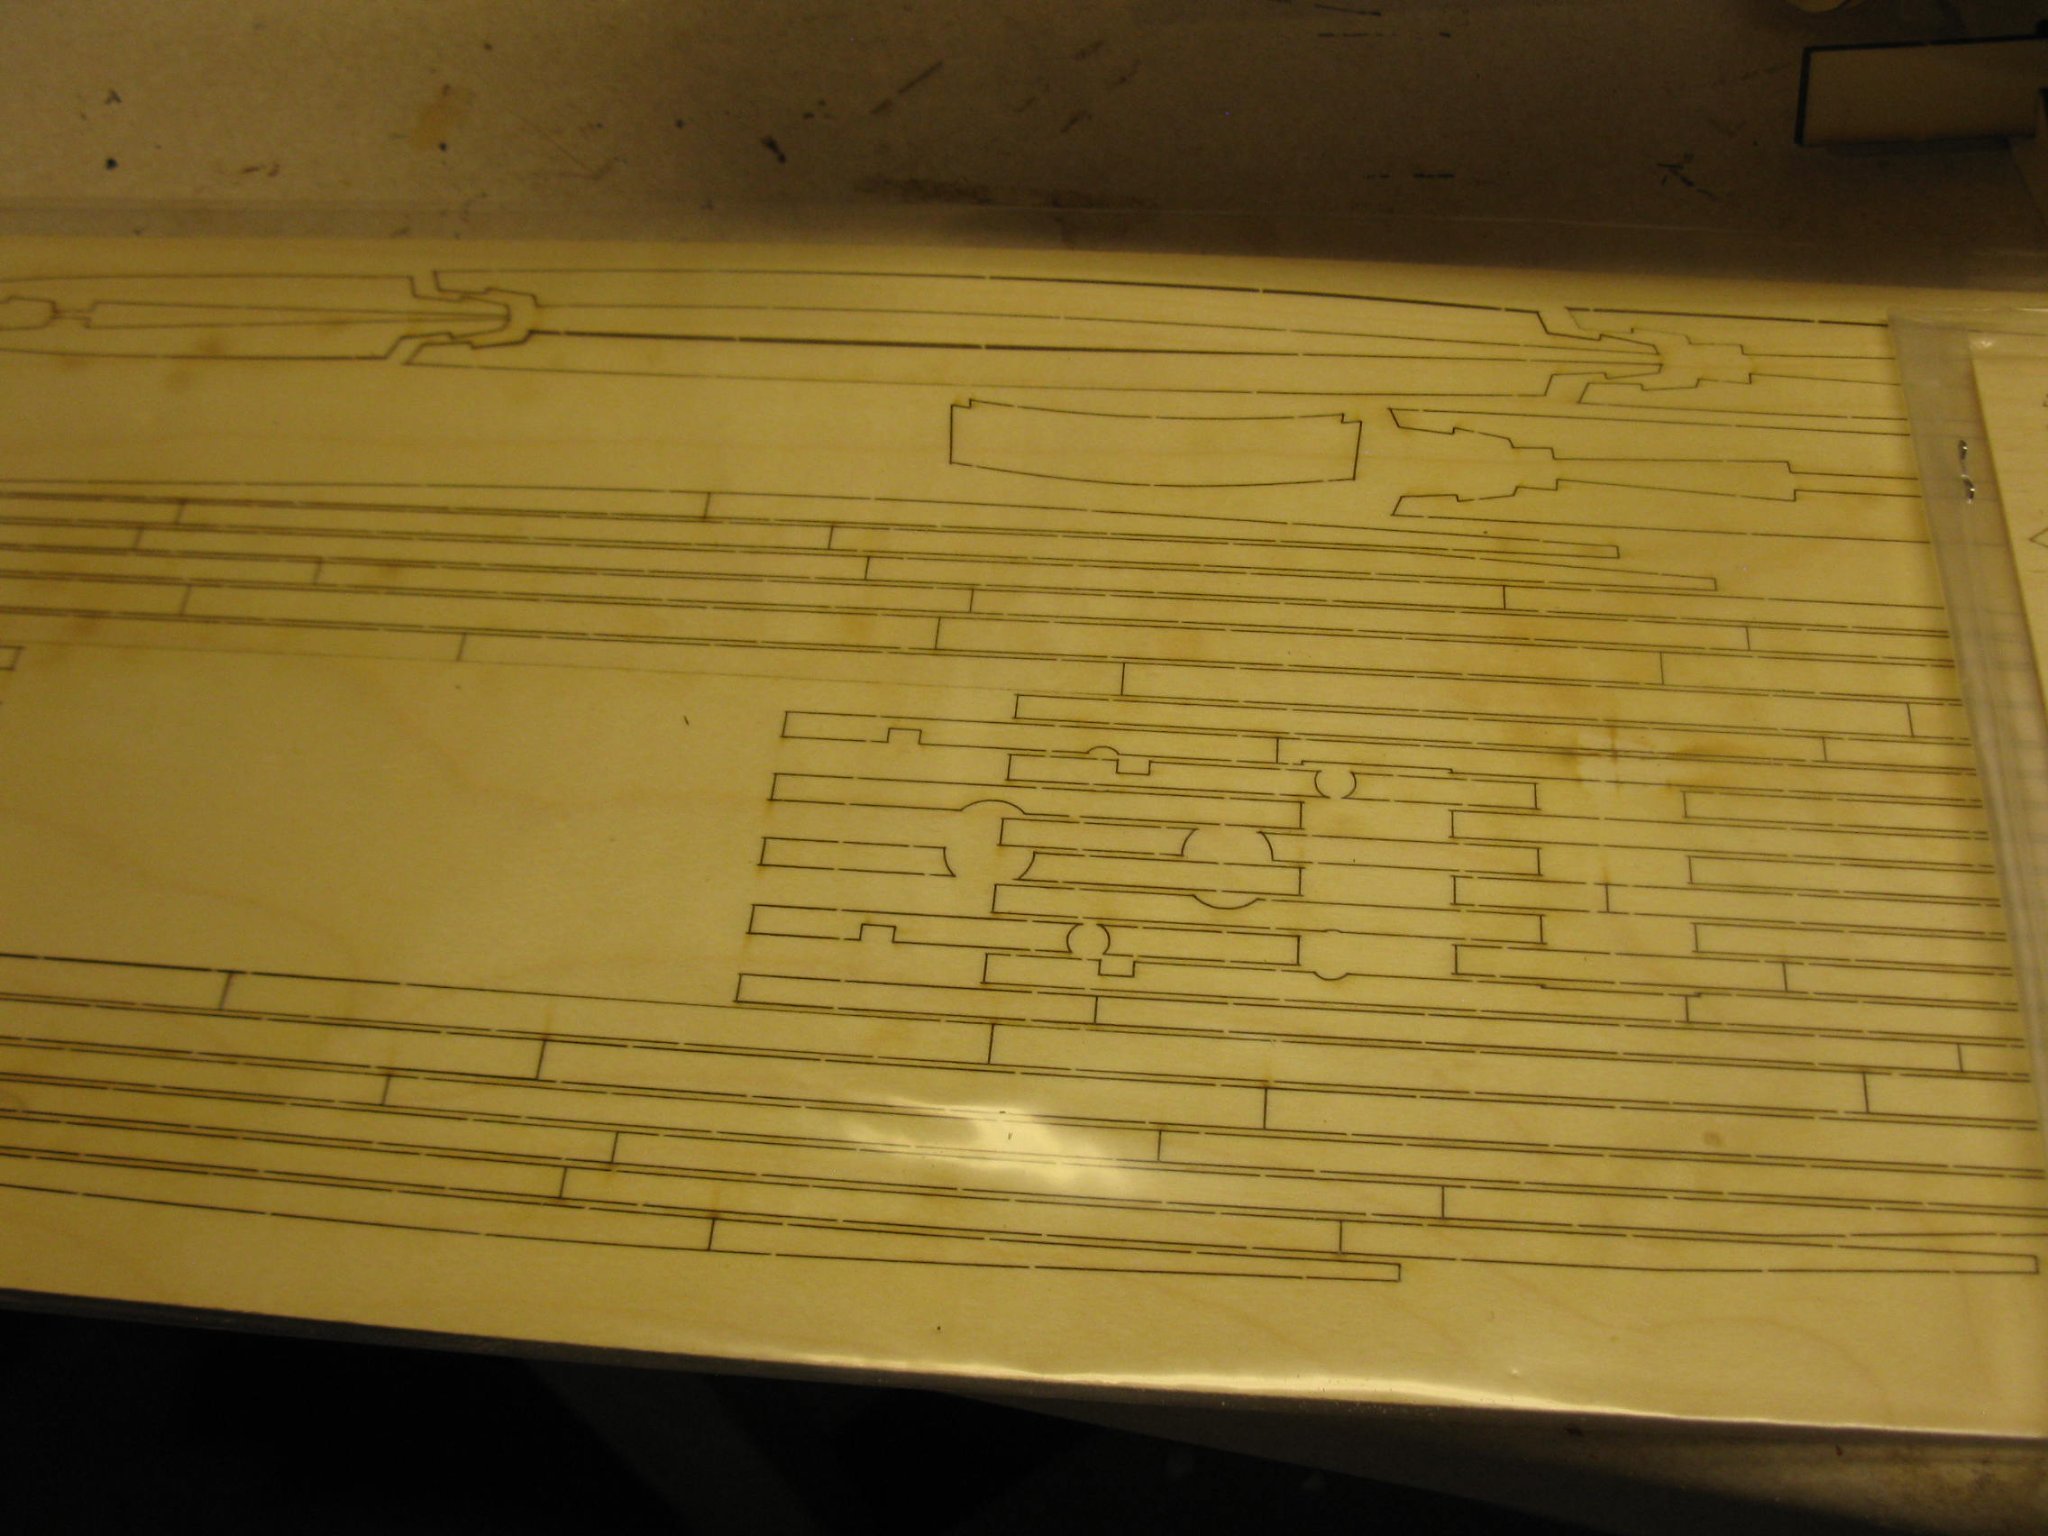
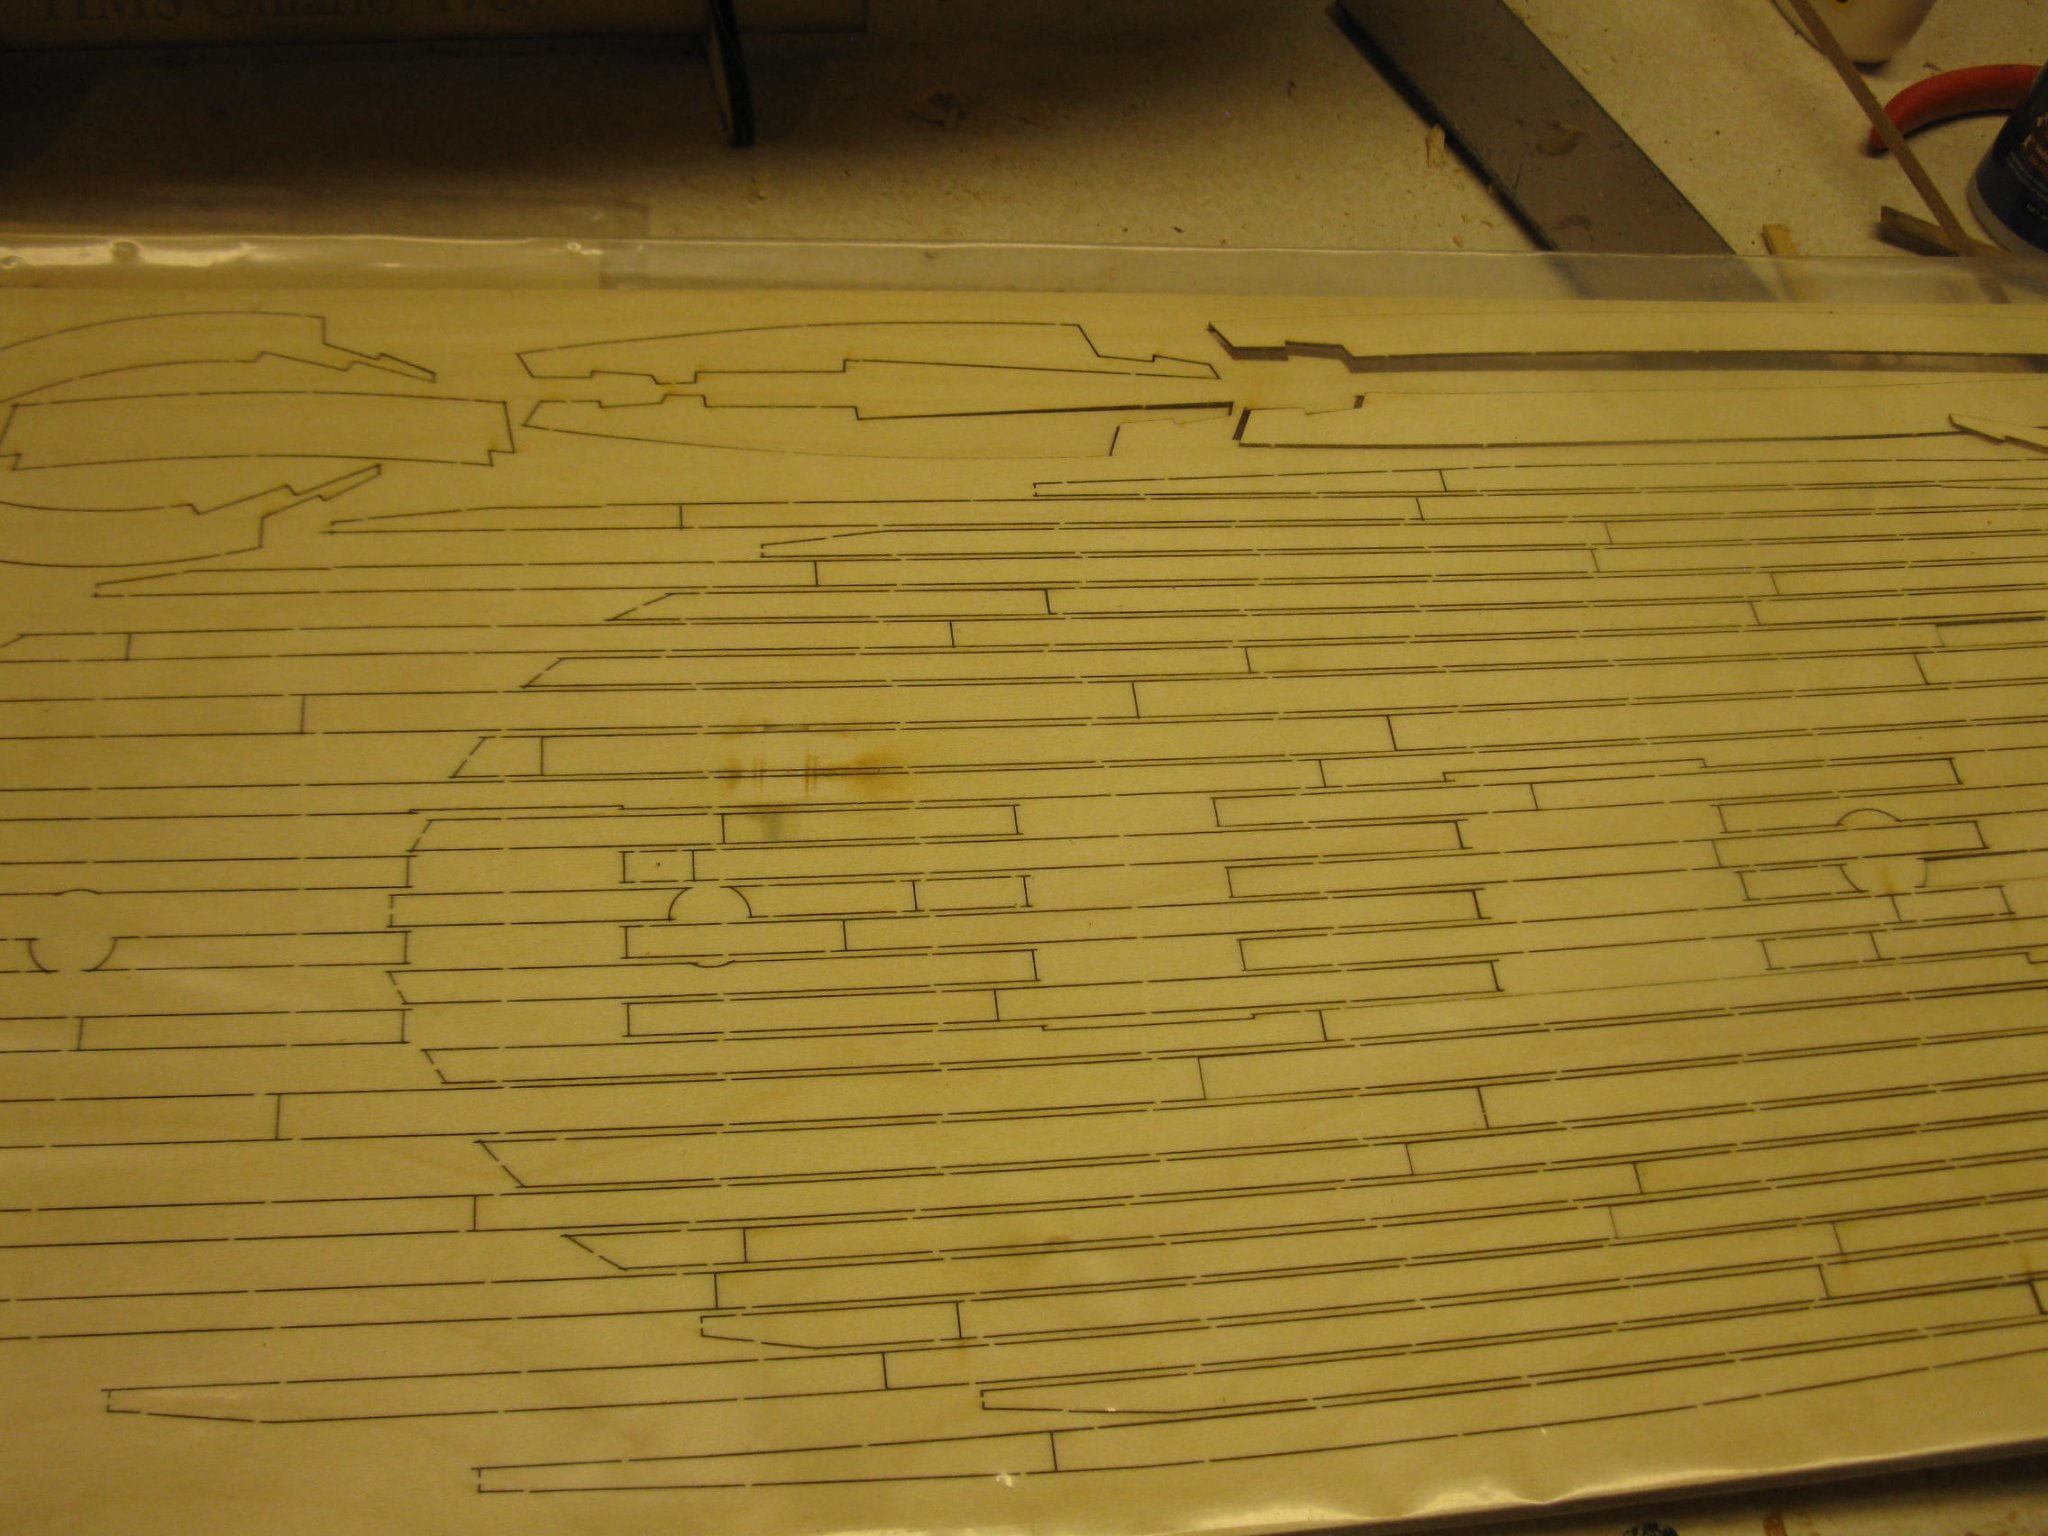
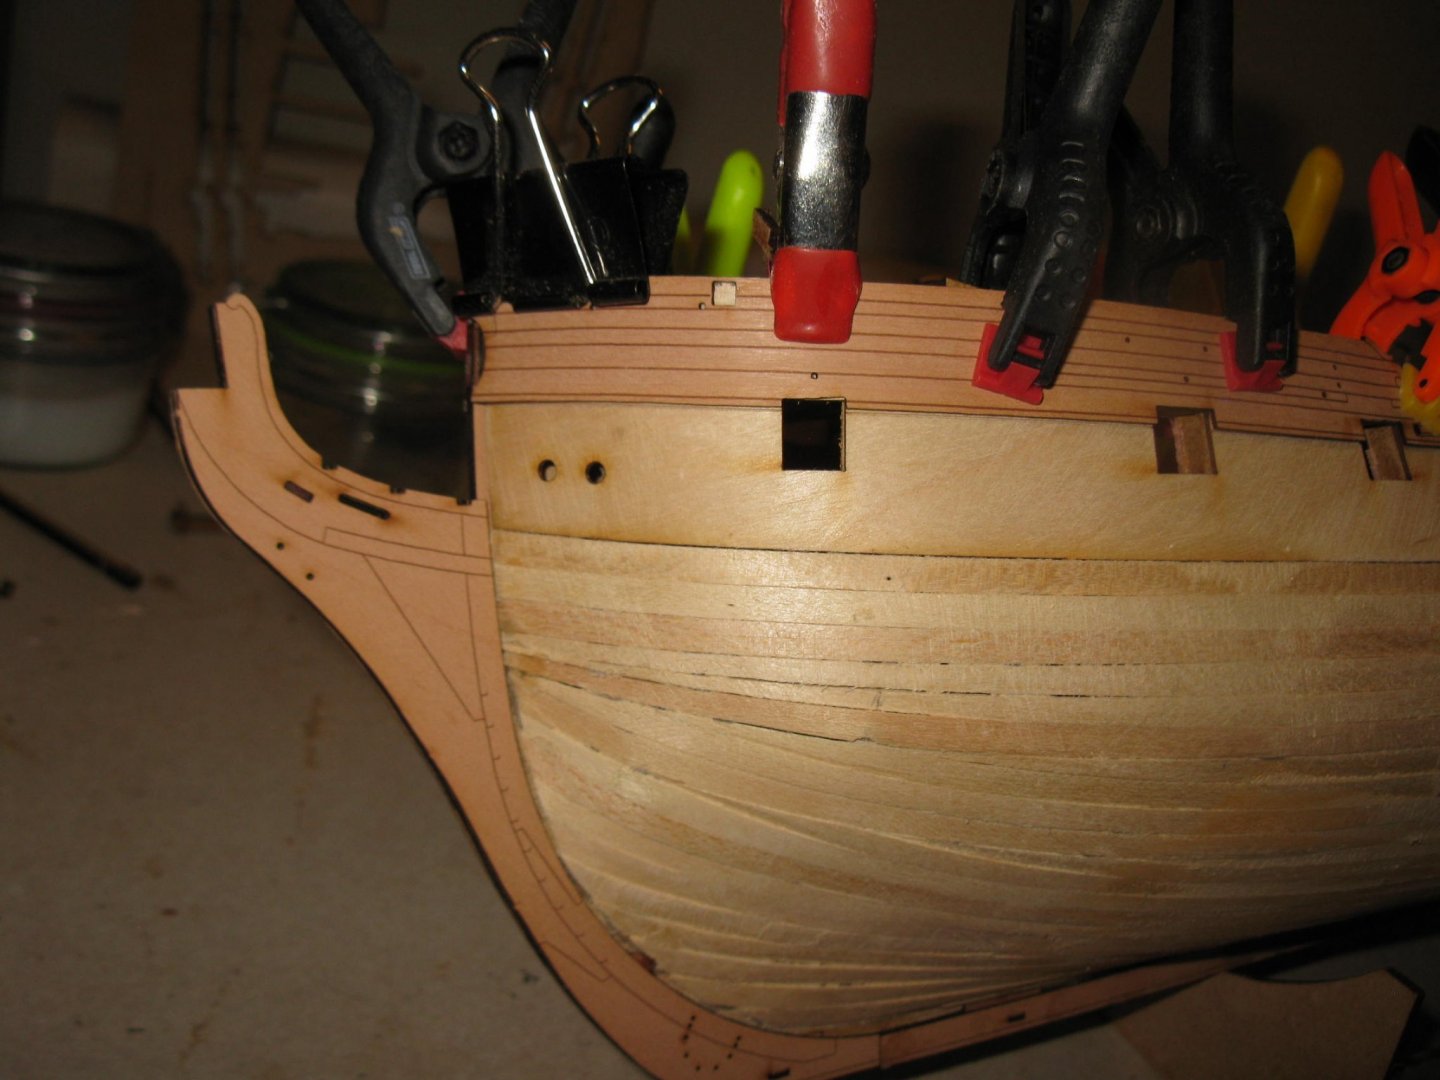
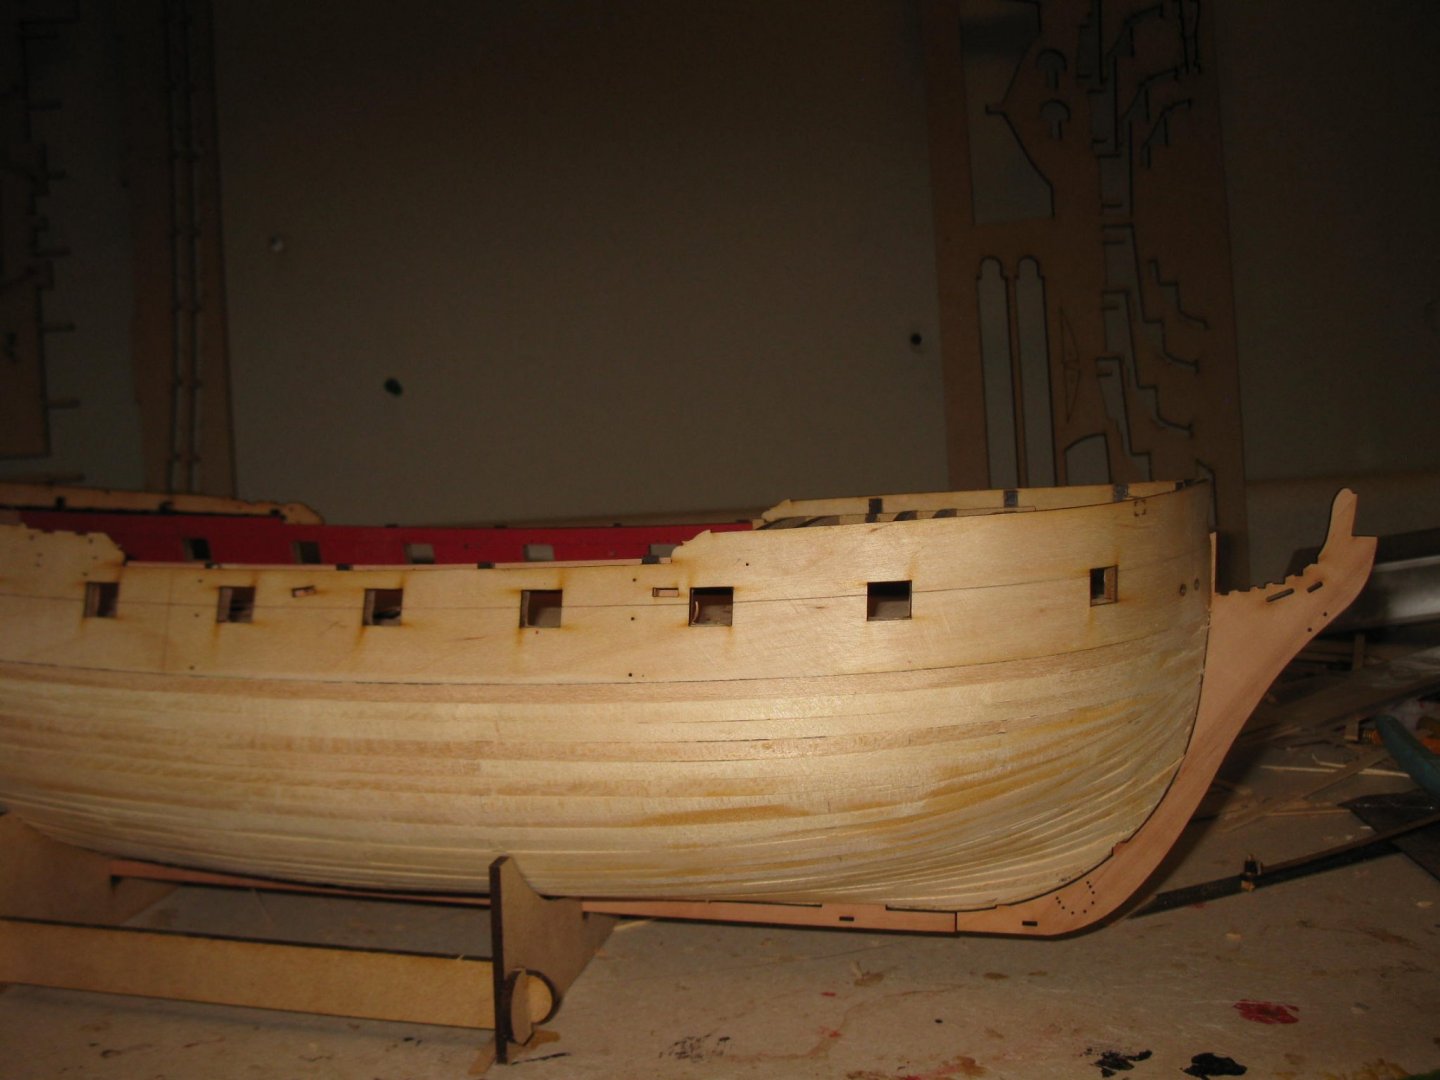
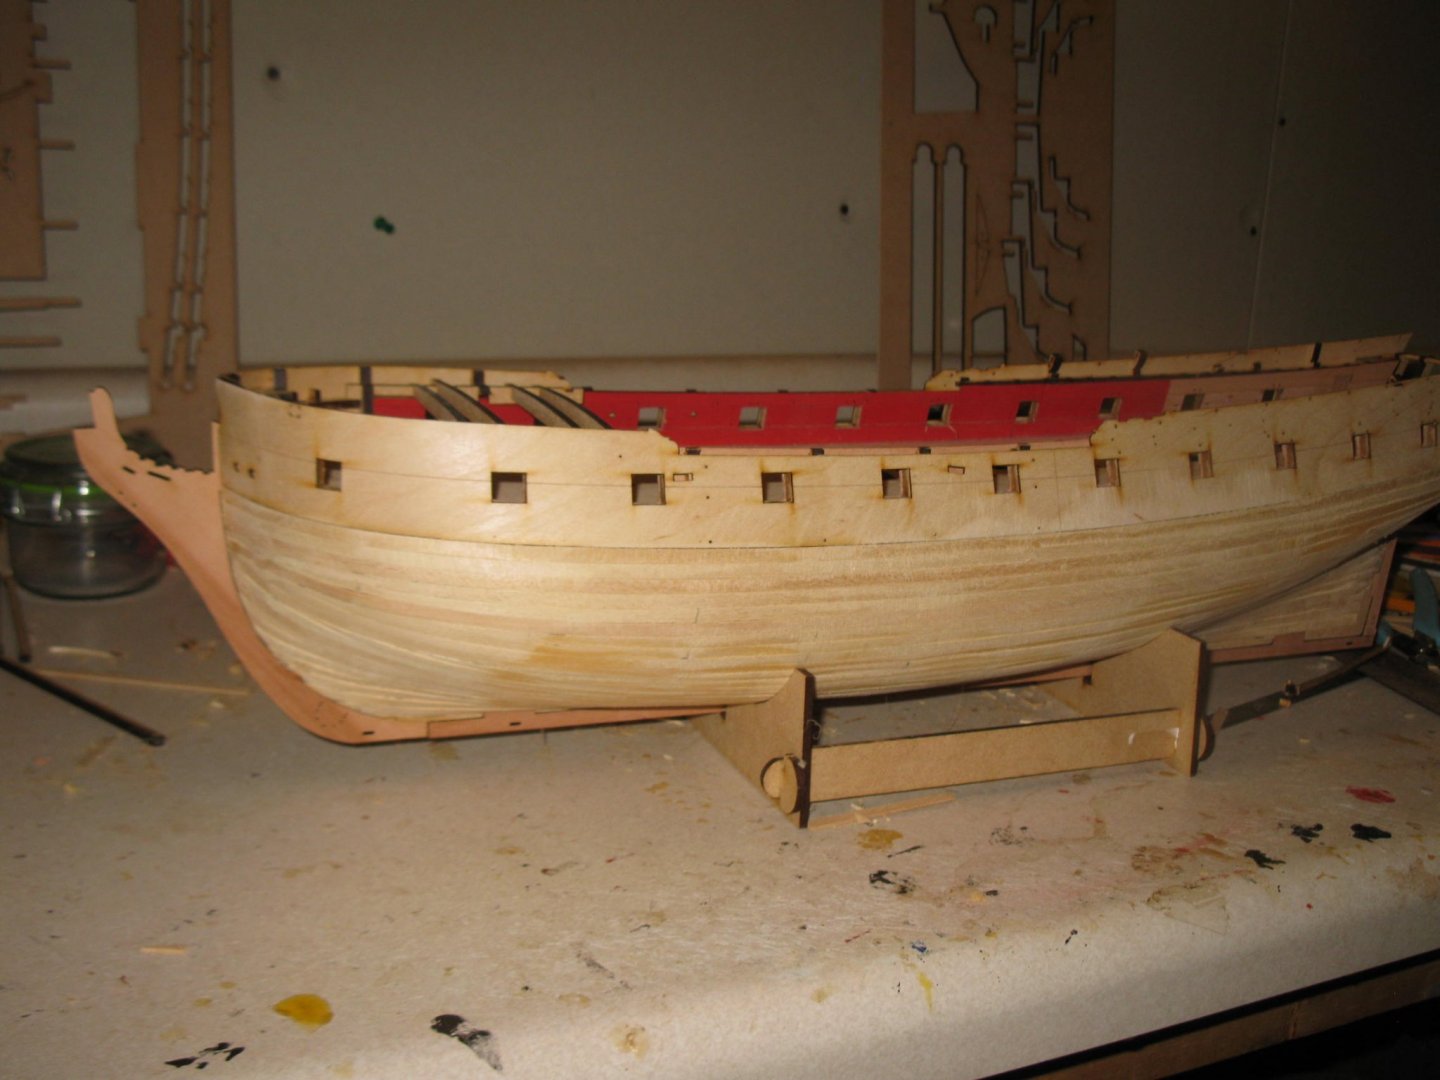
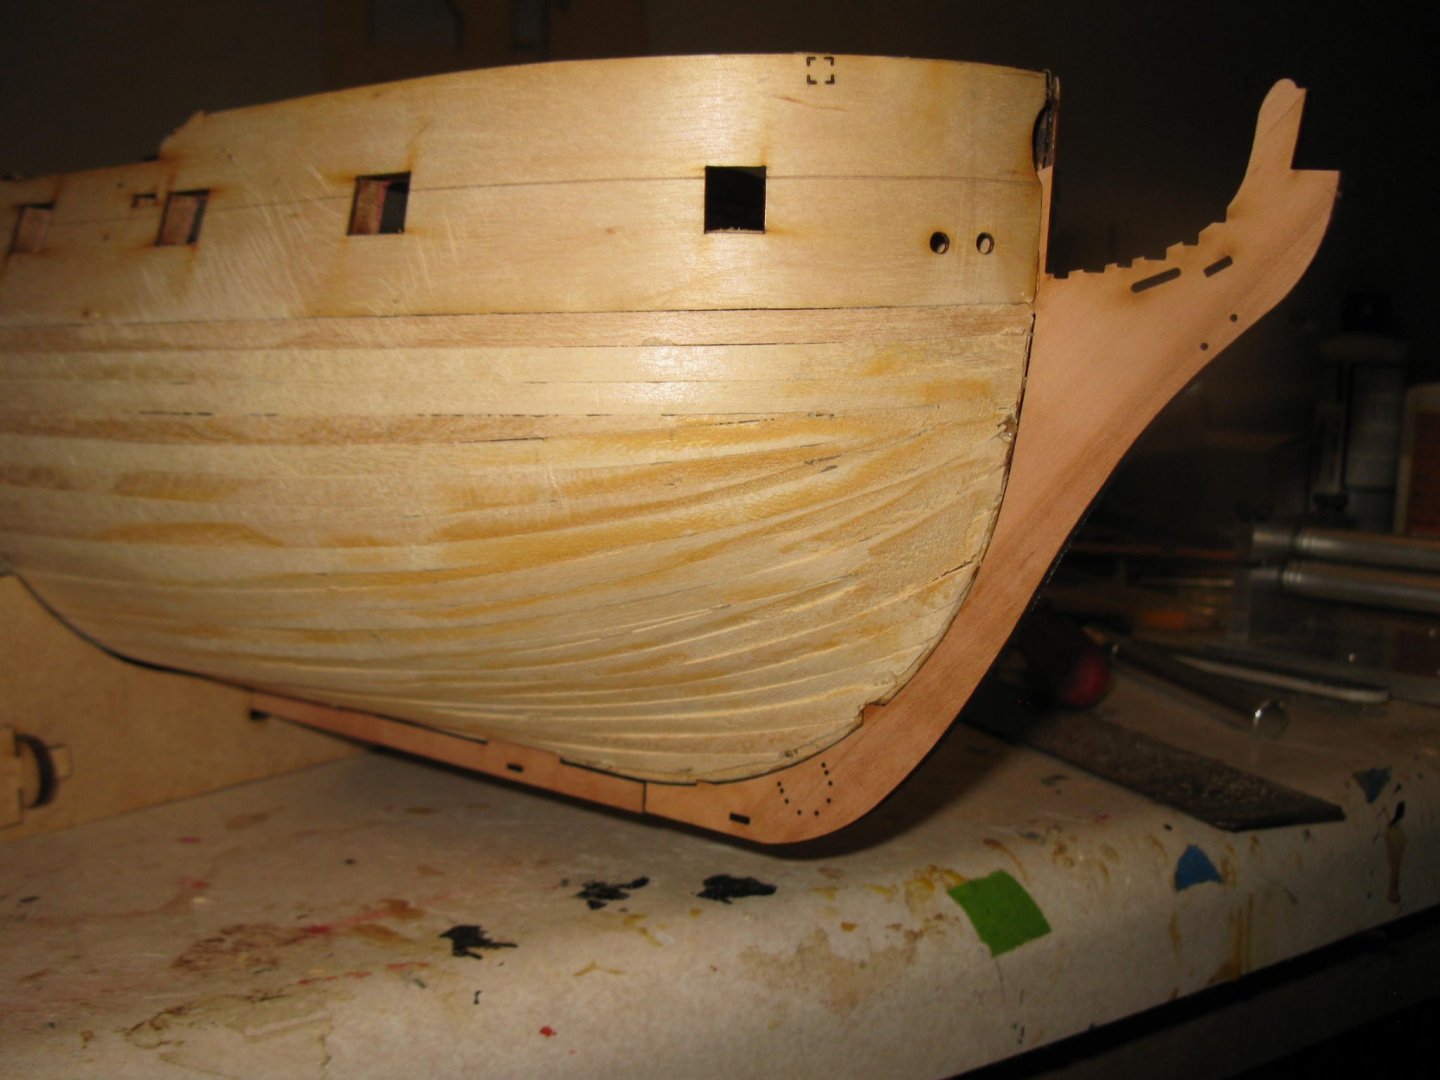
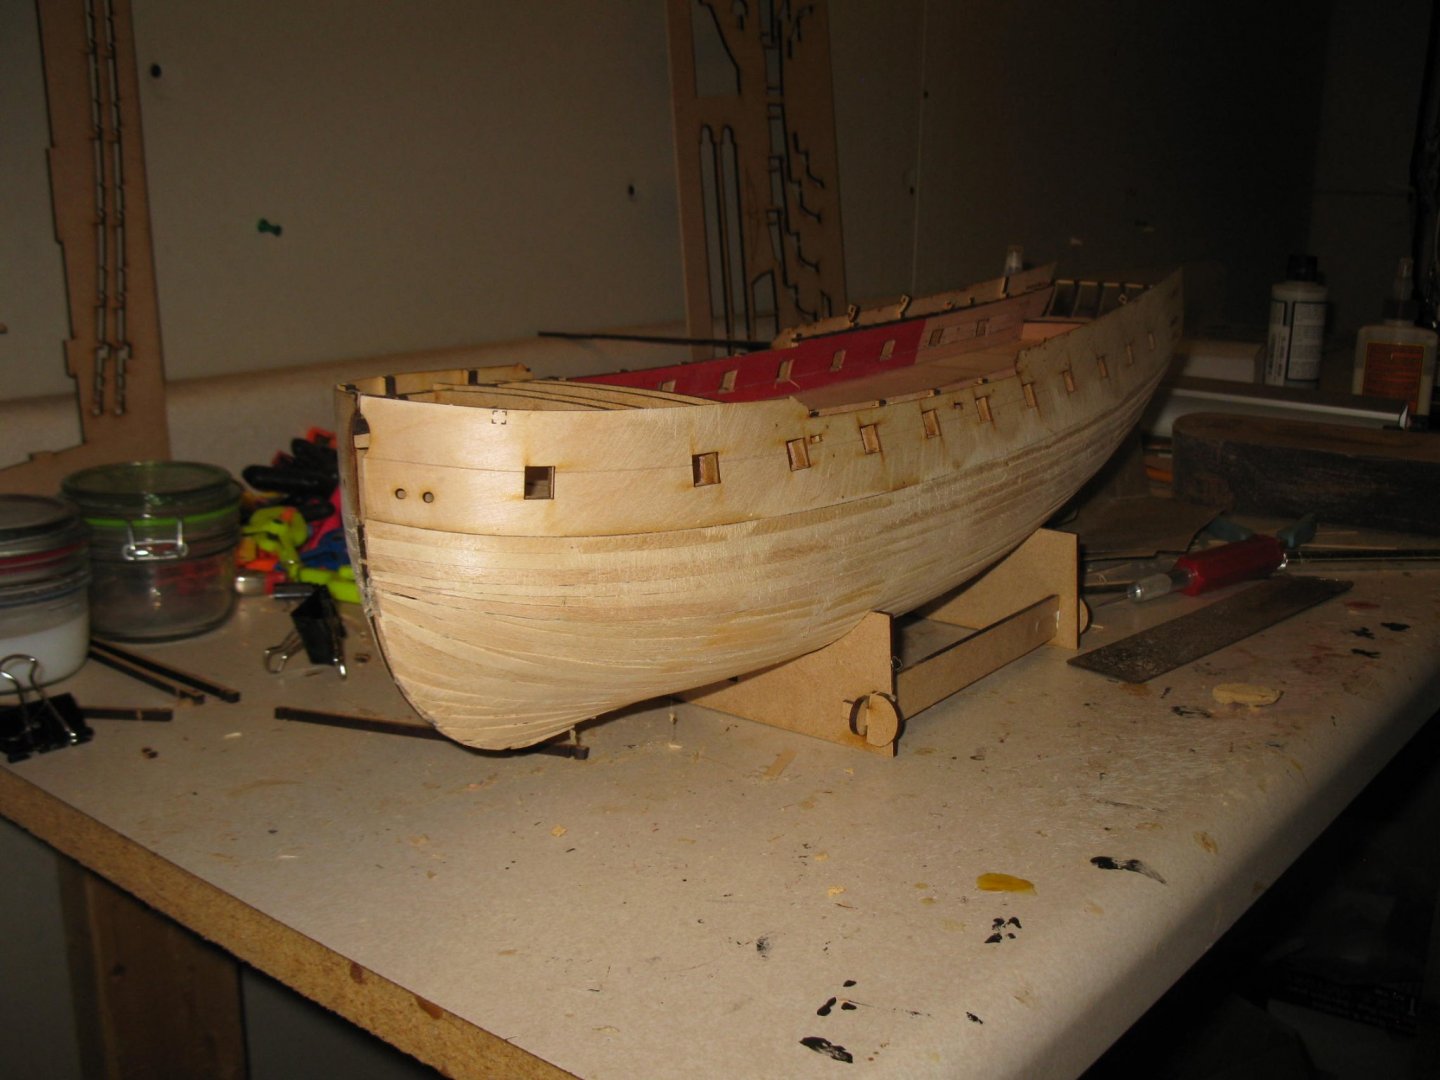
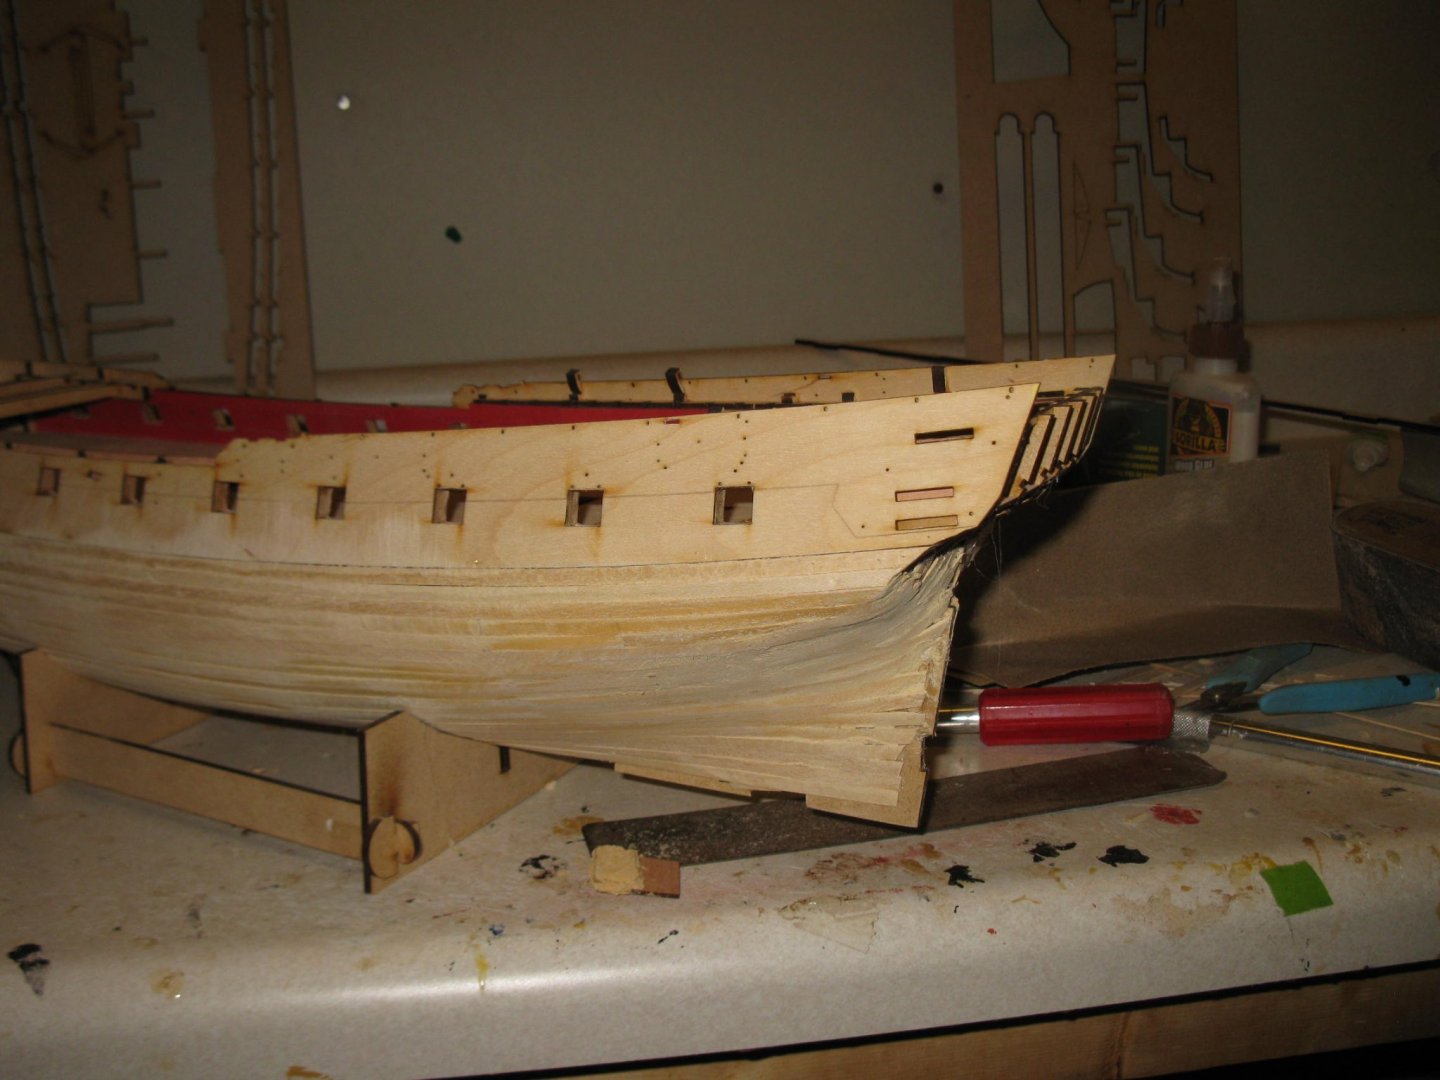
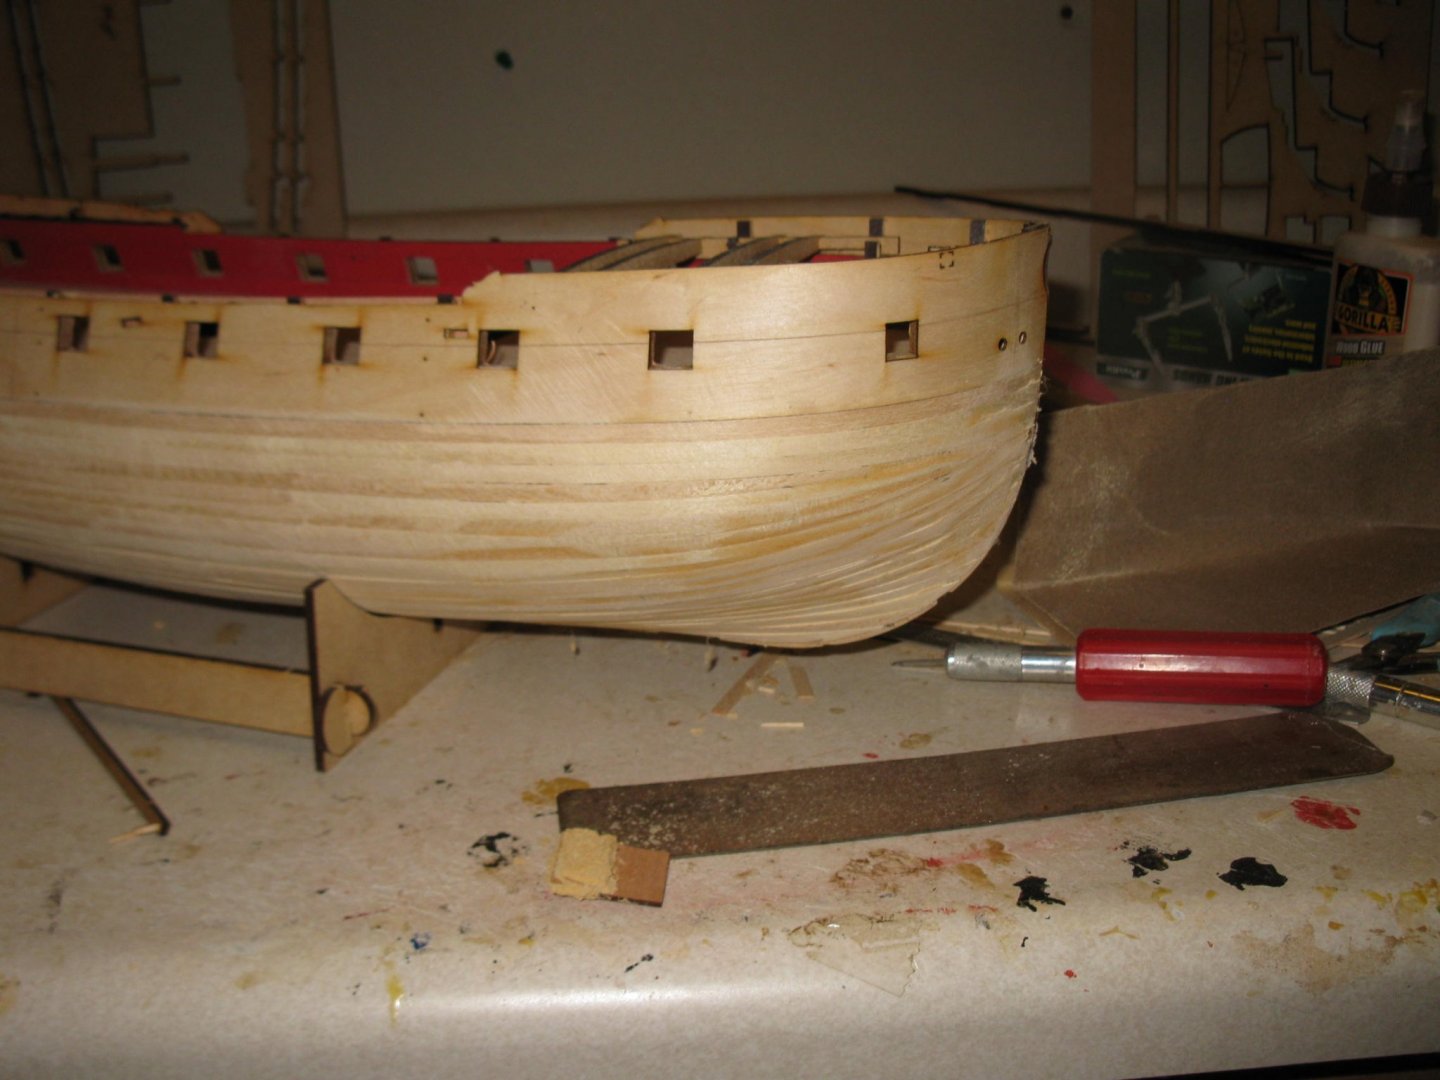
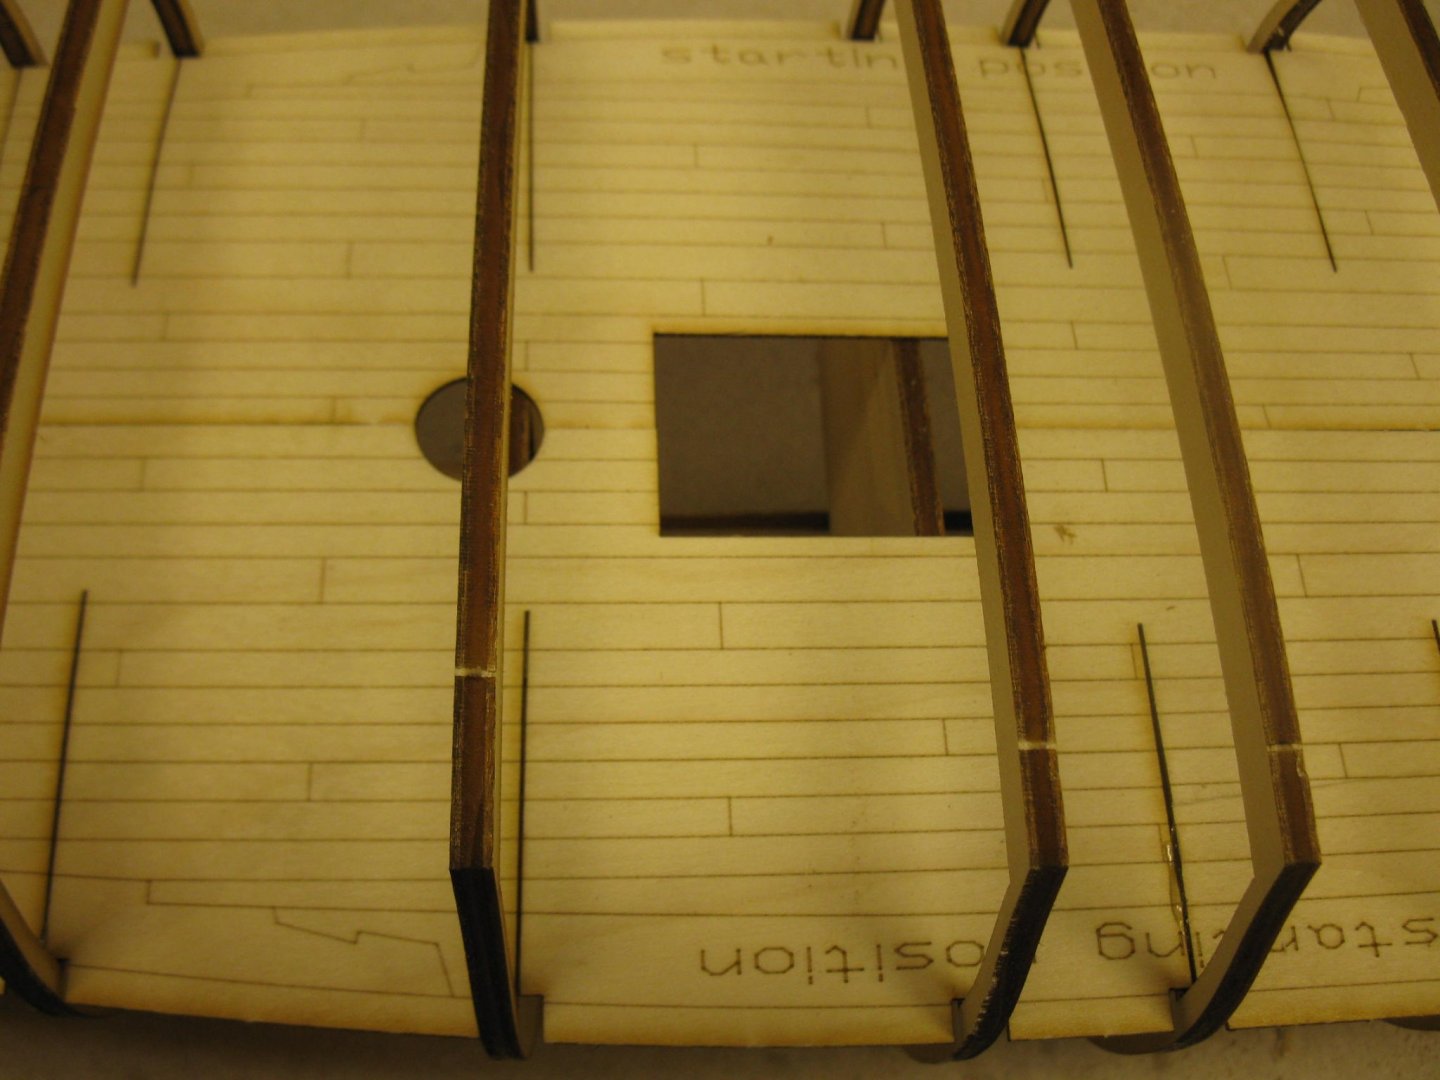
Hi With the work week coming up and my Vanguard HMS Sphinx scheduled to be delivered Friday, it may be awhile before I have another update. I will be putting this project on the shelf for the while but definitely plan on finishing this. Really looking forward to the Vanguard kit if only for the very detailed instructions and superb materials. I will say the support from Zorn is topnotch. But that being said this is still the hardest kit I have ever tried to assemble. And largely because of the vagueness of any directions if they exist. I've built over 20 kits over the years and have never had the issues I have had with this one. Very, very hard build. You probably need scratch building expertise to really handle this kit. The latest pictures show the upper hull planking before any filler or sanding. The cannon ports have been cut from the outside but not drilled through. And I've got lots of measuring and cutting to get the side profile correct.

-
I, too, am really looking forward to getting this kit. And I echo a number of members stating this build will be dockyard style with no rigging (or minimal rigging). There are already 10 fully rigged models around the house and there is just no more room for a fully rigged model. In fact , I am thinking that all my future builds will be unrigged. I wonder if there is any market for just a dockyard style model? I know model shipways has the confederacy this way but I don't know how well that kit has sold.
- 355 replies
-
- 2
-
-
- vanguard models
- Sphinx
- (and 1 more)
-
For all sanding I sit at my workbench with the hose of a dust vacuum clutched between my knees. It has a powerful enough motor that all dust immediately goes down into the collection bag.
- 355 replies
-
- 2
-
-
- vanguard models
- Sphinx
- (and 1 more)
-
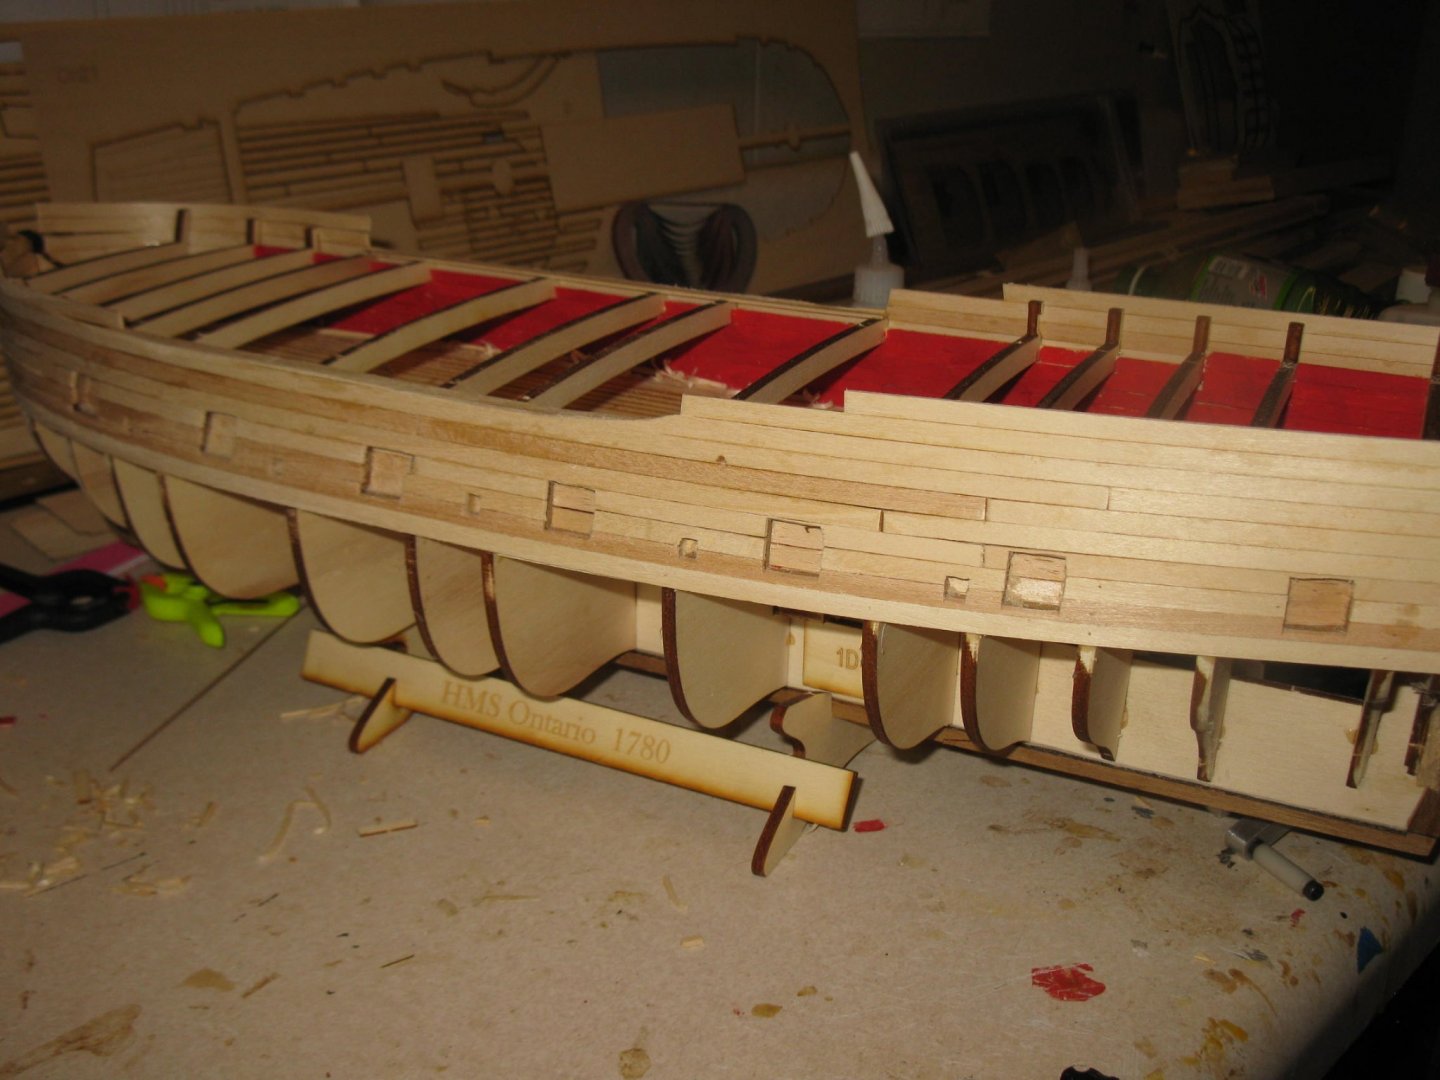
I should mention too that the instructions say nothing about adding filler blocks (although material is supplied), sanding and fairing the hull. I think this should be done before adding the transom. Given all the sanding that will be done, the rather fragile attachment of the transom would probably give all kinds of trouble. Per David Lester's terminated build, I am guessing the error about the forward frames has been corrected as I see no problem in the area he illustrated.
-
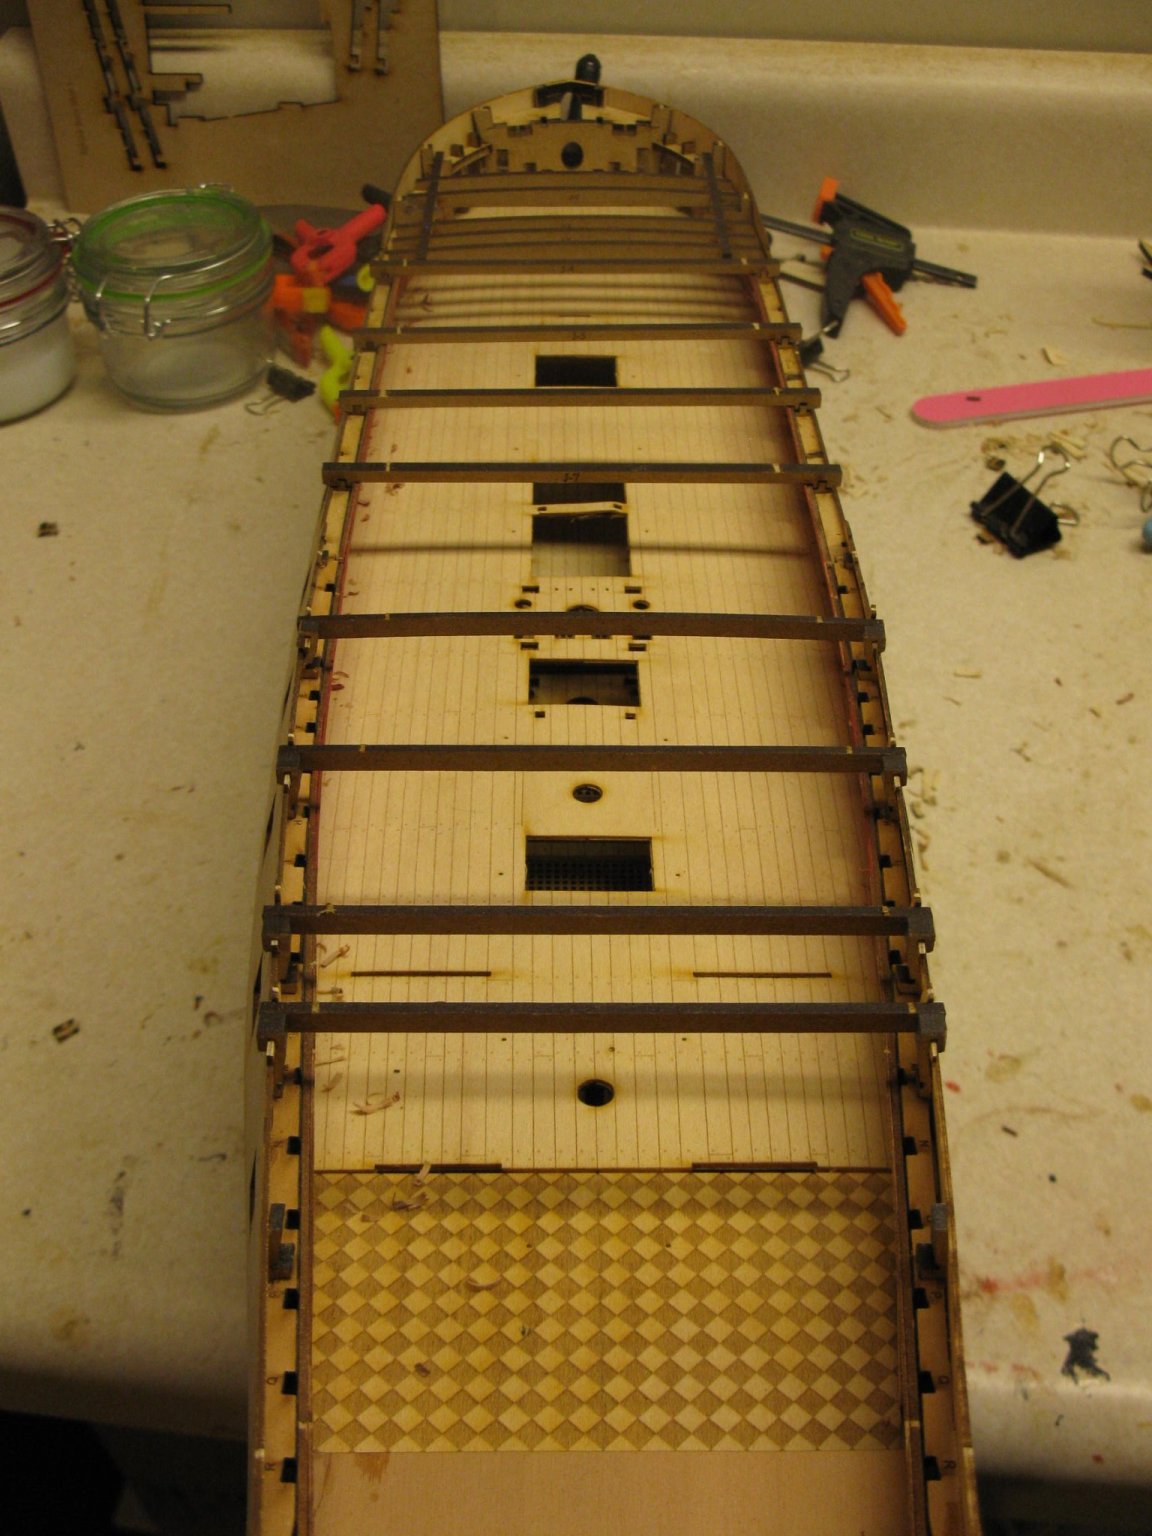
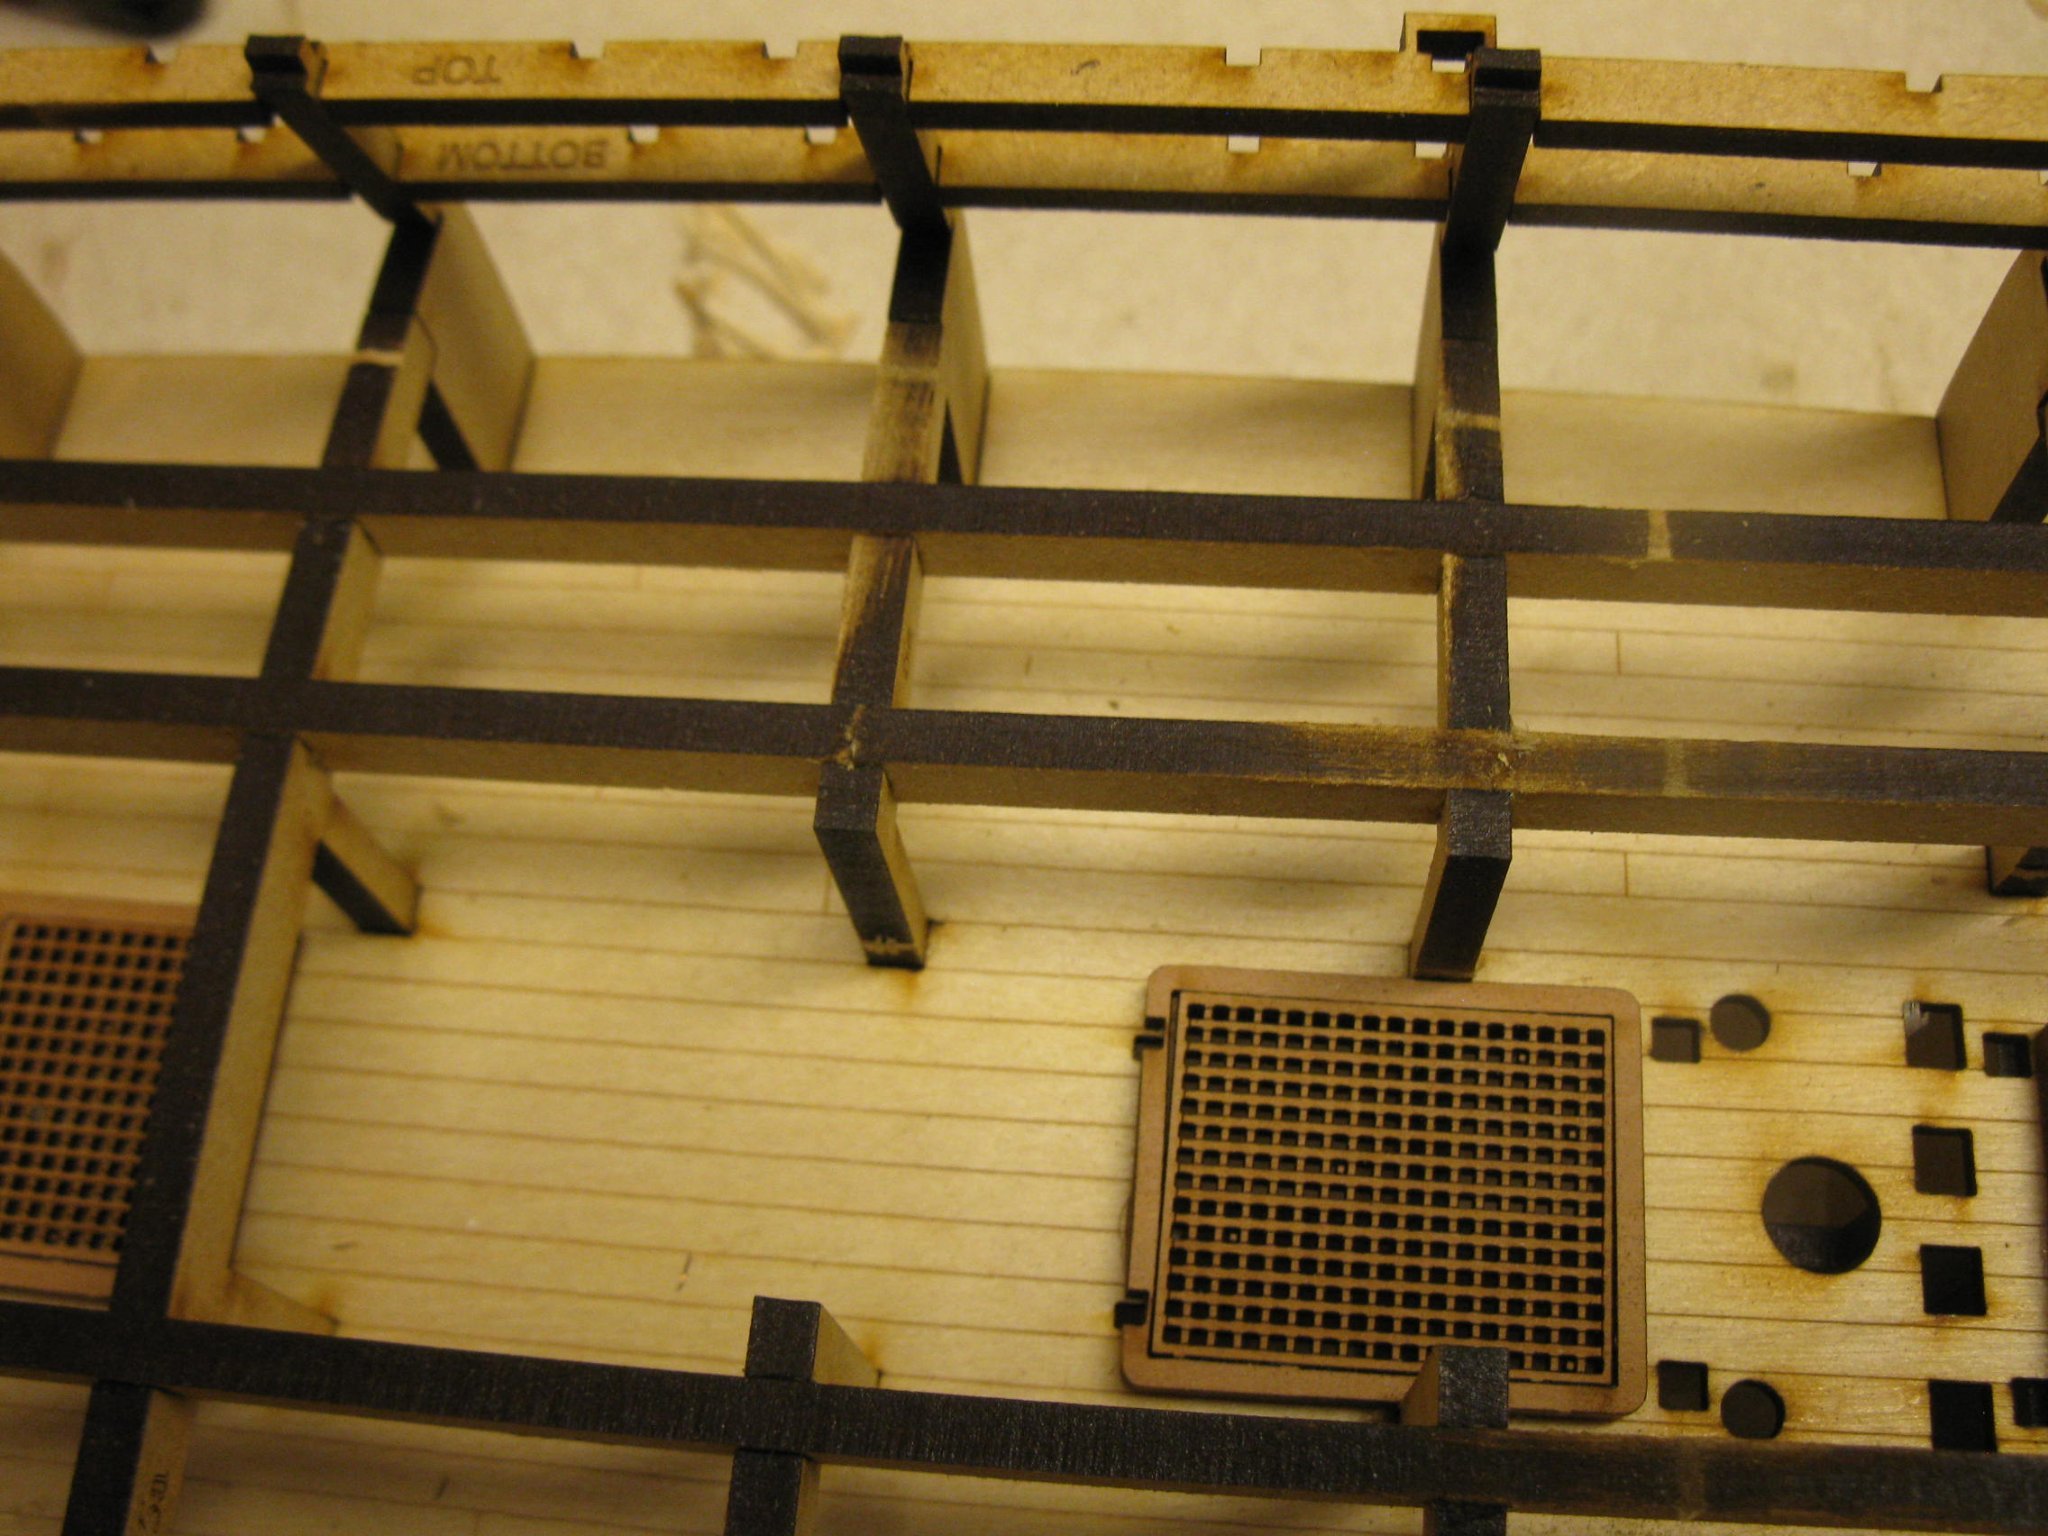
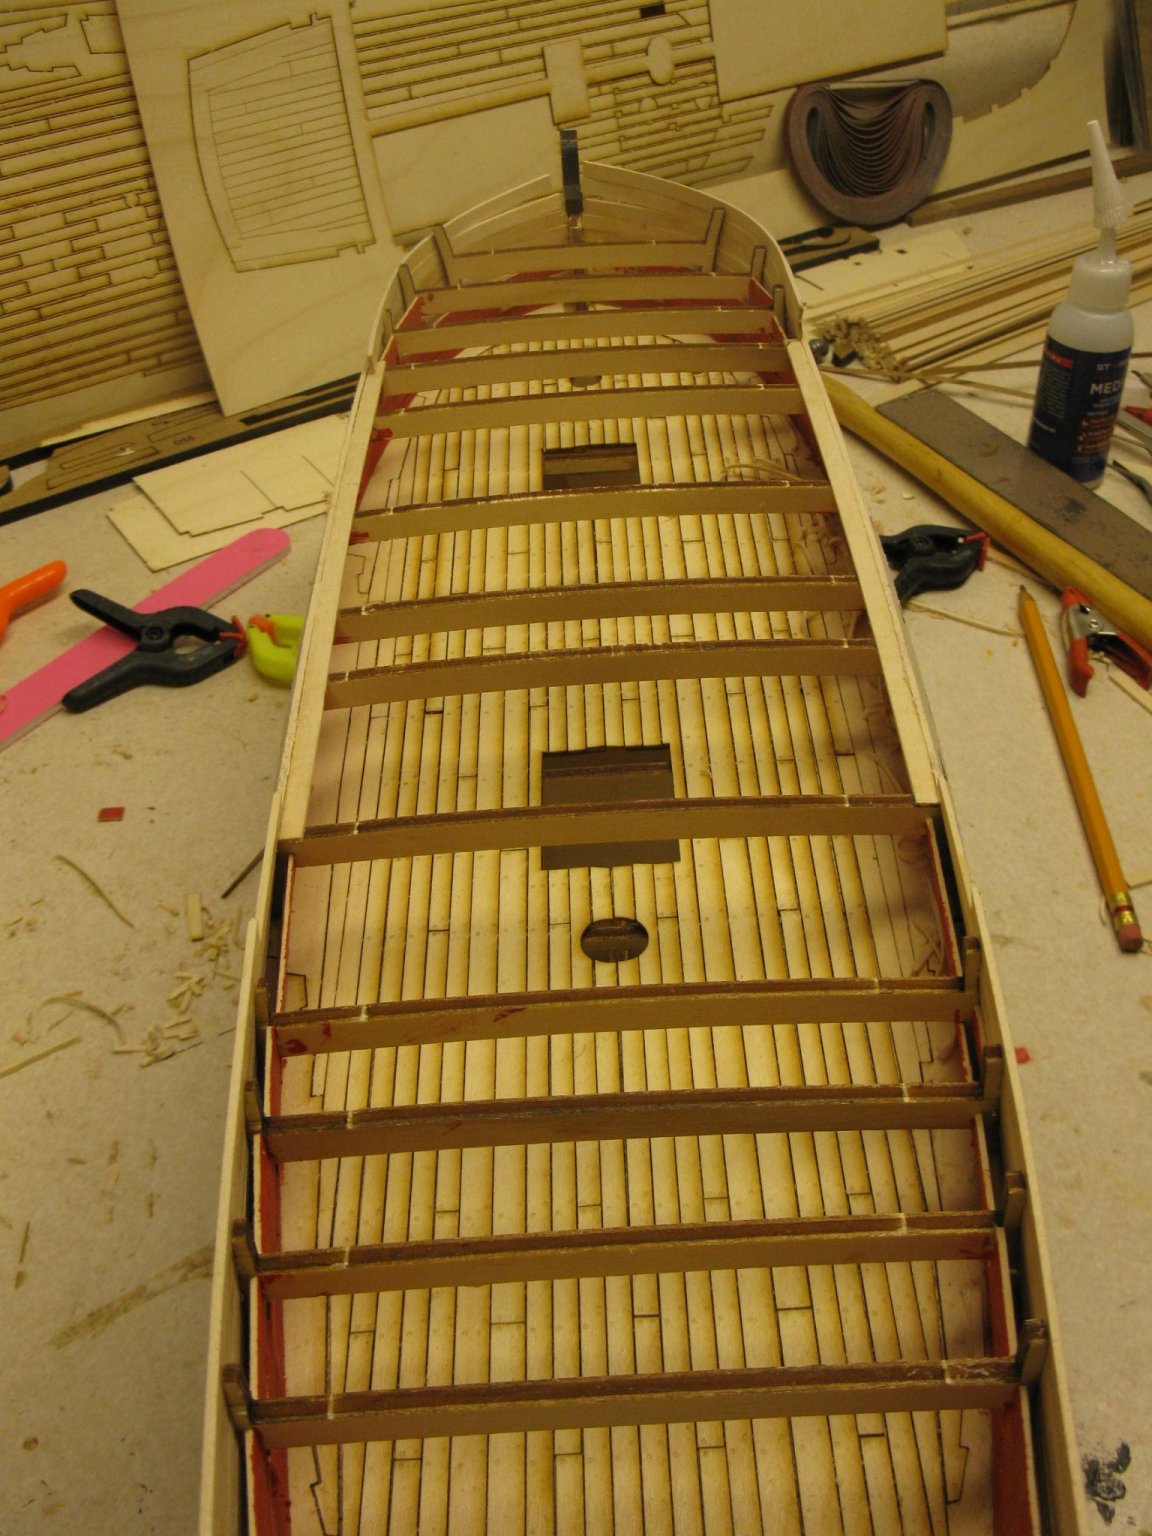
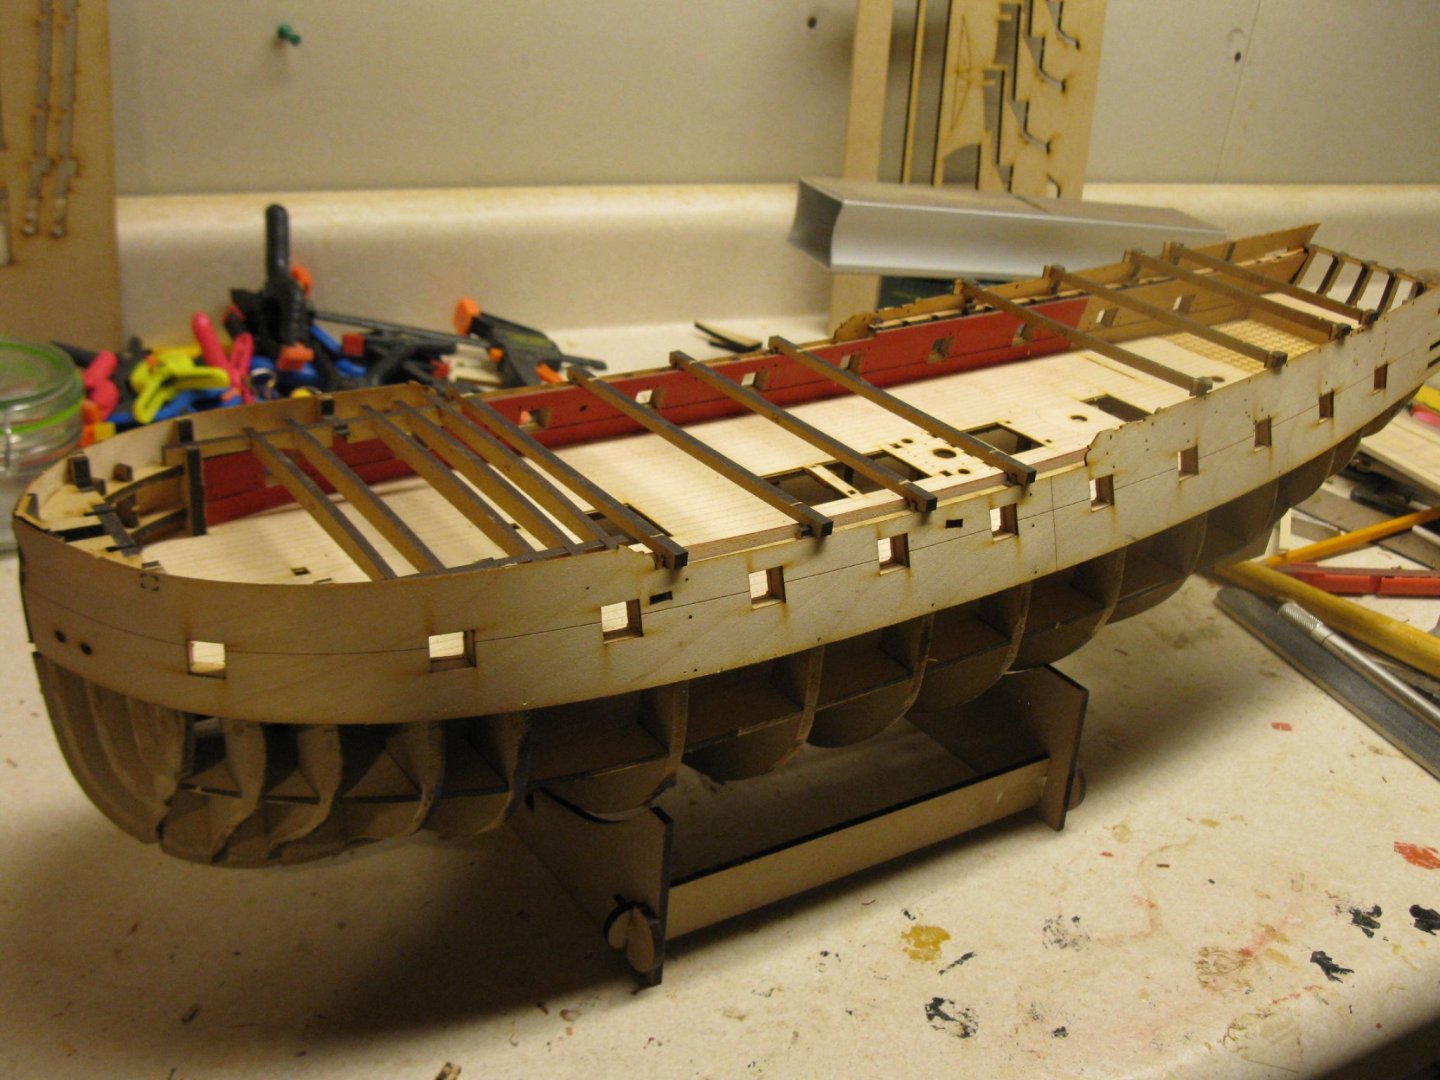
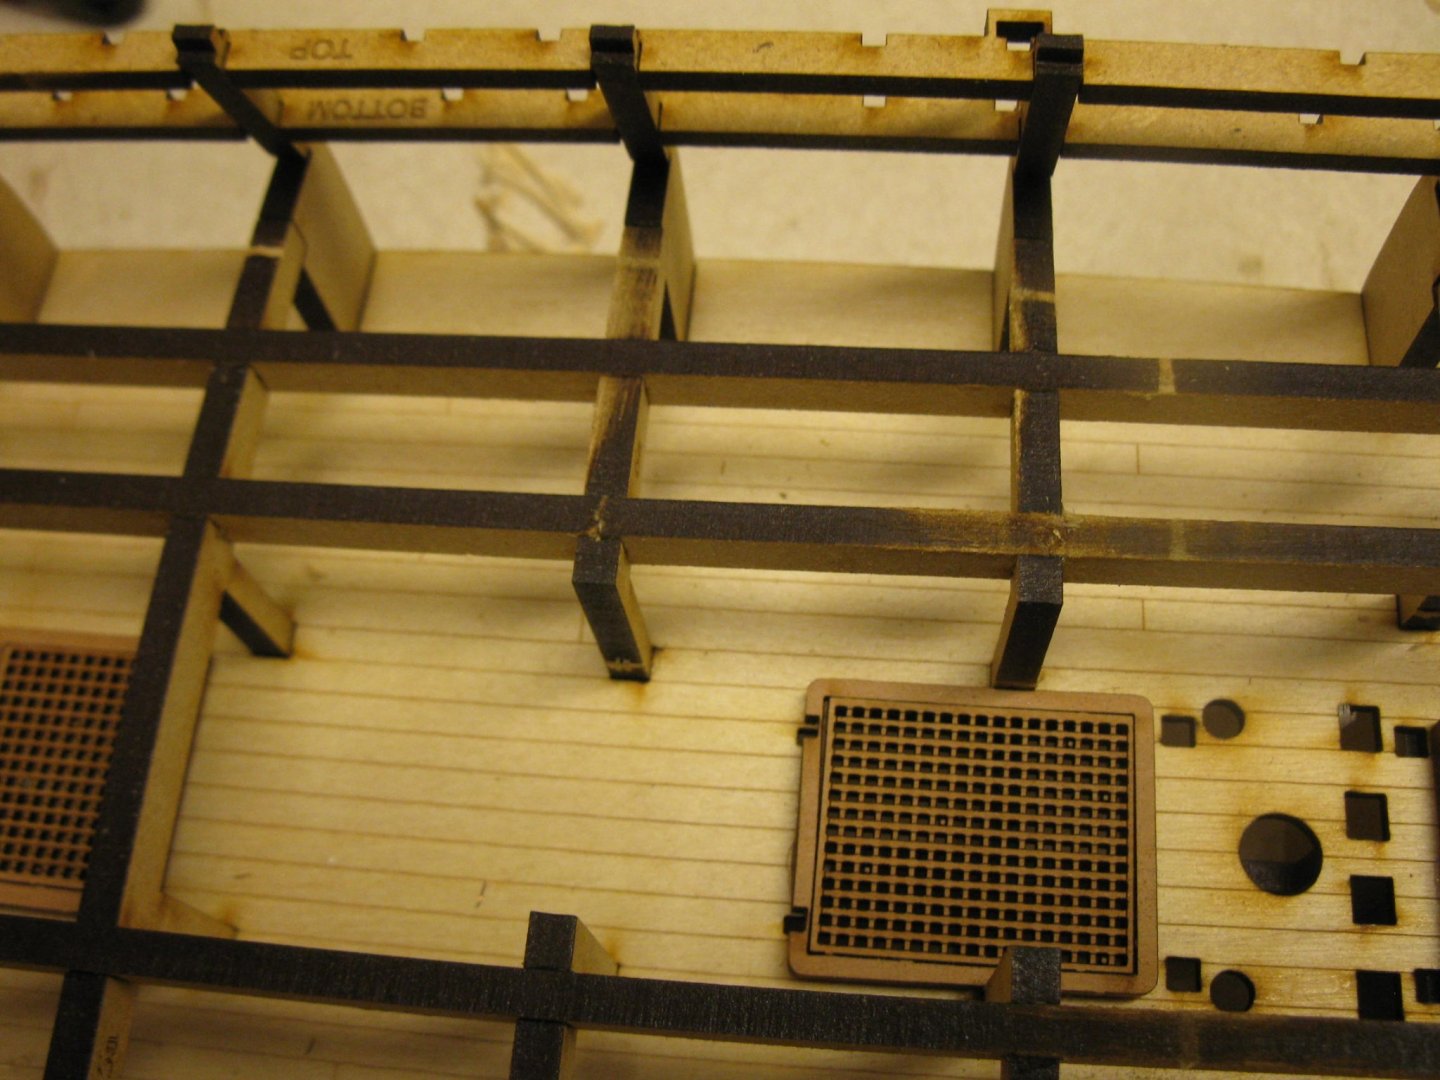
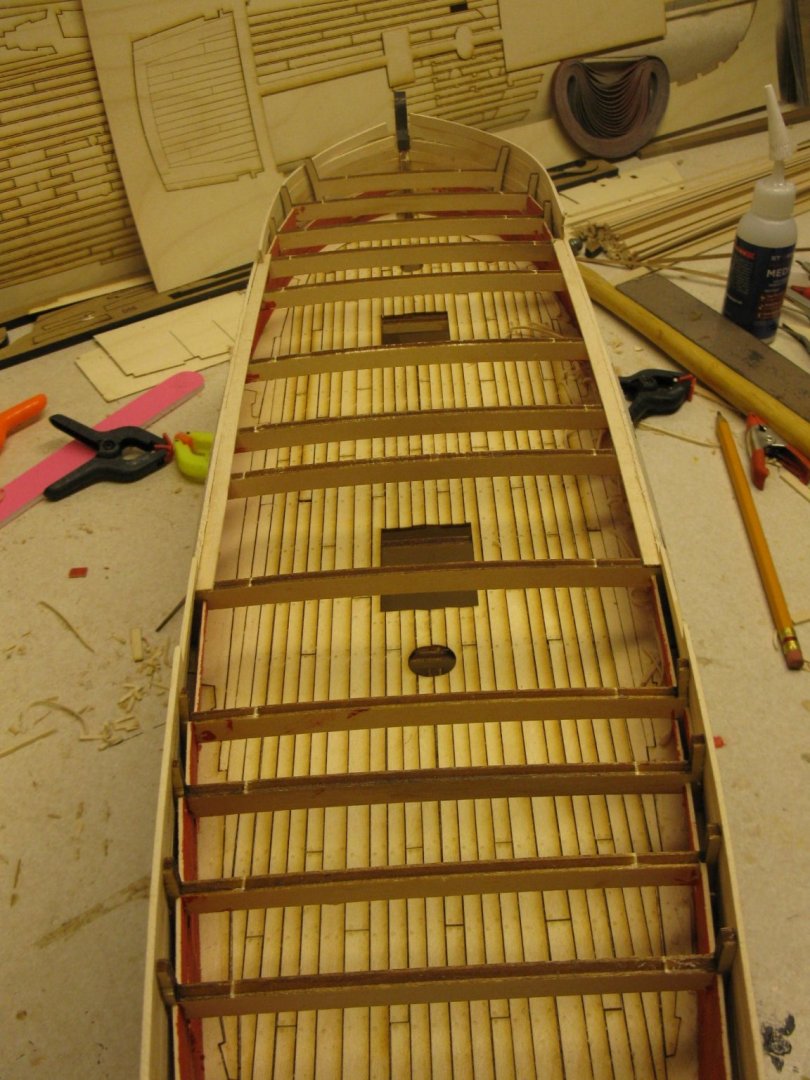
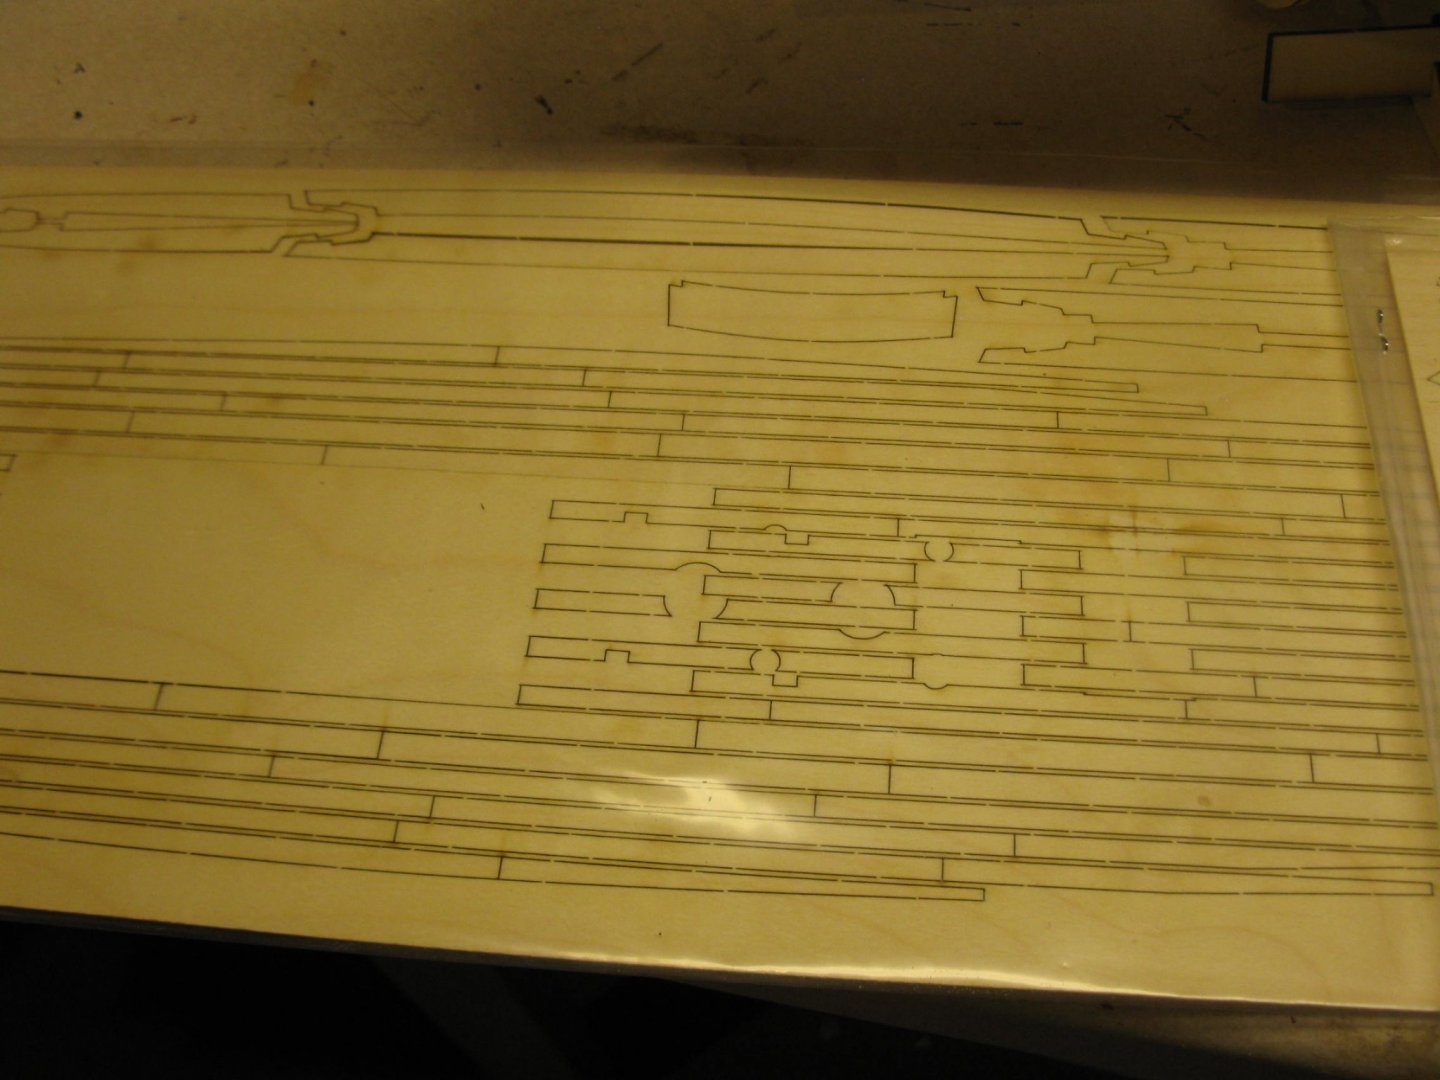
After attaching the transom it is time to work on the gun deck itself. This kit includes the laser cut deck that you install first and then a whole set of laser cut planks. These planks on the gun deck are pretty much not going to be visible so it would be possible to skip these entirely but I will work on them for practice as the same method is used on the upper deck. After this step I should be able to begin the inner walls.

-
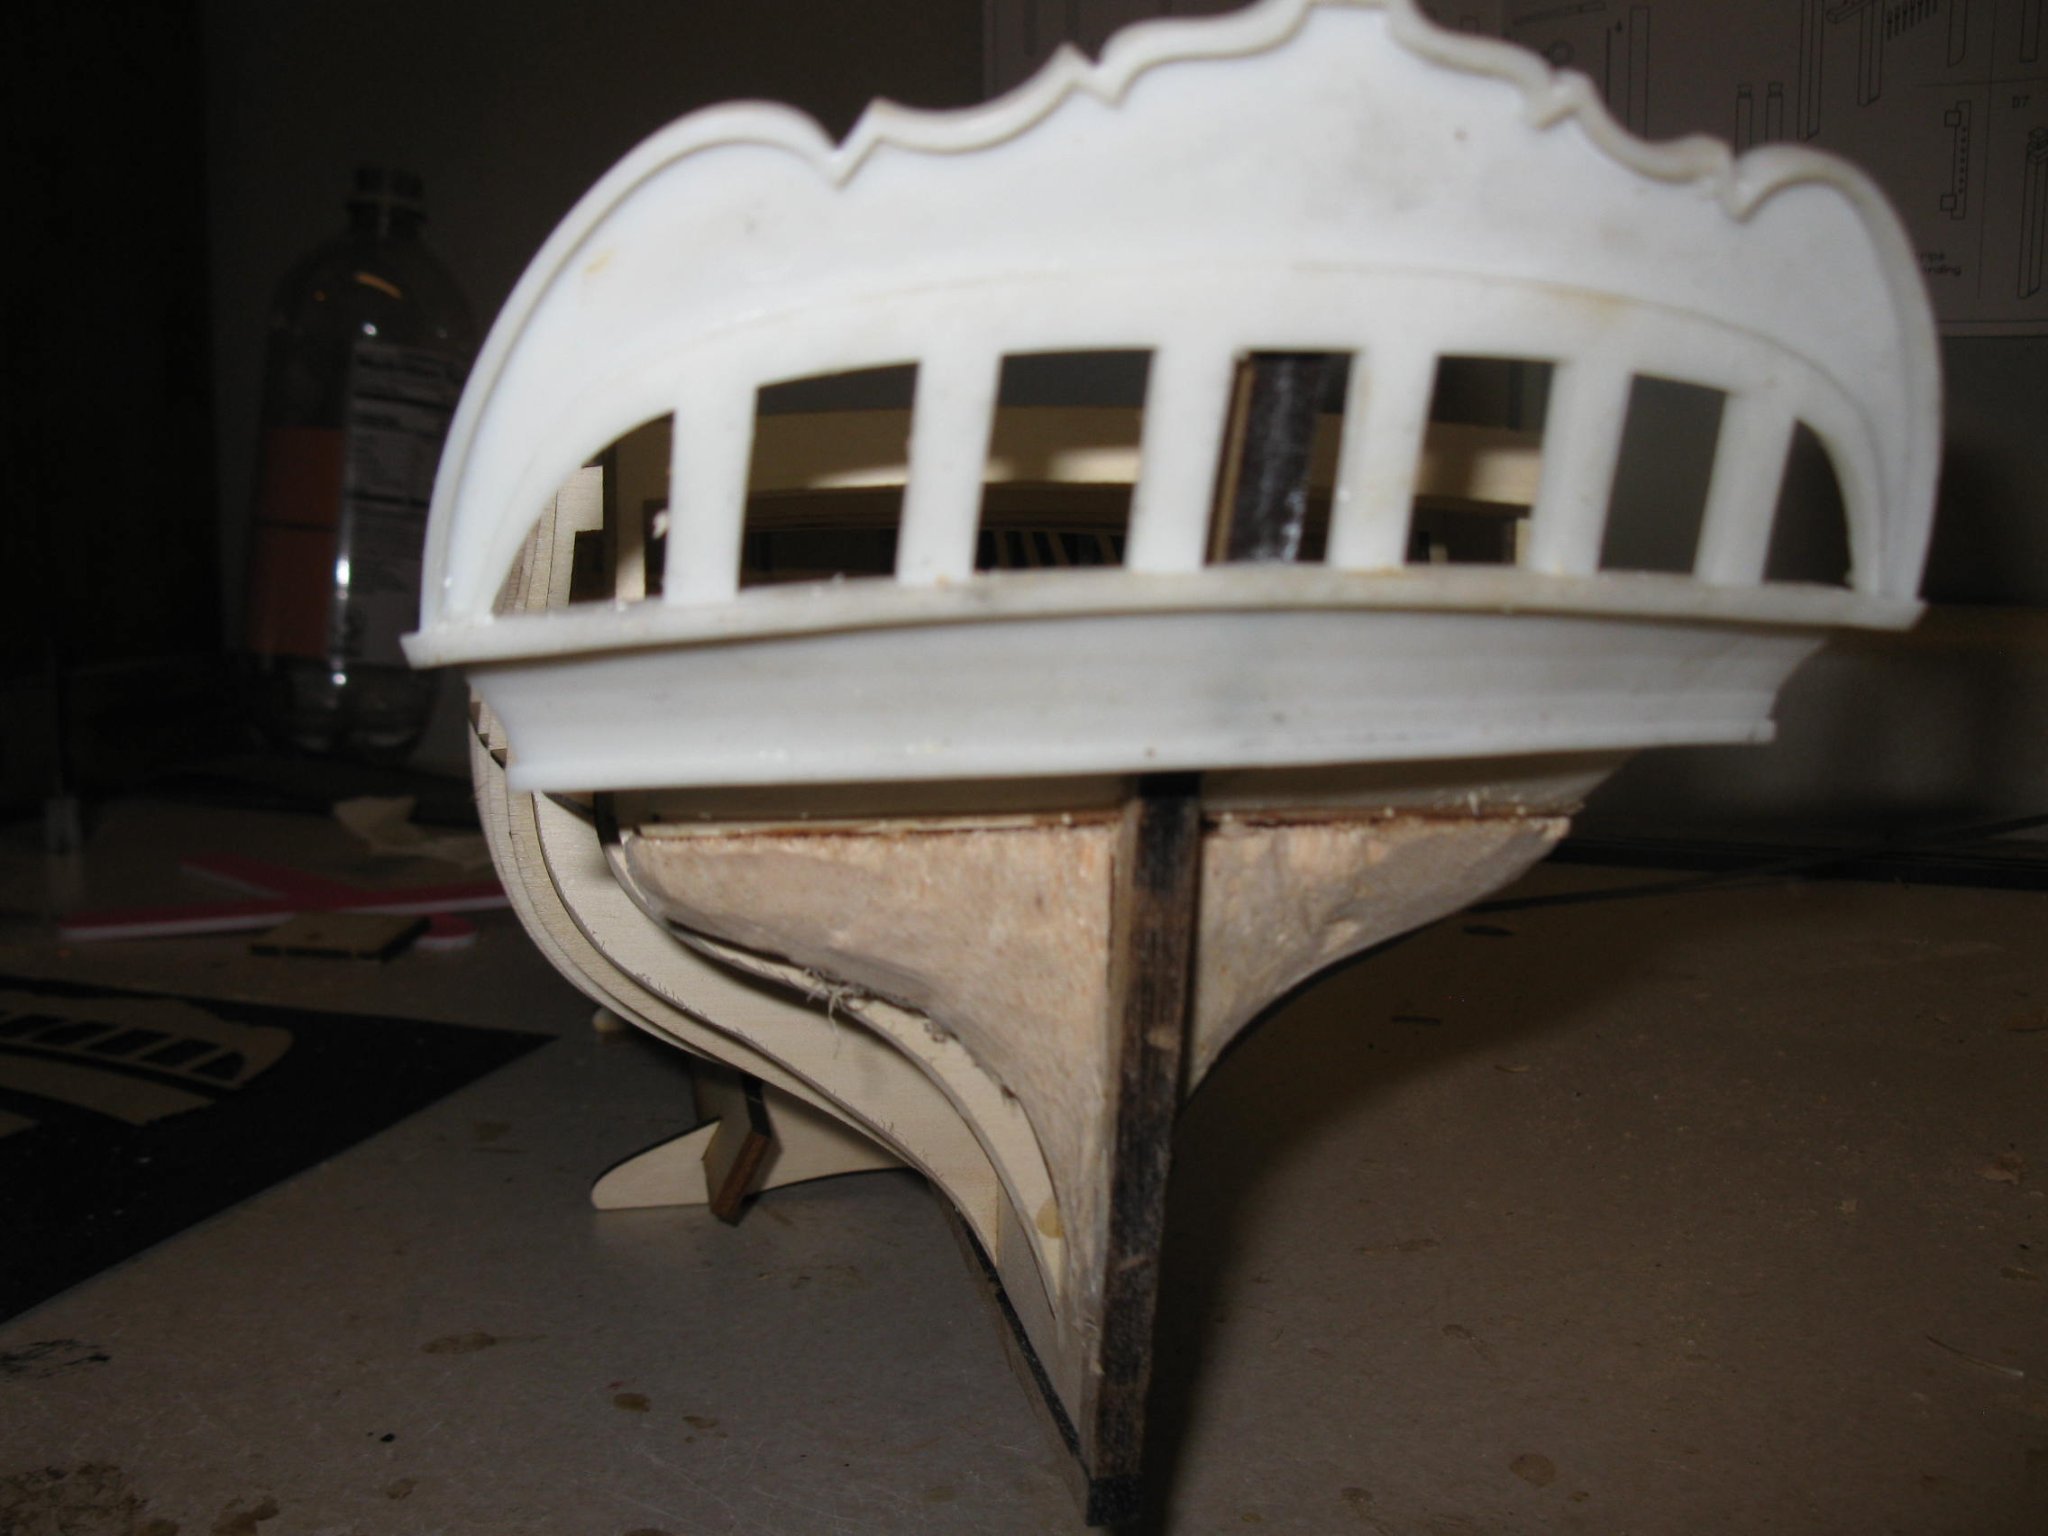
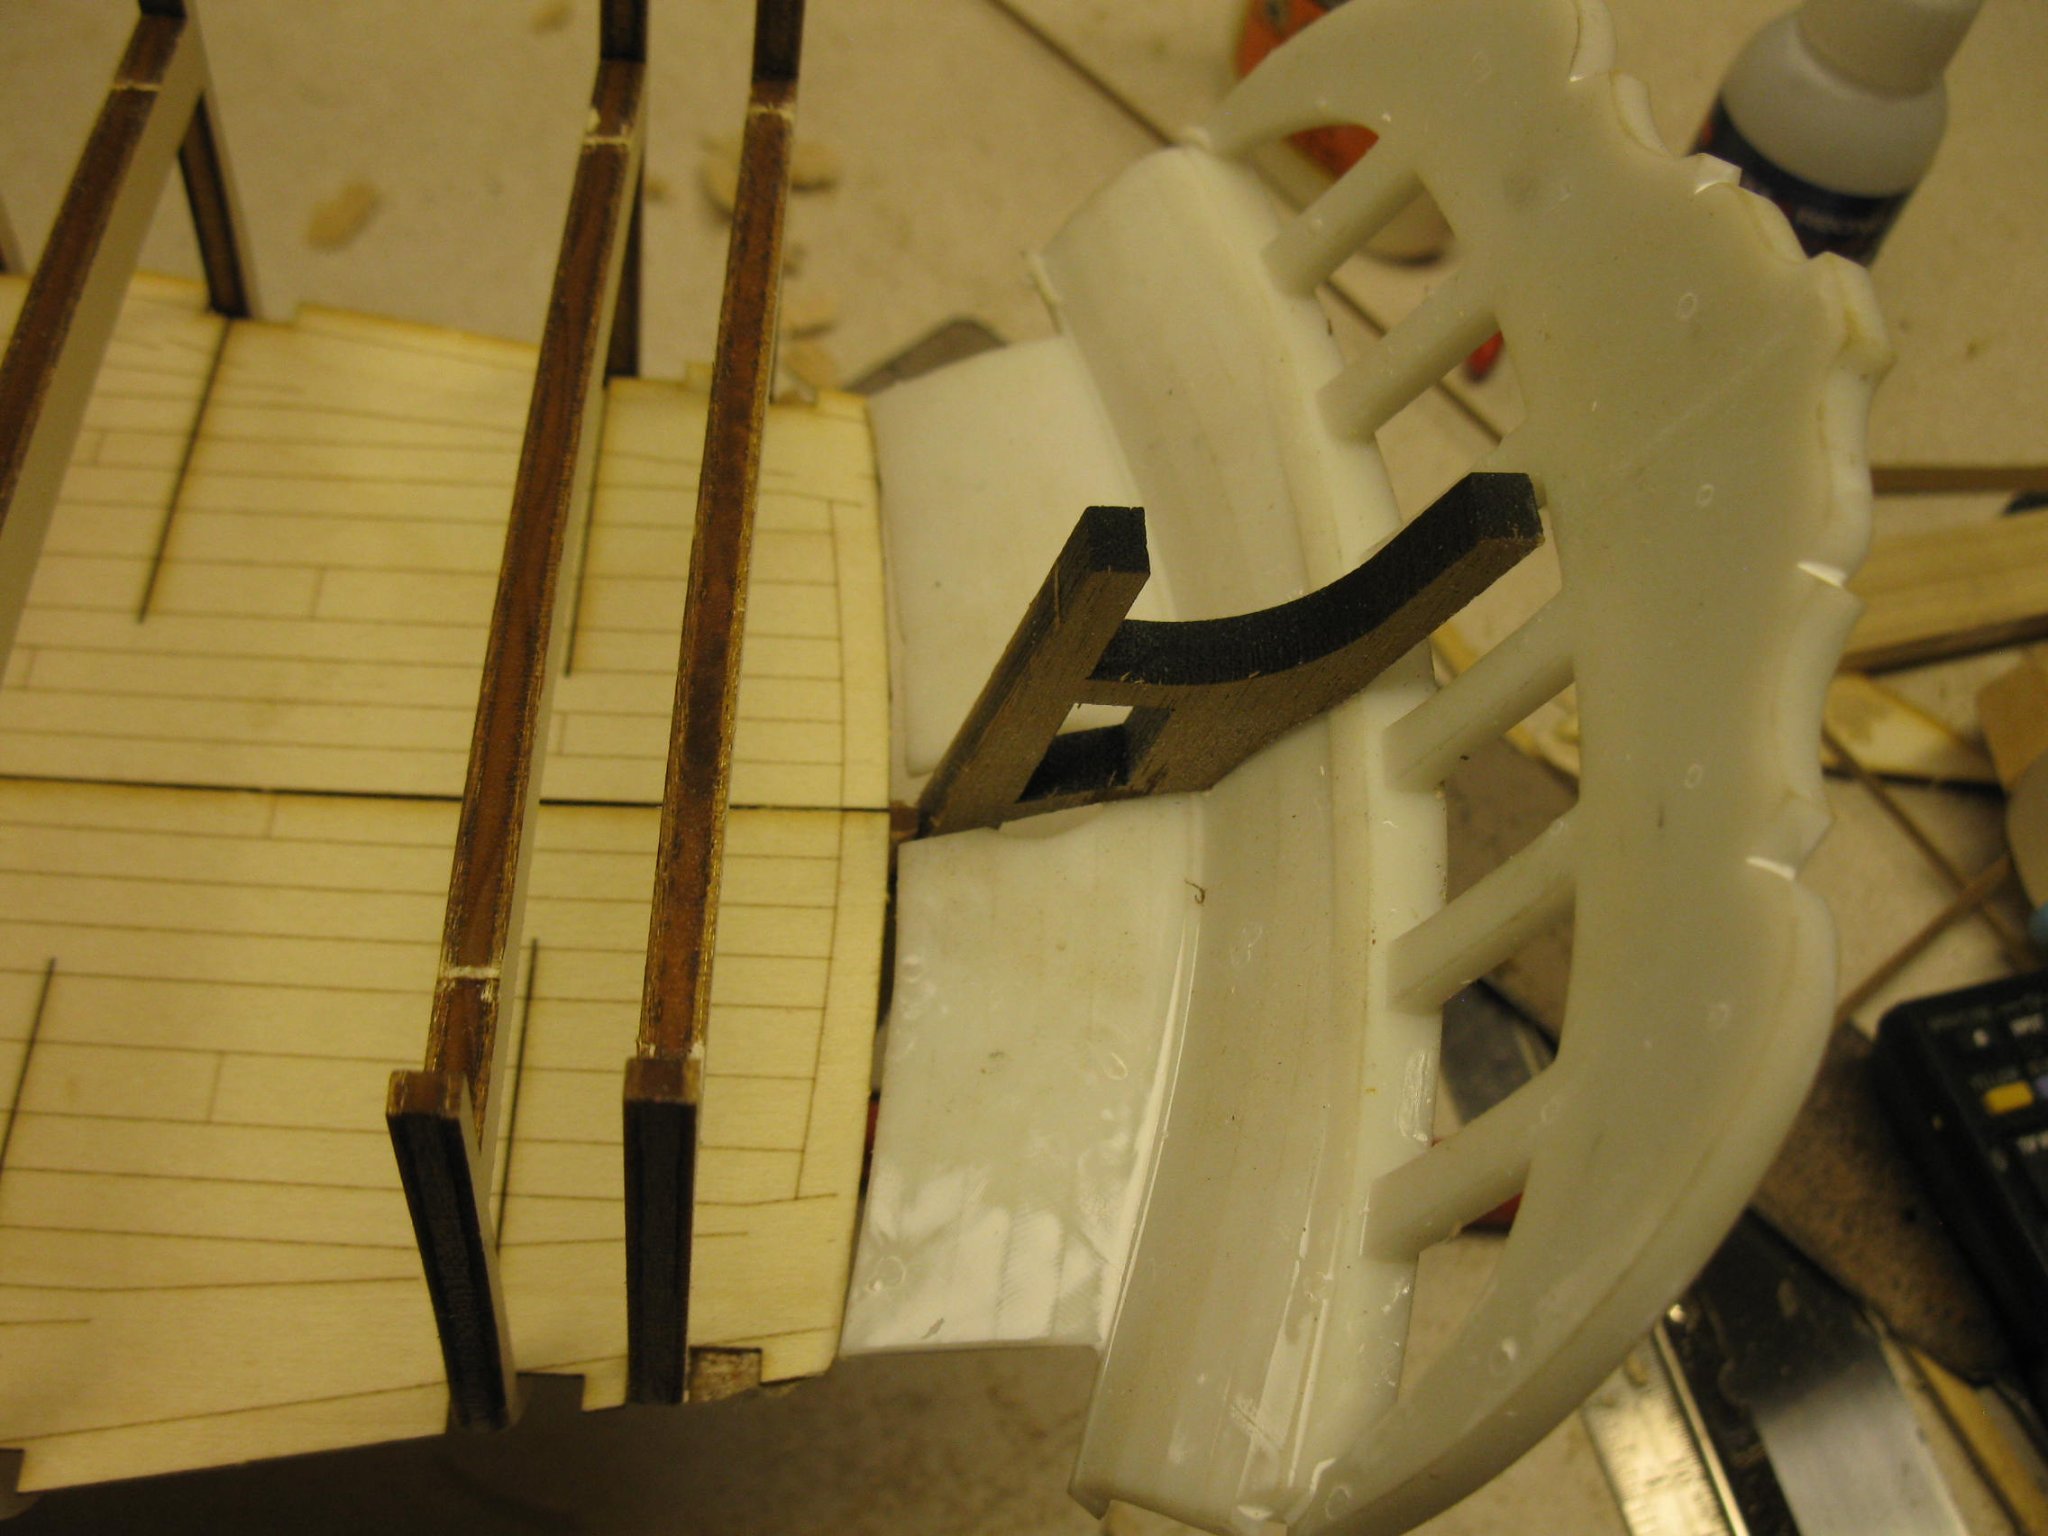
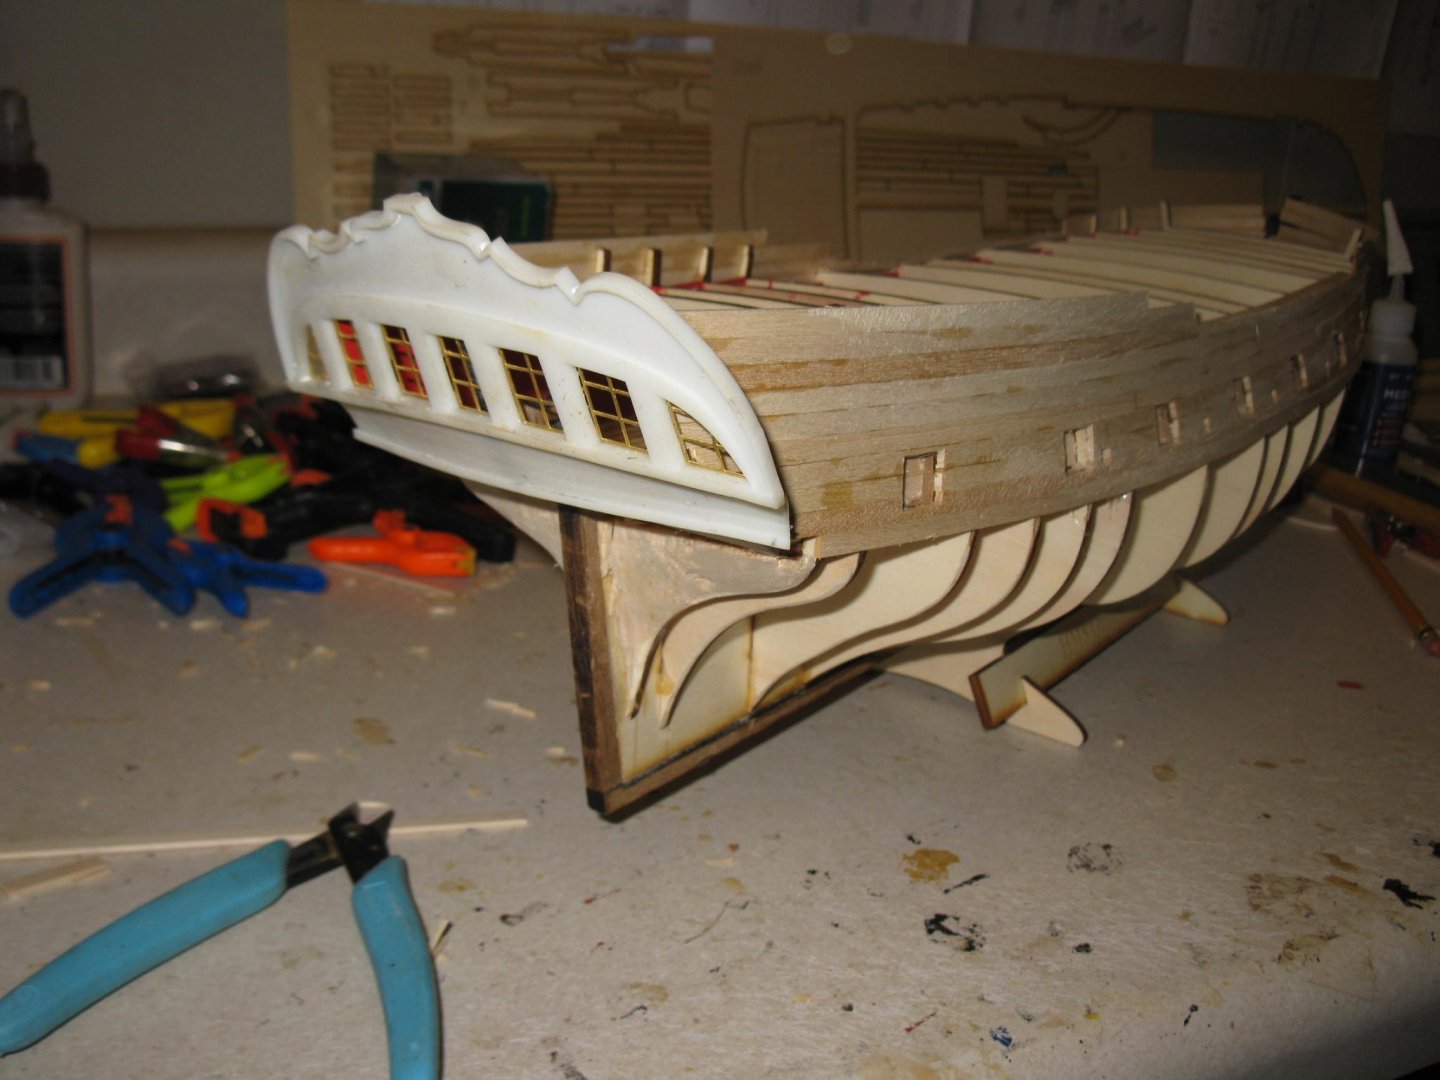
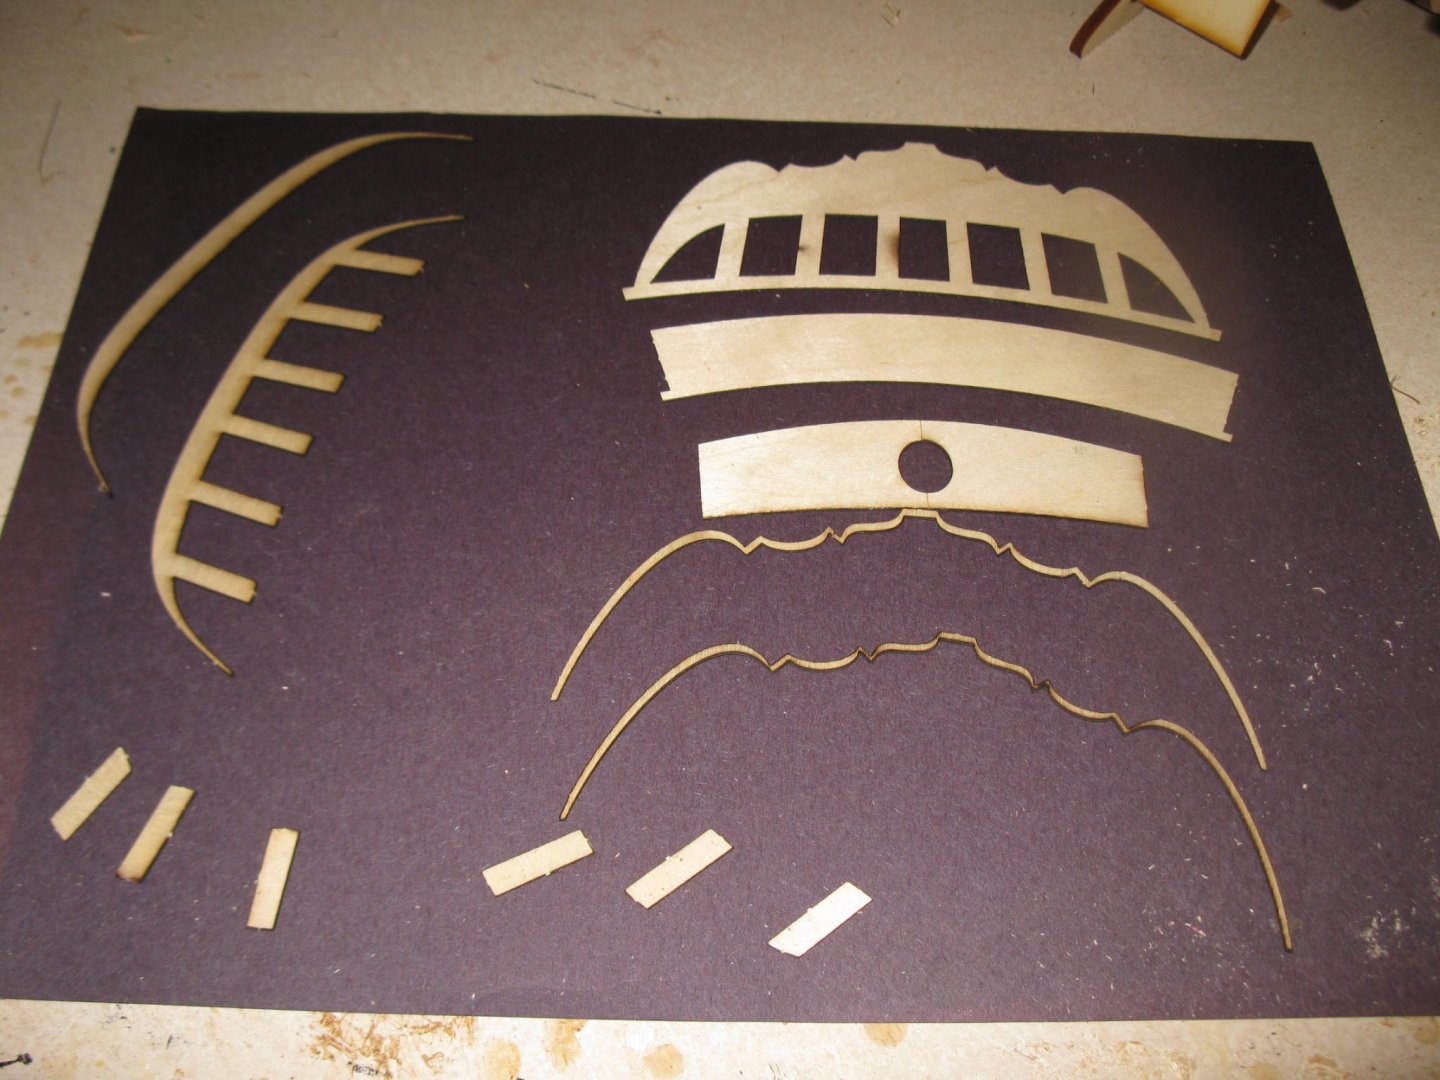
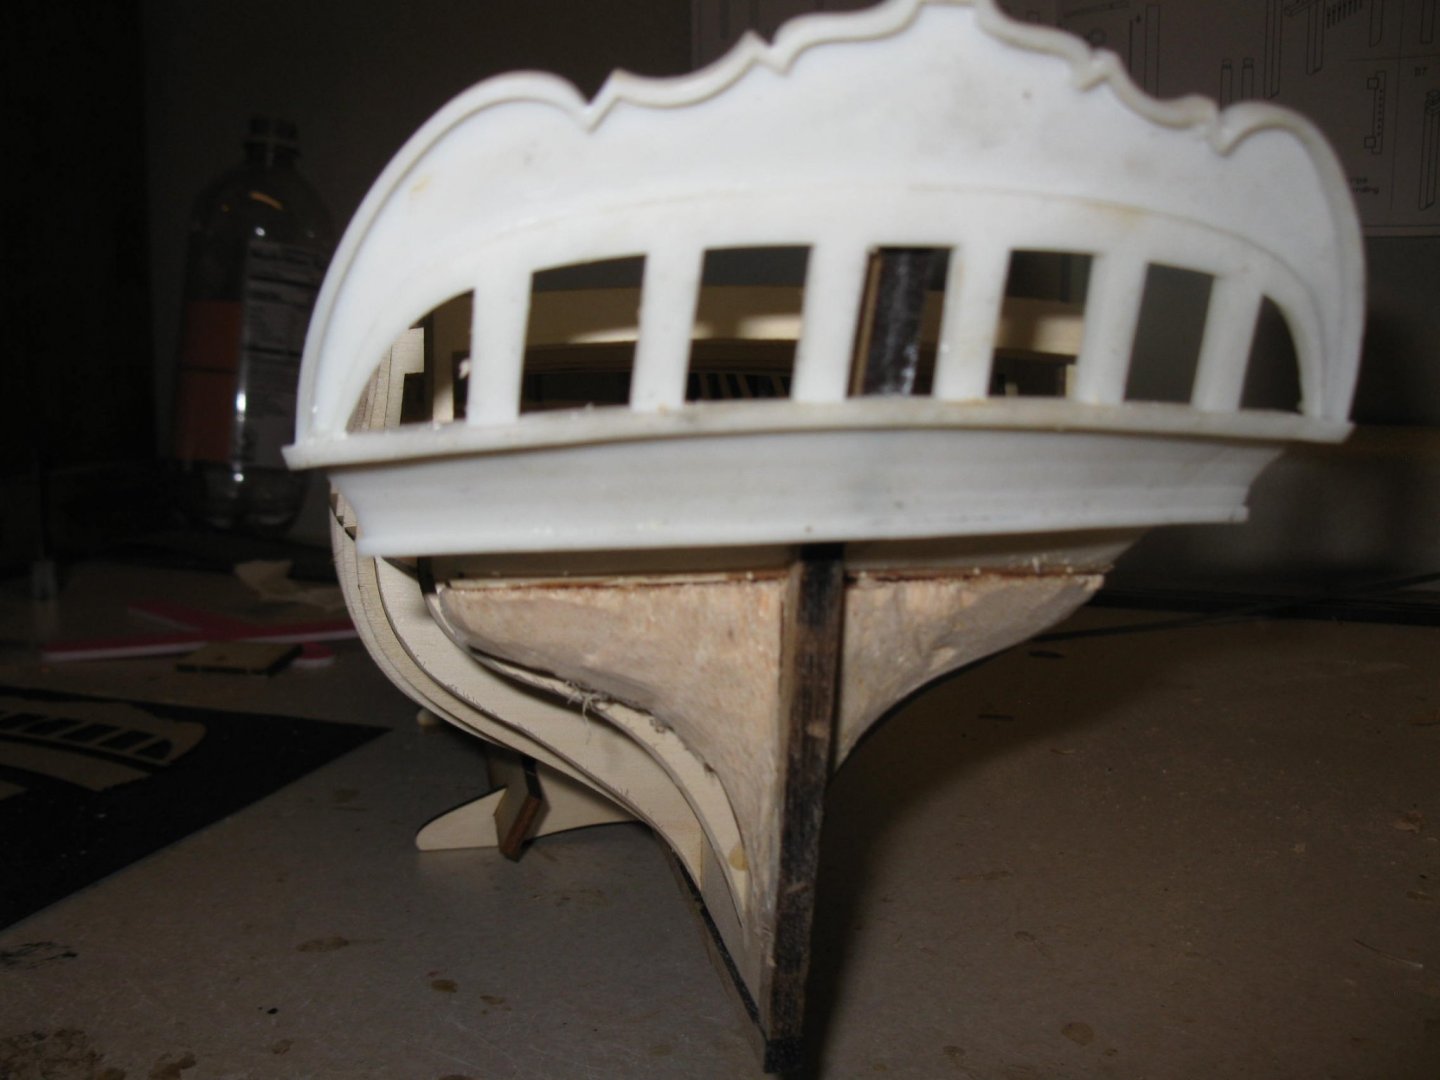
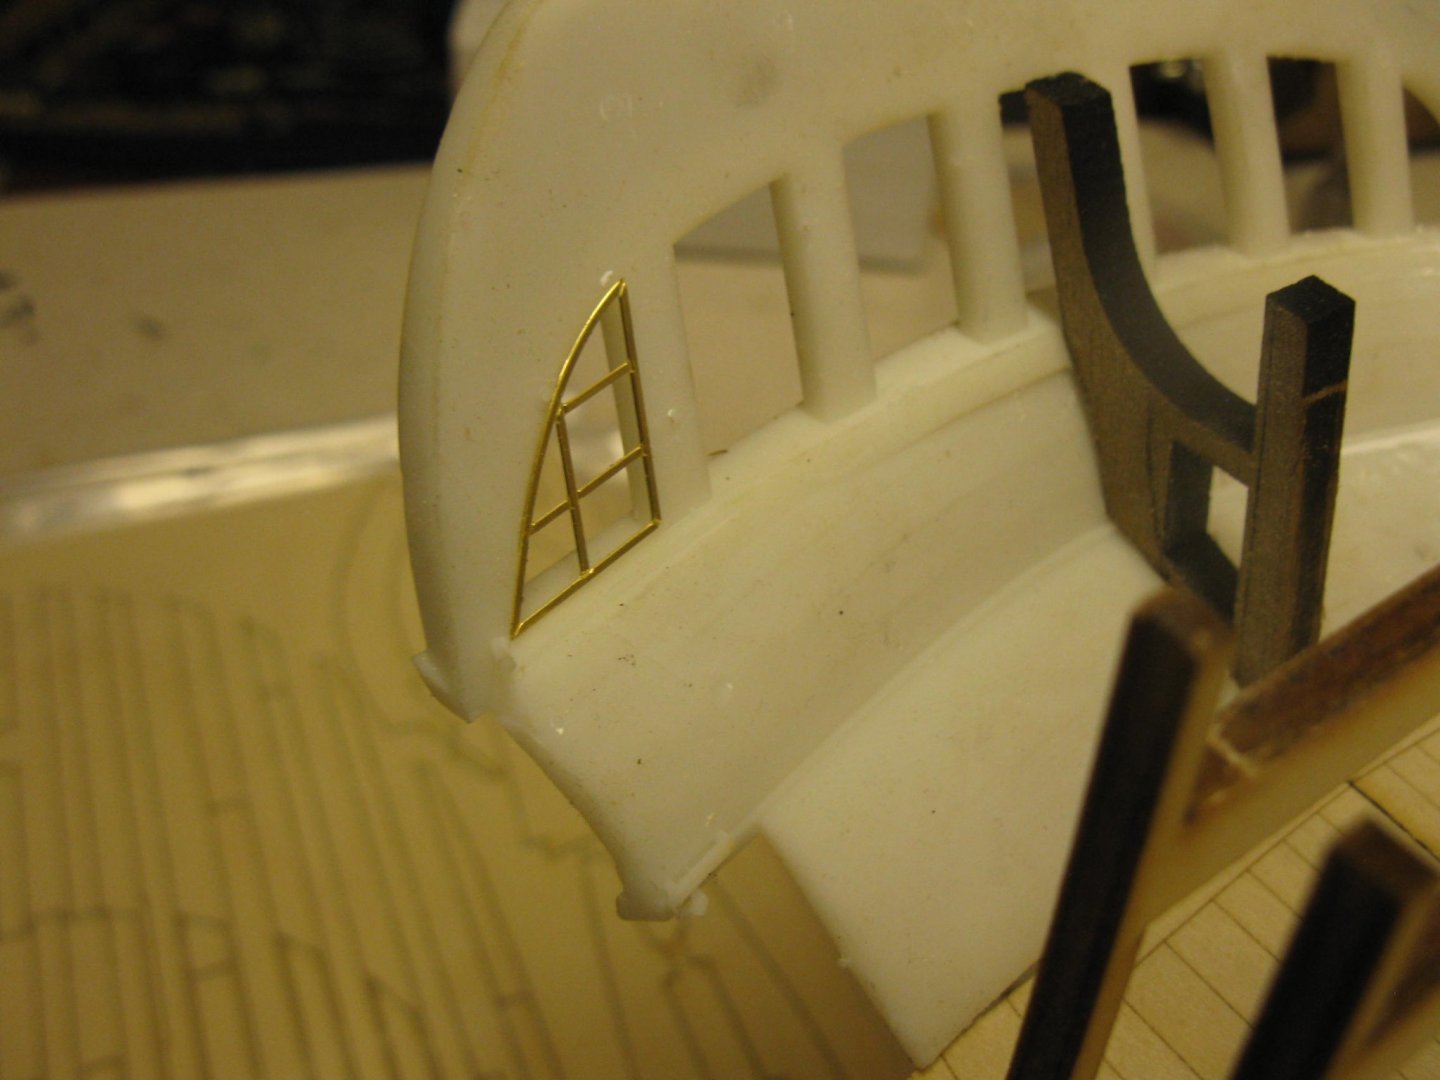
I've spent the past several weeks thinking about how I want to proceed. Per the instructions it is time to apply the inner planking. But in my mind to that correctly and most easily the transom needs to be fitted. The kit now comes with a number of pieces to form the transom or you can order separately the 3d resin transom assembly (which I did). While you can get a nicely detailed transom with the laser cut pieces since there are no attachment points for the transom it would be difficult to get the shape correct unless you build your own ribs. I decided to use the 3d resin piece. With all the complex curves on this piece planking the outside areas would probably prove to be beyond my skills. But since this whole transom is painted I'll forego the planking. There are a set of photo etched windows for the transom. The instructions state those photo etched windows cannot be used with the 3d resin transom. My trial fitting of those windows seems that you indeed can with very nice results.

-
Thanks David Yes. I am sure there are lots more coming. And while I would prefer a straightforward built with instructions guiding my way (like Vanguard Models kits do) , I do find some kind of perverse enjoyment in trying to solve problems. Given my experience I'm pretty confident that I will be able to plug along since I really want a model of this ship. gary