HOLIDAY DONATION DRIVE - SUPPORT MSW - DO YOUR PART TO KEEP THIS GREAT FORUM GOING! (Only 68 donations so far out of 49,000 members - Can we at least get 100? C'mon guys!)
×


myxyzptlyk2003
-
Posts
172 -
Joined
-
Last visited
Content Type
Profiles
Forums
Gallery
Events
Everything posted by myxyzptlyk2003
-
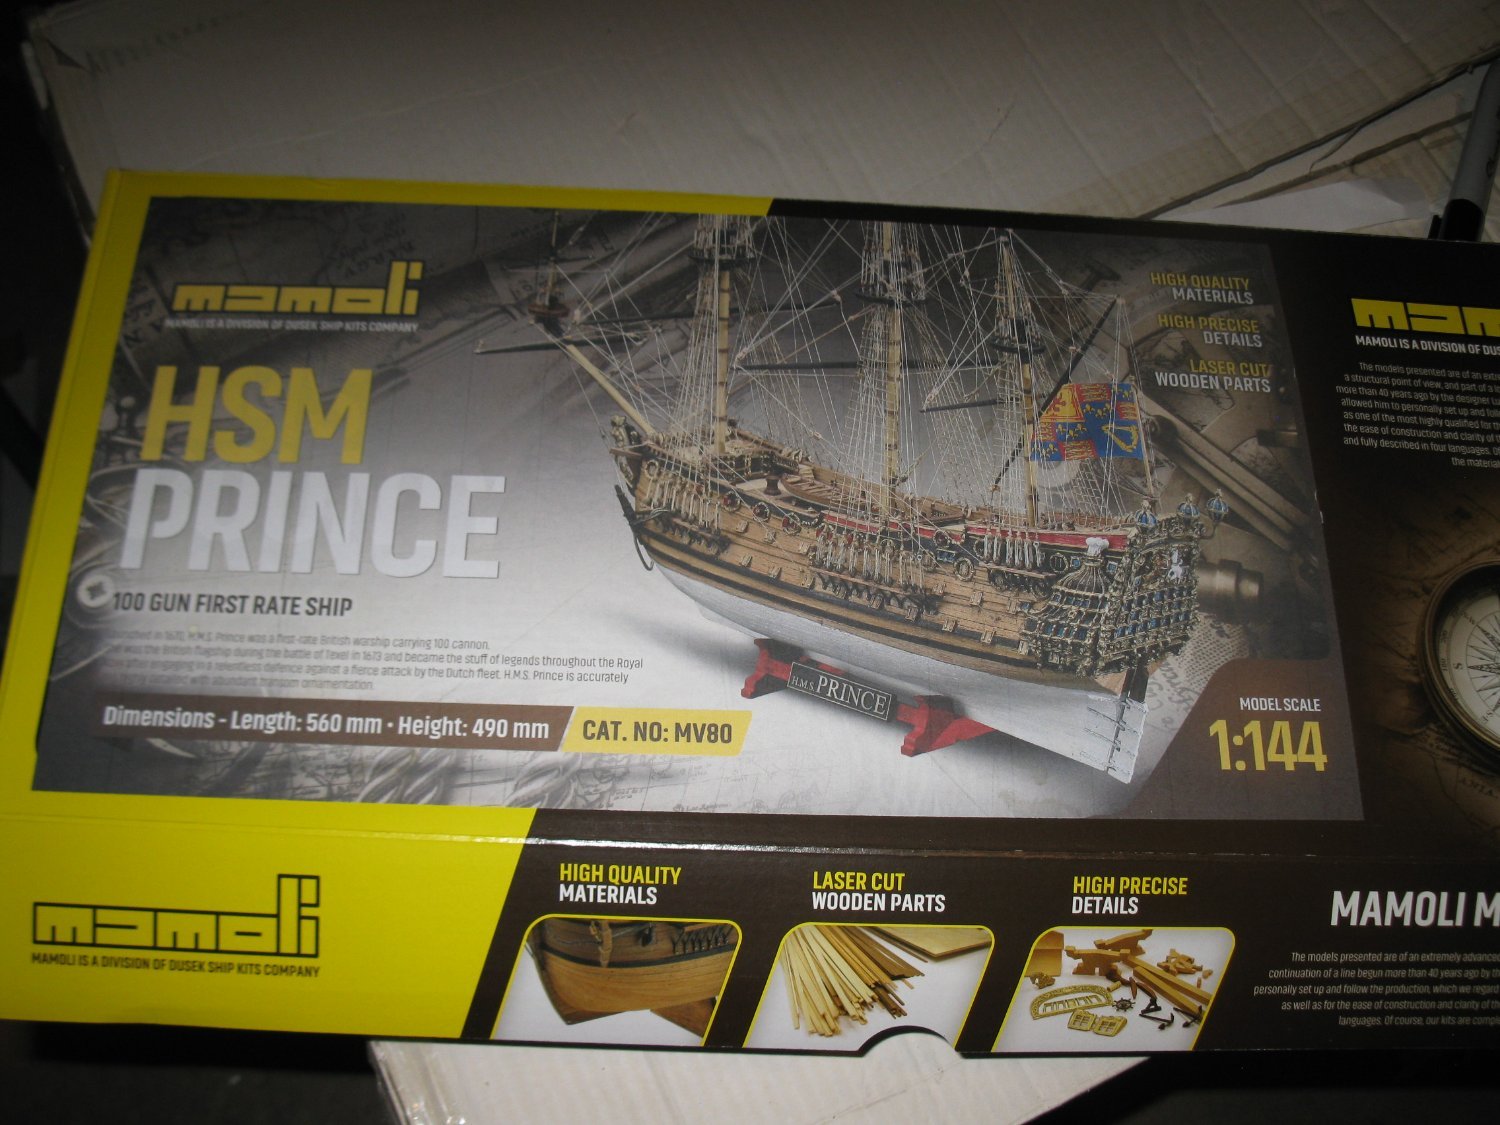
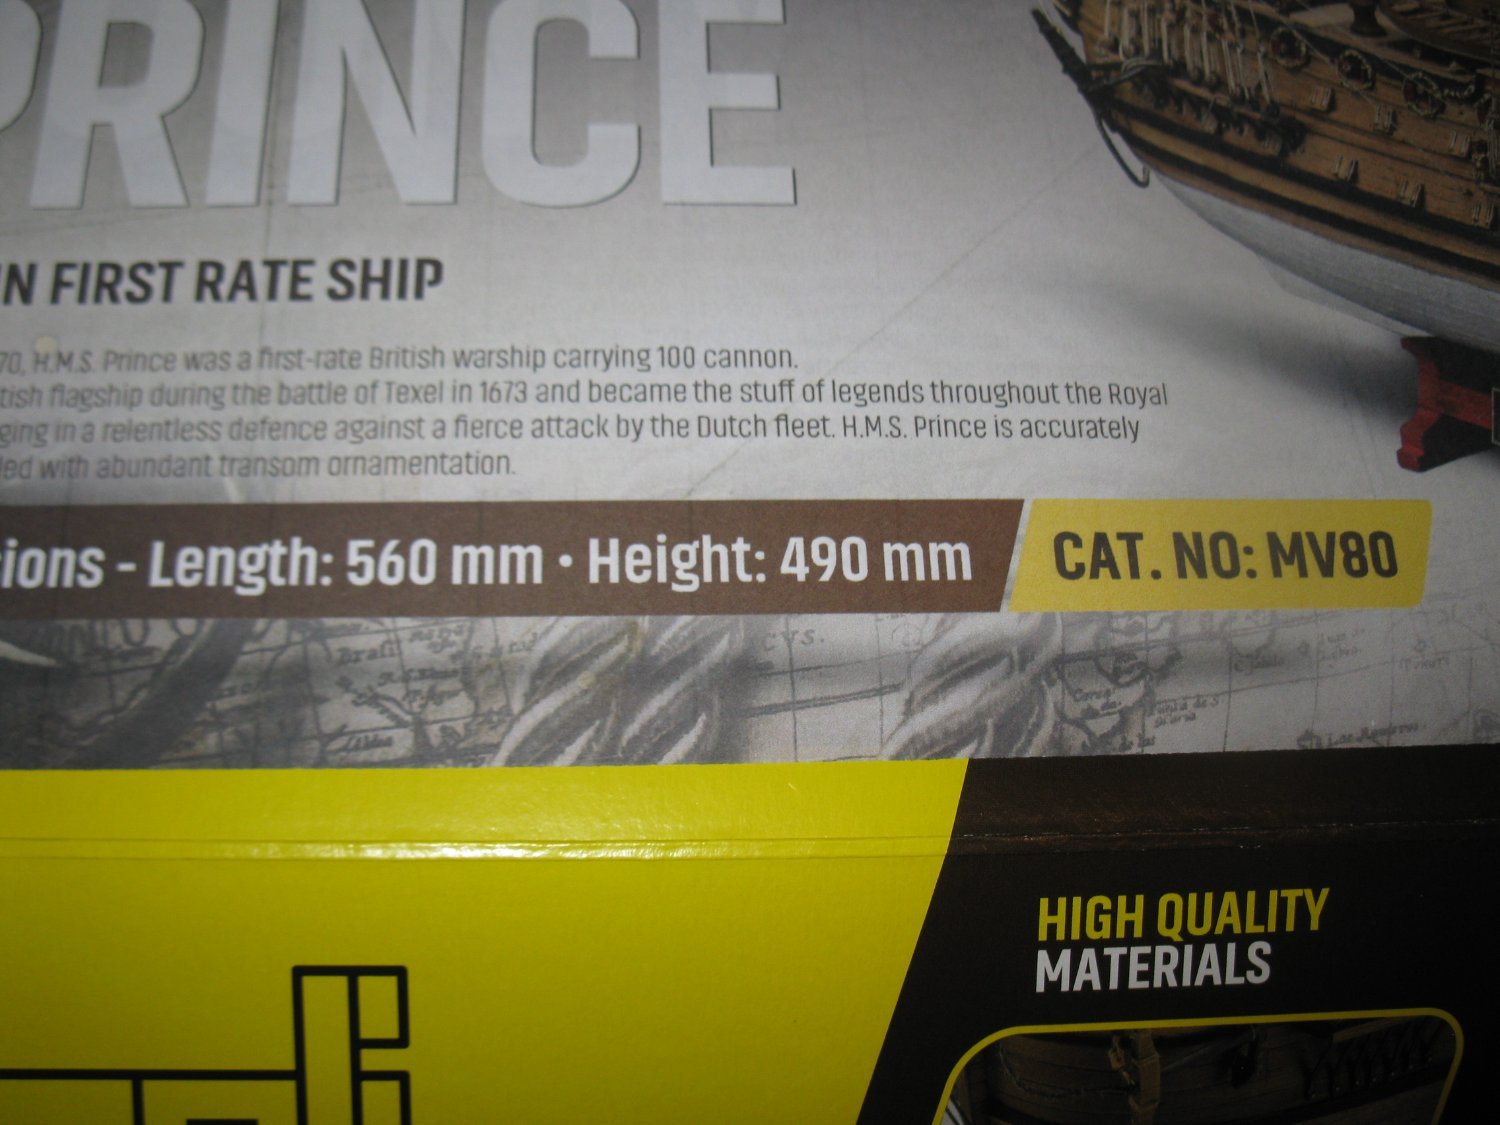
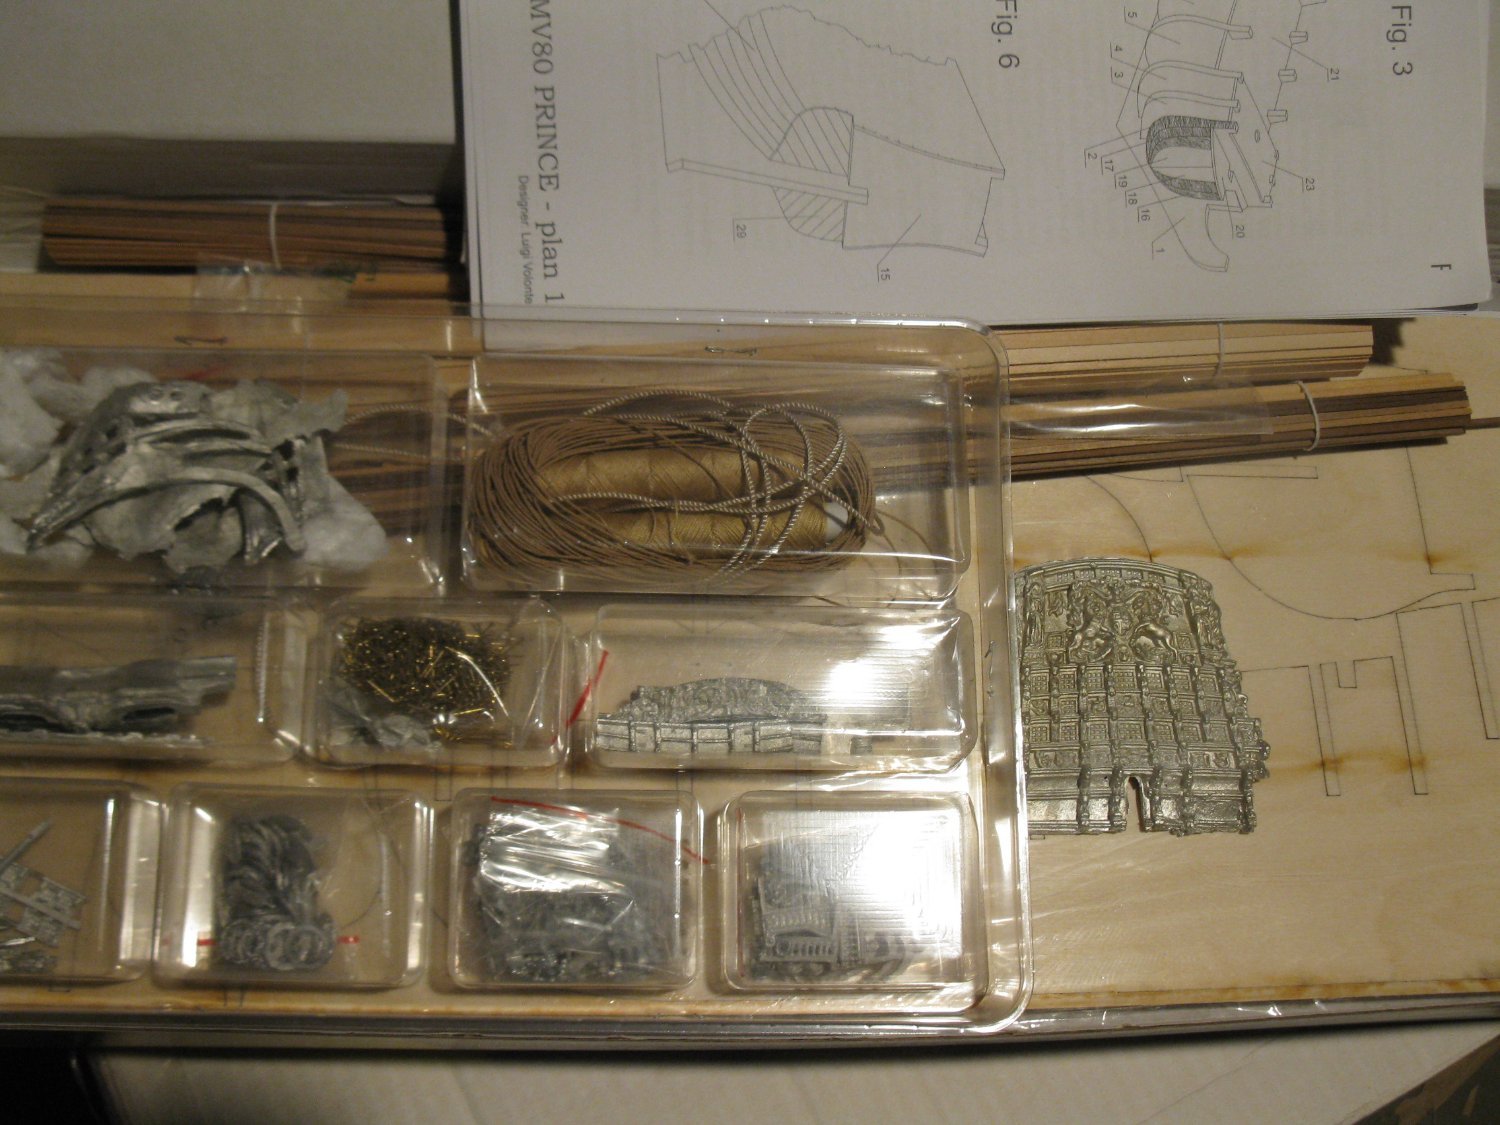
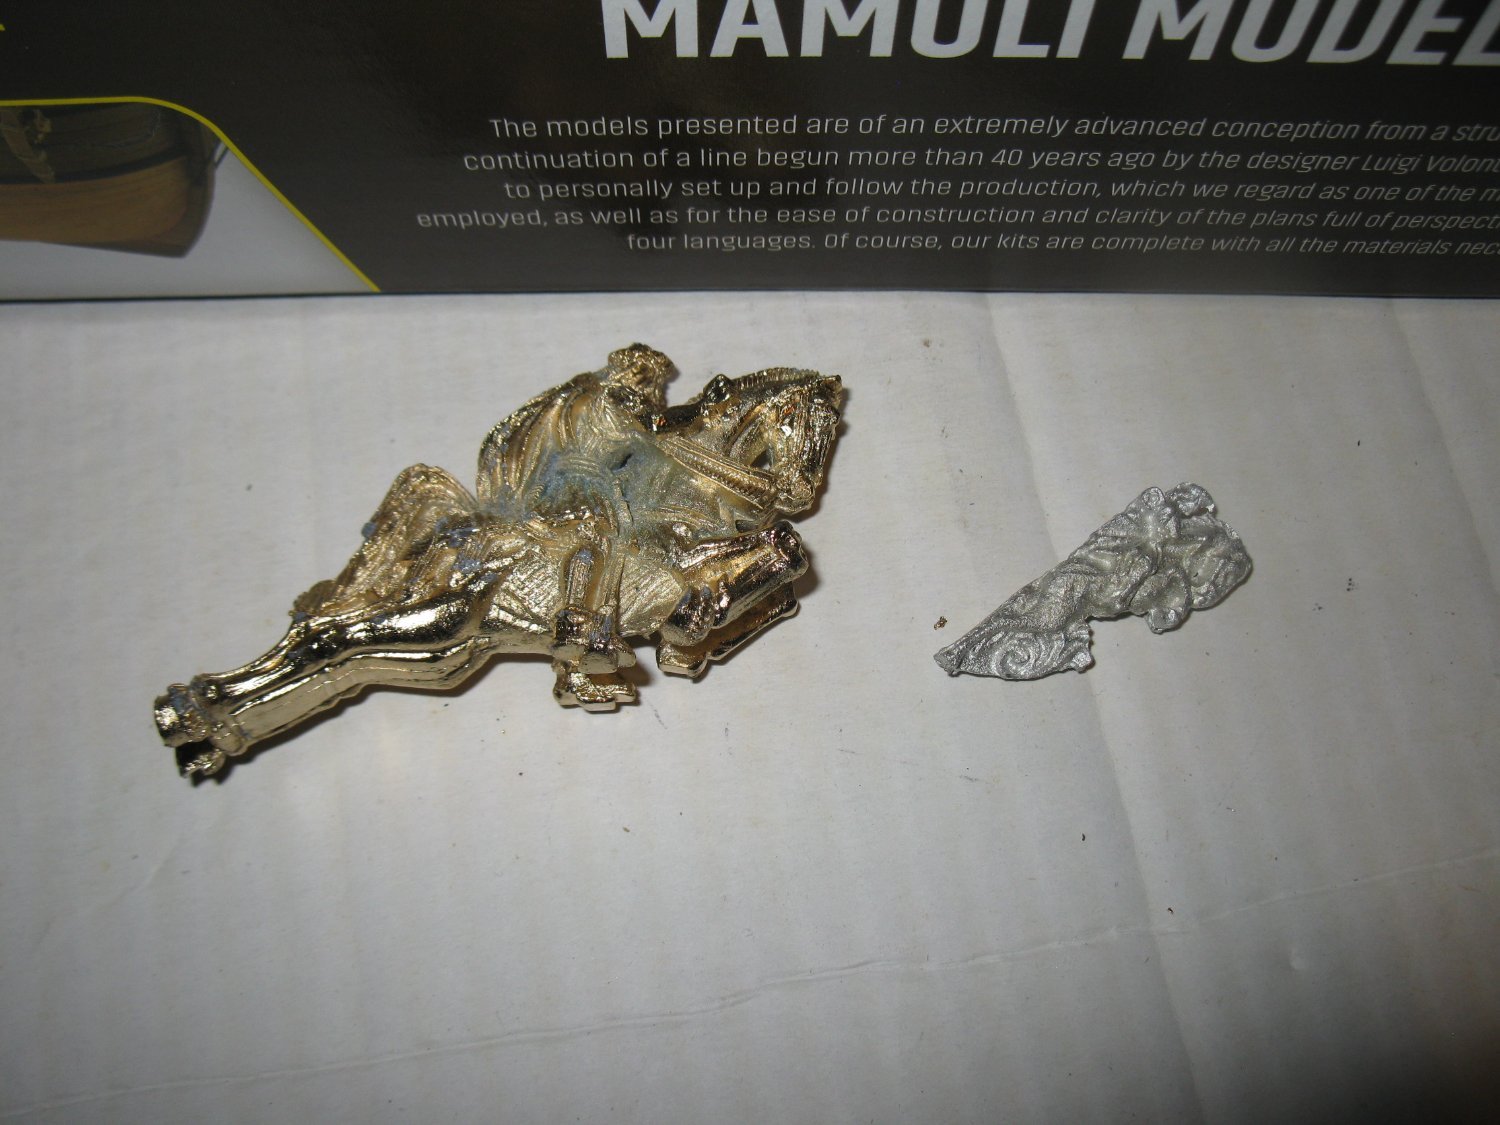
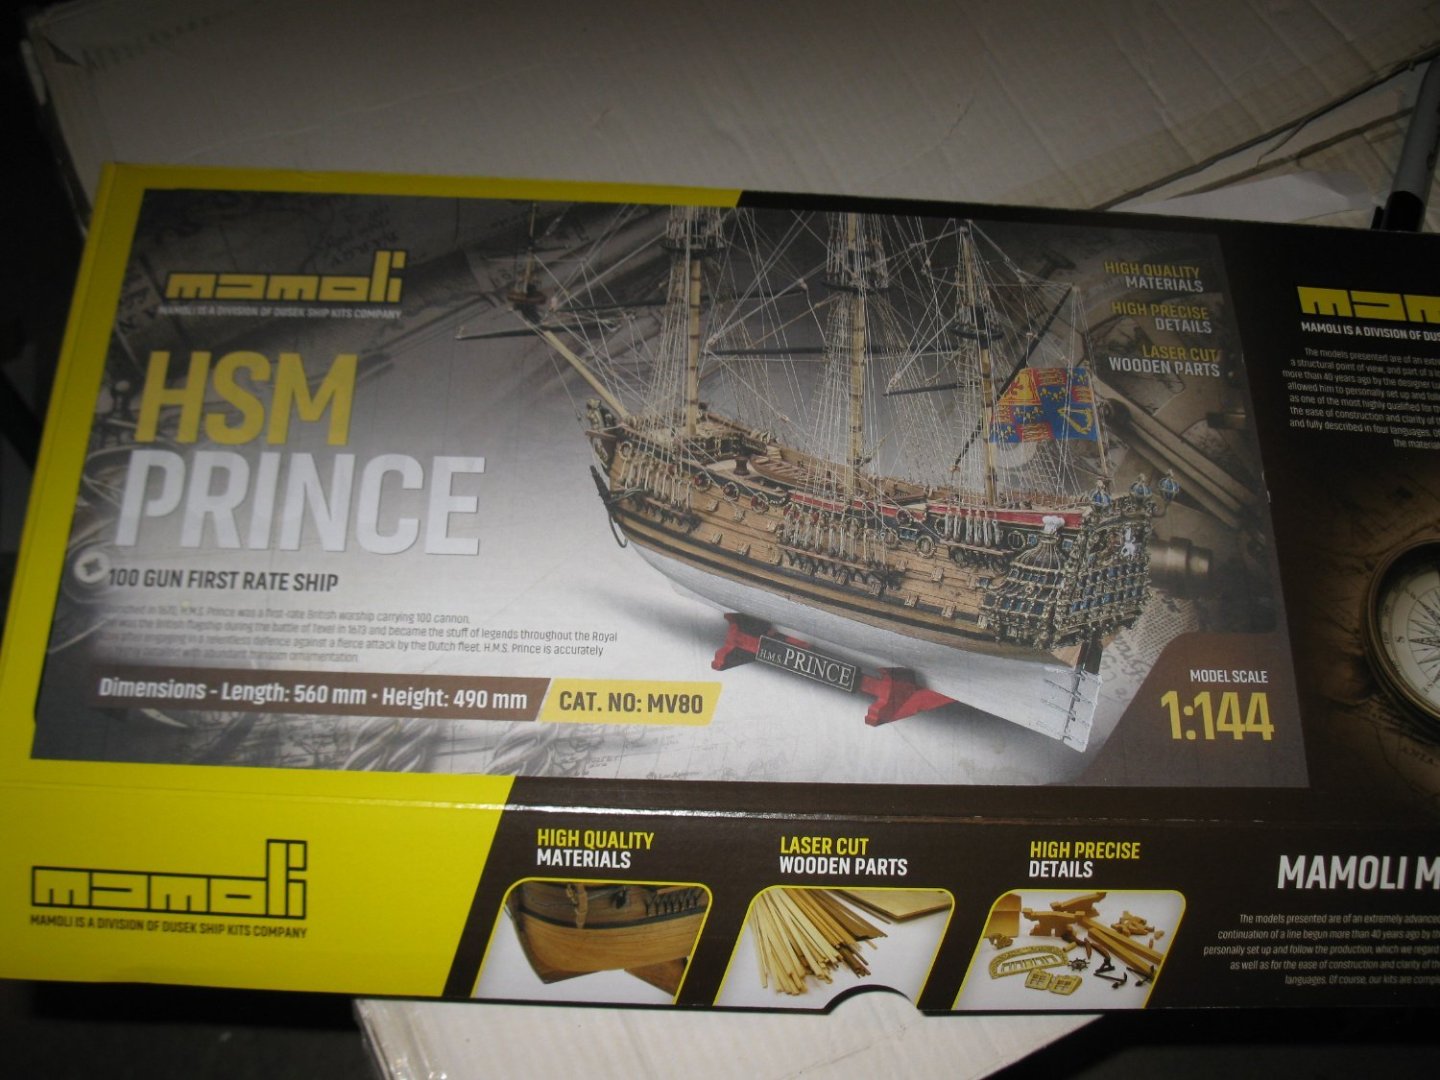
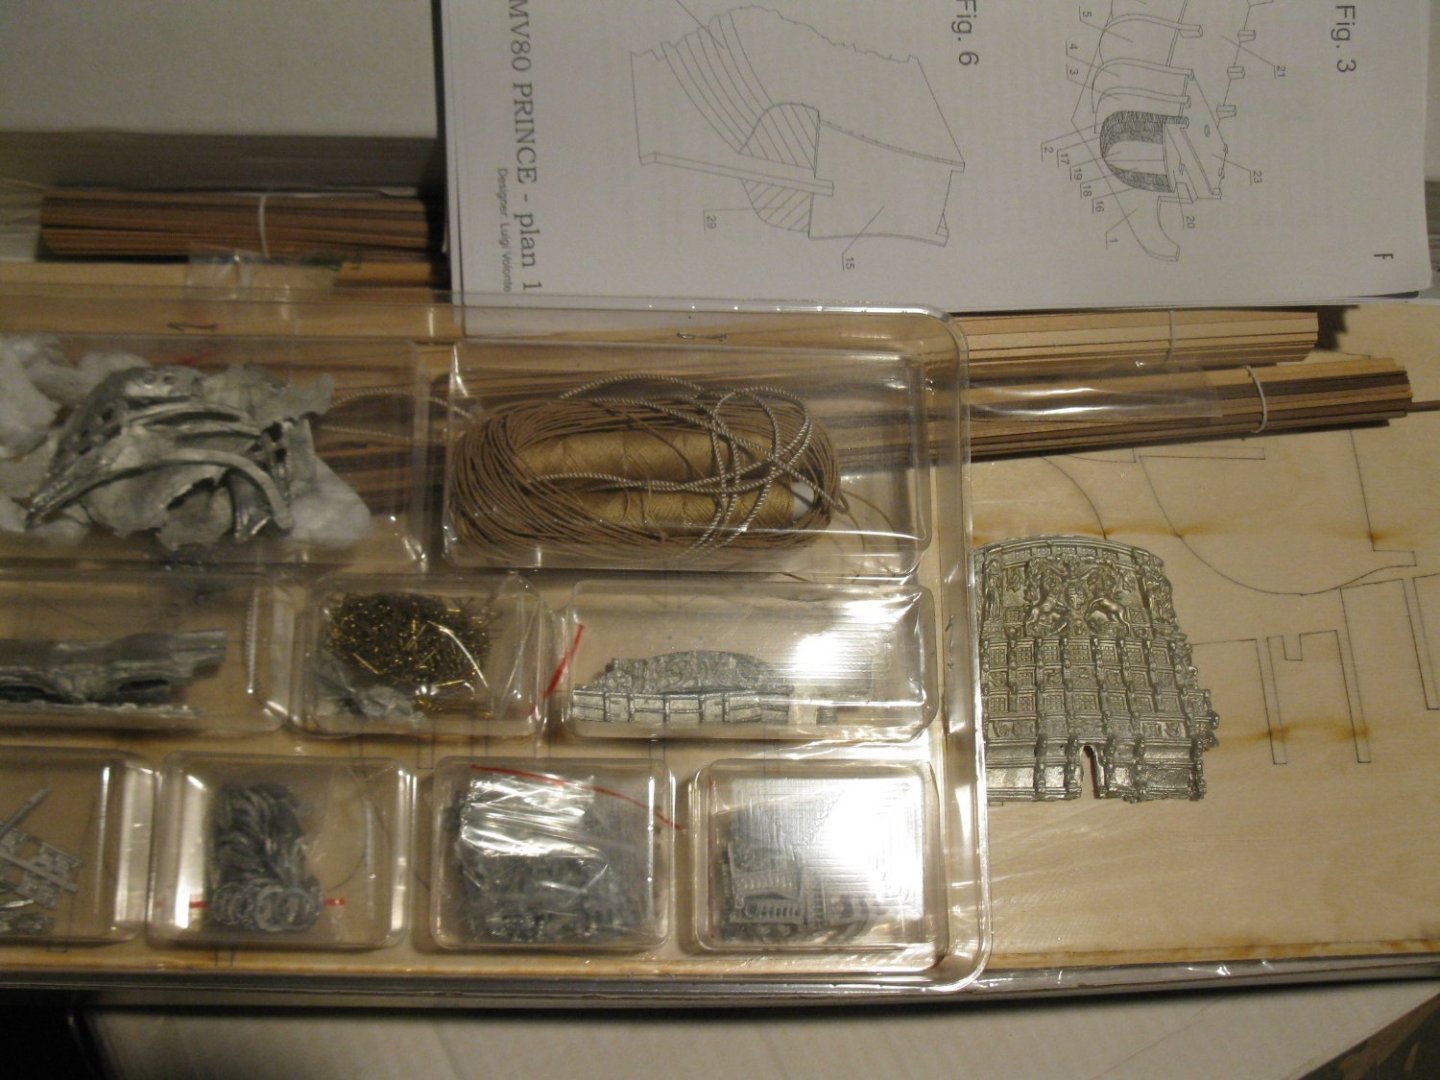
Presently, I am about 1 month out from finishing my Vanguard Cutter Trial. While waiting for any new Vanguard model I was looking for my next project. Note I always have two models going at the same time. My AL Soleil Royal is proceeding nicely but slowly. I've always liked the seventeenth century warships and the Prince would be one of my favorites. I have the old Amati HMS Prince (1/64 scale) in the box. Having built that one in the distant past I know how big it is and given space limits in my house, this 1/144 scale model caught my eye. It looks like the size of the hull is someplace around the Vanguard Duchess model. Given the small scale I do have some concern about working with such small parts. But on the plus side there will be a LOT LESS rigging of shrouds and ratlines! I started my wood modeling hobby about 30 years ago and built many Mamoli and Corel kits. I always found them to be pretty easy to build. This Mamoli kits looks to be pretty similar to what my experience was back then. The wood supplied looks very good as do the laser cut parts. The metal castings are OK. Given the small size the detail on the castings does not come close to the detail on the larger Amati kit. Note the picture of the two figureheads for comparison. It will probably be a month or two before I can add any pictures for this build. Once I get going I will provide more pictures of the kit.


-
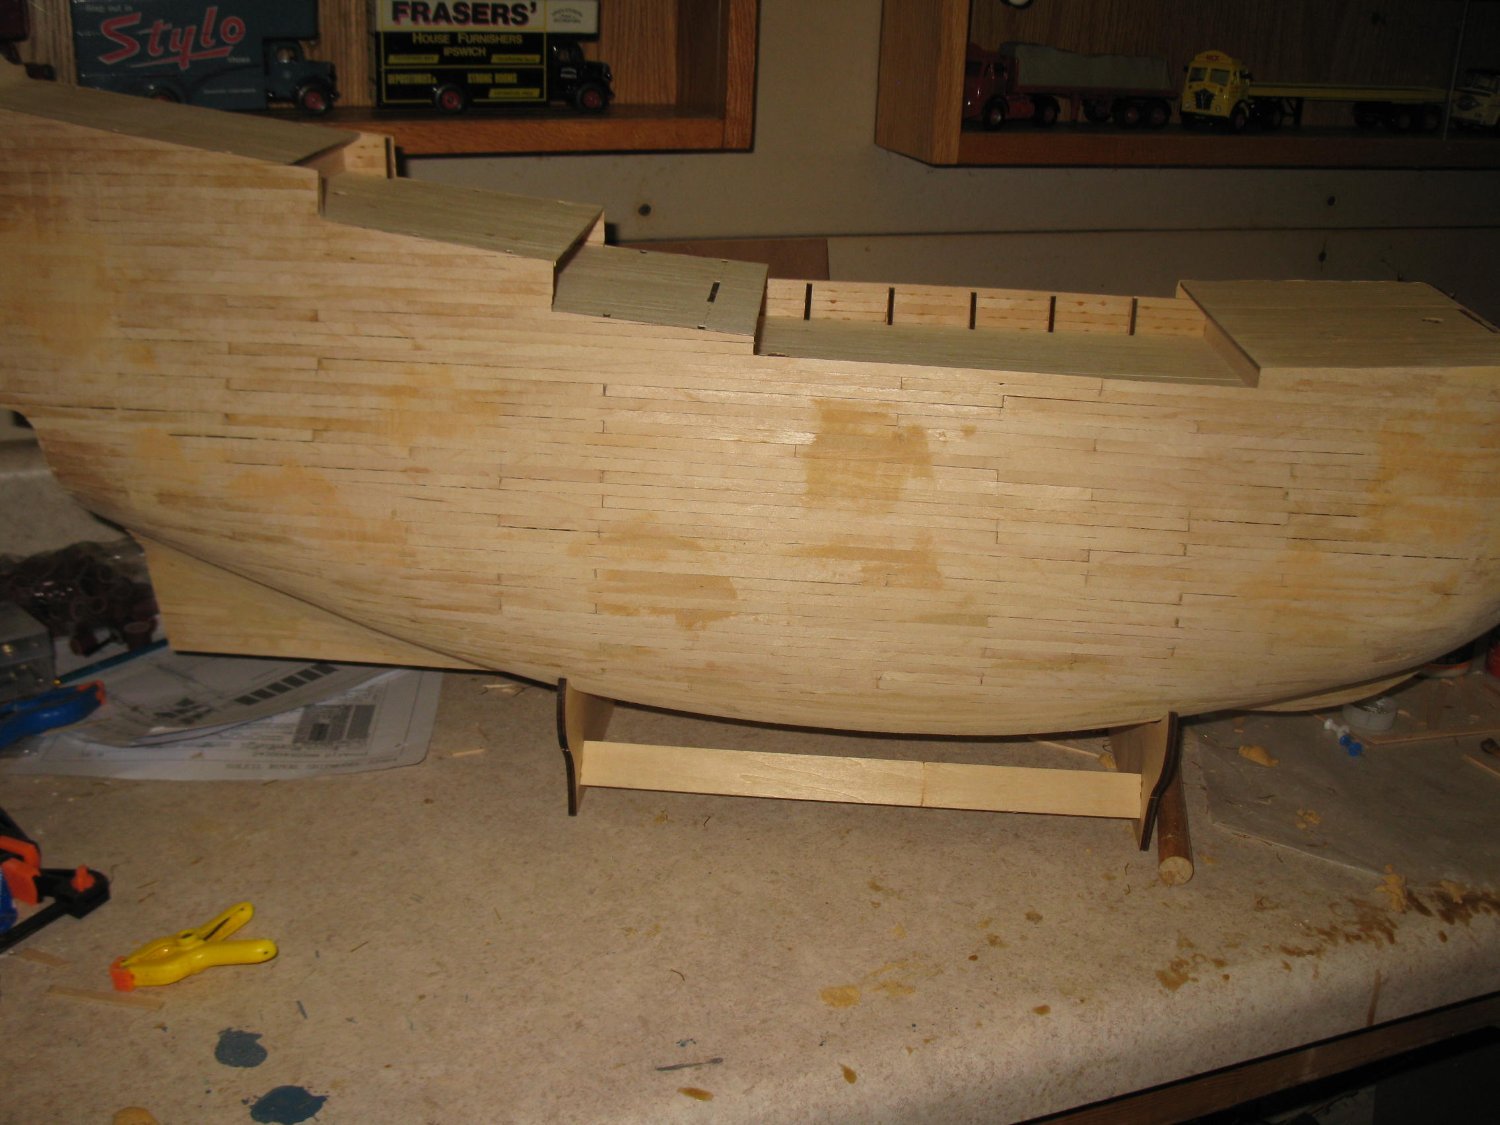
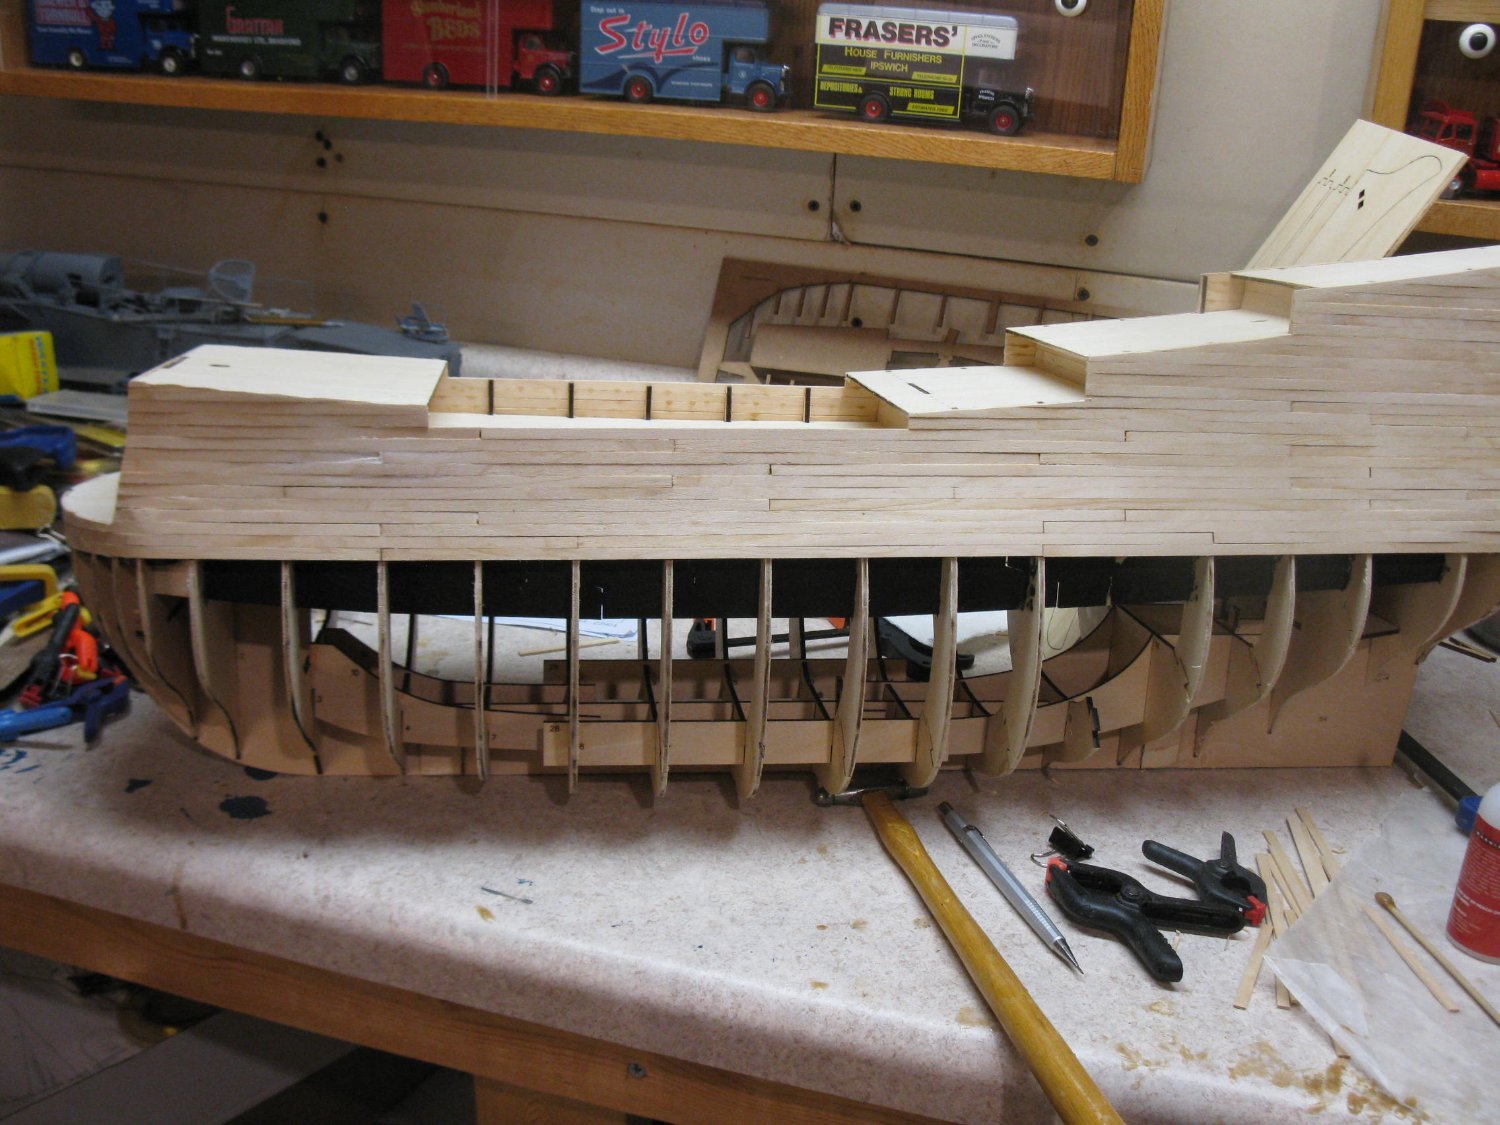
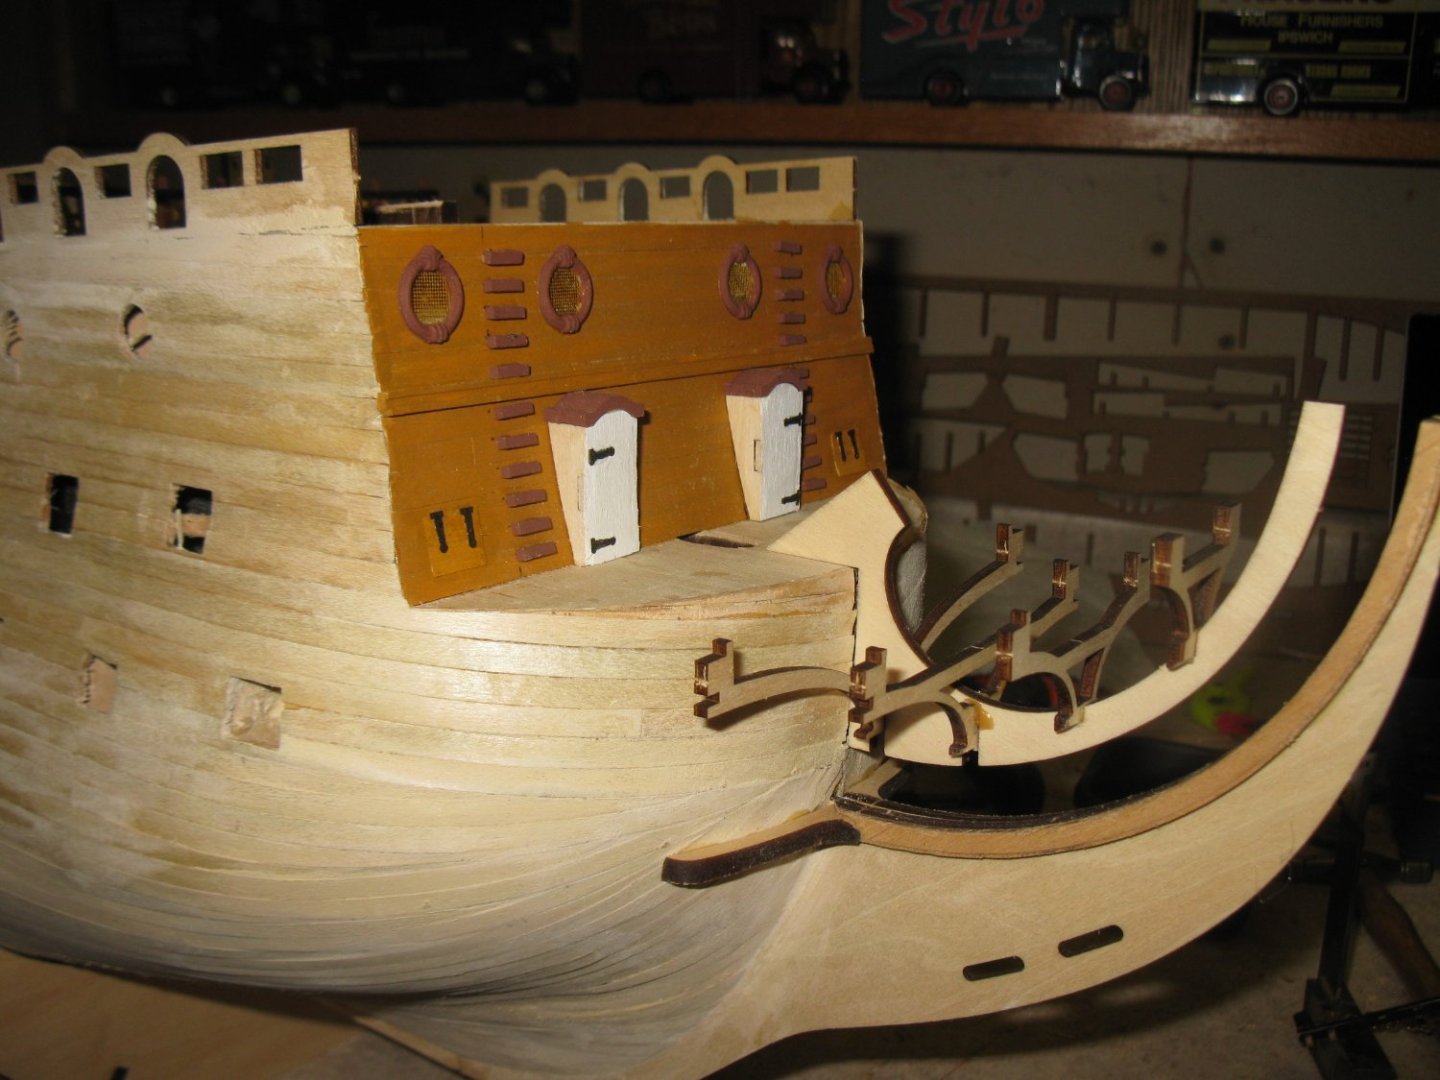
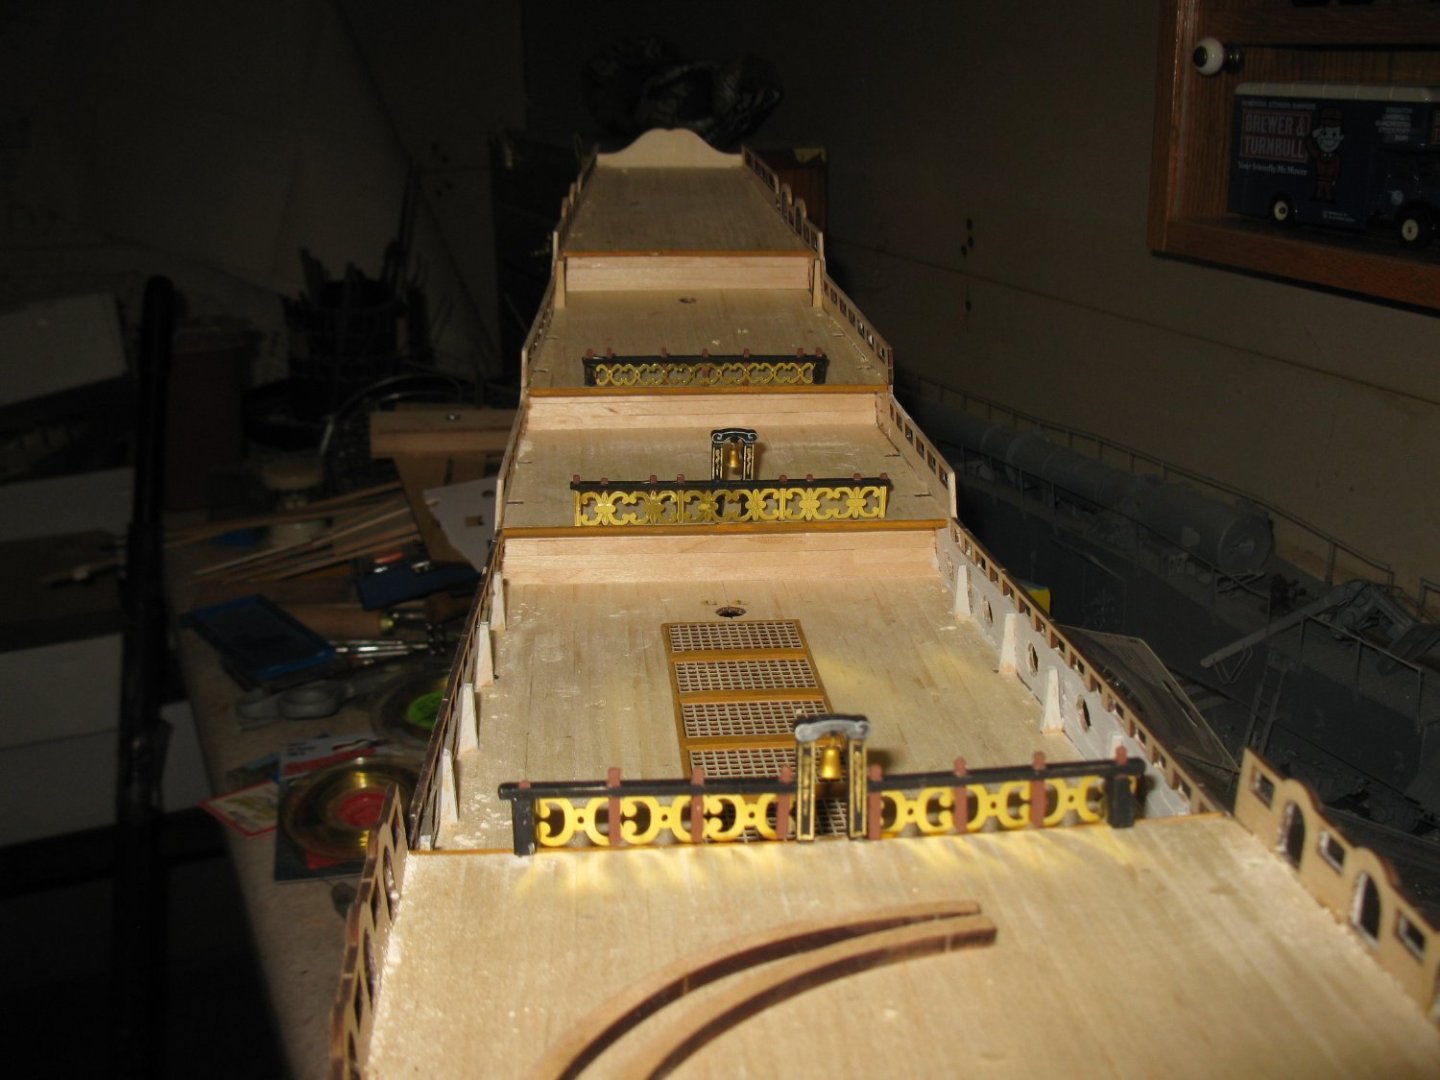
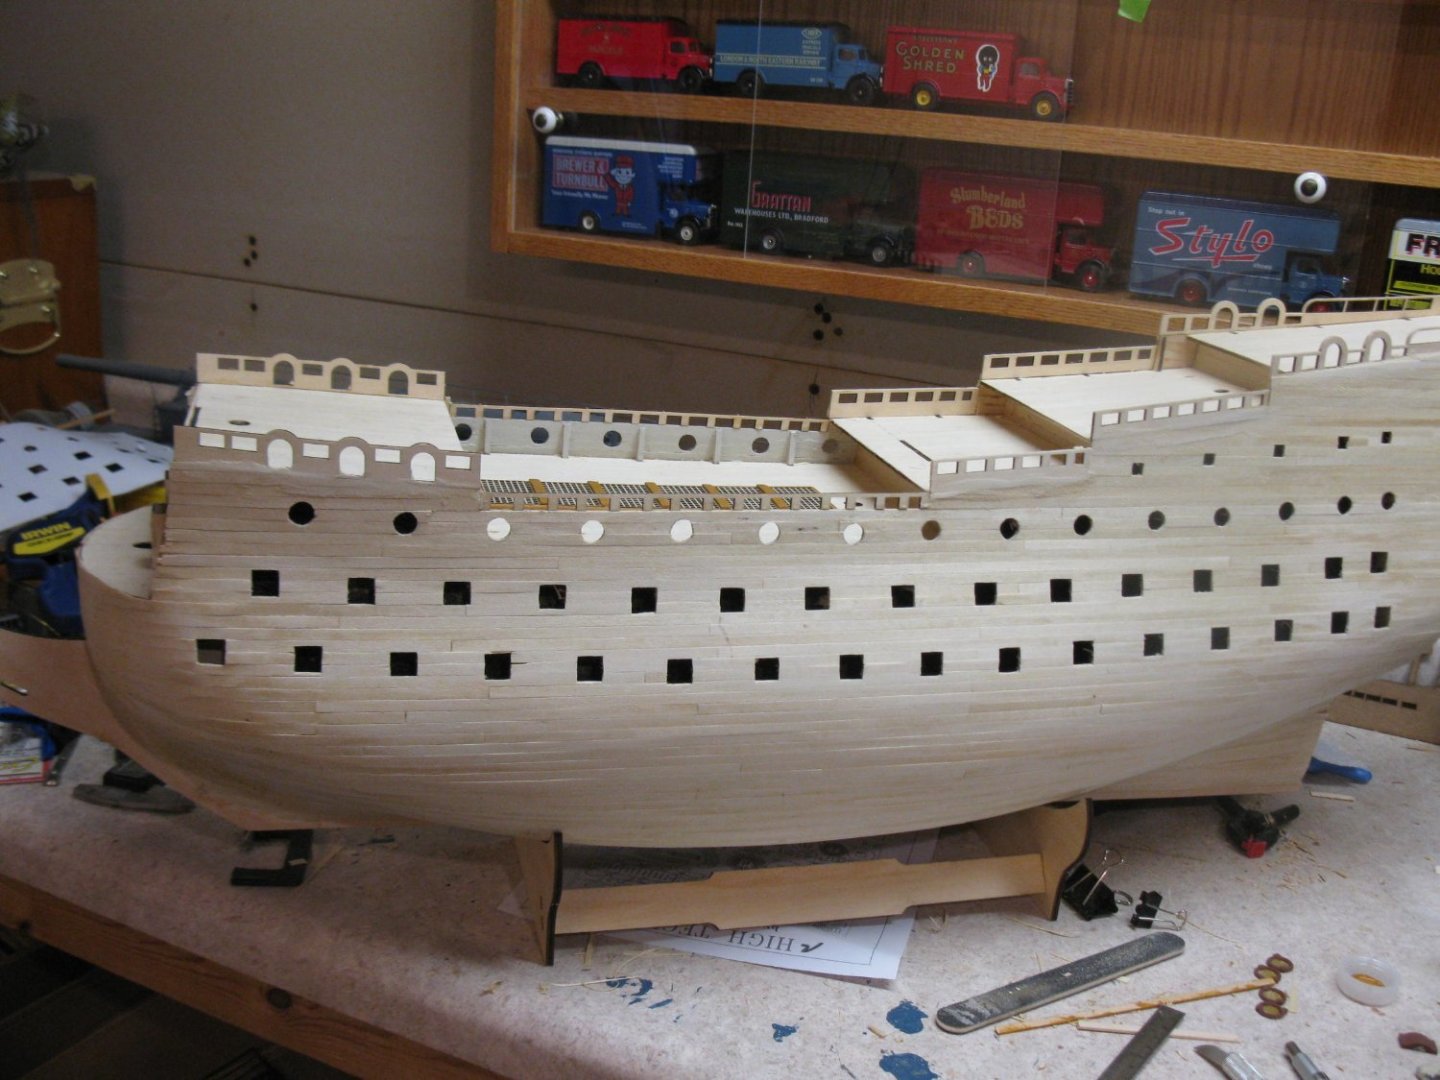
Progess continues although slowly. Some of the railings are installed. Now working on the bow area.
-
If it is like a number of their other kits, their instructions include only computer generated pictures. Never actual pictures of the model. I had to put the one I was working on back on the shelf as it was impossible for me to figure out what goes where.
-
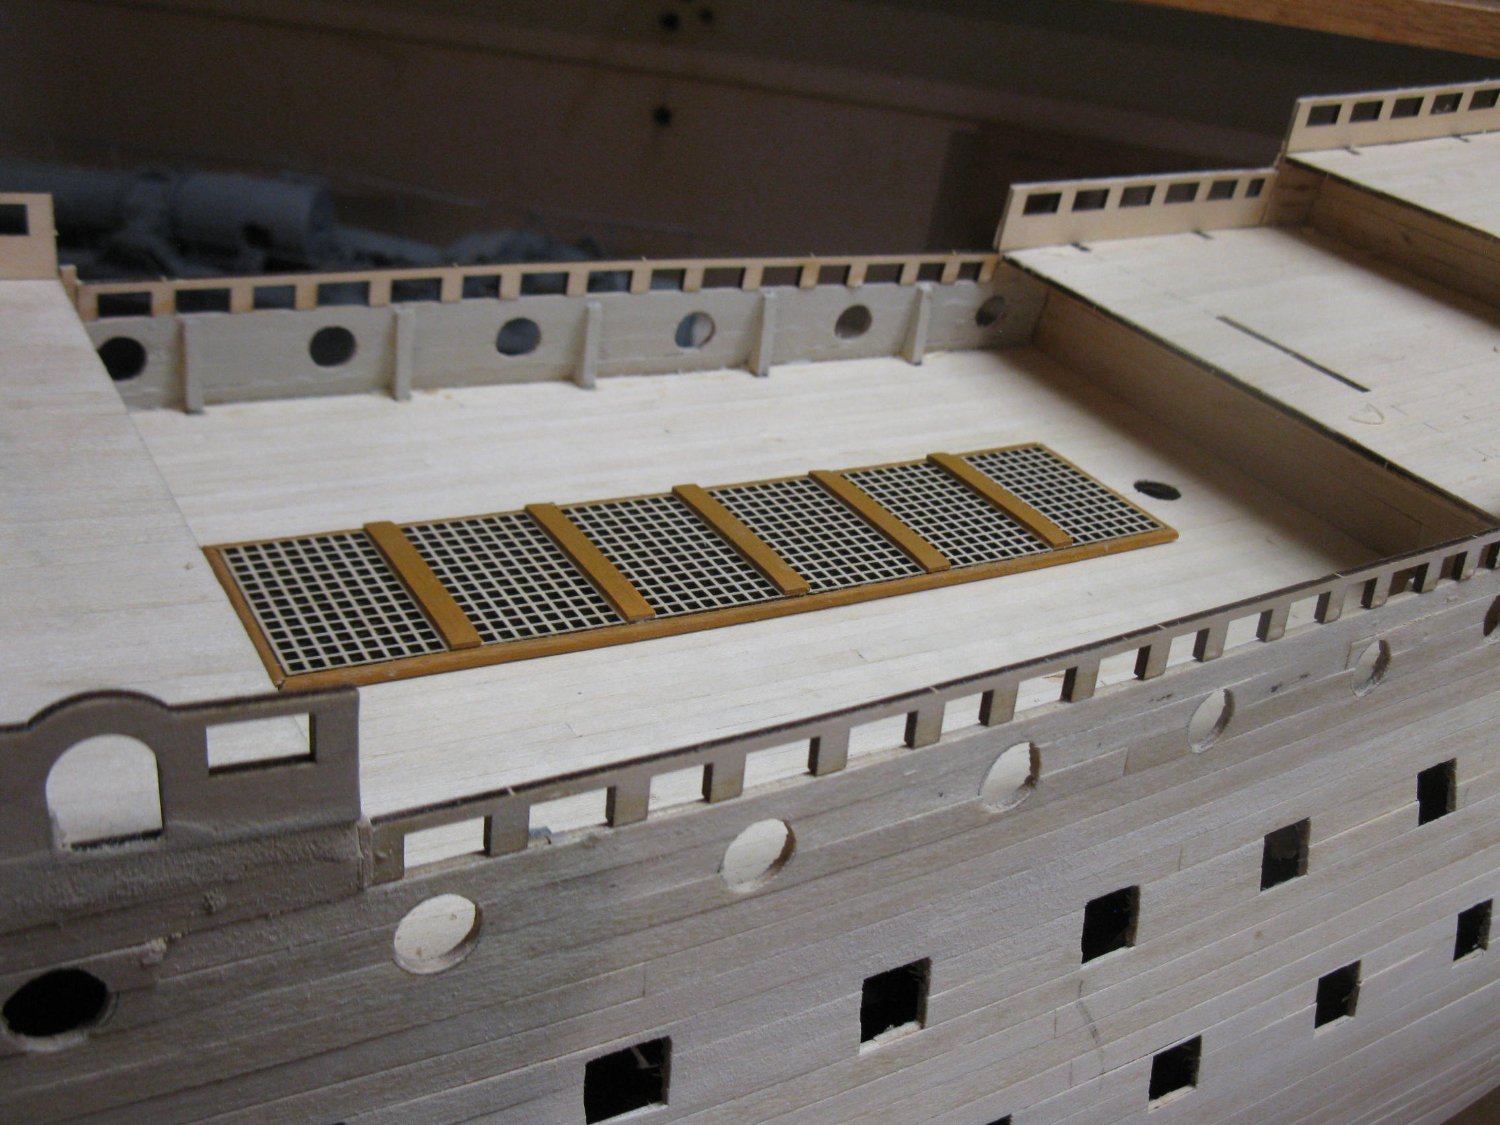
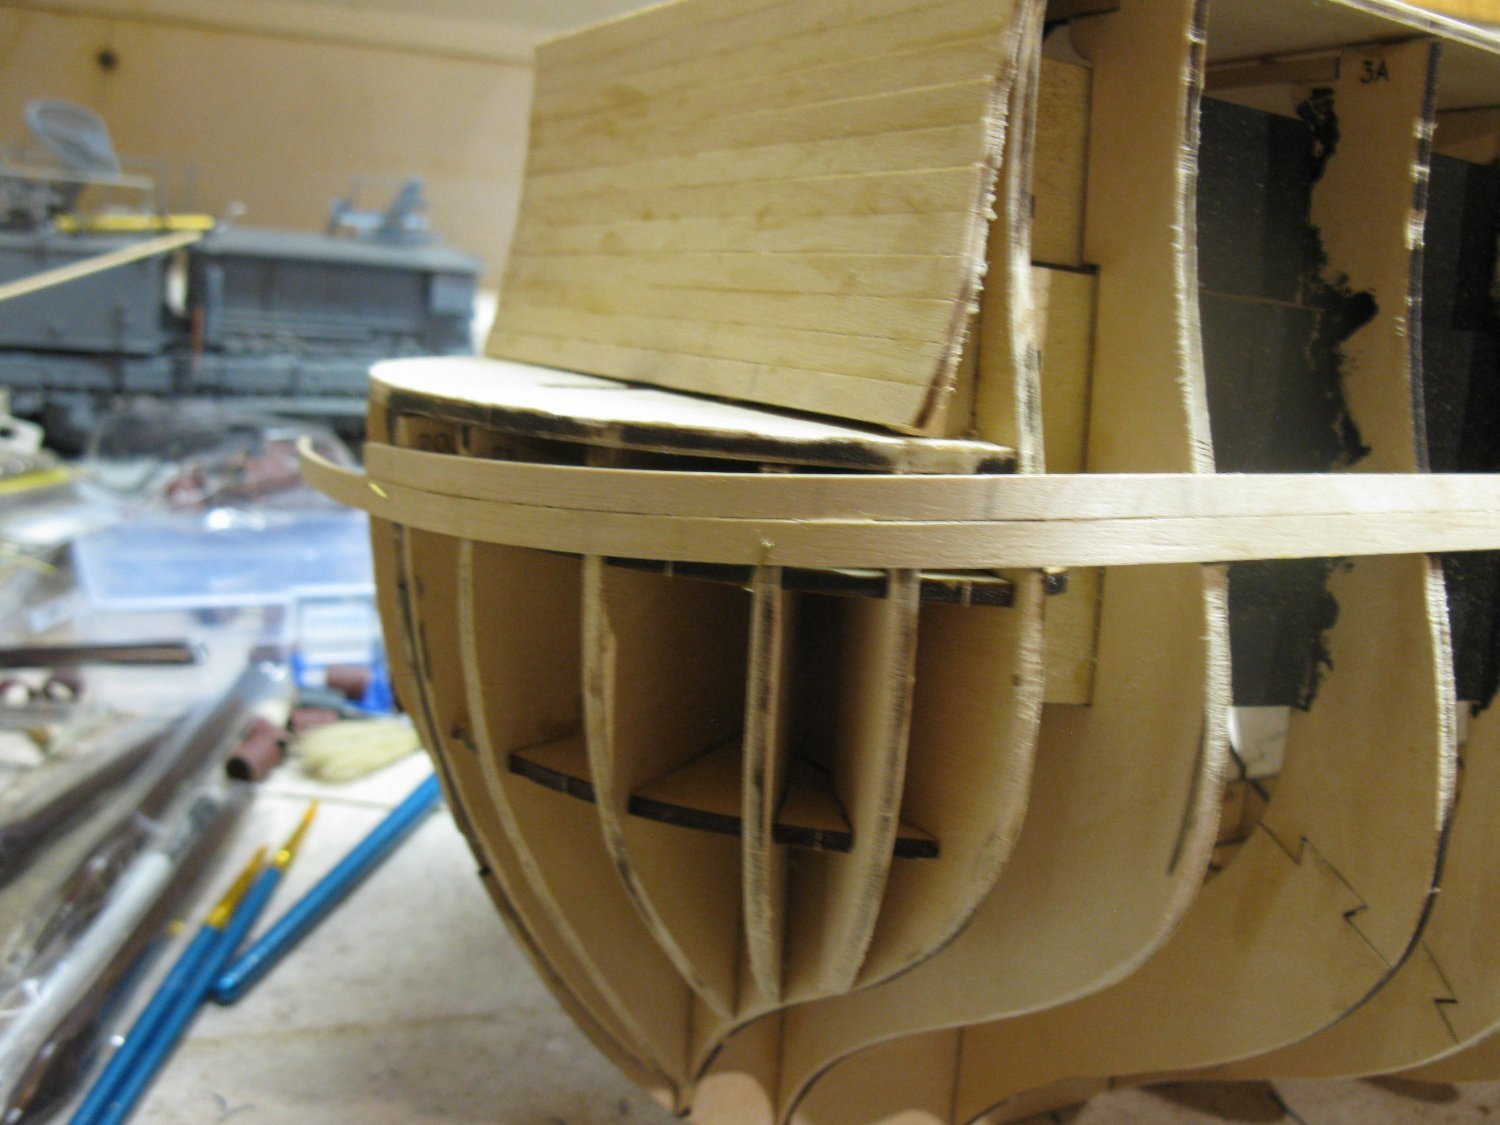
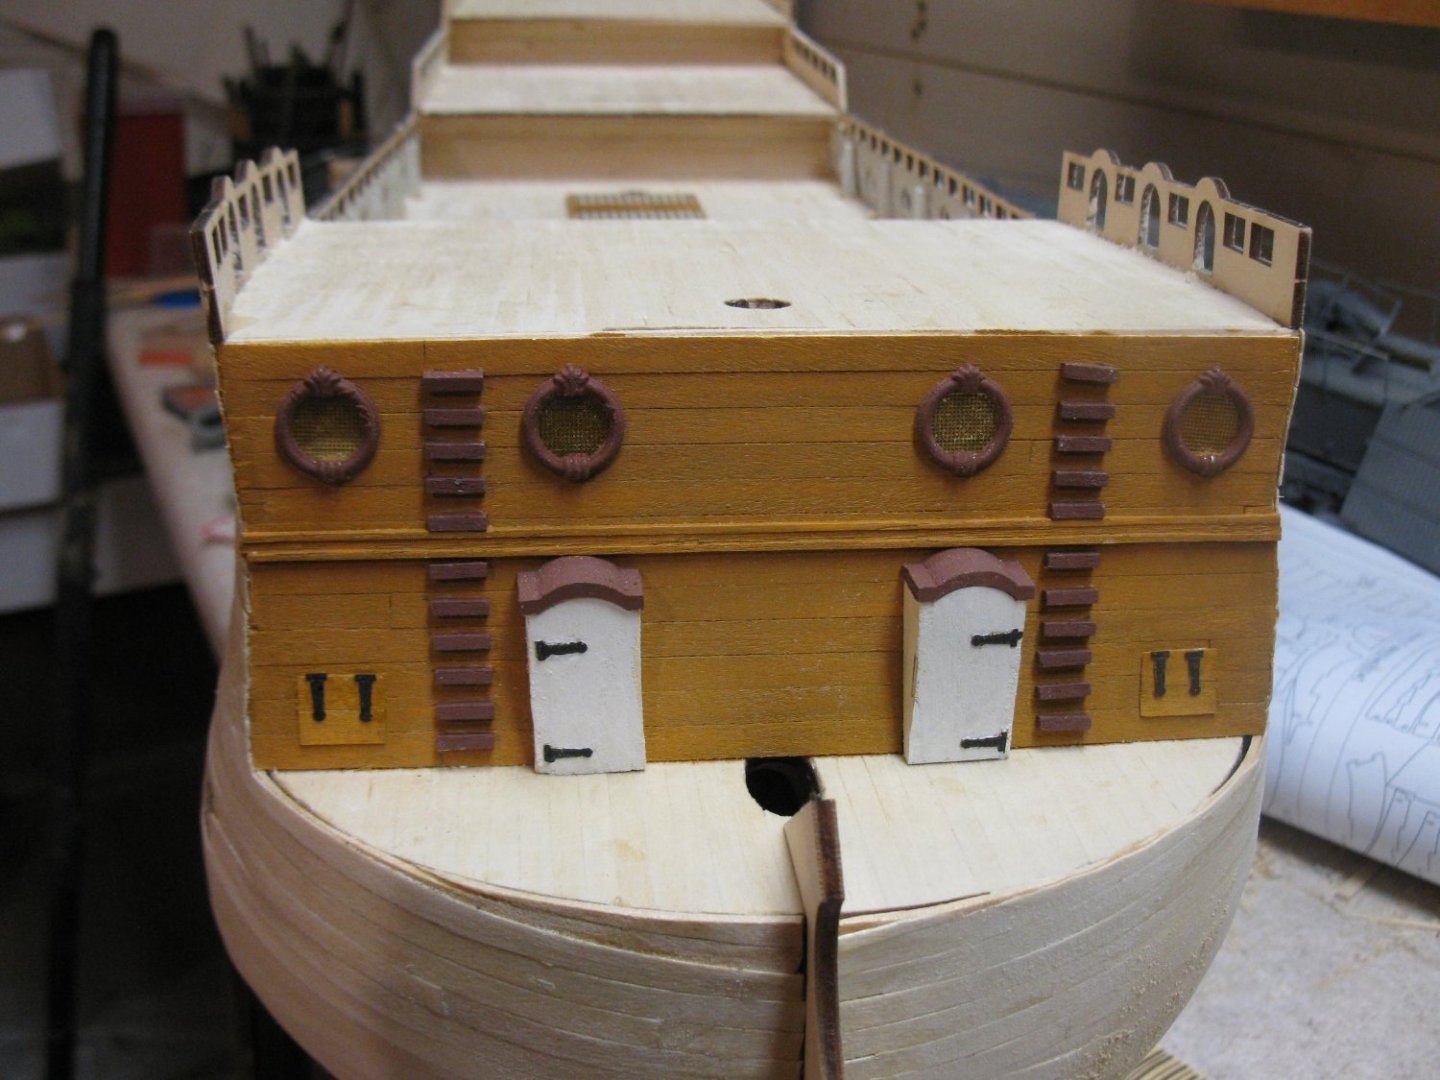
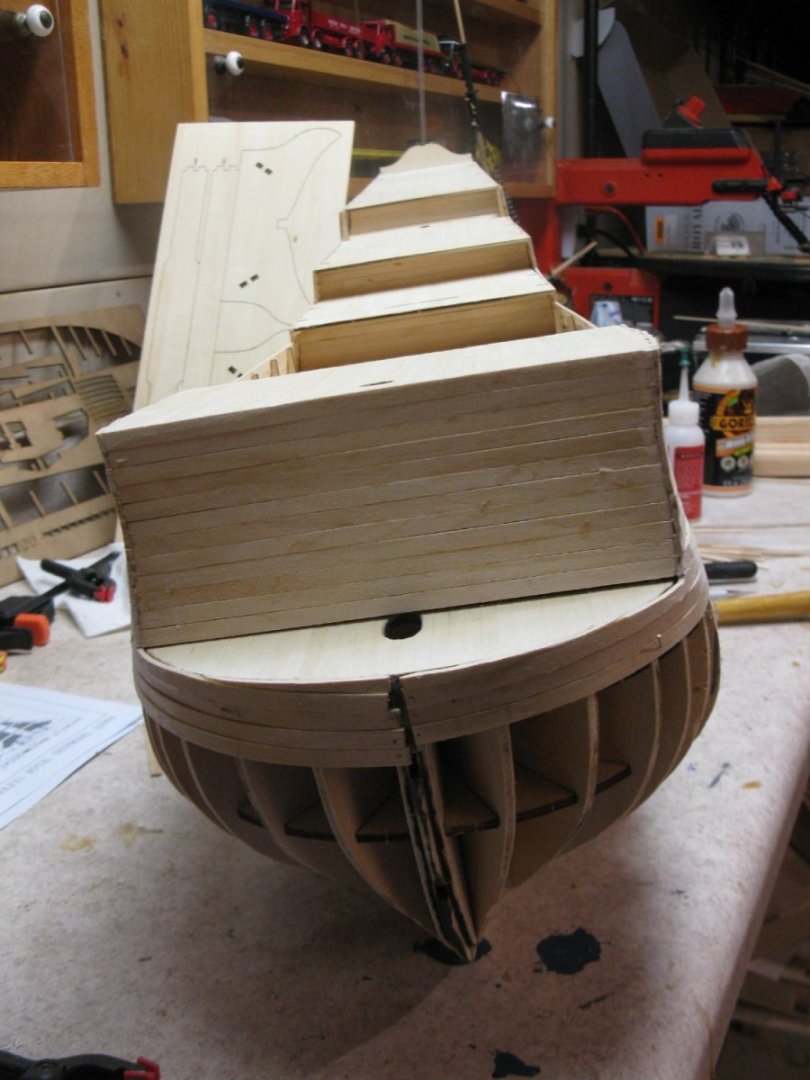
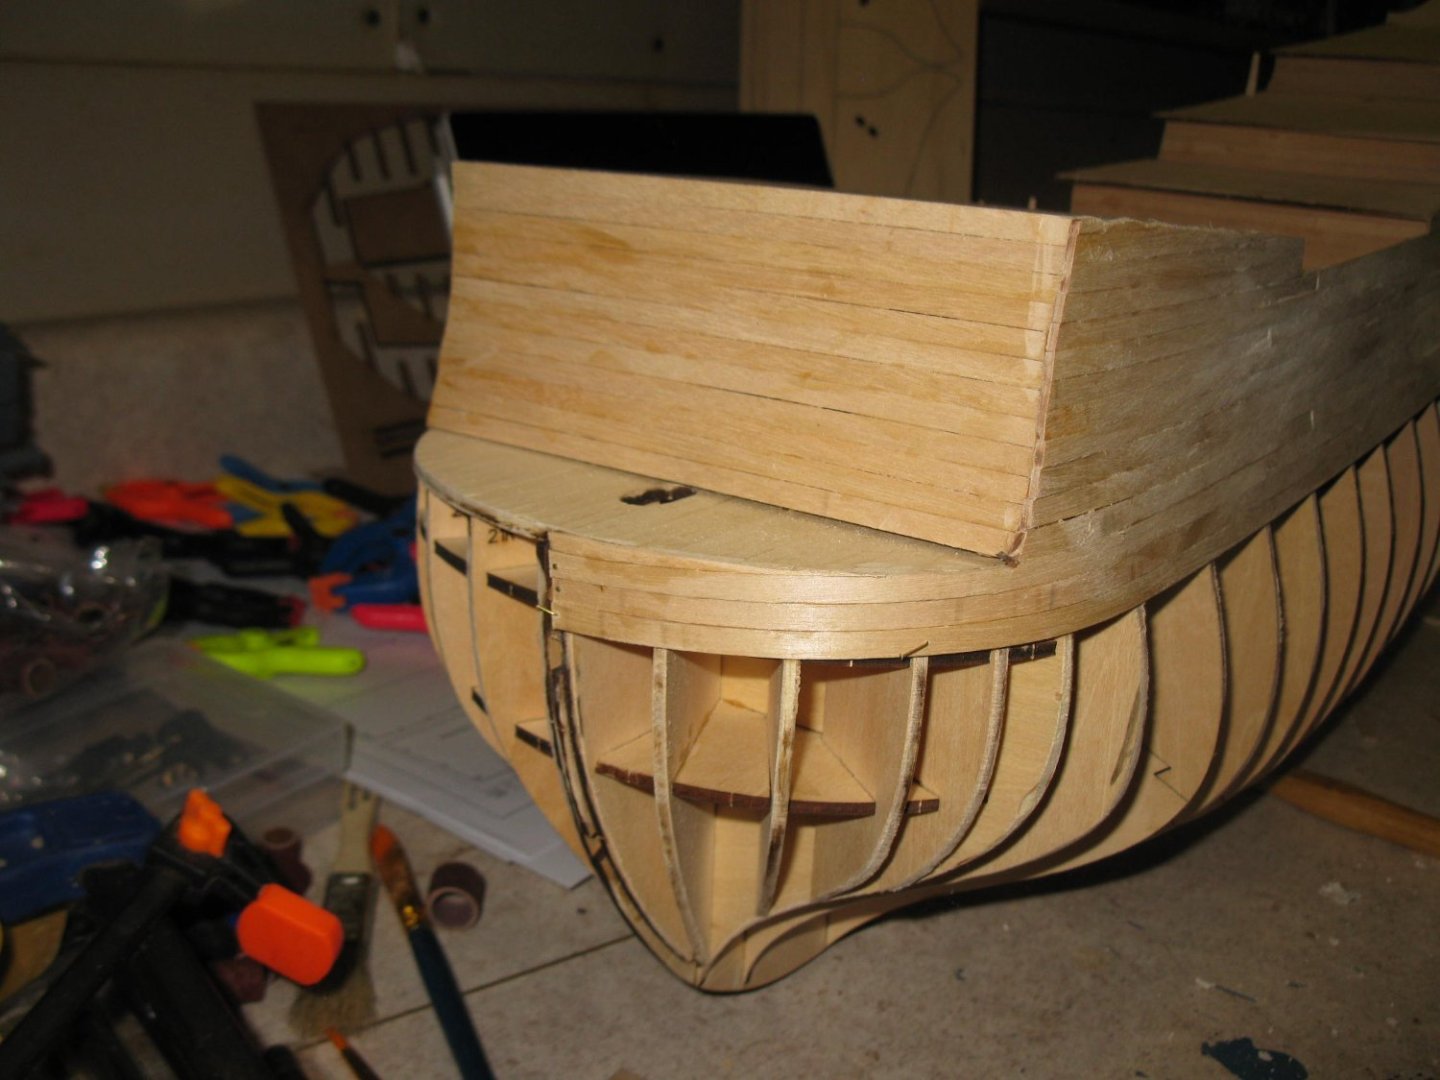
Finished the front portion of the ship. It's nice to work on these little details versus the relative monotony of planking.
-
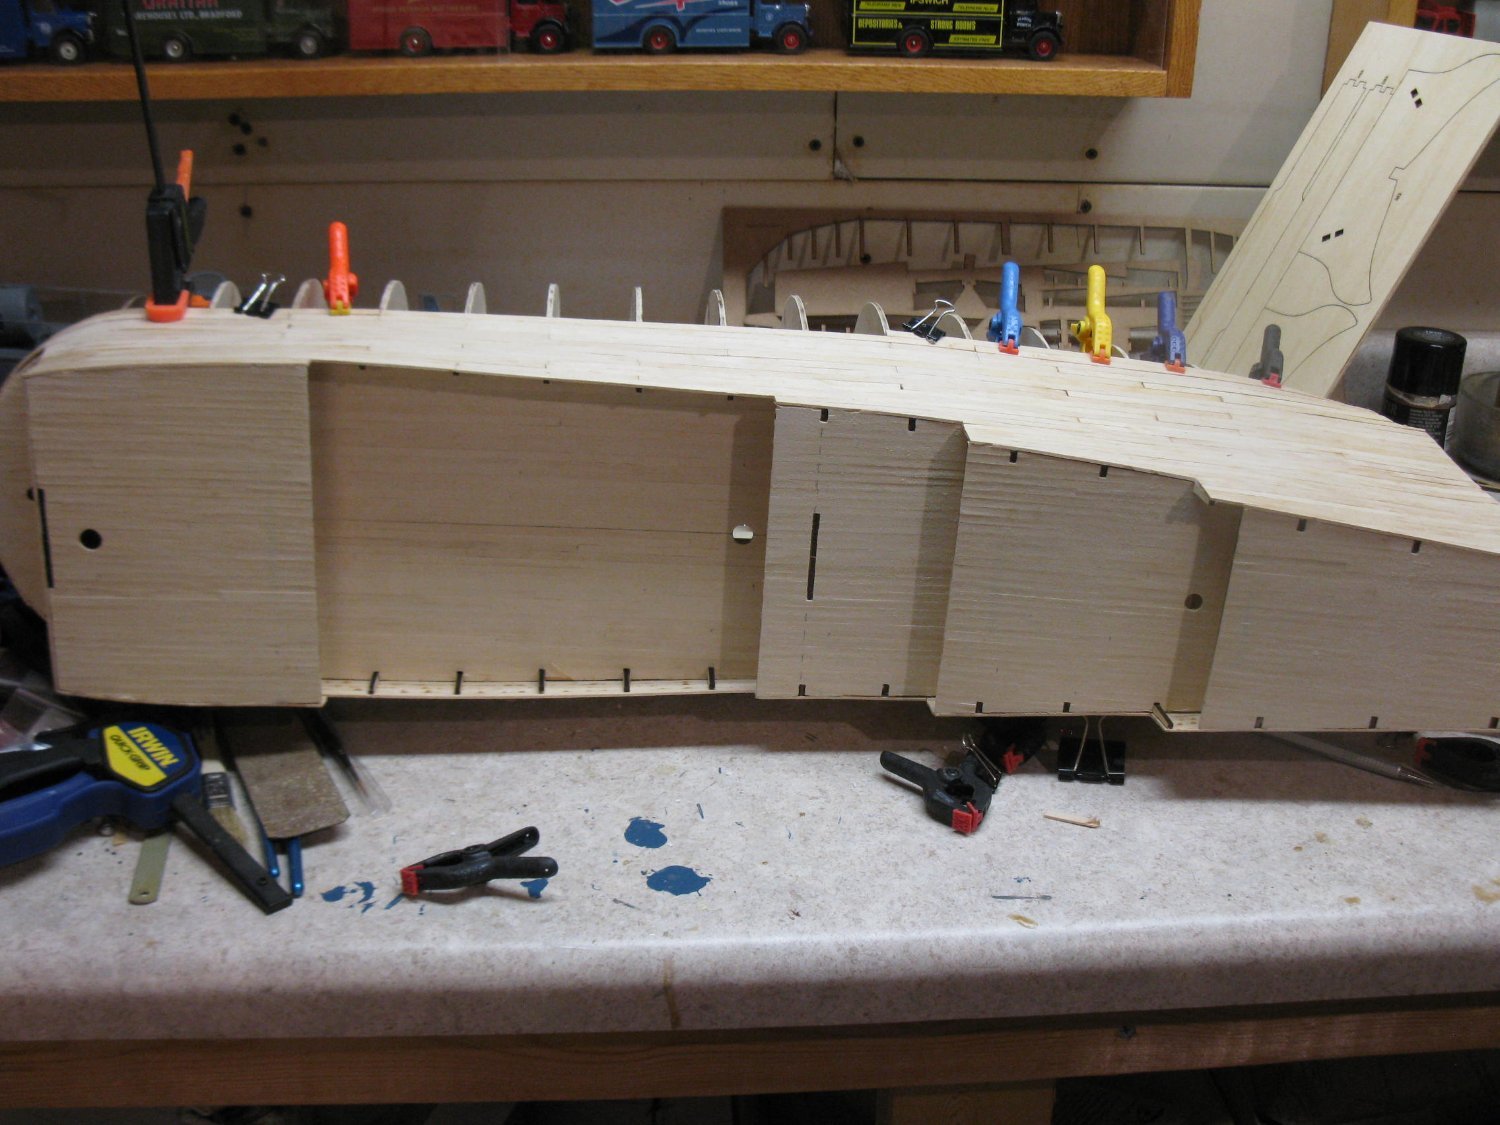
2nd planking is now completed and the upper railings are glued in place. Next step will be some more fine sanding. I am now starting to go back in the instructions and complete a few steps that I skipped. I still strongly disagree with AL's order of instructions but it's not hard to mix things up as long as you think ahead to future steps and what can and cannot be changed. I also really like the AL "scraping" tool that you can use to make all kinds of different mouldings as illustrated in the last picture. That moulded piece will be on the front of the ship.


-
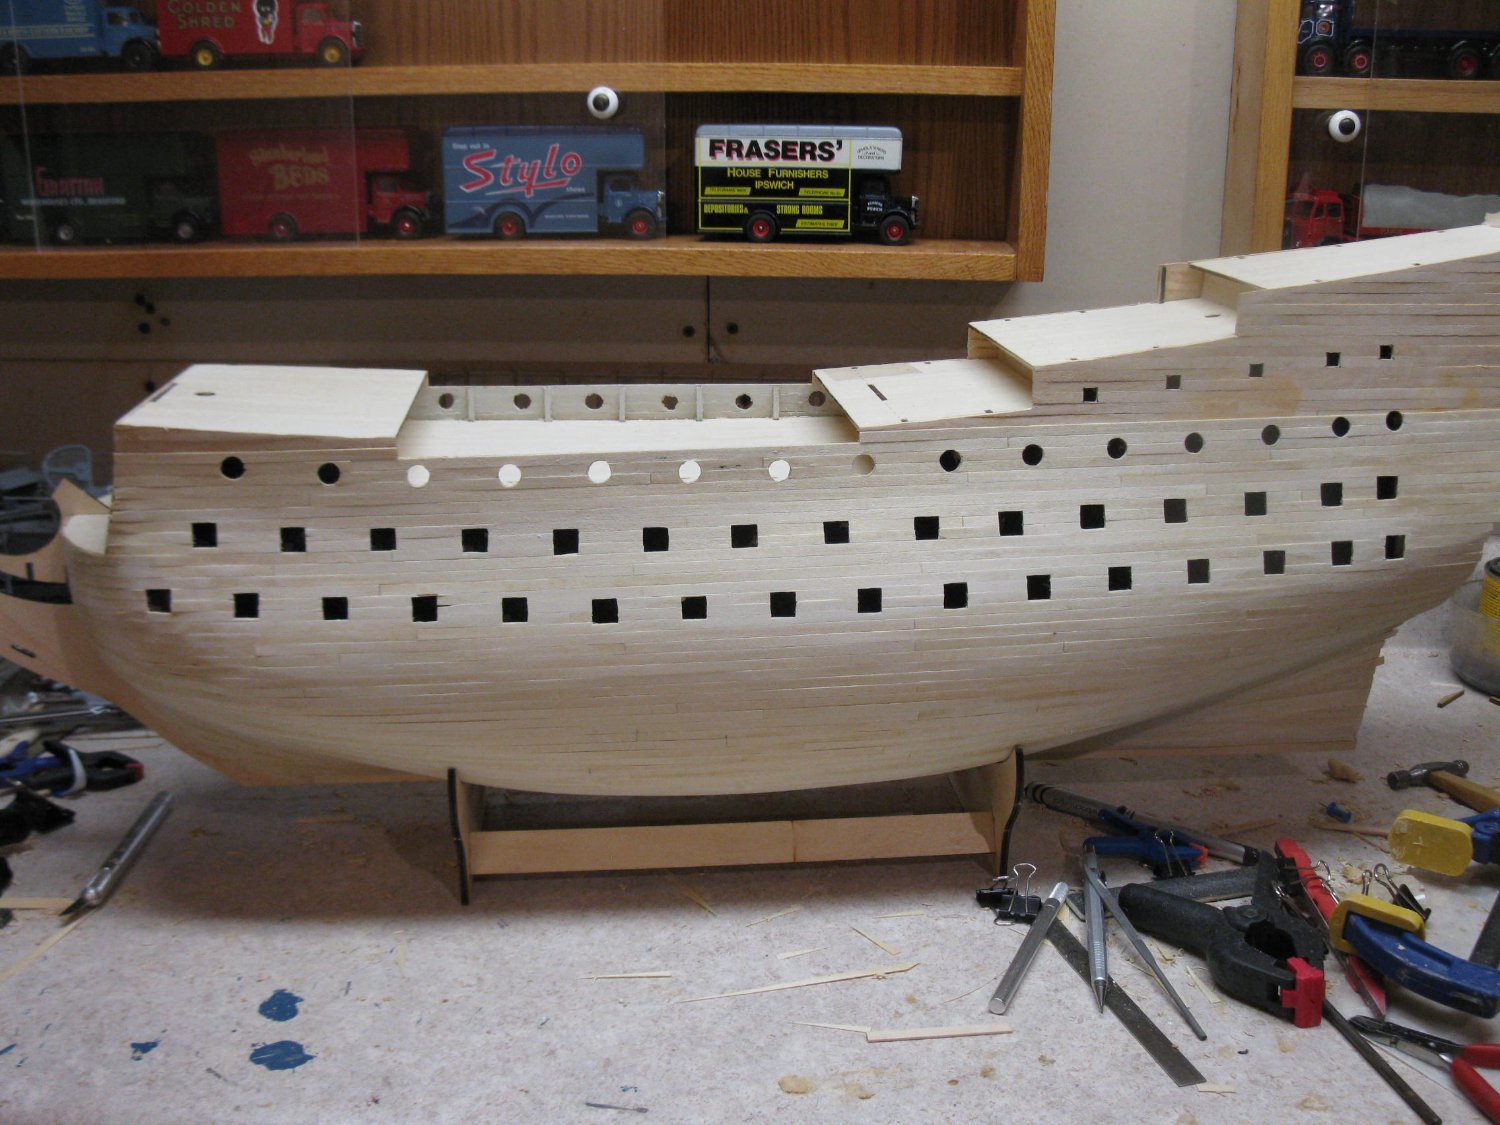
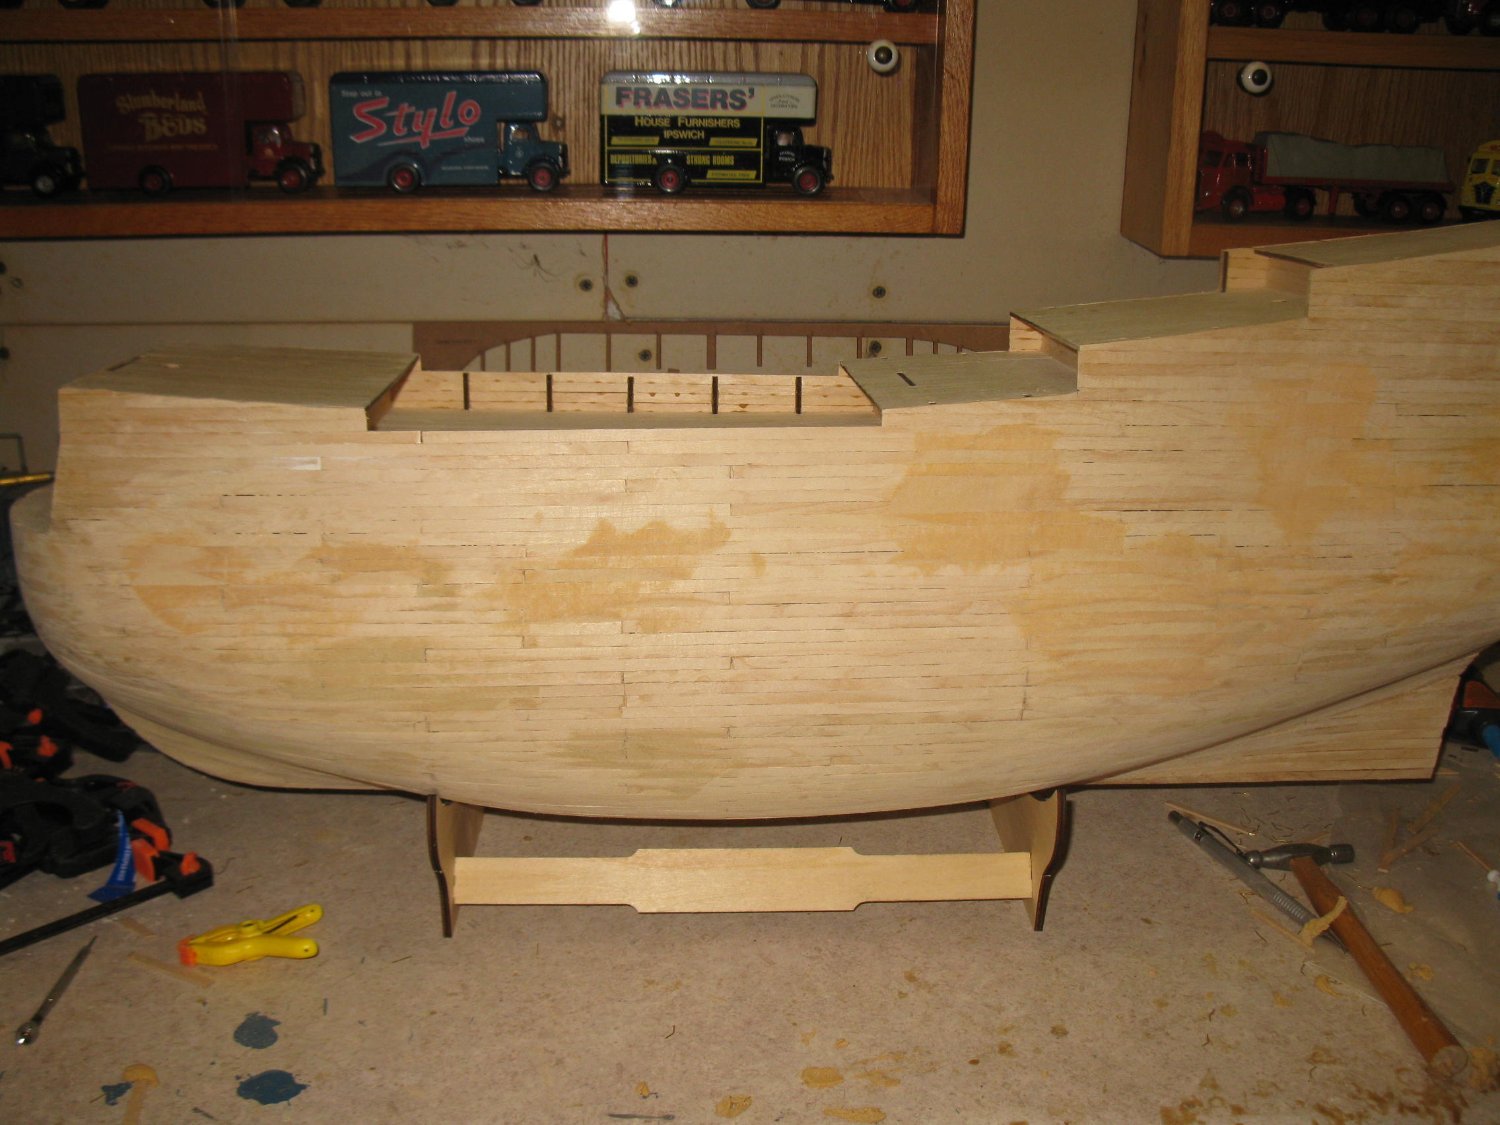
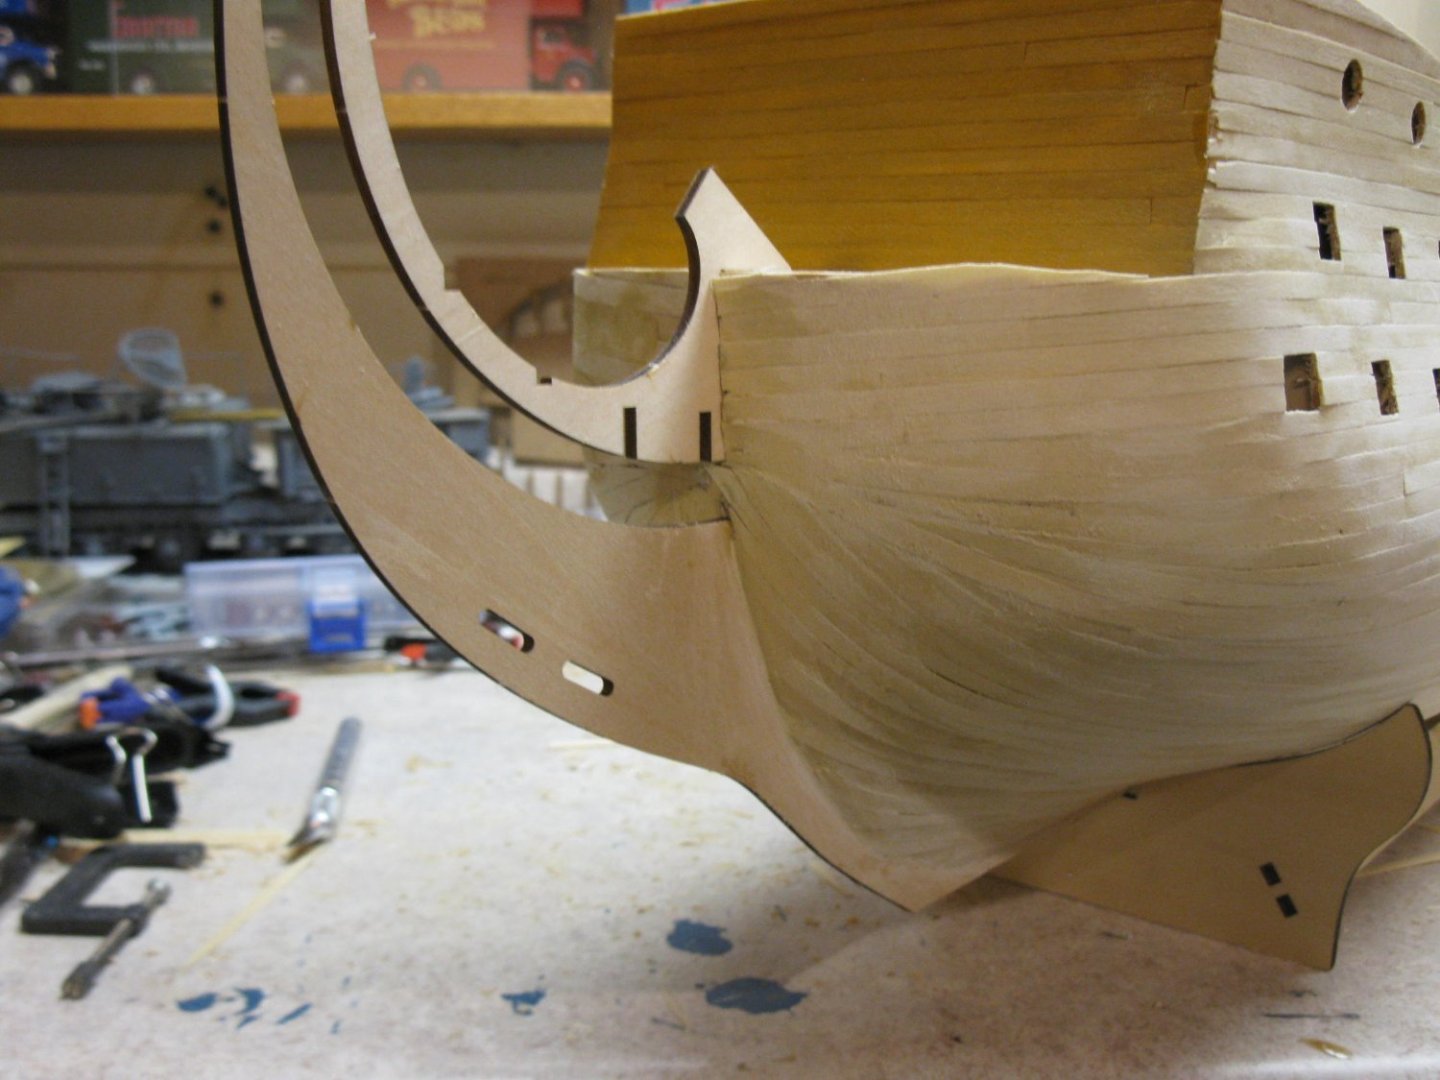
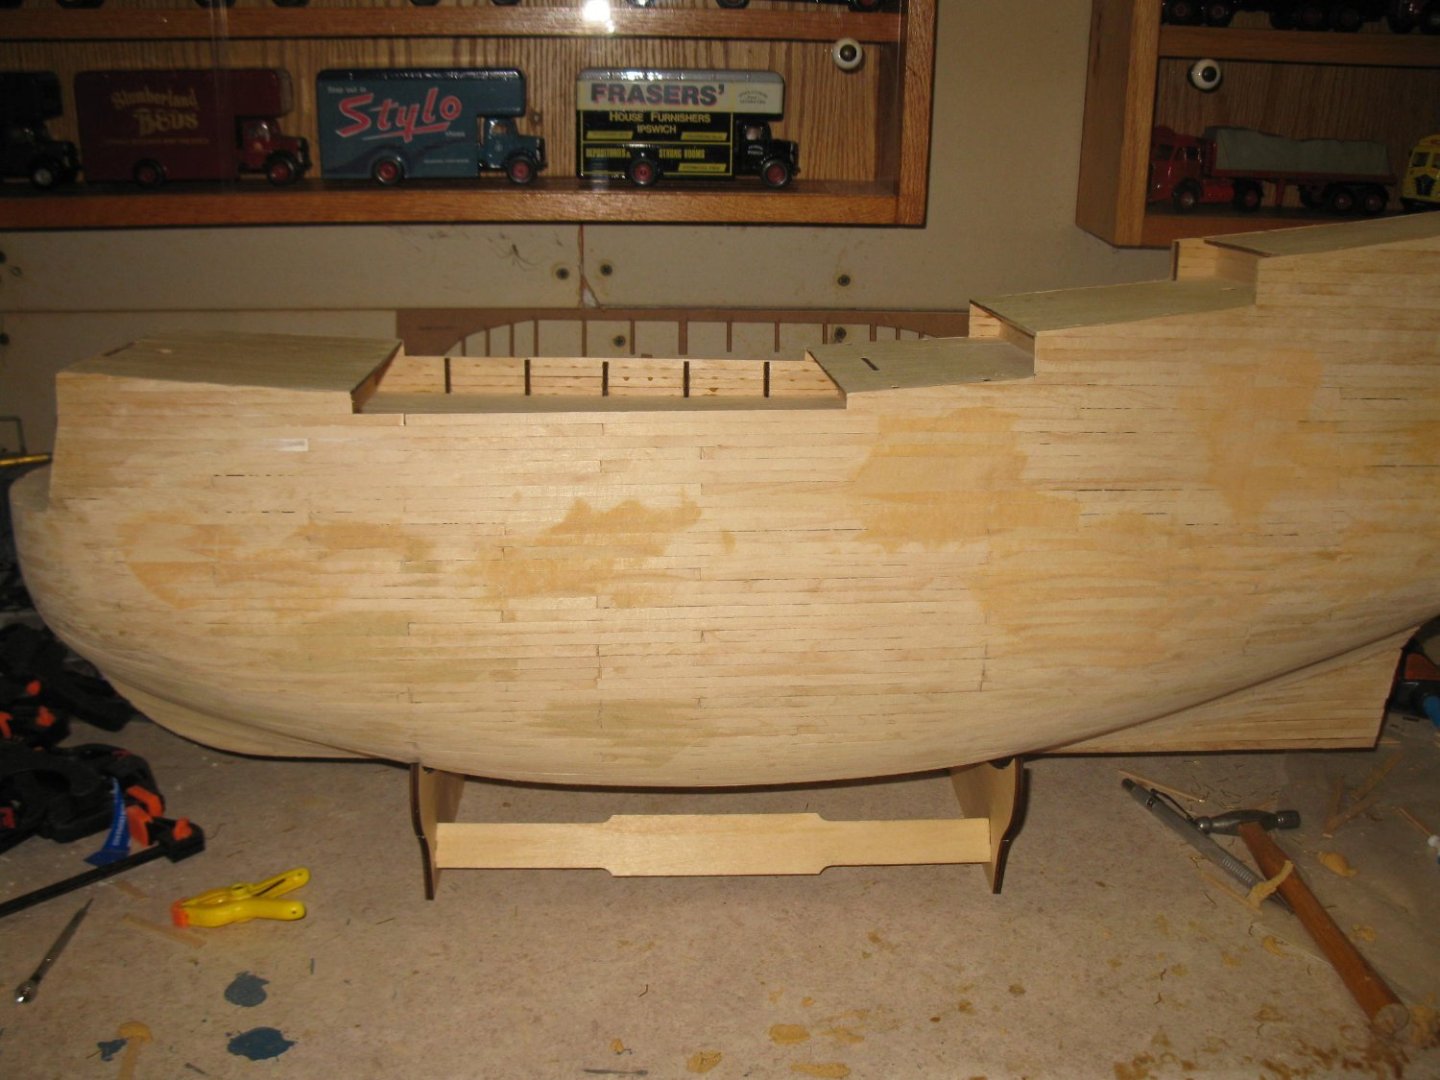
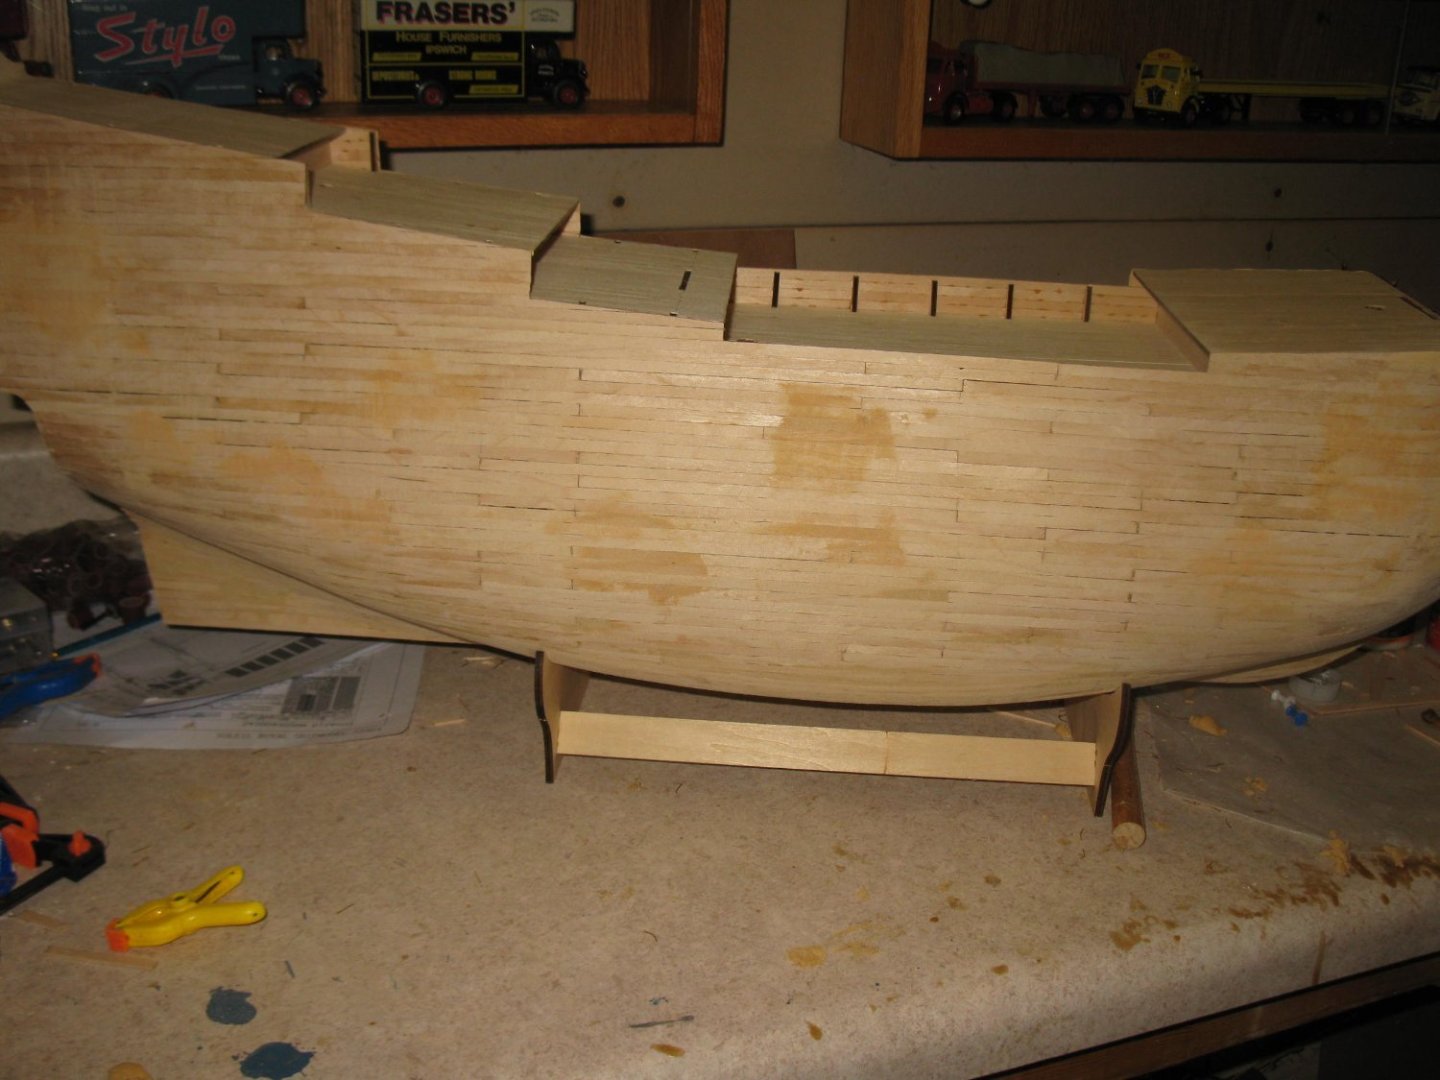
I have the port side finished with the second planking and a light initial sanding. You have to be careful with the sanding as that second layer is soft wood and only 0.5mm thick. But it definitely gives the whole hull a nice smooth veneer. As you can see the port hole defects have been corrected with some more correction coming when the port hole lining is installed. As you can see it worked well to add the stem and keel pieces before this second planking as it allowed a nice tight fit of the planking. Now it's on to the starboard side which will probably take me another 2-3 weeks.

-
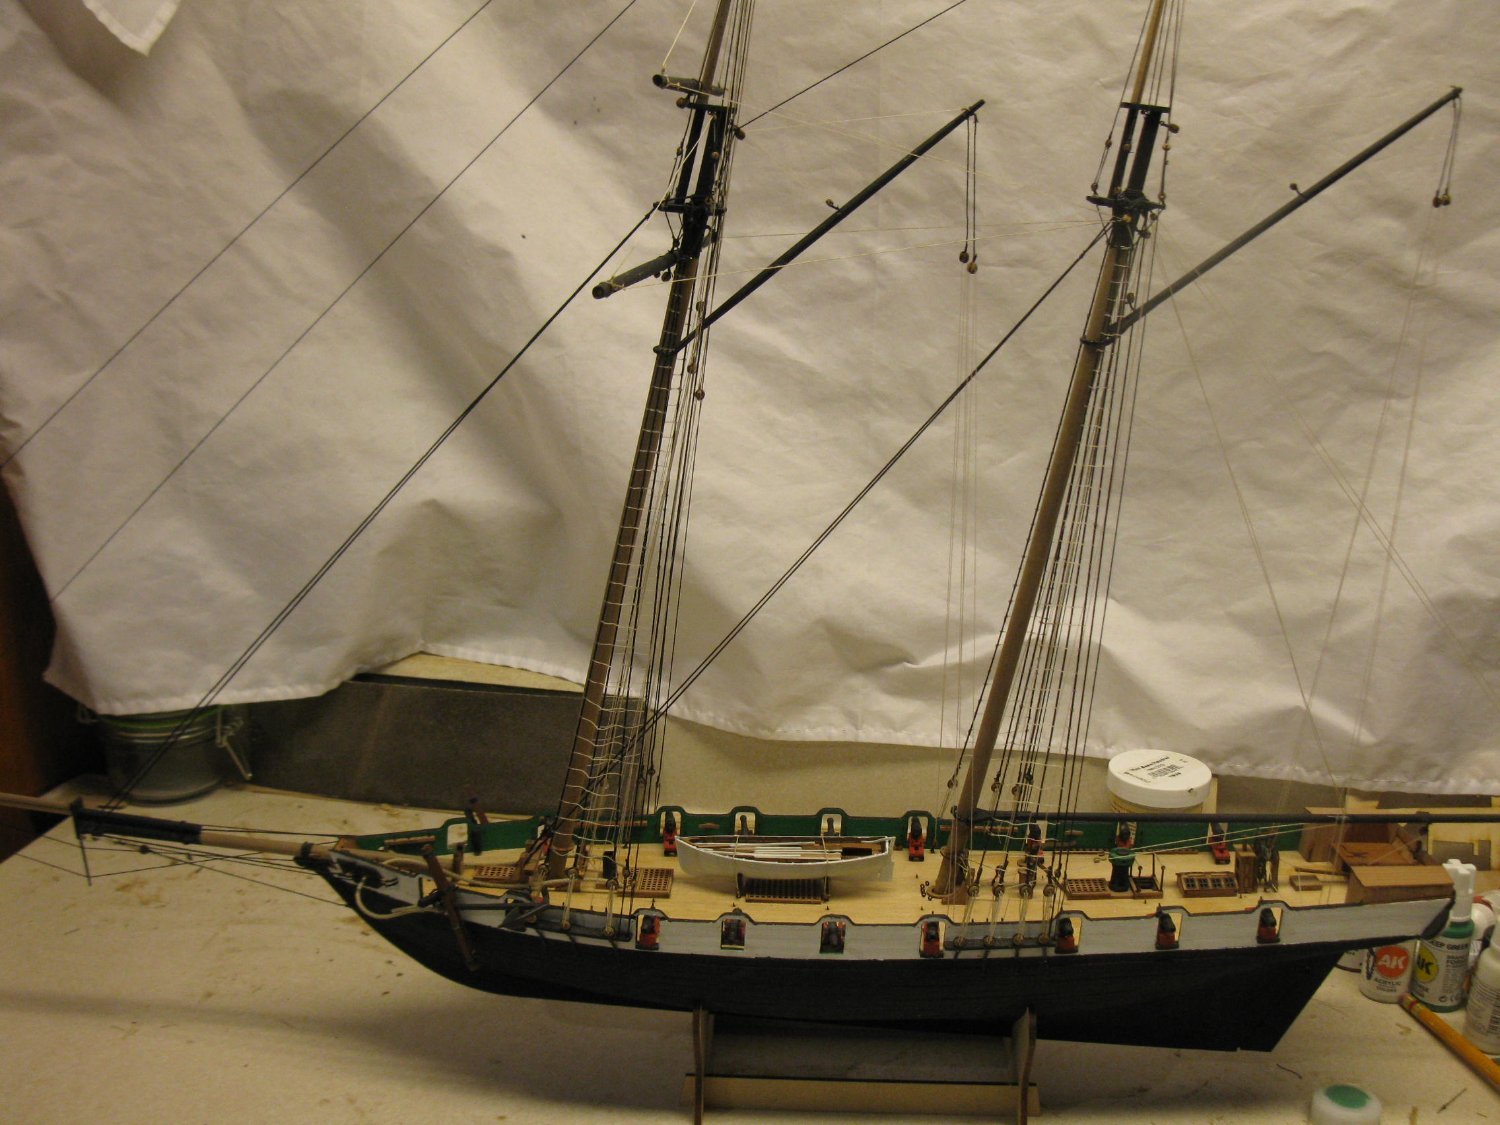
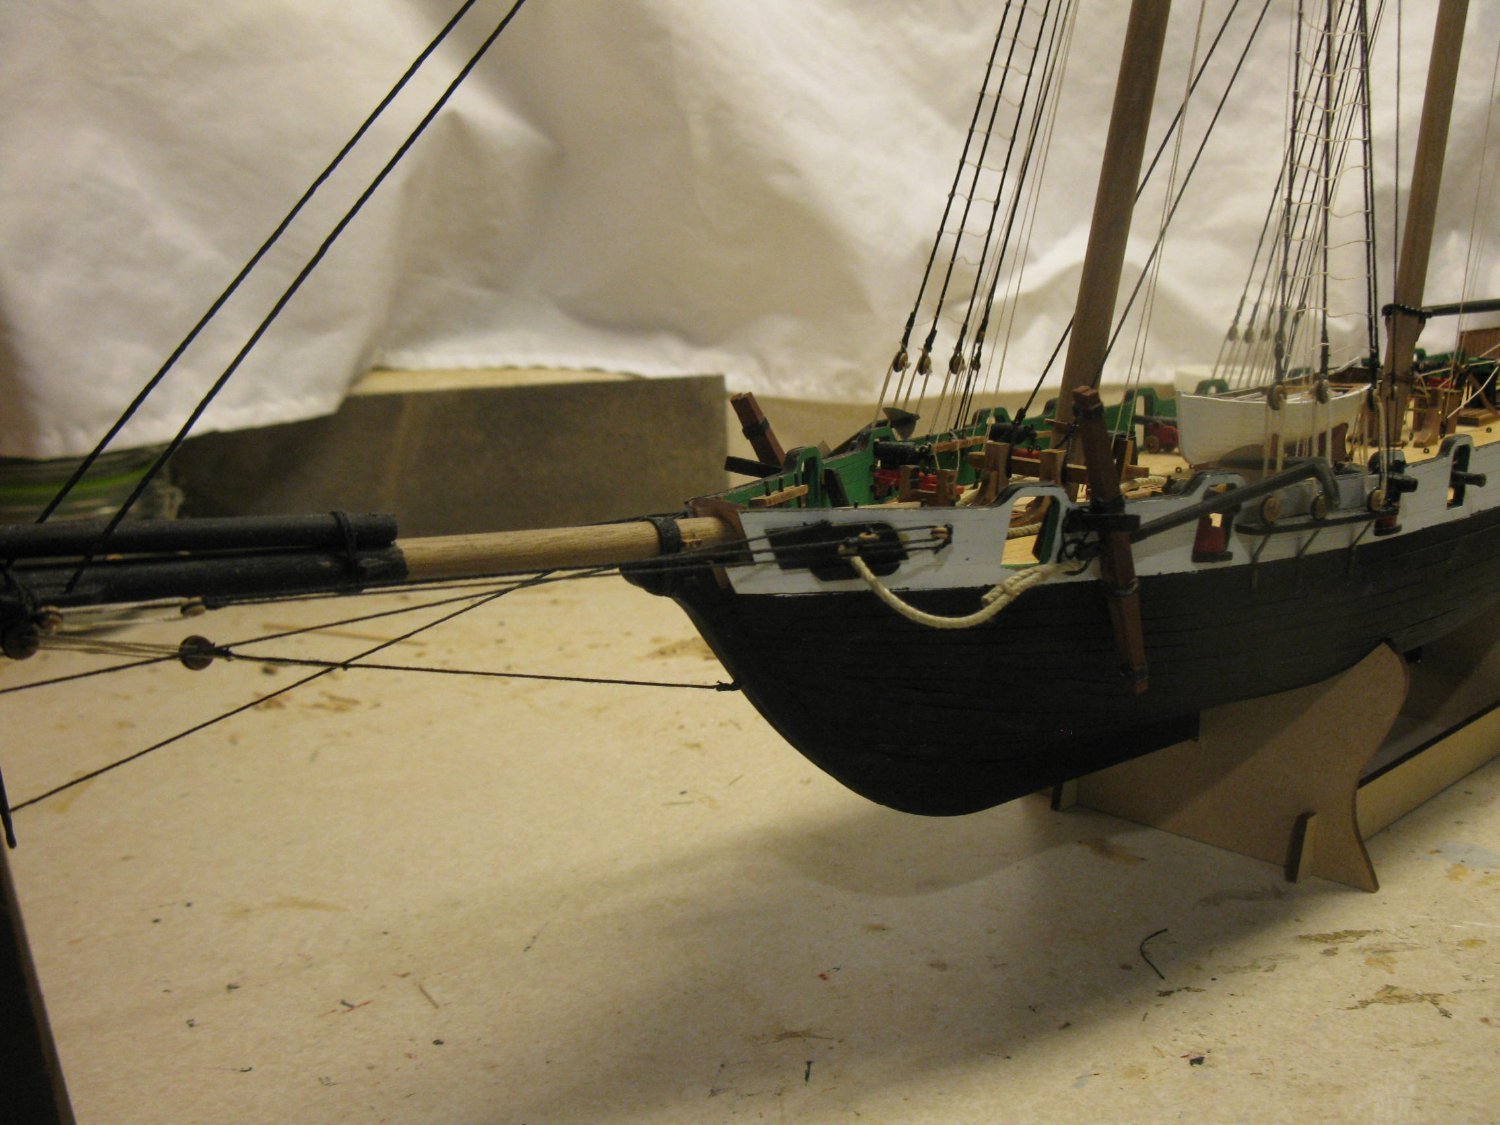
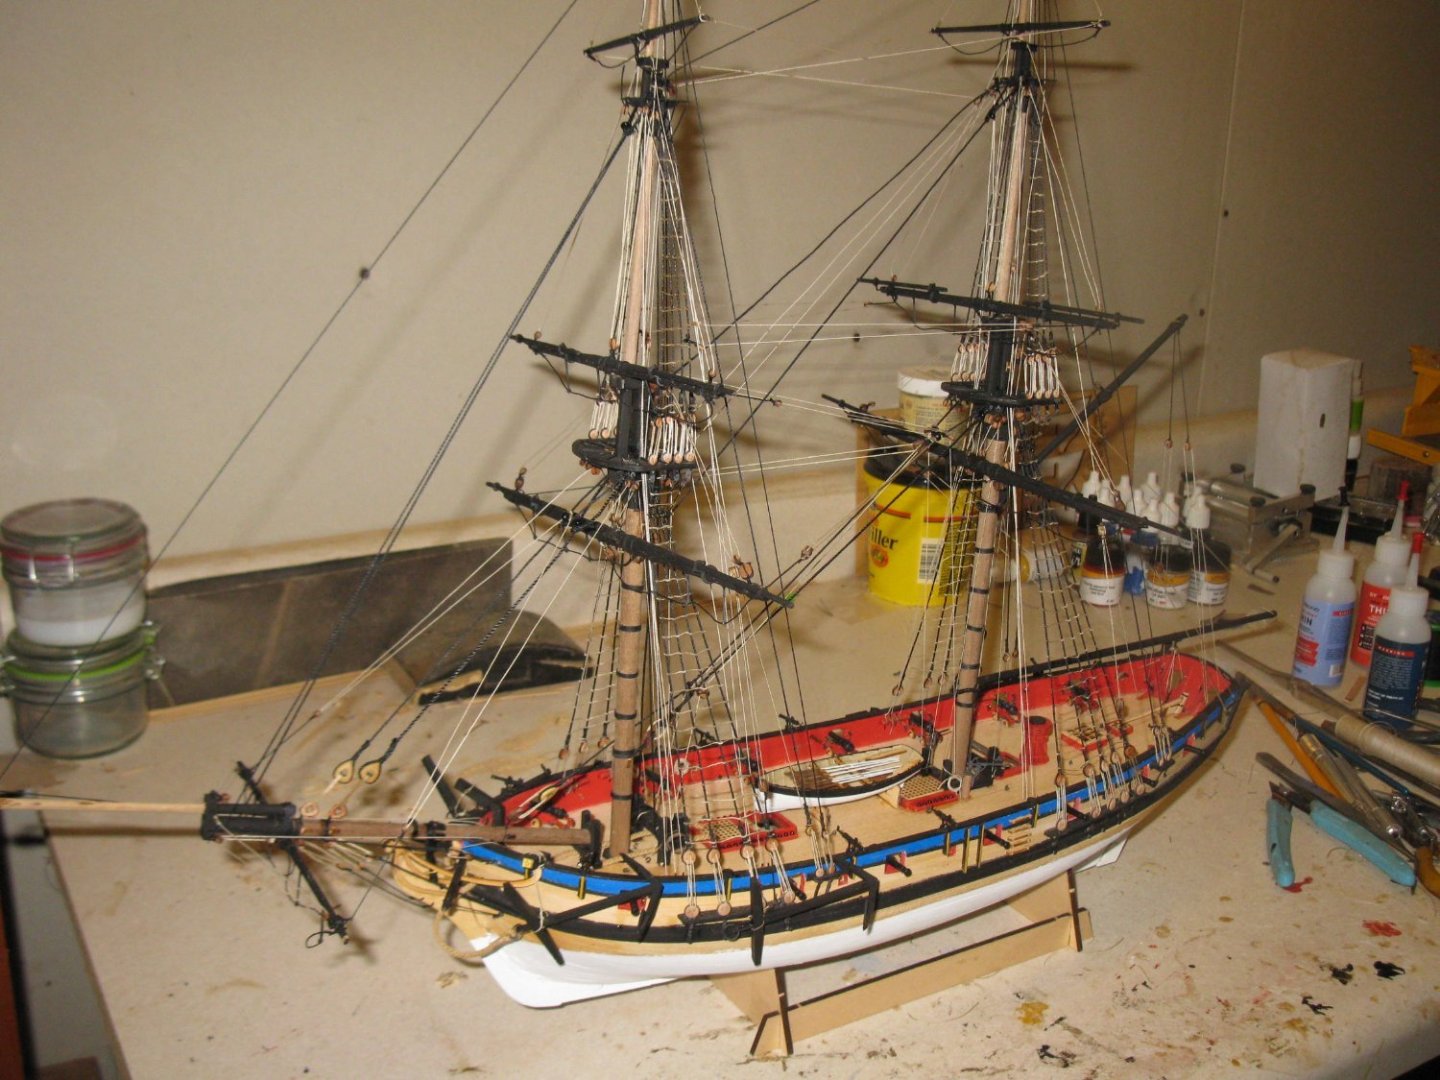
I thoroughly enjoyed building this model. Those Vanguard kits are the best. As you can see from the pictures I have not coppered the hull. I really don't like copper tape. In the past I have coppered the hull of the Caldercraft Victory and that turned out very nicely. In the future if I choose to copper a hull I would use the individual, embossed plates that Caldercraft supposedly has in stock. The ship is presently sitting on top of the case for my HMS Flirt. I have the case on order from Model Expo. Note that case and glass end up costing more than the actual model! (but worth it!)

-
- 8
-

-
- Grecian
- Vanguard Models
- (and 1 more)
-
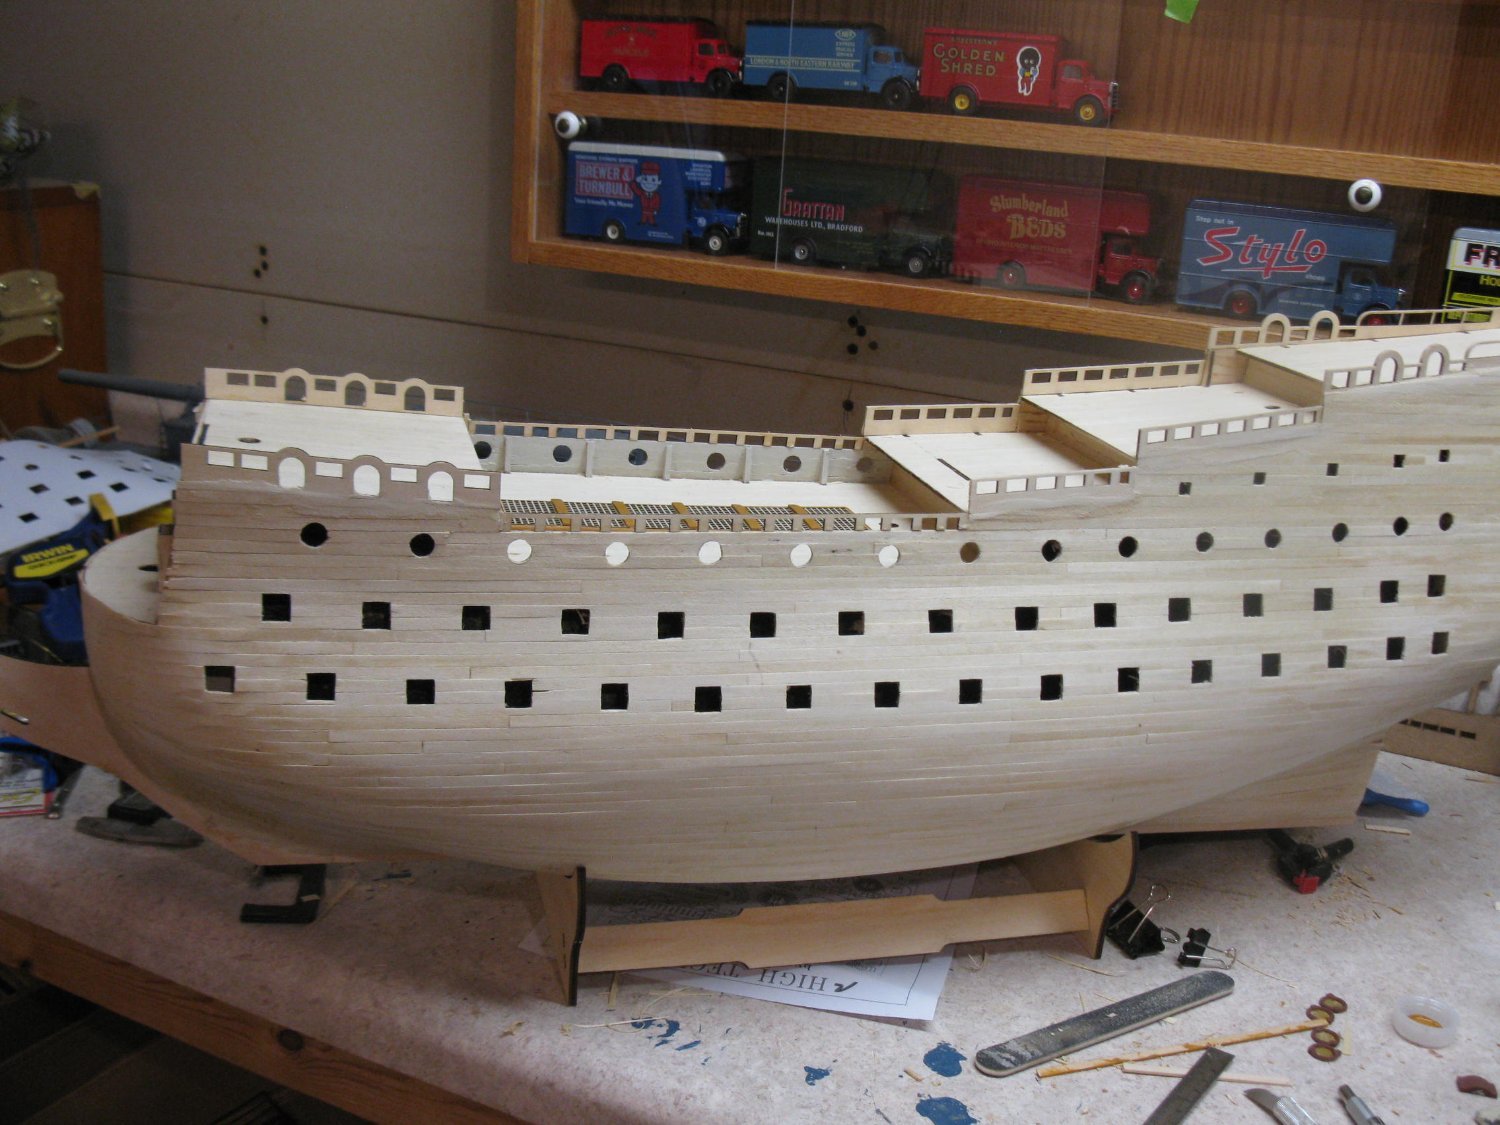
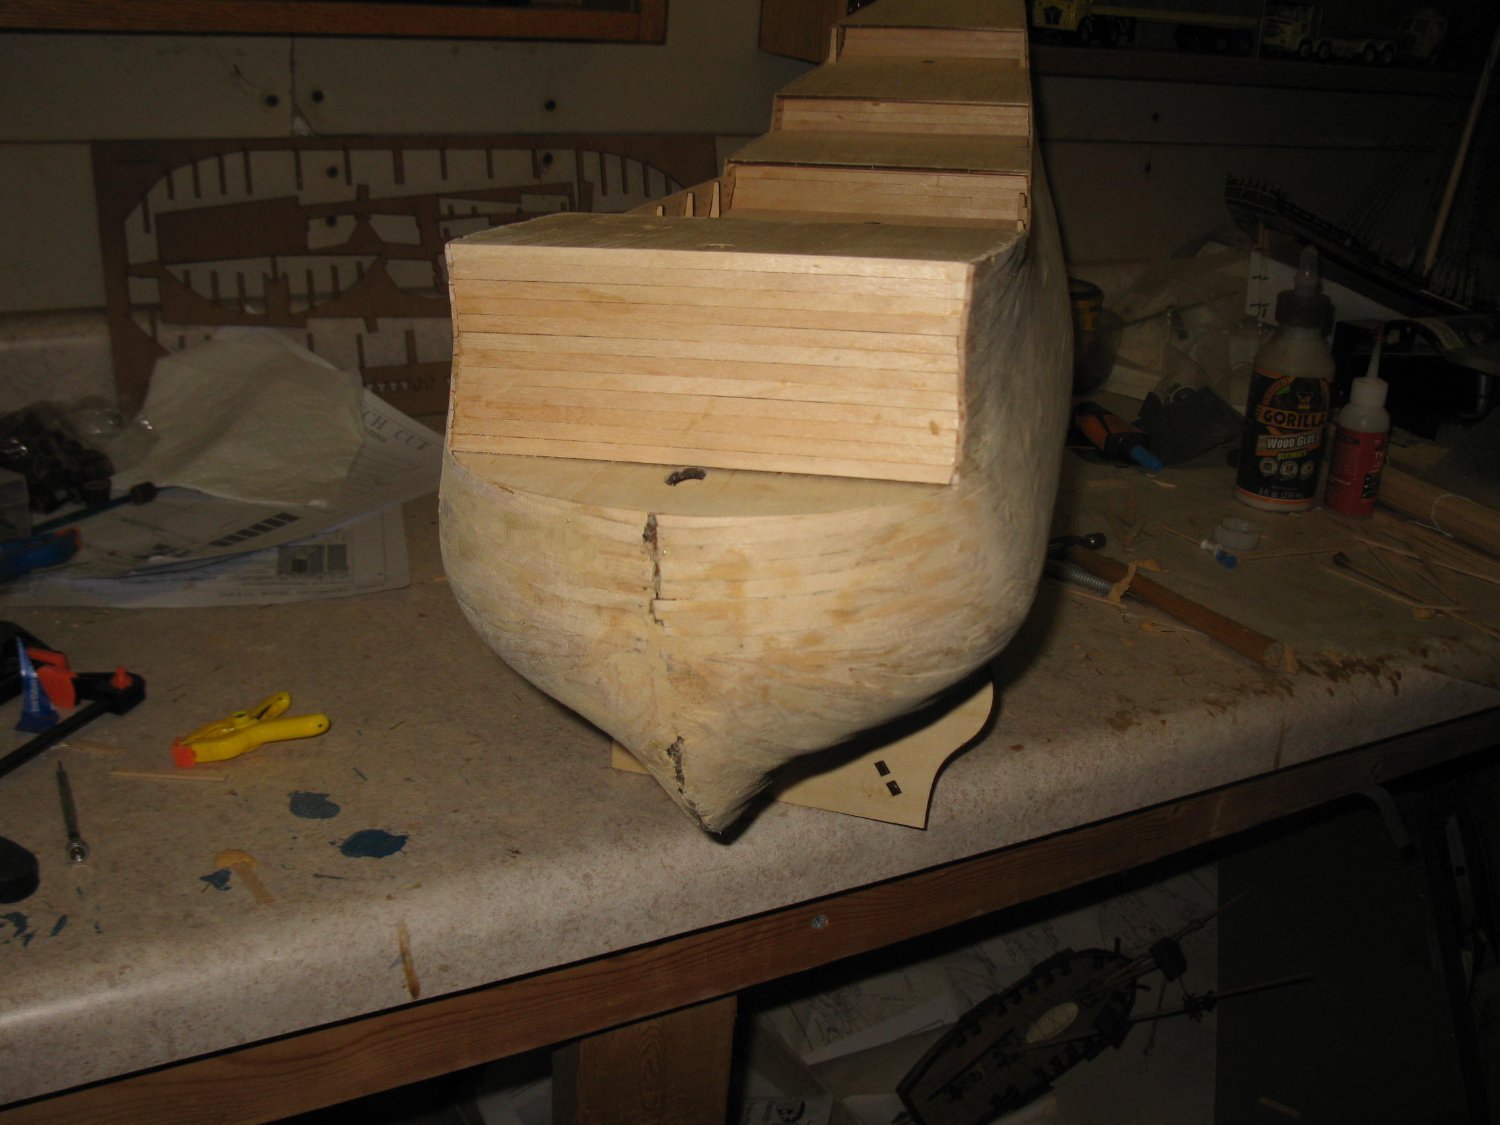
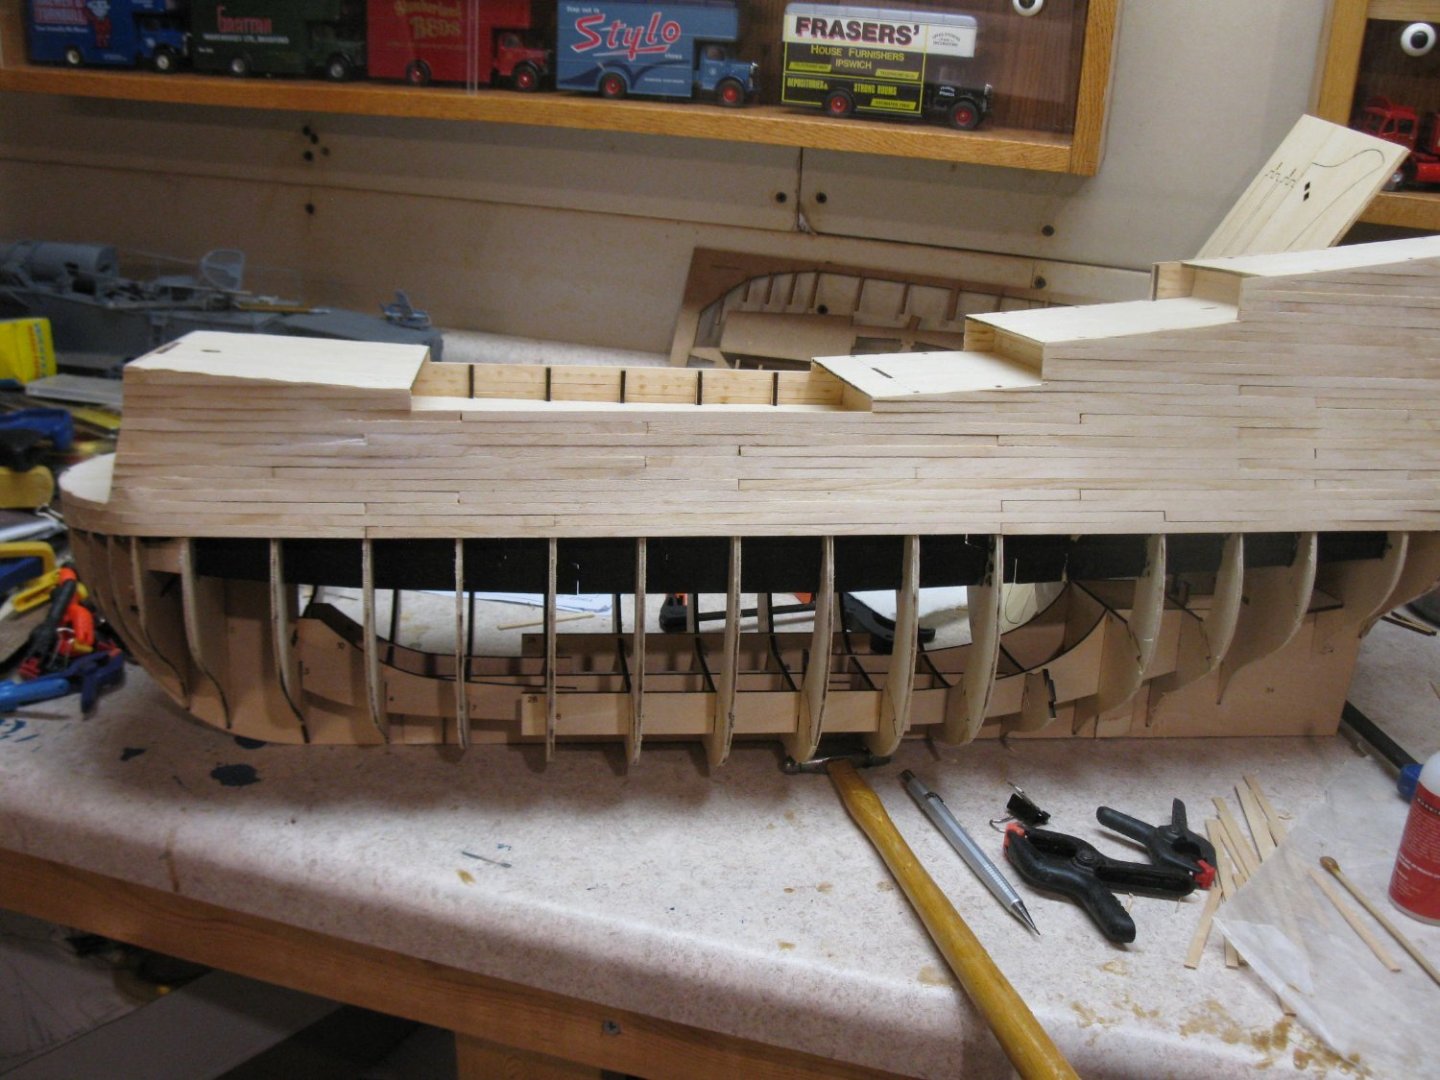
I've spent the last week opening up all the gunports. I am so glad I opted to do this now rather than after the 2nd layer of planks had been applied. Given all the sanding that I did before this step some of the planks were quite thin and did splinter upon cutting open the port. Now I will be able to correct this when I apply the second layer. My next step is to do the second planking on the forward part of the hull and the stern. Then on to the overall second planking taking special care to get the gun ports correct.

-
Thanks for the review. Coming from you, I can put total faith in your comments. I am currently building AL's Soleil Royal and the two kits are so very similar. Although I do question why AL chose to make the ST a single plank model whereas the SR is double planking. For me with my modeling skills a single plank model almost puts it off my list of kits to do.
-
The first planking has been completed, filled and sanded. As stated above I am now going to deviate from the plans and place the gunports by using the template and carefully drillilng/cutting out the openings. Upon further reflection before adding the second layer of planking I will need to finish off the forward bulkhead. After that is completed I will add the stem, keel and sternpost before starting the second planking.


-
Looks like I have about a week of getting the first planking completed. As I review the instructions I think I need to deviate some from them. After the first planking they show a few deck pieces and railings installed but once I start the second planking I am sure I would be knocking those off a number of times. So I will avoid adding any deck structures until all the planking is completed. The instructions also show a lot of the second planking being added and THEN you take the template for the gunports and cut those out. I am going to finish the 1st planking and THEN I will cut out the gunports before any second planks are added. It seems to me that I can correct any minor issues with the ports with the second planking. Plus I won't have to cut through two layers of planks. Also prior to the second planking I will add the stem and keel pieces and then do the second planking. That will allow a snug fit of the planks against those structures. The instructions state to add those pieces after the second planking is completed. Once I get the first planking completed and sanded and smoothed down I will add some pictures.
-
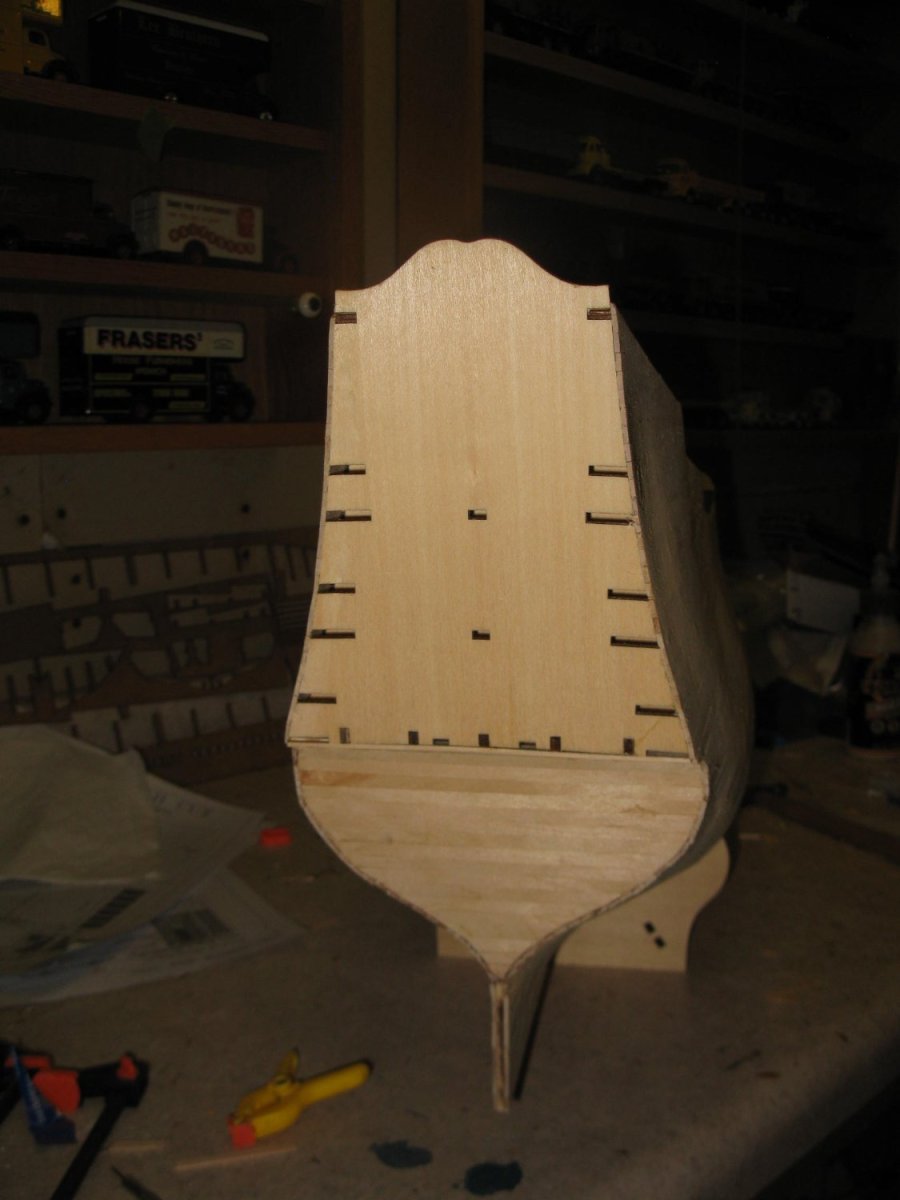
The attached photo shows a VERY rough first planking of one side of the model. There has been minimal sanding at this point with a much more complete sanding to follow. It's a slow process even using superglues. There are a LOT of planks to install. While going over the many, excellent build logs I see lots of people struggling with the laying out of the first planking with many attempting several bands of planks and doing all kinds of measuring. I know there are many methods to planking but I see that AL in their illustrated instructions does their planking without all the calculations and positioning others attempt. The instructions just state to work your way down and once the curve of the hull becomes excessive you go down to the keel and work up. The last plank requires a fair amount of shaping but it works. It's possible that AL does it this way since the whole model will be painted and there is no need to show planking details.

-
The 1st third of the initial planking is completed now with some rough sanding done. To my eye, it's looking really nice. According to the instructions I should be able to get 9 or 10 full width planks to go around the bow before I have to start tapering. After the first planking the instructions state to start adding the deck grating even before the second planking is done. Not sure I will do that at that time. So far, the quality of this kit is right up there with the best. I do not look forward to having to cut out all the gun ports. This first planking is a fairly hard wood. Looks like I need to buy another 100 knife blades.


-
Model Expo just dropped the ad for this on sale for $1200.
-
Per the instructions the first part of the 1st planking is completed. I have trimmed the edges and did some very preliminary sanding. Now it is on the other side to do the same.
-
I have started the first planking of the ship. This will be a bit different from most kits as the planks for this first layer are only 300mm long. The longest dimension on this model will require just under 3 planks. Frankly, I kind of like this process a bit better than having one long plank. The only issue is that I have to be very careful to keep the planks aligned. I am using a medium viscosity cyano glue on the frames and edge gluing of the planks with a regular wood glue. This now brings me to an issue where I have had to deviate from the instructions a bit. The instructions state to measure down 50mm from the tips of the midship frames and apply the first plank. No problem there. But the forward first plank when applied is pictured as being flush with the top of the forward deck area. After verifying that I was accurate with the 50mm measurement it turns out the that forward plank in order to be aligned correctly with that first plank will not be flush with the forward deck area. (see pictures) I don't see this as a problem as I can just add the appropriate planks and trim. I just wonder how AL was able to get the set up as they picture in the instructions.


-
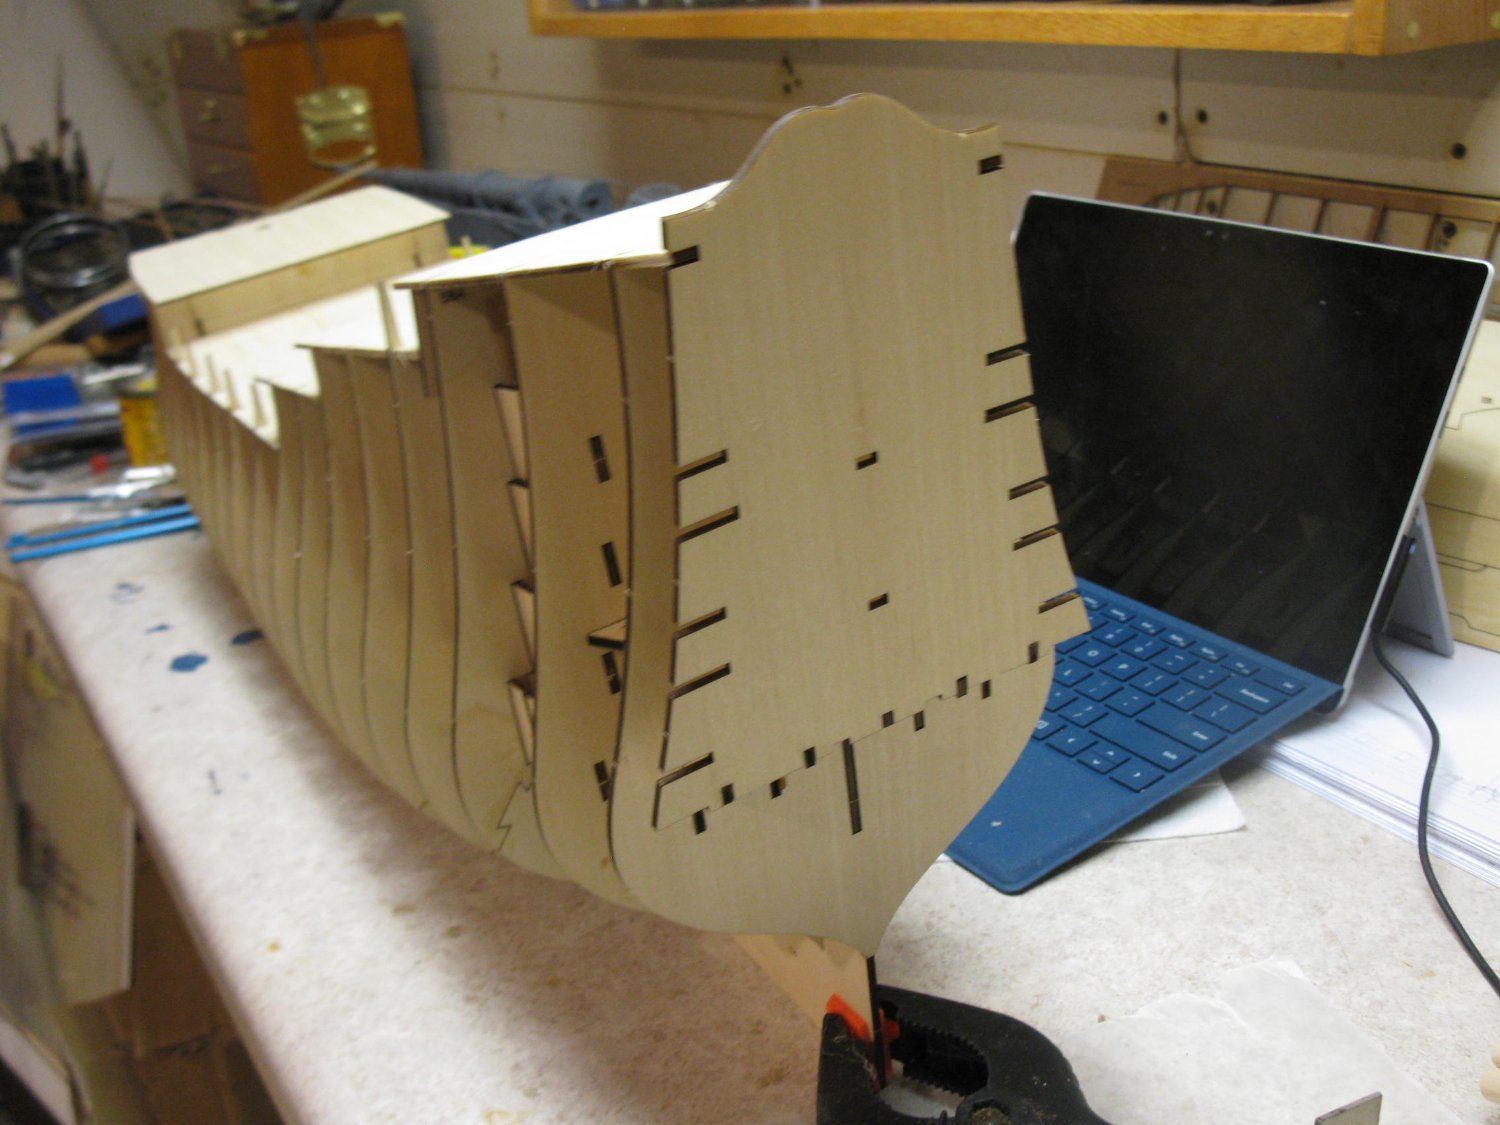
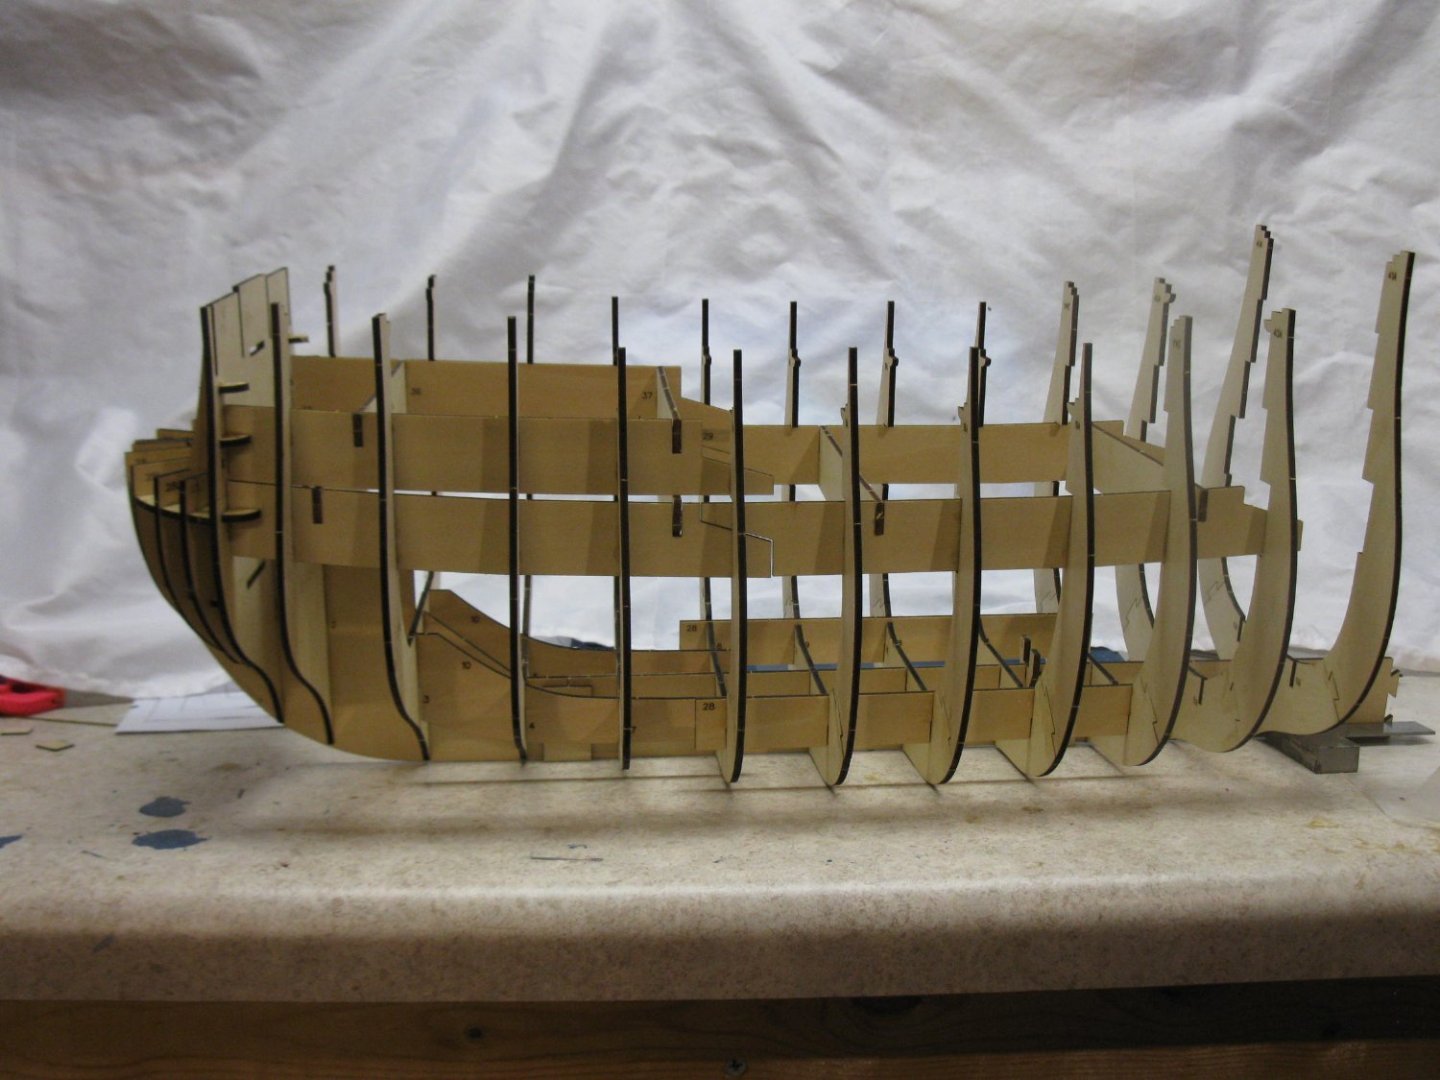
The basic framework if completed now. The whole structure is very rigid. Next a bit sanding to remove the char and a bit of fairing the hull for the planking which will be the next step. The fit of all the pieces has been exceptional. Hardly any filing was needed. The instructions to date have been excellent. At this point one complaint with the instructions. The instructions use icons to guide what needs to be done at each step. The icon for NOT GLUING is very hard to distinguish it from the one for GLUING. Missed that at one step but it did not cause any problem.


-
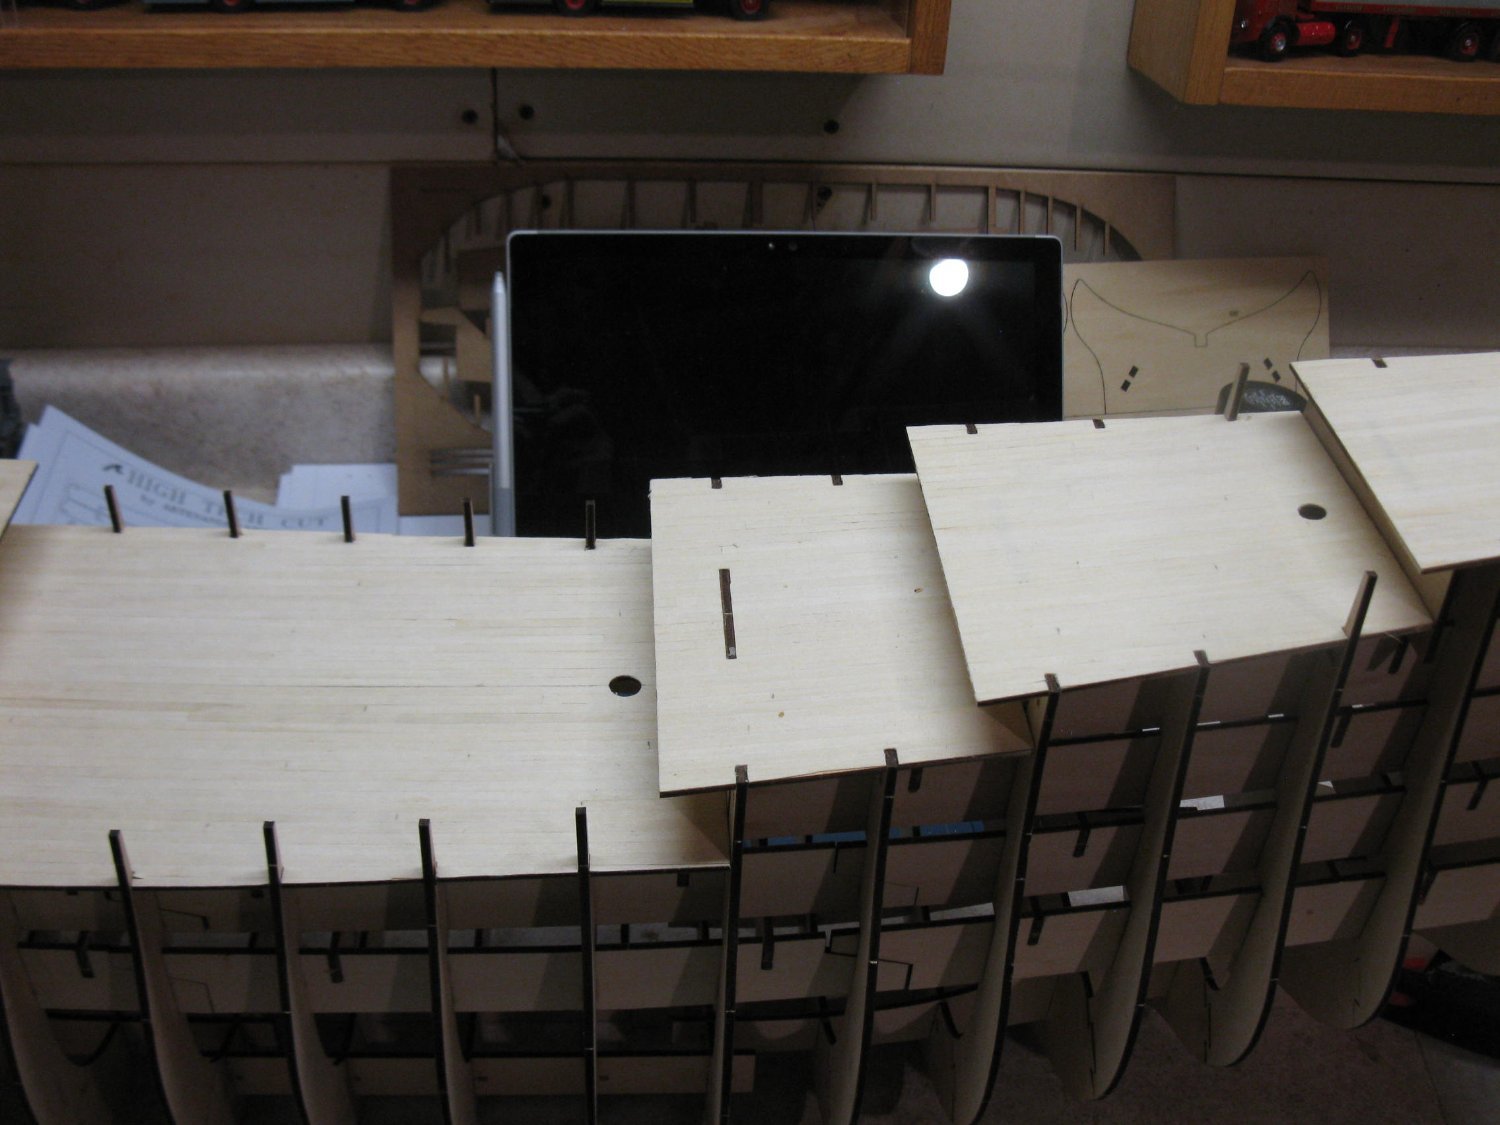
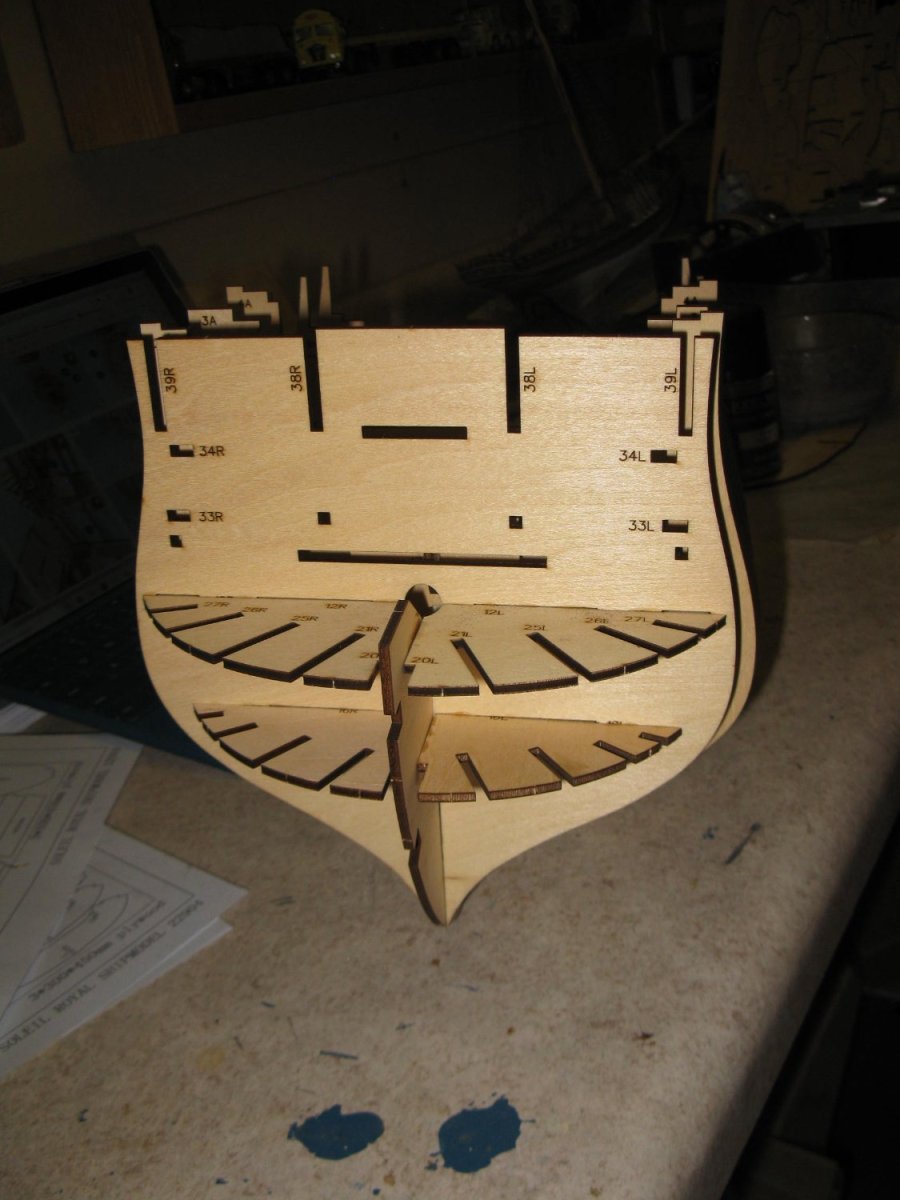
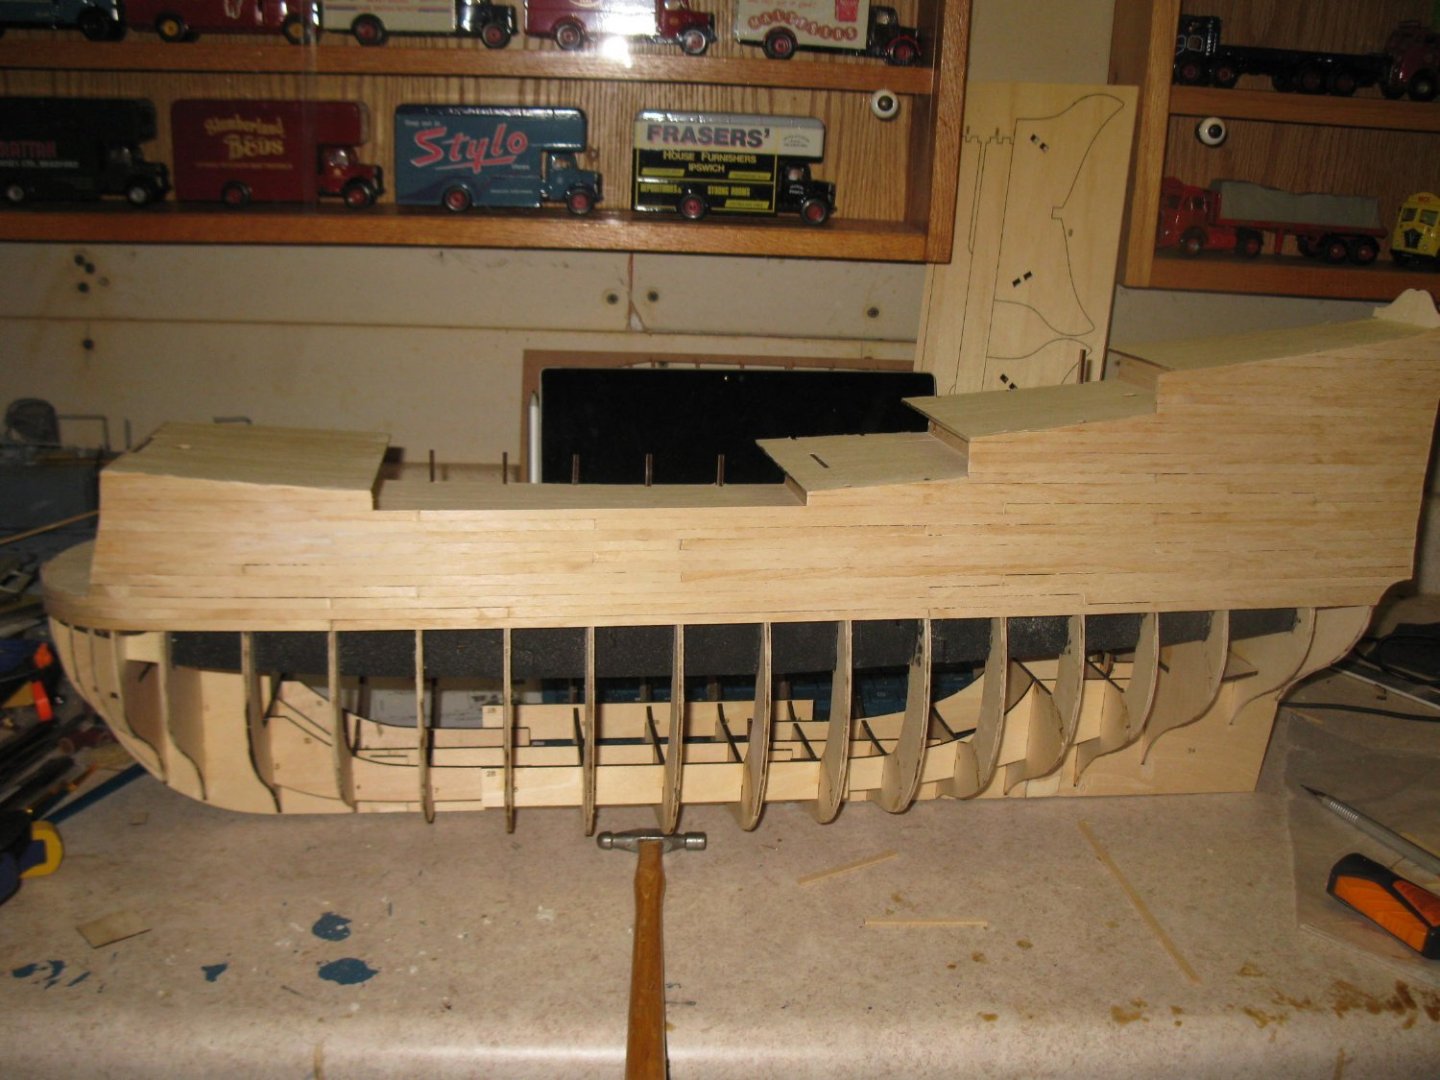
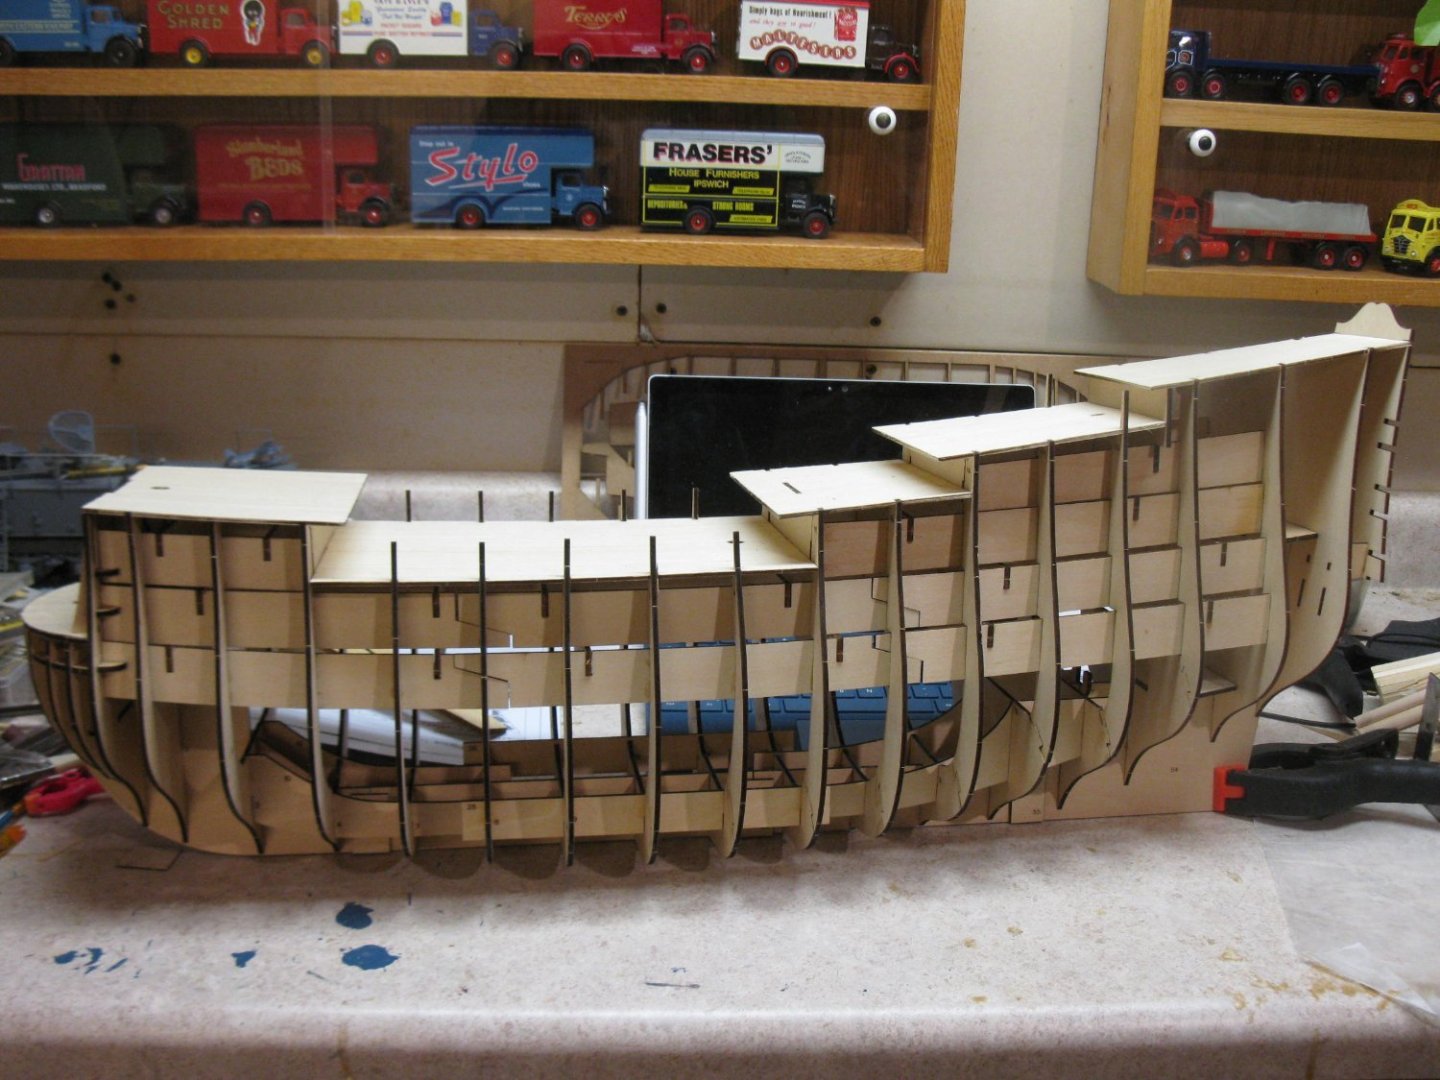
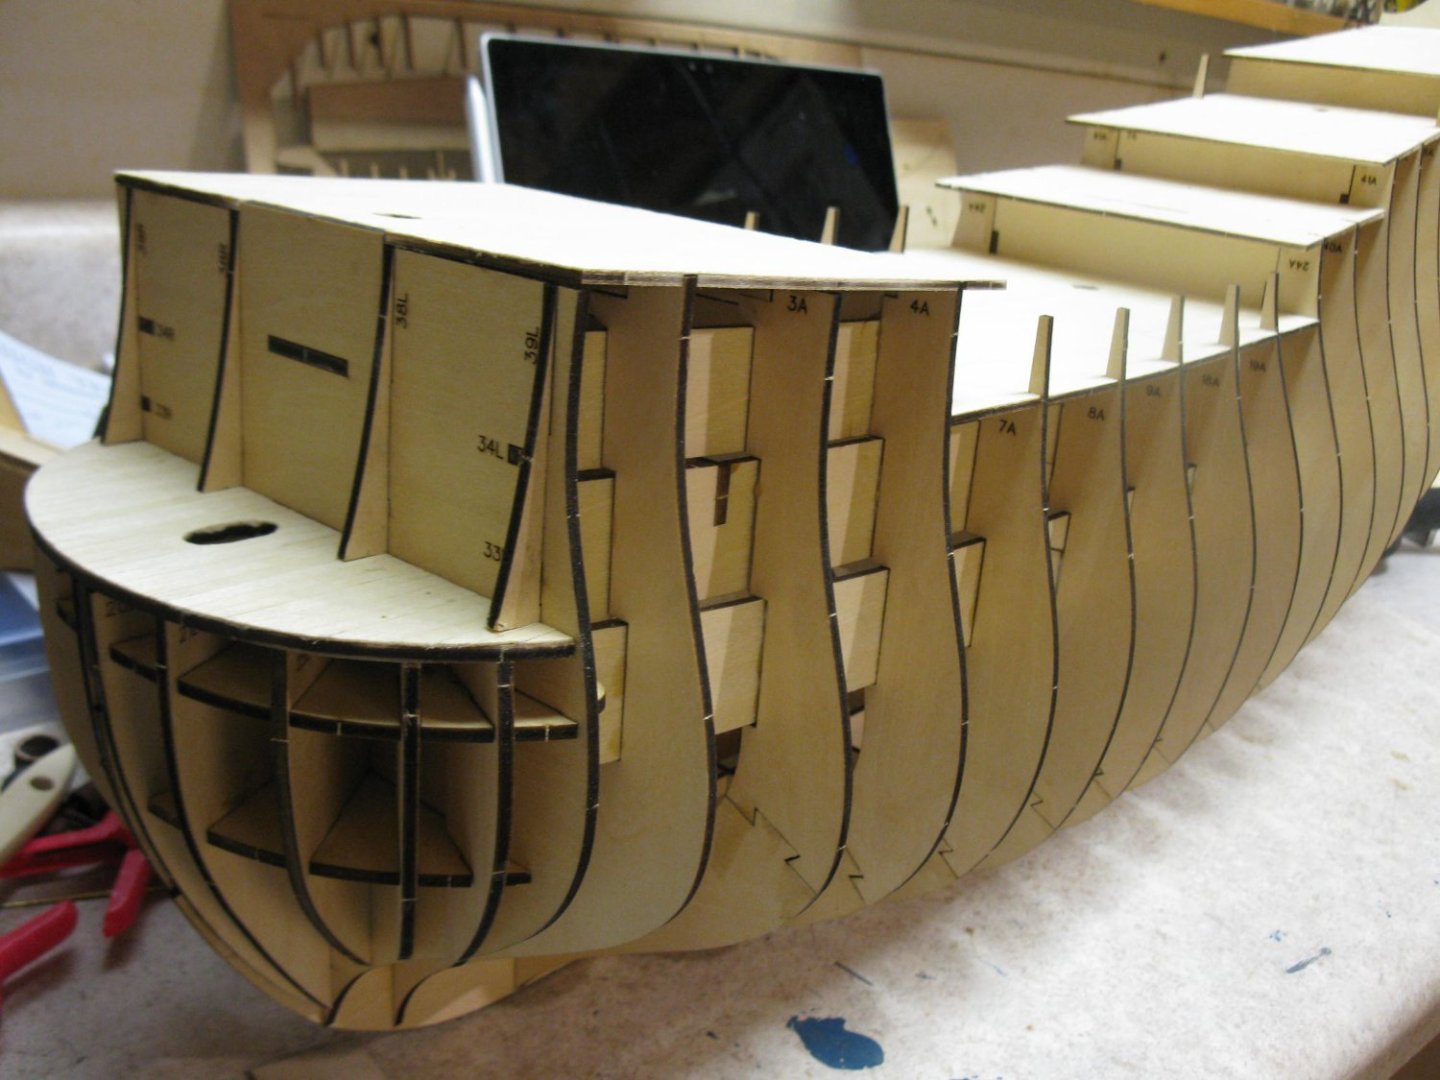
To date I am loving the excellent fit of all the pieces. I have only had to slightly file one slot. All the internal bracing adds a lot of rigidity to the hull. This is a minor point but for me it's nice that the "frames" are not bulkheads like so many kits. Next steps appear to be to starting the addition of a few decks which will further solidify the hull. Some of my first kits were by Artensania and I then moved on to better kits. I must say this newer Artesania kit is so totally different from those early ones. Vastly superior and on a par with the best kits available now.
-
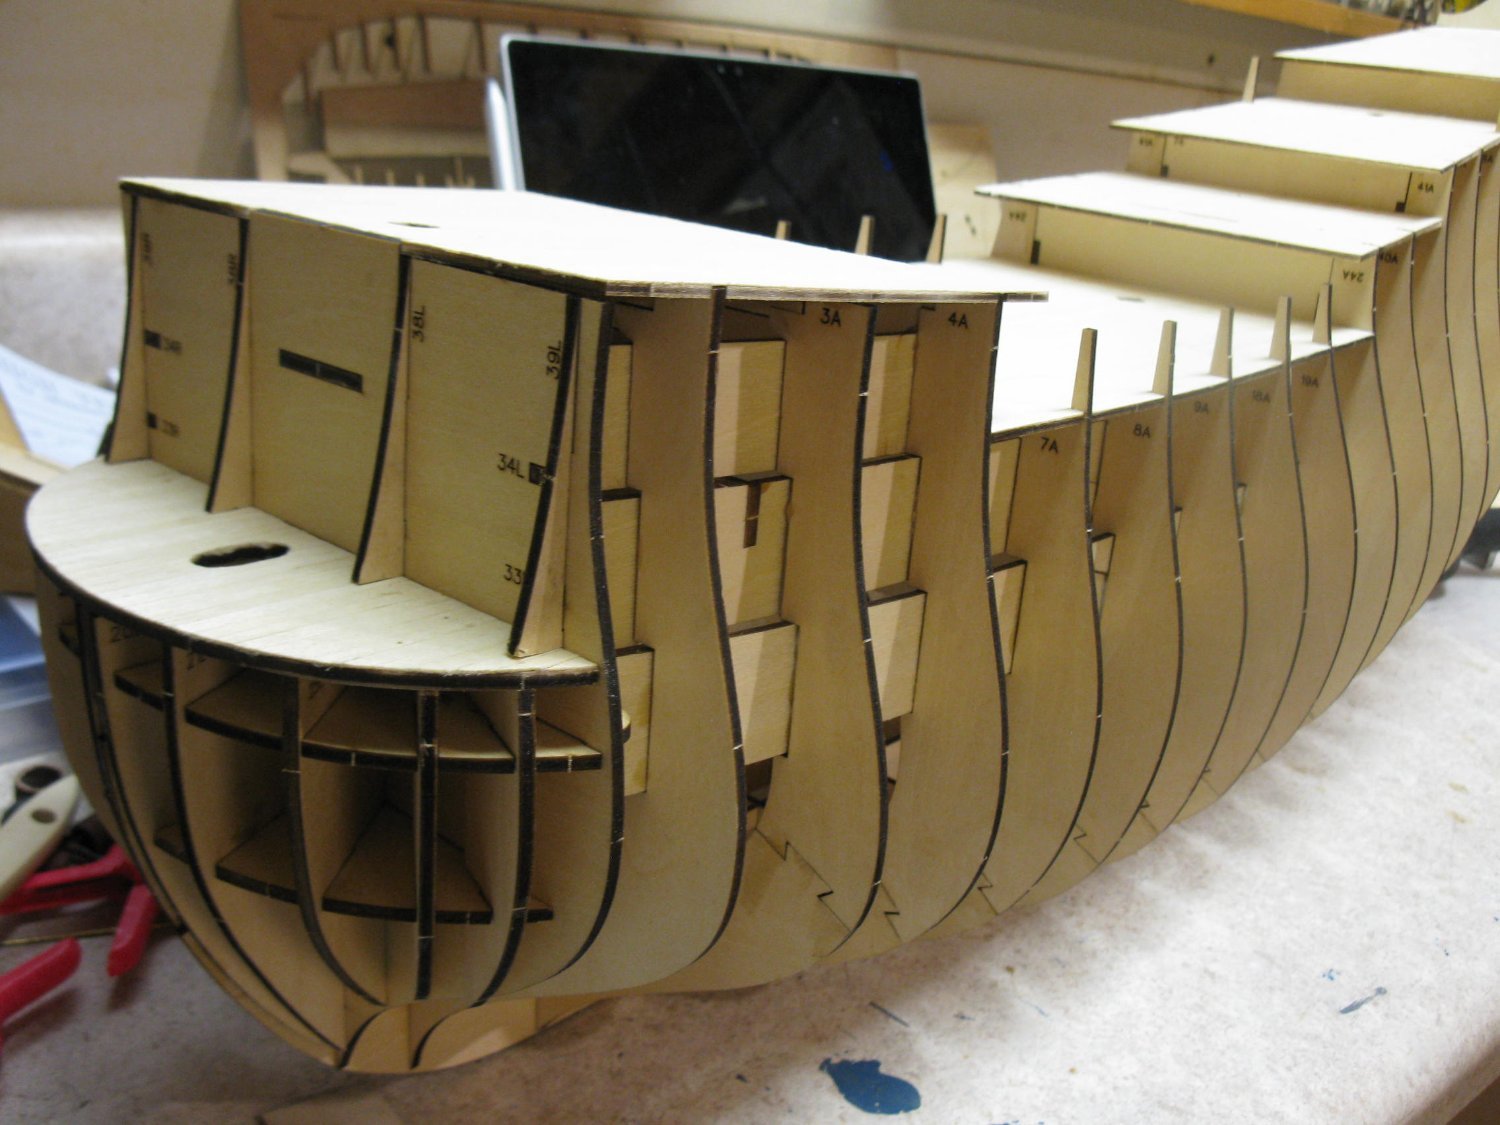
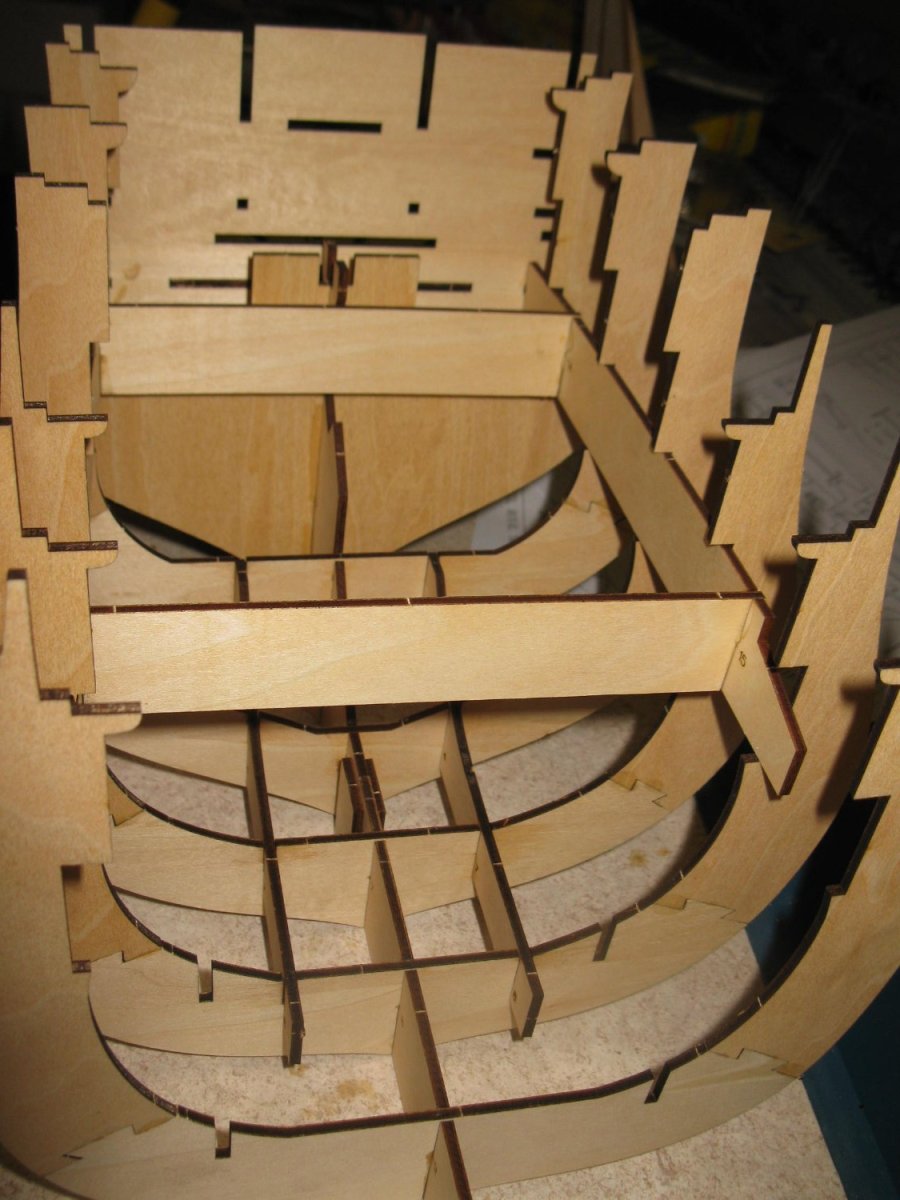
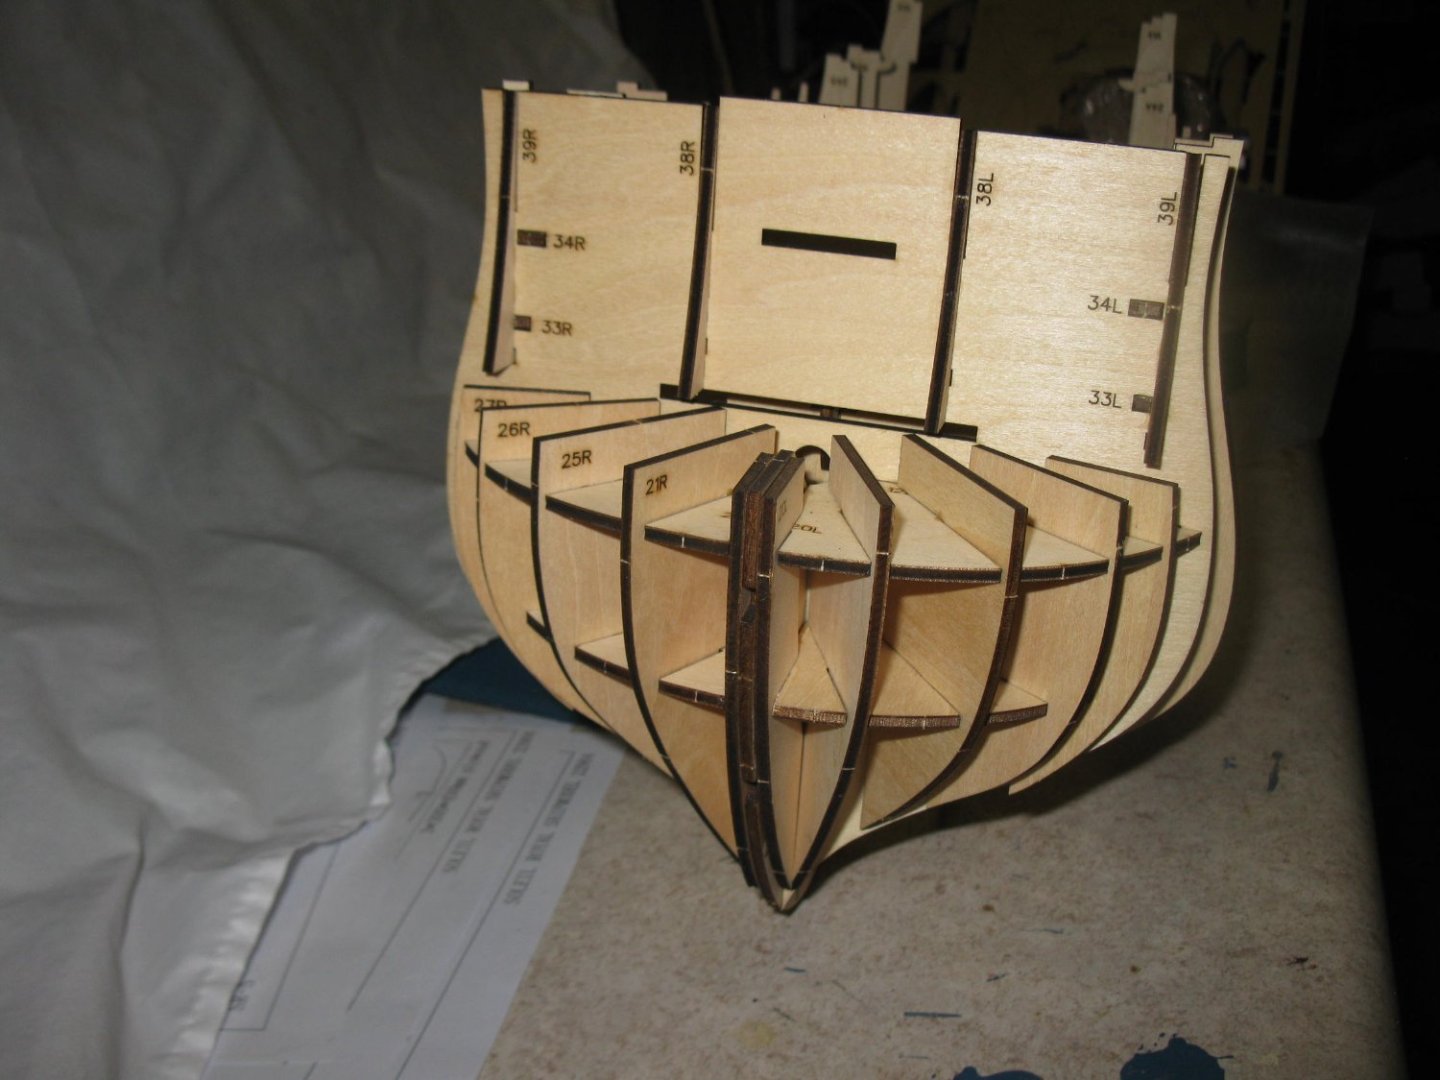
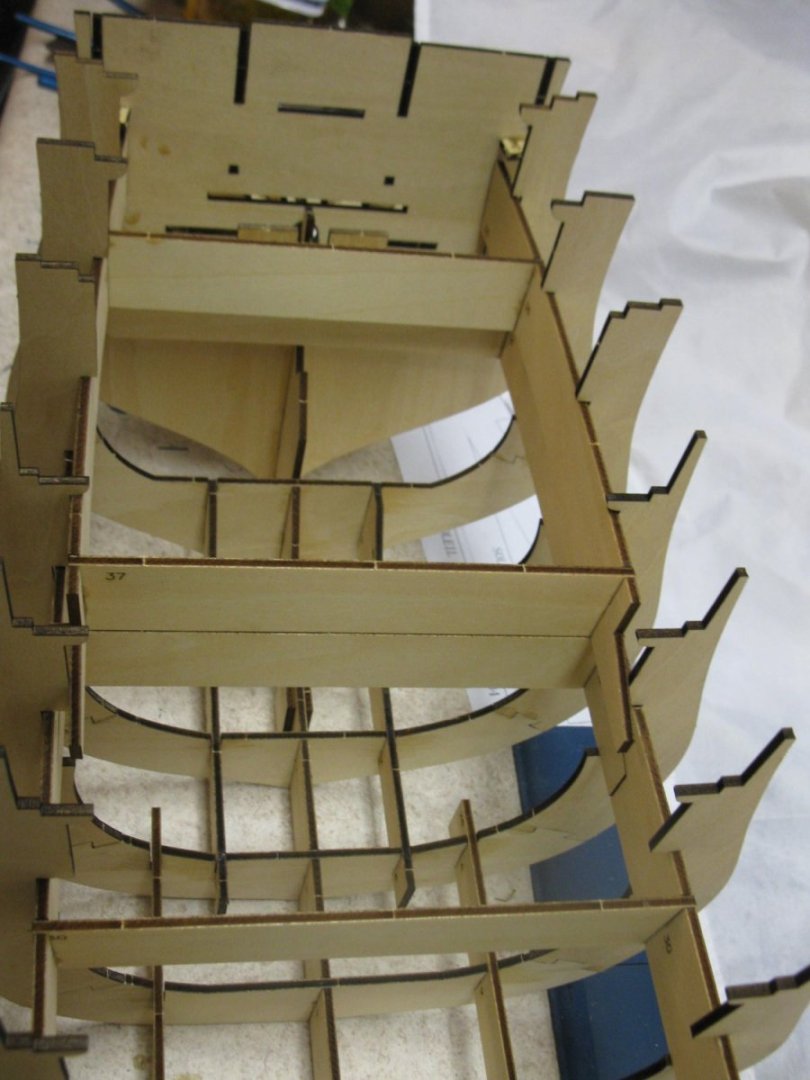
Work progresses. The additional inner structure parts provide a very stable and rigid frame. With this kit rather than the filler blocks for the bow, AL uses multiple bulkheads to form the curve at the bow. At this point the instructions, quality of the material, and fit of the pieces has been excellent.


-
Artesania's brand new kits in 2020
myxyzptlyk2003 replied to modeller_masa's topic in Wood ship model kits
This DVD's play very nicely on any computer with a disc drive. -
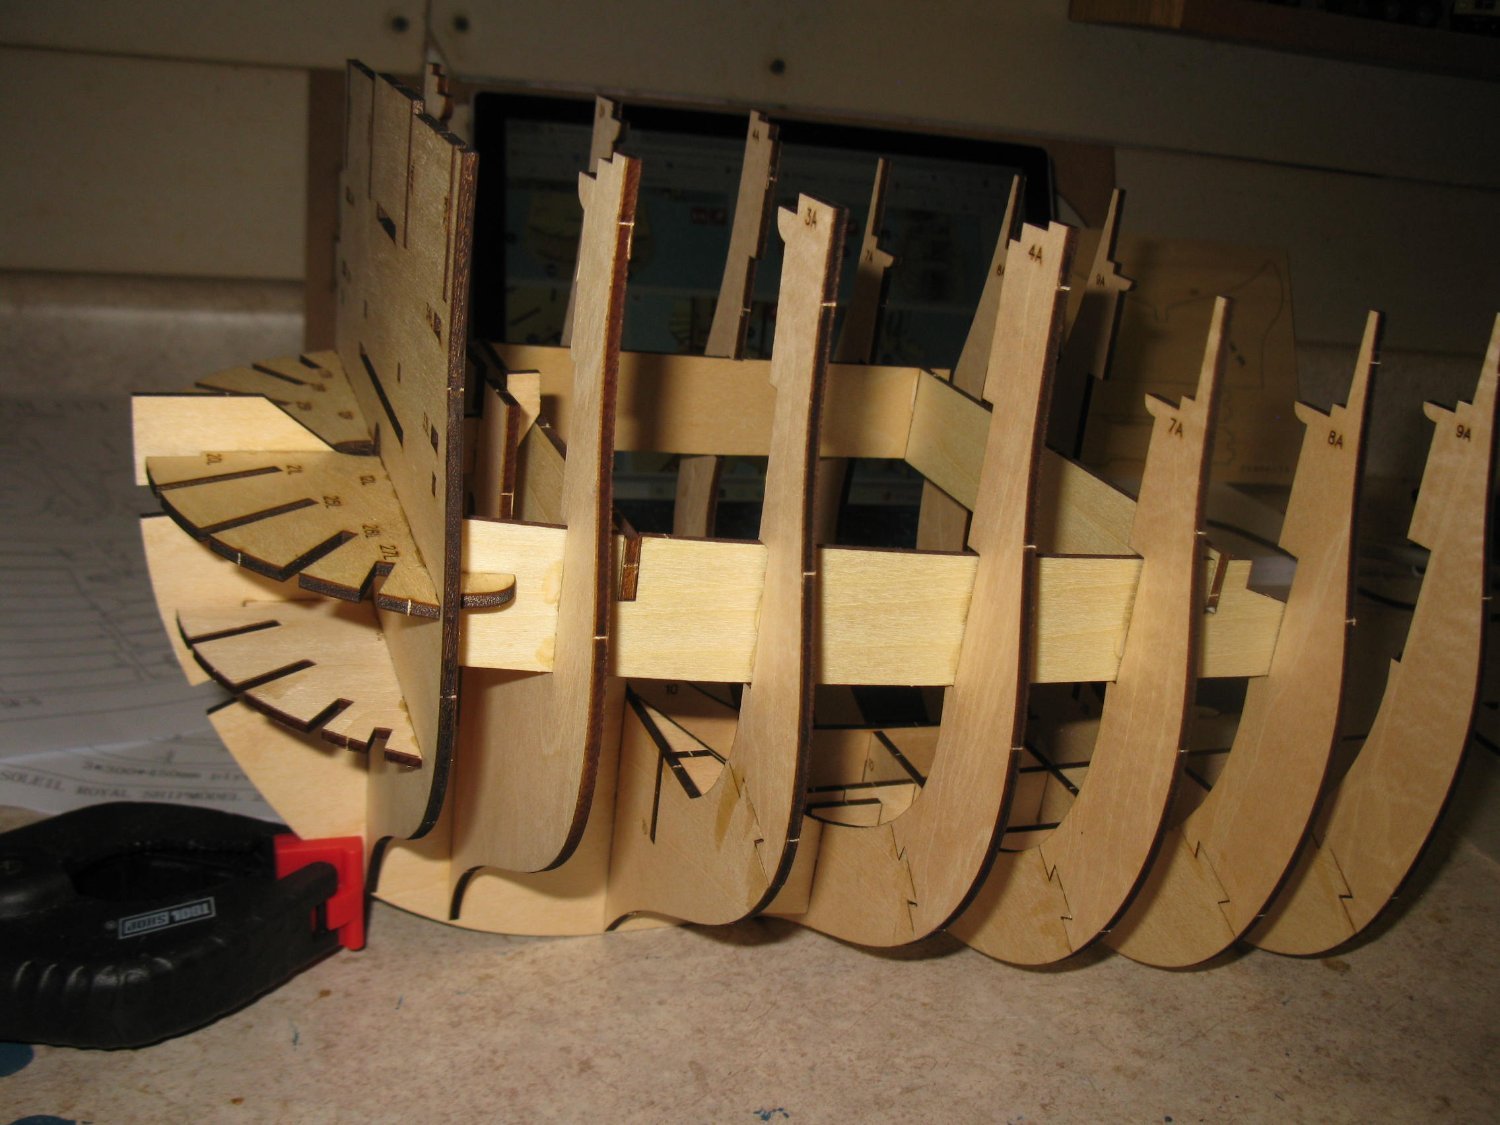
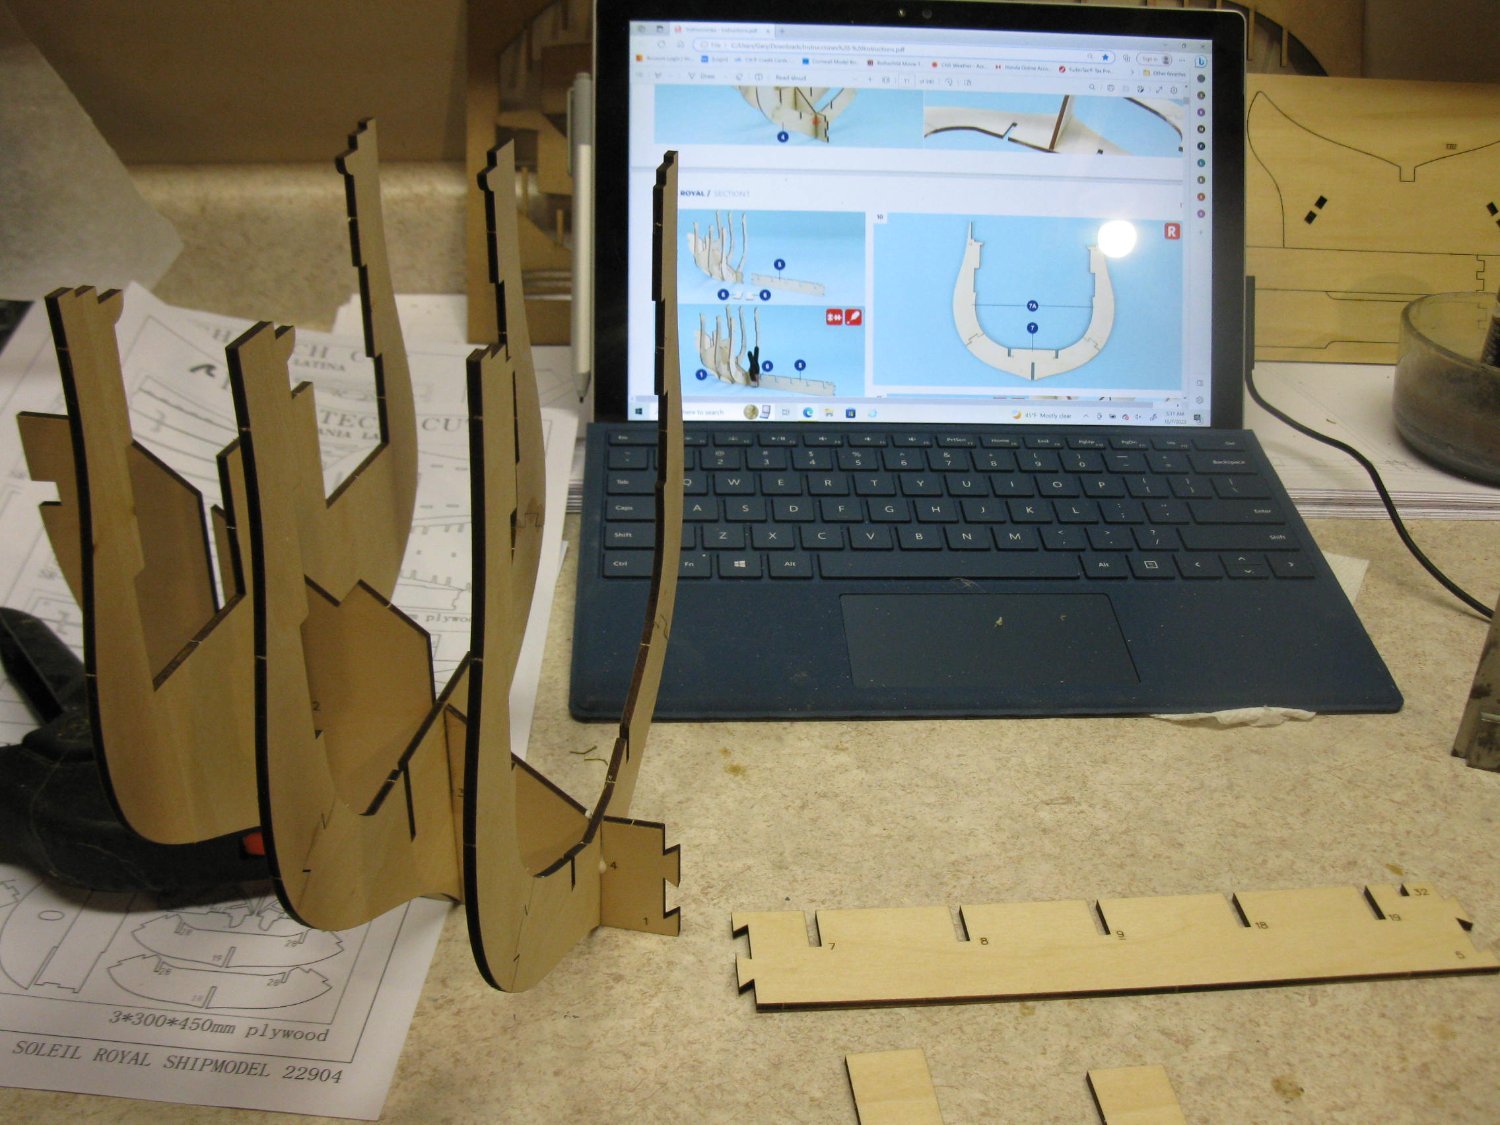
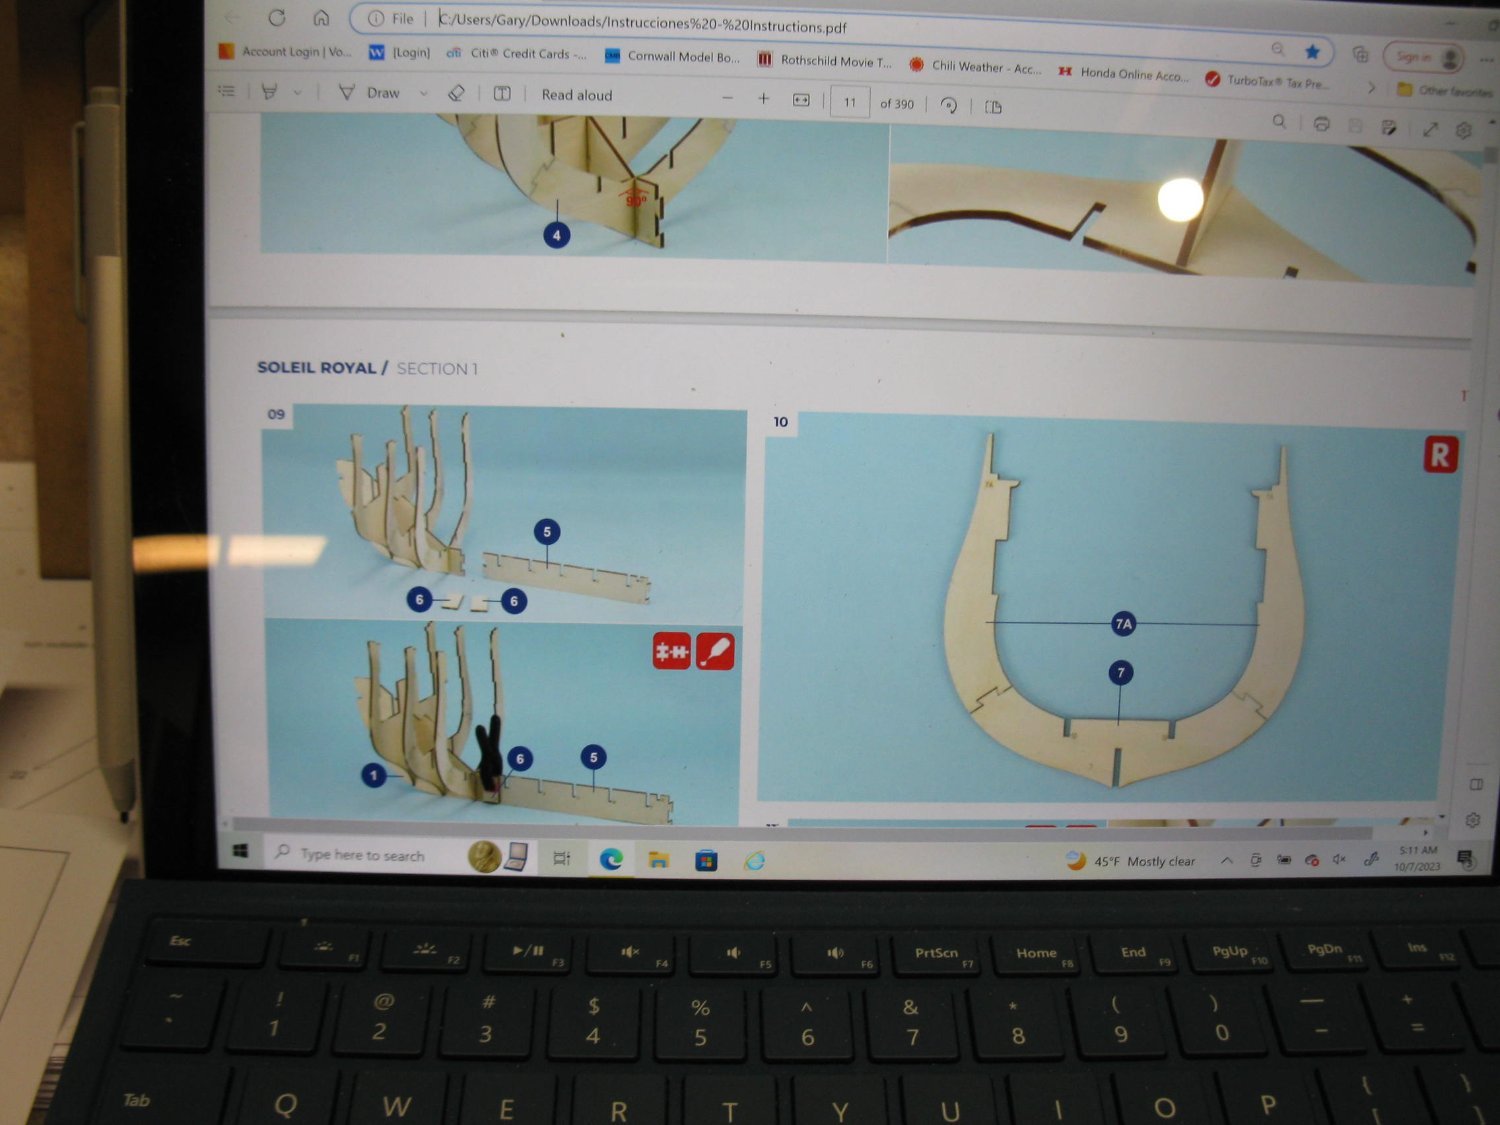
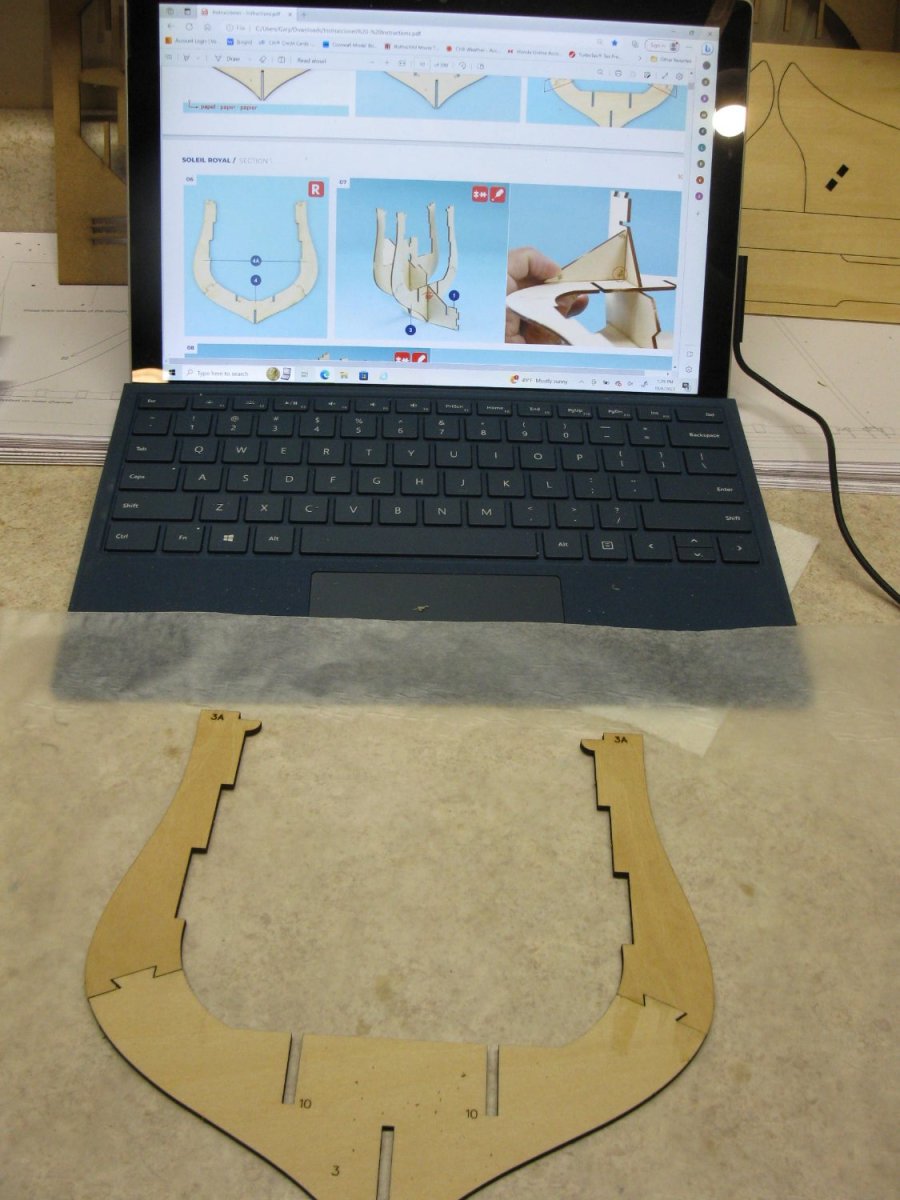
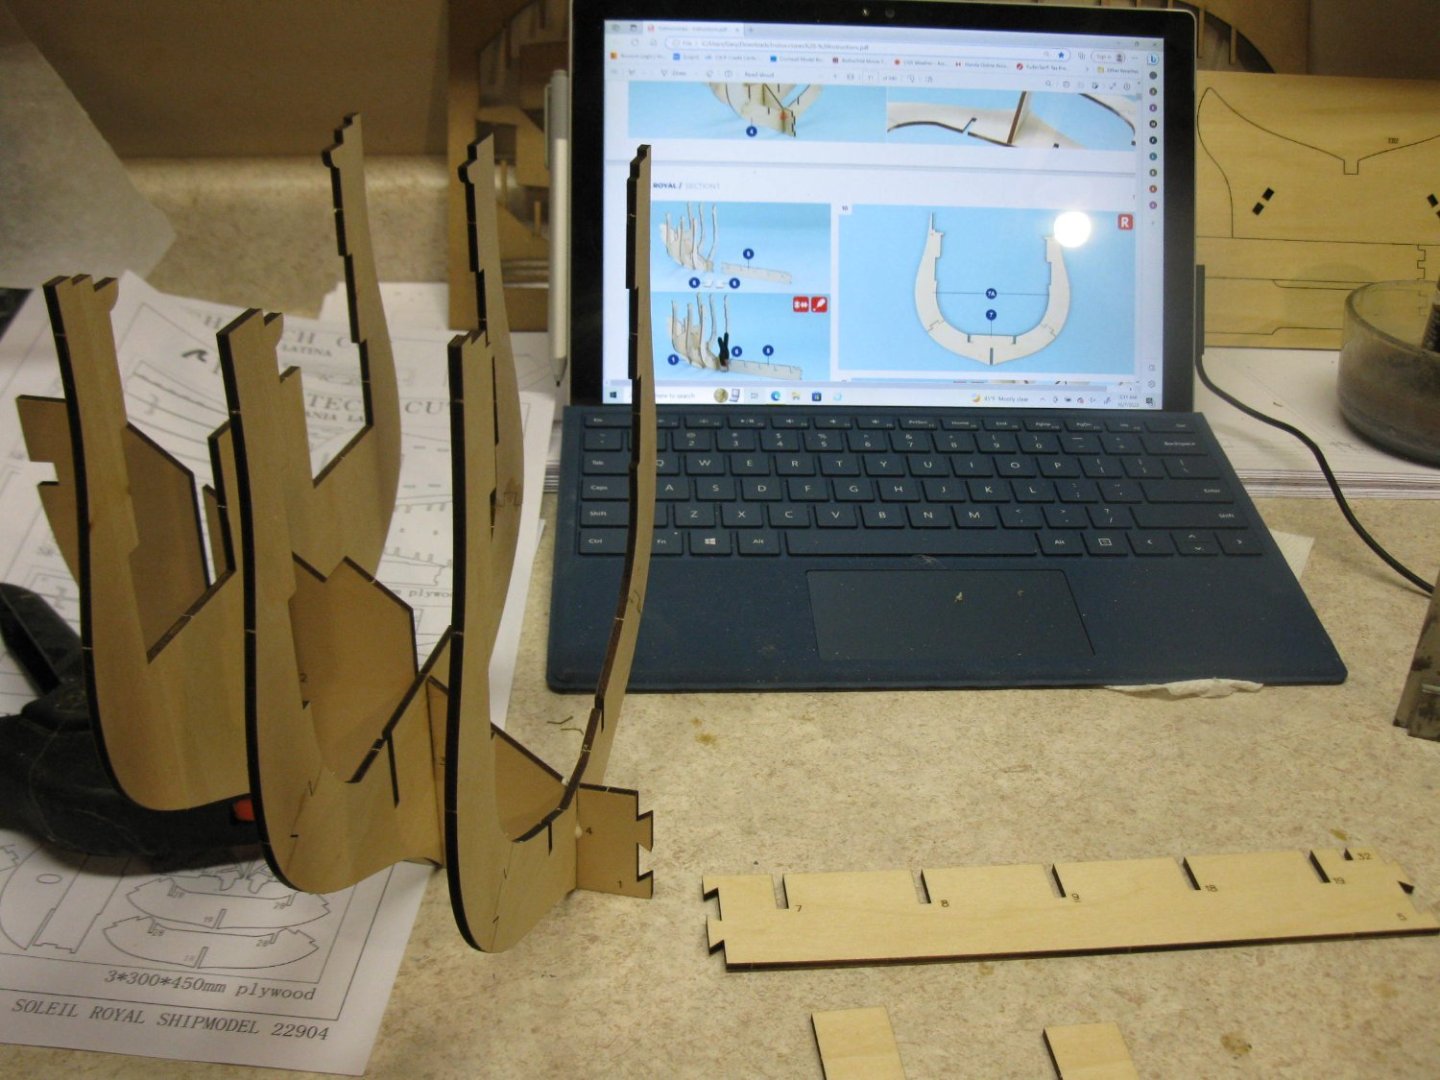
The first few bulkheads have been aligned and glued in place. As you can see the keel is made of several pieces so it will be extremely important to align everything correctly. I don't used a "building board" as there would be no way to fit the keel as the bulkheads fit flush with the bottom of the keel. Also pictured is a typical screenshot of the instructions.
-
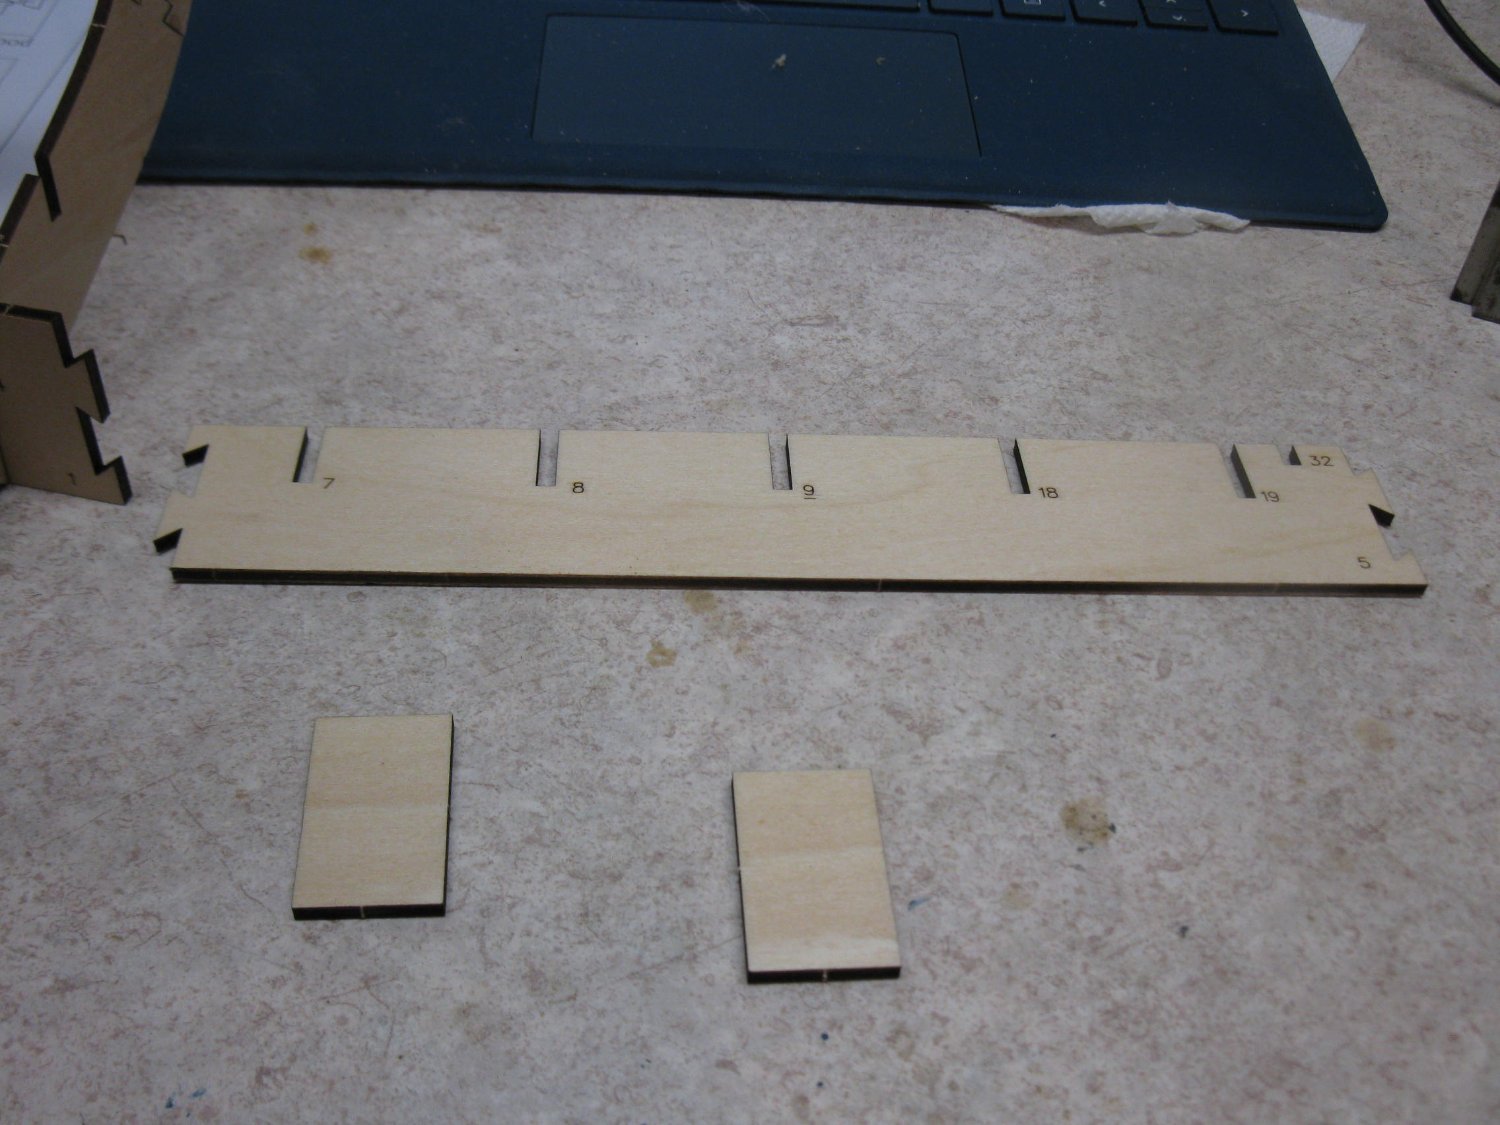
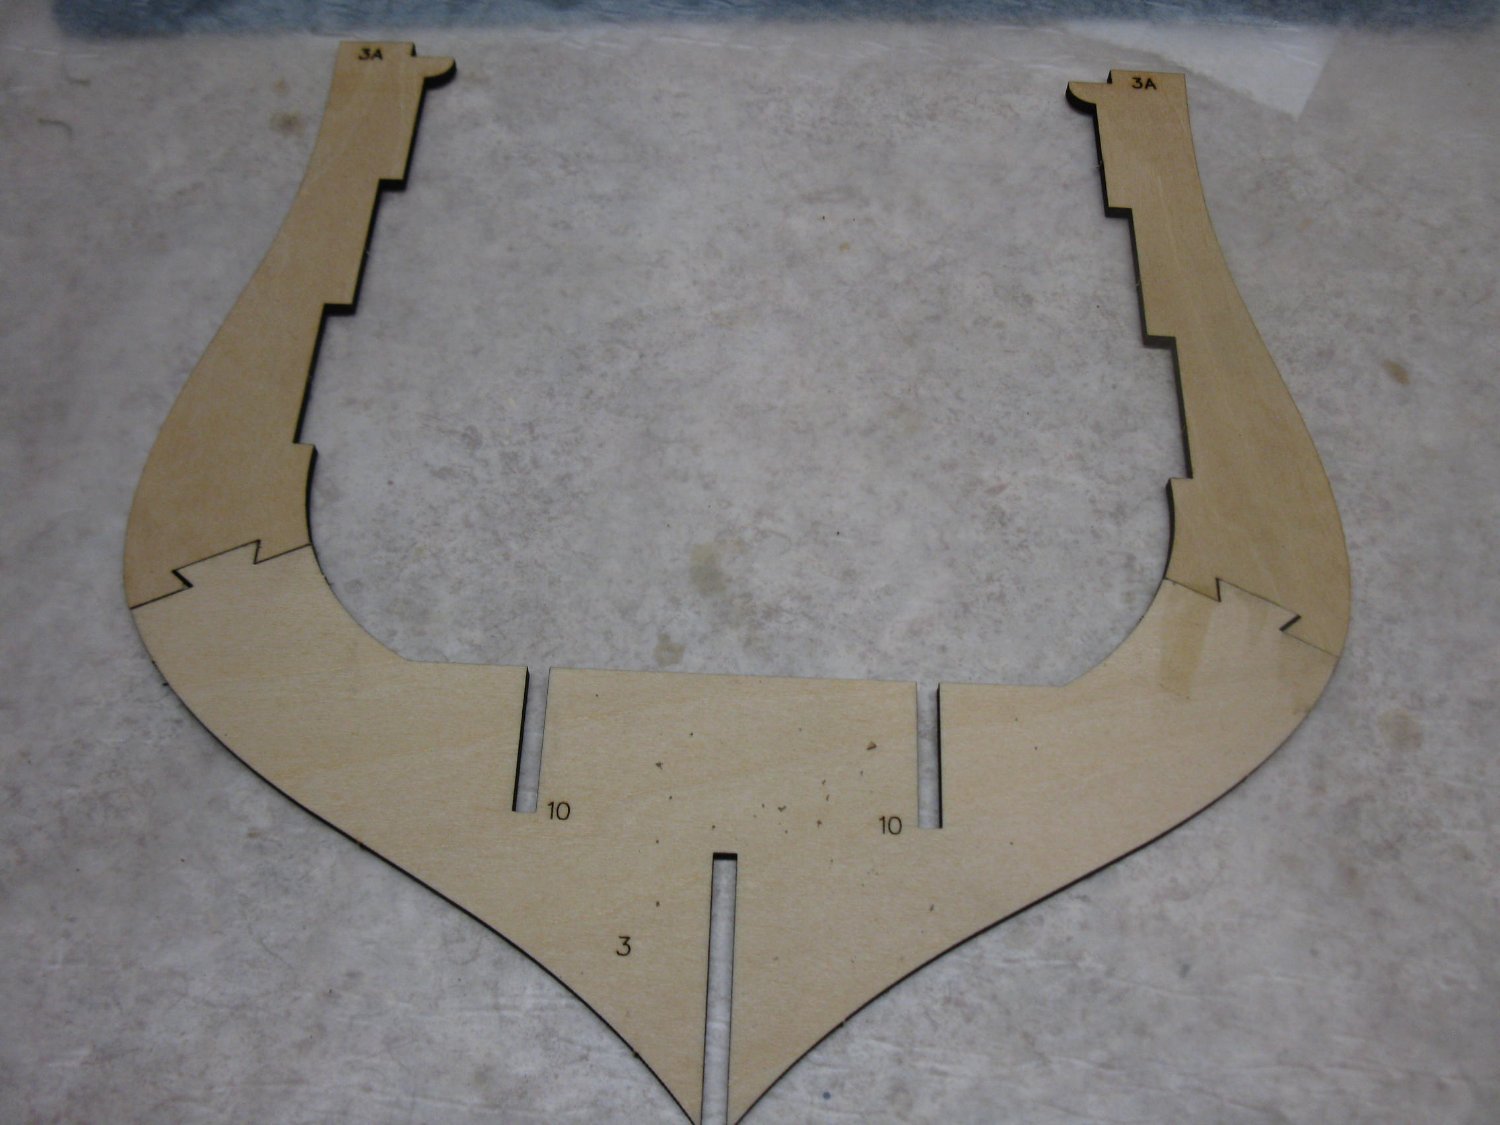
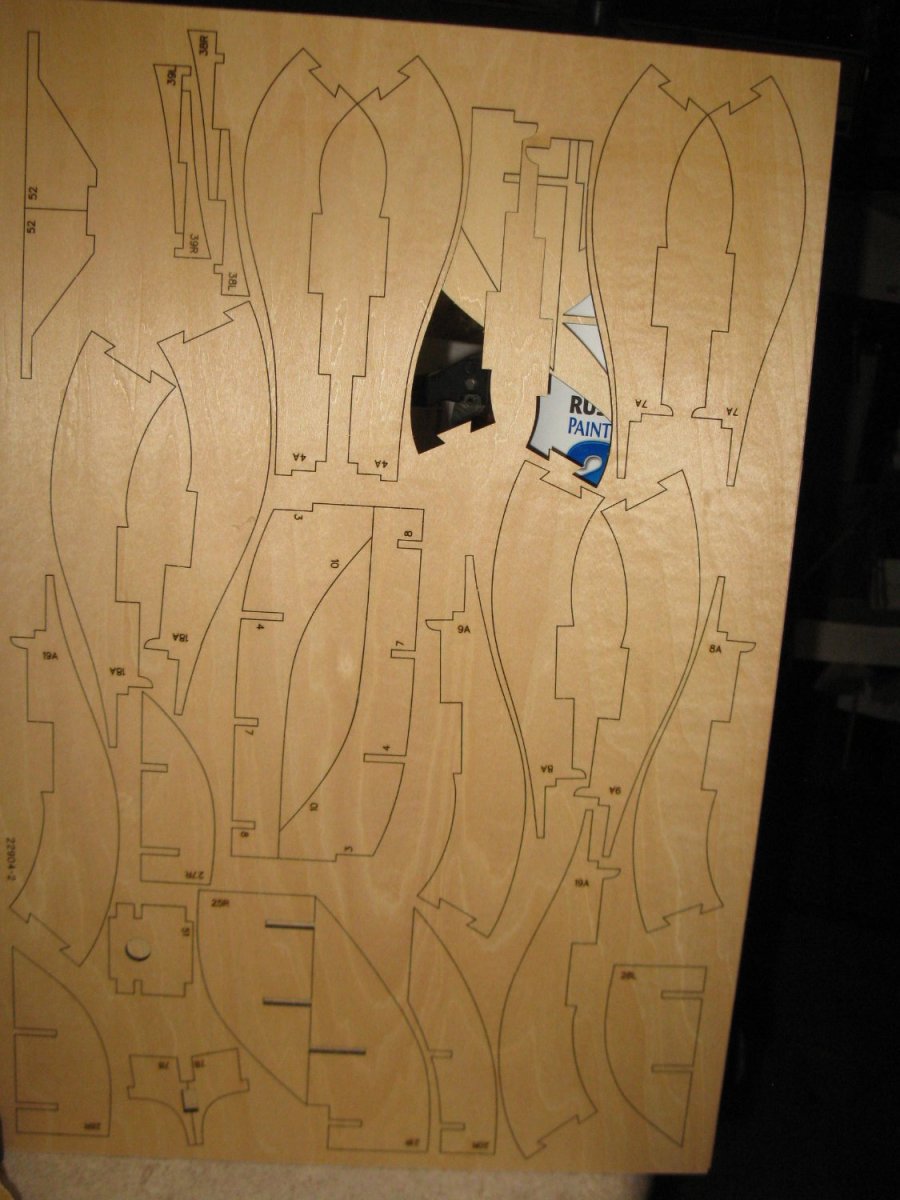
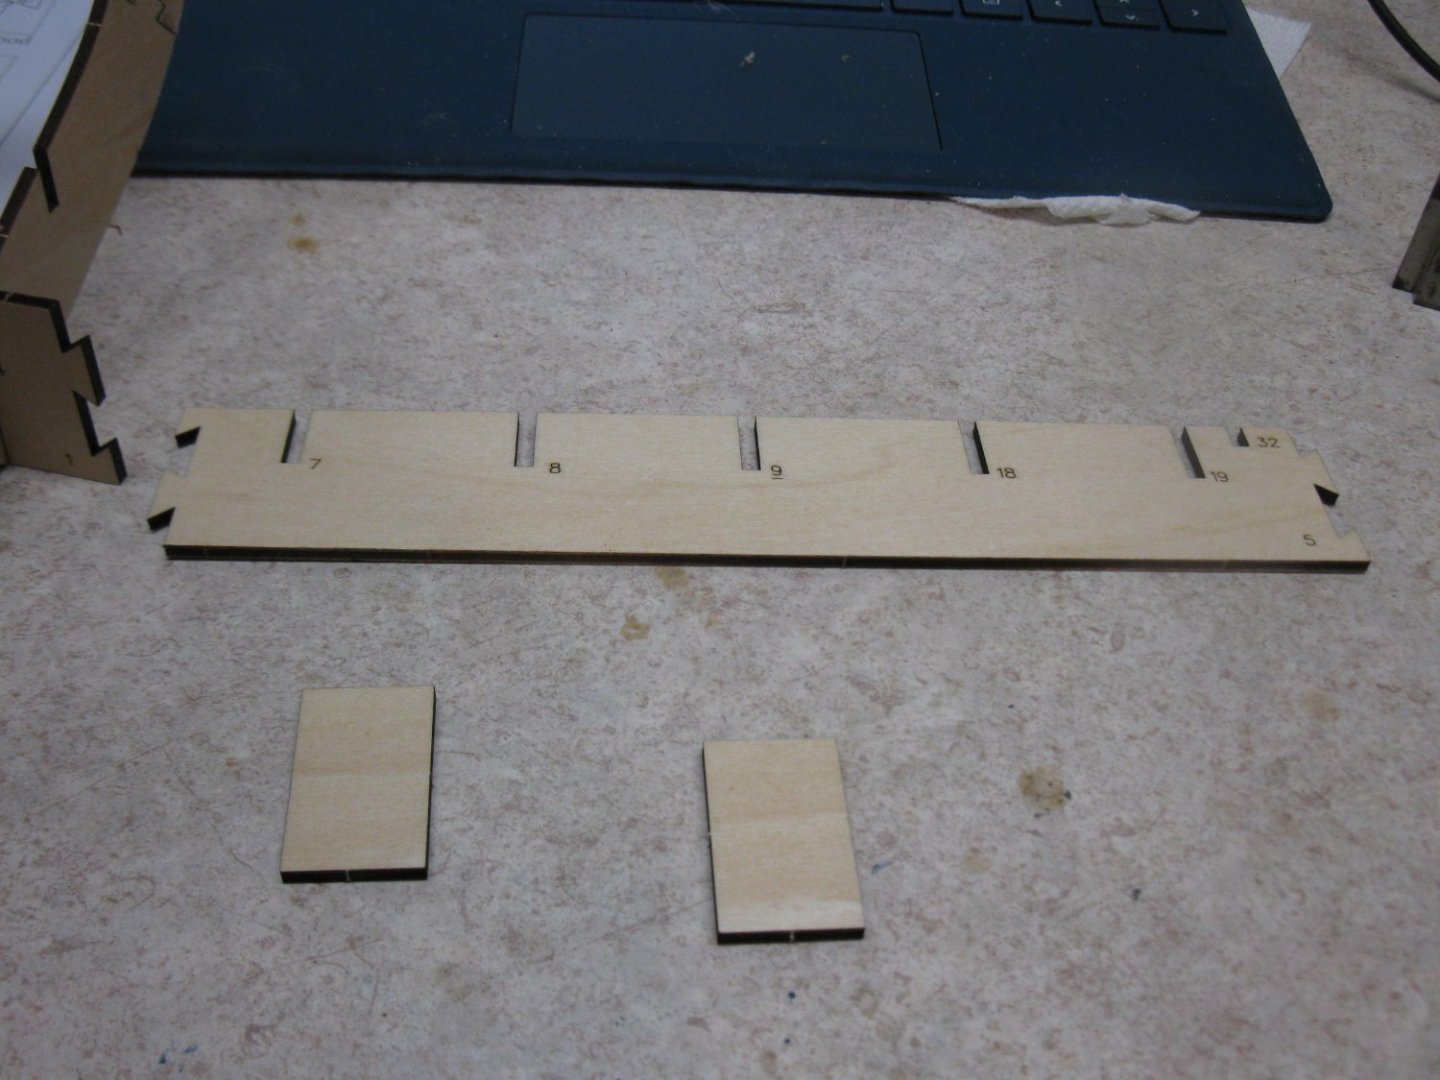
I have begun to work on this kit. As per my usual process, I have two kits going. My primary kit will be the Vanguard Grecian, but while waiting for glues to set, and for a change of pace, I will work on this kit. I will build this kit pretty much out of the box with few modifications. Although I will opt to use other manufacturer's deadeyes, single blocks and belaying pins. In this kit the deadeyes and single blocks are laser cut on the plywood sheets and would require drilling holes and painting. The belaying pins would have to be fashioned from wood stock. As to contents of the kit I would refer people to the YouTube videos which give a very good description of what is inside the kit. As you can see from the pictures I have placed by SurfacePro computer at my work station as all the instructions are on a disc. The only paper in the kit are the porthole templates and a guide to the plywood sheets showing where each piece is. As I have reviewed all the instructions I believe there might be some issues with not having physical instructions or plans but we will see. The bulkheads, for the most part, consist of 3 pieces. So far the fit of these pieces has been excellent. Quality of the wood has also been excellent.


-
Note that for the ship's boat I used the Vanguard 3D printed boat. I have found those boat "kits" supplied for their models to be just way beyond my skills.
-
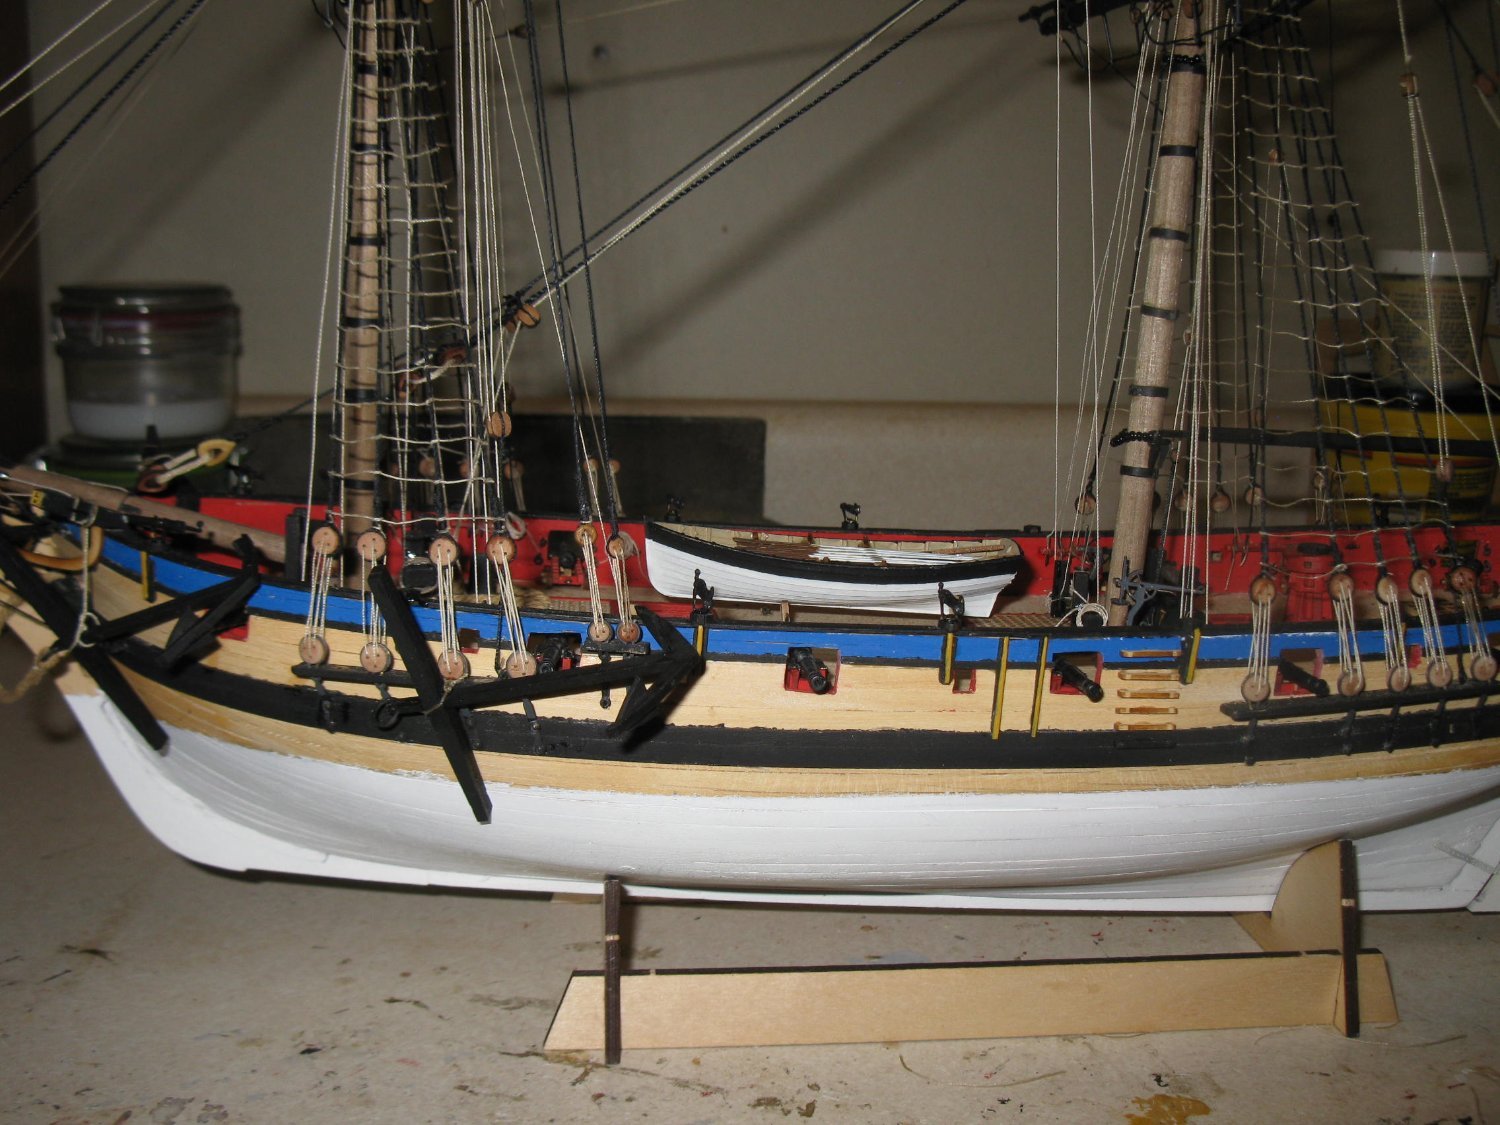
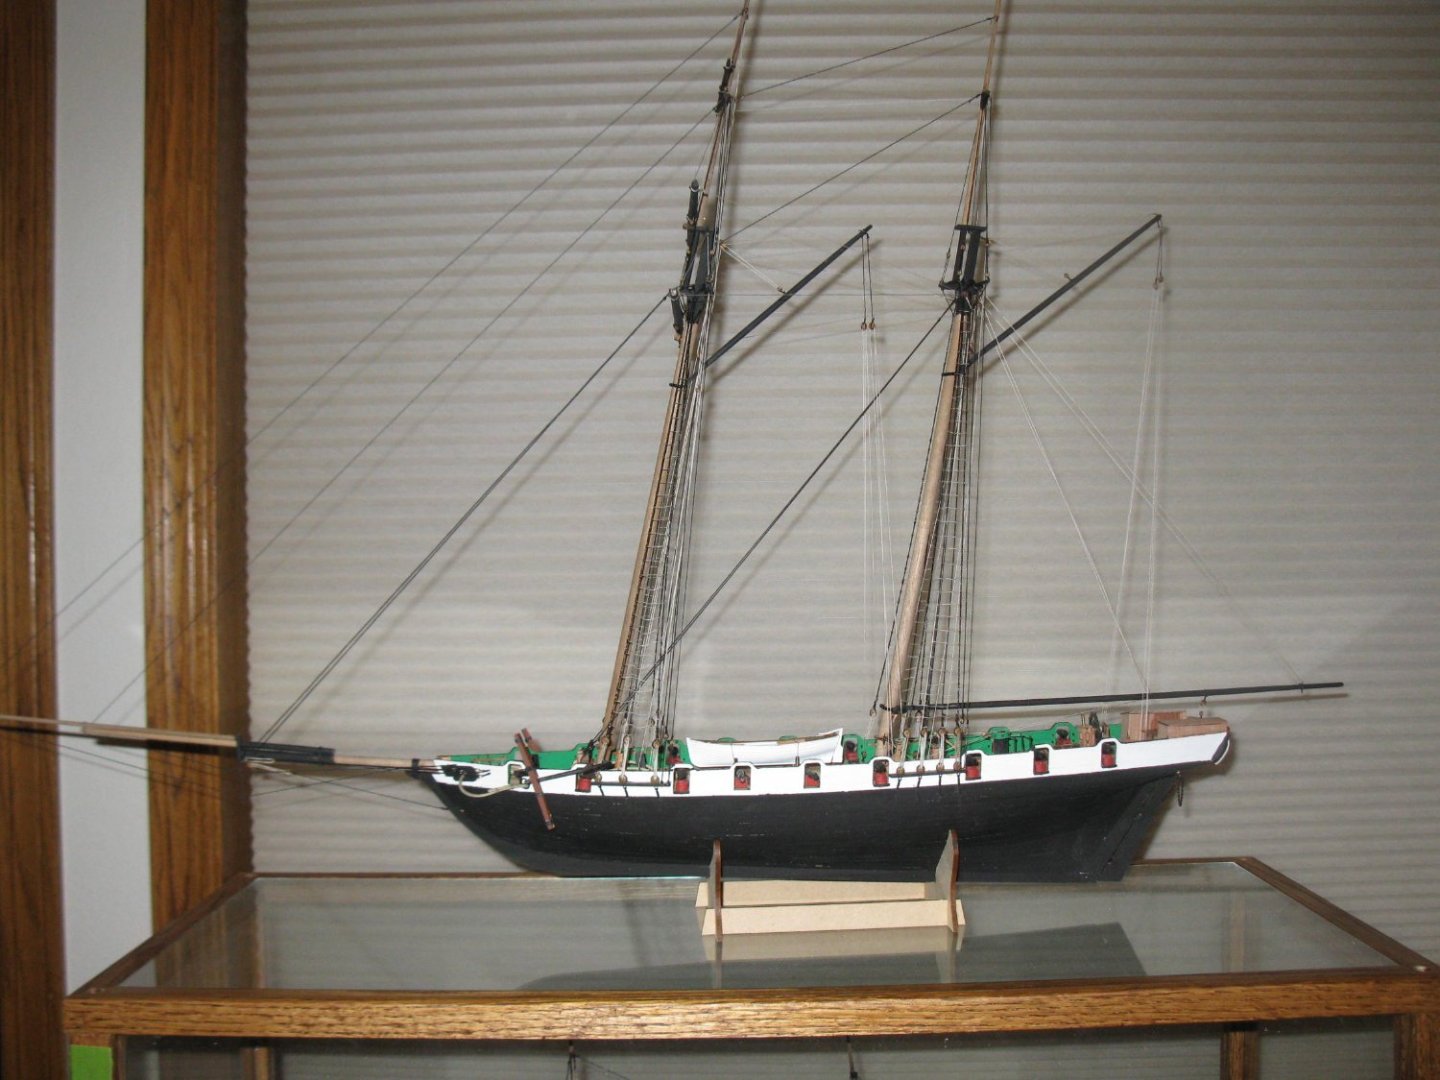
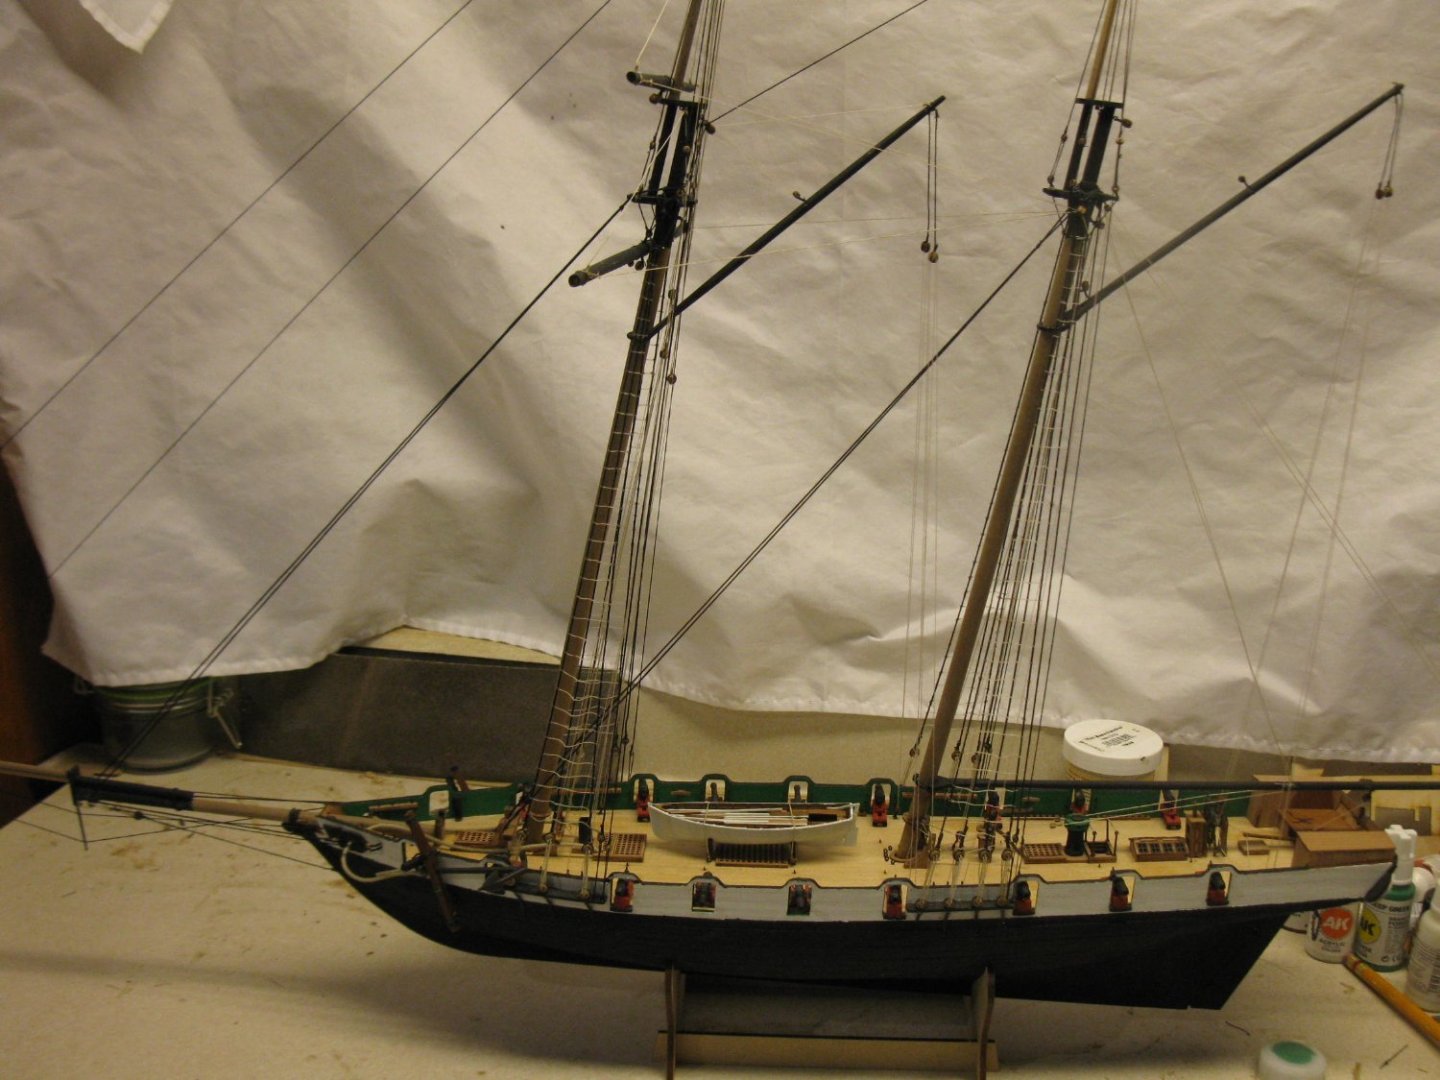
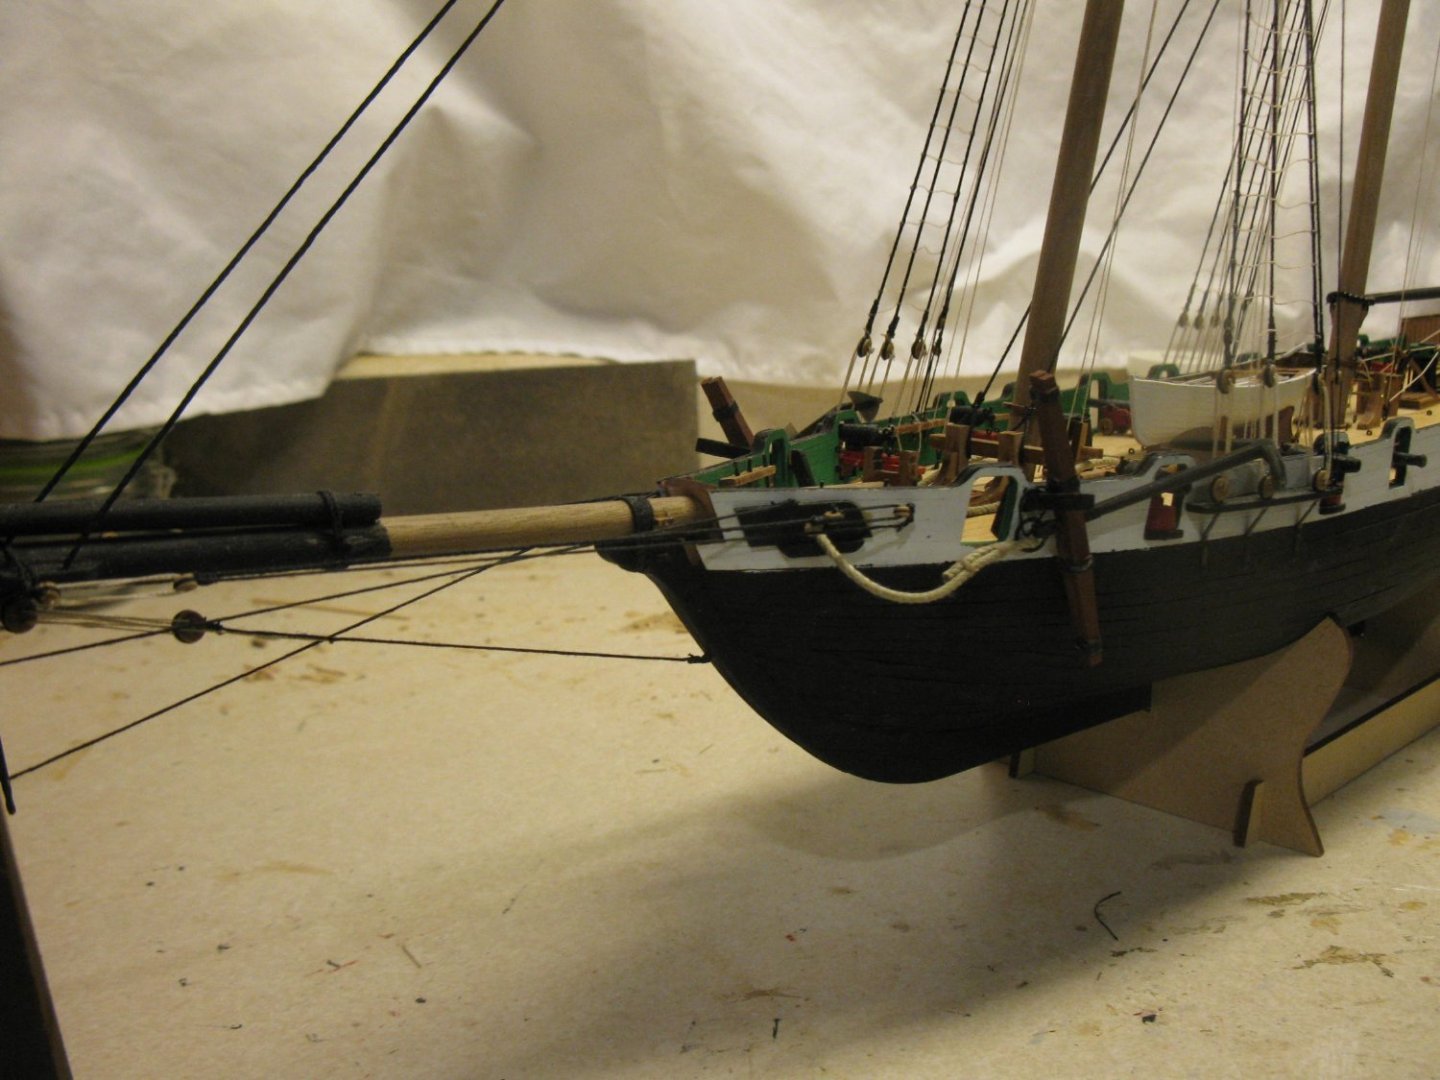
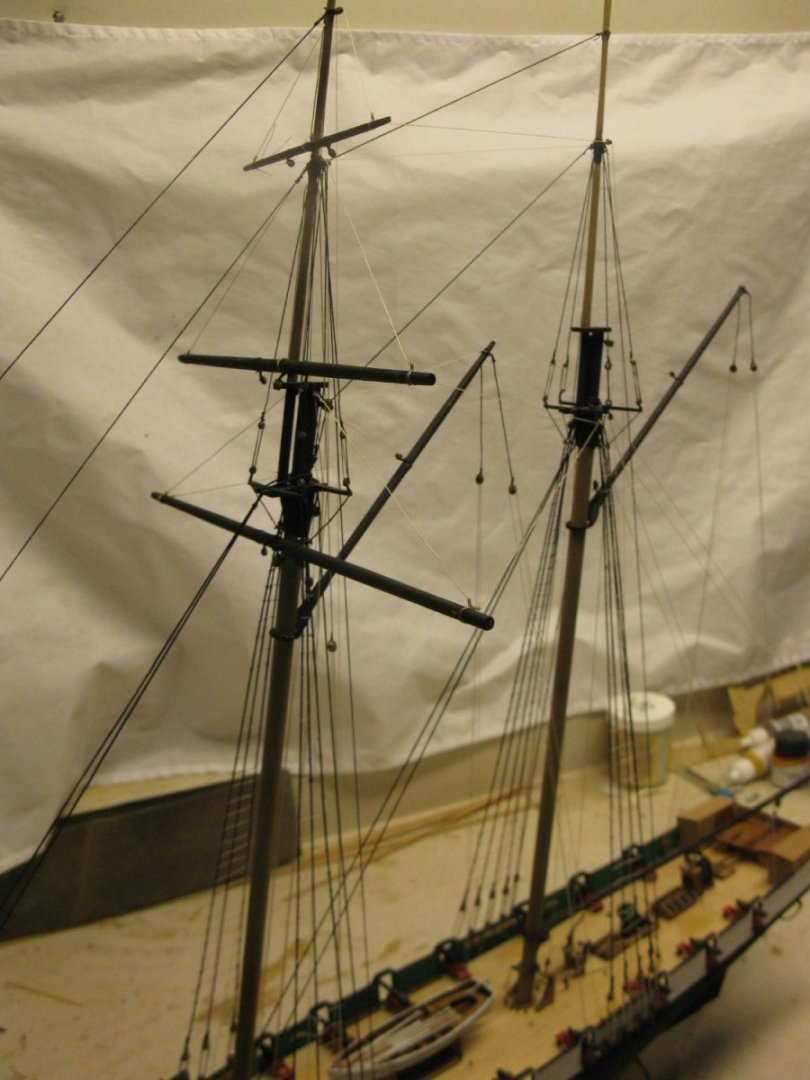
Have just finished the HMS Flirt. Given my age and manual dexterity I was not able to completely rig the model but only the experts are going to notice that. I was very pleased with the ease of building this Vanguard model (as I have been with all the Vanguard models). I have a case coming from Model Expo. (sorry about the pictures but I really don't have a good place to take nice pictures). Now it is on to the Grecian by Vanguard. After that I hope to start the Artesania Latina Soleil Royal.

- 3 replies
-
- 4
-
-
- Flirt
- Vanguard Models
- (and 1 more)
-
Soleil Royal 1/72 - Artesania Latina Ref.22904
myxyzptlyk2003 replied to modeller_masa's topic in Wood ship model kits
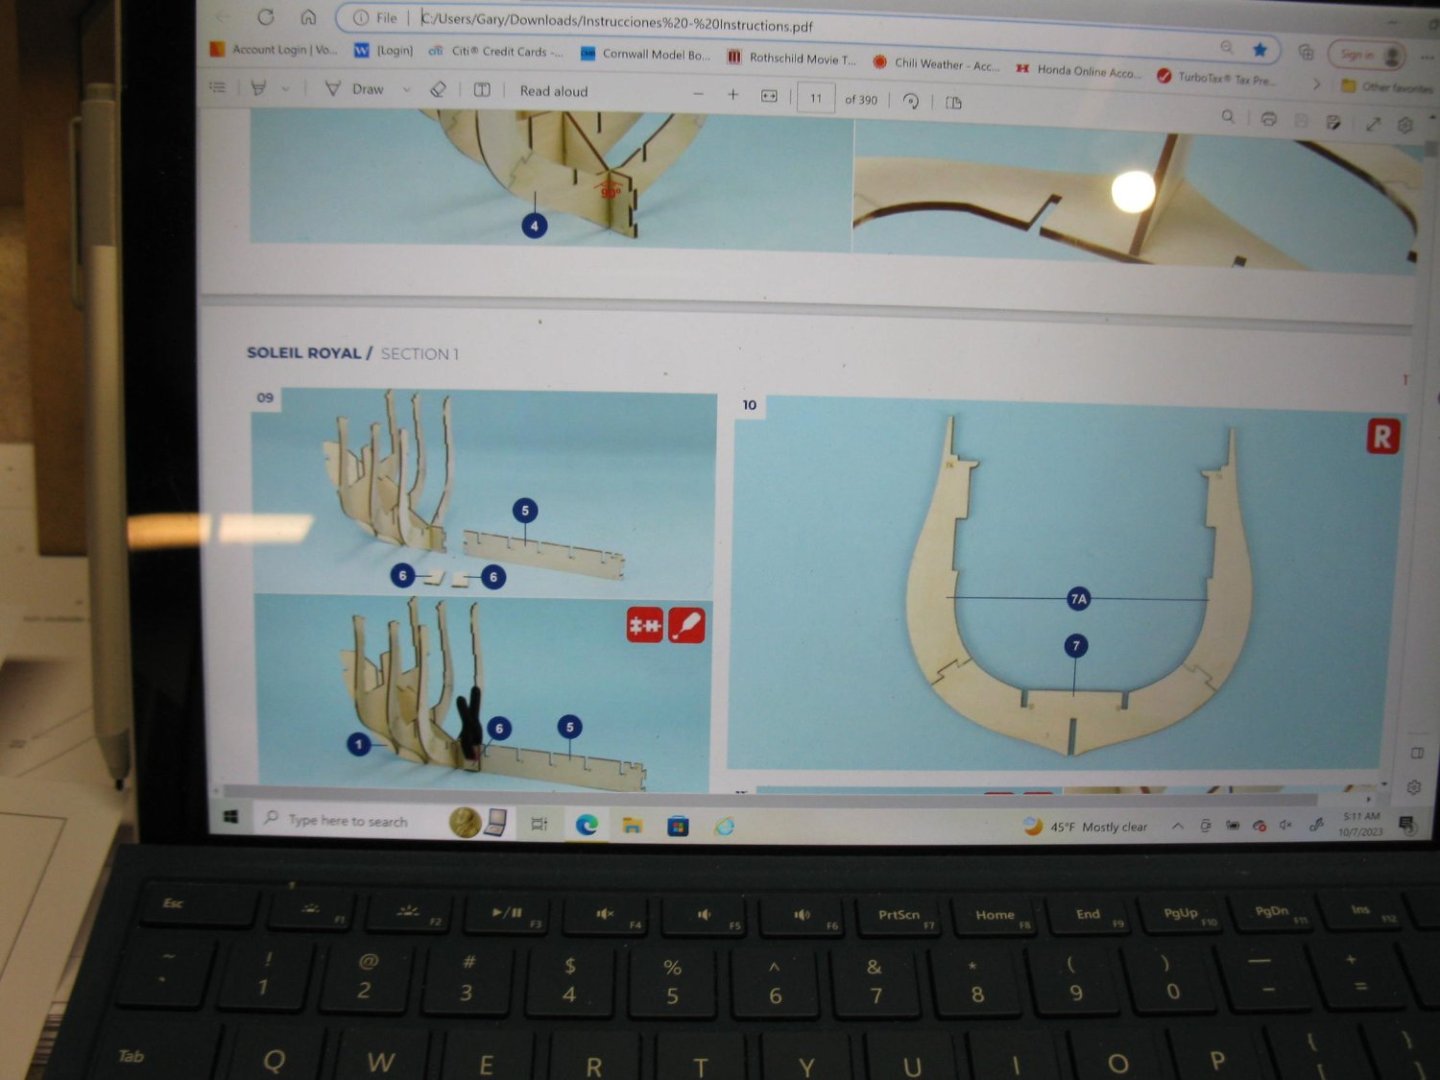
Hi all, Just picked up this kit and hope to get to it in about 6 months after my present builds are done. The Youtube pieces about the kit are very good at giving you a feel of what you are getting. I am not so much a stickler for making things historically accurate. I just want a kit that will result in a pleasing model that 99% of those who see it will marvel and not be aware of the "historical inaccuracies" My biggest issue at this point is having the instructions on a DVD. My computers will not open up any files on the DVD. (Note, I did download them from the website and those work nicely). But this is going to necessitate my adding a computer to my work room so that I can access the instructions easily. Once I start the kit I will probably do a build log.