HOLIDAY DONATION DRIVE - SUPPORT MSW - DO YOUR PART TO KEEP THIS GREAT FORUM GOING!
×


popeye2sea
-
Posts
1,935 -
Joined
-
Last visited
Content Type
Profiles
Forums
Gallery
Events
Everything posted by popeye2sea
-
S.S. Minnow?
-
 EG If you are from the New England area you should consider coming to visit us at the Charlestown Navy Yard. We are there on the last Saturday of every month to do demonstrations, cannon and musket firing. We are recruiting You do not have to be military or ex-military. BTW, recruiters in 1812 paid a bounty of 10 dollars for signing up for 6 years. It was payable to your family to compensate for their lost income. The marine received 6 dollars per month, 3 meals a day and one uniform per year.
 -
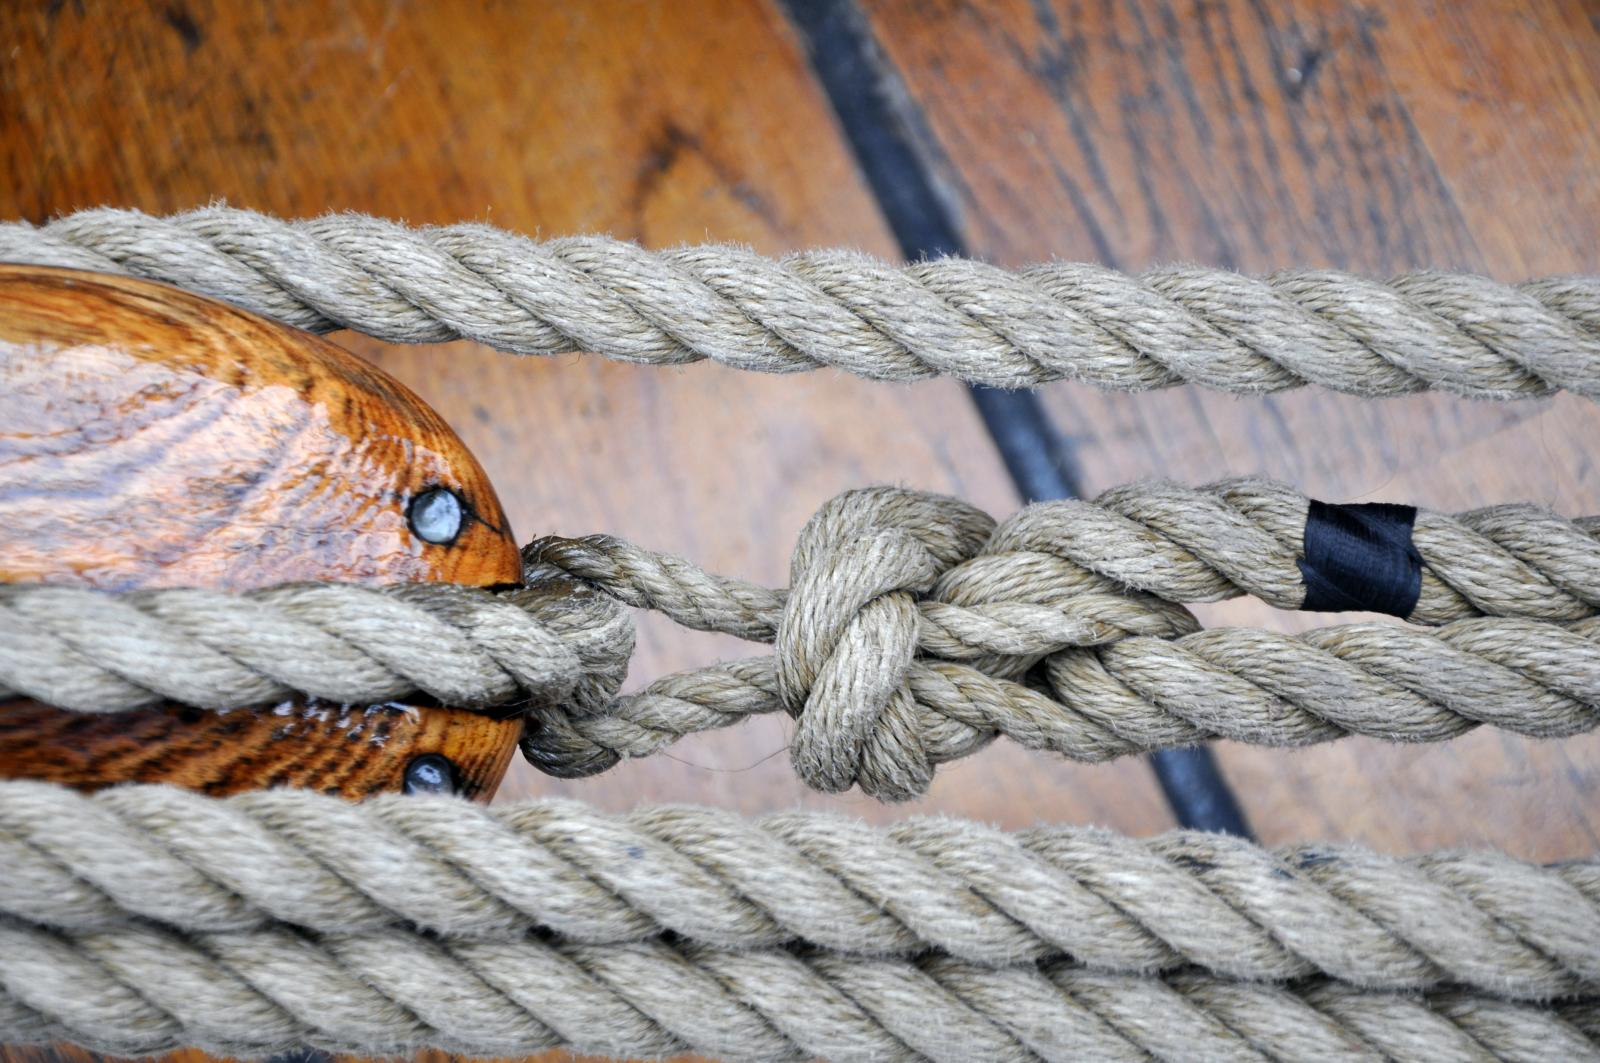
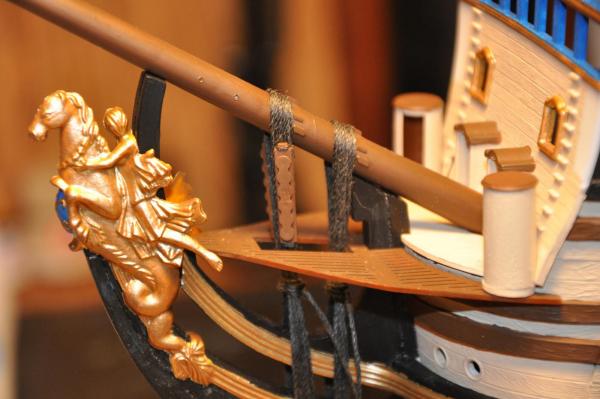
It is a gun train tackle on the USS Constitution.
-
Here is a picture of a becketed block. The becket is the smaller diameter loop that is made fast on the strop of the block. In construction it is kind of like a large grommet. The standing part of the tackle fall is then hitched through the becket and seized to itself.

-
Thanks Mark. Just doing some advance research for my Soleil Royal
-
In looking through the various build logs I have noted that the typical cannon is rigged with the breeching rope around the cascabel of the cannon and a single in-haul tackle. On some models of French ships I see breeching ropes passing through the carriage and two in-haul tackles. Is the latter method typical of French ships?
-
I believe that the only reason the bell is on the main mast now is because that is the location of the gangway and consequently where the Navy posts the Officer of the Deck. If you notice in the photo there is a small wood cabinet attached below the bell. This houses the emergency alarms and the microphone for the public address system. The watchstander is responsible for sounding the bell for time keeping and for side honors. P.S. A new bell was just installed aboard last August during the bicentennial celebration of the battle with HMS Guerriere . In my opinion the new bell sounds awful.
-
Isn't that object a windlass rather then a capstan?
-
Do we have a list of kits organized per scale?
popeye2sea replied to yvesvidal's topic in Wood ship model kits
Oops, my bad. After re-reading, that makes much more sense. -
Do we have a list of kits organized per scale?
popeye2sea replied to yvesvidal's topic in Wood ship model kits
You could do a search by tag. For instance a search for the tag 1:64 returns 3 build logs. Of course it only works if the build logs have tags in their titles. -
Why would you assume I was referring to DDG 98? I was referring to DD 931. I served aboard her sister ship USS Blandy DD 943 back in the early 80's. The photo has to be one of the class that did not receive the hurricane bow modification. It also looks like it is in a river so I thought it might be USS Barry being towed for a museum up the Potomac.
-
Or USS Barry
-
USS Forest Sherman
-
I am contemplating how to fix the area around the head of my Heller Soleil Royal. The knee of the head is in two sections (upper and lower) separated by a gap with two cheeks I am thinking of filling in the gap between the cheeks with a piece that I will carve with decorations to match some of the other decoration of the ship. I also want to add in the timbers that are missing that would have held up the head rails and head deck. I am looking for some advise here. As you can see in the photo below if I construct the timbers by having them arise from the top of the upper cheek they will have a nearly horizontal lead out to the lowest head rail. The other options would be to have them arise from the top of the lower cheek or to have them run from the upper cheek to the middle head rail. Any thoughts? Henry

-
I am contemplating how to fix the area around the head of the ship. The knee of the head is in two sections (upper and lower) separated by a gap with two cheeks I am thinking of filling in the gap between the cheeks with a piece that I will carve with decorations to match some of the other decoration of the ship. I also want to add in the timbers that are missing that would have held up the head rails and head deck. I am looking for some advise here. As you can see in the photo below if I construct the timbers by having them arise from the top of the upper cheek they will have a nearly horizontal lead out to the lowest head rail. The other options would be to have them arise from the top of the lower cheek or to have them run from the upper cheek to the middle head rail. Any thoughts? Henry
- 196 replies
-
- 6
-

-
- plastic
- soleil royal
- (and 2 more)
-
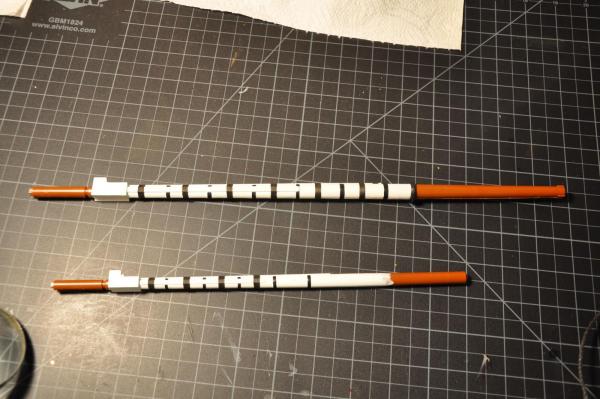
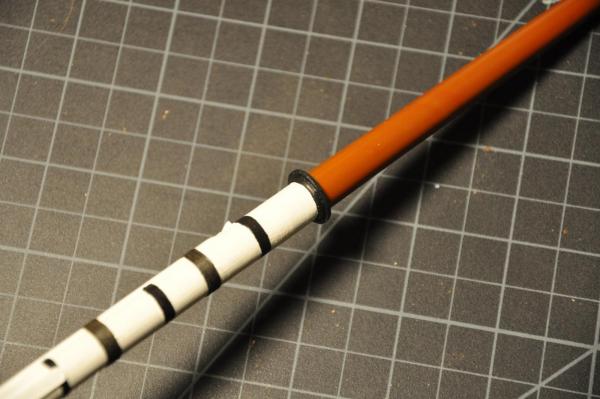
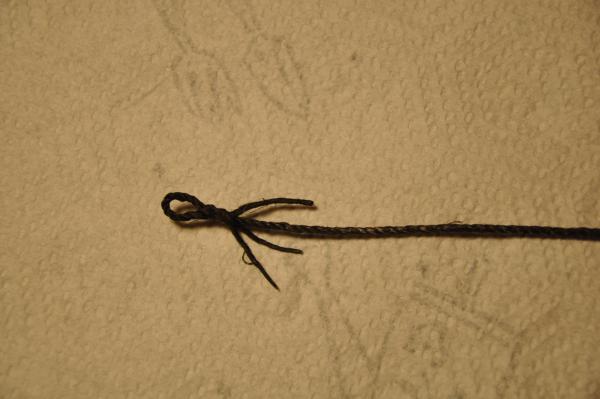
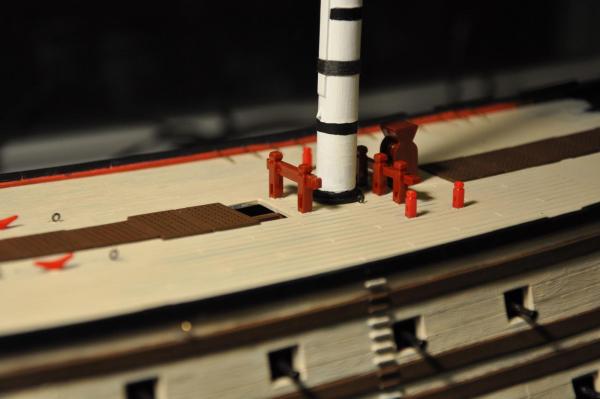
First parts of the rigging. I decided to rig the ship using as a reference The Rigging of Ships in the Days of the Spritsail Topmast by R.C. Anderson. I chose sizes of rigging thread accordingly. Here you see the wooldings, the gammoning and the Main Stay. The thread is poly/cotton dyed black using Minwax Ebony stain. It took a few attempts to get an eye splice turned in; not so bad on the 0.08 inch diameter Main stay but a real bear on the 0.03 inch Gammoning. I don't think I will be making real eye splices on anything smaller than that. I'm sure simulated ones will look just fine for the smaller rope. The wooldings are 0.02 inch and seized around the masts using the method of taking the required number of turns round the mast and over a bight in the line and heaving the ends taught underneath by pulling the bight down beneath the turns. Not all the wooldings have been put on the Fore Mast yet. You can also see the mast coat I added to the main mast. I will put one on the Fore and Mizzen once the deck level can be determined. I still need to raise a mouse on the Main Stay and seize a treble block in on the lower end. Enjoy, Henry
- 196 replies
-
- 8
-
-
- plastic
- soleil royal
- (and 2 more)
-
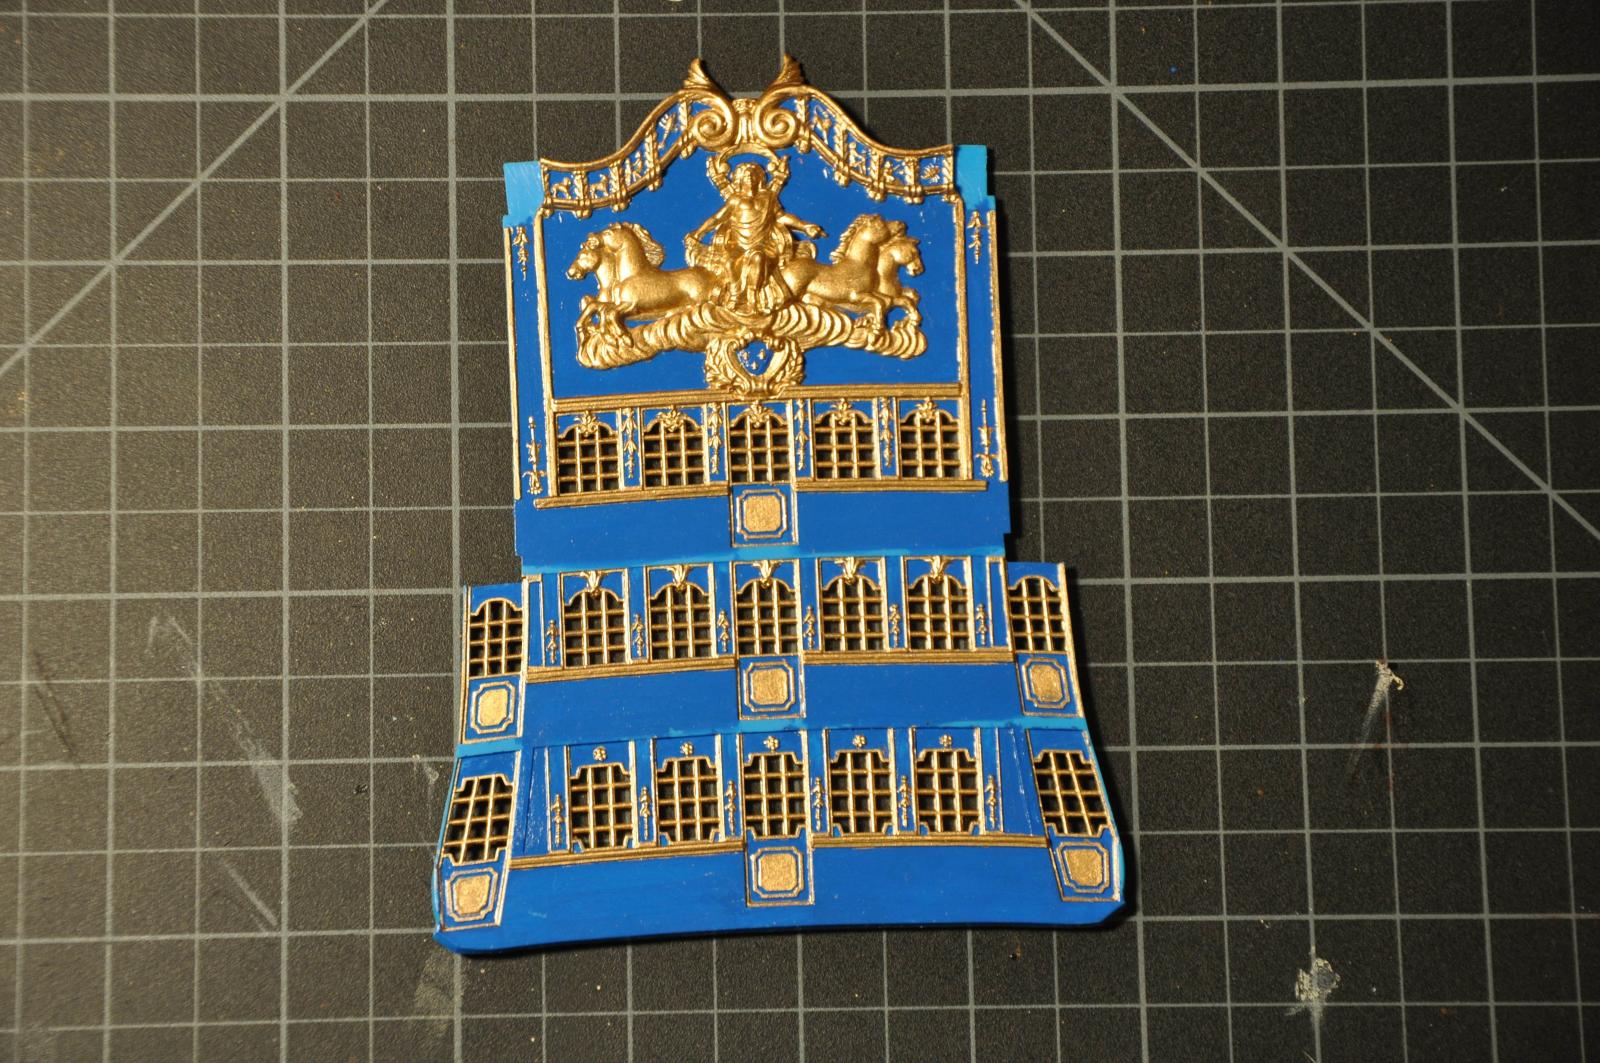
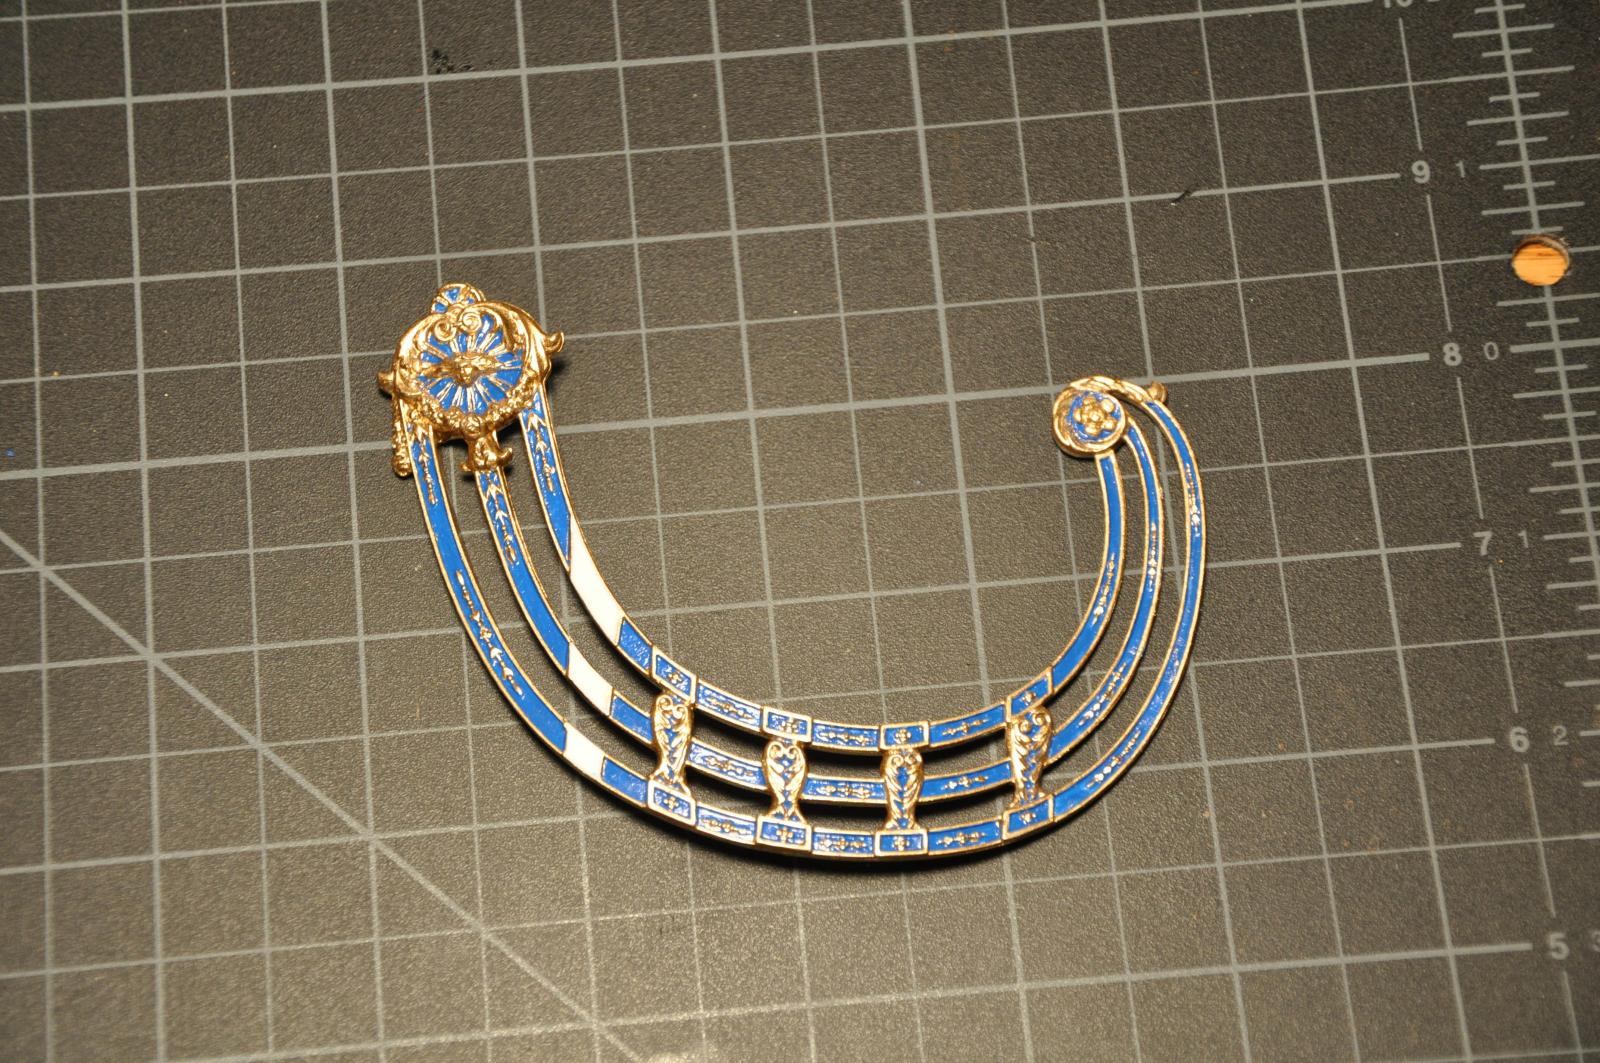
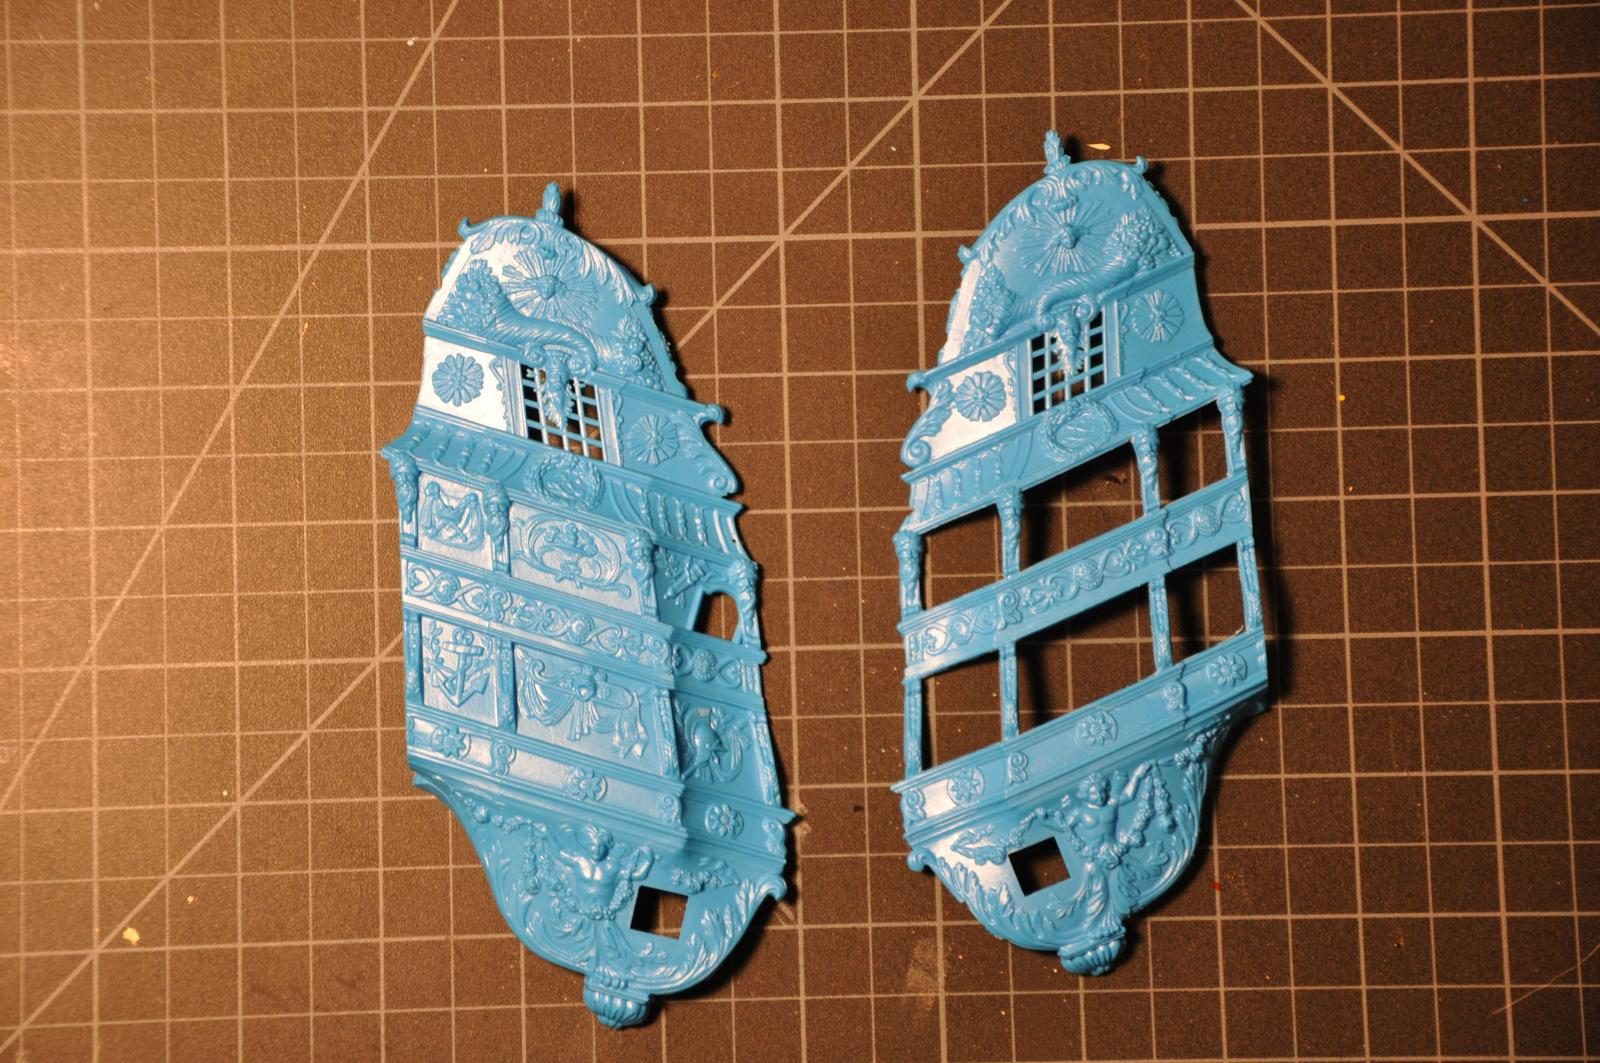
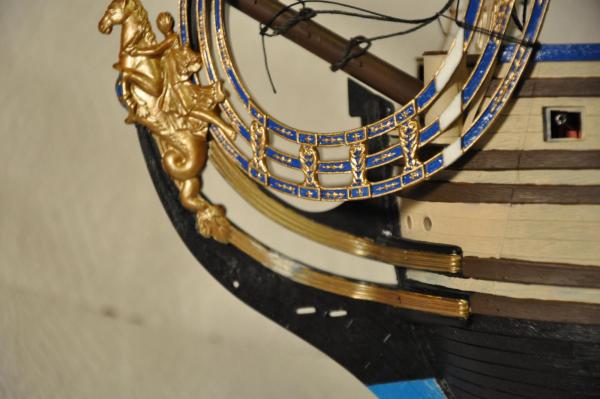
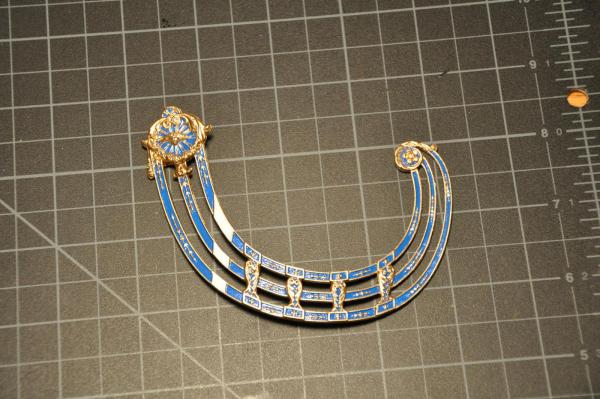
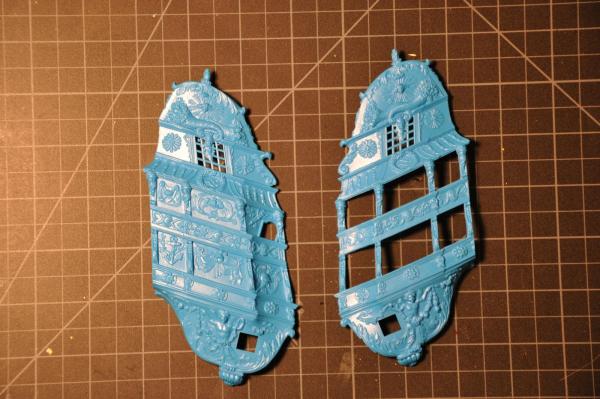
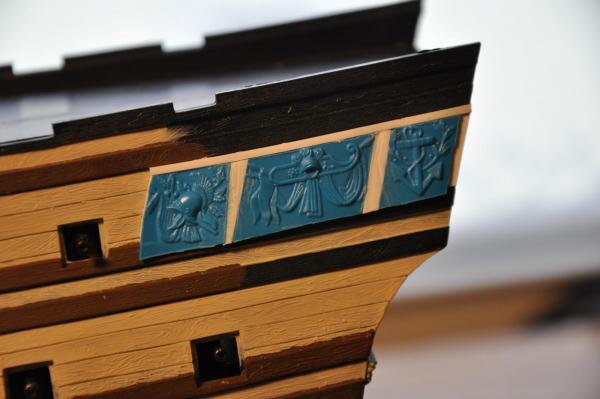
Here is the start on some of the brightwork. The unpainted area of the after bulwarks is where the quarter gallery will go. I opened the quarter galleries. Still working on fitting floors for the quarter galleries out of sheet styrene. The ornamentation that was cut out of the openings will be mounted on the bulwarks.
- 196 replies
-
- 8
-
-
- plastic
- soleil royal
- (and 2 more)
-
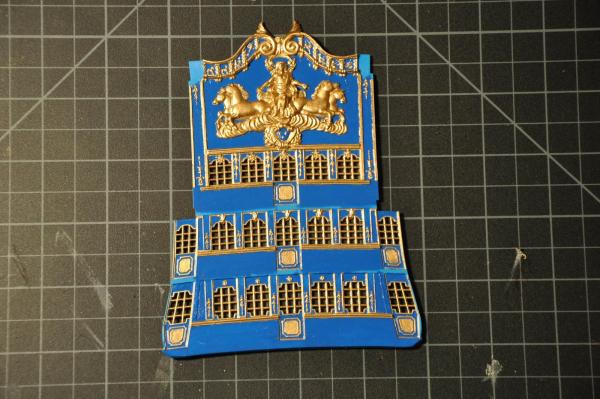
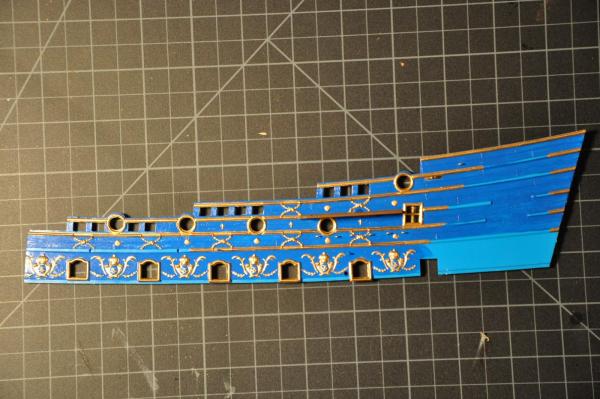
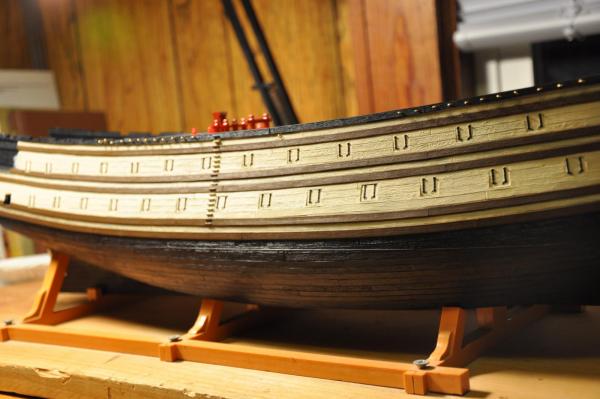
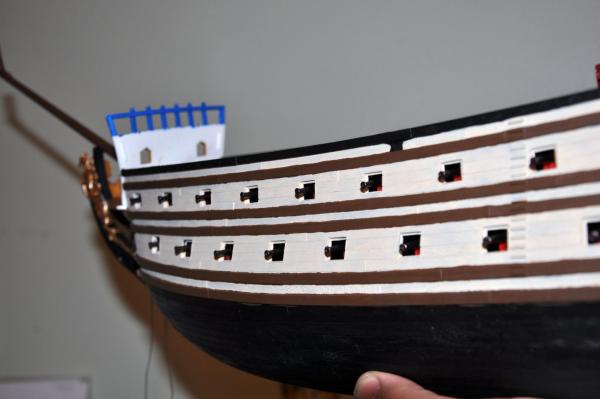
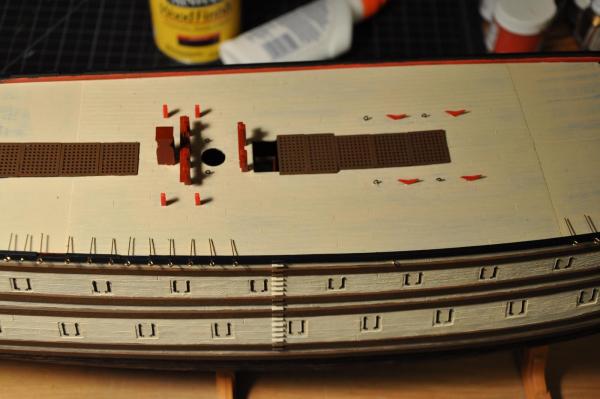
I've finally found the time to reconstruct my build log after the great crash of 2013 Some of the pictures are lost so the log does not start at the beginning. This is my first serious foray into ship modeling. I say first serious attempt because 30+ years ago I built a Revell USS Constitution. But I was still in High School and not very concerned with accuracy or craftsmanship. I just wanted to finish the kit and display it. This kit of Soleil Royal was given to me as a gift way back then and I am just getting around to continuing building it. I am very much looking forward to a build that I can be proud of. Even though I know that my skills are not up to par with some of you I am trying to incorporate as much research and accuracy as I can muster in a plastic kit. Here are some of the pictures of what has been done. I'll try to summarize what I've done so far to catch everyone up. I decided to display the ship with all gunports closed to starboard and opened on the port side. Eventually I plan on setting just the fighting sails (topsails, mizzen, and perhaps the spritsail topsail) with the courses clewed up. I did not like the look of the eyebolts supplied with the kit so I replaced them with brass. The holes for them were drilled and the eyebolts pass completely through the upper wale. The ends will be trimmed and bent over to lay alongside the inner bulkhead. The ends will lay inside the gap between the hull and the upper bulwarks, in an area that needs to be filled anyway. Doing the eyebolts this way should also prevent any pullout cause by strain from rigging. I am leaving the lower hull unpainted for now until a proper cradle/base is finished. I don't want to ruin the paint job. It will be painted a dirty white to represent white stuff. I also drilled a hole through the bottom of the keel, roughly amidships, and fastened a threaded nut inside the hull over it prior to fitting the decks. This will take a bolt from the base to fasten the model down to it. I don't know how other people secure their models to the display bases so I just improvised with what I had on hand. The head grating in the bow has been noted by others to be a problem with this kit. It has no supporting structure to it and seems to be just floating there. I do not know how this would have looked with respect to ornamentations and design, so I have not decided what to do with this area yet. [/size] The decks went in easily. The kit has a series of stanchions along the centerline of the first battery deck to support the 2nd battery deck. There are none for between the 2nd and 3rd battery. As a result there is a lot of flex in the 3rd battery deck. Since there will be quite a bit of rigging fastened here that will produce an upward strain on the deck I added some extra support. I trimmed some sprue to length to make stanchions for the centerline to hold the deck up. And I added a boot (coat?) to the base of the mainmast to hold the deck down. The mast coat was fashioned from sheet styrene and quarter round molding. The masts are dry fit at this point. I do not think I will cement them to the step. I'm going to let the rigging hold them in. I added some shims beneath the hatch gratings to raise the gratings above the deck level to give the appearance of a coaming. All of the eyebolts for the decks were replaced with brass. .

- 196 replies
-
- 7
-
-
- plastic
- soleil royal
- (and 2 more)
-
If it helps, you can think of it this way. The rope must pass around a sheave (a grooved disk turning on a pin in the center of the block. No matter which block you look at for the tackle the throat (the hole that the rope passes through) will be towards the outer end of the tackle. In other words nearest the point the block is seized to, whether that is a spar, a stay, or a hook. Henry
-
Pat, that is exactly how we used them in the US Navy. Henry
-
You could try a false splice. Pass the rope (strop) around the block, tuck it twice through the strands of the long end, pull the tucked end tight around the block, secure with a drop of glue and trim the excess. It will give the appearance of an eye splice. I agree with modeler12, your wooldings seem a bit too thick. They would have been about 3 inch rope. At 1:48 scale that works out to about 0.02 inch diameter. Thinner line will also help alleviate the lump under the woolding from pulling the ends under. Henry
-
Another useful work for 17th century ships is 'The Rigging of Ships in the Days of the Spritsail Topmast' - RC Anderson Regards, Henry
-
Thanks, that answers the question.
-
Perhaps I need to clarify. The eye splice that is stopped by the mouse...is it also served over like the stay?
-
I understand that the stays are usually wormed, parceled, and served from a point below the mouse up to the eye turned in to its end. My question is this....is the eye itself served over or is it left uncovered?