
Marcus.K.
-
Posts
322 -
Joined
-
Last visited
Reputation Activity
-

 Marcus.K. reacted to The Bitter End in USS Constitution by The Bitter End - Model Shipways - 1:76
Hello everyone.
After the very demoralising step of pulling off all my spar deck gun ports I managed to make some progress again.
I dont know how exactly I managed to mess up the gun port placement so badly. Something about measuring once and cutting twice...I can't quite recall...anyway. I won't bore you too much with the repeat process but here are the basics...
I couldnt find any drawings of step 1 in the plans:
Then repeating the process that was completed in a previous post but this time measuring very carefully and this resulted in a far longer waist than before and slightly more elegant lines.
On to the gun deck gun port framing...
TBE
-
 Marcus.K. got a reaction from Geoff Matson in USS Constitution by The Bitter End - Model Shipways - 1:76
I was trying to find photos of Antczak´s beautiful model. I remember we talked about it in our PN conversation - and I remember to have seen more photos than the ones I find right now. He did an exceptionel beautiful model, with a lot of very good, very interesting and very likely features for the 1797 concept (as I believe it was - of course nobody knows for sure 🙂 ).. But we noticed then and here again some strange features, which most likely were not existing or differing. The port with the red shutters is the "16th port" below the cat head - which must be that "bridle port" I referred to in one of my previous post. THIS - most likely - wasn´t existing until about 1812, when Bainbridge prepared the third 1812-15 war cruise - just after Hull came back from his defeat of HMS Guerriere. I am searching my documents - but I don´t find the sources for this statement! 😕 Someone able to help me on that?
The bridle Port - when added - was smaller than the gun ports following (as there is another later mentioning in one of the logs that the bridle ports were cut to the size of the gun ports - indicating that they were smaller before) - and I don´t find THAT sources either! Need to read my Martin´s "Close up"!! It for sure would have had a lid to be closed - as it was the one most affected by wafes from the bow. .. but I do not believe that it was existing in the early years.
If you compare with the Doughty Plan, you will find the very first gun port is just one before the fore mast channels. Below the cat head: no opening in the layout - and most likely not in the later existing ship.
I compared the 1819 Ware Deck Plan with the 1849 Pook Gun Deck Plan and you can see the Bridle Port (red marked) in 1819 - being a tiny little bit smaller than the Gun Port #1 (green marked) - while in 1849 the bridle port hat the same size.
You also can imagine that any gun there would not have room to run inwards - considering the bow sprit sitting in the center of the deck. No "chase gun" on gun deck level.
Here you have a bigger shot of the 1819 Ware Plan - and you see the position and size of the Bridle Port ..
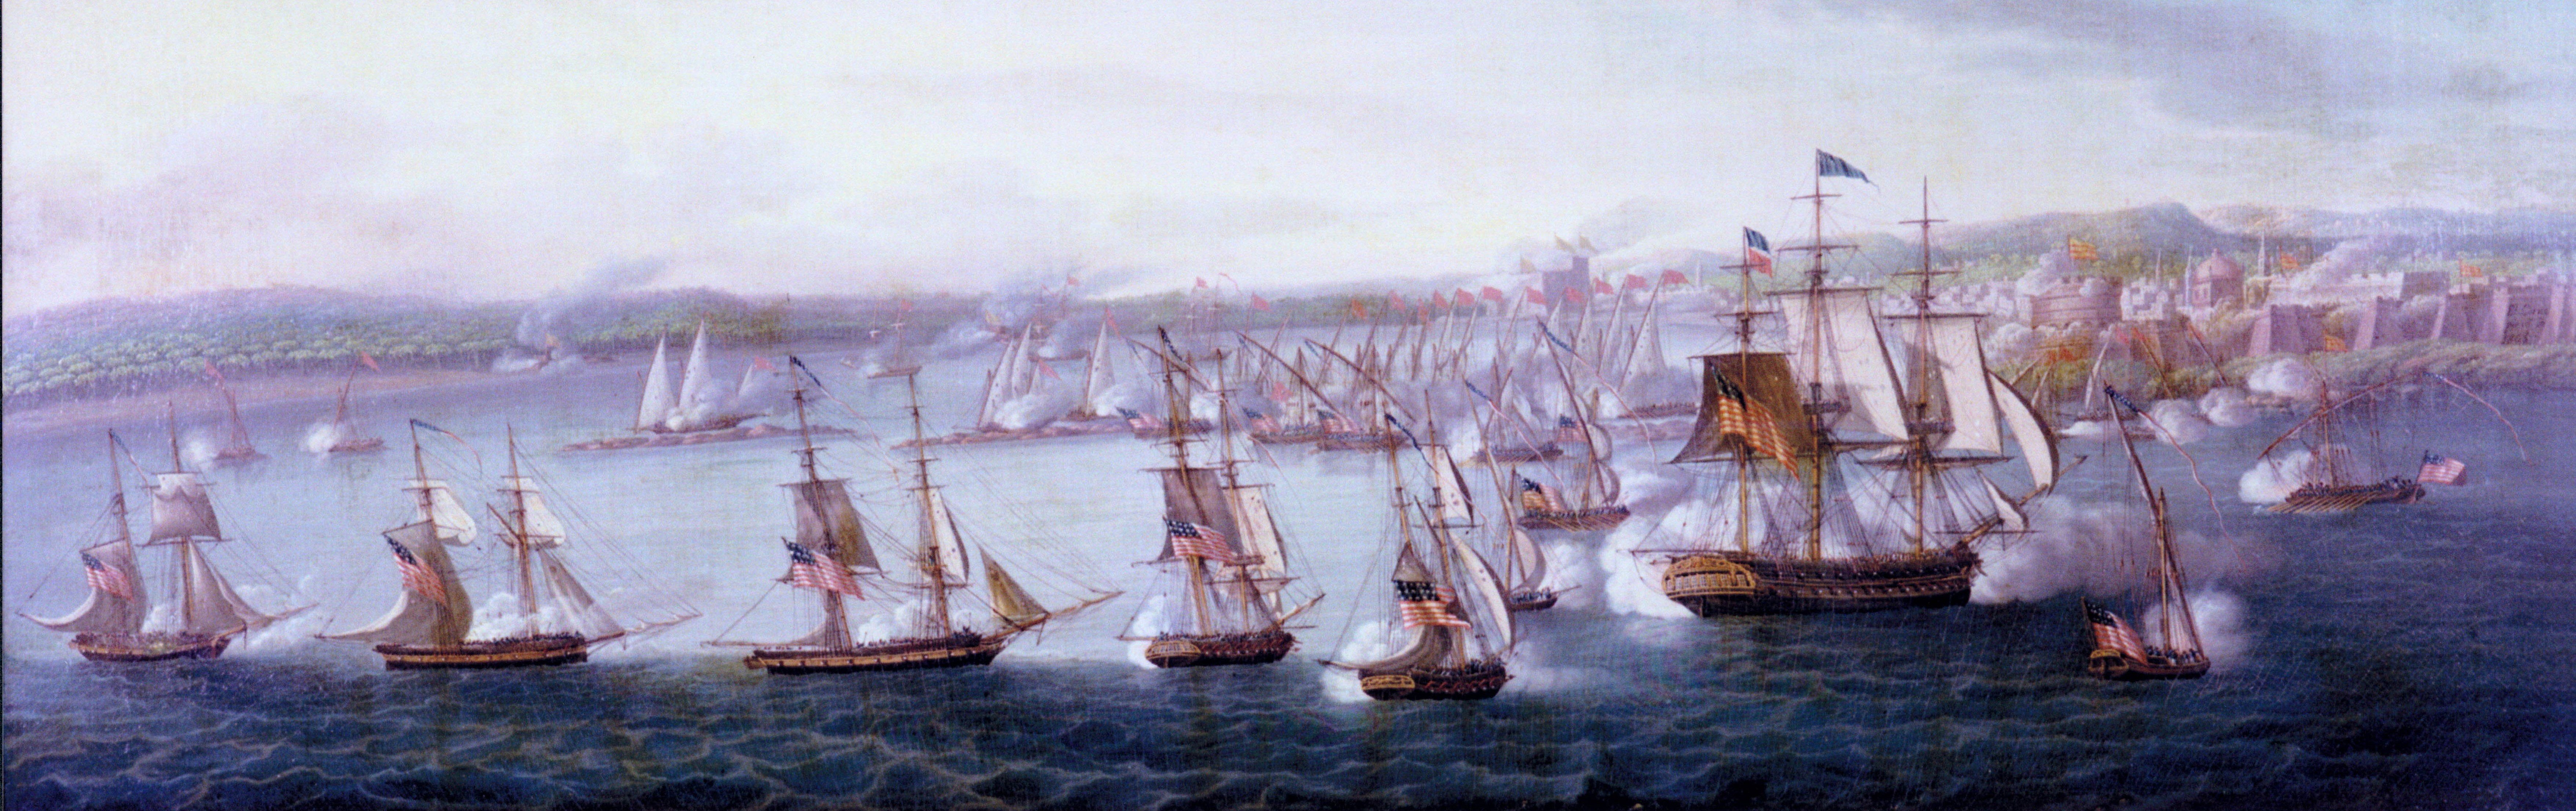
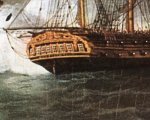
In a comparision of Doughty´s plan, Gillmers reconstruction of the 1797 status, Cornè´s 1803 paiting and Pook´s 1849 side view, we can see: in 1803 there seemed to be no Bridle port - although I admit: Cornè´s bow area is a bit awkward .. he seemed to have issues with perspective and dimensions here.. So it is not a proof - but a certain evidence I would give to Cornè.
My conclusion: I would rather NOT show an opening below the cat head. In my opinion (until I change it 😁) the first Gun port is the one just forward the fore mast channel.
-
 Marcus.K. got a reaction from mtaylor in Hammock Storage
TBE found an interesting entry in "History of the Liverpool privateers and letters of marque with an account of the Liverpool slave trade" which was minutes ago available in Internet-Archive .. by a Gomer Williams printed 1897 .. in which a "Captain William Hutchinson, an experienced privateer commander, originally trained in that finest of all nurseries for seamen, the Newcastle colliers, who afterwards became dockmaster at Liverpool" explains how he prepared is privateer for battle:
Page 11:
and Page 12 to 13:
So much to bravery and "gentlemen's attitude" in battle 🙂 .. but hey, we talk about the common man, the sailor, the marine ..
And here now the important sentences - proving that hammocks were - at least sometimes - used "in the tops" .. meaning in the fighting tops.
That seems to be visible in THIS beautiful painting of the French Ship "Saint-Esprit" .. we see the horizontal hammocks along the shrouds - and we see at least a blue canvas (with white or golden lilies) in the fighting tops side - above the foremasts top shrouds - hammocks possibly stacked behind it.
https://en.wikipedia.org/wiki/French_ship_Saint-Esprit#/media/File:Vaisseau_français_le_Saint-Esprit_au_combat_en_1782.jpg
Thanks @The Bitter End Haiko, for this finding!
There we have at least a verbal prove that hammocks were used in the tops to protect the sailors, marines and sharpshooters from the enemies sharpshooters.
-
Marcus.K. reacted to PqLear in Le Superbe by PqLear – Heller – PLASTIC – Built as “HMS Vanguard”
Been a busy week irl but started to make some progress on the quarter deck and forecastle, both of which are now firmly glued in place.
stocked up shot garlands on upper deck added upper deck "topping lifts" (strings for gun lids) adjusted poop deck to fit added 4 x seats of ease in quarter galleries added forecastle railing started experimenting with scratch building carronades, using a cut-down barrel from the kit's 8-pounders I've been referencing Brian Lavery's Nelson and the Nile for the gun outfitting, it states Vanguard had two 24-pound guns and ten 24-pound carronades on the quarterdeck, and two 24-pound long guns and four 24-pound carronades on the forecastle. Since the kit itself doesn't have any 24-pounders--after fitting the gun deck and upper deck I have two 36-pounders, two 18-pounders, and twenty 8-pound guns left from the kit--I'll try and come up with some creative alternative... current thinking is to use the left-over 18-pounders as 24-pound long guns; use 8-pounders as 24-pounders, and scratch-build fourteen carronades using the barrels from the 8-pounders. At least that's where I'll start, I may end up trying some other alternatives.
Forecastle railings from strips of Evergreen plasticard strips: railings 0.5mm x 1.5mm; timberheads 0.75x0.75mm. Made cut-out for 24-pound gun between shroud 4 and 5, and cut-outs for carronades in front of shrouds. Likely some creative license here as relates to exact size, placement and spacing, but I think the final result looks nice. It works around the challenge with the crowded foremast shrouds (how to sort out the main mast shrouds is a different matter... 😕 ) and occupies some of the empty space in front of the foremast (due to the kit's/Superbe's) longer hull).
Scratch built carronade carriage from plasticard and used barrel from kit's 8-pounder. Perhaps looks a bit small? Next to it is a left-over 18-pounder from the upper deck; which will work as the 24-pound long gun. Will try building a few more carronades before deciding if I look into other options.
Added some furniture to the quarter galleries--other ideas what these spaces were used for? Surely must have been used for storage, for...?
-
 Marcus.K. reacted to The Bitter End in Hammock Storage
Hello Marcus
Thank you for taking the time to present this information so clearly and including additional sources etc.
This is what we need.
Also as I said before, What a beautiful painting. These discussions really bring a whole new level of joy to the hobby.
Cheers
Haiko
-
Marcus.K. reacted to paul ron in Hammock Storage
did anyone think of asking the navy for the information since the Constitution is still a commisioned ship in service? its been restored and in their care so actual documentation and references would be best stored with them. the last time i walked the decks was the year prior to the most recent restoration. the tour guides were very well versed in her history.
edit: i just sent a contact form to the navy and referenced this discussion. lets see if i get a reply anytime soon?
contact form here...
https://www.navy.mil/Resources/Contact-Us/
april edit... no reply from the navy.
-
Marcus.K. reacted to Glen McGuire in USS Constitution by Glen McGuire - FINISHED - BlueJacket Bicentennial Edition - 1/96 - Repair and Completion of Construction
Thank you to all for the nice comments and the likes. I greatly appreciate your help and support.
I have a question for Bob (a.k.a @Knocklouder). Do you have a Venmo for your swear jar? If so, I need to send you a large contribution. If you don’t have Venmo, then run a tab for me. Why? Well, a couple of days ago I was tooling along with the last part of the running rigging – the gaff and spanker boom. I got the gaff in place with its full rigging and a nice parrel securing it to the mizzen mast. I started working on the spanker boom and ran into a problem. When I put the yoke up against the mizzen mast, a bunch of the lines tied to the mizzen spider ring interfered with the boom’s yoke.
I knew something was wrong but I was pretty sure I’d done the spider ring correctly. So I went back to the instructions and found this bit of info I’d somehow overlooked. “The gaff and spanker boom swing on the trysail mast.” The trysail mast? What the heck is a trysail mast? So I checked a my reference pictures from other build logs and there it was – a mast just aft of the mizzen mast with the gaff and boom clearly attached to it. And that’s when the debt to Bob’s swear jar started piling up.
Ugh. I could not think of any way out of the jam except ripping the gaff out and all the gaff rigging I’d locked into place, followed by making a trysail mast and squeezing it into position. There was no reasonable way to drill a hole in the deck to step it properly, so it would just have to be glued into place. That whole exercise pretty much consumed yesterday. I picked a dowel just slightly smaller than the mizzen mast, but large enough where I did not need to remake the jaws on the ends of the gaff and boom. I put a notch on the top of the dowel to fit between the 2 center ribs underneath the mizzen mast top. I glued the bottom of the dowel to a larger diameter disk to look like the collar around the base of the other masts. I painted the mast brown to match what I saw in my reference pictures. It slipped into place quite nicely and I got the gaff reinstalled and rigging in place. Huge sigh of relief, but not real happy with myself for the careless oversight costing me a day of work.
I did not take any pics of the gaff before I had to rip it out. Here's a pic of the new trysail mast in place along with some other shots of the gaff and spanker boom and their rigging.
Gaff rigging below. You can see the halyard attached to the gaff at 3 points (2 of them via single blocks), running thru a triple block before heading below to the deck.
Here's the spanker boom which bisects the vangs coming down from the gaff.
Another shot of the boom showing the parrel wrapped around the trysail mast.
A wider shot of both. You can also see the main lower yard brace in place now. One end is tied to an eyebolt on the boomkin just above the quarter gallery. It runs to a single block on the yard arm then back to a single block also tied to the boomkin. Then it runs thru a sheave in the bulwark and is tied off to a cleat on the inside of the bulwark.
And with that, I dare say that the running rigging is complete!! WOOHOO!!! Another major milestone, albeit not without some difficulties along the way!
When I got all the standing rigging finished a while back, I made a comment in jest that Pat (a.k.a. @BANYAN) needed to send me some of that Australian Bundy rum that I'd heard so much about, so I could celebrate the milestone. Well lo and behold, he took me seriously and being the kind and gracious man that he is, Pat actually sent me a bottle of Bundy rum which I just got. He timed his generosity to perfection!
So this time, I was able to celebrate the completion of a huge milestone with a mix of Aussie and Texan flair! I made my favorite rum drink (mai tai) using Bundy rum for the spiced rum and dark rum from a distillery in Hye, Texas just to the west of Austin. The cultural combination was perfecto!!!
So a huge thanks to Pat for his generosity and to everyone else for your support in helping me get this far in the journey! I hope none of your chooks turn into emus!
-
 Marcus.K. got a reaction from NavyShooter in Hammock Storage
TBE found an interesting entry in "History of the Liverpool privateers and letters of marque with an account of the Liverpool slave trade" which was minutes ago available in Internet-Archive .. by a Gomer Williams printed 1897 .. in which a "Captain William Hutchinson, an experienced privateer commander, originally trained in that finest of all nurseries for seamen, the Newcastle colliers, who afterwards became dockmaster at Liverpool" explains how he prepared is privateer for battle:
Page 11:
and Page 12 to 13:
So much to bravery and "gentlemen's attitude" in battle 🙂 .. but hey, we talk about the common man, the sailor, the marine ..
And here now the important sentences - proving that hammocks were - at least sometimes - used "in the tops" .. meaning in the fighting tops.
That seems to be visible in THIS beautiful painting of the French Ship "Saint-Esprit" .. we see the horizontal hammocks along the shrouds - and we see at least a blue canvas (with white or golden lilies) in the fighting tops side - above the foremasts top shrouds - hammocks possibly stacked behind it.
https://en.wikipedia.org/wiki/French_ship_Saint-Esprit#/media/File:Vaisseau_français_le_Saint-Esprit_au_combat_en_1782.jpg
Thanks @The Bitter End Haiko, for this finding!
There we have at least a verbal prove that hammocks were used in the tops to protect the sailors, marines and sharpshooters from the enemies sharpshooters.
-
 Marcus.K. got a reaction from dafi in Hammock Storage
TBE found an interesting entry in "History of the Liverpool privateers and letters of marque with an account of the Liverpool slave trade" which was minutes ago available in Internet-Archive .. by a Gomer Williams printed 1897 .. in which a "Captain William Hutchinson, an experienced privateer commander, originally trained in that finest of all nurseries for seamen, the Newcastle colliers, who afterwards became dockmaster at Liverpool" explains how he prepared is privateer for battle:
Page 11:
and Page 12 to 13:
So much to bravery and "gentlemen's attitude" in battle 🙂 .. but hey, we talk about the common man, the sailor, the marine ..
And here now the important sentences - proving that hammocks were - at least sometimes - used "in the tops" .. meaning in the fighting tops.
That seems to be visible in THIS beautiful painting of the French Ship "Saint-Esprit" .. we see the horizontal hammocks along the shrouds - and we see at least a blue canvas (with white or golden lilies) in the fighting tops side - above the foremasts top shrouds - hammocks possibly stacked behind it.
https://en.wikipedia.org/wiki/French_ship_Saint-Esprit#/media/File:Vaisseau_français_le_Saint-Esprit_au_combat_en_1782.jpg
Thanks @The Bitter End Haiko, for this finding!
There we have at least a verbal prove that hammocks were used in the tops to protect the sailors, marines and sharpshooters from the enemies sharpshooters.
-
 Marcus.K. got a reaction from Chapman in Hammock Storage
TBE found an interesting entry in "History of the Liverpool privateers and letters of marque with an account of the Liverpool slave trade" which was minutes ago available in Internet-Archive .. by a Gomer Williams printed 1897 .. in which a "Captain William Hutchinson, an experienced privateer commander, originally trained in that finest of all nurseries for seamen, the Newcastle colliers, who afterwards became dockmaster at Liverpool" explains how he prepared is privateer for battle:
Page 11:
and Page 12 to 13:
So much to bravery and "gentlemen's attitude" in battle 🙂 .. but hey, we talk about the common man, the sailor, the marine ..
And here now the important sentences - proving that hammocks were - at least sometimes - used "in the tops" .. meaning in the fighting tops.
That seems to be visible in THIS beautiful painting of the French Ship "Saint-Esprit" .. we see the horizontal hammocks along the shrouds - and we see at least a blue canvas (with white or golden lilies) in the fighting tops side - above the foremasts top shrouds - hammocks possibly stacked behind it.
https://en.wikipedia.org/wiki/French_ship_Saint-Esprit#/media/File:Vaisseau_français_le_Saint-Esprit_au_combat_en_1782.jpg
Thanks @The Bitter End Haiko, for this finding!
There we have at least a verbal prove that hammocks were used in the tops to protect the sailors, marines and sharpshooters from the enemies sharpshooters.
-
 Marcus.K. got a reaction from Dr PR in Hammock Storage
TBE found an interesting entry in "History of the Liverpool privateers and letters of marque with an account of the Liverpool slave trade" which was minutes ago available in Internet-Archive .. by a Gomer Williams printed 1897 .. in which a "Captain William Hutchinson, an experienced privateer commander, originally trained in that finest of all nurseries for seamen, the Newcastle colliers, who afterwards became dockmaster at Liverpool" explains how he prepared is privateer for battle:
Page 11:
and Page 12 to 13:
So much to bravery and "gentlemen's attitude" in battle 🙂 .. but hey, we talk about the common man, the sailor, the marine ..
And here now the important sentences - proving that hammocks were - at least sometimes - used "in the tops" .. meaning in the fighting tops.
That seems to be visible in THIS beautiful painting of the French Ship "Saint-Esprit" .. we see the horizontal hammocks along the shrouds - and we see at least a blue canvas (with white or golden lilies) in the fighting tops side - above the foremasts top shrouds - hammocks possibly stacked behind it.
https://en.wikipedia.org/wiki/French_ship_Saint-Esprit#/media/File:Vaisseau_français_le_Saint-Esprit_au_combat_en_1782.jpg
Thanks @The Bitter End Haiko, for this finding!
There we have at least a verbal prove that hammocks were used in the tops to protect the sailors, marines and sharpshooters from the enemies sharpshooters.
-
 Marcus.K. got a reaction from bruce d in Hammock Storage
TBE found an interesting entry in "History of the Liverpool privateers and letters of marque with an account of the Liverpool slave trade" which was minutes ago available in Internet-Archive .. by a Gomer Williams printed 1897 .. in which a "Captain William Hutchinson, an experienced privateer commander, originally trained in that finest of all nurseries for seamen, the Newcastle colliers, who afterwards became dockmaster at Liverpool" explains how he prepared is privateer for battle:
Page 11:
and Page 12 to 13:
So much to bravery and "gentlemen's attitude" in battle 🙂 .. but hey, we talk about the common man, the sailor, the marine ..
And here now the important sentences - proving that hammocks were - at least sometimes - used "in the tops" .. meaning in the fighting tops.
That seems to be visible in THIS beautiful painting of the French Ship "Saint-Esprit" .. we see the horizontal hammocks along the shrouds - and we see at least a blue canvas (with white or golden lilies) in the fighting tops side - above the foremasts top shrouds - hammocks possibly stacked behind it.
https://en.wikipedia.org/wiki/French_ship_Saint-Esprit#/media/File:Vaisseau_français_le_Saint-Esprit_au_combat_en_1782.jpg
Thanks @The Bitter End Haiko, for this finding!
There we have at least a verbal prove that hammocks were used in the tops to protect the sailors, marines and sharpshooters from the enemies sharpshooters.
-
 Marcus.K. got a reaction from Thukydides in Hammock Storage
TBE found an interesting entry in "History of the Liverpool privateers and letters of marque with an account of the Liverpool slave trade" which was minutes ago available in Internet-Archive .. by a Gomer Williams printed 1897 .. in which a "Captain William Hutchinson, an experienced privateer commander, originally trained in that finest of all nurseries for seamen, the Newcastle colliers, who afterwards became dockmaster at Liverpool" explains how he prepared is privateer for battle:
Page 11:
and Page 12 to 13:
So much to bravery and "gentlemen's attitude" in battle 🙂 .. but hey, we talk about the common man, the sailor, the marine ..
And here now the important sentences - proving that hammocks were - at least sometimes - used "in the tops" .. meaning in the fighting tops.
That seems to be visible in THIS beautiful painting of the French Ship "Saint-Esprit" .. we see the horizontal hammocks along the shrouds - and we see at least a blue canvas (with white or golden lilies) in the fighting tops side - above the foremasts top shrouds - hammocks possibly stacked behind it.
https://en.wikipedia.org/wiki/French_ship_Saint-Esprit#/media/File:Vaisseau_français_le_Saint-Esprit_au_combat_en_1782.jpg
Thanks @The Bitter End Haiko, for this finding!
There we have at least a verbal prove that hammocks were used in the tops to protect the sailors, marines and sharpshooters from the enemies sharpshooters.
-
 Marcus.K. reacted to wefalck in Pomeranian Rahschlup 1846 by wefalck – 1/160 scale – single-masted Baltic trading vessel
So, here it is ...
Planking the hull
In principle planking this hull with styrene strips is not very different from planking with strips of wood. The styrene strips have the advantage that they can be more easily bent across the breadth. One can also shape them like metal by stretching and compressing until they conform to the shape of the solid hull. A disadvantage is that they are less stiff than wood and easily ‘sag’ in, say in thicknesses of les than 0.5 mm, but it also depends on the distance between the frames.
Planking proceeded up and down from the wales and down from the covering board. The Evergreen styrene strips are sawn from sheets as is evidenced by saw-marks on the narrow sides. This results in slight variations of their width, typically up to 0.1 mm wider for a 1 mm wide strip. This has to be considered, when planning the plank layout.
In the end, I didn’t actually use my new plank-clamp much. It was easier to hold the strips short with the edges upright and to scrape the edge with a scalpel to reduce the width in a controlled fashion. There was not much need to bevel the edges. The styrene cement, of course, softens or dissolves the material, which allows it to be pushed together closely, obviating the need for bevelling at least for material of 0.5 mm thickness or less.
Unlike for woodworking, not many specialised tools are needed. I use a scalpel, the tools that in the old days was used to rub-on lettering comes handy to press on the strips, a large diamond nail-file for thinning down strips, and cutting-tweezers as watchmakers use them for shortening strips to length. The latter have the cutting edge bevelled only on one side, allowing for clean cuts without squashing the material. I also made small scrapers from a piece of razor-blade, held in a pin-vise. Steel-wool of various grades helps to blend-in parts or lightly round edges.
The pictures show the planking after cleaning up by sanding and scraping, but before puttying any gaps that may have occurred. I went for some slight irregularity of the surface, as may be observed in a well-used older wooden ship. This livens up an otherwise somewhat sterile styrene surface.
To be continued …
-
Marcus.K. got a reaction from mtaylor in Unknown Model ship 3D printable project
Interesting project - and you said already: "some artistic license" .. Nevertheless: I would close that lowest gun port - as t would be below the water line. There are other issues in your design.
But the question is of course: what´s your goal?
Your title still leave a lot of room for interpretation of how deep in realism you want to end up?
That ship shown here is interesting. A 3-decker for sure.
What I noticed: iron stiffeners at the knees and there seem to be strengthening frames on top of the inner planking in the hull.
I don´t know enough about the 3-deckers.. but I guess the shape of the hull is not a French design (at least in smaller units they had a less "round" profile).
A very flat bottom... Hm.. Could it be HMS Victory? Would of course be the most likely one, right? Worlds most famous 3-decker ...
-
Marcus.K. reacted to PqLear in Le Superbe by PqLear – Heller – PLASTIC – Built as “HMS Vanguard”
I spent much of this week going back to two other reference build logs, @RMC's Vanguard and @flyer's Bellerophon -- both incredibly inspirational, absolutely gorgeous, and terribly humbling I use my 1:150 scale as justification to not get even close in terms of detail and execution!
I was happy to pick up a few new details -- e.g. a brick floor under the Brodie stove -- and noticed a few others a bit too late to incorporate in my own build, e.g. the design/size of the stern name plate. I'm increasingly realizing there are so many historical accuracy details I could have researched or respected more closely but didn't, out of enthusiasm to get going and make progress. I suspect this is a common dilemma for many builds -- with such fragmented access to historical reference material, you don't know what you don't know, where do you draw the line between research and execution? How do you ensure not letting perfect get in the way of good?
I have a big decision to make soon -- whether to weather or not, and if so to what extent. An oil paint/mineral spirit wash on hull and deck will add texture and bring out details and generally looks great, but will require multiple gloss varnish coats prior, and multiple matte varnish coats after. Each application involves the risk of clogging, orange peeling, unwanted residue, uneven sheen, etc., and the risk is especially great when you airbrush on to a highly irregular shape (such as a deck between hull sides with holes in them), which makes the air / varnish droplets flow in irregular and unpredictable micro patterns. And it's incredibly hard impossible to reverse a poorly applied coat of varnish... I feel a bit insecure about my skills here.
In meanwhile, I continued assembling the upper deck and prepped the quarter deck:
Added all furniture and starboard side guns to gun deck Glued both parts of upper deck in place Cut/sanded/adjusted quarter deck to fit (almost 1/8" too wide out of the box) Cut off 1/8" of rear of upper deck, so that stern would fit properly Finished upper deck furniture (gratings, stove, capstans) Painted black/white diamond floor tile pattern in ward-room and captain's cabin I was contemplating building out compartments, dividers and furniture but ultimately decided against it -- after all this will be Vanguard readied for battle! Next steps:
Clean up, paint, assemble, and customize upper deck 18-pound guns (been dreading this...) A few remaining upper deck furnishings (stairs, garlands, eye bolts for ships boats, etc.) Finish Brian Lavery's Nelson and the Nile Also ordered his The 74 Gun Ship Bellona Digest the build plans for Amati/Victory's Vanguard (also on order... realized way too late into this build I should have started with this!) Finalize specs and plans for masts and yards As mentioned in a few other build logs here, the out of the box pieces are too flimsy to support the tension from standing and running rigging. They might be okay for a simplified rigging configuration -- e.g. stays, shrouds, sheets and braces -- but I'd like to at least have the option to add a more complete rigging scheme Iirc, @Blue Ensign made new masts and yards out of wood, and @Admiral Beez added carbon fiber rods for additional stability -- both good ideas which I may get back to. Current thinking is making these as 3D prints, and currently exploring this route with @igorcap Finalize specs for a few other pieces to be 3D printed -- anchors, lanterns, admiral's barge, fire buckets, decorative trim pieces, etc.
Gun deck with furniture and guns in place. Messenger rope is too thin and nippers in wrong place (I think?) but at least explains the concept. Once the upper deck is in place, this build log might be the only evidence this even exists... it's been fun to build though!
Port piece of upper deck in place, waiting for the starboard piece. In retrospect, I wish I had (1) aligned the deck beams with the gun ports, and (2) then aligned the openings for gratings based on the position of the beams.
Last third of upper deck in place, hull pressed together with "temporary rigging" while glue is curing overnight.
Also wish I had painted (airbrushed) the wardroom floor before assembly -- had to hand paint instead.
Masking using 6mm Tamiya tape -- looks like blueberry pie!
Bleeding from hand-painting turned the wardroom floor into a Rohrschach test...
... but came out okay after some manual touching up
Much better results when airbrushing -- no freehand touch-ups needed!
-
Marcus.K. reacted to JSGerson in USS Constitution by The Bitter End - Model Shipways - 1:76
Marcus K - The original posting of Antczak's model images were originally on American Marine Models' website, but have since been removed. They have a memorial to Mark Antczak's memory which states in part:
However, I have not been able to locate an original source for those images now. But all is not lost, I made a copy of them as well as Usetosail who posted them on his build log of the USS Constitution post No. 556. Here are all that I have have plus three additional photos that Usetosail did not post.
-
Marcus.K. reacted to Glen McGuire in USS Constitution by Glen McGuire - FINISHED - BlueJacket Bicentennial Edition - 1/96 - Repair and Completion of Construction
It is truly amazing to get that close and see how immense those things really are.
That makes sense now. Thanks for the explanation, Henry.
Yes! Wouldn't it be great if all of us had such access to the real life version of whatever model we are working on! Only in our dreams!!
And back to the task at hand. Without an SIB in work, I've been able to focus on the Constitution and get a lot of work done (although I'm still on impulse power compared to @Knocklouder's usual warp 9 speed!). The next thing on my to-do list was making the saddles that are affixed to the top gallant and royal yards and provide the buffer against the mast.
Here's one of the yards with the saddle attached and eyepins in place.
Adding the single-row parrel tied off to the eyepins.
Here's the fore topmast yard installed.
I was starting to tie off some of the halyard lines to the fife rails at the base of the fore and main masts when I realized the mizzen mast did not have anything near it to off lines to. A quick peek at the instructions told me I needed to add a spider ring around the base of the mizzen mast.
I had to poach some belay pins from some of the rails inside the bulwark to outfit the spider ring. My ring is cut in half since the mast is already installed, preventing me from sliding the ring over the end of the mast and into place.
Mizzen spider ring installed.
And then it was rinse and repeat on hanging the remainder of the top gallant and royal yards. Shortly thereafter, another milestone reached - all the yards are hung! WOOHOO!!! I really need @BANYAN to send me some of that Bundy rum so I can properly celebrate these milestones!!
The yards are a bit wonky since I have not added lifts or braces yet. But I believe she is starting to look a bit majestic now with her arms spread wide!
-
Marcus.K. reacted to Force9 in TITANIC by Force9 – Trumpeter - 1/200 - PLASTIC - White Star Liner
The after Well Deck (Starboard)
I moved aft and continued the thinning of the Well Deck bulwarks.
The drill was again put to work… I removed a section starting an inch or so behind the aft end of the break (where the kit molding changes thickness) and extending a bit forward of where the break ends (to give a bit of wiggle room to for a future modification).
A quick pass with the hand saw will finish the job.
I use a sturdy file to clean the jagged edge:
Finally, I’ll need to use a medium and fine file to get a clean opening:
Now to add the bulwark.
This was similarly outlined on a small sheet of .020” styrene as we saw on the forward well deck.
I created a mockup to make sure everything fit in the opening. I used the KA brass bulwark as a template to determine the gangway door locations. I moved the wash port openings a bit higher to allow for the additional interior bulwark details to clear the Trumpeter decking with the added thickness of the wood deck veneer on top. Details were added using thin .010” strip.
I installed the new bulwark and then etched the outlines of the gangway doors on the exterior.
It all looked good – until it didn’t. Something was amiss…
Have a look at the aft Well Deck exterior detail extracted from Robert Read’s profile:
I really need to account for all the areas highlighted… The doubling strakes need to be added along with the strake below to give the correct dimension to the side.
Additionally, I need to reconsider the wash ports. Many modelers complain that @#$@ Trumpeter did not completely open the aft well deck wash ports and they must put in the extra effort to open them up.
The kit has an indentation to show their location, but they are molded with a solid interior.
Ugh.
or… maybe…they got that almost right…?
It seems to me that all the photos/representations showing these wash ports on the Titanic always have them with their covers closed over the openings. I can’t find an exception. I suspect that Trumpeter was trying to compromise – show the wash ports, but represent a cover on the interior.
I ripped out the newly installed bulwark and started over.
I cut another bulwark using the template I had already made for the first pass. This time I used .015” styrene for the main bulwark piece.
I then added a strip of .005” styrene that I cut using my new (and very masculine) Fiskar paper cutter. I purchased this at a steep discount during an online sale a few months ago.
This is very useful for cutting strips of .005” up to .020” styrene sheet.
I shaped the gangway doors using .005” styrene and added them to the exterior. Then I inserted filler strips shaped to match the curve of the doors (Circled below) and extended the strake across the bulwark piece - protruding a bit on each end. This’ll help merge everything into the kit and keep it flush to the sides.
I drilled the mooring openings and added thin .005” styrene to represent the closed wash port covers.
The result is ready to install.
The seams were filled with Tamiya putty diluted with Lacquer thinner and sanded smooth.
The doubling strake can now be added using more of the .005” styrene strips made using the Fiskar cutter.
More .005” strip was added to the lower strake to give additional dimension. The ports were re-drilled from the inside.
New doubling straps were strategically placed to hide the ends of the new pieces. These were fashioned from .005” strip with rivets added using another fun new tool:
This is a “corner” rivet tool that allows for accurate embossing of the parallel rivet pattern on small styrene strip:
Apply even pressure to get the indentations, then flip over and cement in place.
Finally, I did some careful filing to smooth the top edge.
I think this’ll work.
I’ll add the interior detail on the next post.
Cheers,
Evan
-
Marcus.K. reacted to Force9 in TITANIC by Force9 – Trumpeter - 1/200 - PLASTIC - White Star Liner
@MisterMeester Ahoy Mark... Great progress on your fine build. I really do think the scratch built bilge keels are a better option.
Cheers
@Hubac's Historian Hello Marc! Thanks again for your continued interest. Your compliments are very appreciated - especially coming from such a skilled scratch modeler. Funny that my Constitution build still resonates out there in the ether. I promise to pick up where I last left off once I conquer the Titanic.
Folks - I have threatened to start a Youtube channel to widen the audience for my build. I've decided to hold off until I've worked my way down the starboard side of the kit and figure out all my scratch build modifications. Then I'll come back to the Port side and let the Youtube audience (BOTH of them - one of whom will be my wife!) follow along. It'll be useful to have the starboard side as a template to explain everything as I start to videotape and post on my channel.
Please stay tuned.
Evan
-
Marcus.K. reacted to The Bitter End in USS Constitution by The Bitter End - Model Shipways - 1:76
A gloomy discovery!
This is not the most proactive post but I Just realised that I somehow managed to mess up the spacing of the gun ports on the spar deck and they have to be gutted and redone.
The gaps between the forward and aft gun ports are 34mm at scale. When I went to mark out the gun ports in then waist I Realised that The maximum amount of space I could possibly allocate between ports while still having 5 ports is 24mm...essentially a 30% error. I could potentially live with this with some minor tweaking but the problem goes deeper....
The gun ports on the gun deck must be both equally distributed and centred between the gun ports on the deck above. This error on the spar deck means that the ports at the gun deck level would also have to be bunched at the waist area.
I did vaguely consider just leaving it as is but I realised that I am still only in the infancy of this build and I will put a thousand plus hours into micro measurements of perfection knowing full well that the bones are all wrong.
Wish me luck. I hope this can be fixed without destroying all that has been done so far,
Cheers
Haiko
-
Marcus.K. reacted to PqLear in Le Superbe by PqLear – Heller – PLASTIC – Built as “HMS Vanguard”
With deadeyes completed, have turned my attention to the inside of the hull again, and started assembling the gun deck. A light sanding of the guns will make it easier to glue them in place, although unfortunately it also meant some of them will now sit a little too low in the gun ports. Will go even lighter on the other side.
(The small hole in the bottom of the gun carriage is left over from airbrushing/painting.)
A tiny dot of CA will hold the breeching line nicely held together just under the cascabel. Note eye bolts at end of breeching ropes -- they're from Amati, I cut off ~4mm and used the excess to make cap squares.
Gun deck half-way assembled. Starboard battery, anchor cables, and pull strings for gun lids remain before upper deck can go on.
As mentioned above, I cut the upper deck in two pieces to be able to put it in place without breaking up the hull. Even this approach is proving quite complicated -- wish me luck, I'll need it! I started this part of the project by adding beams under the upper deck:
All in place, glued onto the larger part only...
... so that I can add the upper deck as a two-step process; first, the larger piece, then the starboard battery -- quite tricky to maneuver the guns and breeching lines in place between the beams, but hopefully it'll be okay -- and finally the smaller deck piece. Unfortunately, this means I won't be able to take a picture of the entire gun deck fully assembled 😕
Started prepping the forecastle/quarter deck. First, original piece (note new holes for masts, as described ^^)
Started by cutting/shaving everything down -- gratings, stairs, gun racks, placeholders for buckets, etc. -- to get a flat deck. Filled resulting holes with squares of 2mm plasticard.
New location and different dimensions for the midships opening. Narrower gangways.
Cut new opening and closed up resulting gap in forecastle.
Plenty of filler to close holes and cracks. Note extended front of poop deck also.
As always, thanks to @glbarlow and @dafi -- I've used your build logs liberally as inspiration and reference (e.g. here, and here). Not all my gratings, stairs, capstans etc. are in the correct places since the hull dimensions are different, but I'm quite happy with the result (which no one will ever see anyway )
I should probably have thought about this sooner... but finally got around to buying the instruction book for Amati/Victory's Vanguard -- realized it'll be invaluable for the rigging, but it would probably have come in handy for the hull, too. Oh well.
-
Marcus.K. reacted to The Bitter End in USS Constitution by The Bitter End - Model Shipways - 1:76
Gun carriages continued....
After reading through everything that @Marcus.K. so kindly shared I dissapeared down a rabbit hole of sorts. This excellent attention to detail and research has been a huge help for me in this project so far so THANK YOU again Marcus, it added a whole new layer of interst and meaning.
I decided that I would go for a "spanish brown"...which was apparently red....but almost a brown...confusing stuff...
I did some experimenting and I am not totally happy with the outcome but I am getting to a colour scheme which I will be able to live with when it eventually comes to the spar deck cannon. I think I will go with the same colours and techniques but I will add slightly more red and add a touch of darker brown. Hopefully this produces the results I need.
Below is the painted result of the carriages....perhaps too brown and not enough red but the light can play all kinds of tricks, they are significantly more "reddish" in person....clearly mor ework to do on colouring
-
Marcus.K. reacted to wefalck in Pomeranian Rahschlup 1846 by wefalck – 1/160 scale – single-masted Baltic trading vessel
Thanks for the 'thumbs up' !
*****************************
Installing the wales
It was fortunate that the upper edge of the wale was marked in the original drawings. I had transferred this to the bulkheads and cut appropriate notches. Somehow, however, these notches turned out to be not very useful as I would have to score the whole core of the hull accordingly, which would have been messy. In the end, I ignored them, though used their upper edge as guidance for placing the wales. I have no information on their dimension, but thought that a width of 240 mm = 1.5 mm looked about right on the hull. They would have been probably composed of two thick planks. For the thickness I choose 0.75 mm, as the hull-planking will be 0.5 mm thick. Contemporary pictures and naval construction books show both options, smooth hulls, where the thicker wales are not visible and step-changes in thickness. I think smooth hulls became fashionable around the middle of the 19th century, but in the Baltic they were always lagging a bit behind, so I went for the stepped design.
Perhaps this is a problem of building up the planking around a solid core, but the way how the wales run against the gilling at the stern caused me some head-scratching. The point where the upper edge of the wale touches the gilling is marked in the original drawings, but it is not clear, where the lower edge touches it. While the wales have an easy run all along the ship, at this point some twisting is needed.
I had not done any planking with styrene before. It turned out to be quite simple: unlike wood, it does not have grain of course and strips can be easily bent and twisted even across the long sides. Pulling the strips around a round piece of e.g. steel causes the strips to curl and one can thus achieve a nice pre-bending without the need of much clamping force, when cementing them on.
Nevertheless, the wales were attached with the recently discovered artificial nail cement, that is a mixture of light-curing acrylic cement and cyanoacrylate. It sets fast, but not so fast that no adjustment would be possible. I let it seep under the wales attached to the hull with Sellotape. Hereby I worked from the more complicated stern forward in more or less long sections, depending on the curvature.
Final clean-up will be done, once the rest of the planking has gone onto the full, with the view to blend everything nicely together.
To be continued ...
-
Marcus.K. reacted to wefalck in Pomeranian Rahschlup 1846 by wefalck – 1/160 scale – single-masted Baltic trading vessel
Thank you very much for the kind comments and the 'likes' !
*************************************************************
Digression 3
As the start of the planking is imminent, I had to think about a way to shape thin, narrow and long strips of styrene. A clamp is needed that can hold strips down to 1 mm width, 0.25 mm thickness and 150 mm length securely. In addition, the strips have to be held in a way that allows to slightly bevel the edges, if needed. The idea was to clamp the material between to flat metal bars of sufficient stiffness.
I happened to have to matching aluminium bars of 20 mm width and 3 mm thickness that once formed part of a jig and could be repurposed.
The two bars were tightly clamped together and milled flat on the top so that they abut with sharp edges. Then, one edge was bevelled to 45° to give clearance for bevelling the styrene (or wood for that matter) strips. Unfortunately, the table travel of my mill is not long enough to do the milling in one set-up and I could not clamp the whole length of the bars in the vice, which resulted in some chatter marks. Not beautiful, but still functional.
The clamping action is exerted by three thumb-screws for which holes were drilled and tapped.
I stuck a strip of Tamiya masking-tape at about 0.5 mm distance from the top edge in order provide a stop for very thin and narrow material.
Now the clamp has to be tested in anger, to see, whether it really proves useful – not all of my home-made tools that felt like a good idea, really turned out to be that practical 🫢
Building log to be resumed soon …