DWright
-
Posts
38 -
Joined
-
Last visited
Recent Profile Visitors
583 profile views


-
 chris watton reacted to a post in a topic:
Duchess of Kingston 1798 by glennard2523 - FINISHED - Vanguard Models - 1:64 - Royal Yacht by Glenn Shelton
chris watton reacted to a post in a topic:
Duchess of Kingston 1798 by glennard2523 - FINISHED - Vanguard Models - 1:64 - Royal Yacht by Glenn Shelton
-
 Glenn-UK reacted to a post in a topic:
Duchess of Kingston 1798 by glennard2523 - FINISHED - Vanguard Models - 1:64 - Royal Yacht by Glenn Shelton
Glenn-UK reacted to a post in a topic:
Duchess of Kingston 1798 by glennard2523 - FINISHED - Vanguard Models - 1:64 - Royal Yacht by Glenn Shelton
-
 Sensational job on the aft deck Glenn. Even under the telling eye of the camera she looks perfect. Your whole log has been inspirational with great instructional hints. Thank you. Now it's time for me to get back to work. I've been AWOL too long. Darrel
- 382 replies
-
- 2
-
-
-
- Vanguard Models
- Duchess of Kingston
- (and 1 more)
-
Rustyj reacted to a post in a topic:
Duchess of Kingston by DWright - Vanguard Models - 1:64
-
Stimpy reacted to a post in a topic:
Duchess of Kingston by DWright - Vanguard Models - 1:64
-
amateur reacted to a post in a topic:
Duchess of Kingston 1798 by glennard2523 - FINISHED - Vanguard Models - 1:64 - Royal Yacht by Glenn Shelton
-
ccoyle reacted to a post in a topic:
Duchess of Kingston by DWright - Vanguard Models - 1:64
-
rafine reacted to a post in a topic:
Duchess of Kingston by DWright - Vanguard Models - 1:64
-
rafine reacted to a post in a topic:
Duchess of Kingston by DWright - Vanguard Models - 1:64
-
Matt D reacted to a post in a topic:
Duchess of Kingston by DWright - Vanguard Models - 1:64
-
chris watton reacted to a post in a topic:
Duchess of Kingston by DWright - Vanguard Models - 1:64
-
One last comment. I did experience a little difficulty installing the false deck as suggested. I chipped a small portion of the deck when extracting from dry fit. Next time I thing I will split the deck longitudinally as I believe Bob F. did, and avoid the damage and angst. Darrel
-
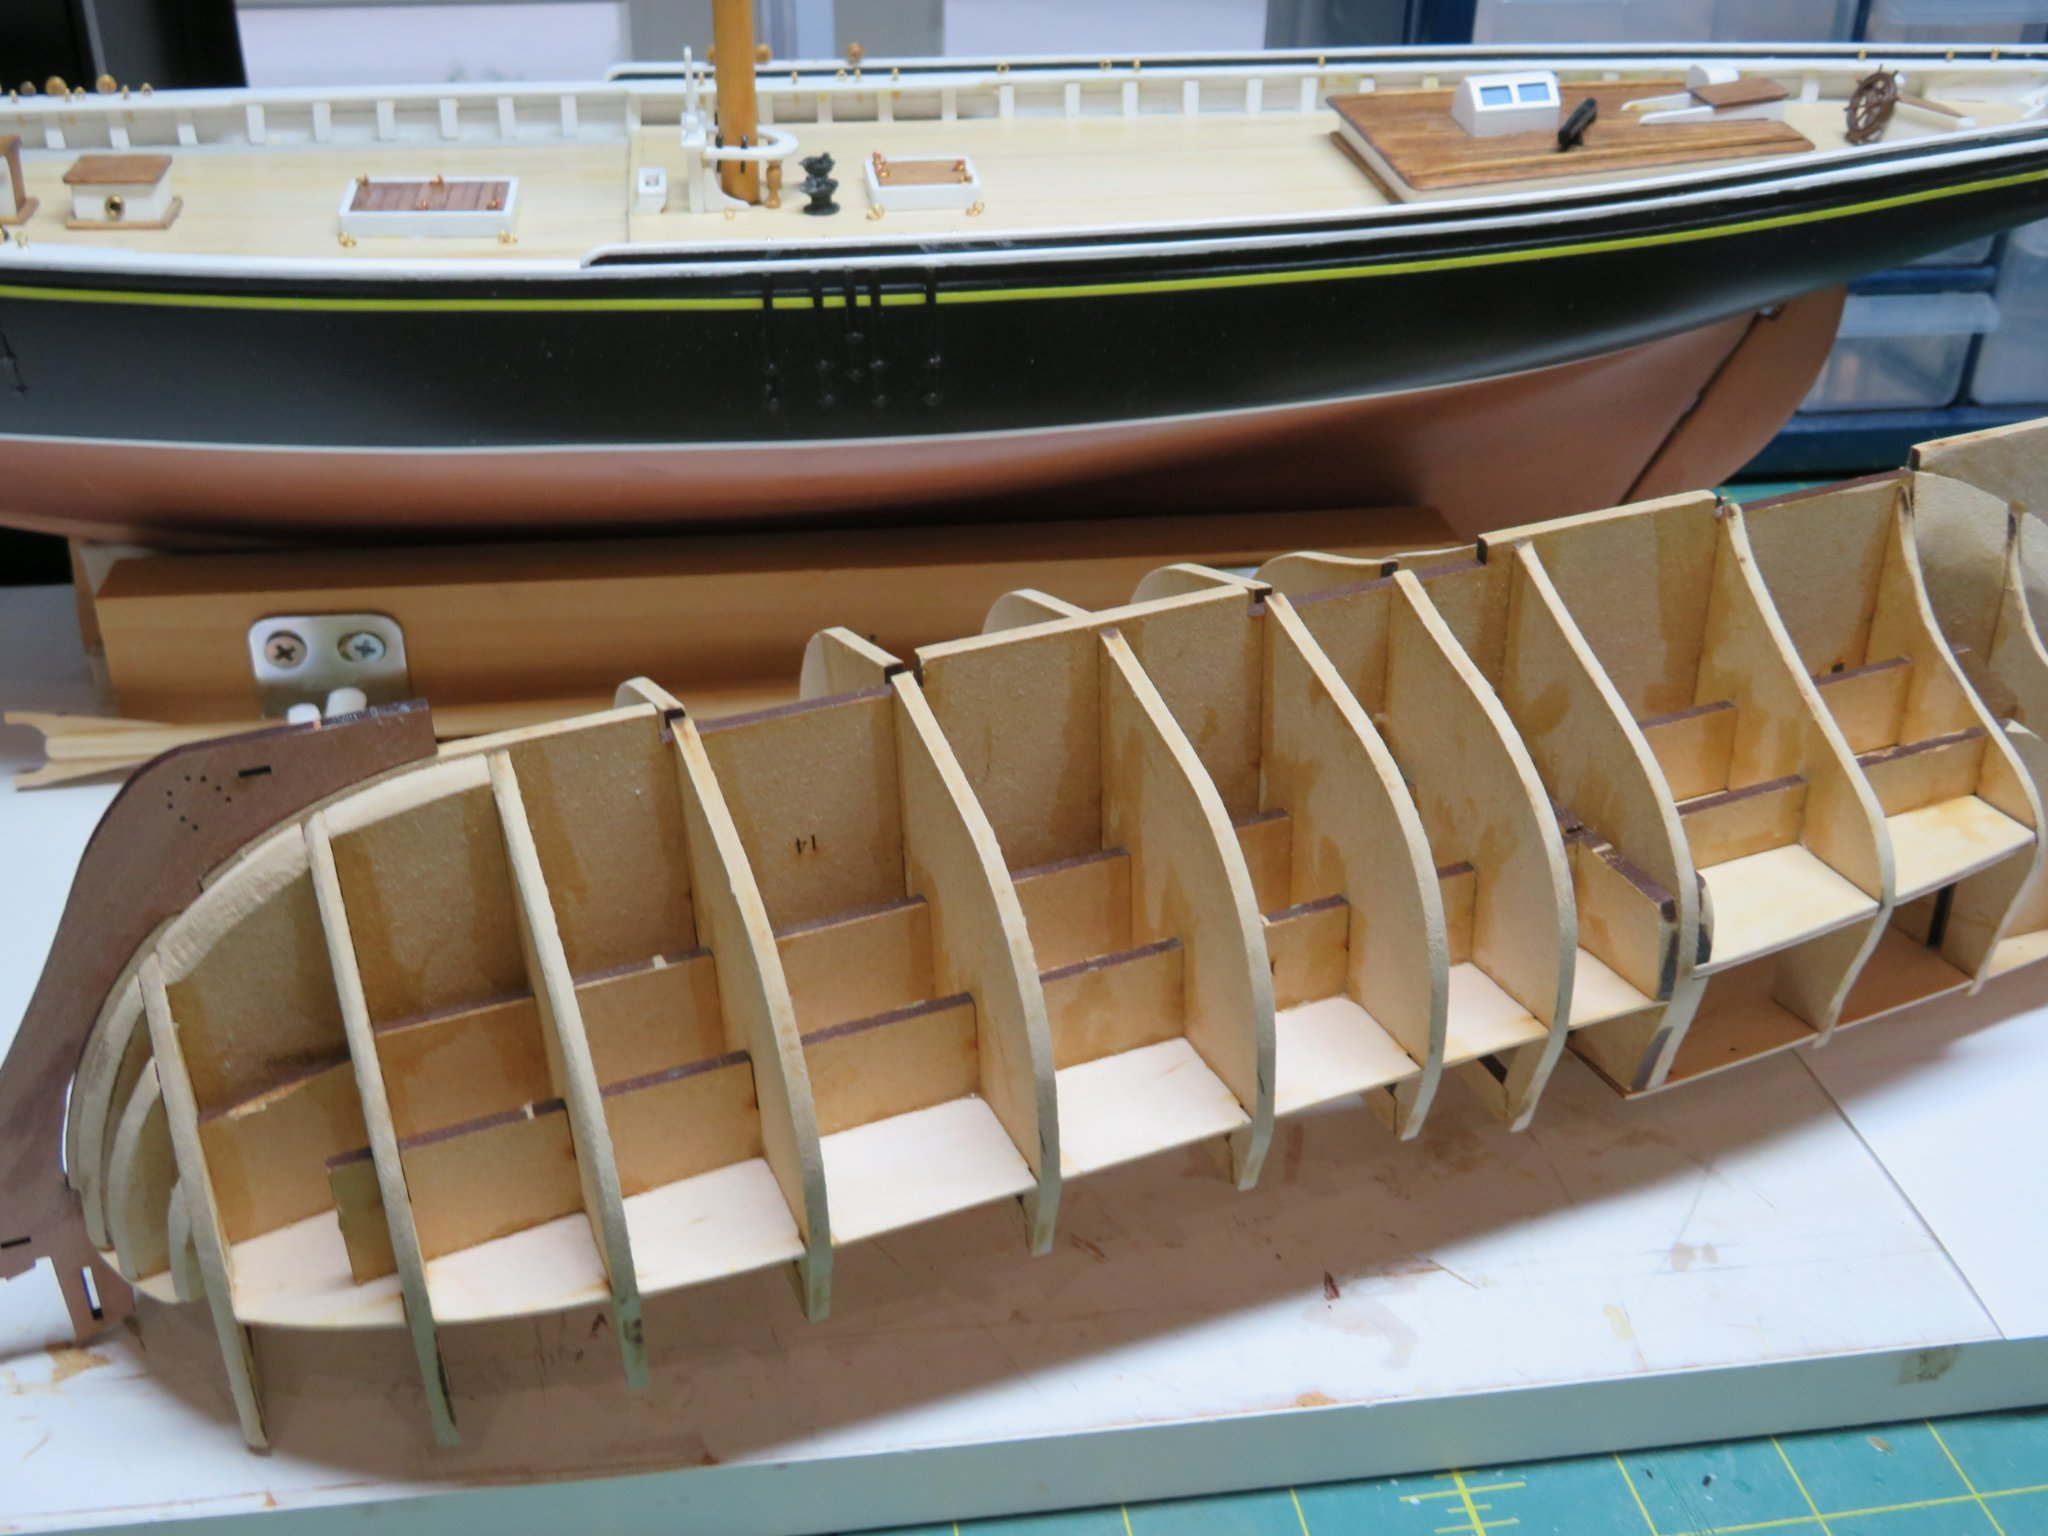
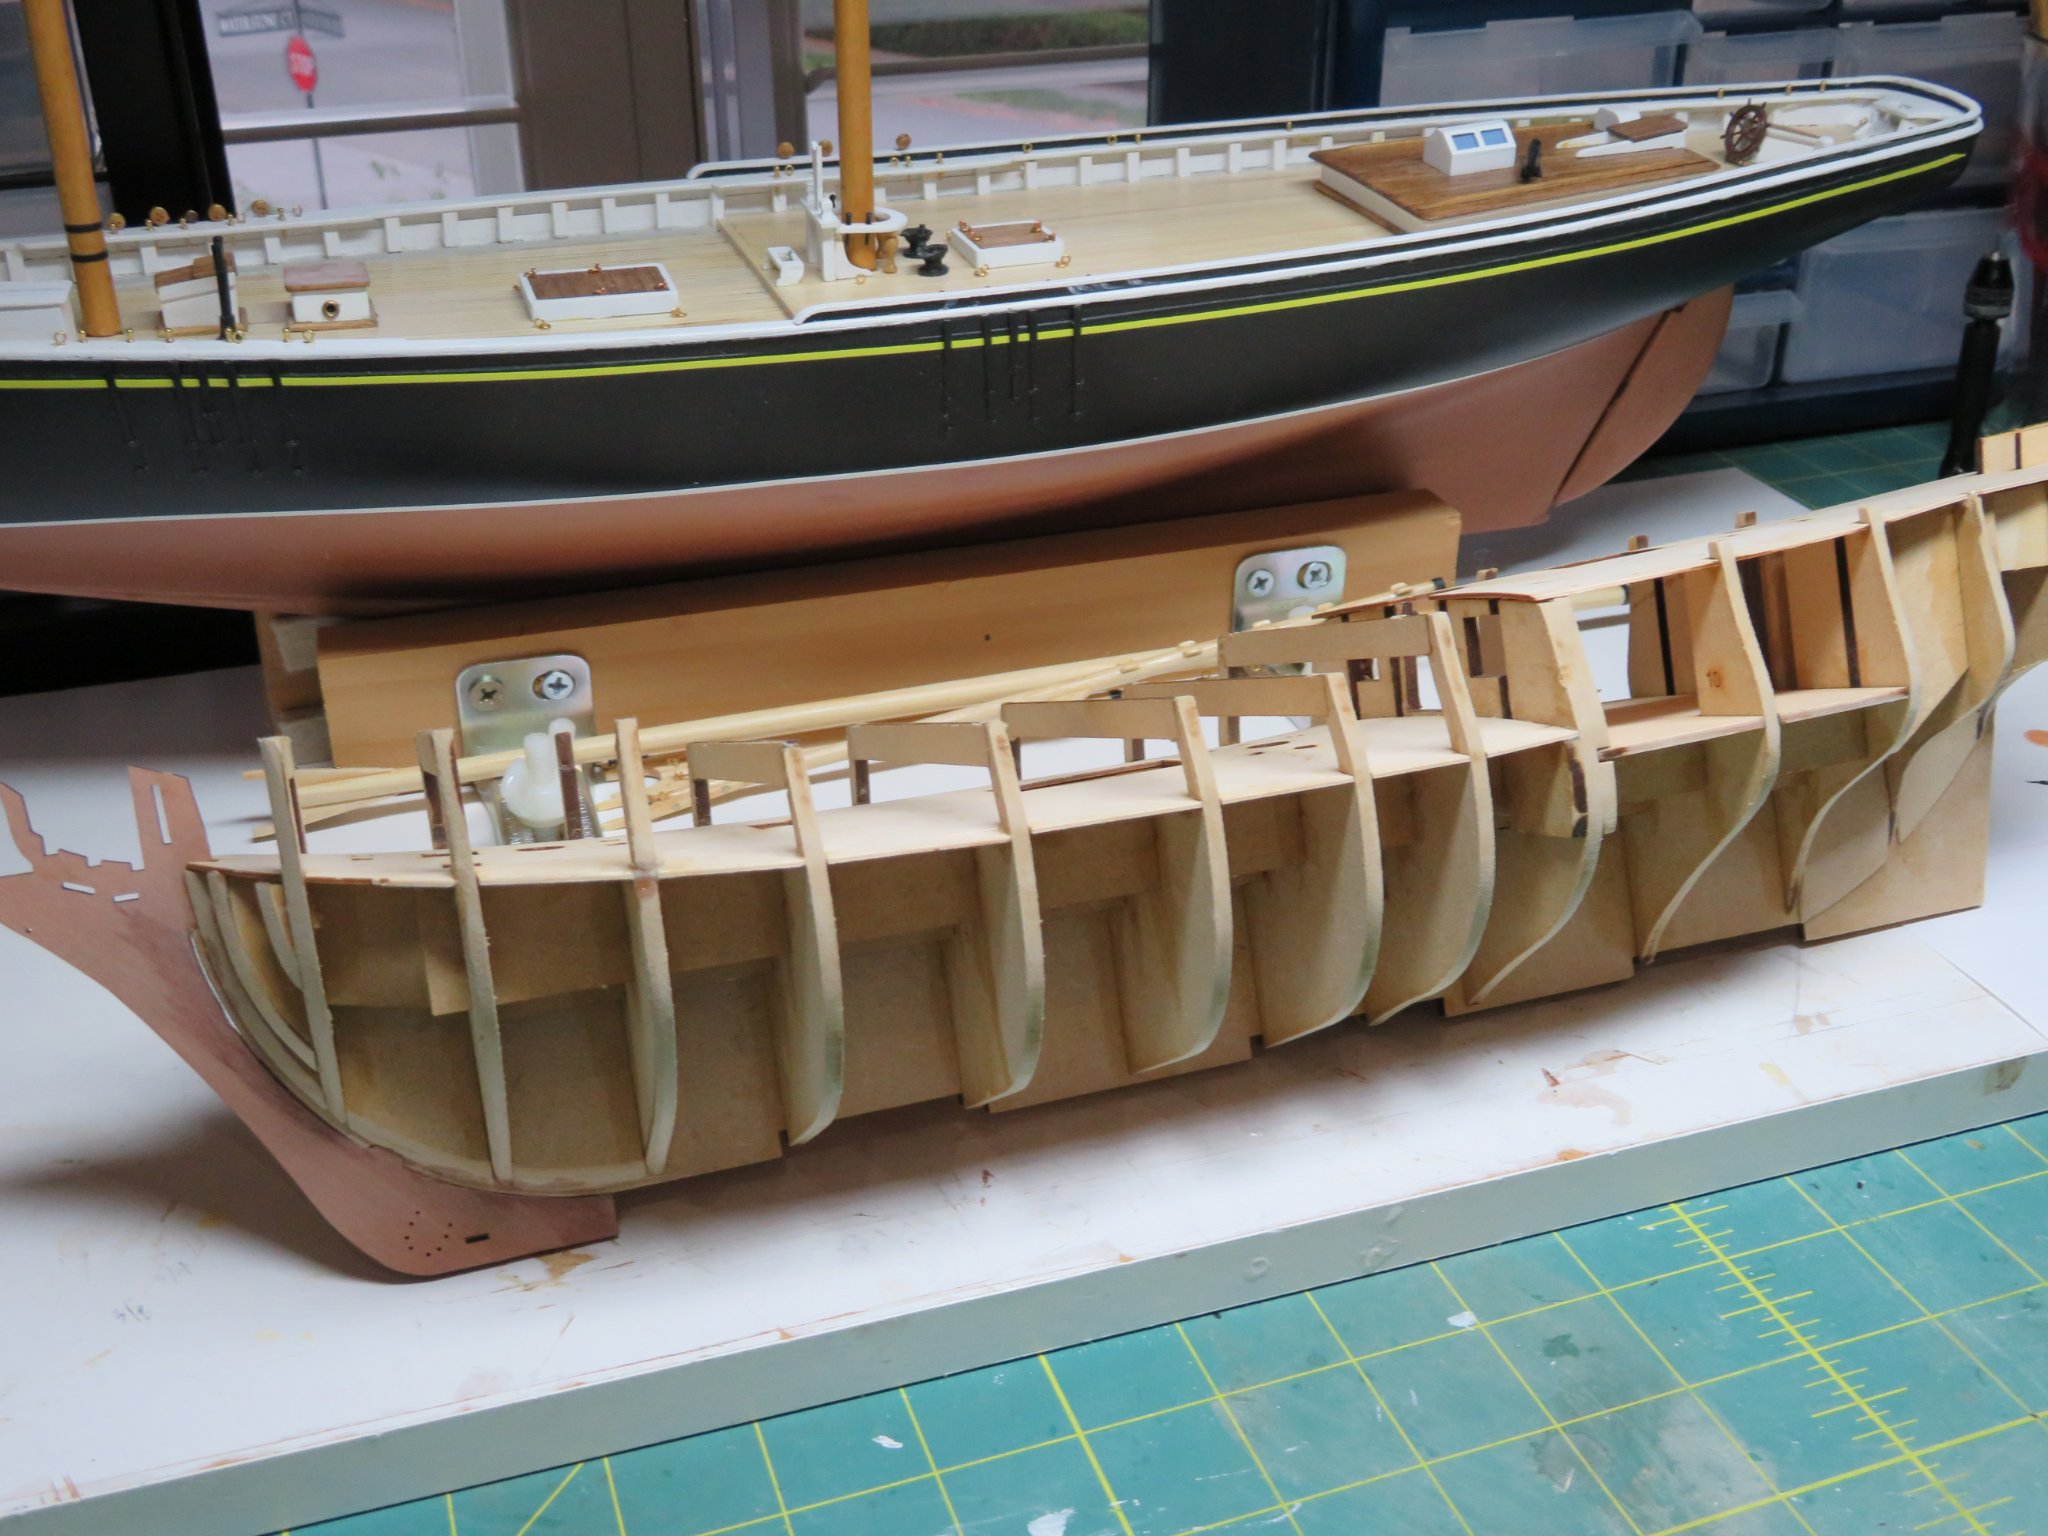
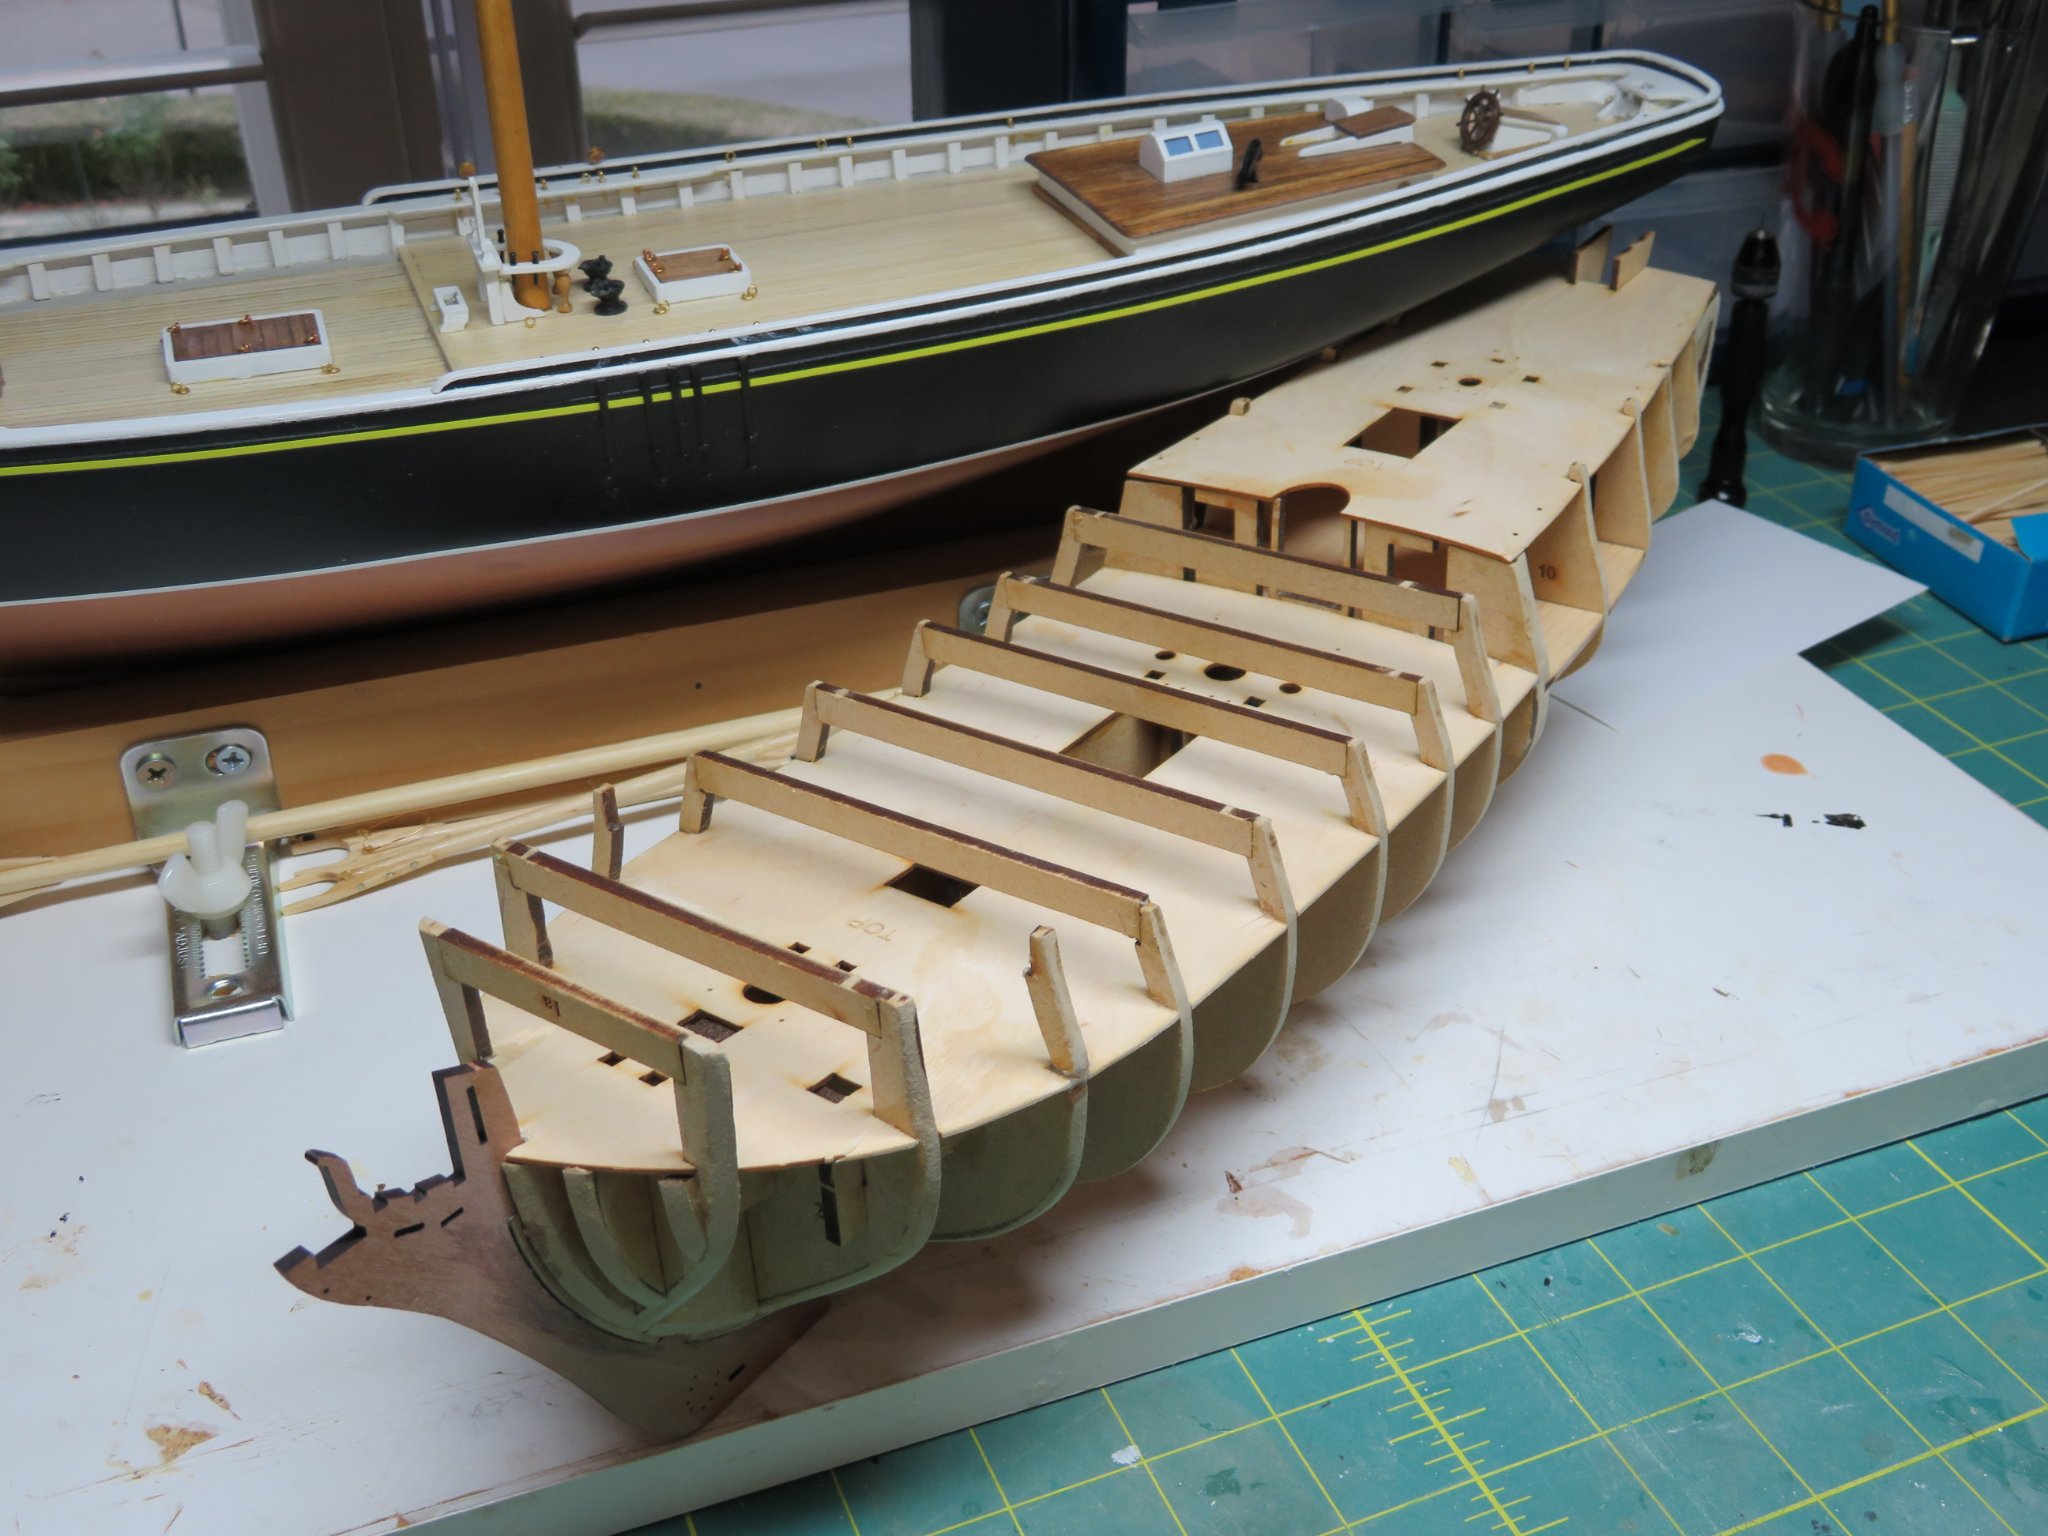
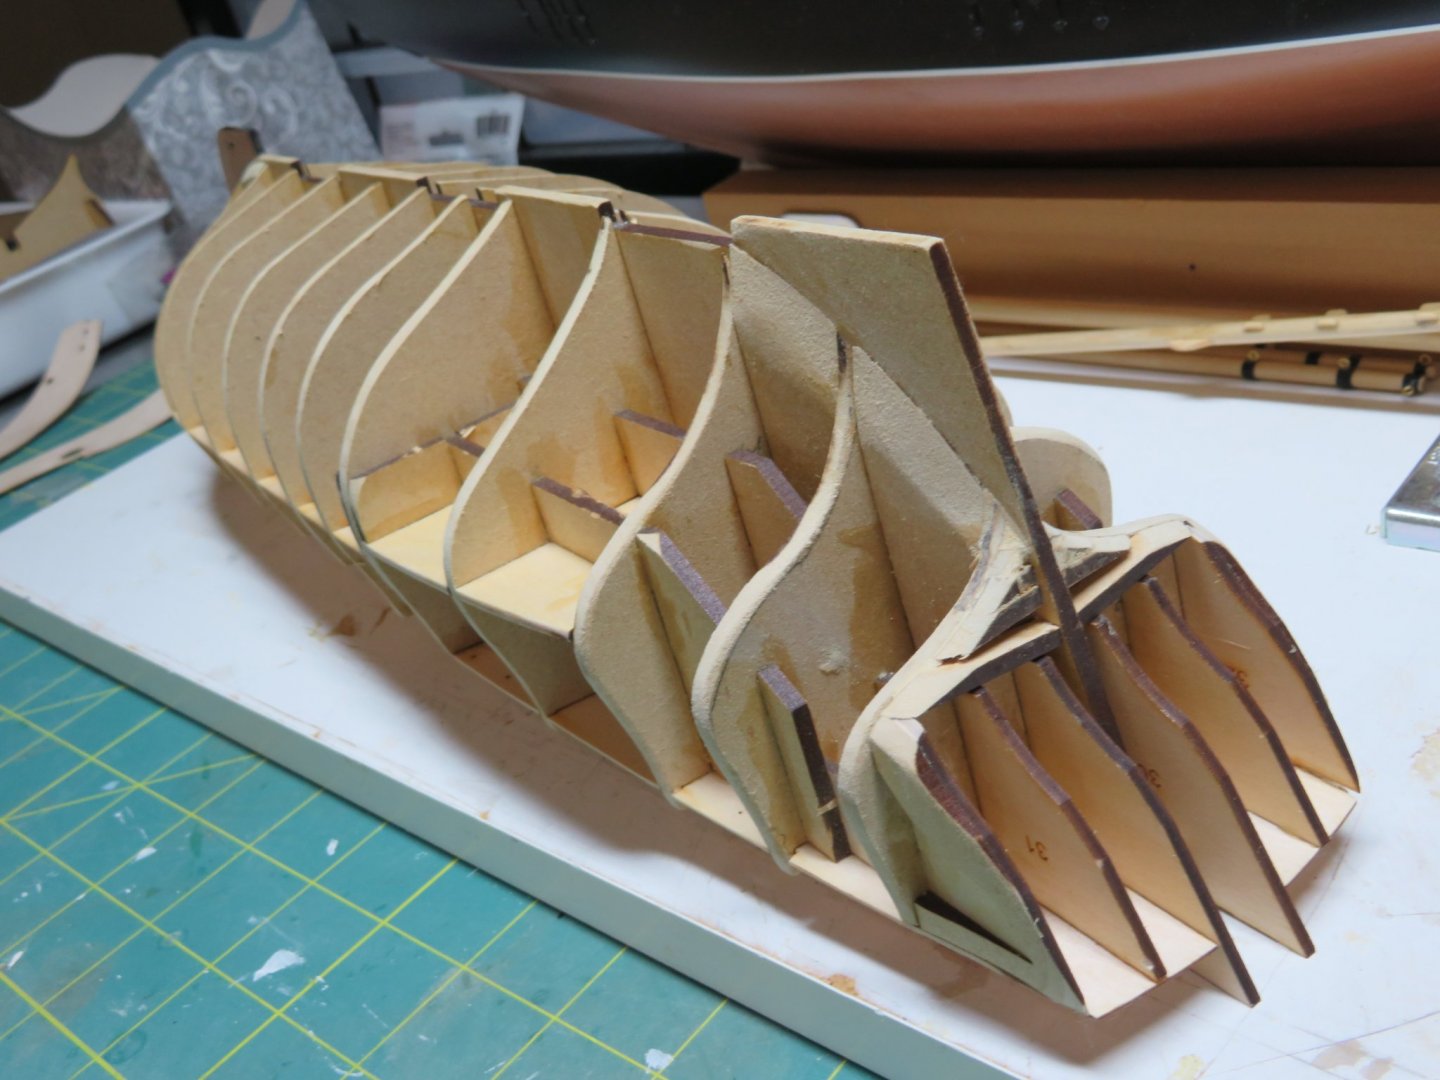
Another Duchess! Initially I was reticent to post another Duchess of Kingston build log as four master craftsmen, in the form of JamesH, Bob Fine, and the two Glenns, have posted outstanding logs as of this date. Since we all approach modeling a little differently, and in an attempt to give this log some meaning, I will point out where I have departed from convention, if at all, and what successes or failures I may have encountered. As a youth, prior to the discovery of cars and young ladies, I modeled both ships and airplanes. I few years back I rekindled my enthusiasm for modeling, and absolutely appreciate this forum no end as it buoys the enthusiasm and provides so many very helpful tips and instructions. Since I'm late to the party I will be posting pictures of the hull frame with completed fairing, and ready for bulwark installation. The first thing I noticed about Chris Watton's unique design is that the modeler does not have to worry about making sure each bulkhead is true, square and aligned. This all important task is take care of by virtue of the of the longitudinal stringer that run the length of the hull. I felt I was constructing a bridge designed by German engineers with so many components designed to keep me on the straight and narrow. Secondly, you will note, from the pictures, that I was perhaps a bit over zealous when fairing the structure, having created some rounding on a couple of bulkheads. On my previous two attempts I didn't fair adequately and had to deal with minor hollows. Not this time! Now to the photos:


-
Okay fellas I'm in. I'll take photos tomorrow and begin to write about my experiences. I truly love the ship we are all working on and dearly want to "bring it home" as close to James' creation as my meager skills will allow. I do have another question. Since my youth, this is the third ship model I've endeavoured. The first two I used CA glue almost exclusively. After the horrors of CA I now have switched to PVA, and a bit more patient attitude. However, I plan on using CA on the bulkheads, planking pinned or clamped after correct bevel and bend, and then judiciously "brush" on PVA between the planks before the first plank sanding. It's an experiment that I'm seeking comments from the far more experienced. Also, as an unscientific survey where do each of you use CA verses PVA on ship model construction? Lastly, I wish to thank all of you for the encouragement and guidance. Modeling is similar to my former passion, golf. It's an individual skill and effort made so much more enjoyable by the camaraderie of your mates, even when the "needle" is out. Cheers to all, Darrel
- 382 replies
-
- 3
-
-
- Vanguard Models
- Duchess of Kingston
- (and 1 more)
-
Glenn, this is turning out to be a wonderful tutorial! I'm at fairing stage and have already used several of your tips & suggestions. The second planking is going to be beautiful. Did you have to use any stealers in the aft section of the first planking? So far my only troubling area was installing the false main deck. I dislike having to "manhandle" ply wood under high pressure up against fragile supports. I considered cutting the deck in half after dry fitting, and chipping the ply when extracting it. I also broke off the port side stanchion #3. Not a big deal. Carry on with your superb work, Darrel P.S.: I've elected to not start a build log as we now have four, and I didn't want to clutter it up with another.
-
It looks terrific Glenn. I not only appreciate the tips and tricks you mention, but also the time log you're keeping. It give a relative magnitude to the phase of construction at hand. I received my Duchess Wednesday, and all of your insight will be most helpful. Darrel
- 382 replies
-
- 1
-
-
- Vanguard Models
- Duchess of Kingston
- (and 1 more)
-
Thanks so much Glenn. It's a real tutorial. I lost partial use of my right hand about nine months ago due to a nerve impingement, and am looking for easier ways to rig a ship. I have plenty of grip, but no ability to open my hand, so using scissors in the right hand is impossible, and seizing is so time consuming and tedious. I have printed out most of Derek's "lesson" and will be using it very soon. I too bought the quad hands, and it will be a real benefit. Again, thank you, Darrel
-
Glad to see the quick and complete recovery from the slight laps. At almost 80 I have them all too frequently! Glenn, do you happen to have a reference to Derek's rigging techniques? I'd like to review them. Darrel
-
It looks terrific Glenn! As I await the arrival of my kit I have read James' log twice and your log at least twice. The detailed information you have noted is invaluable, and truly underscores the value of a good build log. I do have a question. I have always removed the laser char, particularly on bulkheads where planking will occur, to assure complete bonding of the planks. Do you, or anyone else, feel this practice is necessary with this kit? Thank you, Darrel
-
I'm in on this build log too Glenn. I just ordered the kit last week, and am anxiously awaiting its arrival. Cheers, Darrel Wright
- 382 replies
-
- 1
-
-
- Vanguard Models
- Duchess of Kingston
- (and 1 more)
-
Thanks gentlemen for the kind words and encouragement! I can truly say.....without this forum and the encouraging words and advice from people who know what they're doing I might have put this thing down. Knowing that the accomplished modelers here often rebuild an item several time before satisfied, has spurred me to remake parts (as many as five times) until it just "looks right". One of the attributes I keep pushing on is to be neater, cleaner & crisper with each new sub-assembly. This week, while in Seattle, Floyd Kershner showed me some various milled hardwoods he had purchased from a fellow in Ohio. Man, were these "sticks" true and crisp! It would be a delight to model in boxwood, and other hardwoods, to achieve this level of precision. Meanwhile, I have a ways to go before I can put this one in a case! Thanks again. Darrel
-
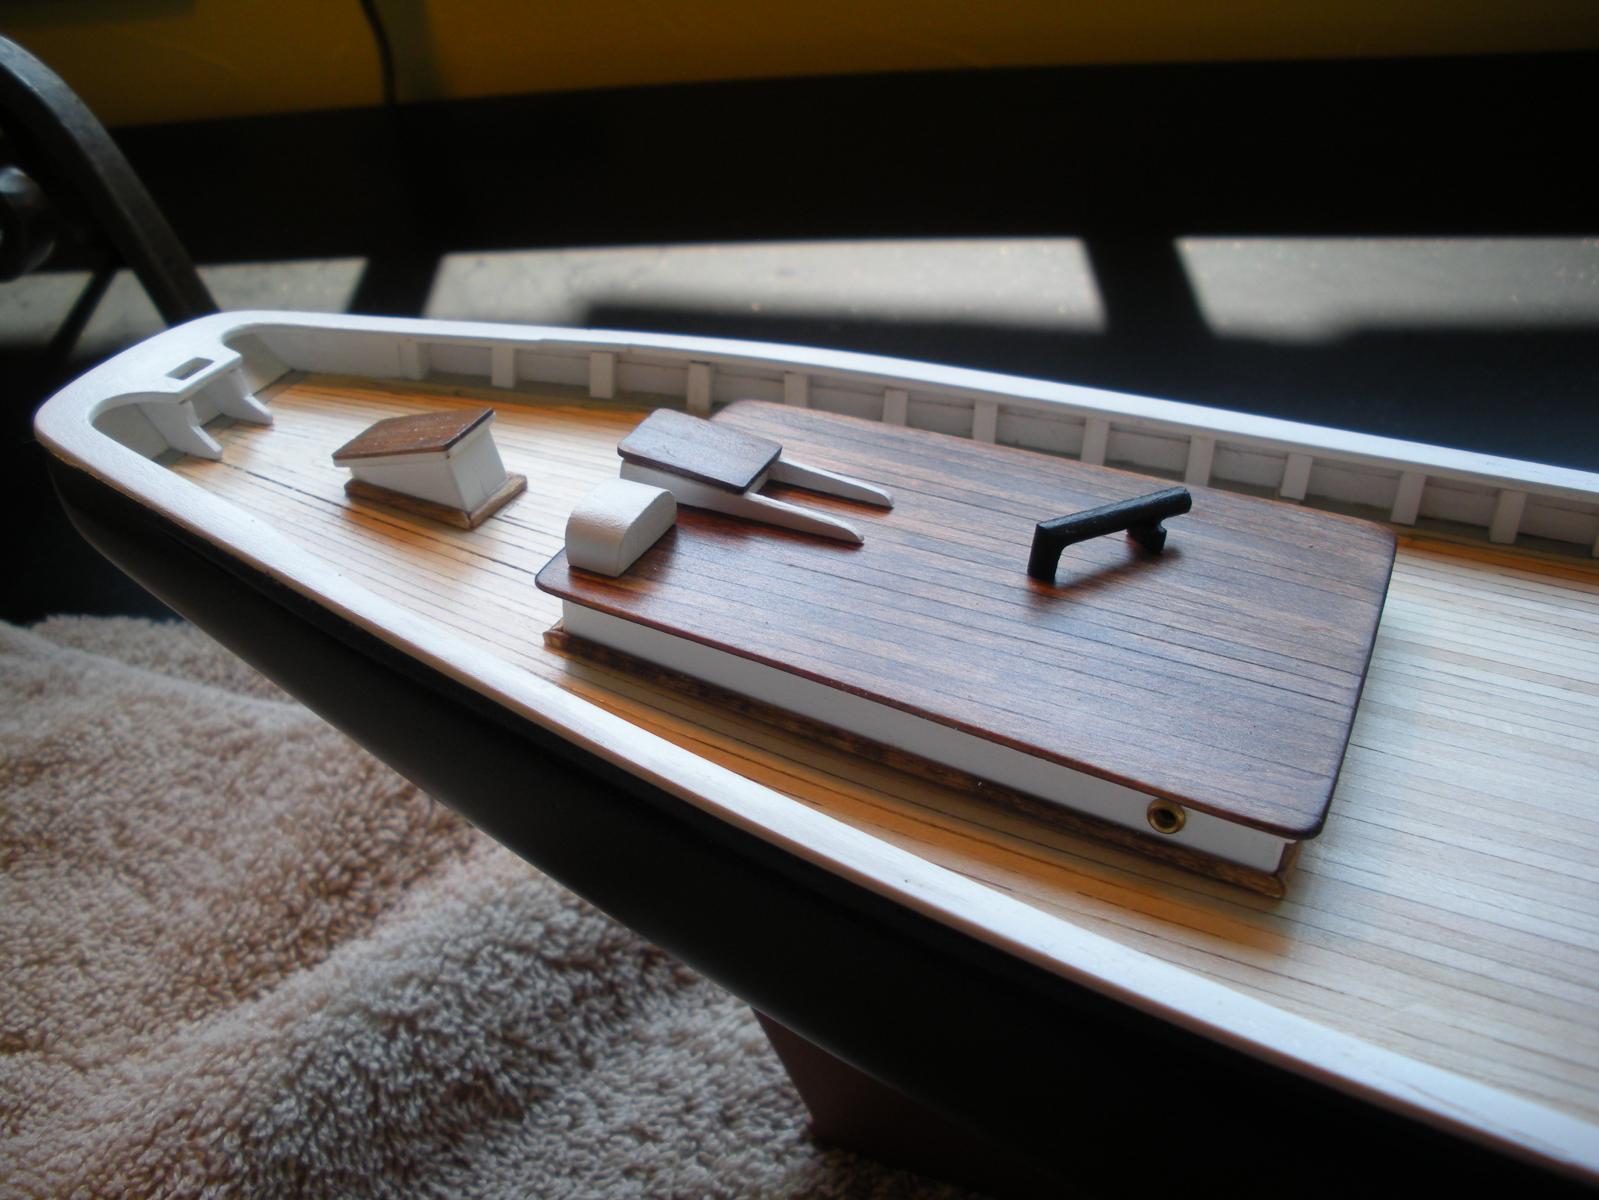
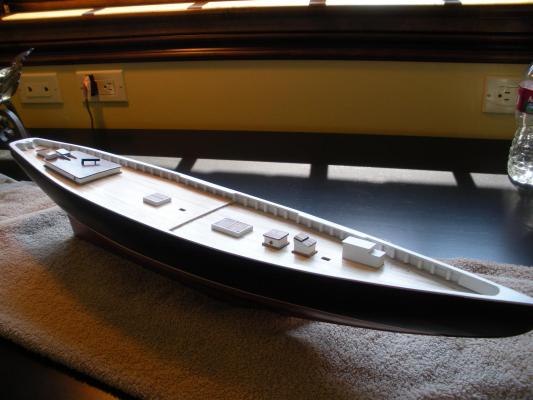
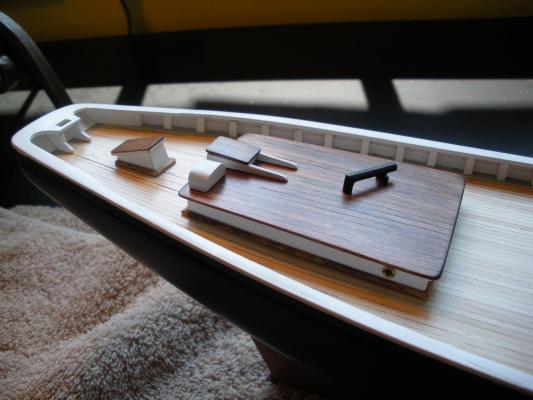
I haven’t affixed these pieces to the deck yet. However, after I complete the monkey and buffalo rails I’ll glue down these items along with the skylight, windless and miscellaneous hardware. I’ll post again when all of the above is complete. Cheers, Darrel P.S. Motored over to Seattle this weekend and spent a delightful three or four hours with Floyd Kershner and a couple other members of the Puget Sound Ship Modelers club.
-
Log #8, July 21, 2014 The hull is finally complete save the Buffalo & Monkey rails! In my last post I showed a photo of some of the deck furniture laid out in a tentative configuration between the two rails on a table. The pieces I had made were constructed, as suggested in Bob Hunt’s practicum, with painted single sheet hatch covers and roofs. Actually, they looked quite nice, but I wanted a little more authenticity and contrast, so I remade the structures with stained planked roofs & hatch covers.

-
Floyd, You're absolutely correct. I did depart from the norm with the copper paint. I happened to notice on Franks Mastini's book, Ship Modeling Simplified, that the Bluenose on the cover was painted in copper below the W/L. I liked it so I copied it. You're also right about falling in love with north Atlantic fishing schooners. I read, with great interest, Elia's log on the Arethusa, a "knockabout" schooner, and also a top flight scratch built effort. It would be wonderful to have that sort of talent, but I think I'll stay in double "A" ball for a while and hone my skills. I would, however, like to model the Blue Jacket's, 1/4 scale, Yacht America. They claim it's an "advanced" model, I think because it's POF and an Admiralty model. Anyway, the 19th and 20th century sail powered fish boats have great hull designs and I've take an interest in this genre. I think Dave's suggestion, along with Geoff's comments about securing the rails, makes a lot of sense. I gave it a dry run, setting the nose piece with the tiny reveal and using masking tape to secure the rails in the proper place. I think I'll use carpenters glue instead of CA as that will give me time to fuss with the alignment. Is the next meeting of the PSSM going to be on the third Saturday in July? And will it be at your home? I'll make sure I make this one. Also, Per and I have exchanged contact info, and we'll try to get together. Darrel
-
Thanks guys. After looking over Elia's Arethusa I'm humbled by your comments! That's what I aspire to. I have leagues to go. Dave, your suggestion made the light go on. The little nose piece is easy to set, and from there just work it back to the stern piece. The only two joints I would have to cut on the boat are the ones joining the stern piece with the main rail. One question: How does one hold the rails in place while the glue sets? I'v seen rubber bands around the hull in various pictures, and I assume they were holding the rails. With a 1/32" reveal on the outside line of the rail, getting the rail accurately secured ought to be loads of fun! Darrel