

DRW-FJ40
-
Posts
43 -
Joined
-
Last visited
Content Type
Profiles
Forums
Gallery
Events
Posts posted by DRW-FJ40
-
-
Thank you. I got that idea from the Dumas 1:8 Chris-Craft kits. And, While I do enjoy small craft at larger scale, I'm viewing most of these builds as gaining experience for larger projects to come. Nothing like deviating from the kit forces mistakes faster and mistakes are where you learn the most. l have a few that I can fix but I wish I had spent a little more time getting the planking symmetrical at the tip of the bow. That's where you notice it most & the first cherry plank has a small gap up there. I'll plan to fashion some sort of fitting/light to go there to draw attention away from my mistakes.
I have a MS Bluenose on the shelf... waiting for my skills to improve... but in the meantime, I stumbled upon the Bluejacket 1:8 lobster smack... talk about small craft at large scale... drool.
-
-
-
Well, it took a couple of weeks to get my wood... in which time I got side tracked on other projects but last weekend, I got back on this one and cut my wood into 3/16" mahogany planks for the hull and 1/4" Cherry & basswood for the deck.
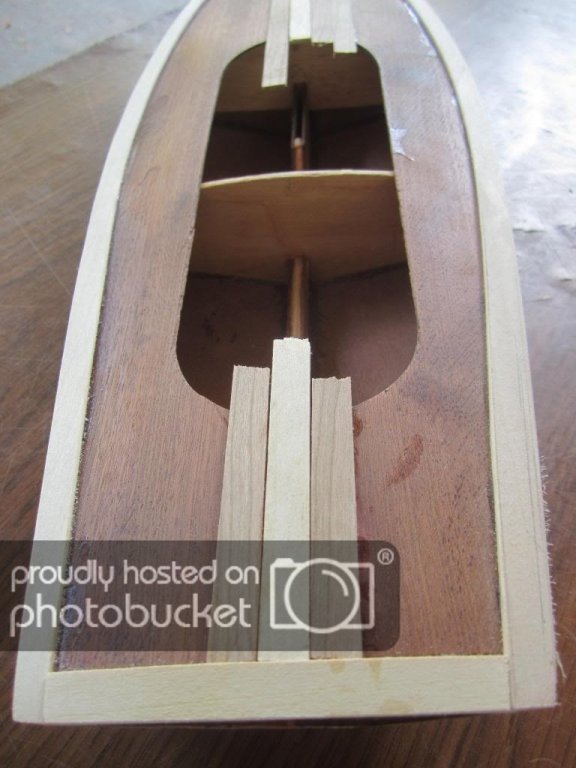
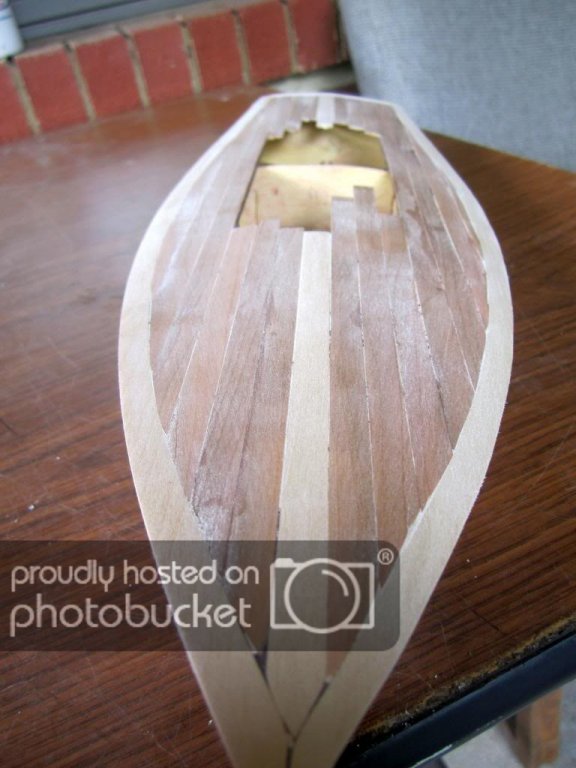
I wasn't exactly sure how to approach this since I'm deviating from the kit and while I've done plank on bulkhead, this is really plank on plywood? And it has a really sharp chine so I started at the keel, went up past the chine & then sanded that smooth and then came down from the top & went past the chine and sanded the joint smooth.
On the deck, I traced the outline of the deck & made a template and then cut curved sections of basswood to "trim the edge", put a racing stripe down the middle & cherry planking in between.
You can see a bit of my finger glued to the hull in the lower left but once I sanded off all my CA/skin it began to take shape.
-
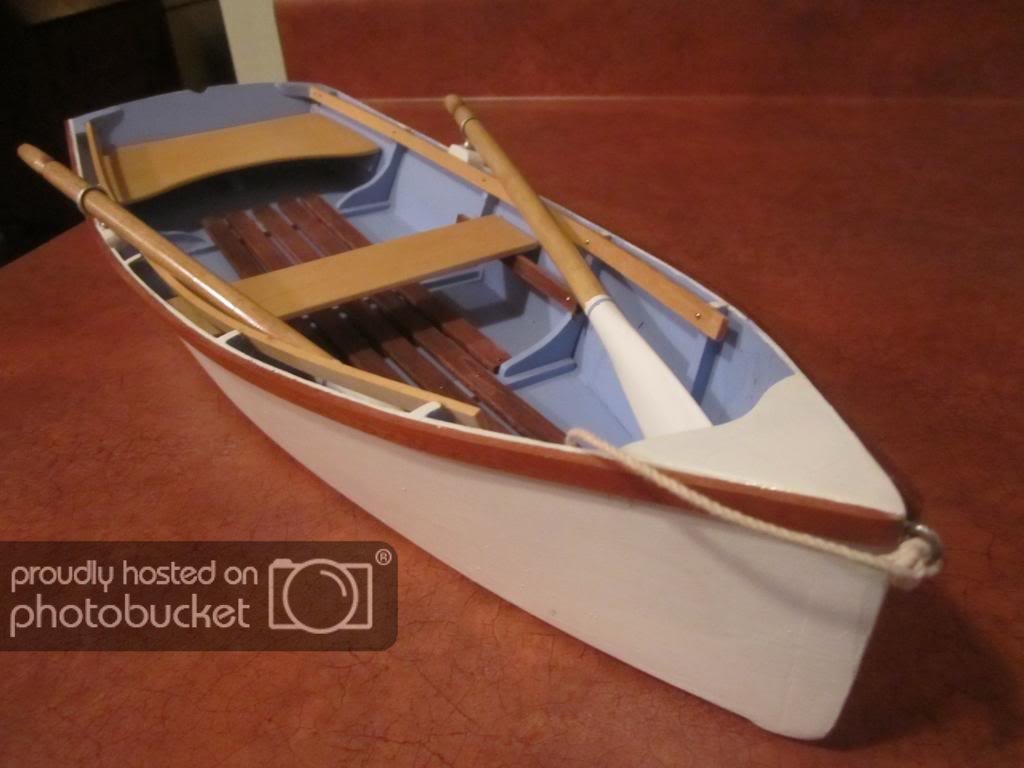
Beautiful job on this... I've been eyeballing that kit for years... I really like the small craft. You've done it justice. All the little added details, weathering, and that aquamarine color... really makes it stand out among the other whale boats.
.. float her in the tub... there are only so many places that rat can hide.
-
I ordered some sheets of 1/32" Mahogany & cherry & maple and will cut planks from the sheet stock. I hope to do something fancy with the contrasting colors of the maple & mahogany but.... we'll see.
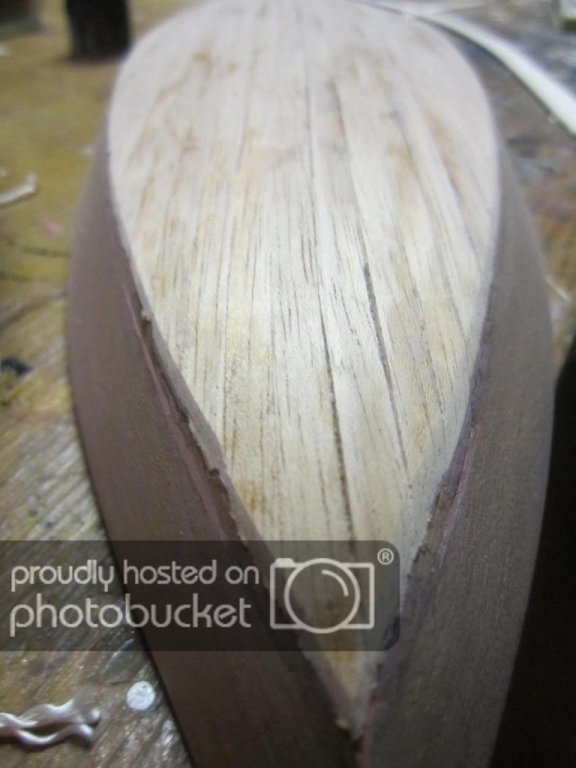
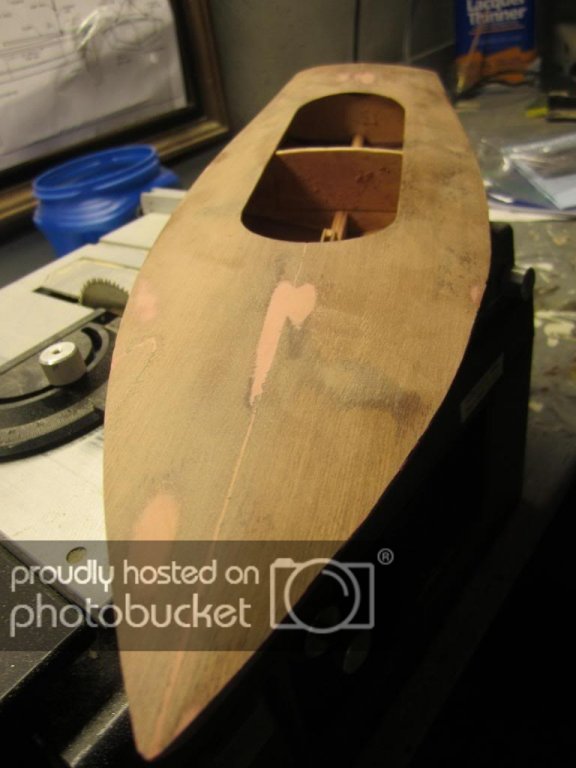
Anyway, that decision allowed me to slap some bondo glazing putting in there & fill in the joints real well and provide a nice smooth base to plank on top of.
So now... just waiting for my new wood.
-
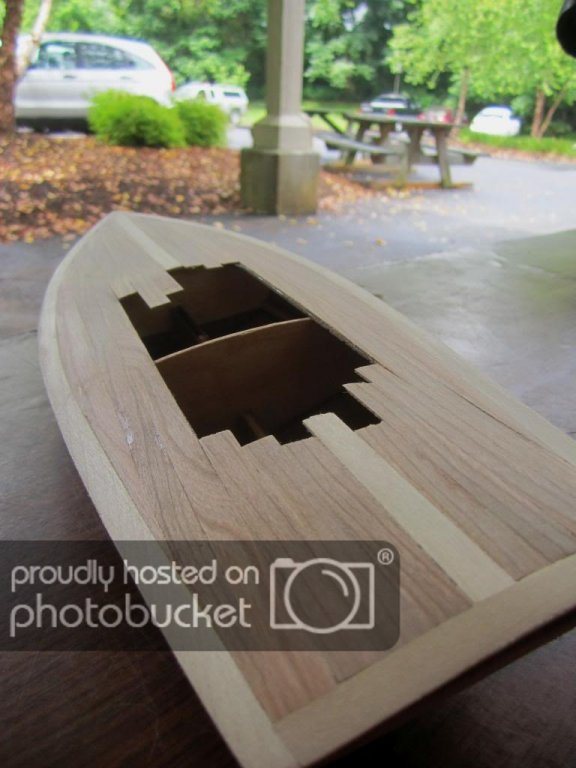
Well, I've committed to planking it. Which is a good thing because some of my joints aren't as clean as I had wanted but I had already decided on the planking so I wasn't being as careful as I should have.
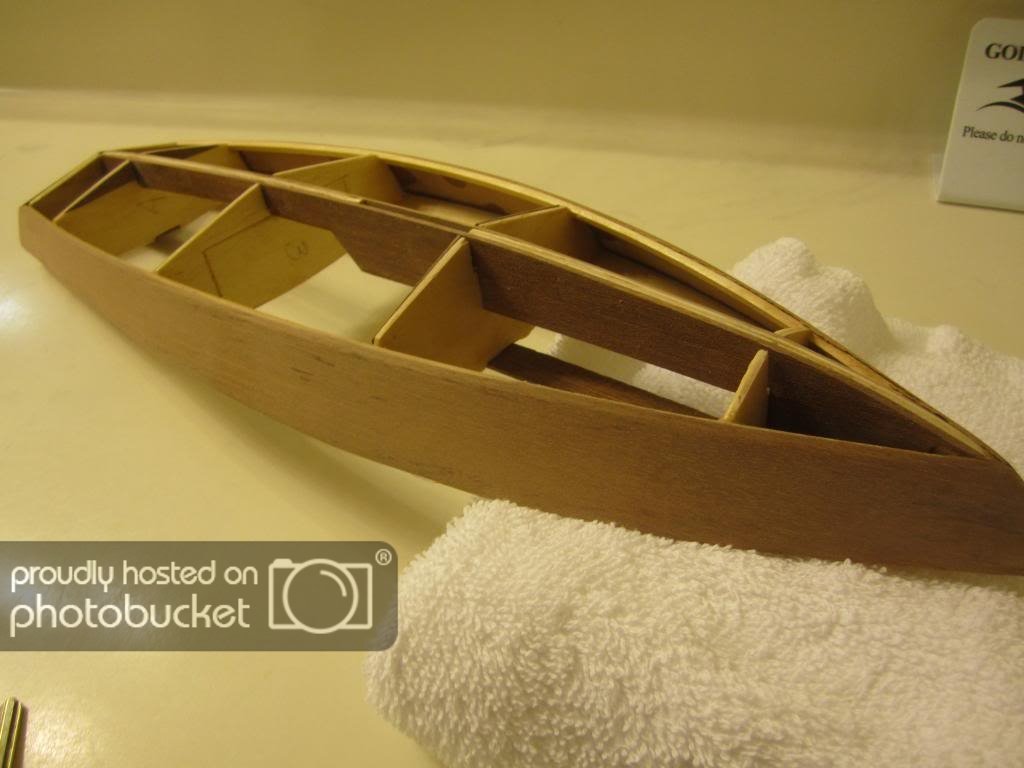
The deck pieces were tricky. For one, you can access the back side of the bottoms & sides but by the time you get to the deck, it's hard or impossible in some areas to get to the back side. Also, the instructions reccomend soaking all these pieces in warm water & forming them to the frames, wrap in ace bandage (that was a good little trick I learned on this build) but I had no problems fitting the sides & bottoms. My deck pieces however had some odd twists to them so I followed the directions here. But I still have a few "waves" I'm not happy with but should be able to hide these flaws with the planks.
I thought I had more veneer sheet stock in my scrap pile than I did. I did find a nice piece of 1/16" maple which gave me an idea and I may try and do a fancy little edge plank on the deck in maple & the rest in mahogany which will make for some pretty contrast on the deck. We'll see.
Here is where I left it last night. I'll fill the gaps & sand and that should make for a nice smooth base to plank on.
- pierremarin, Grimber and KevinR
-
 3
3
-
Wow! thanks for posting those photos SOS. It's funny how you get intimate with a design whether building a model or 1:1. A month ago I would recognize a snipe from a sunfish but instantly recognized those frames.
I like big scale and I like old small wood boats... oar or sail. I first expressed an interest in ship modeling to my wife close to 20 years ago and she got me a Wooden boats cats paw dinghy model kit for my birthday. Upon opening it and going through the instructions, I realized it was way over my head. I still have the kit on a shelf... maybe soon.
And by the way, I love that whaleboat... very nice job you've done... that ones on my list as well.
-
Hi DRW, That really looks like a fun kit. The hull is looking good. And I love the idea of sanding in bed--although I'm not sure if I like the idea of sleeping in sawdust...
My snipe is glassed-over plywood. I believe it dates from the 60's. It's painted red outside above the waterline and white below. It's gray inside. The splash guard just forward of the cockpit is bright teak. It was free boat that needs some fixing up. Like they say, there's nothing as expensive as a free boat. Still, the spars and sail are fine.
I think planking your snipe would look great. I was looking at Edwin Monk's plans for "Truant," which although it's only 12 1/2 feet long, looks a lot like a snipe. He shows three planks on the each side above the chine. It looks to me like the bottom has three planks per side too, between the chine and the keel. So, the planking is all rather wide as opposed to narrow strips.
Hope this helps.
Steve
Thanks Steve, Yes sanding in bed... seemed like a great idea at the time.
I did a little research since I posted and back in the 50's it was a do it yourself plan set that speced out plywood but I have a feeling there are quite a few variations out there so I'm leaning towards planking.
Funny to see a Snipe being built. By the way, I remember seeing these dinghies sailing through the 1950's: they were very nice sailers, but if I remember well, they were fairly heavy (around 150 Kg if I remember well), and were then soon to be outclassed by the upcoming fiberclass hulls. Are there still Snipes sailing ? I wonder!
Nice to see you building one!
Thank you... I hadn't thought too much about the history until I started building it and yes, they are still sailing. In fact based on my quick internet search there are organizations dedicated to the Snipe and most of the recent photos were of fiberglass Snipes. But many wood restoration projects out there and still people building them from plans.
-
DRW: beautiful work on the small craft! I love the combination of paint and brightwork. And I thought I was looking at a full-size canoe.
I'm looking forward to following your progress on the Snipe. I have one of those sitting on a trailer next to my garage. Don't forget the toe straps on the centerboard trunk.
Steve
Steve
Thank you Steve. I assume you have a real one and not a scale model sitting next to your garage. I'll make a note of the toe straps when I get to that step but how is your hull constructed? I'm not thrilled with the mahagony in this kit, it was more for practice but I always try to do my best. At any rate I'm considering a little kit bashing and doing some mahogany planking over the mahogany plywood that comes with the kit. I guess I'm not over concerned with the accuracy of my model in terms of being true to the original but is your full size snipe plywood hull or planked? what about the deck? If you have a picture of it, I'd love to see it.
Anyway, been traveling for work so brought this with me to work on in the hotel. I love sanding in bed... the wife doesn't let me do that at home.
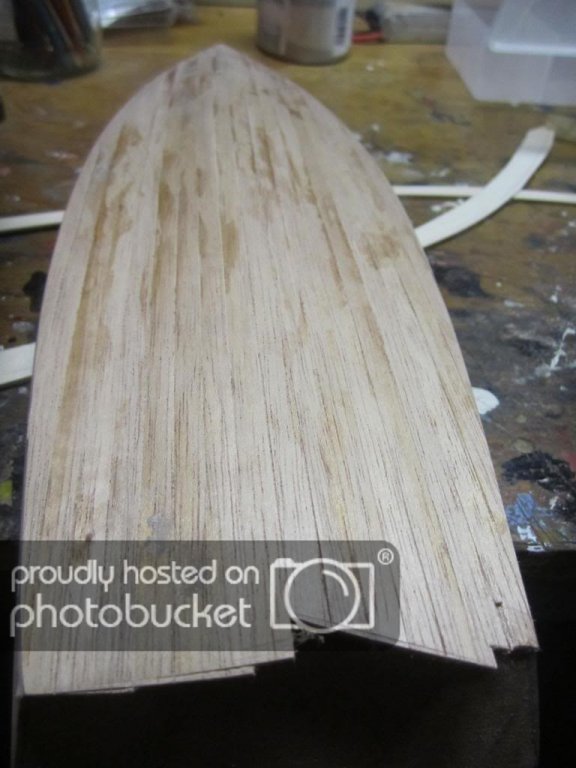
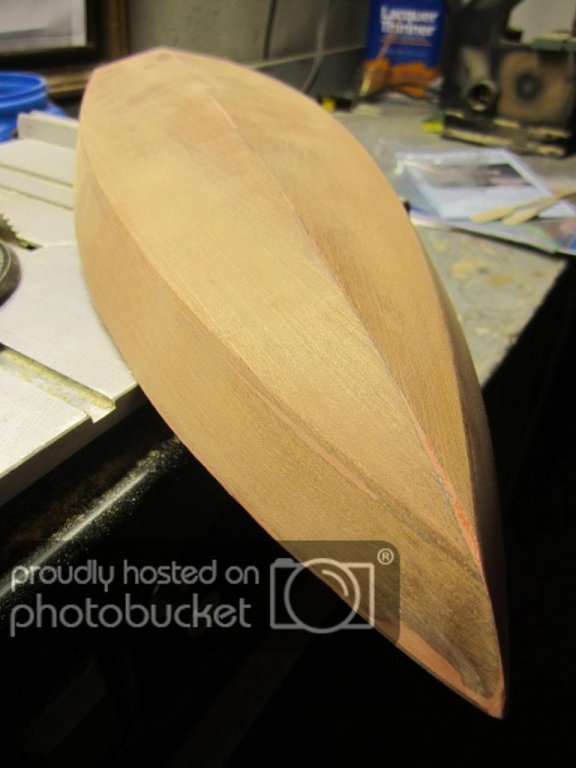
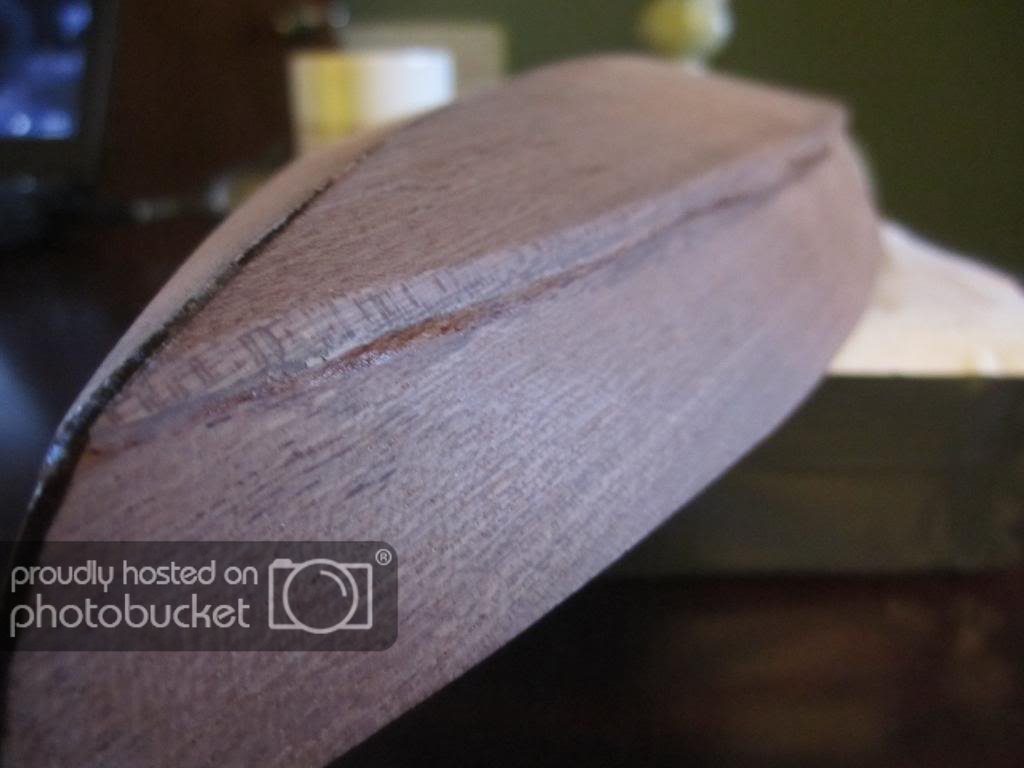
got the sides on first:
Next the bottom. I think I can clean the edges up to where they will look ok but I'm really tempted to use this as my basic shape, add a little filler where needed and then cut some nicer mahogany into strips and plank it.
-
This looks great! And I thought after my 4th midwest kit, I was ready to tackle my Bluenose... you've made this look fun.... like I want to try one.
These Midwest kits are great for gaining experience without spending a lot. You've done a beautiful job with it. I take it your wife approves and it passes the mustard for the curio cabinet?
-
I have tried another brand of epoxy resin before, but it left lots of bubbles in the finish. Yours is completely clear. Did you have any bubbles, and if so, how did you get rid of it?
I've read that the finish of choice is west systems, I've used it years ago on full size kayaks but couldn't justify the cost for these kits... maybe if I did a nice mahogany chris-craft... but I have this theory with glues, paints, etc. that staying consistant with what you use makes for predictable results... good or bad.
I didn't have any issues with bubbles... in fact, I was pretty sloppy relative to my methods, dixie cup, eye ball the quanitites & stir with a pop sicle stick. I don't care much for those foam brushes... I get a pack of cheap craft brushes at walmart & throw them away. It does go on uneven but wet sand & continue layers until there is a nice flat surface then wet sand to 2500 gt. & then the polishing pads.
I've had more issues with bubbles using polyurethane but I've got in the habit of not stirring it which helps a lot.
-
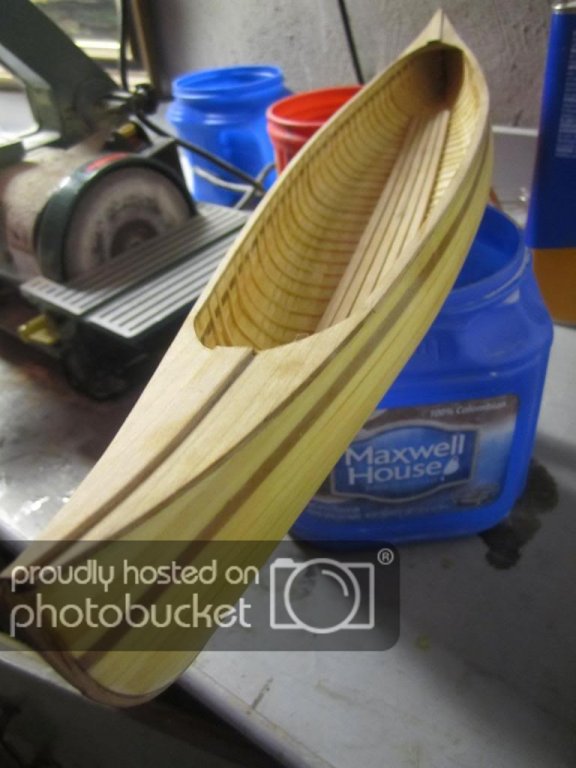
You have been busy. That canoe is smooooooth!

Thanks, not too busy... I built those over an extended period.
You have done some great work. All small boats too. I have the Dumas Ace Sloop kit waiting to be started. The instructions that came with it are pretty sparse compared the the other kits I have. It looks like you have it figured out, so keep up the good work and I look forward to seeing the finished product.
Thanks Kevin, Yes, the Dumas kit looks like it has the potential to turn into a fine model if I don't botch it but not as clear as Midwest & the mahogany is pretty grainy.... and there were a few steps in the instructions that had I not done the Midwest series, I wouldn't have been able to interpret but... good practice.
Wow, that's a gorgeous gloss finish you have on your canoe! What did you use for it?
Thank you Keith, that is Z-poxy finishing resin. It really fills in the low spots well and can make my hull planking skills apear better than they really are.
Oh, and the other key to the finish is a few years back I purchased the micro-mesh polishing pads... I use them on all sorts of projects & put a mirror like finish on my son's pinewood derby car which consisted of a $4 can of Krylon from walmart.
very little progress this weekend. I faired the hull & prepared for planks and then we lost power at the house.
-
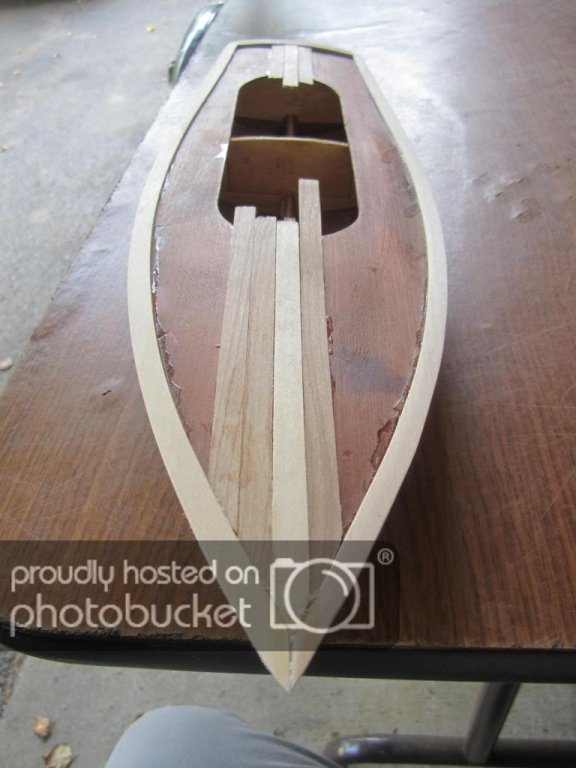
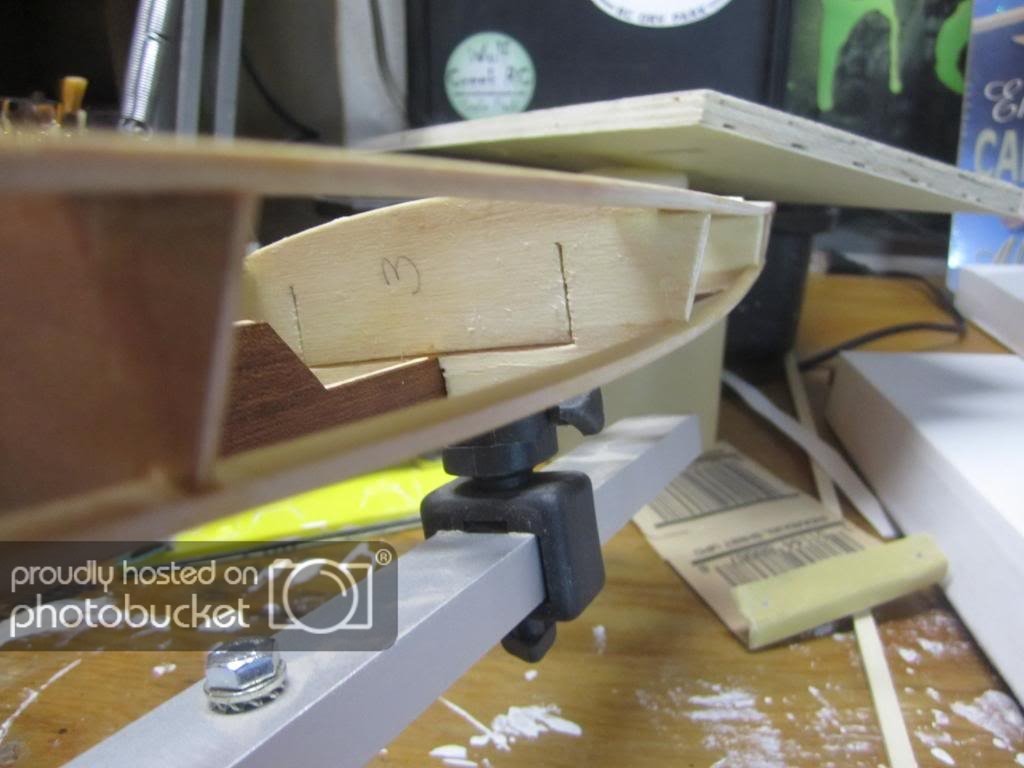
Now the Dumas... I'm glad I didn't start with this kit. It's die-crunched and the instructions need a little interpretation compared to Midwest but easy enough to figure out having built the previous boats.
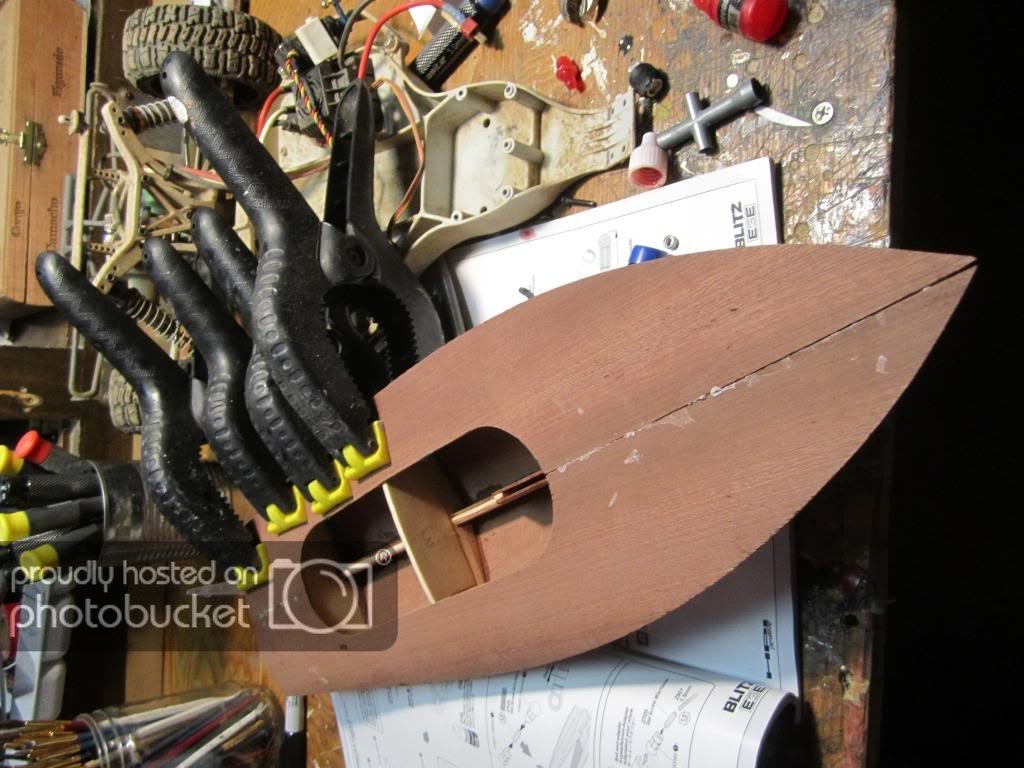
Start with the keel & I've added the frames & sheers:
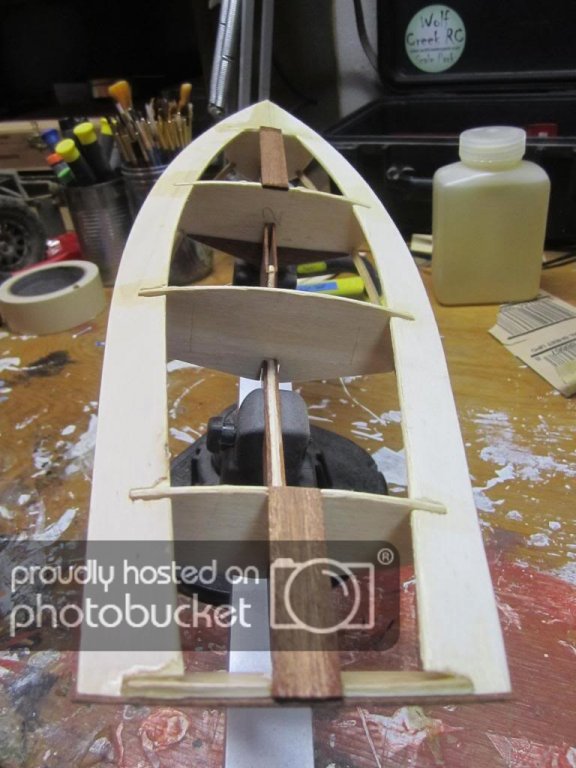
Then the chines:
- Aussie048, Senior ole salt, egkb and 3 others
-
6
-
Here are the three builds I've done so far to prime myself for planking
Midwest large skiff: basics of ship modeling concepts: plank on frame, CA glue & how not to glue your fingers to your boat, reading instructions, basic tools, etc.
Midwest Large Rowing Dinghy, basics 102, introduces multiple planks, yes there are only three per side but technically, that is multiple. If you go by the book, it's also finished natural so you are much more aware of the things you painted over in the skiff.

Midwest Canadian Canoe, This gets into planking more as it pertains to real ship modeling. The first two midwest kits, the planking is pretty much just glued on before any frames are put in (there is a jig). There are 17, 18 per side on this kit and you must bevel, bend and fit each one. Not quite finished but to far along to start a build thread.


- Senior ole salt, KevinR, petehay and 4 others
-
7
-
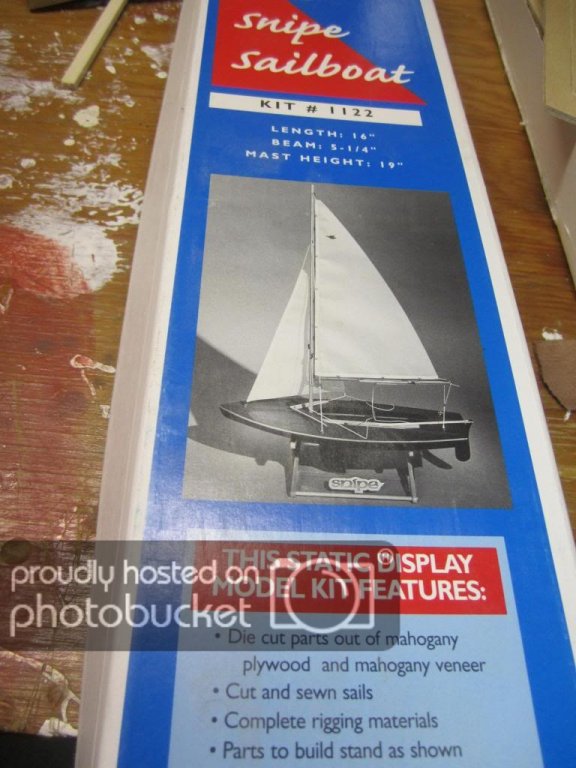
Hello, This is my first build to post on MSW. It's my 4th boat (can't really call them ships yet) in my self desiged ship modeling course. My goal is to start the MS Bluenose 1:64 kit that's been sitting on my shelf for year teasing me... "come on, I dare you, I'll shred your ego into pieces".
The first three were small Midwest kits intended to learn the art of planking. This one is intended to get a feel for rigging. I figured how much simpler can rigging get than a small sailboat?
So the box. from looking at other threads, this seems to be an old sea salt tradition. unfortunately my picture was not taken "fresh" so it's a closed box shot but... what can I say.
-
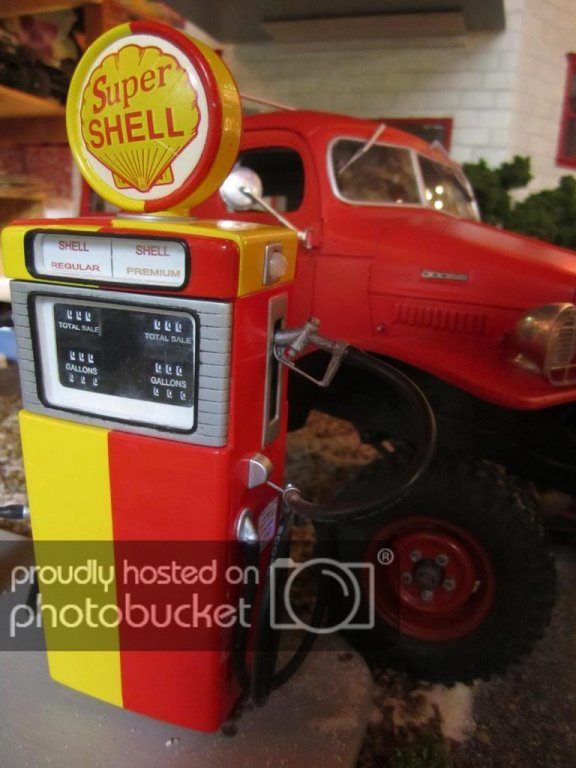
I'm sort of new here but this topic caught my eye. As someone mentioned, material is key for detail. I recently designed a 1950's gas pump and had it printed via shapeways. My conclusions were that you can get that CNC detail with frosted ultra detail plastic and a little elbow grease but... it's plastic and it's expensive. Ultimately it's good for a prototype to "sell" the idea to someone with access to less expensive manufacturing methods. But that cannon would look real good in a material with better detail quality like the "frosted ultra detail"
This is the finished pump model which is 10 scale so about 7.5" tall. The larger pieces are made of "strong white flexible" plastic because it's cheaper and they didn't require the detail. But the pump nozzle & engraved lettering on the face plate are FUD. I experimented with different materials and just couldn't get the detail.
- dgbot, Ryland Craze, avsjerome2003 and 2 others
-
5
Snipe by DRW-FJ40 - FINISHED - Dumas - Small - 4th in my intro to ship modeling
in - Kit build logs for subjects built from 1901 - Present Day
Posted
We are our own worst critics, aren't we. I think I may make a fitting of some sort to cover it up. I thought about a light but it doesn't seem like a small sailboat like this would have lights.
Anyway, I finished sanding and trimmed out the cockpit area, applied natural stain & I must say I'm pleased with the basswood. You expect cherry to look nice with stain but I was pleasantly surprised with the grain in the basswood. after the stain dried, I start brushing on coats of finishing resin.