HOLIDAY DONATION DRIVE - SUPPORT MSW - DO YOUR PART TO KEEP THIS GREAT FORUM GOING! (Only 66 donations so far out of 49,000 members - Can we at least get100? C'mon guys!)
×


MarisStella.hr
-
Posts
479 -
Joined
-
Last visited
Content Type
Profiles
Forums
Gallery
Events
Everything posted by MarisStella.hr
-
 Hi Bob, do you have new photos of this schooner? I'm curious to see the rigging ...
 -
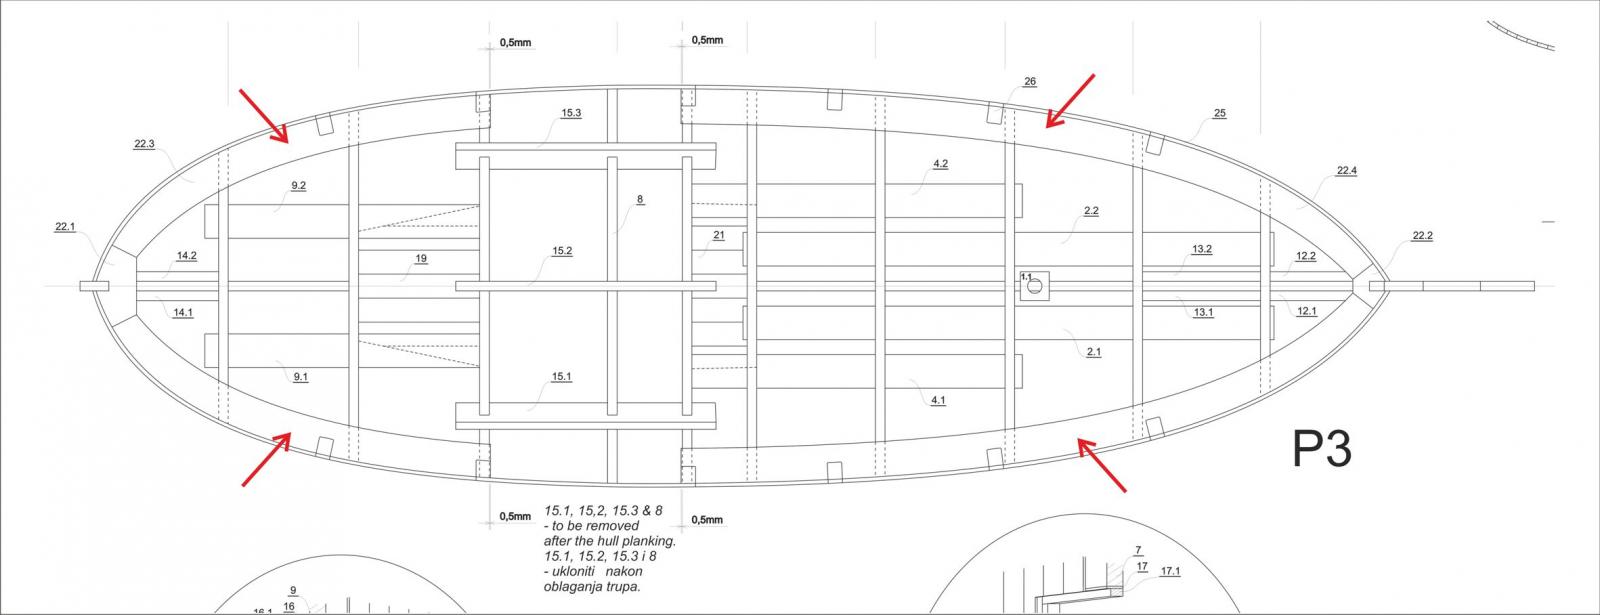
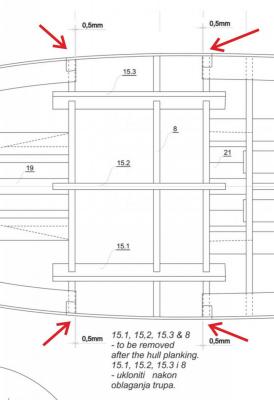
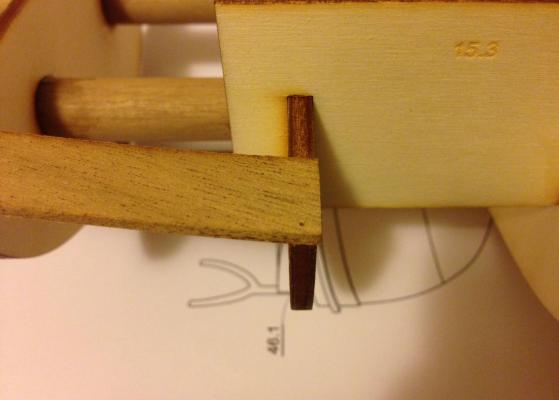
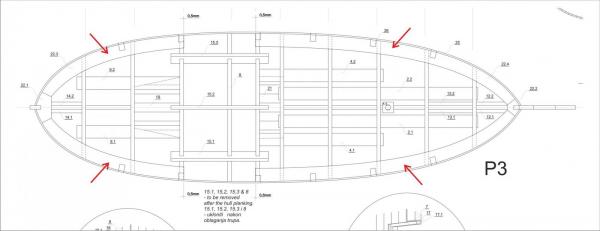
... Dear friends, this is it ... These supports are enough for the modelers with a lot of experience in the hull planking... but never enough sufficient ... This is a single planking method , which means that there is no work repairing ! Putty is allowed, but only in a very small quantities ... To achieve that the planks fit into its place properly, it is necessary to prepare an accurate and stable base for them ... ...And this is what I suggest to everyone, no matter how experienced modeler is : ... My advice is: make a stern and bow blocks... make them out of soft wood ... but not only that, but make the fillers between other bulkheads, wherever you see that it is necessary ... It is essential to create a stable, solid surface for the planks ... Each plank must fit properly into its place, any twisting needs to be disabled ... ... I did it like this :


- 150 replies
-
- 5
-

-
- TRAJTA
- fishing and cargo boat
- (and 2 more)
-
pete48, this is an art ... this is a work of art, it looks simple, but in fact it is the extreme of harmony and elegance ...
- 296 replies
-
- 1
-
-
- herreshoff
- buzzards bay
- (and 1 more)
-
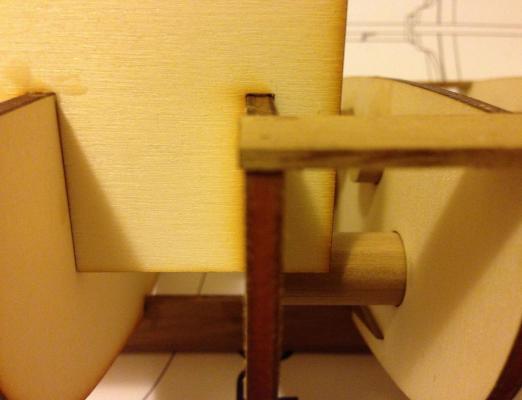
pete48, JMaitri, thanks for the nice comments, ... JMaitri, extendings are 0,5 mm ... here's why : the bulkheads with the extensions are going to be planked with 0,5x5mm strips, so the strips should be in the same plane as the rail ends... it is to be shown later ... everything to get a realistic build ... Now ... it's time to set the supports for the planking strips endings on the stern and bow ... That is quite enough for the proper planking by modelers with more experience in the hull planking , but I always suggest something else ... I'll show it to you a bit later, when I finish this phase, after fixing these supports ... ... So here are the supports:

- 150 replies
-
- 7
-
-
- TRAJTA
- fishing and cargo boat
- (and 2 more)
-
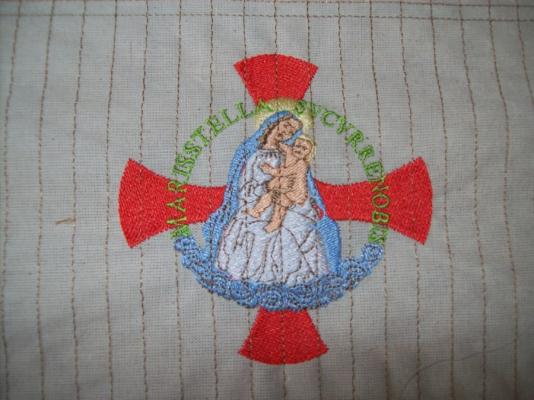
I am very pleased that you like their look ... it's a computerized embroidery ... all samples are identical, they have to be ... sometimes it happens that in some series the color of thread is a little different, that's all the difference ... the interesting thing is that the color of embroidery is the same on the both sides of the sails ... we put the sails made of embroidered fabrics in all our kits ...
-
Thanks pete48... the best things are coming after the hull planking...
- 150 replies
-
- 1
-
-
- TRAJTA
- fishing and cargo boat
- (and 2 more)
-
Max, thank you very much ... I can say that if I am alive this kit will be produced, maybe next year ... ... In parallel with my work, my good friend modeler is doing this model (using this draft) with the intention to compete in the national championship ... His work is appreciated and he always gets medals ... We have already done the same with the MARISSTELLA projects and succeeded at it ... I really enjoy doing this...
-
right jastrząb ! usually it is a problem ... you've done fantastic sails .. it seemed strange to me that such a well-made sails are placed in the kit .... If you did not mind, please, take a look at this ... this kind of sail we put the Santa Maria kit... Otherwise ... you've done this model very well ... congratulations on the sails ...

-
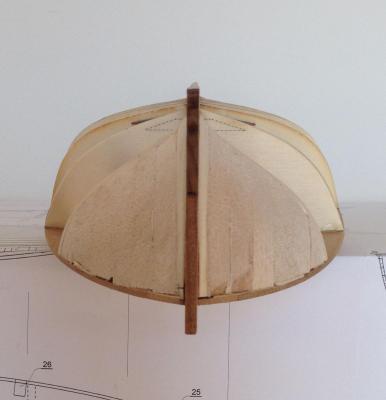
... and now it is time for the false keel... it is made out of a walnut strip...


- 150 replies
-
- 7
-
-
- TRAJTA
- fishing and cargo boat
- (and 2 more)
-
Hi jastrząb ... are those sails made of fabric? are these vertical stripes sutures? was it attached in the kit made in such a form?
-
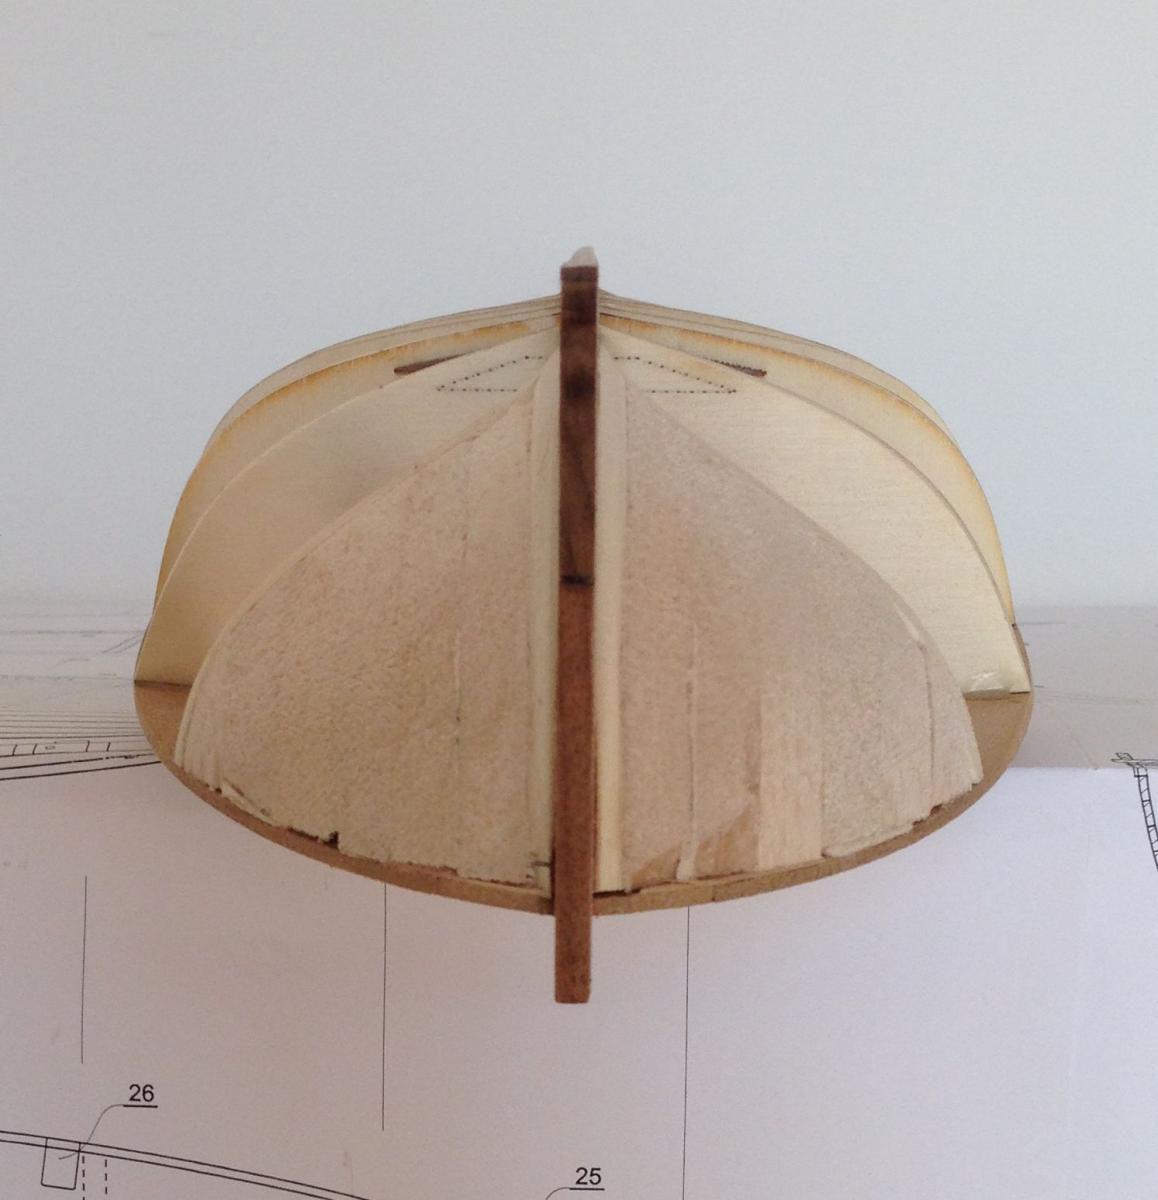
... Dear gentlemen, here's a clip from the draft ... I just finished the stern view :

-
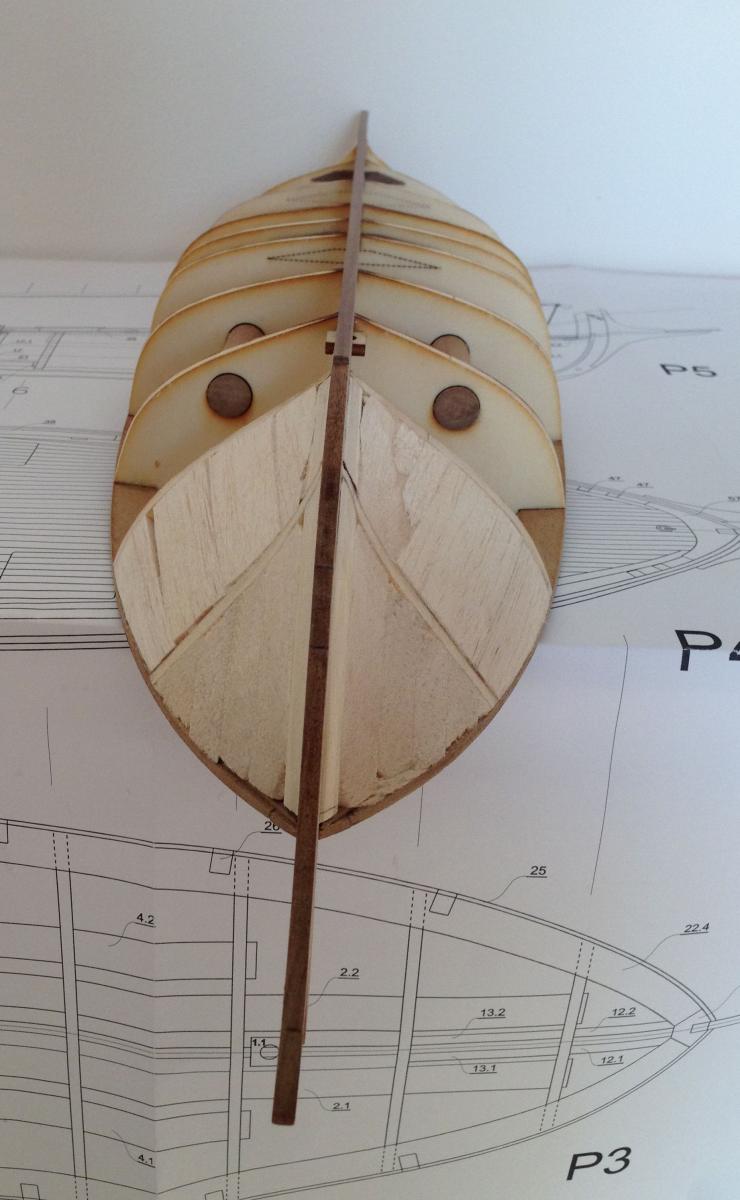
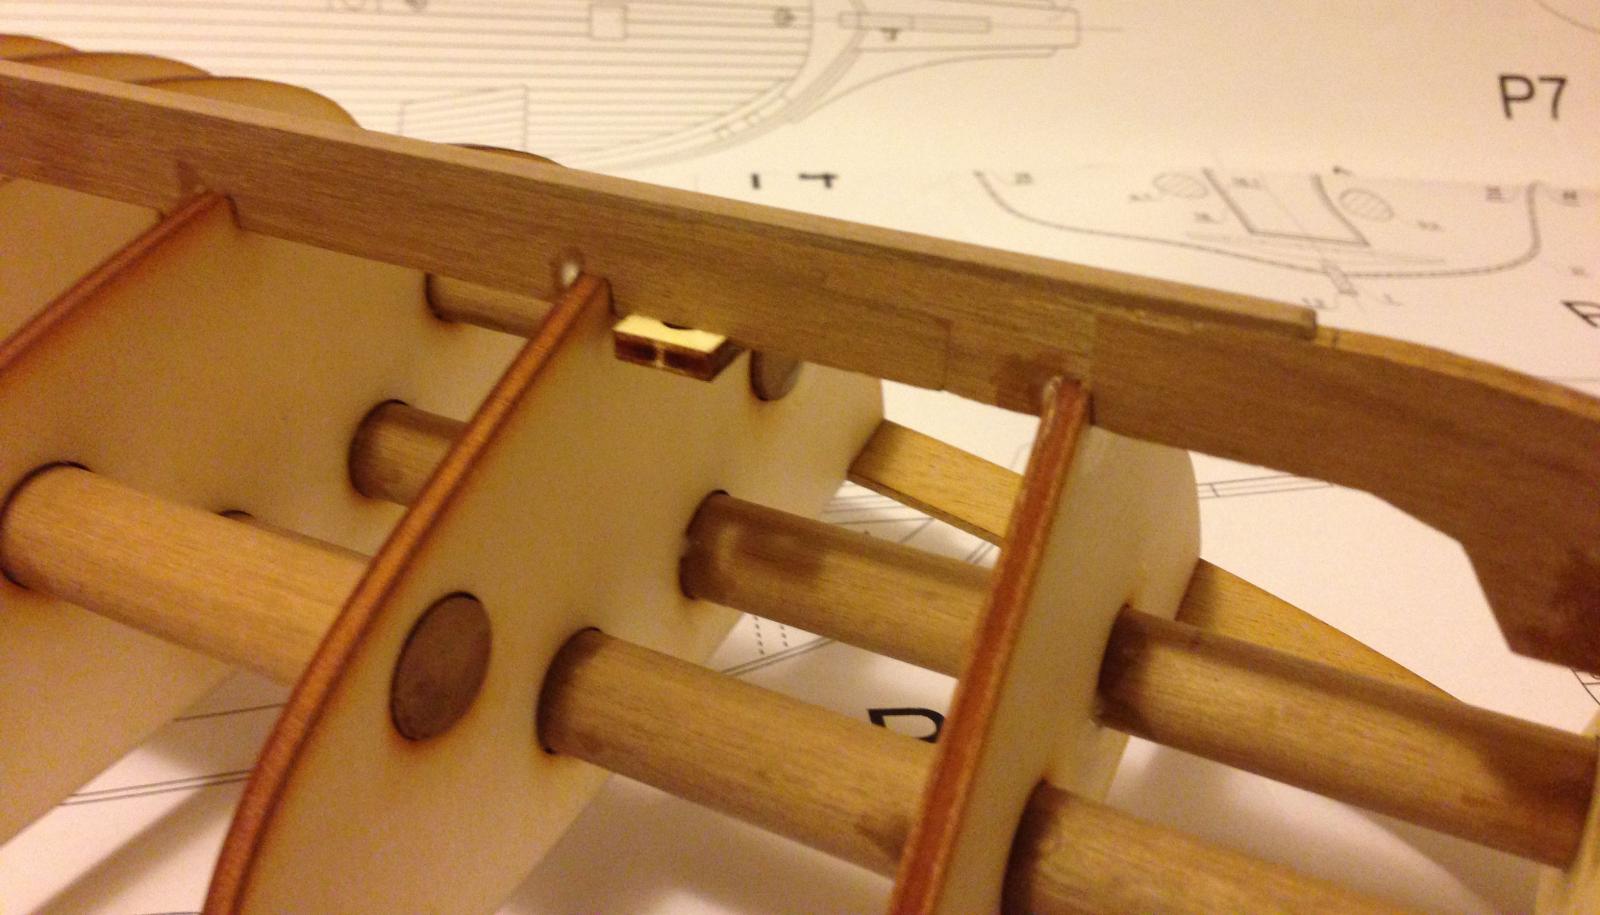
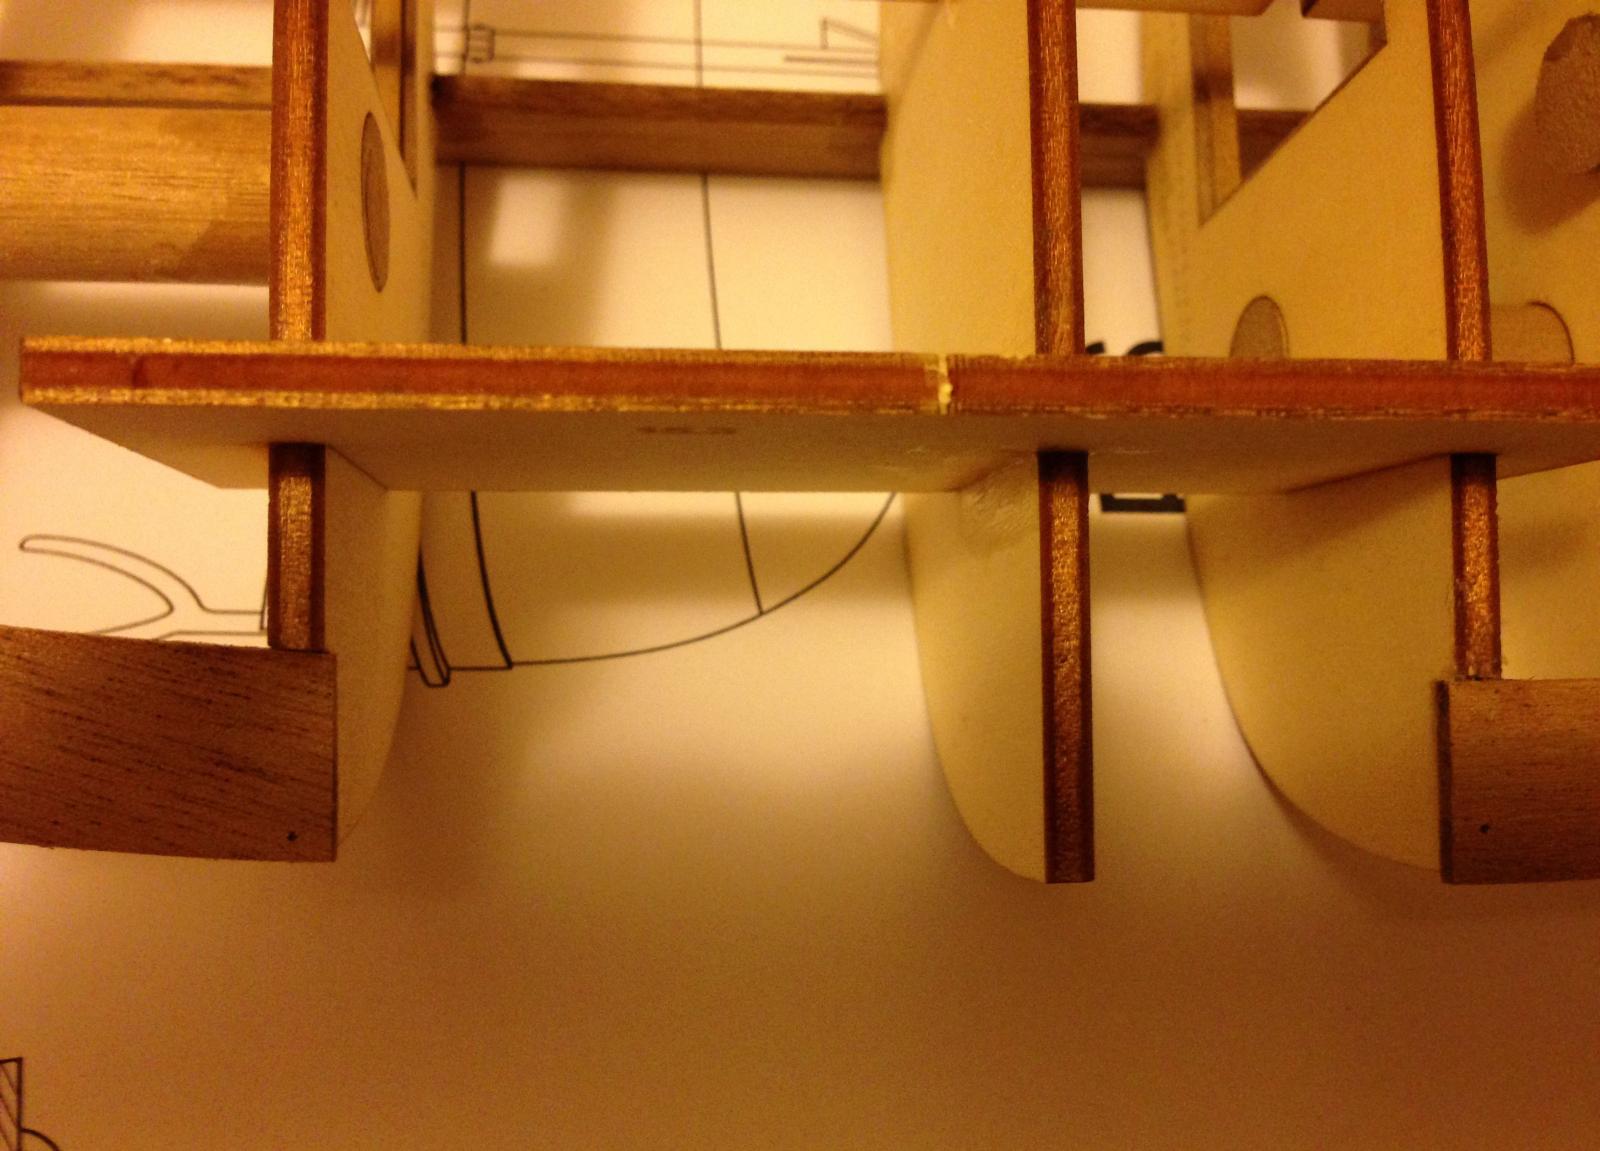
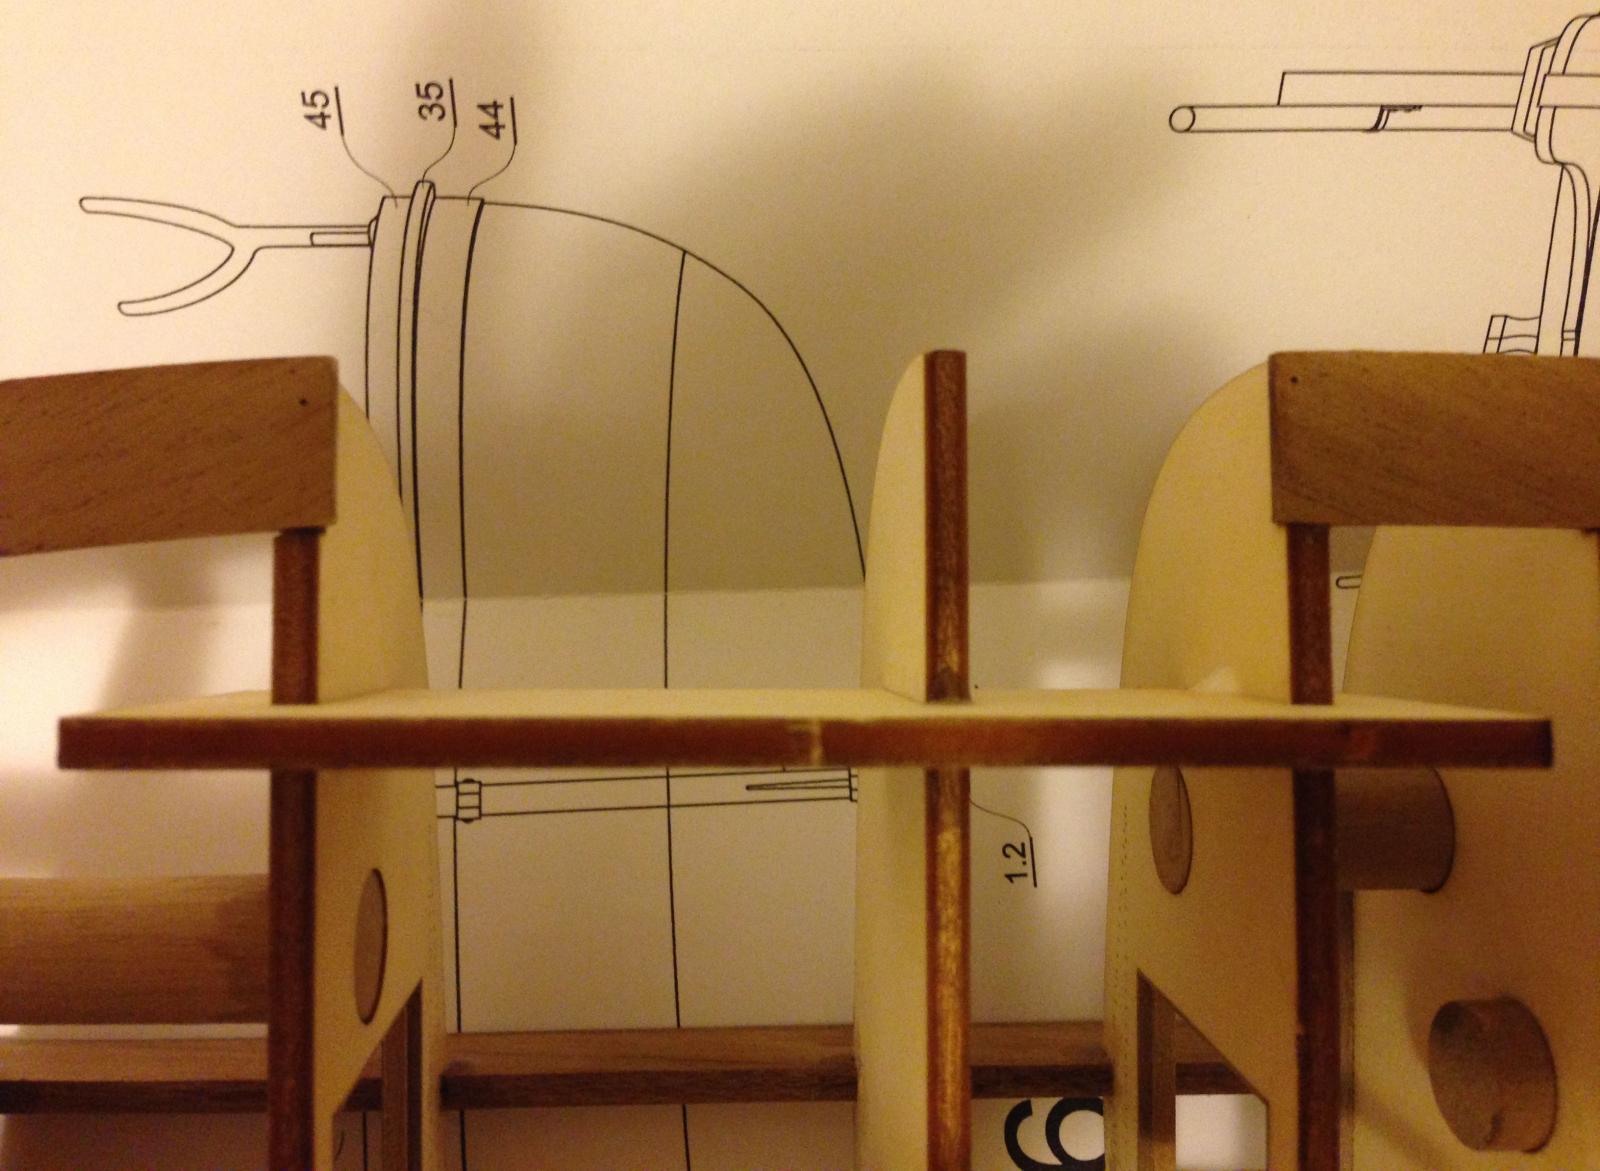
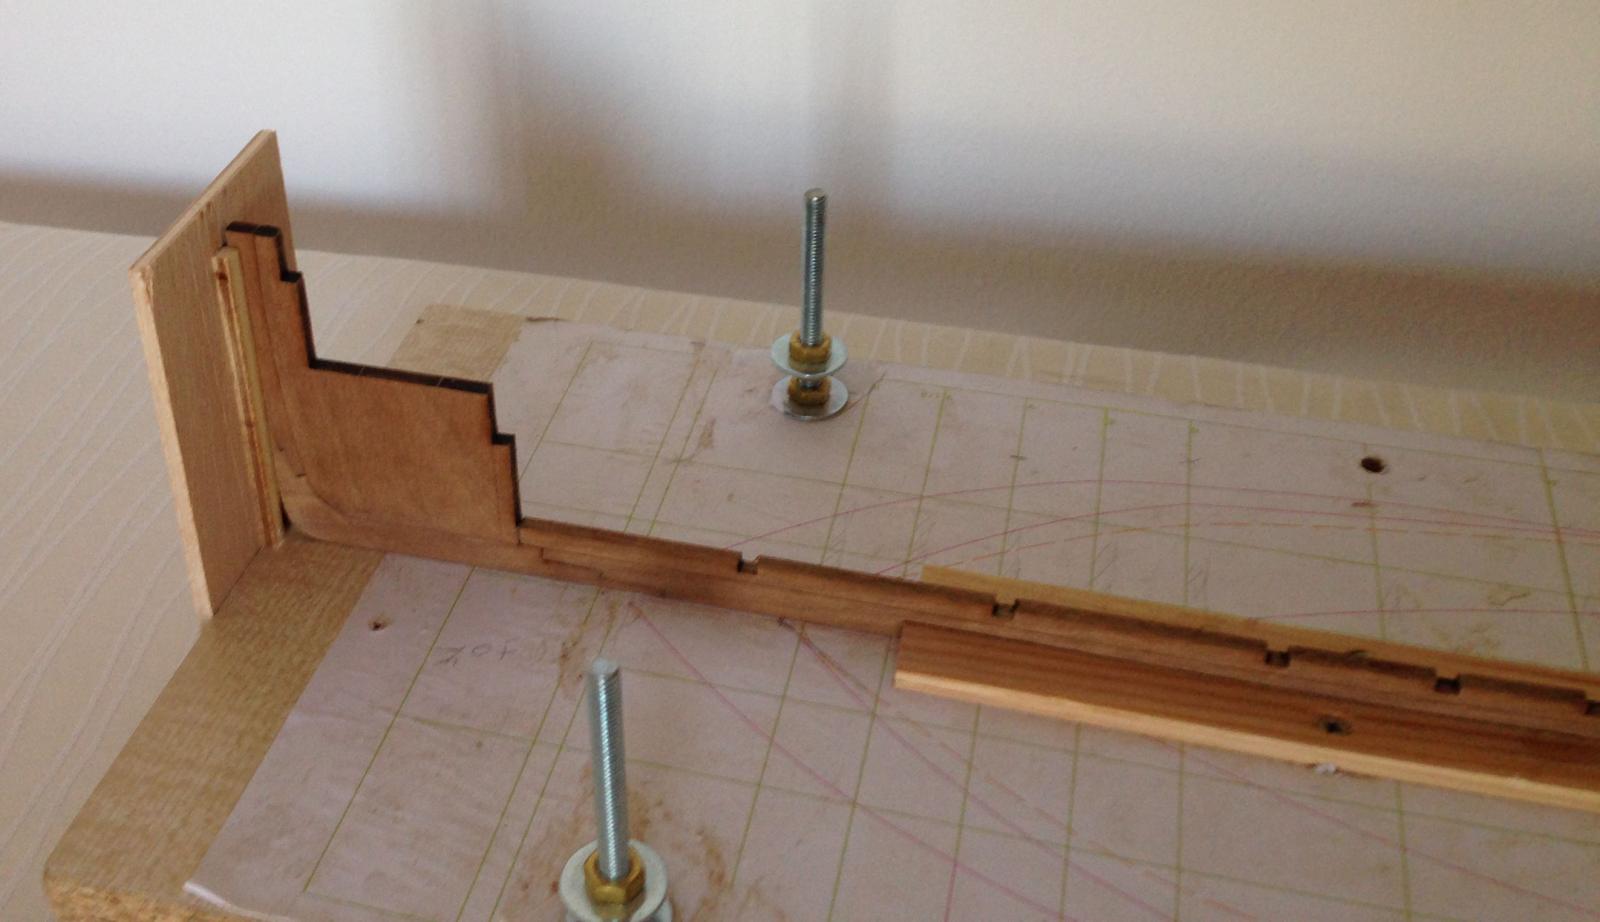
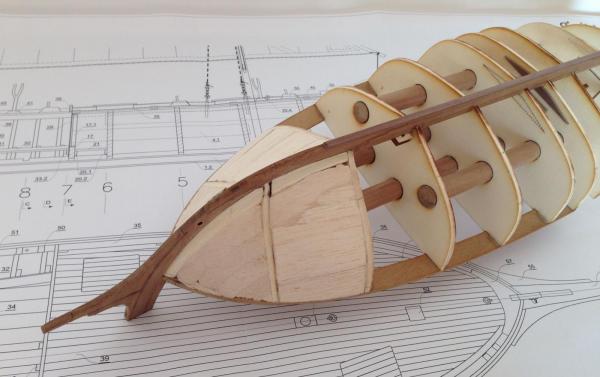
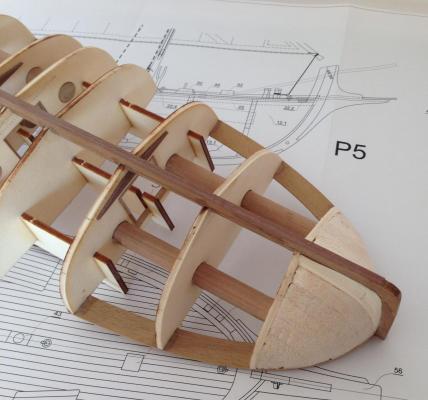
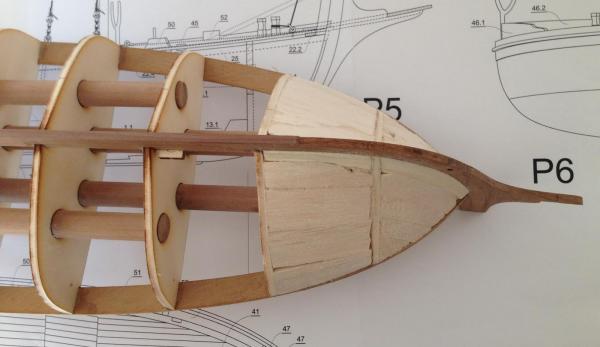
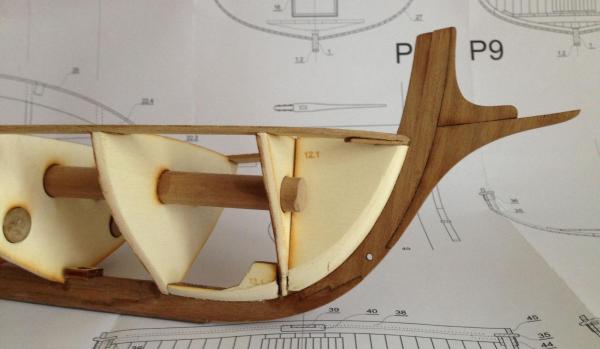
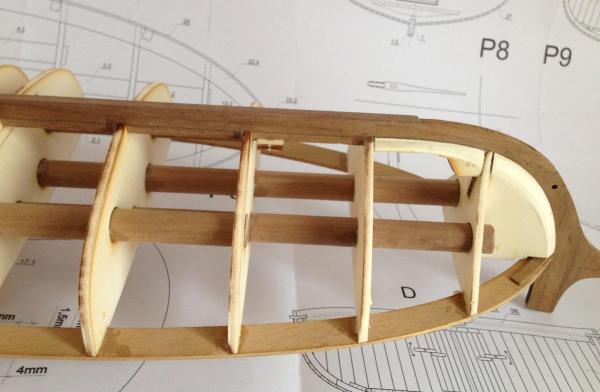
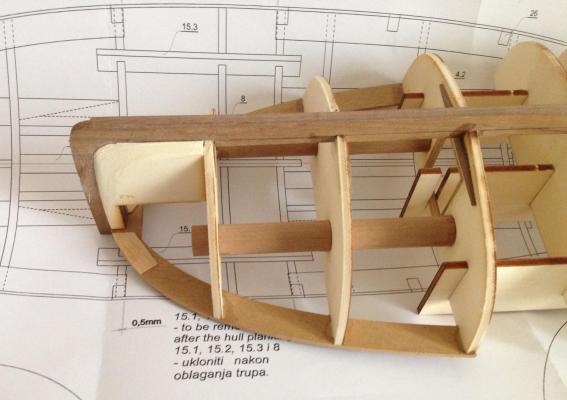
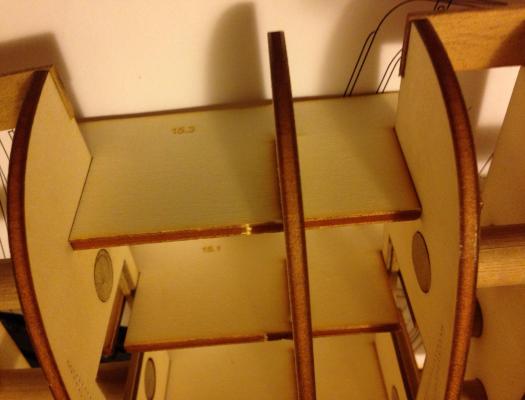
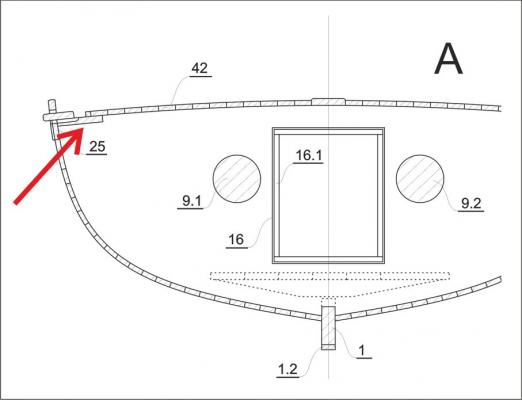
...Here's one important thing ... the lower part of the rail should protrude 0.5 mm to the center of the structure, over the bulkheads in the middle :
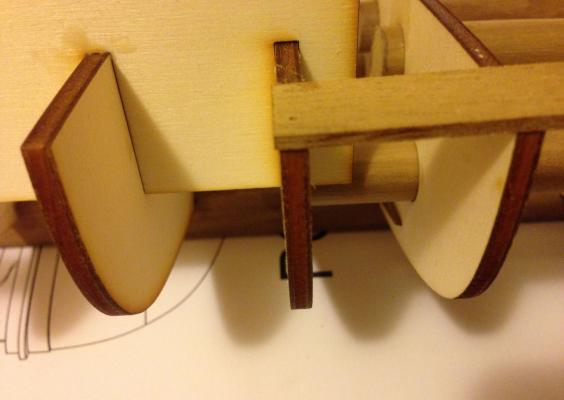
- 150 replies
-
- 4
-
-
- TRAJTA
- fishing and cargo boat
- (and 2 more)
-
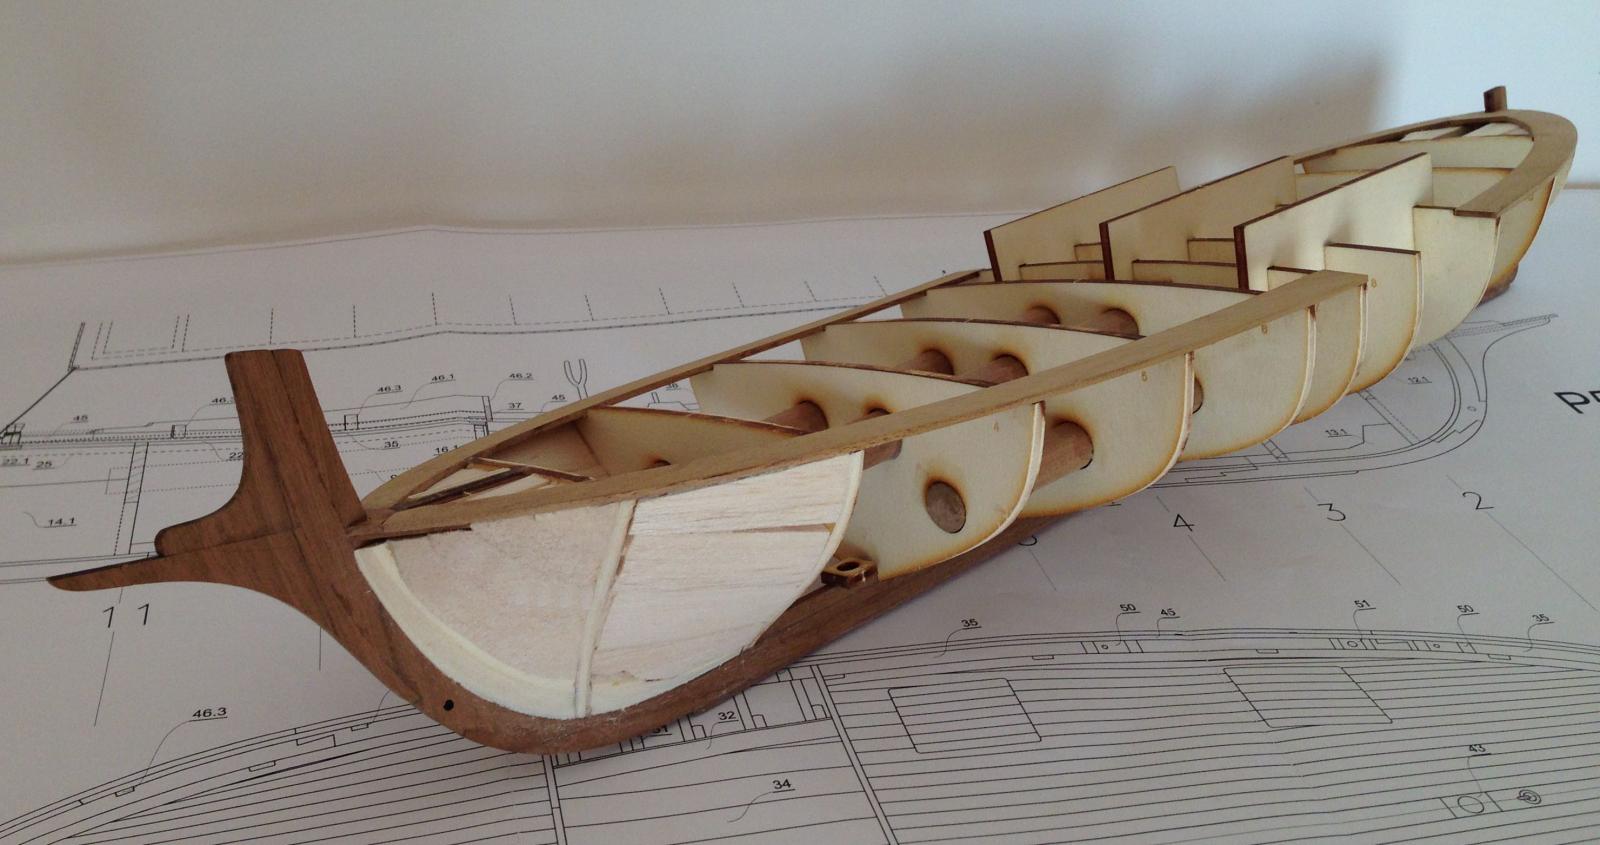
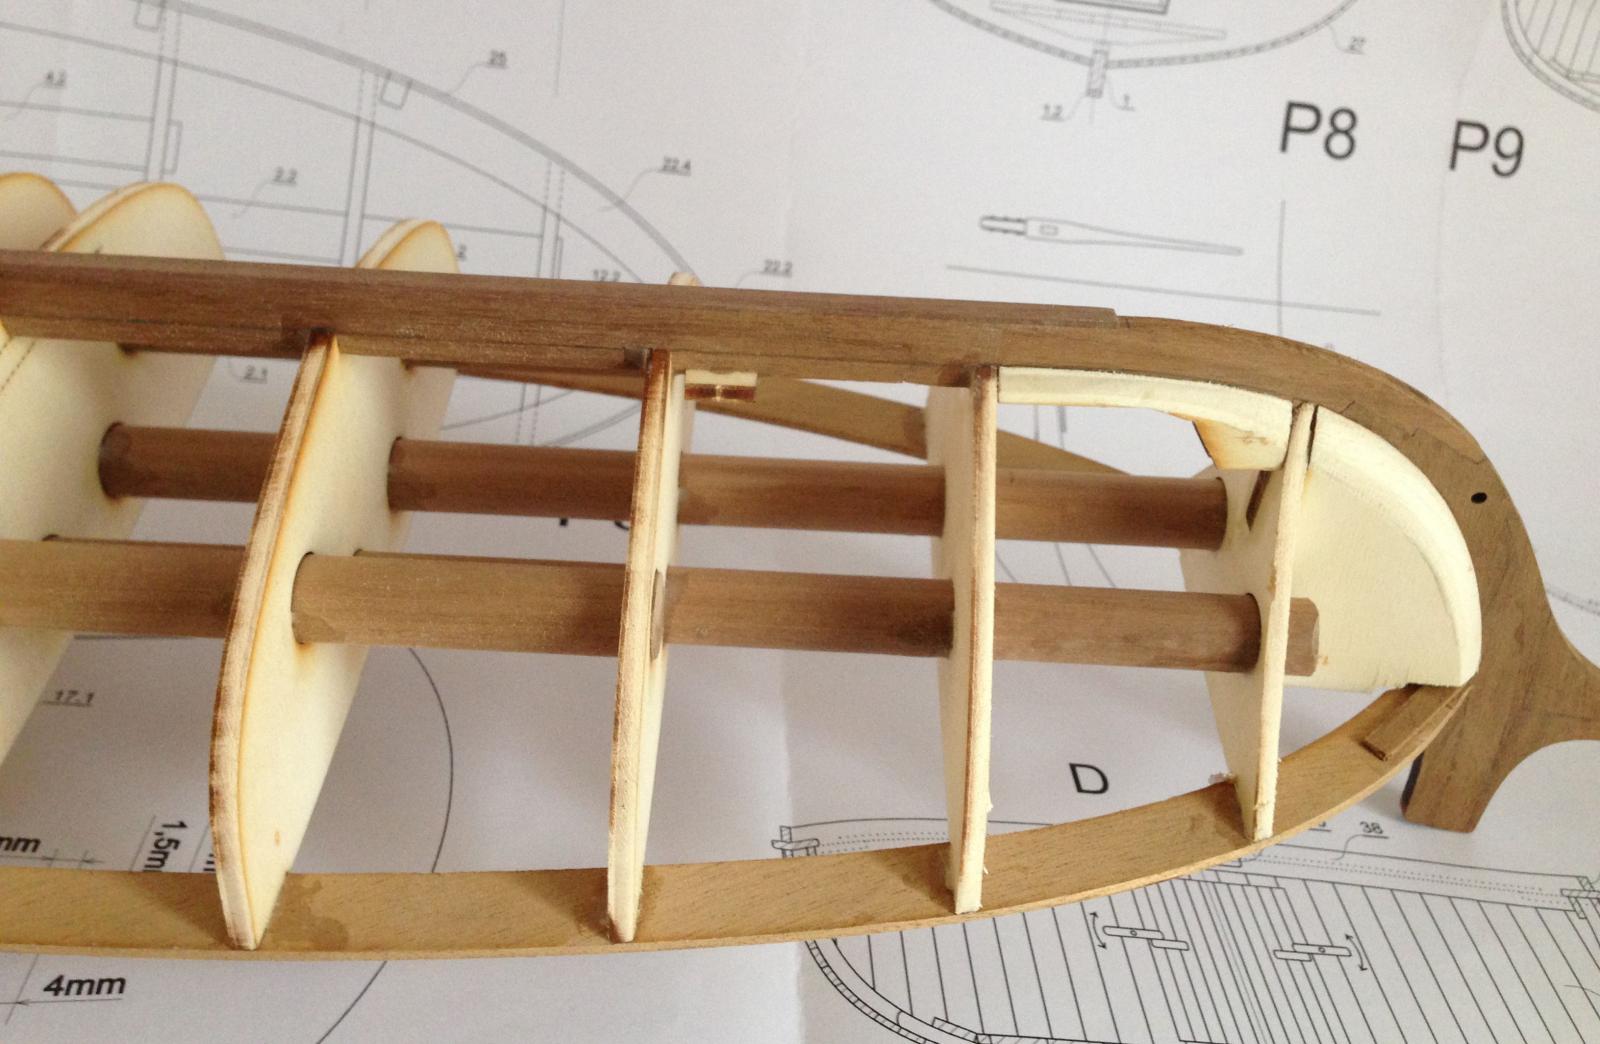
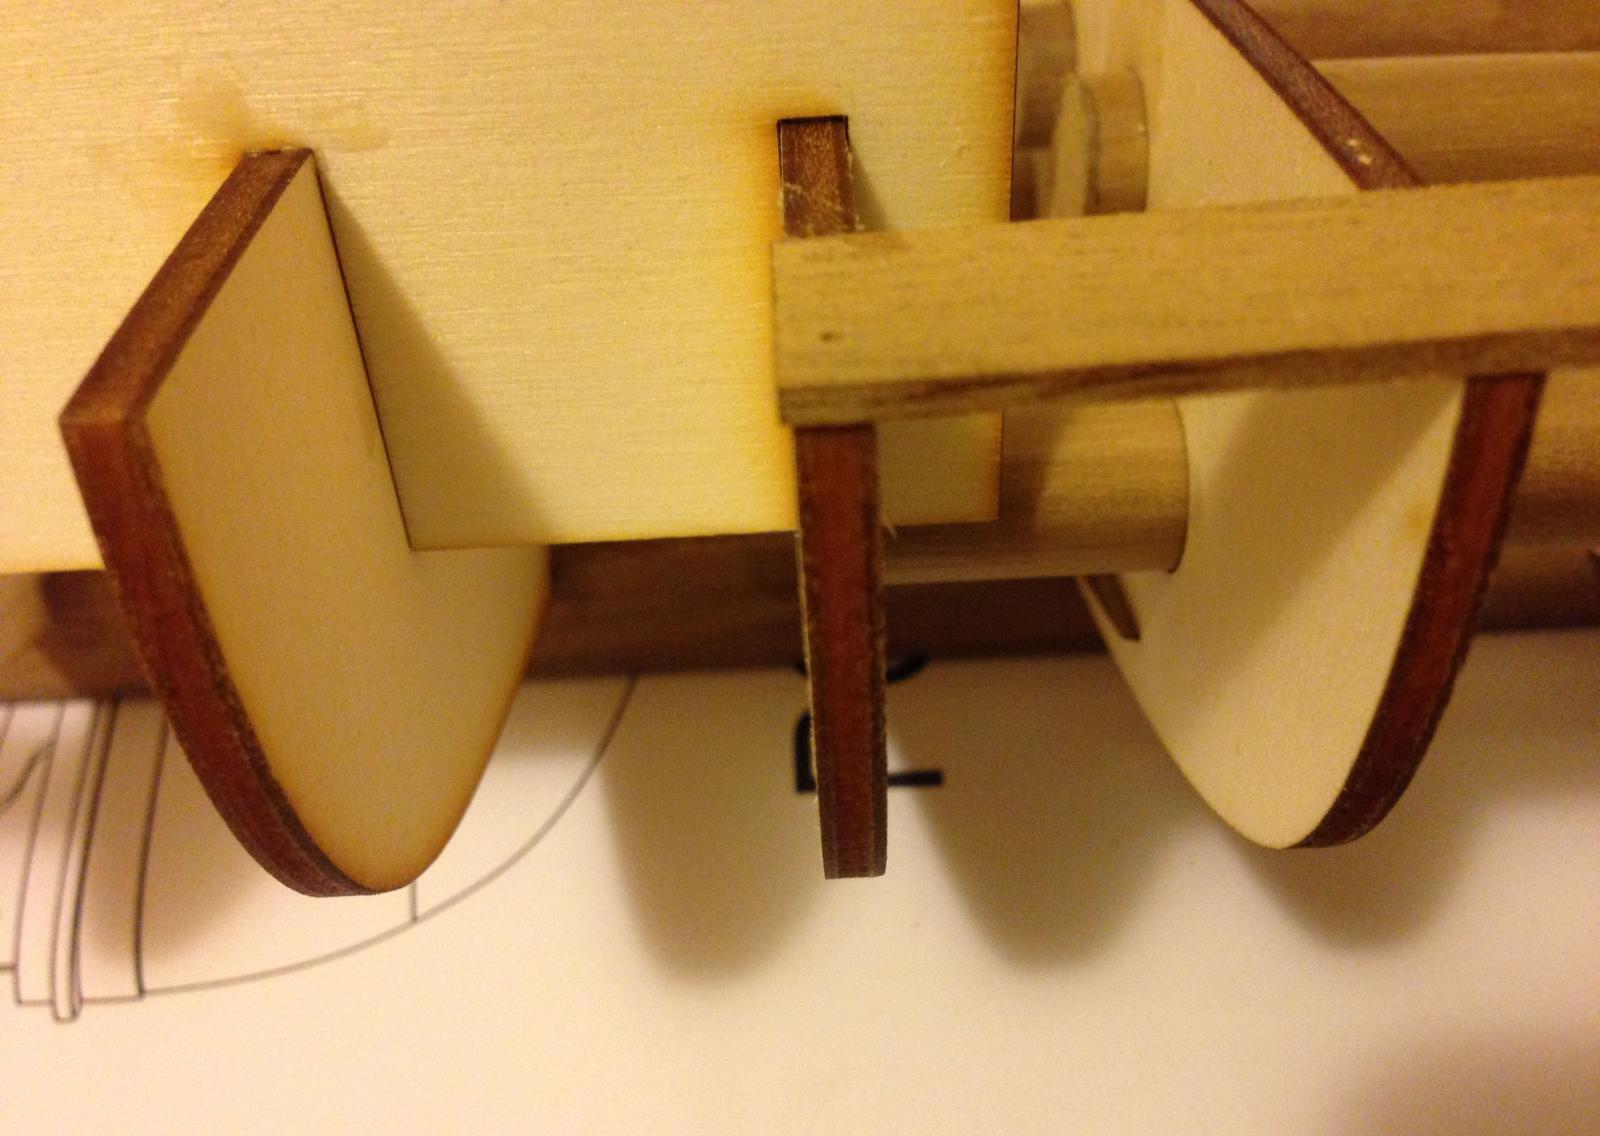
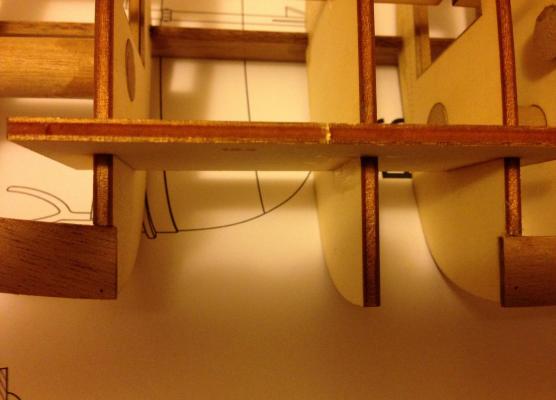
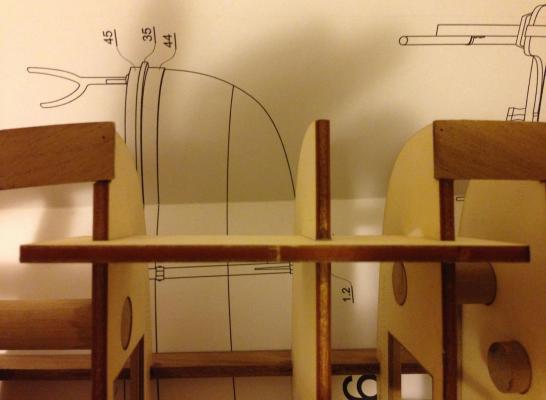
Hi ... ...Now is the time to set the the lower part of the rail ... now, when the glue is dry, when the construction is fully strong, I should adjust the grooves on the ends of bulkheads ... I should put the lower part of the rail in to them... Notice, the rail is composed of two parts, the upper and lower part. Now we need to set the lower part of it...:


- 150 replies
-
- 5
-
-
- TRAJTA
- fishing and cargo boat
- (and 2 more)
-
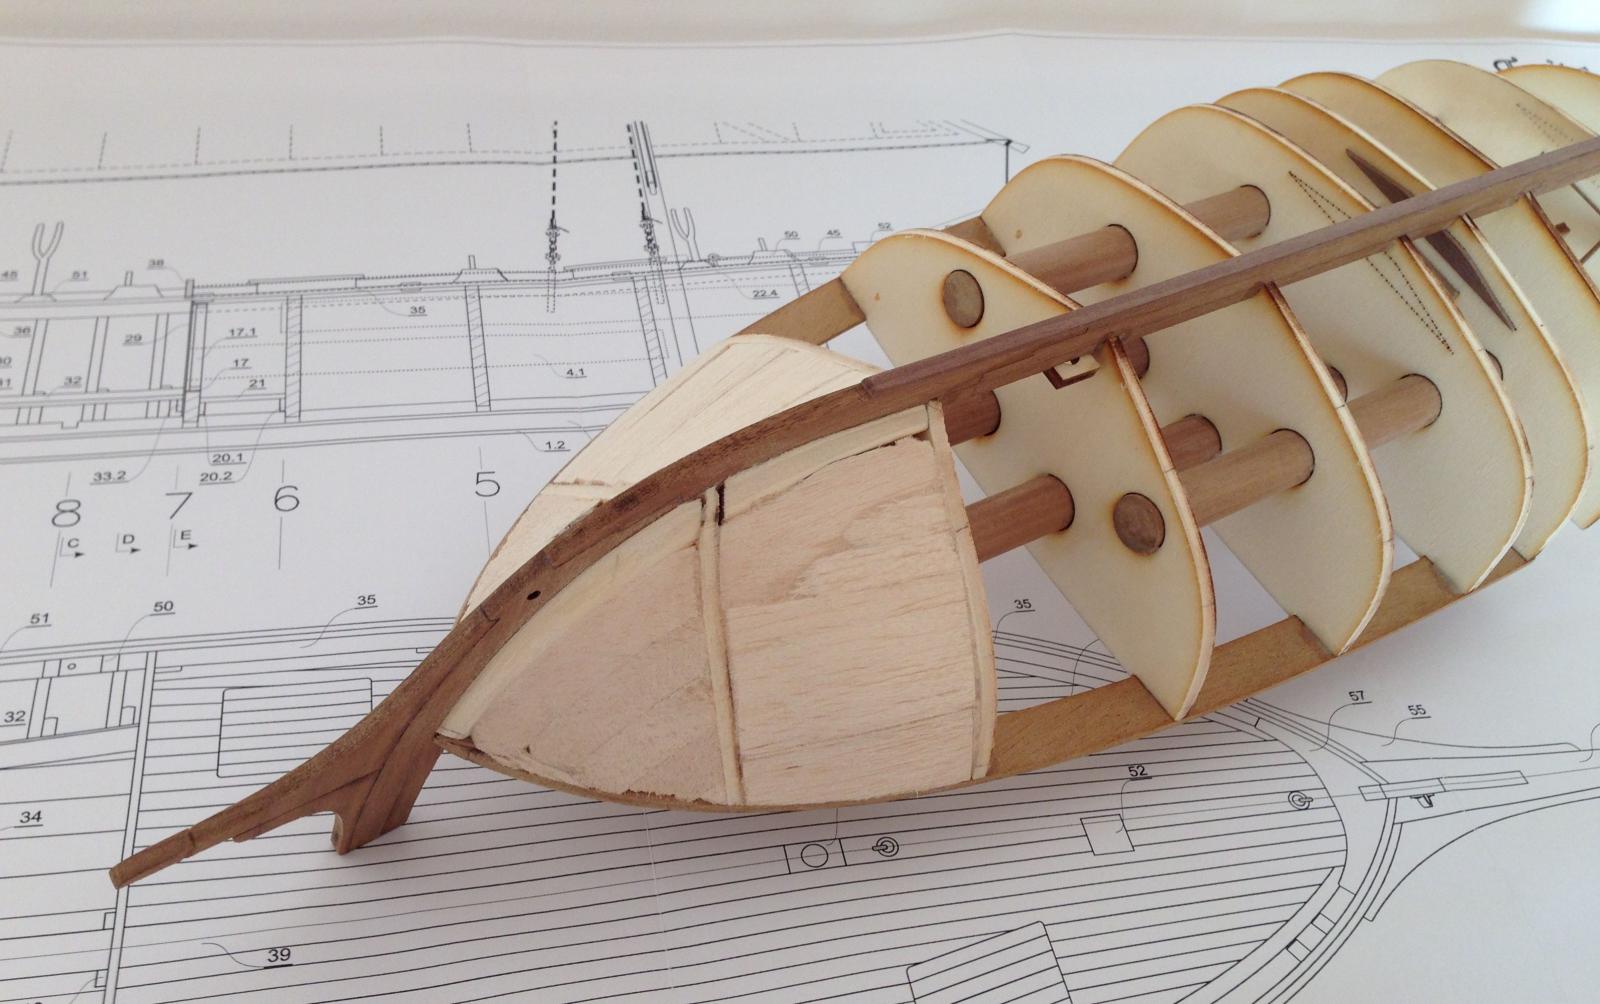
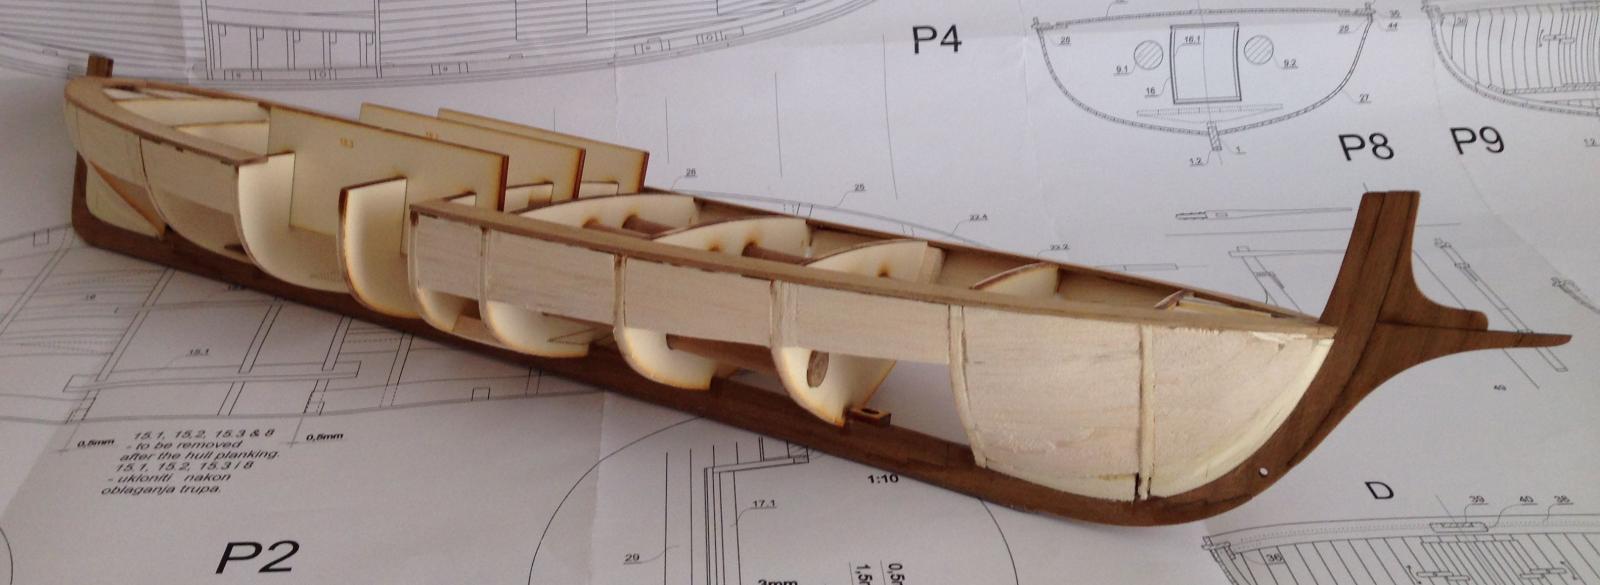
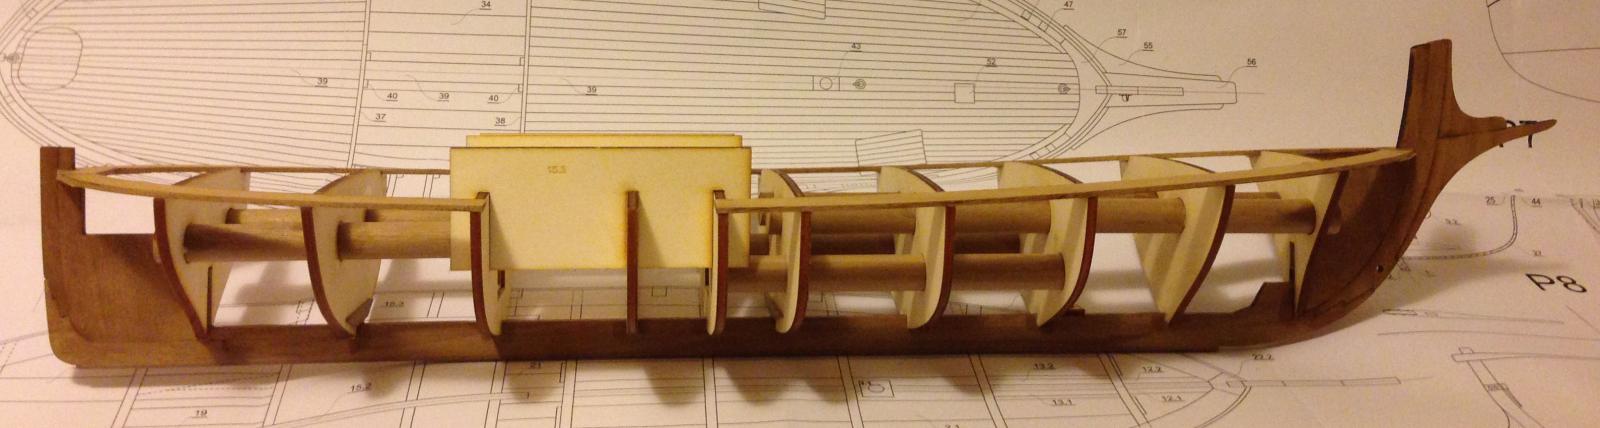
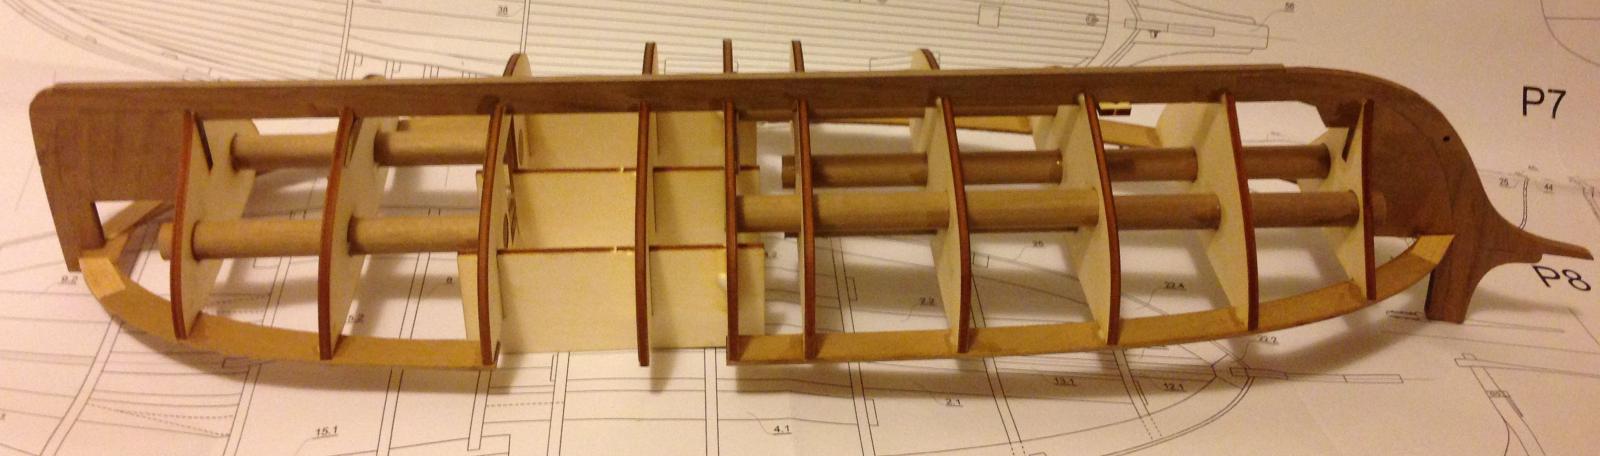
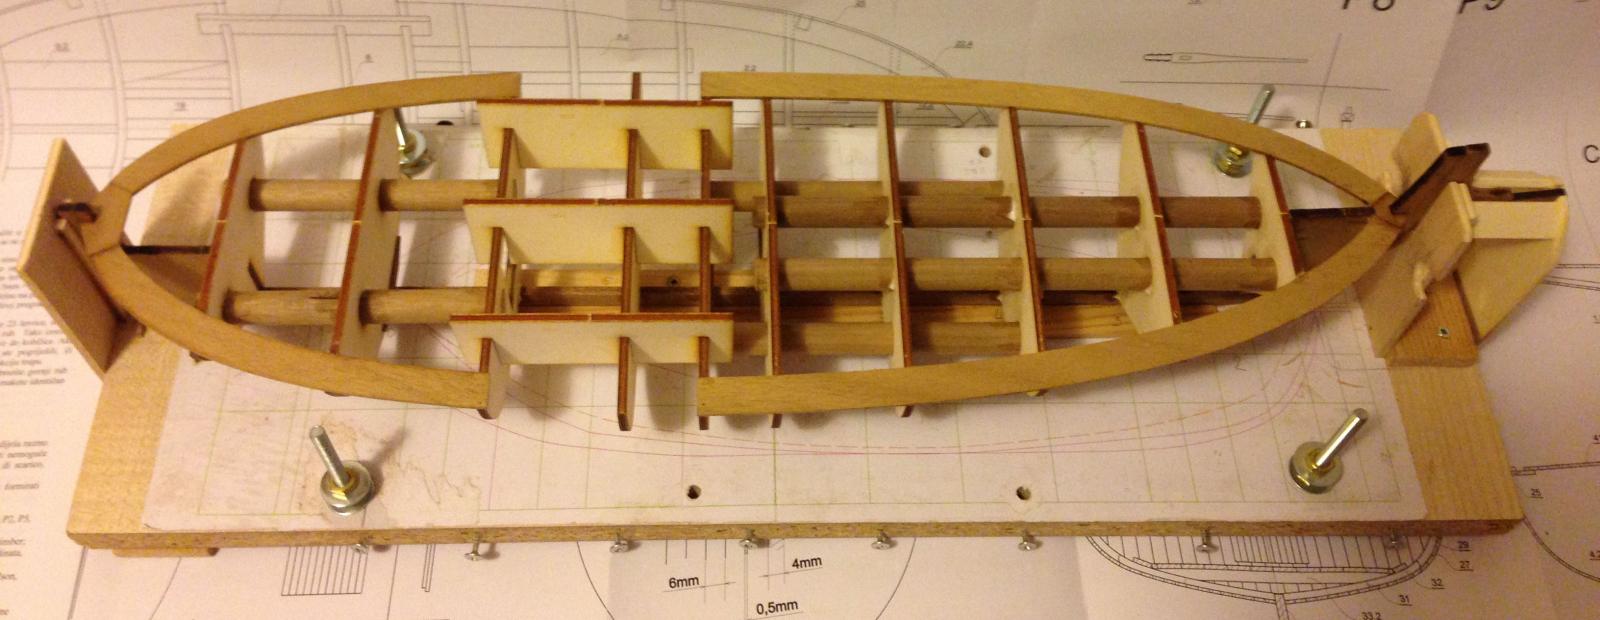
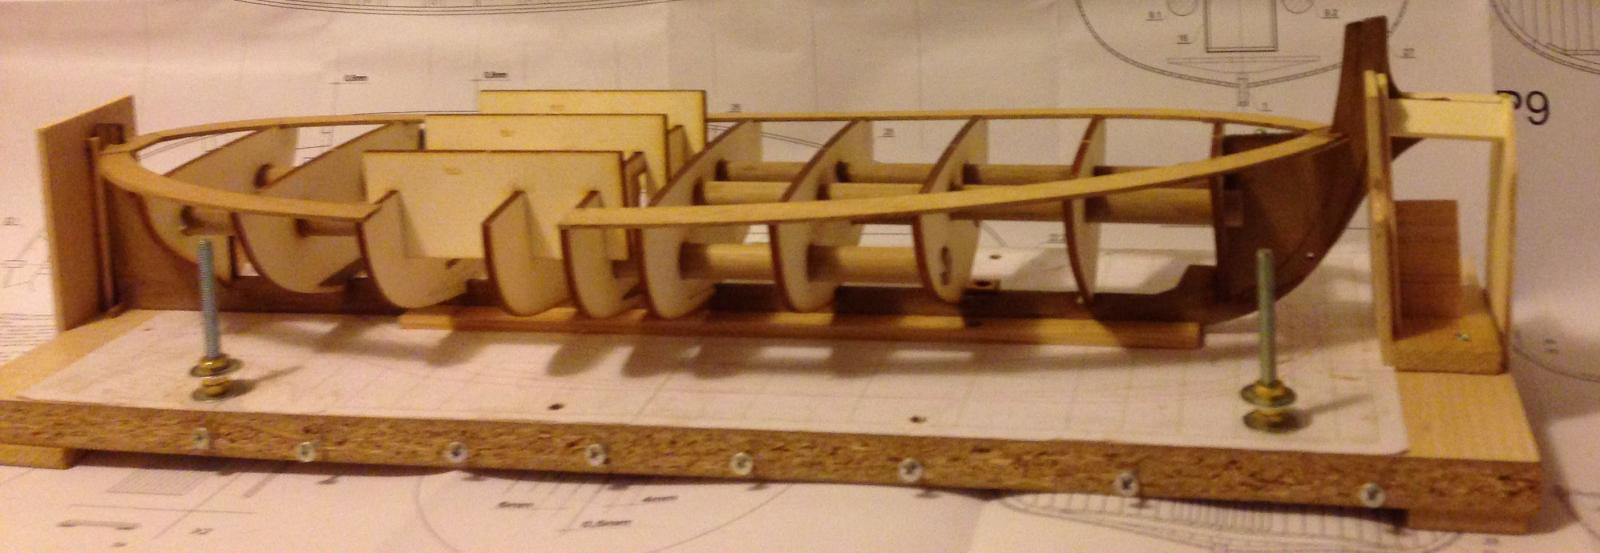
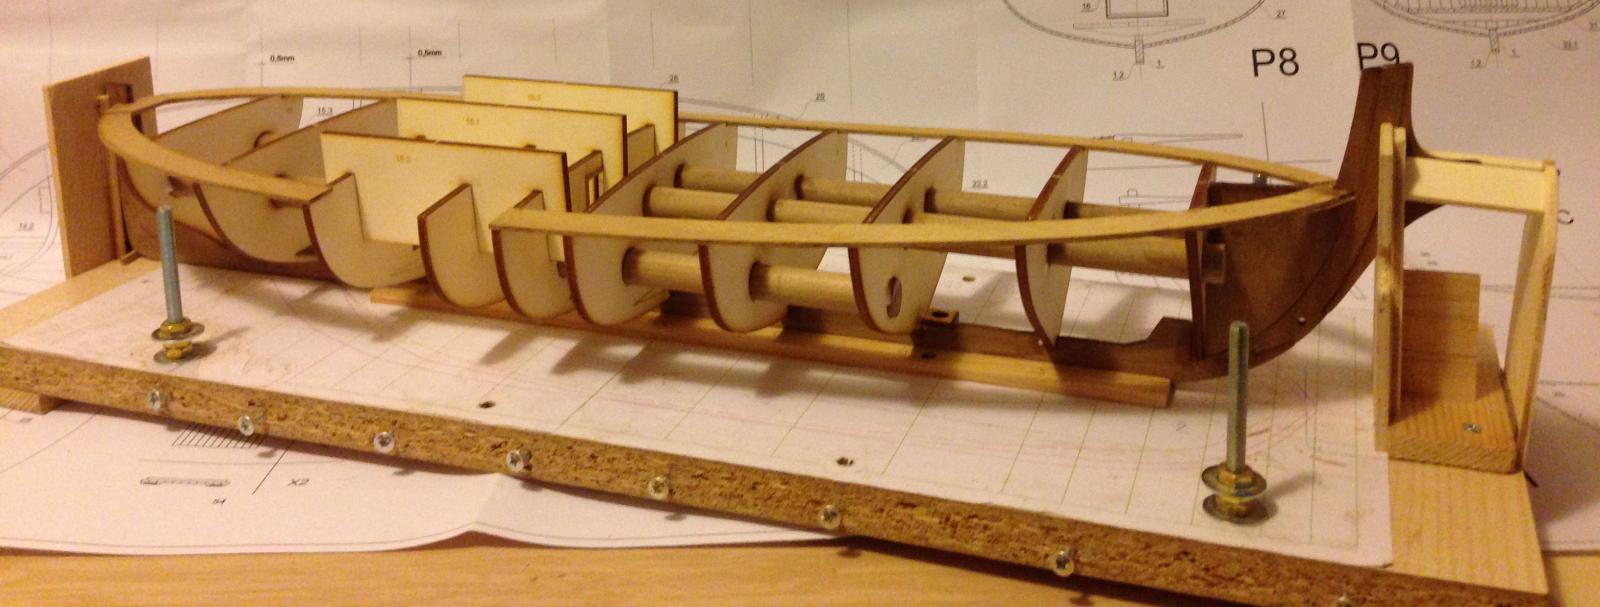
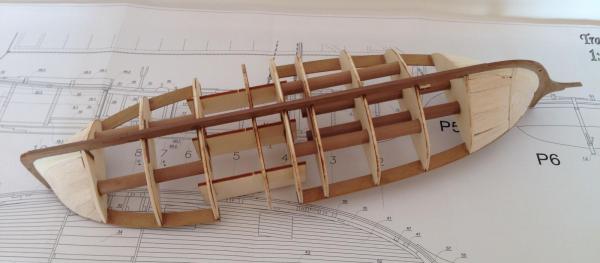
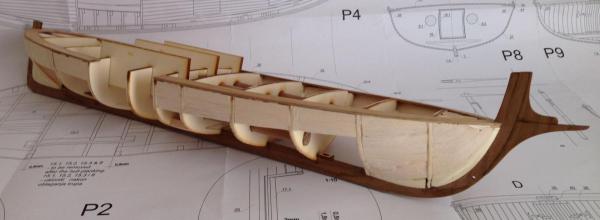
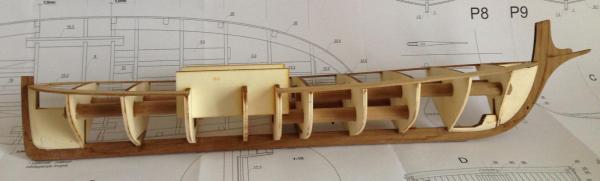
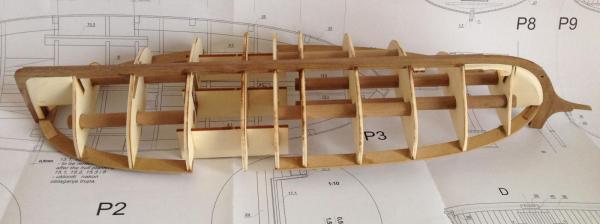
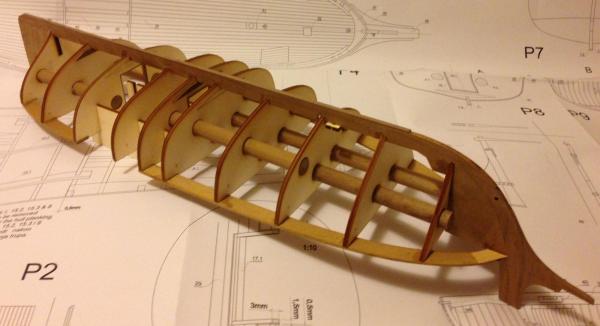
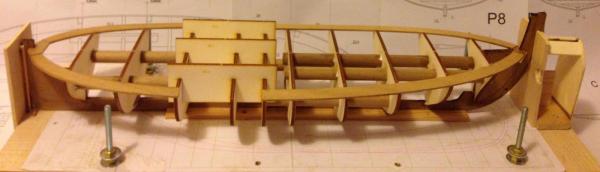
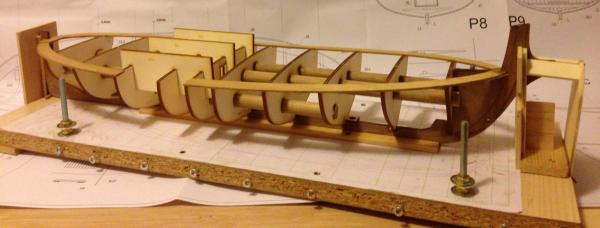
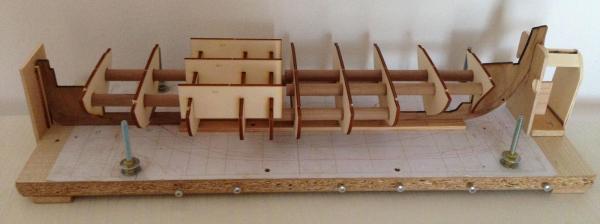
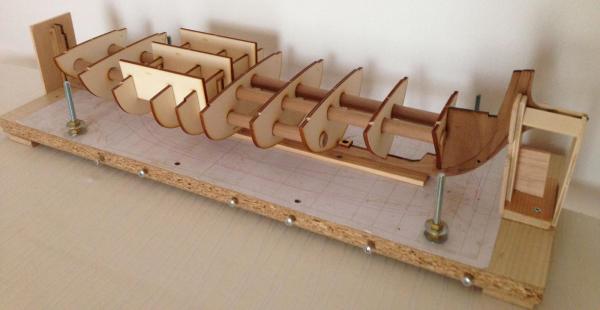
OK ... Now, when the specific bulkheads are done, all the bulkheads should be attached to the keel ( I do not use glue yet ) ... Dowels need to be pushed through the round openings in the bulkheads ... Three square brackets should be set in the middle of the hull, they fix the front and the rear parts of the hull ... ( I do not use glue yet ) ... ... When everything is set in to the place all the elements need to be adjusted accurately in place once more, as shown in the draft ... Now ... when I confident that everything is perfectly set, I apply glue with a brush to the all places where the elements touch each other ... When dry, I repeat it once more ... My opinion is that this is the best way of assembling and gluing the construction ... Here are photos:
- 150 replies
-
- 8
-
-
- TRAJTA
- fishing and cargo boat
- (and 2 more)
-
Thanasiss, dgbott, maggsl_01, Jean-Pierre, Cap'n'Bob, pete48, aliluke, Dida, hexnut, Turksailor, Robert Vaglio, JMaitri, Wacko Wolf... ( I hope I have not left out anyone )... thank you all, nice people, to your comments that encourage further work ... Primarily what I want to achieve on this forum is to inform the rest of the world to the business we do in our small company ... I want to introduce you to the tradition of Croatian traditional shipbuilding, to awake your interest for the forgotten boats of the Adriatic Sea ... In addition, I want to present the kits that we produce, primarily, not to sell them, but to enable you to see it and to compare it with kits that you are already using ... we are happy with the rating that we have achieved in Croatia and around ... Now I feel the need to say something: when I started doing this it was my hobby, I was situated, employed by my company ... Then I felt the need to try to sell my products, and I was successful .. . Since then I started to work seriously, I met a true expert modellers, we are now very good friends and we work closely ... The company has some more employees and my dream come true ... Now I'm doing a job in which I really, REALLY enjoy ... in Croatia this can not work if you does not like it truthfully ... Sometimes it seems to me that I volunteer, but I enjoy it... ...aliluke, it is flattering to be compared with eksperts like Mr. Chuck and Mr. Chris are ... So far I have not met them, so I do not like to talk about them because of it (I do not feel comfortable), but their works, as I've seen here in the forum, it is right masterpieces ... ...... As well, as all of you, I enjoy doing this, it makes us close and I feel the need to show my work, but more than anything to hear your sincere comments and opinions ... ... This is the perfect place to share experiences, learn someone something and ,above all, to learn something as well ...
- 150 replies
-
- 4
-
-
- TRAJTA
- fishing and cargo boat
- (and 2 more)
-
Bob, I looked at all the photos that you set here (once again) , the shape of the hull, a draft of the model, the quality of work ... enjoyment for the eyes, really ...
-
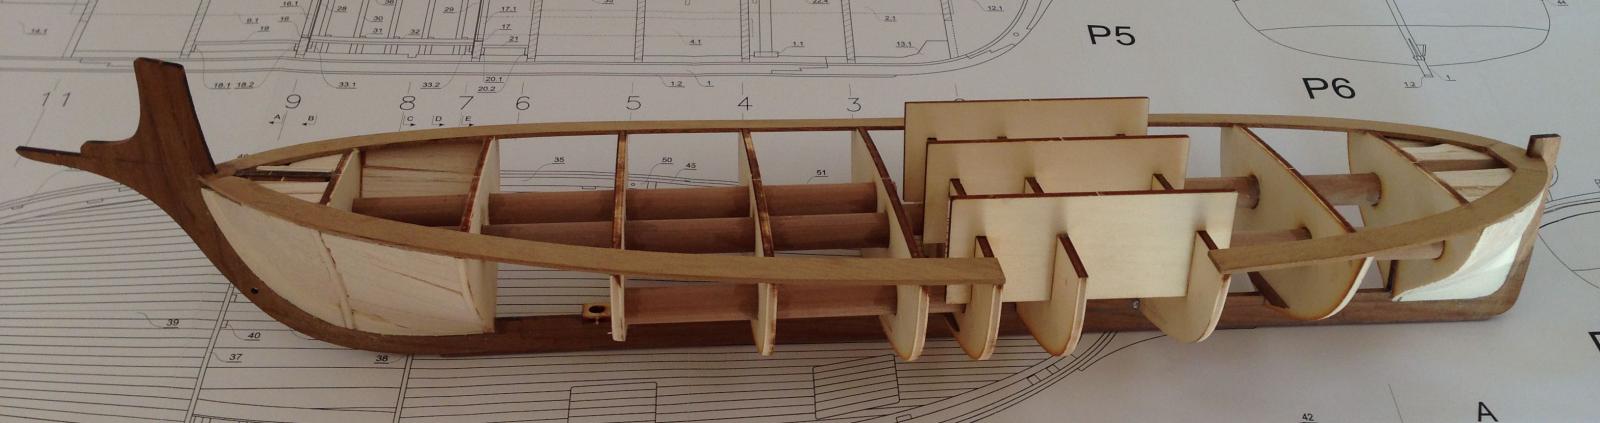
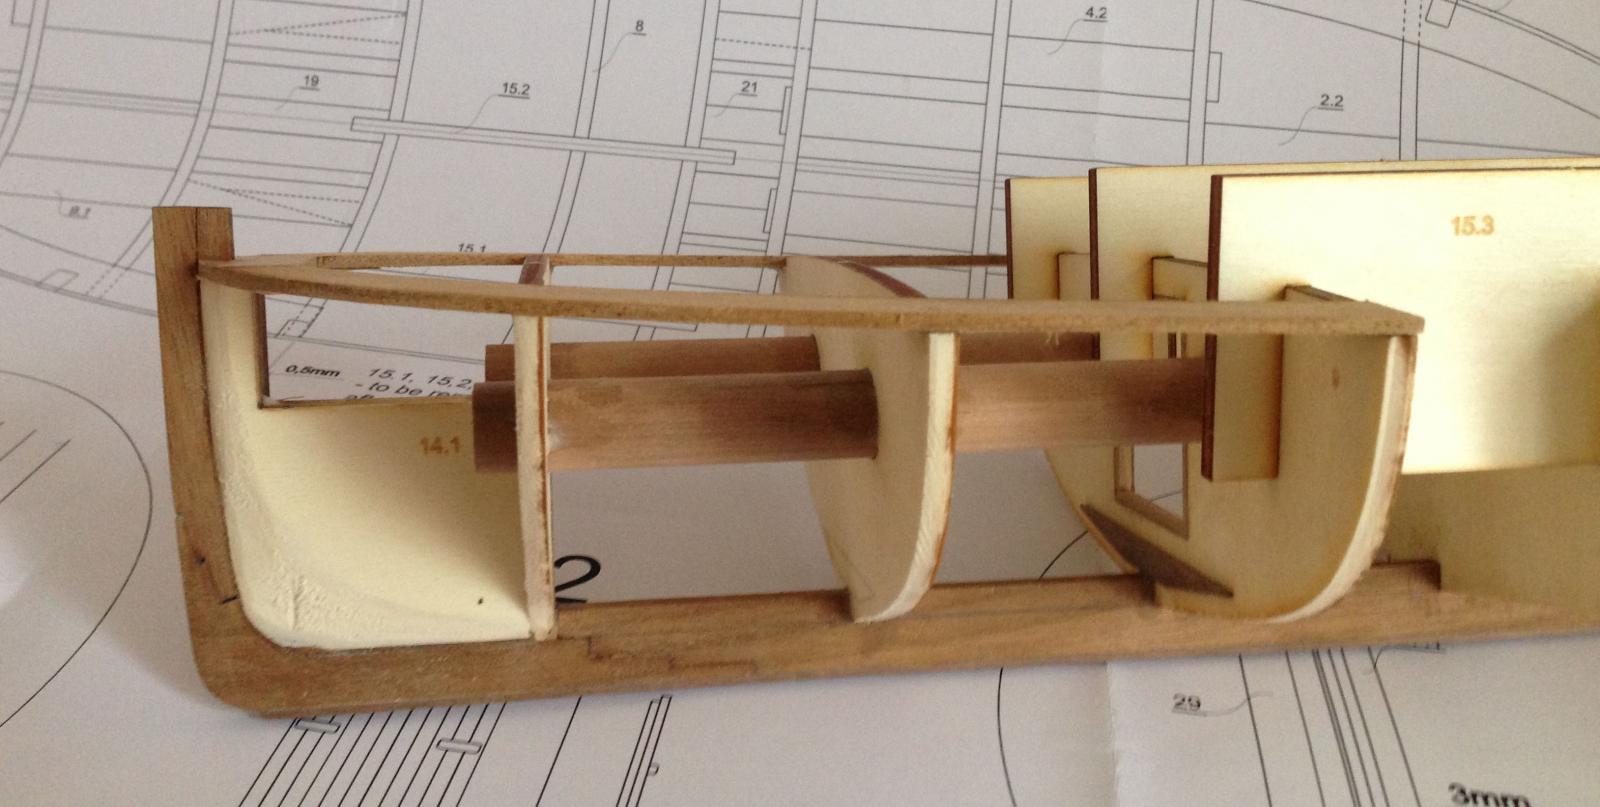
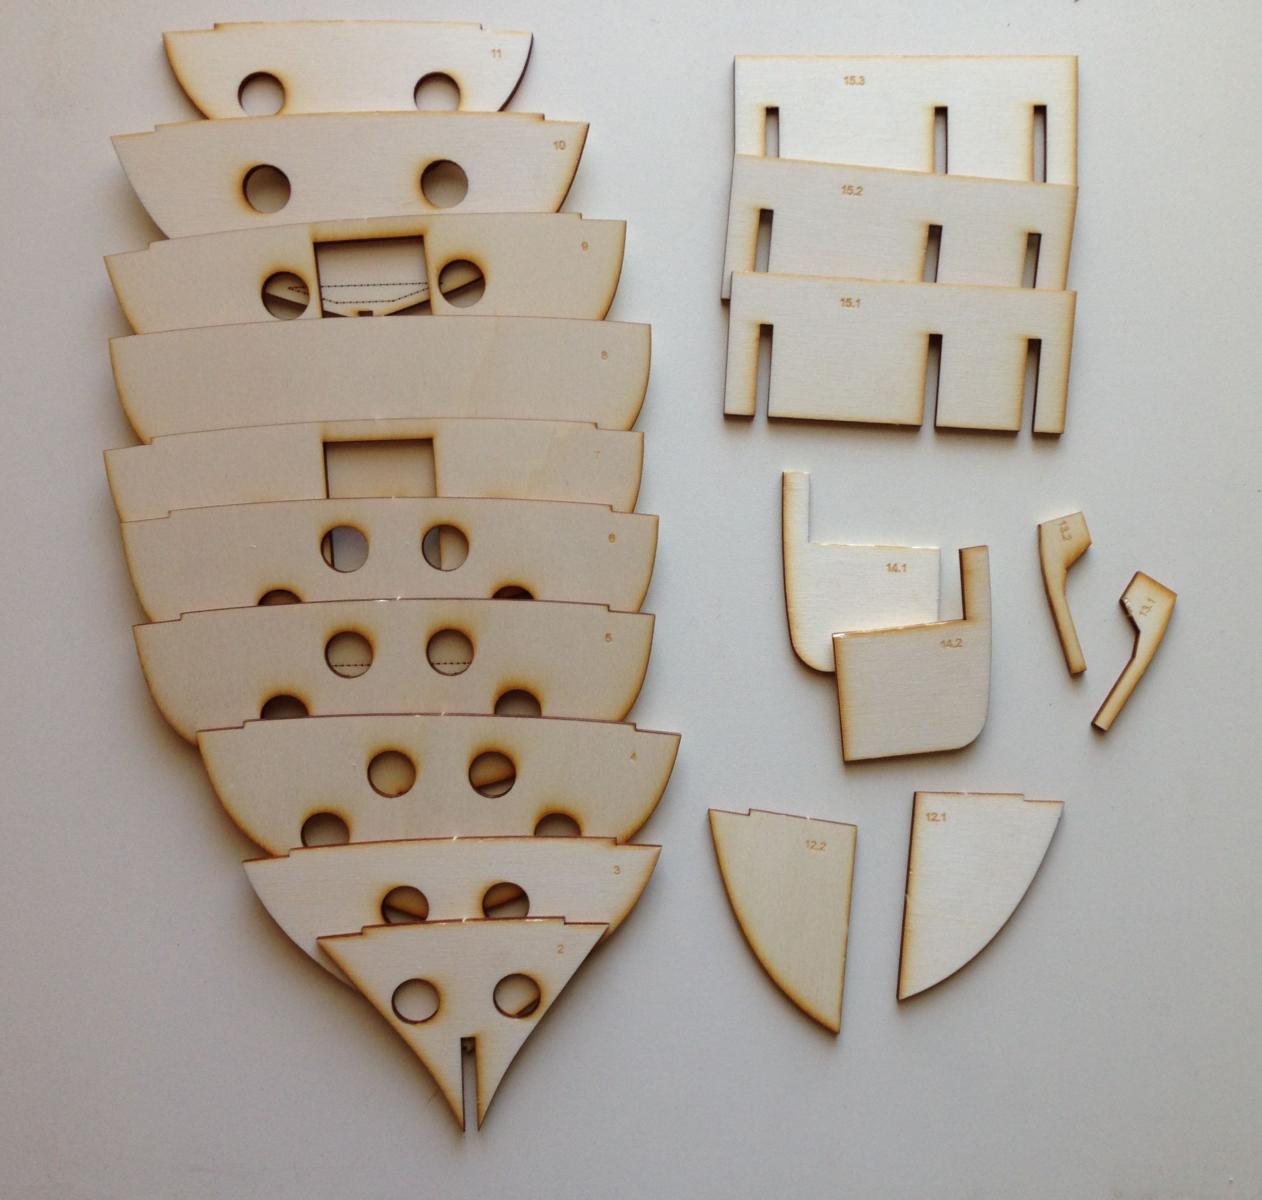
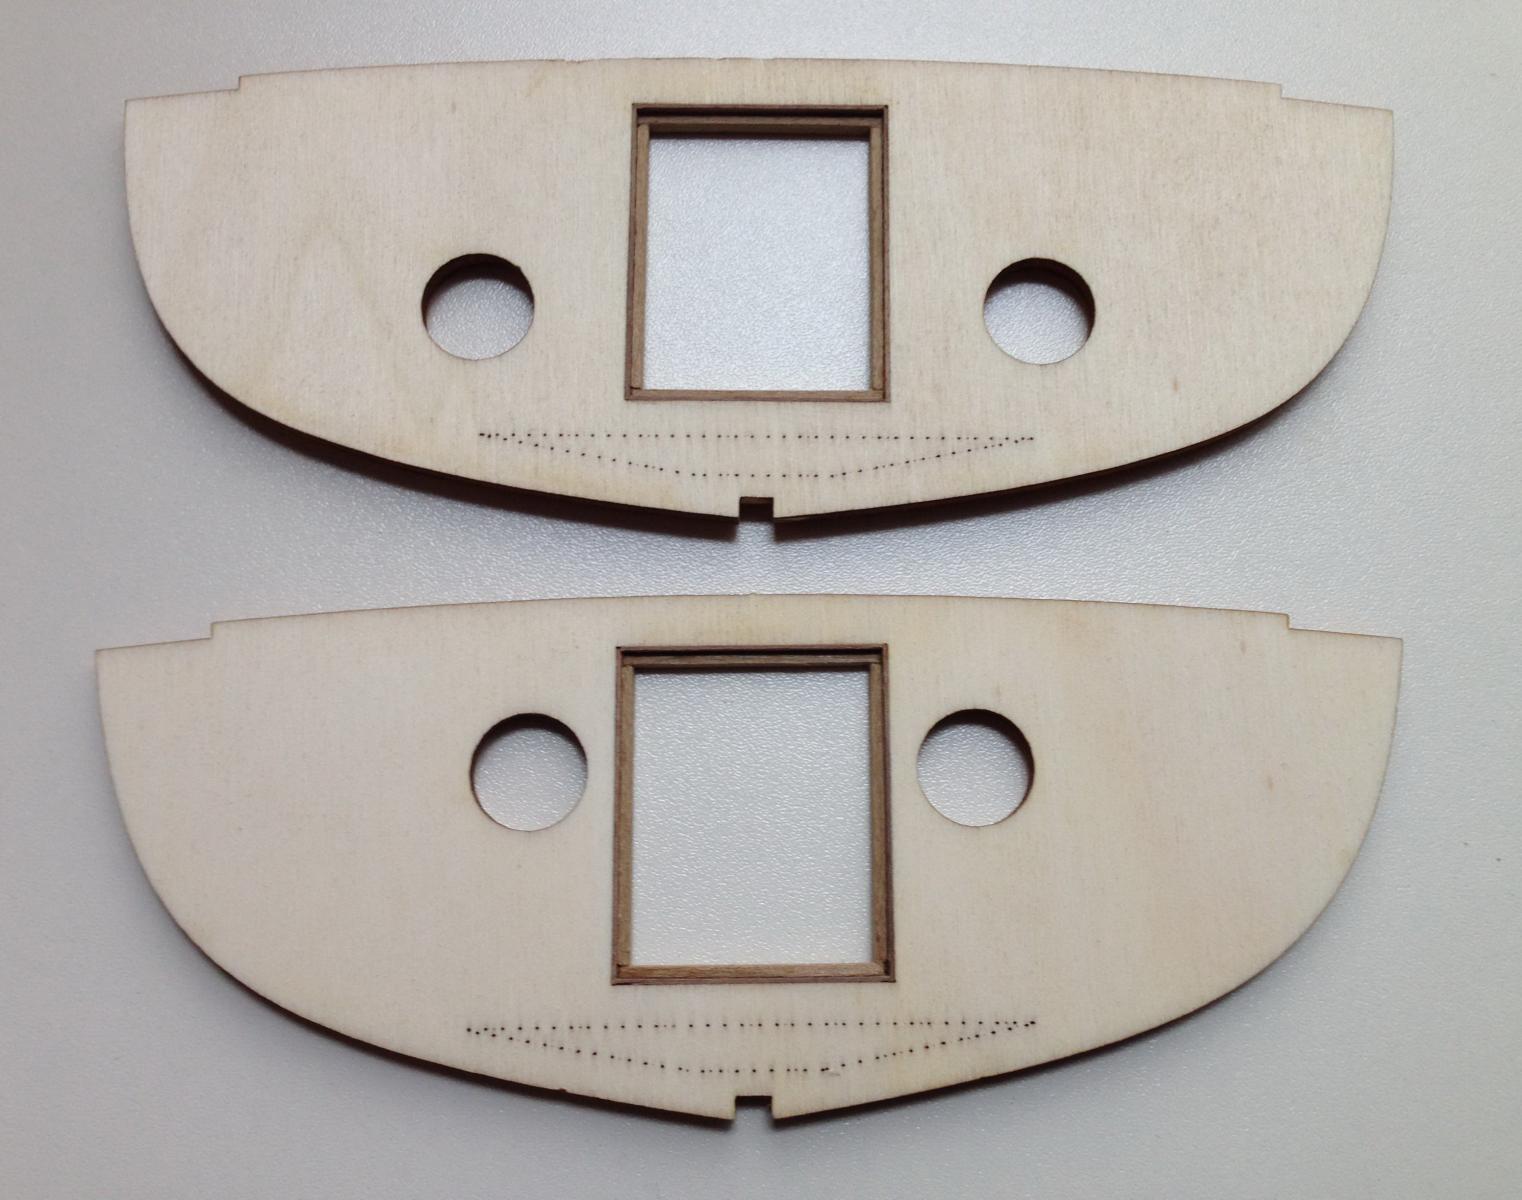
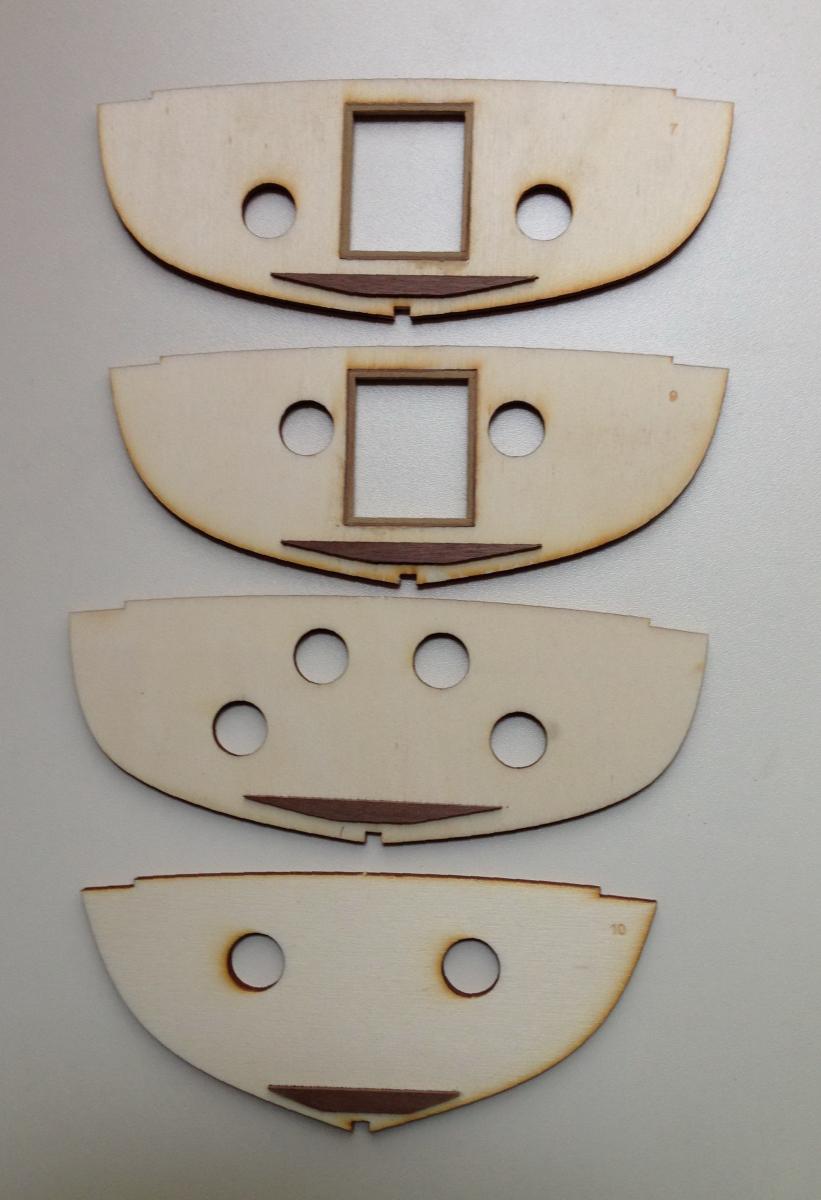
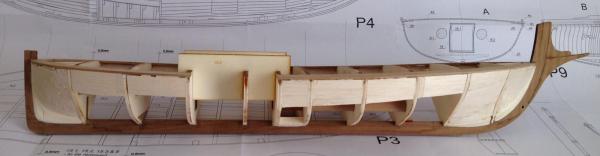
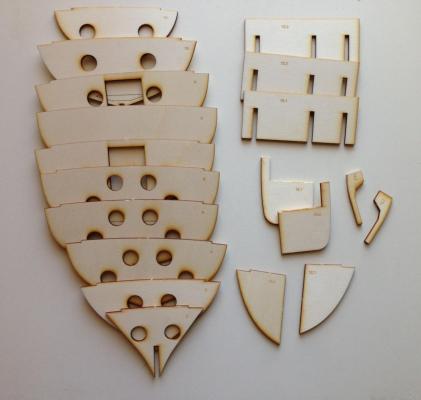
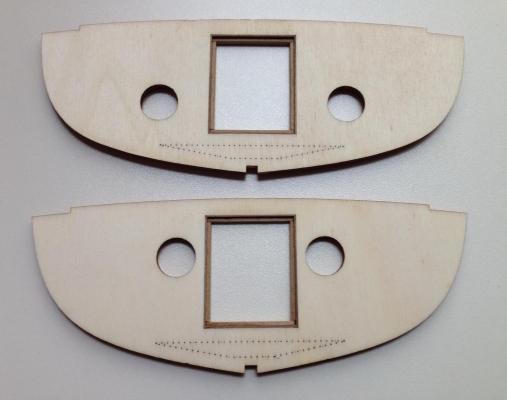
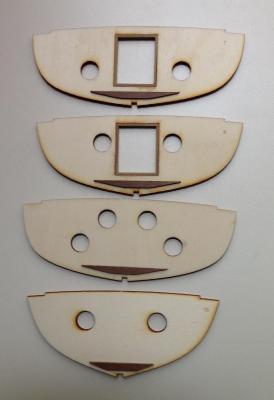
...these are elements made of lime plywood ... before setting in place it is necessary to amend several bulkheads ... It is needed to paste the frames of the openings and to paste the platform supports that will be installed later ... this should be done at this stage of development because it would be very difficult to do later ...
- 150 replies
-
- 2
-
-
- TRAJTA
- fishing and cargo boat
- (and 2 more)
-
Cap'n'Bob... please notice that English is not my first language ... I use the words in a sentence, but I do not know common phrases and expressions behind which lies a hidden message ... I wanted to say that I'm doing this every day for work time, it is my job, and that, as far as man is doing this, there's always more to learn and apply at work ... I never wanted to say that other people who enjoy doing this (as I do) do worse than me ... I wanted to say that this is a hobby in which it is constantly learning ... I did not want to set standards ... ( I am not sure if I understand you correctly )... ... I honestly think that this schooner is a good work ...
-
Hi pete48, I really like the touch of this small model ... it radiates precision ... really nice, outstanding job ...
- 296 replies
-
- 1
-
-
- herreshoff
- buzzards bay
- (and 1 more)
-
Hi Cap'n'Bobb, this seems to be a great work ... very precise and good ... Personally, I like the schooner very much, ...this hull is extremely elegant and beautiful ...
-
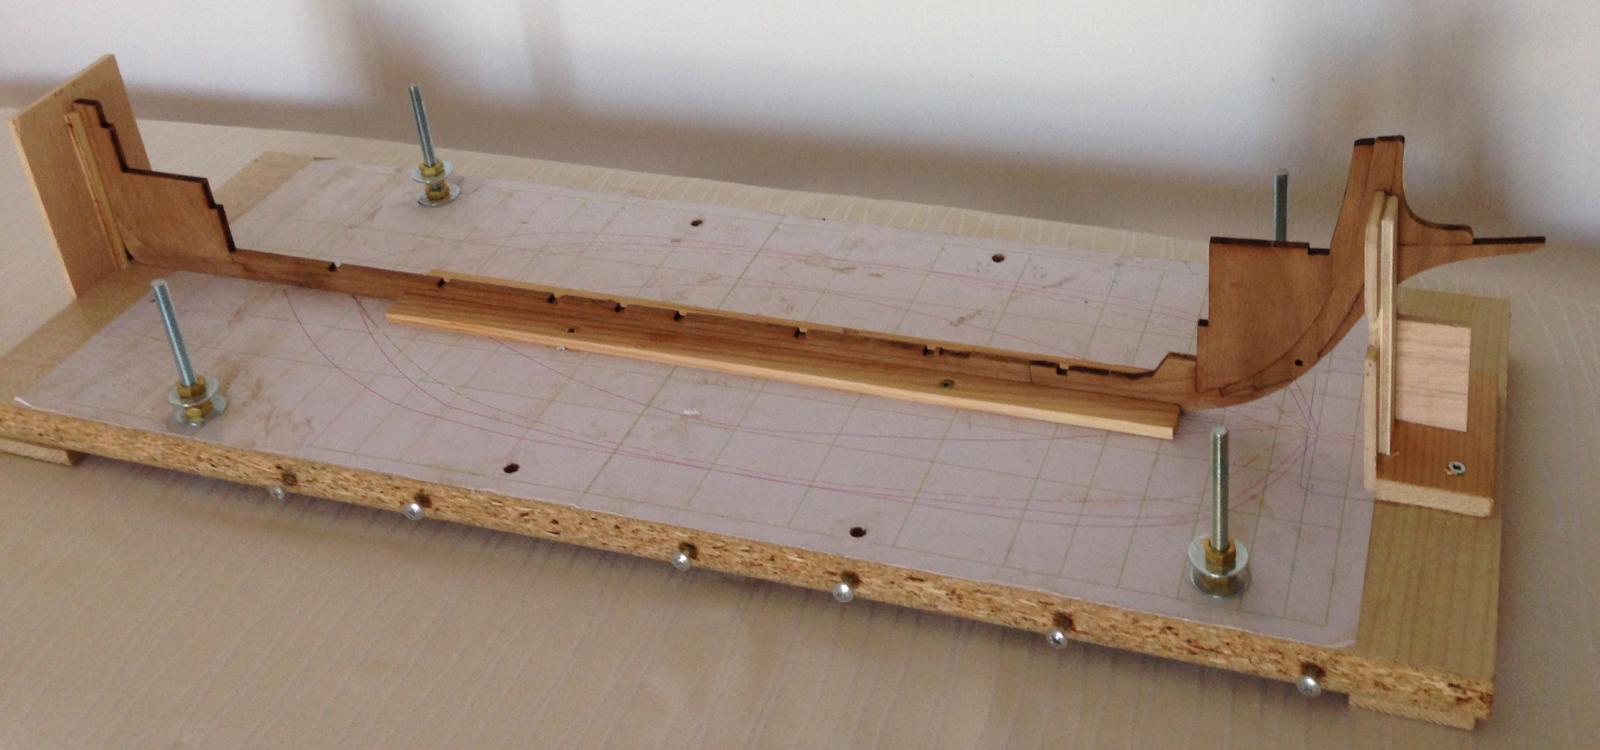
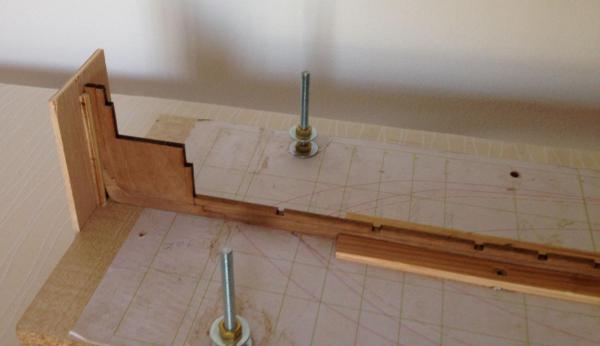
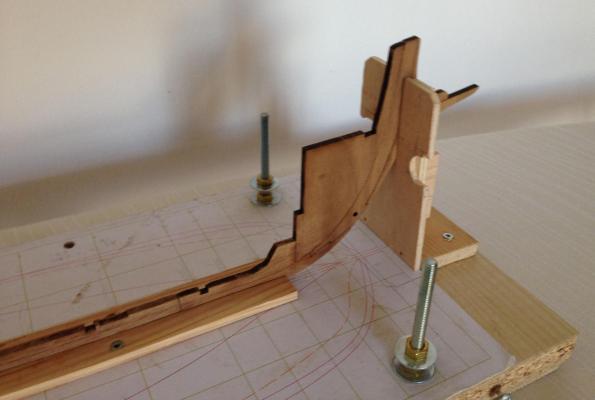
Hi everyone... Thanks for the comments ... It is not for me to rate it :) ... the truth is, when I do the kit designs it is always first on my mind as being better ... I give the most of myself, and there is always something more to learn and implement ... so, back to the project... ...Work stand is a very important thing, I see that many are ignored it here ...my advice is : create a stand in which you will hold the model during its realization. Use a flat board as a base, and two flat strips that you should strengthen on it, as a rail to the keel. It is also good to make even the stem carrier and stern post carrier, also of straight strips and strengthen them to the lower, horizontal strips. The whole stand for the realization of the models should be stable and the model on it must stand tightly and set so that the keel and the posts are vertical to the base. This is the only way to work properly.
- 150 replies
-
- 1
-
-
- TRAJTA
- fishing and cargo boat
- (and 2 more)
-
Hello all... Cristiano ... I managed to get the Austrian book "Das Erbe der Serenissima" ... there are detailed views of various elements, and the most important, all detailed drawings ... now I need to study all together ... I should get two other books in Italian from Italy , I managed to get one, but currently there is no another one available ... Now, I will examine a few days and I'll be back in touch ... everything is full of information, drawings and pictures ... thank you very much for this information ... Let's stay in touch please ...
-
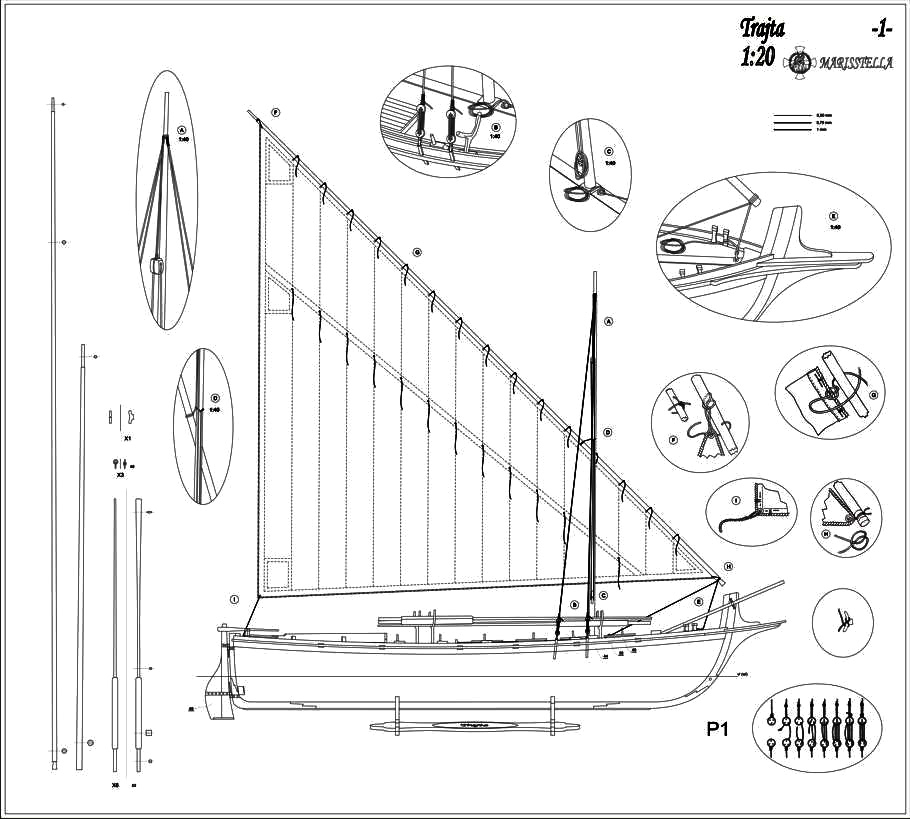
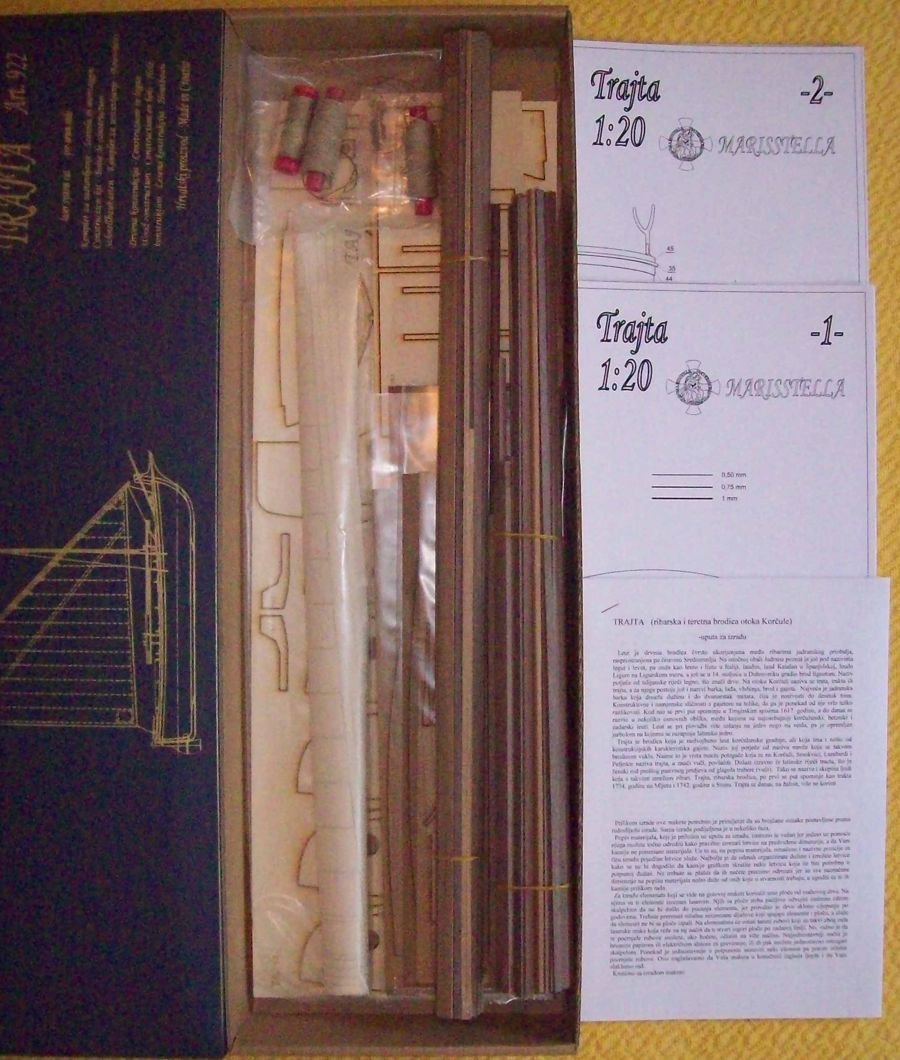
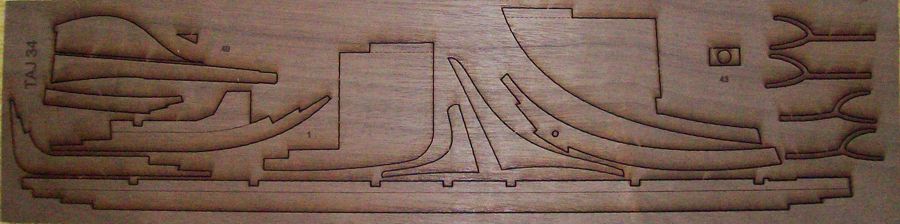
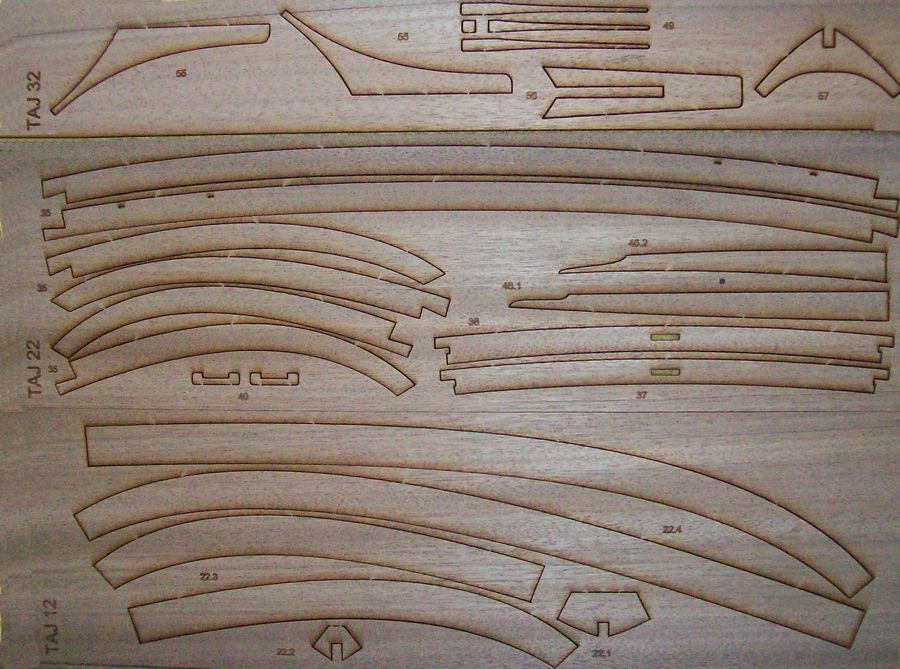
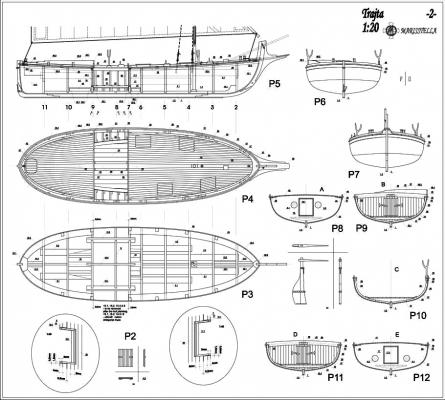
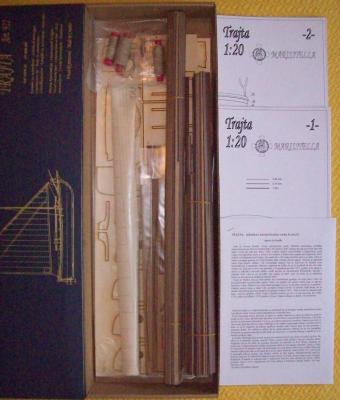
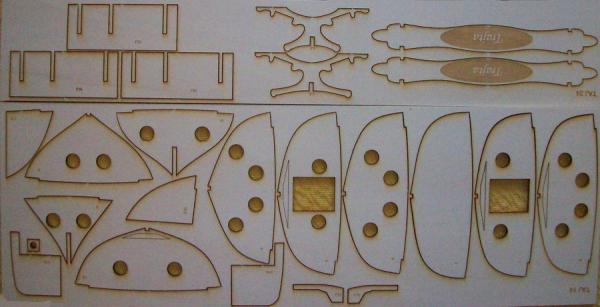
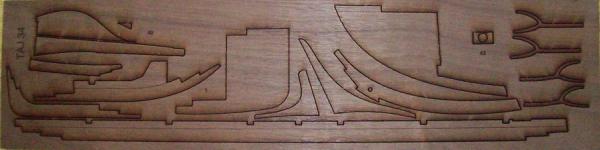
Good day to all ... Thanks Jean-Pierree, you're right, I first need to introduce all to the project , so you will know how it will be looking like ... Here I post this pictures of the draft now, it is trajta, that's the way she looks like ... I post a few photos of the kit box, so you can see what is it looking like ... :


- 150 replies
-
- 8
-
-
- TRAJTA
- fishing and cargo boat
- (and 2 more)
-
In order to work properly, ... it is important to create a workstand ... Only then the bulkheads can be placed on the keel and stem correctly ...

- 150 replies
-
- 6
-
-
- TRAJTA
- fishing and cargo boat
- (and 2 more)