HOLIDAY DONATION DRIVE - SUPPORT MSW - DO YOUR PART TO KEEP THIS GREAT FORUM GOING! (Only 13 donations so far - C'mon guys!)
×


Spiderpig
-
Posts
99 -
Joined
-
Last visited
Content Type
Profiles
Forums
Gallery
Events
Everything posted by Spiderpig
-
Hi David I am currently working on my 3rd and 4th ship. the HMS Prince and made Nostrum. I'm finding the Mare a little too easy now, and the Prince is nice and challenging. I was steering towards the USF Confederacy by MSW. It looks like a lovely ship, challenging, and without the headache of masts and rigging. I'd like to have a break from that part of the build if possible. Cheers Adam
-
Yeah I looked up his other models. They seem to be some great projects. My list would be as follows. Caldercraft - Cruiser Model Shipways - Syren or Confederacy Corel - Mirage, Neptune, Victory or Galeone Vaneta Euromodels - Cocca Anseatica And Al's or Occres King of the Mississippi.
-
Thanks for the help. I will come up with a list of potential kits I'm interested in. I have been eyeing off the Syren. It looks like a beautiful kit. Wasn't it designed by Chuck? A guy who partly runs this site? Adam
-
Vince. I bought mine from Hobbystores in London. http://www.hobbystores.co.uk/default.asp?WPG=HOB_HomePage1&PageNumber=4&s=c:0,c:045,b:Constructo Good price and delivered to Australia where I live. Adam
-
I am wanting to try out a variety of model ship brands. So far I've tried AL, Occre and Constructo. Occre was by far my favourite. What can people recommend to try out? Or what to avoid? Cheers Adam
-
I am currently getting close to finishing up two projects that I'm working on. the HMS Prince and the Mare Nostrum. I need some inspiration for my next project. I was thinking of steering away from sailing ships, and perhaps taking on a version of the paddle steamers that are available. AL, Occre, Mantua and Constructo all do one. Can anyone recommend any of those? Or perhaps inspire me towards something new and exciting?
-
Hi I am currently building the Prince by Constructo. Have a look at my log.http://modelshipworld.com/index.php?/topic/772-hms-prince-by-spiderpig-constructo-scale-161-1670/
-
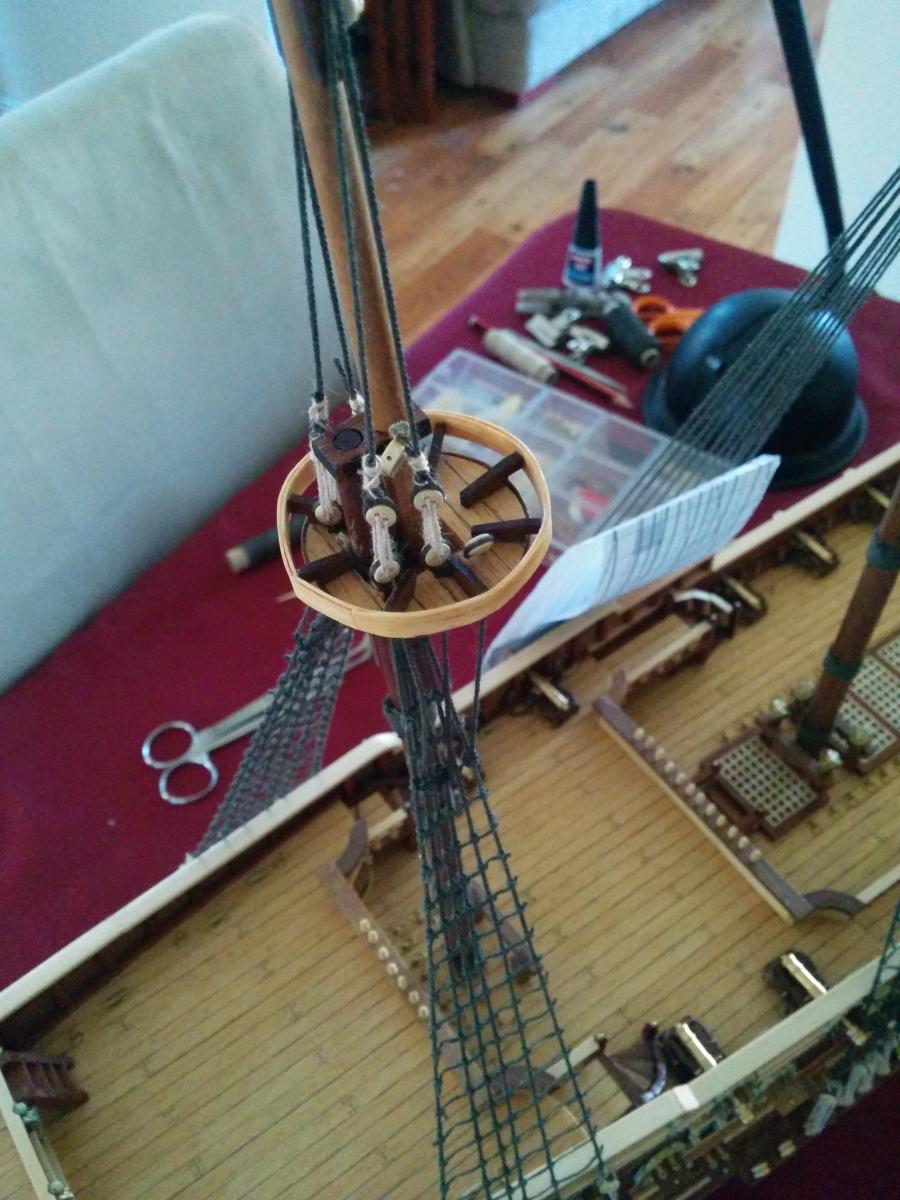
 Thanks guys. I might look into re doing the shrouds on the birds nest. Sjors. The only issue I have with my birdsnests is they are circle shaped. It makes it hard to drill holes on the edge that will line up together. Your birds nests are squared on the edges. I did the same on my Corsair. I'll see what I can come up with. Adam
 -
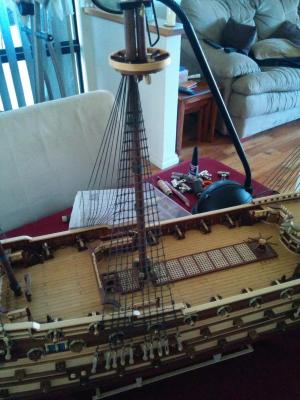
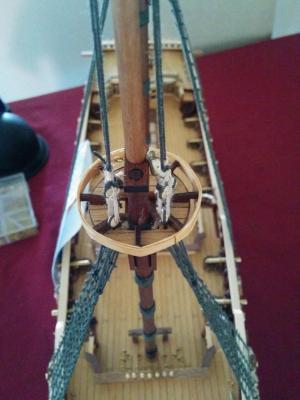
Thanks for the compliments guys! Rigging has begun! The ratlines are complete on starboard side. And now a question on attaching the shrouds to the lookout nests. Do I need to attach them closer to the outer edge of the lookout nests? Or are they OK as they are in the below photos? Any input would be appreciated. Adam

- 73 replies
-
- 2
-

-
- prince
- constructo
- (and 1 more)
-
Thanks guys! I didn't consider painting. Although matt black with a coat if varnish could look nice. Thanks for the advice. I may try it to see what it comes out like. Adam
- 73 replies
-
- 1
-
-
- prince
- constructo
- (and 1 more)
-
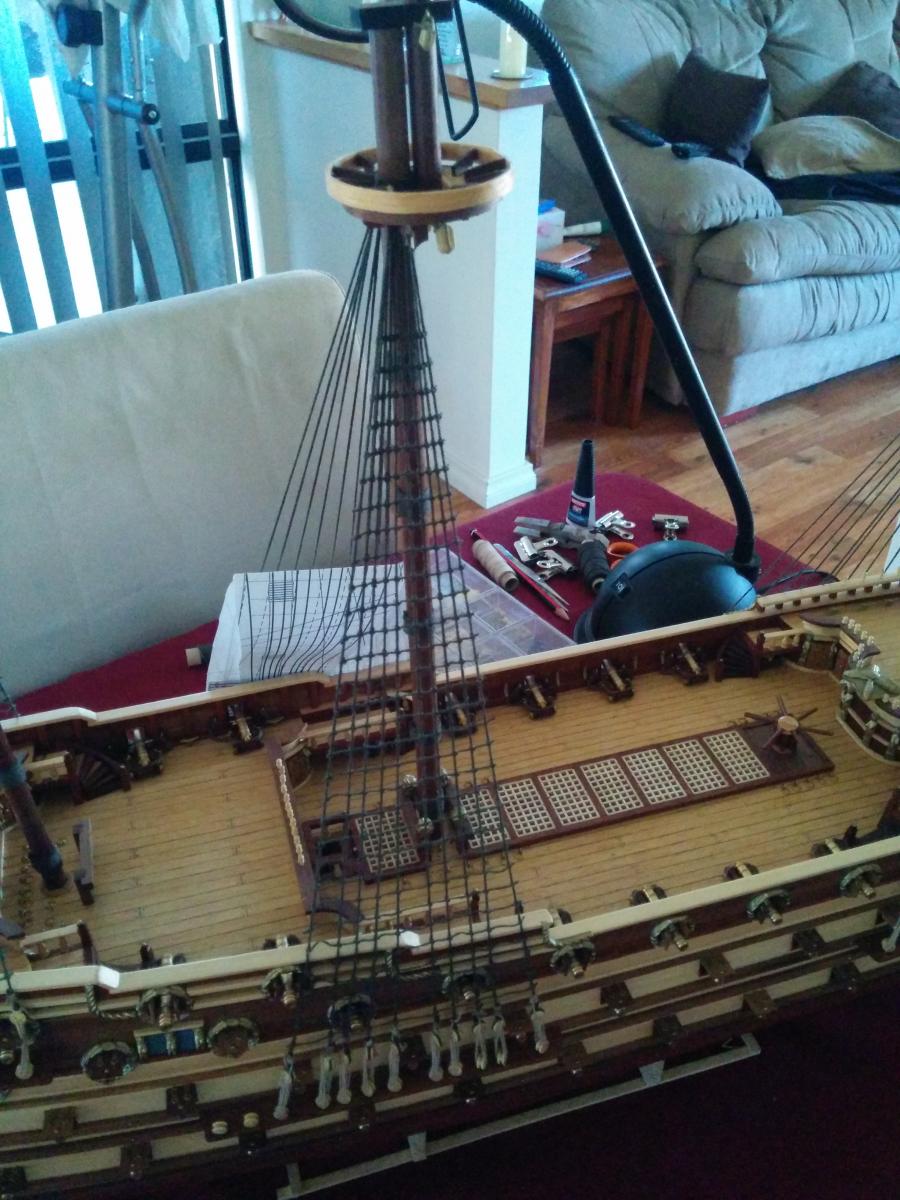
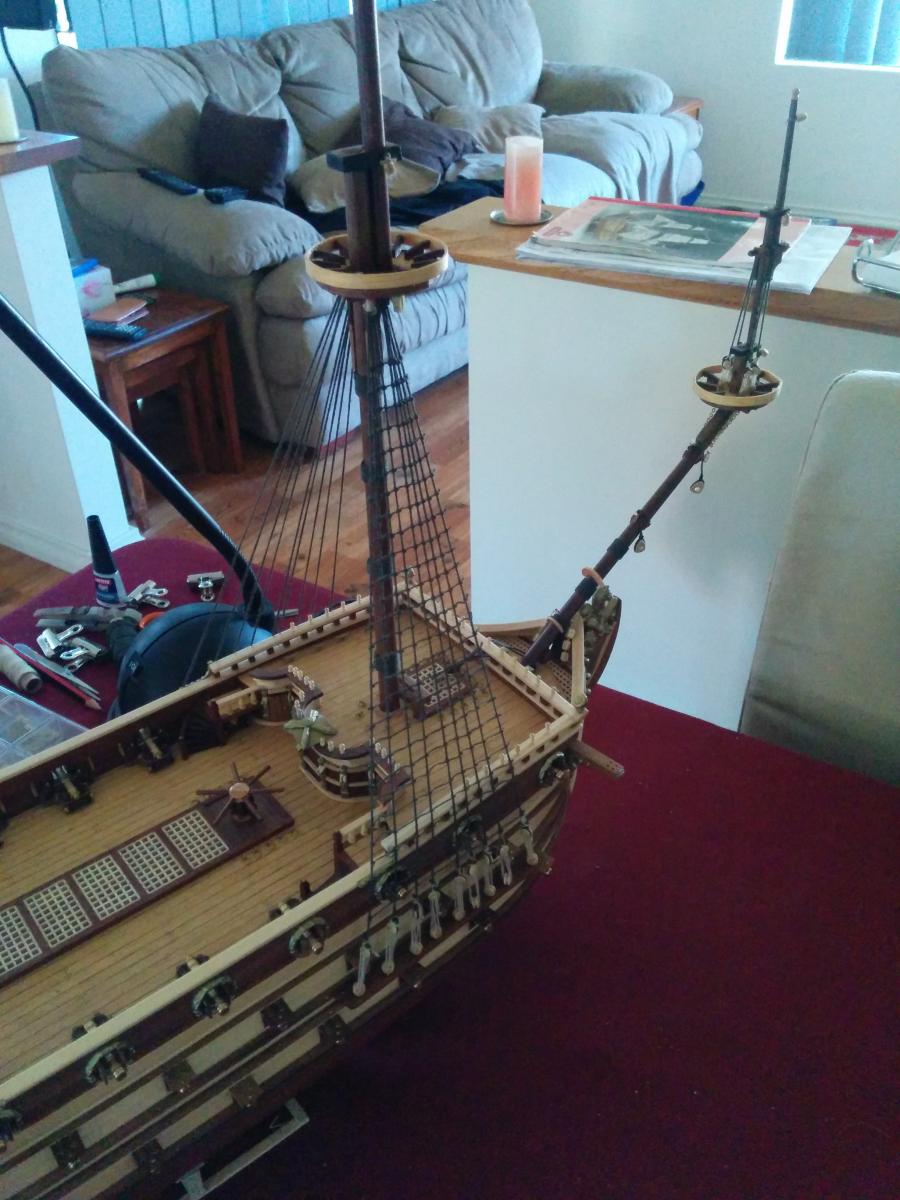
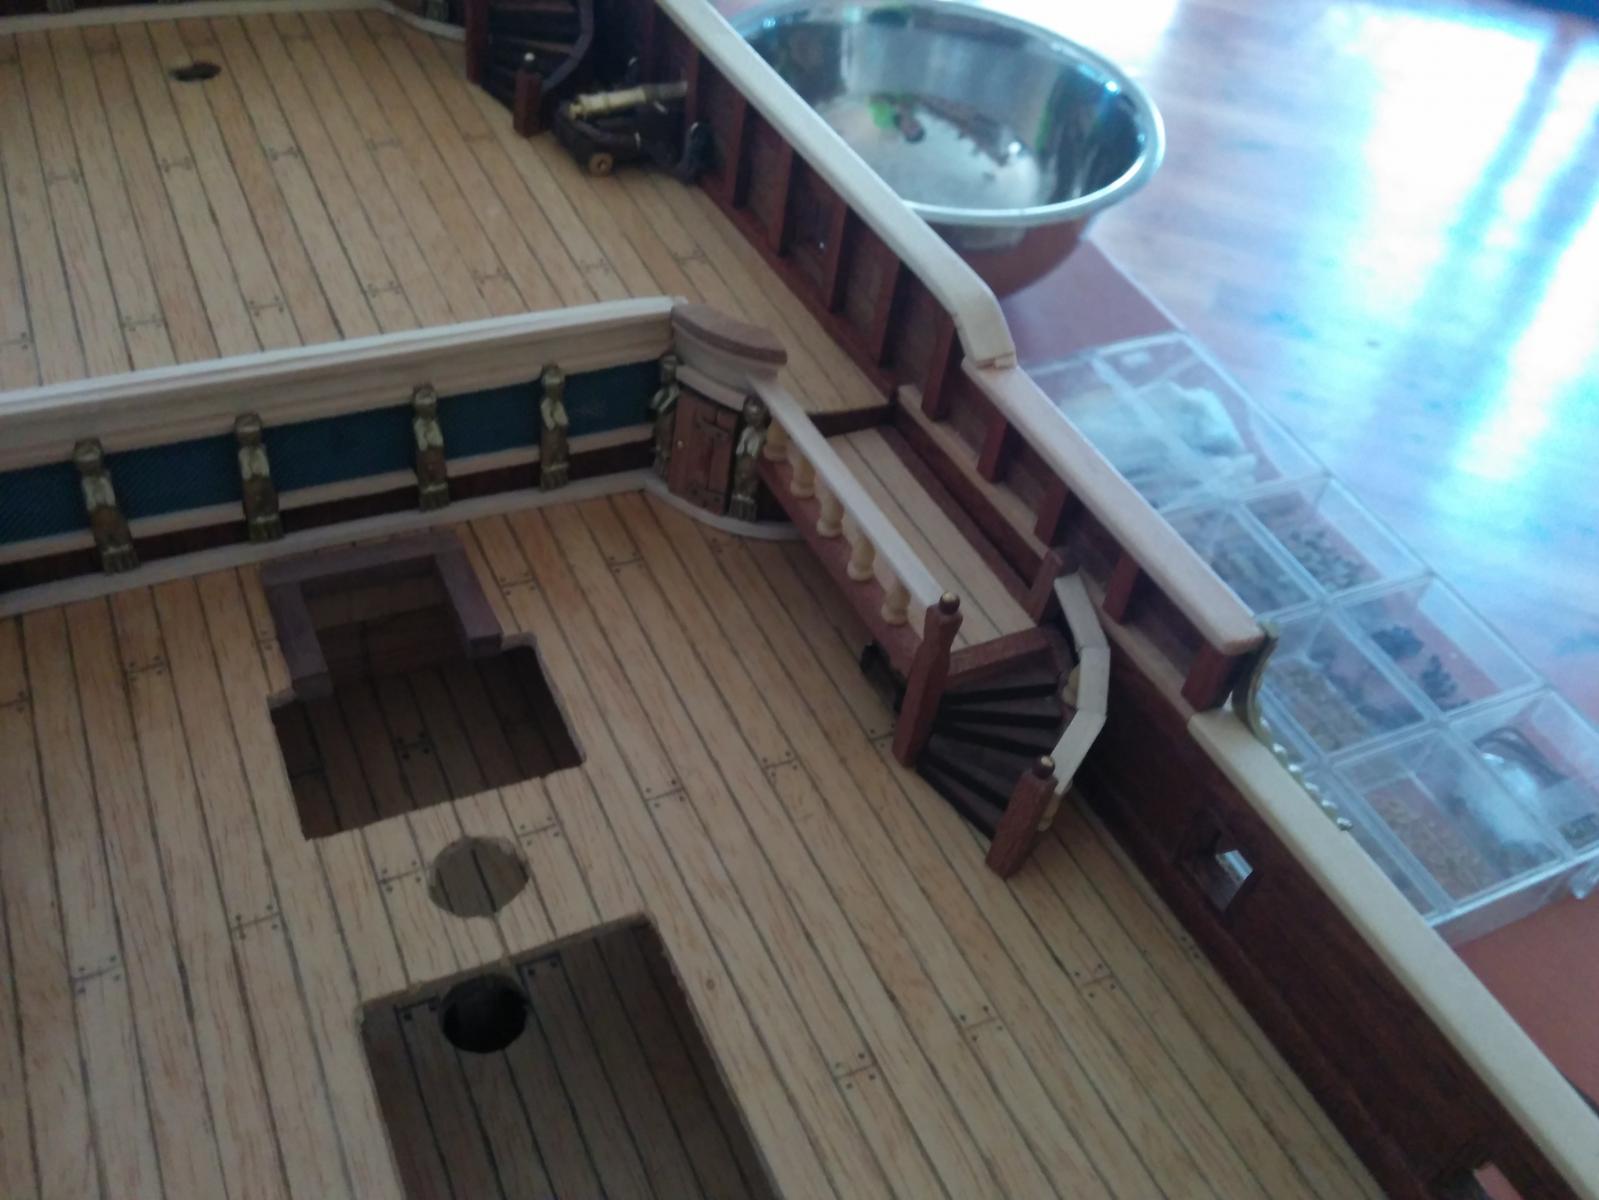
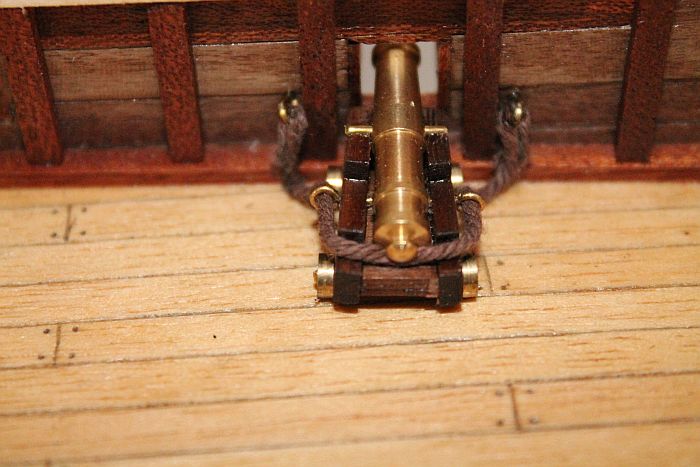
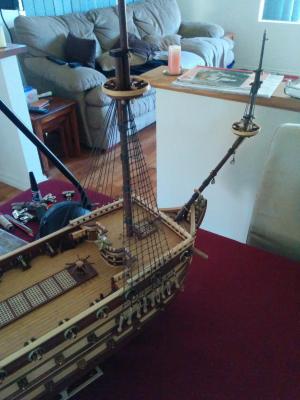
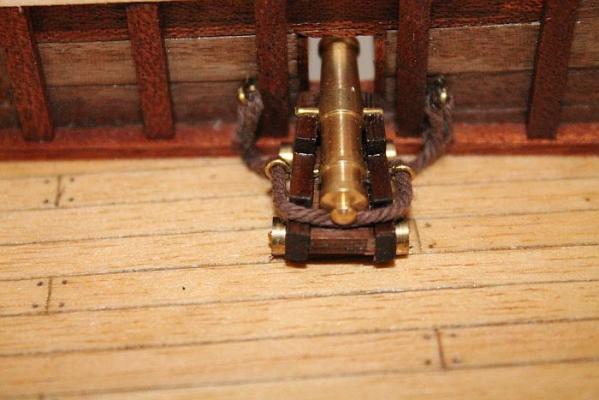
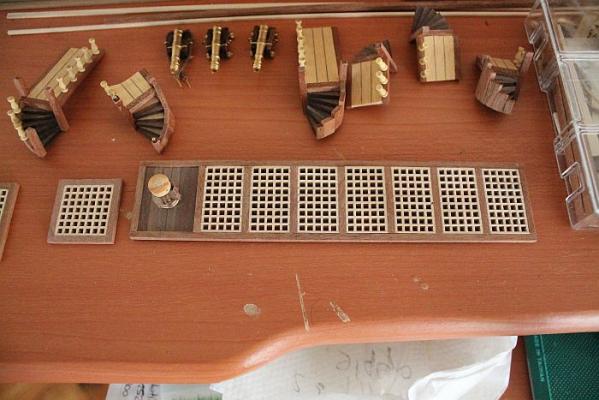
I haven't done any updates for a while, but seen as I'm now on holidays and have plenty of time to get some done here goes! The hull is now complete with decorations and so forth. I am still yet to add the channels for the masts, but I have decided to install these once the masts are ready to be installed. That way I can line them up properly. Other than that I am now ready to move onto the final step of building the masts and rigging her up! Here are some final photos showing some of the detail on the deck: All the Belaying pins are not glued in place yet. I simply added them for pictures. I will glue these in once I start rigging her up. I made some small changes to some of the detail. Starting with the Capstan. This is the way it is supposed to be built according to the photos in the instruction manual: I altered it by adding some 2mm dowel to the pre drilled holes in the top part of the Capstan. This required some experimenting. I started off by using toothpicks, but the wood wasn't to my liking. It was to white, and had no character. I would prefer to use a darker wood, with a bit more grain texture through it. So I went through some of spare parts from previous models and found some nice Mahogany 2mm x 2mm. Perfect! I simply used some 120grit sandpaper to grind it to a curvy shape. Then smoothed it off with some 400 grit sandpaper. Cut the lengths evenly and glued them in place. Once the whole thing was varnished, this is what it turned out like: And a long shot of the whole grating section: Here is another change I made, which I may have mentioned in an earlier post. I decided to rig my cannons on this model, which I never done in previous projects. I found a You Tube video of this exact model of a Russian modeller who used this method to rig his cannons: It's probably not the most authentic way of rigging a cannon, but I am happy with the way it looks over simply gluing each cannon to the deck. And now the final part of this post. I need some expert opinions on this matter. I have been rattling my brain to come up with ideas to replace the mast material that Construto send with the kit. It's a horrible white wood with very little grain texture through it. It almost looks fake, and there was no way I was going to complete the Prince with it! And a shot of what it would look like on the ship. This wood is so white it is nearly cammoflaged with the walls of my home! So I came up with a number of ideas. Starting with simply staining the original dowel with a Mahogany stain. This didn't work as the wood turned purple, and I wanted to create a similar colour to the main outside of the hull: So I then tried finding other types of dowel that I could find. But the unfortunate thing with living in this city is that other types of wooden dowel are hard to come by in the local stores. I could only find Pine and Tasmanian Oak from the local hardware store. Tasmanian Oak was quite nice: A slightly darker wood with much nicer grain texture. I tried the Mahogany stain on it as well, but I got the same result with wood turning purple. So as a last idea I purchased some Walnut dowel from Cornwall Model Ships in the UK. Great store with many varieties of parts and so on to choose. It arrived in the post yesterday! Just in time at the beginning of my Christmas/New Years break! So I can get started on the masts sooner than I expected. A much darker wood, that will look great once I give it a few coats of varnish! I had to change the thicknesses a bit as 3mm Walnut dowel wasn't in stock at the time. So I ordered some extra lengths of 4mm dowel to compensate. However this works out in my favour as the plans say to use 3mm dowel for the top section of each mast. I think 3mm is to thin, so I'm going to change it to 4mm. And if this doesn't work I can always grind down the 4mm down to 3mm. Here is a shot of all three types of dowel I have now. Starting with the dowel supplied in the kit (Anatolia is the name of the wood), on the left. Tasmanian Oak in the middle, and Walnut on the right. Thanks for watching, and have a Merry Christmas and a Happy New Year! Stay safe and keep those posts coming! Adam


- 73 replies
-
- 6
-
-
- prince
- constructo
- (and 1 more)
-
Looking good David! Where did you get the pirate figures??? I had the same idea for my corsair, but I couldn't find them anywhere. Were they pre painted? Adam
-
More updates for this week. I am slowly working towards the bow of the ship adding all the decor as I progress along each deck. The sections at mid ship still need a few parts added. And a coat of varnish. And there is a row of cannons to add to port side. Thanks Adam


- 73 replies
-
- 7
-
-
- prince
- constructo
- (and 1 more)
-
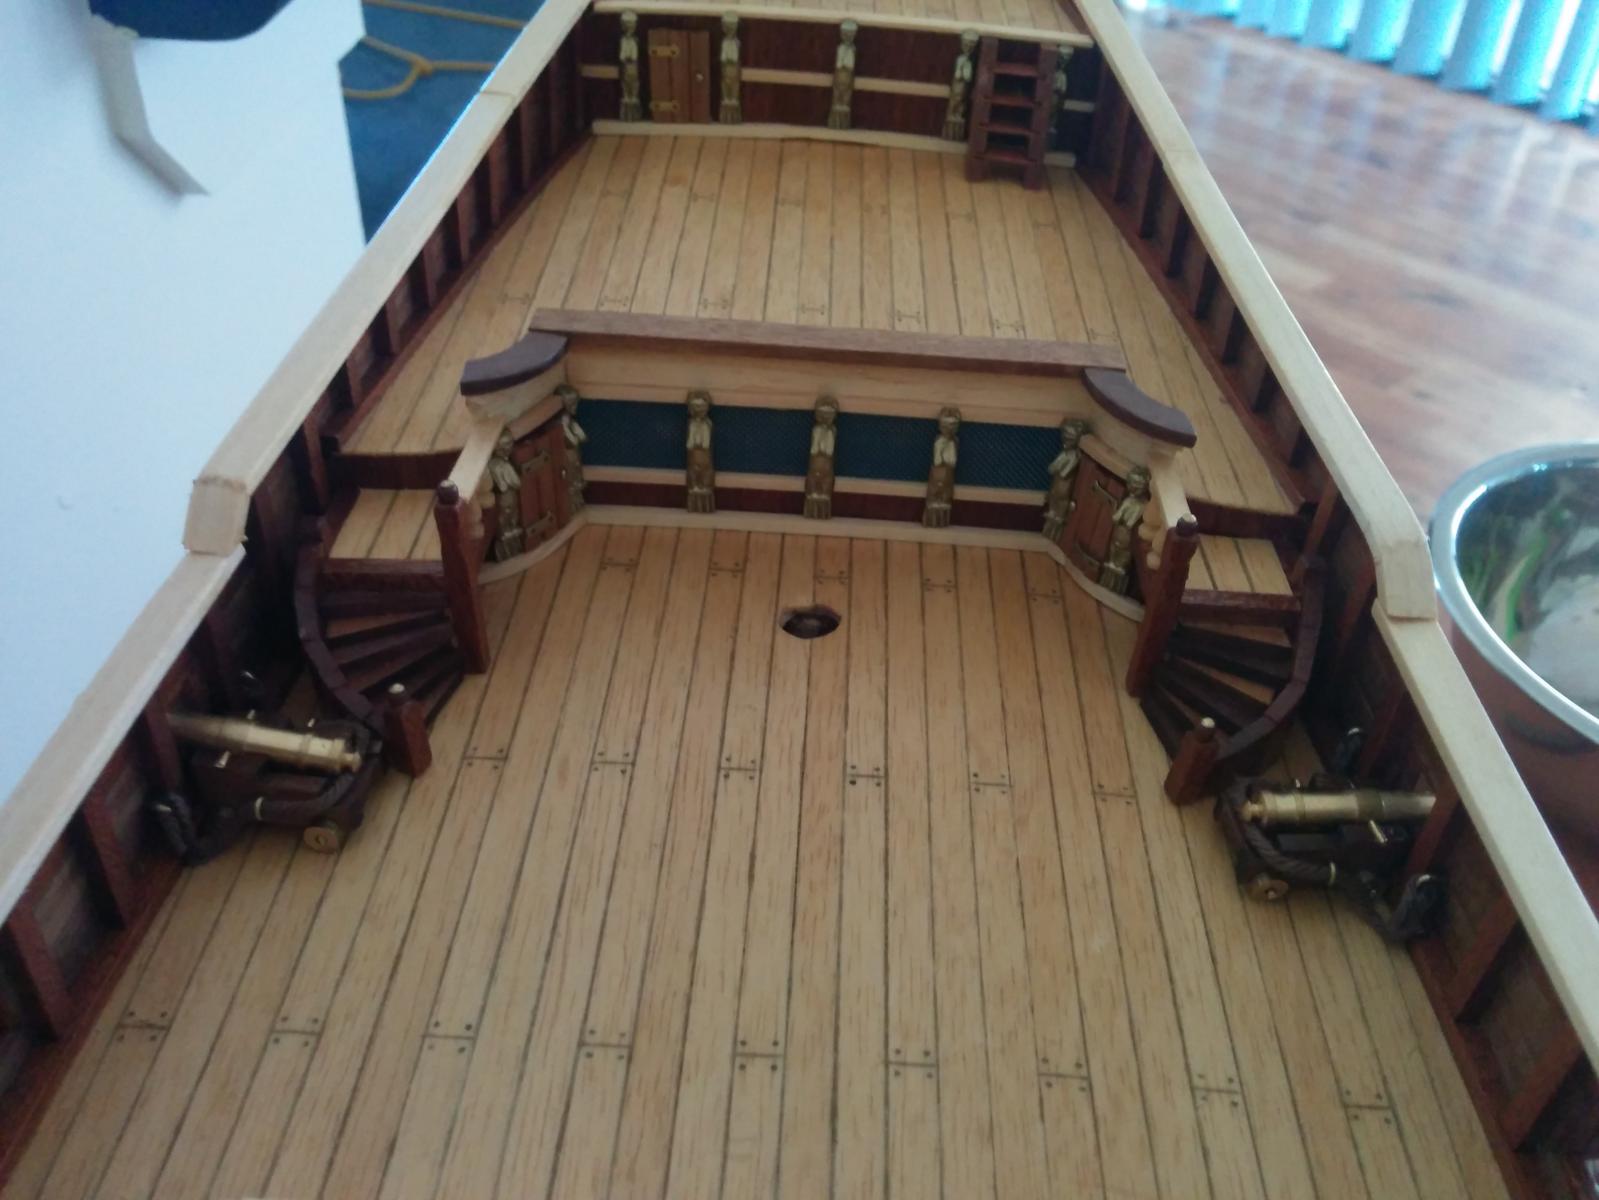
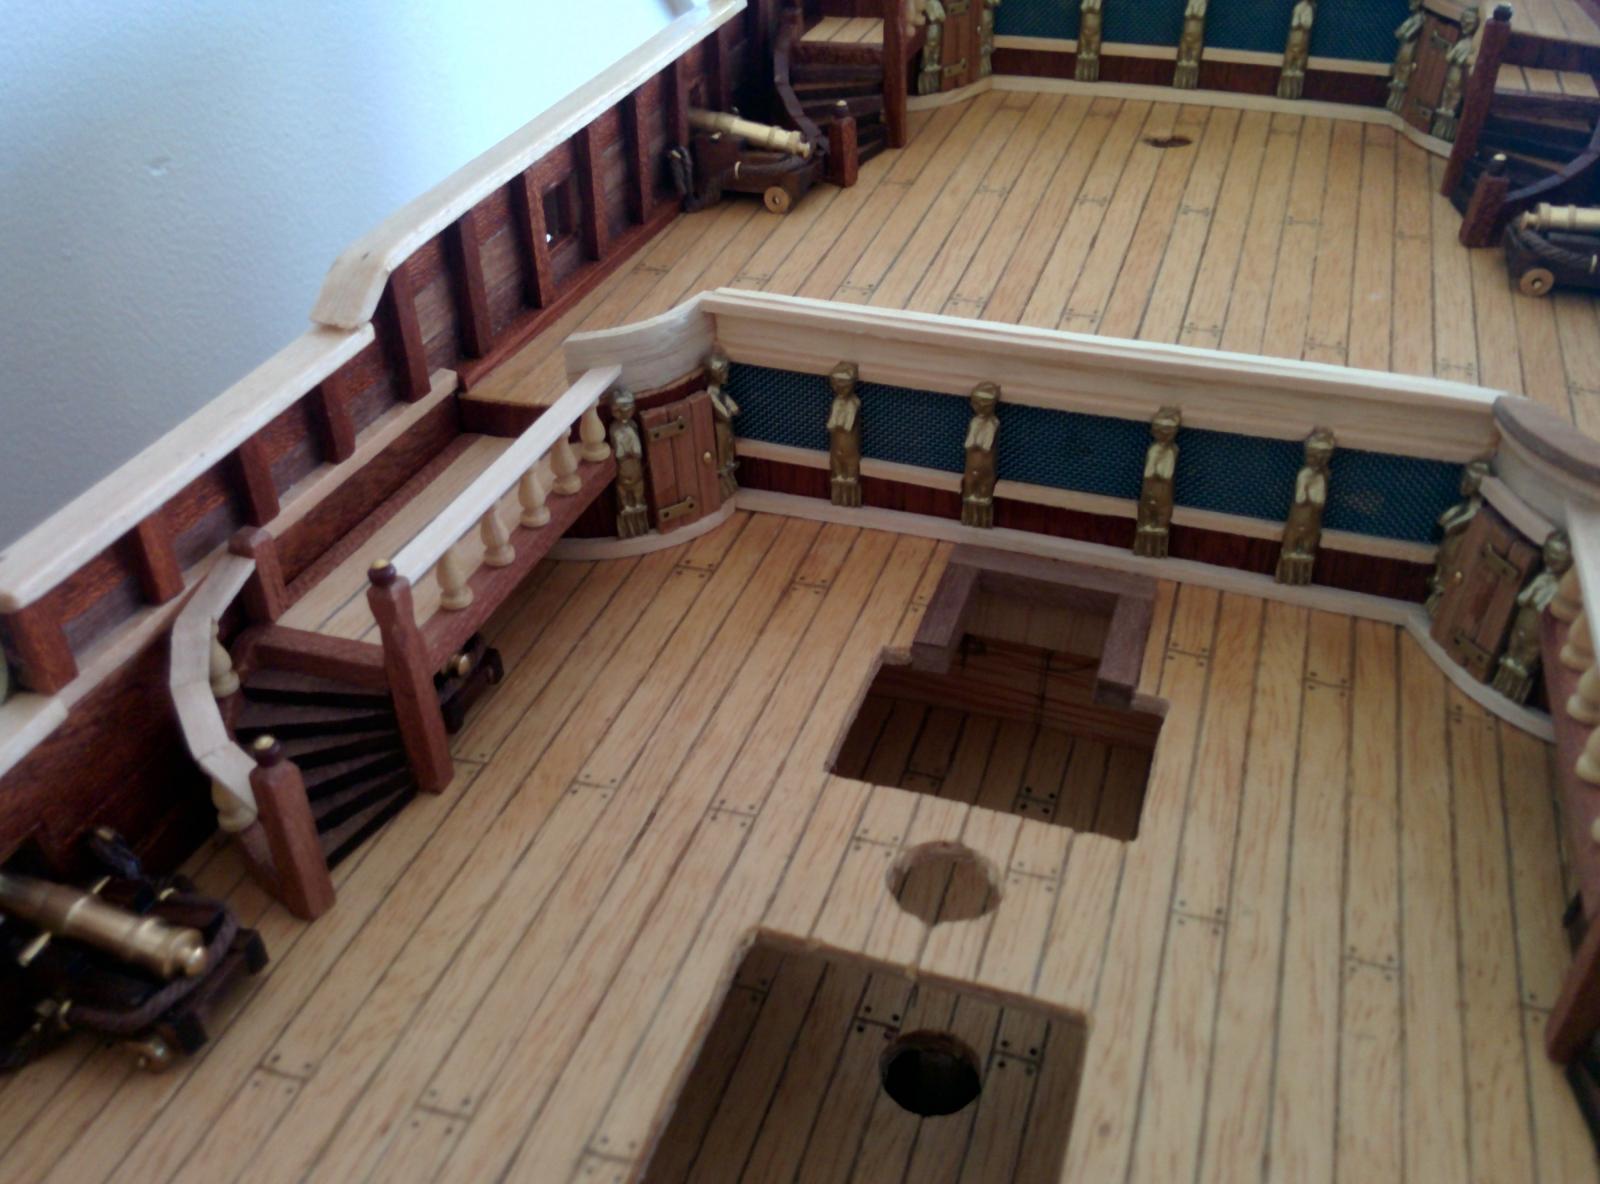
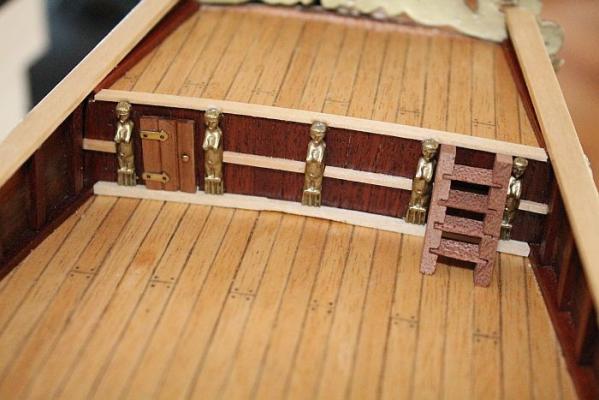
Thanks guys for the kind comments! I have now moved onto decorating the decks of the ship. Starting from the top deck at the stern: I'm still yet to varnish the ladder. But this section of the deck is mostly complete. There is a flag pole holder to be added in the middle, at the back of the deck later. I did alter the door slightly. The instructions indicate to use 4mm x 1.5mm x 17mm African Walnut, but I decided to trim each section down to about 3mm wide. I then added a small beveled edge to the inner sections of the door to give it some added realism. I then moved onto the next level on the deck. I still haven't quite completed it yet, as each level gets more detail as you work towards the bow. I have also added a few cannons to the deck. Although the instructions don't indicate to rig them up, I decided it would look a bit nicer with some rigging. This is my first time rigging cannons, so I'm not sure if this is the authentic way of doing it. I found this method from a You Tube video of this model done by a Russian man. He rigged his cannons in the same manner. And finally some deck decorations that I have been working on. I have completed the gratings, but rather than installing them yet, I am waiting until I get to the section of deck they are attached to. The other parts are spiral staircases, that will be added to the edges of each deck level. Again they are complete yet, and I do want to give them a coat of varnish prior to installation. And also a couple of cannons that are nearly ready for installment. I still need to build 10 more which I can do a bit later on. Thanks for watching Adam

- 73 replies
-
- 6
-
-
- prince
- constructo
- (and 1 more)
-
Hi Sjors She is looking great! I was having a look at Cornwall Models the other day and noticed that the San Ildefonso is for sale. Occre changed it to a normal kit you can buy, not just a member only one. So hopefully we will see more logs of her. She is a beauty! Adam
-
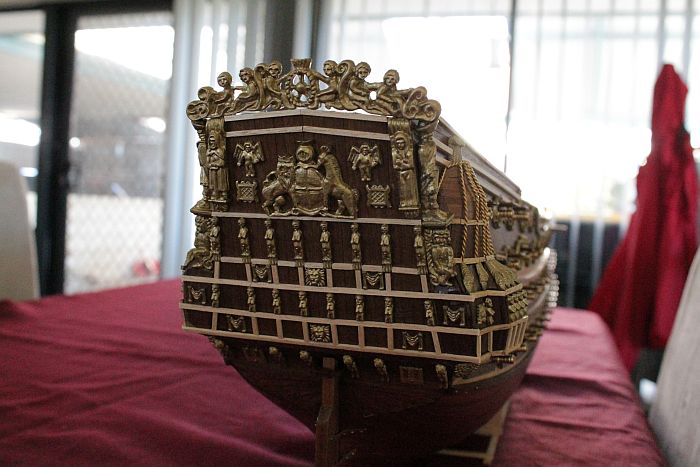
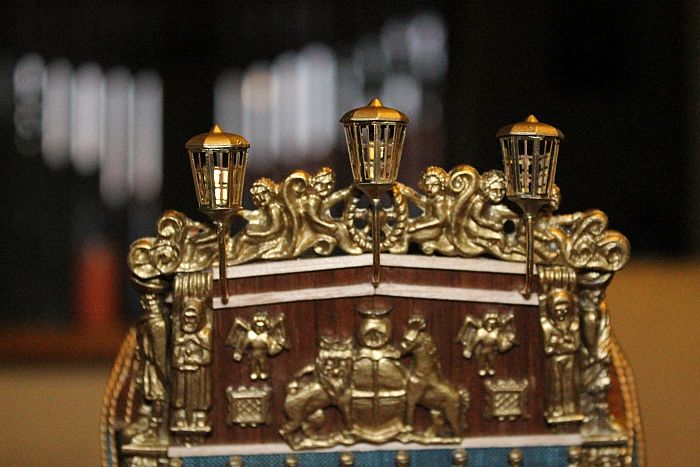
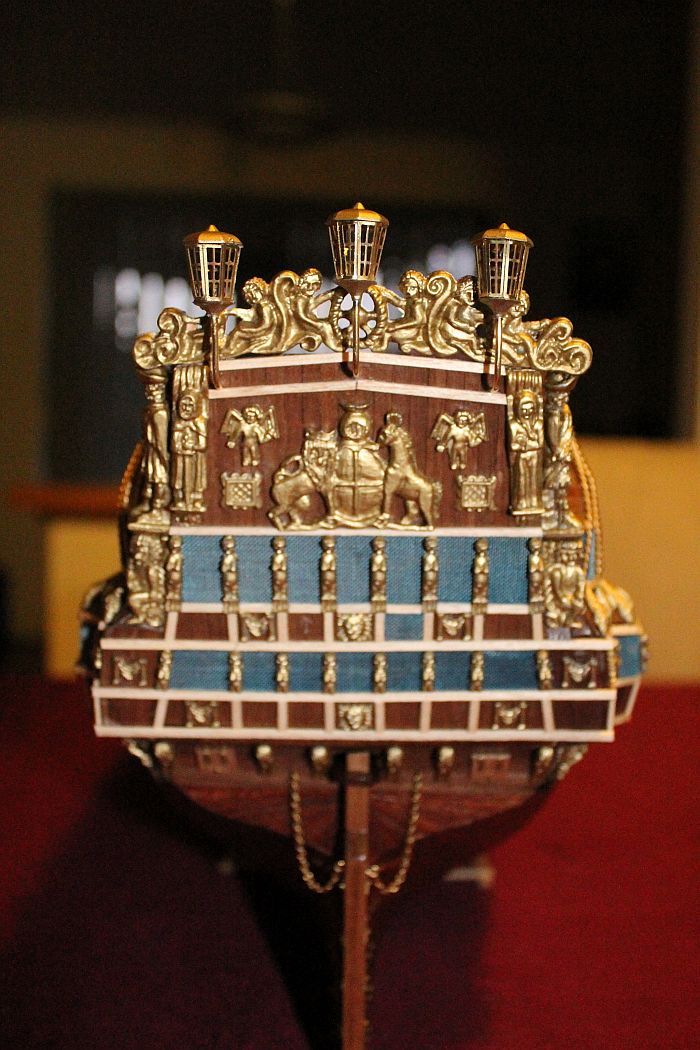
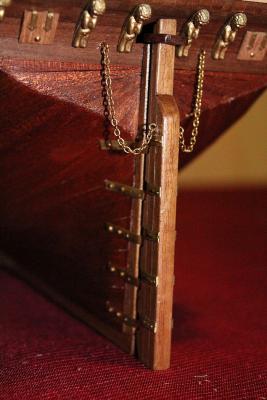
Updates for this week have been good. I managed to get most of the stern area decorated, and the outside of the hull is nearly complete! Starting with the stern galleries complete with the steel mesh that imitates the windows: Next I installed the rudder, along with the chains. I then moved onto the back of the stern: And complete with blue steel mesh for windows: Lastly I added the brass lanterns at the top of the stern: Thanks for watching Adam


- 73 replies
-
- 5
-
-
- prince
- constructo
- (and 1 more)
-
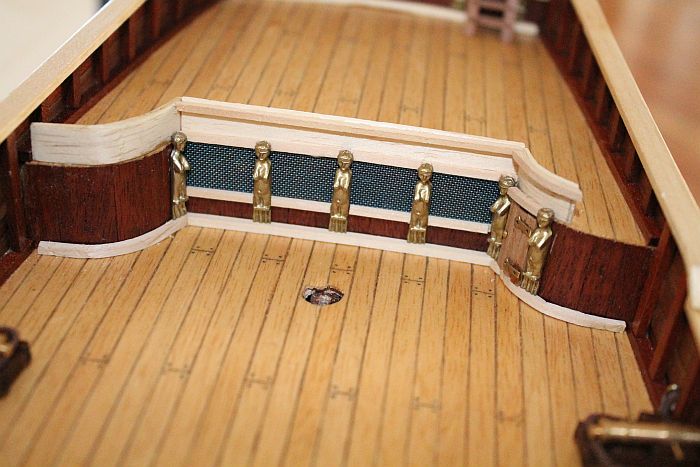
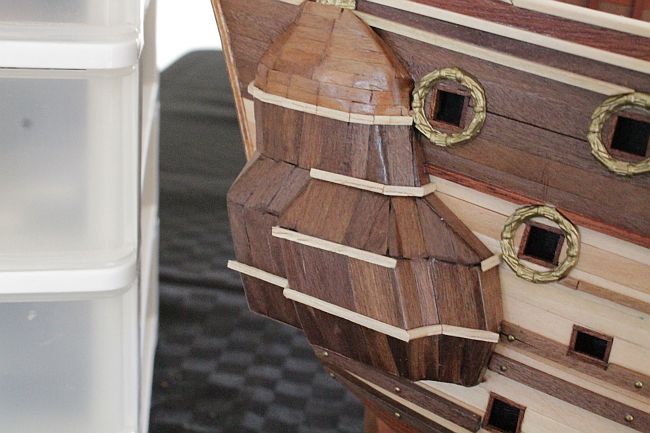
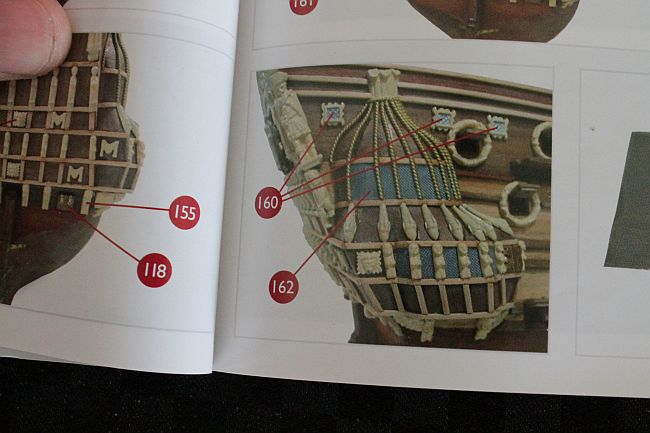
A small update for this week. It has been a bit slow on the decorating of the stern gallery, but the end results are pleasing. This is port side so far: I'm yet to varnish all the wood strips surrounding the cast metal decorations. To make the plaits of brass at the top of the galleries I simply folded a length of 0.8mm brass wire in half. Then pinched one end with a pair of long nose pliers. Stick one end in a drill, I used a cordless drill as they are less powerful and come in handy for a job like this. Then you simply turn the drill on and off until you reach your desired plait of brass! It's that easy! I then moved onto adding the steel mesh that imitate doors. The fine steel mesh supplied with the kit was supposed to overlay the wood of the ship after you painted the wood. I'm not a highly skilled painter when it comes to model building, so I came up with another plan. I cut out a section of steel mesh that I required. Then spray painted it in a Tamiya Mica Blue paint. Being very careful not to over spray too much paint. Wait for the piece to dry, then simply glue it in place! You can just see the glue marks behind, so a little more care will be needed for the other areas. I am very pleased with how it came out! And I'm glad I don't need to paint the small areas in between the other figurines. You can see the ones in the photo just above the one I have completed. They will require the same process. There is also a lot of steel mesh parts on the stern gallery to add as well. For now I have flipped her around and continued on with adding the gun port doors. I will complete starboard side over the next few days. Varnish all the wooden areas, then move onto decorating the upper stern area. Thanks for watching Adam


- 73 replies
-
- 3
-
-
- prince
- constructo
- (and 1 more)
-
I'll be varnishing them Brian.
-
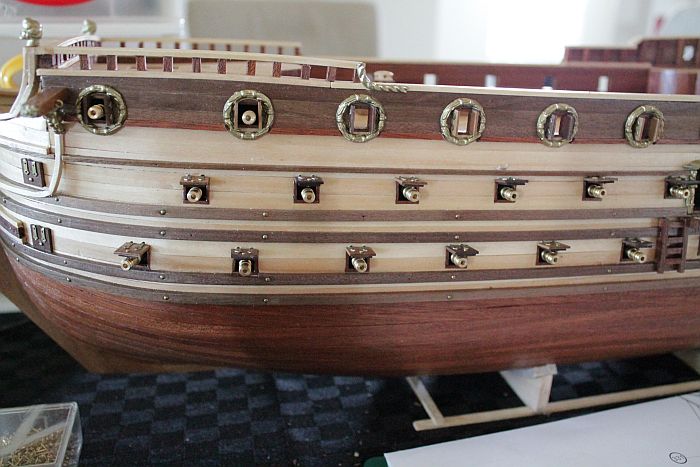
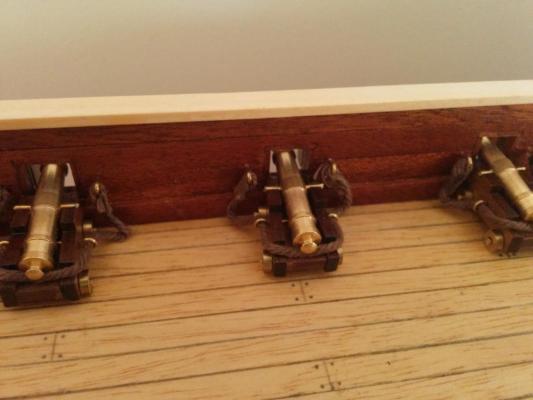
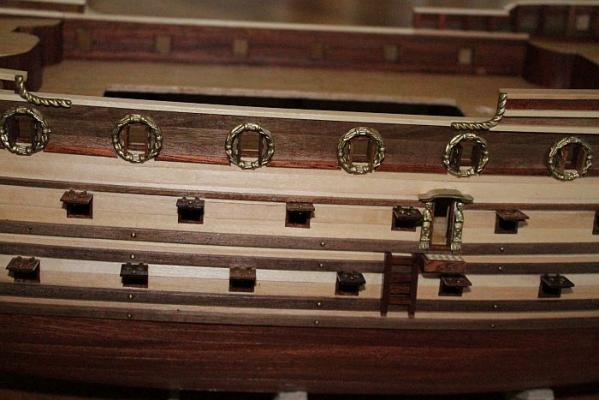
Thanks guys for the kind words! I decided to put off decorating the stern galleries for now and back track a few steps that I previously missed. Starting with installing the gunport doors. Each door needed to be made by hand with some African Walnut, in 10mm X 1mm. Each door is 10mm X 10mm, The open doors have an internal section of 8mm X 8mm in the same wood. I then added the false hinges, and a small pin to imitate the handles. Constructo puts in 2 lengths of the African Walnut to make the doors. However the colour's between the two are very different. This didn't phase me, as I thought it would be nice to pattern the doors like so: You can see I alternated with the 2 colours to create a pattern all the way along the side of the hull. Next I added the cannons. I added all but the 8 cannons that sit on the upper decks. I will add these later. Originally I was going to blacken them, but after some advice and seeing what they look like in the bare brass colour, I decided to keep them in the brass look. There is also some more figurines at the stern end. I am yet to complete inbetween these with some steel mesh. I will paint the mesh blue to imitate windows. Thanks for watching. Adam


- 73 replies
-
- 5
-
-
- prince
- constructo
- (and 1 more)
-
Thanks guys for the kind words. Brian it will be nice to see other Prince builds up! It's such a shame that not many people build the Prince. Considering what a beautiful ship she is. I also noticed that there is a model ship club in Melbourne. Do you know of any in Perth? Adam
- 73 replies
-
- 1
-
-
- prince
- constructo
- (and 1 more)
-
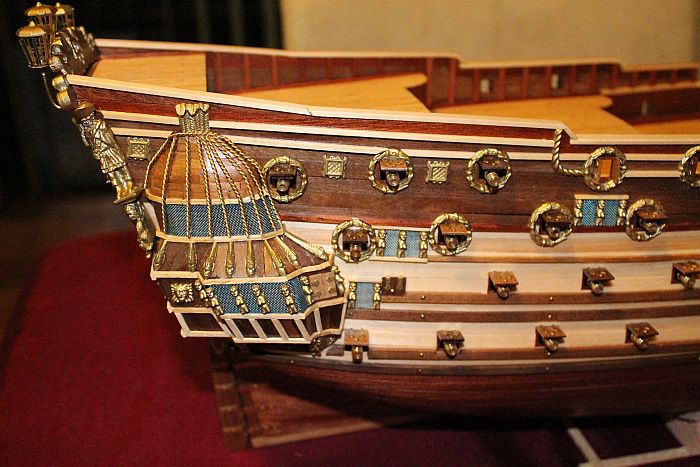
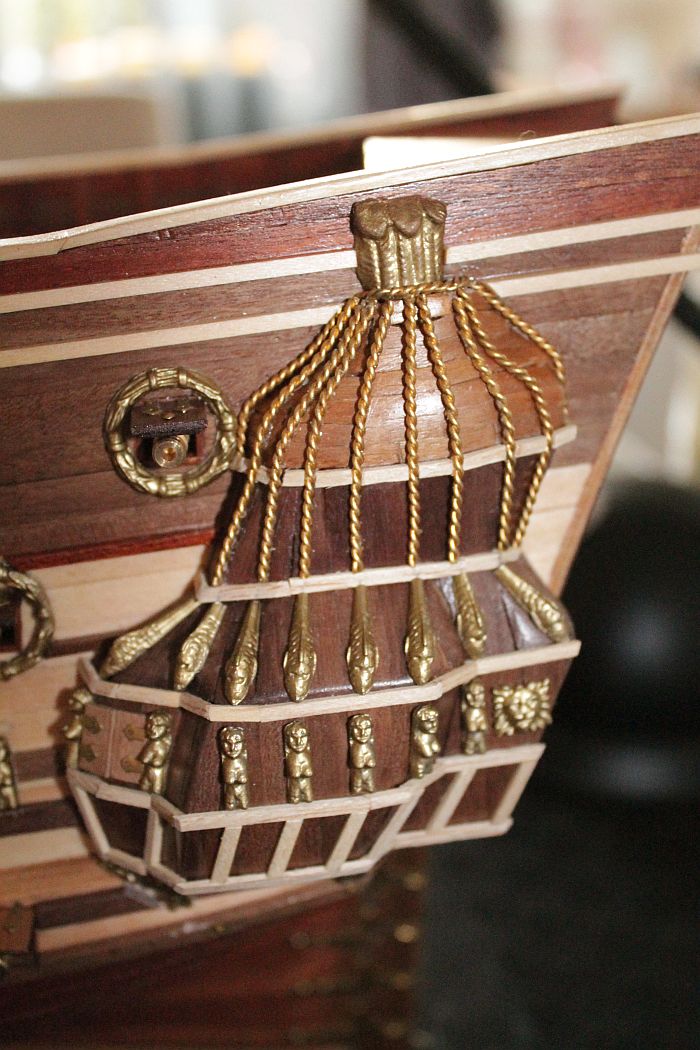
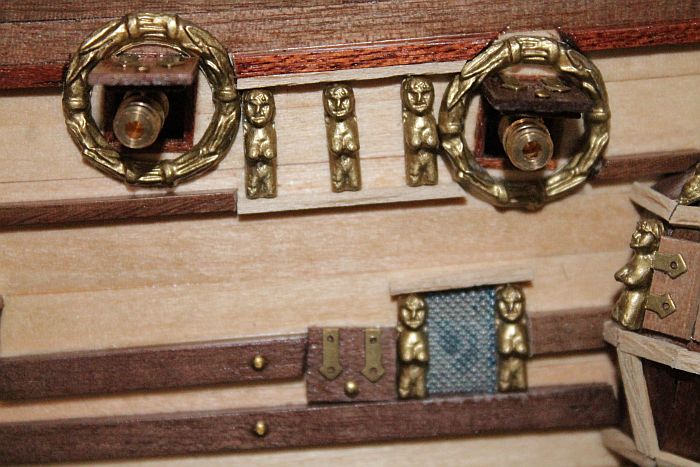
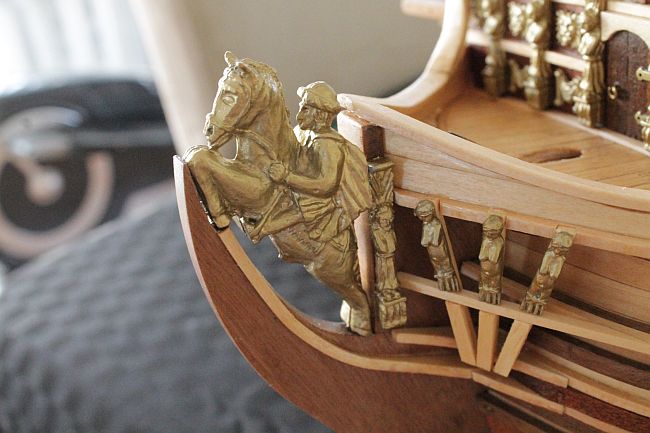
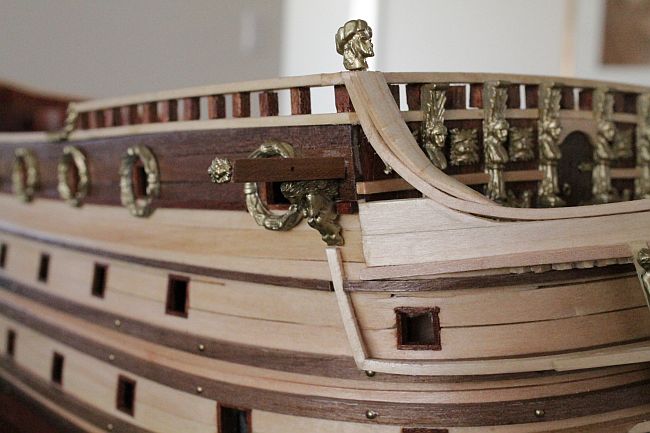
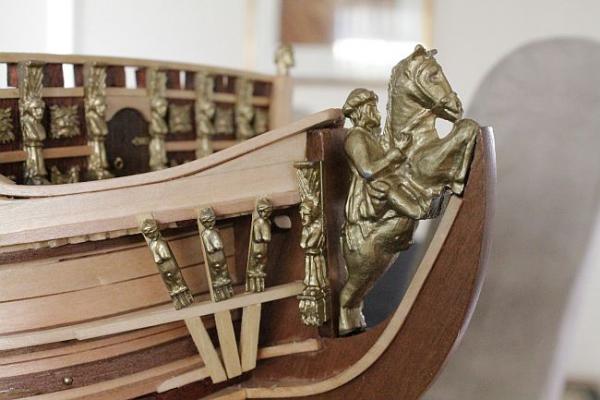
I love these long weekends! You just get so much more time to continue with the build of your ship! I have now finished decorating the bow of the ship. Starting with the figure head and some smaller figurines: Then the Davits that have some small Lions head tacks, and a small figurine underneath. I am now working on finishing off the galleries at the stern, coupled with the vast detail on the stern itself. So far I have begun to add some small sections of wood to starboards sides gallery: This took me hours! So it'll be a while before I eventually get to this complete finish: Thanks for watching Adam


- 73 replies
-
- 2
-
-
- prince
- constructo
- (and 1 more)
-
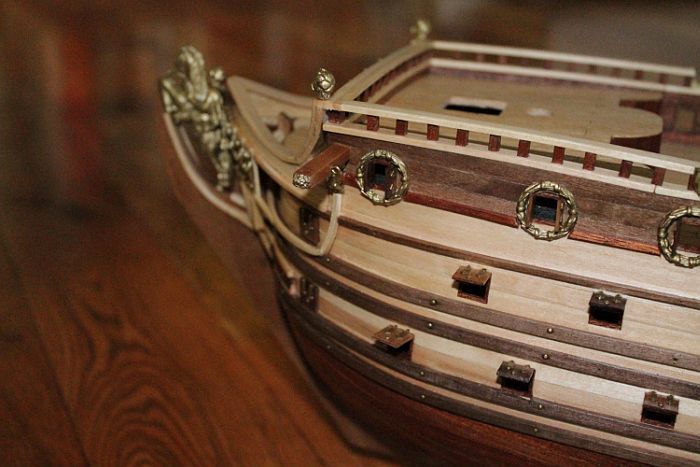
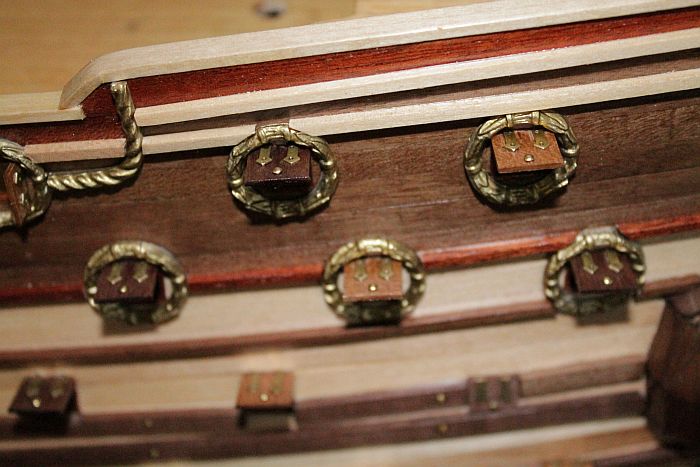
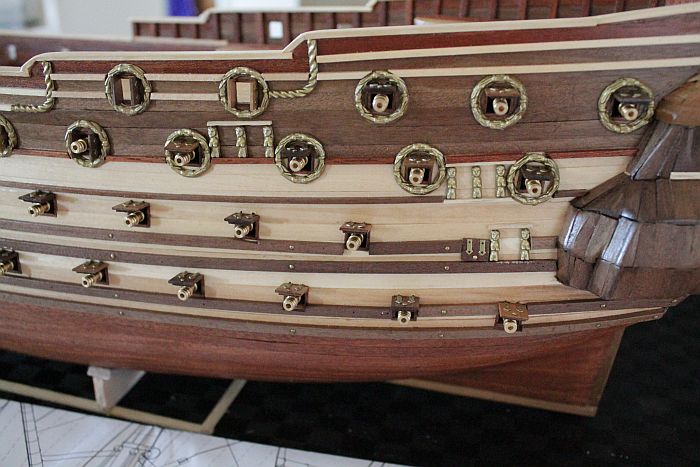
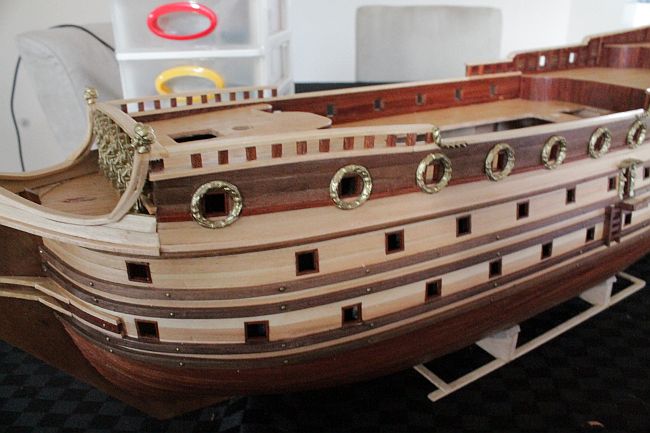
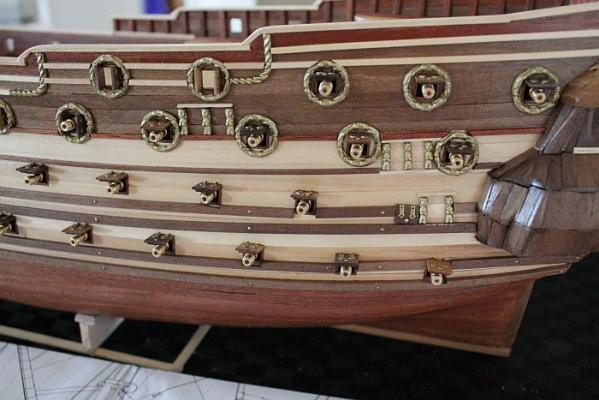
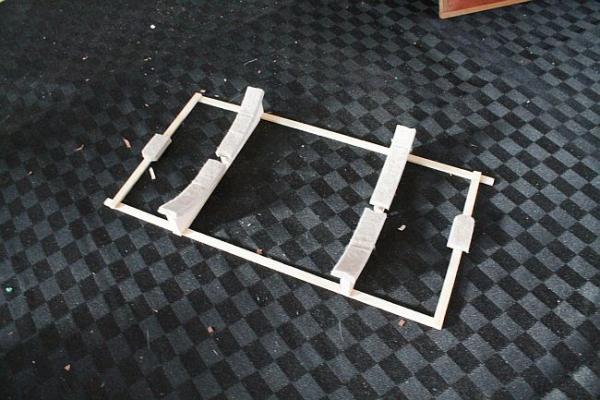
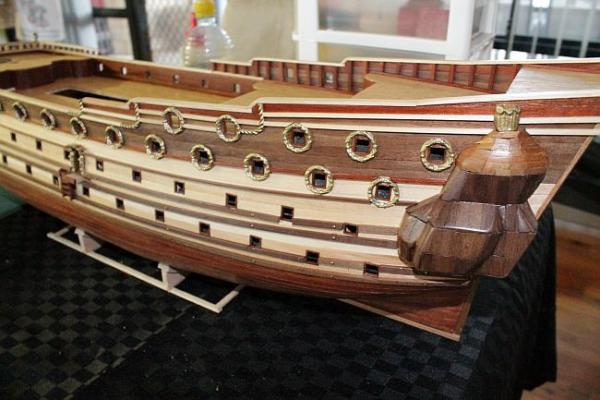
Updates from this week. I have continued on with decorating the hull with some more ornaments and such. Starting with the gold rings that decorate the top two rows of cannons. Also added some wales at the stern. I then went forward a few steps and added some detail to the door at mid ship: And on another note I thought I would add a photo of the building frame I'm using. I have read a lot of posts of people who buy those expensive keel clamps etc. I designed my own. I used left over planks from a previous build to build the frame work. It needs to be roughly a third of the hulls length, and about the same width as the hull. Then I used the offcuts from the plywood frame work that held the bulkheads to create the upright sections. I then added some felt, similar to that used on the bottoms of furniture to protect the hull Thanks for watching Adam


- 73 replies
-
- 7
-
-
- prince
- constructo
- (and 1 more)
-
Thanks guys for the feedback. I think I might buy some cannons to experiment with. Try and blacken or paint them. Then compare to the original brass ones. Then I can make up my mind on what looks best. If I can find a gun metal spray paint that would make it easier to paint them. Adam.
-
Hi I am coming up to a part of my build of the HMS Prince where I am trying to decide what colour to paint the cannons. There are 16 full cannons to build. Wooden framework, with brass guns and wheels. Plus about 70 false cannons for the sides of the ship. What is a typical colour to paint the guns? Like a "gun metal", or something a bit darker than the brass ones supplied. Any tips on Cannon colour would be greatly appreciated. Cheers Adam
-
Loving the detail Sjors! I have to ask how did you curve the wood around your crows nests? I have circle crows nests on the Prince as well. Cheers Adam