


patrickmil
-
Posts
1,209 -
Joined
-
Last visited
Content Type
Profiles
Forums
Gallery
Events
Posts posted by patrickmil
-
-
48 minutes ago, GrandpaPhil said:
Very nicely done!
Thank you for saying so!
- GrandpaPhil, Old Collingwood, Canute and 1 other
-
 4
4
-
16 hours ago, rcmdrvr said:
Wow! You did a really great job and I learned alot studying your photos. The kit is sitting on my workbench. It is really an intimidating box of parts. The hull is huge. I am studying your log and will dive in shortly. Still intend to attempt a waterline presentation for this model.
I really appreciate your kind words! There are a LOT of parts there and the PE can really be daunting, but it does make for a great kit overall. The biggest drawback for me is the decals but they do go down well once you have a good plan. I think a waterline presentation would be amazing and you would be blazing a new trail with this kit by doing so; I haven't seen any other builds that have gone that route. I'm looking forward to seeing your build log!
- Old Collingwood, Canute and mtaylor
-
3
-
Creating a masterpiece out of a bad kit takes time, but it looks like you have it well in hand. Good work on getting the deck down!
- Spaceman Spiff, Canute, NavyShooter and 1 other
-
4
-
Run some Tamiya Extra Thin cement over the rescribed area; that should help tone down the sharpness of the grooves and plank edges.
- Canute, mtaylor and Old Collingwood
-
3
-
14 minutes ago, gak1965 said:
Not sure which ship this is (Enterprise, Hornet, or Yorktown) but a good photo of the cross deck catapult. Carrier aviation is a specialist activity. Launching through the hanger is plain (hah!) insane....
Regards,
George
That looks like Enterprise since that's a Hellcat getting ready for launch. As far as I'm aware, she was the only of the three sisters to survive late enough to get Hellcats. And yeah, hangar deck launches would have been nuts. Great picture!
- Canute, mtaylor and Pete Fleischmann
-
3
-
14 hours ago, ddp said:
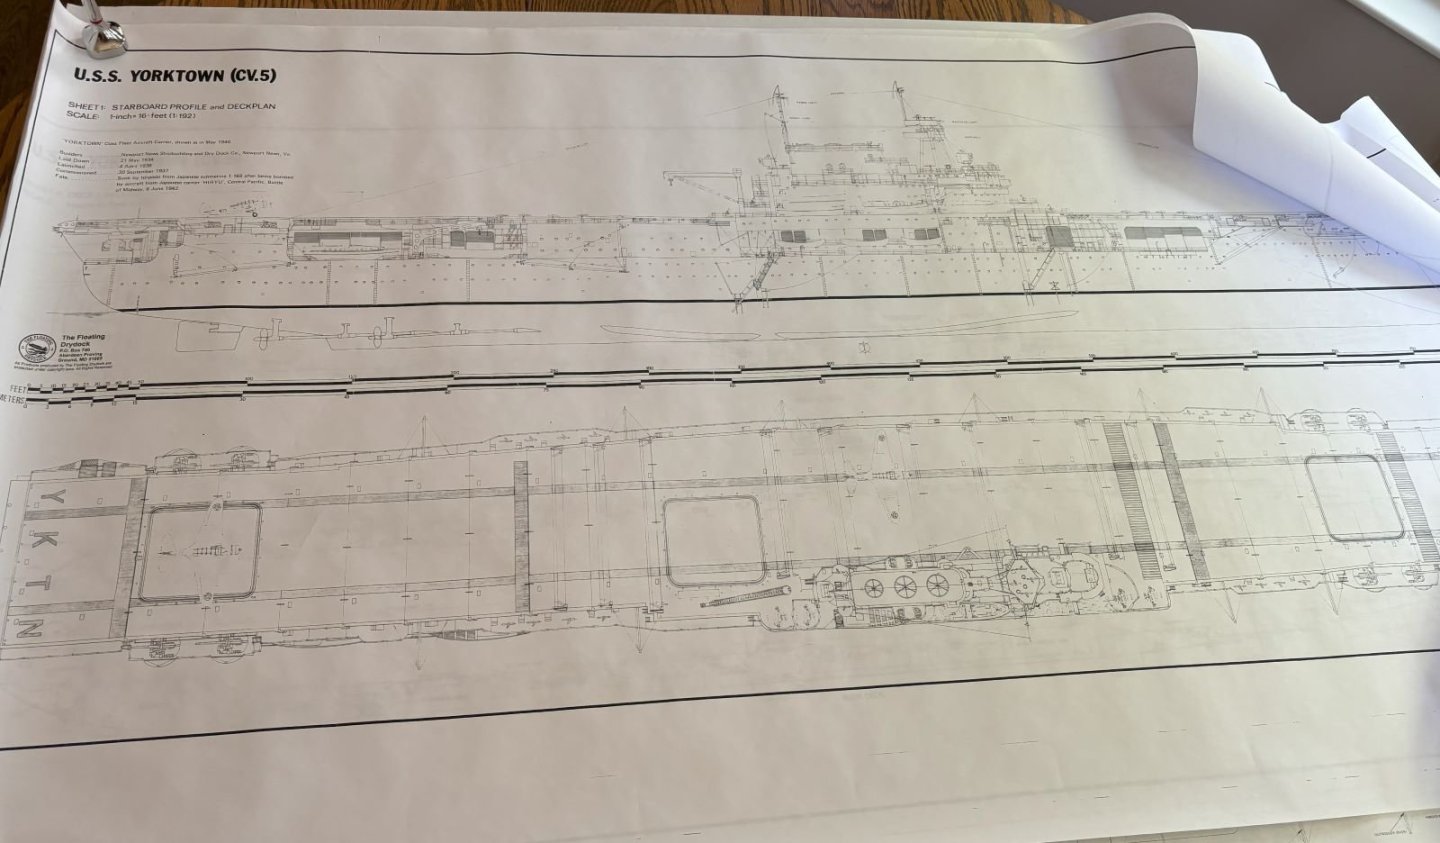
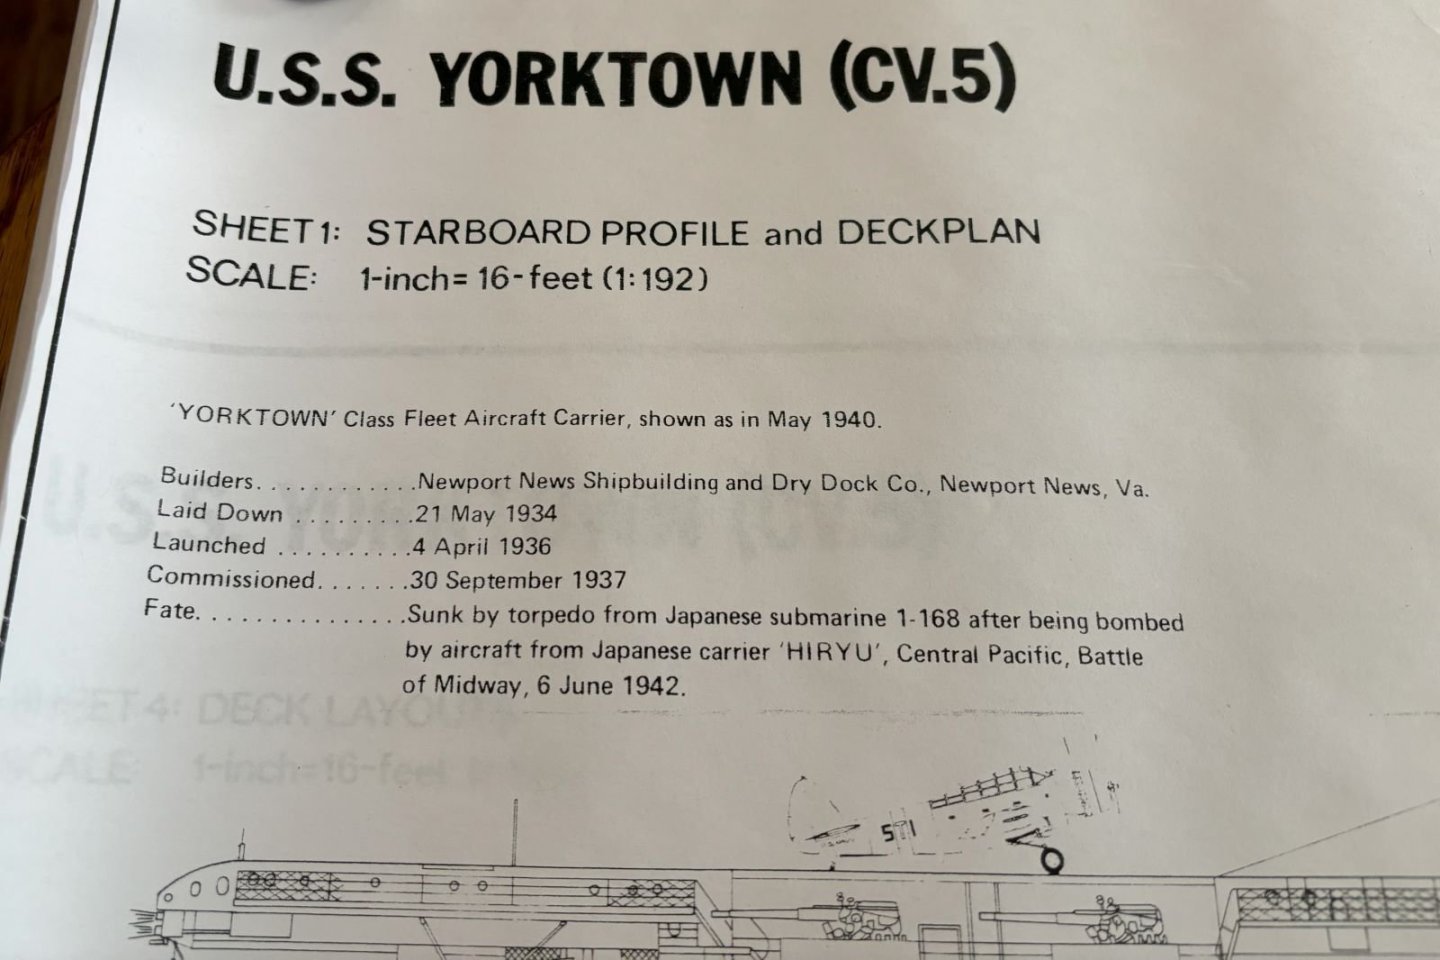
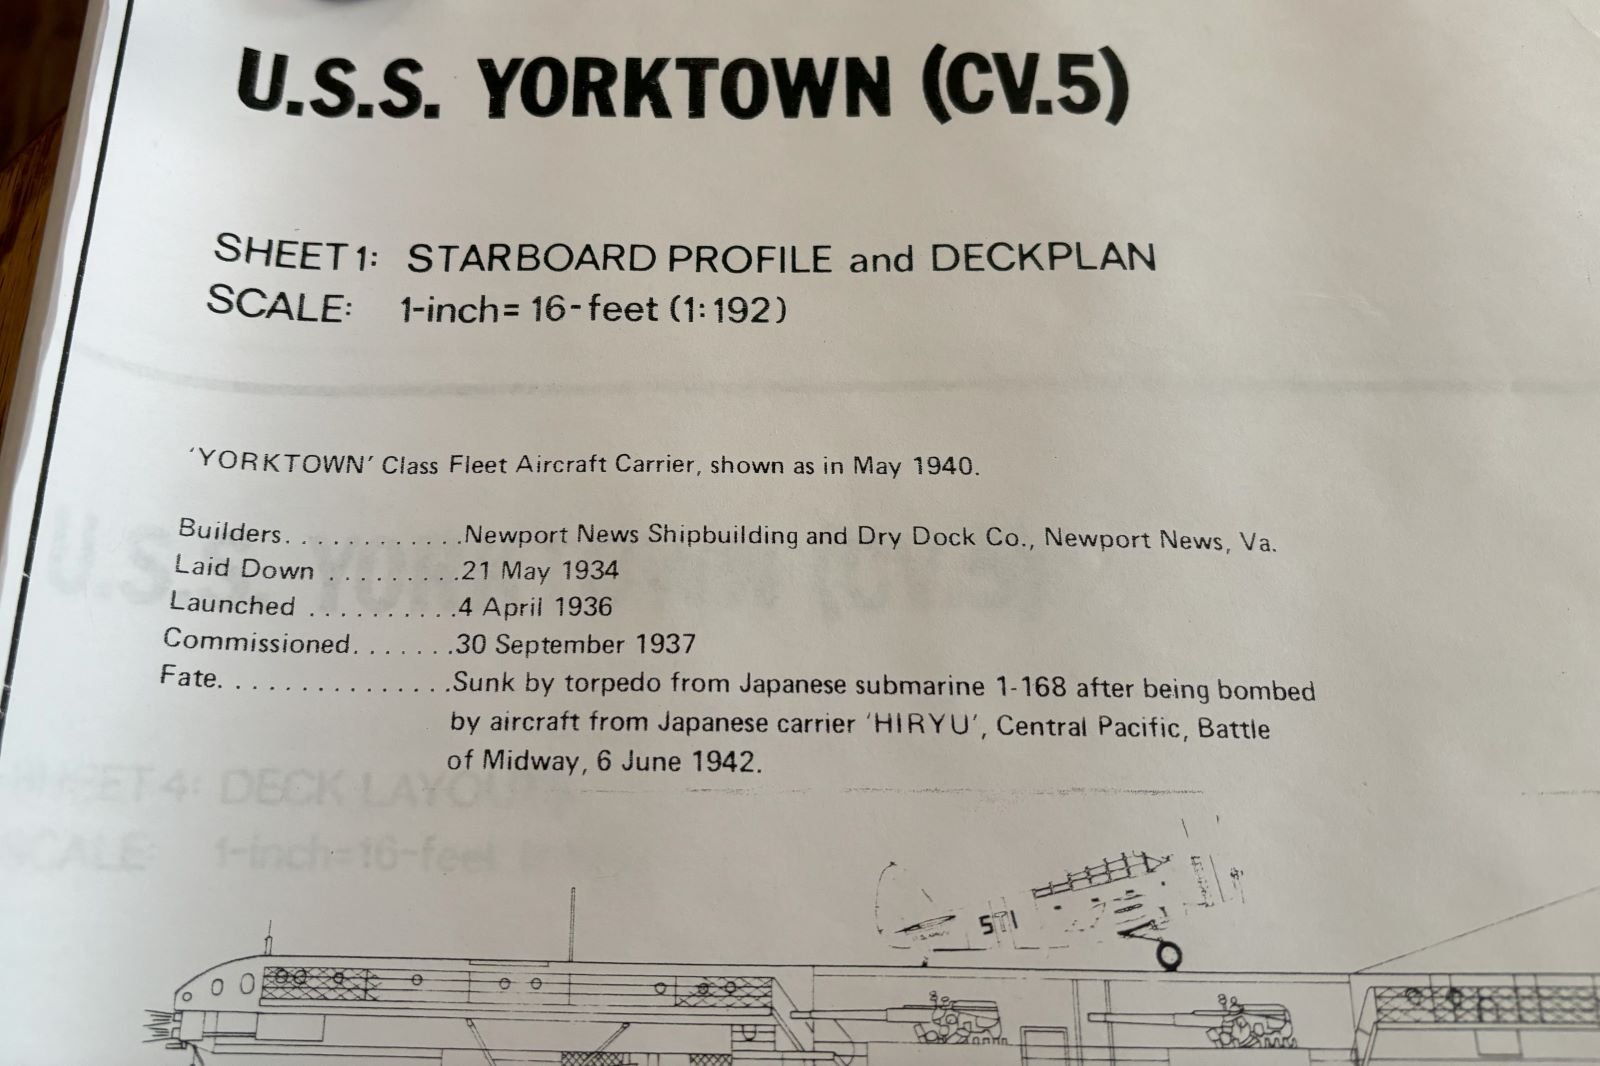
find out first which part of the model's hull matches the width in the body plan drawing so that you have a base point from which to add or subtract plastic to/from the hull. have you had a chance to look at the link that has the 1940's plans of the Yorktown? right now when looking at the upside down model where the bottom at amidships joins to the sides, it does not look right shapewise for an aircraft carrier but that of a tanker. look at the red circles in the attachment & compare it to the drawings.
I have looked at those plans. I agree completely that the hull does not appear to be the proper shape for a carrier. With the profile plans, I'll be cutting each profile out and matching it up to its corresponding spot so I have a good idea of what all needs to be added and subtracted. I'm positive that I won't get it 100% but I'll get it as close as I can.
-
29 minutes ago, ddp said:
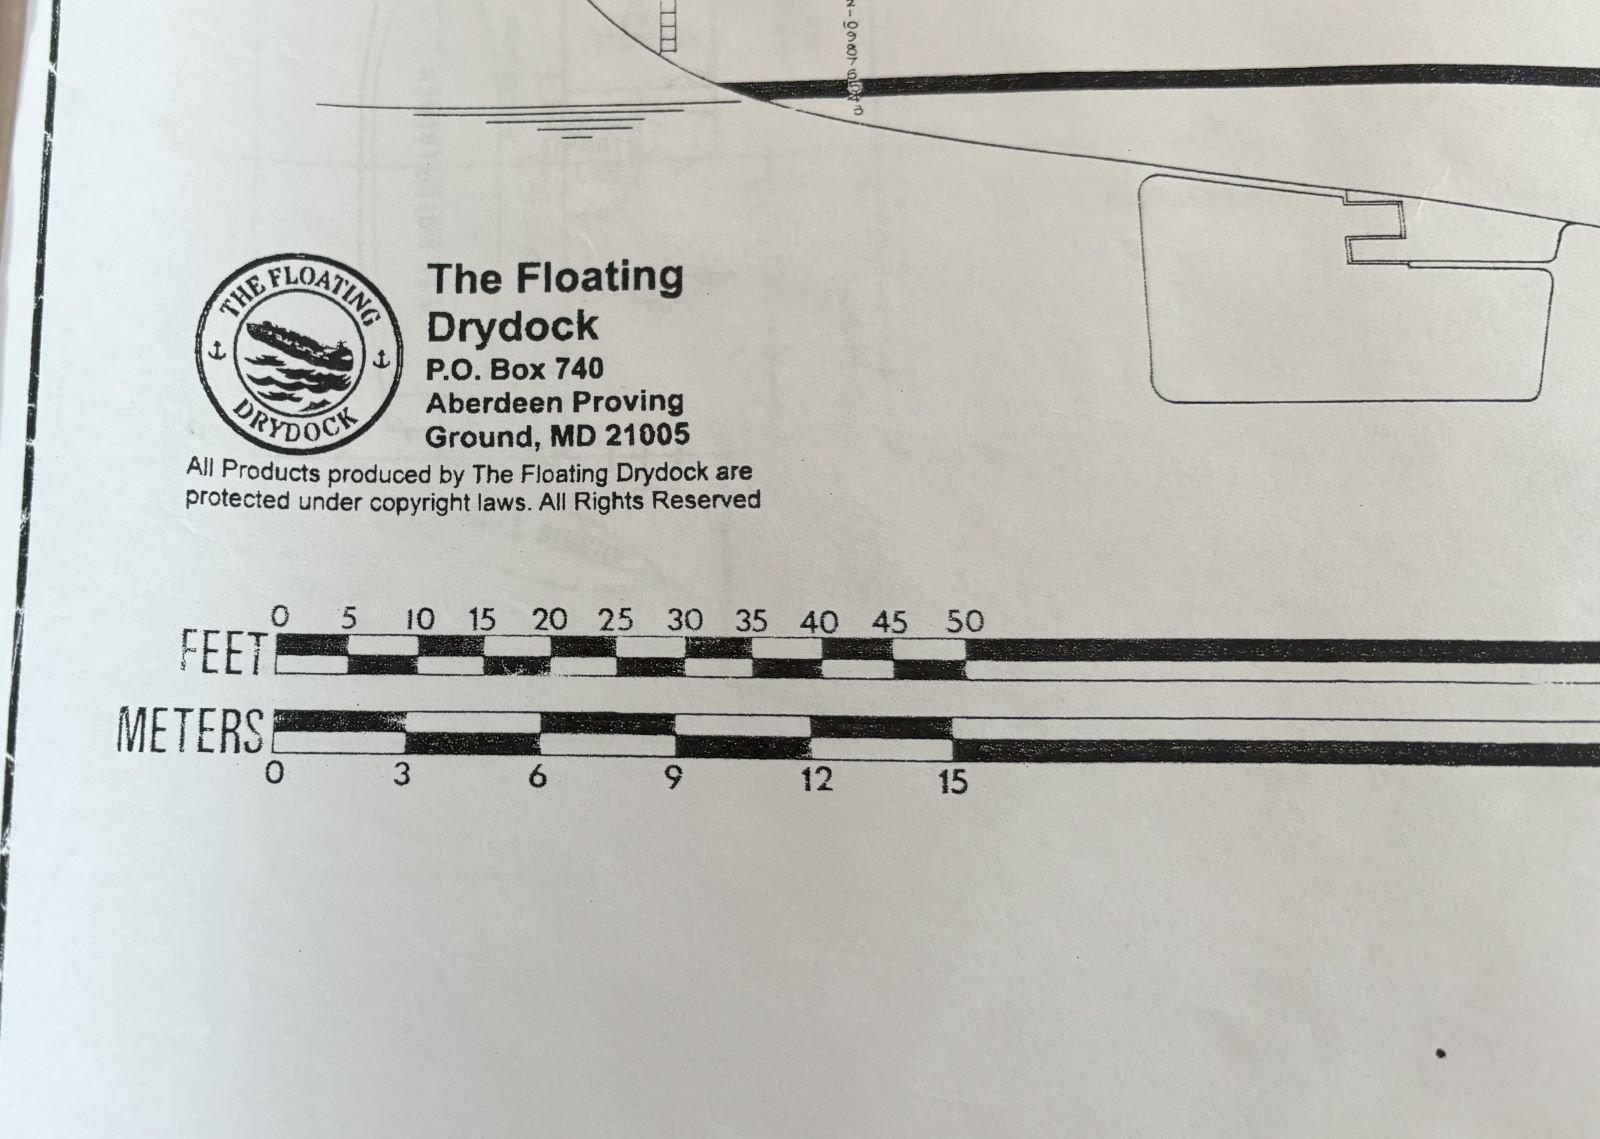
Patrick, how many pages are your Floating Drydock Plans? are you going to put the armor belt on the hull as i don't see it? i don't you need to cut the hull but maybe pull in the sides part way up the hull when looking at your body plan drawing. how thick are the kit's sprues as could be used to help pull the sides in? what does the bottom of the bow look like?
The plans are four pages. I do plan on putting the armor belt on, along with some basic plating. That will have to wait until I get the hull into the correct shape. My current thought is to back the insides of the hull with plastic and sand it into shape to provide that gentle flaring. That will entail a lot of sanding though. The other thing I was thinking was to cut the hull at various places and try to bend some of the hull into a close approximation and then bridge any gaps with styrene sheet. The kit sprues aren't all that thick either. The bulbous bow definitely needs more "bulb". It's a bit on the skinny side.
-
My thoughts at the moment on correcting the hull are centered around getting the profile lines into separate pieces to check where the hull needs to be corrected. Once there, I'm thinking I can cut and bend and then add styrene sheet and finally sand it to its correct shape. I'm still on the fence on docking keels. I know @ddp mentioned something possibly like them in the previous photo I posted, but I'm not able to make anything out other than severely oil canned hull bottom. I've looked at a bunch of other similarly sad pictures and nothing is sticking out. My Webb plans don't show anything for them either. If they are indeed there, they can wait until I have the hull in a generally accurate shape. Hopefully after that, I will have some definitive evidence on whether I need to add them or not.
I'm open to suggestions on other plans of action for correcting this monstrous piece of plastic. I have ruled out making a hull from scratch though. What I have will fit together at the hangar deck and flight deck and those can't be altered or the nice wood veneer flight deck won't fit as it's supposed to. Add to that, I don't want to have to invest in the wood to make a new one and I already have plenty of plastic to work with.
I'm still waiting on a package that should include some deck pieces and 4 quad 1.1" guns. I was also able to find a decent STL file for the water cooled .50 cals so I'll have a go at printing them.
Oh, one other thing; I still need to get about 75 more planes and the regular deck equipment and vehicles.
-
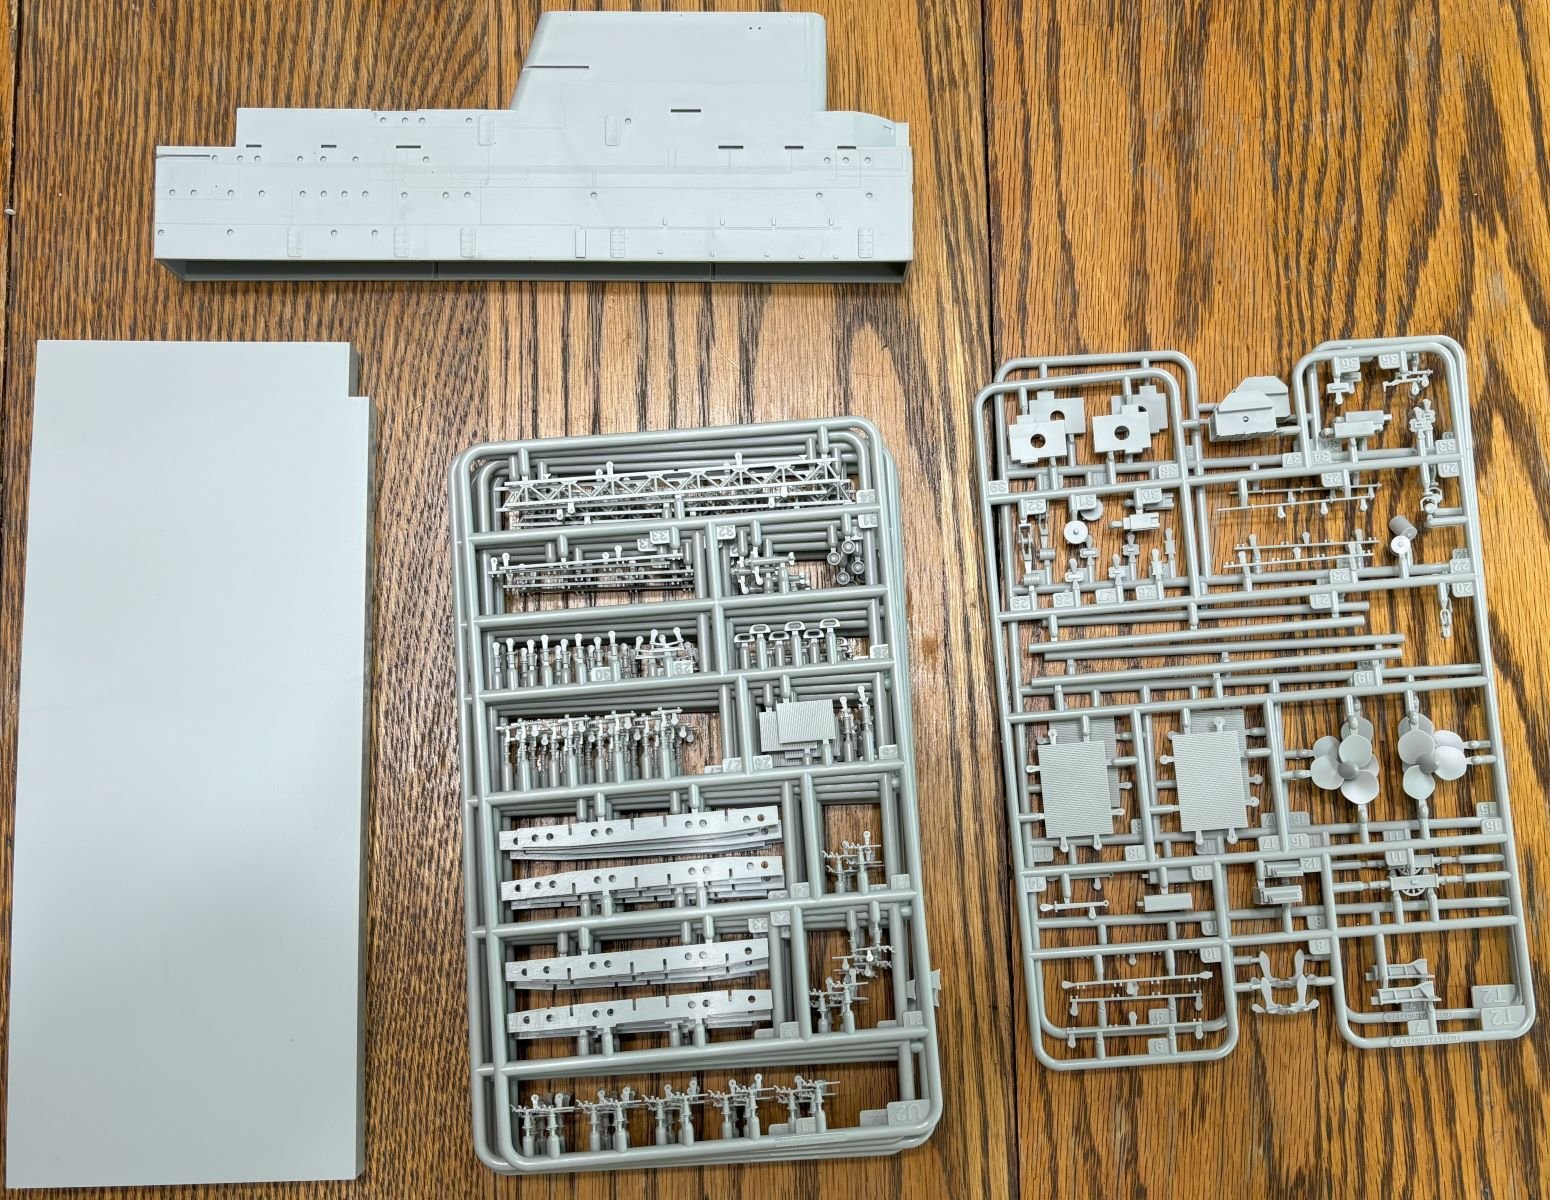
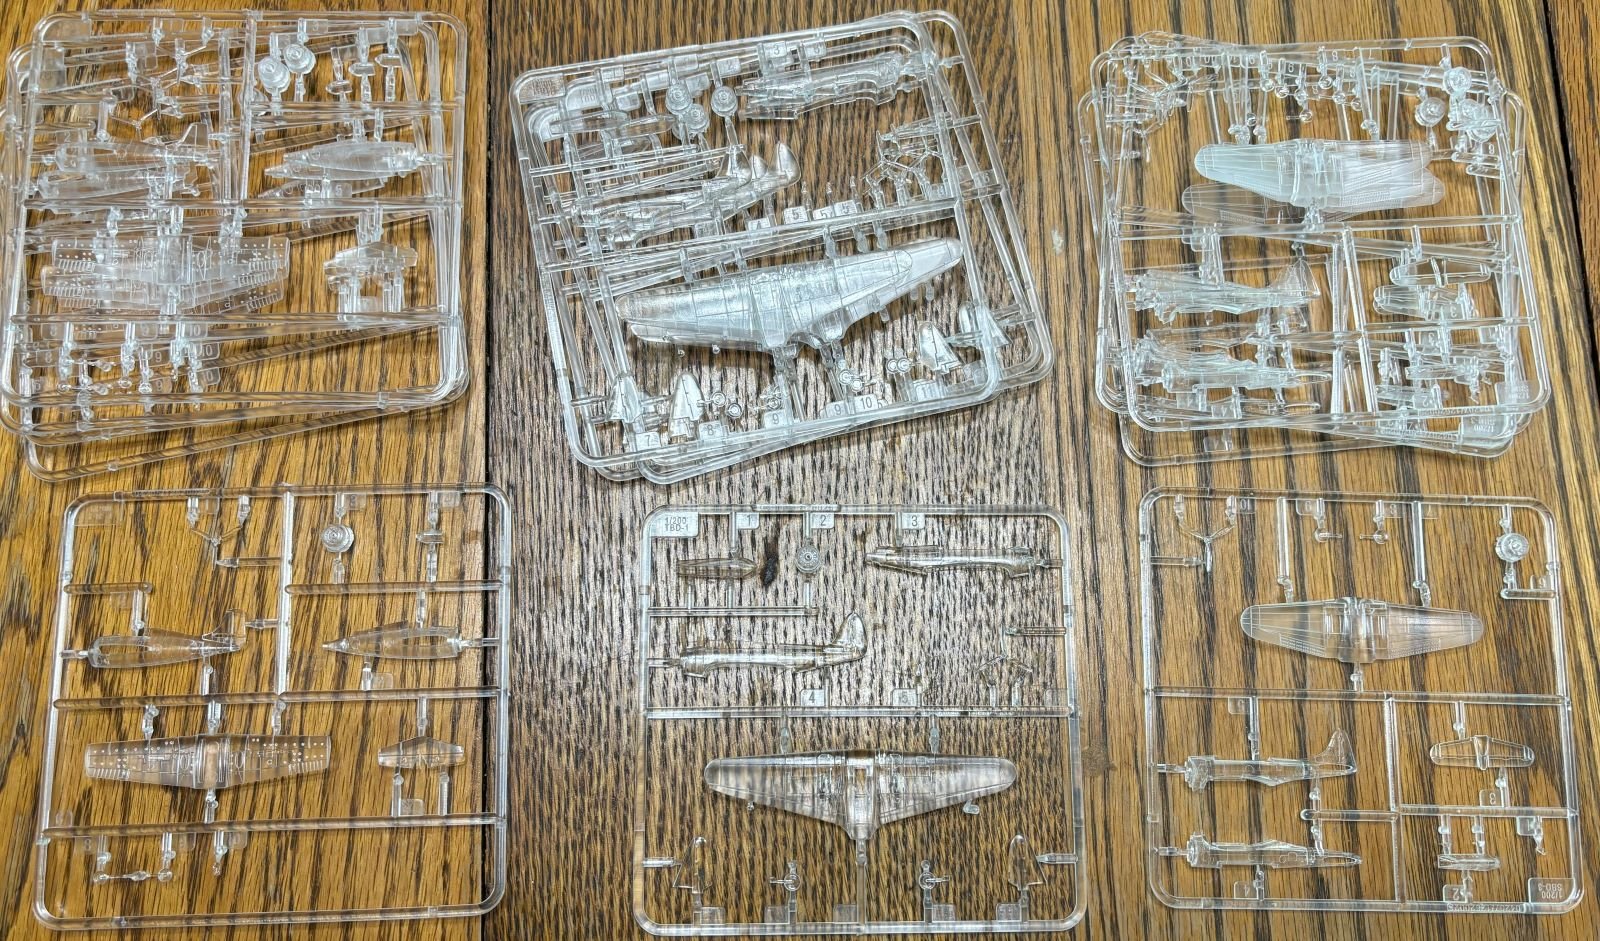
Some good and some bad on how this kit was made:
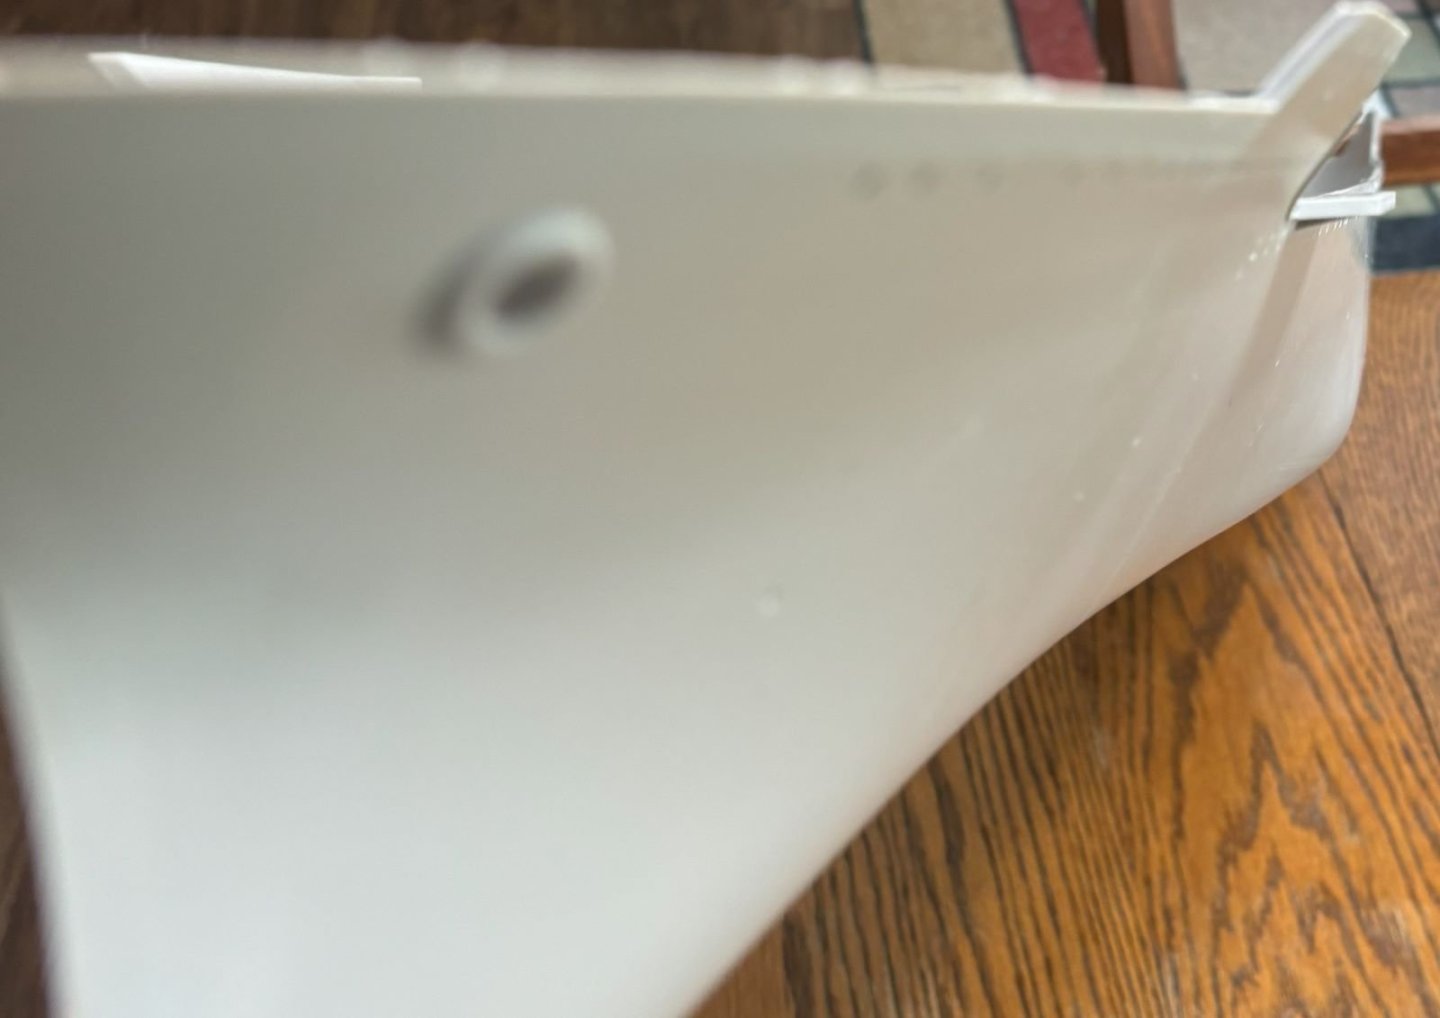
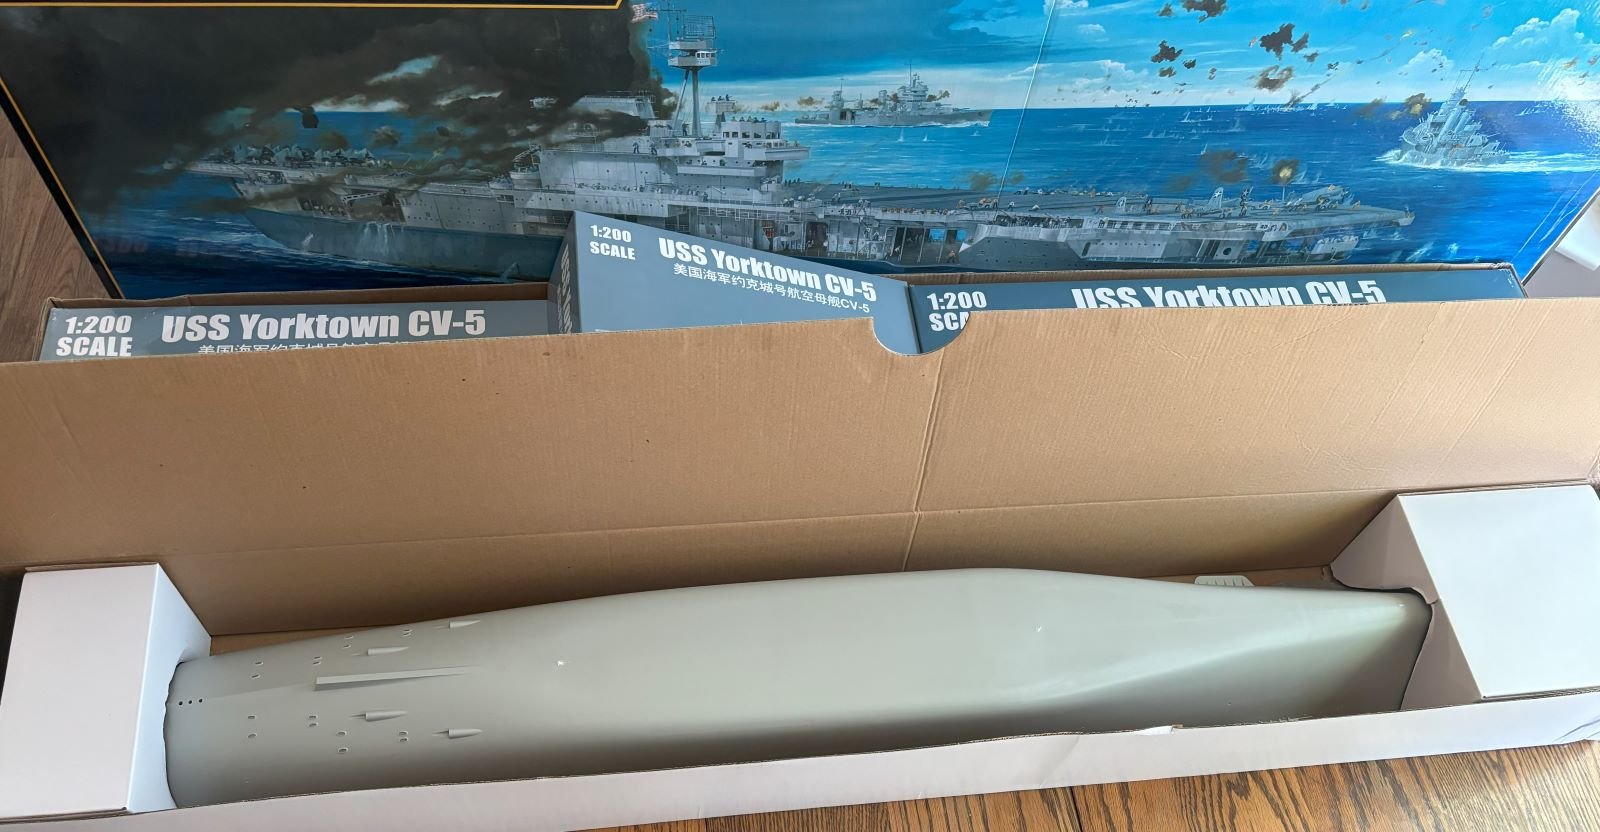
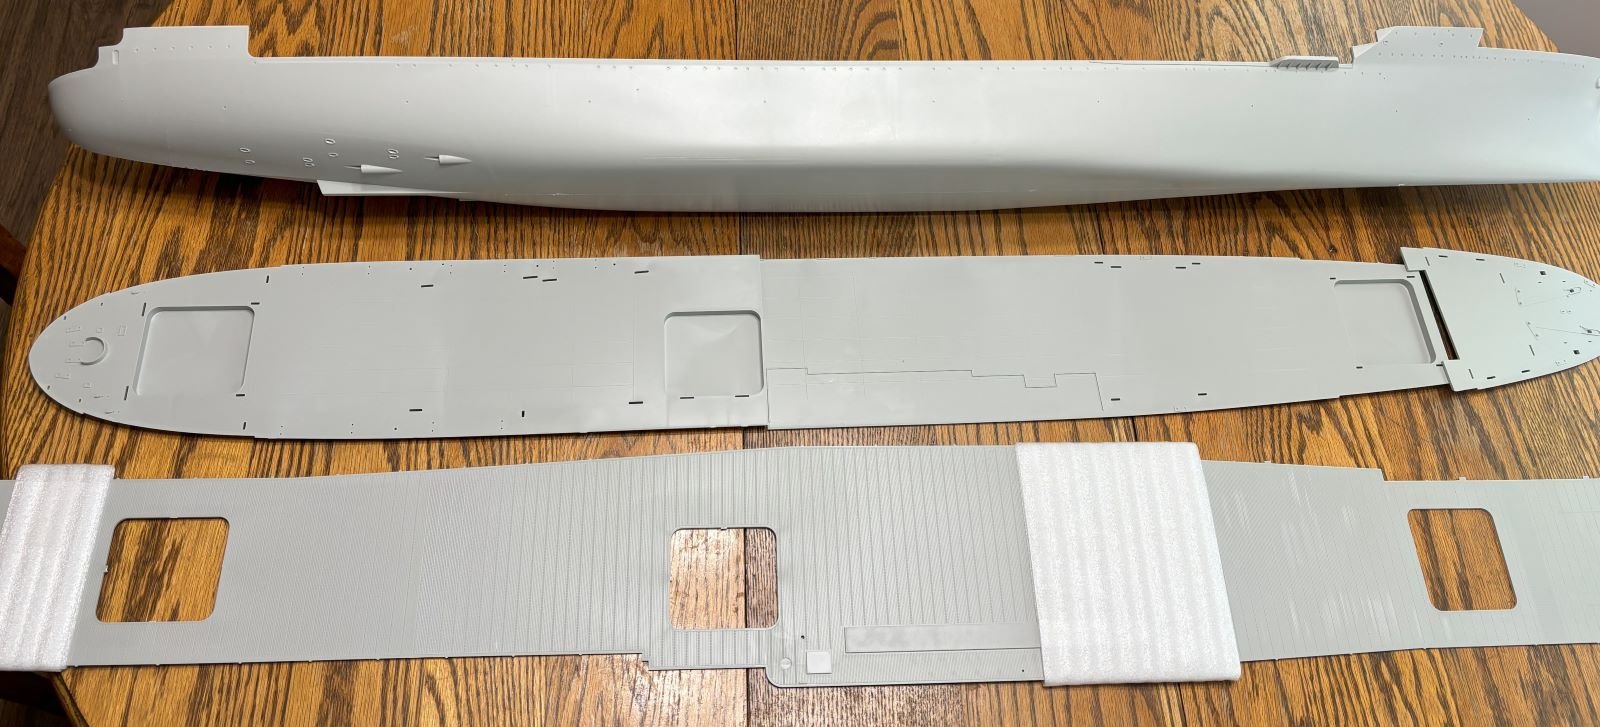
This is a bad picture but good focusing was not working well for my iPhone's camera. At any rate, it shows off a couple of issues with the hull. Note the bathtub shape of the hull in general. Two other items that will need fixing shown here are the hawse pipes (they're very exaggerated and I think are slightly out of place) and the hangar deck catapult platforms (wrong shape).
Instructions should have been called Destructions, lol.
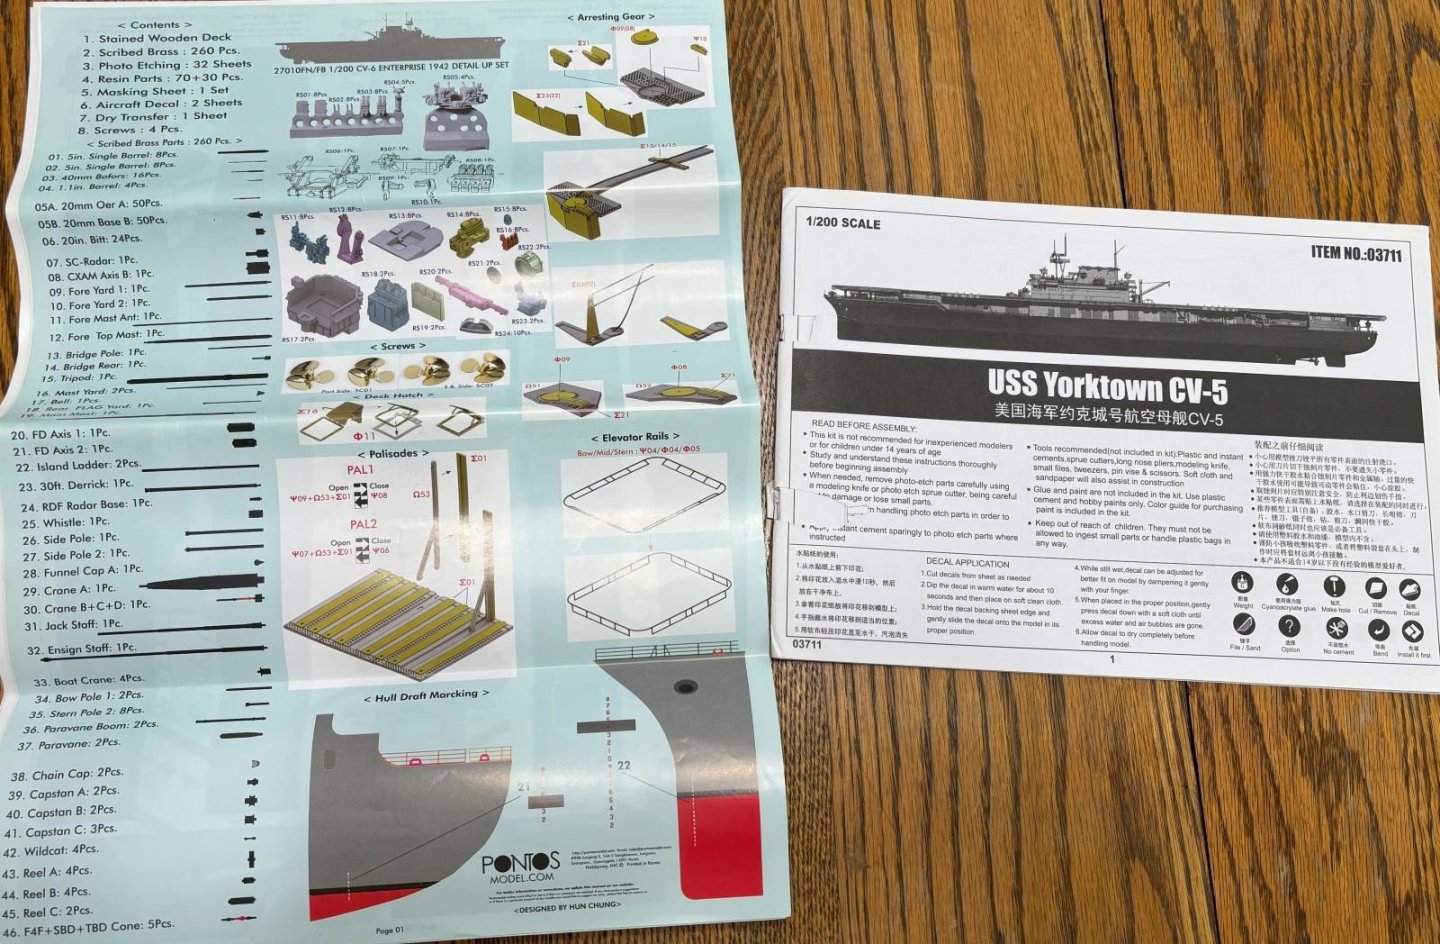
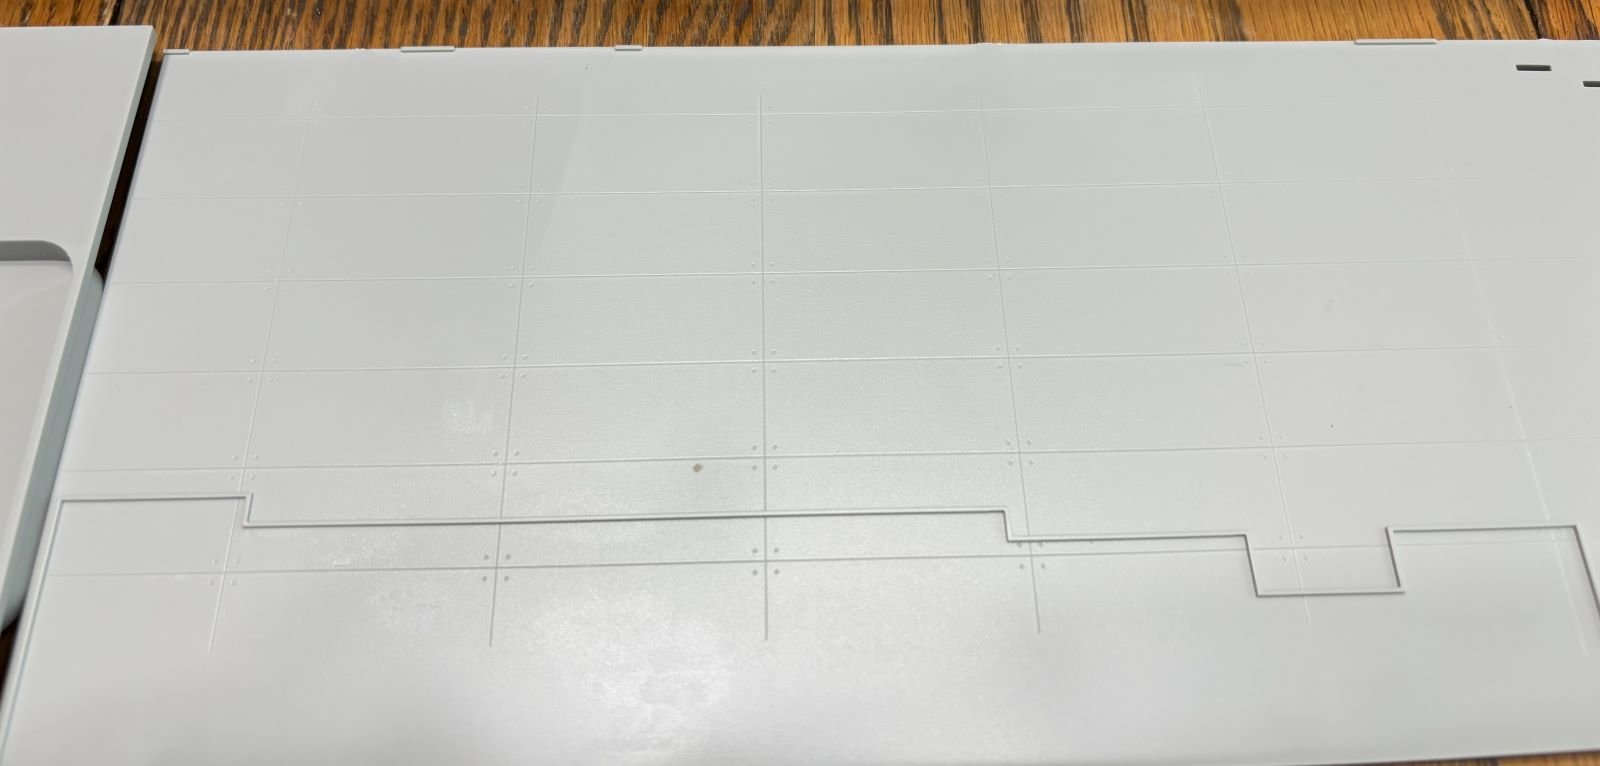
Some good points here though. The decking detail is really good and would show nicely if you're building it straight from the box. The hangar deck detail is also a nice touch for something that might not show up well at all.

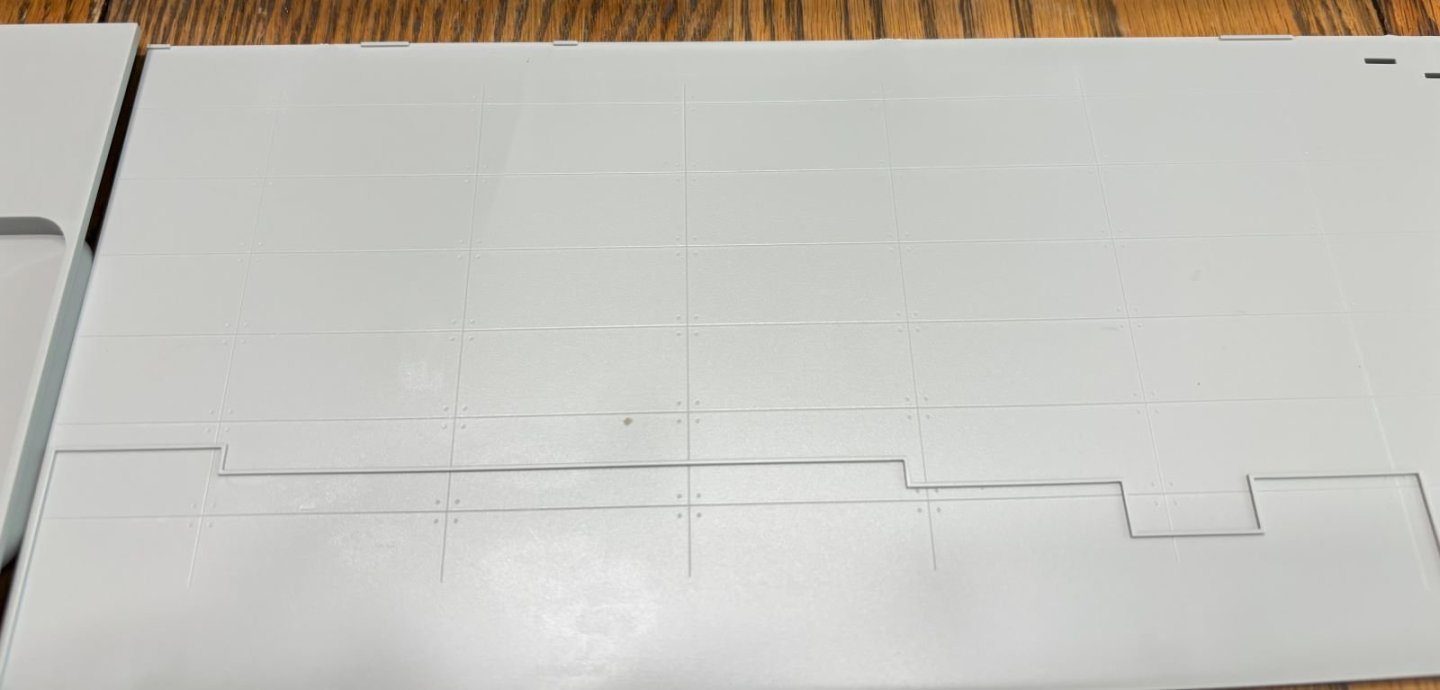
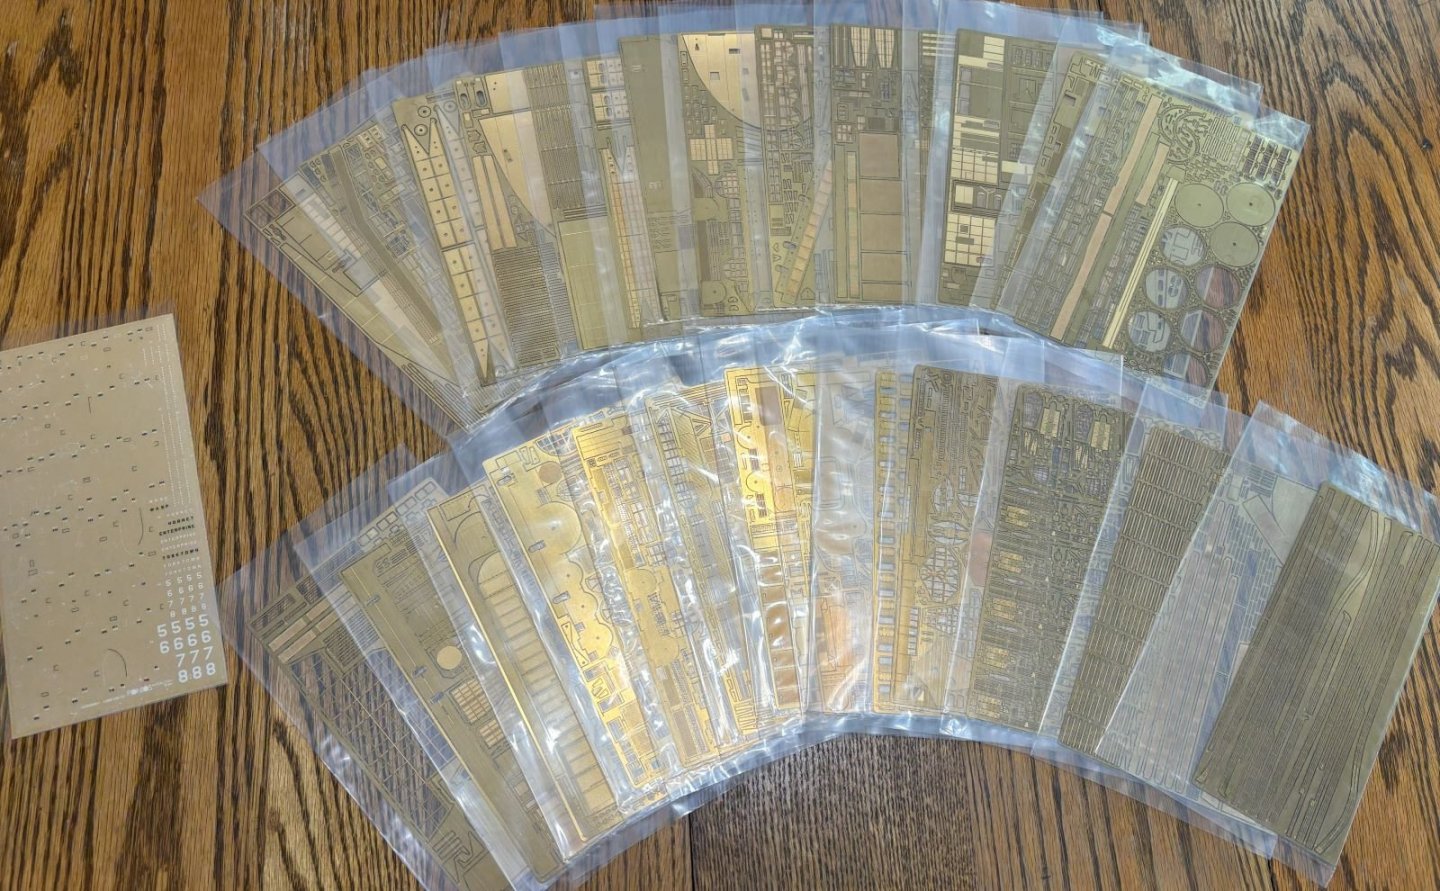
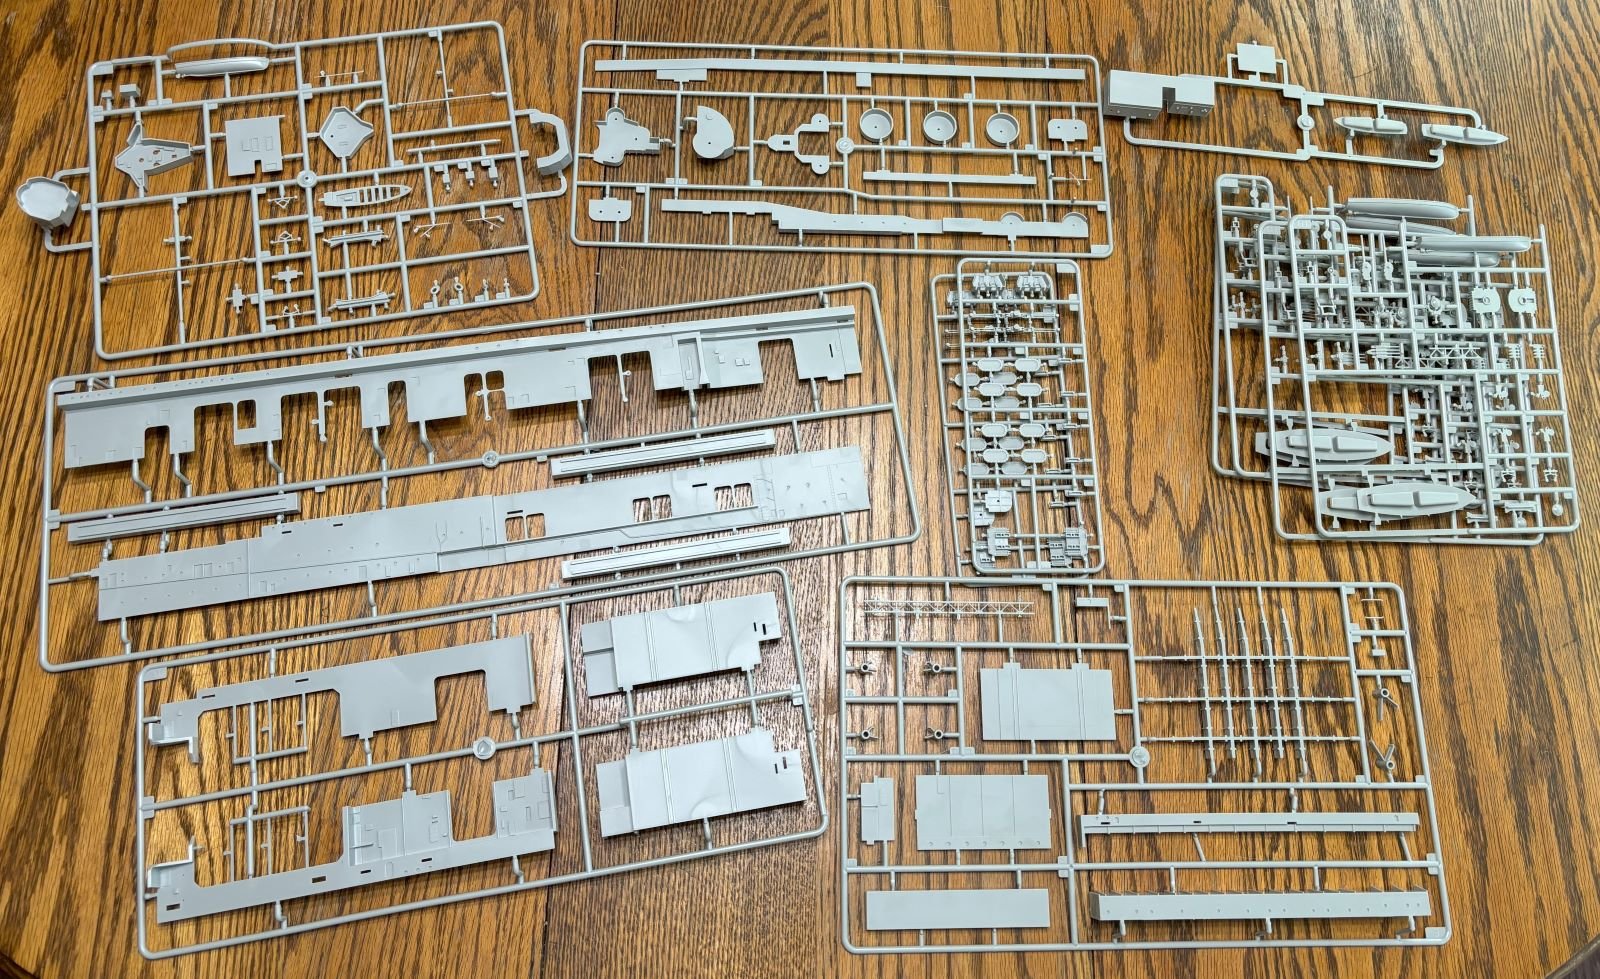
For the most part, no parts were damaged and there is no sign of flash. There will be some ejector pin marks to contend with but the amount of photo-etch going into this might help make that less of an issue since many of the offending marks will be covered in brass.
- mtaylor, ccoyle, GrandpaPhil and 2 others
-
5
-
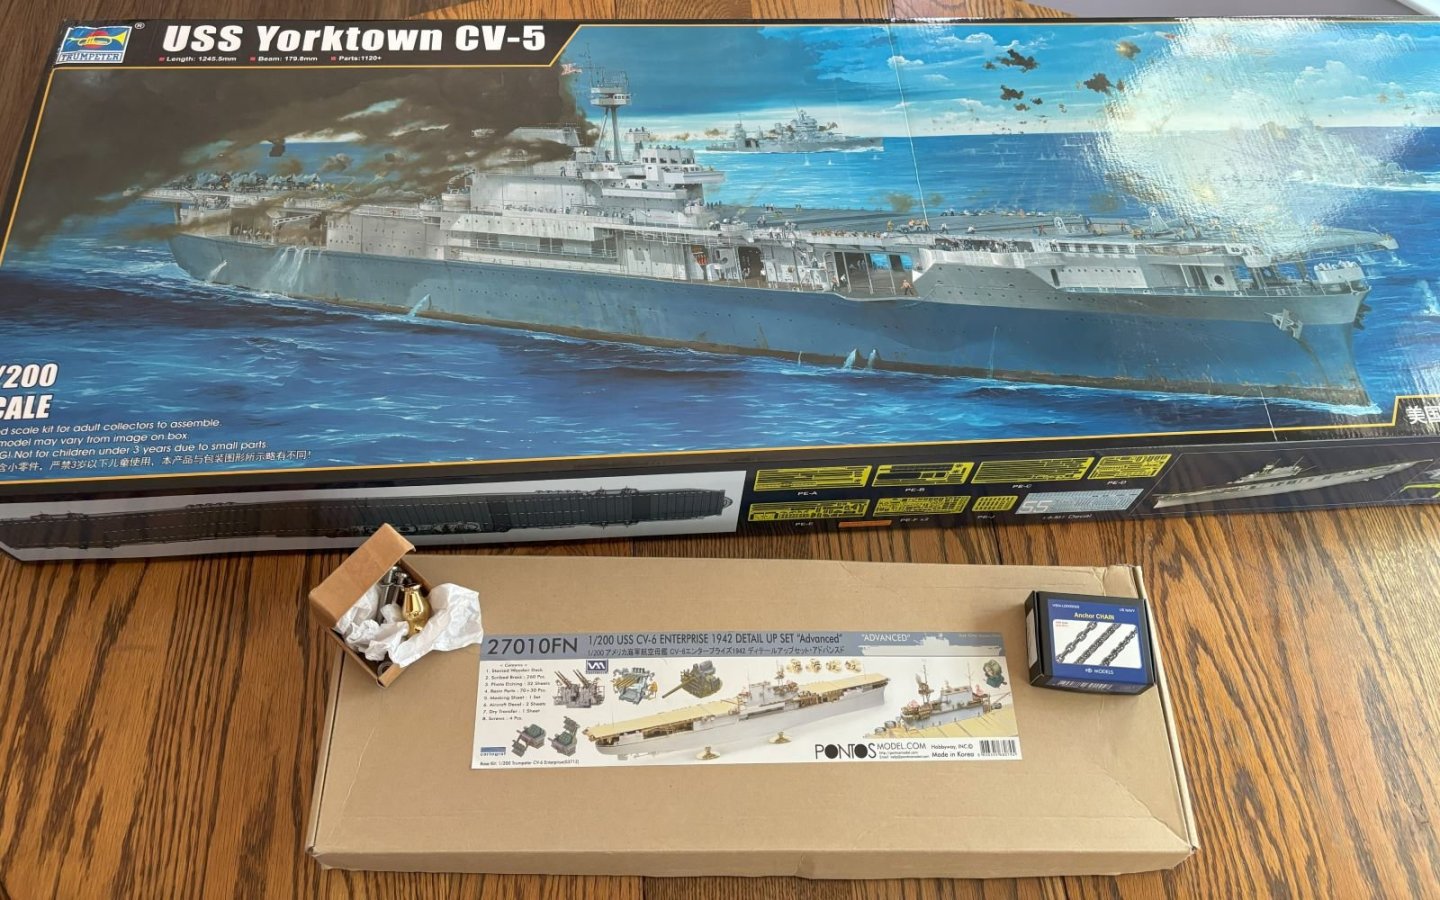
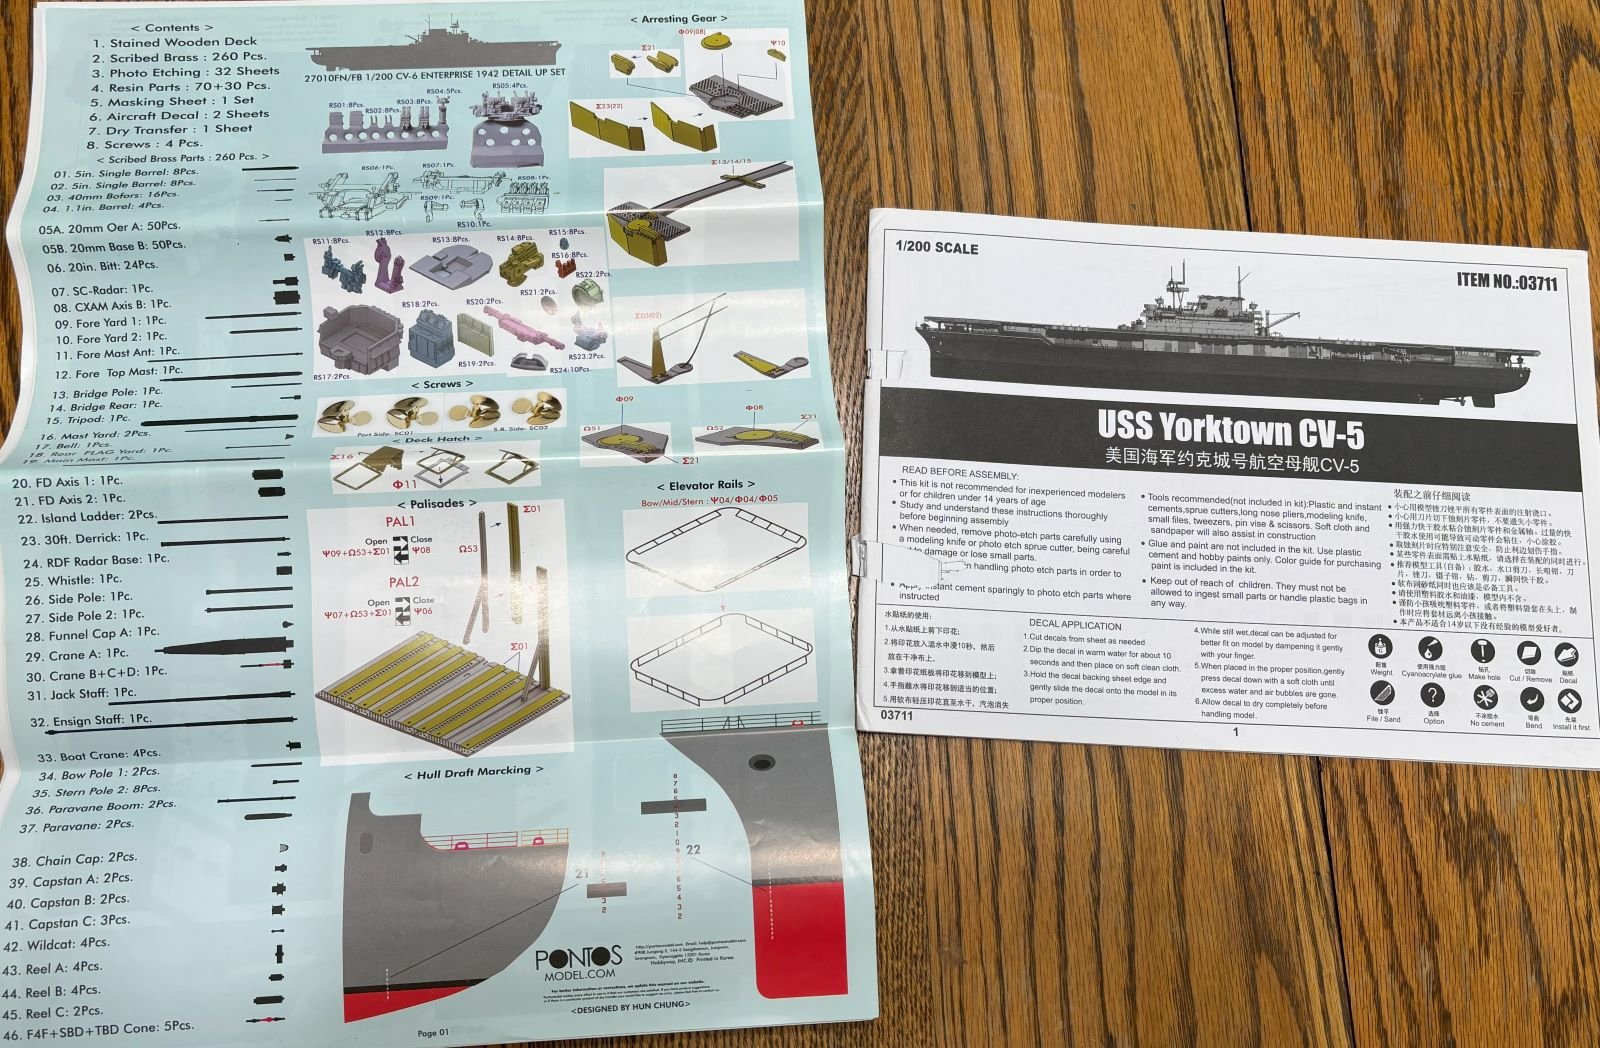
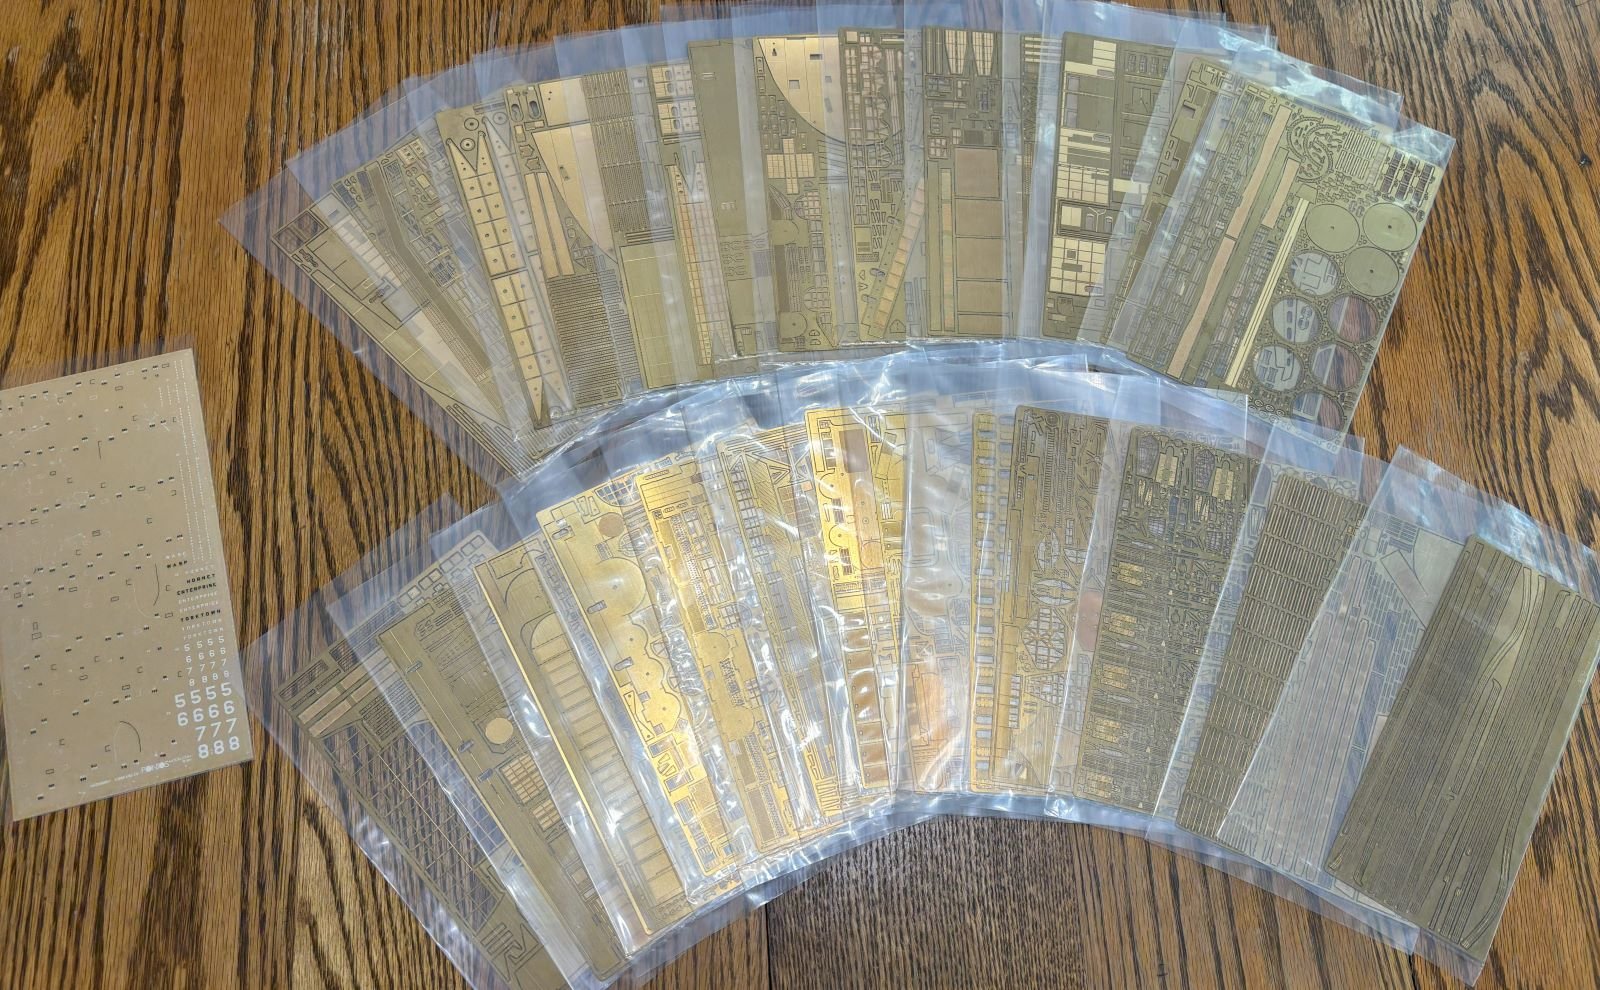
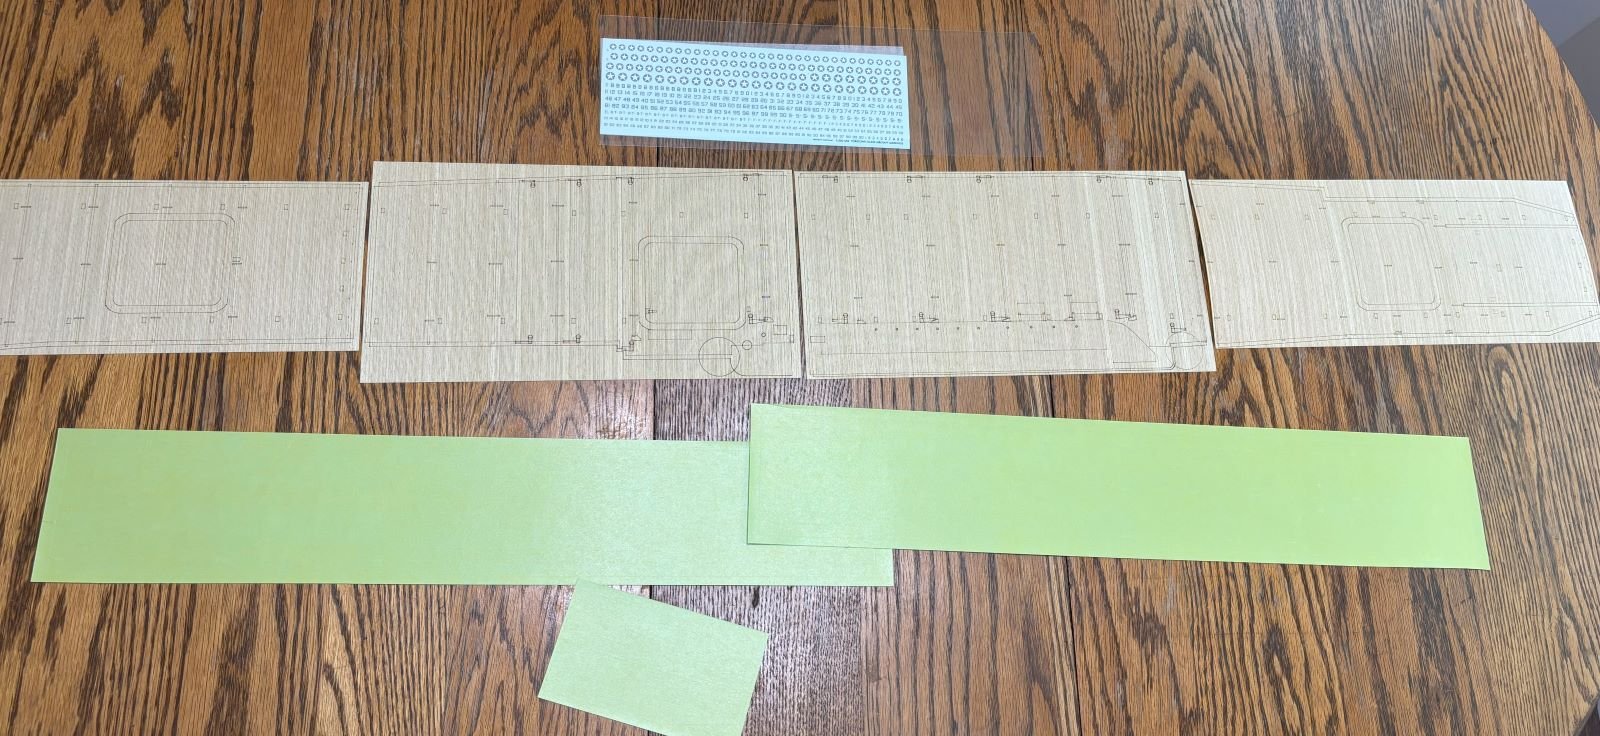
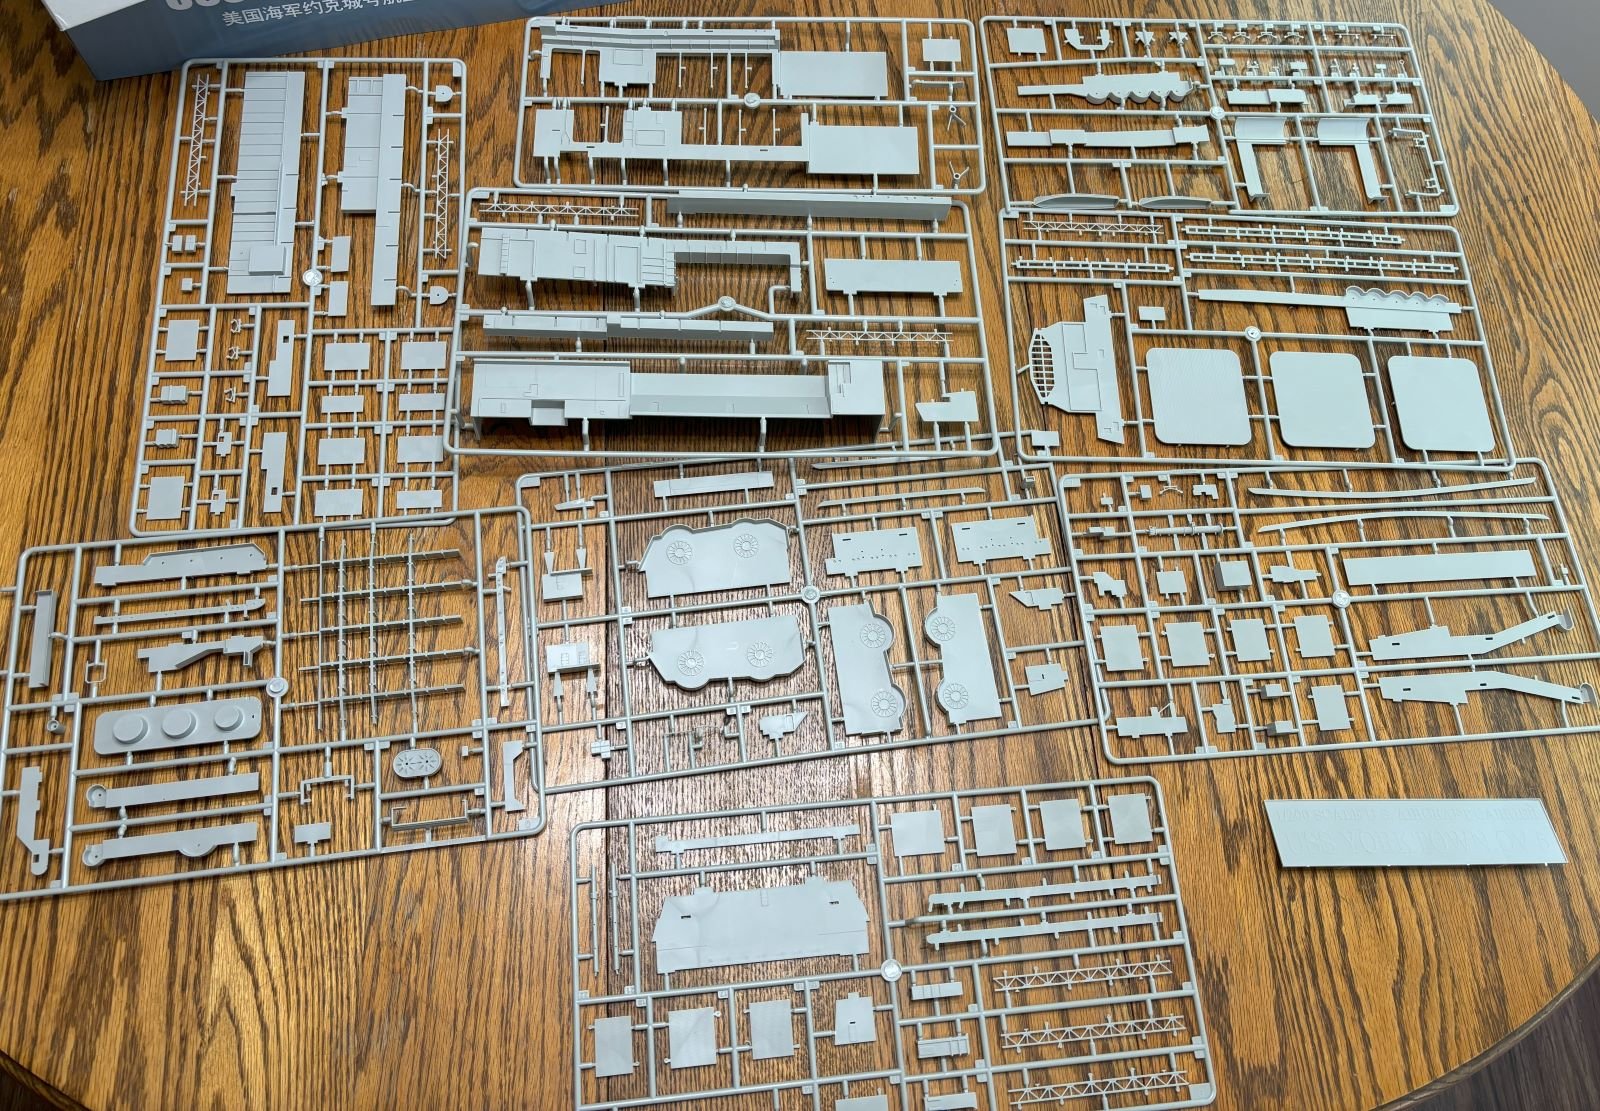
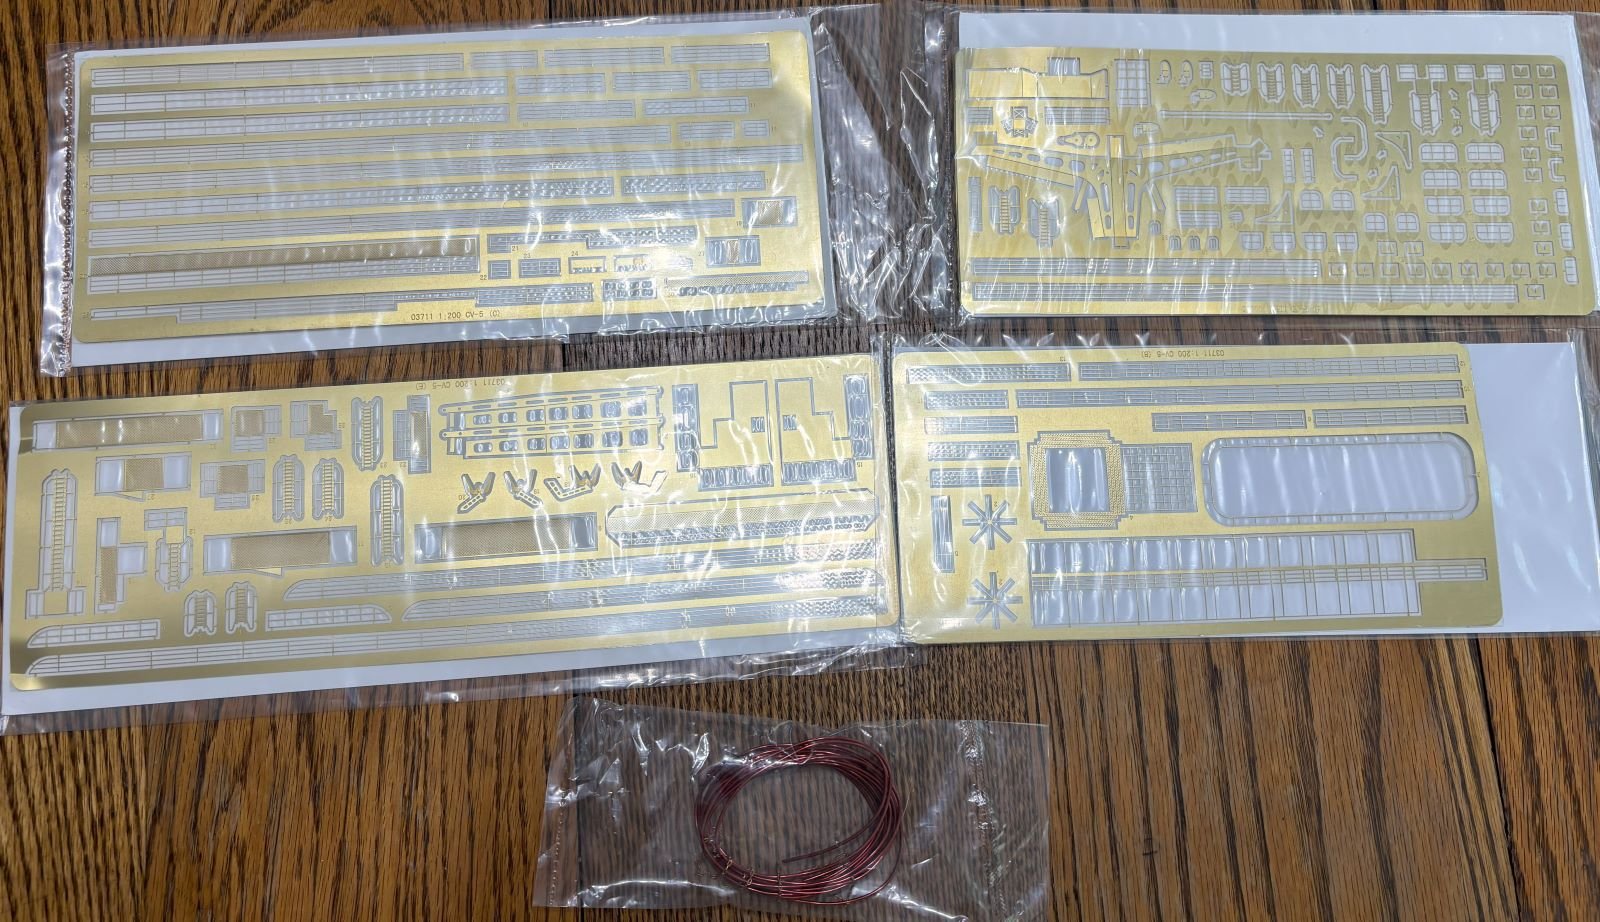
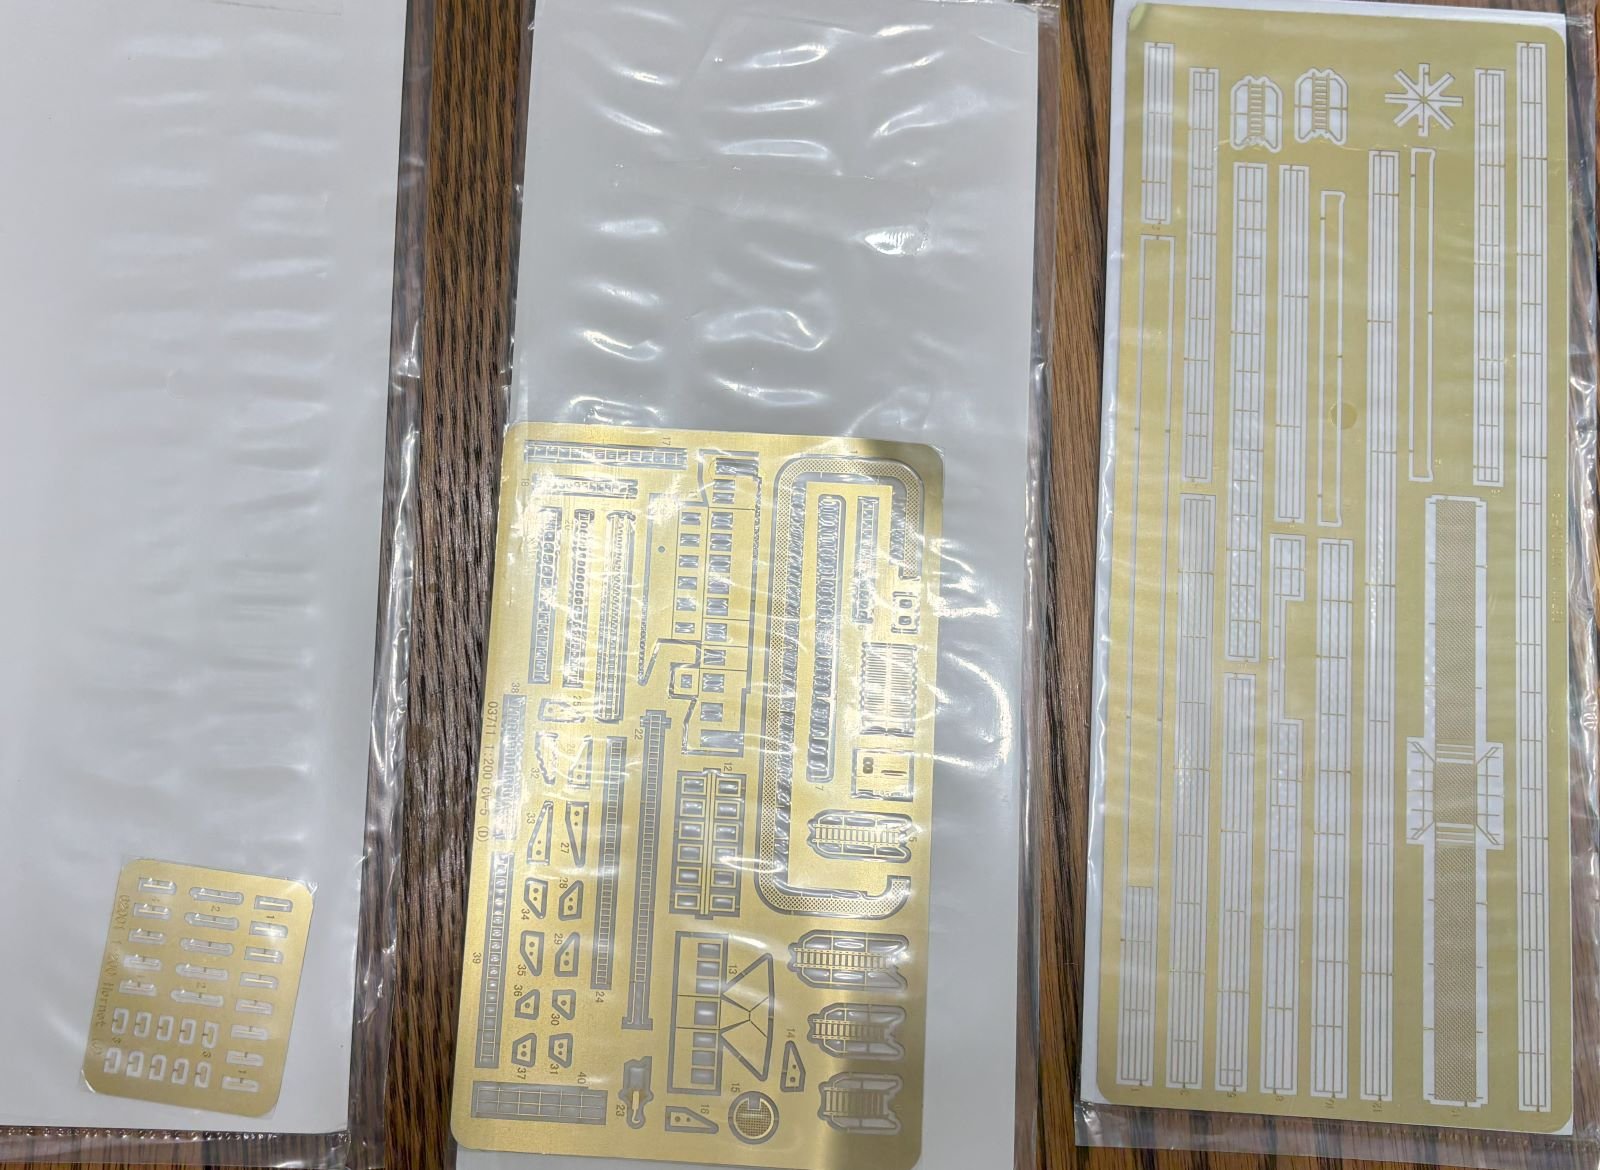
The Pontos set for USS Enterprise CV-6 that I will adapt to my needs for this:


- GrandpaPhil, Canute, mtdoramike and 3 others
-
6
-
-
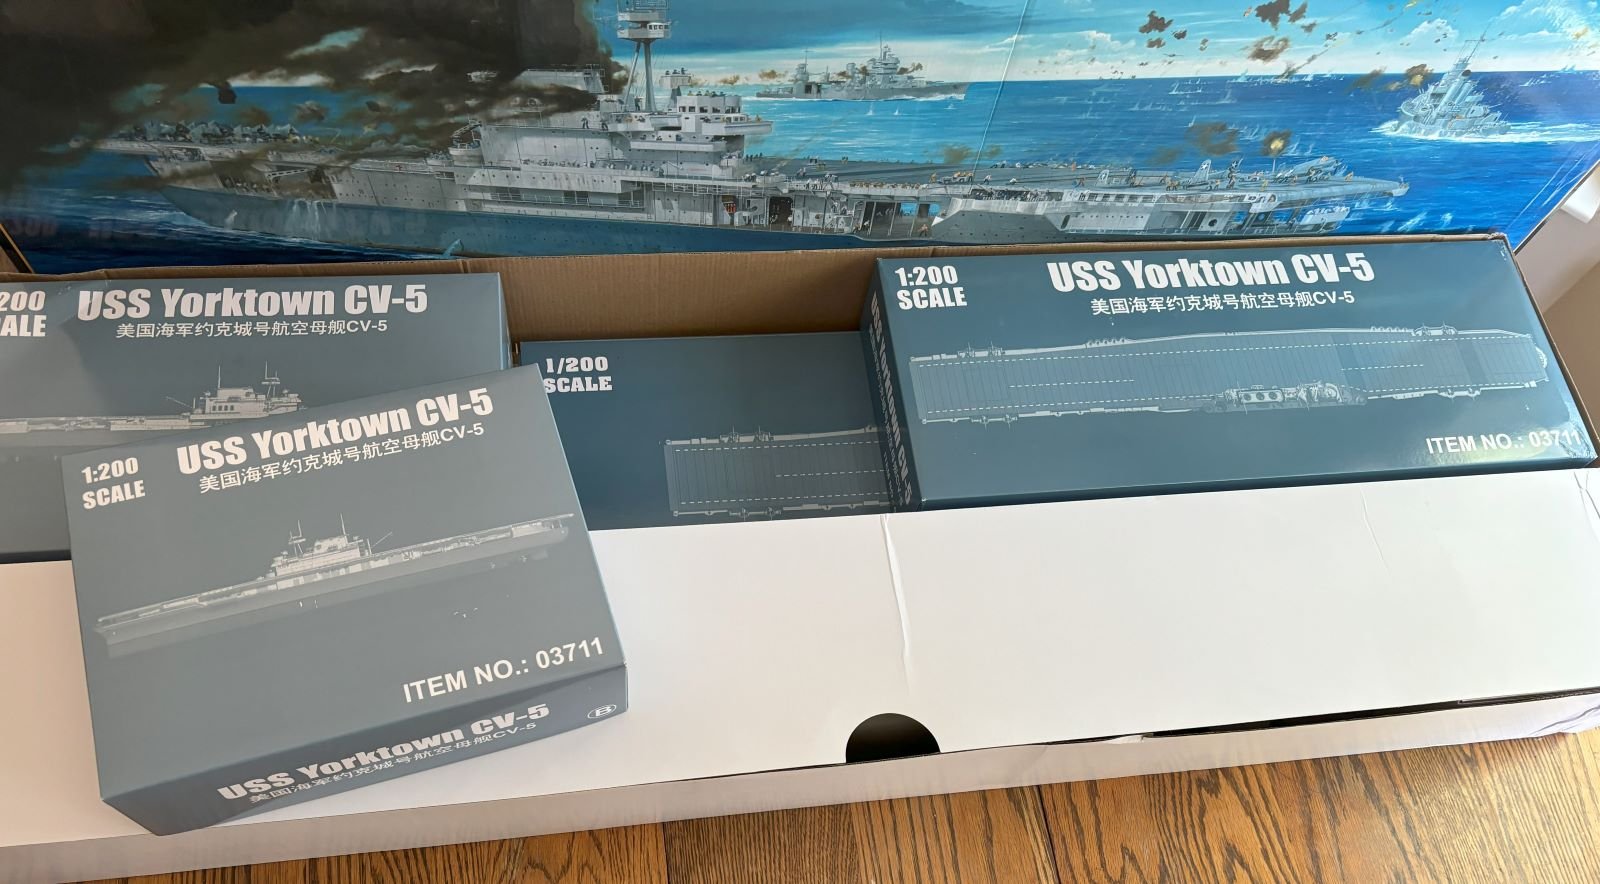
Beware of picture heavy posts. Figured I'd show what I have gathered to this point and explain what some current challenges are concerning bringing this kit to a more accurate state. I won't begin to pretend that I'm going to nail 100% accuracy either. My goal is to bring these materials to a finished model I'm happy with that more closely resembles the real deal. Of note here, not all of the parts will be used.
- mtdoramike, Canute, GrandpaPhil and 2 others
-
4
-
 1
1
-
-
11 hours ago, SiriusVoyager said:
I have always loved Arleigh Burk class destroyers and you have definitely done her justice. Great model!
Thank you! I've always thought they looked pretty cool and menacing.
-
7 minutes ago, ccoyle said:
Wait, what? The CV-5 Yorktown wasn't around in the late 1940s.
Ummmm, yeah... typos, am I right? I'll get it edited.
One thing that was bugging me was the hanger catapult. It appears that at least the platforms extending from the interior of the hanger still was evident, just not the size that Trumpeter has molded them. I'll have to get these slimmed down a bit. Luckily the Webb plans show these off well. This part was confusing as Enterprise got rid of her hanger catapults.
Was also going to point out that I don't think I'll be adding docking keels as I'm not seeing evidence of them in this very heartbreaking photo of Yorktown capsizing to port.

- Canute, mtdoramike and mtaylor
-
3
-
26 minutes ago, ddp said:
CV-5 USS Yorktown Booklet of General Plans (1940) https://archive.org/details/cv5bogp1940
USS Yorktown (CV-5) https://www.navsource.org/archives/02/05.htm
the .50" machine guns are the water cooled version not air cooled.
I appreciate the links! I've looked at both sites, in fact. And ditto on the .50 cals. I believe I need a total of 24. Might be 3D printing them if I can't find an aftermarket company with an offering.
-
10 minutes ago, mtdoramike said:
I know Trumpeter has it's fair share of issues, but it is one of the best companies out there for these types of kits. I understood this when I built the Trumpeter USS Missouri 1/200 and just went with it with a few modifications. Wood is very forgiveable where as plastic is not. You can spend hundreds of dollars on pontos upgrades, but I found most of the offerings in the kit to be satisfactory.
My main issue with the Missouri was it being a 4 screw, so I built it with four operational motors and props. But after running it a few times, the outer props will hit every little debris in the water and sheer off the outside props. Now after replacing those props twice at $30.00 each and waiting a month to receive them from China, I regret the 4 screw setup.
Trumpeter is definitely not perfect, but they are one of the few companies offering modern warships in this scale and they offer them at a fraction of what the others do, so that is a HUGE plus for them in my book. I also feel that the kit, for the most part, does offer plenty of great detail; I guess I'm a glutton for punishment.
I don't do anything in RC so I can't relate, but I absolutely get where you're coming from on replacing the outside propellers.
9 minutes ago, mtdoramike said:By the way, I could have just looked at the box and contents and never built it and I would have been happy, beautiful kit.
I can't bring myself to not start a kit, lol.
- mtaylor, mtdoramike and Canute
-
3
-
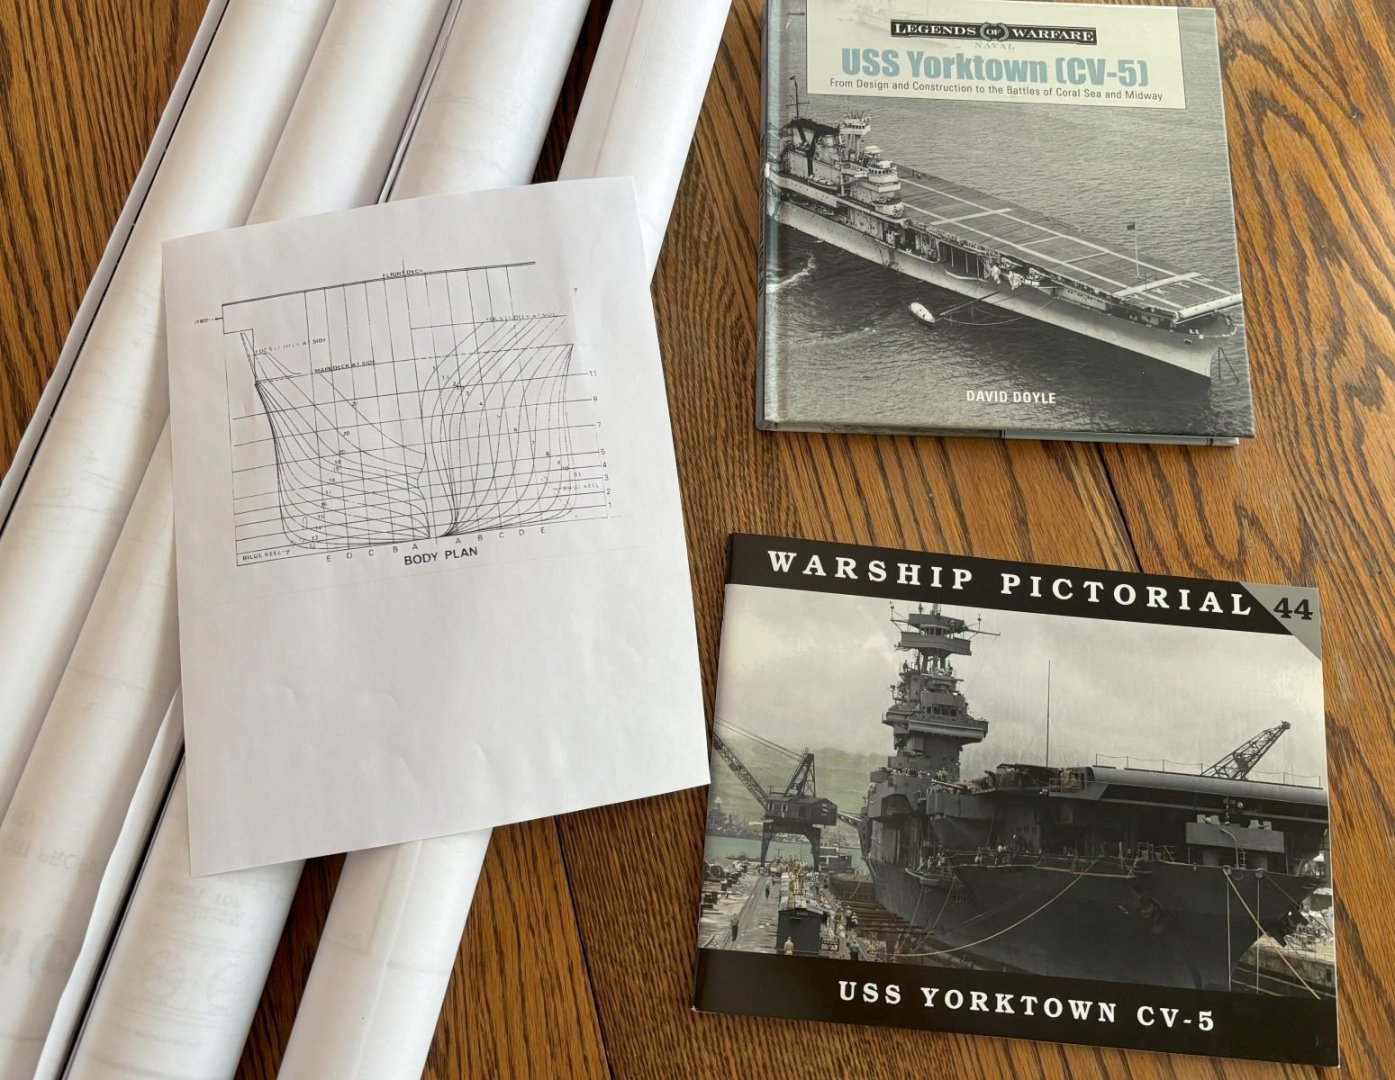
Well, I guess I should start on something new; I only have five other projects going on at the moment, lol. My plan is to model Yorktown in mid to late 1940. I think it's the best the ship looked in her career. Additionally, the aircraft wore flashier paint schemes too. So far I have the kit and the Pontos set for Enterprise with the natural wood deck. I also have the Webb plans from May 1940 and a couple of nice books on The Fighting Lady.
It's going to be a very long term project and of course it will also be getting its own YouTube series like USS Curtis Wilbur. I know there is a lot wrong with the hull and will do my best to address it. We'll see how that goes.
Surprising to me is that there isn't more out there on the internet about this kit as far as reviews, discrepancies between the kit and the real ship, aftermarket options, and documented builds.
Please add more if you know, but from what I can tell is that the general hull profile is incorrect. Rather than just a box shaped tub as Trumpeter molded, the hull should be thinner towards the bottom, go up and then flare out to it's final beam to meet up with the flight deck. I also know that the bulbous bow needs to be a bit fatter, there should be some very slight plating effects and somewhat prominent docking keels from what I've learned through research. Lastly, for general hull corrections, I'll need to drill out, fill, and redrill the portholes since they were present on her in the 1940 and they are molded as ovals rather than round due to molding limitations. Seriously, anything else to add to this list for just the hull?
Some good news for this is most of the Pontos set should be usable and because the wrap-around flag bridge was eliminated prior to when I'm modeling her, I shouldn't have to alter the island too much, if at all. I was finally able to determine that the CXAM radar system was added in Sep 1940 so I think I'll be adding that. Most likely, the degaussing cables will be left off though since these were added in Dec 1940. Now, just need to source from 1/200 scale .50 cals.
I'll have pictures of the kit contents and the Pontos set coming up soon.
Of note, some online plans from Feb 1940: https://maritime.org/doc/plans/cv5.pdf
Thanks in advance for checking in.
Patrick
-
43 minutes ago, schooner said:
Great looking model! Your weathering looks realistic but not overdone.
29 minutes ago, ccoyle said:The finished model looks exceptionally realistic -- well done!
Thank you both!
- Canute, mtaylor and Old Collingwood
-
3
-
Just now, Landlubber Mike said:
Fantastic job Patrick!! Really great model!
Thank you!
- Old Collingwood, Canute and mtaylor
-
3
-
15 minutes ago, Barryc said:
Bravo!!
Well done sir.
Barry
Thank you!
8 minutes ago, Rick310 said:A superb job!! Have really enjoyed following along!
I was born and raised in Columbus, where did you live there?
Rick
Thank you! I lived mostly in the north part of the city and went to Worthington schools a couple decades ago. I just recently moved to Cincinnati though due to some family medical issues.
- mtaylor, Canute and Old Collingwood
-
3
-
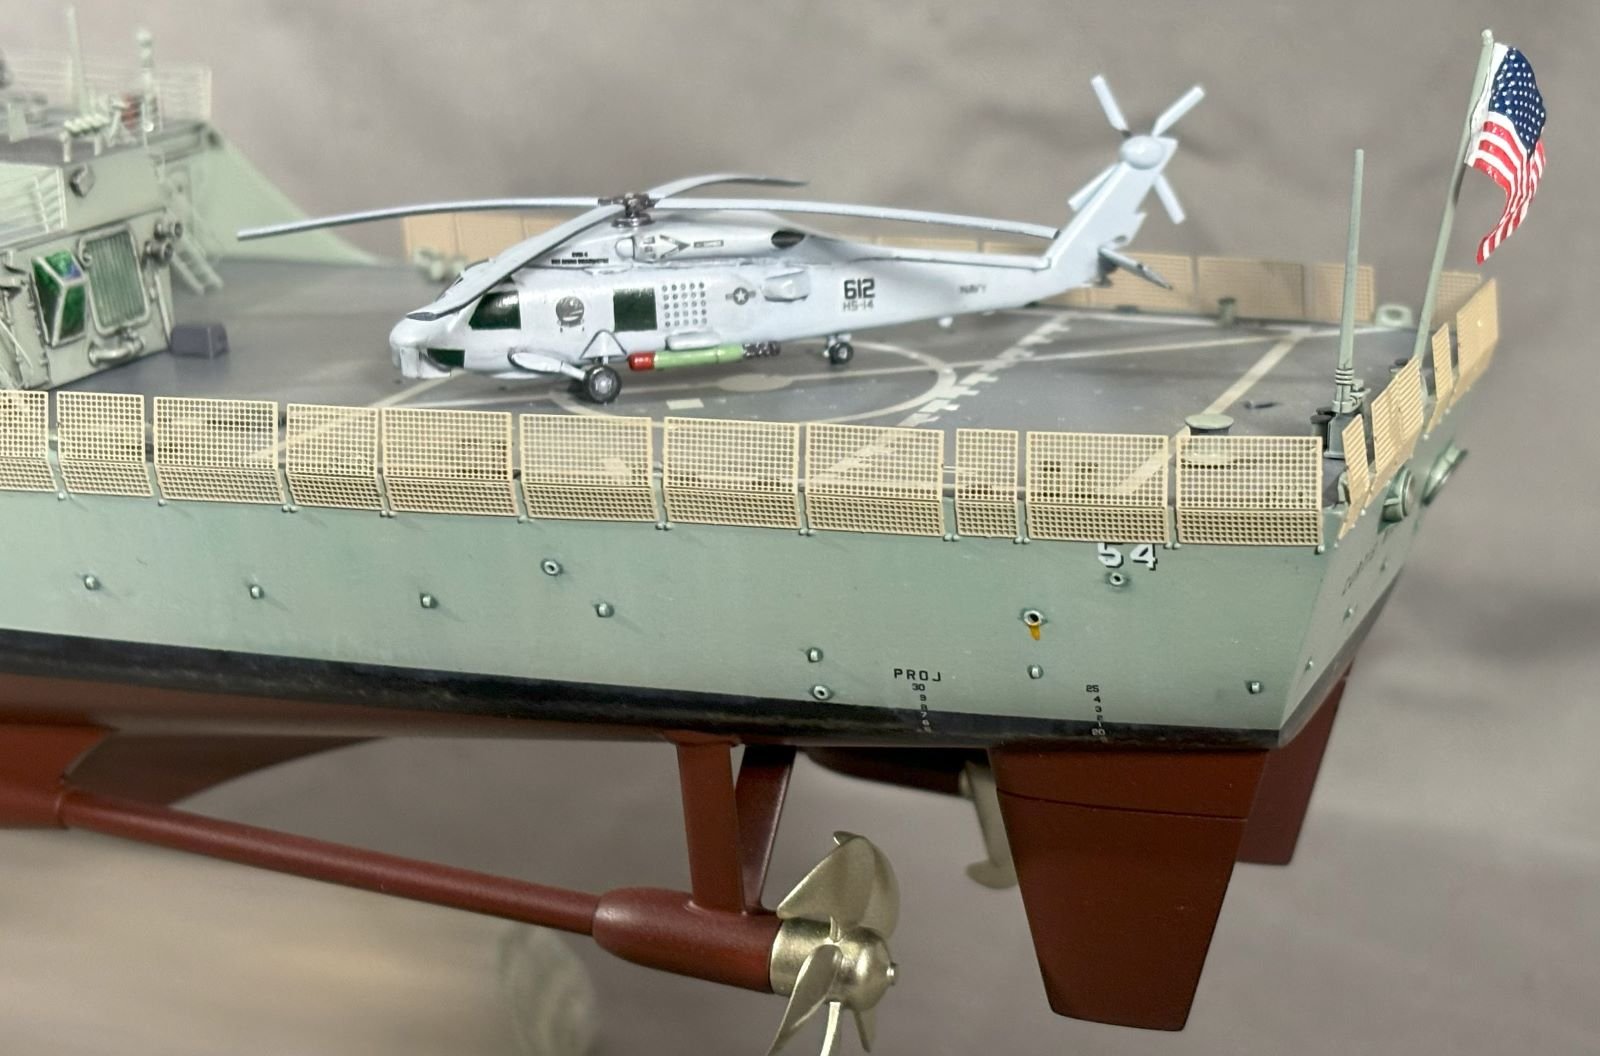
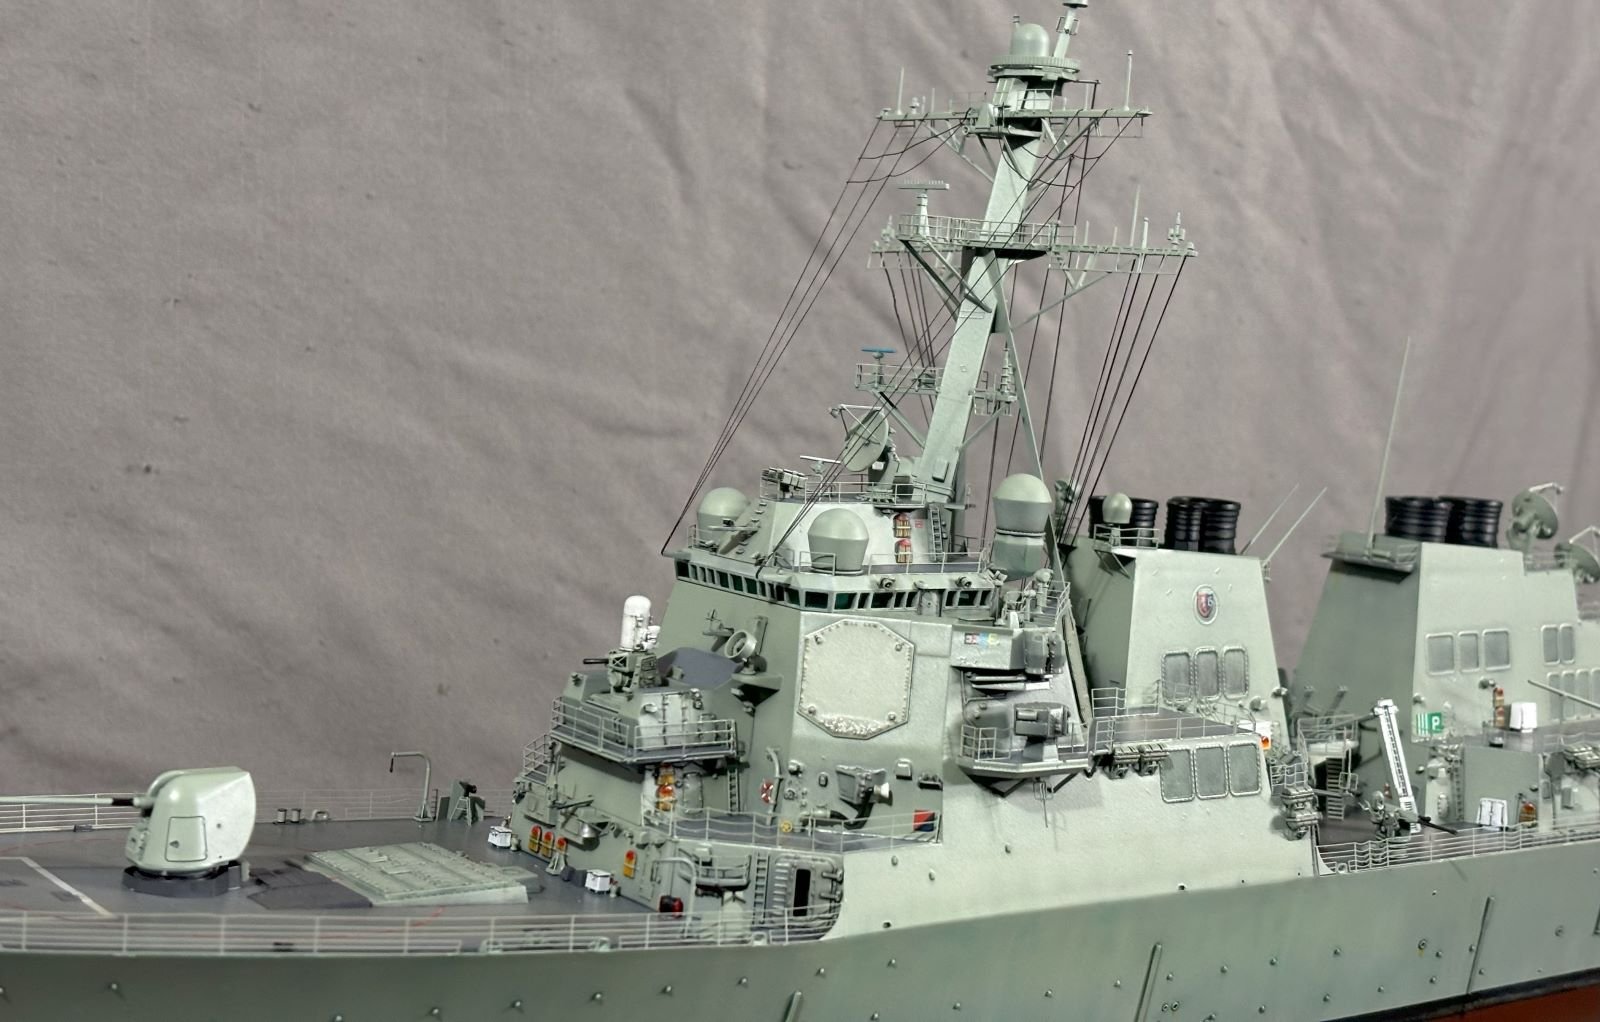
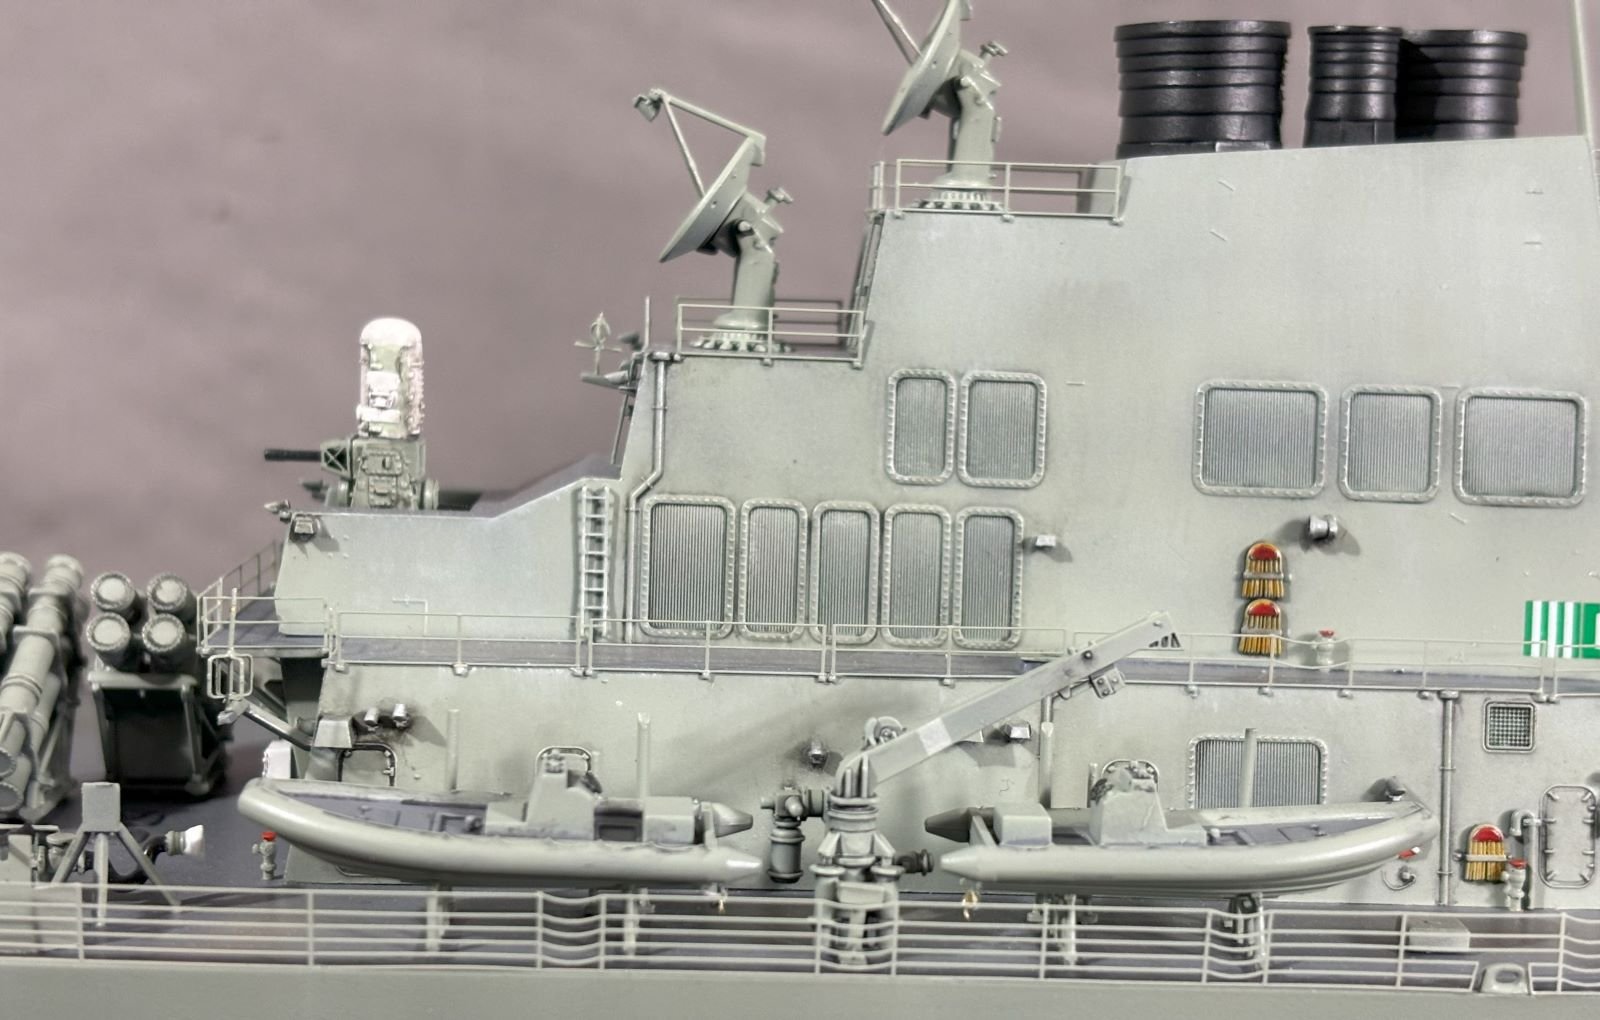
Wrapped up USS Curtis Wilbur the other day. Here are my final pictures.
Overall, I thought the kit was good with plenty of well detailed parts and the final model looks the part. However, there are some detractors:
- Instructions could definitely be better. Some of the arrows are not descriptive enough to show exactly where a part needs to end up. The instructions even showed the torpedo tubes being mounted backward and an incorrect anchor/chain positioning. Some build sequences are questionable and I'd recommend careful studying to ensure that you don't run into trouble getting parts put on from following ILK's build sequence. There were also a couple of mislabeled parts.
- The bridge piece could have been molded differently to allow for windows that were not solid so we don't have to carefully carve them out if we don't wish to paint them.
- As mentioned previously, the propellers are molded too far apart. While fixing this is doable, it would be a hassle.
- Parts clean up could be troublesome on some parts with questionable ejector pin marks and some larger than necessary sprue nibs.
- Some of the photo-etch was either wholly unnecessary or just not well executed.
- Lastly, the whole configuration of the ship could be considered somewhat fictional. I was unable to match with real photos how they would have the final piece configured. If you're looking for 100% accuracy (I was not) then study reference photos closely and make sure you are paying attention to the year in which you are modeling USS Curtis Wilbur.


Thanks for checking it out!
- Nunnehi (Don), king derelict, DocRob and 10 others
-
6
-
 7
7
-
Question: Is the deck a dark brown or is it that orange/red that larger Soviet ships had?
- Canute, mtaylor and Old Collingwood
-
3
-


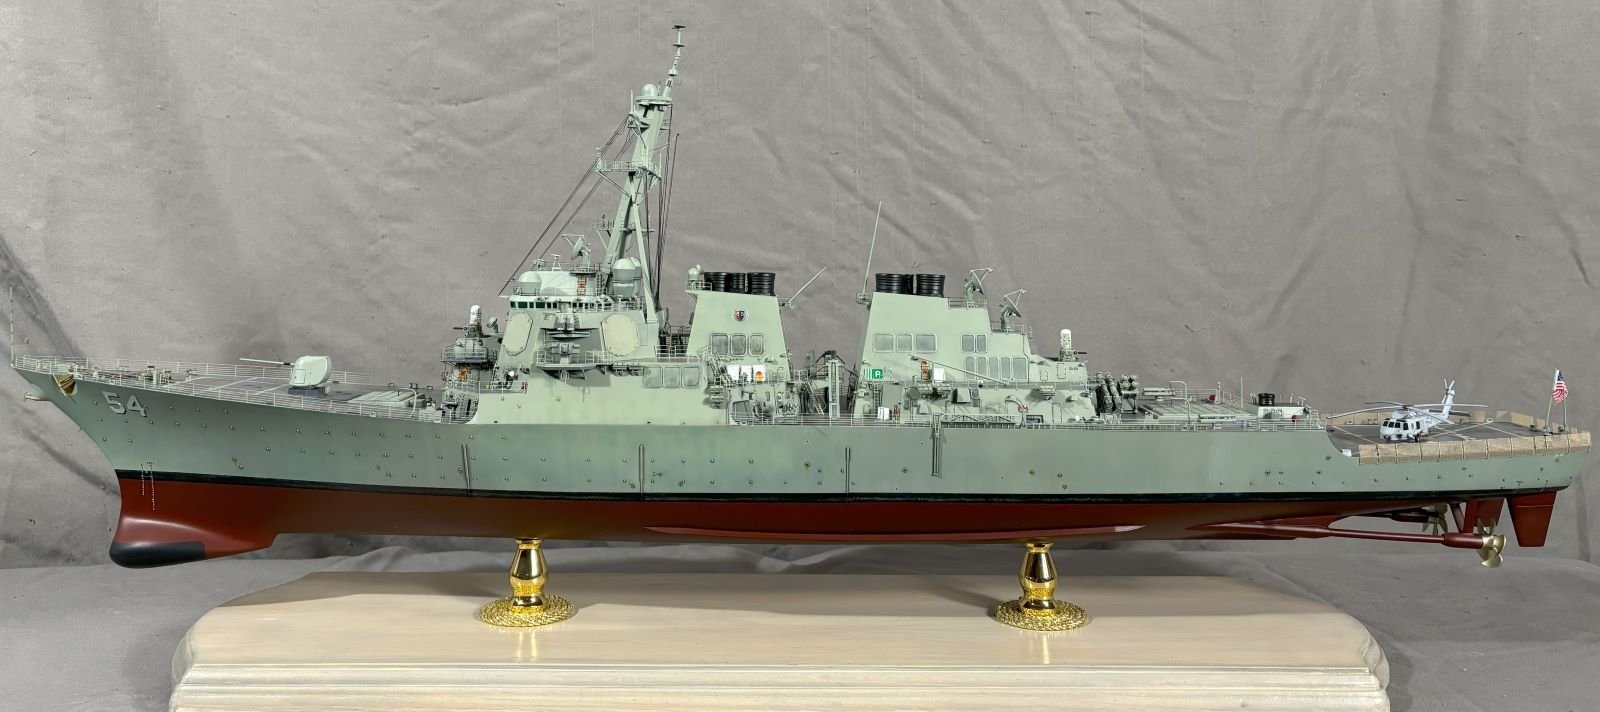

USS Curtis Wilbur (DDG-54) by patrickmil - FINISHED - I Love Kit - 1/200 - PLASTIC
in - Kit build logs for subjects built from 1901 - Present Day
Posted
I really appreciate the kind words and thank you for your service! With your memory of her, I hope I did her proud.