patrickmil
-
Posts
1,209 -
Joined
-
Last visited
Content Type
Profiles
Forums
Gallery
Events
Everything posted by patrickmil
-
 Thank you very much for the compliment! Your builds are nothing short of extraordinary, especially due to the scales involved.
- 97 replies
-
- 4
-

-
- Curtis Wilbur
- I Love Kit
- (and 2 more)
-
Greg, I really appreciate that. A lot of the credit though has to go to you as an inspiration through some of your impressive ship builds here. Thank you!
- 97 replies
-
- 4
-
-
- Curtis Wilbur
- I Love Kit
- (and 2 more)
-
Hi Scott! I appreciate the compliment! The decal on the aft deck had to be cut into pieces and then carefully aligned. The others went down in single pieces but were a real bear to get lined up right. I hope eventually somebody puts together some aftermarket masks for painting those markings on. I was considering painting them myself, but that turned out to be beyond my skill set to make look good.
- 97 replies
-
- 3
-
-
- Curtis Wilbur
- I Love Kit
- (and 2 more)
-
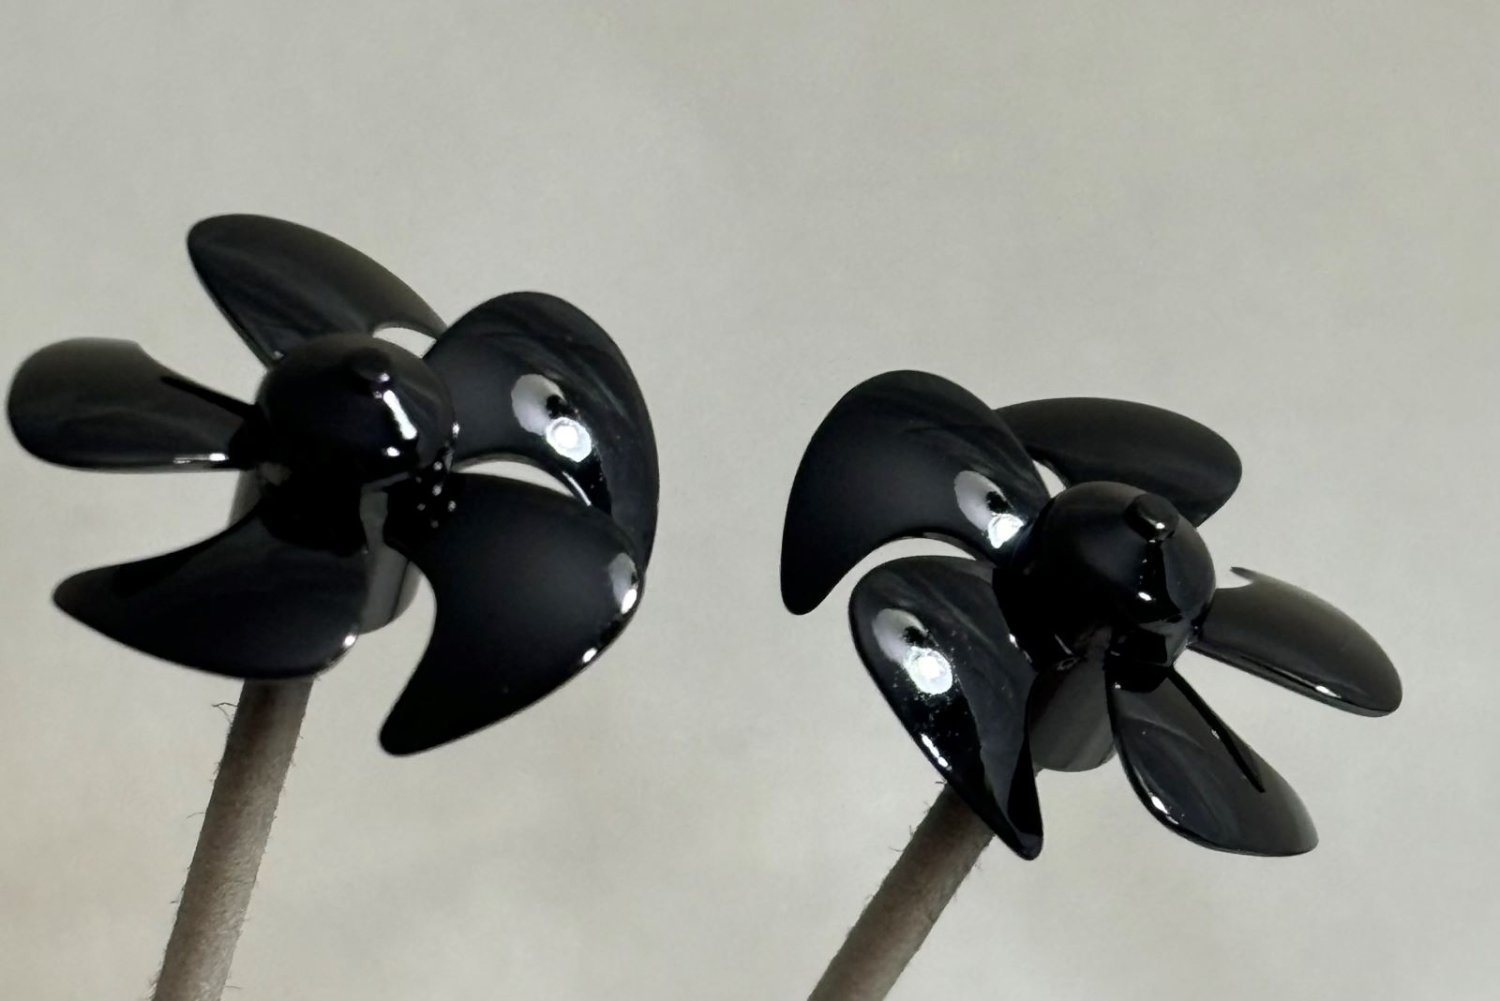
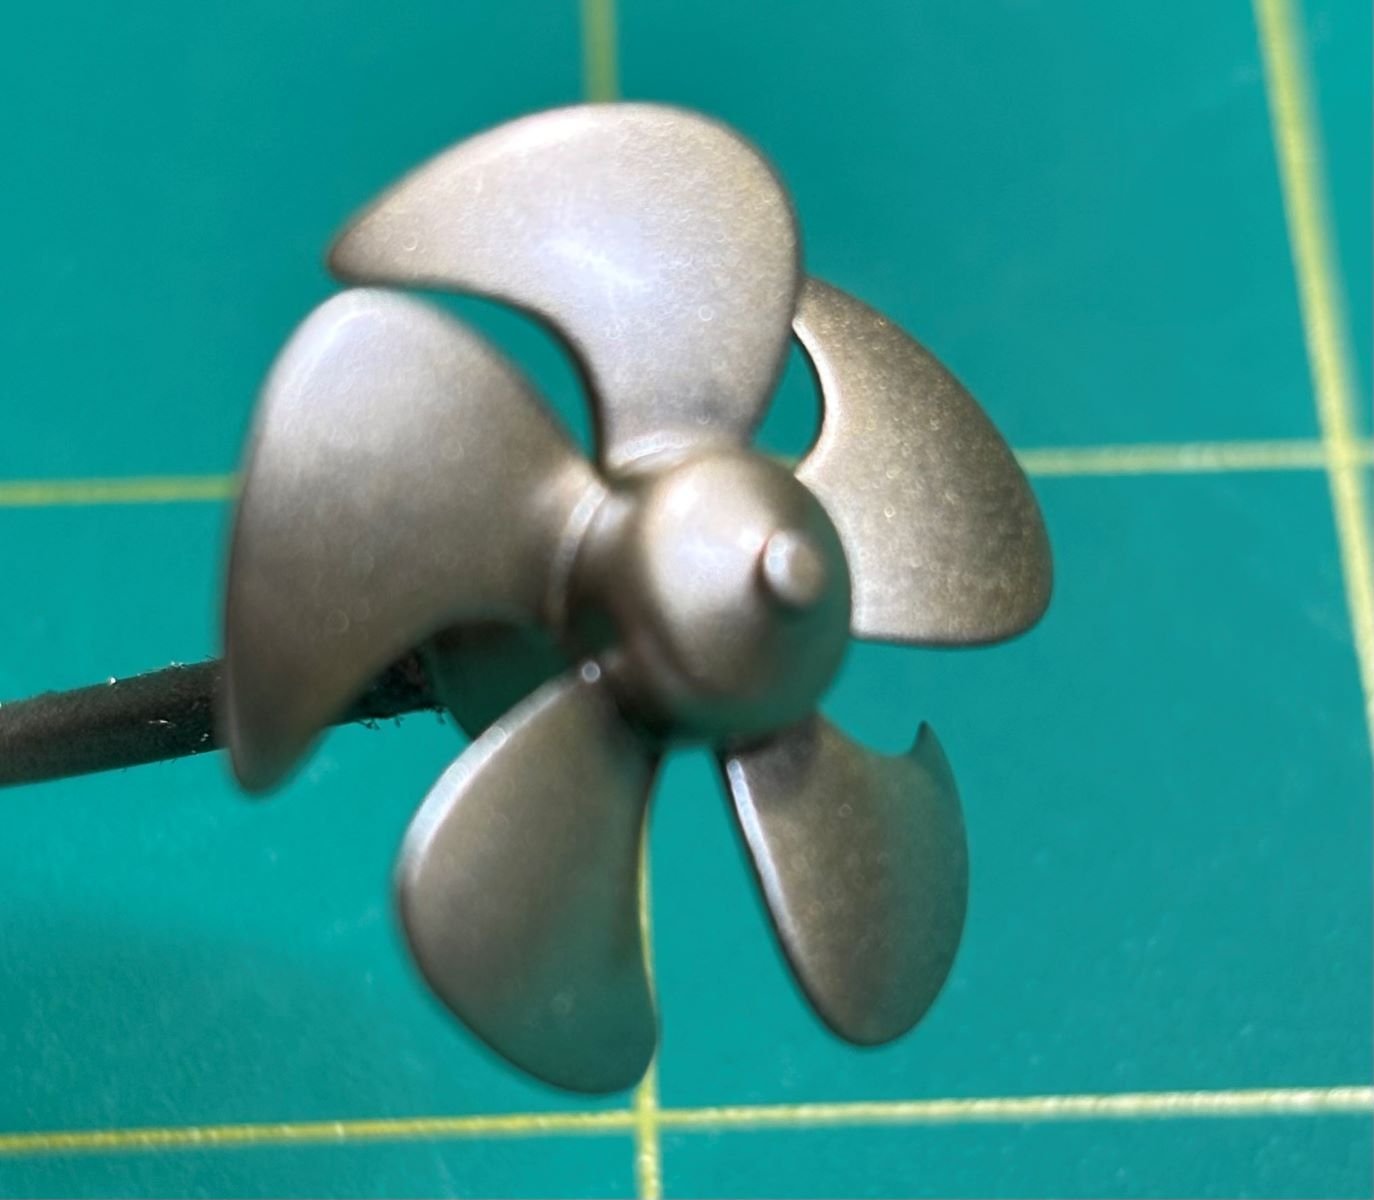
Hi all! Thanks for your likes and following along. I applied decals on the hull and the deck. These were sealed in with clear coats and the carrier film on the decals is almost non-existent now. The deck is glued in place and currently under clamps until I'm certain the glue has fully cured. Also pictured are the propellers that I polished until the plastic parts were shiny, primed with Alclad II Gloss Black Base, and then painted with Bronze top-coated with Gold Titanium. To me, the propellers more closely match pictures of the real things in online resources. I have some pictures of my progress to date. Now begins all of the "fun stuff" with the superstructure and weapon systems. Until next time, thank you and be safe!


- 97 replies
-
- 12
-
-
- Curtis Wilbur
- I Love Kit
- (and 2 more)
-
@ddp, I usually do leave applying decals until last. I'm not with this one. The decals are too large or will need to be cut and reassembled in place, and I do not wish to do so without plenty of places to rest my hands while doing so. Alternatively, if the decals get messed up, I can still mask off and paint the markings while the deck and hull are apart from one another.
- 97 replies
-
- 4
-
-
- Curtis Wilbur
- I Love Kit
- (and 2 more)
-
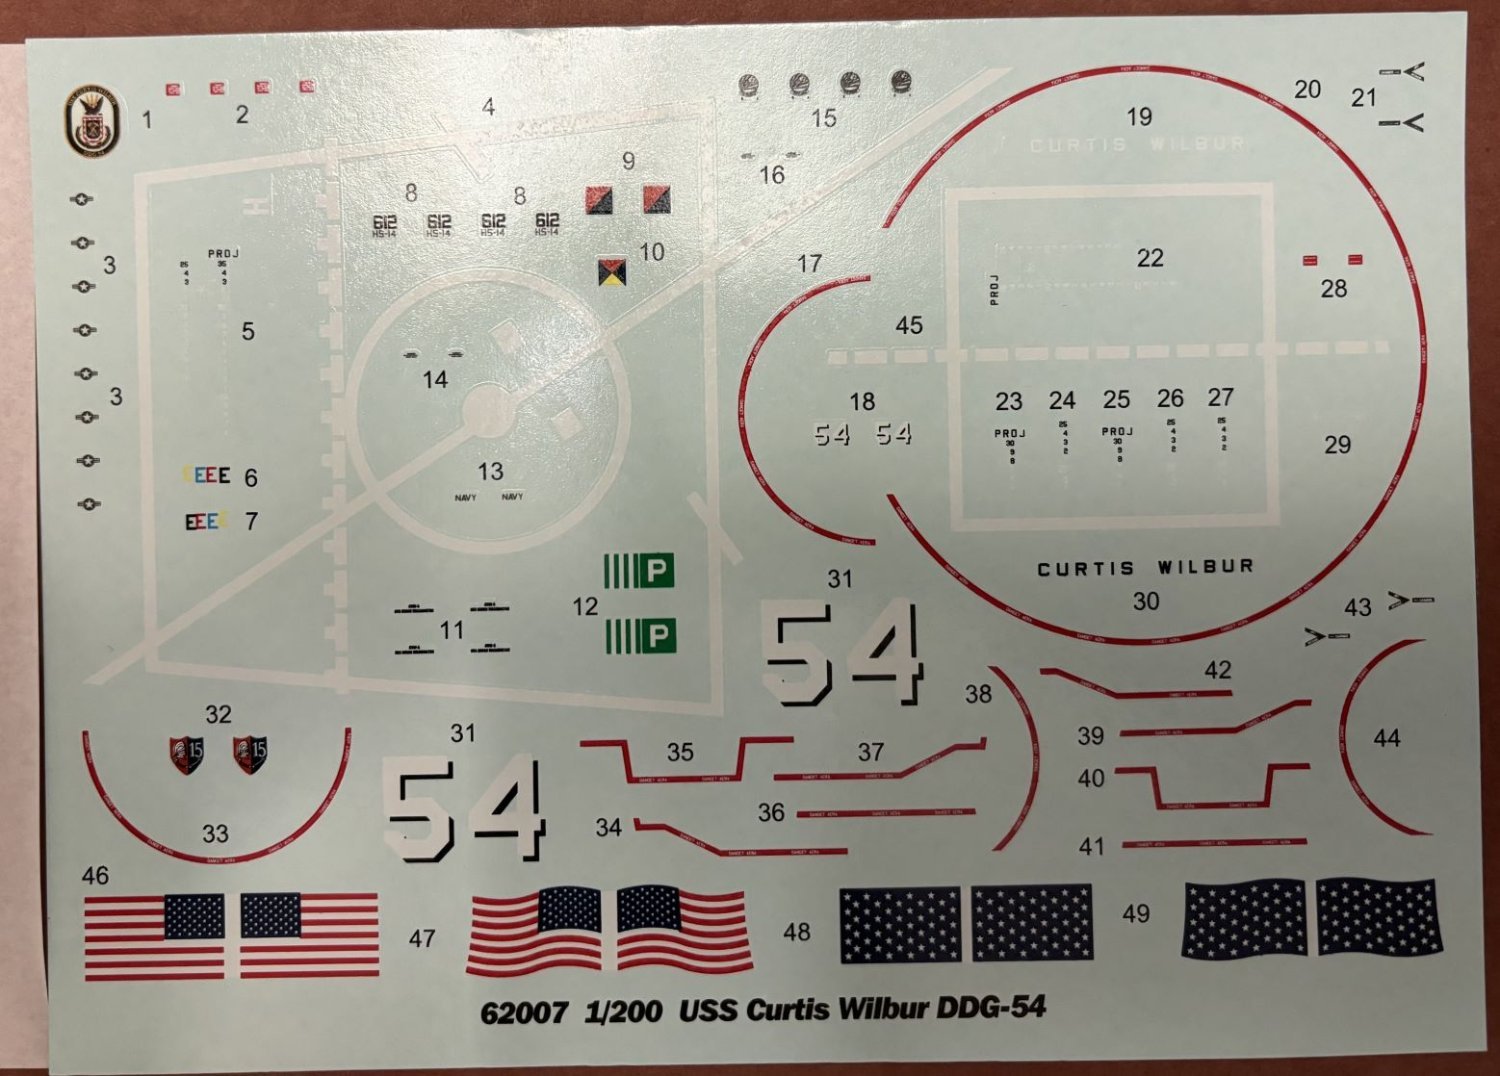
Hi everybody! I really appreciate your likes and following along. I have no pictures on this reply and it might be a while. It honestly just occurred to me that applying deck and hull decals now would be easier rather than wrestling with further along in the build with the superstructure and other details in place. And to add to that note, the kit's decals give me mixed feelings. On the one hand, they are very thin and the carrier film completely disappears after a clear coat is applied. On the other hand, the thinness lends itself to them easily folding under or onto themselves. The way the decals are laid out is not great. The white lines for the aft deck are printed as one whole decal with other decals in the dead space. Same thing for the white lines in front of the 5" gun up front. My options are to cut them into separate decals and carefully apply them bits at a time, or mask off the decks and spray the white on. This will take some time. Thanks, Patrick
- 97 replies
-
- 4
-
-
- Curtis Wilbur
- I Love Kit
- (and 2 more)
-
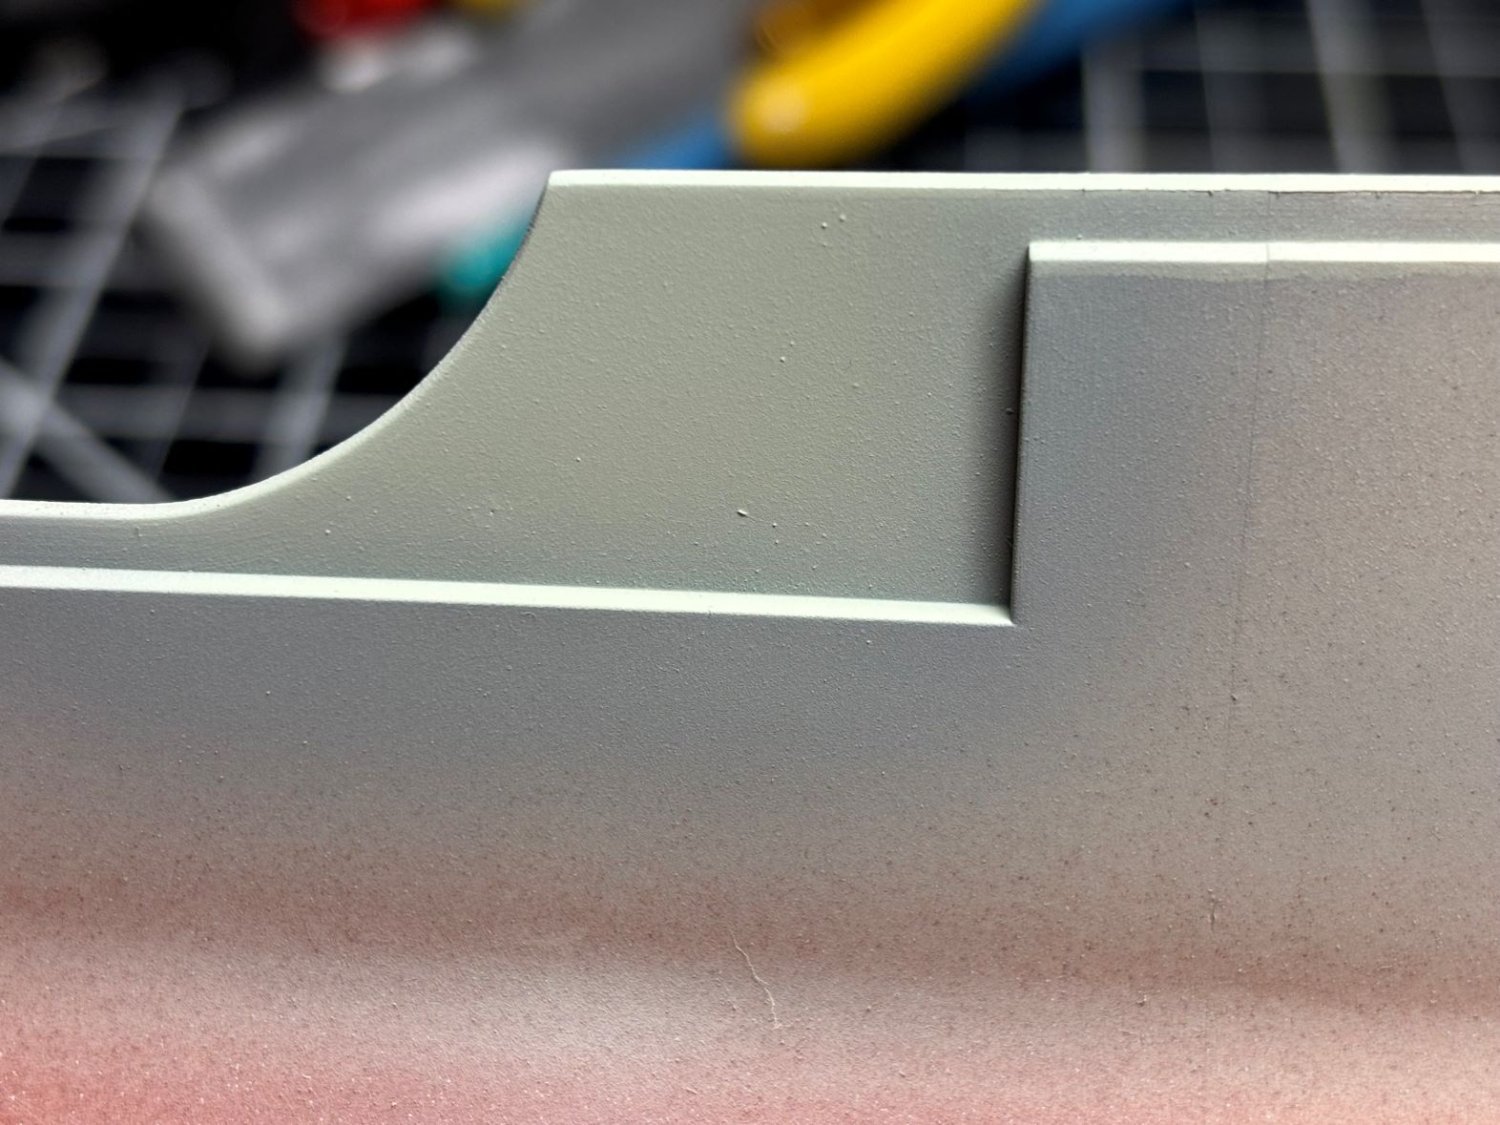
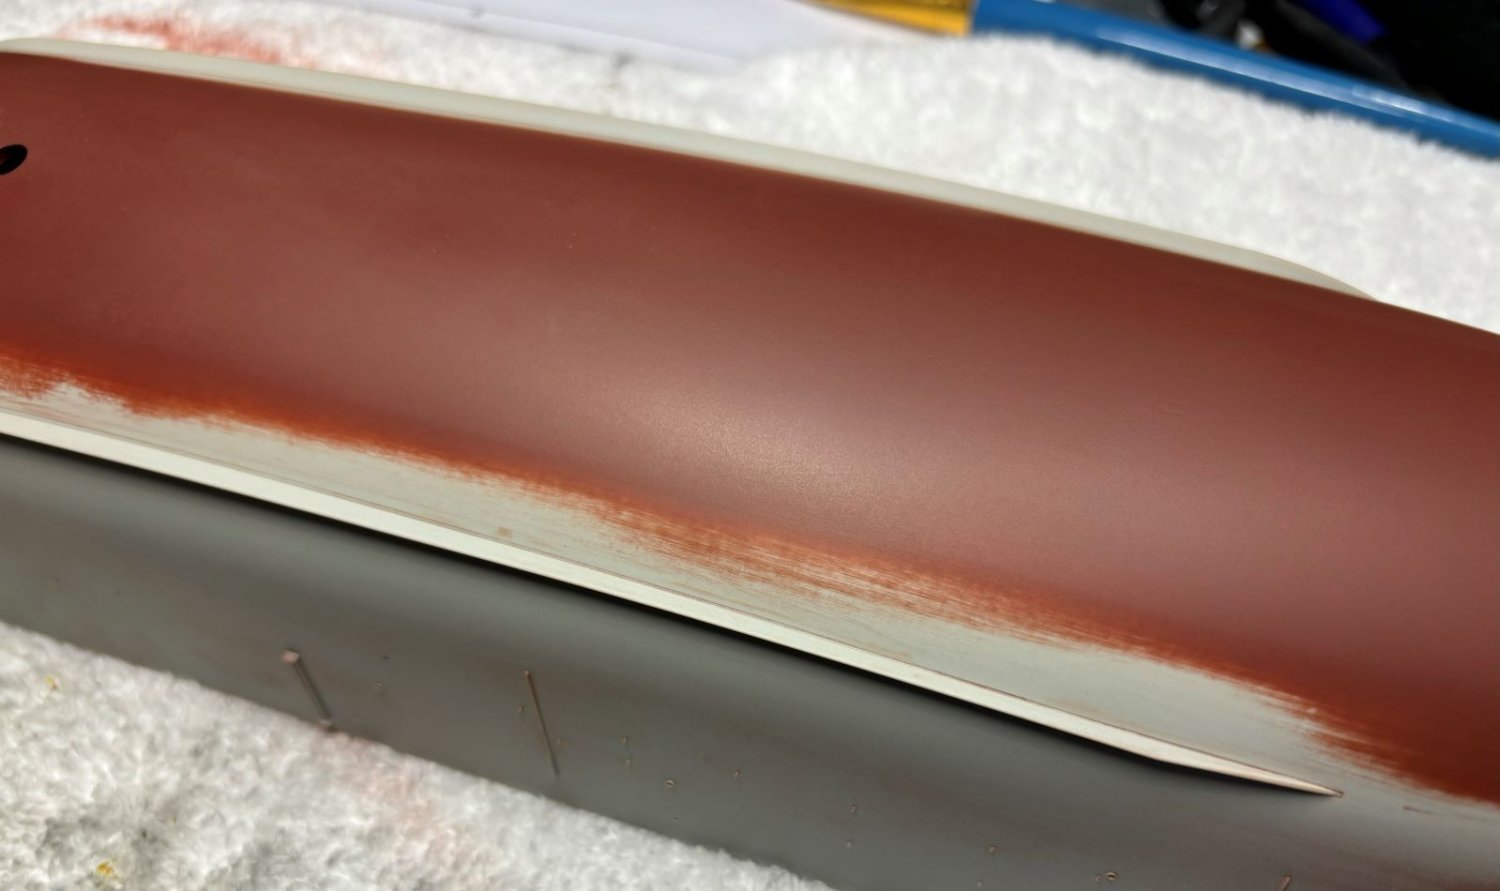
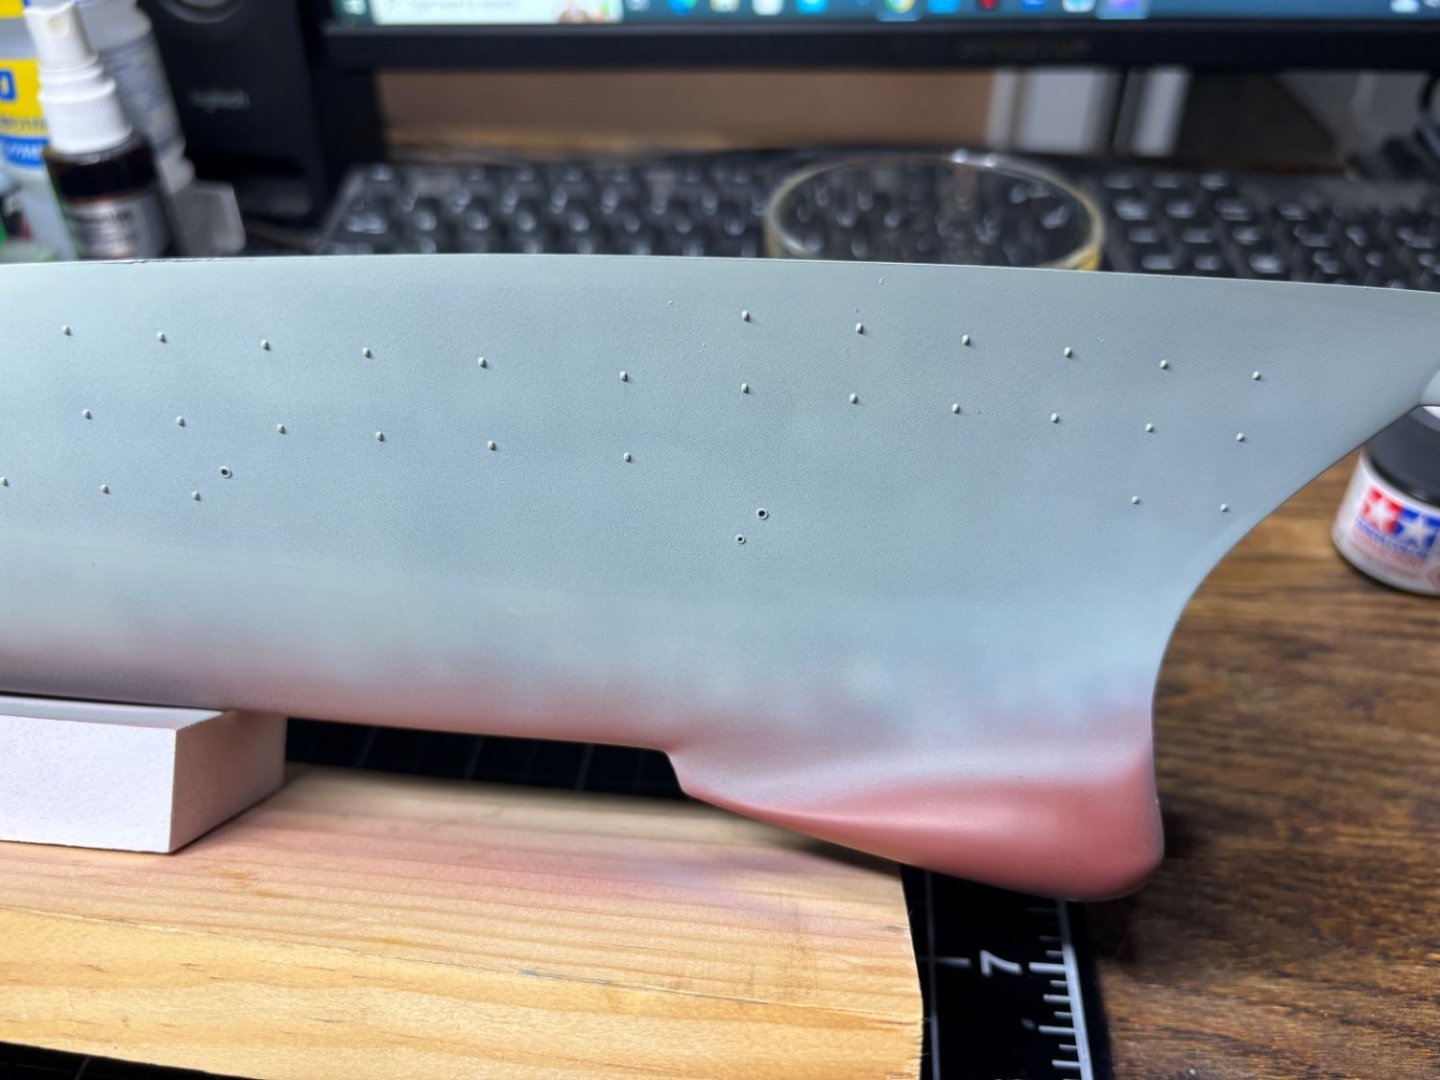
Hello Everybody! Glad to be in 2024, lol. Thank you for all the likes and the comments so far; they are appreciated. I put down XF-53 over the entire deck and then took some painstaking efforts to mask off most of it to apply a darker "trim" color, XF-24. The colors look pretty stark in contrast and the main deck color might look a little light at the moment. After hours and hours of looking at pictures of the real thing, the colors are the closest my eyes will let me pick. That said, the main deck color will be deepening a bit with a clear coat and then darken up a bit with weathering, filters, and washes. I think it will tie things together nicely once done. Oh, as for the where the "trim" color goes, that was another interpretation and how I wished to represent the USS Curtis Wilbur. Unfortunately, there are no pictures that cover every inch of deck during the 90's, so I did the best I could and went with what I thought looked logical and had a nice aesthetic. Well, I brought more pictures. Oh, I owe an explanation for below, lol. I had ordered much wider masking tape; it just wasn't going to get here as soon as I wanted, so I used 6mm. I'm a glutton for punishment. Unfortunately, the color depth from black-basing beneath the XF-12 (JN Grey) isn't showing up terribly well on the camera, but it looks nice in real life. Thanks for looking in!
- 97 replies
-
- 14
-
-
- Curtis Wilbur
- I Love Kit
- (and 2 more)
-
Hi @ddp, Yeah... Initially when I was researching the subject, I came across this website, https://www.seaforces.org/usnships/ddg/DDG-54-USS-Curtis-Wilbur.htm, which is a treasure trove of pictures. The second to last picture of the ship spotlighted that issue quite well too. I wasn't in the mood for major surgery and I'm relatively sure most people wouldn't have noticed. For that matter, I won't me making any real intentional modifications from how the construction of the kit is laid out other than my own choice in paint colors and omitting unseen ridiculousness. The ATC windows in the rear turned out better with my replacement of their photo-etch with my styrene. There doesn't appear to be many other really pieces of photo-etch in front of me, but the universe has this habit of laughing at my plans and perceptions. 🤣 And with that, I do have some pics to share! Thanks for looking in and Happy New Year!!!!


- 97 replies
-
- 12
-
-
- Curtis Wilbur
- I Love Kit
- (and 2 more)
-
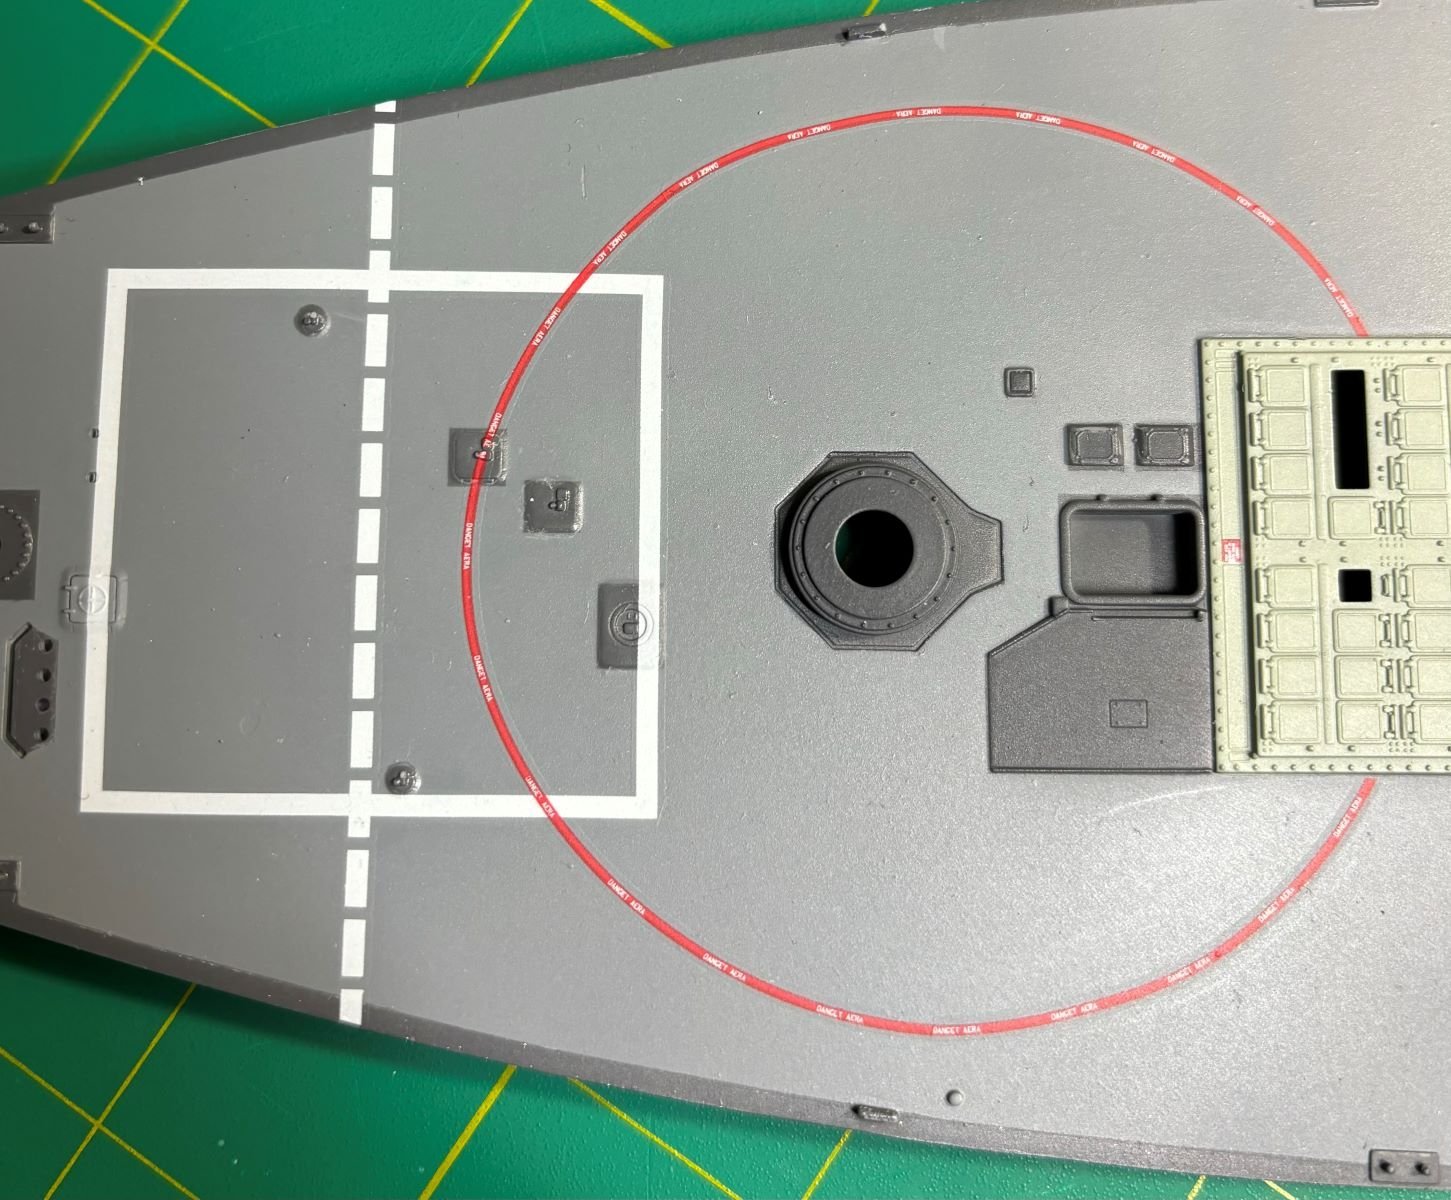
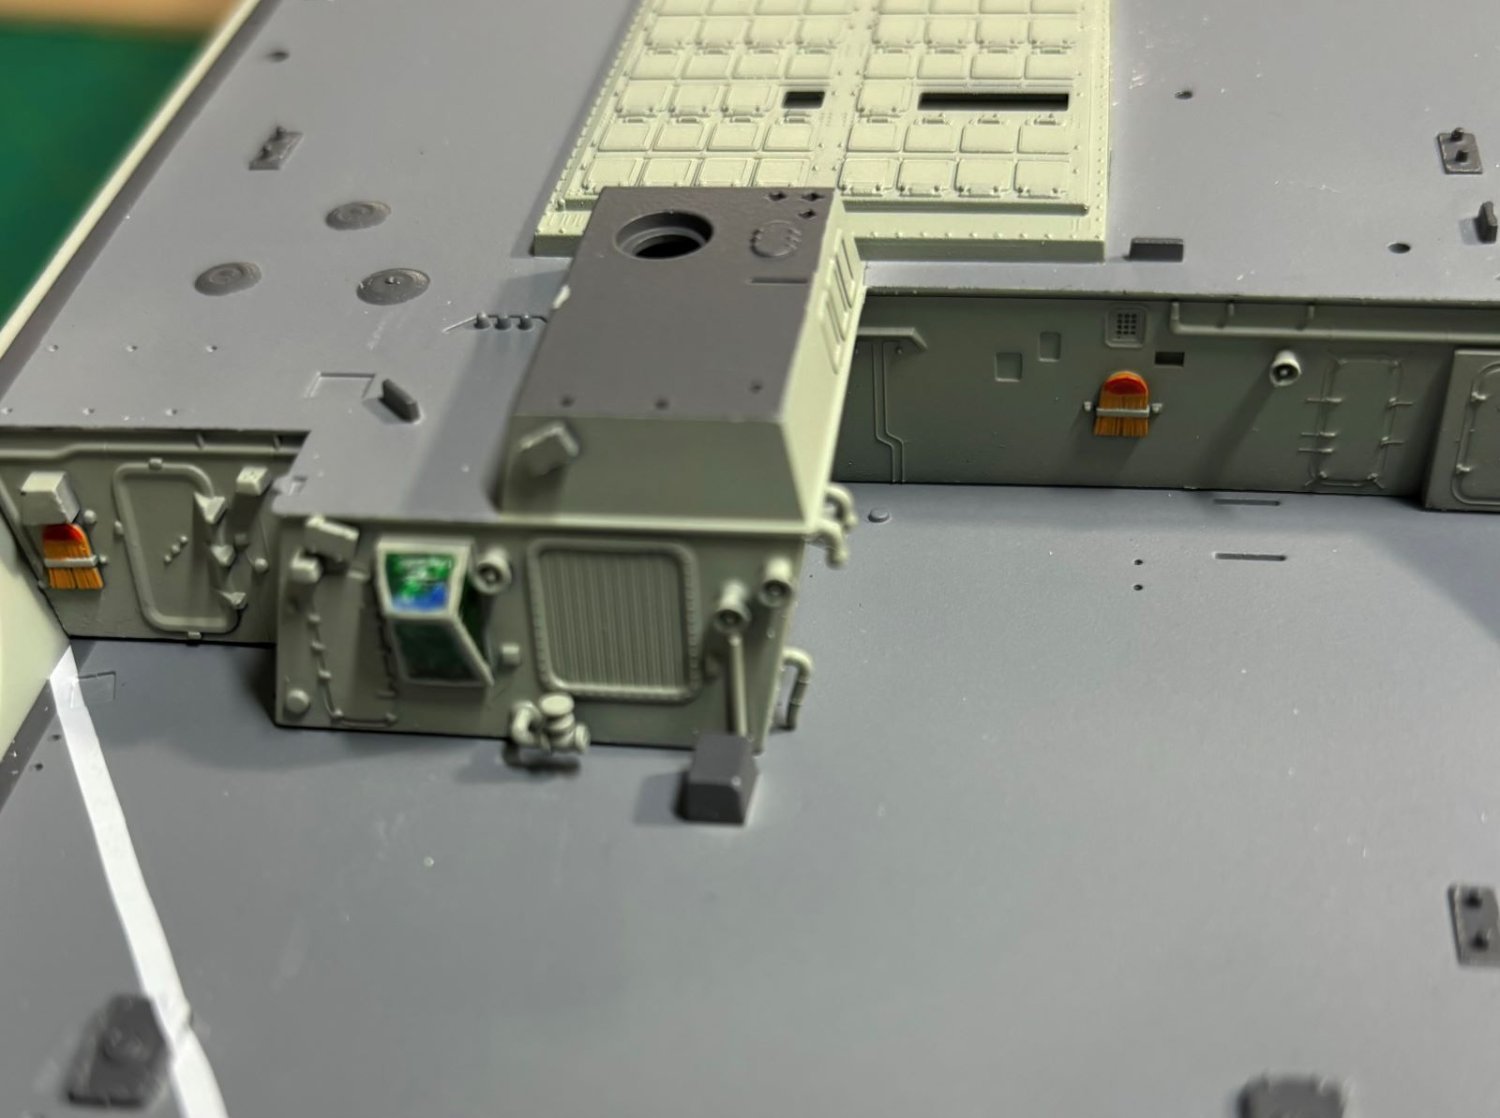
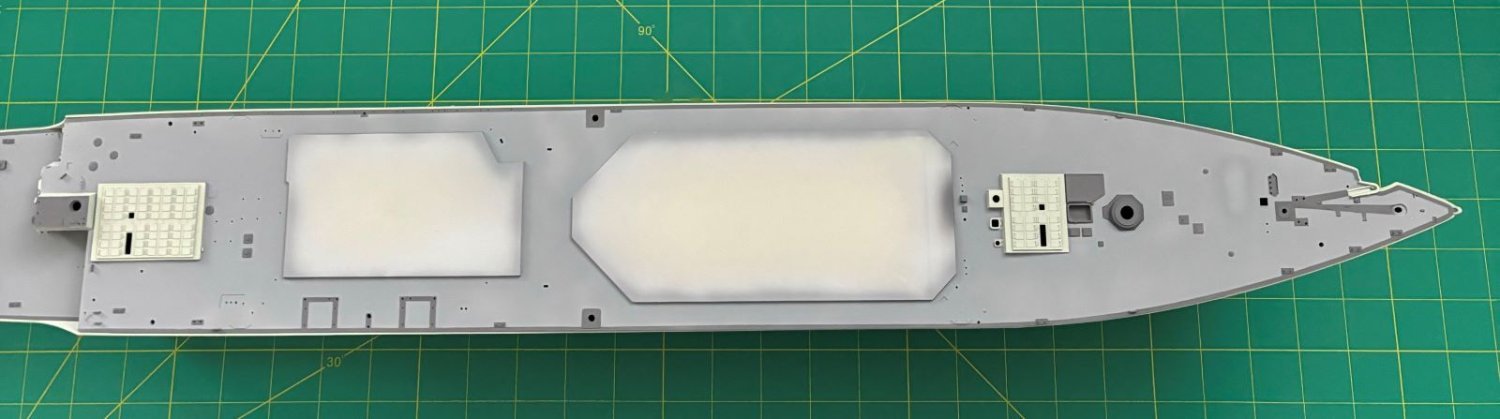
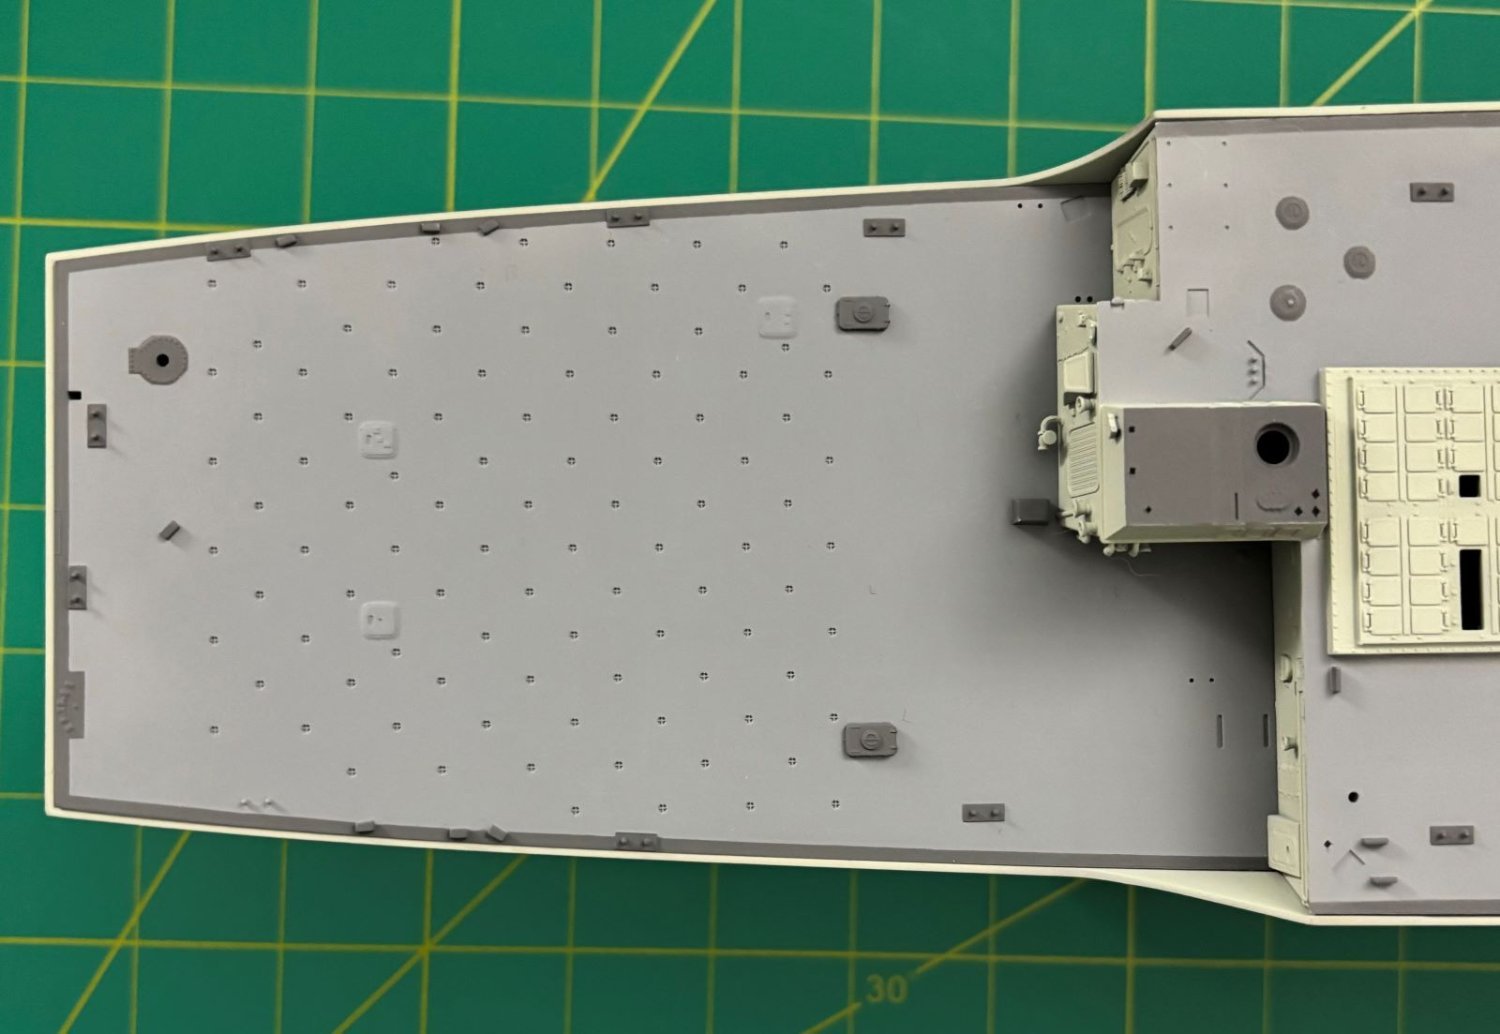
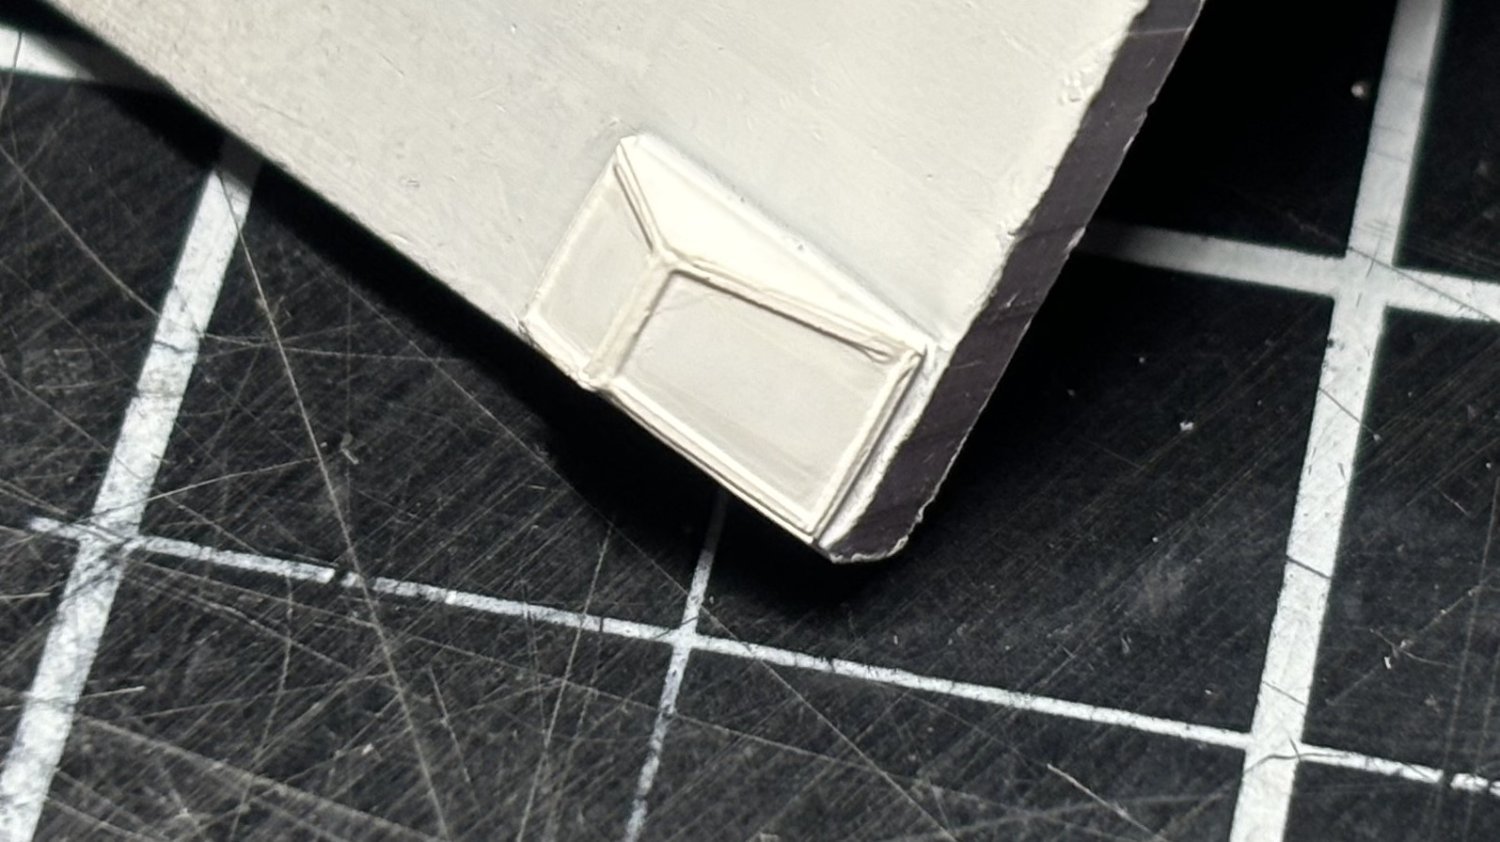
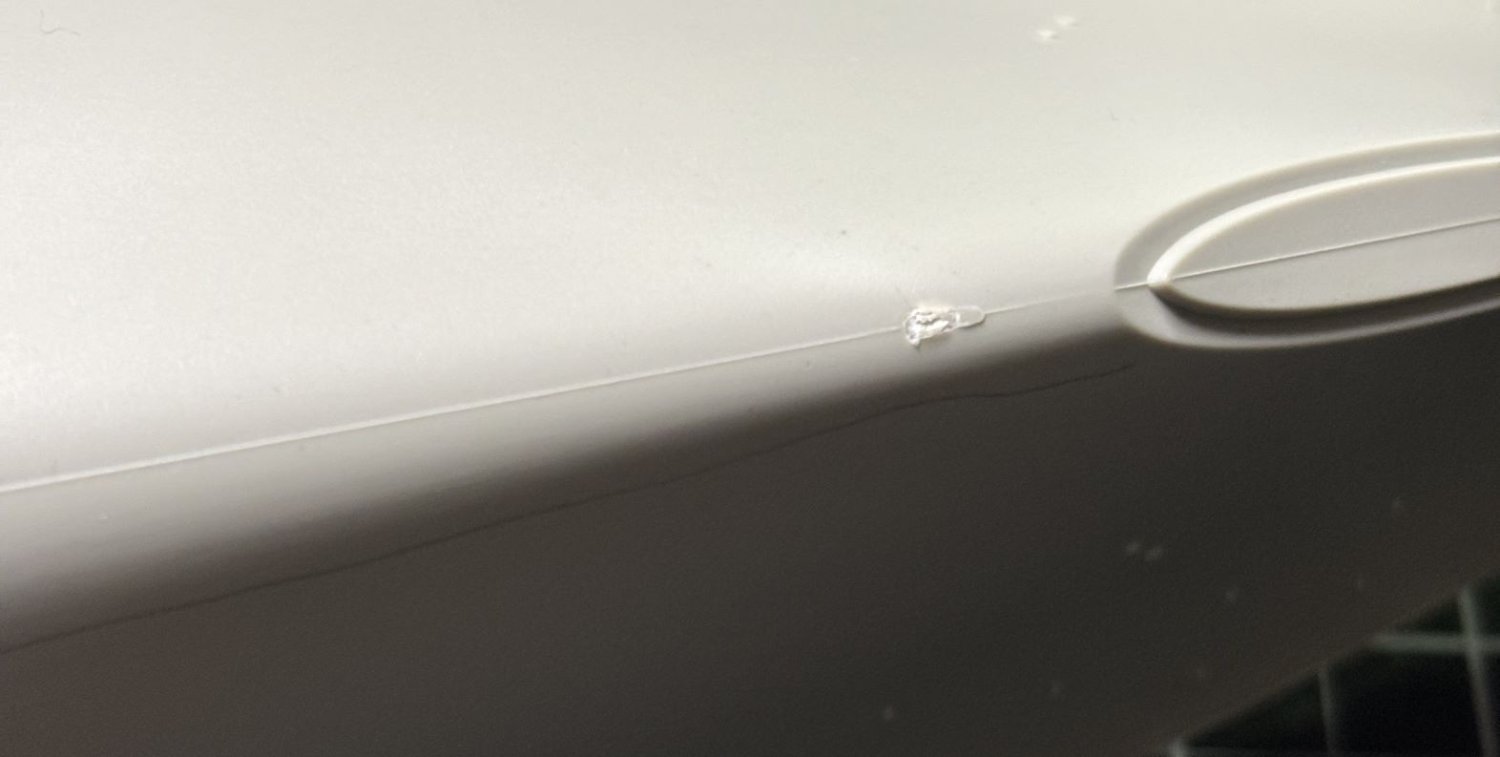
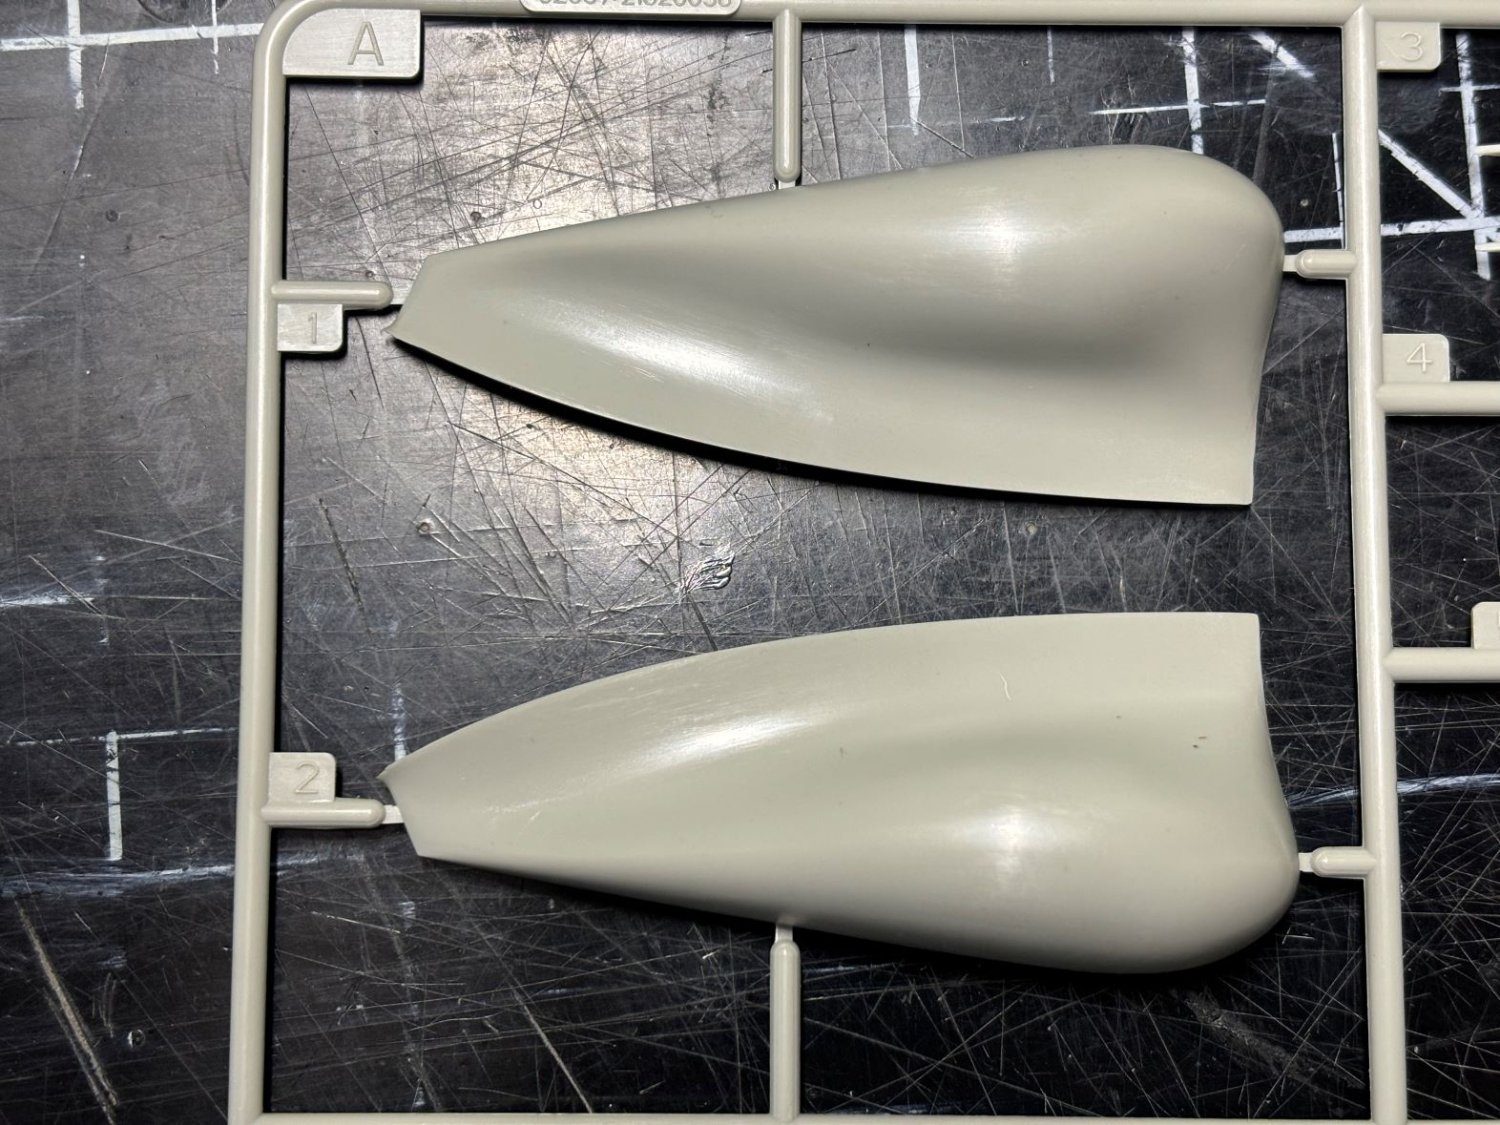
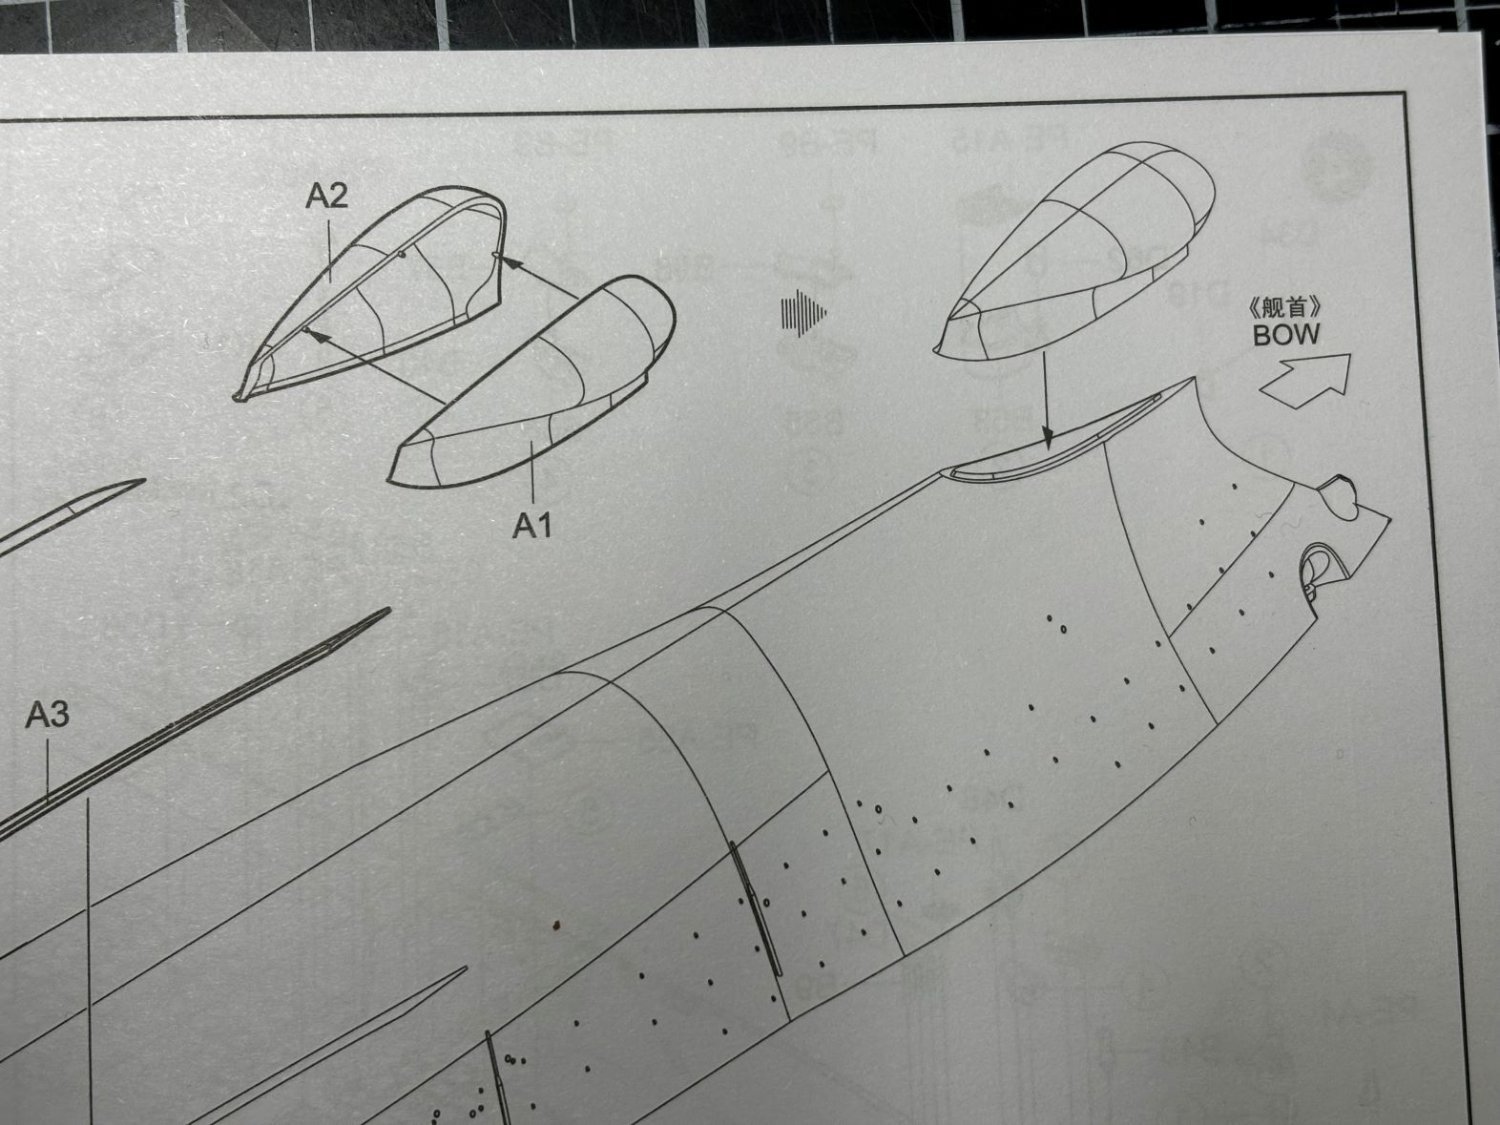
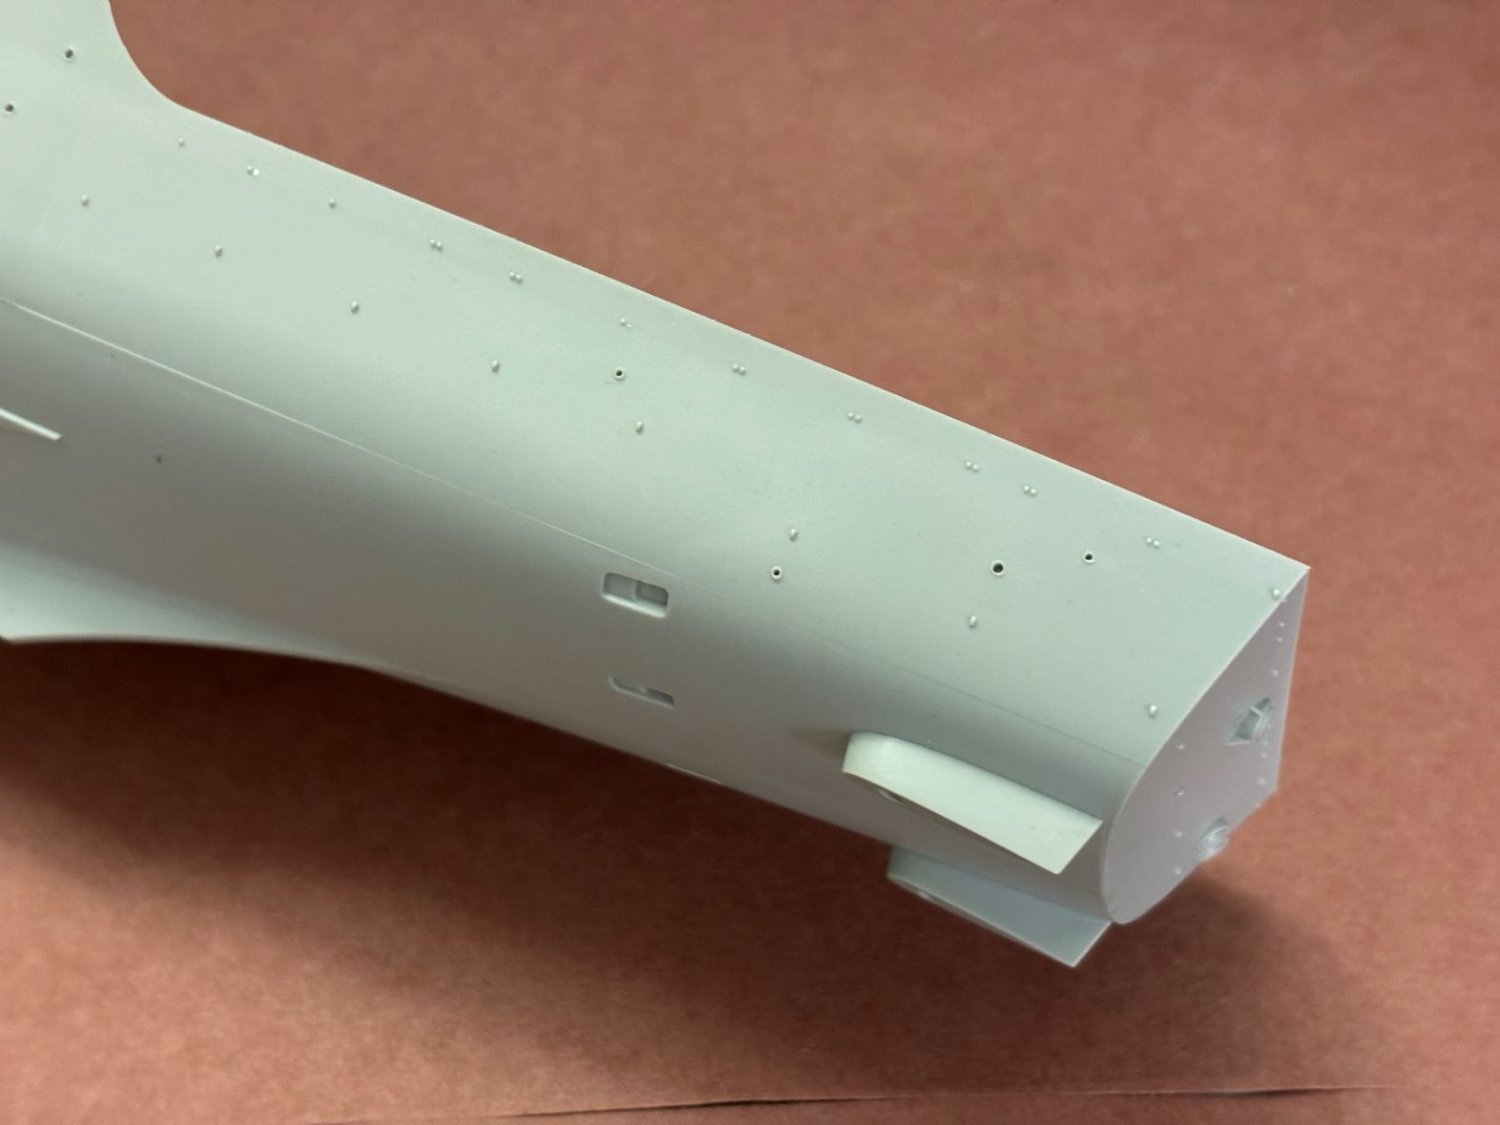
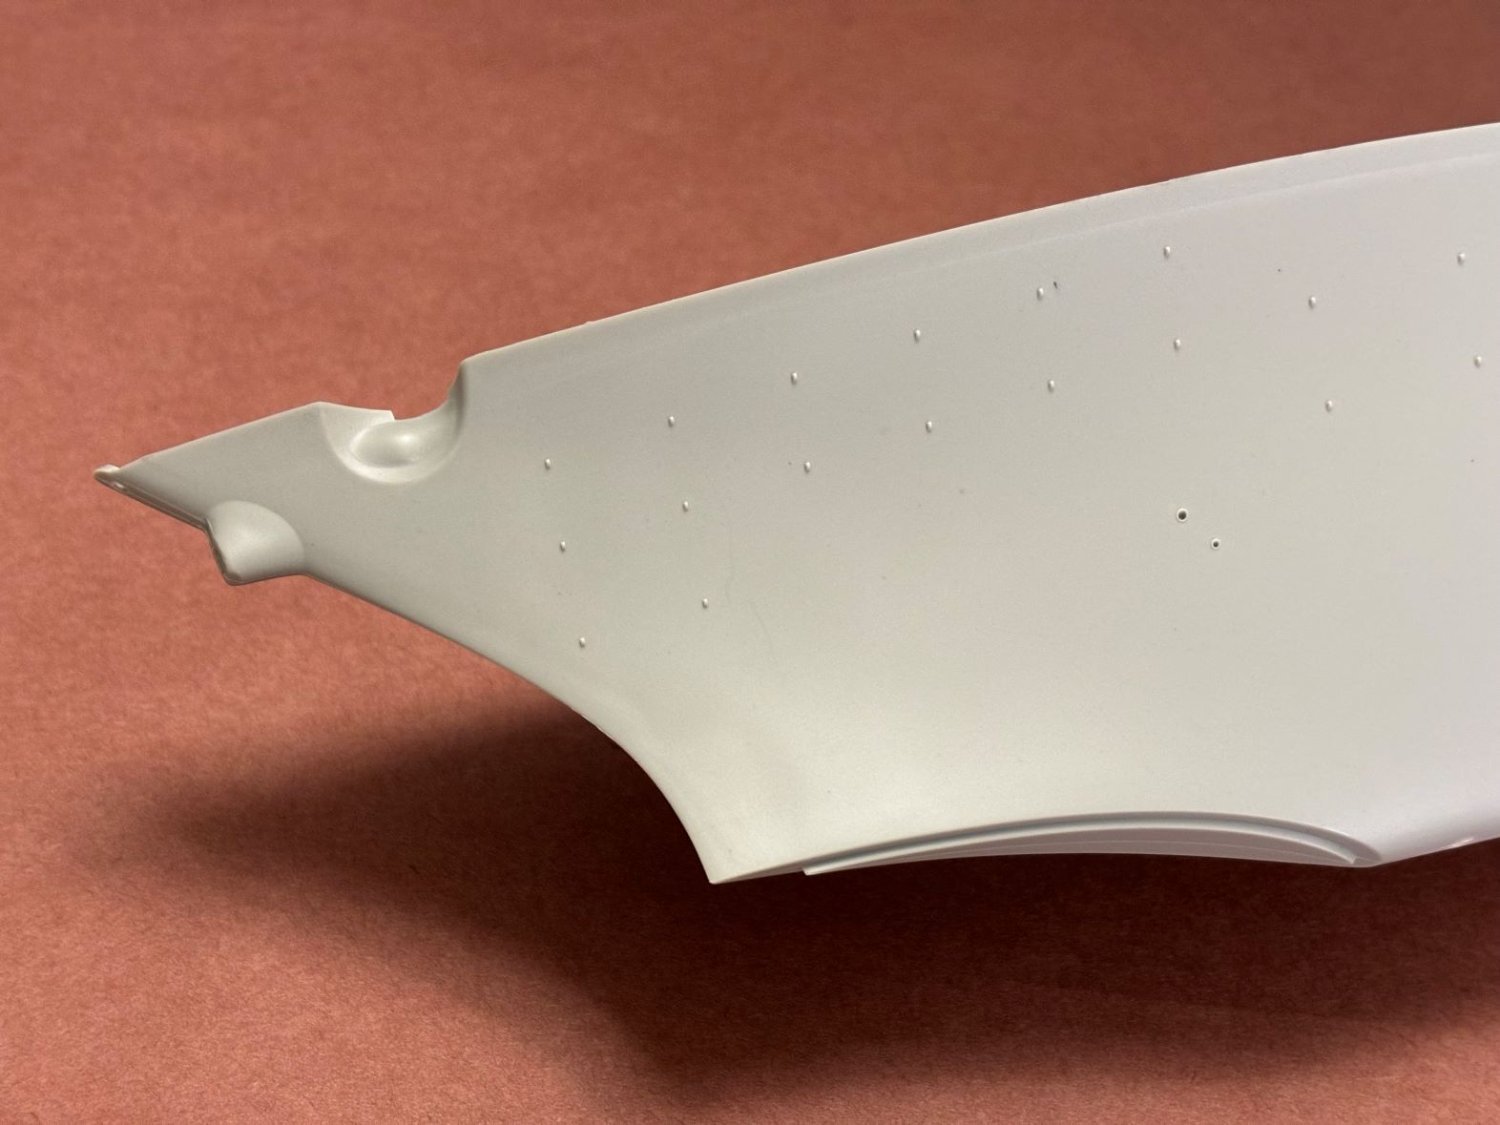
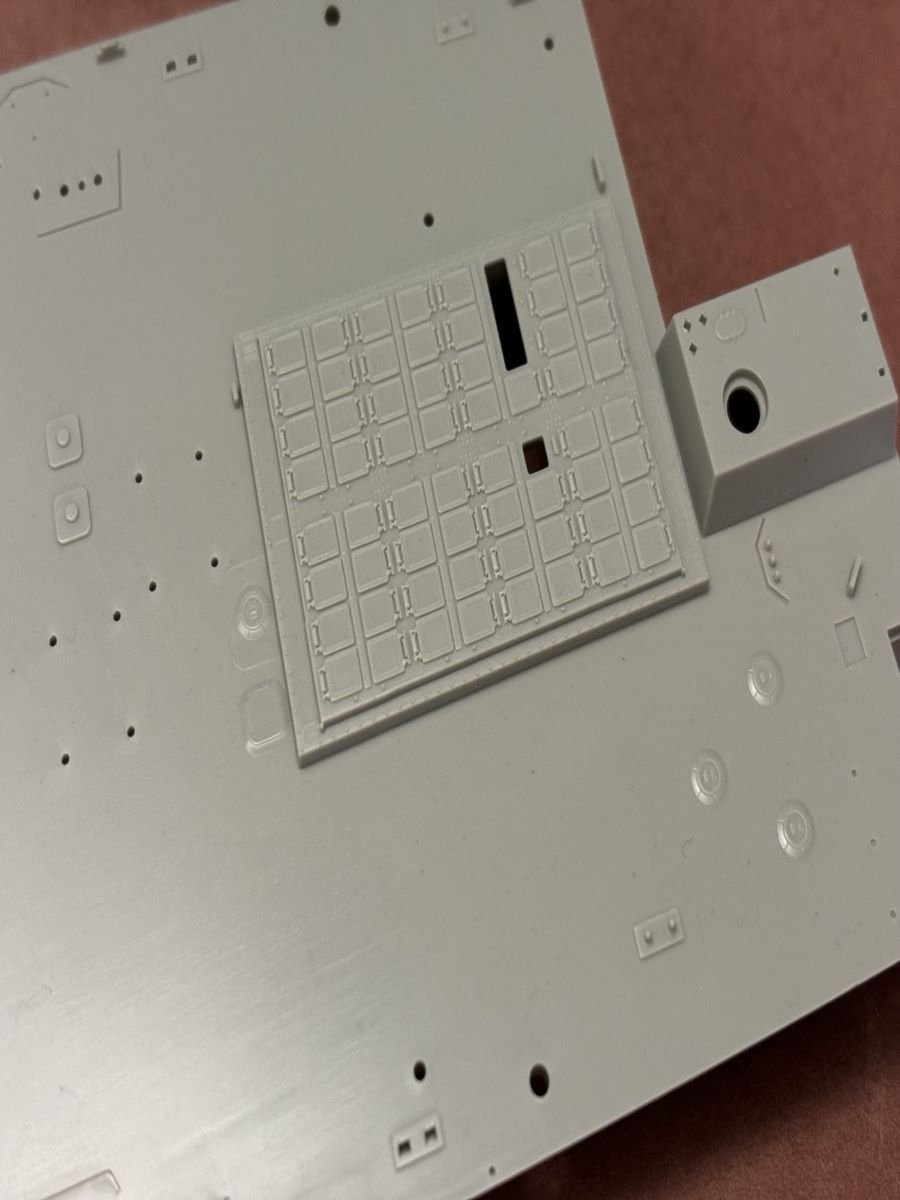
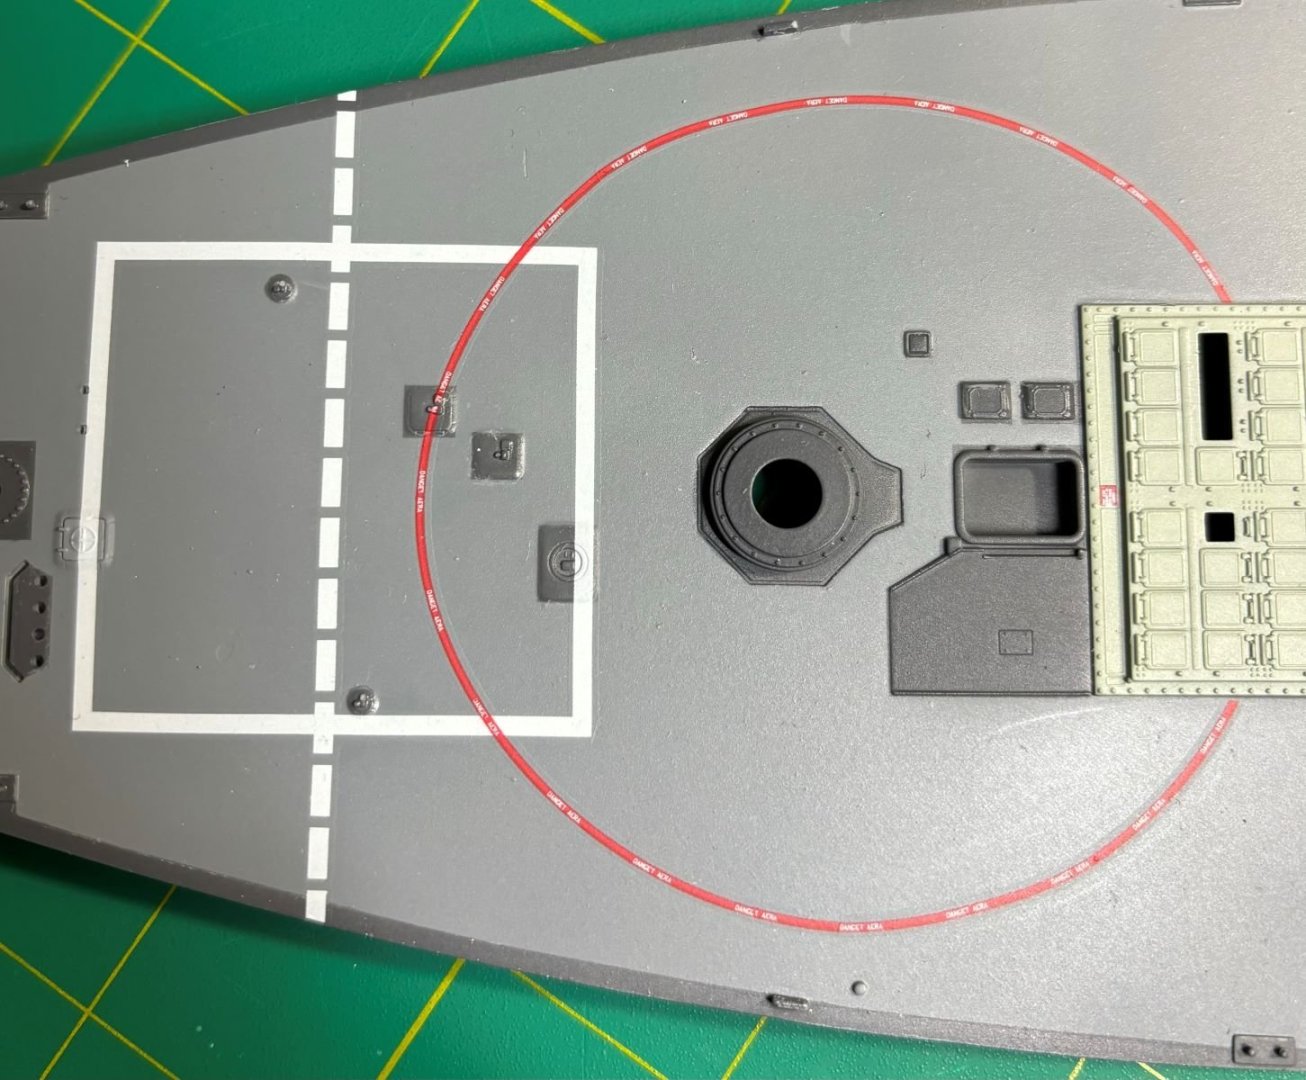
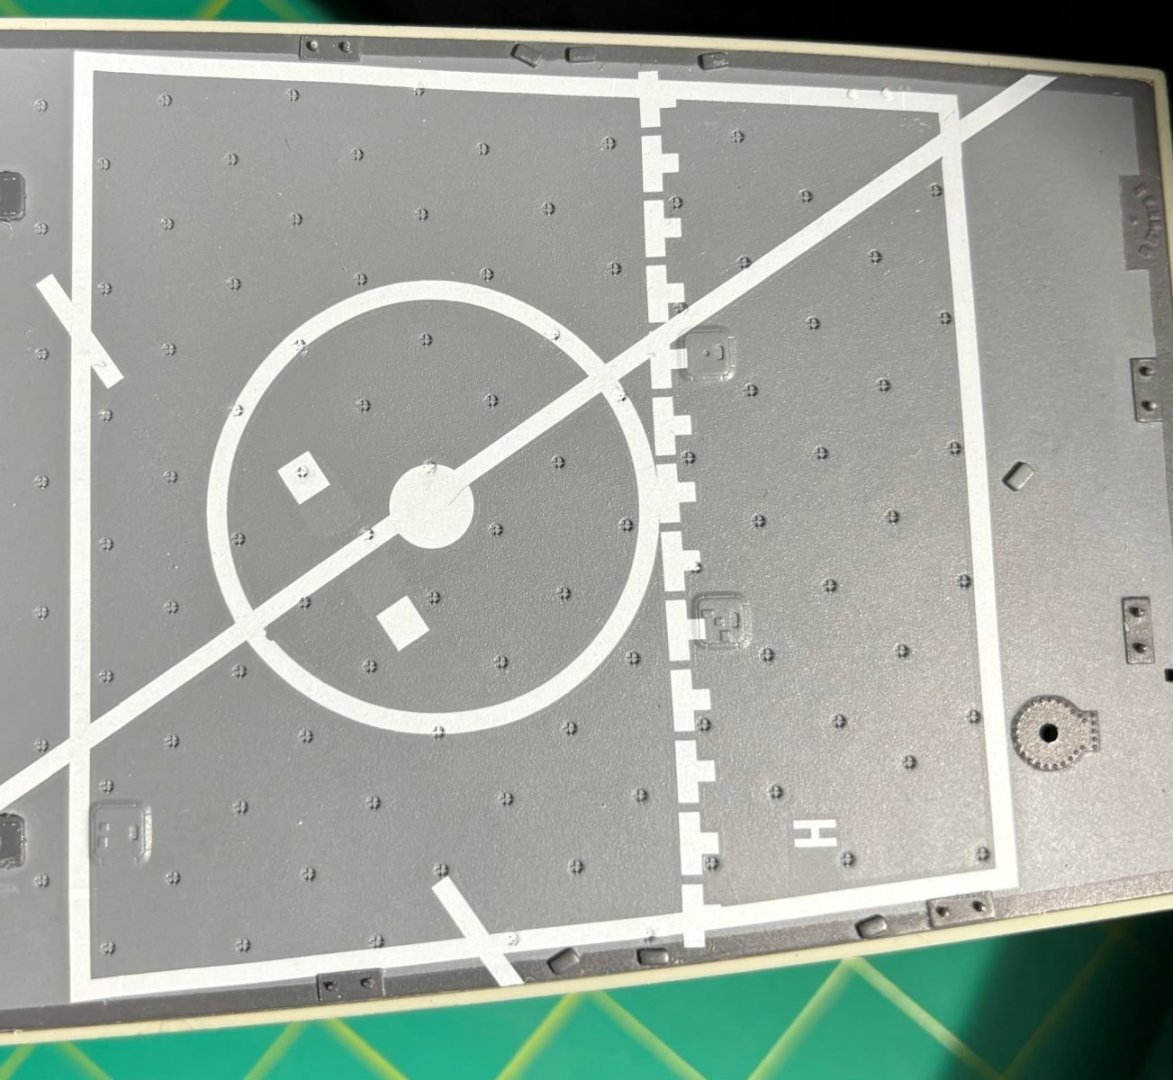
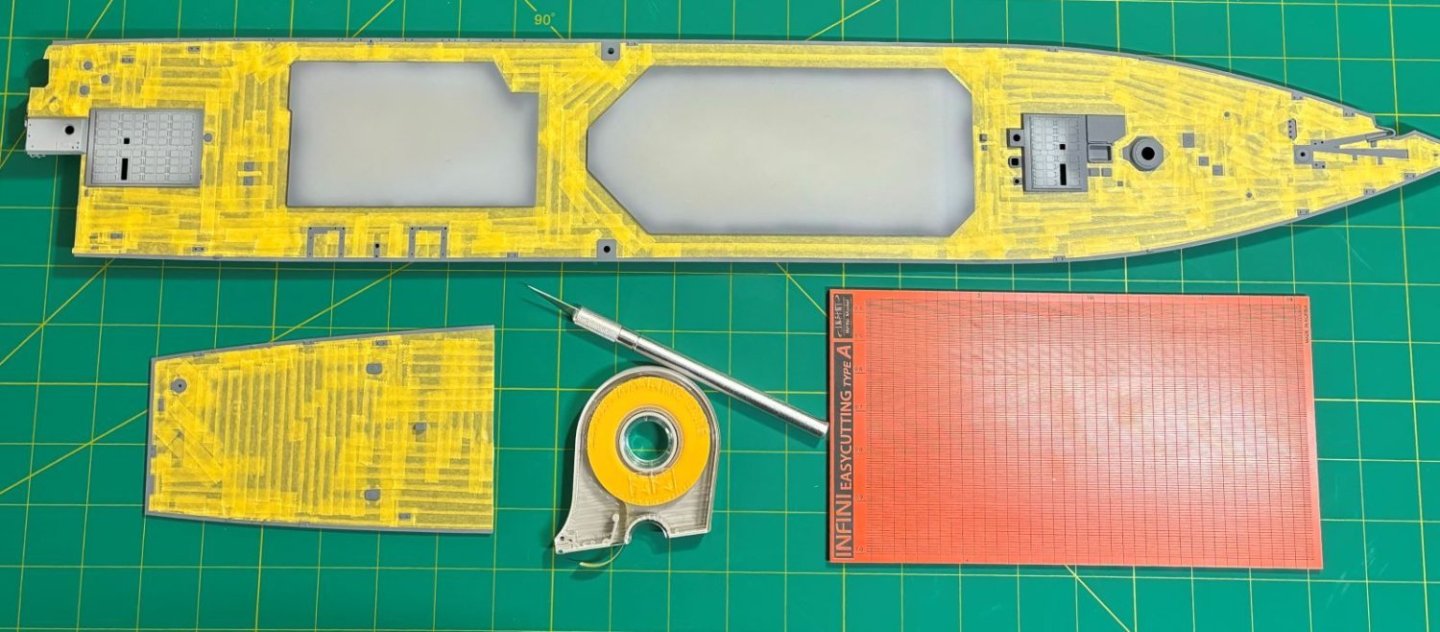
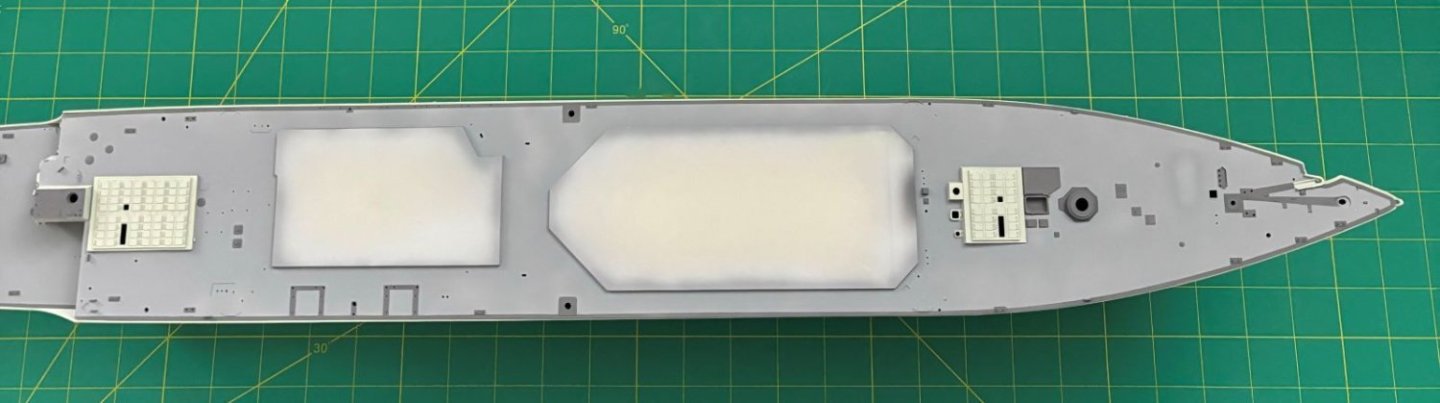
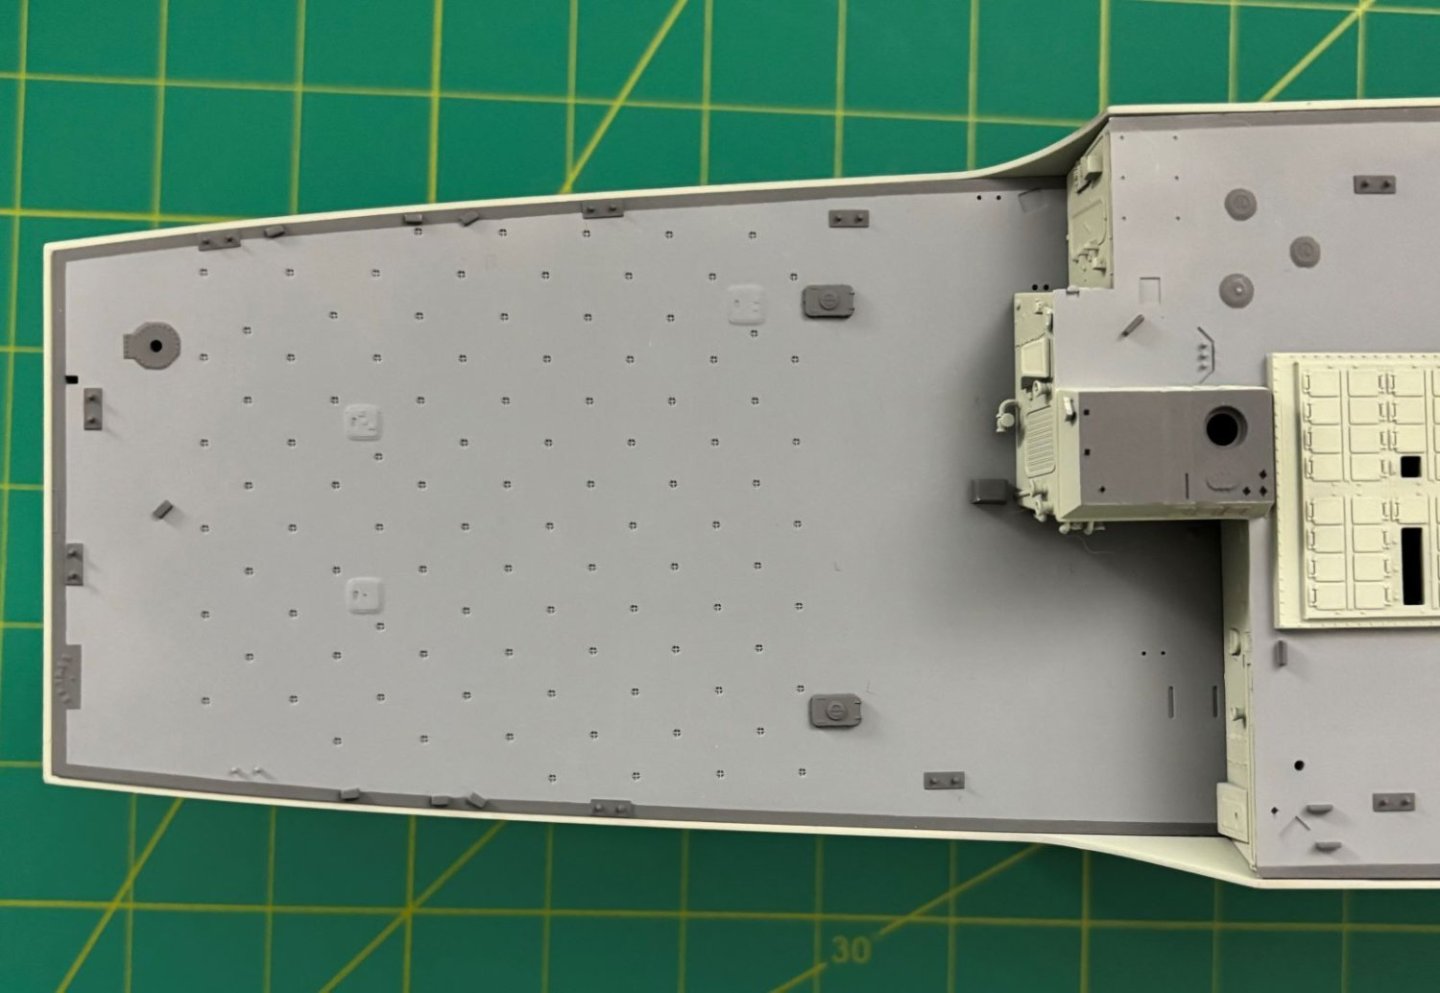
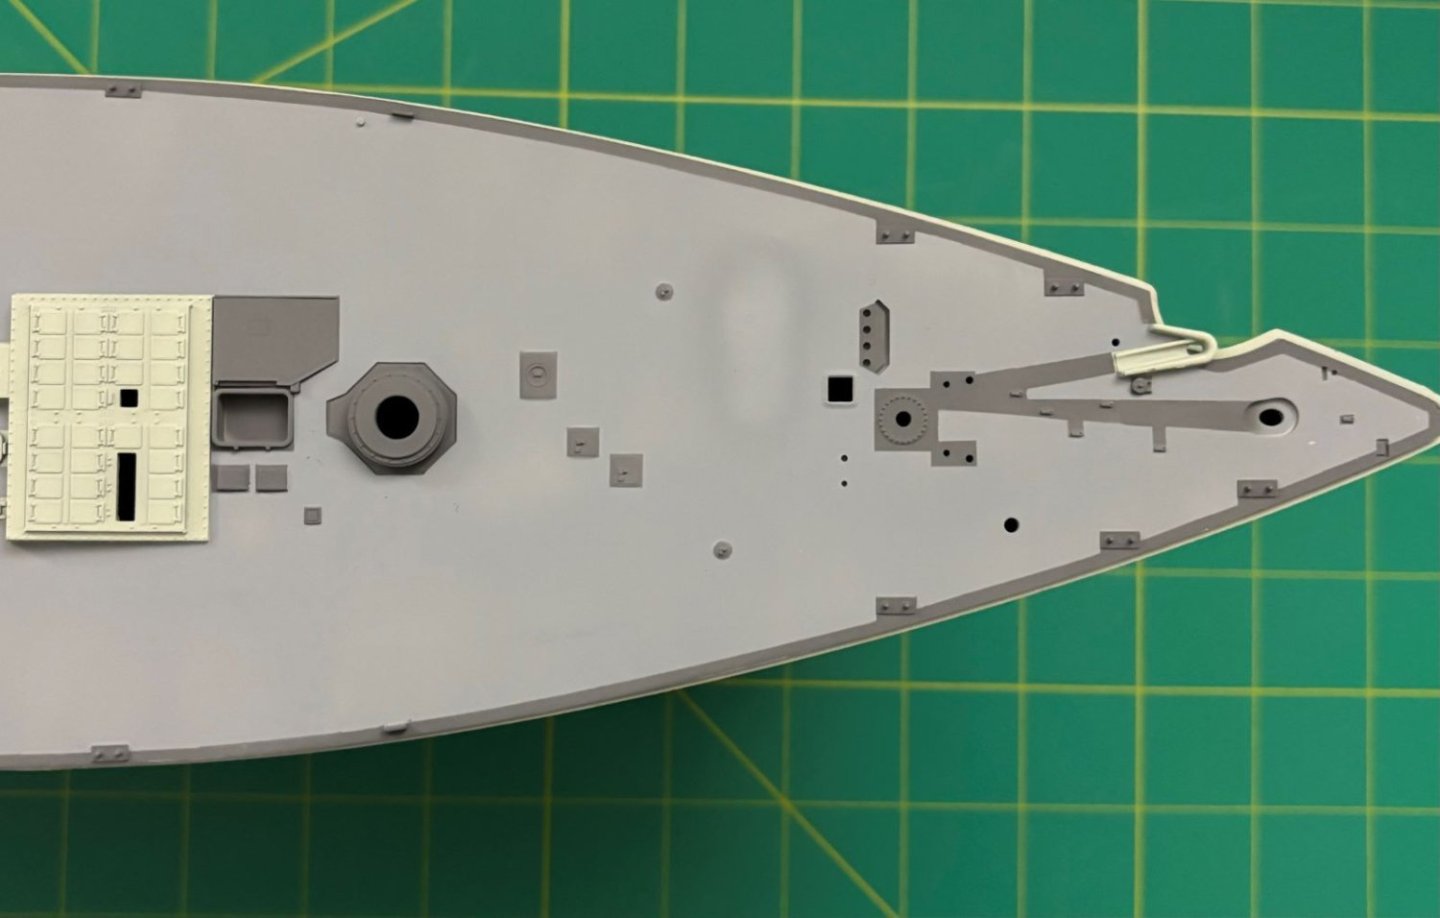
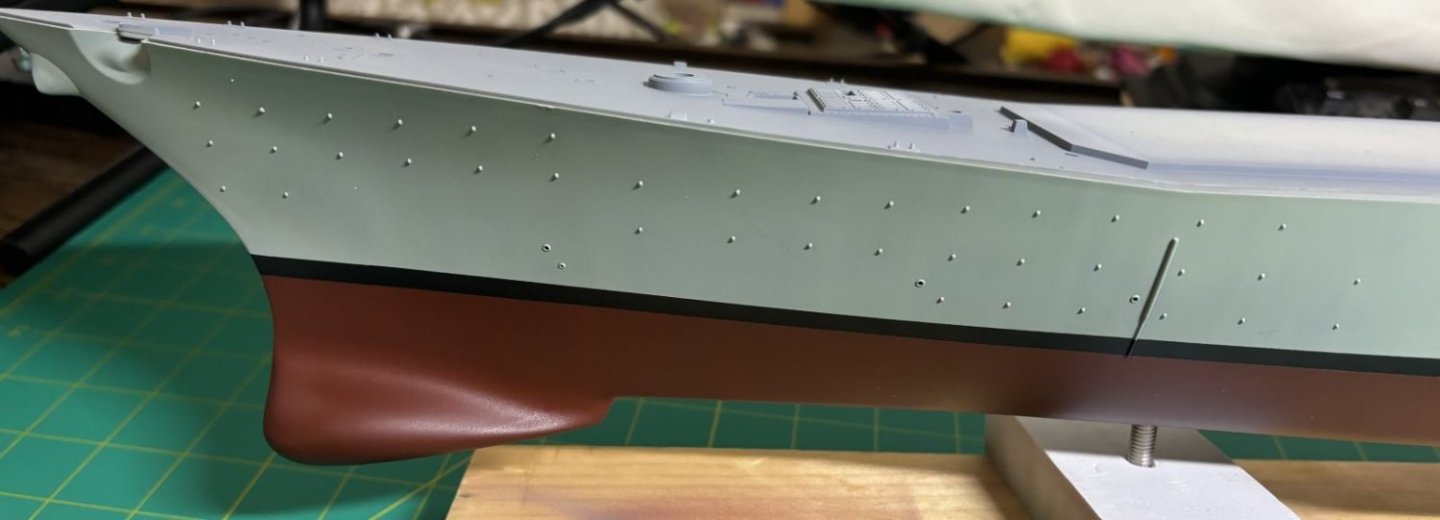
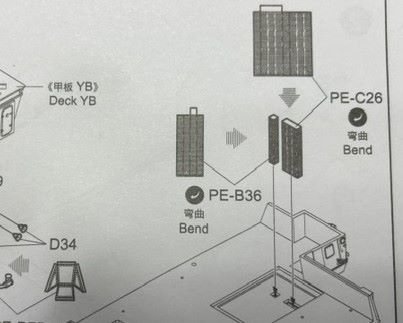
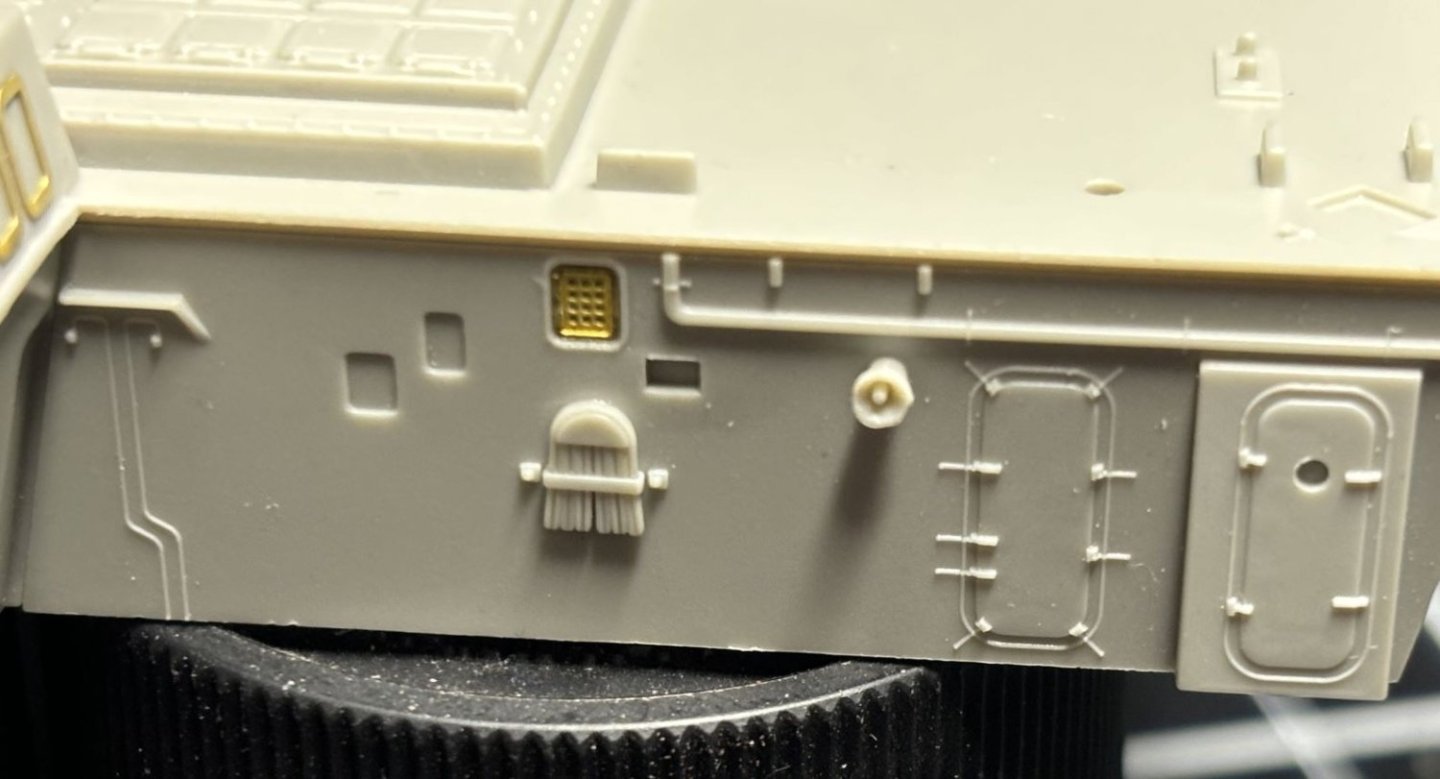
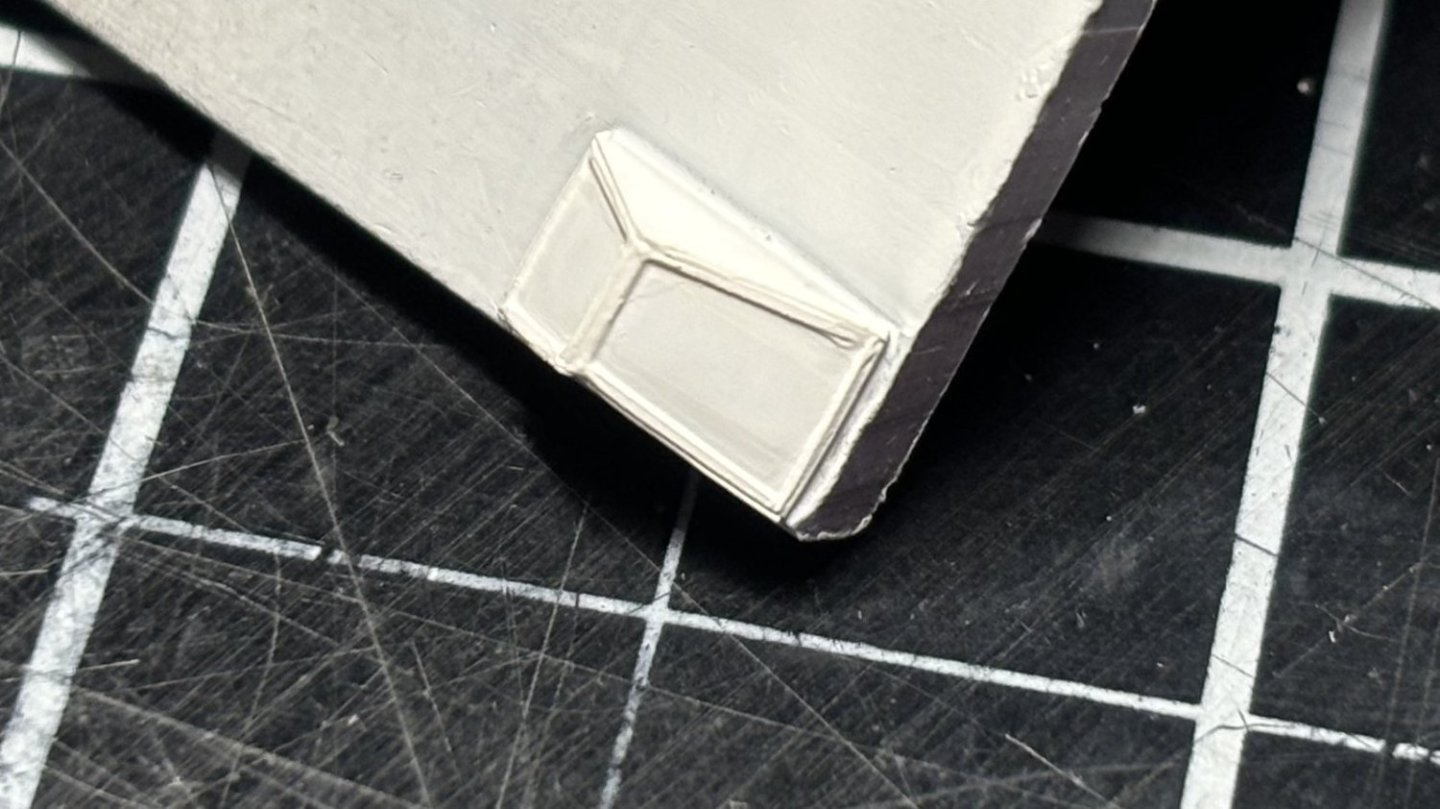
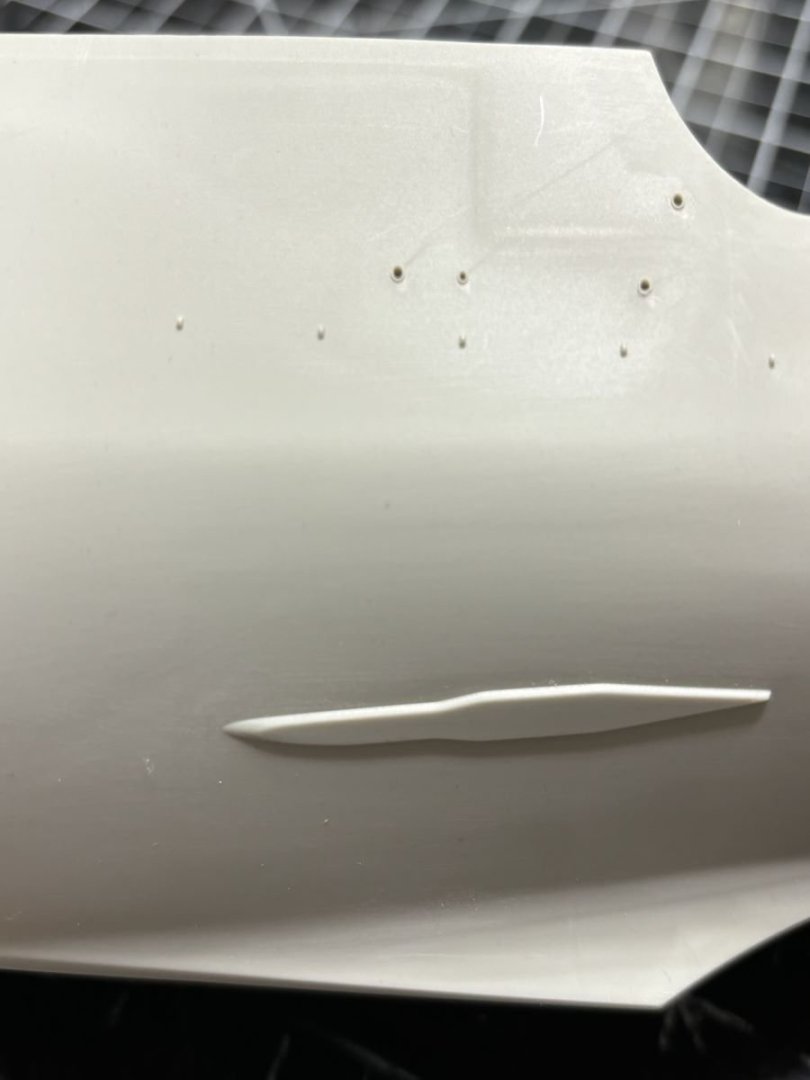
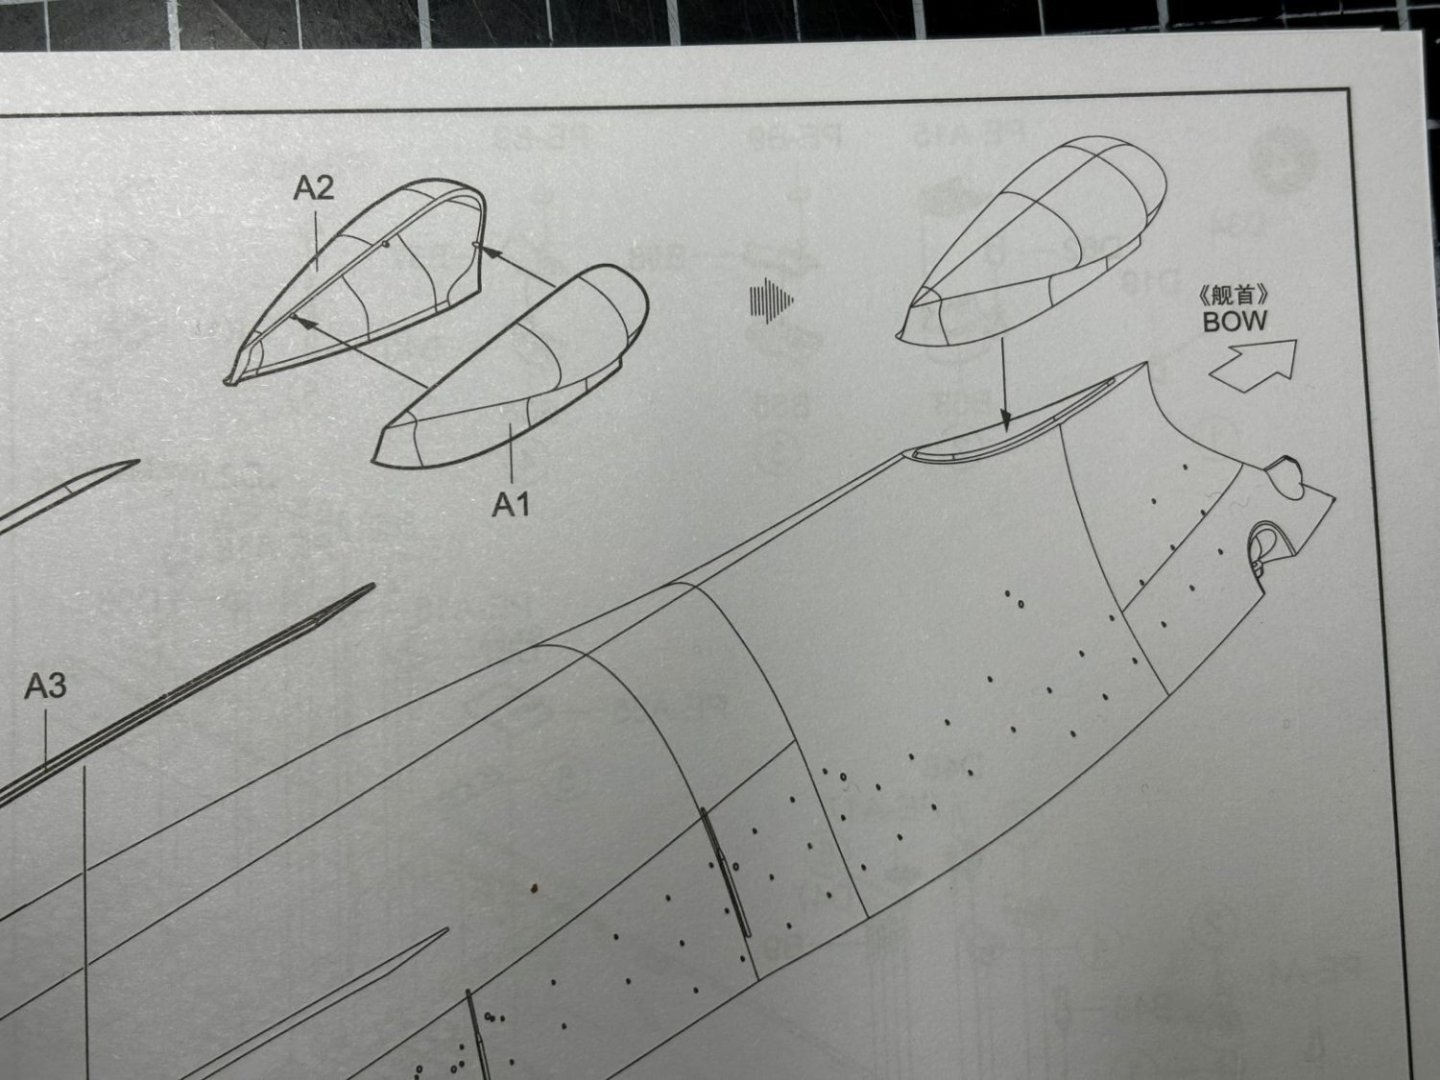
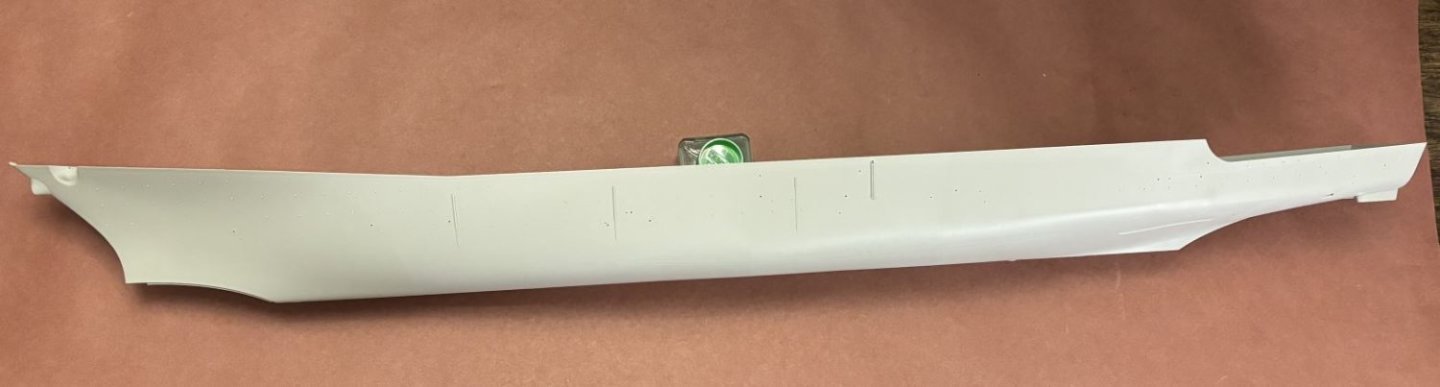
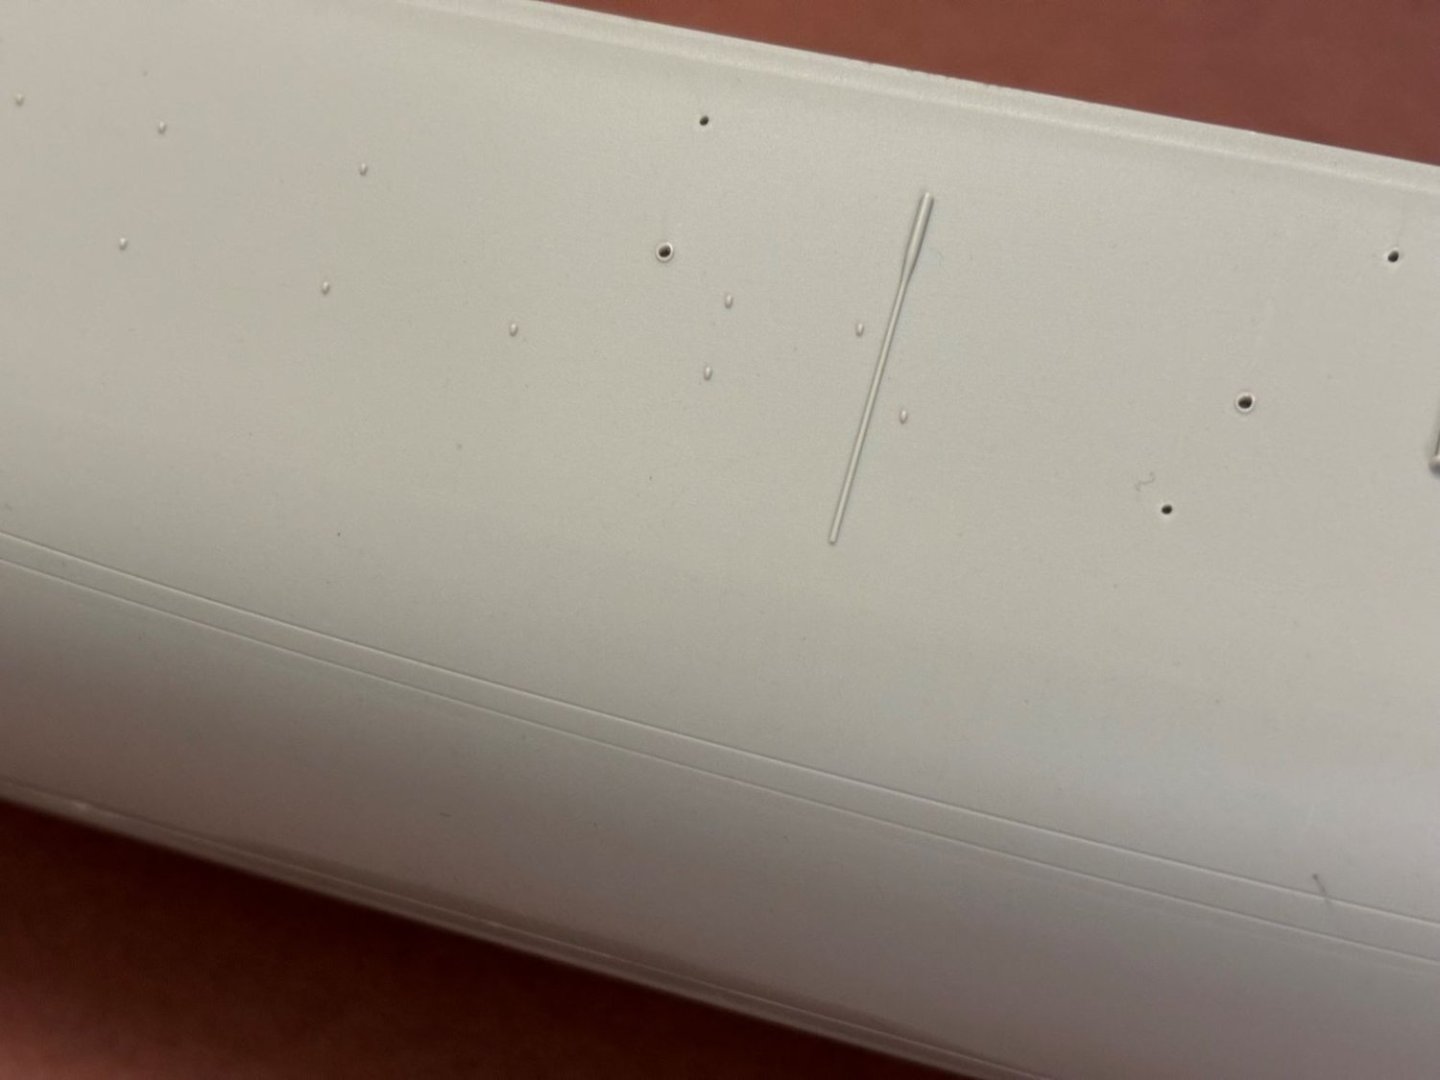
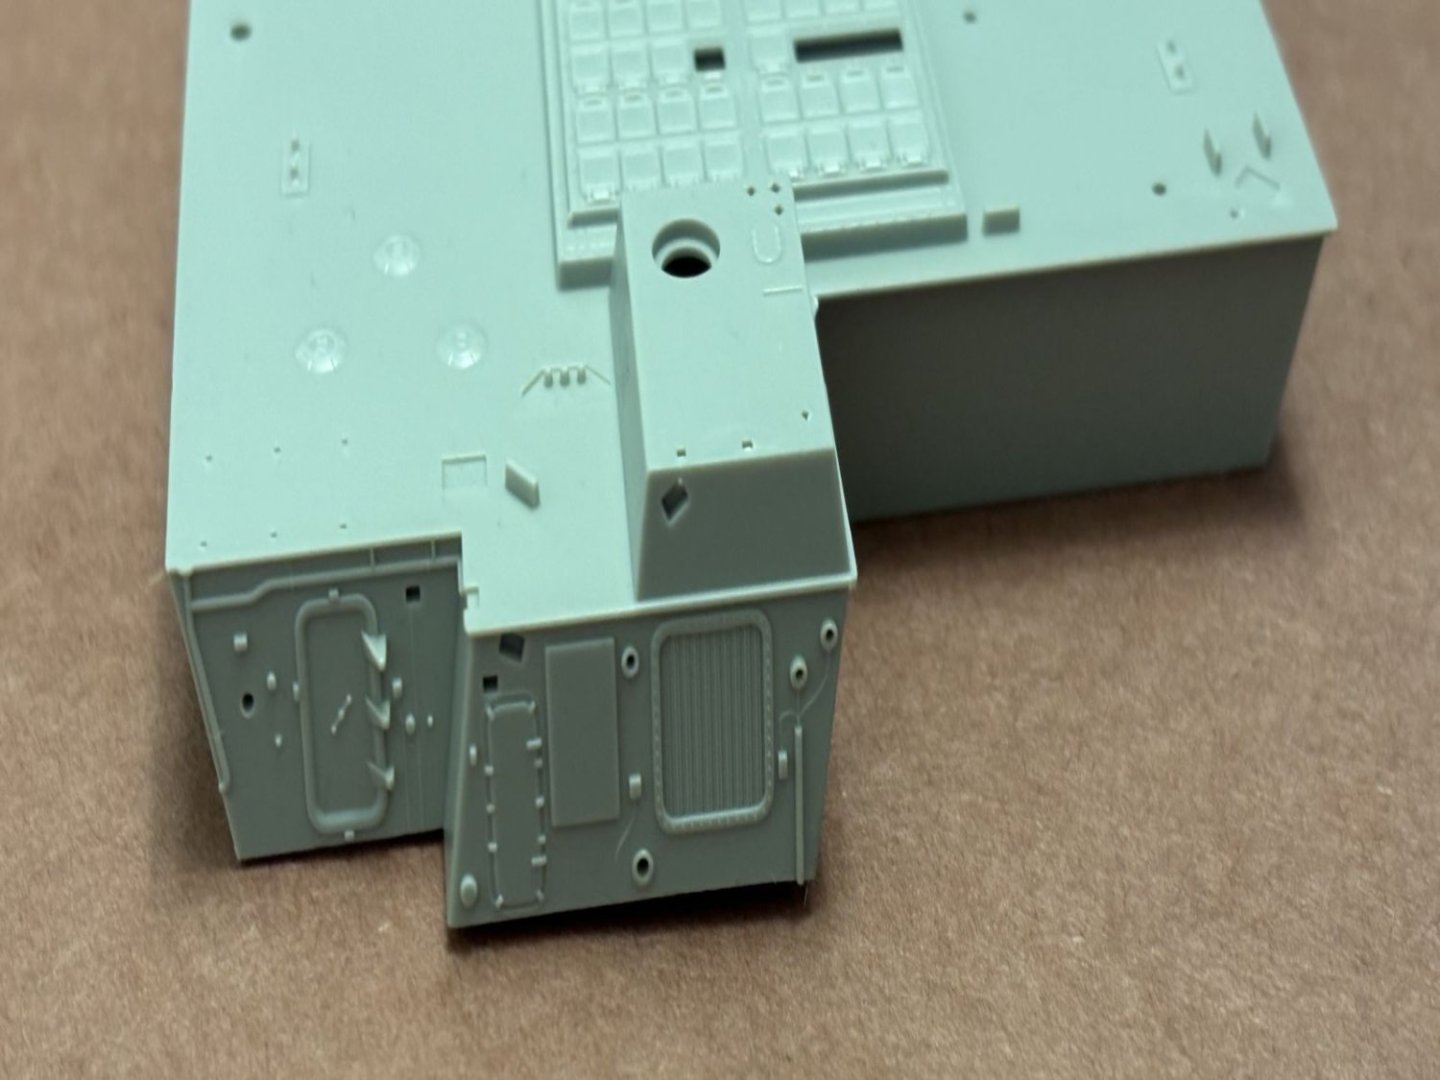
Hi everybody! The hull has its upper half painted in light grey; specifically Tamiya XF-12 IJN Grey. BUT, this is over a light ghost grey Vallejo primer, preshaded using Tamiya XF-24 dark Grey, blended using Tamiya XF-66 Light Grey (not very light, mind you), and then finally top coated with the IJN grey. I feel this gives me the best depth and tonal variation and allowed me to play with the colors to show almost hint at a frame. I still have to mark a proper waterline, paint the black stripe, and then paint the hull red. The grey is the longest I've played with grey tones before and for a change I found it to be very enjoyable. Typically the painting is pure dread for me since I can never match what the masters before me have done. I also constructed Step 1 finally. Some particular "Gotcha"s I came across along the way are all of the pieces are potential carpet monster meals. They are tiny! Also, some of the photo-etch in this kit really sucks. I mean it is terrible and there is no reason for it to be to begin with. The ATC windows, in white primer in one of the photos, is my solution to the photo-etch kit part. The macro is hell on such a tiny part, but from six inches away it does the trick. The photo-etch is made to show windows just like the real deal. The problem here is there is not a single piece of clear plastic to back it, but better yet, every other window on this ship represented in the kit, is molded as solid grey plastic with the intent of being painted. Why the ATC windows get the honorable, yet terribly executed photo-etch, we'll never know. Another dumb issue is the 4 pieces of photo-etch made to represent the vertical launch system tubes. 1. They'll almost never be noticed at all 2. The corrugated outsides will never be seen after gluing the deck in place 3. The inside, that would be visible (with opti-visor), is only plain, flat, shiny, and not etched with any detail in any way. I've included a pic of the instructions showing the offending photo-etch pieces. I opted to replace the ATC windows with styrene and completely disregarded the stupid vertical launch system parts. Hope you like the pics! Below is my solution for the ATC windows. Again, macro is hell on tiny parts. HAHAHAHA And below is a reminder to not forget to paint the inside bulwark here. Thanks so much for looking!!!


- 97 replies
-
- 9
-
-
- Curtis Wilbur
- I Love Kit
- (and 2 more)
-
When you have your channel started, please let us know what the channel name is so I can follow.
-
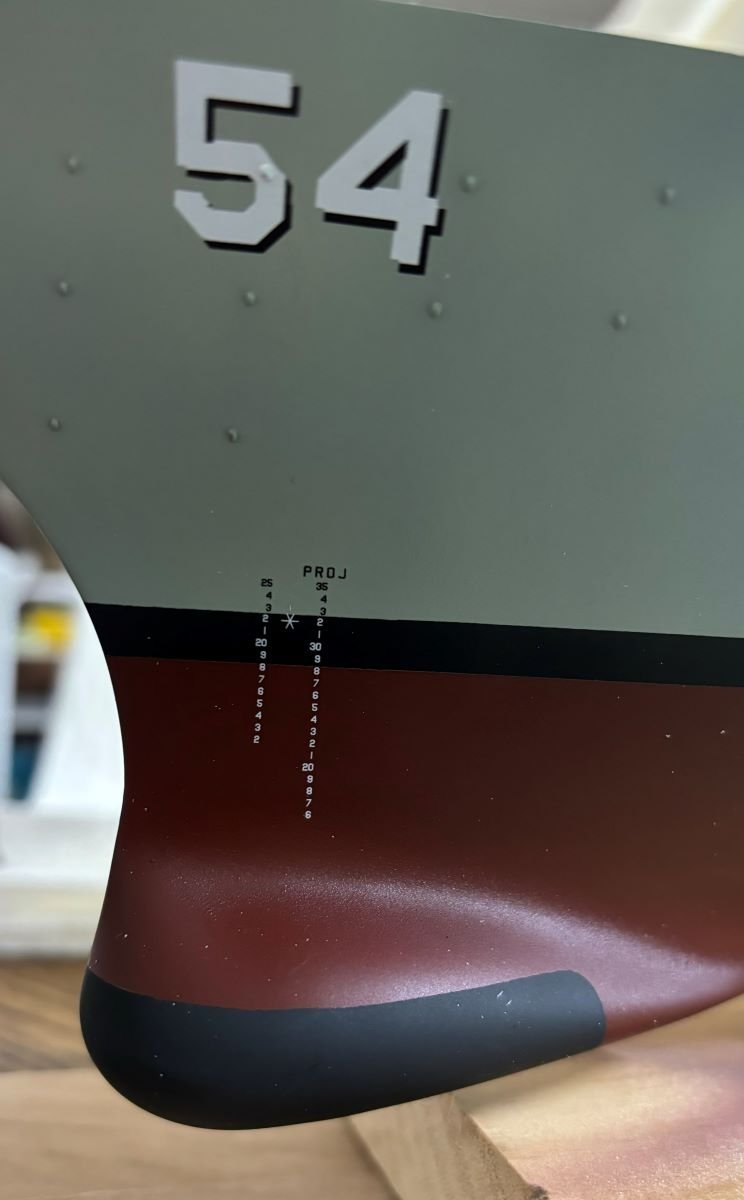
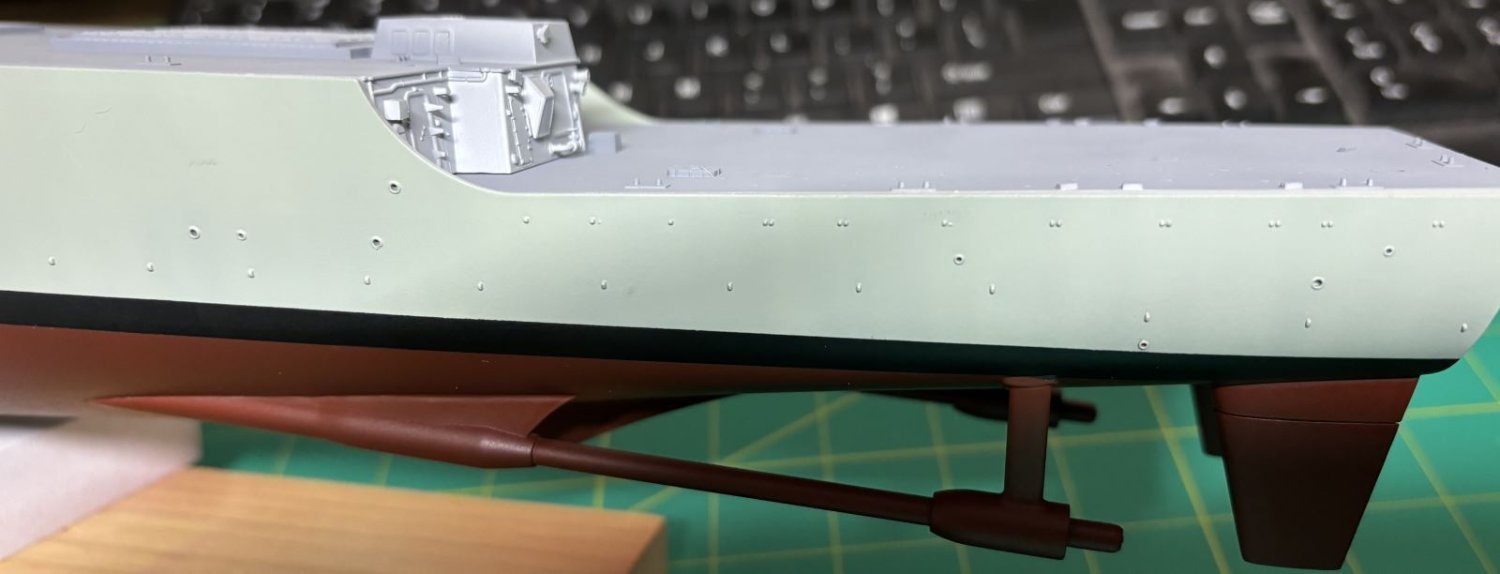
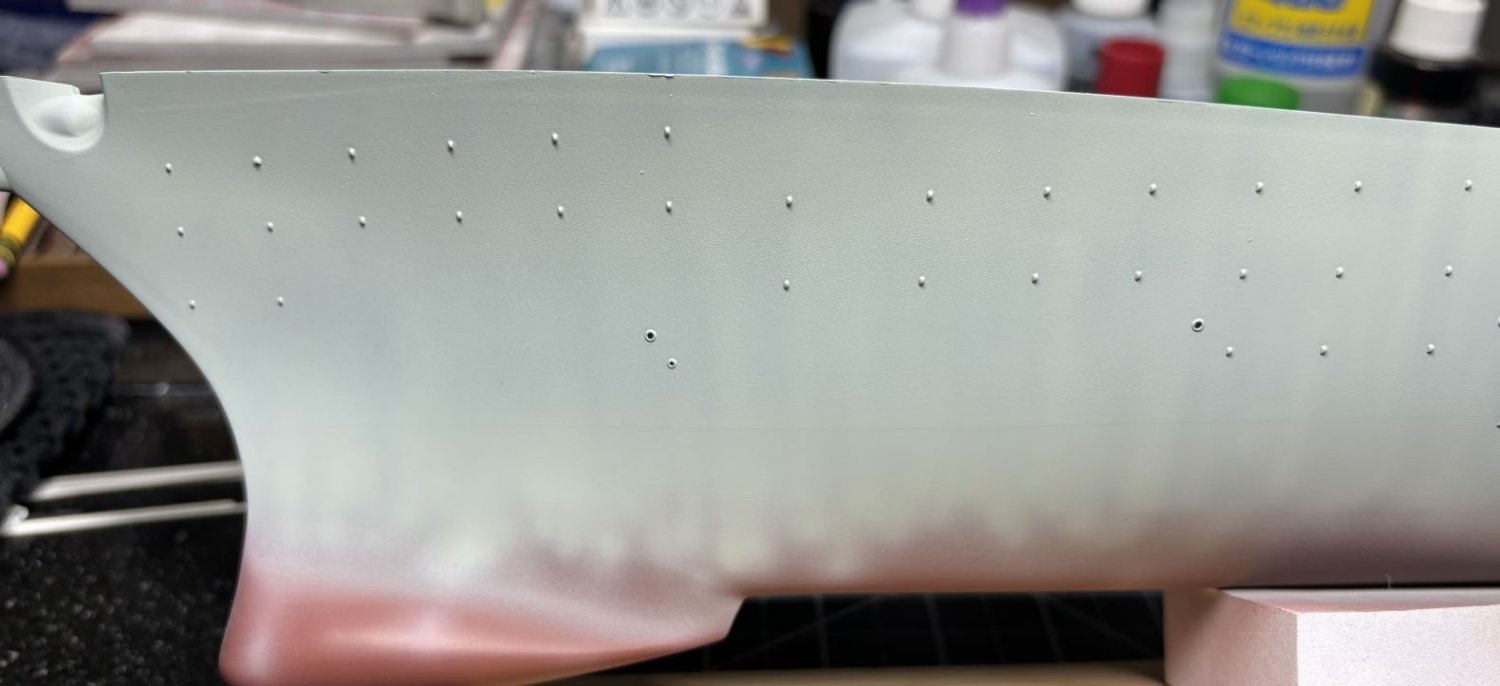
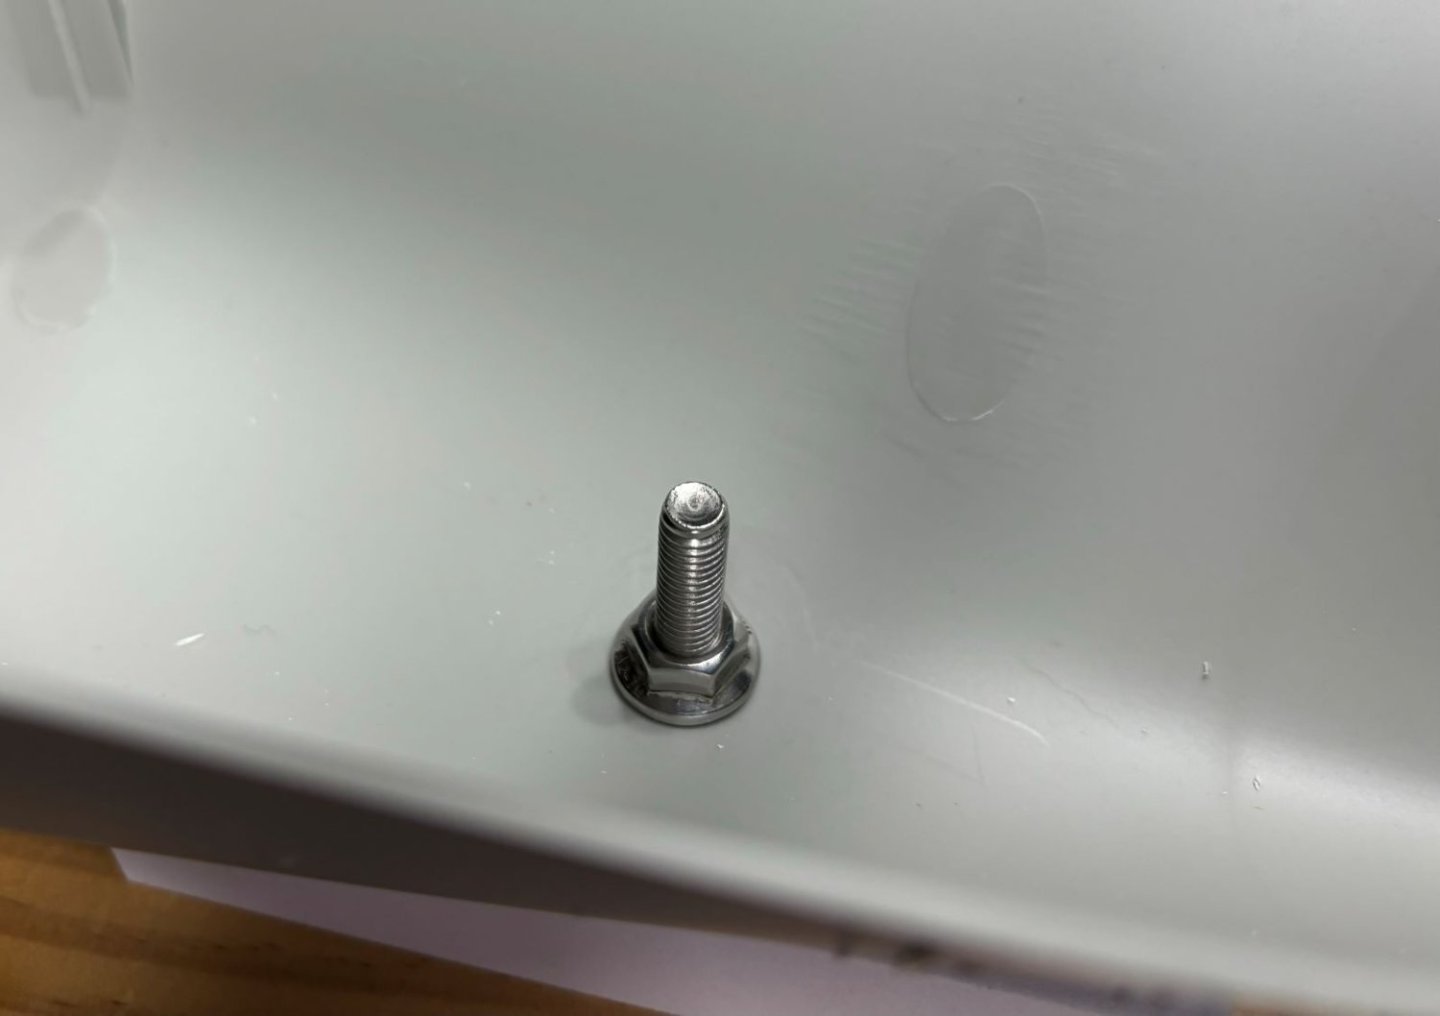
I got some primer on this hull. I used Vallejo German Red Brown surface primer. I sprayed this with a .66 tip at roughly 22 PSI. I bring this up because I have read so many blistering reviews of this primer. It was my first time applying it so based on the reviews, I was apprehensive and took every precaution. It turns out it may be my new favorite airbrushed primer. I didn't thin it at all and cleaned my airbrush afterward with Vallejo airbrush thinner. With the primer in place I was able to see that the majority of my prep work was good but there were a couple of nitpicky spots that needed attention. Once those were covered, I cleaned the remainder of the parts that attach to the hull bottom (except the propellers). When you're about to attach the parts, pay close attention to the positive mounting for the propeller shafts. It's too wide and needs thinned quite a bit. I did so using an curved hobby blade and a dozen test fittings later, the parts snuggled on. I mounted these first, then the bilge keels, then the propeller shaft supports, and finally the rudders. Everything got some reinforcement gluing and then some sanding. I waiting on one trouble spot on the propeller shafts to finish drying so I can make the front, bullet shape look proper. I've attached some pics. Next up will be more priming and then painting. I'm not using the colors called out by I Love Kit so when I get around to painting, I'll be sure to list what I used in case anybody is interested. Thank you for all of the likes and your comments. Thanks for looking in! Patrick


- 97 replies
-
- 11
-
-
- Curtis Wilbur
- I Love Kit
- (and 2 more)
-
Outstanding work! Your Bismark is amazing and I'm very jealous that I don't have one for my collection.
-
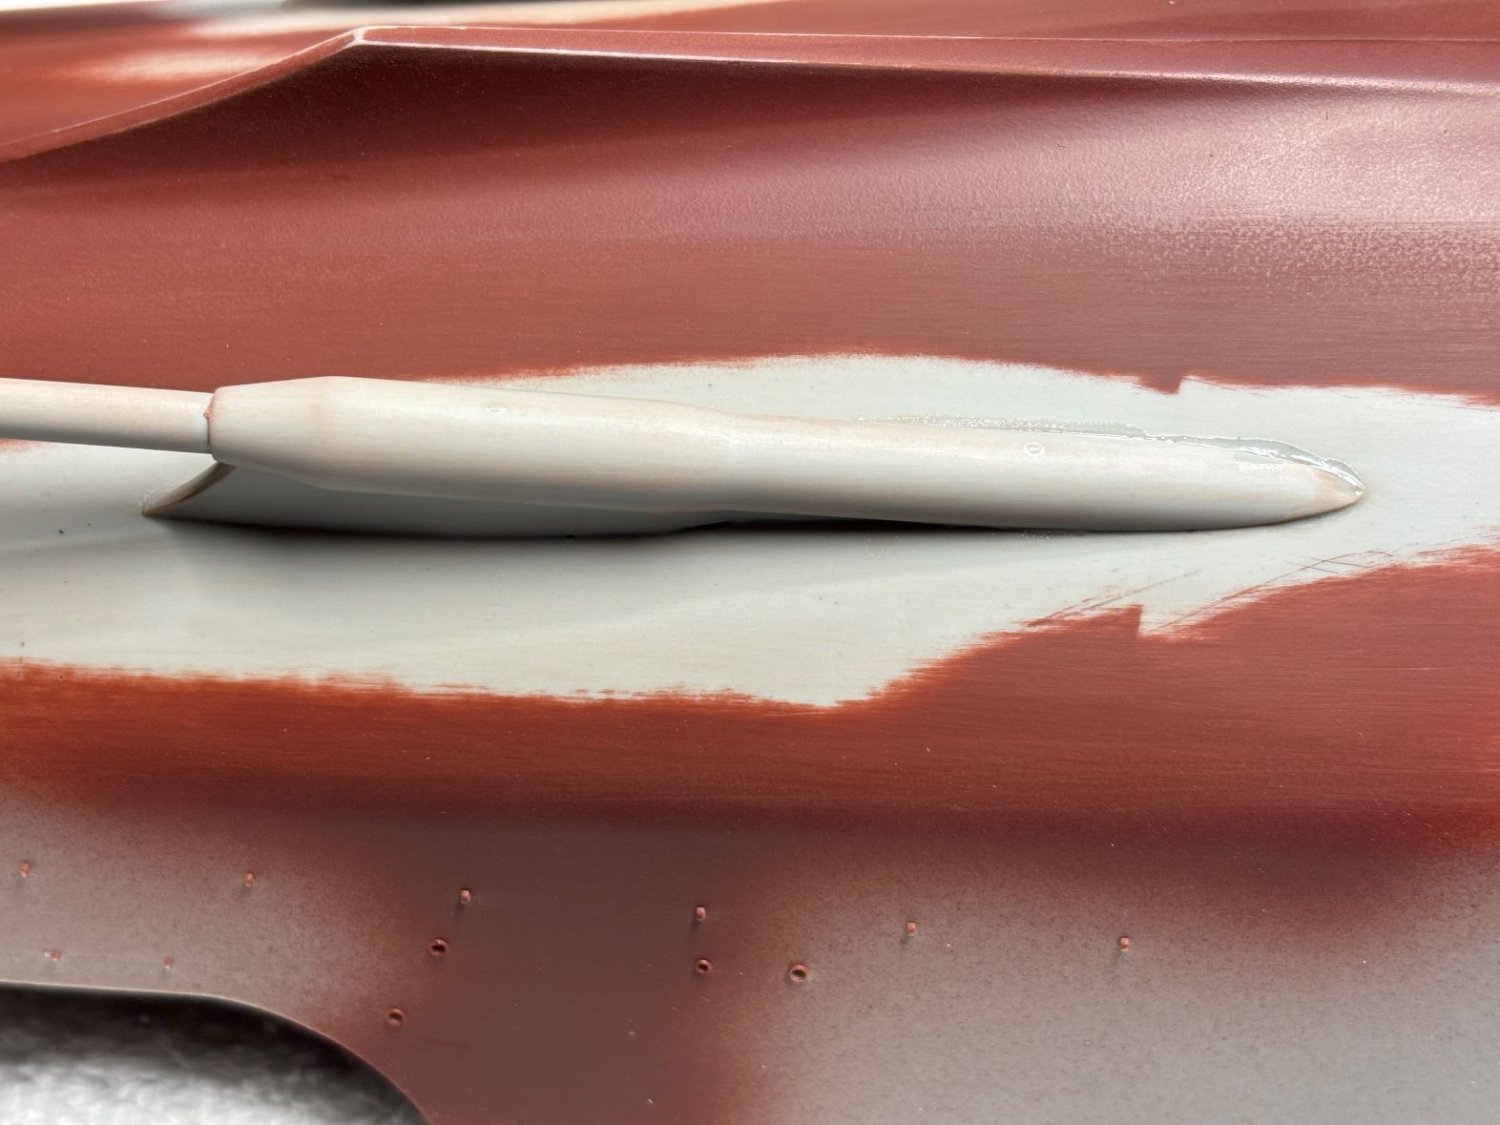
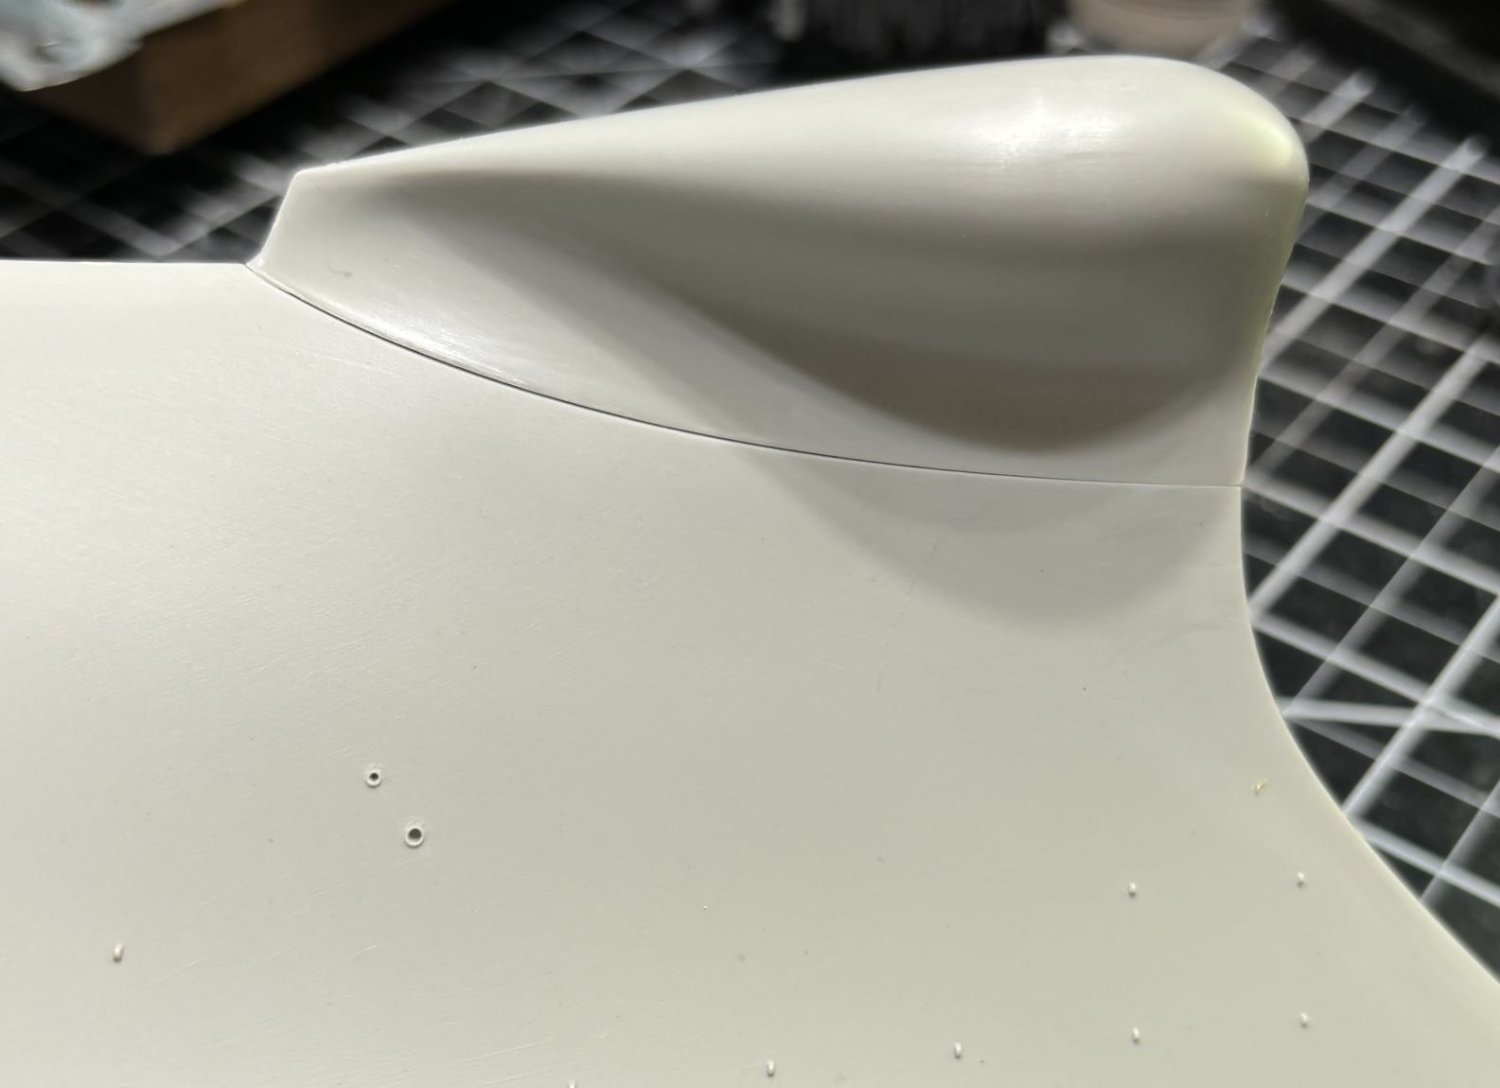
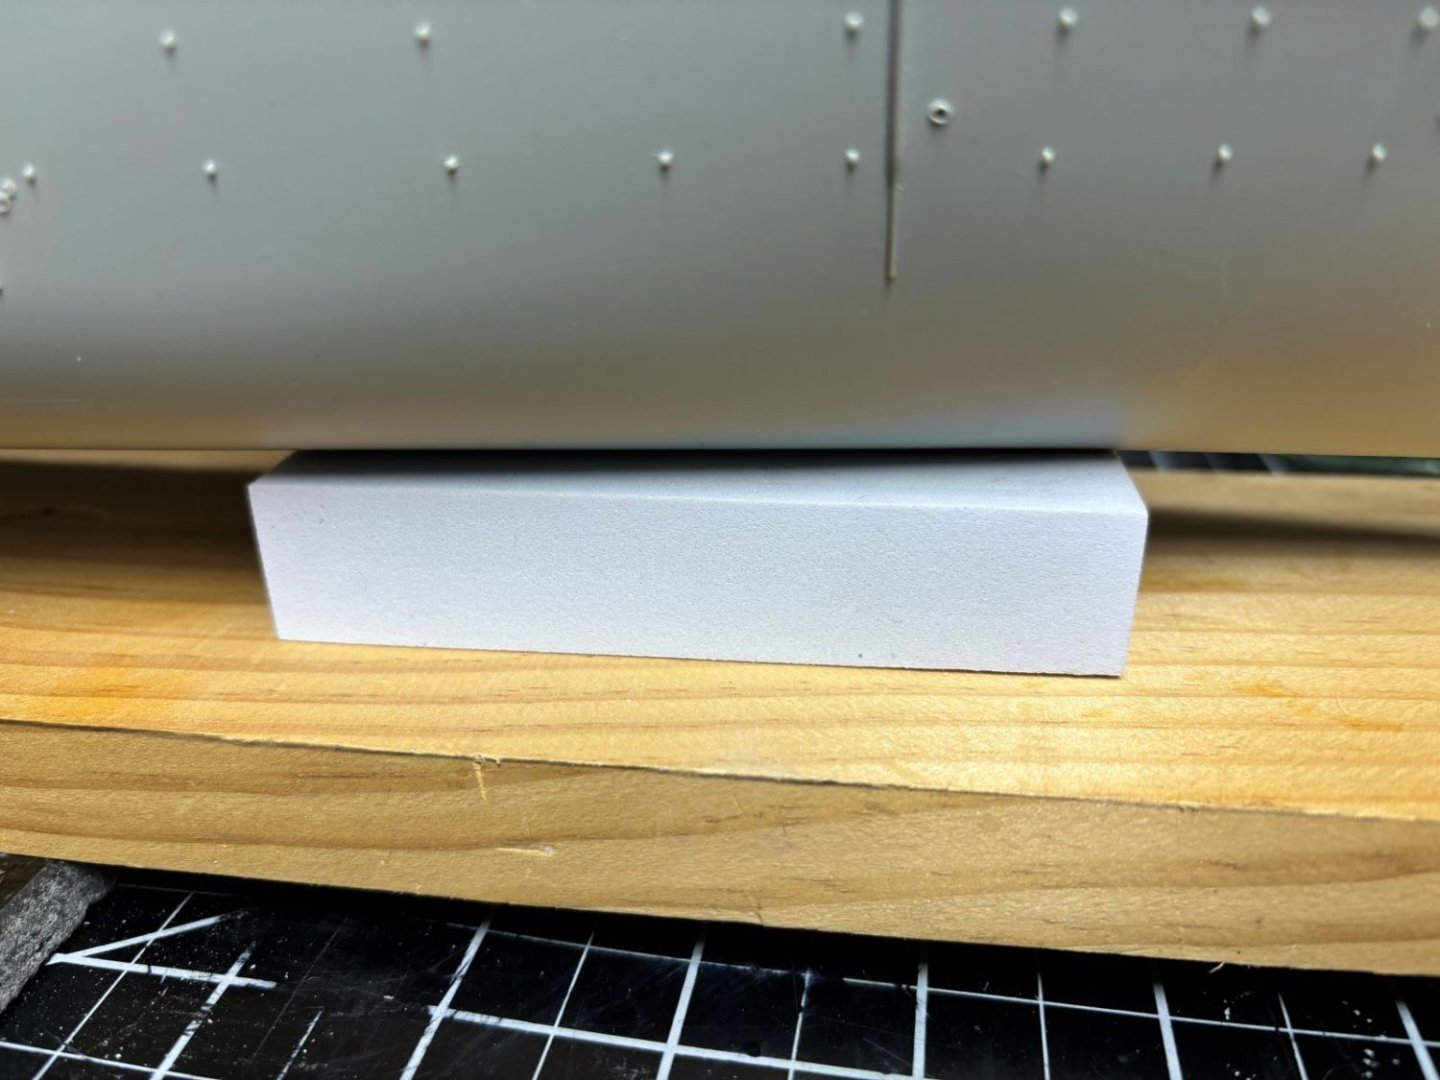
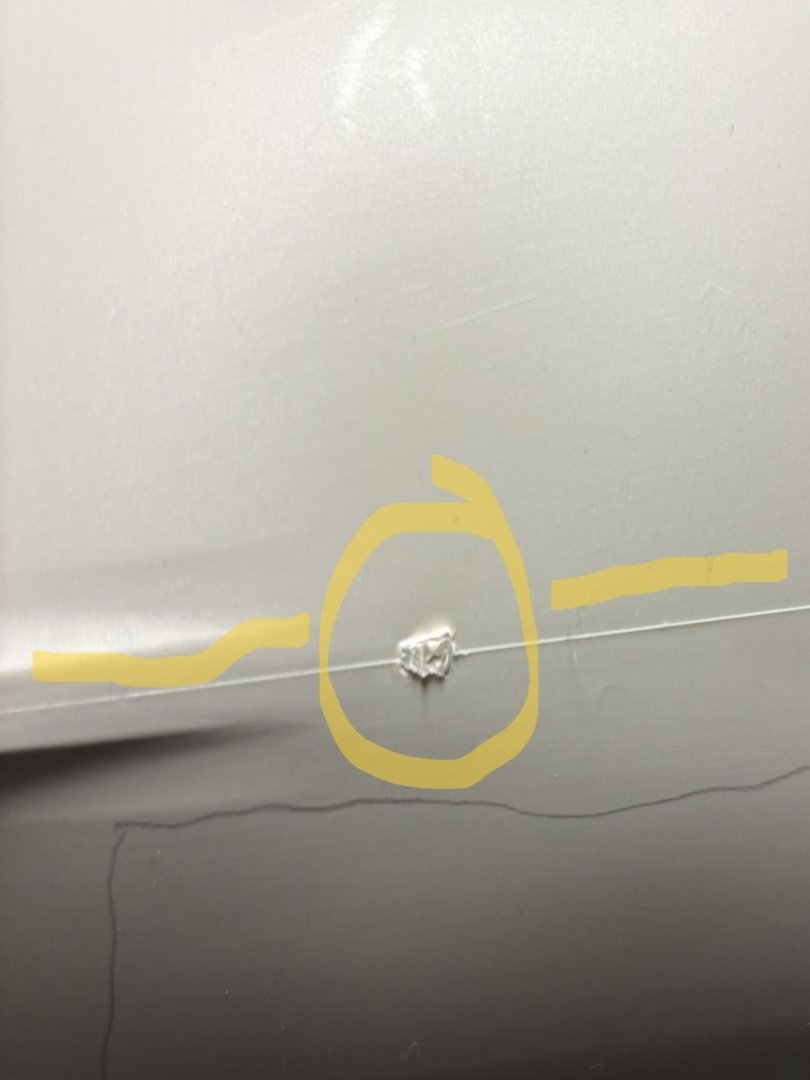
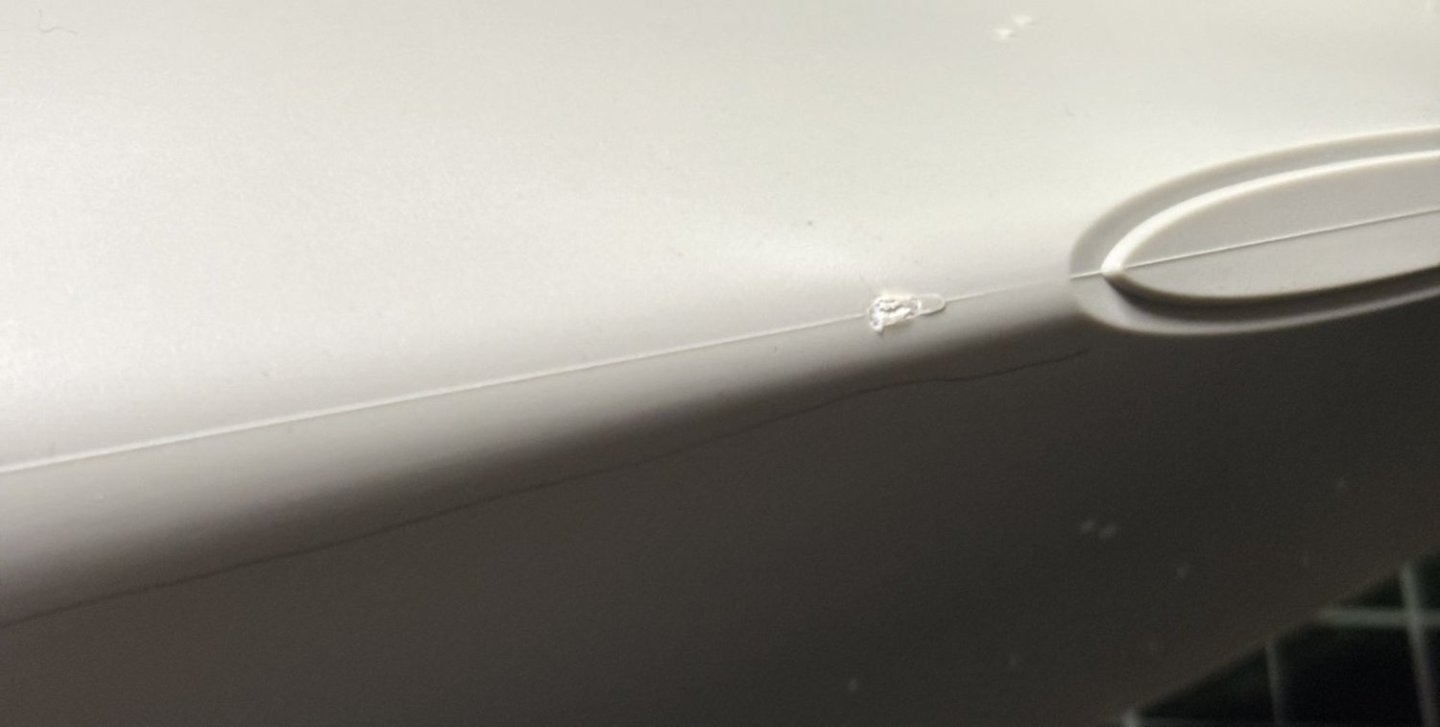
Baby steps... How do you eat an elephant? One bite at a time... Whichever euphemism works best for us, lol. Not much progress to actually show off, but I do have a few pics anyway. I'll describe what I did first though. There was a slight gap where the sonar bulge met the rest of the hull. From online pics, there doesn't seem to be any line there on the real deal. I couldn't even make out a weld bead. What to do to fill the gap? I decided to use stretched sprue and Tamiya Extra Thin. Multiple applications of my favorite solvent based adhesive were applied. I will let this sit for 24 hours before I sand it back so I don't start sanding into soft, goopy plastic. I also got my holes drilled through the bottom of the hull and a chunk of cheap 1x4 pine to have a solid working base for now and have this ready later when I have something decent to mount it on. Thanks so much for checking in! Patrick

- 97 replies
-
- 7
-
-
- Curtis Wilbur
- I Love Kit
- (and 2 more)
-
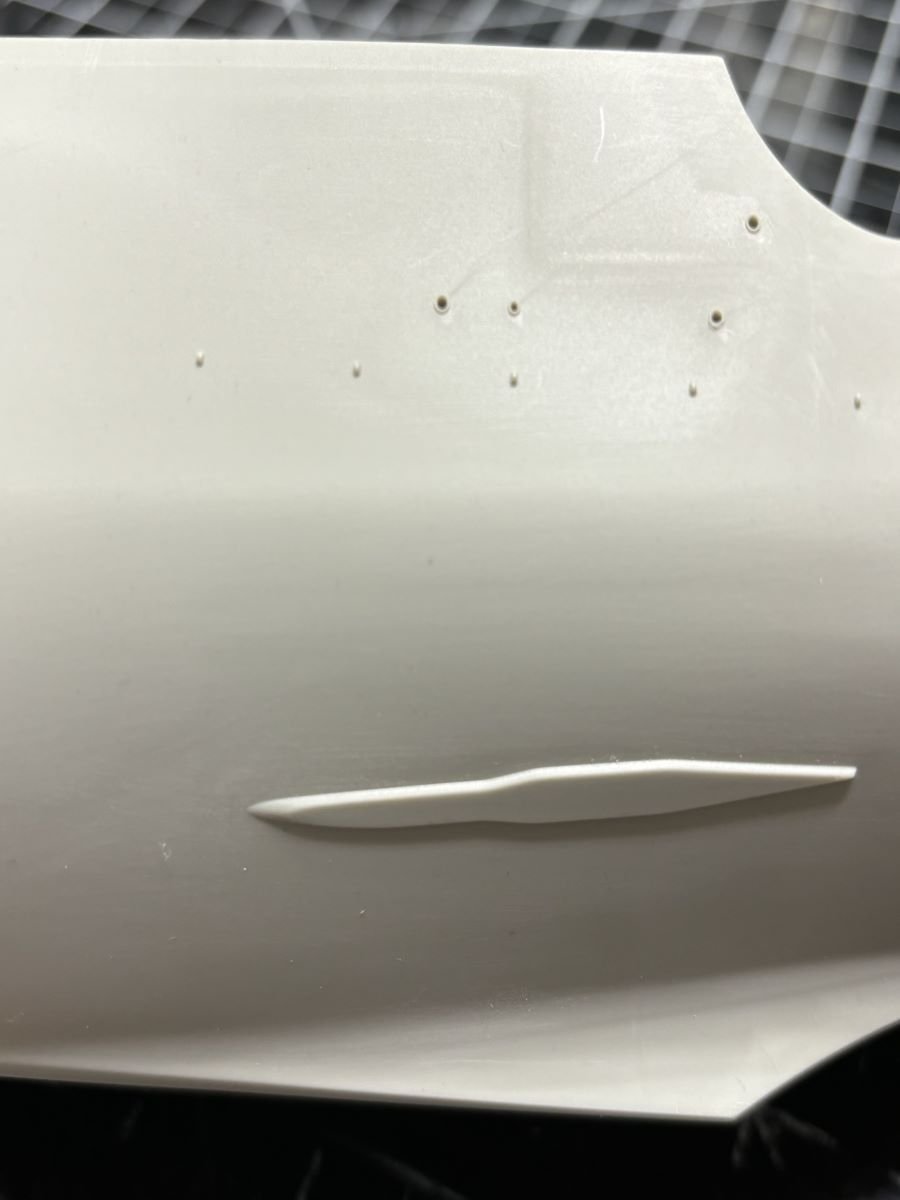
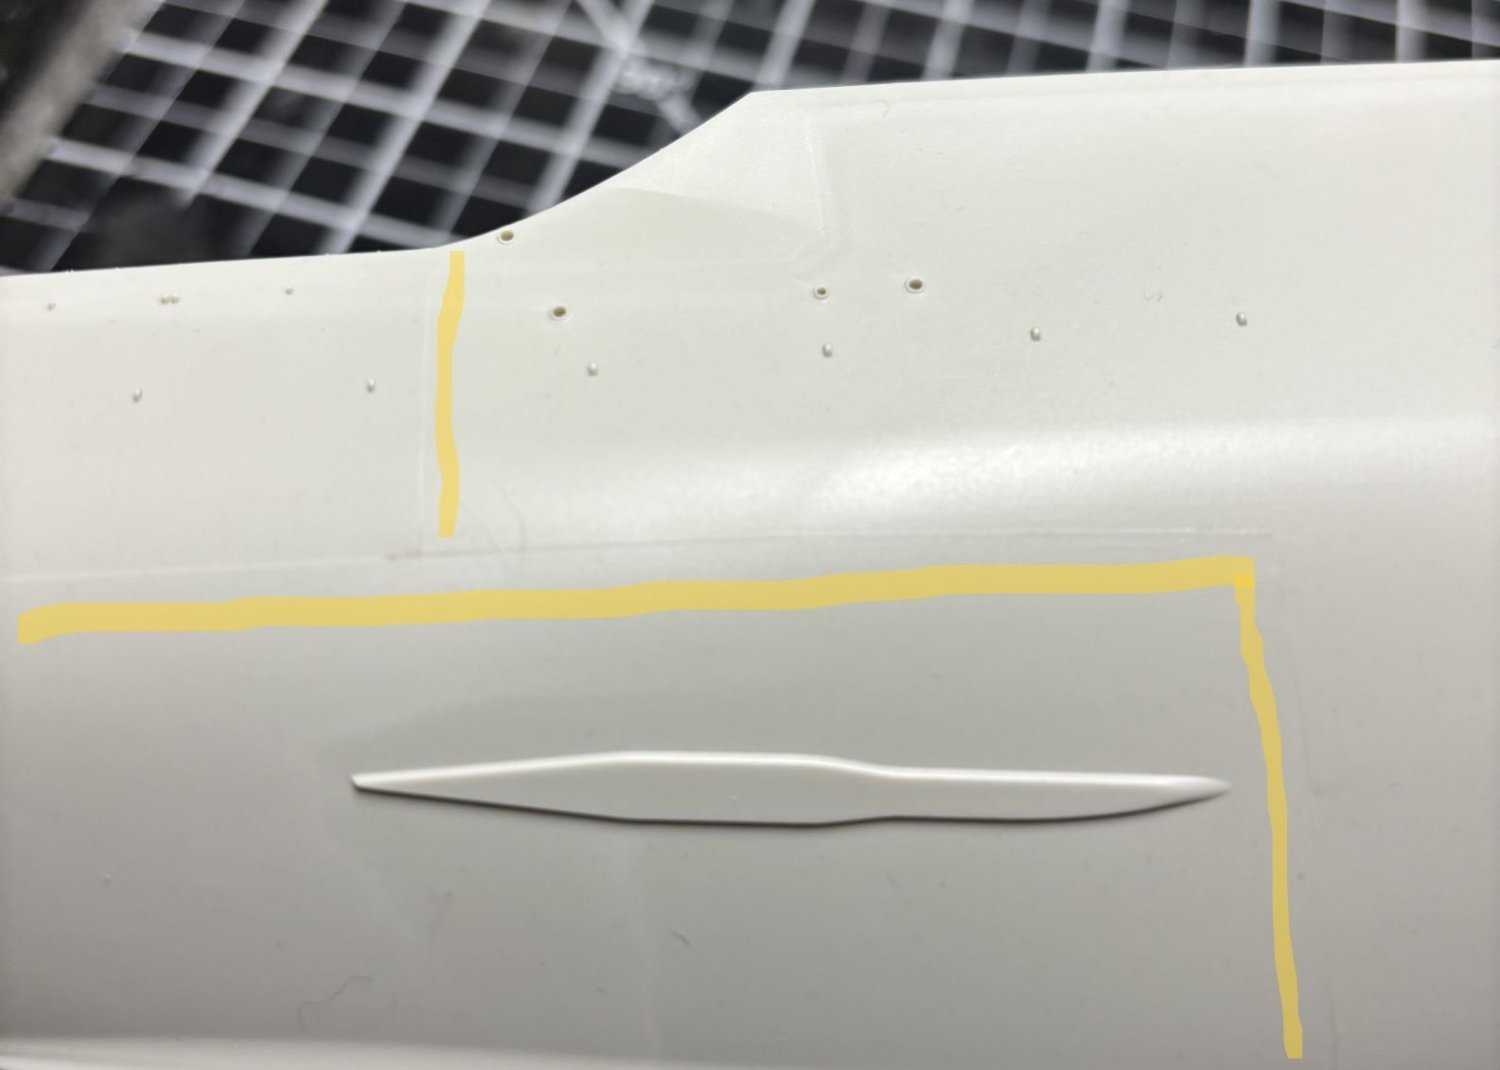
Hi Ken! Glad to have you here. Small bit of progress to show, but it took a considerable amount of sanding. The hull is now free of mold seam lines. There was the most slightest of steps as well but it sanded out easily enough without leaving a trench. I also attached the sonar bulge on the bow. Now I just have to blend that in. After that, I'll measure and drill holes to allow for mounting the hull to brass pedestals and a wood base. PSA: The bow's tip is fragile. I almost broke it off when maneuvering the hull around while sanding. The tip hit the wall behind me and bent. I was able to bend it back thankfully. I'll be protecting it while not working on that area from here on out. Thanks for looking in! Patrick

- 97 replies
-
- 7
-
-
- Curtis Wilbur
- I Love Kit
- (and 2 more)
-
Ok... Earlier I mentioned a YouTube channel. It's new to me and I'm learning as I go. If you wish to view a video version of my USS Curtis Wilbur exploits, you can see them at the following link: https://www.youtube.com/channel/UC2OLZJD_BYzN_99bynZ8wyQ That's right, it's called Patrick's Scale Studio; don't blame me, blame AI. AI's channel name ideas were waaaaay better than mine. I'm just trying something new and I get that some of it may be remedial for most, but I also used my wife and two daughters as sounding boards and their advice was "Pretend like I don't know anything about this hobby, and truly I don't; just convince your audience in case they're like me." At least they're supportive 😆 That said, I'll gladly receive any and all constructive criticism. I don't necessarily put that to use always, but I can take it. Thanks! Patrick
- 97 replies
-
- 8
-
-
- Curtis Wilbur
- I Love Kit
- (and 2 more)
-
The I Love Kit instructions would have you start on adding details and other highly breakable items to the main deck (Step 1) and then gluing that main deck and the aft deck in place on the hull (Step 2). If we lived in a perfect world, I could follow this. However, while I love the benefits of slide molding, there are mold seams and maybe a slight step in places on the hull that I think should be dealt with first. That and the bulbous part of the bow that accommodates the sonar takes me to Step 3 first. I will deal with the mold seams and a smooth transition for the sonar in the bow. My next progress posting will hopefully include pictures of the completed hull. Thanks for looking in, Patrick

- 97 replies
-
- 8
-
-
- Curtis Wilbur
- I Love Kit
- (and 2 more)
-
Hi OC! Jealous again, HAHAHAHA! I really like the lines of the Arleigh Burke DDGs. They look sleek but imposing at the same time. I hope I can do this kit justice. Thanks for following, Patrick
- 97 replies
-
- 4
-
-
- Curtis Wilbur
- I Love Kit
- (and 2 more)
-
Hi Chad! I'm hoping you can help me avoid any huge mistakes with your experience. I have done some very light reading on the Aegis system and really think it's cool. I really took for granted that it was so revolutionary in radar coverage. Also sounds like this kit would easily convert to the USS Barry. Glad to have you following, Patrick
- 97 replies
-
- 4
-
-
- Curtis Wilbur
- I Love Kit
- (and 2 more)
-
Hi Jeff! I'm jealous that you got the opportunity to check one of these out. The McFaul, if I'm reading Wikipedia correctly, is a Flight II ship in that class; she still didn't get hangers and the length is the same. Converting this kit to the McFaul wouldn't be too hard. Overall, my rating of the kit is very high. The moldings are all very crisp and the detail provided is plenty enough to not lament not having a Pontos set. I would give it a 9/10 and only because the instructions, like all Trumpeter instructions, suck. No color call-outs, some of the placement isn't very well shown, and there is absolutely NOTHING written about the subject. Thanks for checking in, Patrick
- 97 replies
-
- 5
-
-
- Curtis Wilbur
- I Love Kit
- (and 2 more)
-
This should be the last of the kit pics. Next posts will hopefully involve progress on building toward completion. BTW, I have started a new channel on YouTube where my awkward *** will be building this gorgeous kit and will keep pace of updates here. More details on that to come. Thanks for looking in! Patrick

- 97 replies
-
- 7
-
-
- Curtis Wilbur
- I Love Kit
- (and 2 more)
-
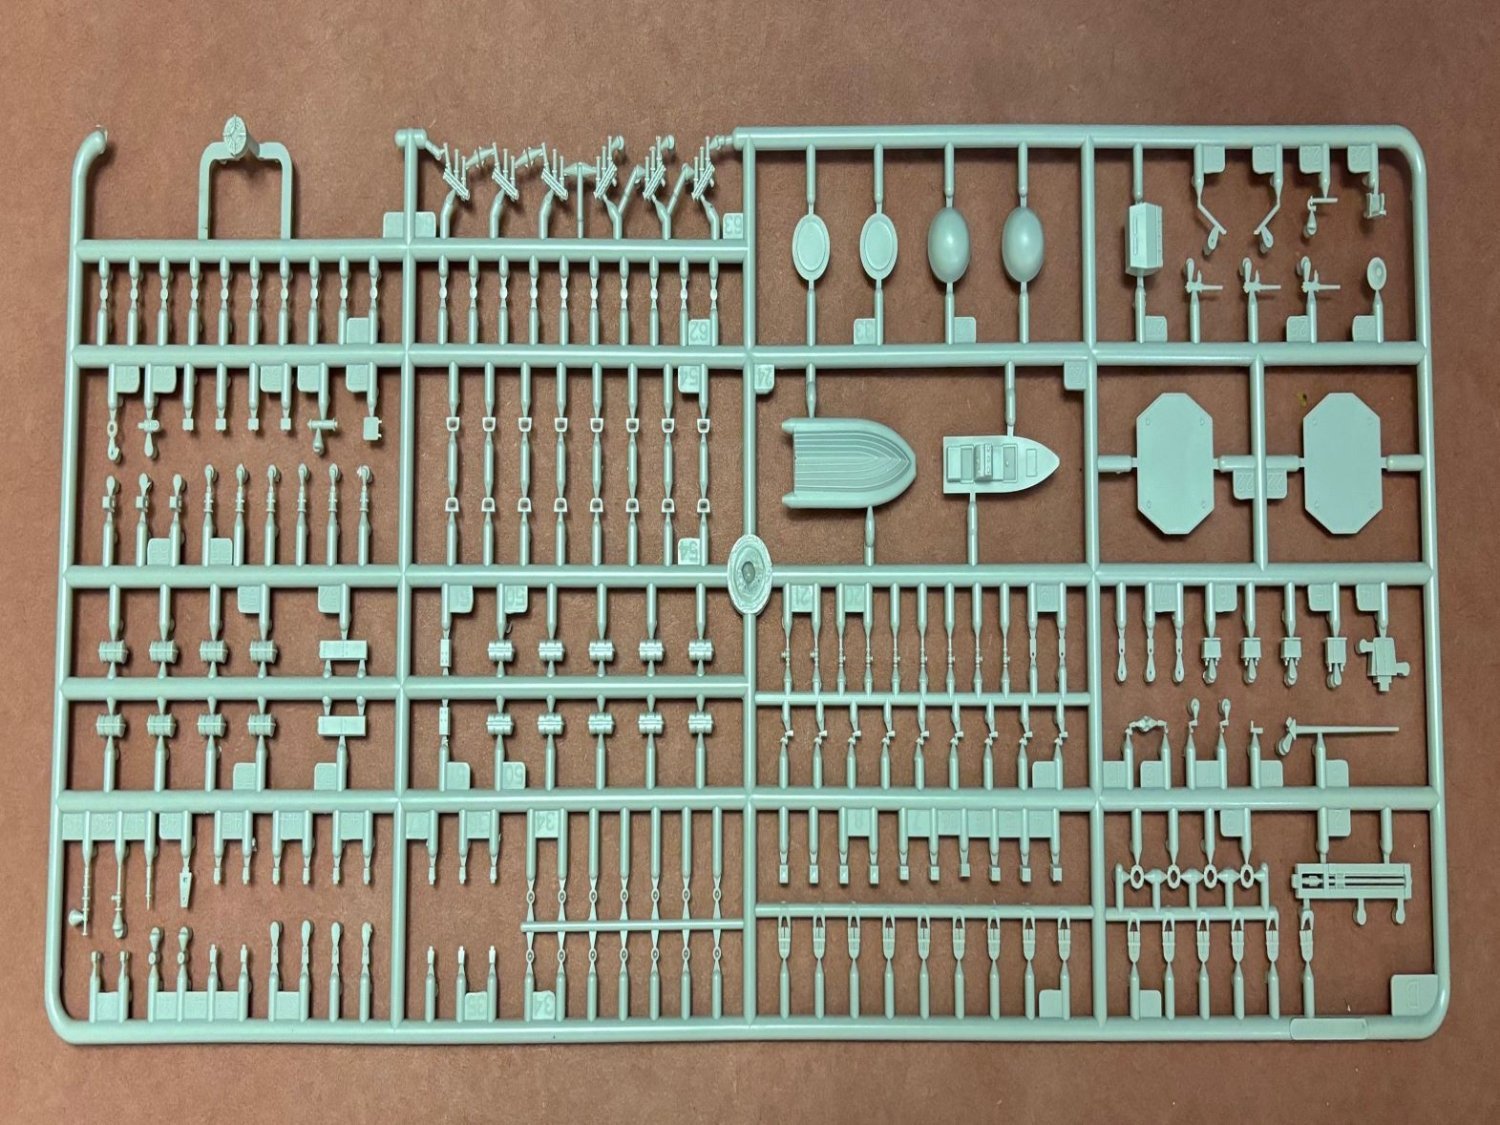
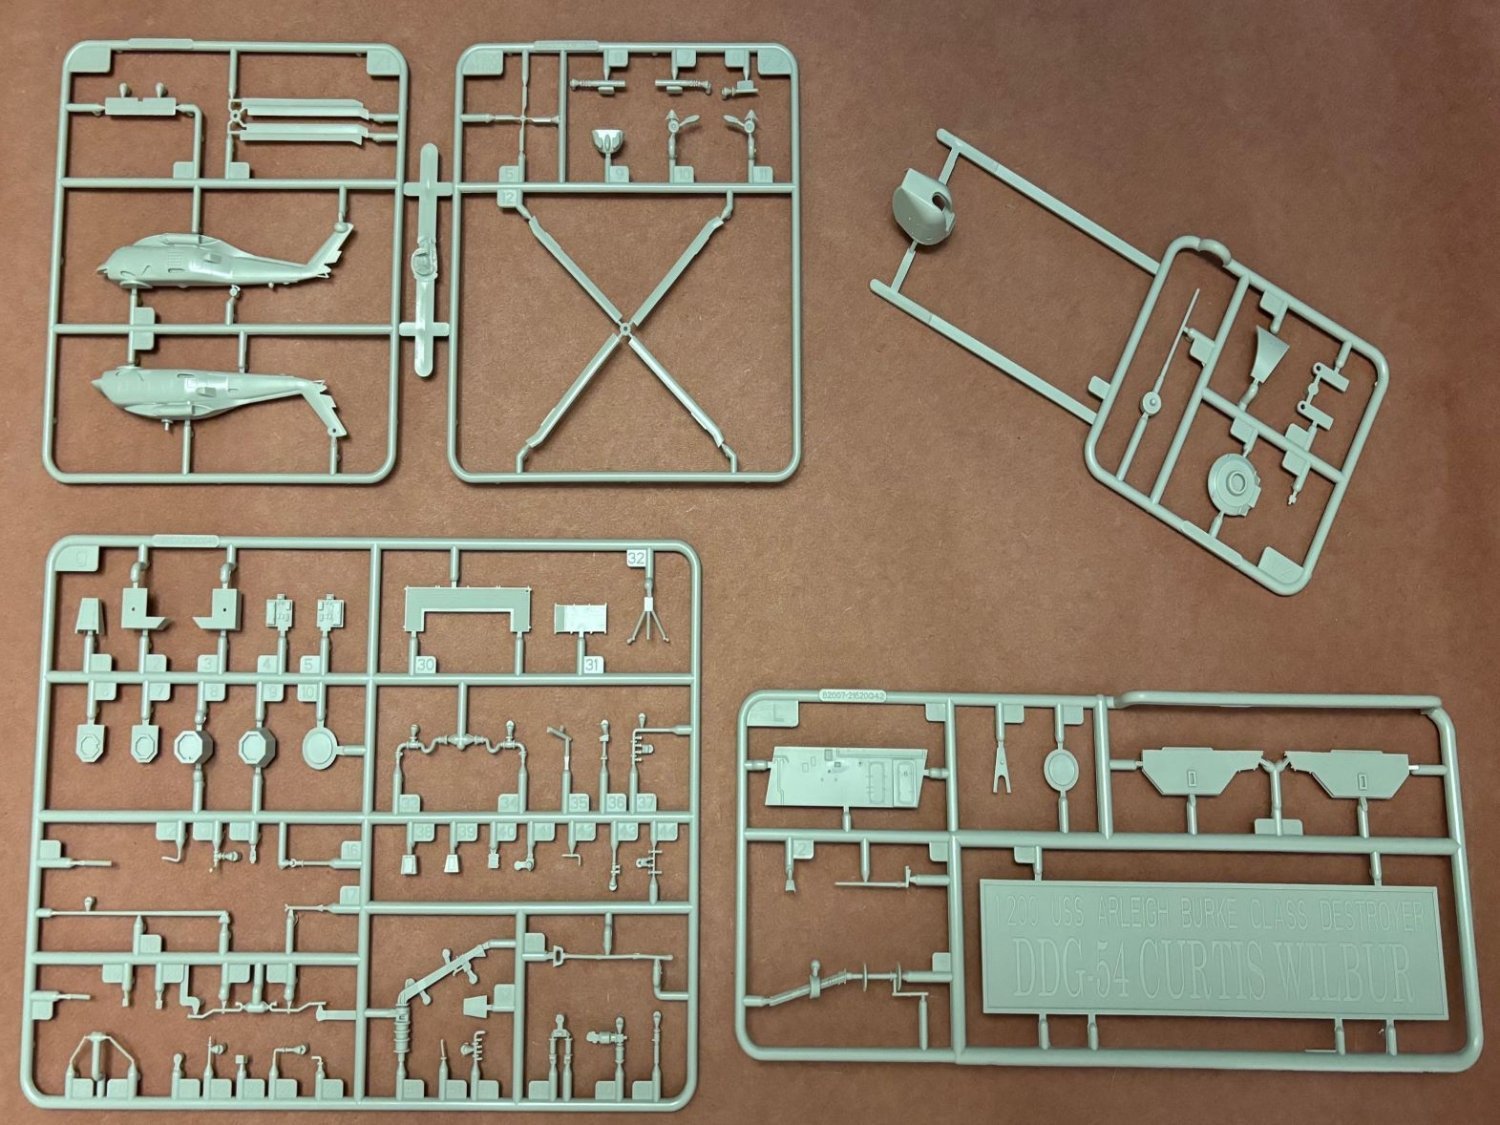
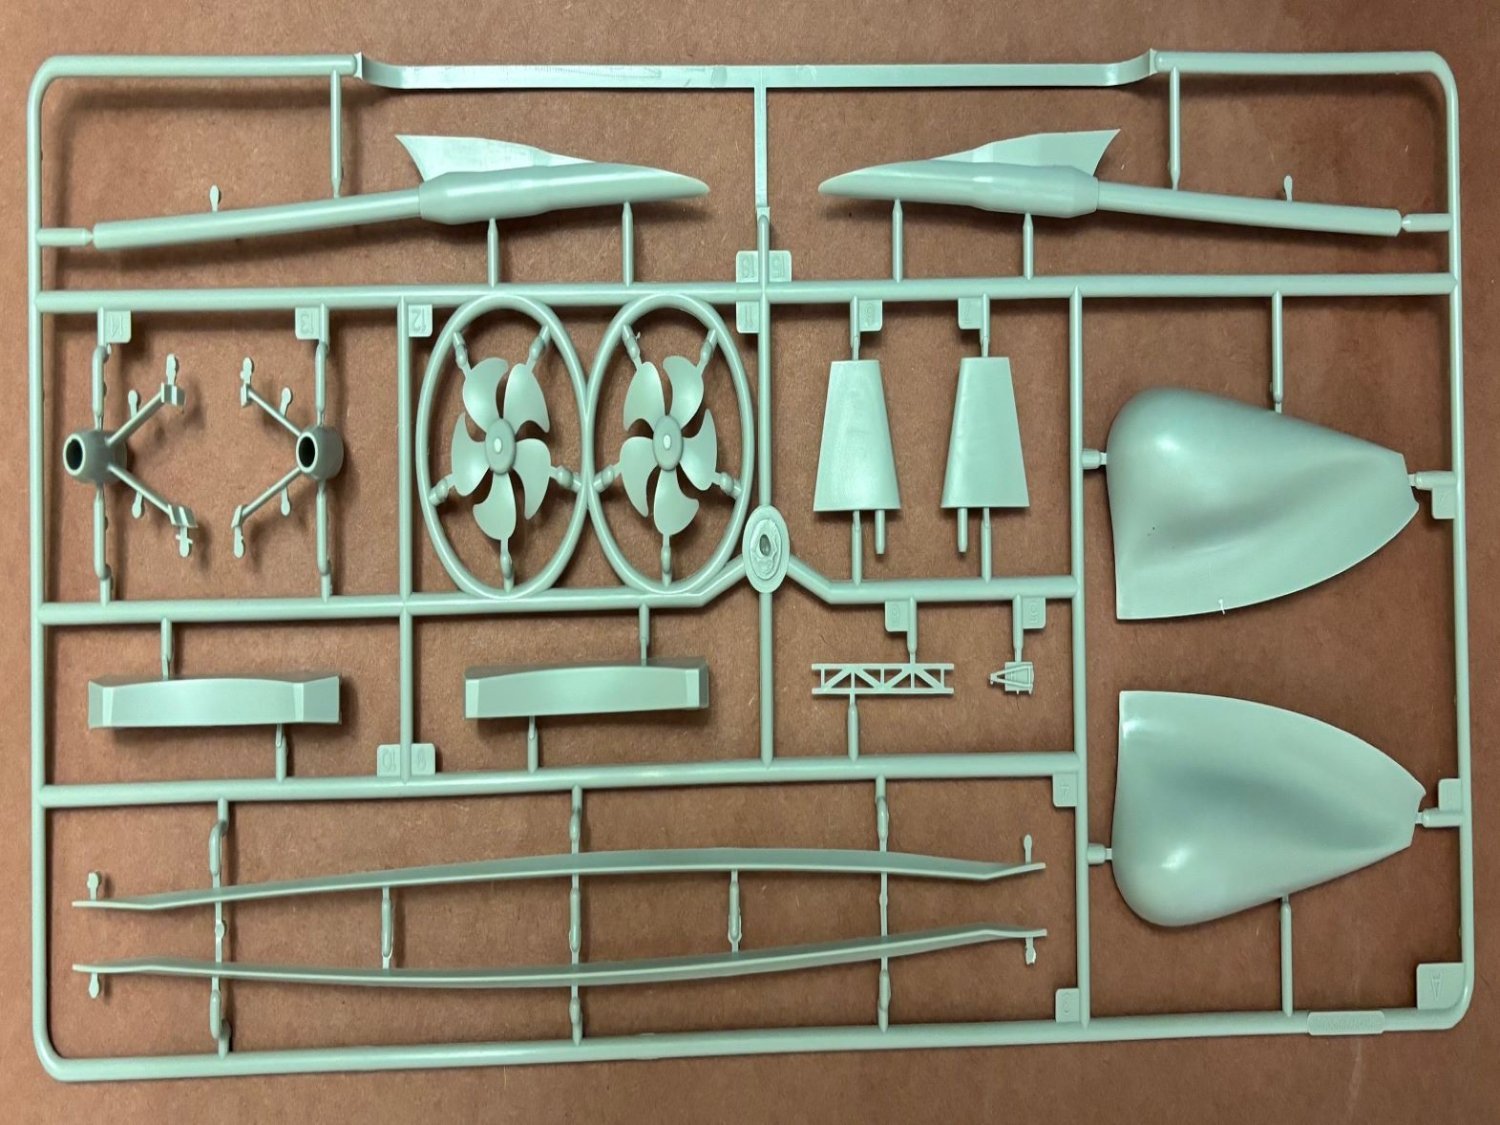
More sprue shots! Ugh!!! I promise I'll figure out the OOTB photo editing software on this damn PC. Again, sorry for the semi-distorted pics. The pics don't show all 33 of the sprues because there are many duplicates. More still to post... Patrick

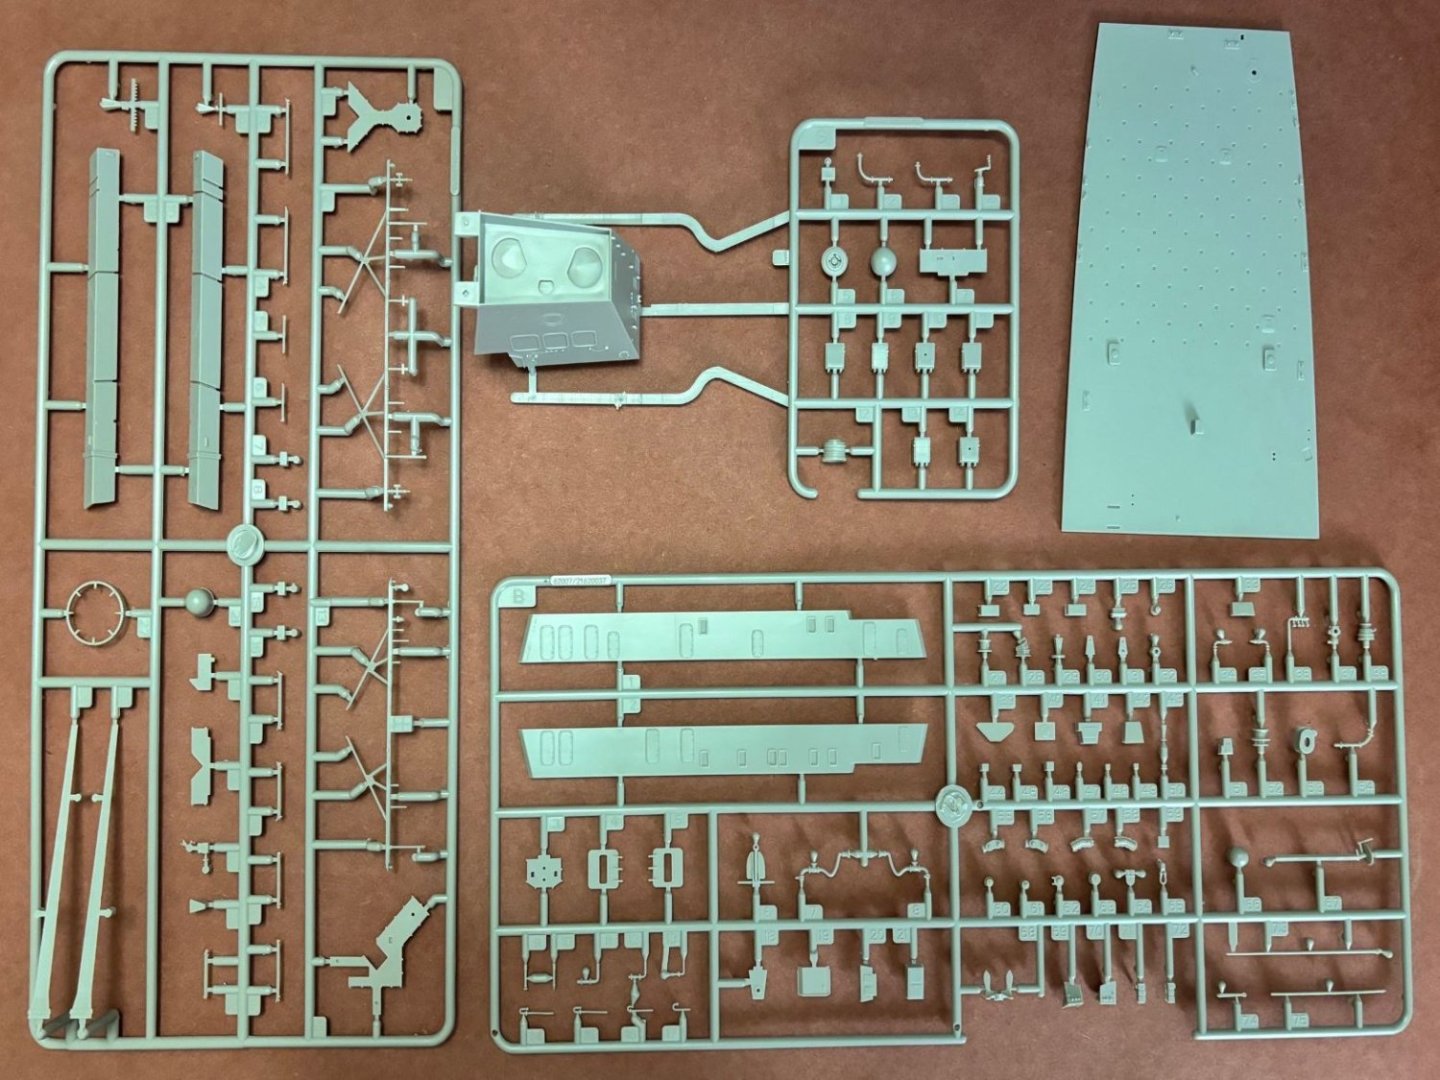


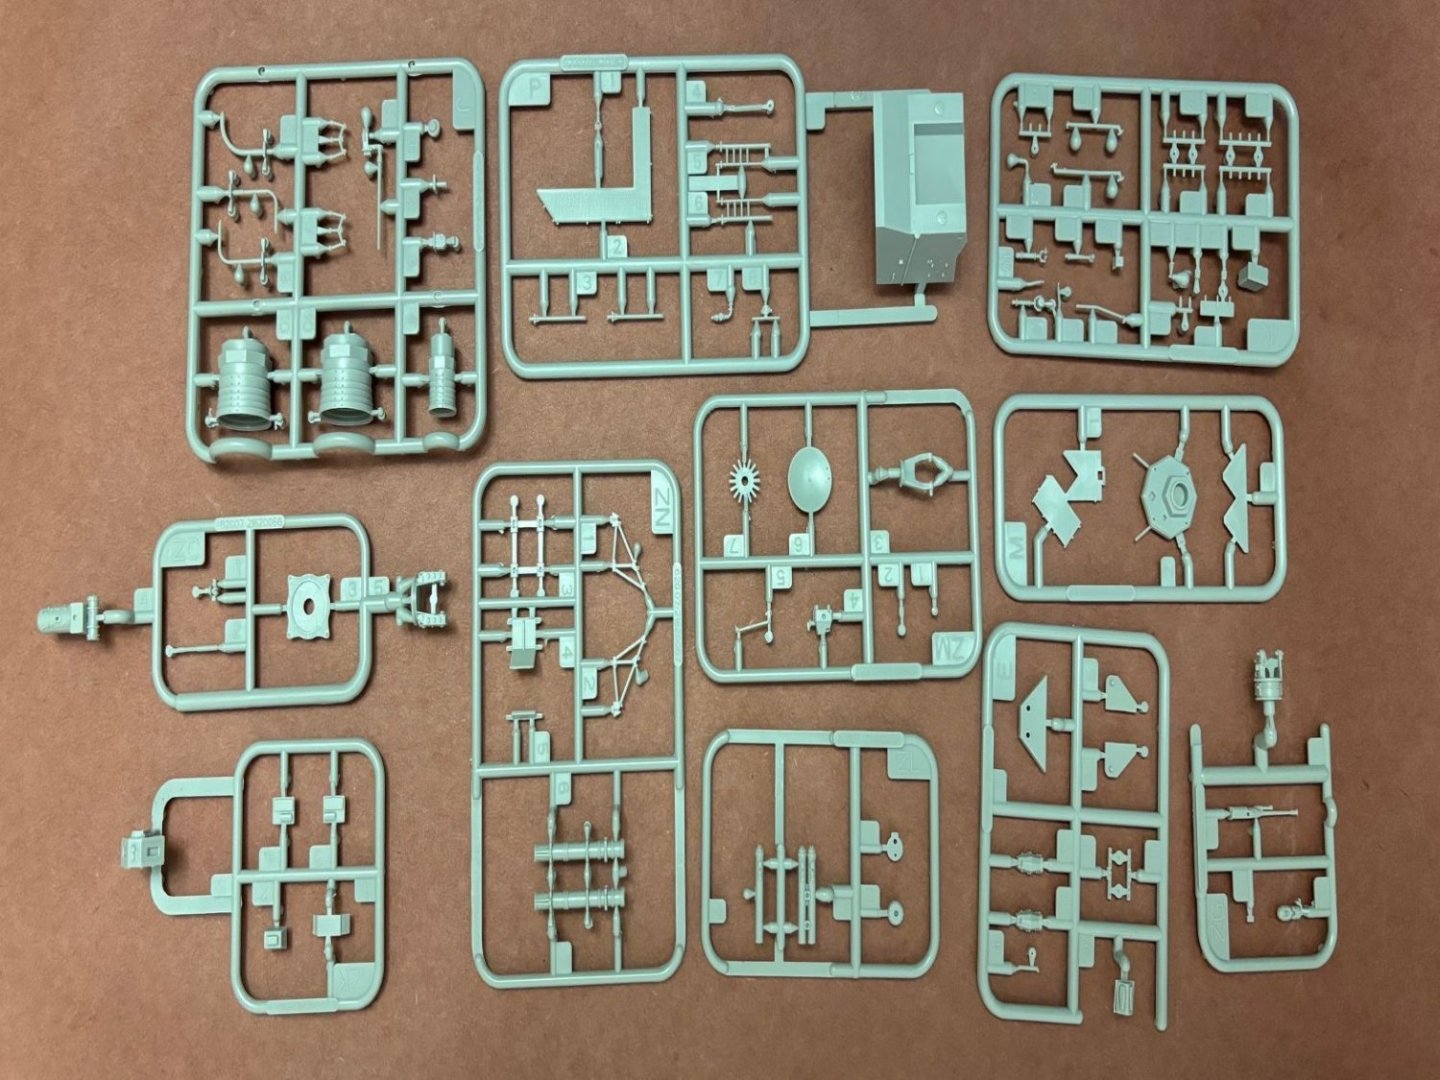
- 97 replies
-
- 9
-
-
- Curtis Wilbur
- I Love Kit
- (and 2 more)
-
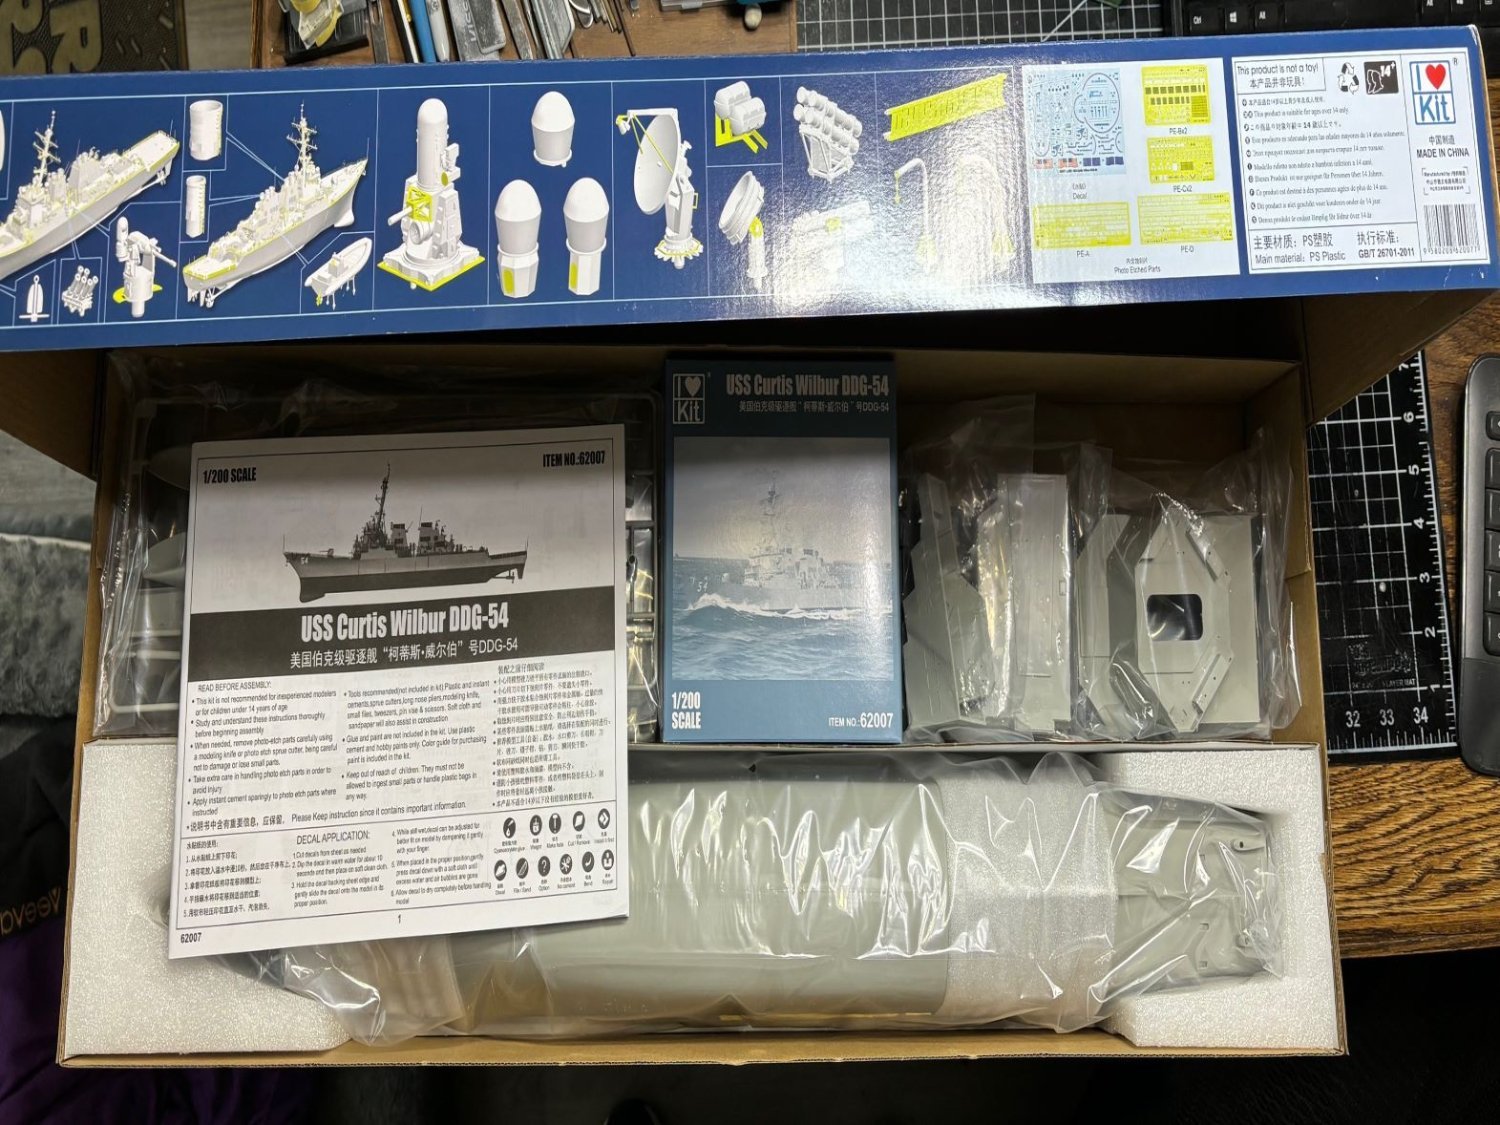
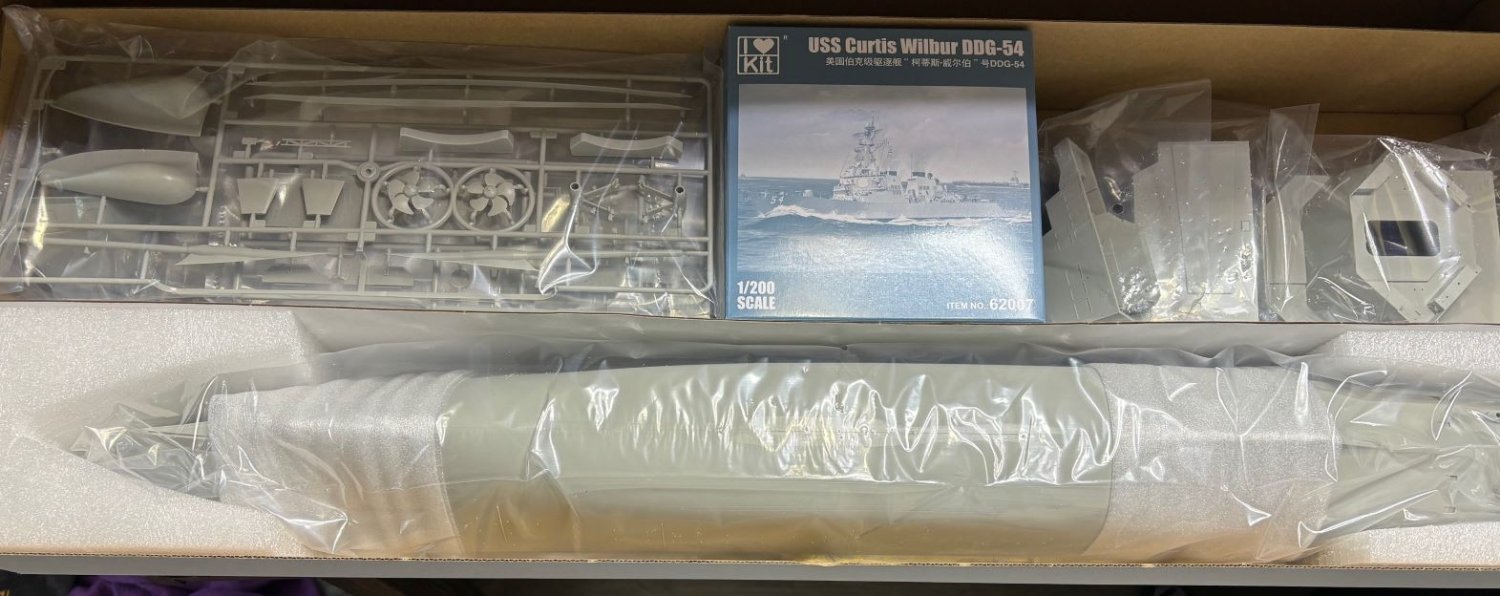
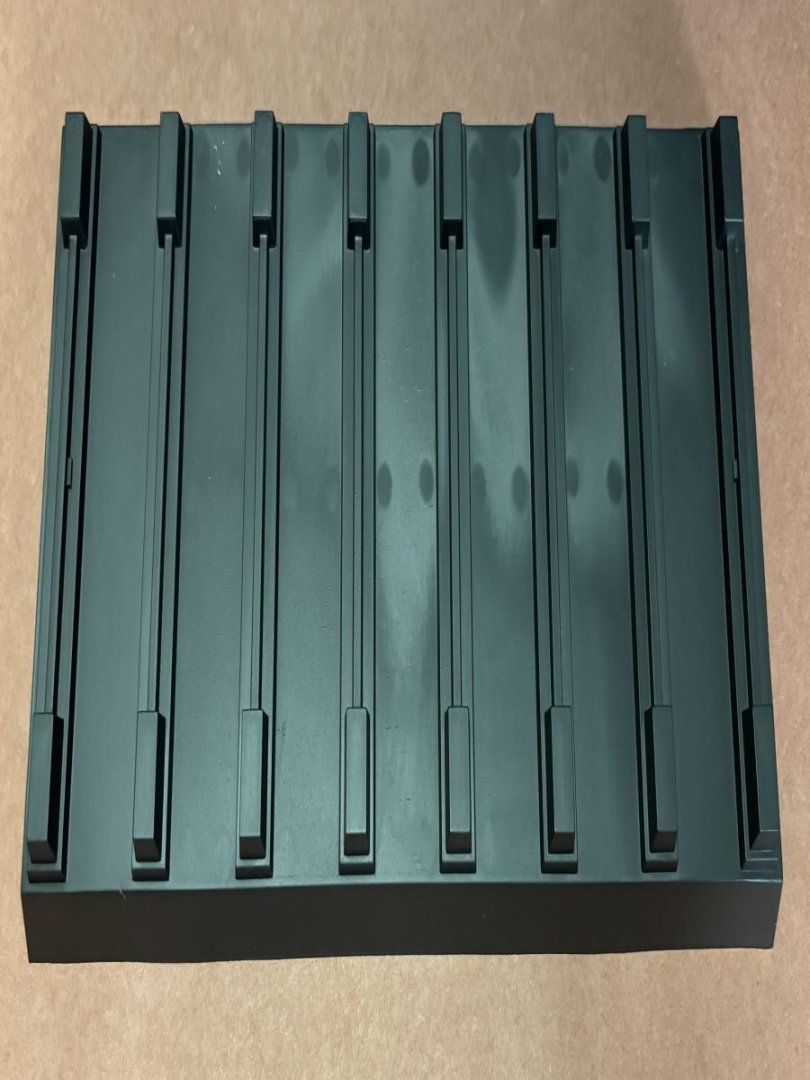
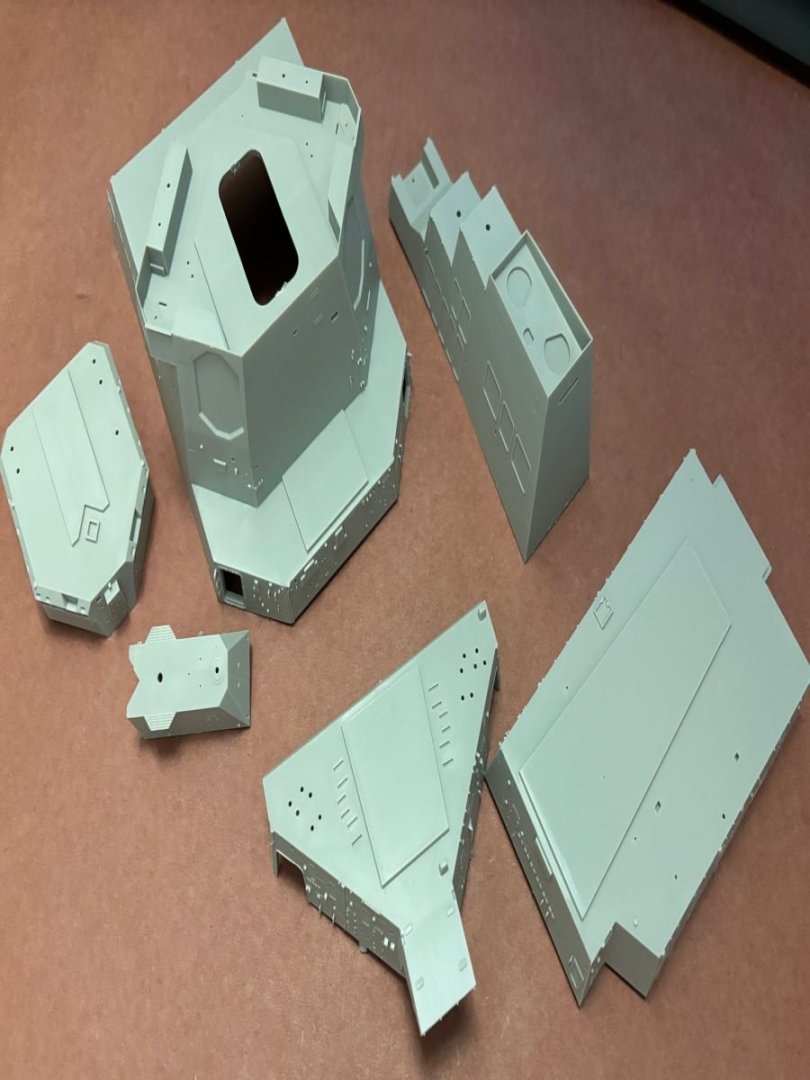
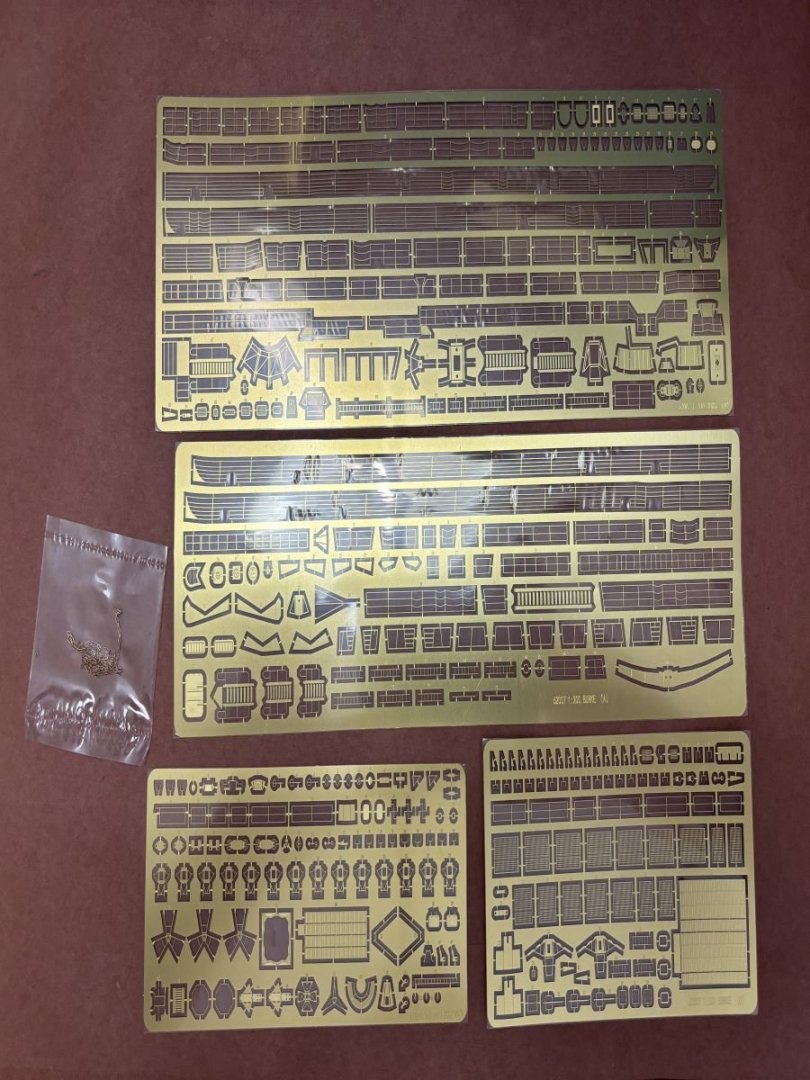
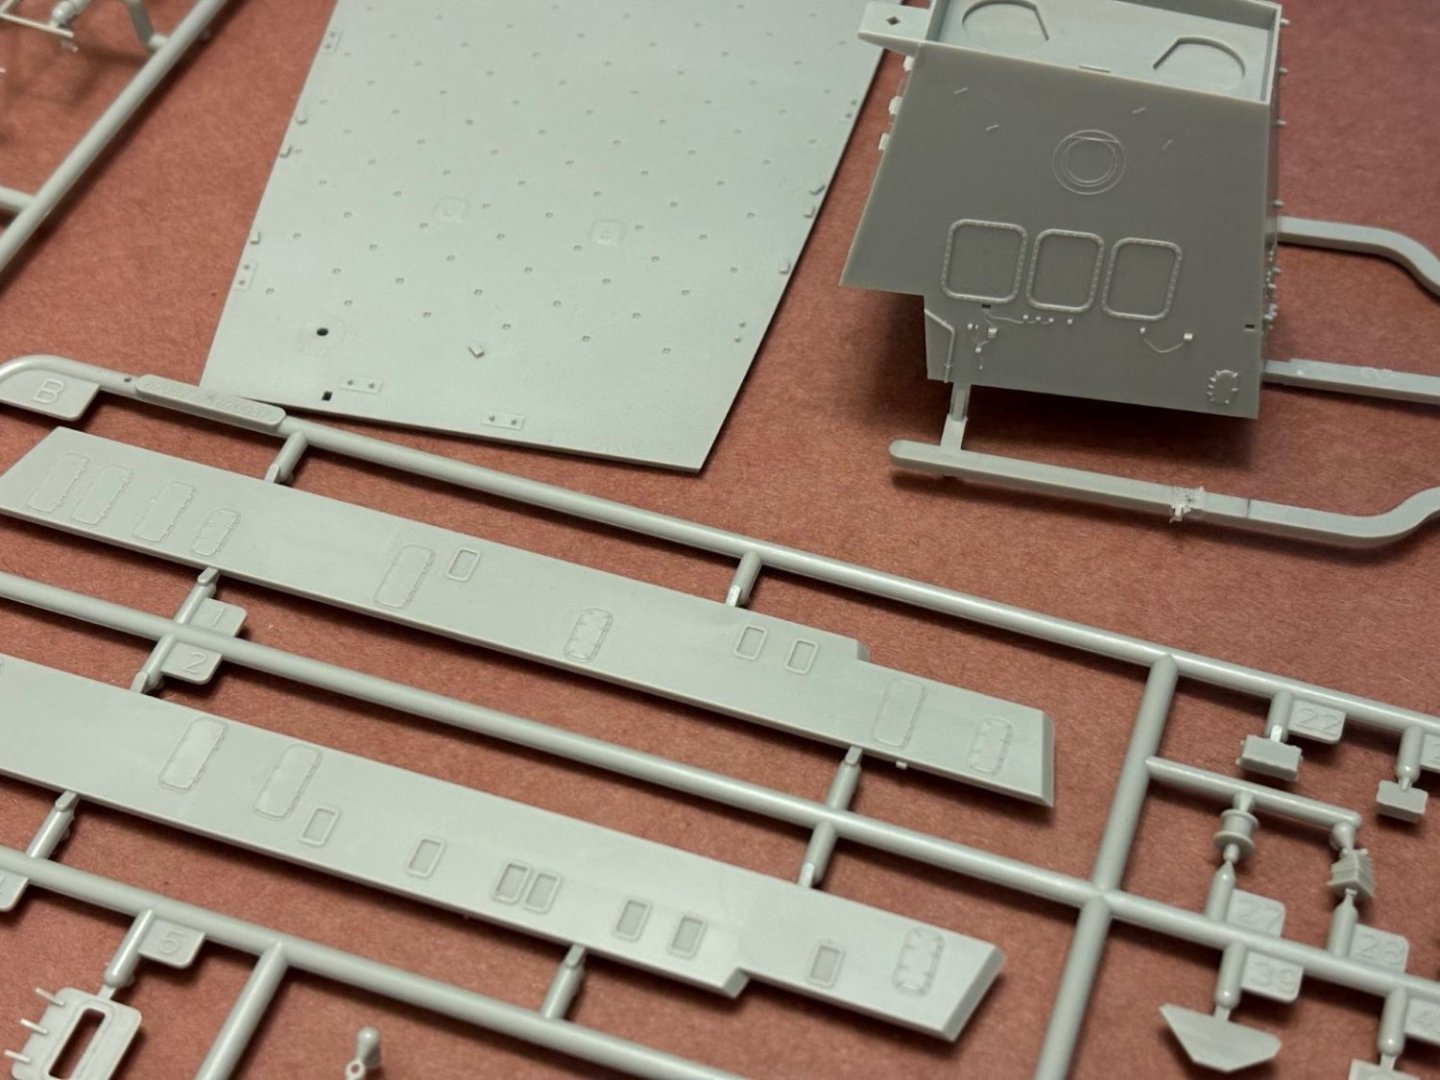
Ok, obligatory sprue shot time!!! Just a couple of stats on what came in the box. The kit contains 33 plastic sprues, 10 separate parts that had no sprue attached, 6 frets of photoetch, copper chain, and decals. I'm very impressed with the quality so far but have yet to actually put anything together. I guess we'll see since I Love Kit (aka Trumpeter) can be hit or miss with their kits. I do not plan on using the included display stand but will put the completed kit onto two brass pedestals and a wood base. That's a long way off though. Hopefully my clumsy attempt will somewhat resemble the real deal. Nice, one piece hull (mostly one piece) Some details shots on the hull The main deck piece and detail shots following Apologies on the limitations of my iPhone; a couple of the pics are distorted. Patrick


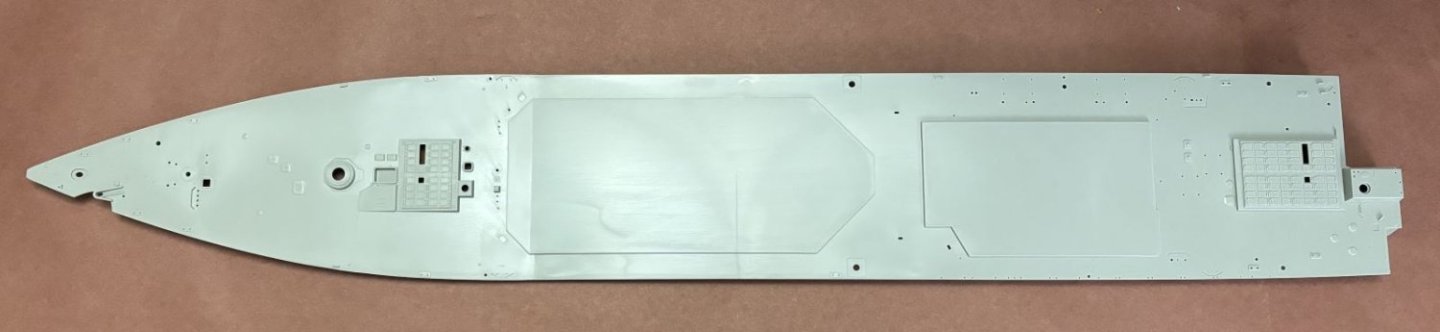

- 97 replies
-
- 6
-
-
- Curtis Wilbur
- I Love Kit
- (and 2 more)
-
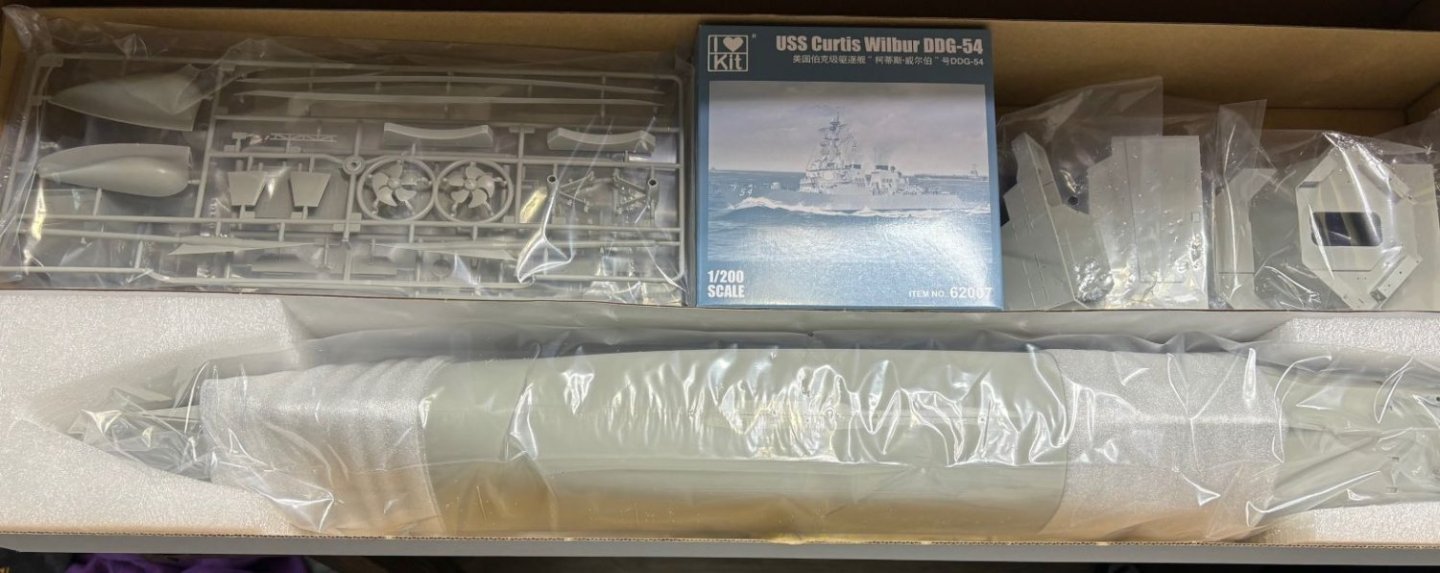
Adding several tantalizing pics. I still have to unpack everything and should be able to provide more of a comprehensive kit review in the next couple of days. Overall dimensions: Length 769 mm/30.3", Beam 111 mm/4.4", 1300+ pieces It's been a minute since I've posted anything here, let alone pictures, so please let me know if I'm doing anything incorrectly. 😄 Thanks, Patrick


- 97 replies
-
- 10
-
-
- Curtis Wilbur
- I Love Kit
- (and 2 more)
-
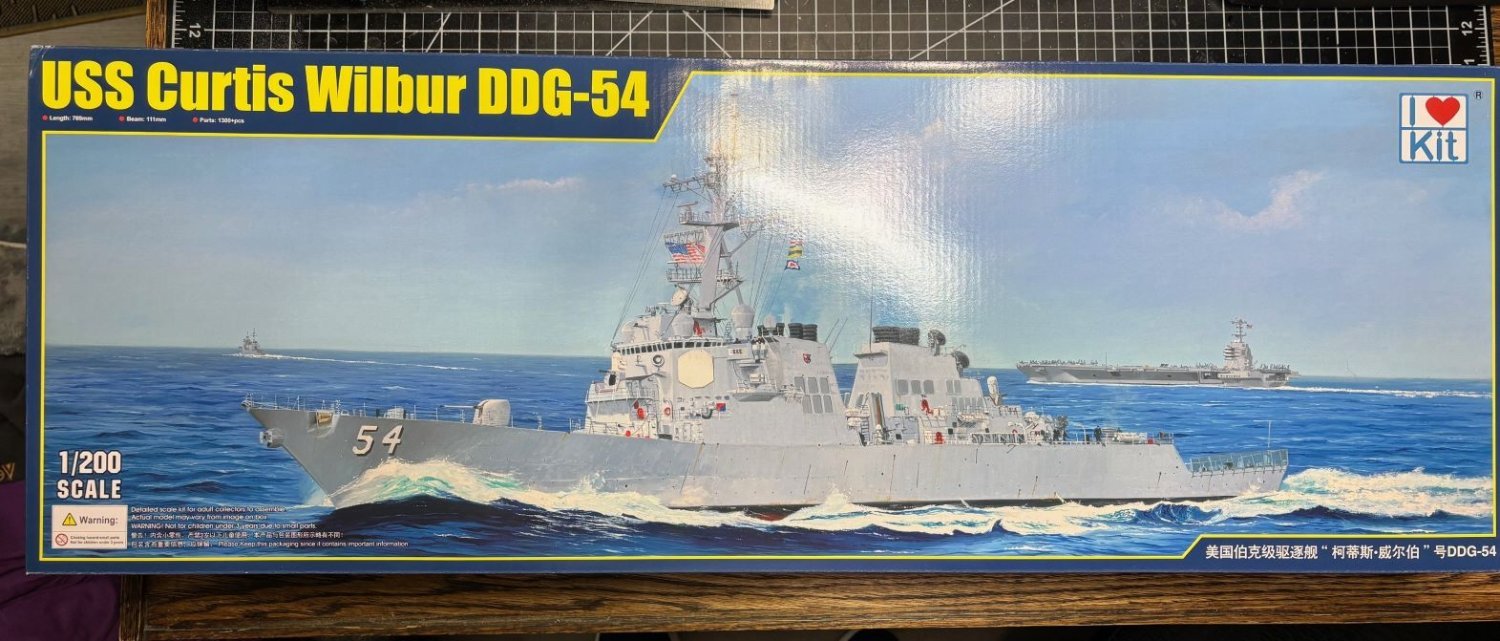
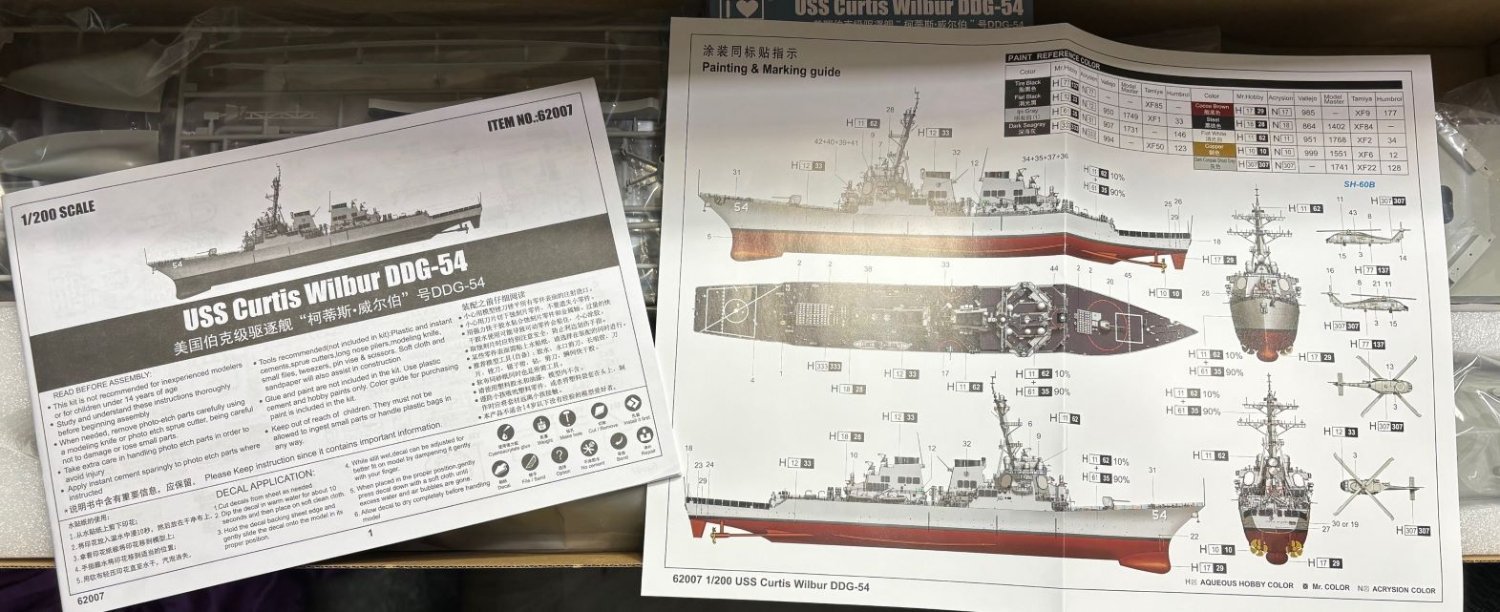
Hi All! Been awhile since I've shared any modeling on this forum. Figured I'd change that with the new tool kit from I Love Kit (Trumpeter). It's the USS Curtis Wilbur in 1/200 scale. It's an Arleigh Burke class guided missile destroyer. The kit is based apparently on the destroyer during the mid to late nineties. There is no aftermarket available (that I could find) for the kit yet, so I most likely will be modeling her as I Love Kit (Trumpeter) intended. This is a placeholder until I can get some shots of the kit sprues once I unbox it. At first glance though, this looks like a very solid attempt by I Love Kit (Trumpeter). I hope you like what you see in upcoming posts in this topic! Patrick
- 97 replies
-
- 9
-
-
- Curtis Wilbur
- I Love Kit
- (and 2 more)