


jcoby
-
Posts
88 -
Joined
-
Last visited
Content Type
Profiles
Forums
Gallery
Events
Posts posted by jcoby
-
-
Nice. At least the kit got the reefer white and cream colors right. Pretty much everything else is wrong.
The red trim is more of a burgundy and the decking and mahogany colors seem reversed. The mooring blocks are way darker than called out for. Now I'm curious what she looked like at launch. Have the colors changed over the years? I wonder how much was changed after the demasting as well. That must have been an awful mess to cleanup.
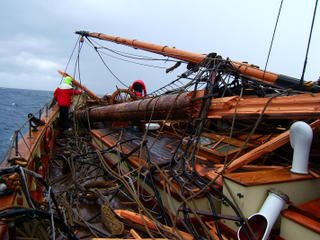
Also interesting that the post notches aren't like called on the plans. And the real ones are much easier to reproduce in scale. And that the blocking under the rails/winches is raised a bit over the decking. I don't think that's called out on the plans.
-
It seems like every picture of the PoB II on Flickr is HDR. The ropes glow, flags are blown out, darks are black, mids are light, and lights are neon. Either that or the PoB II is really crazy looking in person. IMO, the only picture in that stream that isn't HDR is the one of the stern.
I had to give up on Flickr for finding color-accurate pictures of the PoB II.
-
I just noticed in your pictures of the actual PoB II that the side fancy piece and transom top arch trim are both much smaller than called out on the kit plans (and how I built them). I'm not sure I'm going to change it though. I've spent hours on those pieces and they aren't easily changed. The transom area is easily the most frustrating part of the build so far.
-
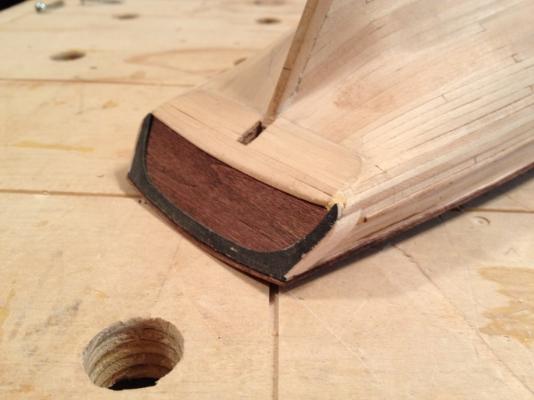
A bit late but here you go.
Looks like I extended the last plank of the return to form that detail. Knees are even with the planksheer. I had to redo this section several times so it's much rougher than the rest of the model and the filler needs to be touched up some more and planking lines scribed. I don't want to make it too smooth; I want the planking to show through the paint.
I installed the knees and then fit individual pieces cut from the hull planking stock to fill in the aft planksheer. They don't have any actual curve to them but you cannot tell.

-
I think I made the knees flush with what you have now (flush with the planks). The transom then goes on, fancy/fashion pieces, and a trim piece under the transom. I think there is also another trim piece that goes through the transom but I was going to apply it last.
I can take a picture when I get home if it will help any. I think I had to redo portions of the transom area three different times due to the plans not being very clear and my lack of experience. I gave up on trying to make it perfect and had to apply some filler. It all gets painted black so no big loss.
-
Maybe look into using chemical coloring? There are various chemicals that react with the tannins in the wood to give a naturally aged color. The PoB II has been in the sun for 27 years now, so the mahogany has been affected by the sun more than anything else.
I don't know what would react with basswood. I've heard about baking soda, iron+vinegar (black!), concentrated dark tea, lye, potassium dichromate being used.
Dyes are also another option if you want to try and nail the color. They seep into the wood itself instead of just into the grain.
The PoB II as it stands today is actually pretty uneven when it comes to the rails. The more I handle it without any top coat the more it seems to match natural wear. Lighter along the edges and darker in the middle. A bit of 400 will lighten it even more.
I guess it really depends on whether you are going for "as built" or "as-is today." Fresh cut mahogany is pretty light in color. Just a little bit of orange to it.
-
Glad to see you working on the PoB II again!
I'm up on the fence about the props. The castings that come with the model aren't that great (like all the other metal castings). Seems like a lot of work for something that's likely to fall off later but it's true to the original. They're something I'd planned on adding nearly last–right before permanently mounting it to the stand/blocks.
-
You could do it either by making the first strake and the wales as solid or over a first layer of planking.
Honestly the lines of the Pride aren't that hard to do. I lofted the measurements from the side view and transferred them to the hull using calipers and used a small block plane (actually an old xacto razor plane) to taper and bevel the strakes. The basswood is pretty forgiving so it may be significantly more work using boxwood. I have no experience with boxwood. The worst is the area around the garboard strake but very doable with patience.
-
I would fill at least the first 2-3 bays and the last 2-3 with medium-hard balsa or basswood if I did it again. The first few bulkheads move too easily under the stress of planking if you don't steam bend them (which I didn't) and the last few have a pretty severe compound curve. Speaking of the transom, make sure you build it as shown in the plans. The counter is actually planked separately from the transom and hull. I had to cut off a bunch of planking to make that happen.
I washed the inside of the hull a couple of times with diluted PVA to make sure all the planks were secured to each other. If you are double planking, CA would work as well (if not better) but I was worried about it bleeding through to the other side and making a mess when it came time to paint.
Make sure you can get the double planking in the correct thickness before you commit to doing it. I have another kit that is double planked and the first layer is ~3/32" inch or so (probably 2mm actual) but the second layer is almost paper thin. Probably 0.5mm or ~ 0.020". If you can only get the boxwood in thicker sizes you may be better off just single planking it over balsa or basswood filler blocks.
-
Jcoby, Just checking in, hope all is well

Warm Regards,
Bill
All is well. I generally don't work on her too much in the summer. I spend most of my free time out in the garage. Once it gets cold in the fall I go back to the Pride.
I've spent a few hours here and there trying to get the never-ending little deck pieces done so I can finish up the hull and get it mounted to the stand and painted. It's one of those things where you make seemingly no progress other than finding more things to work on until one day it's ready to start permanently mounting pieces.
At some point I need to decide what to do with the rigging line. The MS supplied line is frustrating. It's slippery, stiff, and full of kinks from being on the flat bobbin. I haven't found a way to straighten it out. Hanging with weight doesn't seem to do much and it's some sort of plastic so any sort of heat will destroy it.
I may make line or buy it from Syren. I'm not sure which yet.
-
I also applied a ~25% diluted wash of wood glue (PVA) to the inside of the hull before decking. I just added some water to it until I could brush it on. This strengthened the hull quite a bit and stopped any movement of the individual planks. If you glued the planks to each other fully this won't be needed. Since I used CA there were some spots that didn't bond fully.
-
I installed the coamings first (I assume that's what you mean). They were installed first when the ship was built so I tried to replicate that. I plan on installing the deck furniture just before setting the completed masts.
Here is a pic of how I did the coamings:
And one of the completed deck:
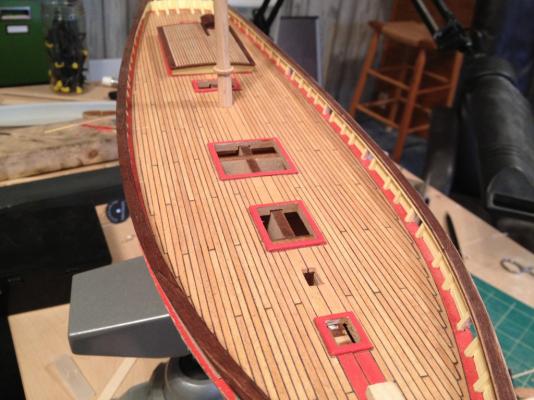
I used black construction paper to simulate the joints, sanded, and scraped the entire deck before applying the conditioner and stain.
- Shiptek, Bill Hime, Ryland Craze and 5 others
-
 8
8
-
I had the same idea but mahogany is far too coarse grained to use at this scale (I have some Honduran mahogany). You'd want to find something that's tight grained with a red hue to it.
Honestly, at 1:64 scale the basswood works just fine as long as you paint or stain (pre-staining is essential). If you want to leave it natural with just a coating of wax then finer woods are required.
-
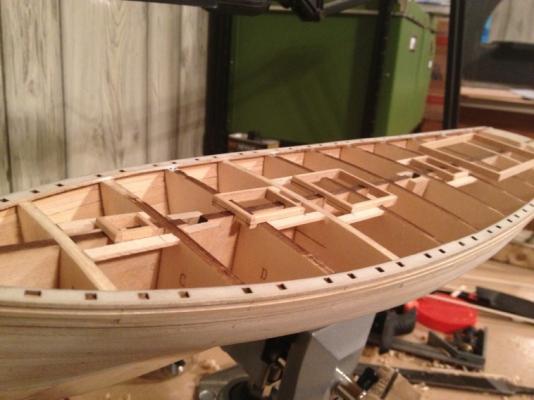
Looking good. I see yours is the probably same version as mine with the planksheer too short at the aft end. You may want to fix that now (or immediately after planking the hull) if the gap bothers you. It's not glaringly obvious that it's wrong unless you are looking for it and know it shouldn't be there. It just looks like stowage boxes in front of the knees. It's much more difficult to fix once the knees and stanchions are in place.
You may also want to put a block of balsa in between the #1 and #2 bulkheads and possibly the #2-#3 space as well. I had some problems with the bulkheads moving aft and the planks wanting to flatten out a bit there. Installing the temporary strakes (as per the instructions) will definitely help with the bulkheads bending. I wish I had.
Doing it over I wish I had used a different stain for the mahogany bits. The minwax mahogany stain comes out far too dark and red. The basswood absorbs the color so readily that it's over-stained. It needs to be more of a brown with a tiny bit of red in it. Maybe more like the dark walnut color or even a custom mix.
-
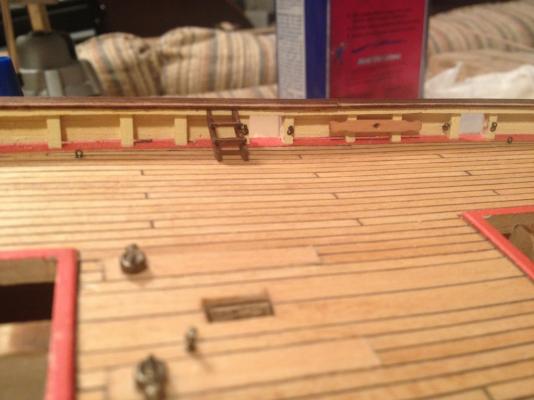
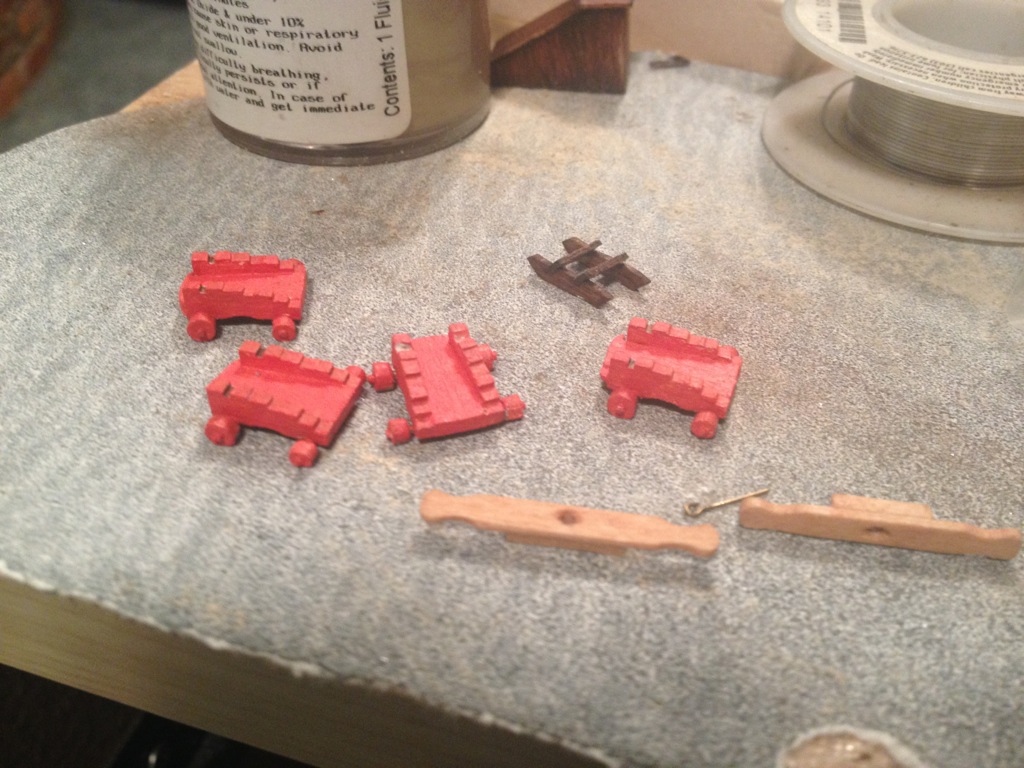
Not much progress to report. I made the port ladder. This took far longer than I expected. It's only about 1/4" long but it took over an hour (and two or three attempts) to make.
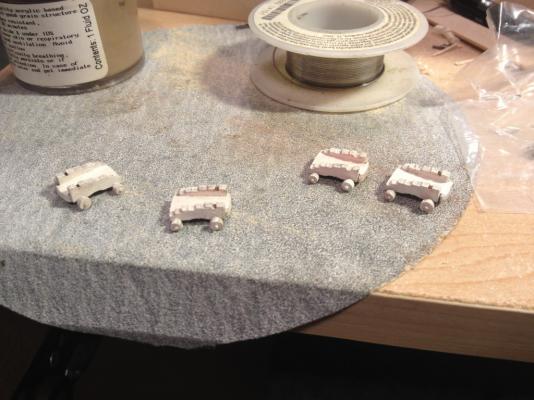
I also put the first coat of paint on the gun carriages. They look a bit too monochromatic to me. I think i will add some black to the wheels and dry brush some grime onto the carriages.

-
Thanks for the very detailed response. I am even less sure I can handle it now
 I still have time to decide as I am still planking the hull. She looks great
I must have explained it poorly then! It's really not that hard to do. It's just critical that everything is even side to side in order to have everything come out the same.
Depending on how many strakes you have done on the hull you might want to stop and add a couple stiffening blocks between the 2nd and 3rd and 4th bulkheads. Mine actually distorted aft about 1/16" from the pressure of the hull planks. If you are actually steam bending the planks (I installed them dry or with a quick soak in warm water) you probably won't have any problems.
Oh–and I just thought of one more thing. You may want to install the pads for the various pieces of deck furniture (the winch and rails) as you plank. I didn't and it's a complete pain to retrofit. But be warned: the winch was not the correct size in my kit! I adjusted the pads inward to match the winch instead of trying to fix the winch or make a new one.
-
Thanks for doing such a great log!
I have been away from the hobby for some time but coming back now. In fact I could not recall my log in name so I started a new profile. It may have been lost in the crash I guess, along with my own build logs. I wish I had your craftsmanship and skill she looks great!. In my own POB II build I am working on planking the hull. After a long laps of time, wood once again is flowing out of the box and onto the hull. In part do to your log inspiring me. I have been trying to decide if I want to do the deck in full strips or something more realistic as you did. However, I cant seem to get my head wrapped around the planking layout. Your pictures of the deck are so clear I think I see how you did it but if you are willing I would love a few details such as length of each plank. It looks like you pattern staggers its length by the next bulkhead starting at the bow? Also is that the Ipswich Pine stain on the deck? I like the color. If you don't mind me shamelessly stealing your ideas I am thinking of doing my deck like yours?
Keep up the fine work, cheers!
Sorry to take so long to respond. I've been in England for the past 10 days on vacation.
Thanks for the kind words. This is my first ship build. I've learned so much doing it.
In regards to the deck:
Make sure your planksheer is 100% correct and symmetrical. I used a set of calipers and tried to get everything to within 1/64" (0.015" or so). The planksheer supplied in my kit is actually about 0.200" too short at the very end. All of the locations of the stanchions are correct. There is a gap that is hardly visible once everything is fully installed. I don't know if they have updated the kit to fix this yet or not.
I installed all of the coamings before planking.
Also make sure the bulkheads are fully faired and free of twist before you start. If you want, install a couple temporary strakes on the hull to help stiffen things. I had to add material to 3-4 of the bulkheads to get them true.
I stained the strips (it is the Minwax Ipswich Pine color called for on the plans) first. Be sure to use pre-stain. Basswood does not take stain very evenly.
I glued the stained strips to the construction paper (using wood glue). I then cut them free from the paper with the down side cut flush and the top side cut a bit proud. Leave one end a bit long so it can be wrapped around to simulate the caulking between boards. You want to use a construction paper somewhere around 0.006" thick to get scale accuracy.
I used CA glue for all of the planking since I only get an hour here or there to work on the ship.
I installed the nib strake and then the wider two center strakes being 100% sure these pieces were even and true.
For the decking pattern I just kinda winged it. I couldn't find any pictures of the actual deck that clearly showed the pattern. I decided that boards in the 20-30' range would probably be used and that excessive joints would be avoided as much as possible. Even if shorter boards were actually used it would cut down on the number of joints visible and keep the deck from looking too busy.
This led to having planks that are 5.75" long or so (4 bulkheads I think?). I decided on a 4-stagger (that is the pattern repeats every 4 boards). You could also do a 2 stagger or a 3.
I started next to the center strakes and worked my way fore-aft working one row at a time. If the distance between coamings was less than the 30' then I installed a full length board even if it would have a joint according to the decking pattern.
To cut the nibs I used a deck board to mark where it intersects with the nib strake. I then tapered the board to half width from the mark and traced taper onto the nib strake. I used a small square to make sure the nibs were staying even. You can adjust the width of the board or the taper to move the nibs around a little bit. I then used a small saw and an xacto knife to cut the nib strake.
After every run I'd take the calipers and look for any variation accumulating. Simply adjusting how much pressure is on the strake during installation can make up to a 0.010" difference. That really adds up over the width of the deck. Pay special attention to where the widest point is. That strake will be pretty visible if it isn't 100% even side to side.
Be sure to pay attention to the stock provided. Some of it tapers pretty heavily towards the ends.
If you have any other questions or need pictures that I haven't posted earlier in the build log I'll do my best to help.
-
Nice work. I like the colors I see.
Russ
Thanks for the compliment. I feel like I should probably have started with something a little more simple!
Funny you say that because they seem too vibrant and a little garish to me. The mahogany stain in particular is not correct (too purple). The mahogany stain on the rail where I've sanded and handled it the most looks the most realistic to me. The red coamings should be darker. My attempts to mute the red just made it turn various other colors. I will probably age the deck furniture to make things look a bit more realistic.
It's surprisingly hard to find decent pictures of the Pride II (especially since it's still a working ship that gives tours and rides). The best ones on Flickr are almost always taken in HDR which makes them look awful. Or they don't take pictures of the bits I want to get details of. I guess most people don't find the little nooks and crannies interesting!
-
nice looking ship Jcoby,
beautifull lines, hull and deck also look great
is that angle the 2nd mast ist Standing correct so ?
Nils
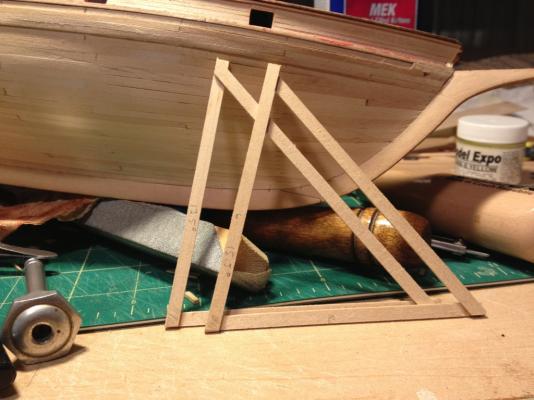
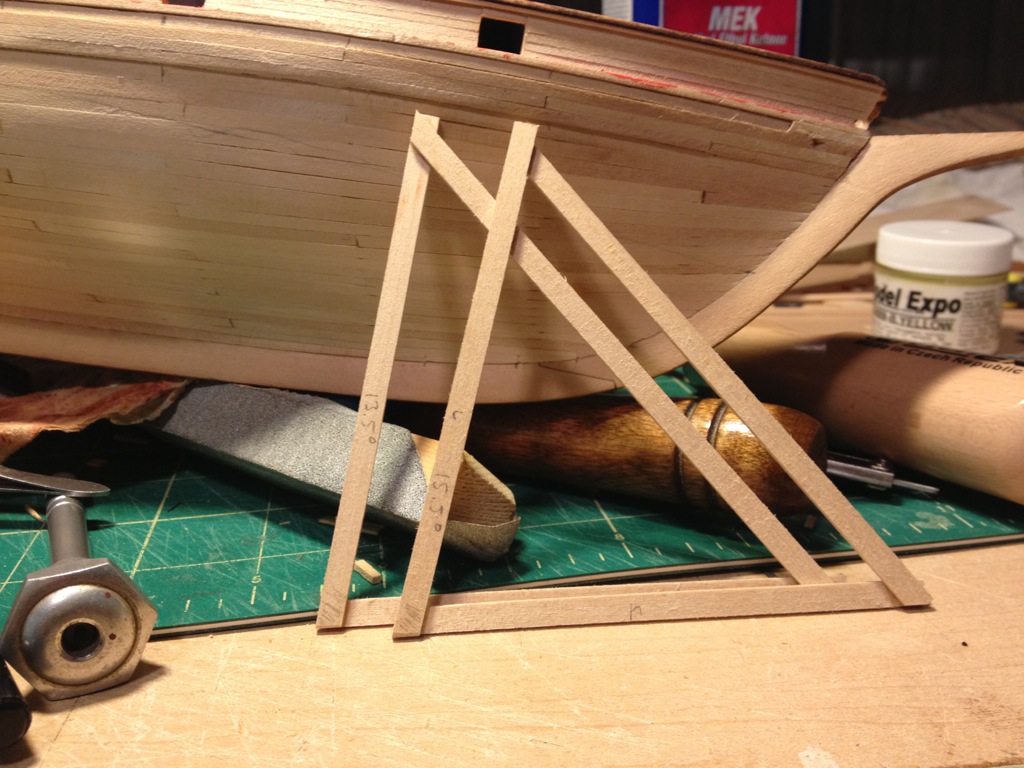
The angle of the mast is close to correct in that picture (within a degree or two). The mast is set at 15.5°. It looks more extreme because the ship is not level.
I made a couple of jigs to set the masts once I get to rigging:
- Mirabell61, MarisStella.hr, Elia and 2 others
-
5
-
Progress has slowed down again now that the weather has turned nice. Plus I managed to get the flu followed by conjunctivitis. Having a kid is a great way to get sick.
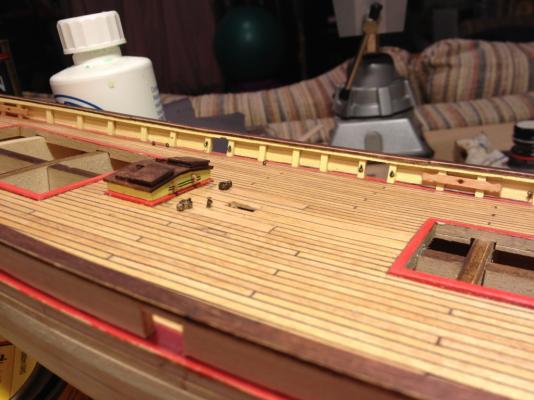
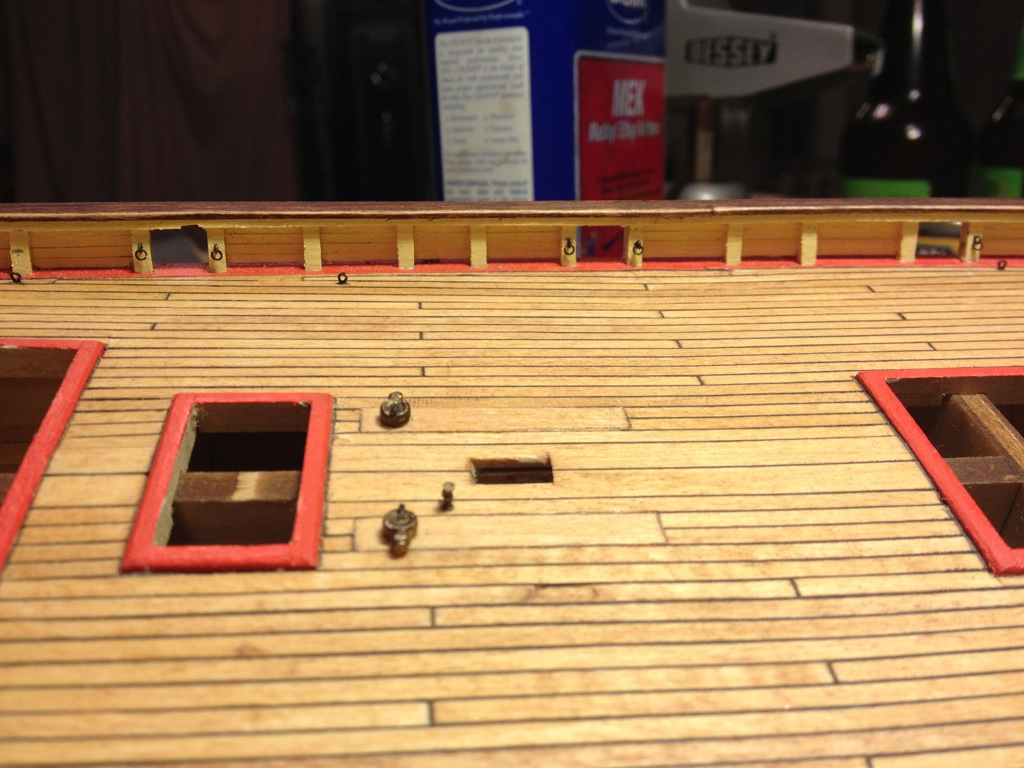
Apparently I used the wrong stock when I made the engine access hatch. It ended up being 1/32" too small in both directions. Instead of making it completely from scratch I just glued on some 1/32" stock to bring it to size and then transferred the hatch covers to a new top. After a coat of paint it's unnoticeable.
I also added the stowed pump arms to the engine access hatch. Those are the smallest pieces I've had to make so far. The arms themselves are 1/64" in diameter (~0.015") and are about 3/32" apart. I also had to make two sets because the plan callout for the arms was scaled about 30% bigger than it should be. It worked out for the better because I stained the first set the wrong color.
To break up the monotony of working on the deck details I've been concentrating on getting all of the rail details done. I have all of the cannon eyelets and rings installed and have finished all four of the cleats where the mooring lines go through. Various cleats go on next followed by some strips in the cannon openings and the ladders.
-
I installed most of the cannon eyelets today. There are four (two on each side) that get installed on the fore side of the stanchions. I'm not sure how I'm going to drill for them. I may just drill a little crooked and push them into proper position. The basswood is pretty forgiving in that regard.

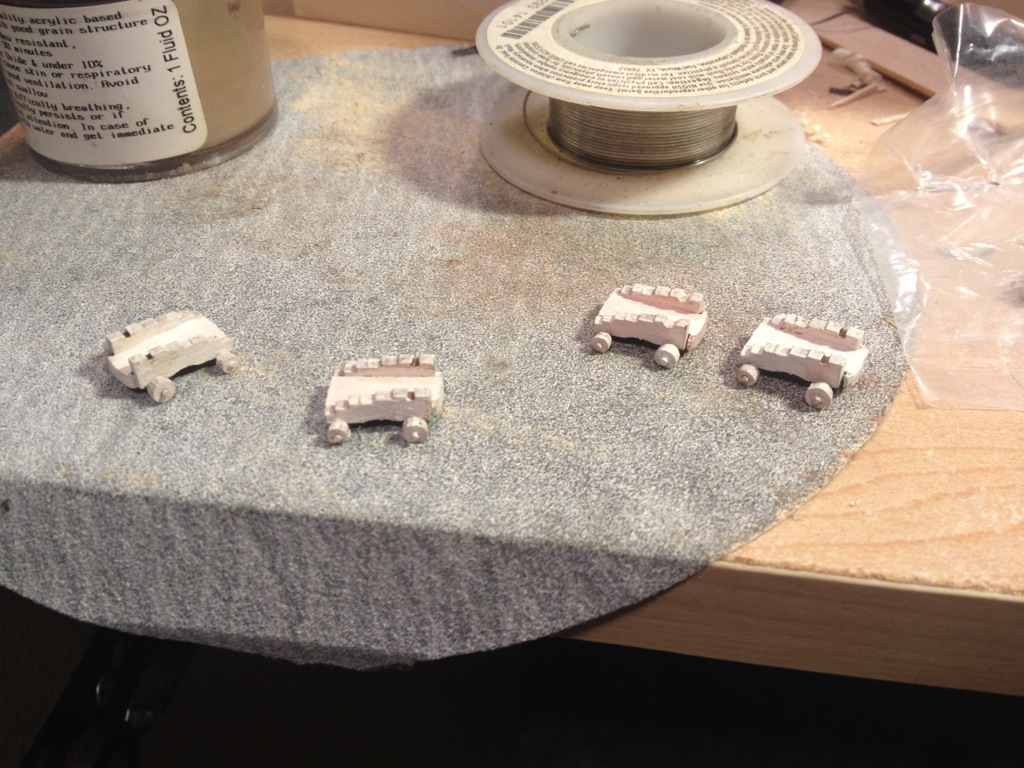
I also put a coat of primer on the trucks for the cannon. These things are tiny but still seem too large to my eye but I am not changing them. They seem to fit in the gun ports with a bit of sanding on the wheels to make everything flat.
-
One out of scale and squished cannon that doesn't fit into the opening quite right mostly done. The castings in this kit are far from precise or well done. Lots of flashing and everything has shrunk or there is some mold shift.
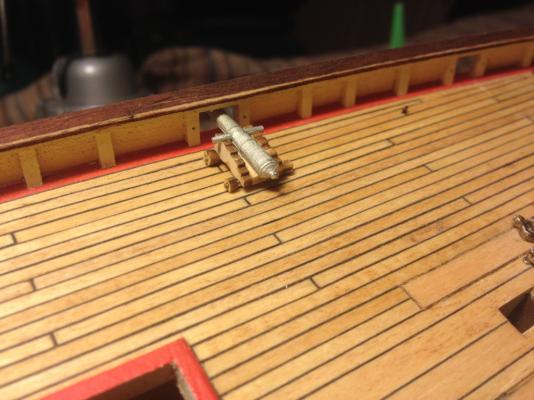
Three more to go. I have the carriages glued up for the other three. All that's left is to install the trucks, paint, and add a set of eyelets and rings. I'll probably have to massage everything a bit to get it down to size so it fits in the gun port without touching.
I don't think I could do one of those models that have dozens of guns onboard!
- russ, Aussie048 and MarisStella.hr
-
3
-
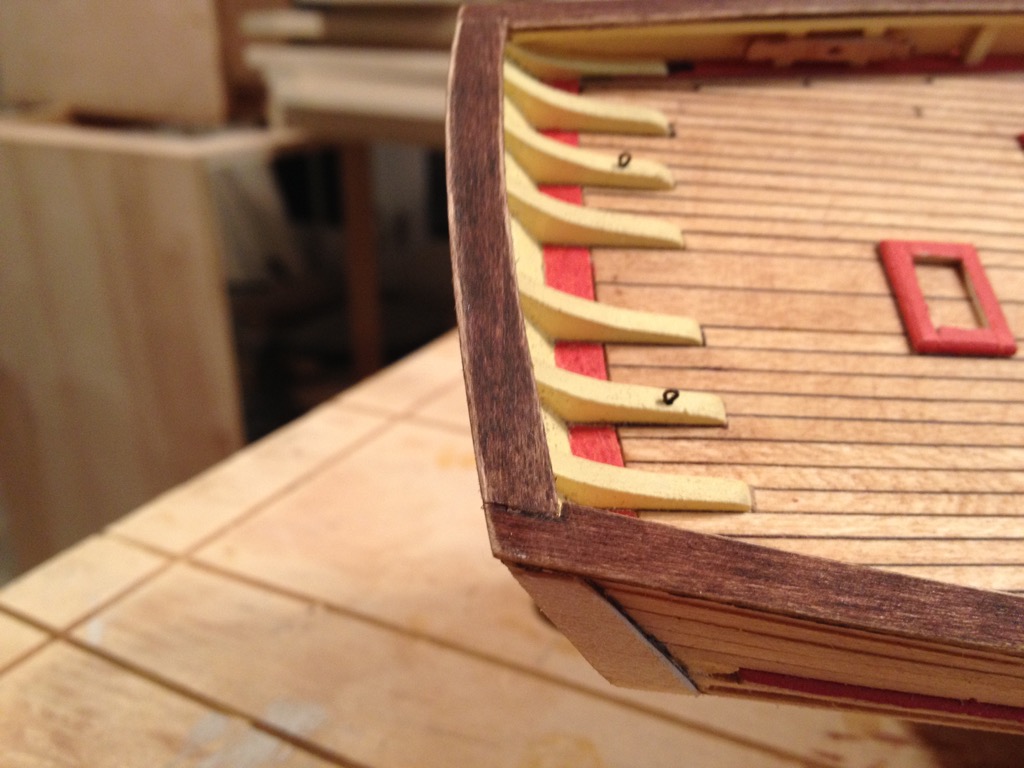
I spent some time on the various eyelets tonight. I installed the 14 deck eyebolts and two that go on the stern knees. You can also see in the picture that the pump and fire hydrant are more bronze than the other pictures show.

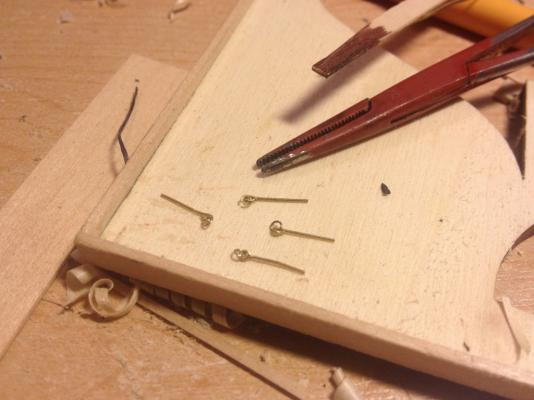
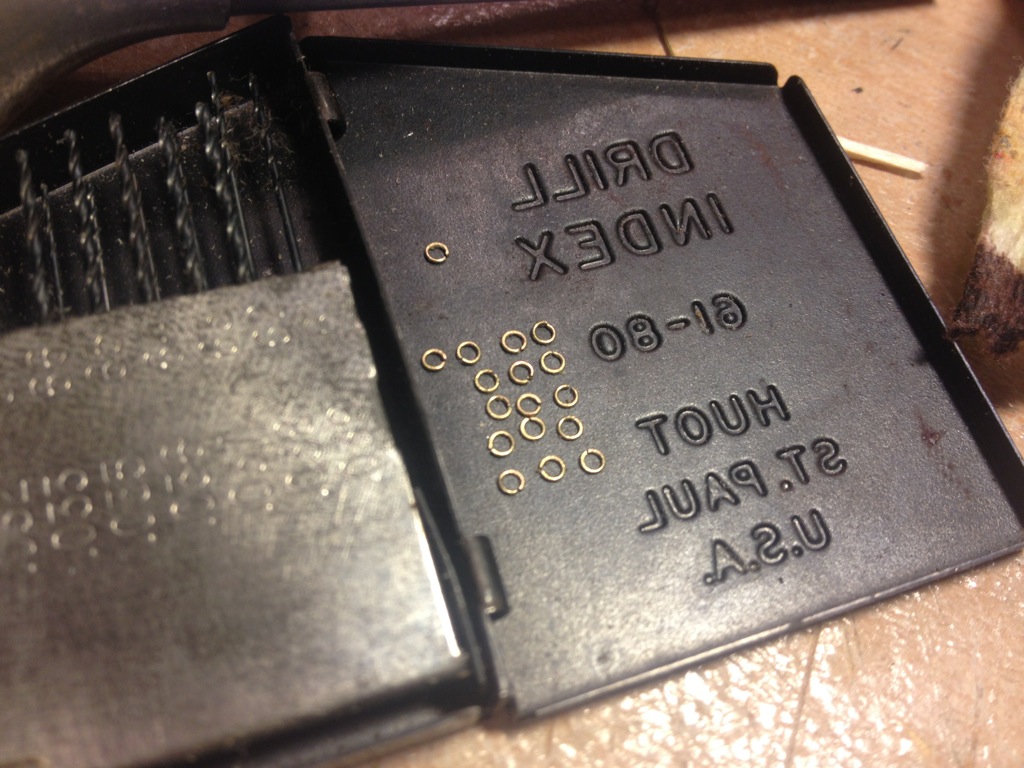
I then started on the eyelets and rings that hold the cannon in place. I found some 0.011" brass wire from another kit. I wound it around a #70 drill bit but that turned out to be far too small for me to work with.
So i switched to a #61 and that seemed to be OK. I wound tight coils and then split them off with some small side cutters. I then flattened them in a set of smooth jaw pliers. I made 22 of them even though 20 were needed. Turns out that they go shooting off very easily and I needed all 22 of them!

After that I held the eyelet in a set of small hemostats and used tweezers to bend the eyelet. I inserted the ring and then flattened it back out. The result is passable at this scale I think. It doesn't match the plans exactly (they're about 30% too big) but there is no way I could work with a 0.025" I.D.
It took me as long to figure out how to make the first four as the remaining 16.
Next step is to blacken them and glue them in. I may make a jig and rig up the cannon to them before gluing.
-
Looks really good! And the work space doesn't look that crowded-compared to mine.
As an interesting aside, I was going thru some old boxes this weekend, and found a brochure from the Pride of Baltimore 1 (from 1983) whe she visited Seattle. If I ever get my workroom cleaned up, I know I have plans for POB 1-if I can find them. I'd love to make a Pride 1 and Pride 2(I have the Pride 2 kit) and put them rafted together in a diorama. I hope I live long enough to do that.
Thanks again,
Harvey
Interesting idea. I have no clue what the difference is between the two Prides other than a couple decades between their construction. I think they modernized Pride II a bit but I don't know if the general design itself was changed.


Pride of Baltimore II by Blue Pilot - Model Shipways - Scale 1:64
in - Kit build logs for subjects built from 1901 - Present Day
Posted
Looking good. There's no guarantee I did anything right! I have no clue what I'm doing
You may need to shave down the aft knees the thickness of the planking since you elected to install them after the planking.
Honestly, it doesn't have to be perfect. There is so much stuff that gets installed that you won't see much of the deck once the model is complete.
Are you planning on leaving the deck lights off? I am. The materials supplied with the kit for those are for costume jewelry and I could not think of any way to make them look decent. Maybe substitute some acrylic rod for the rhinestones for the lenses? I also considered painting them on or doing something along those lines but in the end they just don't add anything to the model.