Shazmira
-
Posts
1,303 -
Joined
-
Last visited
Content Type
Profiles
Forums
Gallery
Events
Everything posted by Shazmira
-
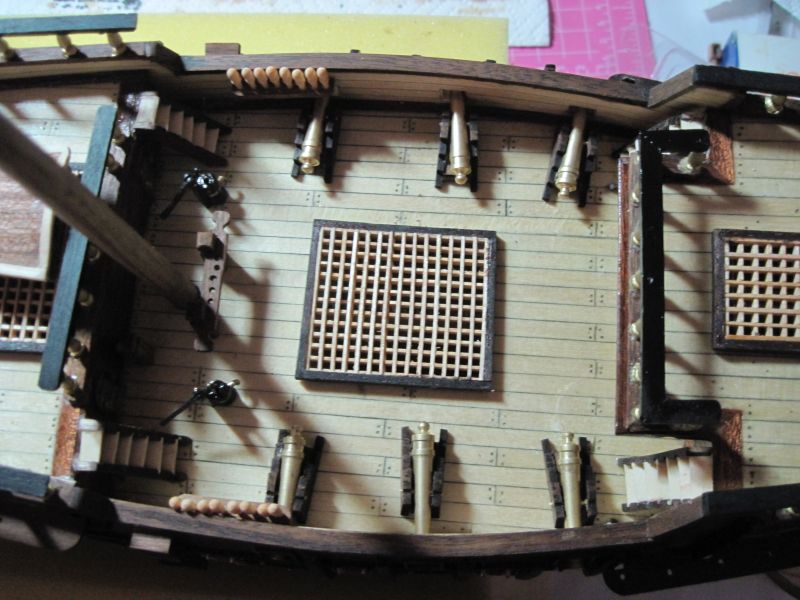
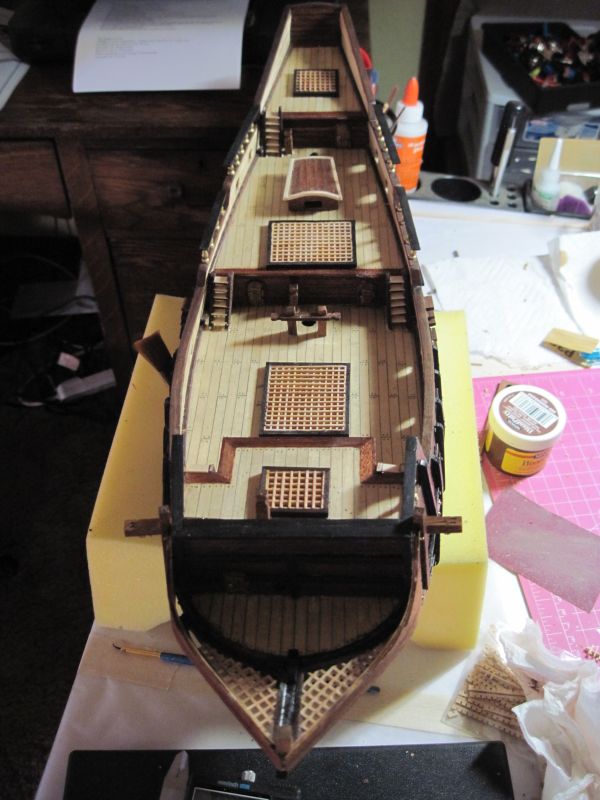
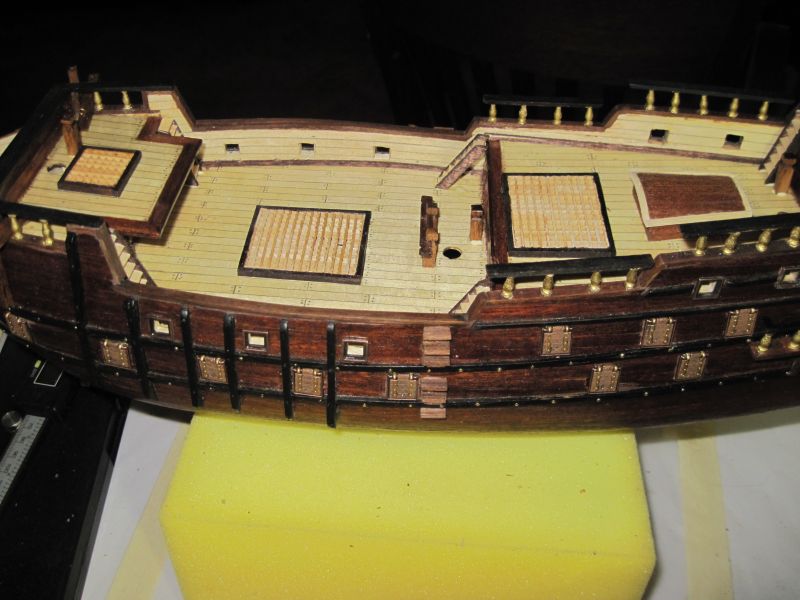
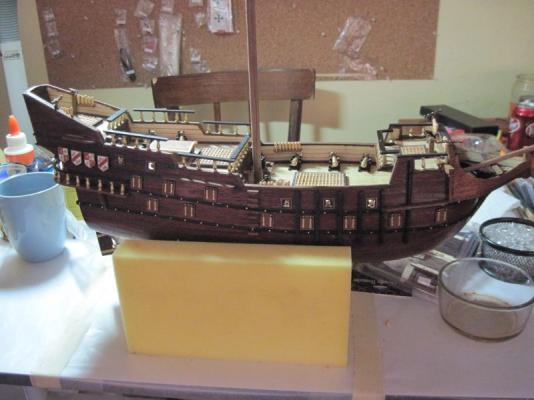
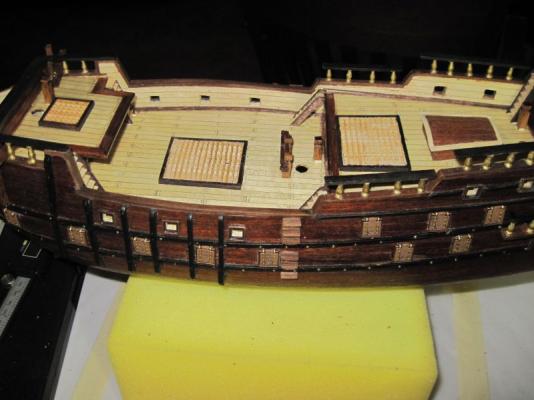
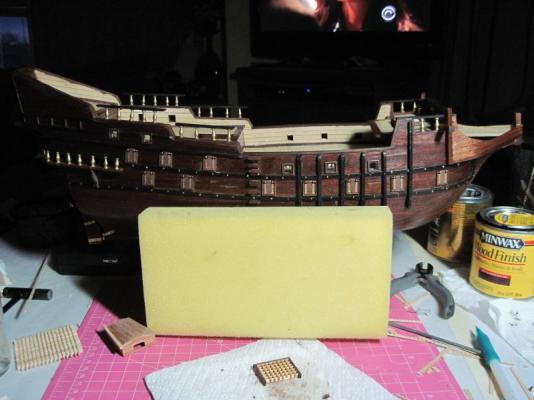
 Ok Sjors, just for you, some pics. Cannons and carriages on the deck (not yet rigged) guns at the bow and stern installed Pinracks in place raiings done channels on also have anchors done but since I can't do my deadeyes and chainplates yet, I can't mount the anchors Ready to start working on the masts tonight....then I am going to have to decide what I want to do with this lifeboat...use it as is and call her good, or build myself one....hmmmm....
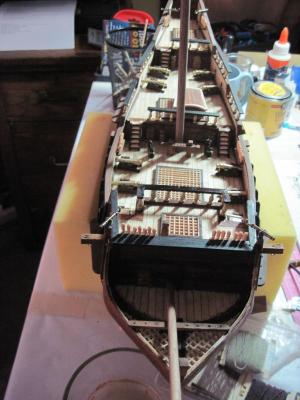
- 773 replies
-
- 4
-

-
- san francisco ii
- artesania latina
- (and 1 more)
-
Well, my carriages are going to be wheeless.... I didn't get any wheels in my kit, and I found last night, that if the carriages sat any higher the guns wouldn't fit through the opening anyway. So...it will look stupid to anyone who knows better, but the peeps around here won't be any the wiser.
-
Sjors, WOW!!! She looks great...all that hard work and patience is really paying off!!!!
-
If I had a spare $1500 laying around I would buy the byrnes tablesaw, thickness sander, ropewalk, disc sander, pluss I would pick up a mini drill press, and a scroll saw. I could save myself thousands, just by milling my own lumber....if only, if only, if only....maybe I should pick up a summer job just so I can invest in those things
-
Looking very nice TIm!!! BTW, since you are just about there, when it comes time to cut your channels that will hold the dead eyes on the hull, and the railings for your decks; don't cut them to length per the instructions...measure your ship first. I cut mine per the instructions and the railings on the fore deck are too long, as are the forward channels. The rest seem to be okay, but dang it, I don't have anymore of that dimension wood to redo the forward channels so I had to just cut them to fit over a second set of tracks.
-
I meant channels not racks....one of these days I will learn the names to all these parts lol. sorry, not much progress to talk about. I worked on lots more little bits and pieces yesterday, and am working on the guns and carriages but no pictures yet. Am feeling a bit under the weather so haven't been as diligent of late.
-
Welcome to my little corner of the world Augie, we don't lack for excitement here...and I LOVE my pink cutting mat lol. Andy awesome drawing, now I understand. Eric, dot feel bad about what you did, your straight up and down chainplates with the shortened ones just above the conflicting gun ports is EXACTLY what the instructions show to do...same pictures in the manual as you did. If I made that apron thingy, I would do just like Sherry said, stand up and probably dump the entire drafting table, build and all over onto the floor. THAT would be a real tragedy.
-
I love the Confederacy...especially love the fact there would be no rigging involved lol. But that price is scary. With the Syren on sale, I really couldn't resist, and I have been talking to Chuck about her. She is just so beautiful....
-
Ooooh I just broke down and ordered this kit for my next build....love your log Augie it is similar to mine with lots of ramblings and sidetracks. Me thinks it is that banter that keeps me building and trucking along. Without it, things would just be boring and technical Awesome build by the way. I can tell I will be referring back to this one often when I finally begin building mine
- 1,668 replies
-
- 6
-
-
- syren
- model shipways
- (and 1 more)
-
Are you telling me NOT to put in the deadeyes with the chainplates now, like the instructions say? Do I go ahead and attach the racks for those to the hull now?
-
Sherry...looking quite good there girl, you show em all!! I really am impressed, several people have been trying to pull me to the dark side...I have decided that in the next 12-18 months when we buy the new house, I will upgrade the old garden house to my shop, then I will start scratching as well. I am working on acquiring the tools now, so I will be ready when the time comes
-
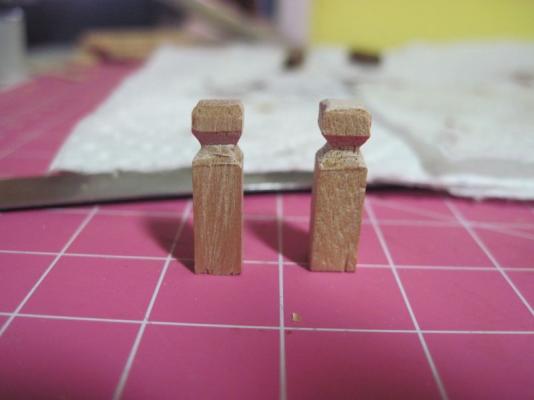
As for the perfectionist part....I have always been one of those types of people, never much subscribed to the "it's good enough for gov't work" line of thinking, but more along the lines of "if it's worth doing, it's worth doing well". Early on, I did go with the "it's okay for now, because I can sand it to perfection" but now on these little bits, I am finding I have to be content with the mediocrity that my available tool set offers me. Like those pintles...are they perfectly carved with all straight lines and bevels, and perfectly aligned drill holes? Hell no, but you know what....I don't own any micro tools that will allow me perfect miters, and perfect depths and alignments. All I have is my #11 exacto, a pin vise, ruler, and my eyes. So for my purposes I was pretty darned happy with how they came out. I was especially amazed that I could do that on such a small piece. So I am happy with the result and in the end, I am really the only one I have to please. I am thinking though that the overall result of the ship itself is shaping up to be fairly decent for a first attempt, amazing how much we learn along the way that will help with the next build, but I think I can safely say she will be 2 footer...you know, looks awesome from about 2 feet away. And I can live with that, as I have seen some 6 footers on here lol.
- 773 replies
-
- 3
-
-
- san francisco ii
- artesania latina
- (and 1 more)
-
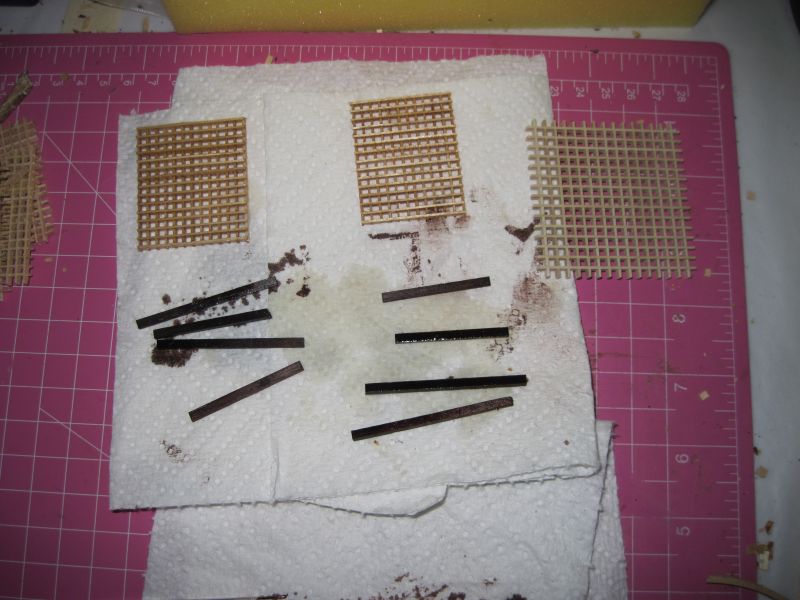
Thanks everyone for the kind words and the encouragement! I actually feel like I am getting somewhere at last. It is strange how just putting a few odds and ends on the deck start to bring the whole thing together and make it look like a ship. @Aaron, it is in two pieces..that is how I interpreted the pictures in the instructions. Word of warning...the kit did not supply with enough of those little grating strips, luckily when I made that visit to the hobby store I had bought a package just in case. The little bits and pieces seem to go quicker now. Either my skill in making them is improving, or my patience has gone beyond the perfectionist stage and just wants to get it done. I do see a light at the end of the tunnel though. according to the instructions I only have 10 more steps to go, a couple more little bits (8 to be exact) then I can start wiring some deadeyes for the hull, next is the cannon and carriage construction, the life boat, and then yipee the masts go in. I think I am actually excited to get to the rigging stage...one, I want to see just what everyone complains about, and two, I told myself when I get there I will also start building my longboat kit
- 773 replies
-
- 1
-
-
- san francisco ii
- artesania latina
- (and 1 more)
-
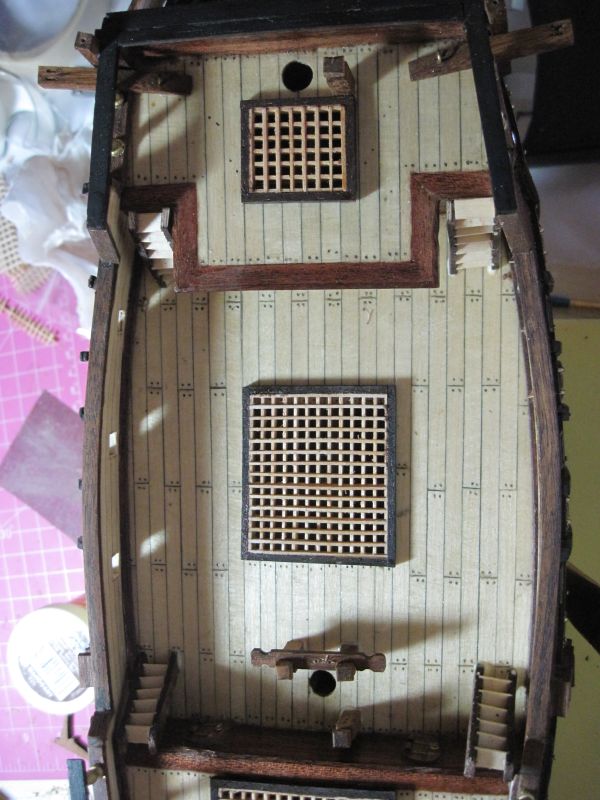
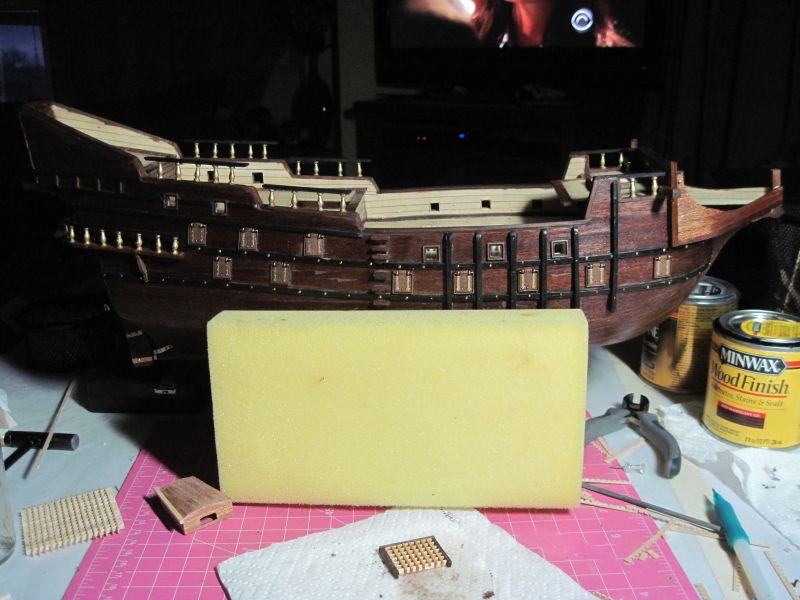
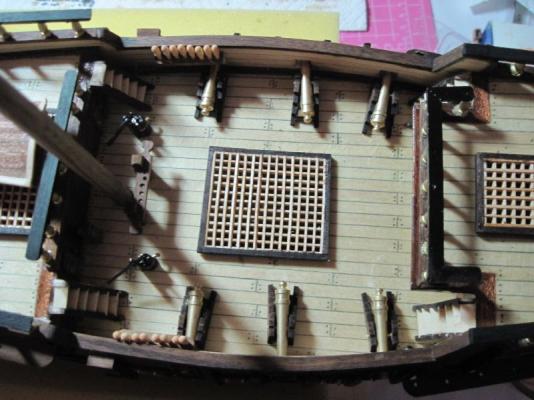
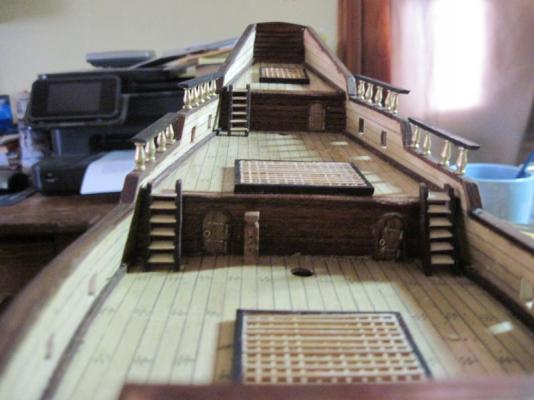
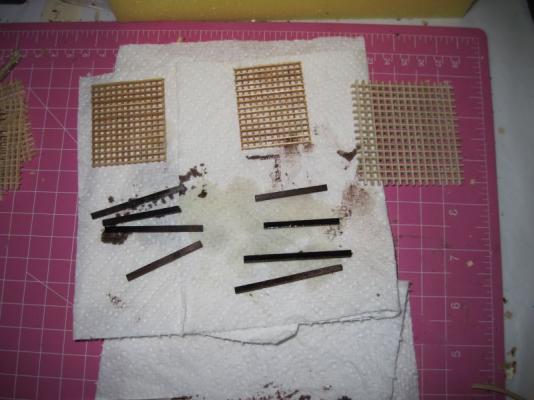
Gratings completed. Installed As she sits now with a bunch of little bits completed


-
YEA!!! Pictures at last....I must say they were well worth the wait. Looks VERY nice Sjors!!
-
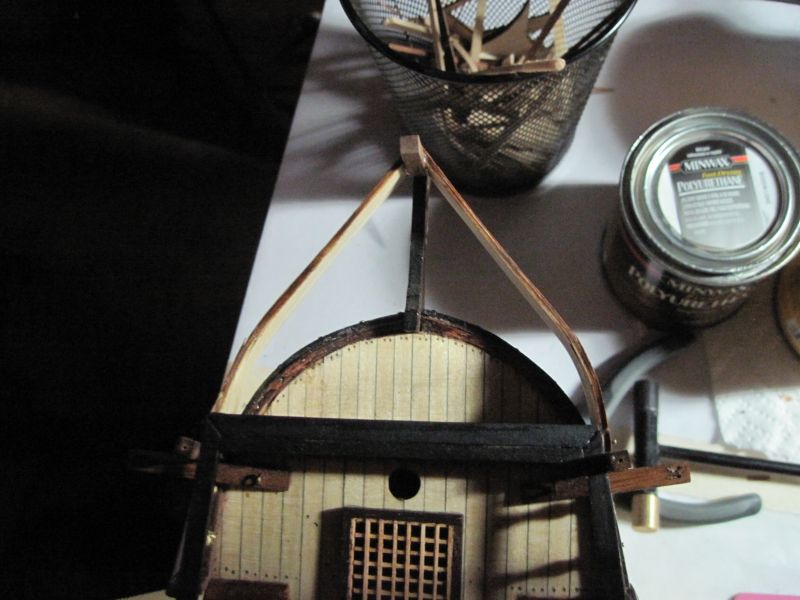
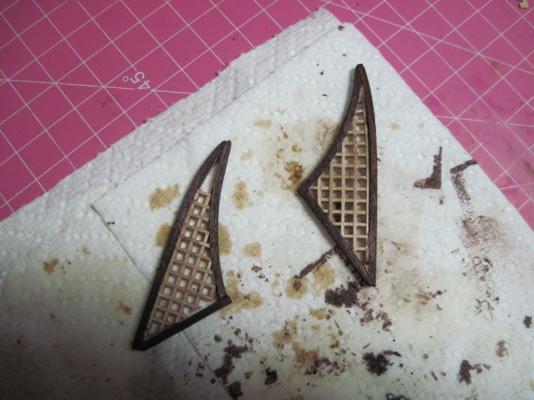
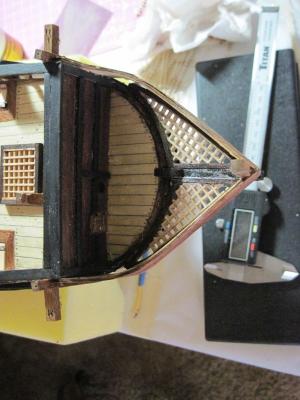
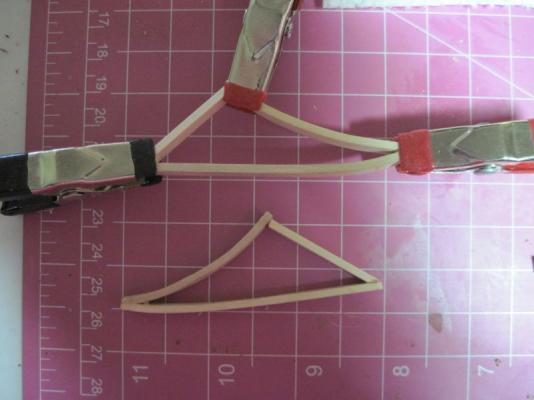
So, I have managed to get one classes' papers graded while working a bit on the ship. Got the first pintle finished, Does this look too tall? It is the proper height according to the instructions, but again, since I don't know what a pintle's purpose is, I think it looks oversized sitting there on the deck. Completed bending, measuring and fitting the bow-beak frames. Waiting for glue to dry so I can sand smooth and make the joints look better. Then I can install the gratings. Cut my other pintles..actually pretty happy with my rough carving skills of such a tiny piece using only a #11 blade. these haven't yet been sanded smooth, but I was very pleased with the overall shape of them Now, back to work!!!

- 773 replies
-
- 1
-
-
- san francisco ii
- artesania latina
- (and 1 more)
-
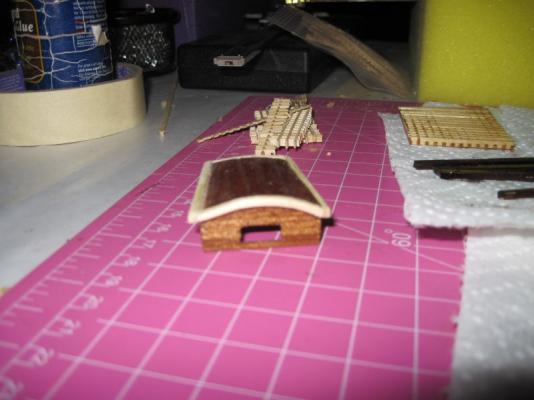
Aaron, as far as the thickness, it won.t matter a bit for the limber boards. you are right, the applewood is rather ugly!! Bedford, I'm working, I'm working lol. Got up this morning, and have been installing the rest of my doors in the bulkheads above deck. Making my ladders, finishing up the gratings, and yes, I did figure out how to do my frames for the grating between the bow and the beak while I was sleeping, so soaking and bending wood for that now!!! Thank you everyone for the explanation of the catdavits...really did find that an amusing name, but it makes sense now.
-
Sjors! ! ! Hahahahaha You called that one right Andy! And here I was just getting on to post pictures, but now maybe I should wait.......... Not much progress really although I have worked every night. Finished the "beak" and the catdavits(whatever the heck those are) Got my cabin finished and ready to glue on the deck. I have been fighting with the gratings...the ones provided in the kit do not have the grooves cut in a straight line, but more on an arc. So I had to take a file to each individual groove in order to get them put together. The small ones are done and on the deck, 2 large ones are waiting for the stain of the frames to dry to complete assembly and installation. I am puzzling out exactly the best way to build the odd shaped frames that will hold the grates between the bow and the beak, so that has stopped me for the night. I figure I will do my usual.....go to sleep tonight and dream up my fix for the frames, then I can tackle them in the morning.

-
Good to see you back Aaron, hope you enjoyed your little break but wanted you to know I for one have missed you here
-
Thanks for the vote of confidence Mark. I have a stress ball at work that i have been using. The problem is I have picked up an infection deep in the incision so it makes it very painful to put any pressure on the palm yet. I seem to be able to model fairly well as I am working basically on small parts and bits and the first two fingers and thumb of right hand work reasonably well so I can hold the small tools. I think if I were still planking and doing lots of major shaping and sanding I would be up a creek at the moment. So hopefully by the time I am ready for that Syren the hand will be up to the challenge as well. P.S. hope the wife is recovering well
-
Thank you for the link Anja, and the notification Adrieke. This looks interesting...might have to see what I can do with it.
-
Love that finish Randy! I gotta get some of that oil for the next one!
-
This has been a joy to watch, your craftsmanship and inventiveness is first rate!!!
- 552 replies
-
- 1
-
-
- maine lobster boat
- Midwest Products
- (and 1 more)
-
Sjors, you never fail to amaze me with your good humor Your posts have become part of my daily routine, get up, eat breakfast, drive to work, log on to read what Sjors had to say so I get a big smile on my face! It makes for a great way to start the day!