

j21896
-
Posts
287 -
Joined
-
Last visited
Content Type
Profiles
Forums
Gallery
Events
Posts posted by j21896
-
-
Aldo!
What a fantastic holiday gift to see you back in the shipyard and posting on MSW! You have been missed my friend.
I want to wish you and your family a Happy and HEALTHY new year! And let's not forget your Badger -- she deserves the company of your Triton and Pegasus along side her. So here's to a very busy shipyard as well -- for many years to come!
Cheers,
Robert
- mtaylor, rdsaplala, harvey1847 and 2 others
-
 5
5
-
-
-
-
Beautiful Bob! That last broadside shot is just great!
Robert
-
-
Hi Grant,
Would it help to sand a bit of a concave shallow in the top surface of the strip before making the other cuts?
I'm glad you mention that the grain direction issue messed with your head a bit. In looking ahead a little, contemplating how I am going to make the cleats for my bulwarks, that was a puzzler for me.
Robert
-
Hi John,
For future reference, if you decide to go with copper for anything, here is a link to purchase liver of sulphur from Amazon:
It works great highly diluted with water.
Cheers,
Robert
- Landlubber Mike, mischief and texxn5
-
3
-
Hi Jason,
You are progressing through this rigging thing beautifully!
I wonder, could you expound a bit for those of us who haven't yet gotten into serving lines? This is probably a stupid question, but why is "trimming a bit off" not an option?
Thanks,
Robert
-
Thanks guys. Of course there is a bright side to all this. The first go round I didn't have any HobbyMill cherry wide enough for the brackets, so I used inferior wood. This time, I still don't have any HobbyMill stock large enough, BUT ...
Many, many moons ago, about when I first started this project, I was in a Rockler store and bought a piece of cherry wood sized 3" x 3/8" x 24". I had no power tools at the time, so I really couldn't use it, but it was just such a beautiful piece of wood I grabbed it. Well, in my search for lumber to start my second attempt at the carriages, I came across that long forgotton gem!
As Grant would say, I now have the chance to play with my toys (Byrnes thickness sander and table saw) some more -- and to use them much more extensively. This time, I didn't have to glue up strips, I could in fact slot the profiles in a larger block of wood, then slice the brackets from that. Also, I'm going to drill all the holes for the eyebolts BEFORE assembling the carriages this time.
Robert
- gjdale, Wintergreen and augie
-
3
-
Wow, great link Mike! He used draughtsman's linen for the sails -- wonder how that compares to the thickness of your material??
Robert
-
Thanks John. Unfortunately I foolishly skipped an essential step in the process of making the gun carriages – a mistake for which I am now paying dearly with my time.
Before going about mass production of any scratch built items, it would obviously be a good idea to build a prototype!! In building the gun carriages, I neglected to do that. Instead, I just followed the plans, failing to consider that -- being plans for “after-market” carriages -- they may need some adjustment to fit my build!
I made all the components, built up all the carriages, got to the stage of adding the quoins and realized the height of the guns in the ports was going to be too high.
 At first I decided to continue on, and “live with it”, and I completed the carriages. Then, I realized that I was dragging my heels on installing the ironwork because I could not live with it.
In any event, I drew up a few adjustments that I think are subtle enough to not throw off proportions relative to the gun barrels -- which are obviously not changing. I built a prototype, and now I’m fabricating all new parts. This is going to take a while longer.
I feel pretty stupid, but I think I’ll just chalk this one up to a bad case of “go fever” (to use a 1960’s Apollo program reference).
Robert
-
Hi Augie,
She's looking just gorgeous! Fabulous work, and so fast too!
For planking the lower hull, you've probably already read it, but Chuck's tutorial on the subject is the gold standard in my opinion. (I sure wish I had it before I did my planking
 )
)It's in the downloads section on the main MSW page here:
Robert
-
-
Hi Gary,
I must join in the chorus -- that stove is just beautifully done!
Robert
-
-
Ouch!! Very sorry to hear about that mishap Grant. I hope you can get her fixed up with minimal redo's!
Robert
-
Hey Wes,
I love your innovative approach to the skeletal assembly! This will be a fun one to follow.
Robert
PS. Please don't abandon your beautiful Conny!
-
Hi Sjors,
Best of luck with your gigantic, new build!!
Cheers,
Robert
-
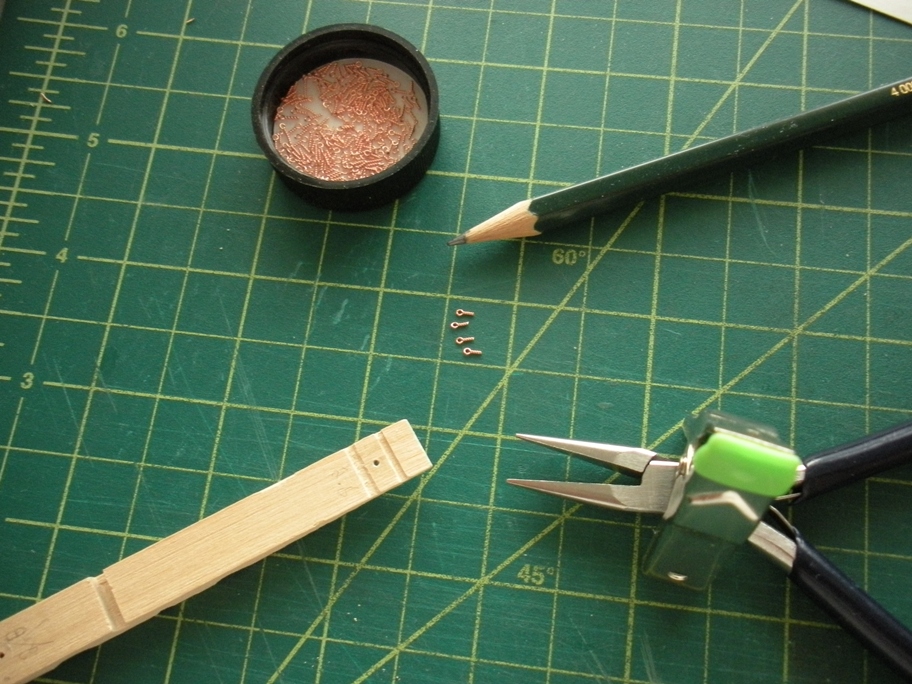
Eyebolts
Not much time being spent in the shipyard of late, so progress has been extremely slow. I thought I’d at least post a “micro-update” before the close of the year. I made the carriage eyebolts using the guidelines provided by B.E., along with the suggestions for fabrication received here:
http://modelshipworld.com/index.php?/topic/4308-in-need-of-tips-and-techniques-for-making-eyebolts/
Using 28 gauge copper wire, I chose to go with the "twist method" nicely illustrated by SpyGlass here:
http://modelshipworld.com/index.php?/topic/3336-securing-eyebolts/page-2#entry107526
I followed that process, including use of the clothes peg, with one minor adjustment. To free up a hand, after using the pliers to pull the ends of the wire through the hole in the clothes pin, I used a small clamp to hold them. Straddling the legs of the clamp over the pliers as shown, prevented it from rotating while turning the drill bit in the eye (not shown).

Time to motivate, and get these blackened and installed in the carriages!
Happy New Year to all.
Robert
- Archi, Elia, Landlubber Mike and 1 other
-
4
-
-
Jason,
I figured I'd ask, as I'll be going the cradle route too. It's probably not necessary, but I was just wondering if folks use any special techniques to "lock" the hull in place.
Robert
-
-
That sure looks like a fighting ship Jason! Those deck shots are beautiful-- they really show off your fine craftsmanship. In fact, if you felt like posting a few more overall shots, that would be okay too (hint, hint)

I like your idea to go with walnut for your masts -- they're looking great. You and B.E. have me eyeing that mini Proxxon lathe.
Cheers,
Robert
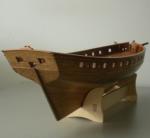
HMS Cumberland 1774 by AlexBaranov - FINISHED - 1:36
in - Build logs for subjects built 1751 - 1800
Posted
Hi Alex,
May I ask how many years it took, start to finish, for you to create this magnificent work of art?
Thank you for posting your build log!
Cheers,
Robert