mrcc
-
Posts
574 -
Joined
-
Last visited
1 Follower

Recent Profile Visitors
3,034 profile views


-
Thanks Peter… yes, at the end of the day (with the few models I have done), I think it best to glue the masts in. Cheers,
-
 cotrecerf reacted to a post in a topic:
Order of Mast Assembly
cotrecerf reacted to a post in a topic:
Order of Mast Assembly
-
Henke reacted to a post in a topic:
HMS Agamemnon by Henke - Caldercraft - 1:64
-
 Hi Henrik… You will love the lathe! I bought mine used a year ago and just recently turned some masts and yards on it. I found that it was easier to use the plastic collets when turning the masts rather than using the chuck. Cheers,
 -
Baker reacted to a post in a topic:
Order of Mast Assembly
-
Henke reacted to a post in a topic:
HMS Agamemnon by Henke - Caldercraft - 1:64
-
Knocklouder reacted to a post in a topic:
Order of Mast Assembly
-
Luckily my low back is very strong! Thanks for the replies...
-
Thanks Henrik for your reply… the information is much appreciated! Cheers!
-
Thanks for your input… Mamoli’s instructions for rigging is over 4 sheets and each sheet references additional blocks and items to attach to the masts and yards. I will really have to study them in detail so I don’t miss anything.
-
Henke reacted to a post in a topic:
HMS Agamemnon by Henke - Caldercraft - 1:64
-
Thanks Rich, thanks Pfalzer! I have a “game plan” at this time and appreciate your help and suggestions.
-
Thank-you for your input! I appreciate it...
-
 Knocklouder reacted to a post in a topic:
Friesland 1663 by mrcc - Mamoli MV24 - 1:75
Knocklouder reacted to a post in a topic:
Friesland 1663 by mrcc - Mamoli MV24 - 1:75
-
I have a couple of kit builds under my belt, but not sure how to do masts that have multiple elements to them. I scoured this specific section of MSW without a clear understanding. The question is glue the lower portions of the masts FIRST, securing them in their respective mast holes in the deck and then build the top mast, and then the top gallant mast subsequently (adding all the blocks and fittings as you go up at each section of the mast), making sure all are in proper alignment as they build up or whether to build the entire masts off the deck and then place them? Not sure on my Mamoli Friesland what is best or ideal given the very limited instructions on this matter?
-
Wonderful build Henrik… read your build log from beginning to end. One question, you mentioned dry fitting the upper portions of the masts, but at this time, are all your lower portions of the masts glued and secured in their mast holes in the deck? Not sure on my Friesland, whether to build the entire masts off the deck and then place or build up the masts from the bottom up, section by section?
-
Gaffrig reacted to a post in a topic:
Lynx by Gaffrig - Panart - Scale 1:62
-
Lynx by Gaffrig - Panart - Scale 1:62
mrcc replied to Gaffrig's topic in - Kit build logs for subjects built from 1801 - 1850
Everything is very nicely done! -
Baker reacted to a post in a topic:
Friesland 1663 by mrcc - Mamoli MV24 - 1:75
-
Thanks Peter, Thanks Bob!
-
petervisser reacted to a post in a topic:
Friesland 1663 by mrcc - Mamoli MV24 - 1:75
-
Thanks Patrick... I am quite happy with how it has turned out to date!
-
mrcc reacted to a post in a topic:
Wasa 1628 by Knocklouder - Billing Boats - 1:75
-
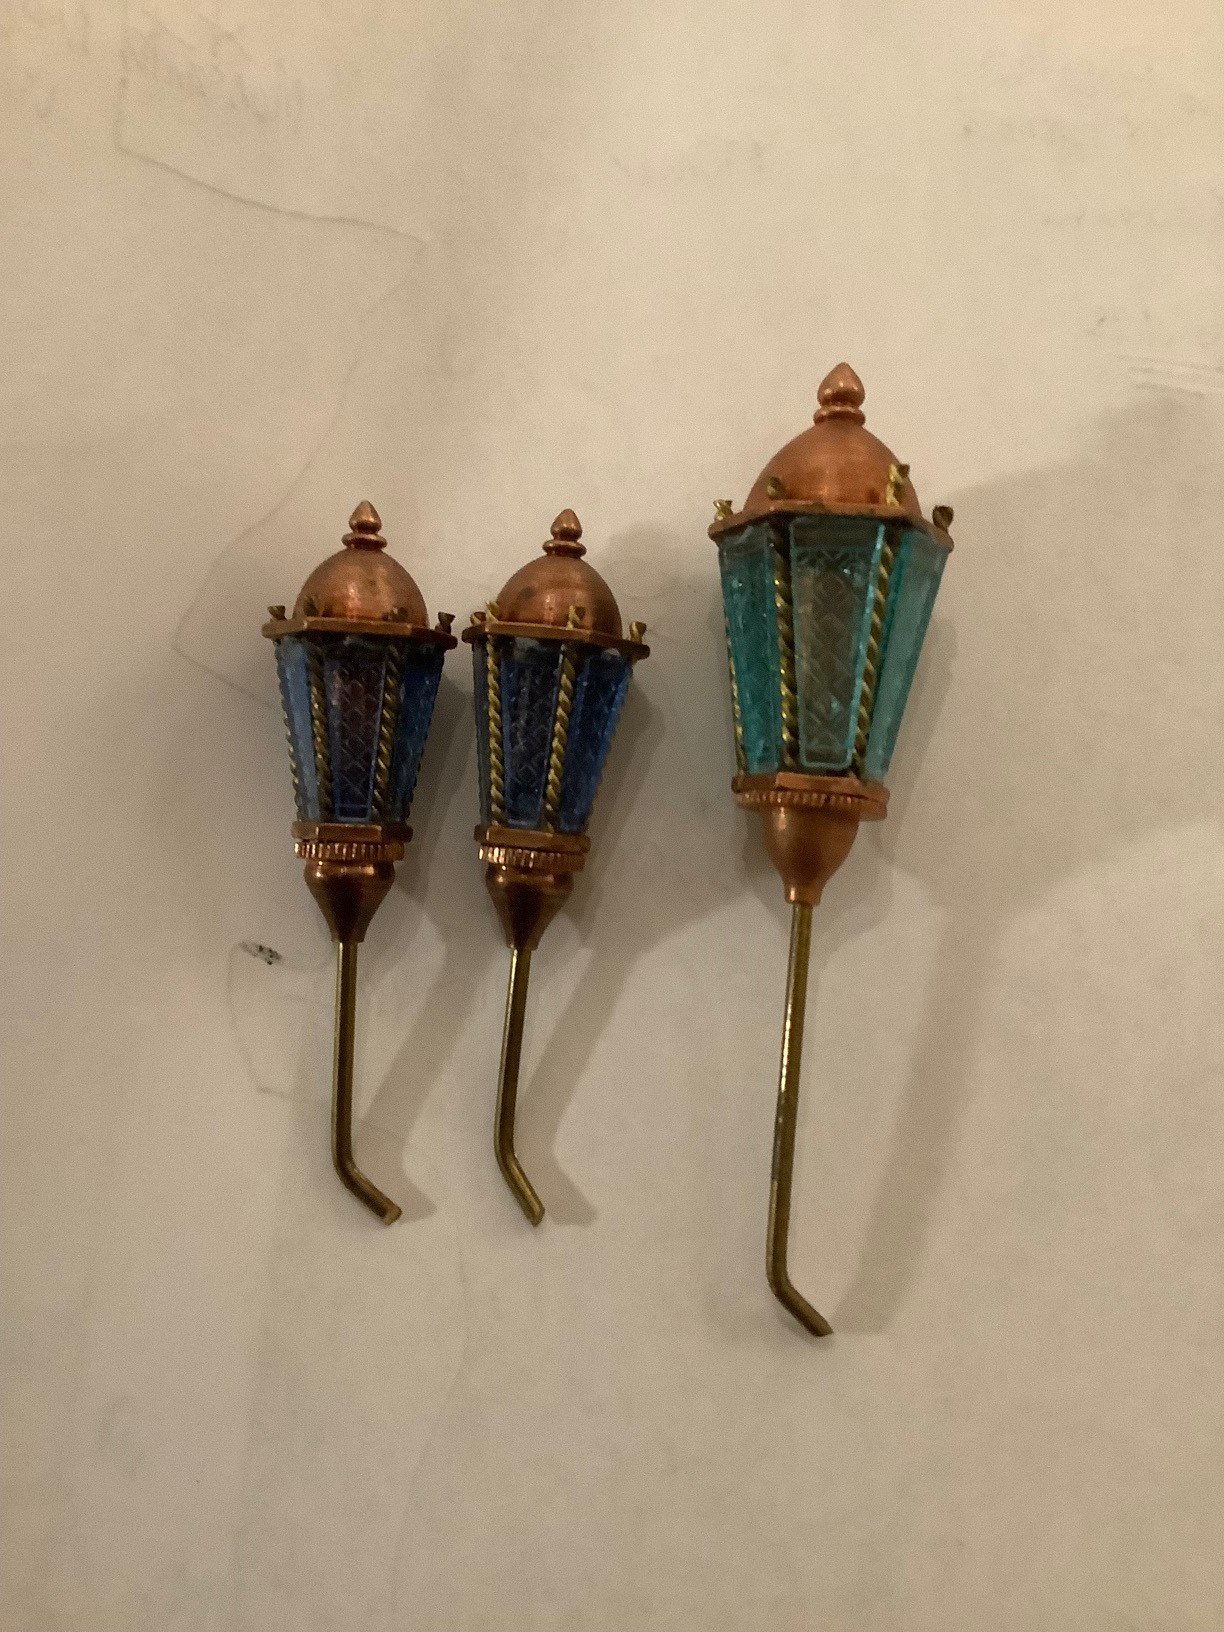
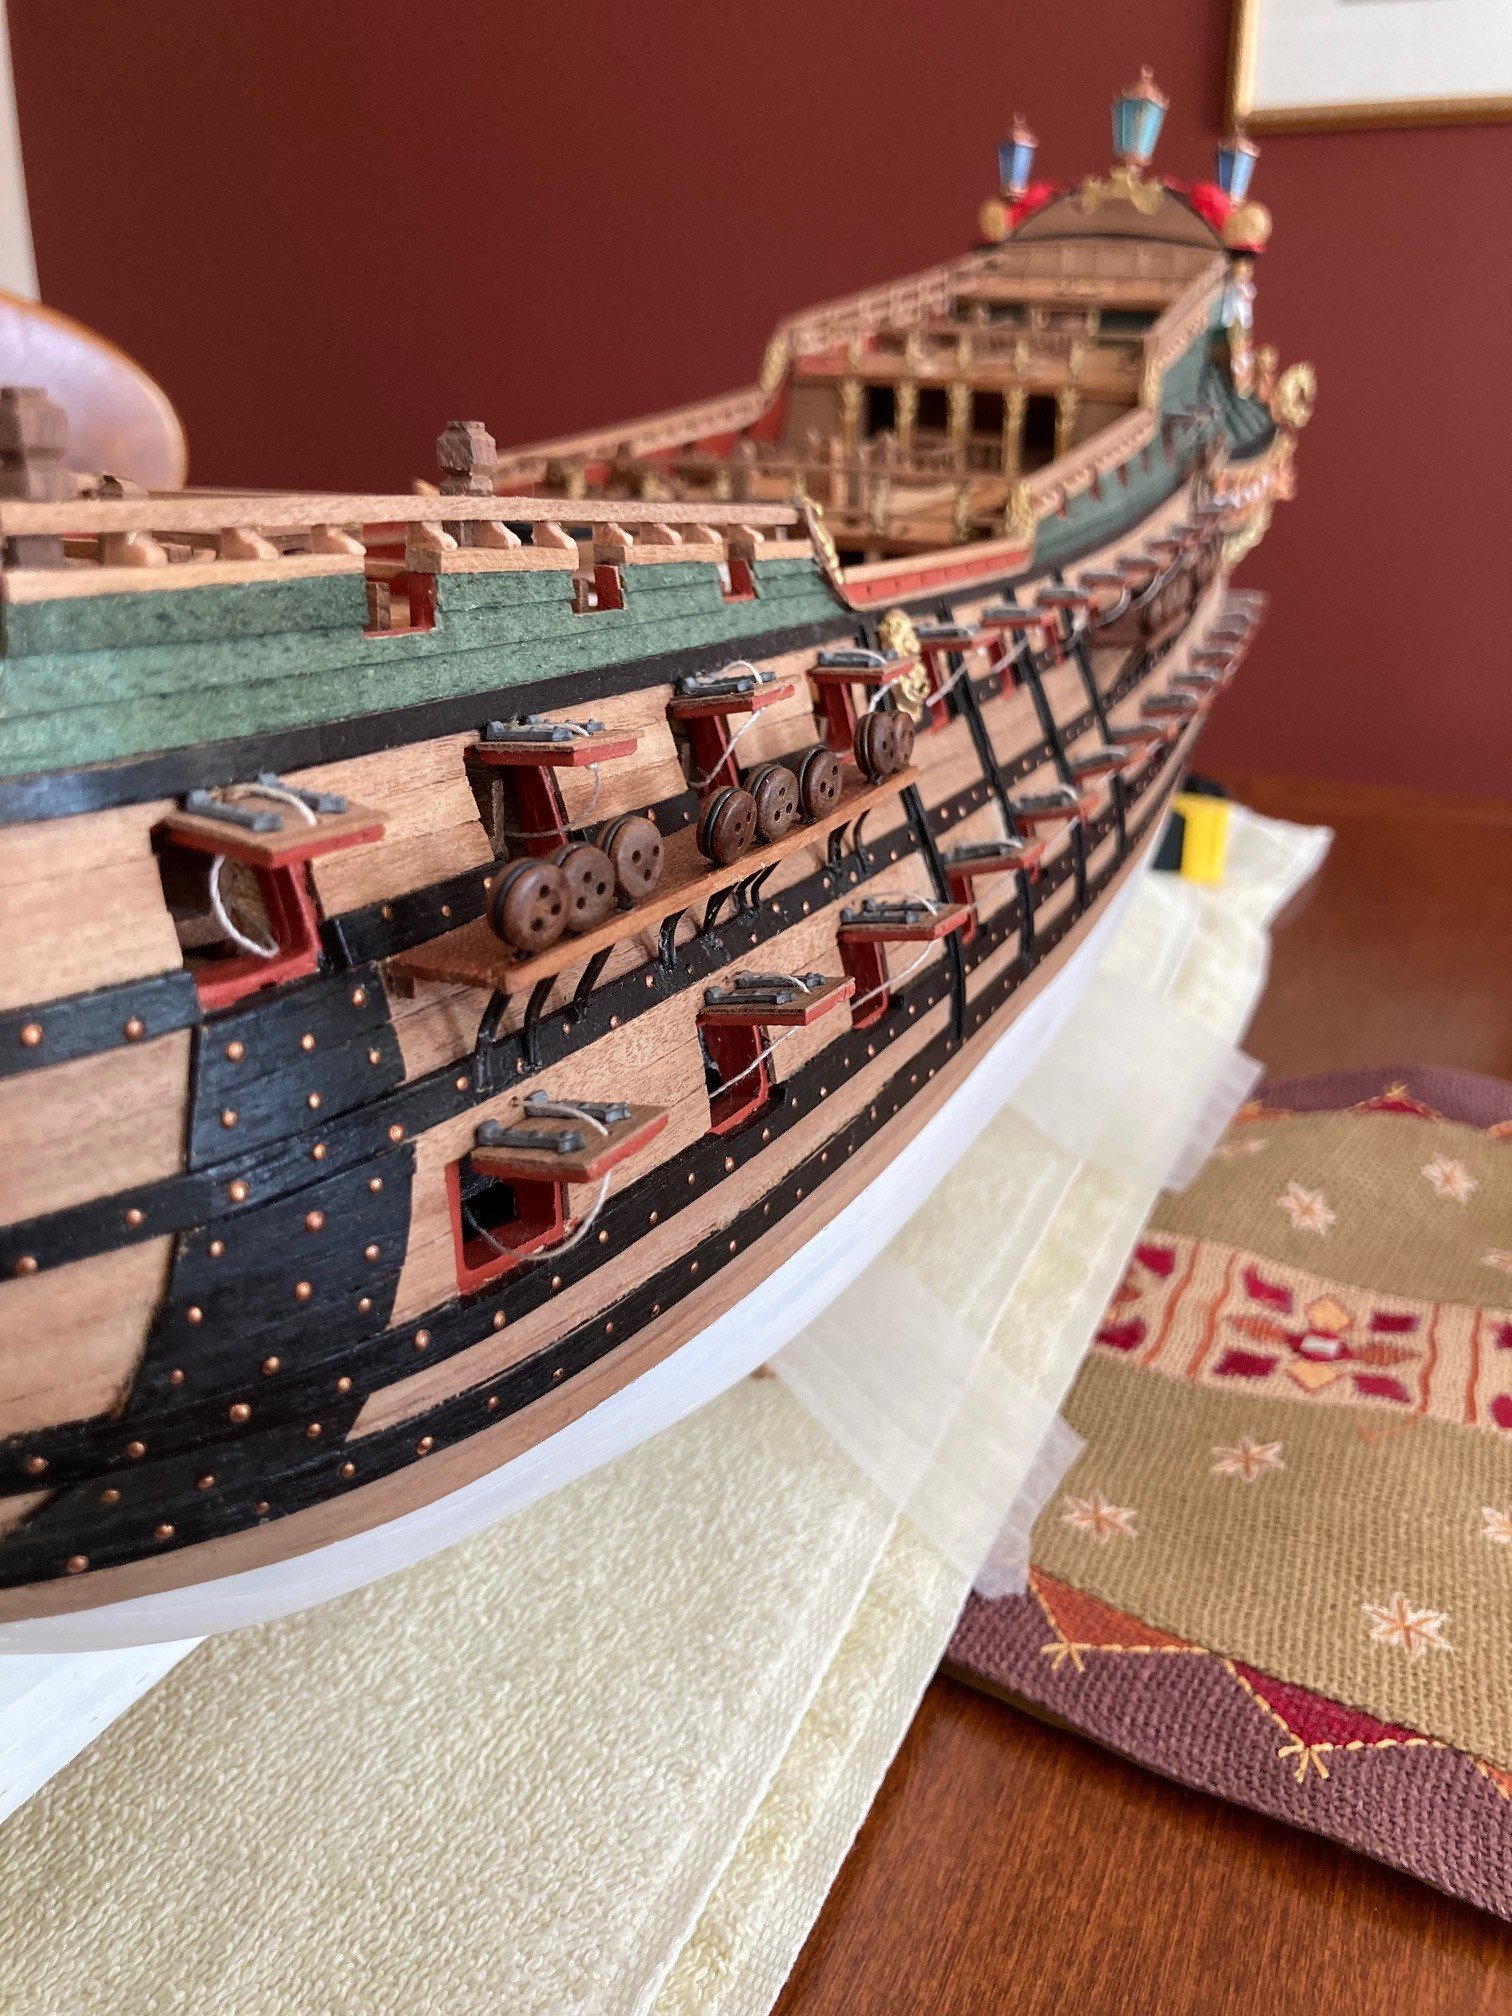
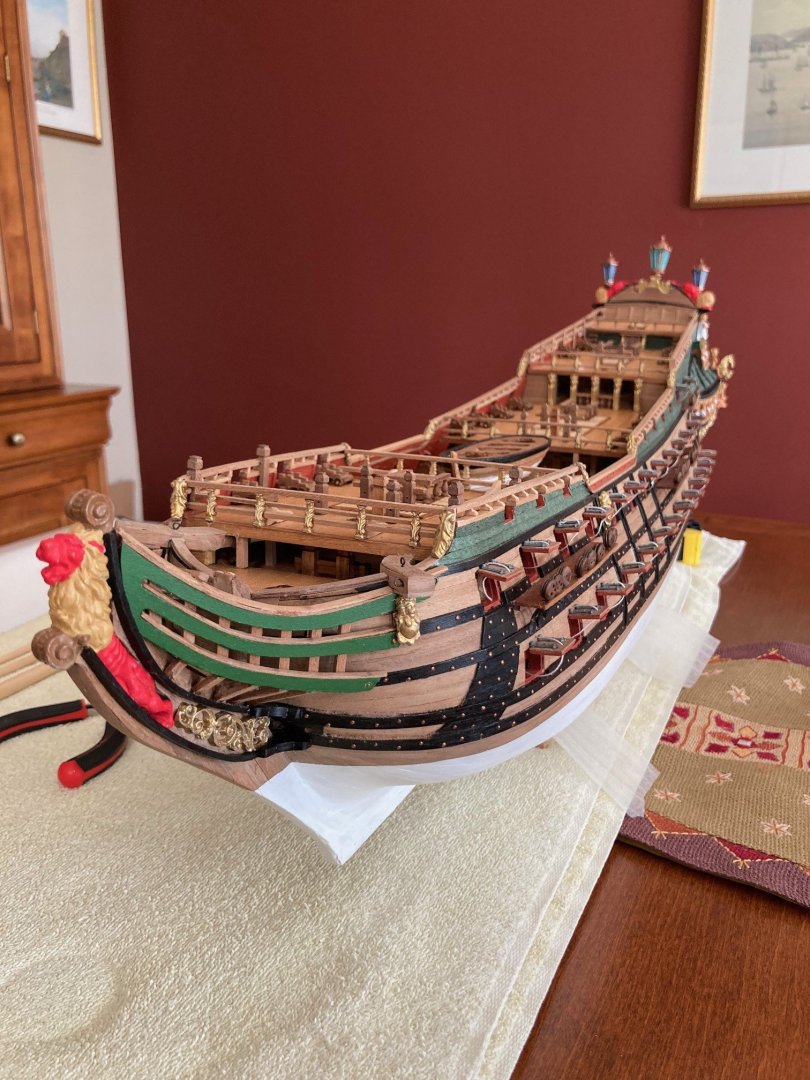
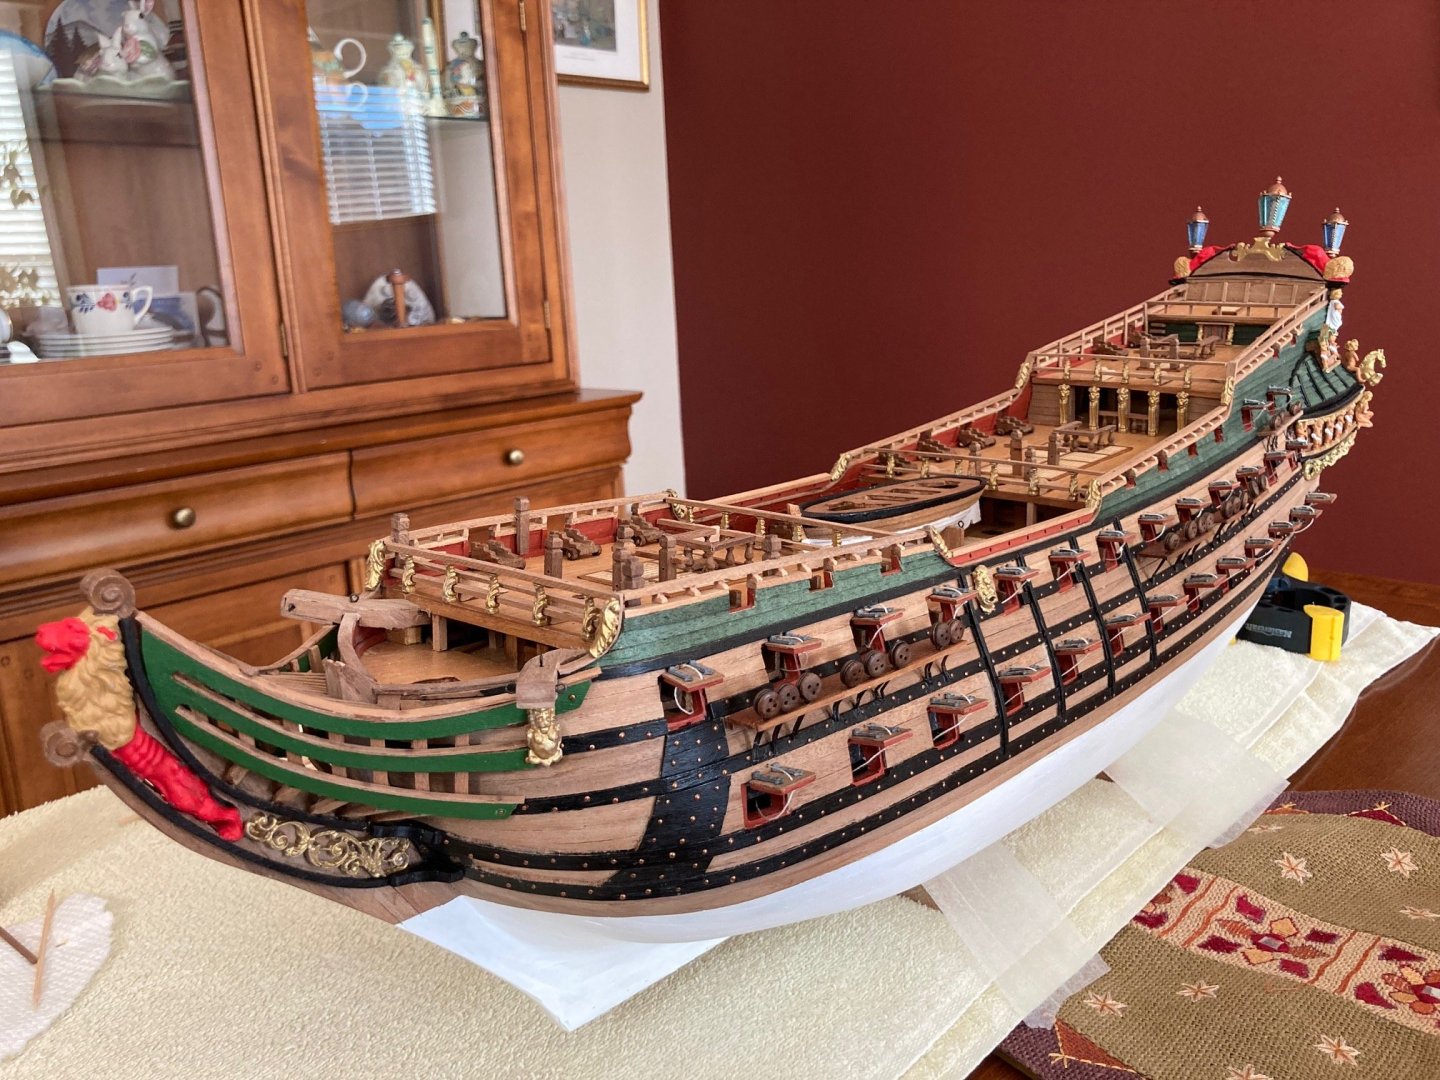
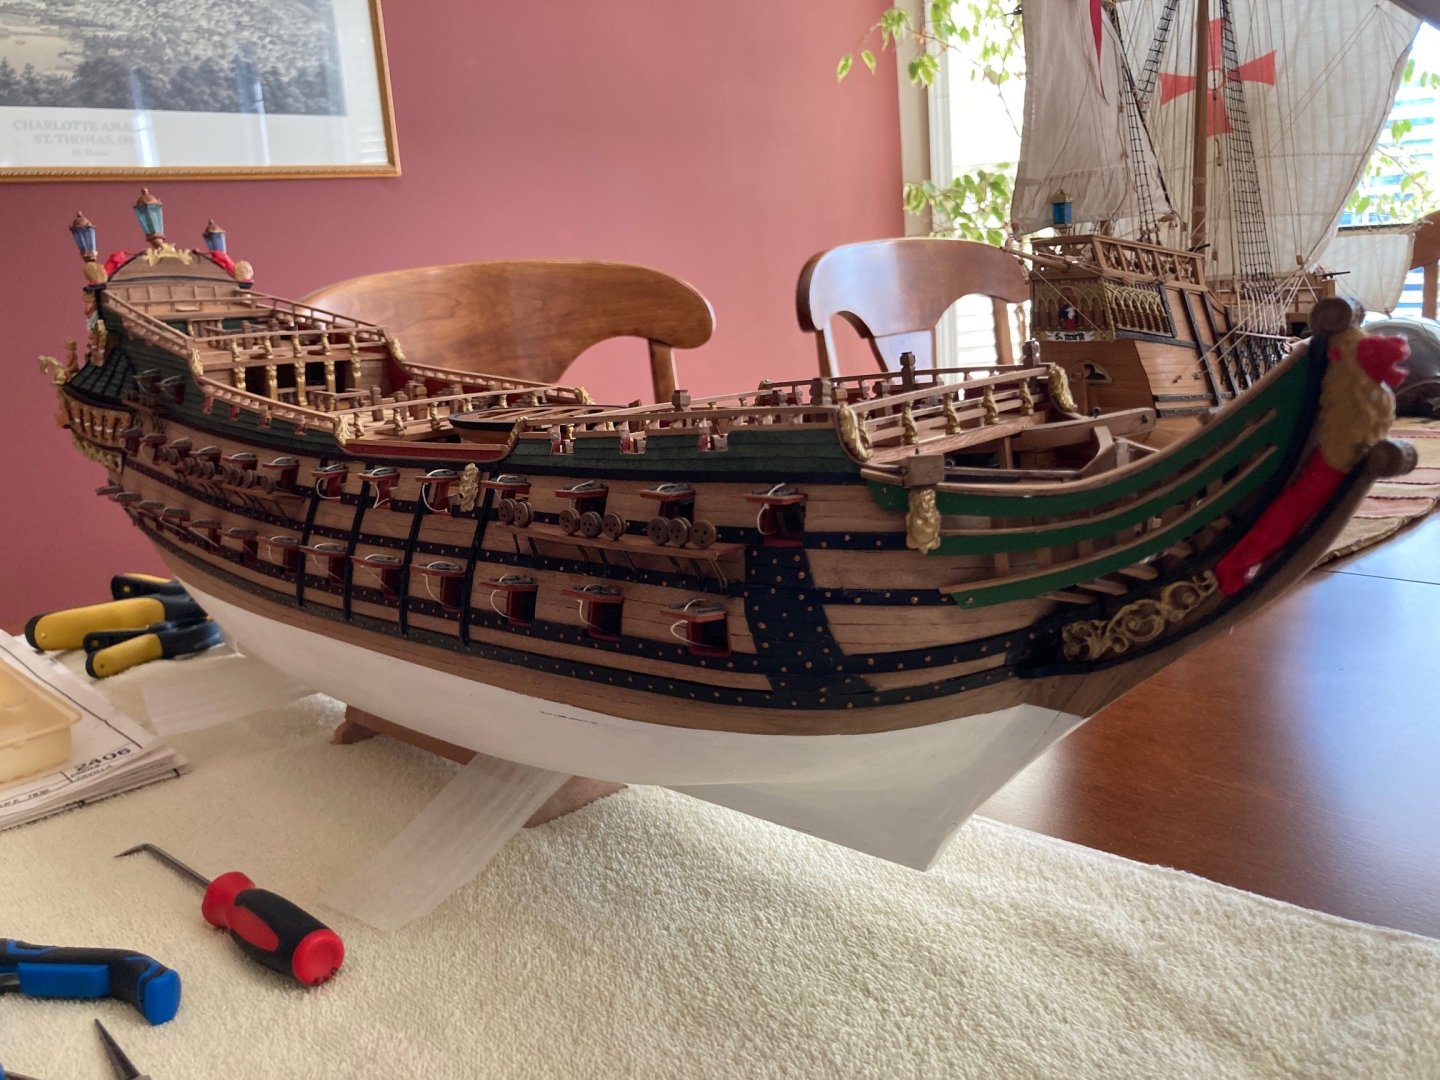
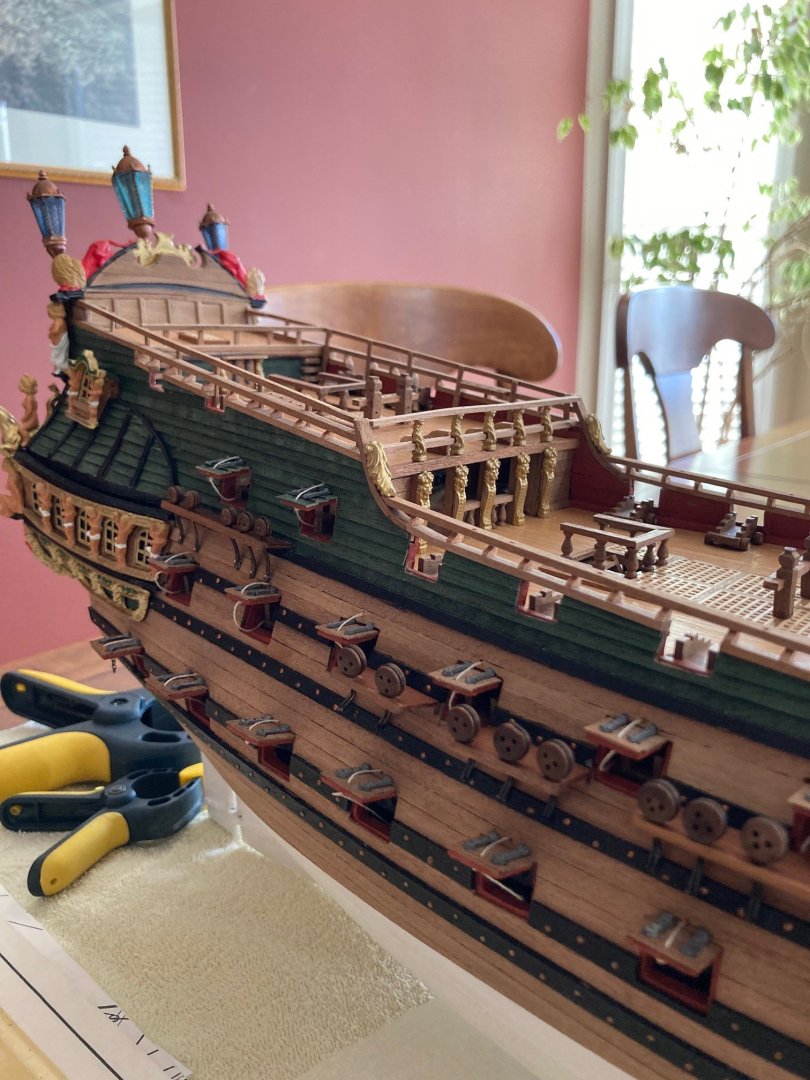
And some pictures of the full hull as she sits at this time... First though a closeup of the kit supplied stern lanterns before they were attached to the stern... very nice in my opinion. Shame about the different color of the panes on the large centre lantern. I told my wife I was going to take a big break at this stage of the build but last night I could not help but turn a few of the masts with the used Proxxon lathe that I bought roughly two years ago for this very purpose. It was fun!

-
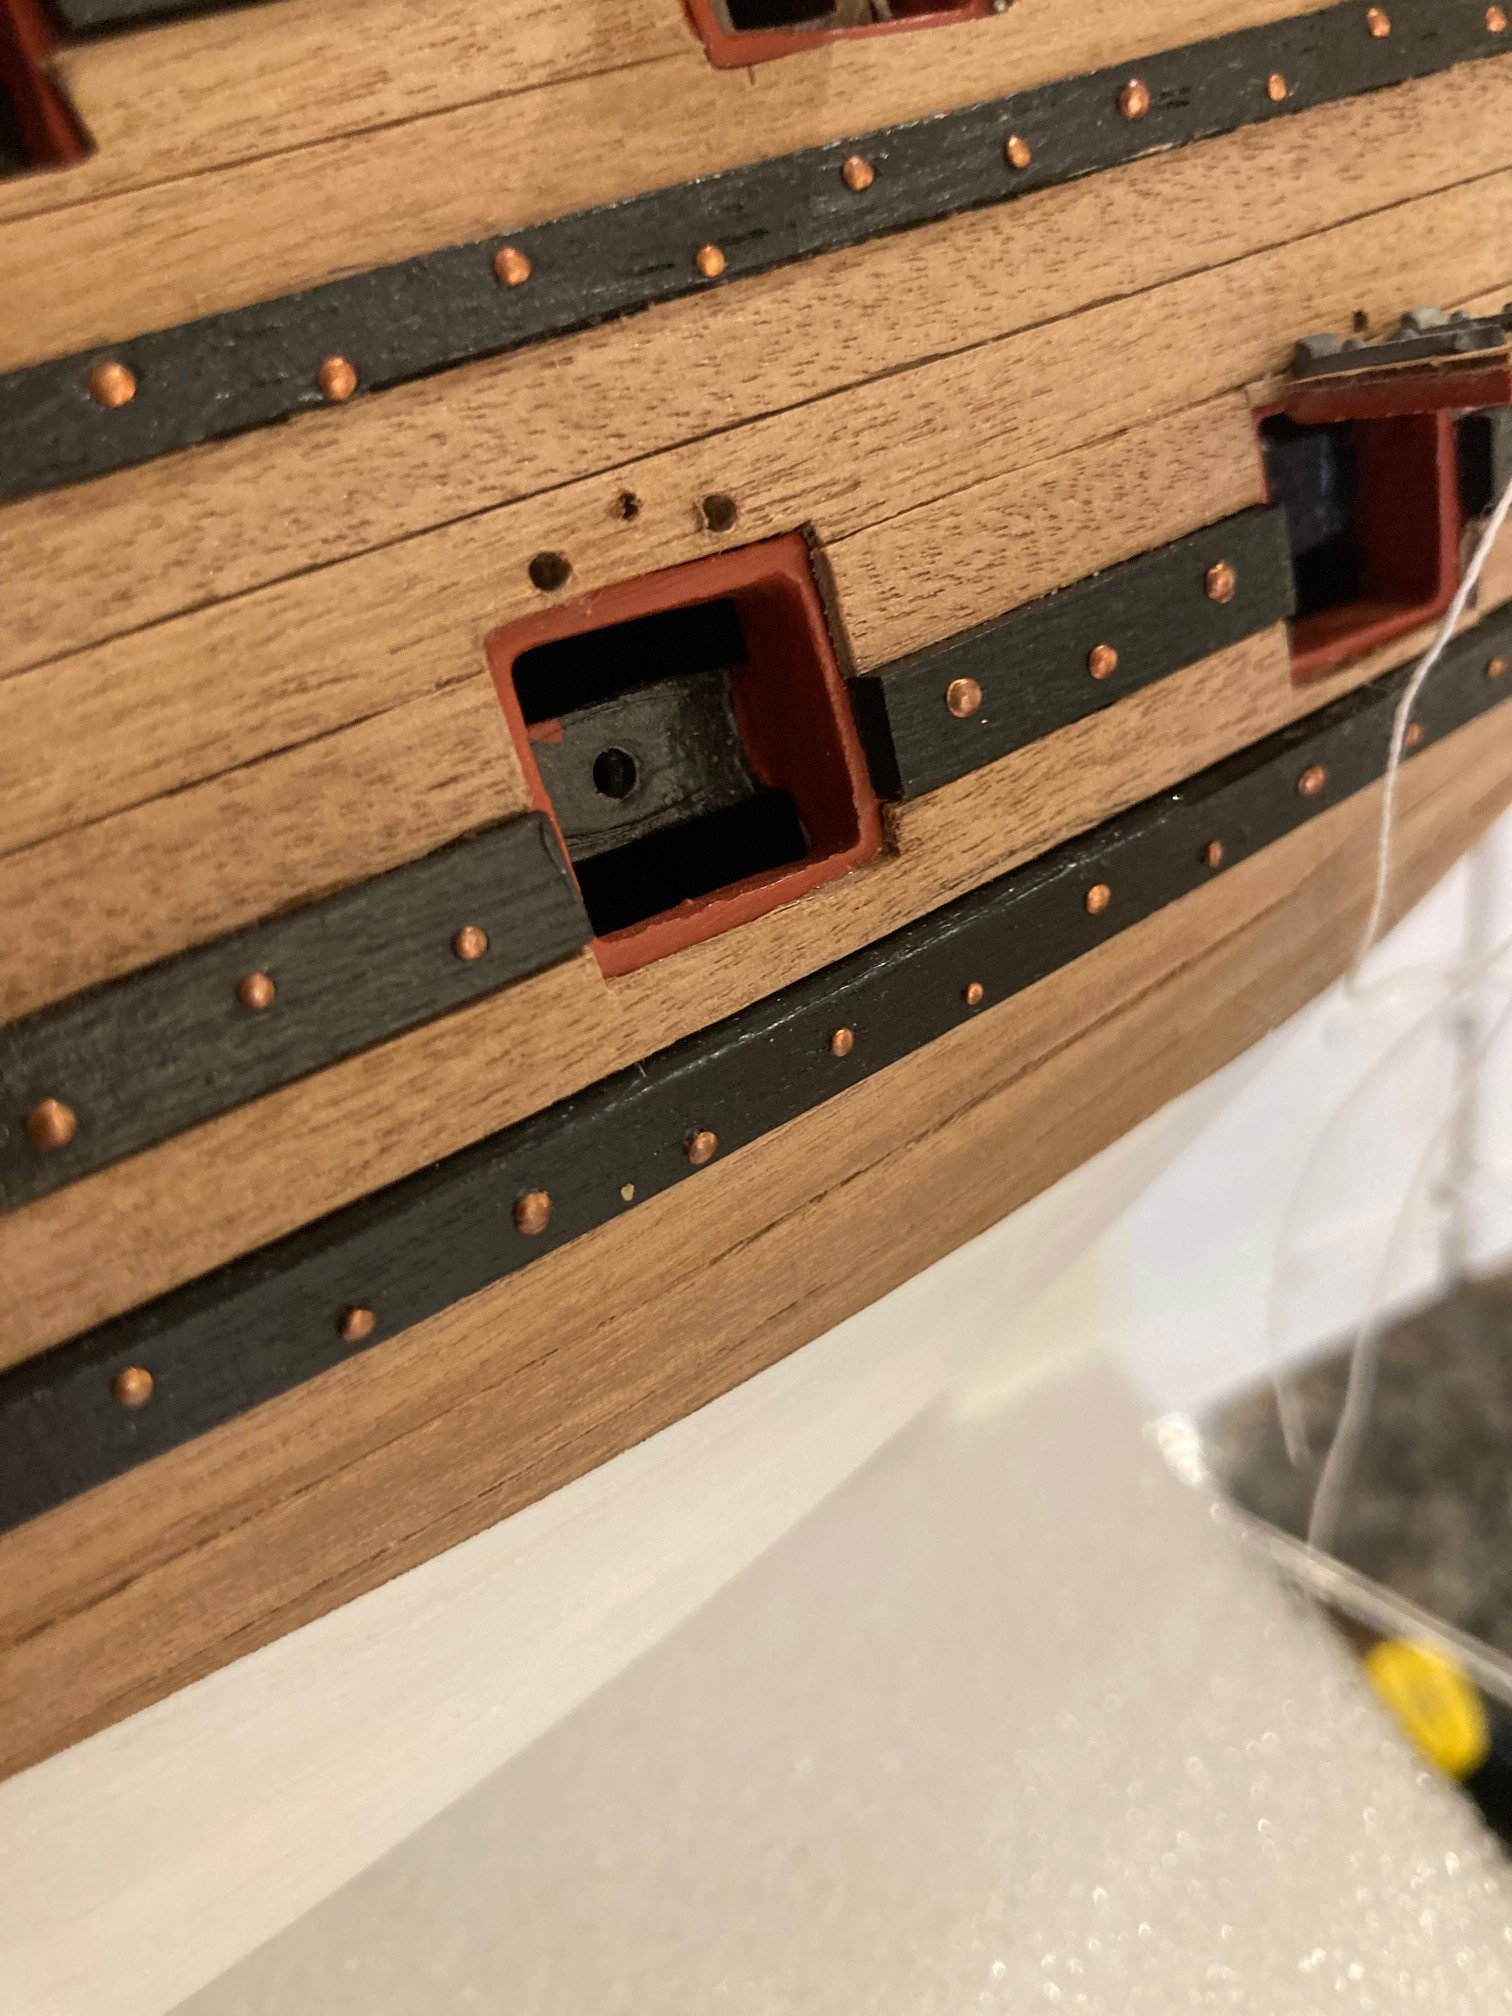
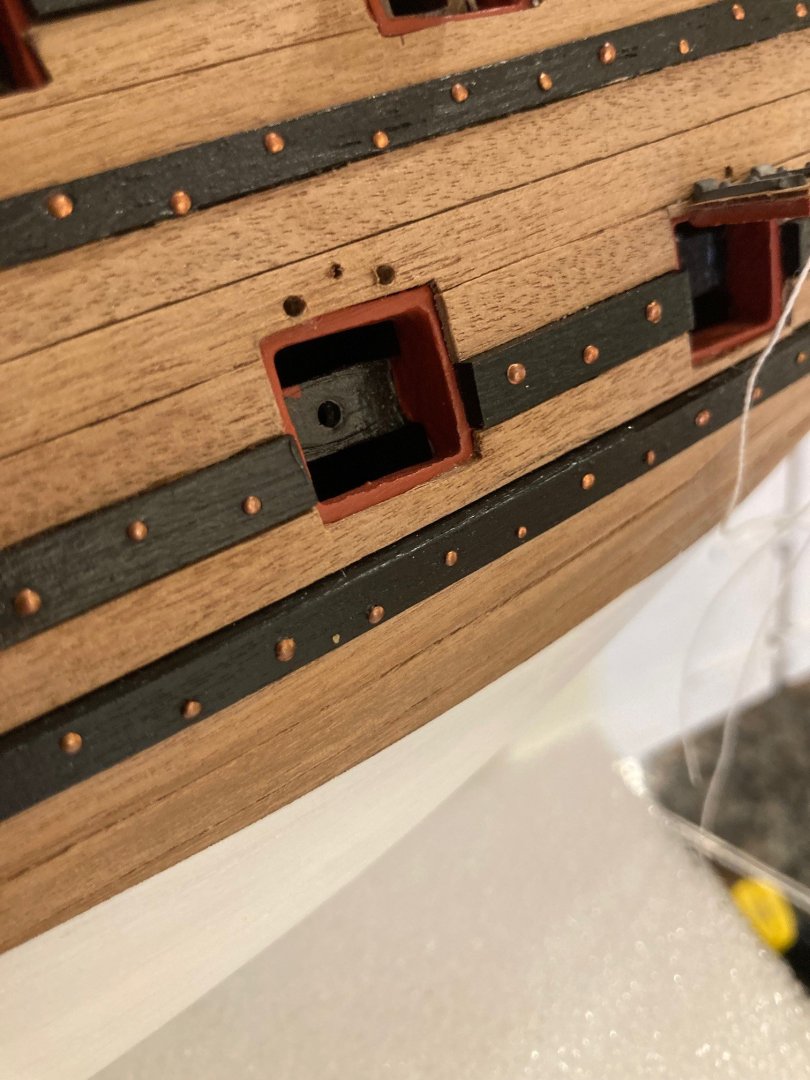
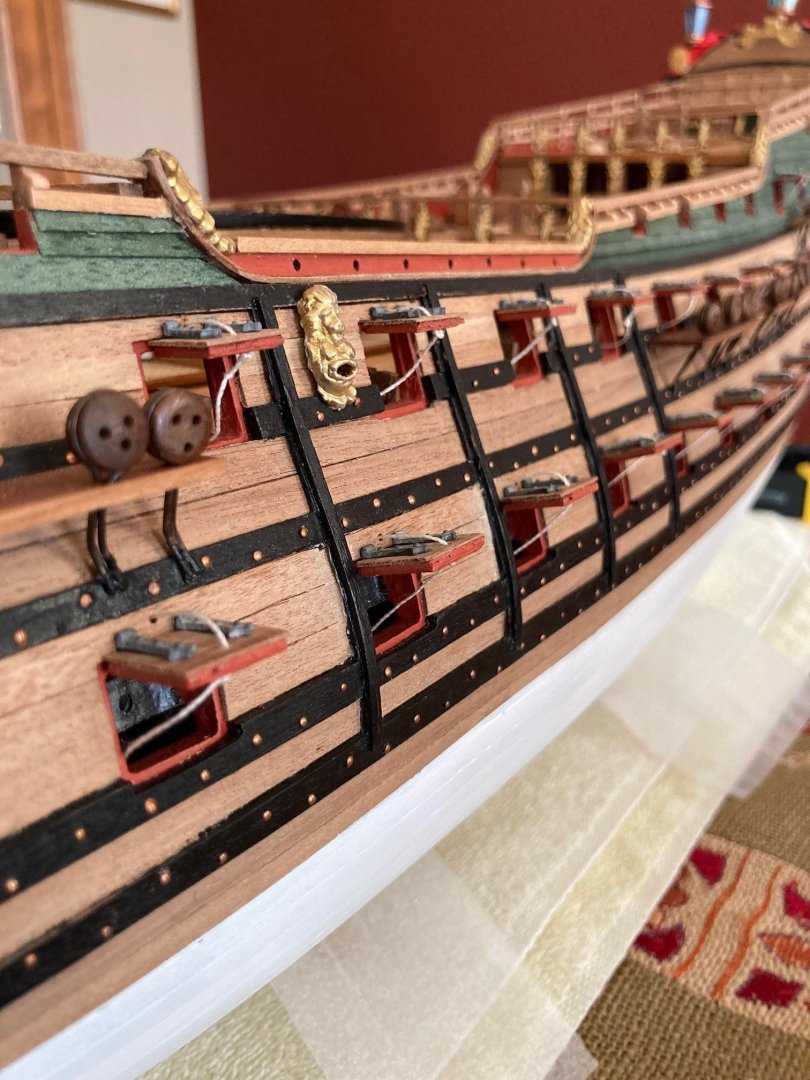
An update as I have now officially finished the hull. All the gun port lids are now attached and with the exception of all the cannons being installed onto their gun cradles, I am now ready for the masts. I am going to place the cannons at the very end of the build... There are additional fittings such as eyelets and ring bolts to attach to the deck and hull but their placement is more associated with the rigging stage of the build. I will likely pre-drill some of these holes for the eyelets and ring bolts at this time, before the decks get too cluttered.


-
I am one who would wait for a Vanguard Models HMS Victory, as they say in Canada and perhaps in other places, “till the cows come home”!