palmerit
-
Posts
1,116 -
Joined
-
Last visited
Content Type
Profiles
Forums
Gallery
Events
Everything posted by palmerit
-
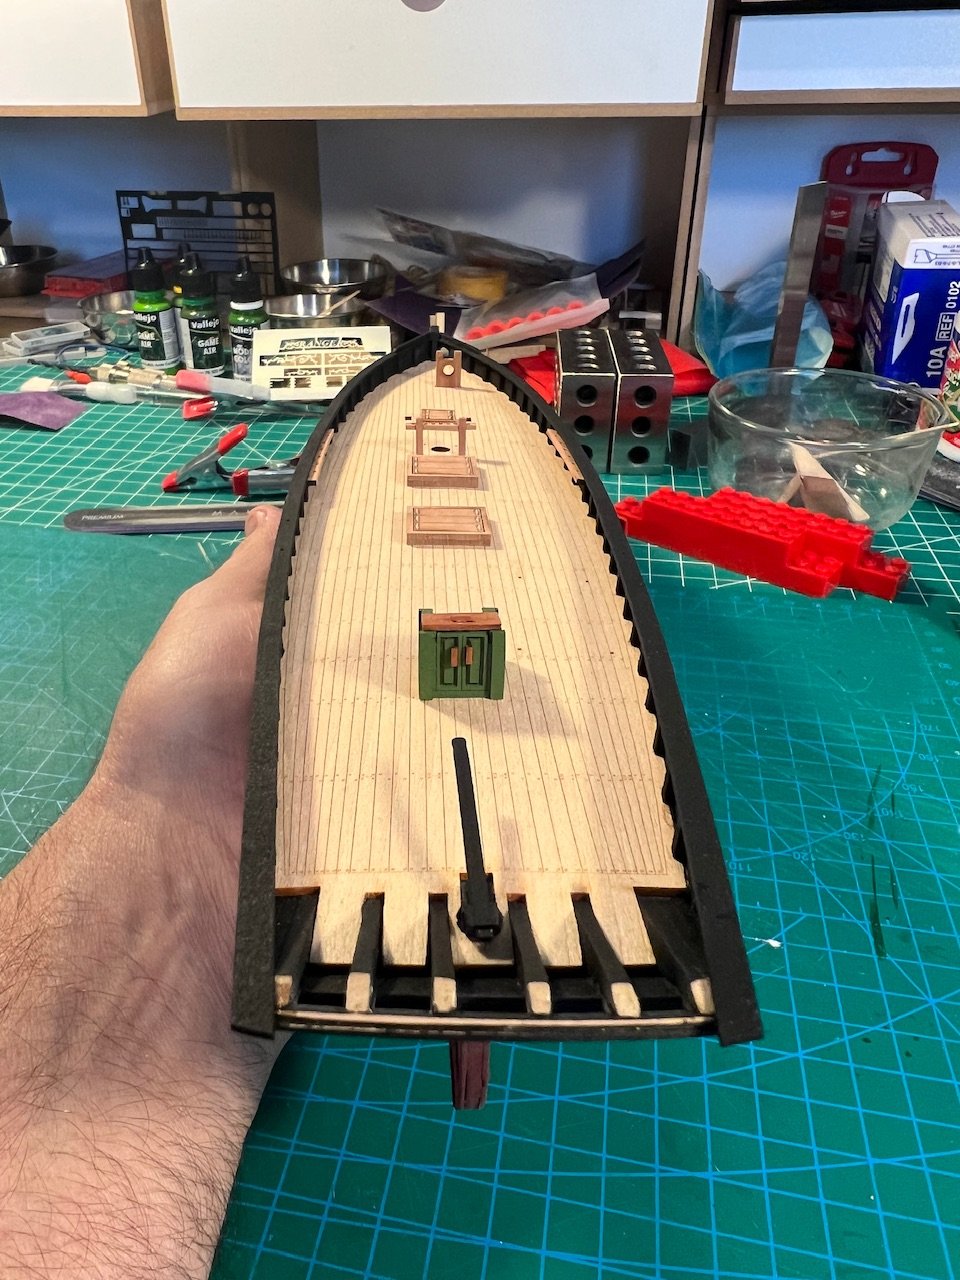
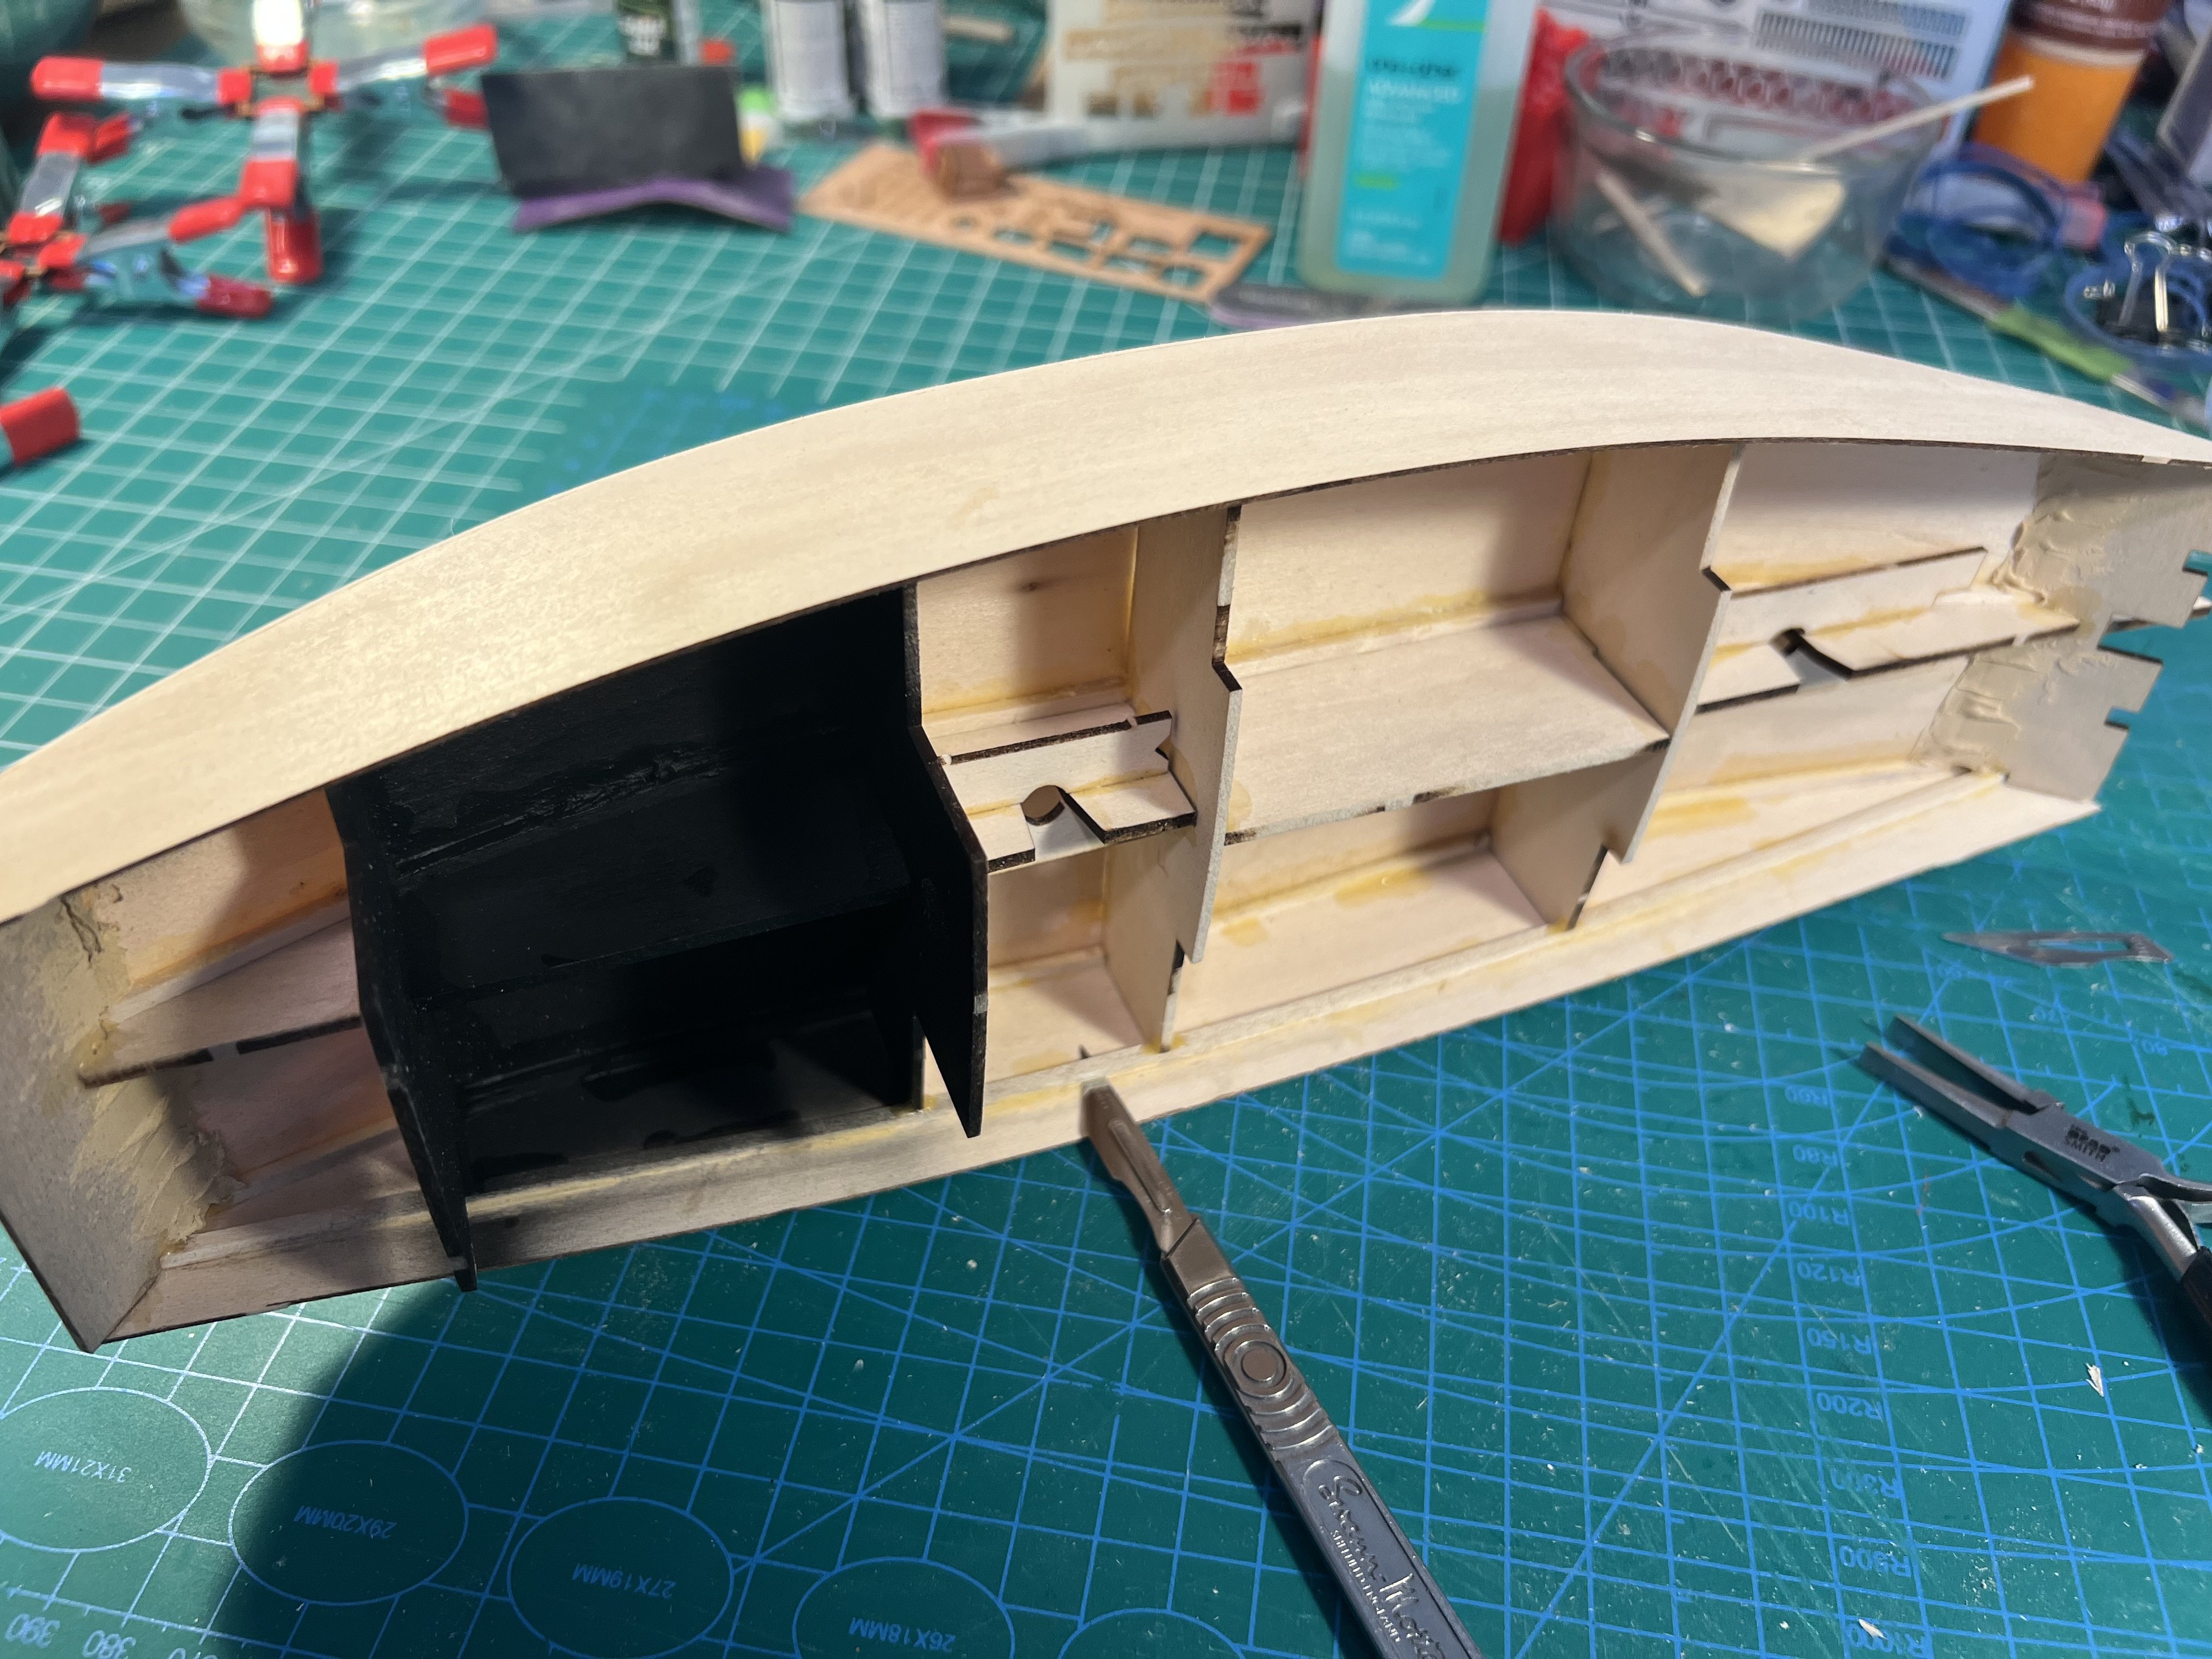
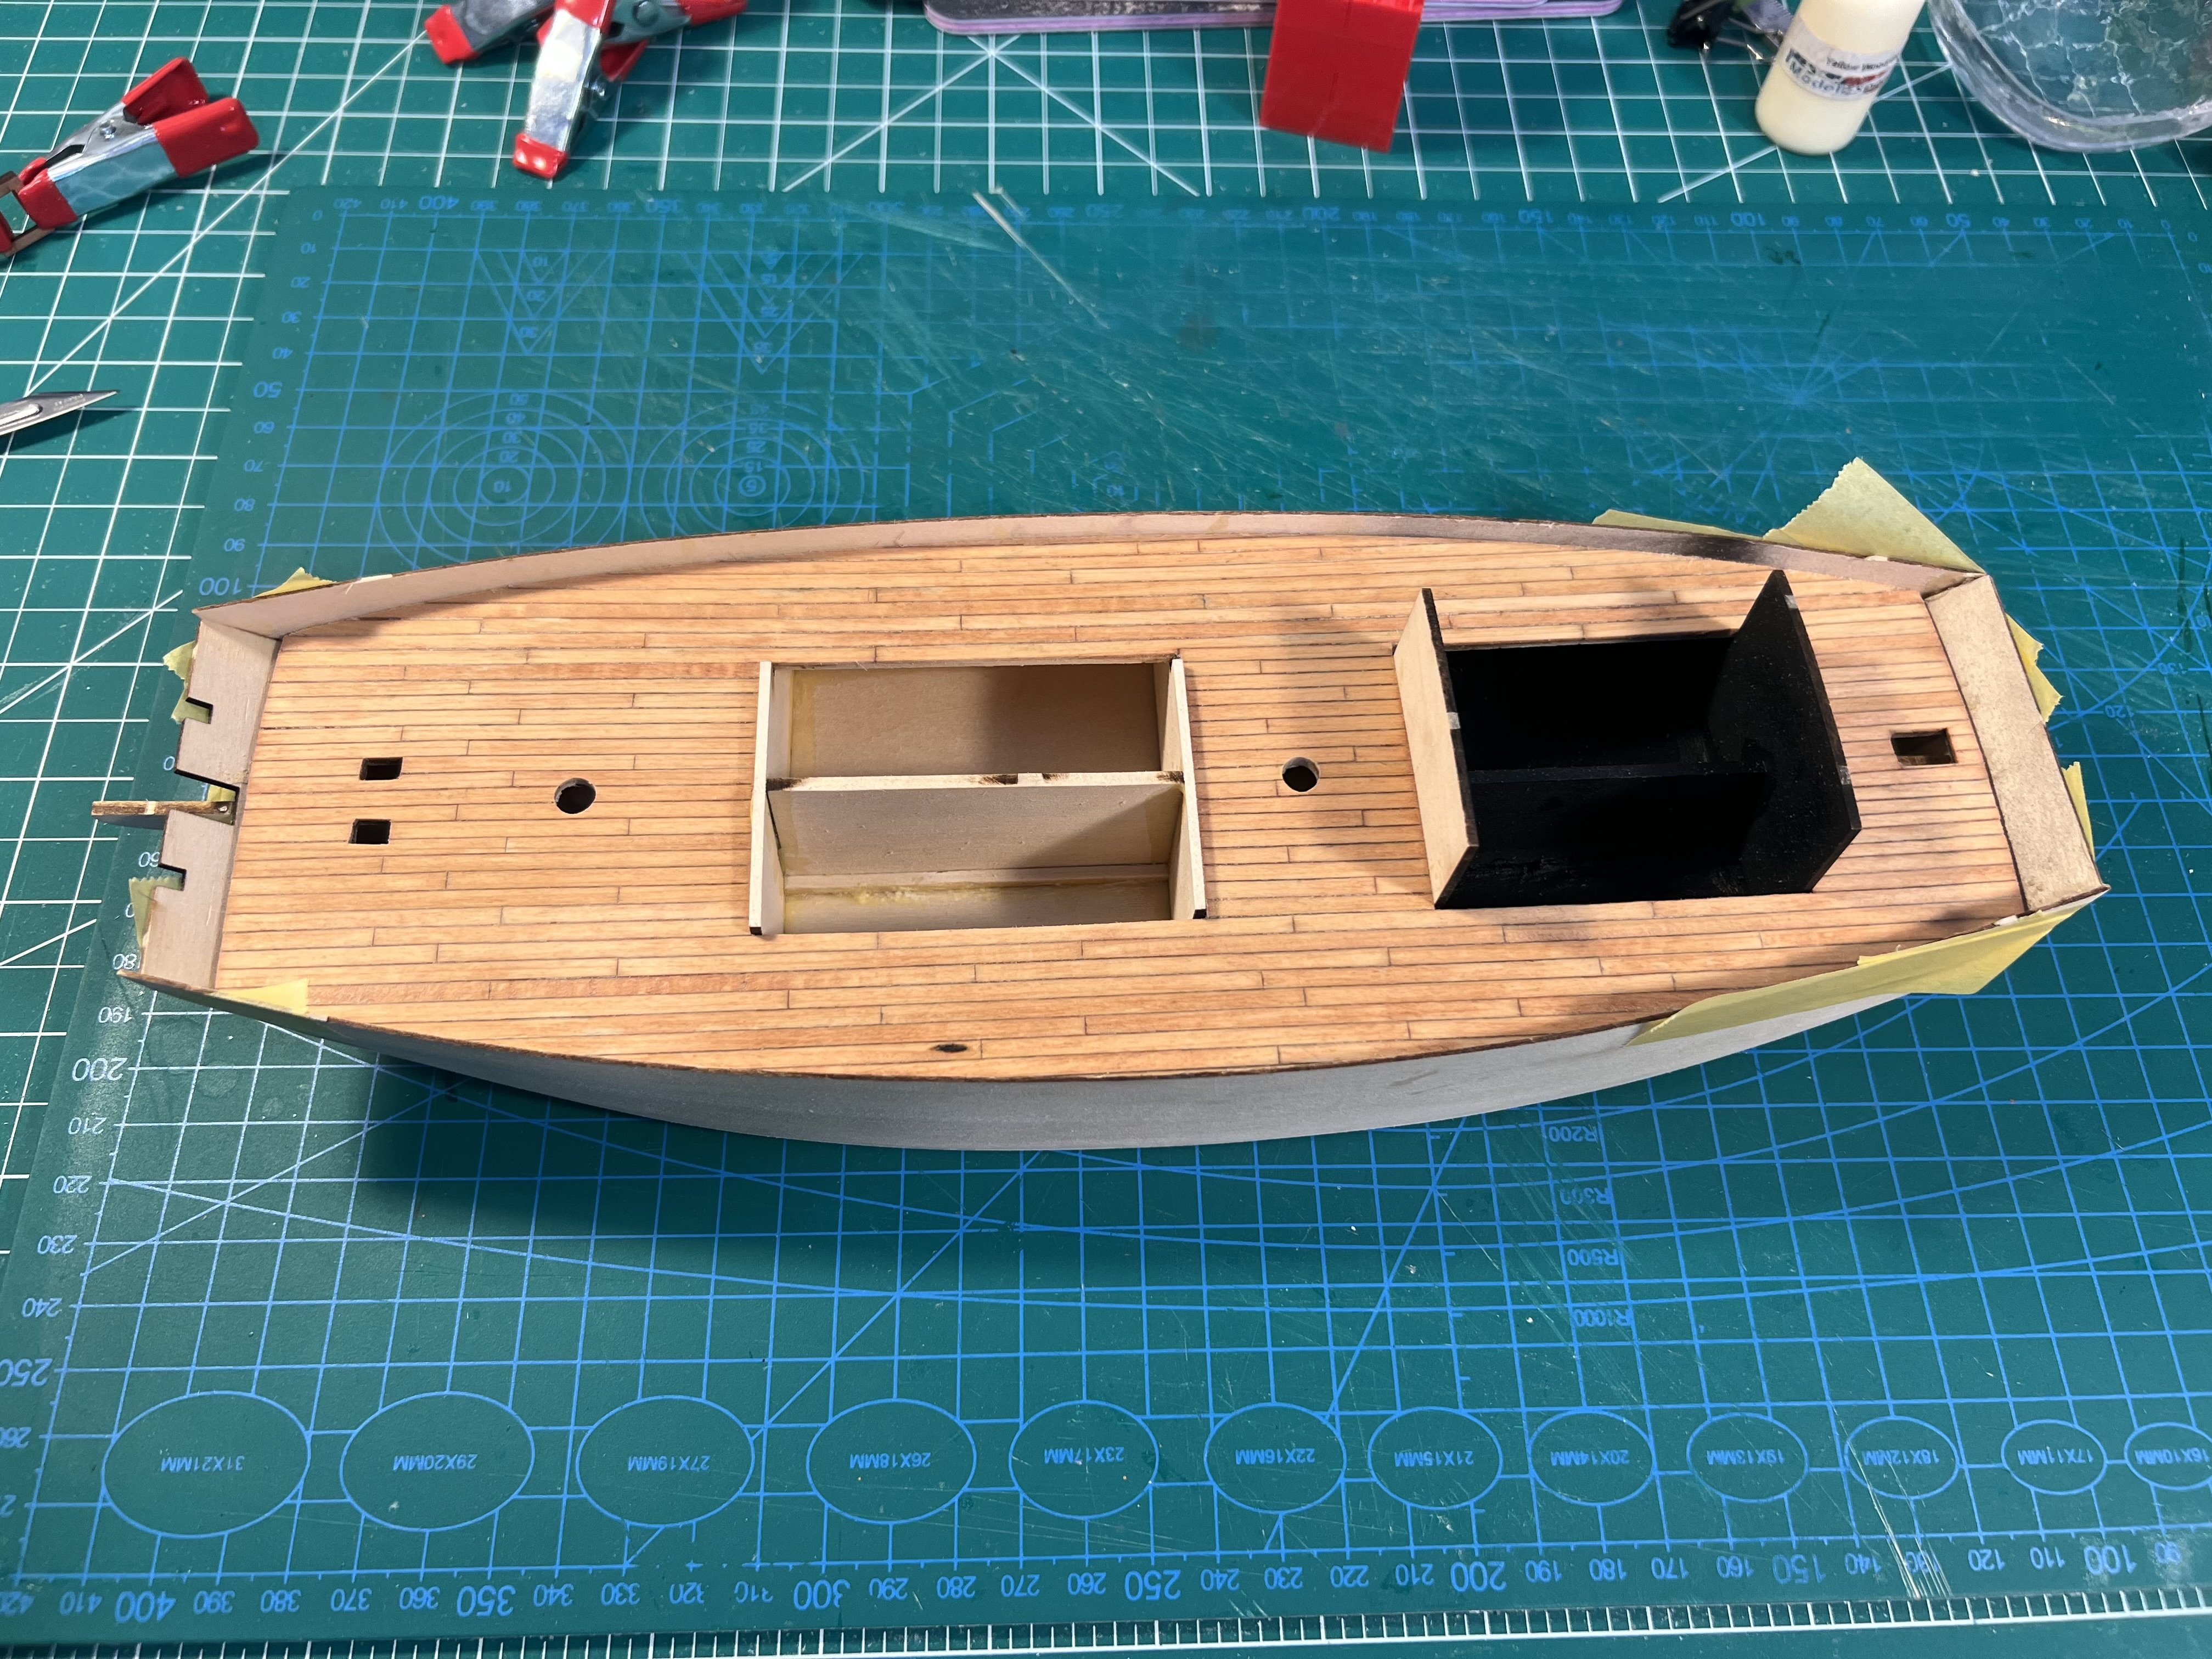
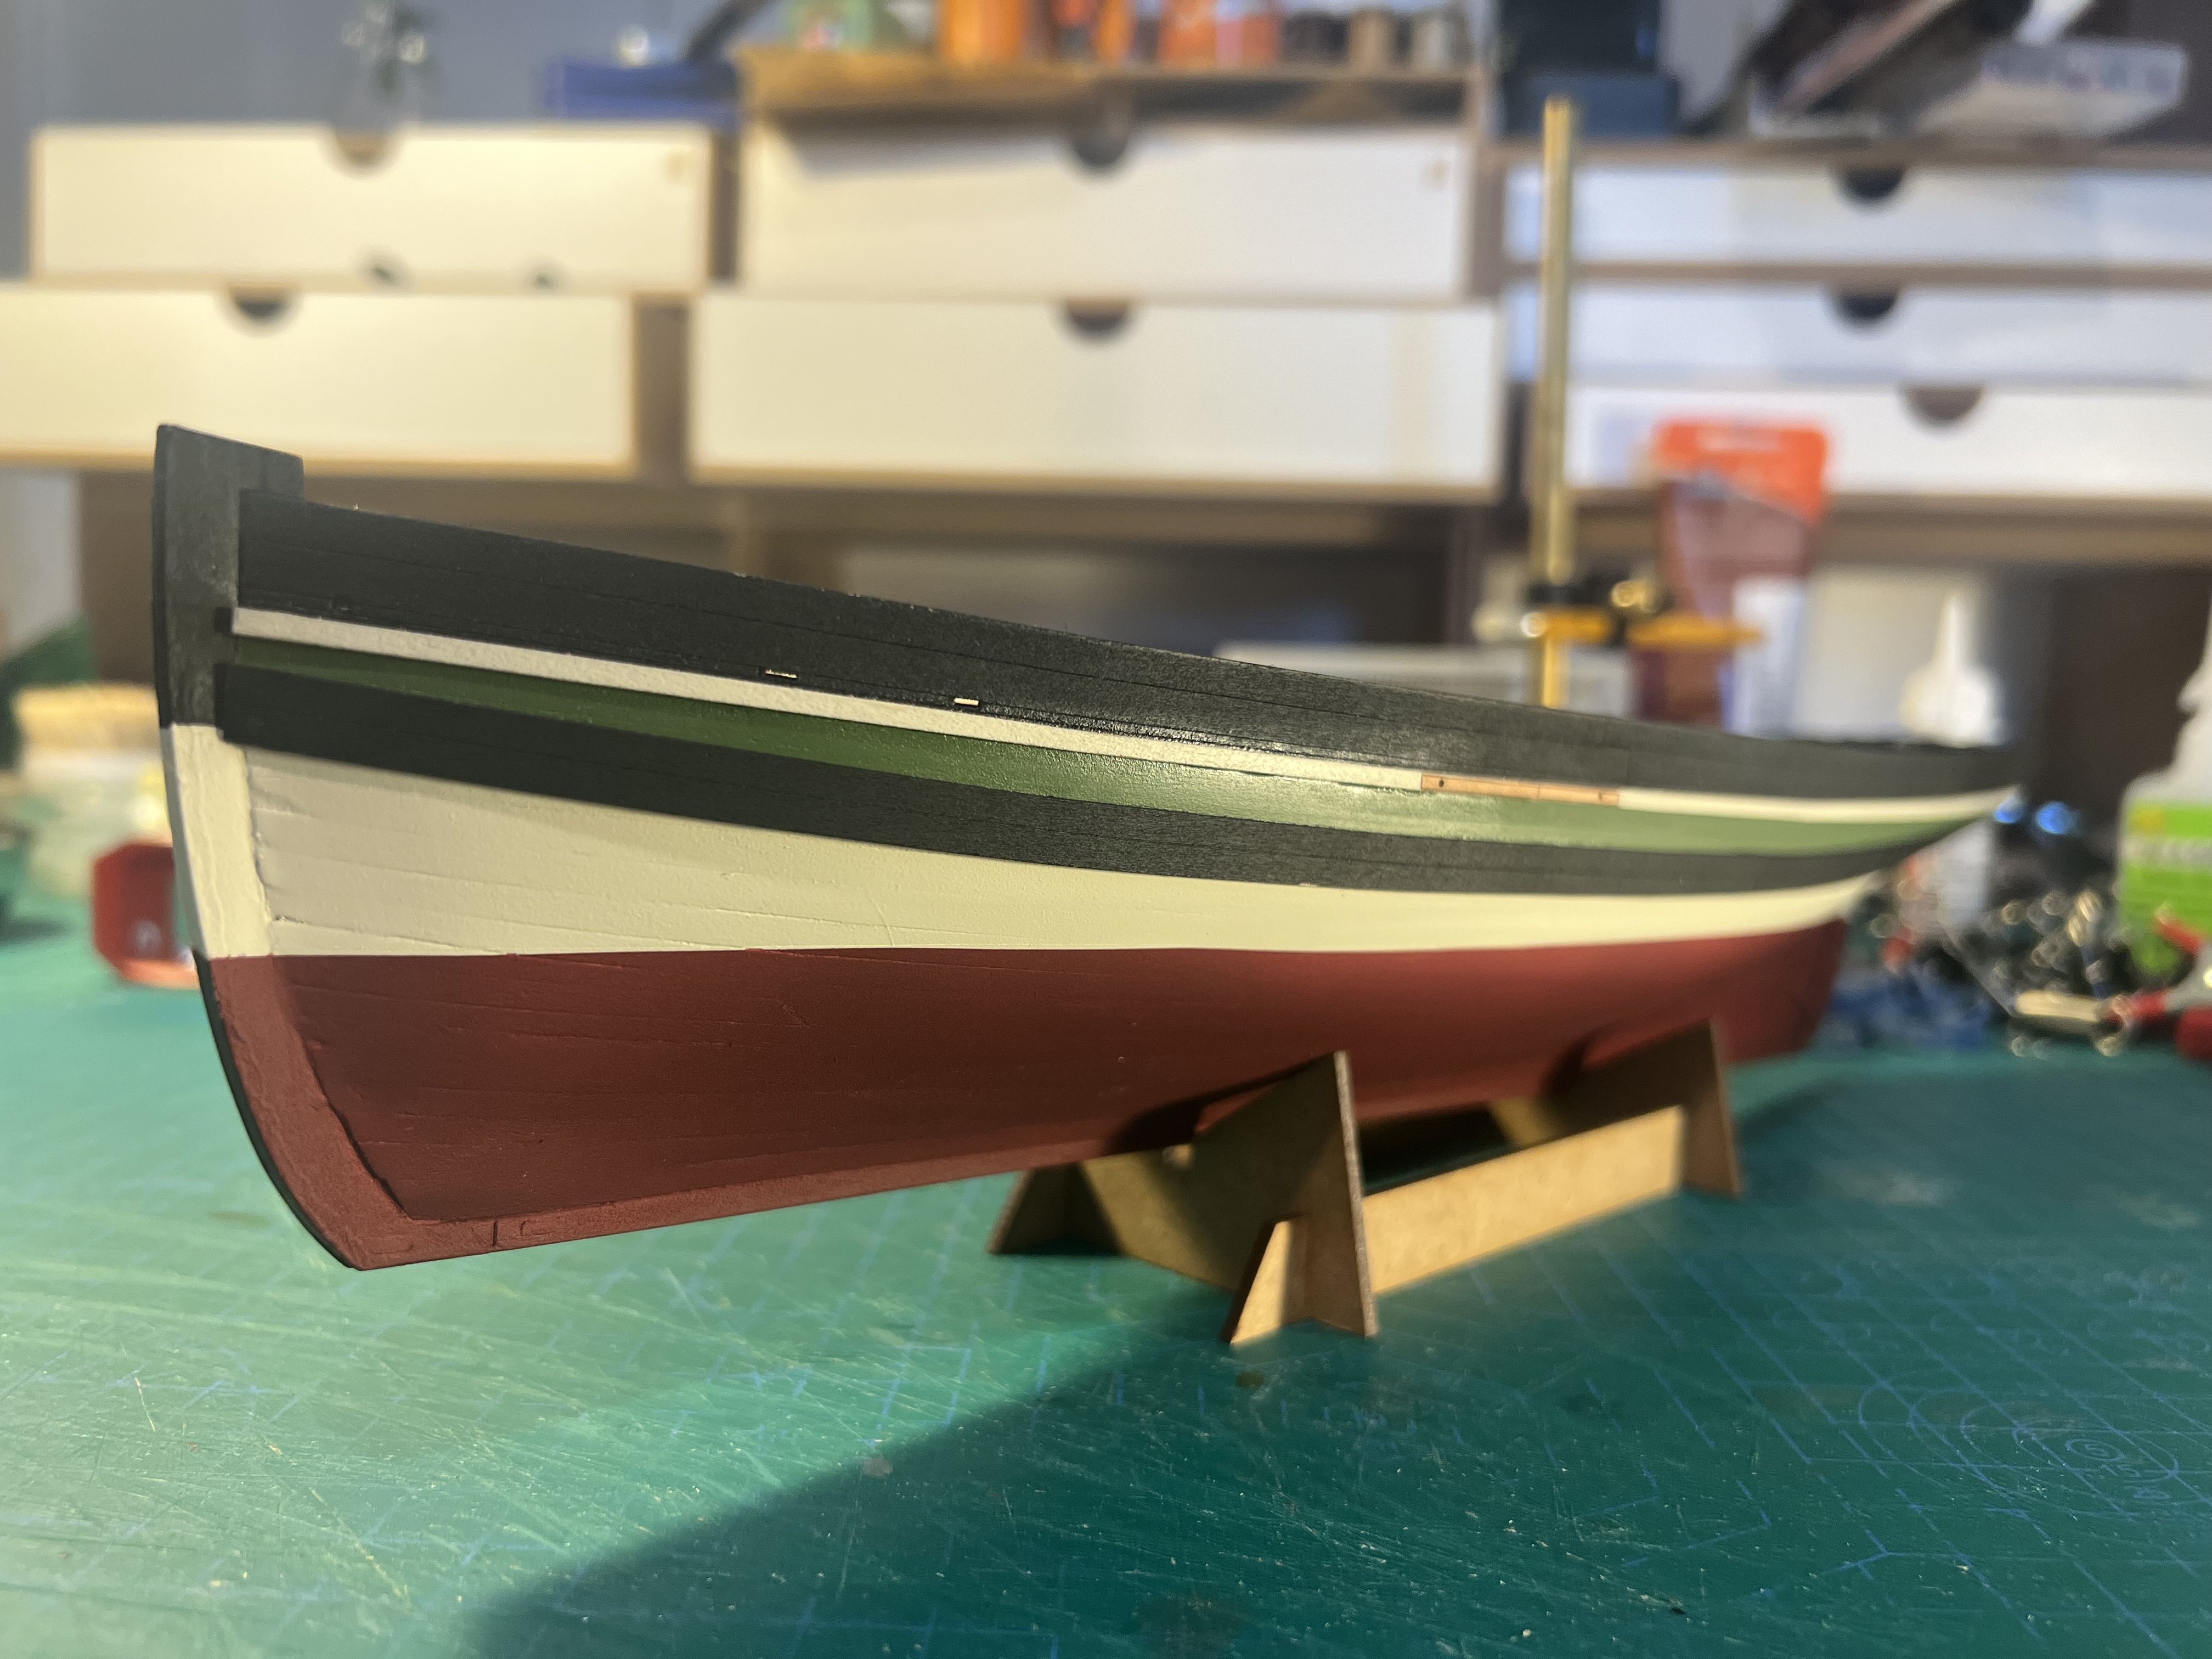
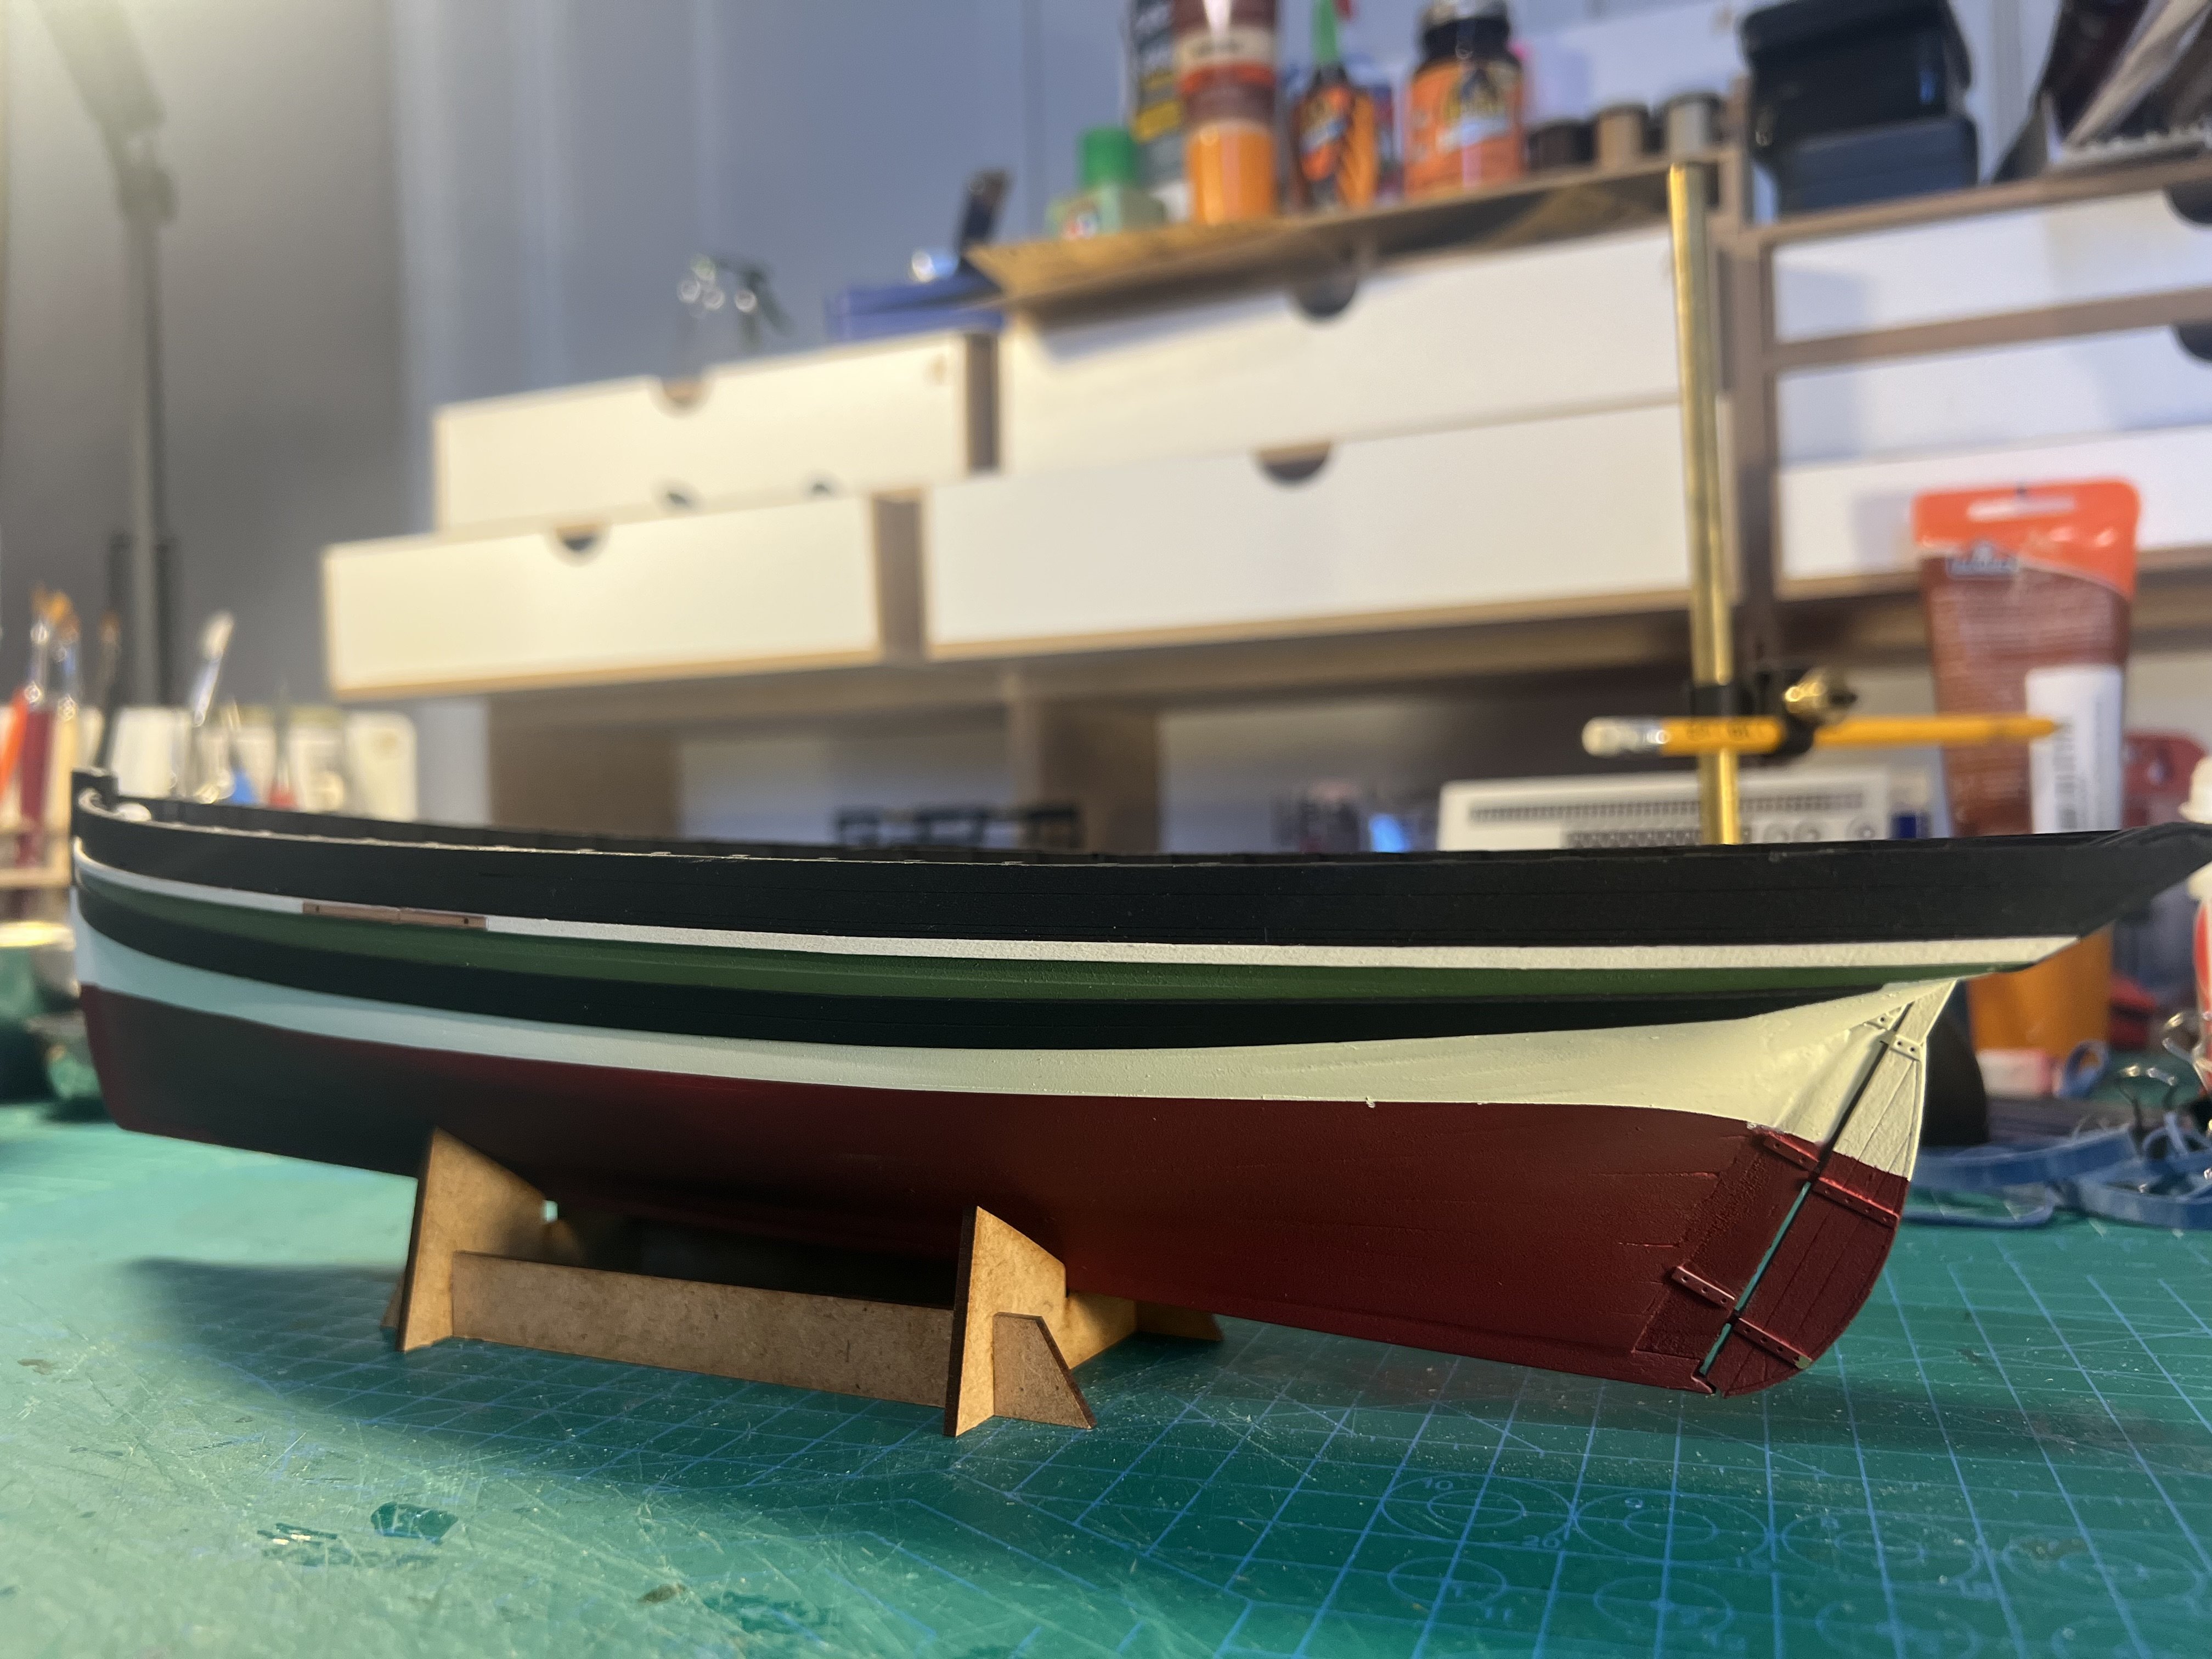
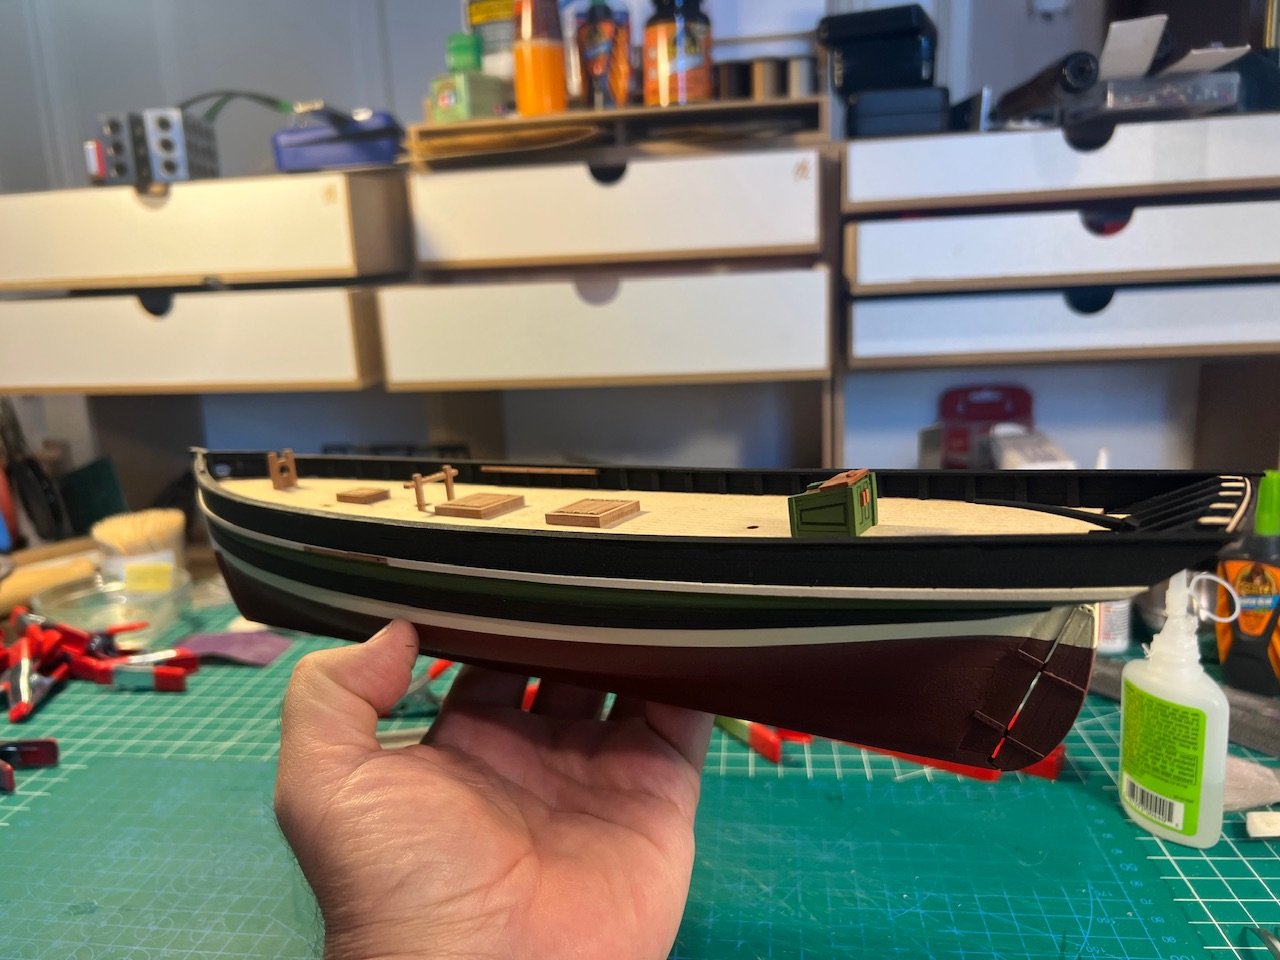
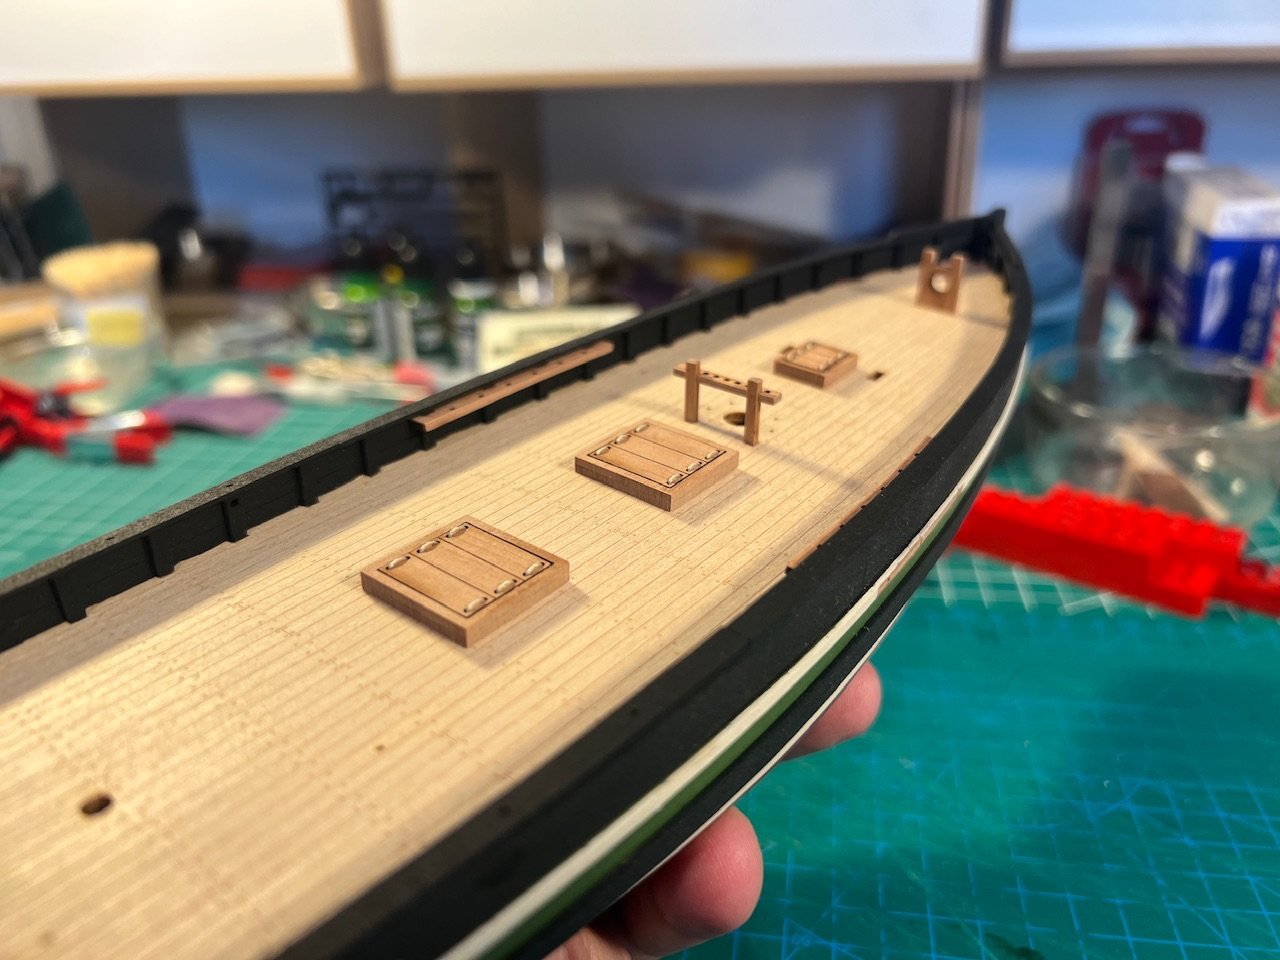
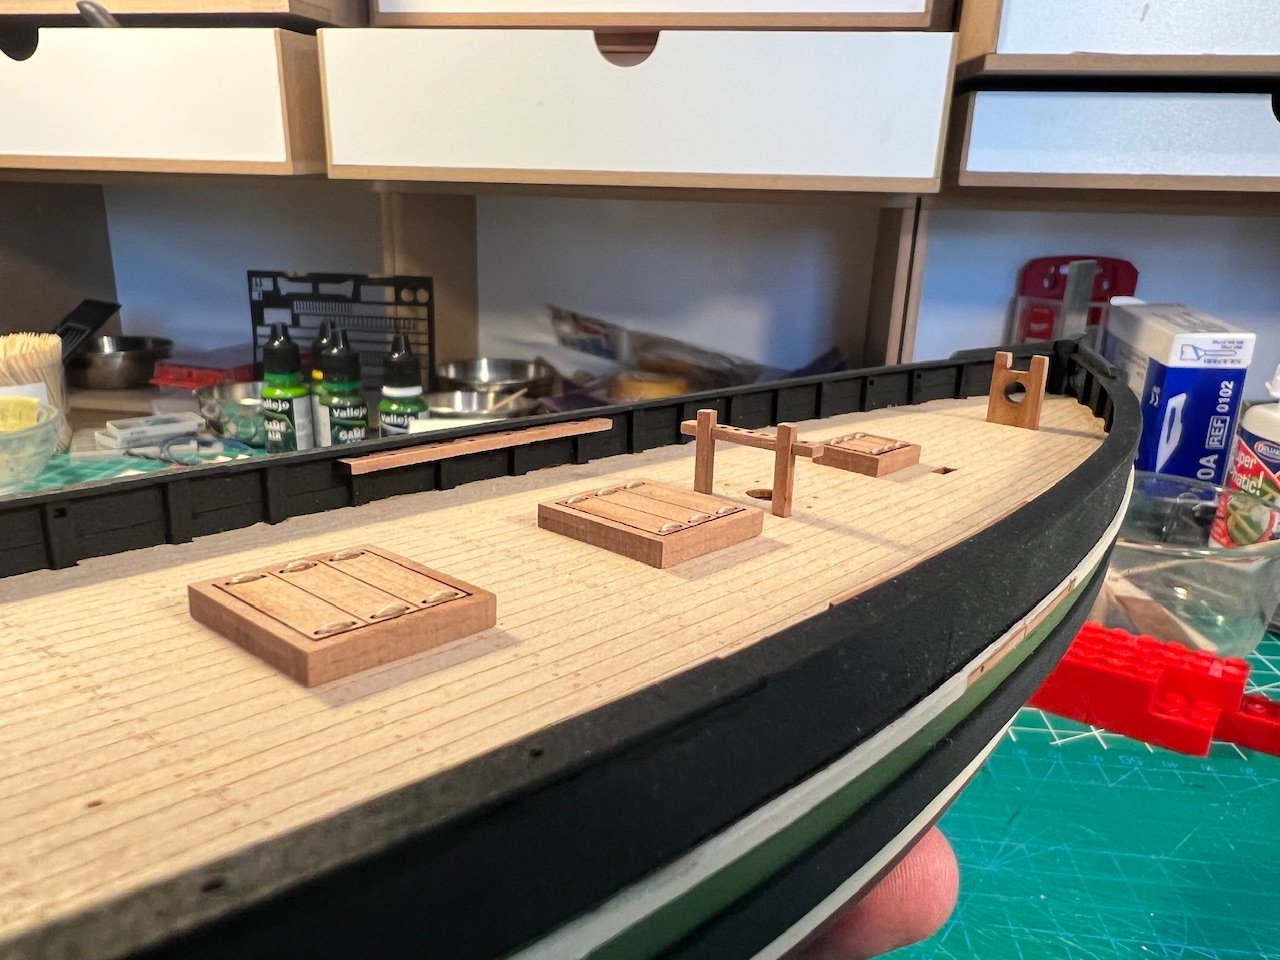
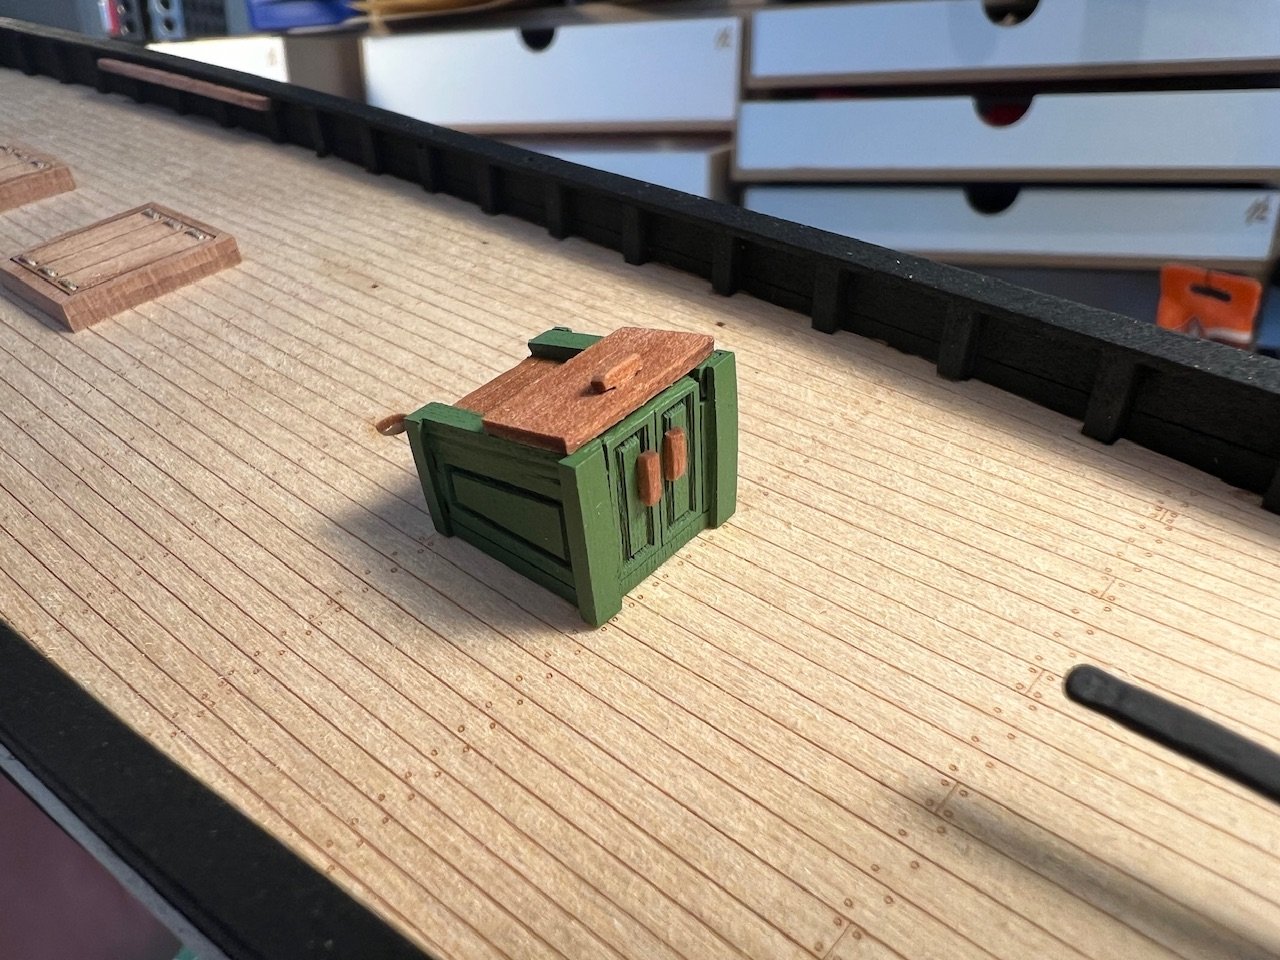
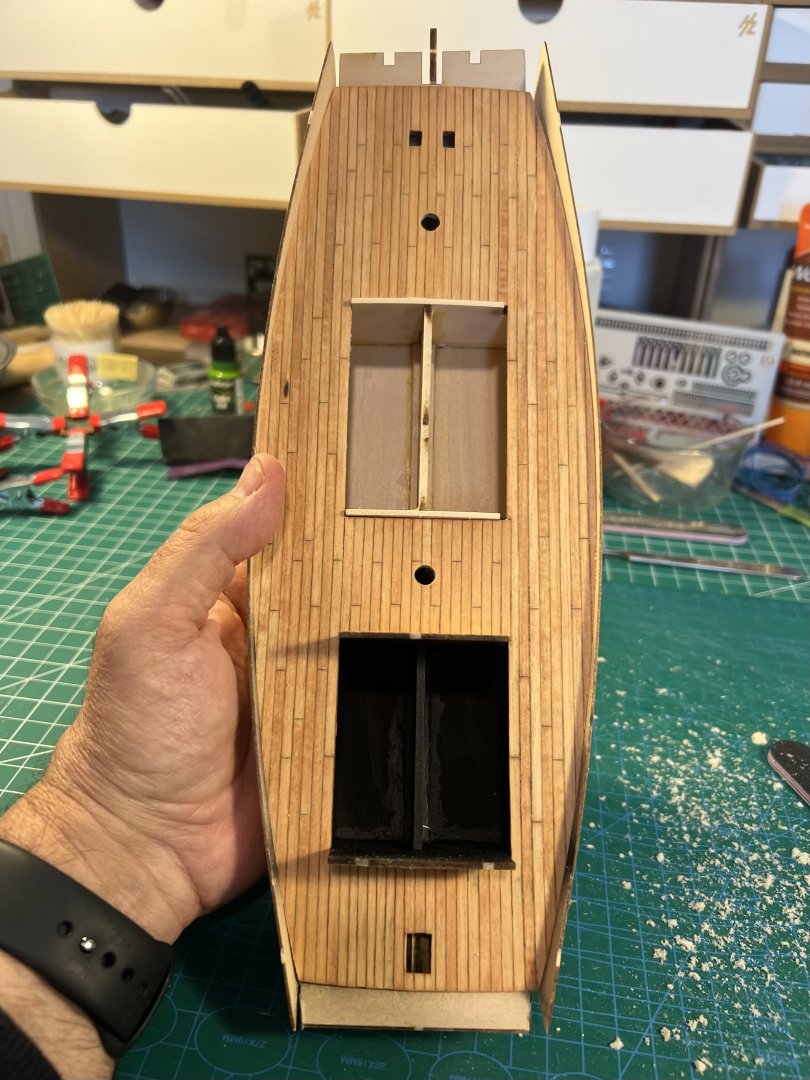
Added some of the deck pieces. Still some more to add. I added some trim to the companionway (and painted and stained) because I did not like the jig saw puzzle piece look without doing so.

- 133 replies
-
- 6
-

-
- Ranger
- vanguard models
- (and 1 more)
-
The Philadelphia is apparently undergoing preservation (it's closed to public since January): https://americanhistory.si.edu/explore/projects/gunboat-philadelphia
-
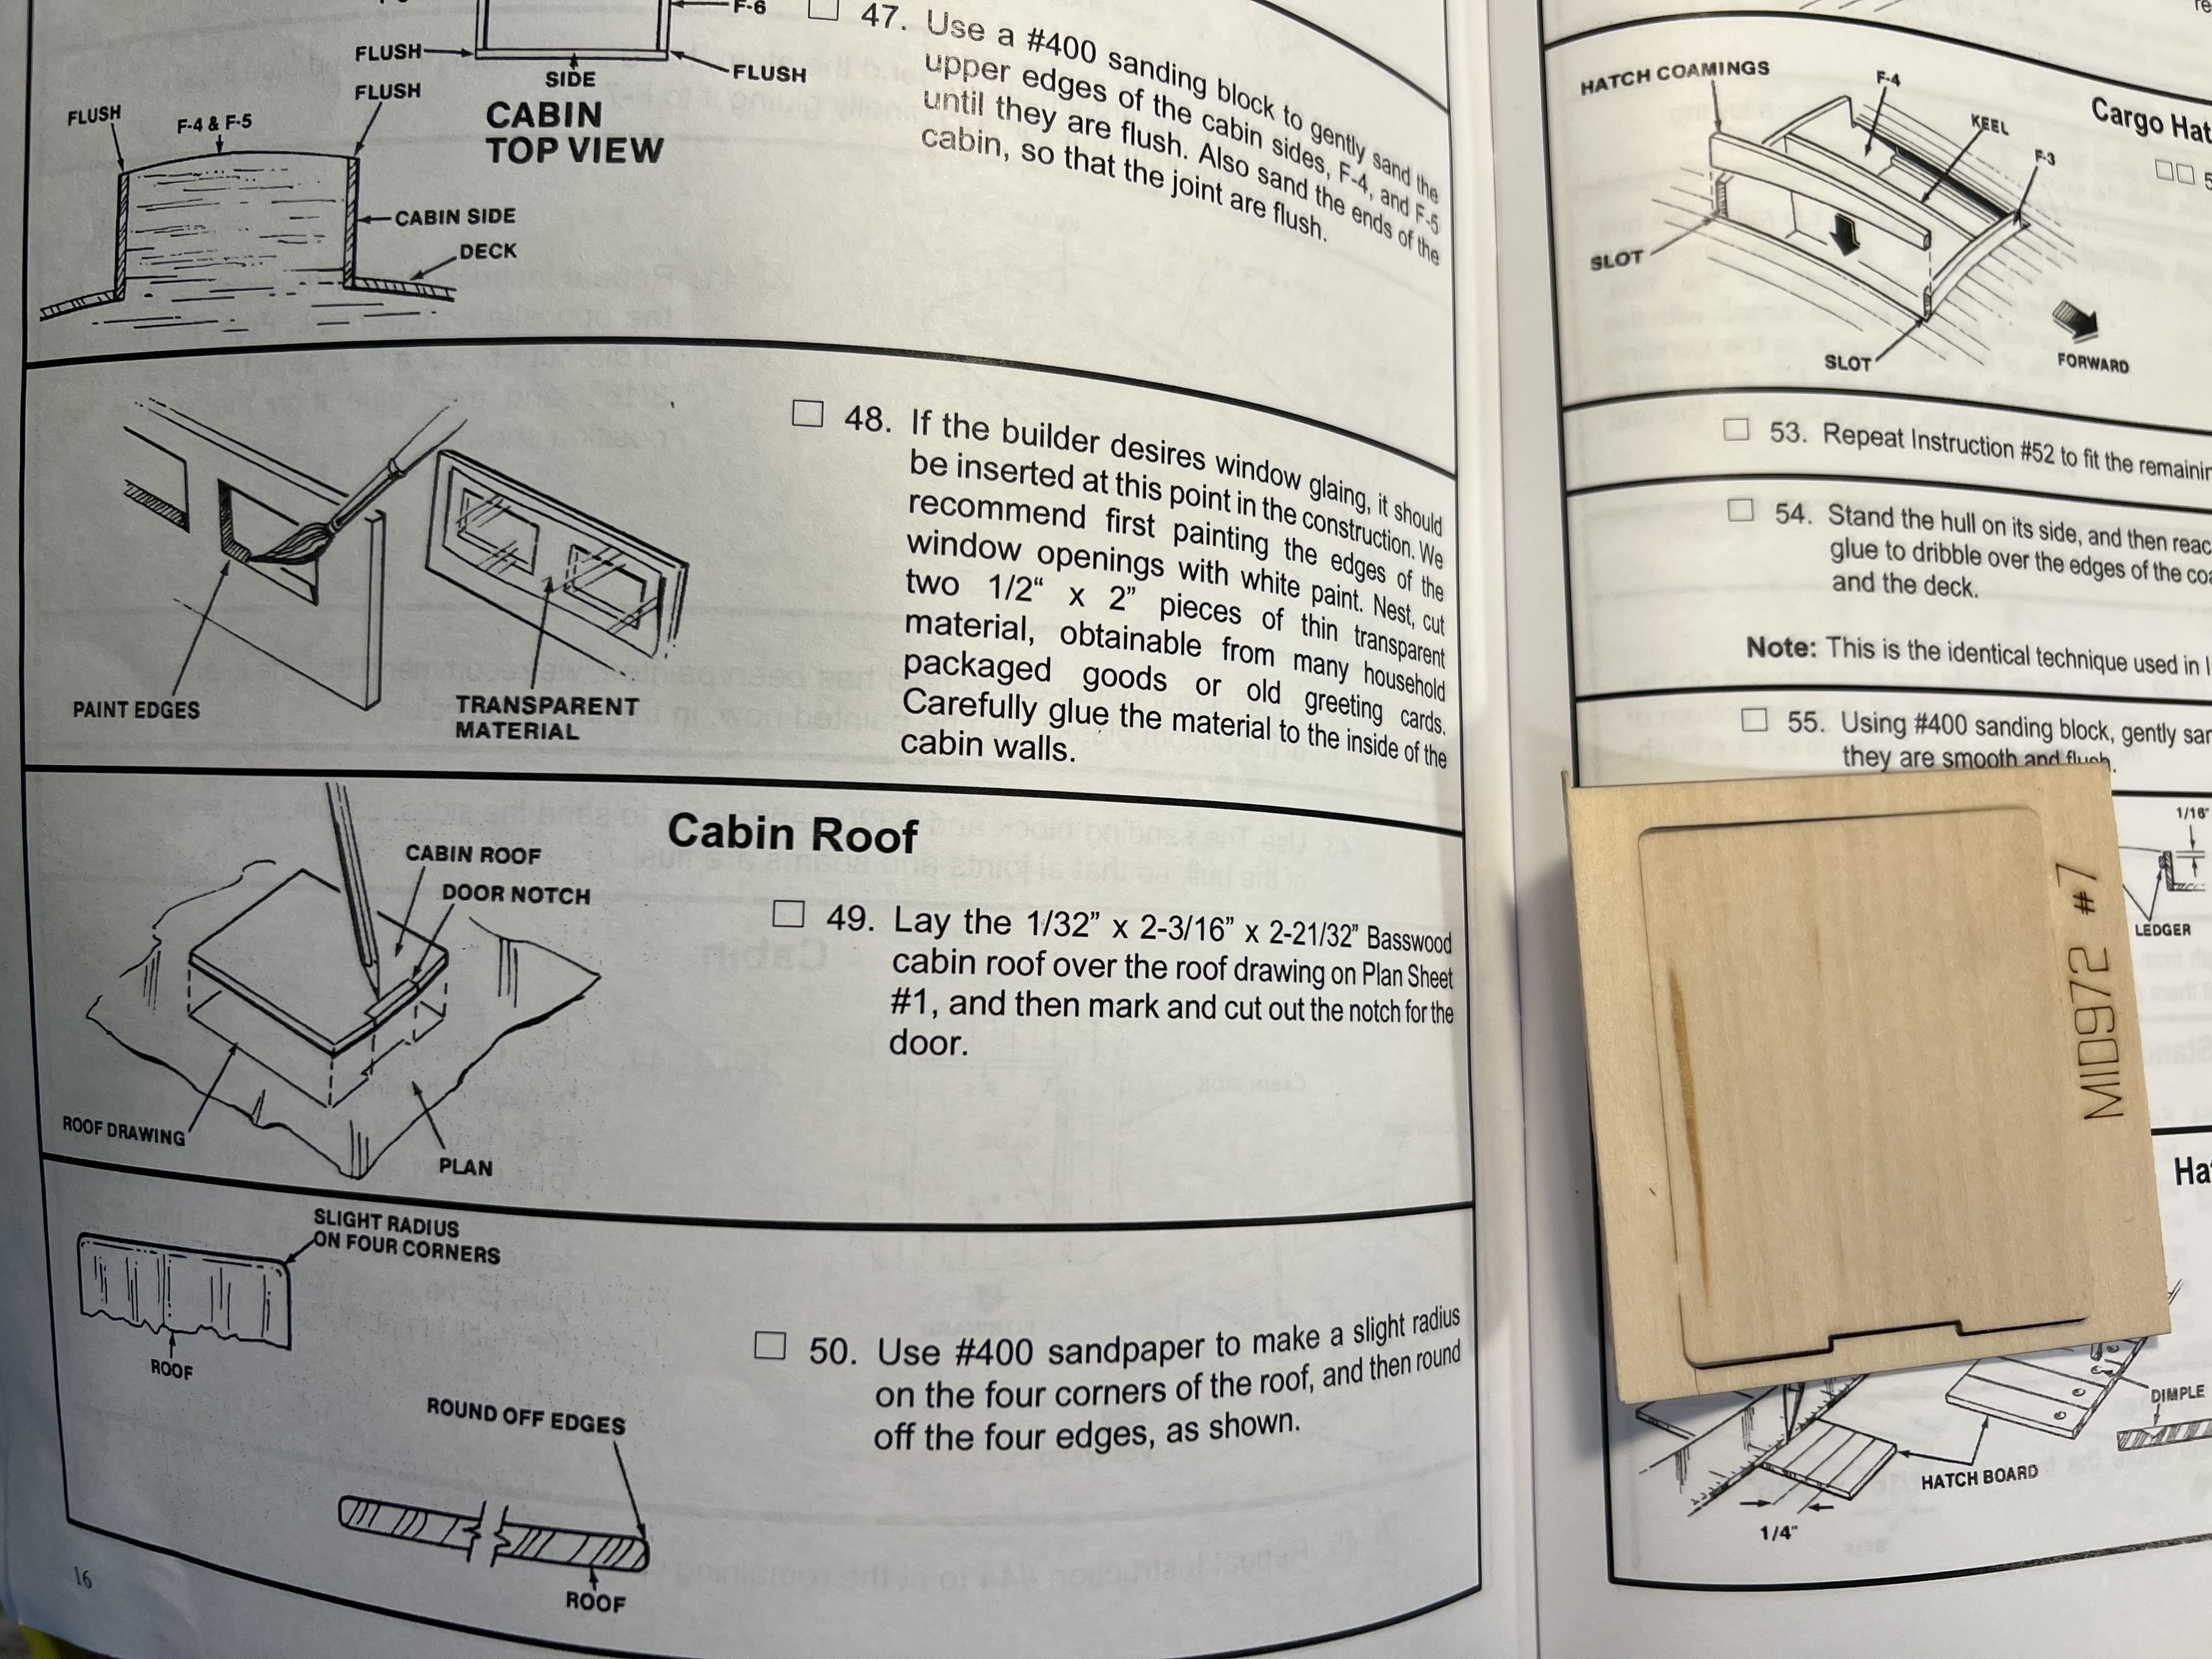
Note that the instructions include some steps that aren’t needed. For example, cutting out a notch out of the cabin roof for the door and rounding the corners of the roof. Those are done in the laser cut piece now.

- 48 replies
-
- 1
-
-
- San Francisco Bay Scow Schooner
- Scow Scooner
- (and 1 more)
-
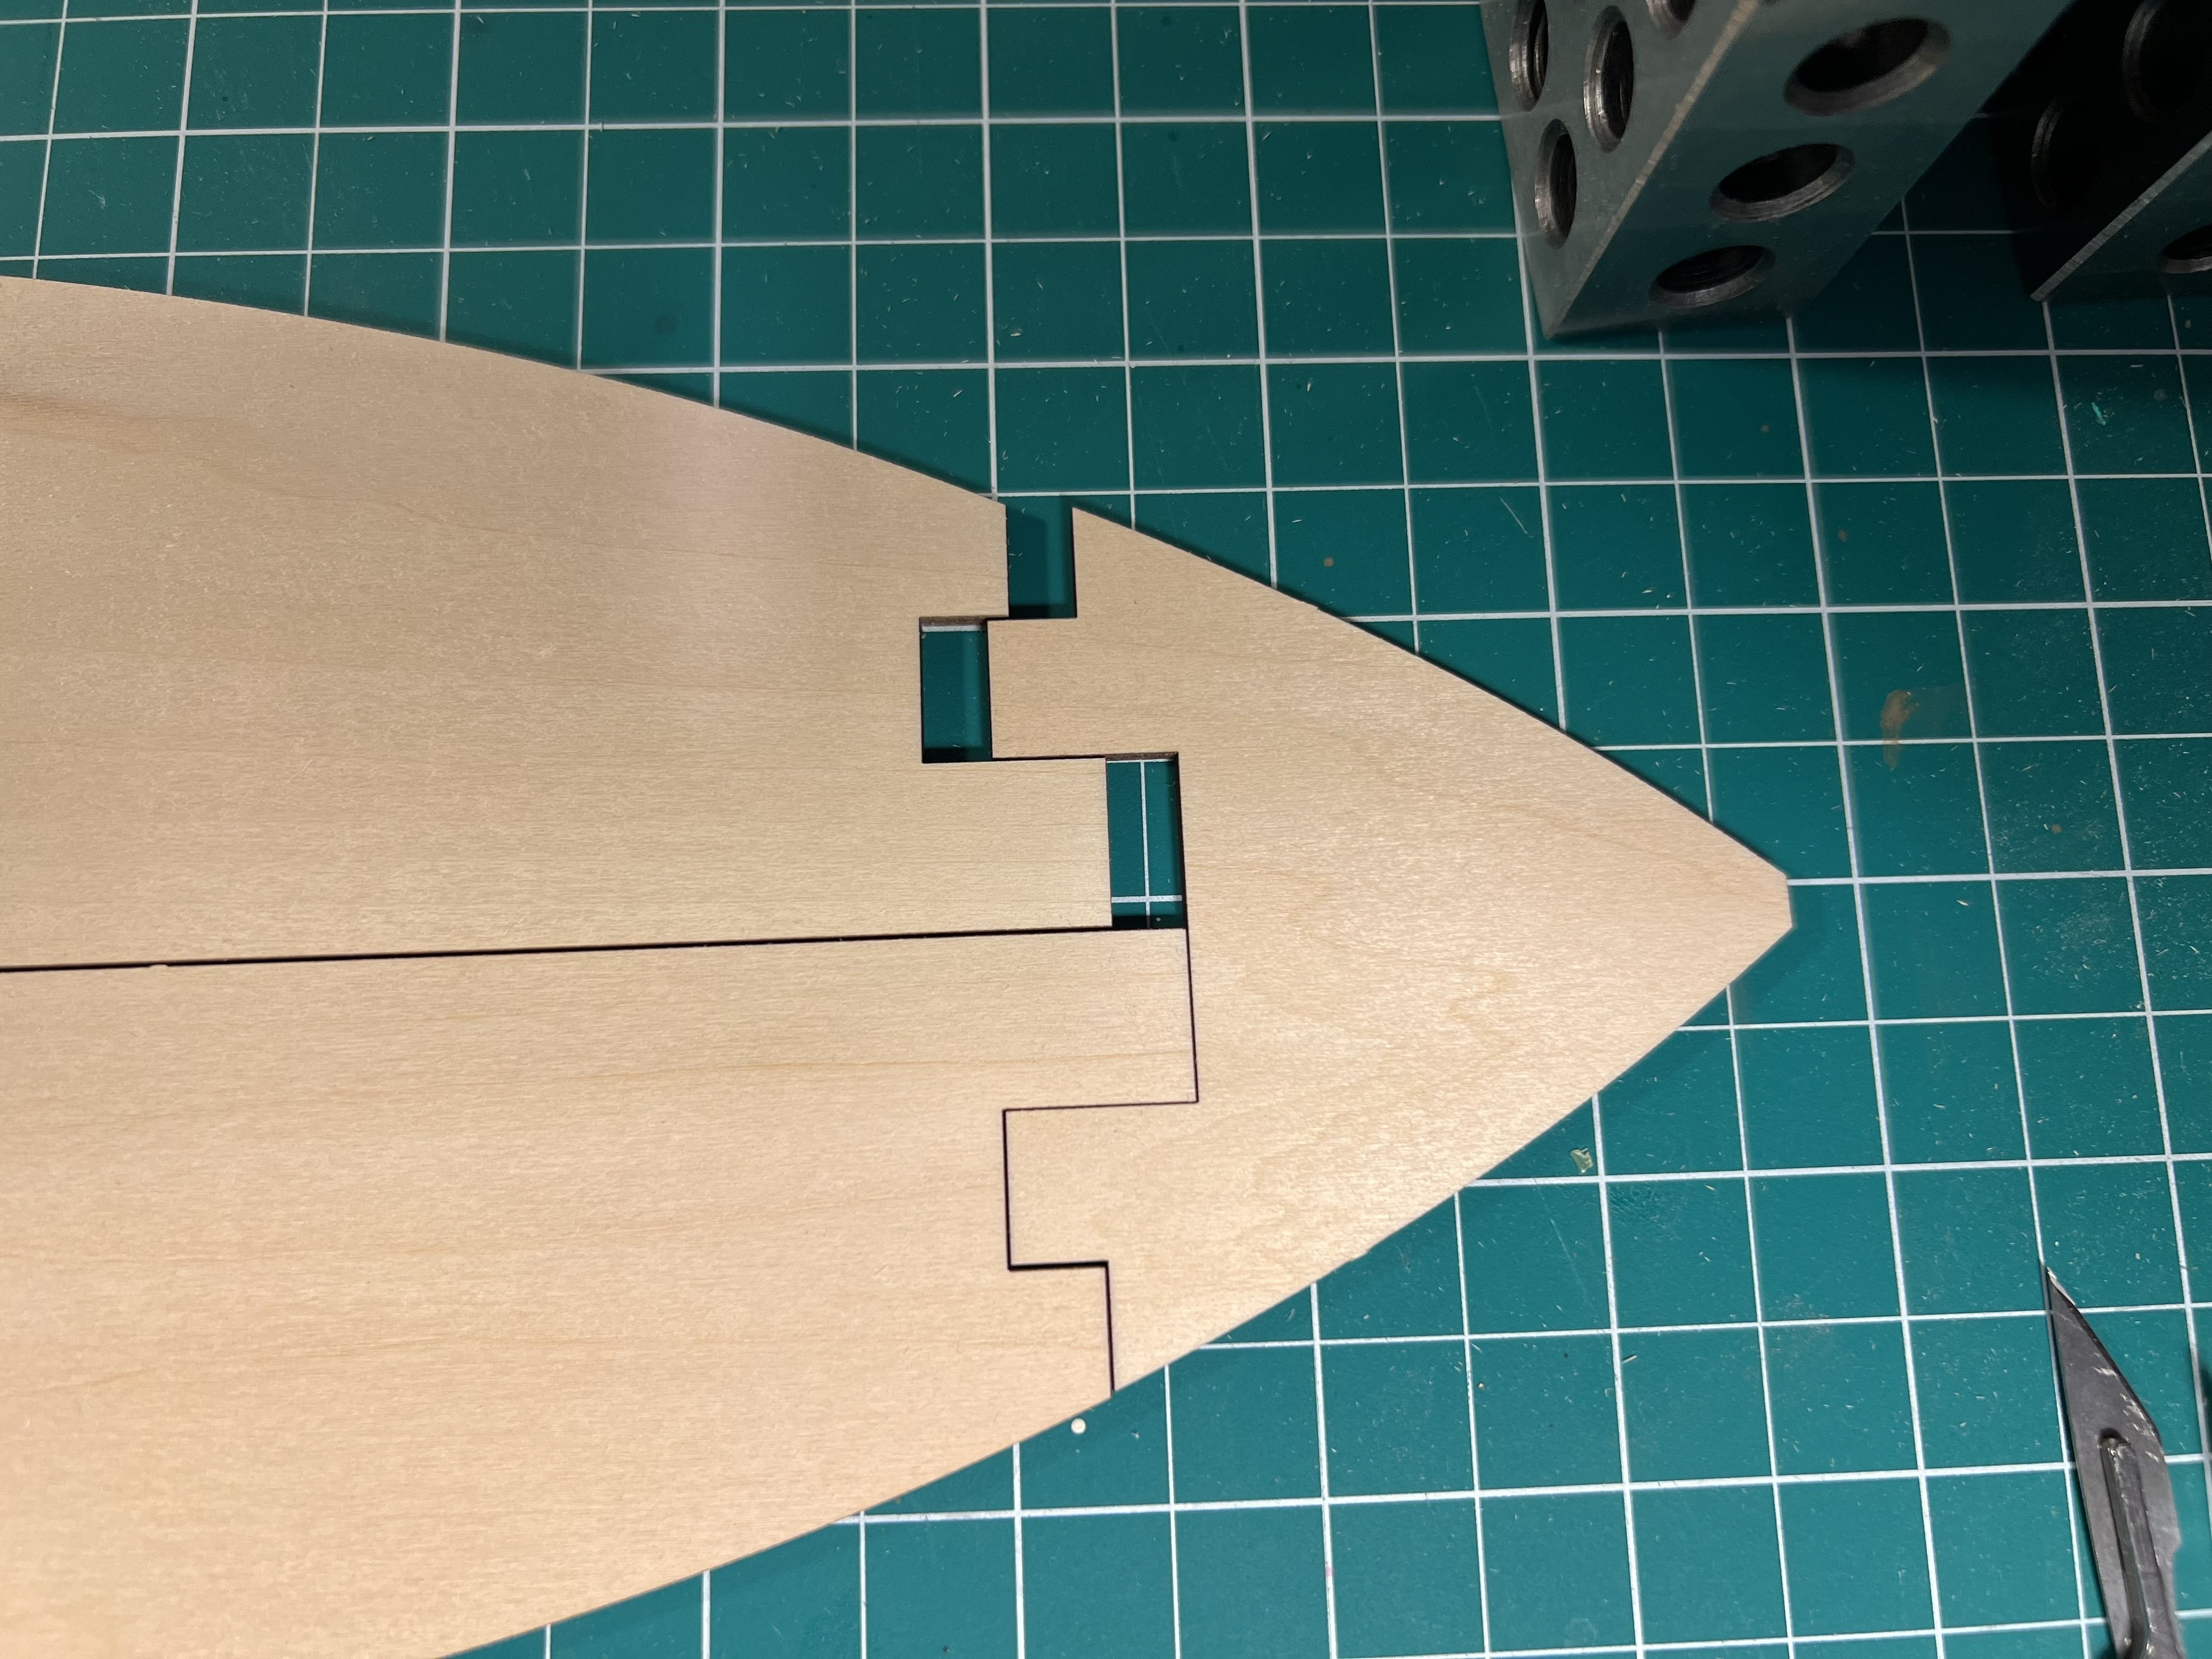
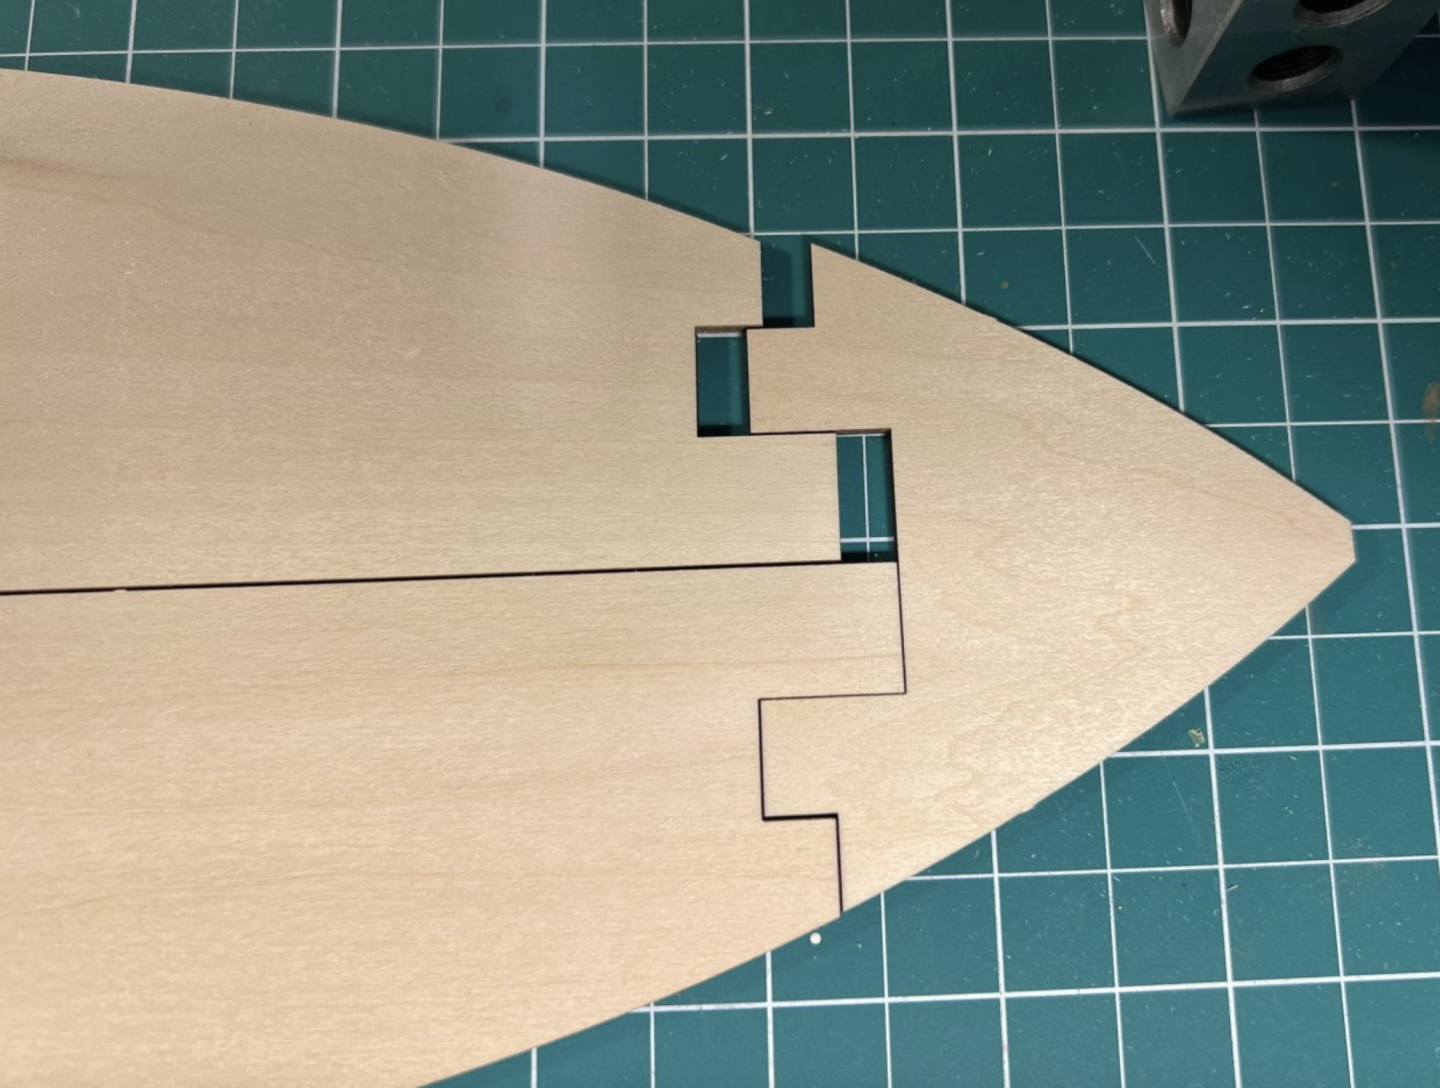
Yeah, I certainly don't blame these things on the designers. The folks at Model Shipways are always trying to put another challenge in front of you. I'm working on the Philadelphia, following Olha's build, and her kit and my kit (and lots of others) had this fun one (see photo) to try to figure out. Instead of asking them to send me a new part - assuming they have new parts that fix this - I'm going to follow along trying to see how Olha fixes hers. Figure I'll learn something from that experience. I don't quite understand the business model that doesn't do a better job of quality control, especially for what are supposed to be model kits aimed at relatively beginning modelers. I'm sure there are people who buy these kits and don't find a web site like this and get frustrated or think they made a mistake and just move on to another hobby. So they sell one kit rather than possibly dozens of kits to someone. I can see advanced models just giving you the supplies and having you figure things out for yourself, but beginning/intermediate models should show a little bit of care and oversight. This model lists at nearly $300 - though I got it for half that. You'd think they monitor these websites. I'm sure they weren't exactly pleased to see that in Olga's first video of the group build that Model Expo / Model Shipways has been advertising just about every day that their biggest parts don't fit together at all. They literally have a Creed Bratten running their QA department.owin
- 86 replies
-
- 4
-
-
- Model Shipways
- Norwegian Sailing Pram
- (and 3 more)
-
I think you’re right wrt paddle wheel boats. The Philadelphia is a very similar flat shallow hull, for the same reason as the hulls on paddle wheelers. You can often check the instructions online, at least for some kits, to see what kind of hull construction it has. The Philadelphia makes it hard to see what I’m describing because the illustrations are all on plan sheets, not in the instruction book. You can check Olha’s build when she gets to planking. I bet some paddle wheel kits have the pre-spilled planks, and the planks are probably wide and there aren’t that many. I understand your frustration with the strip planking. My Sherbourne was garbage - both layers. The hull ended fine, but that’s because of filler, sanding, and tons of layers of paint. The only thing the Half Hull really did for me was visualizing what edge bending is trying to accomplish with strip planking. My Vanguard Ranger was certainly better. But it was supposed to have some bare wood up top that was to be oiled/stained. No way on mine, so I painted the entire hull. I’m kind of surprised I stuck with trying to understand planking. It was pretty frustrating. I kind of “get it” now, and least to some extent. We’ll see if I ever get to the point of having a bare wood hull. I’m going Olha does a group build someday with a strip planked hull. Maybe she’ll pick a Vanguard model, but she seems to have some agreement with Model Expo.
-
If you haven’t done a model that requires faring the bulkheads, I recommend having the “printed” sides of the bulkheads pointed towards their respective ends of the ship (they can be put in either direction). These markings then show approximately (don’t take them as exact) how much of the bulkheads (at an angle) will need to be sanded off; a lot near the front and back, none at all (except to remove the char) in the middle.


-
If you’re not a fan of this kind of thin strip planking, the Midwest San Francisco Bay Scow Schooner I’m working on has no planking at all. I think the Model Shipways Philadelphia that I just started in order to follow Olha’s YouTube build has prespilled planks (like with the Dory, Pram, and Smack). I imagine there are other models of this style.
-
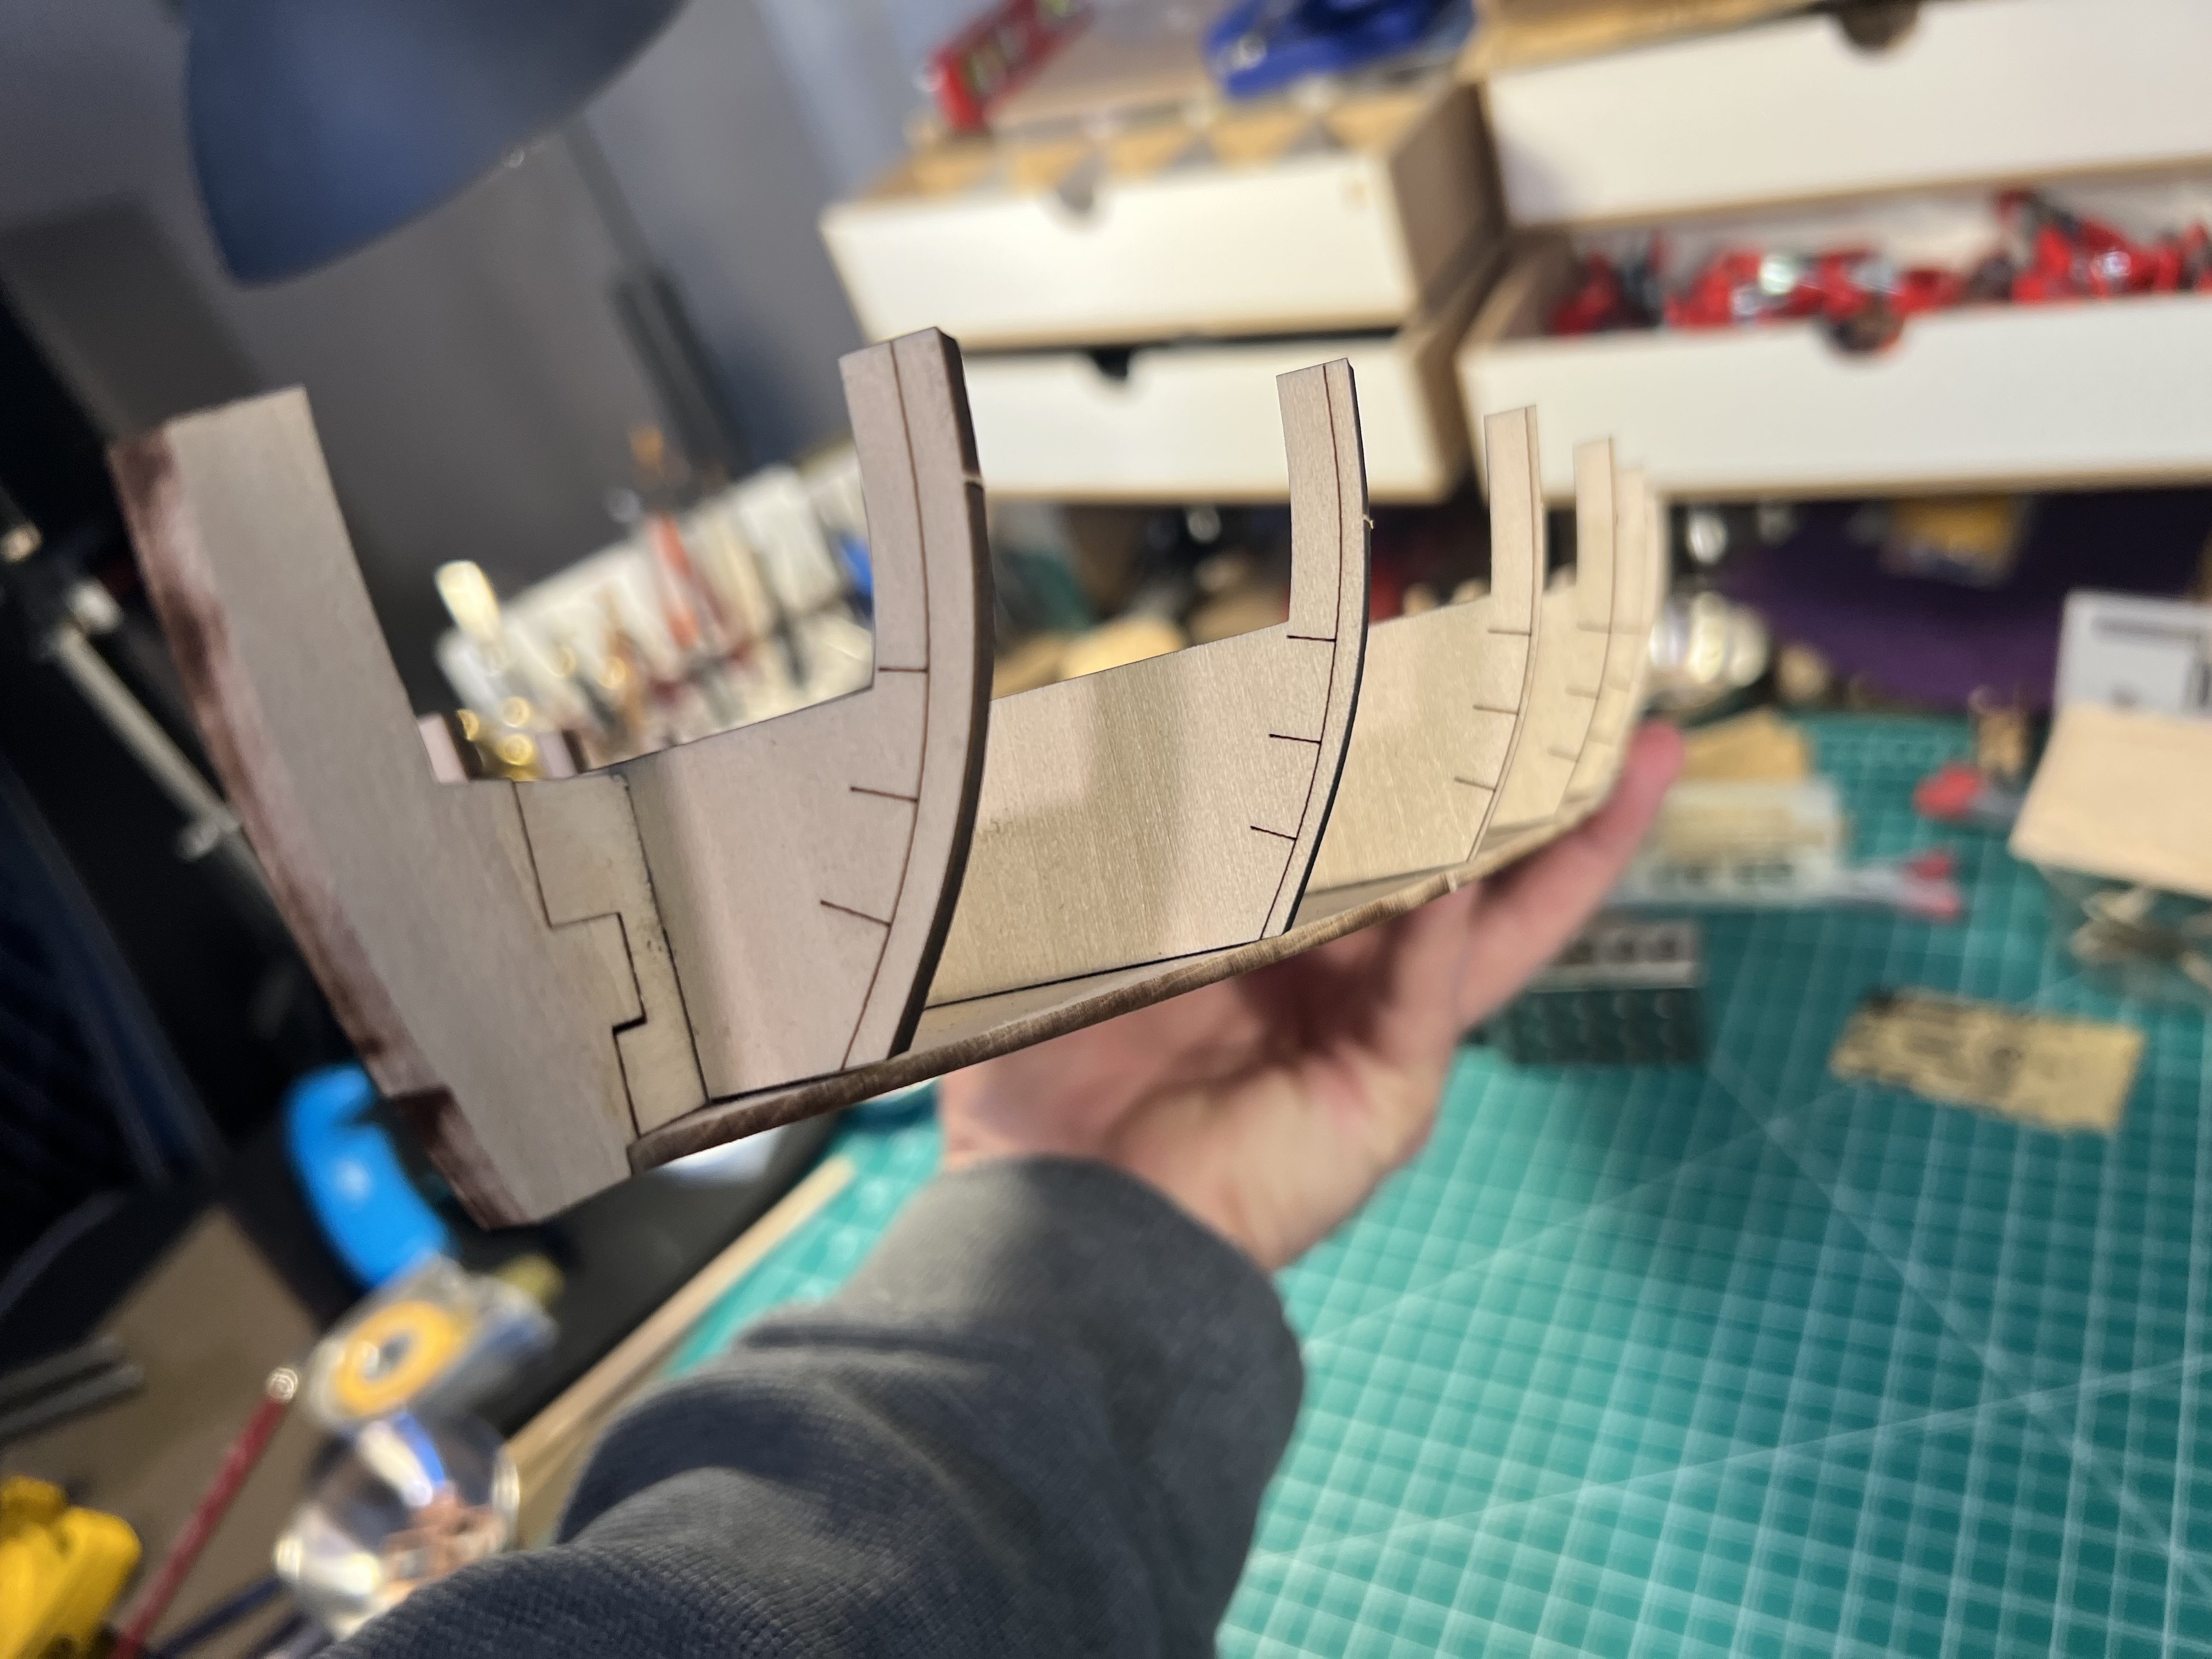
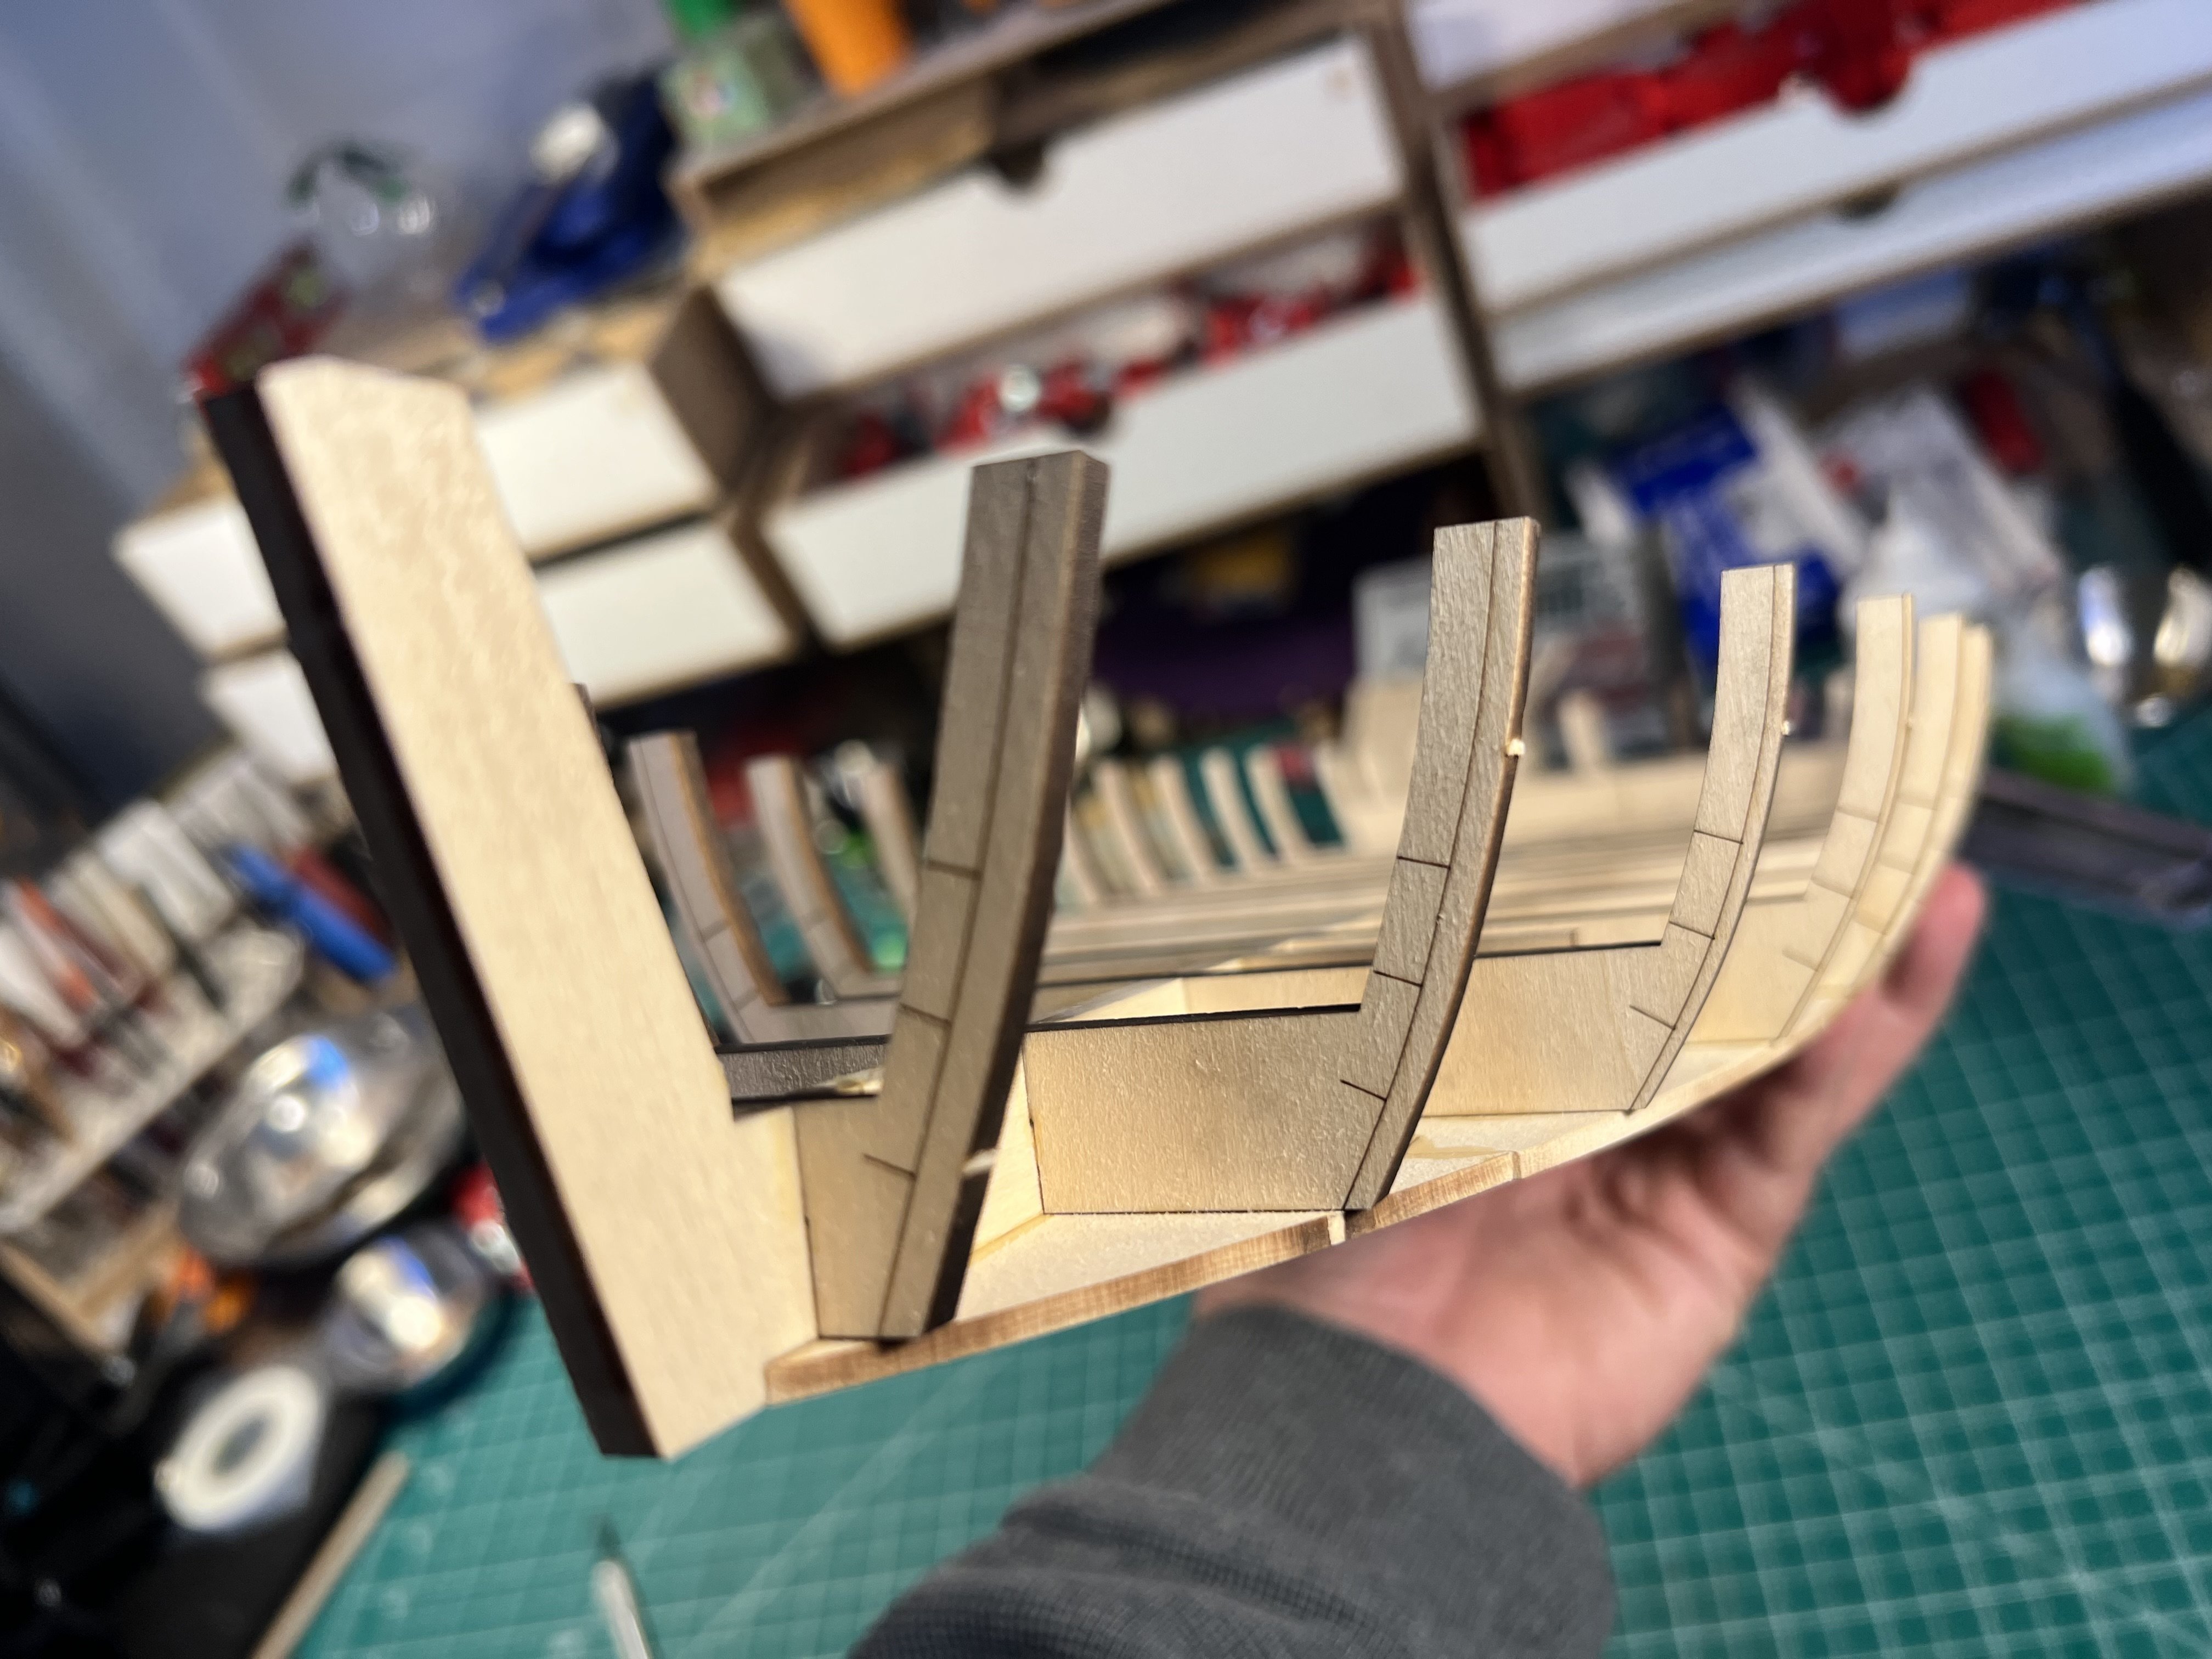
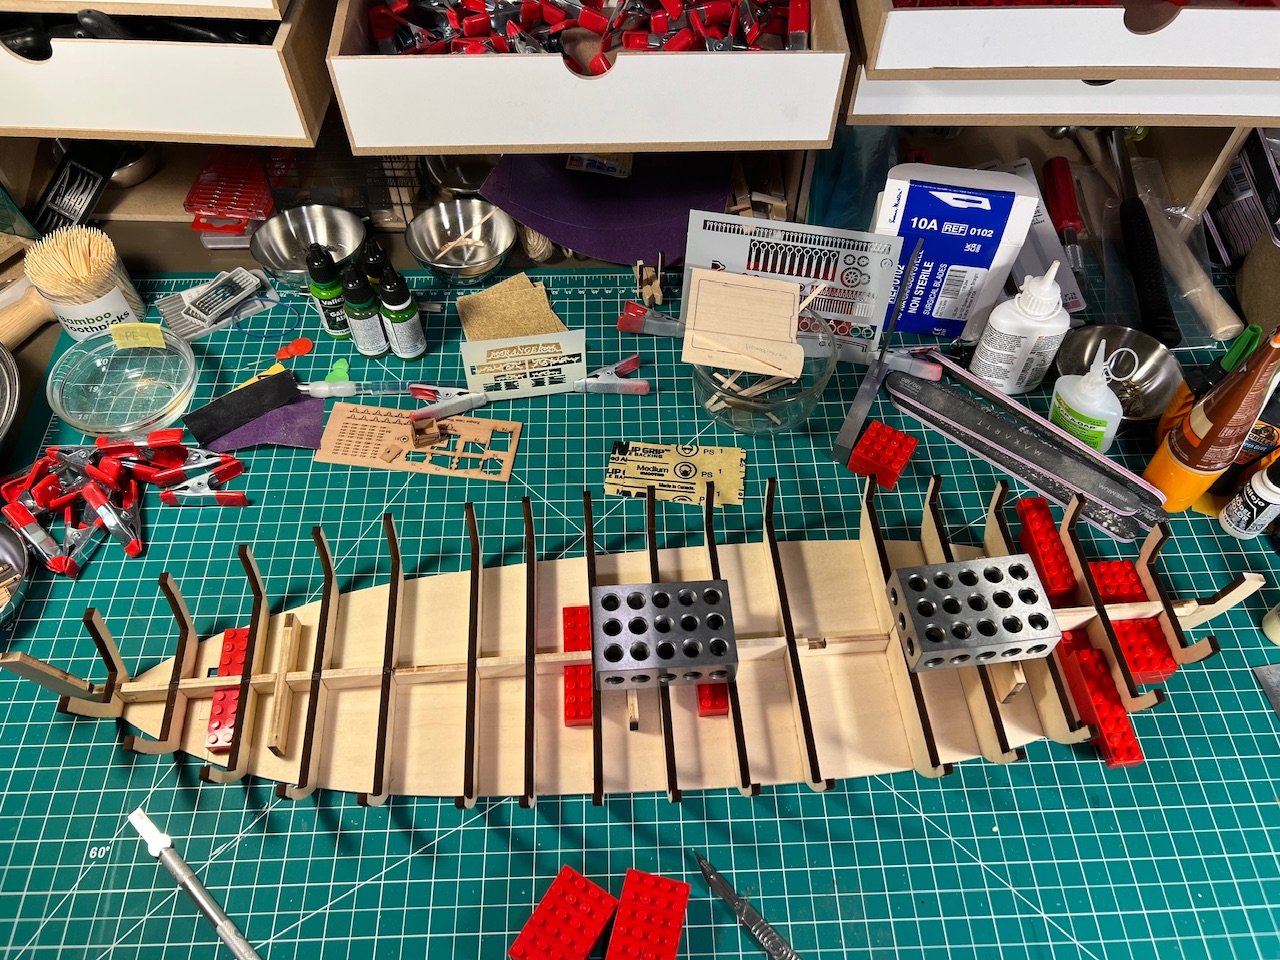
Adding the bulkhead pieces. I’m now caught up to where Olha is. Only took me 2x as long 😉
-
Good eye. If I was just building this on my own I’d have ordered a new piece. I’m treating this as a learning experience to learn from and replicate how Olha deals with this same grief.
-
Like Olha’s kit, my bottom pieces are cut wrong. One of the pieces is too short. Frustrating given that this kit has been out for quite a long time that this mistake hasn’t been fixed. I don’t understand what business model would keep Model Shipways from fixing (and avoiding) these kinds of mistakes, especially on what’s a fairly beginner model. Every model I’ve gotten from them has quality control problems. Thankfully they do have a great replacement policy, but I wish they tried a little harder to avoid problems in the first place. I’m going to build with the error (and not request a new part) so I can follow how Olha fixes her model.

-
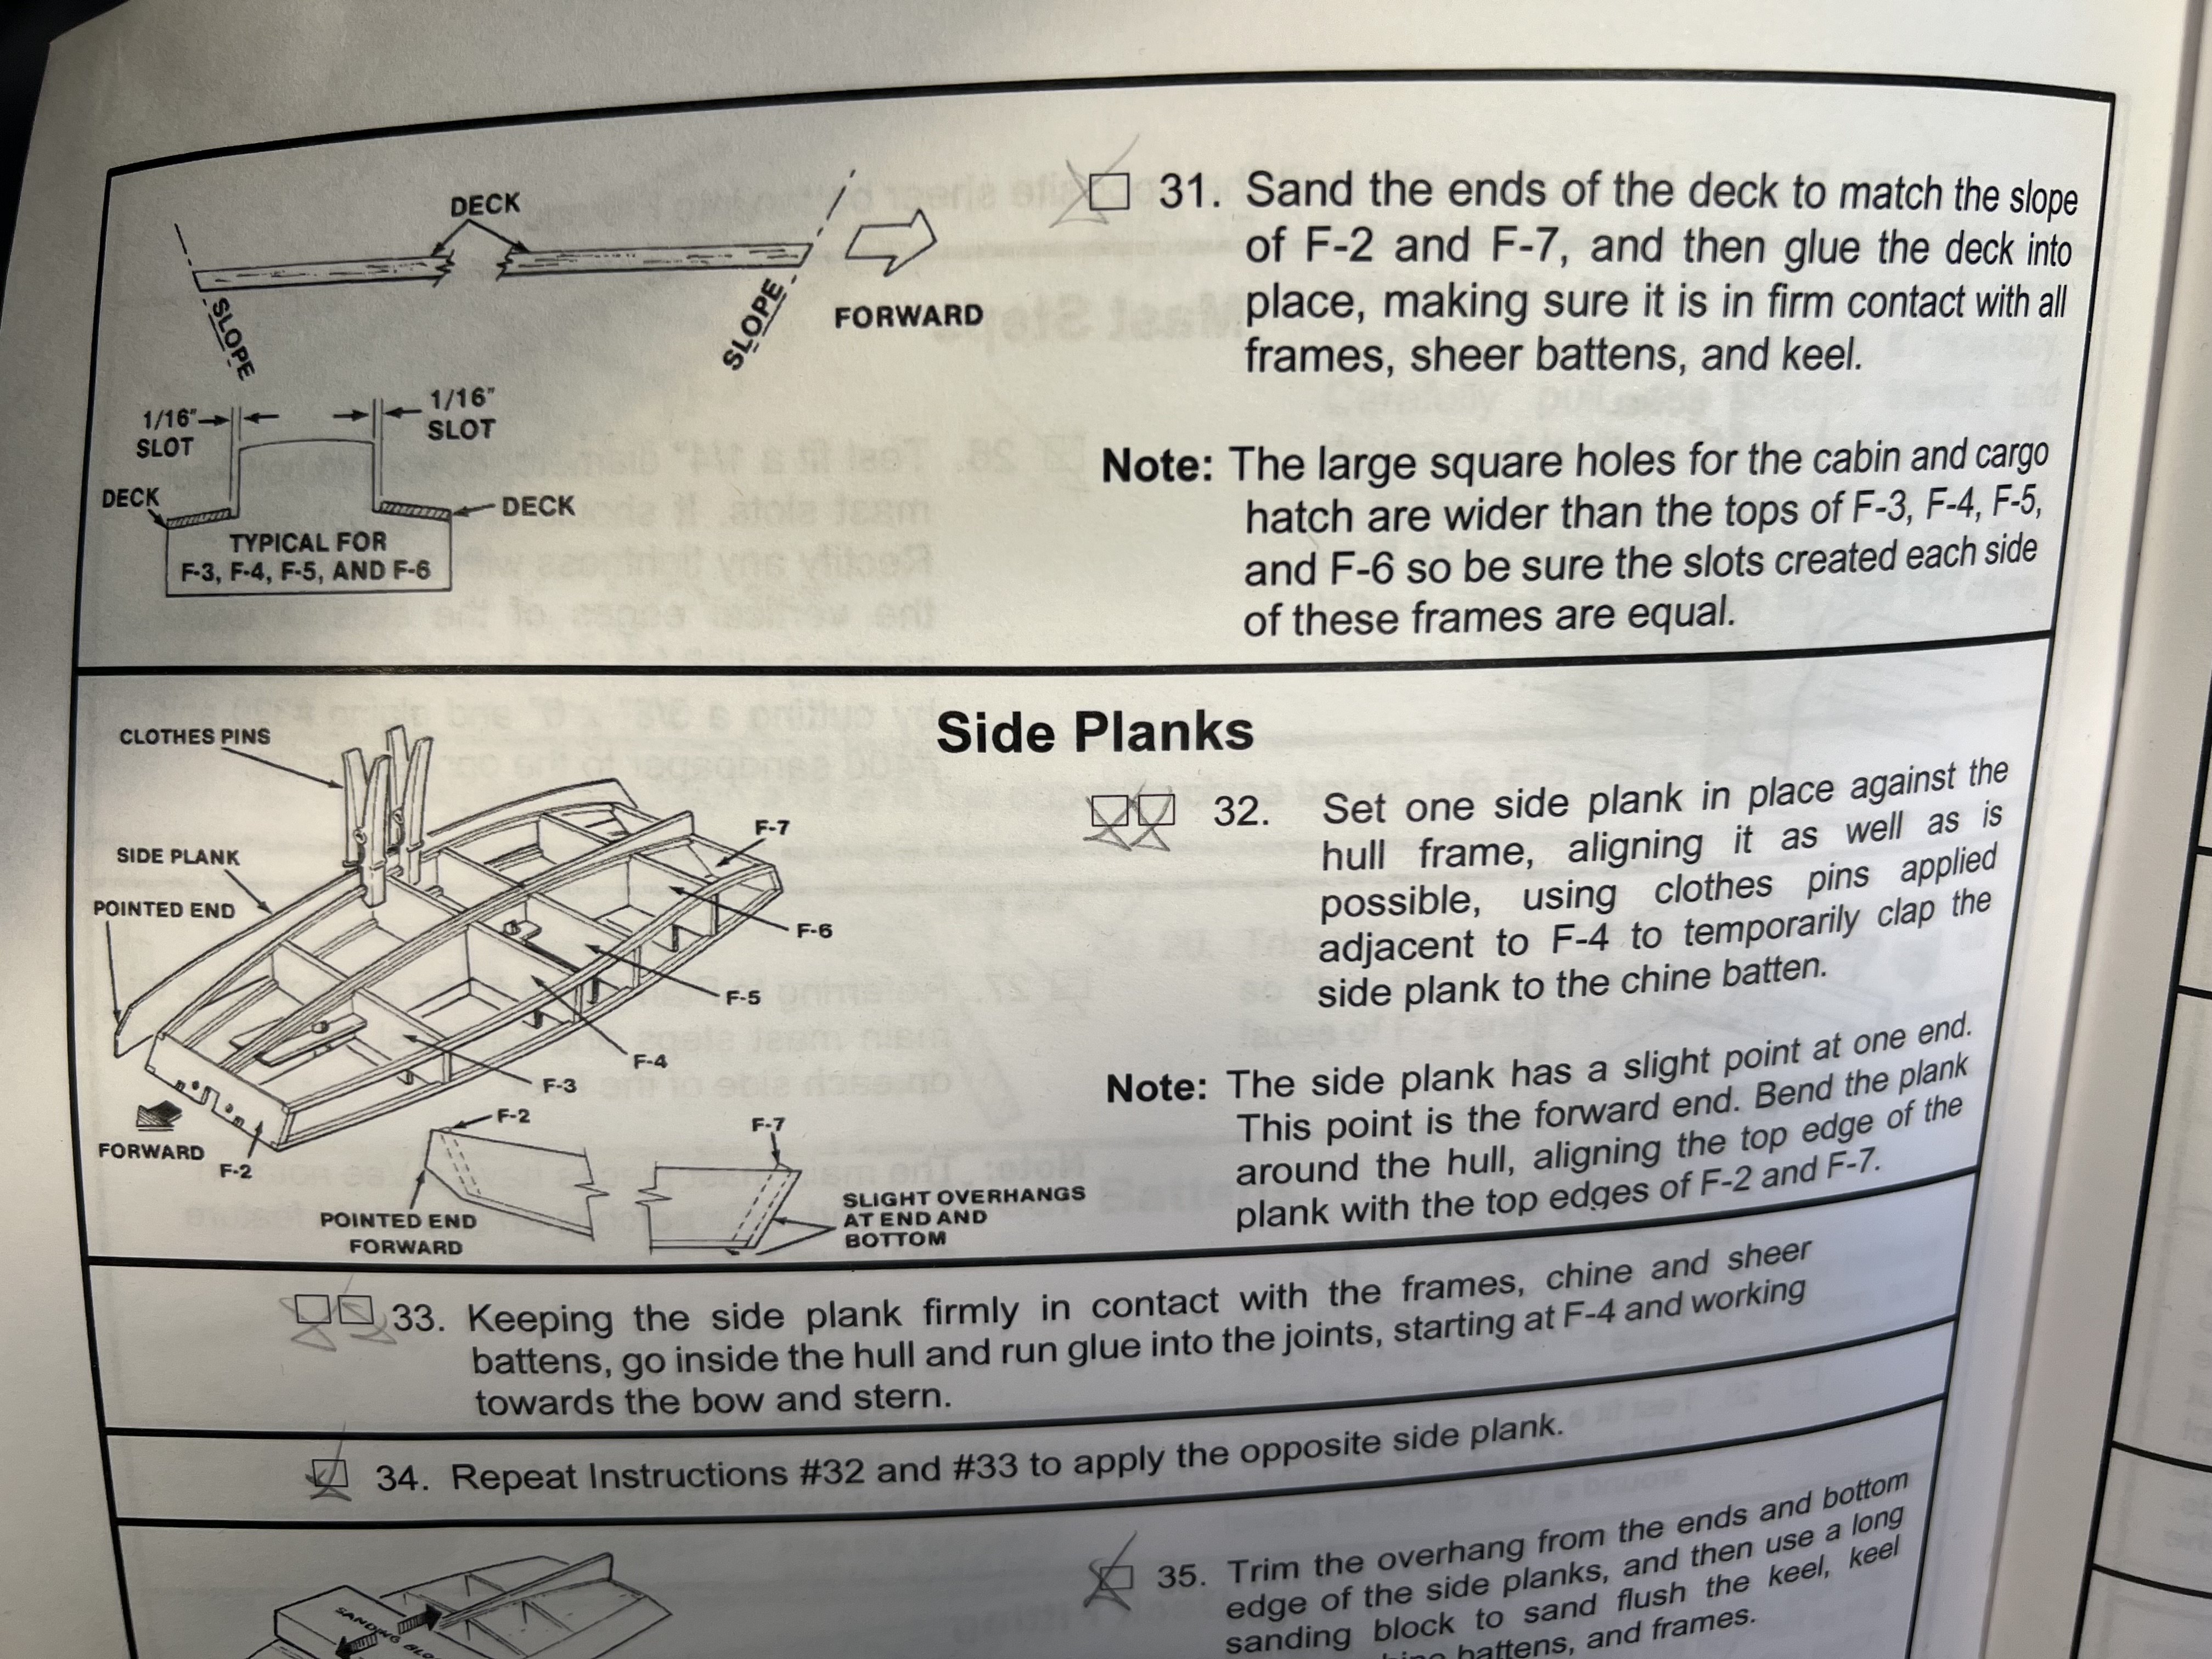
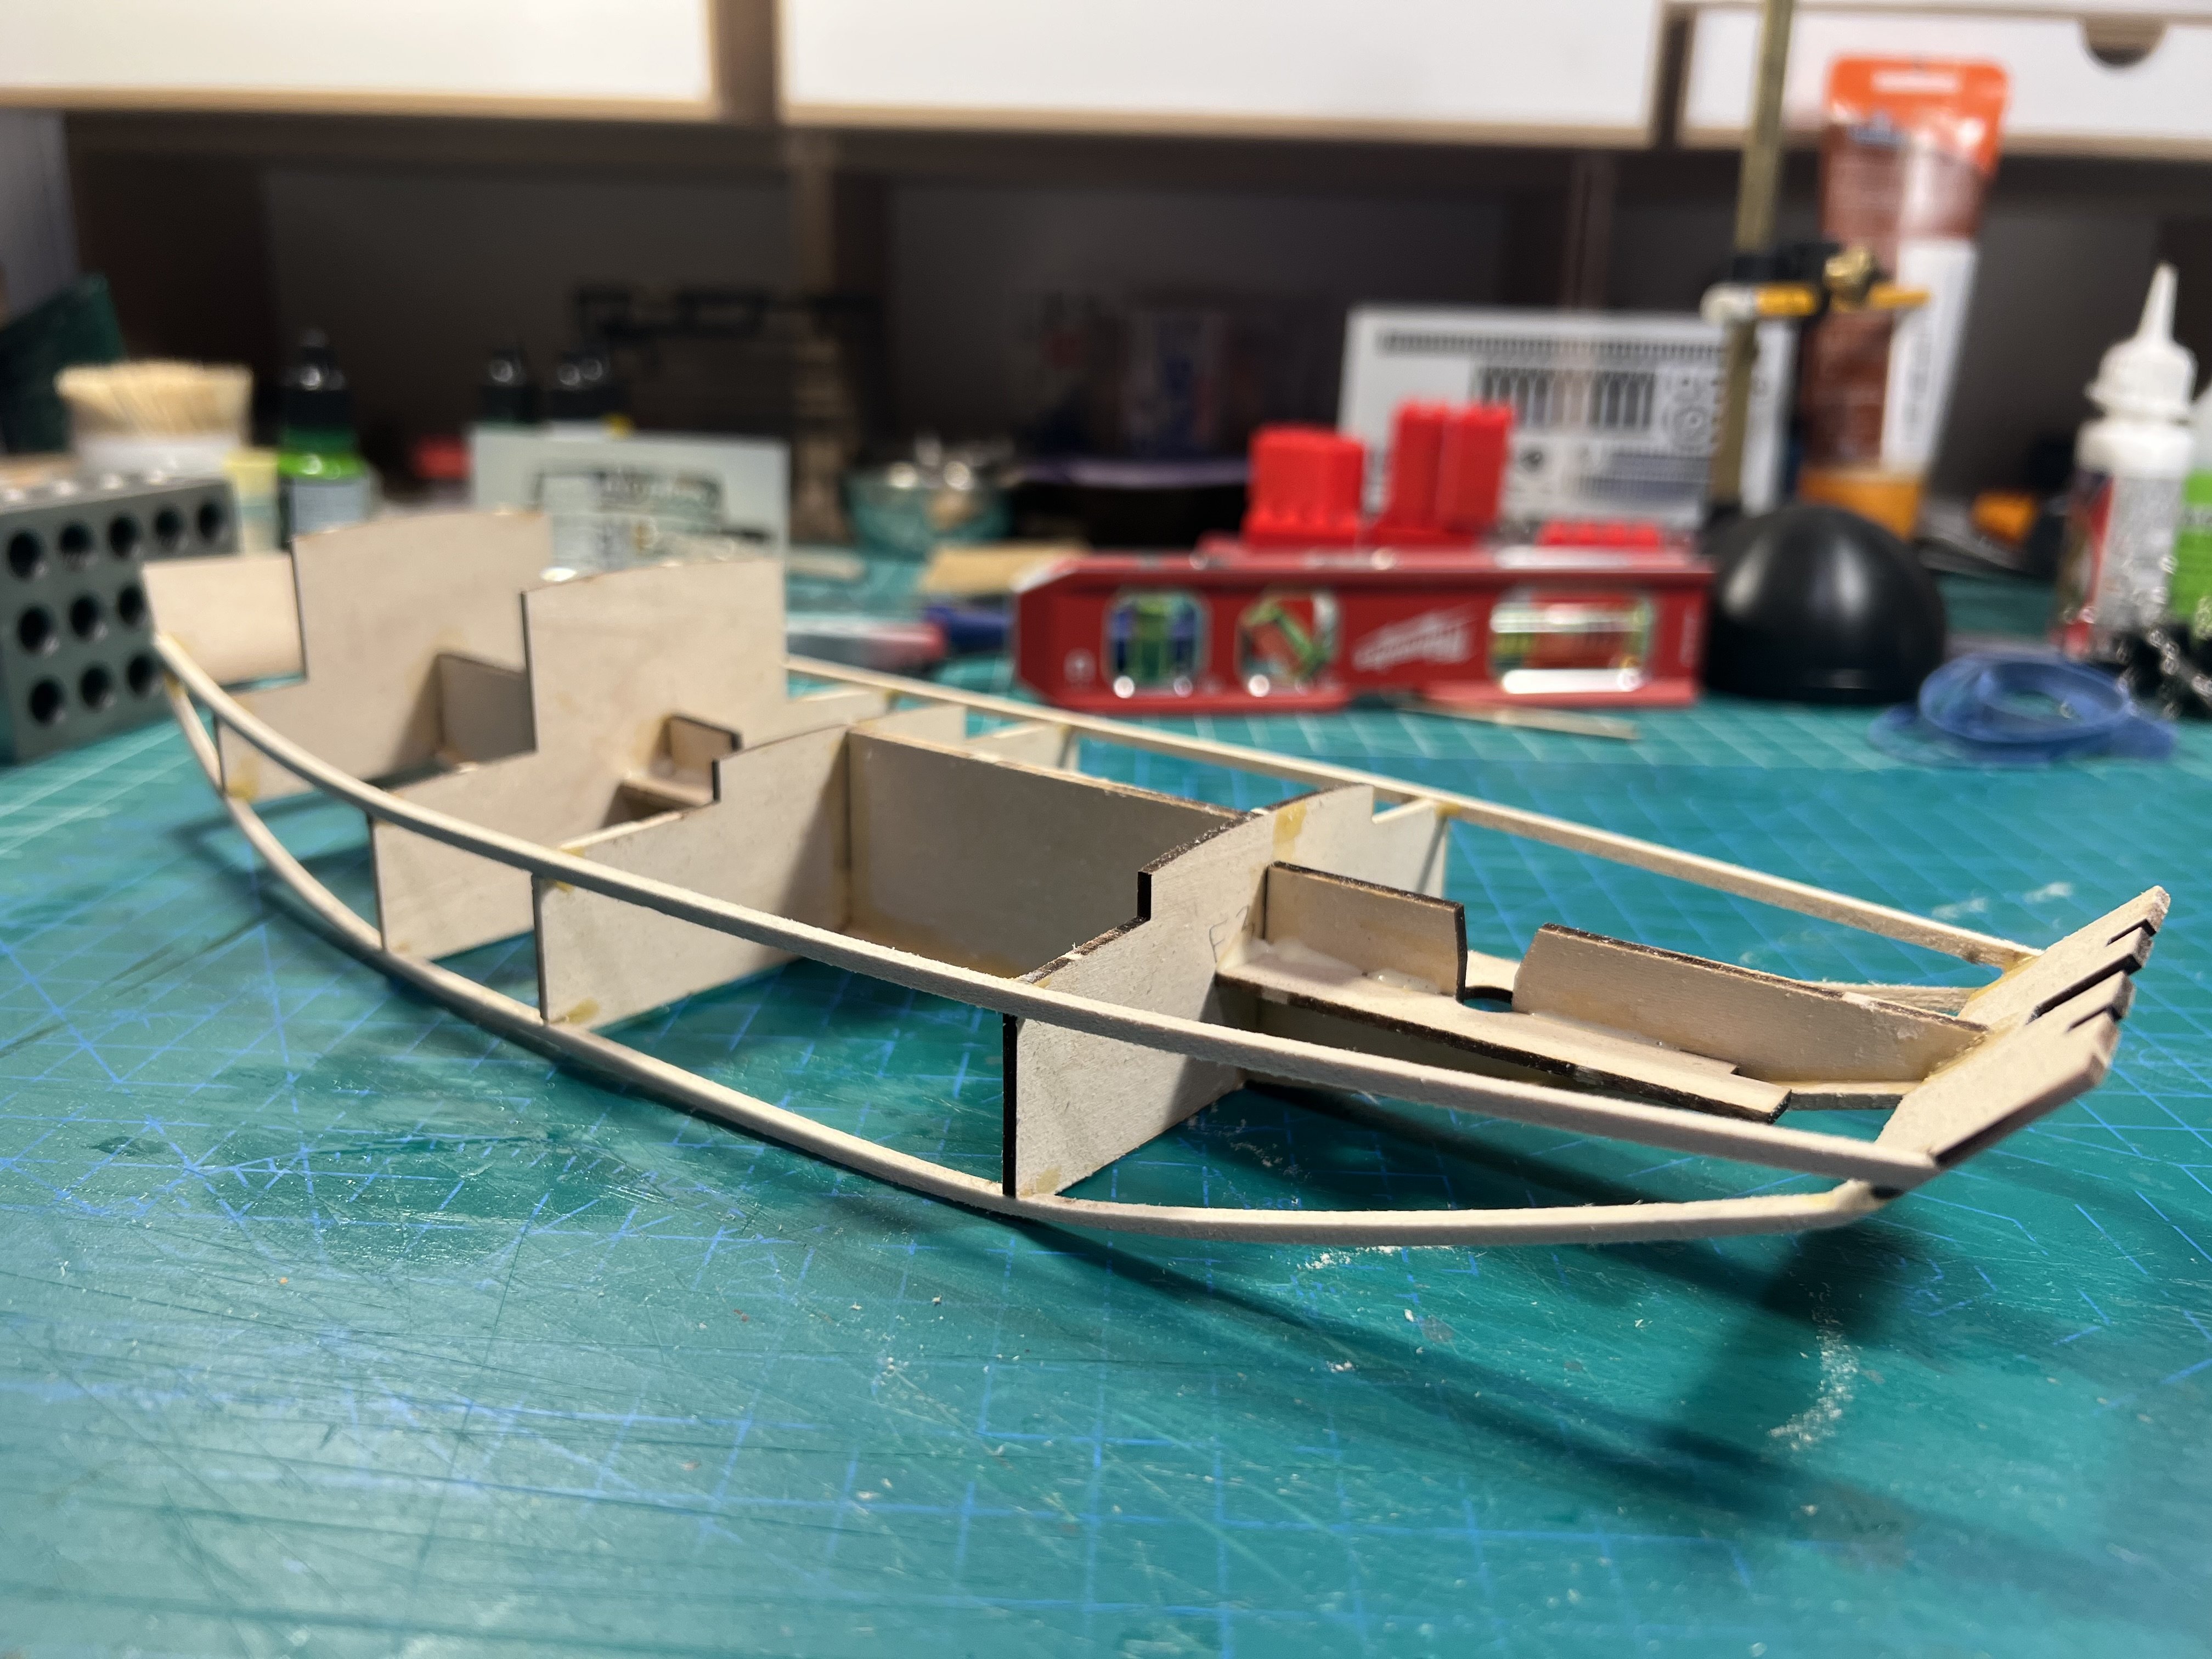
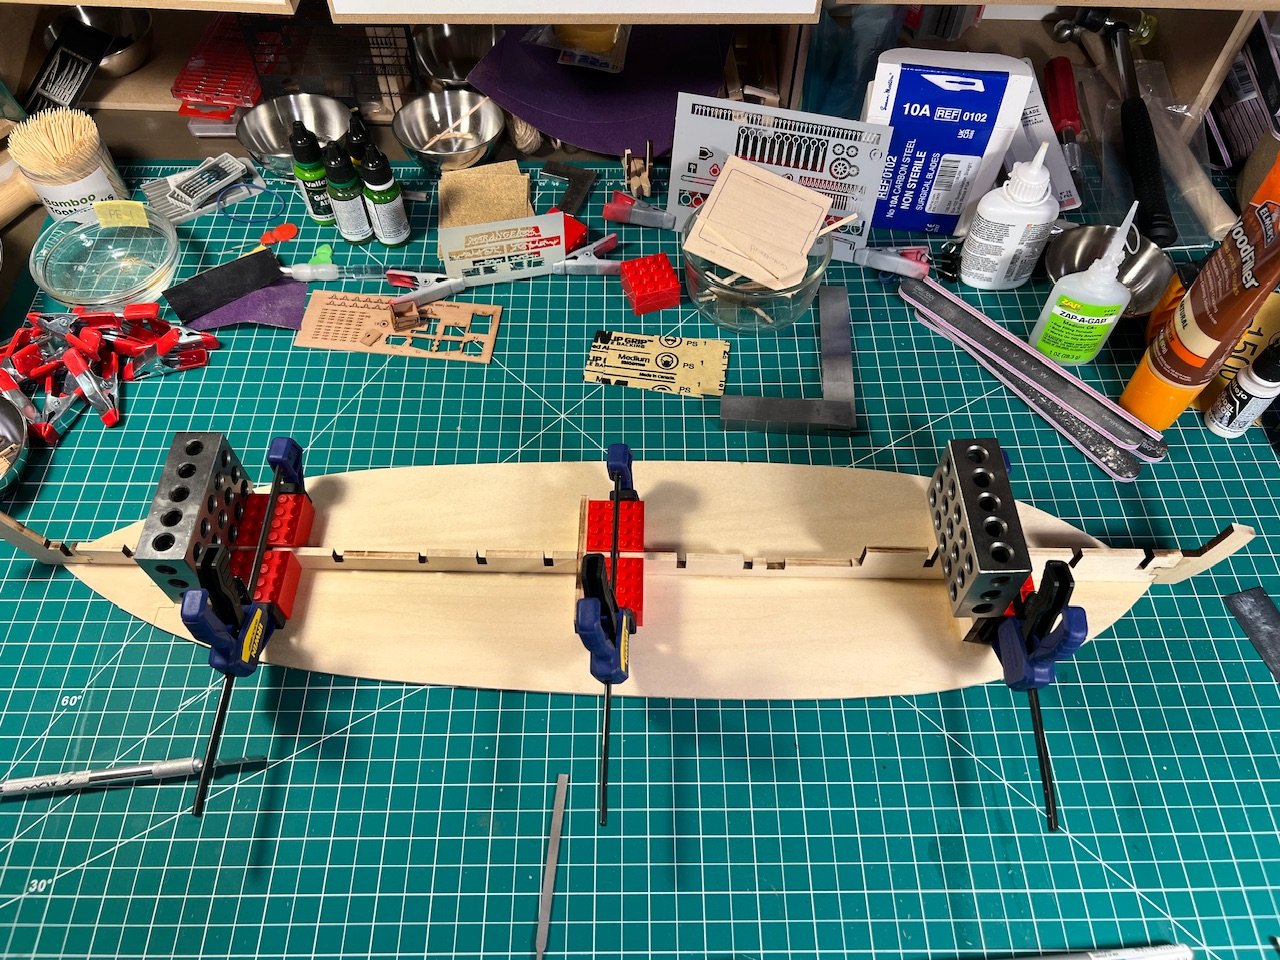
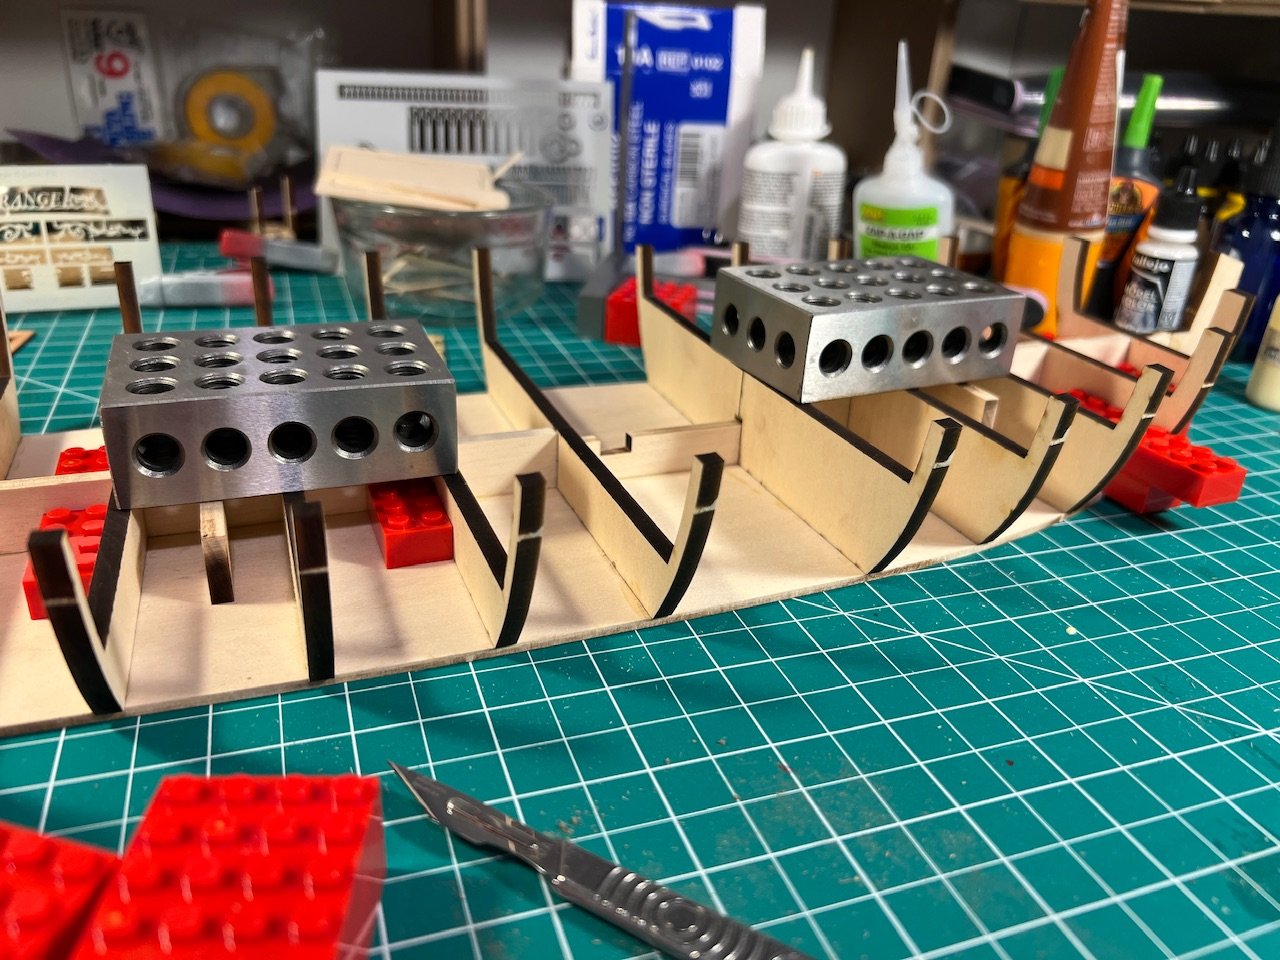
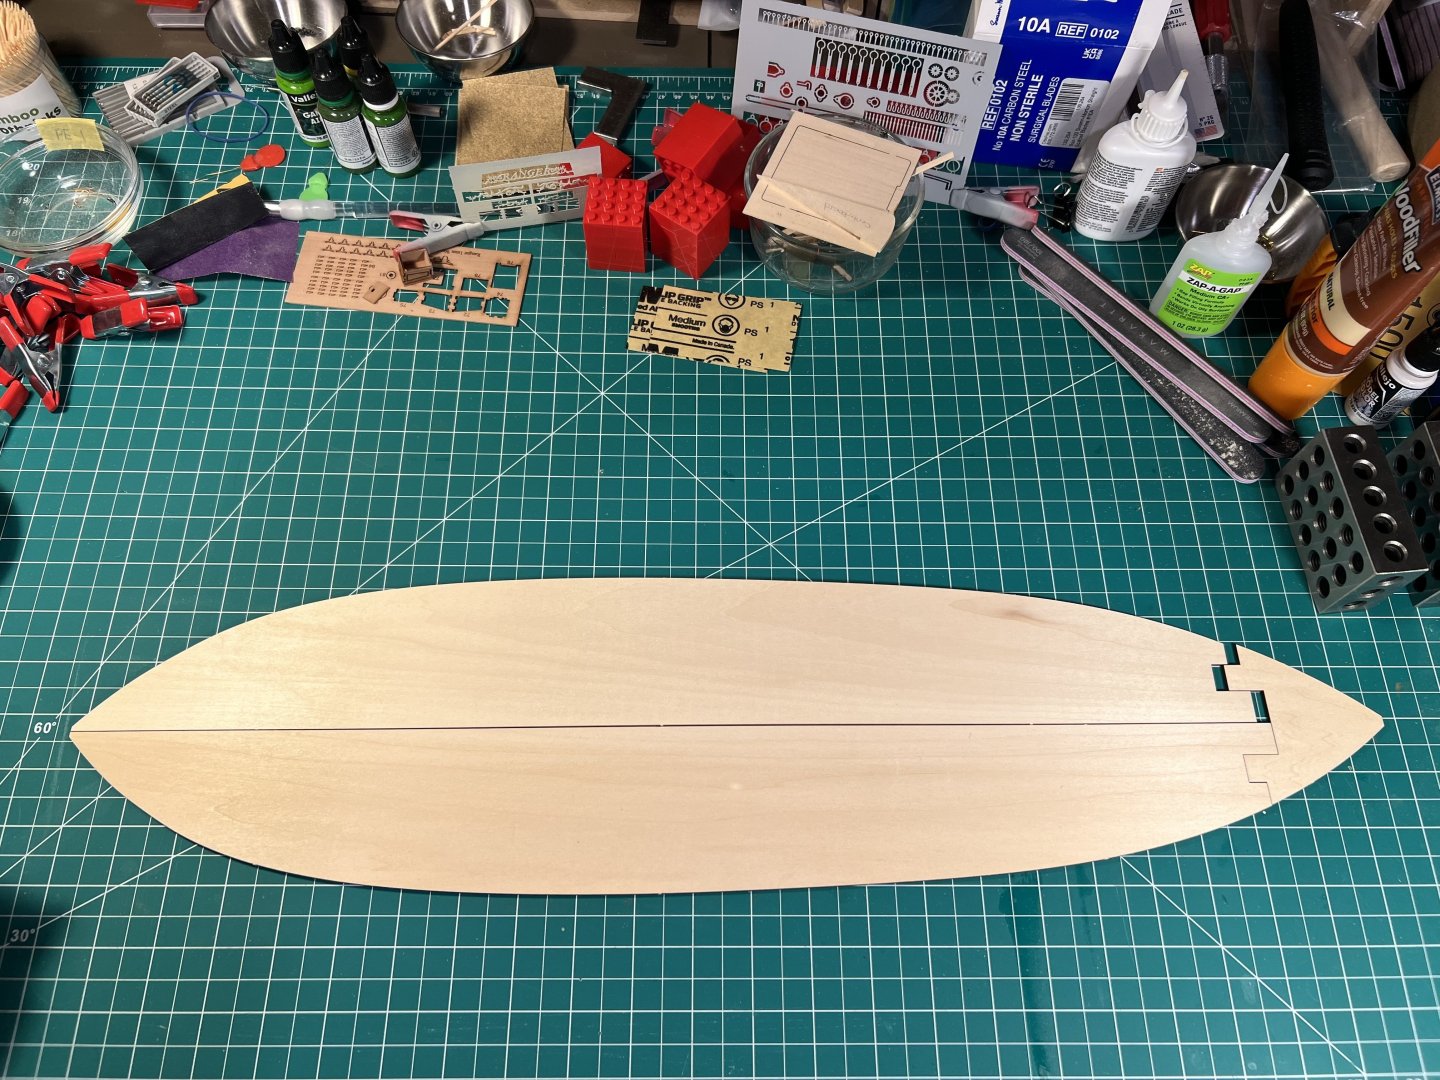
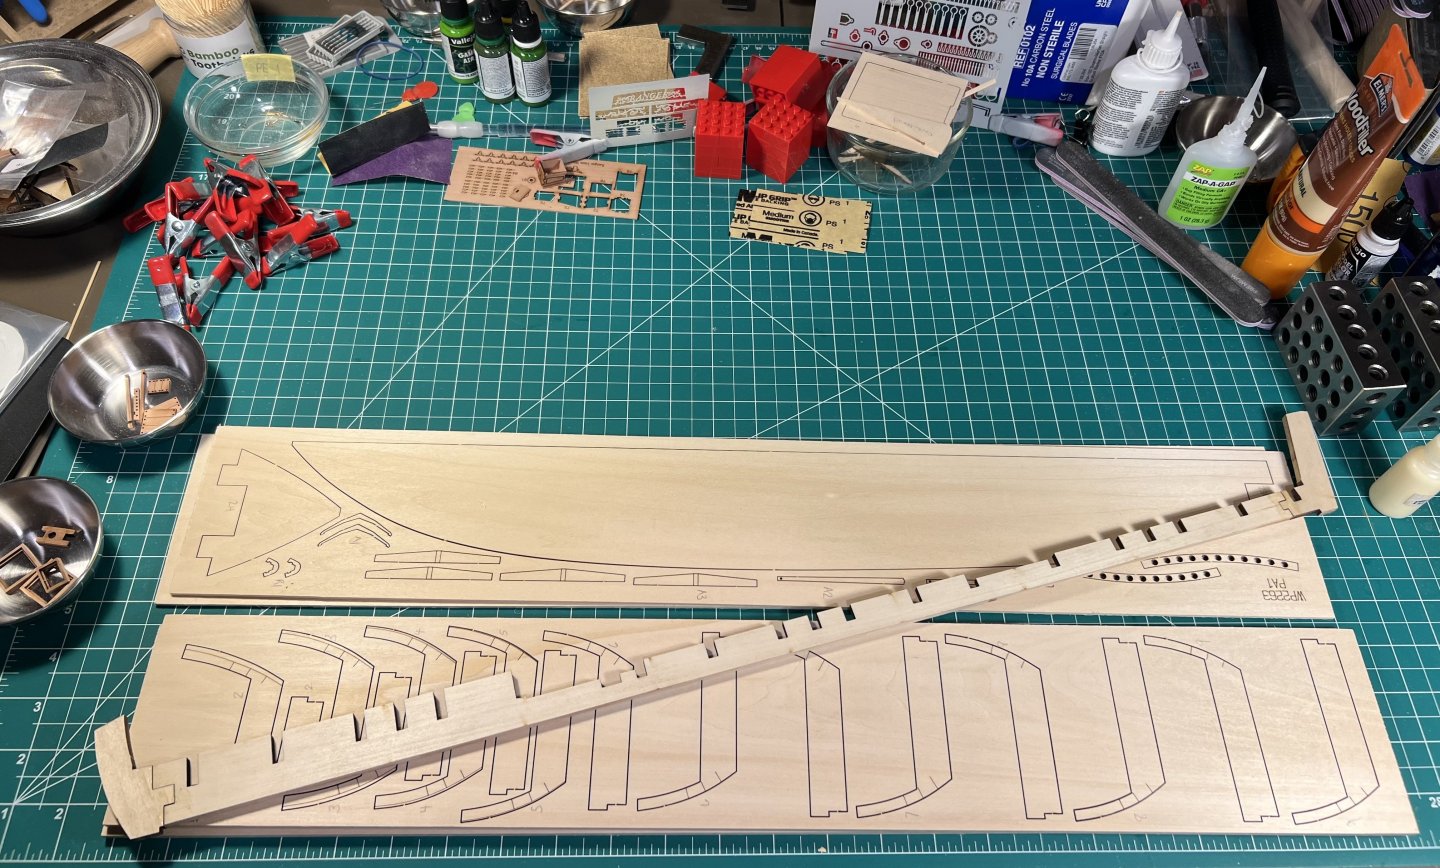
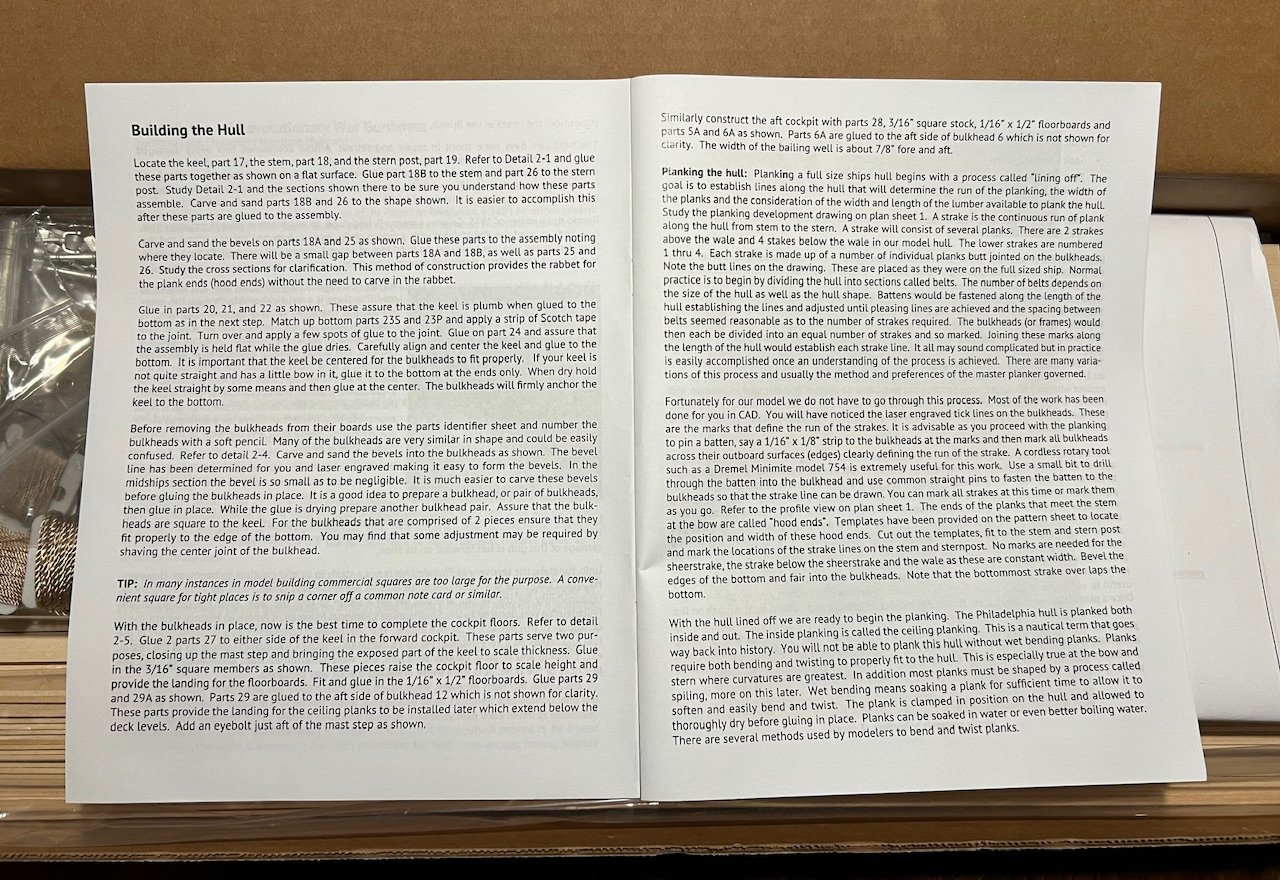
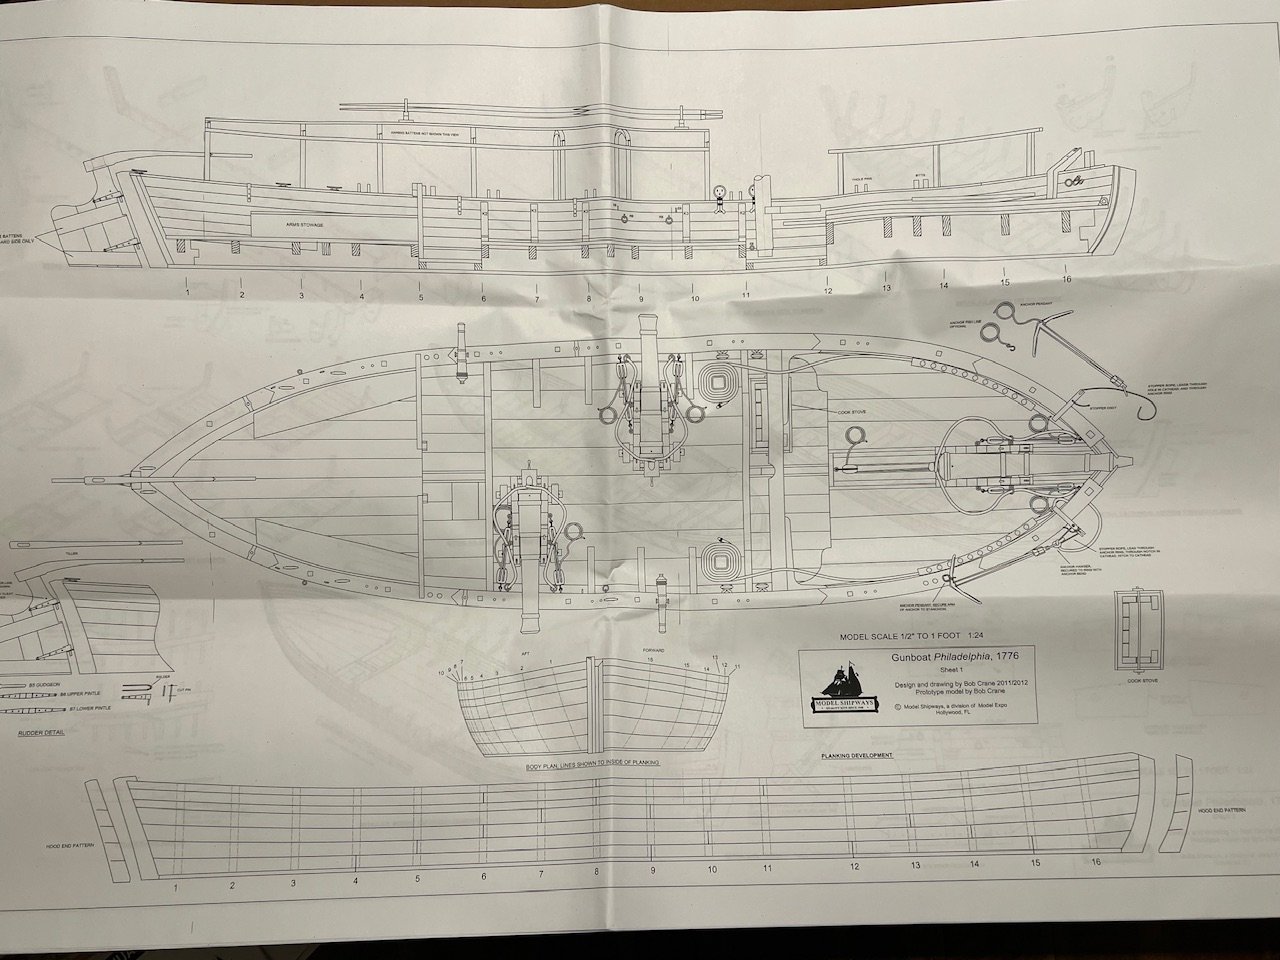
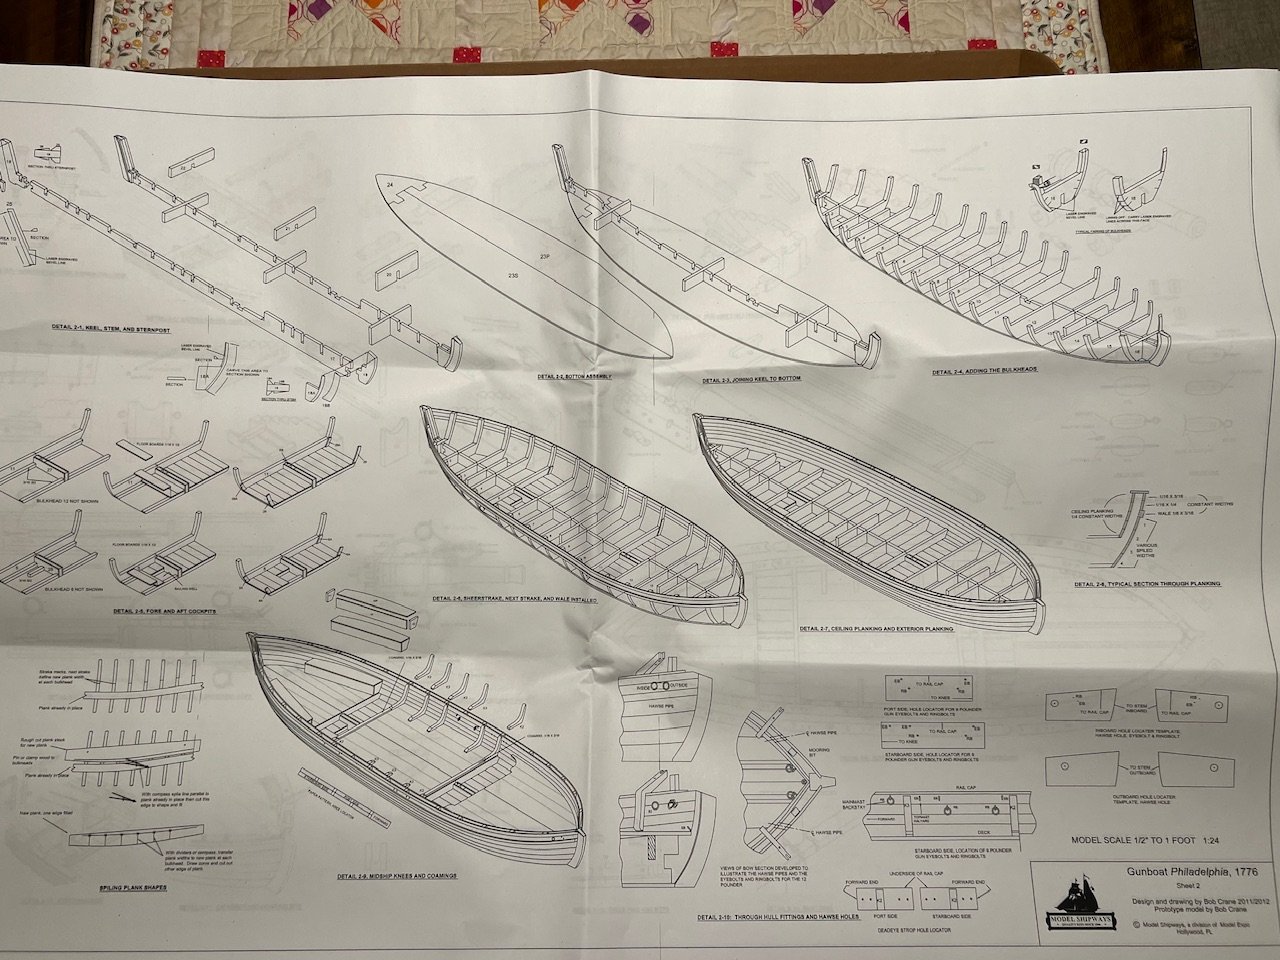
The instructions have you add the stem and stern post to the keel. All these pieces are thick and sturdy. The instructions then have you add additional pieces to the stem, but Olha pushed those steps to next week so I will to. The next step is to construct the bottom from three pieces (this boat is flat-bottomed), add the keel to the bottom, then add the bulkhead pieces to the keel.
-
I definitely made the planks wider than needed. It was a lot of shaping via sanding. I was never able to just trace a pattern that was the right size. It really was at best just a rough estimate. I cut to the right length using my Ultimation cutter. But width was lots of “carving” to the right shape with a sanding stick.
-
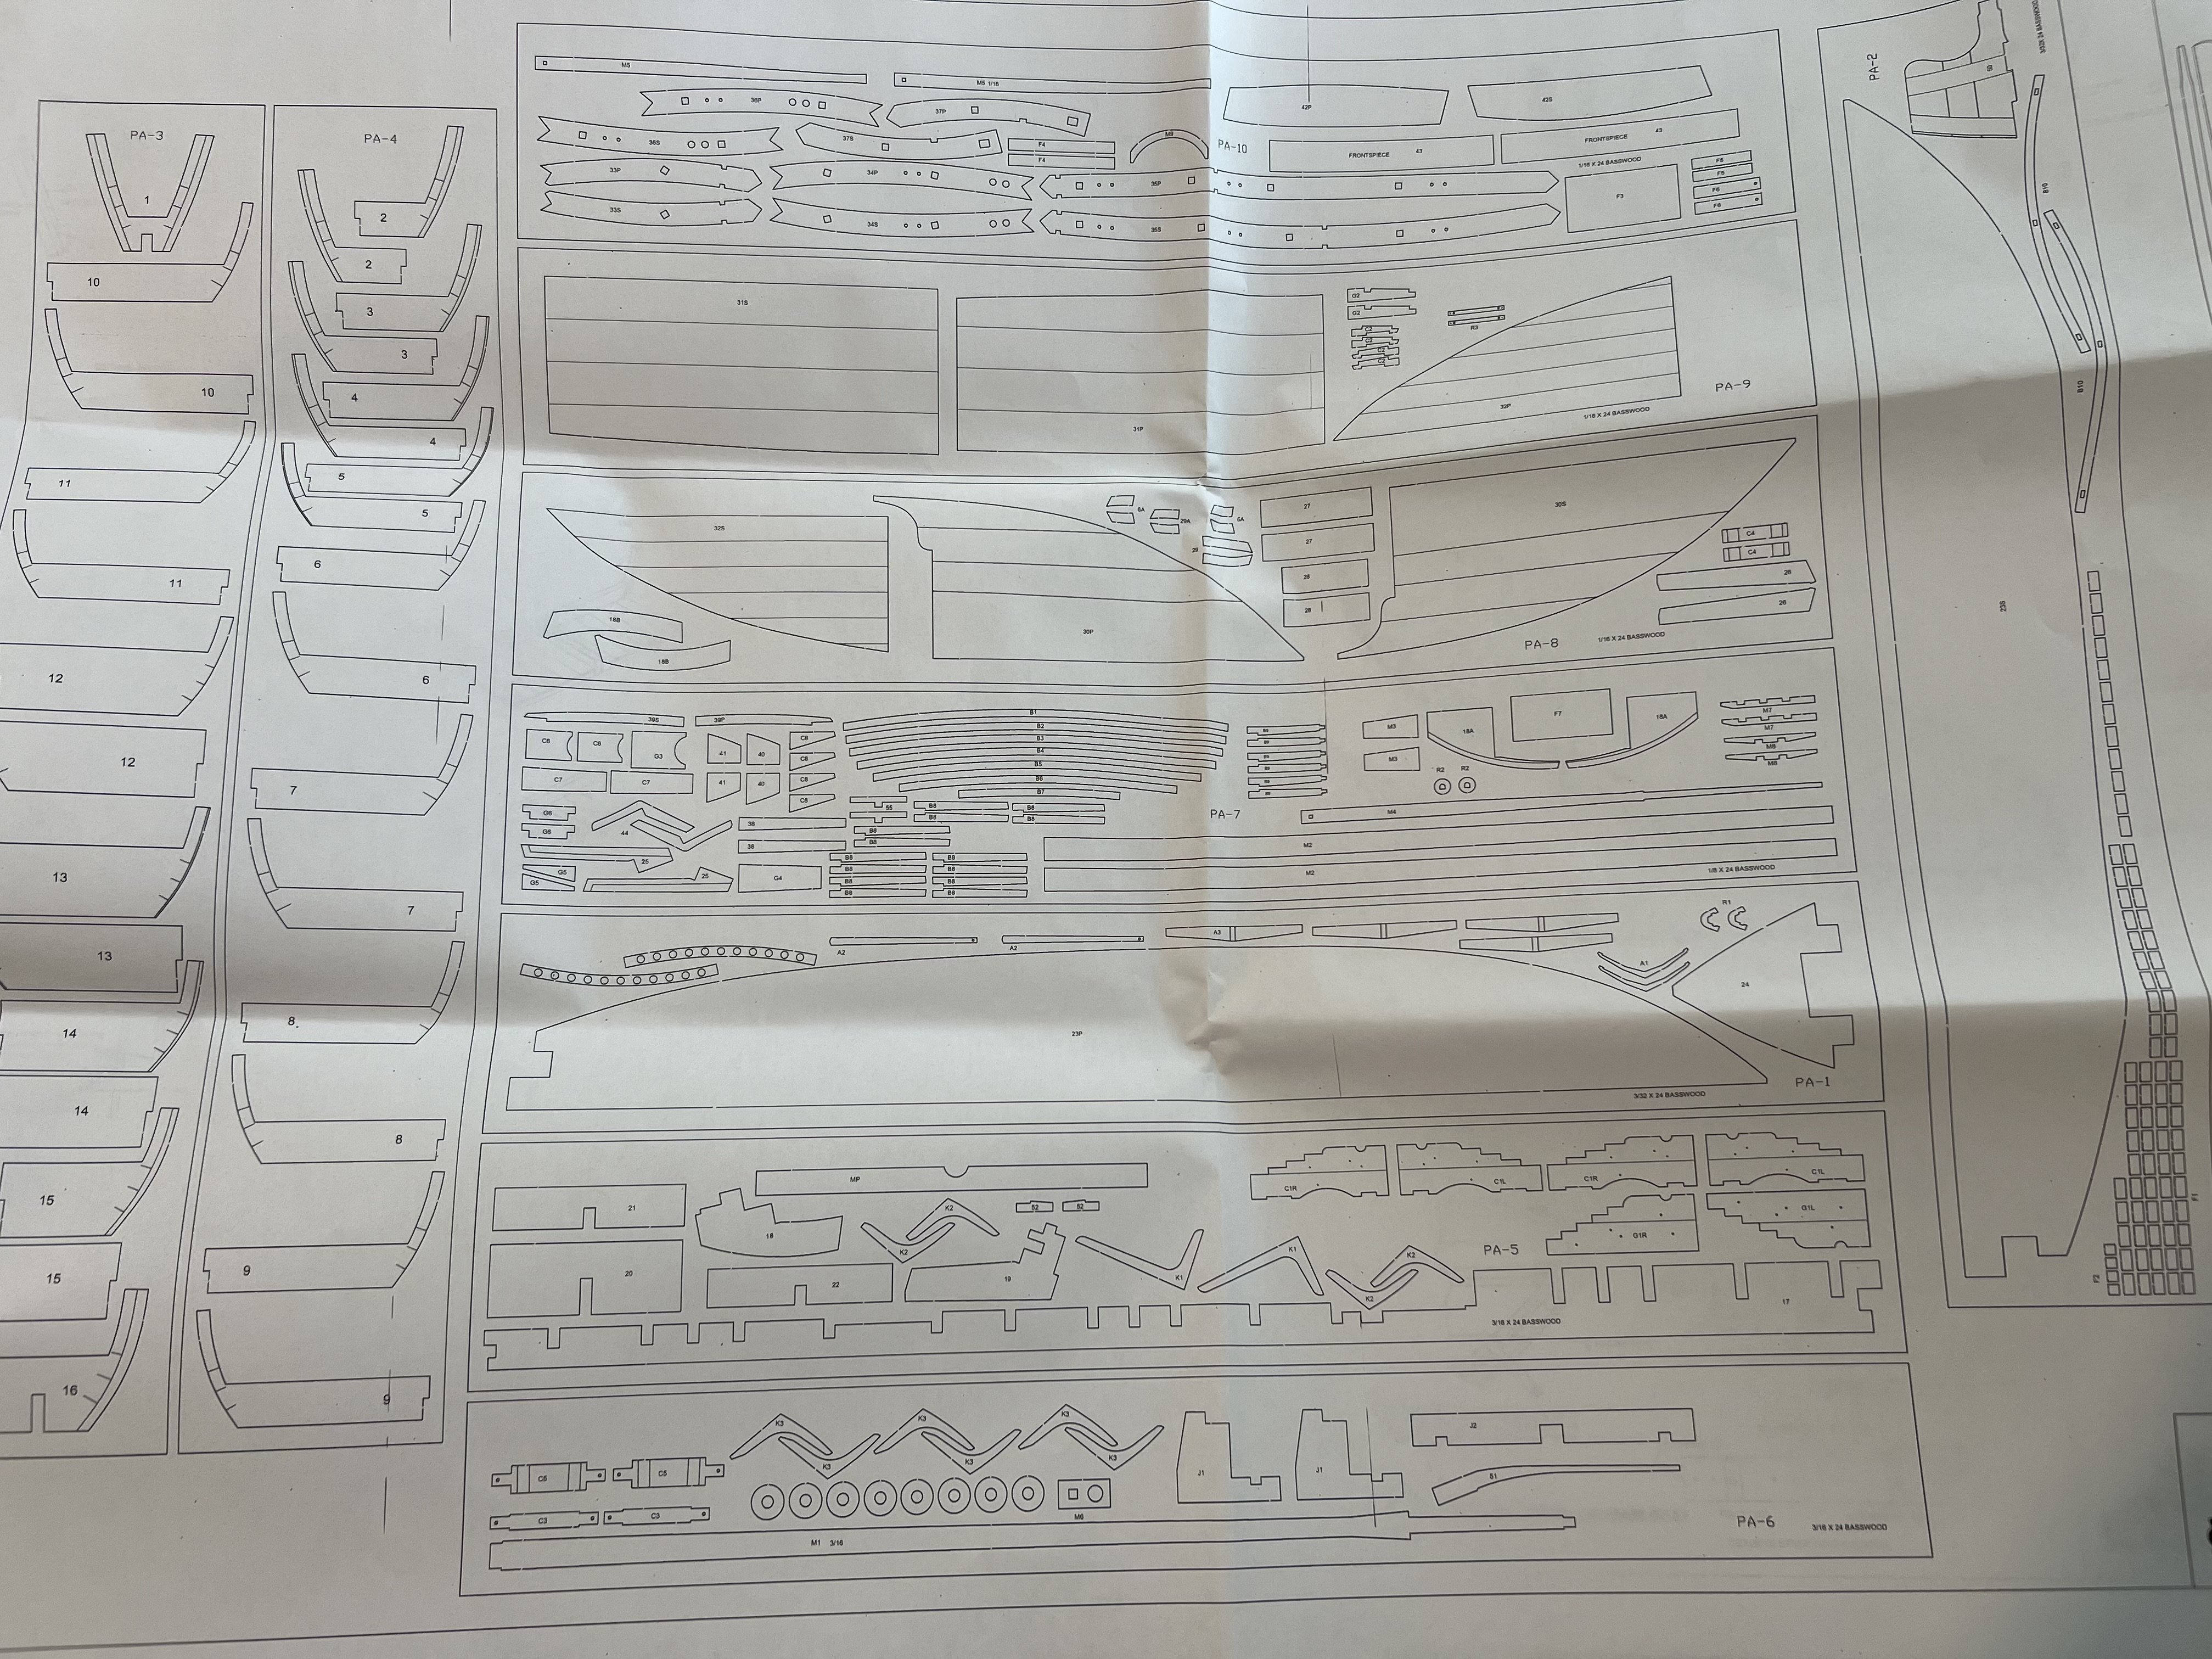
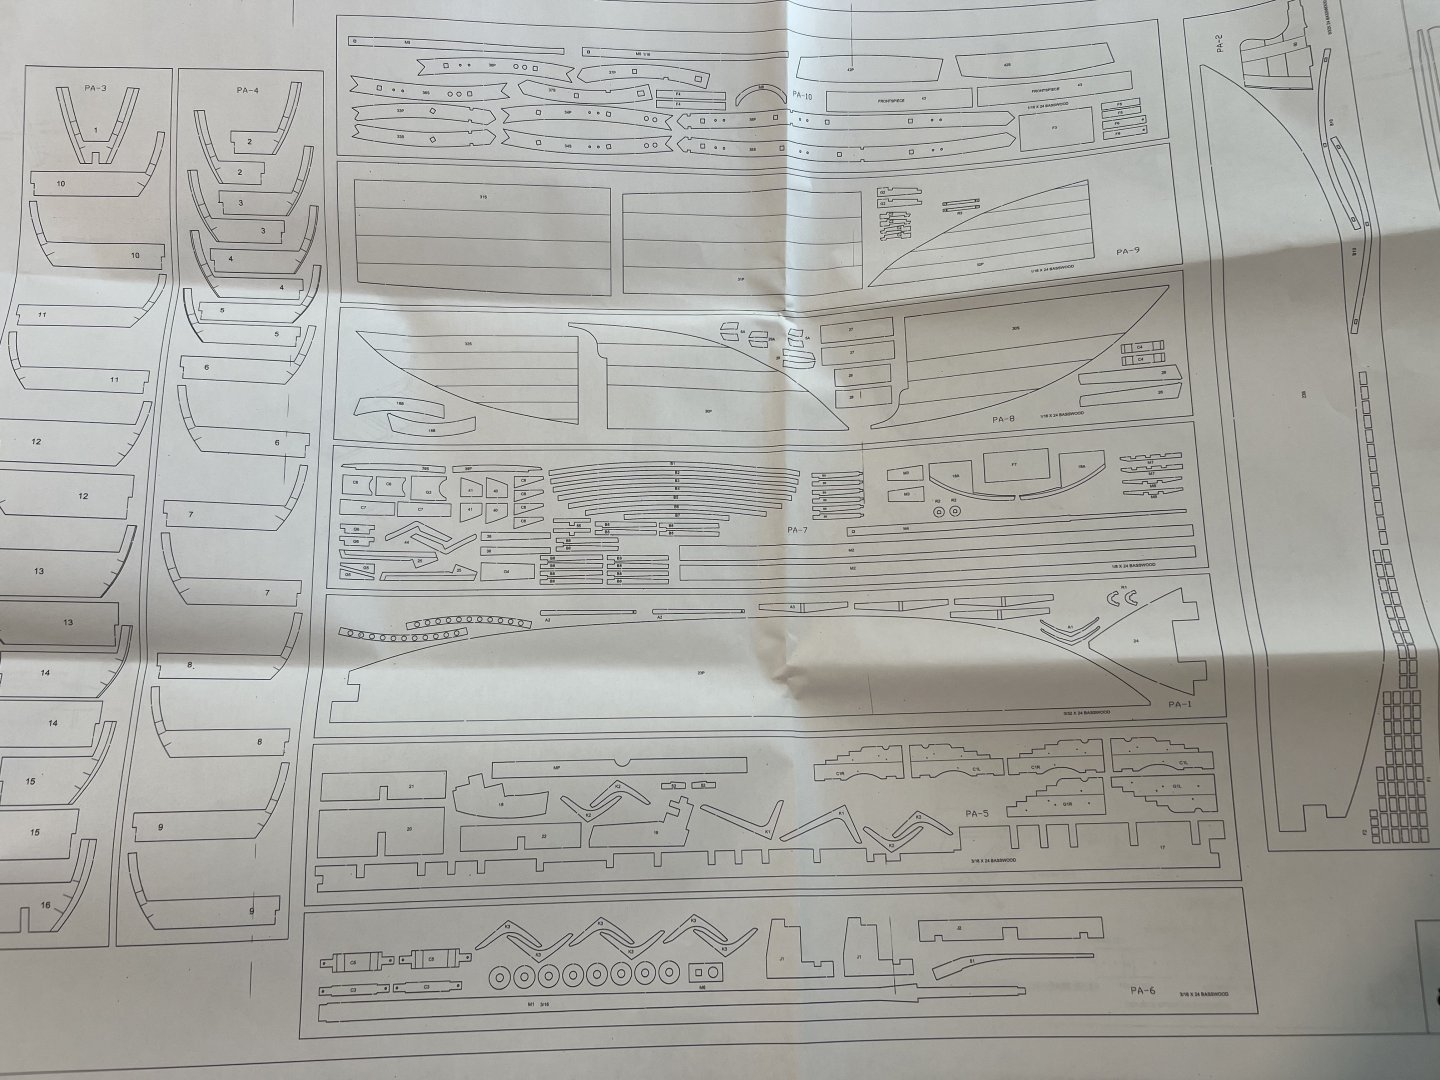
I’m following along with Olha’s build. I’ll probably fall behind at some point but will try to catch up when I can. First step is locating and labeling the parts for the bulkheads and the keel. As I mentioned, this kit has large plan sheets, including one with a full map of the sheets. Will copy the part numbers to the sheets. I won’t write the numbers on the parts because this model will be stained.

-
Definitely need to edge bend (and bend bend) a bit on the Sherbourne. The hull is painted, so you can get by with filler and sanding. But better to do edge pending.
- 47 replies
-
- 2
-
-
- Sherbourne
- vanguard models
- (and 1 more)
-
So I made a mistake that I think I’ve corrected. While I read things over a couple times, I skipped over the step of adding the deck before adding the sides and bottom. I think I was just remembering how some of the other model kits have gone, where the deck is after the hull. Also, the diagram that goes with adding the deck doesn’t look like adding the deck. Well on this kit, the deck is before the sides. I ended up have to cut the sides from the top batten (that I so proudly announced in my previous post). The deck needs to be sanded quite a bit to fit. If you actually follow the directions you add the deck and then sand it flush with the battens, then add the sides, then add the bottom. (Again, this model does not have traditional planking.) I did split the sides a bit so I will need to add some glue, filler, and do some sanding. The whole model is painted, so filler and sanding will be fine in the end.


- 48 replies
-
- 4
-
-
- San Francisco Bay Scow Schooner
- Scow Scooner
- (and 1 more)
-
In case you missed this post I just made - thought those building this ship might be especially interested:
-
In case you missed this post I just made - thought those building this ship might be especially interested:
-
Lots of kits (Vanguard Models being the possible exception) seem to have some disconnect between instructions and what’s supplied in the kit. (My only experience is with Vanguard, Model Shipways, and Midwest.) I’ve found mistakes, drawings of part sheets that don’t match what’s supplied, etc. A challenge when first starting. You get used to it. Really experienced modelers don’t pay much attention to written instructions. I don’t know how long this kit has been on the market, but some go back decades - the instructions often remain the same but the parts change. My current Scow Schooner was reissued recently but the instructions are largely unchanged from the original - they reference a discontinued paint line and quaintly advise the modeler to talk with their local hobby/model store. On the paint, I’d guess that Occre paints come in two sizes, so they doubled up with smaller bottles.
-
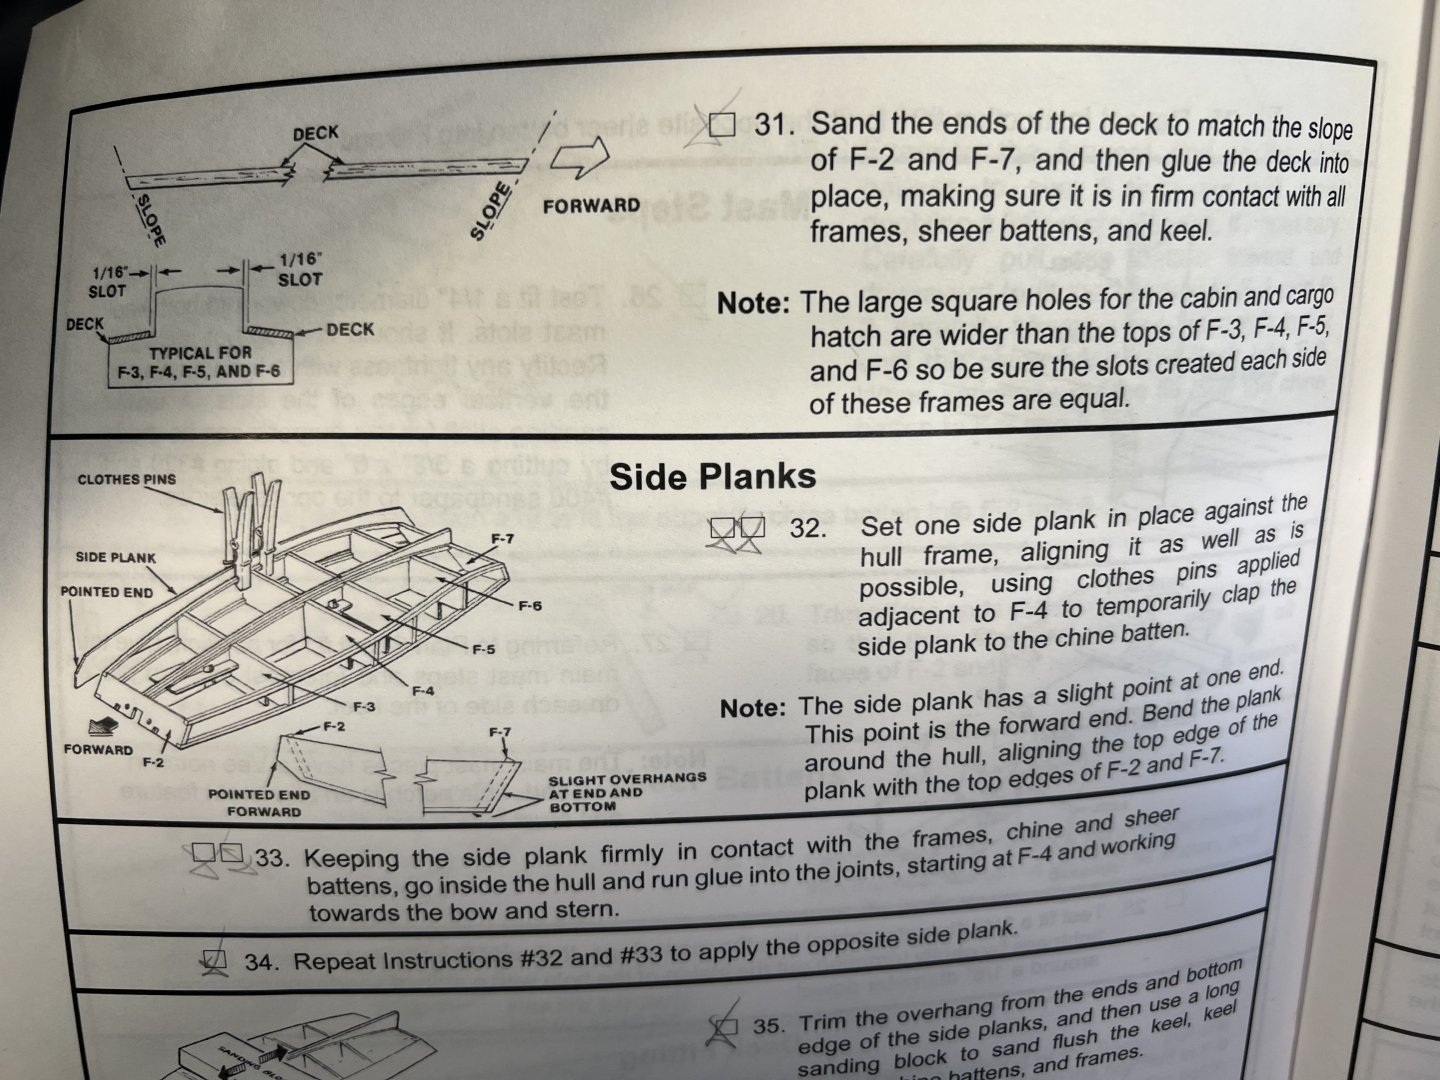
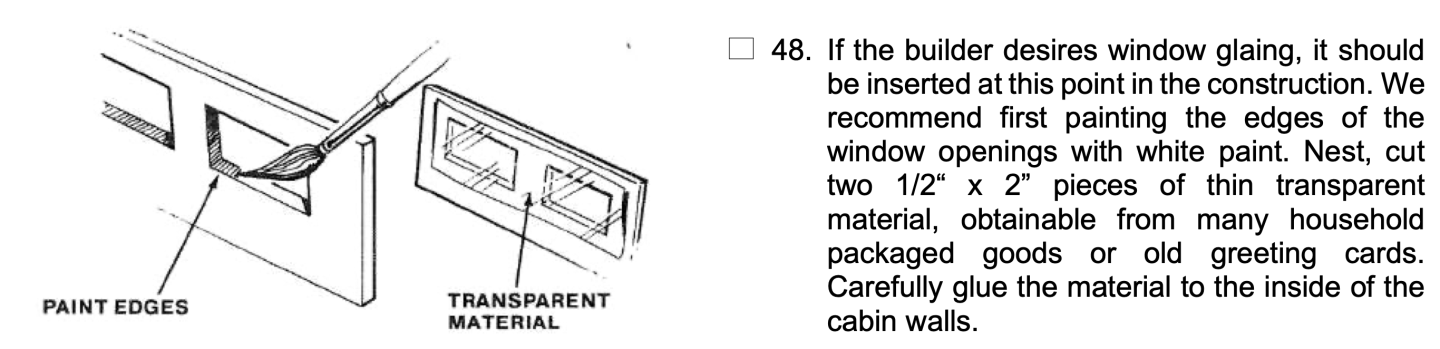
My Scow Schooner has fairly large openings for windows. The instructions note that a "thin transparent materials" can be used - "from many household packing goods or old greeting cards." Recommendations for what looks good, is reasonably easy to use, and easy to find to simulate window panes / window glazing? I've seen recommendations of old overhead transparency film (I used to use overheads to teach, but I haven't seen them in our department offices for years), microscope slide covers (hard to cut), a mica film (unclear what kind of buy, and some of them I found online seem fairly opaque). I did try searching on the site (directly and through google) but couldn't find a lot of posts with recommendations - maybe I just missed them. I saw the recommendations about mica here, but it was unclear what kind to look for. Other ideas?
-
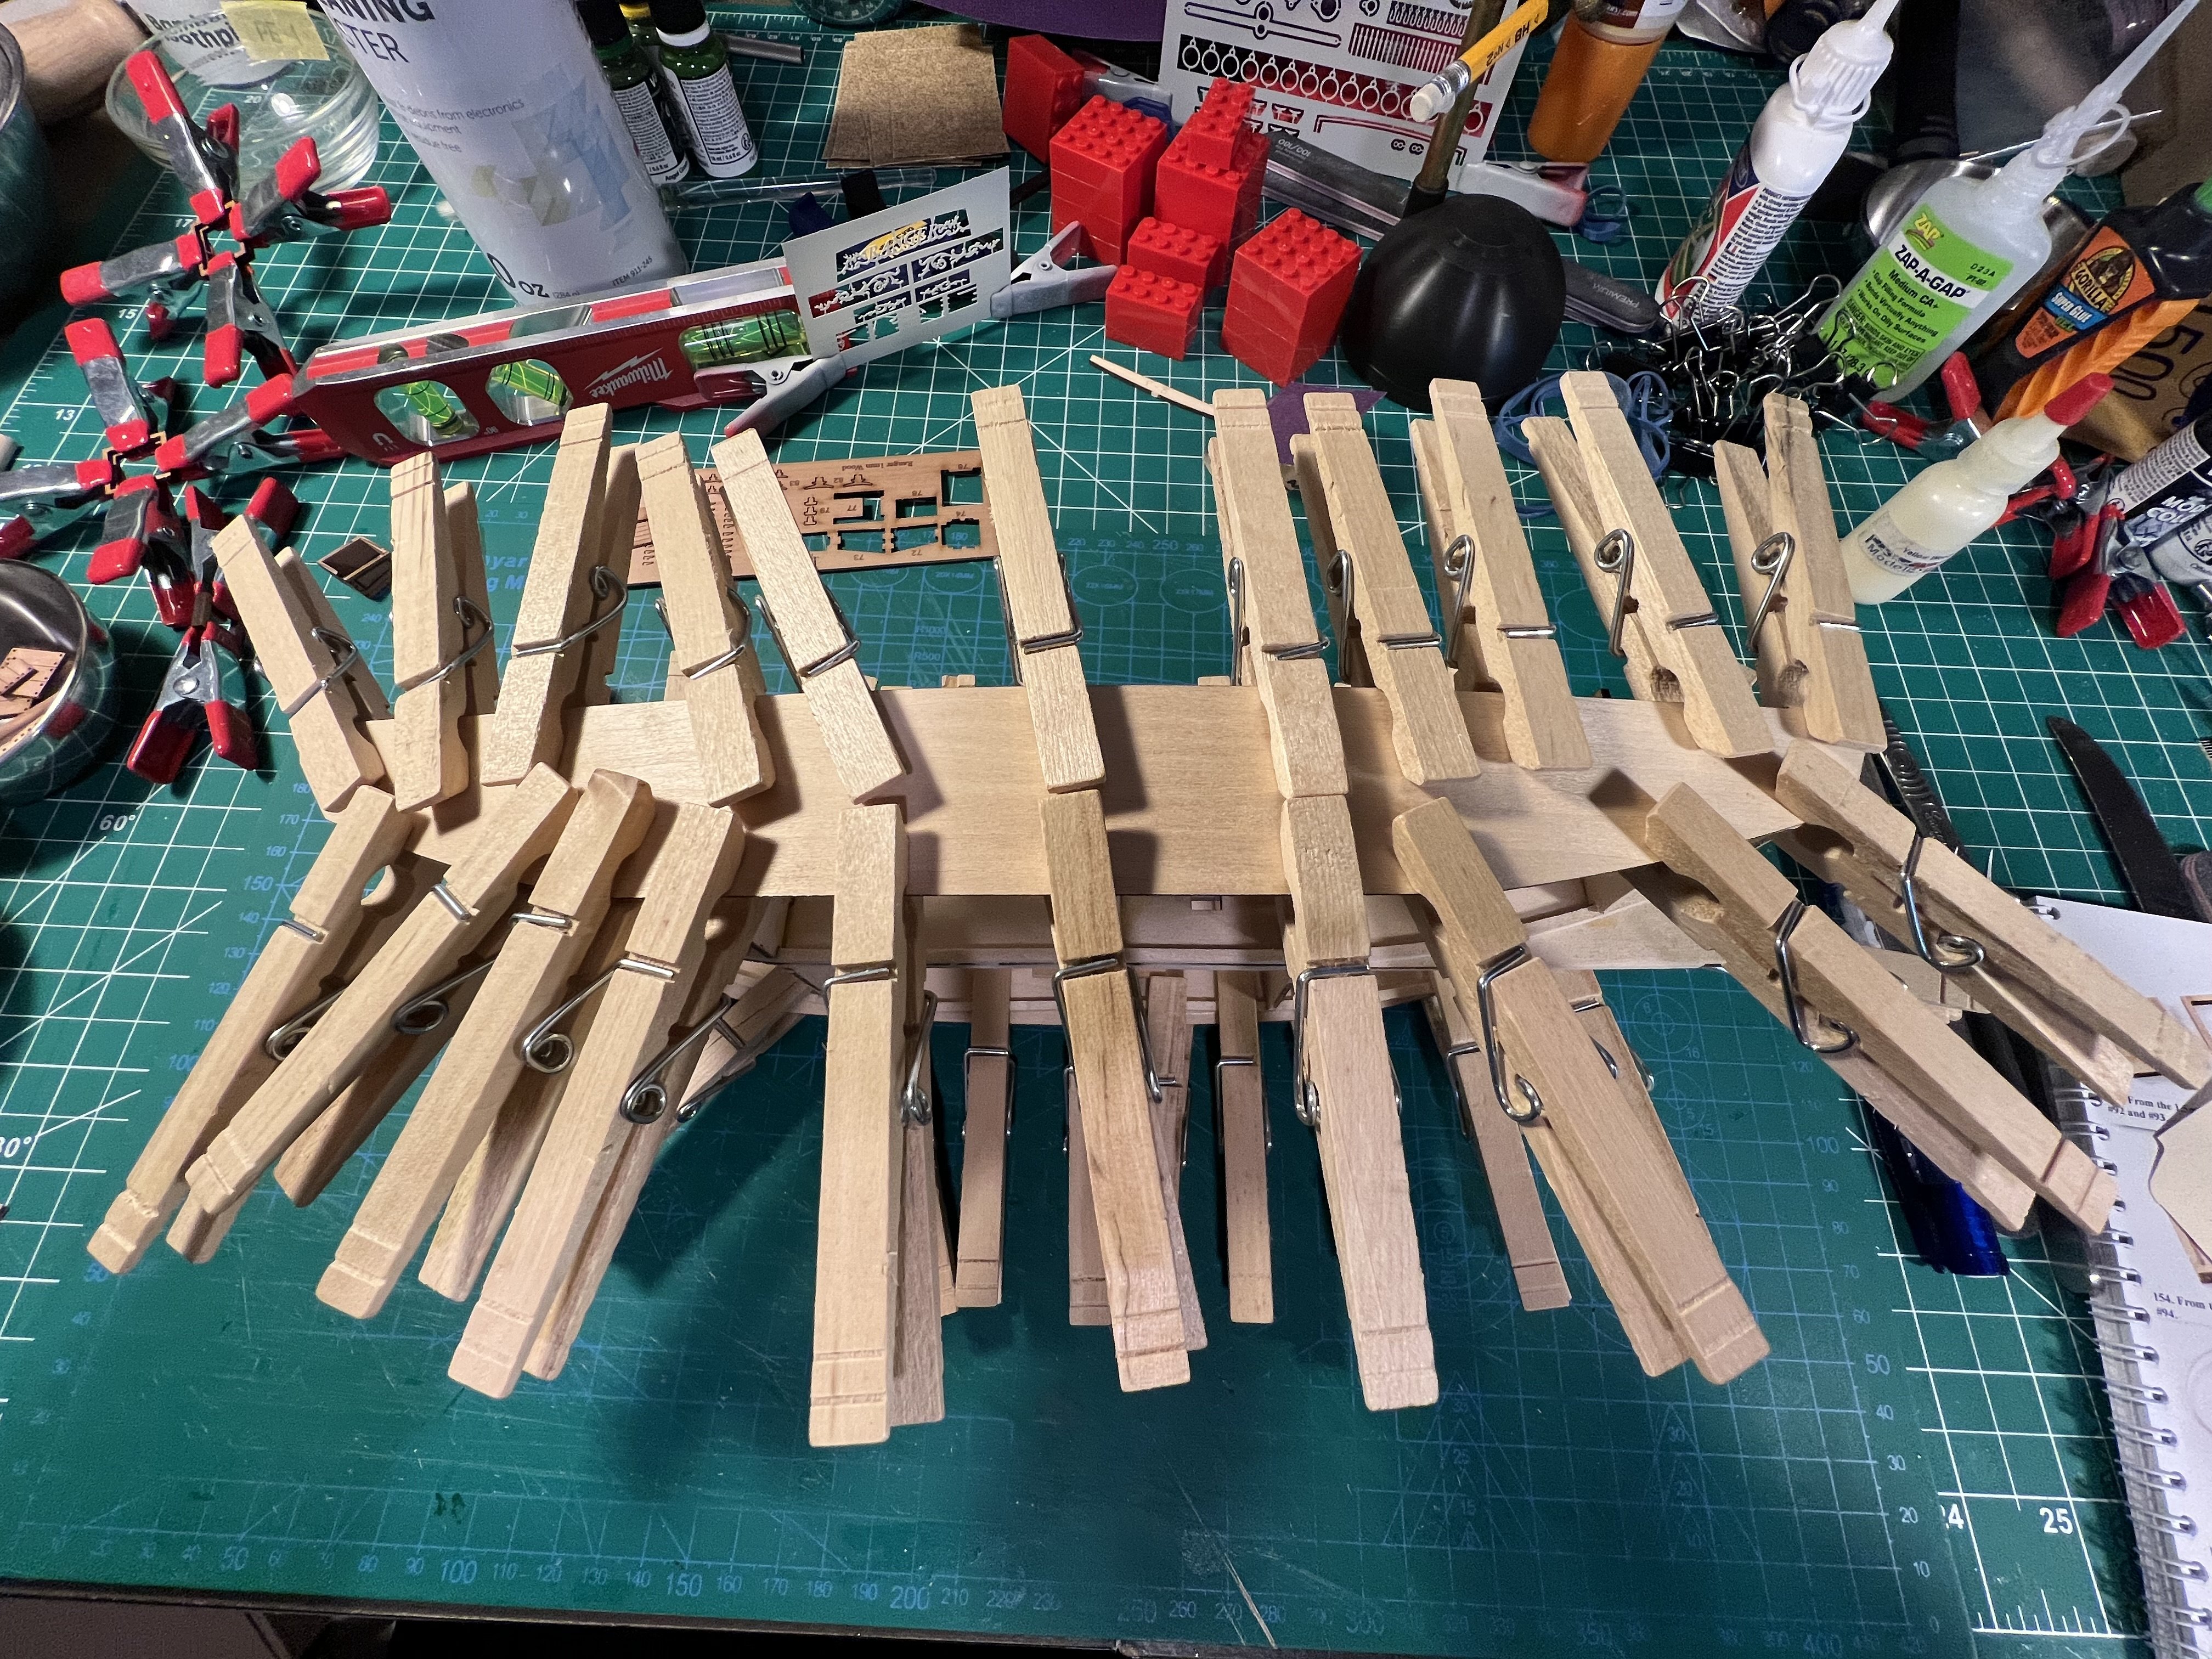
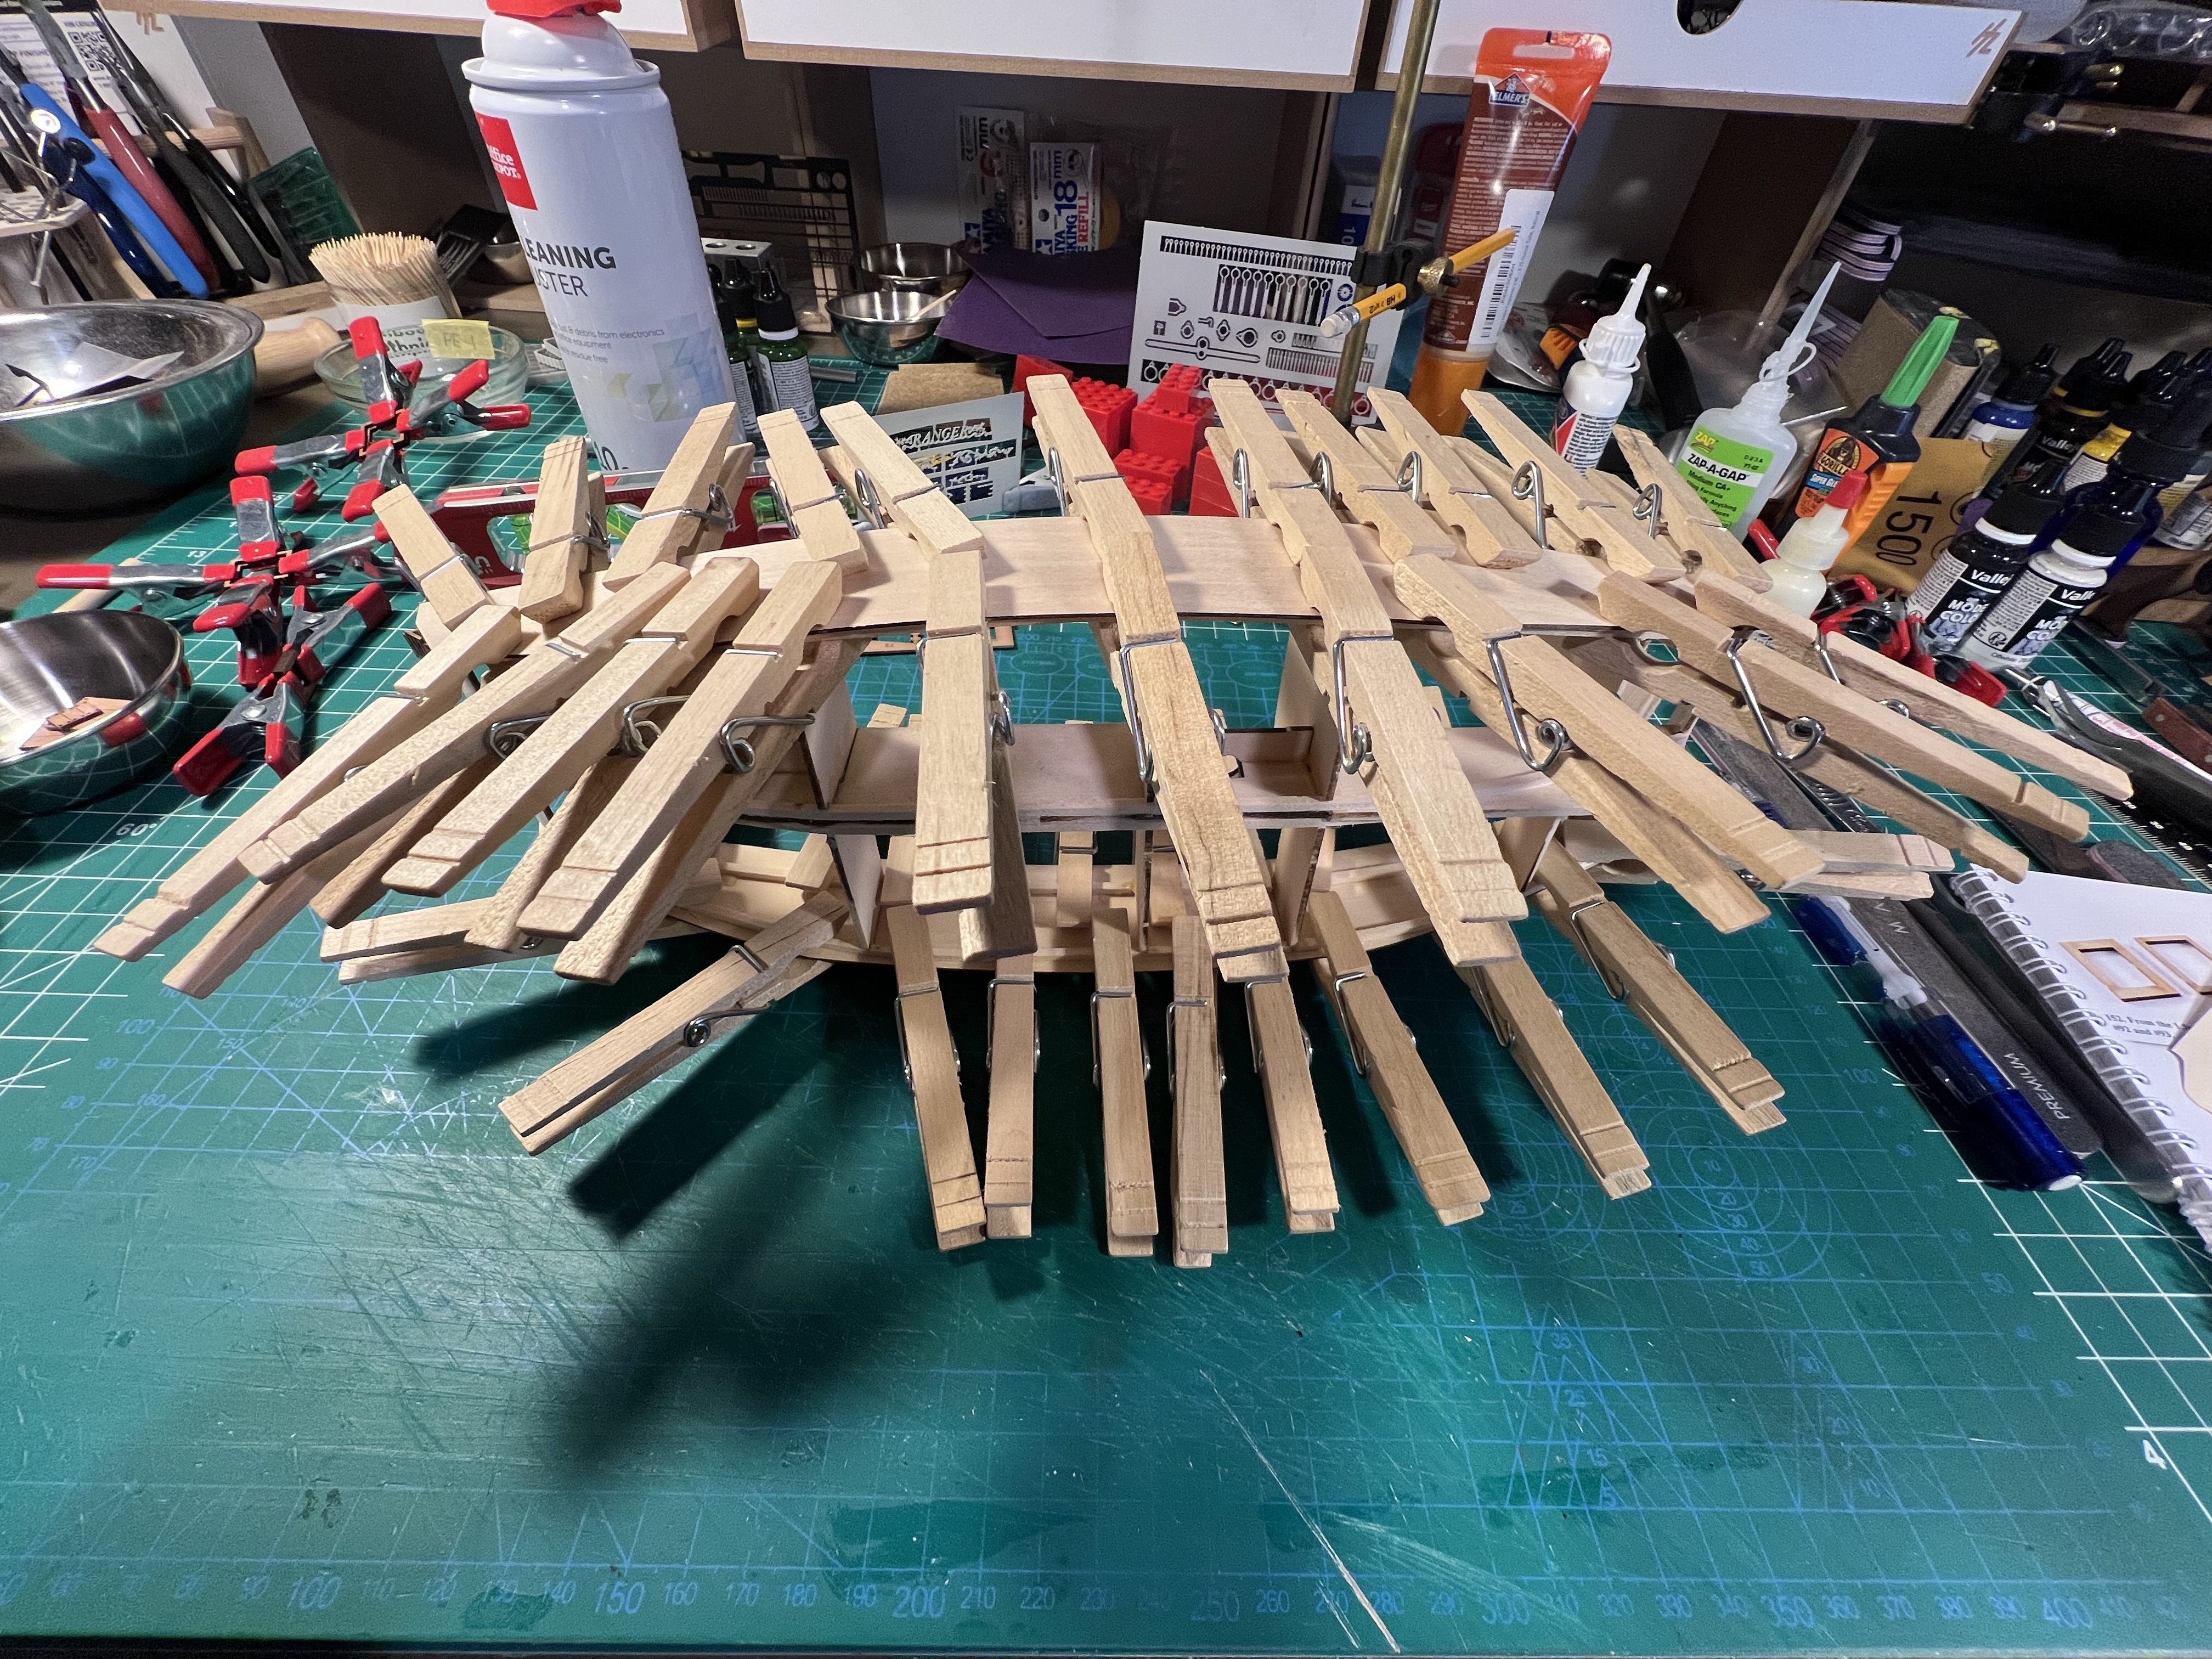
Gluing and clamping on the sides. Will need to sand the bottom flush after the glue dries. Then the bottom pieces will be added.


- 48 replies
-
- 4
-
-
- San Francisco Bay Scow Schooner
- Scow Scooner
- (and 1 more)
-
Just have a few touchups to do on the paint. Otherwise moving to next step adding deck pieces and furniture.


- 133 replies
-
- 7
-
-
- Ranger
- vanguard models
- (and 1 more)
-
Best White Wood Glue For Ship Building
palmerit replied to OldeManToad's topic in Modeling tools and Workshop Equipment
I use original Titebond PVA glue because it was recommended here. I would not go with Tightbond II or III, which are waterproof, only because others recommended not to go with those, not because I did a comparison. I also have some Titebond Speed Set, but haven't used it very often. It does set quicker than regular Titebond. I also have Super PHATIC ALIPHATIC Glue, which dries much quicker than PVA, but not as quick as CA glue. Someone had recommended it, so I tried it. When gluing pieces that are not glue (metal parts), you need CA glue of course. I use both the gel version and the thin version. The gel is easier to apply. But the thin version has a nice wicking action and you can get it into tight space that are coming apart (e.g., I just used it on a wale that had separate a bit from a hull). I use Titebond PVA most often, then it's a toss between the Super Phatic and different CAs. -
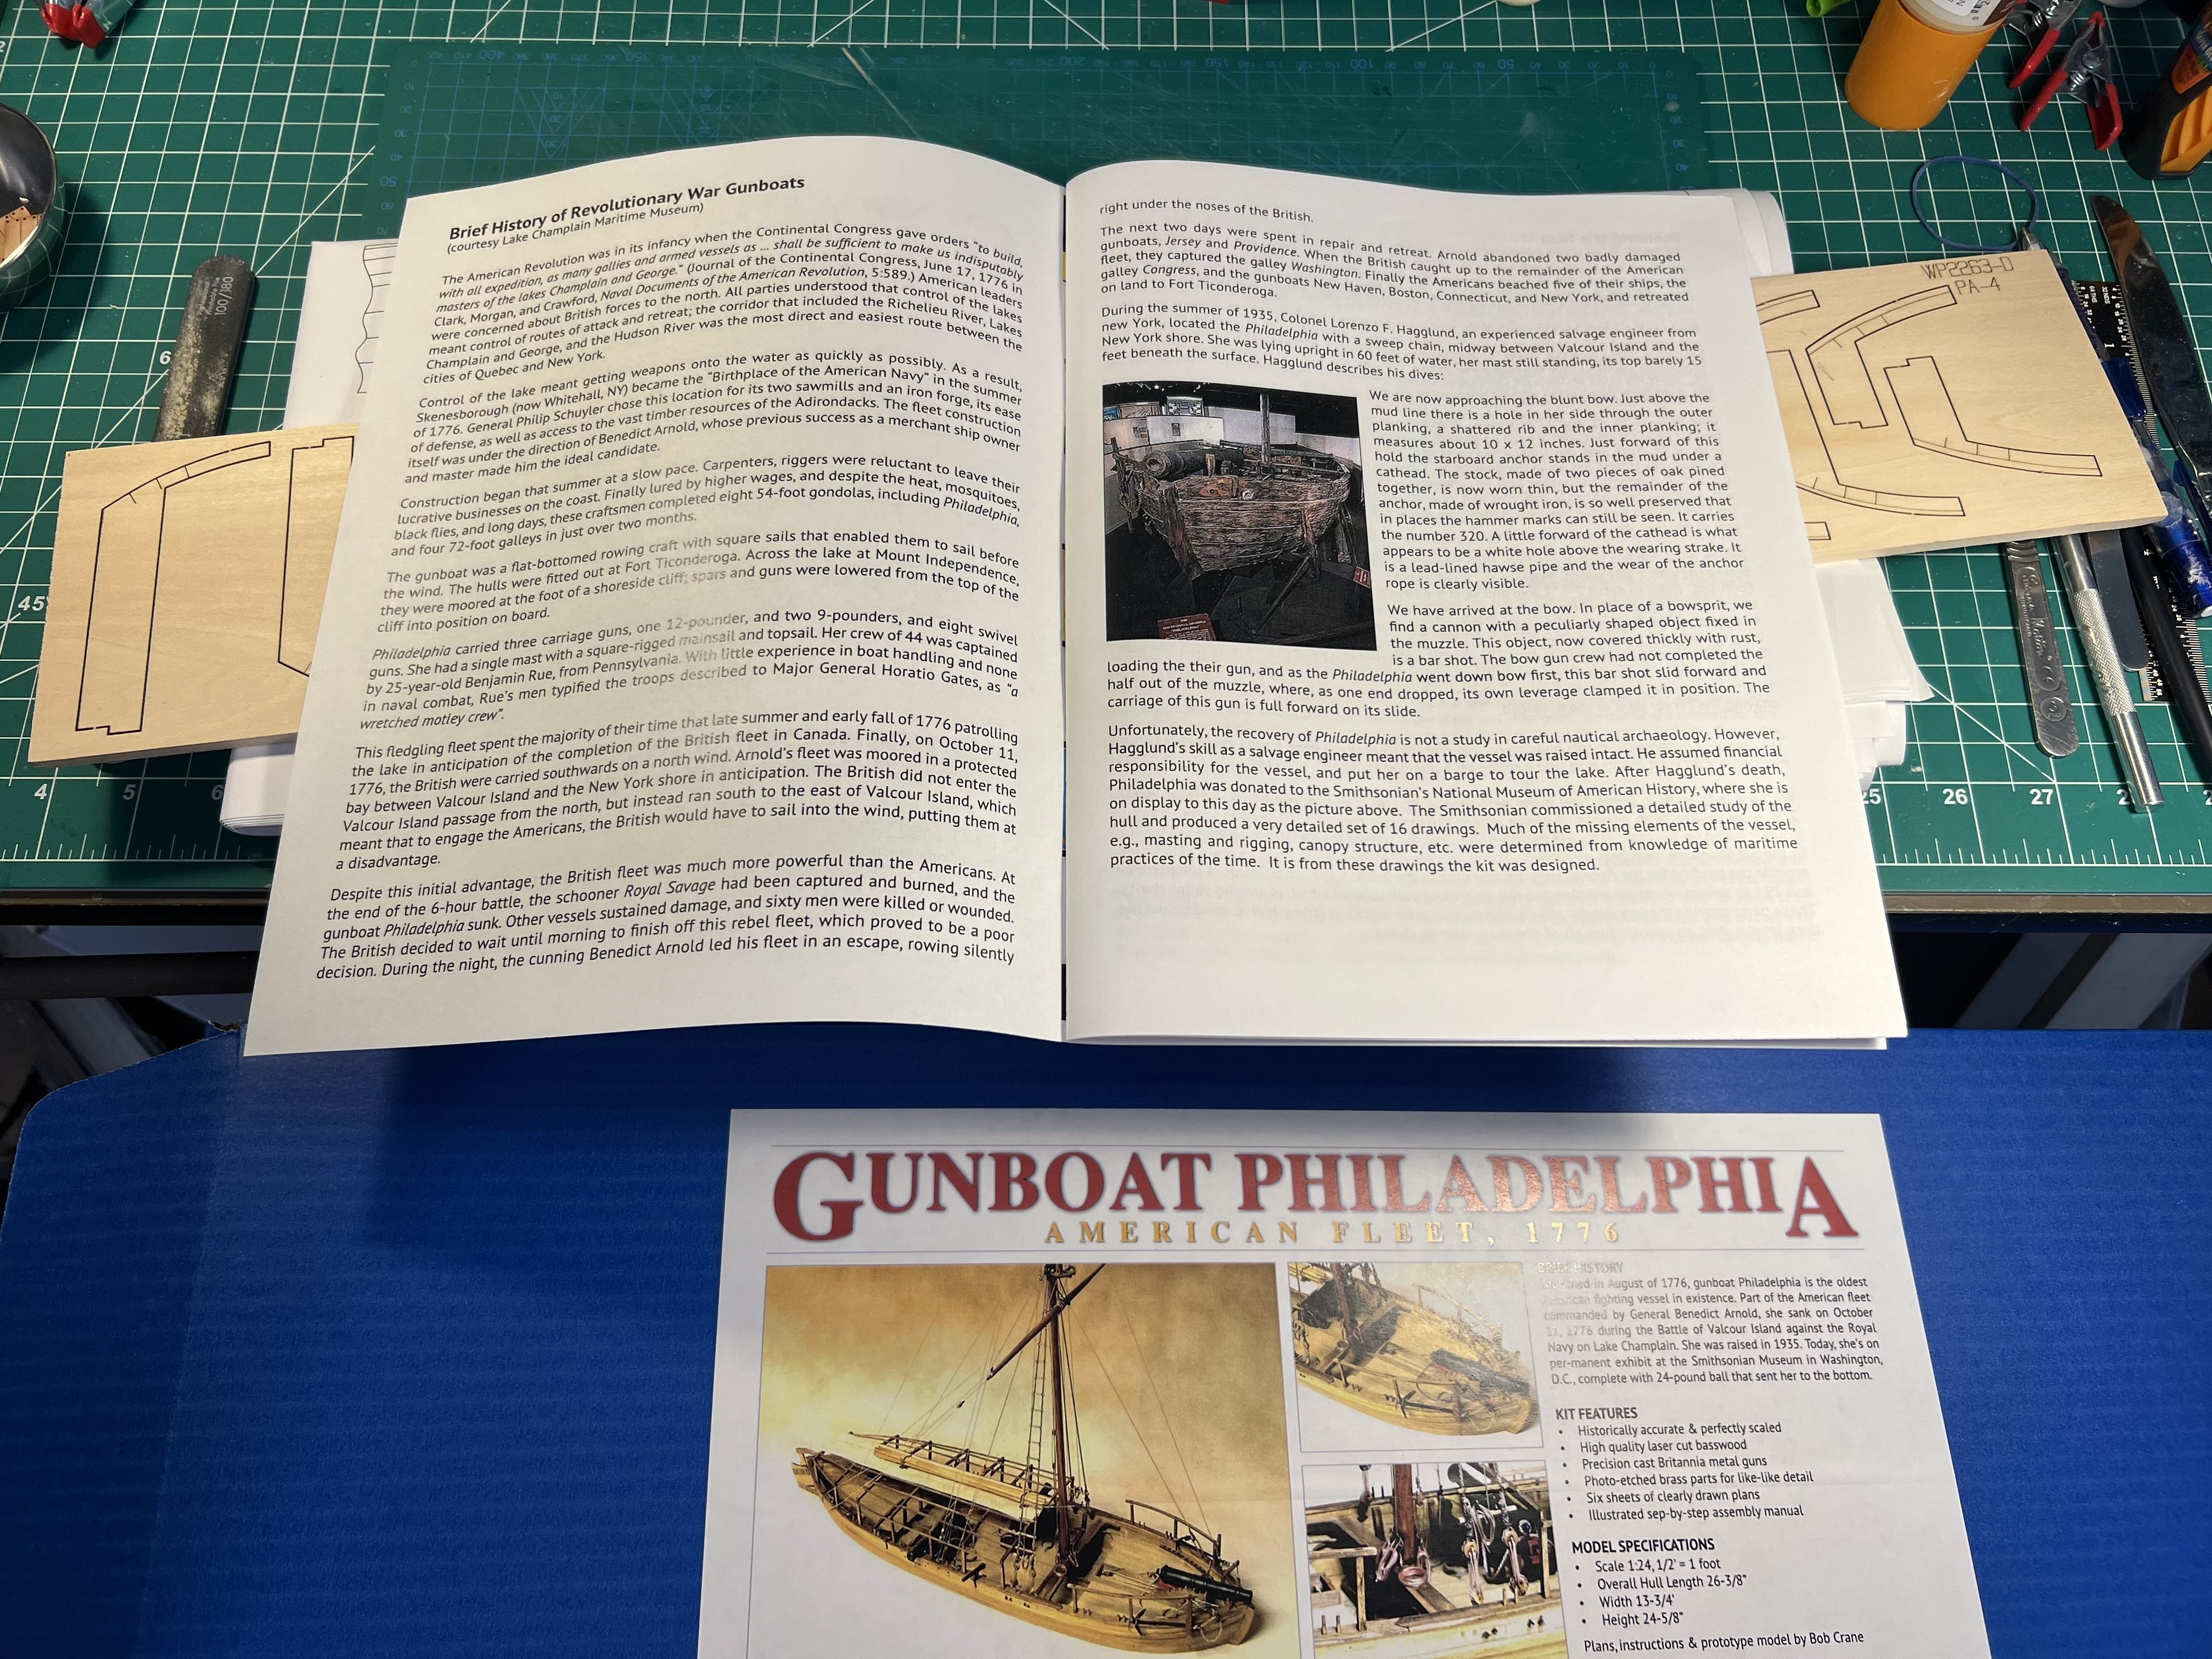
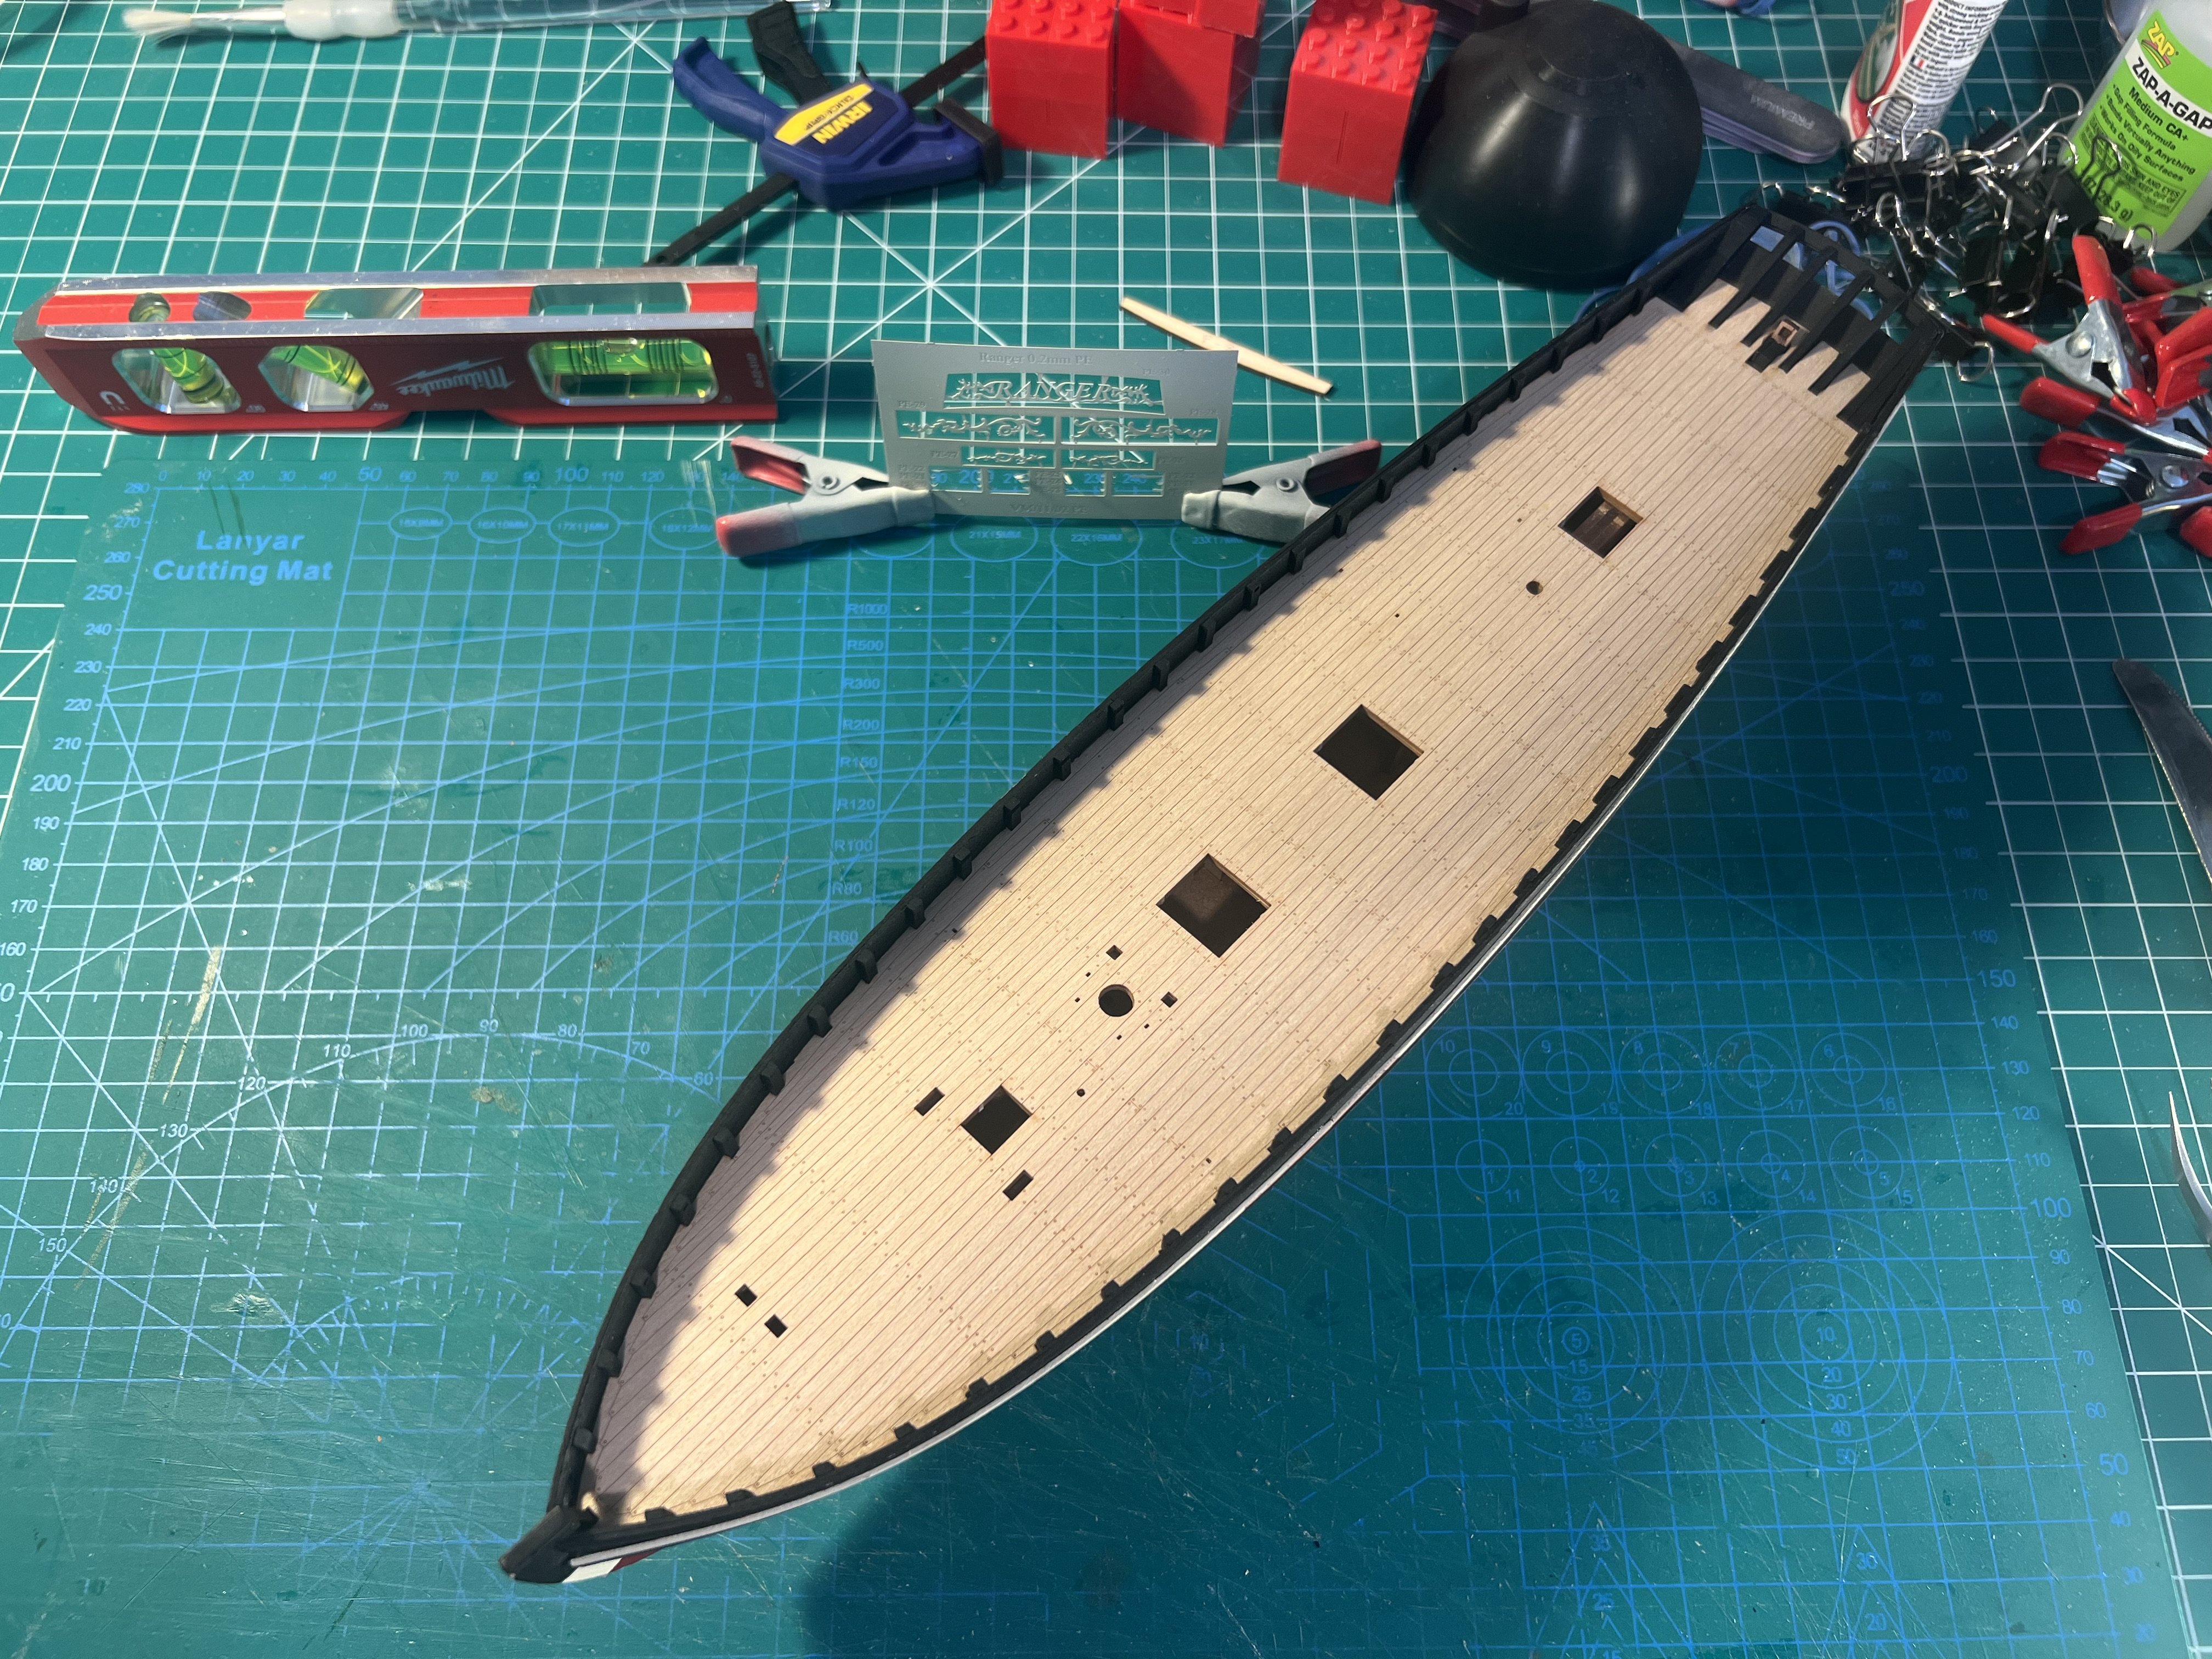
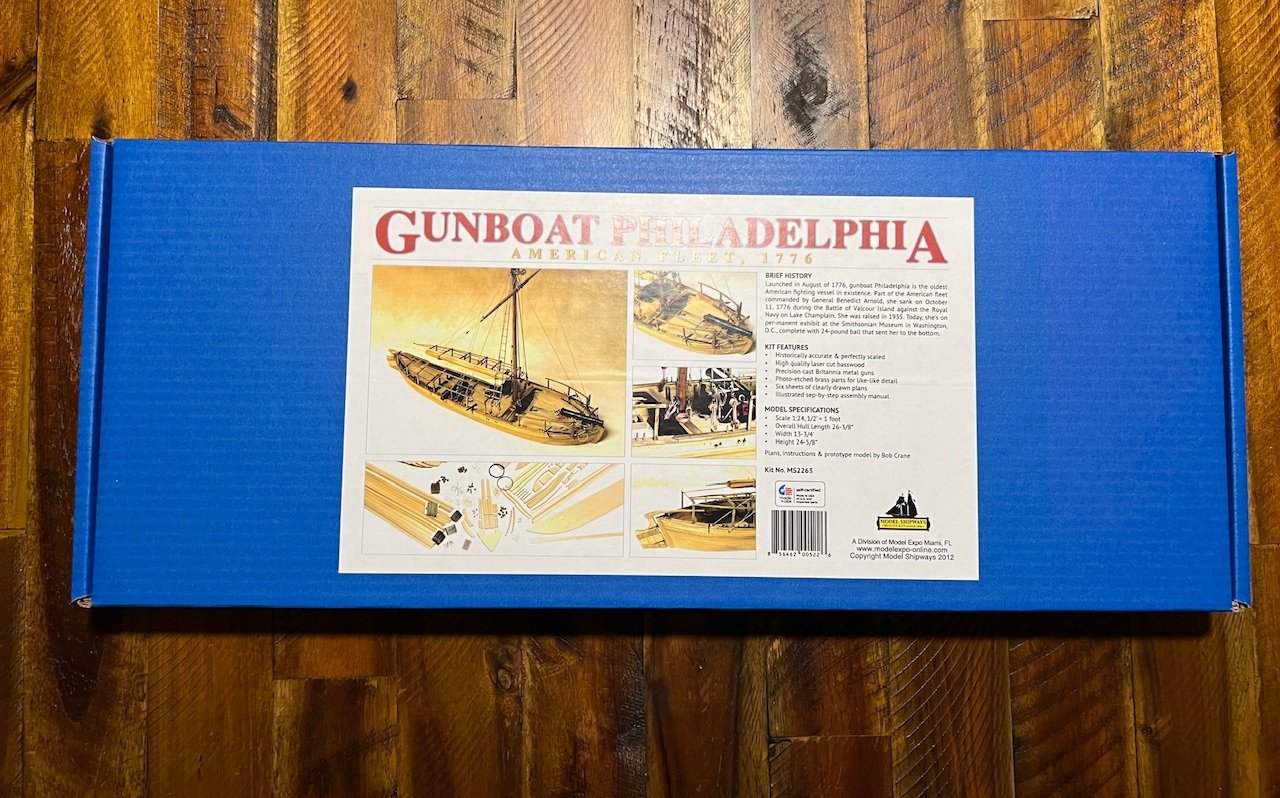
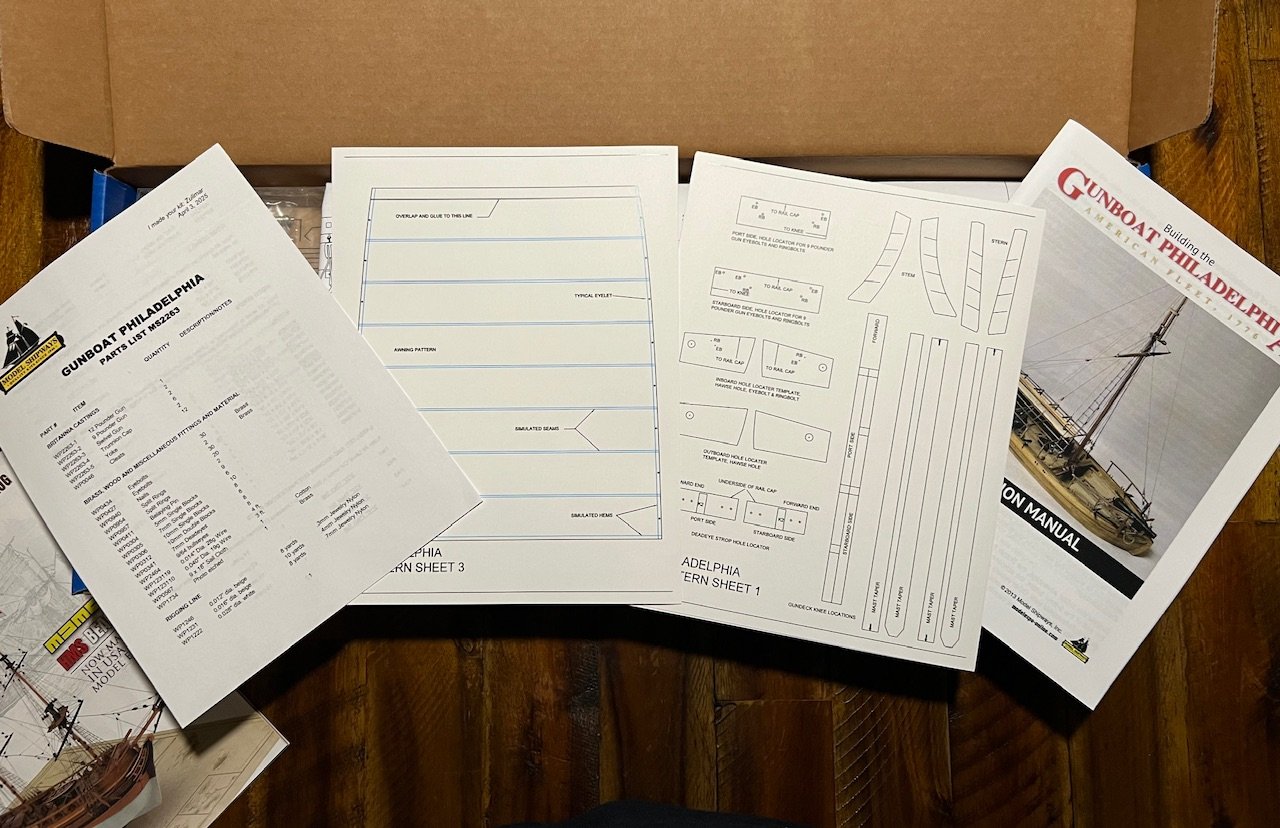
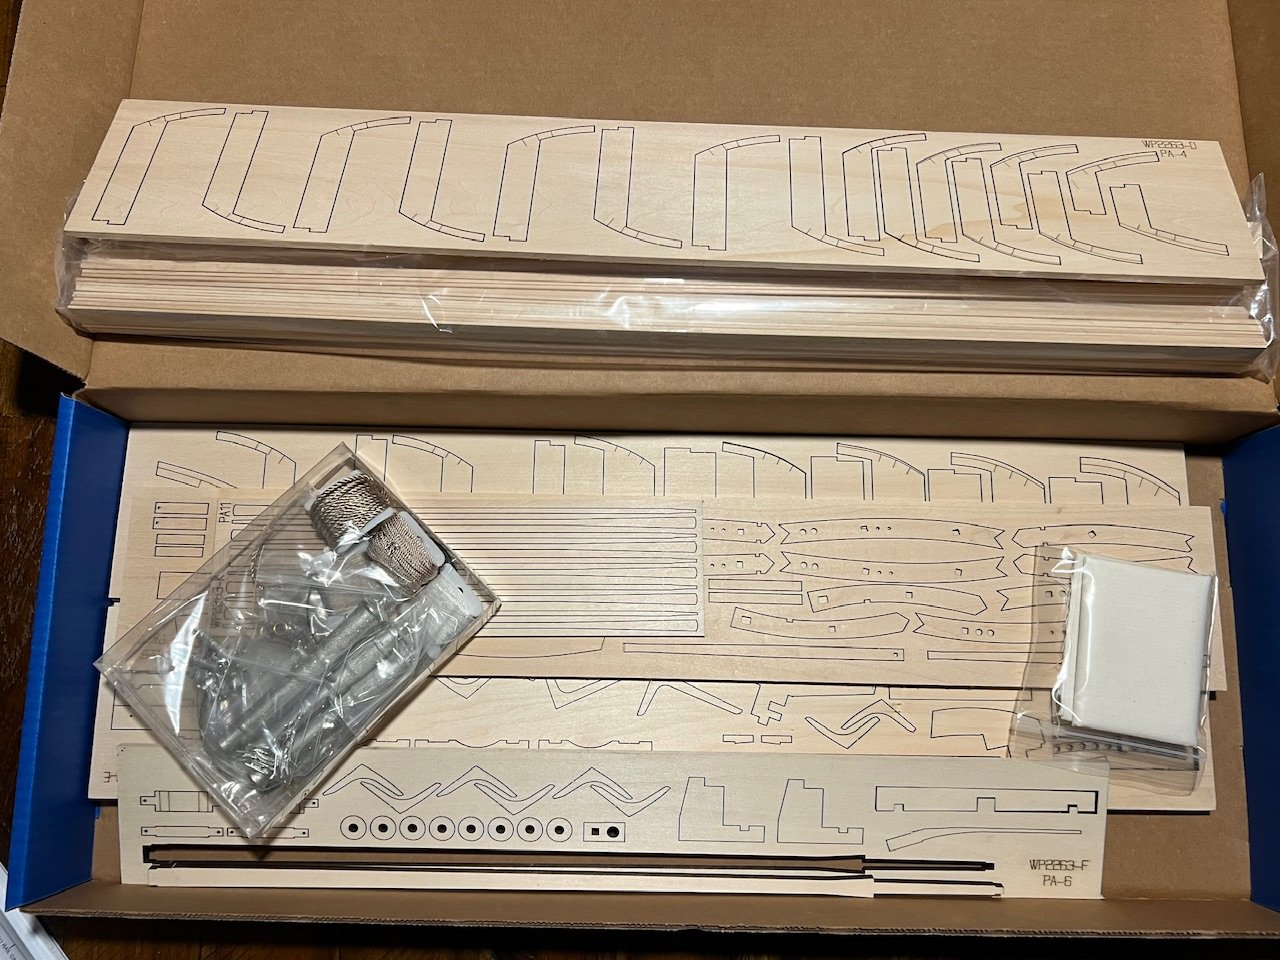
I've been following some of Olha Batchvarov's videos ()https://www.youtube.com/c/OlhaBatchvarov/videos. She's been doing a group build on the Midwest Models Lobster Smack for a while that should wrap up in a week or two - I had just completed the Model Shipways Lobster Smack and was not interested in building another one of those to follow along. Next weekend (Sat May 10), she is starting a new group build on the Gunboat Philadelphia by Model Shipways. I wasn't sure if I wanted to follow along on this build since I had so many other models in my stash and that I was trying to work on, but I was able to get a copy of the Philadelphia for over 50% off the usual price and decided to jump on this group build. It's a different style of model from anything else I've built or have in my stash. And the instructions are also quite different from any model I've worked on so far. The instruction book is text heavy with almost no illustrations. Instead, there are lots of large paper plans that include build instructions as well as the usual kinds of things that are on plans. I'm going to try to follow along fairly closely to what Olha does and at the pace of her group build. She said she expects this group build to take at least 6-8 months. I'm sure I'll fall behind a few weeks from time to time because of travel, vacation, and work, but I don't plan to go ahead of her in the instructions. Ships in Scale apparently had a multi-part series on the Model Shipways Philadelphia back around 2014. I've been thinking about buying the back issues from the NRG web site: https://thenrgstore.org/collections/ships-in-scale
-
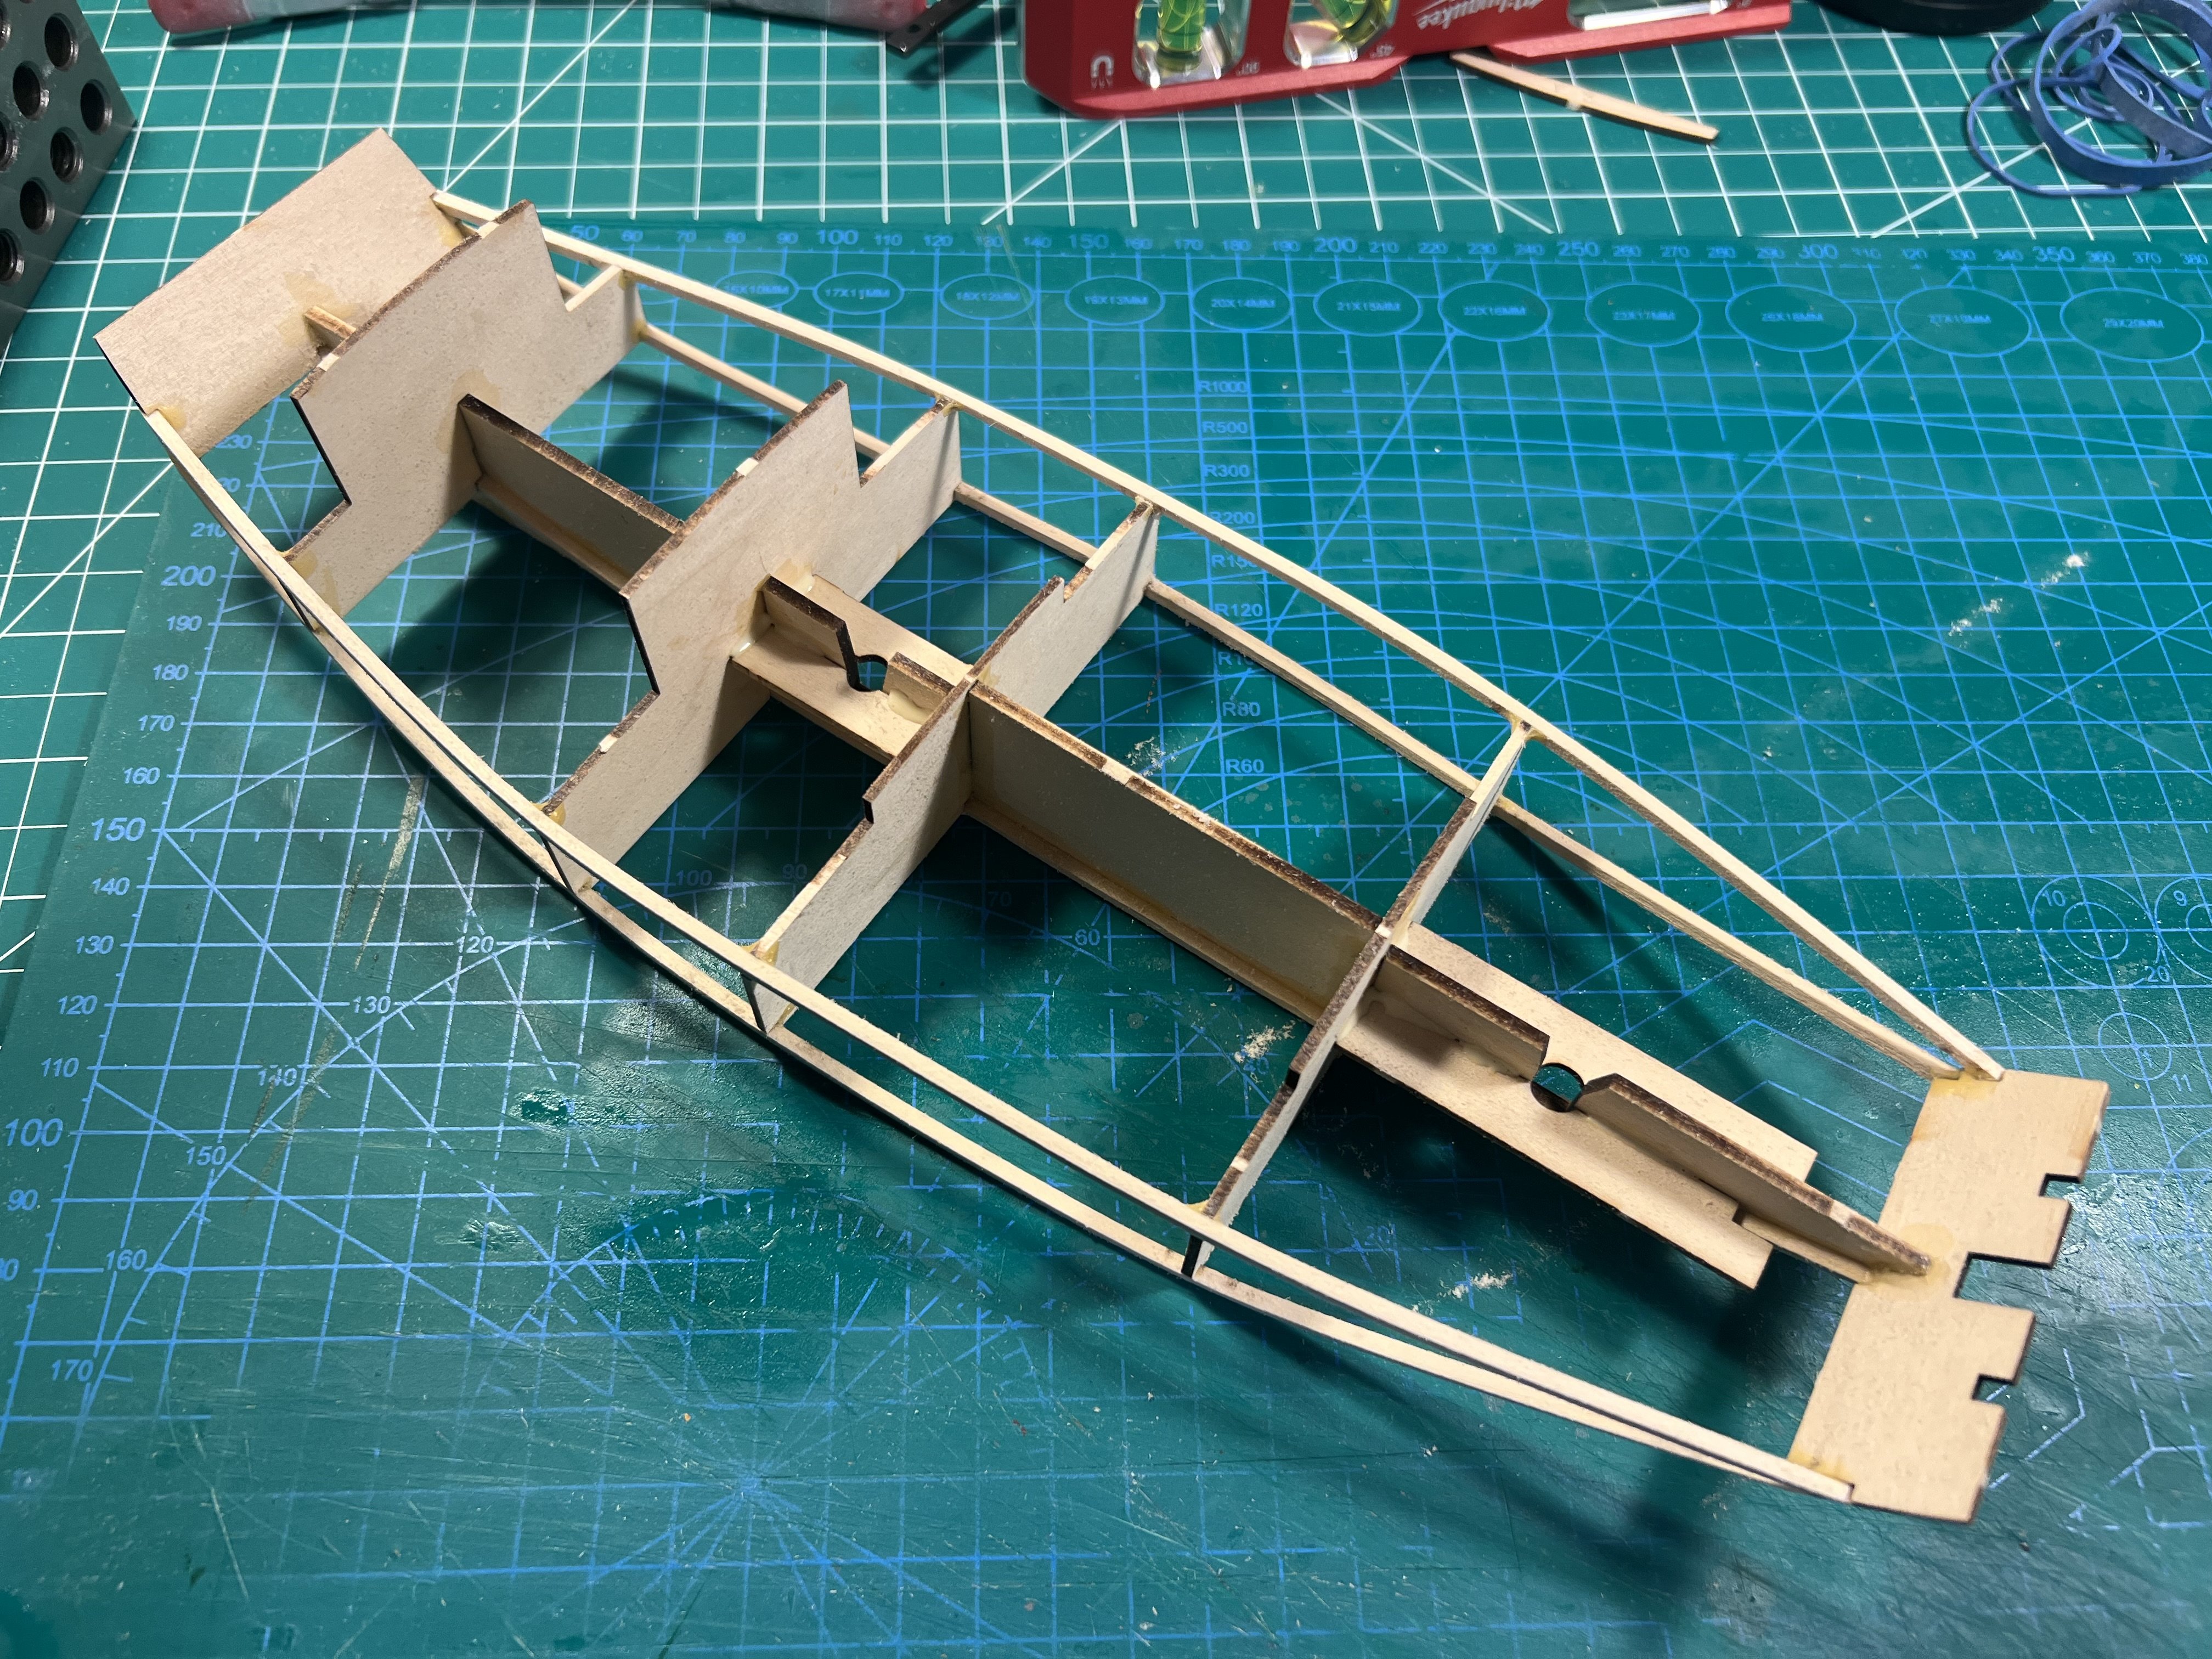
Finished the frame. Will be adding the sides, bottom, and deck in the next steps. No planking on this model. This kit is quite different from others I’ve worked on.


- 48 replies
-
- 2
-
-
- San Francisco Bay Scow Schooner
- Scow Scooner
- (and 1 more)
-
Arabia Steamboat Museum in Kansas City
palmerit replied to palmerit's topic in Nautical/Naval History
@Cathead also has posts on their research: