palmerit
-
Posts
1,090 -
Joined
-
Last visited
Content Type
Profiles
Forums
Gallery
Events
Everything posted by palmerit
-
In Tennessee we’re almost as hot. I have a window right next to the airbrush booth but being in a 130 year old house, most of the windows do not open and even if they could I would not want the hot air coming in. For a while I painted in our cellar but then searched and found this setup. I learned the setup I have from this YouTuber: I found others with similar setups. The bucket is from Home Depo or Lowes (I painted my bucket and lid black). It has a snap on tight lid. You see in the video that there’s a large hole for the exhaust vent in the lid and then smaller holes in the lid to let out the exhaust air. Most of the paint fumes stay in the bucket. There’s a few inches of water in the bottom and some detergent. The exhaust hose ends a few inches above the water. I try to wash it out about once a month. The filter at the top sits over the smaller holes in the lid to catch anything that might carry out. I now have fish tank filters that I cut to size. I use this for acrylics (Vallejo). I would not use spray enamels in the house. I hope that helps.
- 133 replies
-
- 2
-

-

-
- Ranger
- vanguard models
- (and 1 more)
-
Another option is to photocopy the plans so you can cut portions out and use something like a light coat of rubber cement to adhere them to the frame (the rubber cement let you easily peel it off). I often photocopy portions of plans to that I can cut into them and poke holes in them and spill things on them, knowing that I have the fresh plans stored in the box.
-
Here’s a useful page for illustrating a way to strop blocks with a becket: https://www.modelboatyard.com/stropping.html
- 133 replies
-
- 2
-
-
-
- Ranger
- vanguard models
- (and 1 more)
-
What do you plan to apply along the top edge of the copper (where it reaches the wooden hull)? I've seen some people keep it rough, some use a piece of copper-painted rope, some use thin strips of copper. Just curious what options you've used and what you're planning. I suppose it depends on how clean the edge is.
-
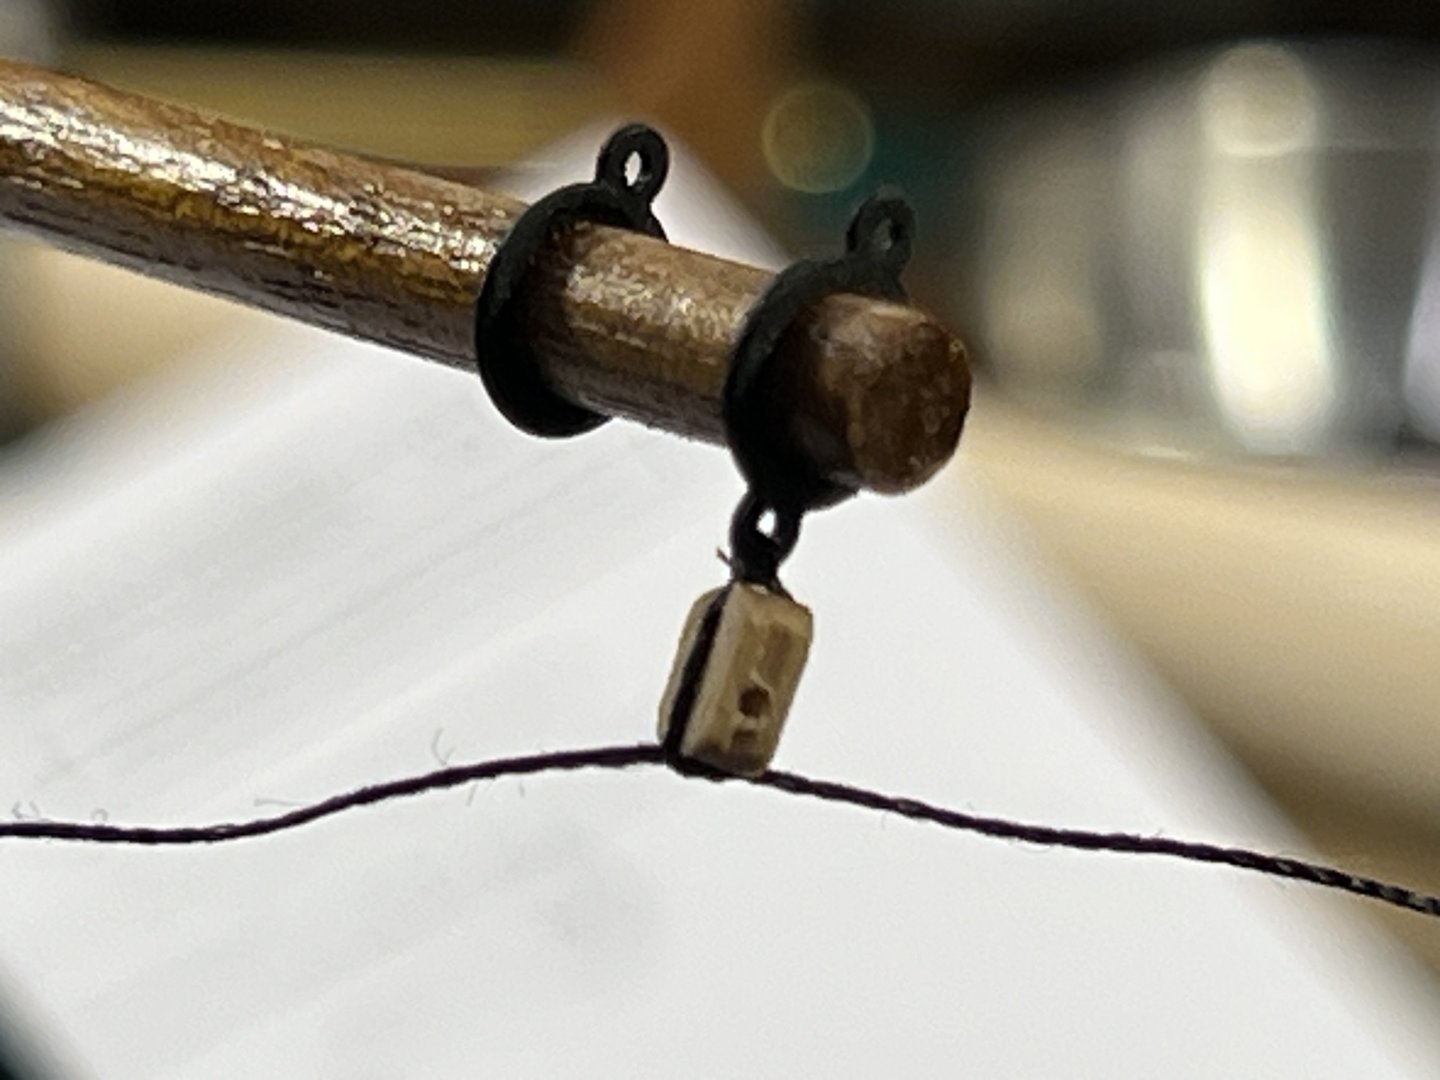
For simply attaching a block to an eyebolt, Olha simply ties a knot at the bottom of the block (adding some thin CA, and later some shellac, and cutting the loose ends flush). She does add seizing between the eyebolt and the block. I found this as another (likely more challenging approach thanks to @Thanasis. Maybe someone like this would work allowing for a becket (loop) below the block, adding seizing between the block the the loop at the bottom and a seizing between the block and the loop around the eyebolt at the top.

- 133 replies
-
- 2
-
-
- Ranger
- vanguard models
- (and 1 more)
-
Olha Batchvarov has a nice demonstration of attaching a block to an eyebolt (I see now that I should have added the block to the eyebolt before adding the eyebolt to a mast or yard or bowsprit). It’s Ep. 17 of her Lobster Smack build (yeah it says “PAINTING” but she also does masts and blocks) starting around 1:13:16.
- 133 replies
-
- 2
-
-
- Ranger
- vanguard models
- (and 1 more)
-
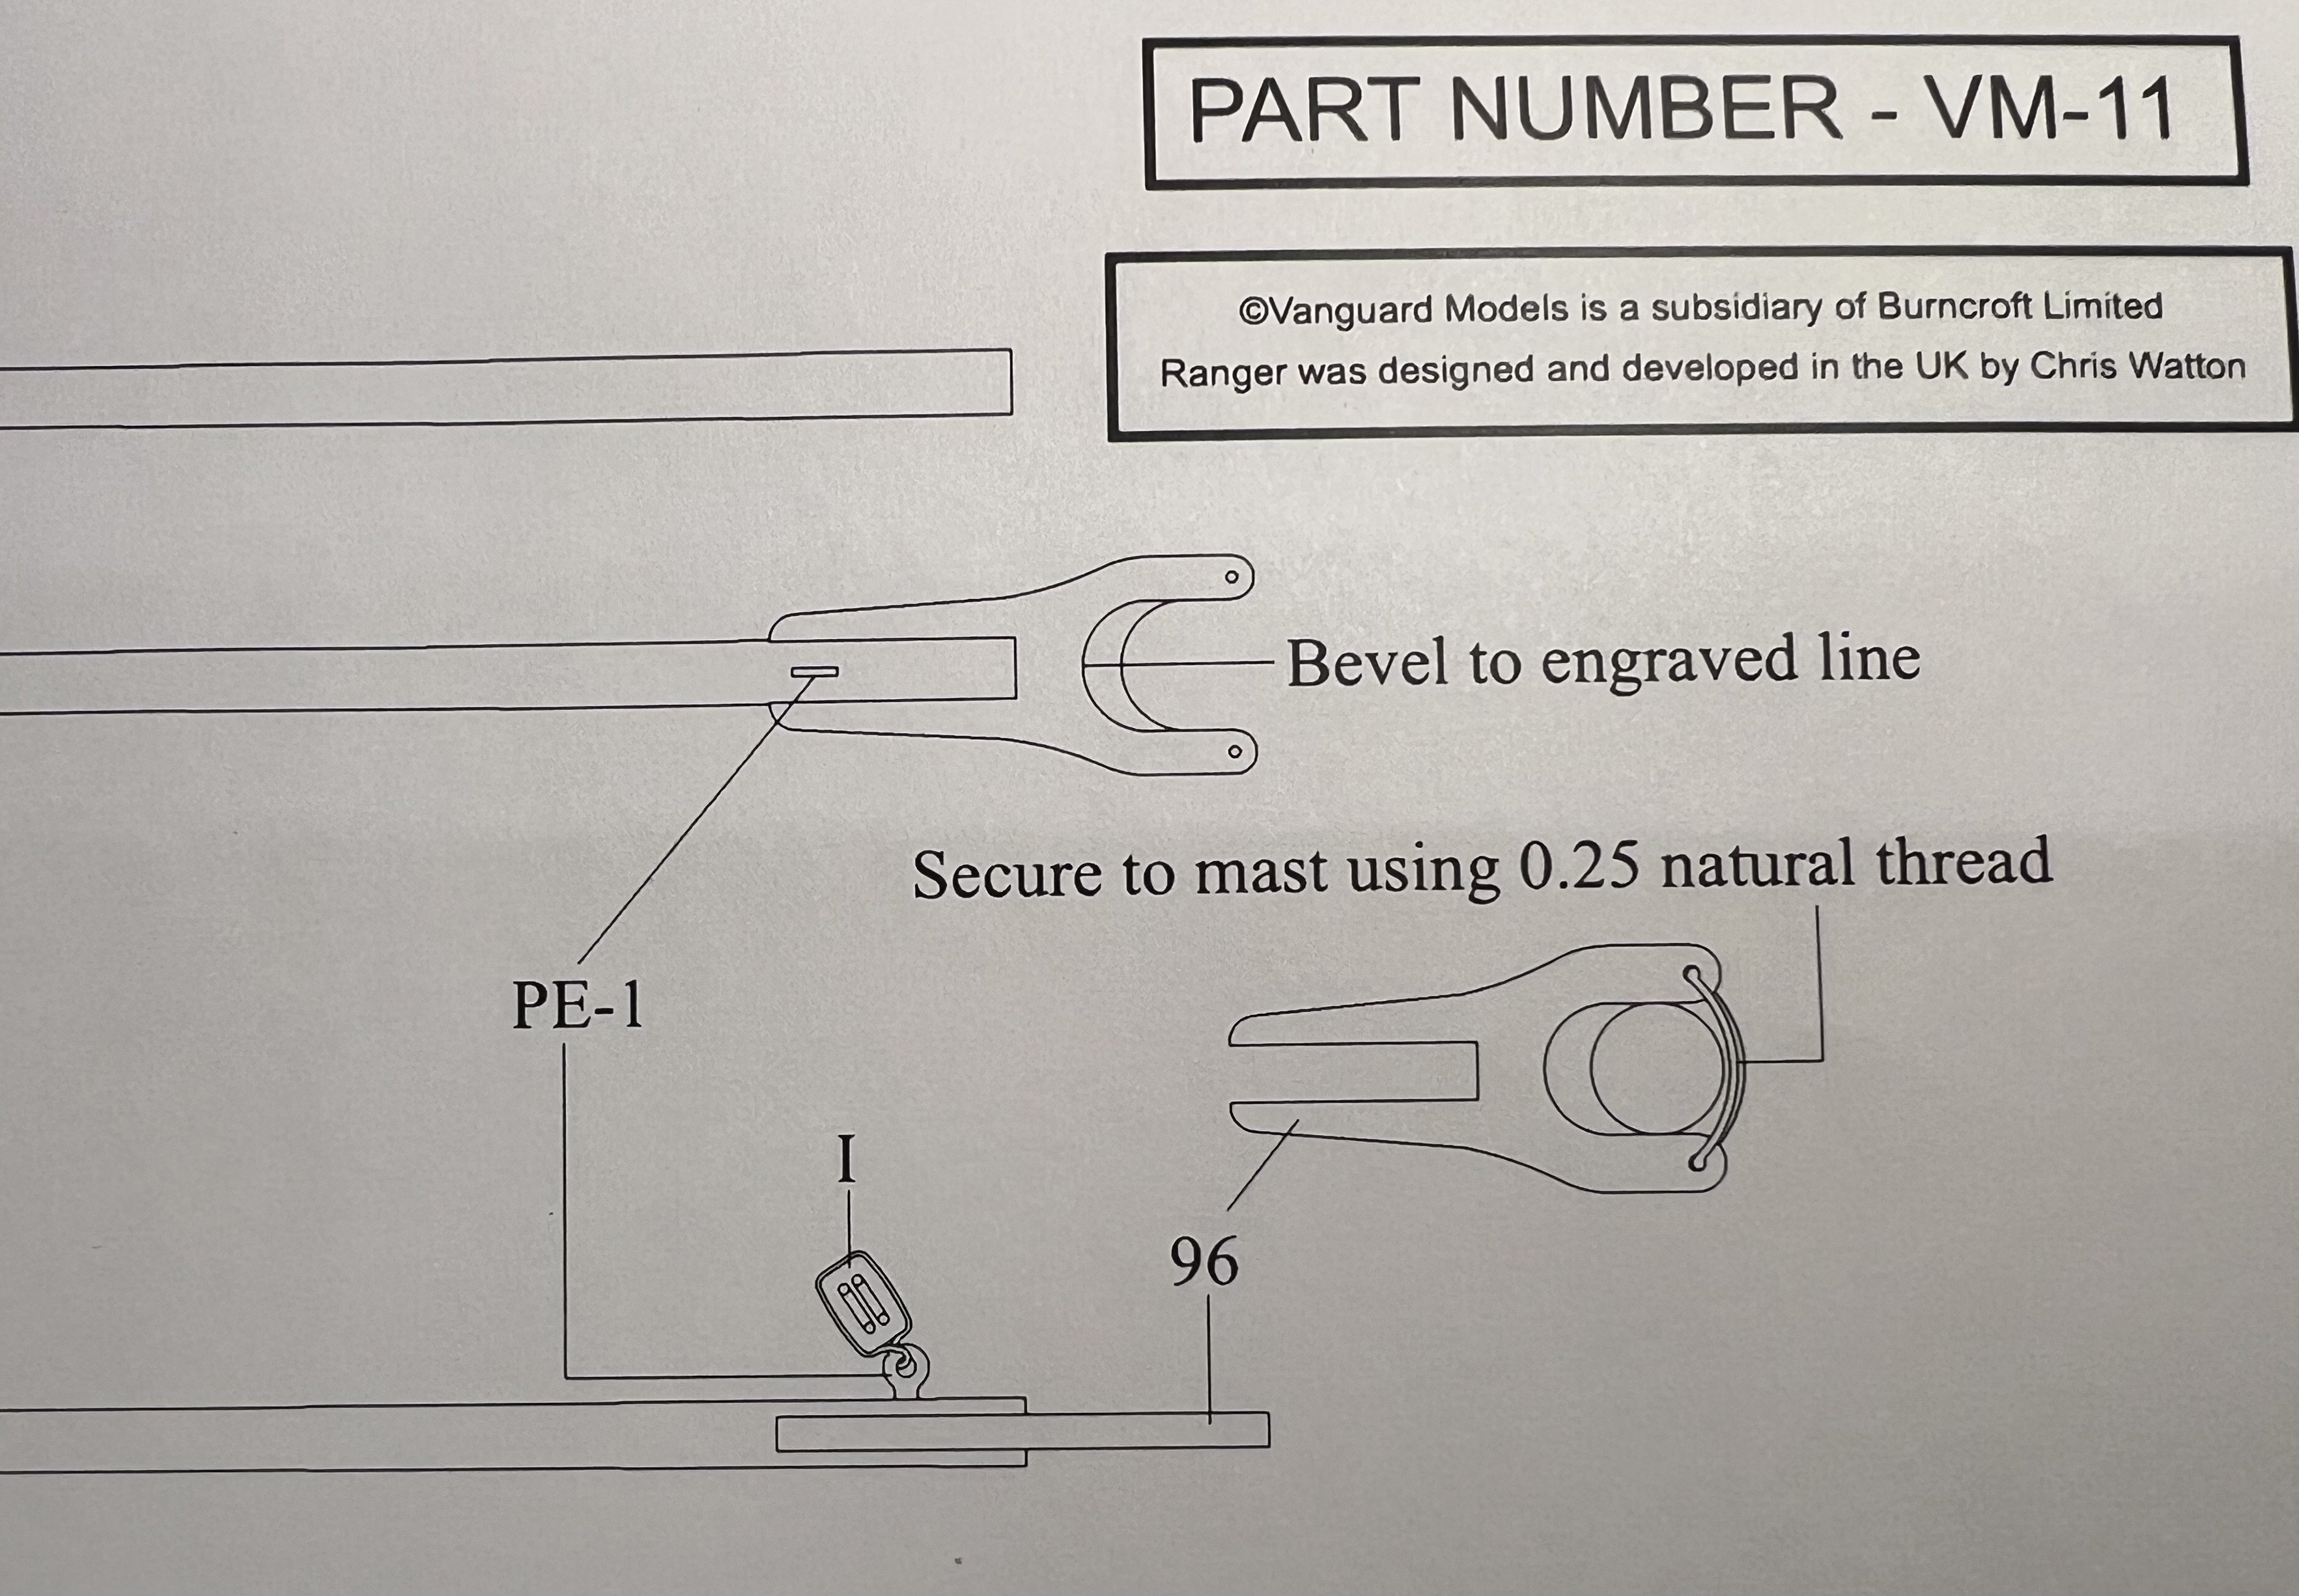
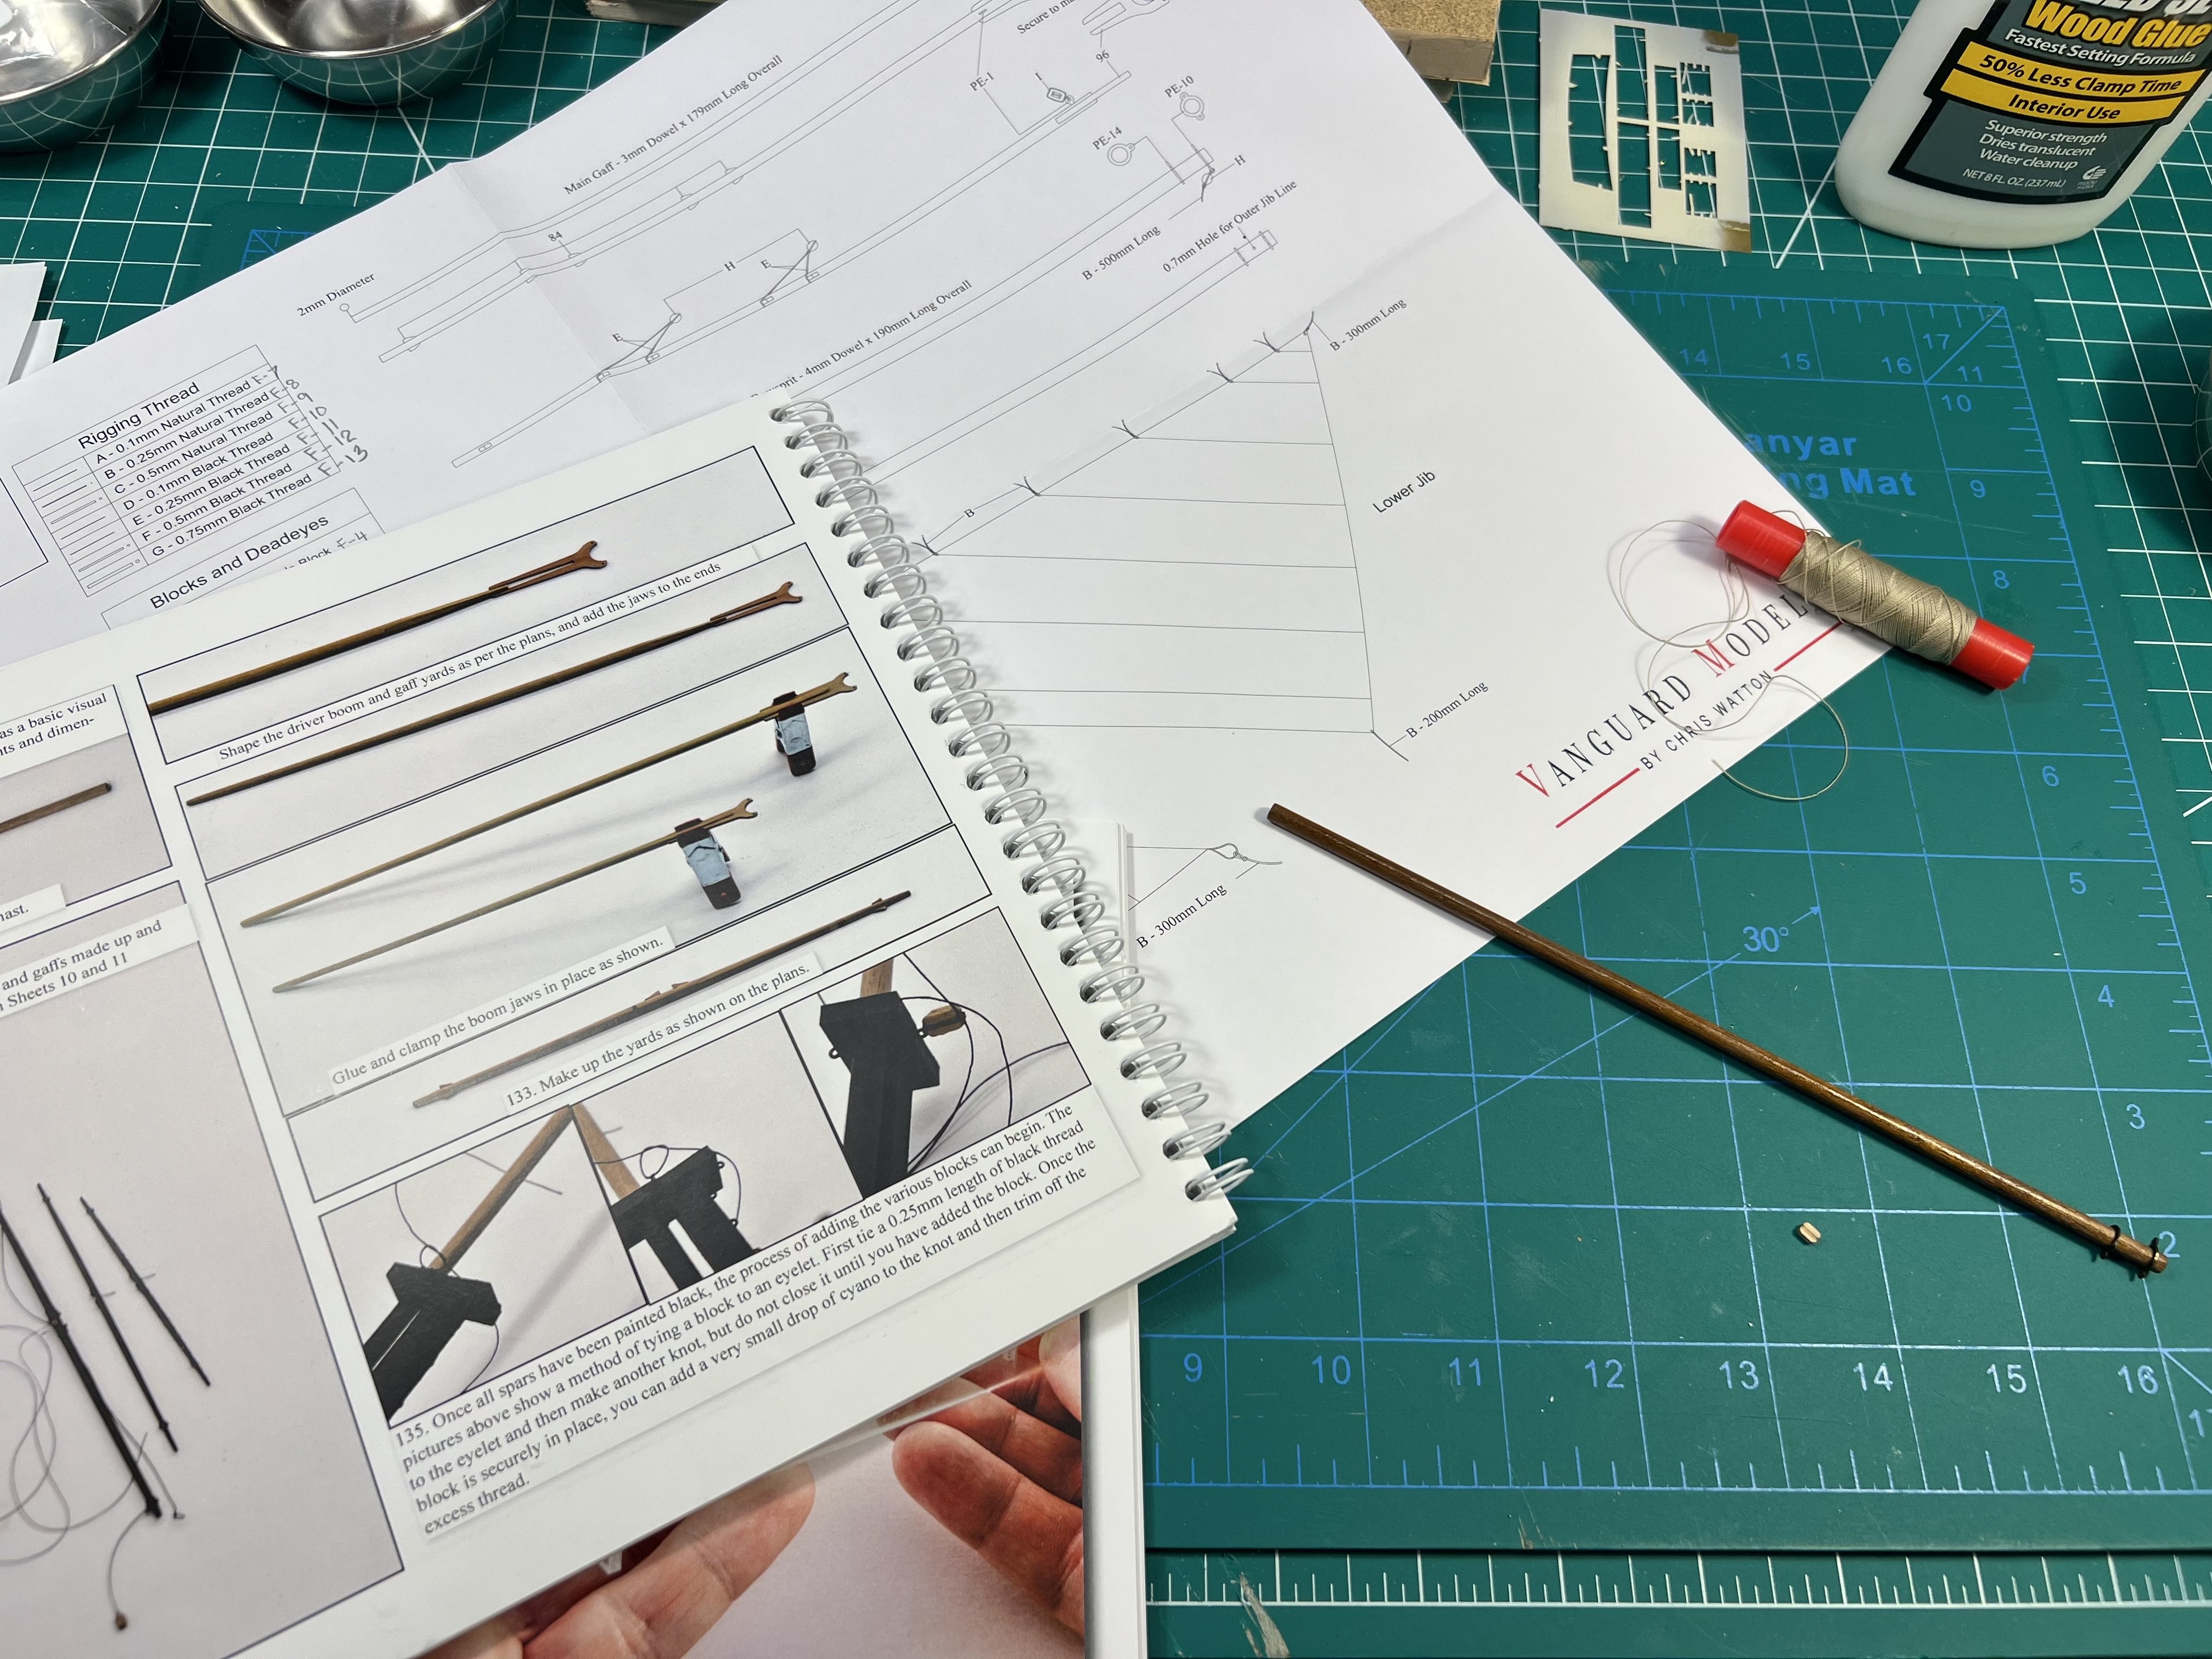
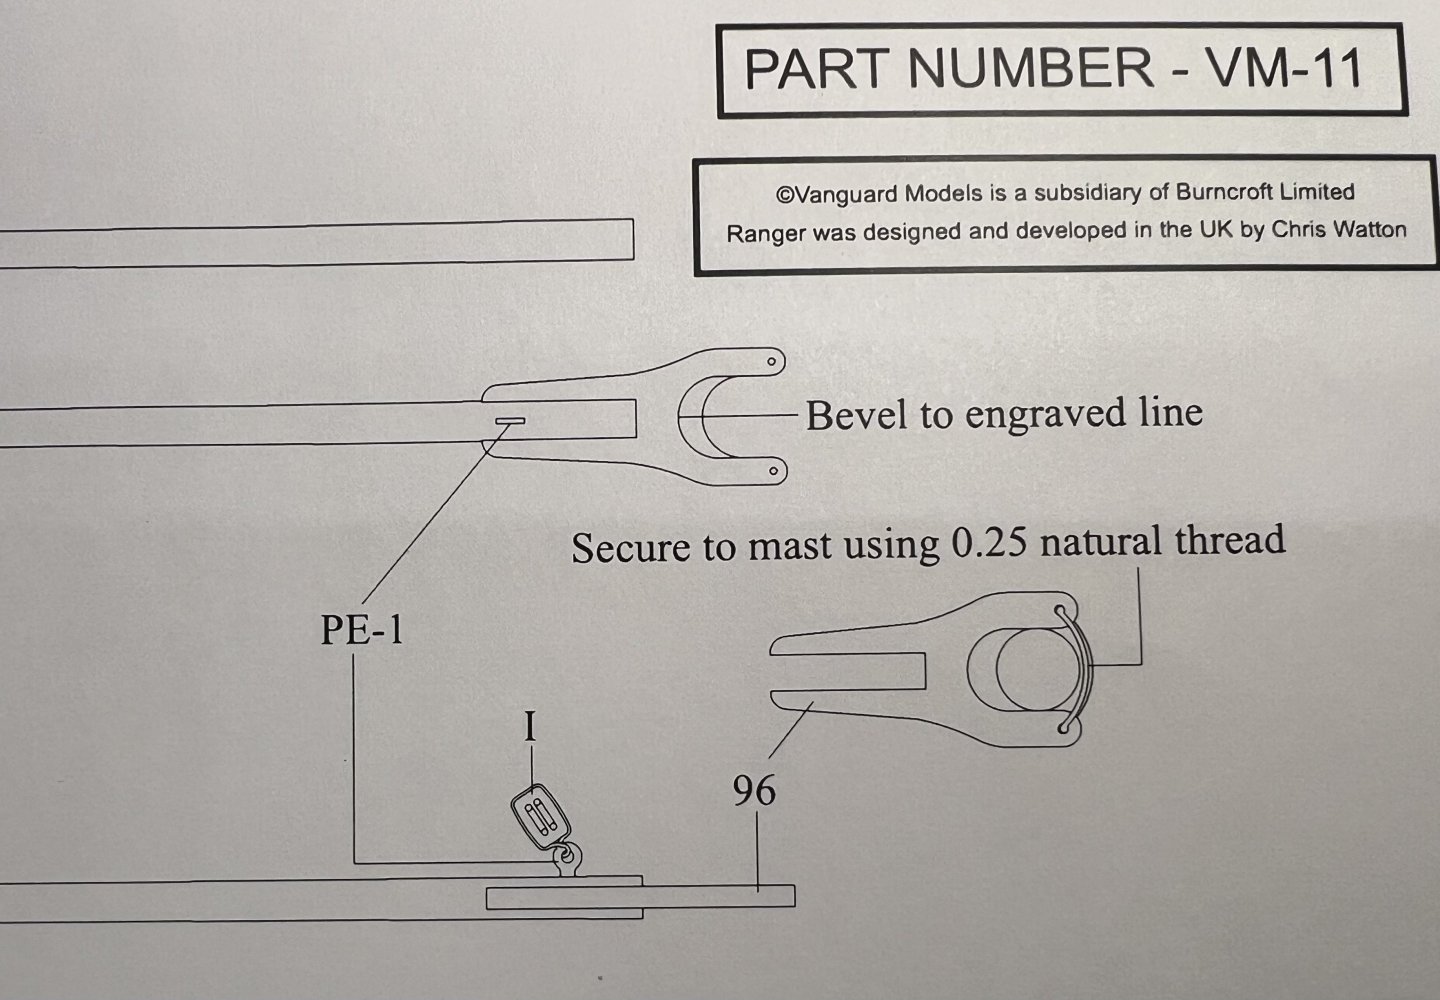
To attach the main gaff it says to secure using just .25mm thread. Wouldn’t a gaff use parrel beads? I have some that I bought before for another model that I could use. I’d think on a real ship ropes would pretty quickly fray, wouldn’t they?
- 133 replies
-
- 4
-
-
- Ranger
- vanguard models
- (and 1 more)
-
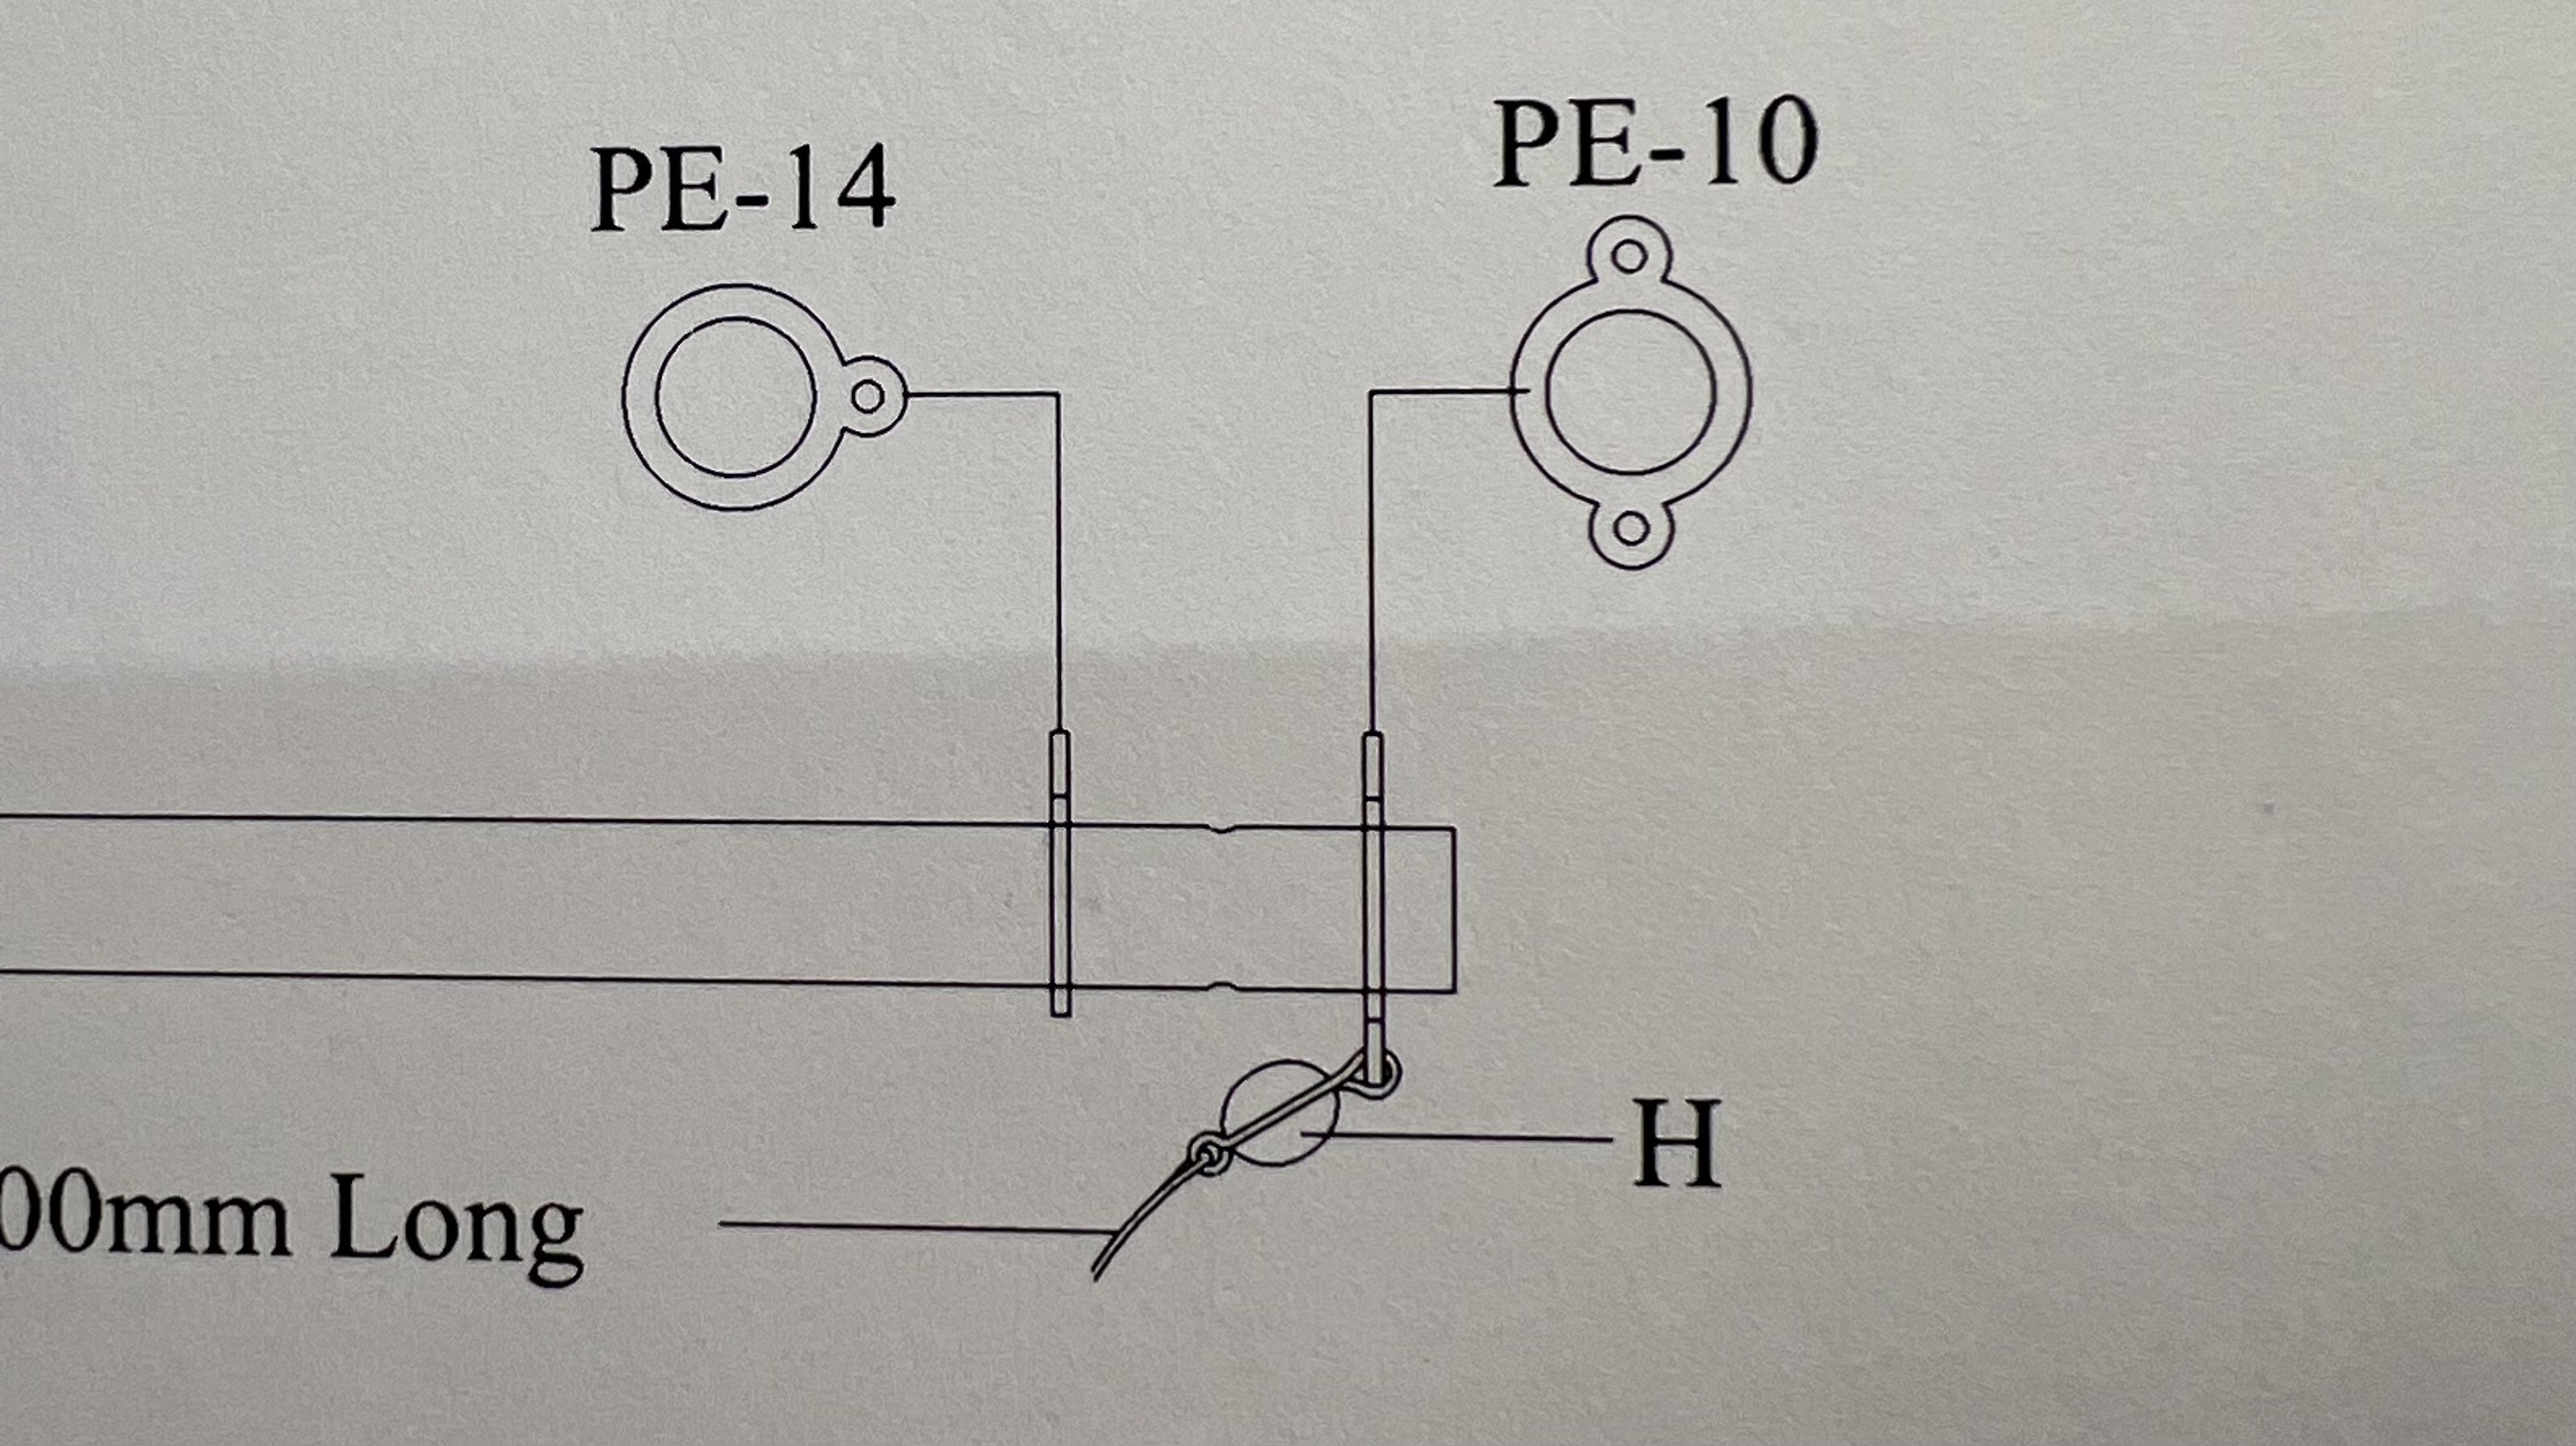
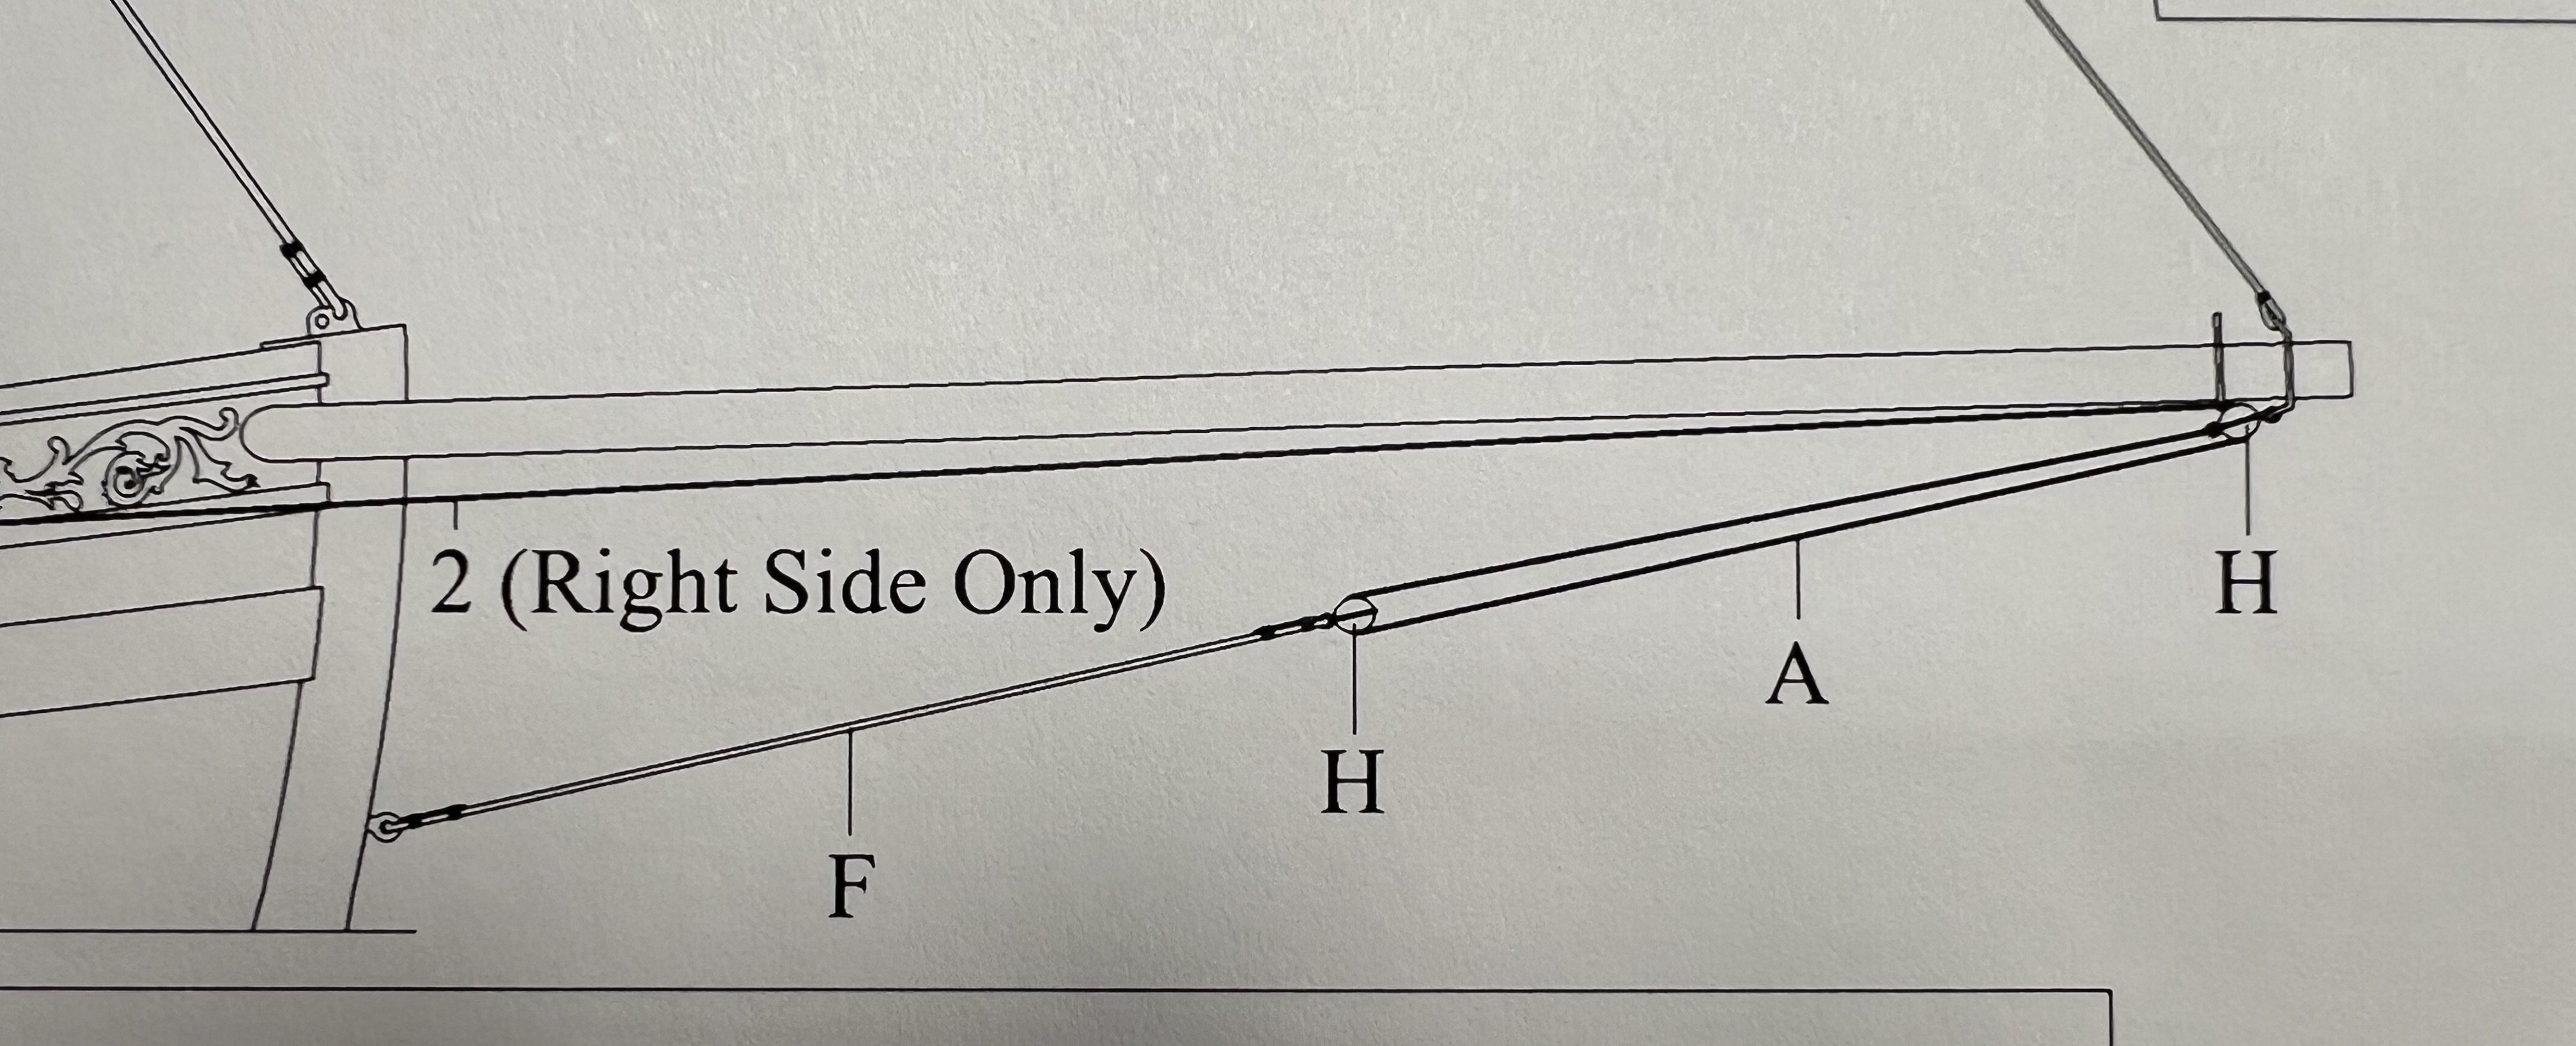
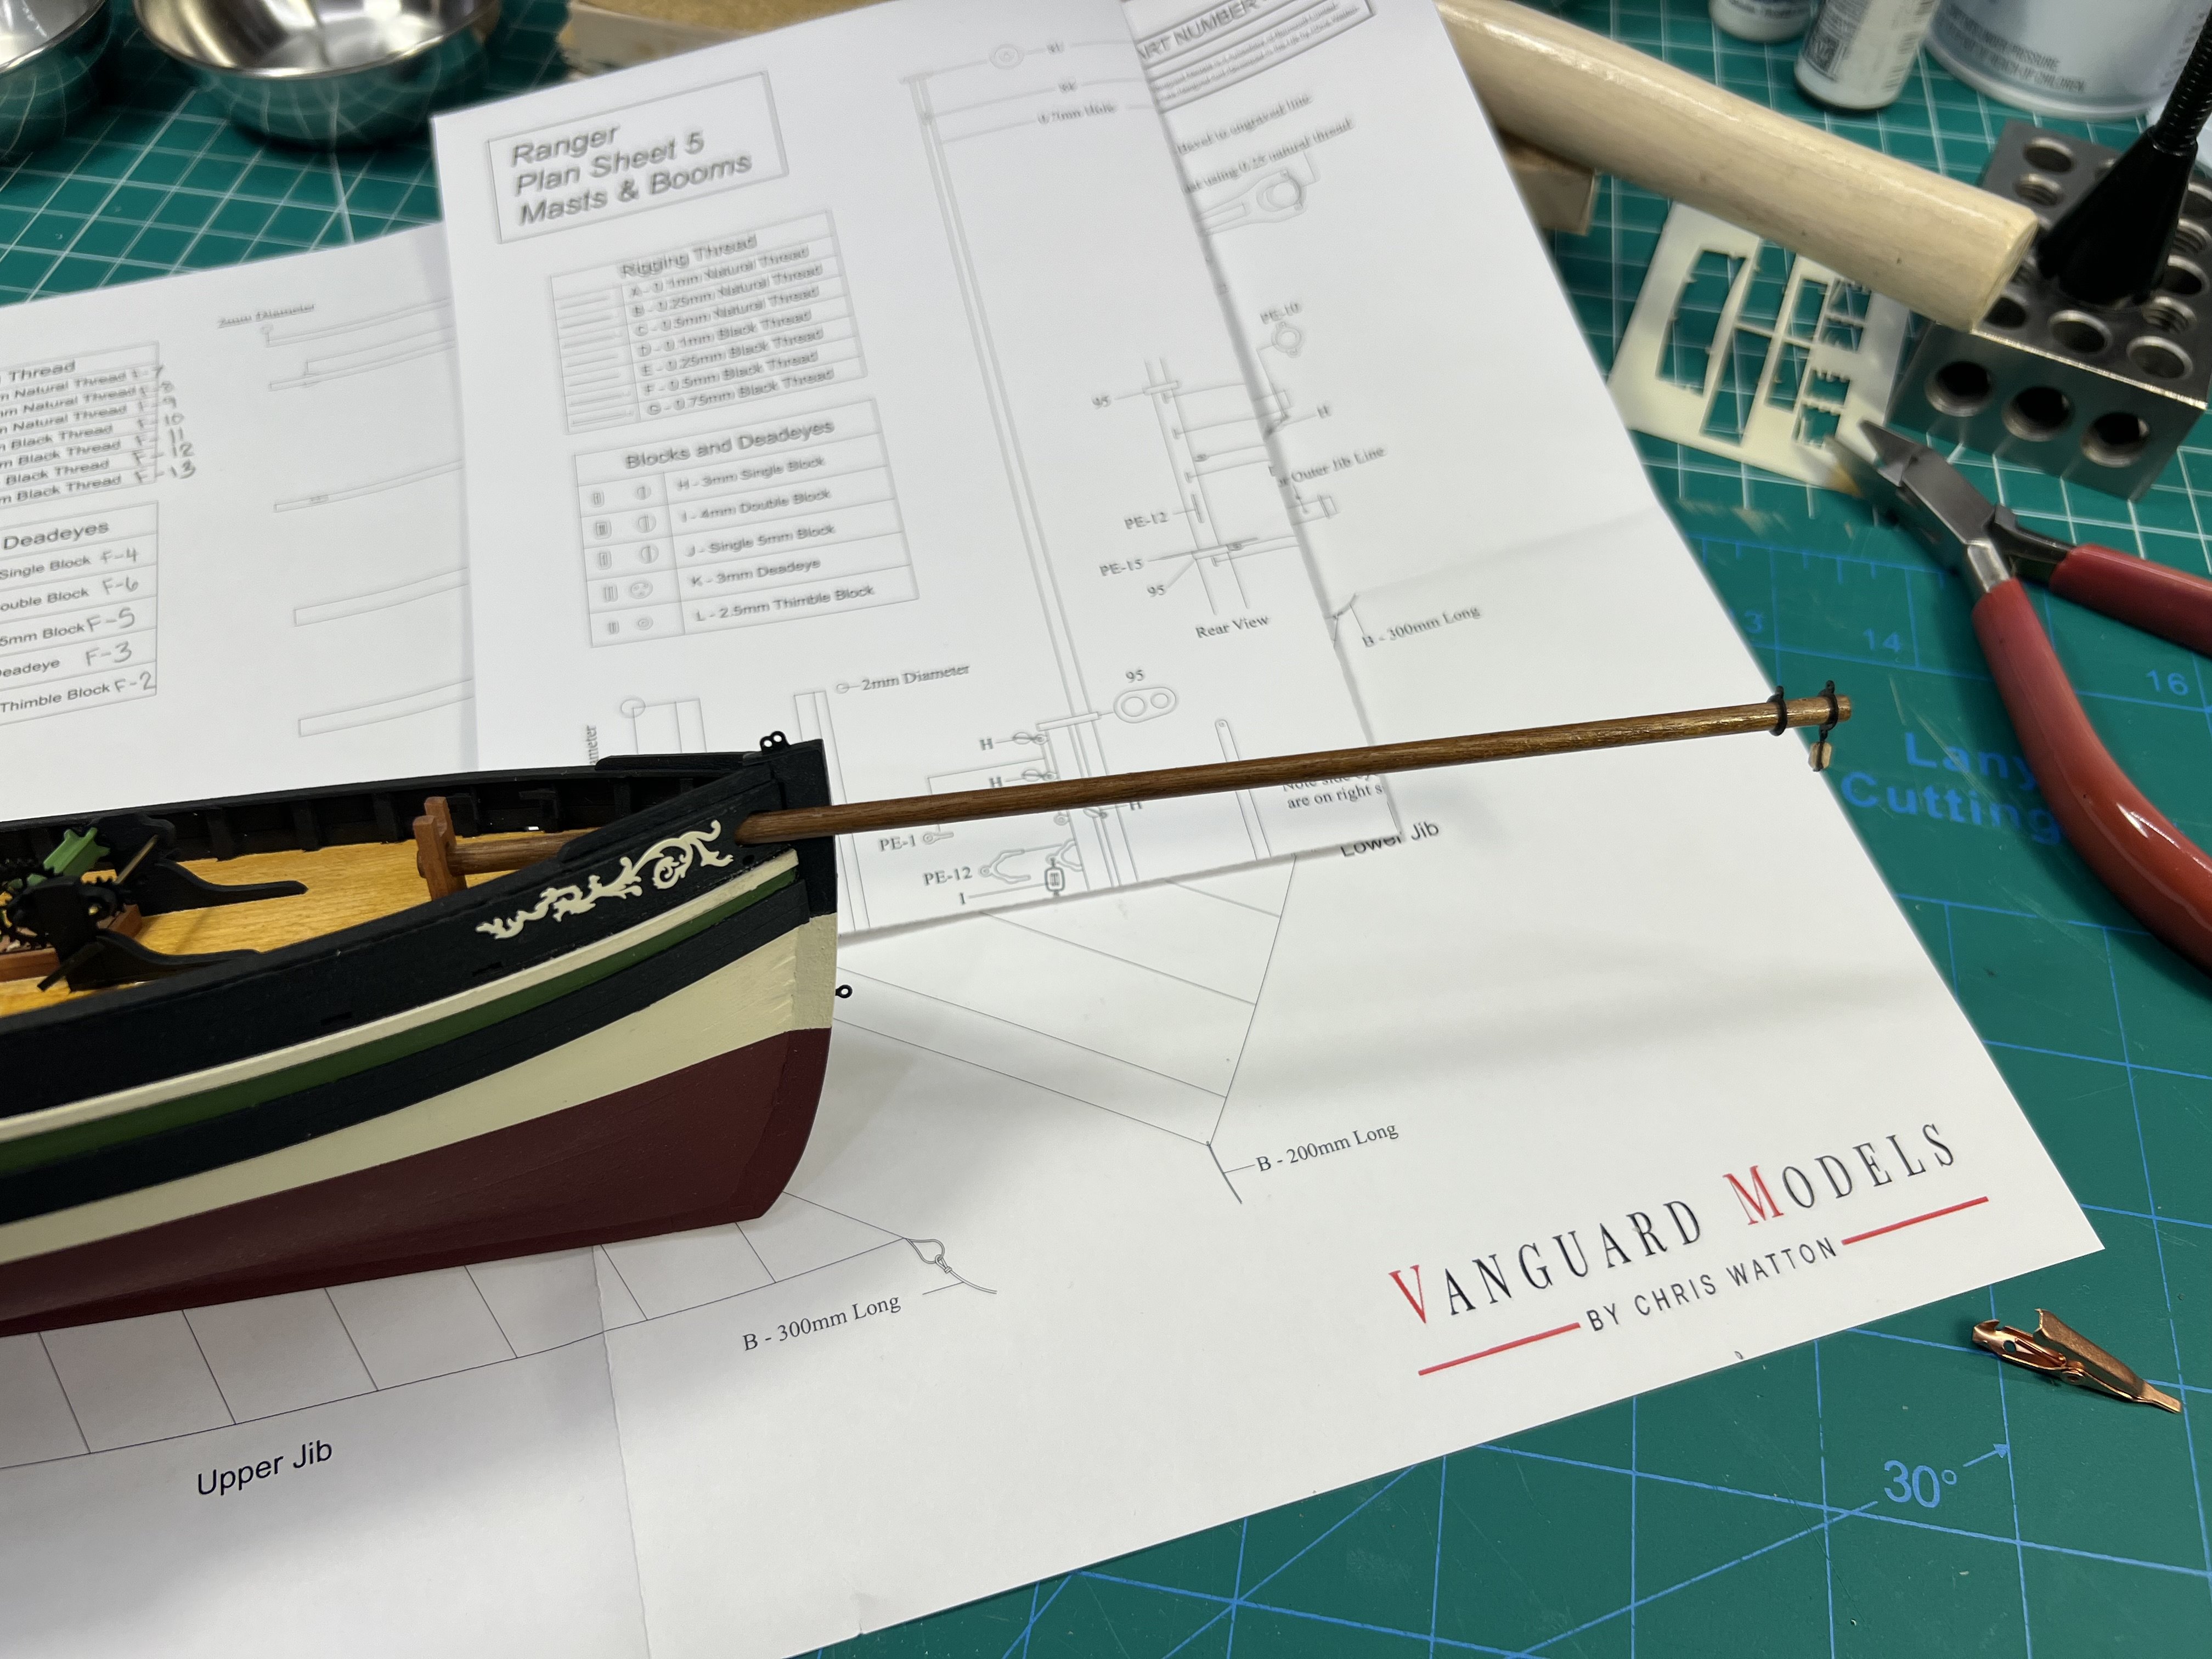
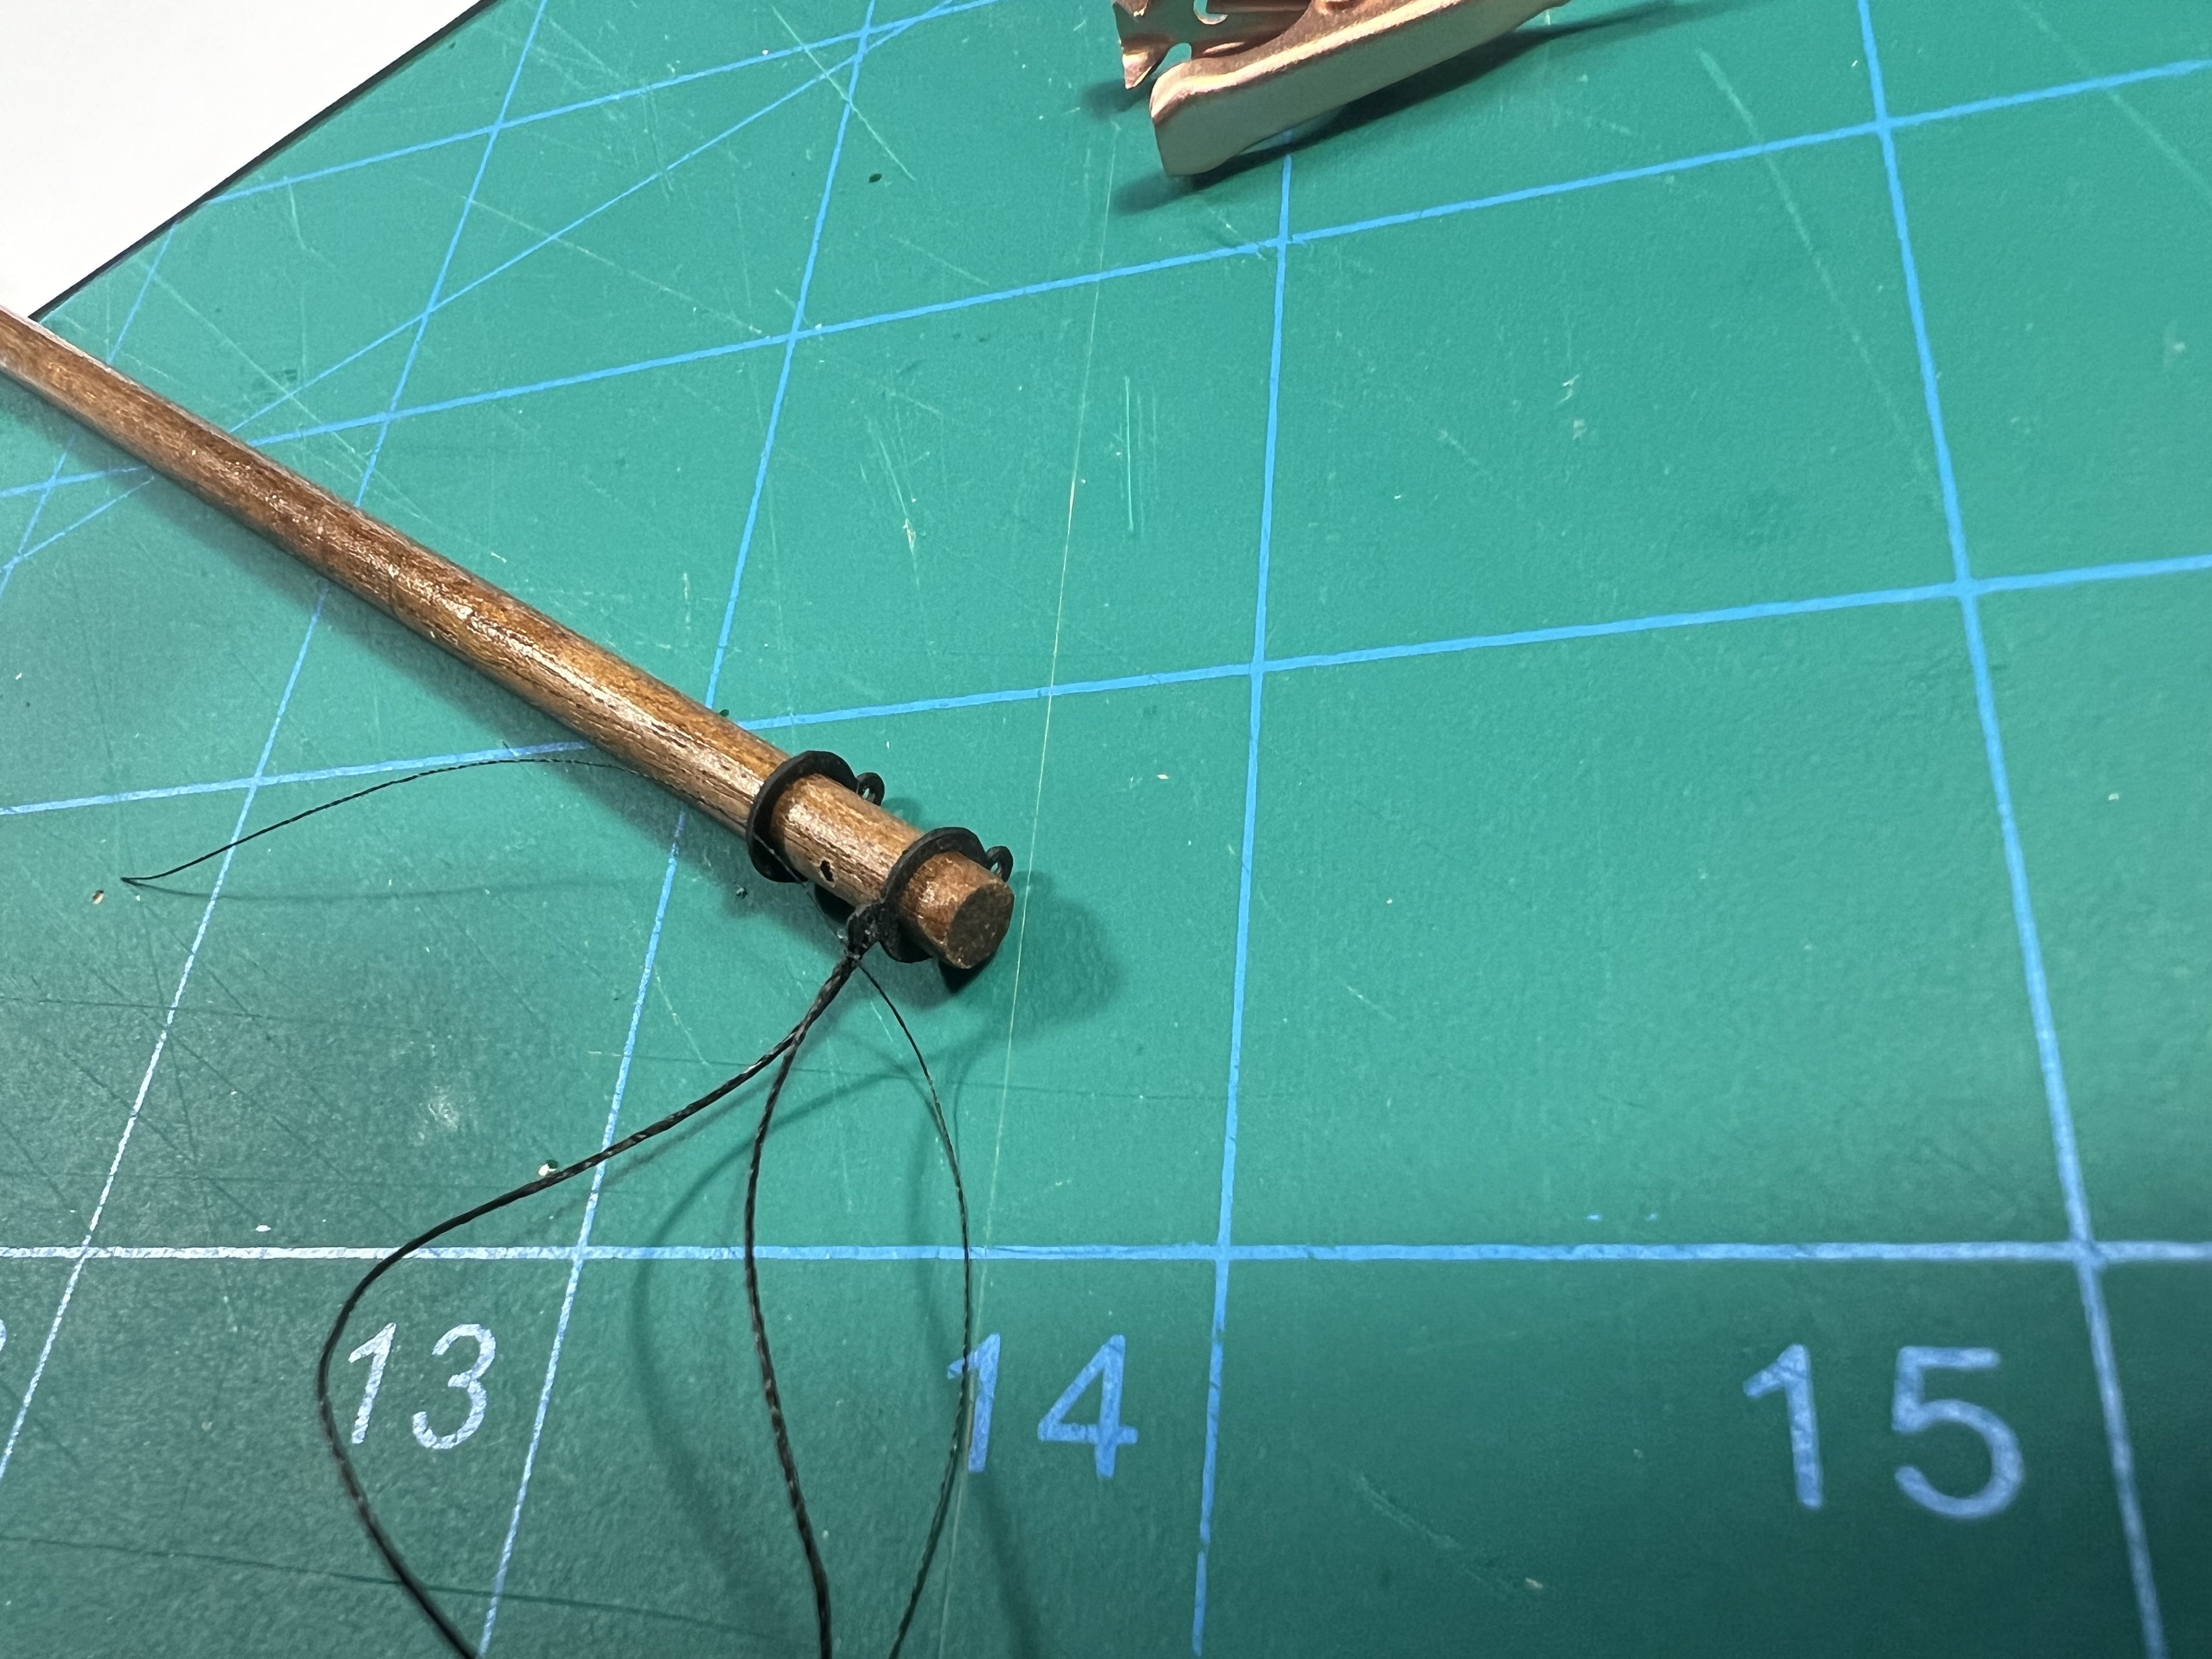
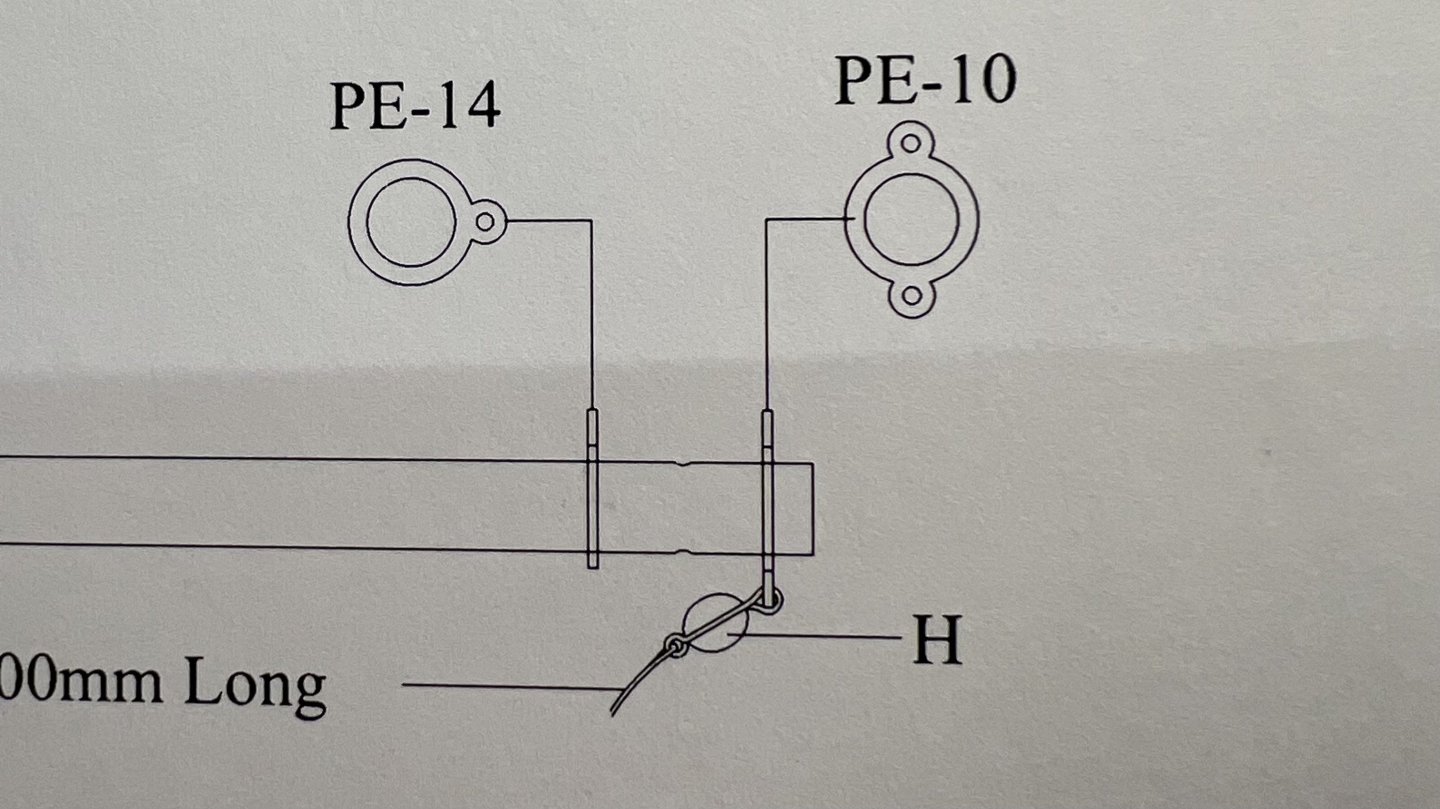
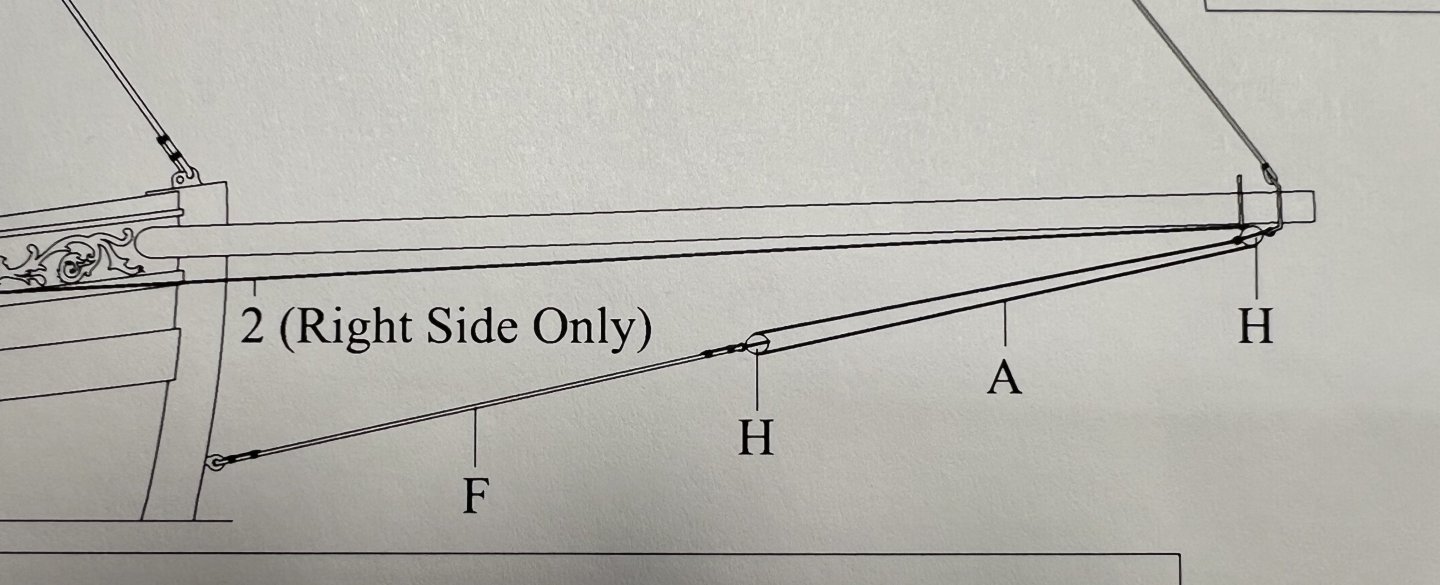
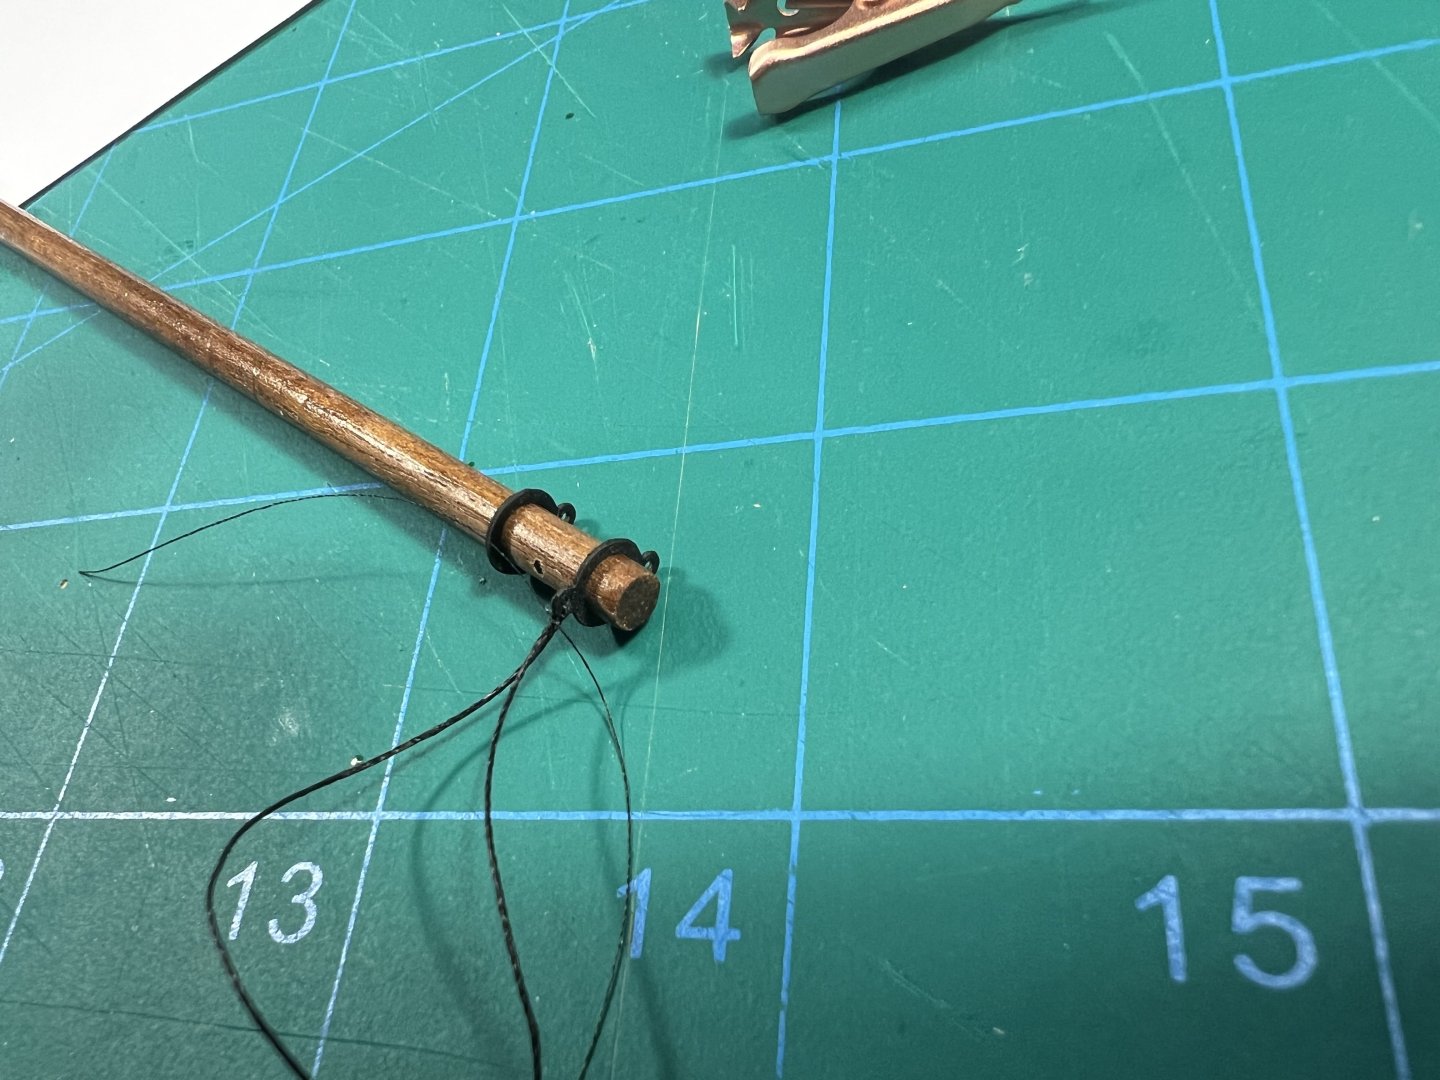
I realized I didn’t tie the (single) block on the bowsprit properly. I forgot the loop under the block. I’ve attached the drawings of the block placement from the plans. I’m puzzled as to how to create this. I also don’t know if this has a name to be able to search online. It looks like one continuous line that forms the loop under the block, then wraps around the block, then loops around the eyebolt. I’m guessing that since the is a piece of standing rigging the loop at the bottom (under the block) would not have a thimble since the line that loops through that bottom loop is static (thimbles are supplied with the kit). I looked in Ashley and in Petersson but could not find a sample of this. Does this have a name? Would I start by forming a loop (that goes under the block) and then adding a seizing to tie it up off, the loops around round the block? Would there the be a seizing above the block? And how would I attach to the eyebolt? I know I could just tie a knot. But is there a more realistic way to do it at scale? I suppose that the line that connects through the loop under the block (labeled as “B - 500mm Long” on the plans) would be tied off with a seizing right?

- 133 replies
-
- 3
-
-
- Ranger
- vanguard models
- (and 1 more)
-
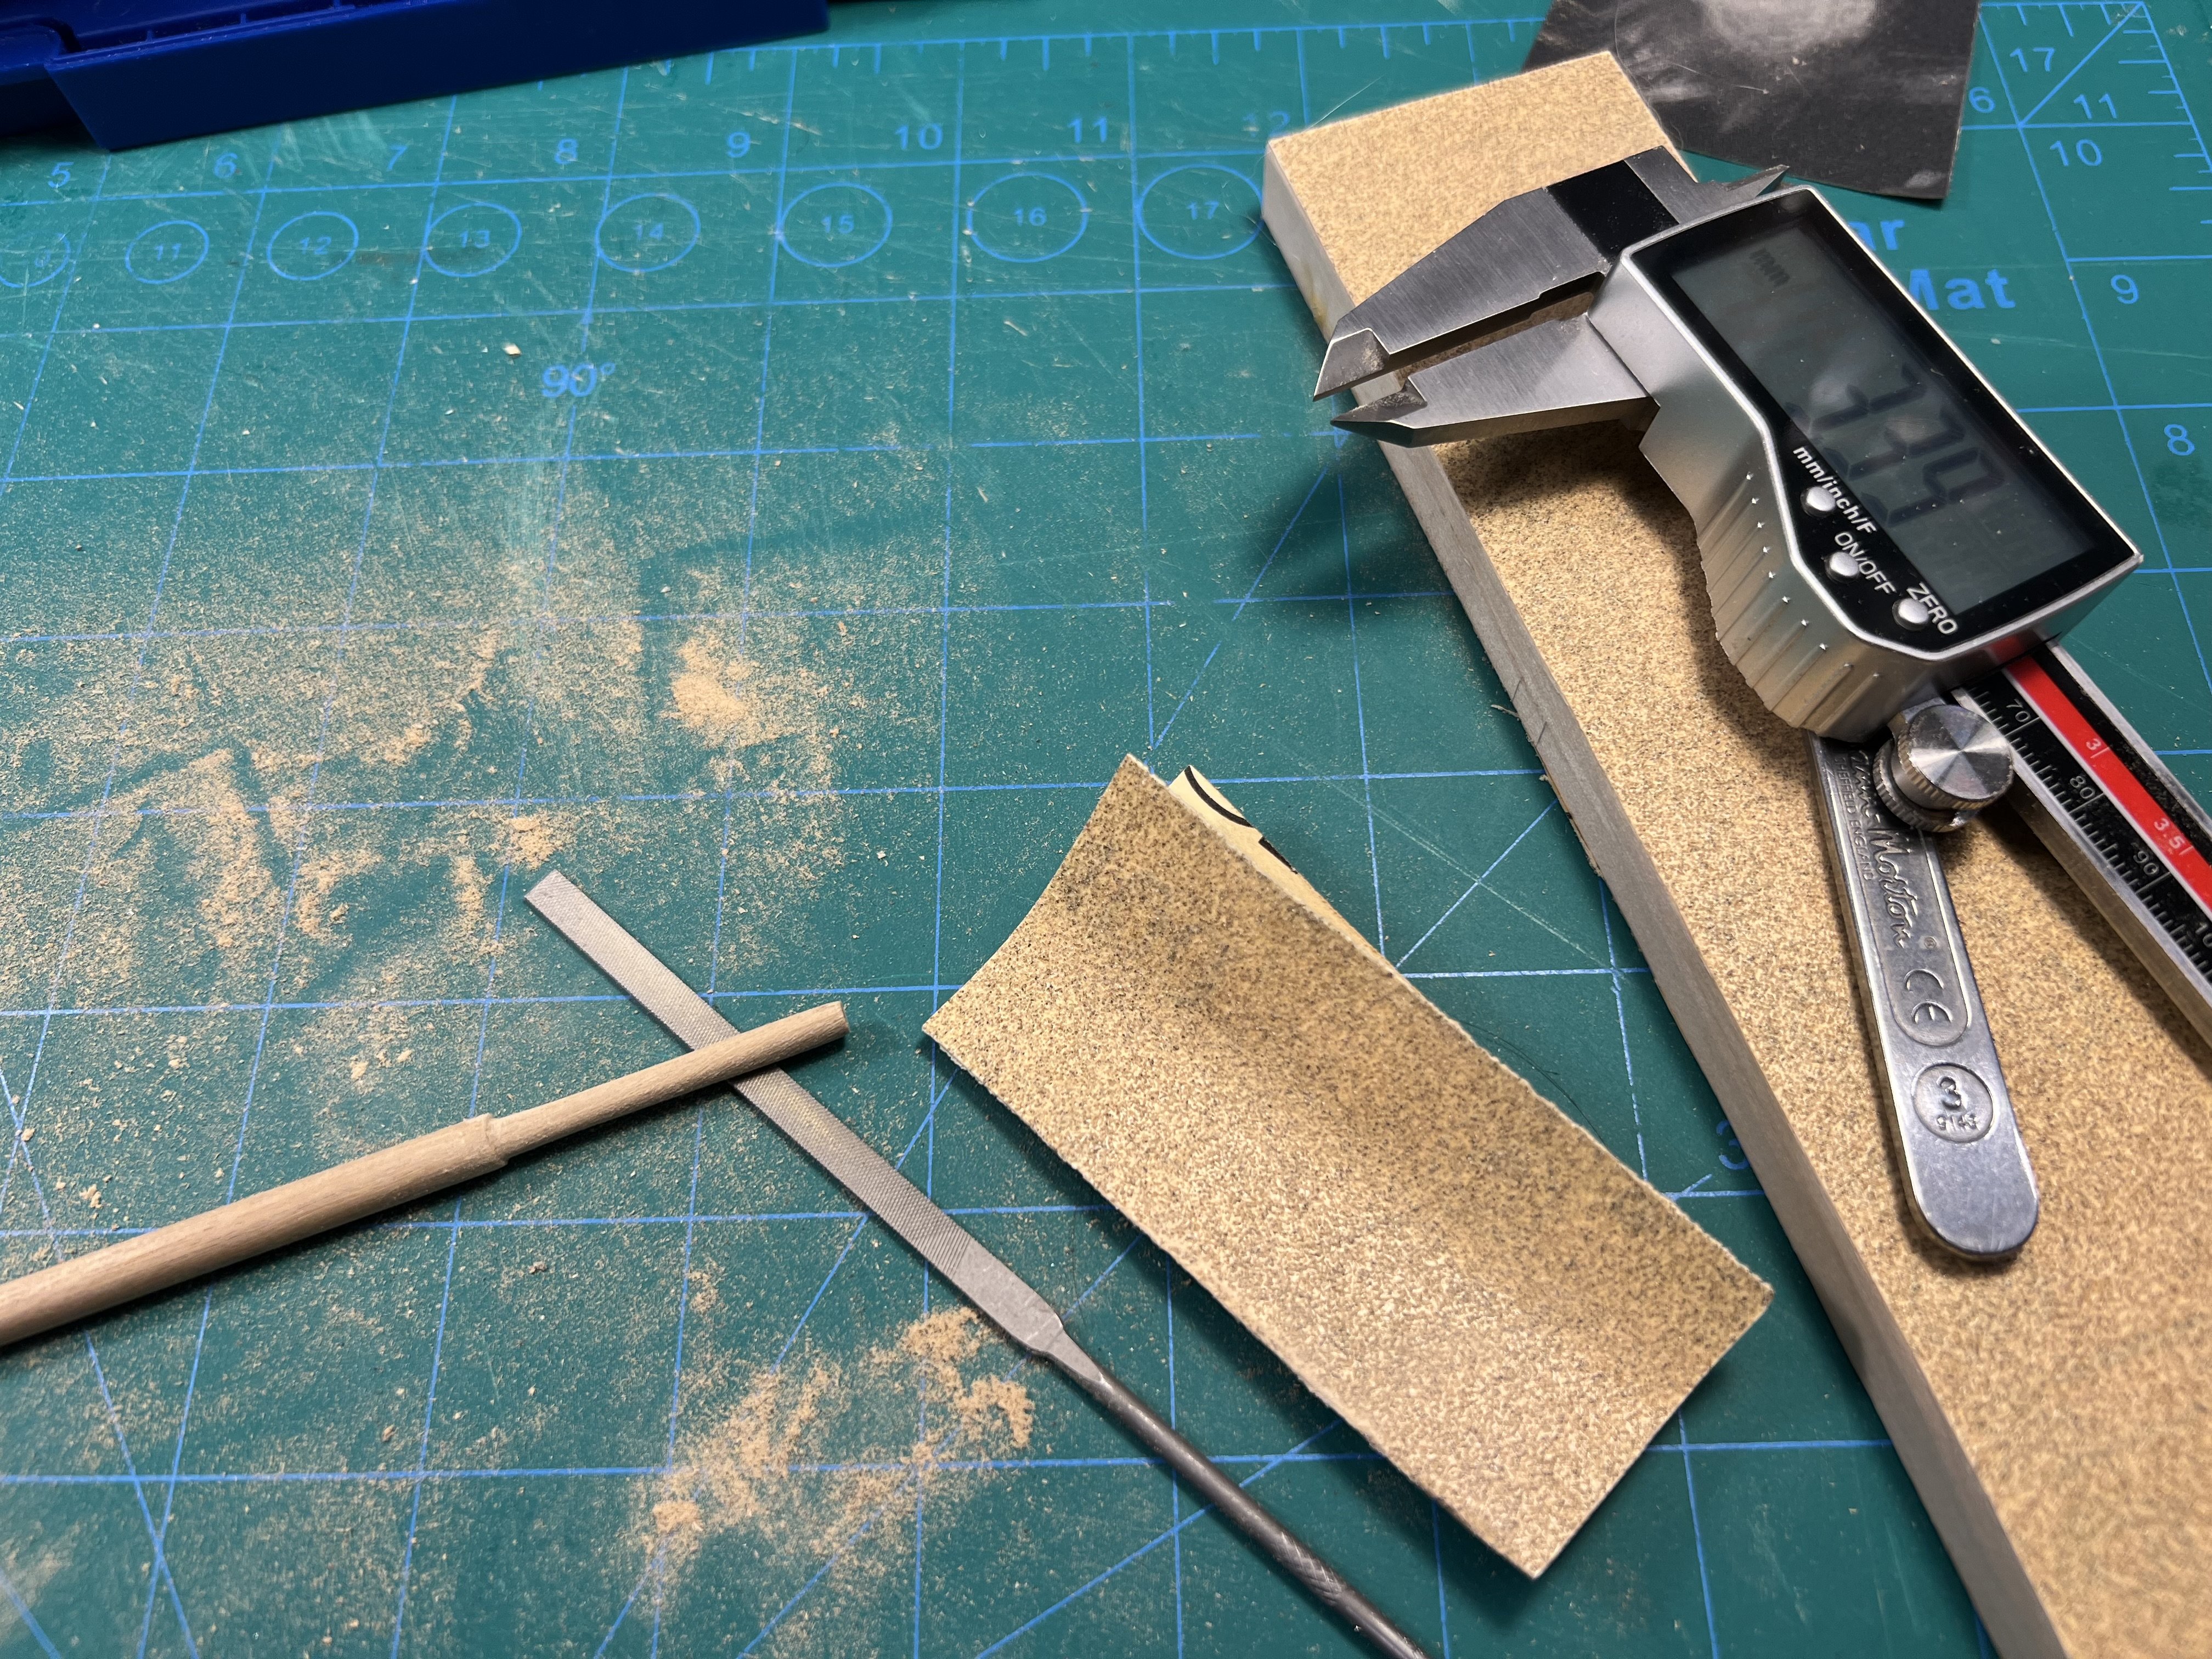
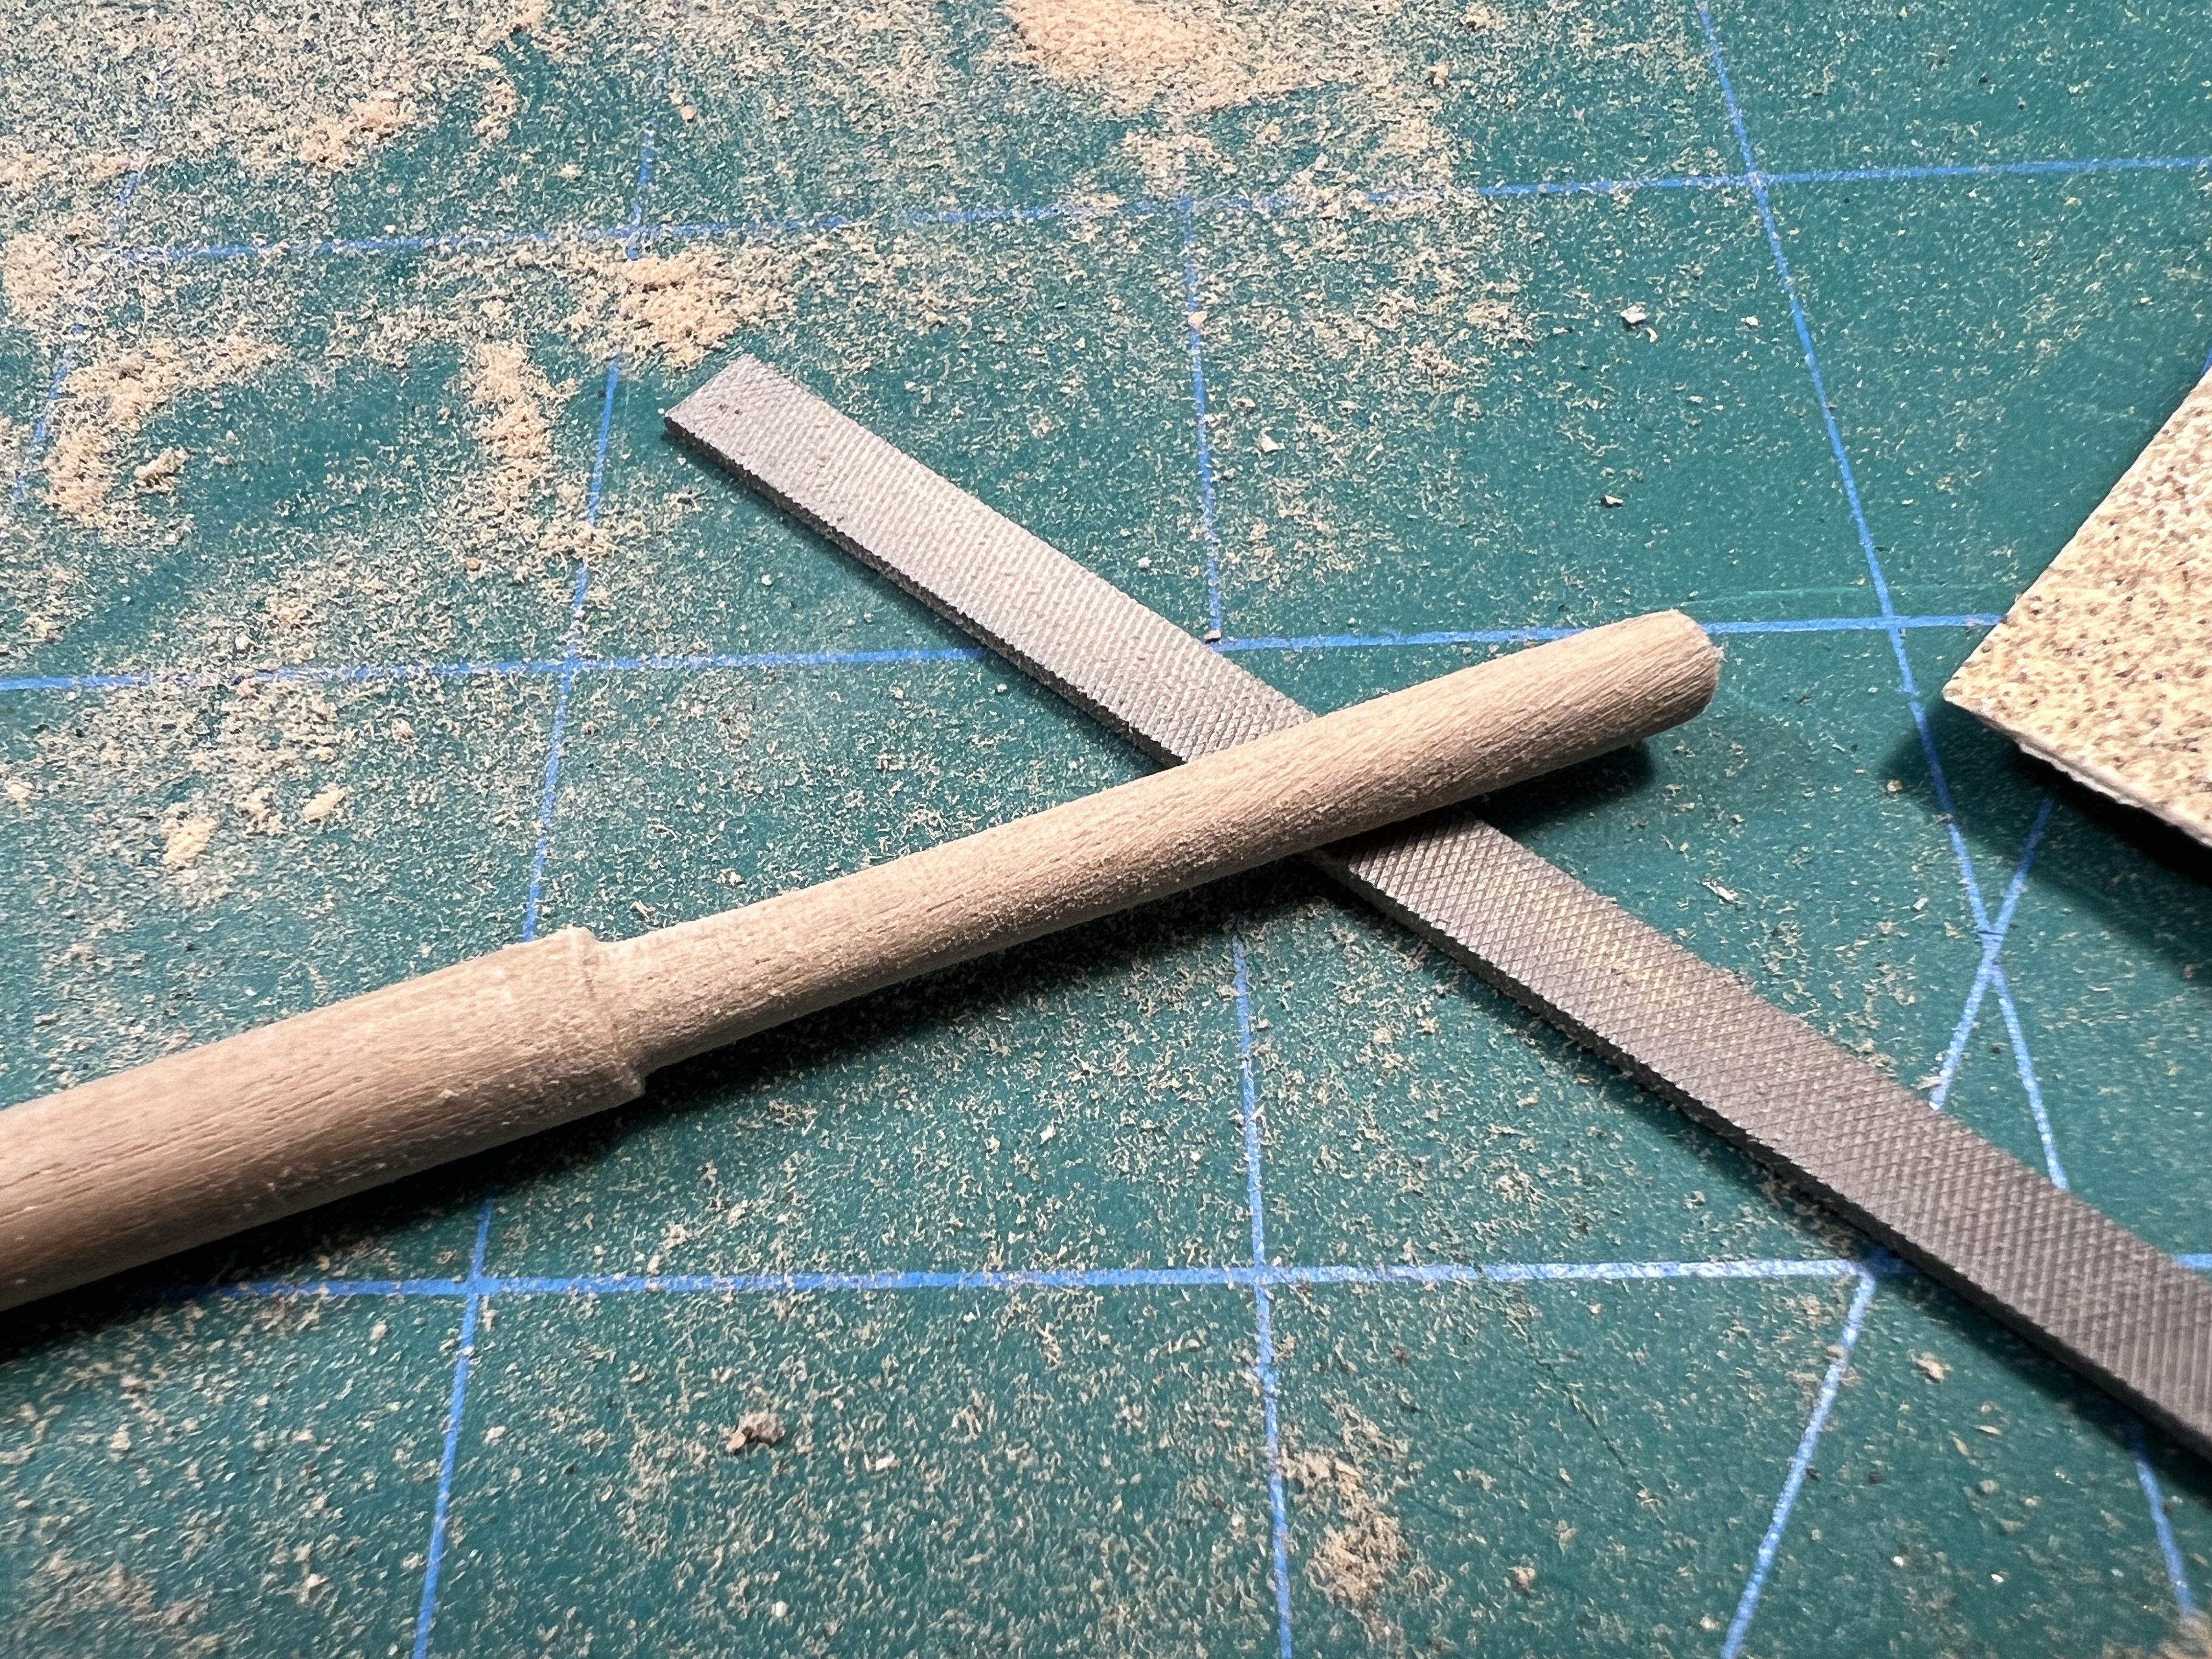
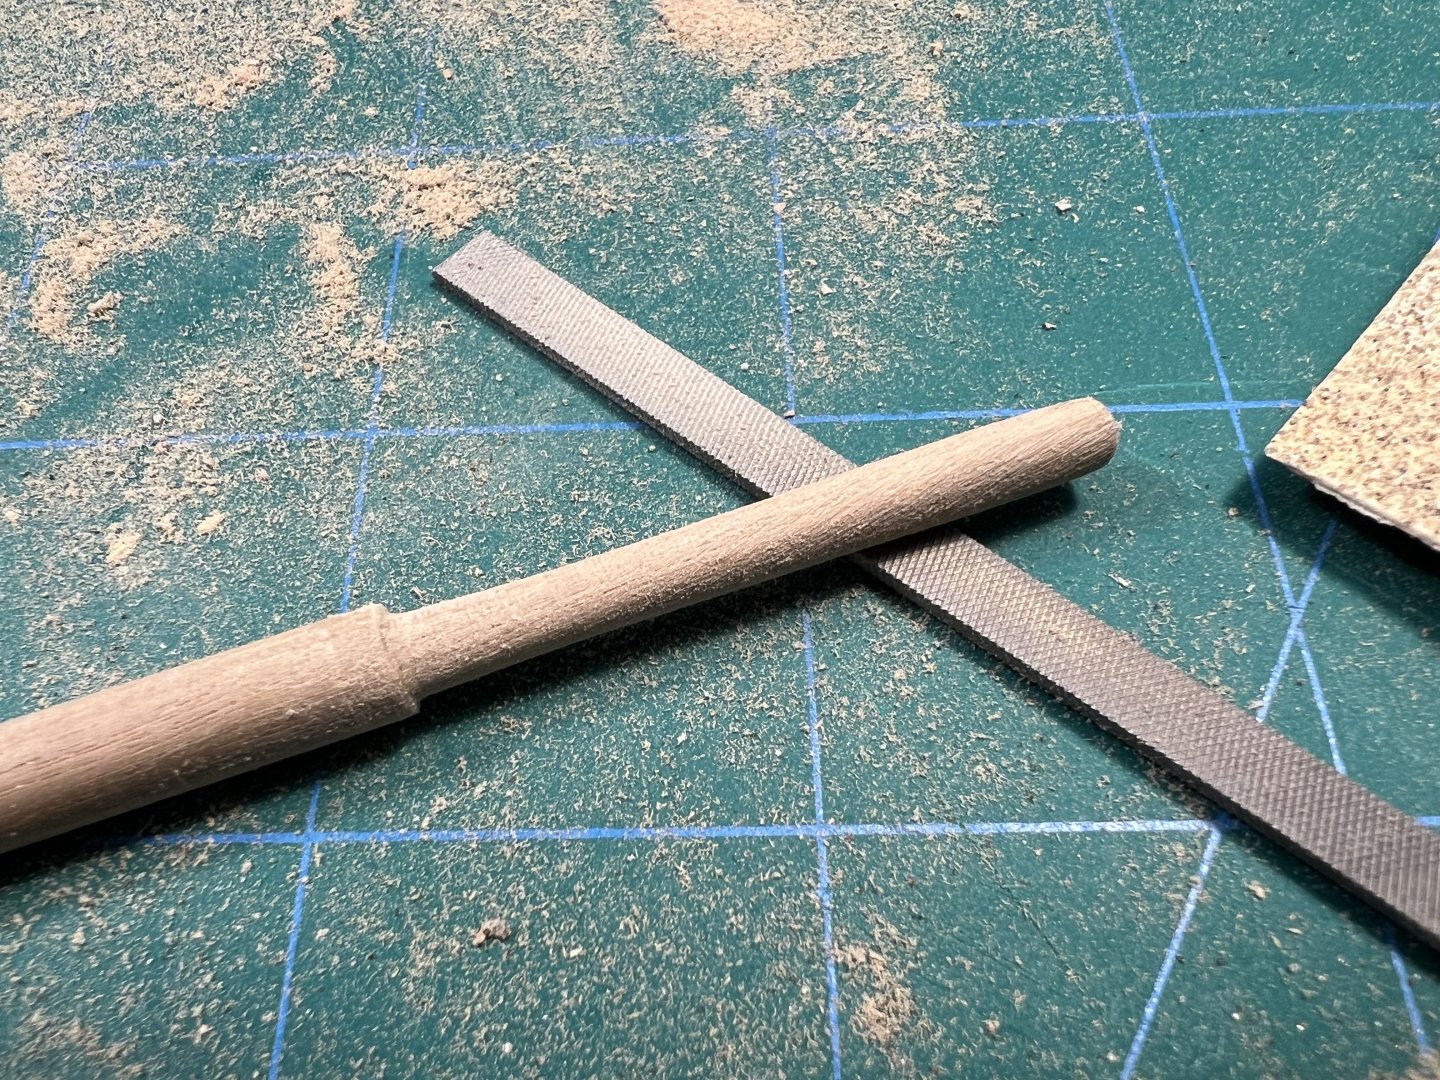
Had to reduce the end of the main mast from 6mm to 4mm and add the part to mount the top half of the main mast.


- 133 replies
-
- 4
-
-
- Ranger
- vanguard models
- (and 1 more)
-
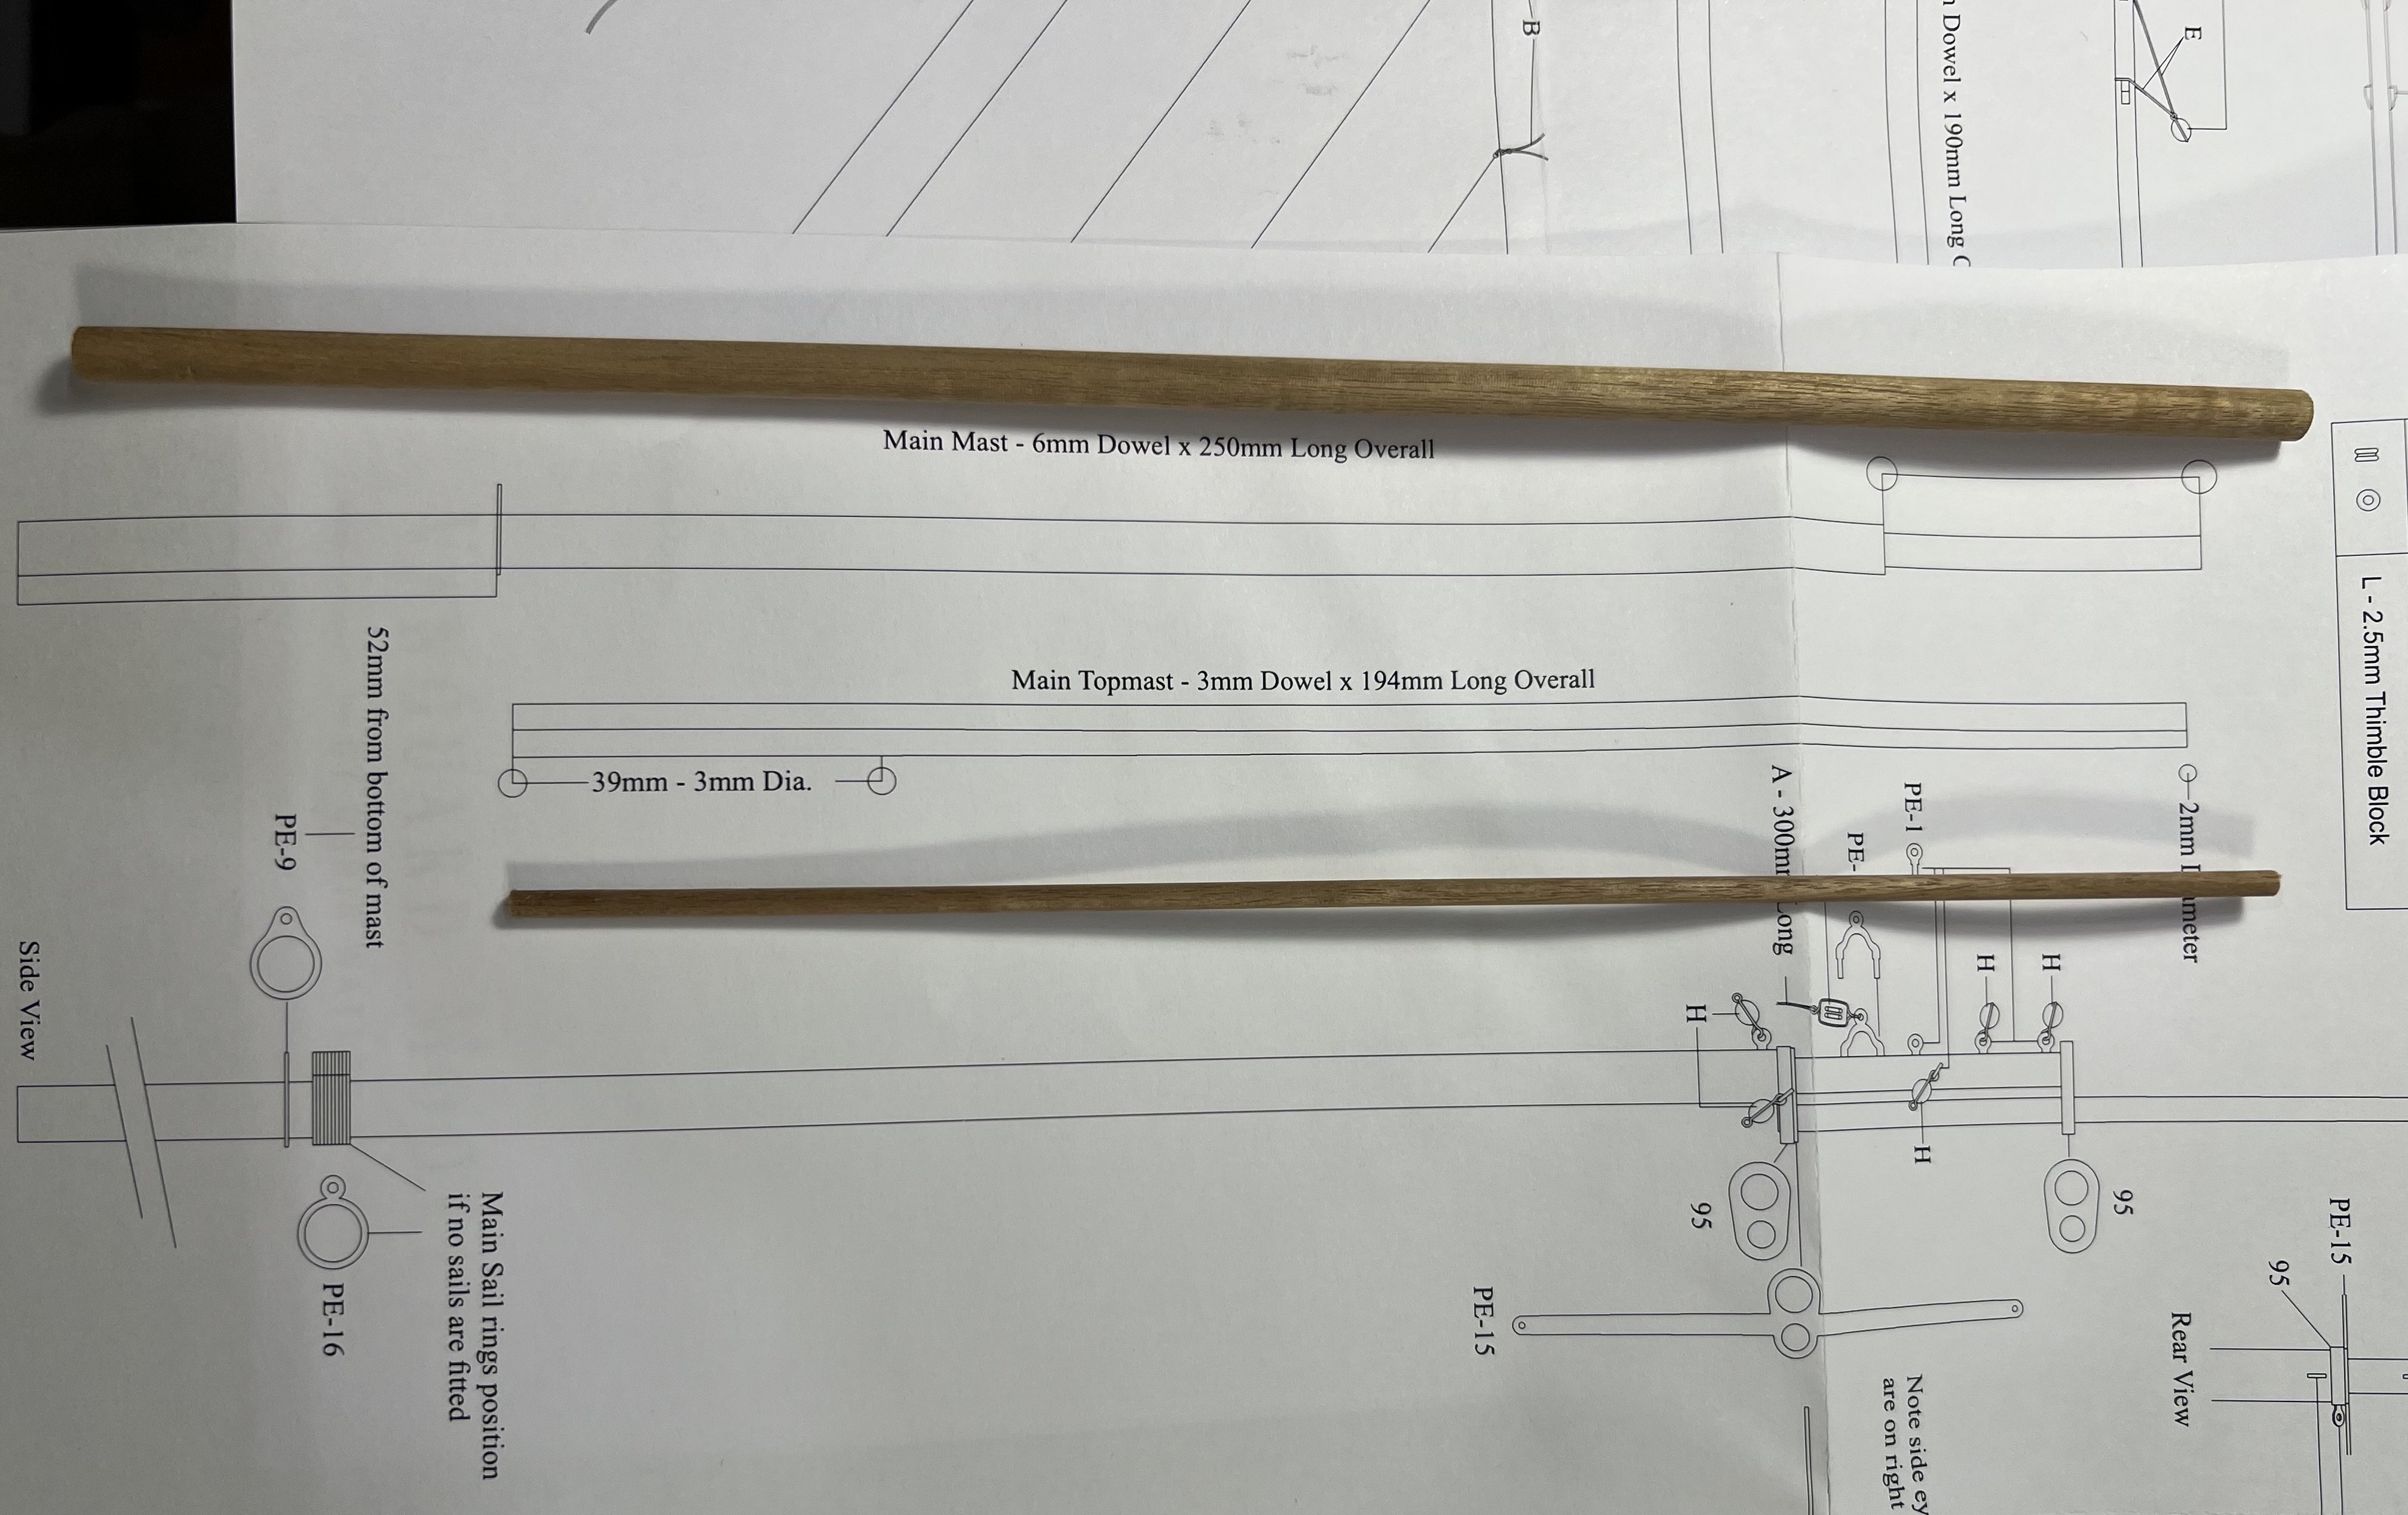
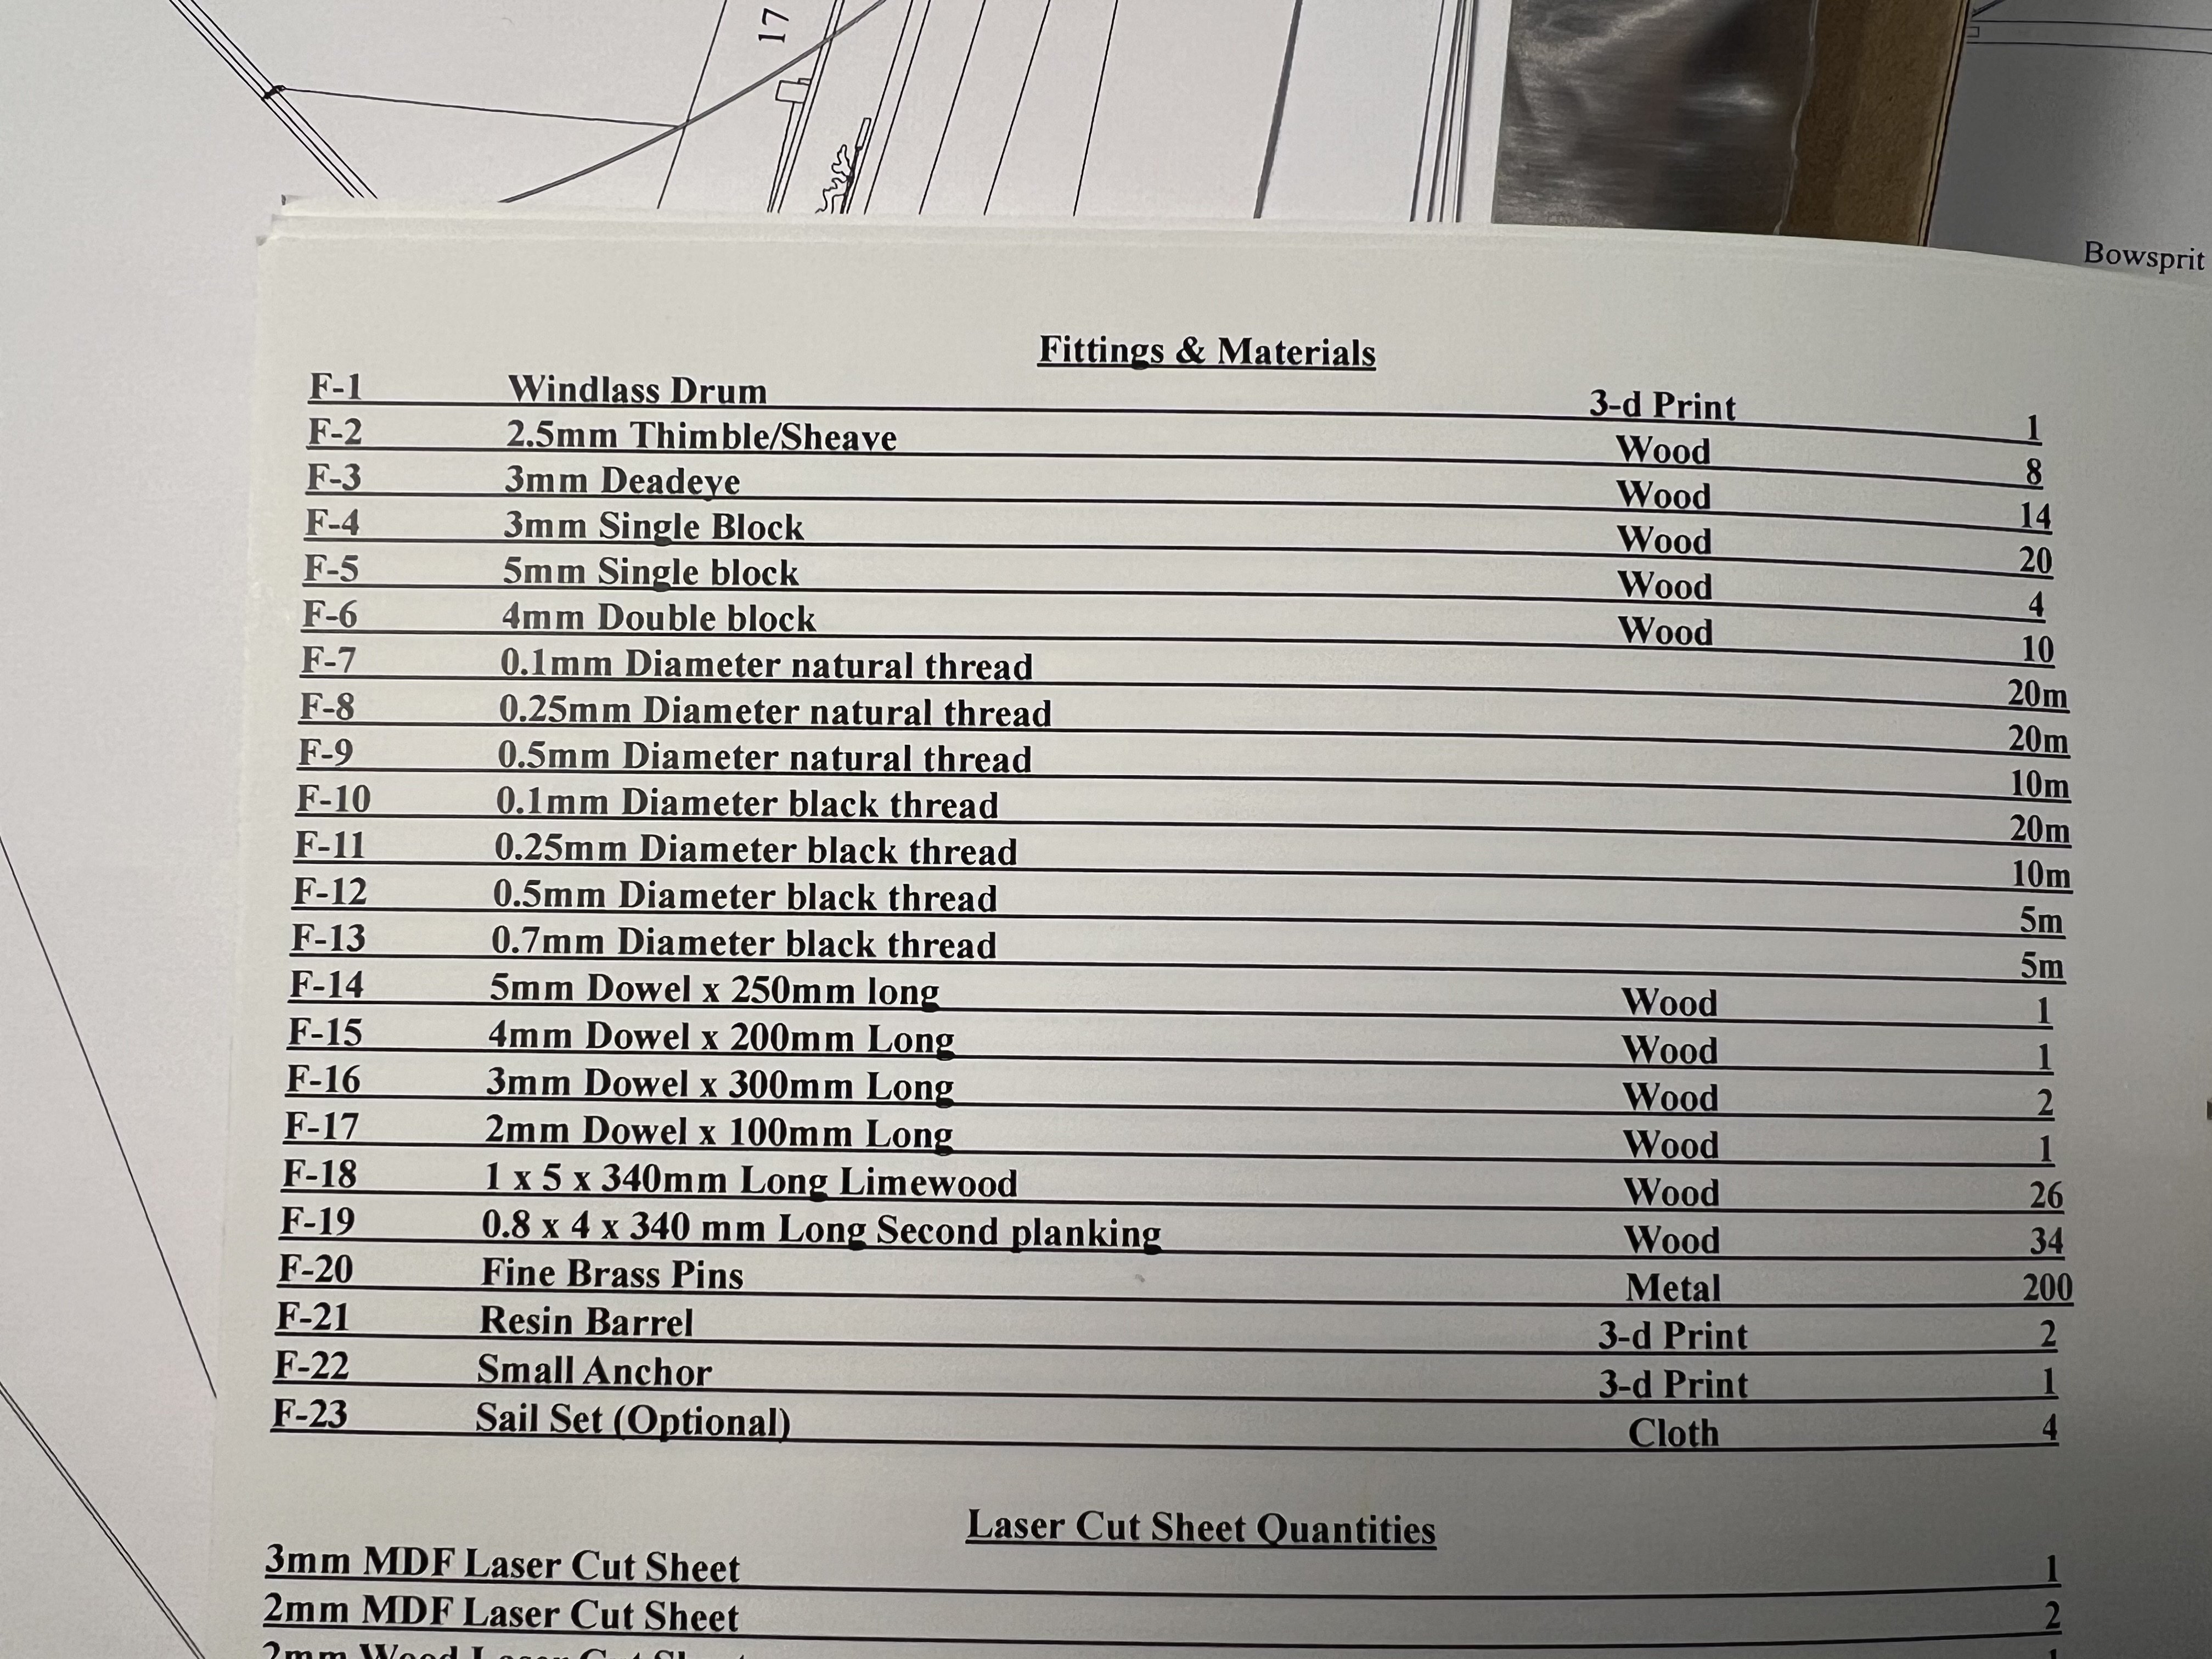
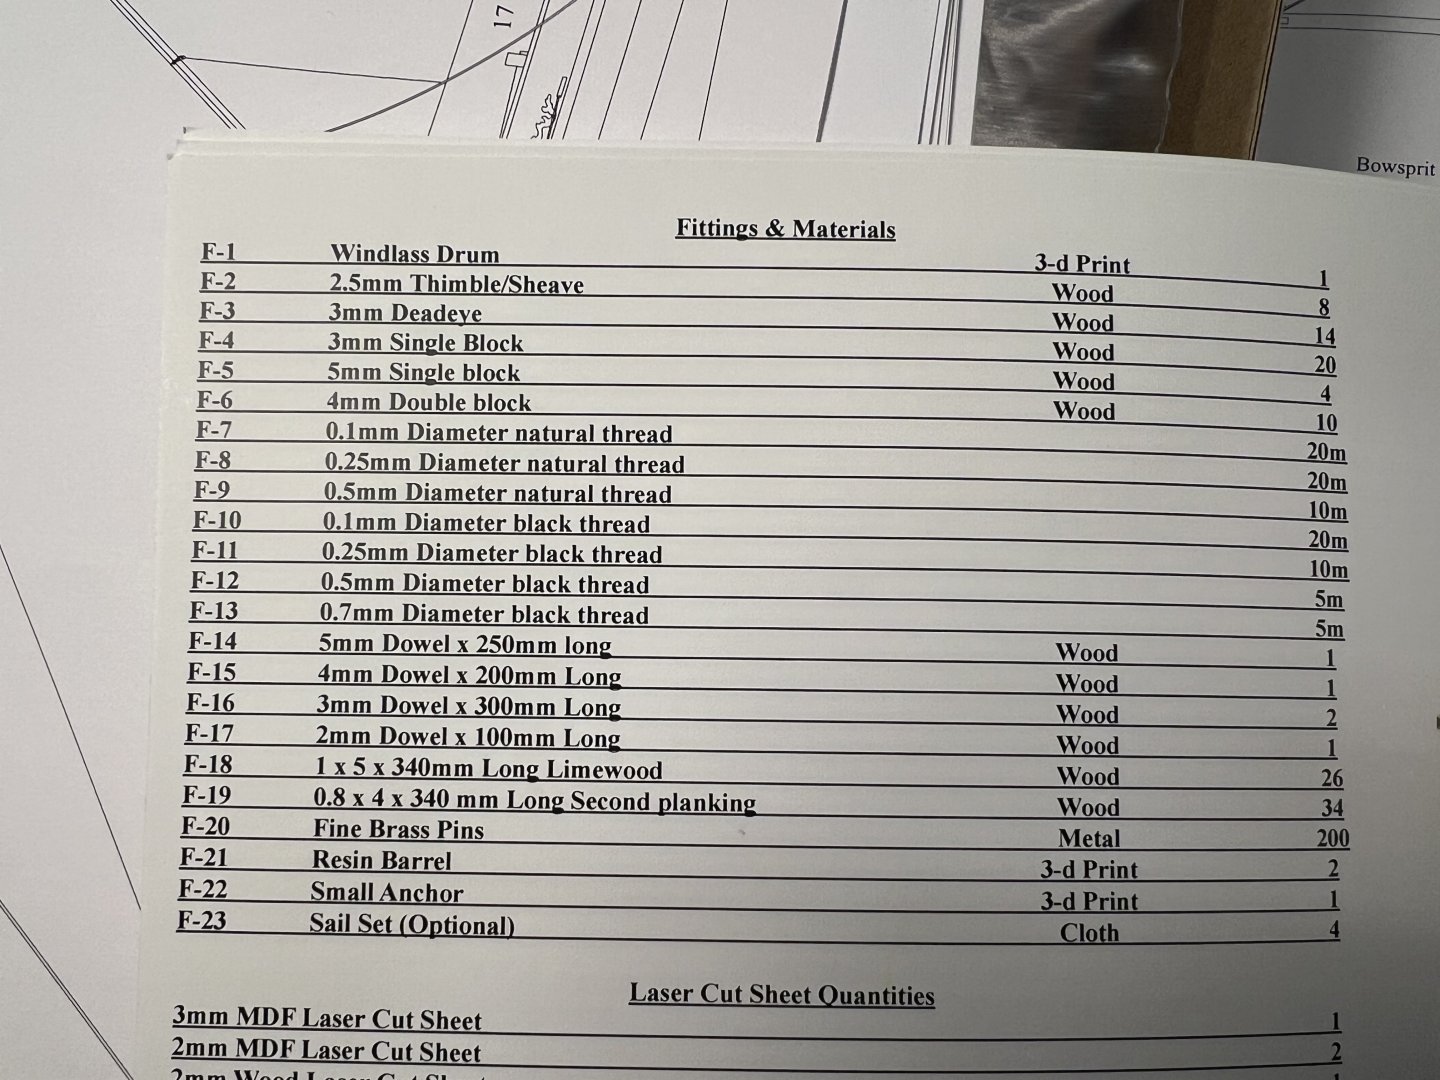
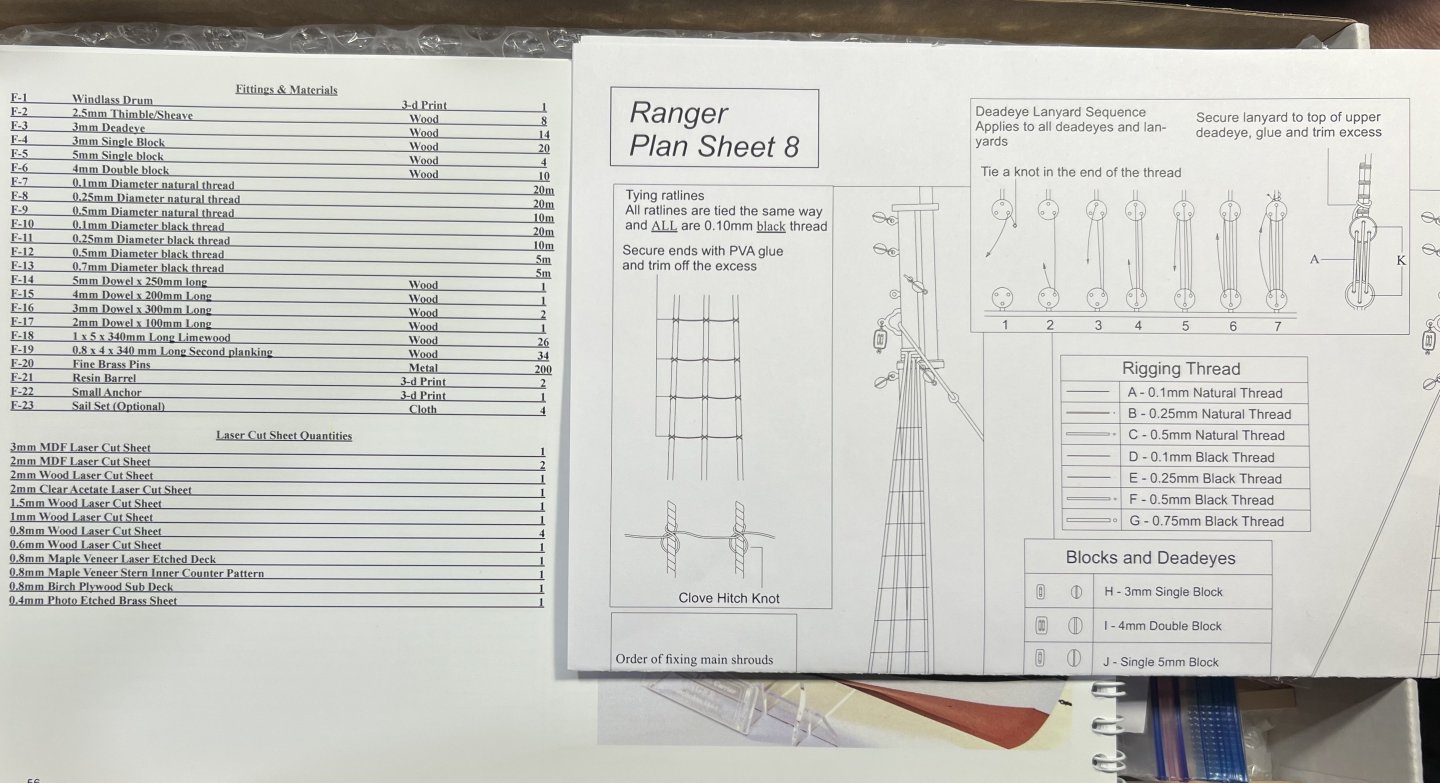
The main mast is created from a 6mm dowel and a 3mm dowel. Note that while the plans say 6mm dowel, and the part is a 6mm dowel, the part list at the end of the instructions erroneously lists a 5mm dowel.

- 133 replies
-
- 2
-
-
- Ranger
- vanguard models
- (and 1 more)
-
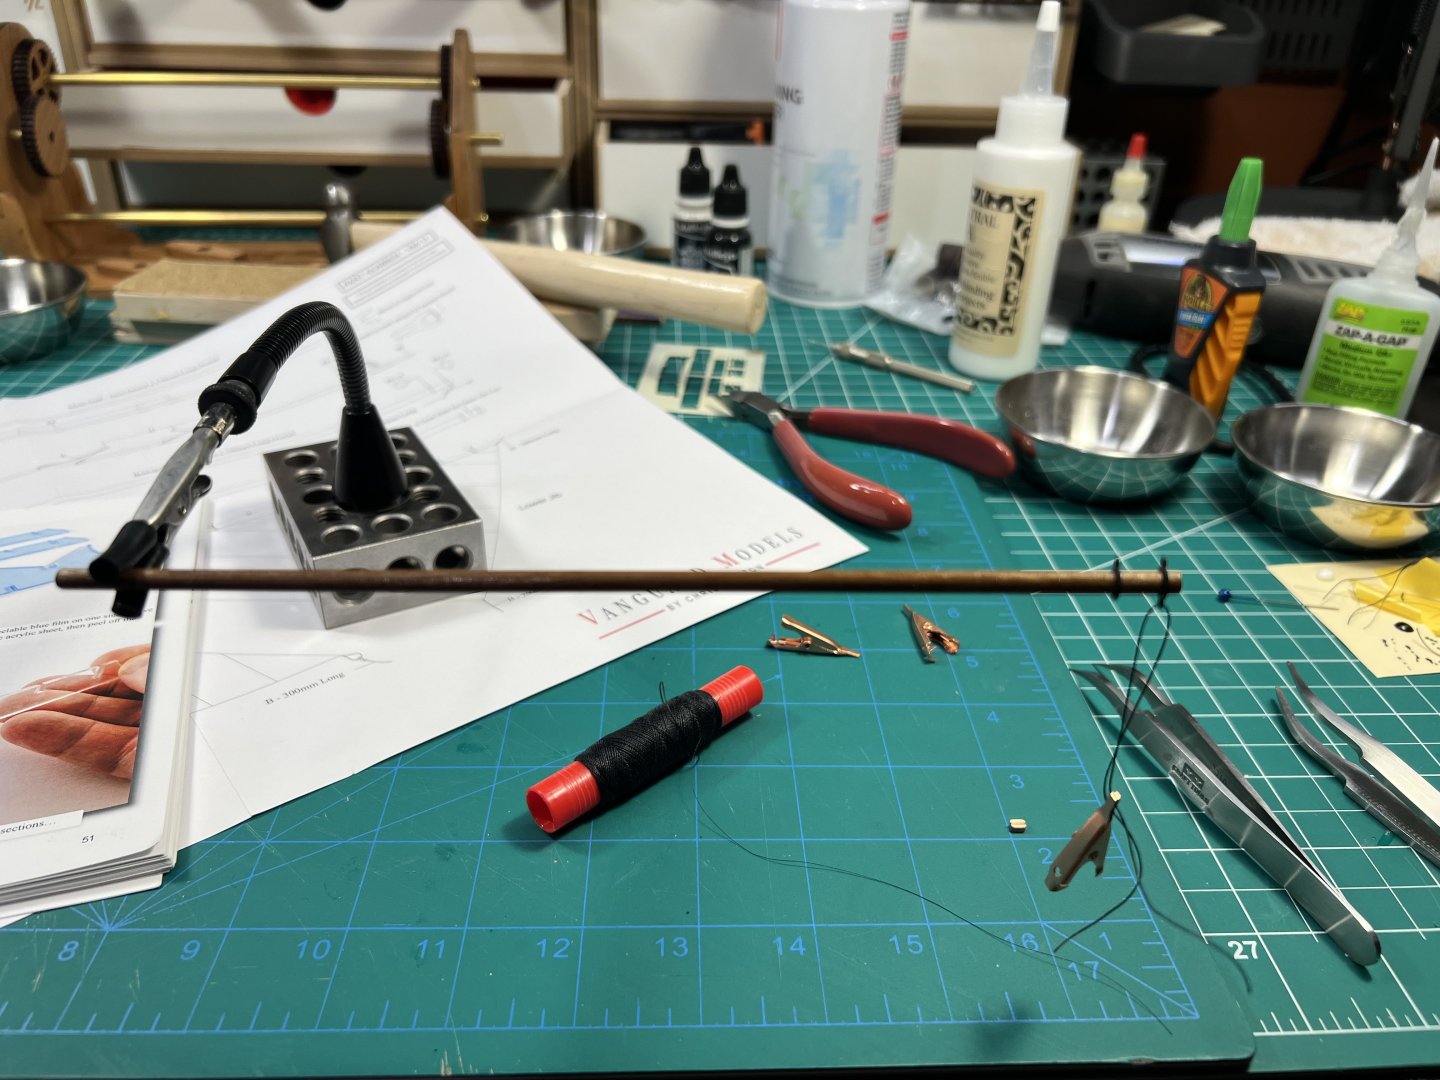
To tie the block to the ring, I kind of followed the approached described by Modelkit Stuff (building the Sherbourne): Rather than use a 0.25mm line between the eyebolt and block, which seemed far too thick, I used some ultrathin 16/0 veevus (fly tying) thread. .
- 133 replies
-
- 2
-
-
- Ranger
- vanguard models
- (and 1 more)
-
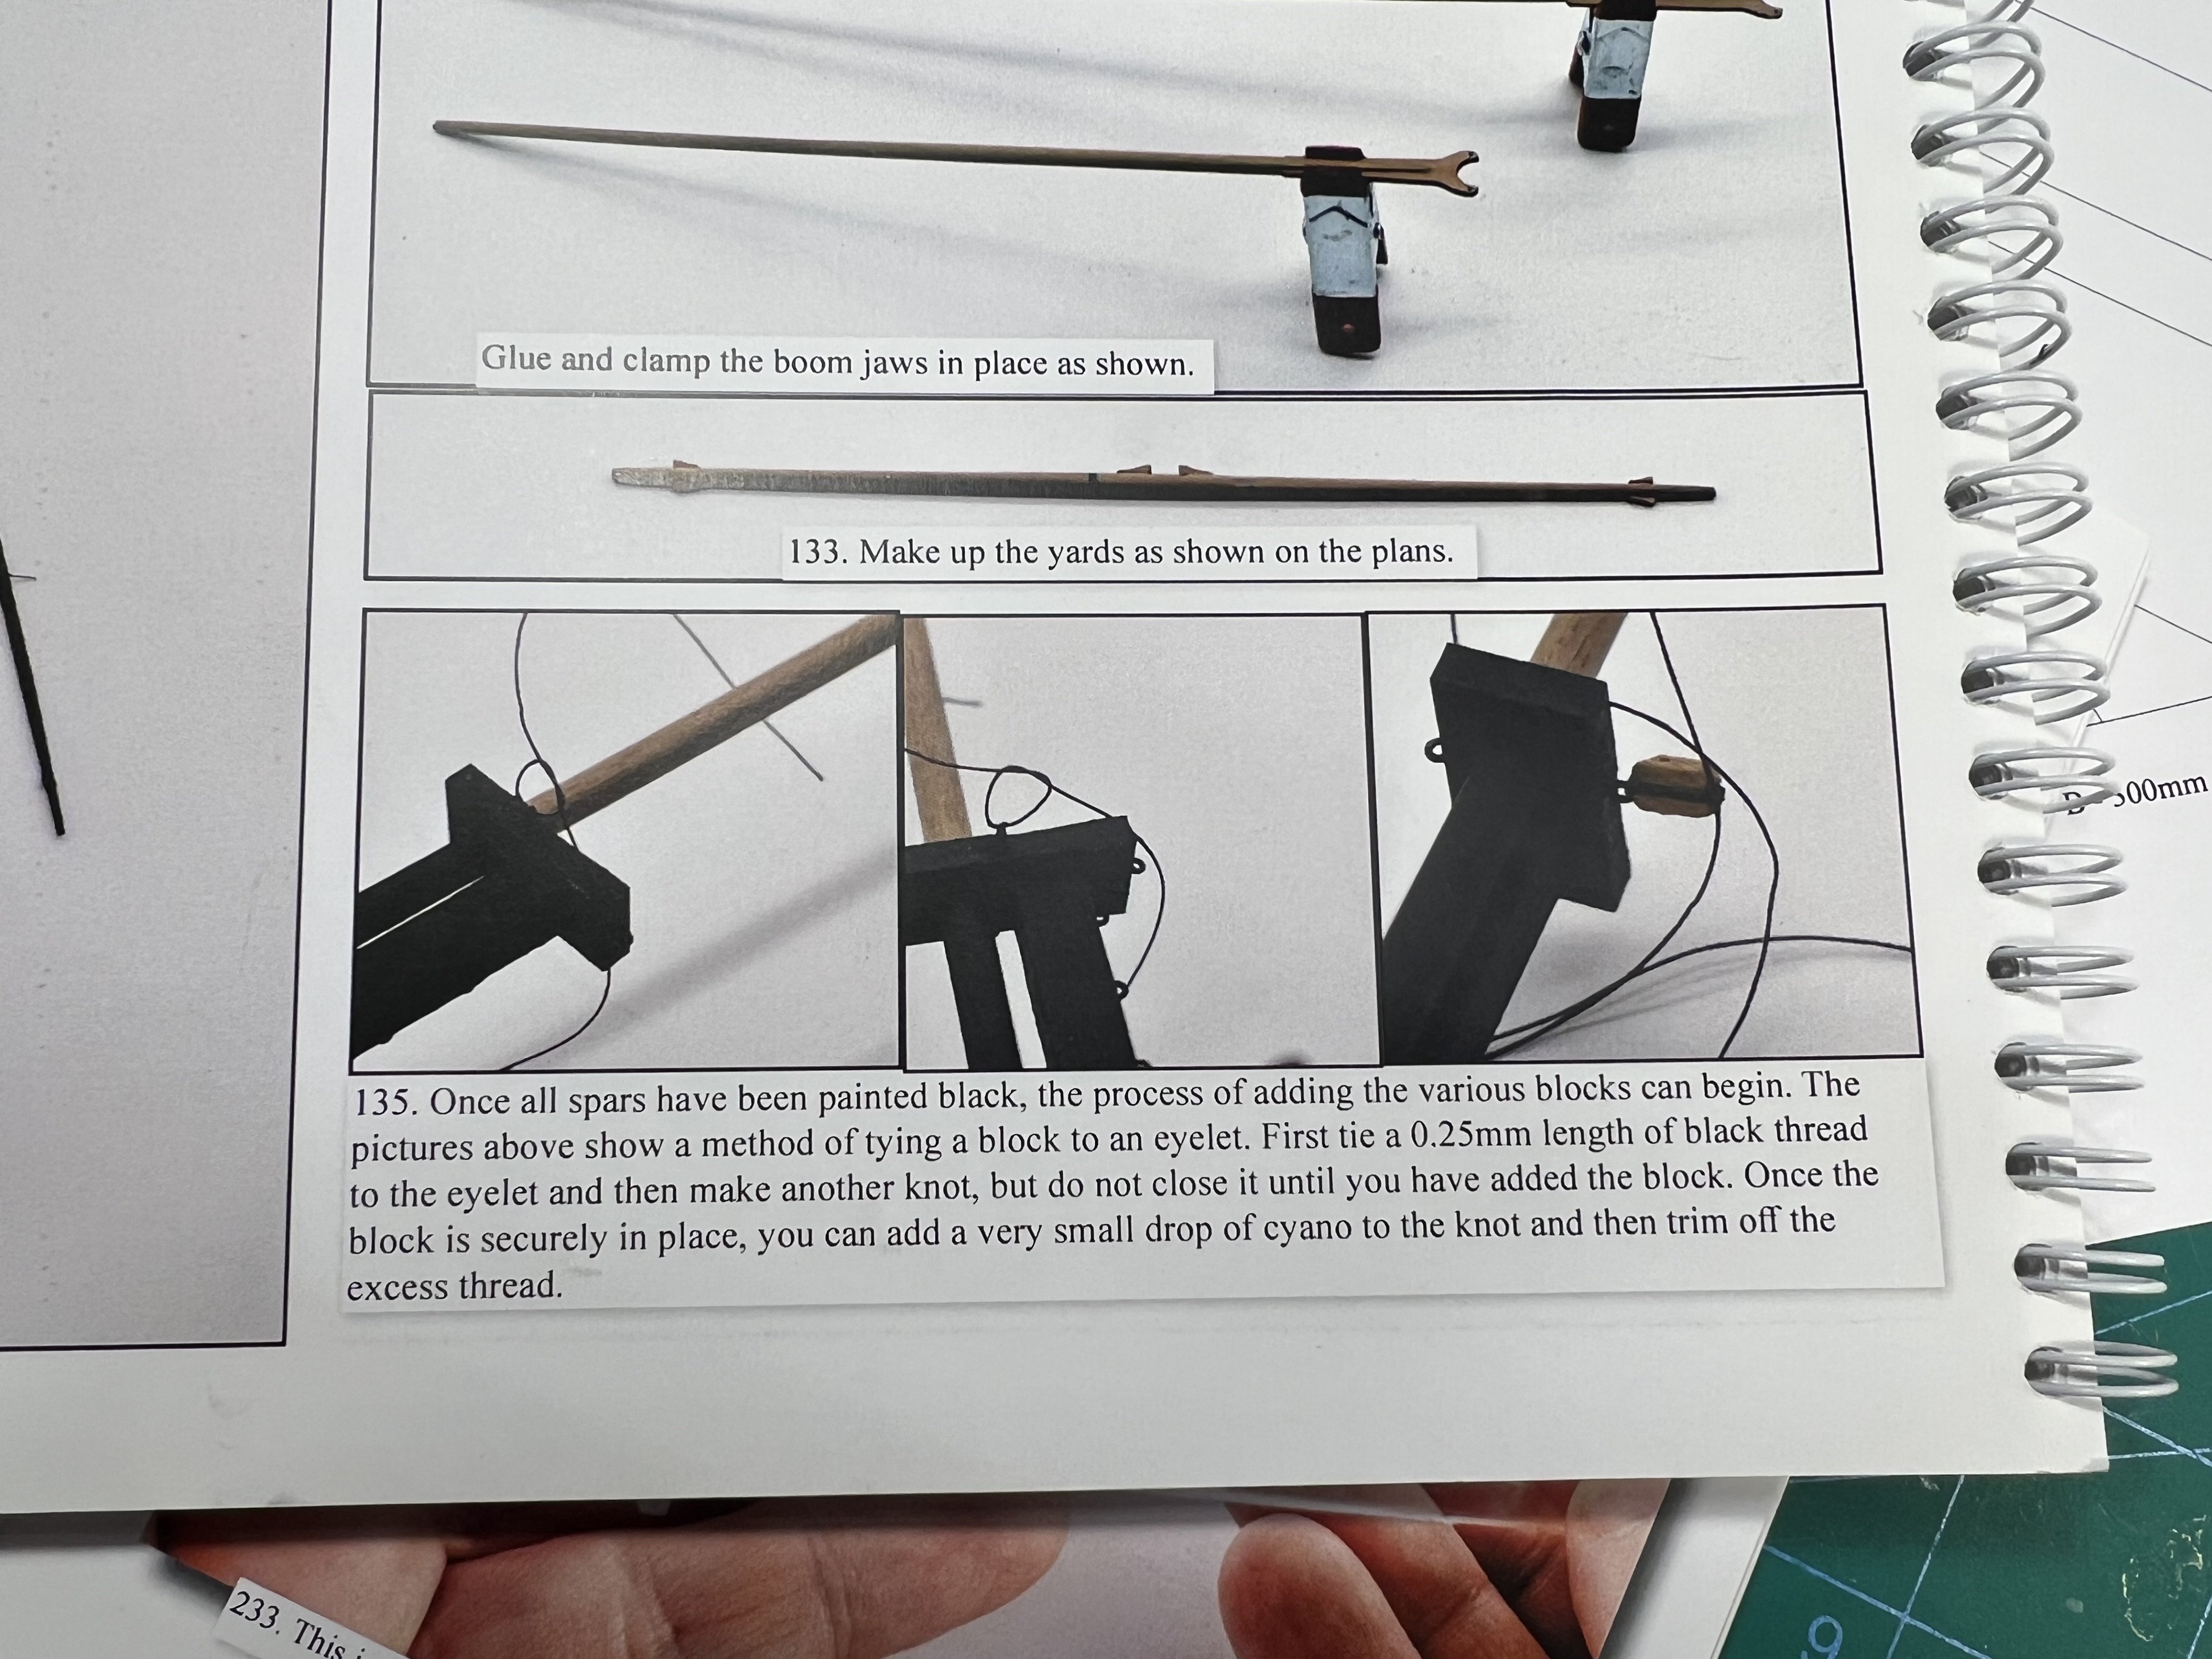
Starting the rigging. I missed in the instructions what thread to use to rig block to eyebolts. I checked the instructions for my Sherbourne and it says to use 0.25mm black thread.


- 133 replies
-
- 2
-
-
- Ranger
- vanguard models
- (and 1 more)
-
Looks right. I like it when people have links to their build logs in their signature at the bottom - sometimes people reference their own builds, sometimes it's nice to see what else someone builds when you like what you see. To add something to the signature (bottom) go to your account settings (under your user name at the top) and then select signature.
-
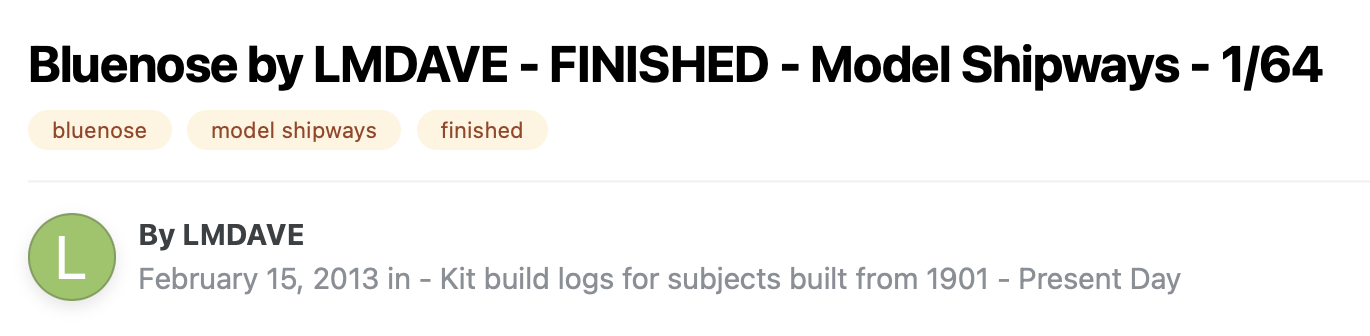
When you find a Bluenose build log, at the top there should be tags (in the case below I pasted in, "bluenose", "model shipways", and "finished" because it is finished). Click on the tag and you'll bring up other builds that used that tag. When you create a build log make sure you add tags yourself so others can find your build log later. There will also be "bluenose ii" build logs that I think are from Bluejacket (different ship, different model). Some build logs of that model might use "bluenose" instead of "bluenose ii". I'll sometimes also search on google (for builds and topics), adding "site:modelshipworld.com" to the search since google search often works a bit better than search on the forum itself. This is true for most web sites I've found. Did you check out this video series? The guy building the Bluenose isn't (by his own admission) an expert model ship builder (or at least wasn't when he build this) but he can maybe point out some issues he had along the way and how he dealt with them:
-
iPhone users know that the iPhone has a feature that records a couple of seconds of video when you take a photo. I know some people have had trouble uploading photos because the HEIC format of these short videos cannot be opened on this site by other users. I'm guessing that's because some people transfer photos from their phone to their computer and then upload the HEIC photos - to get around this they need to convert the HEIC photos in JPG photos. When uploading to this site from my iPhone, the phone automatically converts from HEIC to JPG for the upload thankfully. While I like the feature when looking at snapshots on my phone, I found another problem with the "Live" feature when taking macro shots to upload to this site. Yesterday I snapped a photo of a small part for a post I was making. It certainly seemed to be in focus when the photo was shot. Unfortunately, because it was taken with the "Live" feature, while it seemed in focus, the JPG that was created from the HEIC file was blurry. It was late in the evening and my brain was also blurry so I didn't check the photo and by the time I realized it was blurry I had already installed the part. You can turn off "Live" on the iPhone camera in the camera app (you might be to turn it off permanently in settings too). At least for my version of iOS, in the upper right corner there is bullseye-looking icon. If you click it, it'll turn "Live" on and off. Hope this helps someone else.
- 1 reply
-
- 3
-
-
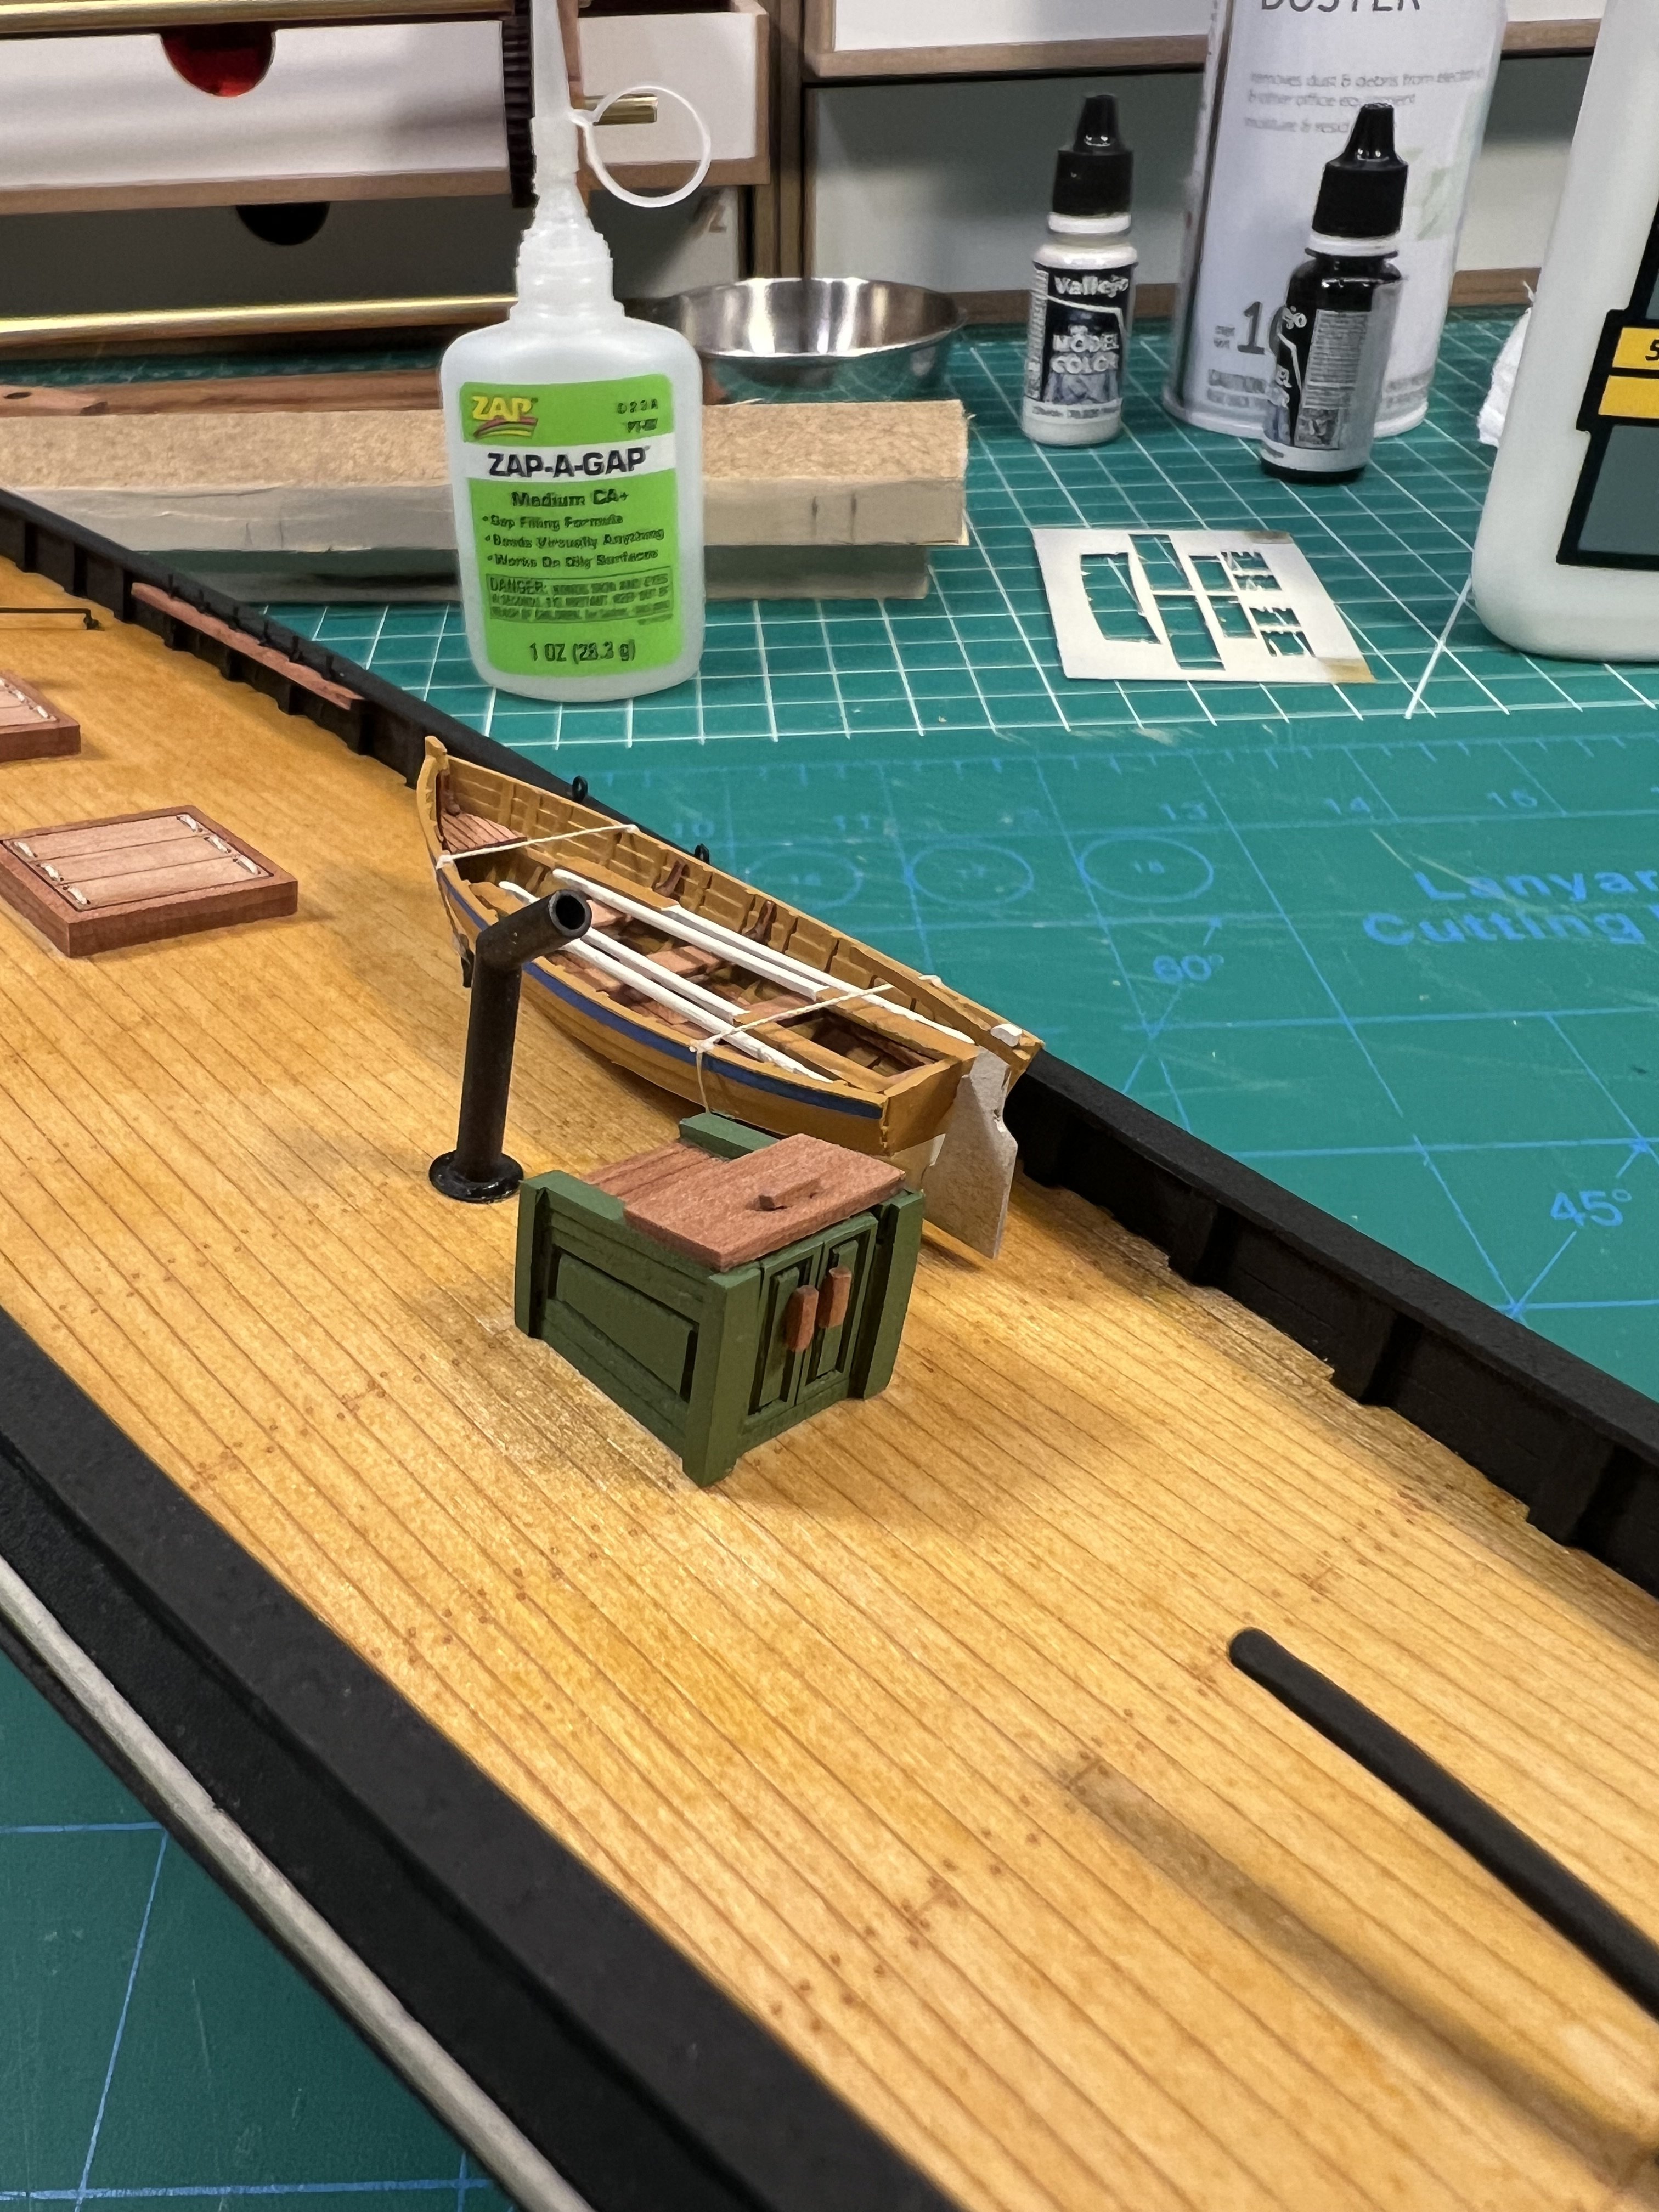
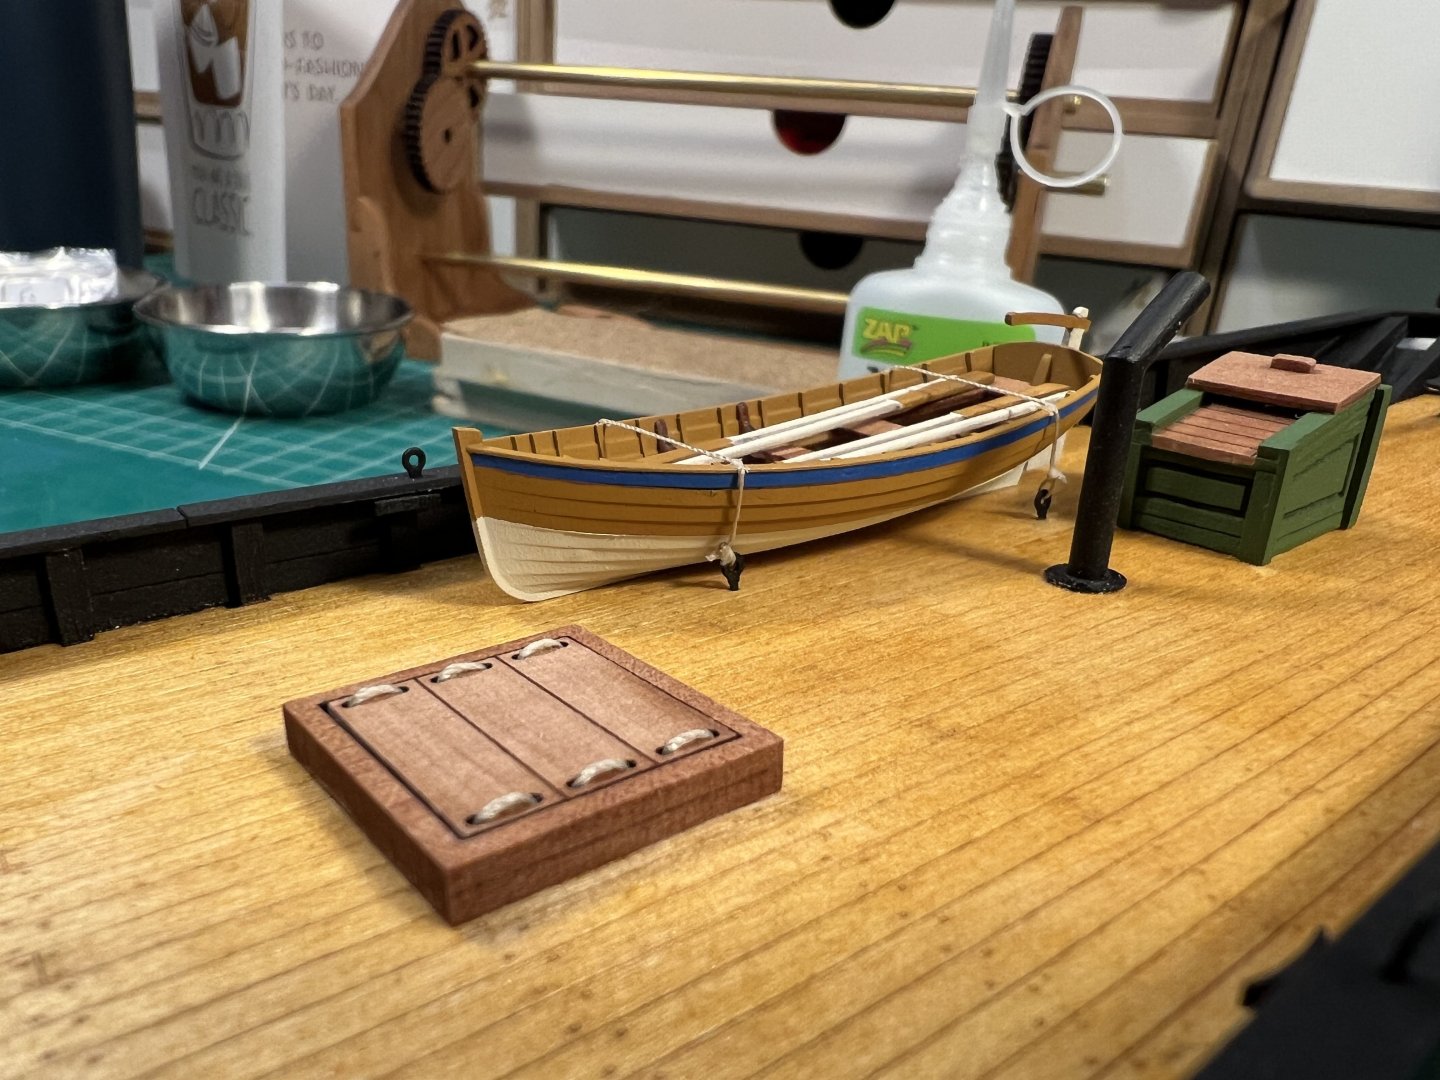
Lashing the small boat to the deck. I just attached using a couple of half hitches.

- 133 replies
-
- 8
-
-
- Ranger
- vanguard models
- (and 1 more)
-
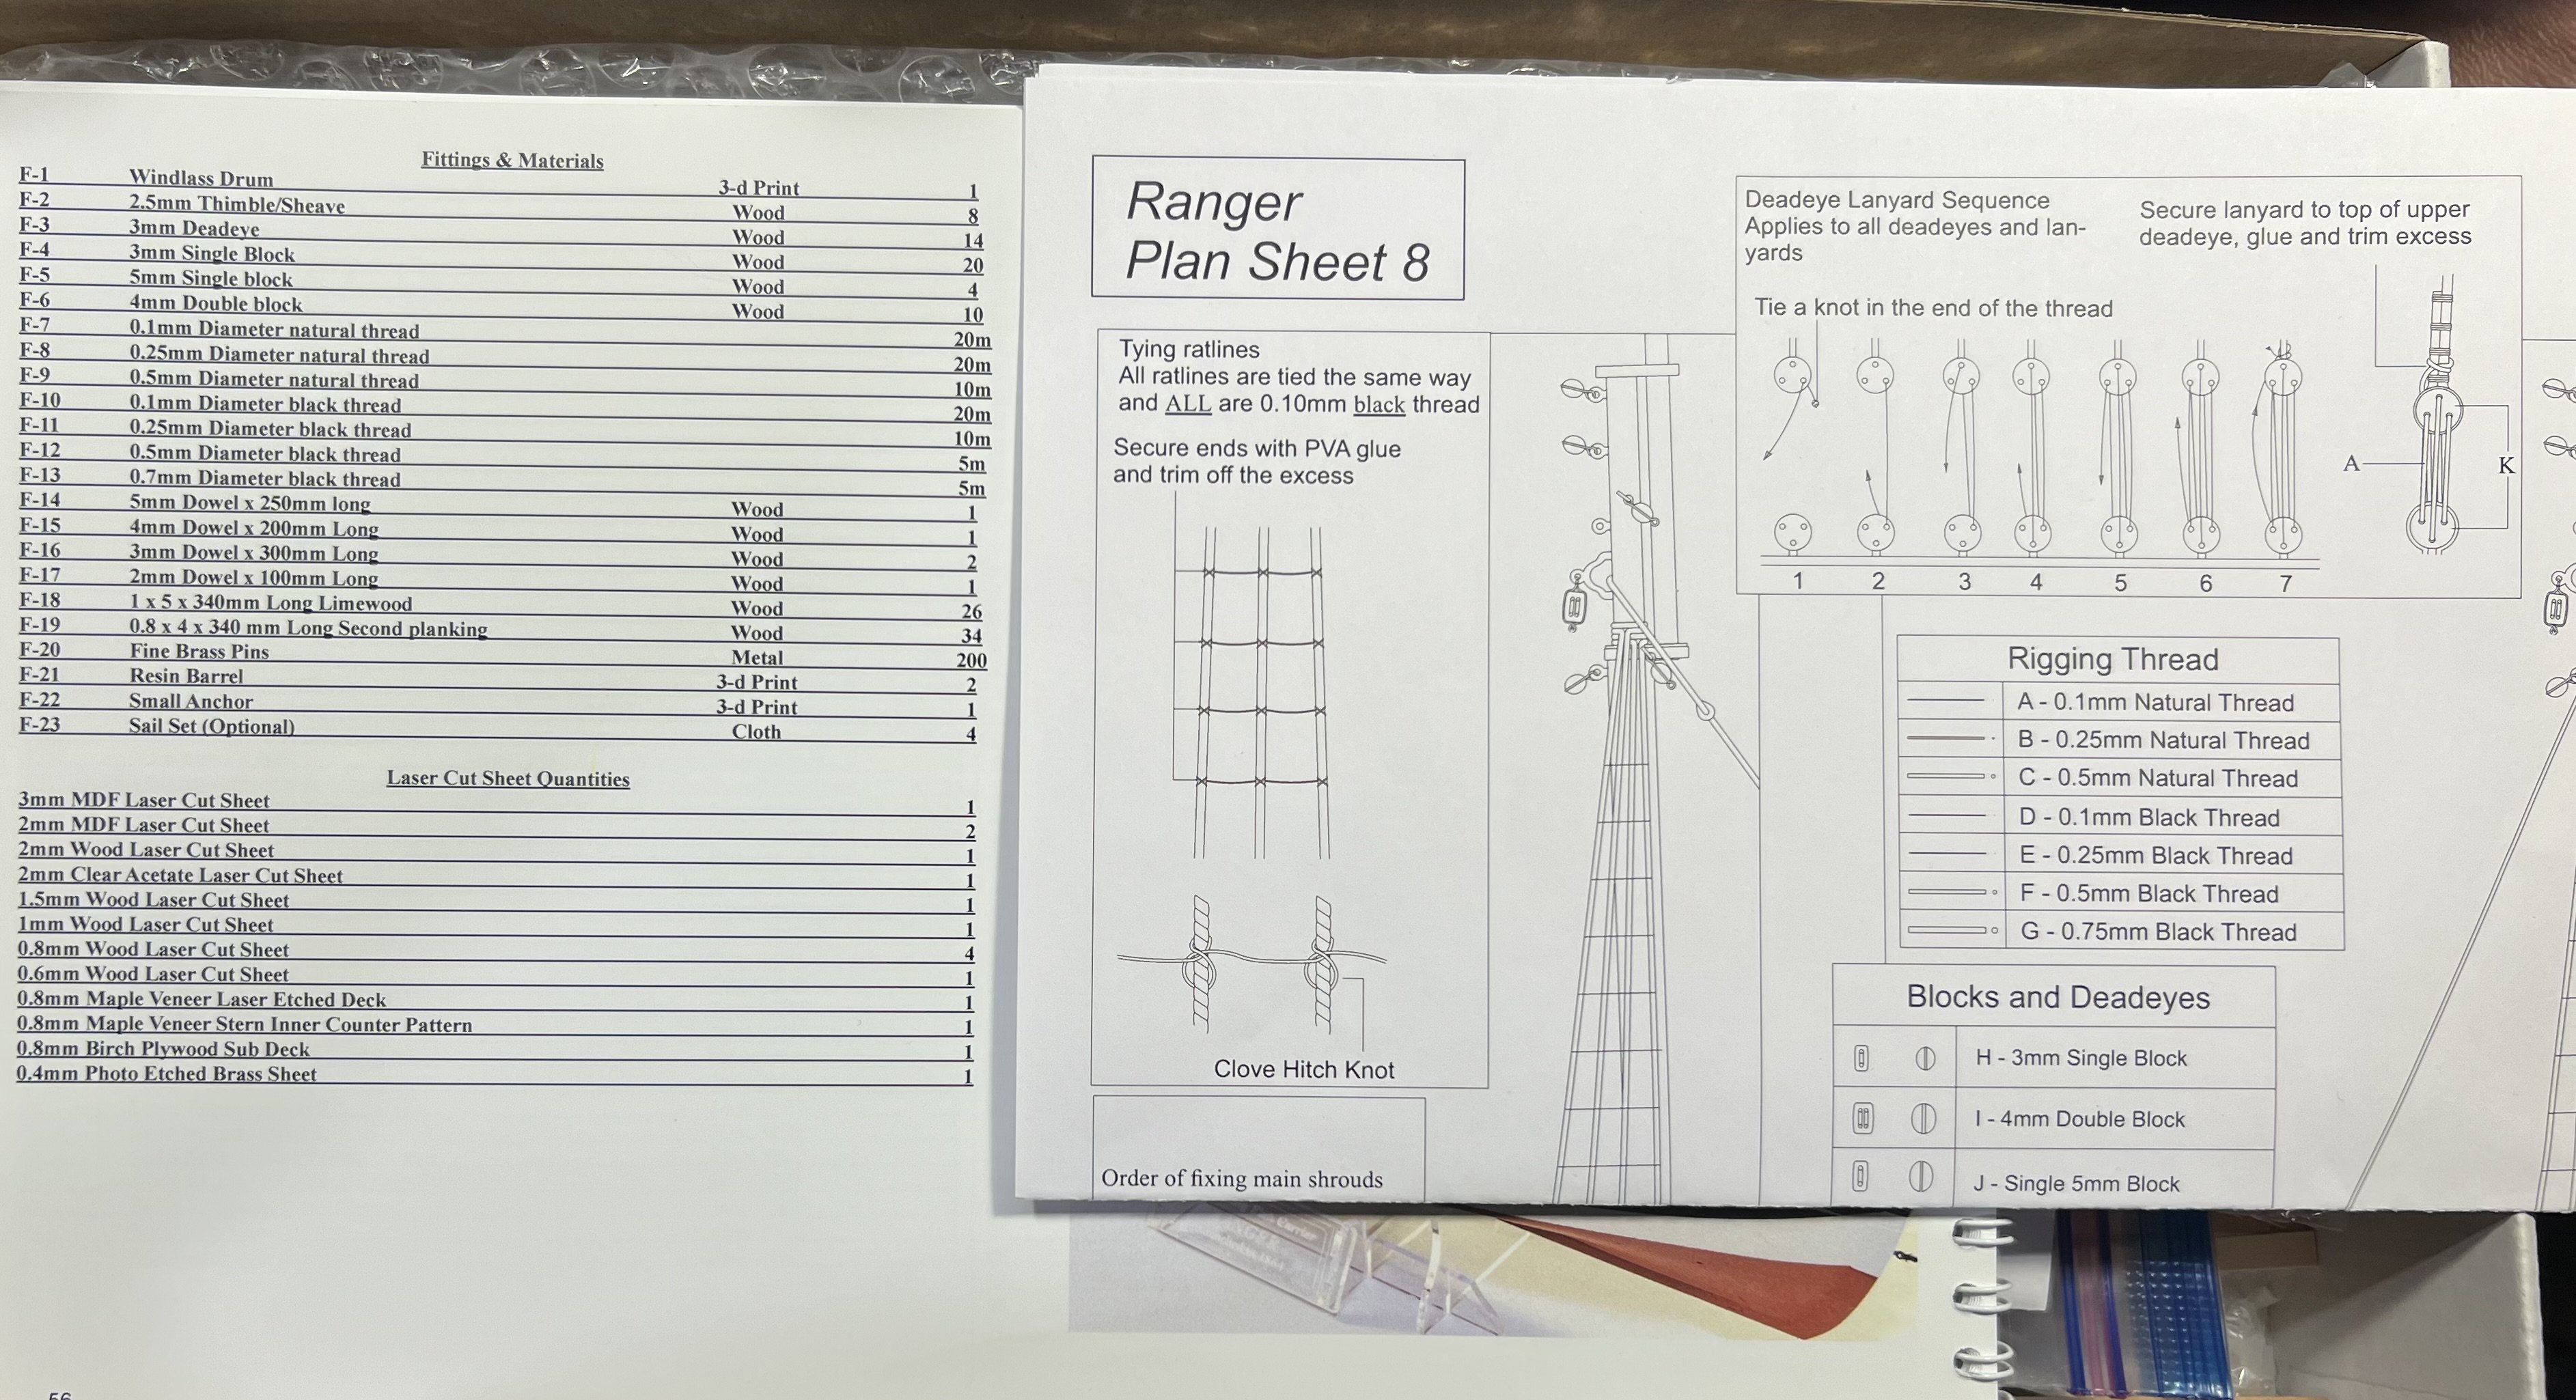
One point of potential confusion for futures builders of this model: this model (and my Sherbourne) label rigging thread options with letter (A, B, C, etc.) on the plans but then the thread themselves are labeled F-7, F-8, F-9, etc. on the spools. My Sherbourne had a translation from one labeling to the other but I missed where that was done for the Ranger. It could have been somewhere, but I missed it. The instructions sometimes just refer to dimensions and color. In looking at the parts list at the end of the Ranger instruction book I saw the list of threads (labeled F-7, F-8, F-9, etc.) with the dimensions (.1mm, .25mm, .5mm etc.) and the color (natural vs. black) to be able to figure out the mapping.
- 133 replies
-
- 3
-
-
- Ranger
- vanguard models
- (and 1 more)
-
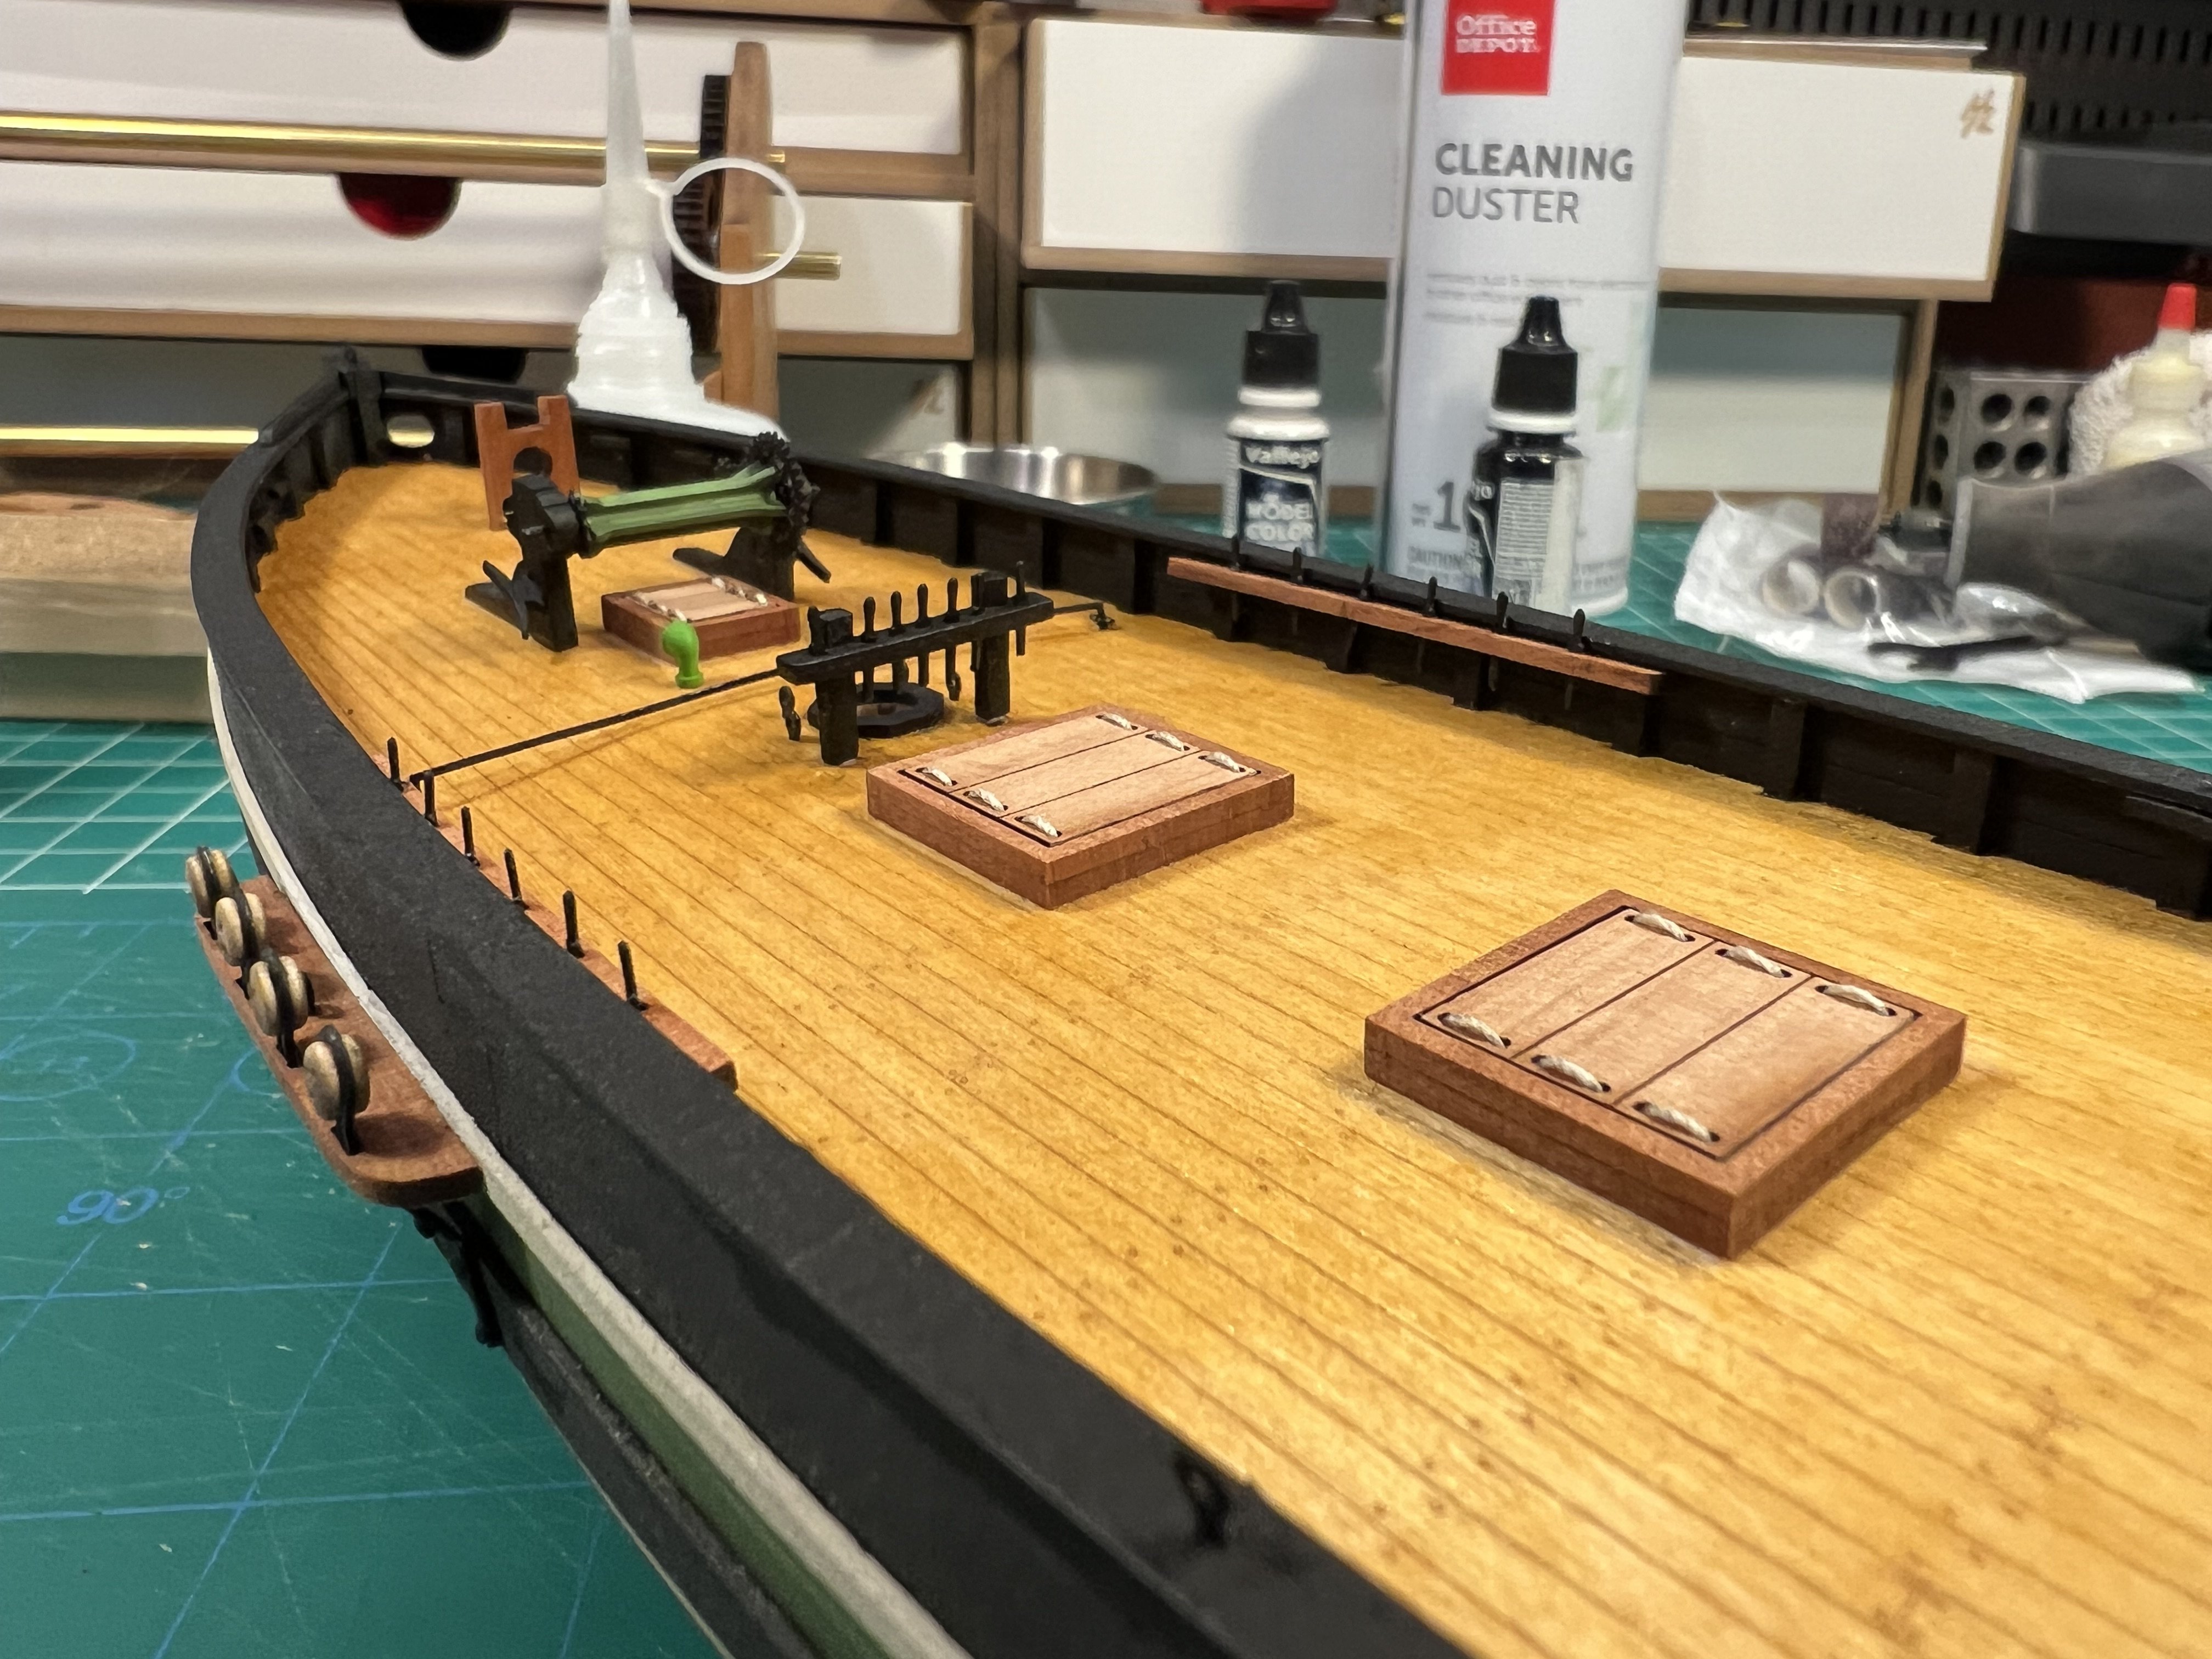
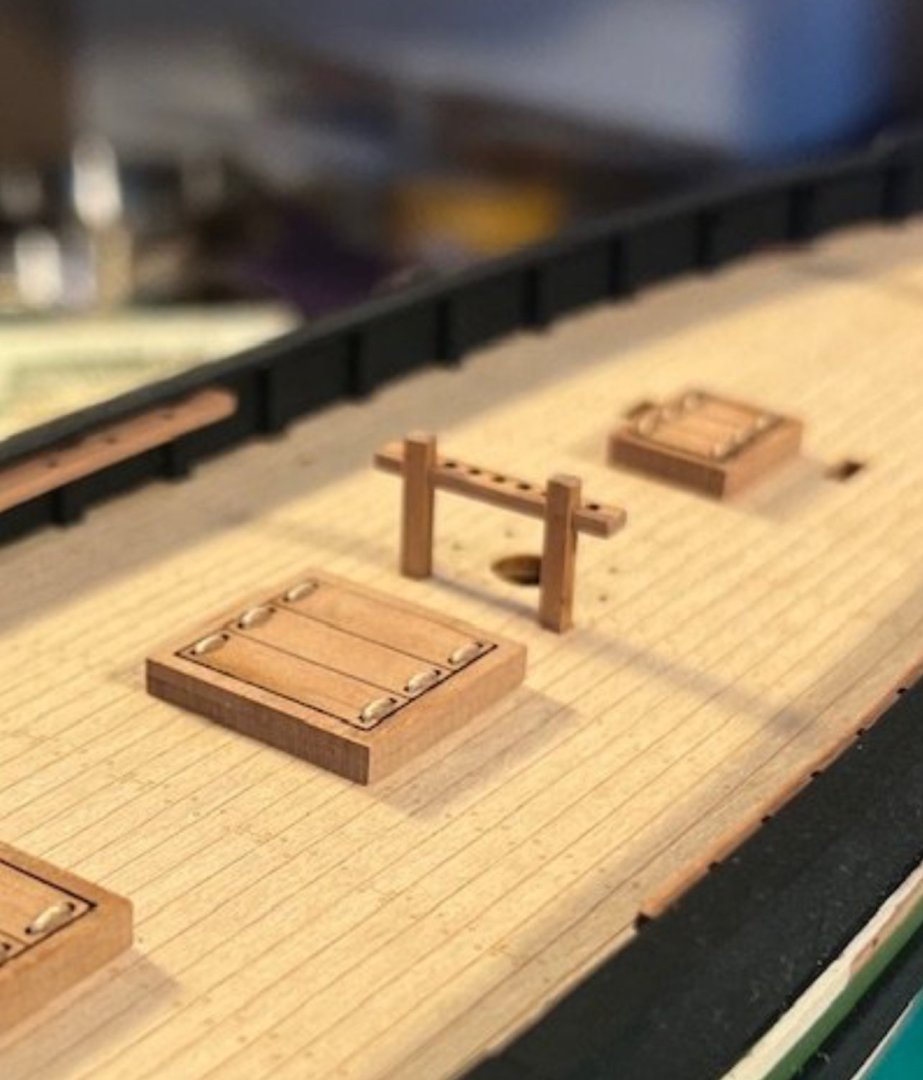
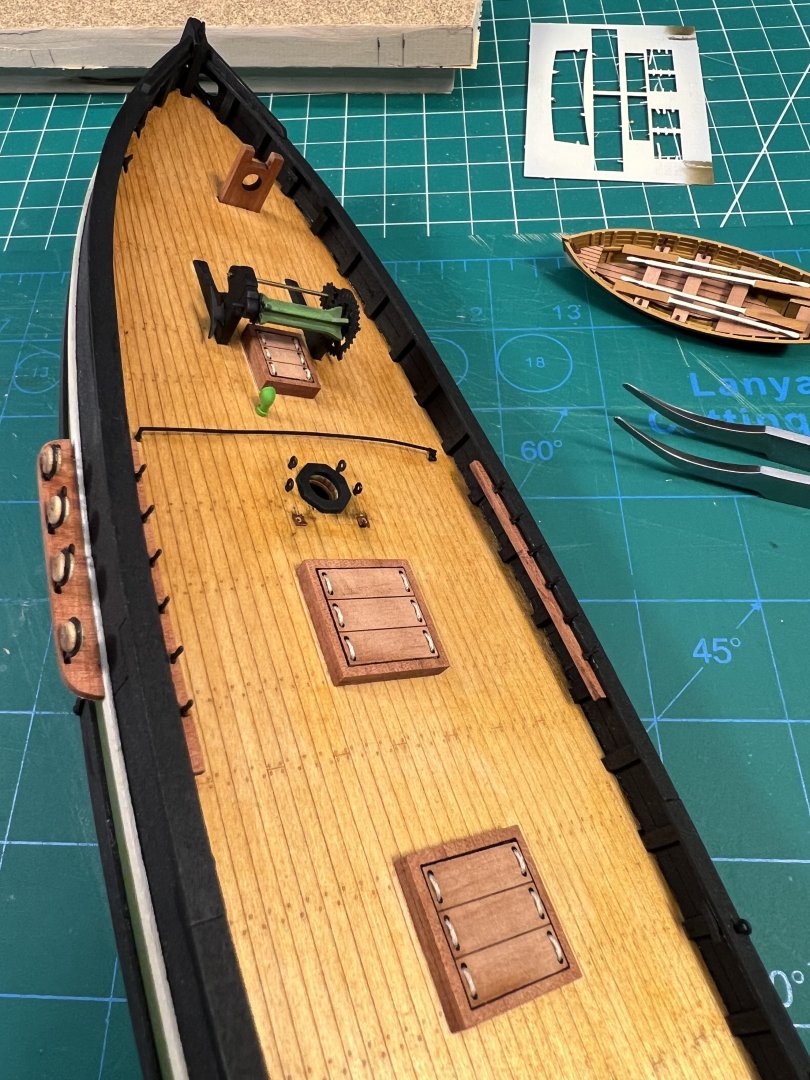
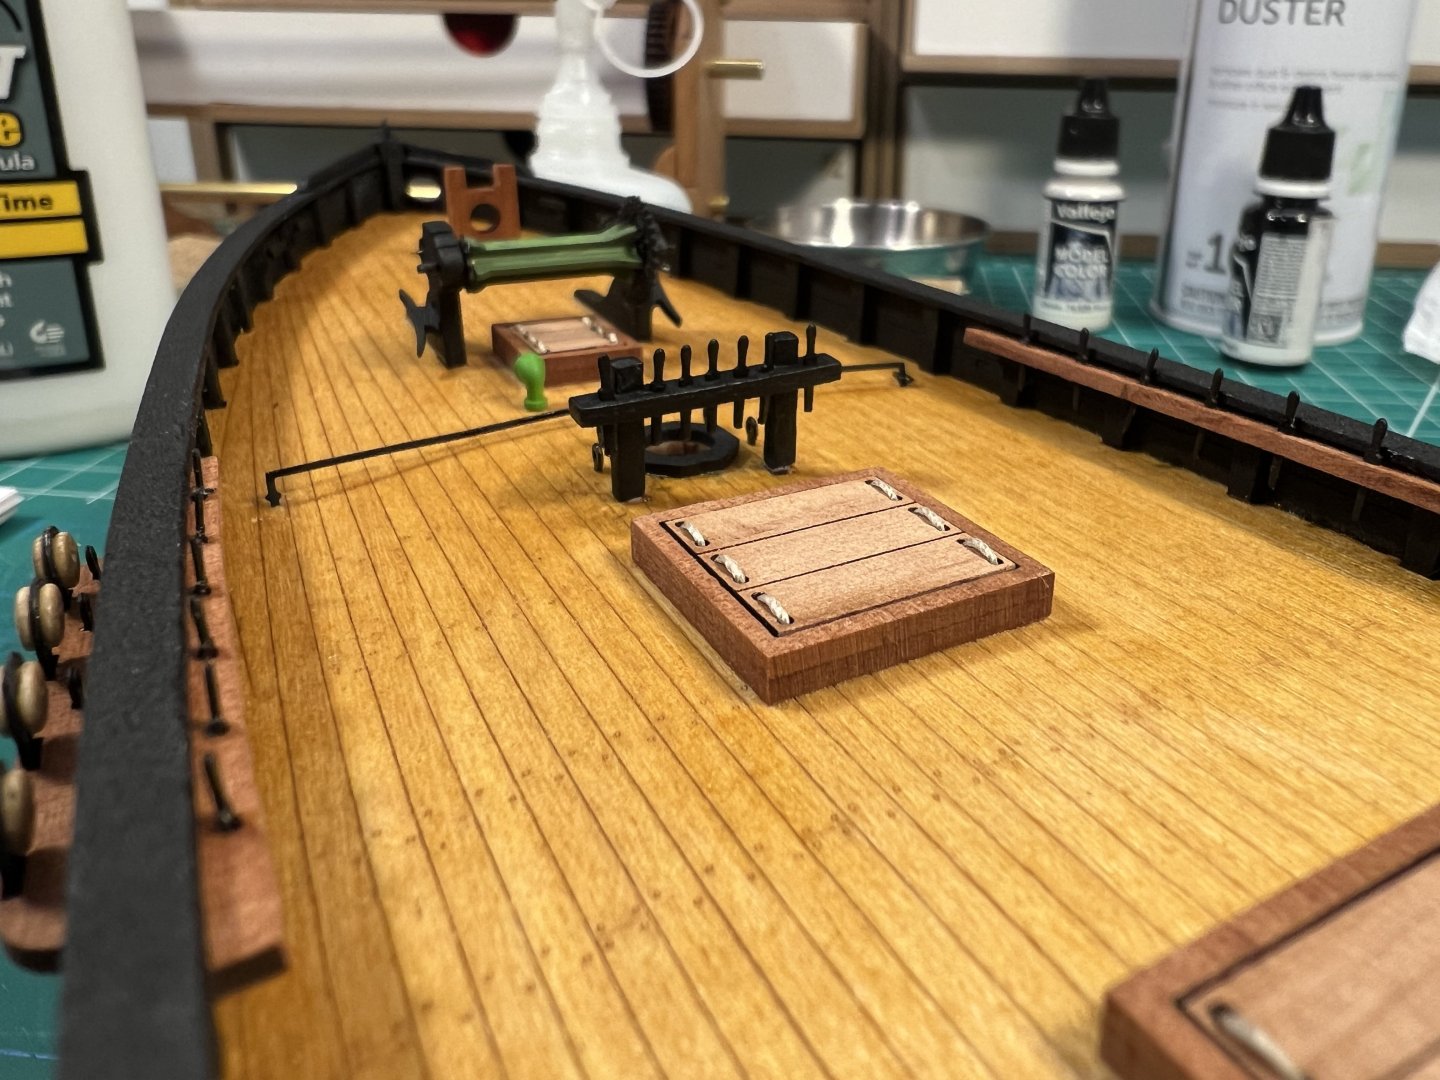
@Dfell pointed out a while back that I had inadvertently installed the piece with a cross bar (and sometimes with belaying pins) that lines are tied to, with the belaying pins facing the mast rather than the other way around. (I don’t know its name.) Not yet having an intuition for where parts go, I got myself turned around in the photos in the instructions and installed it backwards. This piece installs deep into the ship, reaching the second deck layer, where it is glued in place. It needs to be able to hold several lines taught so it needs quite a good seating deep into the ship. What that meant is that it would be impossible to remove the piece. The only option I could think about was cutting piece off flush, turning it around, and reattaching it. Now the fun began. My first attempt was simply to glue the piece into position. After gluing it, I decided to paint it black because it didn’t look nice after cutting the piece, turning it around, and gluing it into position. Well then I realized that this wasn’t going to work. After checking out the rigging diagram, I realized that several rigging lines would be tied to this piece and that bit of glue was not going to keep that piece connected to the deck. In fact, I could jiggle the part. I was just it would come loose. Instead of just ripping the piece off - which I probably could have - I used alcohol to loosen the glue. That worked. But it also caused some of the black paint to stain the deck a bit. I tried sanding the paint off, but since this it an etched deck, any more sanding than I tried would have sanding off the etching. So then I tried a few ever darker stains to try to cover up some of the paint stains. That worked a descent amount but it made the deck a lot darker than it might have been otherwise. To reattach the part a bit more securely, I cut the flat end off a couple of pins, drilled holes in the two bottom supports of the part, and superglued the pieces of pin in place. Then I drilled holes in the pieces of the part that remained in the deck and superglued the pins in place. Not perfect but I think it will work.

- 133 replies
-
- 7
-
-
- Ranger
- vanguard models
- (and 1 more)
-
I think it means that this particular sub-section of the forum "How to use the MSW forum" is not supposed to have any modeling content. It's supposed to ask questions about how to use the forum, not how to model. Modeling content goes in the other 99% of sub-areas of the forum.
-
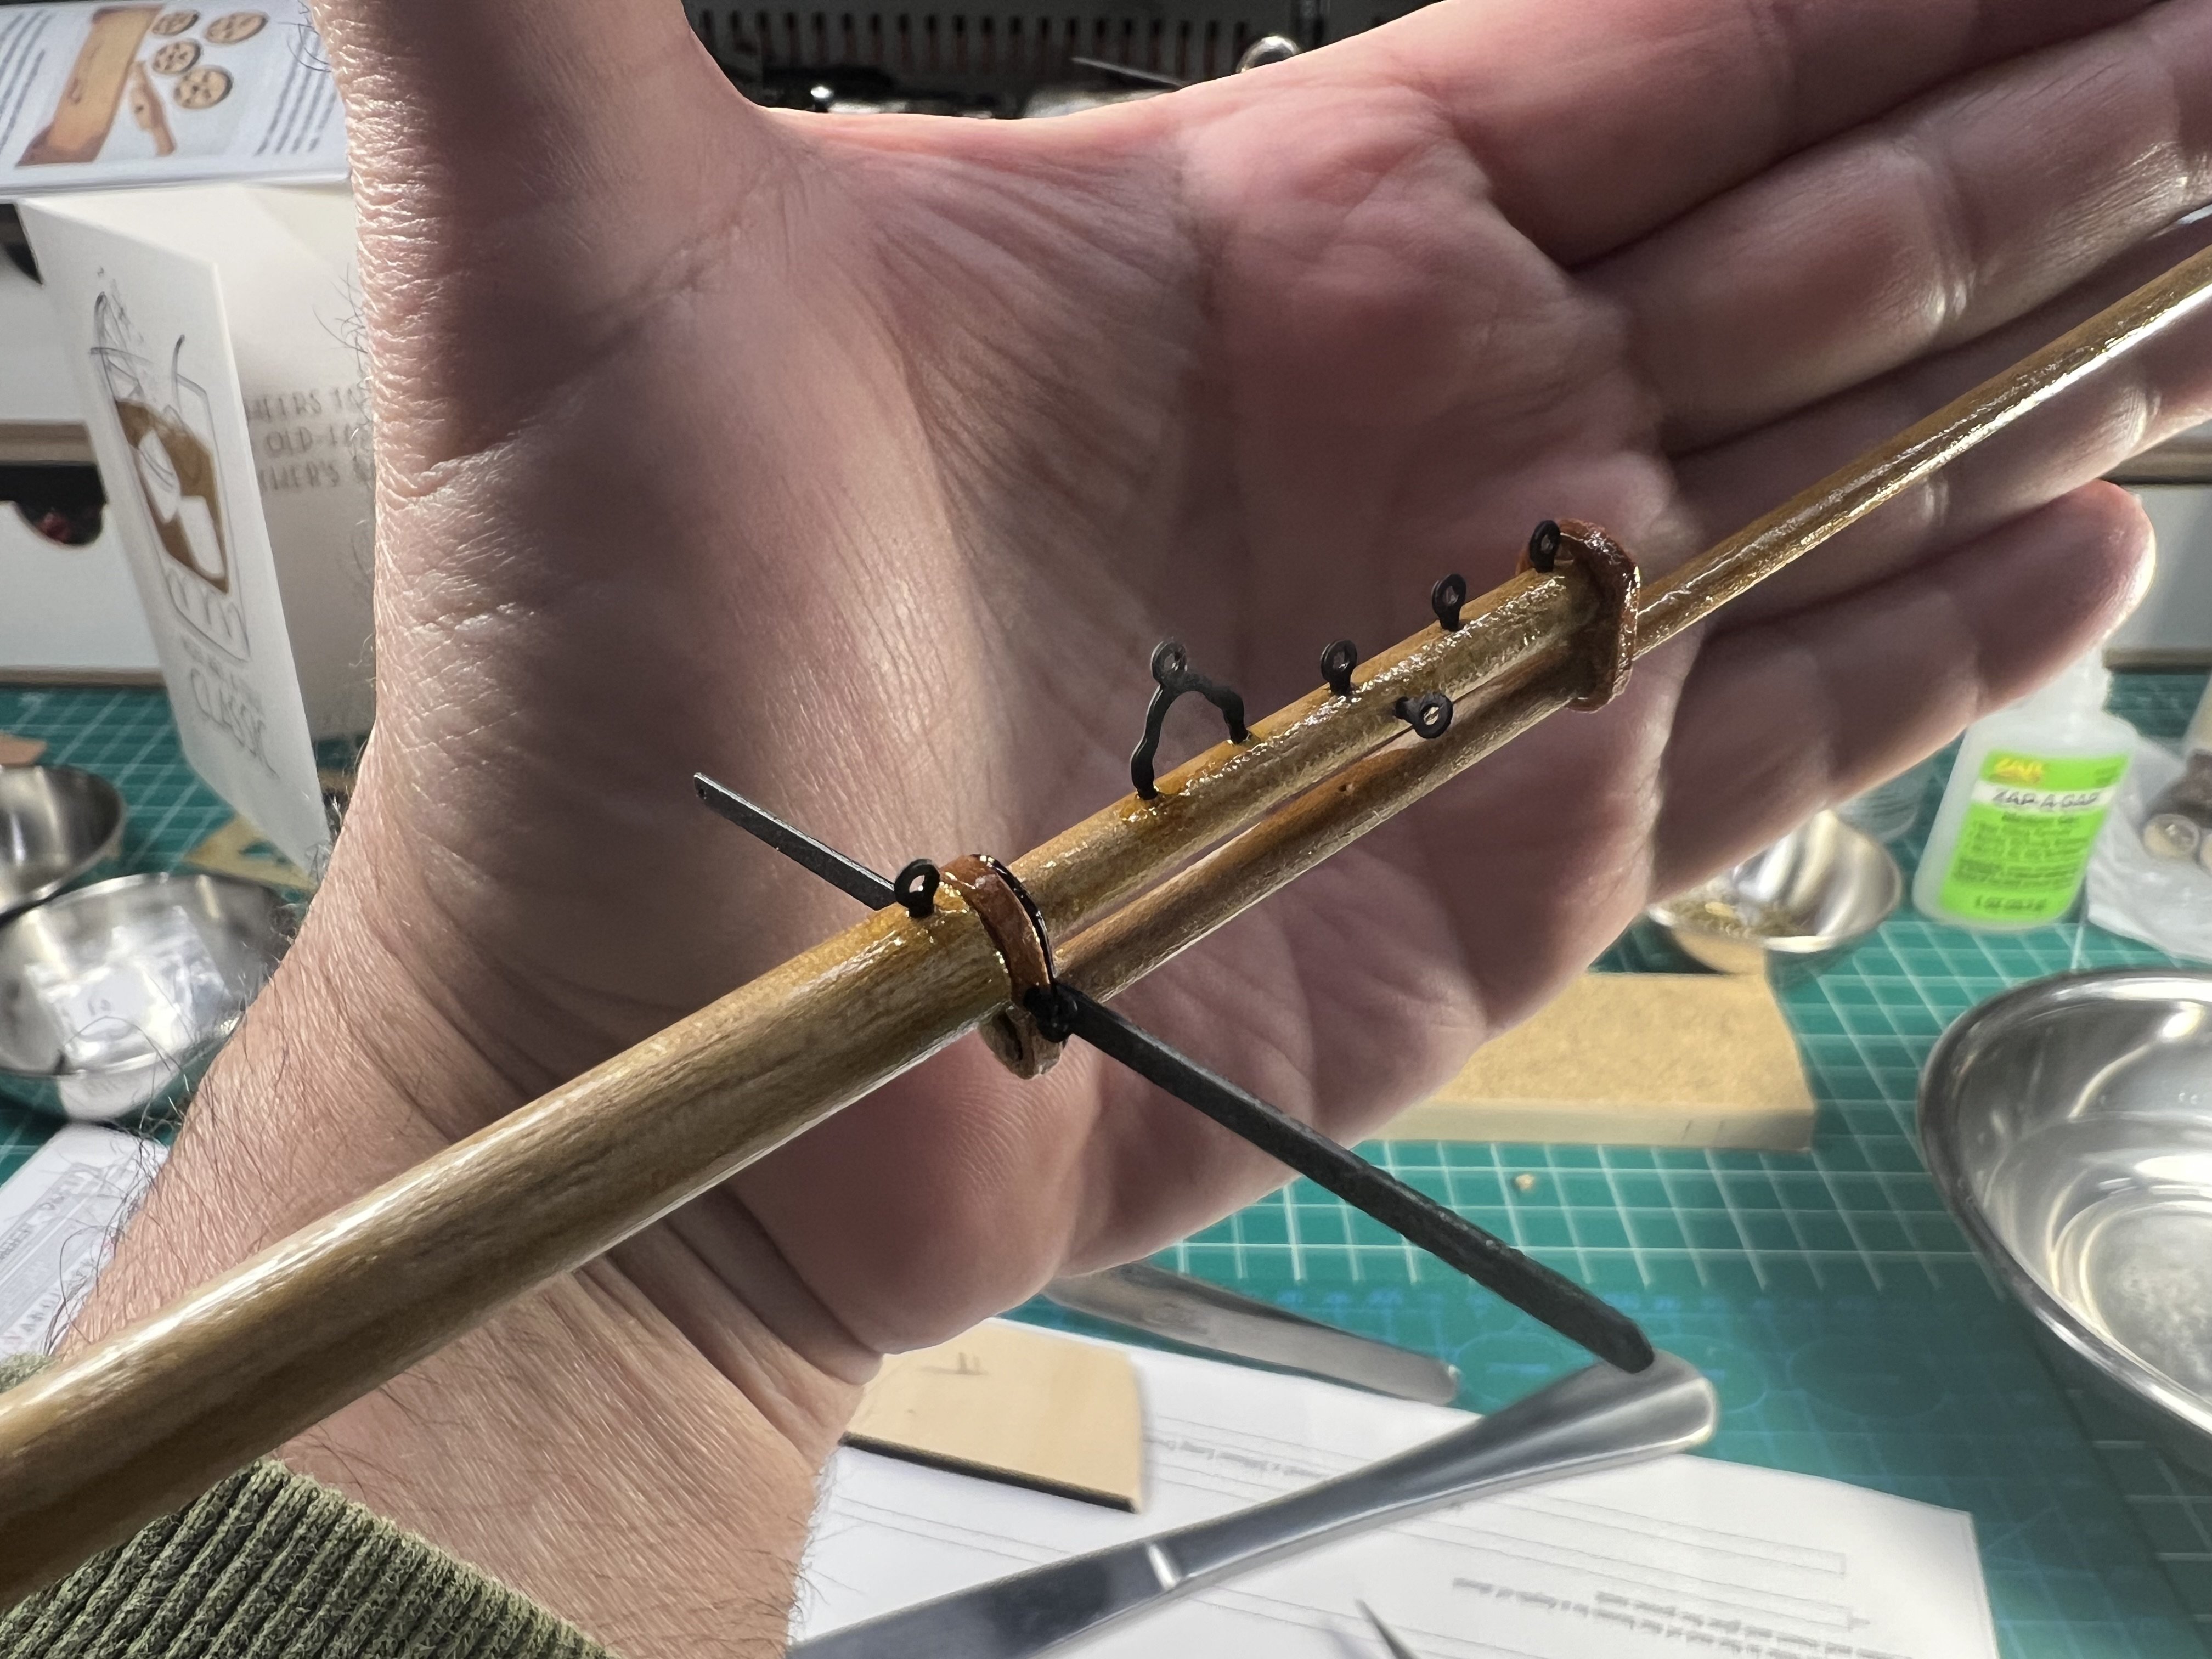
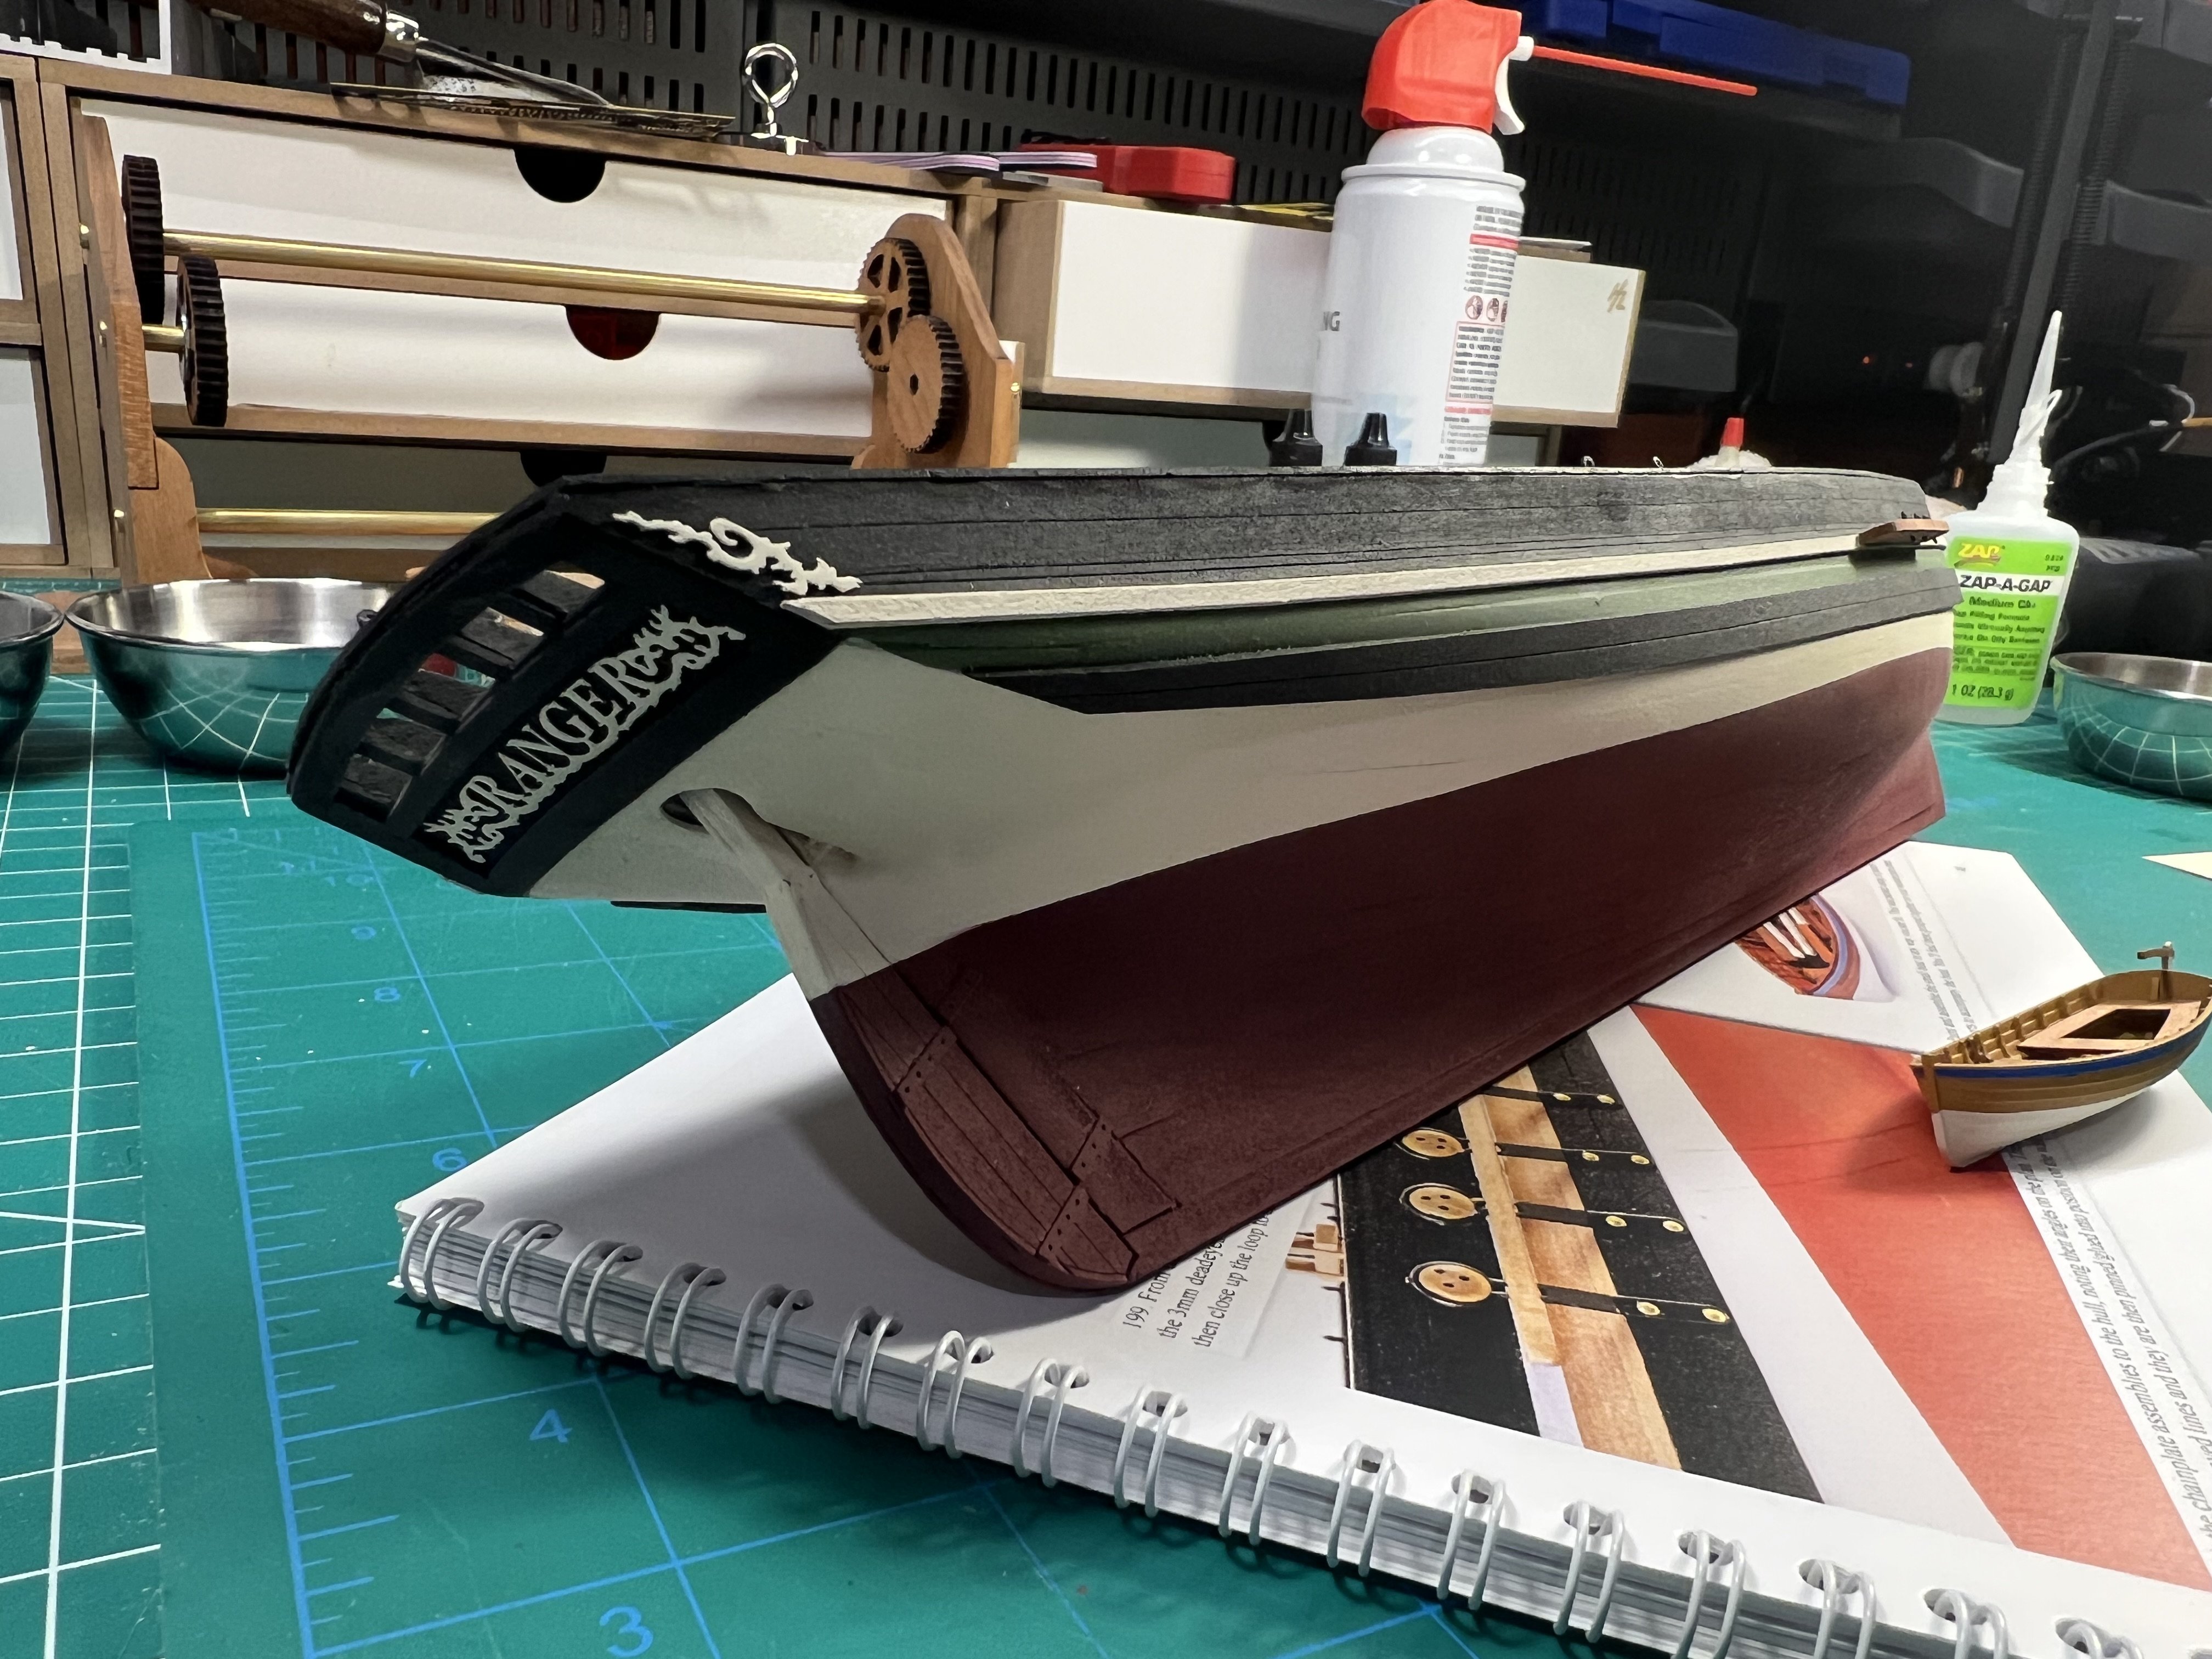
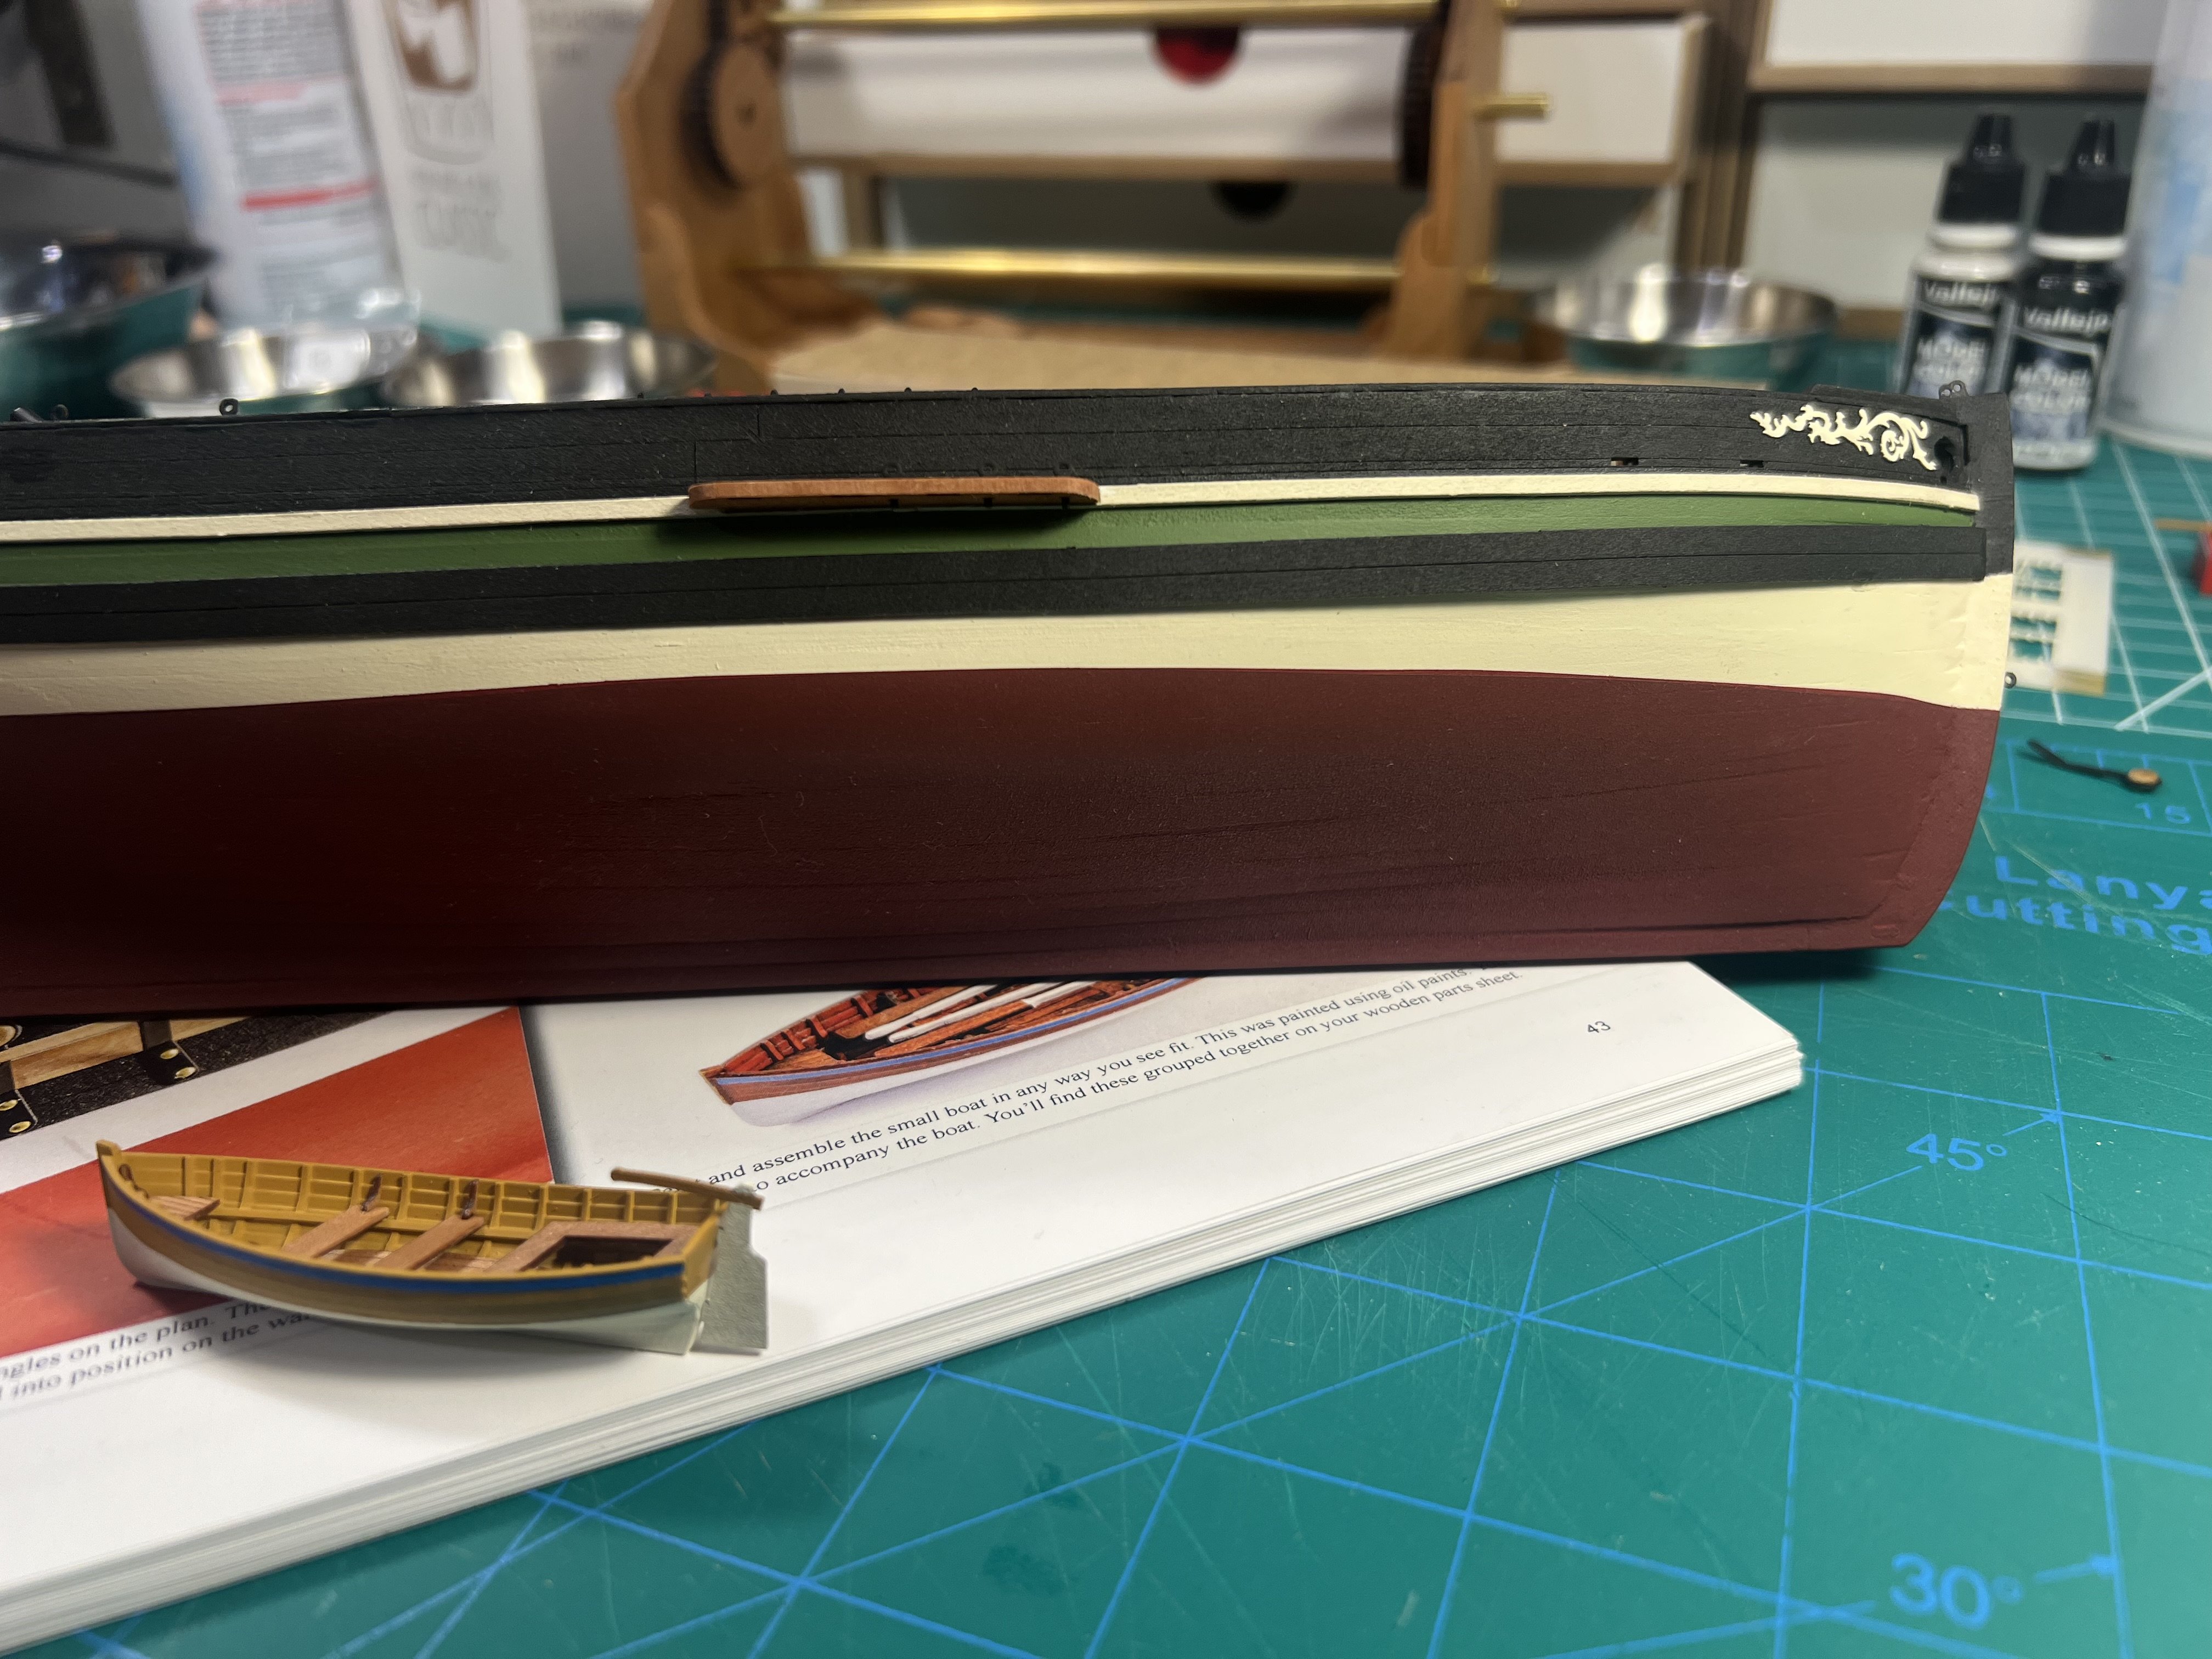
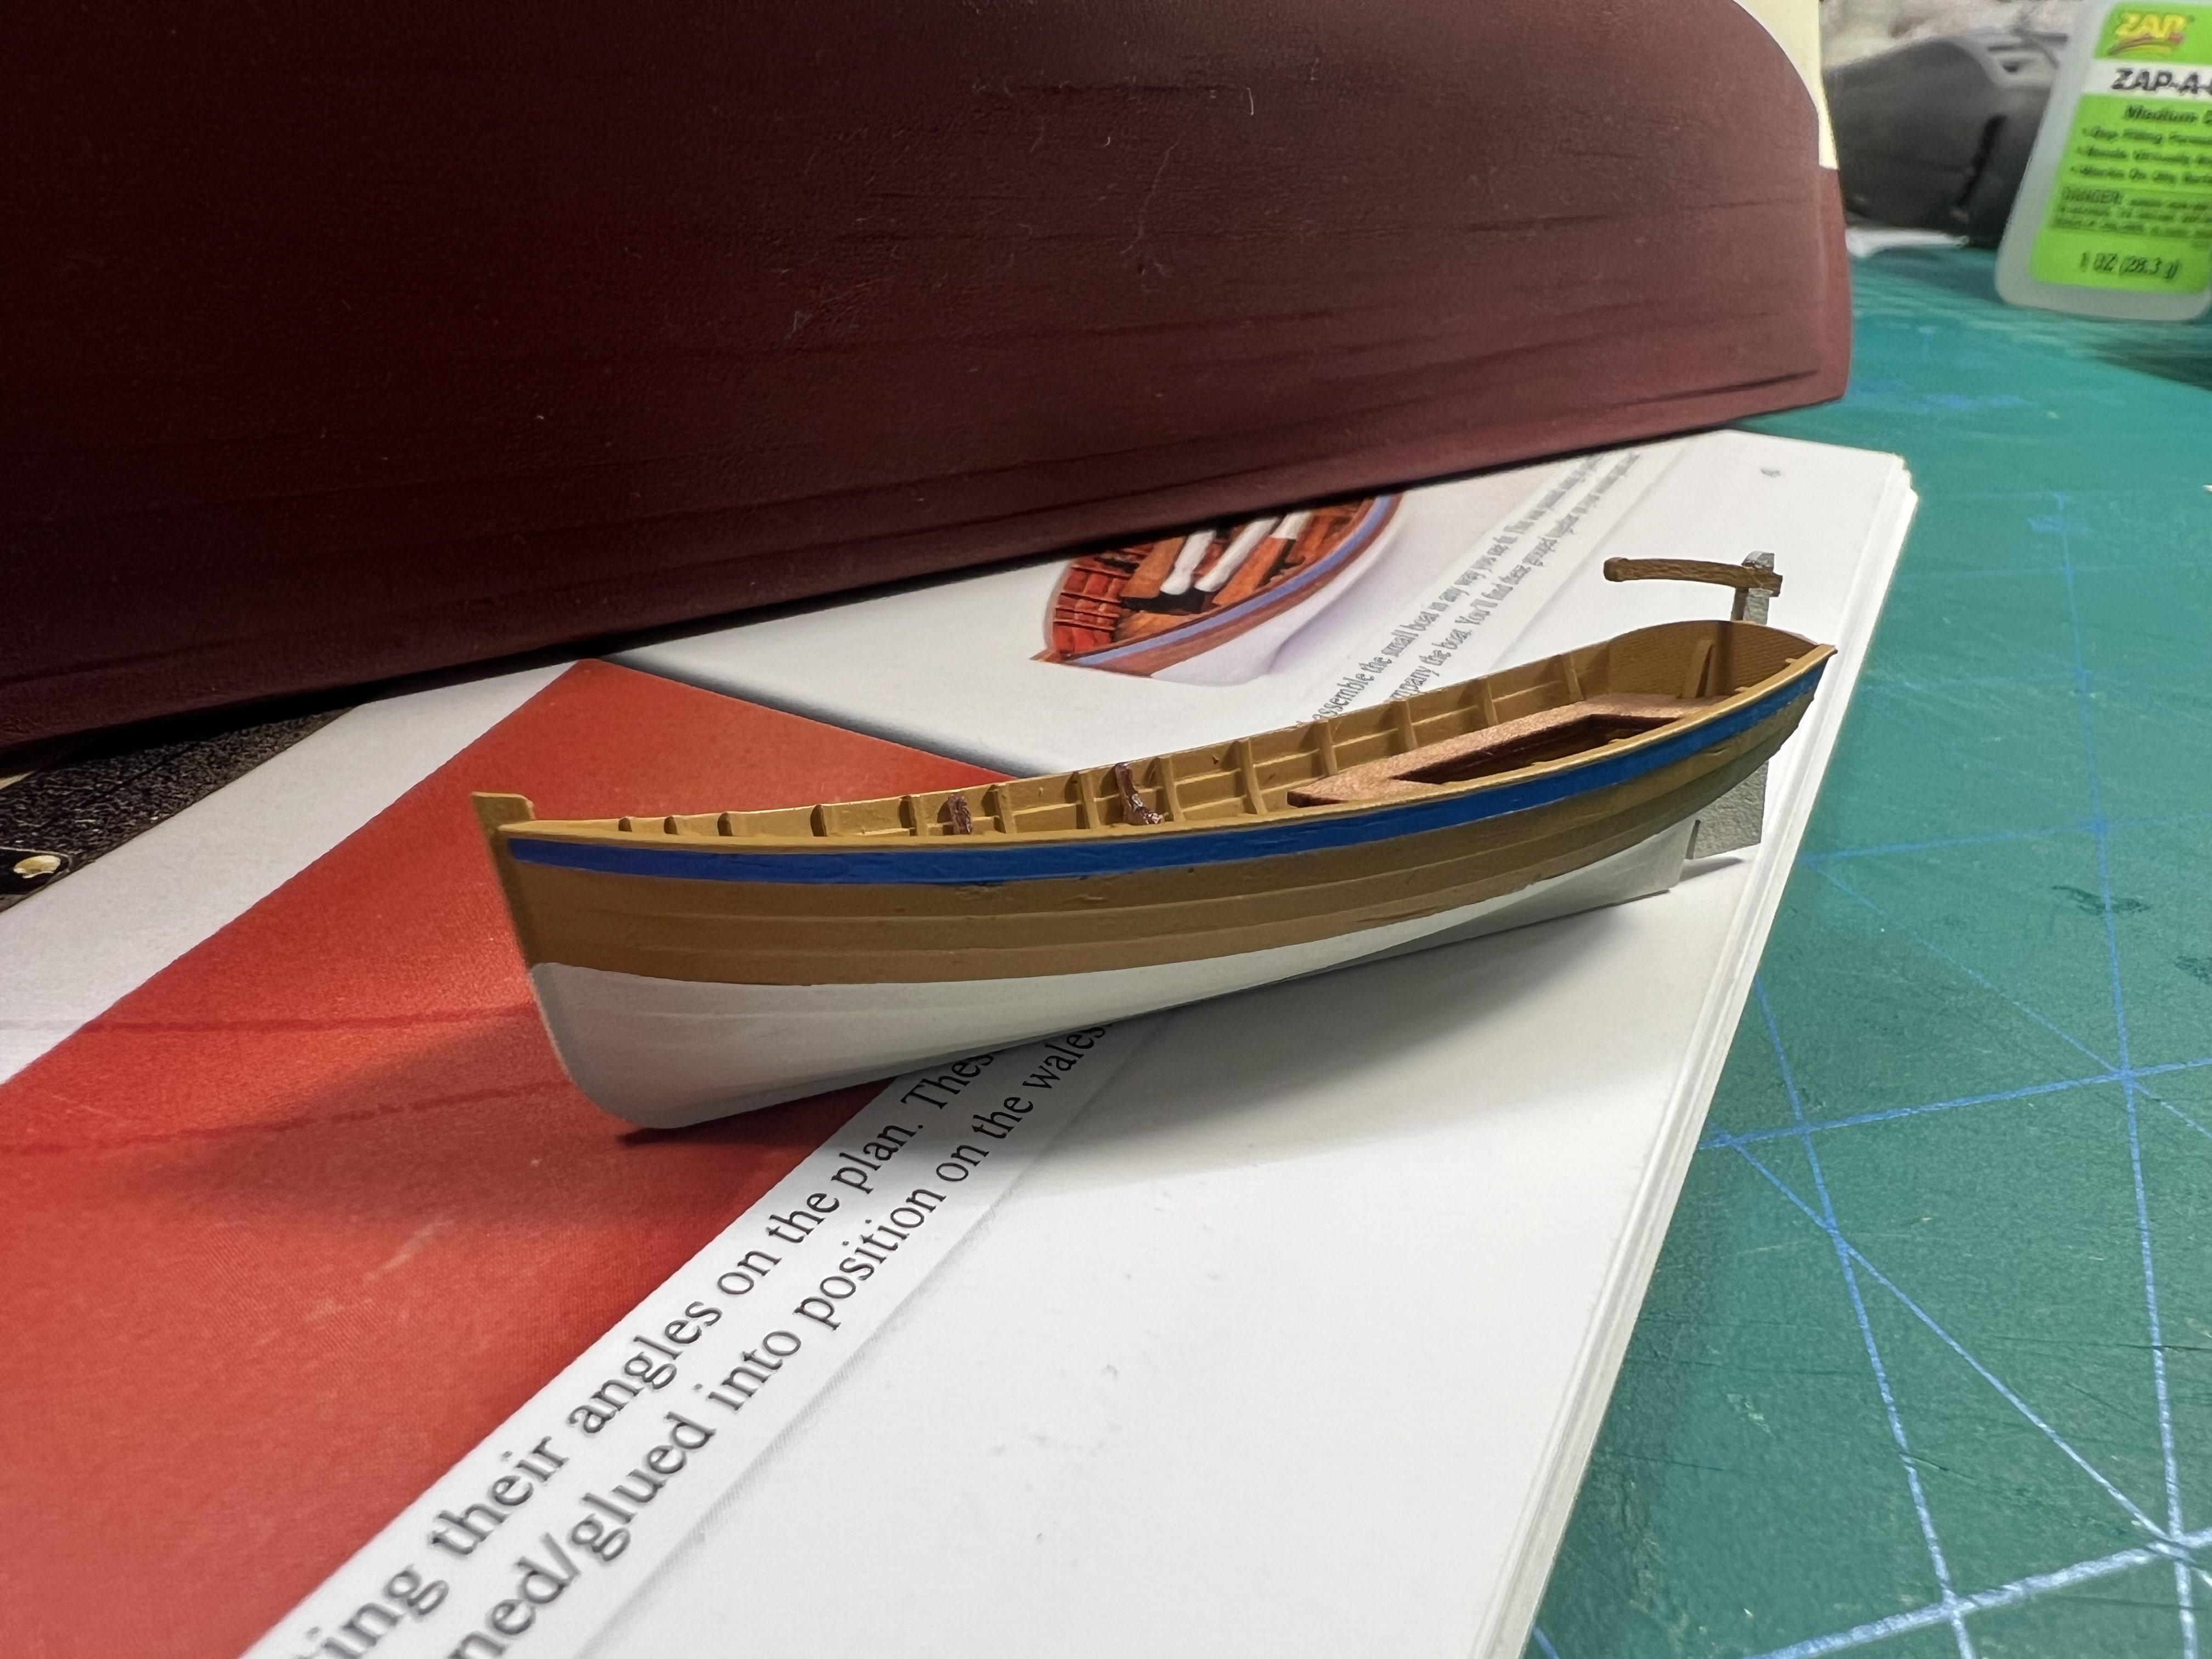
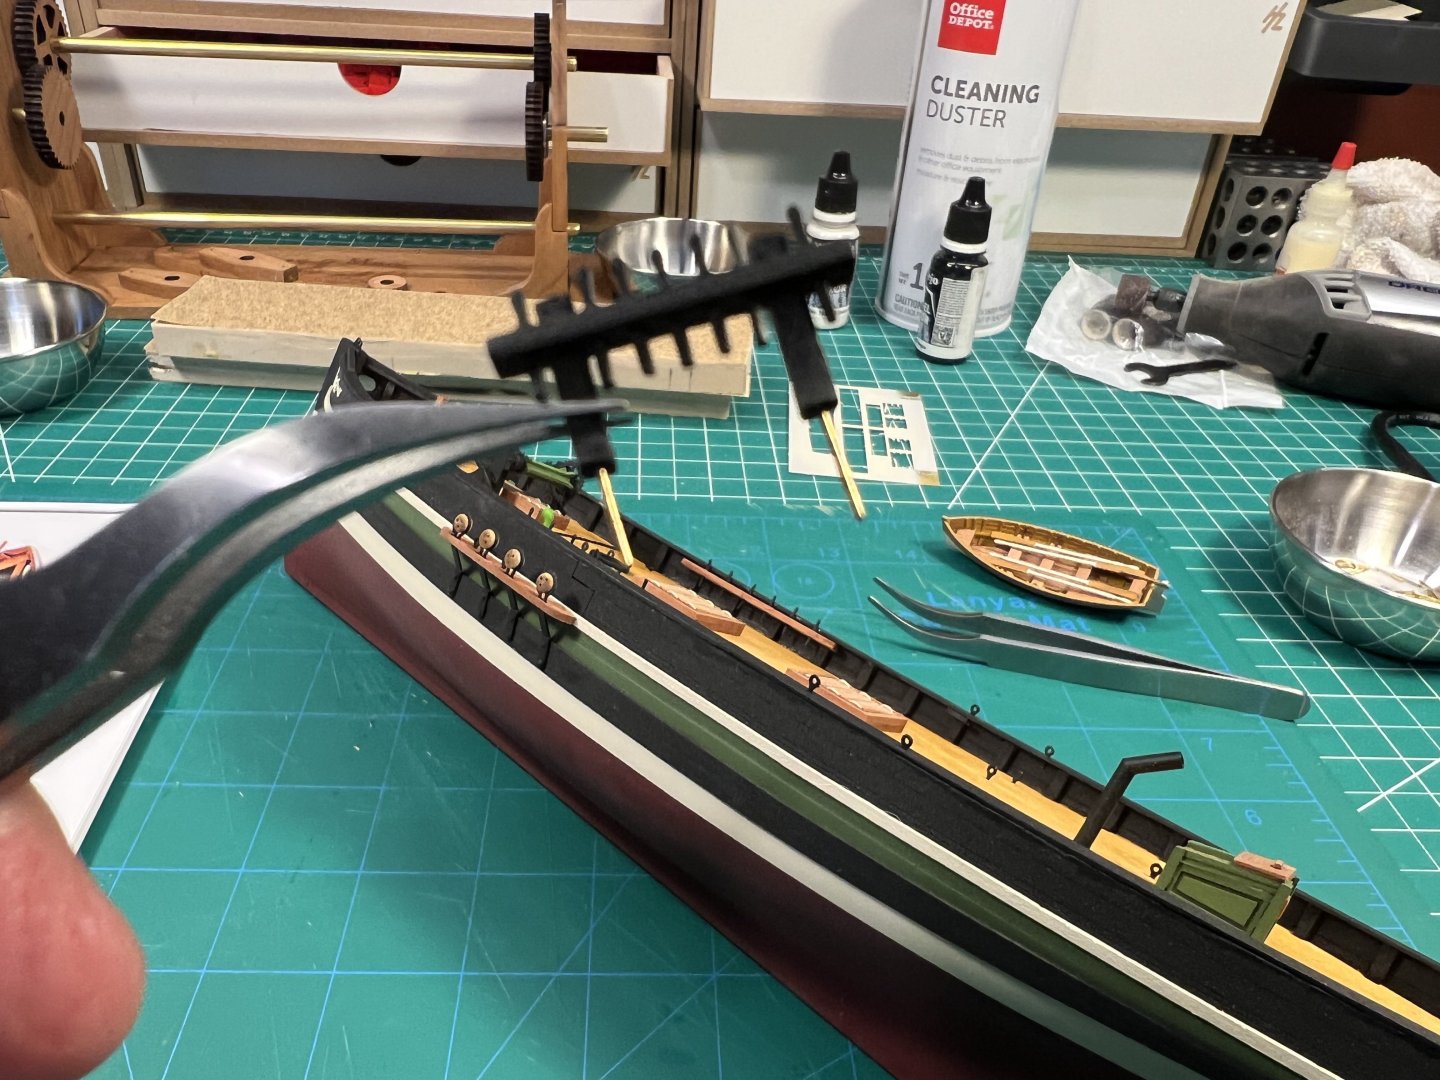
Back from a work trip and vacation for three weeks in Europe (Italy, France, and Scotland) and found a little time to start getting back to the ships. I had painted the small boat and its parts before leaving. Assembled them over the past couple of days. There aren’t instructions to build the small boat, just to “assemble … in any way you see fit”. Thankfully, I could use the photo in the instructions as a guide I also added the PE decorations that I had airbrushed weeks ago. Next step I’ll be added the deadeyes that I had put together before my trip. Finally was able to use the PE bender tool I had bought a while ago.


- 133 replies
-
- 4
-
-
- Ranger
- vanguard models
- (and 1 more)
-
Have you tried any Vanguard Models? They’re from the UK and make great (maybe the best) kits. Not subject to the tariff/trade nonsense.
-
I also decided that I'm going to plank the bottom of the boat. I had seen some other Philadelphia builds (both scratch and kit) that added planks on the bottom. The kit bottom was kind of unsightly to begin with - it had a jig saw puzzle look - and it was even worse with the mistake in the laser printing. I also ended up ordering a replacement sheet from Model Expo. While their QA isn't the greatest, at least they have a great parts replacement policy - I've probably ordered a replacement for 3/4 of the kits I've built from them. While I'm not going to take off the part I added (and glued) that was miscut, that misprinted sheet had other parts on it. What was sent - that should be to my house by now - should hopefully be printed to the right scale.
-
I'm still traveling, in Scotland for another week, so no modeling for a while. I was reviewing some of Olha's videos I had missed and saw that she had gotten in touch with Chuck (https://syrenshipmodelcompany.com) and he agreed to make some large scale (9mm) blocks that are needed for the large scale Philadelphia. I ended up ordering the full set of supplemental blocks and such that Olha recommended from Syren, as well as other things from the parts list for the model (other blocks and rope, at least the closest size I could get): Black Rigging Hooks - 90 per package - assorted sizes 3mm, 4mm and 5mm: https://syrenshipmodelcompany.com/boxwood-rigging-blocks.php#!/Black-Rigging-Hooks-90-per-package-assorted-sizes-3mm-4mm-and-5mm/p/558191743/category=5764789 9/16" long Belaying Pins (14.2 mm) 3/8 scale (25 per package) https://syrenshipmodelcompany.com/boxwood-rigging-blocks.php#!/9-16-long-Belaying-Pins-14-2-mm-3-8-scale-25-per-package/p/749011820/category=5764703 3.5 mm Thimbles - Black (25 per package) https://syrenshipmodelcompany.com/boxwood-rigging-blocks.php#!/3-5-mm-Thimbles-Black-25-per-package/p/759078783/category=5764703 11/32" (9 mm) Single Sheave Rigging Blocks - Color : Swiss Pear (15 per pack) https://syrenshipmodelcompany.com/boxwood-rigging-blocks.php#!/11-32-9-mm-Single-Sheave-Rigging-Blocks-Color-Swiss-Pear-15-per-pack/p/759103780/category=5764703 11/32" (9 mm) Double Sheave Rigging Blocks - Color : Swiss Pear (12 per pack) https://syrenshipmodelcompany.com/boxwood-rigging-blocks.php#!/11-32-9-mm-Double-Sheave-Rigging-Blocks-Color-Swiss-Pear-12-per-pack/p/759223890/category=5764703 3/16" (5 mm) Single Sheave Rigging Blocks - Color : Swiss Pear (25 per pack) https://syrenshipmodelcompany.com/boxwood-rigging-blocks.php#!/3-16-5-mm-Single-Sheave-Rigging-Blocks-Color-Swiss-Pear-25-per-pack/p/692074694/category=5764703 9/32" (7 mm) Single Sheave Rigging Blocks - Color : Swiss Pear (15 per pack) https://syrenshipmodelcompany.com/boxwood-rigging-blocks.php#!/9-32-7-mm-Single-Sheave-Rigging-Blocks-Color-Swiss-Pear-15-per-pack/p/763358585/category=5764703 .008 (.20mm) ULTRA TAN Scale Rope - 29' per package - Poly/Cotton Blend (I don't know if I might need this, but if not I can use it for another model) https://syrenshipmodelcompany.com/boxwood-rigging-blocks.php#!/008-20mm-ULTRA-TAN-Scale-Rope-29-per-package-Poly-Cotton-Blend/p/44934212/category=0 .018 (.45mm) ULTRA TAN Scale Rope - 29' per package - Poly/Cotton blend https://syrenshipmodelcompany.com/boxwood-rigging-blocks.php#!/018-45mm-ULTRA-TAN-Scale-Rope-29-per-package-Poly-Cotton-blend/p/44934215/category=0 .030 (.76mm) ULTRA TAN Scale Rope - 29' per package - Poly/Cotton blend https://syrenshipmodelcompany.com/boxwood-rigging-blocks.php#!/030-76mm-ULTRA-TAN-Scale-Rope-29-per-package-Poly-Cotton-blend/p/419481238/category=0 .035 (.88mm) ULTRA TAN Scale Rope - 29' per package - Poly/Cotton blend https://syrenshipmodelcompany.com/boxwood-rigging-blocks.php#!/035-88mm-ULTRA-TAN-Scale-Rope-29-per-package-Poly-Cotton-blend/p/44934218/category=0 .045 (1.14mm) ULTRA TAN Scale Rope - 29' per package -Poly/Cotton blend (the model calls for .040, so I bought both .035 and .045 to see which works) https://syrenshipmodelcompany.com/boxwood-rigging-blocks.php#!/045-1-14mm-ULTRA-TAN-Scale-Rope-29-per-package-Poly-Cotton-blend/p/44934219/category=0 .055 (1.4mm) ULTRA TAN Scale Rope - 29' per package - Poly/cotton blend https://syrenshipmodelcompany.com/boxwood-rigging-blocks.php#!/055-1-4mm-ULTRA-TAN-Scale-Rope-29-per-package-Poly-cotton-blend/p/45278535/category=0 .080 (2 mm) ULTRA TAN Scale Rope -14' per package - Poly/Cotton Blend https://syrenshipmodelcompany.com/boxwood-rigging-blocks.php#!/080-2-mm-ULTRA-TAN-Scale-Rope-14-per-package-Poly-Cotton-Blend/p/84164586/category=0 7 mm Deadeyes - 3D Printed - Color: SWISS PEAR - 25 per package https://syrenshipmodelcompany.com/boxwood-rigging-blocks.php#!/7-mm-Deadeyes-3D-Printed-Color-SWISS-PEAR-25-per-package/p/696810865/category=9242145 The total was a bit over $100 (shipping within the US). And I'll certainly have extras left over (both blocks and rope).