


adivedog
-
Posts
123 -
Joined
-
Last visited
Content Type
Profiles
Forums
Gallery
Events
Posts posted by adivedog
-
-
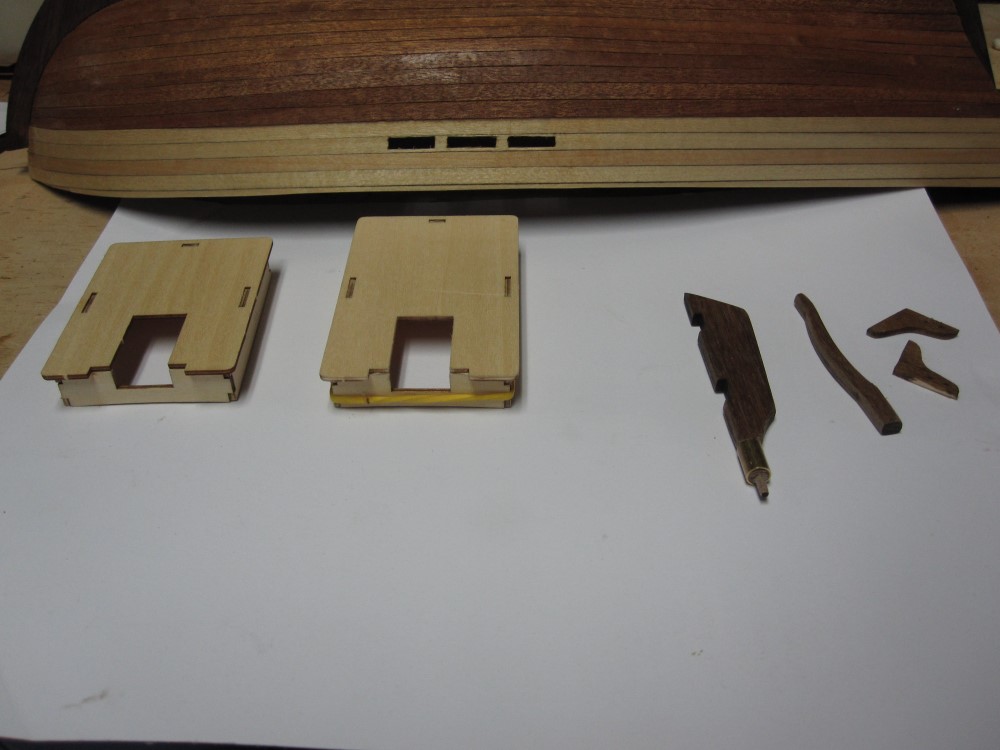
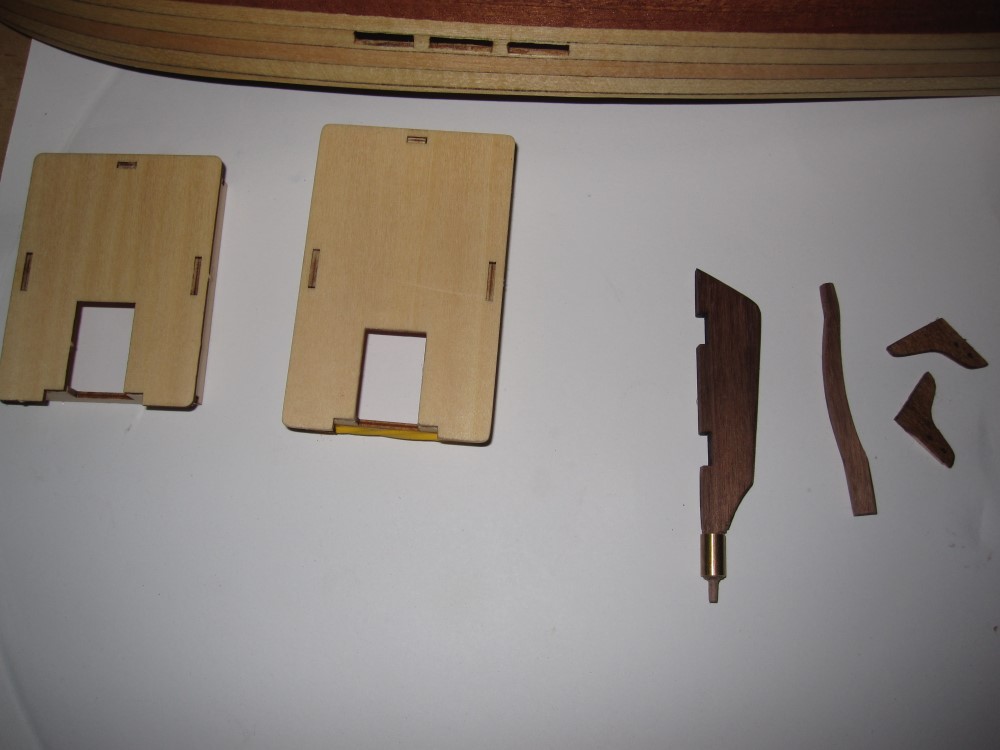
Got the rudder done, not perfect but did the best I could. Forgot how patient you have to be in the hobby. And correcting mistakes.
Got the helm glued on
Now starting on the Bowsprit. Having a dremel has been a life saver. Especially with a ferrule that accepts .4 micro bits for eyebolts.
- GrandpaPhil and Gabek
-
 2
2
-
After 5 years, I'm actually back on the build. Working on rudder and bowsprit. Will get photos this am. Have spent several days trying to get fittings on the rudder, which wasn't helped by the fact that one of the rudder hinges was missing. Spent a few hours searching stores and found paper binders that were the same width and color, so made one after several tries.
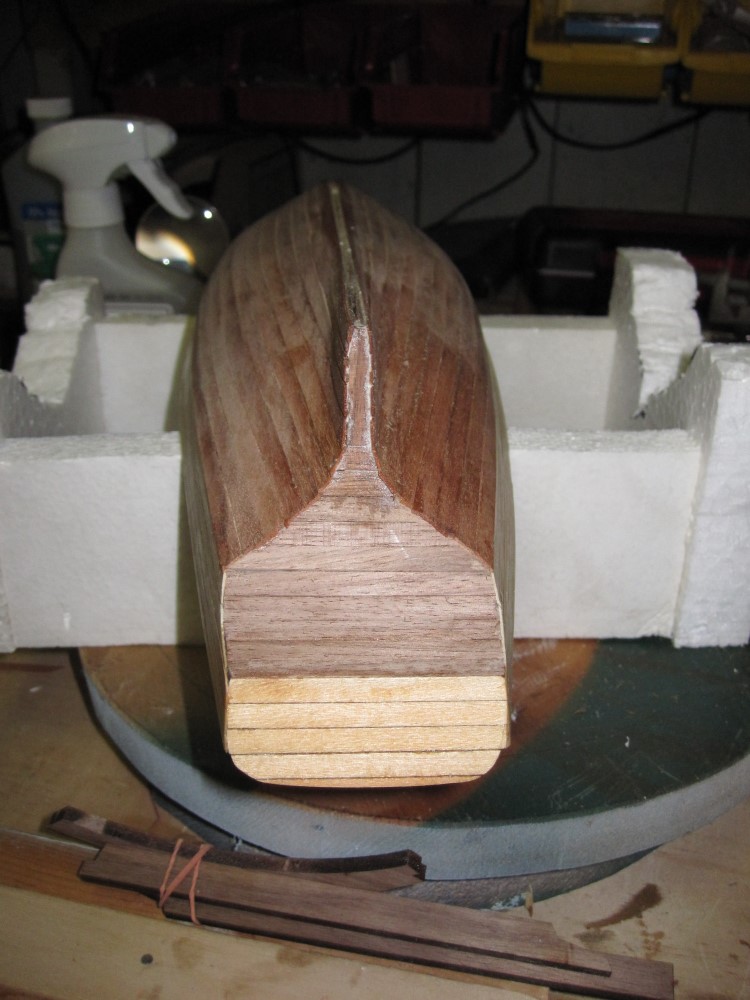
The bowsprit, I formed by putting my drill in a vise and using sand paper to form, checking the diameter regularly to get final size right.
Pictures to follow, heading to garage now.
-
Am about to start back on build. Hope I can remember how to do it. Didn't realize it's been almost 3 years. Don't remember why I quit. ?
-
Just got back from spending 5 months in Texas staying warm. Will be getting back on the Swift, as soon as I get everything caught up and the weather gets a little warmer.
Hope everybody survived the winter OK
-
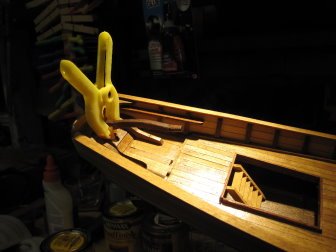
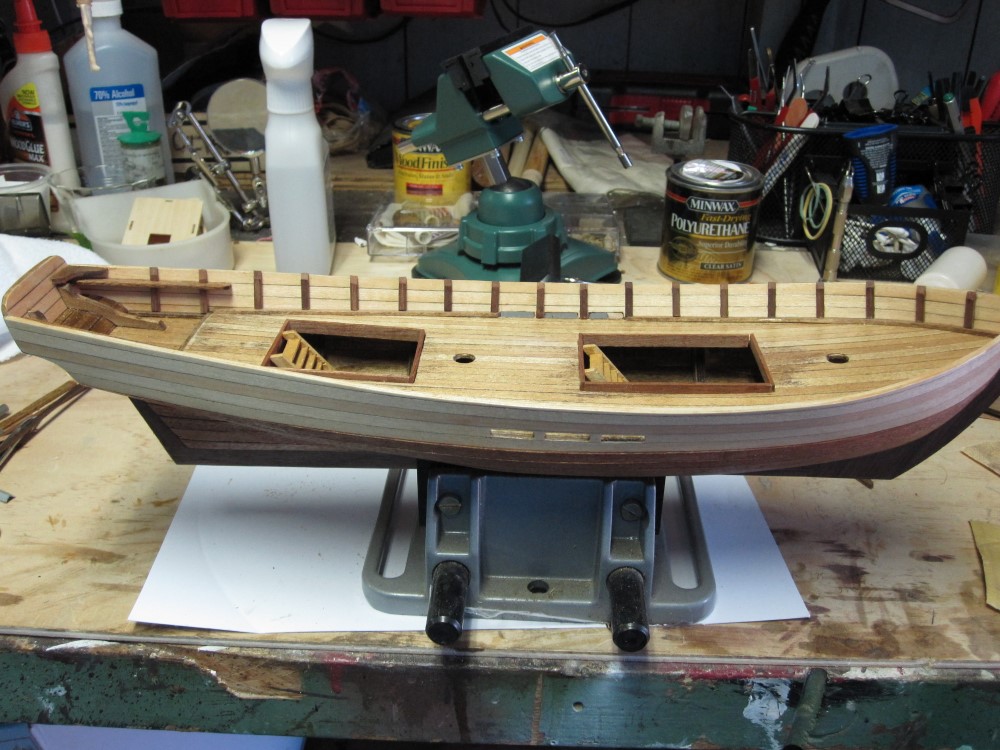
Got the stanchions done on the larboard side, mowed the yard, now taking a break.
Used the aluminum angle iron to make sure they were square.
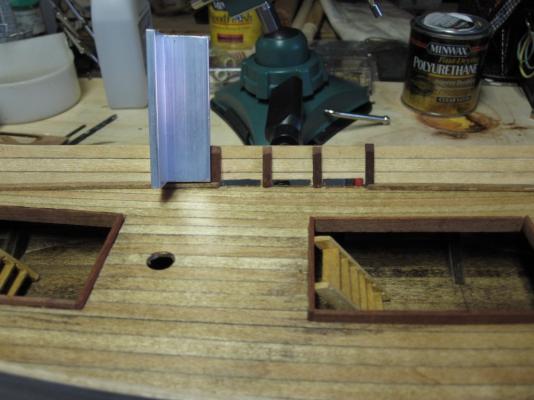
I did bevel the bottom of the stanchions at the scuppers to give water easier drainage.

- mrshanks, rony, qwerty2008 and 4 others
-
7
-
-
Tony, I'll mess around with it when I am waiting for the glue to dry on something. this weekend I plan on doing the stanchions and top rail.
I would imagine that the scuppers will be something that can be added anytime, even after it's done do there's plenty of time to get it figured out.
-
Bob, I agree with Grimber. Don't worry about the time. Sometimes, I don't work on it for several days or a week. Sometimes, you will only work on it a few minutes when you glue something and may not work on it again until the next day. Just take your time, relax, and enjoy it. It is kind of nice to see something spring from nothing and you did it.
-
I think I might try some tin. I can use snips to cut and then I can shape it, then maybe paint ?
-
I put poly on the hull, stern, and keel. While letting it dry, I glued the deck houses together, and worked on the rudder.


Tomorrow, I'll put the hole in the stern and start on the stanchions.( Not sure if that's spelled right. ) and top rail.
-
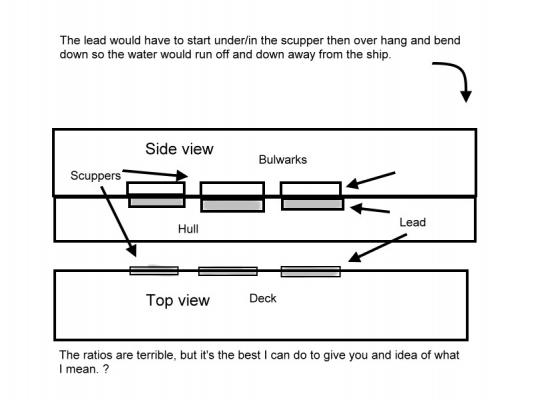
Hi Tony. Thanks for the idea. I think the lead would have started just inside the scupper and would extend out a little over the hull then bend down to keep the water away from the ship. Keep thinking, we ought to come up with something.
I attempted to draw something but I don't know if it will make any sense.
-
Also, I didn't measure the plank widths when I did my deck. It came out fine, I think there was a little difference on the outer edge, but not much. I did find the difference on the width's when I did the first planking. I really doubt if the old boys back then measured the plank widths too much anyway.

-
-
Thanks Gdog, I'm sure yours will.
Keith, there were four keel pieces. Bow, stern, and the two main pieces. I don't really like the way they were done, but that's what you get. I did try to
glue-saw dust the joints but it didn't take too well. Also, would think the keel should be beveled some, but assume it's not so it will sit in the stand ?
-
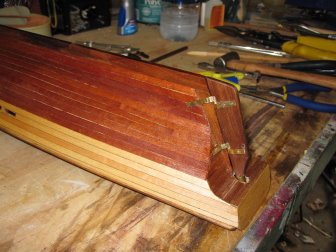
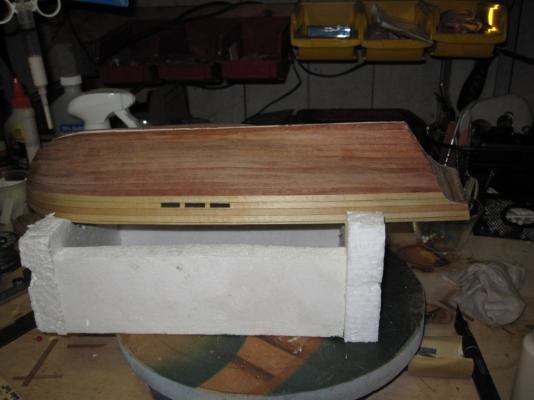
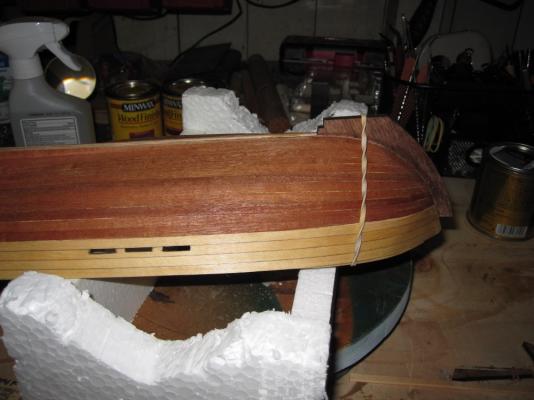
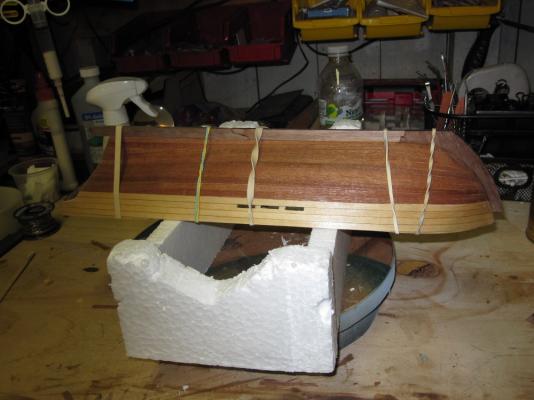
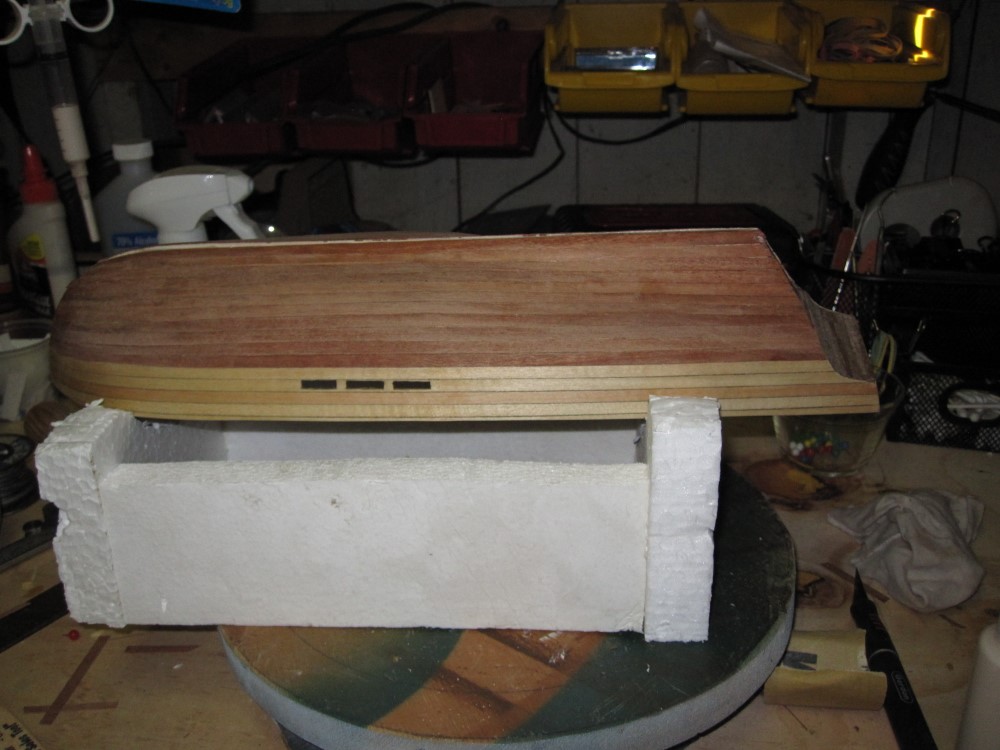
Can finally update some pictures on the progress.
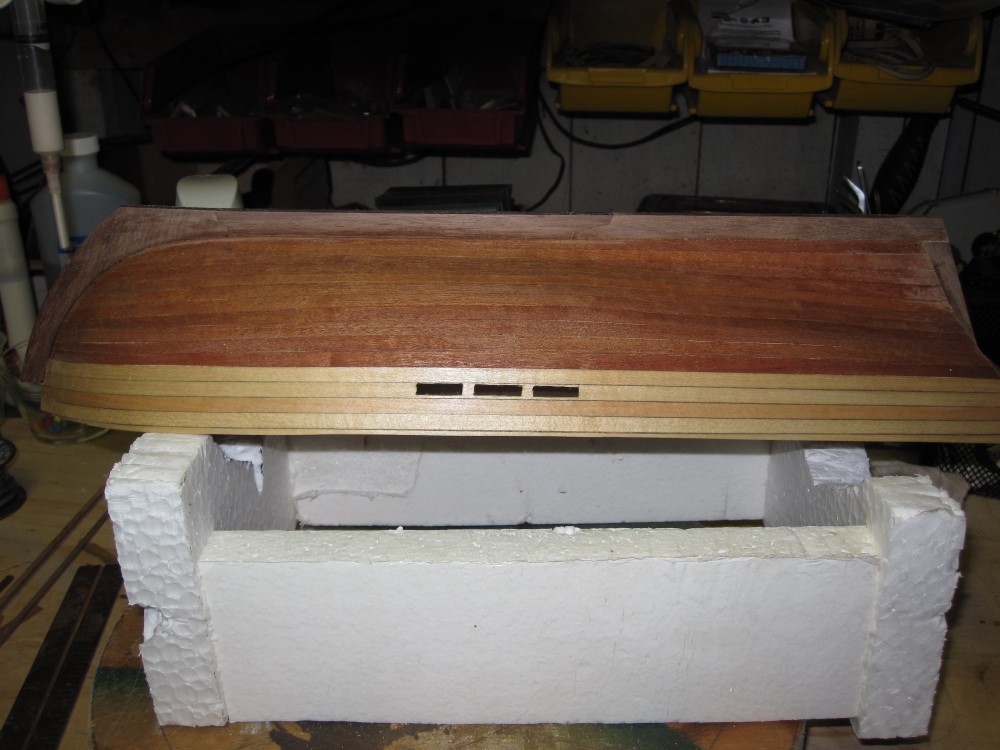
I decided to plank before adding the keel to see how it would work. Most ships have a rabbet line, but the Swift doesn't so am pretty happy with the way it went. This picture was taken right after I sanded and filled some small gaps in between the planks. It was a little difficult to do, sometimes, had to lay on my lap to iron planks on.
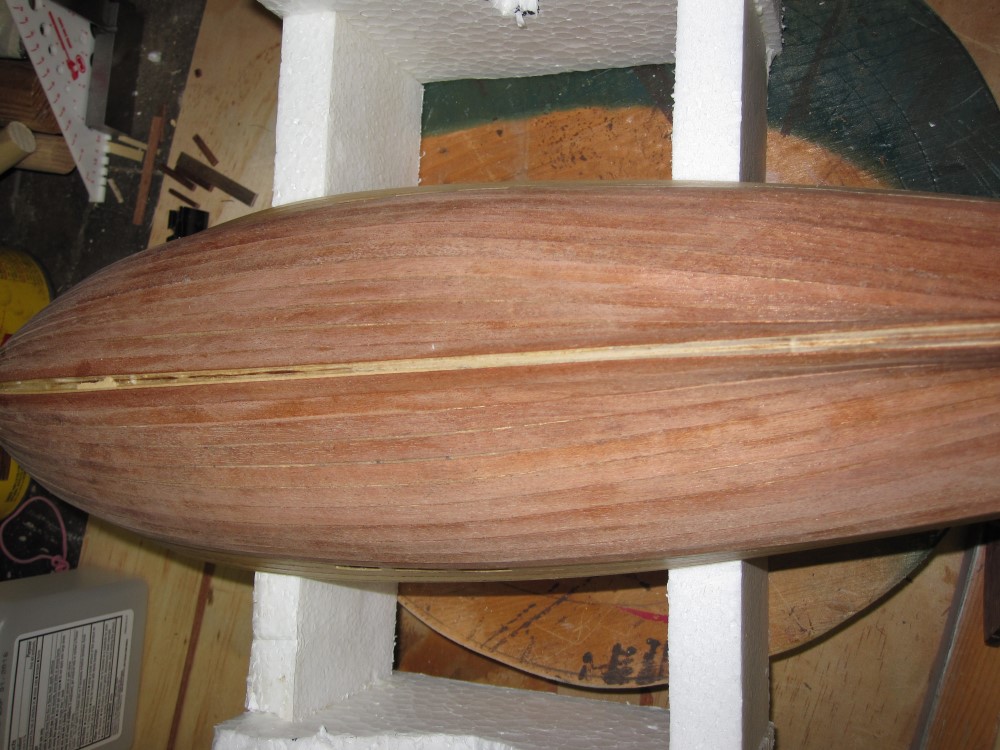
This is how the keel line looks. The false keel was beveled and the finish planks were put on almost to the top of false keel.
Then sanded all the way down for the keel to fit.
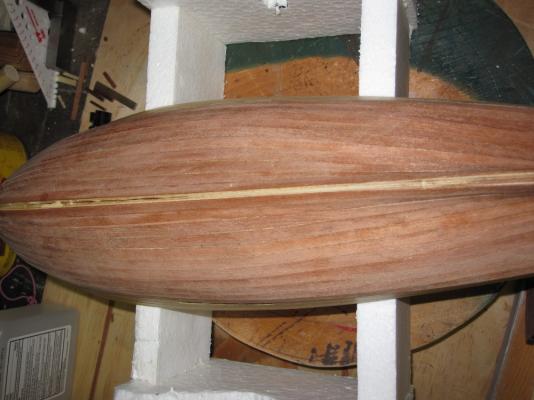
Thought I screwed up the bow, I should have ran the planks closer together at the bow. I was afraid the Keel wouldn't go over the gap. But it came out fine.
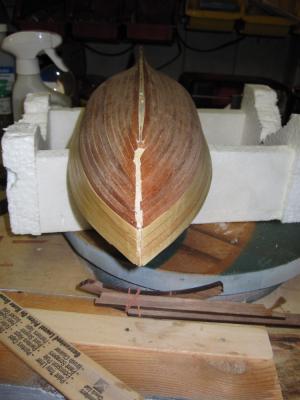

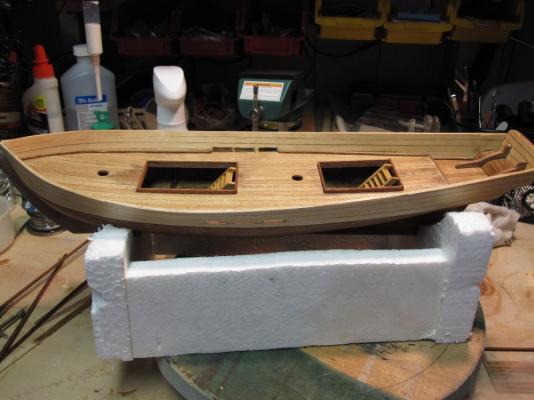
After sanding the keel line. Attached the bow piece of the Keel. This piece needs to be done first. I put a dab of ca on to hold in place, and used wood glue on all the rest of piece. BTW, I did put on a coat of poly before sanding the keel line. Figured that would help bond everything together.
After it dried, did the same for the rest of the keel.
There were a couple of small places, I filled in with thinned wood glue and sanded dust from the left over walnut pieces.

Overall, it came out real well. Now can get started on some fun stuff on the deck.
- themadchemist, lamarvalley, giantdog and 1 other
-
4
-
Like the stain color. That's kind of what I went for. It was a work boat.
As for the stringers. You won't follow all of the directions just as they say. You'll have to figure things out as you go. Some things can be done ahead of time and some later than they say.
-
I agree with Keith. Basically, add a plank at the top and a plank at the bottom. Then measure the middle frame and see how many mm total between and divide by 5 (mm) which is the width of the plank. You will have 8 or 9 planks, don't remember. Anyway, once you have the number of planks, you will measure each frame from bow to stern. This is where the fan comes in. Take a piece of paper or card stock and at each frame you will mark on the stock the length between those planks. Let's say at frame three, put the paper along the frame, mark where the planks that are glued at top and bottom. Then use the fan.
If you need, 8 planks, put the first mark on the middle of the fan, slide it out until the top mark reached the eighth line. Then you measure the width of one unit. I marked the paper at each section, then put it against the frame and marked the frame. Go to the next frame and repeat.
One thing I found was all the planks are not the same width, so I added a couple of planks and then remeasured and remarked again.
Hope I didn't muddy the water too much. I went through the same thing a little while ago. It will come pretty easily once you get started.
Gook Luck
- SailorBob and themadchemist
-
2
-
I did have the garage partitioned, but took all the sheeting down a couple of years ago. I go to south Texas in Nov. until April so until now, haven't really needed it heated. I am going to so something to temp. get a little heat in there. I've got a propane heater, I bought for the garage a while ago I use, but doesn't help much without the partitions.
Soaking the wood for a few minutes will help a little, which I'm sure you're doing. Well, like I said we are both getting some good experience.
-
First off you're doing an excellent job on the build log.
Second, I want to know how you can keep your workbench so neat and organized. Mines always a mess of things I'm using or going to use.
Plus I'm envious of having it in the basement where you can work on it year round. Mine is in my detached (unheated) garage, so when it's cold I don't get much done. Will be able to do some of mine in the house now that I won't have to sand too much.
The build is going well, it looks like you got some poor lumber for the planks, but it's all good for the learning experience. Trying to use full planks is easier, but as you found out, now you have to start fixing the gaps. But that will all be covered anyway.
Good job.
-
I can't believe Hobby Lobby or one of those stores hasn't gone to Hawaii. I guess everything is not perfect in "paradise"

-
If you fill out the card at HF, they will send you flyers on their sales, and e mails with coupons. I got the caliper of $10
I was lucky enough to have a garage full of tools and power tools, so was ahead of the game.
Hobby Lobby is another good place, if you have one close by. They also put a 40% off coupon in the Sunday papers.
-
That's an idea, but I don't want to get that involved yet. Still trying to keep things simple. The pieces would only be about 1/4" x 3/4" and very thin.
-
Tony, things are looking good, just read through your log so far.
A couple of things on the tools. More clamps. Harbor freight has a tube of various sizes, mostly the small ones. They also have a digital caliper that has mm/fractions/inches, which is invaluable for planking.
A scroll saw or band saw. I use mine all the time, as have had to make new parts.
From the looks of yours so far, I think you're going to have a nice ship when your done.
-
By the way, I finished the second planking this evening. Will be posting some pictures soon. I will say, i think the second planking was harder than the first layer. Only because of the wood in the kit. It is so thin and dry, really hard to work with.
This hobby is a lot of woulda, shouda. Woulda gotten better wood, shoulda done a lot of things.
I figure this project is my learning experience and hopefully will not make the same mistakes next time.


Swift by adivedog - Artesania Latina - 1:50 - First build
in - Kit build logs for subjects built from 1801 - 1850
Posted
Sanding the bowsprit to correct size with a hand drill. Just lock drill on, then use course sand paper to taper. Measuring often