
HOLIDAY DONATION DRIVE - SUPPORT MSW - DO YOUR PART TO KEEP THIS GREAT FORUM GOING! (Only 20 donations so far - C'mon guys!)
×


YankeeD
-
Posts
151 -
Joined
-
Last visited
Content Type
Profiles
Forums
Gallery
Events
Everything posted by YankeeD
-
I second that!! And not only that but a table top router as well. Like the proxxon MP400 but then Byrnes worthy
-
August. Not much progress, the weather keeps nice and warm so few hours to spend and also low motivation. Finished the foremast and mars, same procedures used as foir the main mast. T Then I worked the planking up to the rahout. I am now going to find a way to get (router??) the right profile for the Rahout. Not easy as it will be 5-6mm by 2,5 to 3 mm. I really have to build something here and make my own router bit.... Not easy
.thumb.jpg.9f8407fadbe91876d0209a25a14464fd.jpg)
.thumb.jpg.05a49e98b1dd6a4d65a28a0e23a4081b.jpg)
.thumb.jpg.2708a177f0c5e492c1b640645a22e985.jpg)
.thumb.jpg.5cc00f2ea3b4d413bdbe12548f912130.jpg)
.thumb.jpg.8dc740532353919417911cb274c4d685.jpg)
-
A small, dutch, but affordable kit company is Kolderstok. The have some nice kits, like Chuck, he (the owner) works by doing everything himself. http://kolderstok.nl/index.en.html Just my 5 cts. (ps No I am not related in anyway... 🤗)
-
Yes thats possible, but that leaves no nice surface and as the copper is soft it wrinkles and bends like h.... So I would like to remove it keeping nice smooth copper wire. Tried lots of solutions. None worked. Alass.
- 193 replies
-
- 2
-

-
- wilhelmina vii
- fishing
- (and 1 more)
-
Received it today. Works great, very soft. Ordered 0.8 and 1mm. However since it is wikkeldraad there is an enamel paint over the wire. Tried different solutions to get rid of it, aceton, terpentine. But it wont solve. Maybe wasbenzine. Well, i.ll keep on trying. Thanks for helping me out Jan.
- 193 replies
-
- 2
-
-
- wilhelmina vii
- fishing
- (and 1 more)
-
Thanks Jan! Seems available after all. Will make an order and see.
- 193 replies
-
- 4
-
-
- wilhelmina vii
- fishing
- (and 1 more)
-
haha, I am in the electronics business.... But no 1mm solid core copper. The main there is either stranded wire or solid core but then 1mm2 or up. So As said I do have the 0.4 and 0.5 but 1mm seems hard to find. And some times you find 1mm brass but as said above that tends to be quite stiff. Well we keep looking. Thanks for all teh help/answers. Hans
- 193 replies
-
- 4
-
-
- wilhelmina vii
- fishing
- (and 1 more)
-
Yes indeed. And I dilute it with pure white spirit. Learned in another thread here and on some other forum.
-
July, and the weather keeps good here, too good to be really busy. But some progress was made. I proceeded with the main mast, cap and top and also the formast. I enjoyed making the top (mars). I needed some workabouts to get the nice round sphere. Fine tuning the size and shape. here the hings holding the outer ring are still too bulky, I sanded them into a smaller outline by hand. As you can se here. and the outer is glued and hold fast for drying by some tie wraps. Coated and dry fit on the mast The status as per today. Now the top for the foremast. Also some experimenting with oil colour for the hull and decks. The smaller parts like masts gratings ornaments will be in 'beits' the colour as per previous picture.
.thumb.jpg.67968a2bff0d0c8406e83ee7650cf43a.jpg)
.thumb.jpg.815308fcdb62317e7750363daf2c844c.jpg)
.thumb.jpg.313ddfc0dcbbcaaf18c920adb4e61130.jpg)
.thumb.jpg.54a0bbf43117e21719cf80d6b16a0da6.jpg)
.thumb.jpg.e0ae427b098aa088e852499ad7bb17a5.jpg)
.thumb.jpg.7ad662f69a28fb2d3fddde87fd4e82b0.jpg)
.thumb.jpg.ba94bc0ae4cc0226407739e1678ca4bb.jpg)
.thumb.jpg.50a68316710897419e0a7bfdc3028fc2.jpg)
.thumb.jpg.2f753d8081c062a50fa370337315a828.jpg)
-
Kees, very nice!! Question: the copper wire is that 1mm? where do you purchase that in NL? I do find 0,5 but I also need 1mm and can't find it. (Maybe not looking hard enough....) rgds Hans
- 193 replies
-
- 6
-
-
- wilhelmina vii
- fishing
- (and 1 more)
-
Thanks for the explanations. I will follow your build and further lessons about the historical building of our Dutch vessels with interest. Rgds Hans 👍
-
Another month passed by so time for another update. Not much has happened as we were out to the sun for a couple of weeks. As said I continued with the masts, below the 3 masts are the final masts outlined and all.. This was quite some ado to get them in the right angels in both directions... langscheeps and dwarsscheep... (Longship and sideships???) Next step the ezelshoofd and hommer, the pictures speak for itself but there was some mindbraking involved to get what I liked. As the mast were too long form mu turning device I had to invent a workabout...
.thumb.jpg.f2d50f548b903f12c17afacaffd47a73.jpg)
.thumb.jpg.14fca8d71ca258f6a11e623e1f6a2a06.jpg)
.thumb.jpg.3ee82685b7b5b8464ea5356a69cf8e7e.jpg)
.thumb.jpg.7868fbc390d4a09fbd489dfdb0759563.jpg)
.thumb.jpg.859a1243e12d23d19f62cfab8947d890.jpg)
.thumb.jpg.6fa0b67eb2de1500b769bccf5e571a4b.jpg)
.thumb.jpg.c494a71a3db05f5c7521a841d384d57e.jpg)
.thumb.jpg.32923558fff32aa406a8757a32473b2d.jpg)
.thumb.jpg.6554f9b8906d8fd8cf66152305d4edae.jpg)
.thumb.jpg.e147484c099f7ae64188216c4a0611d0.jpg)
.thumb.jpg.a87e756cf9e06173f92e9e83bbb28947.jpg)
-
More than a month ago so maybe time to give an update. Steadily working through the gunport hatches, a tedious and boring job. Fitting all in place.. Working the hatches into place and adding the gunwale parts. 4 But I am happy with the looks. Not too tight and perfect. I like it that way, as I am sure ships in those days weren't neither. Then the insides grounding. And I still like how it came about.. The next steps will be finishing the maingun deck so I added some loose parts that I build earlier for the looks. I guess any builder wants to see how it will look and cant wait to see the whole....?? Also I will be doing the final masts at least first parts, as I have been using too short counterfits. Below the right lenght cuttings ready for working on them. This I will do first as I will be happy to turn from the monotonous work of the gunports. (Please ignore the deformation of the mobile lens.. it gives some strange angles here and there)
.thumb.jpg.37c61fb193406c548fa728eec8b7e3b7.jpg)
.thumb.jpg.63f9e59d02335d428da2757ba391de6b.jpg)
.thumb.jpg.7e096cd938fc3f9a5f115bccf79dd956.jpg)
.thumb.jpg.4fd4fdf635567555ec9078b185141fe9.jpg)
.thumb.jpg.8f5539a6fe6e80051f2f2ad14b32076e.jpg)
.thumb.jpg.d6d09437692826fa483cbfdde3bcc4bb.jpg)
.thumb.jpg.55eba5d287885b9ea89ec3c91ee2d060.jpg)
.thumb.jpg.12cae8be453a34808e2cc3fac3ab3712.jpg)
-
In the meantime we have advanced. I build a new clamping/workboard. As there is no longer need to hang the ship upside down and I want free space to work all around the ship. The next steps are working gradually upwards now. I have to finish everything around the main gundeck before I can close the next deck. A test with a 3D printed model of the emblem Filling the gap to be able to add the planking Then the gunport rabbits and hatches Rabbit sanded to follow the hull. And so far for the port side, now on to starboard side.
.thumb.jpg.39ded5a46081ec1511c66250f94afbc5.jpg)
.thumb.jpg.c11ae37fdb72339e94be013b9b5eb5d6.jpg)
.thumb.jpg.c7a6ef268ad8382b1e7cf4f3fbc57aa5.jpg)
.thumb.jpg.68b6ec7852c7624a34328f931c5aa2fe.jpg)
.thumb.jpg.f2360b1cc723aa34c84d79873151149b.jpg)
.thumb.jpg.f71dd094d6c9b9238a0a6a12c5d09101.jpg)
.thumb.jpg.2808a326a1a65ce2d483a66357aa55c9.jpg)
.thumb.jpg.43c25ae41a0d14bd4ef898f7ce4b9040.jpg)
.thumb.jpg.b711f4ccef5c50f9f764a88e52d541cc.jpg)
.thumb.jpg.1040fa07afbd045b882daa61a891a391.jpg)
-
🙁🙁 If I only were a year or 2 down the road I would apply... but rigging is too far in the future I guess...
-
It seems the build of Mr. Hollom has been deleted??
-
I finished the rudder. I am really satisfied with it. I will not fasten i yet. Only in a later stage, just to prevent damages.

-
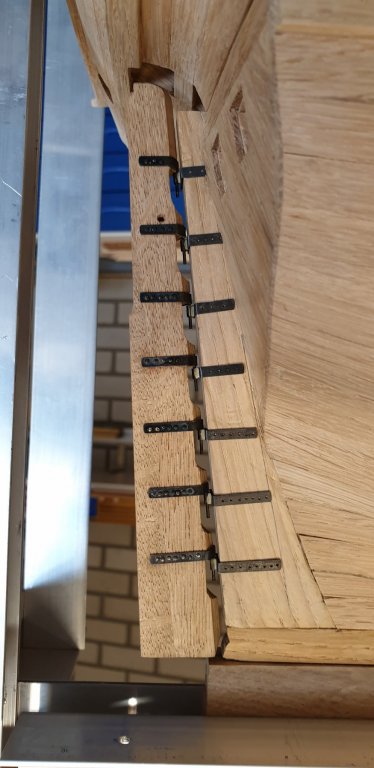
Hi all, (do not want to be gender specific....;)) I have returned to the hobby again after a full recovery of my hand. Thanks for all the good whishes. Just waiting to get the right hand done, but that will be spring somewhere. not just yet... I have started redoing the rudder as said. I am using mainly the method used by Drazen (Thanks for that!) I think the photo's are mostly self explanatory. Its a slow learning curve but I like it very much although progress is slow. I made the rudded out of seperate parts of wood, taking care of the grain direction as to prevent as much as possible deformation. And I decided to do the hinges also from scratch. Previously I used Amati hinges. I In the background the Amati hinges from the previous rudder. I had a big problem blackening the parts. I left them much too long in the solution and 2 were totally 'eaten' away. I did 4 pieces again. I on purpose made the bolting a little out of line. I like the looking of this. And now up to the counter part. I hope to finish today.
.thumb.jpg.402d95c18c88fb1f78ddd06f6b1245b8.jpg)
.thumb.jpg.88b5984f67420fcb3dc3592212451ec4.jpg)
.thumb.jpg.c841cc8236825e8b79b8f66899b821af.jpg)
.thumb.jpg.c1e95c6b42927abef9098fb5beac60c2.jpg)
.thumb.jpg.048dc4a1a9a3f55445625a35bbdc6394.jpg)
.thumb.jpg.f6ceaabe7363a91868d500bae4b782a3.jpg)
.thumb.jpg.bd14f4a6d1f020a505ee7020a8f8ffe4.jpg)
.thumb.jpg.7950b7247d594c66382accac5614ee6e.jpg)
.thumb.jpg.414af3f19d06194cba38e01696dbf098.jpg)
.thumb.jpg.8e2d1a3ce5e1d3af1ab1abb43a357792.jpg)
-
Thanks for all your good whishes!!!
-
Just a short update. Its been very quiet and I haven't done much. I have had surgery on my hand and that takes more time as expected. I also neglected to take it easy and that put me back again a couple of weeks. Also the motivation is low. The weather is cold and bad and I need to go outside to the shed.So I guess it will be untill next year before I will continue. Don't worry I'll be back :)! Hans
-
Well its been more then a month, time for an update. I finished both sides with the gunport inserts/rabbits It took me the majority of the past months. Still also some small corrections but I am happy withe results. In between sides I stopped for some diversion to work on the gunport lids and hinges, just as a test. But I am not satisfied. I have to find an easier method to make them in qty. For now the work will stop a couple of weeks for holiday. The next step I decided to do the rudder anew. I made that in an too early stage and I want to improve it and more realistic. I just became more and more unhappy with it.
.thumb.jpg.3ebd729c340e314bcc898be38882f46e.jpg)
.thumb.jpg.8d16671ca51bc2746ca21f8dff6b4ab0.jpg)
.thumb.jpg.46d41bbc6e92c1be034bbb6248262b3b.jpg)
.thumb.jpg.fff9a3fa803891247a1f481d1b7d011c.jpg)
.thumb.jpg.751d5c38ccab368822c9537a833ed242.jpg)
.thumb.jpg.e3f96948e1ffd24eb410b11168f32239.jpg)
-
I am joining in, great techniques to be learned here!! Very nice work indeed. Grtz hans.
- 193 replies
-
- 4
-
-
- wilhelmina vii
- fishing
- (and 1 more)
.jpg.22f10bf8ff40016aa48234690220a887.jpg)
.jpg.98fedf913e9621a0344e0eba4c90a5ad.jpg)
.jpg.f7a5f6dd55c5486f5cd874ae028a42b0.jpg)
.jpg.f150efe395c4659f2efd930bfd0d95b9.jpg)
.jpg.d6651df7955748f4384580bda367519e.jpg)
.jpg.9b7b896089b5ba527f52e28a9d411fec.jpg)
.jpg.d1da85e867241216e0815605902aff72.jpg)
.jpg.ef63693493bdb88e17bb5bceae321575.jpg)
.jpg.ed08fbe92144030144bac2933aa76691.jpg)
.jpg.912cb8825b66eb09f48ae579277aef2e.jpg)
.jpg.3e541892fbf6fa429852156a36c6efcc.jpg)
.jpg.799987e451278b9bae1f313ba899c8a6.jpg)
.jpg.c395298f16e8267b2faf1d2a112baa35.jpg)
.jpg.3bb2ee84ca75ebc28808fbb6f9d5a898.jpg)

.jpg.d953e92fad08b74ffe34844e5f4bf830.jpg)
.jpg.75d958e1d44a422d329233dbb70dae3c.jpg)
.jpg.ae56198f7d7a62b456fa566ad3afff79.jpg)
.jpg.20da53fd52cdd4968c6b8c9314d1d7ca.jpg)
.jpg.8396b796767682203023e08de5c8e1c1.jpg)
.jpg.5a39cacce70340a572705331e6eed88b.jpg)
.jpg.7f233aff3eac99c28fbad1cb1d517cf1.jpg)
.jpg.5cd60606f213d2b0f2ecef12e6a642f8.jpg)
.jpg.180db52f1a4031601f7224a3c4c8db0f.jpg)
.jpg.1b2e670242244e1760af3de4311c5c5b.jpg)
.jpg.40ec95091f2c4a567aab5d1f7a45be38.jpg)

.jpg.72029dfdfff4541e9b1dfbe8909bd7b0.jpg)
.jpg.6af7e38b55e376a08a1cfafff9d2dc77.jpg)
.jpg.f914f296dbc7124298a912f9c92ce9a1.jpg)
.jpg.b1bc5aa7497983b49c4c0984382d47d2.jpg)
.jpg.5ca3e7e81feb3a8c0e12c000c8843993.jpg)
.jpg.a25cd5b81cc4f420cc815e273298d923.jpg)
.jpg.db71927a64bb710bb2d5c5d41a0df1f3.jpg)
.jpg.0e75f6757544794770bd2402cbcb0021.jpg)
.jpg.2846d5e82b9106aae5364a4d125eb4e6.jpg)
.jpg.224feb22e953dd9100ef396ca446e3b1.jpg)
.jpg.ae89112b59770d22ad7bd10e4ed843e1.jpg)
.jpg.86fc30a095db25c3c49eaa1da9ba66e9.jpg)
.jpg.1bd4611d01209e0004b70adf52ec7aae.jpg)
.jpg.b3c9dcab3db4a6b26d7a75a1768b2dbb.jpg)
.jpg.4a12c4e9a62835fda5f37669be20c849.jpg)
.jpg.659fdddb84f23d489e66b71c585971f6.jpg)
.jpg.3f35155f62c7ed1030500335e7fdfd81.jpg)
.jpg.1e844f29a0863367905d44fc1a4efeb9.jpg)


.jpg.5e2fed97de7825023f3d9bb9b4979090.jpg)
.jpg.24d9cbe0f009170dd9b780c47bd90459.jpg)
.jpg.15951e1a13f41191e75f255554384cdf.jpg)
.jpg.945b4204a9b0a8b96615ac3a661bc2f8.jpg)
.jpg.09548506f85e5d17d224c55984338b5d.jpg)
.jpg.fe3e5e8db3e6147c9c03695f7a37678e.jpg)
.jpg.bdb1ba930d06578366e3ca7cc6a7b2fd.jpg)
.jpg.0a9ddc9c62defa6886e0969c44bd3854.jpg)
.jpg.8b0350f8c9d440a30fd6381e9ea4b299.jpg)
.jpg.2645e84e77890e08690cb46315589fee.jpg)
.jpg.9ff8e0263ab2a26cb9ea8b4a0bf84ea0.jpg)
.jpg.b432fbef181636199d27f04cd9ff16f1.jpg)
.jpg.77b53c76839243ee3f960c73d84b844b.jpg)
.jpg.b6568b4f02f502e1a8808fa8eb555a70.jpg)
.jpg.c98cec2af727c9e9b0baf96914add95f.jpg)
.jpg.96dc0cadf7325ade5dcef188be6ea25c.jpg)