


dzerbato
-
Posts
45 -
Joined
-
Last visited
Content Type
Profiles
Forums
Gallery
Events
Posts posted by dzerbato
-
-
Nice work. Your build is certainly making me eager to start my Speedy.
-
-
The brass blackening overall is going well. It's the first time I've used a brass blackener, but it's fairly easy. I clean the brass with alcohol first, then dip it.
-
-
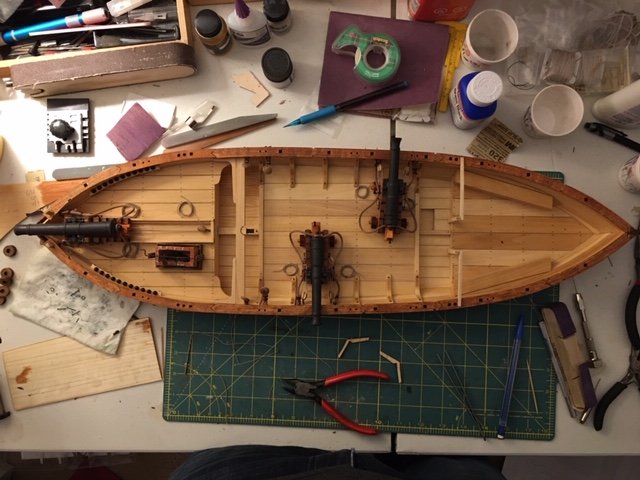
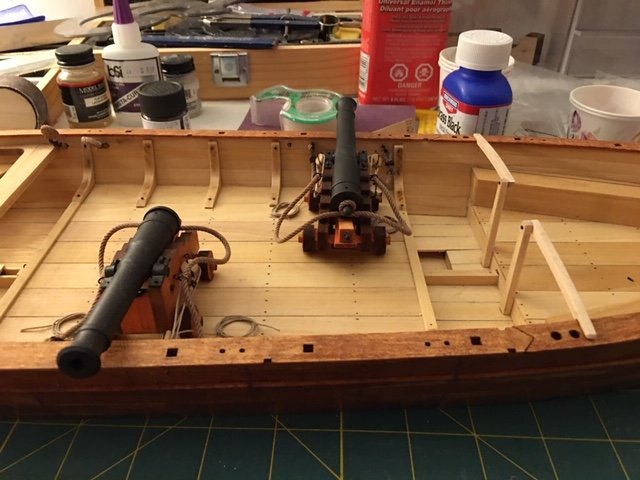
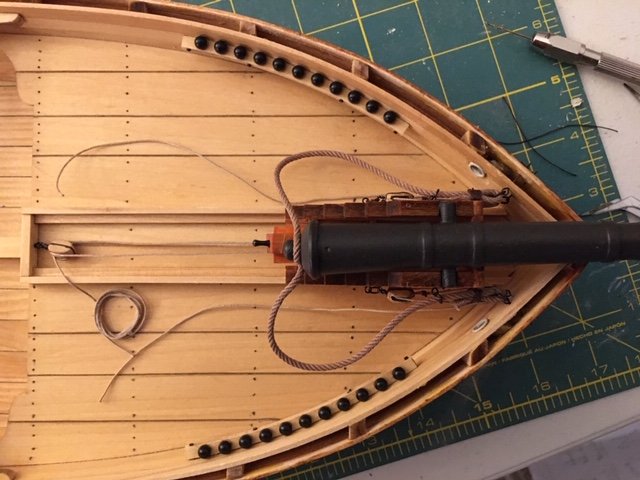
After a few weeks, I've made some more progress, but nothing spectacular. The cannons are completed now, the rails installed, rear rails installed, catheads and the swivel gun bases. The rails detail continues and I've started work on the rudder. I'm really enjoying this build and really like the scale of this boat. Rigging the cannons was very satisfying for me. Here are some pictures.
I stained the catheads Minwax natural to match the interior, but looking at this picture, I may refinish them to match the rail. We'll see.
.JPG.b8b31cbdd5669764aaa4877a701956d7.JPG)
-
You're doing a fantastic job! Did you end up using the kit supplied rail caps or making your own?
- mtaylor, Canute and BobCardone
-
 3
3
-
Thank you. The rope is from Syren too.
-
1 hour ago, DelF said:
Is this what you remembered? This is a different issue - I think Chris is referring to the method he has used on other models whereby the gun port openings are pre-formed by frames within the bulwarks. This would not be practical for Speedy as the bulwarks are too thin.
Our issue is about lining the inside of the gun ports to neaten the cut surfaces.
Derek
Yes, my memory failed me again. Thanks for finding that.
-
Chris Watton had mentioned something previously in one of these logs about the gun port lining. There was a reason it wasn't included, but I can't remember why. The width of the material may have been a problem.
-
-
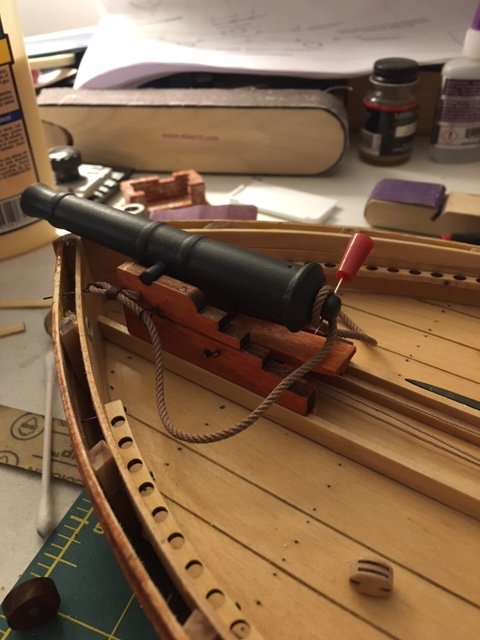
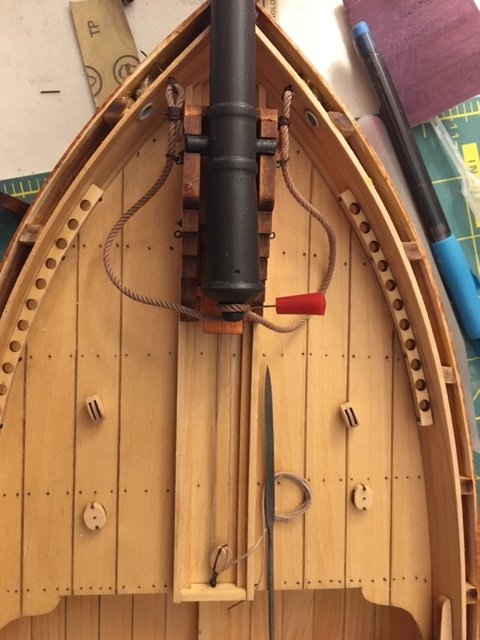
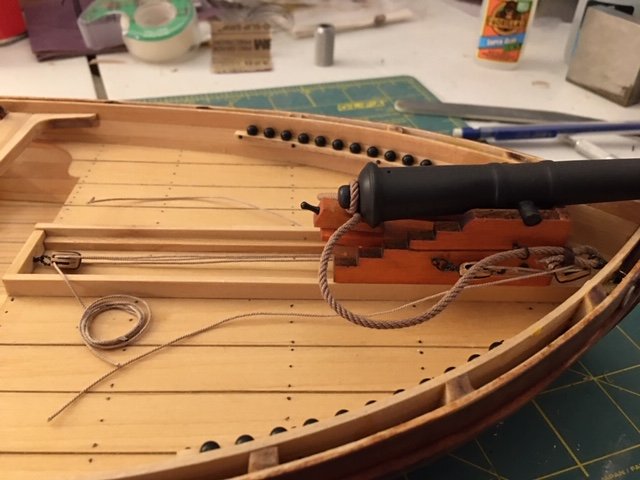
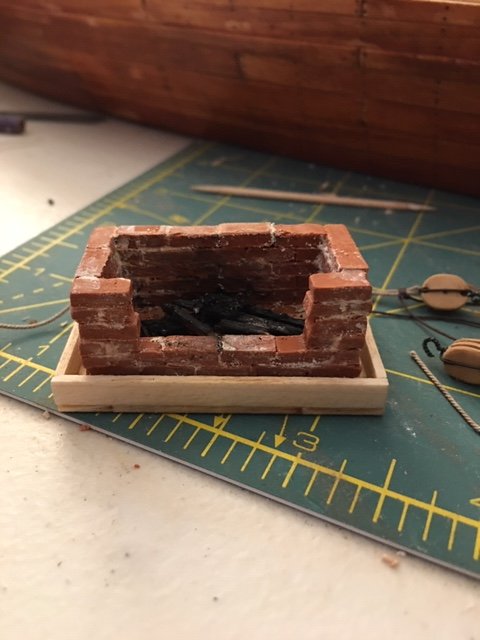
I've made some progress on this build. I've completed the cannon carriages, added the cannon ball racks, completed the stove, and rigged the 12lb gun. I must say rigging my first gun was pretty fun for me. The Syren rope and blocks really make a difference in the overall appearance of the model. I had never really thought about it, but the tackle really works (until I glued the carriage, lol). For the stove, I used the advice of some of the other builds on this site and make bricks using clay and the wood cutout as a mold. I used white putty as grout. It's intentionally a bit messy, but needs a bit more clean up. I added some burned match sticks and ash as well. I thought it came out pretty decent. I made one rope coil for the slide tackle, but that was a pain. I may just pre-make them and glue them down for the others.
- GrandpaPhil, JpR62, Canute and 1 other
-
4
-
I will be using the laser deck (version 2). The focus of this ship to me are the hull lines and rigging/masts. Minwax natural with a satin poly ages to a nice, soft yellow hue on basswood.
-
-
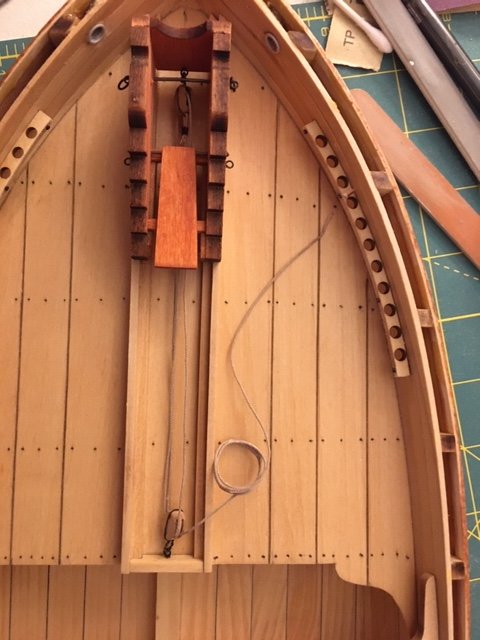
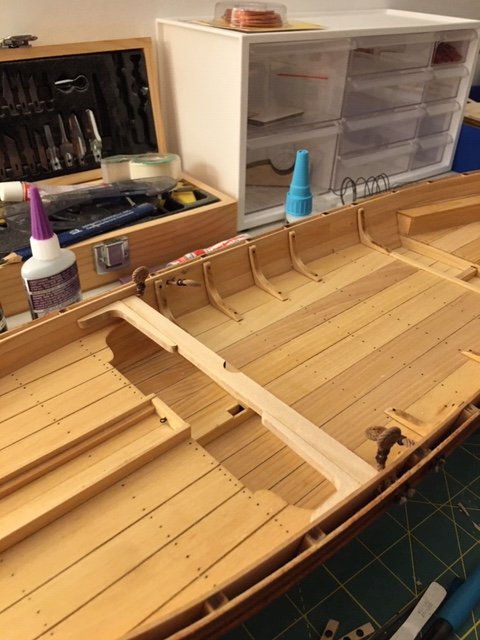
I now have the lower dead eyes completed, the mast partner installed, finished the haus holes, and have finished the exterior nails. The haus holes were done with 3/16 brass tube and the supplied kit photo etch pieces, painted a light grey. The lower dead eyes were not very complicated to assemble, but I did have some issues with some of the planking chipping as I drilled them, despite using a pin vise. I did have a minor issue with the location of the lower dead eyes compared to the mast partner. The dead eyes are located via a template provided by the plans. Given the location, I actually move the one closer to the mast partner in about another 1/16" as I was concerned about them fitting properly. The mast partner is located via a jig made from laser cut pieces. Of course, despite this, the mast partner still encroached on them slightly, but at least is located properly. For me, this isn't a huge deal because the dead eyes will still work fine, and the mast partner is properly located. However, if I did not move the one hole 1/16" closer, it would have been a much bigger deal and I would not have been able to install the mast partner in the right location. I don't know what caused this problem, as I haven't seen it raised in other logs. I thought I would raise it now in case anybody else has this problem, or at least to be aware of its potential.
.JPG.69c26d30232b6c47b6a4dec554c23e3b.JPG)
- Fright, GrandpaPhil, JpR62 and 4 others
-
7
-
Spilling can be difficult at this scale given the width of the planks, but I've learned there are a lot of different ways to get the job done.
-
You are progressing quite nicely. I'm glad to see all these Speedy build logs.
-
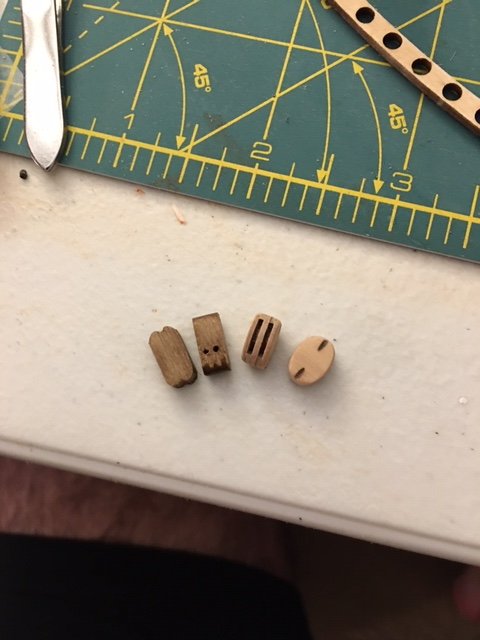
The nails continue, lol. As I'm preparing to start the gun rigging, I thought it would be good to show the kit blocks compared to the blocks I purchased from Syren. These are double blocks and made from the "kits" Chuck sells. I assembled the kits and they went together very easily. I then used a sanding stick to shape them. Each block took a 3-4 minutes to shape. I am waiting on a block tumbler to expedite things a bit for other builds. Now, to be fair, the kit instructions do recommend to shape the blocks a bit which I have not done. Anyways, here's a pic. I am certainly impressed with the Syren blocks, particularly at this scale, they really do make a huge difference.
- Moab, Canute, GrandpaPhil and 2 others
-
5
-
I haven't considered not coppering it, but you raise some fair points. I guess I'll have to see if I'm up to it, but at least it's a relatively small model compared to the Vanguard.
-
-
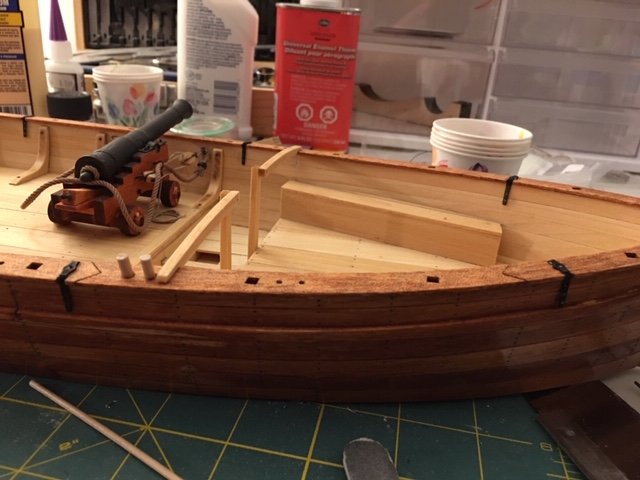
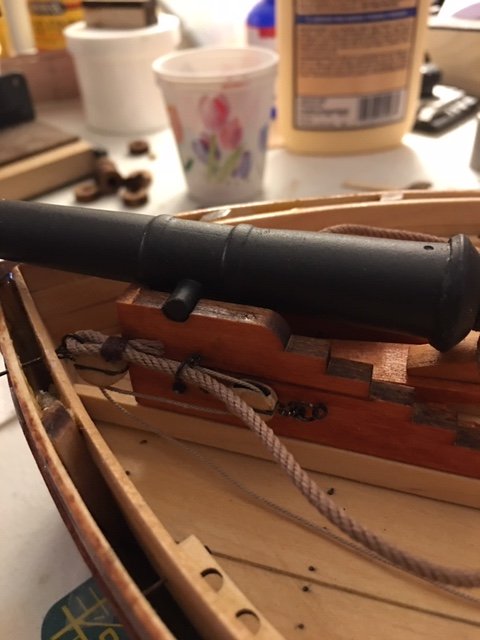
Just a small update. I've finished the 12lb carriage, and continued on the nails. They are not 100% historically accurate, but I like the look. I've been able to drill a number of the holes in the hull for various eye bolts and ring bolts as well.
.JPG.273fed0837d11090c590054073a1e2d2.JPG)
- JpR62, GrandpaPhil, BobCardone and 1 other
-
4
-
I had read about the mortar too. Apparently, it was removed and additional ballast added under the stern deck to compensate for its weight. Certainly a cool idea.
- BobCardone and Canute
-
2
-
-
-
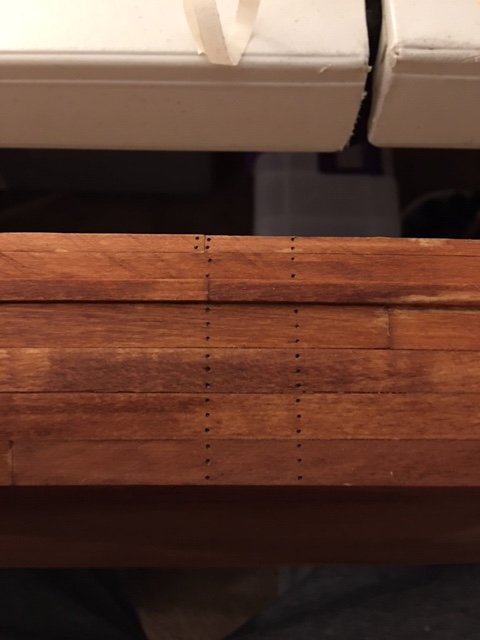
So I want to give credit where credit is due. While I'm sure others have done/created similar techniques, I tested BobCardone's technique for simulating nails, and at least at this scale, it's very convincing and easy to do. Perhaps with a harder wood than basswood it may be a bit more difficult, but for the small sample I did, it came out great. Very quick and easy. Here are my results after about 5 minutes. The ball point pen adds a nice indent which creates a great 3D effect. I did use thin masking tape rather than a pencil line to keep things straight. I just squared it up at the bottom to make sure it ran true.
Gunboat Philadelphia by dzerbato - Model Shipways - First Wooden Ship Model
in - Kit build logs for subjects built from 1751 - 1800
Posted
It's been a while since I've posted an update. My wife and I had our second kid in April, so modeling time has been tight, or I'm just too tired, lol. I have made a bit more progress and gotten some of what I'll call the harder parts done. The mast and yards are completed. They are made from wood dowel. I tapered them by carving to square first, then taking the corners down and finishing by using my electric drill and sand paper. The drill worked great and was very easy. I just left more of the dowel on the end to not have the drill damage the piece.
I also finished up the final touches on the hull. I added nails to the swivel gun stanchions and prepared and installed the two swivel guns that come with the kit. I added the various cleats as well. Next is to start the rigging.