HOLIDAY DONATION DRIVE - SUPPORT MSW - DO YOUR PART TO KEEP THIS GREAT FORUM GOING! (Only 13 donations so far - C'mon guys!)
×


slow2cool
-
Posts
114 -
Joined
-
Last visited
Content Type
Profiles
Forums
Gallery
Events
Everything posted by slow2cool
-
I have a disk sander from Micro Mark. It seems I use that more then any other tool. I set it up for " 0 " clearence. If you don't know what that is let me know I will send a pic. Also I have a dremel, and a dremel drill stand that I use for drilling, but also set up for a milling machine. If you would like to see I can send a pic. I think you will need some type of sander soon. Trying to do all that sanding by hand get old real fast. I am following your build so let me know if I can be of help, or shoot me a message. Joe
-
I am working on the same build. This is the first ship I have done with sails and ratlines. For some strange reason that I don't understand I really like doing them. Seems like it makes the ship the ship. You have done a great job on your ship, I am sure the rest will be just as good. Joe
-
Hi Rainbow Looks like you have a very good start. Planking is a learning thing. Different types of ships will be harder then others. The most important thing I learned is the planks should lay down without much force. I use the same bending tool as use have. It works well for bending the wood for the hull. I also use a curling iron at times. For your first build and the tools you have you are doing really great. I started out with a lot of wood experience, ( I built rc airplanes, and other wooden projects ) and had a boat load of tools ( power and hand tools ) You will get better, and it will be easier with every build. Joe
-
back akwards ???? proper attachment of buntlines
slow2cool replied to slow2cool's topic in Masting, rigging and sails
Thanks Tom I was going to go back to the future but, couldn't find a DeLorean, Mr Peabody wouldn't let me use his way back machine, so I will let it be. Joe -
back akwards ???? proper attachment of buntlines
slow2cool replied to slow2cool's topic in Masting, rigging and sails
Thanks for the link spyglass, it all seem so clear now. Don't know why it didn't come to mind when I was doing it. I am left with a. redoing all of them b. going back in time and doing them right in first place It seems that b. would be the easy solution. -
back akwards ???? proper attachment of buntlines
slow2cool replied to slow2cool's topic in Masting, rigging and sails
That's what I was thinking after I did it. This is my first ship with sails, so it has been a learning curve. Thanks so much for the info, and insight. Joe -
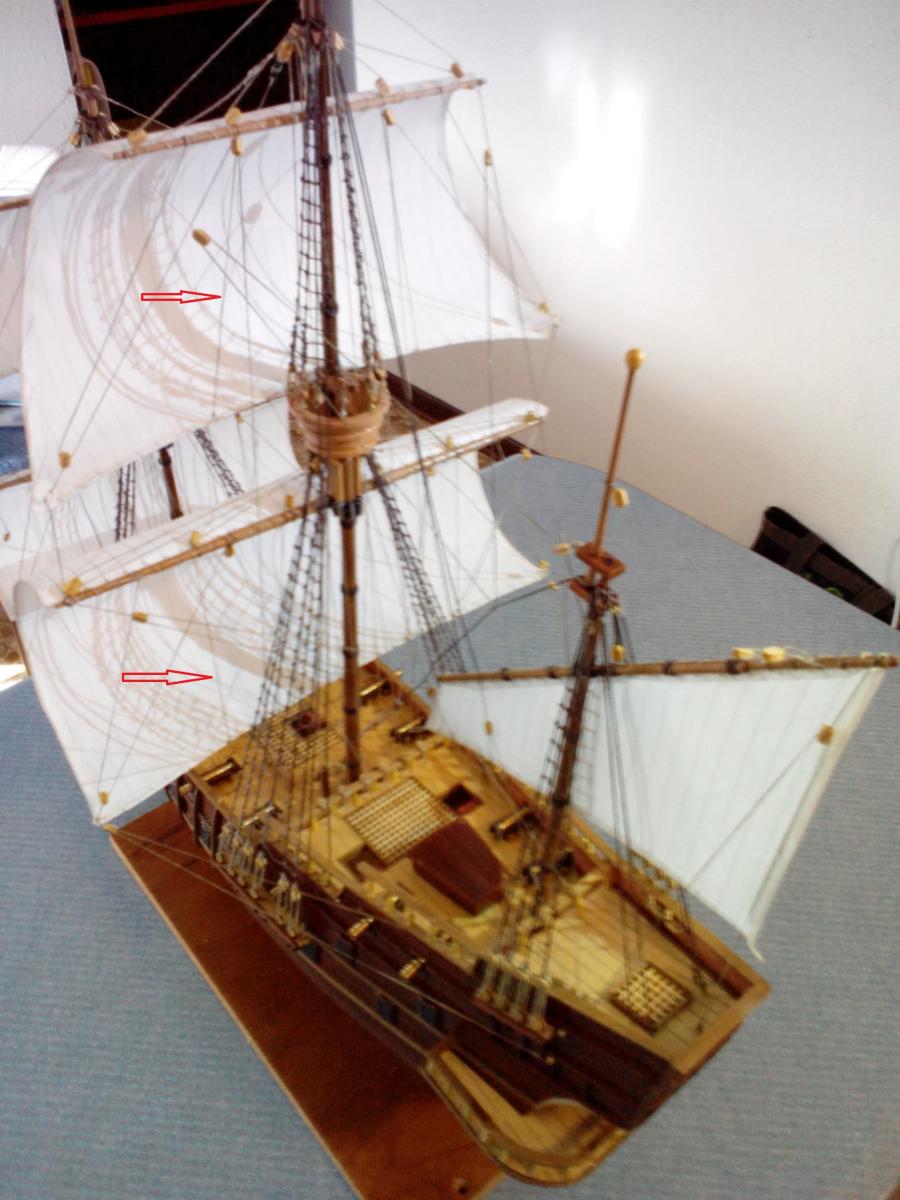
From the drawings I ran the bunt lines on the back of the sails. Looking at the picture on the box, it looks like they are running in front of the sails. Did I run them wrong????

-
Thanks for the info. I will tuck it away. I never would have guessed doing it that way, it sure sounds good to me. Joe
- 208 replies
-
- 2
-

-
- john cudahy
- finished
- (and 1 more)
-
WOW how in the world did you make those lights???? Joe
- 208 replies
-
- 1
-
-
- john cudahy
- finished
- (and 1 more)
-
Cutty Sark by NenadM
slow2cool replied to NenadM's topic in - Build logs for subjects built 1851 - 1900
Great work, looks like you work some magic of your own.- 4,152 replies
-
- 5
-
-
- cutty sark
- tehnodidakta
- (and 1 more)
-
Thanks so much for the info, my kit never even came with the red plastic Joe
-
LMDAVE I am working on the same ship, your lantern from your kit, looks way better then mine to begin with. What I would like to know is how did you get the red part to look so real??? Joe
- 114 replies
-
- 1
-
-
- san francisco ii
- artesania latina
- (and 1 more)
-
Bob is right you won't find it as future. I also have a old bottle, and found a new one at Ace Hardware. What you will look for is acrylic finish. I also use it for a sealer, primer, and finish. I find it 101 uses for it. Also great for putting on photoetch parts. Never thought about making windows out it until I saw your log.
-
I use my airbrush for so many things. I spray acrylic floor finish for my clear coat. You can look at my King of the Mississippi. Plus any other colors that I need. A little off topic, the acrylic floor finish will give you a great clear coat, it cleans up with water and is self leveling. I have used it as a under coat, or base coat for a top color. It will fill in gaps and pours with enough coats and when you spray on the color coat it finishes as smooth as glass. As for the airbrush, it all depends on how many models you are going to make in your life. You will need a fair size compressor, I have a pancake type. I did buy one of those very little ones that are for airbrushs, but I found it was always playing catch up and not giving me enough pressure. The airbrush I would say that will give you the most bang for your money would be http://www.amazon.com/Paasche-TG-3F-Double-Gravity-Airbrush/dp/B002N0QA9A/ref=sr_1_3?s=arts-crafts&ie=UTF8&qid=1454448860&sr=1-3&keywords=paasche+airbrush It will do Achieve patterns from a hair line to 1-1/4-inch That's what you want, there will be times when you want a hair line, and if you are painting the hull you will want 1- 1/4 inch Clean up is also easy, you want a brush that is easy to clean Joe
-
Henry Thanks for the info It's all clear to me know Joe
-
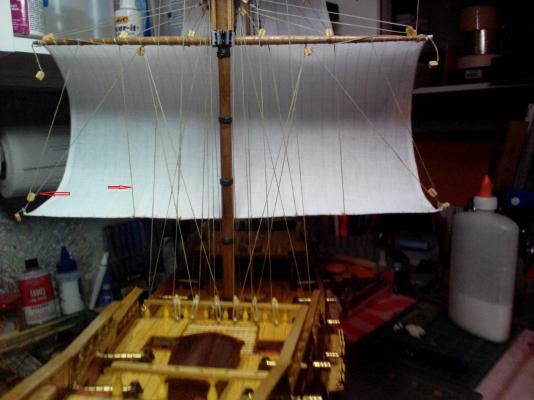
This is the 1st ship I have made with sails and rigging. My next one will not have the sails, I will just have the rigging. What I would like to know is from the pic, what and how would I do with crew lines and bunt lines ( the red arrows ) ??? Would I just not put them on at all ??? Would I put them on and tie them to the yard ??? What is done on a real ship that does not have the sails on it??? Thanks Joe
-
Just to let you know the windows I made are very fexible. I find a lot of uses for Future Floor Wax. I put it in my air brush and finish my models with it. It is very forgiving and self leveling. It's almost imposible to mess it up. If I paint wood I use it as a base coat, sand it down a little, paint the finish coat, it comes out very smooth and looking like glass.
-
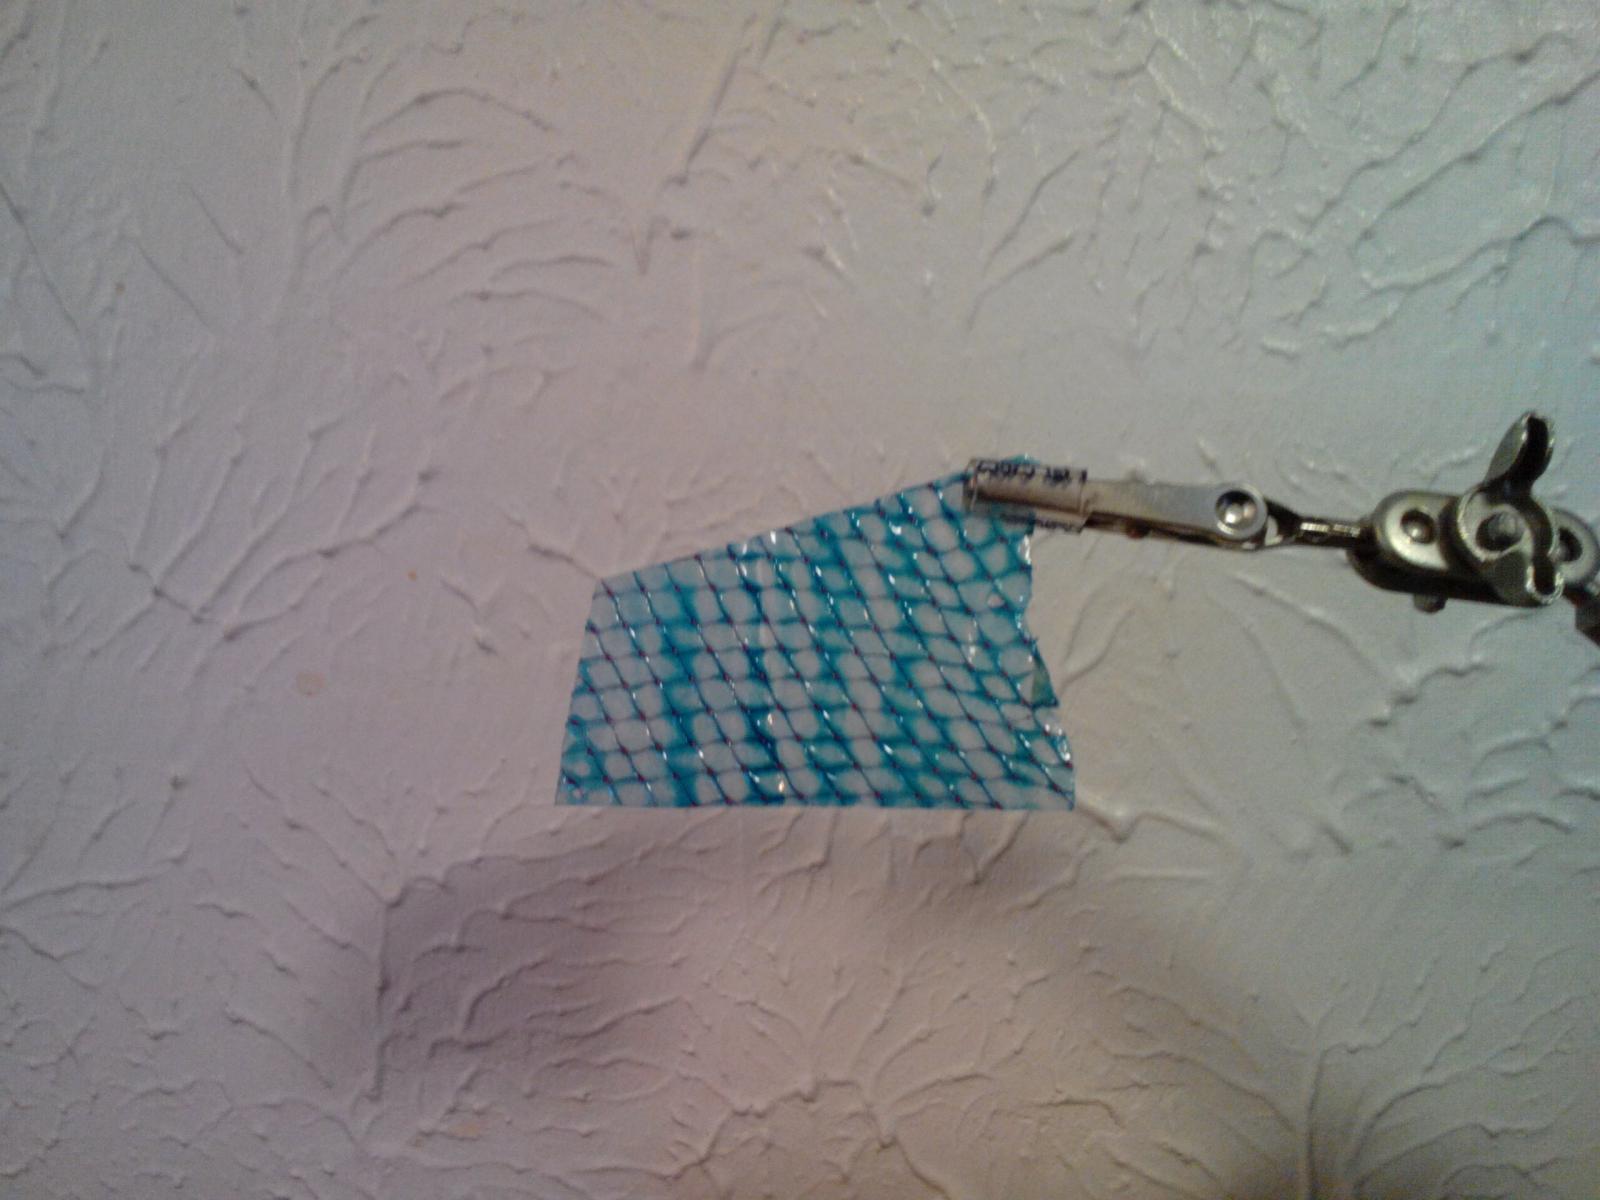
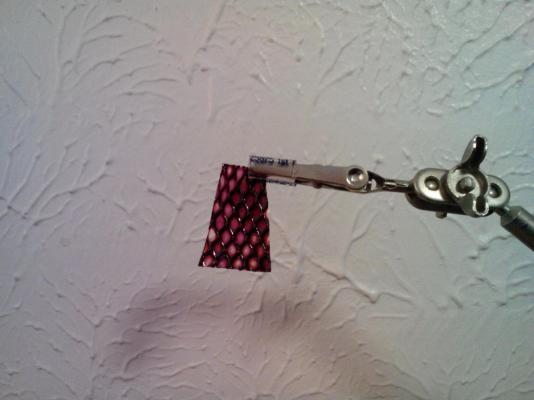
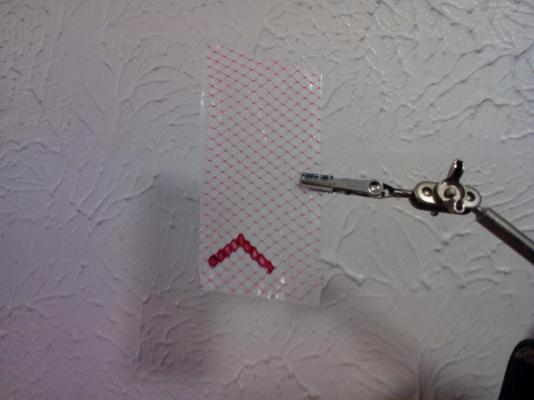
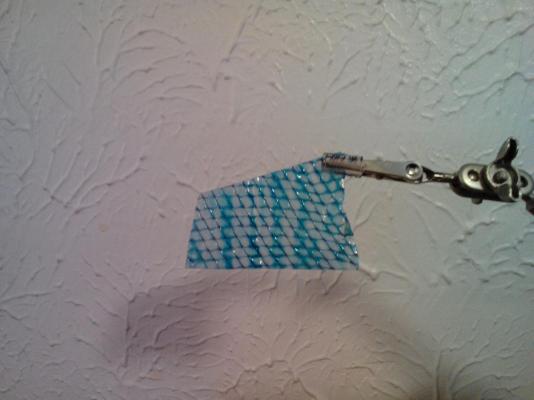
Pics of windows using future floor wax and food coloring 1st pic is using cling wrap for backing, comes out very clear as you can see by the divers helmet in back of window 2nd pic using cling wrap and food coloring in the wax then pouring on netting 3rd pic using wax paper for backing, this gives a frost look, the red windows are food coloring mixed with the wax and put on with a paint brush after the clear wax dried 4th pic using wax paper for backing and mixing food coloring in the wax then pouring on netting Thanks for letting me post Popeye Joe

-
Hi Popeye I did a test using Future Floor Wax, with clear wrap, and wax paper I did it with clear floor wax and some with food coloring in the floor wax Is it okay to post the pictures on your log??? Joe
-
I have been followong your build. When I have some time I was going to try making windows. What I had in mind was to use the netting, but I was going to try future floor wax. It is still water based, so I was thinking about using food coloring. Not sure is I should put the food coloring in the wax then pour it into the netting, or try the food coloring on the wax in the netting when the wax is dry