HOLIDAY DONATION DRIVE - SUPPORT MSW - DO YOUR PART TO KEEP THIS GREAT FORUM GOING! (Only 20 donations so far - C'mon guys!)
×


CharlieZardoz
-
Posts
969 -
Joined
-
Last visited
Content Type
Profiles
Forums
Gallery
Events
Everything posted by CharlieZardoz
-
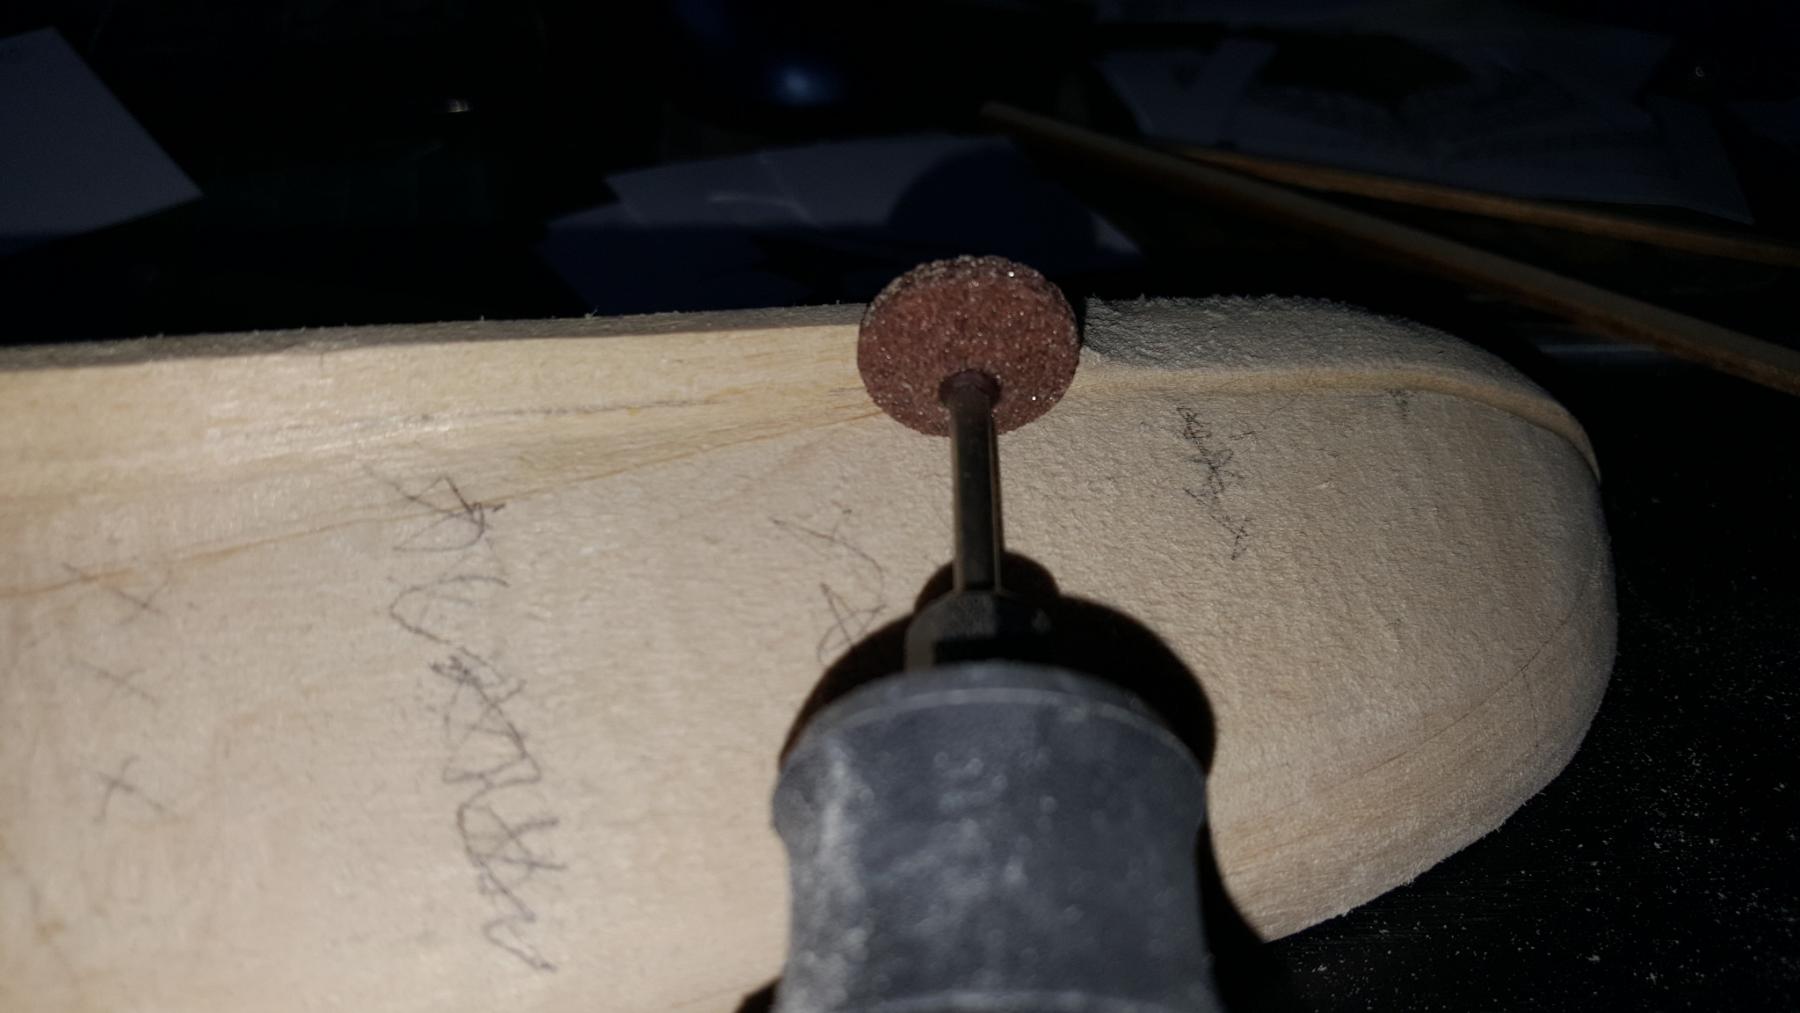
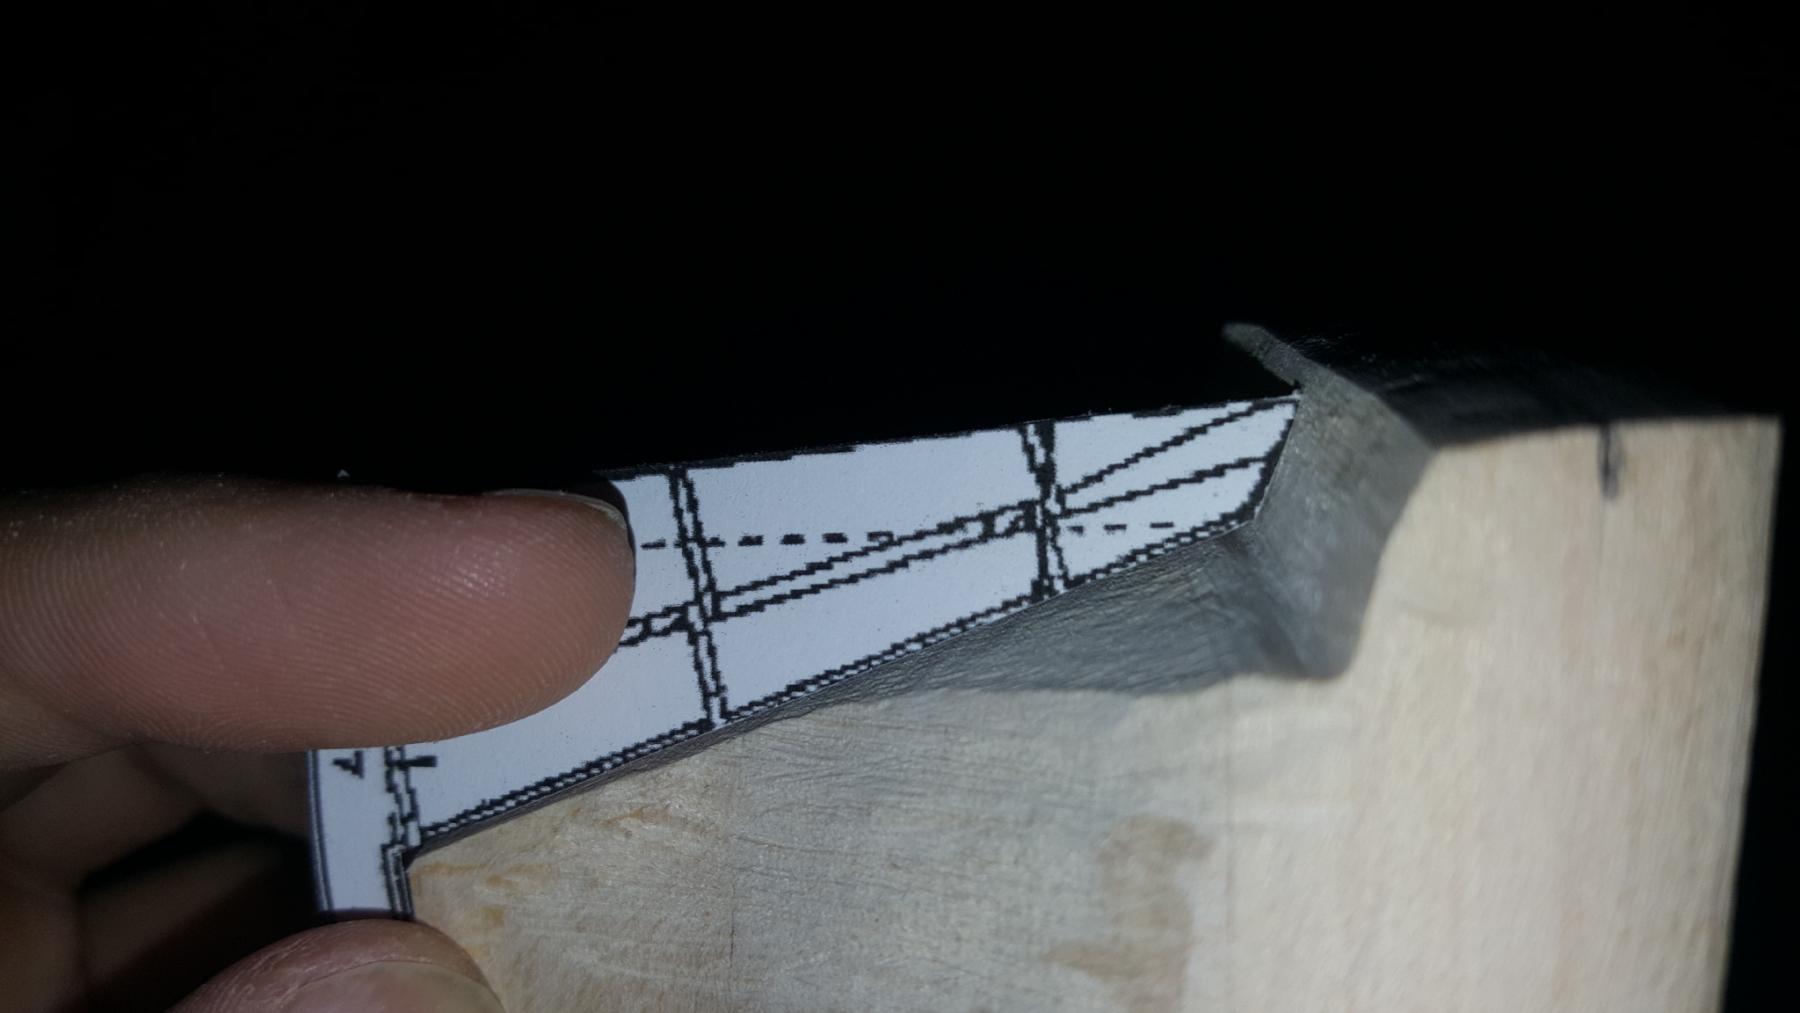
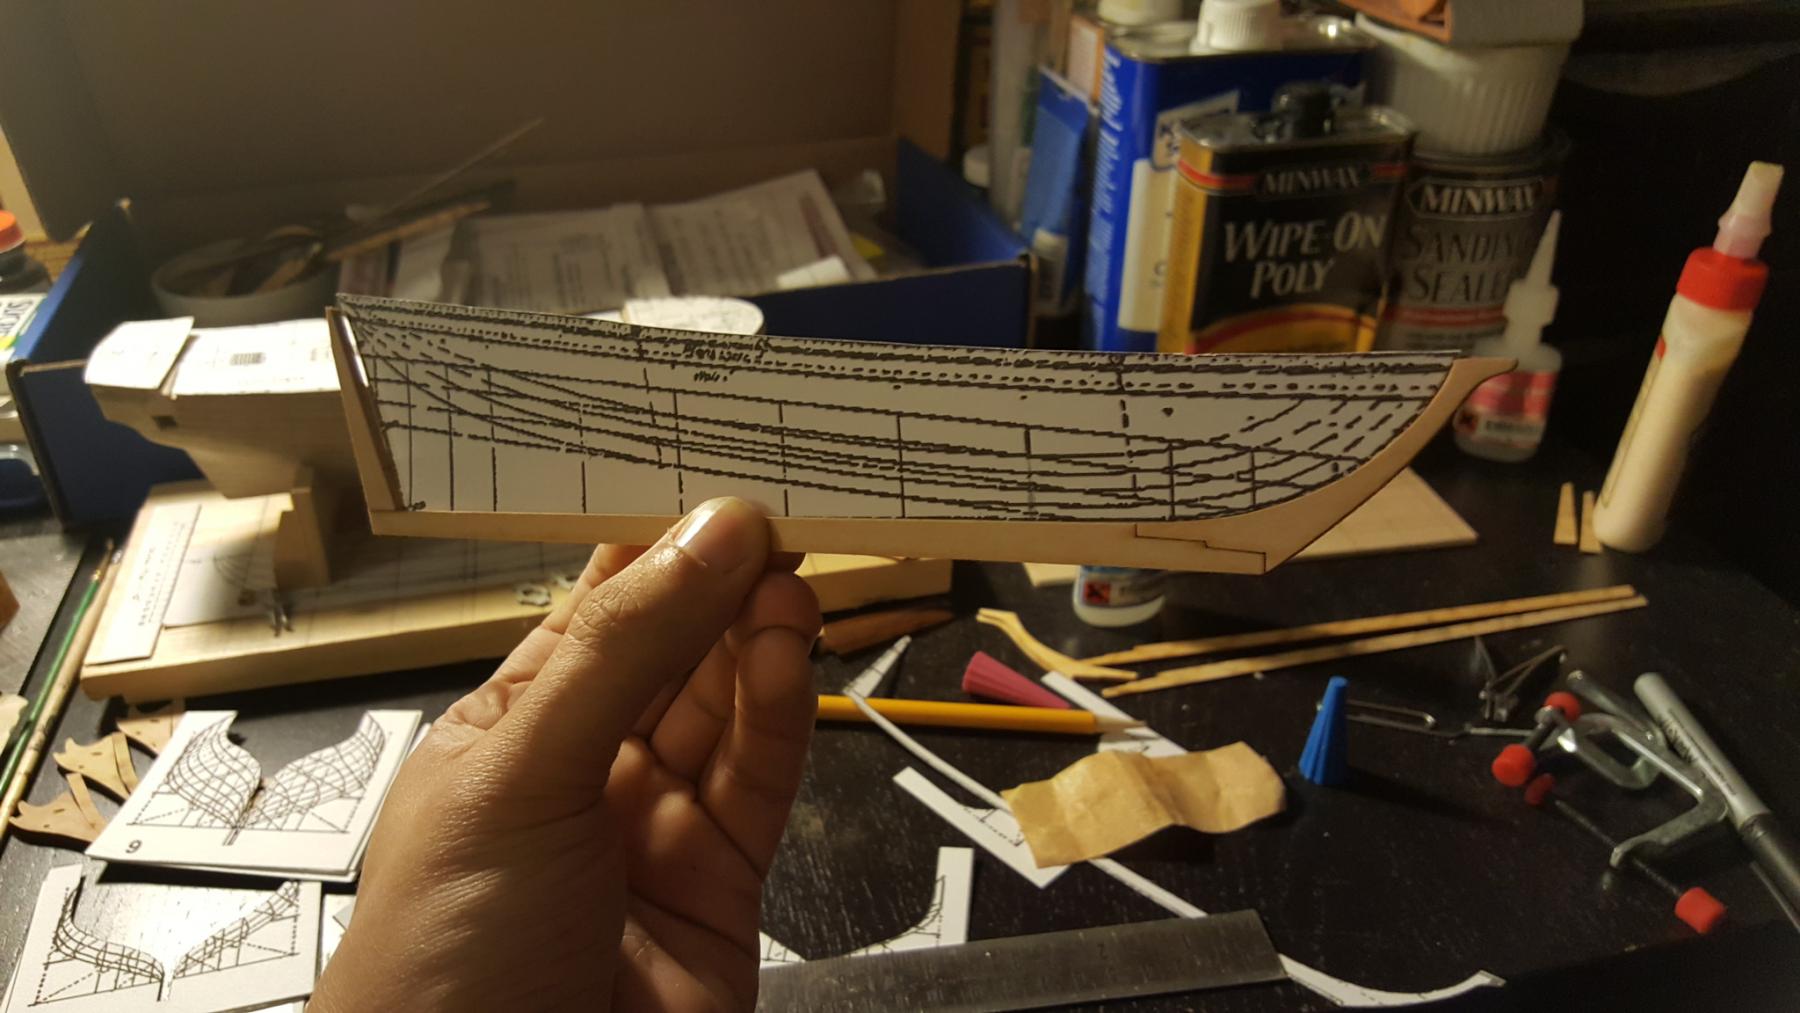
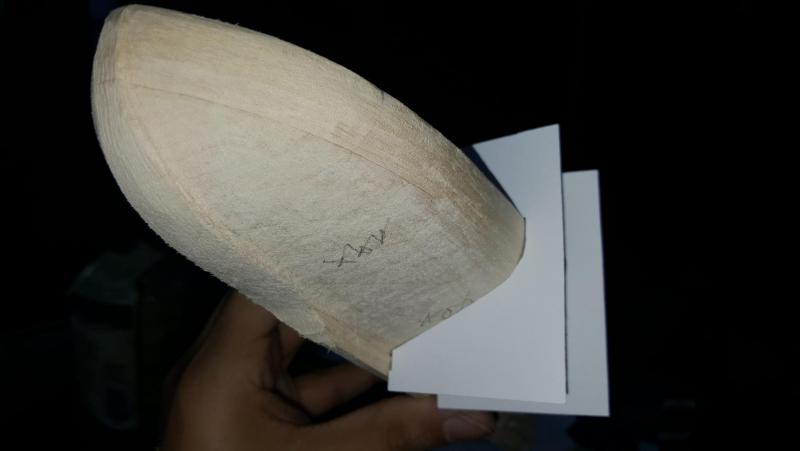
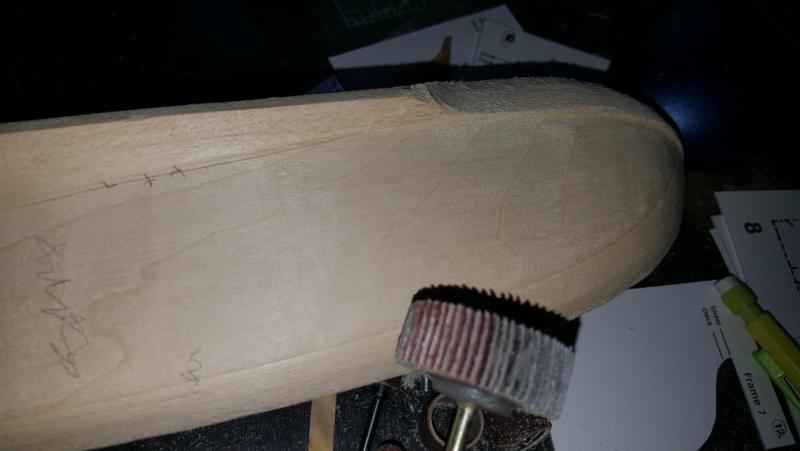
 The keel now fits where it should. Notice the beak overhangs a bit. This is correct and in the proper keel (made in cherry?) I will have the beak extend about a quarter of an inch onto the top deck. The lines on the hull will be redrawn a few times but they help me know where to sand. The xxxx's are where the templates brush into the wood incorrectly so those areas are where I sand next. EzPz!
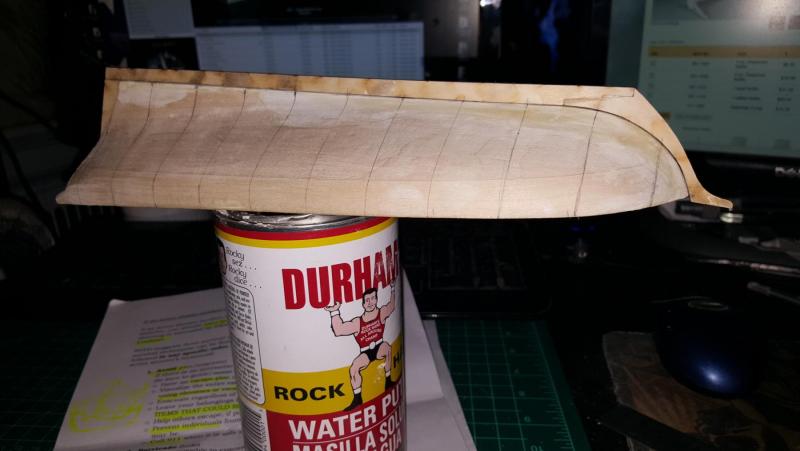

- 362 replies
-
- 3
-

-
- active
- revenue cutter
- (and 1 more)
-
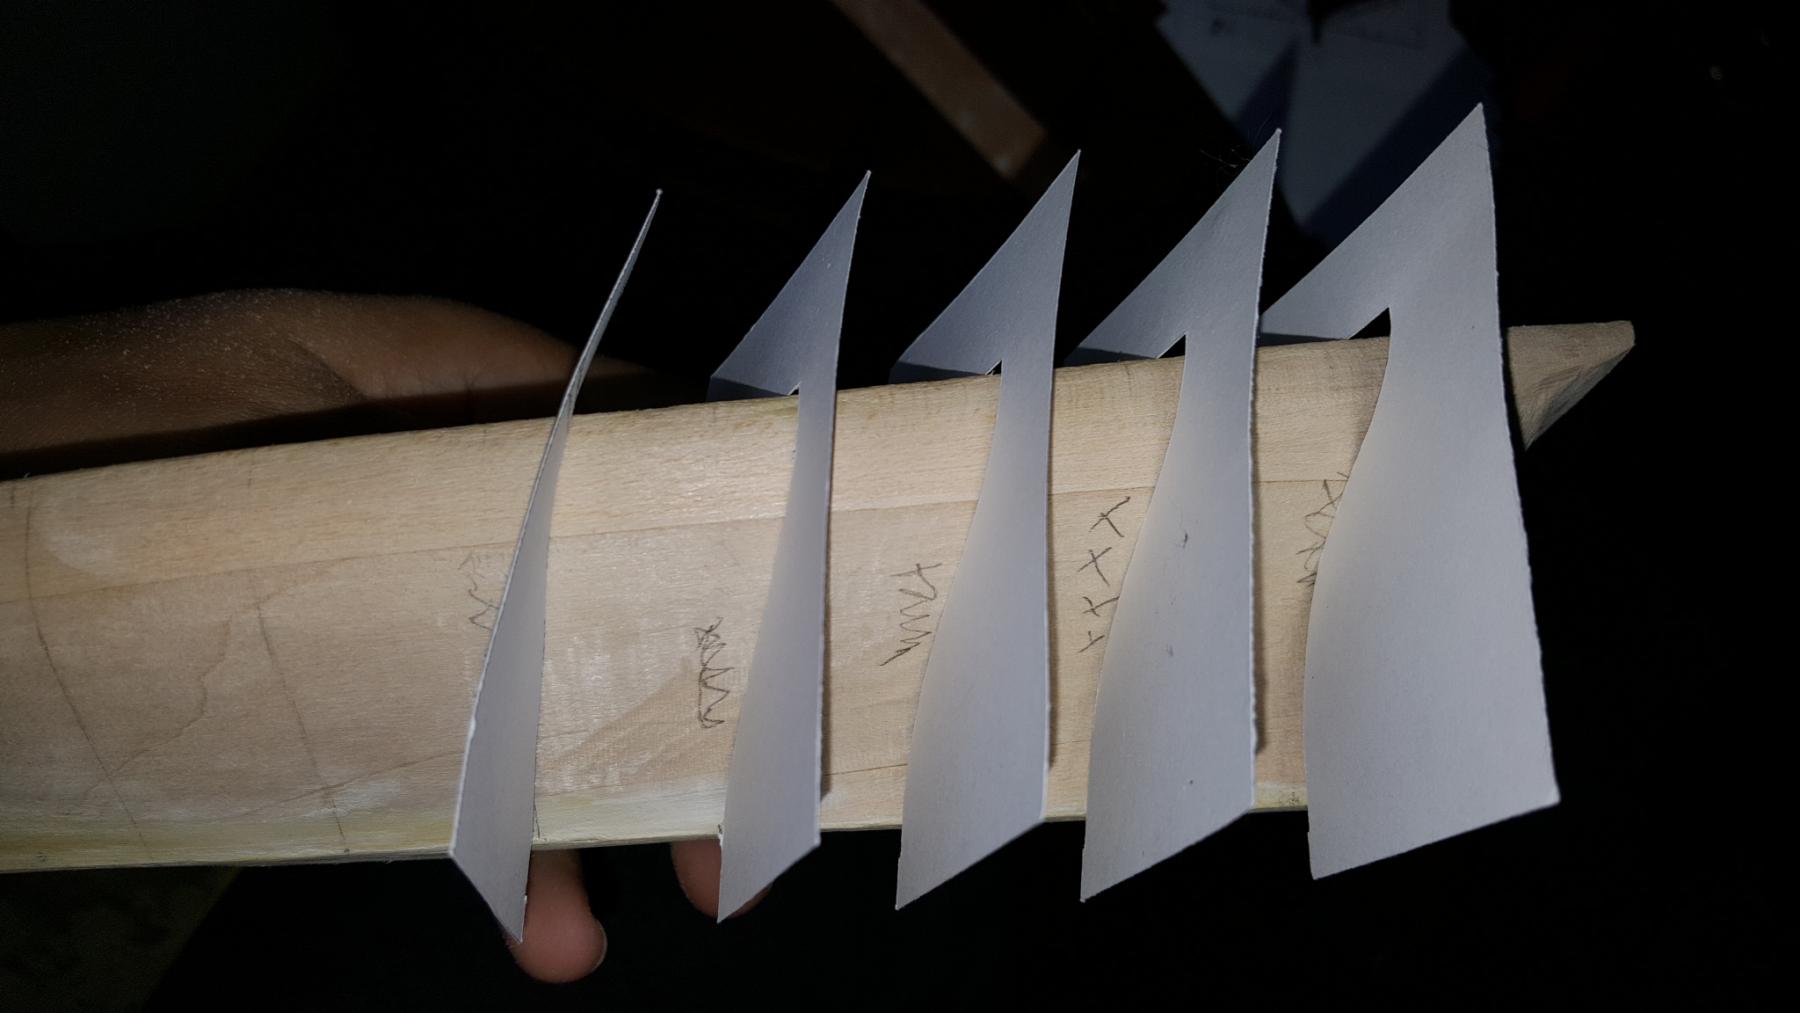
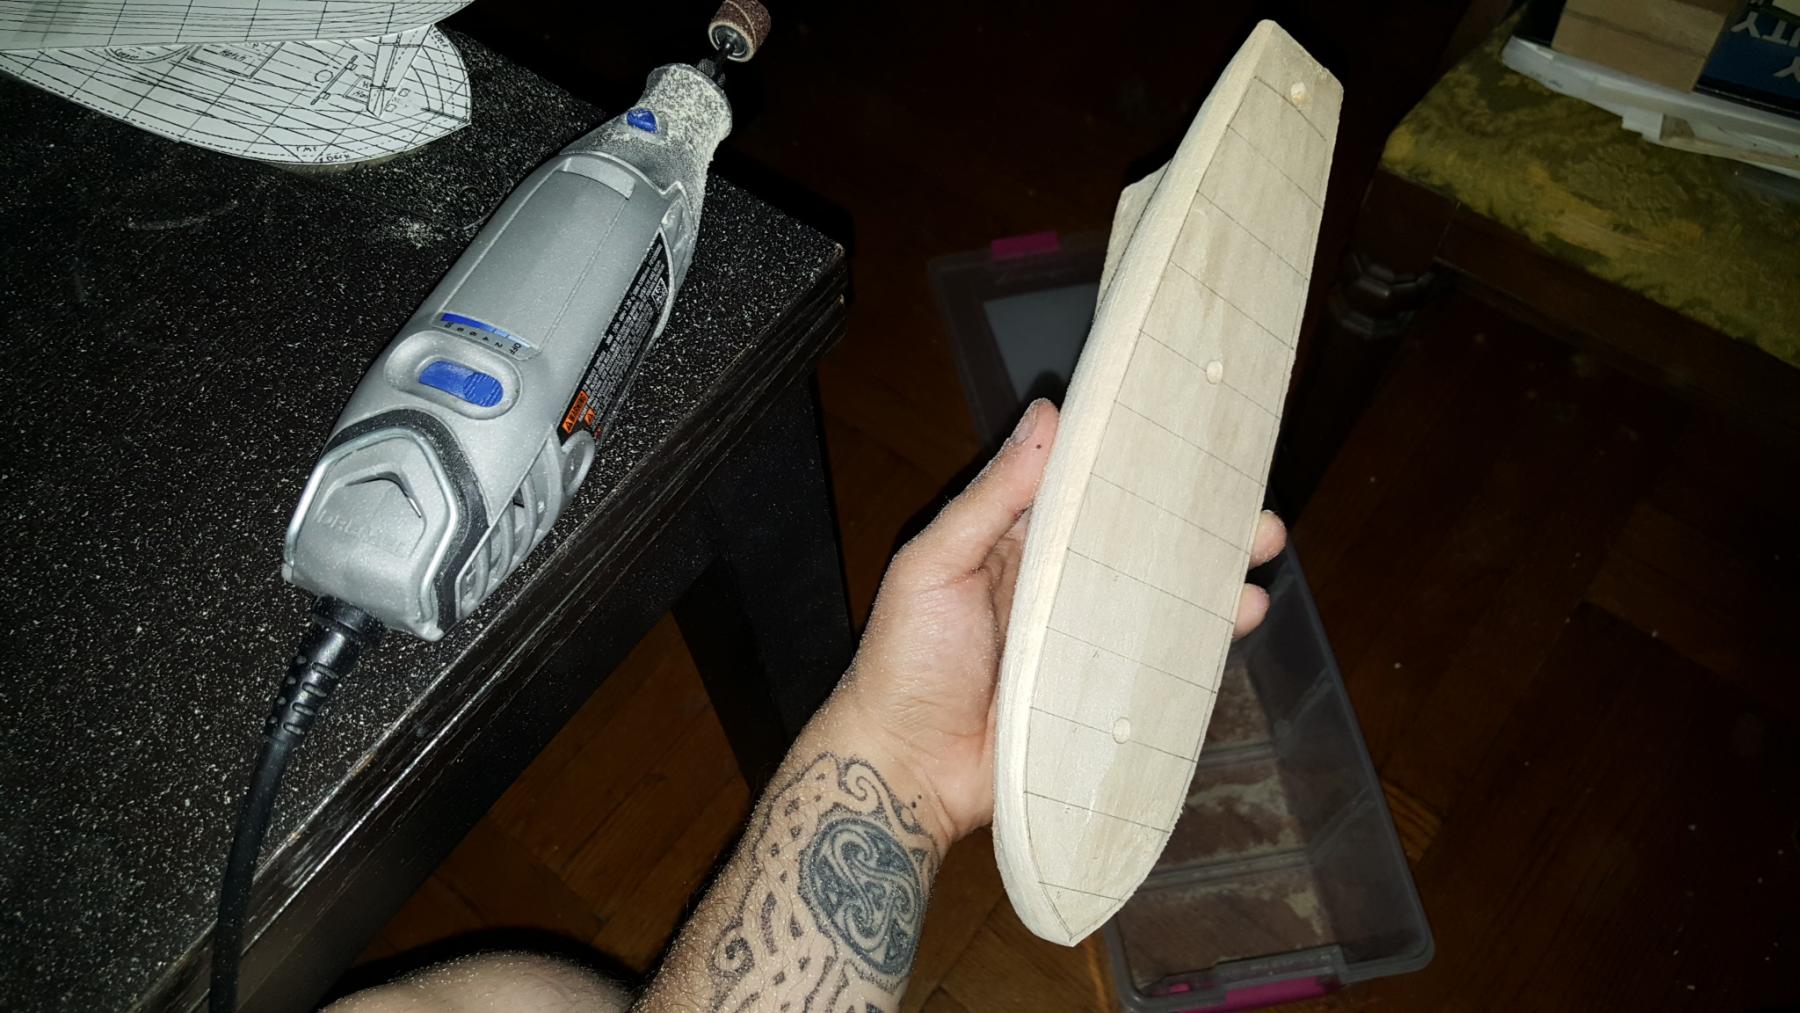
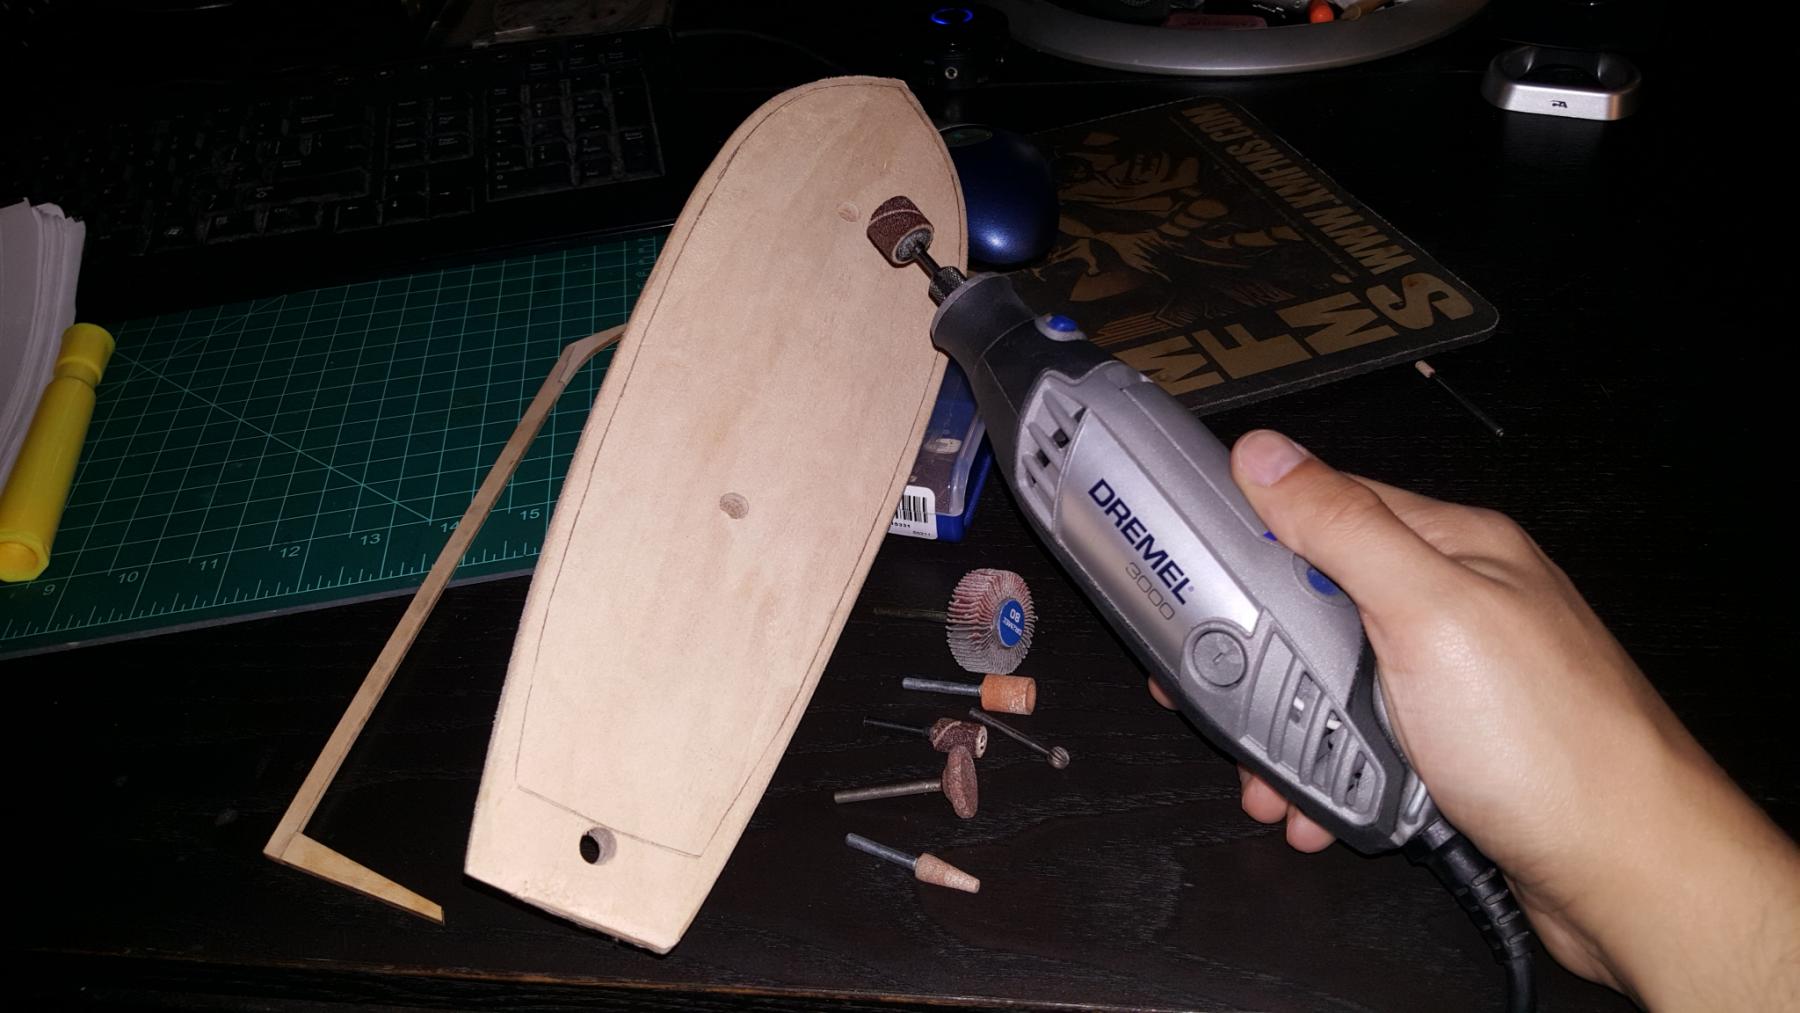
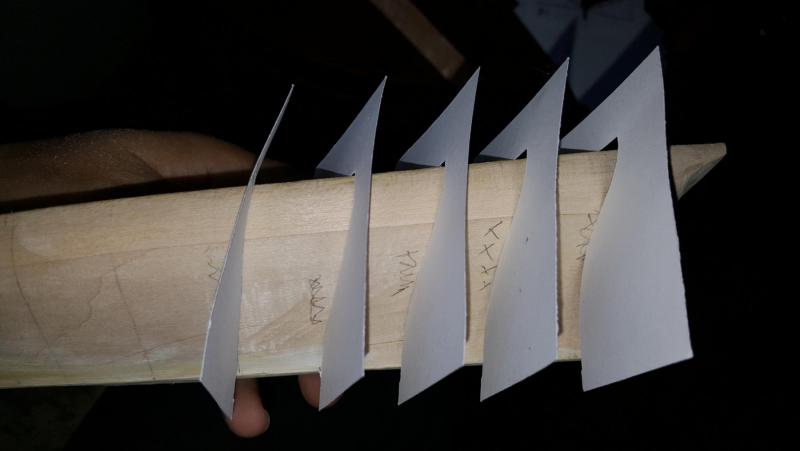
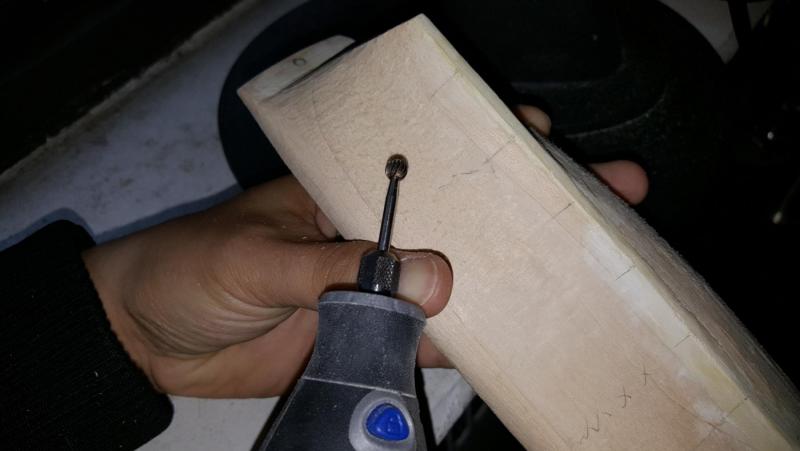
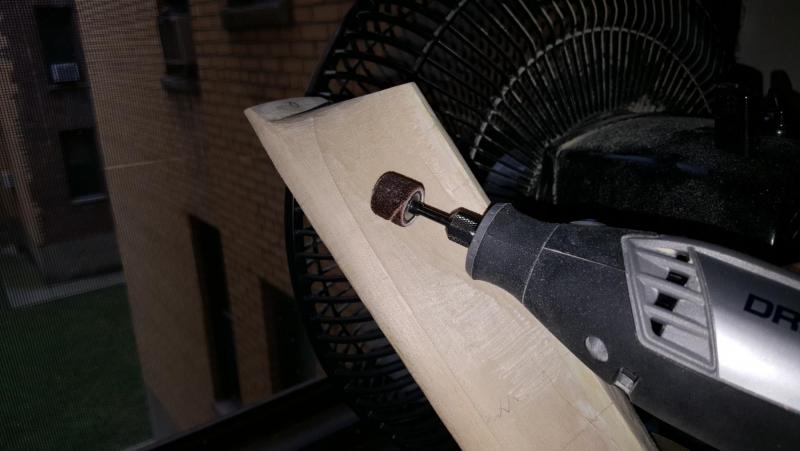
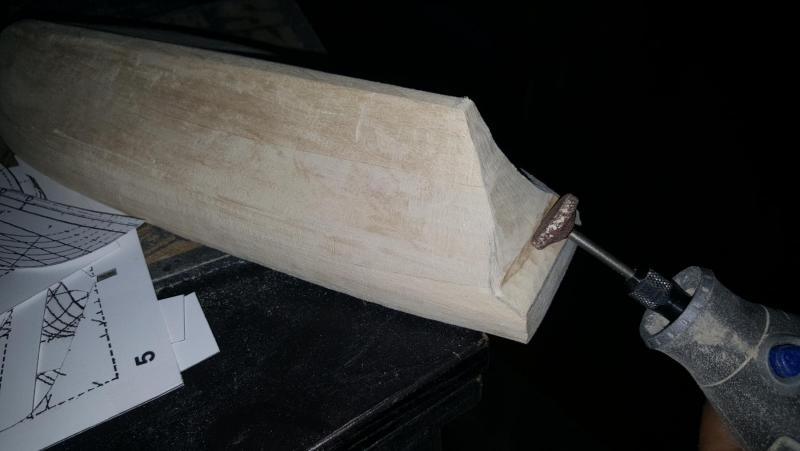
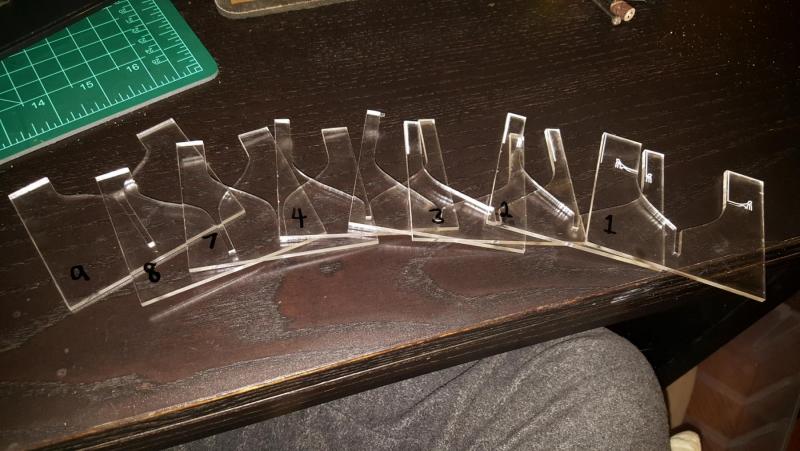
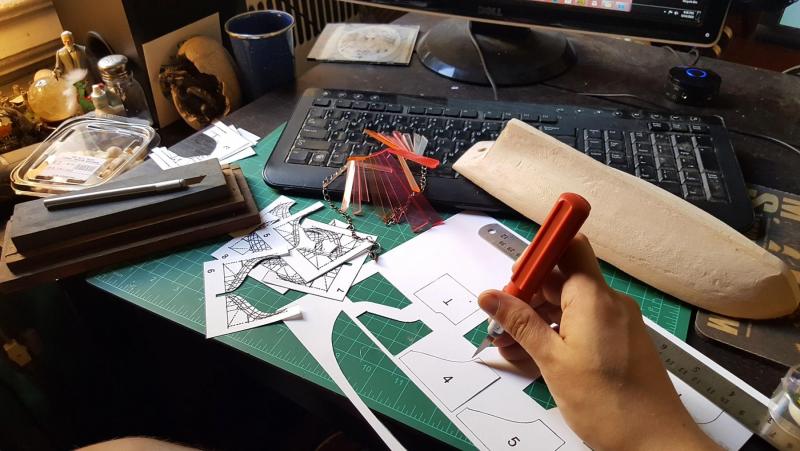
So then came the sanding process. You can see the tools I used starting from the bow and working my way back. The shaping templates helped me to refine the form and were invaluable. You can see the various bit I used to sand roughly then refine and the smaller ones for curves and detailing.

- 362 replies
-
- 5
-
-
- active
- revenue cutter
- (and 1 more)
-
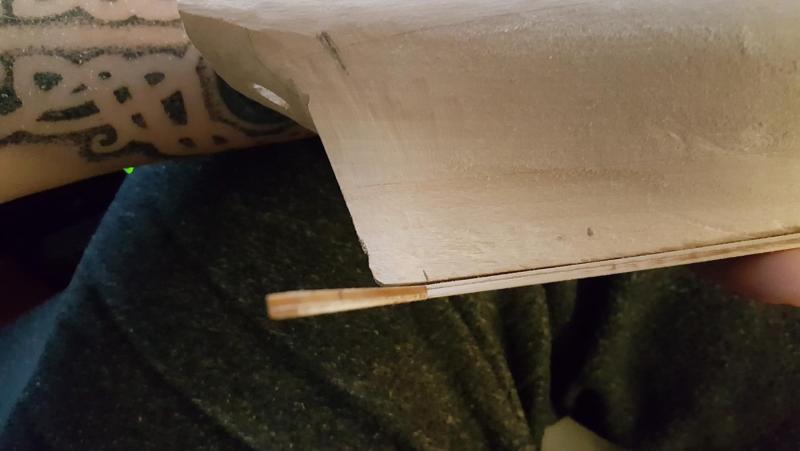
Using a slicing style blade for the dremel I sliced about a quarter of an inch off the keelson. In hindsight it should have been from the deck however it ultimately worked out just as fine even if I now have lungs full of sawdust lol. The box shows what fell in the rest blew out the window using a reverse fan

- 362 replies
-
- 3
-
-
- active
- revenue cutter
- (and 1 more)
-
So here is my newest update. I spent a week or so reshaping the hull from the 31 ton at 1/48 scale (the kit) to a 51 ton 1/64 scale. This was a bit more challenging than one might think while both look similar there is actually quite a bit of difference in the incline. The 51 ton is flatter at 27 degrees while the 31 ton has more drag at 30 degrees. Fortunately the templates at modelshipwright are perfect as they indicate the height as well as correct shape. Also for a bit of fun I put the Sultana template next to the revenue cutter so you can see how different the shapes are.


- 362 replies
-
- 4
-
-
- active
- revenue cutter
- (and 1 more)
-
Thanks Mark! It's really a very easy shape to carve. Much more than Sultana which has an apple shape but my experience with Sultana helped me with this one. The work I did in a few months I can do now in a few weeks and in turn I need to work on this one a bit to teach me more about Sultana as well. Im sort of bouncing off one to another. That said I want my next ship to be plank on bulkhead I am looking forward to starting Ballahoo once these 3 are past the planking stage
- 362 replies
-
- 3
-
-
- active
- revenue cutter
- (and 1 more)
-
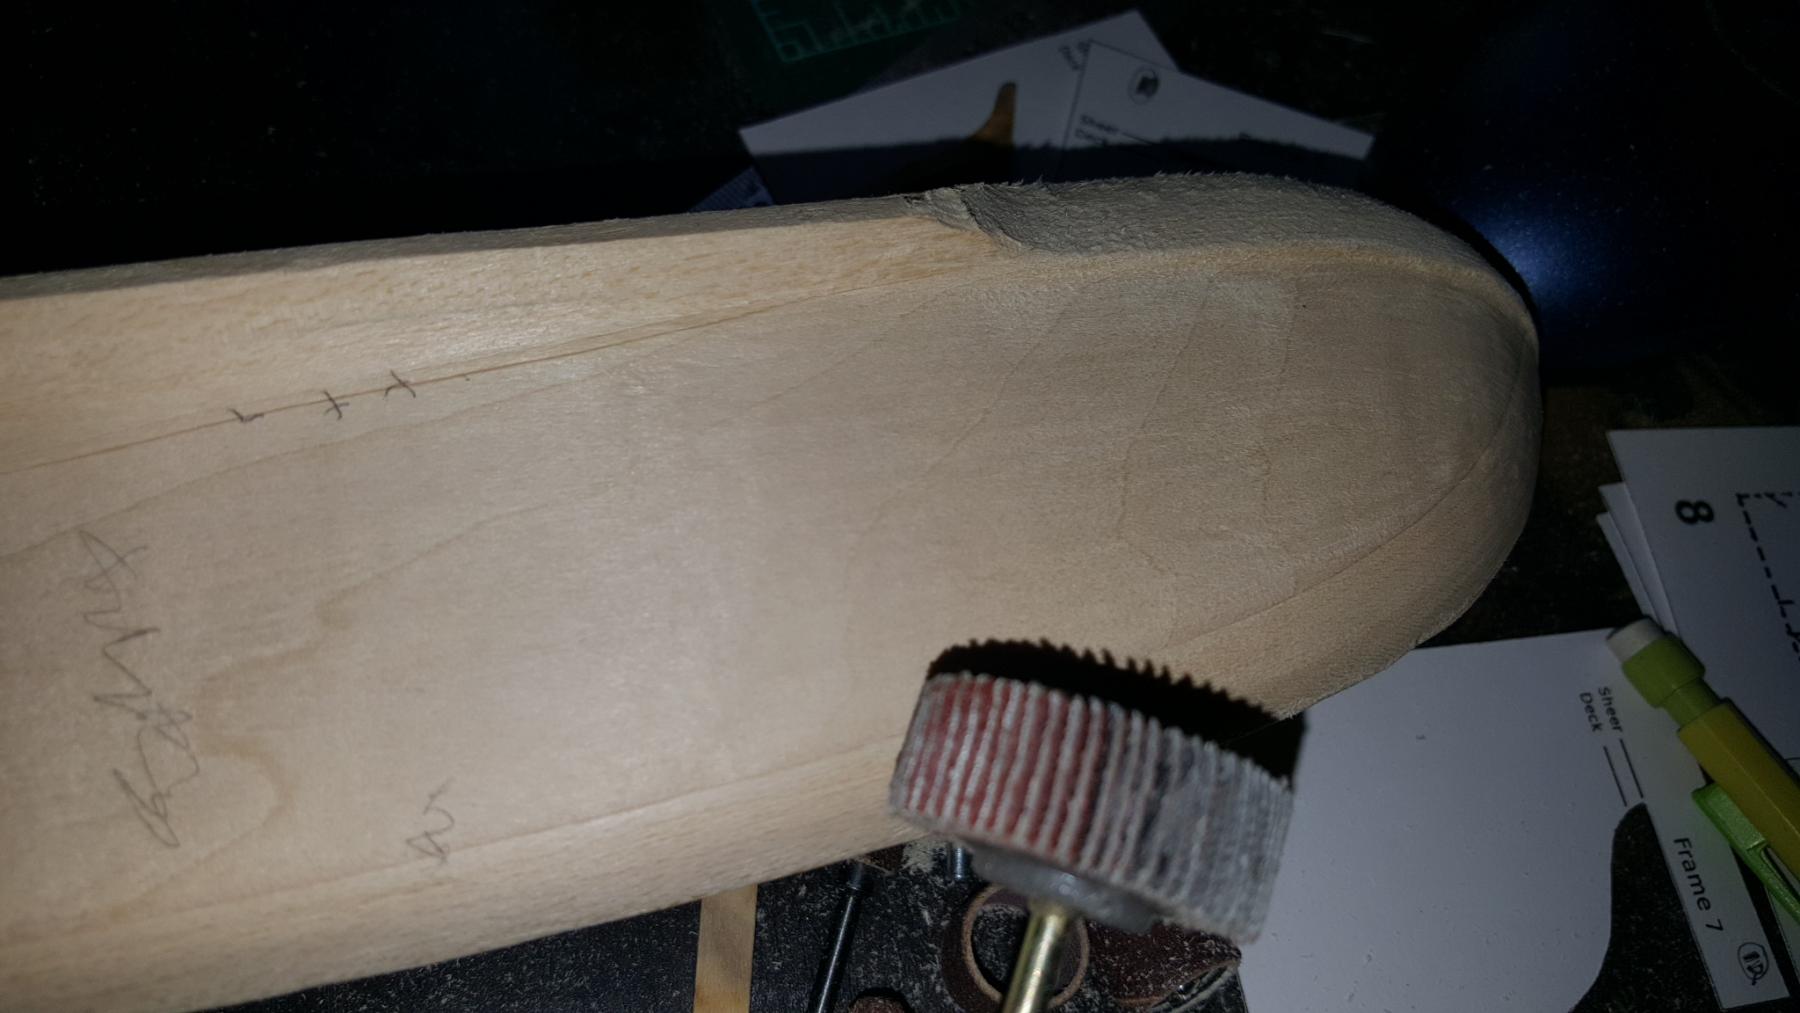
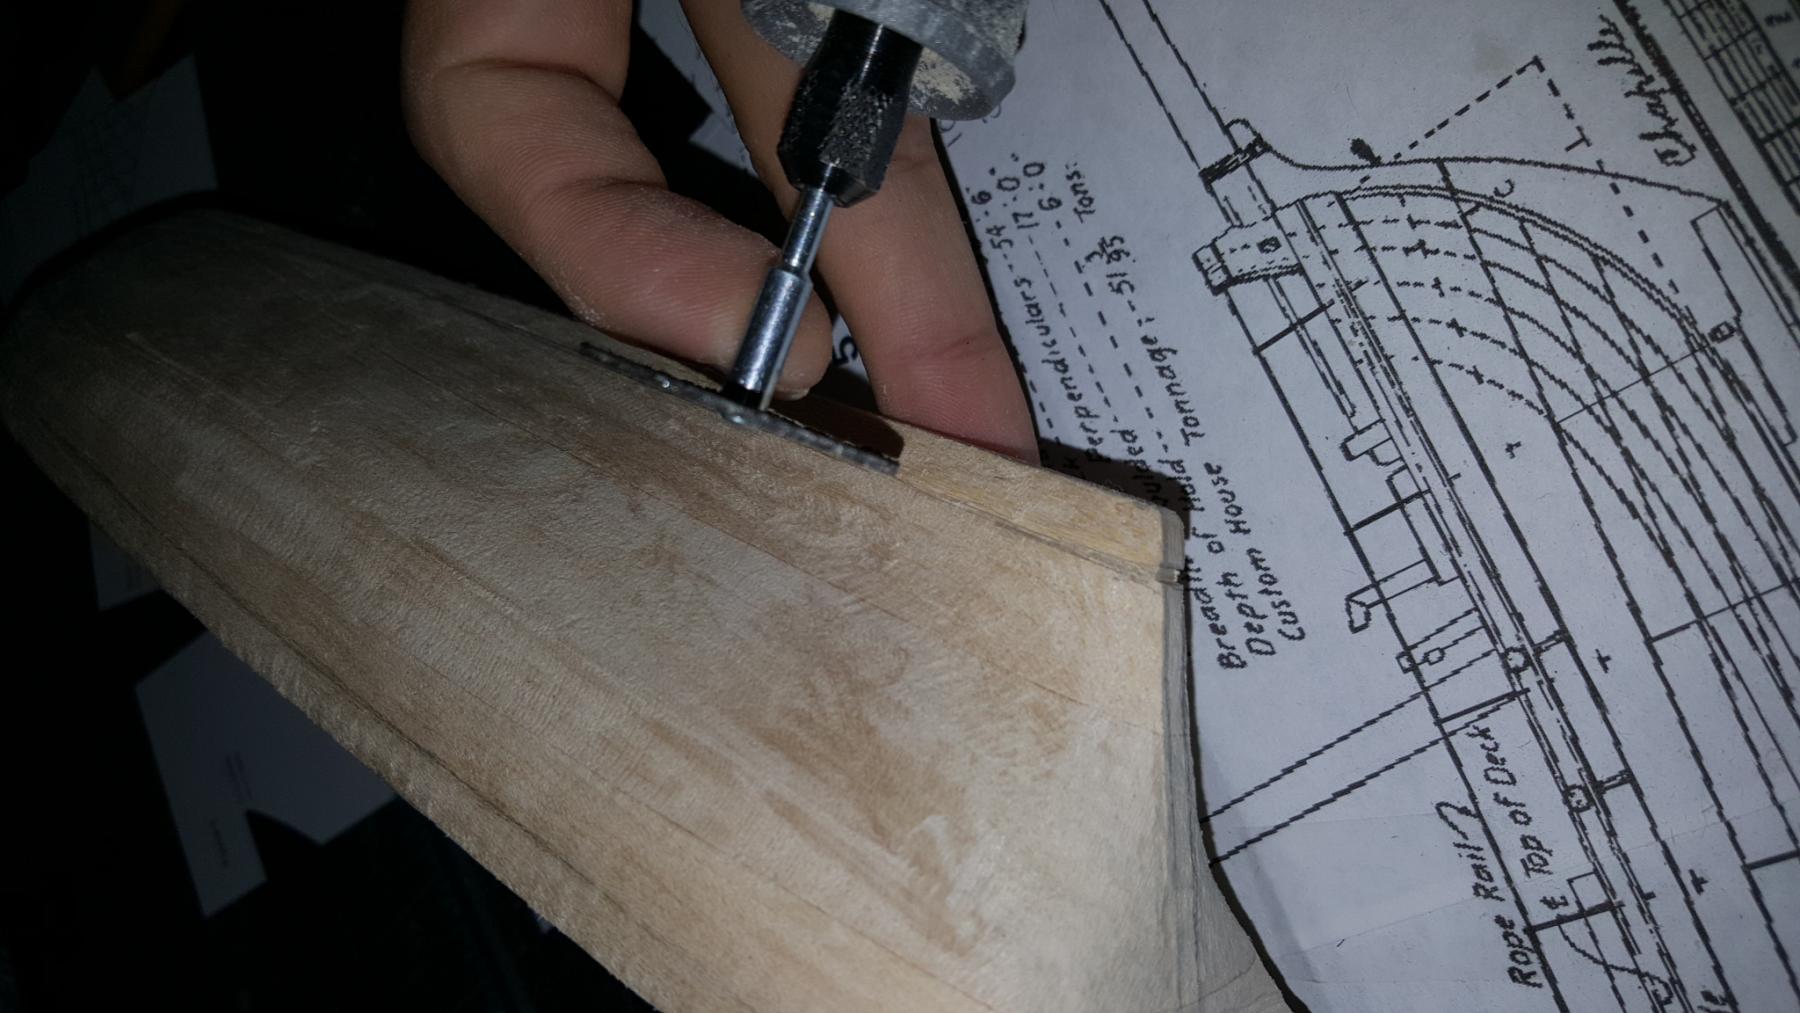
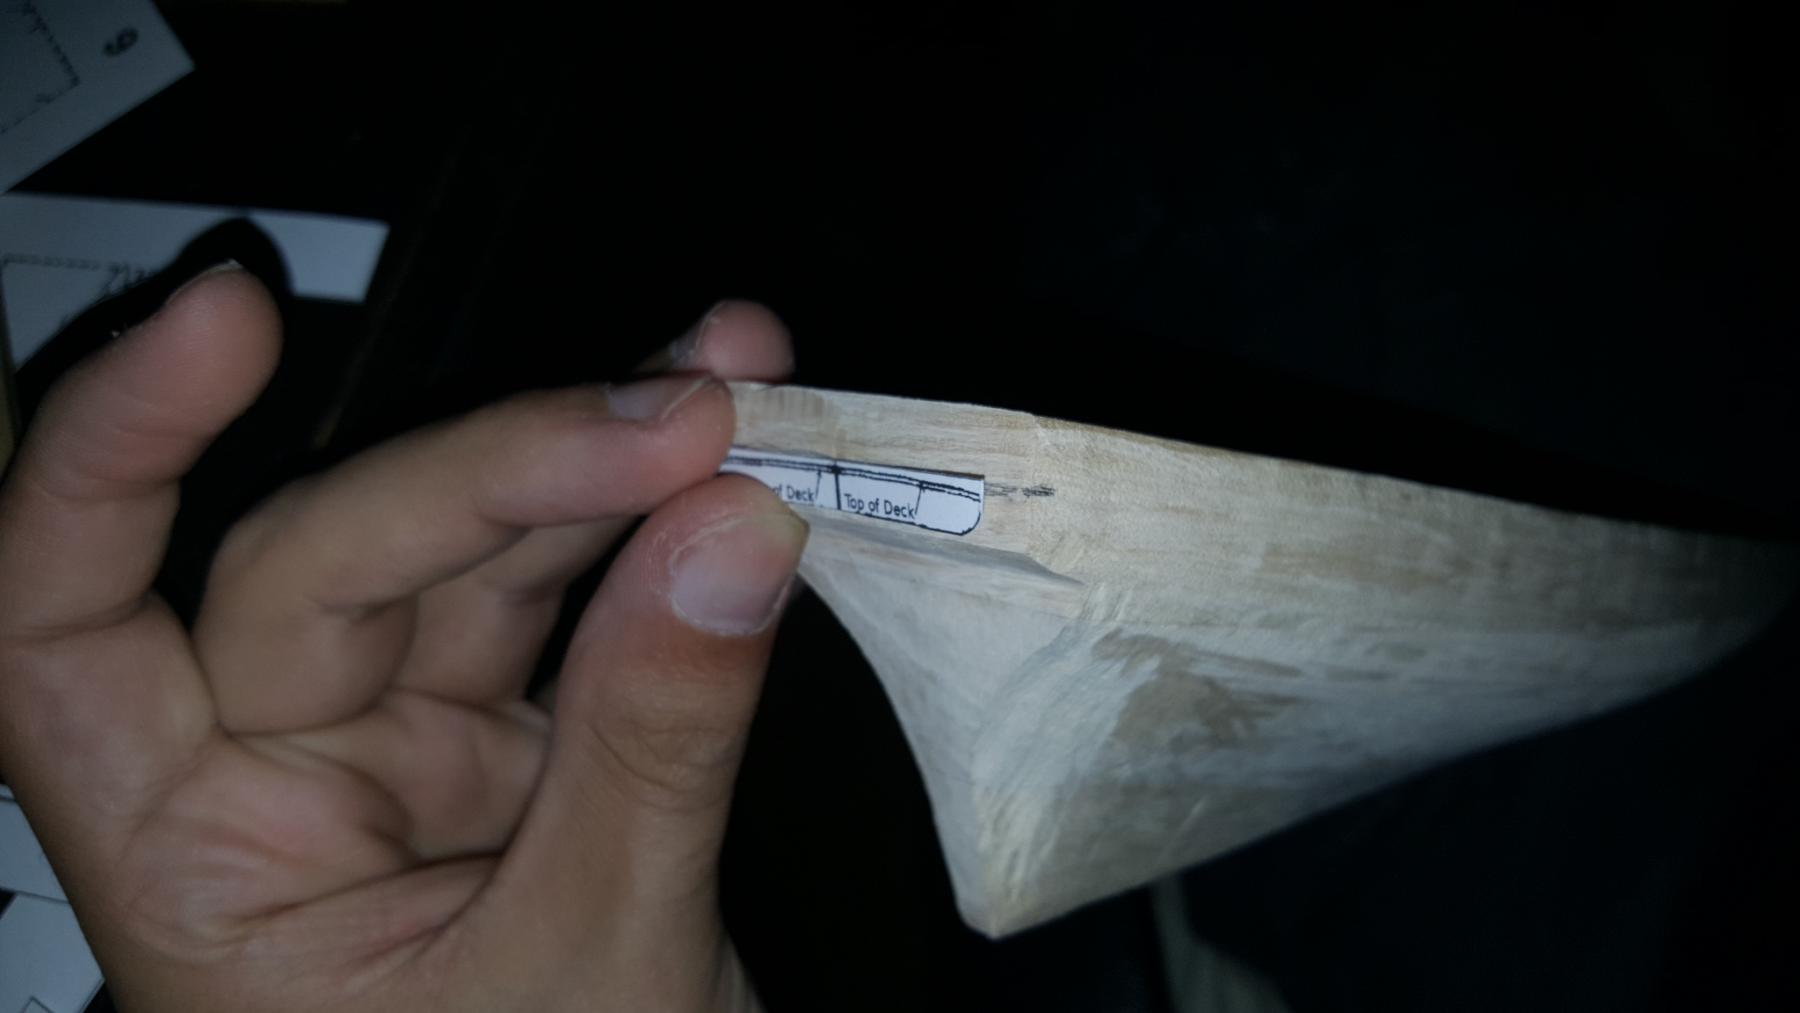
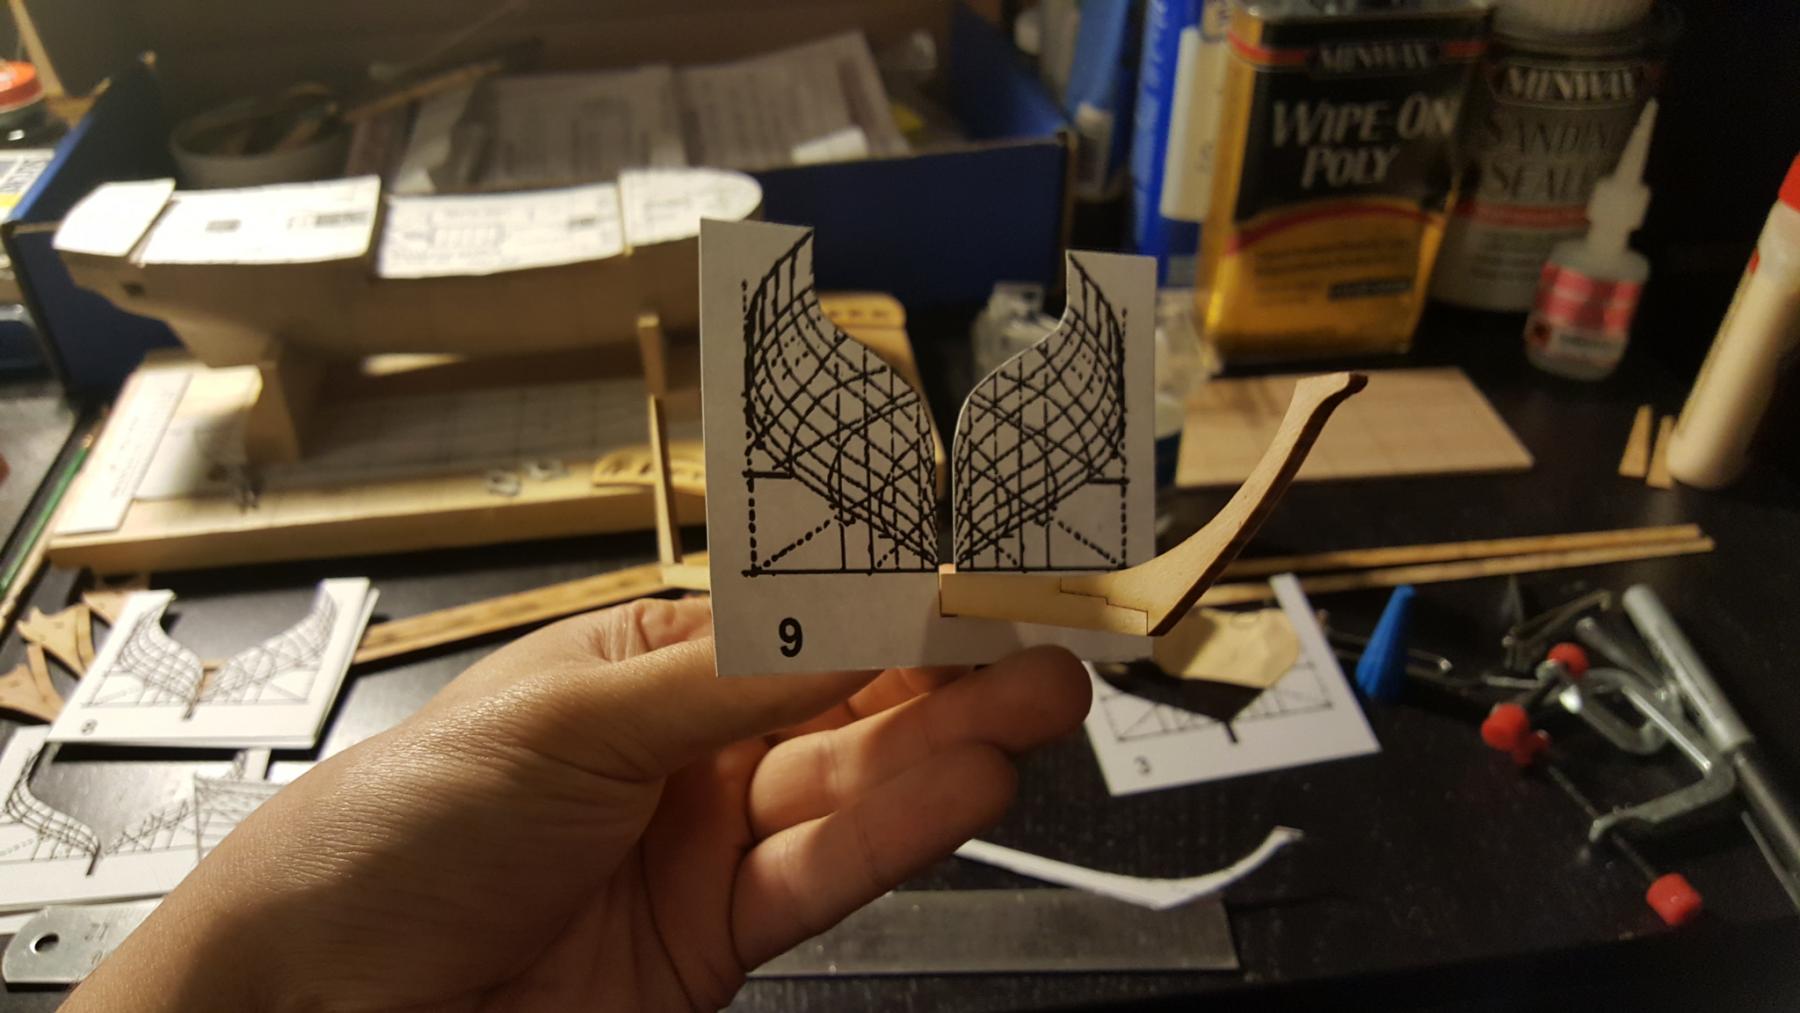
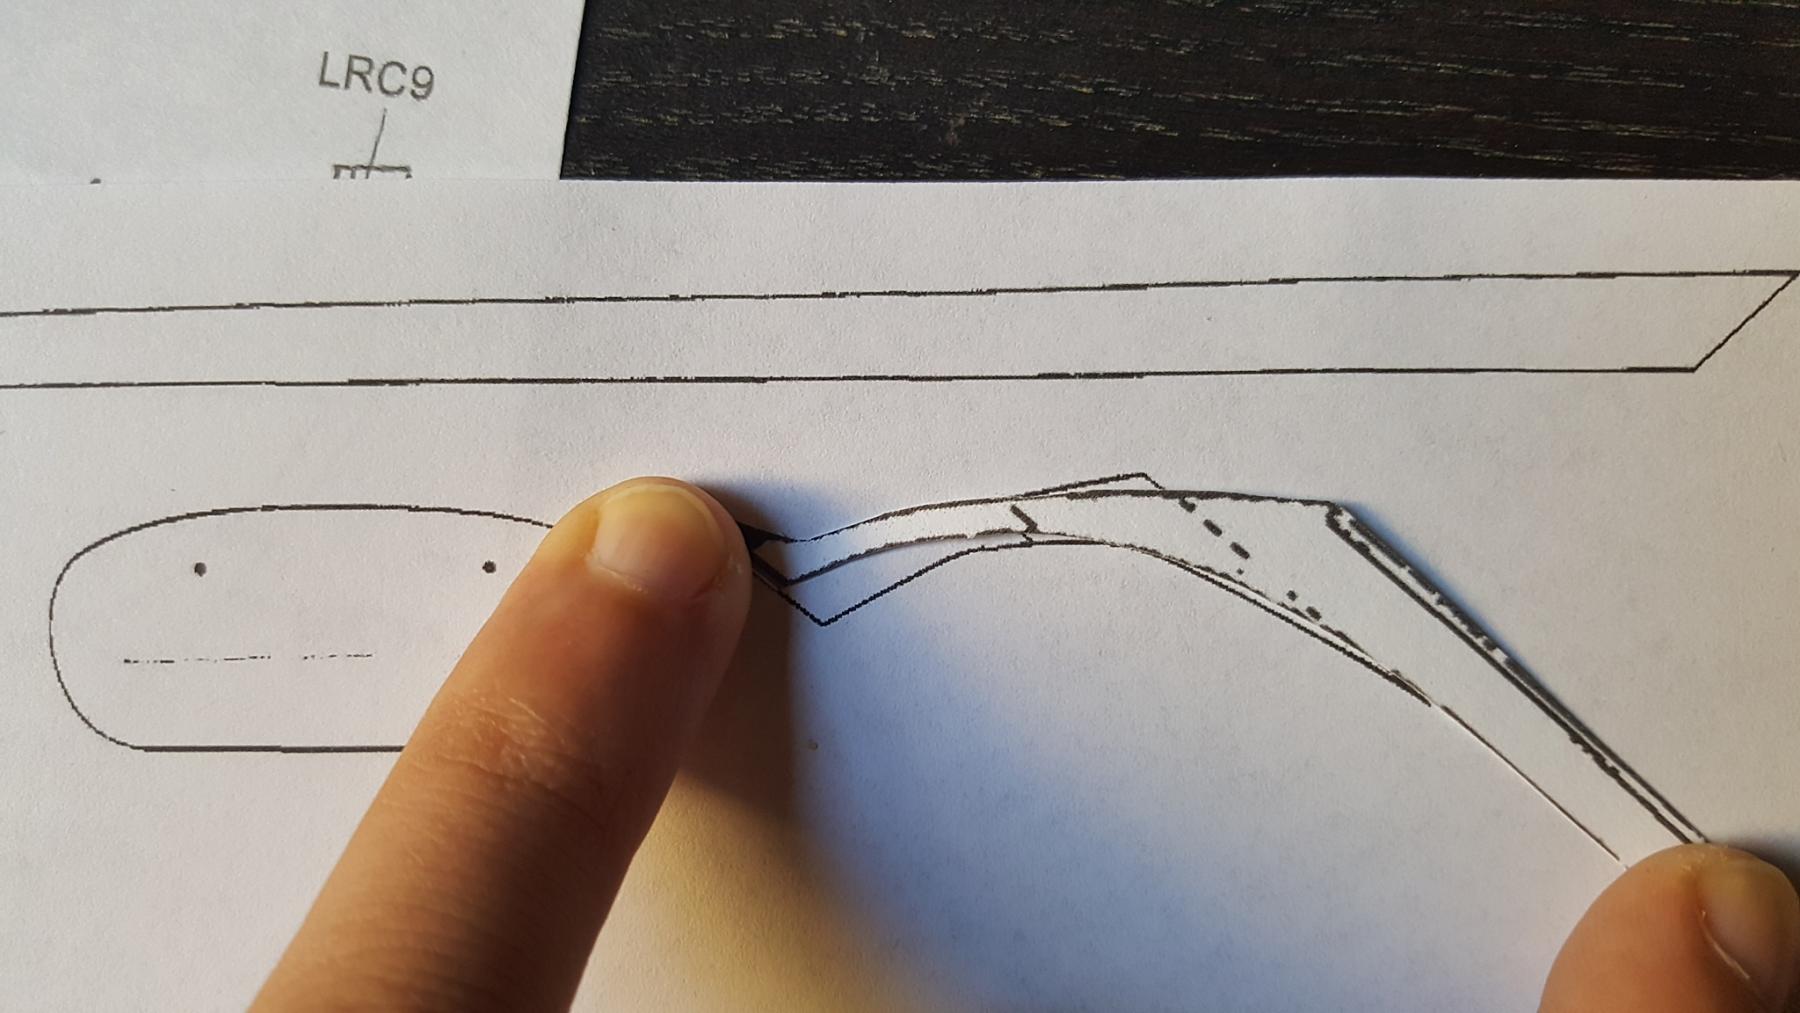
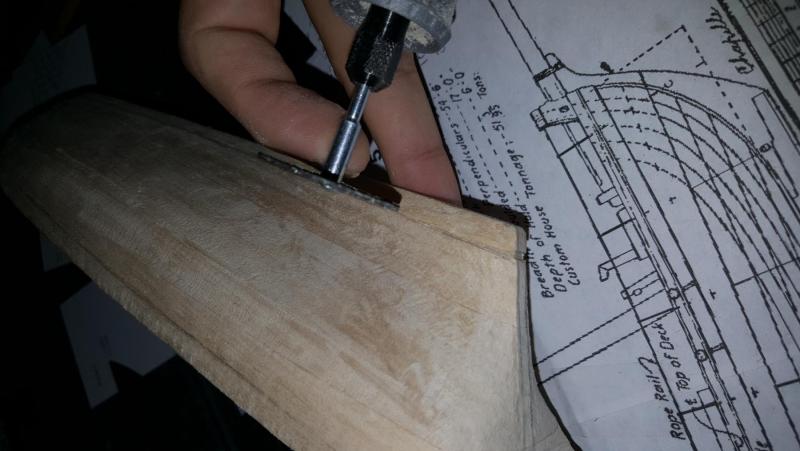
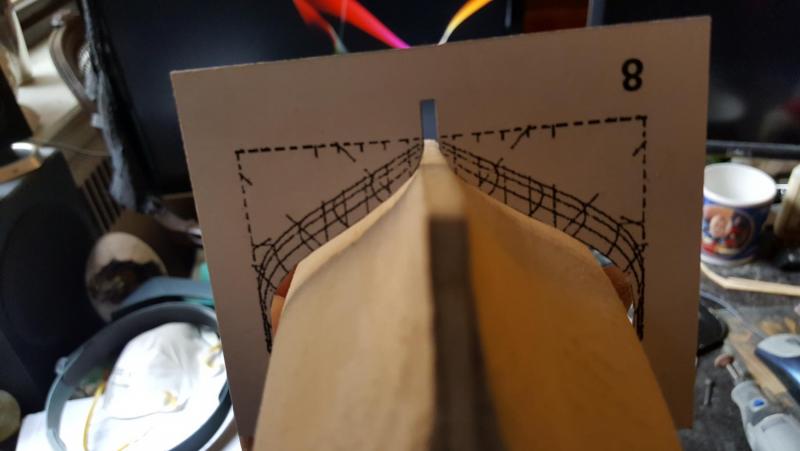
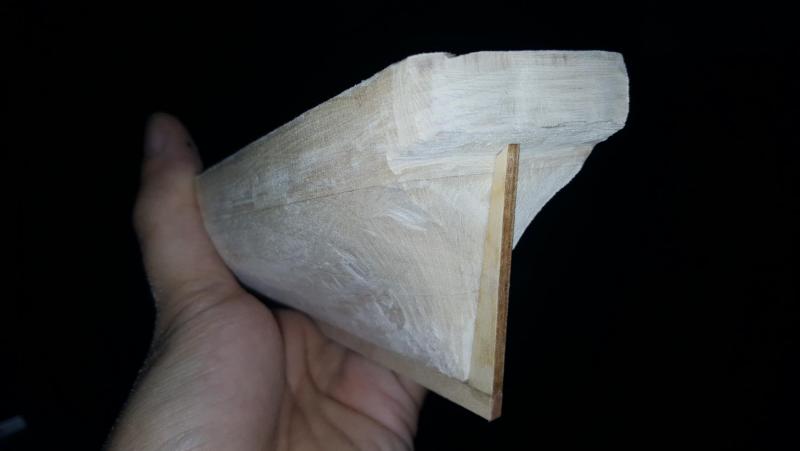
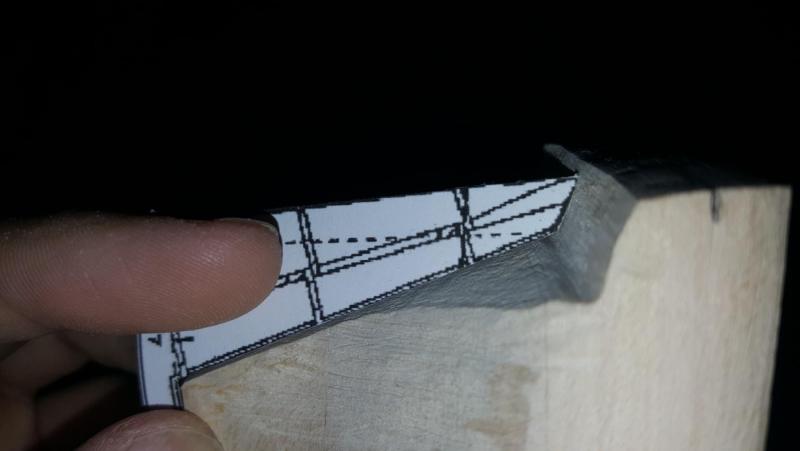
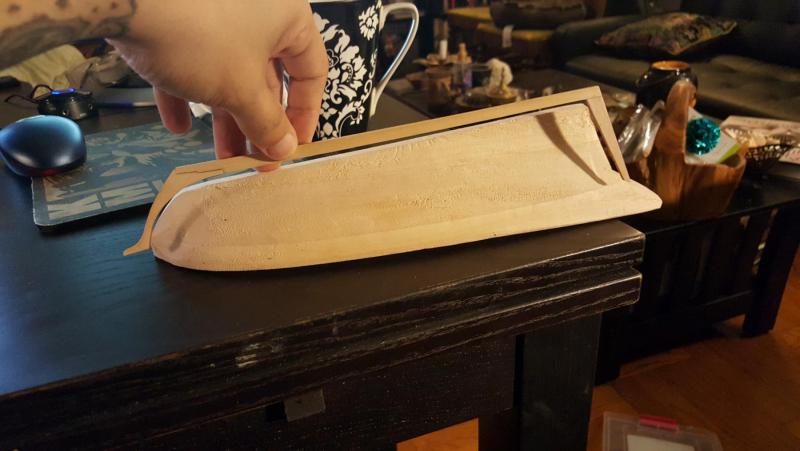
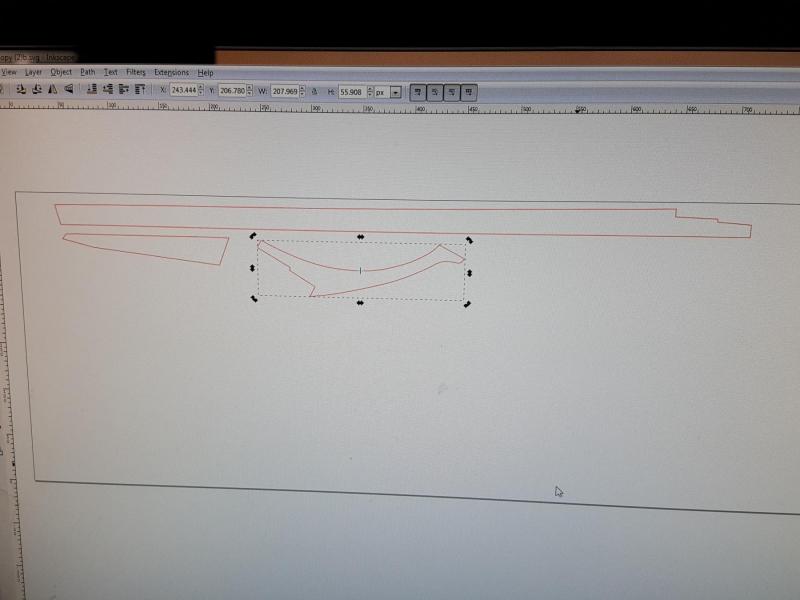
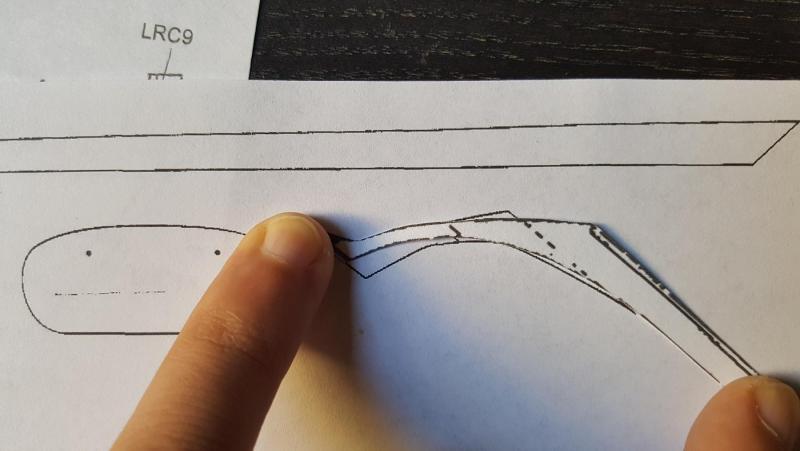
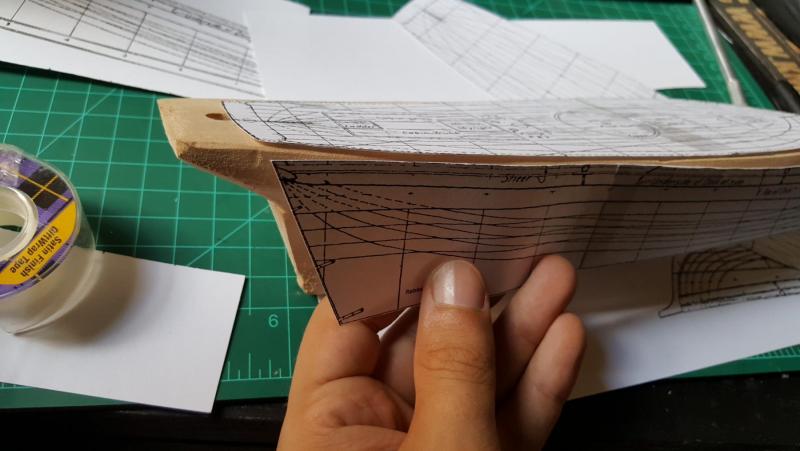
The last part of this is the height. This is something I have to ponder the hull needs 1/4" taken off the top of the deck, You can see the amount needed when adding the transom, plus the image at the bow that stem piece must be slightly above the top of the deck. I'm not sure if I will shave from the top, bottom or cut the hull in half and do it that way. It has a very specific build in curve to the top so I am unsure if I want to alter that. That said I can recreate it using the plans, as you see in this pic the curve of the deck follows the line I have circled, the image itself stops at the top of the ships tiny bulwark/sheer. So more work to be done!


- 362 replies
-
- 6
-
-
- active
- revenue cutter
- (and 1 more)
-
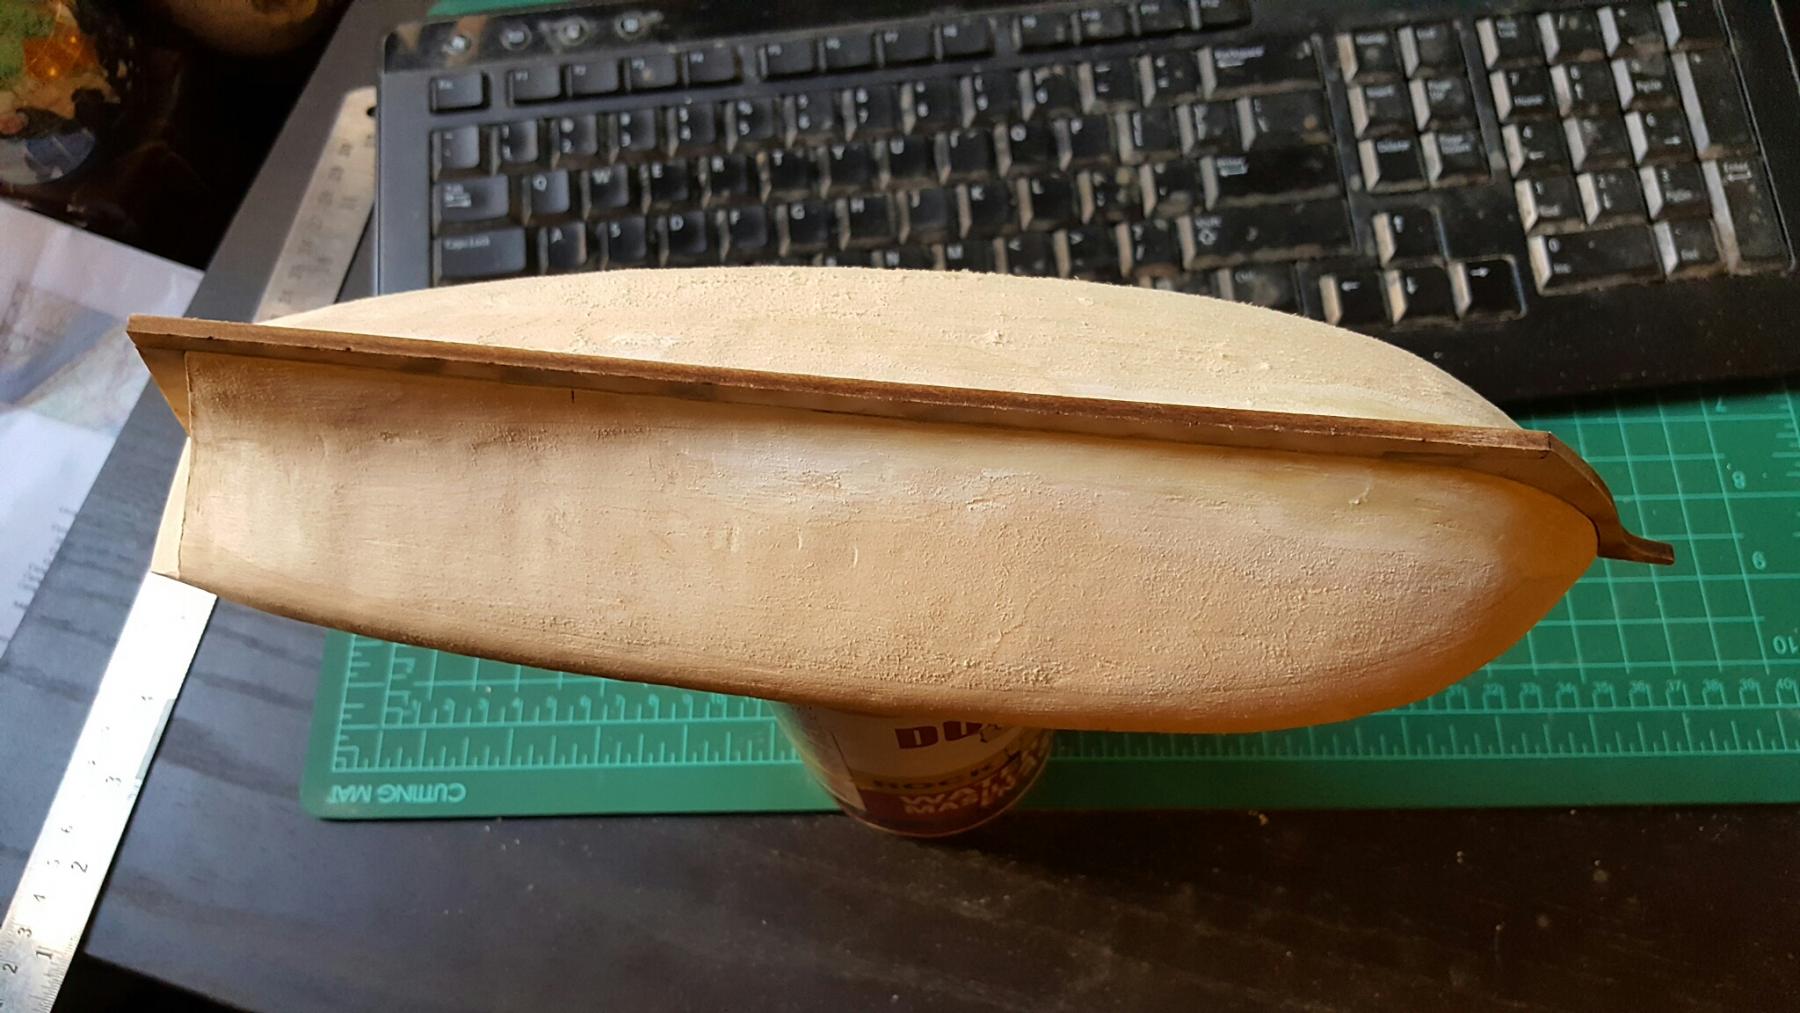
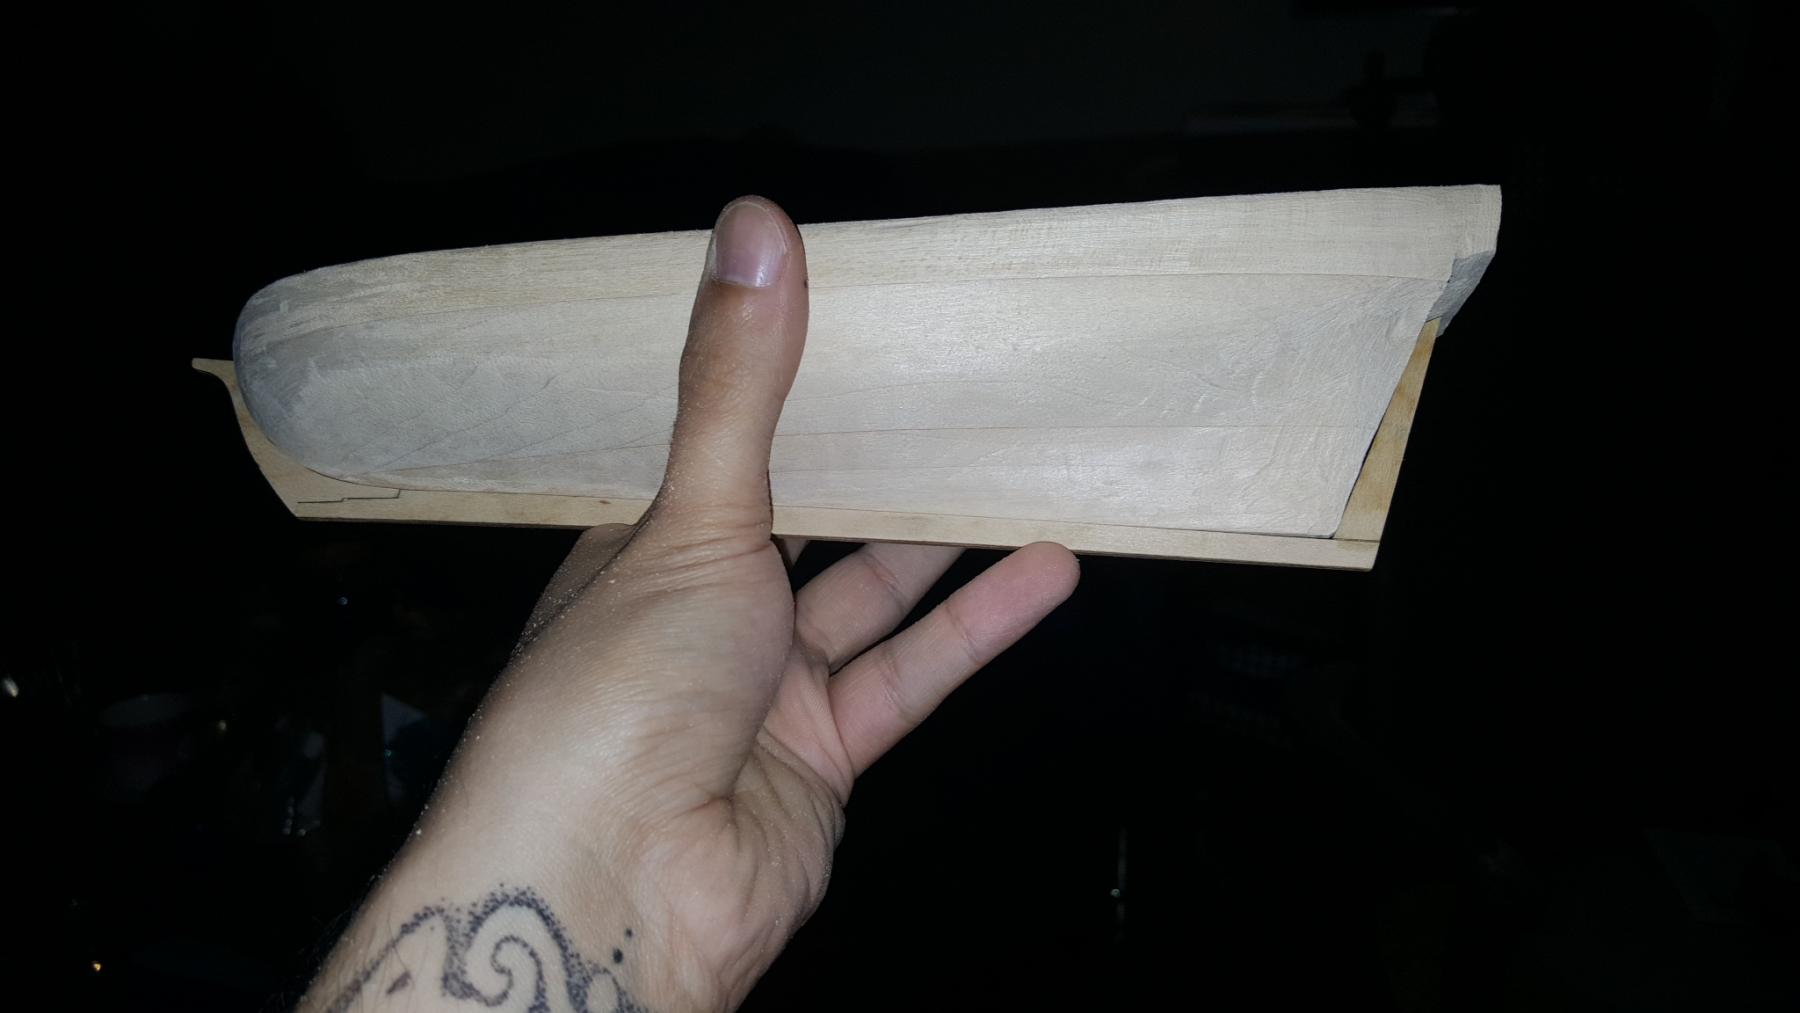
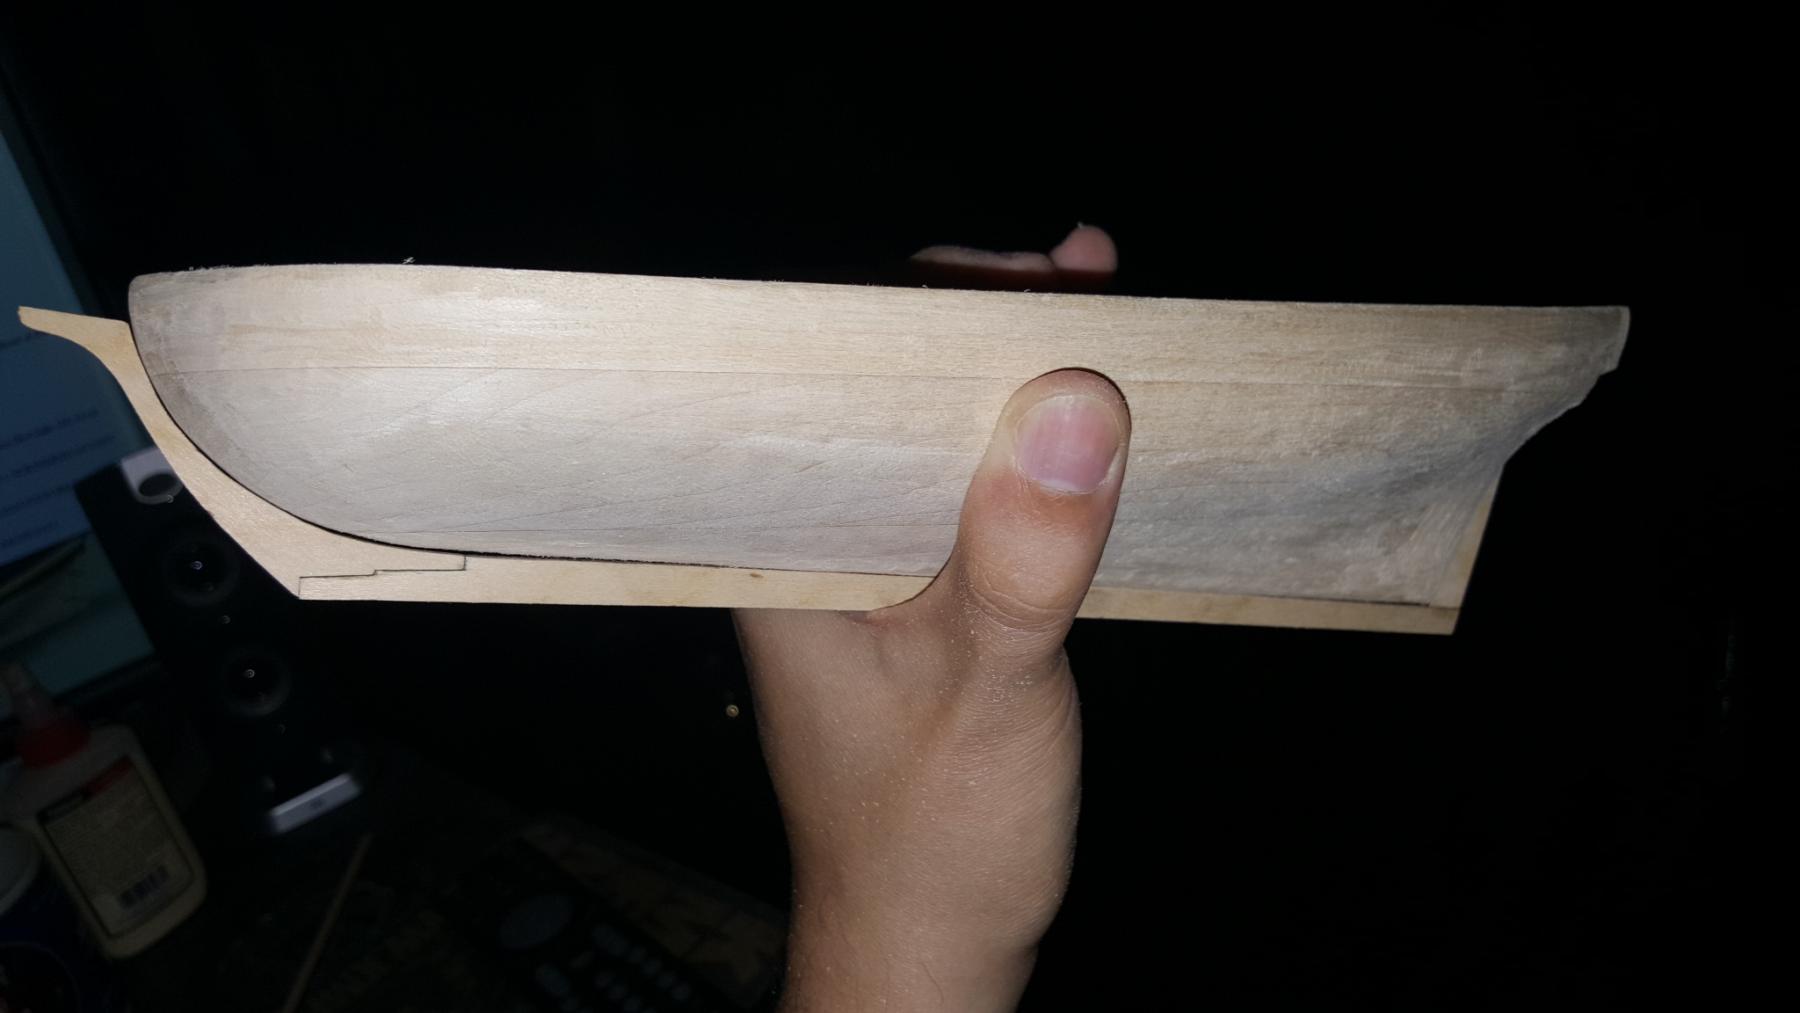
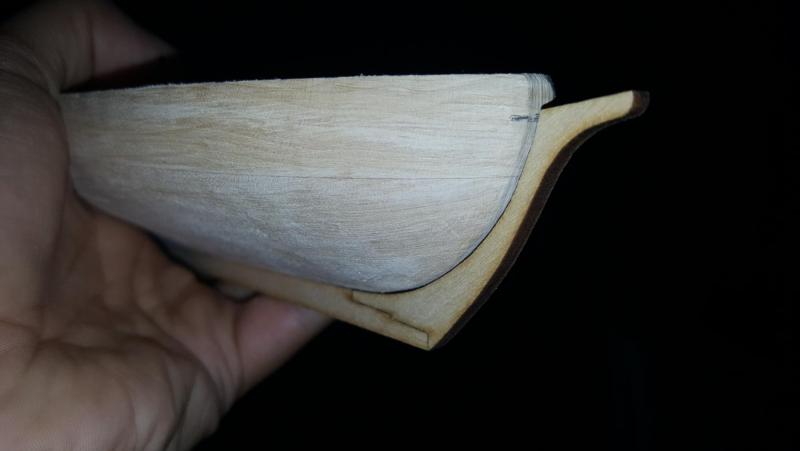
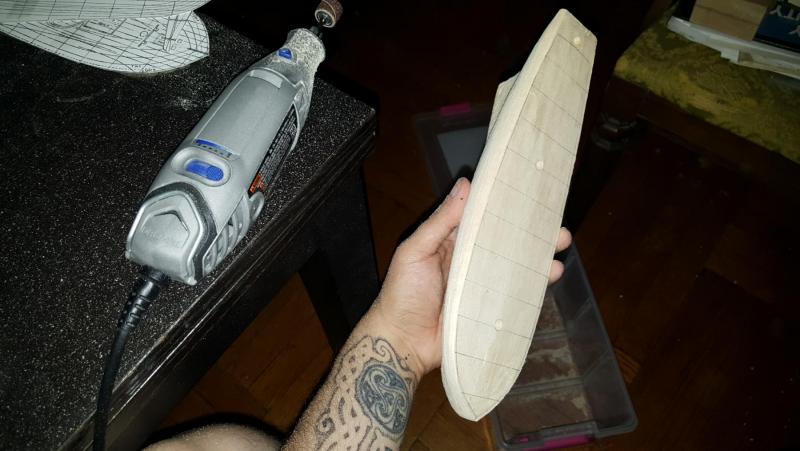
So now the keel fits. The hull is around 10.5" and for now is roughly shaped.


- 362 replies
-
- 7
-
-
- active
- revenue cutter
- (and 1 more)
-
So after that came modifying the length. The front was relatively easy I then used the dremel to shorted the back and took off about an inch from the top and half inch from the bottom. The square tuck stern will of course be smoothed out but for now it gives me the angles which I can line up with the rudder and keel as so.
- 362 replies
-
- 4
-
-
- active
- revenue cutter
- (and 1 more)
-
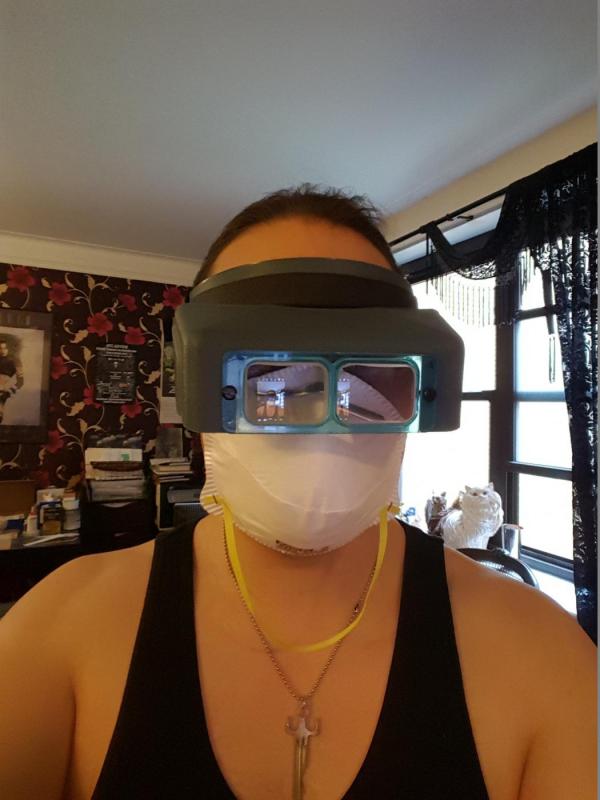
Greetings all! So just a quick status update as I've spent the week sanding down the 51 ton hull, which for now we will call Dallas. My first order of business was to sand the sides down and match the deck outline. This means lots of sawdust as you can see. Cover your eyes and mouth see how fashionable I look! (me doing Brundlefly impression "heeeelp me"!)
- 362 replies
-
- 13
-
-
- active
- revenue cutter
- (and 1 more)
-
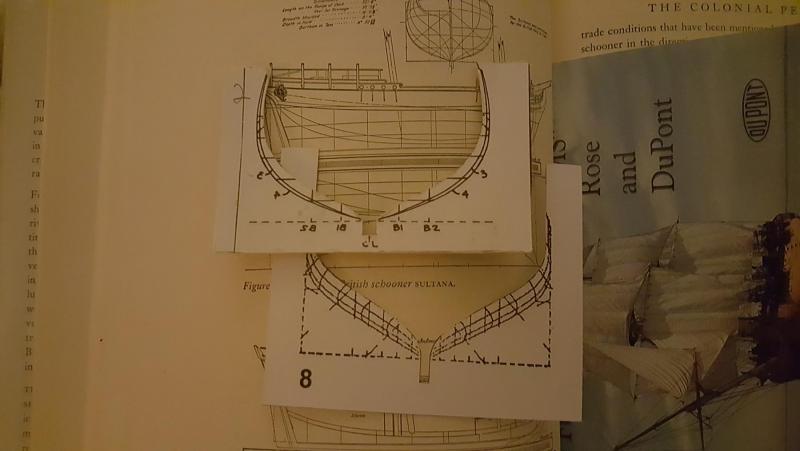
Fascinating! Didn't realize how much smaller she is against the Pickle 8)
- 25 replies
-
- 2
-
-
- finished
- sherbourne
- (and 1 more)
-
It is kinda sketchy. I'd be fine with calling this a kit log however I sort of feel that would be almost dishonest since what I plan to finish with won't really be what the kit as advertised though I'll happily defer to the moderators for advice.
- 362 replies
-
- 3
-
-
- active
- revenue cutter
- (and 1 more)
-
Thanks Mark! It came from the kit. I'm debating whether putting it through the laser was even necessary since as you saw the keel s via the plans came out just fine (and the bow part was shaped funny). That deck also came from the kit as an etched veneer you can just slap on. The deck lines are worth saving though I plan to do the deck planking with strips but will use the resized image as a guide. Again I've debated on whether to put this log in the kit or scratch section. Sultana honestly is 90% scratch this one is like 99.9% lol
- 362 replies
-
- 5
-
-
- active
- revenue cutter
- (and 1 more)
-
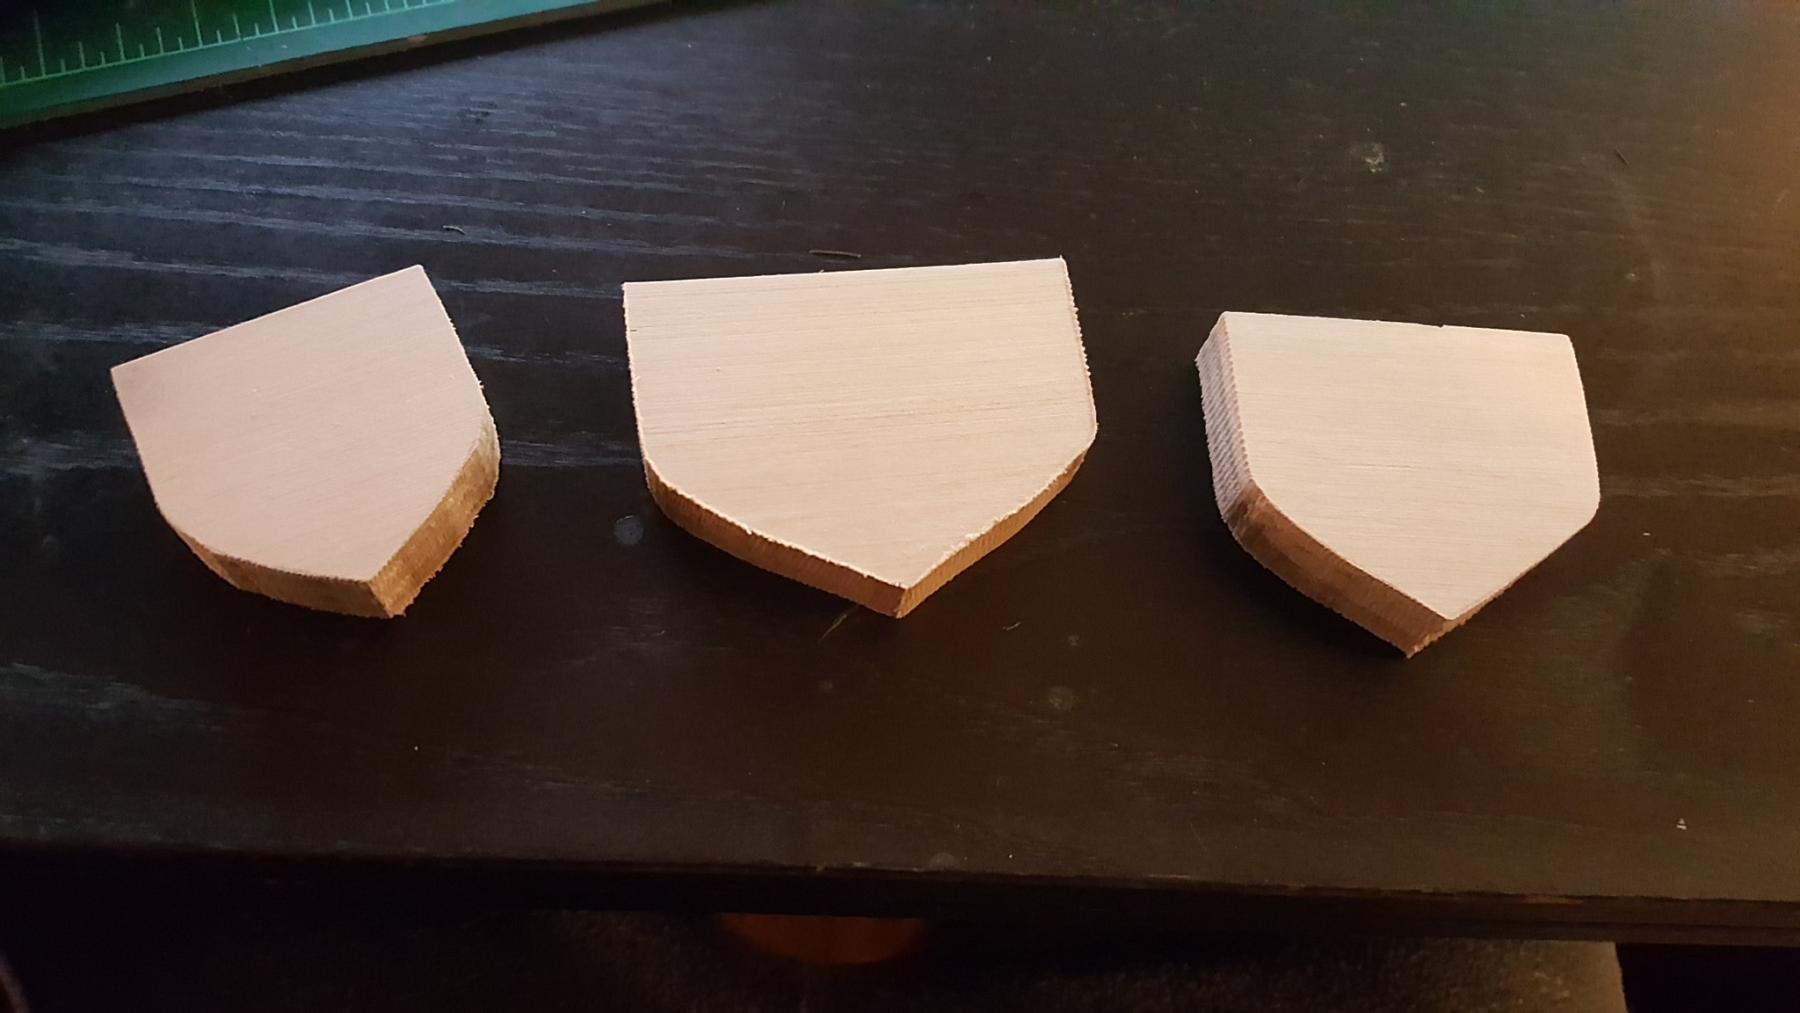
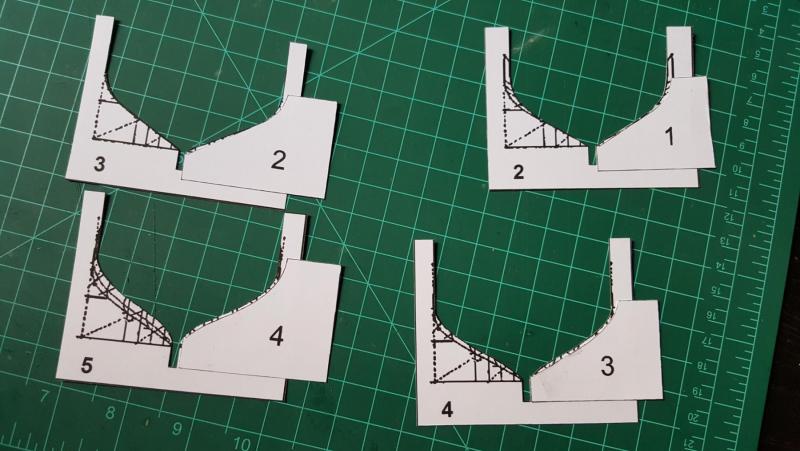
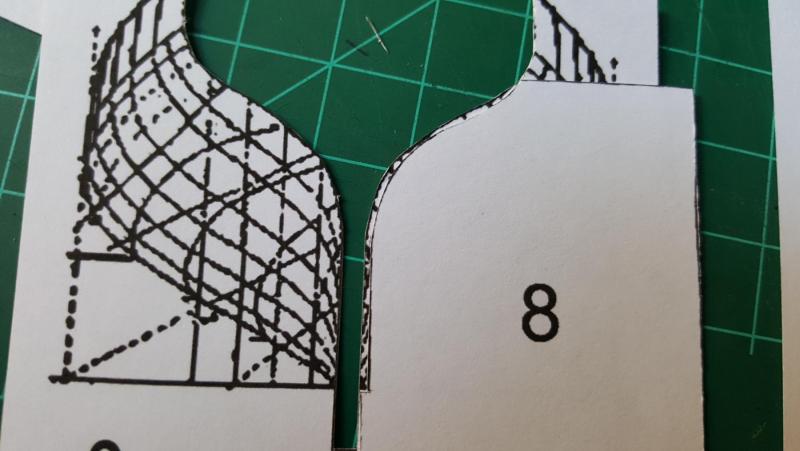
And that's pretty much where we are now. For this project my next step will be to start sanding down the 51 ton hull using the dremel and then cut out bread and butter slices for the 31 ton ship. The slices will be 15/16" in length to keep with the scale so my plan is to take my two inch by 3 inch block and cut it with a table saw the blade should sheer off the needed 1/8" in between then cut out the slices using the templates and a scroll saw then glue them together and shape them. Rough example below. So that's building a very similar ship in 2 different ways which should be quite educational. Stay tuned!


- 362 replies
-
- 8
-
-
- active
- revenue cutter
- (and 1 more)
-
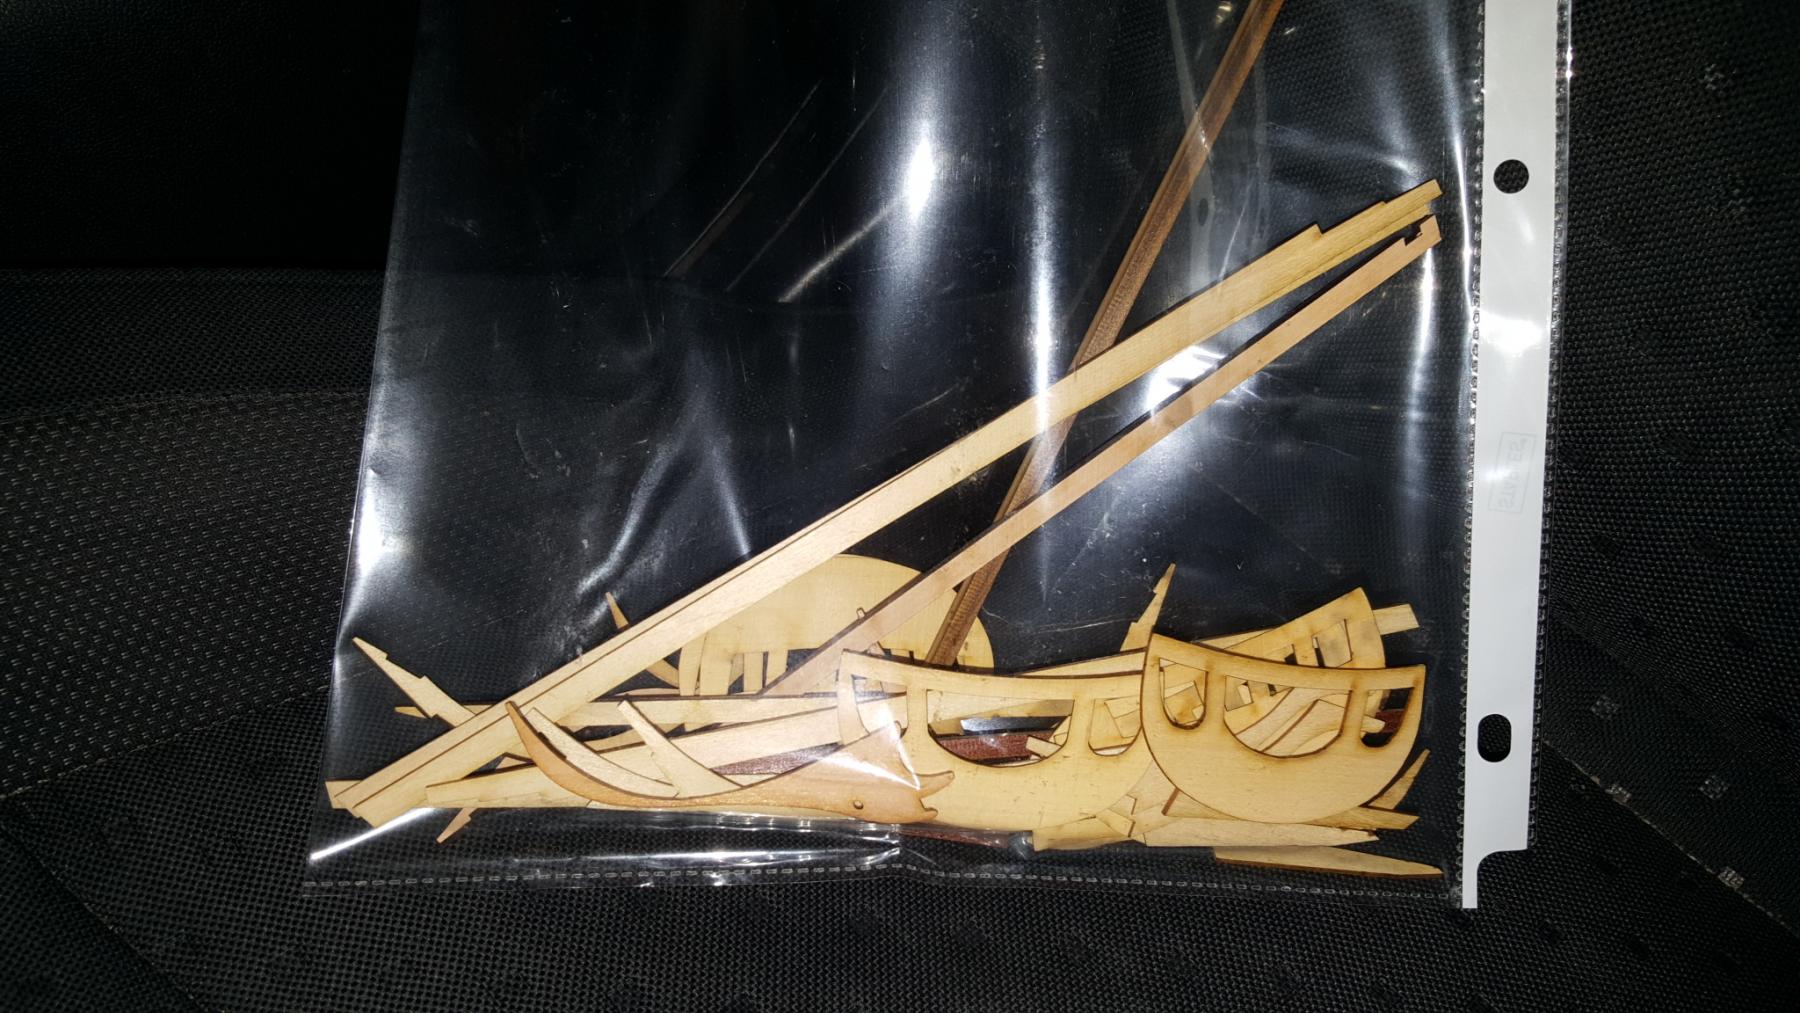
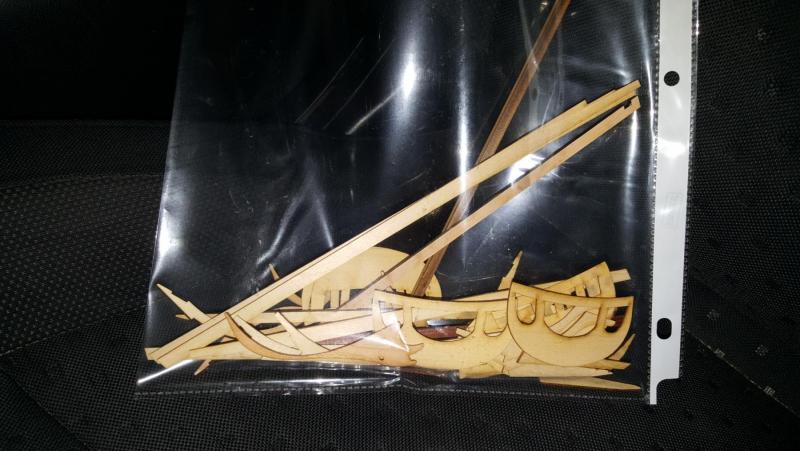
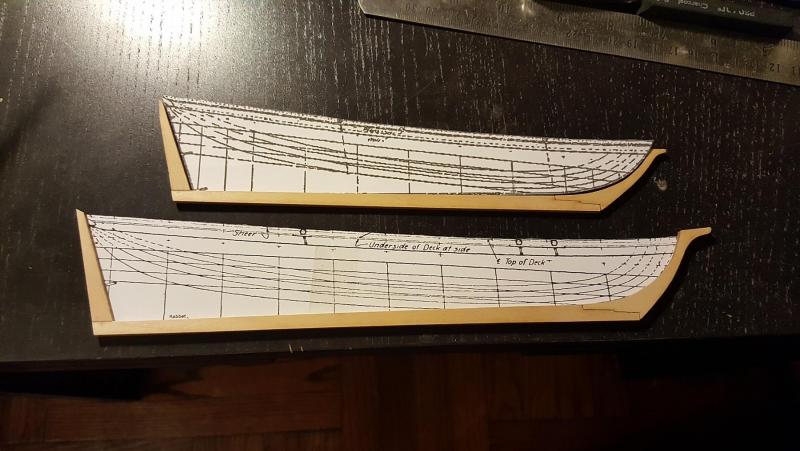
So I returned from the lab with a bag o parts! And while much of it was for Sultana I did the two keels and some of the acrylic templates (ran out of material darn it) Note the pic with the two keels alongside each other ain't that just fascinating how there is a slightly straighter "sheer" on the 51 ton ship.


- 362 replies
-
- 9
-
-
- active
- revenue cutter
- (and 1 more)
-
MDF? You mean my mousepad? That's for the band KMFDM
- 362 replies
-
- 3
-
-
- active
- revenue cutter
- (and 1 more)
-
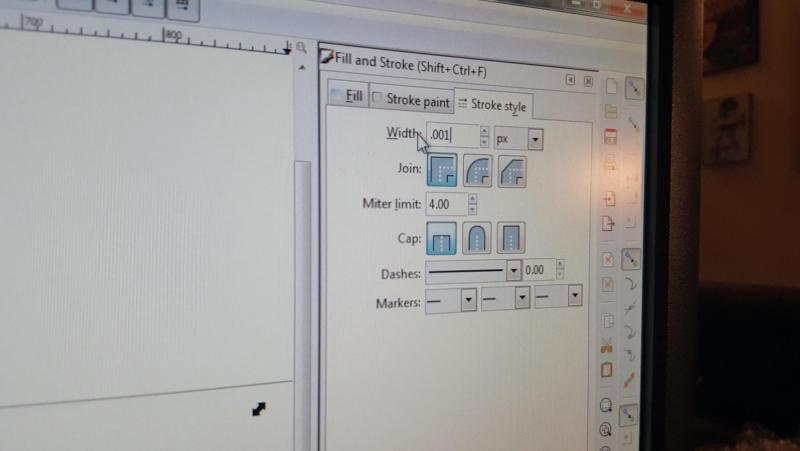
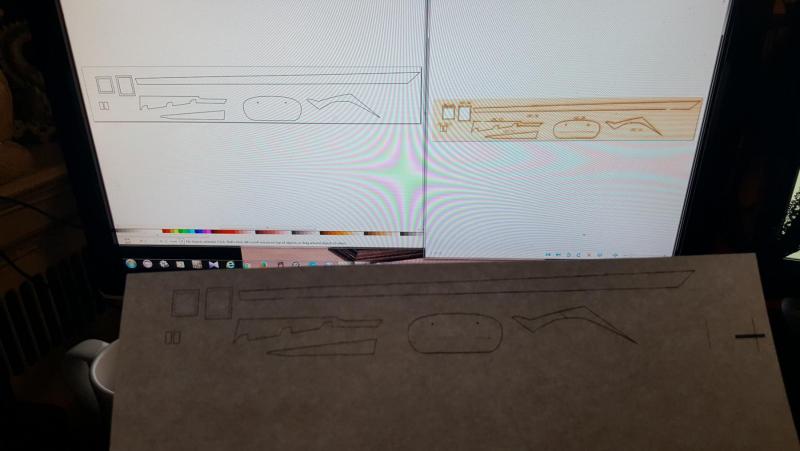
The last step is to move or rotate the pieces to fit since the keel is stronger when going with the wood grain also it saves space. Rotating is just a double left click and last step is to change the px to .001 which is what my laser uses for cutting. Cutting is done in red and etching in black though different lasers use other settings. That's all there is to laser cutting!
- 362 replies
-
- 5
-
-
- active
- revenue cutter
- (and 1 more)
-
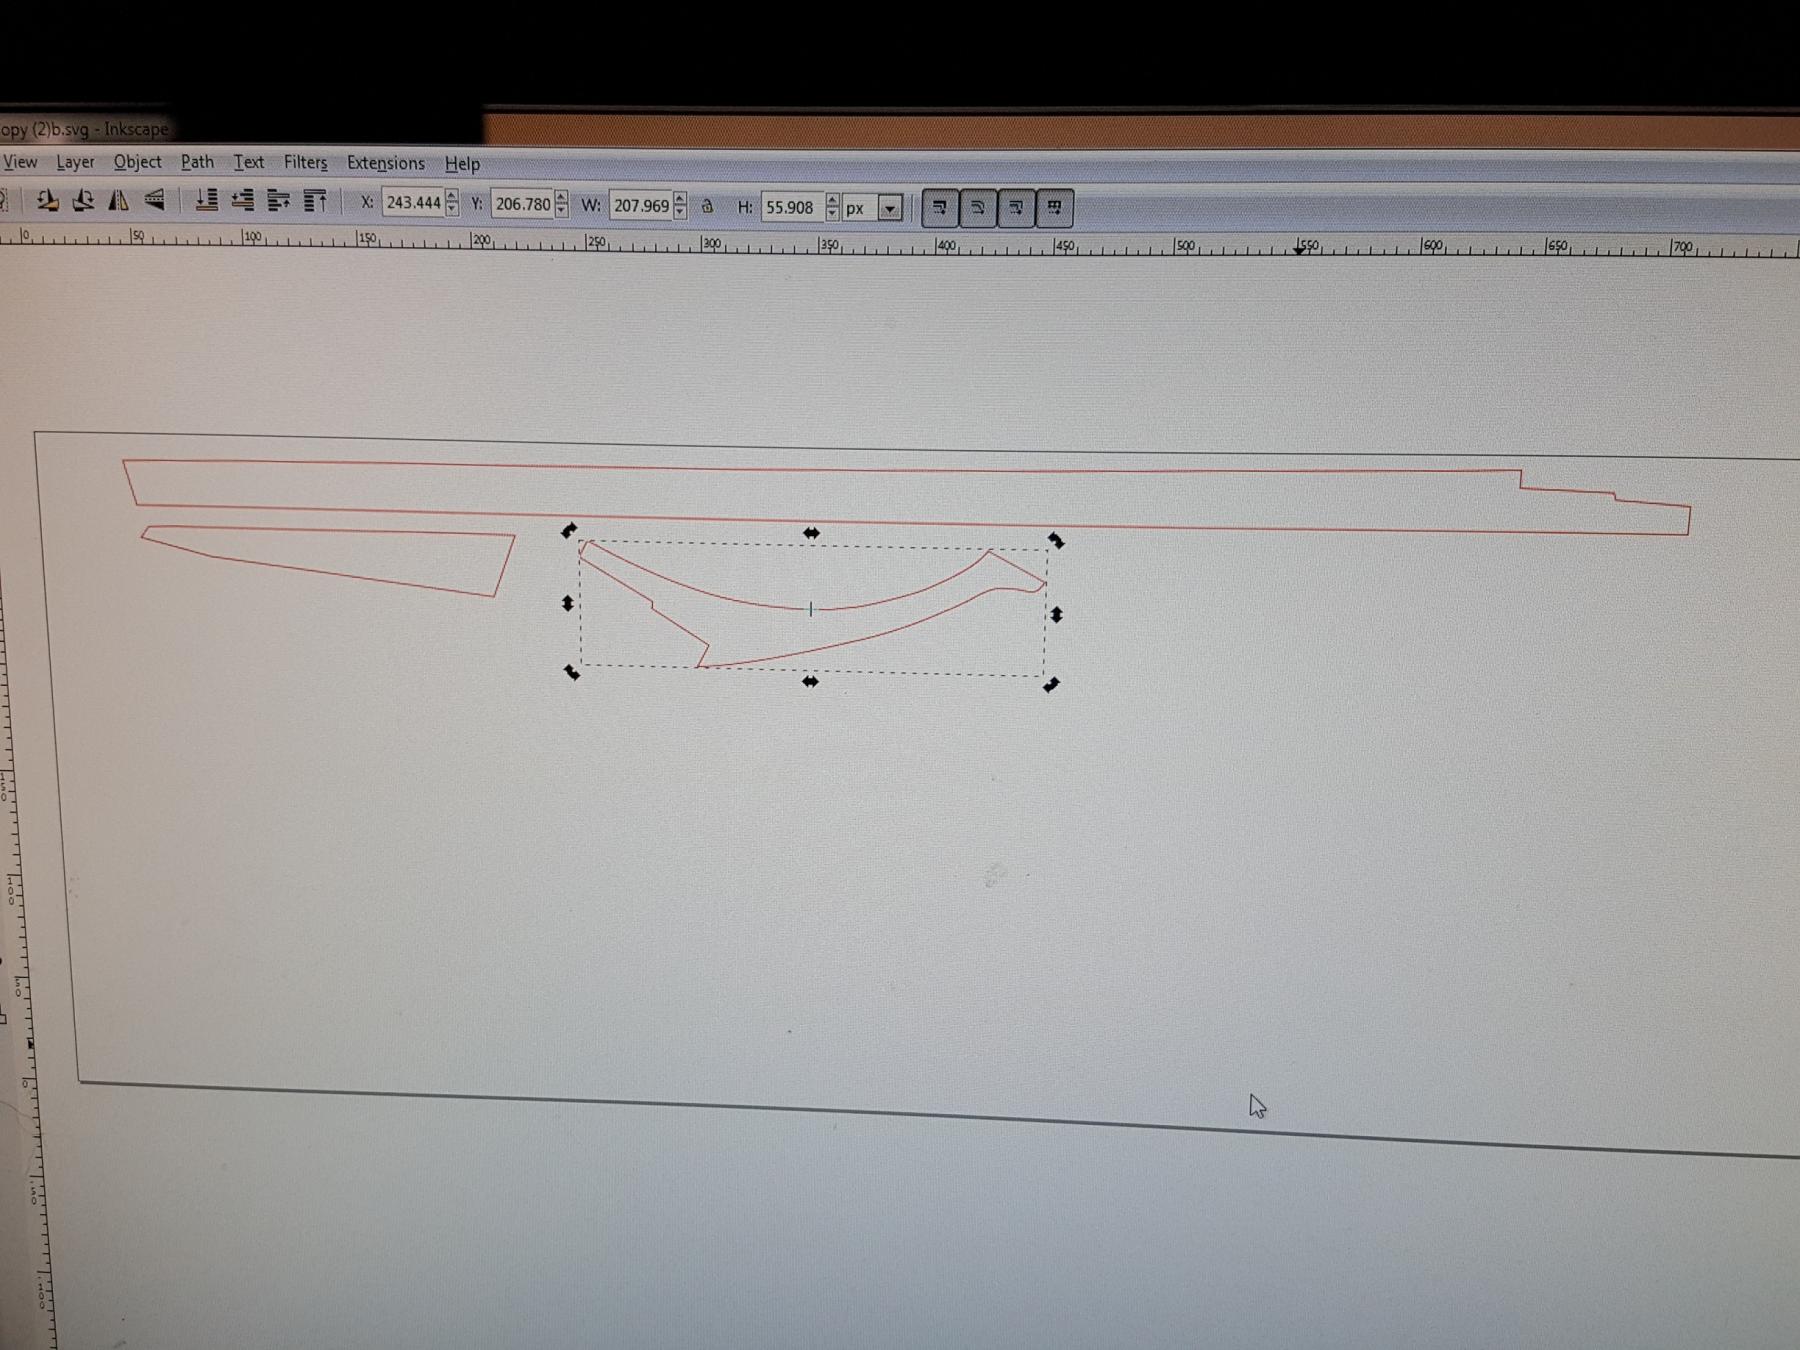
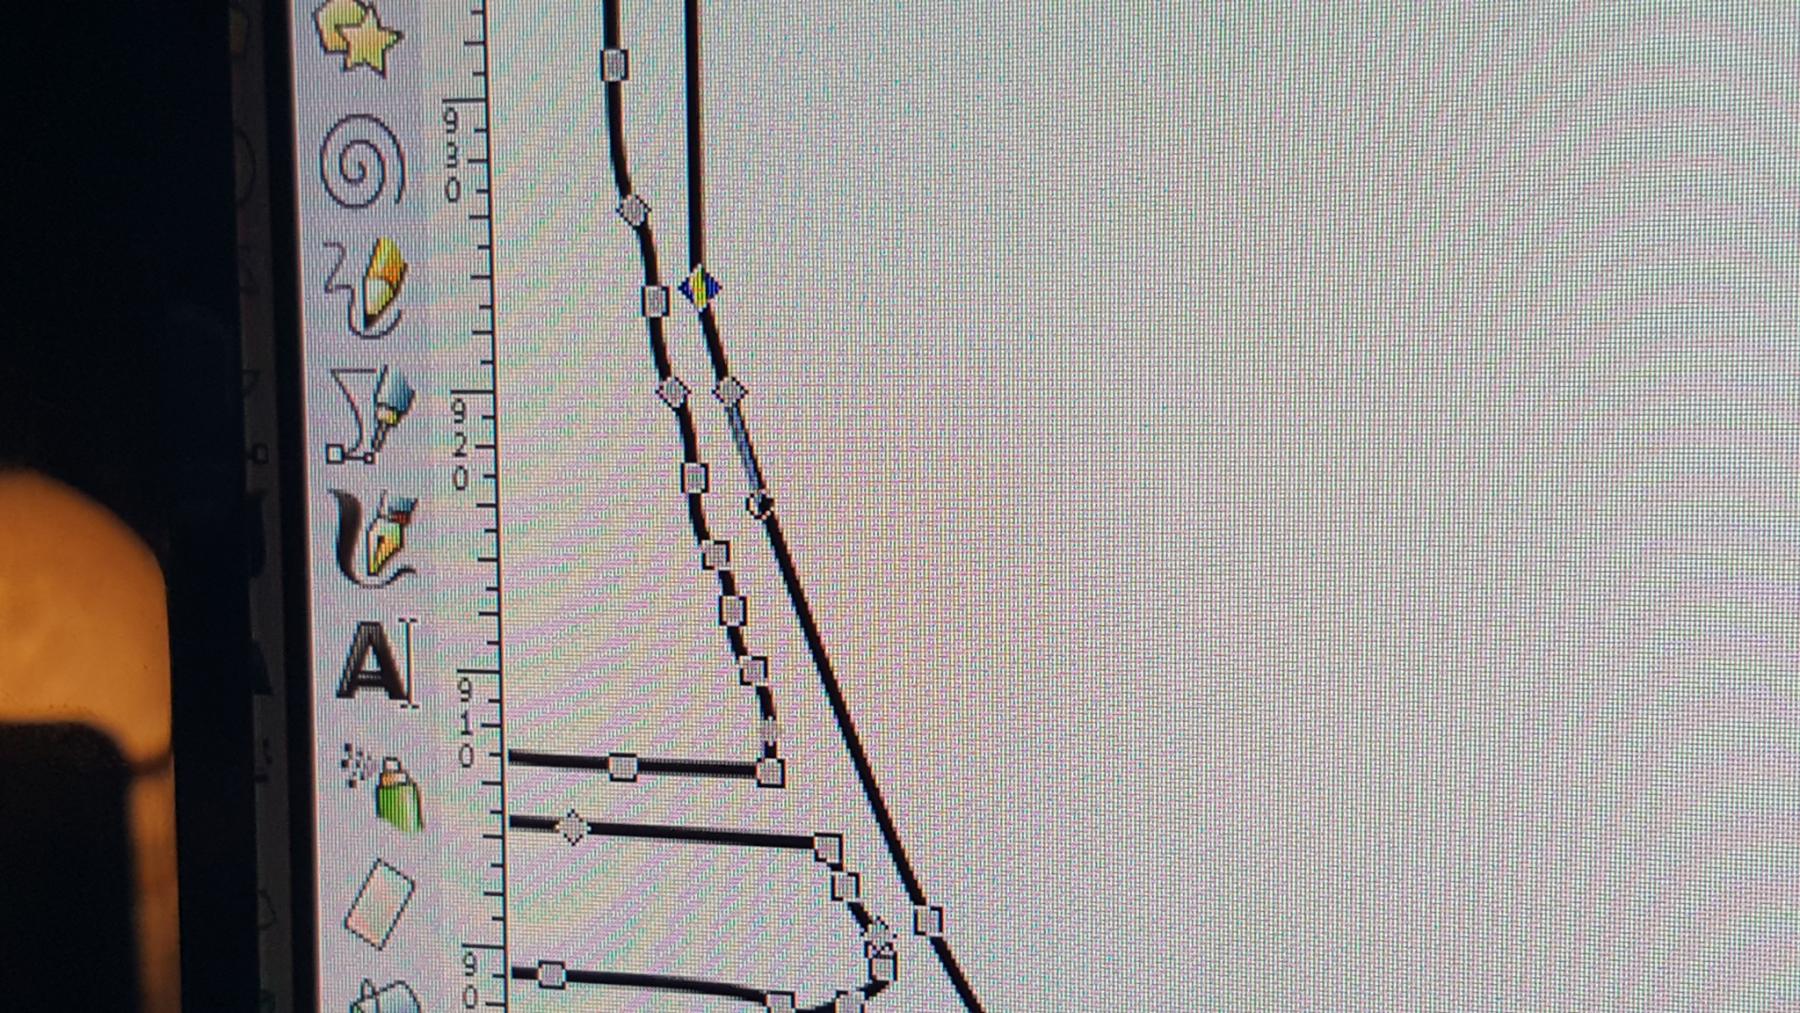
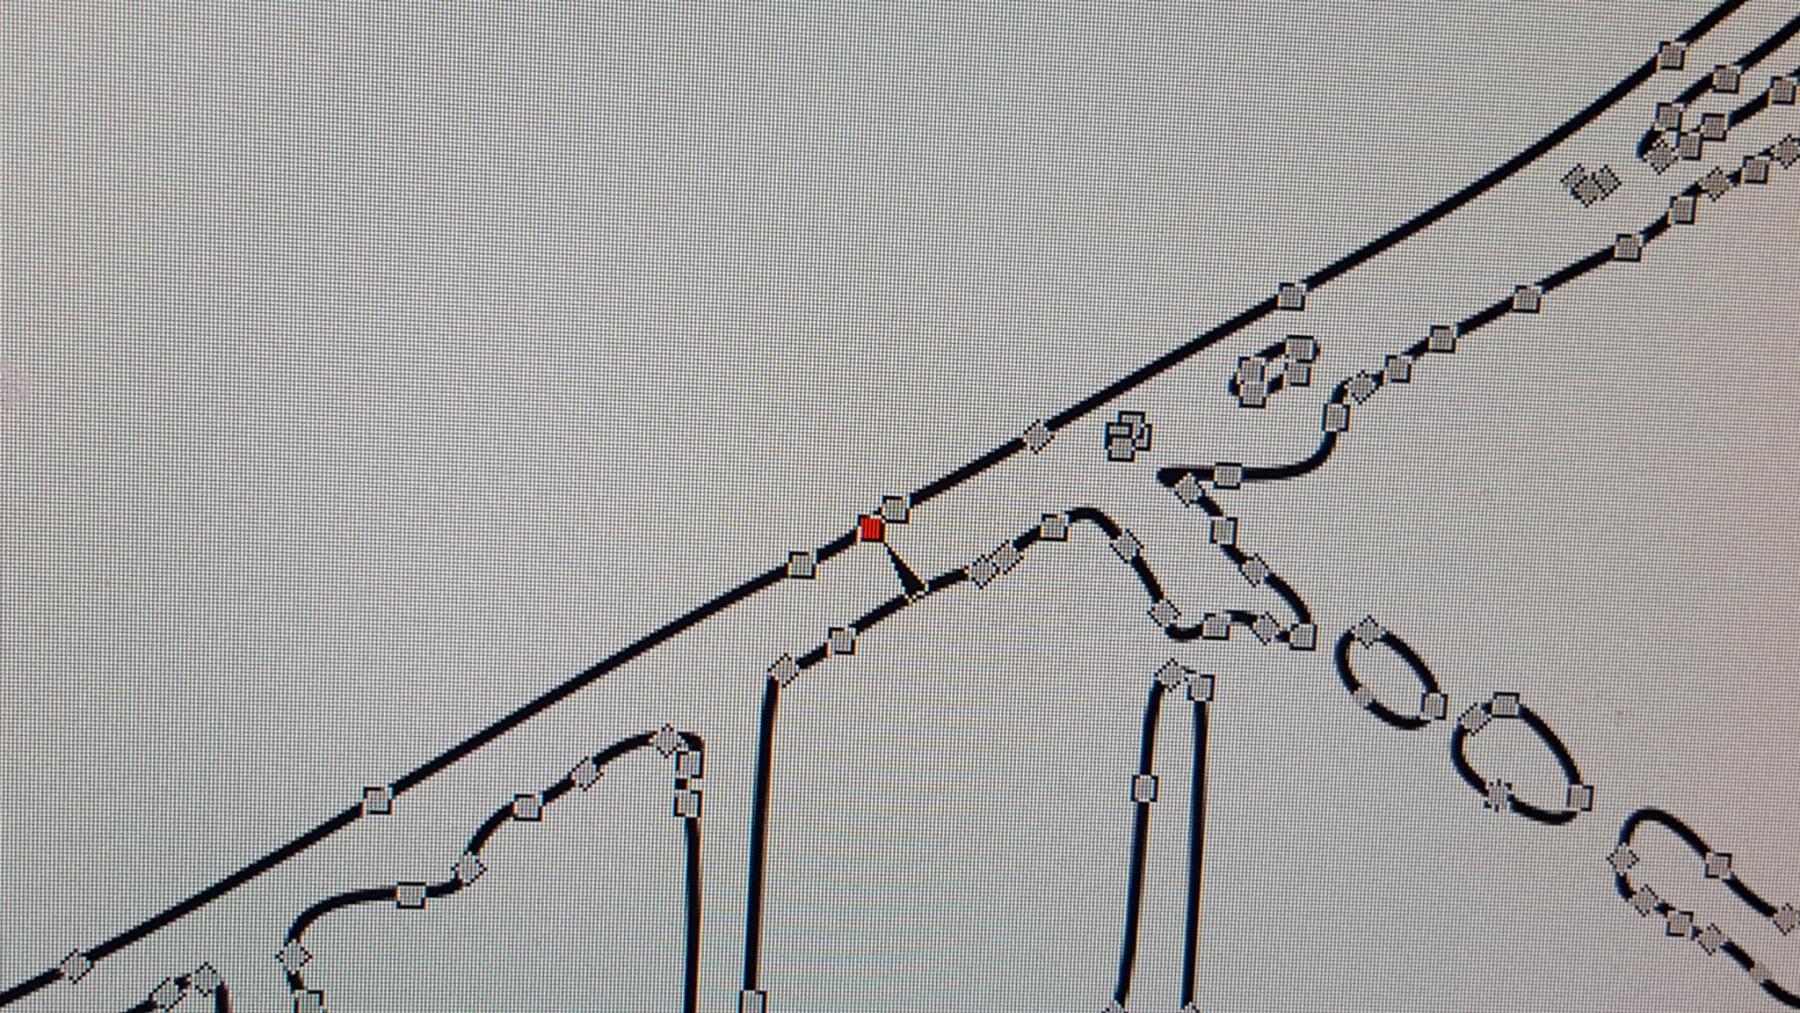
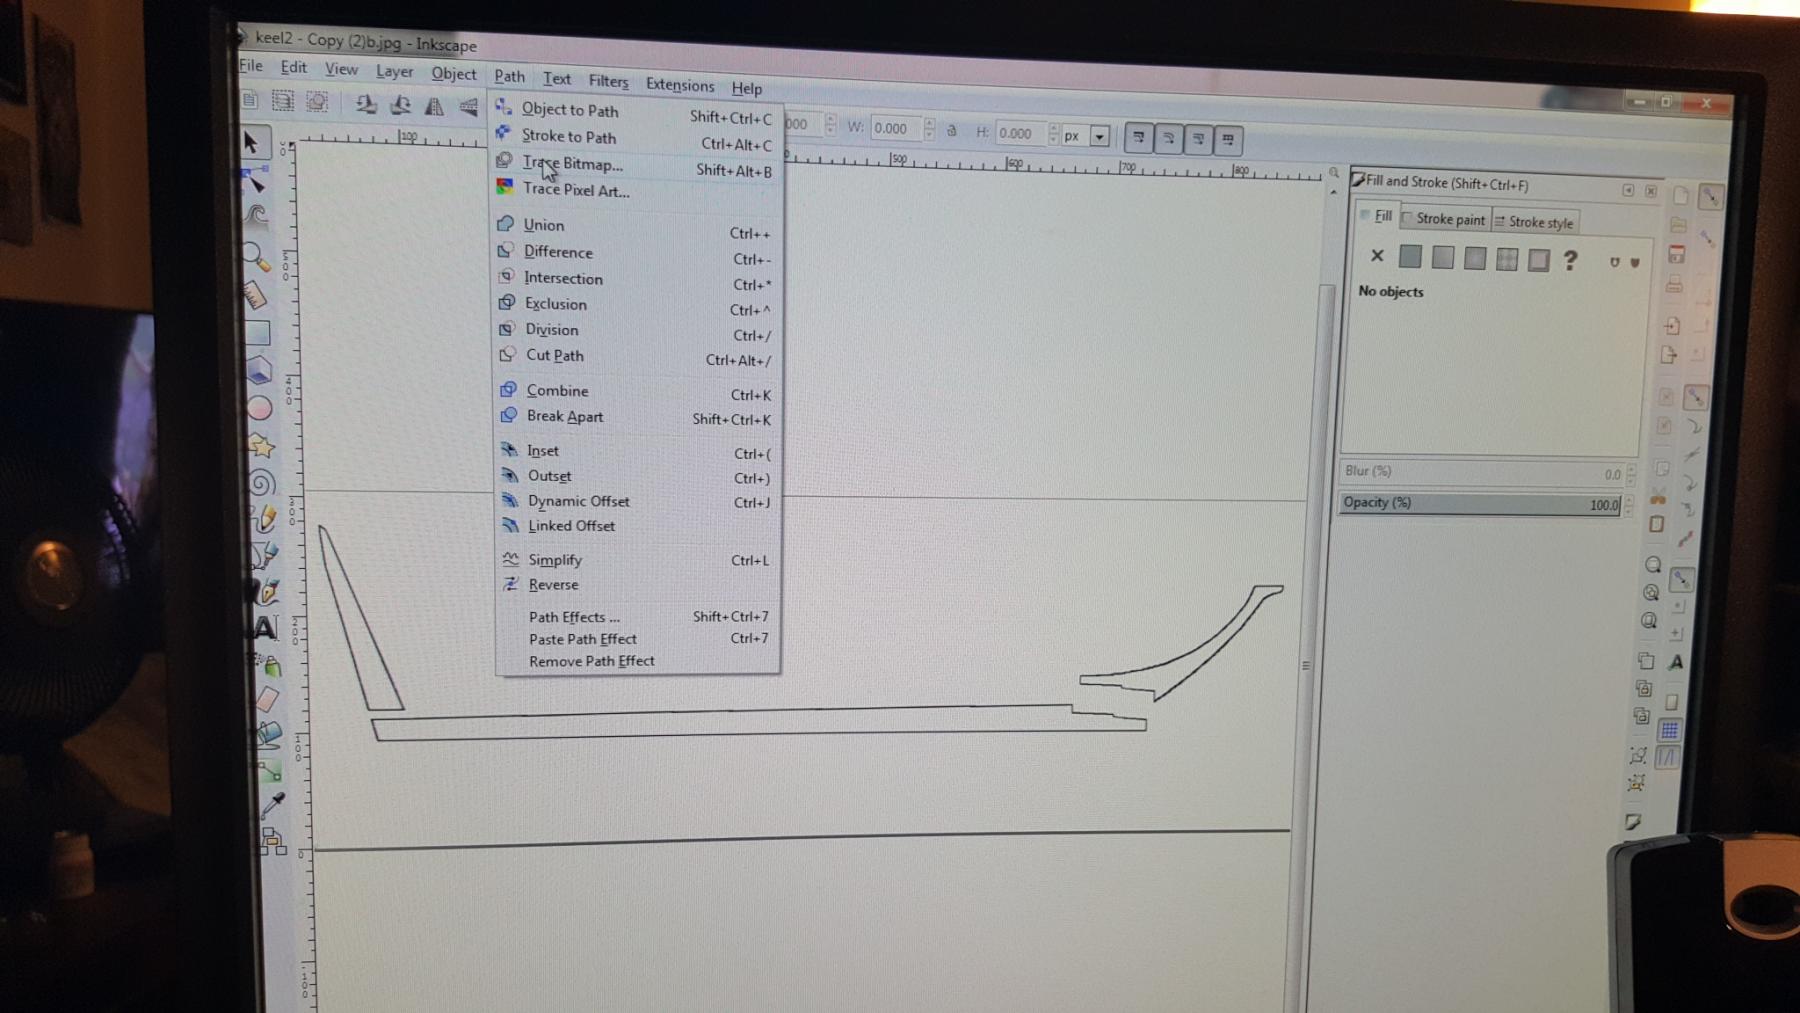
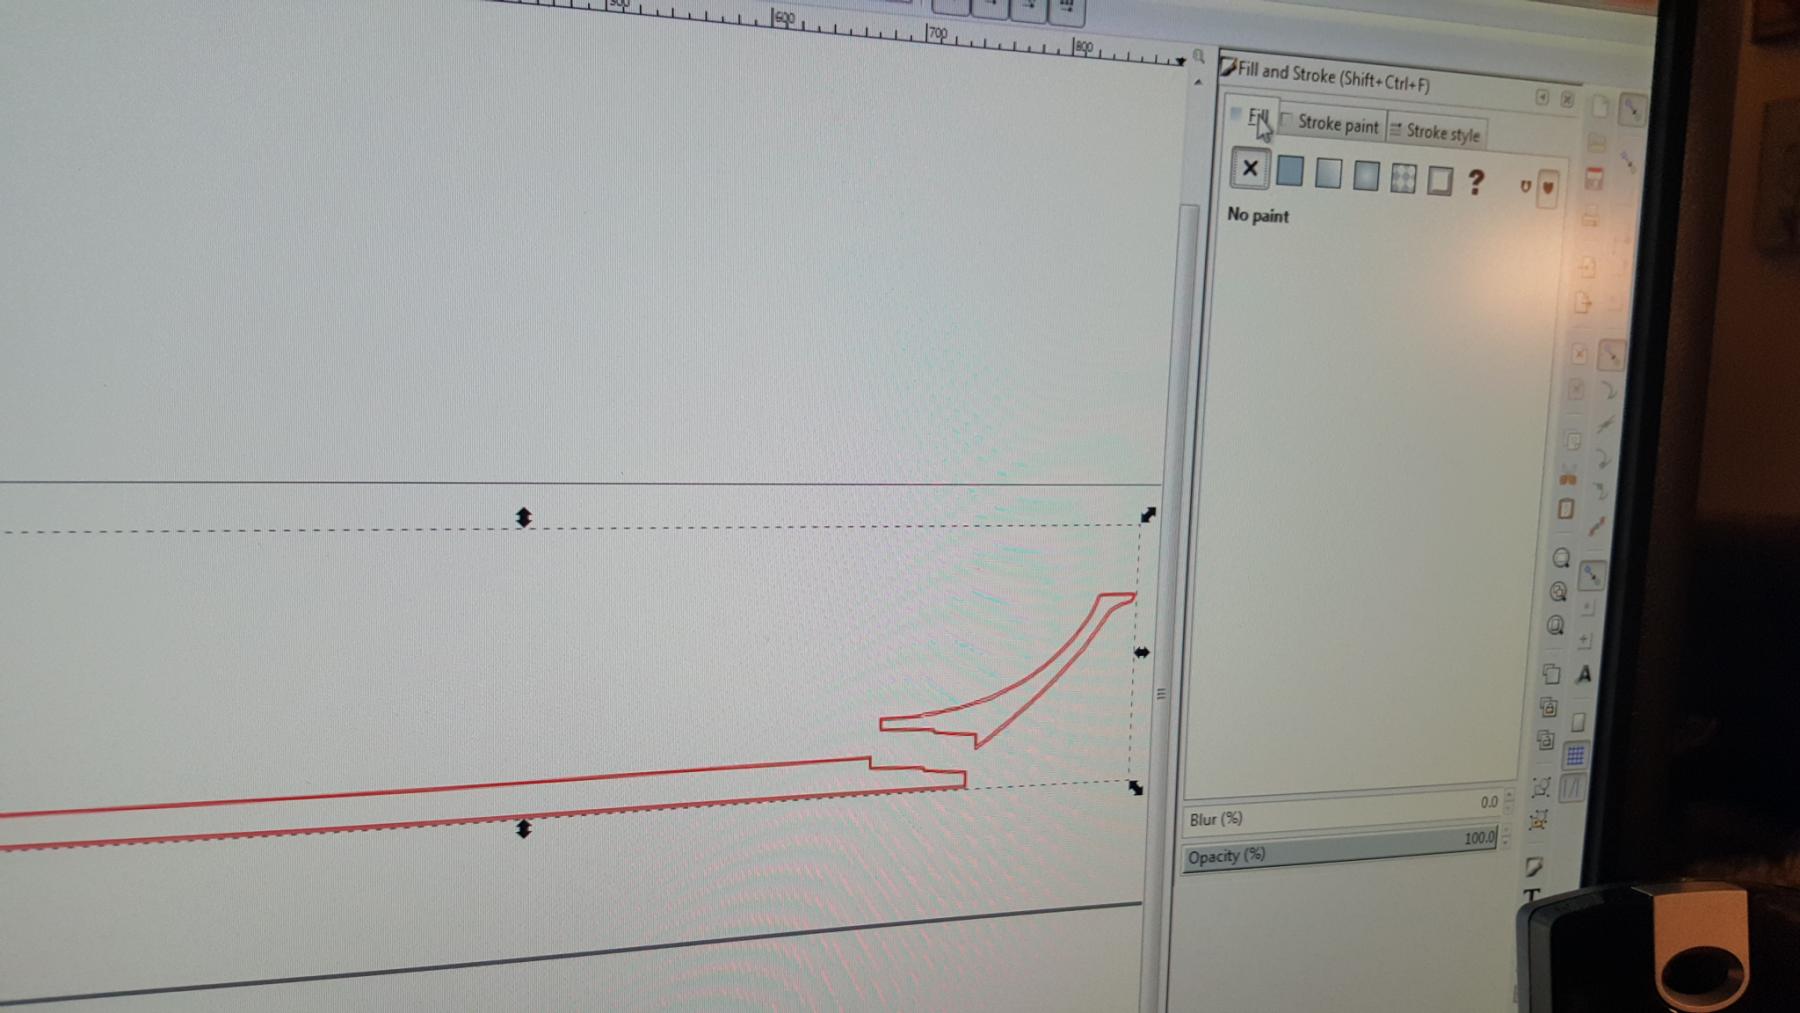
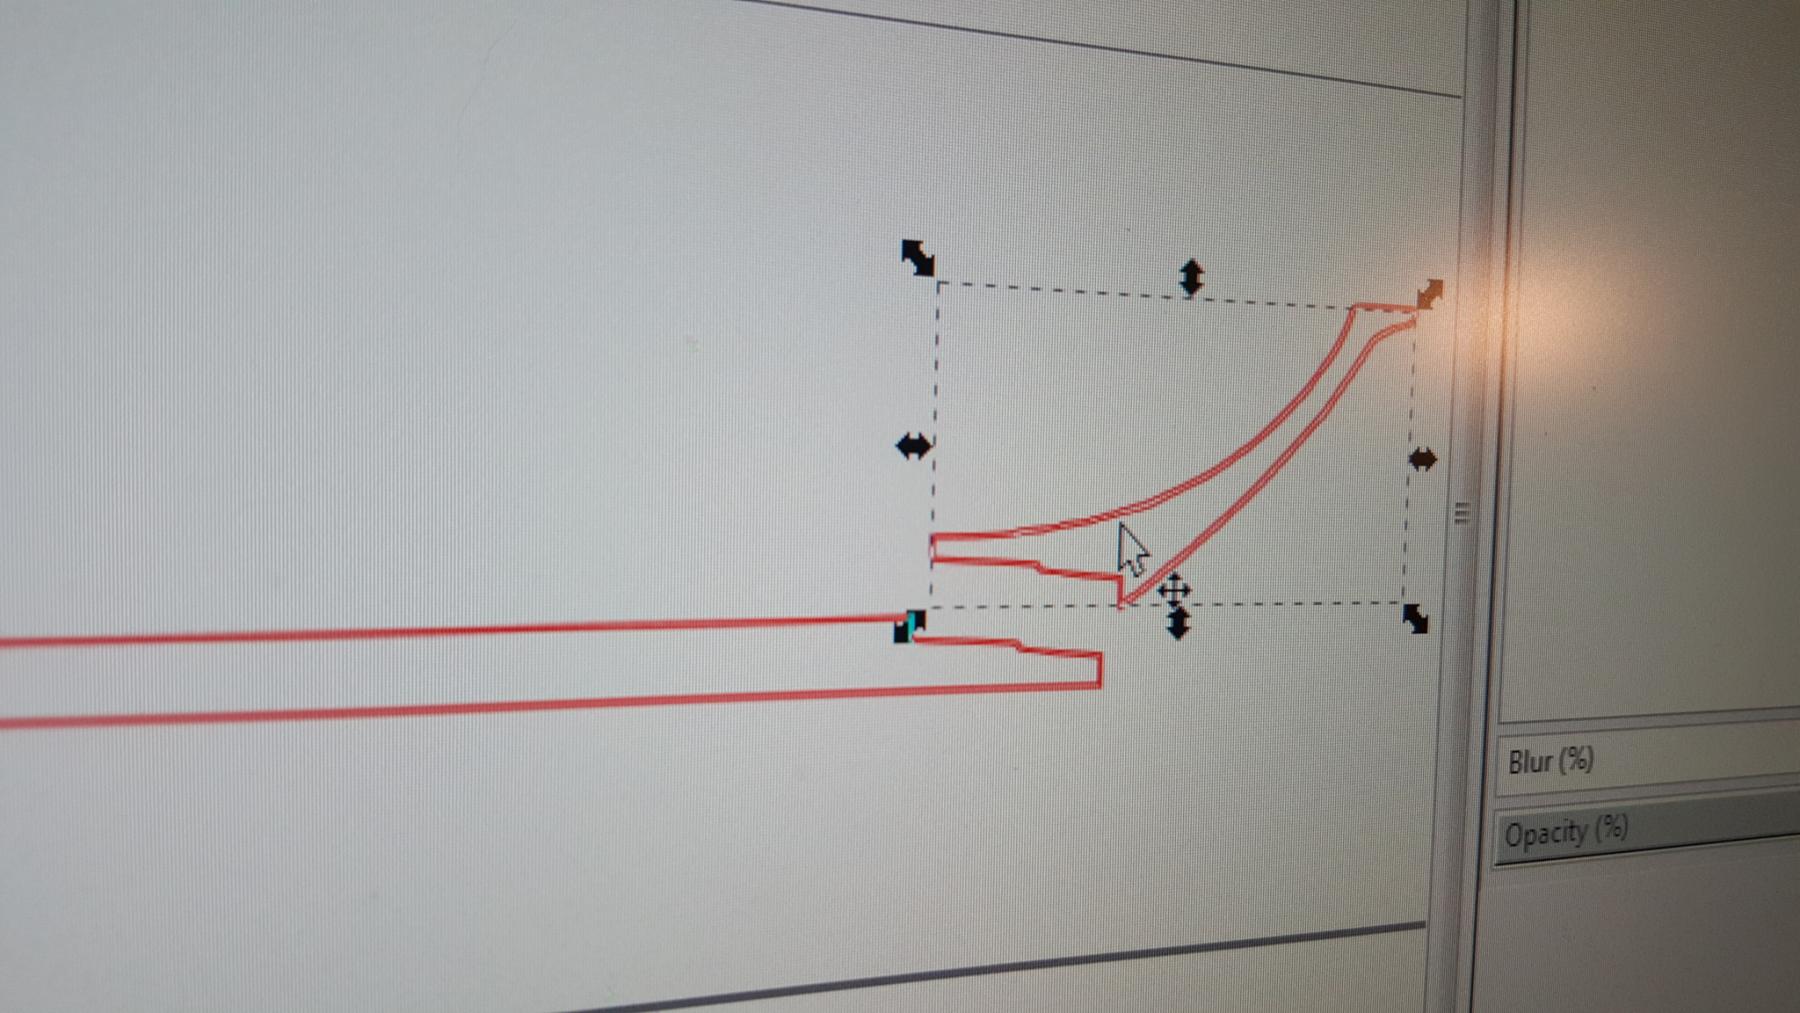
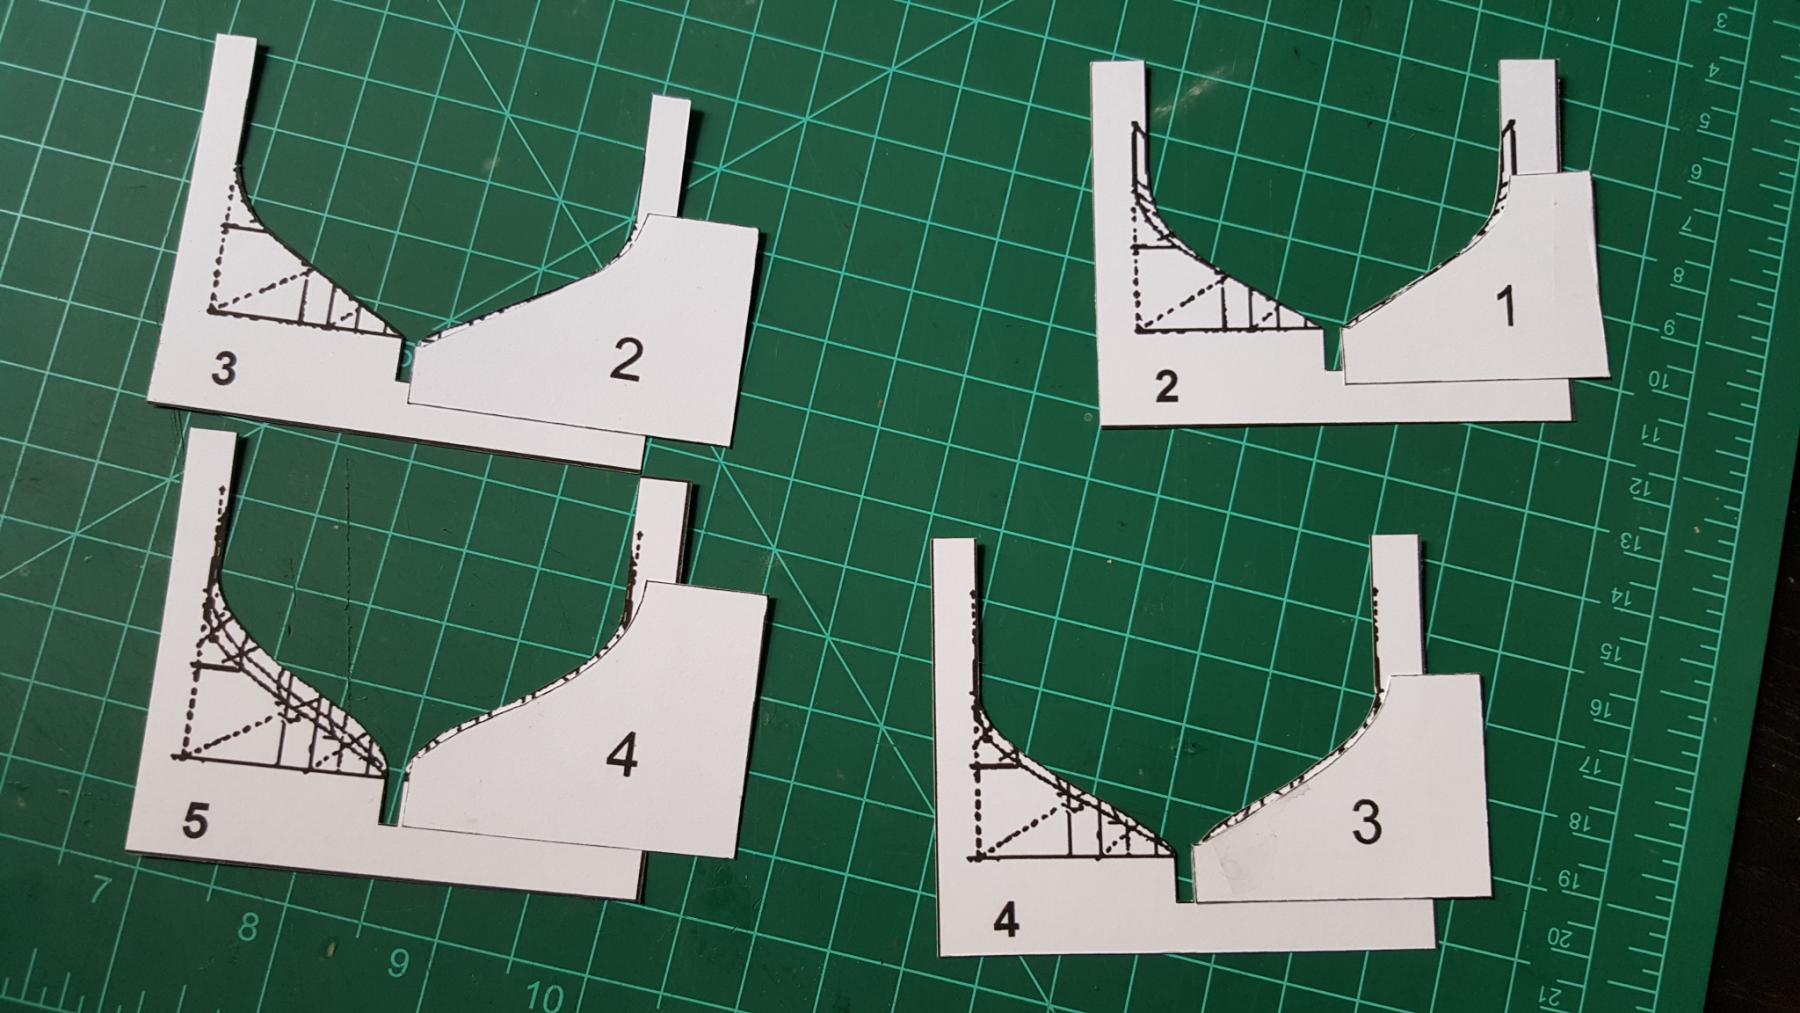
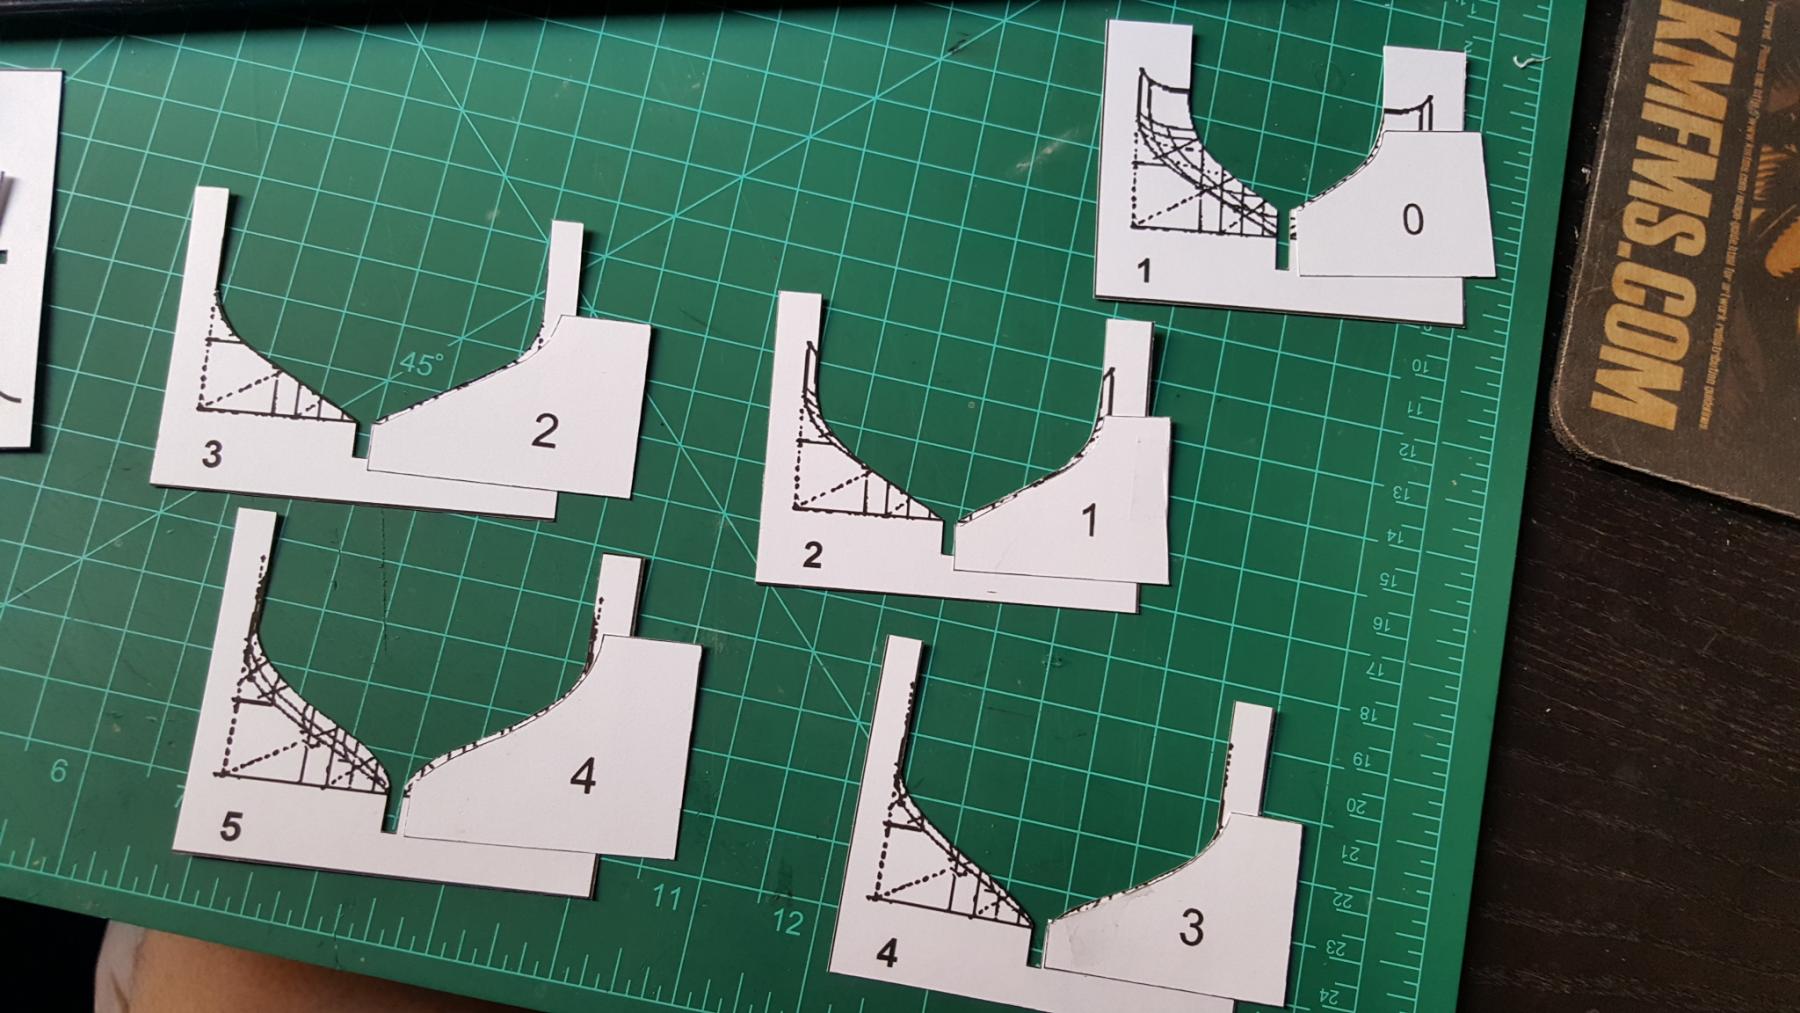
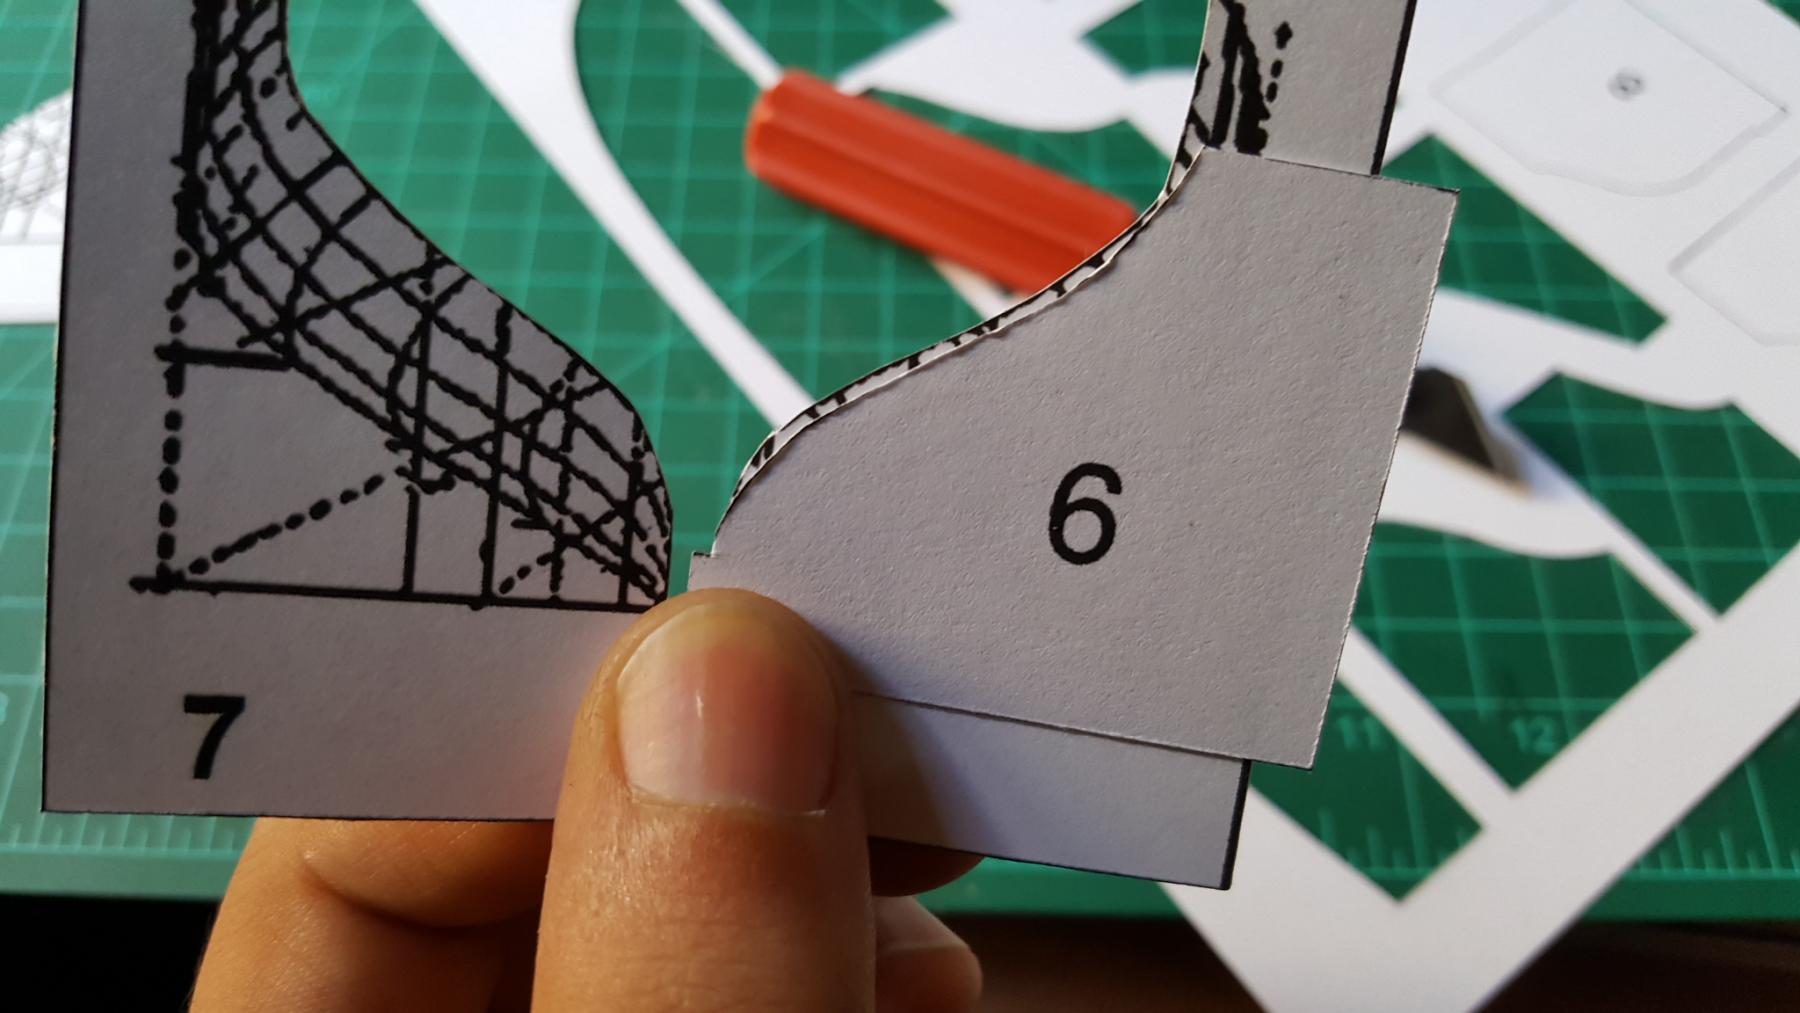
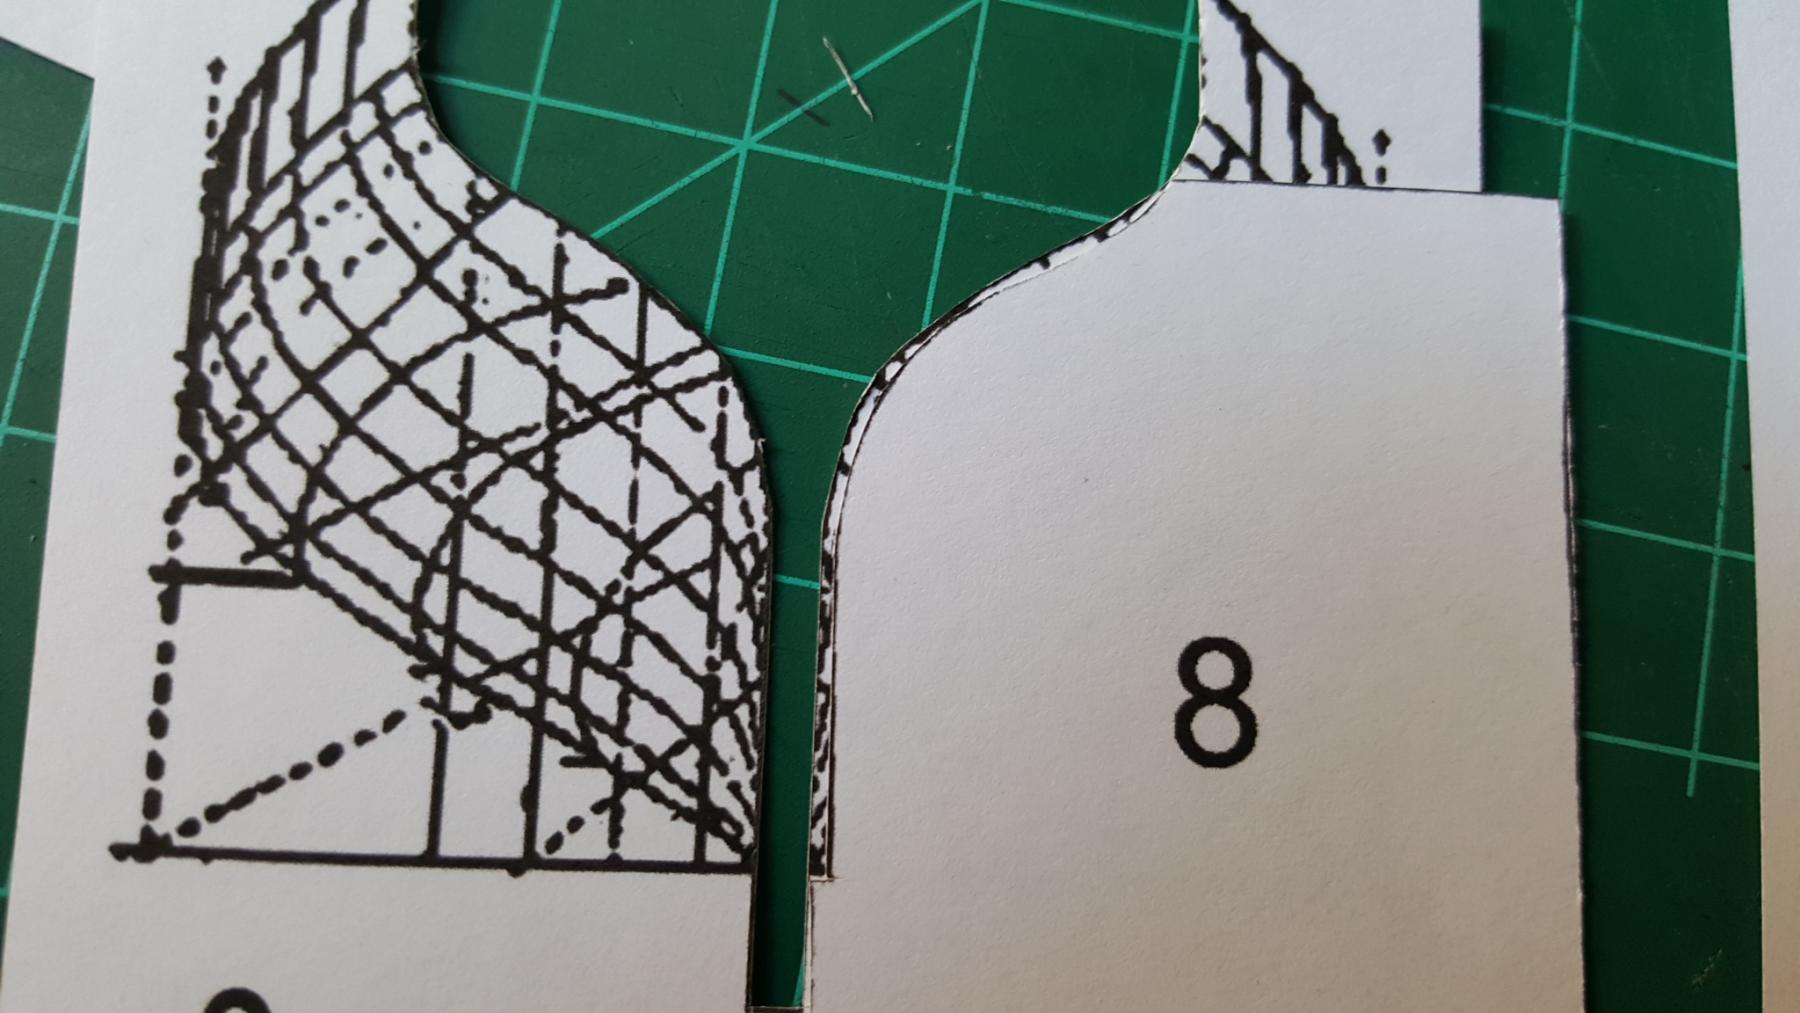
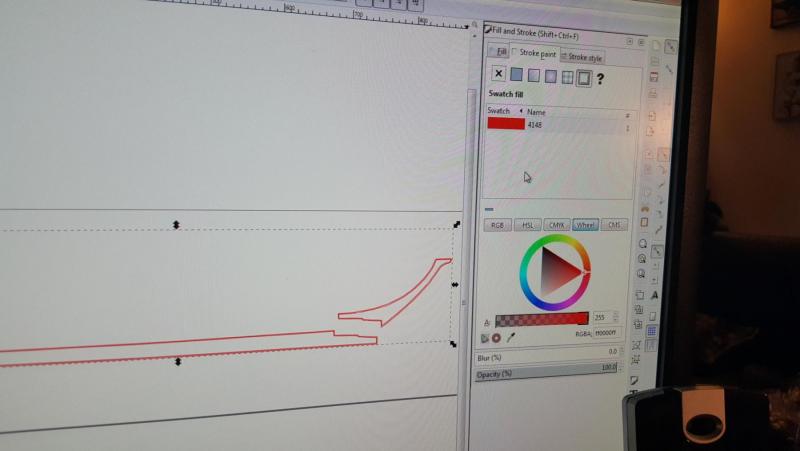
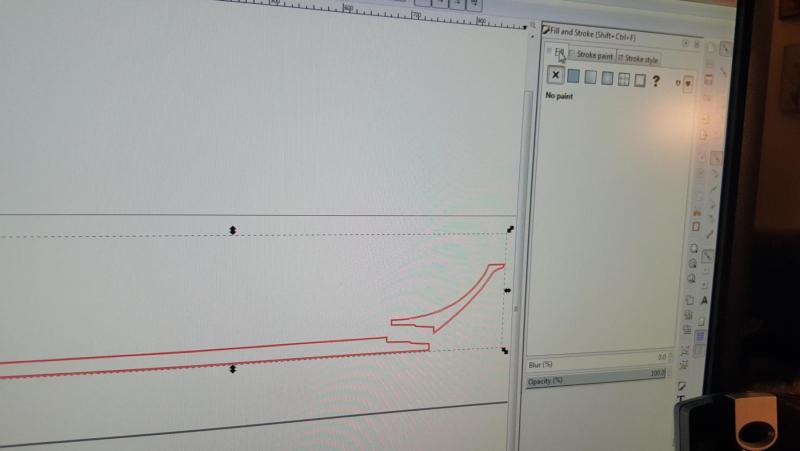
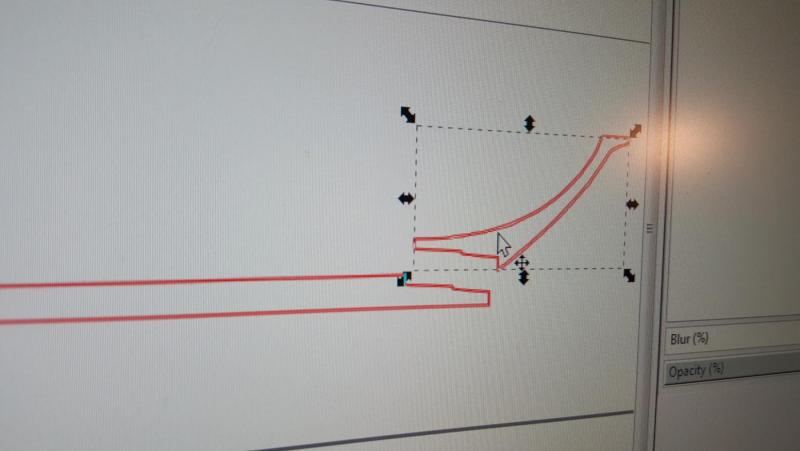
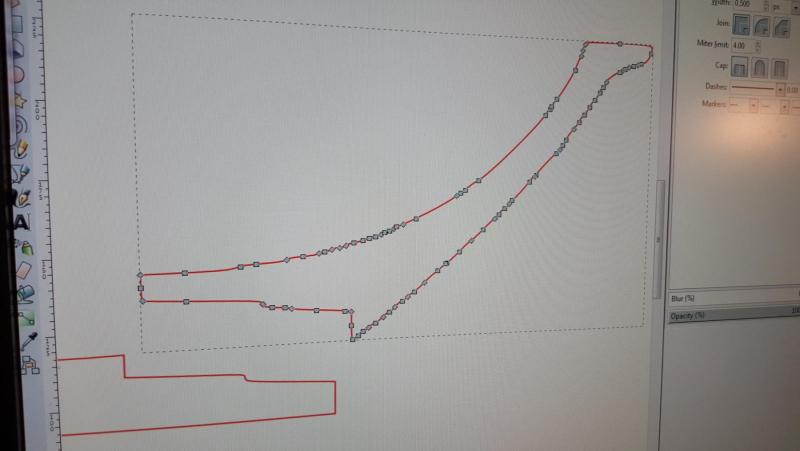
After tracing bitmap is done, go to stroke paint and use the hollow box. This traces the image and then go to fill and x it out. Now you have an inner and outer line with white in the middle. Delete the inner line, the outer line will allow for some extra meat to the piece you want to laser burn since lasers will burn away a tiny portion of material at the edge and will make anything you burn too thin unless you compensate. After that you have to correct the image. Scanned images will be very rough and go to the upper left where it says edit nodes and simple delete or move the nodes which don't belong. The end result if done correctly will make a smooth line or curve.

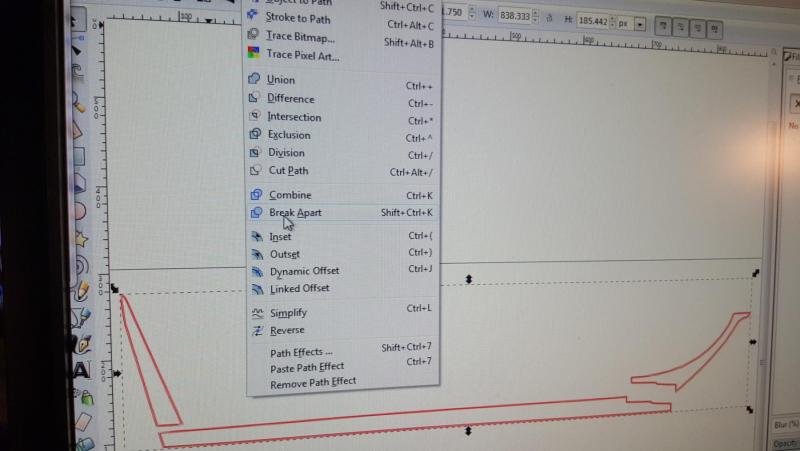
- 362 replies
-
- 6
-
-
- active
- revenue cutter
- (and 1 more)
-
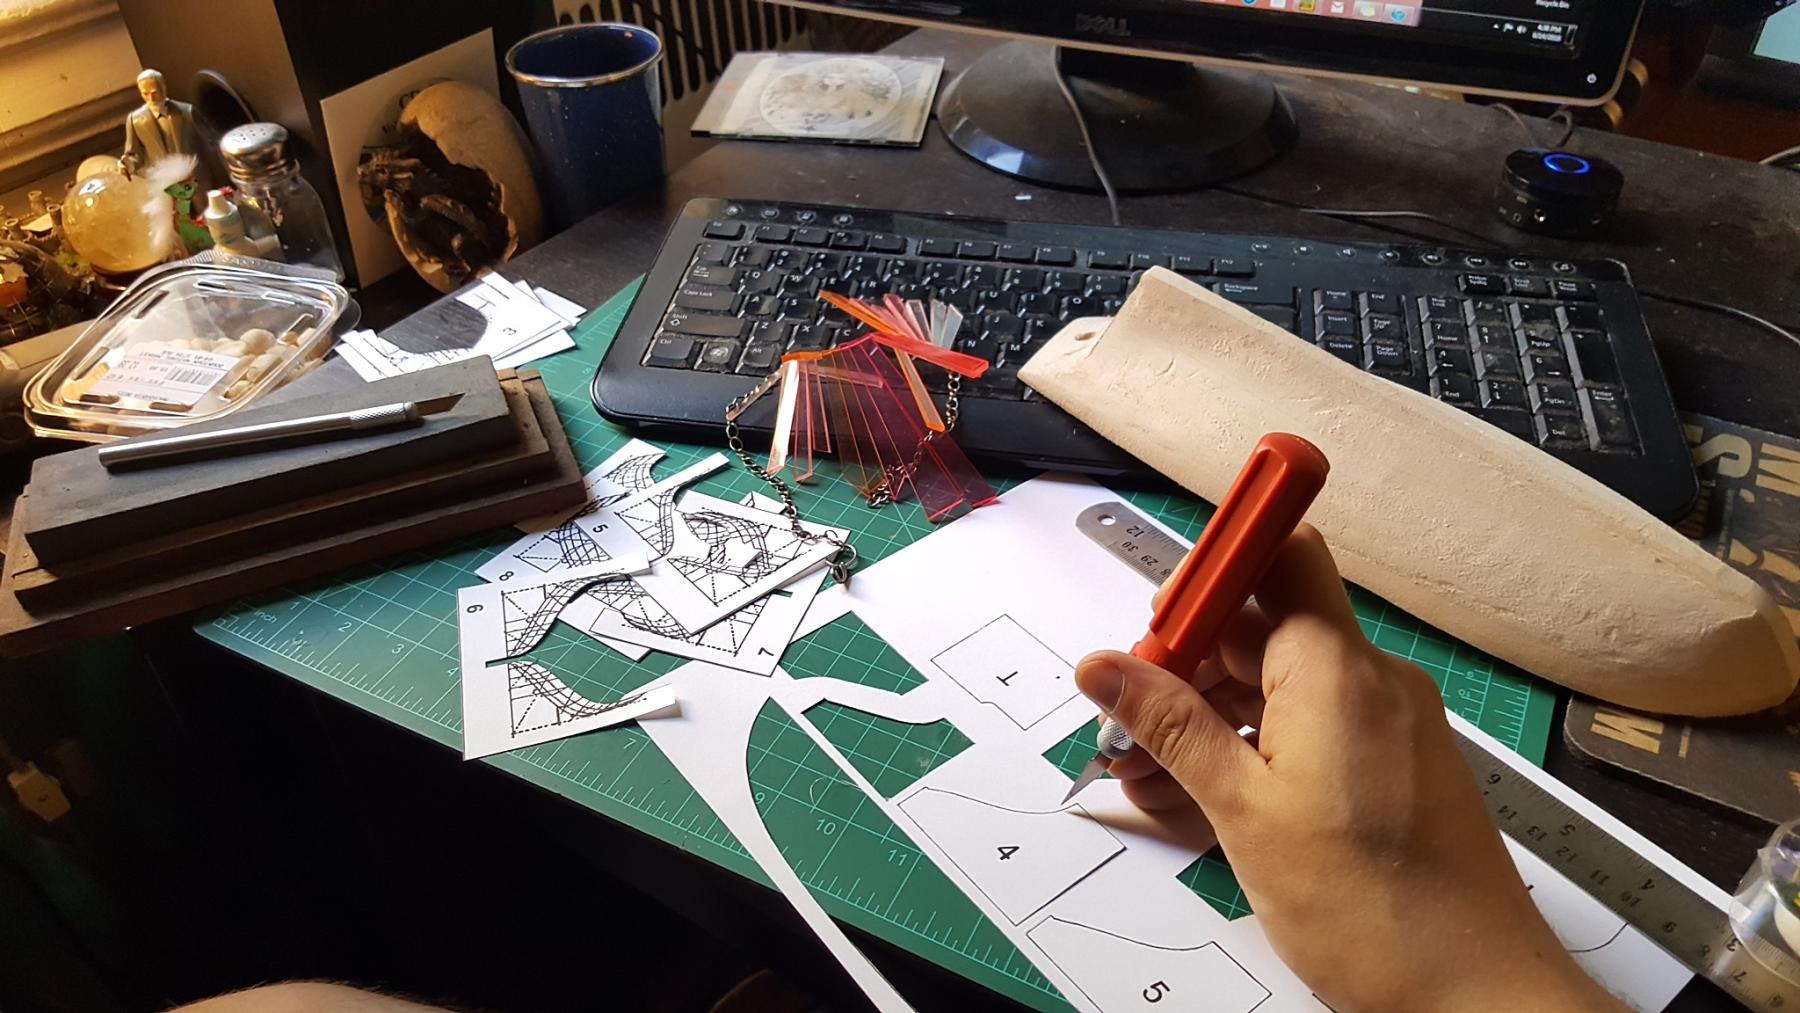
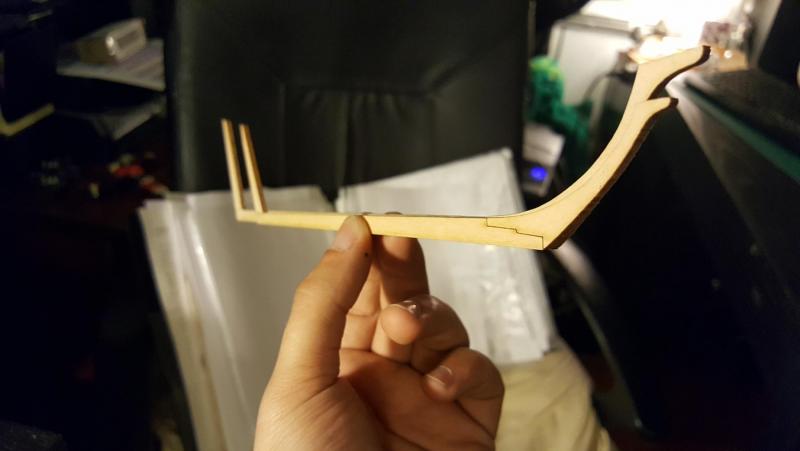
I then prepared laser parts by scanning everything into inkscape/adobe. The keel was cut into 3 parts which increases strength by going with the flow of the wood. The templates will be scanned and cut in acrylic which like I did with Sultana help shaping in the final stages since they aren't flexible like cardboard can be. The process of creating laser parts is as follows. first add the image into inkscape, then trace to bitmap which makes a rendered copy of the image. After delete the image and keep the render.

- 362 replies
-
- 5
-
-
- active
- revenue cutter
- (and 1 more)
-
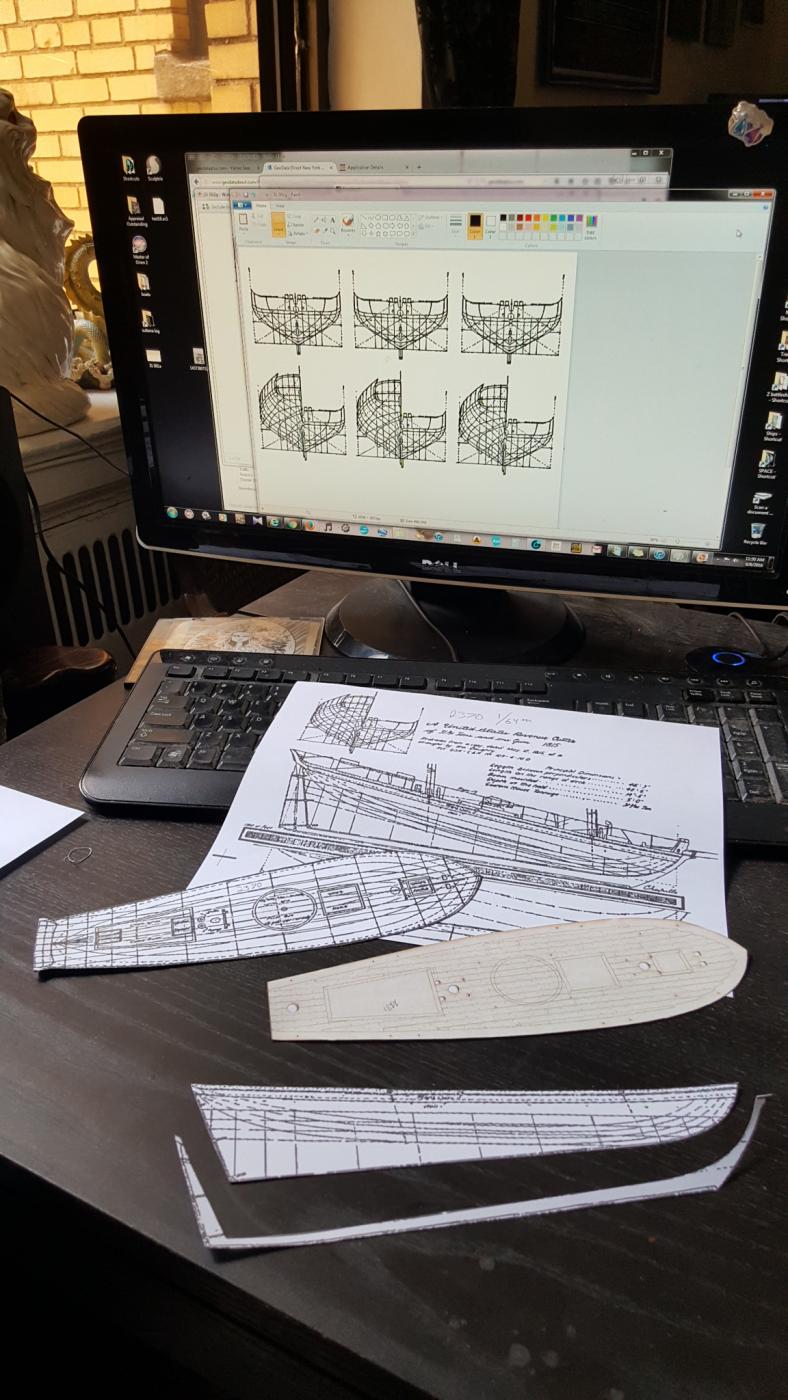
I also took the opportunity to resize some of the parts/plans from the kit itself. I literally just put the wood sheets into the scanner and then pushed the contrast waay up making the image black and white. I can then recut the parts using the laser at my workshop to the 1/64th size needed. In the future if I ever decide to resize another kit this will pretty much be the method to use, That said just a note regarding the kit templates, they weren't too bad but as you can see needed a bit of adjustment?


- 362 replies
-
- 6
-
-
- active
- revenue cutter
- (and 1 more)
-
The keel and hull lines are all separated same as I did with Sultana and templates cut out with carboard. I did this for both models. NOte my Sigmund Frued action figure to the left. he assures me that I am perfectly sane!

- 362 replies
-
- 8
-
-
- active
- revenue cutter
- (and 1 more)
-
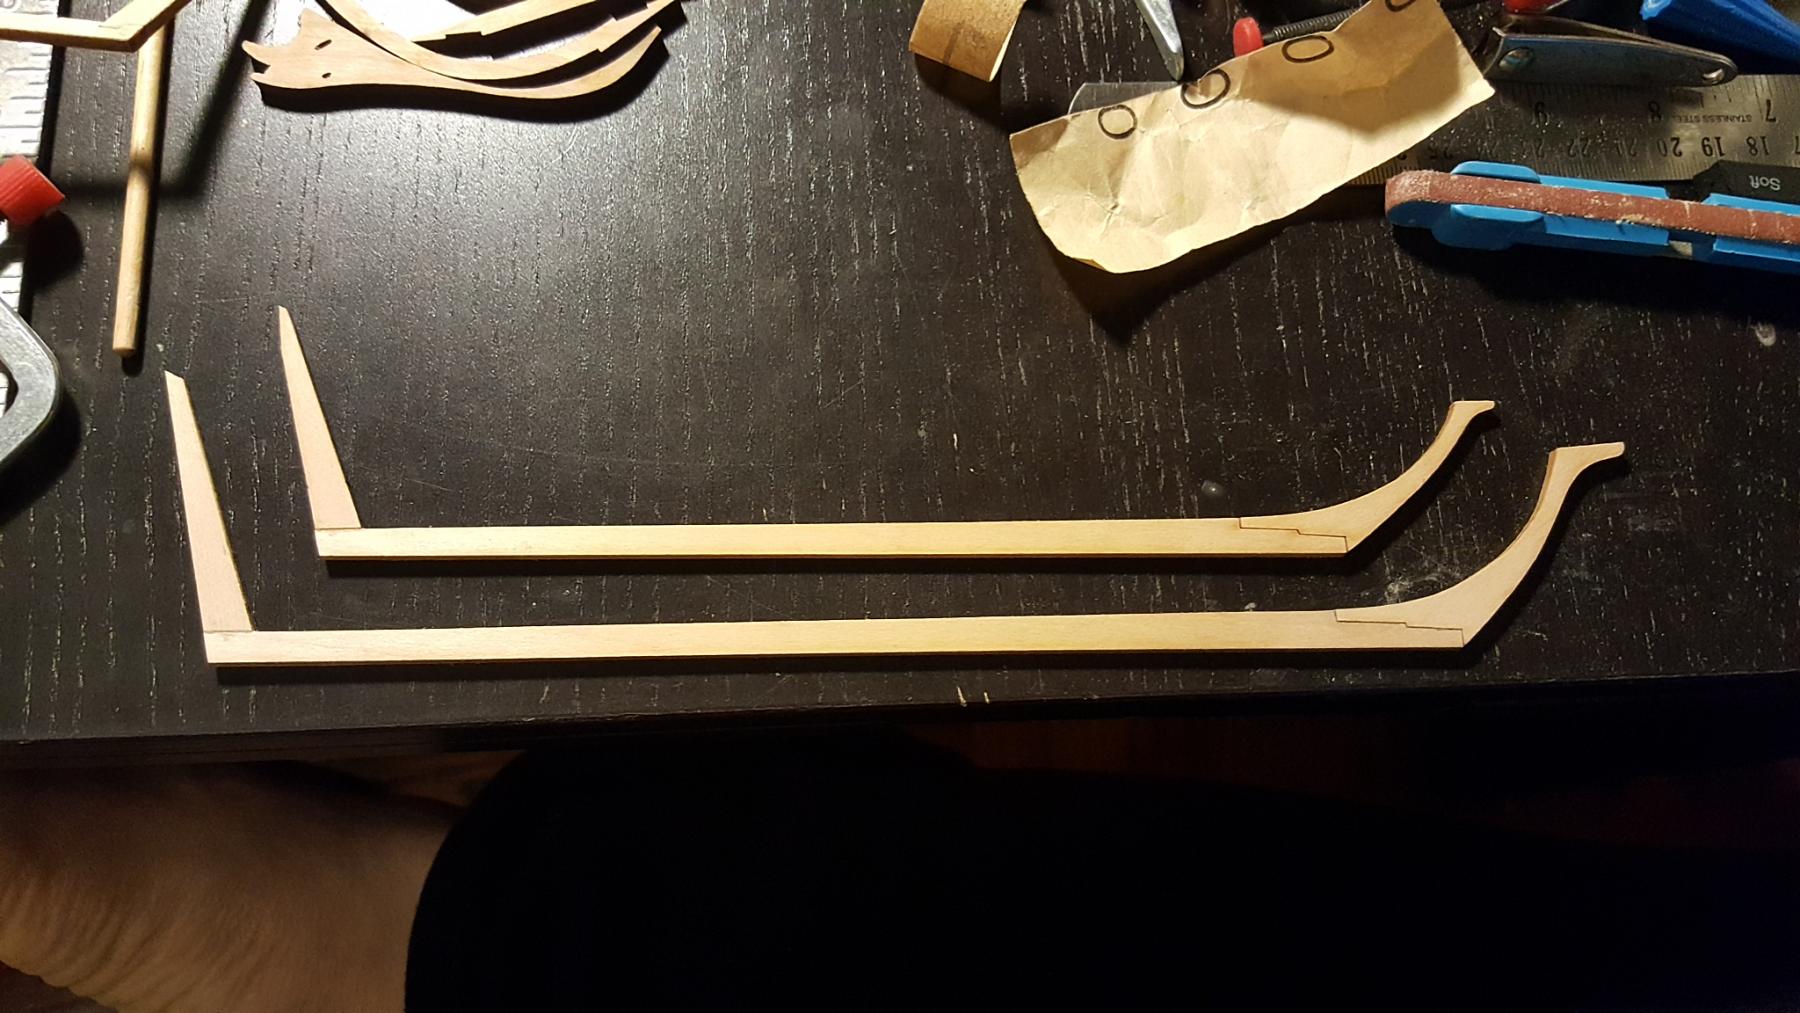
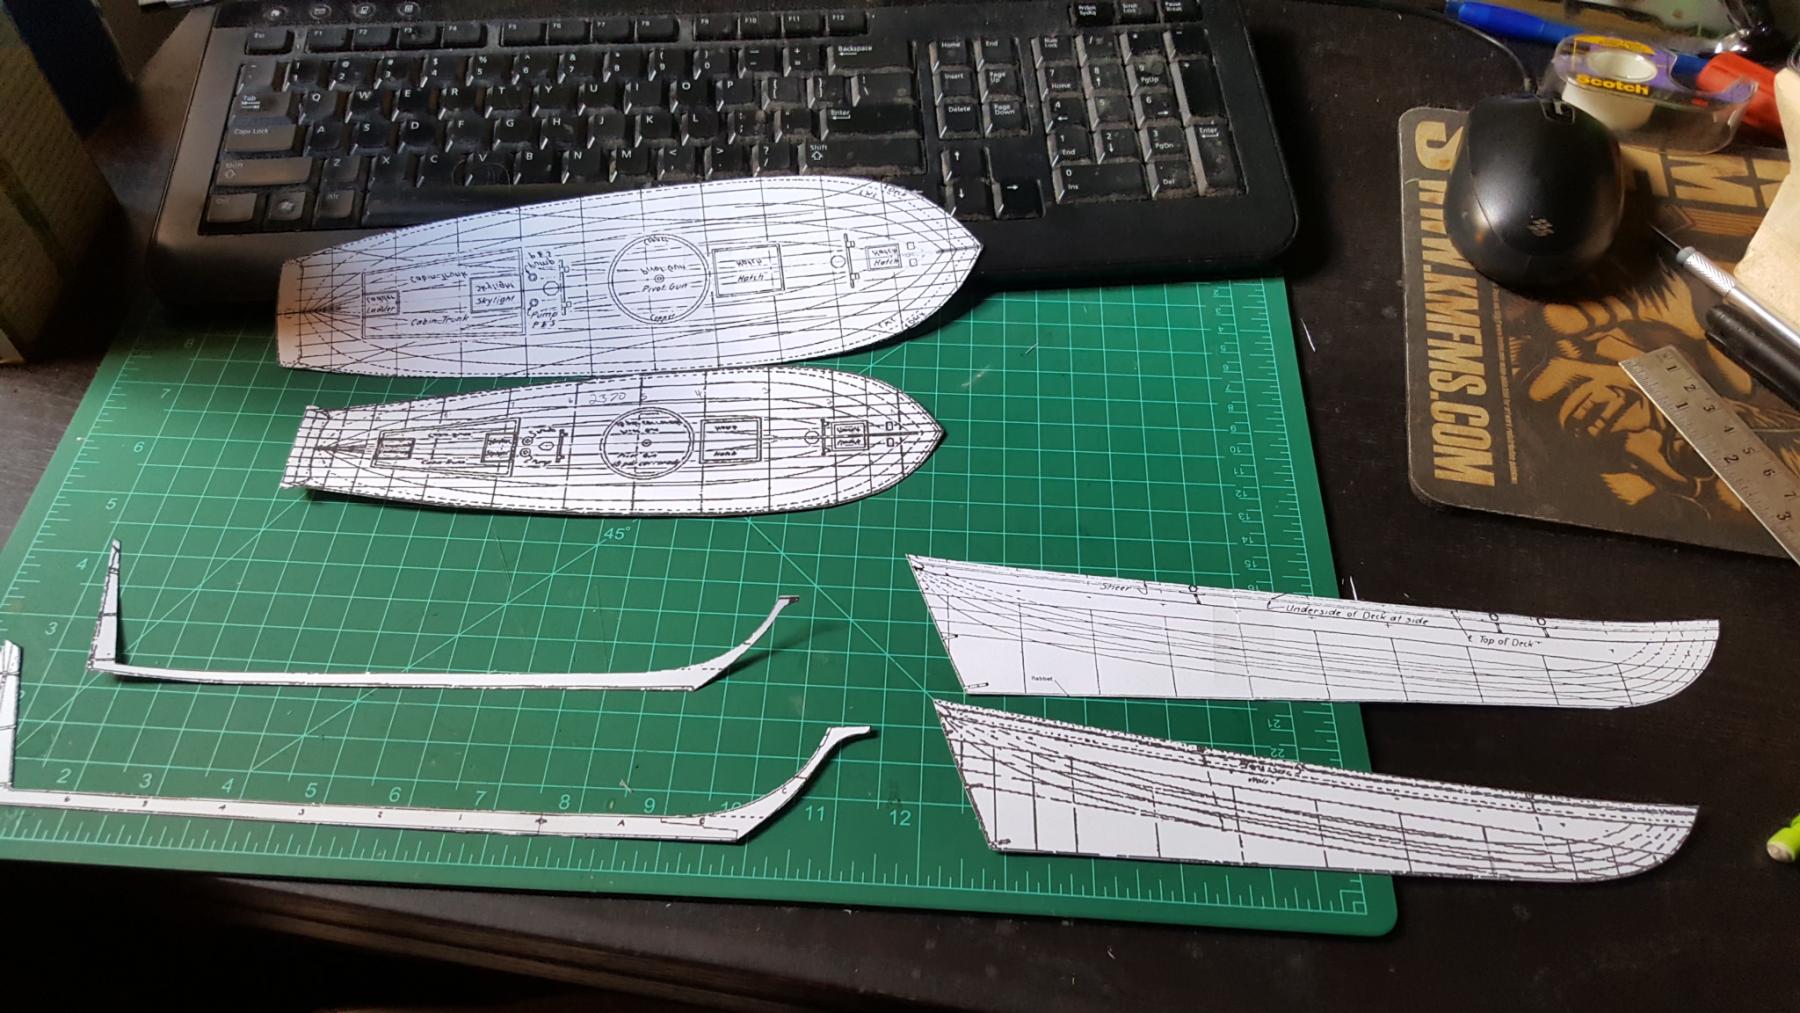
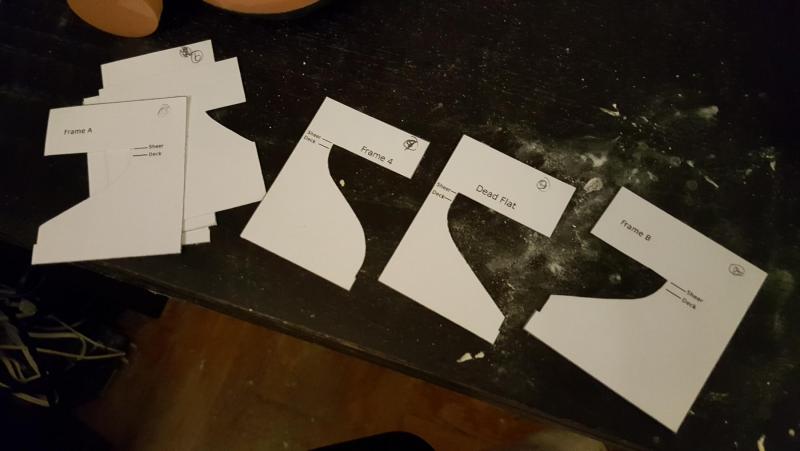
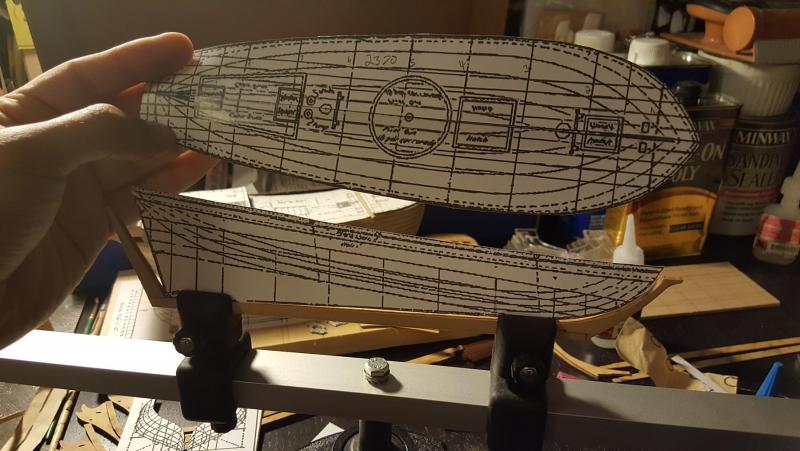
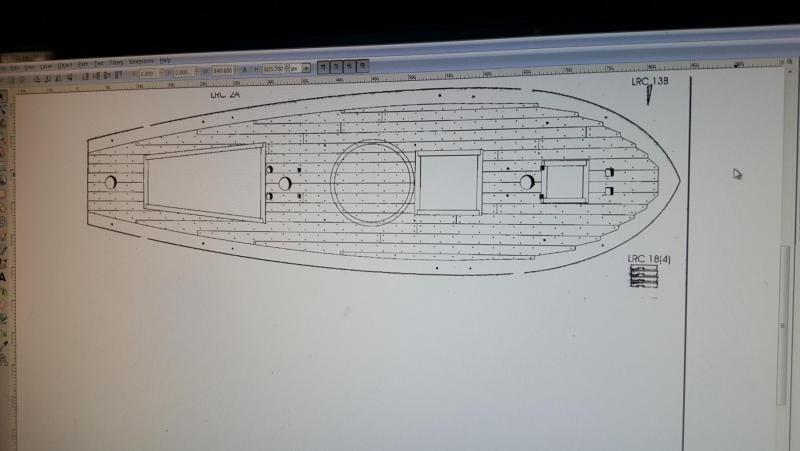
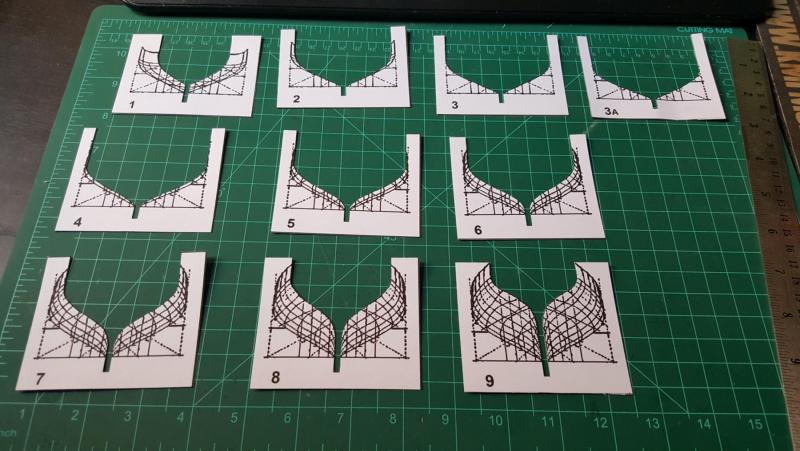
So step 1 for me anyways is to take apart the plans into the pieces necessary for shaping and constructing the hull. Note that I superimposed the deck hatches etc. over the lines using bitmap so that way I can justge placement and size of everything that will have to be built on the deck. Also shows mast placement which on the wood block will be moved appropriately. Here are the top and side profile templates of both ships and both keels alongside.

- 362 replies
-
- 6
-
-
- active
- revenue cutter
- (and 1 more)
-
Of course! And feel free to offer thoughts as we are all learning together
- 362 replies
-
- 2
-
-
- active
- revenue cutter
- (and 1 more)
-
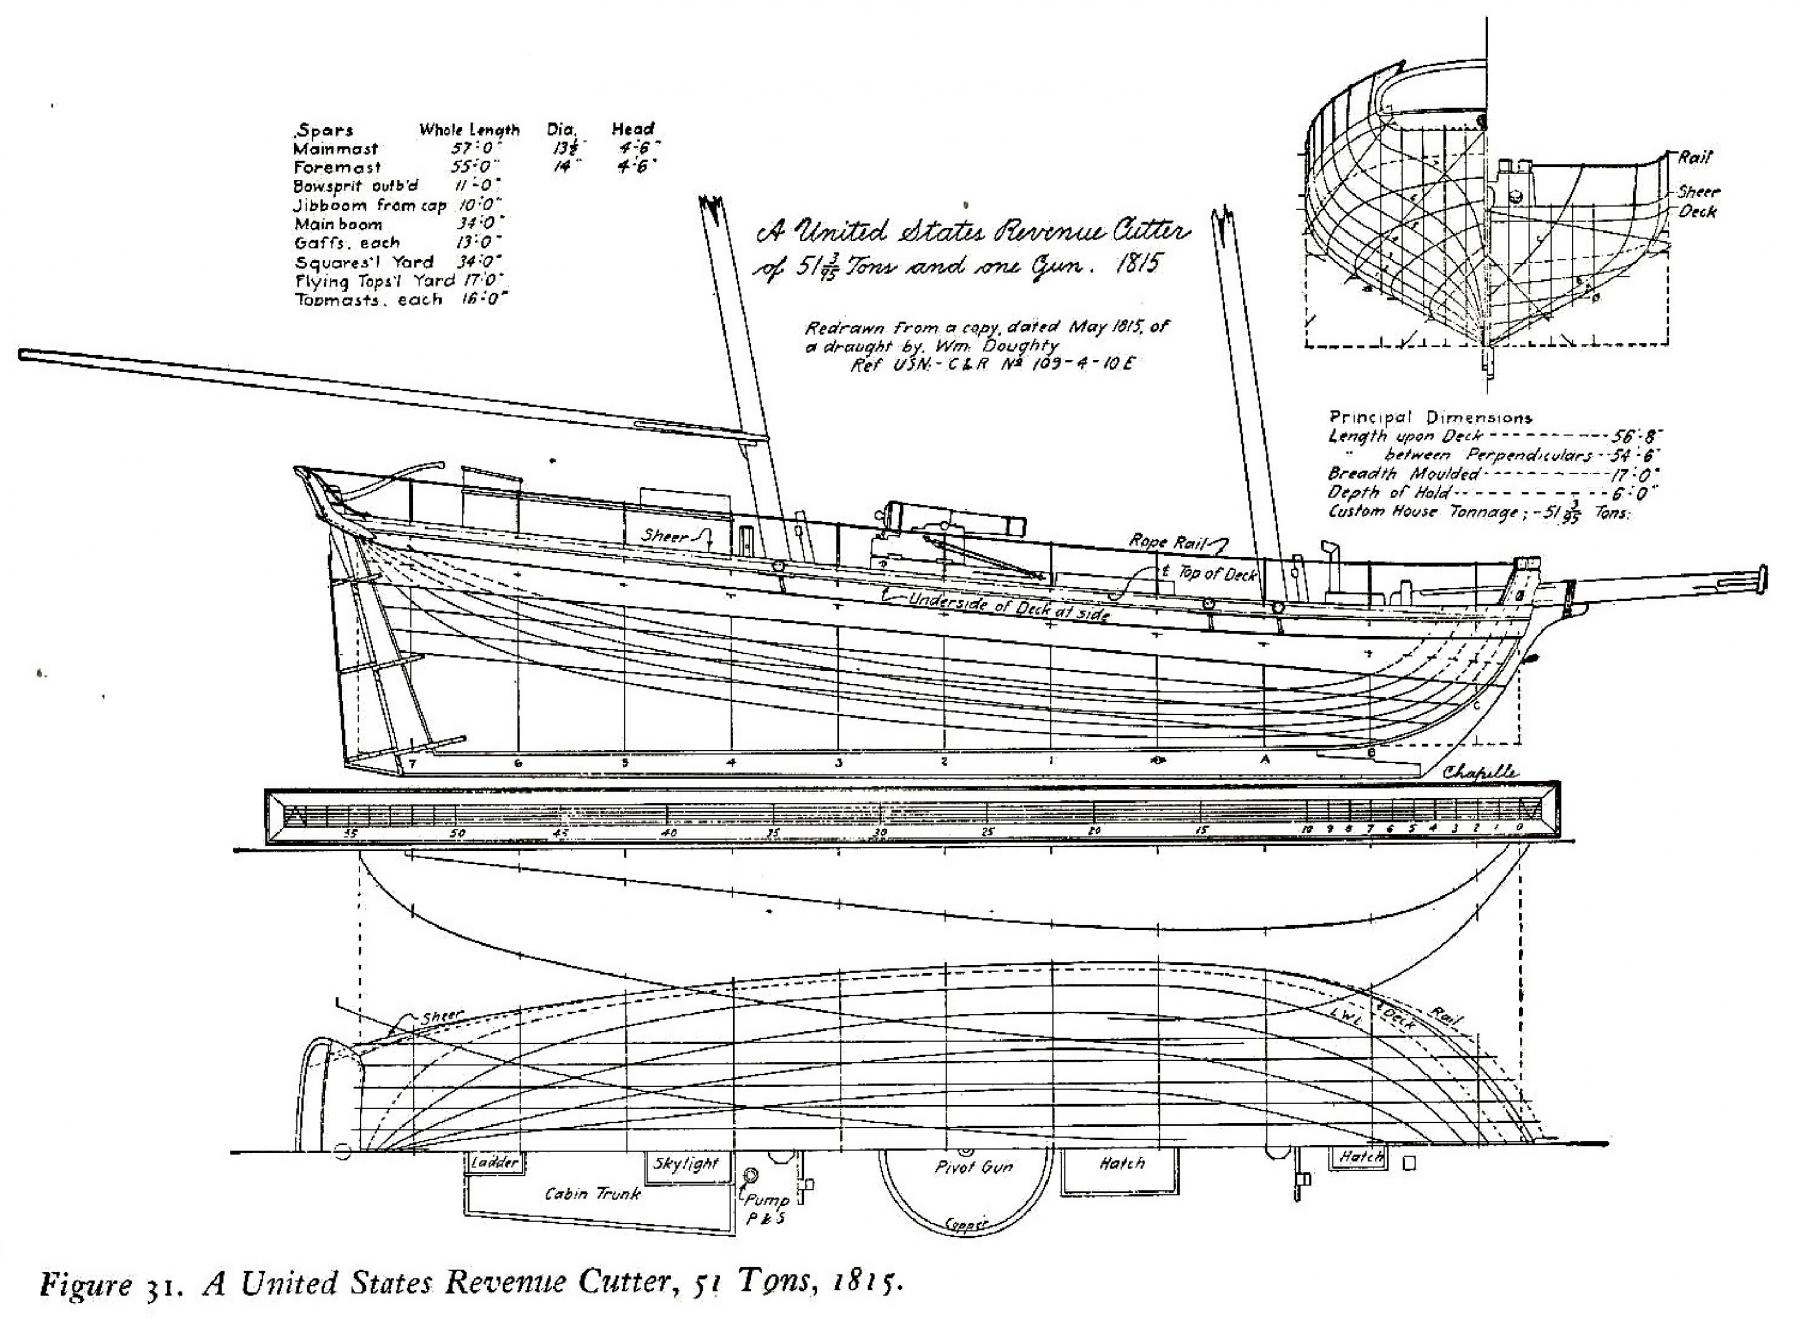
The 51 ton ship at 1/64th scale produces a model at around 10.25" (between perpendiculars) or 10.5" (deck length) and a width of 3 3/16". Not sure what the overall length will be as I have no basis to go off but I imagine it will be somewhere between 18-19" This one will be built using the hull block provided by the kit. The main adjustments will be to account for less drag in the larger ship and about an inch size between the 1/48 31 ton and 1/64 51 ton which will be shaped via a dremel. I am also using some plans from the modelshipwright site which had the Doughty plans in 1/72 scale which I simply blew up to the appropriate scale. I don't plan on building the 80 ton at this time but someday perhaps Again this attachment is to scale with the model I am making for anyone wishing to do the same! The accuracy of the scale is within 1/16" of an inch (that's me doing it by hand not at a print shop), but close enough that no one would notice

- 362 replies
-
- 6
-
-
- active
- revenue cutter
- (and 1 more)
-
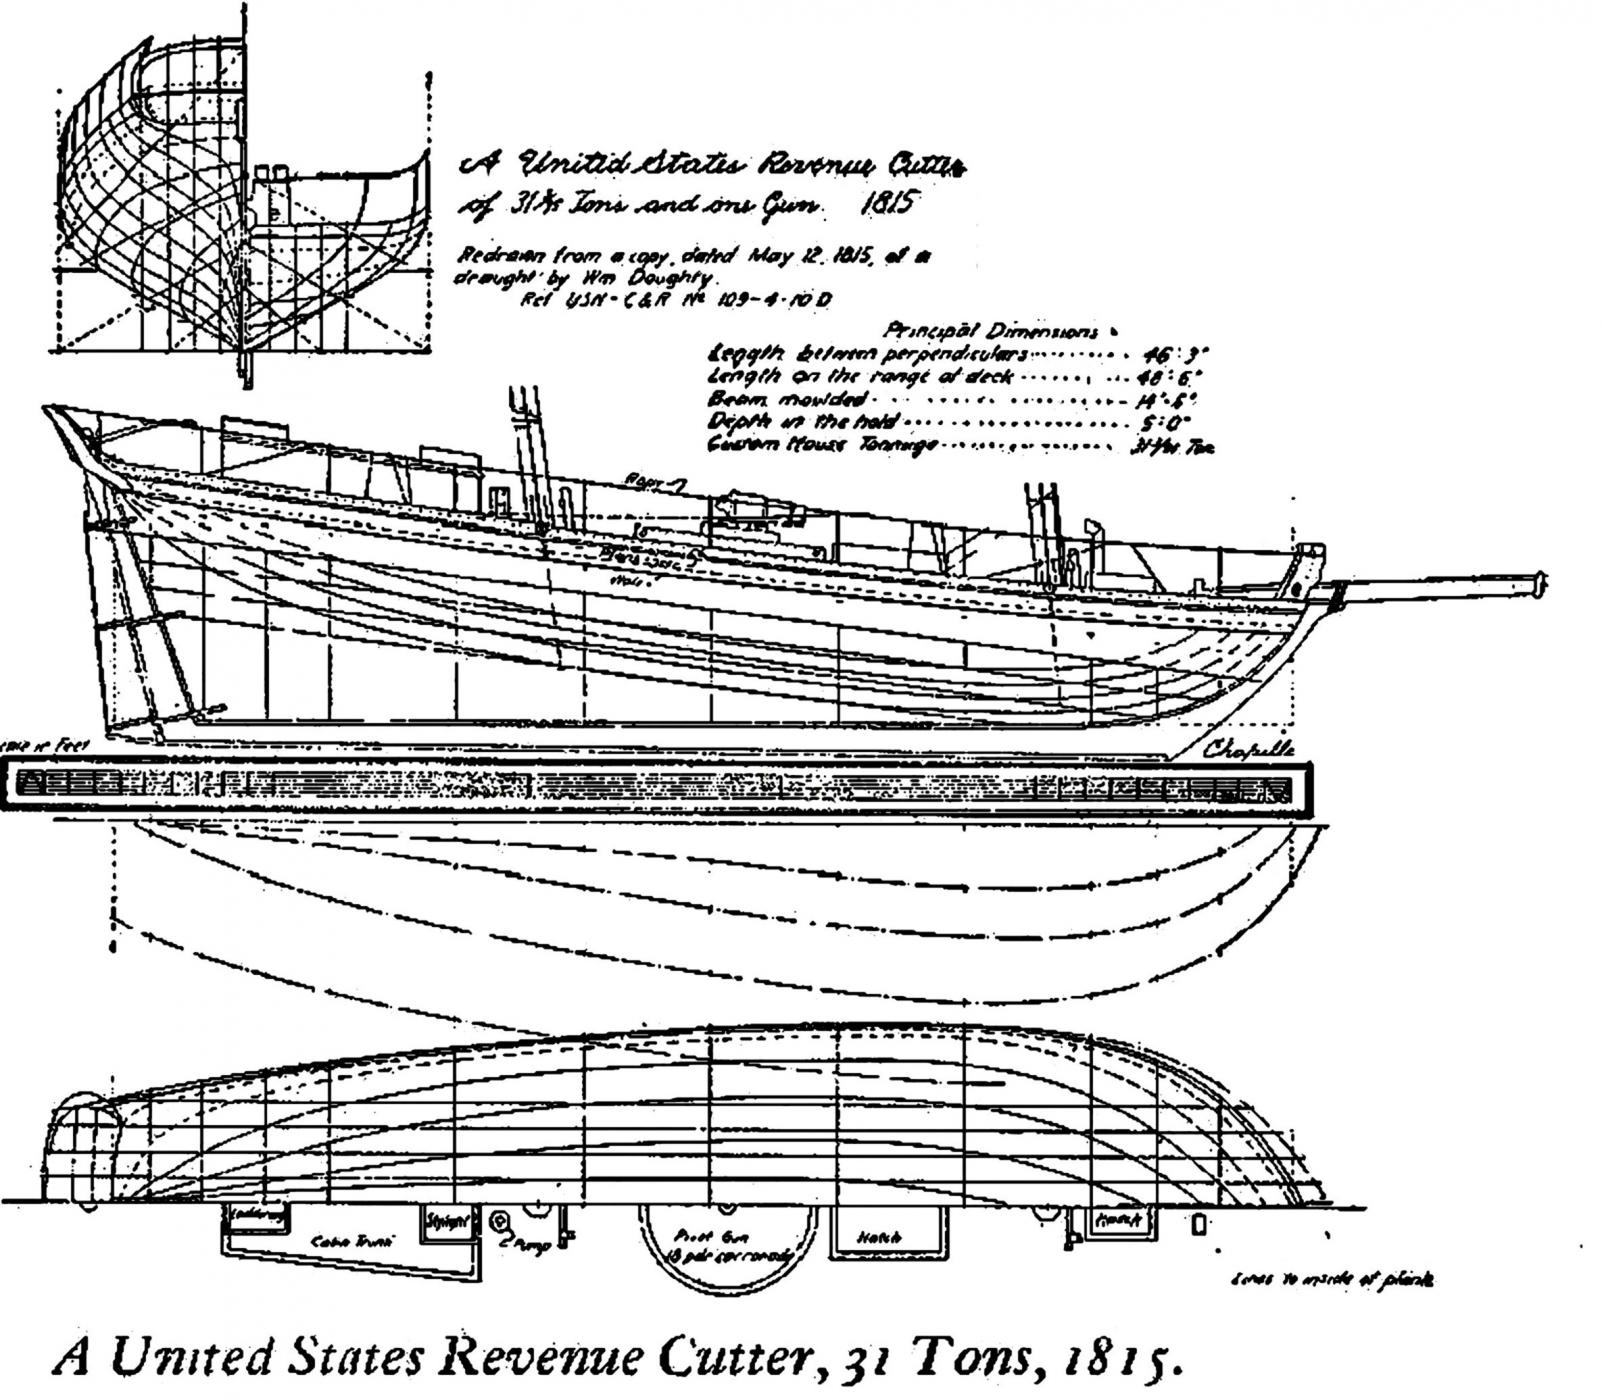
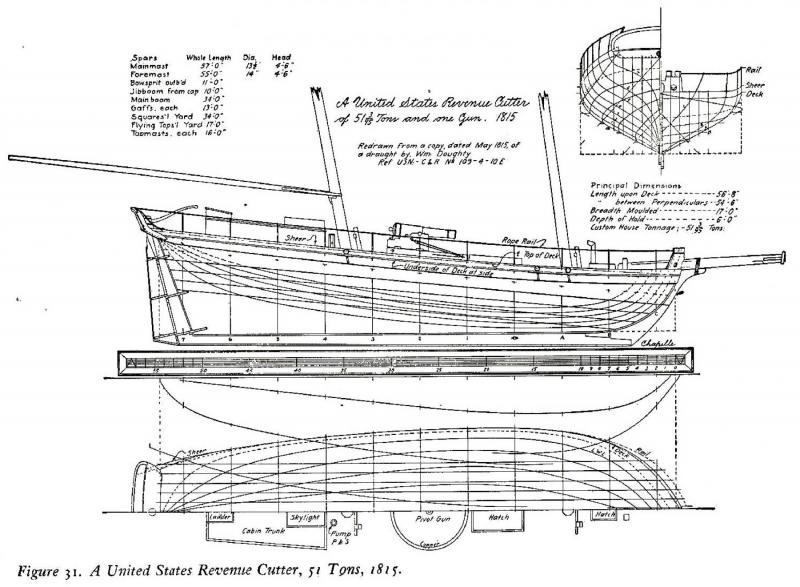
So first the basics. The revenue cutter designed by William Doughty came in 3 sizes described in Chappelle's American Sailing Ship's book as 31, 51 and 80 ton. These ships were in service directly after the war of 1812 (1815 to 1825?) and were intended to replace those ships lost in the war. The 31 ton was about 46.3' long, the 51 ton 52.6' and the 80 ton 67'. There have been many models of these ships on the market and most have various levels of inaccuracies leading to quite a few unfinished logs on this site. From what I can see the Bluejacket kit did a reasonably good job of creating a kit from the 31 ton plans at 1/48 scale. At this scale the hull length is roughly 11.5" and 19" in total. Resizing the ship to 1/64th scale the hull length becomes about 8.65" and the overall length 14.25". This model will be built from scratch (using the block of wood done in a bread and butter fashion) however certain parts and plans from the kit have been scanned and then resized accordingly as were the Doughty plans from the book. The process took me little more than an afternoon to calculate and convert at home and the plans below are to 1/64th scale. No ship names have been recorded from this tonnage however many names could be applicable as it seems the coast guard at the time would resure names repeatedly once a ship would go out of service a new one would promptly take it's place. Plausible names could be Active, South Carolina, Gallatin and Lookout.

- 362 replies
-
- 4
-
-
- active
- revenue cutter
- (and 1 more)