

sonicmcdude
-
Posts
174 -
Joined
-
Last visited
Reputation Activity
-

 sonicmcdude reacted to Wishmaster in Bracera by Wishmaster - FINISHED - scale 1:20
Although ship isn't finished a cargo certainly is :DD
My friend cut planks for me so i started with planking.
Good news is that I'm going tomorrow to get my saw and after so much time she gets only minor improvement so I'm not sure how she will work.
In meantime i made some cargo hope it will not sink her
I made some kind of jig for wet planks to get shape
-
sonicmcdude reacted to Wishmaster in Bracera by Wishmaster - FINISHED - scale 1:20
Tnx Brian.
Anchor:
-
sonicmcdude reacted to Wishmaster in Bracera by Wishmaster - FINISHED - scale 1:20
Hello everyone.
I'm starting build log of bracera (brazzera) traditional croatian coastal vessel.
Scale is 1:20 and plans are from 1981 - Tehnodidakta, Pula.
It's pretty simple vessel and maybe ideal for beginners as I am
I don't know how fast will be this build because my table saw proxxon is broken and it's on service-reconstruction almost for about 5 month. I use all blocks and strips of wood and improvise as much as i can till i get my saw. I can't make a planks for hull, deck etc...
Wood i will use is domestic pear and cherry.
Thank you all and suggestions, comments etc. are welcome.
Parts on paper
Parts for cut on wood
Glued
That's combination of pear and wood. I used only flax oil. I think it will be nice combination - not to big contrast.
-
sonicmcdude reacted to RiverRat in Contour Guage
My kit supplies pieces for a stand/cradle that has a keel slot started, but not the hull shape.
I found this contour guage at a Harbor Freight store (US chain with cheap tools/hardware) for a few dollars. There are higher quality ones available elsewhere.
I used it to get the hull shape to do the cradle piece. I can also see it used to check the hull's shape and symmetry when fairing.
Brian
-
sonicmcdude reacted to DORIS in ROYAL CAROLINE 1749 by Doris - 1:40 - CARD
Thank you, dear friends, I am pleased and appreciate your comments and congratulations a lot.
I am also glad and honoured, you like my work on Royal Caroline. I love sailing ships and that´s the reason why i like making their models.
When I have more free time I would like to create here at MSW another build log with my Royal William scratch build, that´s also a card model. Hope, you will enjoy it as well.
Oh, I have just remembered, there is a birthday party on Royal William, so who wants to join? Now there are only a few officers, but at night the fun begins.....
Kind regards,
Doris
-
sonicmcdude reacted to captainbob in Looking for photos of homemade micro woodcarving gouges
This is the way I did it.
microchisels
Bob
-
sonicmcdude reacted to Ilhan Gokcay in Matthew 1497 by Ilhan Gokcay - FINISHED - Scale 1/50
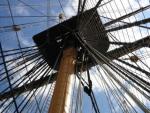
I'm going on with the rigging. Heart blocks are used for the mizzen and foremast shrouds and these are fixed to deck. I’ve attached also every possible standing and running rigging to the main mast at this stage. For convenience I’ve modified some cloth pegs which proved to be very useful.
For large and more detail photos see also:
http://www.flickr.com/photos/ilhan_gokcay/sets
http://www.flickr.com/photos/ilhan_gokcay/sets/72157626433922489/
-
sonicmcdude reacted to EdT in HMS Naiad 1797 by EdT - FINISHED - 1:60 - 38-gun frigate
End of the Reposts!
Starting with the next post the material will be new - no more reruns - I hope.
Ed
-
sonicmcdude reacted to EdT in HMS Naiad 1797 by EdT - FINISHED - 1:60 - 38-gun frigate
1:60 HMS Naiad 1797
Part 175– Head Continued
Posted 1/29/13
In the first picture the rail to support the grating bars on the starboard side is being glued into place with some improvised clamping. The carling and three grating bars are installed on the port side.
Since the last post, I had to revise the grating areas. The center cross piece that defines the forward end of these sections was too far aft and would have interfered with the gammoning – a little drafting glitch – now corrected.
The next picture shows all the gratings completed and the shafts for the two forward “seats of ease” installed through openings in the grating.
The next picture shows the starboard false rail pinned in place.
The seats have been added to the tops of the square shafts. The aft seat on the starboard side has been fitted and is just visible above the back of the false rail.
The next picture shows both false rails and all the seats installed.
The aft seats give some additional support to the fragile tops of the false rails. This can be seen more clearly in the next picture.
The figure is still loose in this picture. She makes appearances at various times in these pictures.
The next picture shows the hull inverted for work on the head timber facings and the wash cants.
In this picture the curved, molded facing pieces have been installed on the head timbers. The wash cants are also installed. I was very happy to have the bunker over the wheel for this upside down work.
The next picture shows the current state from dead ahead.
These pictures are quite useful for finding little errors of alignment or worse – much better than viewing while bent over at an angle. I was pretty satisfied with the symmetry.
The last picture shows the whole model at this stage on a freshly painted shipway - re surfaced with a new copy of the plan.
The work on the head is essentially finished at this stage except for a trailboard, some bolting and the small scrolls just behind the feet of the figure. What next? Gun doors? Deadeyes and chains? Finishing the unplanked port side? Haven’t decided yet.
Ed
-
sonicmcdude reacted to Gaetan Bordeleau in Harbor Freight Workbench
This workbench is suppose to be used when assembling furniture.
For model ship construction I would prefer something like a Watchmaker's Bench where a lot of storage for small parts is available.
Here is as an example a small project to make one.
http://www.custommade.com/custom/watchmakers-bench/37076/
-
sonicmcdude reacted to rafine in Triton cross section 1:48 by rafine
I had intended to do the treenailing slowly and in small segments, but my obsessive-compulsive side took over and I finished the entire port side in one burst over a couple of days. Once I got into it, it was almost impossible to stop. First, I made a supply of treenails using bamboo skewers from the supermarket. (The first photo shows some treenail pieces and a couple of pieces of bamboo that have been split and ready to run through the drawplate). Then I laid out three double rows on the hull using tape to keep straight lines. Next, I drilled holes and inserted the treenail material after cutting a point on the end to ease insertion and dipping in glue. Lastly, I nipped off the pieces with a flush cutter. I then repeated the whole process twice more. Finally, I sanded the planking.
By the way, the package of skewers that I bought for about $3 would probably last all of us combined for a long time. I'll be away for a few days, but then I expect to do the same thing to the starboard side.
Bob
-
sonicmcdude reacted to rekon54 in Le Fleuron 1729 by rekon54 - 1:24
good evening
advances Fleuron
rekon54
-
-
sonicmcdude reacted to captainbob in Bristol Pilot Cutter by michael mott - 1/8 scale - POF
Michael,
Saw that first picture of the cutter on the floor and My mind saw it as a 1:48 scale and I thought 'What a great diorama of a work shop with miniature power tools.'
Bob
-
 sonicmcdude got a reaction from Jeronimo in LE BONHOMME RICHARD by Jeronimo - FINISHED
Oh wow!!!!!! this is just awesome to have this beauty in a living room.
-
sonicmcdude reacted to Dan Vadas in HMS Vulture 1776 by Dan Vadas - FINISHED - 1:48 scale - 16-gun Swan-class sloop from TFFM plans
Making Light Frames
To make the Light Frames themselves I cut a channel using my Byrnes saw. This is 1.5mm wide by 1.0mm thick, and has a 0.5mm rebate in the middle to hold the acrylic "glass" which is 0.48mm thick :
To make the corners I cut the rebate out of one section, leaving it slightly long - this will be sanded back when it is completed :
I just made this piece up as a demonstration. I'll make a proper jig to assemble the pieces later.
Danny
-
sonicmcdude reacted to harvey1847 in HMS Triton 1773. POF. 1:48. Daniel
Hi again!
Here´s where I am now... ALL the frames cut out. How I miss the laser cut bulkheads of plywood of the comercial kits!!!!
And all set to be sand and glue together.
Happy modeling!
Daniel.
-
sonicmcdude reacted to rekon54 in Le Fleuron 1729 by rekon54 - 1:24
hi
link to two videos on Italian ship models Championships Class C3
rekon54
-
sonicmcdude reacted to Jeronimo in LE BONHOMME RICHARD by Jeronimo - FINISHED
3nd Construction stage
Main-Mast-Section
Project Planning;
Length of hull ; 499,0 mm
Hight of the keel to the top of the mainmast :1489,0 mm
Mainyard width including
Main-topmast studdingsail-boom : 729,0 mm
Complete rigging
Regards Karl
T e i l 26
-
sonicmcdude reacted to mtaylor in Licorne by mtaylor - 3/16" scale - POF - TERMINATED LOG
Thanks gentlemen for the nice words.
Kevin,
I'd start with something with less guns than a 74. But that's just me... The Alfred or maybe the Billy Ruffian is on my bucket list, though.
Aldo and Micheal,
Perhaps the best way to explain these pumps is with a video...
-
sonicmcdude reacted to Ilhan Gokcay in Matthew 1497 by Ilhan Gokcay - FINISHED - Scale 1/50
Finished the parrals.
For large and more detail photos see also:
http://www.flickr.co...han_gokcay/sets
Best go into the set and choose slideshow or
http://www.flickr.com/photos/ilhan_gokcay/sets/72157626433922489/detail/?page=47
-
sonicmcdude reacted to SaturnV in SaturnV's 1:48 Full Framed Triton Build
Thank you all for your input. As I go through the build logs for others I learn quite a bit and more and more this is all making sense now.
I will look into getting the precribed books for reference.
Meanwhile, I did some work over the weekend. Cut out the keel parts and test fitted them together:
-
sonicmcdude reacted to Dan Vadas in HMS Vulture 1776 by Dan Vadas - FINISHED - 1:48 scale - 16-gun Swan-class sloop from TFFM plans
I have some mica, but it's way too thin and very discolored - might be OK in a 1:200 scale model .
Longitudinal Aft Cabin Bulkhead
There is a longitudinal bulkhead separating the Captain's Sleeping Quarters from the Coach. This is made in similar fashion to the two athwartships bulkheads. At this stage this bulkhead - and the forward one - are only dry-fitted. Both cabins in this area share accommodation with a 6-pounder, and all the eyebolts etc for them will need to be fitted first. I still have to cut the beams and ledges into it's top edge, fit the Cants to the bulkhead and give it a coat of finish :
Danny
-
sonicmcdude reacted to rekon54 in Le Fleuron 1729 by rekon54 - 1:24
...............
see you soon friends
rekon54
-