DONATION DRIVE - SUPPORT MSW - DO YOUR PART TO KEEP THIS GREAT FORUM GOING!
×


bonedoctor51
-
Posts
54 -
Joined
-
Last visited
Content Type
Profiles
Forums
Gallery
Events
Everything posted by bonedoctor51
-
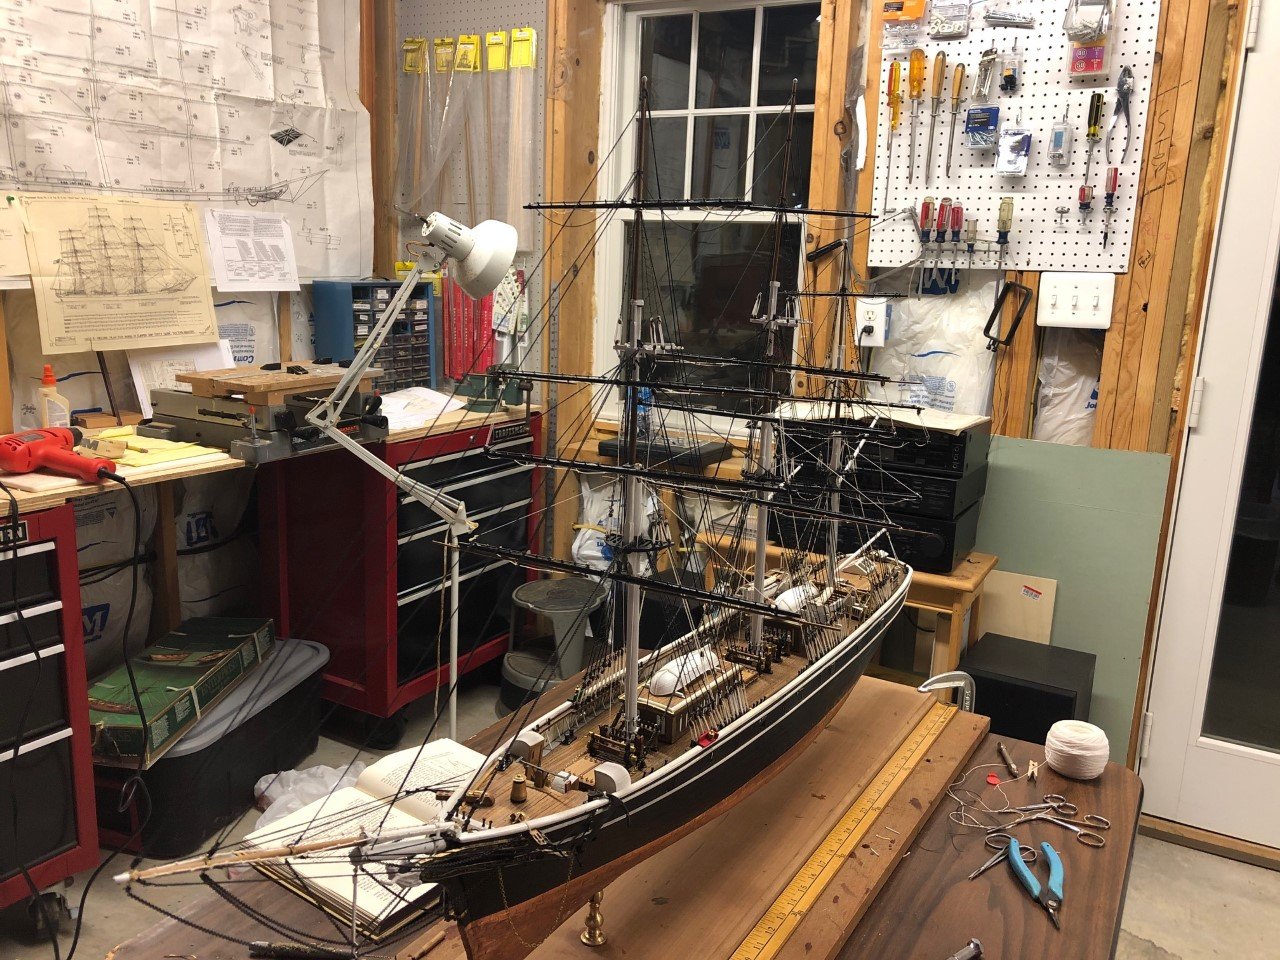
I am almost finished the Sergal Cutty Sark, scale 1:78 this model is 44" long. Any larger scale would be huge! This ship is so difficult to model that I suspect that many builders abandon the project or scale back their expectations. This should be undertaken only by an experienced expert builder. The kit was an older issue dating back to the 1980's. It sat in my workshop until 2010 when I started it. So ten years later I am almost finished including sails. The current kit I understand is not as good, as some of the fittings are just awful. This kit was fair, except for the plans, which had gross errors. It must be built from Longridge's book and plans from the Cutty Sark Museum. Very difficult but a good model can be the result. There are some intermediate photos of my model if you search for them. I'll post an update in a few weeks. From what I have read the Billing Boats kit seems to be quite good. Good luck Lou
-
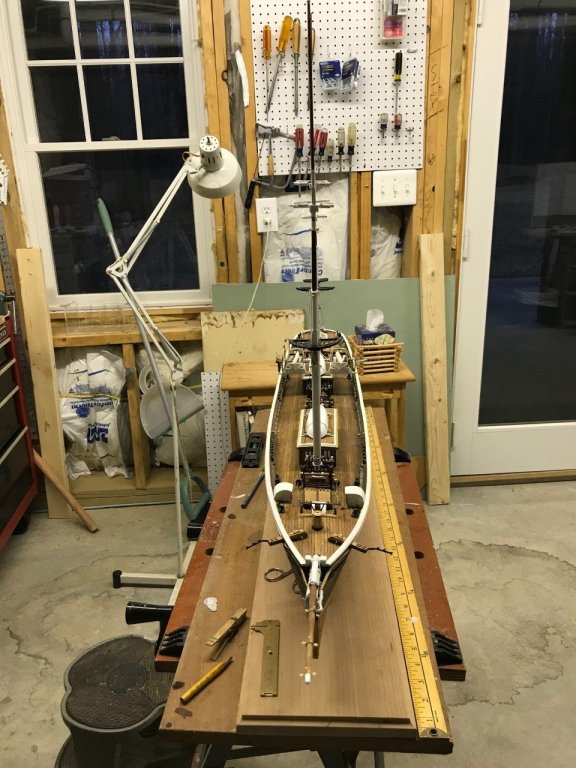
 Cutty Sark under construction. Started as a Mantua Sergal kit many years ago, modified according to Longridge and Underhill. Ten years into the project, expect to finish in another year. Lou
-
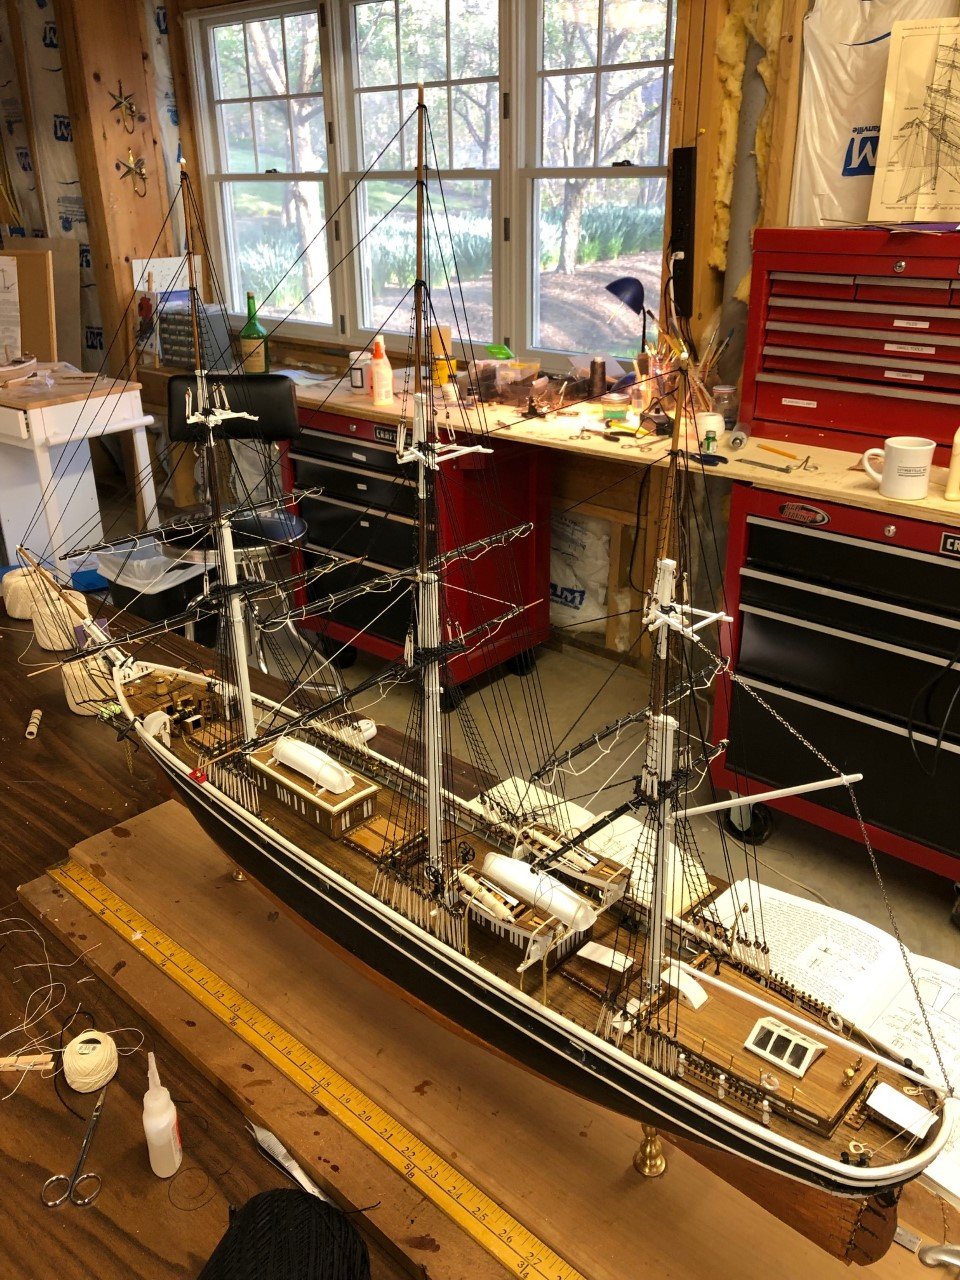
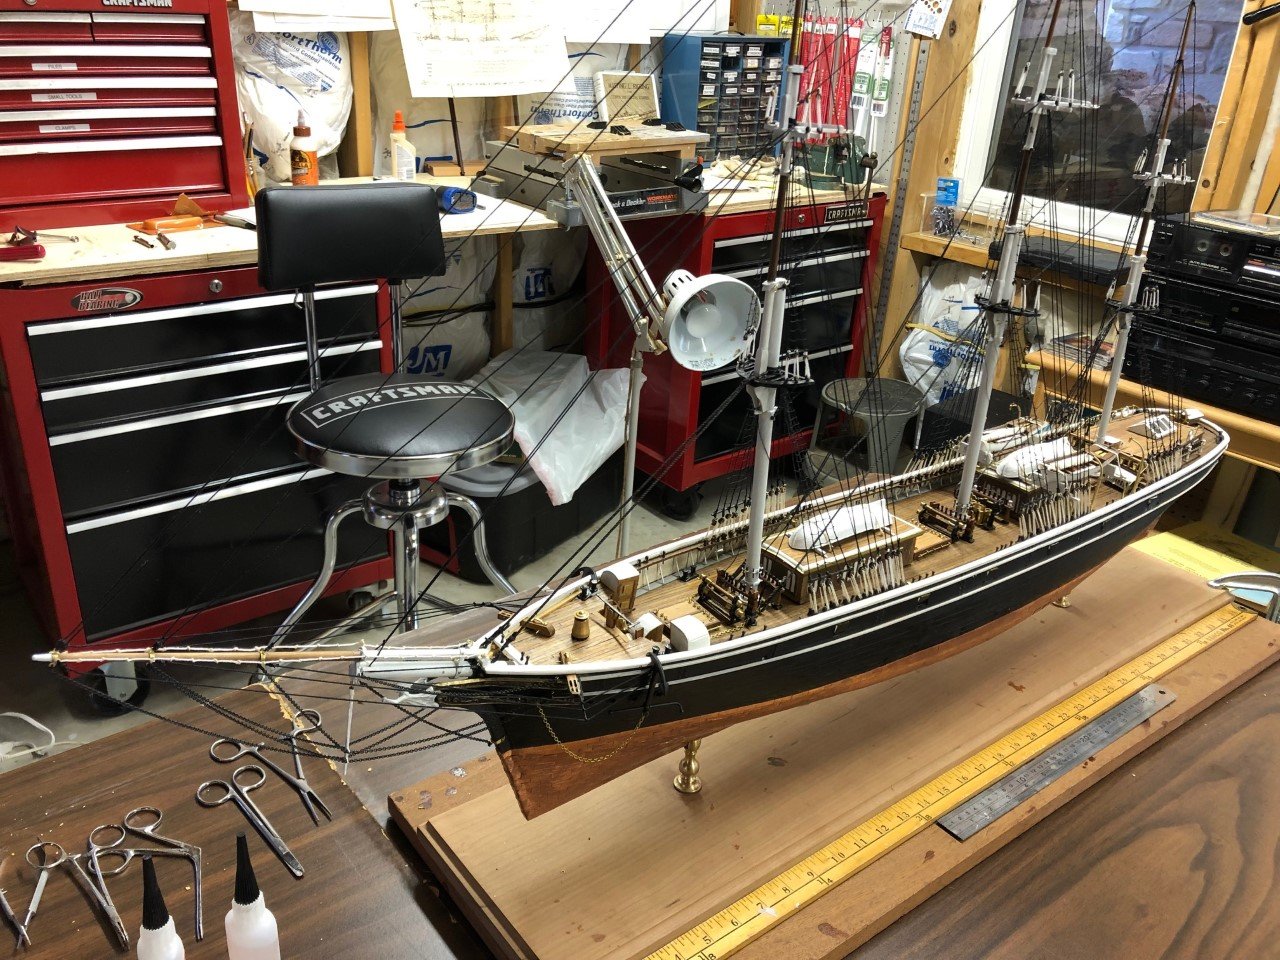
Current status of the project. Only a few more spars to go. I have a nicely made sail set that I will use of the fit is good.

- 42 replies
-
- 6
-

-
- Cutty Sark
- Sergal
- (and 1 more)
-
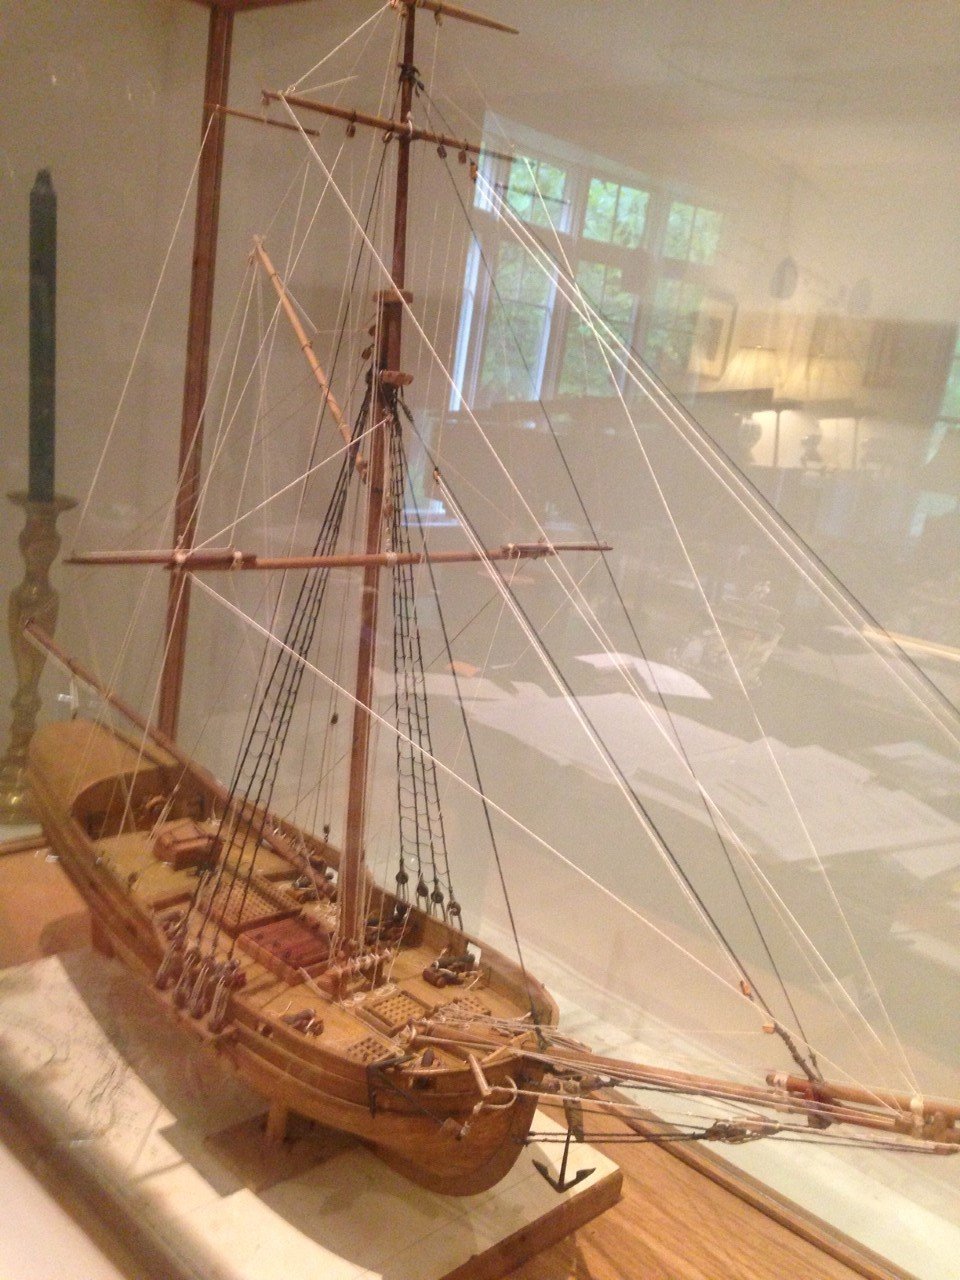
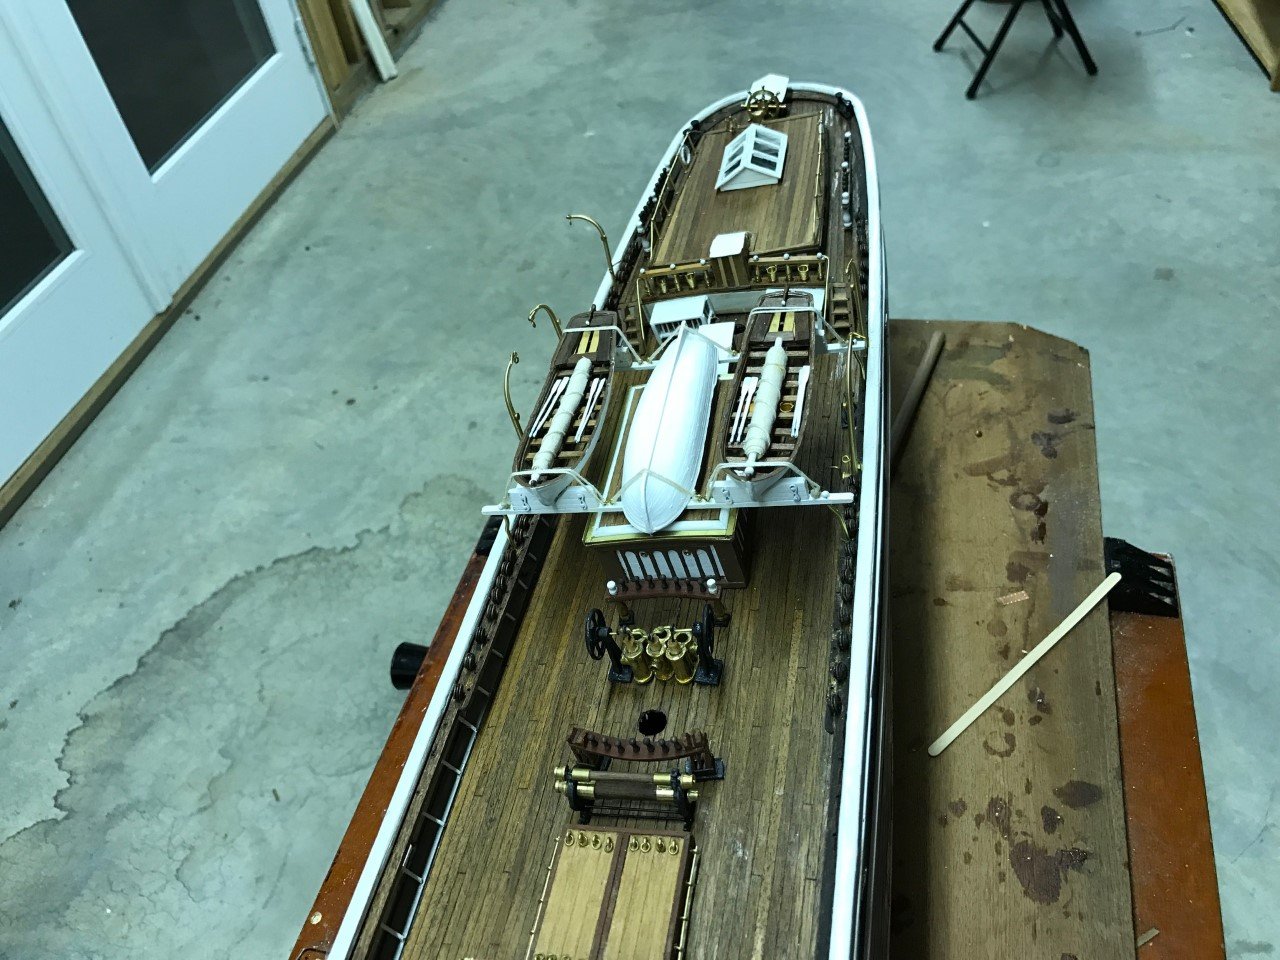
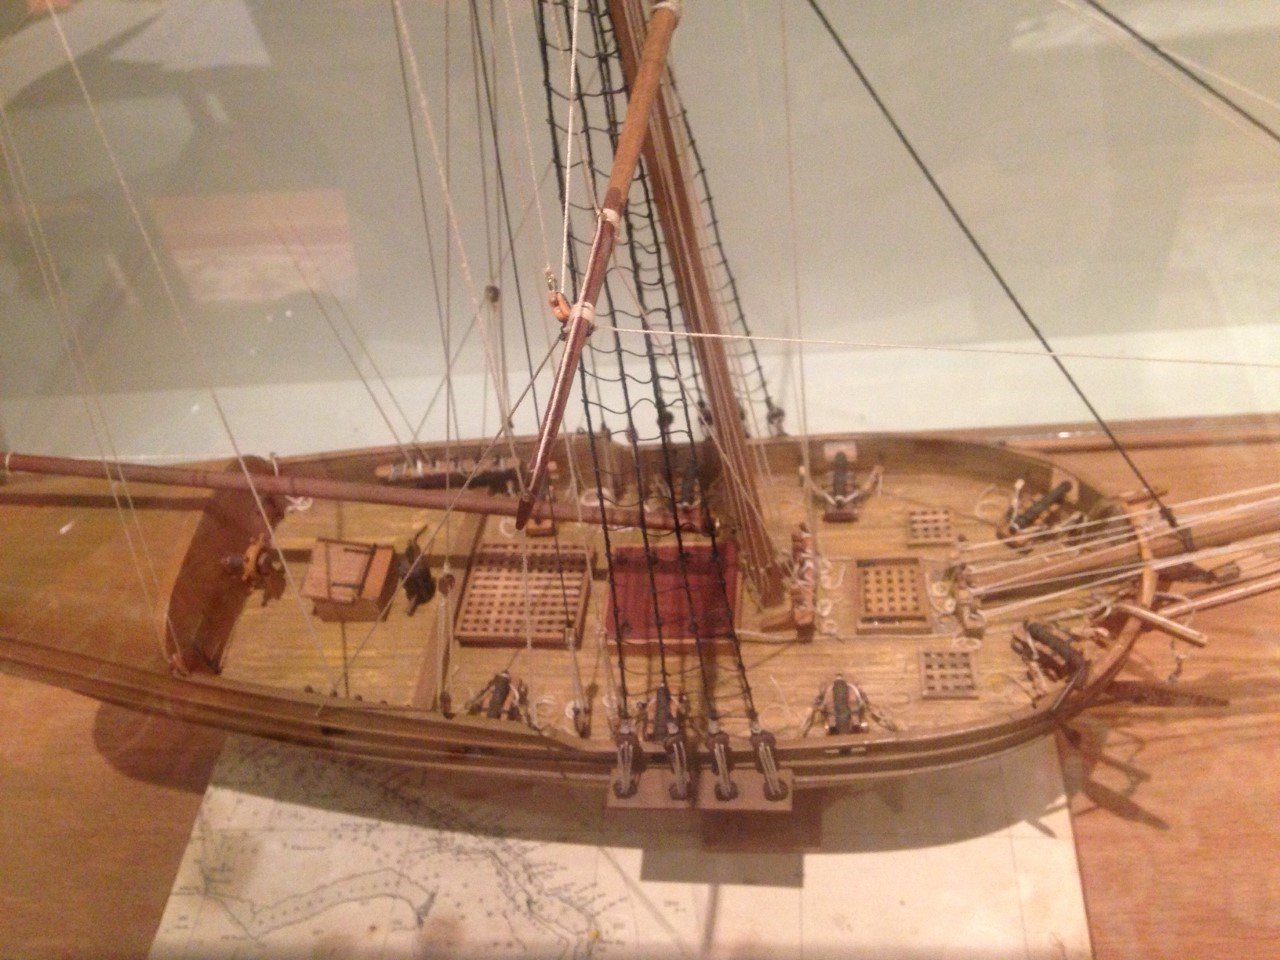
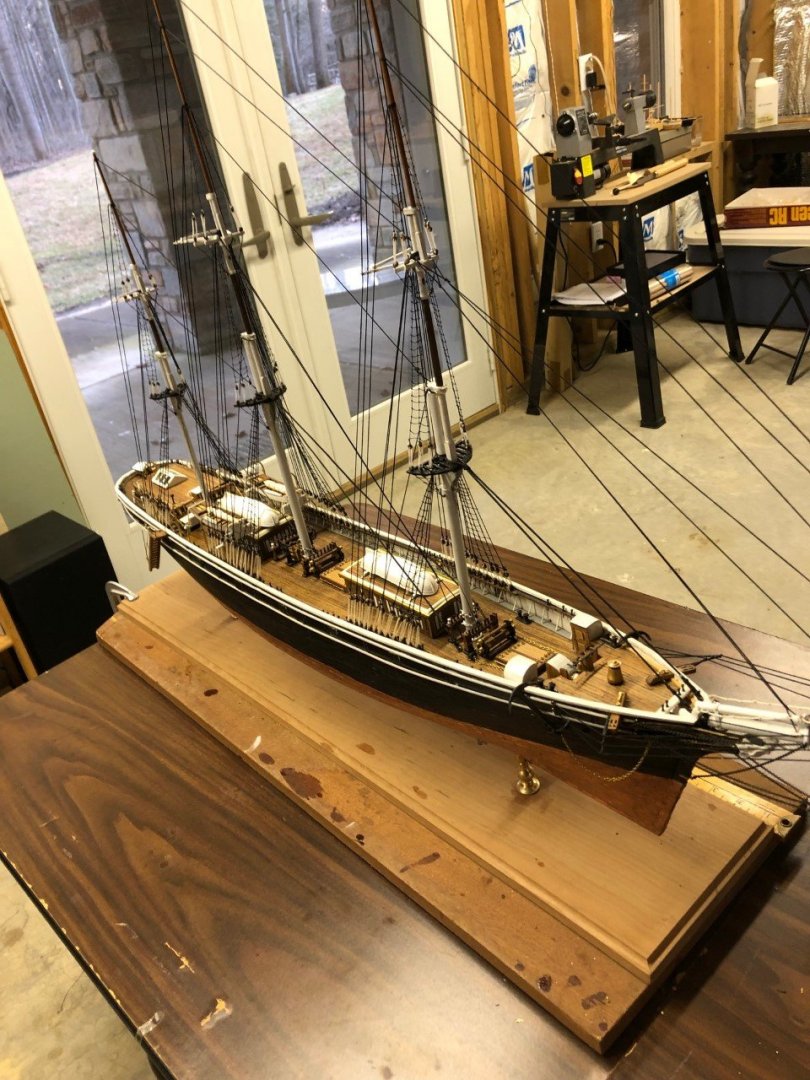
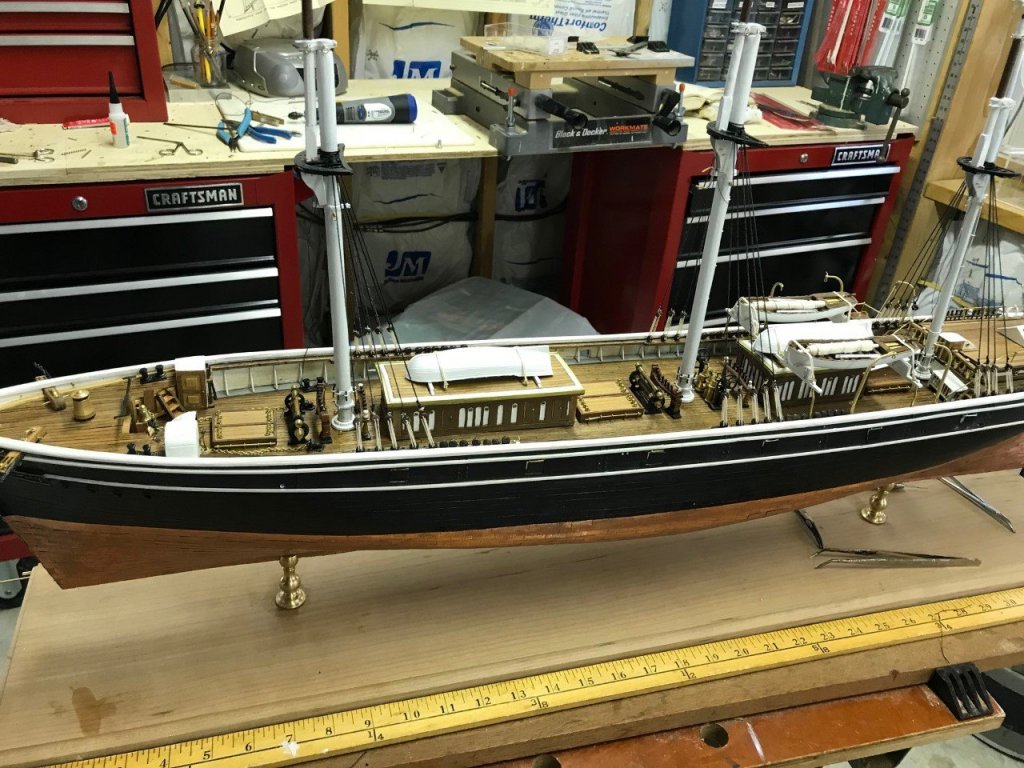
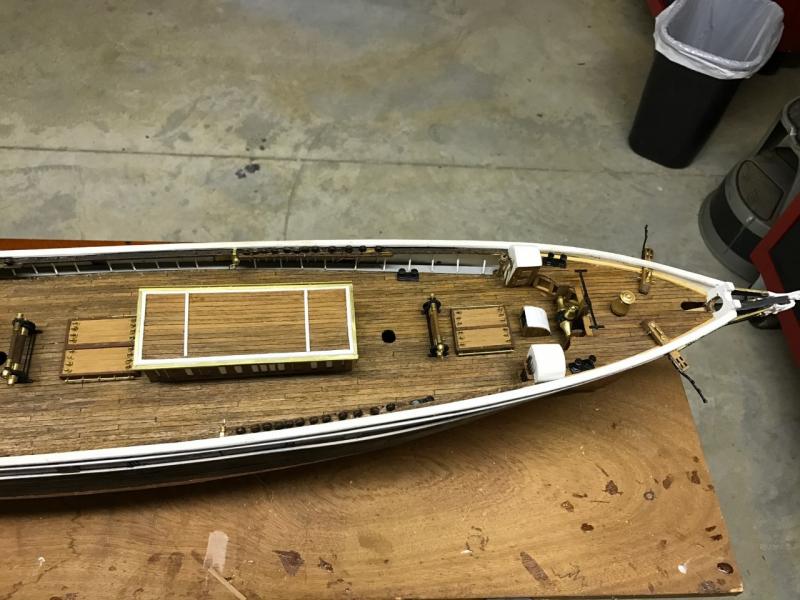
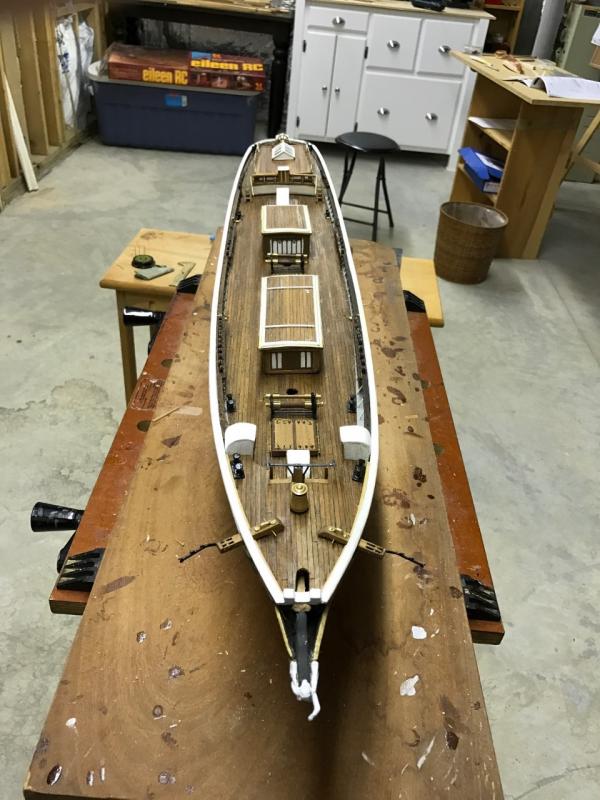
This model started life as the Sergal Cutty Sark 1:78 scale. It was purchased in 1985, started, and abandoned until 10 years ago. I had only done the frame but after other projects I decided to work on it. It was to be my master project with no compromises! The kit plans have gross inaccuracies and the model has been heavily modified and built according to details in Longridge and Underhill. All wood and brass construction. Hollow hull, egg-crate construction, sheathed with 2,500 individual copper plates. I then overpainted the copper plates with a thin wash of copper, white, and black paint to cut the shine and give a weathered appearance. The deck is 3mm X 0.6mm walnut planked in a 5's pattern, not the 2's shown on most plans. I strongly urge anyone attempting to build the Cutty Sark to get Longridges book and follow it closely. Also, there are a lot of photos of the actual ship on the web and help fill in needed details and colors. The paint scheme is as close to realistic as I can research. Feel free to use my model as an example. I have built many models over the years, but this one is extremely difficult due to the complexity of the tea clipper running gear. I have a sail set, but I have not decided if whether or not to use it. Below are some photos of a Bermuda Sloop that I built from plans by Rob Napier published in NRG many years ago. It was after finishing that model that I started the Cutty SArk again 10 years ago. Good luck! Your models look great. Lou


- 14 replies
-
- 4
-
-
- constitution
- revell
- (and 2 more)
-
Nice model! I built it about 40 years ago, before I started all wood construction. On the Constitution I overplanked the deck with 4mm x 0.6mm walnut for a more realistic appearance. Prior I had built the Revell Cutty Sark, truly an outstanding kit, and did the deck by first painting it black, then overpainting with teak paint (tan with a dab of green added). Then sanded the deck with very fine sandpaper to bring up the raised grain embossing. This has to be done with a very light hand so as not to erode the grain detail. The scale of the Cutty Sark by Revell is probably too small to consider overplankig. You would have to use 2mm x 0.6 mm walnut and it would be tedious and difficult. Experiment with paint first. Good luck I've enclosed a photo of my current project -- Cutty Sark, originally a Sergal kit, heavily modified according to Longridge. I've been working on it for 10 years off and on, and I expect to finish it within another year. I'm 74 years old so I figure I better hurry! Lou

- 14 replies
-
- 3
-
-
- constitution
- revell
- (and 2 more)
-
Thank you for the kind words and encouragement. Only about another year or so to go! With the Covid crisis I've been working mostly from home and have had more time to build. Lou
- 42 replies
-
- 1
-
-
- Cutty Sark
- Sergal
- (and 1 more)
-
I have the sail set. Will make the decision when all of the yards are done. I like the sails as they enable better modelling of the running rigging. Lou
-
Current status of the project. I've been working on this model for about 10 years. I think I can finish in about another year or so. Started life as a Mantua-Sergal kit 1980's vintage, extensively modified according to Longridge and Underhill. Thanks for looking. Lou


- 42 replies
-
- 9
-
-
- Cutty Sark
- Sergal
- (and 1 more)
-
Update as of December 31, 2019. Masts and standing rigging complete. Ready to do spars and running rigging. Question. Regarding the jackstays. Longridge gives the dimensions of the jackstays as 3/4" diameter iron rods. At a 1:78 scale for the Mantua/Sergal model this translates to .25 mm. Impossibly small. What diameter did anyone else use? I'm looking at .4 or .8 mm. Thanks Lou Halikman

- 42 replies
-
- 5
-
-
- Cutty Sark
- Sergal
- (and 1 more)
-
Cutty Sark by NenadM
bonedoctor51 replied to NenadM's topic in - Build logs for subjects built 1851 - 1900
Current status of Sergal Cutty Sark, extensively modified from the grossly incorrect plans. Using Longridge and Underhill as guides. 10 years into this project!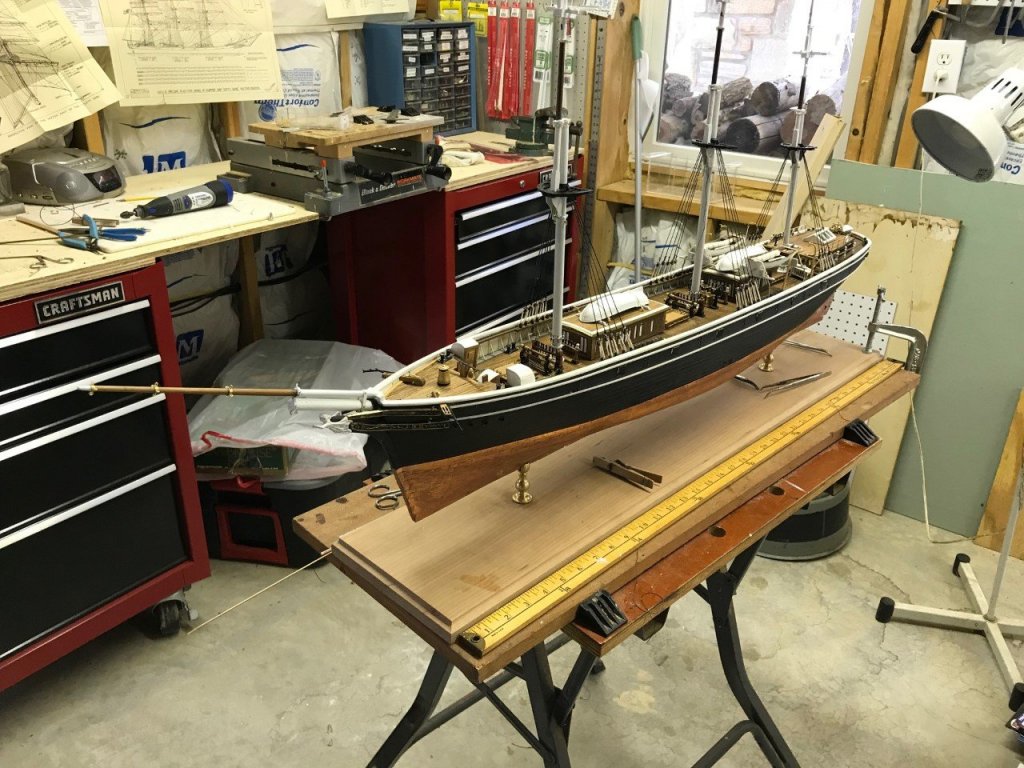
- 4,152 replies
-
- 16
-
-
- cutty sark
- tehnodidakta
- (and 1 more)
-
I built a similar kit about 15 years ago of a Bermuda Sloop, kit was Mantua. Heavily modified from plans from the Massachusetts Maritime Museum. Check old issues of Nautical Research Guild for a reference. Fairly difficult due to the hull contour, but a lovely model when finished. Lou
-
Cutty Sark by NenadM
bonedoctor51 replied to NenadM's topic in - Build logs for subjects built 1851 - 1900
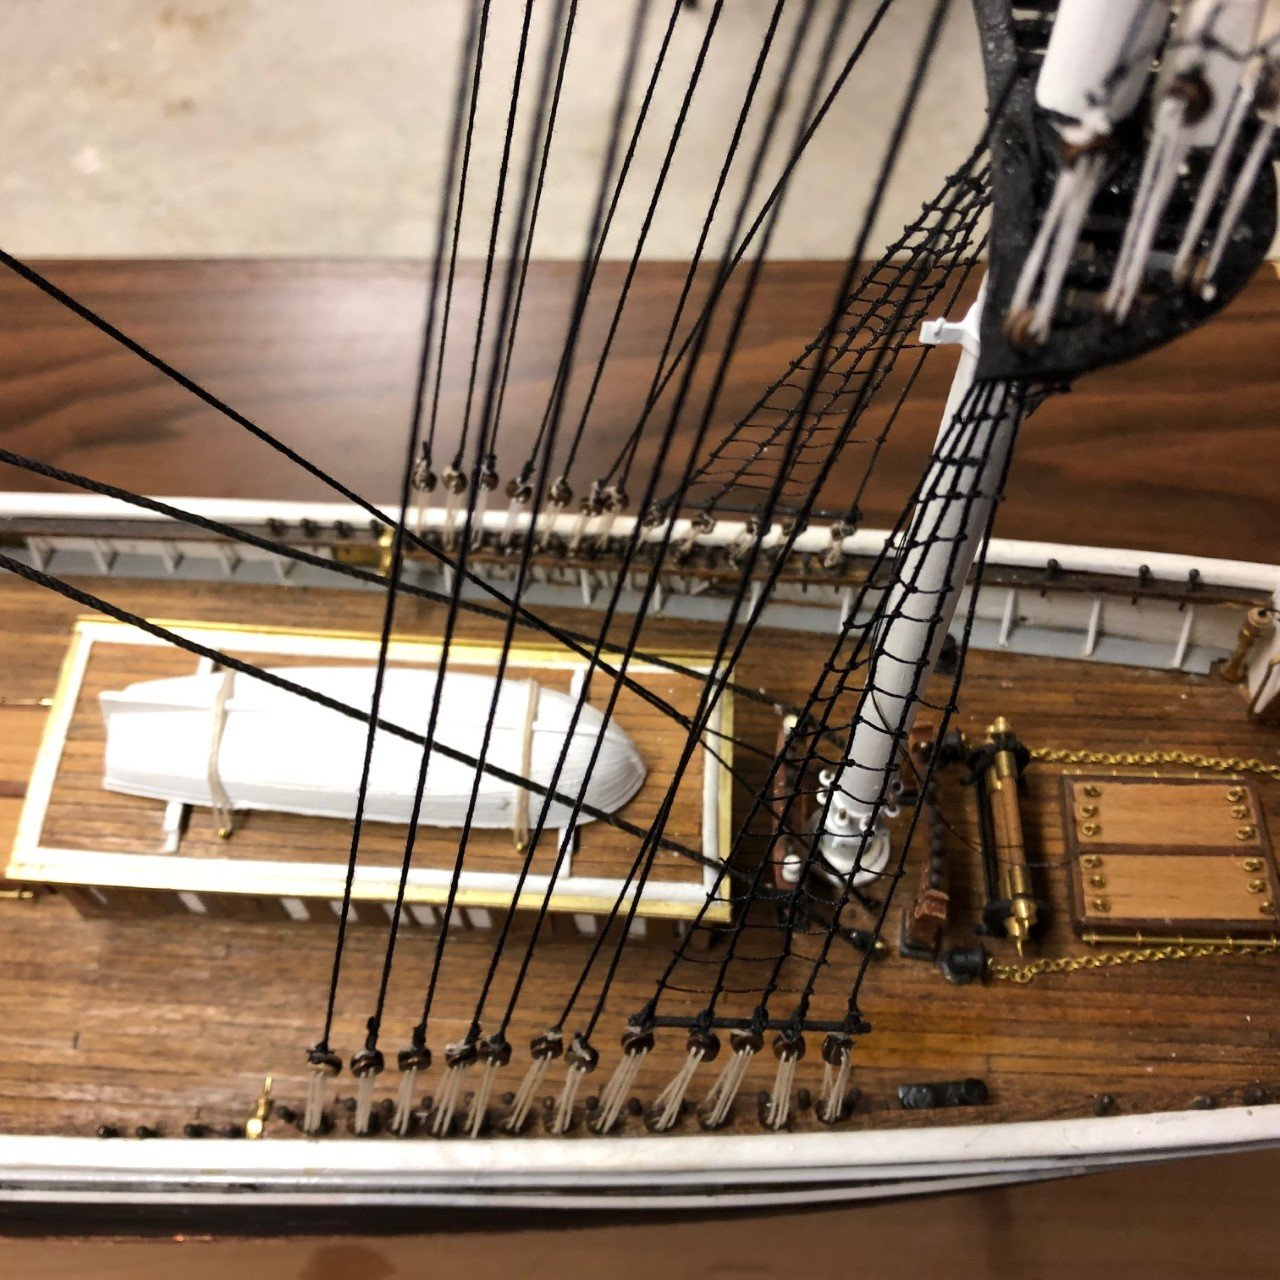
Thank you for the kind words from the master. I will be posting some new photos of my Cutty shortly. Rigging lines in my opinion should not be prominent. Gossamer -- thread-like -- is usually the rule. Thanks for the photo. In the past I have used surgical black silk for the shrouds and ratlines (I am an orthopaedic surgeon). It handles easily, knots securely, and doesn't sag with age. It is available in bulk quantity non-sterile. I will try to figure out the diameters from a chart I found on Wikipedia and order a few spools for the project. At this point my model is almost completely scratch-built, as the plans from Sergal were grossly inaccurate and the parts supplied were not realistic, mostly over-scale. Longridge and Underhill have supplied the necessary details. Your work is amazing. Lou- 4,152 replies
-
- 6
-
-
- cutty sark
- tehnodidakta
- (and 1 more)
-
Cutty Sark by NenadM
bonedoctor51 replied to NenadM's topic in - Build logs for subjects built 1851 - 1900
Gorgeous work! I believe that you and I are building the same sergal version of the Cutty Sark. I'm ready to begin the shrouds and ratlines, but I don't know what diameter black thread would be most accurate to scale. I suspect the line included with the kit is way too big. I looked at 0ther suppliers, but I can't get a handle on the appropriate diameter. Any assistance? Thanks LOU HALIKMAN- 4,152 replies
-
- 4
-
-
- cutty sark
- tehnodidakta
- (and 1 more)
-
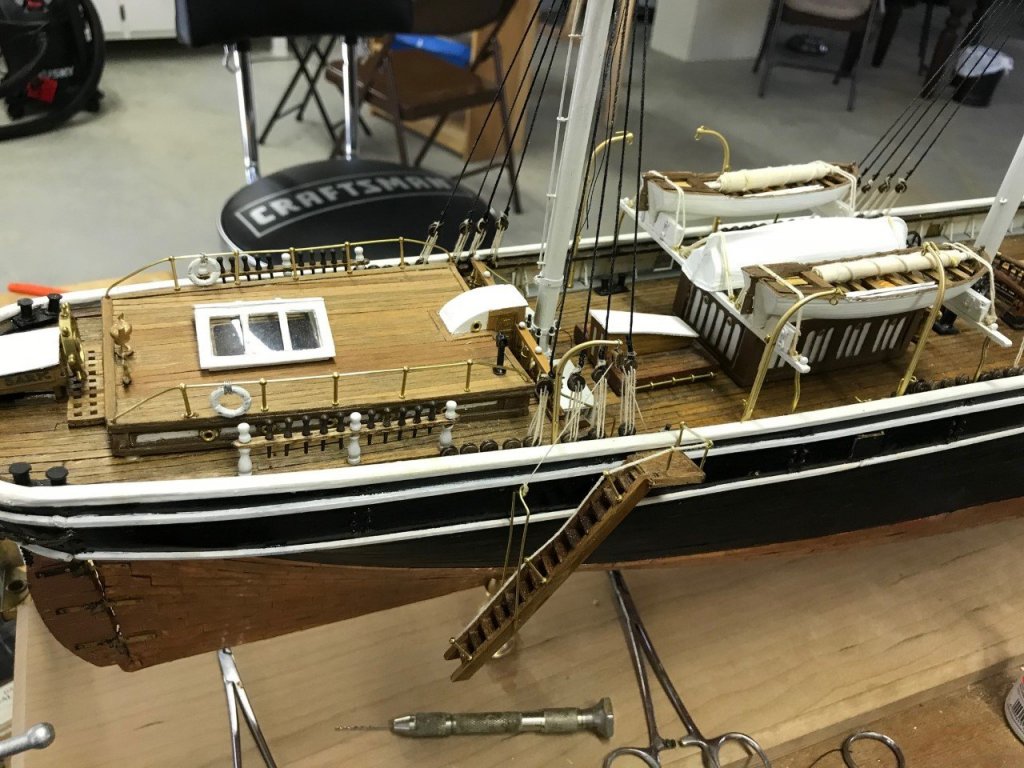
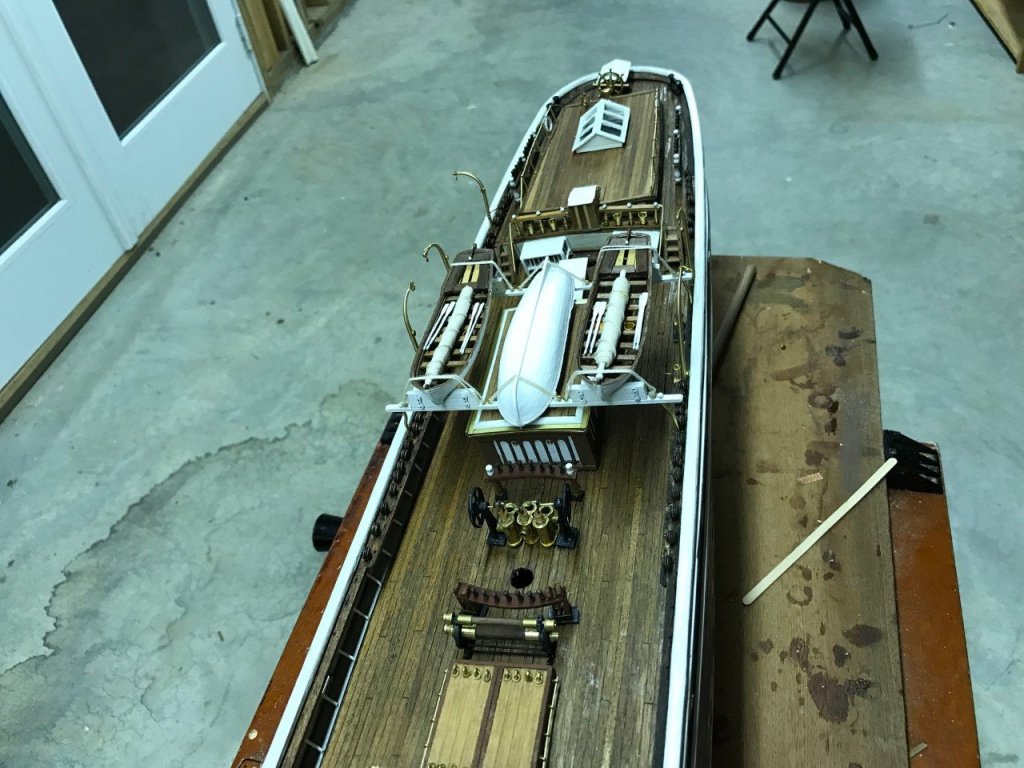
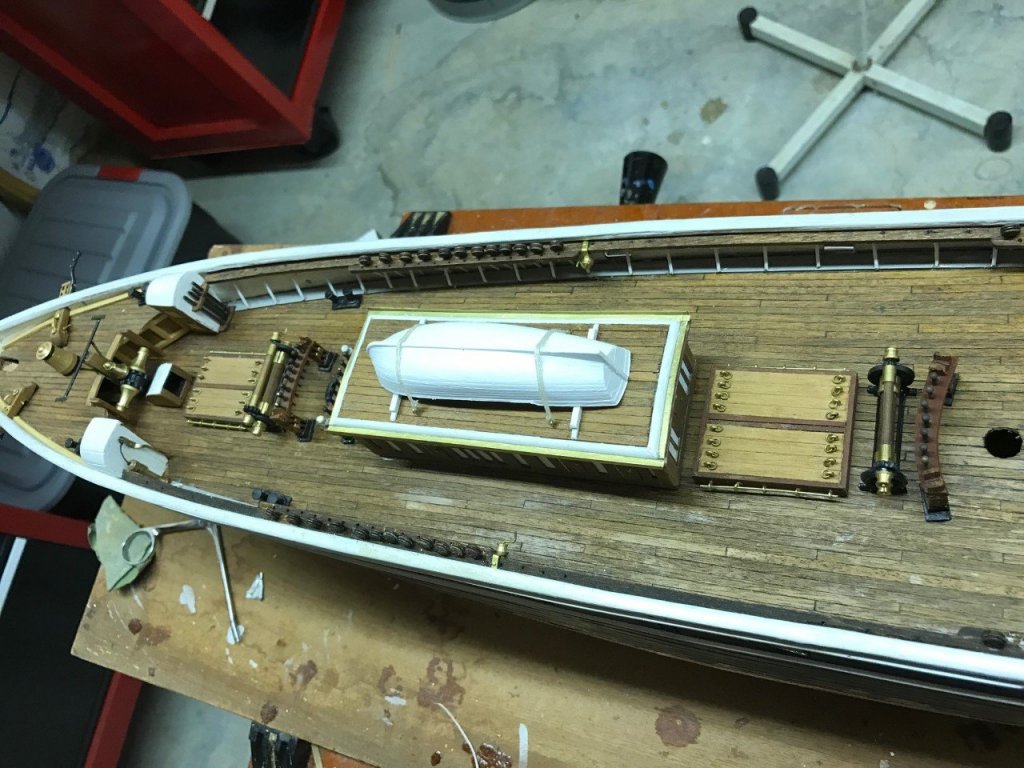
I planked the deck with 3 mm x 0.6 walnut all the way to the bulwarks then added the waterways. Quite a job bending them. The deck is planked by the rule of 5 's, not the rule of 2's as shown on the plans. The staggered fives are more realistic. Actually I would have had to use 2 mm walnut to be on scale, but one place where you can cheat a little on scale is on the deck. Otherwise it looks too busy. So 3 mm was the choice. I did the deck first then the waterways to bring the height of the waterways up to the correct level for the scuppers. Putting the waterways down first made them too low. For the bulwarks I used the brass sheets on the outside and planked the interior. Looks better that way. Be very careful about the deadeyes and belaying pin locations. They are backwards on the supplied plans. Use Underhill and Longridge as guides. The deadeye internal chain plates are way over scale. I used 0.81 brass wire painted white for these and the bulwark stanchions. Same problem. I personally cannot tolerate overscale parts. I'll add the two forward ladders later. I don't like the ones with the kit -- too big. I'll address that problem later. Please do not hesitate to contact me by private email. Lou
- 42 replies
-
- 2
-
-
- Cutty Sark
- Sergal
- (and 1 more)
-
My internet connection is bad. Did you get my last email? BTW, I'm using 8 mm walnut for the mizzen lower mast and 10mm walnut for the fore and main lower masts. My metal working skills are not as good as yours. Lou
-
Beautiful work. How did you make the hawse pipes for the anchor chain? I'm currently stuck on this detail. Thanks Lou
- 525 replies
-
- 1
-
-
- cutty sark
- mantua
- (and 2 more)
-
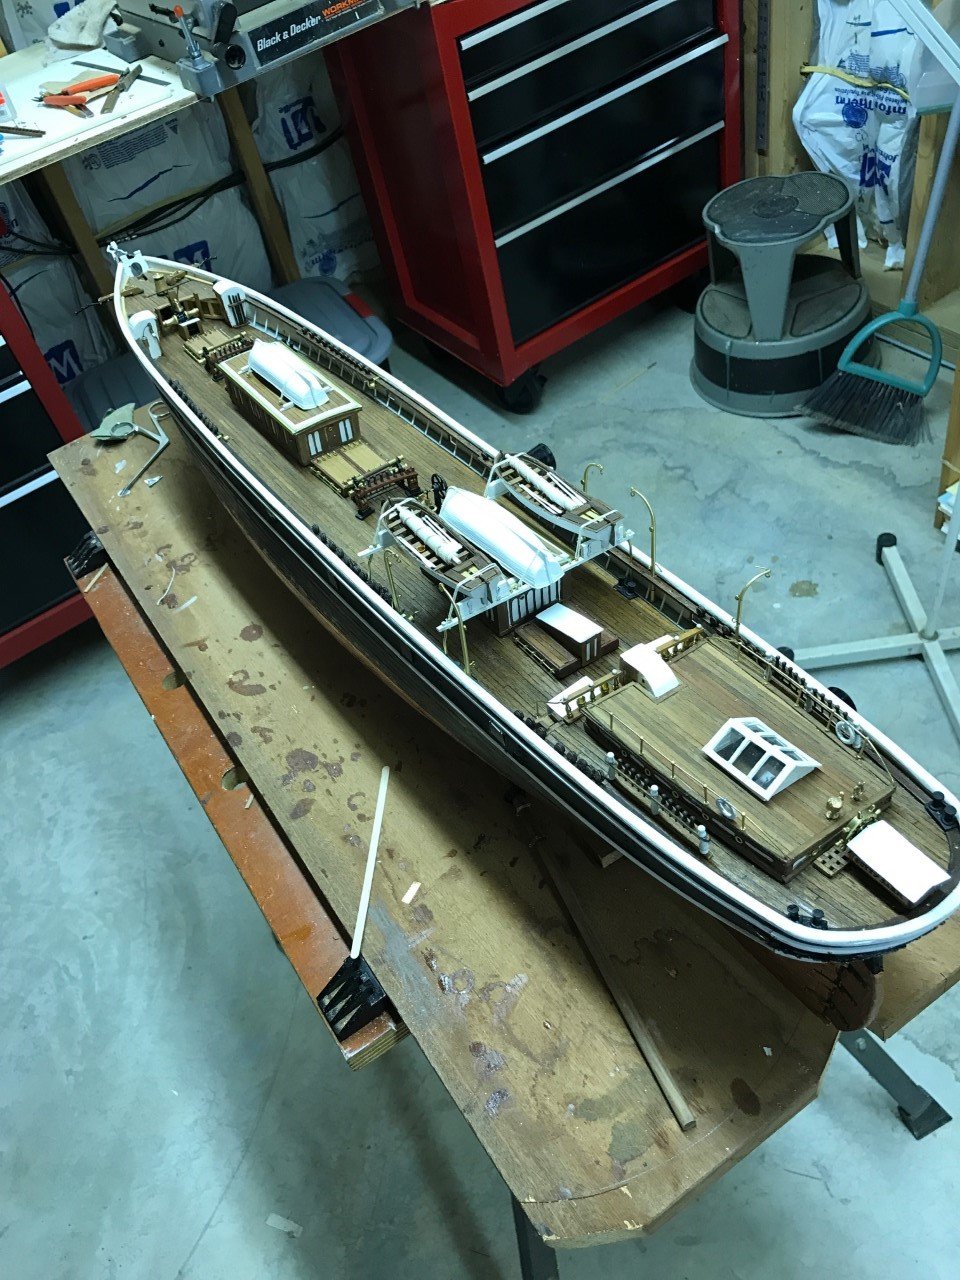
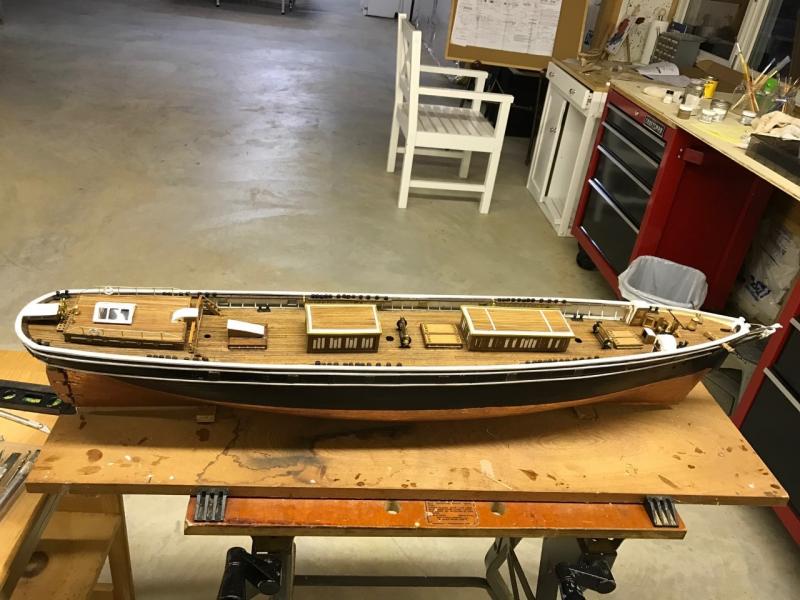
Progress as f May 1, 2017. Ready for masts and rigging. Lou

- 42 replies
-
- 8
-
-
- Cutty Sark
- Sergal
- (and 1 more)
-
Progress at one additional year. Longridge's book is absolutely essential, as the details on the plans are frankly incorrect. Hope to finish the deck this winter and begin masting and rigging next fall. Lou
- 42 replies
-
- 7
-
-
- Cutty Sark
- Sergal
- (and 1 more)
-
See Longridge's book for all details. It will make a huge difference. I have been working on the older kit of this model for quite a number of years. I will be posting some pictures today of the work in progress. Lou
- 55 replies
-
- 1
-
-
- cutty sark
- sergal
- (and 2 more)
-
Cutty Sark kit. Sergal 789 circa 1976
bonedoctor51 replied to Luapdraw1234's topic in Wood ship model kits
Caution!! The plans are notoriously inaccurate. I strongly suggest getting a copy of Longridge's book to use as a guide. I will be posting some new photos today of my work in progress of this model. Lou -
I did the same thing coppering the Cutty Sark (Sergal). I used thick cyano cement sparingly, then an acetone wash to remove the flecks that were on the outside. Finally, a thin coat of copper paint dulled the finish just enough to look realistic. The copper was too prominent before the paint. No tarnish in 3 years. Lou
-
Thanks Nenad! This project turned out to be much harder than anticipated. Back in the 80's I built the Revel model of the Cutty -- the 3' one -- with many wooden parts added to enhance appearance. It was a walk in the park compared to this. Lou
- 42 replies
-
- 1
-
-
- Cutty Sark
- Sergal
- (and 1 more)
-
Thanks everybody. I made boxes to use for scratch building the deck houses. That looks like the only way to go. I have Underhills book, and I have built other similar but not as extensive ships. I was just hoping for a "shortcut" comprehensive diagram to avoid making mistakes. As I'm sure you are aware, the plans supplied with the Sergal kit are incorrect, misleading, and in many instances just plain wrong. I guess I can draw up a pin placement diagram to use as a guide. I wrote for MSB for many years. My articles were about the Dallas, a revenue cutter, a north seas trawler, and a Baltimore clipper. The last one was a kitbash and is quite close to the Pride of Baltimore, which sunk a few years ago. I had photographed the ship in harbor (I live in Monkton, about 30 miles north of Baltimore) and rebuilt the ship accordingly. I started a series on Mississippi river boats, but the model I was using was too inaccurate, and I had gotten too far to turn back, so the project was abandoned. I still have the incomplete model -- the only model that I never finished -- and am planning to rebuild it as a cotton hauler. More recently I built a Bermuda sloop from plans supplied by Rob Napier as it appeared in NRG a number of years ago. I don't have a photo to share, but it is fair to say that it is my pride and joy. I love ship modelling, and am teaching three of my grandchildren the art and craft of modelling. I want the Cutty Sark to be the best model ever, and I'm just having a harder time than I anticipated. Thanks all. I'll post updates from time to time. Feel free to private email me at any time. bonedoctor51@hotmail.com. Lou Halikman
- 42 replies
-
- 3
-
-
- Cutty Sark
- Sergal
- (and 1 more)