HOLIDAY DONATION DRIVE - SUPPORT MSW - DO YOUR PART TO KEEP THIS GREAT FORUM GOING! (Only 24 donations so far out of 49,000 members - C'mon guys!)
×


IgorSky
-
Posts
1,841 -
Joined
-
Last visited
Content Type
Profiles
Forums
Gallery
Events
Everything posted by IgorSky
-
Many thanks, Patrick! Each time, I also think that I has reached the limit... But then it turns out that we can go a bit further
- 22 replies
-
- 2
-

-
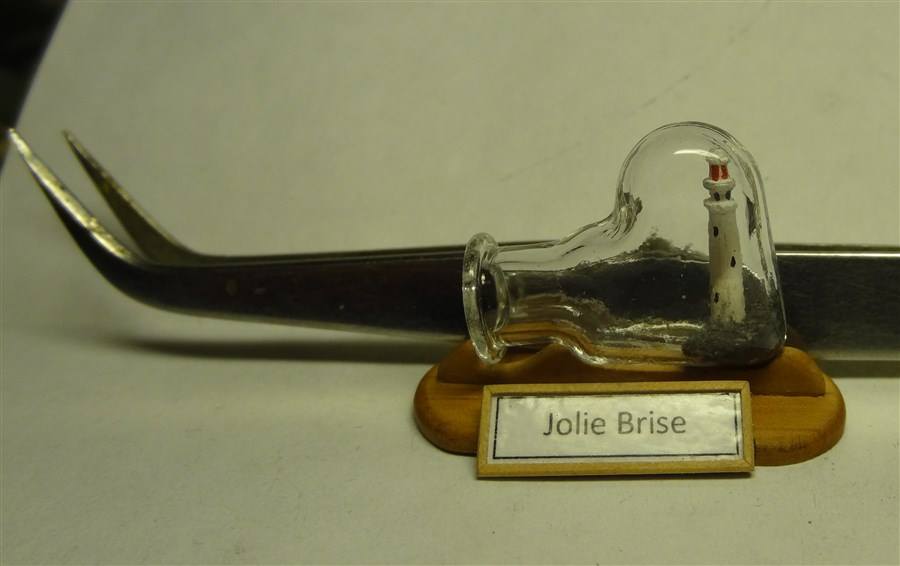
- jolie brise
- diorama
- (and 2 more)
-
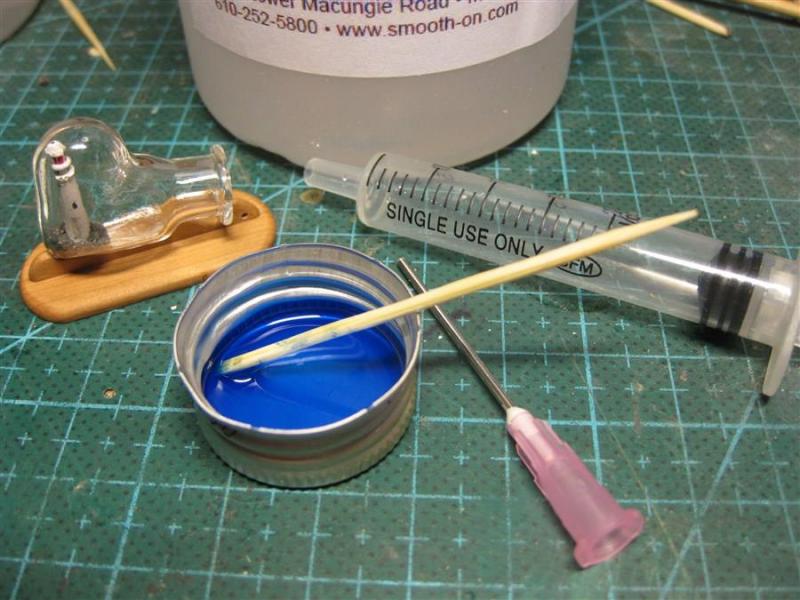
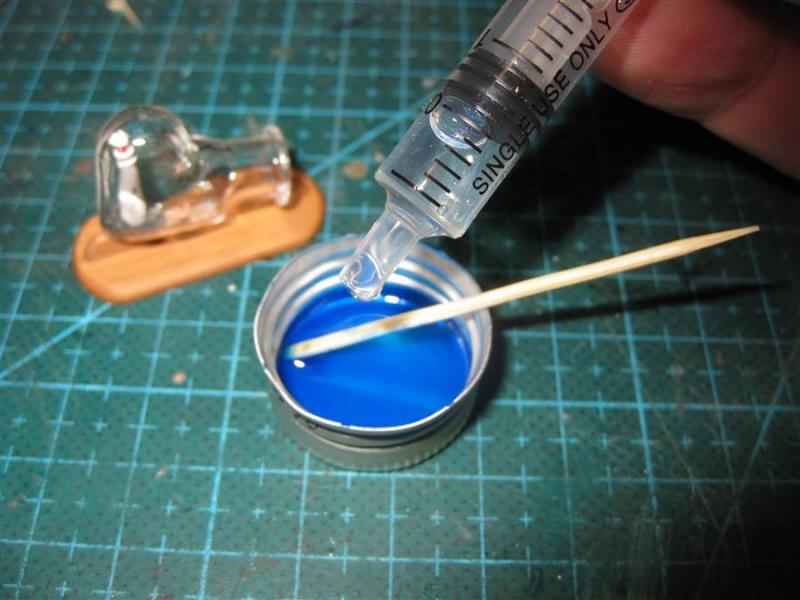
Thank you, Nils! This bottle was me for a long time, but I did not know how to use it.
- 22 replies
-
- 4
-
-
- jolie brise
- diorama
- (and 2 more)
-
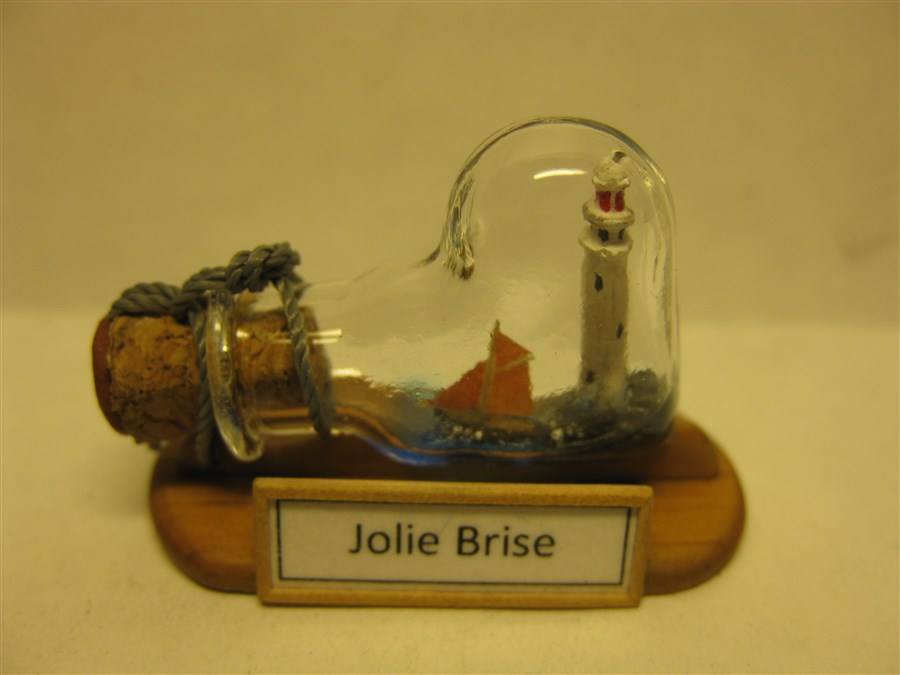
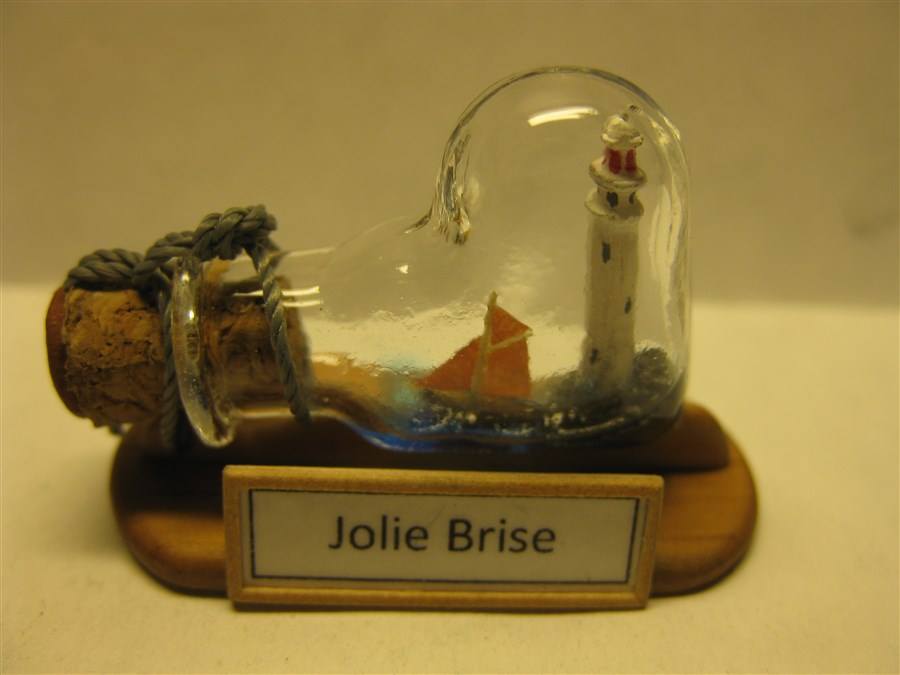
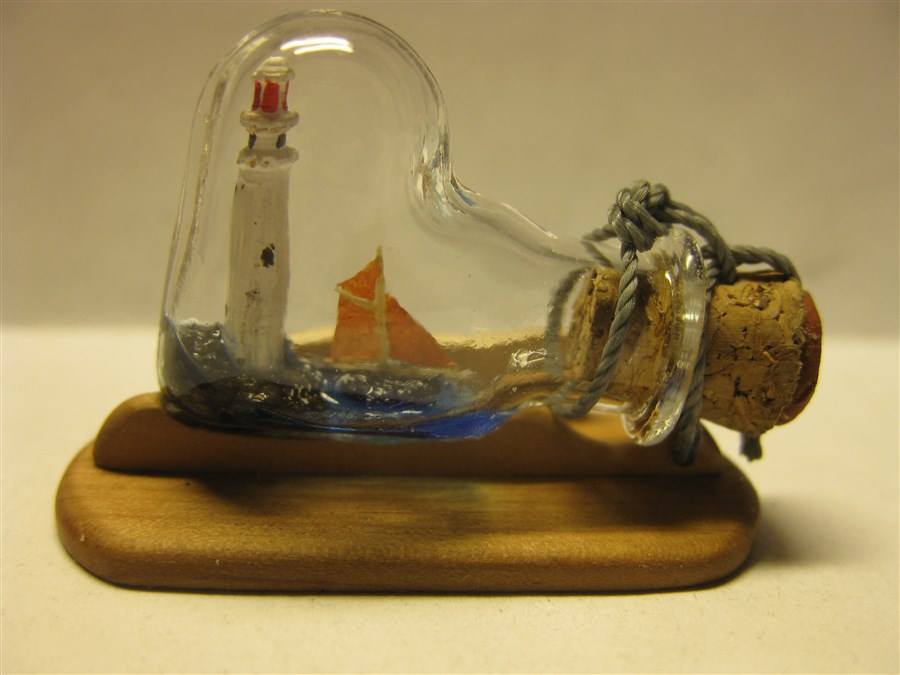
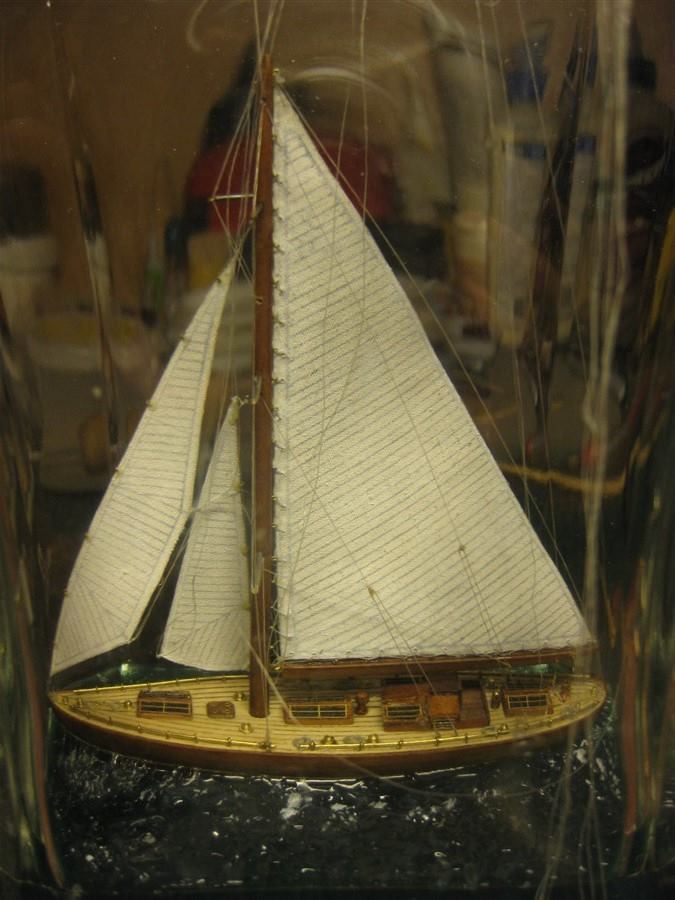
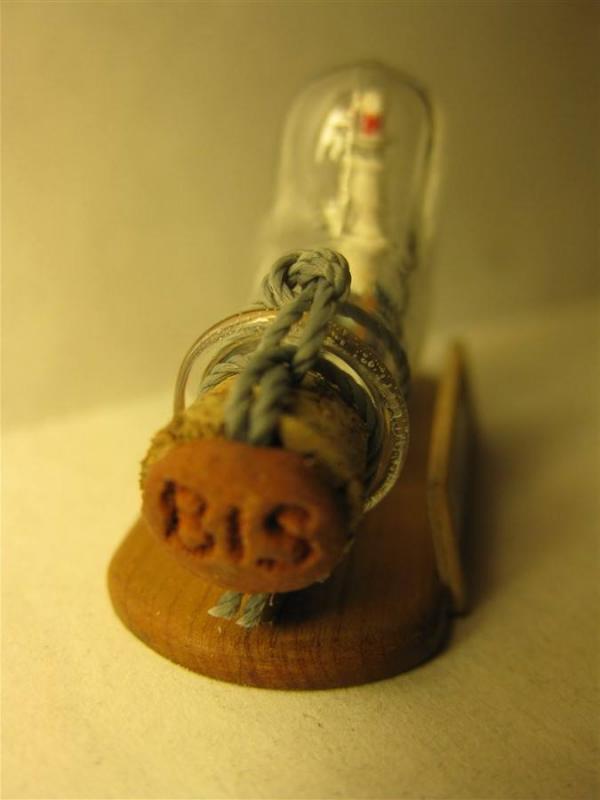
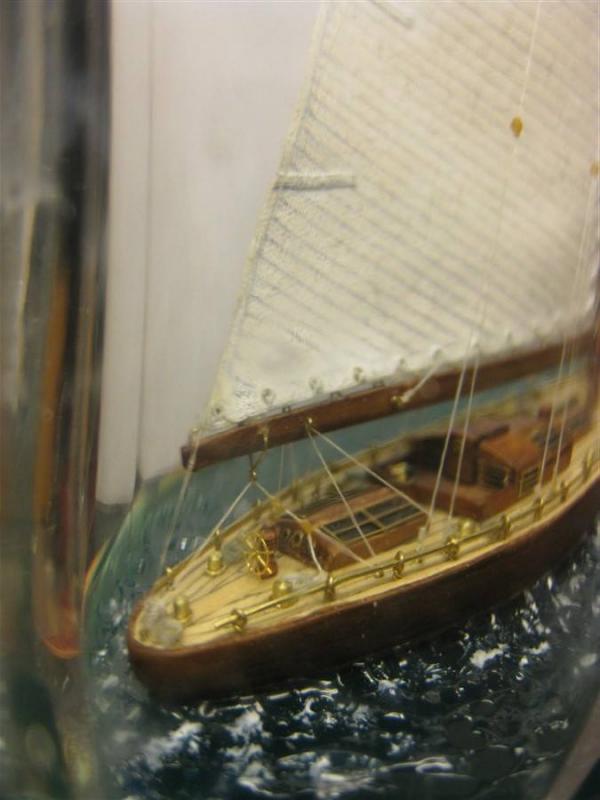
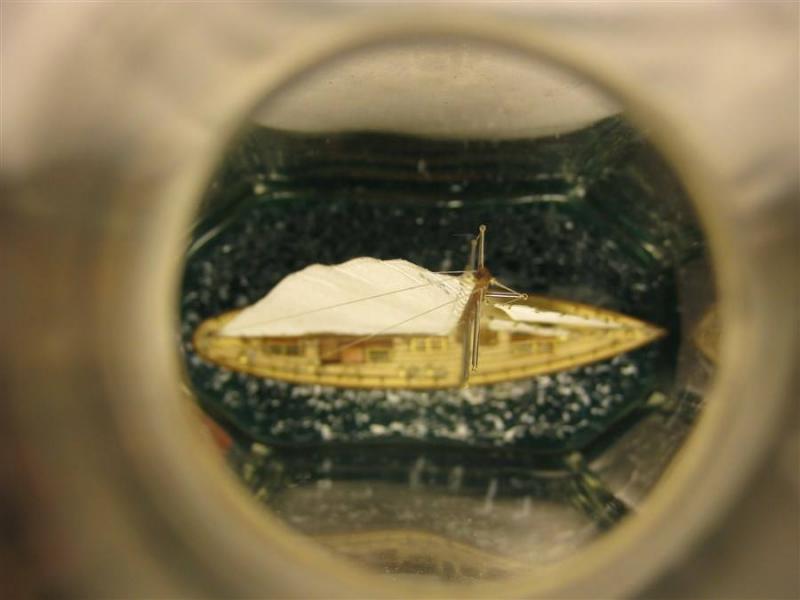
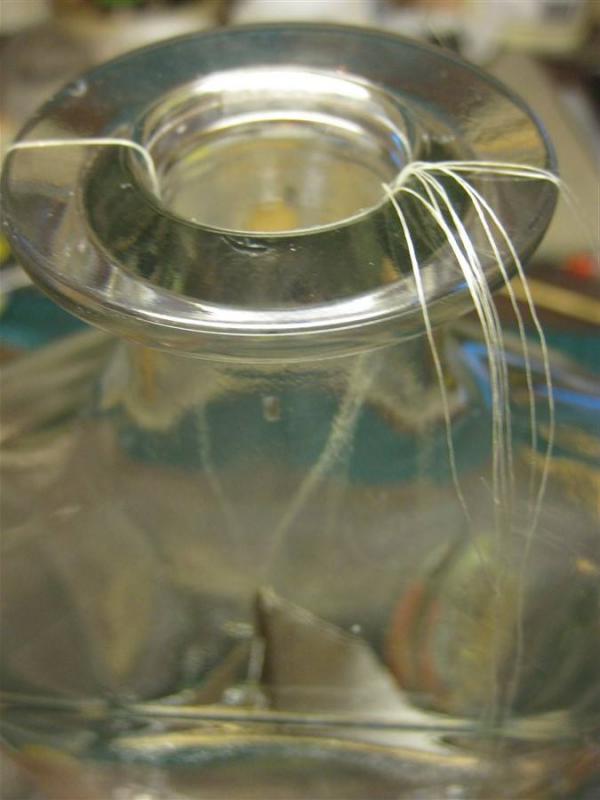
Then I put the cork and sealed it. All - this model is complete!


- 22 replies
-
- 11
-
-
- jolie brise
- diorama
- (and 2 more)
-
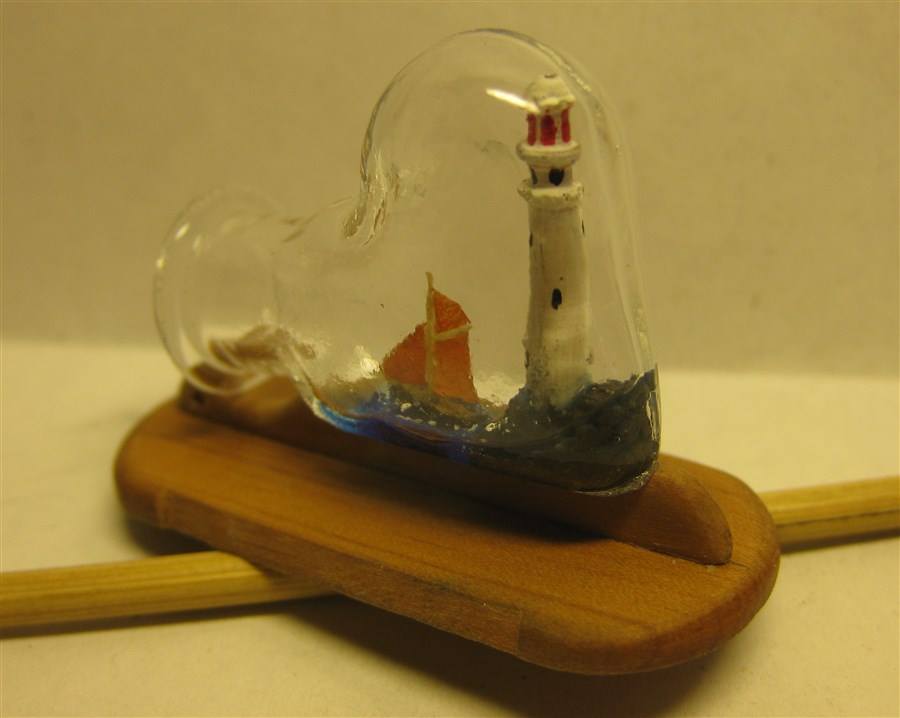
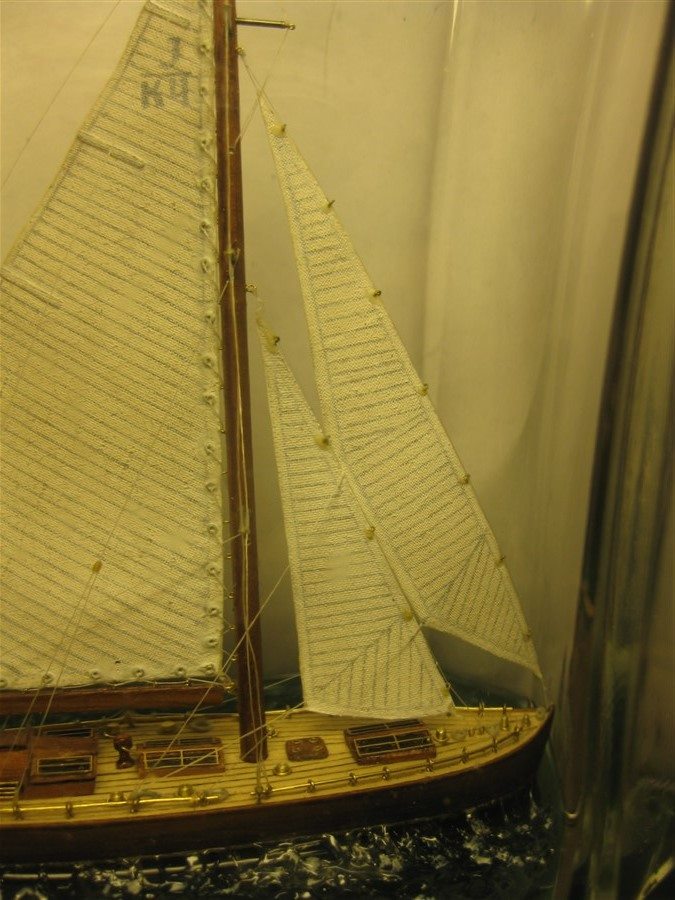
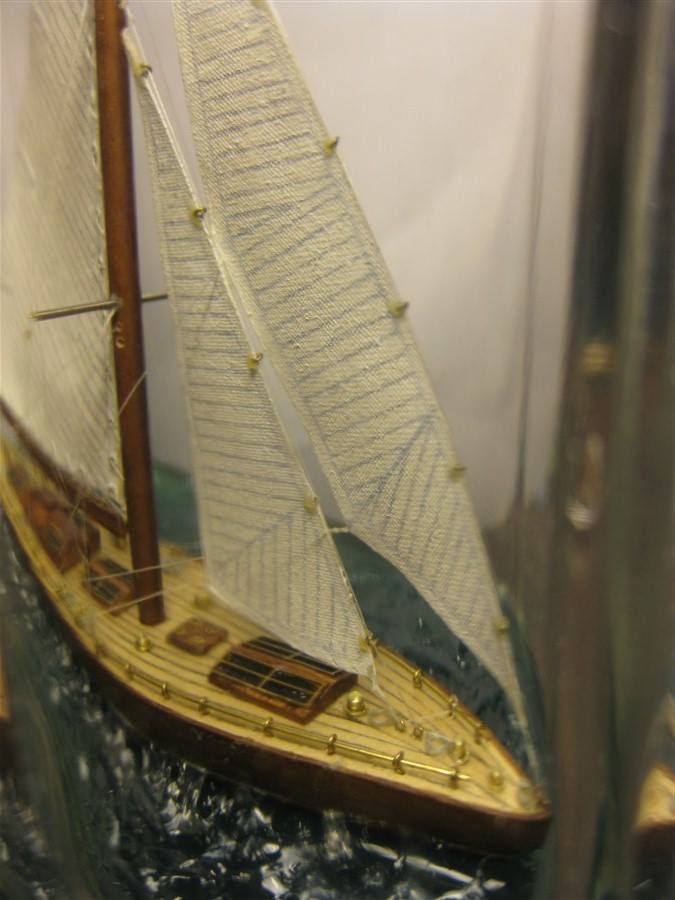
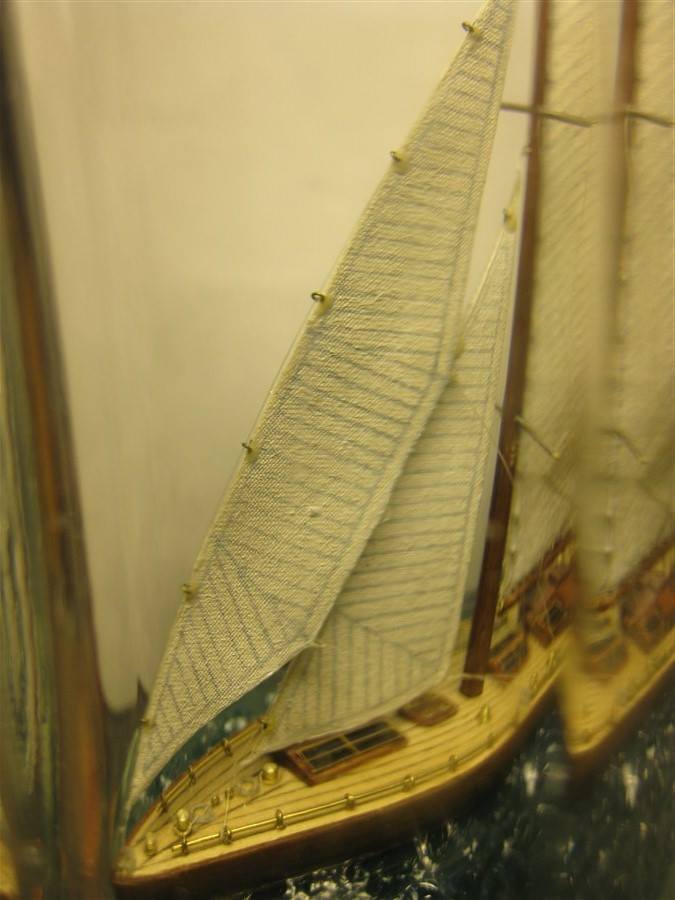
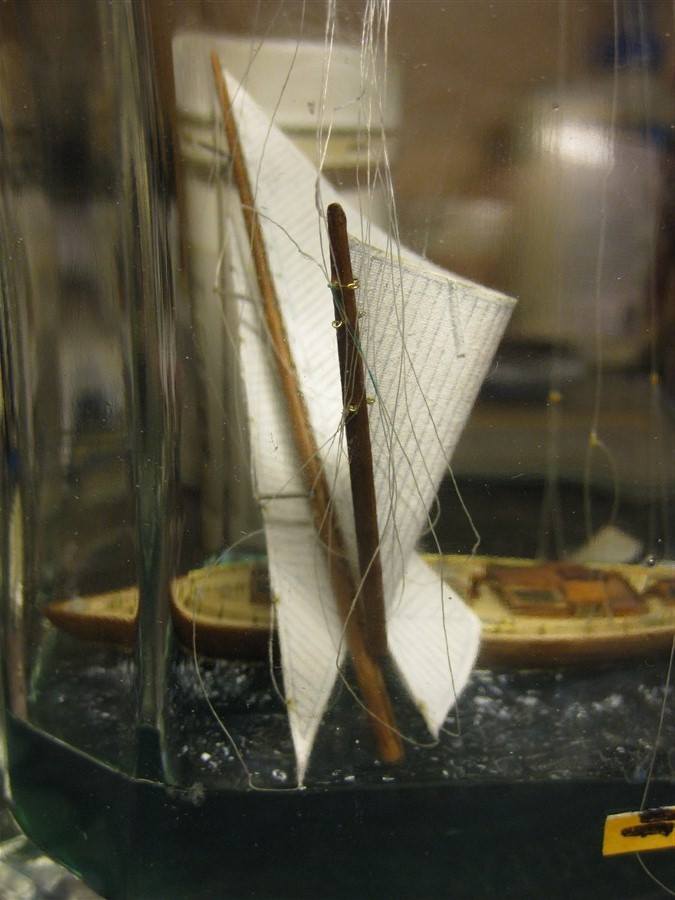
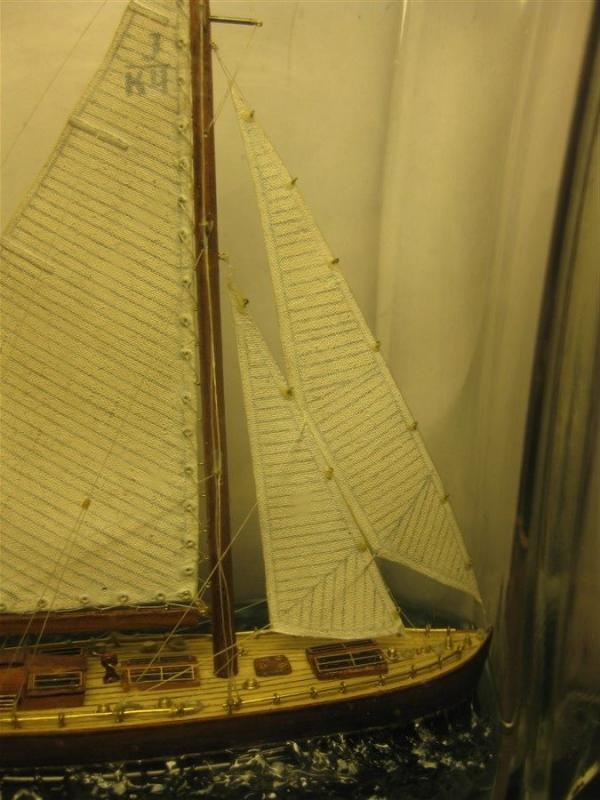
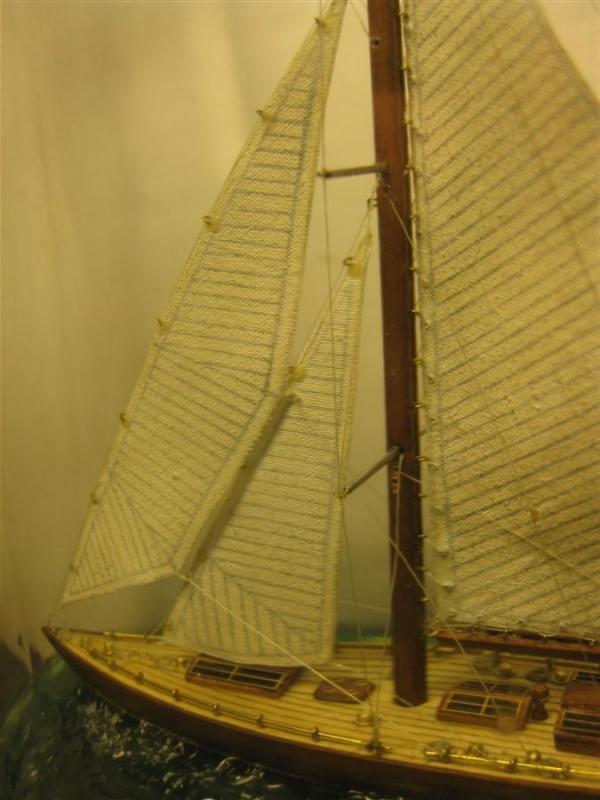
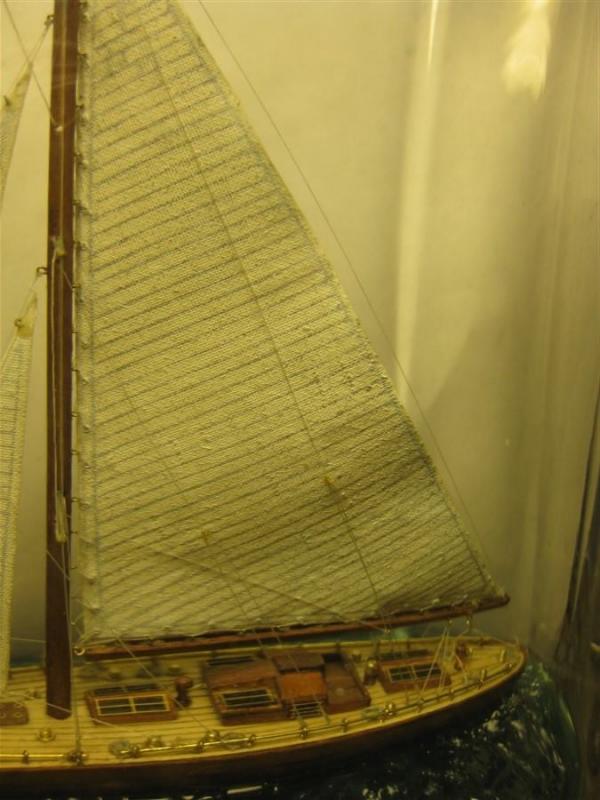
After complete drying of the sea, I inserted the mast with folded front sail into the throat of bottle. Then I expand the front sail and glued its corner to the bowsprit.

- 22 replies
-
- 9
-
-
- jolie brise
- diorama
- (and 2 more)
-
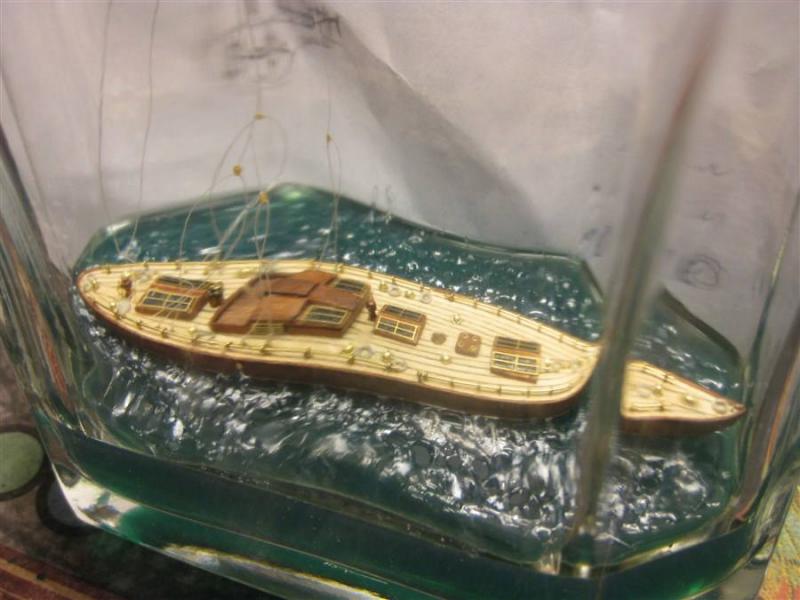
I made the sea from two-component colorized silicone. This was my first attempt to use this material. I poured a few drops of the mixture in the bottle and after a few hours, when the mixture was a little dry, I put the hull of the boat in the sea.

- 22 replies
-
- 5
-
-
- jolie brise
- diorama
- (and 2 more)
-
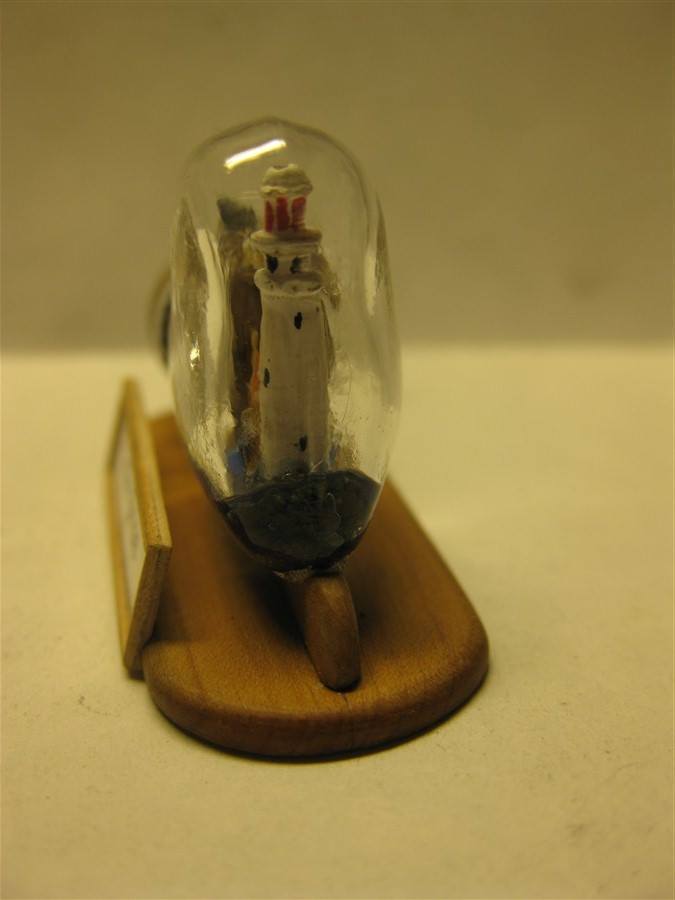
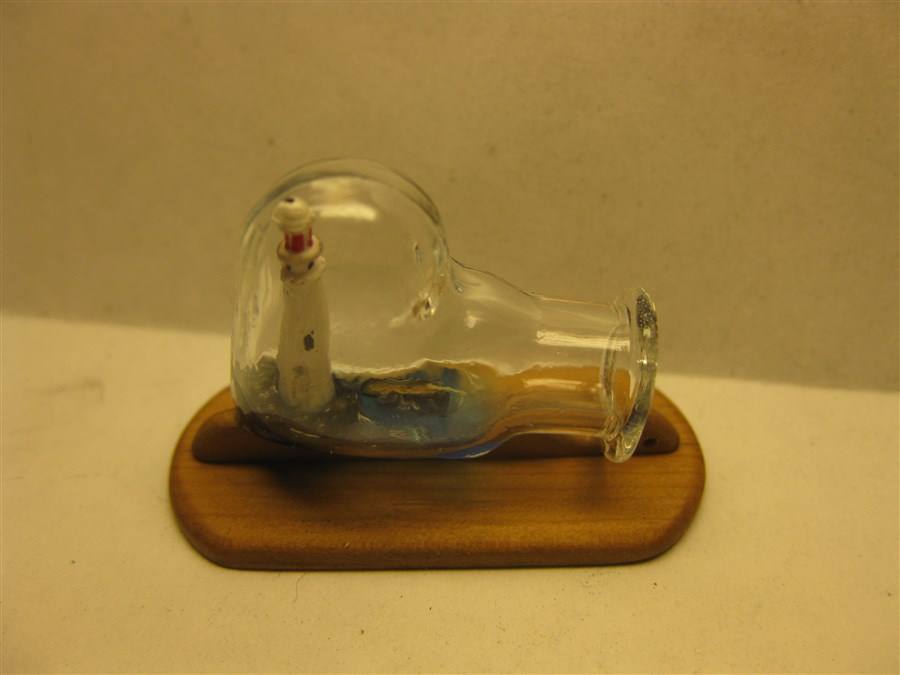
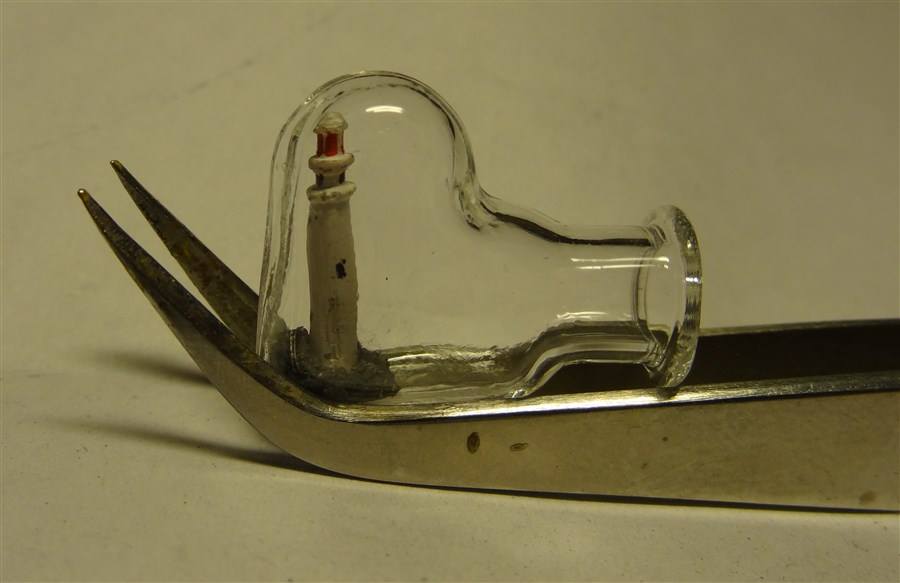
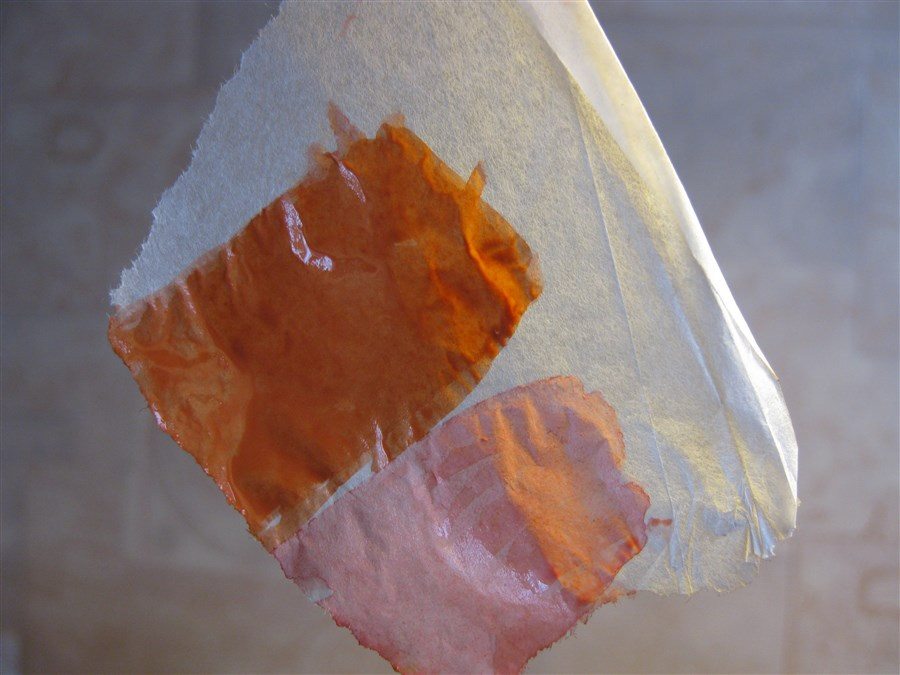
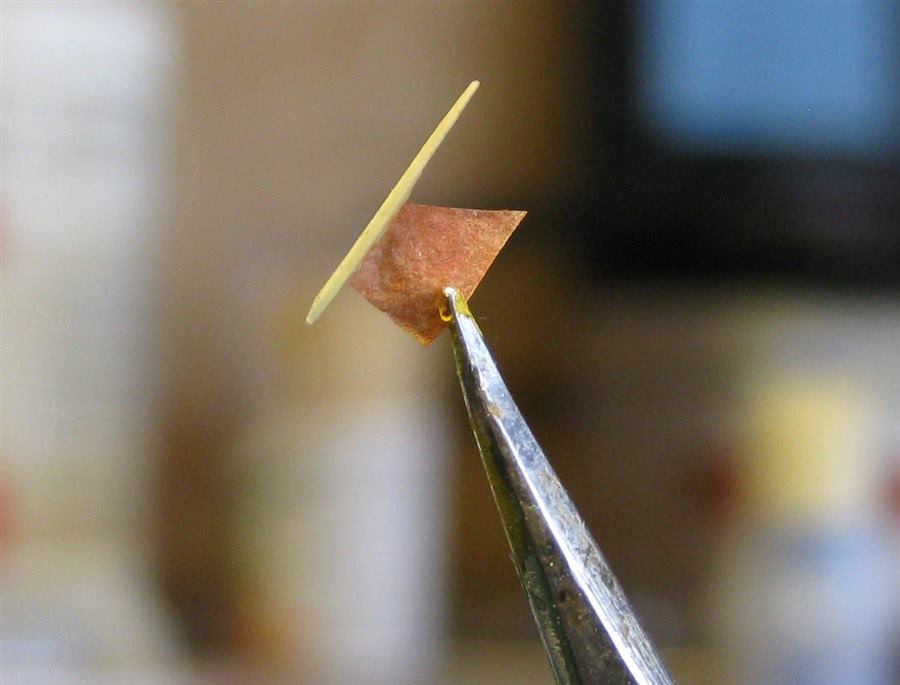
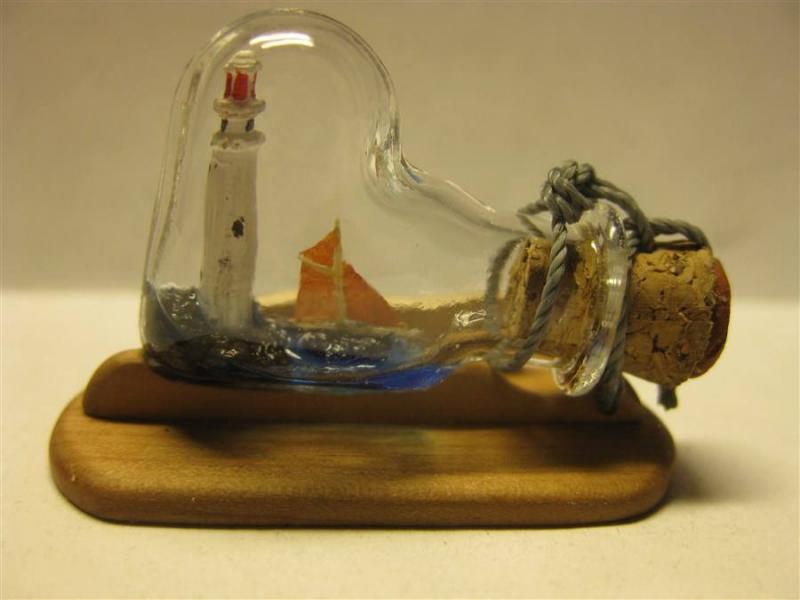
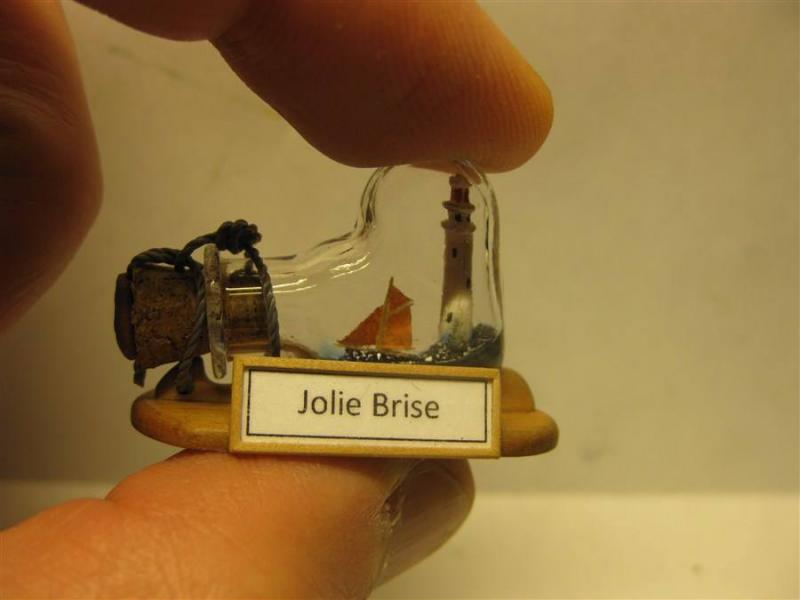
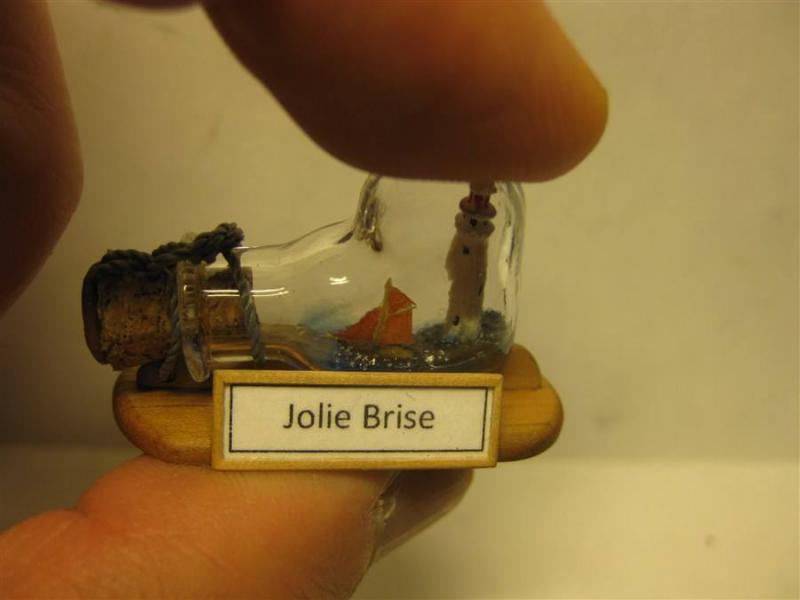
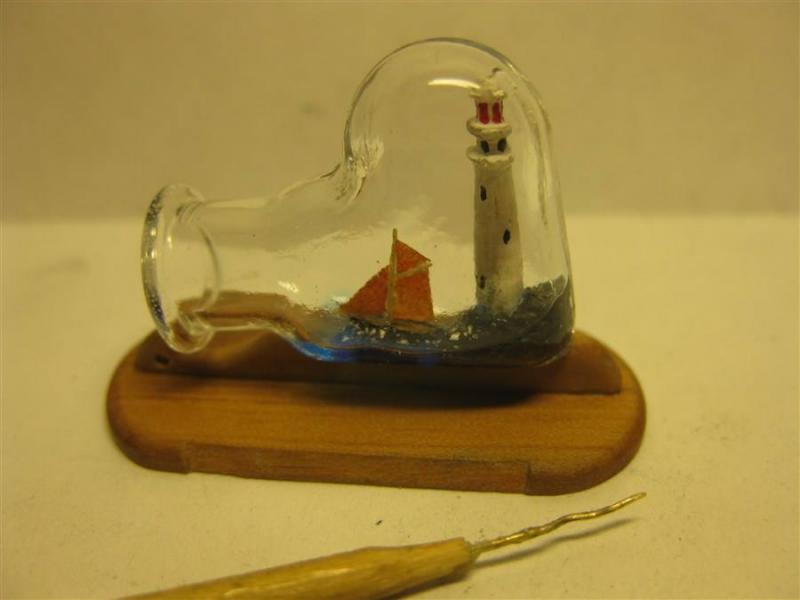
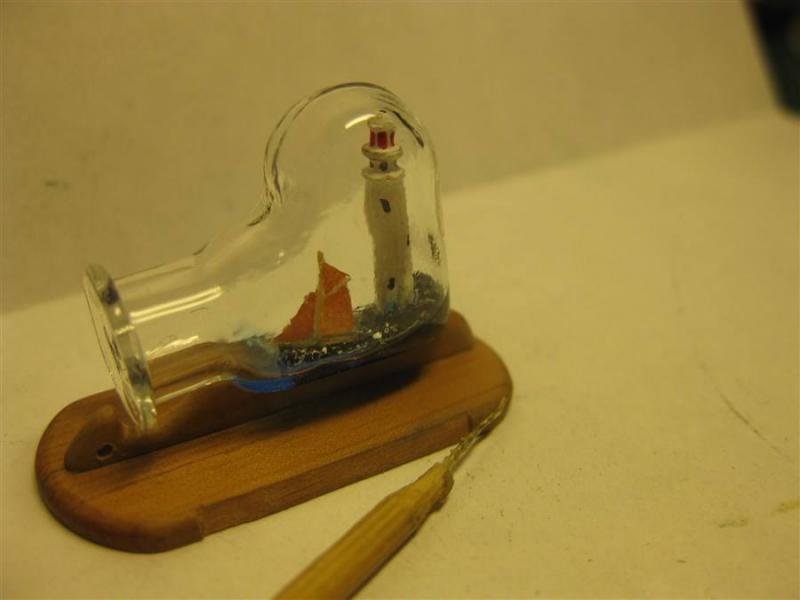
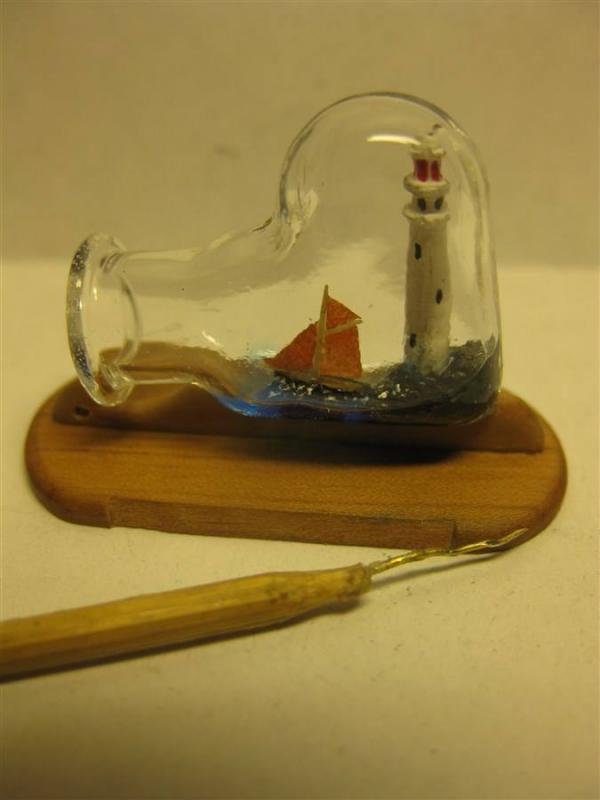
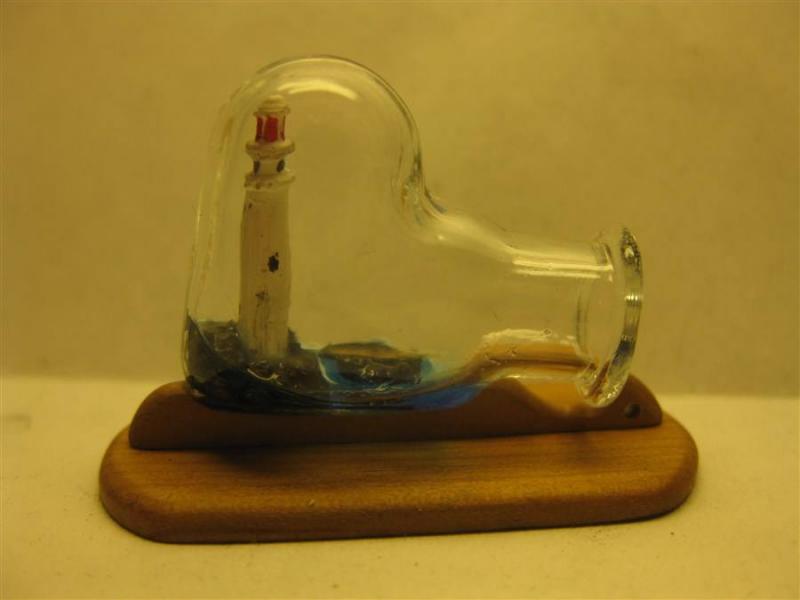
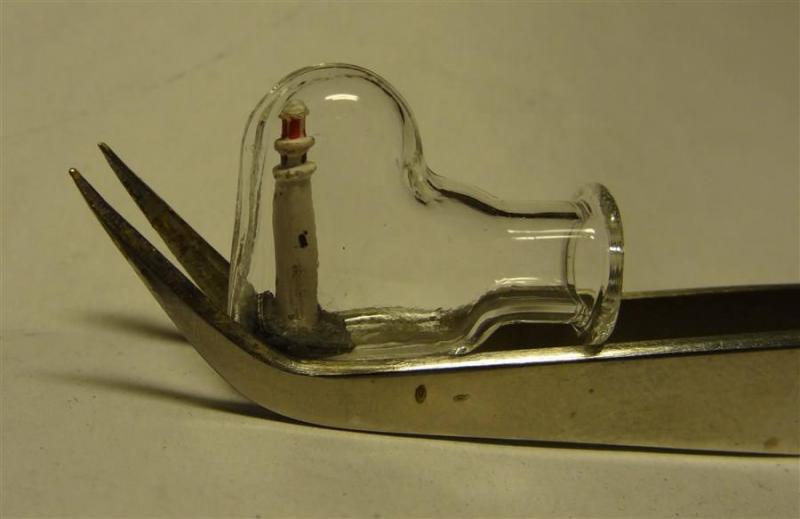
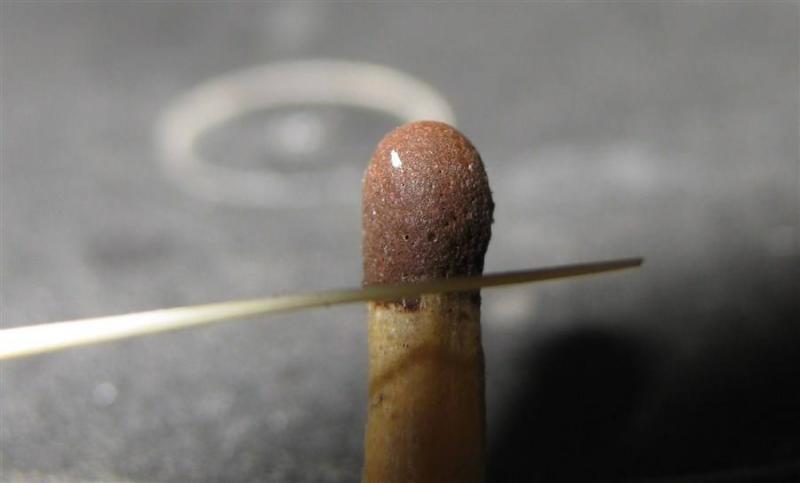
Lighthouse ... I carved it out of bamboo and colored paint. Then I did the rock from epoksilin. I also cutted out parts of the pedestal from the pieces of pear.

- 22 replies
-
- 5
-
-
- jolie brise
- diorama
- (and 2 more)
-
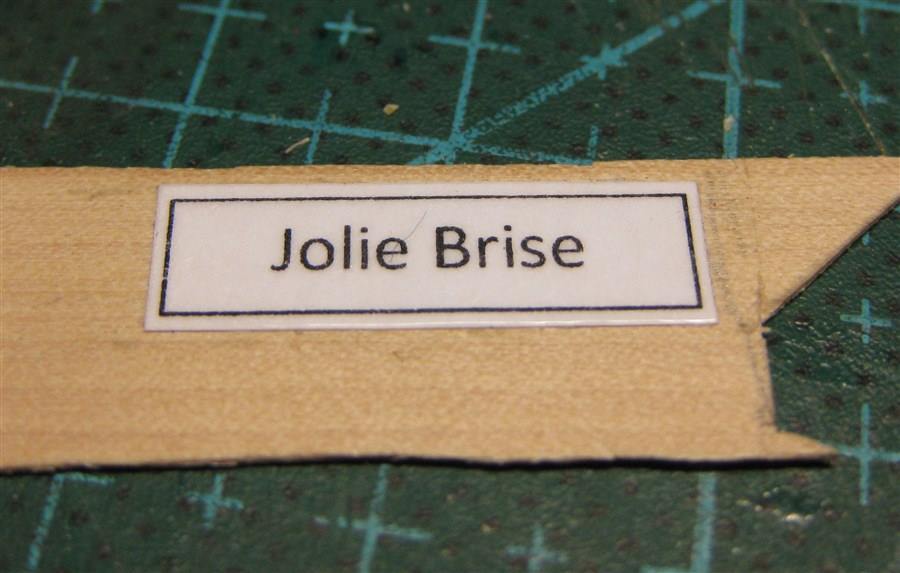
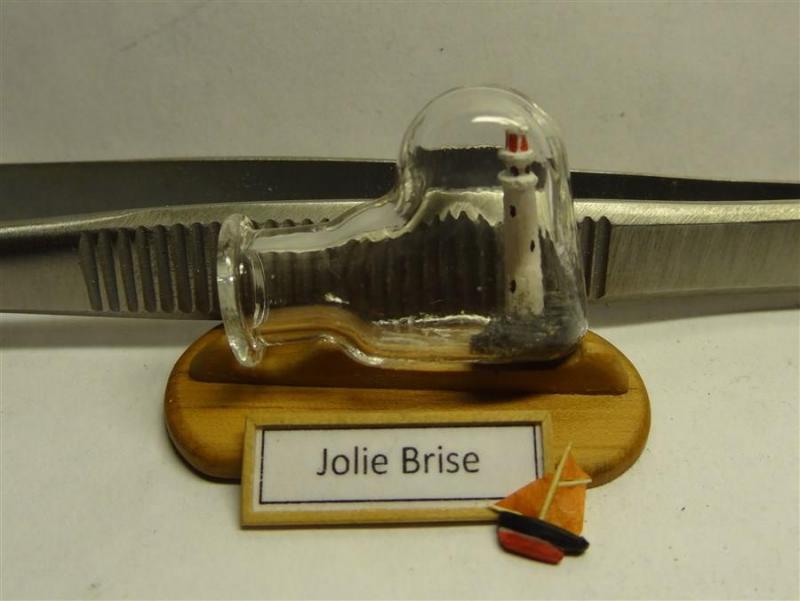
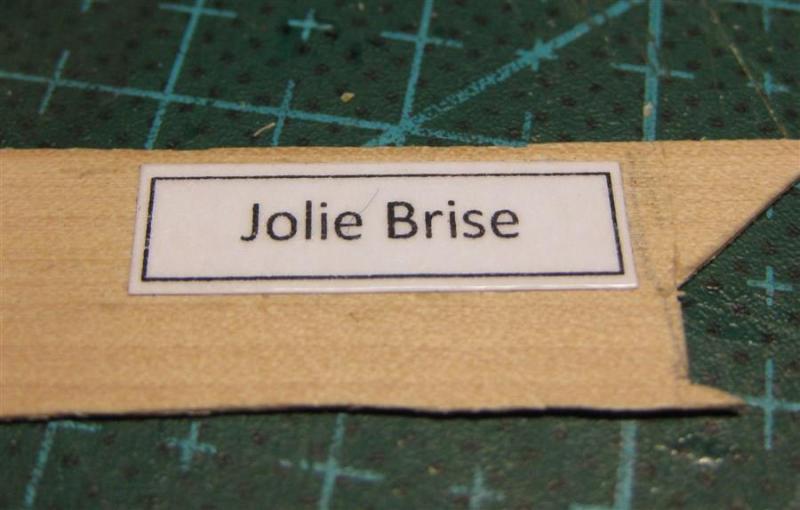
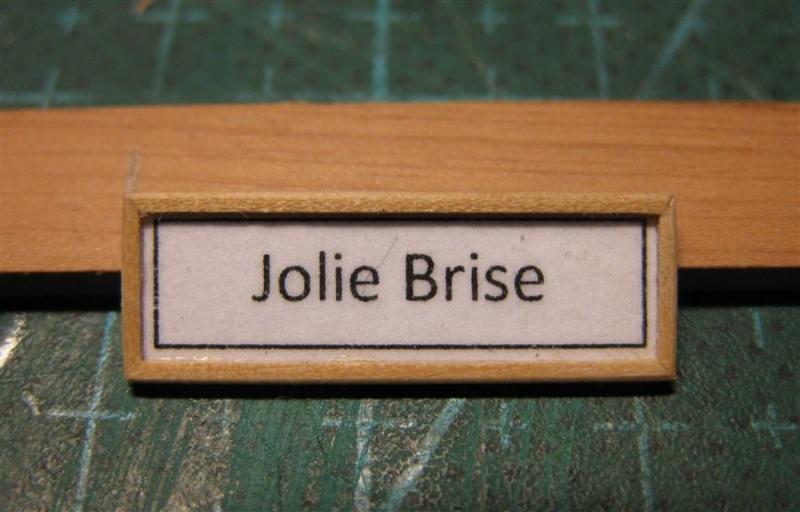
The nameplate ... I printed it on a printer, laminated tape and glued to 0.5 mm veneer. Then I made the frame from pear strips 0.5x0.5 mm and handled fine sandpaper.
- 22 replies
-
- 5
-
-
- jolie brise
- diorama
- (and 2 more)
-
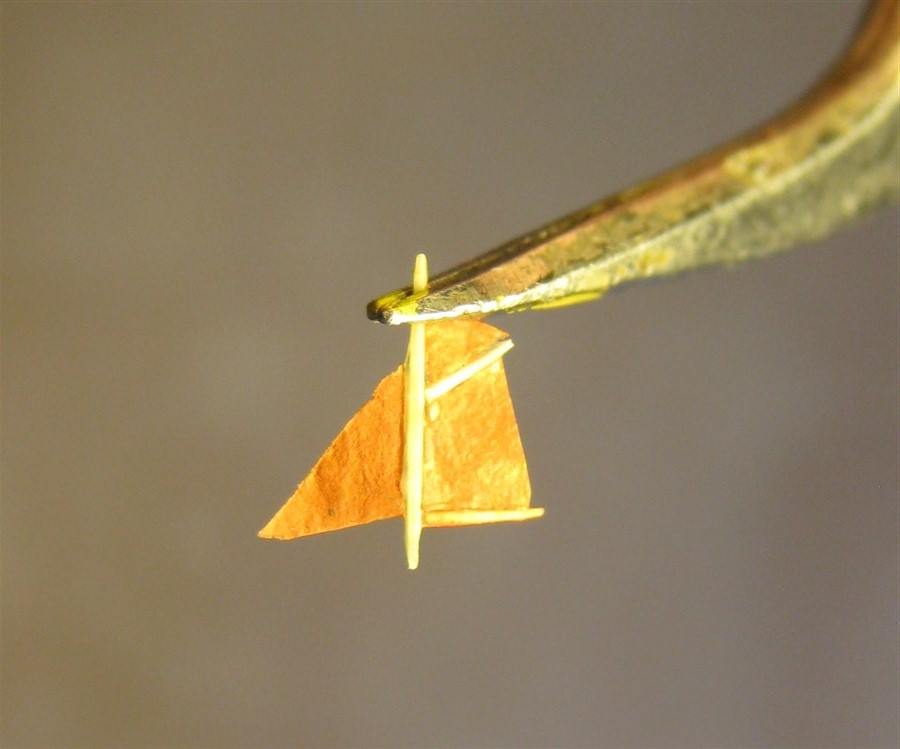
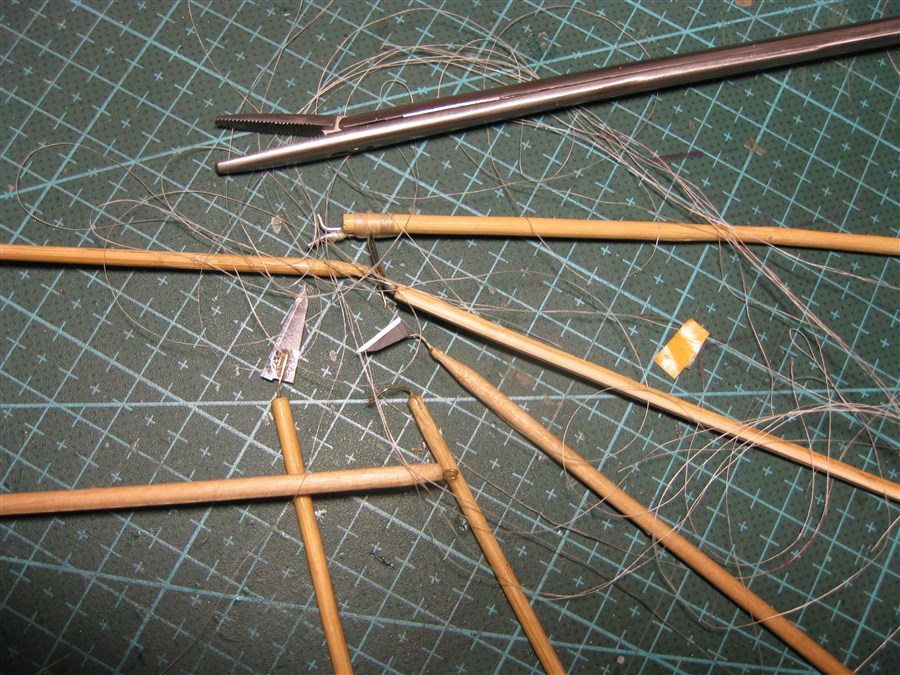
Mast and boom ... I did the parts of the spar traditionally from bamboo


- 22 replies
-
- 5
-
-
- jolie brise
- diorama
- (and 2 more)
-
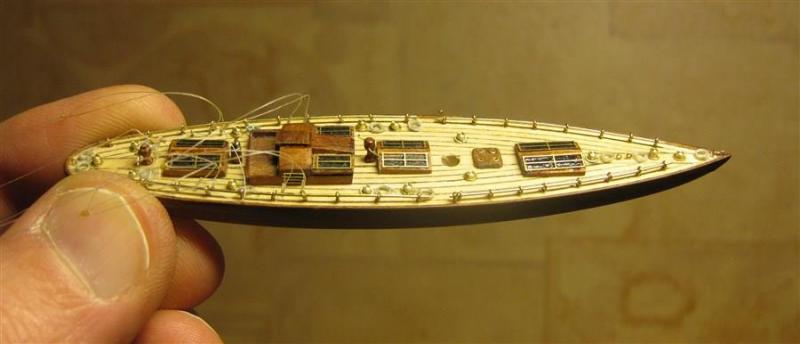
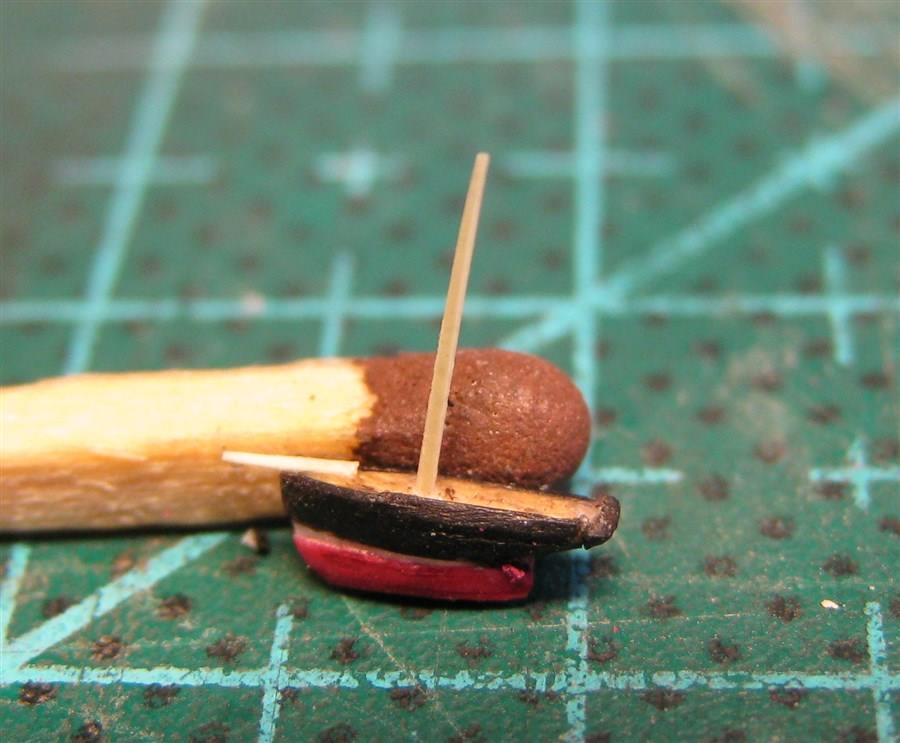
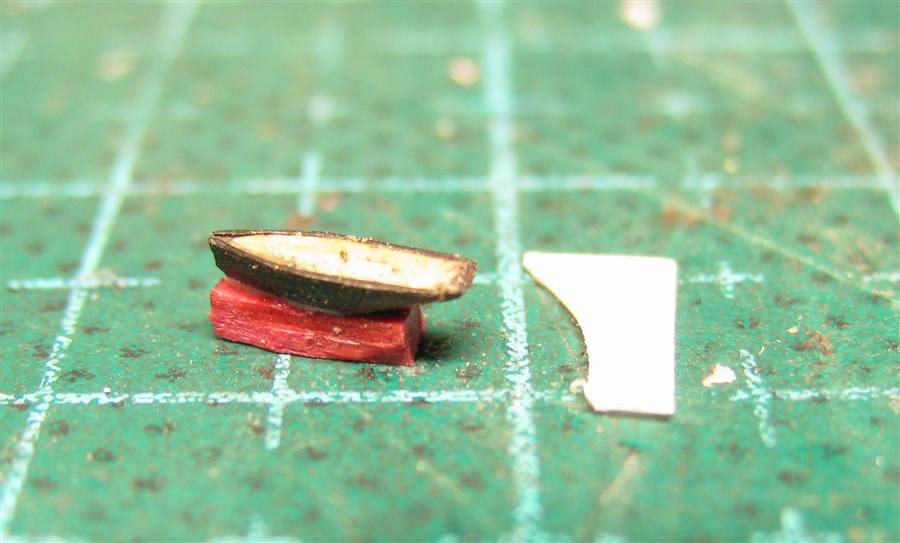
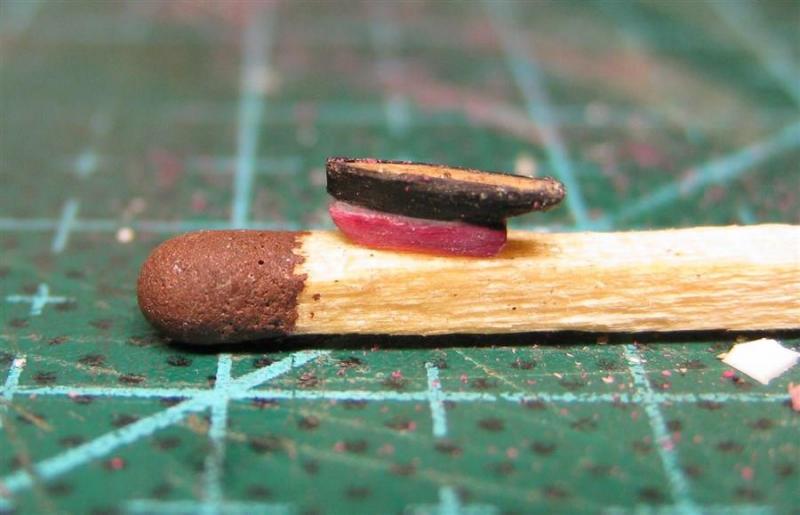
I had handled the sandpaper these parts and in the end I got the boat hull.
- 22 replies
-
- 5
-
-
- jolie brise
- diorama
- (and 2 more)
-
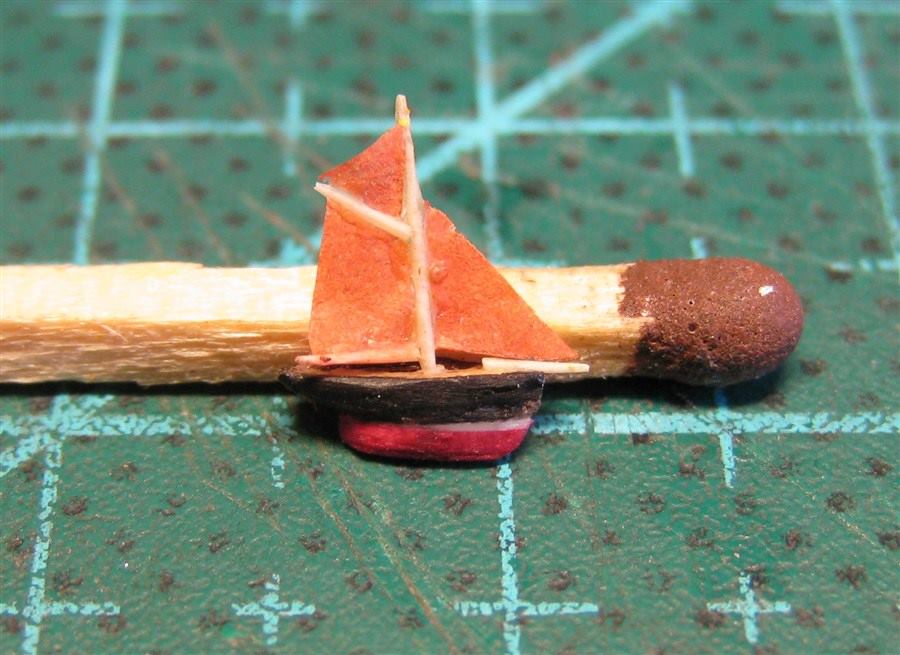
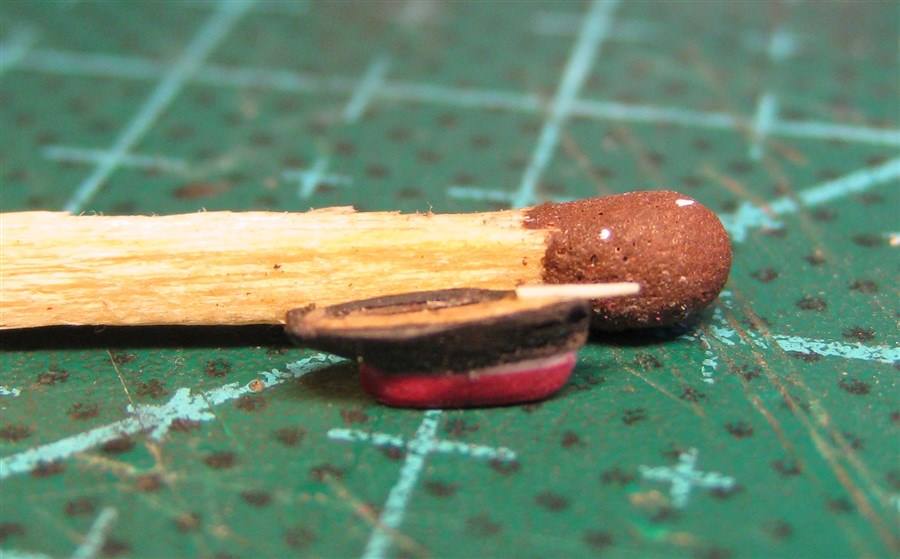
Then I made a billet for the underwater part of the hull from the two pieces of the red hornbeam.

- 22 replies
-
- 5
-
-
- jolie brise
- diorama
- (and 2 more)
-
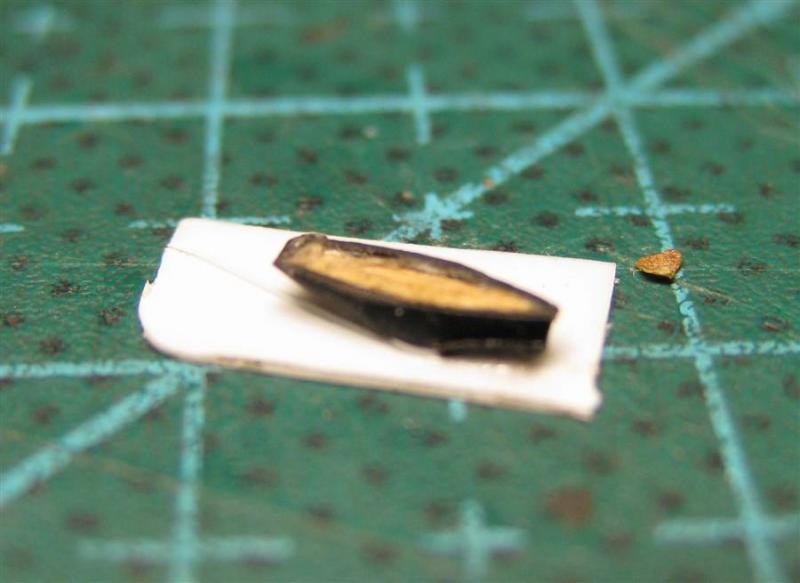
Then I made a water line from a piece of white plastic.
- 22 replies
-
- 5
-
-
- jolie brise
- diorama
- (and 2 more)
-
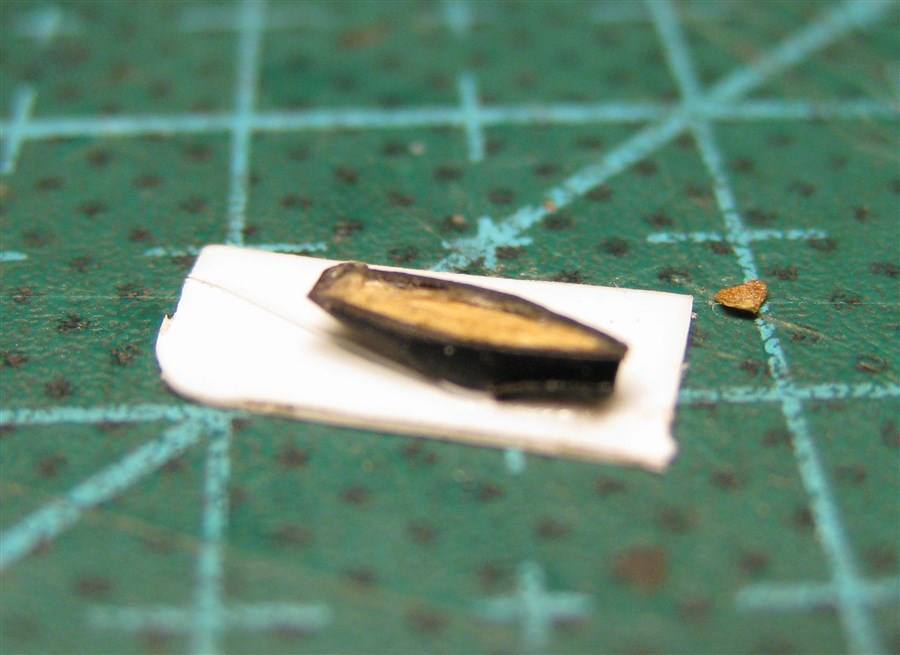
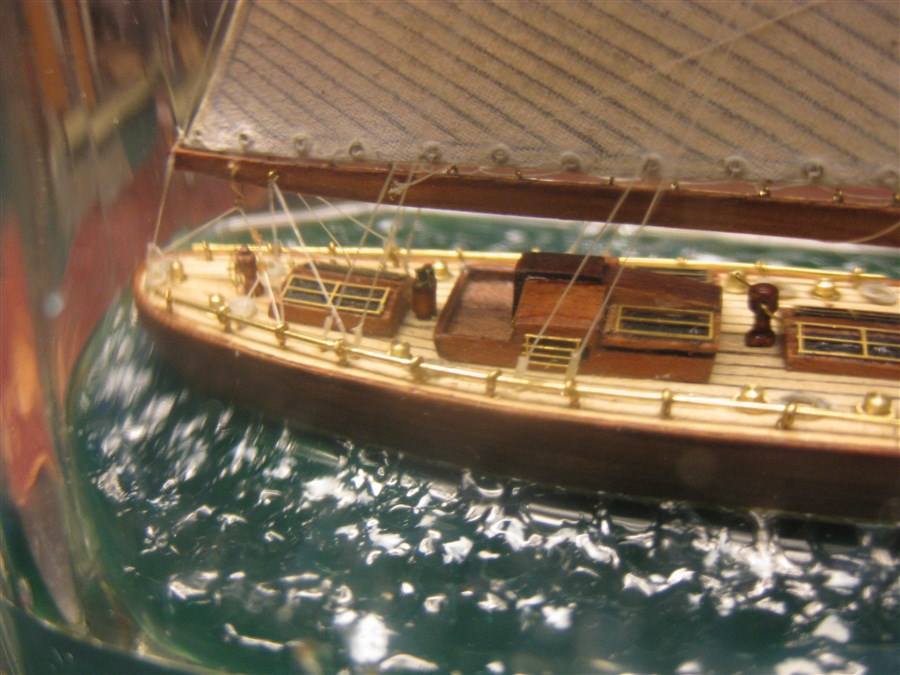
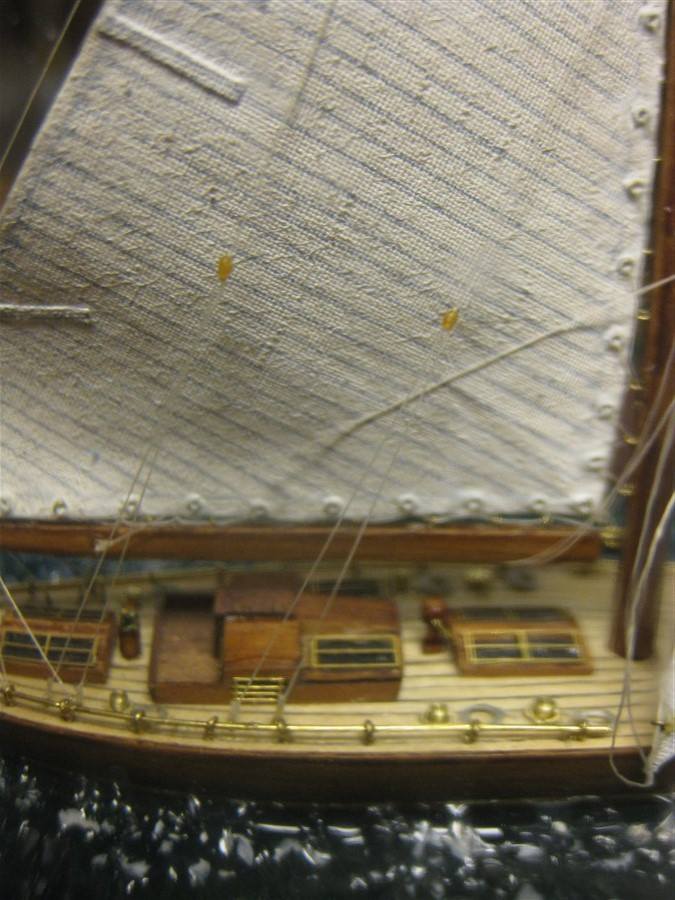
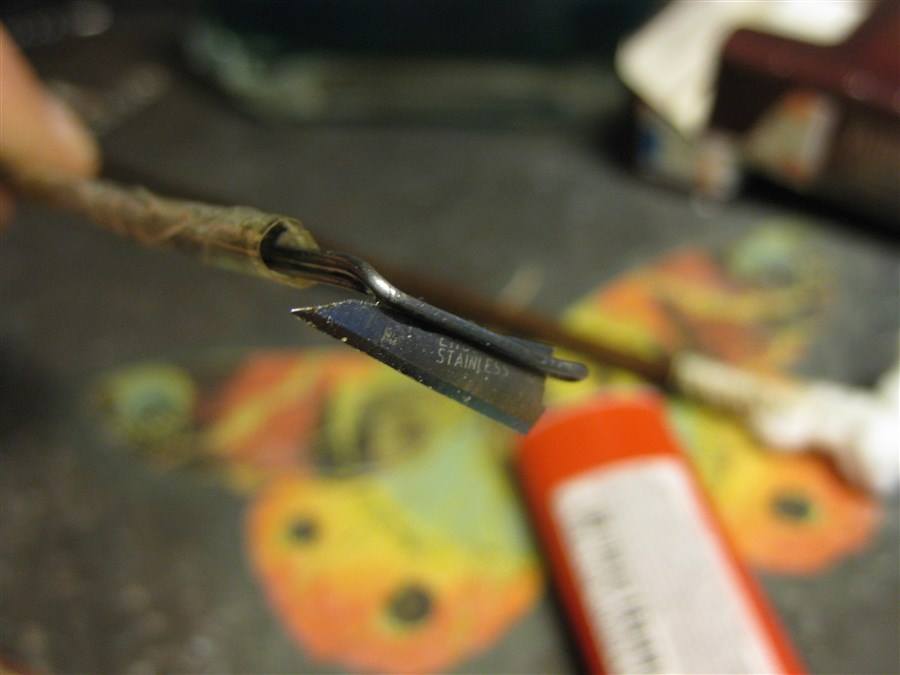
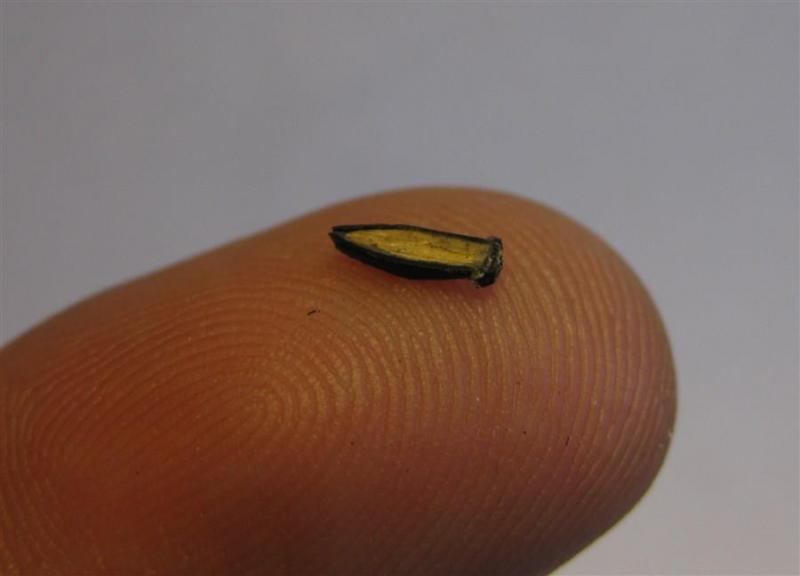
Choosing a boat and lighthouse prototypes came somehow by itself - I like this combination in a long time and I even tried to draw them. So, I started this project with the building of boat. Based on the size of the interior space, the scale is around 1/3000. I started to build a boat in almost the same technology as the rest of my models. First I made the deck from several small strips of pear, which I previously whittle away with sandpaper to 0.3 mm. The deck is also the basis for the above-water part of the body. Then I glued the boards of black hornbeam.
- 22 replies
-
- 5
-
-
- jolie brise
- diorama
- (and 2 more)
-
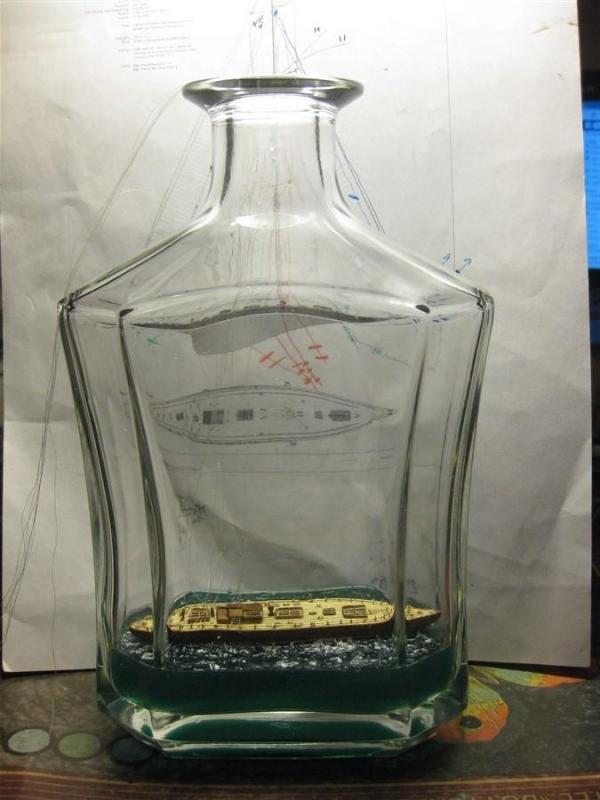
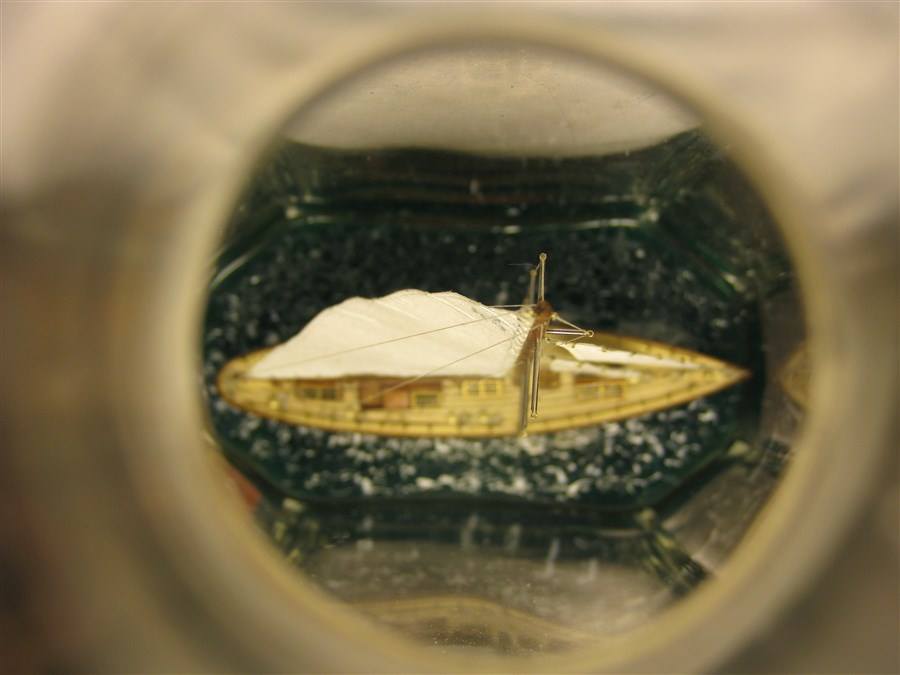
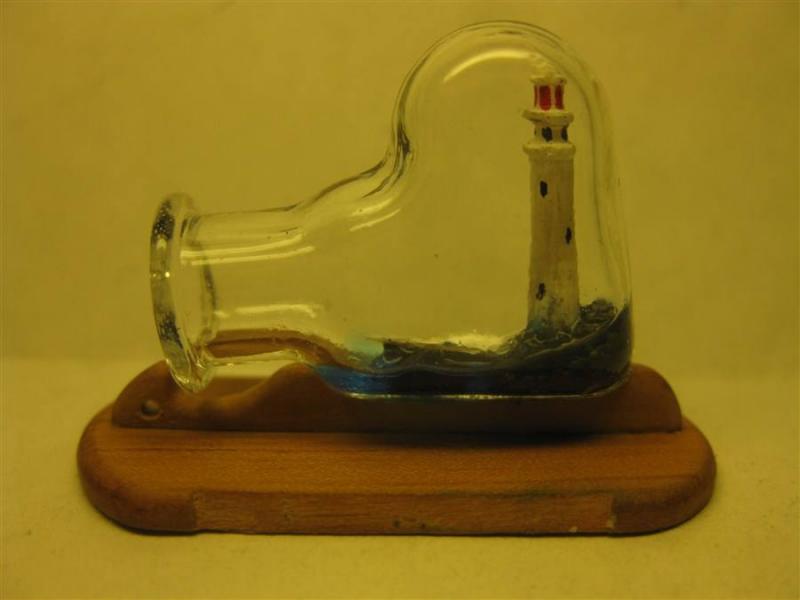
Hi everyones! First of all I want to thank to Piet. His miniature diorama in some way inspired me to this mini project. From time to time I have a desire to try their skills in the direction of further miniaturization of shipbuilding in bottles. Here, a short history of one of these small projects. The flask with strange shapes, reminiscent of a heart with an asymmetrical arrangement of the neck, lying in a drawer of my desk for a long time, but I did not have any specific ideas for using it as a receptacle for the construction of a model in a bottle ... And then ... As always, the idea came unexpectedly - sea, rock, lighthouse, boat. On this photo this flask is in the center

- 22 replies
-
- 6
-
-
- jolie brise
- diorama
- (and 2 more)
-
Hi Bob! At this time I am prepared more carefully the algorithm of building model in a bottle and drew the scheme for it. And I remember the main rule - do not rush! In the words of one of the ancient Chinese sages:to hurry - it is to do slow motions without stopping. But as I said earlier, I felt horror, when I was looking at the slipway with the upper part of the hull and was seeing is this large number of yarns.
-
Many thanks for your compliments, Carl! But, of course, I'm just learning Oh, thank you very much, Michael! I have always with admiration watch your build logs, and, of course, I try to learn from you too! With my best regards! Igor.
-
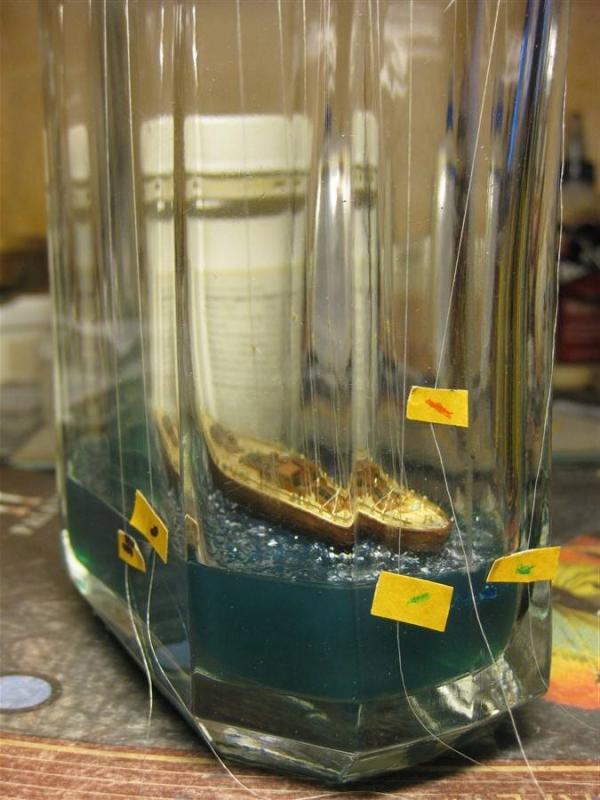
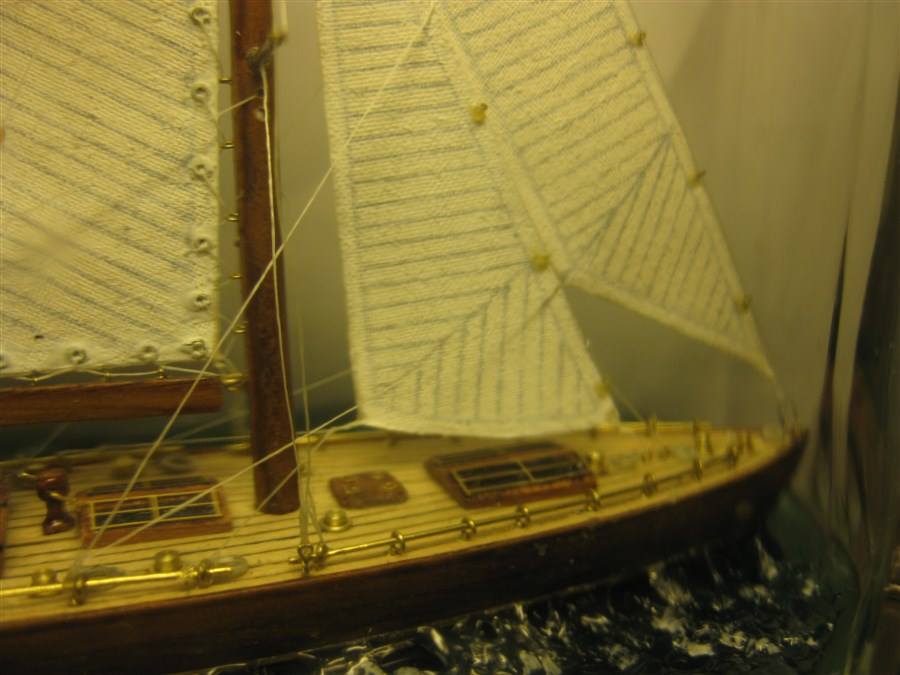
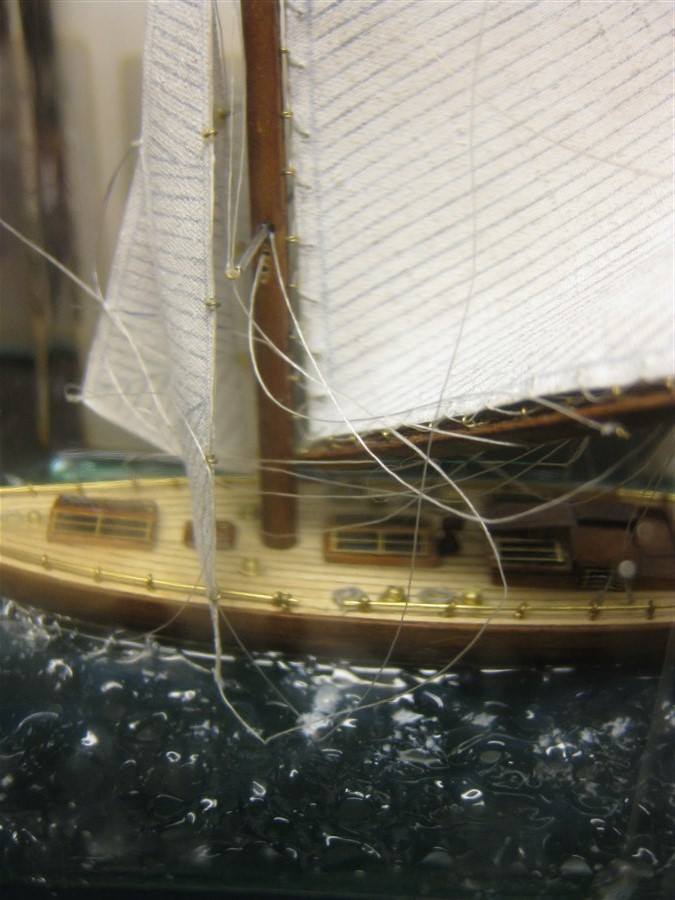
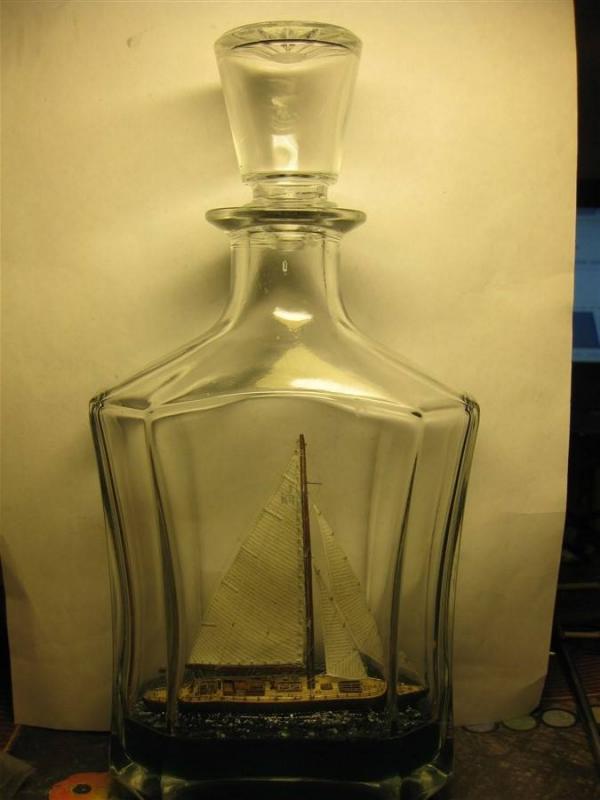
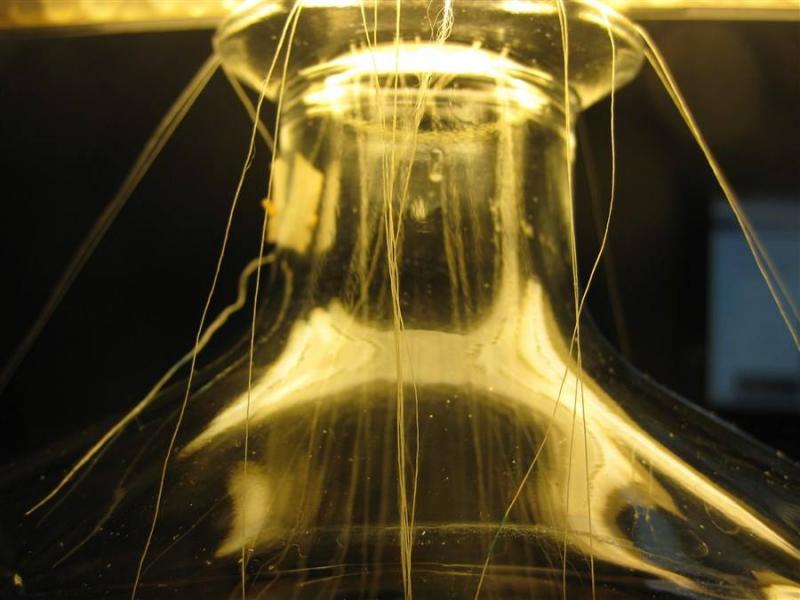
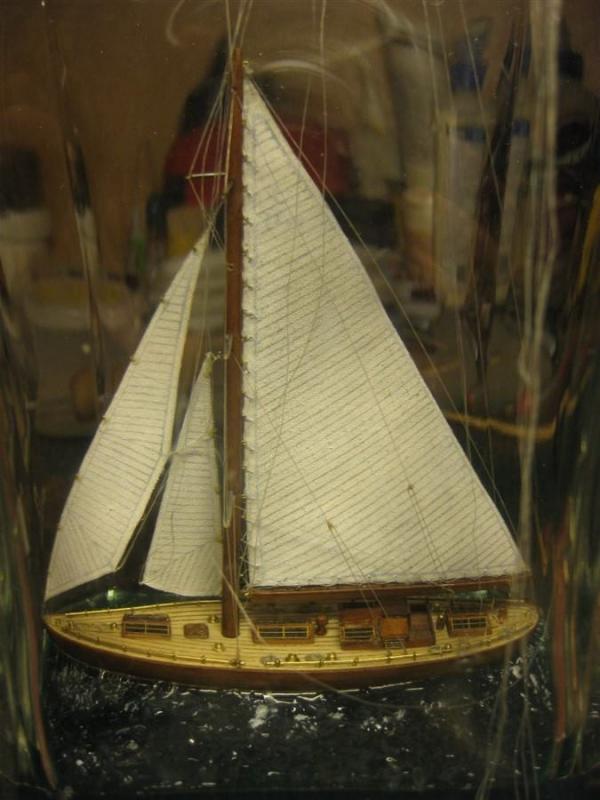
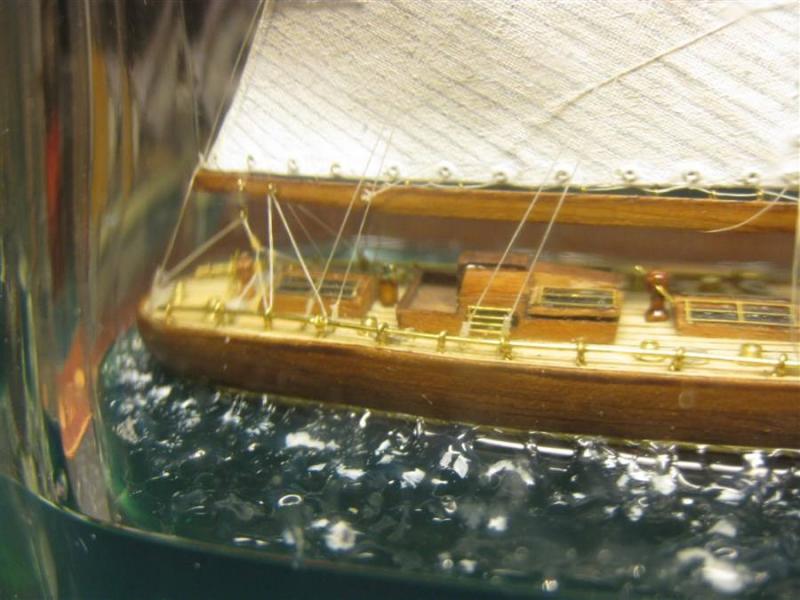
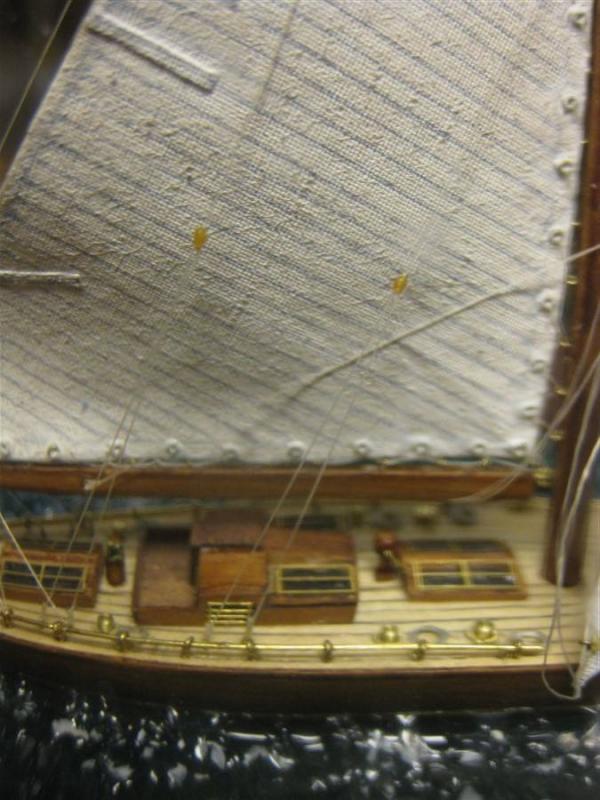
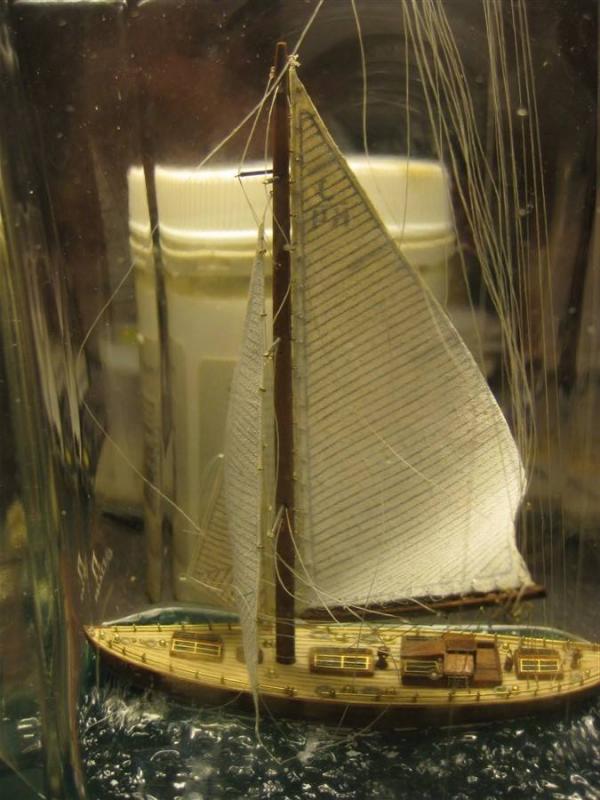
Well, I finally fixed and cut the last thread. I can relax and take a photo of the model with her spars and rigging through the bottle wall. Now, I still have time to clean the inside of the bottle, finalize the design of the cork, and other things associated with the blockage of the bottle.


-
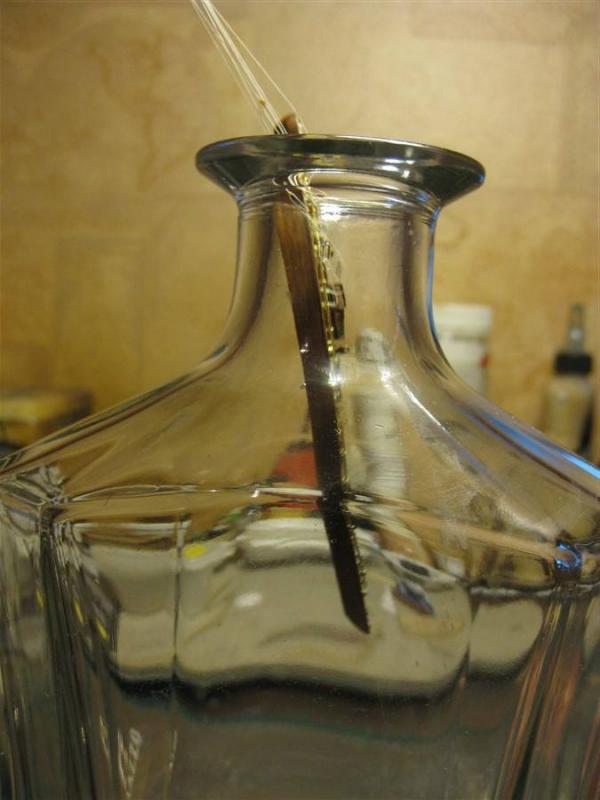
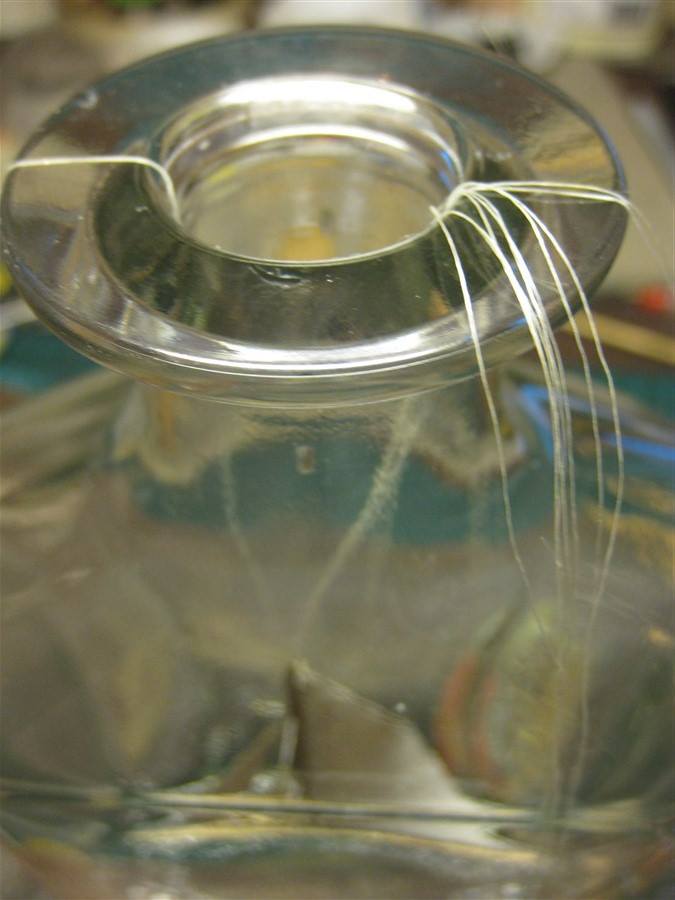
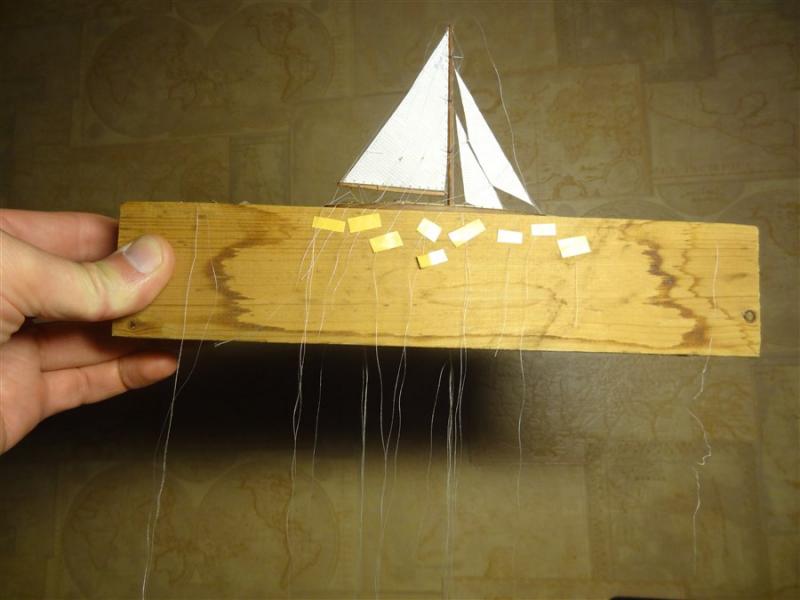
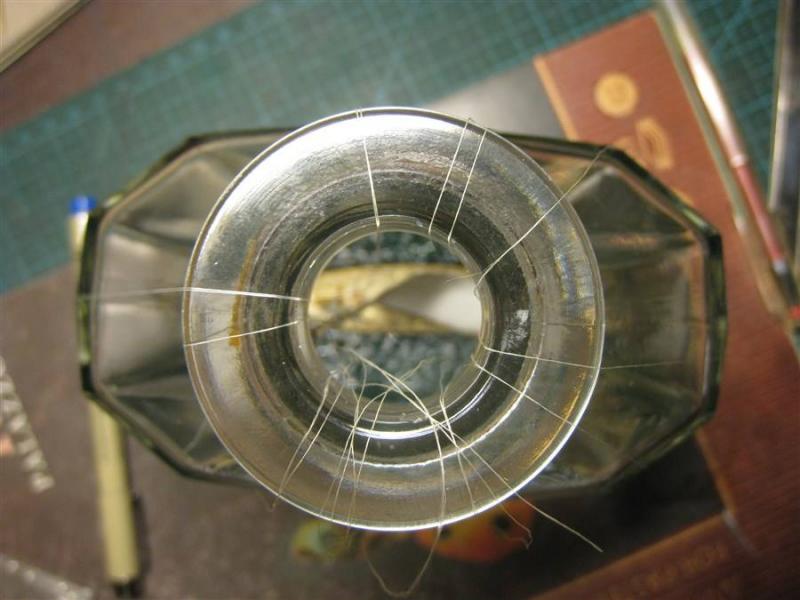
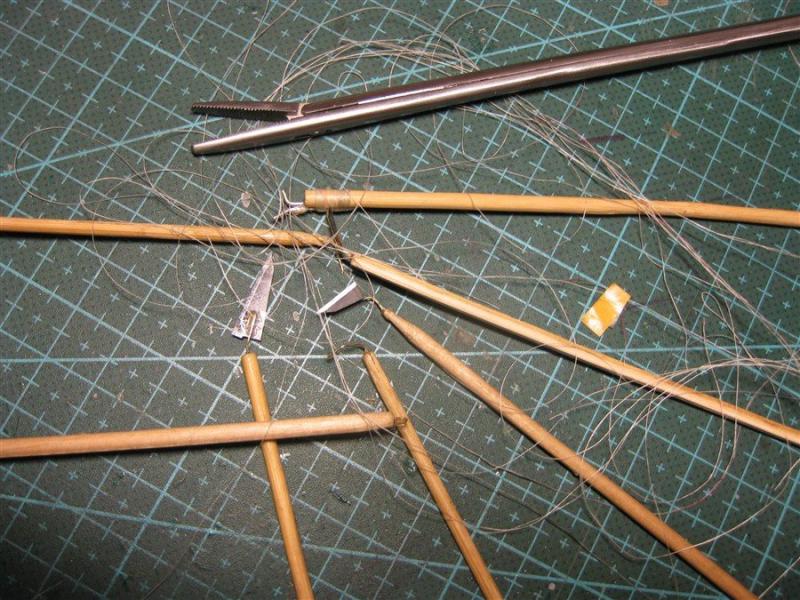
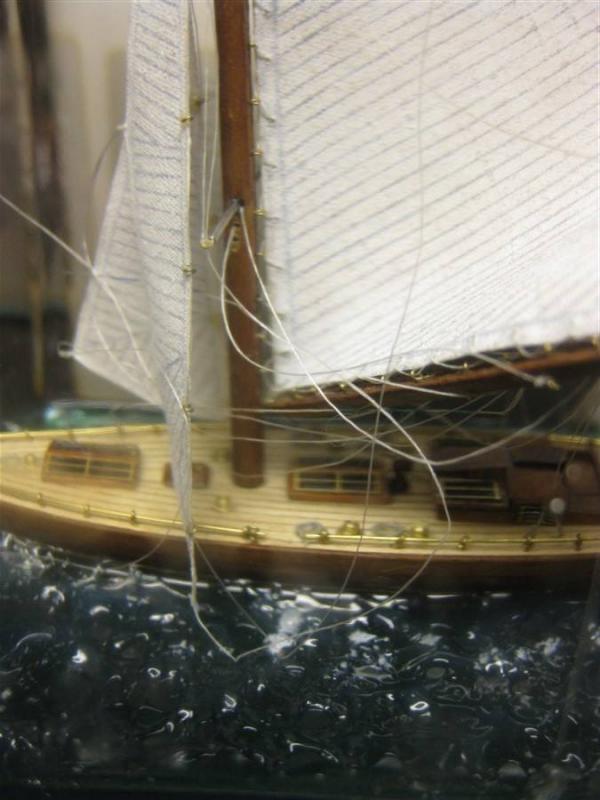
Next to me was necessary to sort out the threads, temporarily fasten the ends on the outside of the bottle with tape, and, slowly, begin their stretching, fixing, and cutting excess.


-
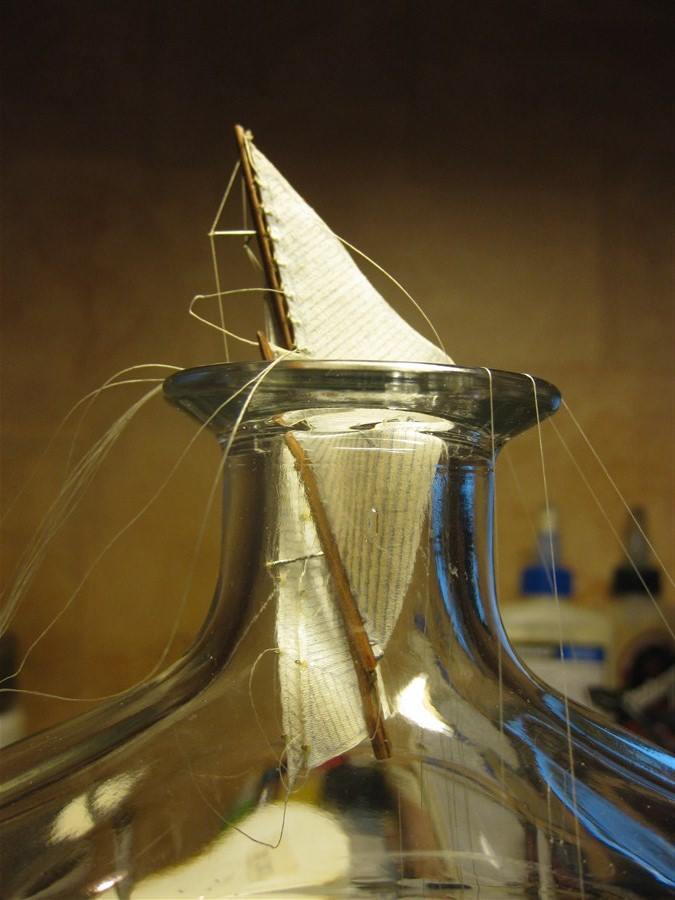
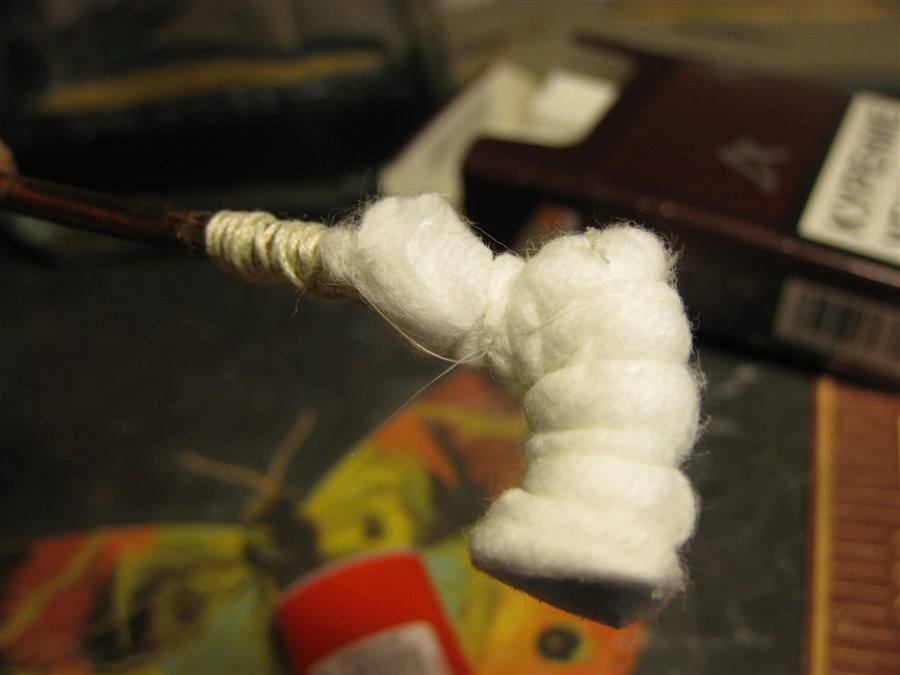
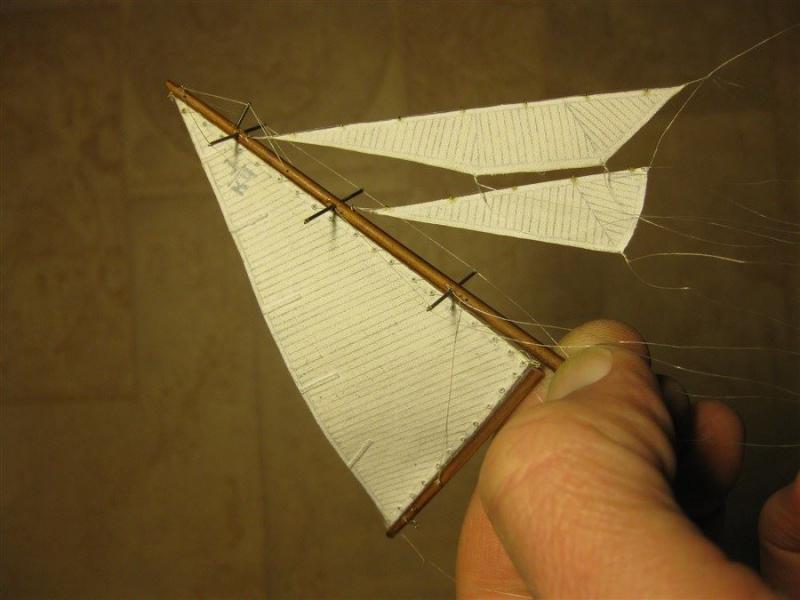
Well, that's ... I went to the most interesting and dreary part of the whole construction - installation of mast and tension of the rigging inside the bottle. The boom is made movable, so I picked the mast with sails in a compact package and put it all into the neck of the bottle. Then I put the mast in a hole in deck. As a result, I got a not fixed mast and a bunch of threads coming out of the throat of the bottle.


-
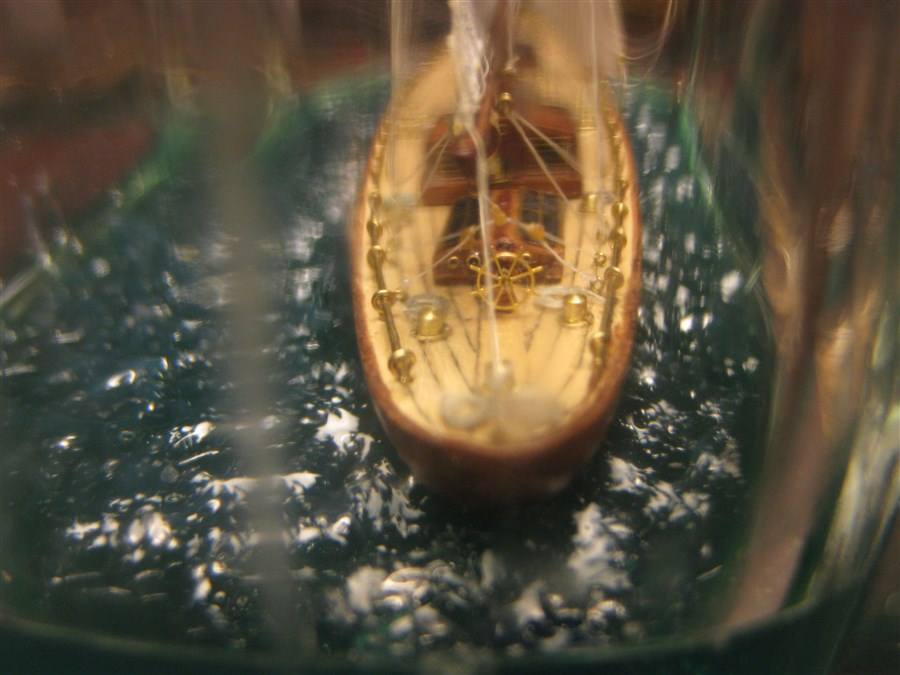
Now all are ready to place the above-water part of the hull in the bottle. I put it in a bottle. Then planted it on the studs, protruding from the lower part of the hull, put a little the glue in places connection of both parts and pressed. Then I unraveled part of the rigging, coming out of the throat of the bottle, and gave the thread ends on the outside of the bottle, so that they are not confused.