HOLIDAY DONATION DRIVE - SUPPORT MSW - DO YOUR PART TO KEEP THIS GREAT FORUM GOING! (Only 20 donations so far - C'mon guys!)
×


EKE
-
Posts
231 -
Joined
-
Last visited
Content Type
Profiles
Forums
Gallery
Events
Everything posted by EKE
-
 This is the product I just ordered. I'll let you know how it works. https://www.amazon.com/gp/product/B07JNWLTVY/ref=ppx_yo_dt_b_asin_title_o01_s00?ie=UTF8&psc=1
 -
Thanks so much for the kind words, Mike. The clear nail polish is nothing special, really. It’s a clear nail top coat. Lots of companies make it. You want a lacquer-based polish, not the acrylic stuff. The lacquer based polish dries really fast and sets up really firm. The OPI polish I’ve been using dries with a slightly glossy finish on rope and thread, so if it’s applied too heavily, it looks too shiny in my opinion. I ordered some matte-finish lacquer-based clear nail top coat (whoa, that’s a mouthful!), but I haven’t tried it yet. It may prove to be the “secret sauce”. I’ll let you know. I’ve always been used to setting knots with CA, but I’m really against that now. The thin CA tends to rapidly wick into anything porous, like cord, thread, rope, fabric. It’s really hard to control. That’s why I think the clear nail polish works so well. It’s thick, it goes only where you put it, and it dries really fast.
-
...at least for a little while. Yea! Enjoy it while it lasts.
-
James- Just created a gallery for Fidelity. Thanks for the prod, mate.
- 222 replies
-
- 5
-

-
- First Build
- Lady Isabella
- (and 2 more)
-
Thanks for all the kind words, my friends. Seriously, I could not have finished this as successfully without all of your critique and support. I’m grateful! James...you ask what’s next? Well, a bit of a break from ship modeling, as I have now been fully vaccinated, and I’ll be wanting to reconnect with some full-size sailboat racing, which is now required for my sanity. And also radio-controlled sailboat racing - I have to do a lot of sailing to collect enough points to qualify for the US National Championships in August in San Diego, and because of COVID, I’m way behind. But ship modeling has hooked me, for sure. I have two kits on the shelf right now... a Vanguard Flirt, and a Dapper Tom from Model Shipways. So after a short hiatus, I’ll be starting in on one of those.
- 222 replies
-
- 4
-
-
- First Build
- Lady Isabella
- (and 2 more)
-
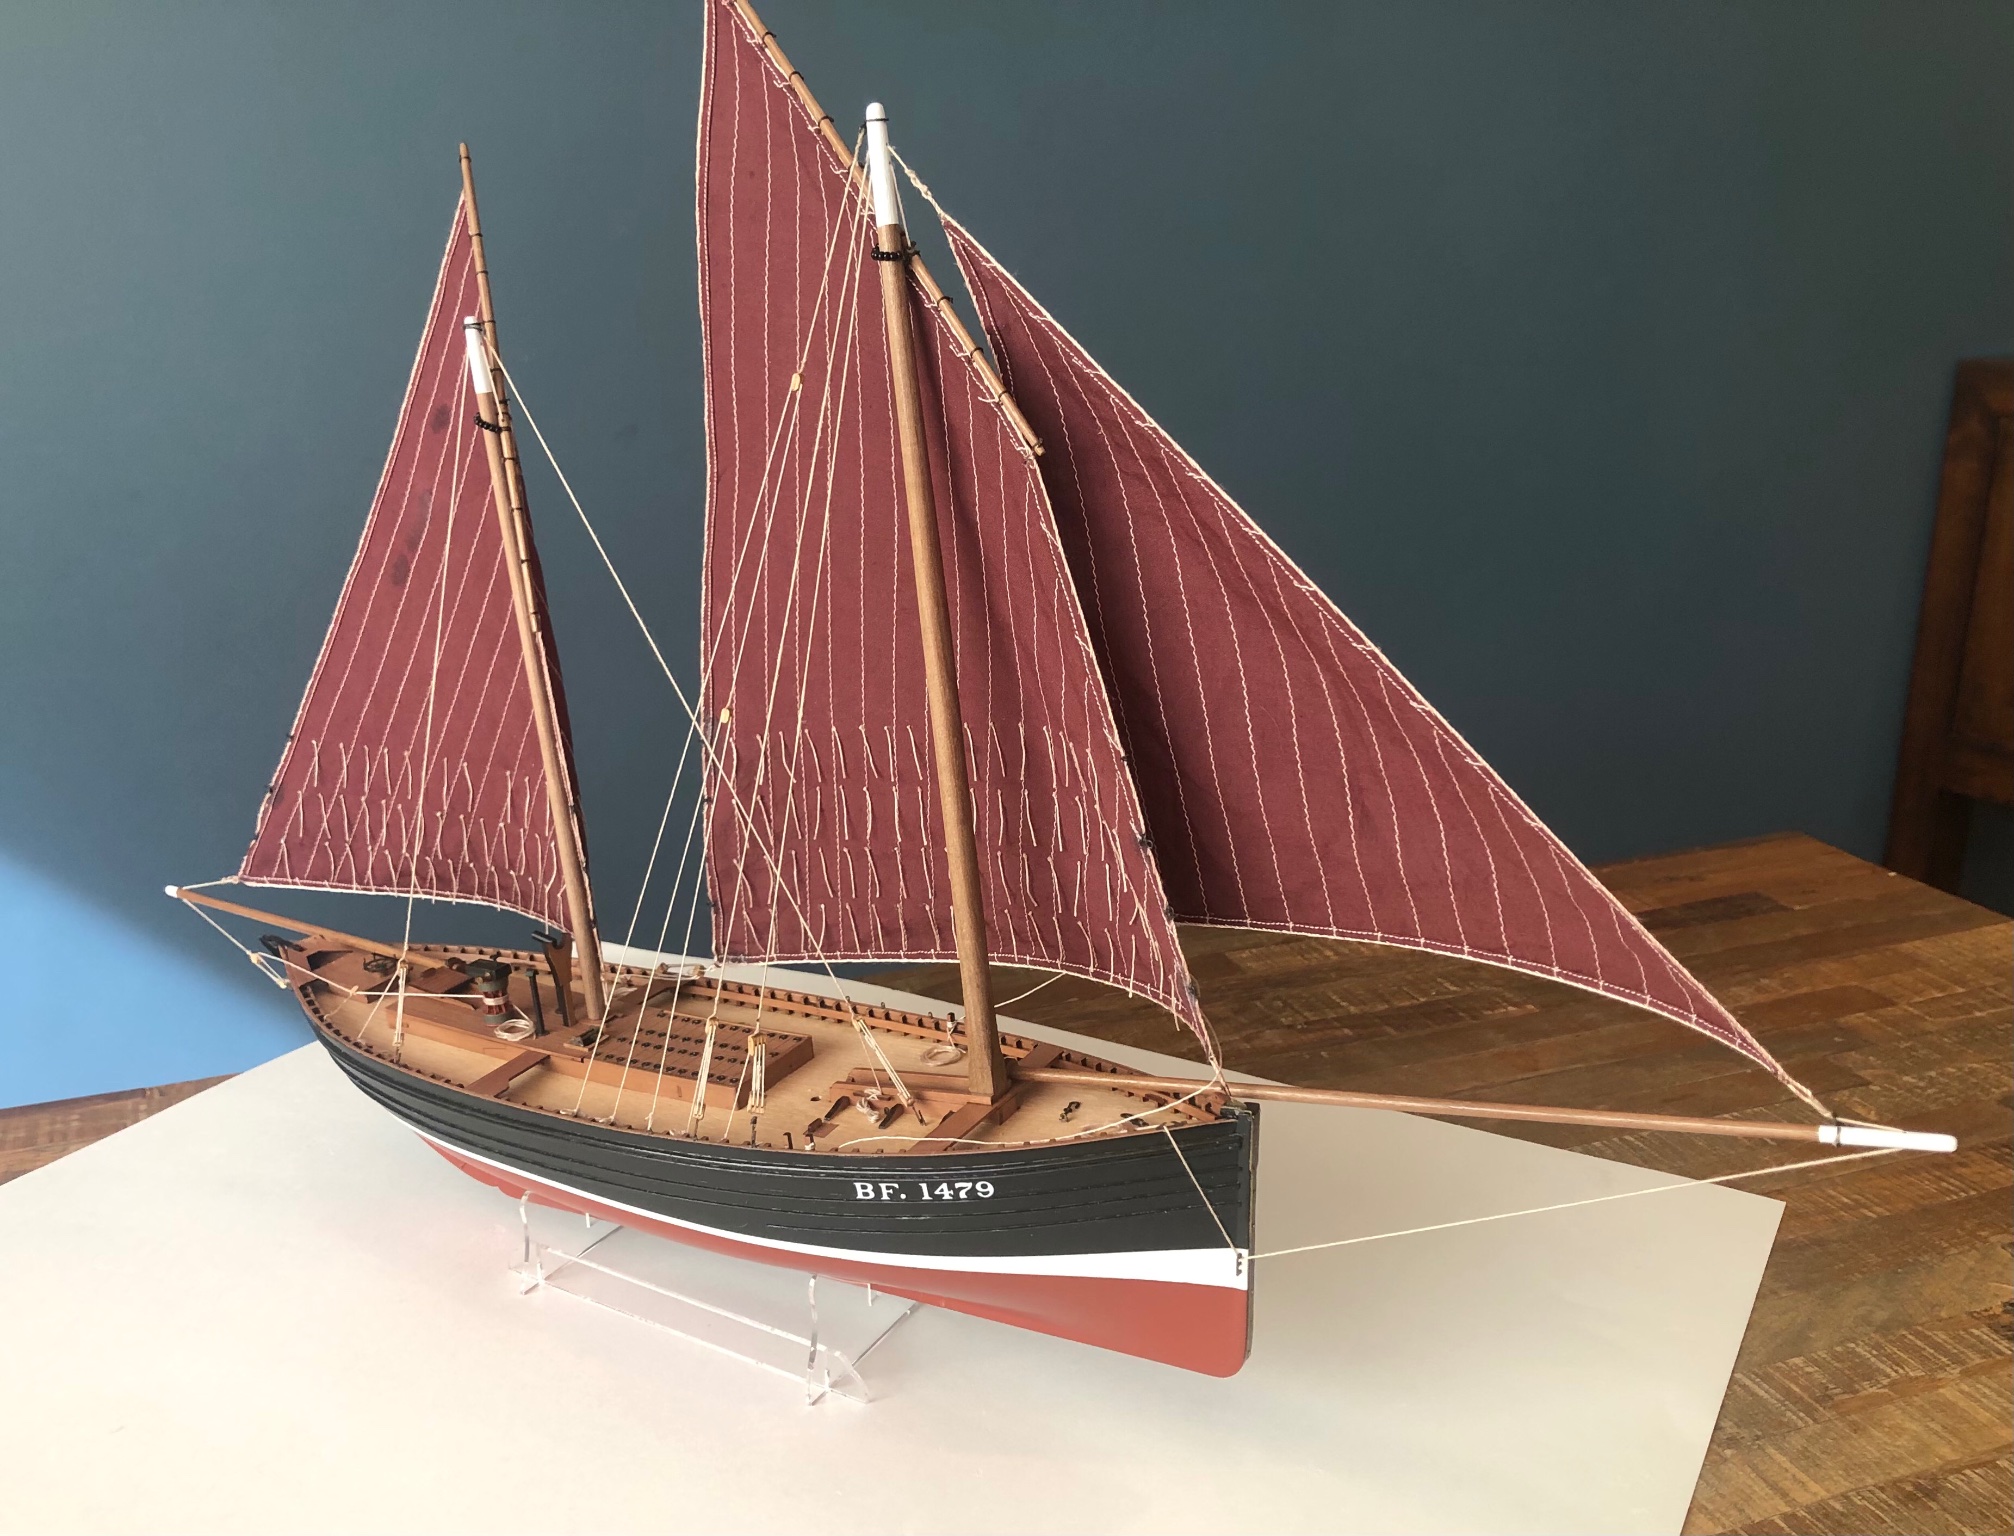
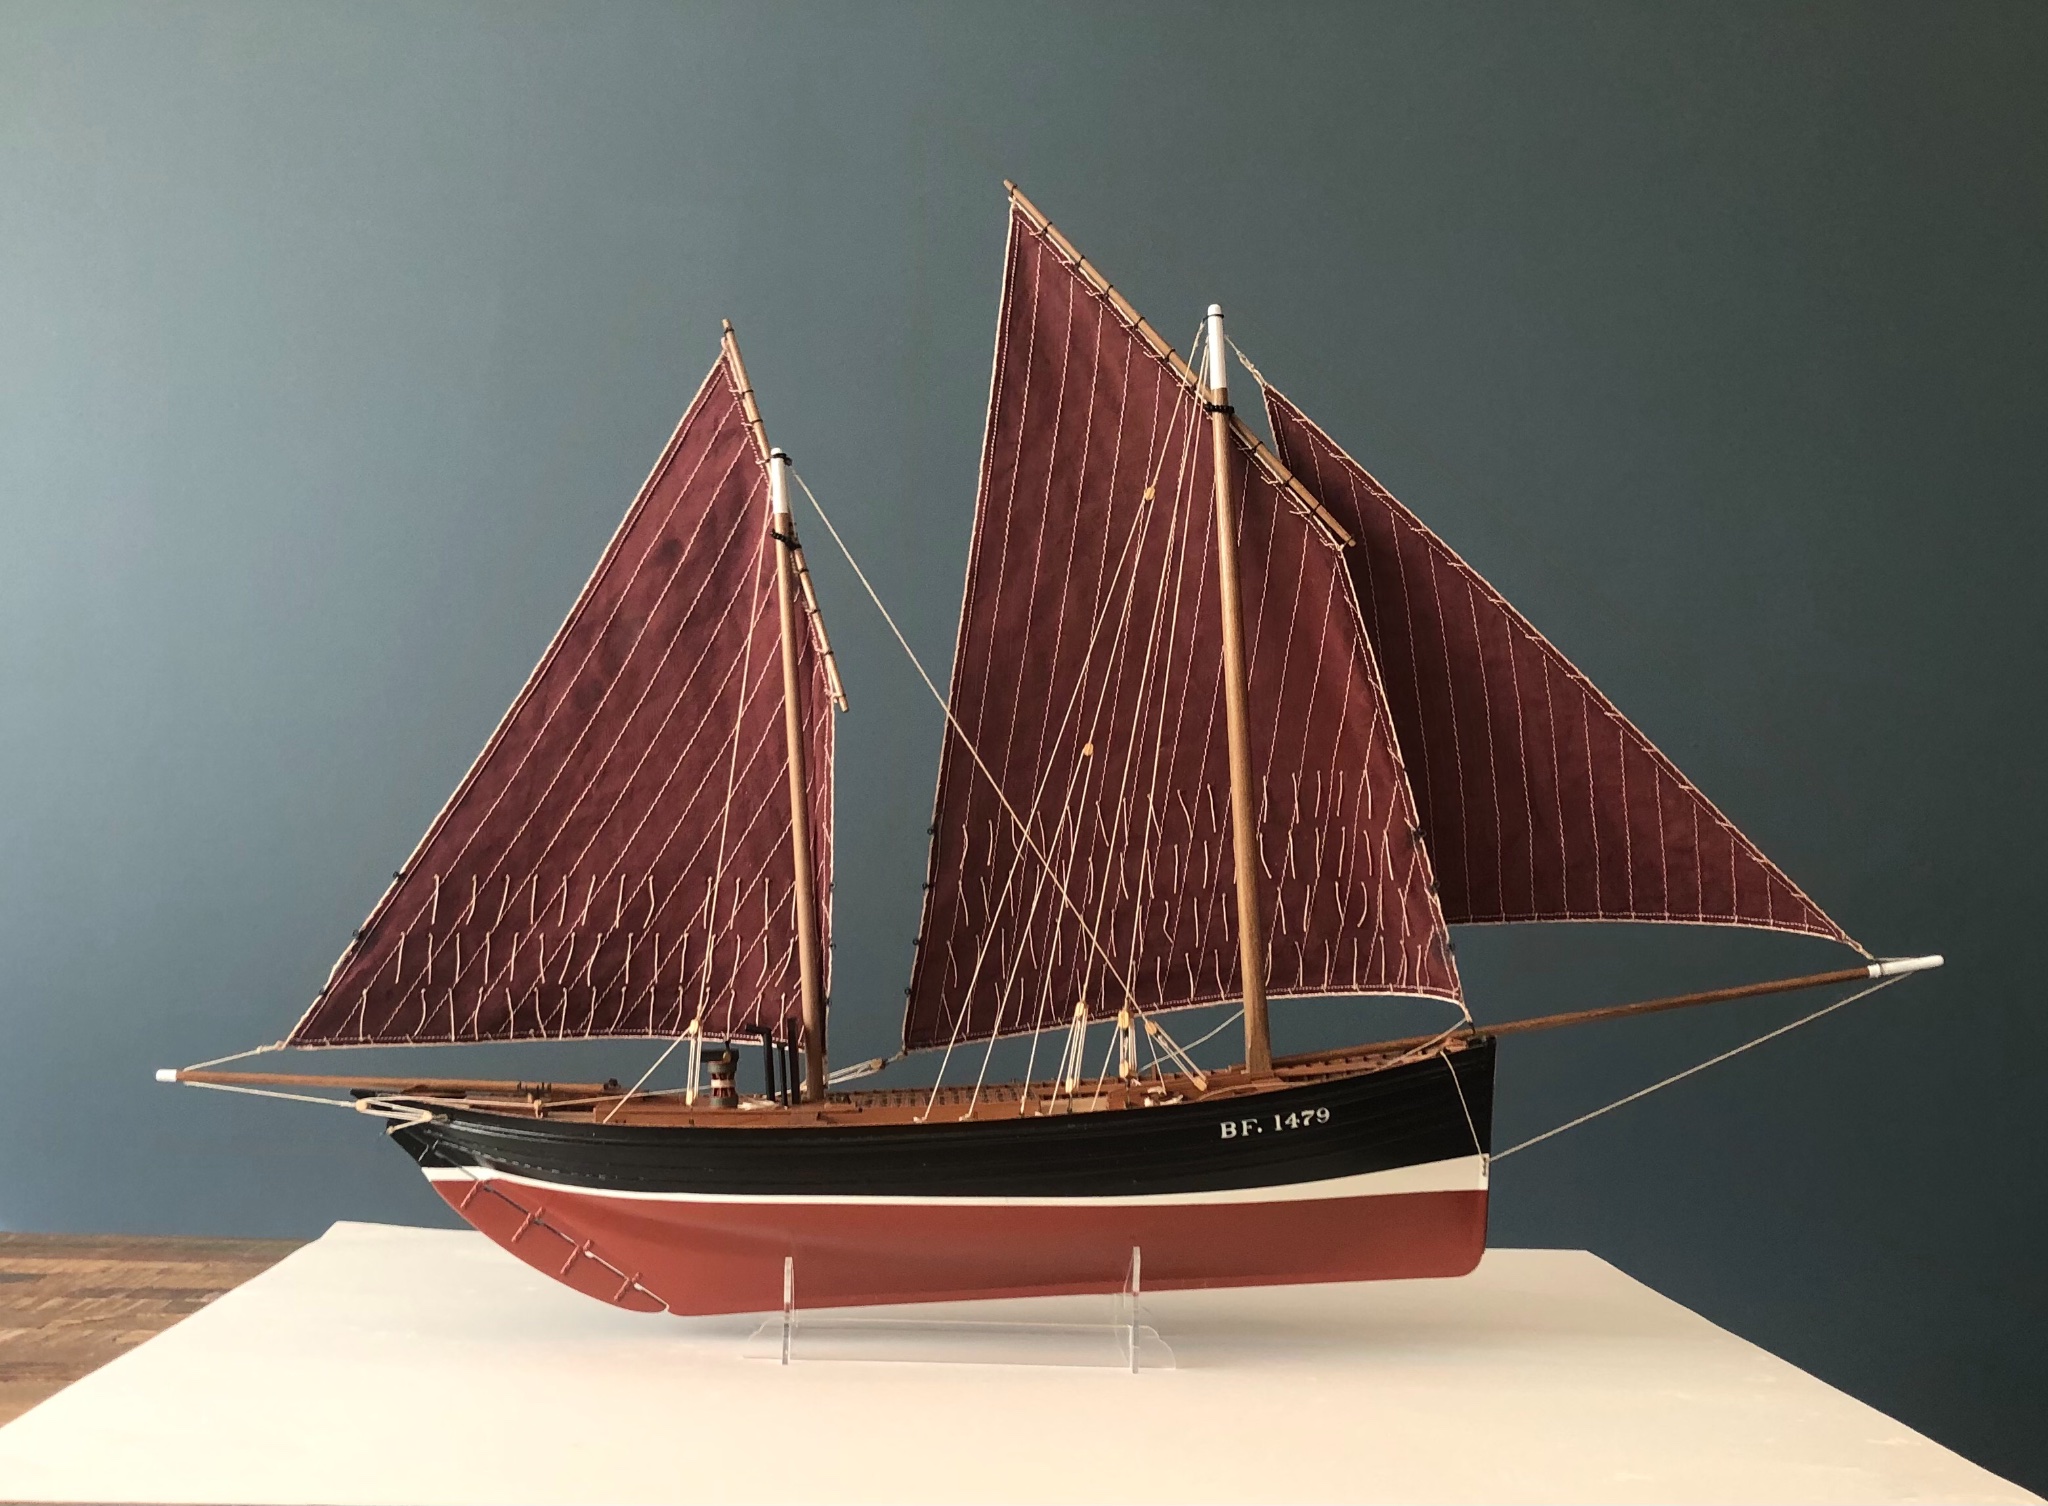
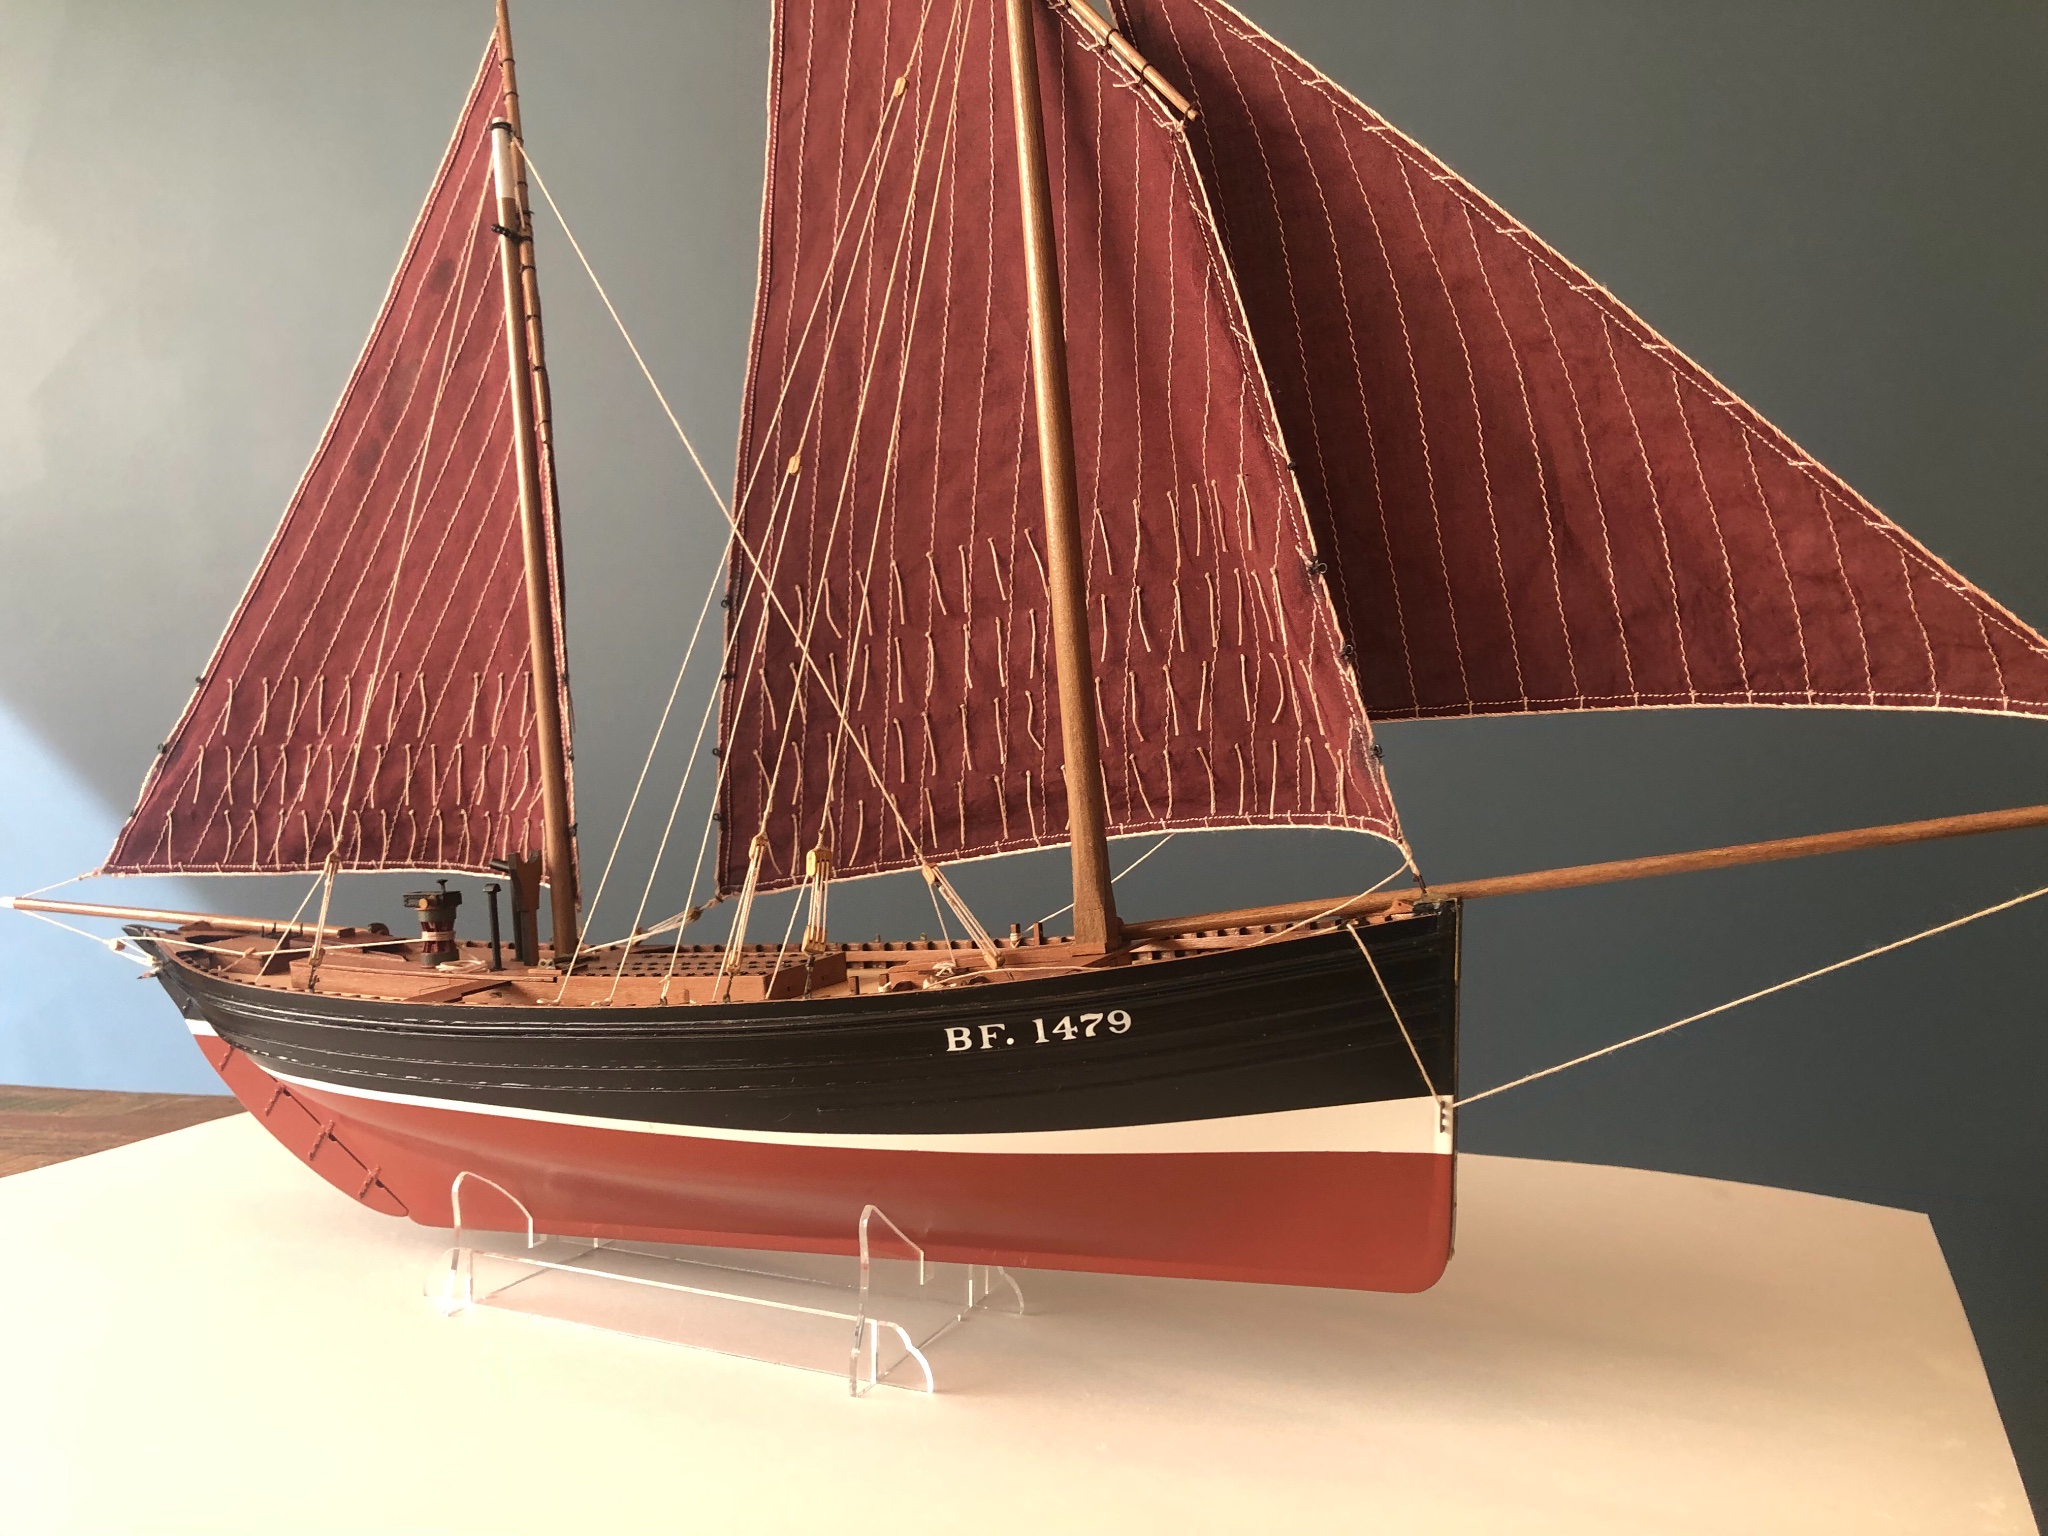
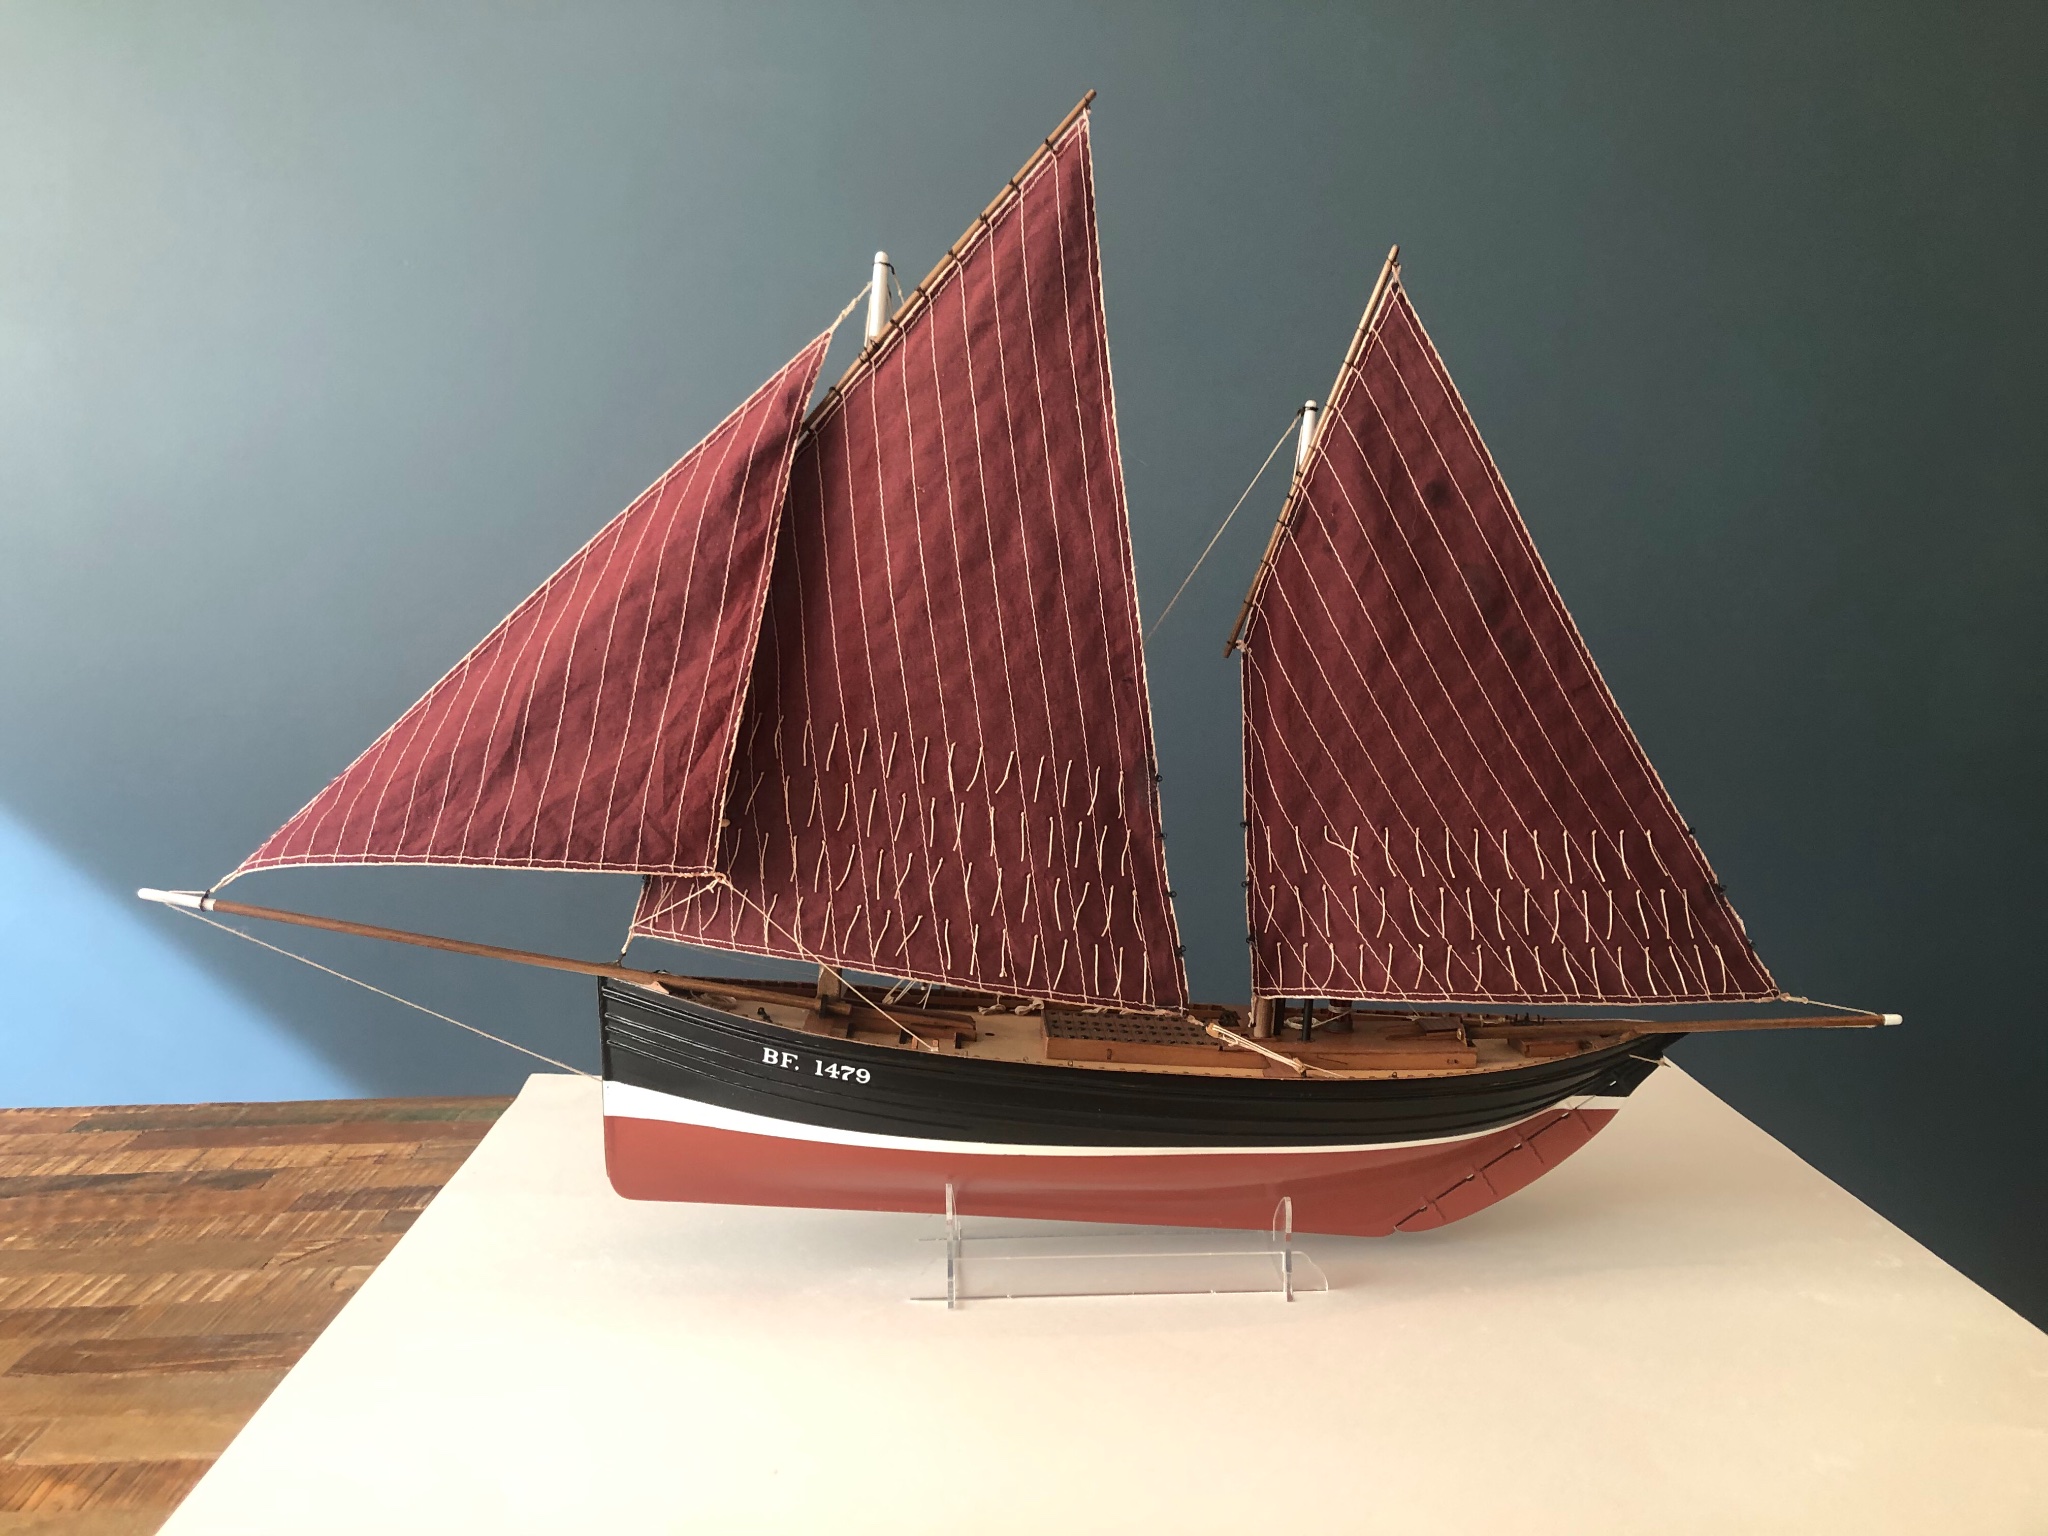
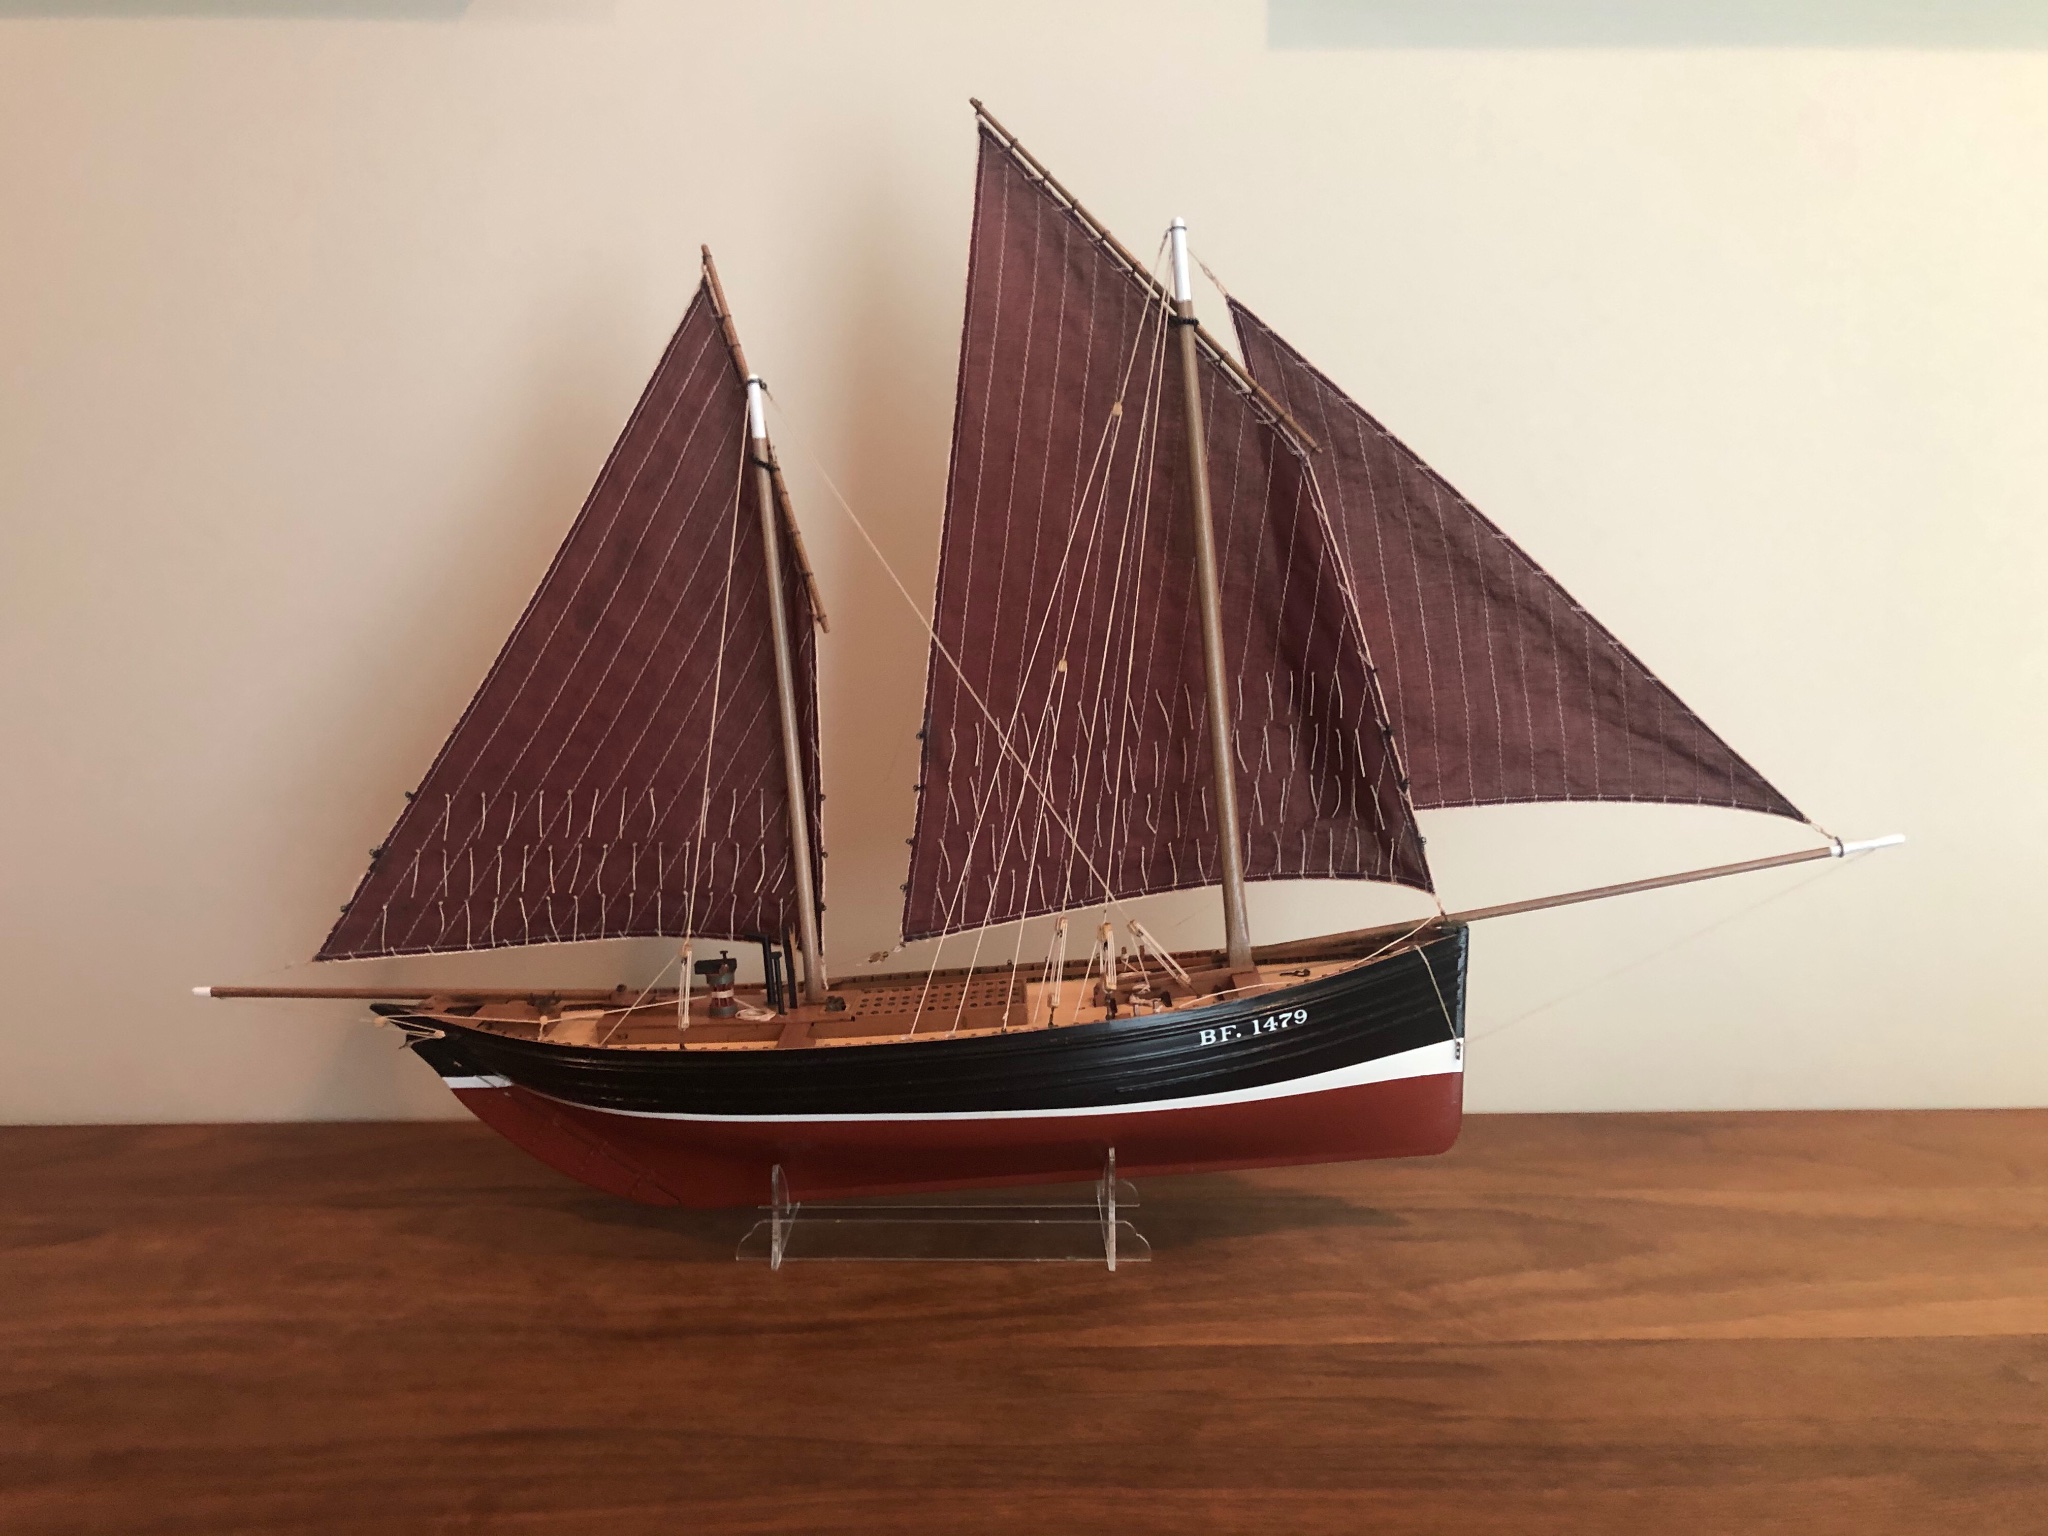
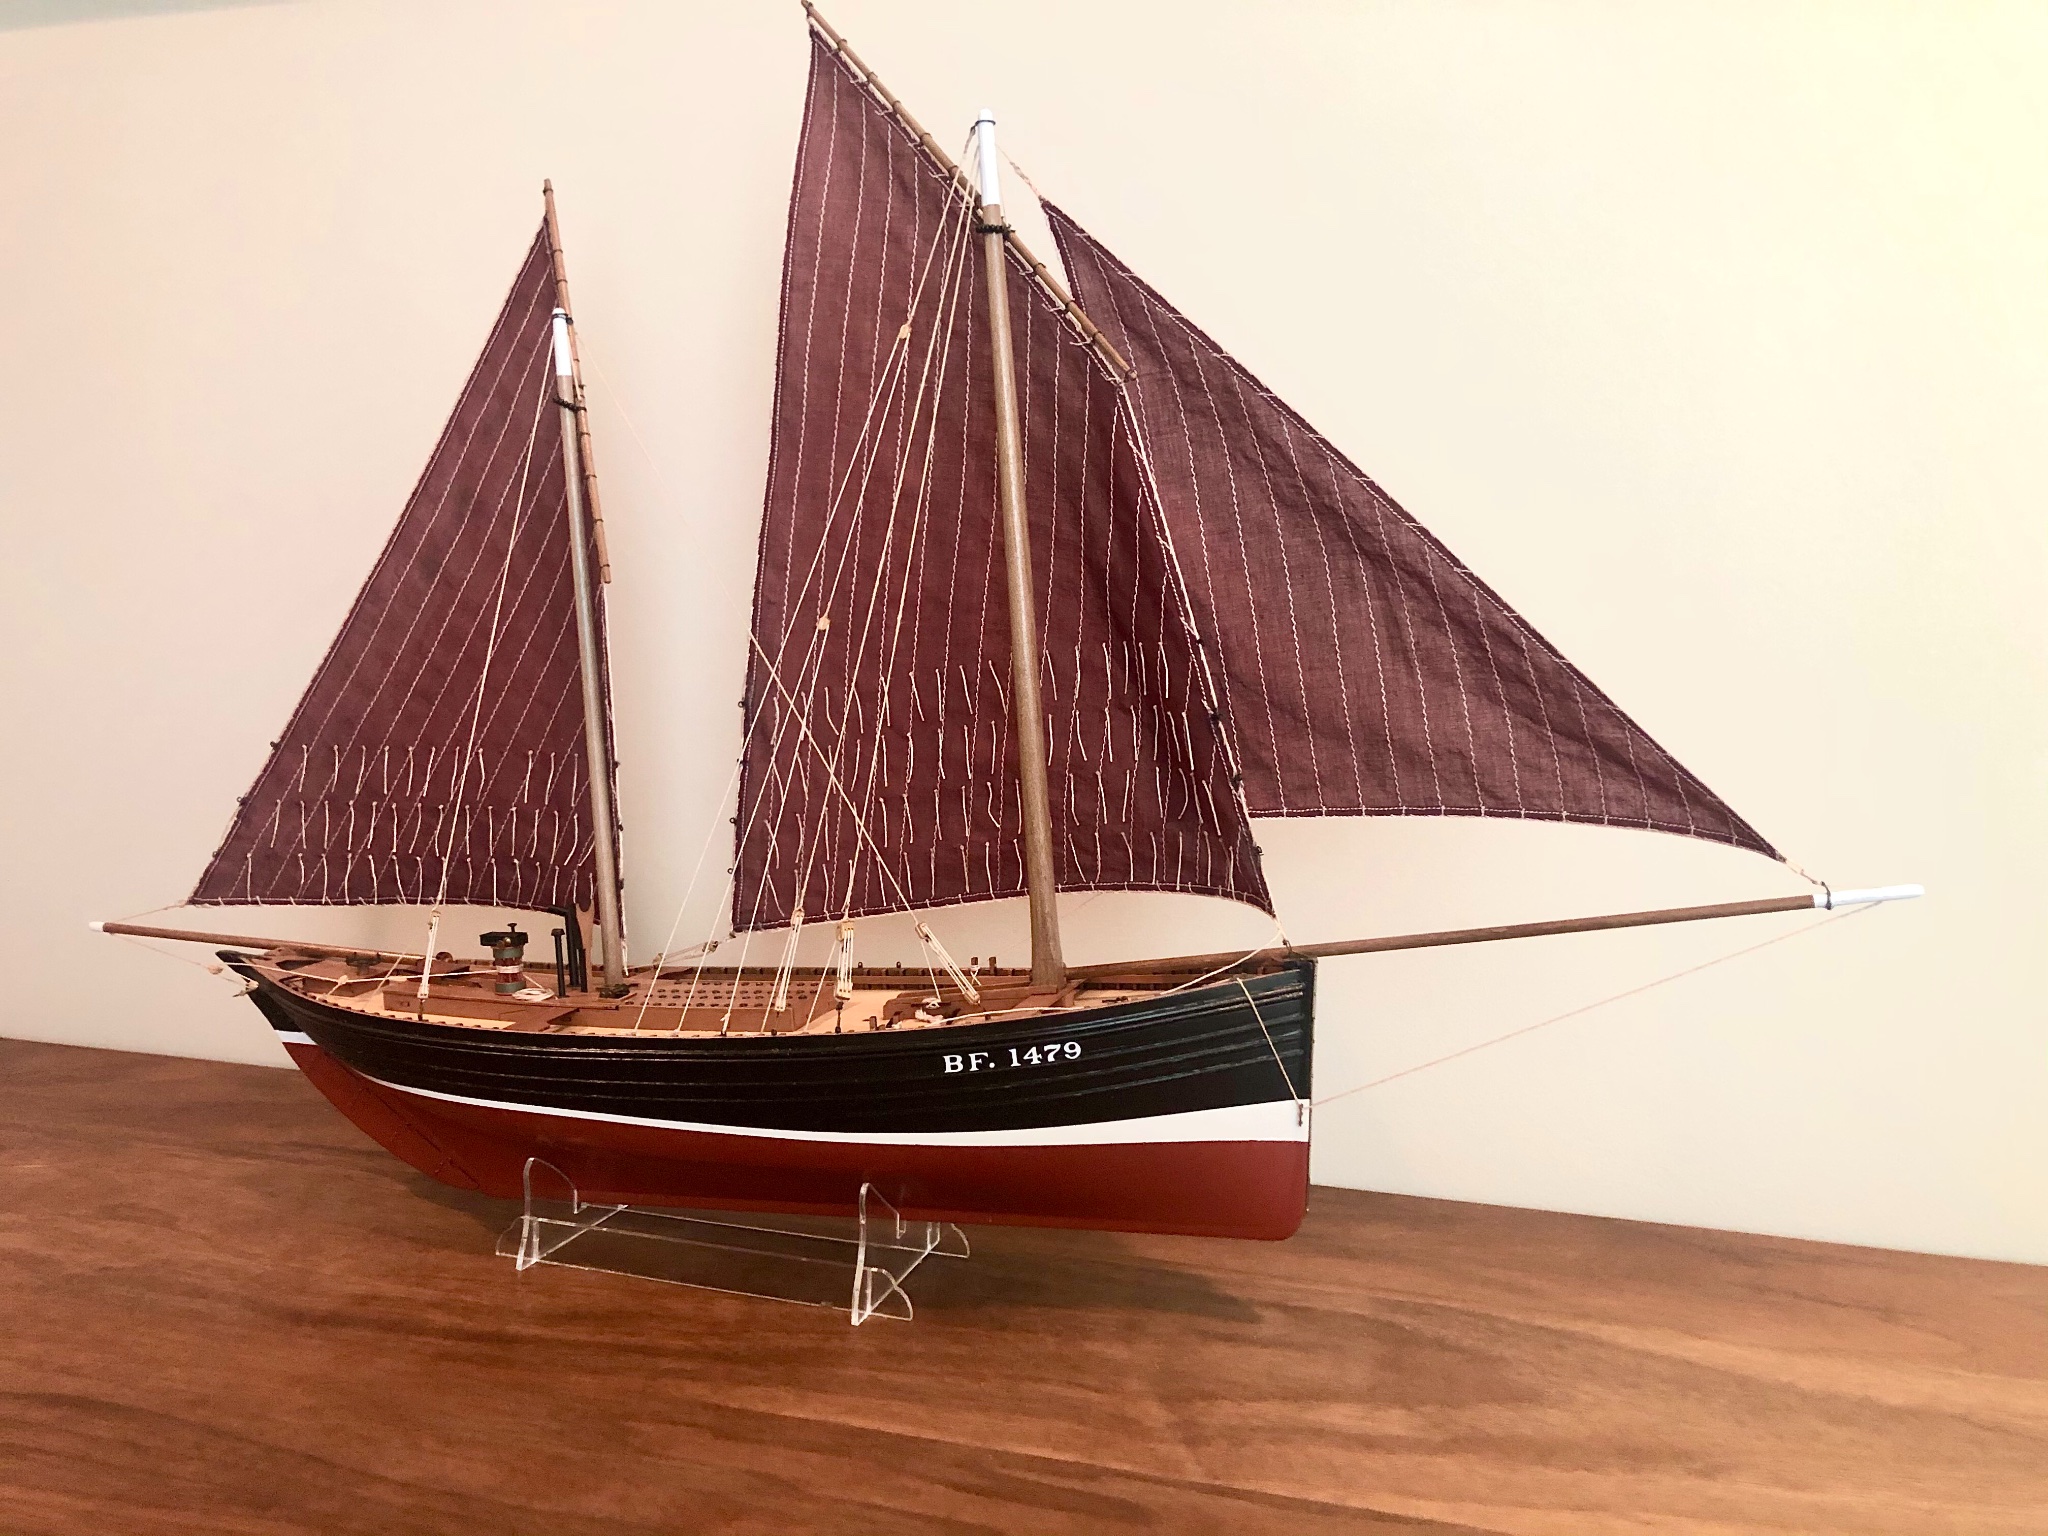
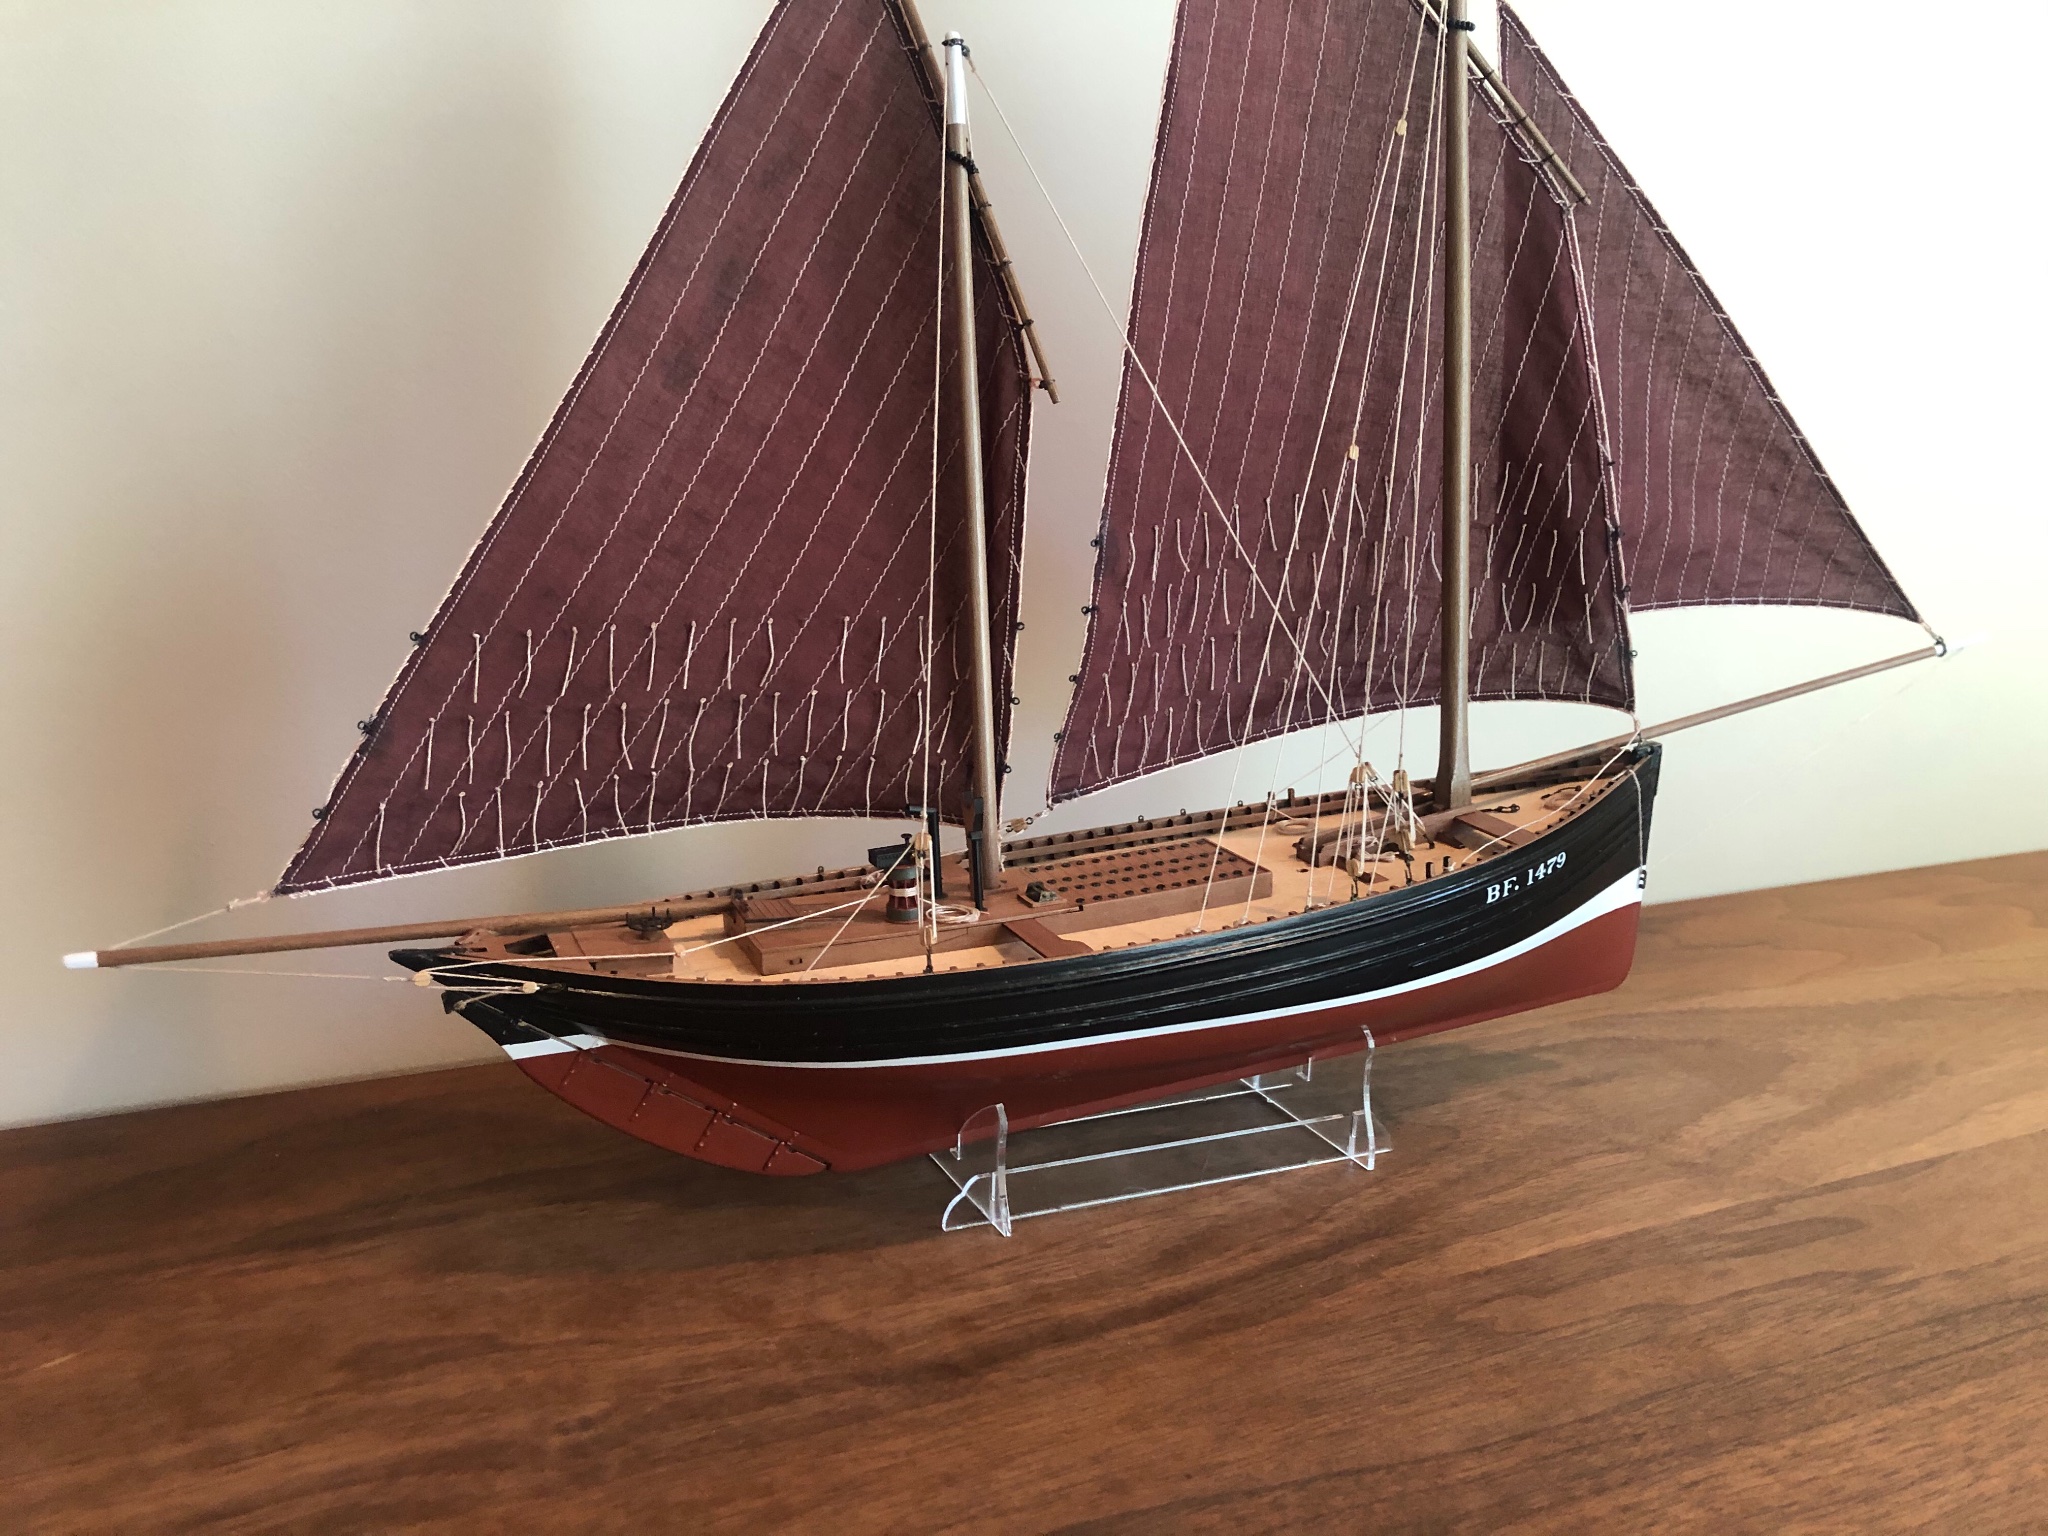
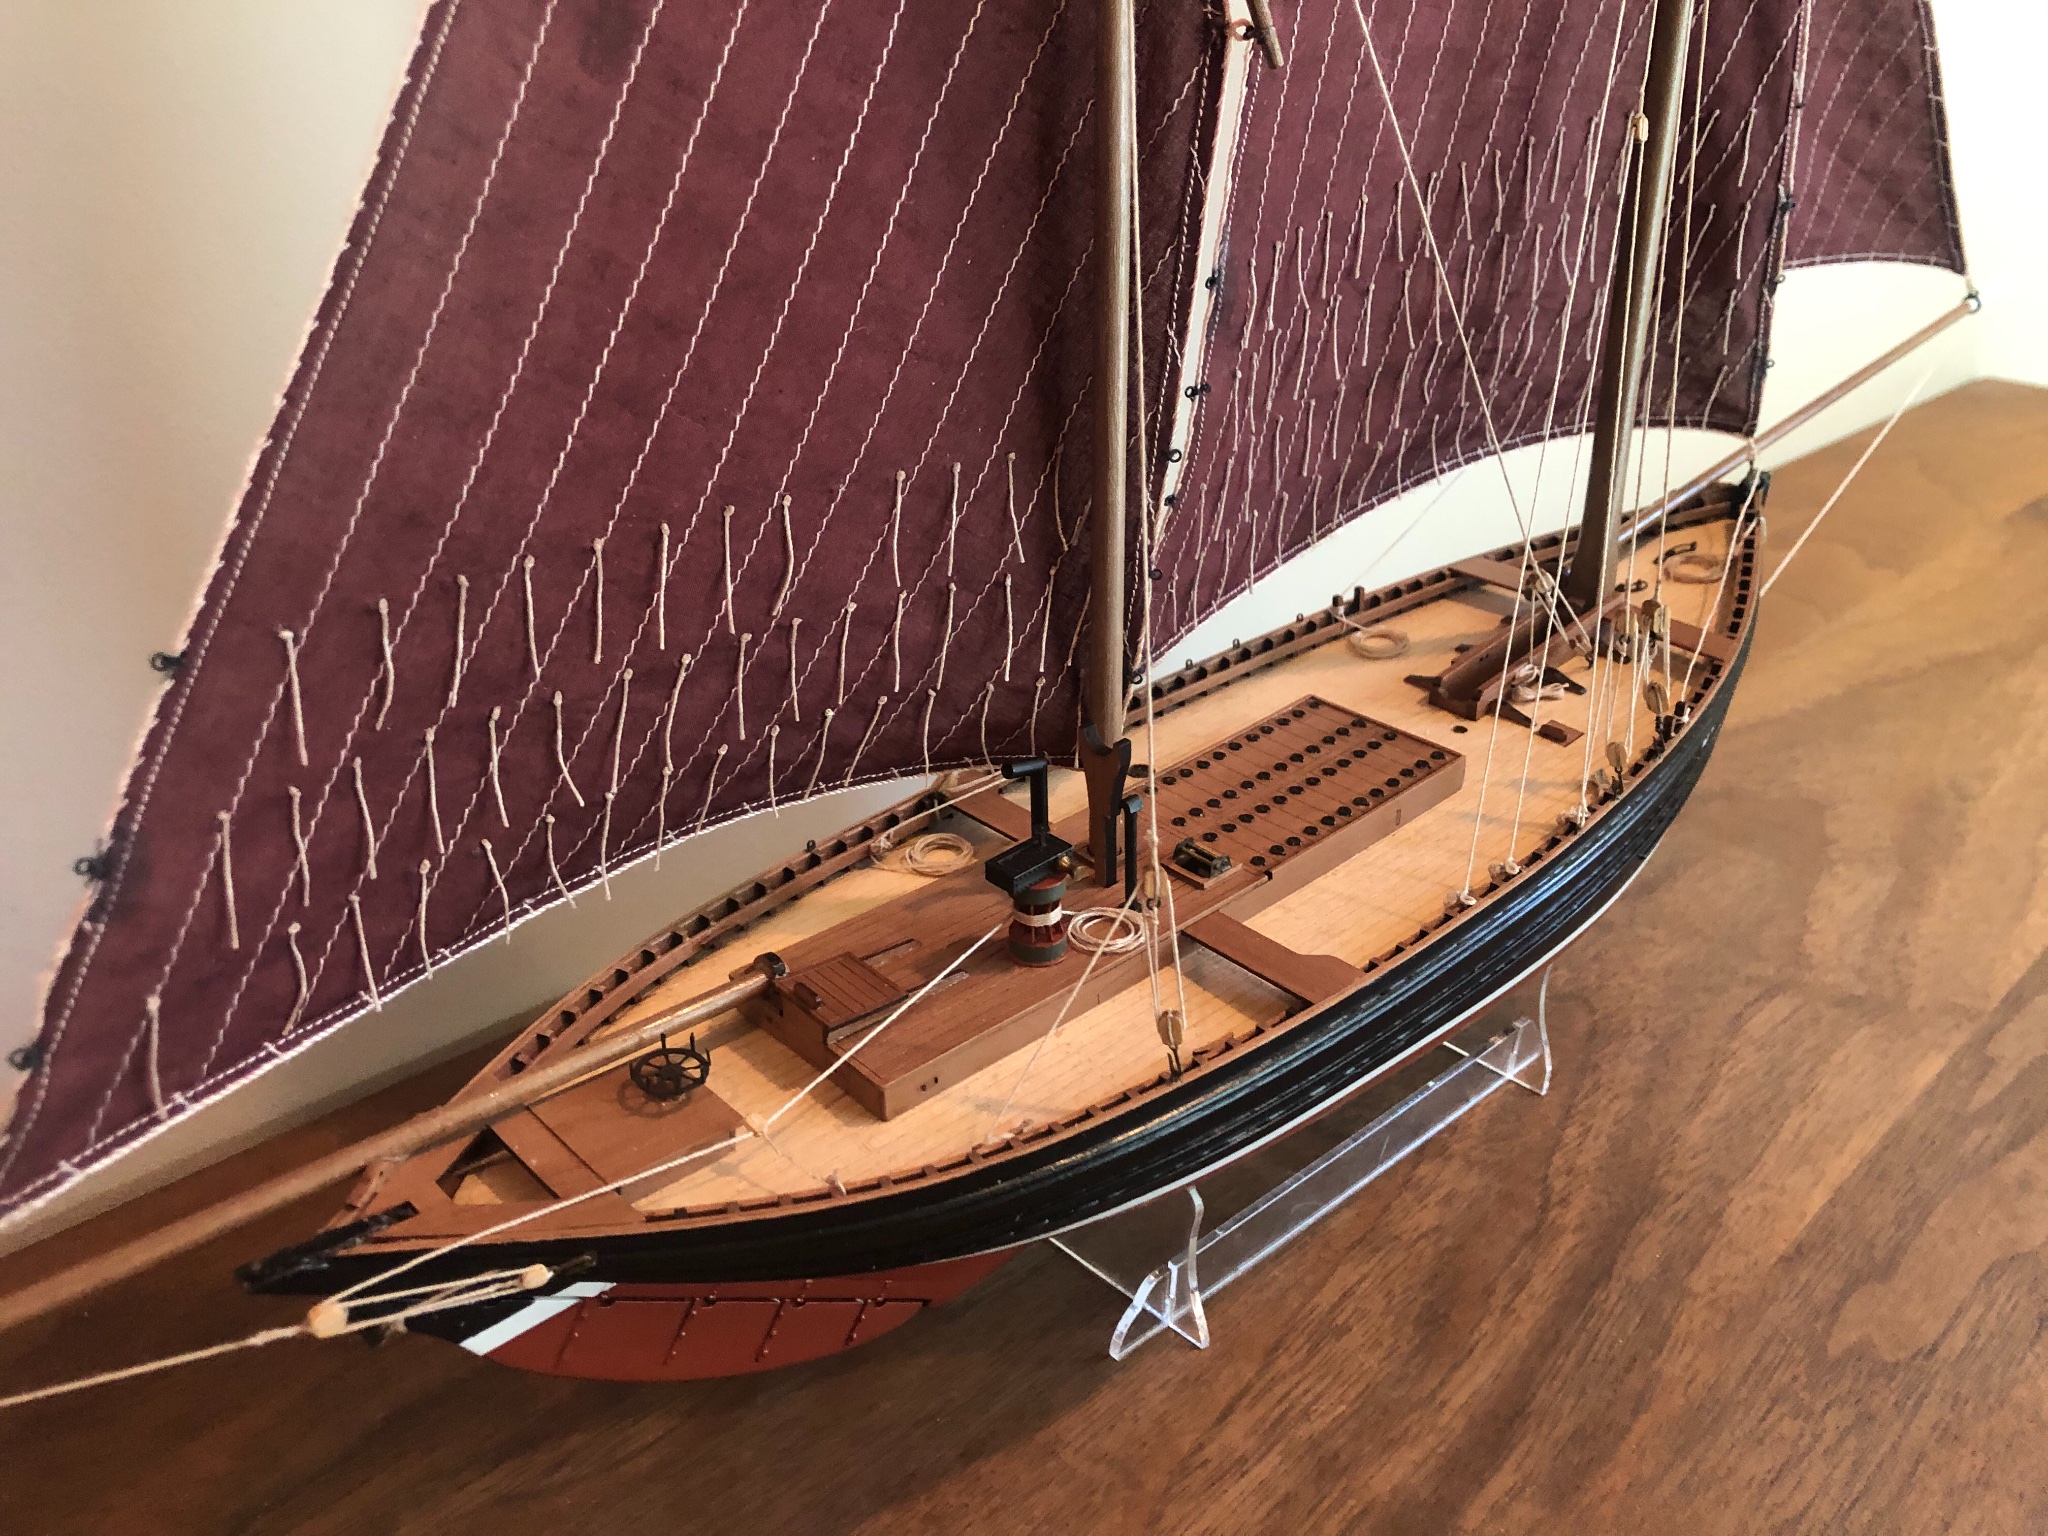
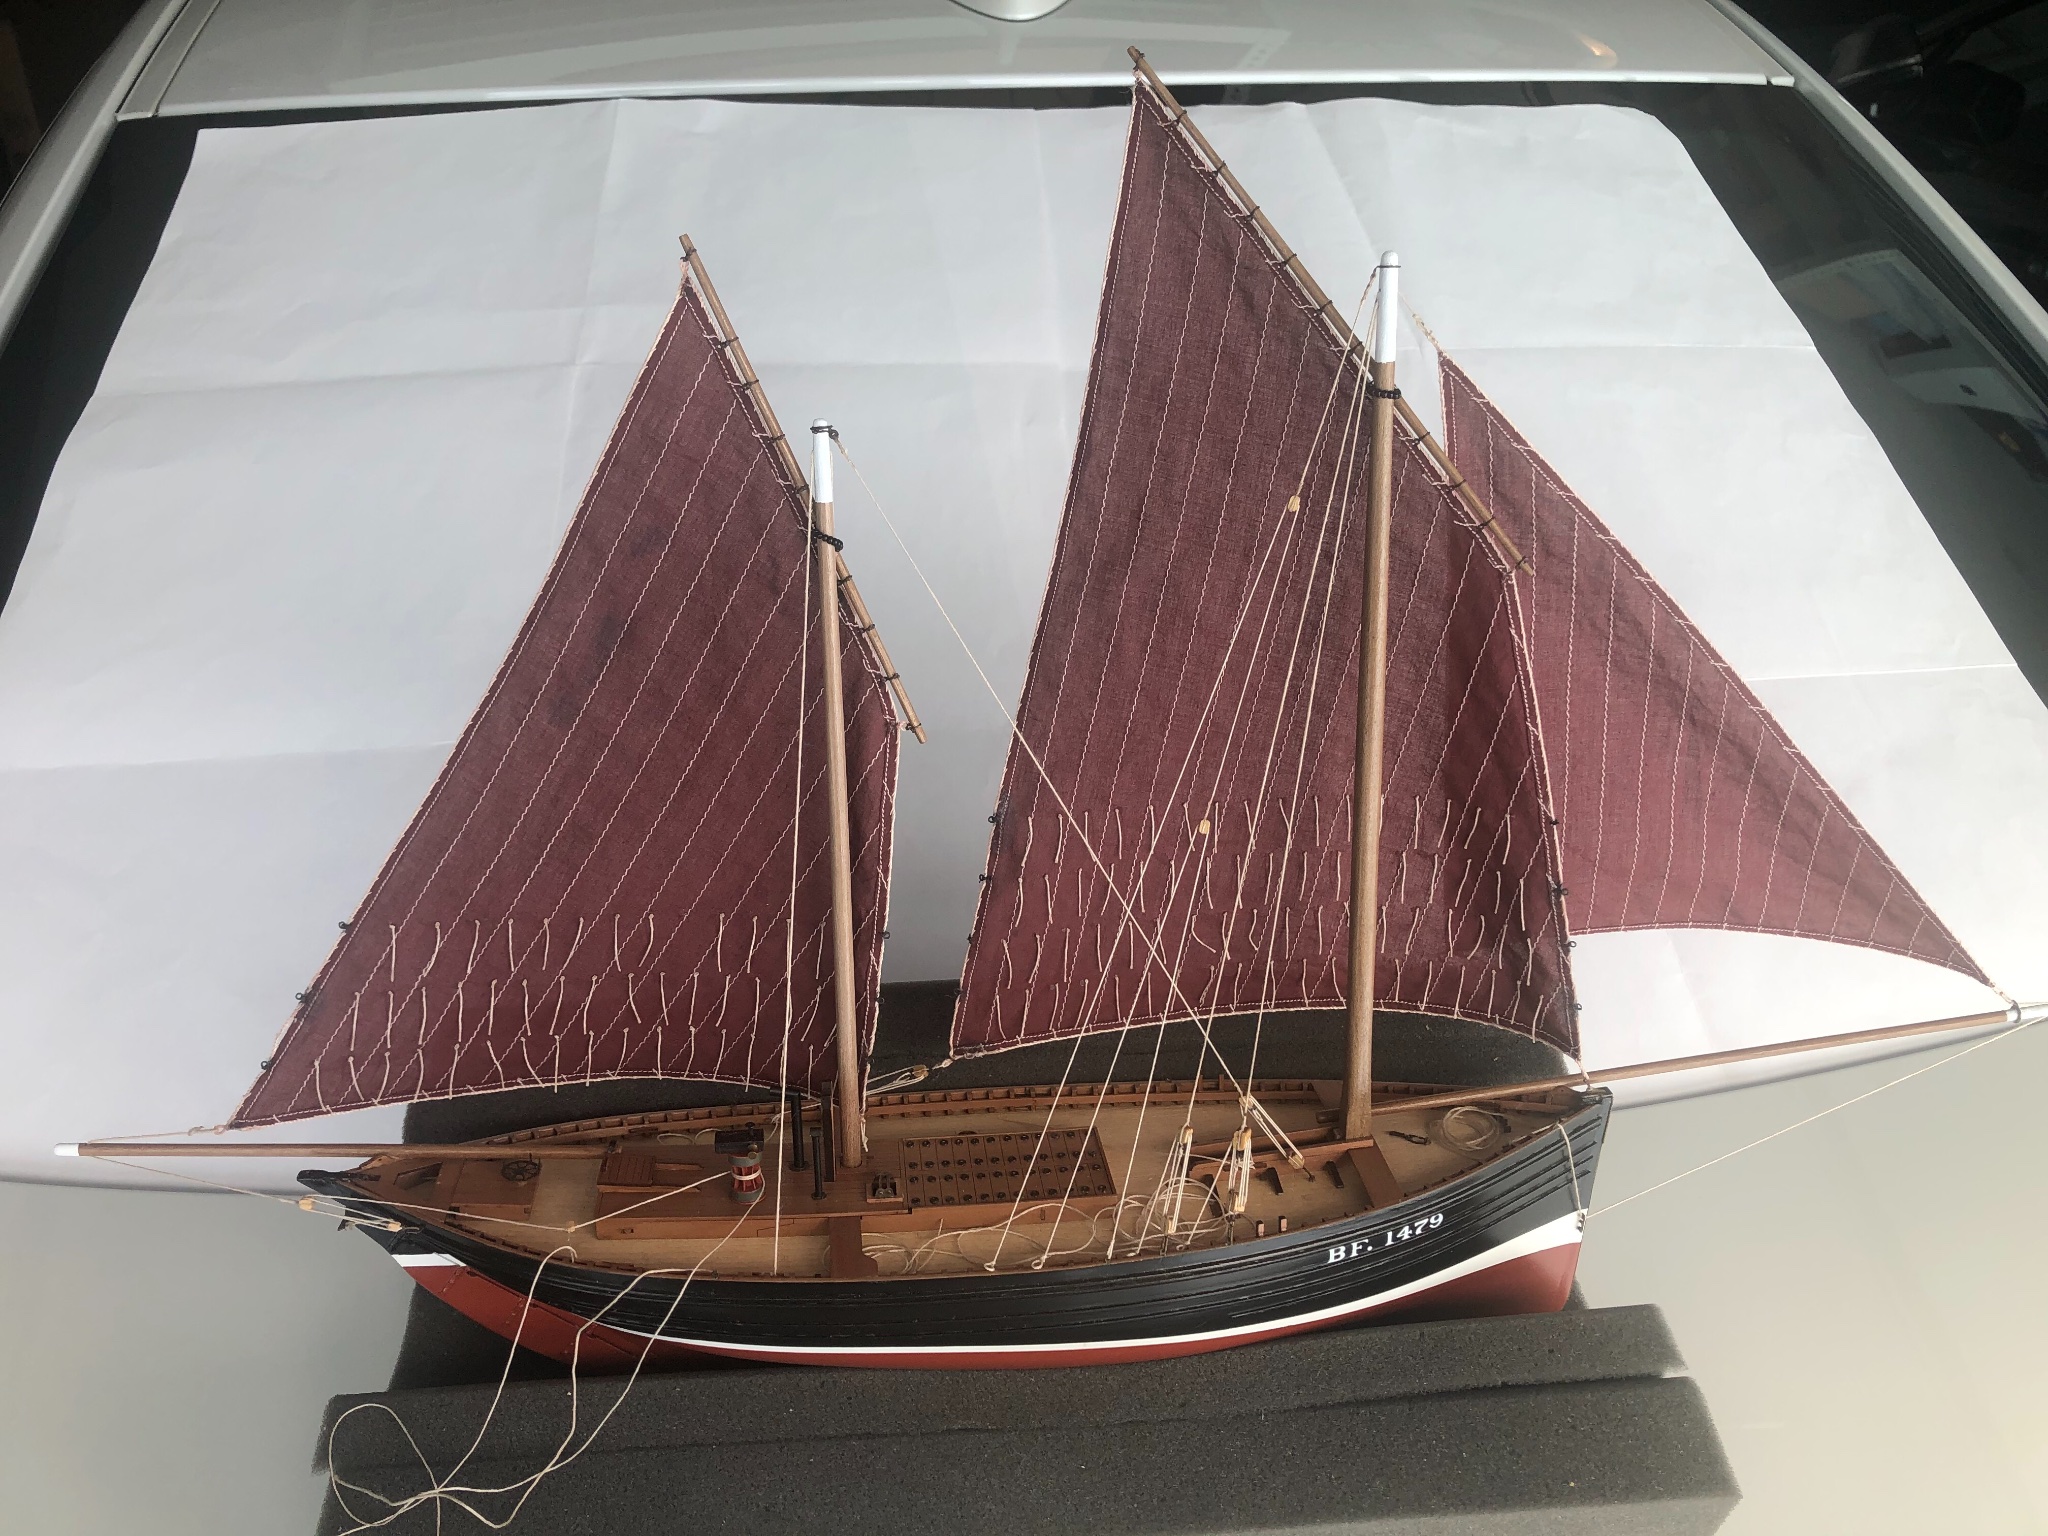
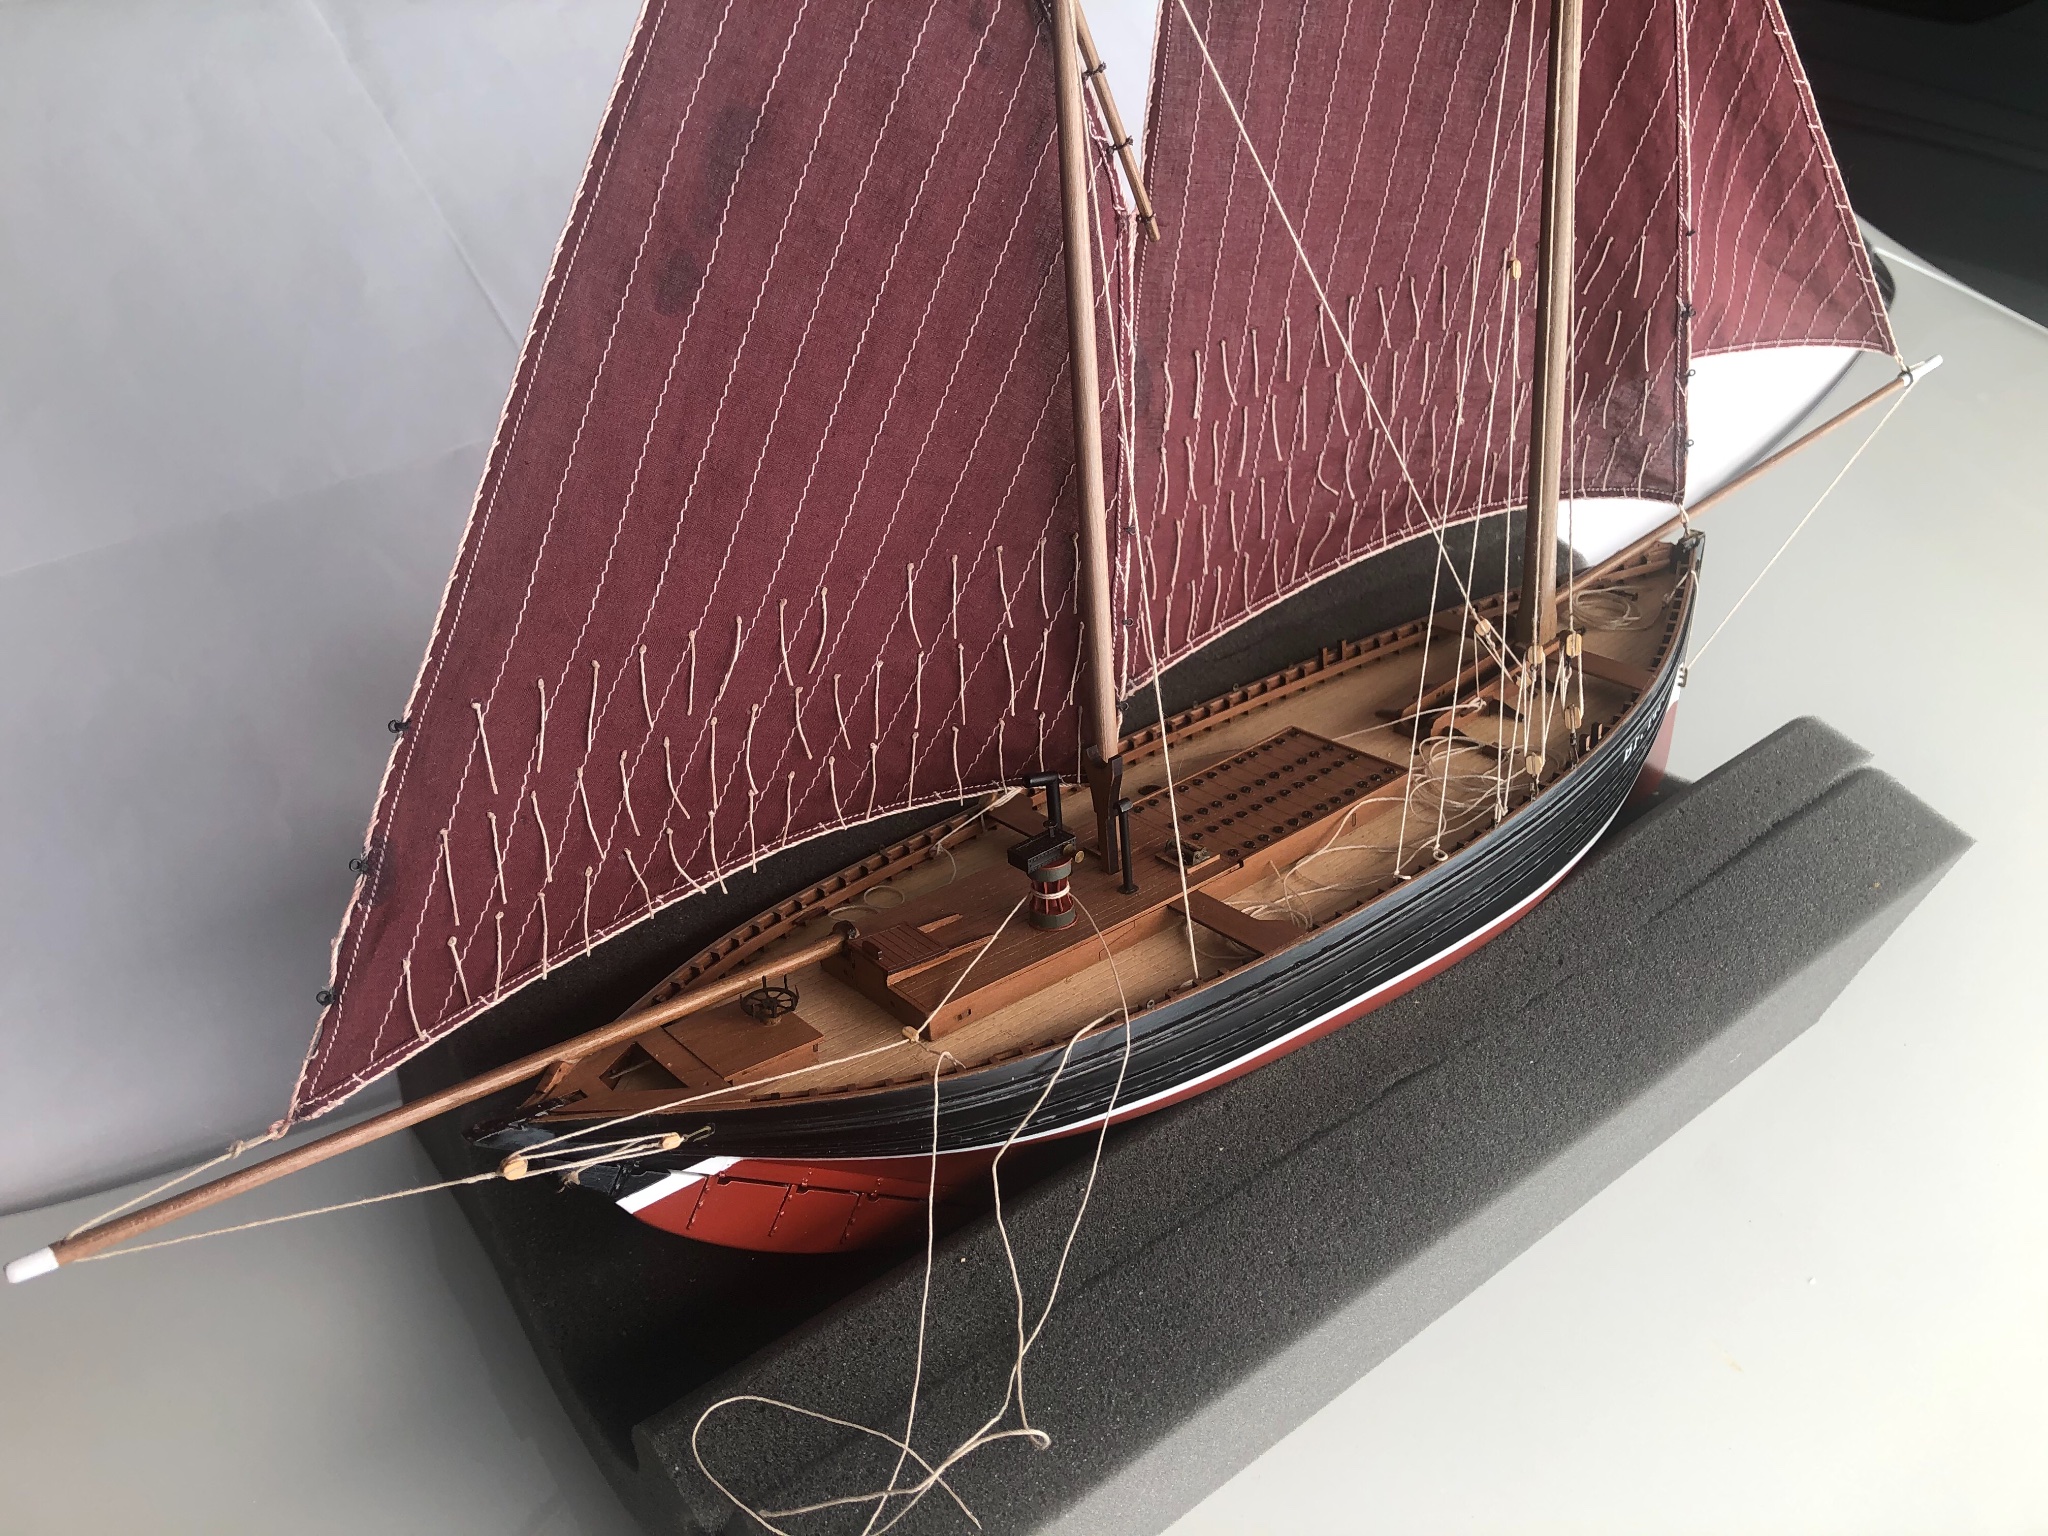
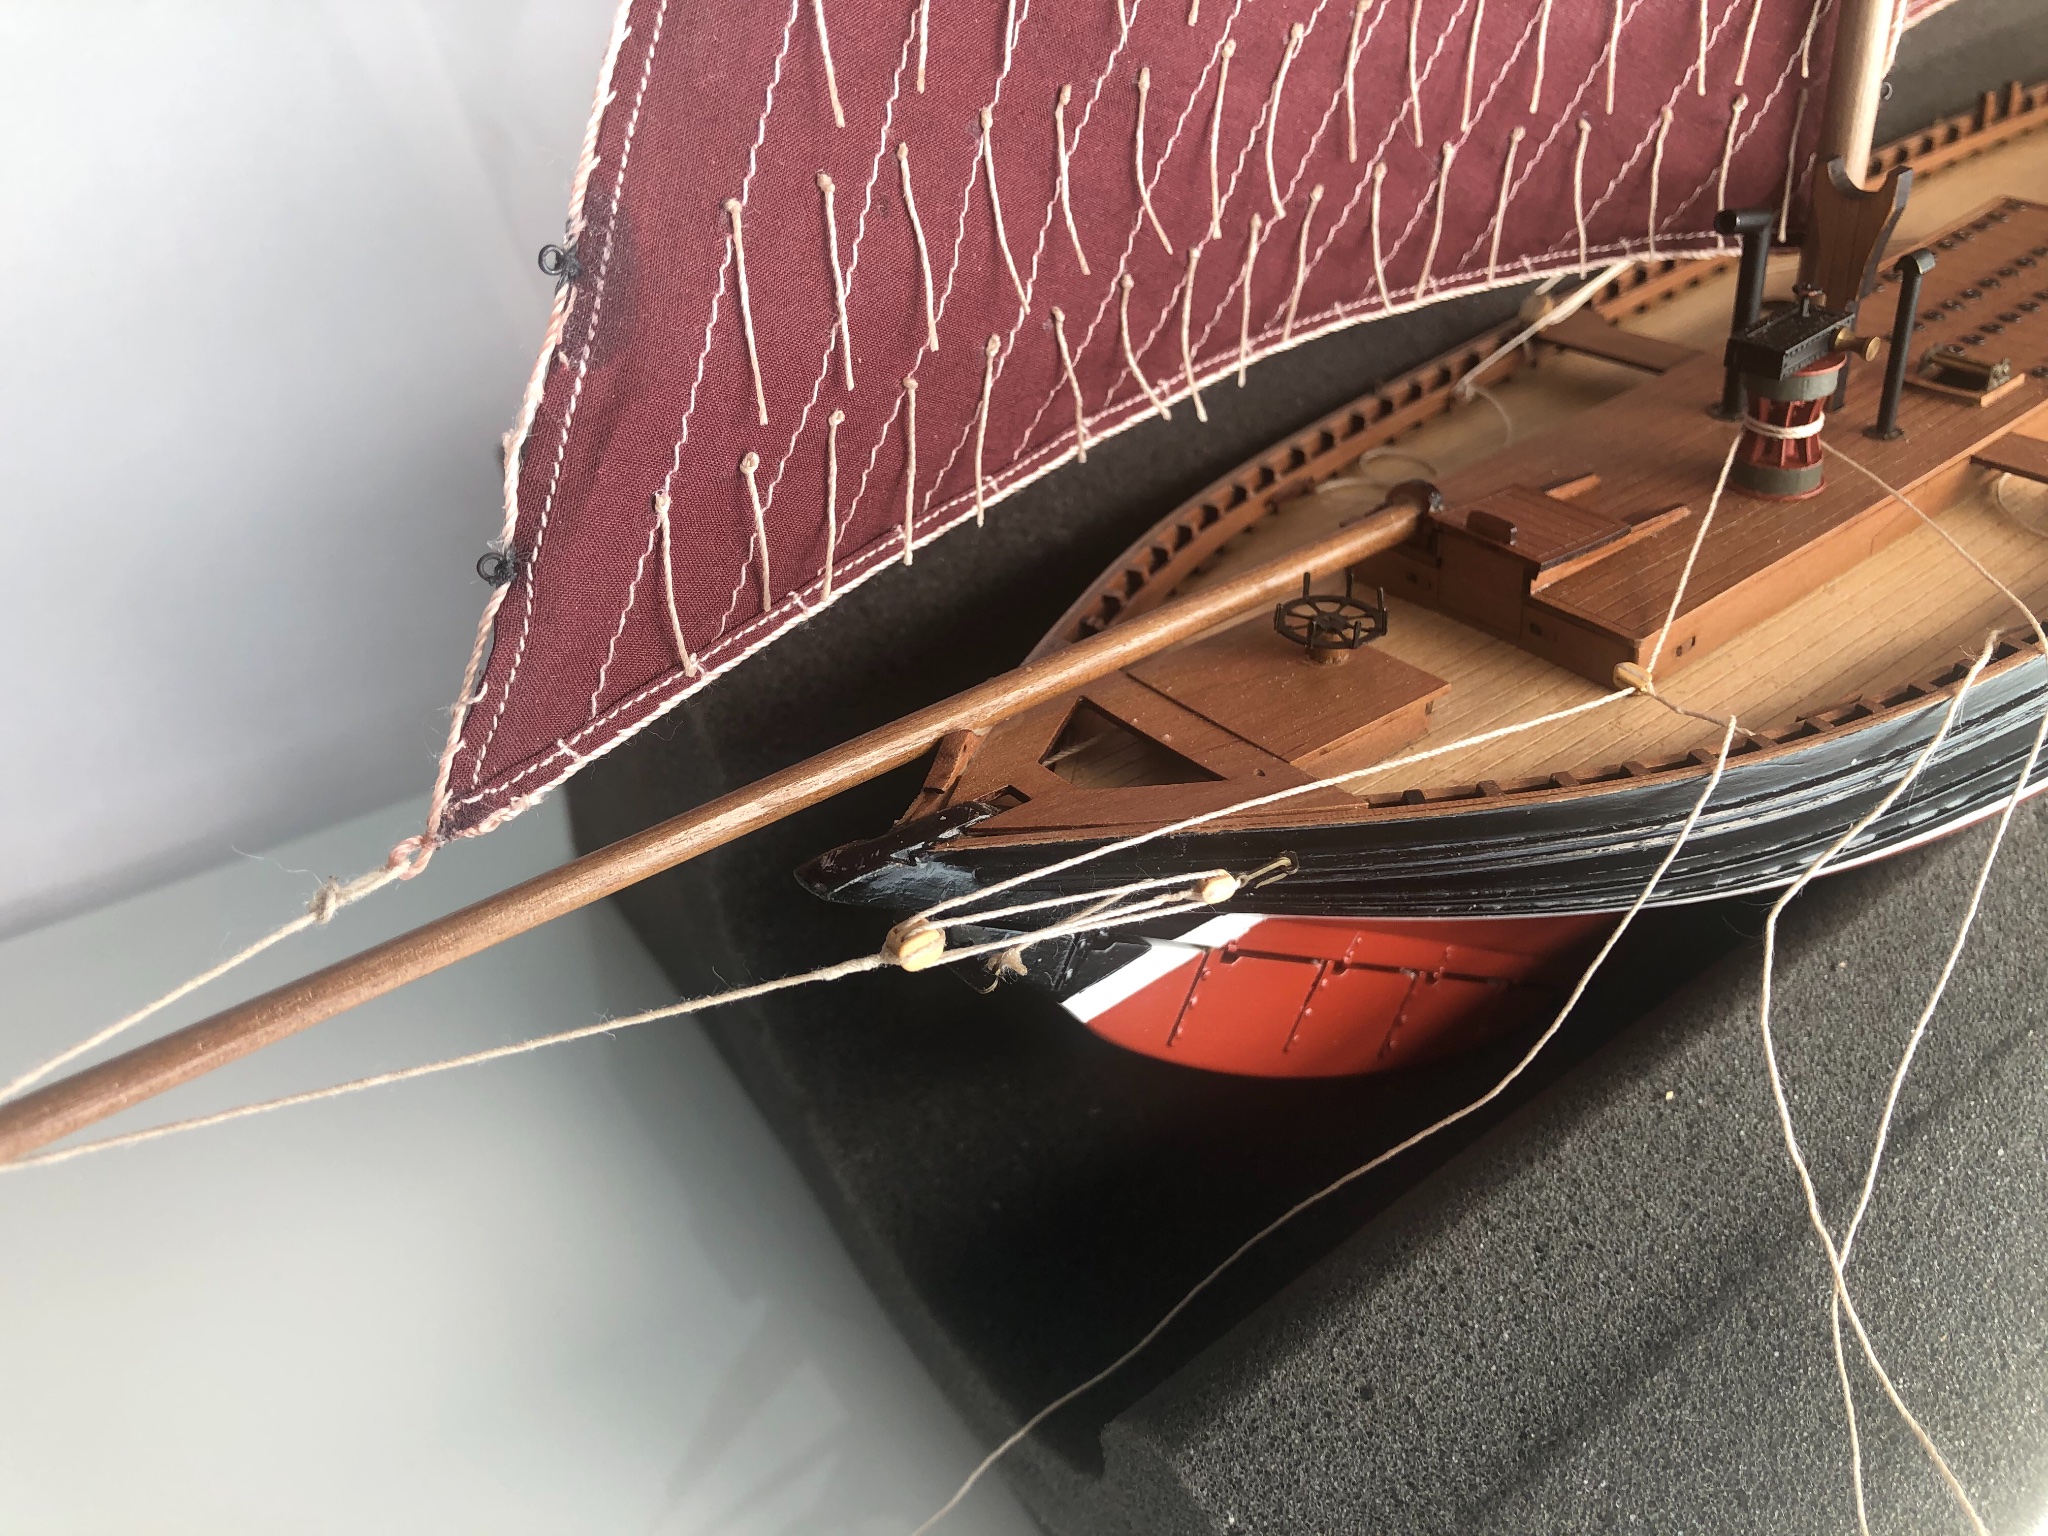
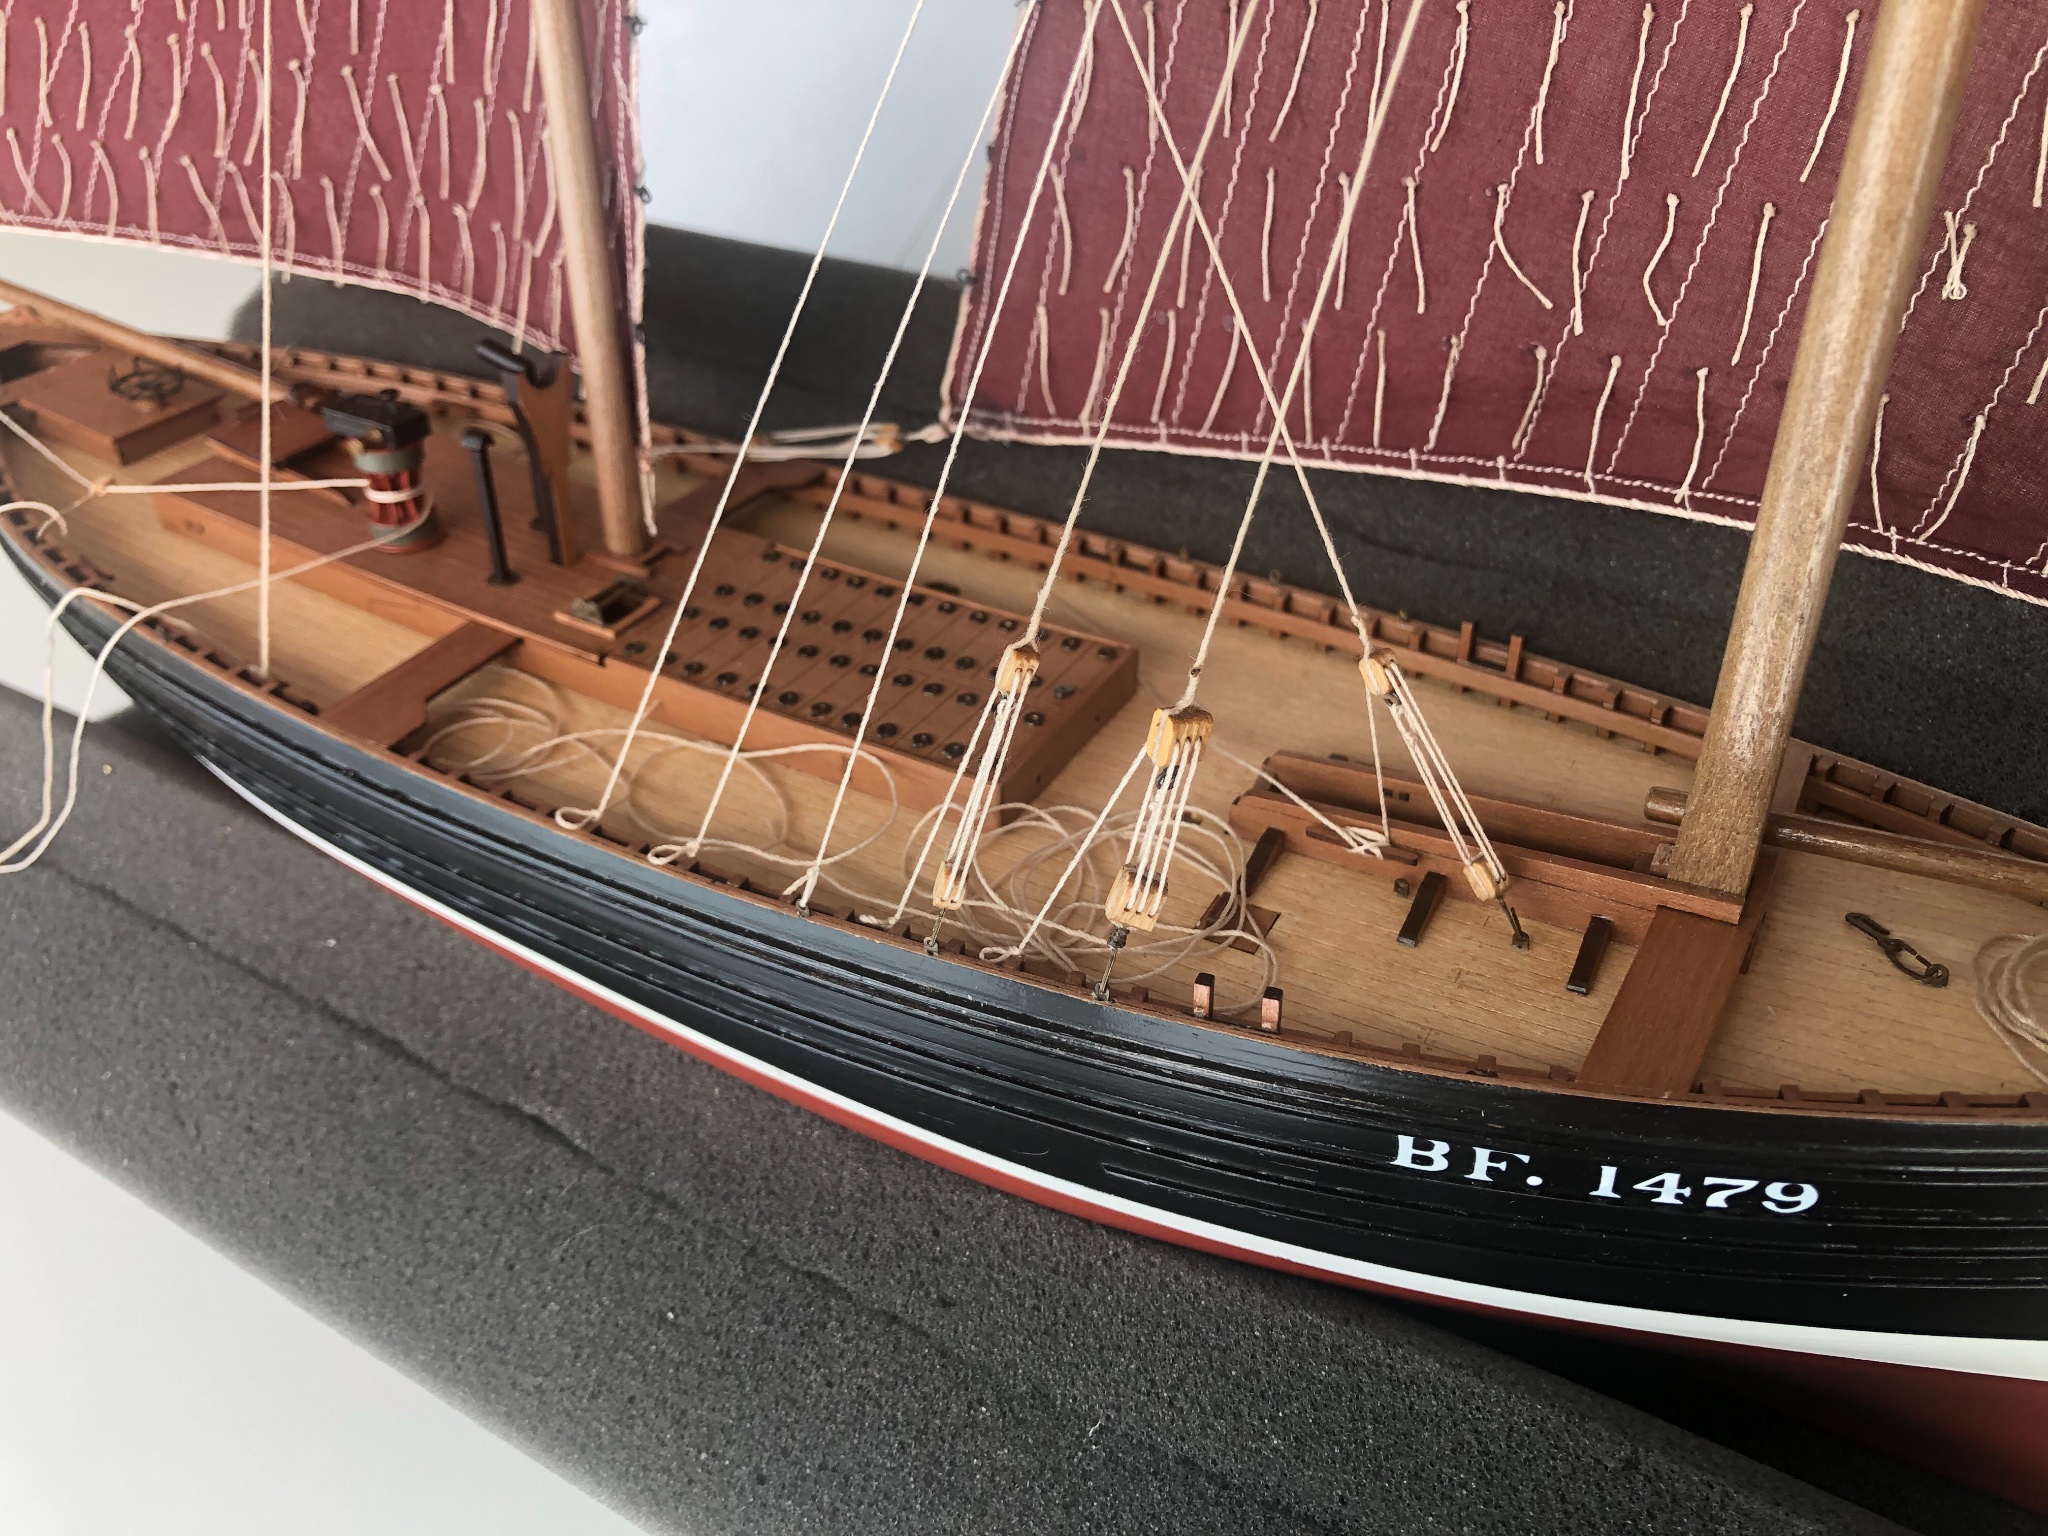
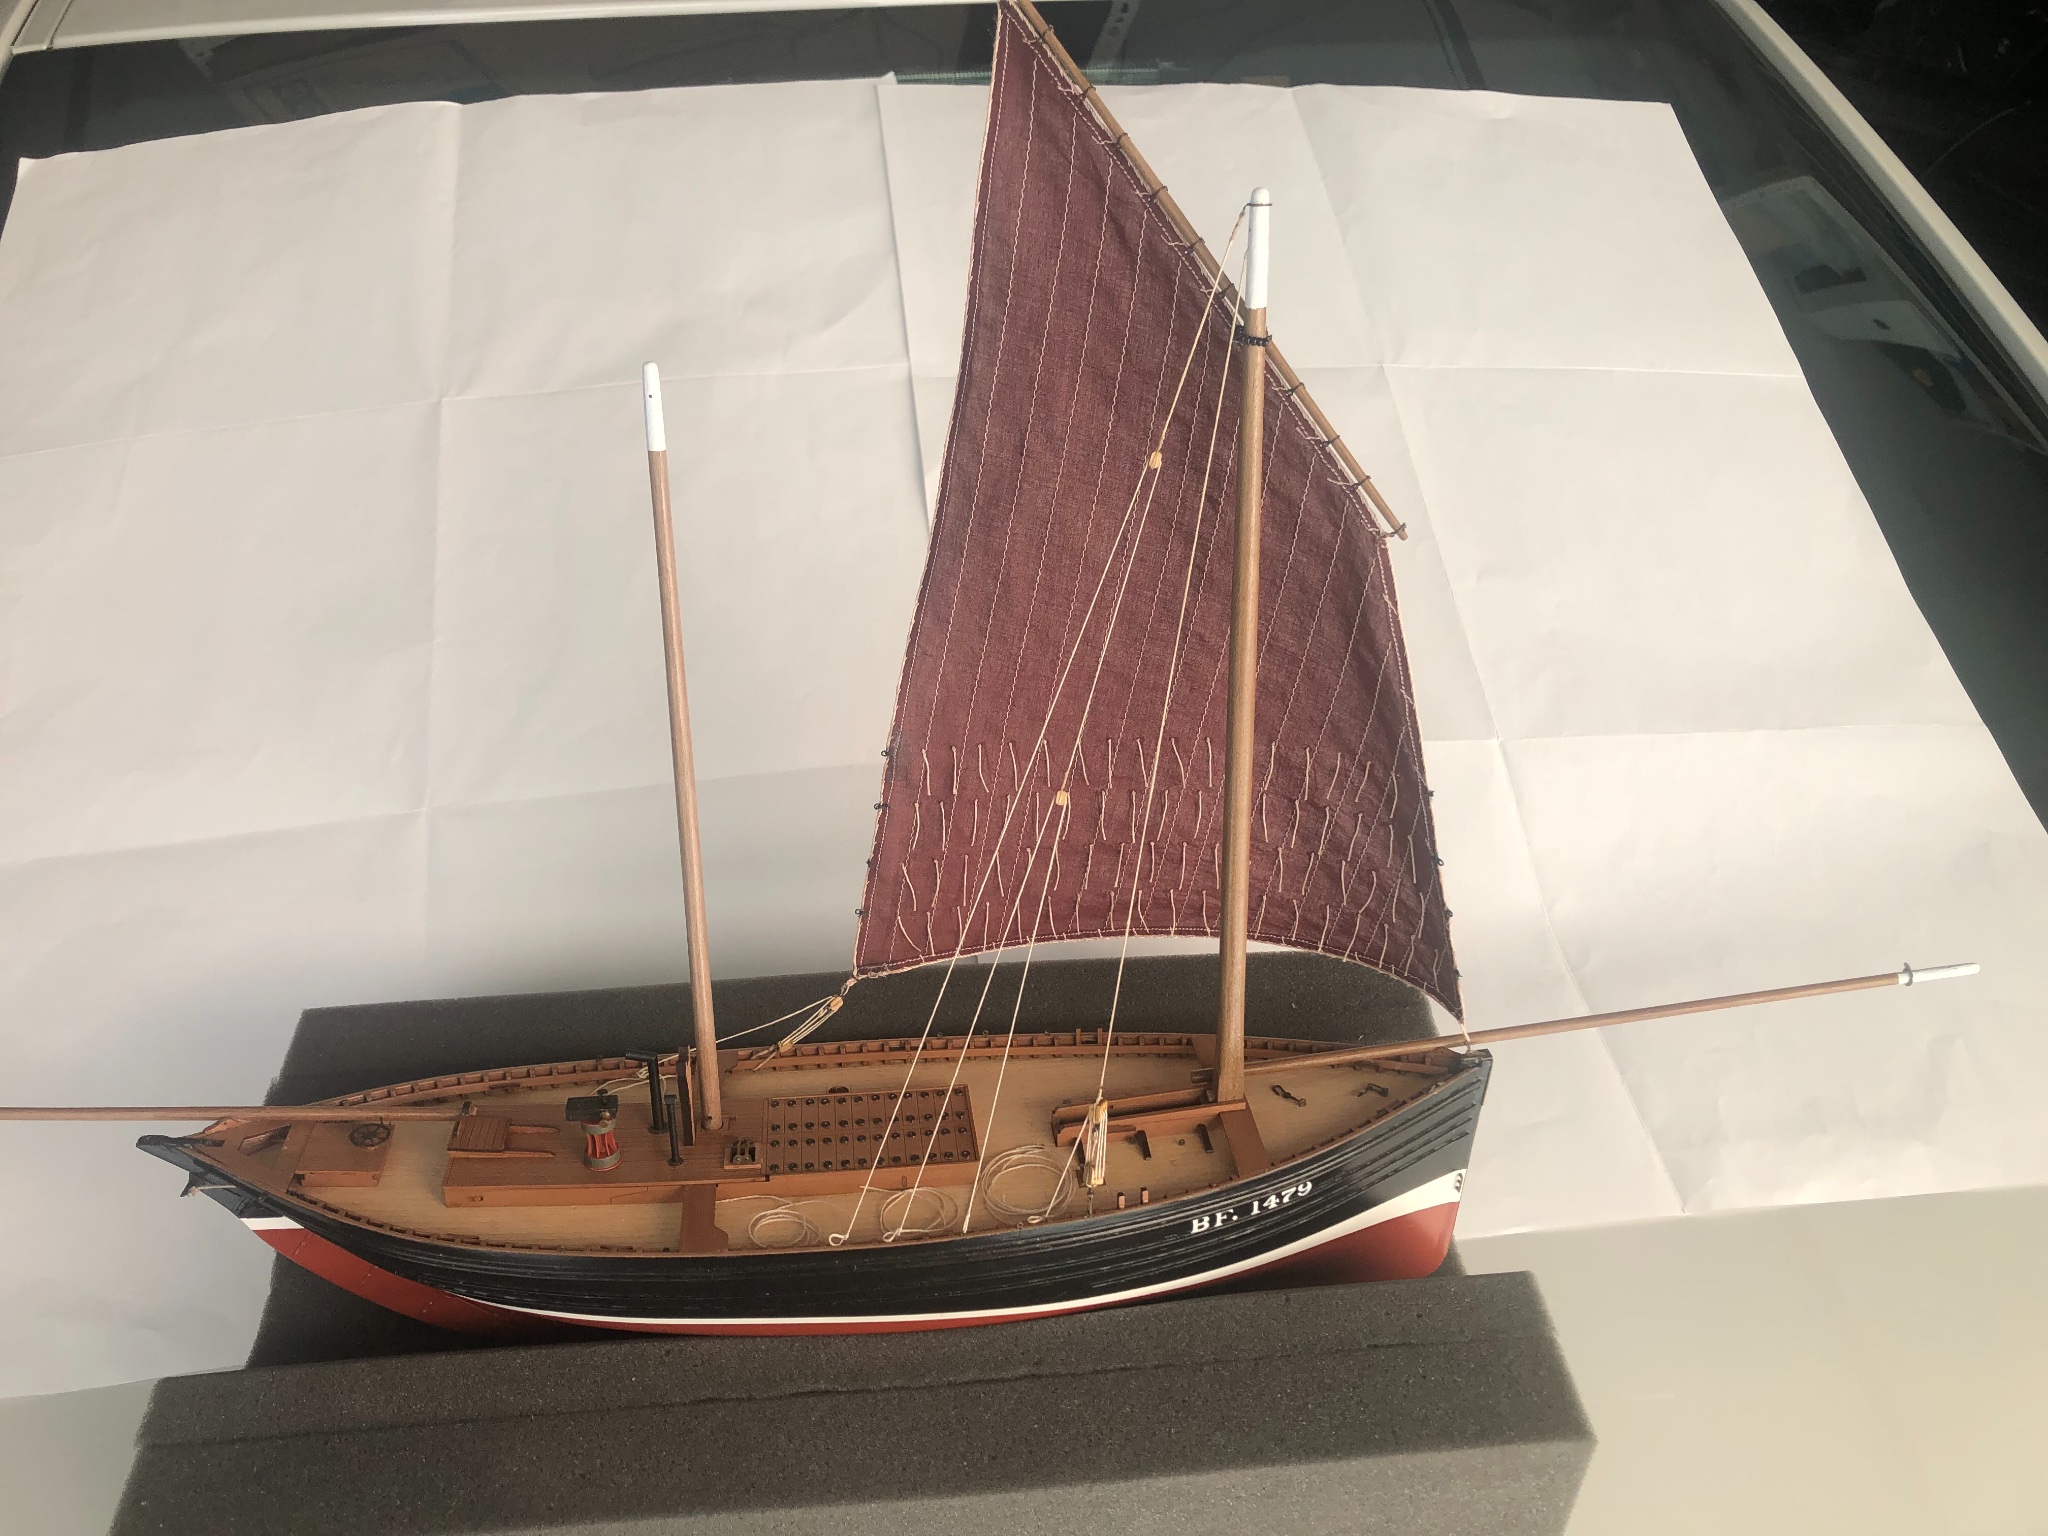
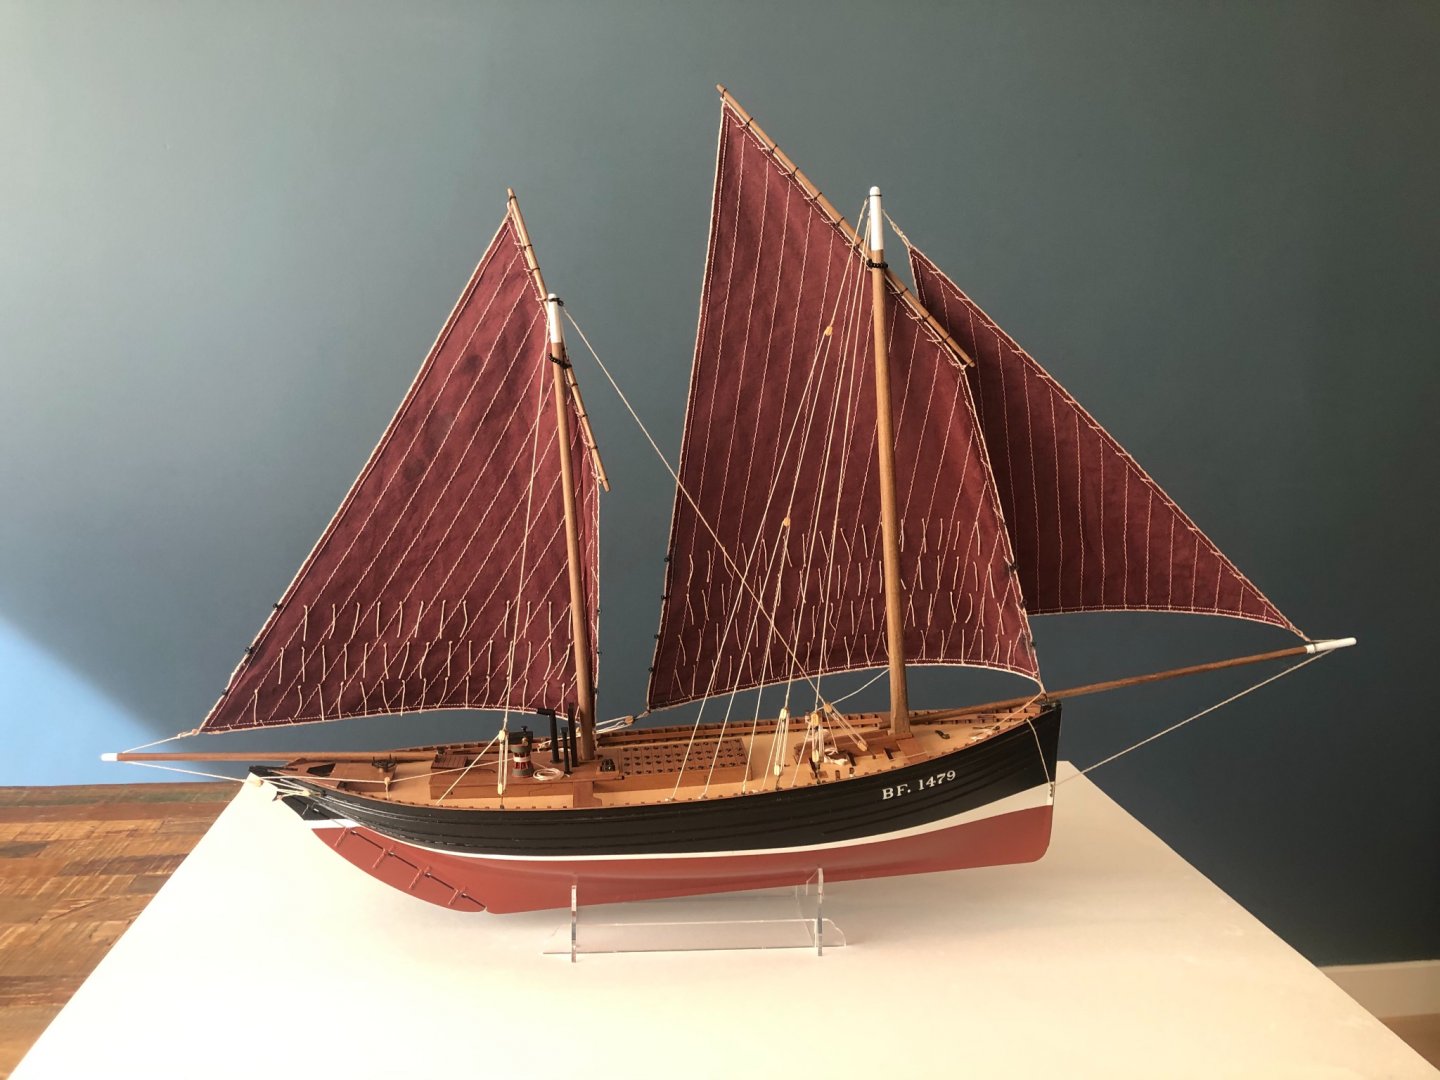
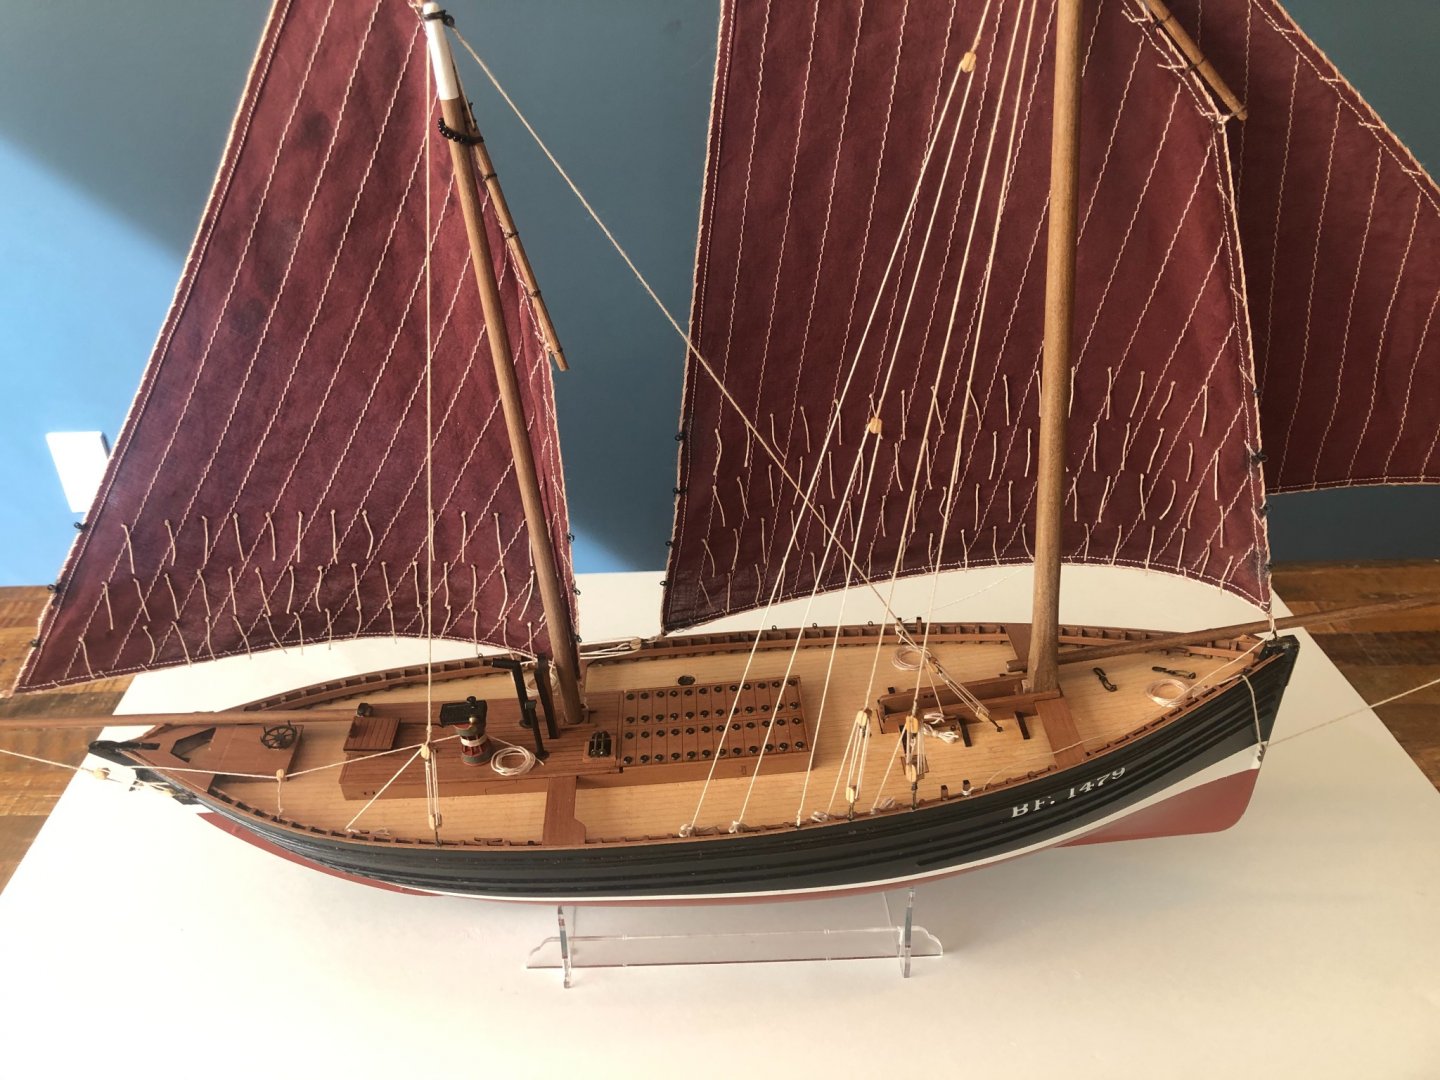
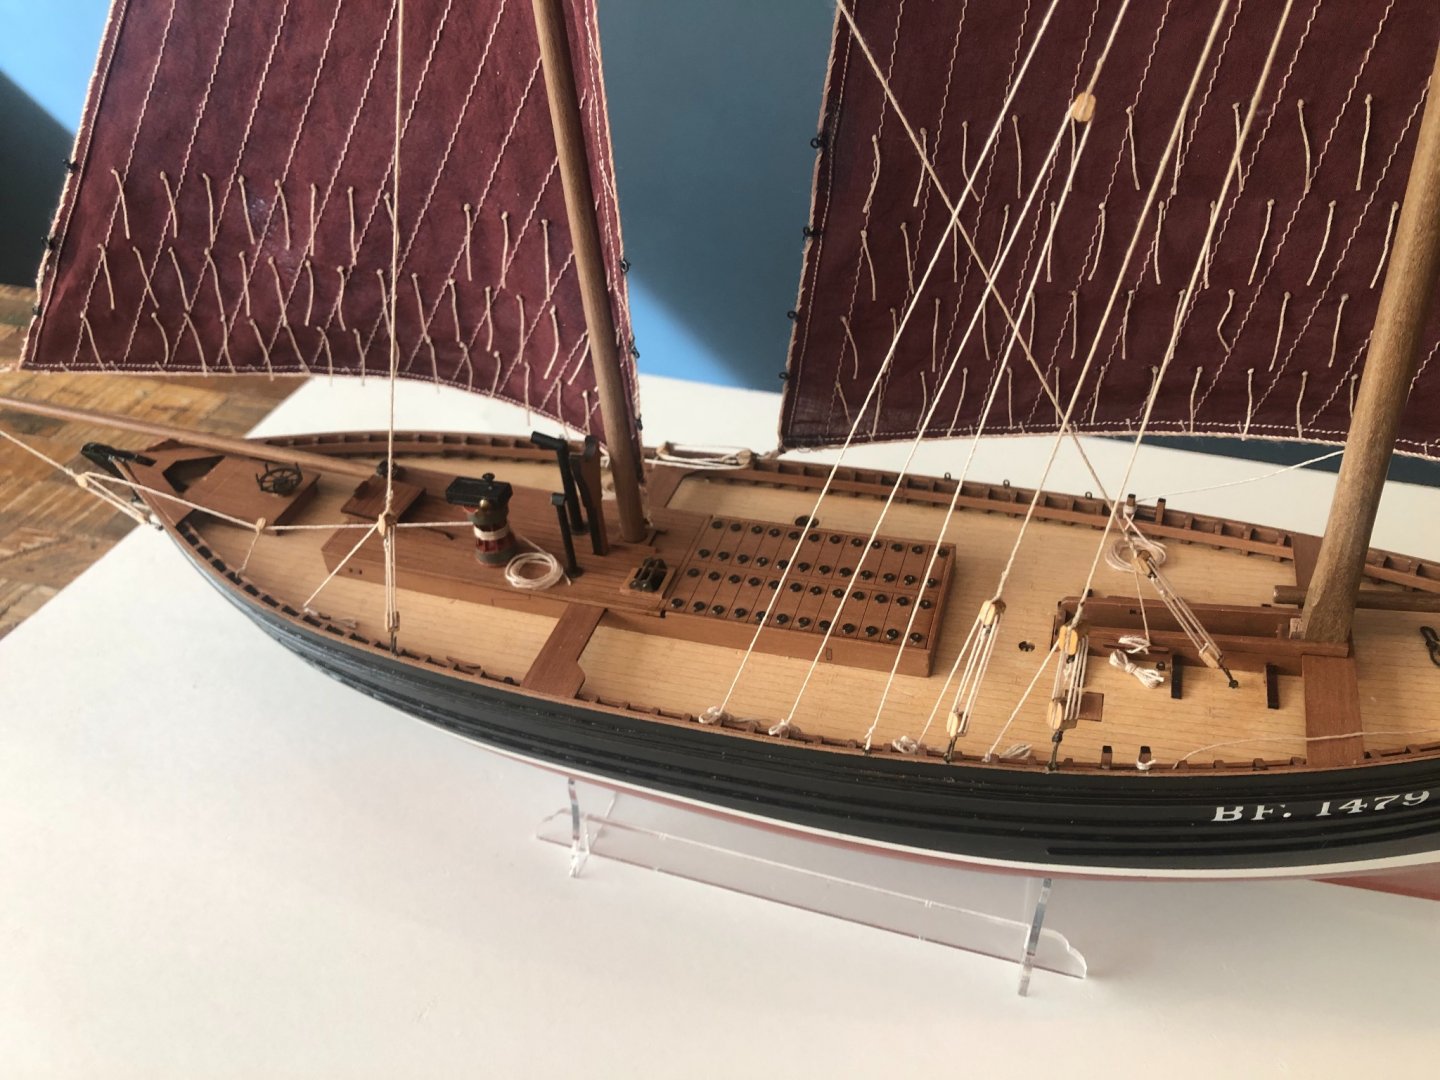
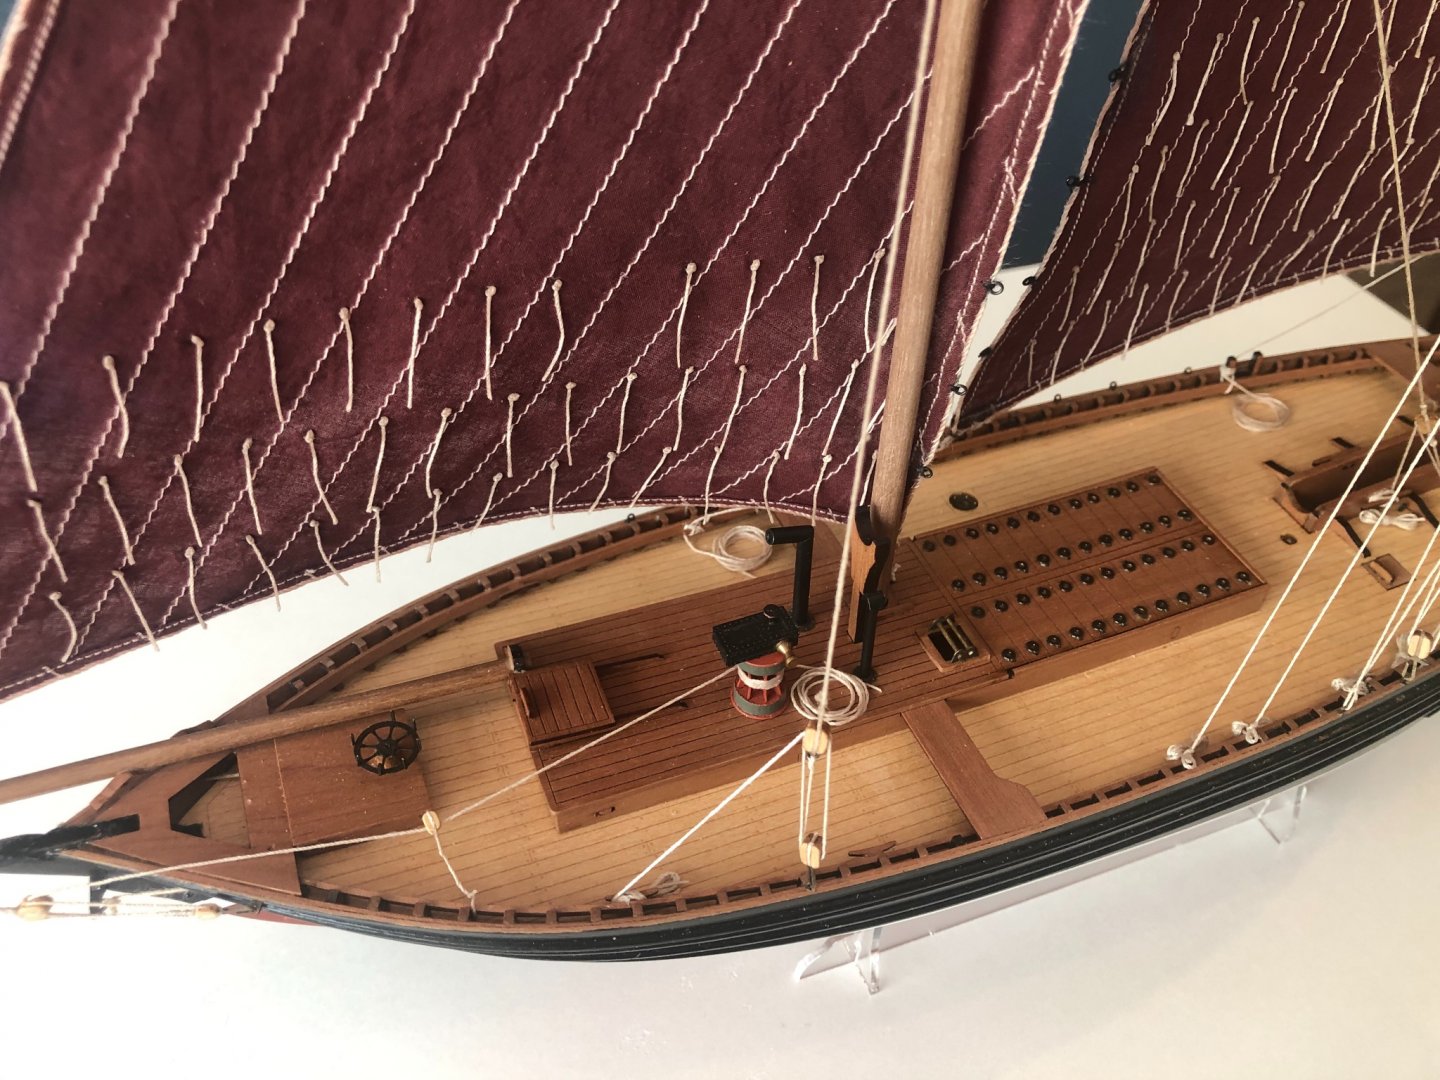
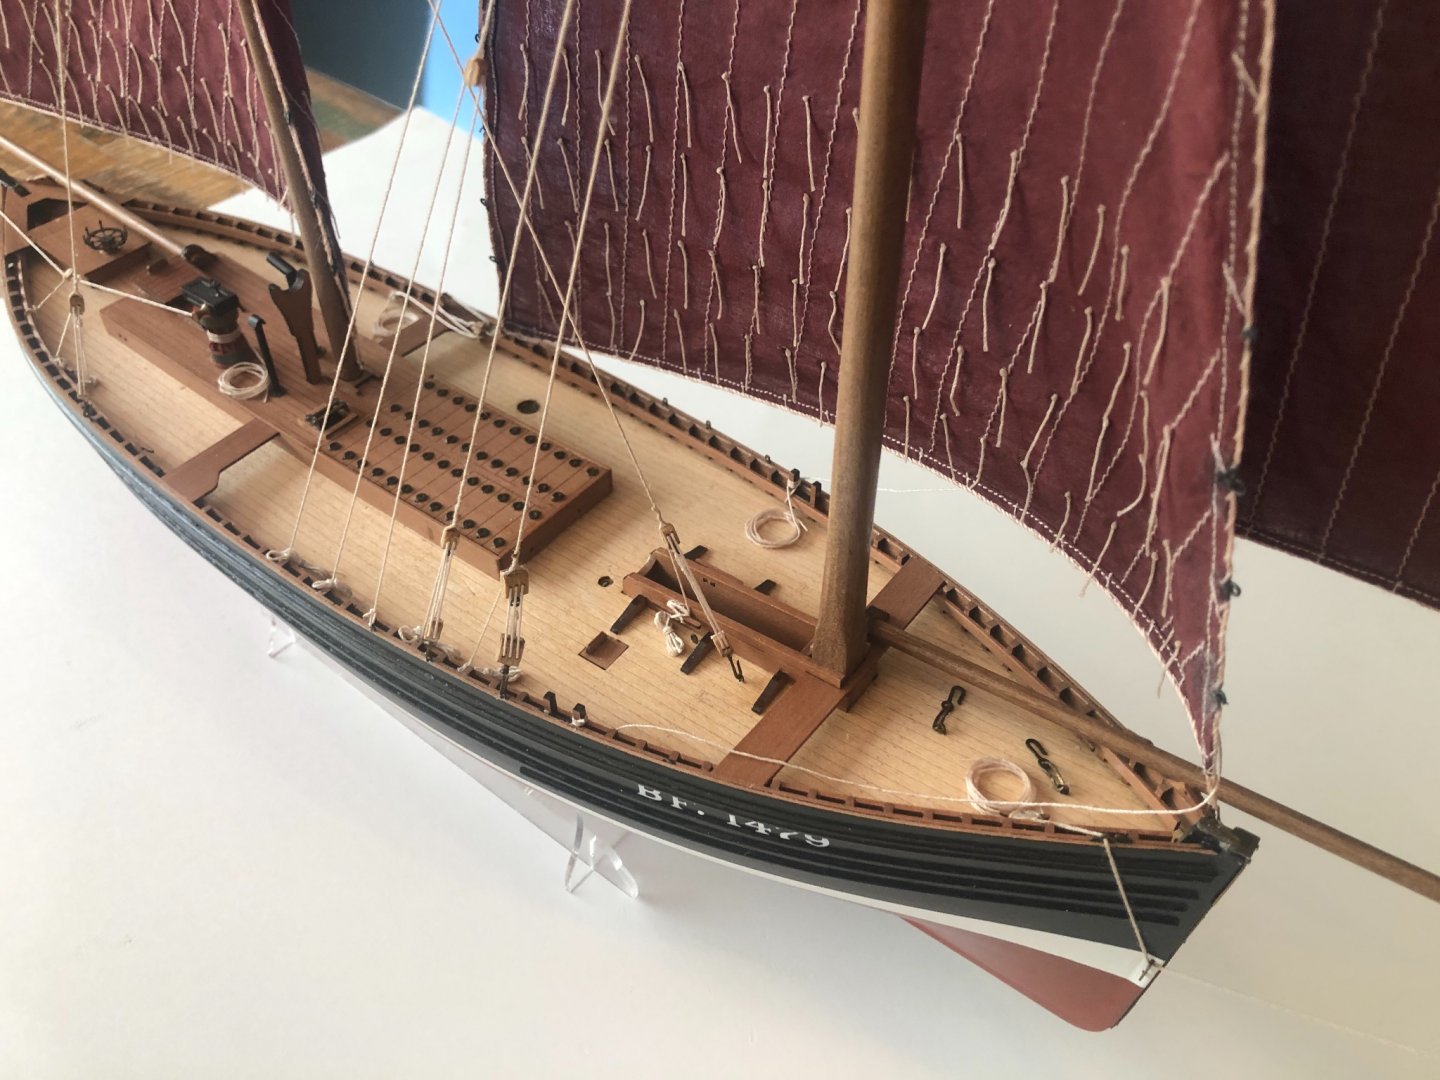
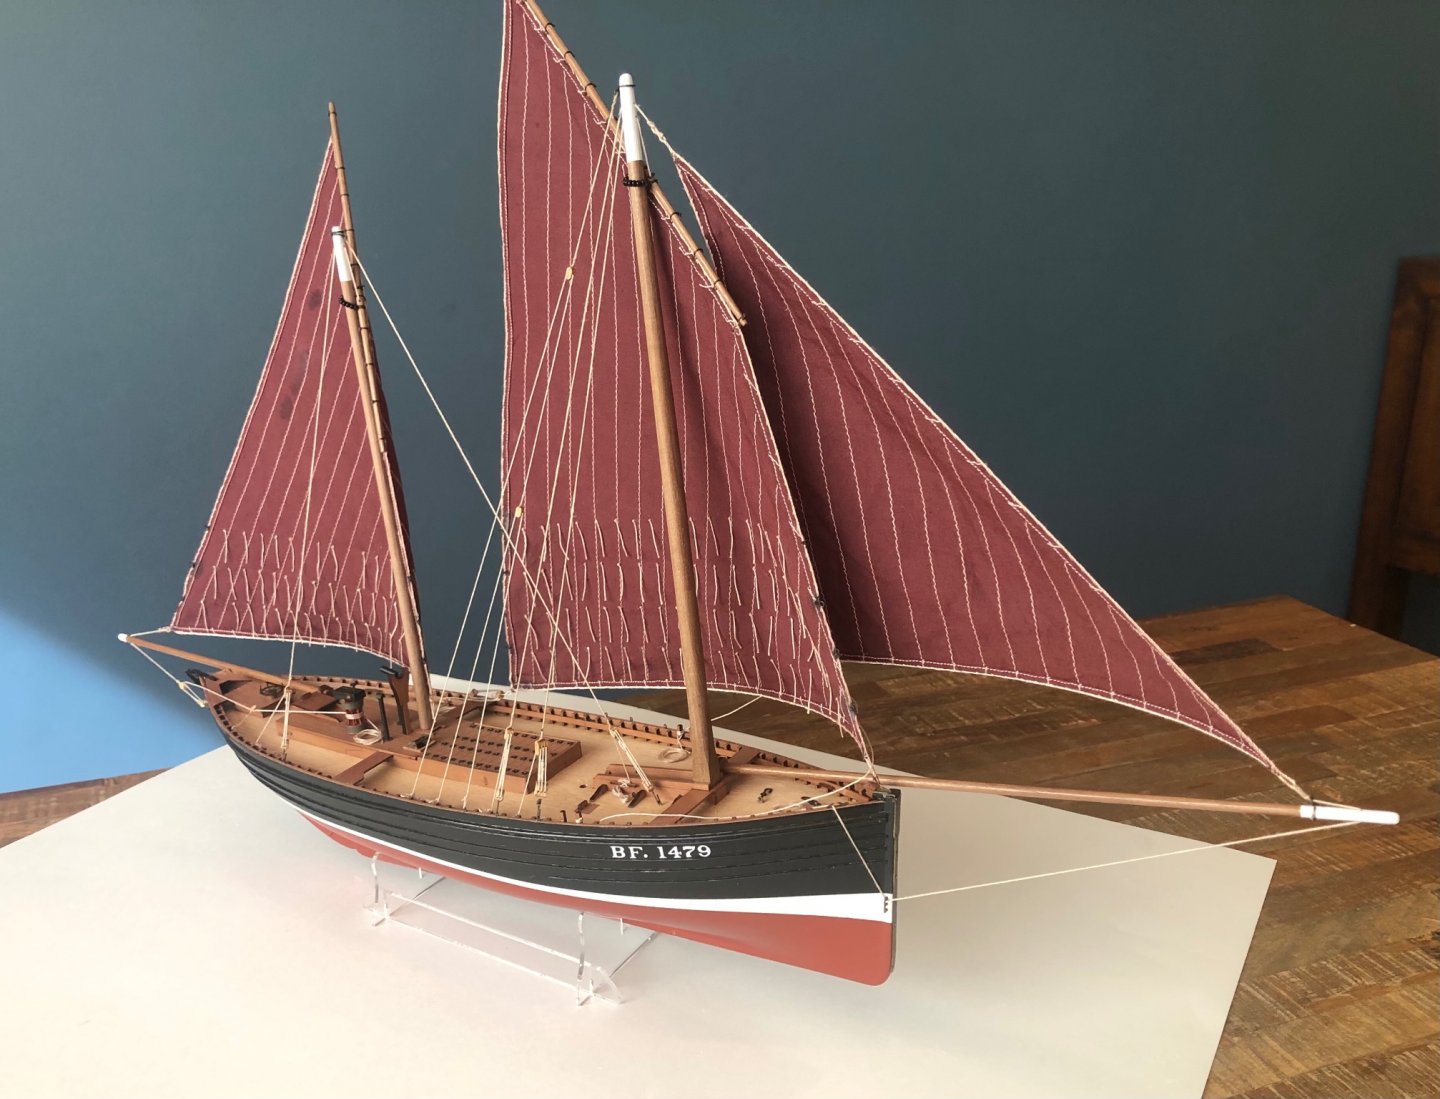
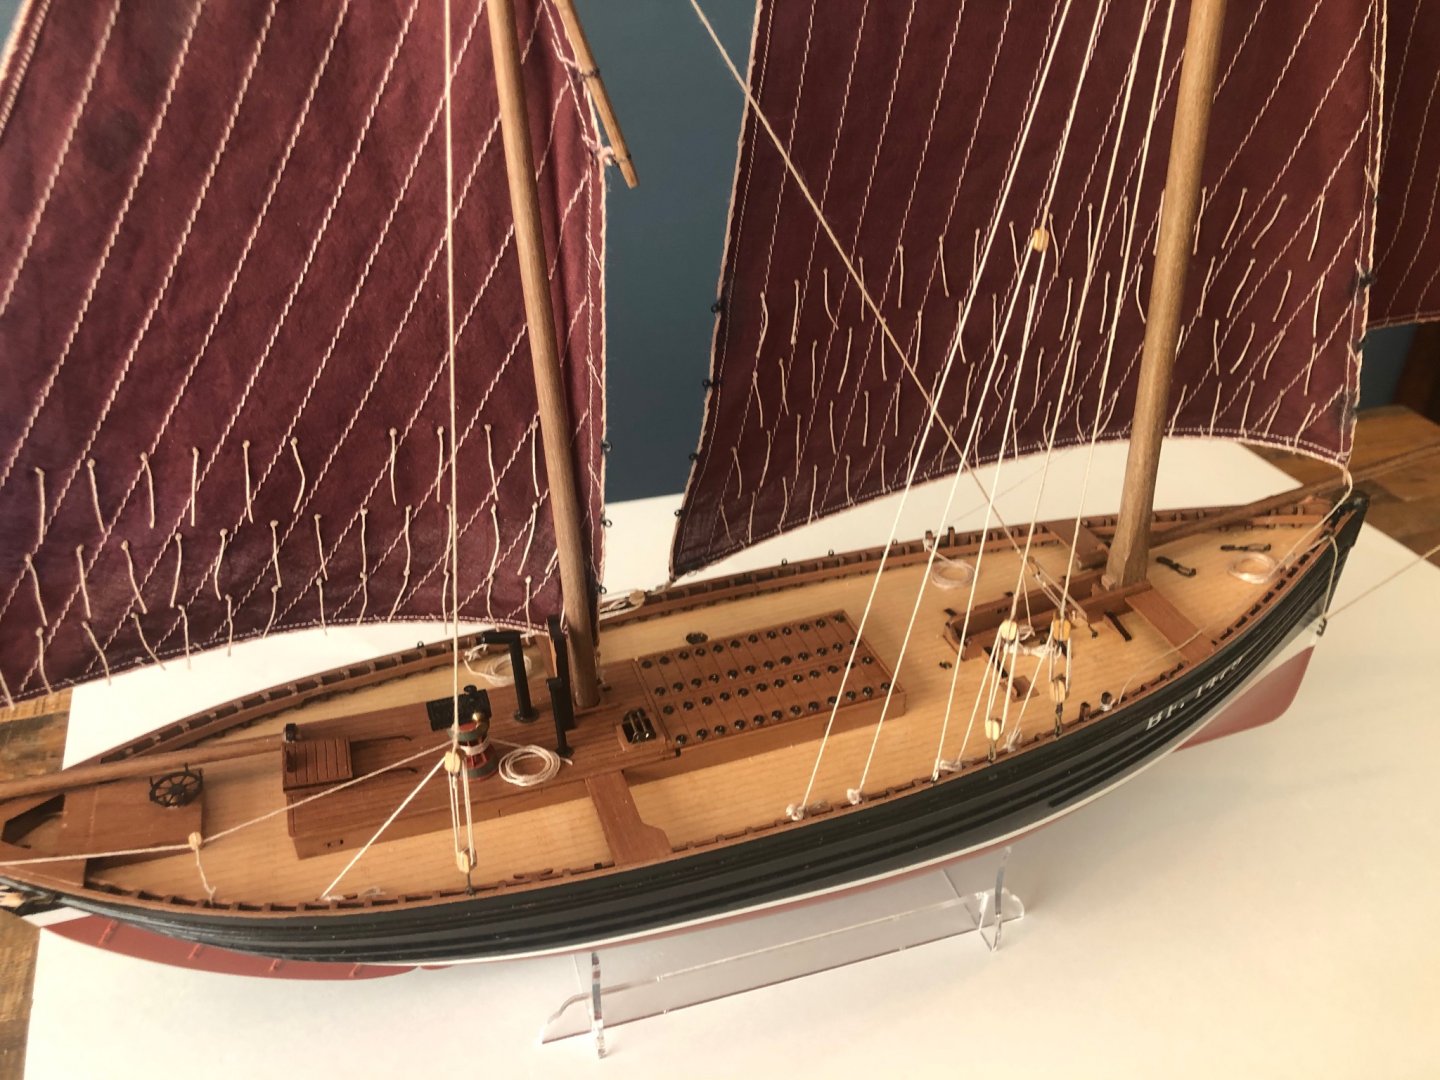
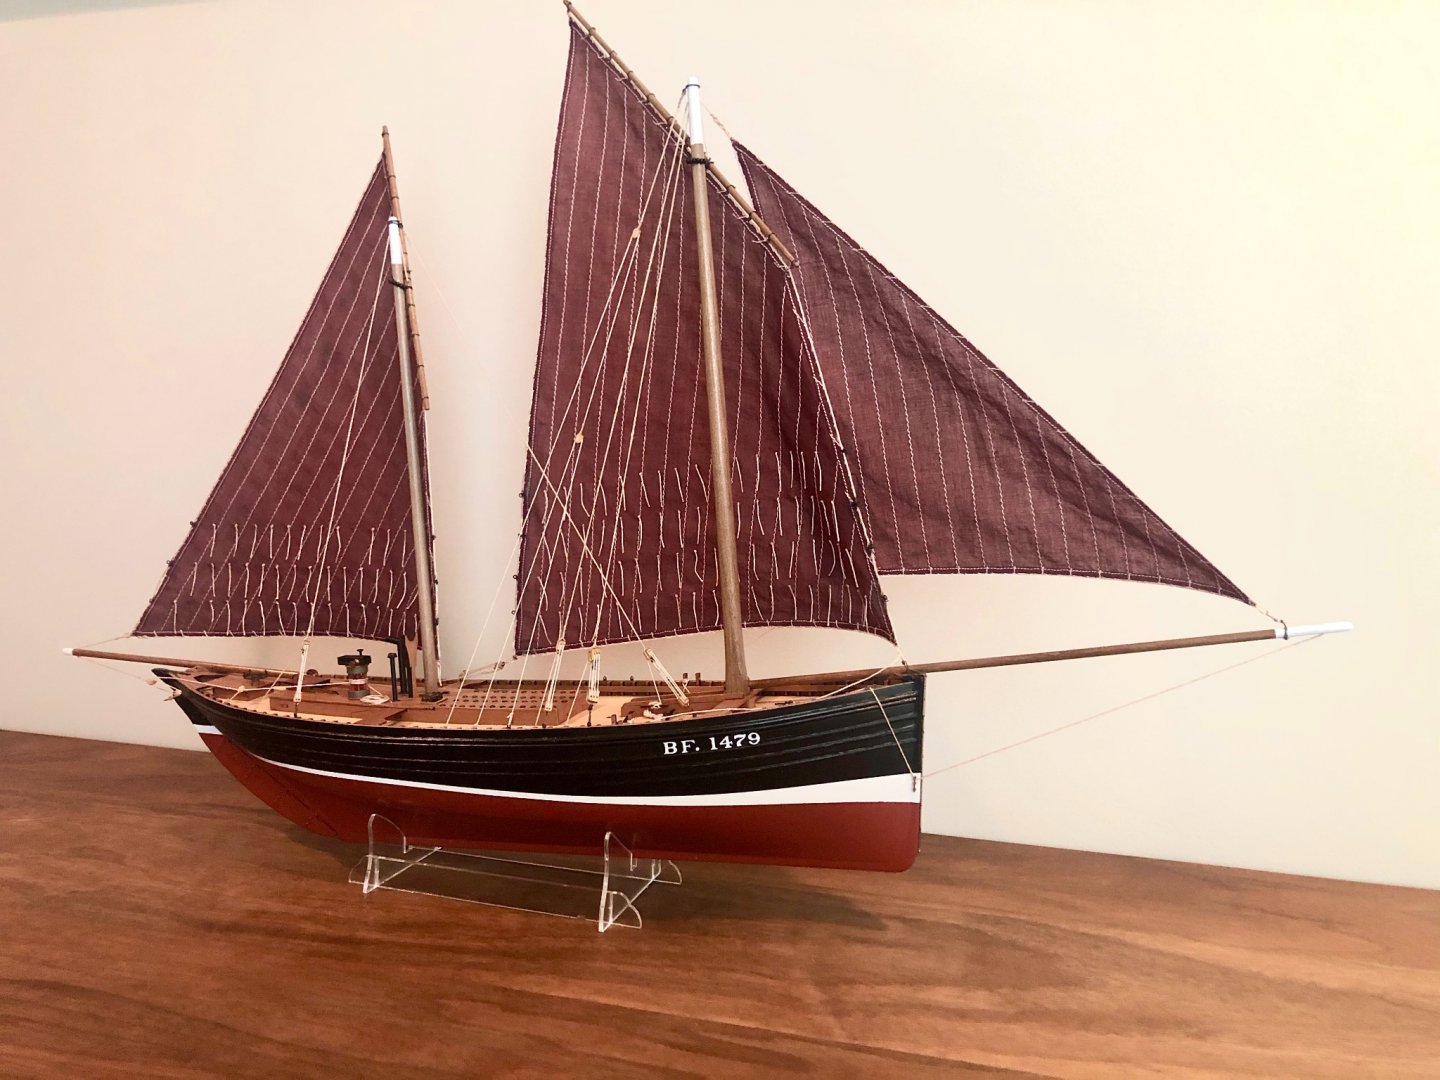
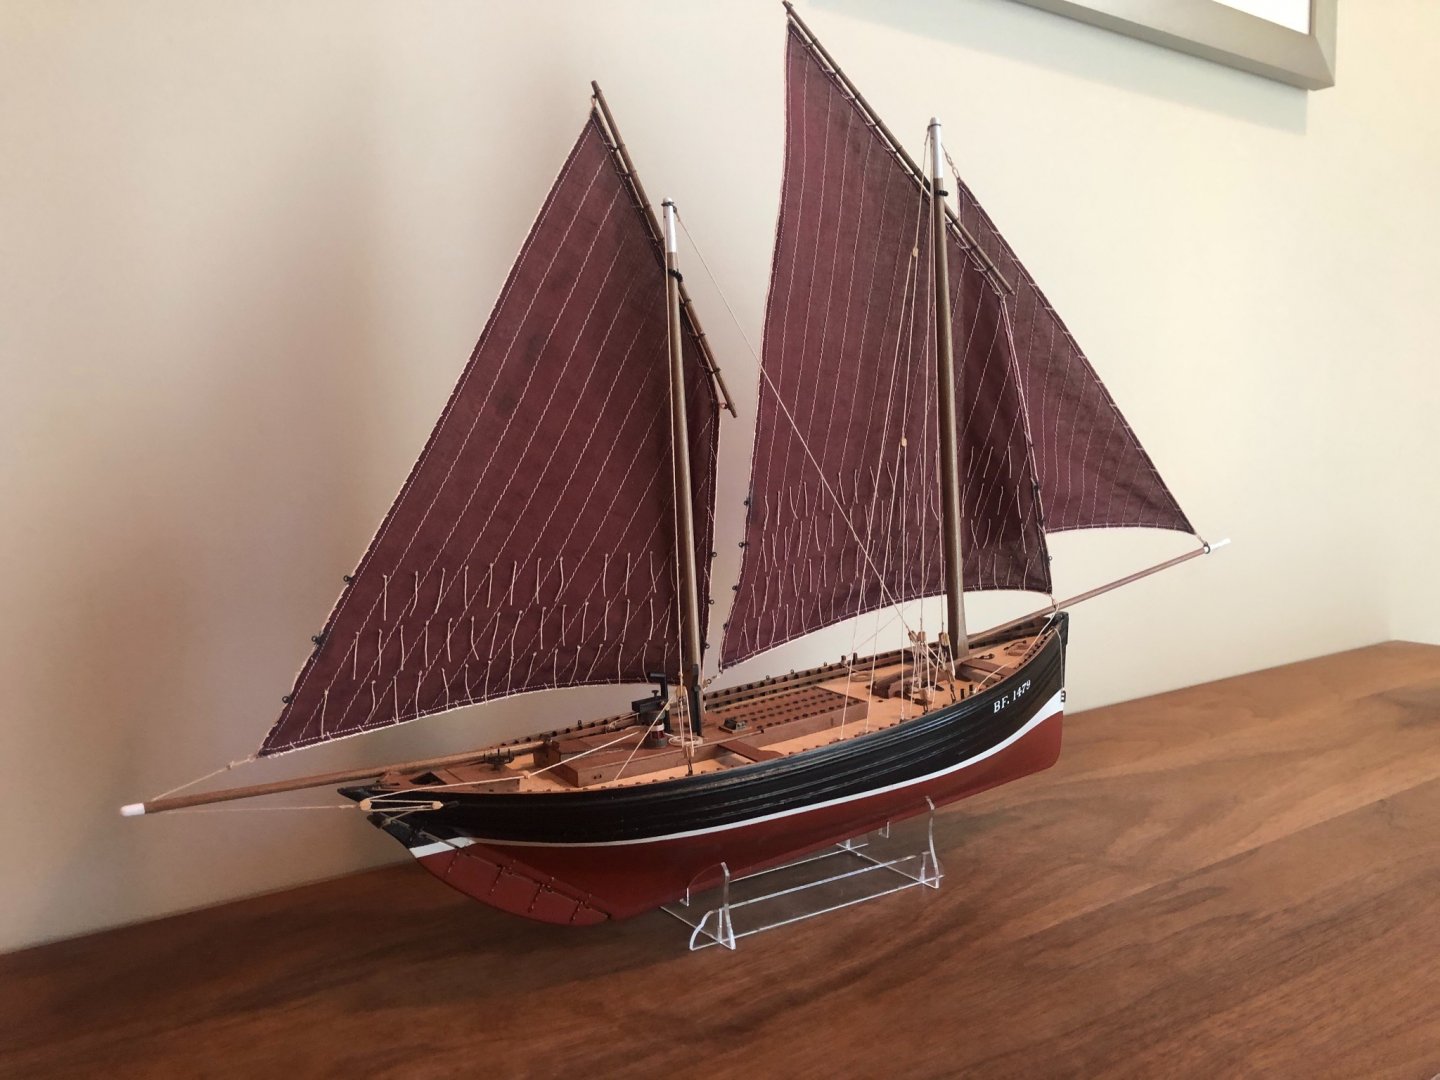
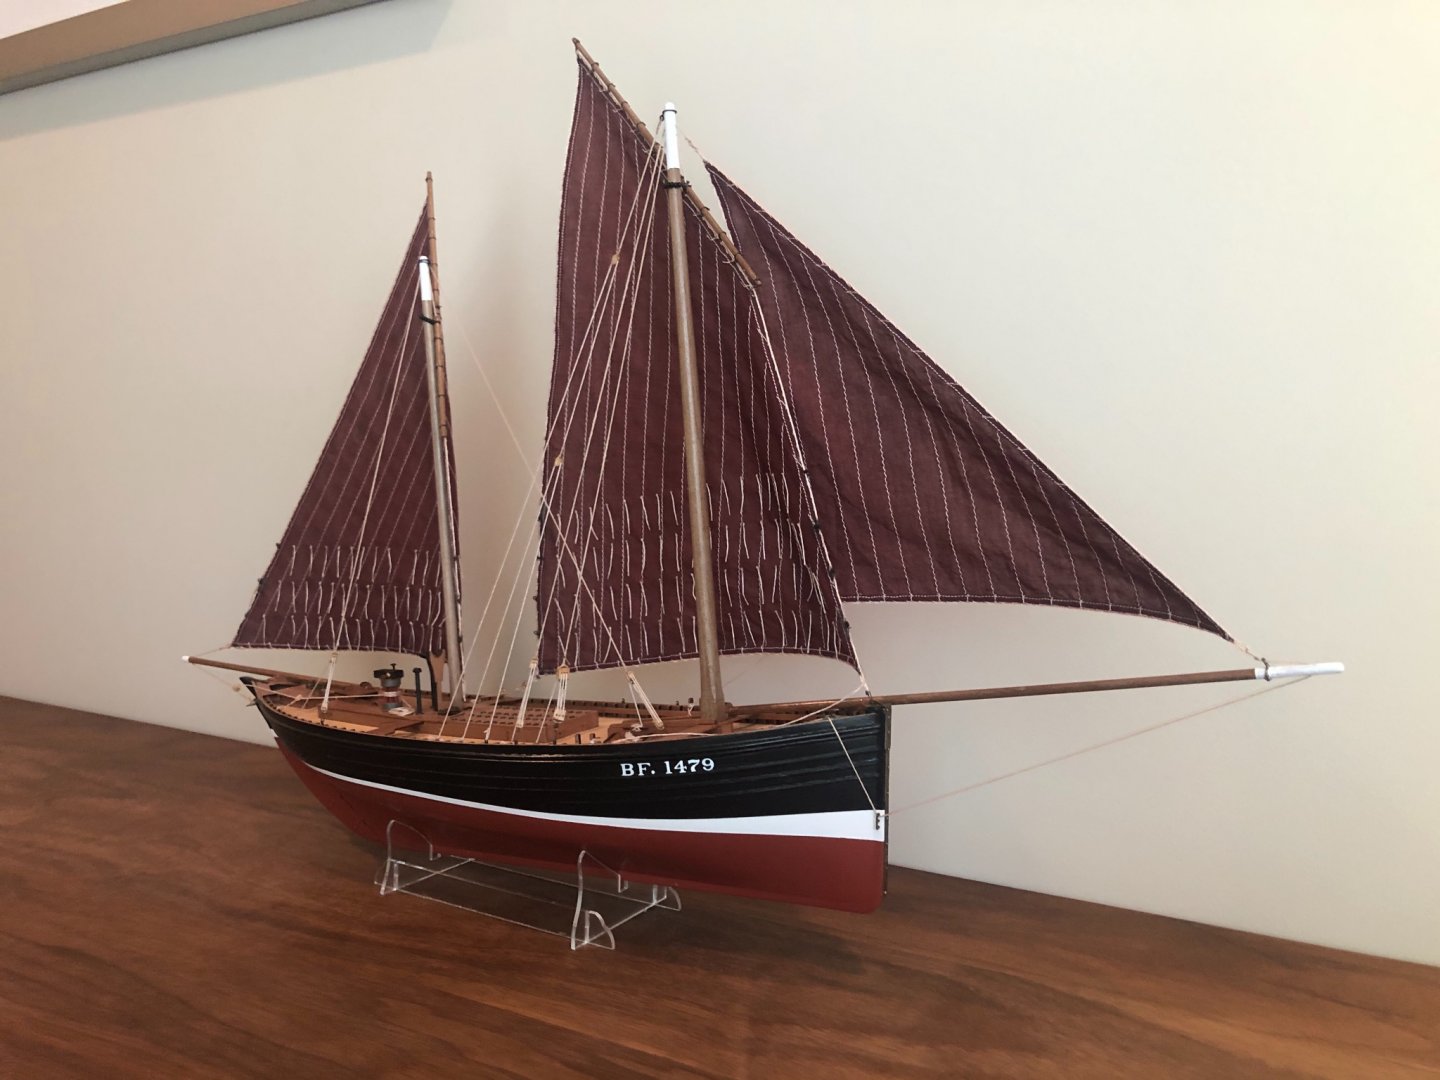
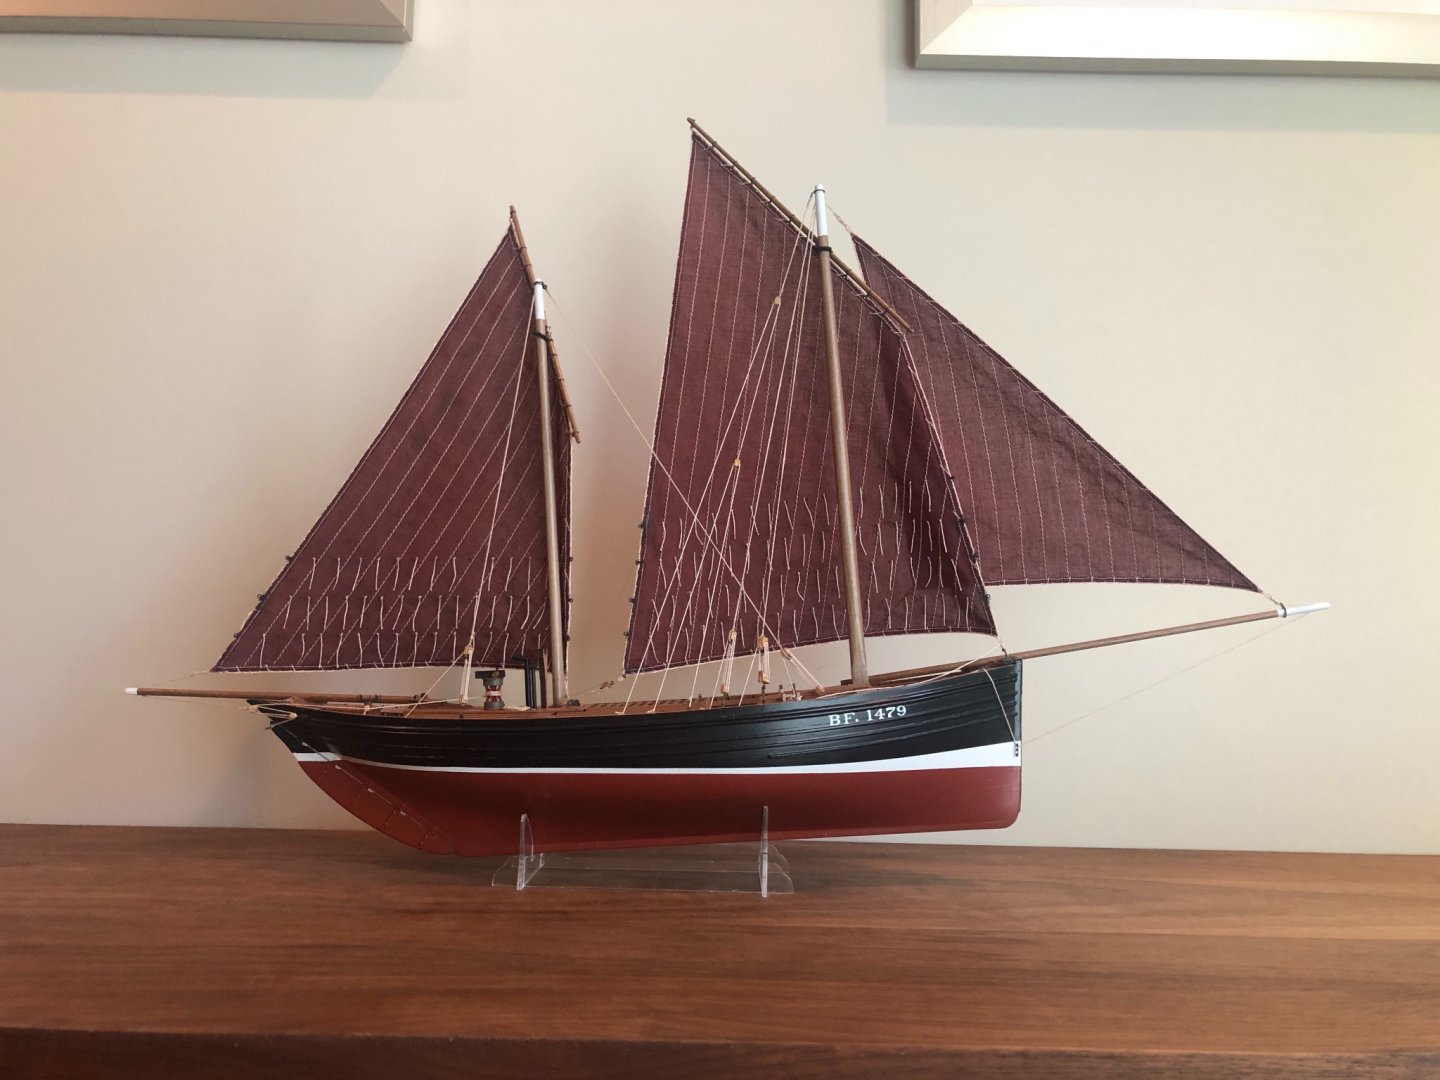
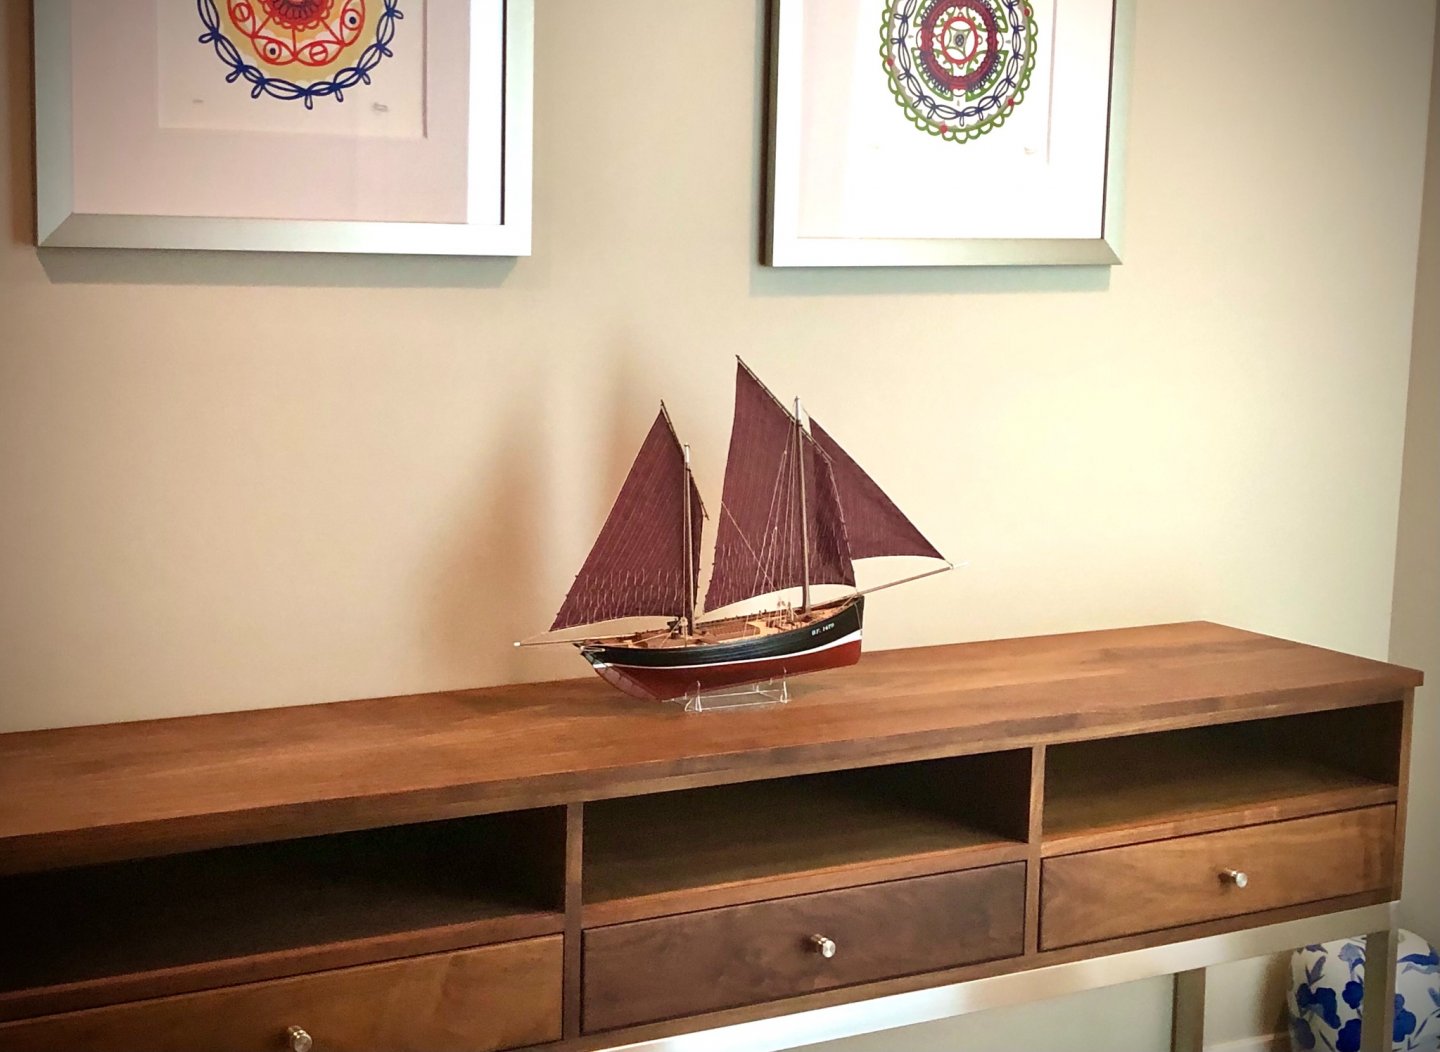
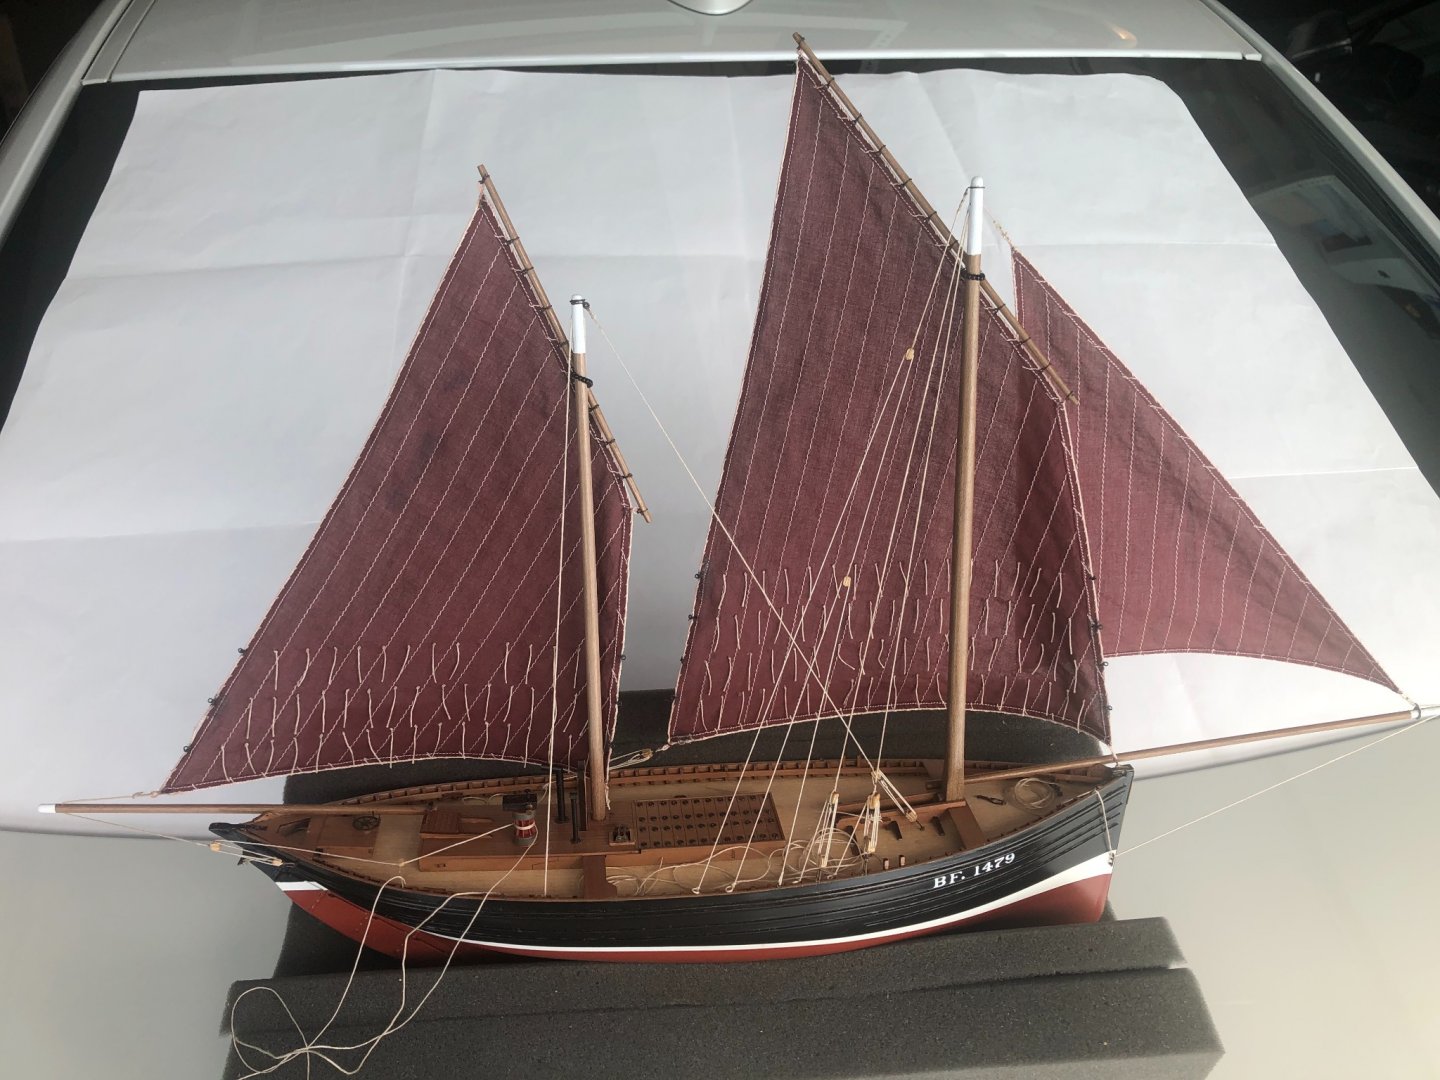
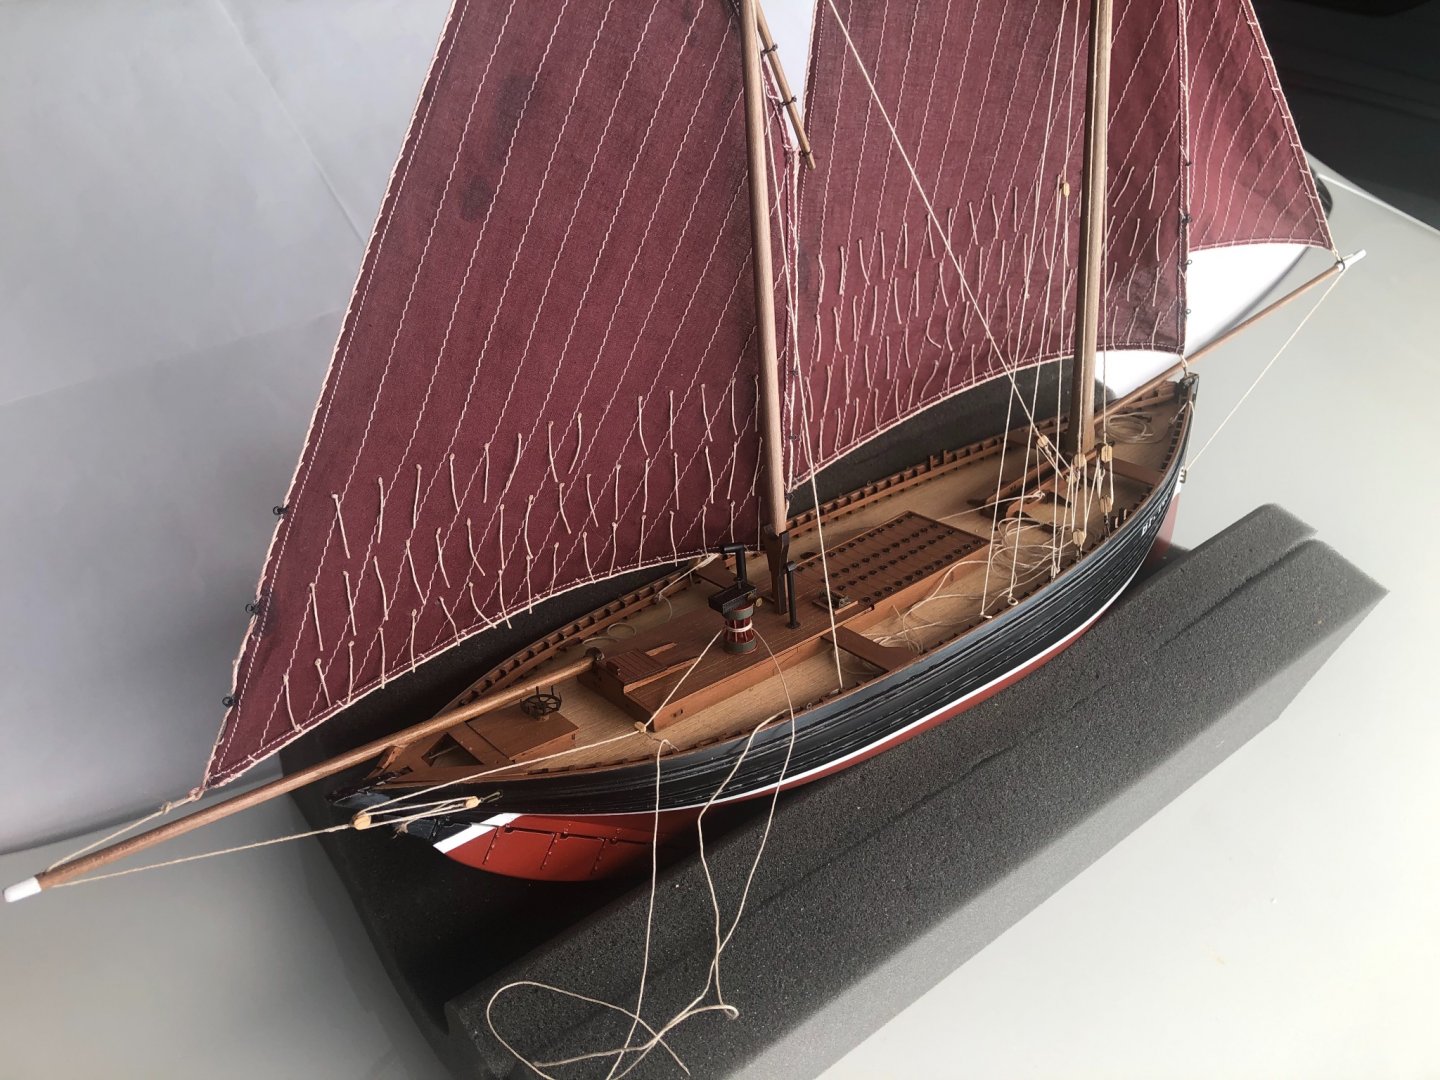
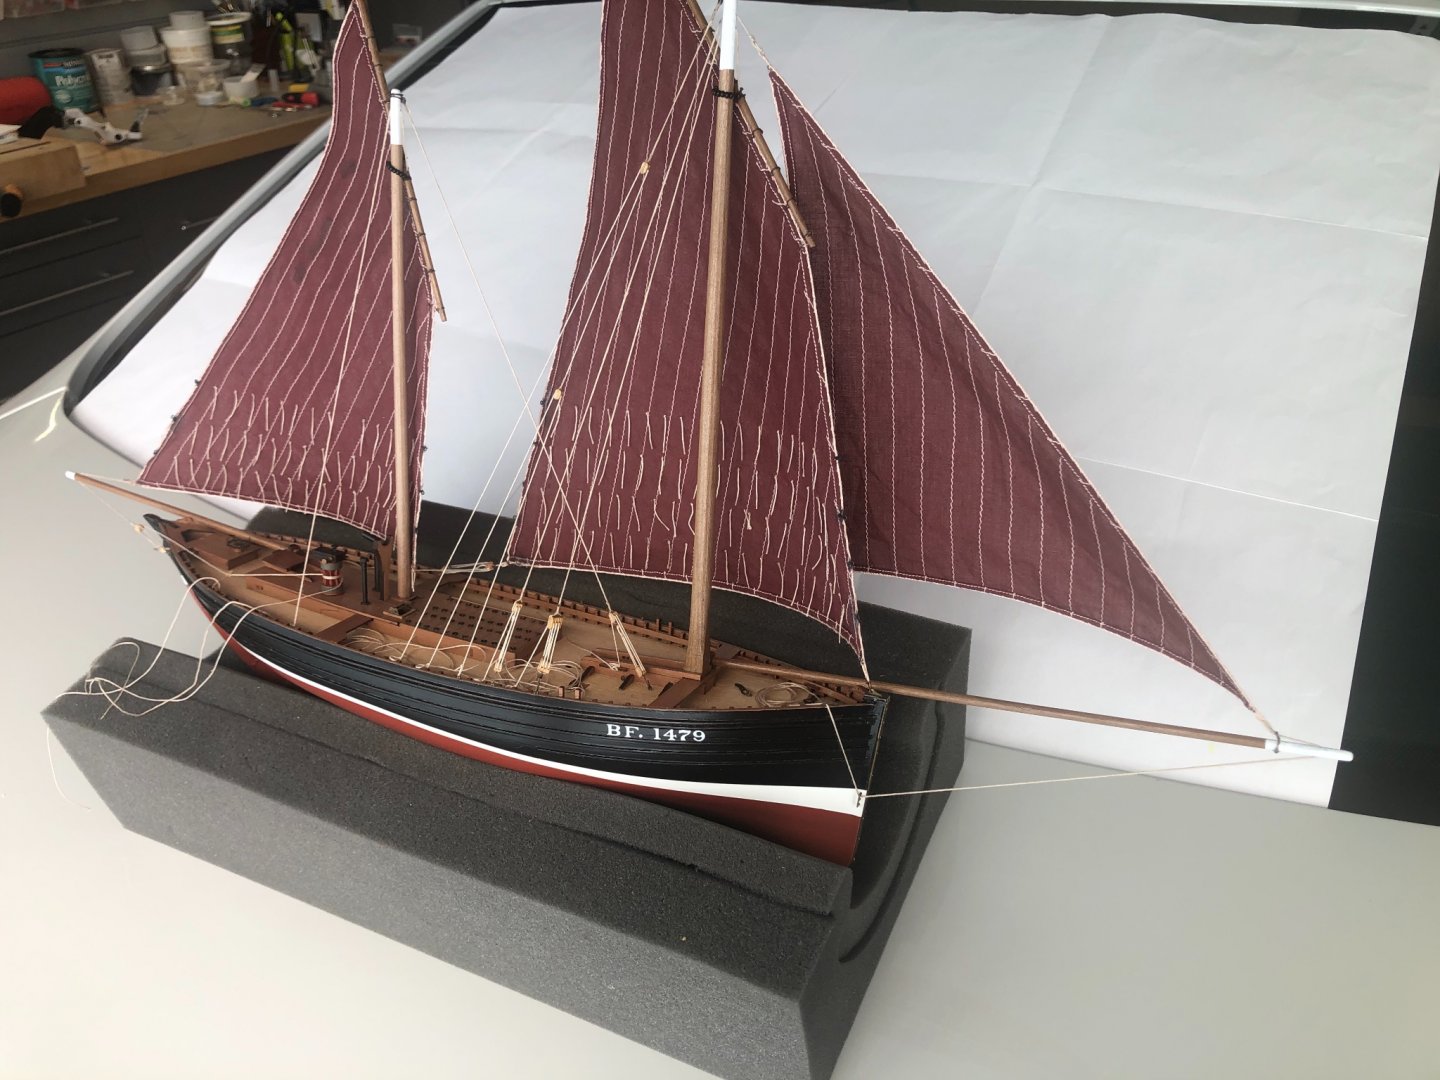
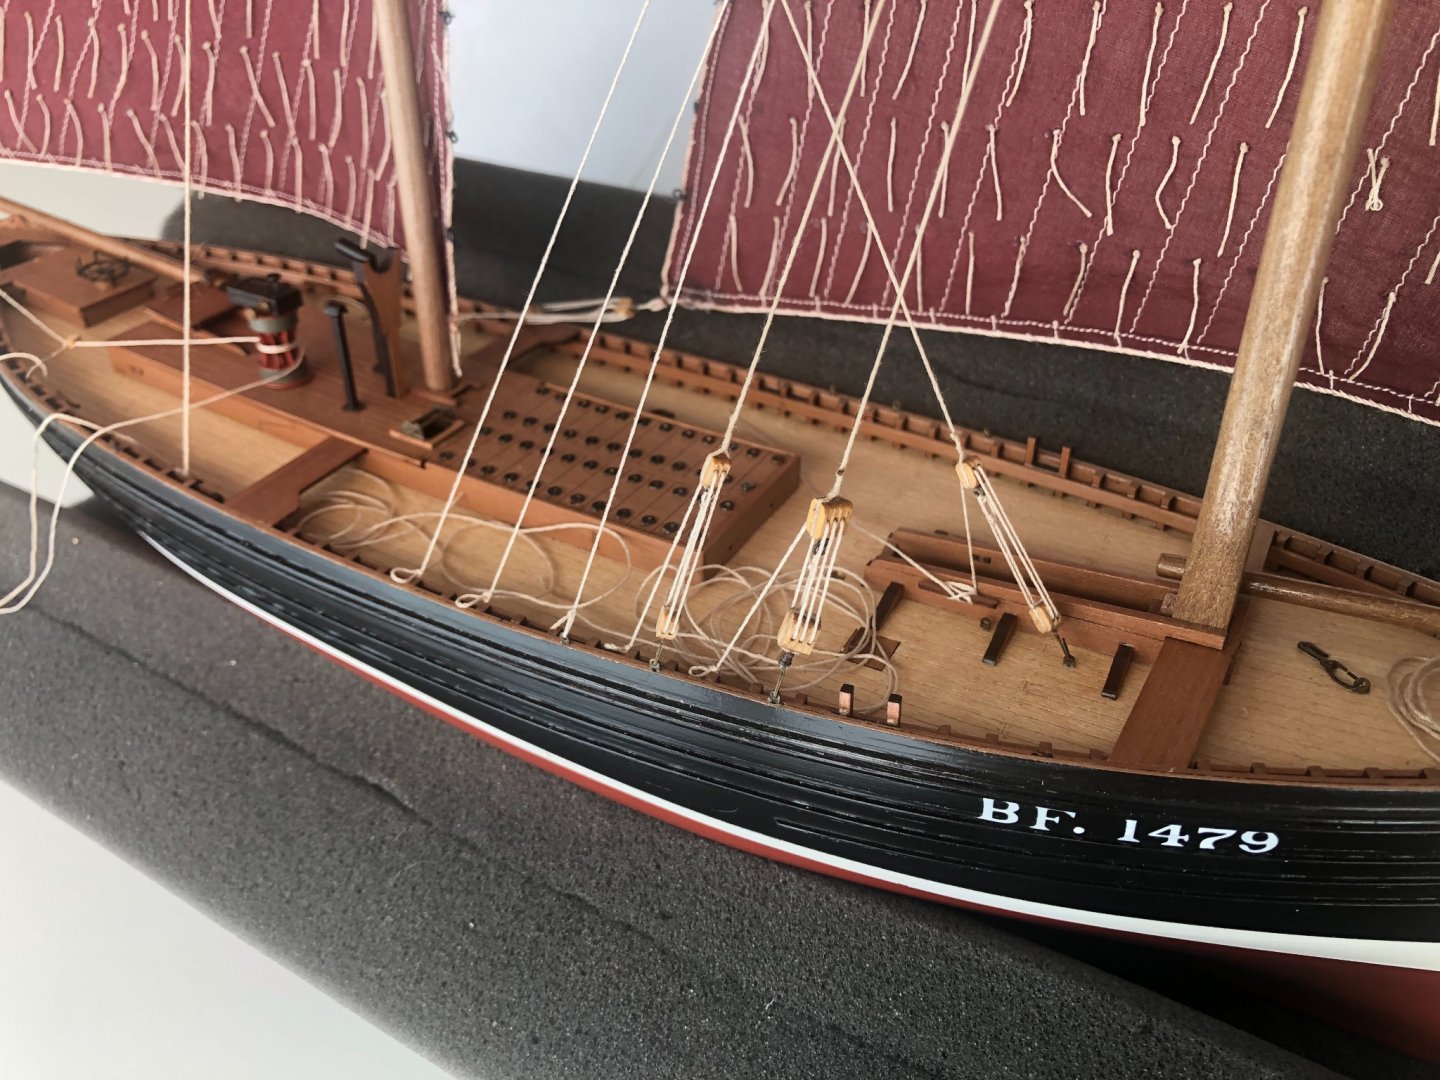
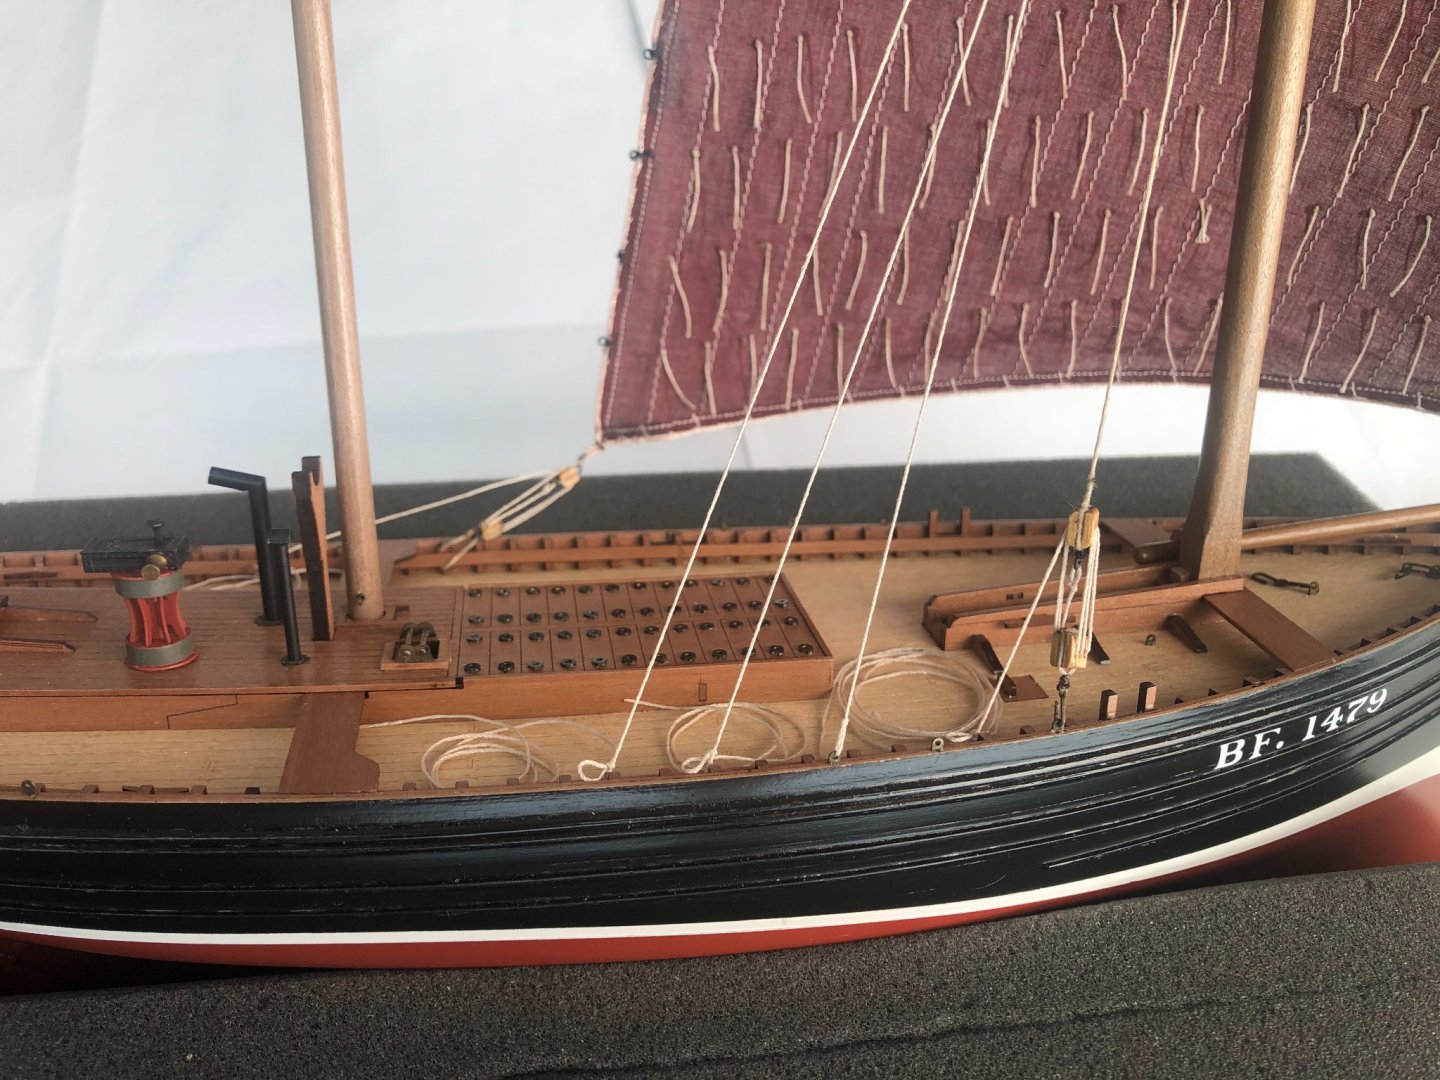
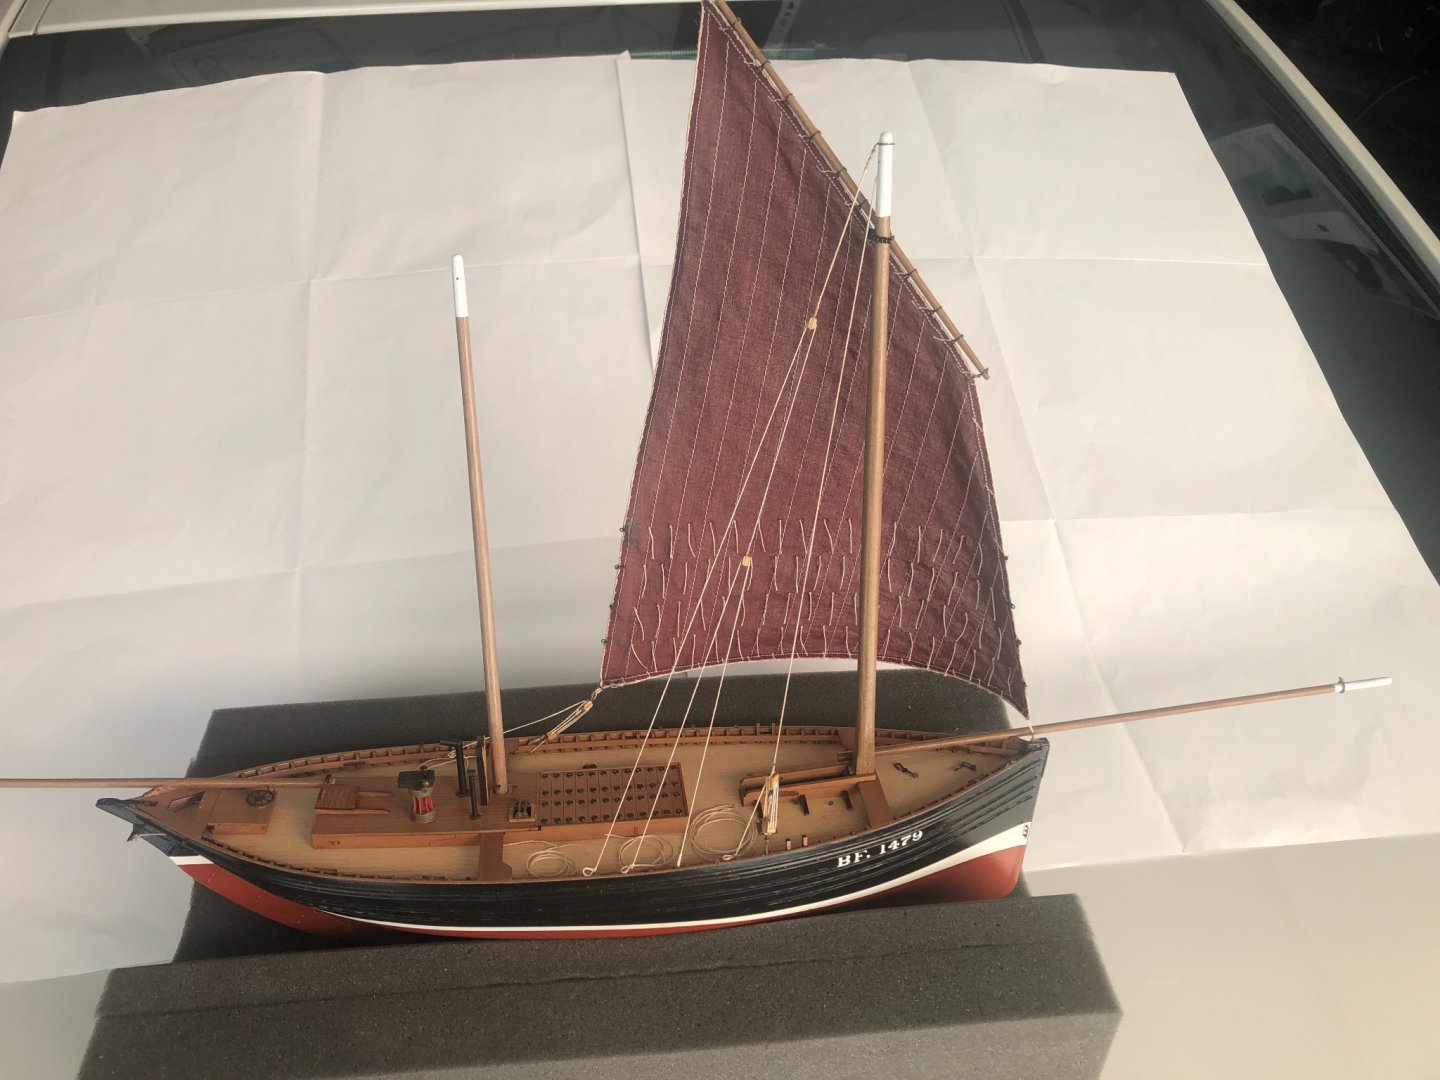
Well, my Zulu, BF 1479 Fidelity is finished. This has been a really fun and informative journey, which began when I received this kit at the end of last August. Despite a very busy professional and family life, I’ve managed to prioritize enough time to keep construction moving forward, slowly and steadily, and it paid off. Since my last update, I snugged up all of the rigging, fixed it in place using the clear nail polish, completed the sheet and line tails, and trimmed all lines to proper length. I am really feeling good about how she turned out. Although there are scores of things I would improve, and all sorts of things I’d do differently next time, I think that Fidelity came out really well, and is a pretty authentic representative of the Zulu type. The way the sails are set, she appears to be charging home on a close reach, in the early morning breeze, her hold full of fish ready for market. I hope that this build log and these photos are helpful to those who may be building this kit in the future. I can’t speak highly enough about the quality and thoughtful detailing and engineering in this kit from Chris Watton at Vanguard. I think this is a perfect first project for someone wanting to get into this hobby, and it’s designed to help set that person up for success. I’ve learned so much from building it, and absorbing the wisdom embodied in the design of this model. Many thanks to all of those who have helped me along the way, notably Chris Watton, James Hatch, Bob Garcia, Rik Thistle and Blue Ensign. Here’s some photos of Fidelity, including one showing her in her new home on the console table in the entry of our house.


- 222 replies
-
- 22
-
-

-
- First Build
- Lady Isabella
- (and 2 more)
-
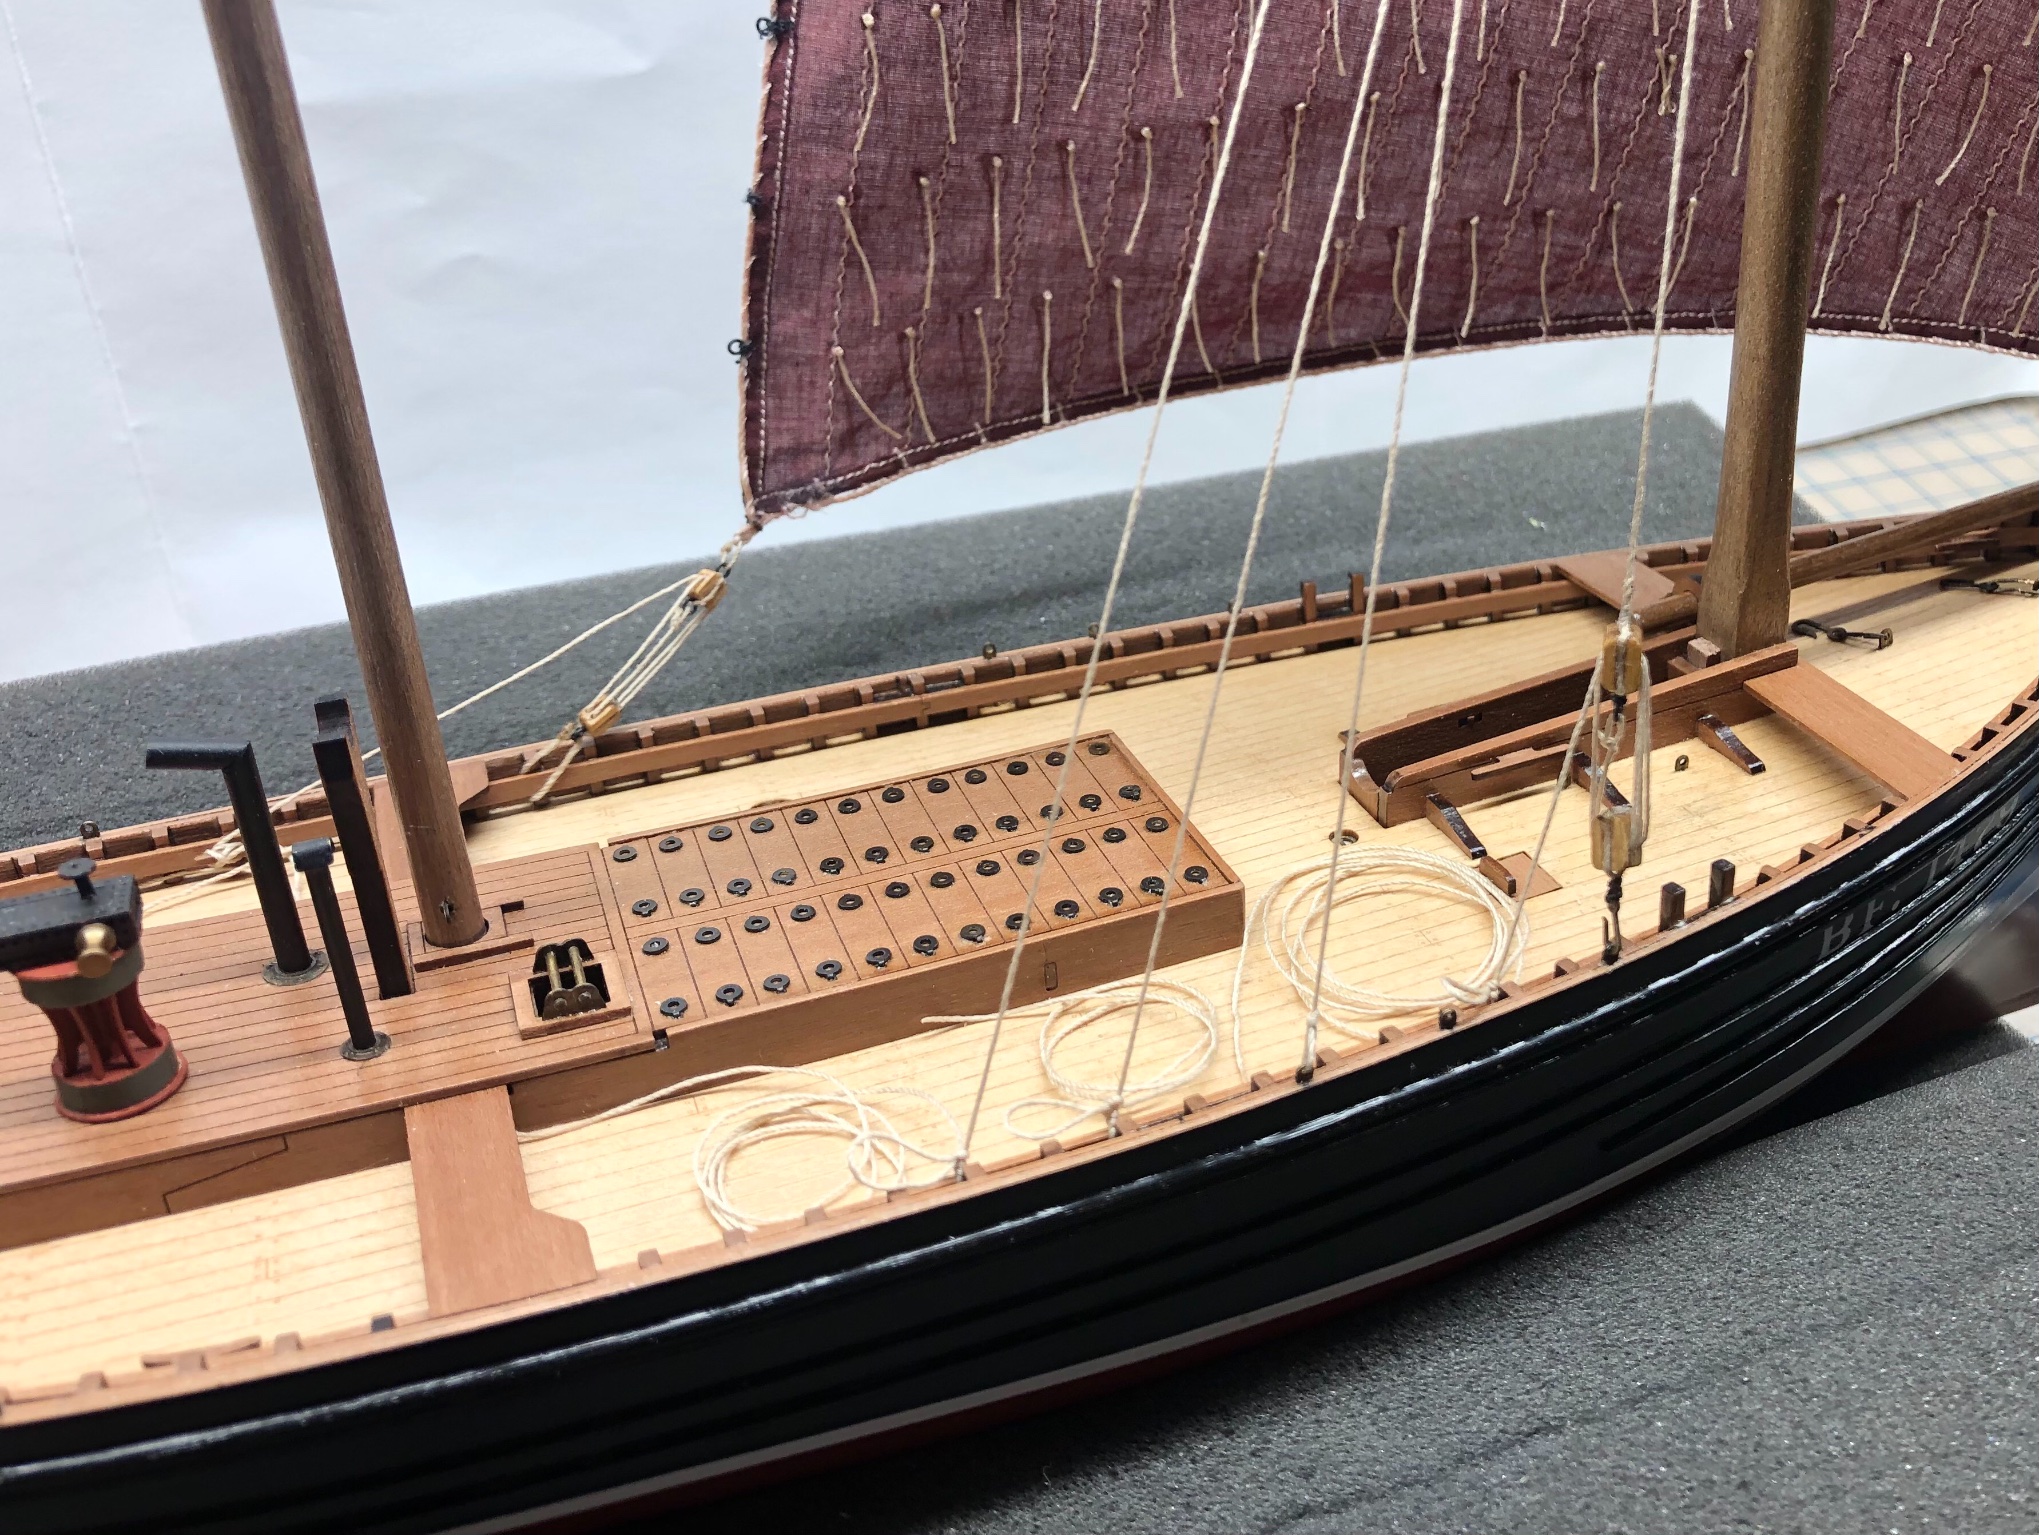
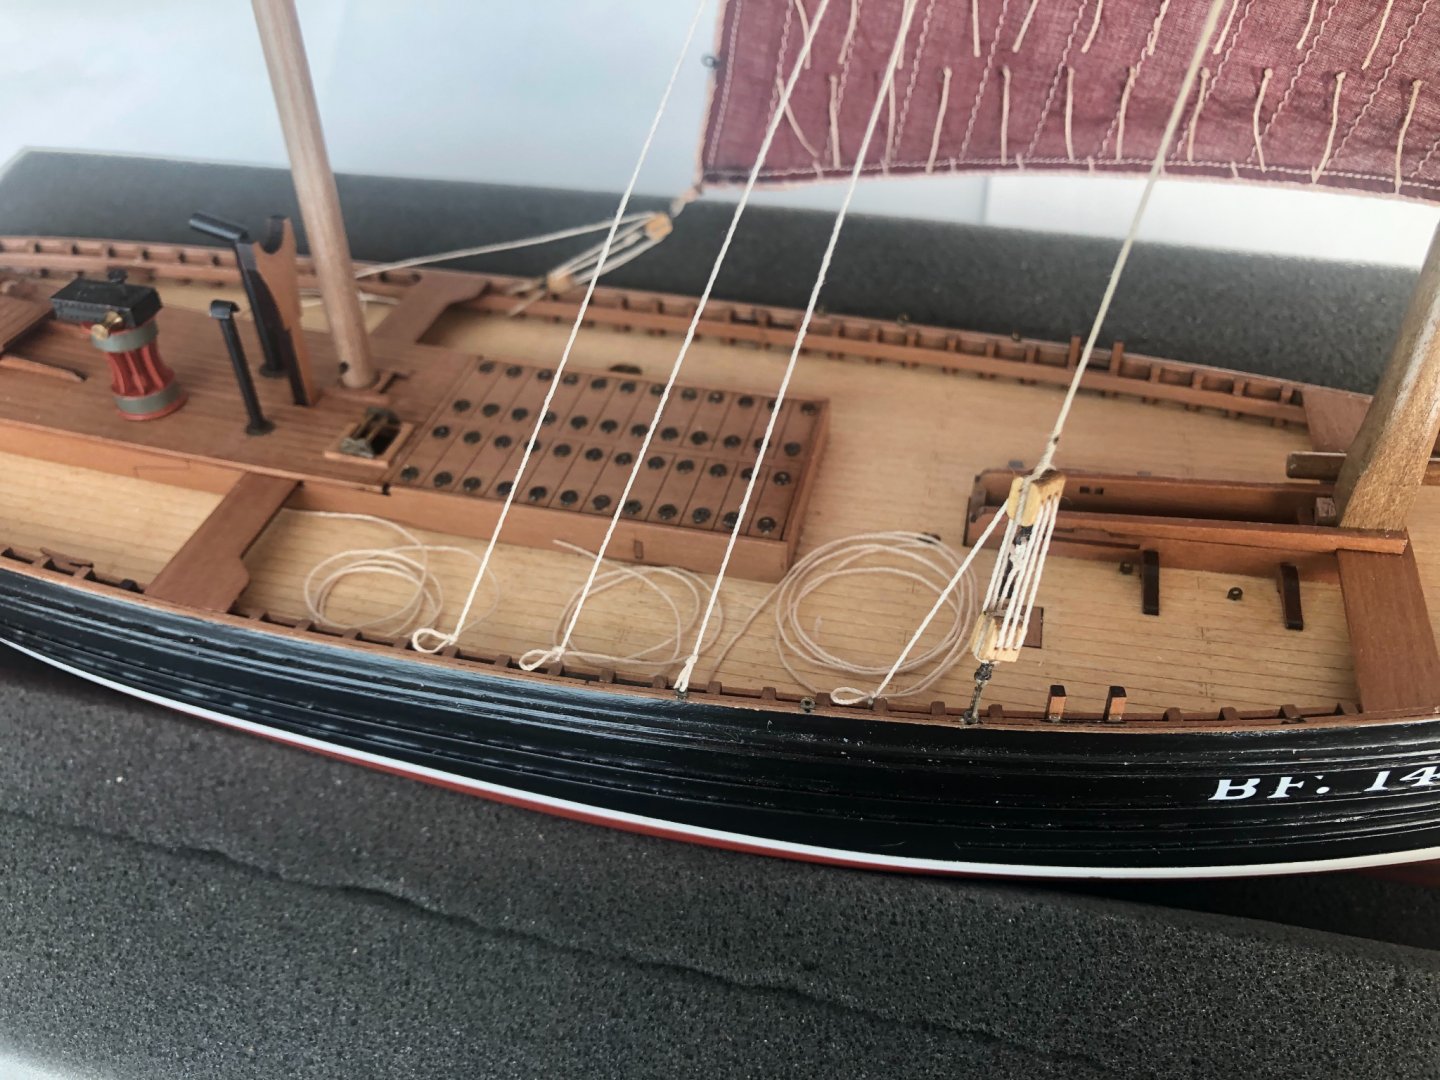
Thanks Richard! I've made my long coils 1/2" long, which at 1:64 scale is 36". I figure that's a proper length for a crewman to have made up. I really do like the nail polish for locking things in. Great stuff.
-
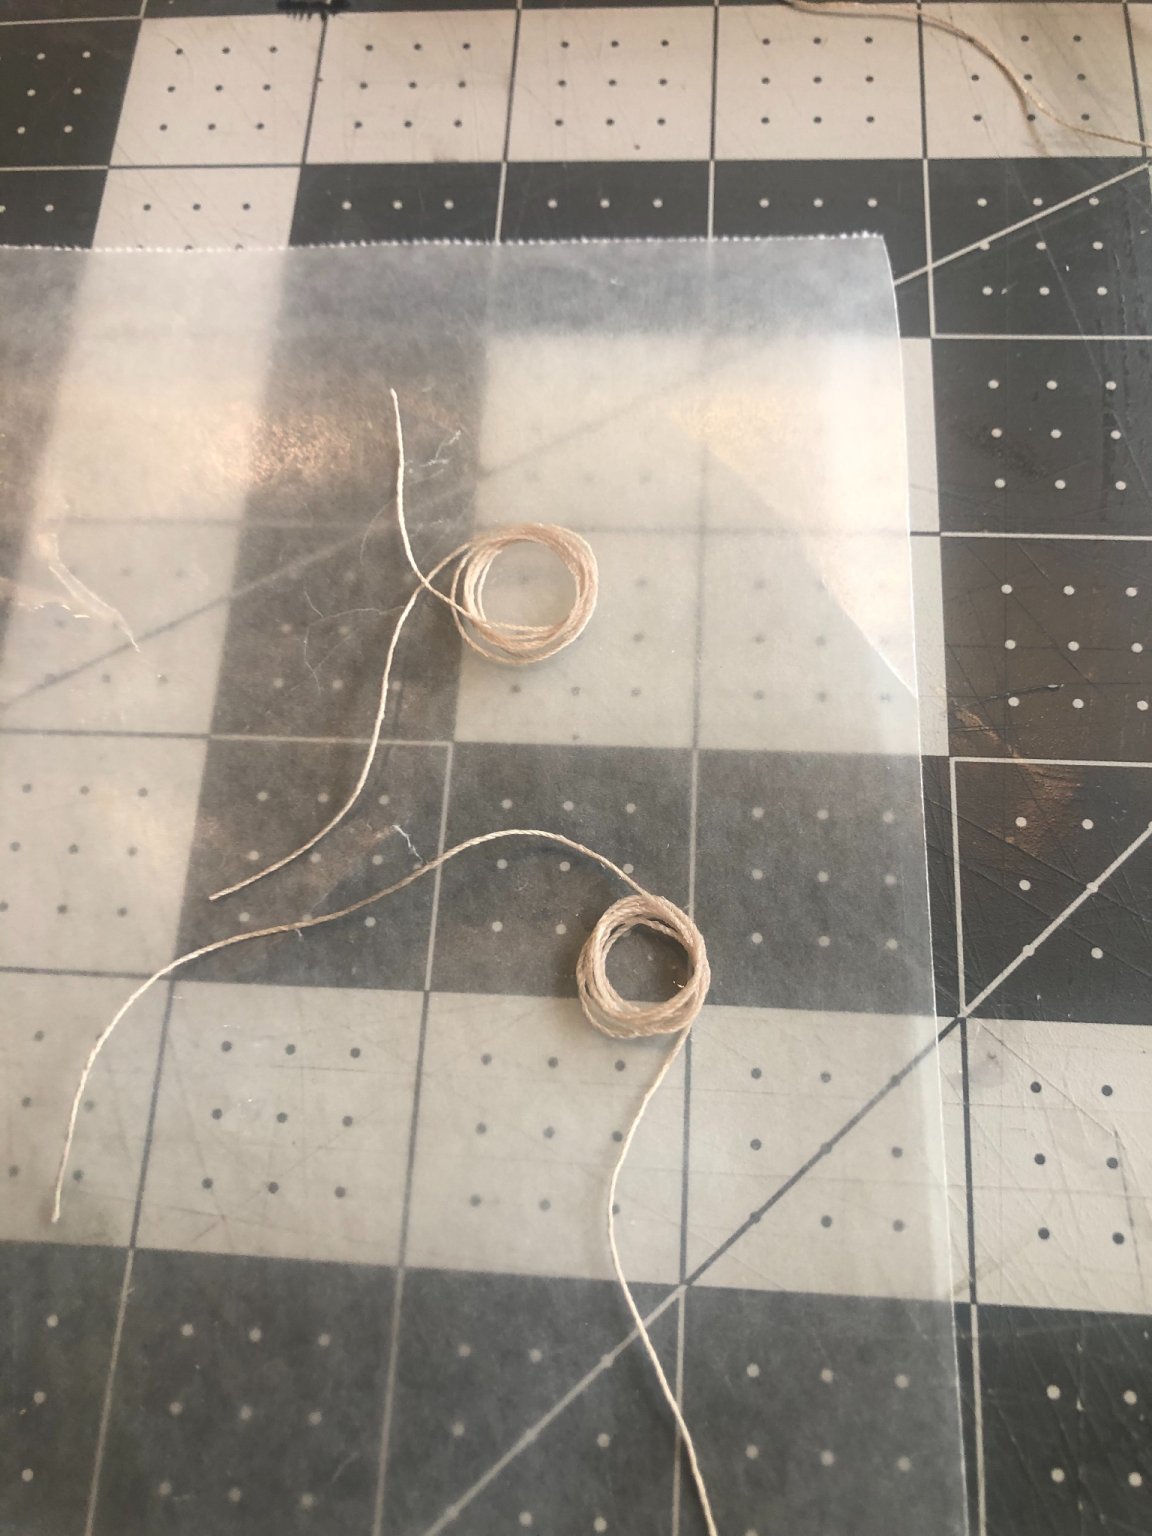
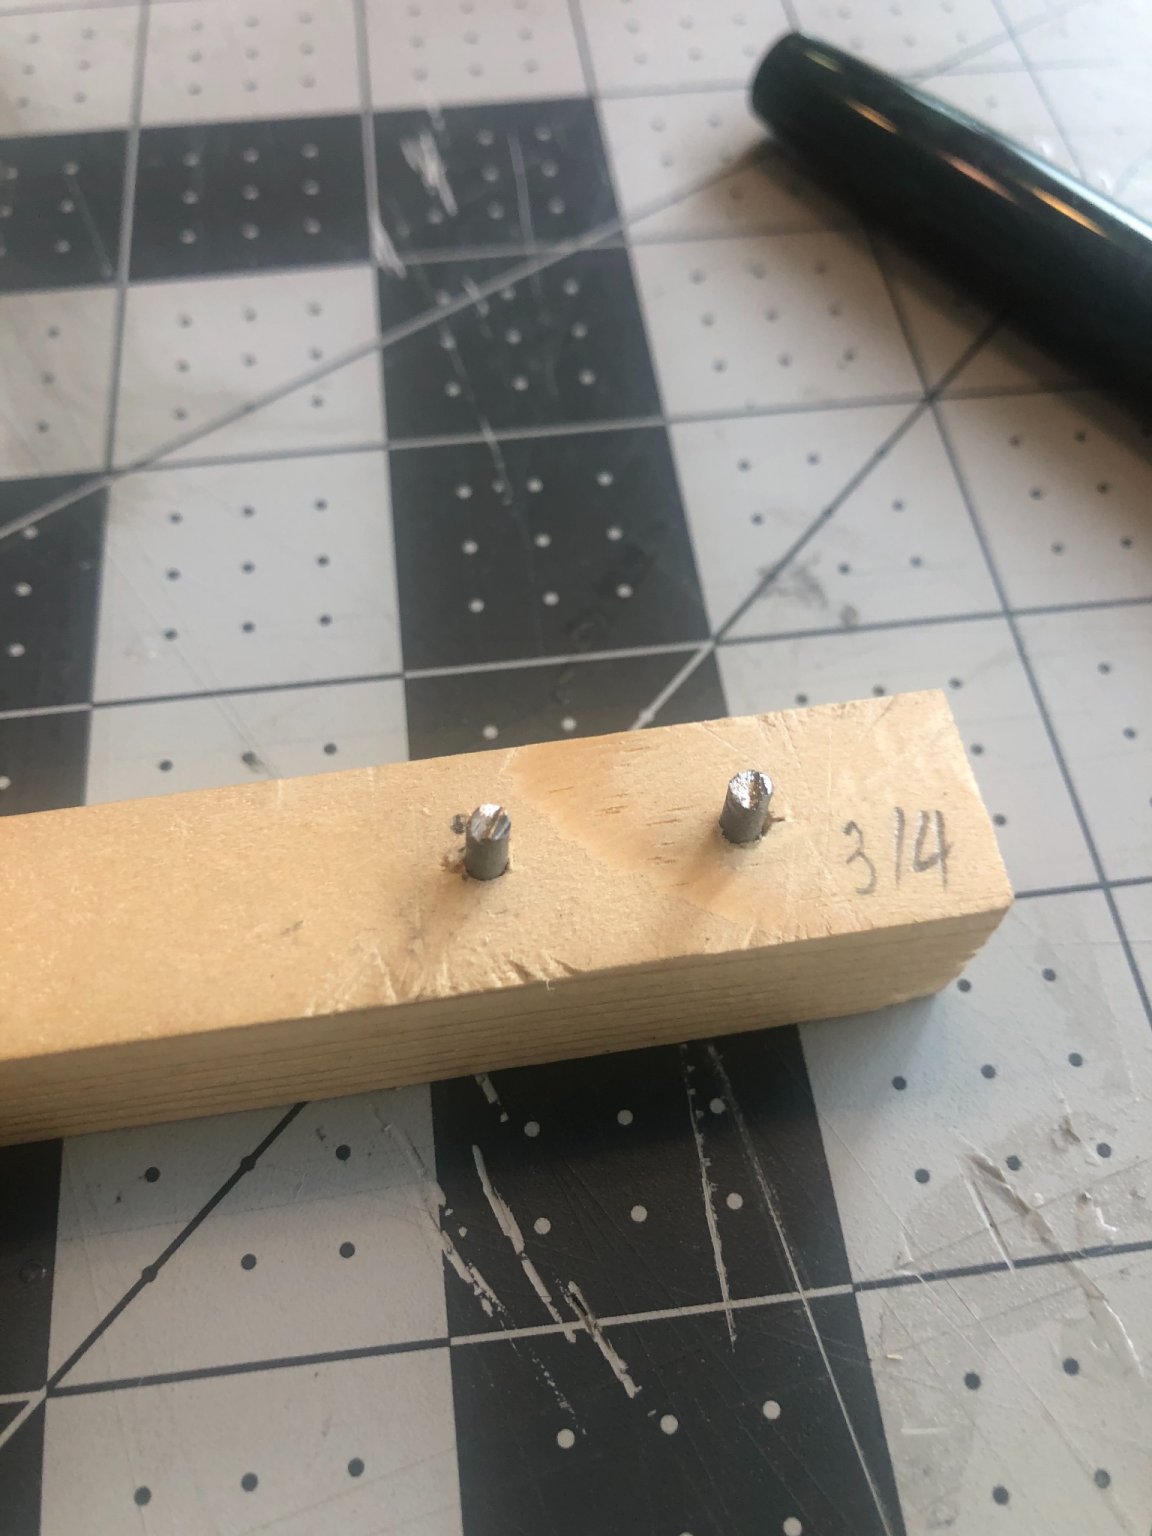
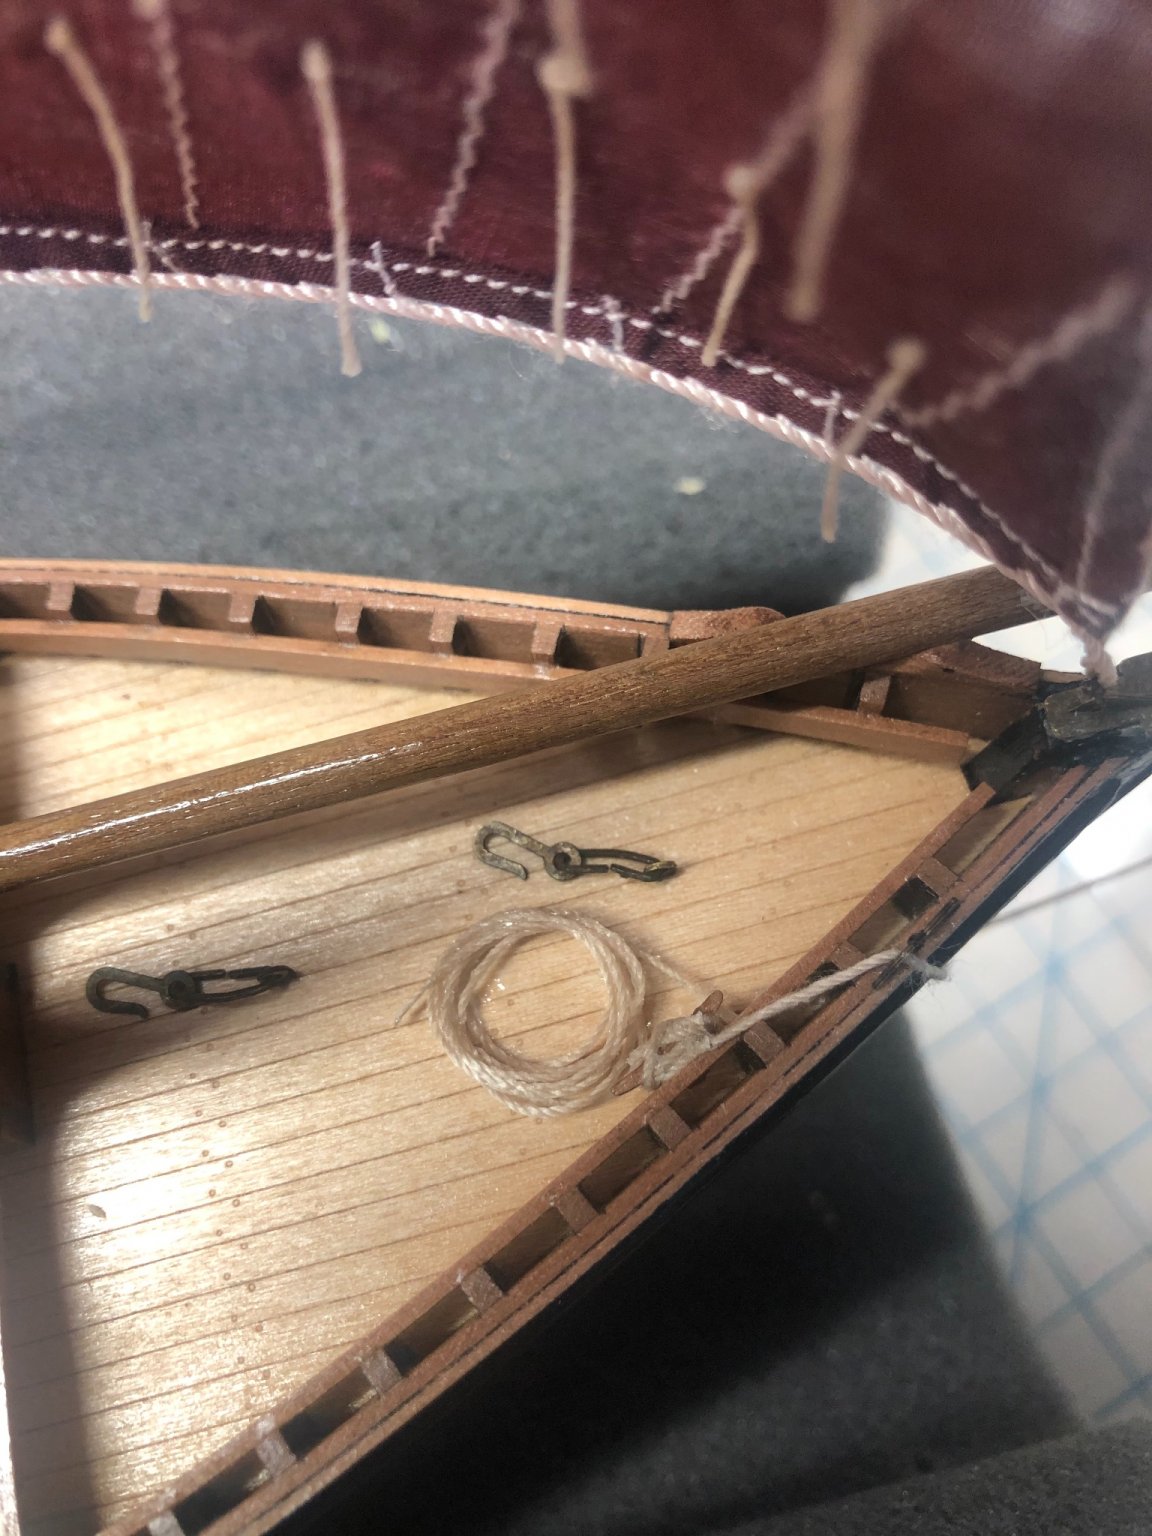
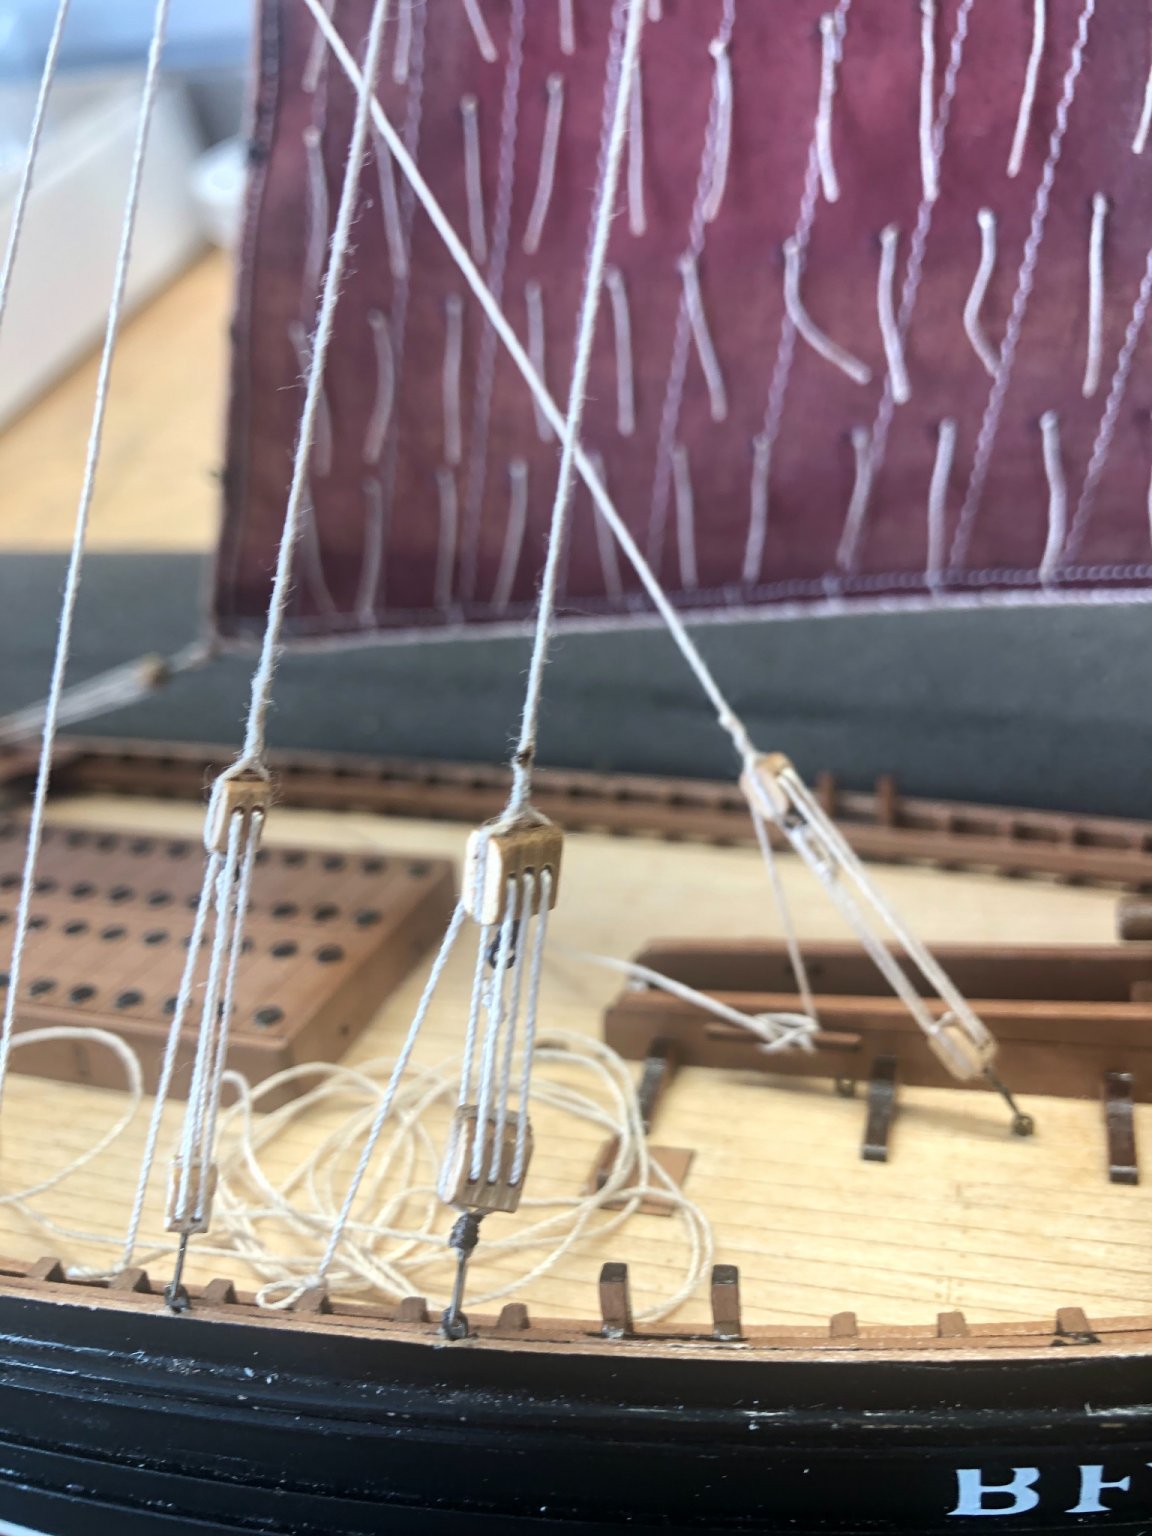
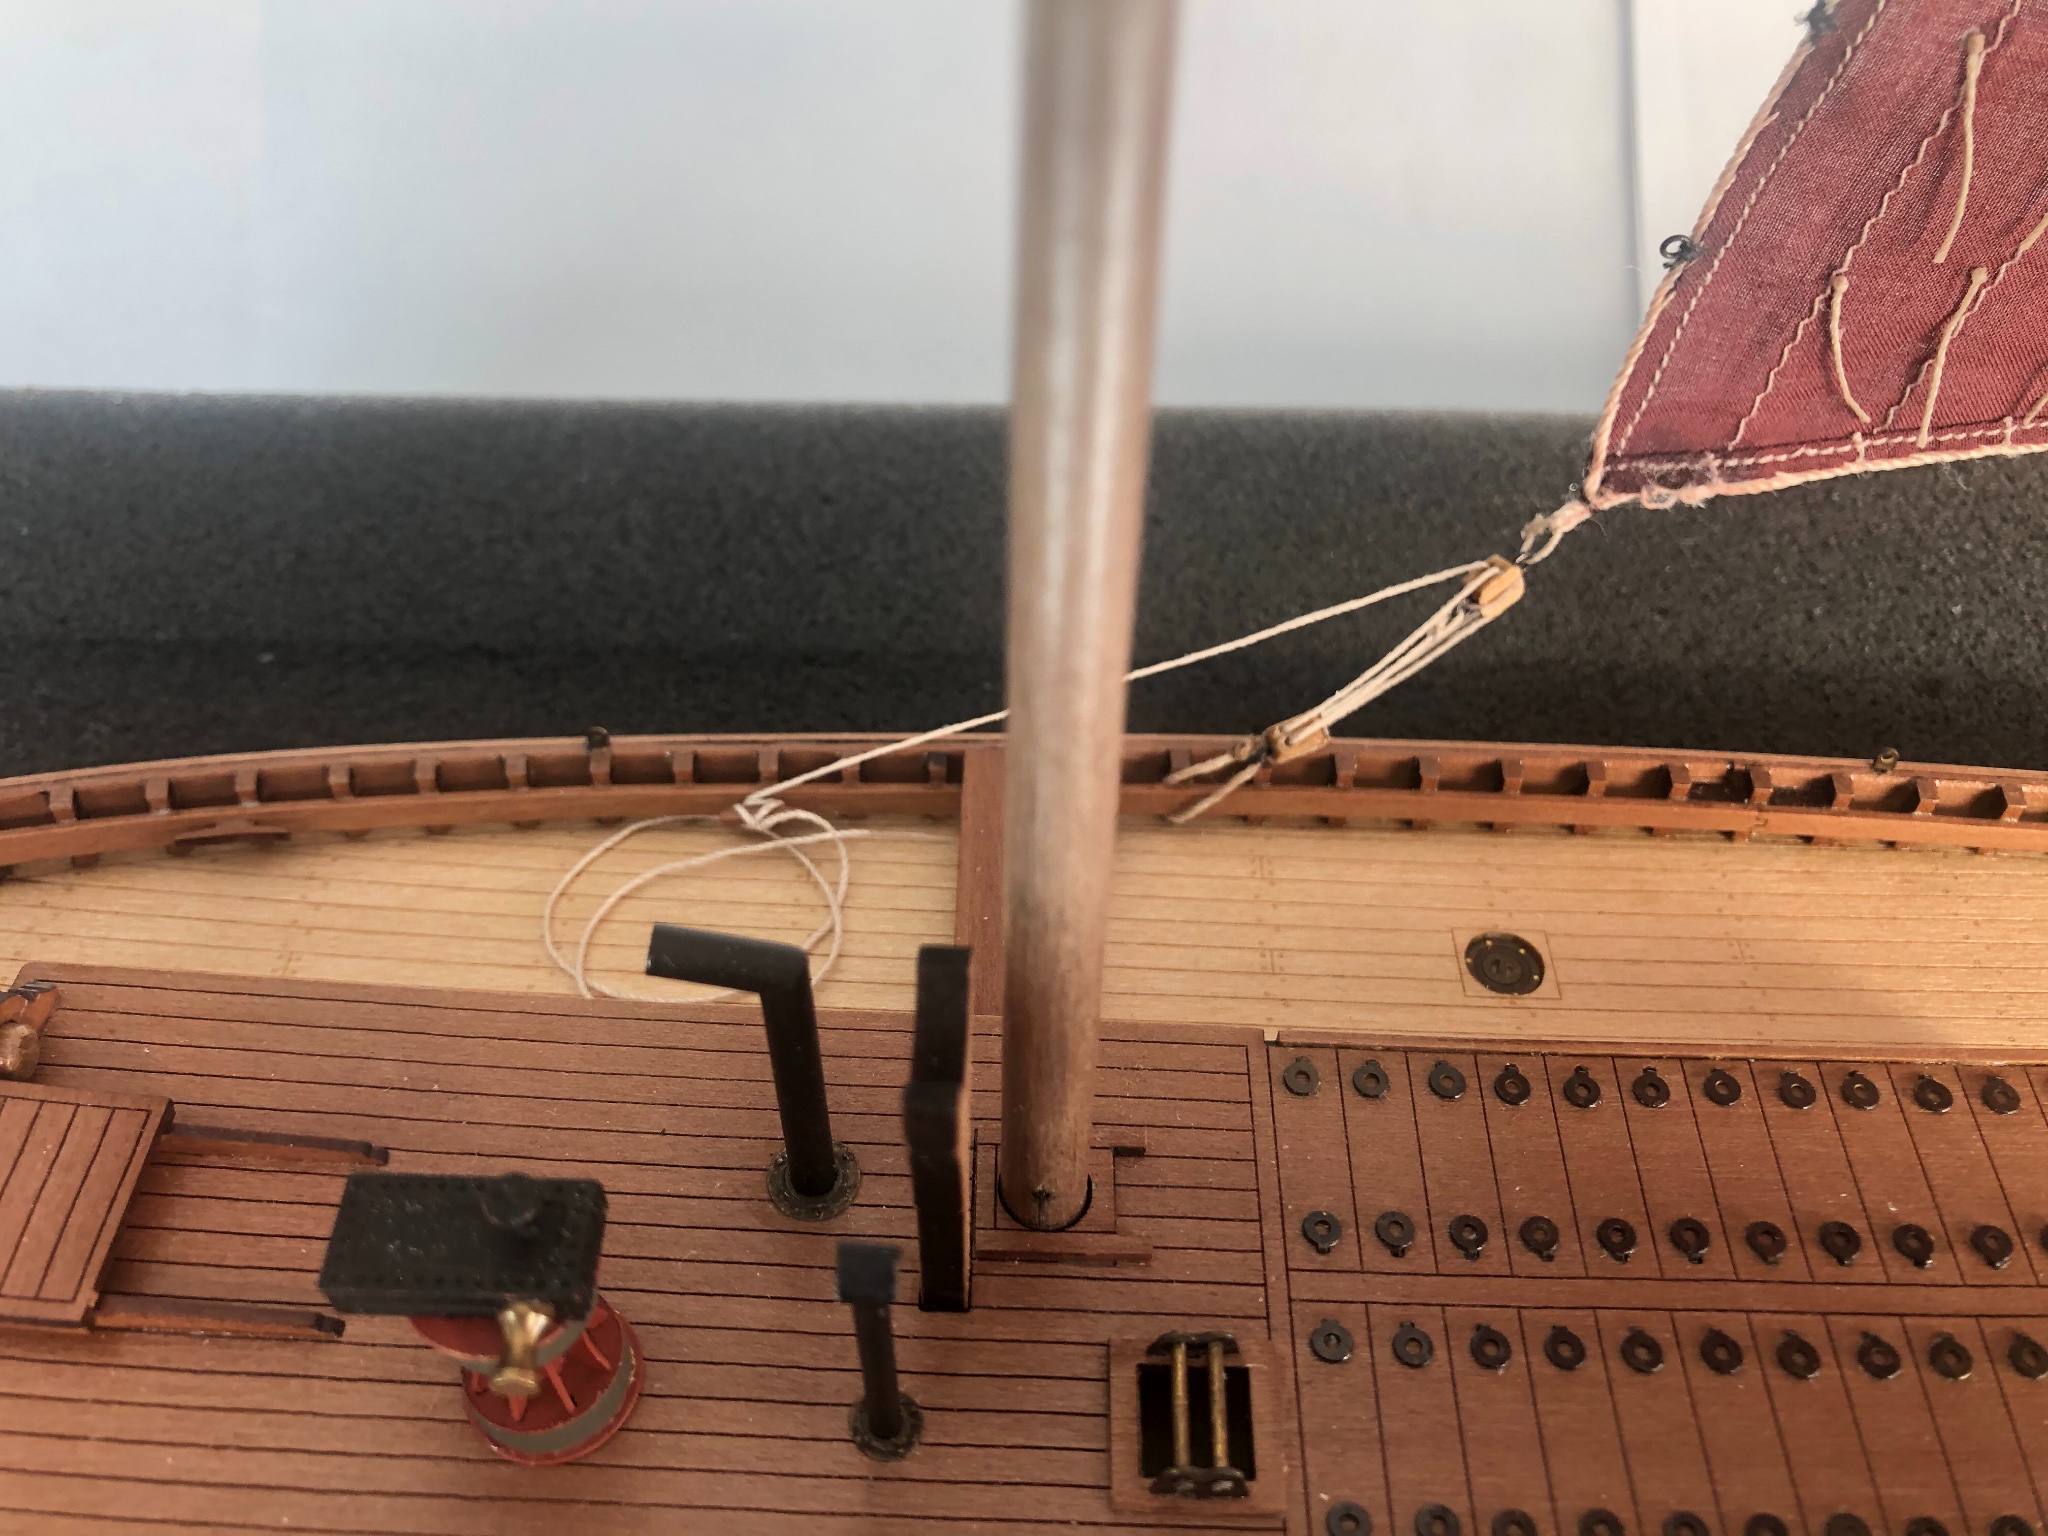
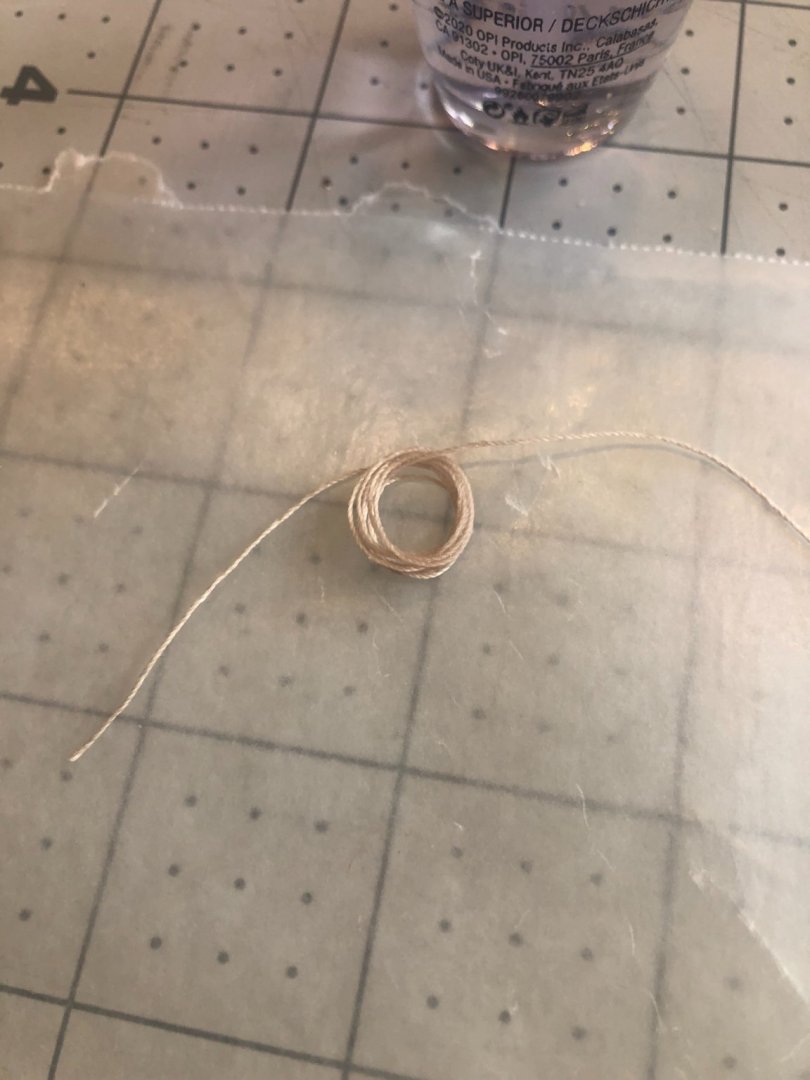
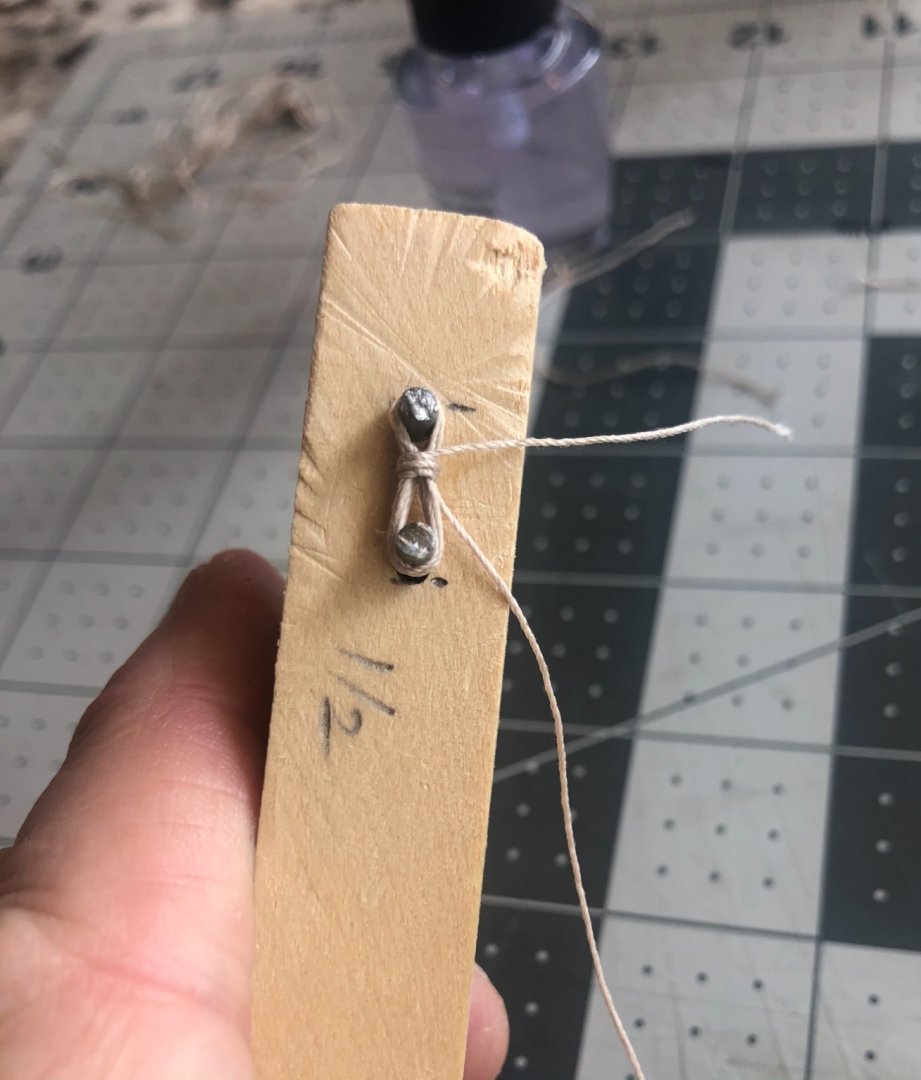
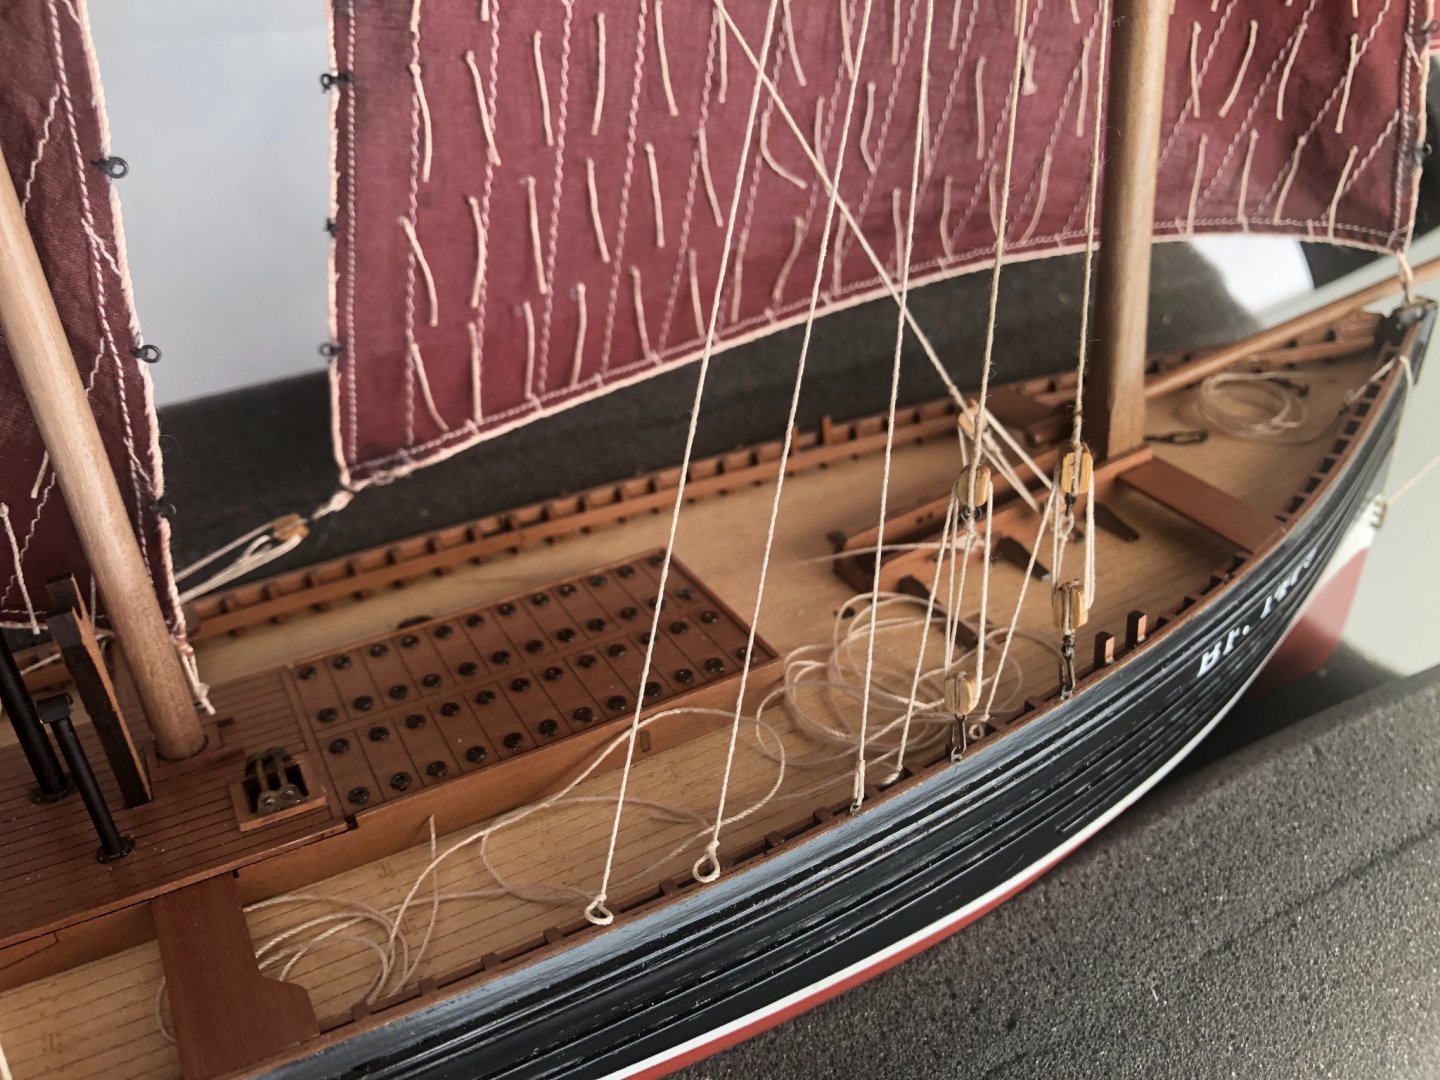
Ok. I fibbed to you all about this next post being photos of the completed model. I thought it would be interesting to share my experience creating coiled sheet tails. I learned a lot, and mastered a few techniques that I think are effective. I made all the tails of the rigging lines fast to their appropriate places on the hull, either to cleats or to the bulwark rail. I got everything snugged up tight and once it all looked good, I set the knots and trimmed the tails close. My goal is to then create coiled tails separately, and install them so that they appear to be the tails of the rigging lines. I’ve been using some clear lacquer-based nail polish to set knots and to “train” the rigging thread, and it’s been successful. It’s quite viscous, and I find it much more controllable than CA. It dries very quickly, yet it doesn’t kick off all at once like CA, so you have a bit of time to manipulate things. Also, when it’s set up, it’s a bit less stiff than dry CA, so you retain some flexibility. I created two different styles of coiled line tails. One style is simply a circular coil laying flat on the deck. Not a true Flemish coil, which is too fussy for a working boat, but a looser coil that looks quickly-but-neatly laid down by a crew member. These I made by wrapping the thread 8-9 times around the end of a dowel, and then pushing it off onto a sheet of waxed paper. Then I gently painted the coil with the clear polish, and teased it into a natural-looking shape. The polish dries in about 7-10 minutes. The other style is a coil done up more neatly, to be hung from a cleat or the bulwark rail. For these, I made up a little jig from a scrap of wood and some nails. I wrapped the thread around the nails 8-9 times, and then lashed around the coil at one end. This is a method of storing the running tail of a line with which every sailor is familiar. Once completed, I painted the coil with polish while it’s on the jig, and then when dried, I pulled them off. I trim one free end a bit short of the end of the coil, and then the other end will be carefully glued to the attachment point. This all seems to have been pretty successful. I’ll post some more photos when the coils are installed on the model.


- 222 replies
-
- 3
-
-
- First Build
- Lady Isabella
- (and 2 more)
-
Here’s an update on the rigging, which is nearing completion. I’ve installed both the jib and the mizzen lug now, so the sail plan is now complete. I still have to build and install the block and tackle for the mizzen halyard, and then I’ll be cleaning up the tails of all the rigging lines, making up some rope coils for some of the lines which are tied off to the bulwark rails, and I’ll be coiling some of the lines on deck in a Flemish-like working fashion. I’ve been reading some of the posts here on the forum about techniques for making natural looking rope coils, so I’ll be trying to use some of that knowledge. BF1479 Fidelity is nearing completion. My next post will be photos of the completed model. As always, I’m grateful for all of you who have helped and encouraged me on this journey.


- 222 replies
-
- 6
-
-
- First Build
- Lady Isabella
- (and 2 more)
-
I’ve finally found some time to make some progress on the rigging. As with most of this build, this is new to me, so I’m learning as I go, and every little bit seems to require me diving into the forum here, or Edgar March’s book, or the internet, to do research on best practices. But my sailing experience helps, because I can answer some of the questions just by asking myself, “what would make sense”. Of course, if anyone has any recommendations, I’m “all ears”. Tied the mainsail to the yard, constructed the parrel, and I was finally able to set the sail on the mast. I inserted a stainless steel wire into the hem at the foot of the sails so that they would take a proper sailing shape. This seems to have worked well. I have completed the halyard, the burton stay and the main sheet. It took me a while to figure out a technique for building the blocks, but I arrived at at method that I believe is pretty accurate without being too challenging. For the blocks requiring a becket attachment, I threaded on a tiny 2mm ring, and seized it into the right position. Where splices were required, I wove the end of the line into the standing part, pulled everything tight, twisted the line a tad, and set it into place with a drop of CA. This seems to be a pretty good simulation of a scale splice. Where the attachments for the standing ends seemed to make sense as knots, I tied bowlines. Where the running end of the line would be made fast to an attachment point, like the bulwark rail, I tied them off by wrapping them several times around the rail and using a slip knot to make it fast. That’s what I’d do if I were the crew... the halyard and burton would need to be easily removable so that they could be shifted to the other side of the boat during a tack or a gybe. I left an appropriate amount of tail on the lines, and when everything is done and snugged up, I plan to coil and stow the tails in a seamanlike manner. Below are some photos. On to the jib and mizzen, and then we’ll be nearing the end! -E


- 222 replies
-
- 7
-
-
- First Build
- Lady Isabella
- (and 2 more)
-
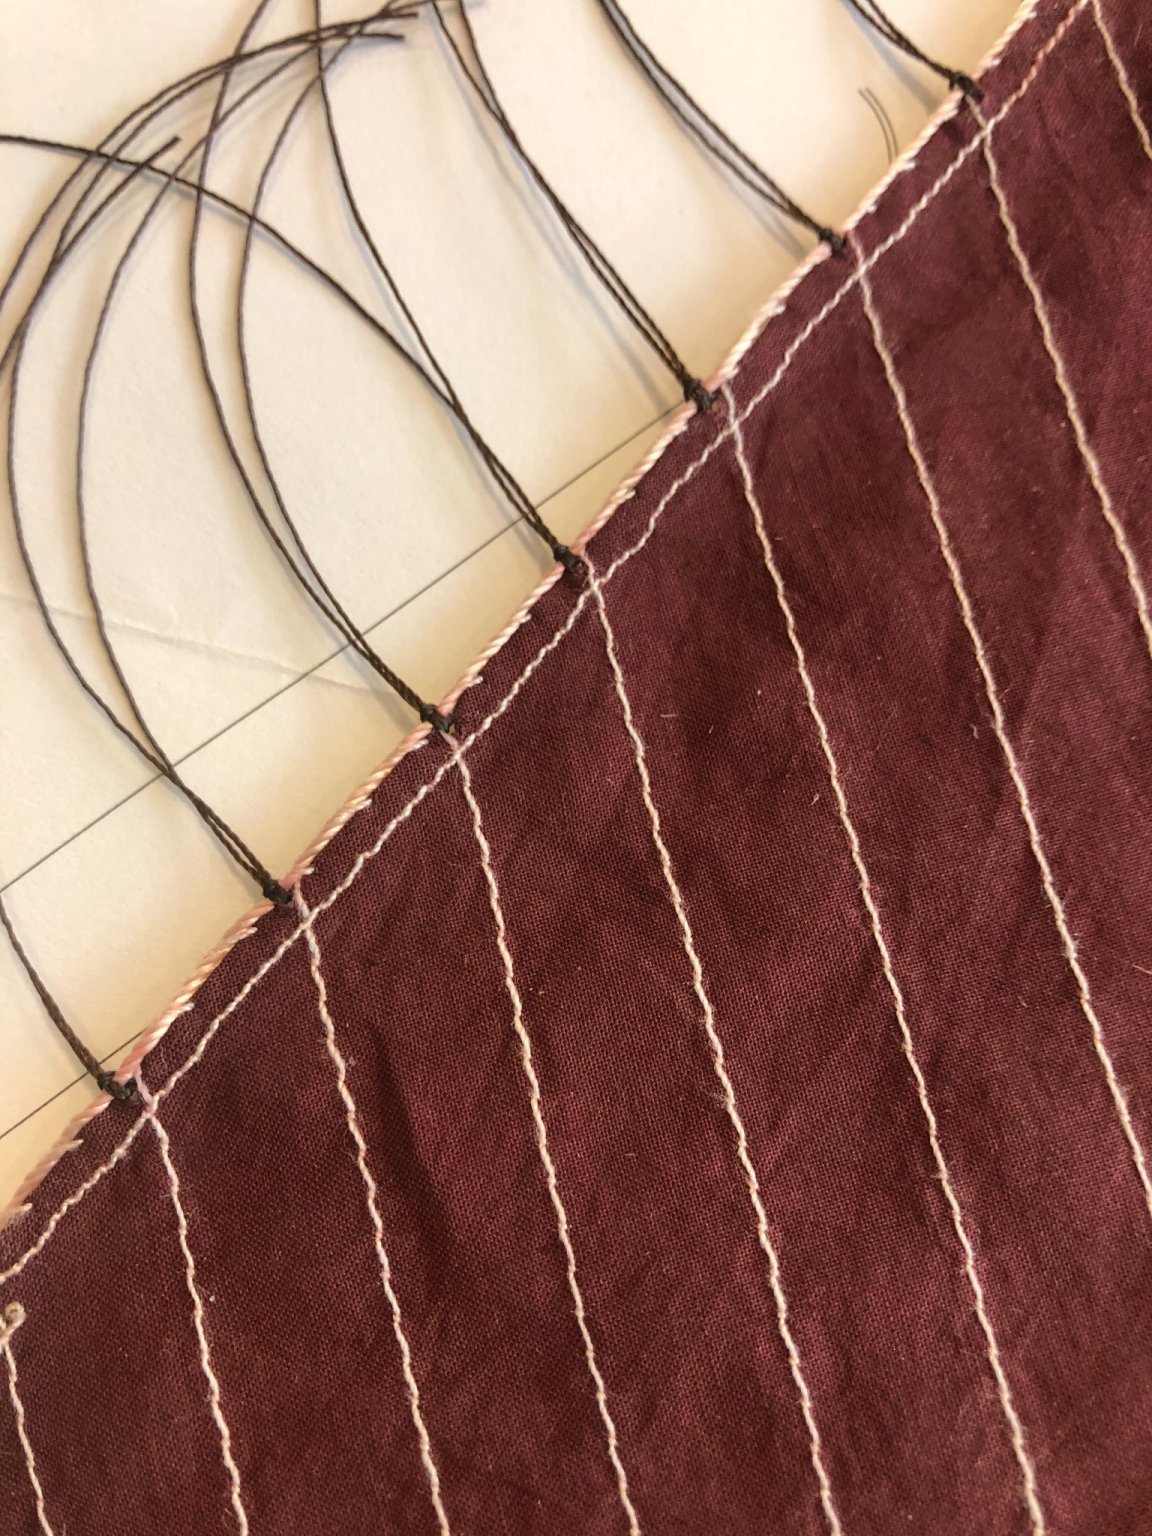
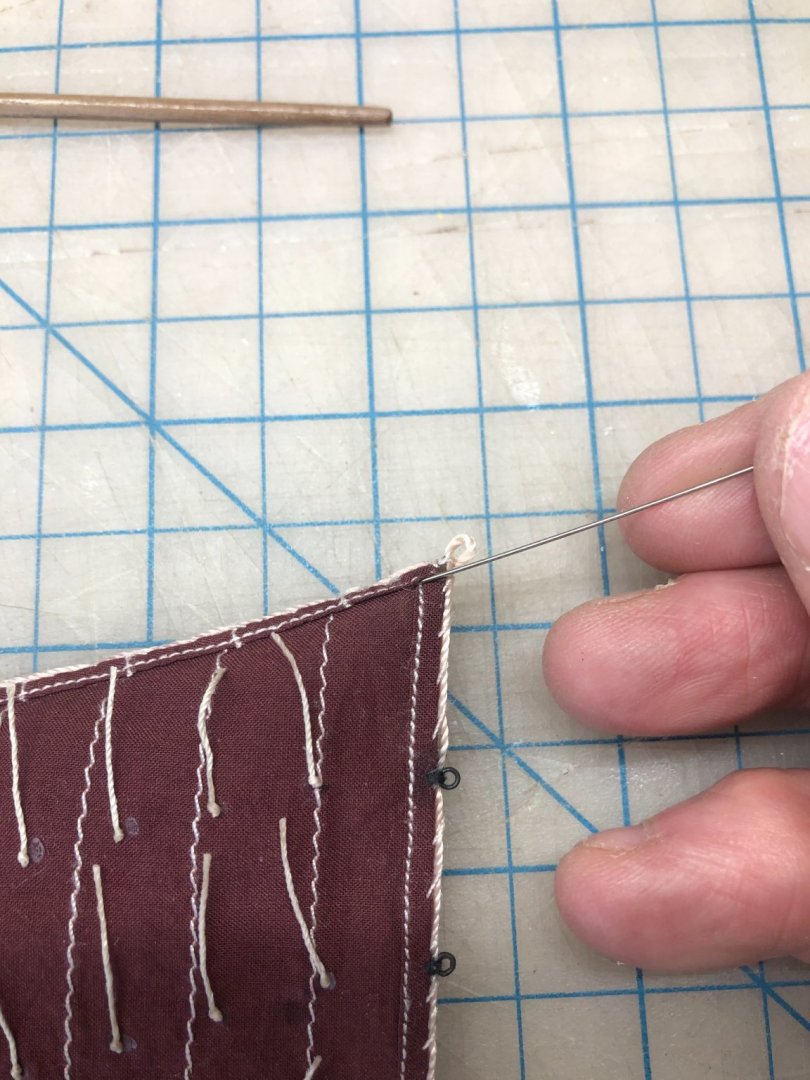
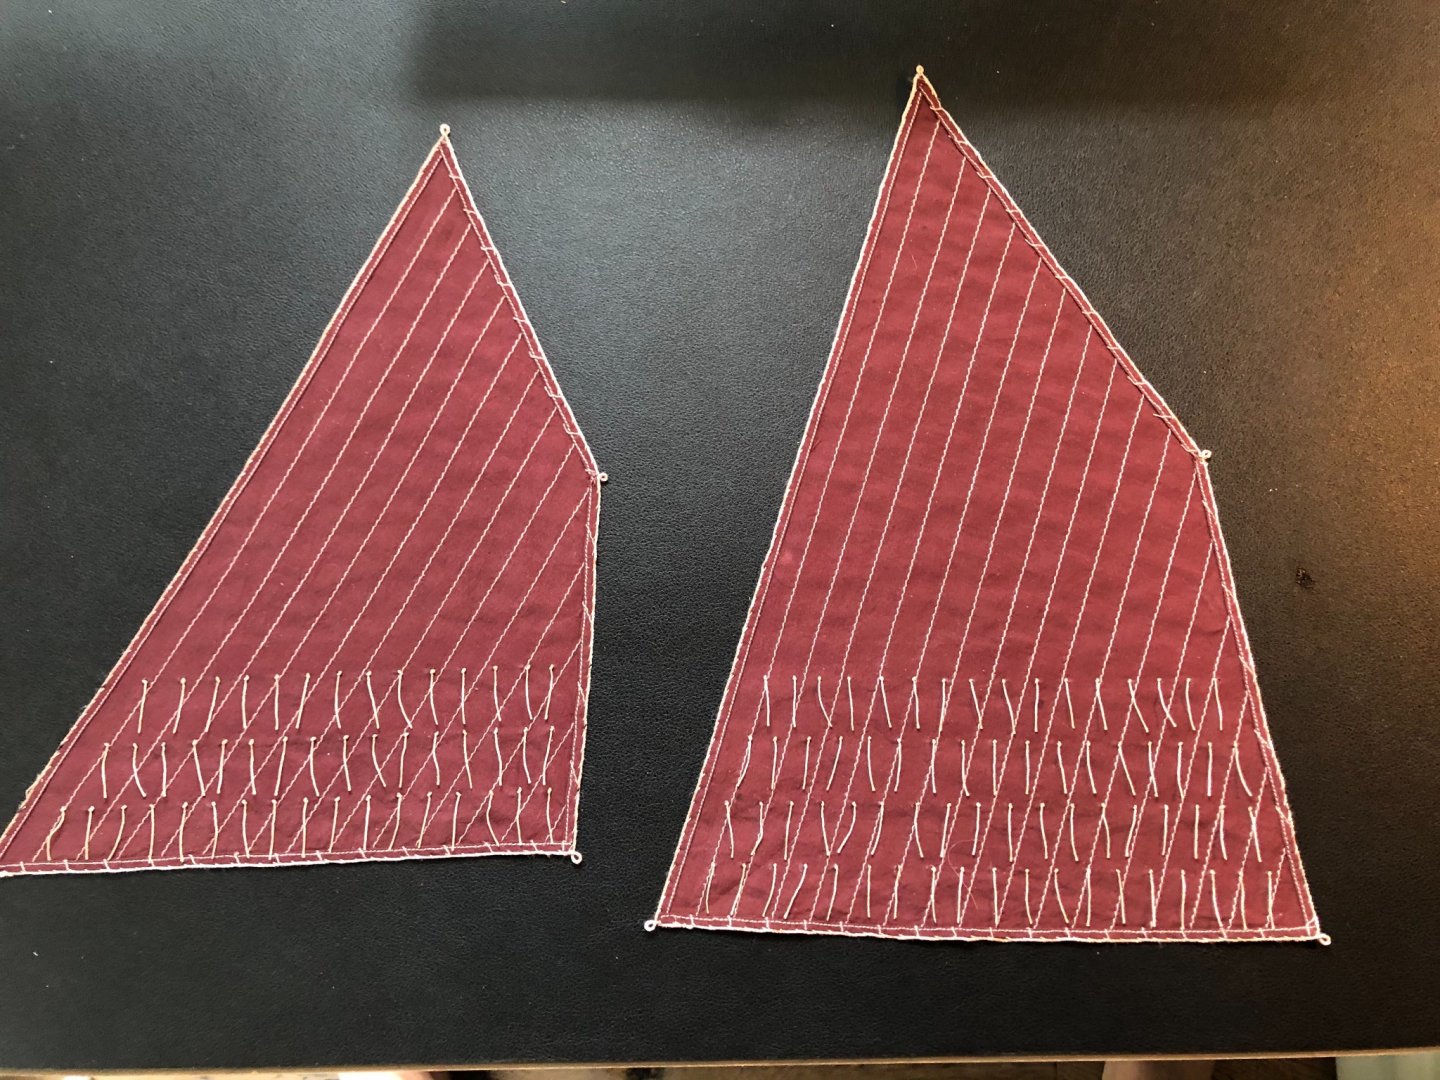
Here’s a small update. It took me a week or so of evening work, but I finished the reefing ties on the main and mizzen sails. This was accomplished during evening sessions of a hour or so, after work, where I’d make myself a cocktail and glue tiny little knotted ties to the sail. Tedious, but strangely satisfying. I think it came out quite well. The ties look correct to me, and they hang in a natural fashion. Success. A couple things I learned: It became apparent that a figure-8 knot worked better than a half-hitch. The resulting knot was a bit larger, and it lays flatter to the fabric when gluing the tie on. Also, setting the knot with a small drop of CA helps make sure it doesn’t come untied, and allows you to trim the extra thread right up close to the knot. Now that this task is behind me, next up will be to lash on some very small rings at the edge of each row. There would have been bronze rings lashed to the luff and leech of the sails to tack the sail and to attach the sheet after reefing, so I’ll add those. Then on to real rigging!
- 222 replies
-
- 7
-
-
- First Build
- Lady Isabella
- (and 2 more)
-
It’s been a couple of weeks since I’ve been able to work on the Zulu. Been swamped with architecture, and modeling has had to take a temporary hiatus. However, I finally got a weekend where I didn’t have to work 👌. So I started back in on getting the sails done. I decided not to attempt the weathering wash. I was convinced by a few of you who suggested that my build was “clean” and that weathering the sails might be a discordant note. Also, I was terrified about possibly screwing them up irreparably. 😬 But I have started installing the reefing ties. I decided to follow BE’s lead, and glue individual knotted ties to each side of the sail. This allows them to hang in a more scale-like, natural way. My process has been: Tie a knot in the cord, carefully apply a tiny drop of thin CA to the knot to set it, cut the excess close to the knot, then trim the tie to the correct length (15 mm). Then I apply another tiny drop of CA to the end of the tie to keep it from fraying. Then I carefully apply a tiny dot of PVA to the knot, and place it in the right spot on the sail. Repeat 234 times. The results look really good so far. This is going to take a while, though. I’ll check back in with you all in six months or so when I’m done. 😆

- 222 replies
-
- 3
-
-
- First Build
- Lady Isabella
- (and 2 more)
-
I just found the passage you may be speaking about, in March’s “Sailing Drifters”, page 260-261. “A 60-footer, fishing in illegal waters in the Minch, was surprised by a fishery cruiser, and although the Government vessel was doing 14 knots, the lugger beat her into Stornoway”. Not surprising to read that. 60 ft. + on the waterline, and as I said, a really fair hull shape with low wetted surface. In a fair breeze and the right point-of-sail, 14+ knots is certainly quite possible. Your model is really magnificent. Beautiful job. It captures the flavor of what those boats must have been like.
-
Having immersed myself in the history and aesthetic of the sailing drifters of Scotland for the last few months, and having studied lots of photos, I can’t help but think they must have been pretty fast boats. Long and fairly narrow, with fine, sharp bow sections, and low wetted surface, I bet they could really move with the wind on the beam.
-
Sails look very authentic. It really looks like they are filled with breeze. Excellent!
-
Your sails are really great. Can you describe the paper you used in a bit more detail? Also, I’m wondering how you attached the wire to the foot and the leech. Beautiful, GB. Thanks!
-
This looks really beautiful. The level of detail in this kit is stunning, and it all looks well conceived and engineered. You’re doing a wonderful job with it!
-
Thanks for all of the comments and suggestions. When I talk about "weathering" these sails, I'm not talking about antiquing them so that they're looking like the Dead Sea Scrolls. I'm just talking about a subtle patina that will make them look a bit less like brand new cloth. I agree that my build is "clean", and the approach I've taken is to make the model appear to be a newly built, well-maintained version of the Zulu type. So I think your thoughts on not wanting the sails to be discordant with that are right on. Thanks for the input. I'm going to experiment a bit this weekend with a VERY diluted wash of brown/black to see what I can achieve.
- 222 replies
-
- 3
-
-
- First Build
- Lady Isabella
- (and 2 more)
-
So I've been thinking about sails, and although I think the color of the tanned sailcloth came out just about perfect, they just look too...perfect. I think they need to be weathered or antiqued a bit. I am considering making a very diluted wash of brown/black acrylic paint, and with a wide, soft brush, painting on some vertically-streaked patina on the sails. Not a lot of weathering, as I want it to be controllable, and I don't want it to look like I fussed with it too much. But I think building up a bit of patina will feel more authentic. What do you all think? Any other ideas on how to achieve this? Any and all recommendations gratefully welcome. -E
- 222 replies
-
- 1
-
-
- First Build
- Lady Isabella
- (and 2 more)
-
Thanks GB! Slow and steady, but it's coming along...
-
Thanks Richard. Good point... I may take the standard tan thread and tint it with a warm grey xylene marker. Thanks for the head's up, BE. I am considering this. Your ties came out very nicely, and hang down in an authentic way.
-
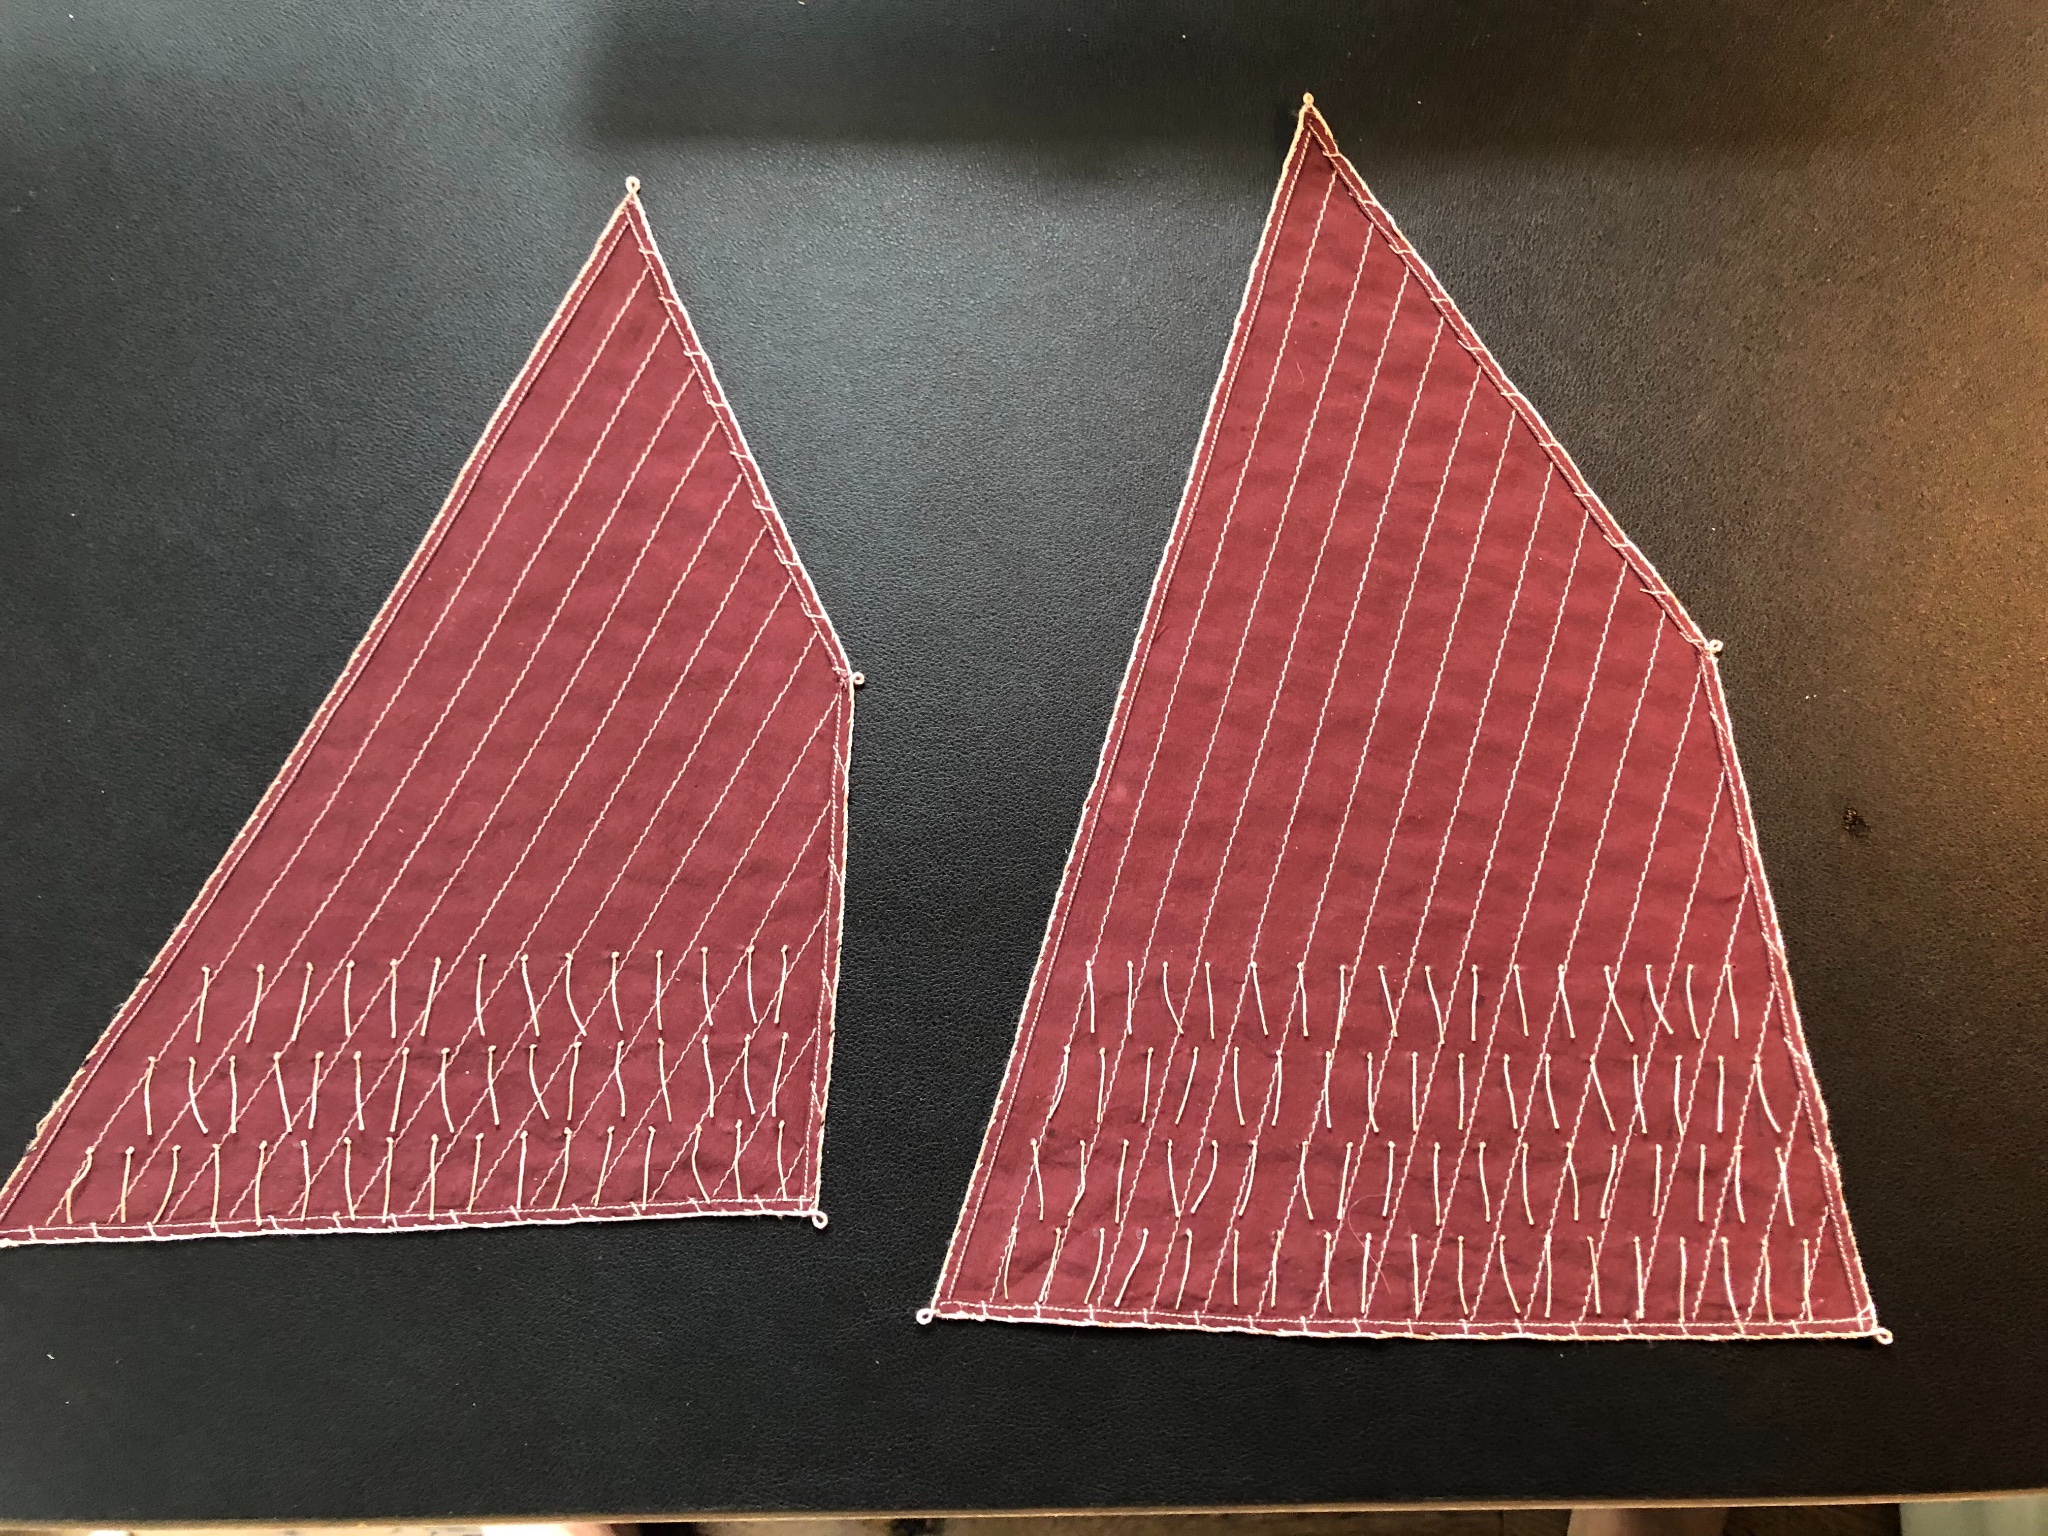
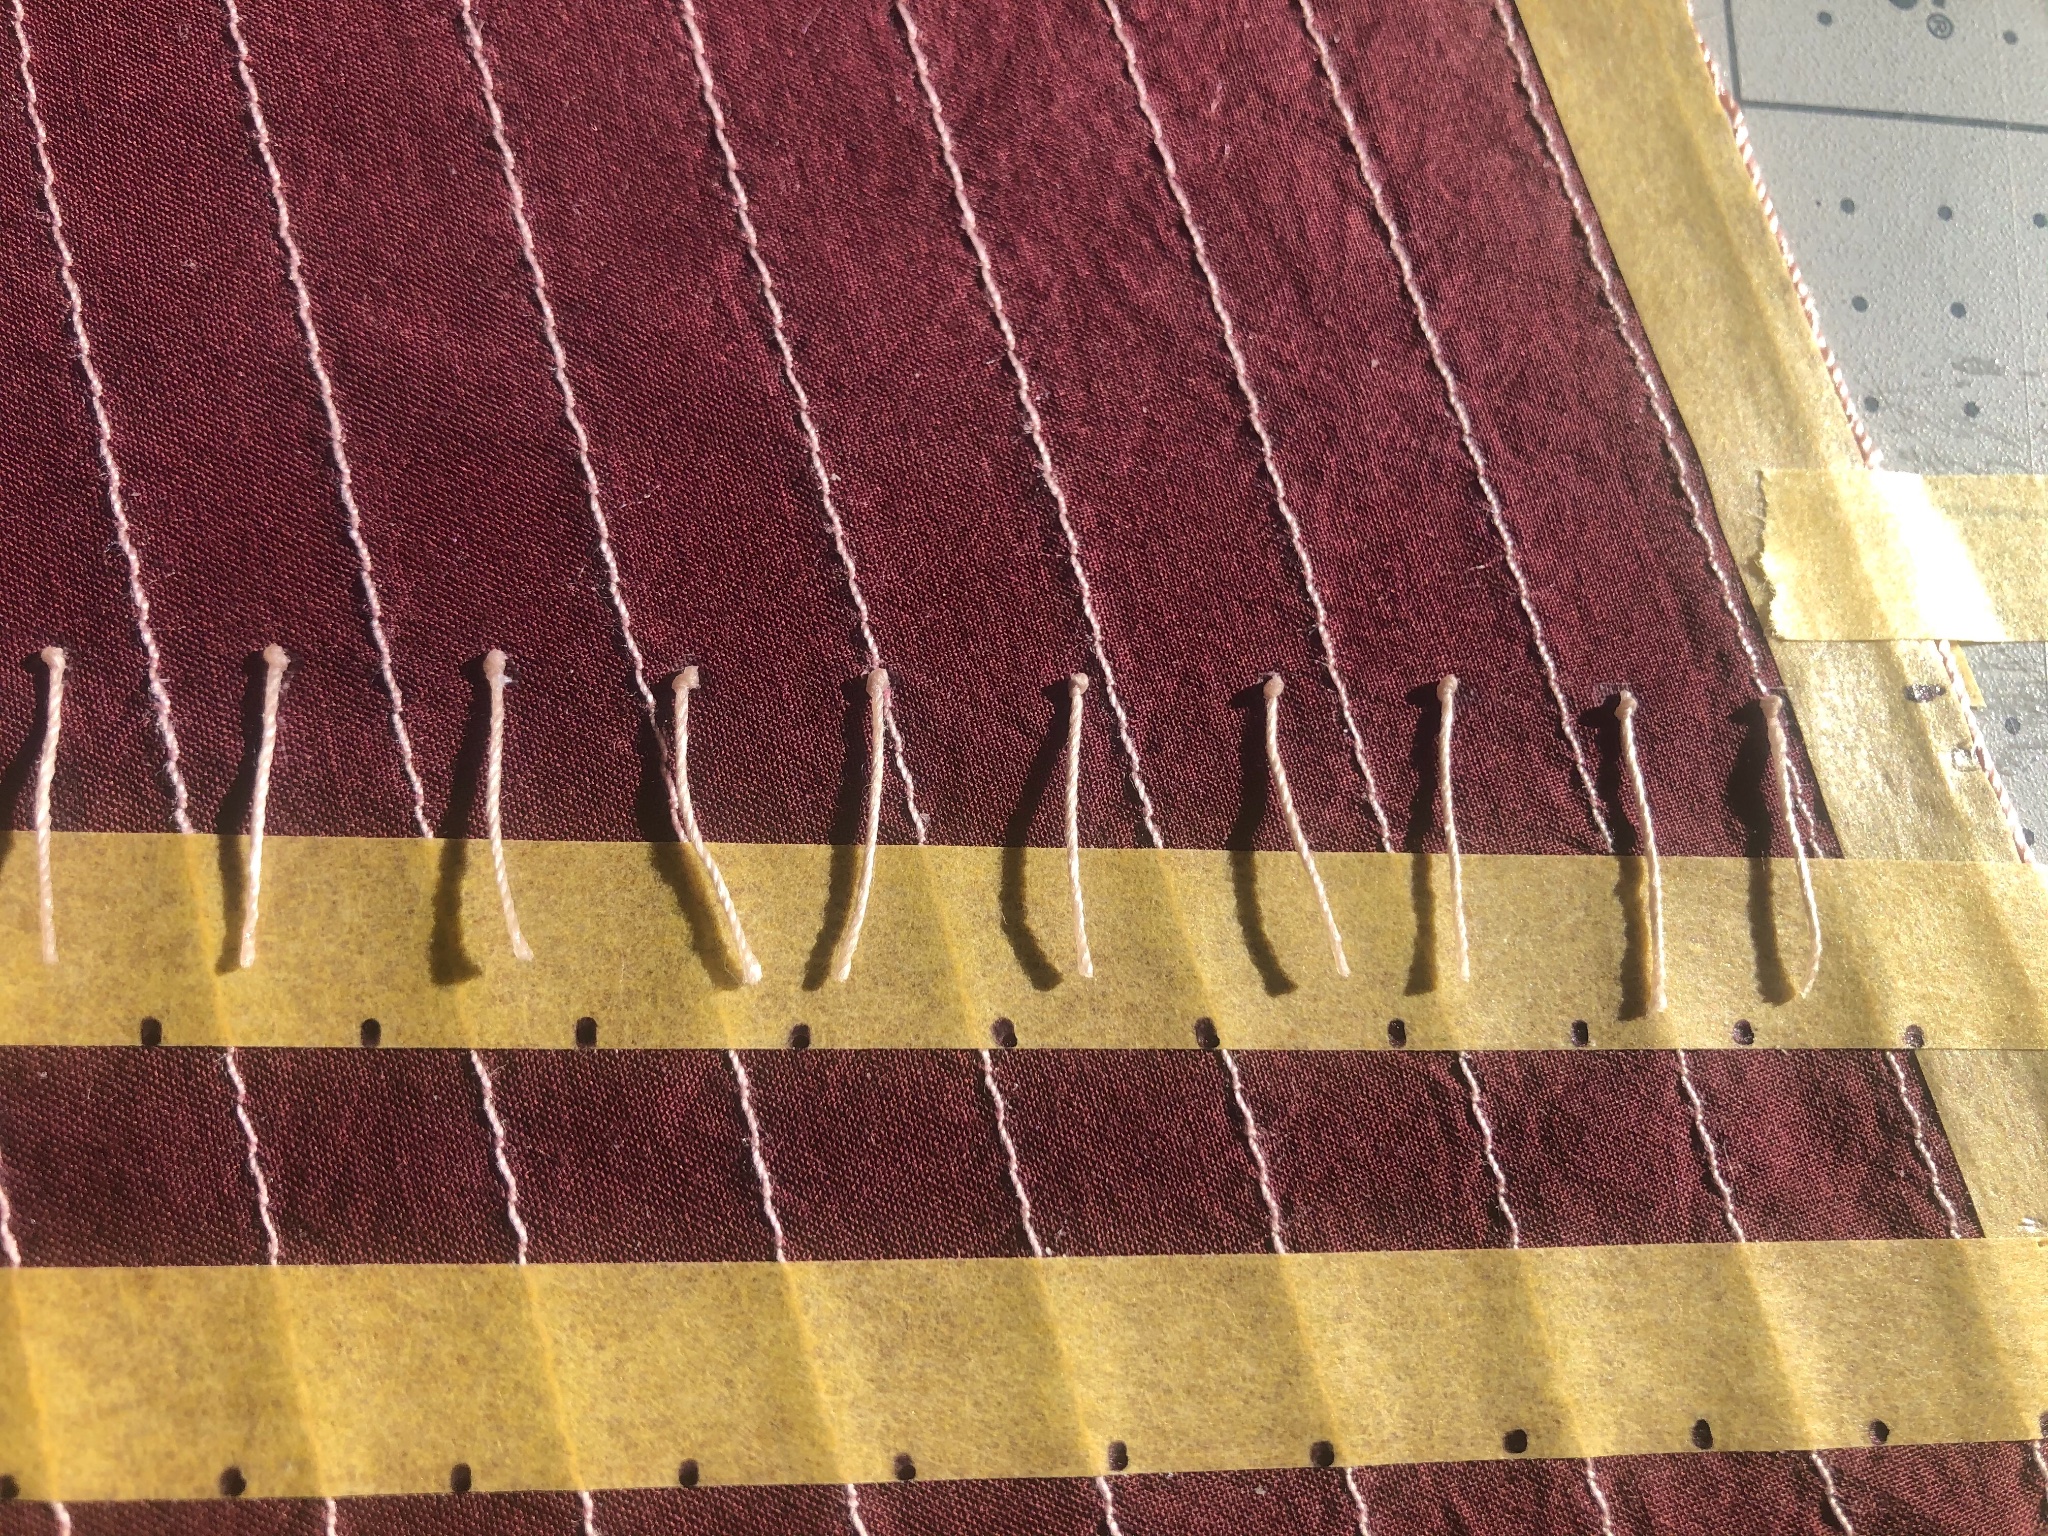
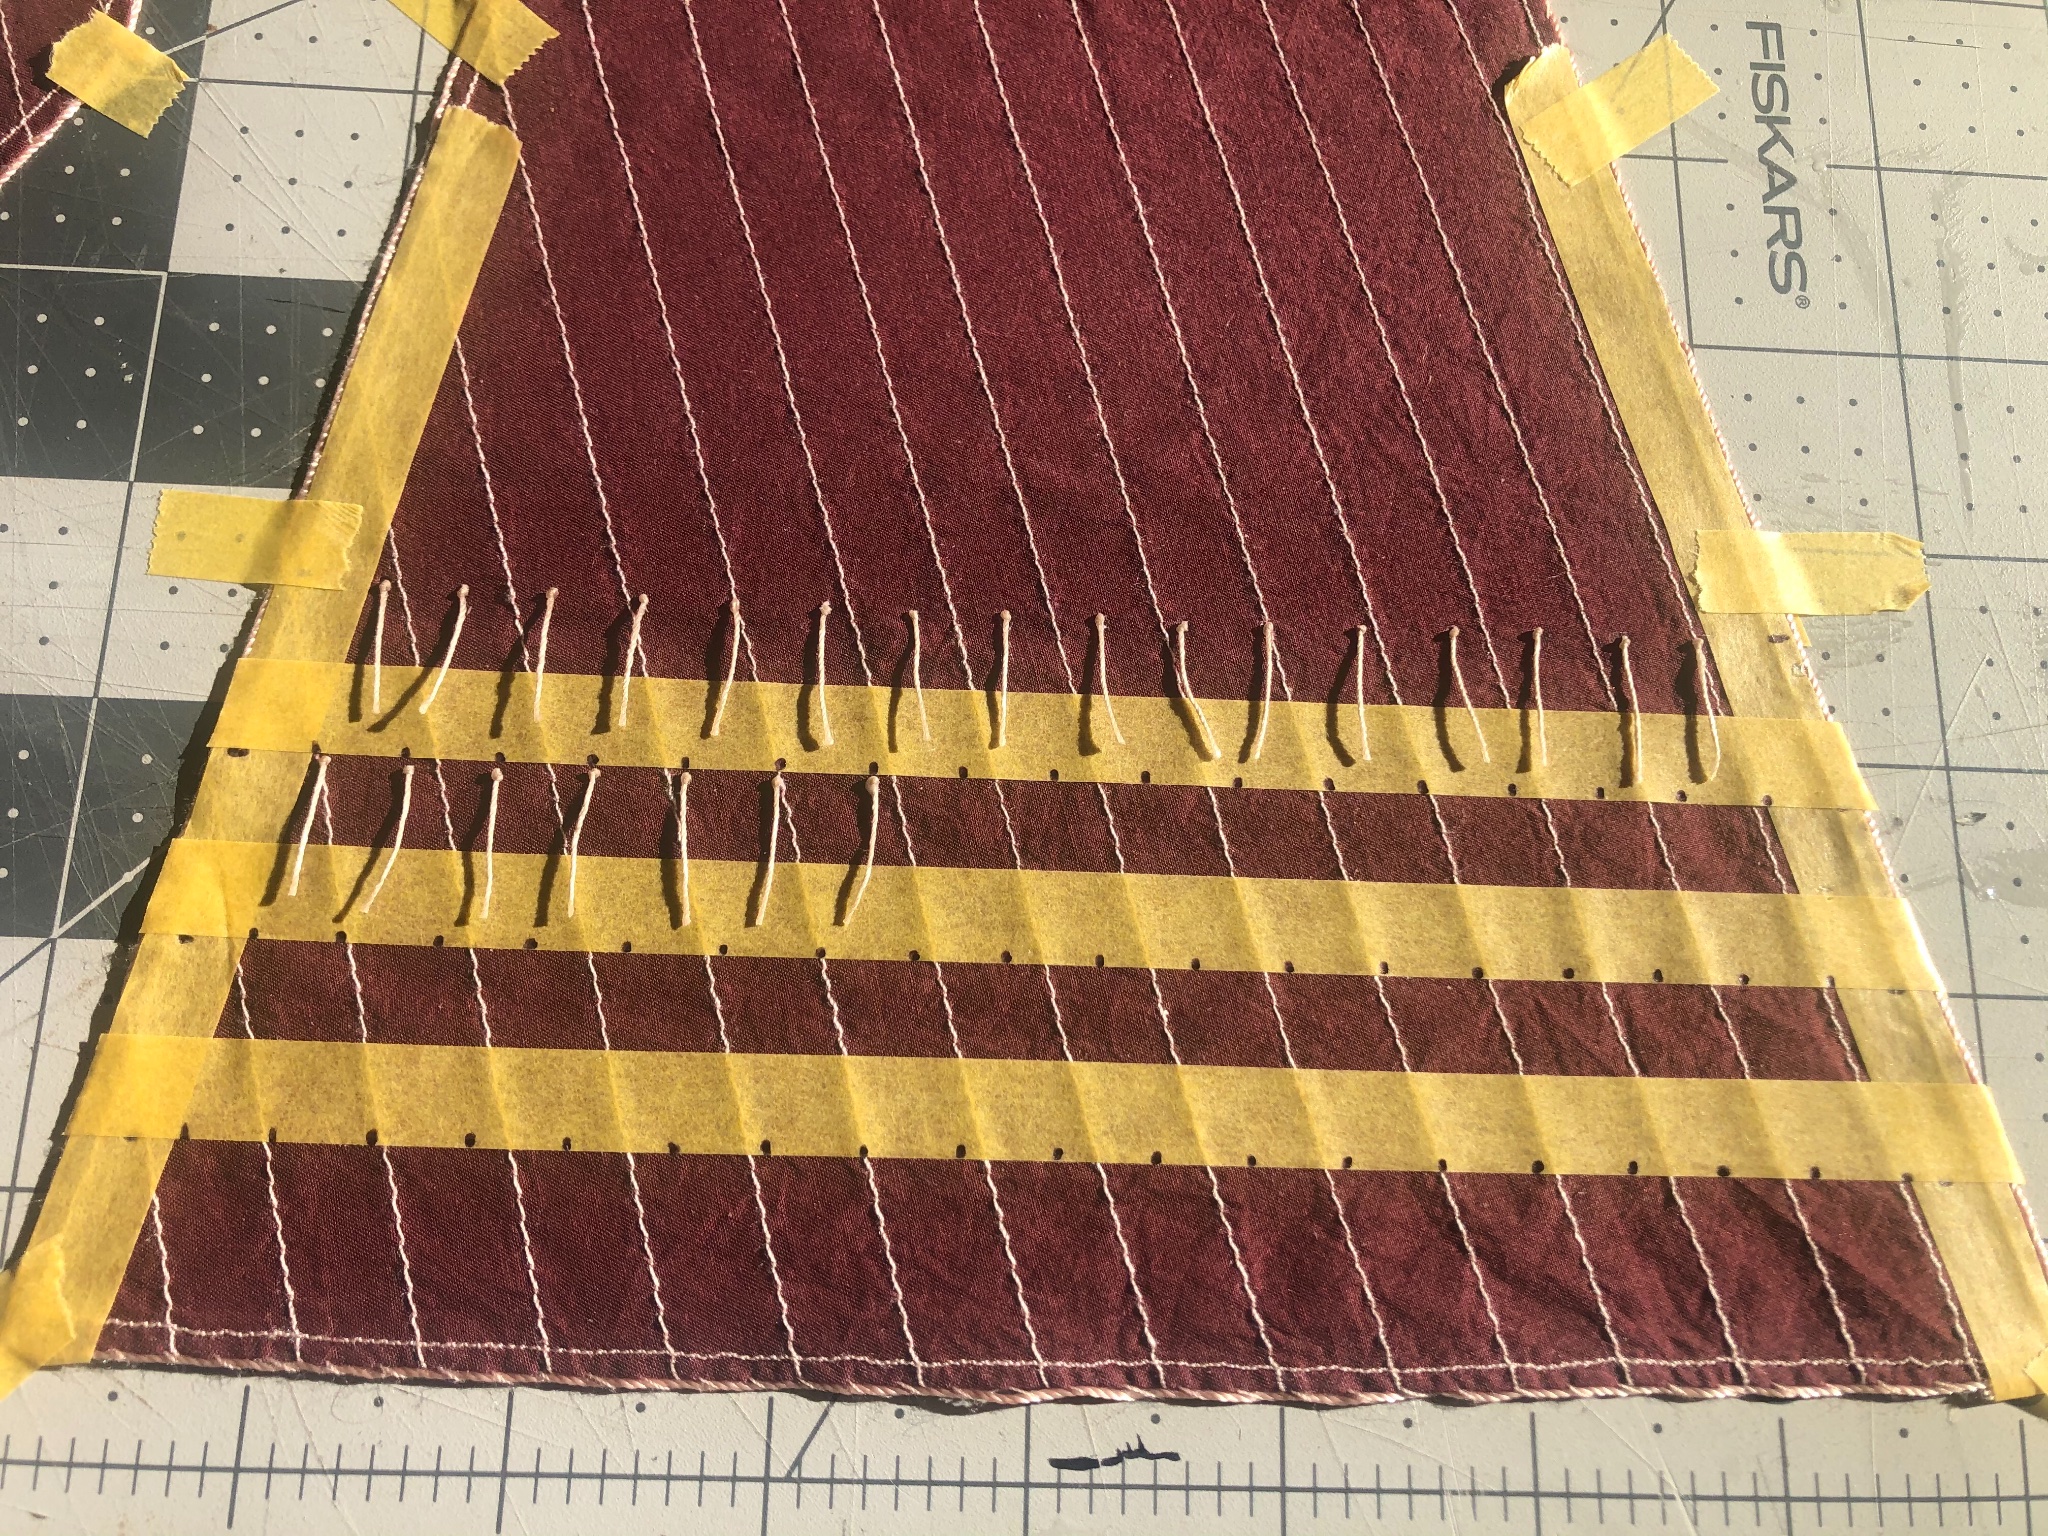
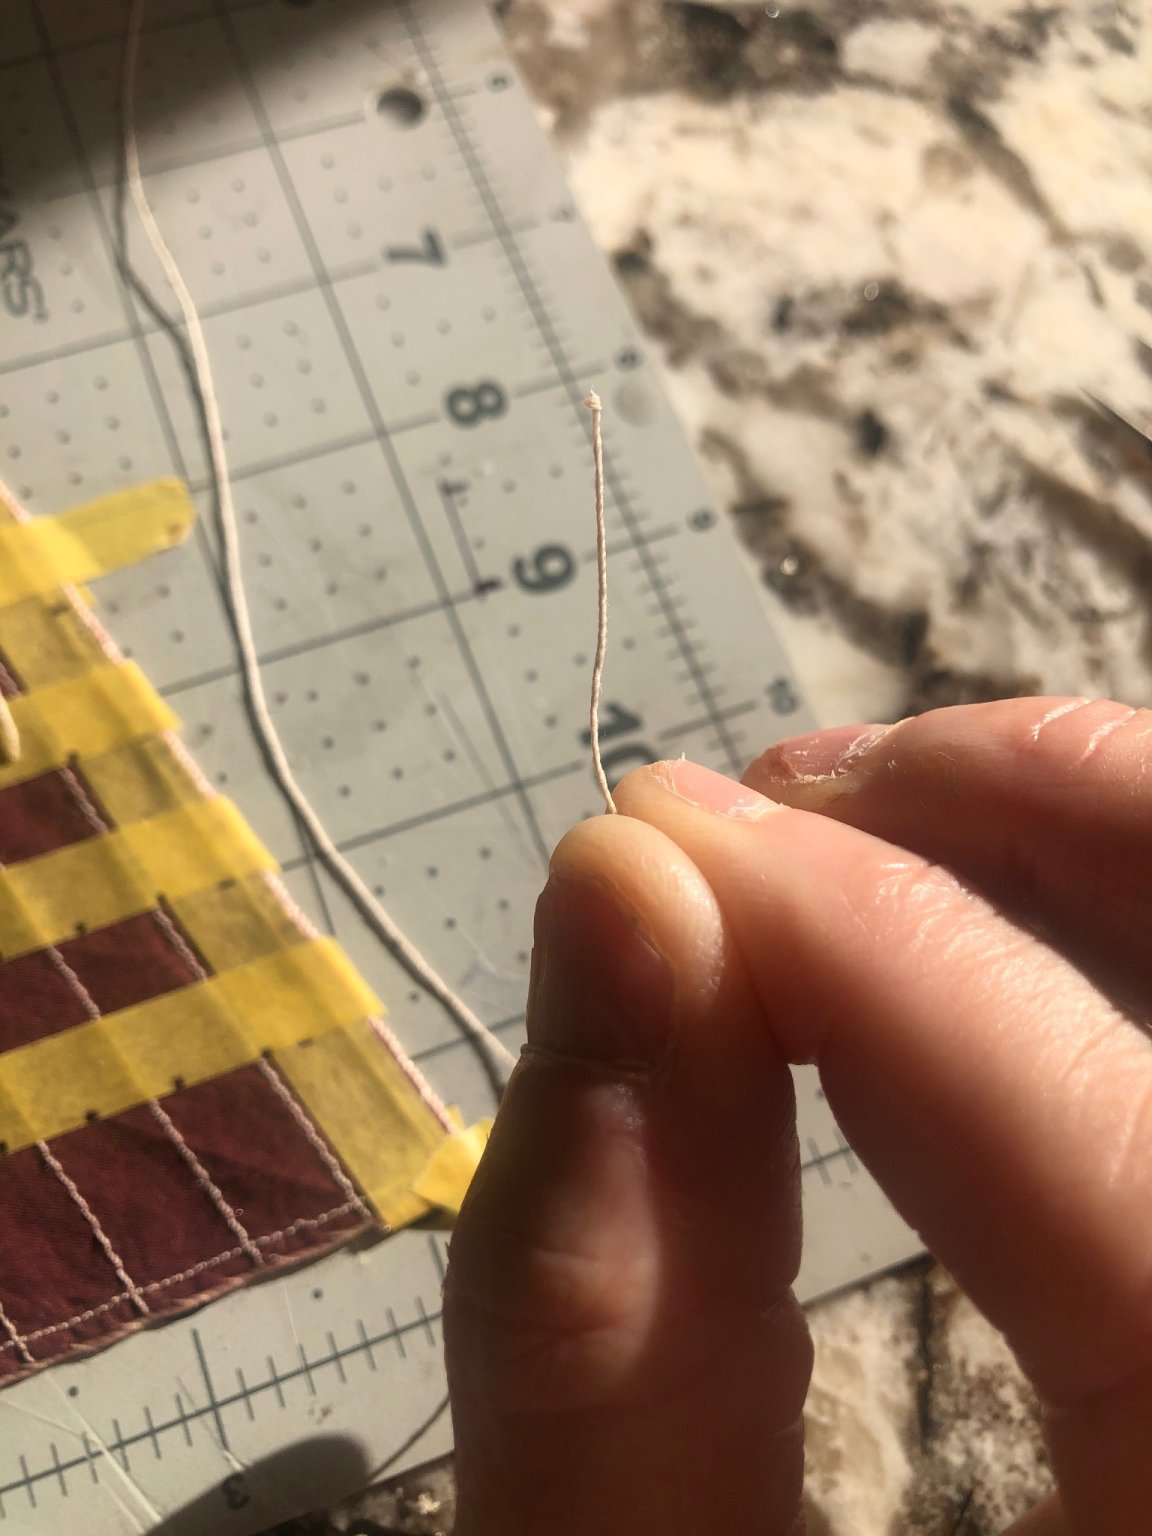
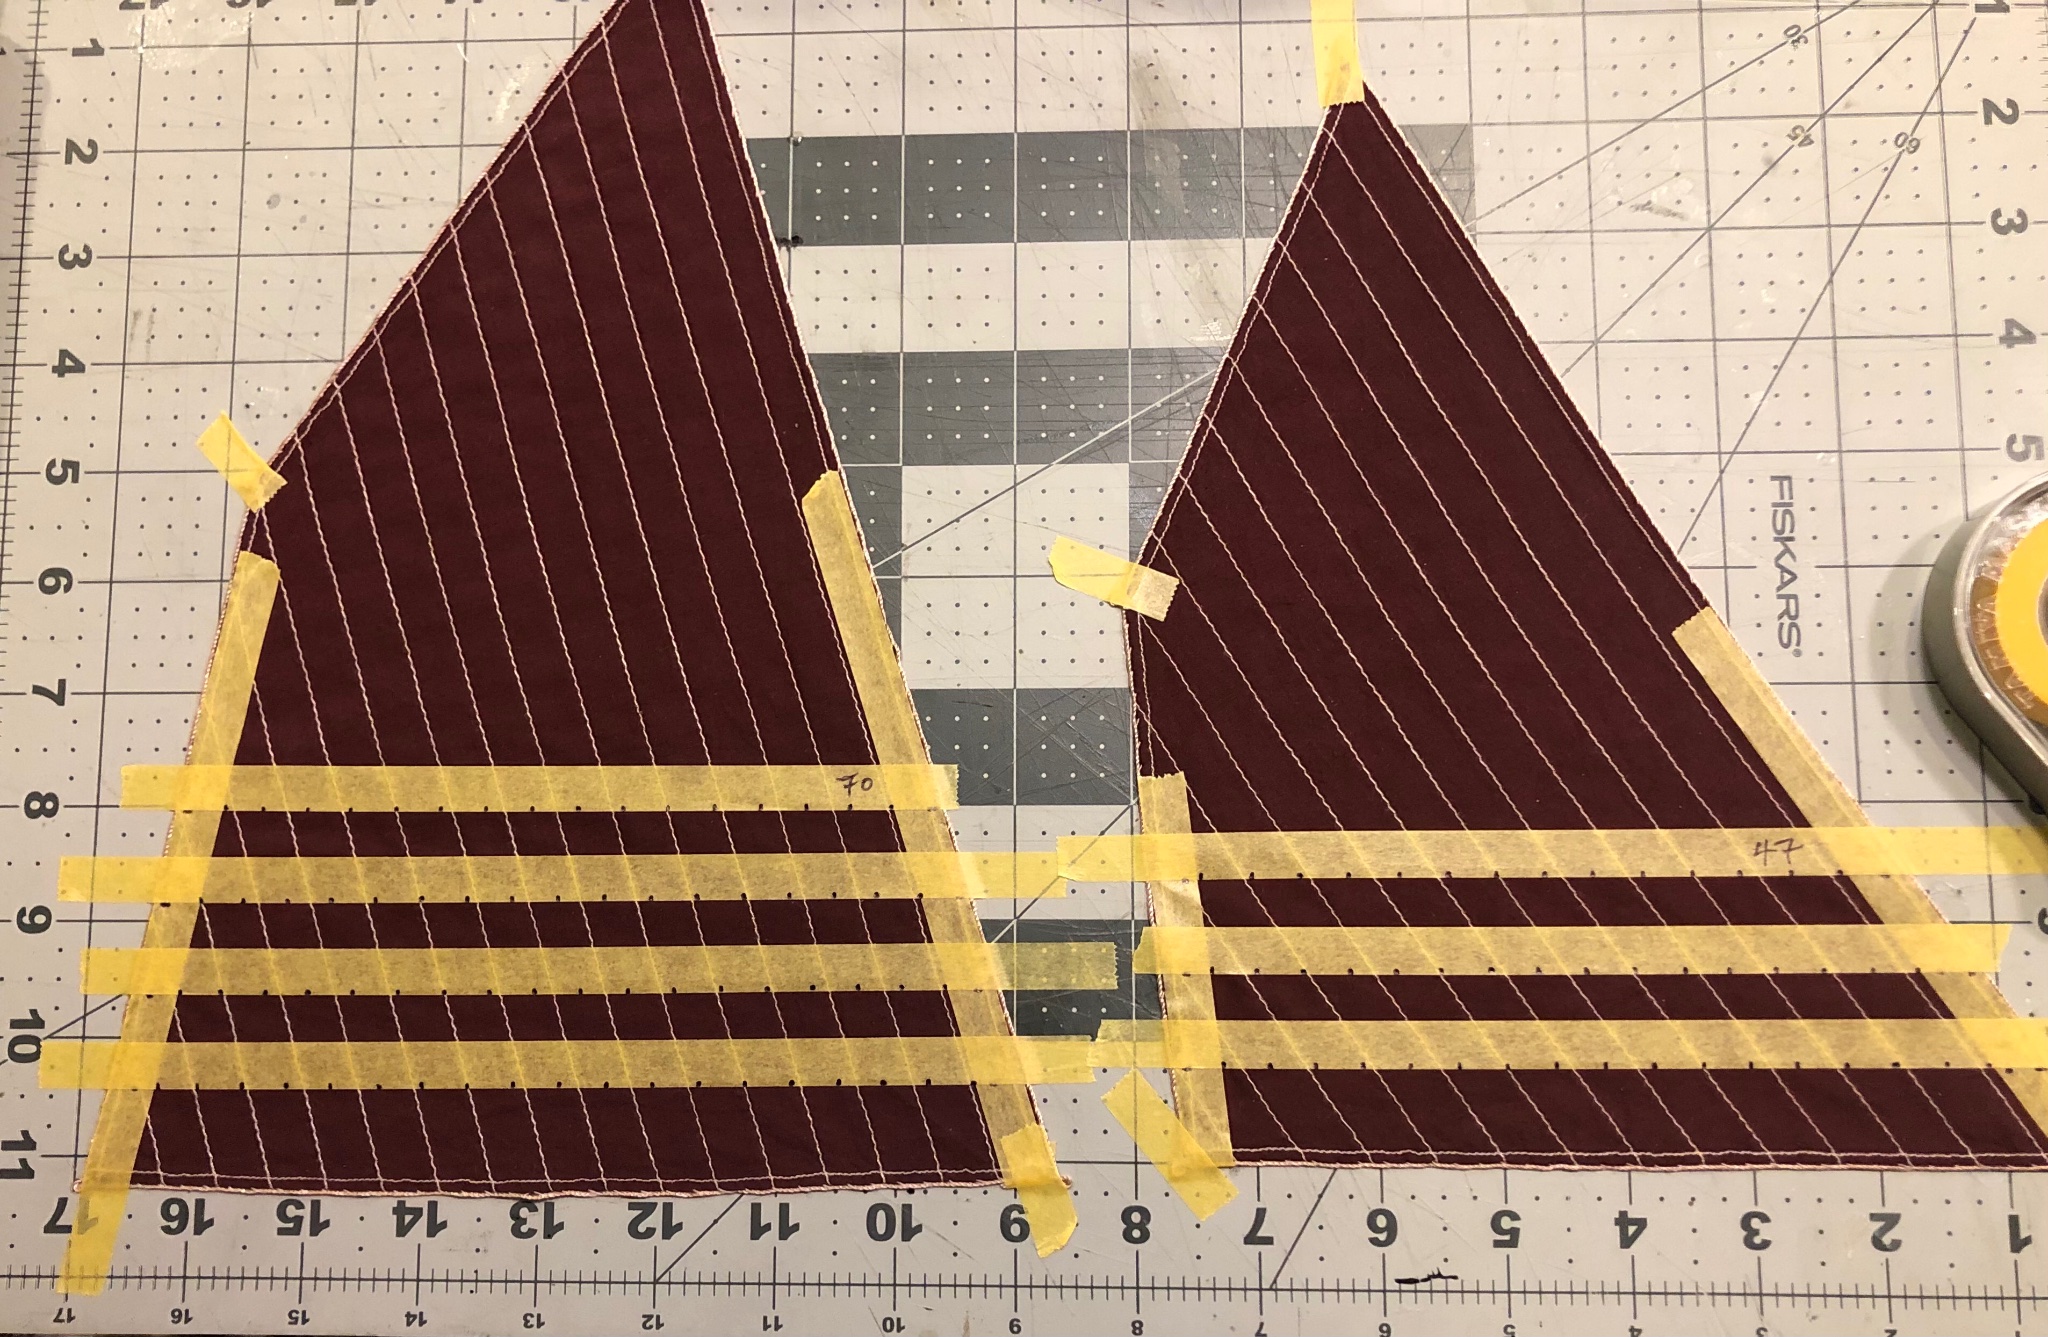
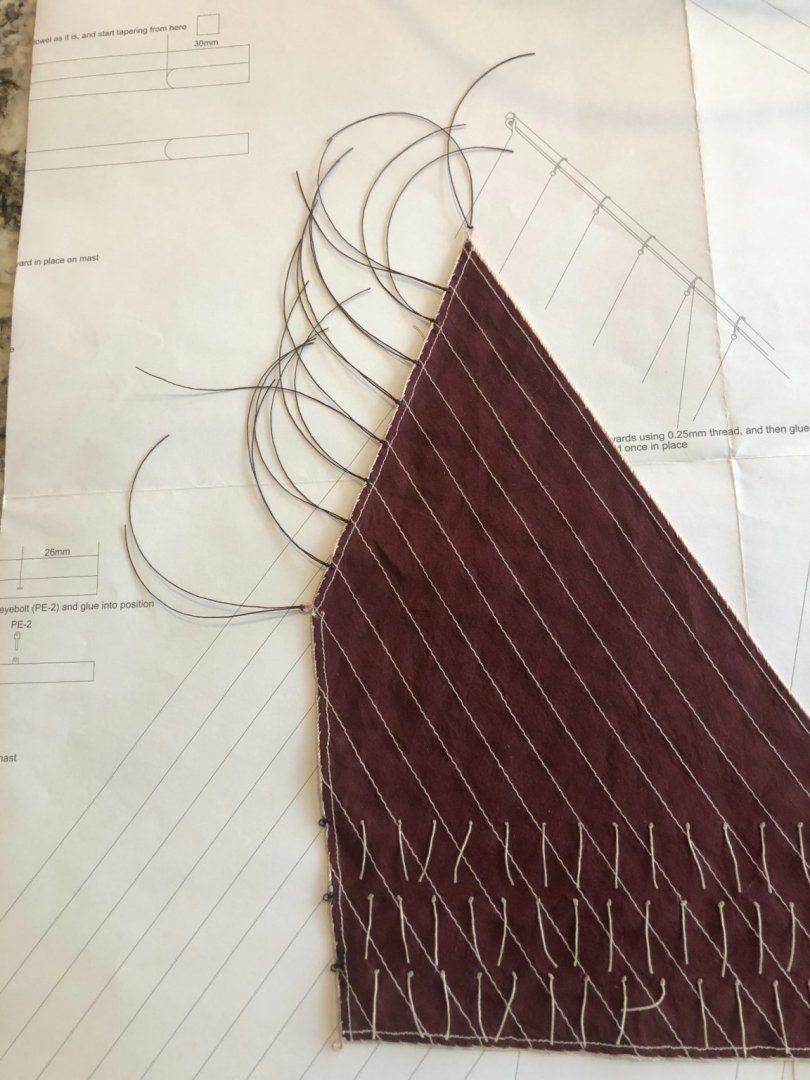
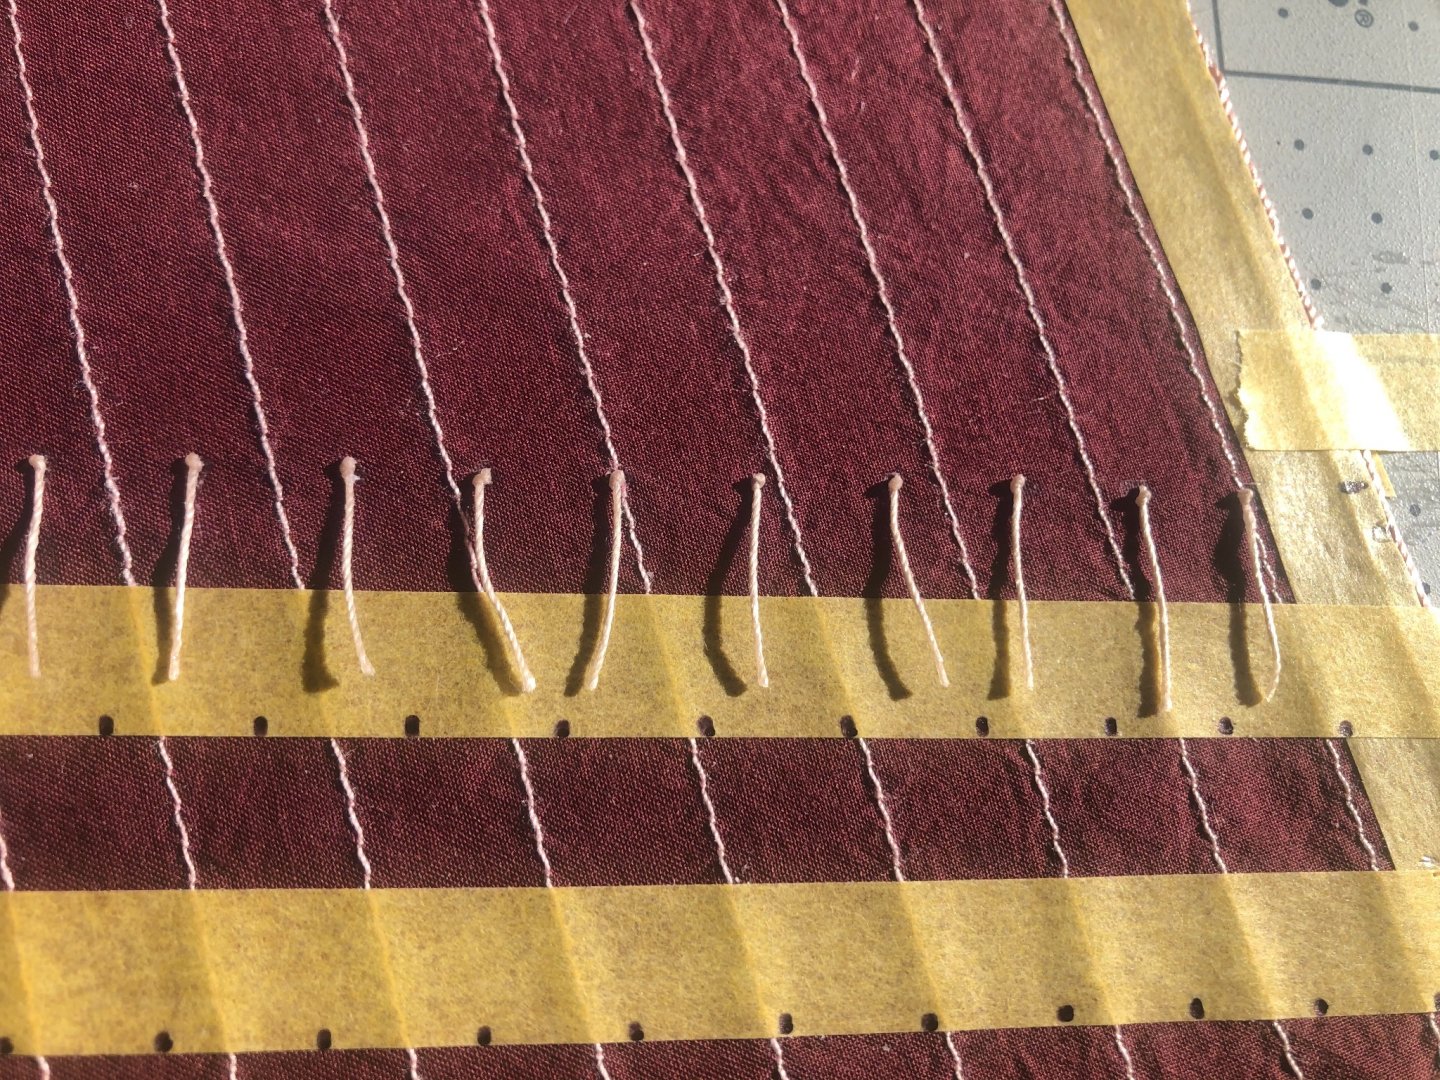
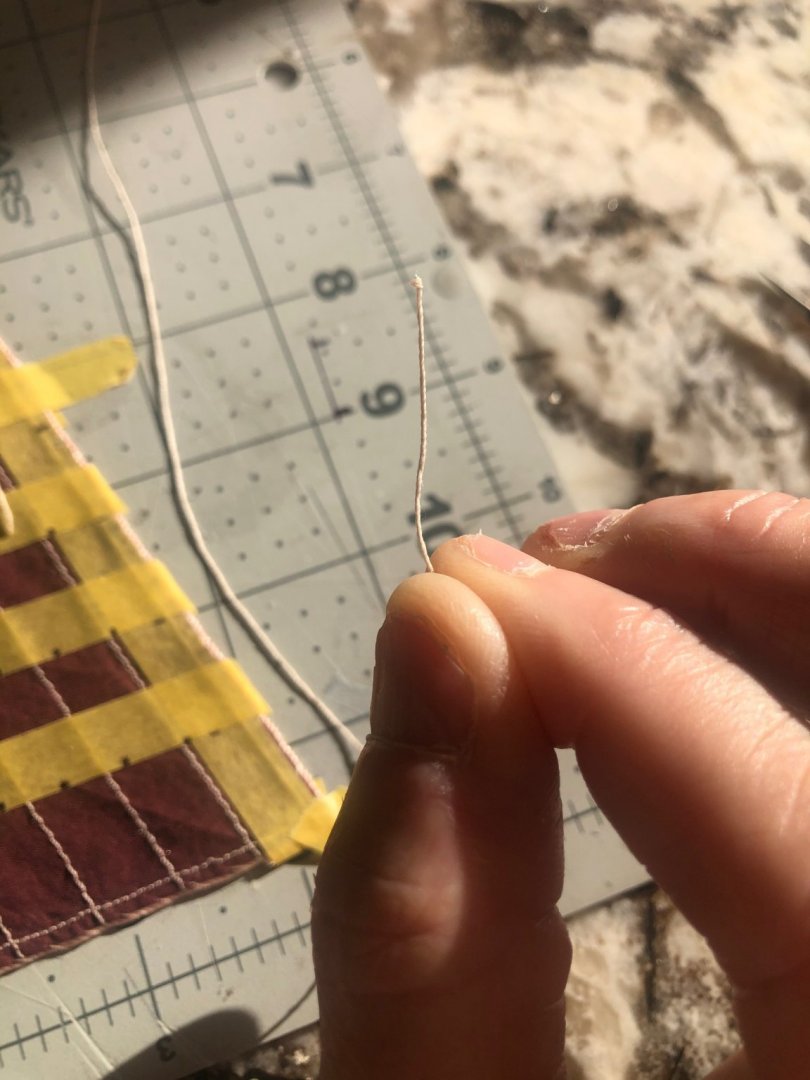
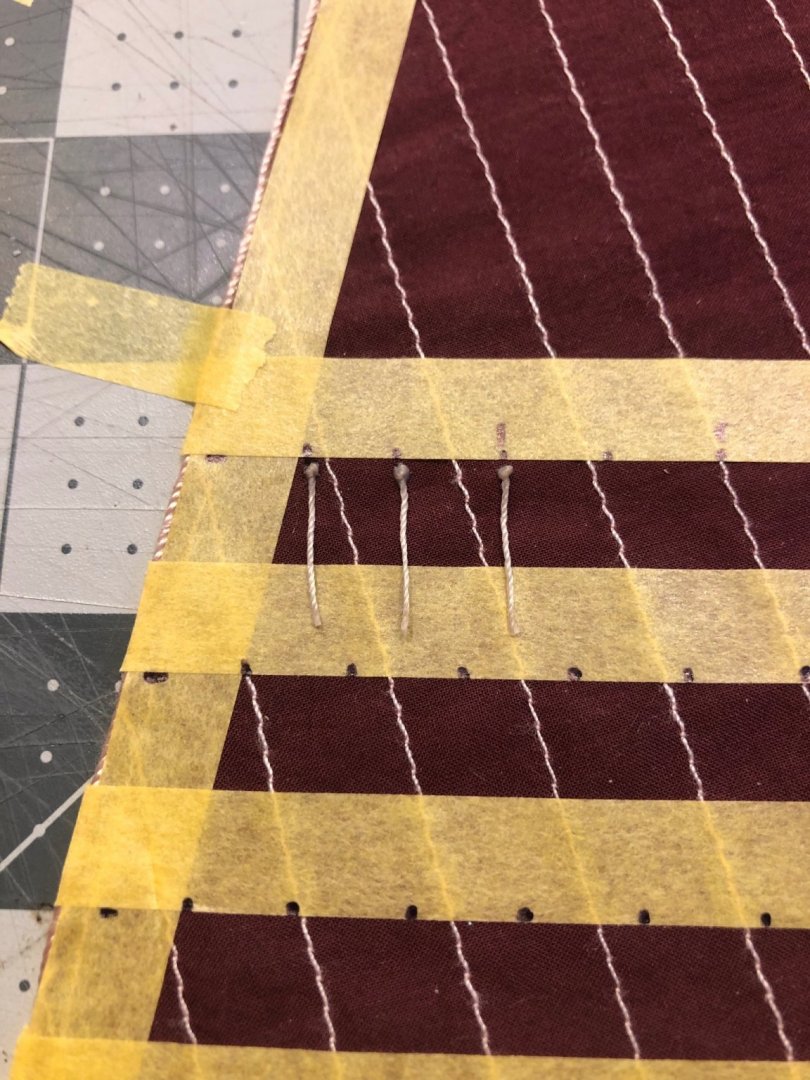
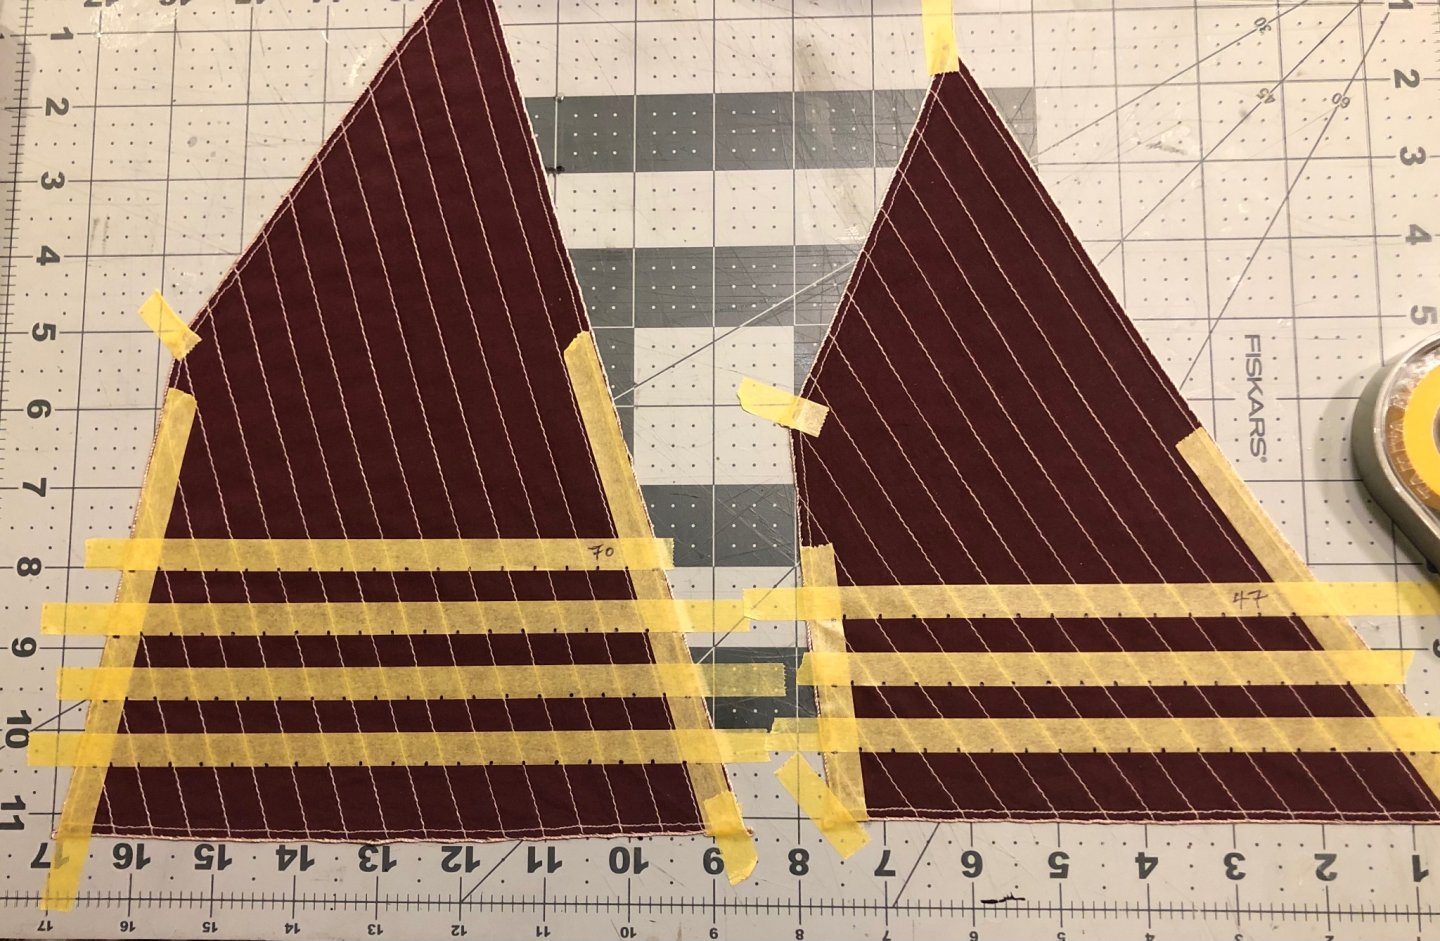
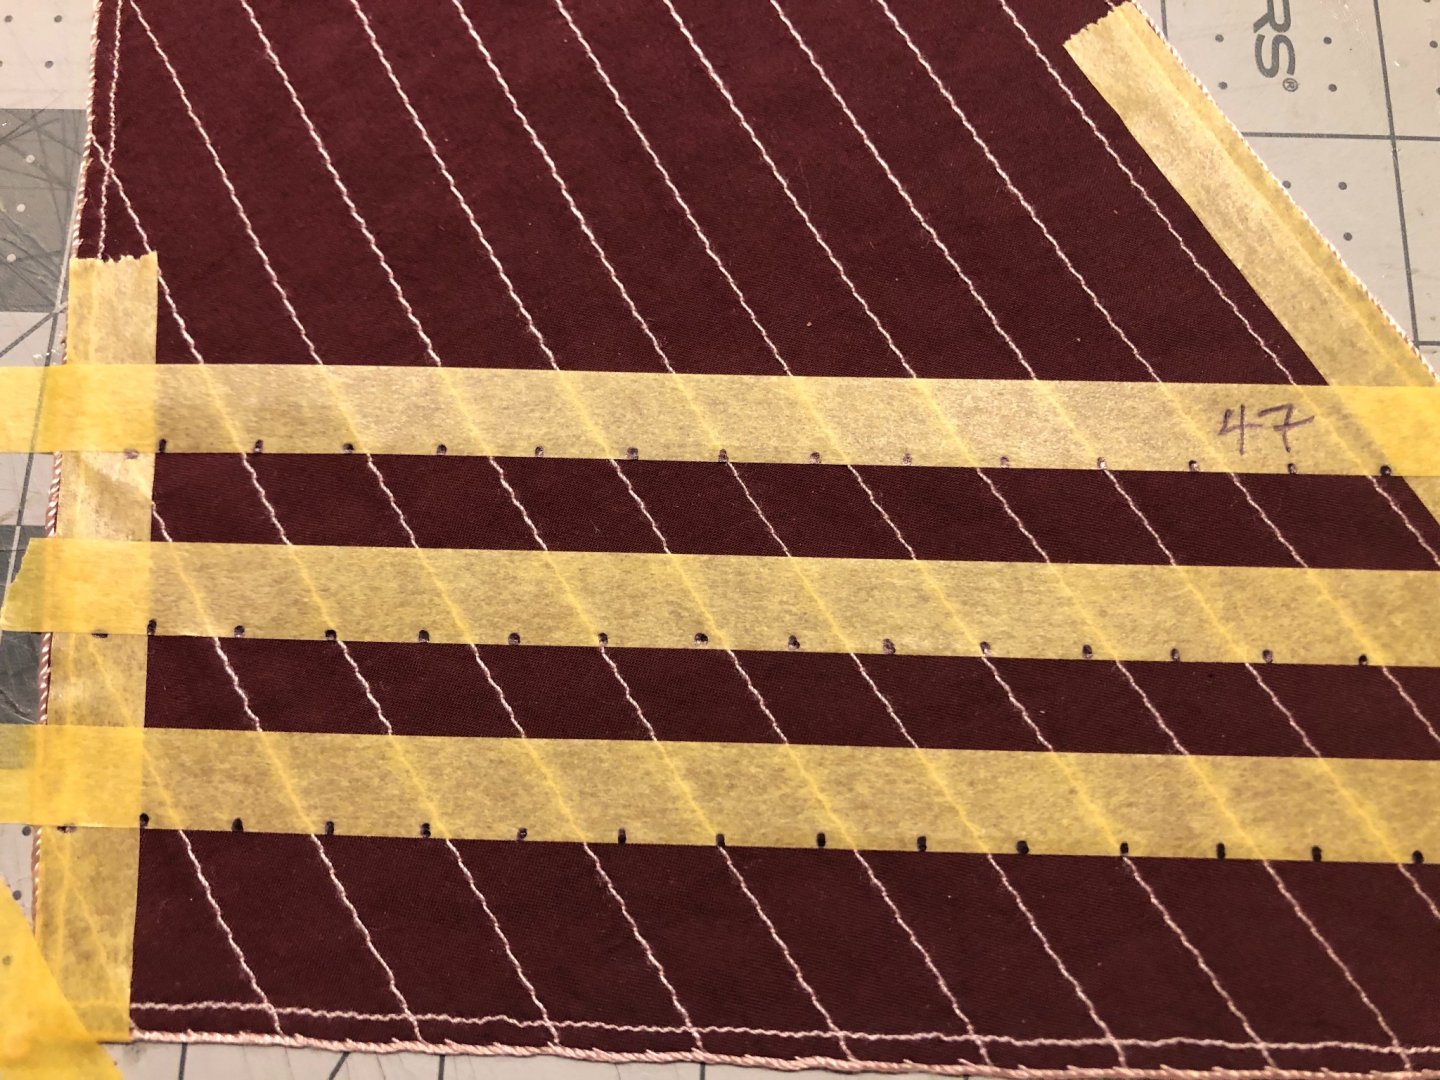
Small update. I’ve been marking out the layout for the reefing ties on the sail. In studying the precedent photos of the herring drifters in Edgar March’s great book, it seems that there was no standard layout for these ties. Between three and six rows of ties on the foresail, and between two and four rows on the mizzen were apparently common. I decided to install four rows on the foresail, and three on the mizzen sail. I laid these out parallel to the foot of the sail, spaced about 20mm vertically. I laid a tape strip down just above each line, and marked out the reef points at 10mm intervals. The plan is to poke a small hole below each mark, and thread lengths of 0.25 brown thread through, and snug a knot up to the sail on each side. Then I’ll trim each tie to 15mm in length. Once all 117 of the ties are installed, I can carefully fiddle with some white glue to tame them into hanging vertically.
- 222 replies
-
- 5
-
-
- First Build
- Lady Isabella
- (and 2 more)
-
Just discovered your log, Gb. This is looking so great! I'm following with interest, as I am completing my build of the Vanguard Zulu. Thanks for the inspiration! -EKE
-
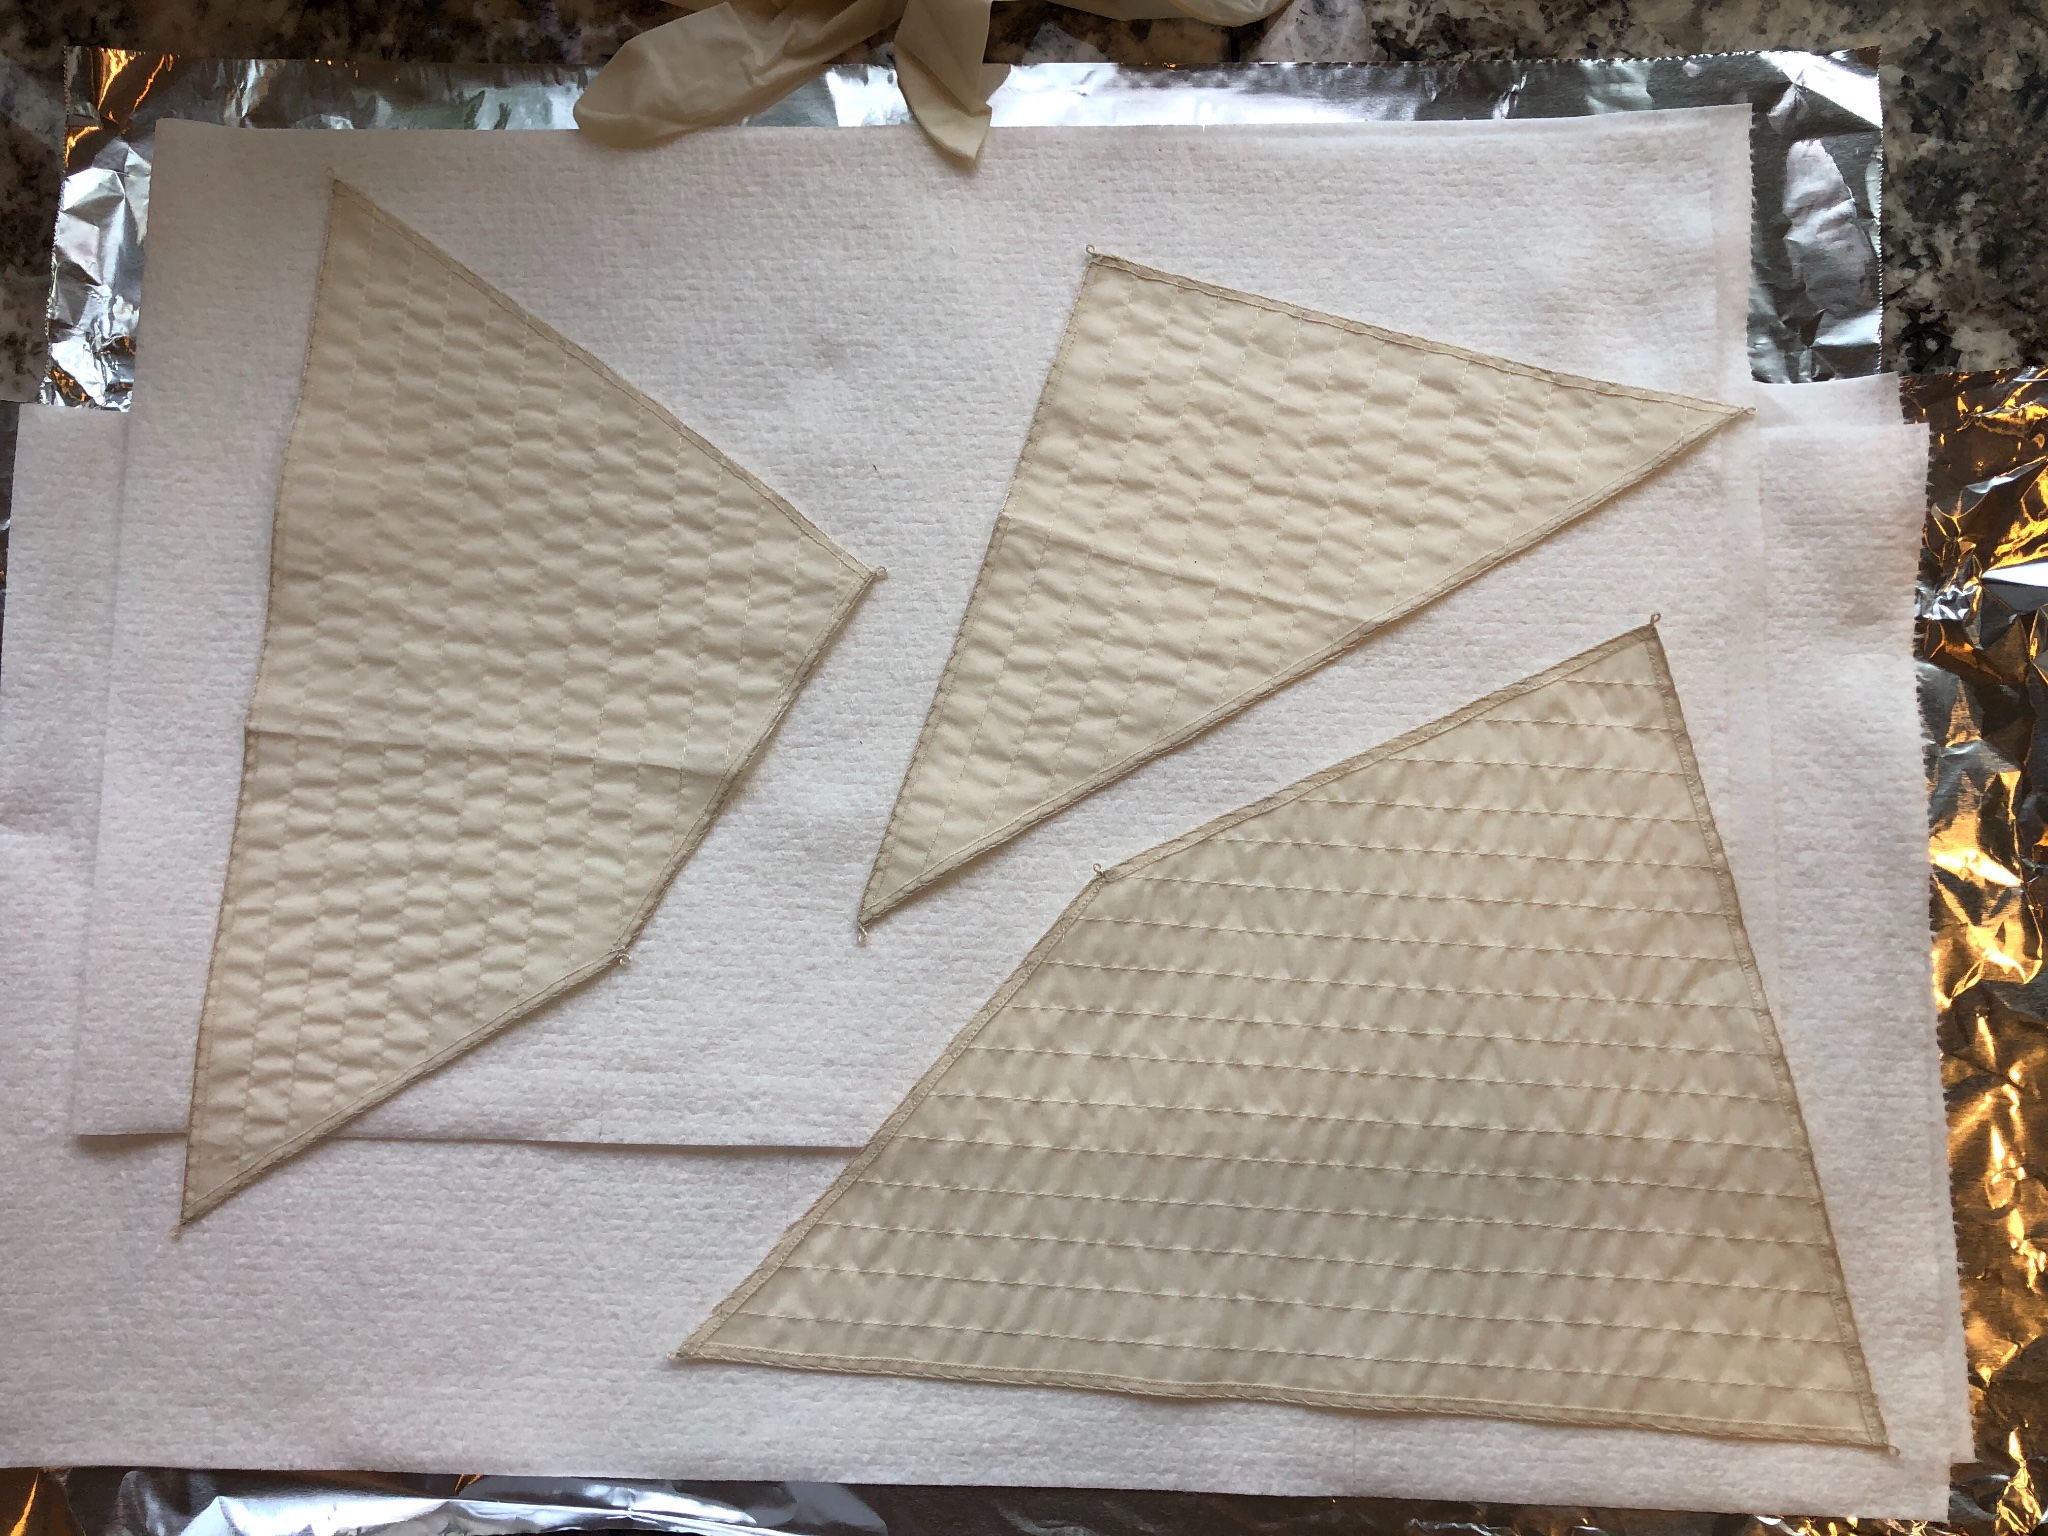
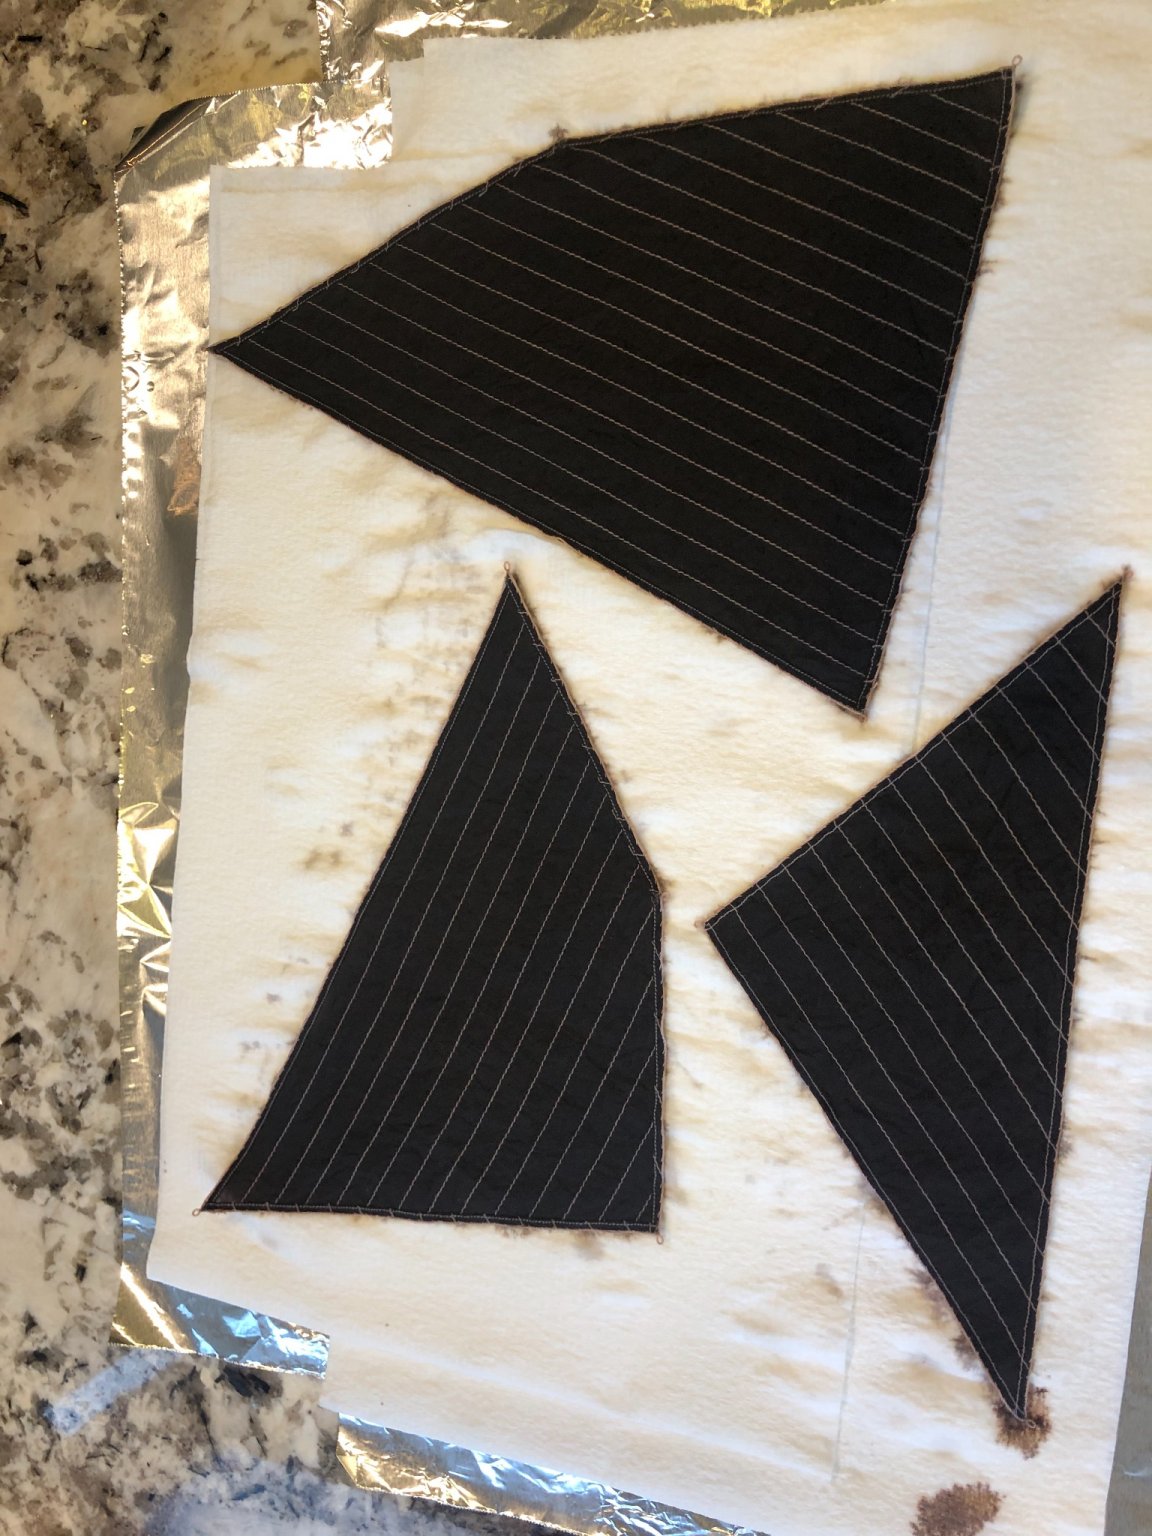
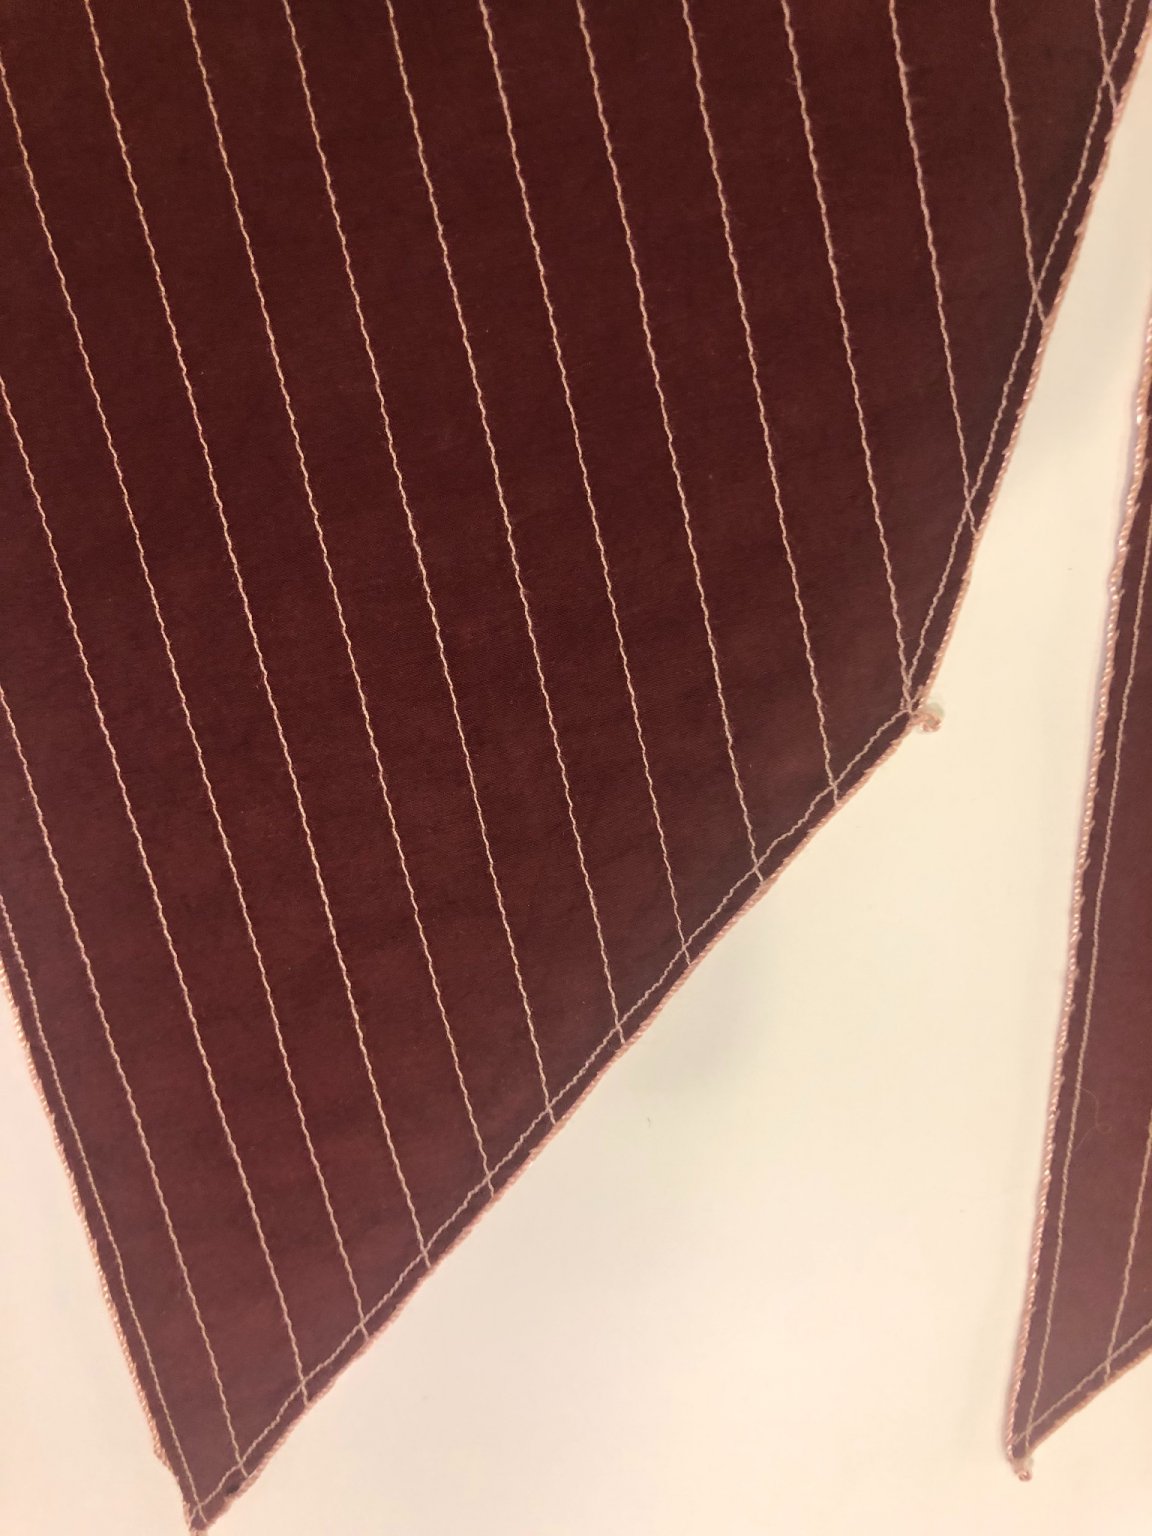
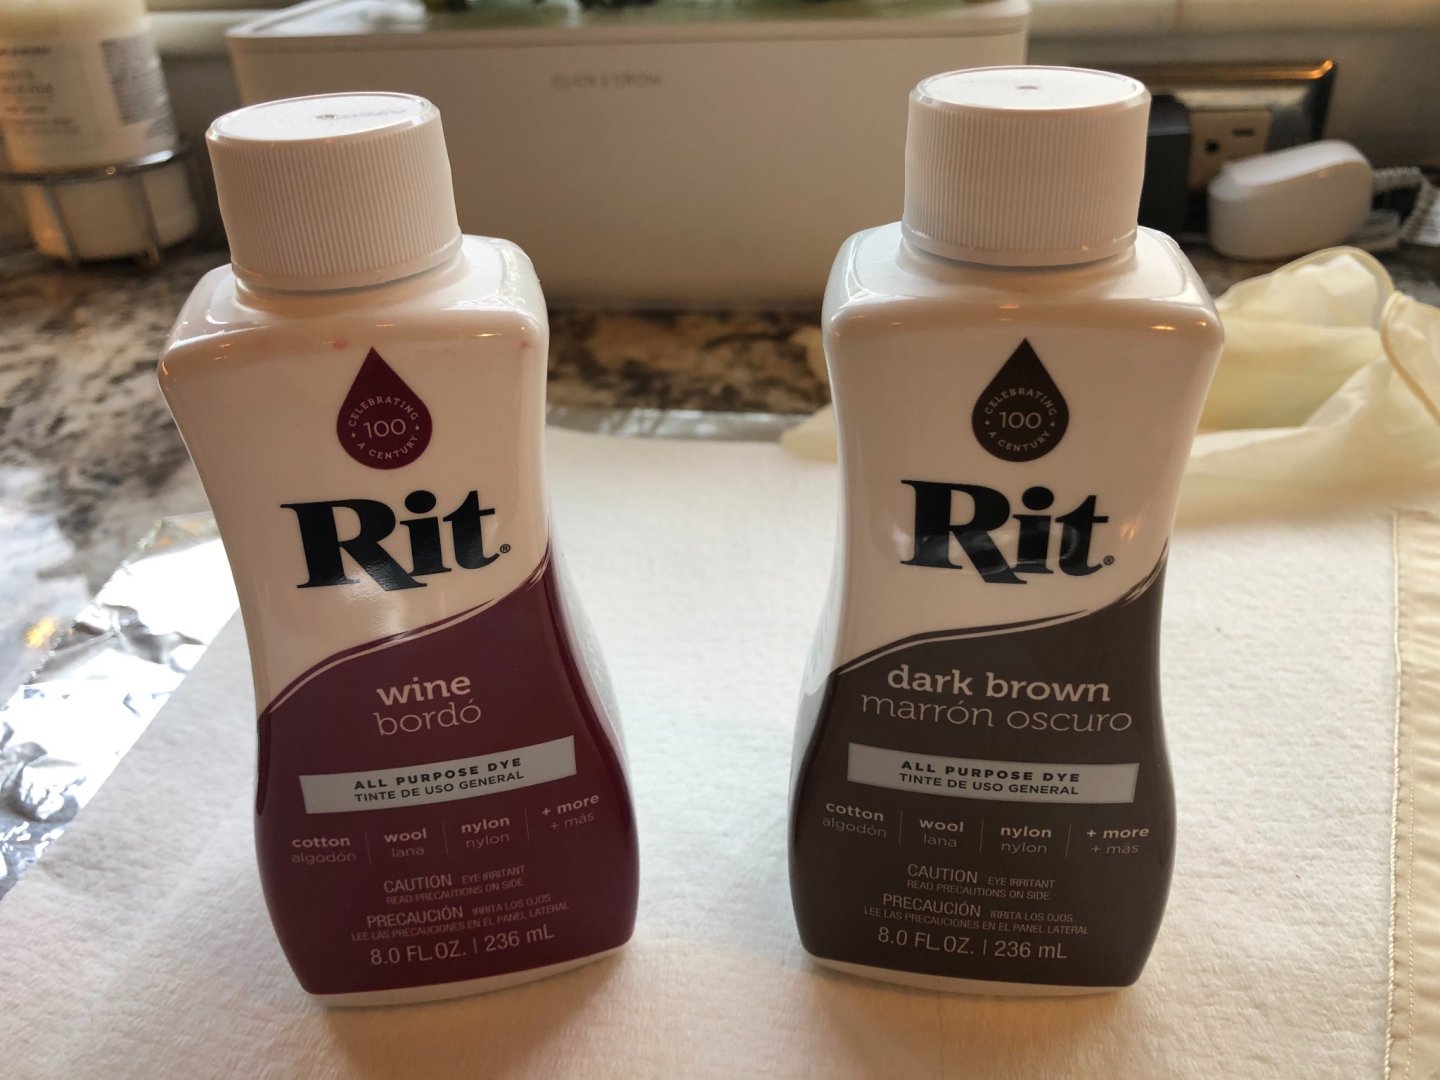
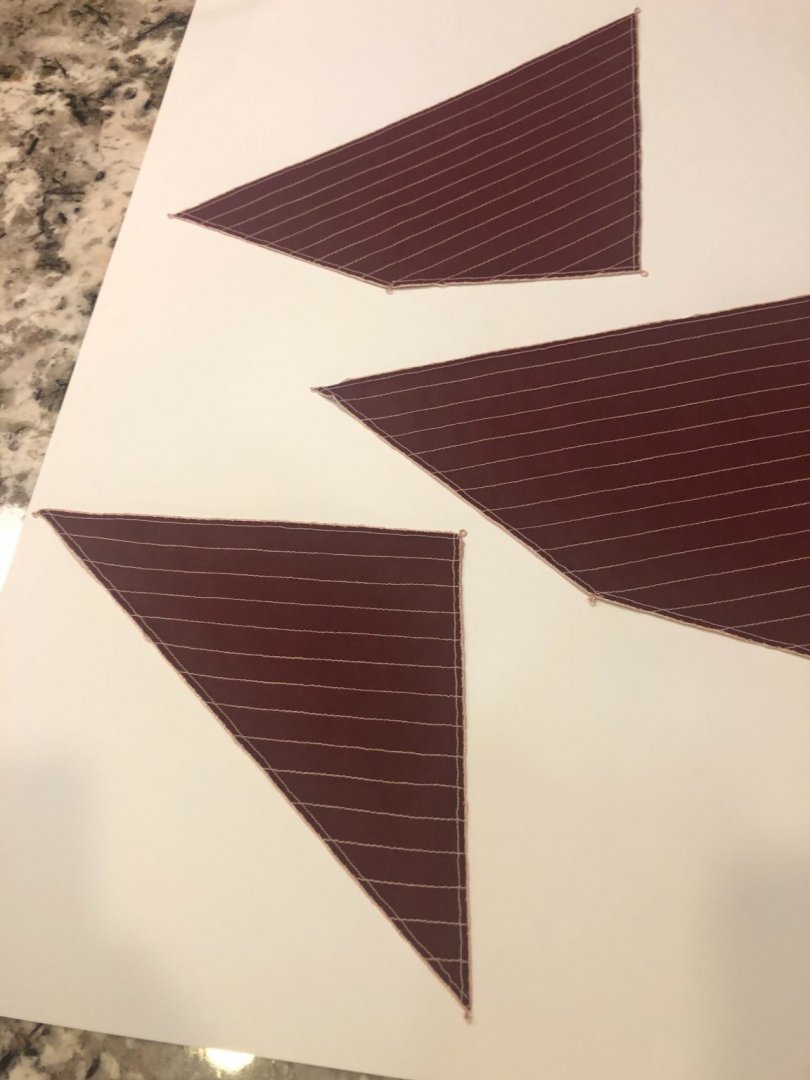
This weekend, I dyed the sails. Used the Rit Dye that many have been using, in the “Bordo (Wine)” and “Dark Brown” colors. This was very easy and straightforward. I heated water, about a liter or so, on the stove until almost boiling. Then I poured that into a bowl, with a heaping tablespoon of salt, and the dye. First pass was about two-thirds brown and one-third wine red. I swished the sails around in the dye until I thought the color was dense enough. Perhaps 20 minutes or so. Then I pulled them out, rinsed them in clear tap water, and laid them out on paper towels. I thought the first pass was too brown, so I repeated the dying, but this time just with the red dye. This brought the color to what I think a true tanned bark color. I let them dry a bit, and then, when they were still slightly moist, I ironed them with a medium-hot iron. Smoothed out all the wrinkles quite well. As others have noted, the stitching stubbornly refuses the dye, but in looking at the finished product, I agree that the sails look rather interesting with the contrasting thread. Next step is to dive into the rigging!


- 222 replies
-
- 9
-
-
- First Build
- Lady Isabella
- (and 2 more)
-
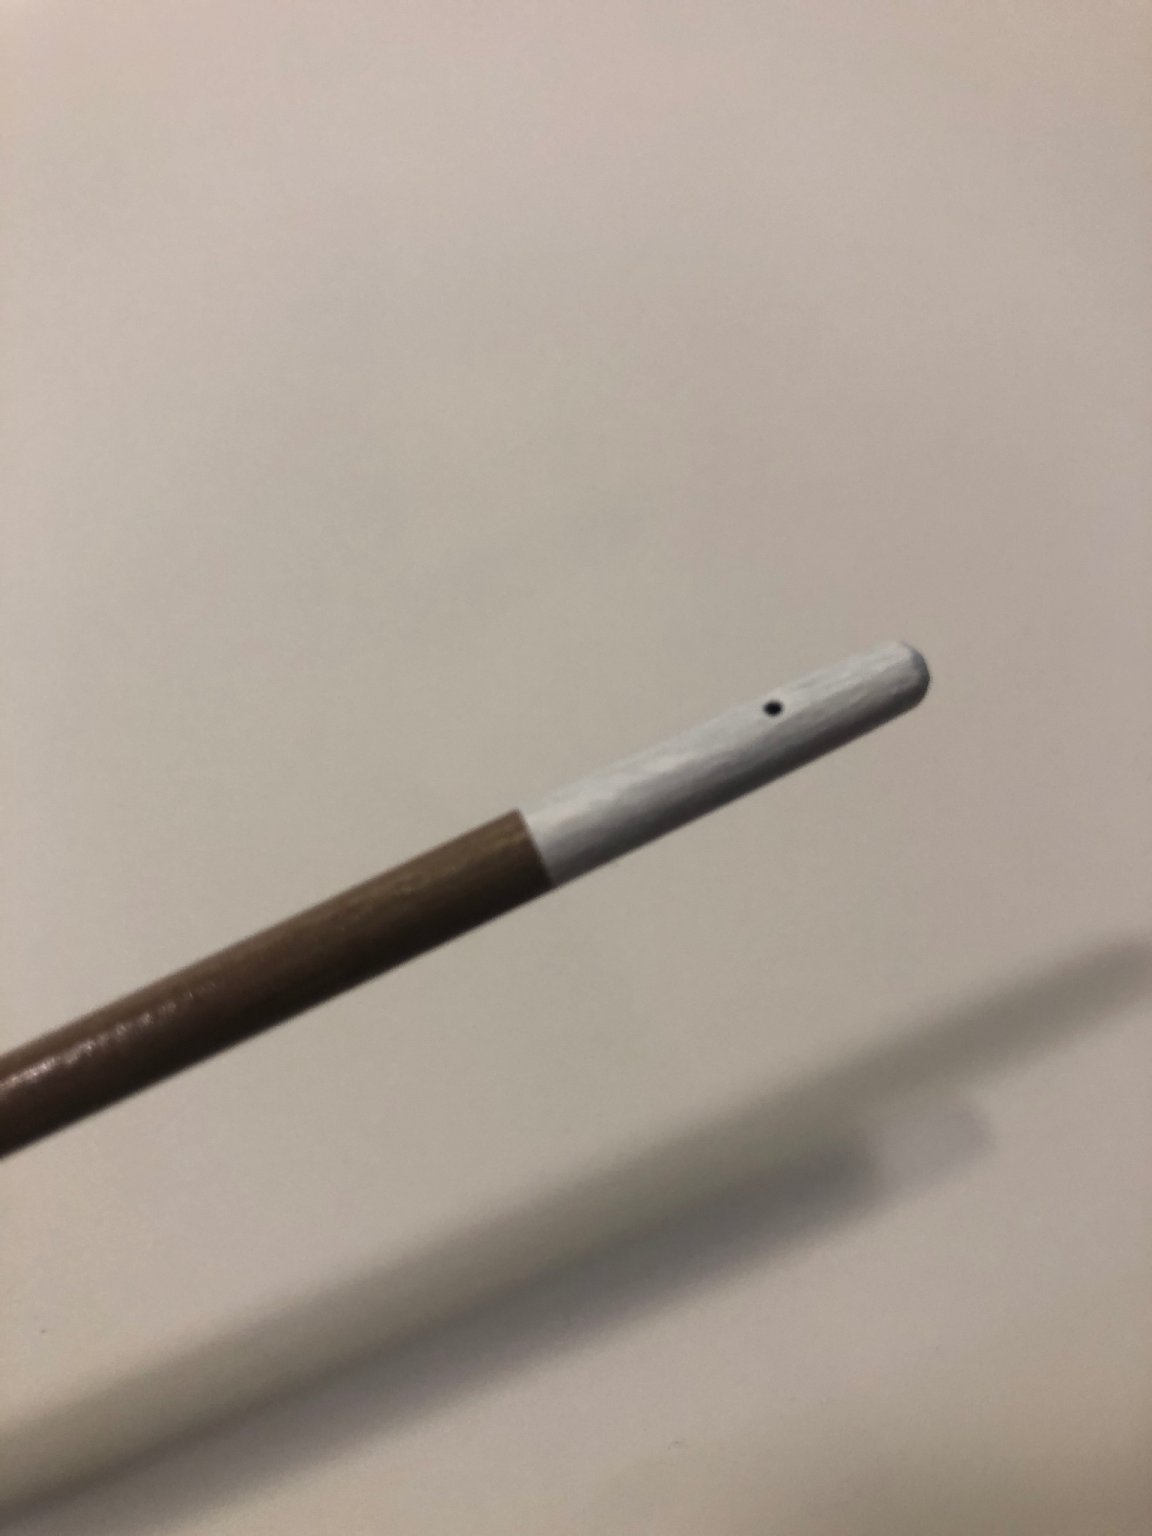
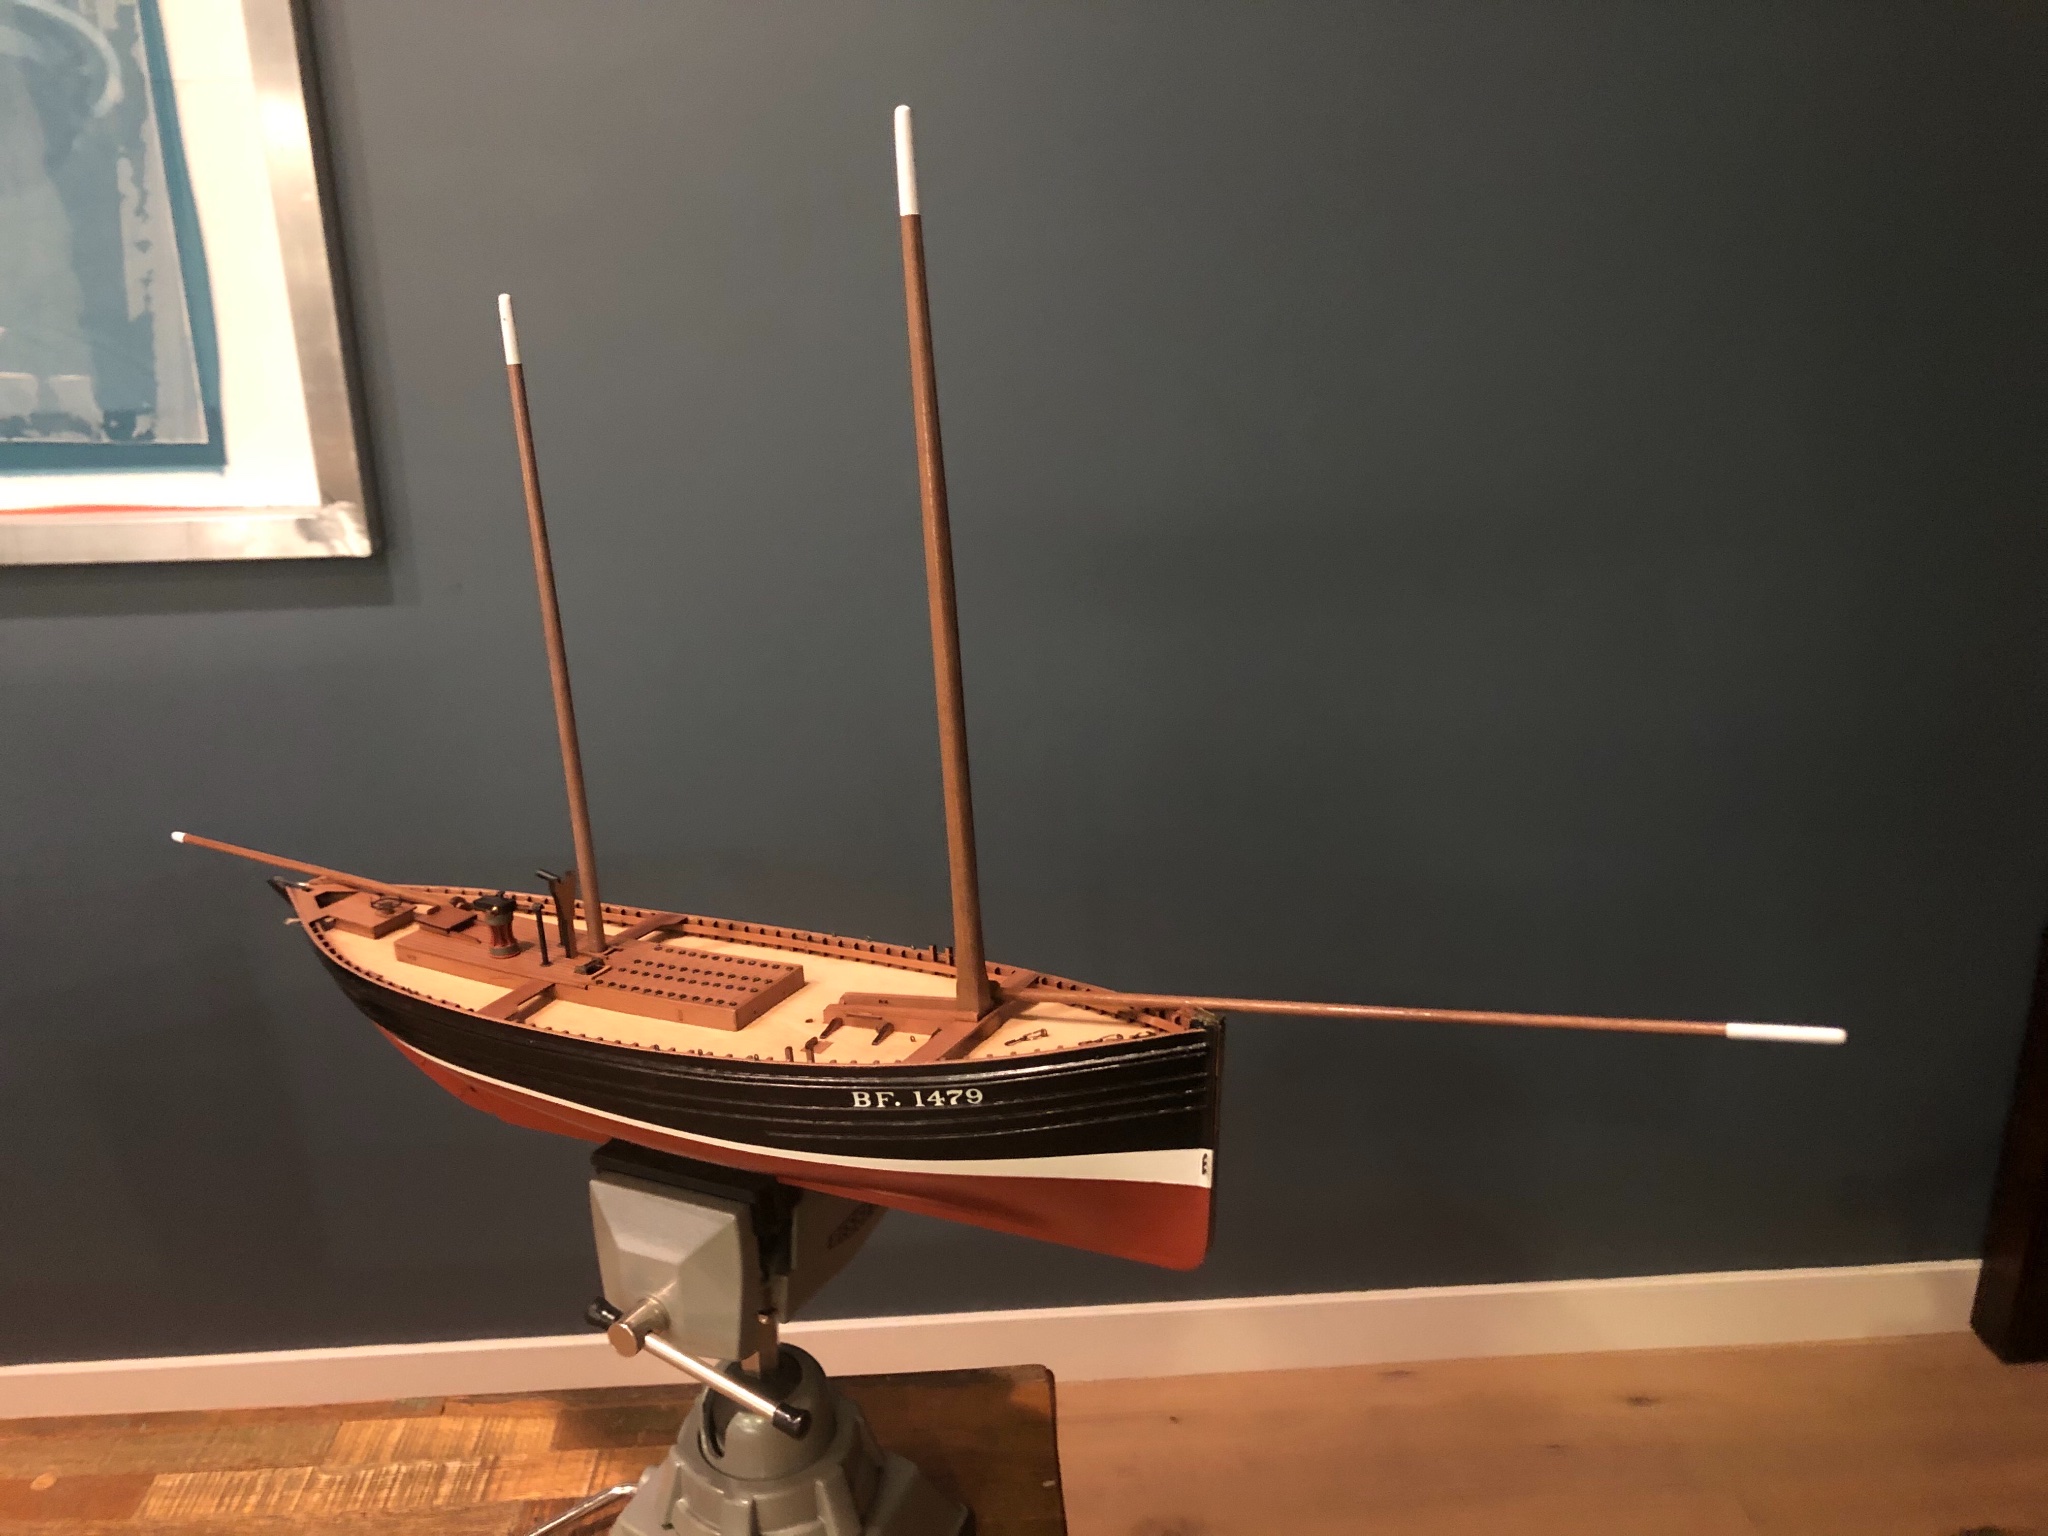
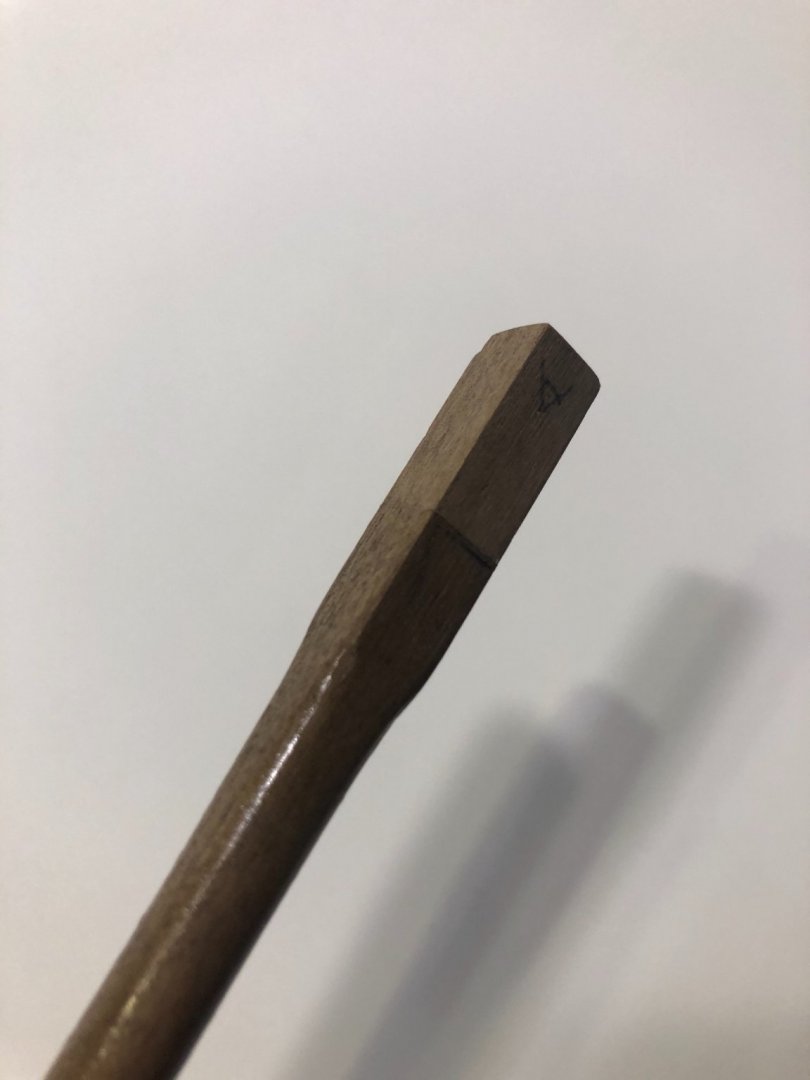
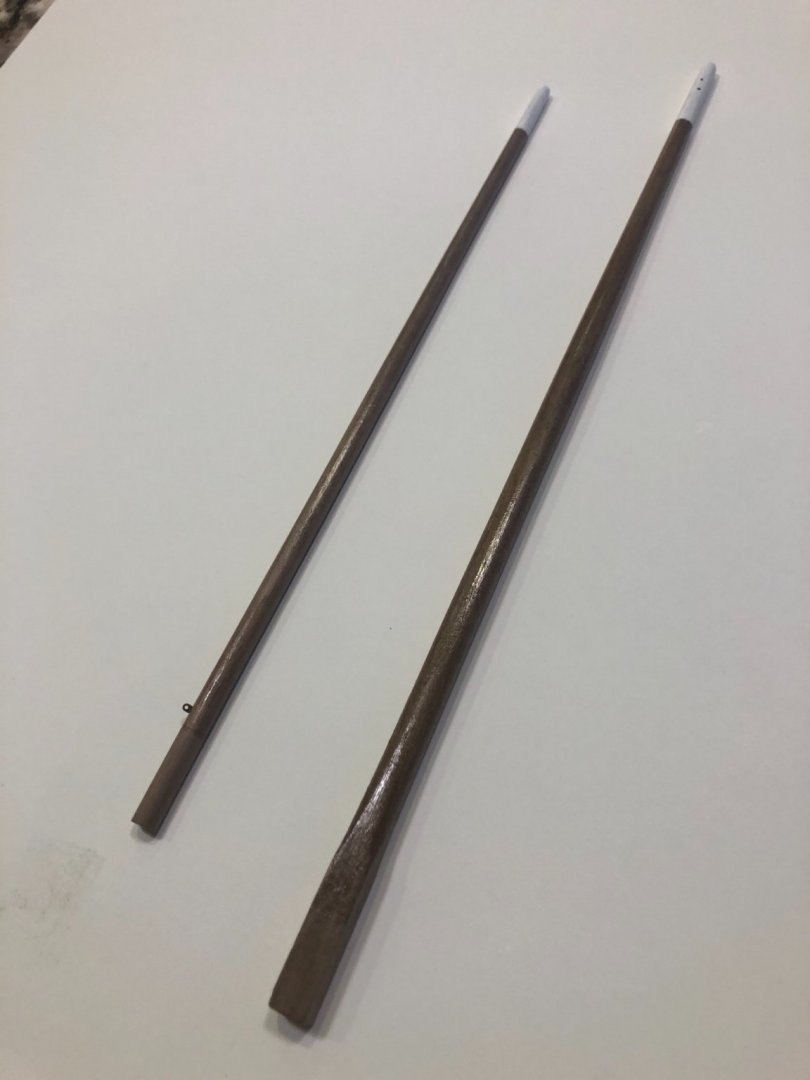
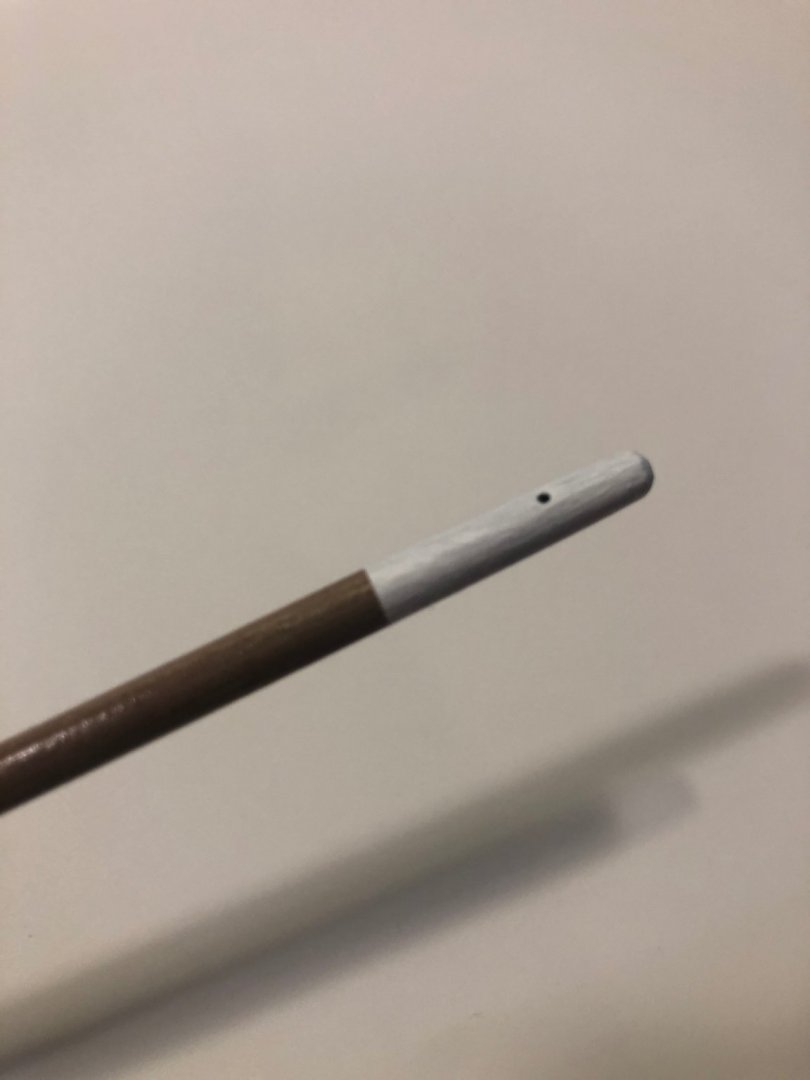
Update time. I’ve had a crazy week at work, so I’ve had to fit ship building in around it. But I’ve made a bit of progress on spars, yards and sails. I started by shaping all of the spars per the drawings provided by Chris. The main forward mast is a square piece of lumber, which needs to be tapered and made round. I have no lathe, so this was done by hand. The bottom of the mast where it steps into the deck is left square. I marked that part off, and then started in on shaping the piece. I began with my small micro-plane to rough shape it, then proceeded with a long sanding block and 120 grit sandpaper. An hour and a half, or so, and it was complete. The mizzen mast comes as a piece of walnut dowel, and needs to be tapered from the deck line to the tip. The bowsprit and boomkin also are tapered in one direction. The two lug yards are tapered at each end. After rough tapering, I sanded all smooth and gave them two coats of varnish. It seems that the Zulu’s usually had the tips of the spars painted white for visibility, and to protect the end grain from weather, so I followed that convention. Here’s a couple of photos with all finished spars in place.


- 222 replies
-
- 8
-
-
- First Build
- Lady Isabella
- (and 2 more)