HOLIDAY DONATION DRIVE - SUPPORT MSW - DO YOUR PART TO KEEP THIS GREAT FORUM GOING! (Only 20 donations so far - C'mon guys!)
×


EKE
-
Posts
231 -
Joined
-
Last visited
Content Type
Profiles
Forums
Gallery
Events
Everything posted by EKE
-
 Looks great DB!
 -
Thanks! Glad you found the log useful, Glomar. The bottom paint was PlastiKote Red Oxide Primer. Rattle-can all the way.
- 222 replies
-
- 2
-

-
- First Build
- Lady Isabella
- (and 2 more)
-
Excellent, Bob! The hull is so beautiful! Great to see it again. And the deck houses look really good. So glad you're back at it. -E
-
Thanks, Jim. Chris makes it easy, as everything in his kits is so well conceived. And I have that wonderful manual to guide me. It’s like both of you guys are standing by my side.
-
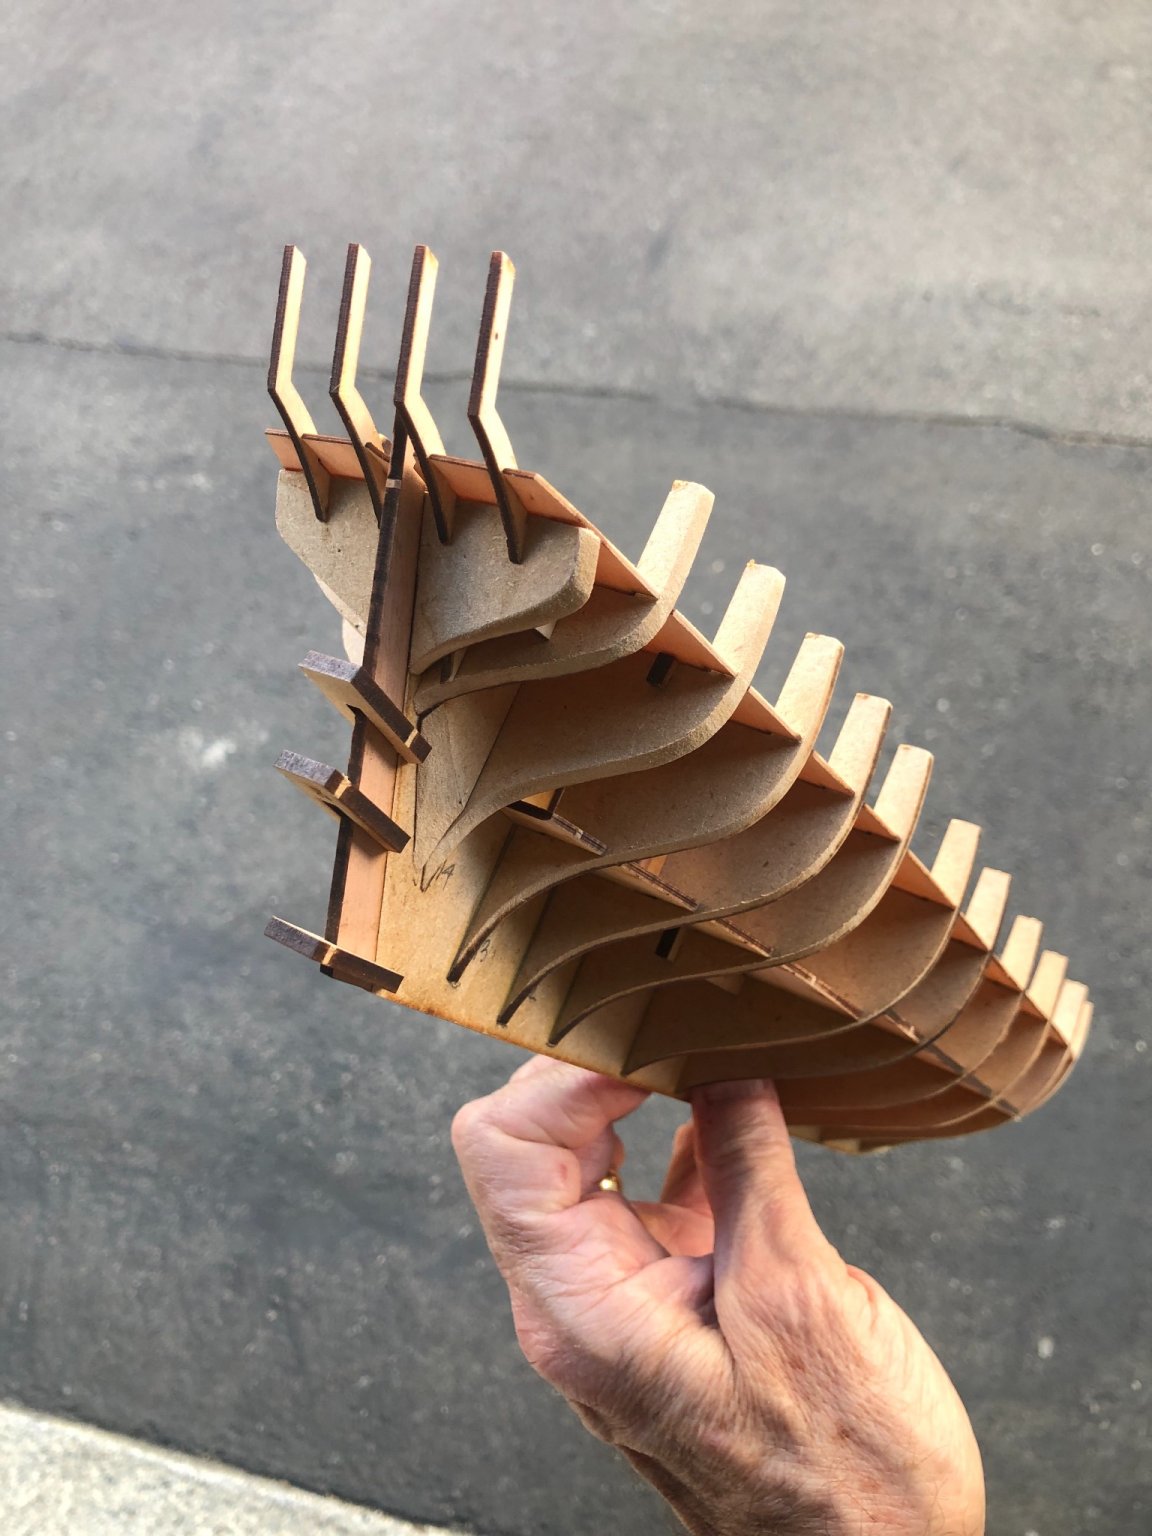
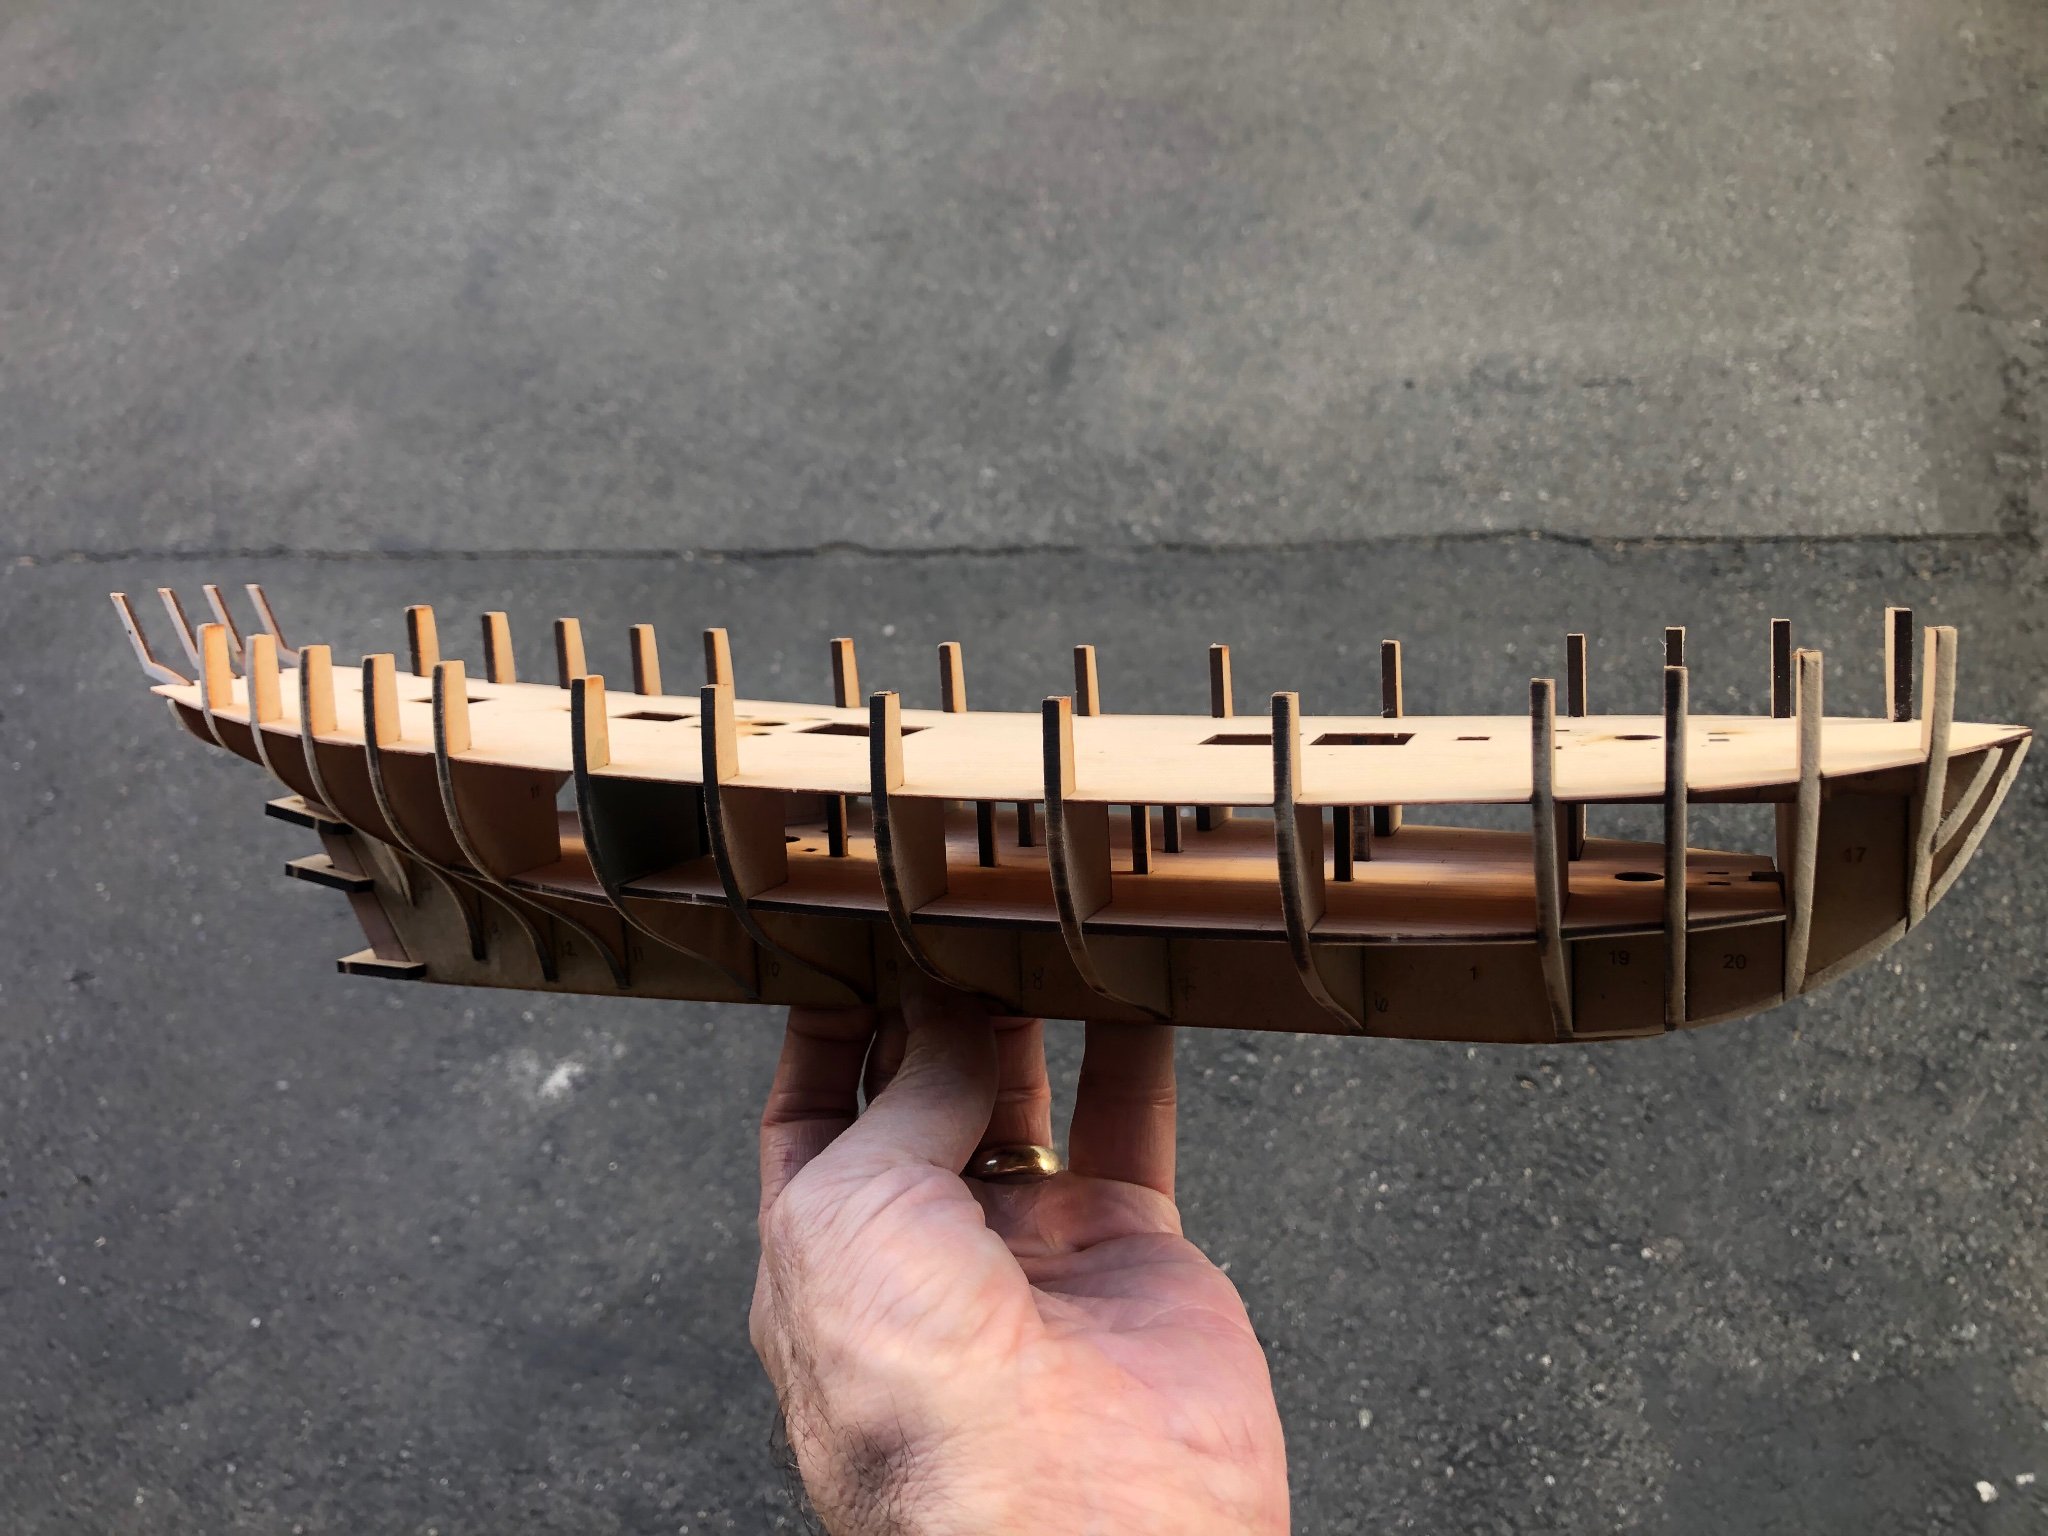
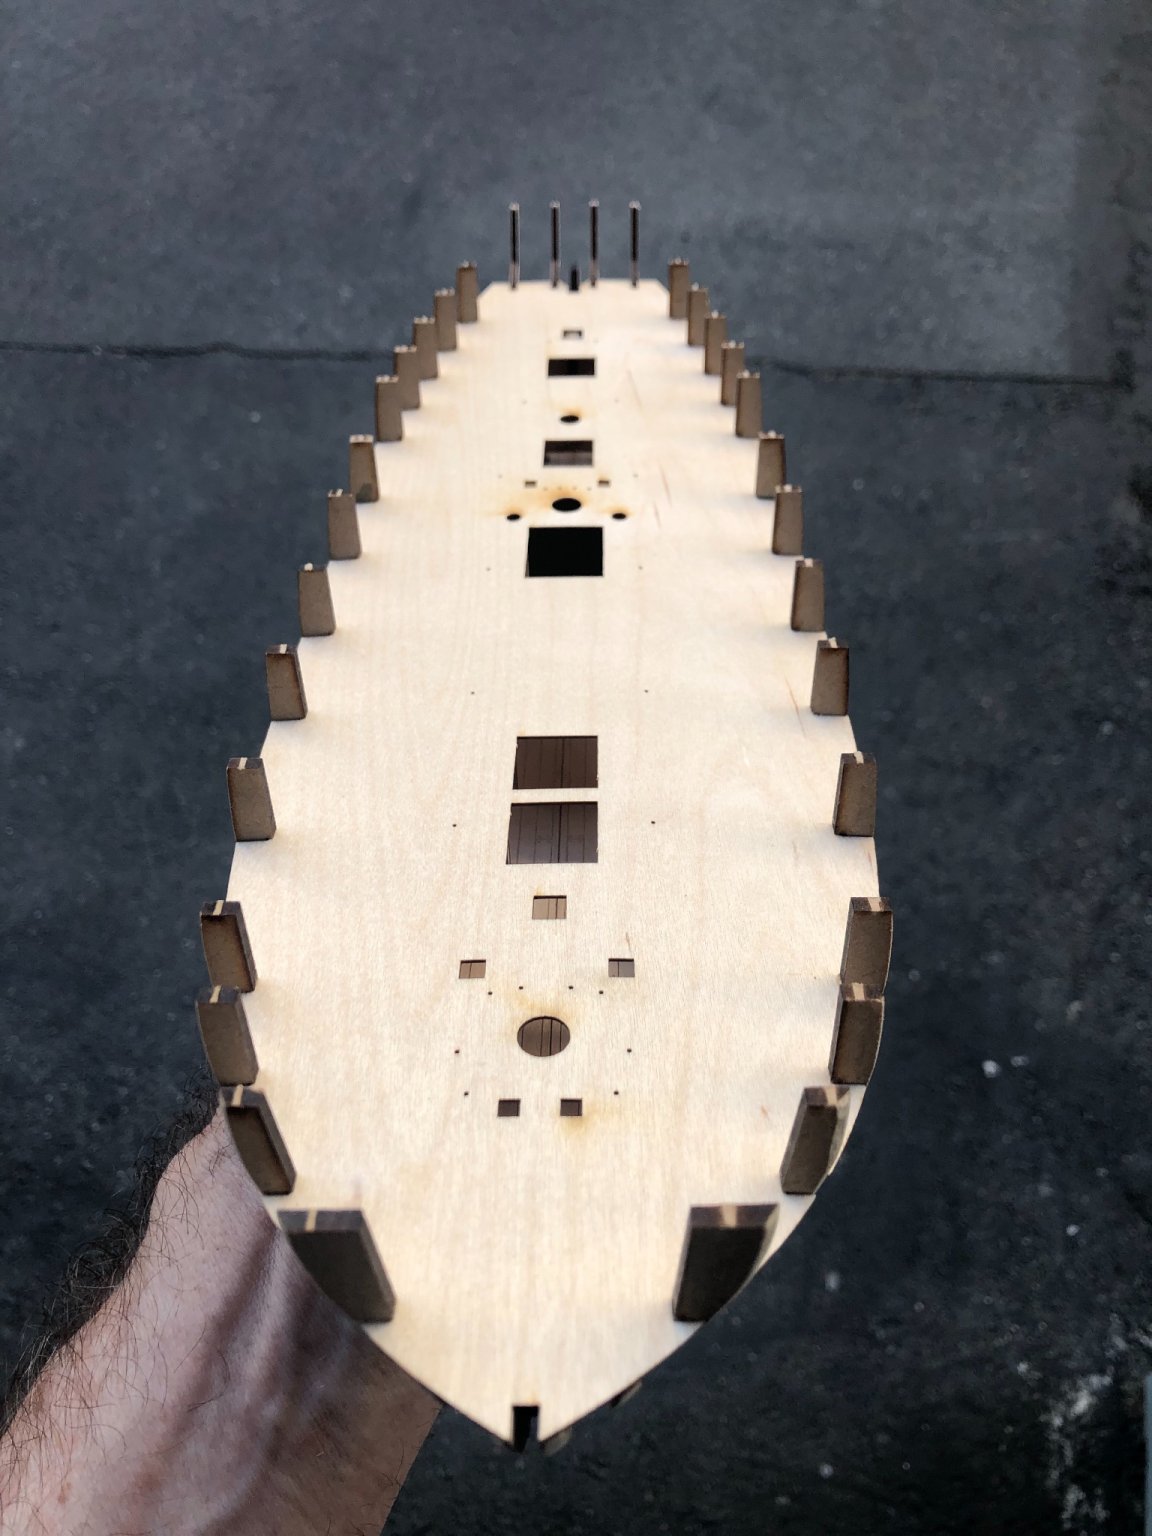
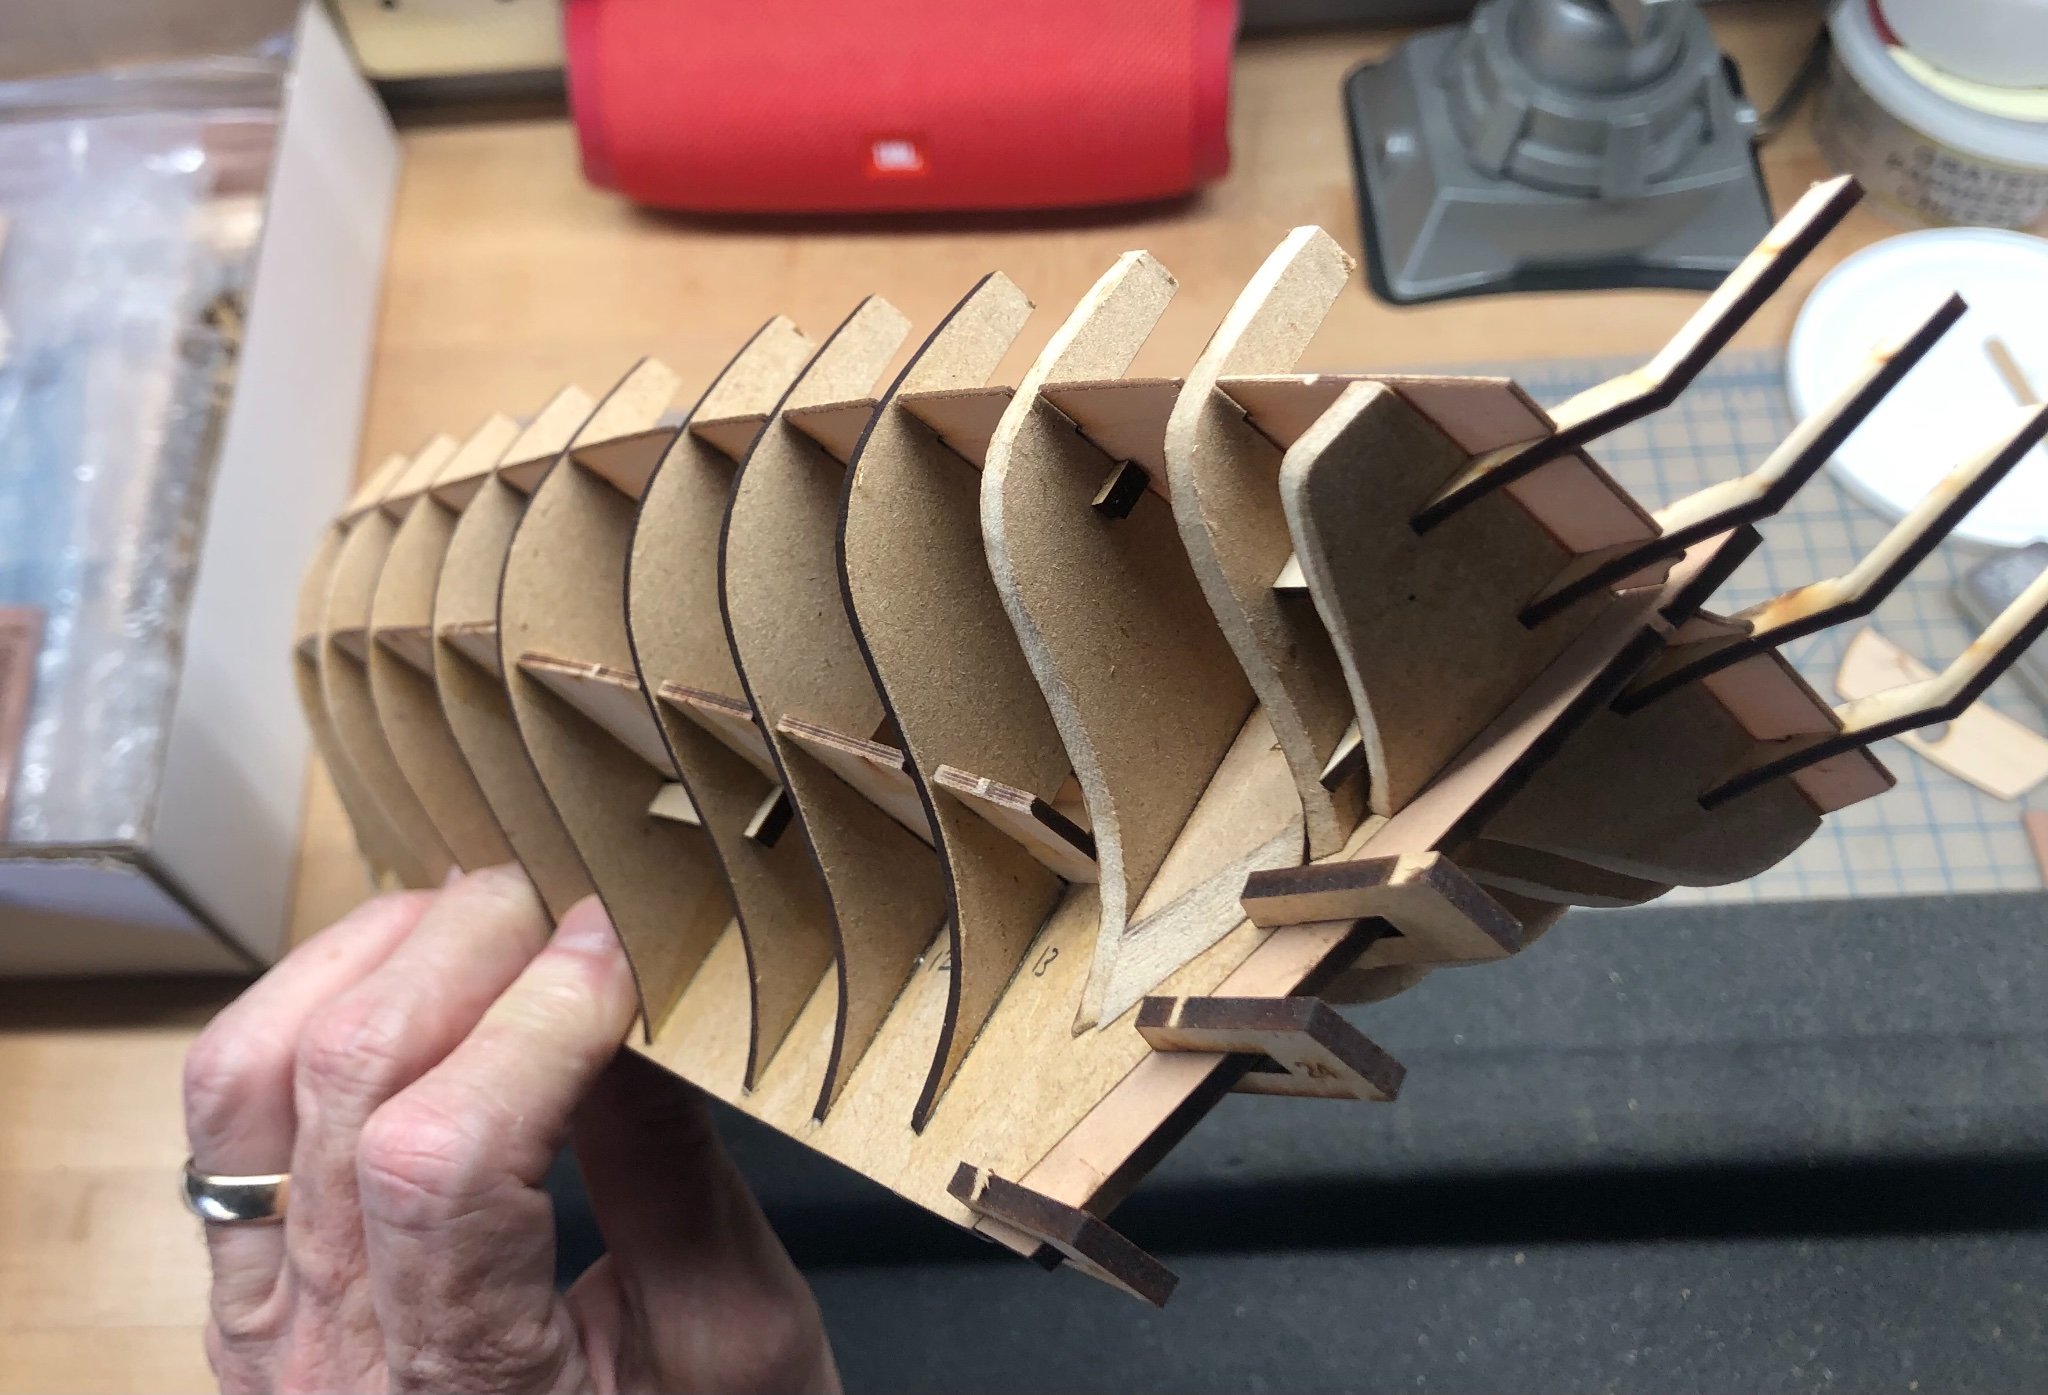
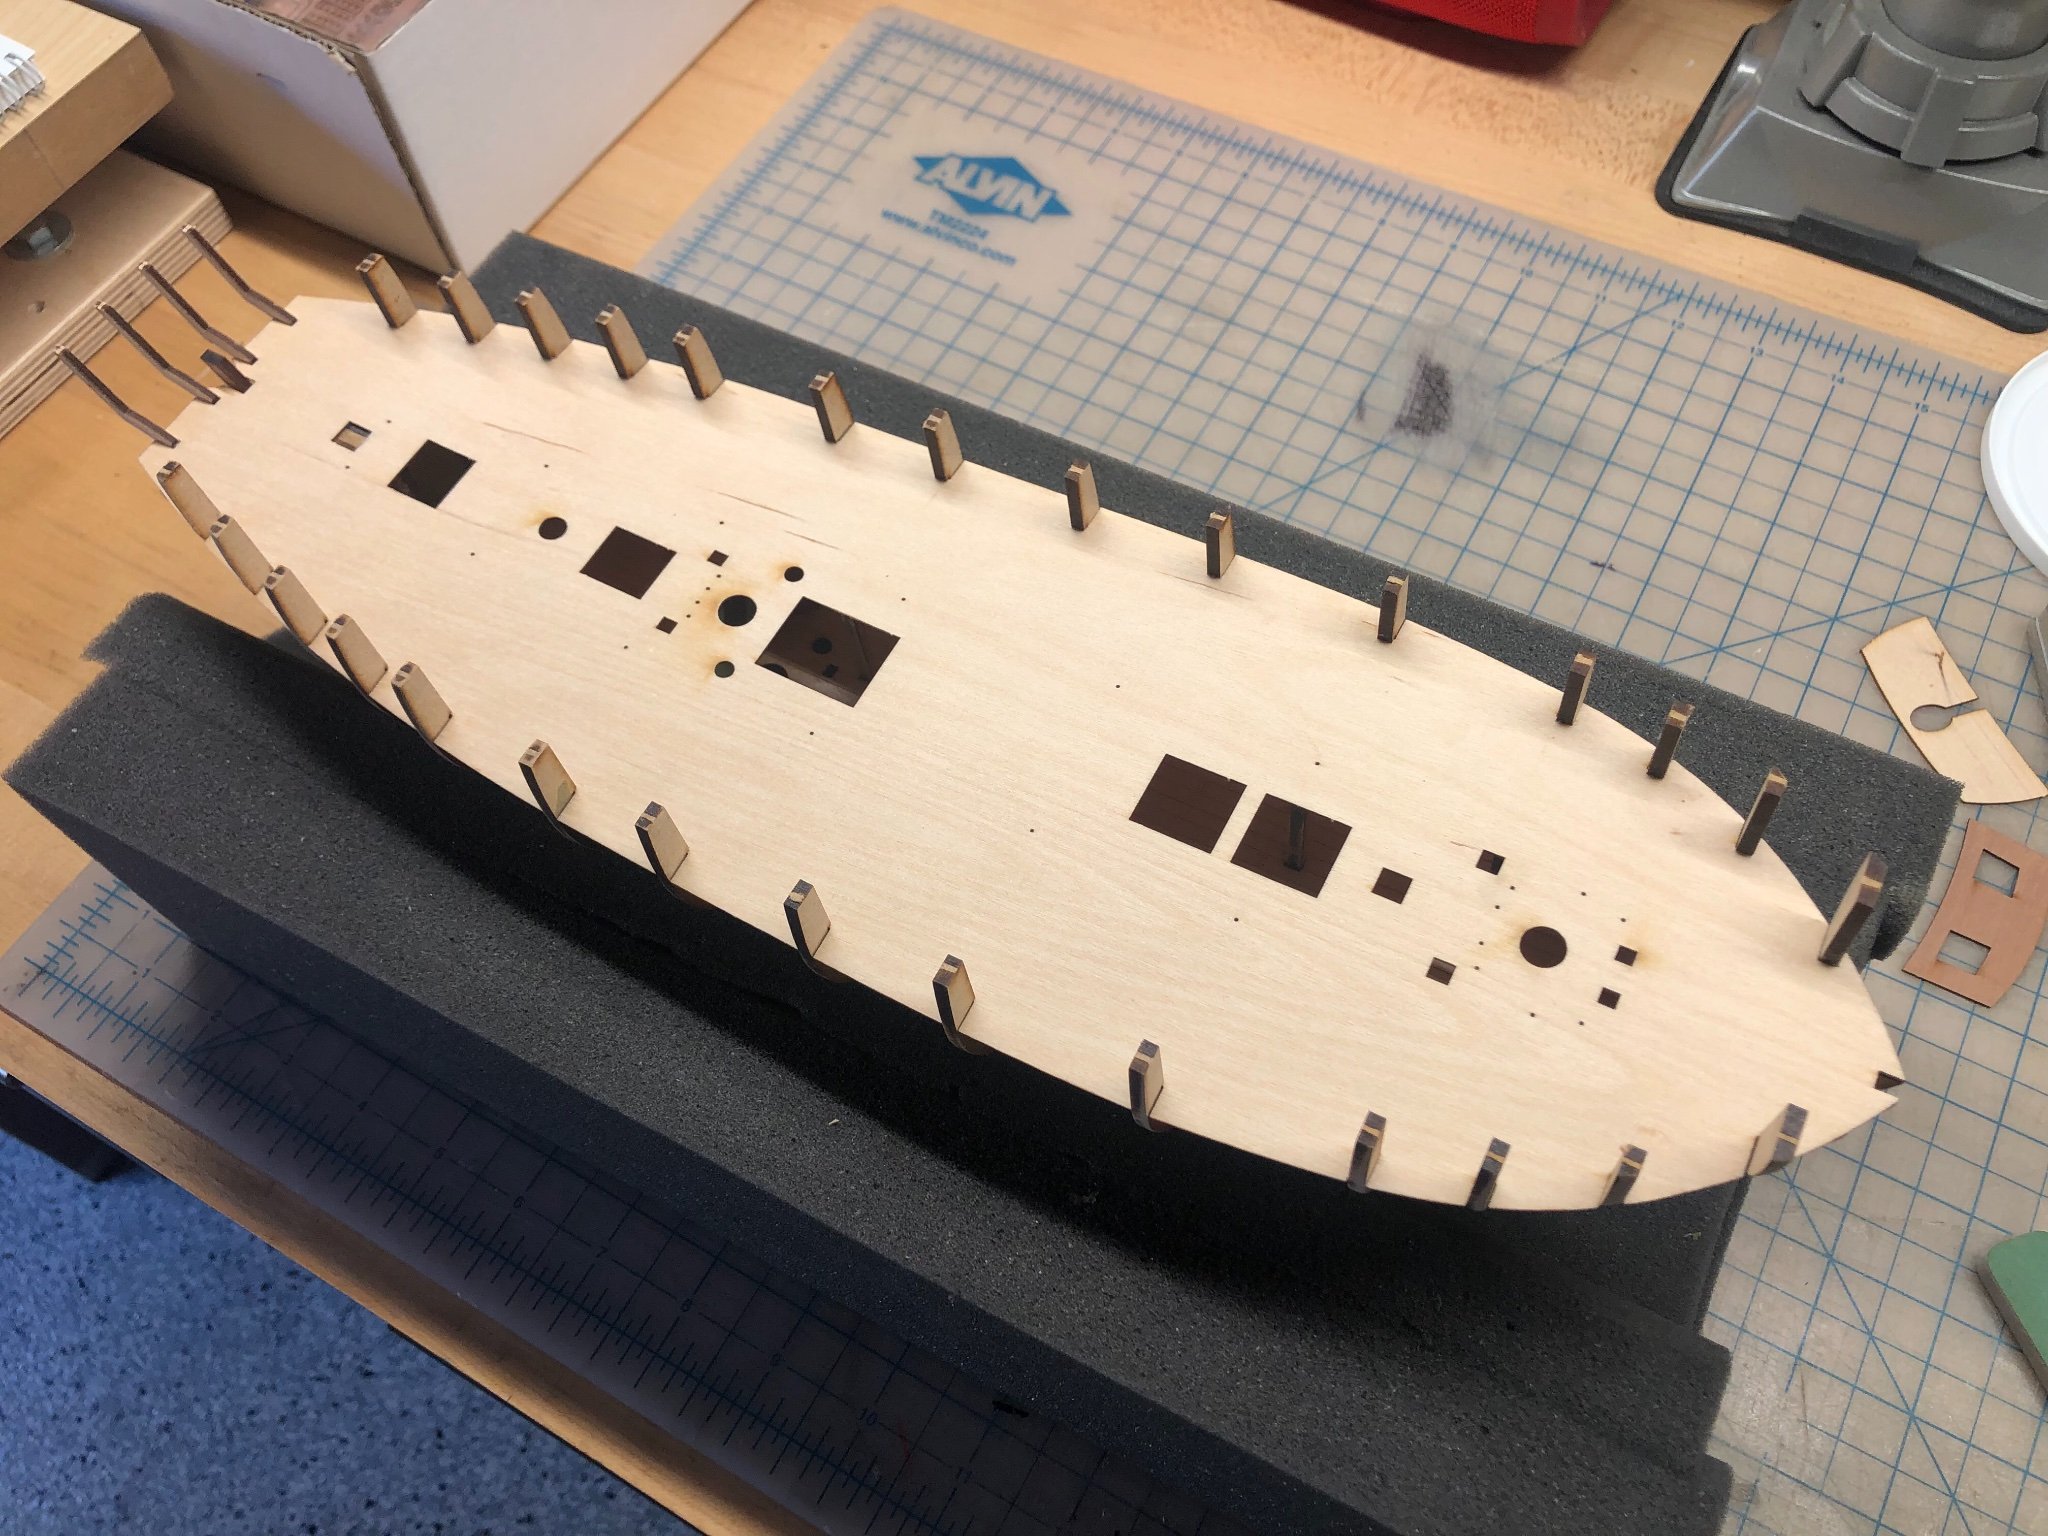
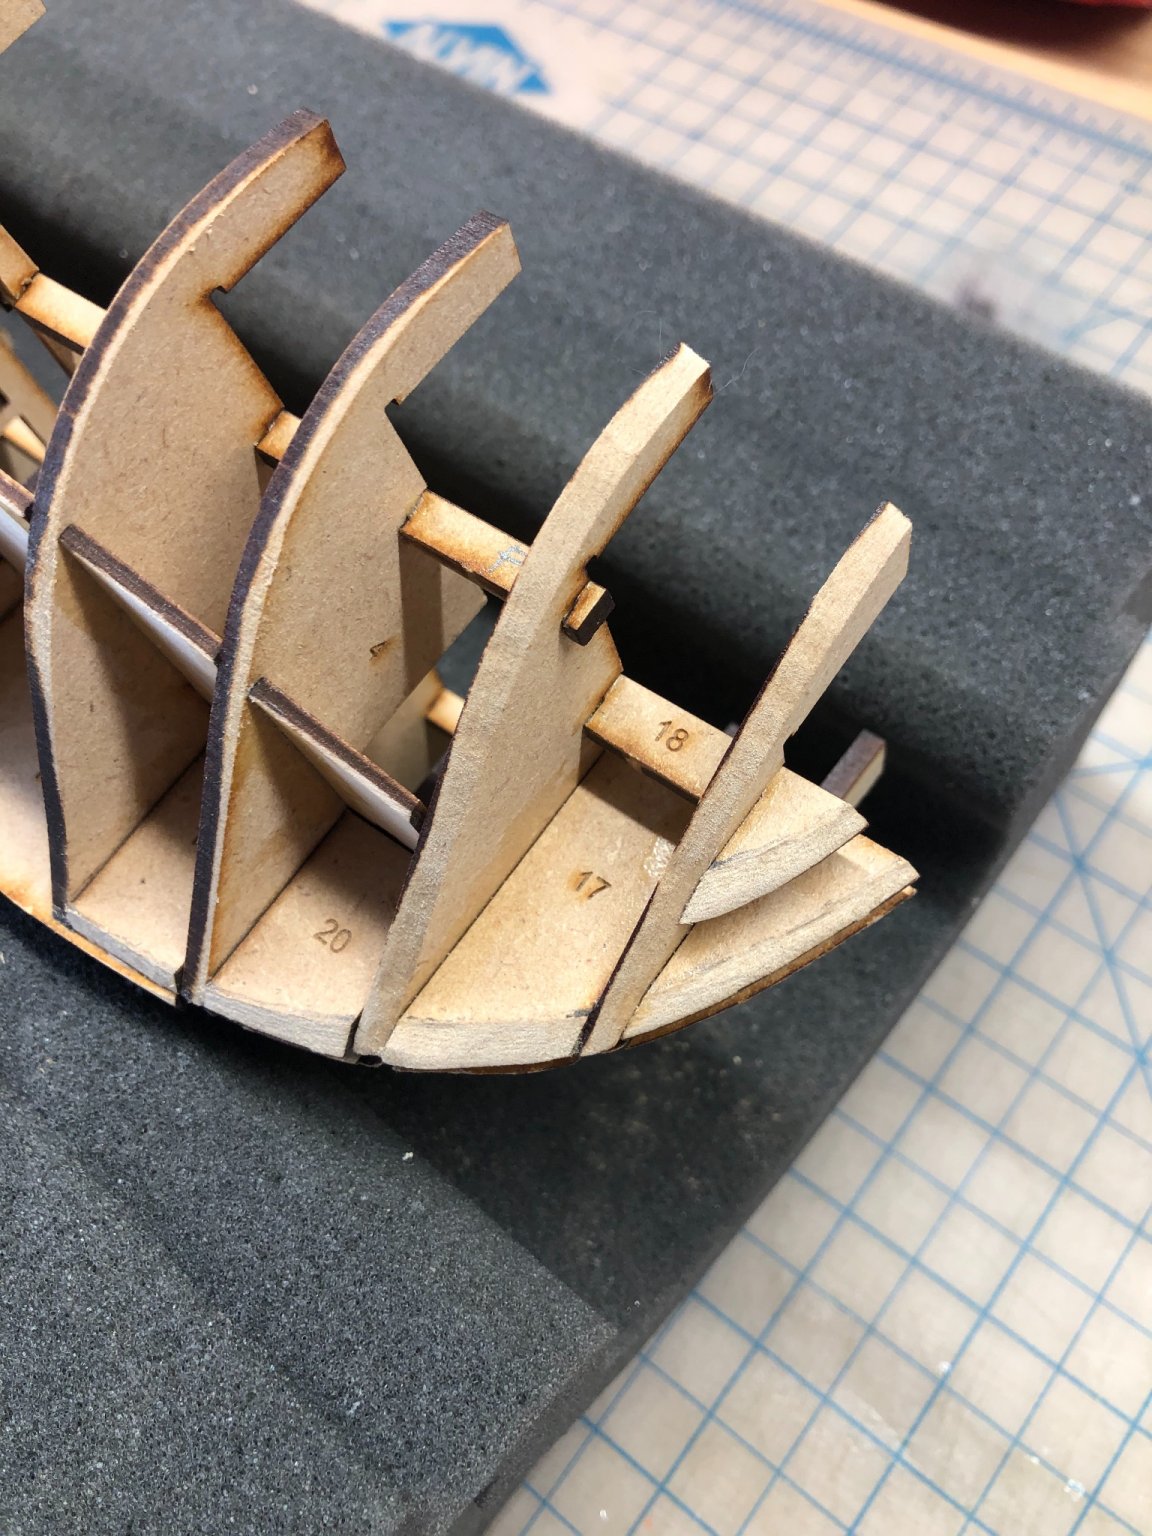
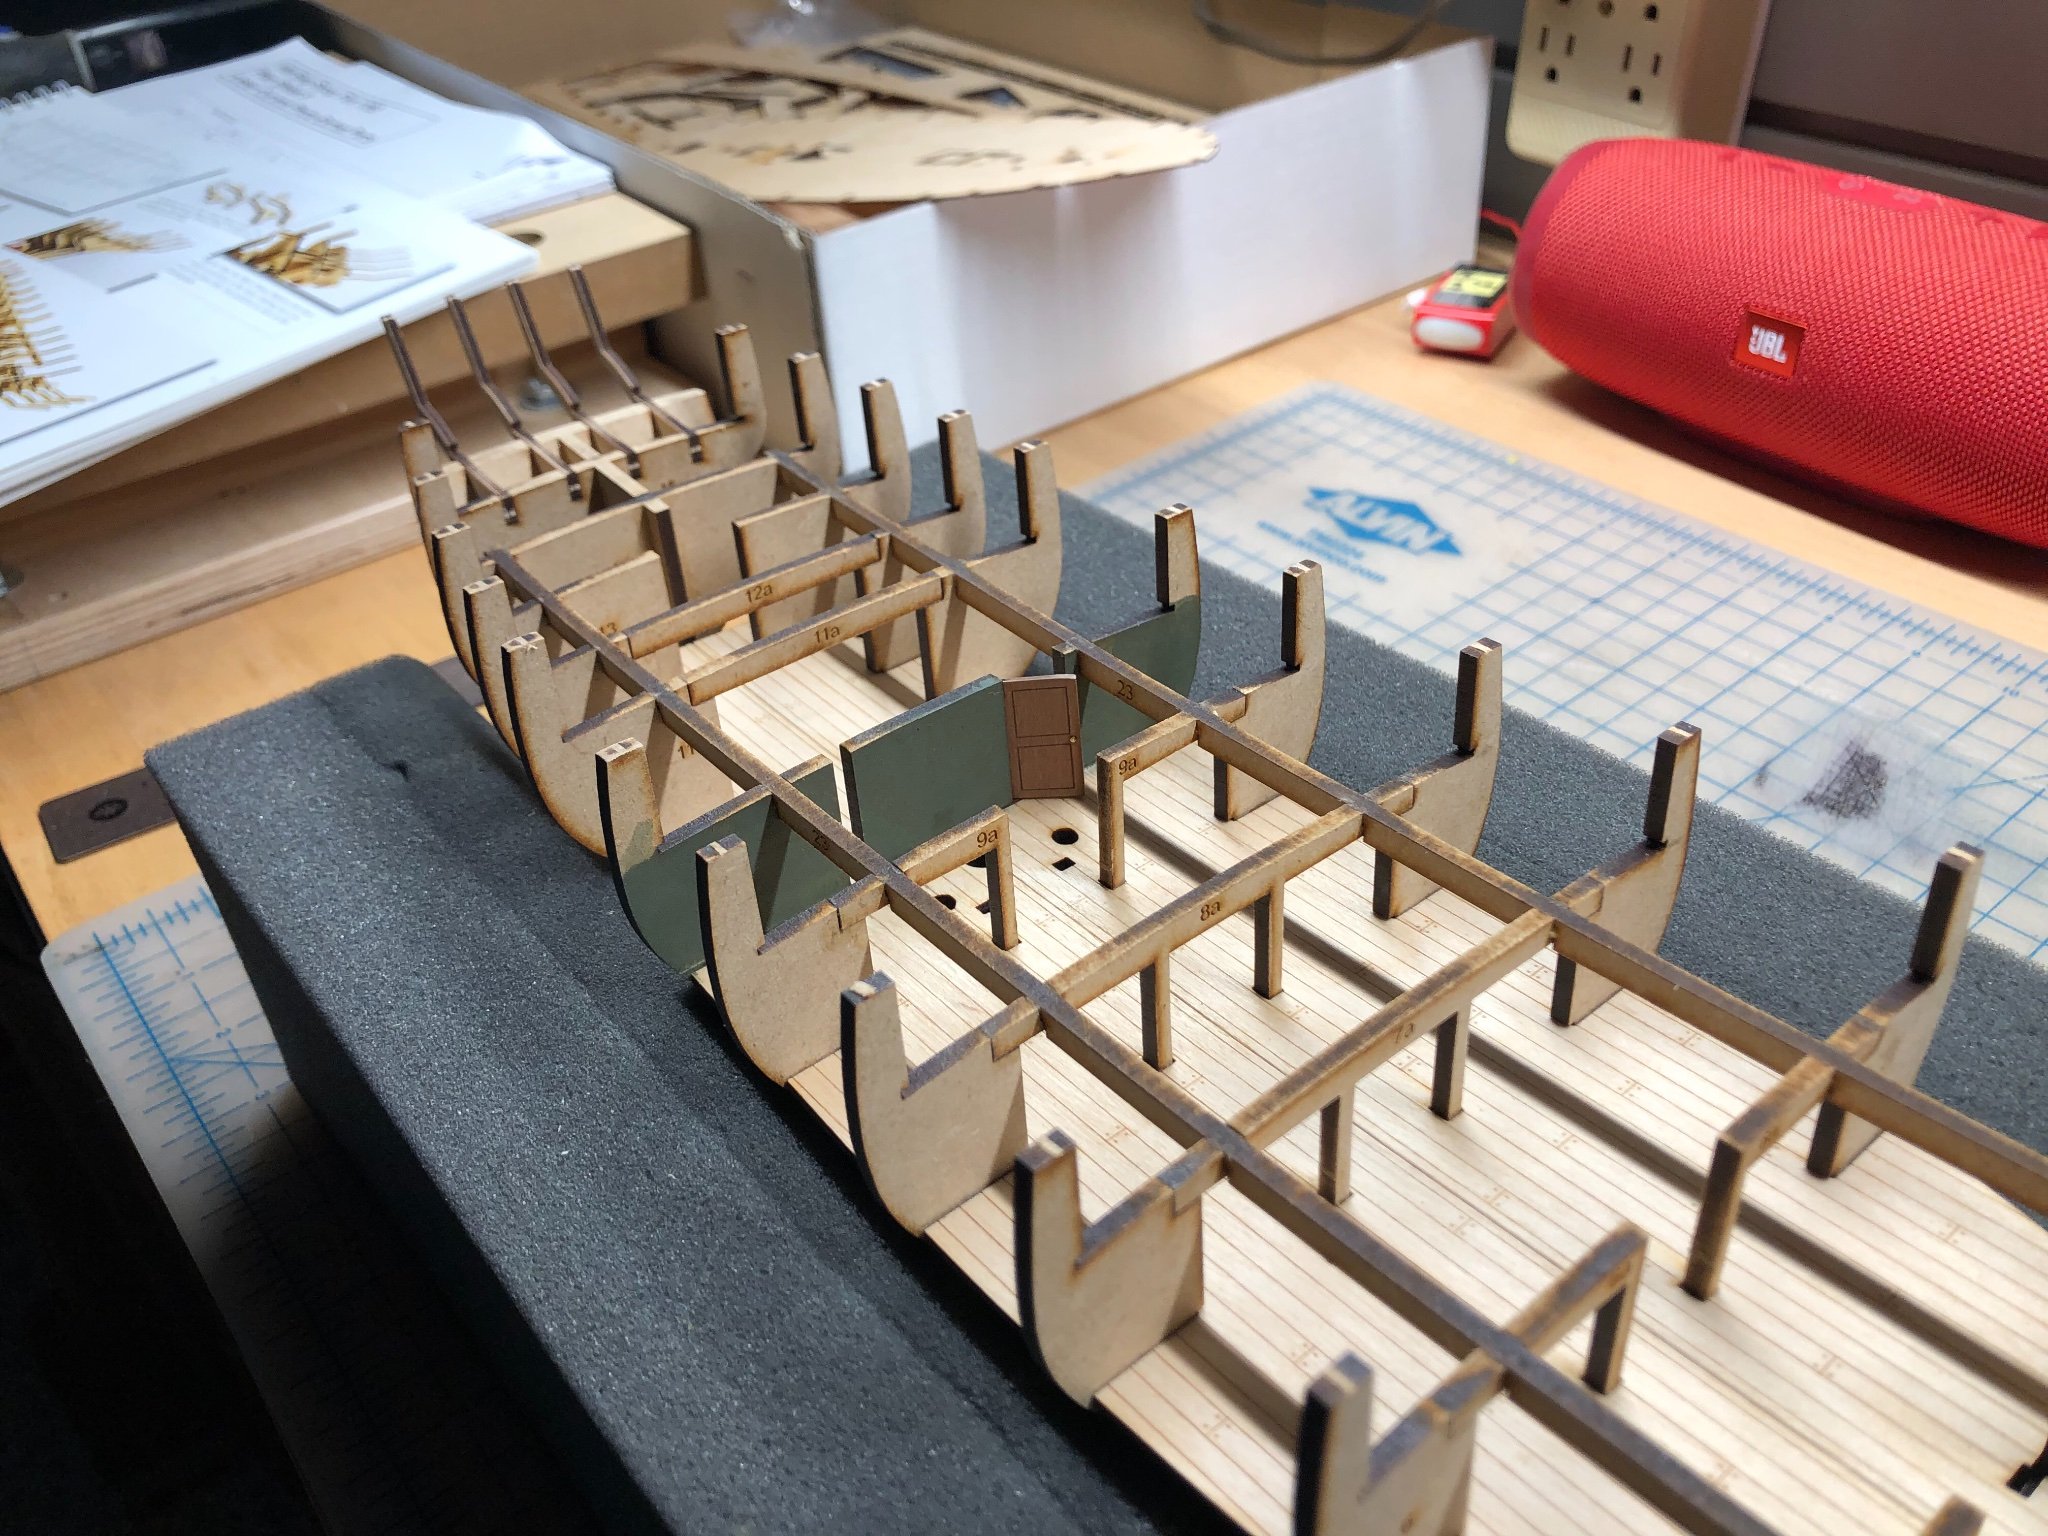
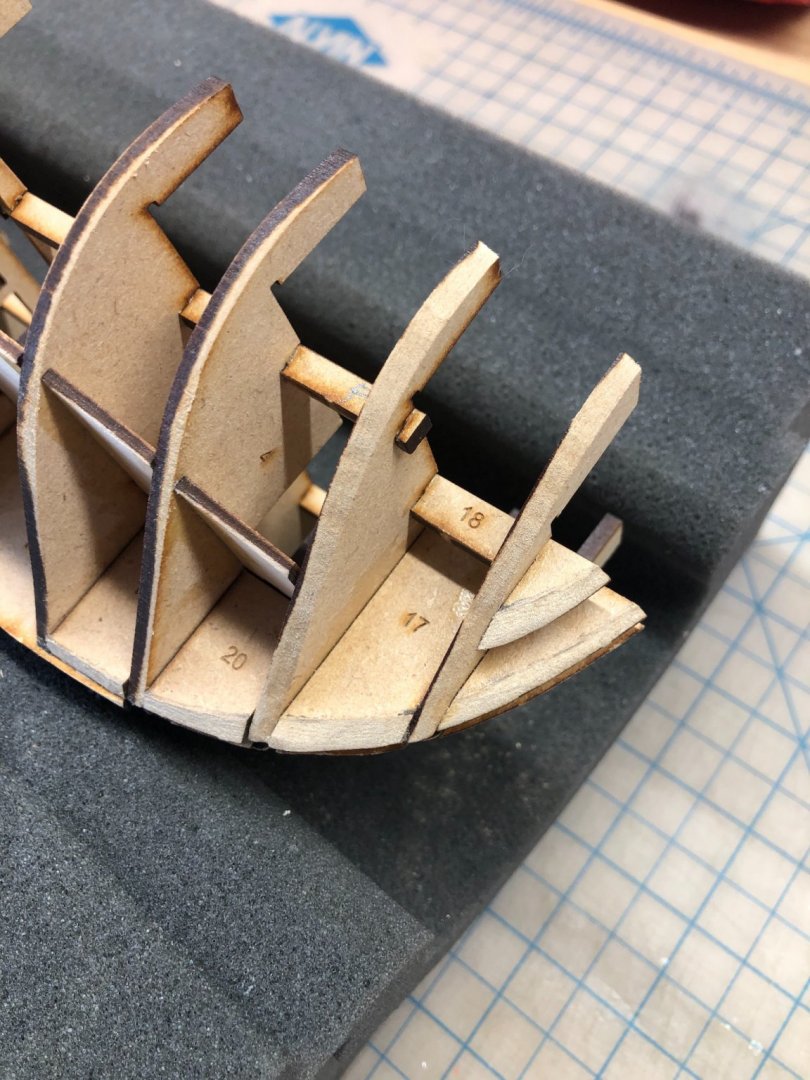
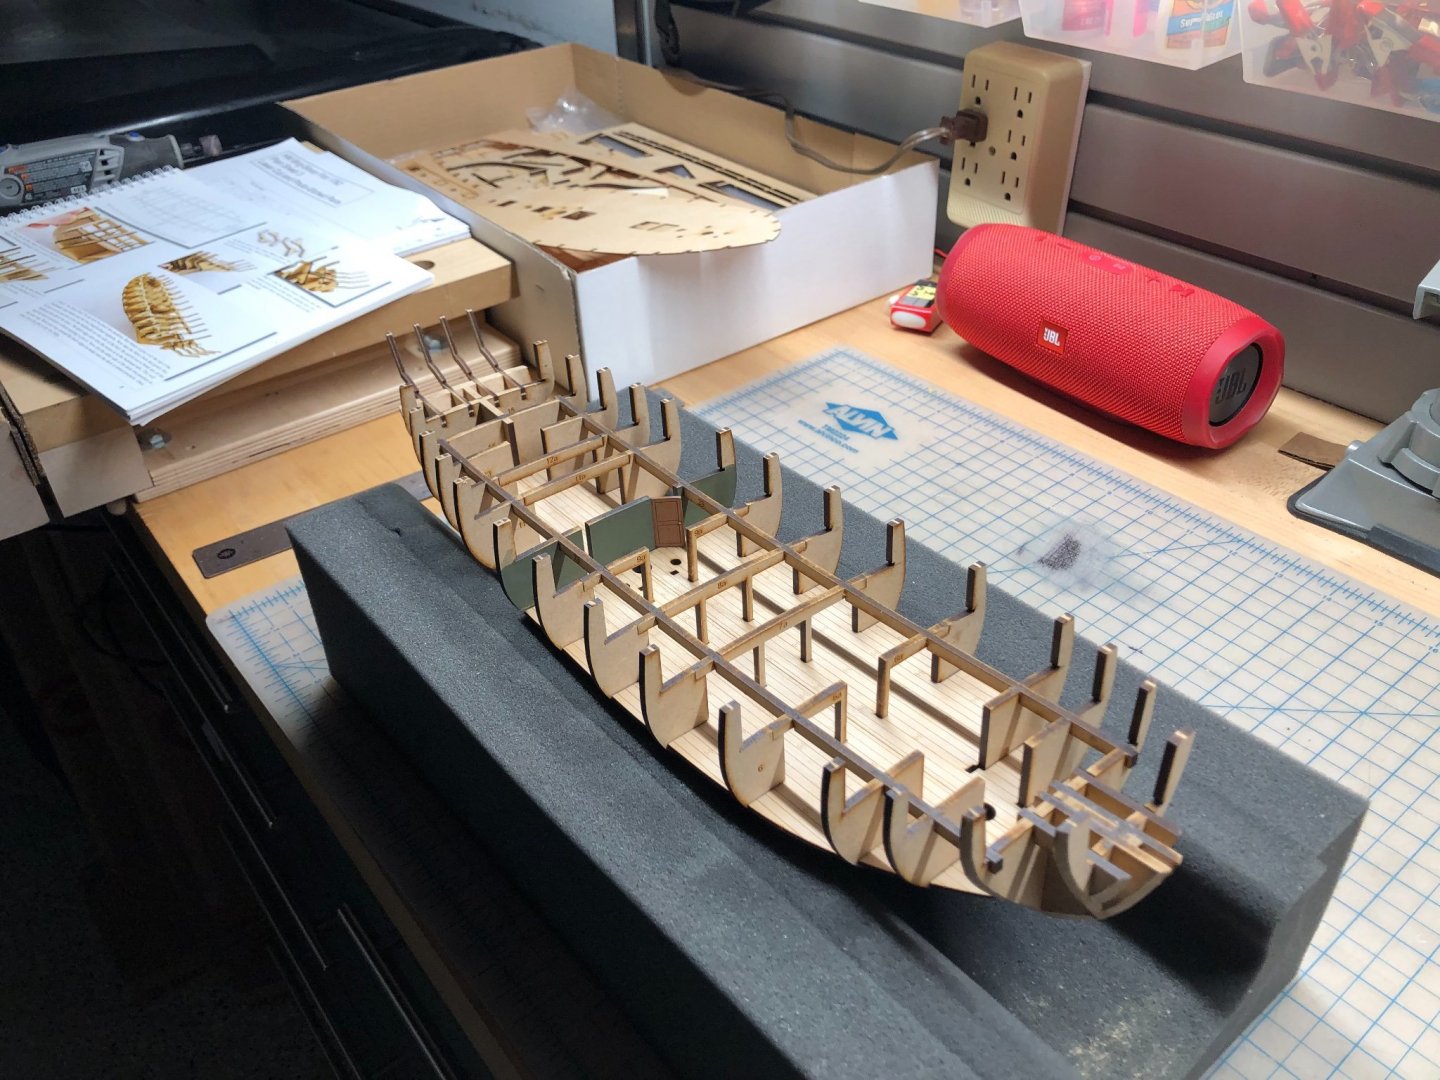
Hi, friends! I’m still here. Been absolutely buried on new projects at work, so I had to put Flirt aside for several weeks. I have finally been able to spend a bit of time moving it forward, though, and I thought I’d give you all an update. I pre-beveled all of the filling parts, and glued them in place. I tried to be careful not to over-bevel them, so that I can bring them down to correct shape during the final fairing. I completed the basic framing, installing the transom beams, and gluing all of the deck girders in place. Next up is was the installation of the plywood upper deck, but before that went in, I painted the bulkhead with the little door with a grey-green acrylic, so that it would look a bit more finished when when looking through the hatch of the finished model. Then I installed the upper false deck, which is light plywood, and very flexible. The deck needs to be gently bent with a crown at the centerline, and then it will snap into place in the little slots in each bulkhead. I recommend being careful when doing this, as there are a few places where the bulkheads are a bit thin where the bulwarks start. The MDF material is brittle, and you don’t want to break anything. The deck fits beautifully, it’s very accurately shaped. It is designed to have a very slight crown in the middle, and it naturally sits right down on the bulkheads and girders. No clamping really needed, but a did clamp in a couple of spots just for insurance. I used PVA glue to bond the deck in place. Next up, installation of the transom, and then final fairing of the frame to prepare for planking. Hoping to find a bit more time in my schedule to keep this moving forward. -Erik


-
I am. Been swamped at work, never been busier. I have been poking along at it. When I get the time I’ll bring y’all up to date. 👍
-
Question for Chris and James: will sails be offered for Erycina and Nisha?
- 36 replies
-
- 2
-
-
- vanguard models
- Erycina
- (and 2 more)
-
I can’t tell you how excited I am for these kits! I just love the look of these working craft, and I can’t wait to build them so they can take a place next to my Zulu.
- 36 replies
-
- 2
-
-
- vanguard models
- Erycina
- (and 2 more)
-
Outstanding job on the planking. I'm finishing up the framing on my Flirt, and I hope I can come anywhere close to the lovely job you've done. Bravo!
-
This is just so impressive. Wonderful job, James and Chris! I expect that you will sell as many as you can make, Mr. Watton.
- 355 replies
-
- 4
-
-
- vanguard models
- Sphinx
- (and 1 more)
-
Great to hear, Clare. I'll give a report when I receive the goods. -E
-
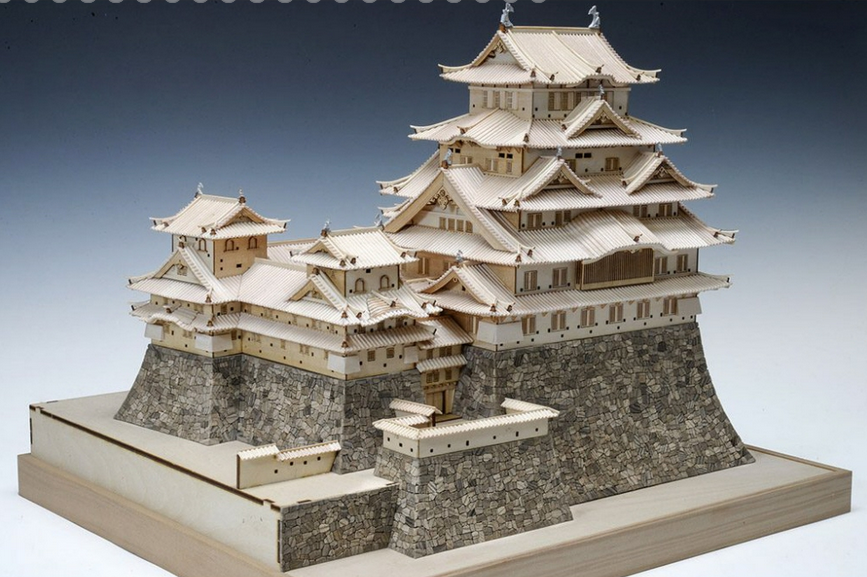
I was also looking at their offerings under "Japanese Castles" These models are stunningly beautiful. This reminds me of the castle palace I visited when we were in Tokyo.
-
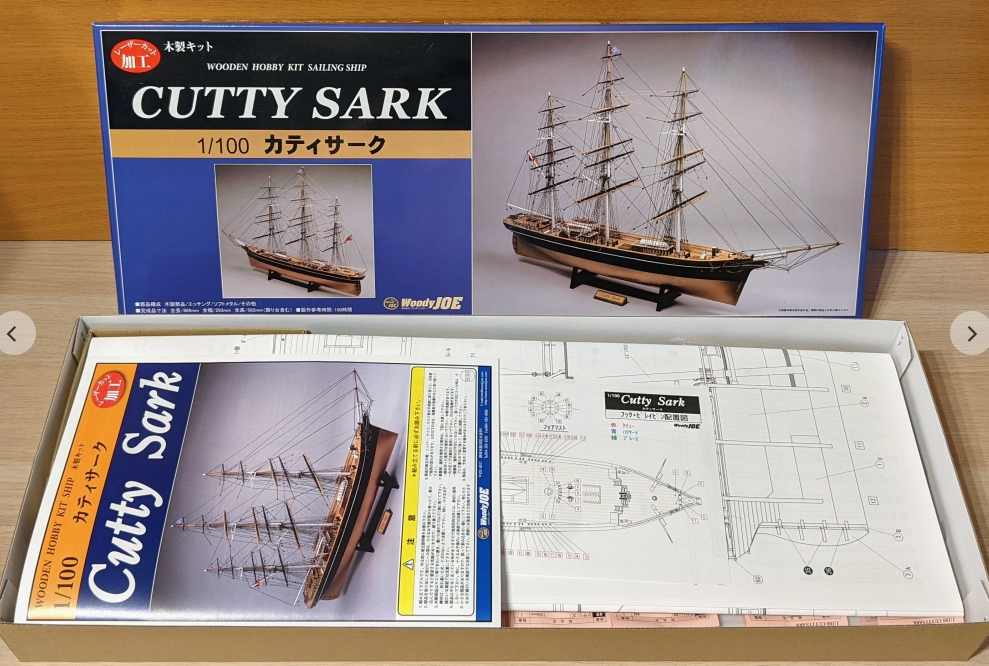
I just bought the WoodyJOE 1:100 Cutty Sark. Very nice e-commerce site at Zootoyz. We'll see how the shipping goes from Japan. -E
-
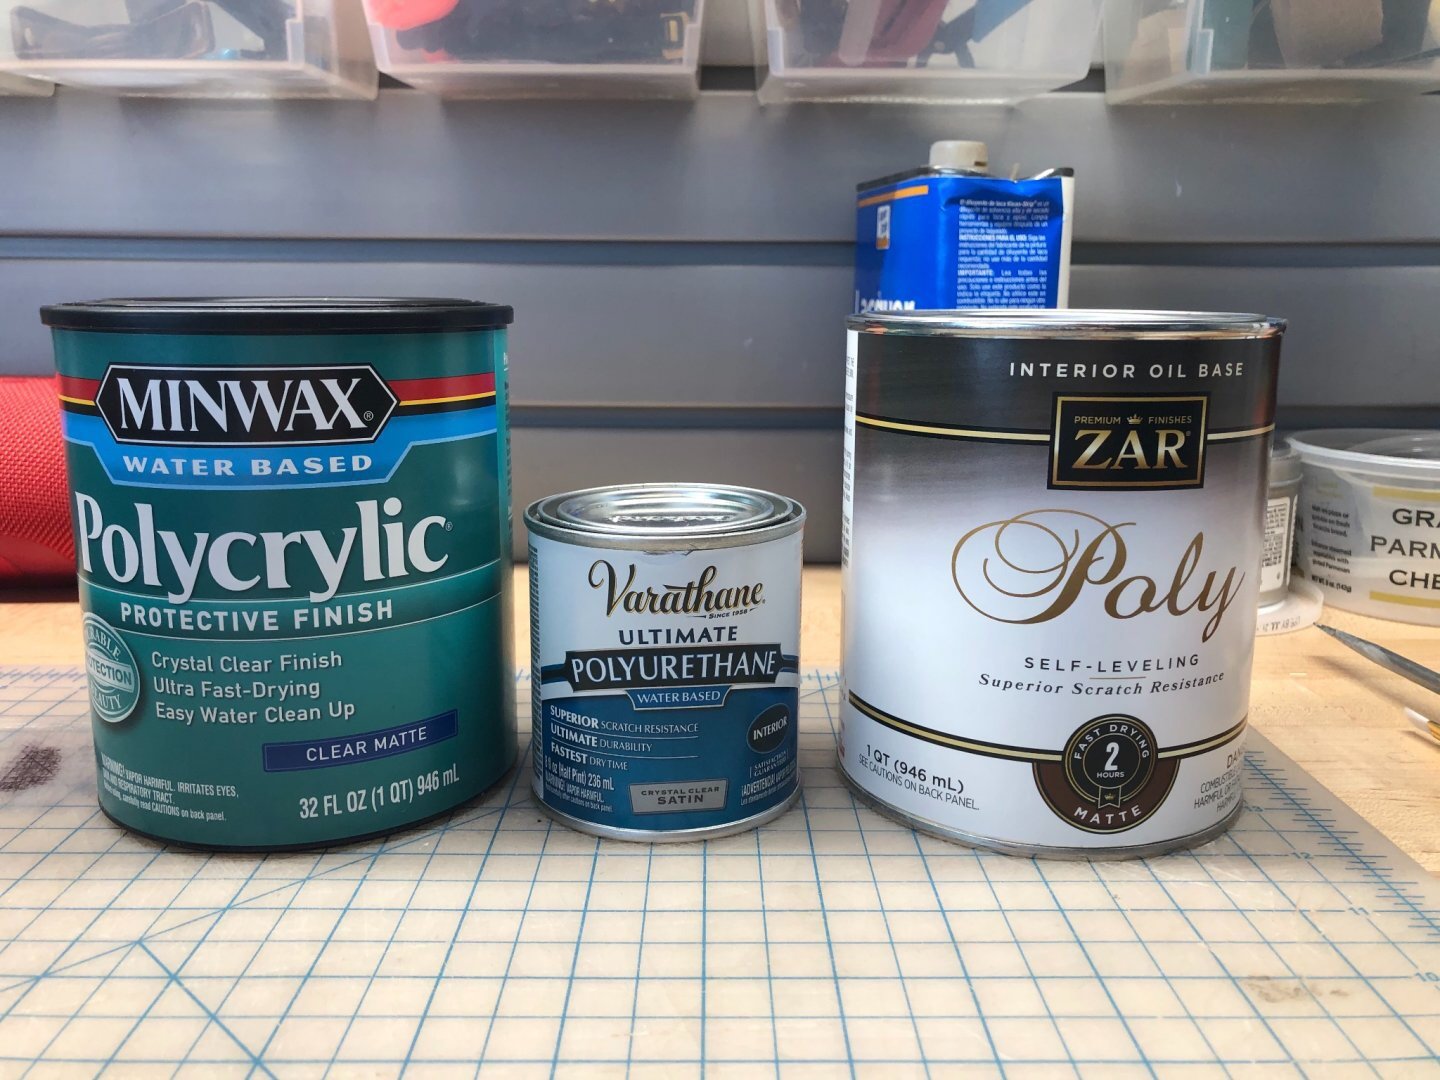
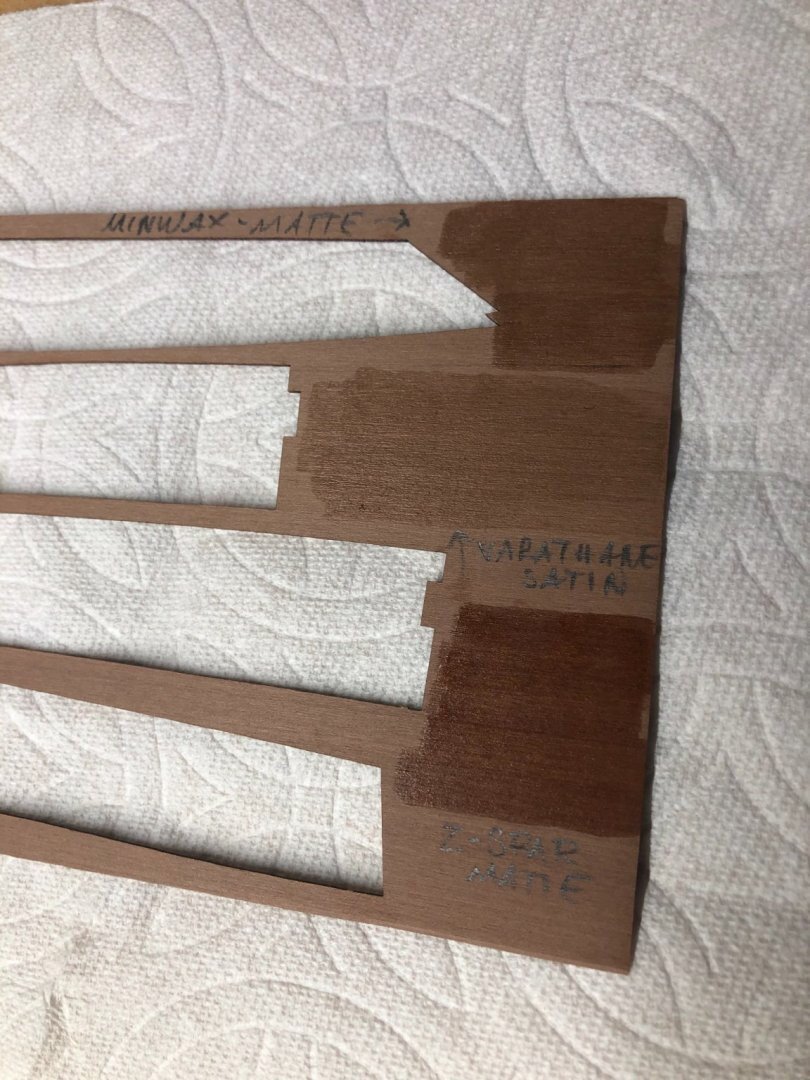
During my Zulu build, I experimented with these three varnishes, and I ended up using the Minwax water-based Polycrylic varnish. I think it’s terrific stuff. Goes on a milky white, but dries perfectly clear. It has a very nice color on the pearwood from the kit. It has a self-leveling quality, so that you really don’t see brushstrokes after it dries. And cleanup is easy, as it’s water based. I recommend trying it. I got it delivered from Amazon.
- 355 replies
-
- 6
-
-
- vanguard models
- Sphinx
- (and 1 more)
-
So beautiful. I would really like to build one of these to display in my office!
-
Hi Thomas, I’ve never bought anything from WoodyJOE, so this is new to me. The photo I posted is from their site. I’ll probably use one of the links in this thread to try to order one. I’ll reach out to you via PM to chat. -E
-
I've been thinking about future projects, and I've always wanted to build a great clipper ship. I've looked at all of the notable kit options (Red Jacket, Flying Fish, Thermopylae, etc.) , but I noticed that WoodyJOE offers several versions of Cutty Sark. There's a huge, 1:80 version that's over 40"long, and then a 1:100 version, with or without sails. I may see if I can purchase the 1:100 without sails. It's about 34" long. From what I can tell, the quality, packaging and instructions are similar to the Susquehanna. I think Cutty Sark would be a good clipper to build, since there is abundant information available on her, and I could bash a bit to bring it up to a higher level. I'd certainly want to do real copper plating on the hull.
-
Ed- I was doing a search on MSW on clippers, and discovered this log for Young America. I have spent the last few days pouring over it with fascination and admiration. I have seen many magnificent models here, by many master modellers. But I have to say, I haven't seen anything quite like this incredible creation. I mean it when I say: This is a masterwork. Thank you for bringing it into the world, and thank you for sharing your technique in such beautiful detail. I know I'll continue to learn from referring to this log for years to come. As a beginning ship modeller, I have to say this is invaluable. With admiration, Erik
- 3,618 replies
-
- 3
-
-
- young america
- clipper
- (and 1 more)
-
Damn… I was about to order one… (kidding.)
-
Sorry Chris! You just got me excited when I saw the new fishers.
-
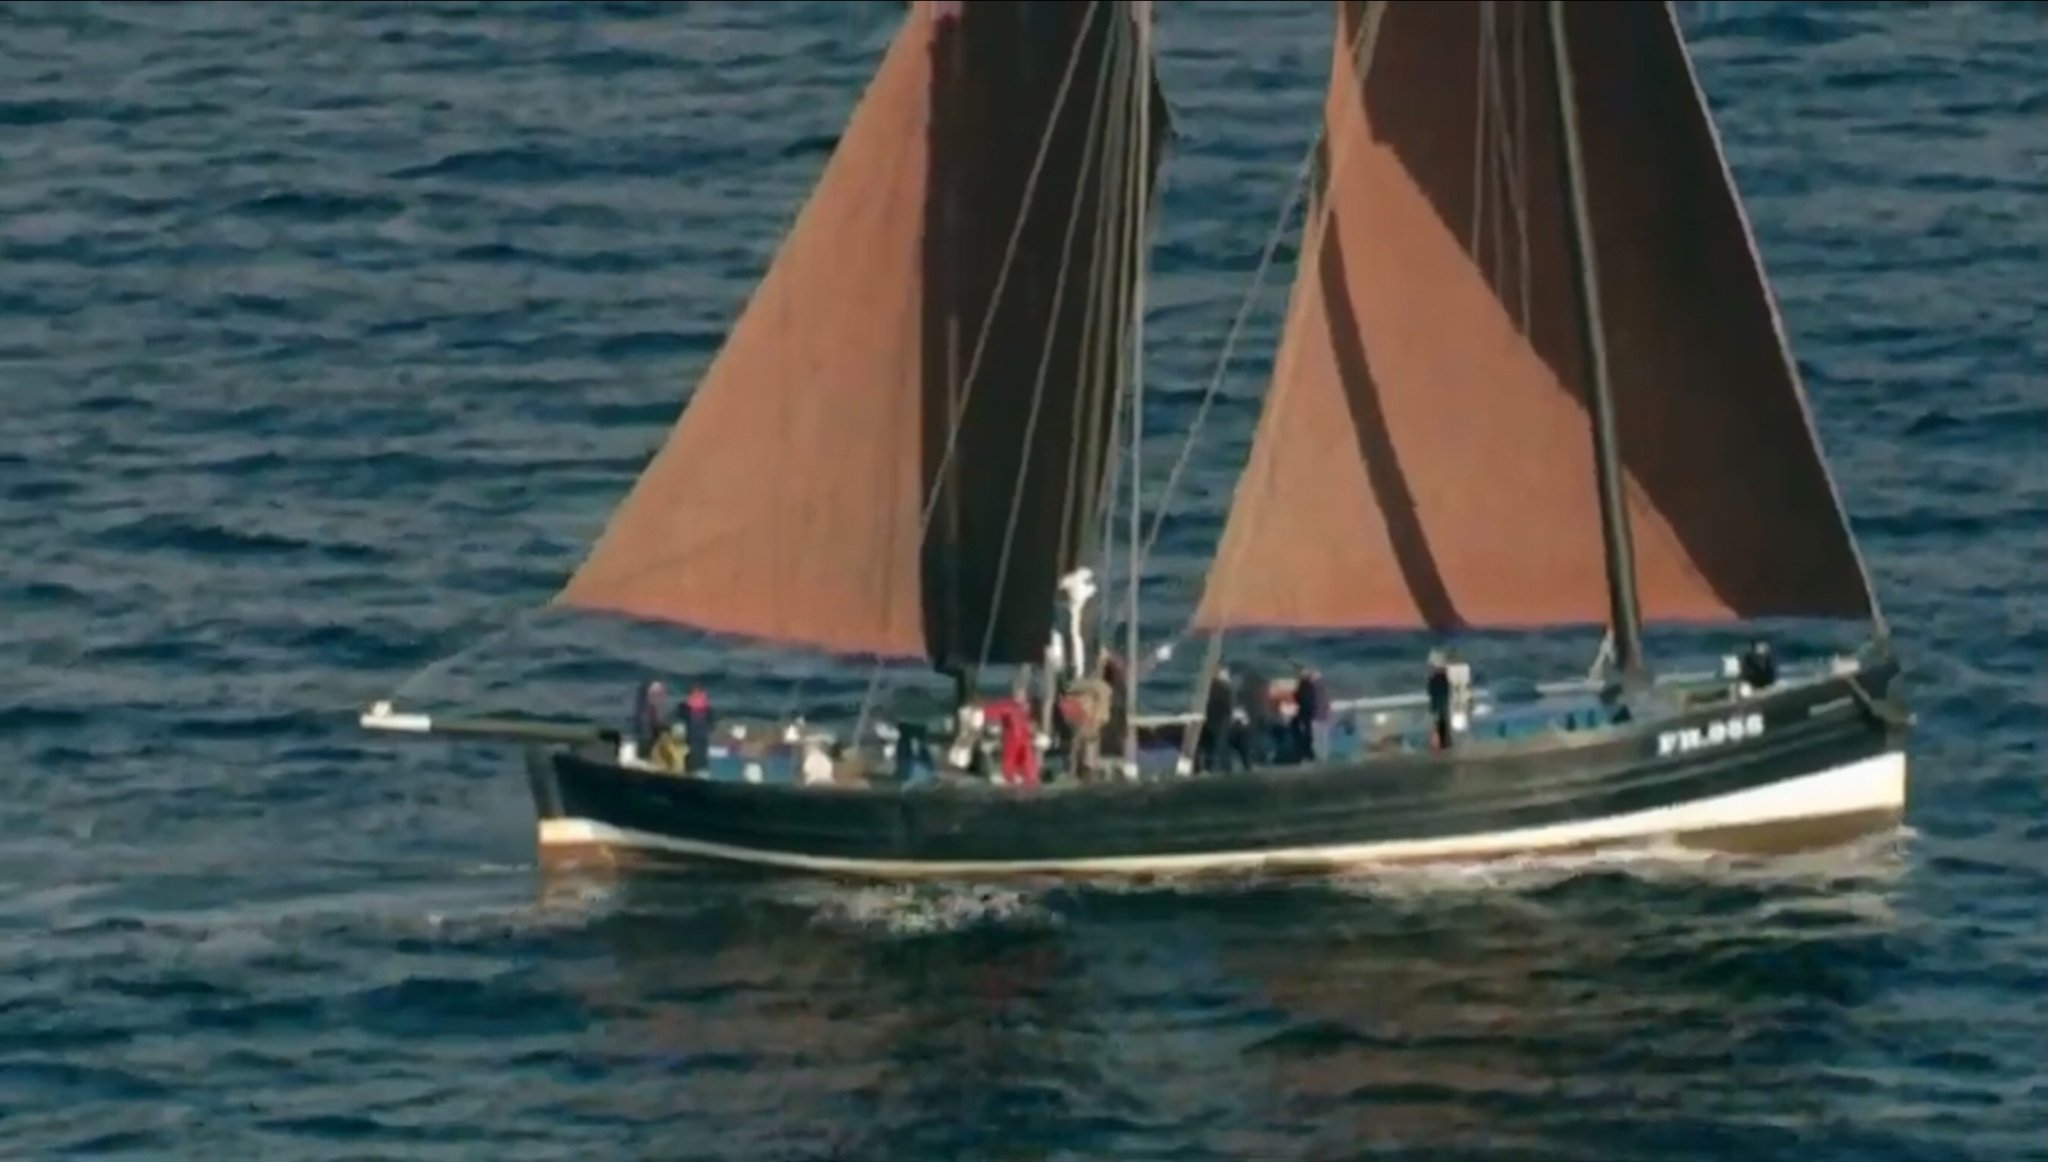
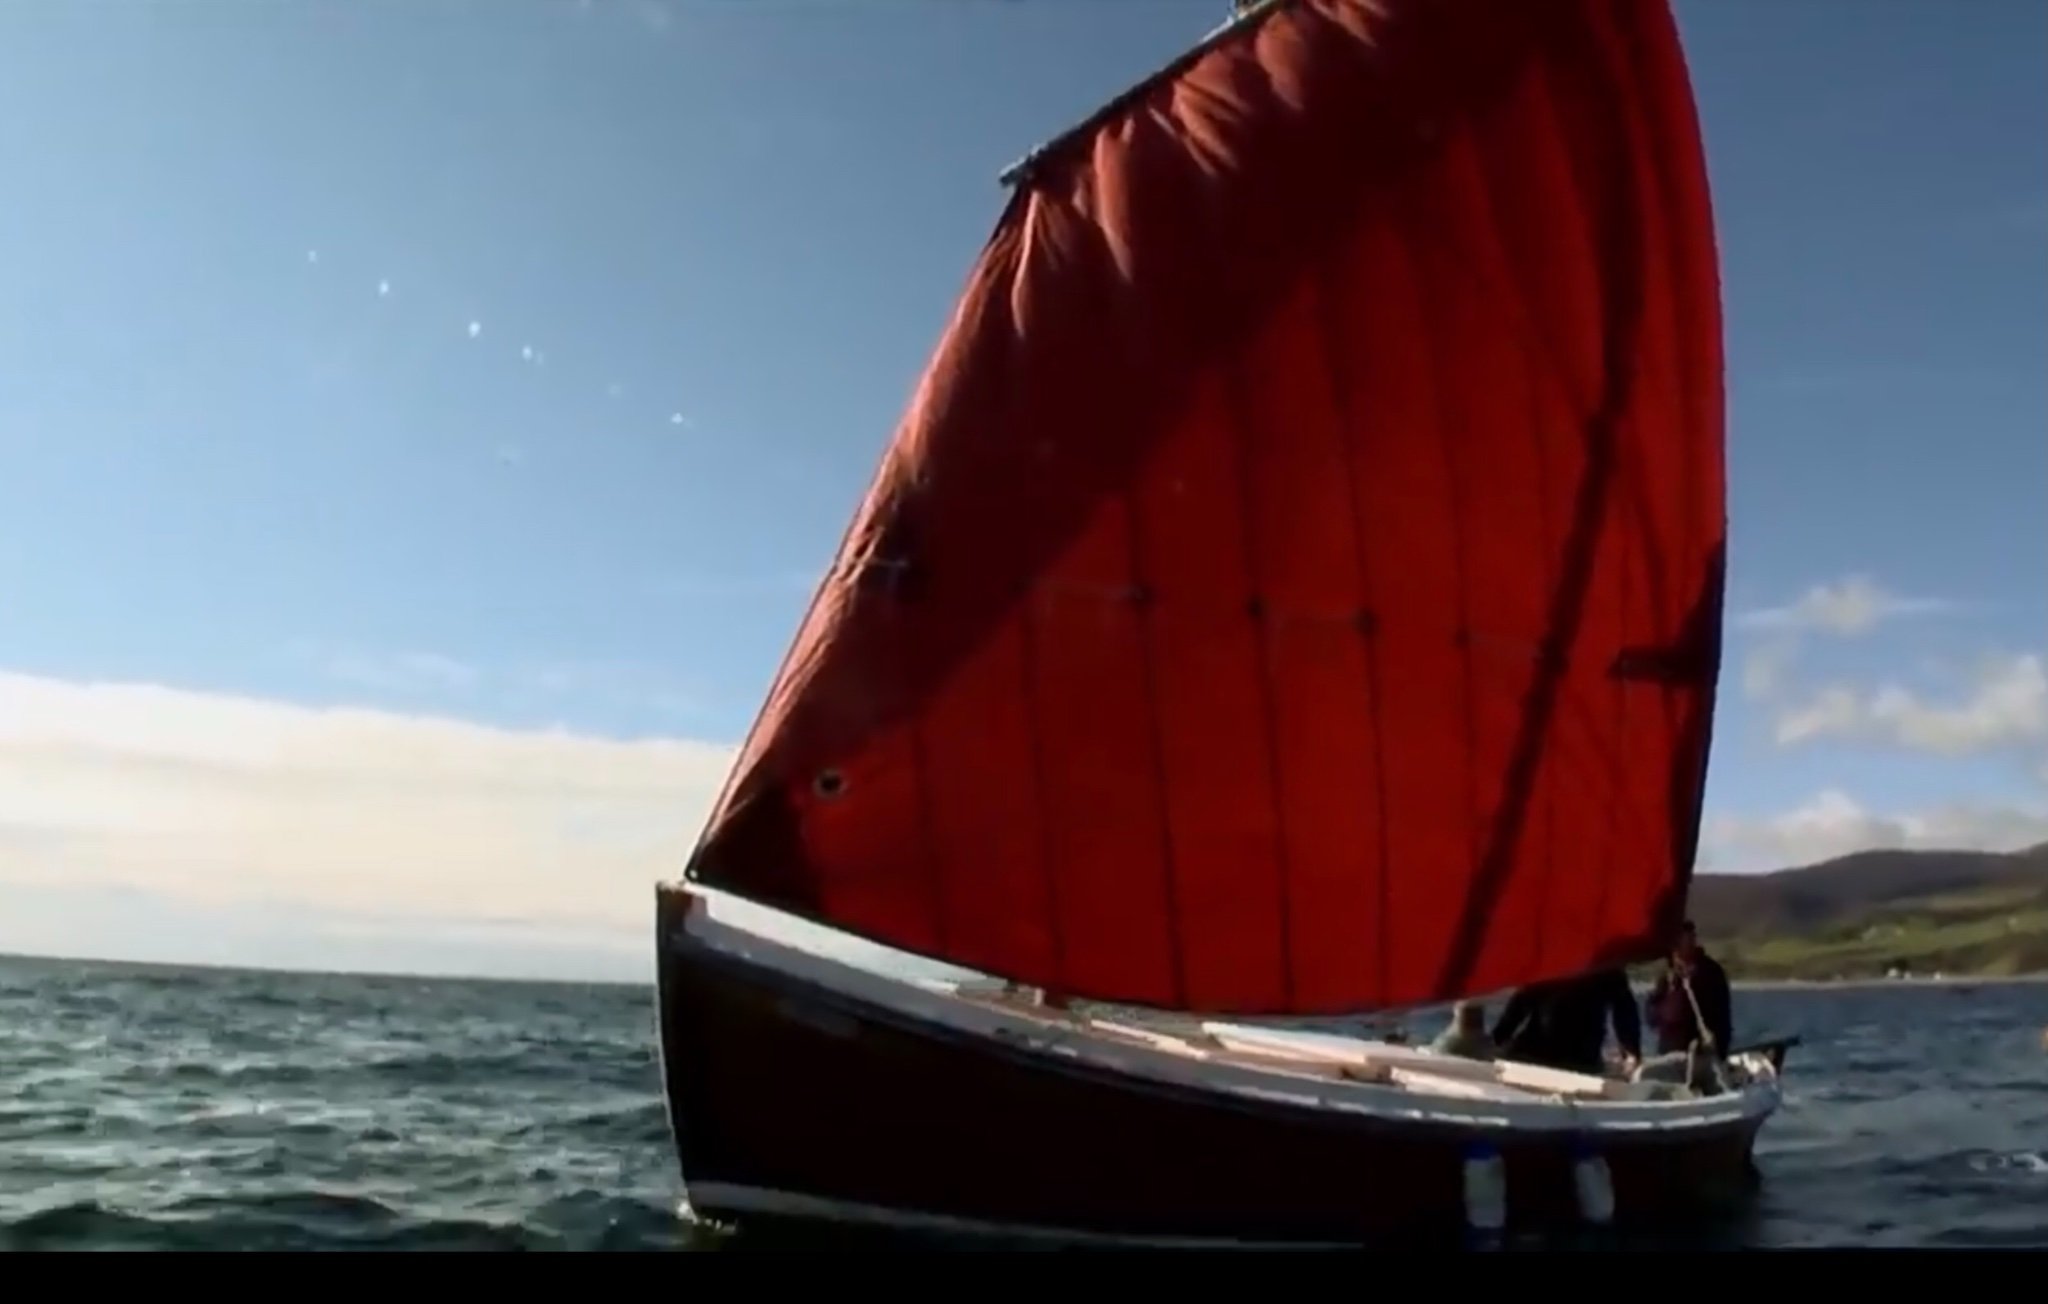
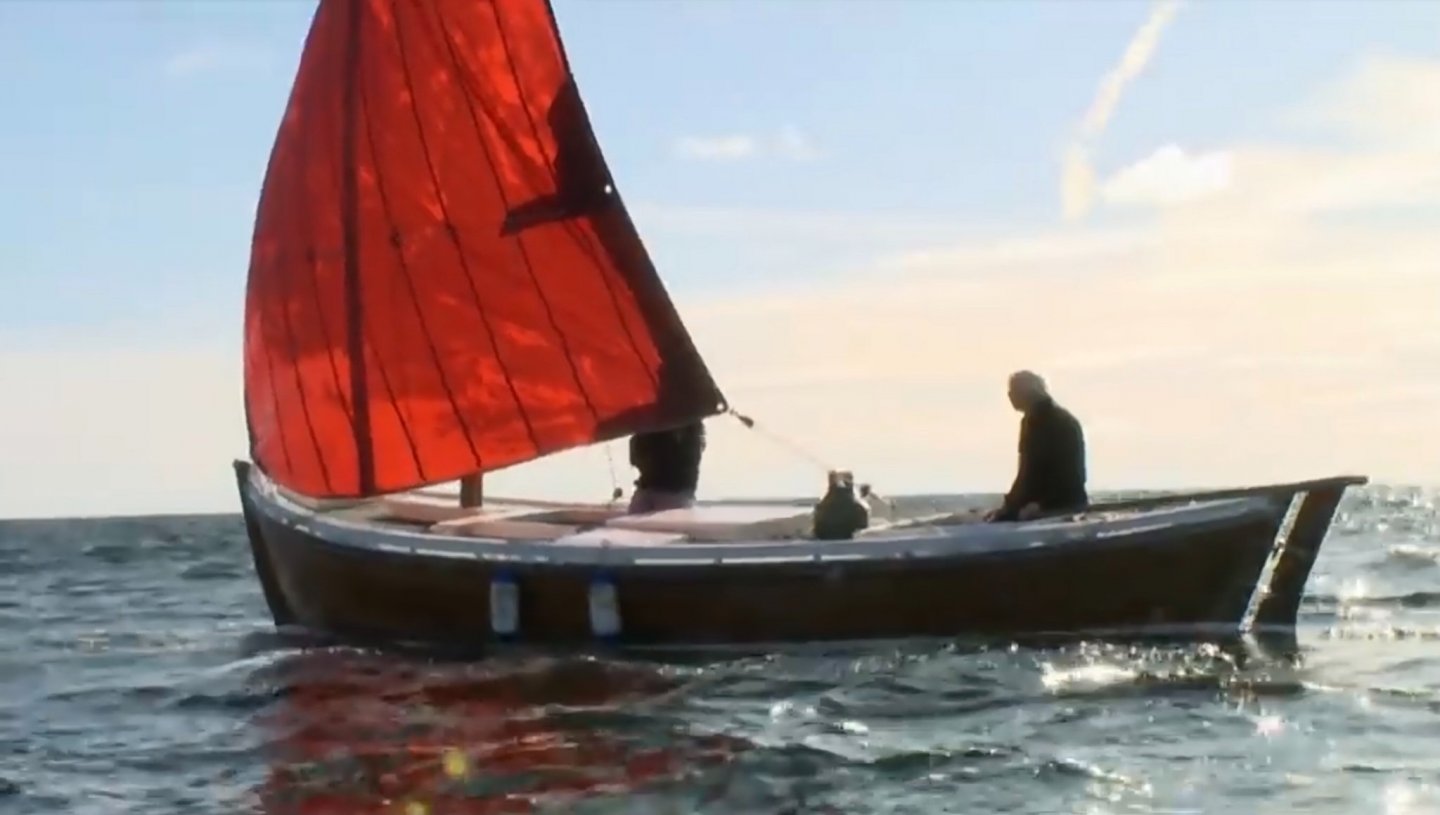
That video was so good. It really gives you great insight into what the boats were like, and what it must have been like to be at sea in one of them. I also learned a lot about the rigging details…what I got right and what I got wrong on my Zulu. I grabbed a few screenshots as I was watching:


-
Thanks for posting the video, Richard. Excellent! I’ve bookmarked the whole series on YouTube.
-
I just checked my order, and it seems the one I bought is the 1981 “reprint” with the longer title. When it comes, we can share notes and compare. -E