HOLIDAY DONATION DRIVE - SUPPORT MSW - DO YOUR PART TO KEEP THIS GREAT FORUM GOING! (Only 20 donations so far - C'mon guys!)
×


Tallshiptragic
-
Posts
551 -
Joined
-
Last visited
Content Type
Profiles
Forums
Gallery
Events
Everything posted by Tallshiptragic
-
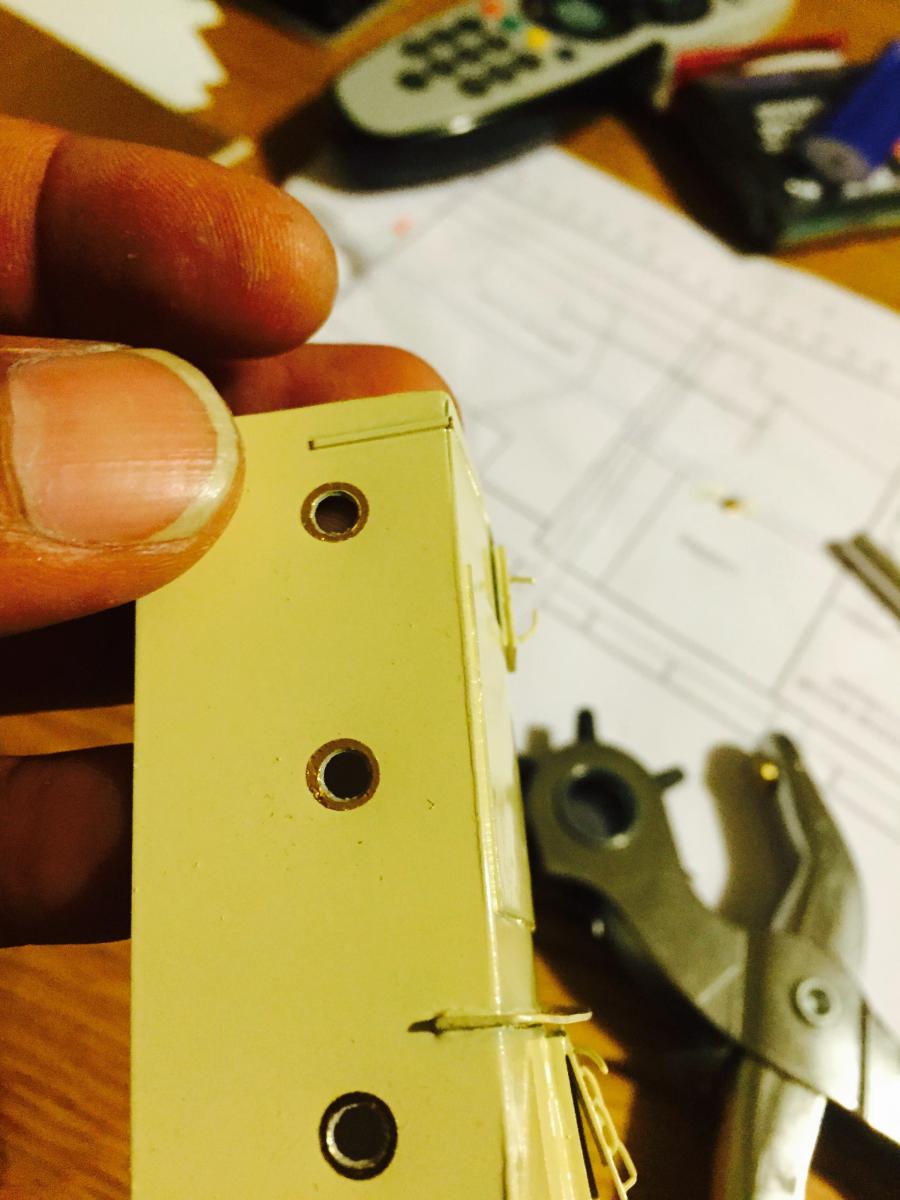
 Hey igor, I used self adhesive coloured foil punched with a leather punch. Perhaps use the same technique though punch the foil with the syringe? Out of anyone you would have the care and patience to try it at that small a diameter.
-
Belaying pins vs. shroud cleats - moved by moderator
Tallshiptragic replied to timboat's topic in Masting, rigging and sails
Halyards and sheets from topsails would go to the jeer bitts, clews, buntlines and leech lines would go to the shroud cleats or pins next to shrouds if fitted. Shroud cleats were used on ships to clear the deck area for the use of guns and if there wasn't much deck space etc on a merchant ship. A pin rail built up on the bulwark where the shrouds are take up a lot of space. -
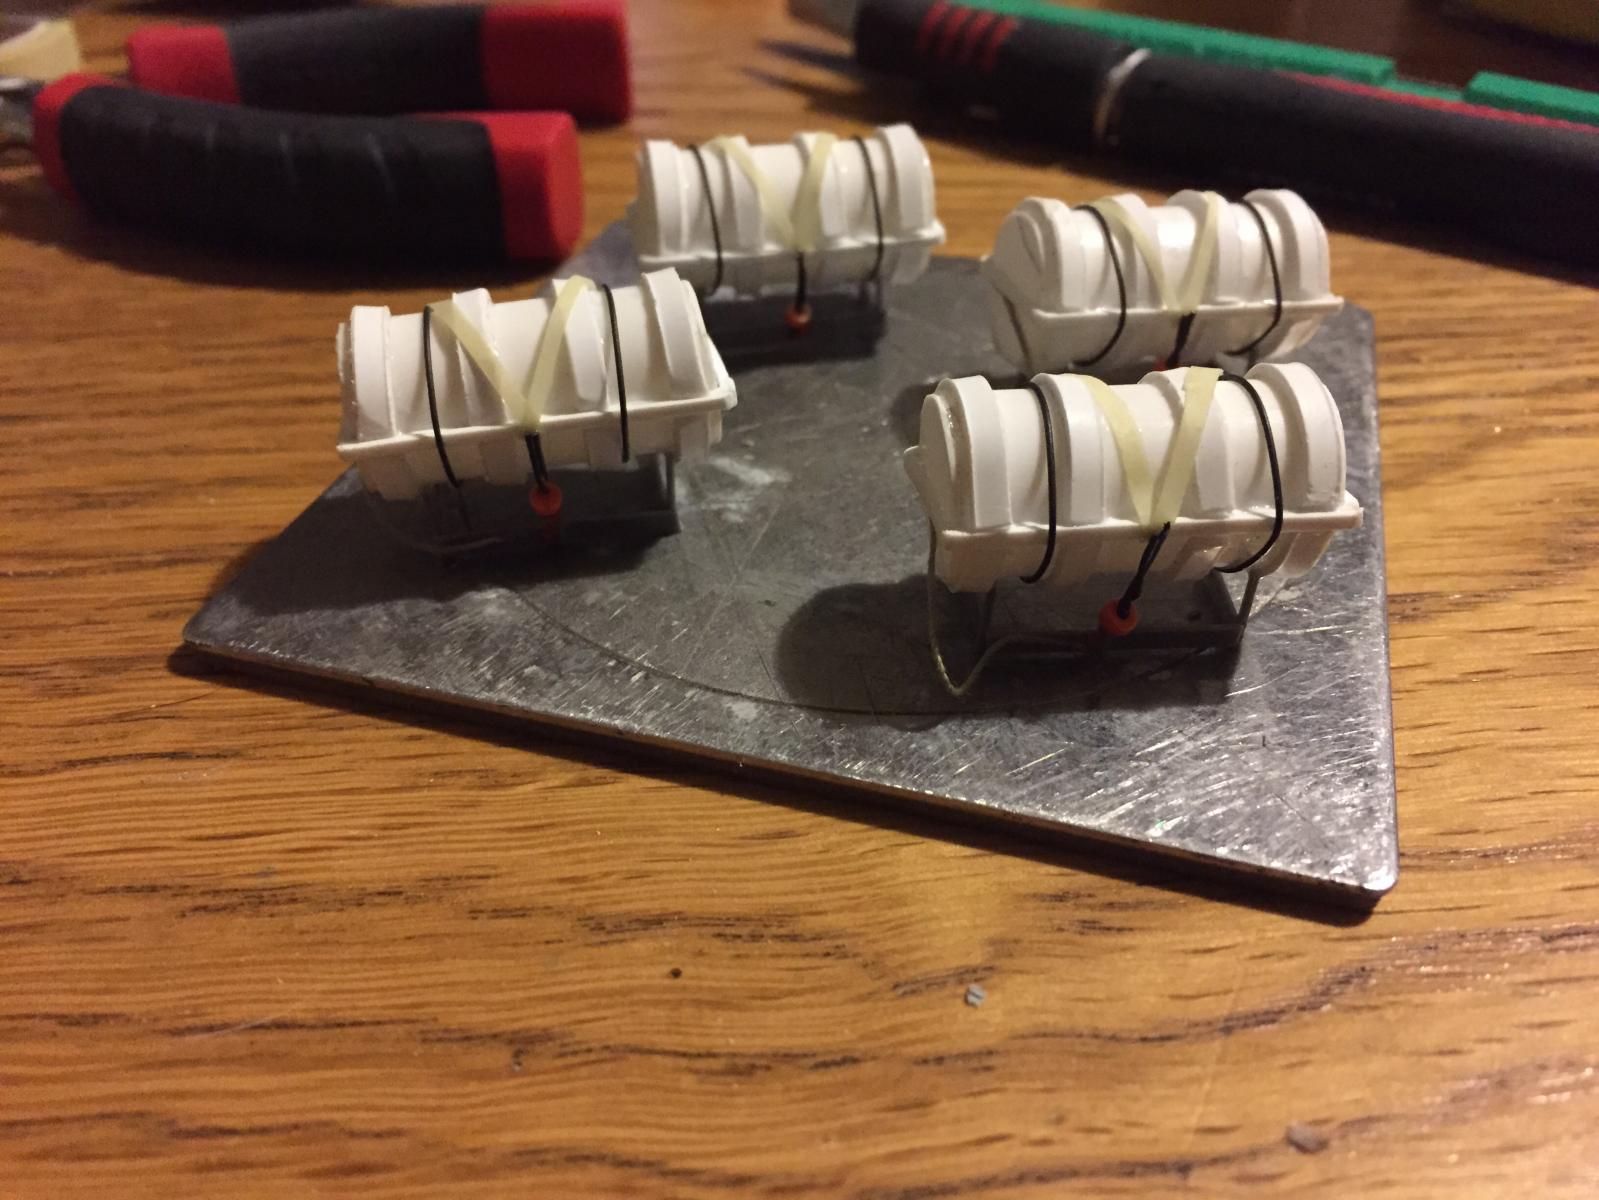
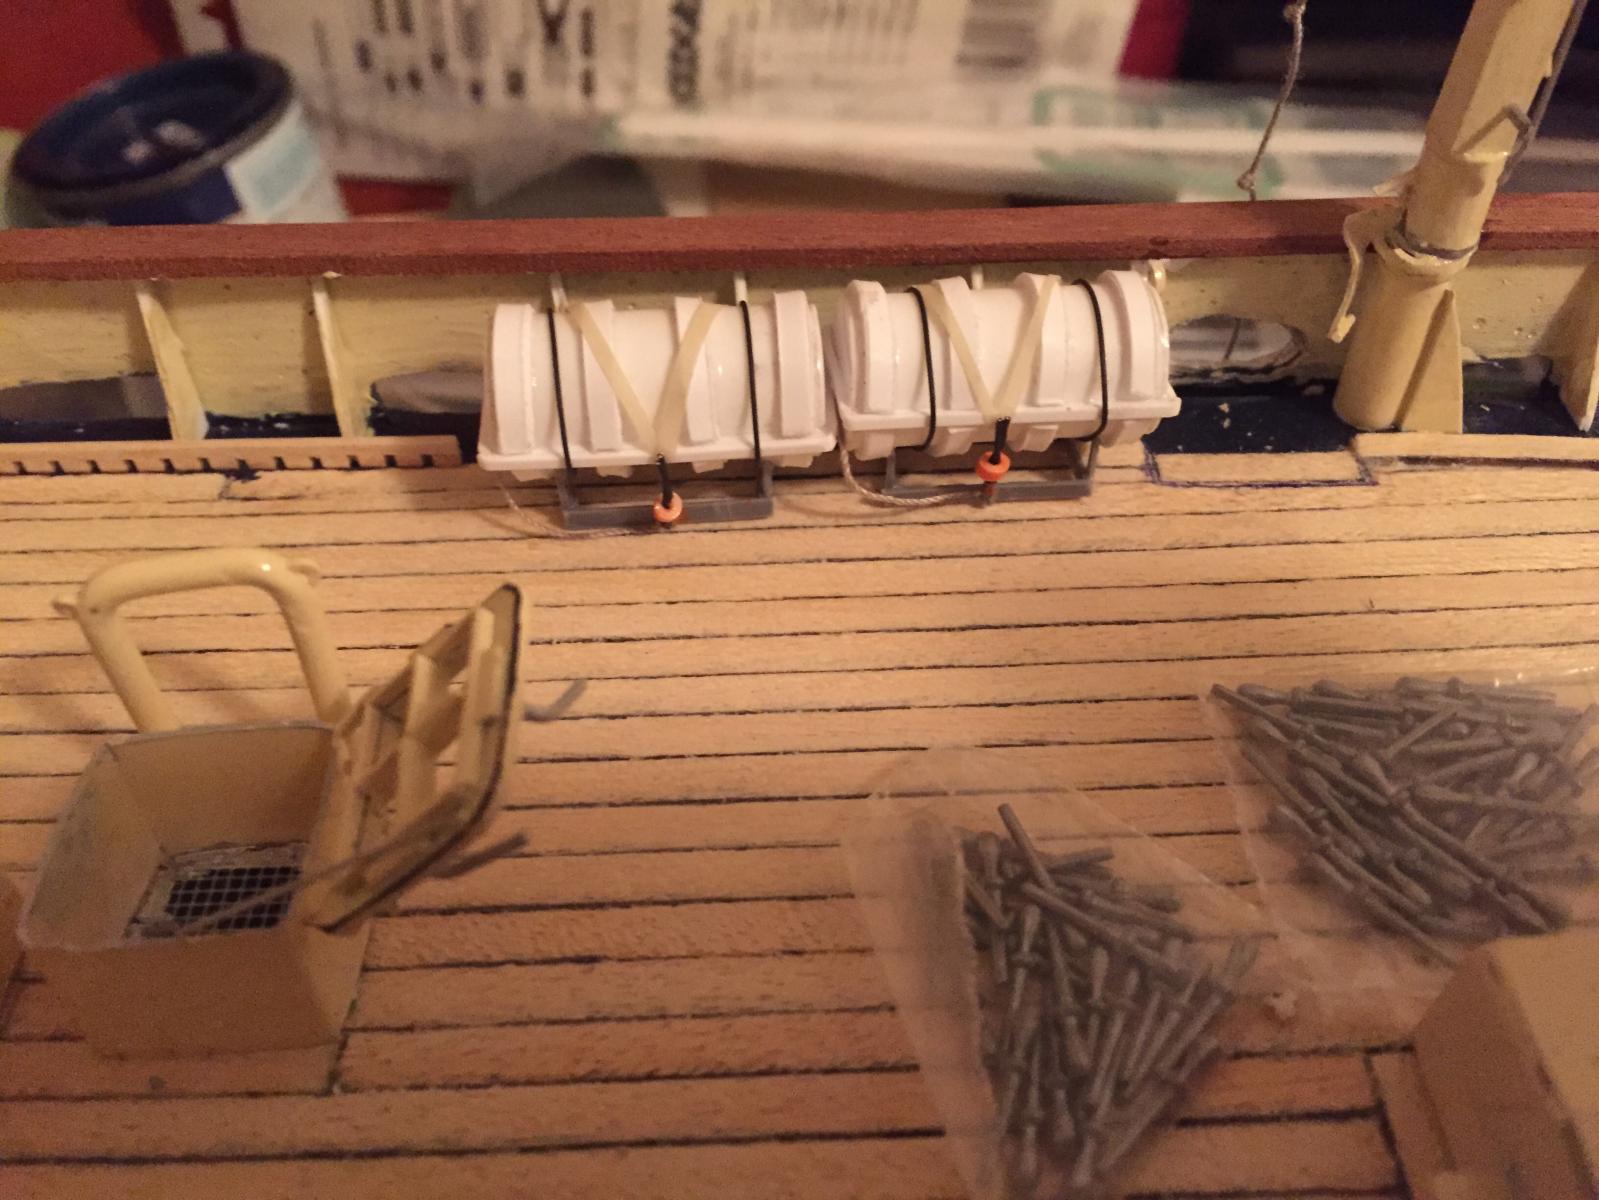
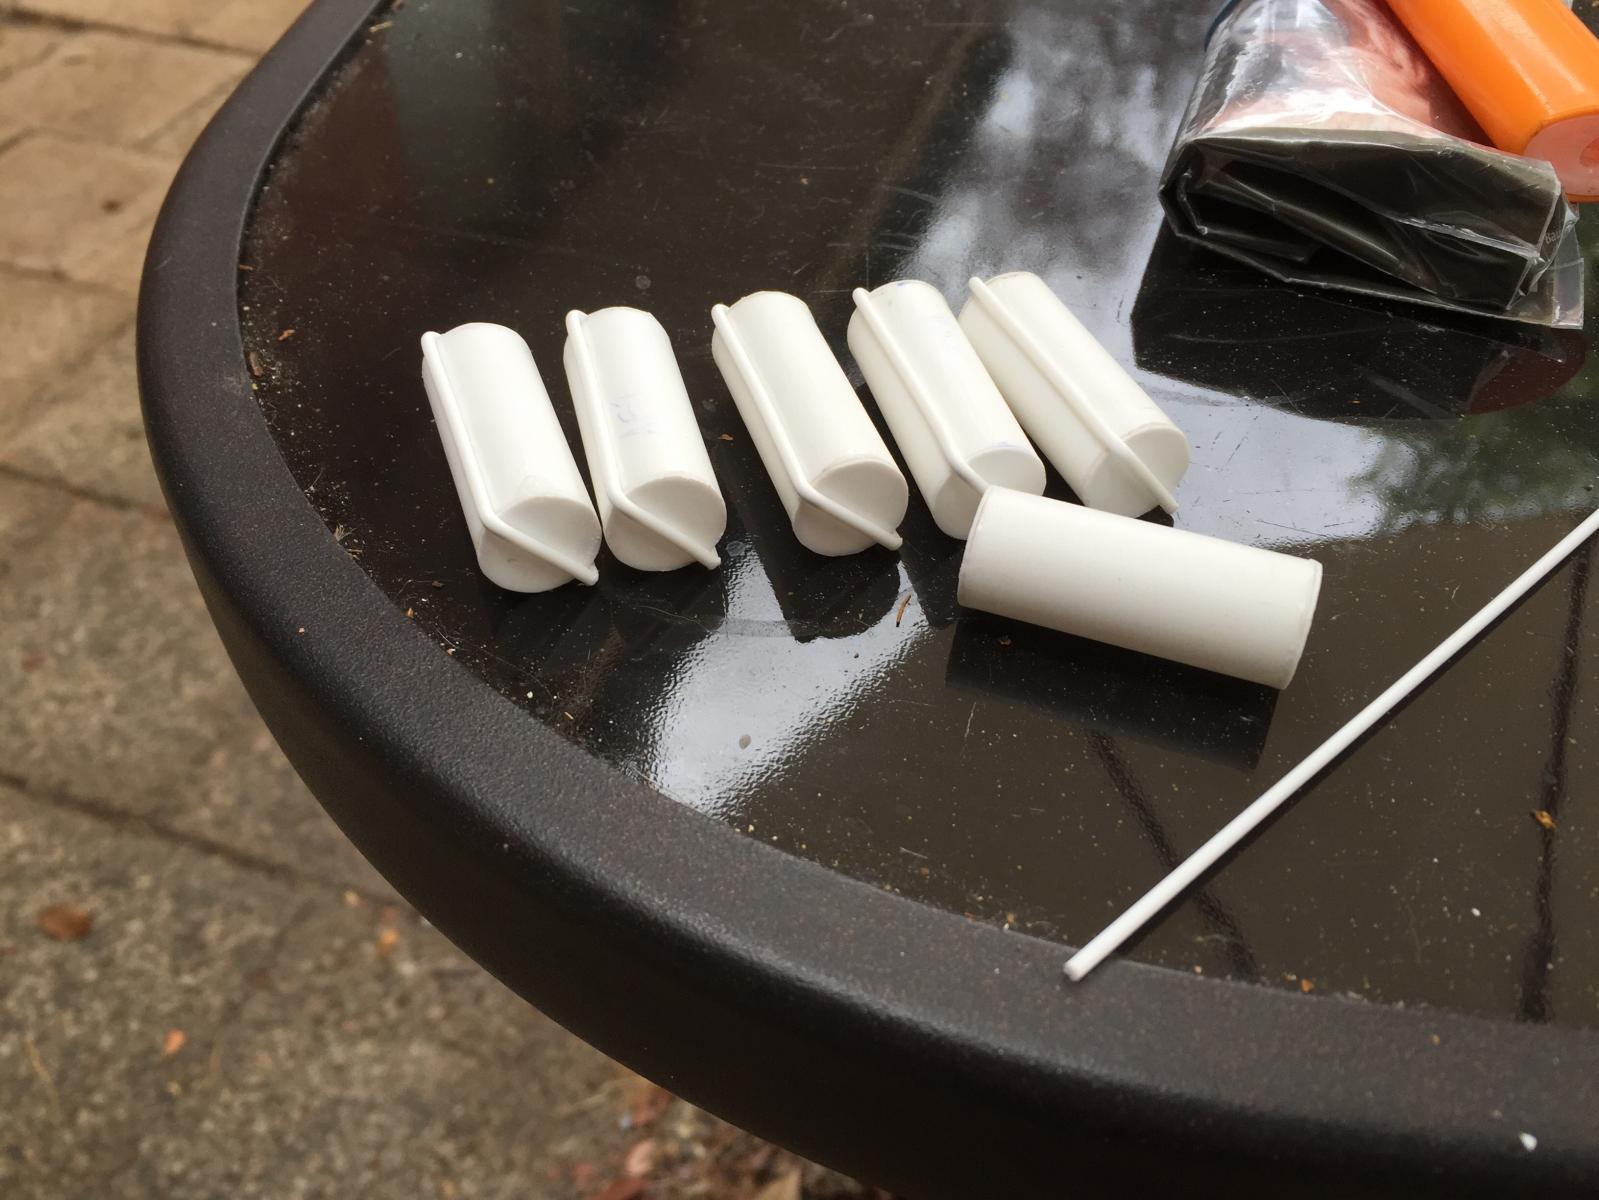
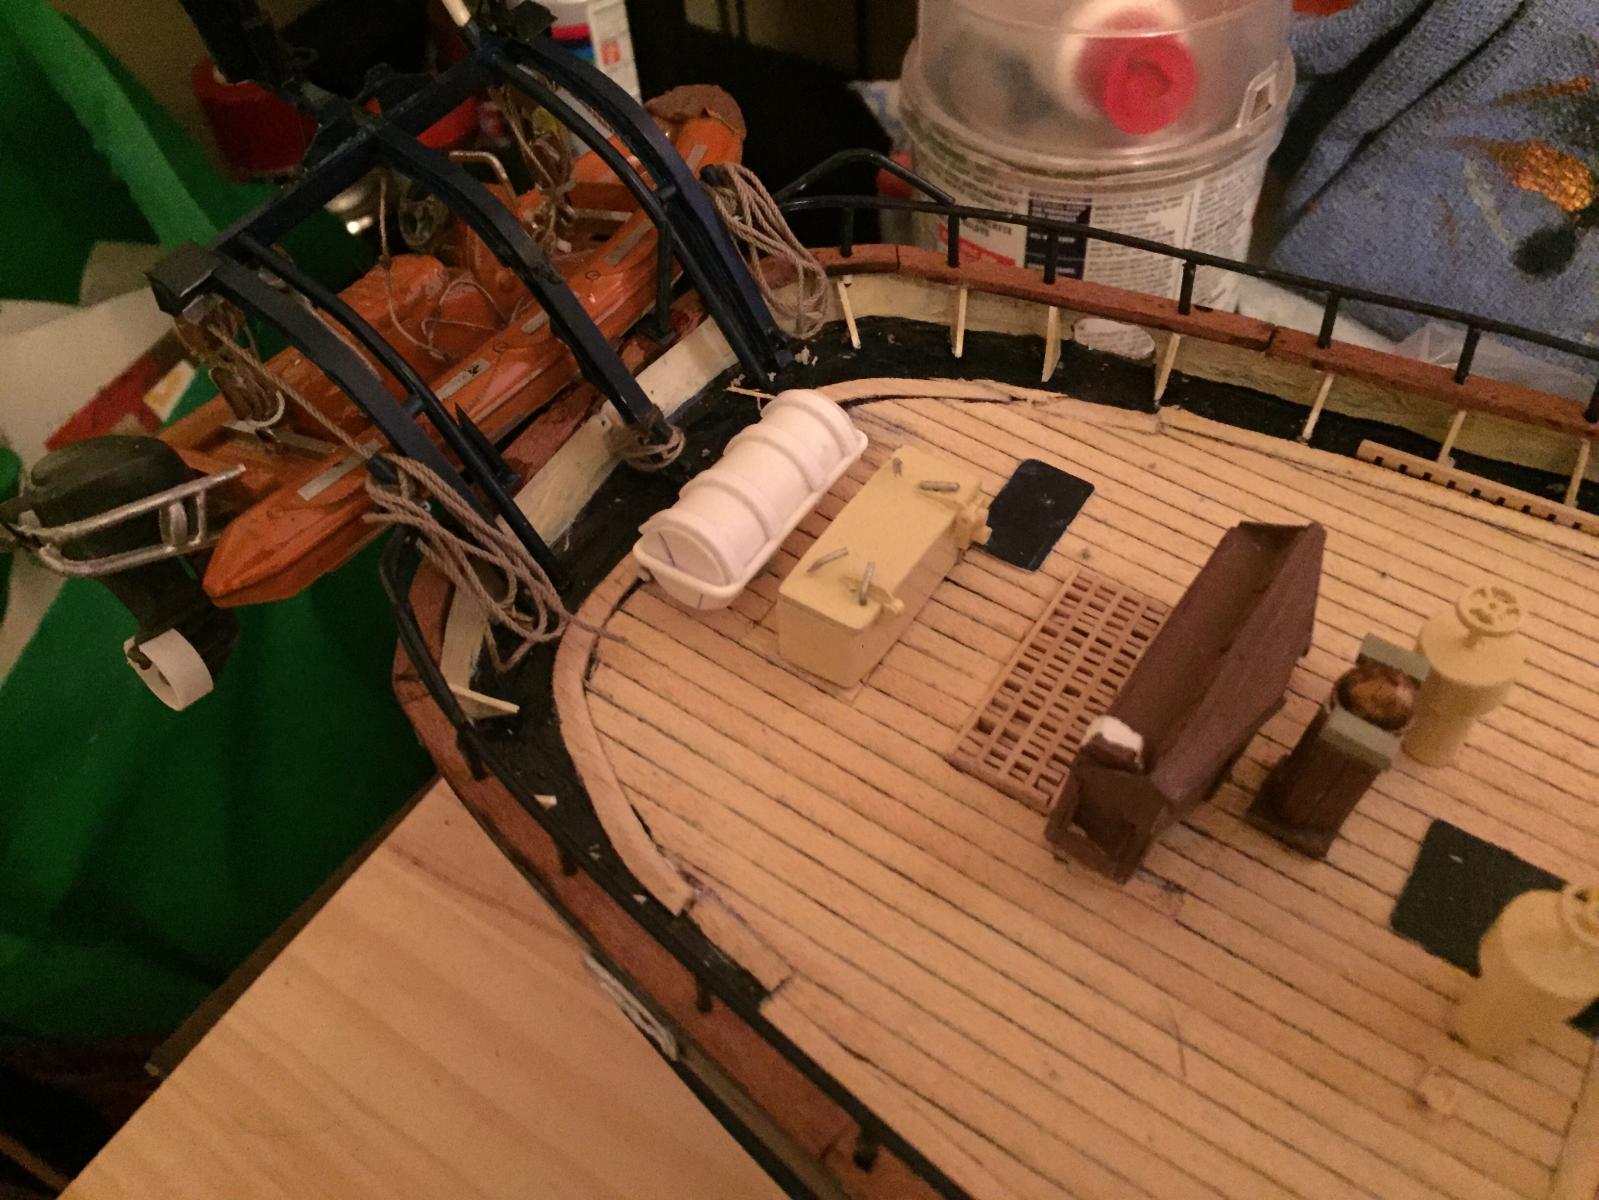
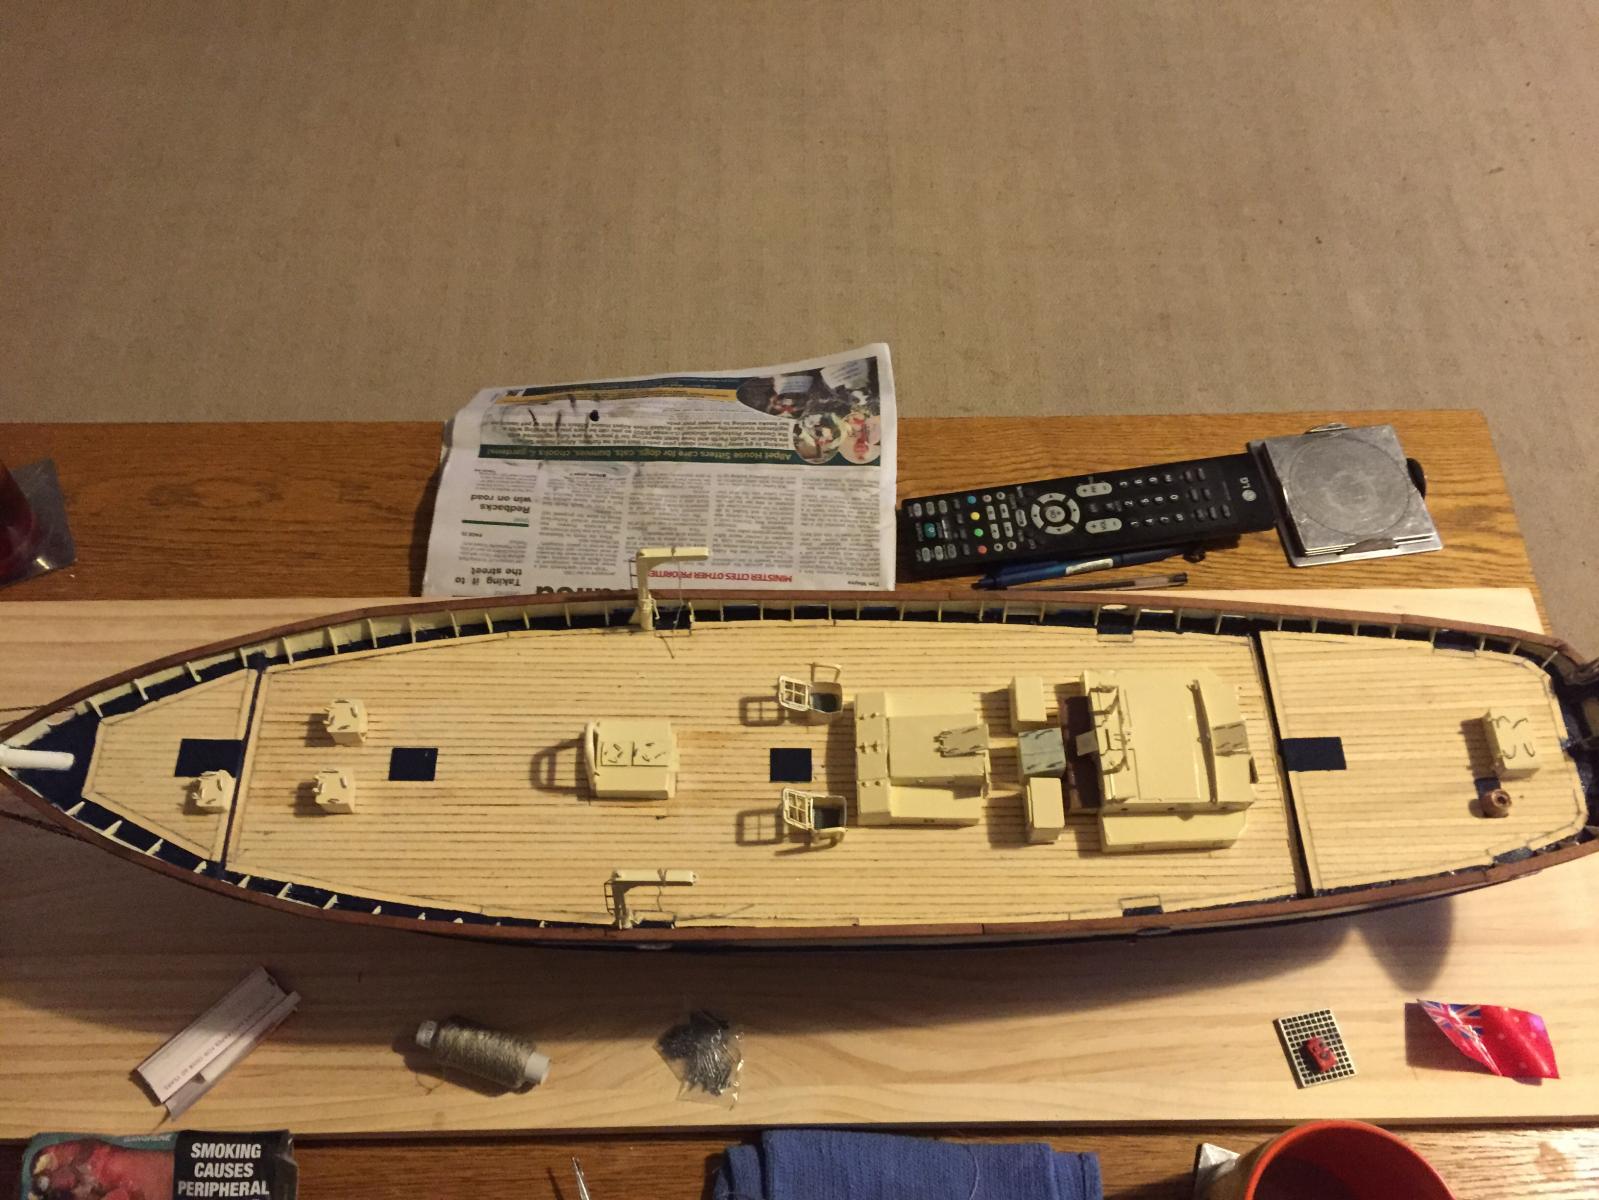
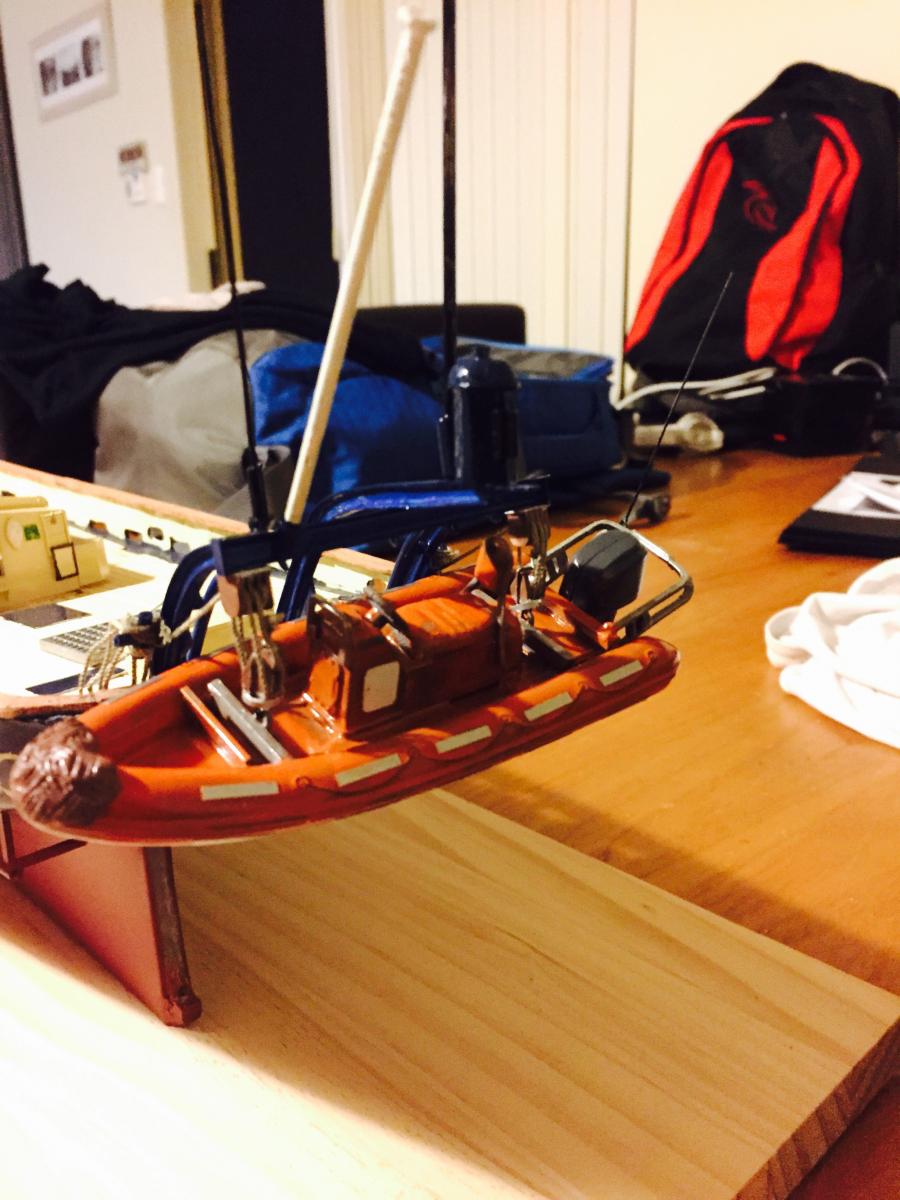
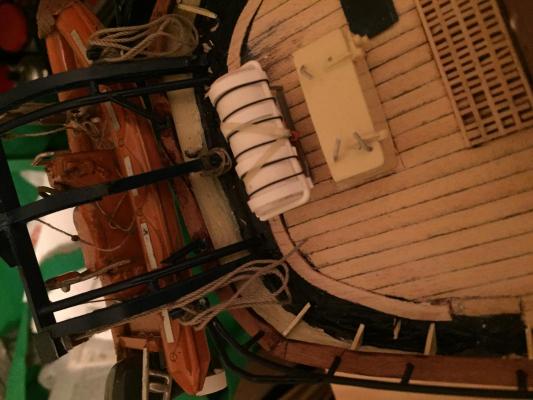
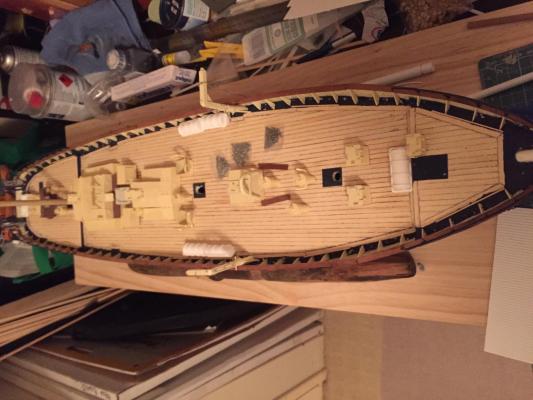
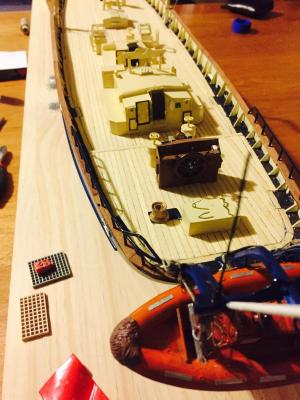
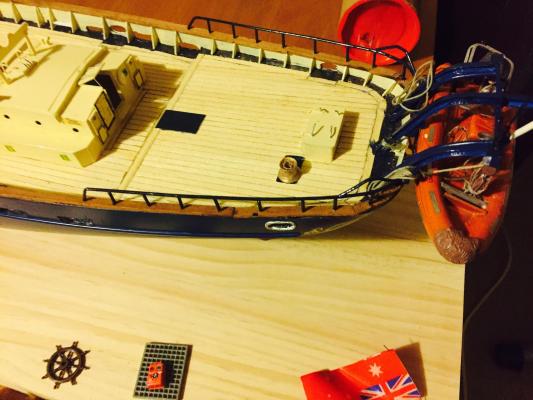
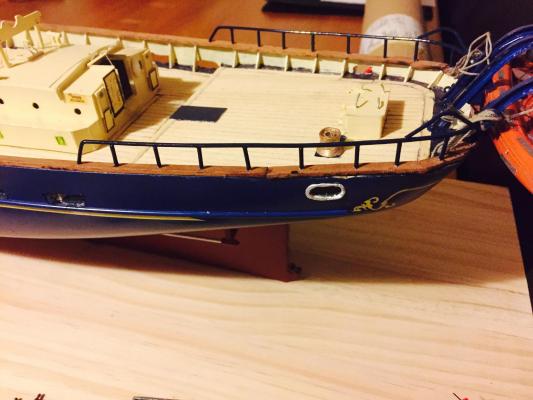
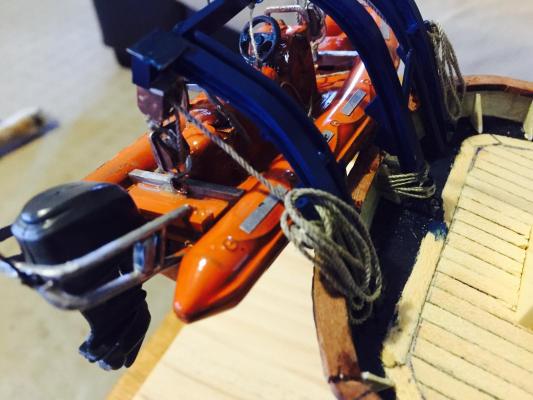
All six canisters made up. The four midships are slightly smaller than the ones forward and the one on the poop deck as there different makes but still 25person rafts. The black straps are the packing bands which I used black coated copper wire. The tie down straps are artist tape which is glued down but colour wise match the real straps perfectly. The hydrostatic release is just plastic tube painted orange to match what we have on Leeuwin - does the job I think. The weak link on our canisters are attached to the shackle which holds the strap and hydro release so the painter is attached to this and the left side of the canister. Also the canister on the poop deck is fixed slightly off centre on purpose as the real one doesn't quite sit perfectly All that's left is to add decals, I'll make these up on my next print run of decals.


-
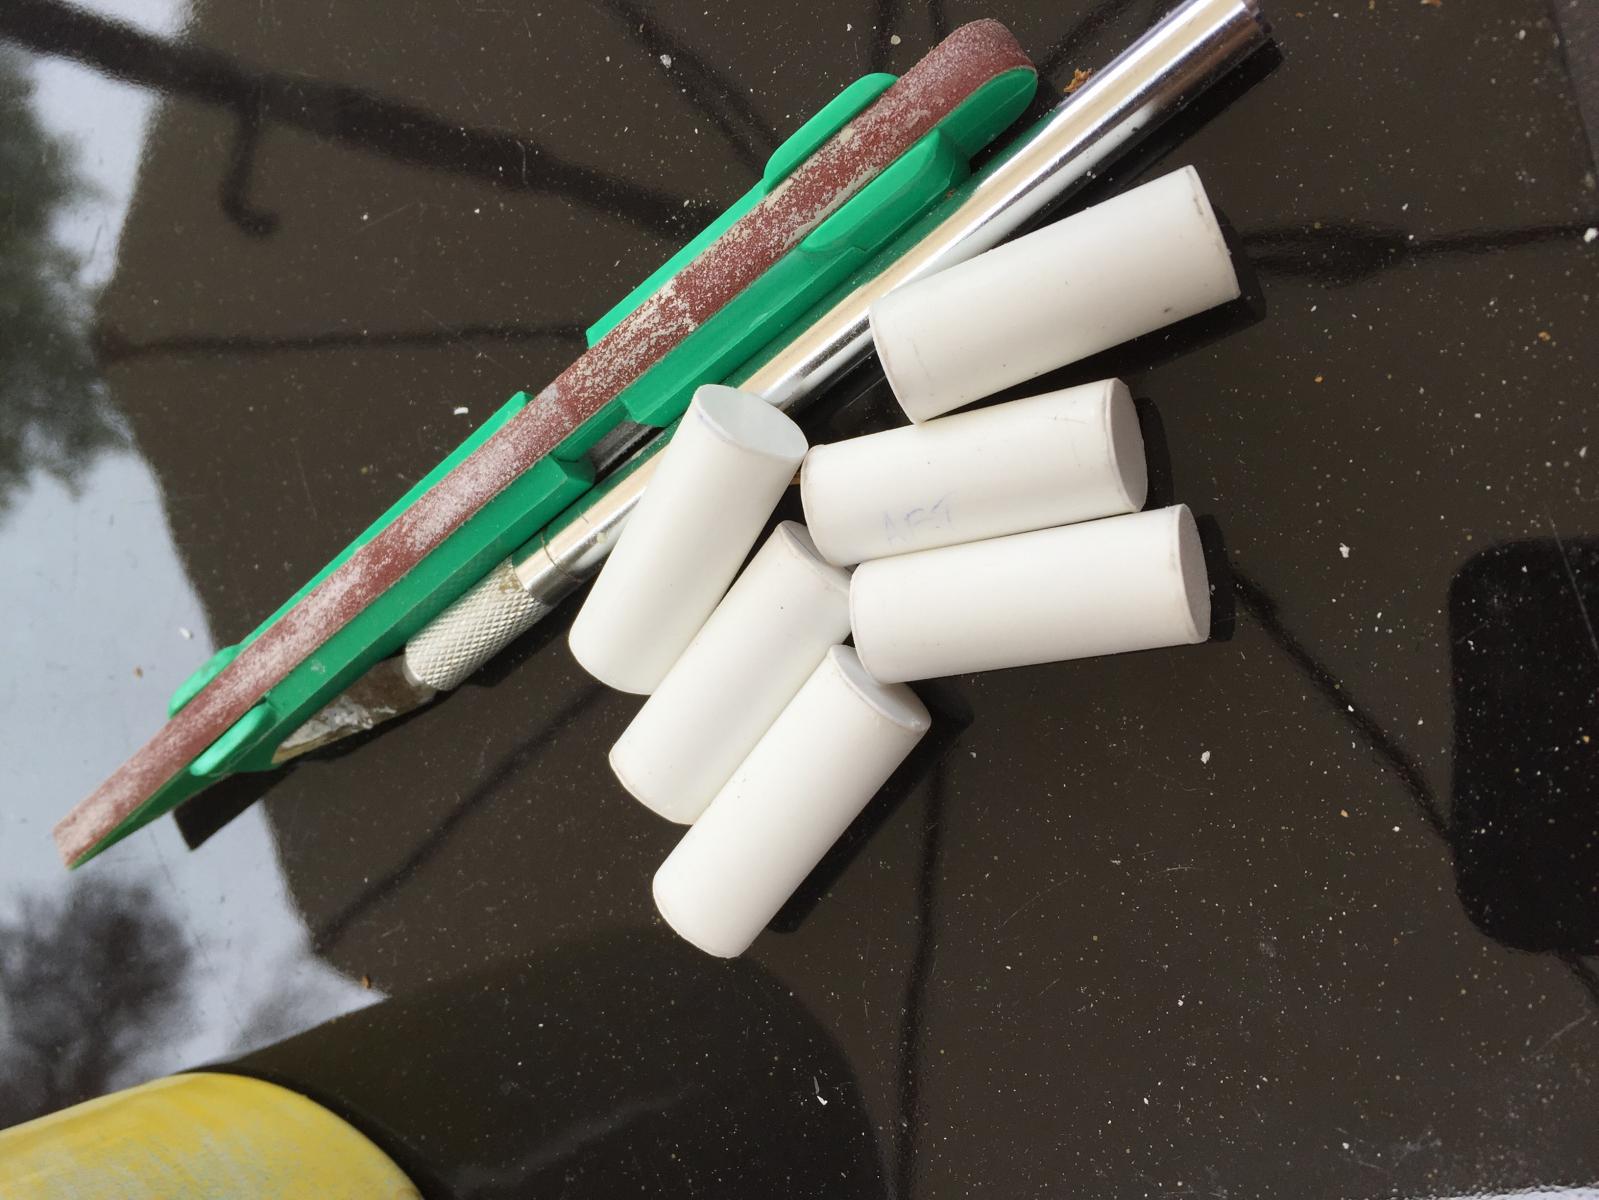
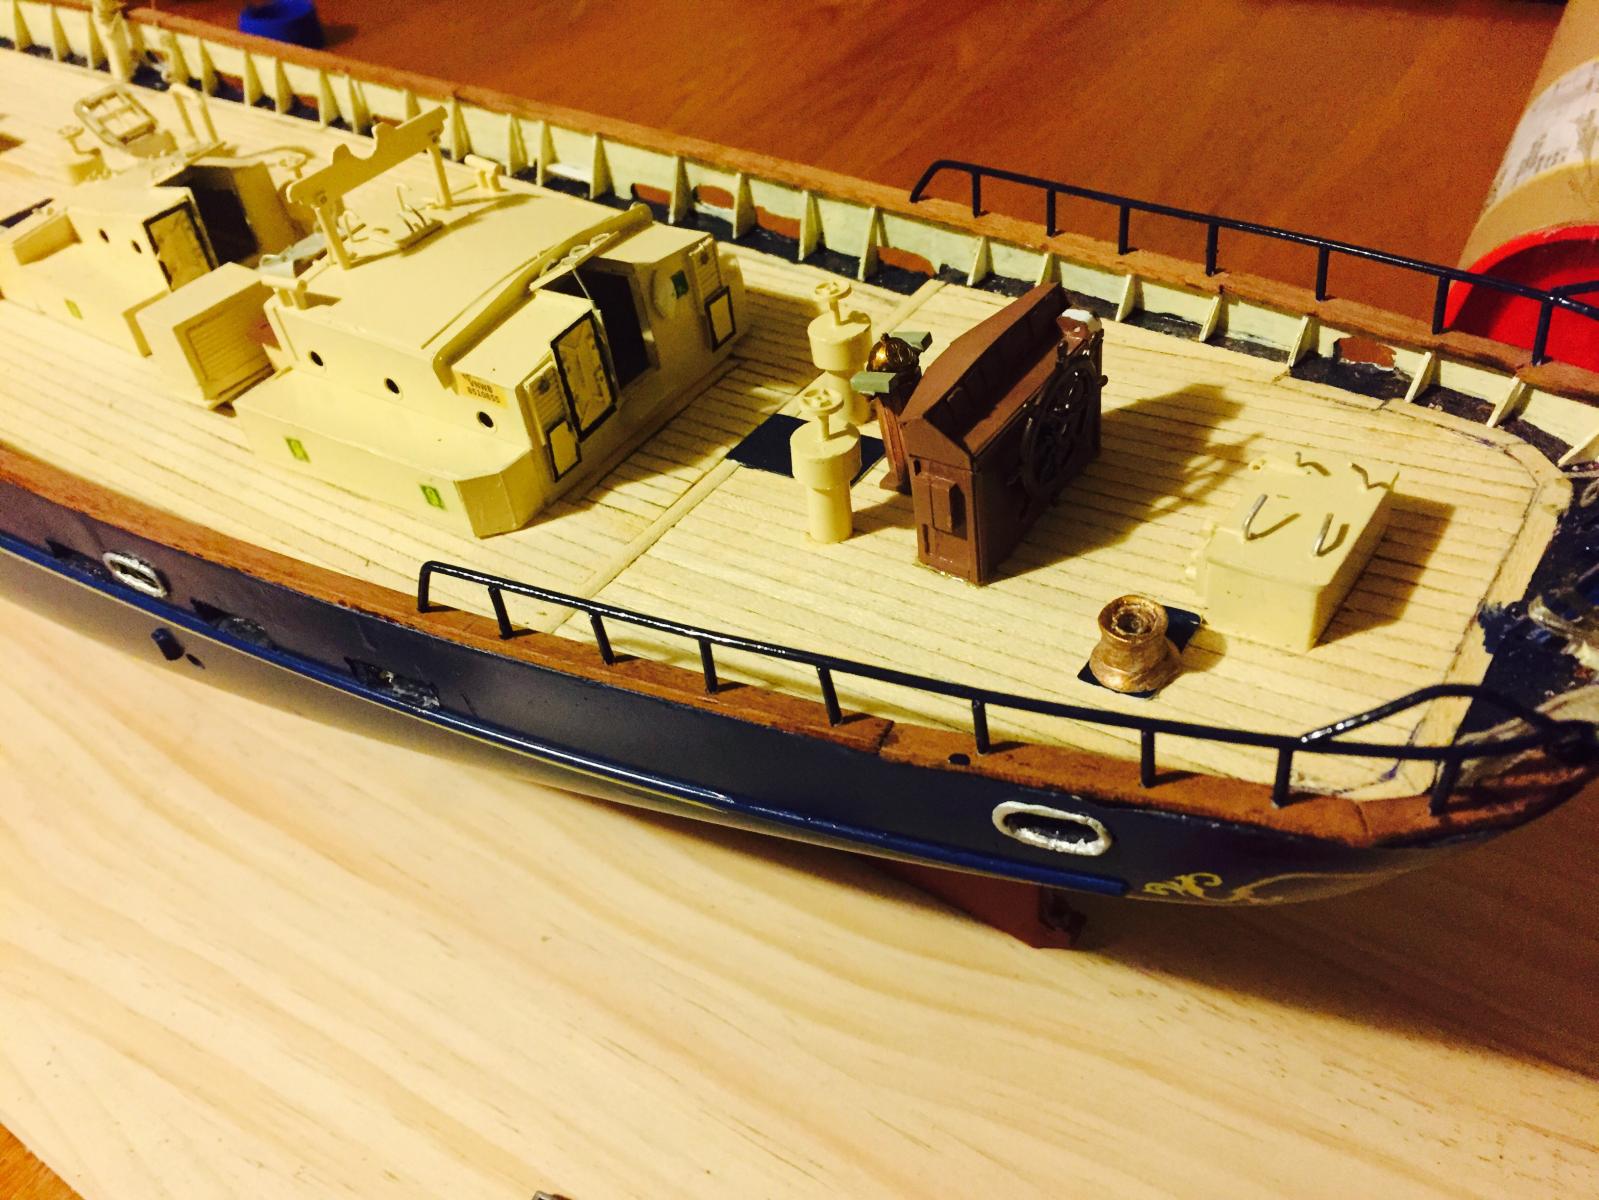
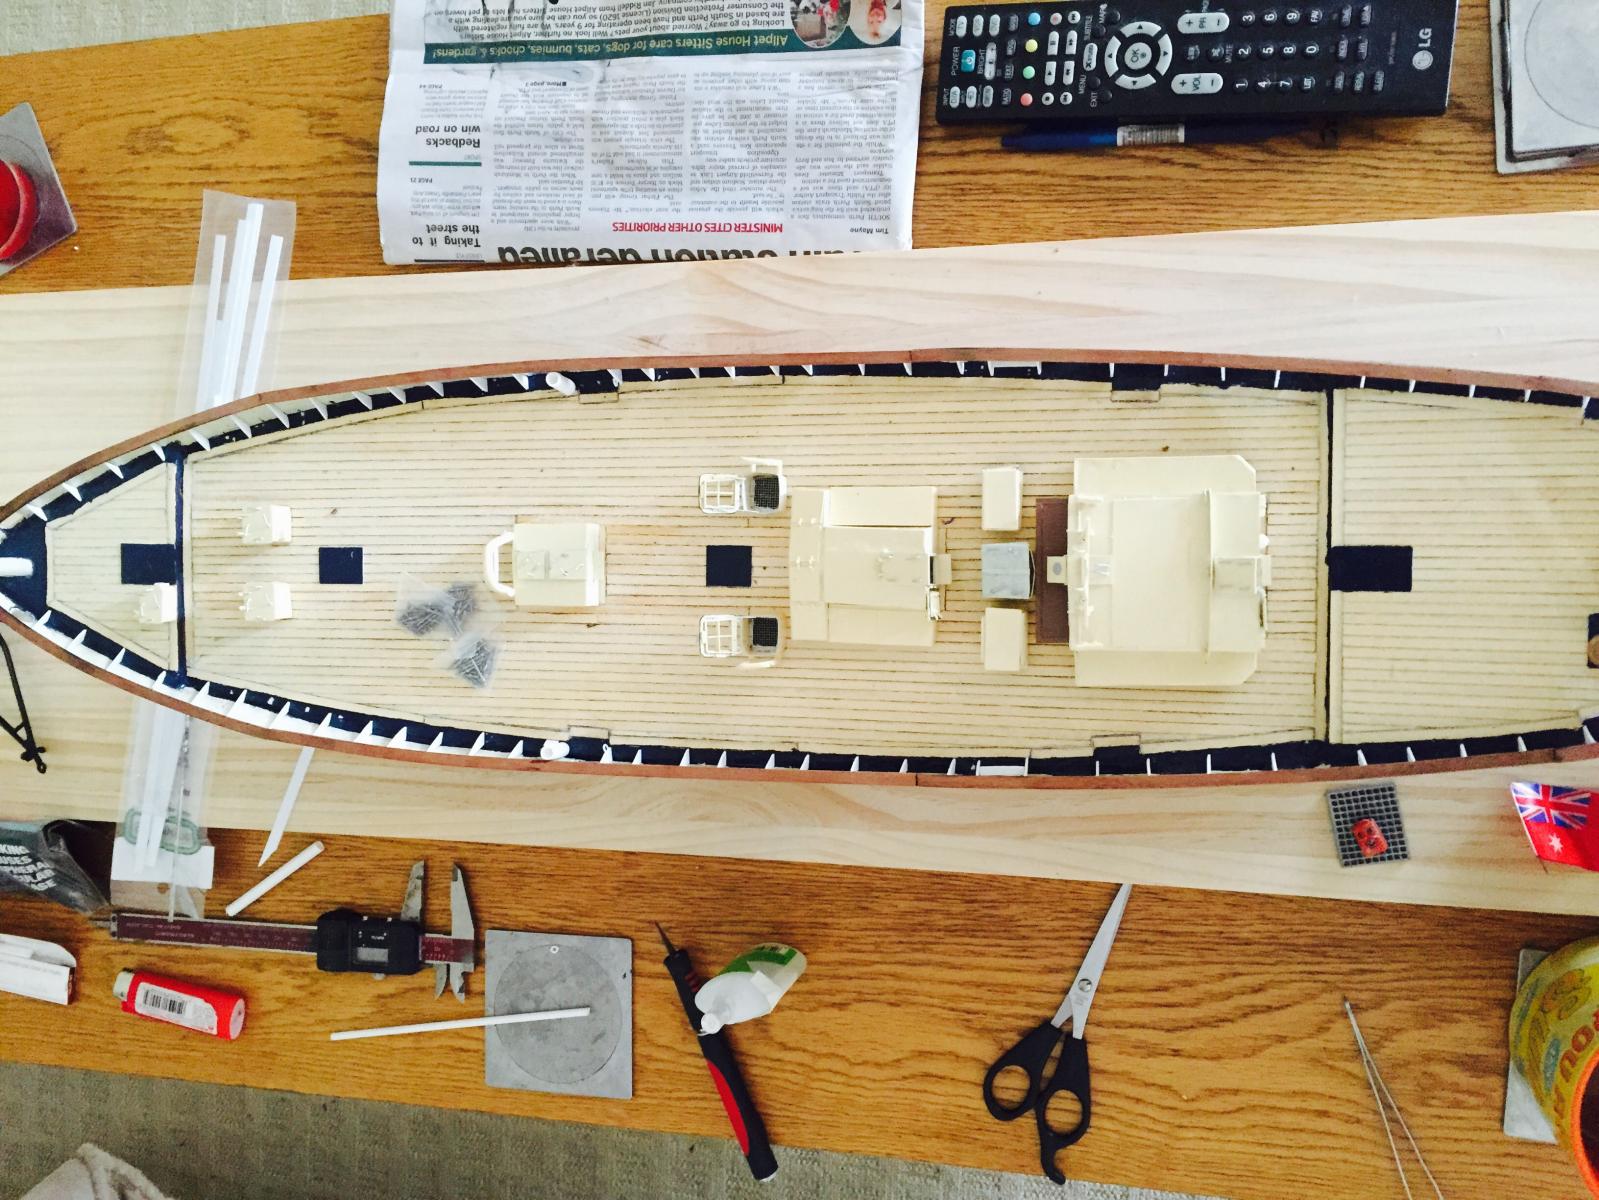
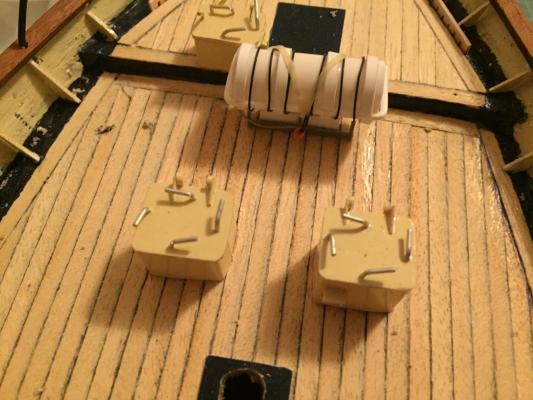
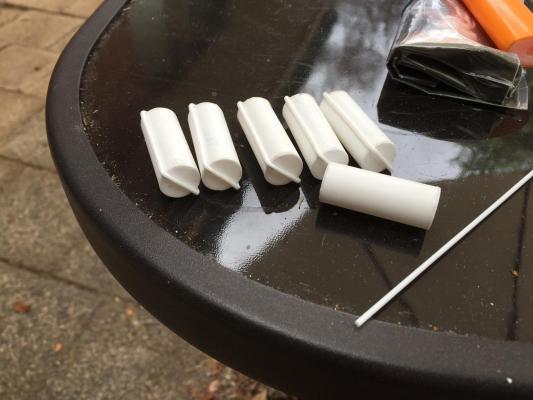
Back ashore, so thought I'd get some more deck detailing done. There's a few wooden deck boxes to still be made up, anchor windlass and bollards but first I wanted to get the life raft containers made up. I used plastic tube as the basic structure, covered the ends with sheet and strip and half rounds for the supportive bands and seal. So far only the basic structure are done but all 6 have been started. Making them together one step at a time is far easier than only making one full container at a time. Leeuwin has 6 25 person liferafts, one aft, one forward and four midships. These are all SOLAS so completely enclosed offshore life rafts with individual epirbs.


-
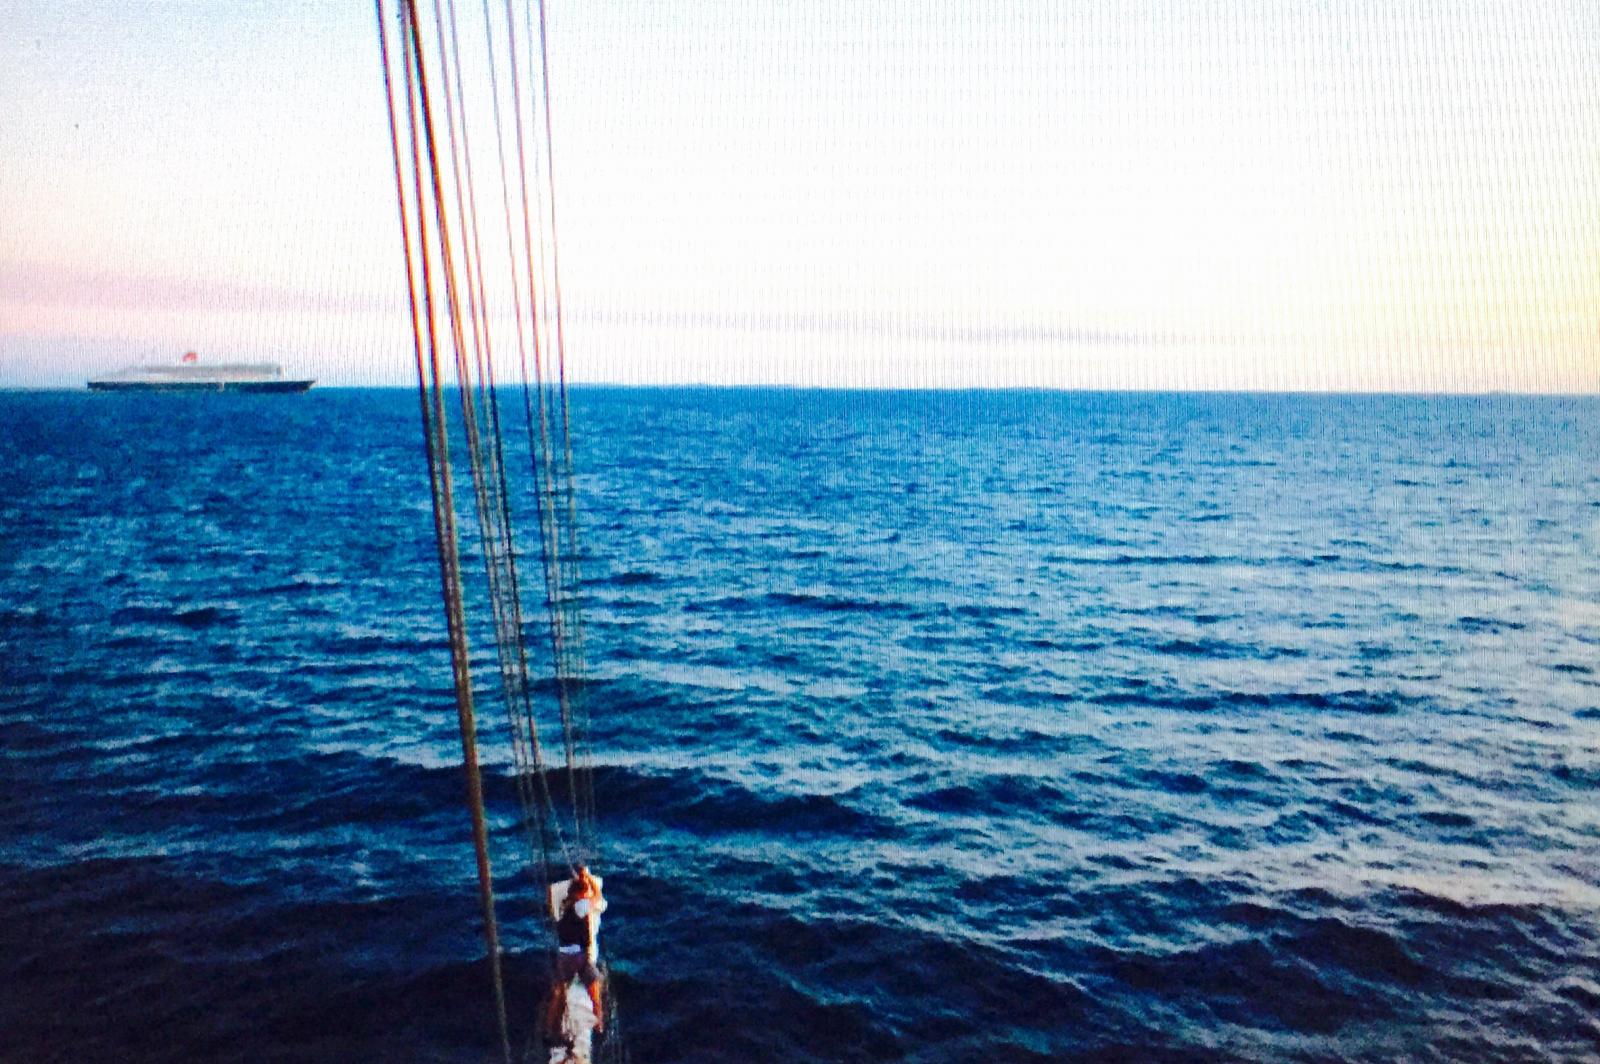
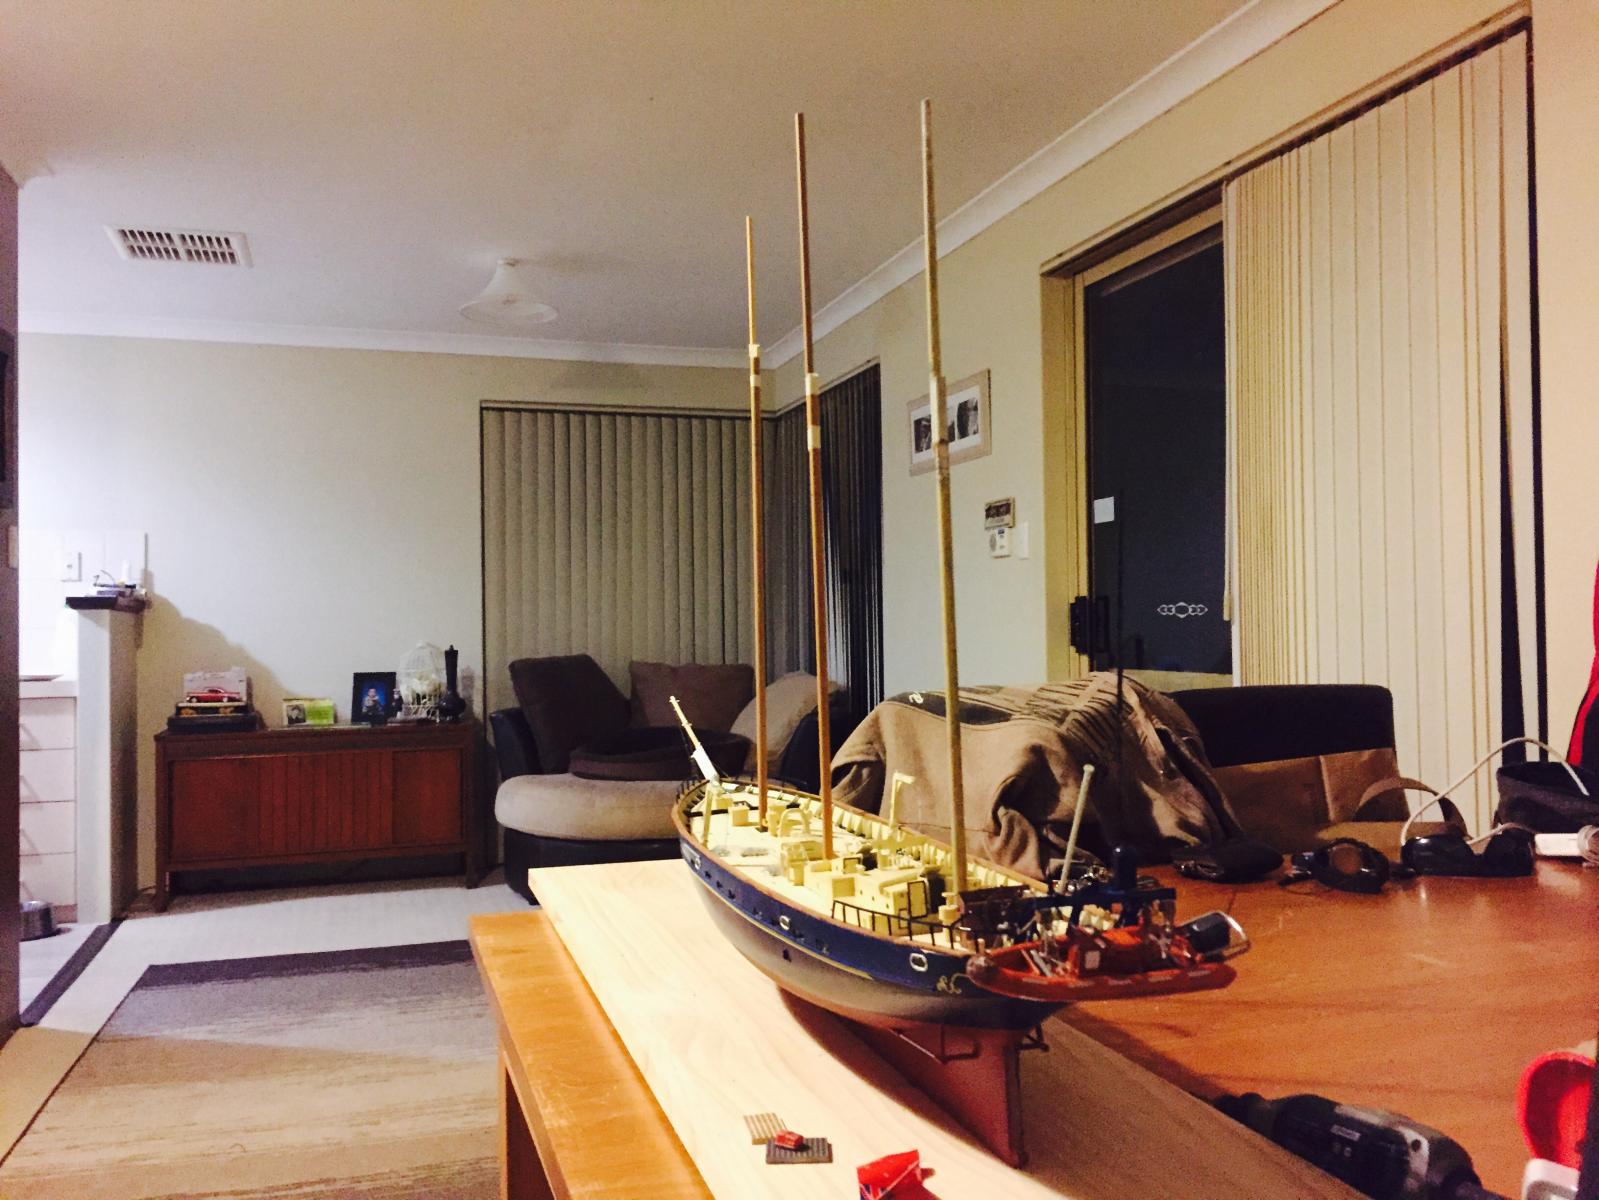
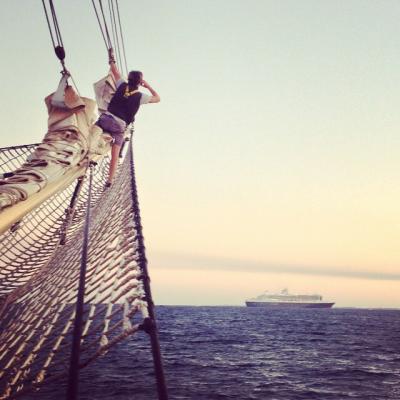
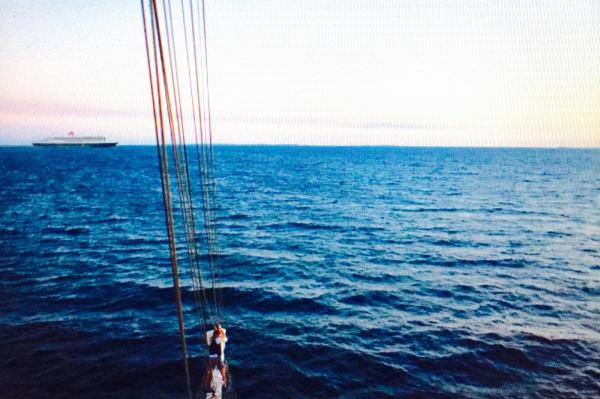
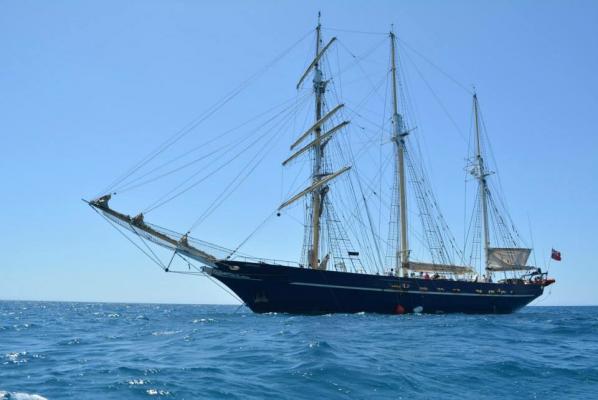
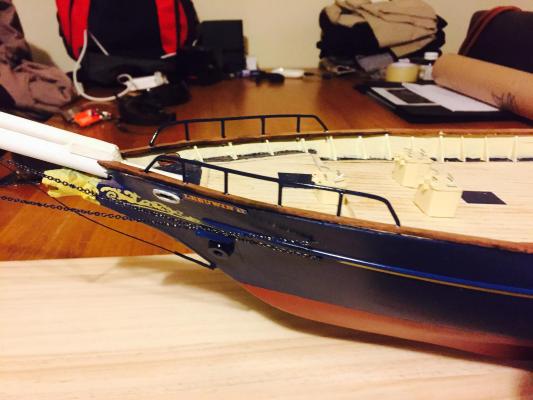
A bit of déjà vu for our chief mate yesterday morning. His last ship the Queen Mary 2 passed us. He was the chief officer on the Mary before coming to us. The first photo, we tried to replicate an old Cunard poster from the 30's of a sailor on the bowsprit of a tall ship while the first queen Mary steams past. Think we did a good job of that one. The second one I took aloft on the foremast.
-
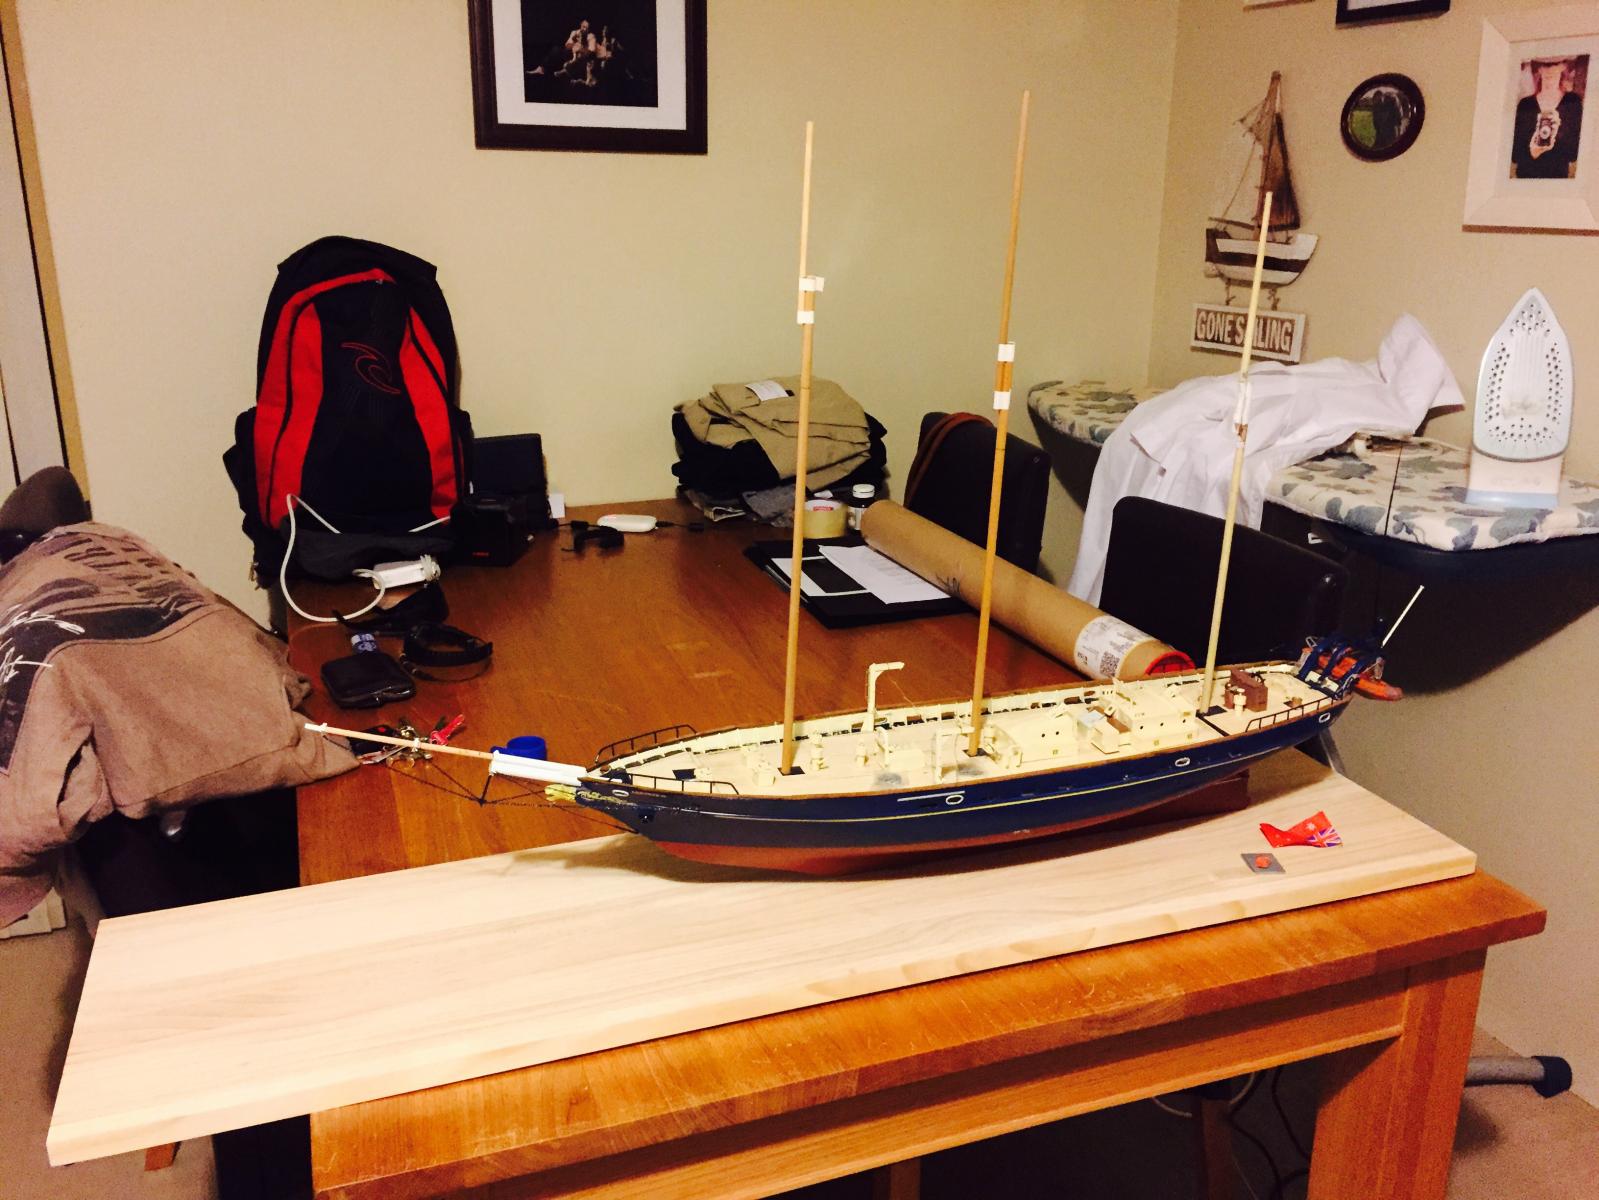
Thanks Hans, I am leaning to having furled sails. I might set the mizzen sail as if she is at anchor. In very light winds we set the mizzen to keep her pointed into the wind. I've also decided to show the port davit rigged outboard with one of the dory's attached with the starboard dory secured on deck, again just to show how it all works. I won't be using fabric for the sails - as you say it always looks over scale and our sails when furled are very very tight fuels so most likely will be using tissue paper or the like. Thanks very much john. We're back in a couple days from this voyage to do a few day sails and prep for our run up north of WA, so hopefully get some modeling in before we head off for that stint.
-
The bottom must be De Ruyter, not tromp.
-
How about, the 'B' lines with the ports as 'A'
-
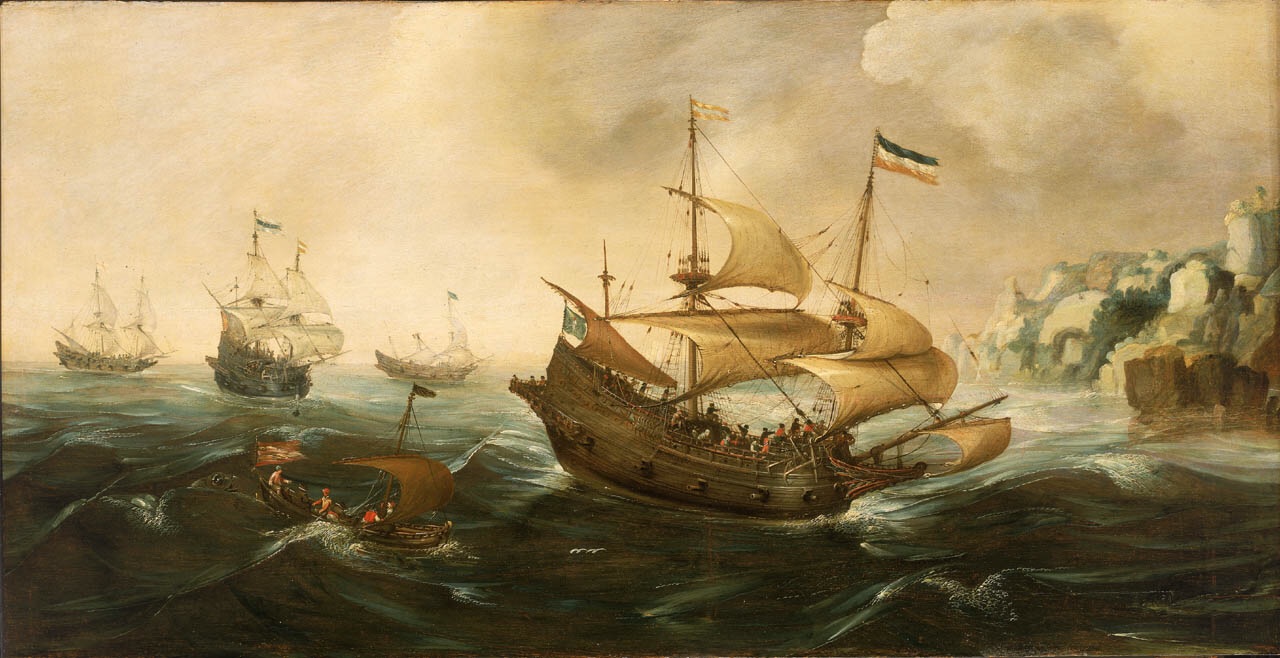
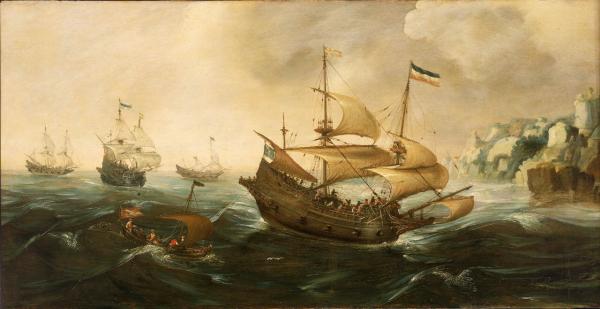
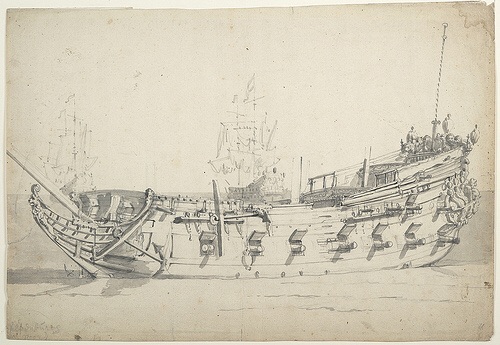
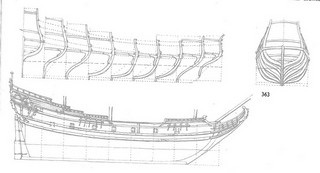
First two images are warships - a little later than your period yes but shows lower ports and different design to the earlier pinnace (last photo) showing higher ports and more hold space so possibly a multi role vessel rather than a warship as such.
-
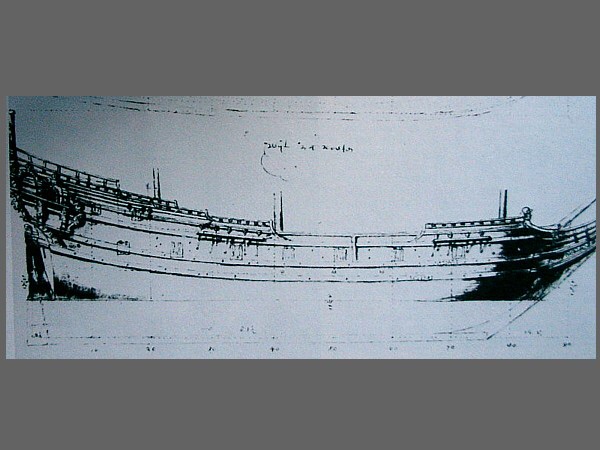
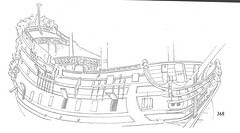
Duyfken's guns are on the open main deck as below is only a hold. There aren't anymore decks below, apart from a step down to the tiller flat which then opens up to the hold itself. Though if you're building a ship of larger tonnage there would possibly be gun's on a lower deck. Though remember for a Dutch ship - if it was for trade the guns were on the weather deck as all possible space was kept for cargo. Only when you get to the larger pinnaces and larger like Batavia, are there dedicated gun decks. Try not to compare with English ships as Dutch ships were very different. The main decks would actually run straight through again to keep as much space possible for cargo. The Dutch ships were also much more shallow draft than English ships, so having an extra deck for guns below wouldn't of been an advantage to their design. Below a sketch of a pinnace similar to your design the guns are high up and on the weather deck. So I like your 'a' sketch but without that deck covered - need to see a scale reference as just a profile can be misleading as to what you're intending

-
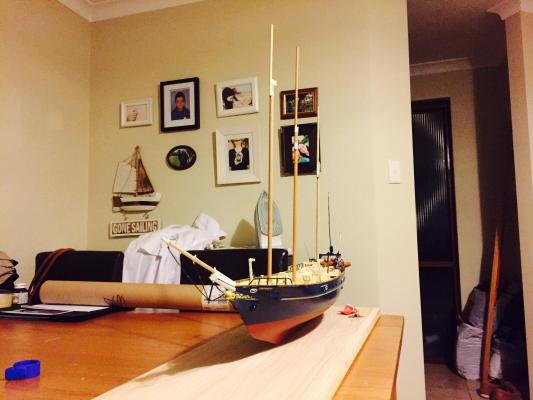
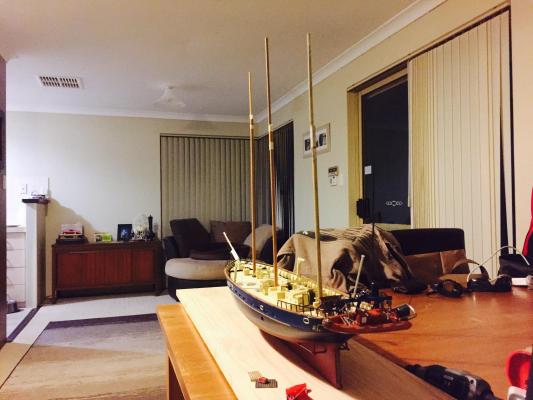
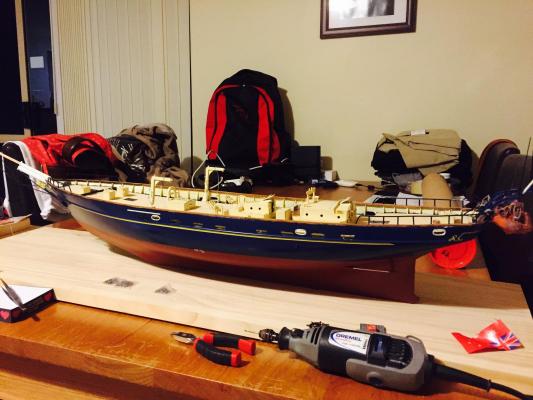
Hi Patrick Yeah I couldn't resist still a long way off fitting them proper but like you said, it does give a good indication of the final size of the model. I will be including sails - a tall ship model without sails, unless it's in an admiralty style with exposed planking etc just doesn't look right to me. Obviously sails are bent off especially during refit... But still looks odd. I've yet to decide whether or not I'll have them set or have them with harbour furls.
-
Just wanted to see how the masts would look All lower masts are steel and only the top masts are wood. The foremast is a little different as compared to similarly rigged vessels, the fore lower and top masts are one single mast, with the t'gallant mast a separate piece. The first futtock is still just above the fore course yard but the mast continues up to the base of t'gallant.

-
Looking good Bryan. I've always used my first planking just as a base - still try to keep as neat as possible but mainly to give good lines for the second planking. A lot of builders treat the first layer as if it was the only but I'm one of the lazy ones... can't wait to see more.
- 75 replies
-
- 1
-

-
- Caldercraft
- Supply
- (and 1 more)
-
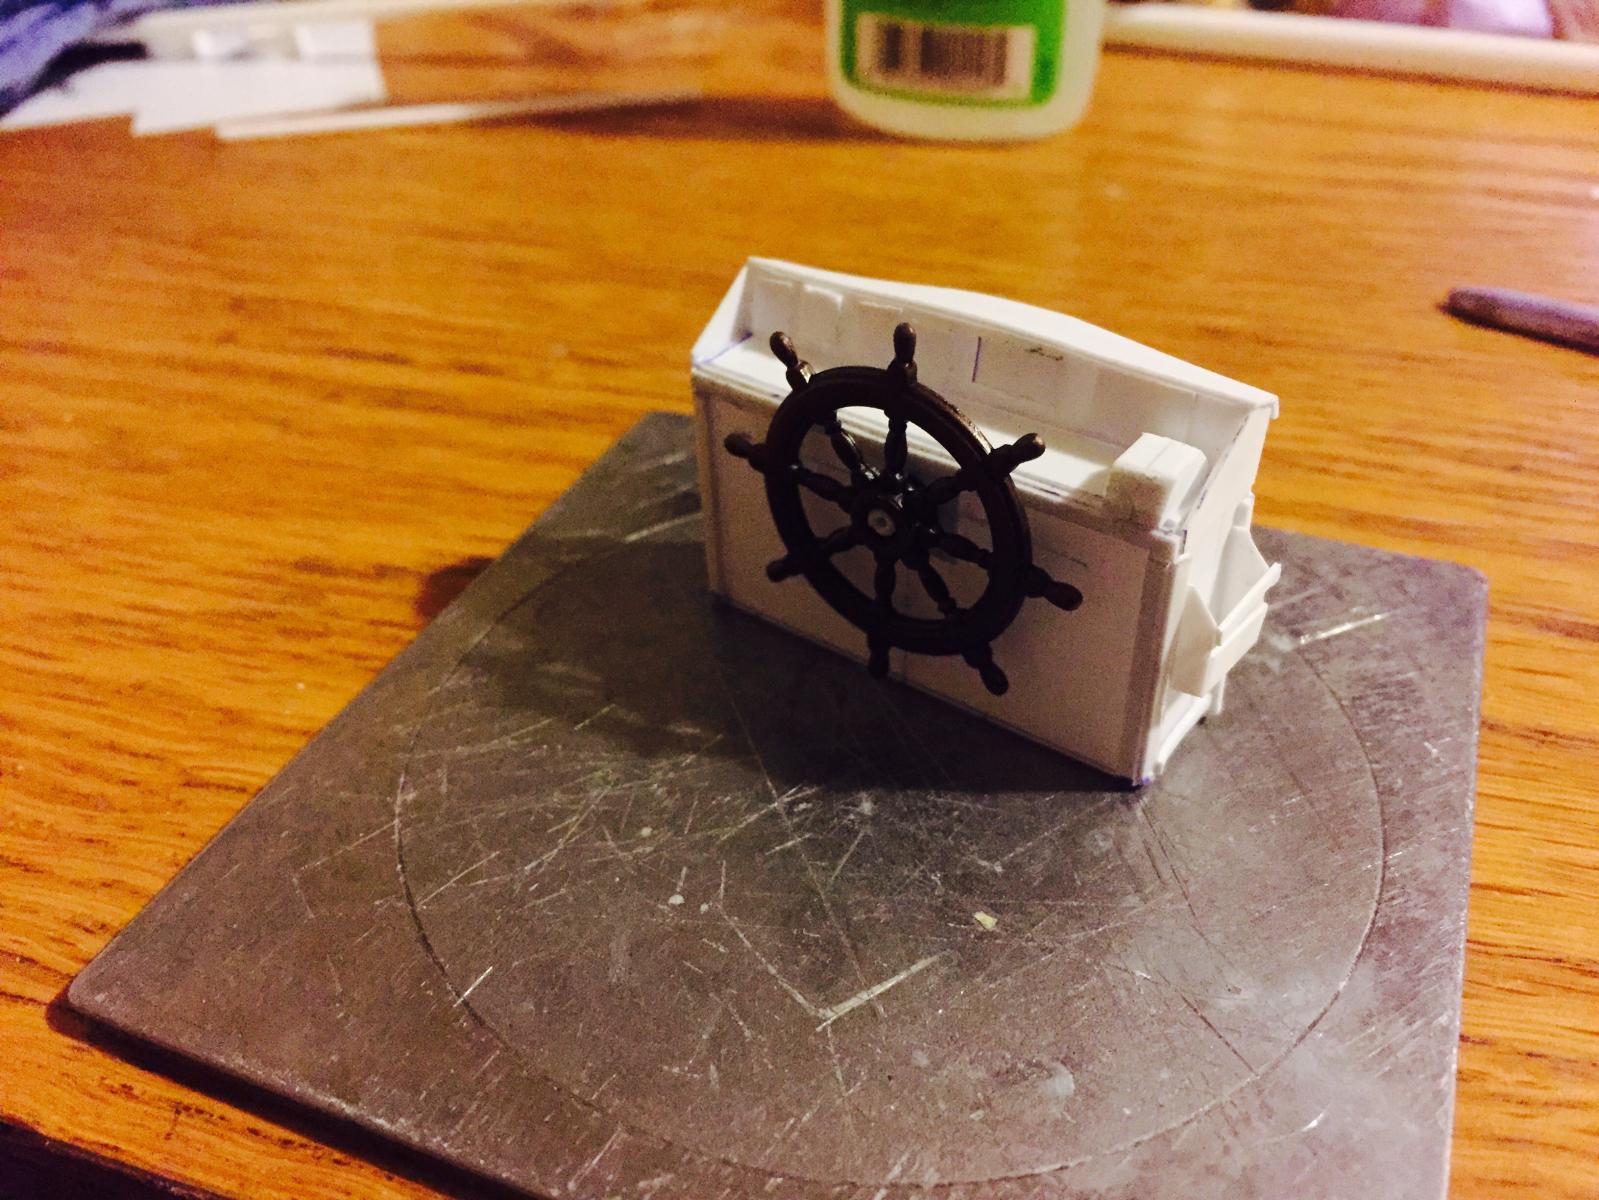
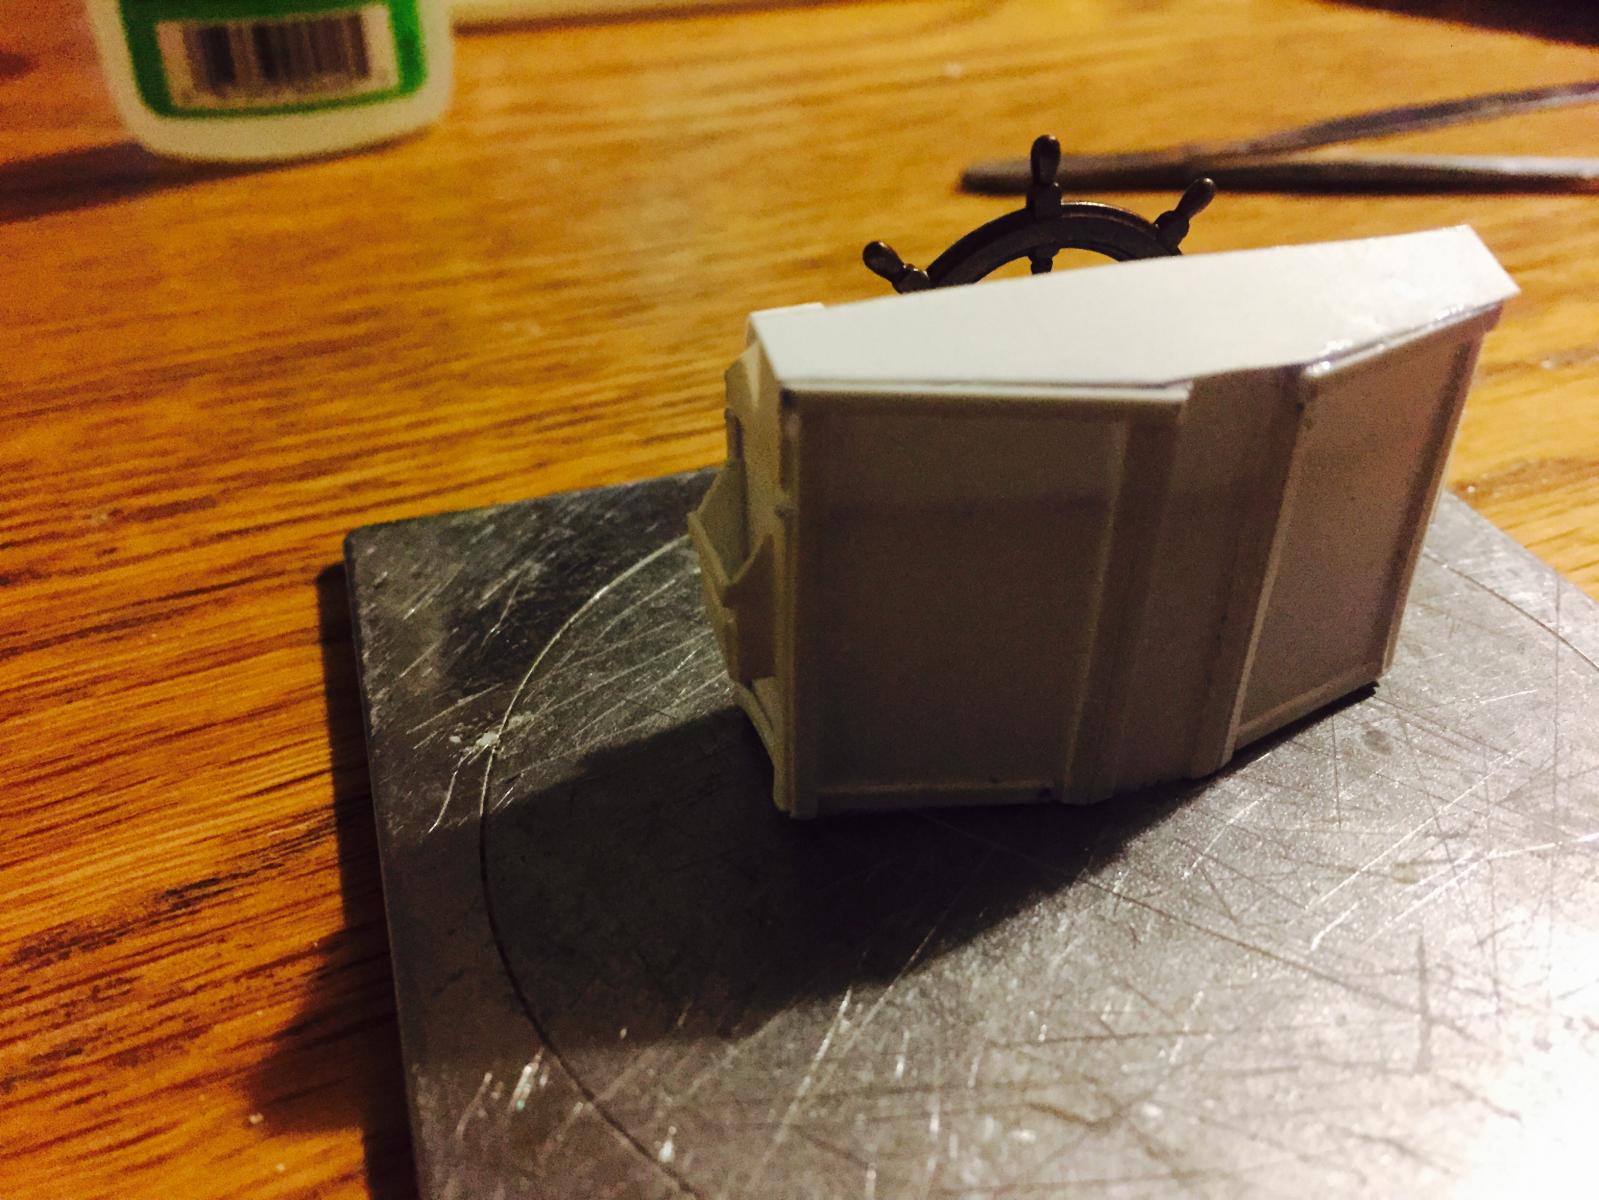
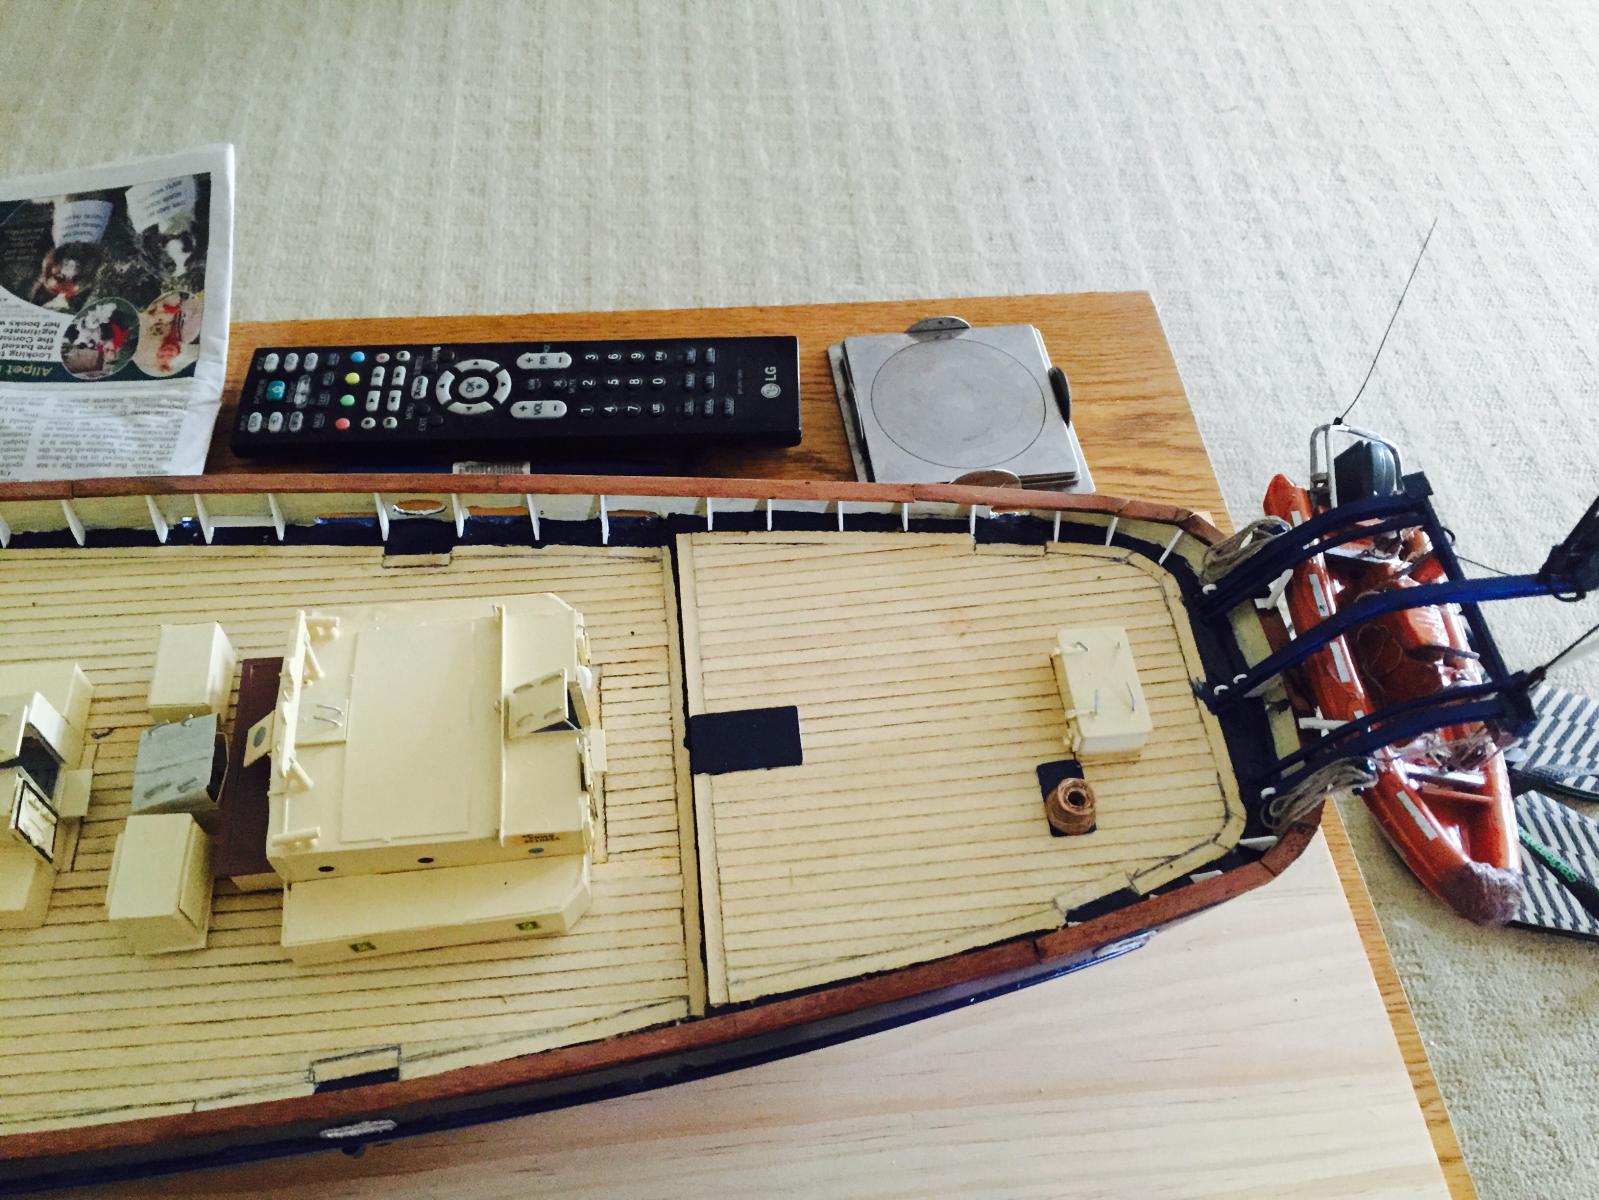
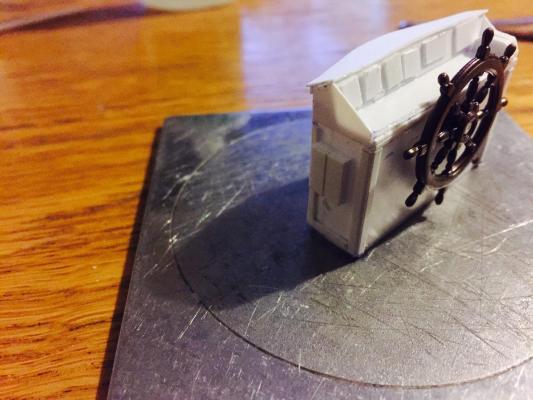
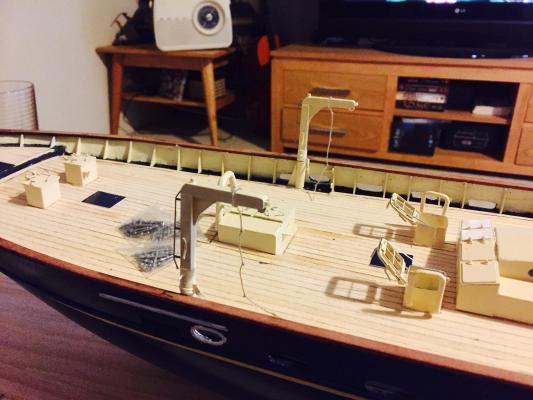
Poop deck is starting to look very busy now. I was putting the helm station off for awhile, though now it's almost done. On the dash are four repeaters showing, depth, wind angle and wind speed, speed over ground and course over ground. Next to these are the displays for each engine showing, rpm, engine temp plus shut down buttons and ignition keys - these keys are only a second step as the engines are actually started below. Also in front of the helm on the dash is a gyro compass repeater - the actual gyro compass is in the chart house. I'll use decals to show these on the helm station. The other item I've made is the megnatic compass.


-
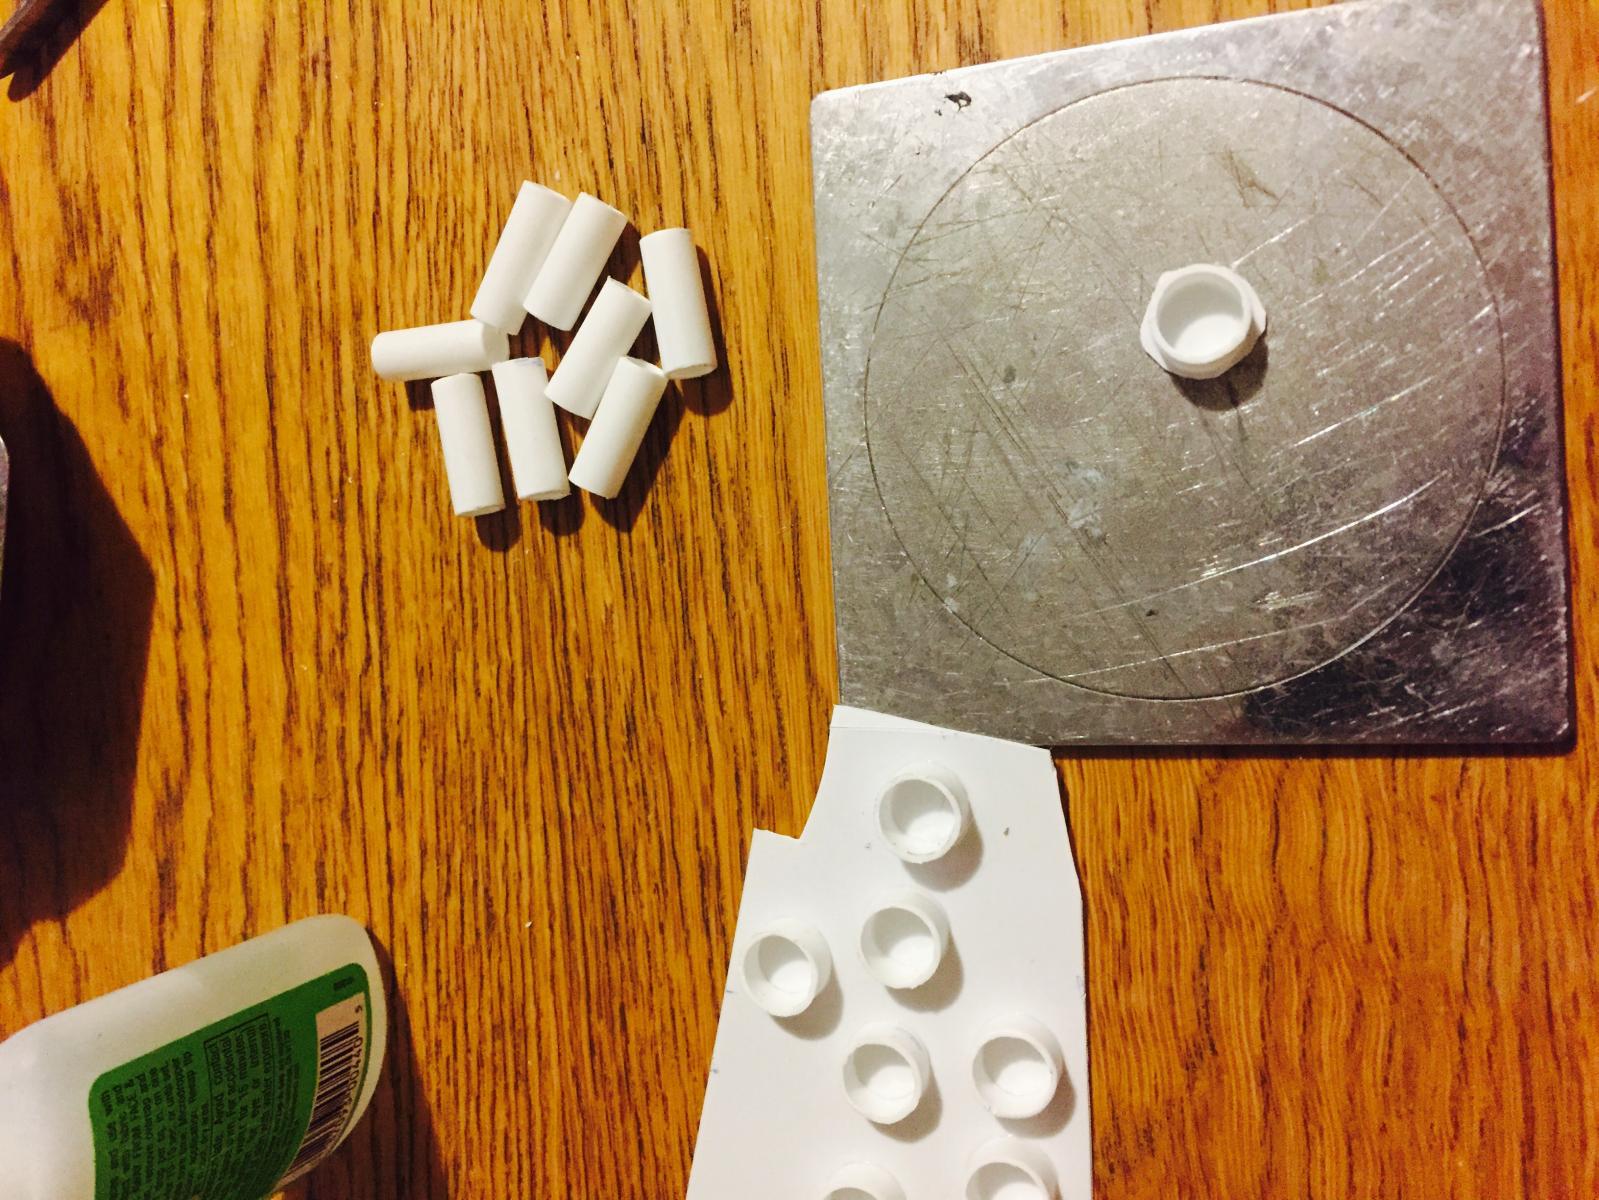
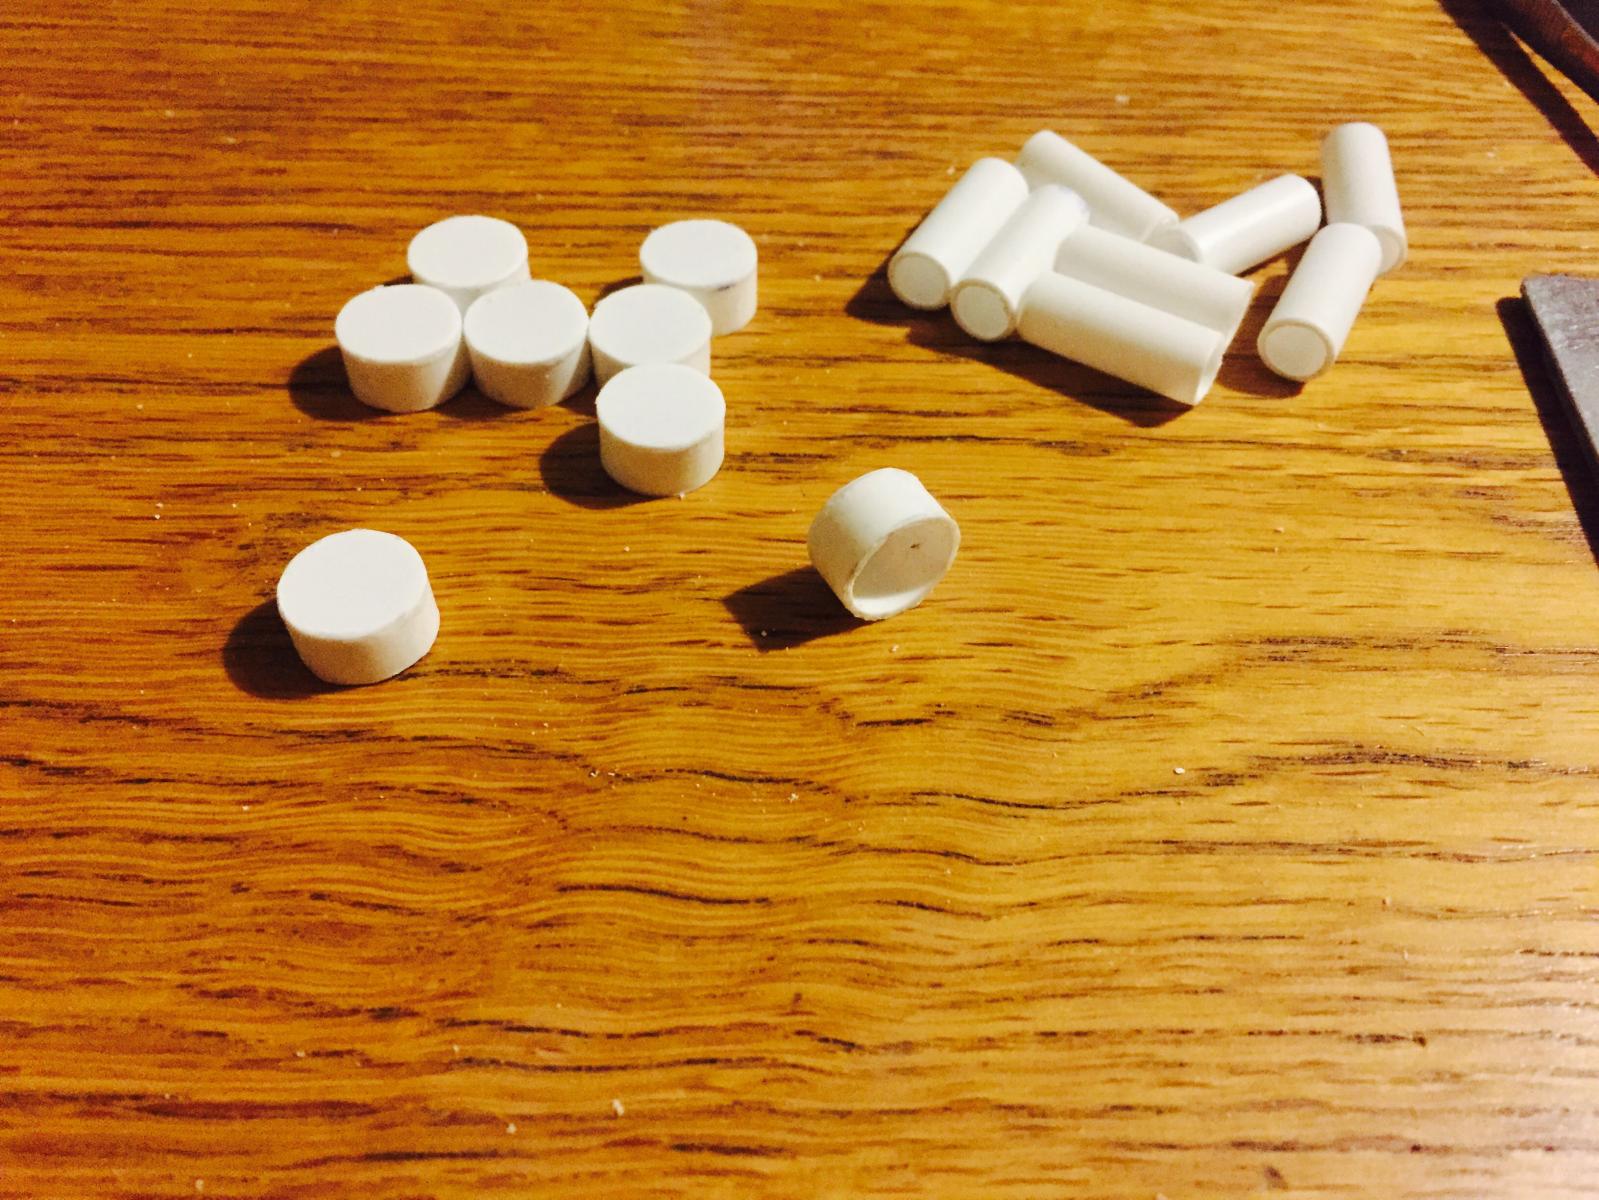
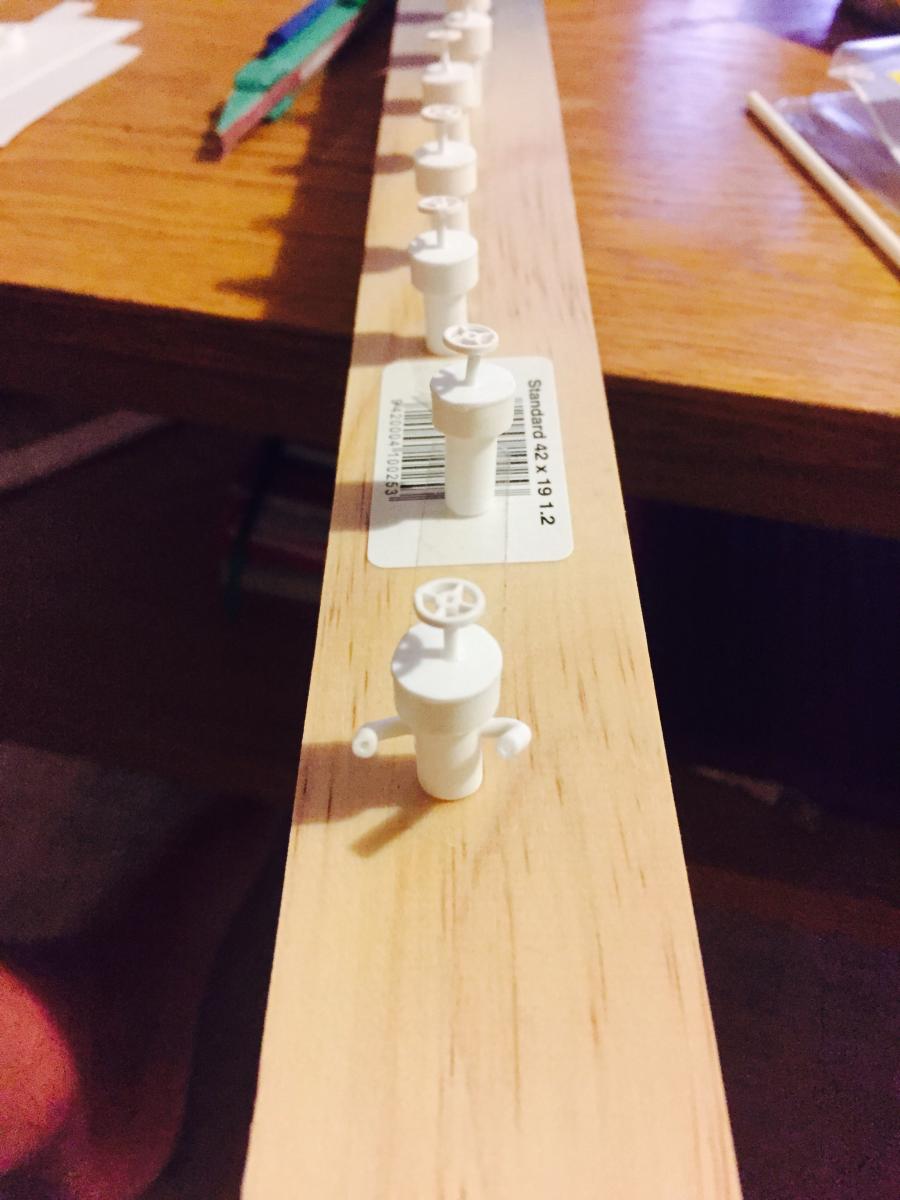
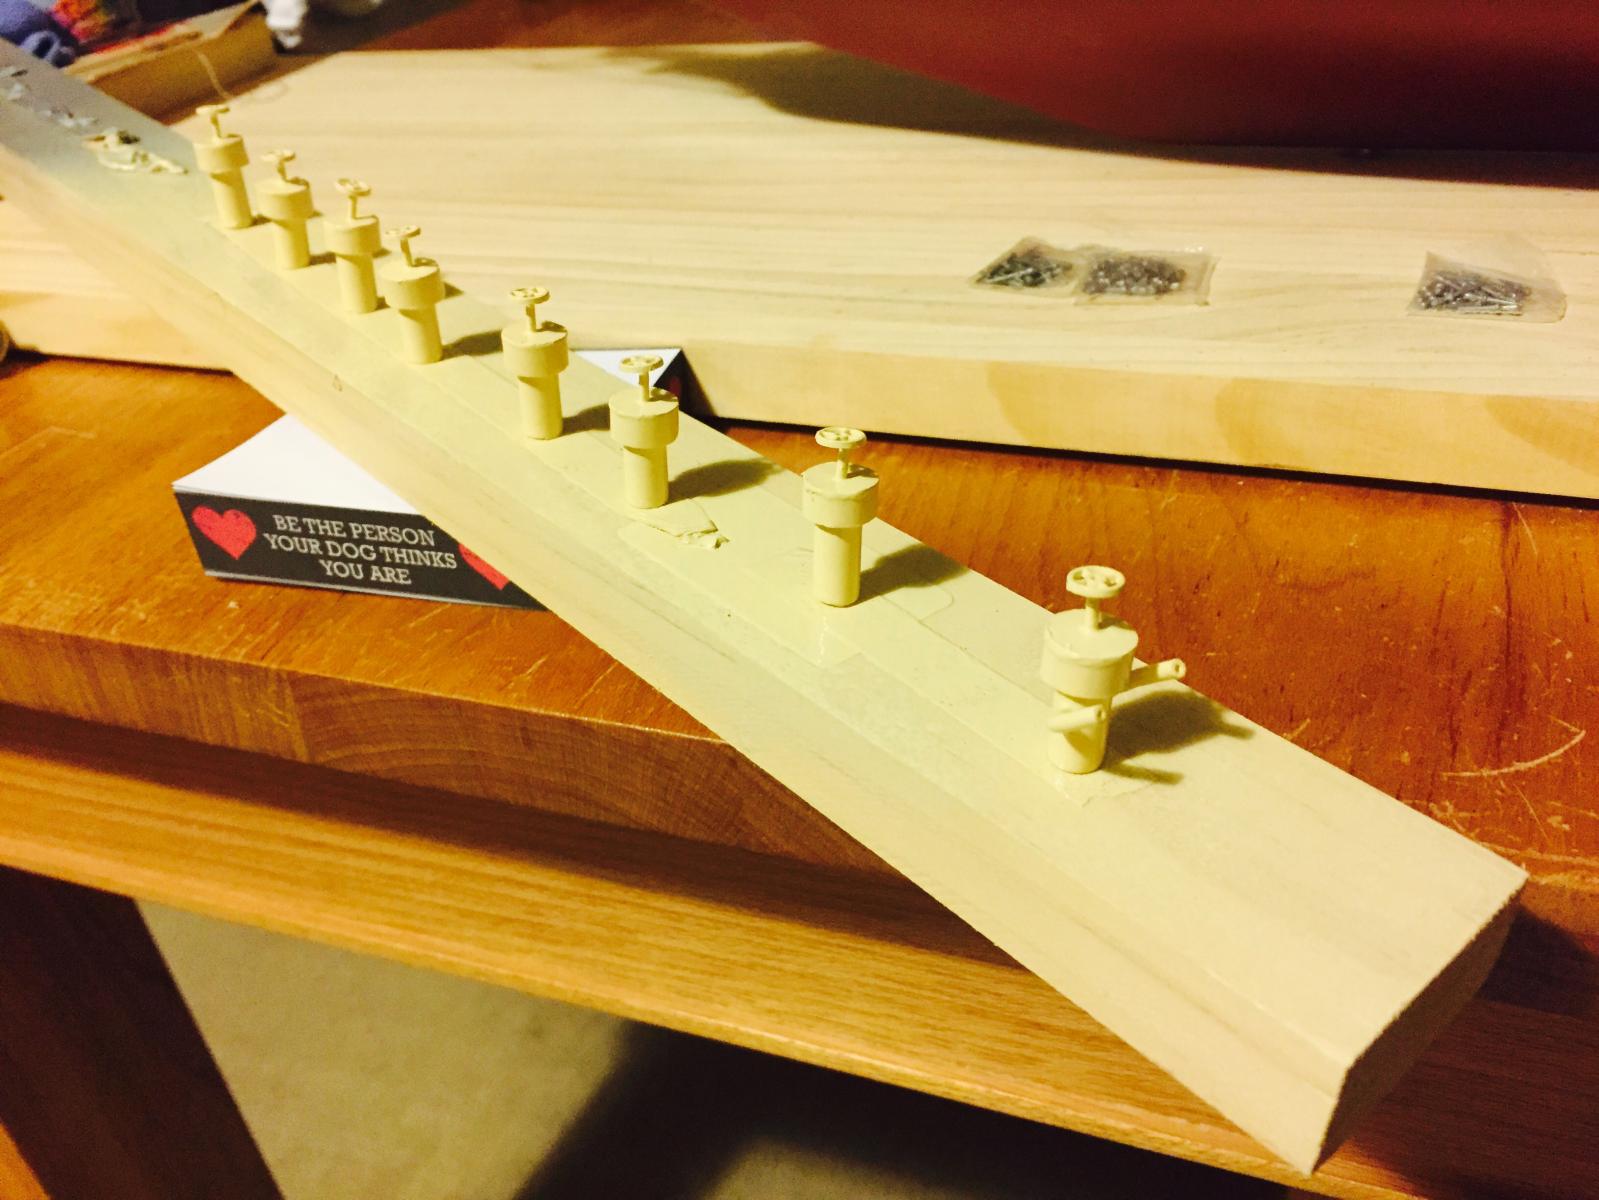
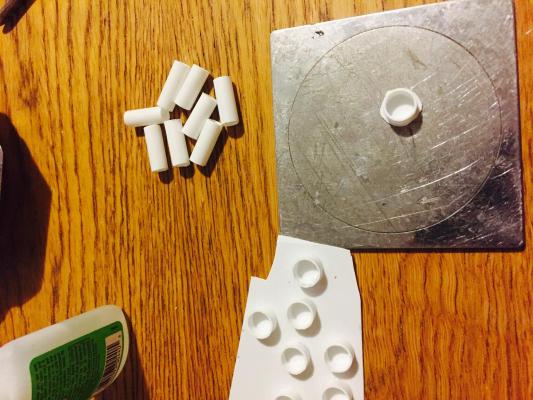
Mushroom vents now made up. 7mm plastic tube was used as the main shaft, this was cut to the full height of the mushroom vent. 10mm plastic tube used for the upper casing. The 10mm parts were then glued to .5mm sheet and cut around the casing to form the enclosed vent top. The shaft was glued inside the upper casing leaving the basic structure of the vent. 4mm hand wheels - model train accessory - attached to rod on top of the vent which represents the hand wheel which opens and closes the vents valve. All vents are left open unless an area needs to be shut down, so I've modeled them fully extended. The one vent with two 'J' shaped bar sits behind the foremast and these bars are to prevent the two sorts from resting on the vent itself.


-
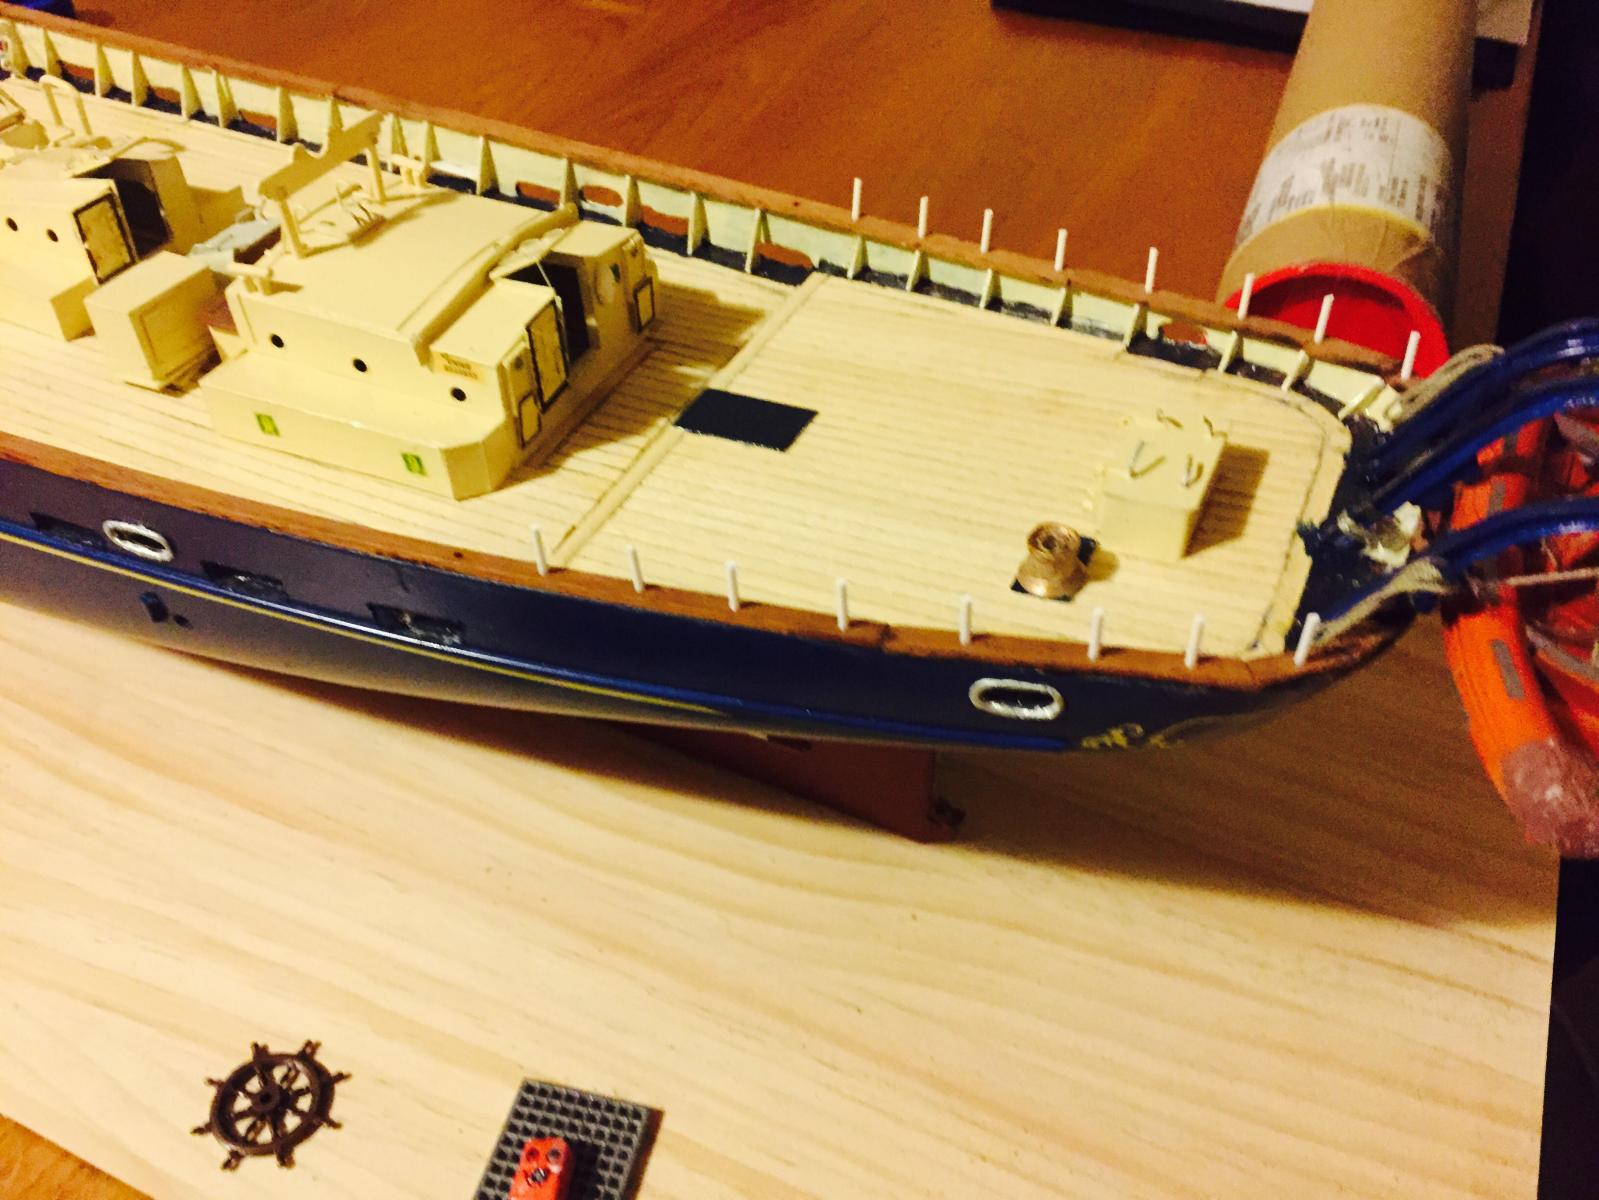
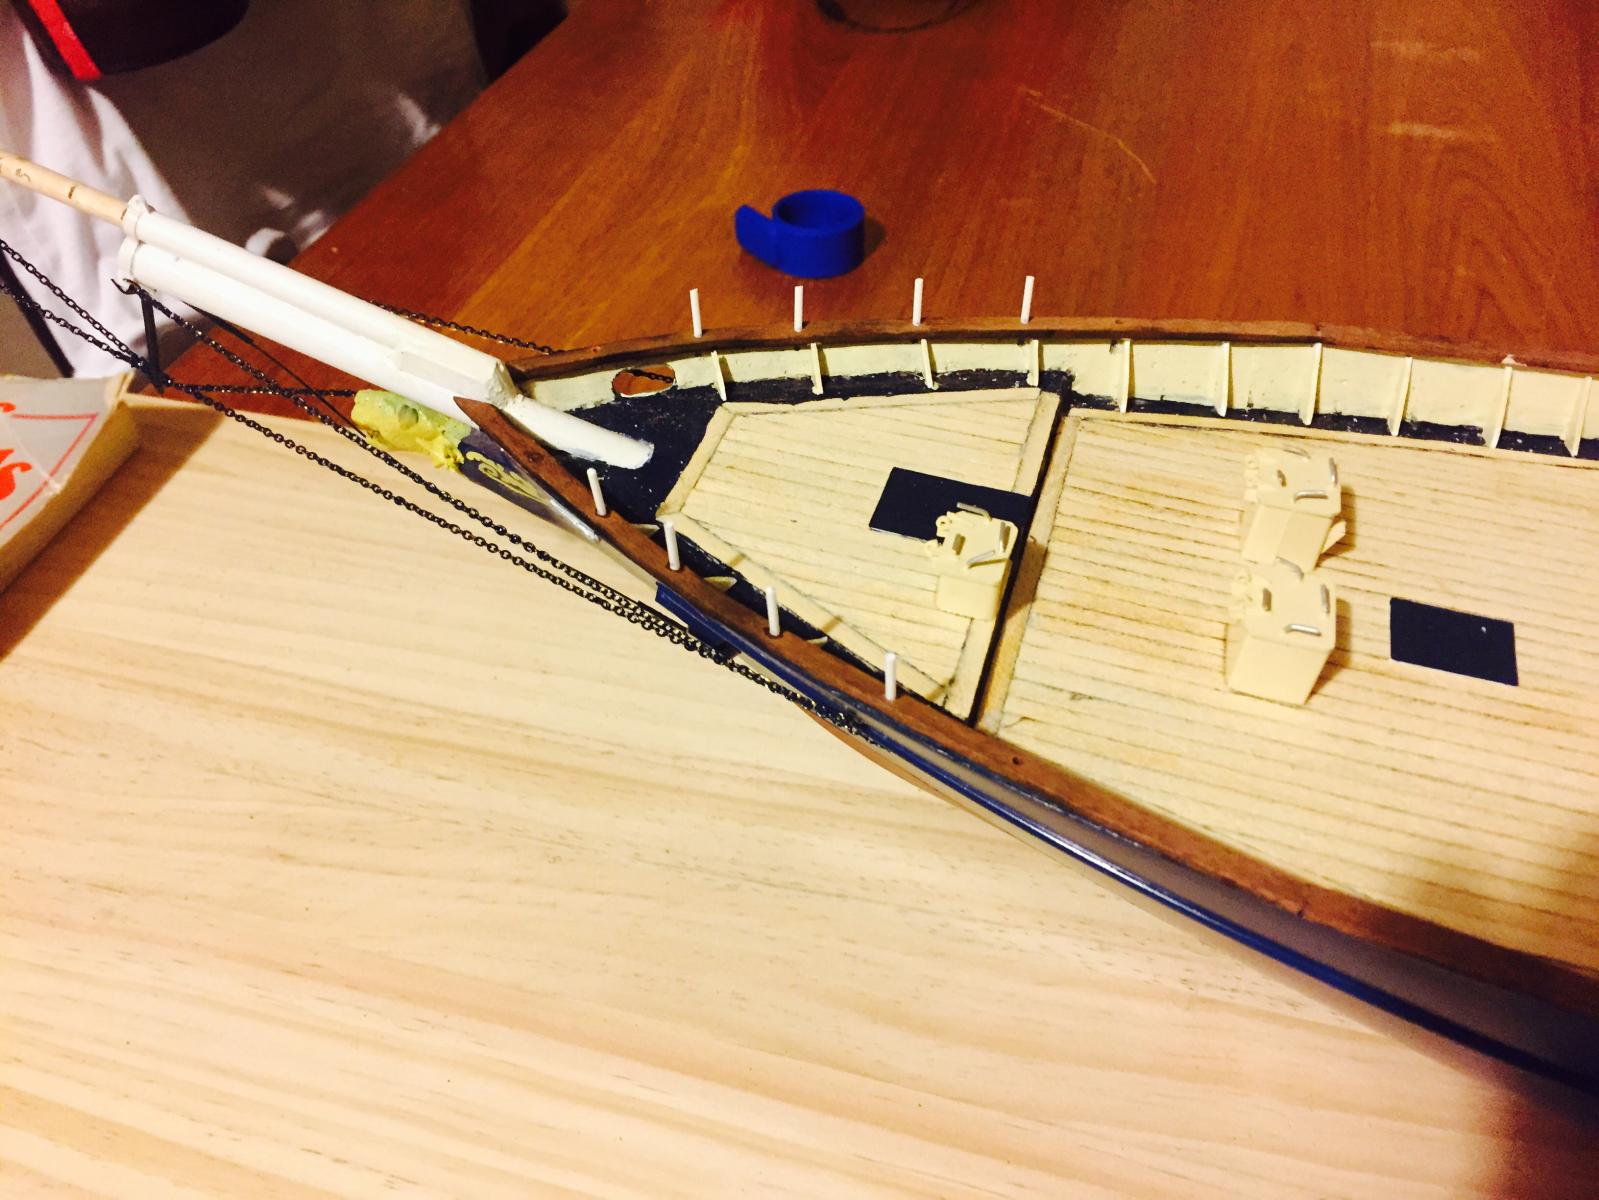
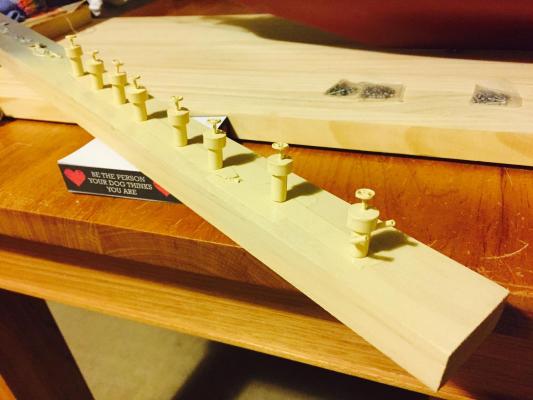
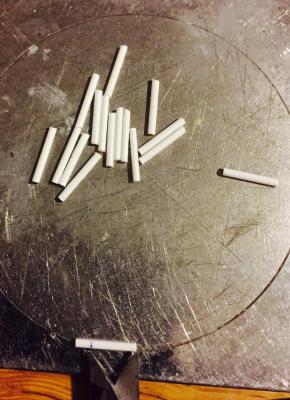
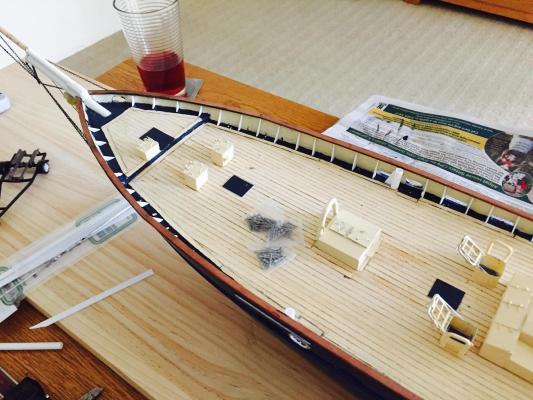
Hi Patrick, I definitely won't throw it out. Might come in useful somehow. Finished f'cstle and poop deck railing this arvo. I've used 1.6mm plastruct rod to make up the stantions and rails. Stantions first cut over size and measured in drilled holes in the capping rail. Once correct height, glued and let to set. The rail also made of plastruct rod, shaped and attached to stantions once dry. Painted, all done.


-
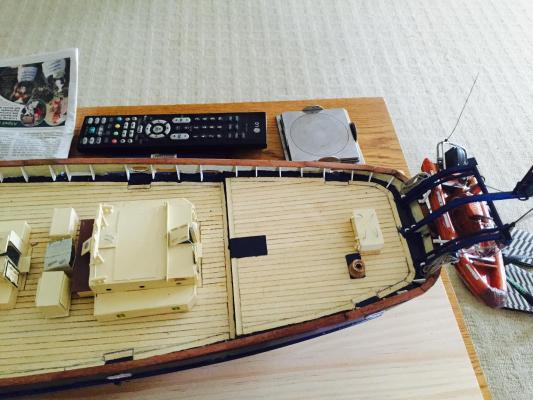
Thanks very much Patrick. The galley and engine room would be seperate models displayed outside of the ship itself. The engine room sits under the chart house and the only way to see the galley would be through the fan hatch, so you wouldn't see either even with lighting inside. Still planning on making them once the main model is completed. Now for another small update, derricks and bulwark supports painted and have started to rig the derricks just with the man rope for now.

-
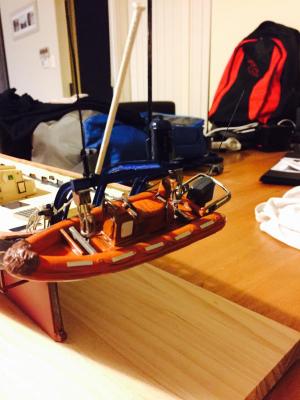
Directly in front of the centre rear davit, will be a life raft and emergency tiller mounted to the deck. So I've added chafing gear, which is 18mm hemp rope lashed to stop one of the blocks from the mizzen sheet rubbing against the davit itself.
-
Both derricks now made up. And attached to bases with hand brake. These are used mainly to launch the two dorys which we use as our tenders. Also both of these derricks are an identical copy of each other, rather than mirror image so that steel cleat which is on the same side of the derricks shaft are correct
-
Frames attached to bulwarks. Also the base of the two derricks midships are now attached.


-
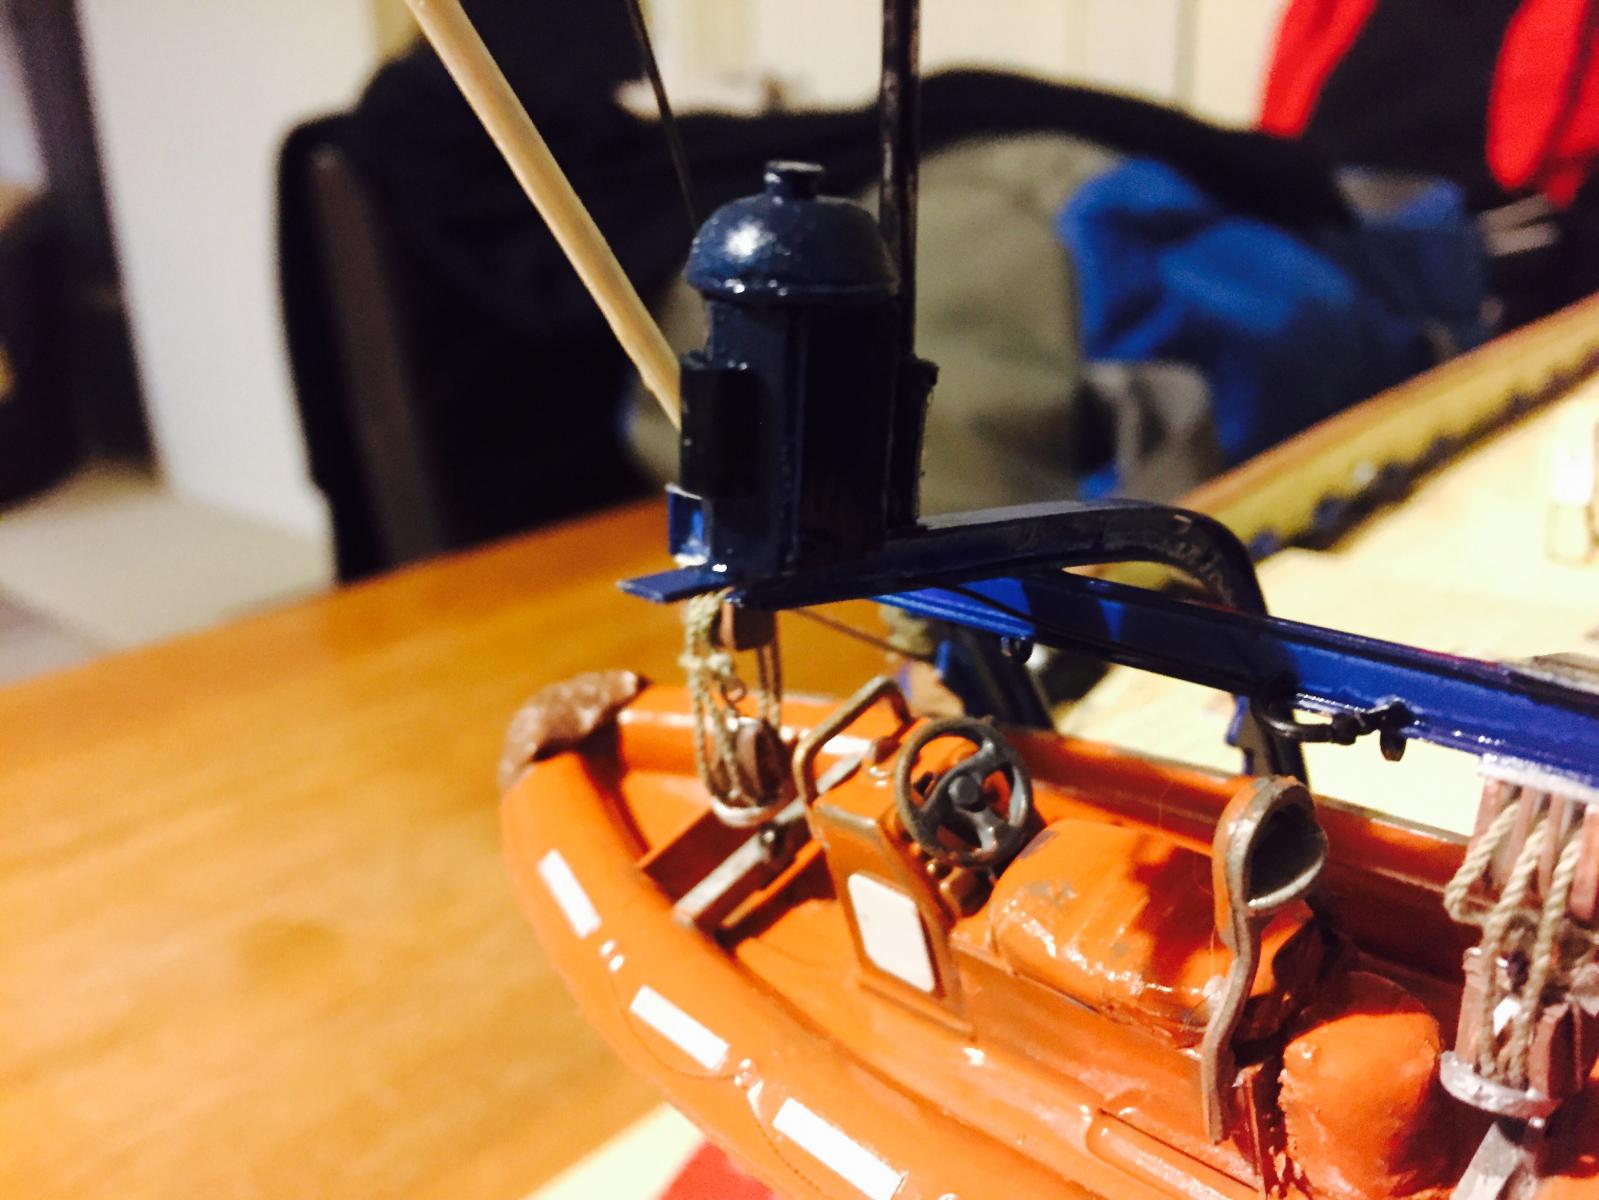
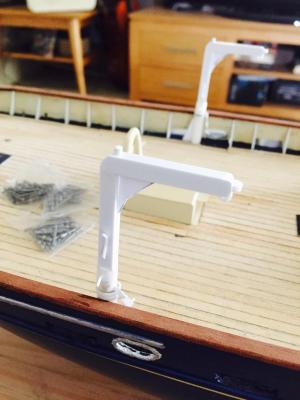
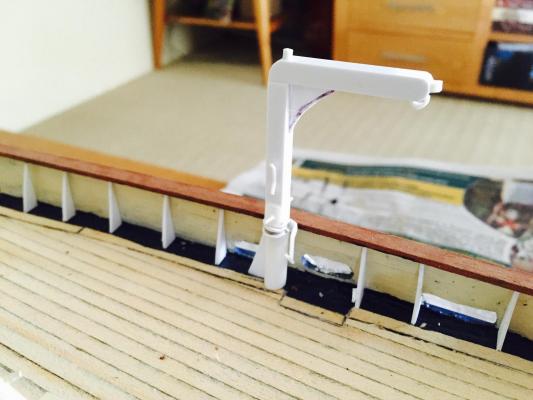
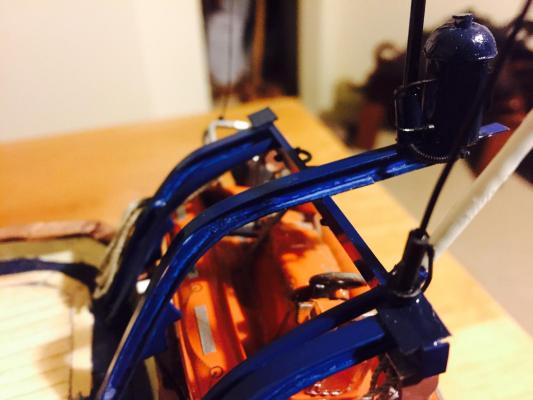
Wiring harness added to aerials and lantern. The wiring runs through the two steel tubes on the inside of the two outer davits. I used black coated copper wire, used for detailing engines on model cars and aircraft.

-
It will be nice to see these kits on the market. Once they do, I think my list of future builds maybe set! HF and VHF aerials added to davit structure as well as the stern lantern. This is shaped to look like a lantern typical of the 19th century, though has a modern lamp as its lighting fixture.
-
Cross-Jack Yard on a cutter (Sherbourne 1763)
Tallshiptragic replied to tkay11's topic in Masting, rigging and sails
Haha wouldn't say shot down at all. Just remember when you're sailing 'full and by' the yards would be made sharp up, so due to the size of the main and fire course you would still see them. As for the disappearance of a sail fitted to the cross jackyard. There most likely was never an official sail, as the gaff mizzen replaced the lateen mizzen thus making it impossible for an earlier sail to have been rigged. On a cutter of course a 'course' could have and from paintings were set. Though these sails would taper towards the deck unlike traditional ship rigged courses. You find this shape of fore course on barquentines and topsail schooners... So really anything could have been done. -
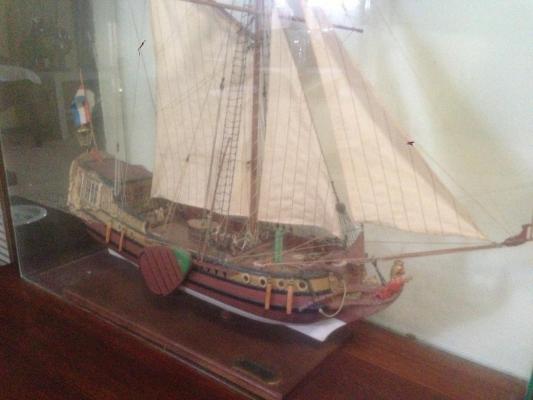
Hi Jan, it's the same ship but my father replaced all the carving work, made his own blocks and added small details using the book Jan B mentions above De 17eeuws Statenjacht. I still have this book also.
- 305 replies
-
- 4
-
-
- utrecht
- statenjacht
- (and 1 more)
-
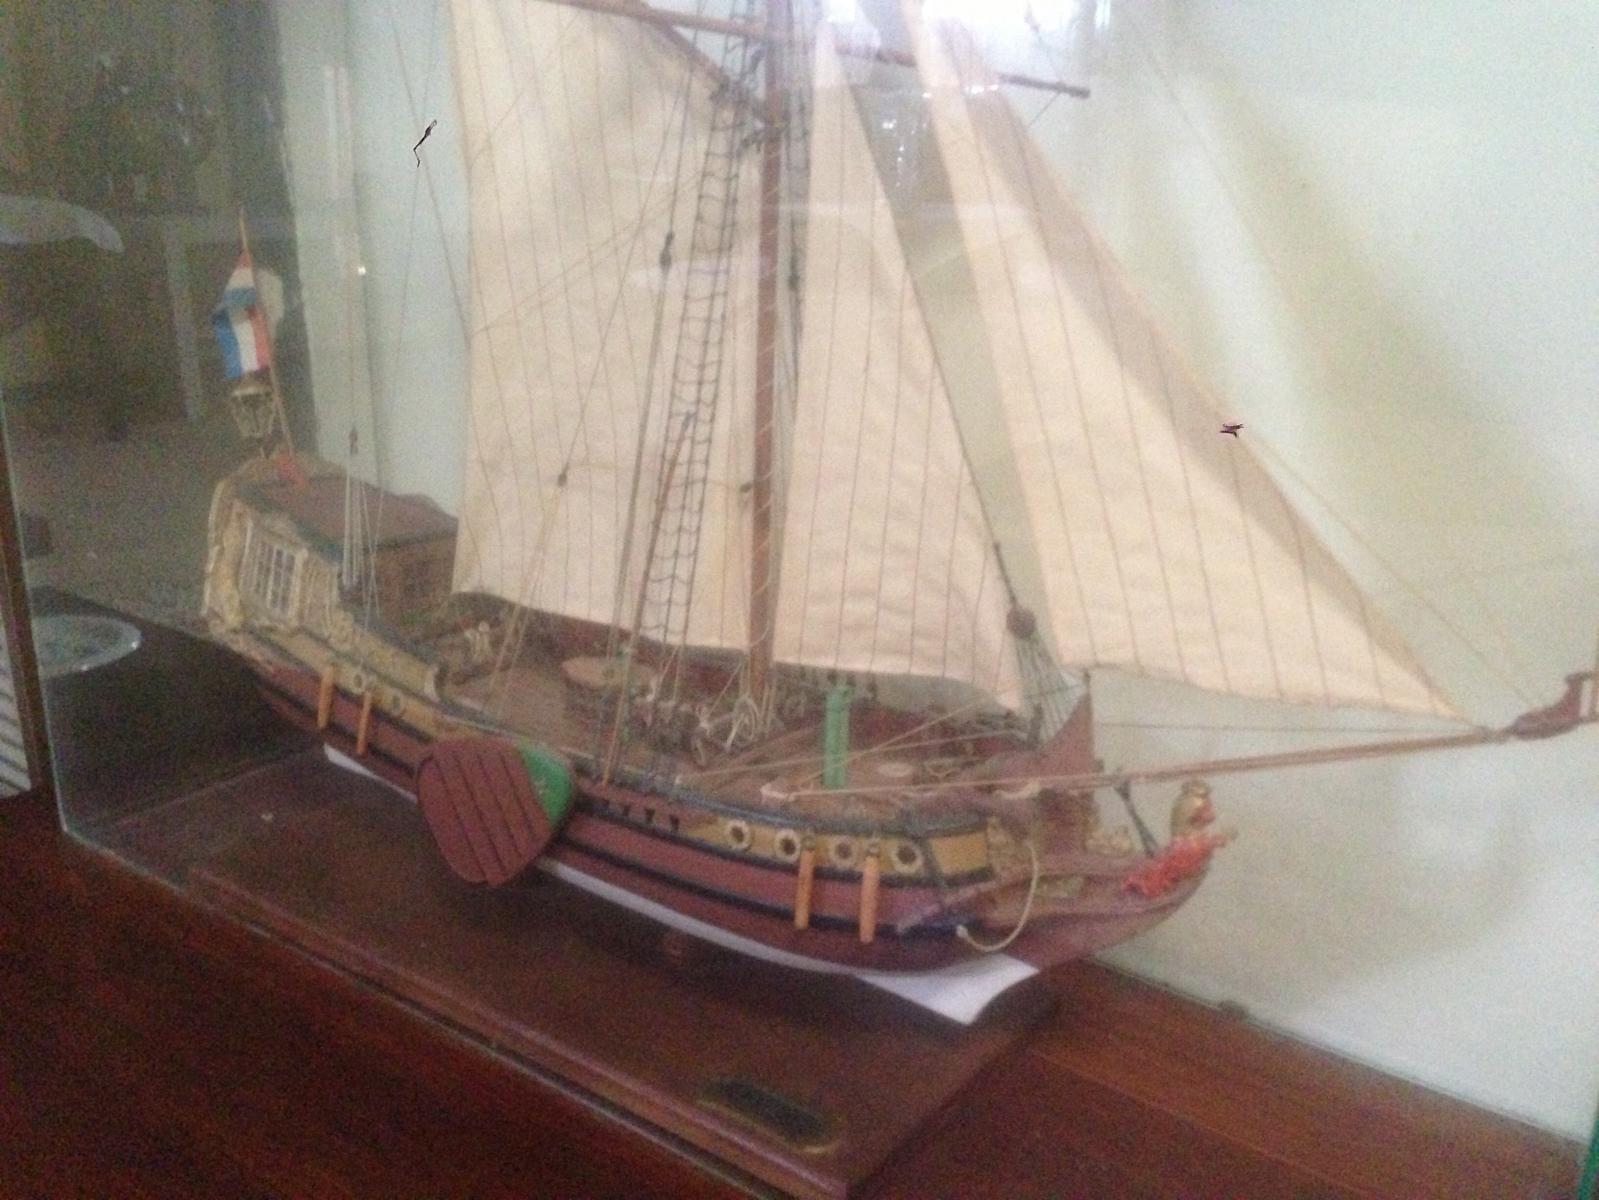
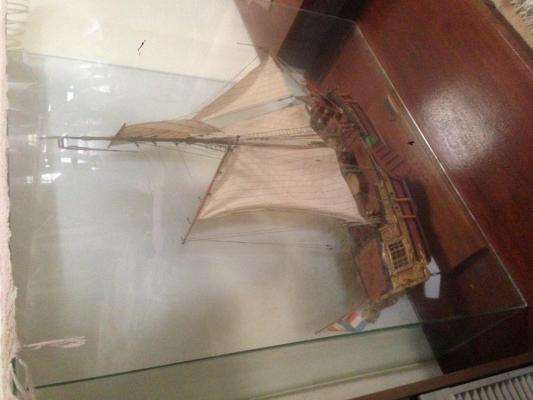
Hi Marcus how is your Utretch going? Looking forward to seeing more. I have a heavily modified model based on the large Billing Boats kit of a statenjacht my father built. It's about 35 years old now but lives inside its glass case and still looks as good as when he first finished her.
- 305 replies
-
- 7
-
-
- utrecht
- statenjacht
- (and 1 more)