HOLIDAY DONATION DRIVE - SUPPORT MSW - DO YOUR PART TO KEEP THIS GREAT FORUM GOING!
×


hdrinker
-
Posts
232 -
Joined
-
Last visited
Content Type
Profiles
Forums
Gallery
Events
Everything posted by hdrinker
-
She’s looking really great Kevin. You’re showing me what it should look like. I’m loving reliving the various steps. Henry
-
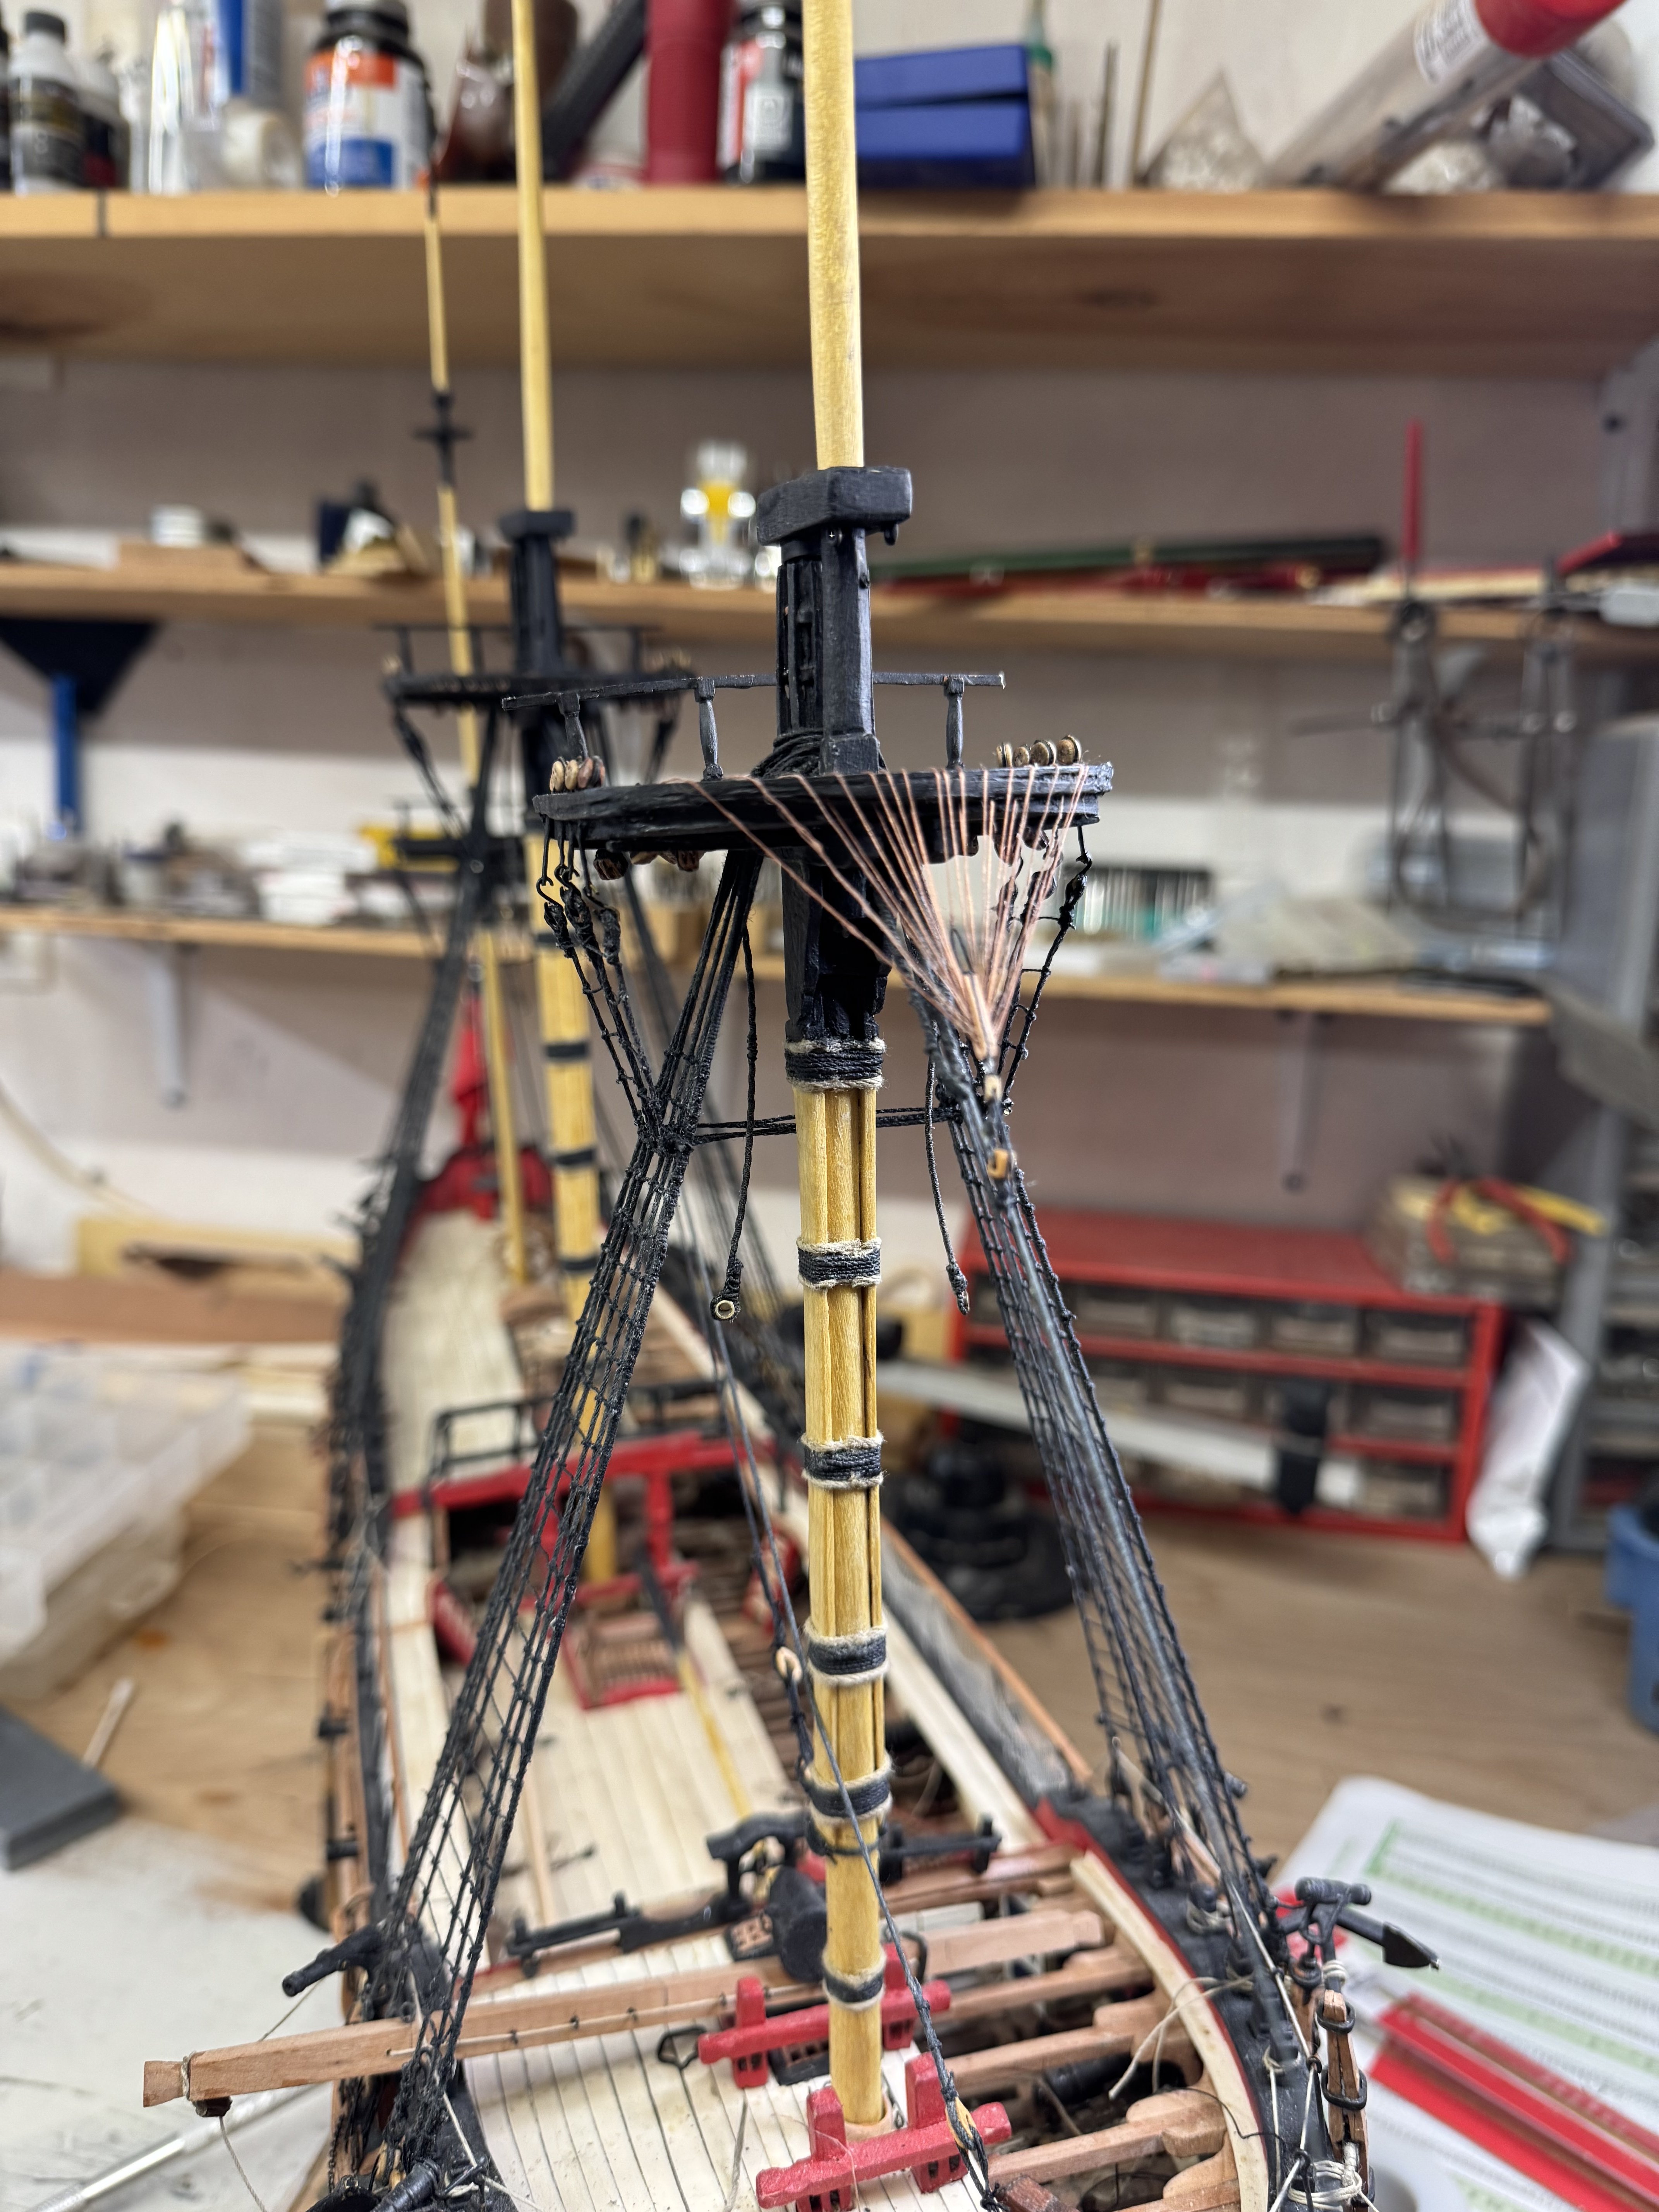
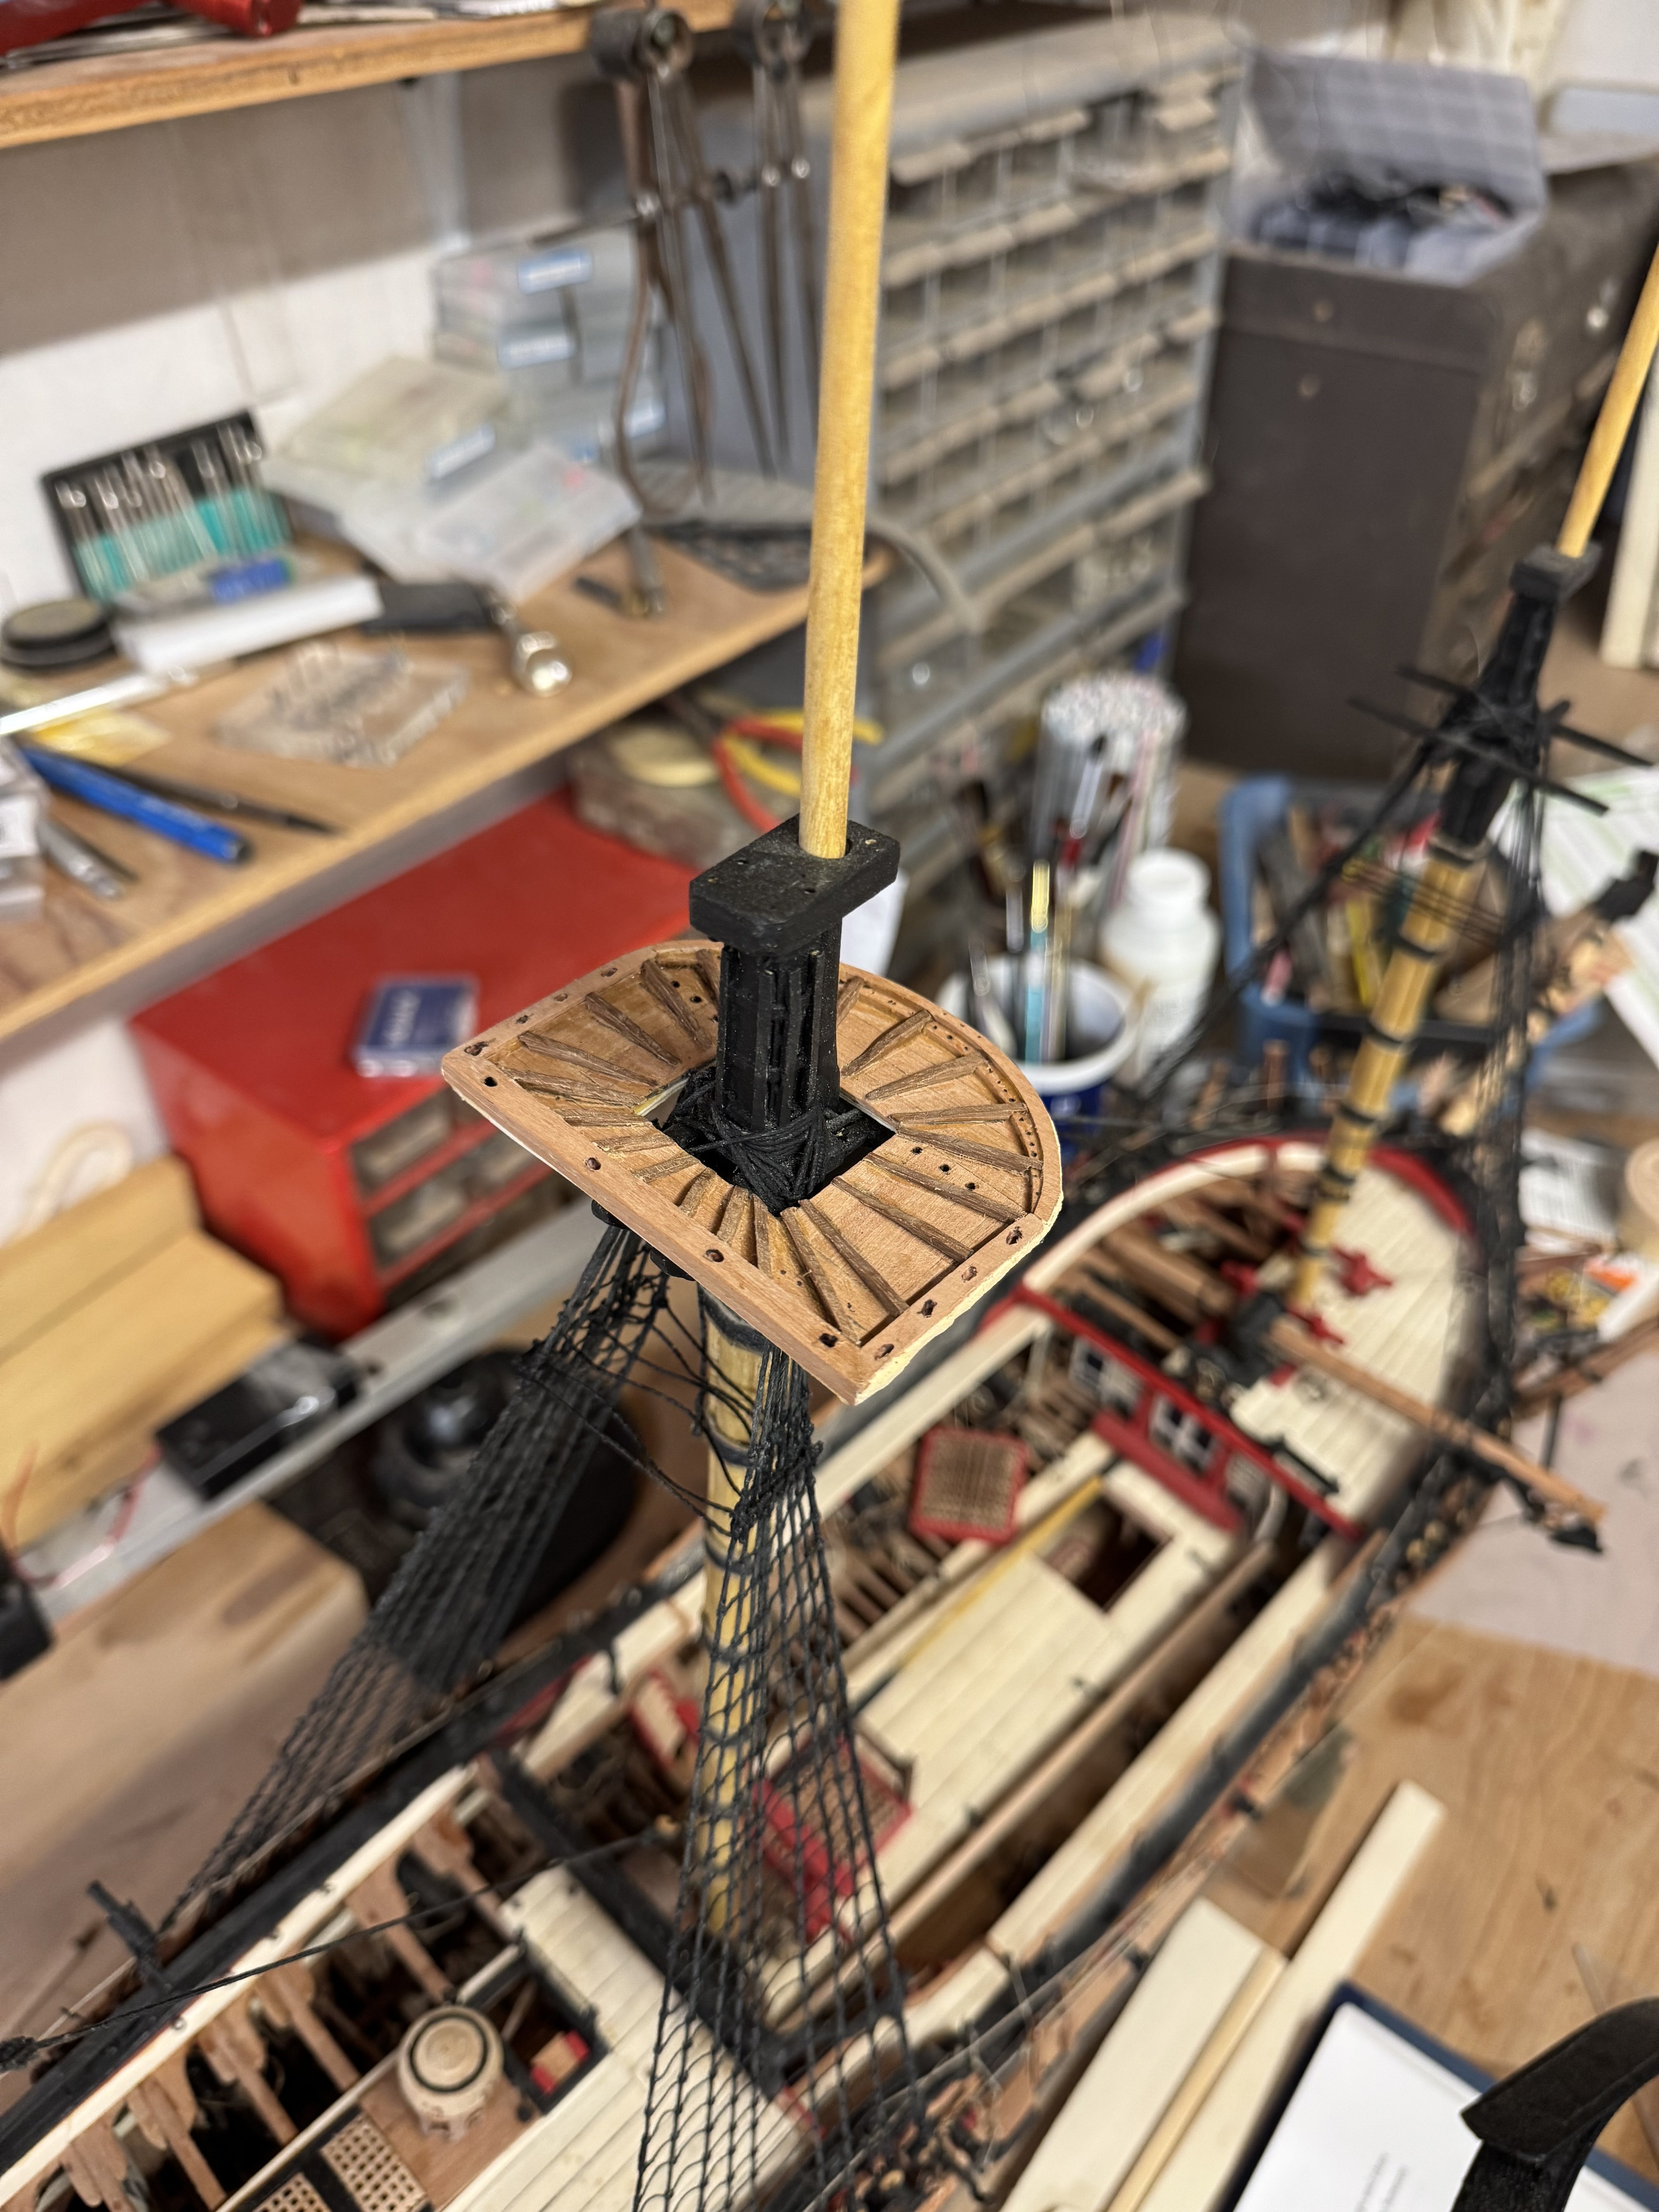
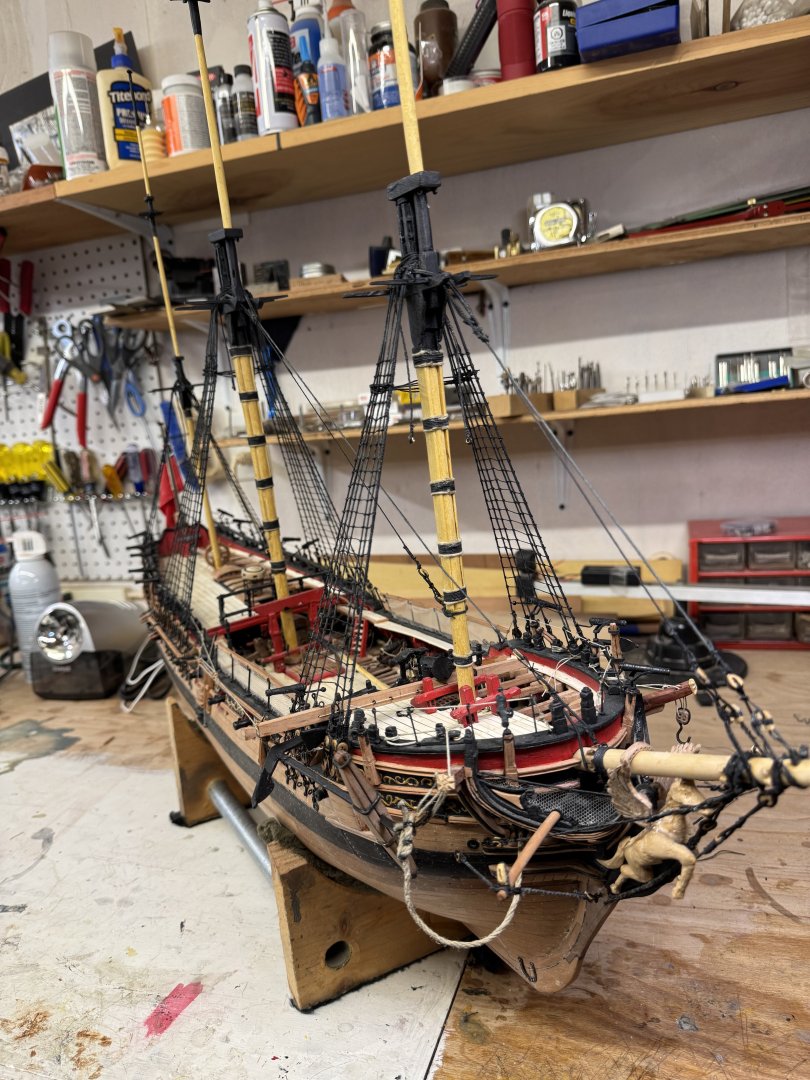
Euphroes and crows feet were a challenge. I followed Dave’s advice and used 6/0 thread from my fly tying bench. #26 drill with the milling machine. If the holes in the euphroe are too close together, the thread saws its way through from one hole to the next. Leave a distances about equal to a hole diameter between holes. The thread I tie flies with in brown is not mono thread, and it readily comes apart into many tiny filaments unless it’s treated with dilute PVA. After many painful hours of trying to thread that 6/0 thread through the holes in the euphroes, I got a sewing needle from my wife and a needle threader and that made a big difference, especially when trying to reverse thread the holes in the tops. I also learned the hard way to keep tension on the crows feet during threading. Otherwise the euphroe has a habit of rotating, which gets quite confusing as one progresses causing the lines to thread the wrong way at times and losing parallel alignment. I spent about 15 hours over 3 days doing this and must have started over on each mast several times.

- 257 replies
-
- 8
-

-
- pegasus
- Swan-class
- (and 1 more)
-
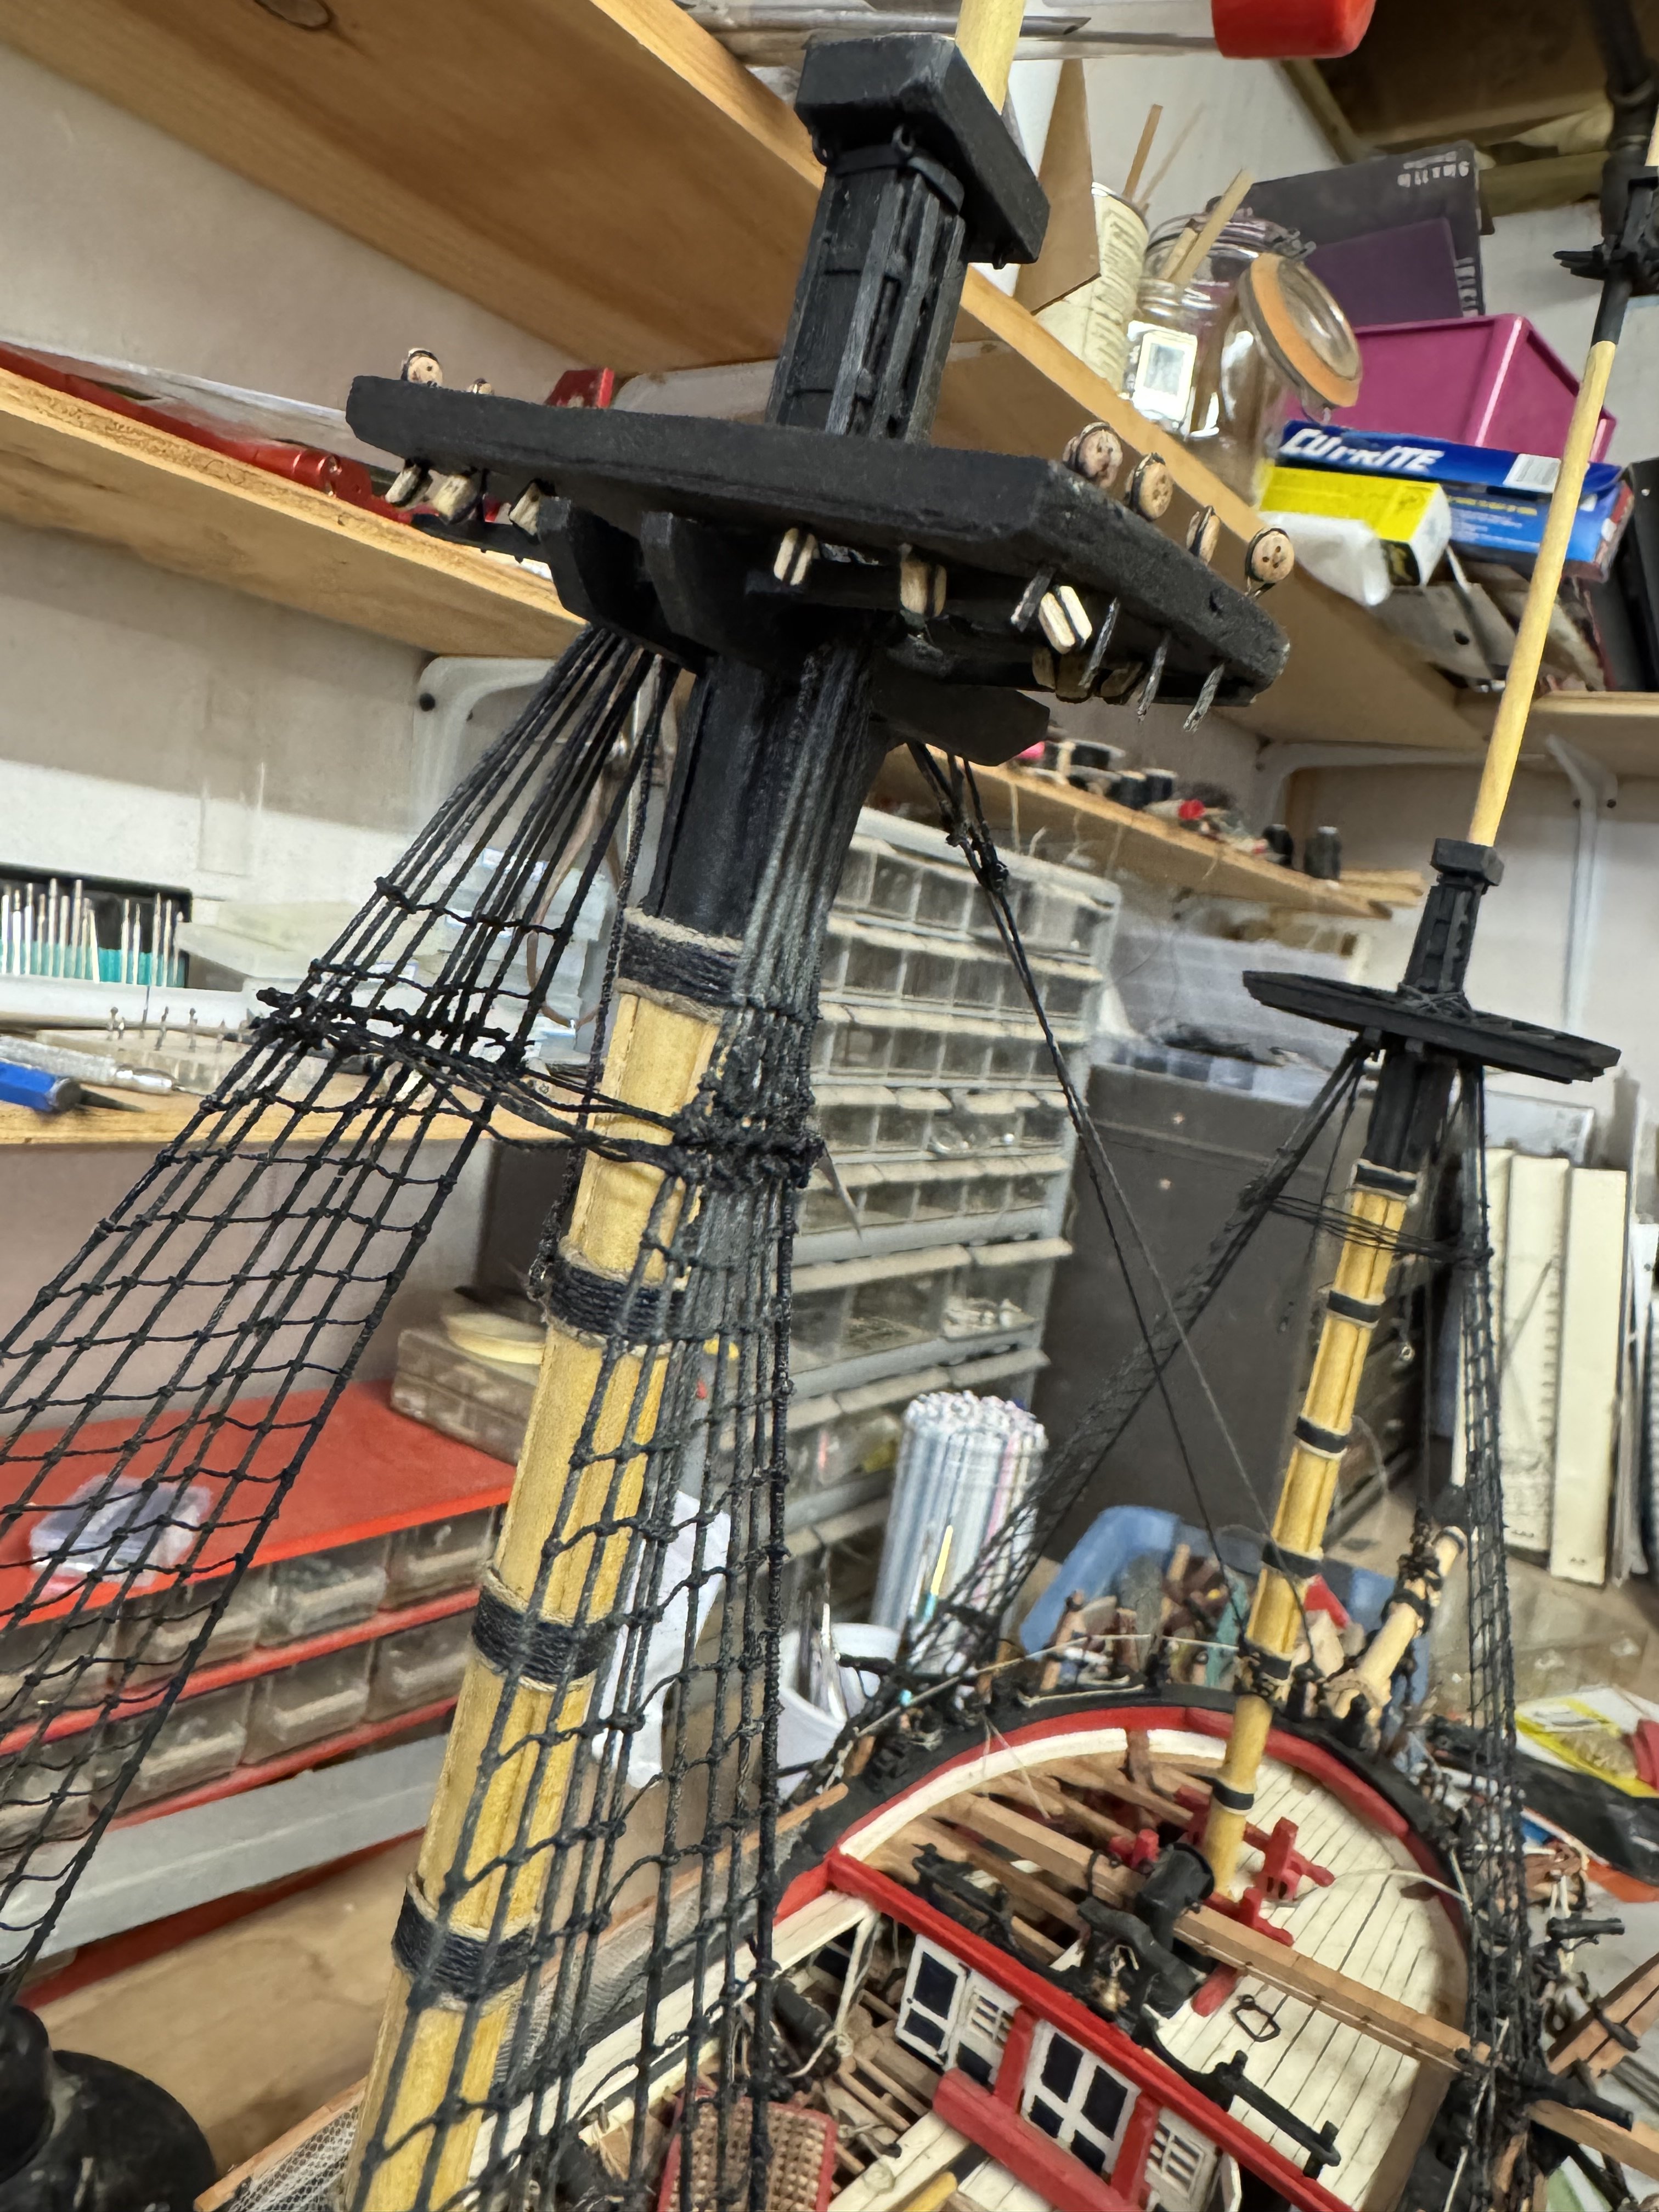
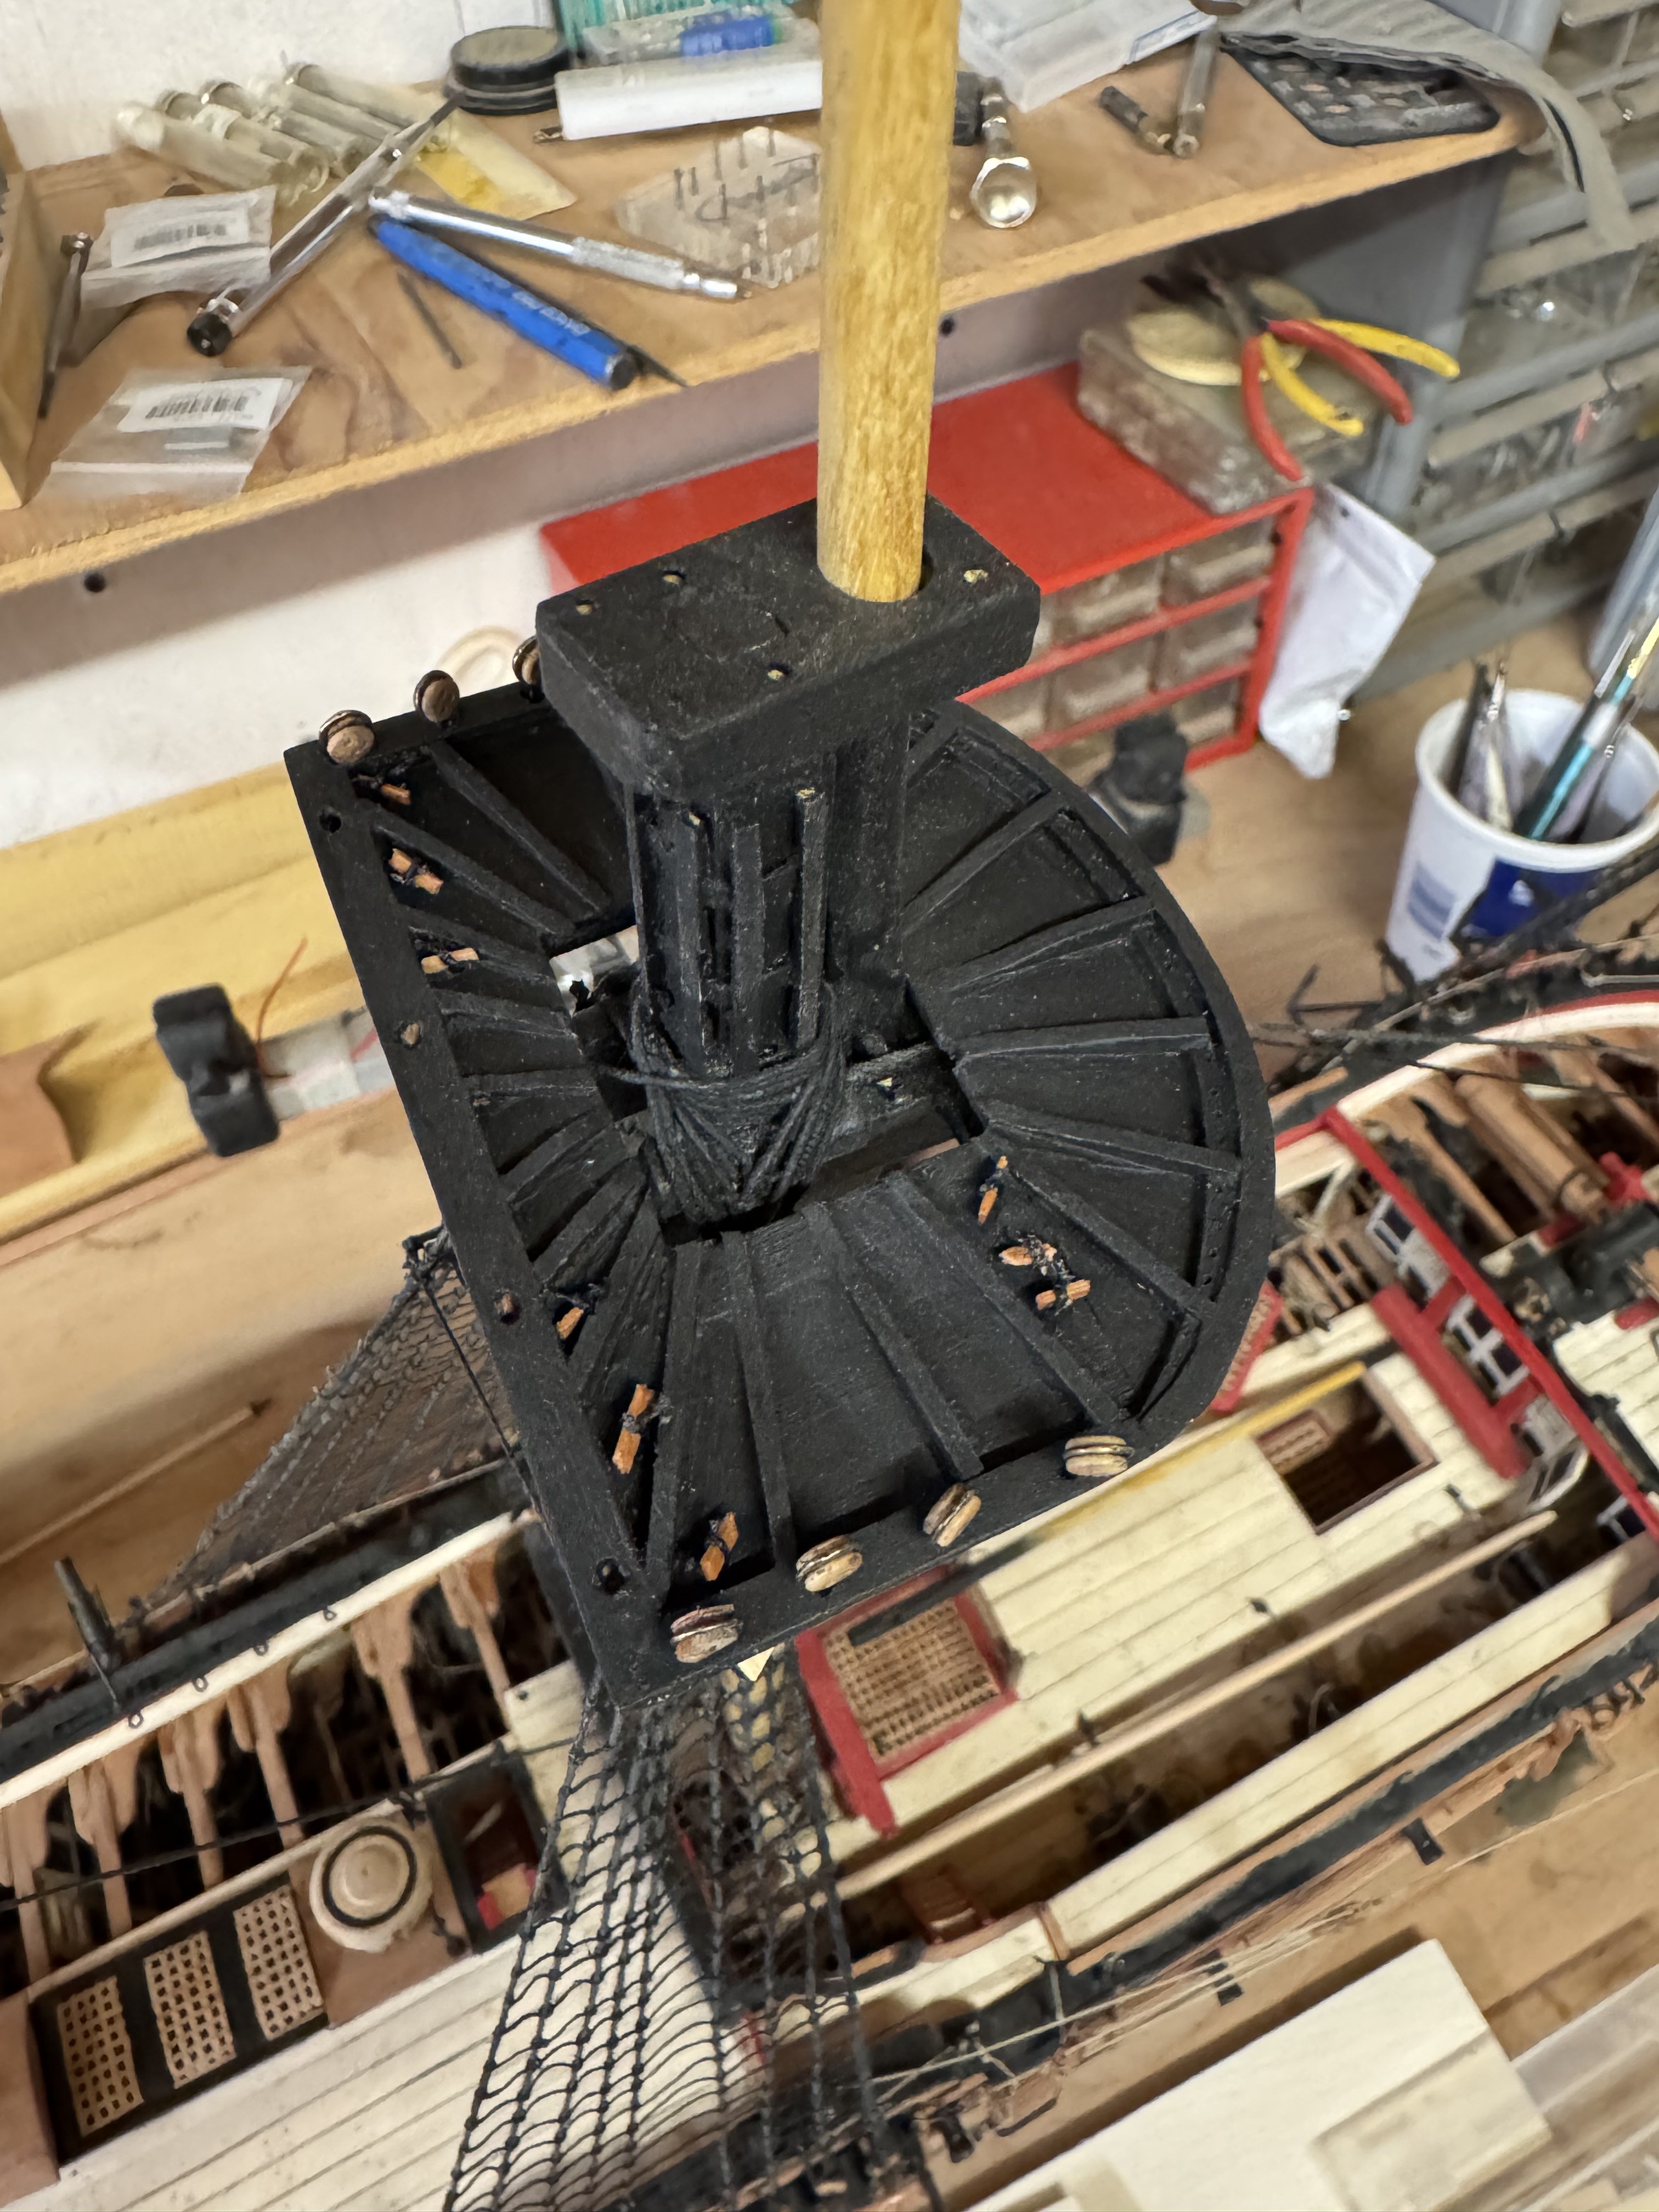
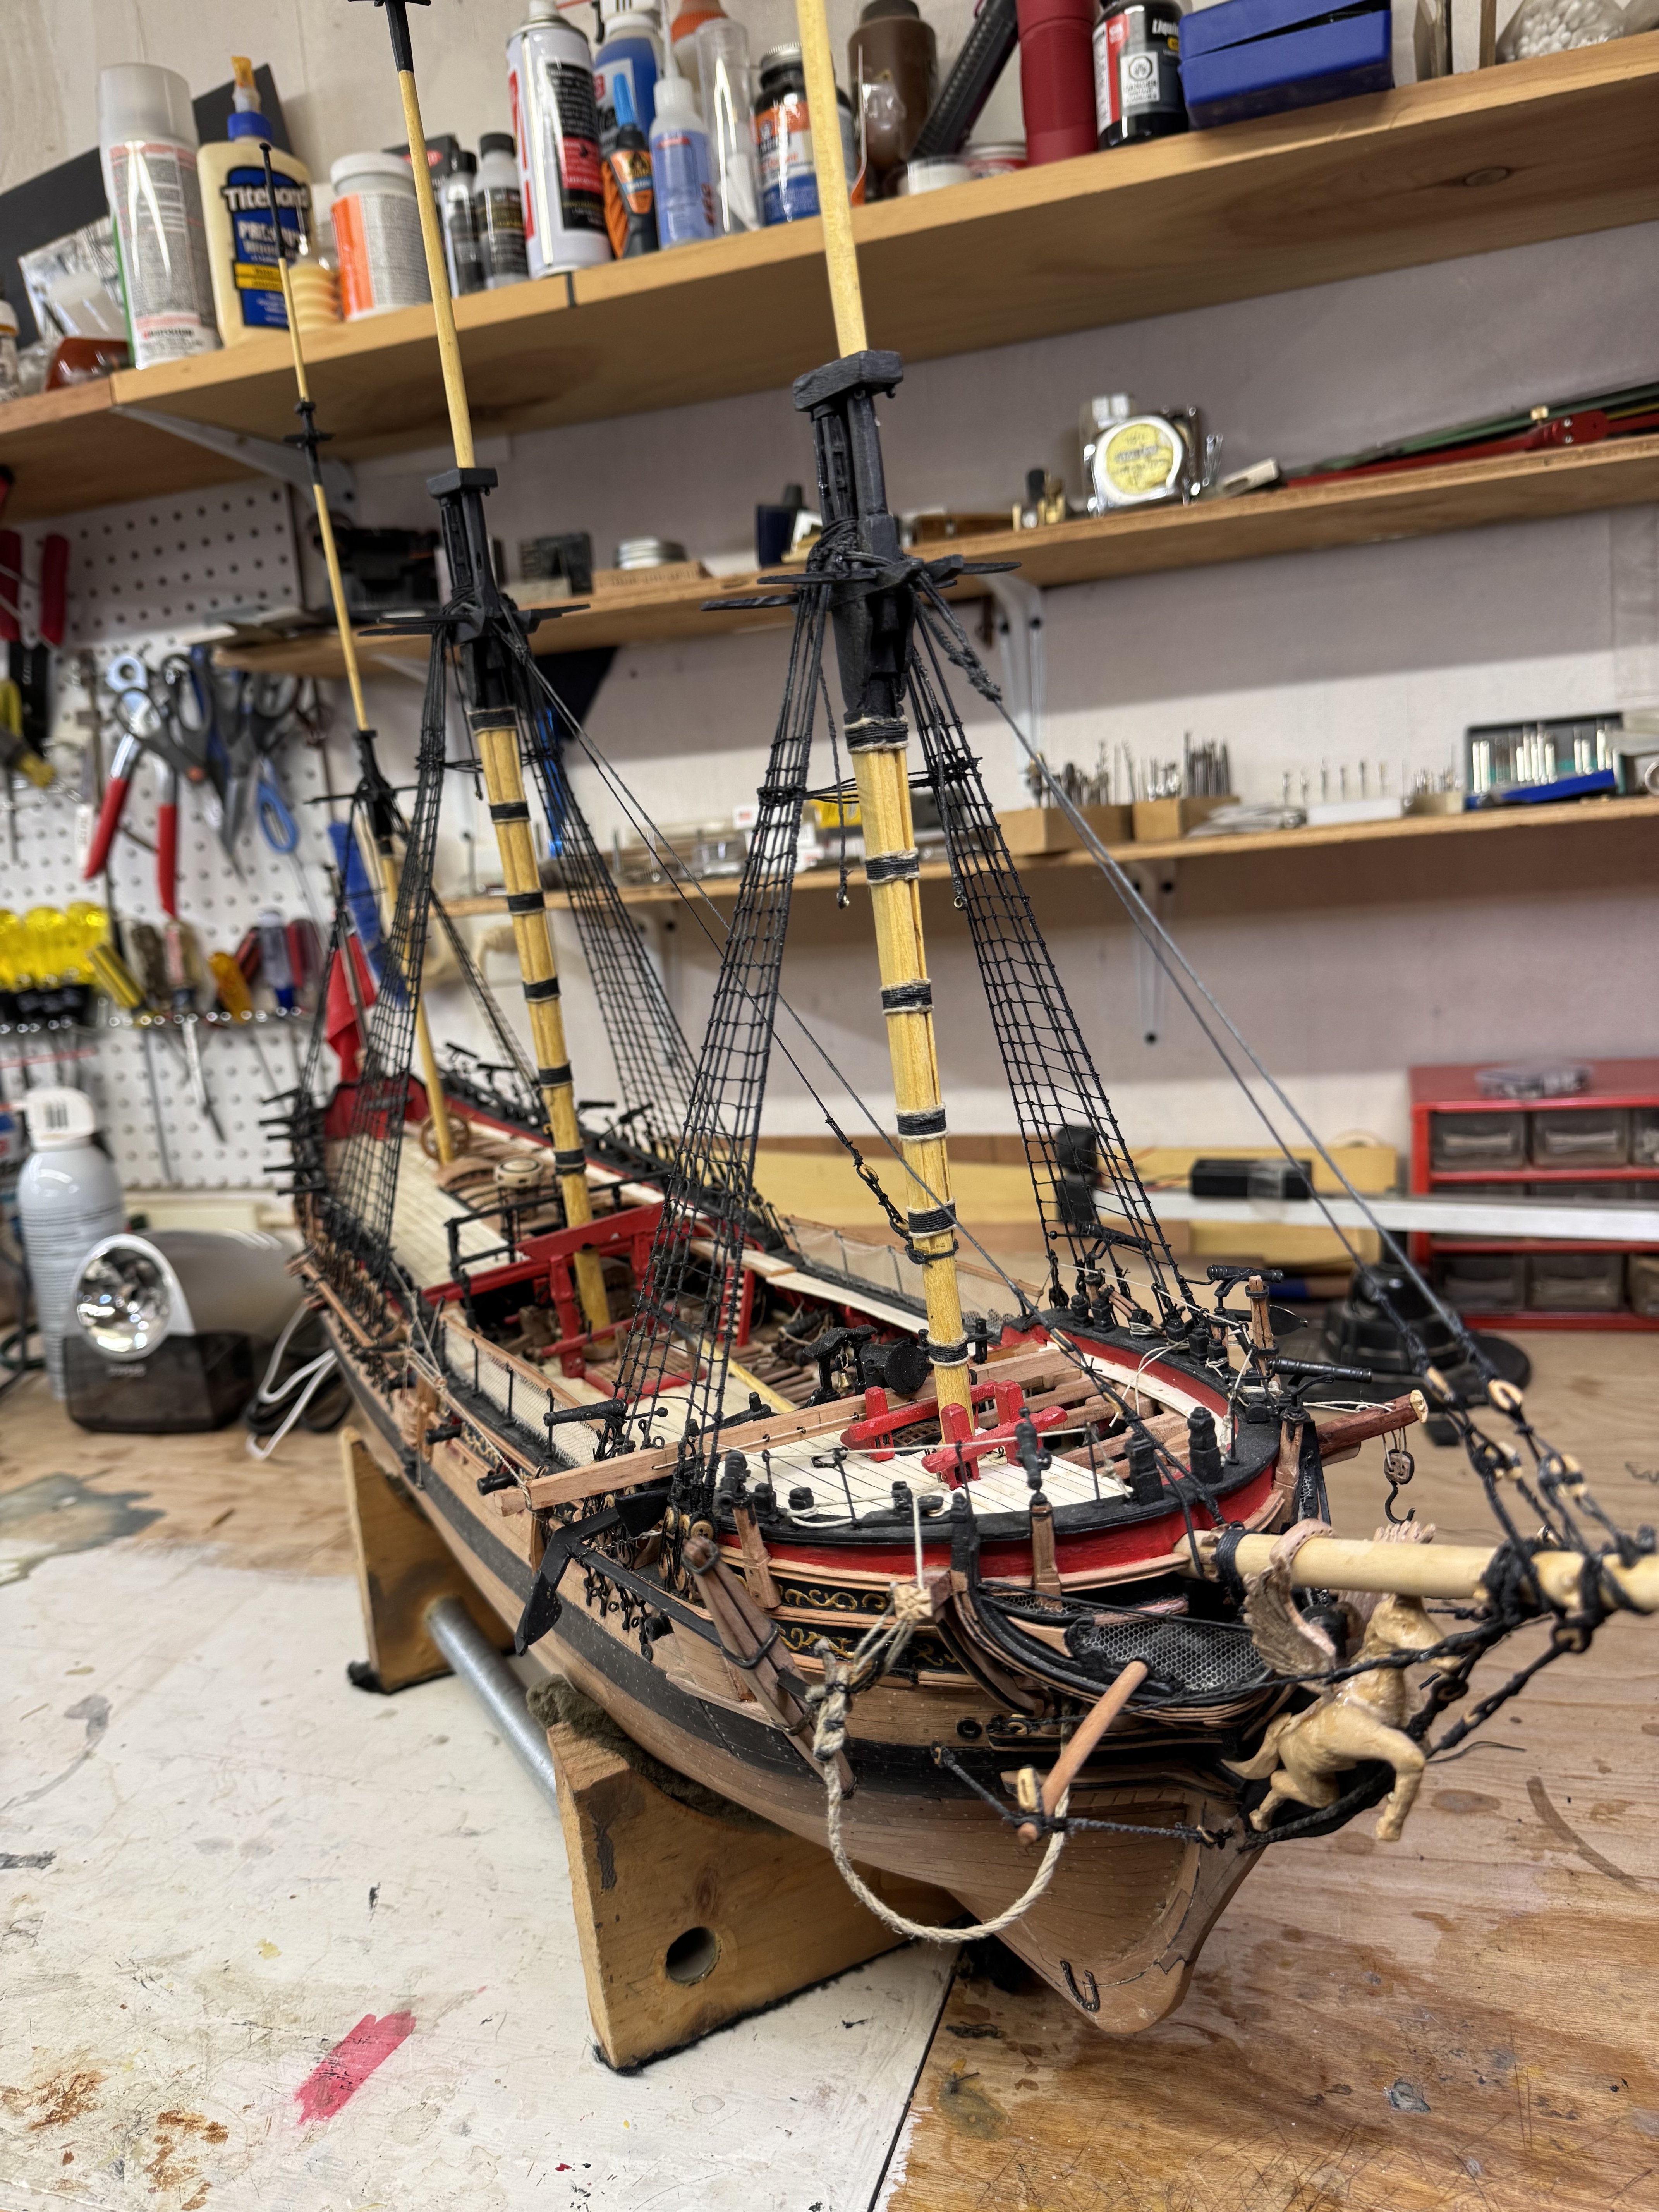
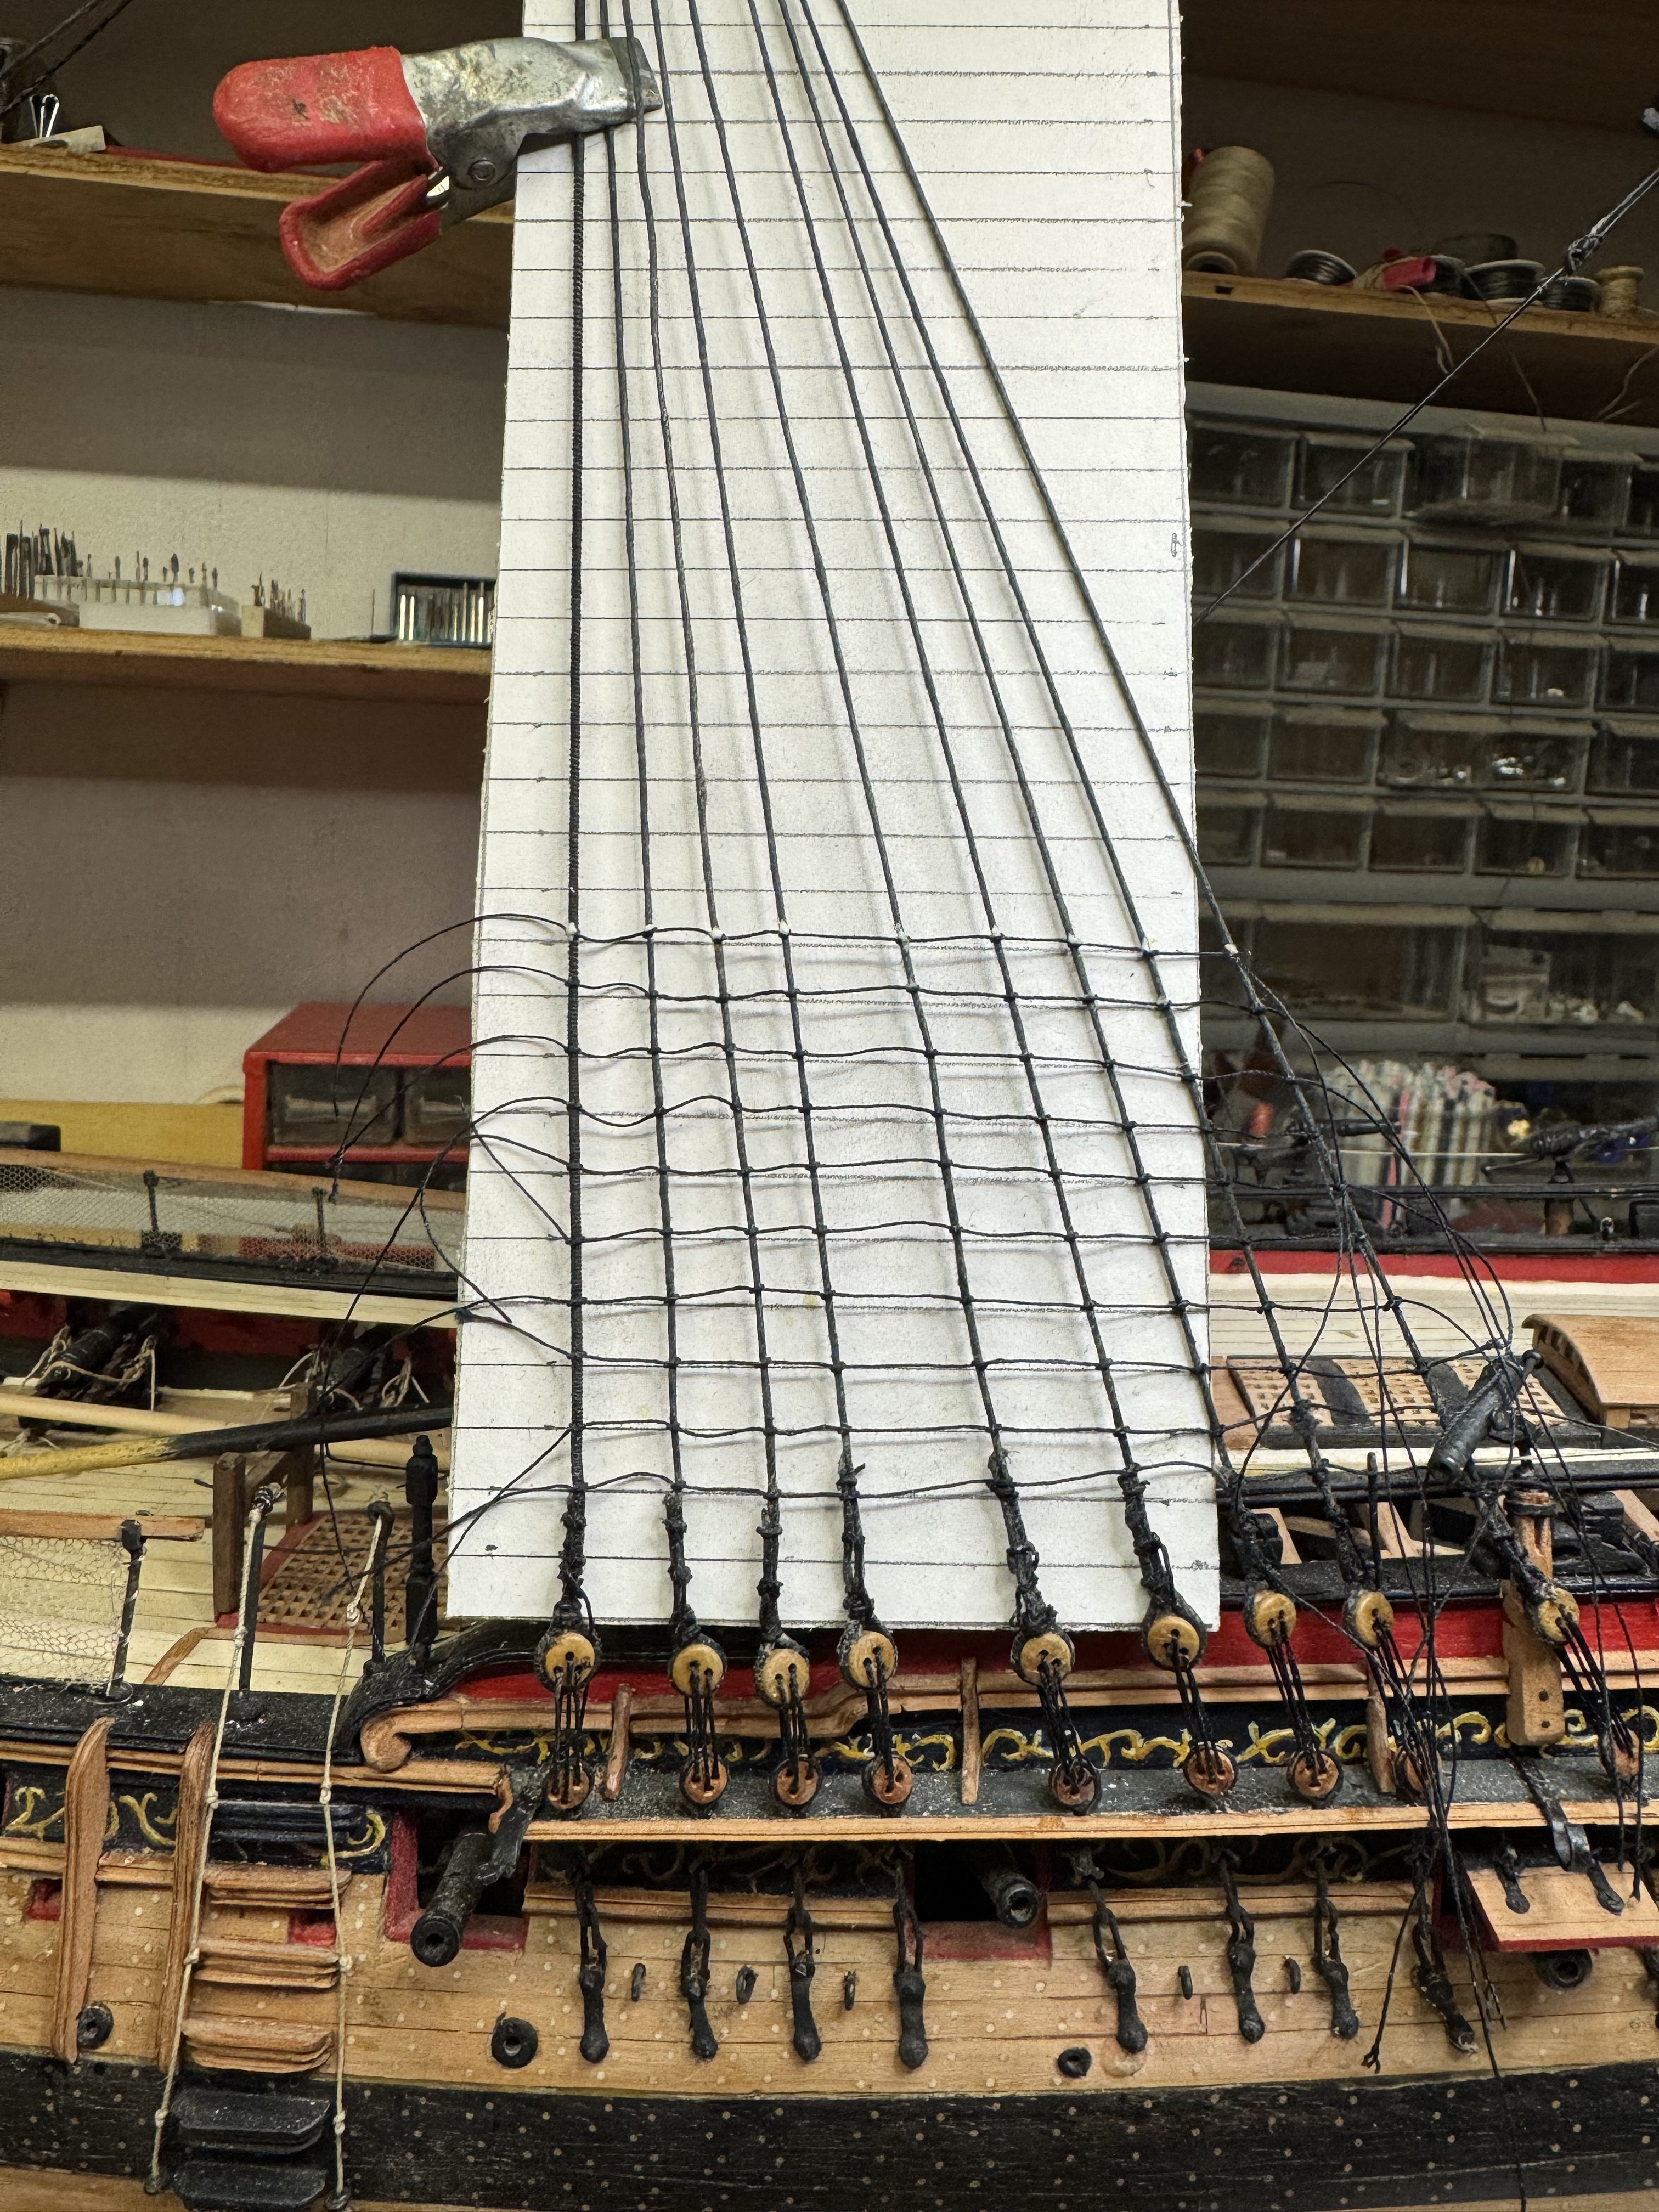
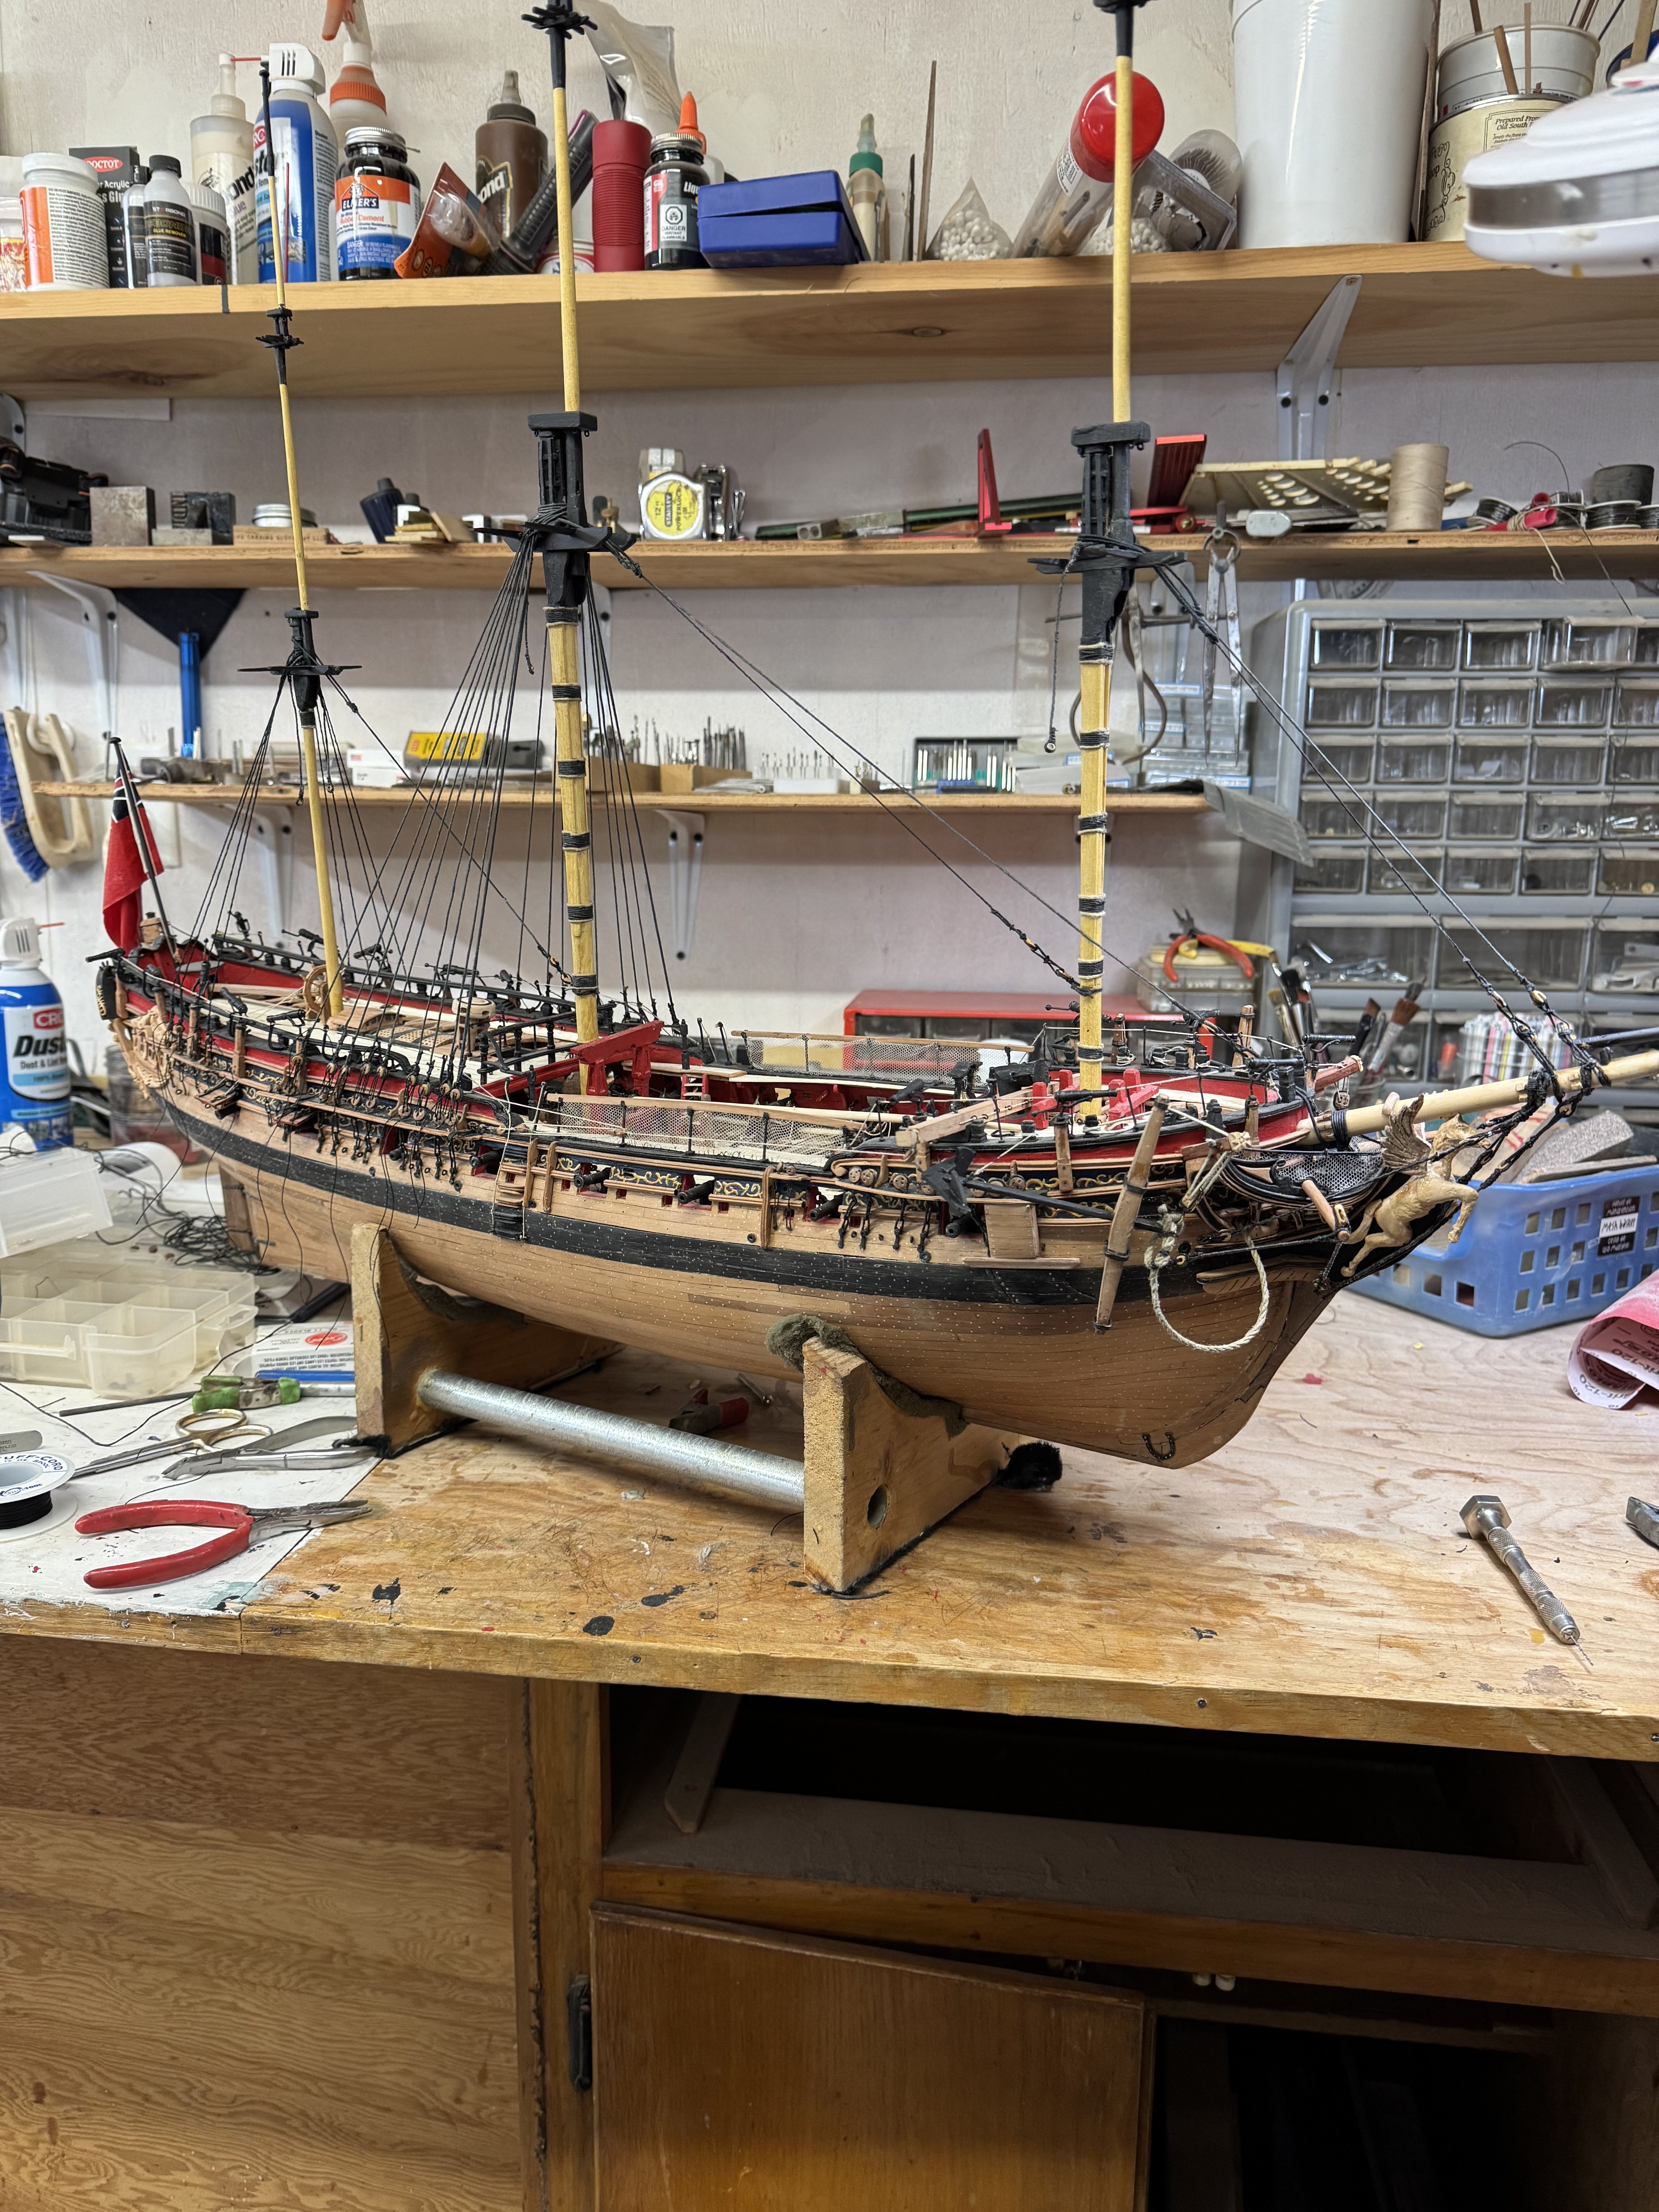
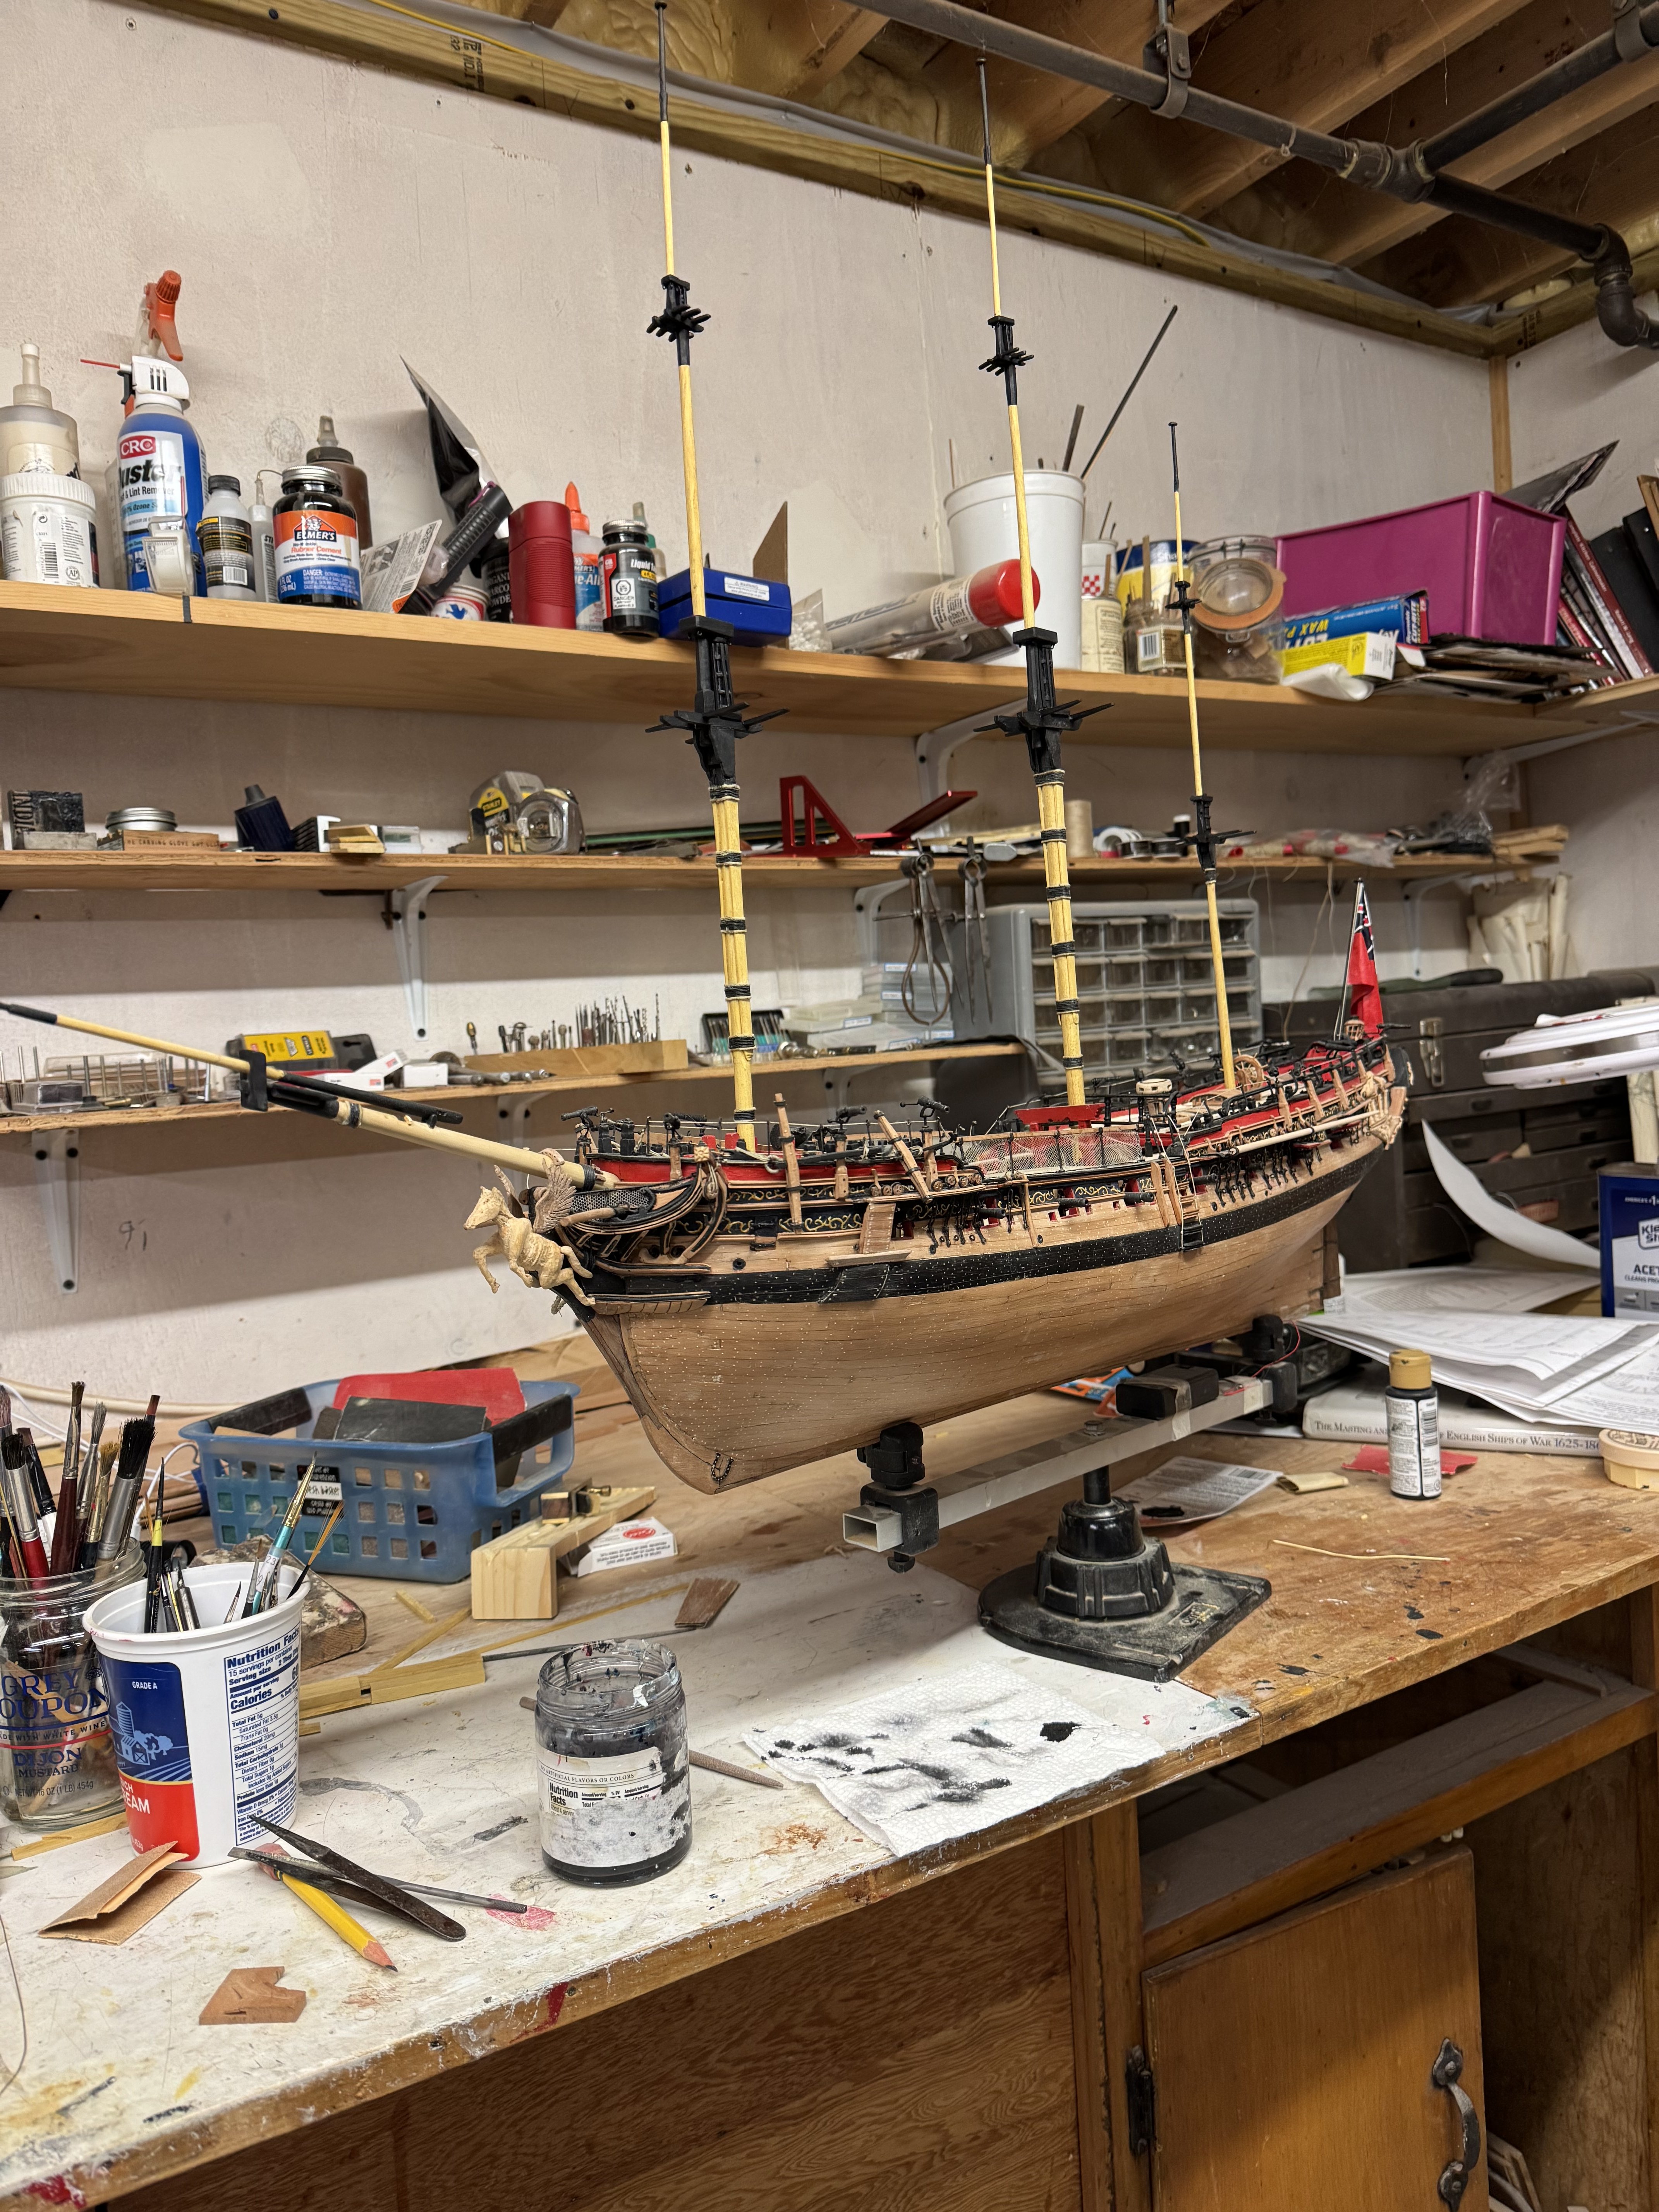
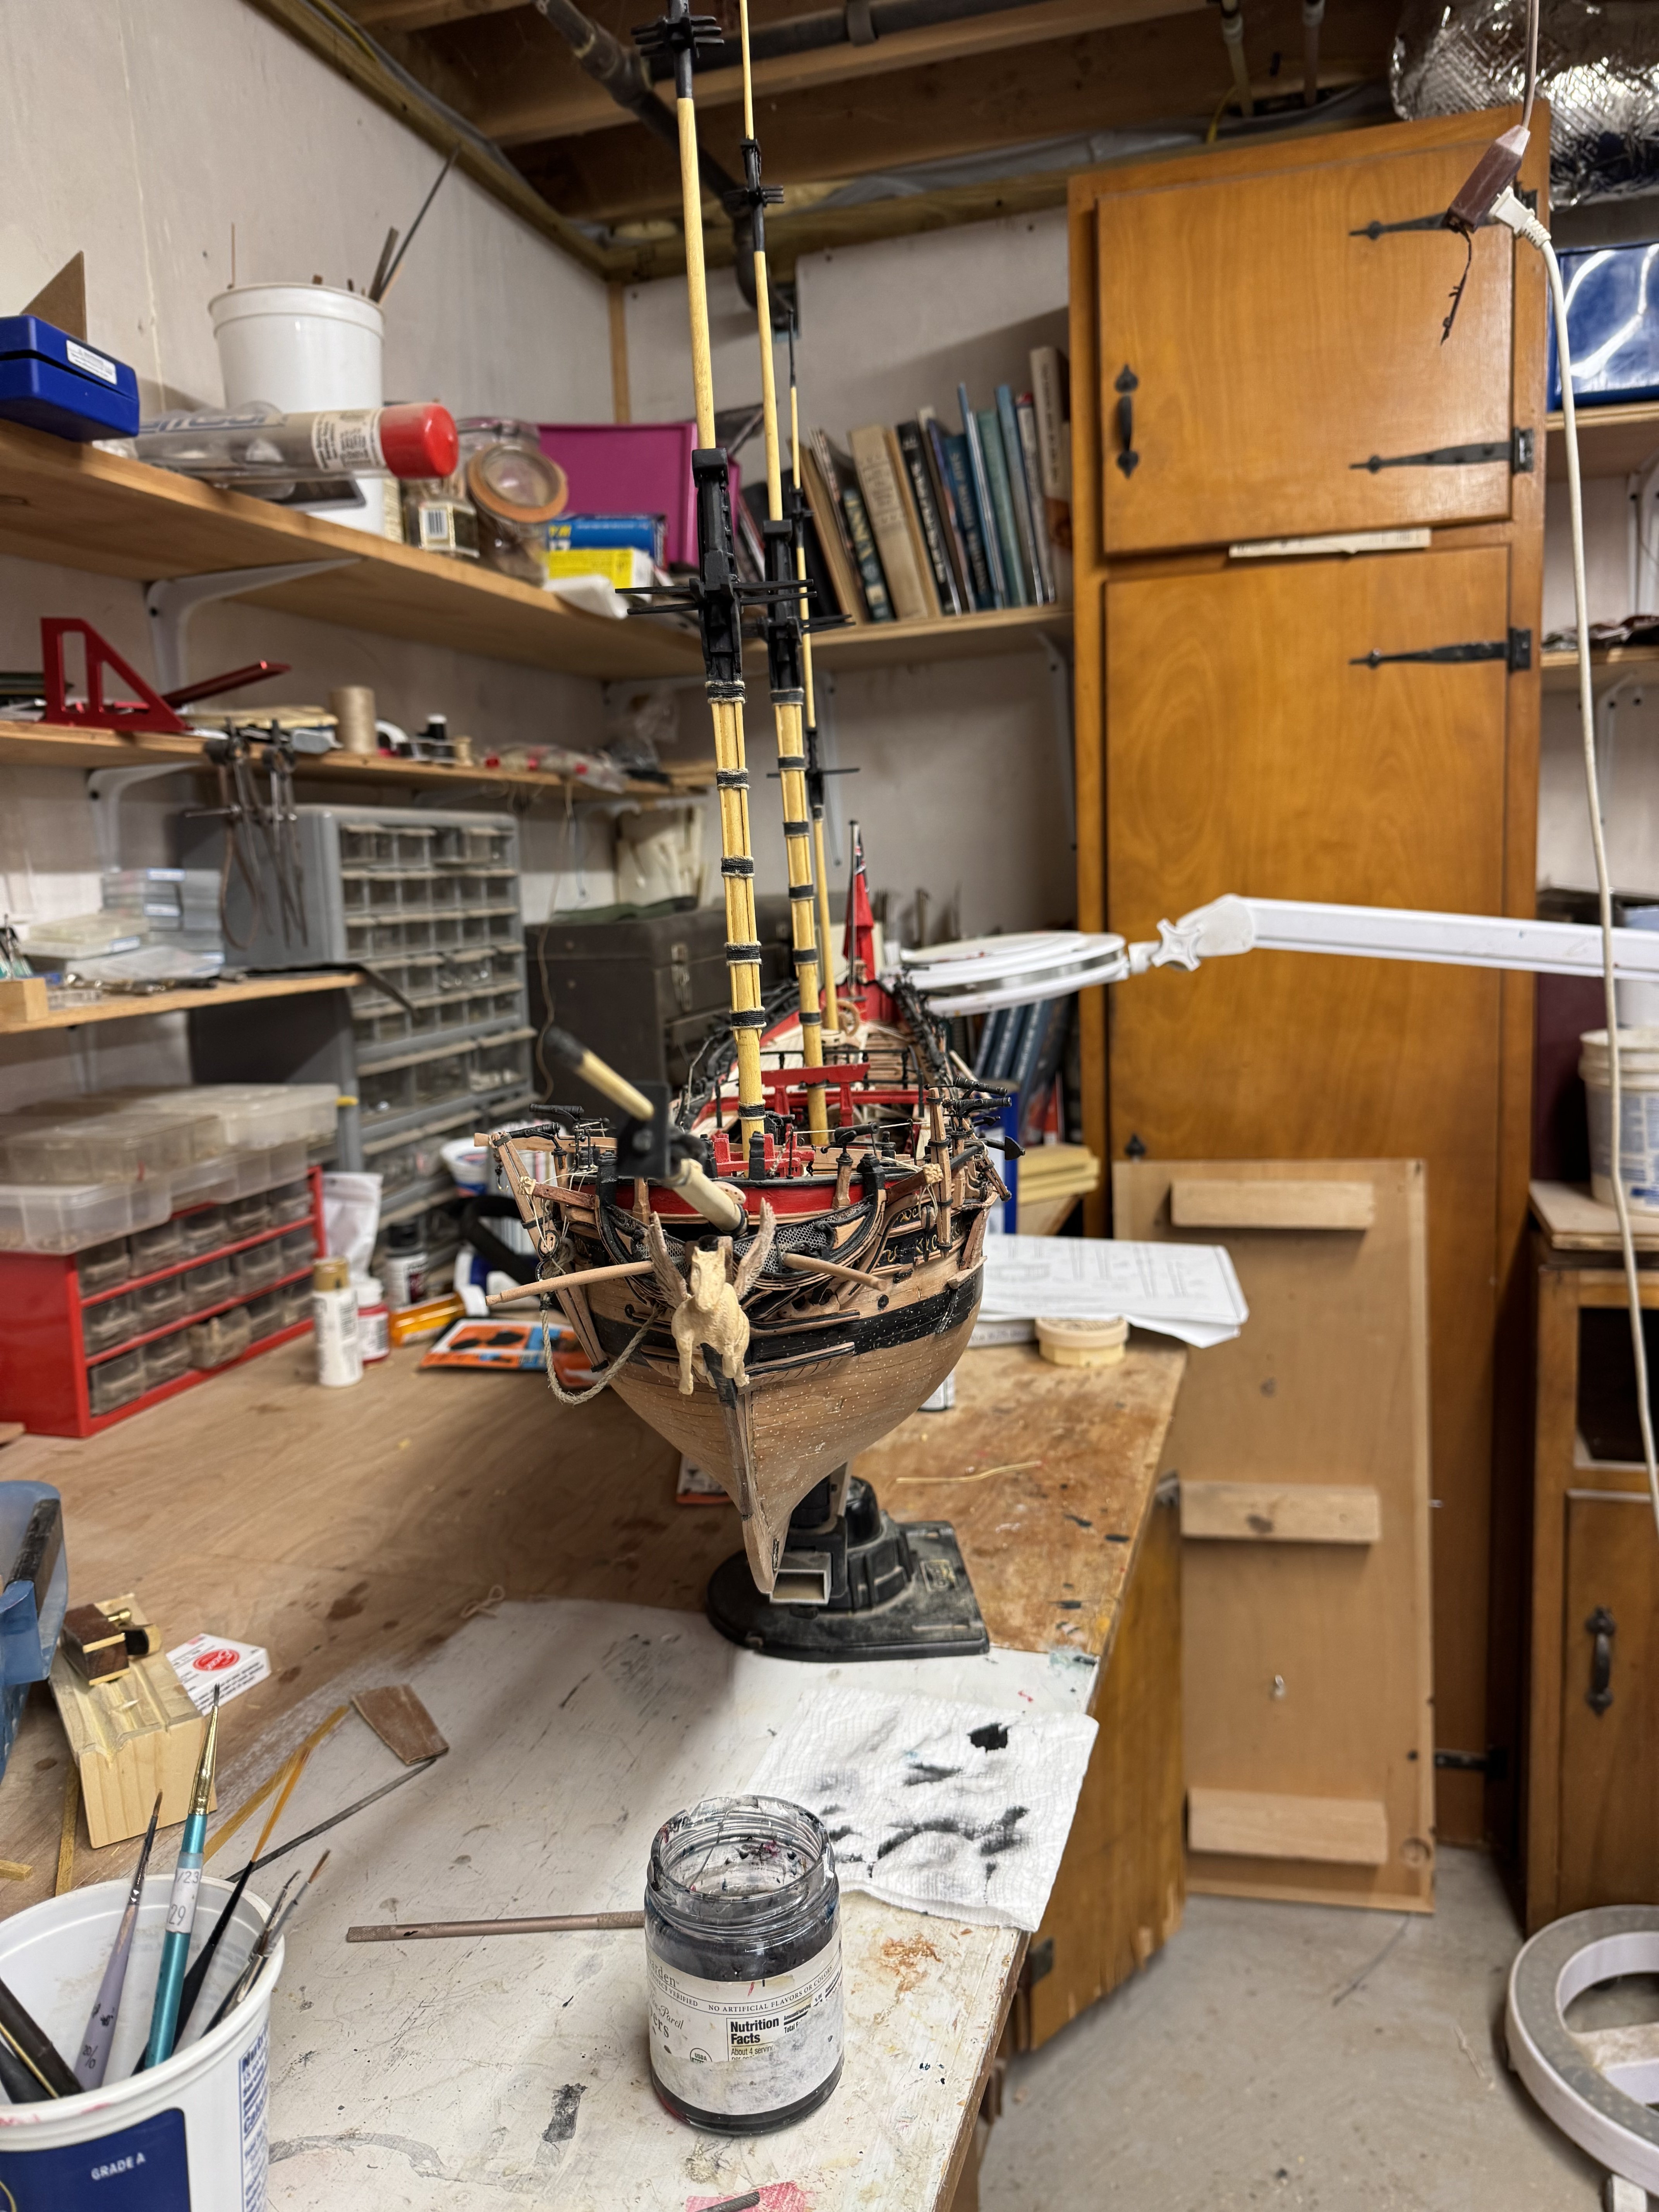
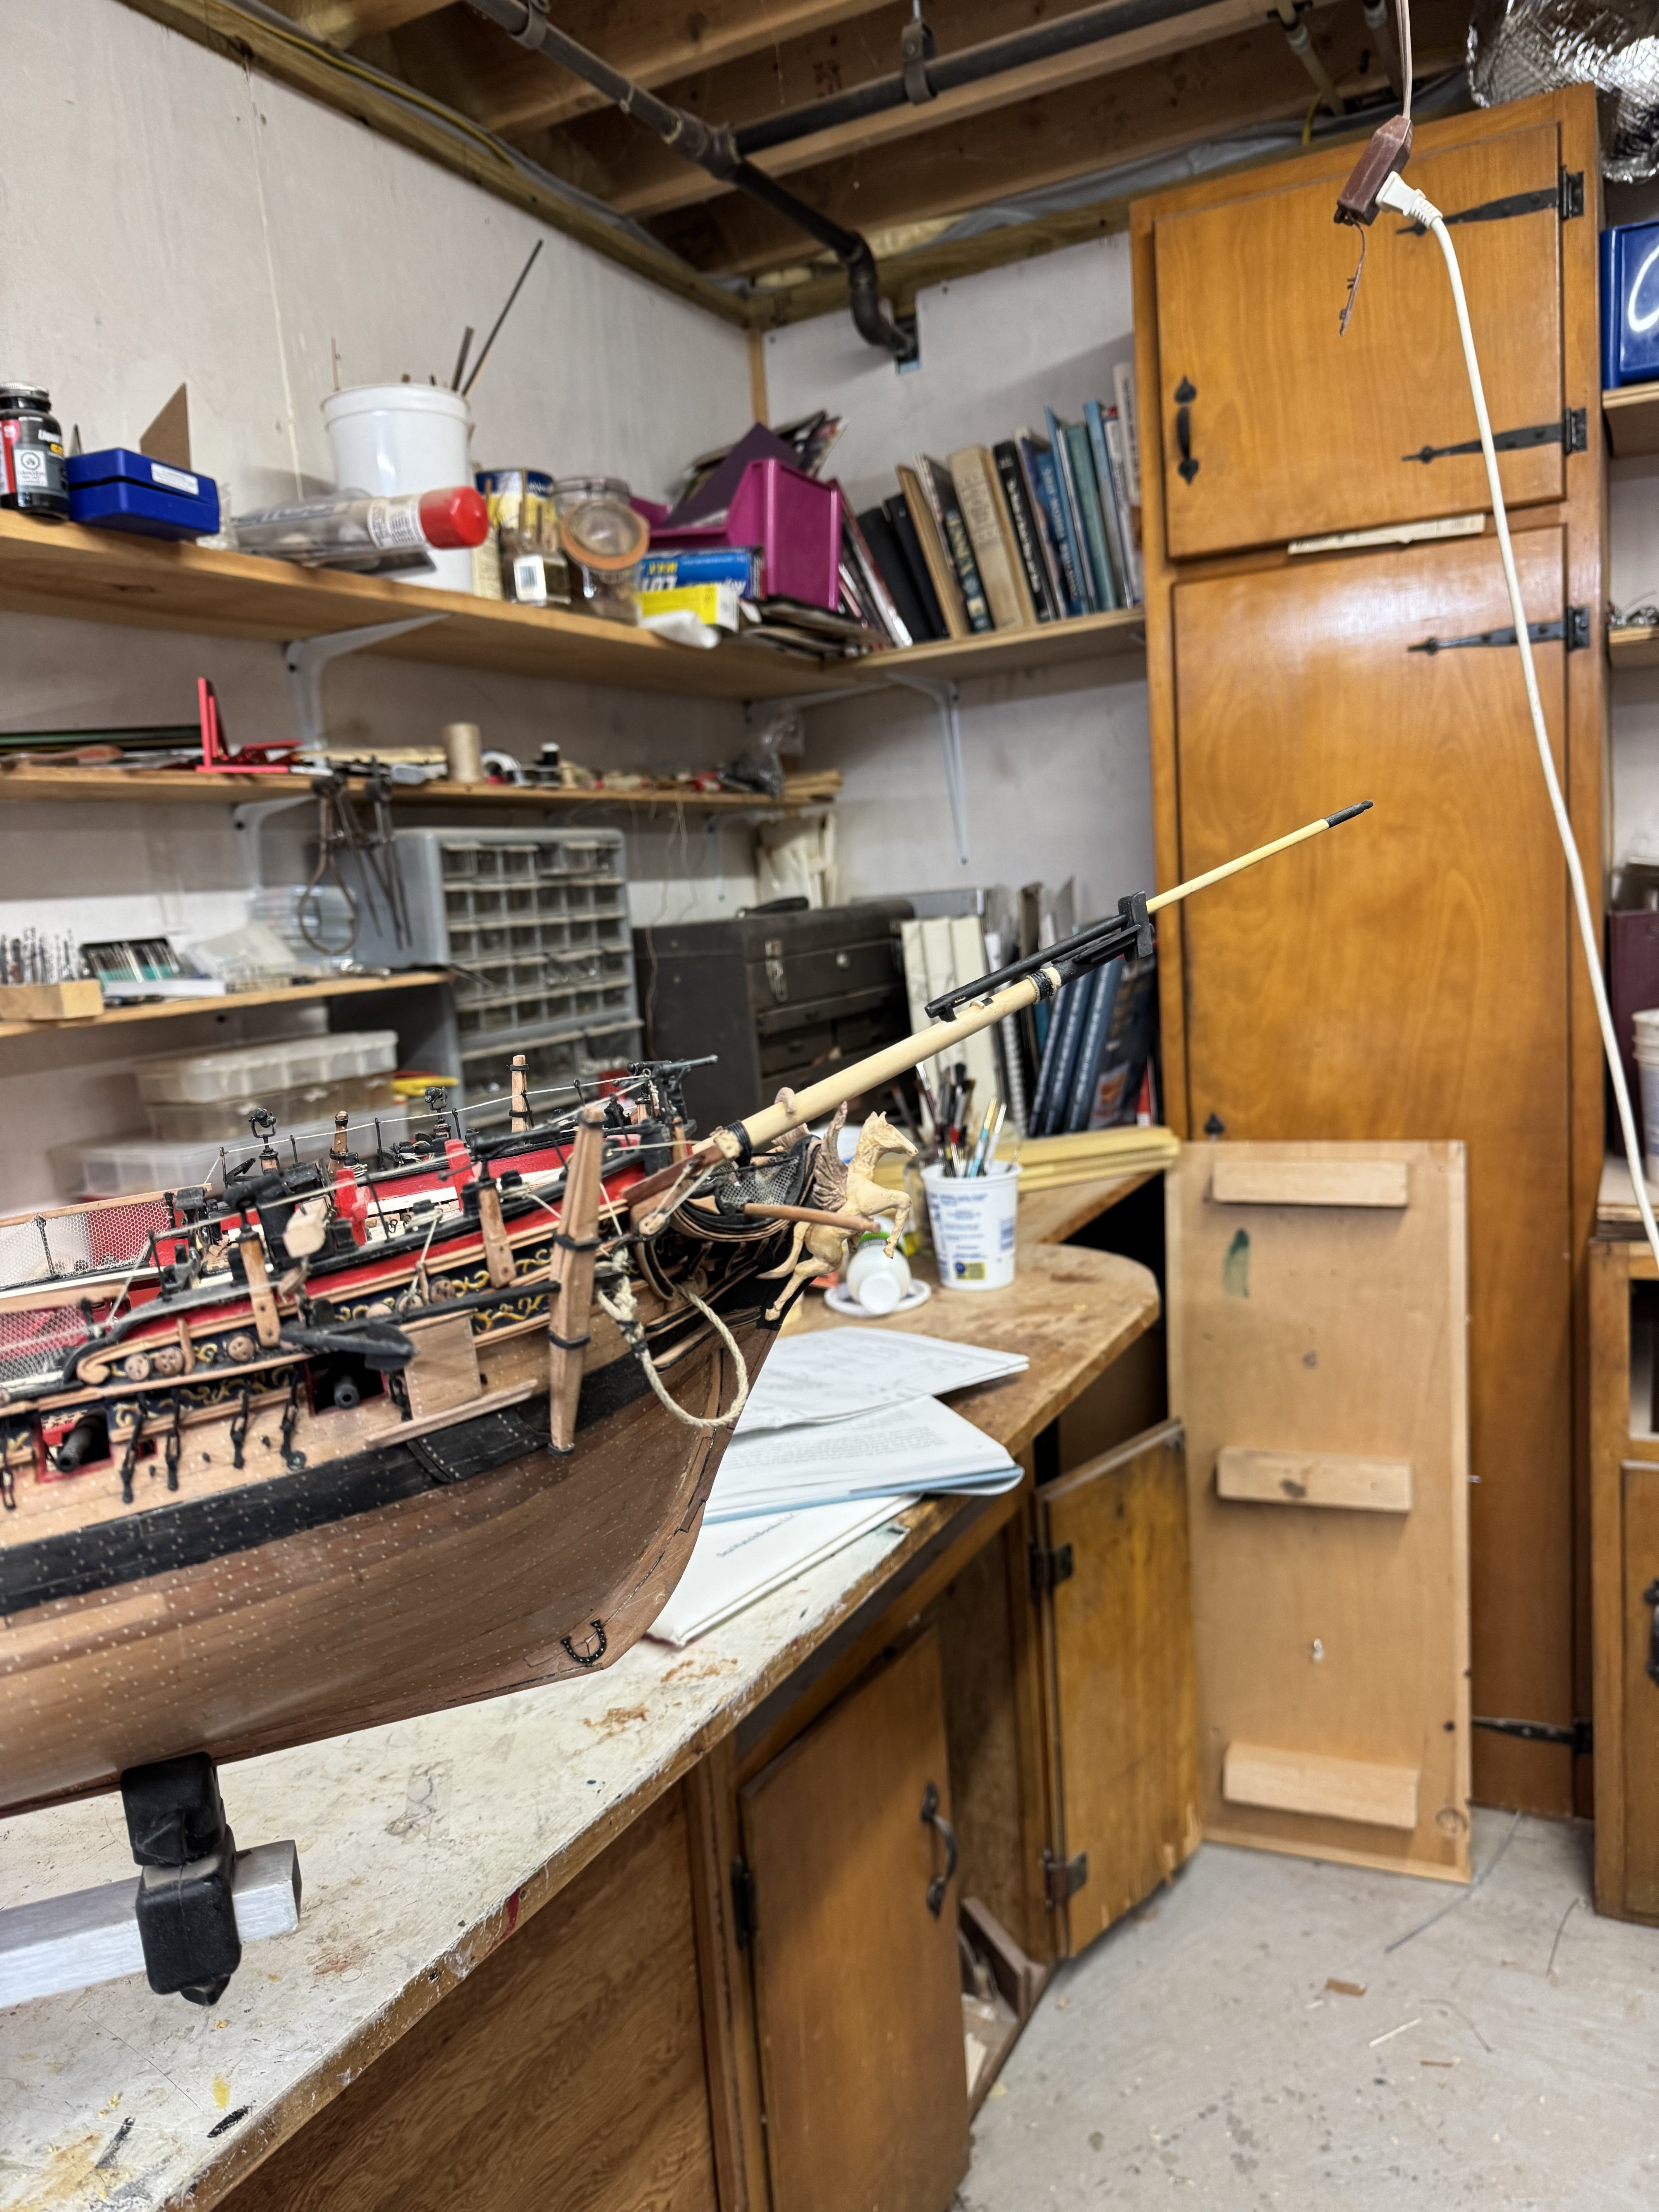
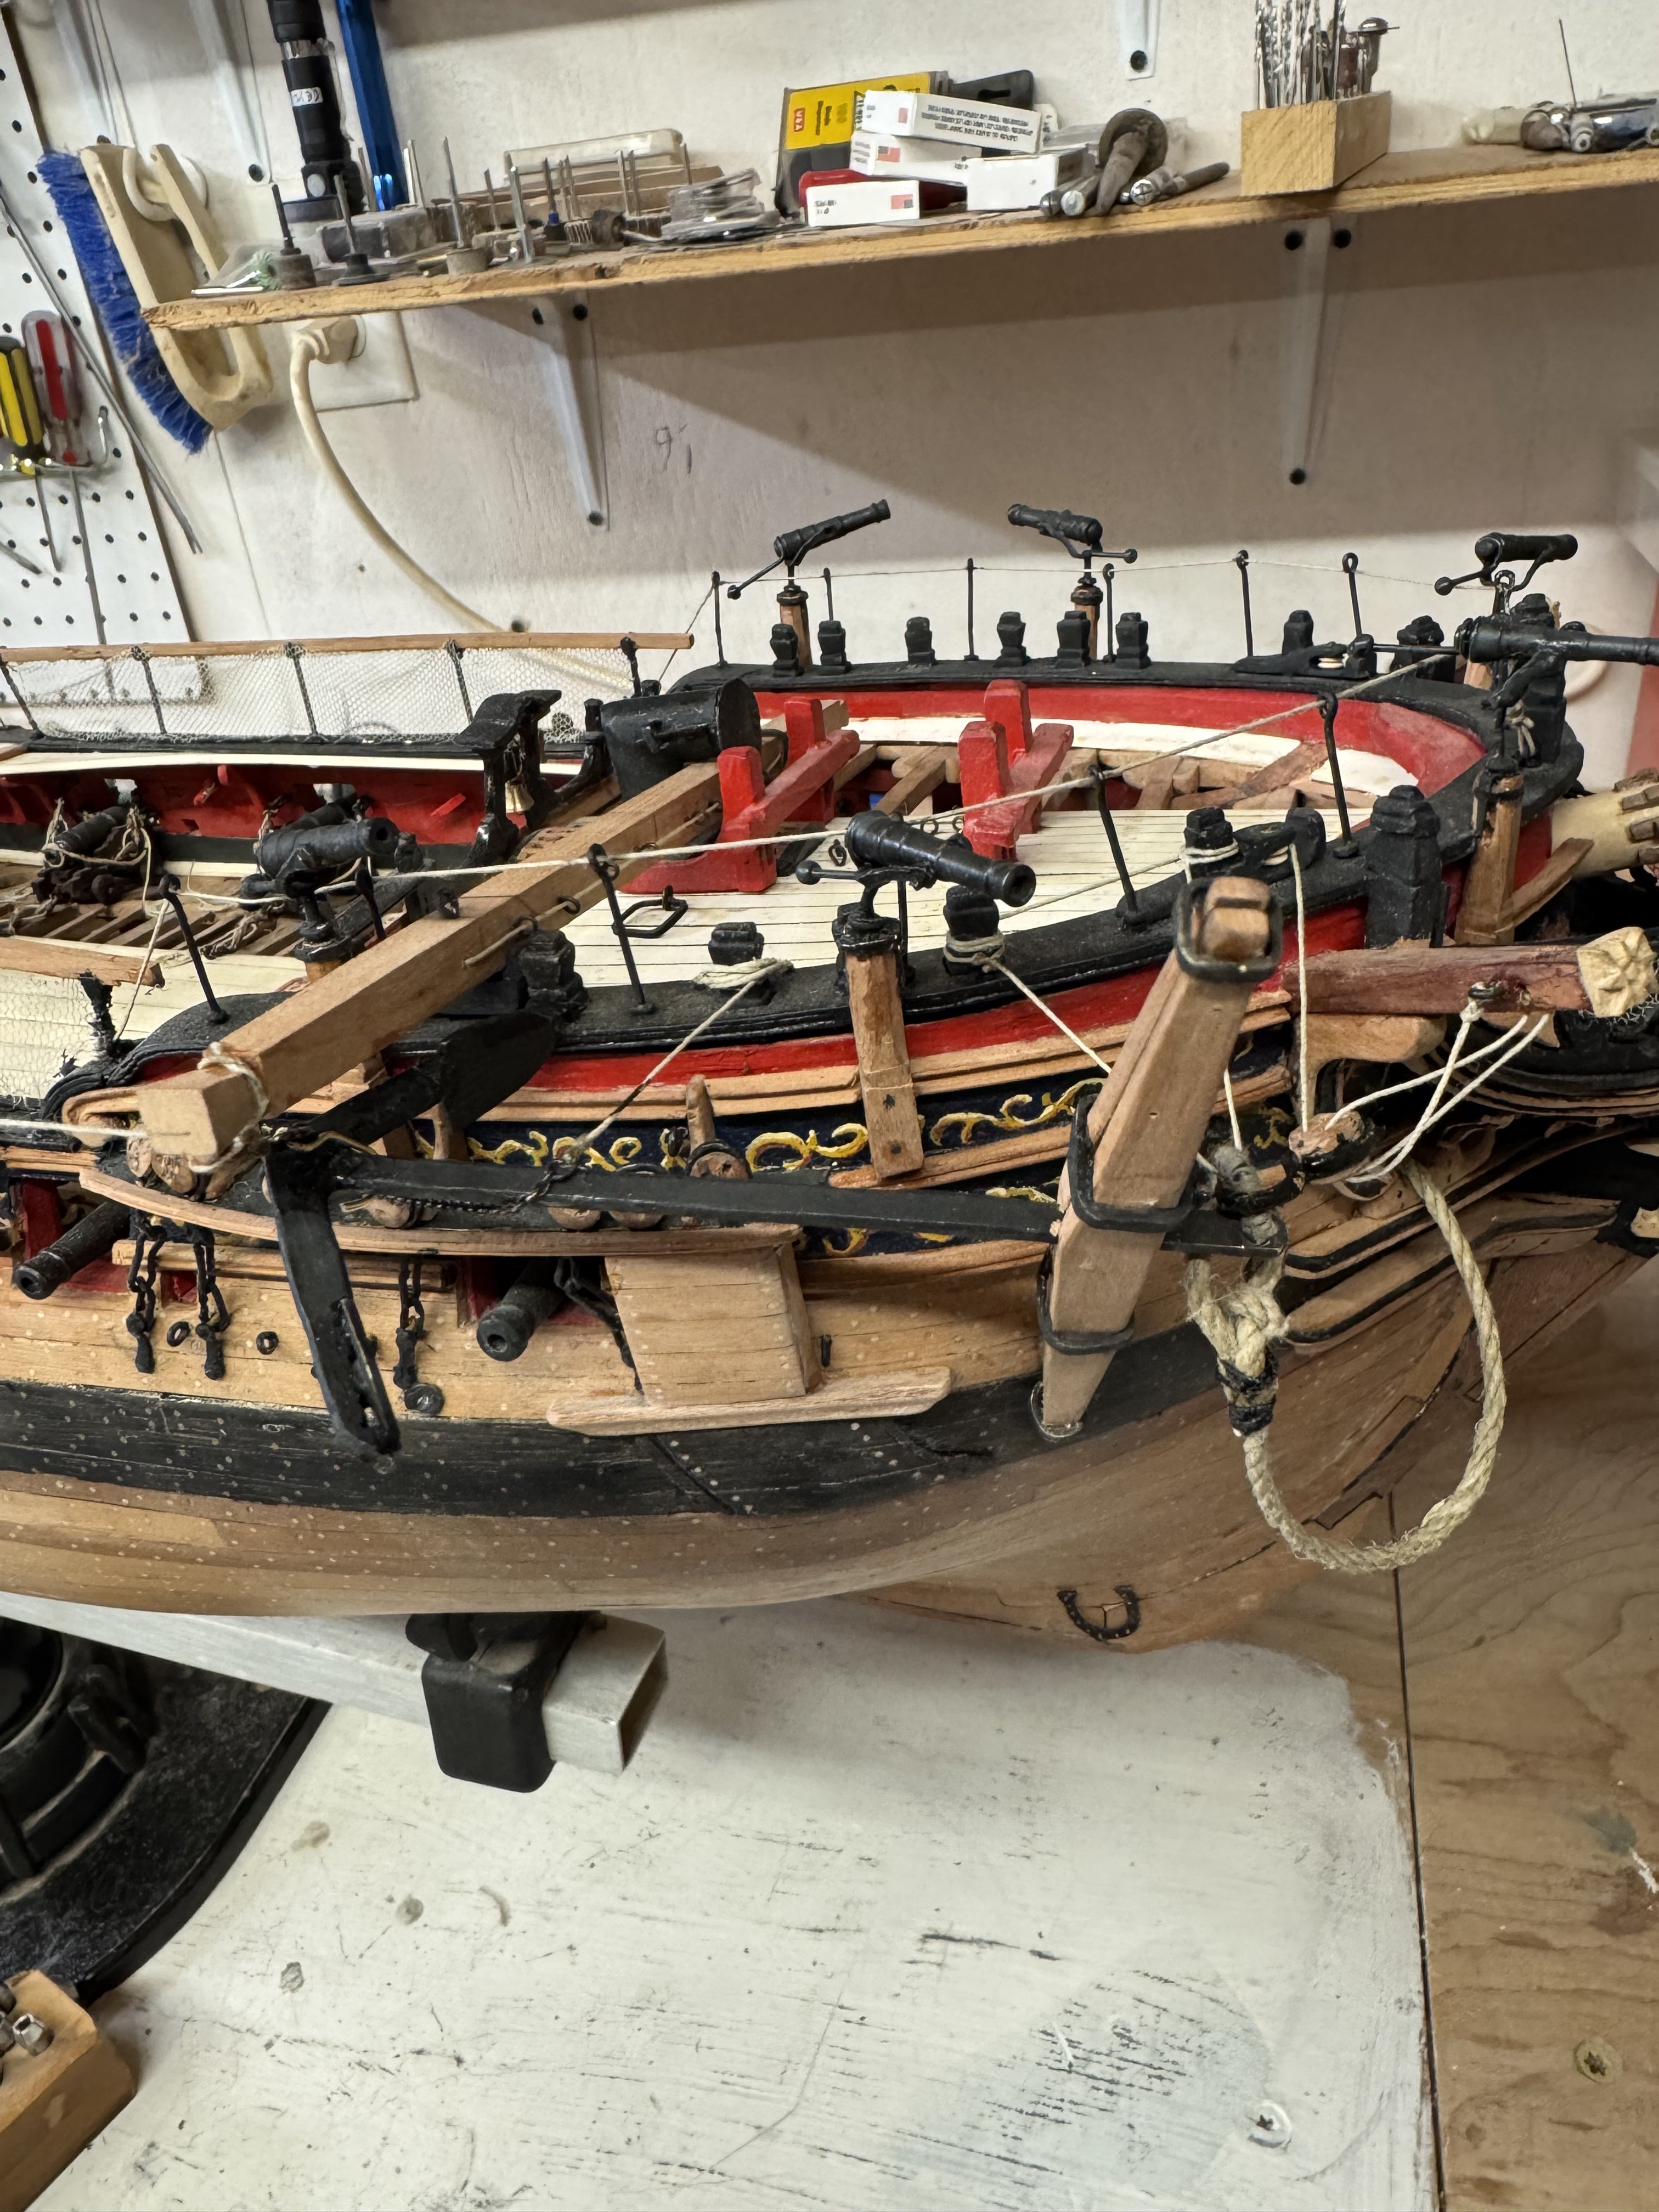
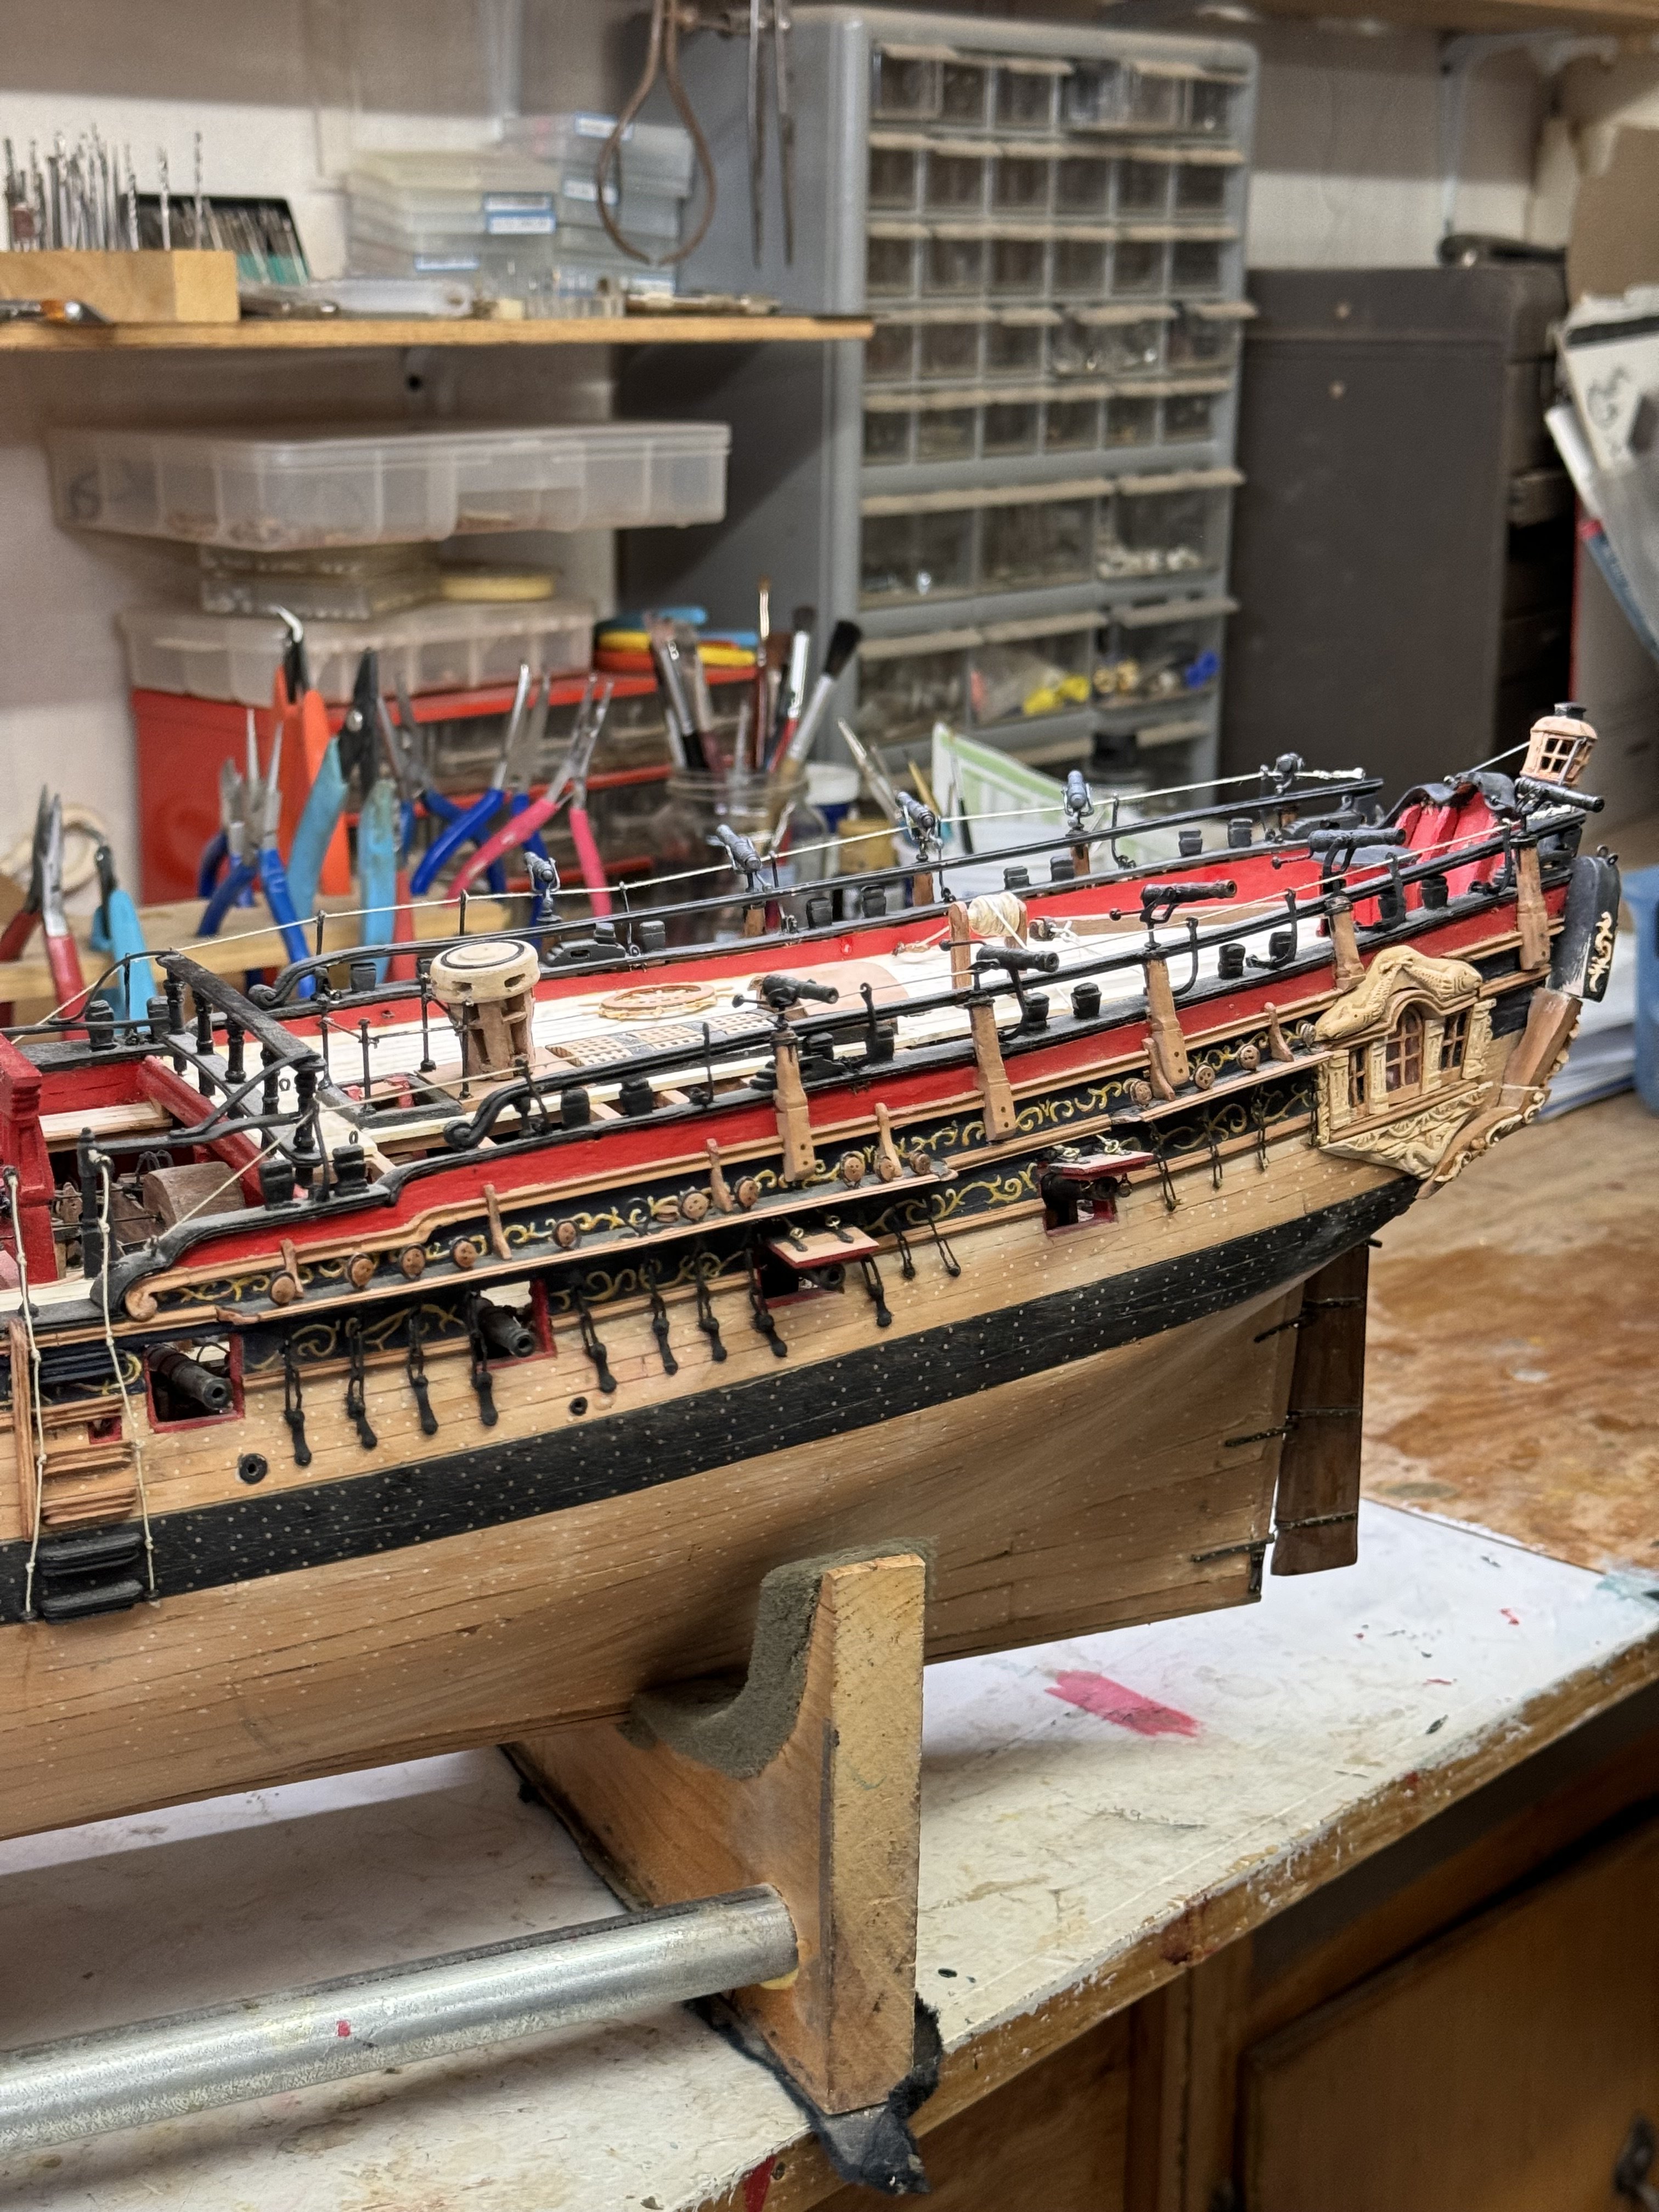
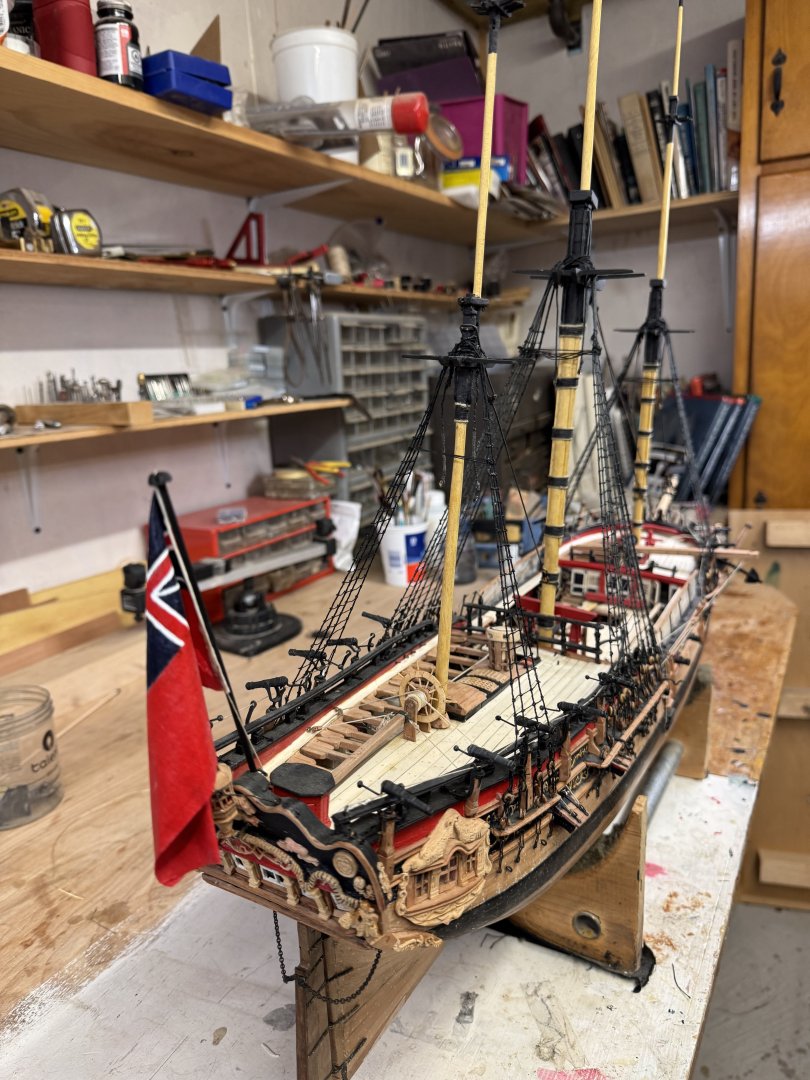
Ratlines, Futtuck Staves, Catharpins installed. Ready to start on tops.Ed

- 257 replies
-
- 10
-
-

-
- pegasus
- Swan-class
- (and 1 more)
-
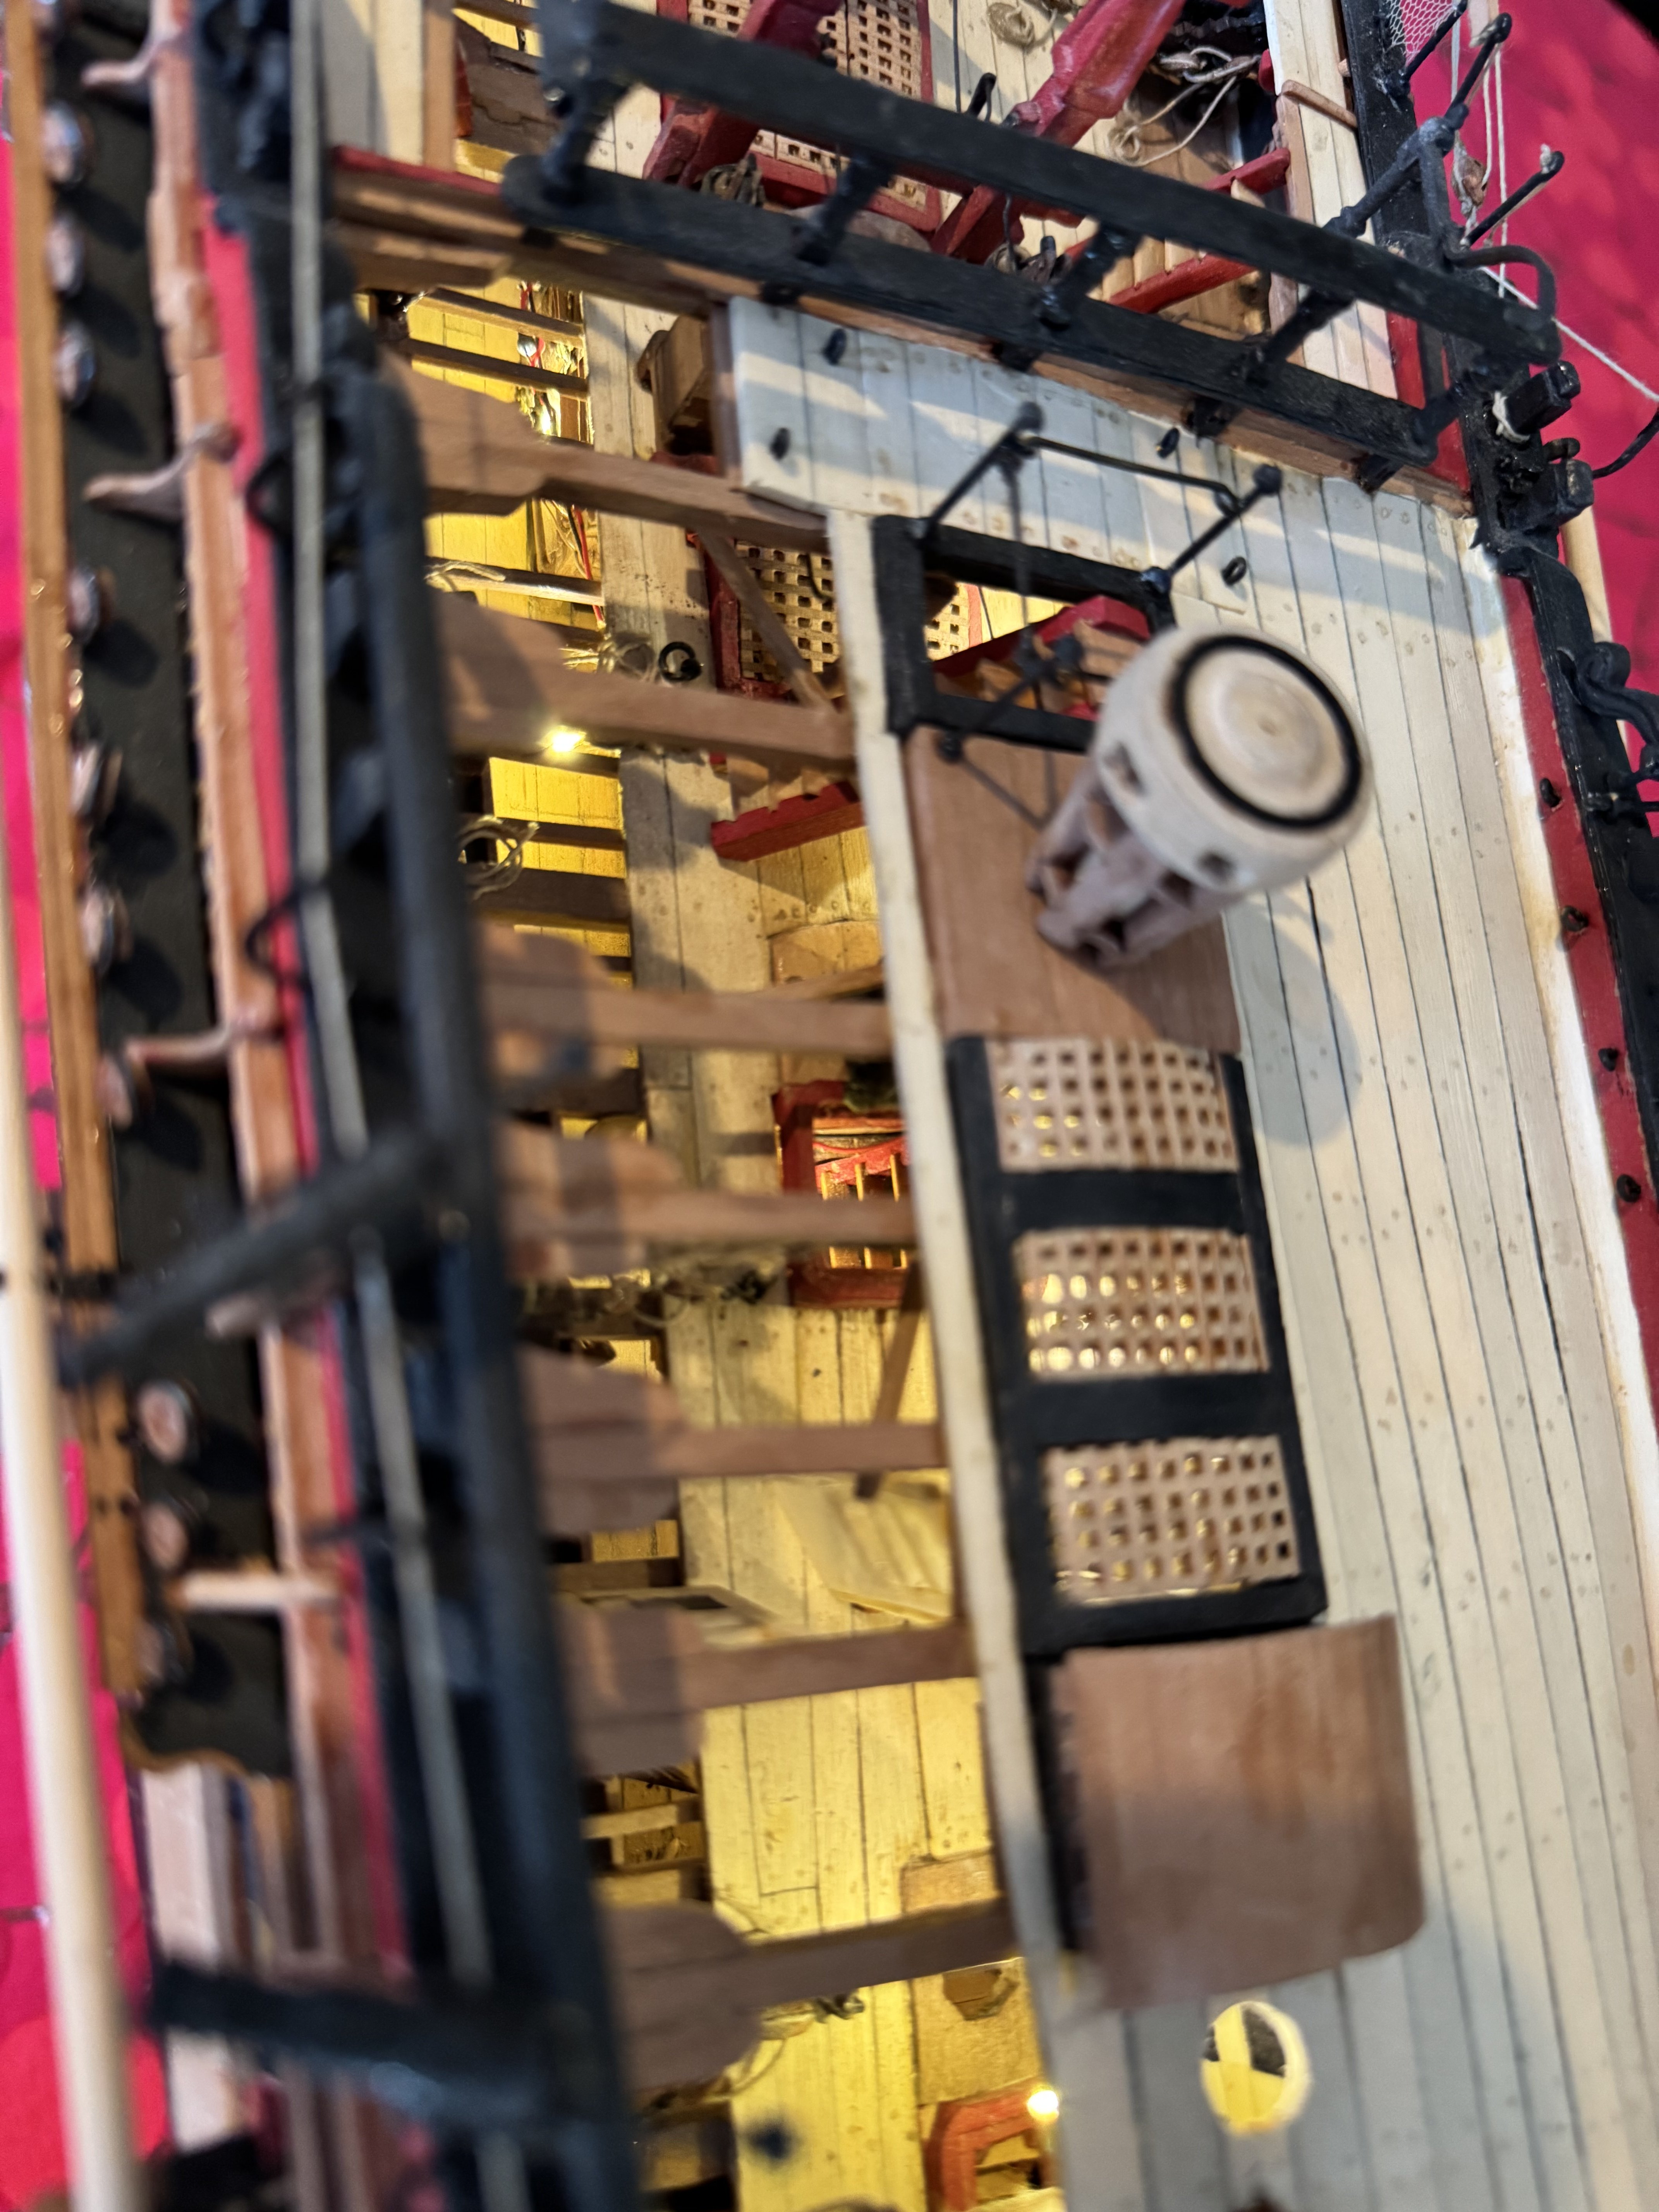
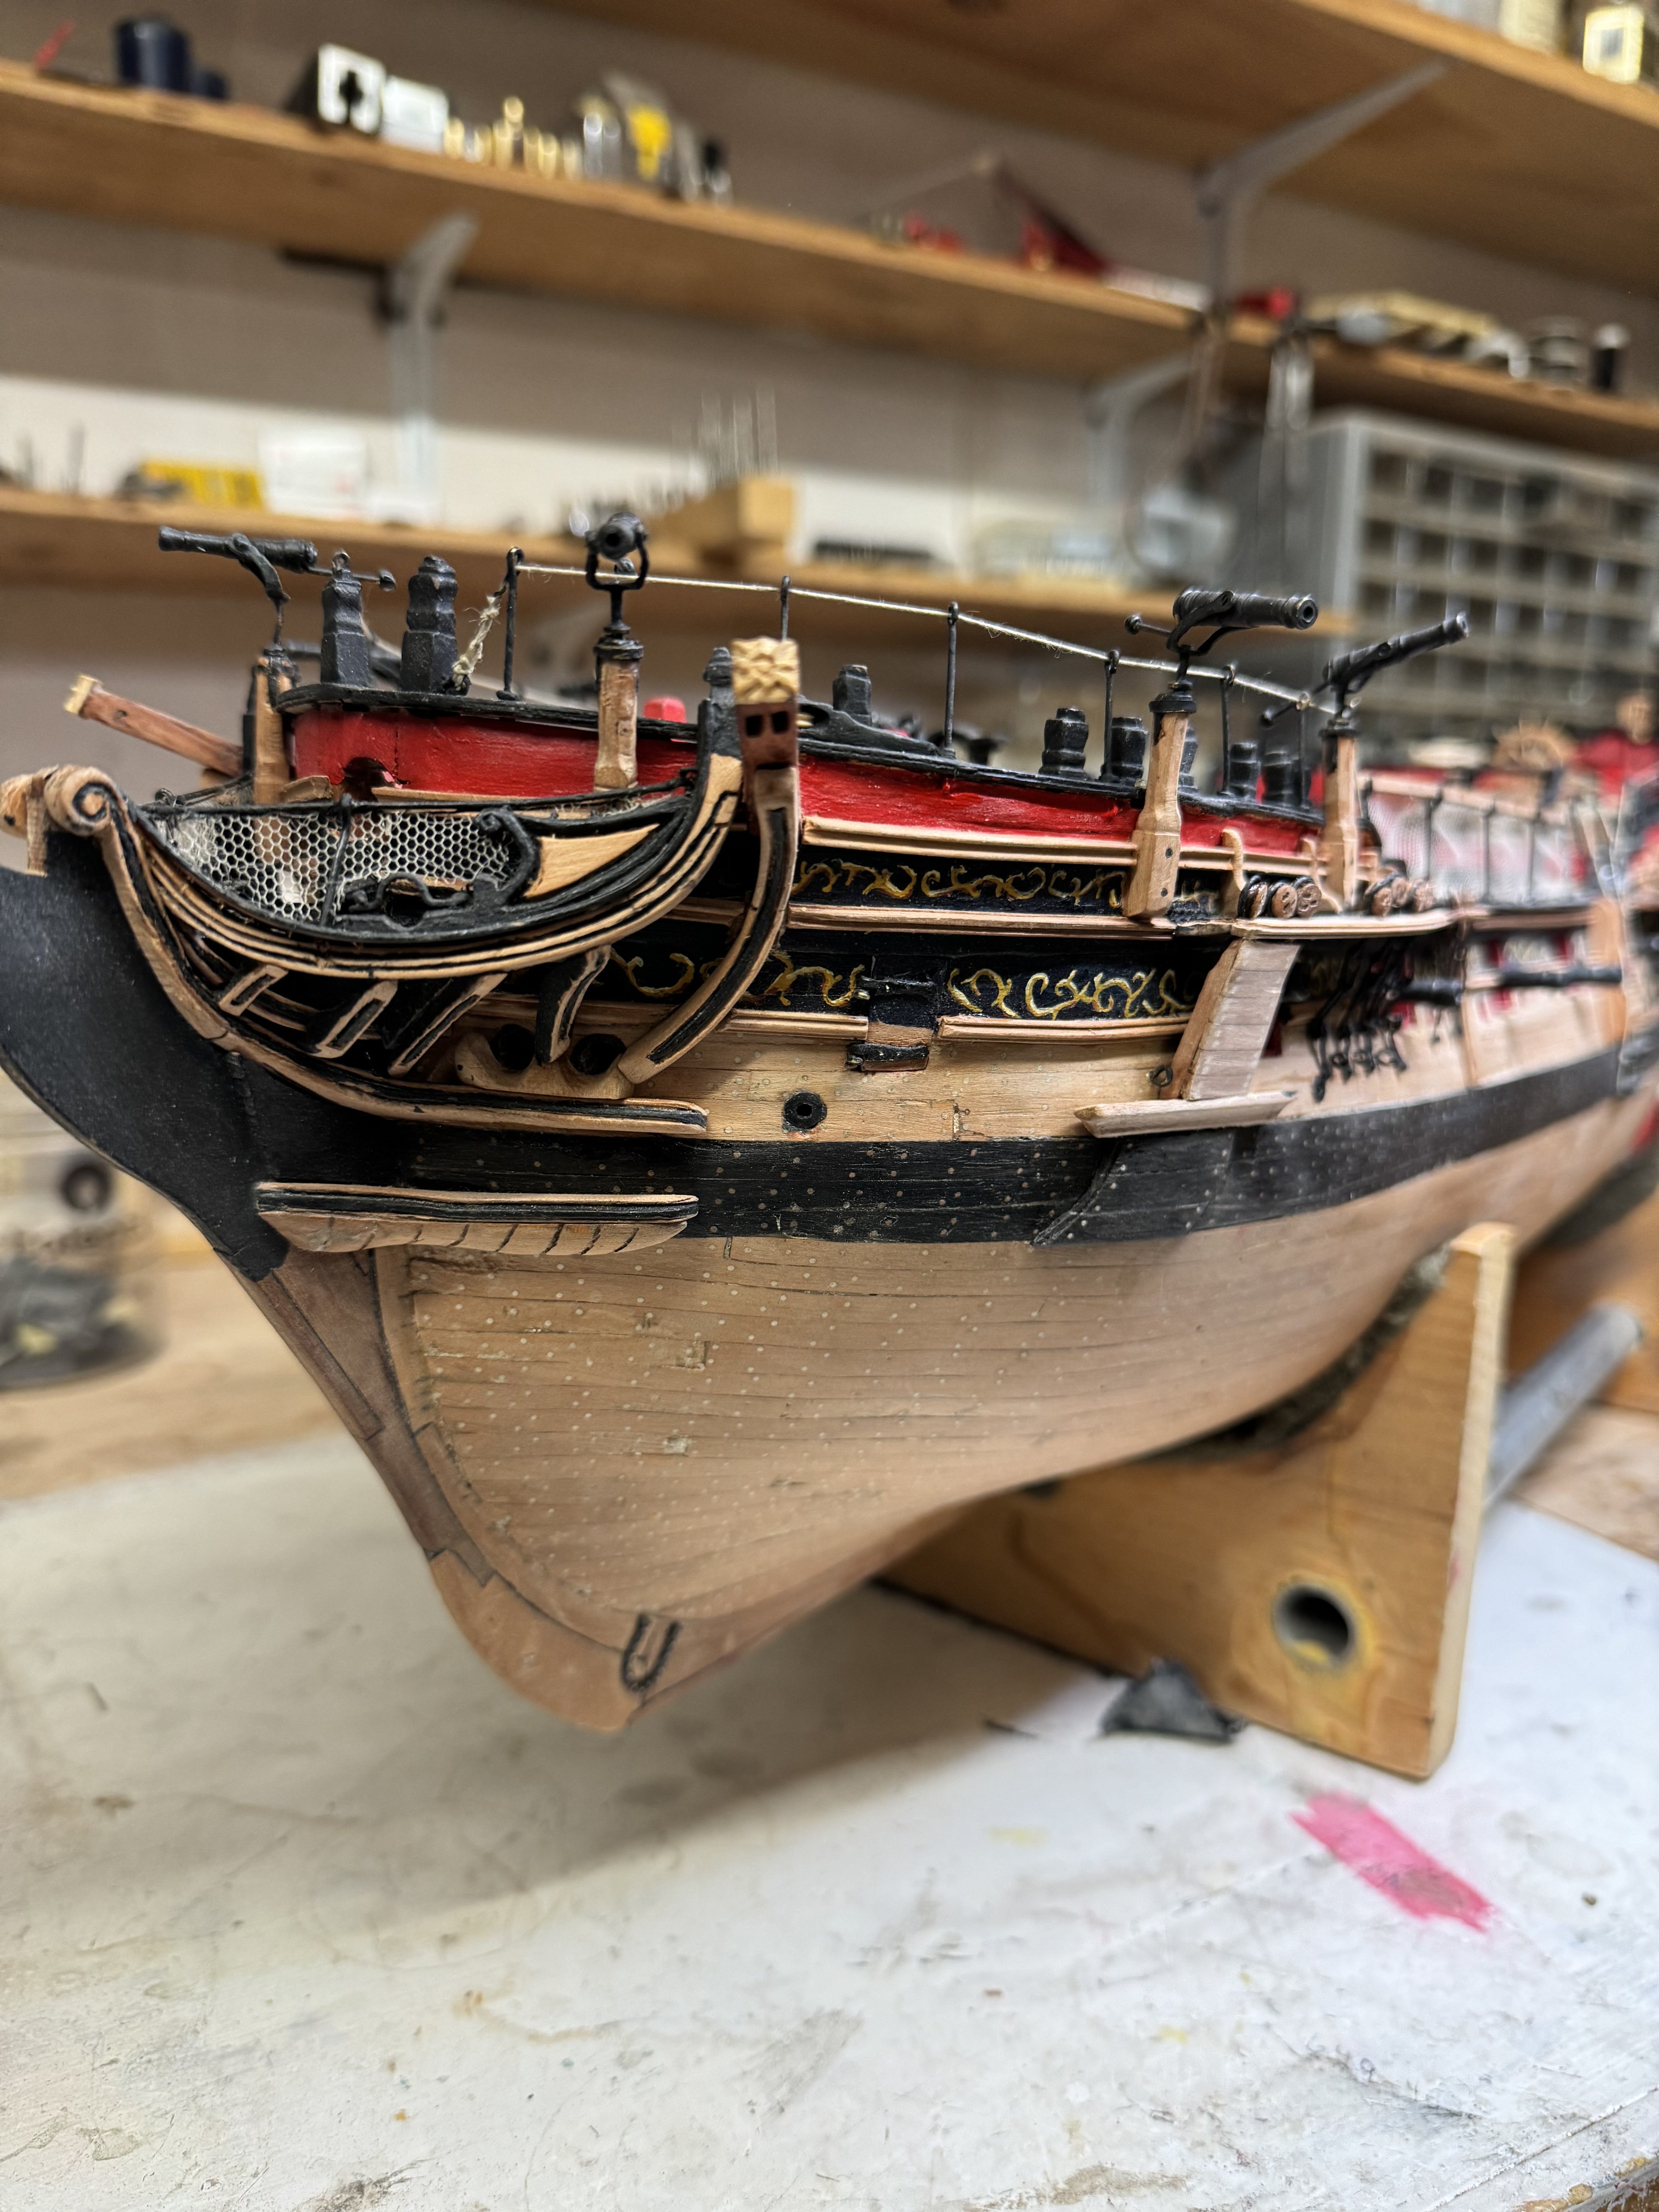
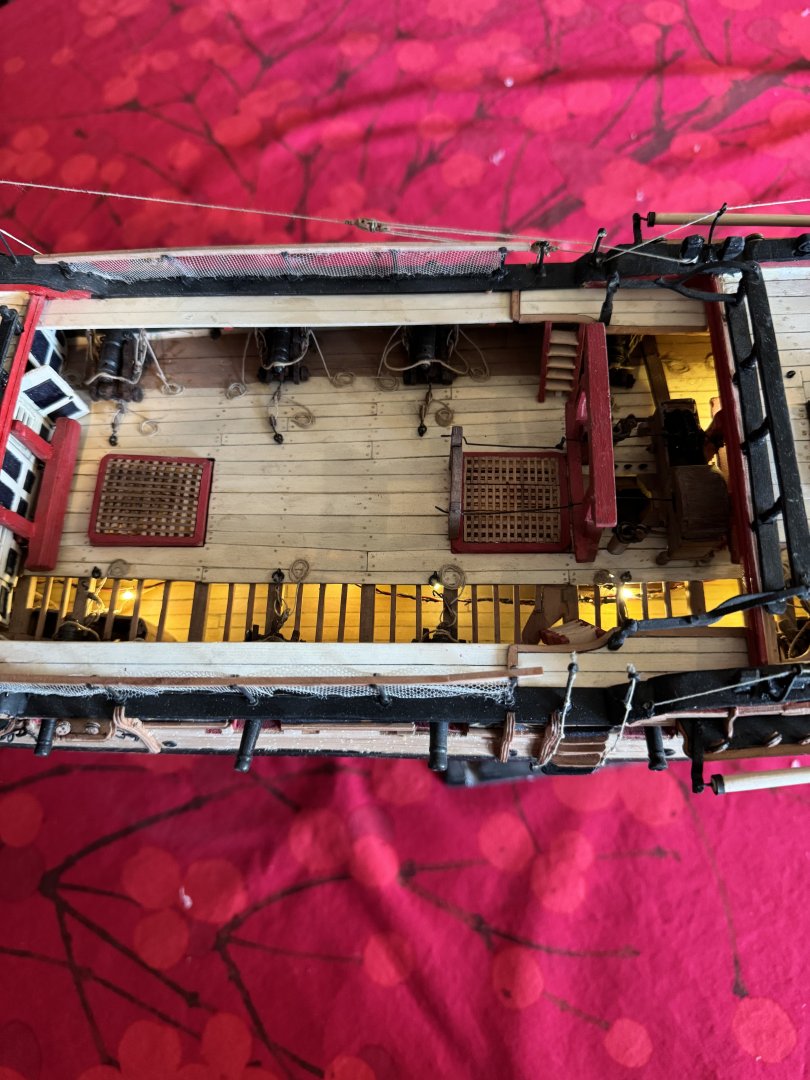
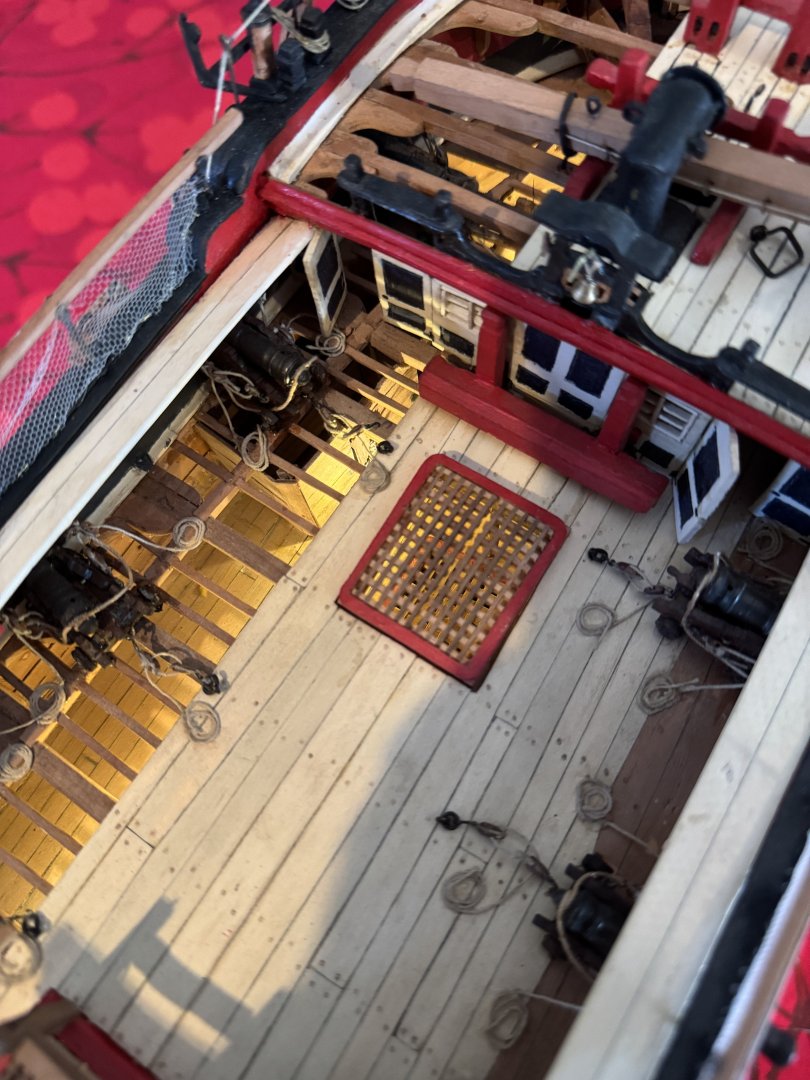
While the lighting remains intact, the effect is underwhelming without more views of the lower deck I’m afraid. Lots of effort with little return.

- 257 replies
-
- 8
-
-
- pegasus
- Swan-class
- (and 1 more)
-
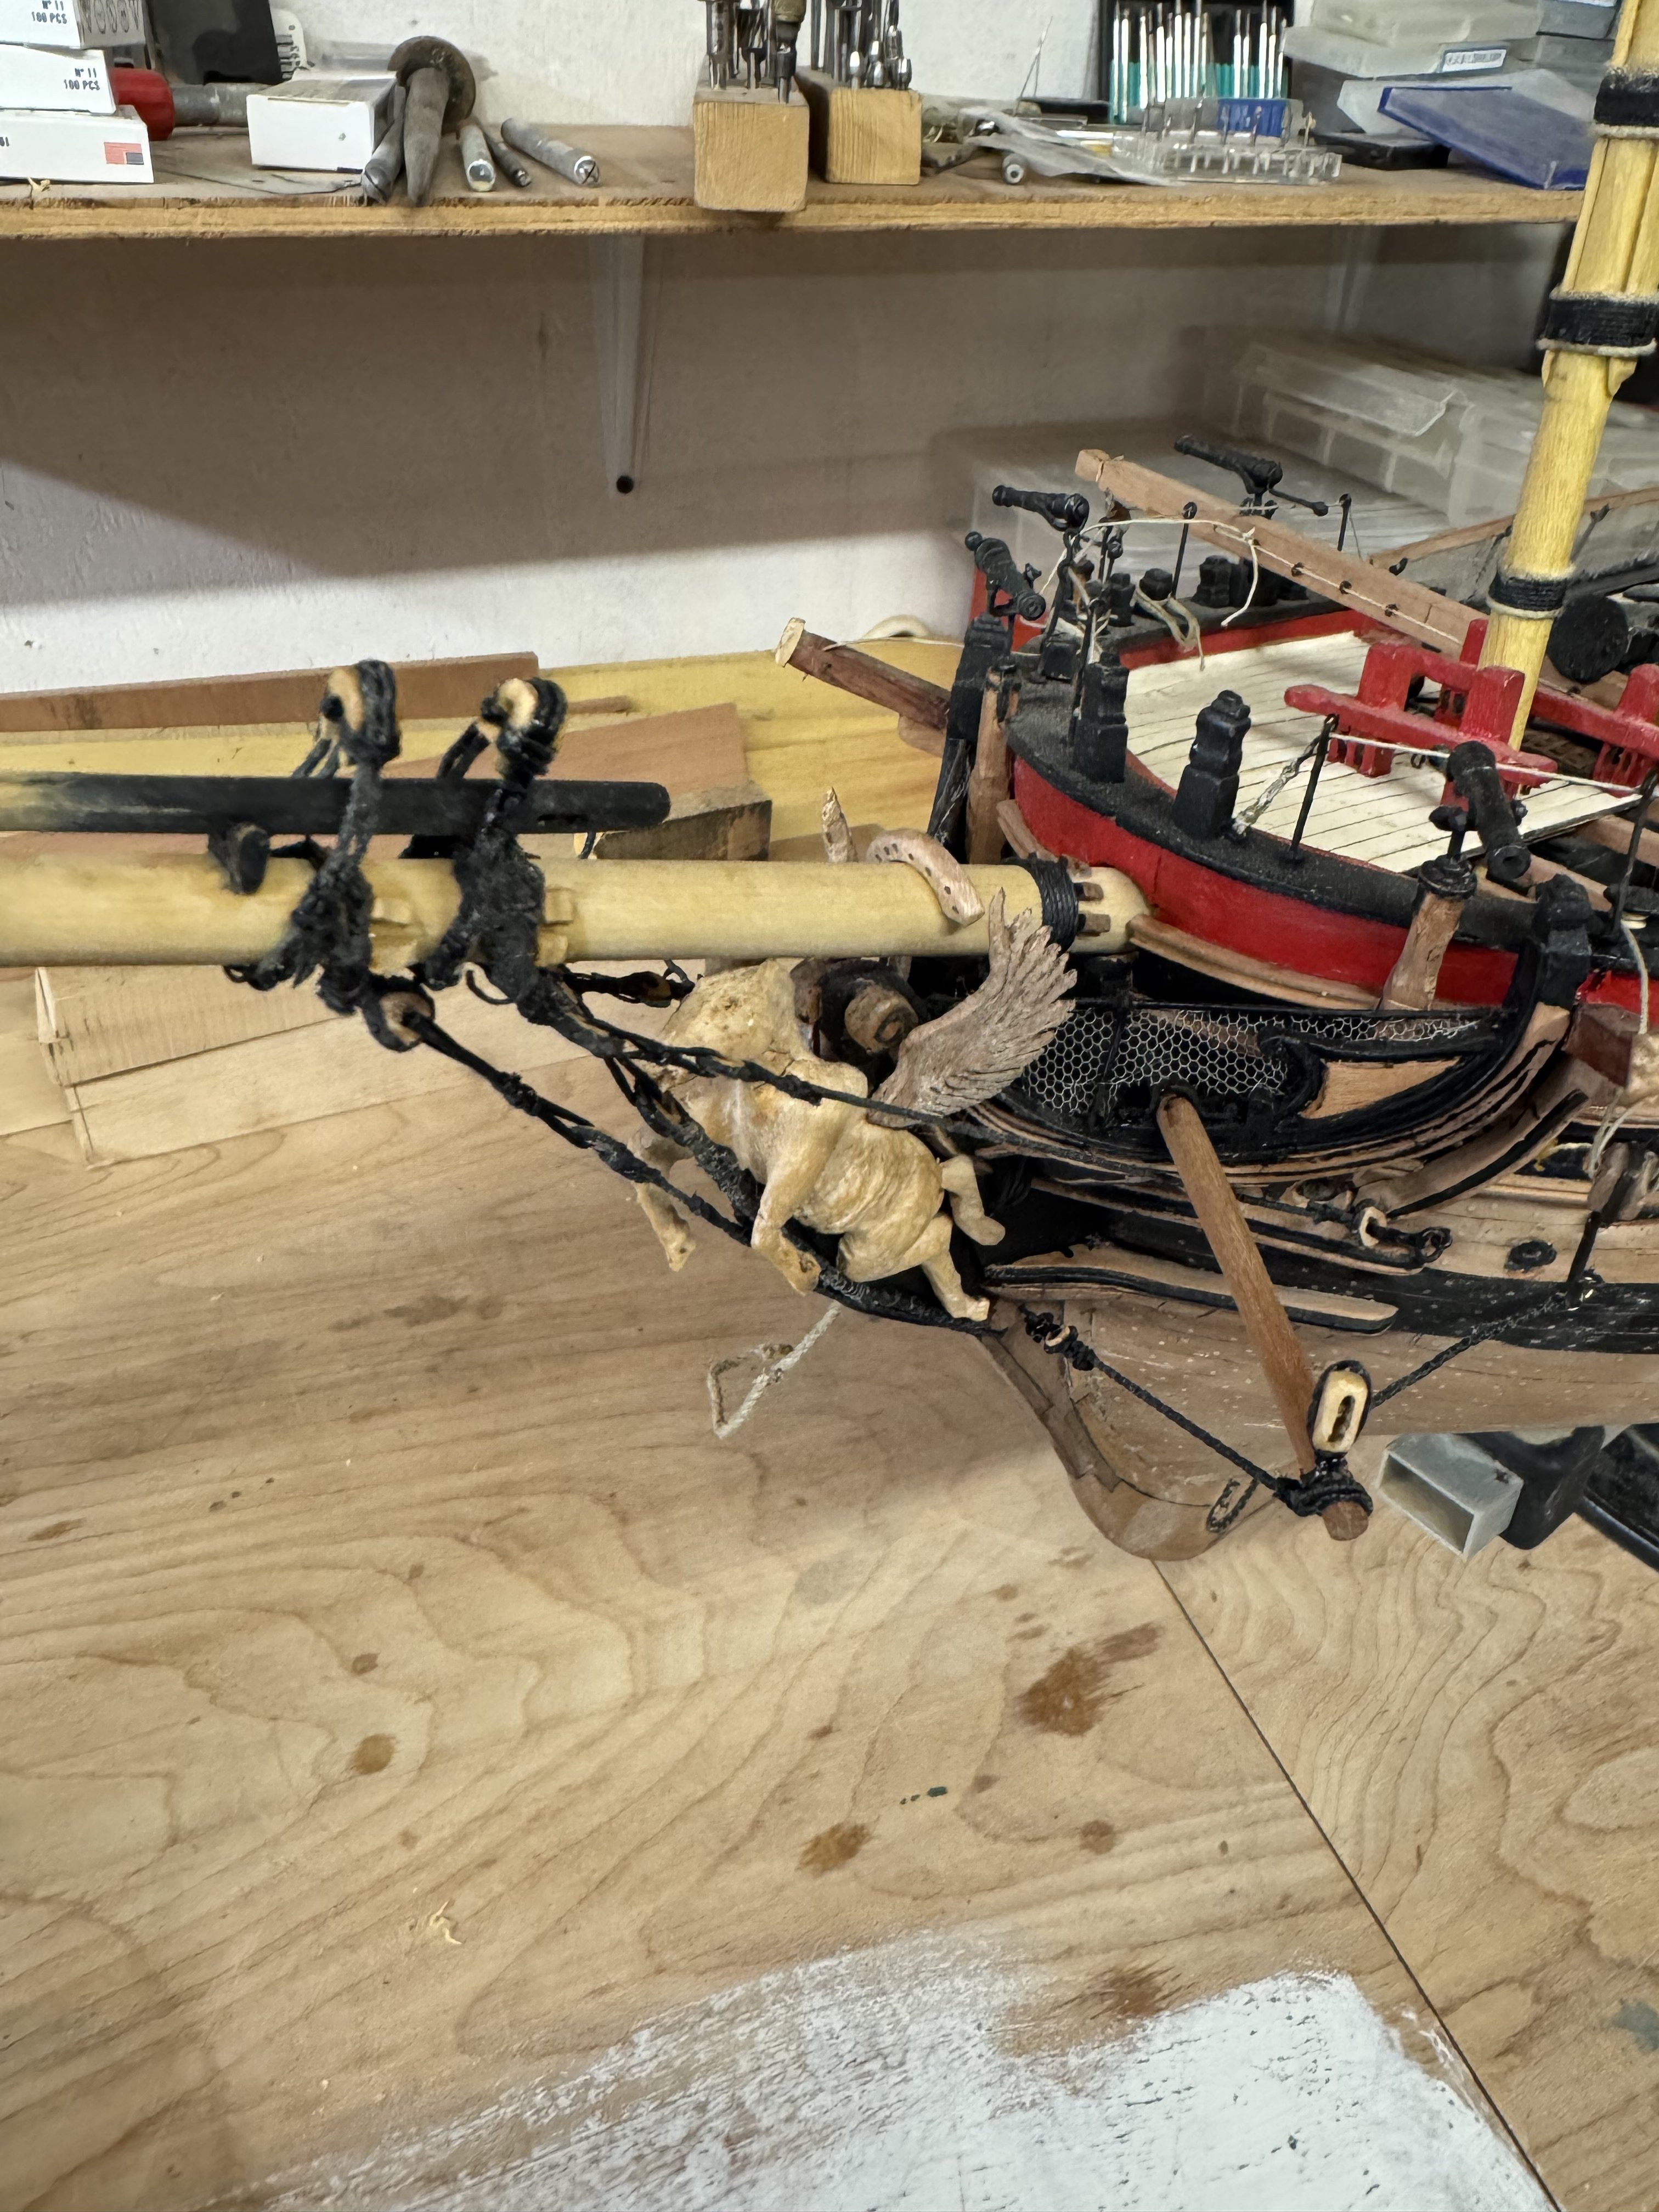
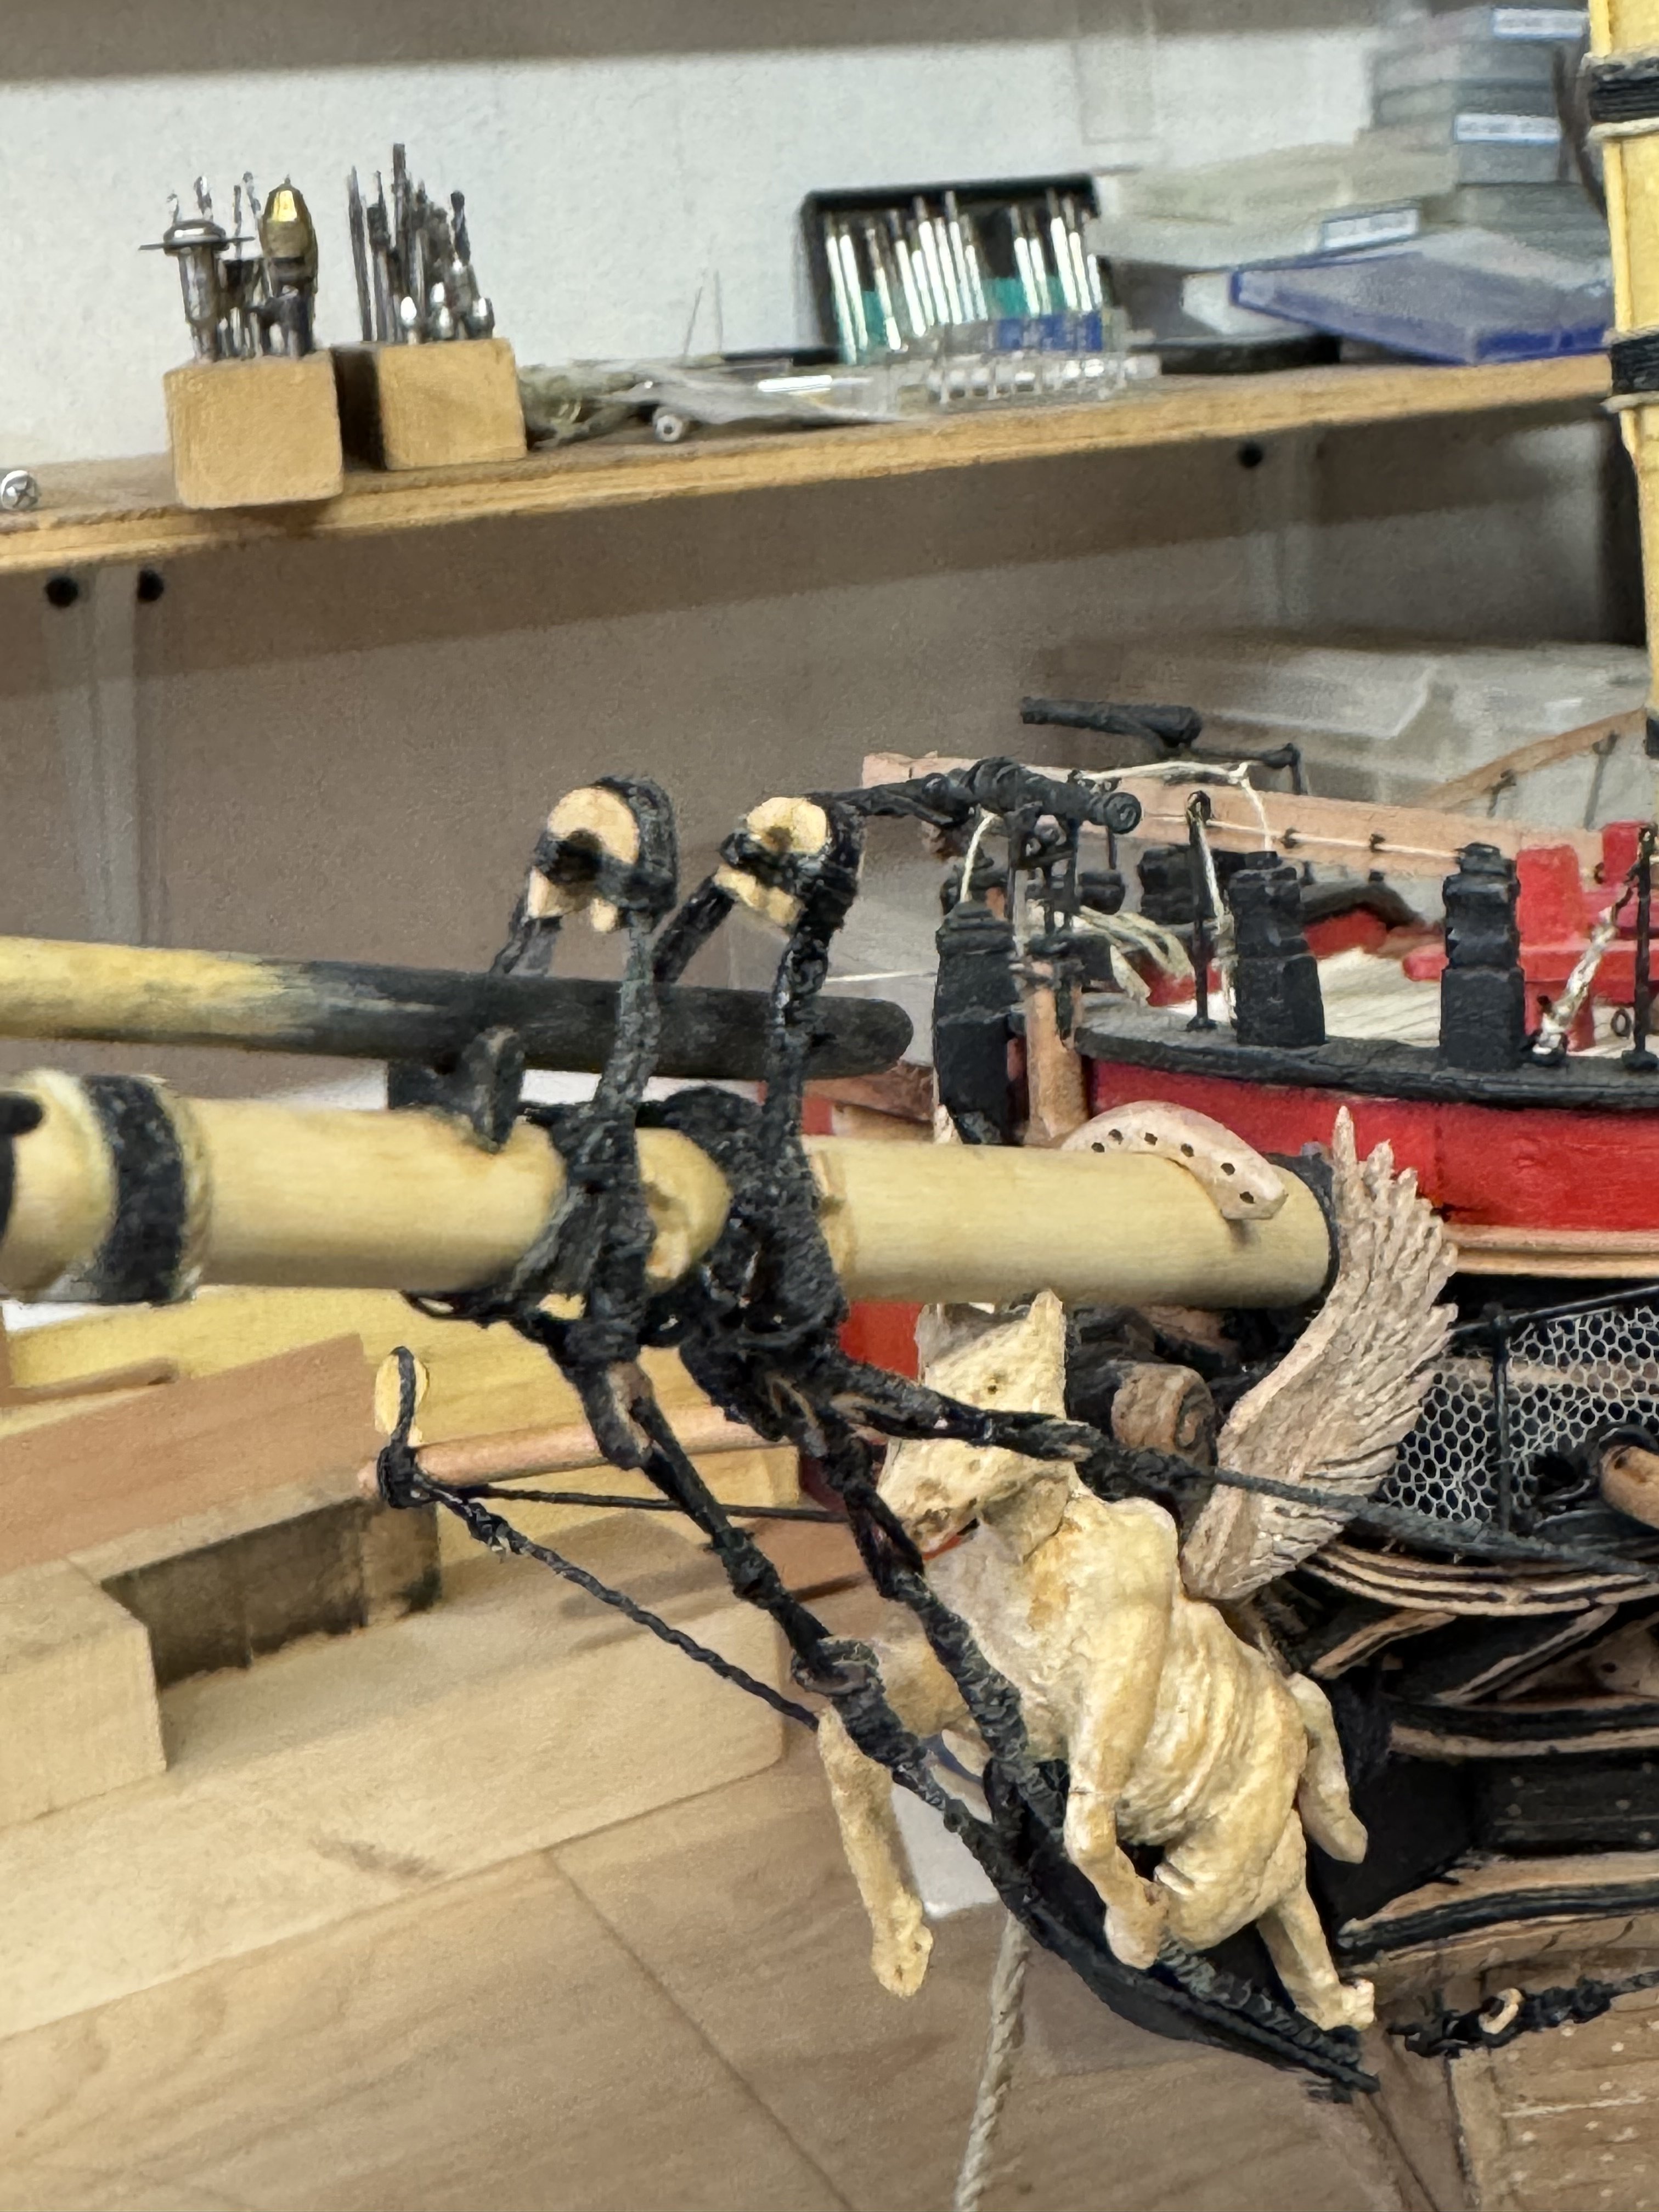
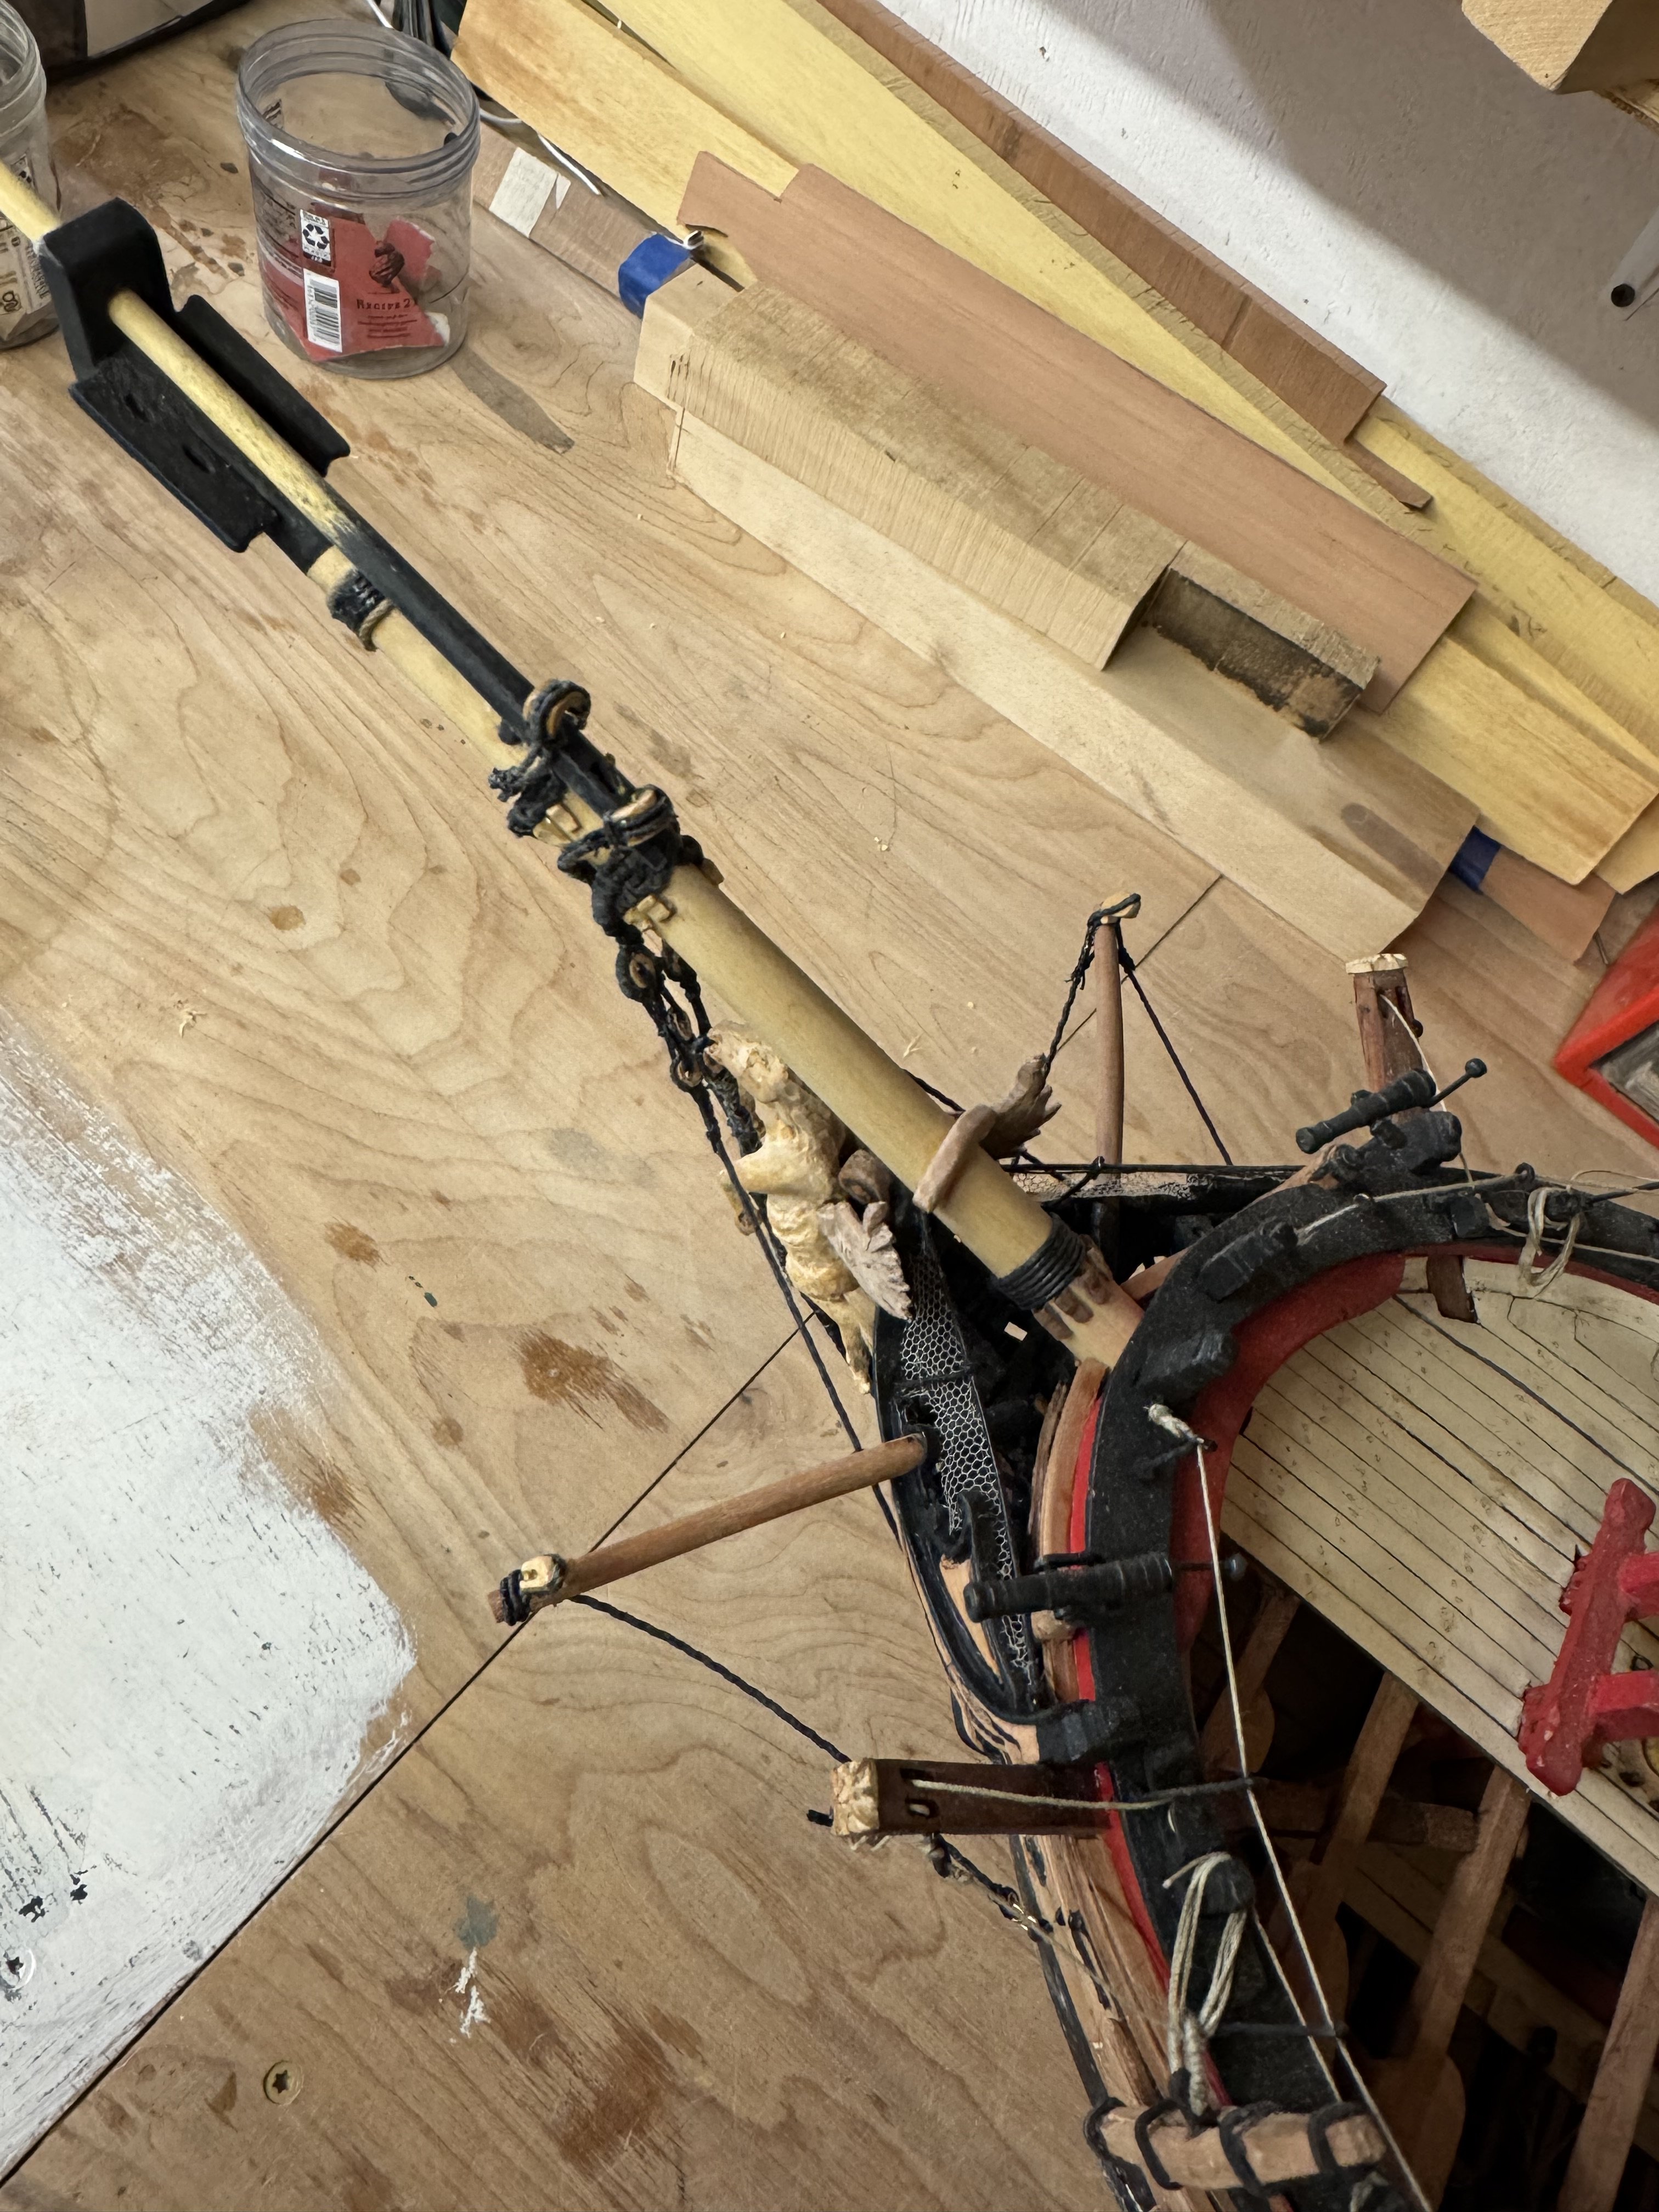
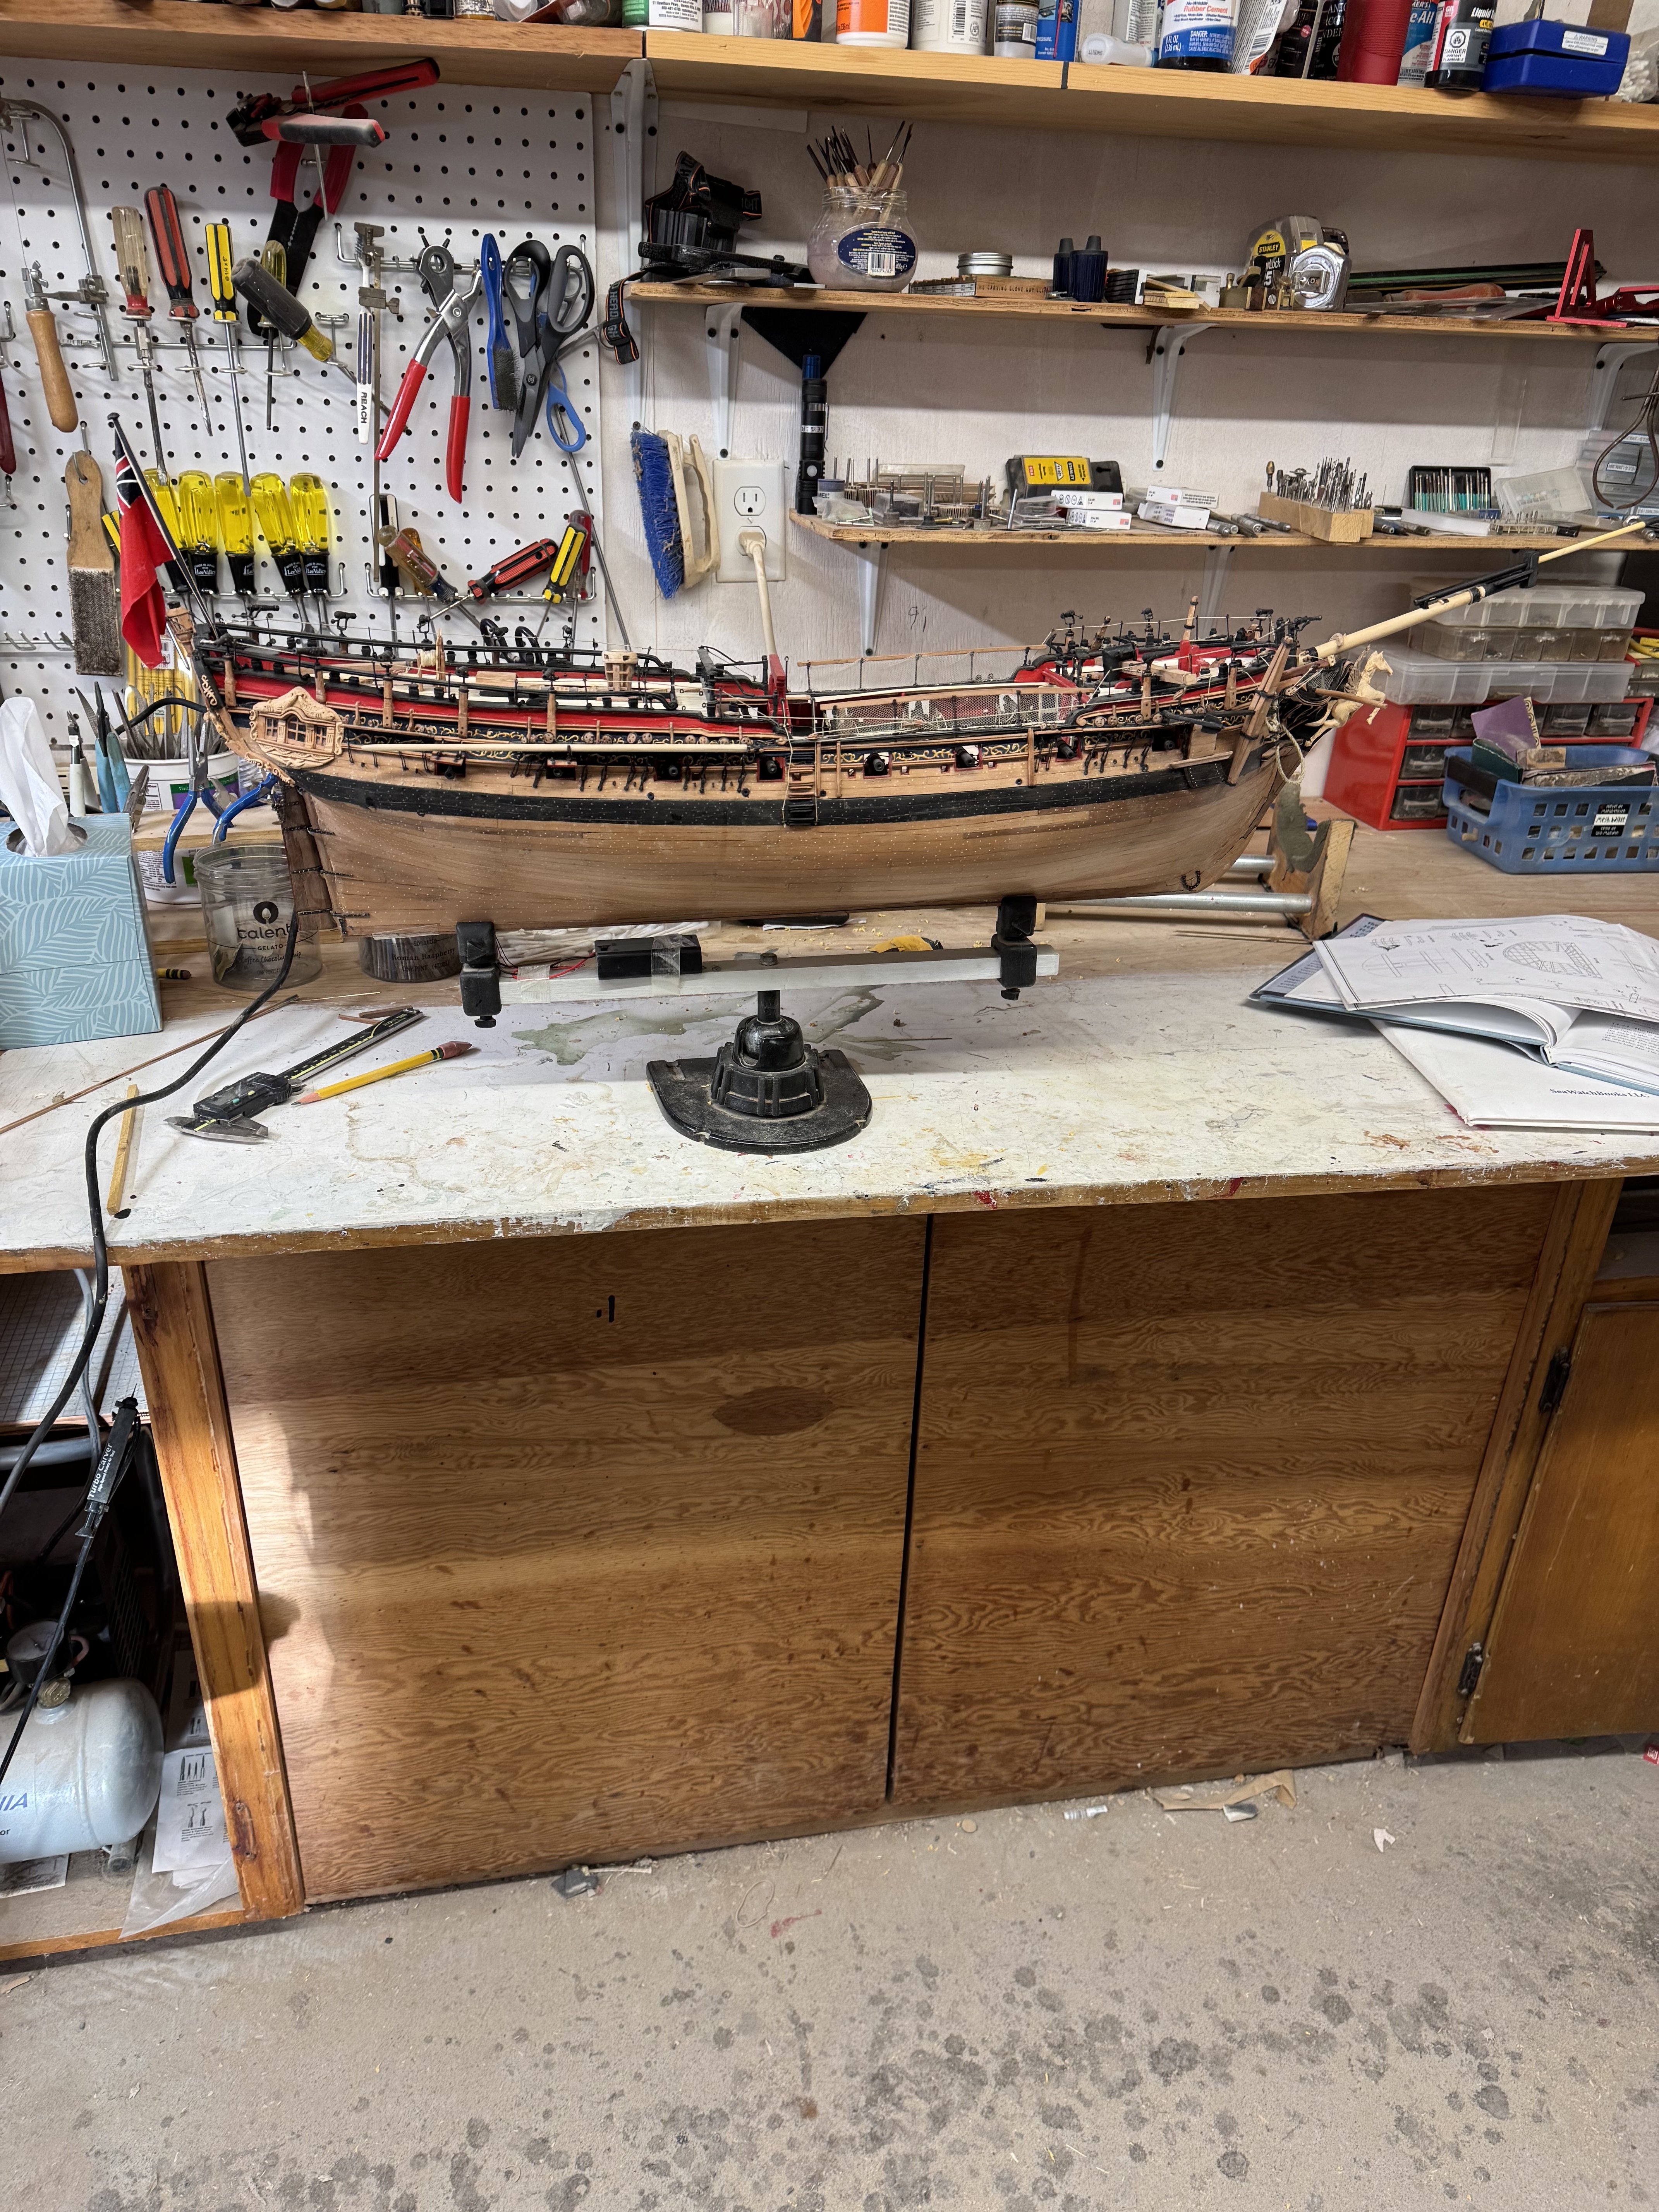
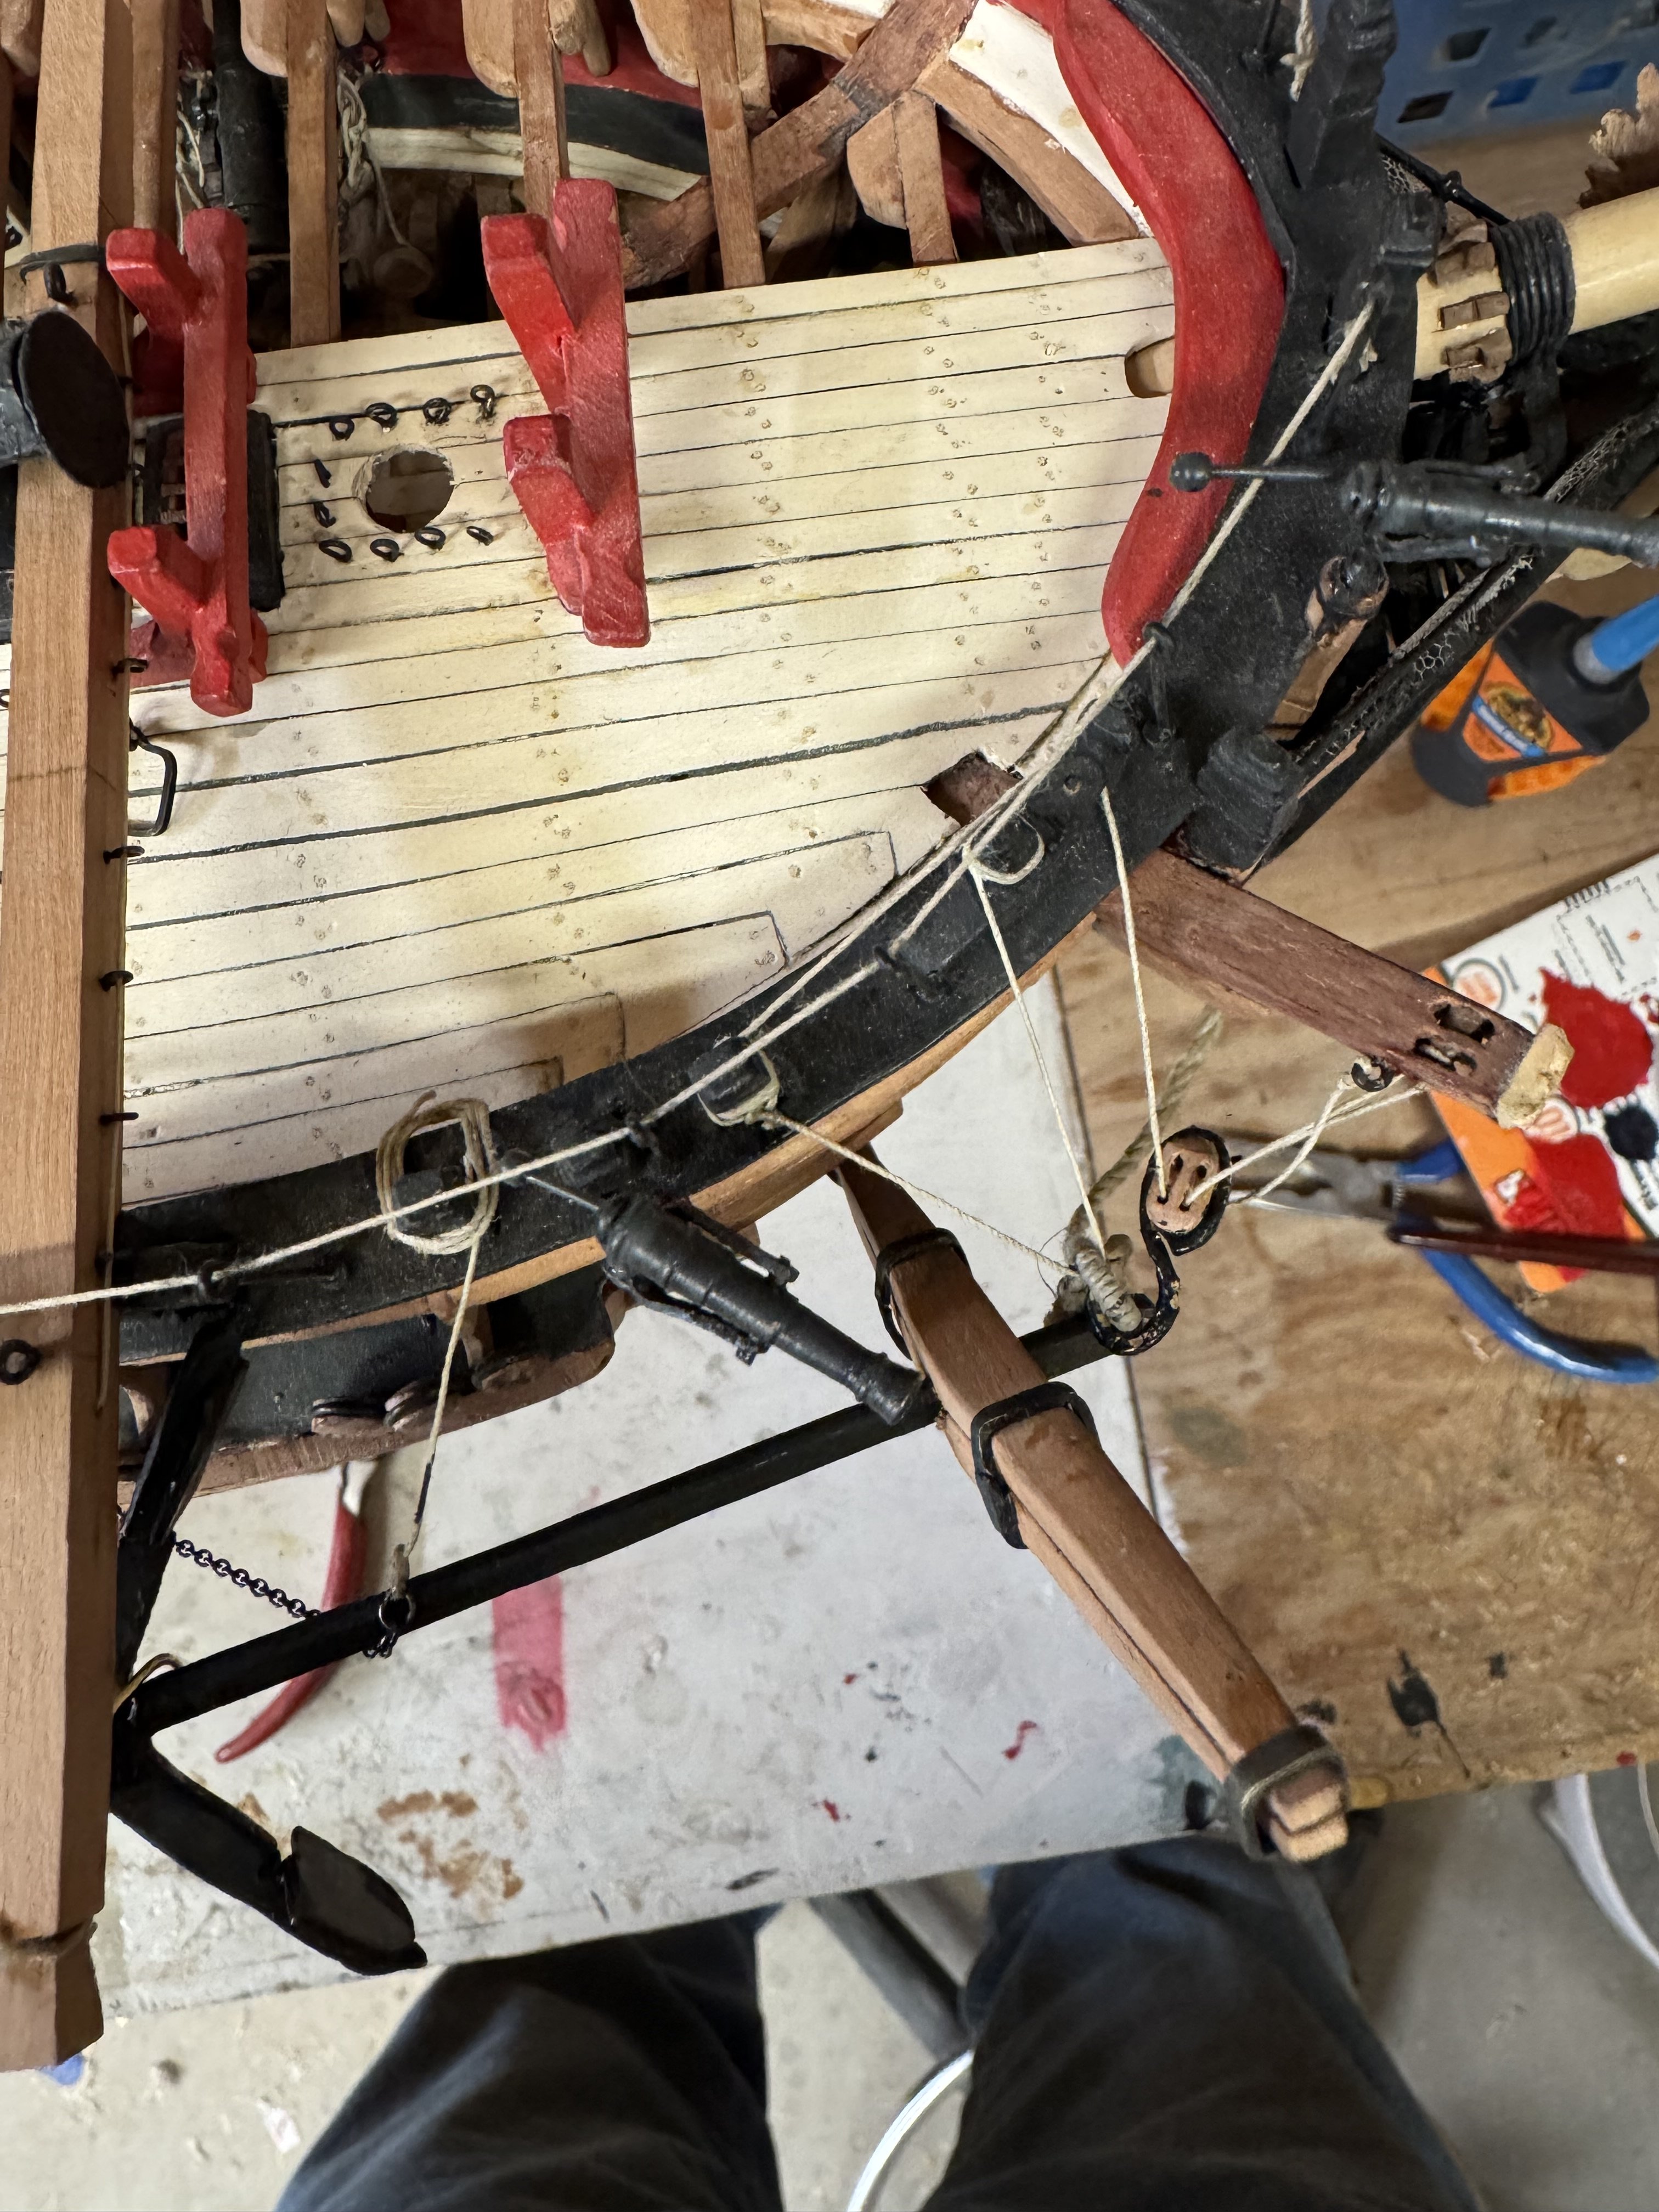
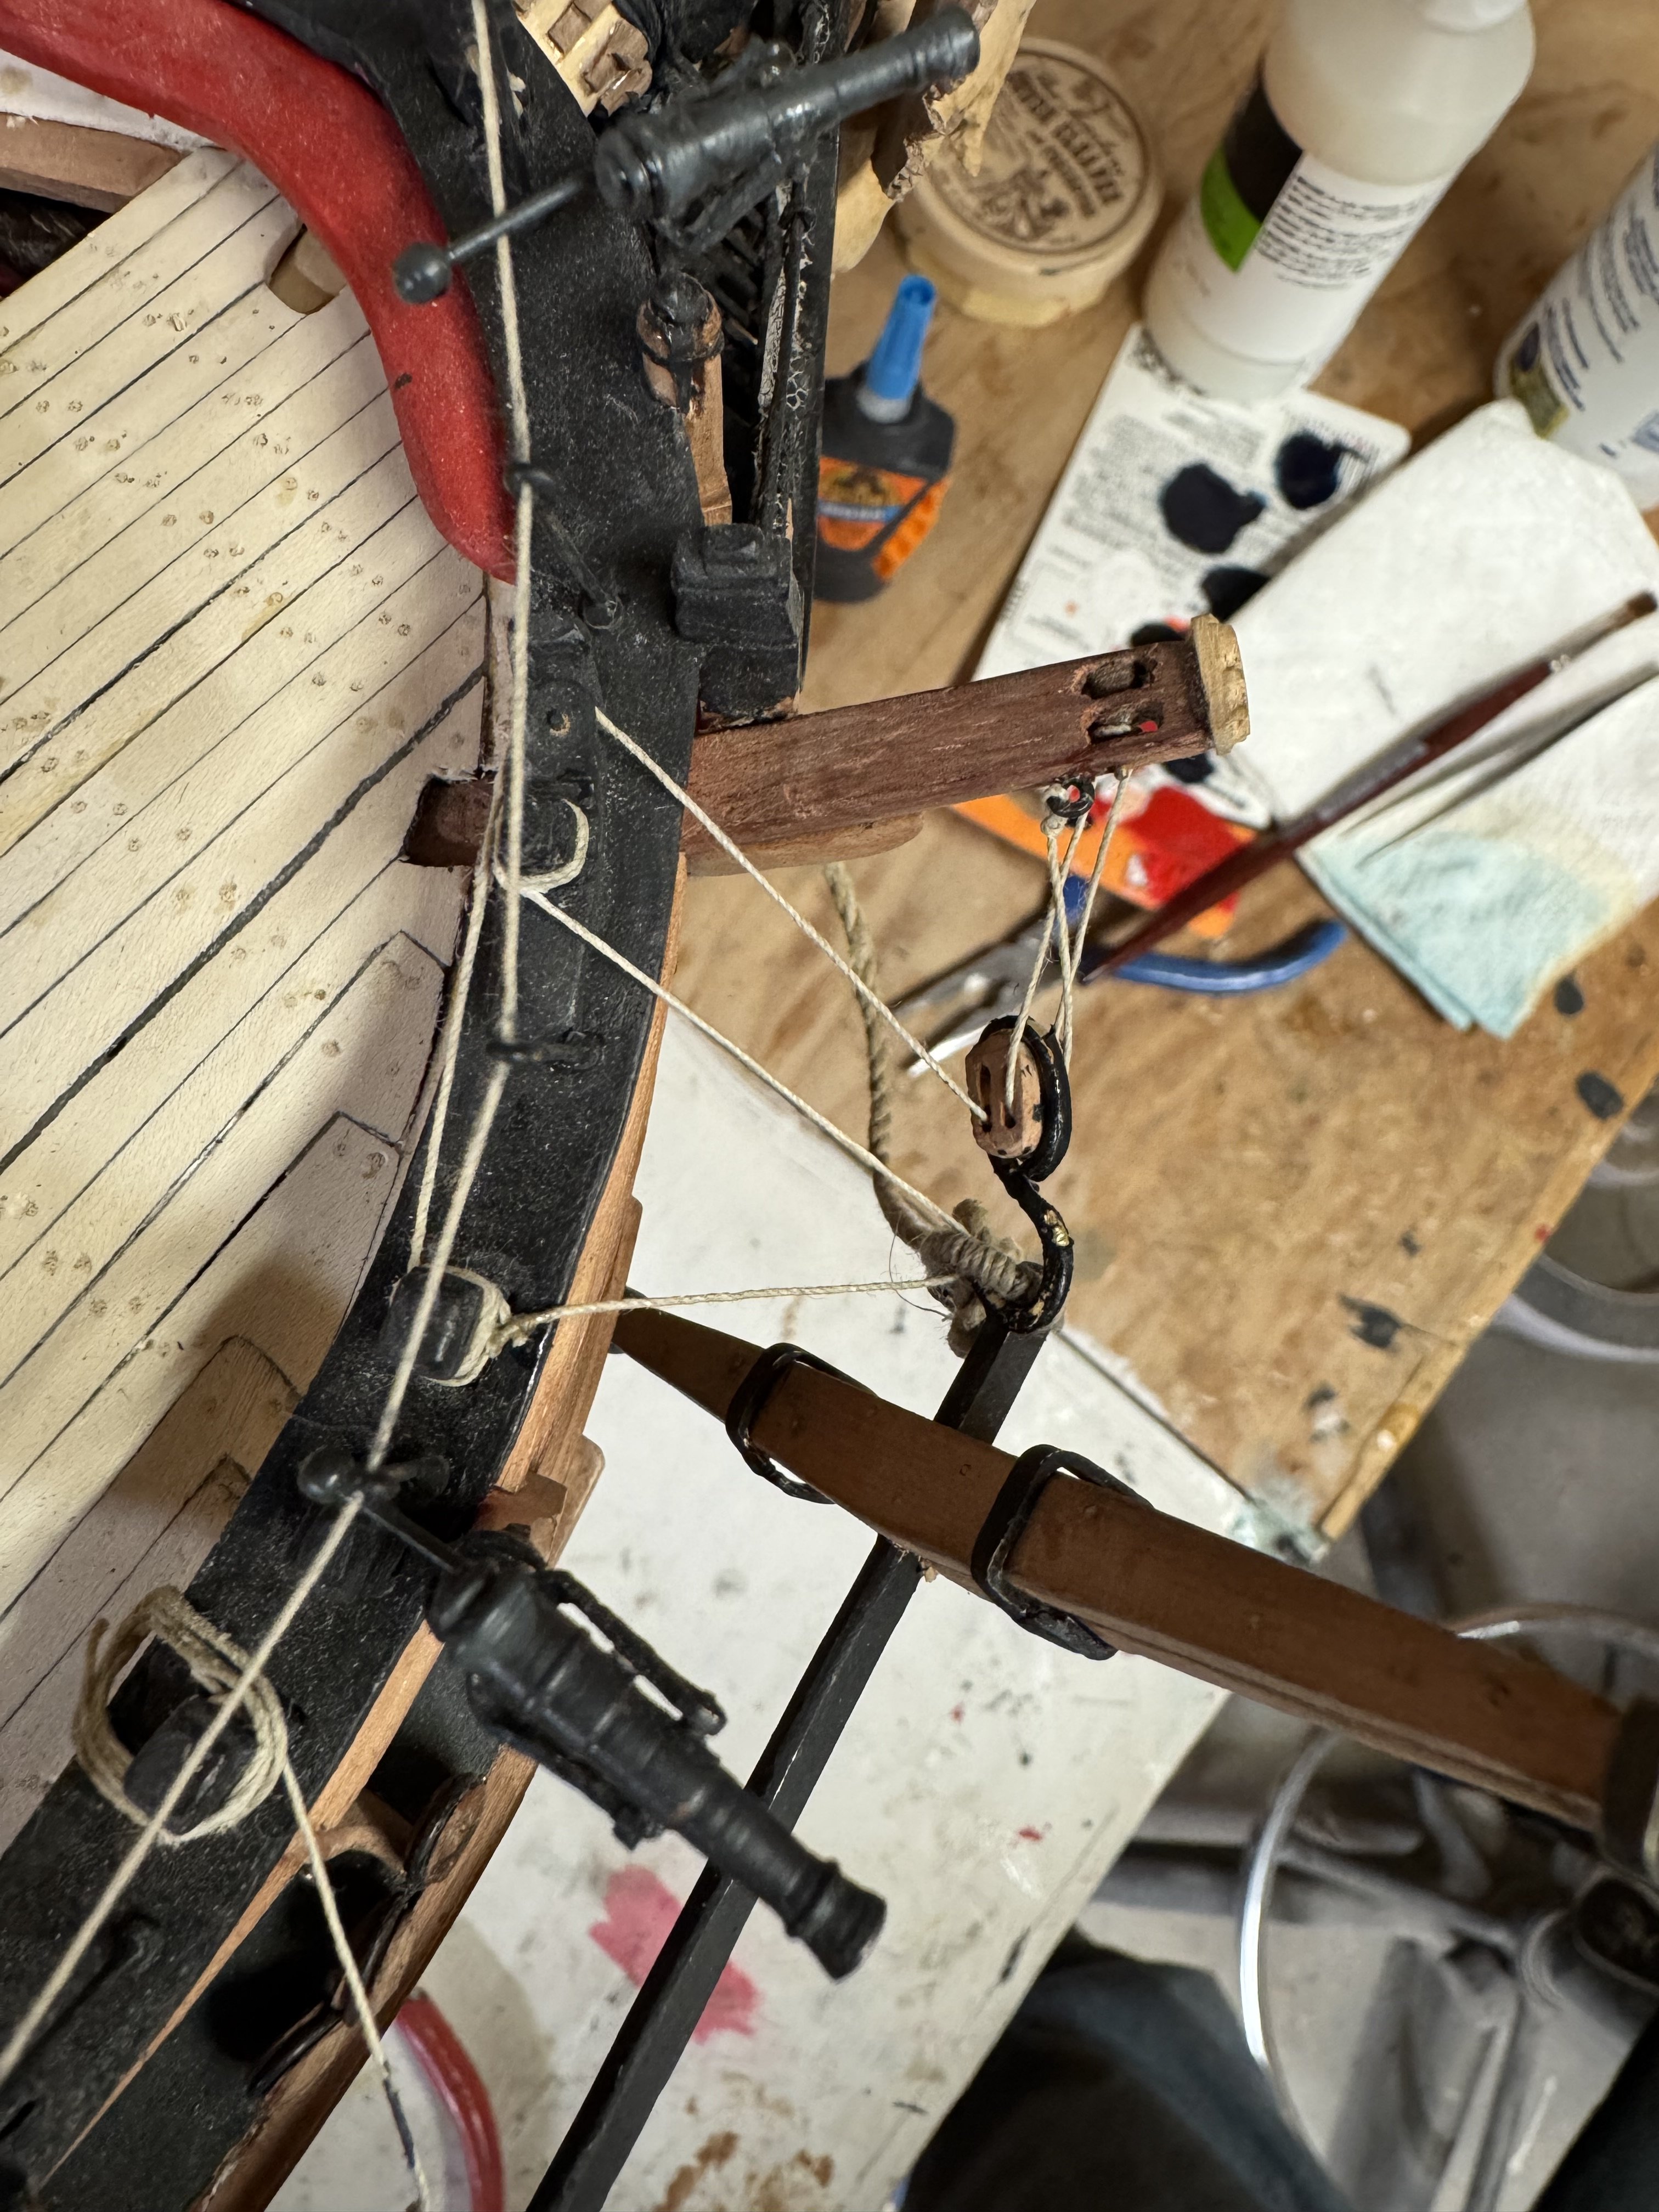
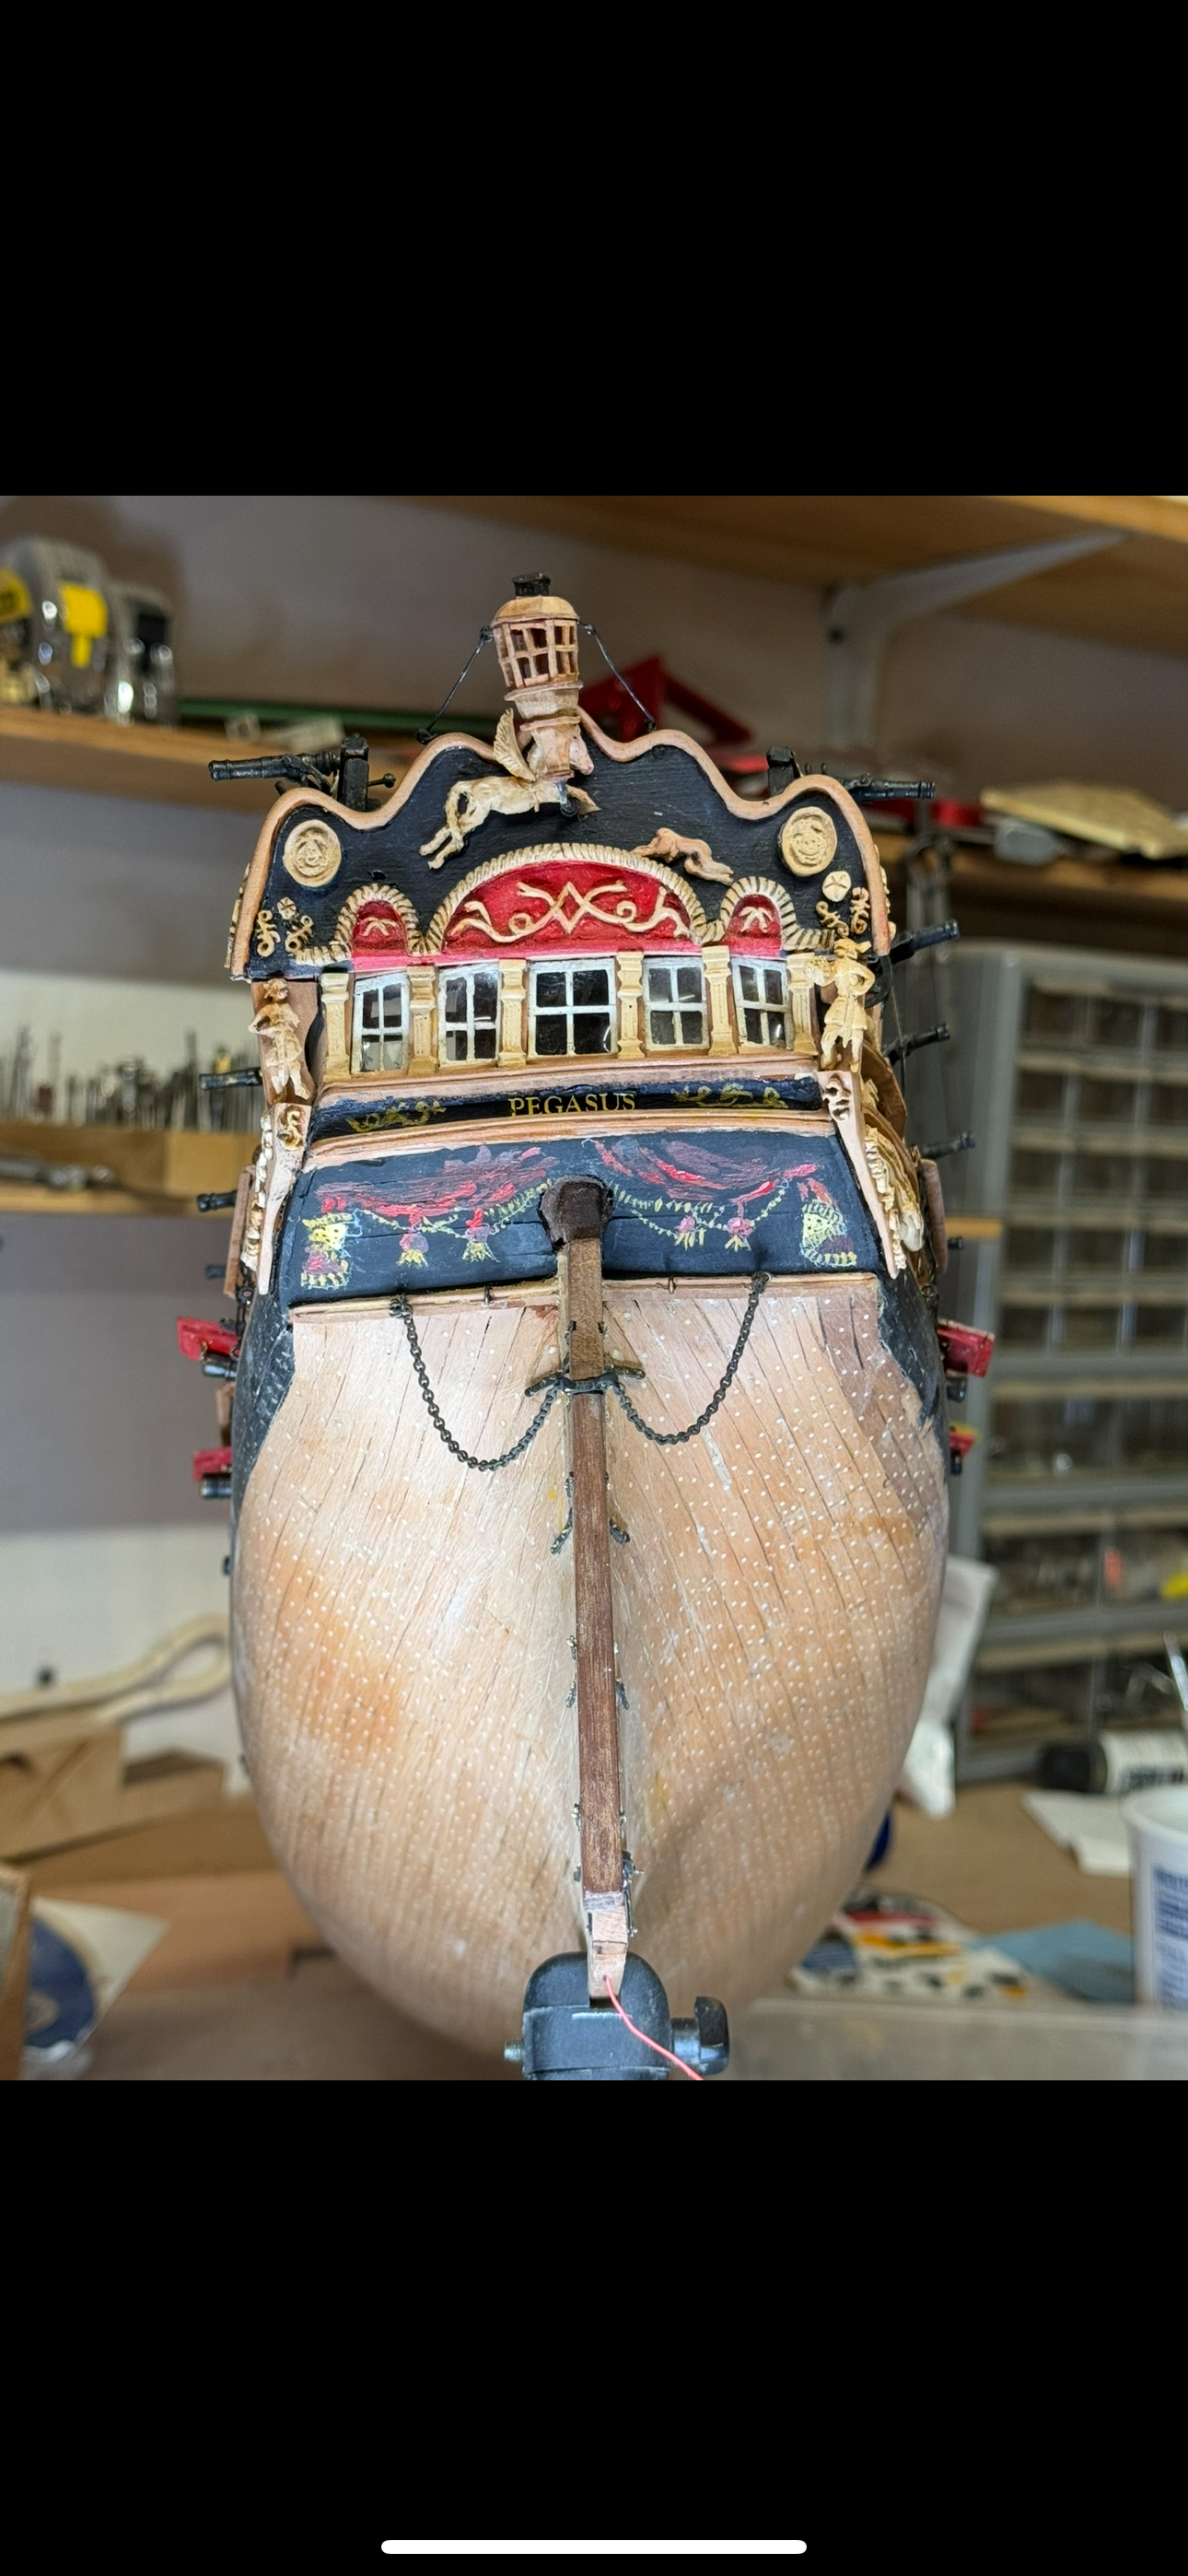
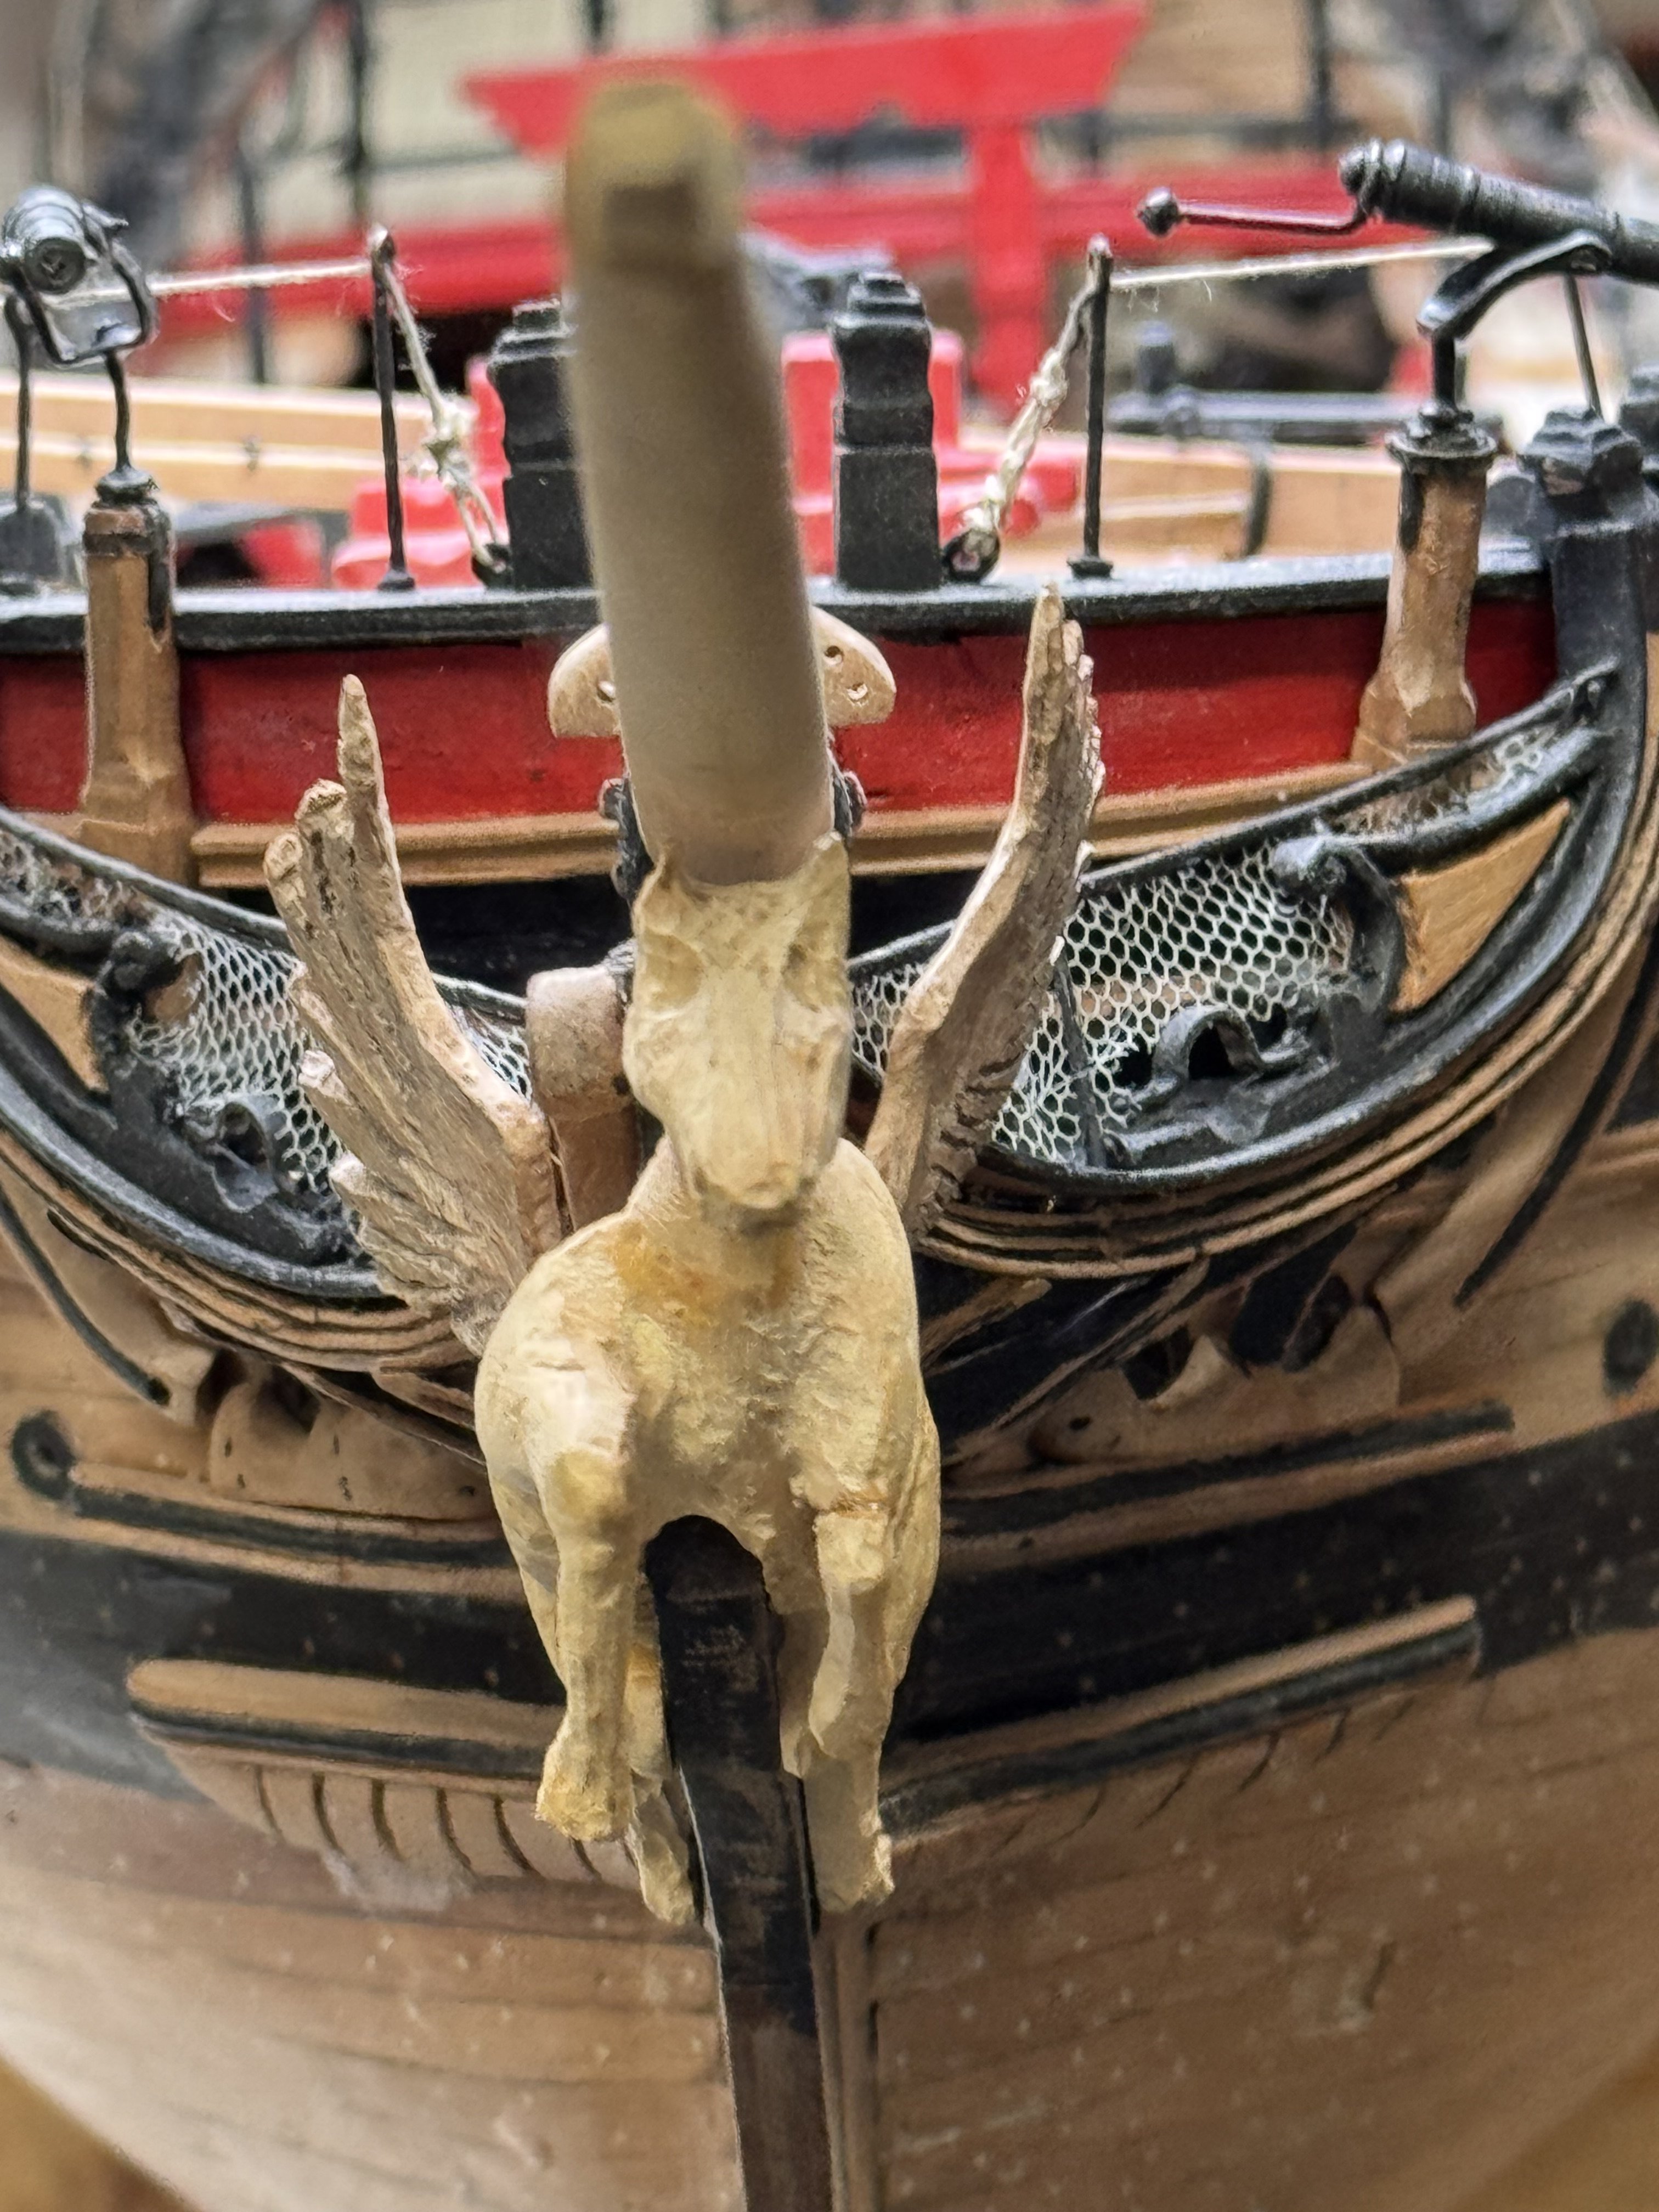
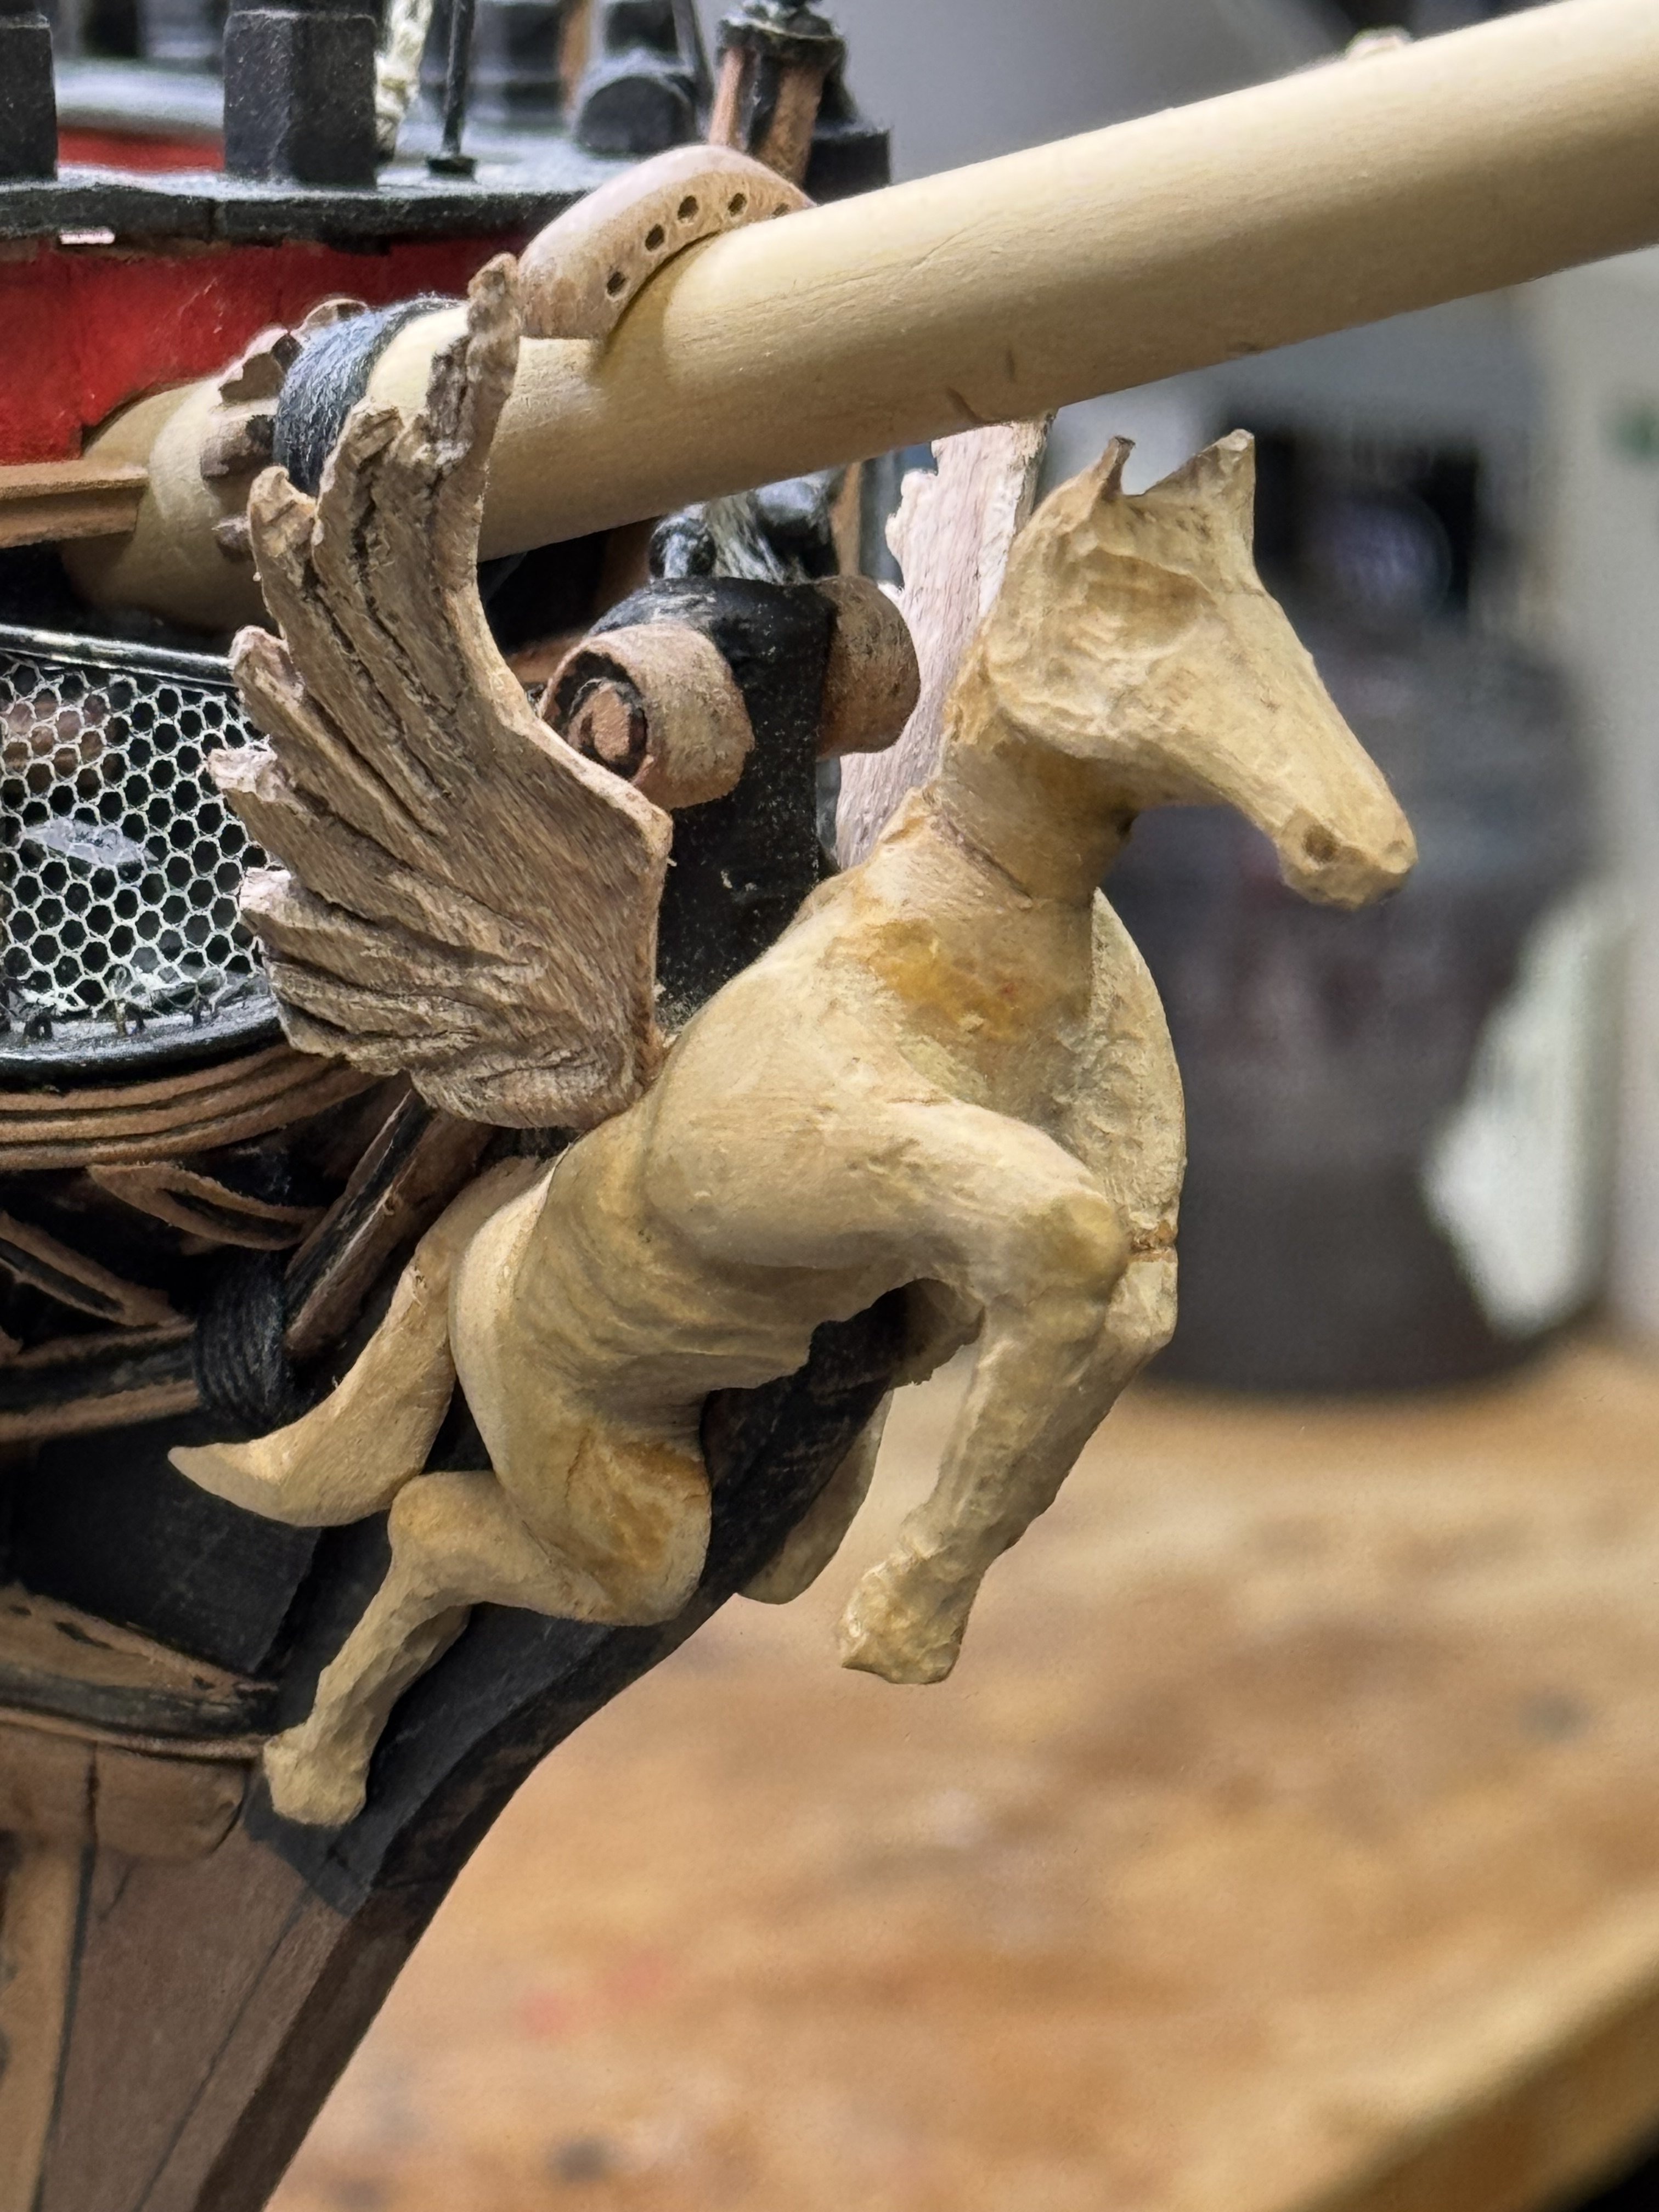
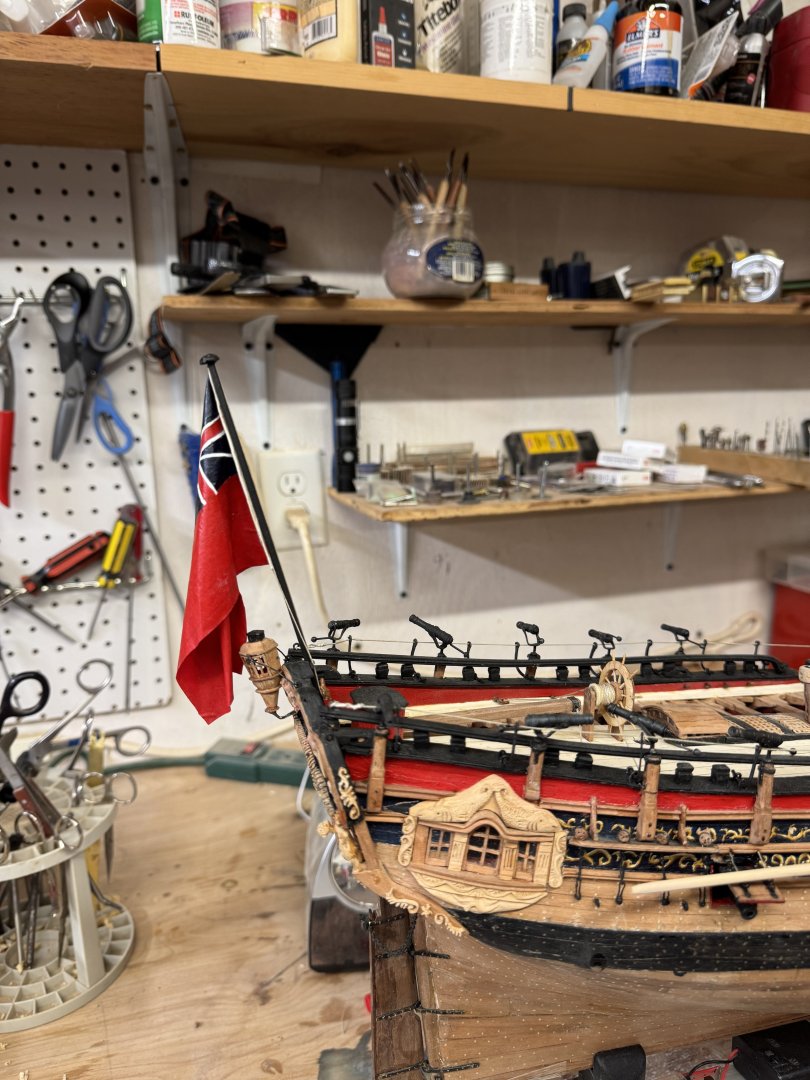
I decided to use rice paper for the ensign. I placed the paper over the pattern which was produced on a regular lined notebook sheet. As suggested by David, the rice paper was wetted and taped over the pattern to a board just as it started to dry. Once dry, I painted the first side. When that was dry, the rice paper was peeled off the pattern. In doing so, areas of the pattern paper adhered to the rice paper. These were removed by wetting the painted rice paper and gently rubbing off the adherent paper. A tear in the rice paper resulted in a small hole which was covered with a patch. The ensign was turned over and taped down again, this time over waxed paper. The reverse side was then painted. The patch adhered nicely. When dry both sides were touched up. Final trimming of the edges to the proper dimensions was followed by gluing a narrow strip of sail cloth along the halliard edge, folded over to the reverse side with the halliard incorporated. The composite was clamped until dry. Next, the halliard was passed through the sheeve atop the ensign staff and down around a cleat at the bottom of the staff. The final step was wetting the ensign with a paint brush and shaping it to resemble a flag assuming a collapsed posture in the absence of wind. The result is shown. The next image shows the big bower anchor in a styalised pose representing the process of fishing it towards its stowed location on the ship’s side. The cat fall and hook are still engaged, the stopper and shank pendant are in place, and the fish hook is engaged around the inboard fluke arm. I’m afraid that this will complicate rigging the model some if I decide to proceed in that direction.
- 257 replies
-
- 5
-
-
- pegasus
- Swan-class
- (and 1 more)
-
A guide to using MSW
hdrinker replied to James H's topic in Using the MSW forum - **NO MODELING CONTENT IN THIS SUB-FORUM**
If I want to search a specific topic, such as beveling individual frames, how would that be done without going through the list of some 400 subtopics in the framing and planking section? Henry Drinker -
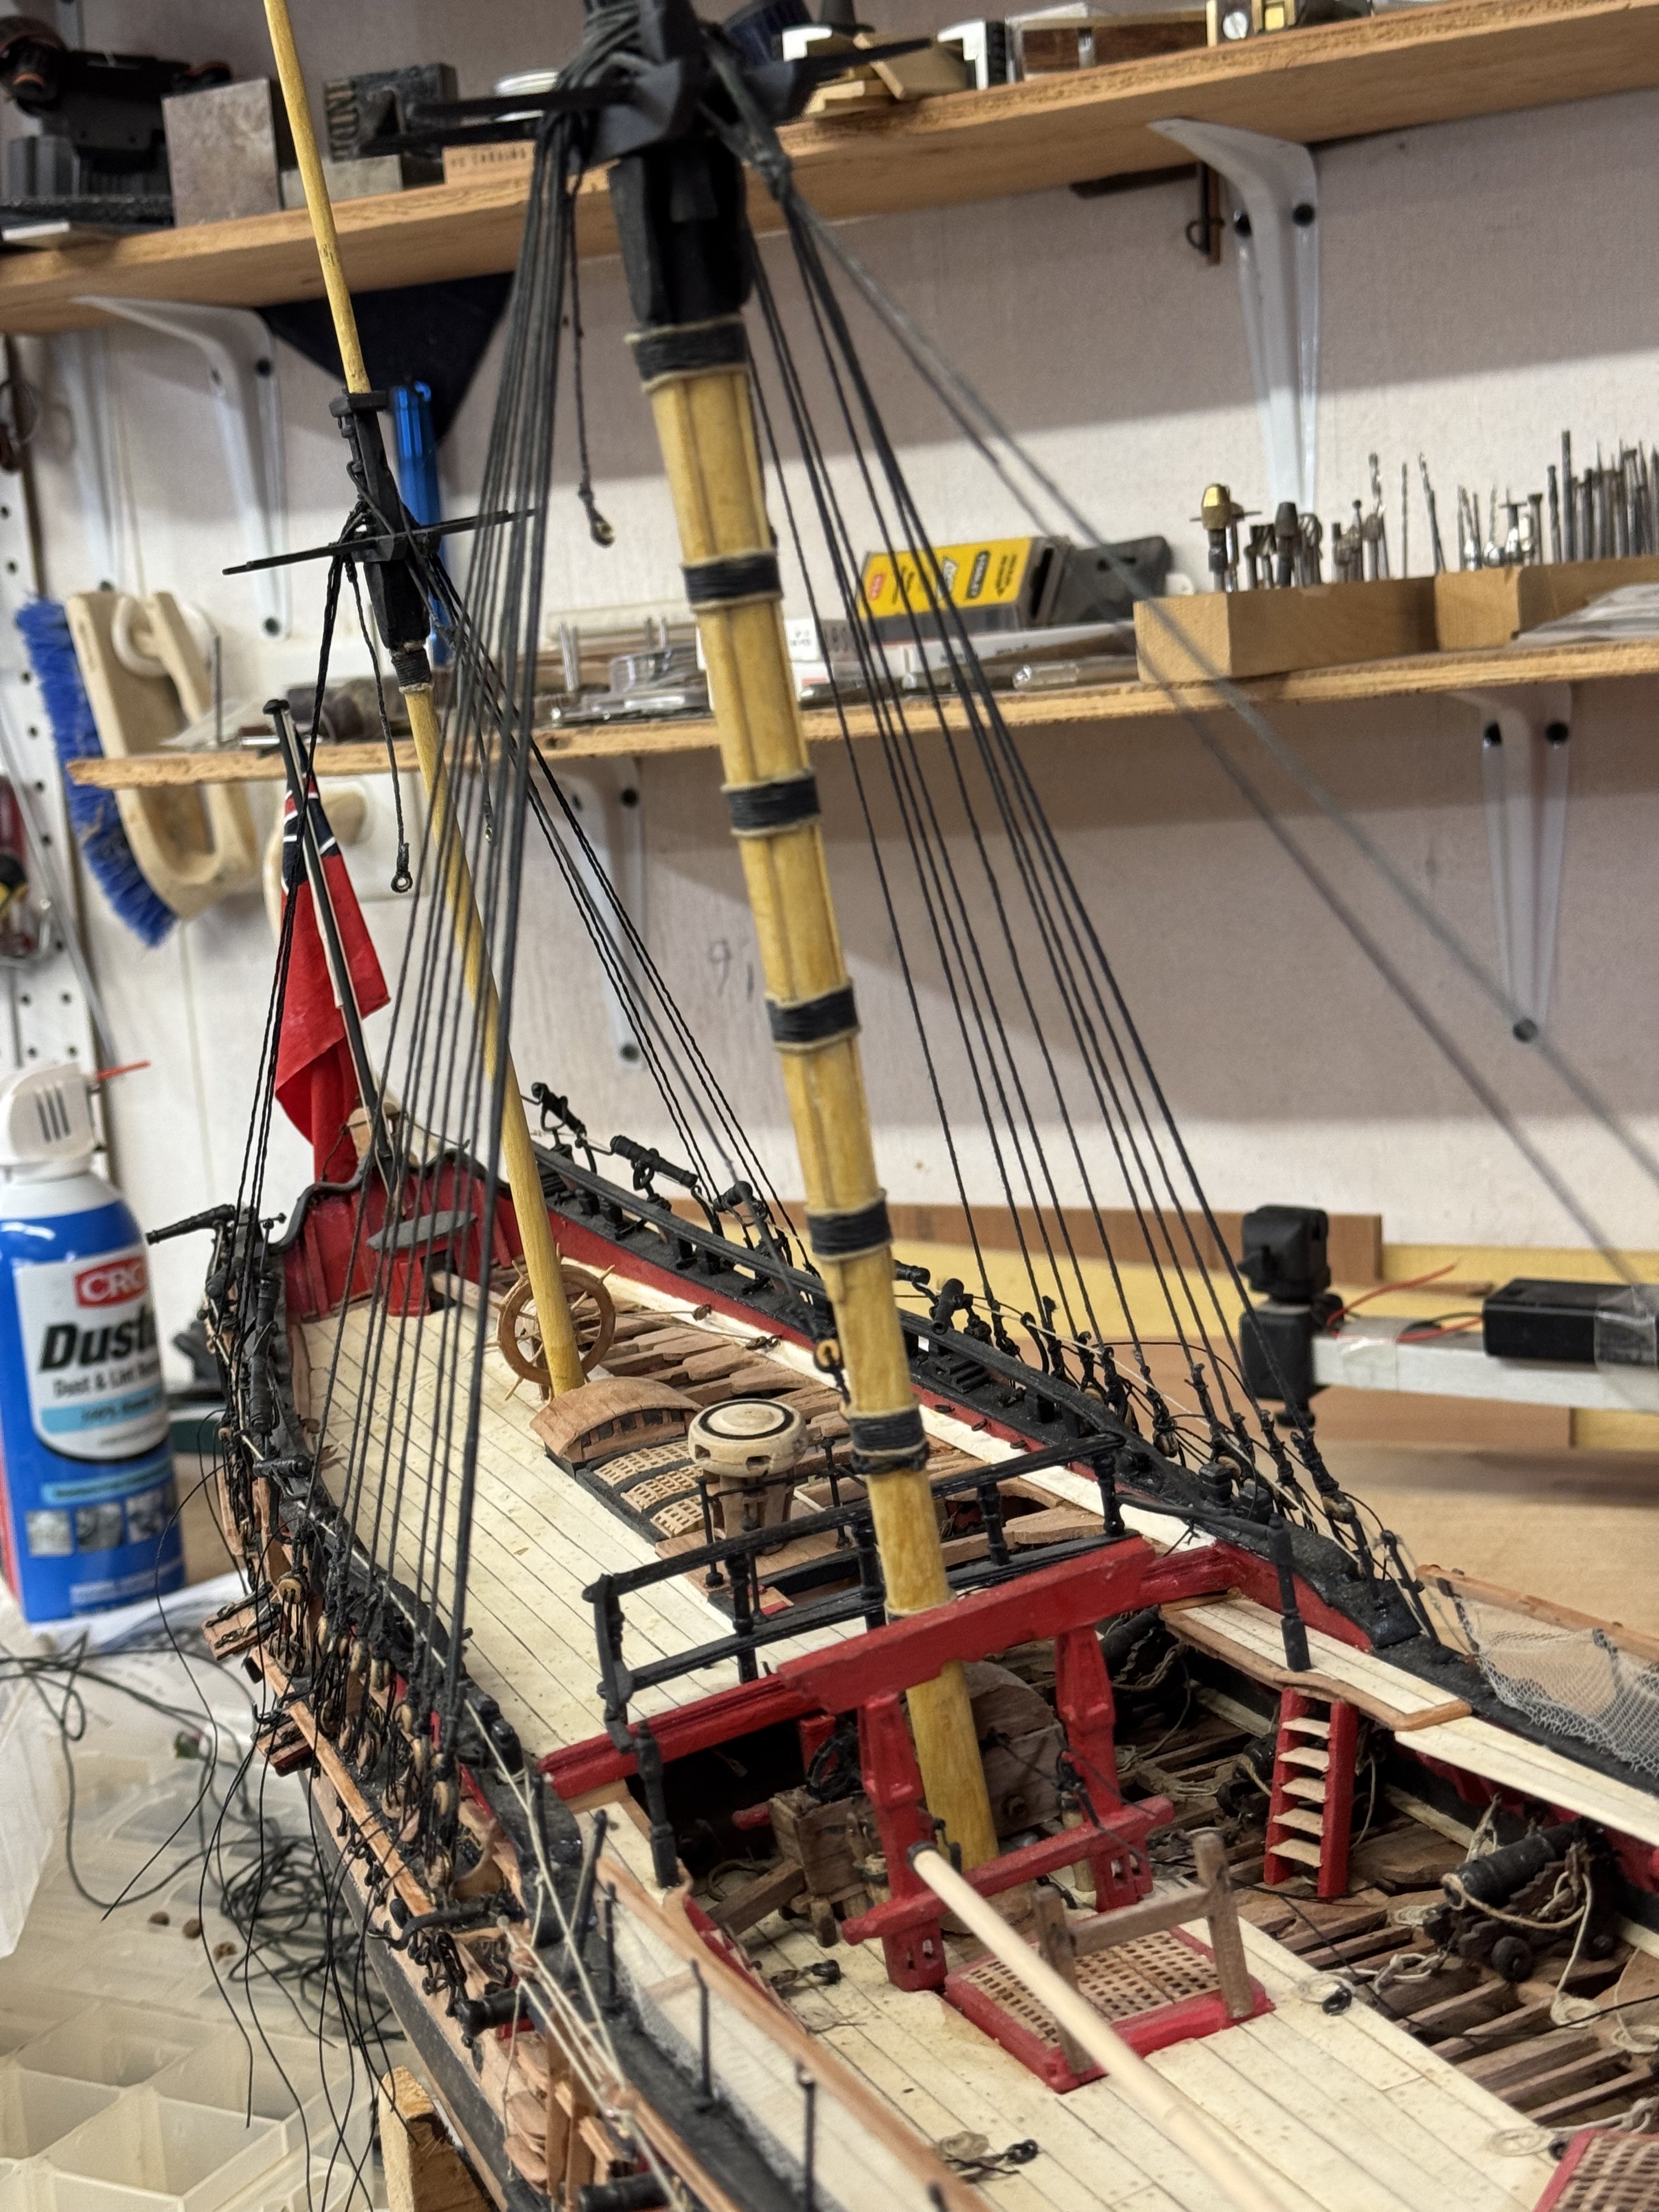
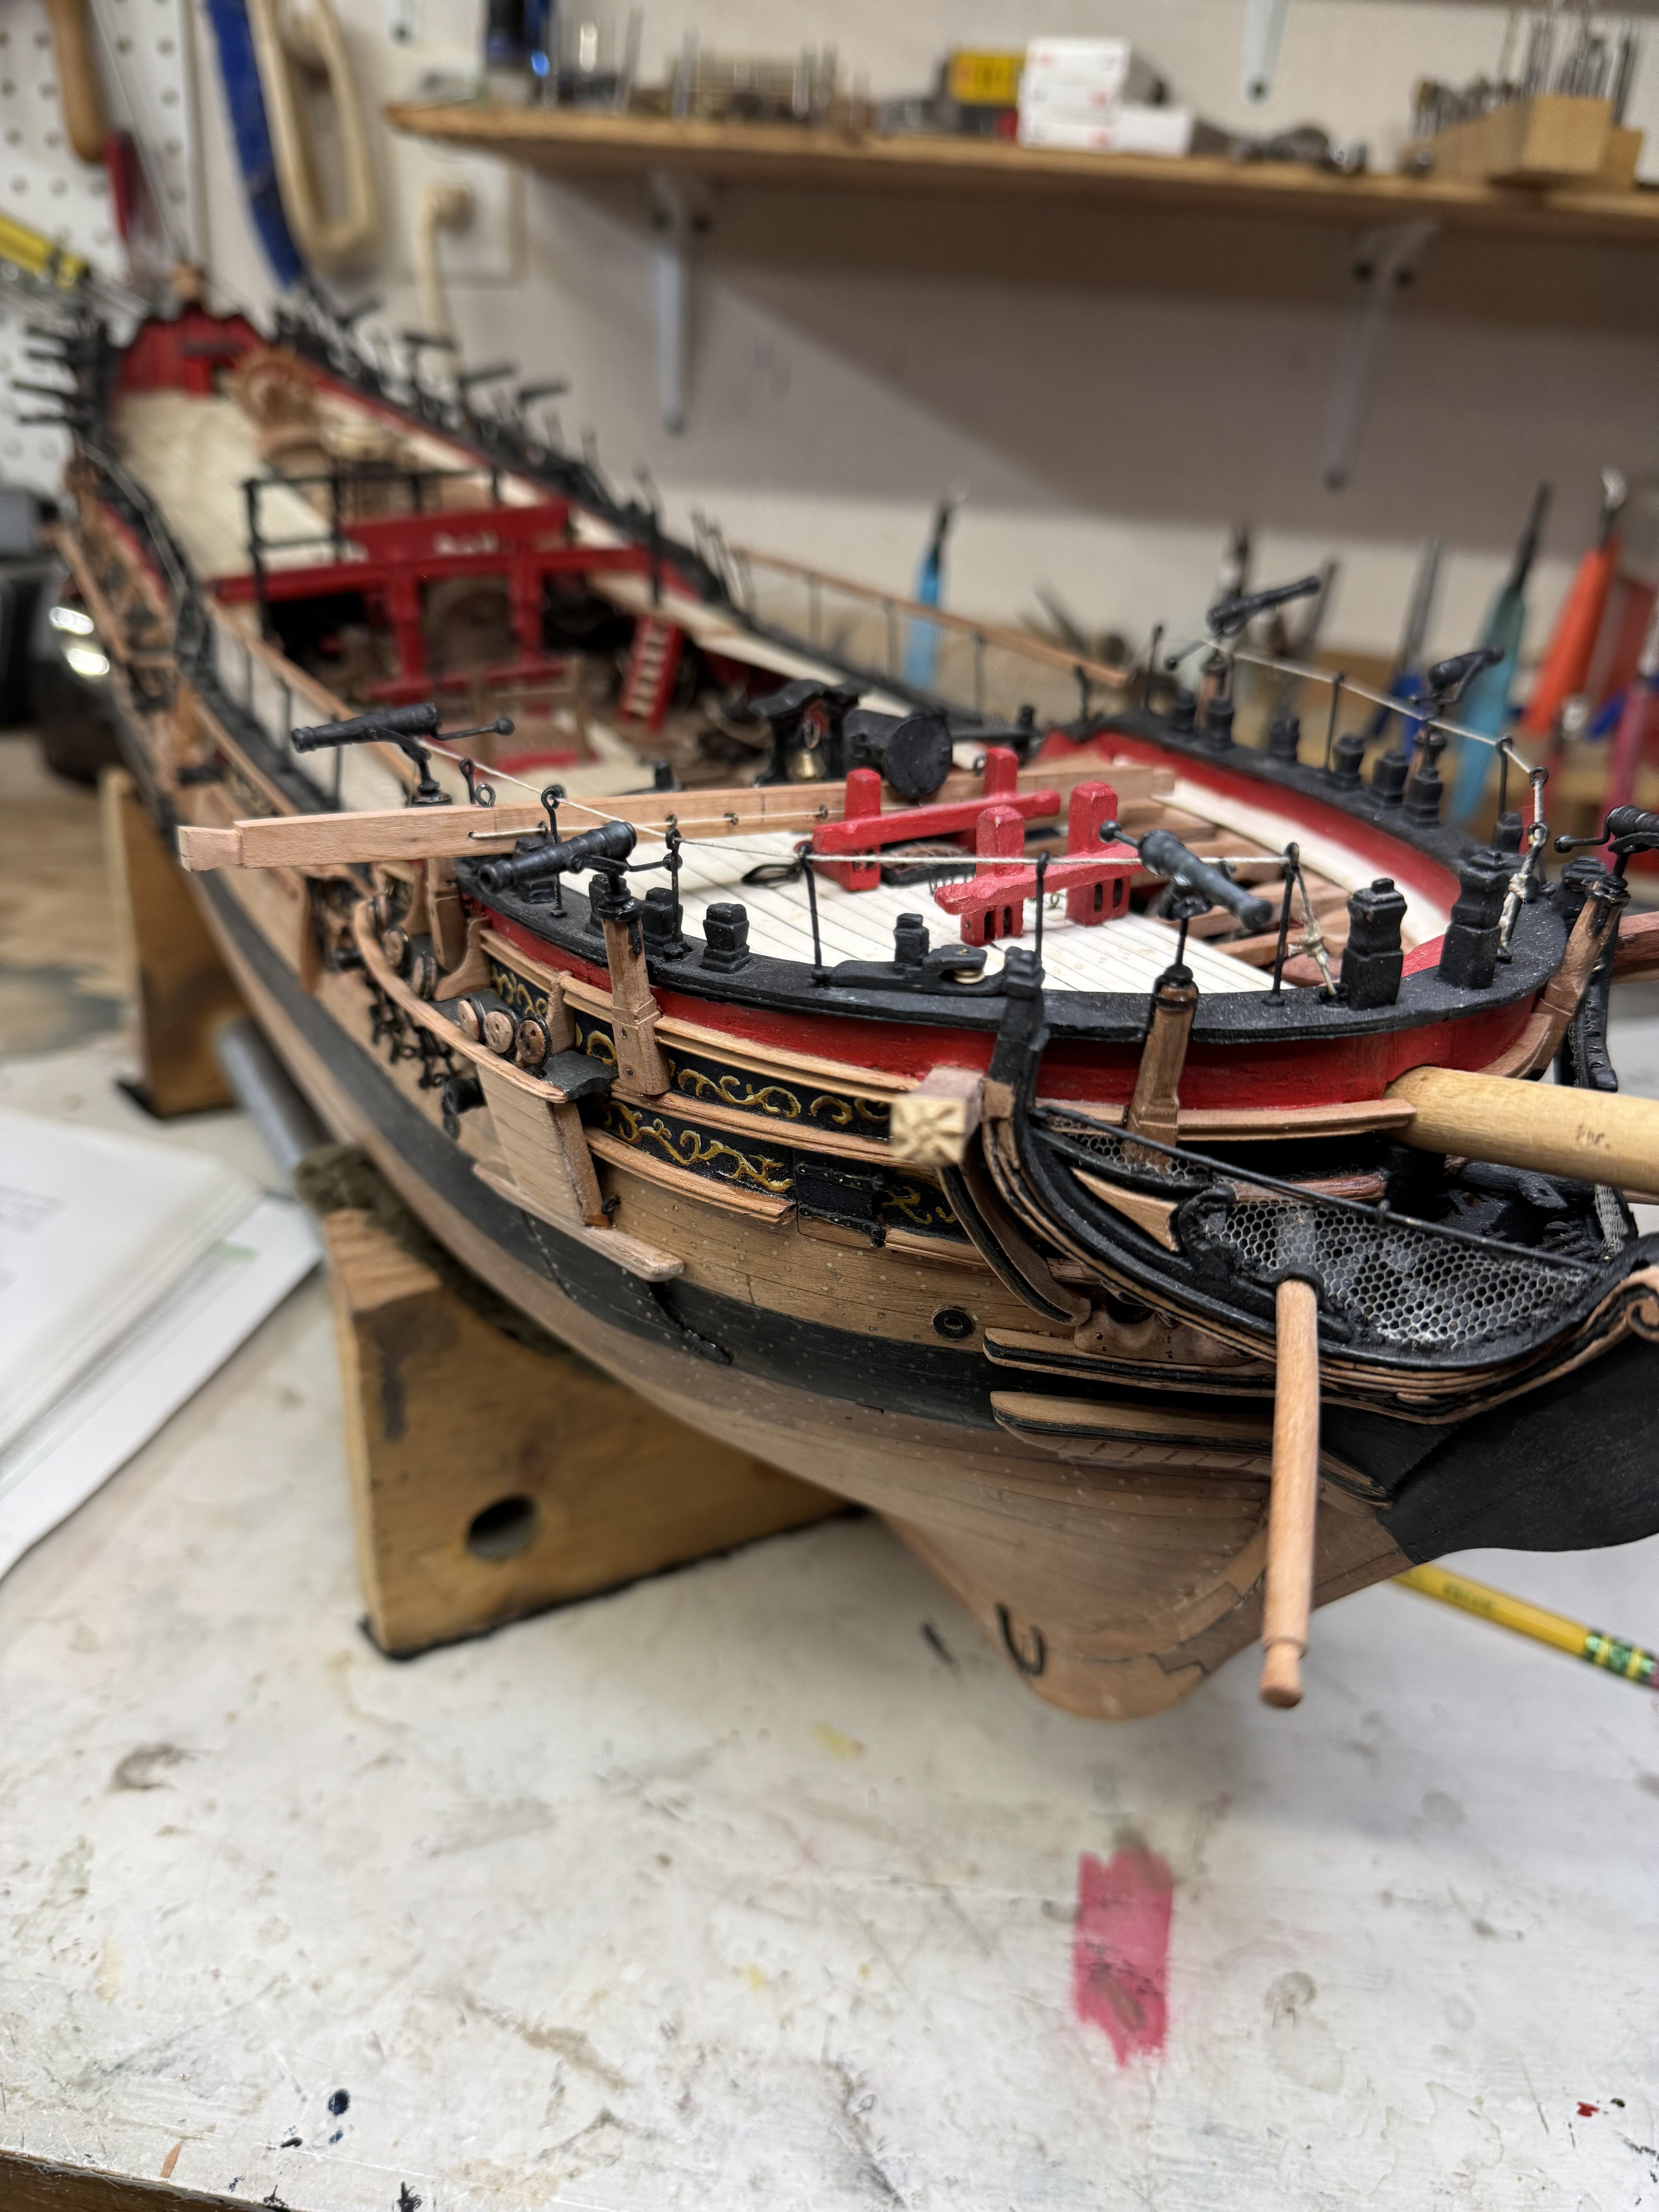
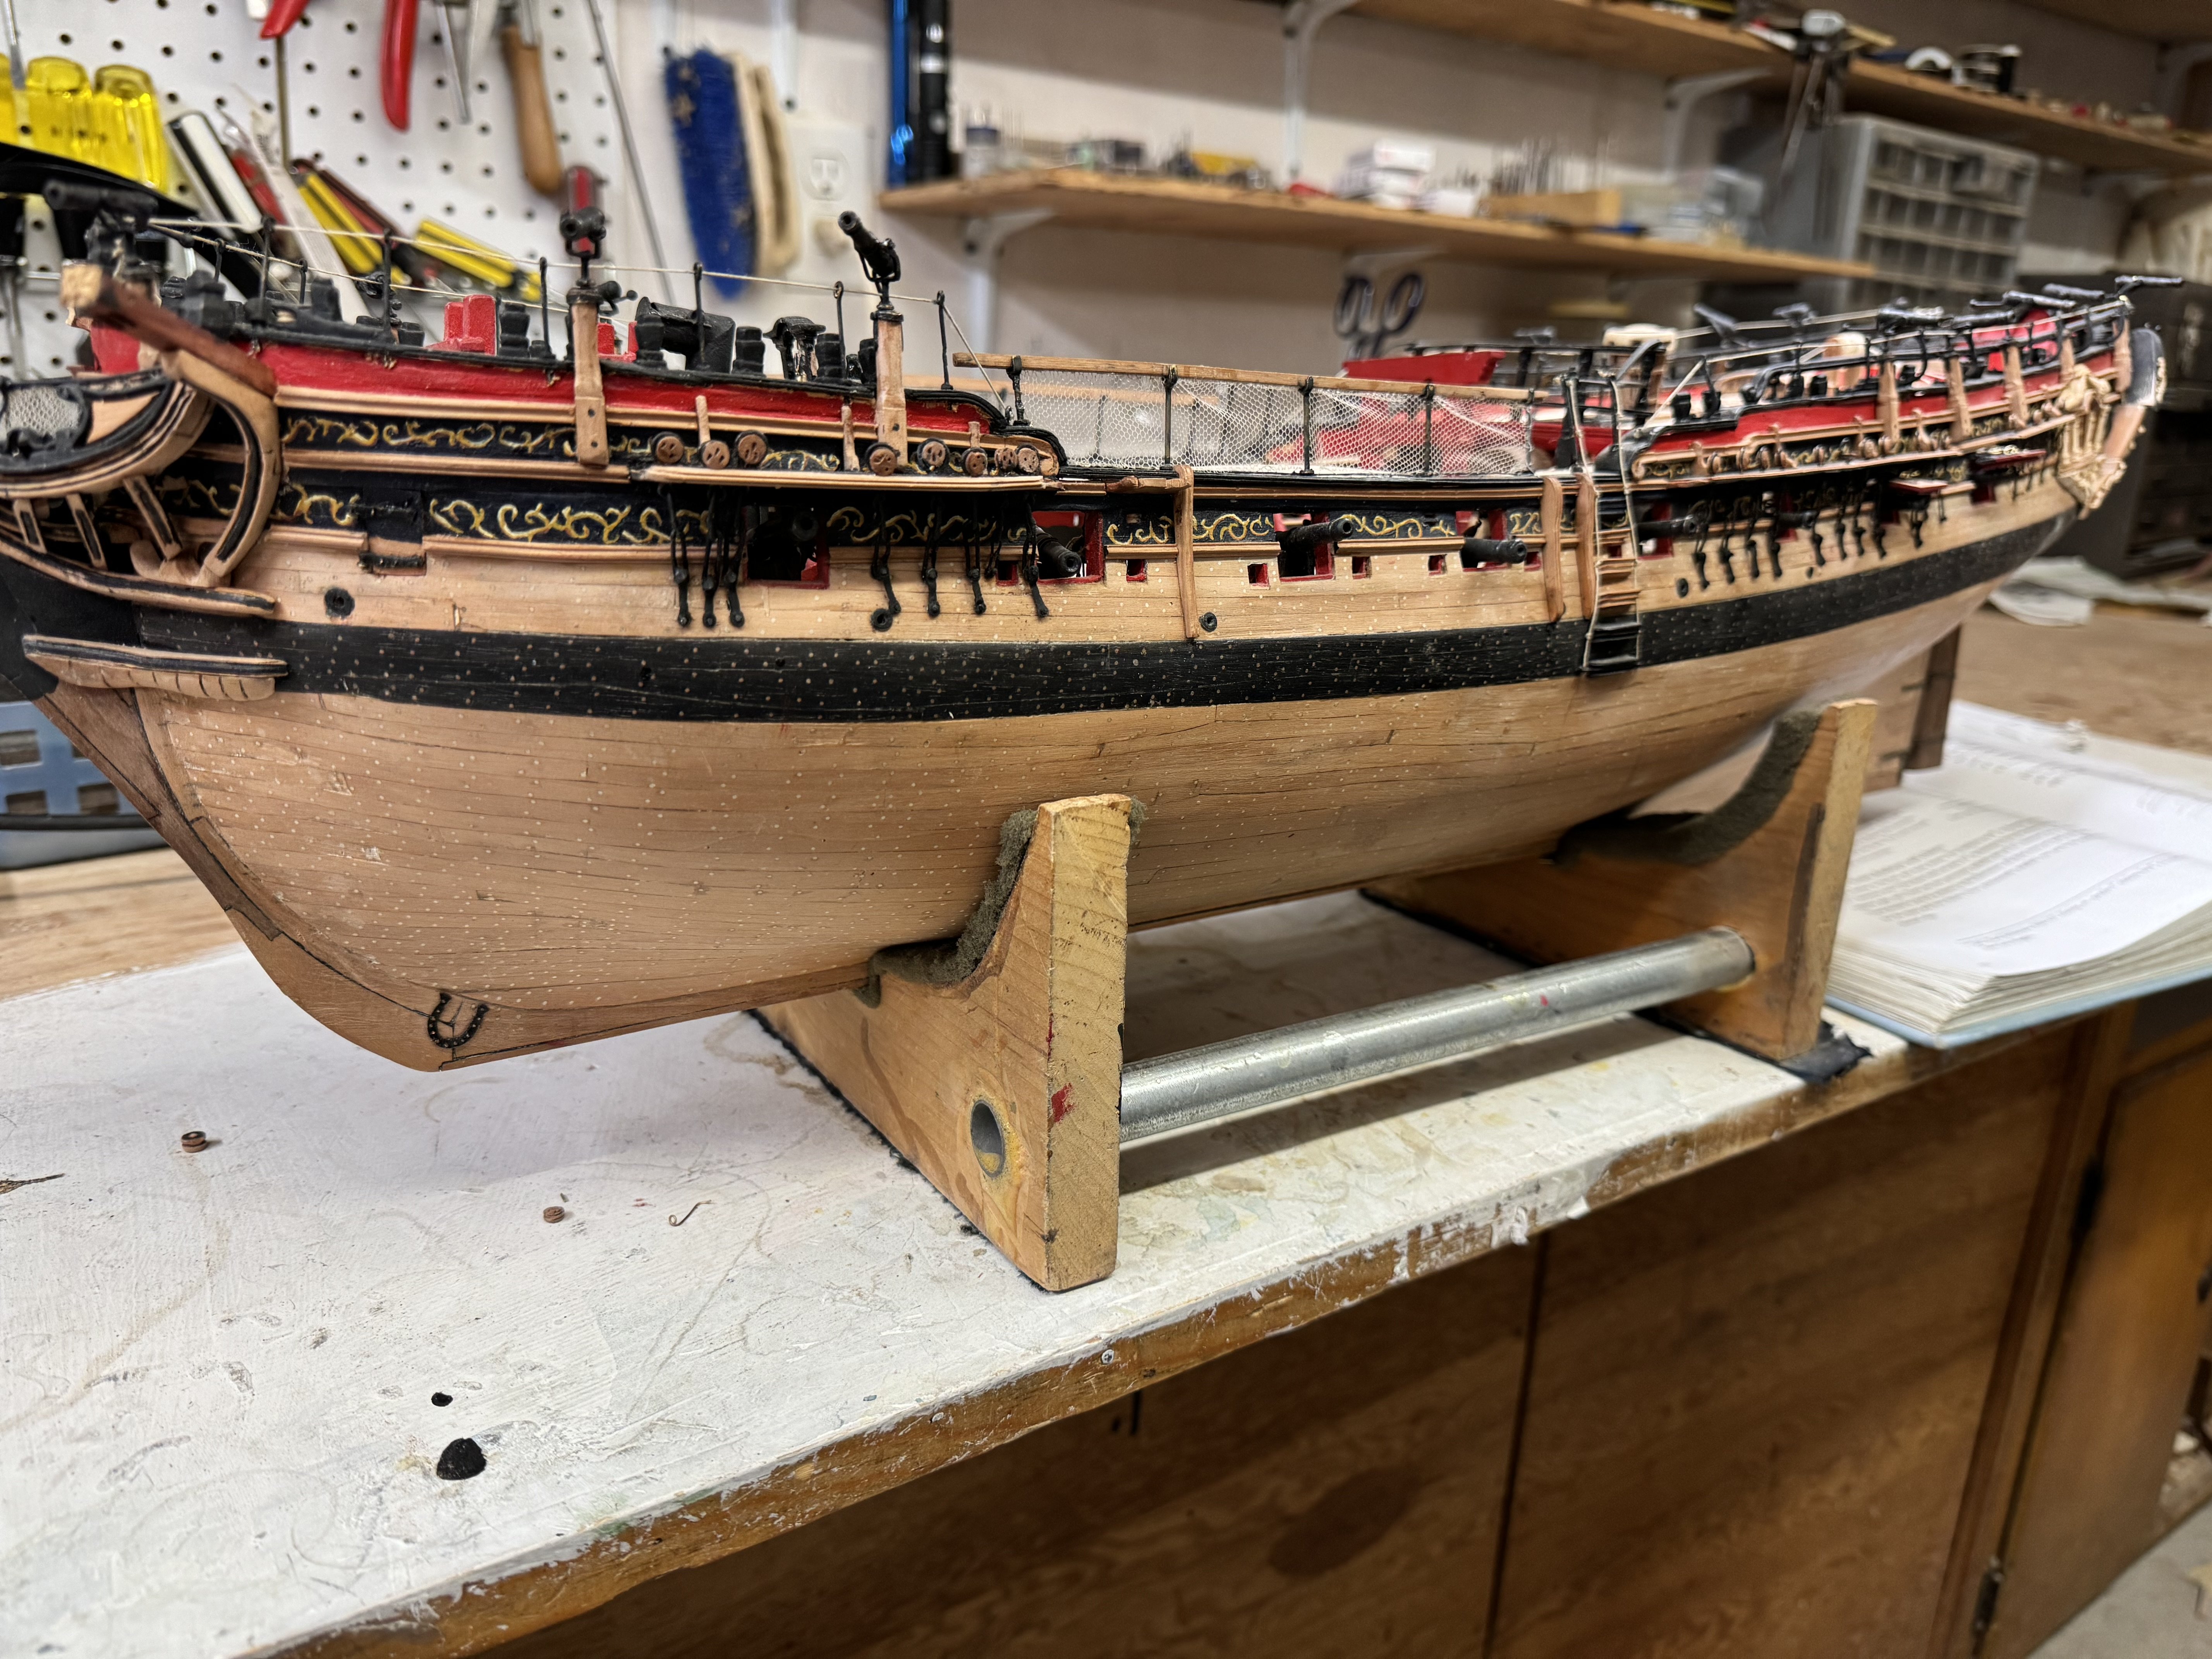
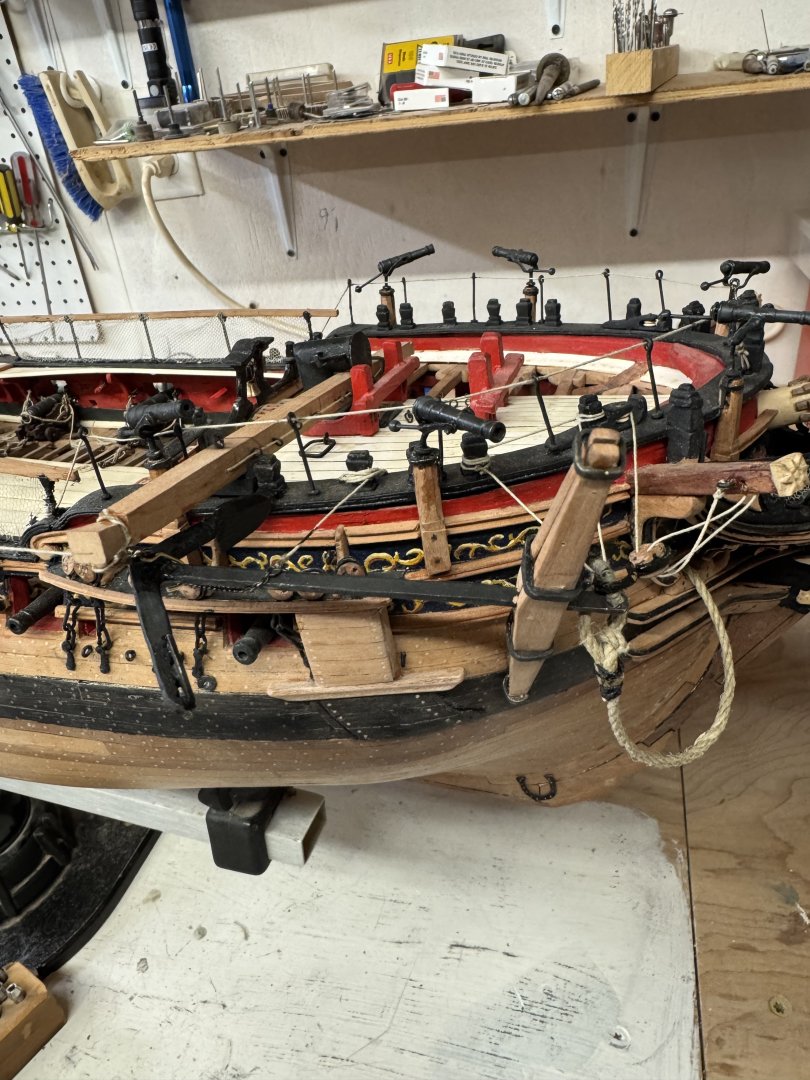
Lower deadeyes, chains, billboards, bolsters and linings in. I’m leaning towards rigging the build. In reviewing the plans for the bowsprit, I noticed that the various diameters as specified in the plans differ from those in the text, vol II, ch. 11.27. As I seem to do with some regularity, I’m likely missing an obvious explanation. But perhaps Greg or someone could explain it.


- 257 replies
-
- 6
-
-

-
- pegasus
- Swan-class
- (and 1 more)
-
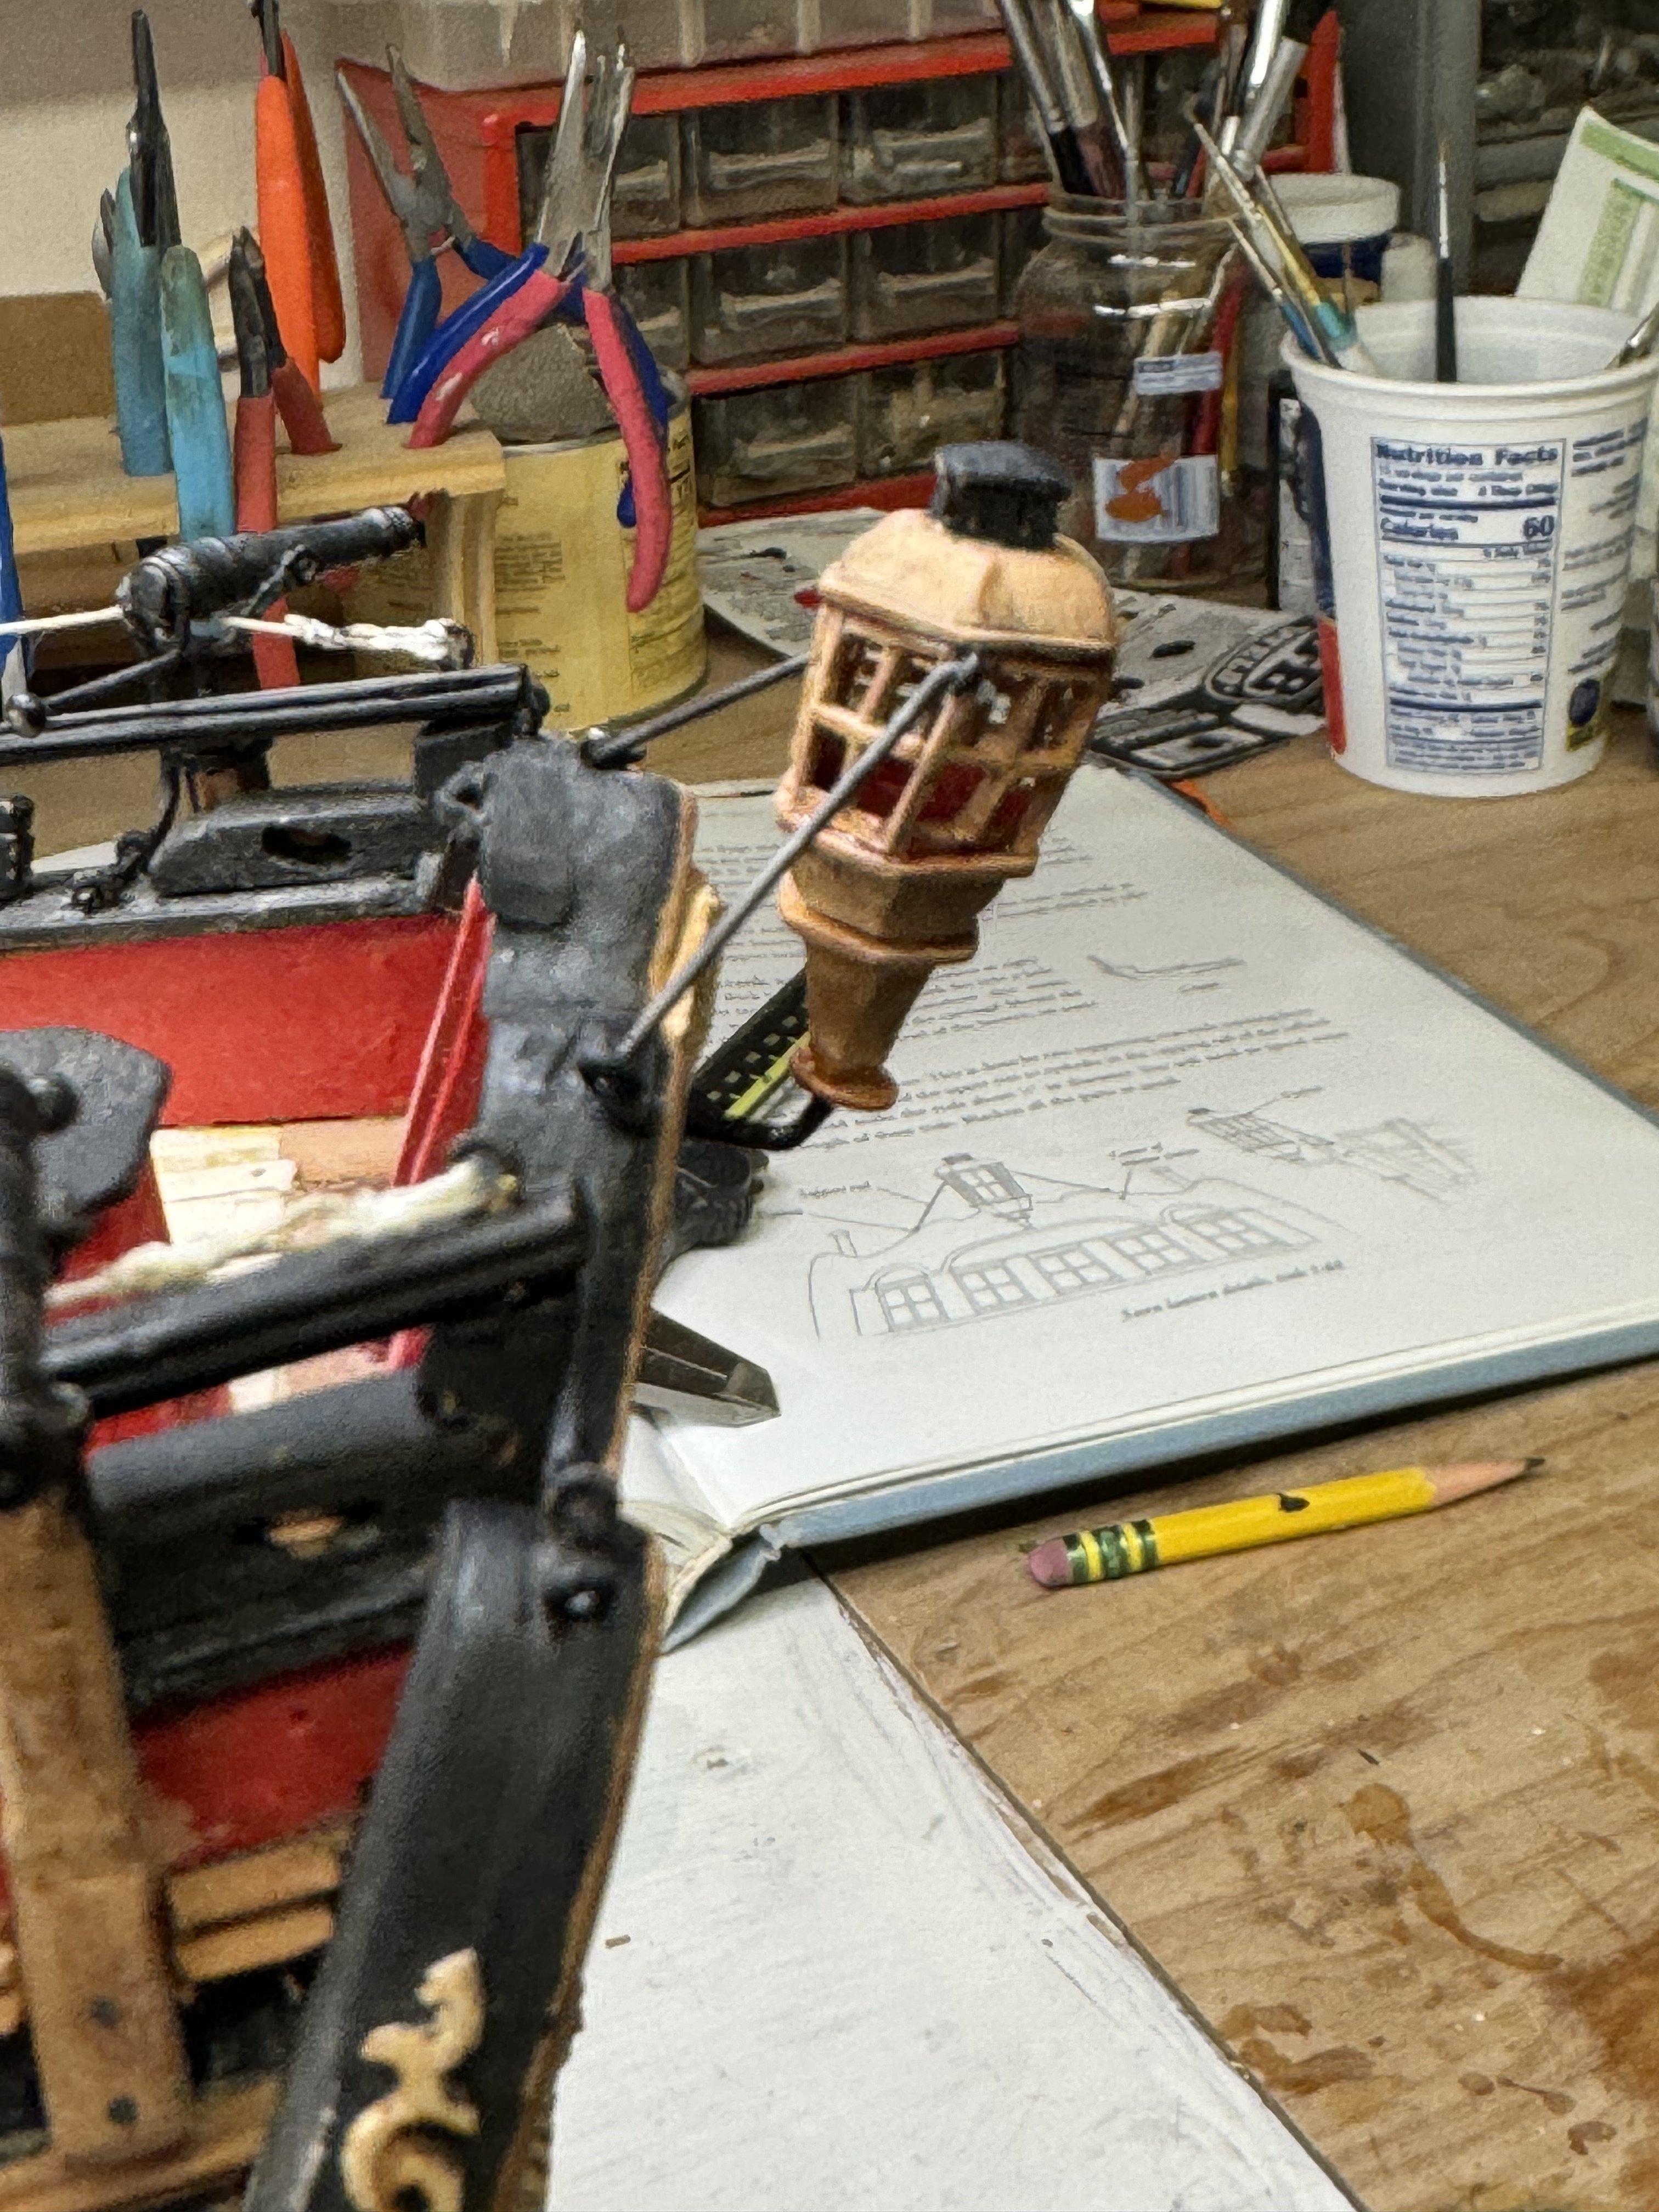
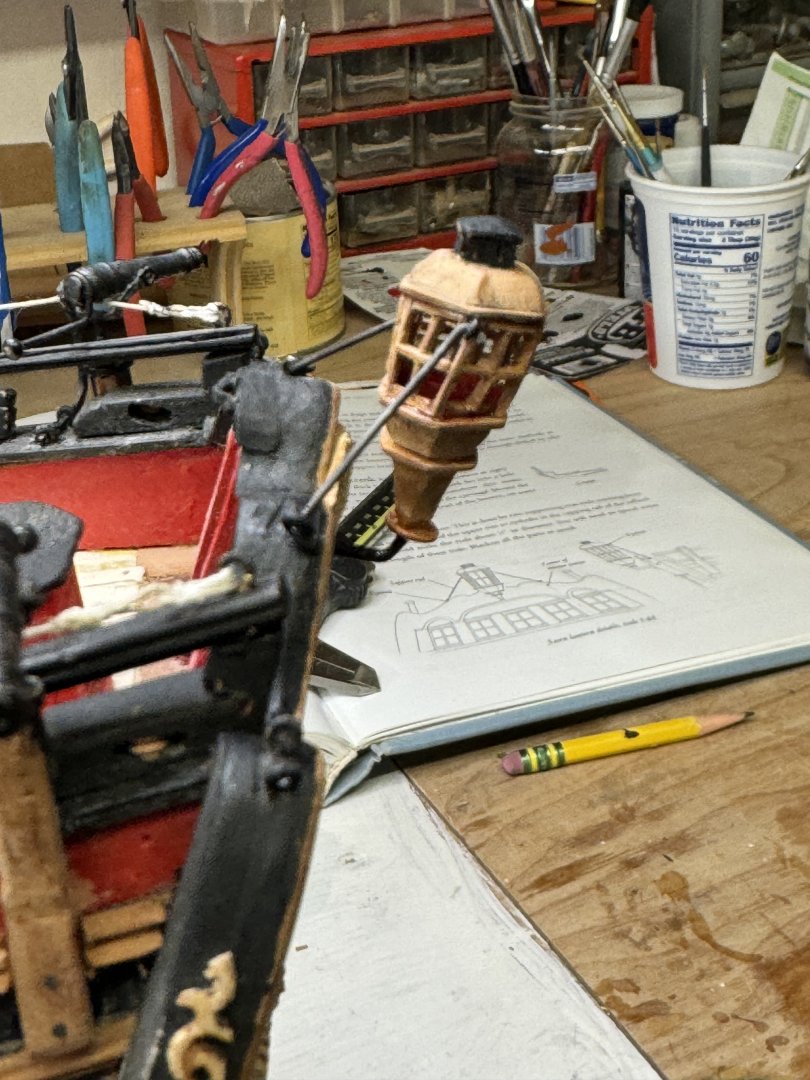
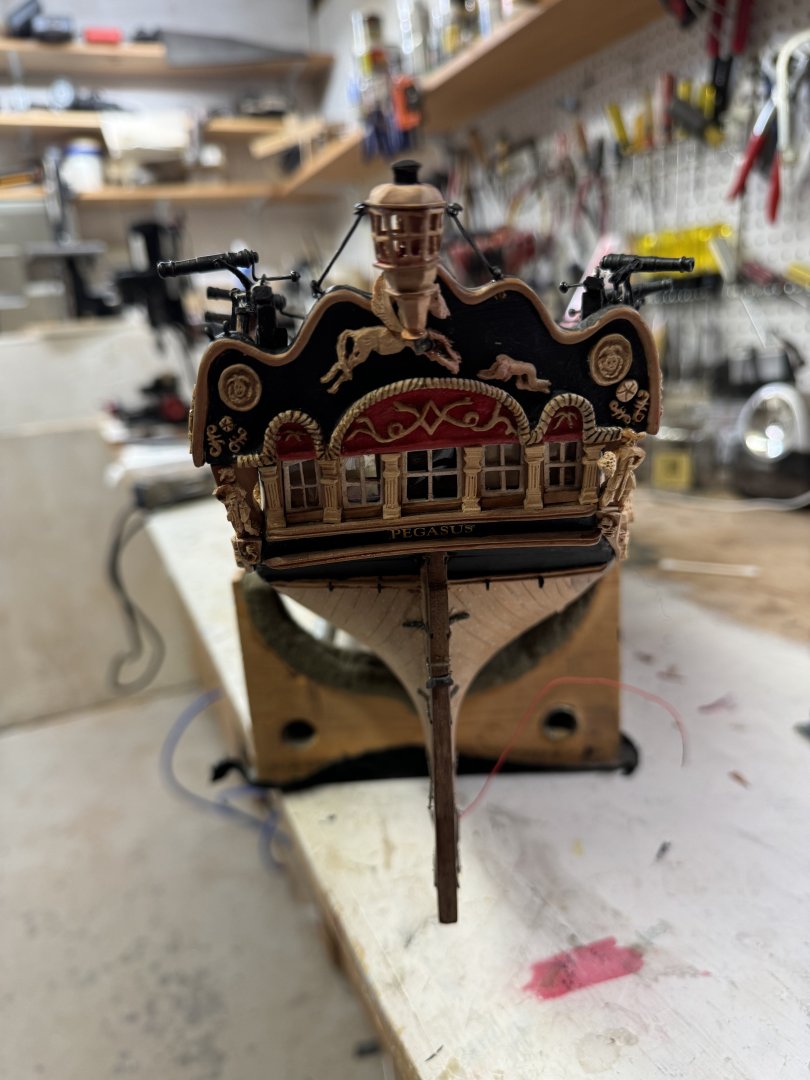
Sparex - H2O rinse- Brass Black- H2O rinse definitely produced superior results. Stern lantern complete.
- 257 replies
-
- 4
-
-
- pegasus
- Swan-class
- (and 1 more)
-
I glued the pieces to a wooden mandrel and when finished ate away the mandrel with my Turbo Carver. 😊
- 257 replies
-
- 1
-
-
- pegasus
- Swan-class
- (and 1 more)
-
That’s what I ended up doing, Toni. Worked fine and was quick! Henry
- 257 replies
-
- 3
-
-
- pegasus
- Swan-class
- (and 1 more)
-
I have started using Sparex, rinsing in water and then putting the pieces in a 5:1 (approx) of Birchwood Casey Brass Black. It does seem to work better. Much appreciate the tips. While I await a new delivery of .032 “ brass rod to complete the starboard site chains, I’ve experimented with making a pattern in wood for the stern lantern. Making a hexagonal rod in 1:48 has proven a challenge so far. I tried my mini tilting arbor table saw with the blade angled 60 degrees, but had trouble securing the work against the fence once the fence surface became smaller. Then tried my milling machine (Sherline) with a tilting clamp. That should work, but am having a time getting the bit centered on the stock properly. I think I could use some advise from Greg. Henry

- 257 replies
-
- 4
-
-
- pegasus
- Swan-class
- (and 1 more)