HOLIDAY DONATION DRIVE - SUPPORT MSW - DO YOUR PART TO KEEP THIS GREAT FORUM GOING! (Only 75 donations so far out of 49,000 members - C'mon guys!)
×


hdrinker
-
Posts
232 -
Joined
-
Last visited
Content Type
Profiles
Forums
Gallery
Events
Everything posted by hdrinker
-
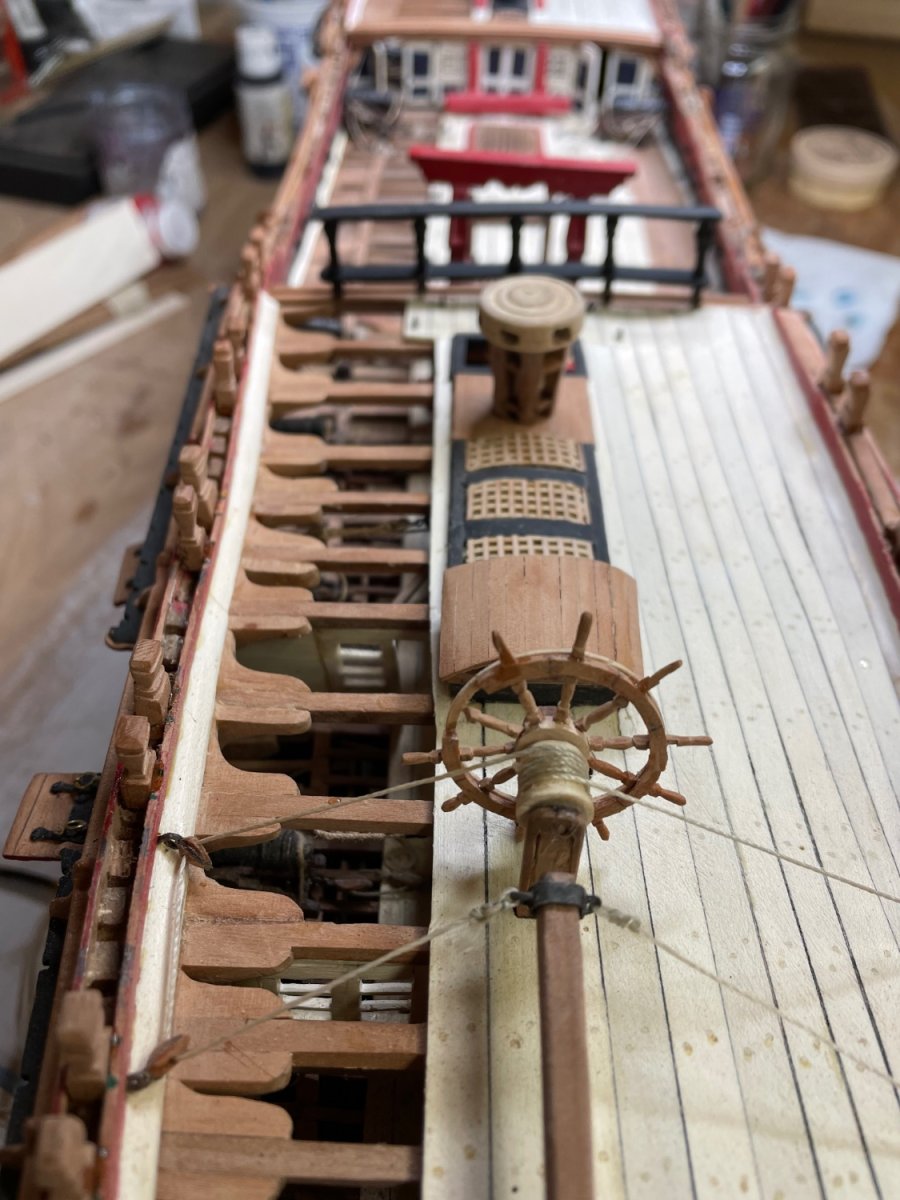
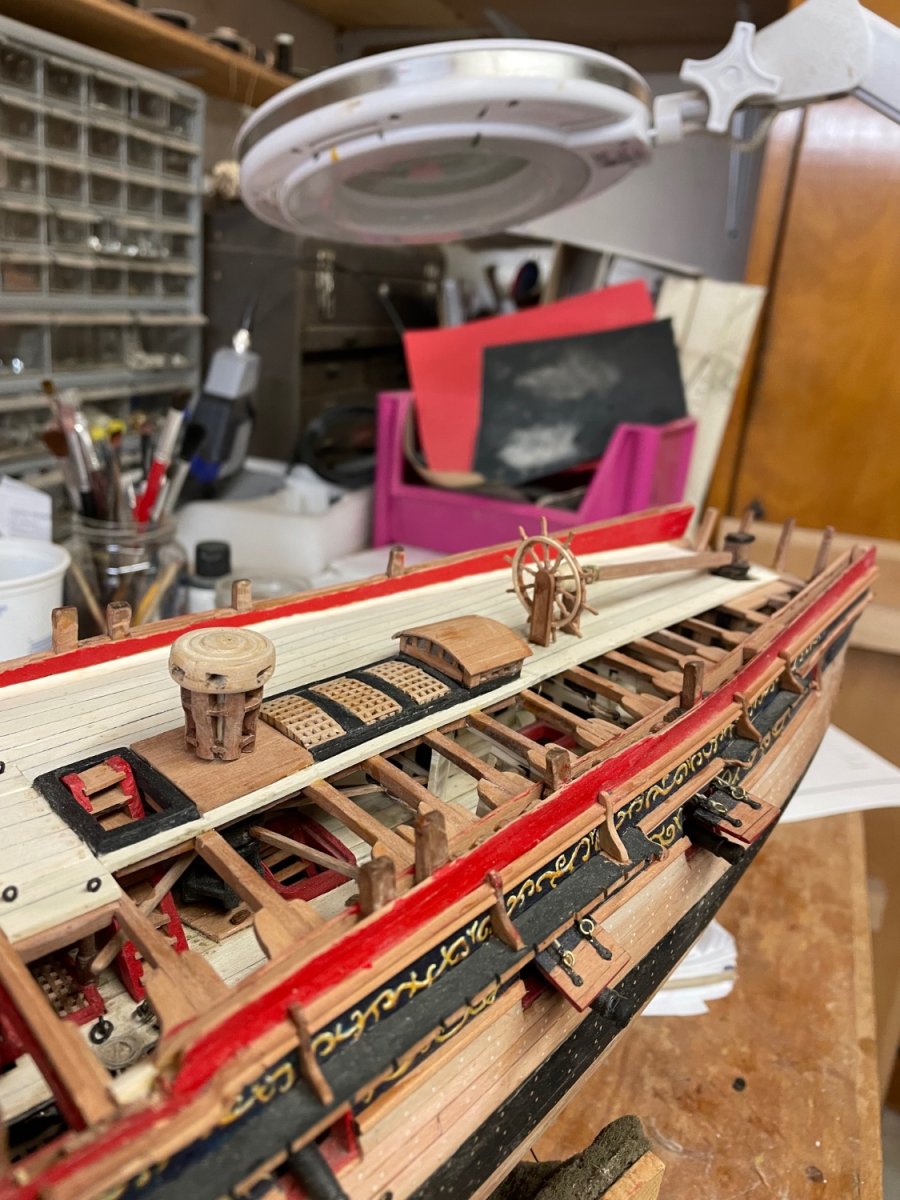
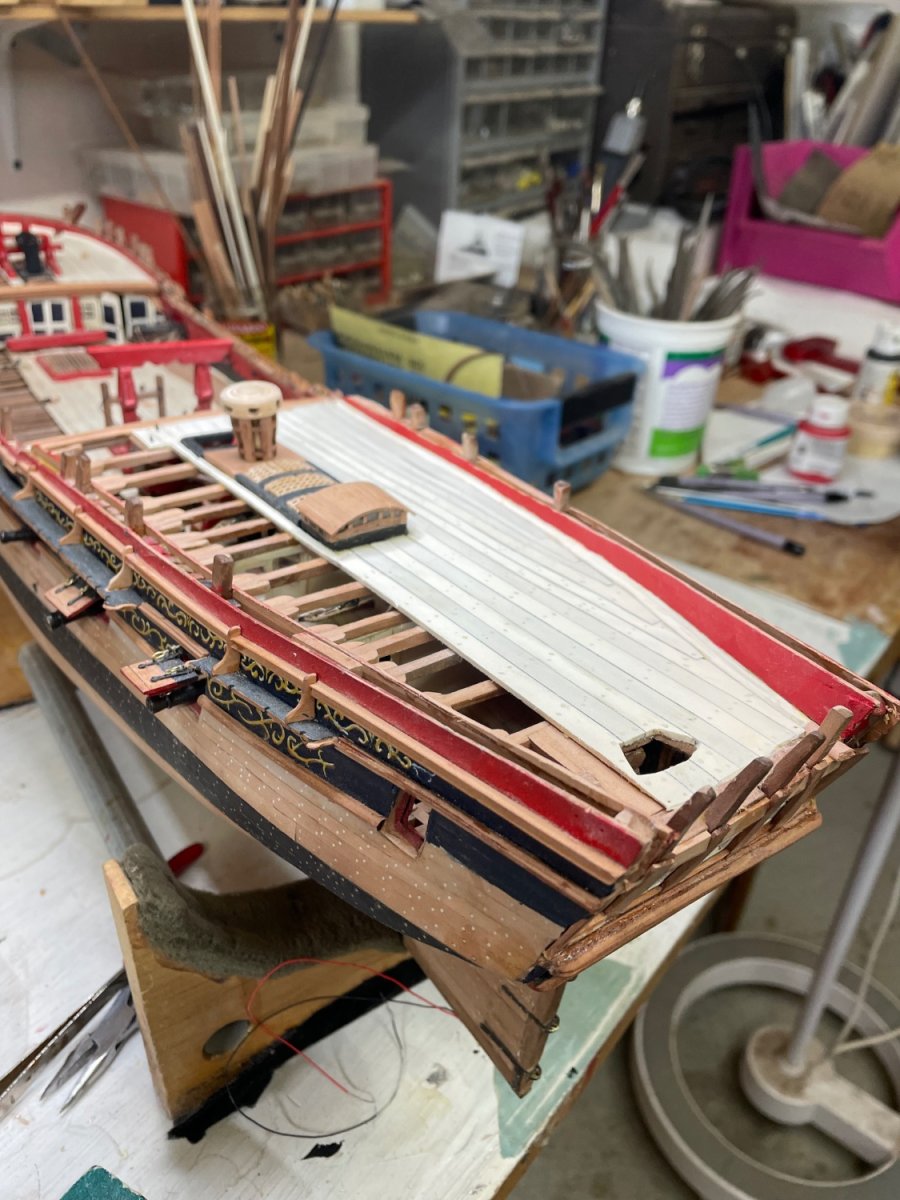
Breast work, wheel tackle. Pausing before tackling the belfry capital.

- 257 replies
-
- 9
-

-
- pegasus
- Swan-class
- (and 1 more)
-
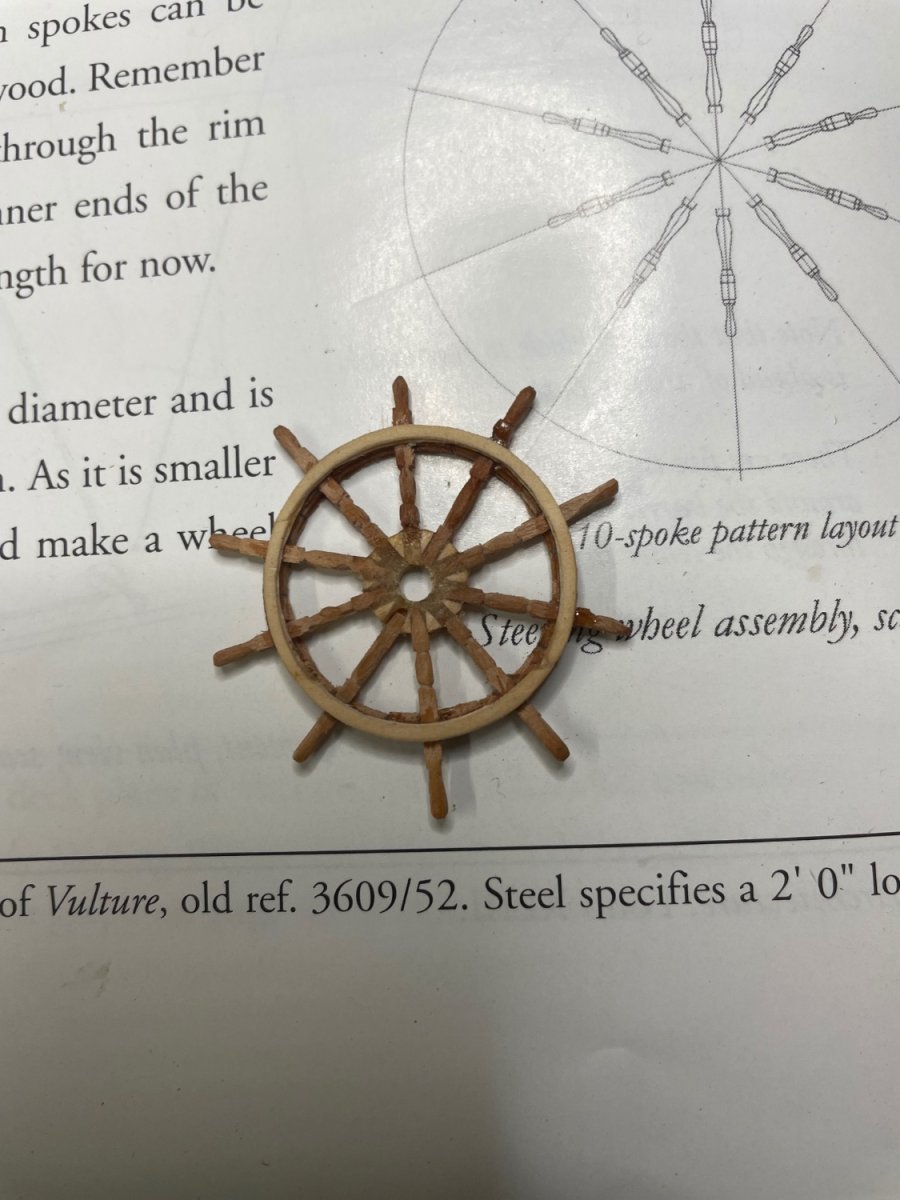
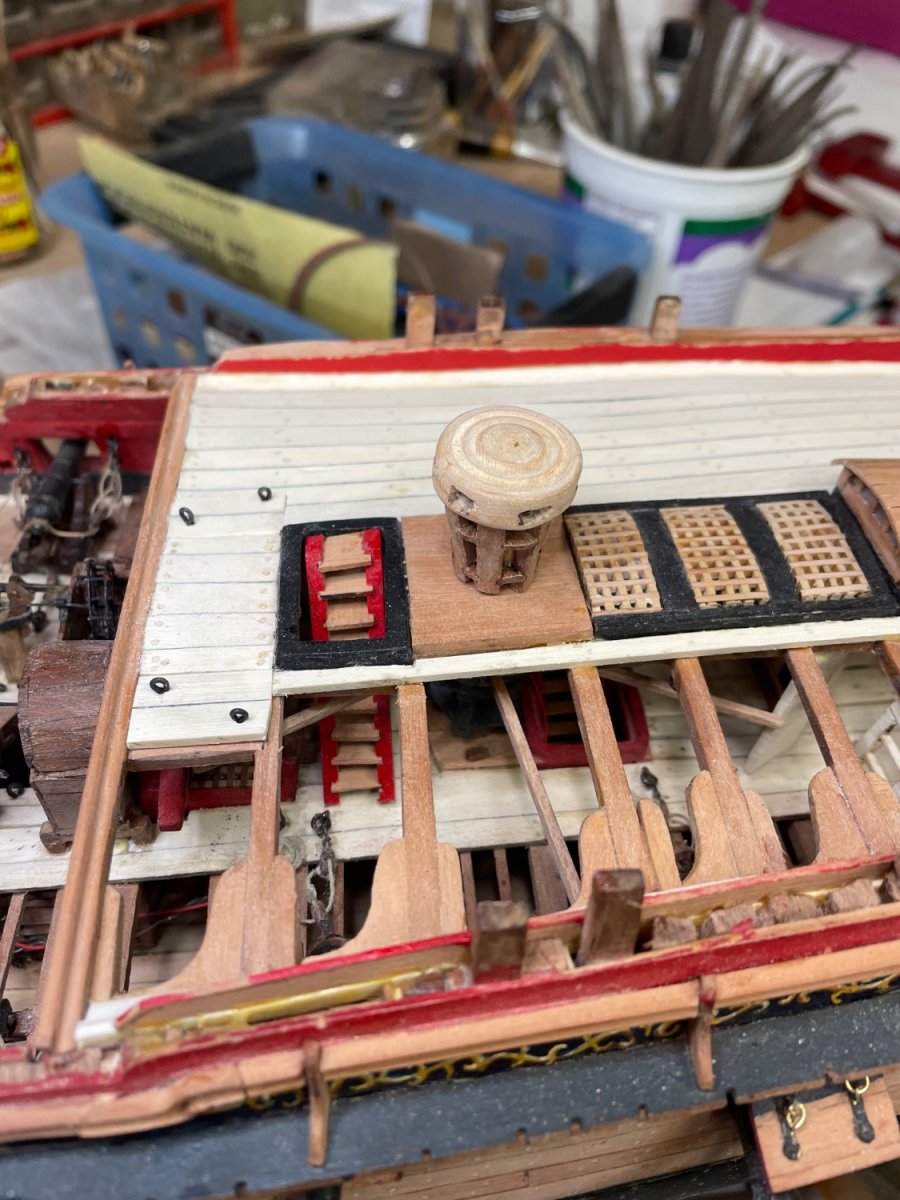
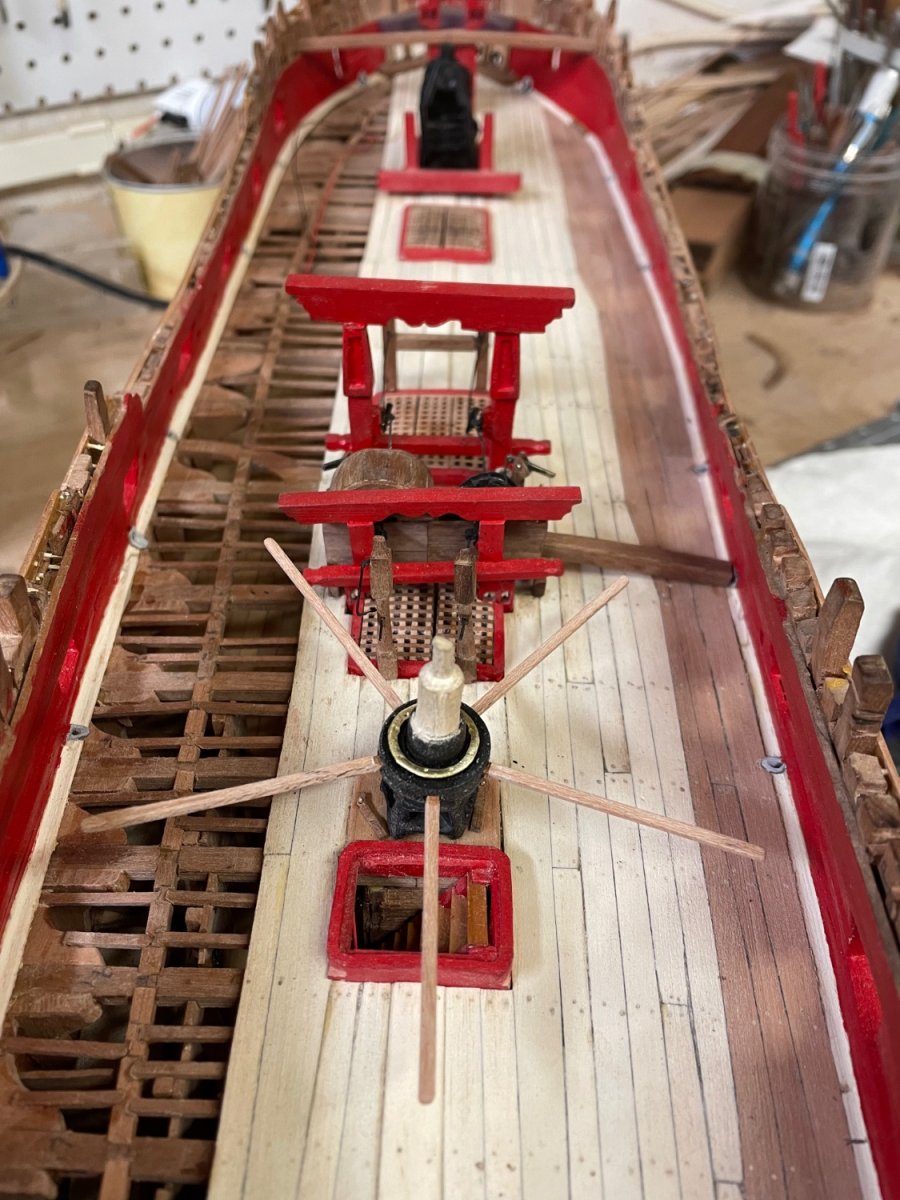
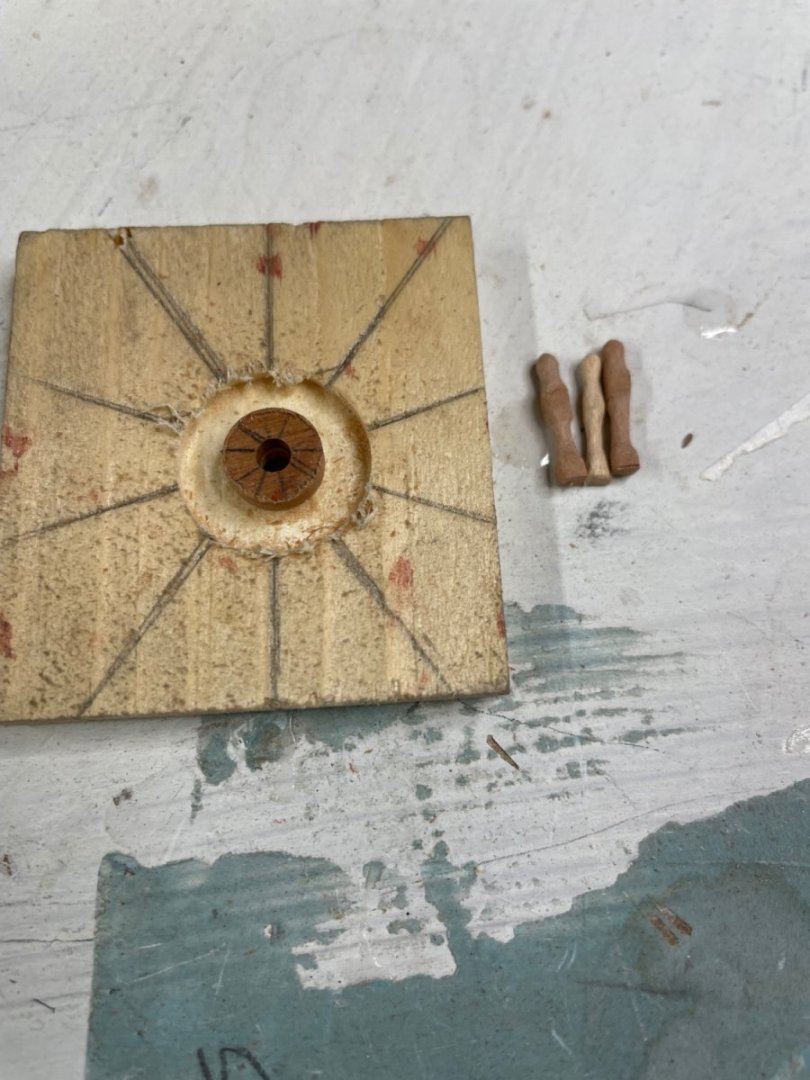
Progress on the quarterdeck. Starting the wheel, using Greg’s method, which so far has worked really well. I found that making the spokes by hand is easier for me than using the lathe.


- 257 replies
-
- 10
-
-
- pegasus
- Swan-class
- (and 1 more)
-
Where does one order coffee wood in sufficient bulk to accommodate a figurehead carving? Qq
-
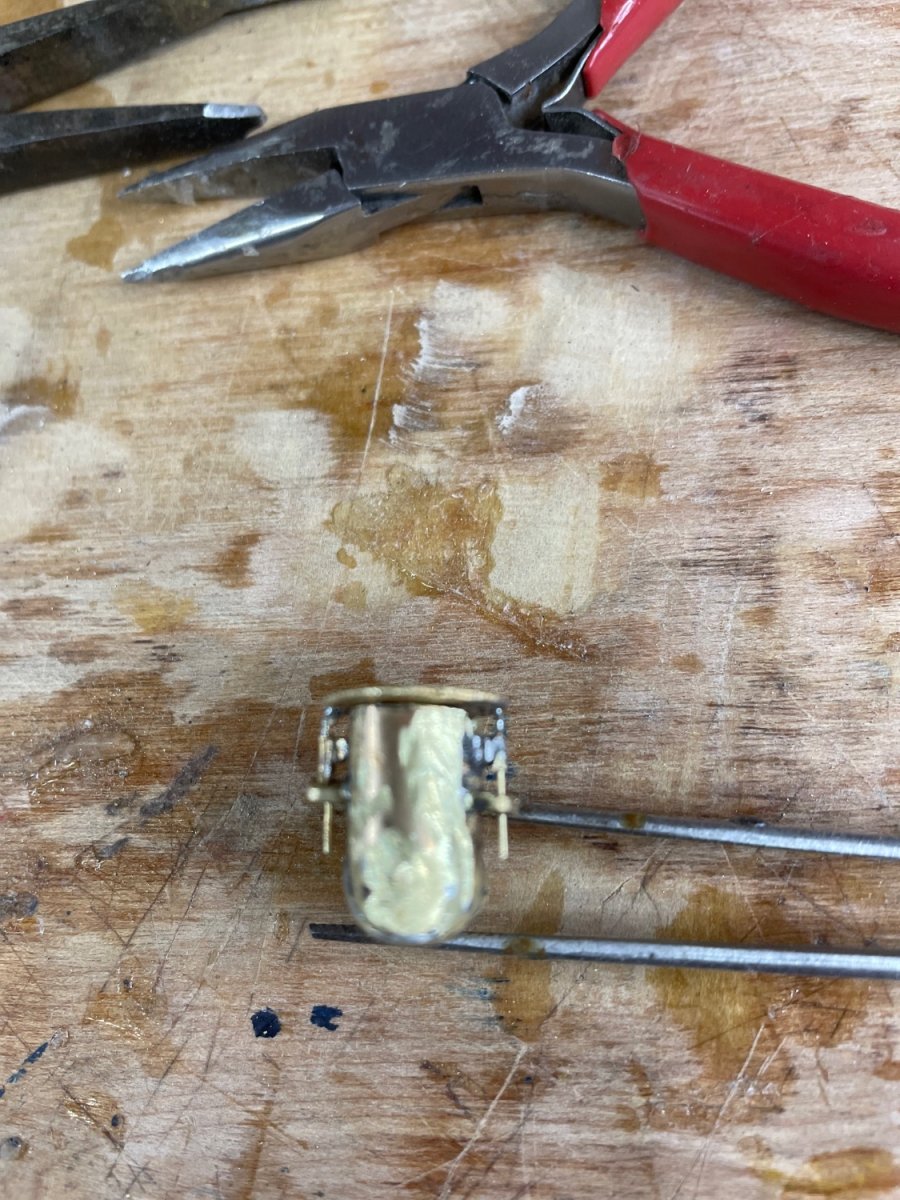
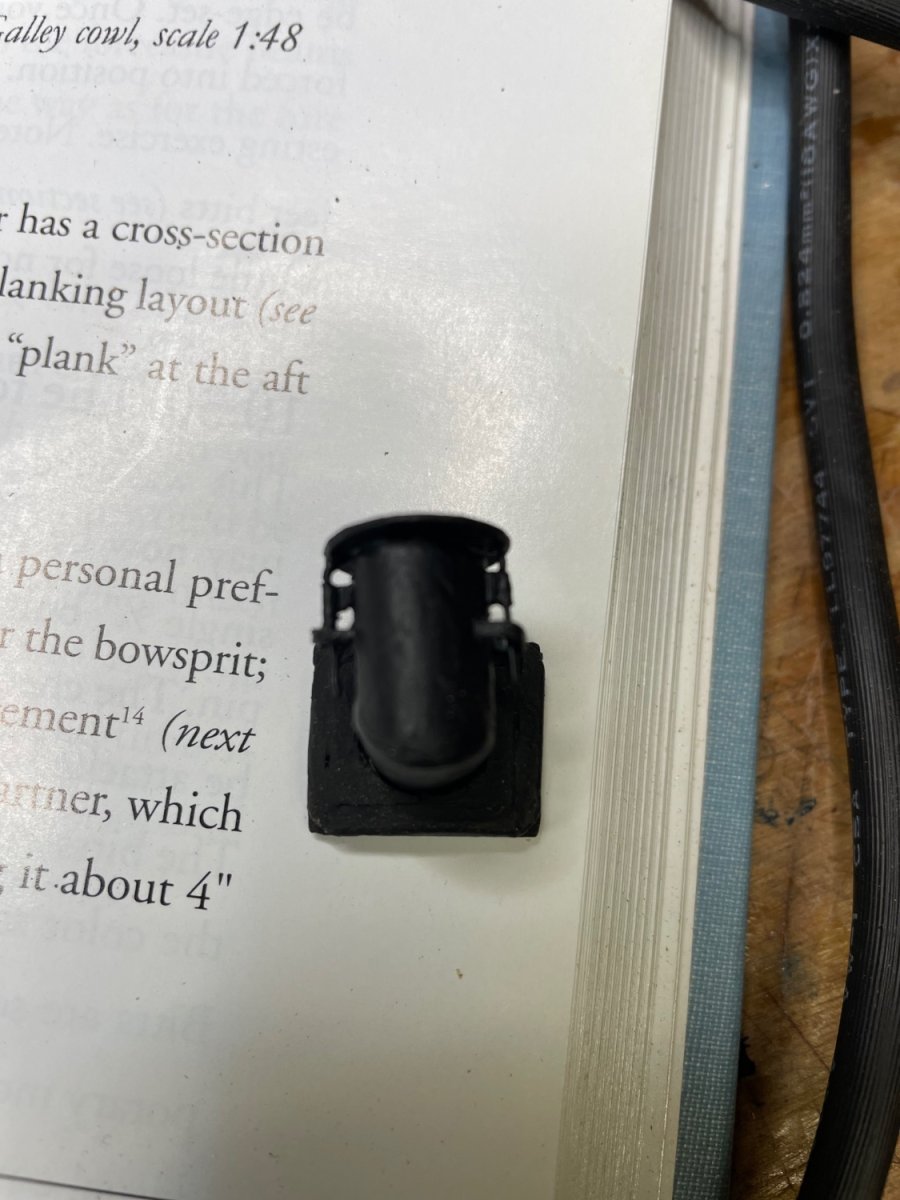
I put the cowl away somewhere so I wouldn’t lose it, and of course, I couldn’t find it…..so, made a second one. They’re soldered brass made over a dowel template which I left within.

- 257 replies
-
- 8
-
-
- pegasus
- Swan-class
- (and 1 more)
-
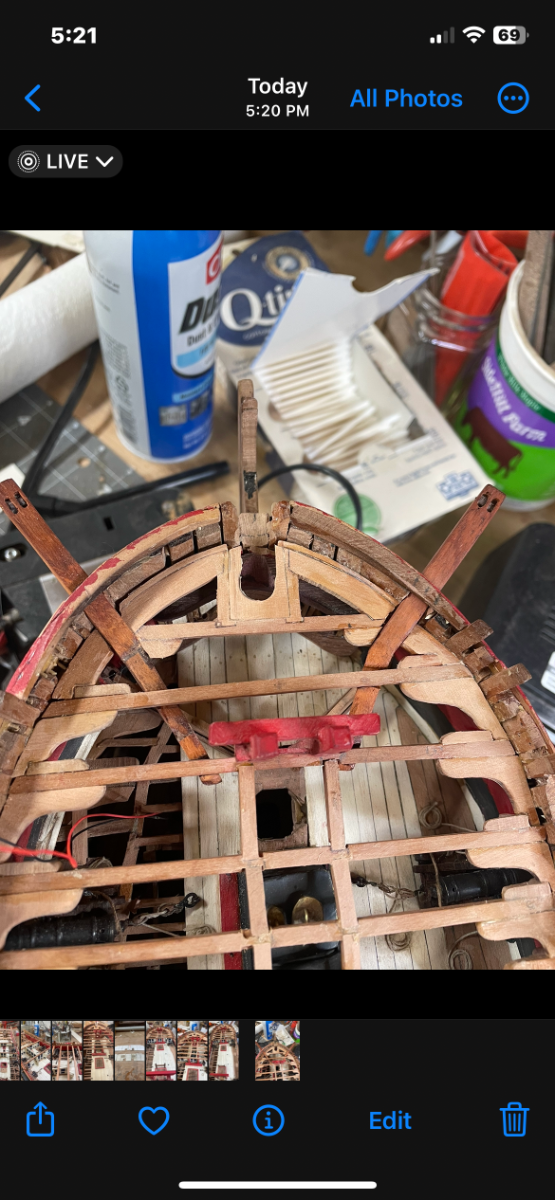
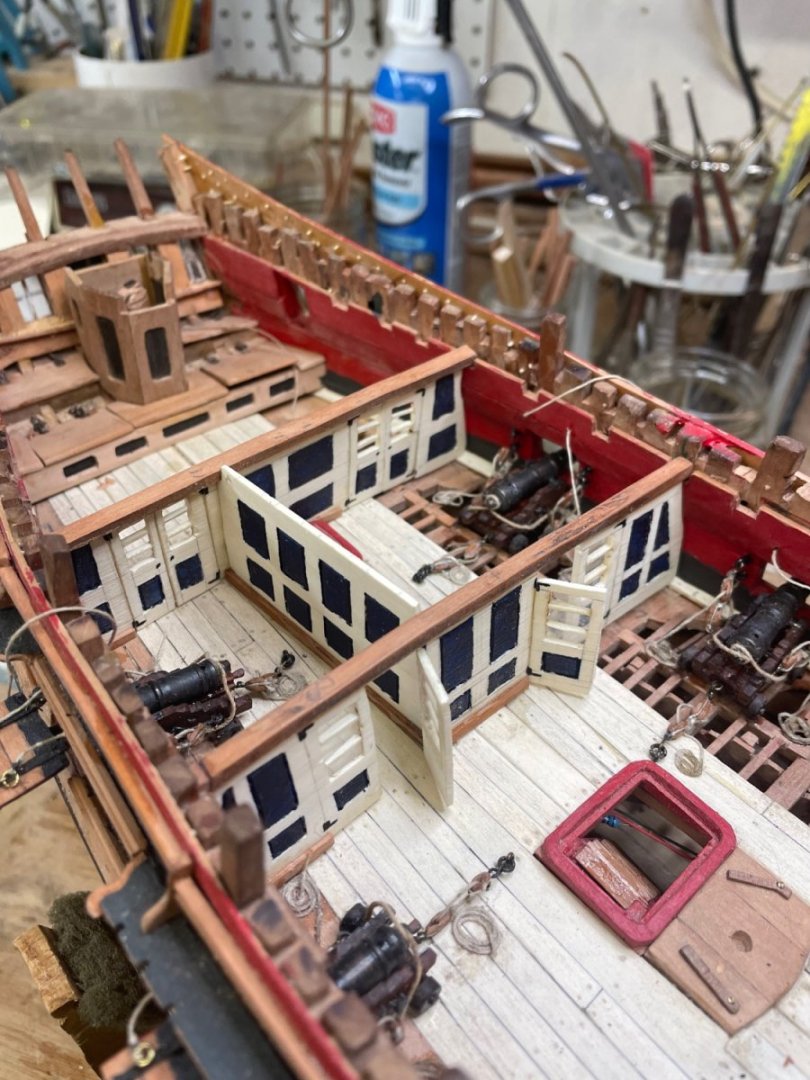
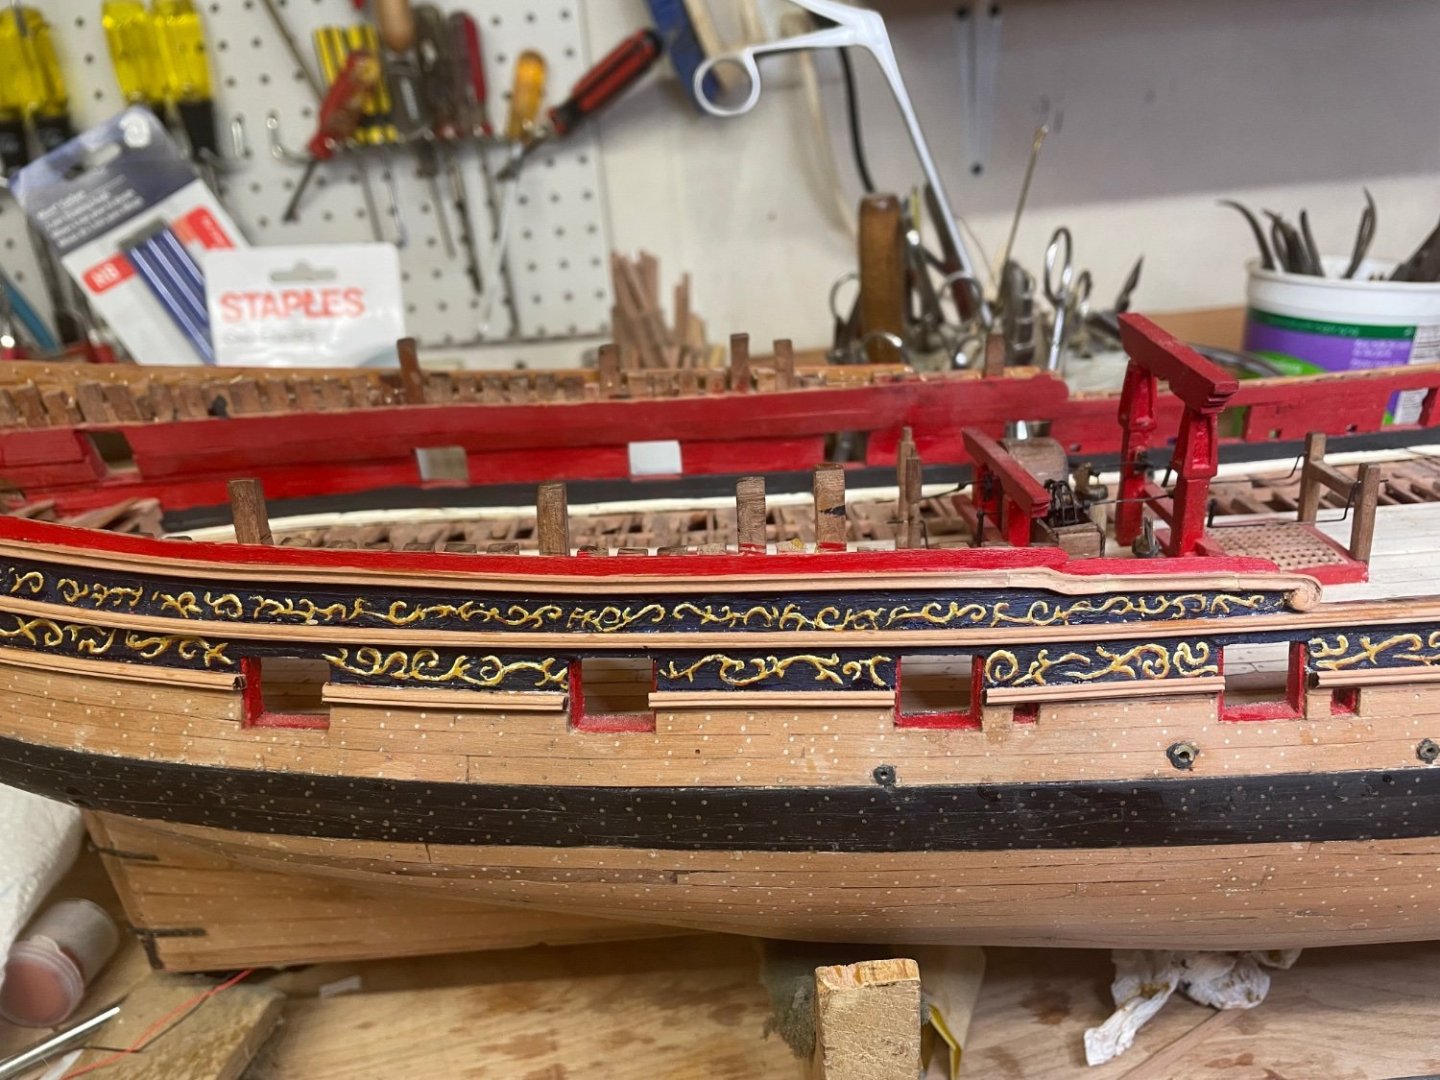
Aft bulkheads added. I found these a challenge. The construction varied a little from the book. I found it worked OK to use holly of the prescribed thickness and make the beveled panels with a #11 blade cut in at an angle. Getting the right fit to the inner sides was done first for the fore and aft bulkheads using heavy cardboard. These were then incorporated into a cardboard blank which provided an exact pattern of the whole bulkhead. The section and panel lines could then be drawn on this template. I used the band saw to cut the sections so the kerf of the saw blade had to be considered, as subsequent assembly of the various sections together would otherwise result in a shortened bulkhead. So a new pattern was made in cardboard redrawn to a greater length with the kerf lines added. The pattern was then transferred to a wooden blank with all the lines drawn and the sections and doors cut out. The result was a pair of bulkheads very close to the necessary width with the lines for the panels straight all across. The final challenge involved the fore and aft bulkhead between the transverse bulkheads. This joins the transverse bulkheads at the inner frames of the starboard doors and is meant to be parallel to the center line of the model. To accomplish this, the starboard doors of the transverse bulkheads need to line up with each other accordingly. This required that the door positions of those bulkheads be drawn in the right location initially. That location, moreover, needs to be close enough to the center line to accommodate the ring bolt of the gun tackle between those two bulkheads. I admit to not being aware of this last detail when I drew the original lines for the doors and panels. As a result, my fore and aft bulkhead does not lie parallel to the center line. Not a big deal since it won’t be seen anyway. But for the perfectionist these considerations might avoid redoing the bulkheads after the matter is discovered. It will be noted in the second image that the gun port lid tackle has been added only for the port gun lids. My plan is to tackle the focs’l next before completing the deck beam construction.

- 257 replies
-
- 7
-
-
- pegasus
- Swan-class
- (and 1 more)
-
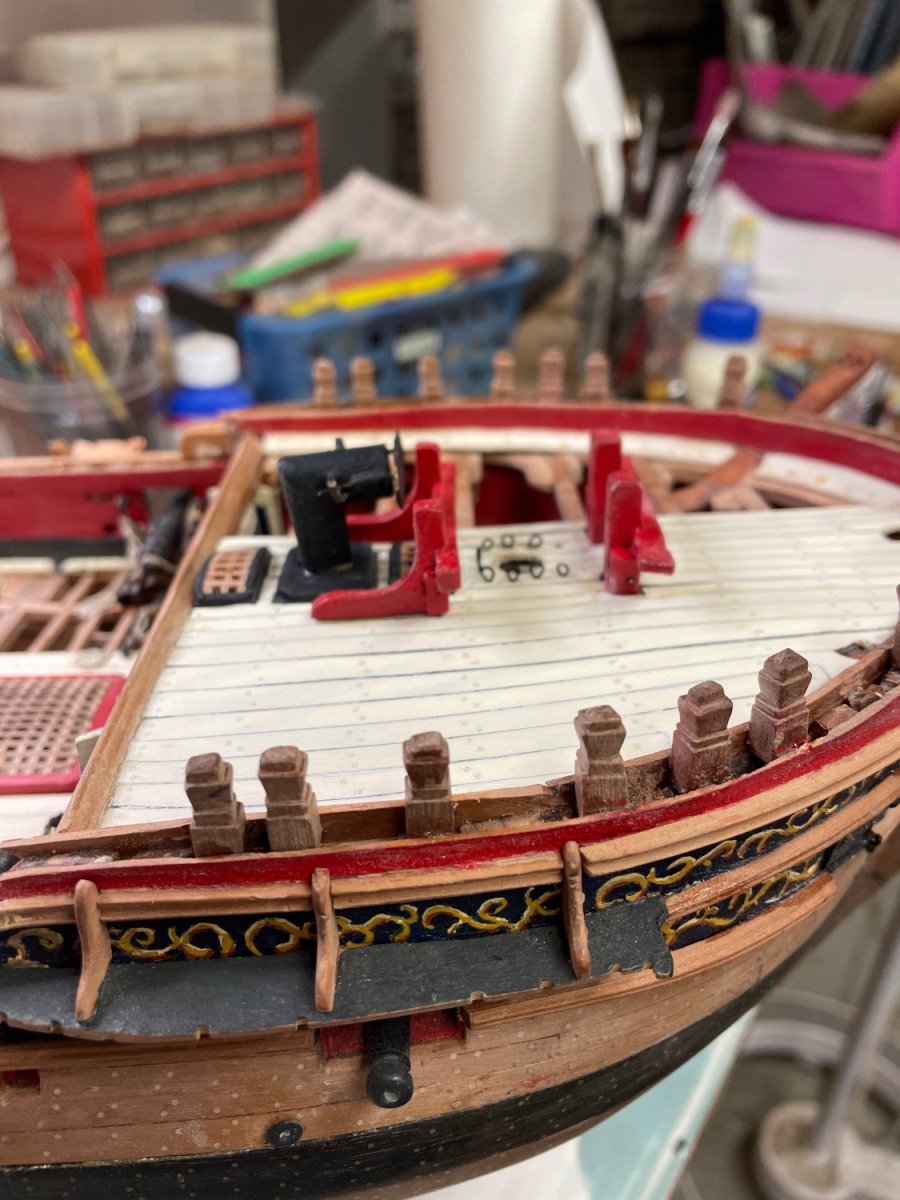
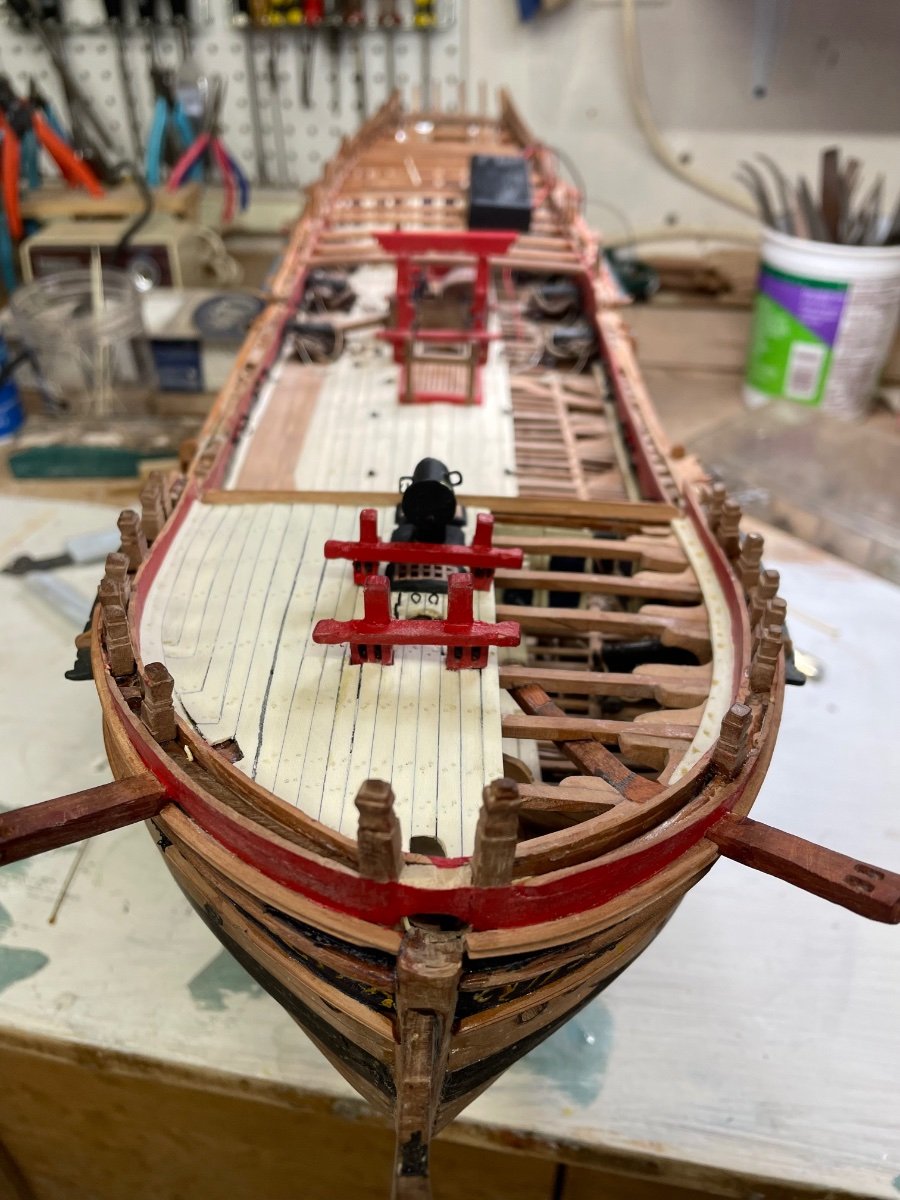
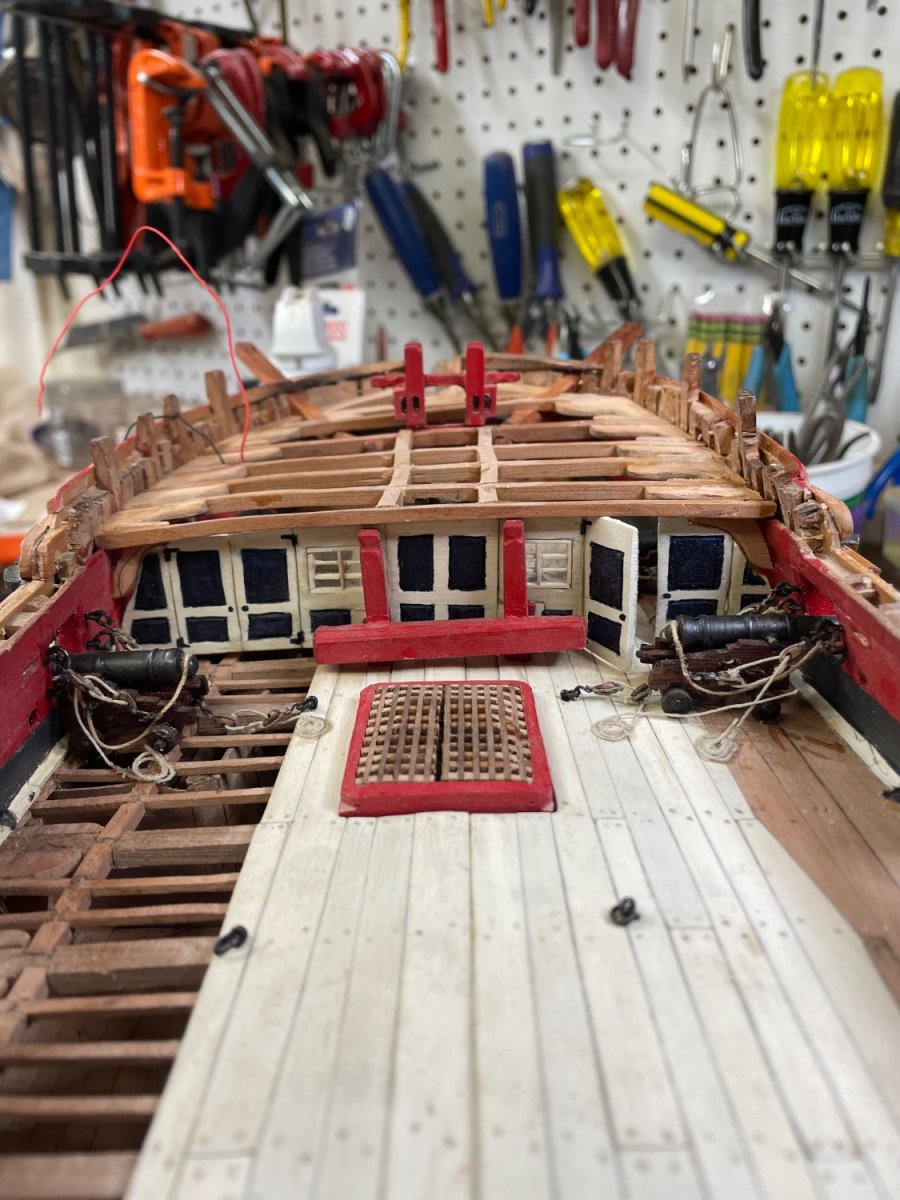
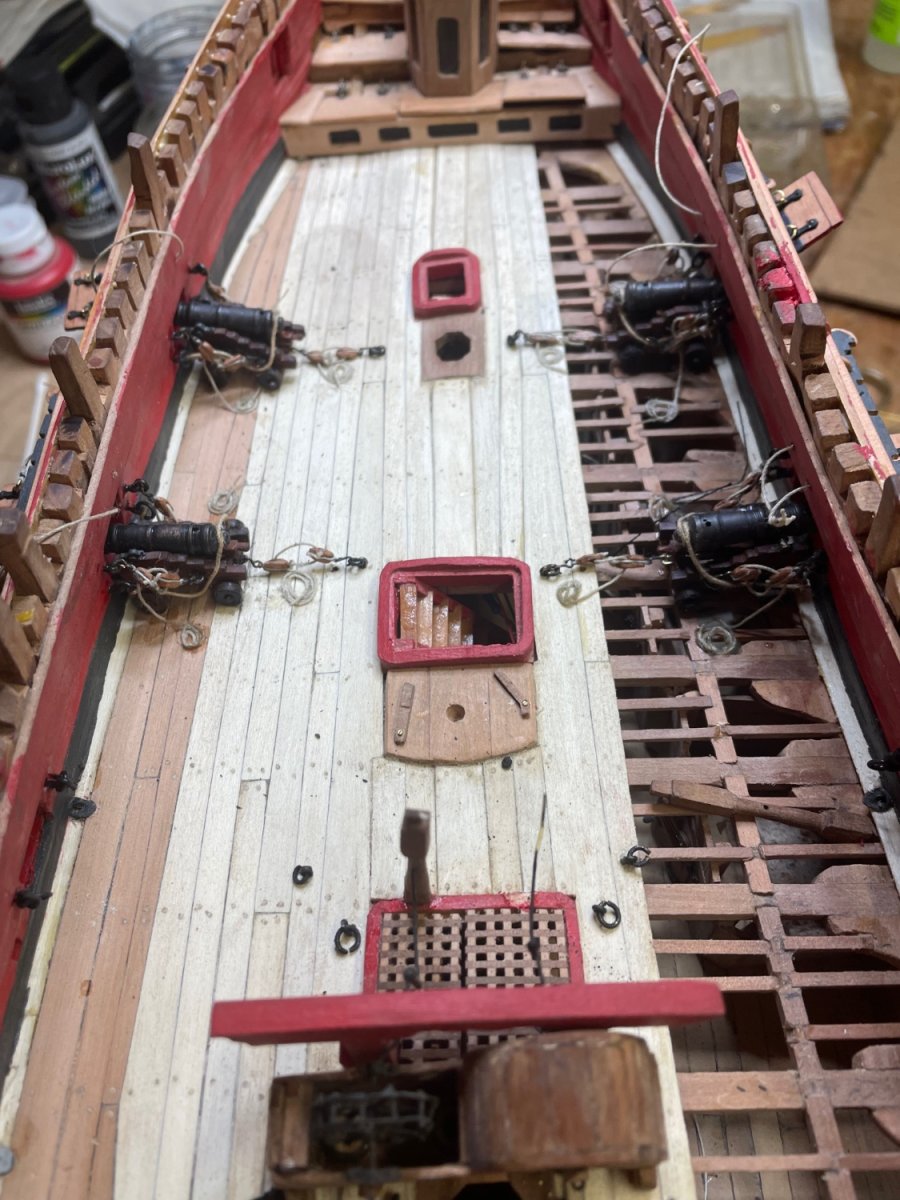
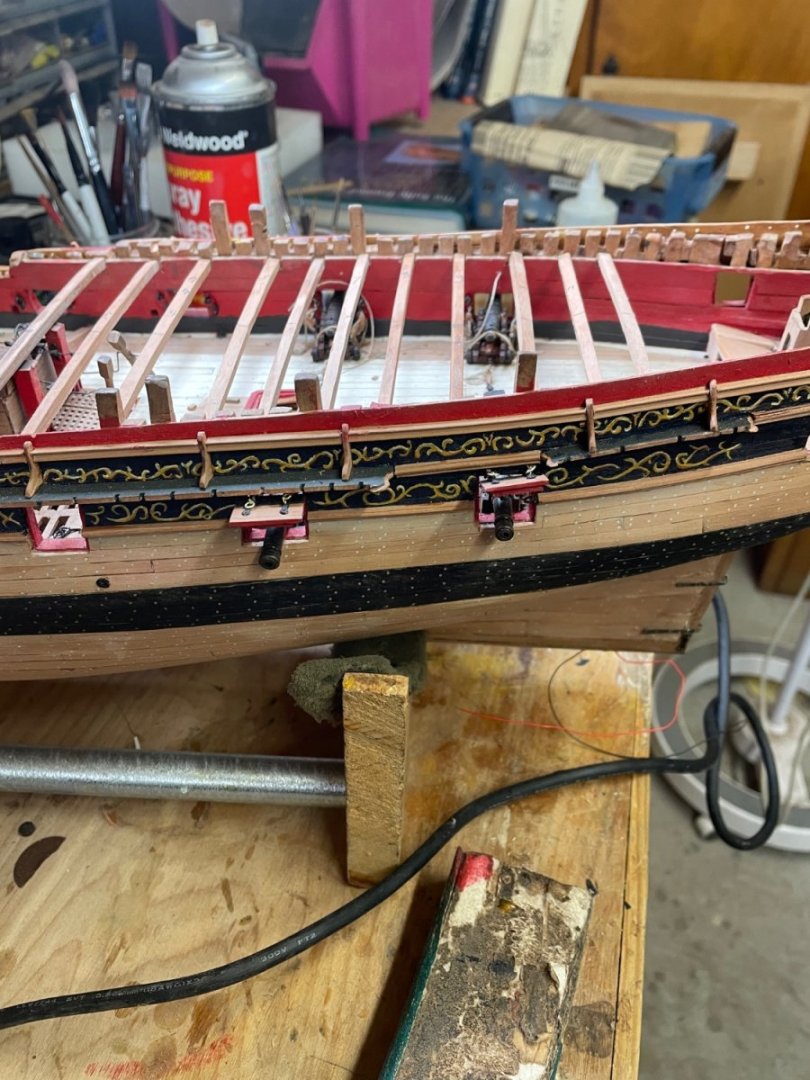
After guns and lids done. Preliminary quarter deck beam fitting.

- 257 replies
-
- 12
-
-
- pegasus
- Swan-class
- (and 1 more)
-
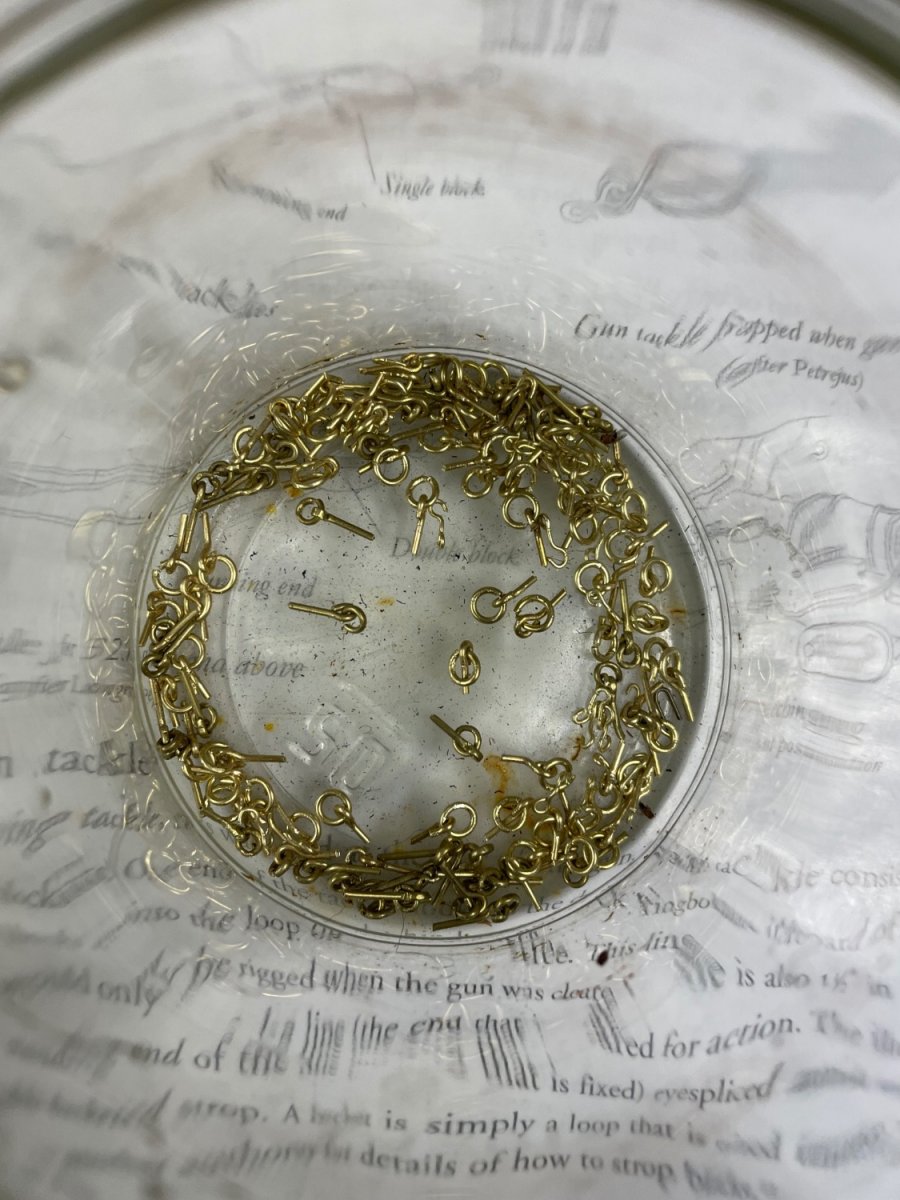
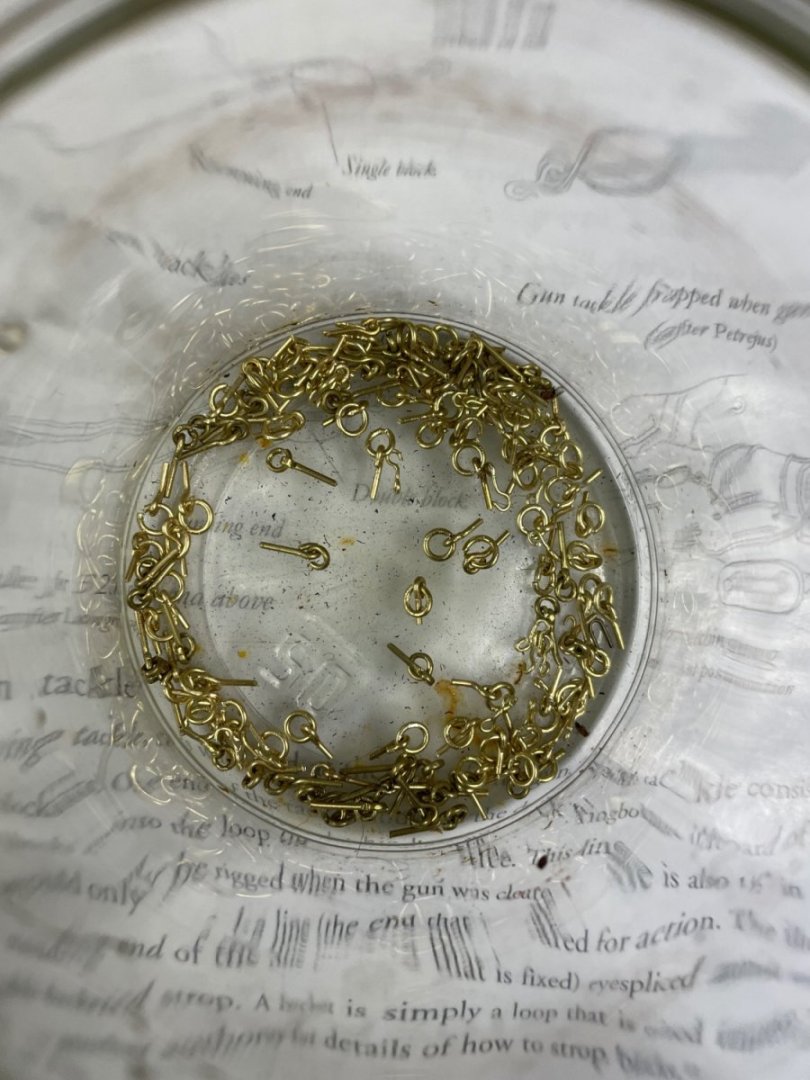
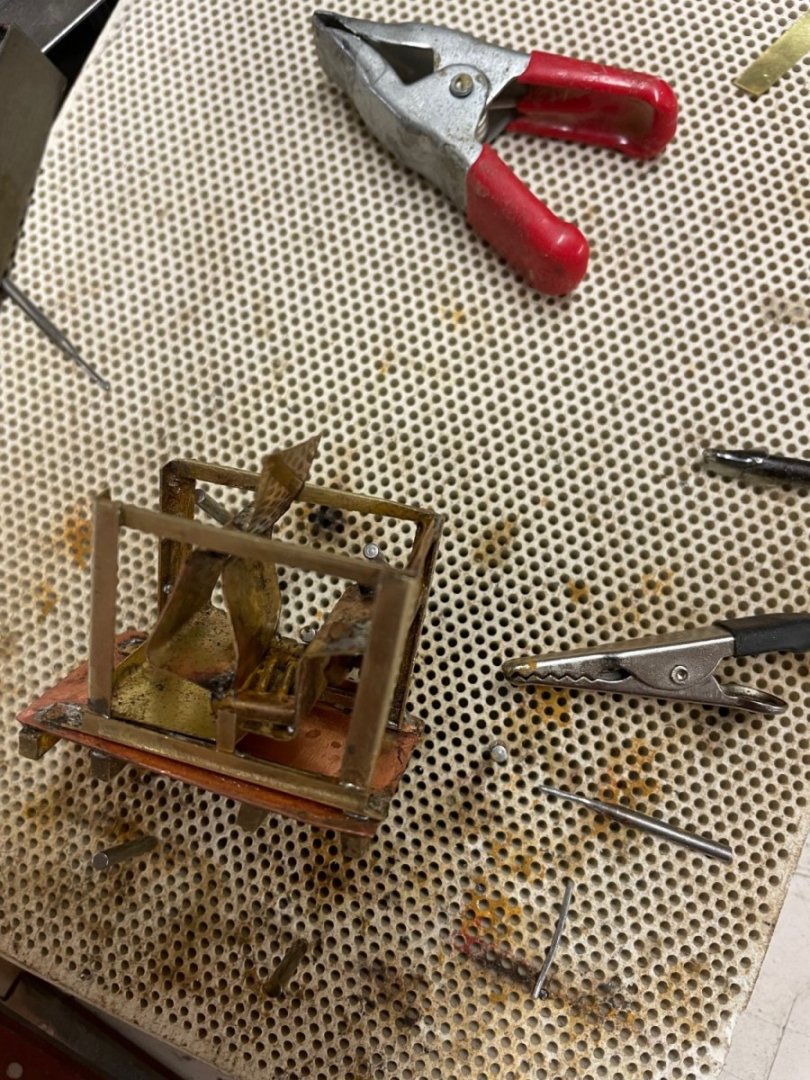
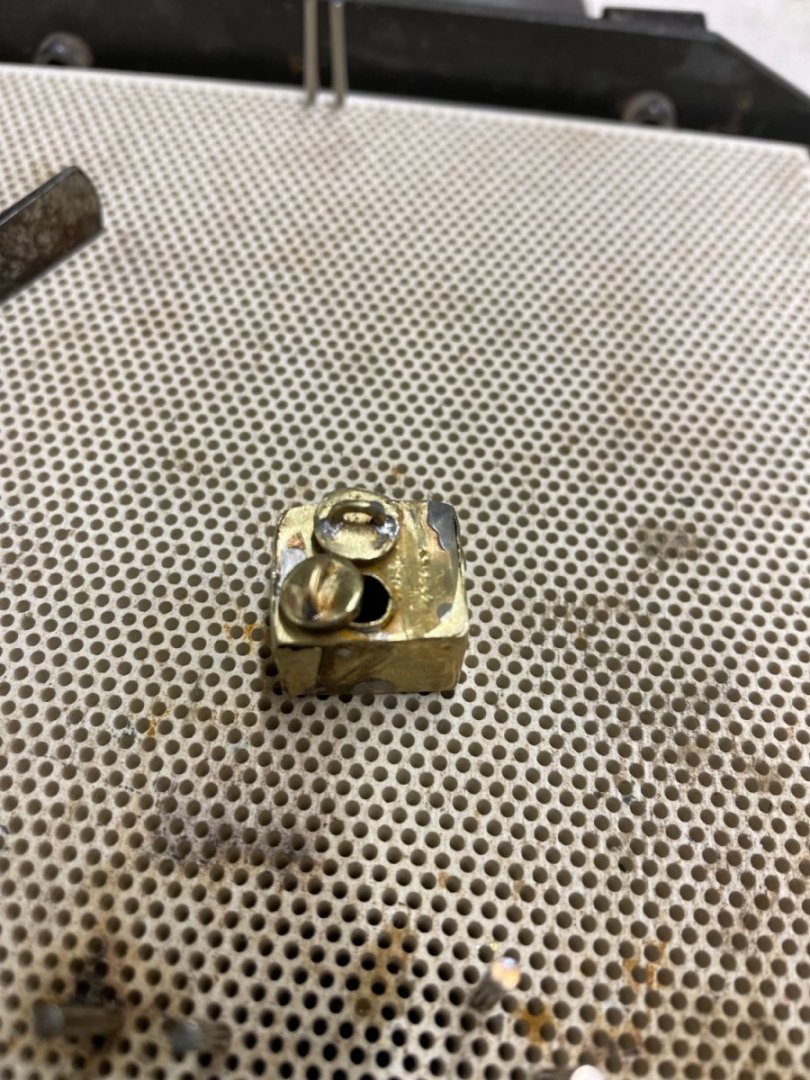
Have started the gun carriage tackle. Not including the hardware on the carriages themselves, there are a total 96 blocks, 96 eye hooks and 80 ring bolts. All to be blackened and lacquered. A daunting task of which making the metallic components alone occupied the day today and will do so for another several days for blackening, etc. Haven’t begun the blocks.
- 257 replies
-
- 8
-
-
- pegasus
- Swan-class
- (and 1 more)
-
Taking encouragement from Kevin Kenny, I embarked on the scrolls with some satisfaction in the results.
- 257 replies
-
- 14
-
-

-
- pegasus
- Swan-class
- (and 1 more)
-
Kevin, my wife, who is an artist, and I watched your frieze video and were blown away. You’ve inspired me once again to tackle a part of this build I thought was way beyond my skill level. Henry
-
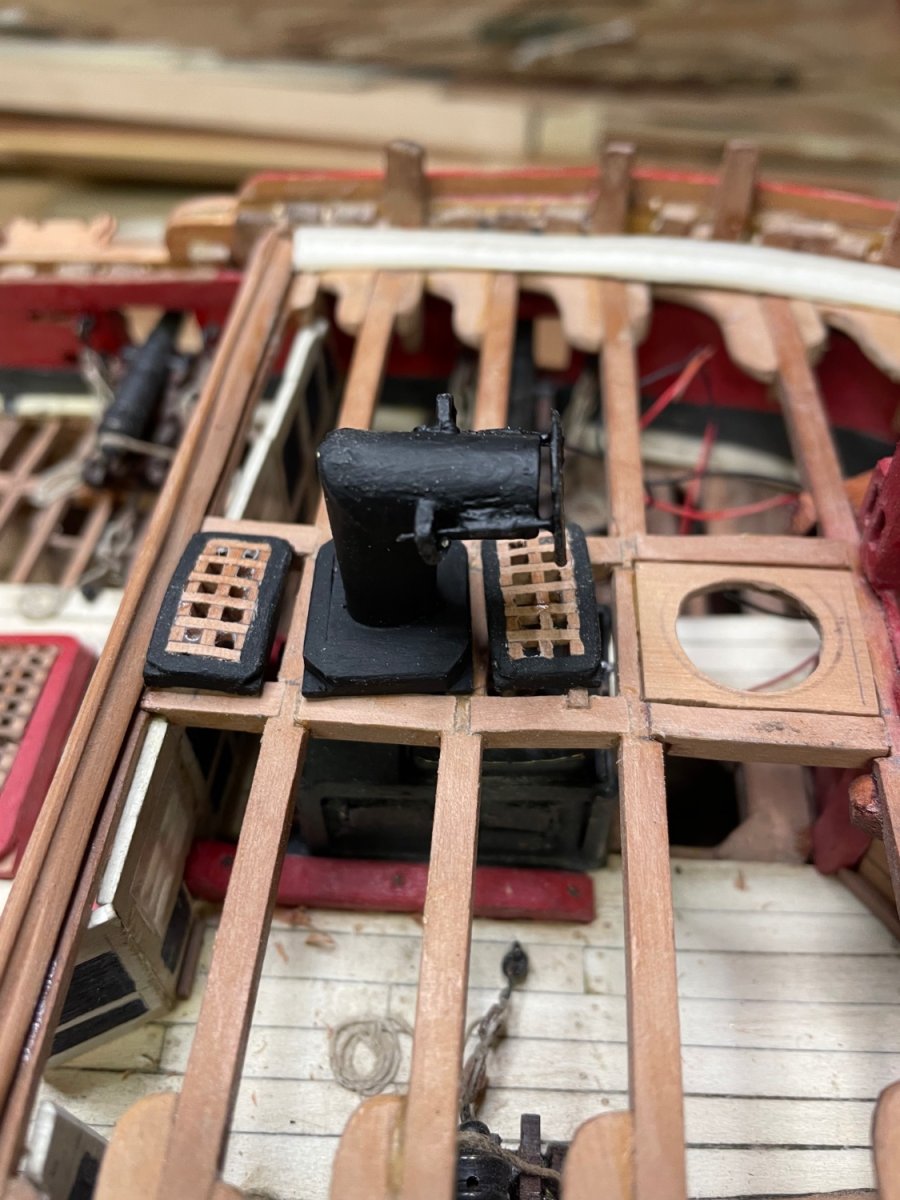
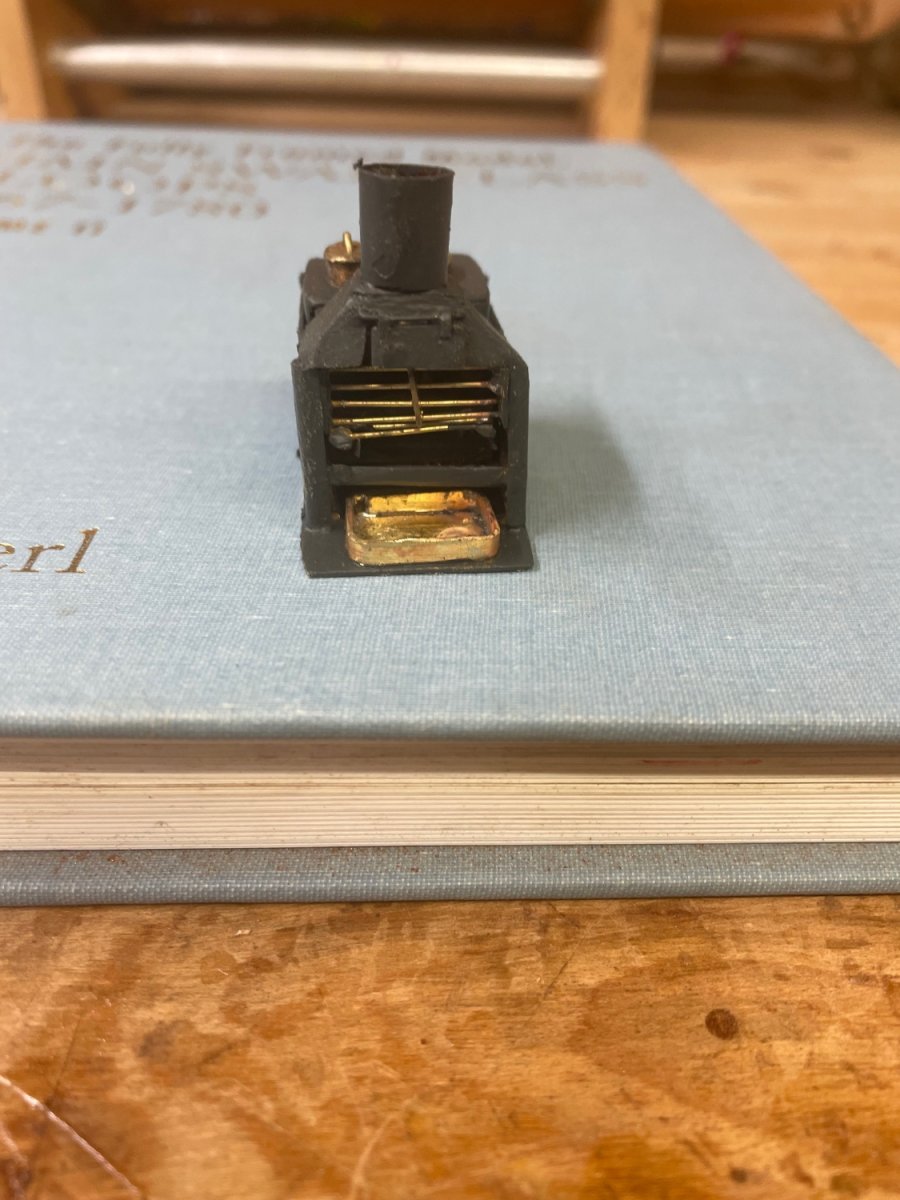
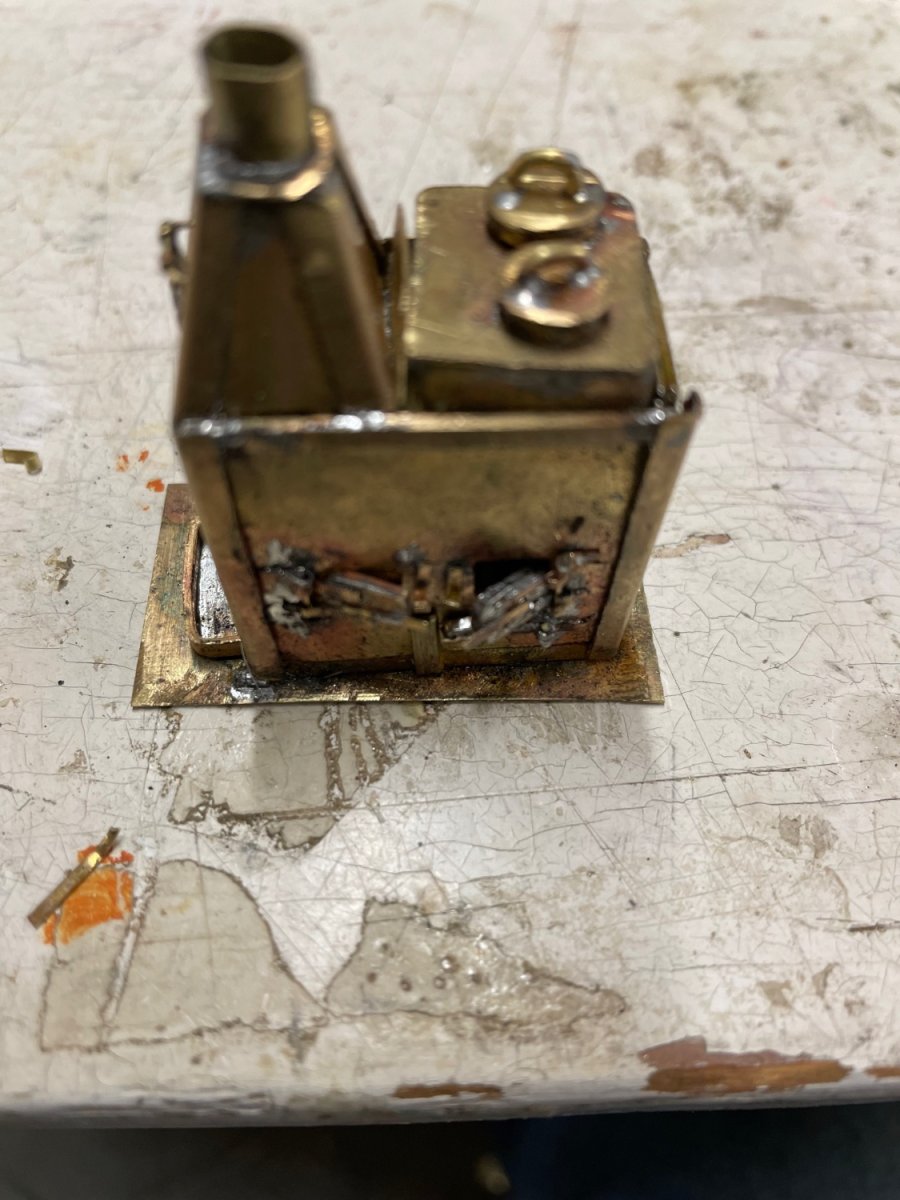
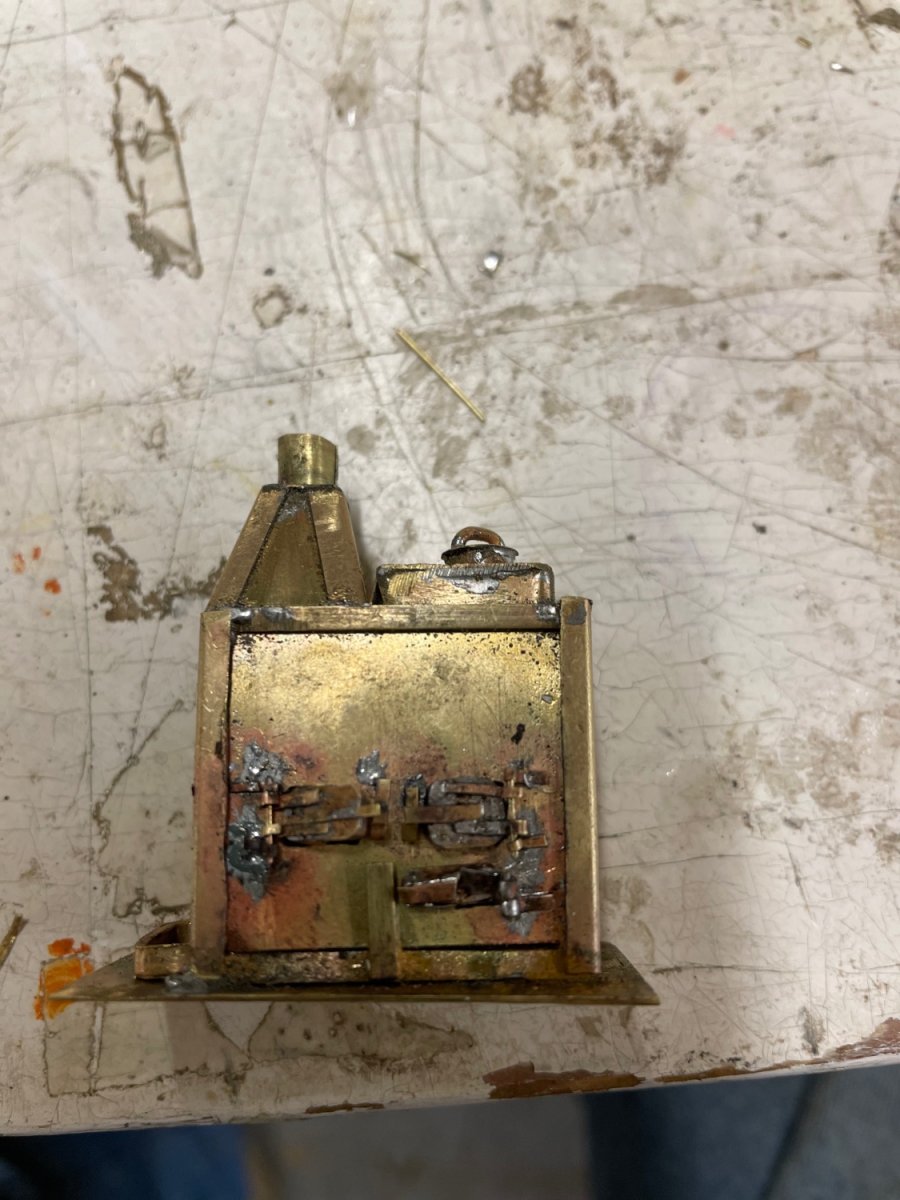
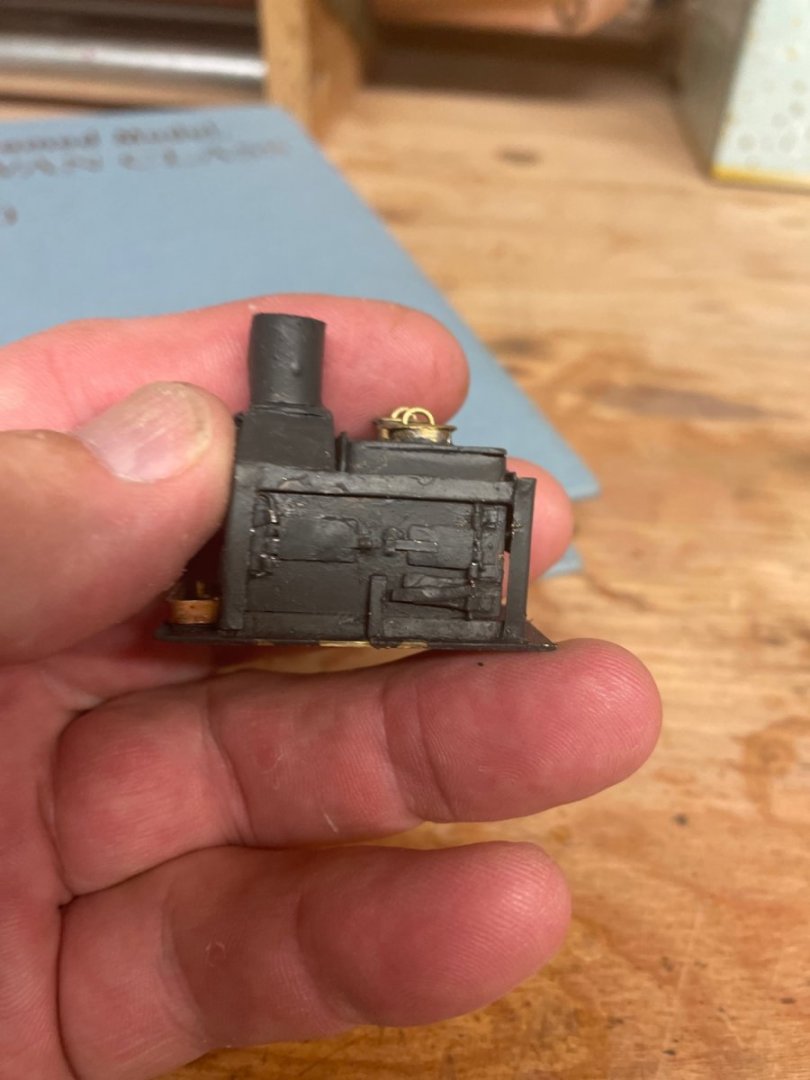
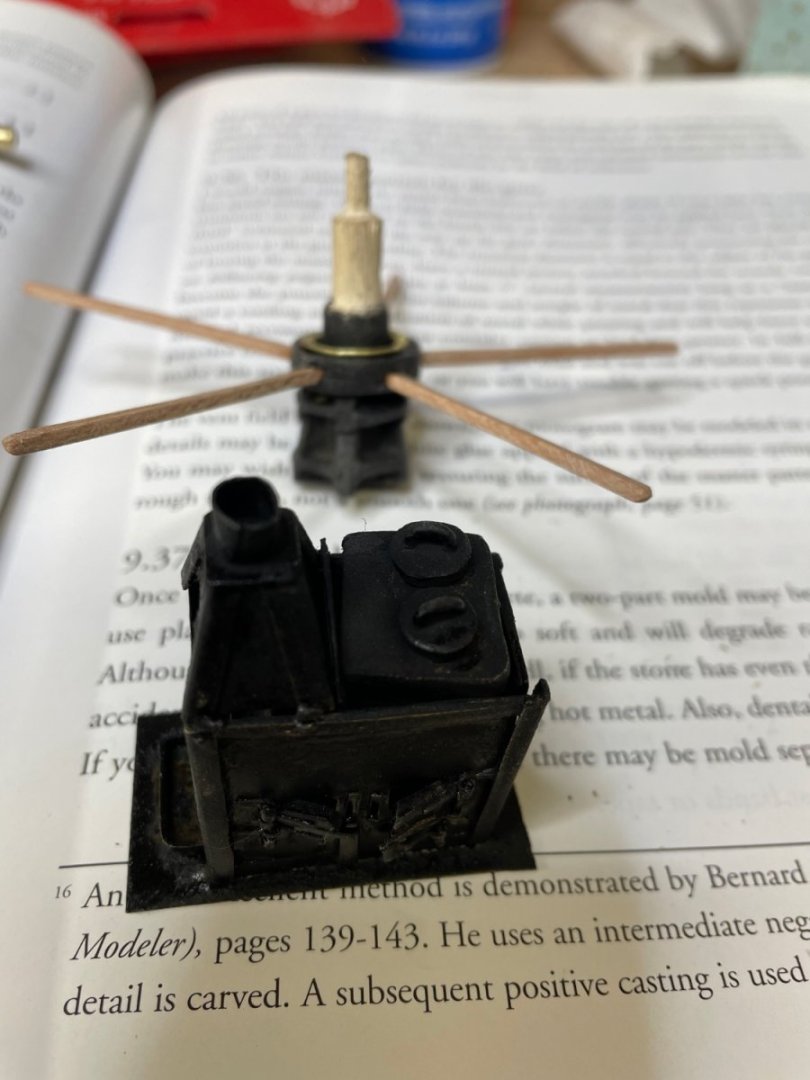
Second iteration of the stove, the first not fitting between decks well. Ready to begin blackening the cannons.

- 257 replies
-
- 7
-
-
- pegasus
- Swan-class
- (and 1 more)
-
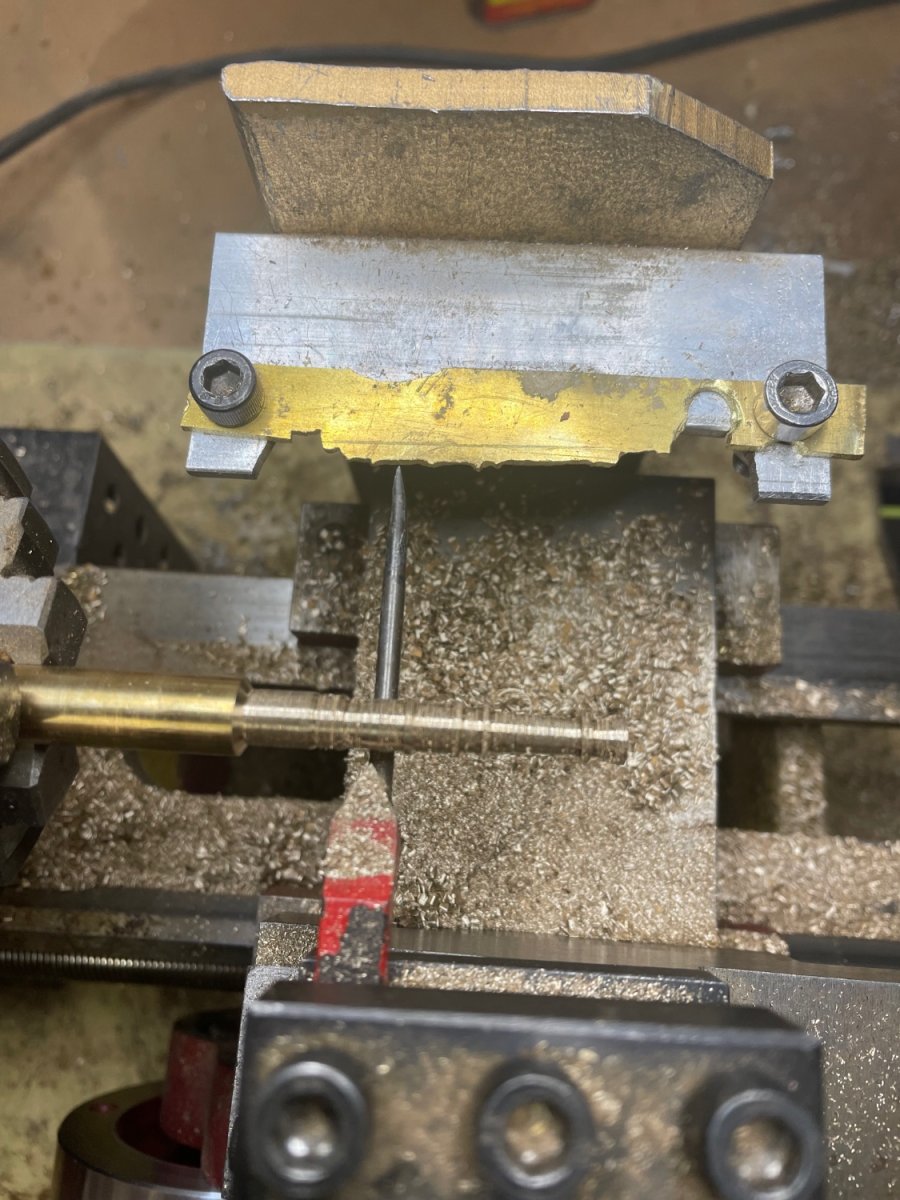
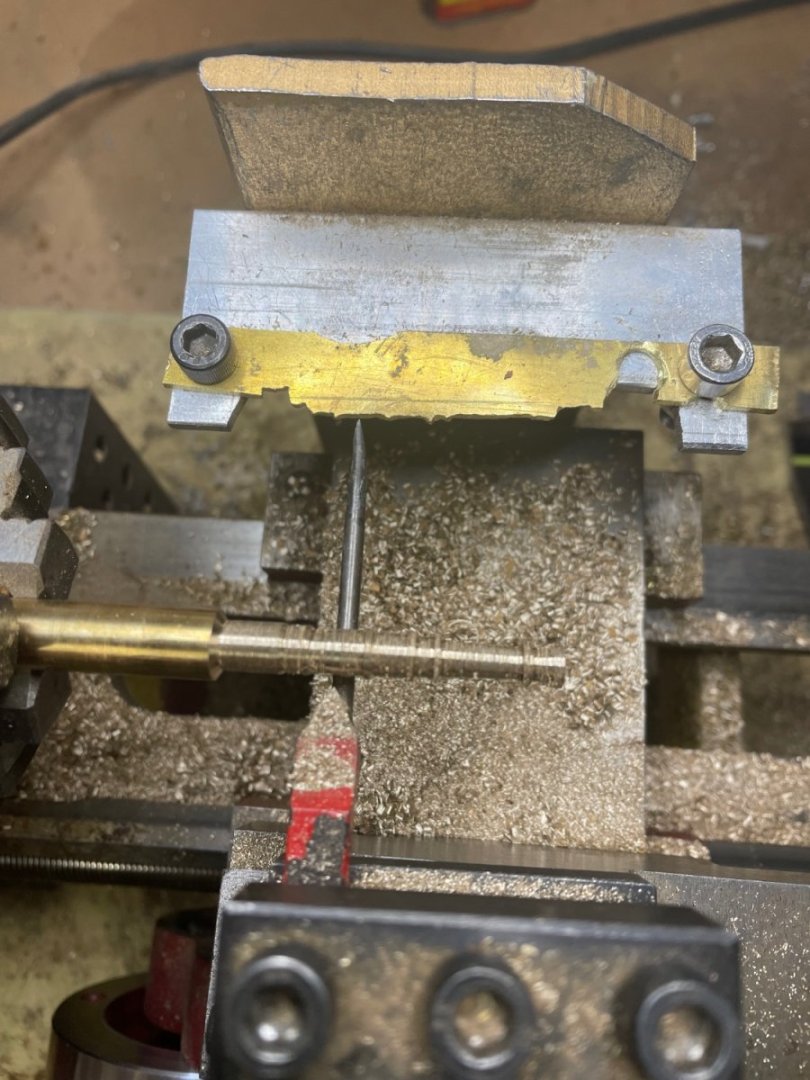
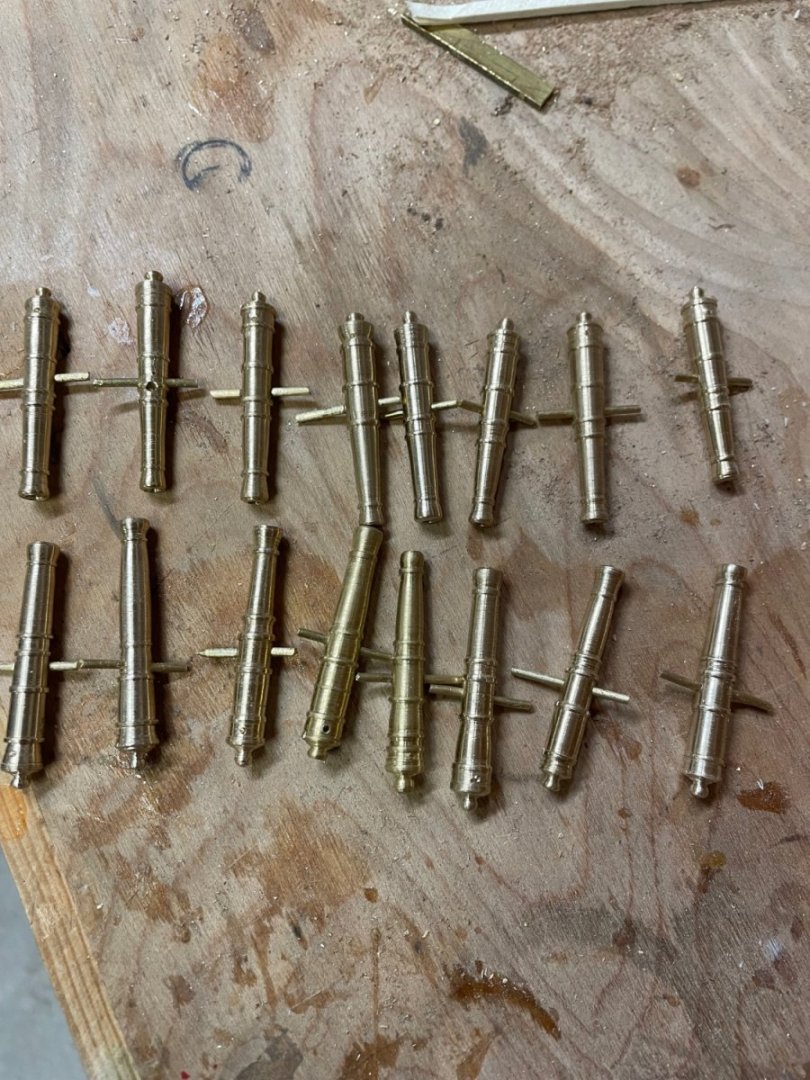
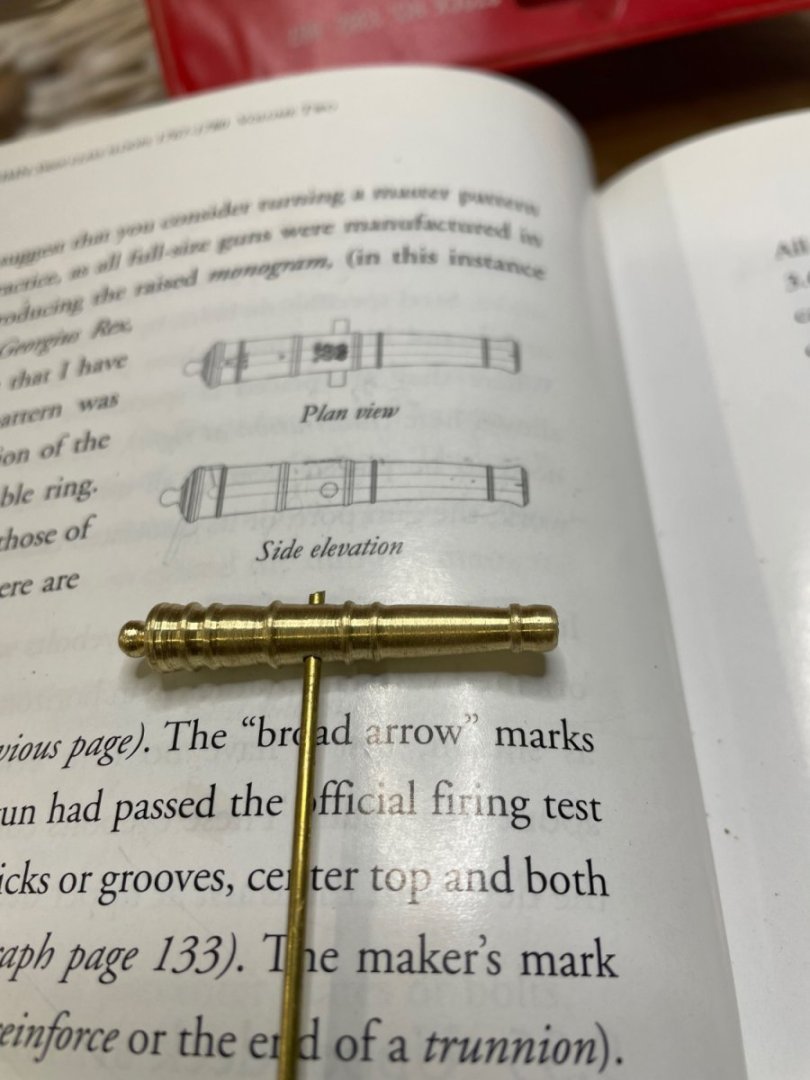
Cannon barrels turned on my MicroMark mini lathe using a follower set up. They’re not as exactly identical as those made from a casting but once blackened it’s difficult to tell.
- 257 replies
-
- 11
-
-
- pegasus
- Swan-class
- (and 1 more)
-
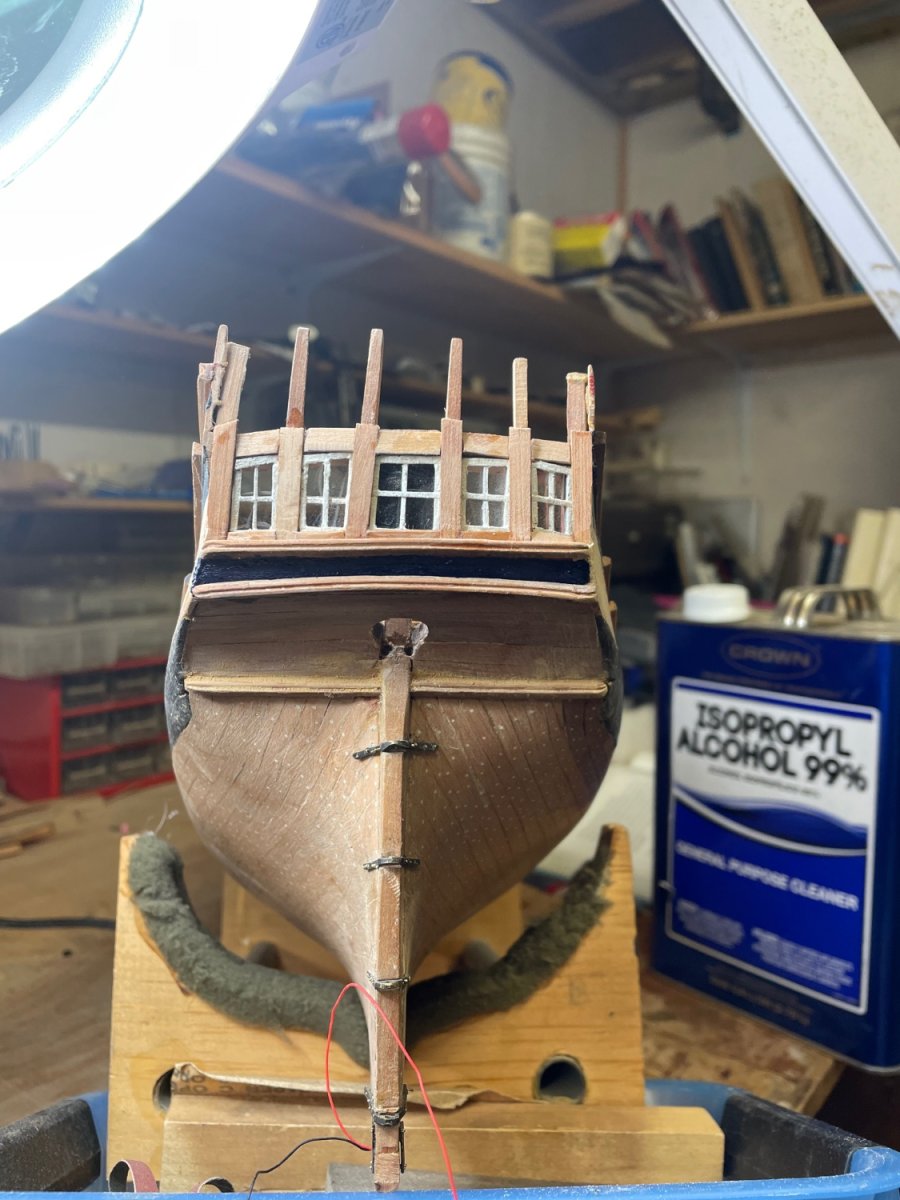
Beginning work on the stern lights while I await delivery of narrower brass rod for turning cannon barrels.

- 257 replies
-
- 7
-
-
- pegasus
- Swan-class
- (and 1 more)
-
Thanks Kevin. As it turned out, I used a blackening solution which after several applications undid much of the fine detailed soldering. So several steps back, I persist. But I no longer shake in fear at the soldering process. I’m using resistance soldering almost exclusively and find that with a sharpened tip, the heat can be applied to a very small area without threatening adjacent joints. When there’s an issue, yellow ochre paste applied to the joint at risk works well .
- 257 replies
-
- 3
-
-
- pegasus
- Swan-class
- (and 1 more)
-
Progress, although not of the standard set by Captain Giampierocicci!
- 257 replies
-
- 3
-
-
- pegasus
- Swan-class
- (and 1 more)
-
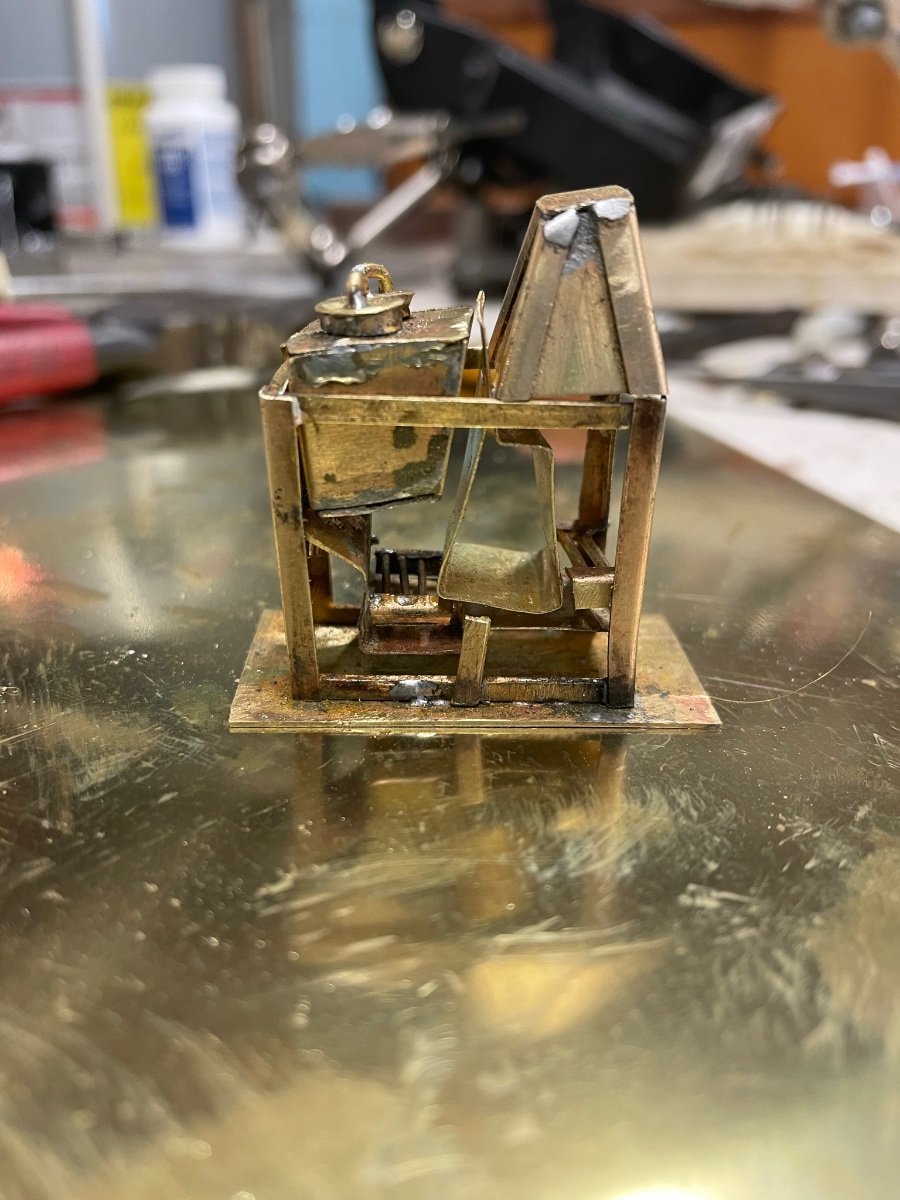
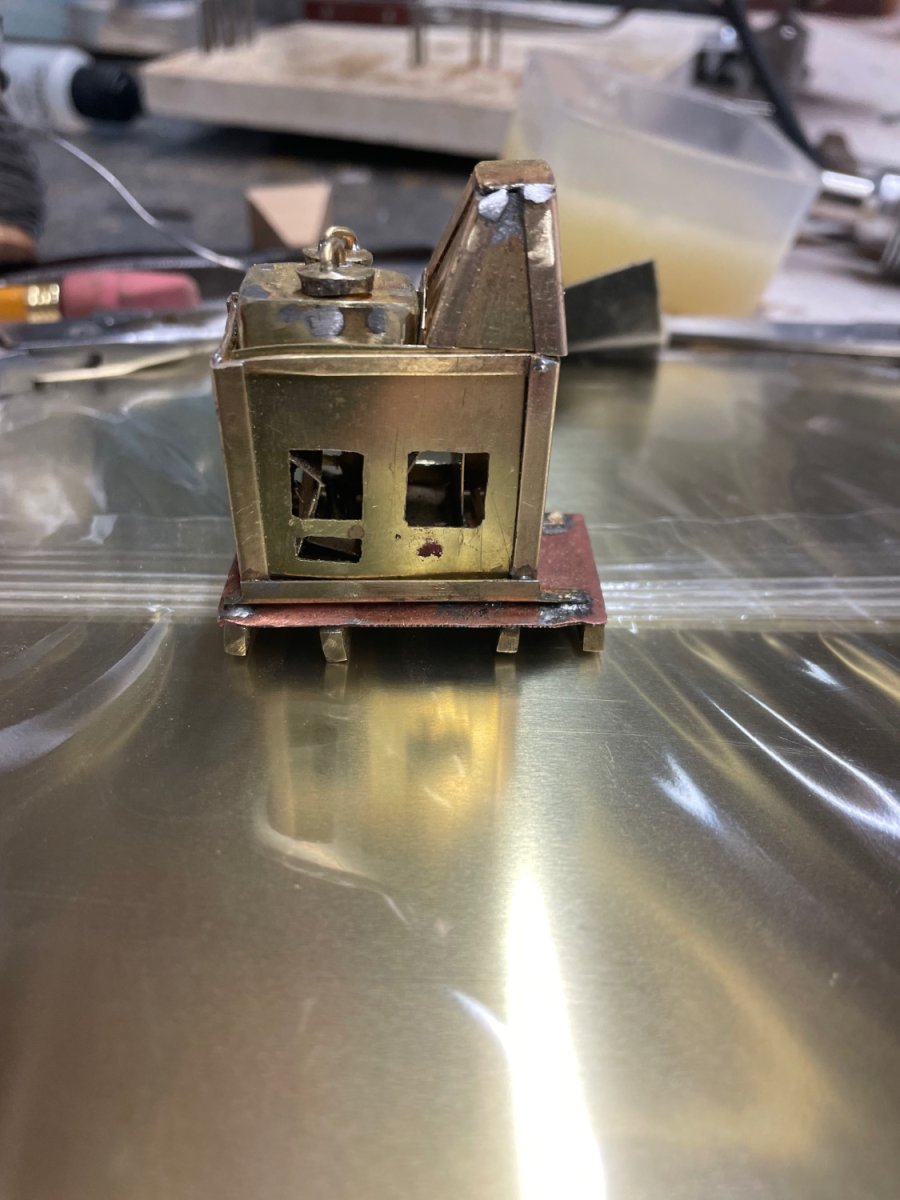
First real attempt. Very challenging! Inside grates didn’t line up correctly and things a bit askew, so am starting again.

- 257 replies
-
- 8
-
-
- pegasus
- Swan-class
- (and 1 more)