


aydingocer
-
Posts
898 -
Joined
-
Last visited
Content Type
Profiles
Forums
Gallery
Events
Posts posted by aydingocer
-
-
-
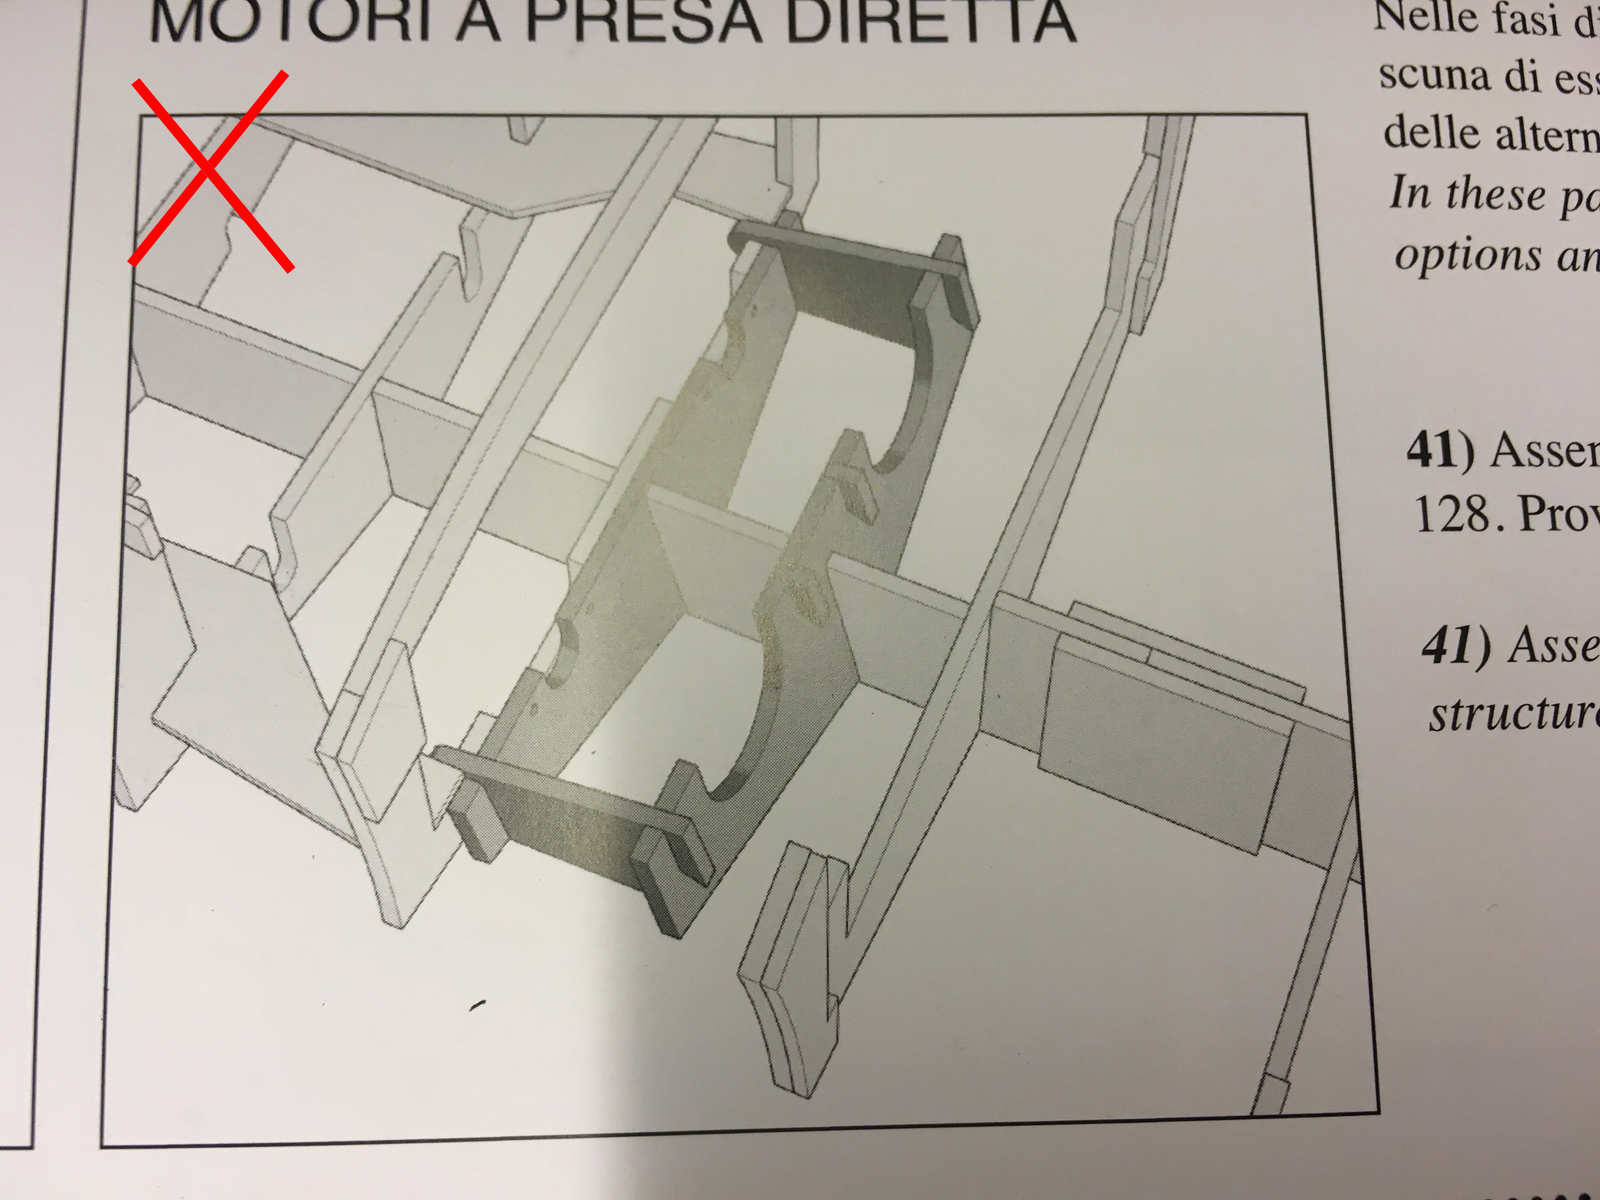
If you would go for direct drive option, you'd be constructing this "nest":
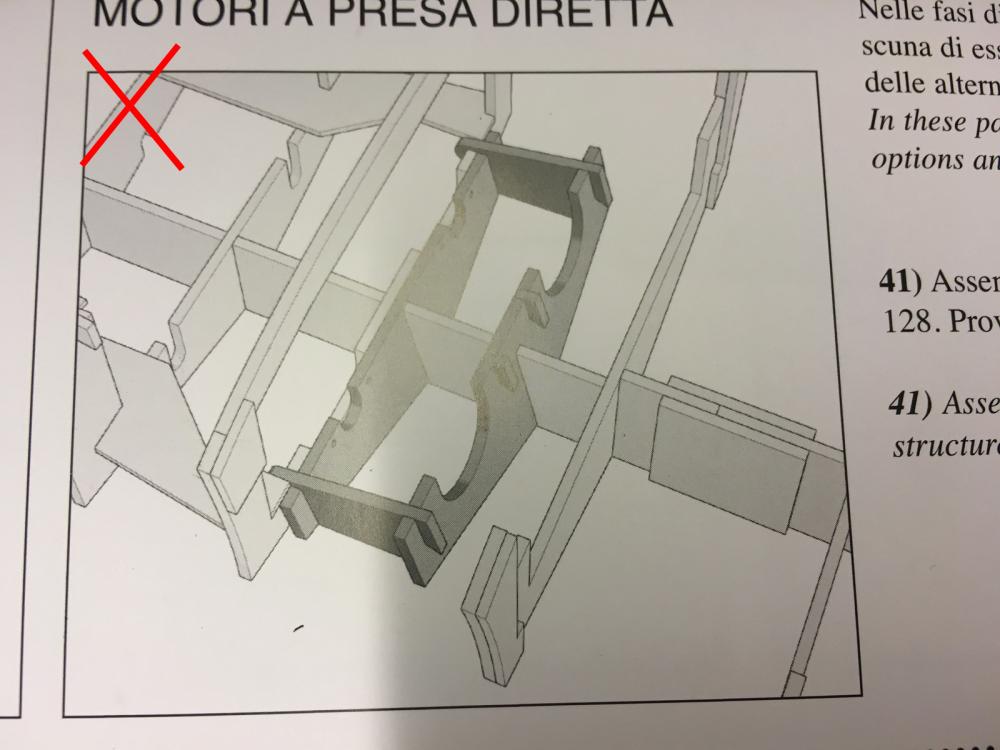


Below is sequence of moves for how to carefully insert it to place:
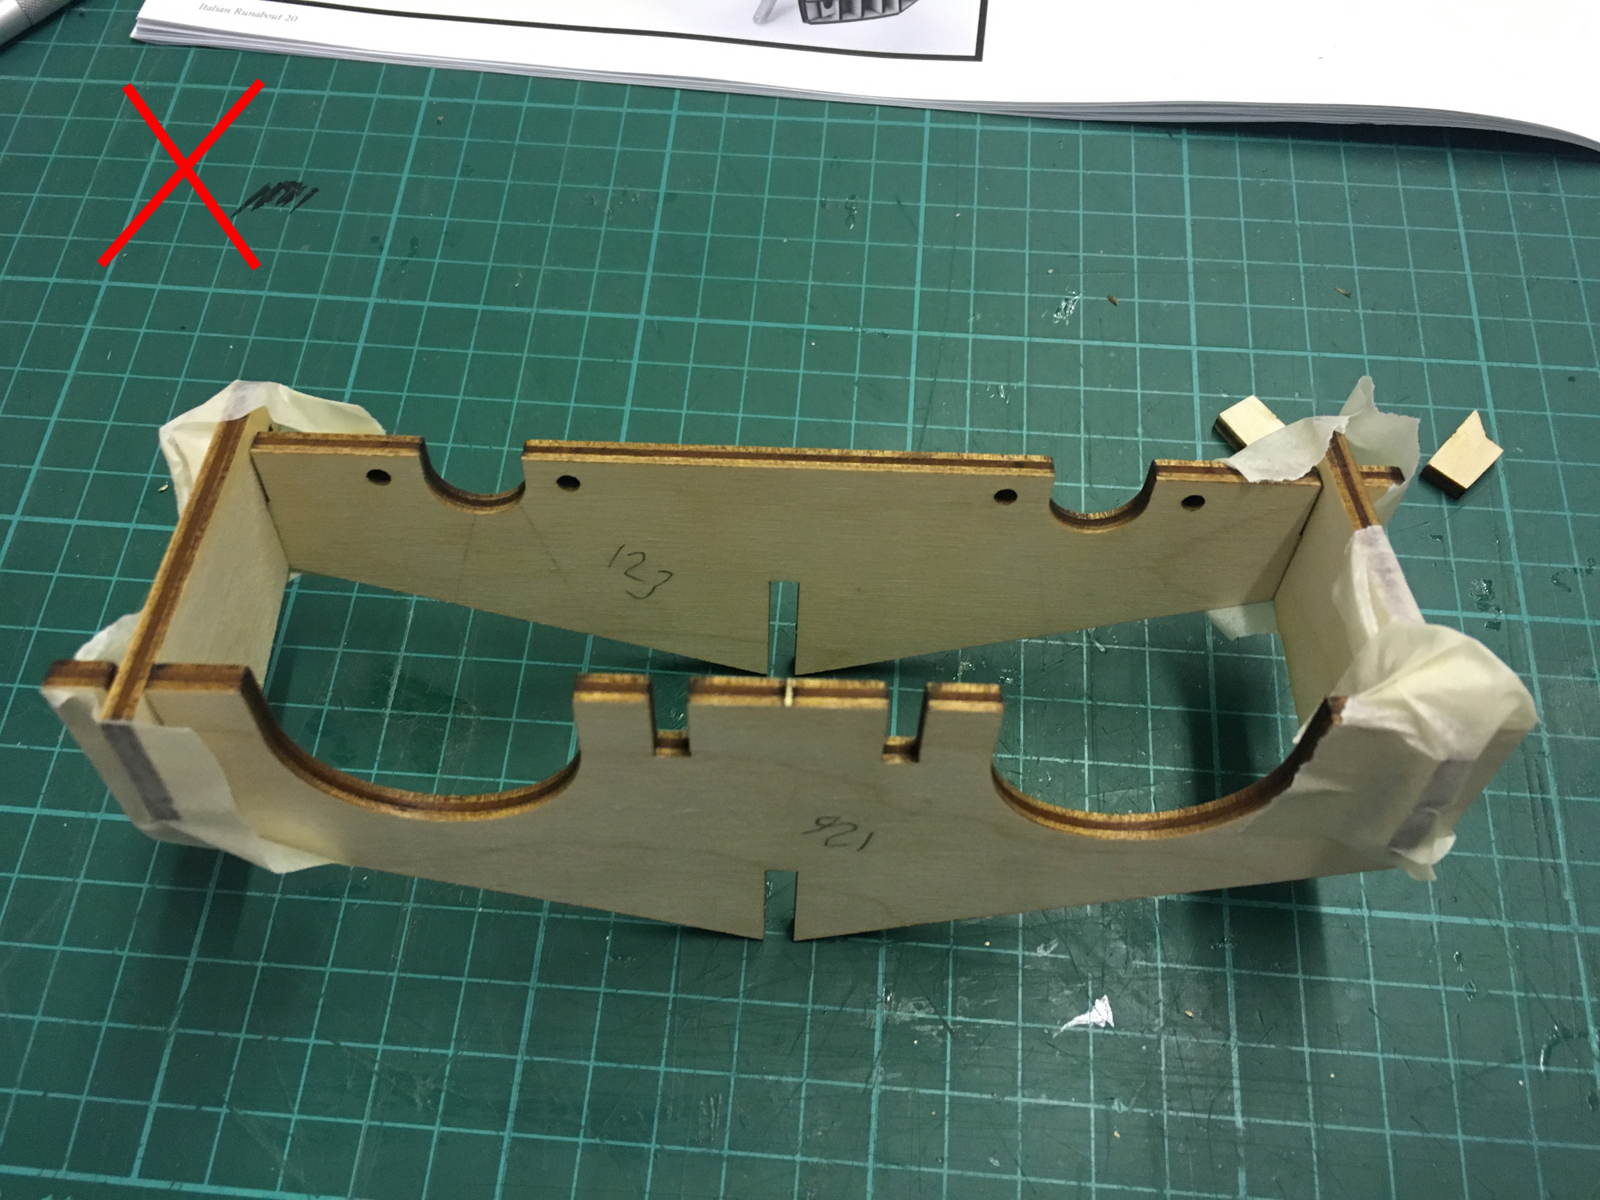
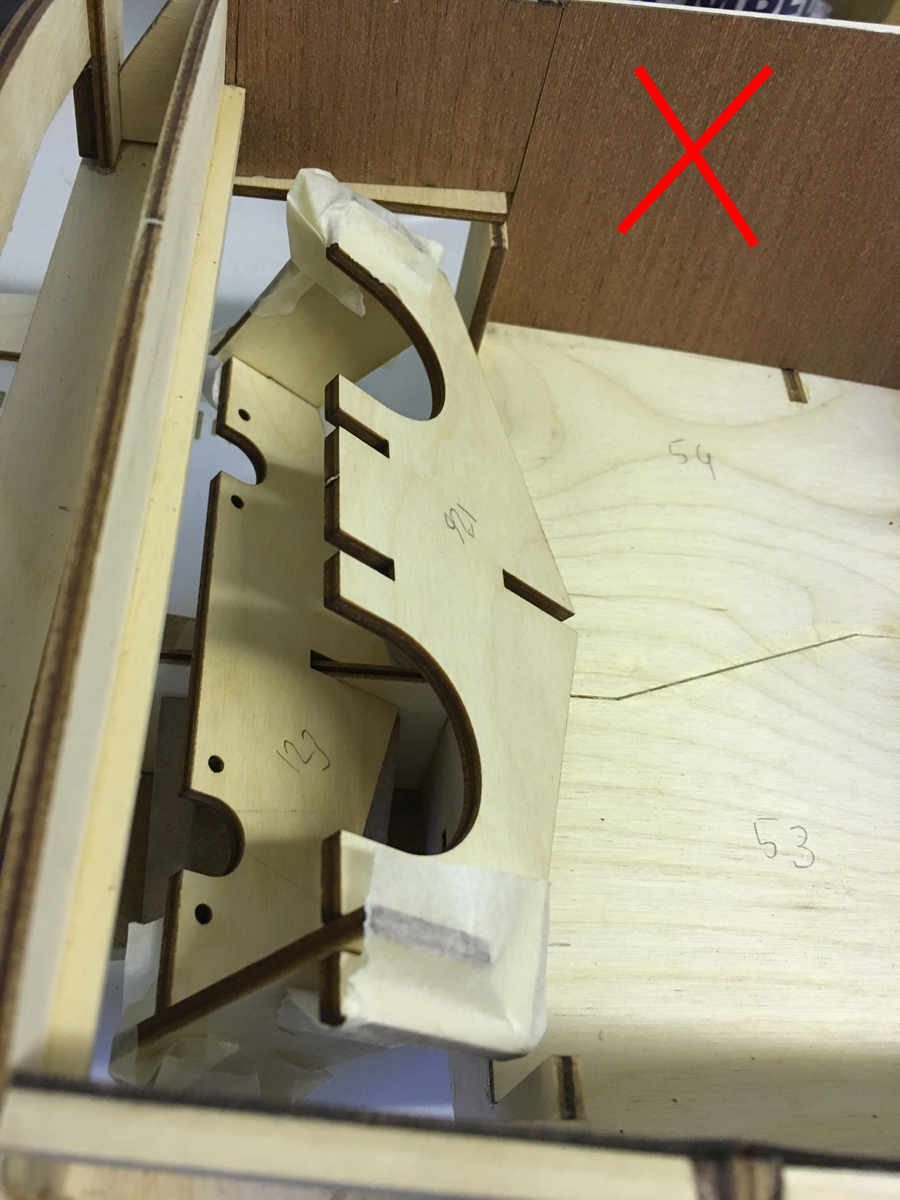
Insert the keel to part 123...

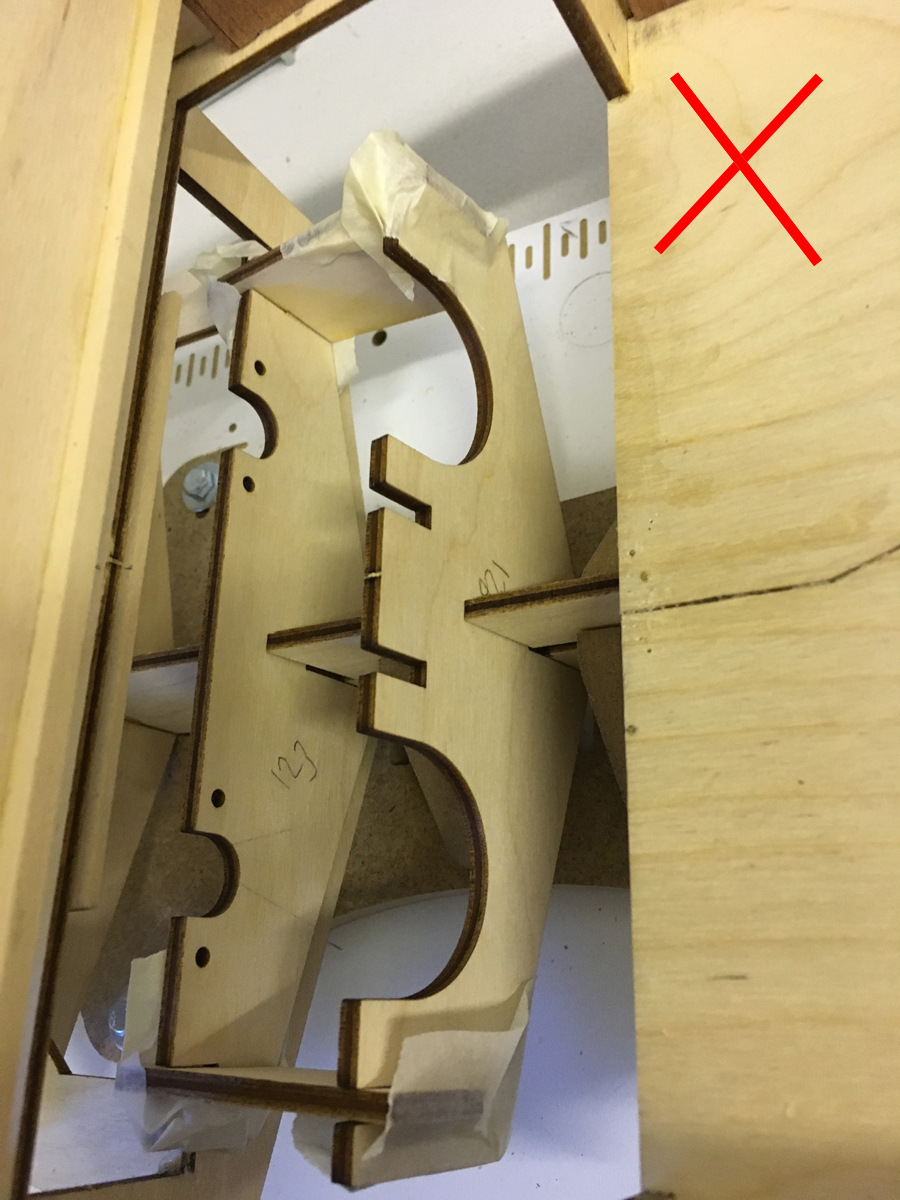
.. then slide it so that keel is inserted into part 126...
... finally slide to place and push down.

-
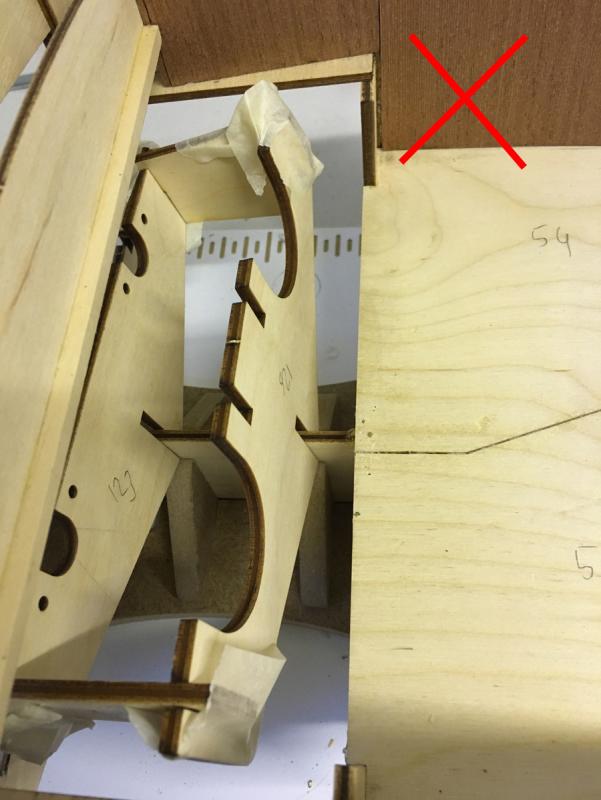
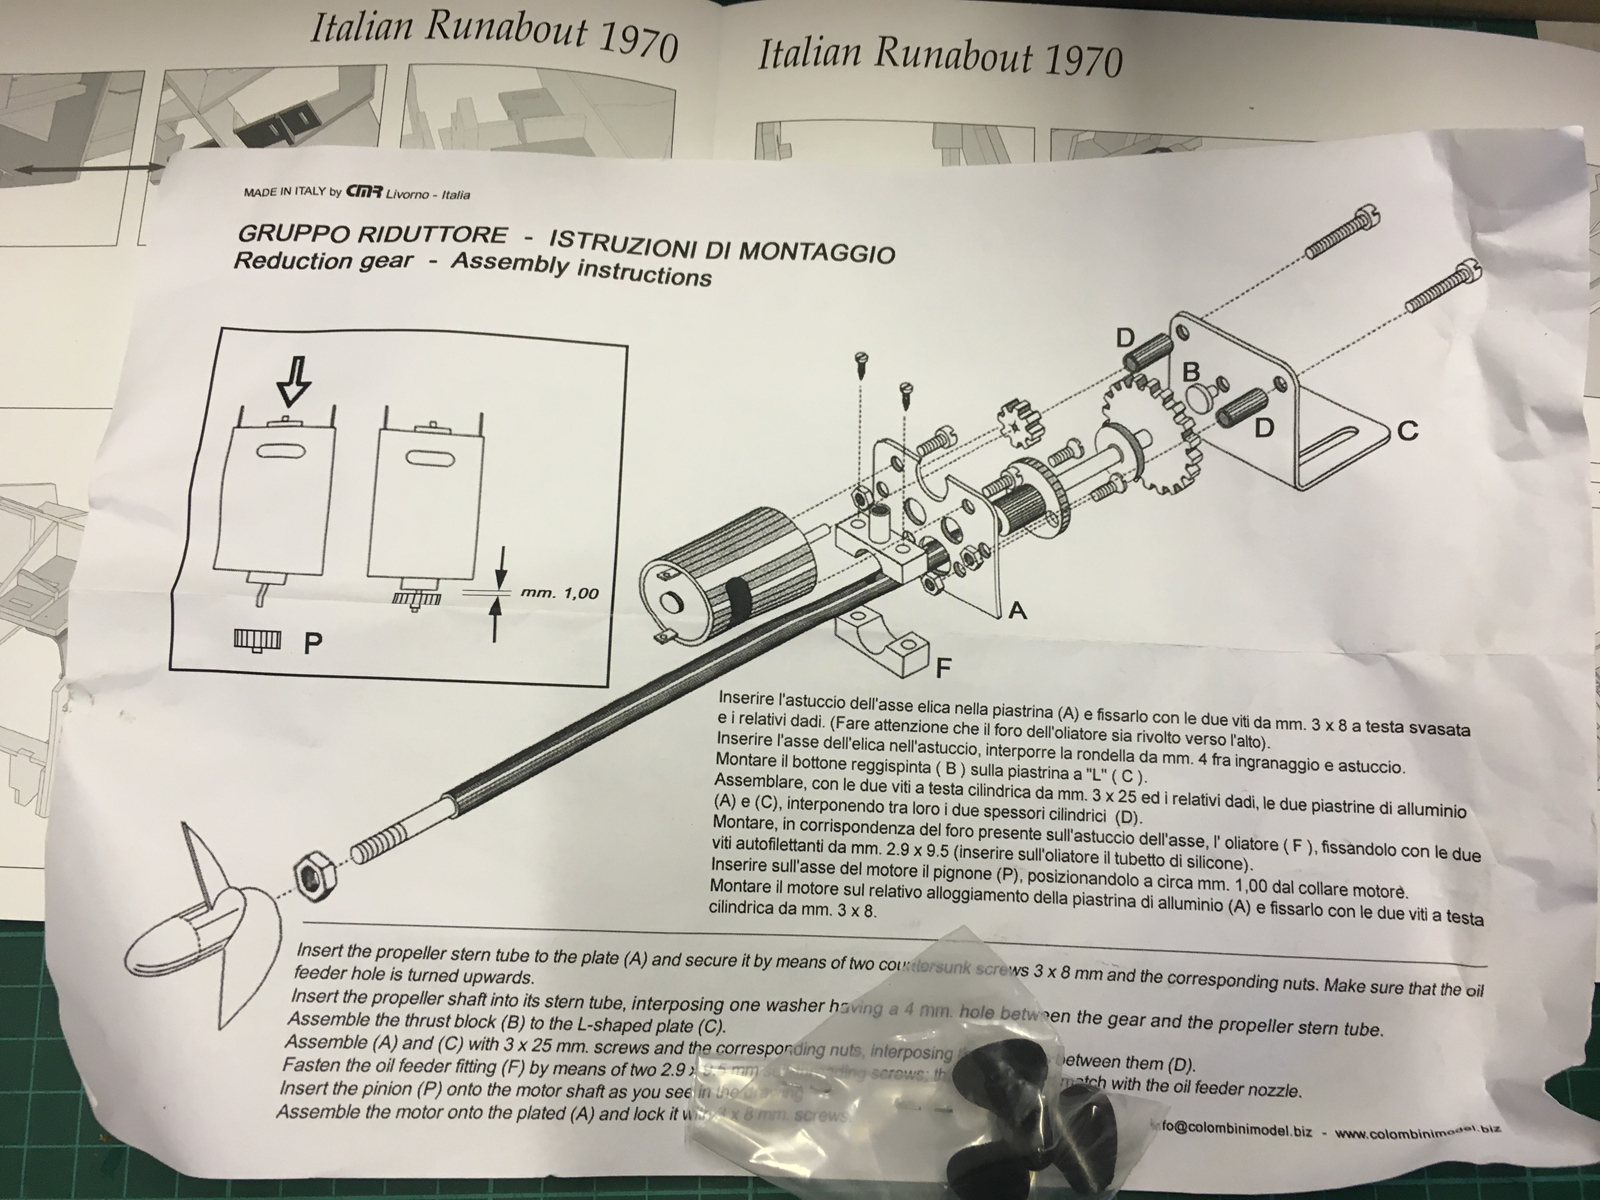
Apparently there are 2 options here, depending on if you use the "direct drive" option or the setup with "reduction gear". The kit that came with the kit happens to use the later (i.e. the reduction gear option), but I will also share here what you'd do if you'd go for the direct drive option. The photos which are meant for direct drive option are marked with a red (X).
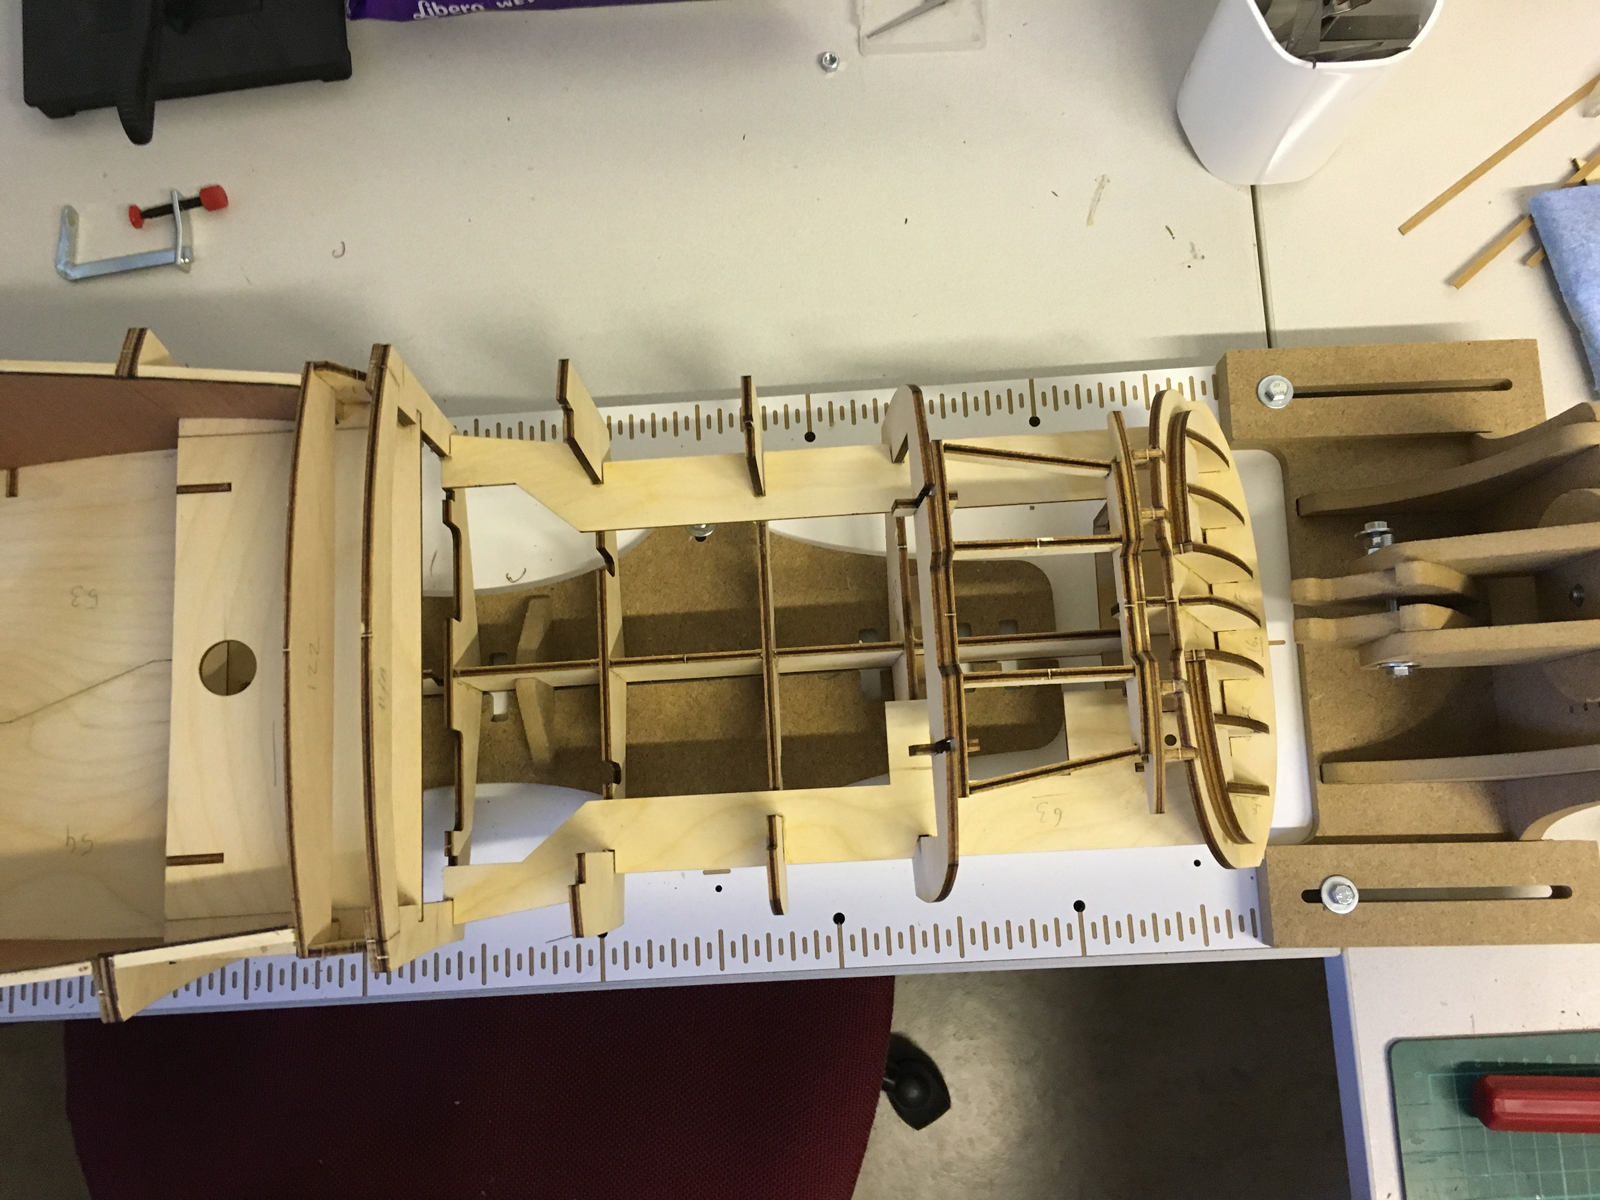
This is where the motors will sit. The engine compartment:

-
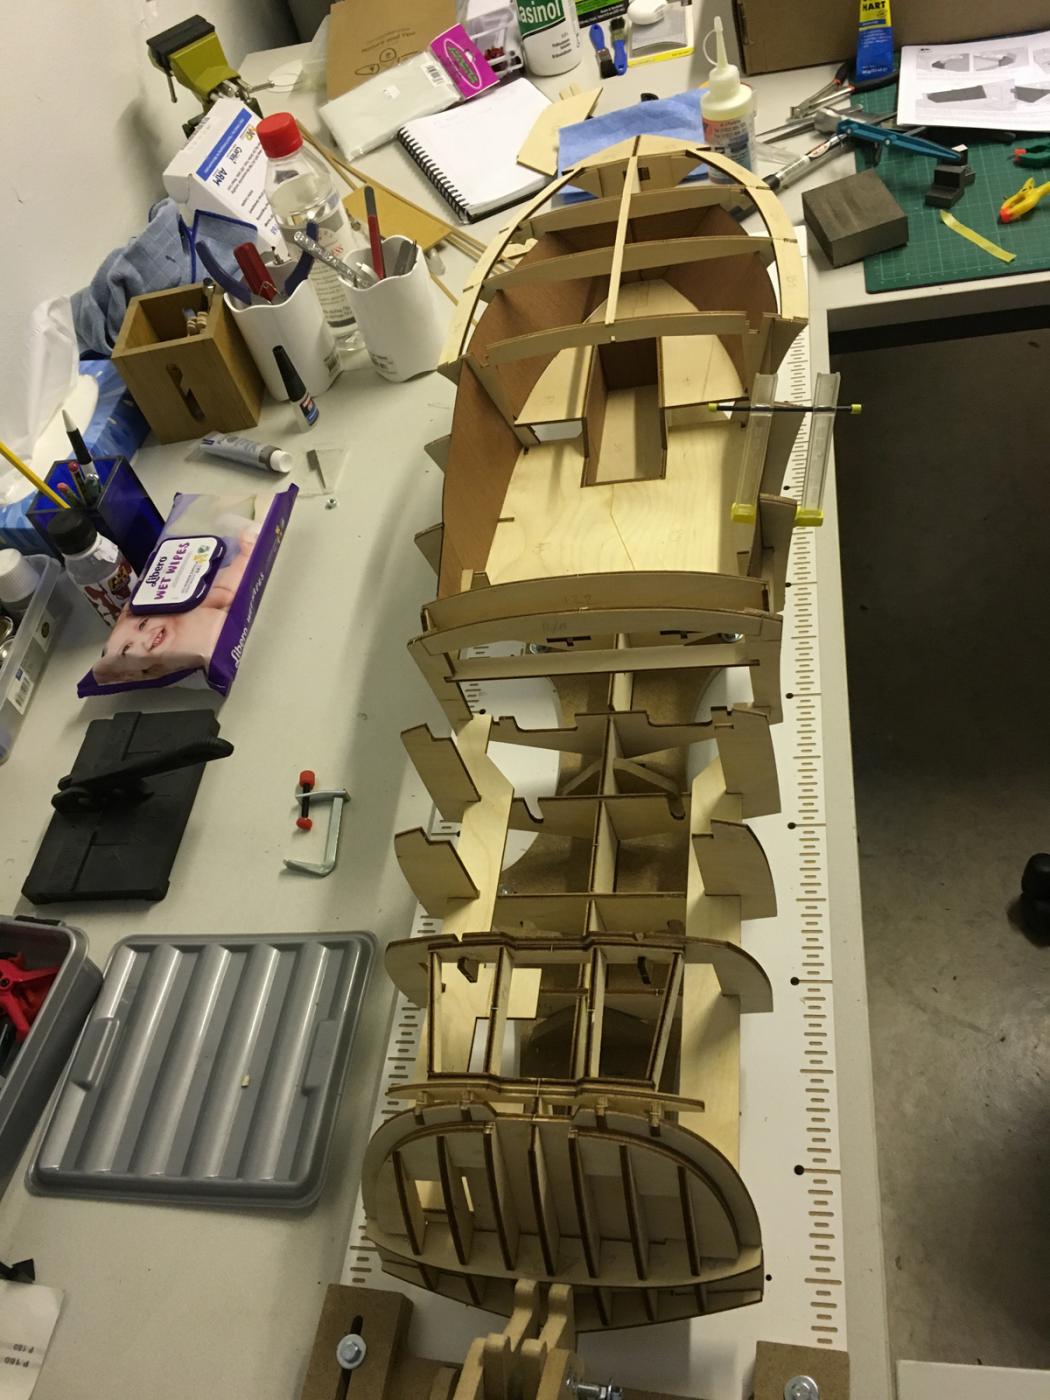
BUILD DAY 6. MOVING KIT DRY-FIT
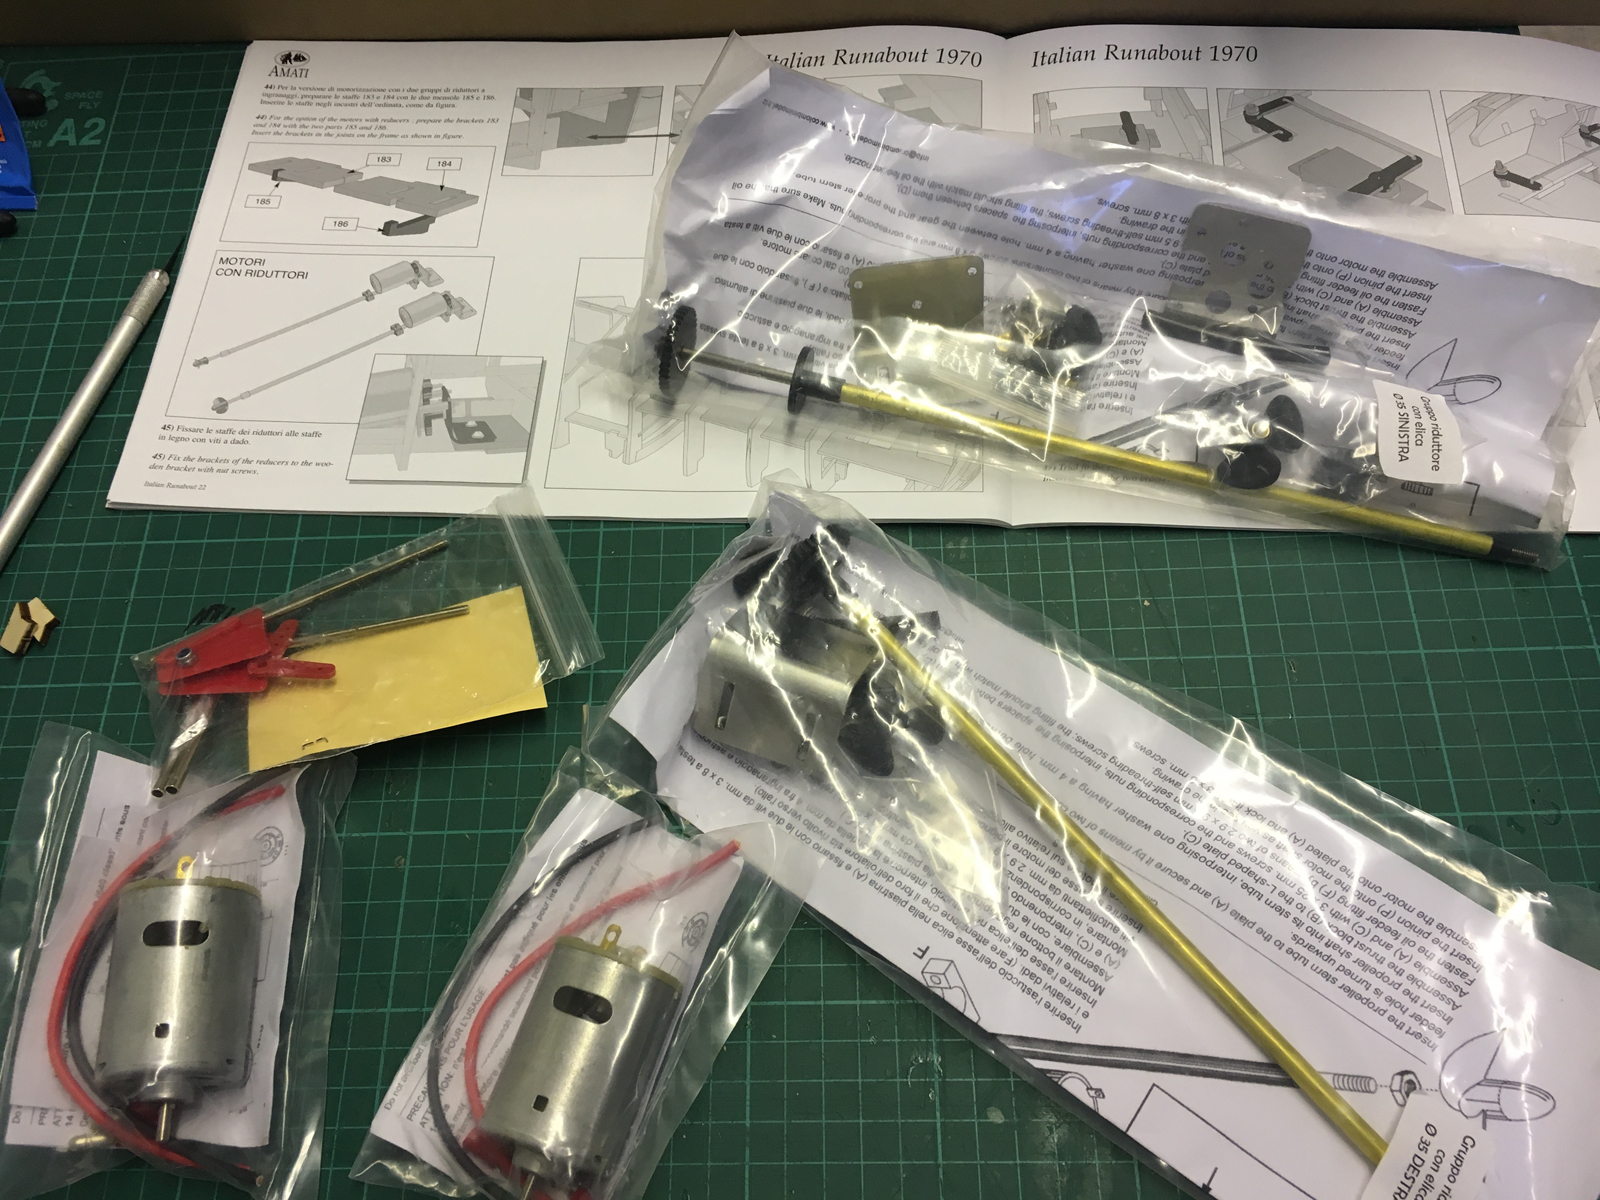
While waiting for the faux leather which I ordered to arrive for the upholstery, I thought it is good time to check what the motor construction will look like. I want to make sure for myself that:
- The motor kit is assembled correctly
- All the needed parts are present
- It fits correctly to the hull
- The moving parts work fine in-vitro, before assembling to the hull. This means: I have all the motor kit, batteries etc installed on a test bench and I can use a radio transmitter to control propellers and rudders, so that I don't face surprises afterwards.
Opening the box and checking carefully, two things annoyed me a bit:
- Some papers are ONLY in Italian (though the "this is not a toy" kind of warnings were tip top complete in many languages
 ) )
) )- Receiver and servo are not included in the kit. Maybe this is the way but I just thought that when you pay 150 euros for an R/C extension kit you won't have to look around for more electronic components to get it working. These are the components which will be installed in the hull so the shape and size somehow matter. I'll have to figure out what brand/model servo and receivers are compatible with Riva Aquarama.
Alright, enough whining and no hard feelings. This is still a great kit and so far is worth every penny. Following posts will include some photos of the motor kit construction and try-outs...
-
Merhaba Aydın!
I've just found your build log (I've been away from the forum for a while) and you're doing great! I've only made 2 RC boats so I don't have that much experience but I made sure that all internal seams were watertight by using thickened epoxy fillets on the internal seams - along the keel line, the chines etc. I also coated the insides with unthickened epoxy and fibreglassed the outside of the hull - more epoxy.
Both boats get a fair bit of use in the summer (I made them for my grandchildren) and both are bone dry inside. Looking at your pictures though I'm not sure how you'd go about filleting the seams, it all looks quite full inside that hull!
Anyway, good luck with the rest of the build. I'll keep watching.
Merhaba Yambo!
I saw in another forum a guy covering all the hull, AT THIS STAGE, facing out with boat sealer (namely Hempel Sealer 999) so maybe I'll comply with his approach. Anyway I will figure out something. Other than that, yes, I am planning to cover it with fibreglass sheet + epoxy.
-
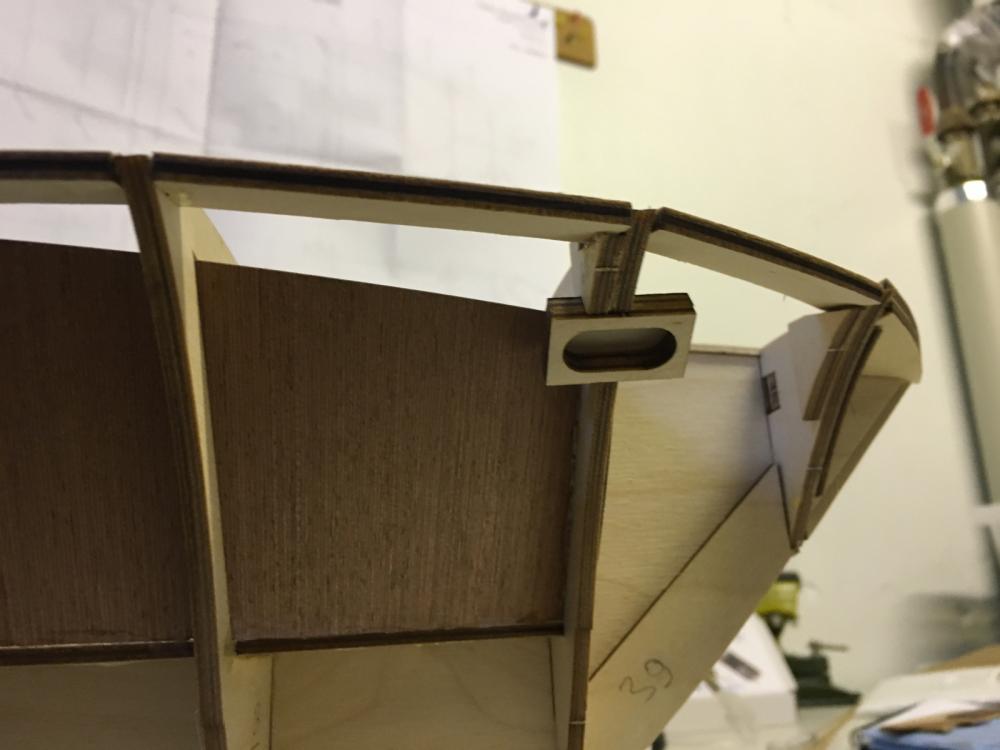
Looking good Aydin, regarding the front light, does the kit come with any sort of inserts for the woodframe?
Then another question, and I think it's only the camera angle, but the longitudinal of the light frames are to be parallell with the deck.
You are building a speedster in speeding time....

Hi Per,
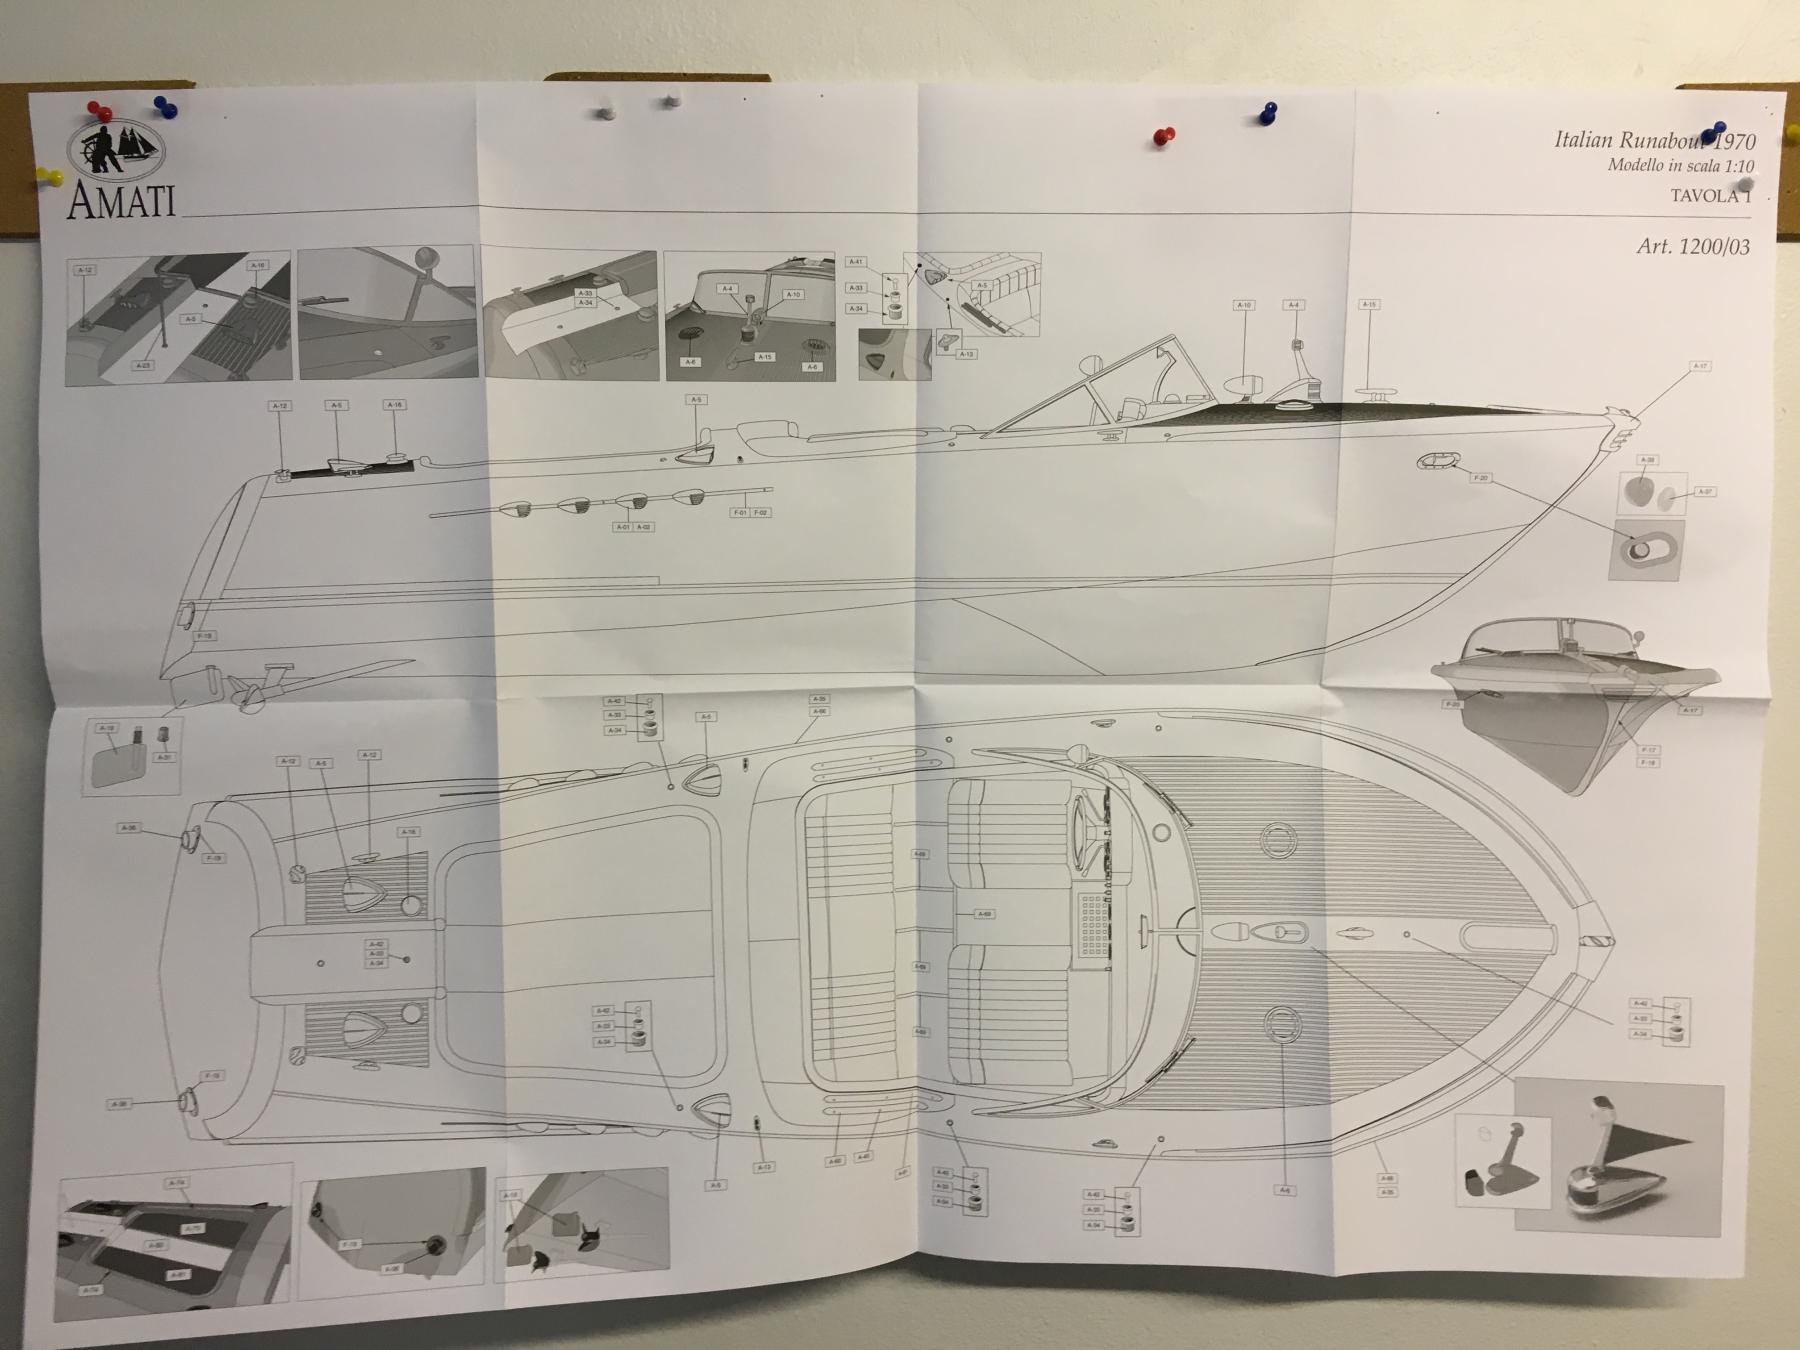
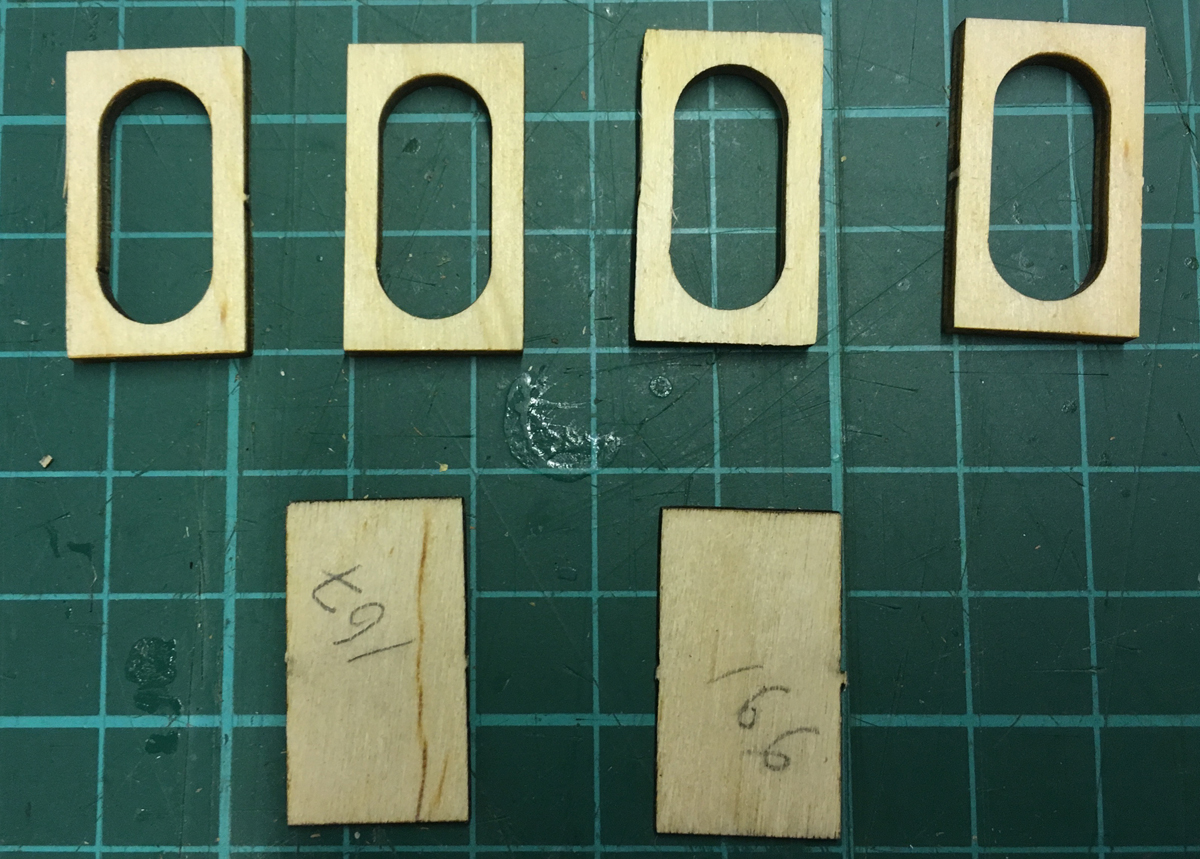
I didn't check yet for the inserts but according to the plan sheet below, it comes with some sort of ornaments:
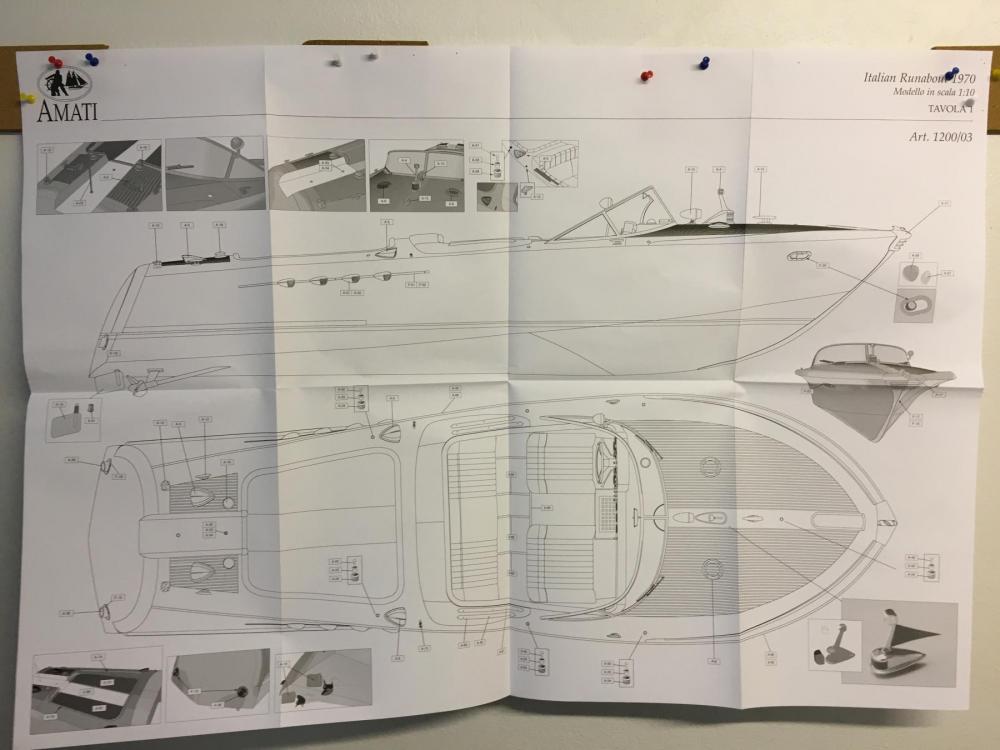
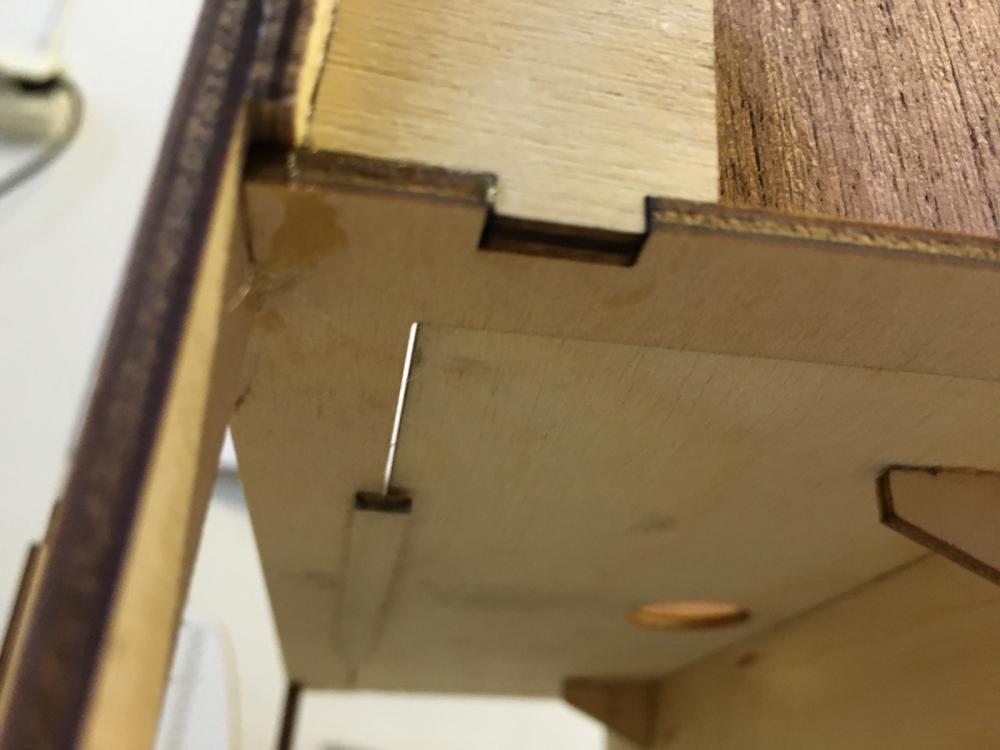
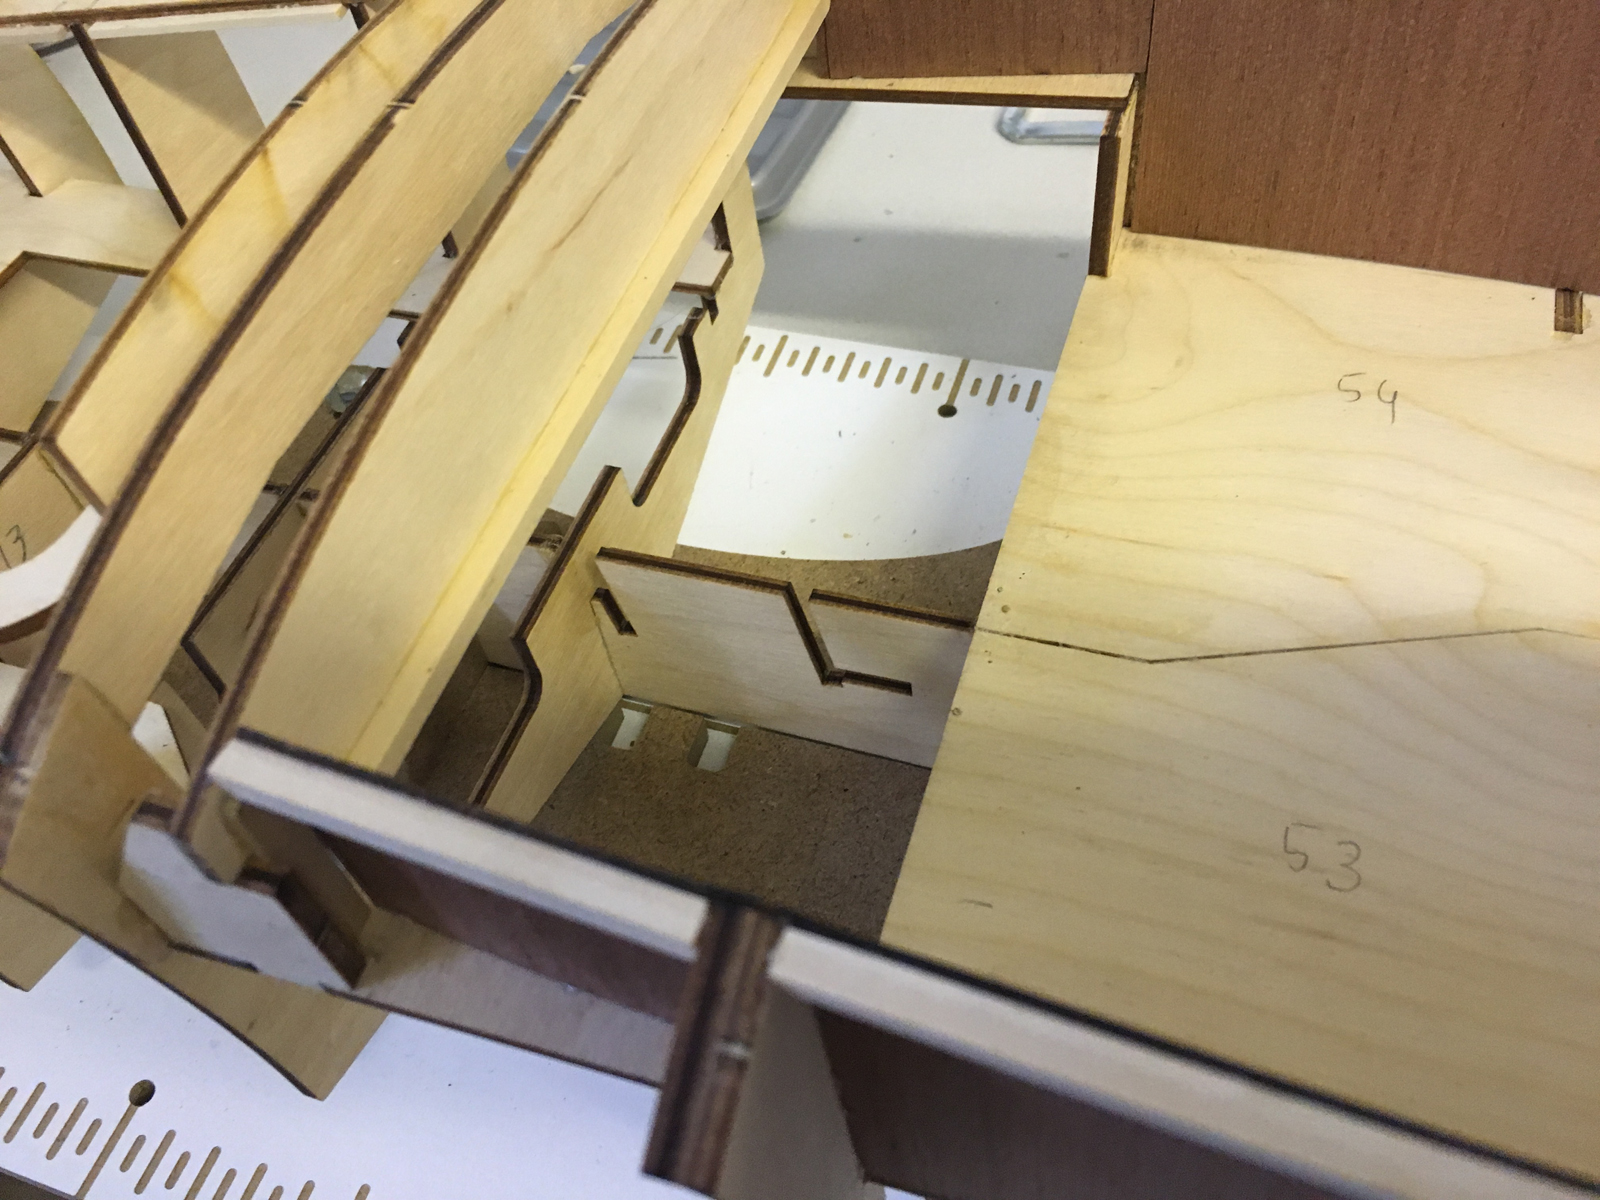
The long edge of the light frames are parallel to the deck. Actually if you check the image below, their slot is quite precise. It is the frame at the back, the slot on the right side. I have left the workshop for today but I will try to find answers for you tomorrow.

-
-
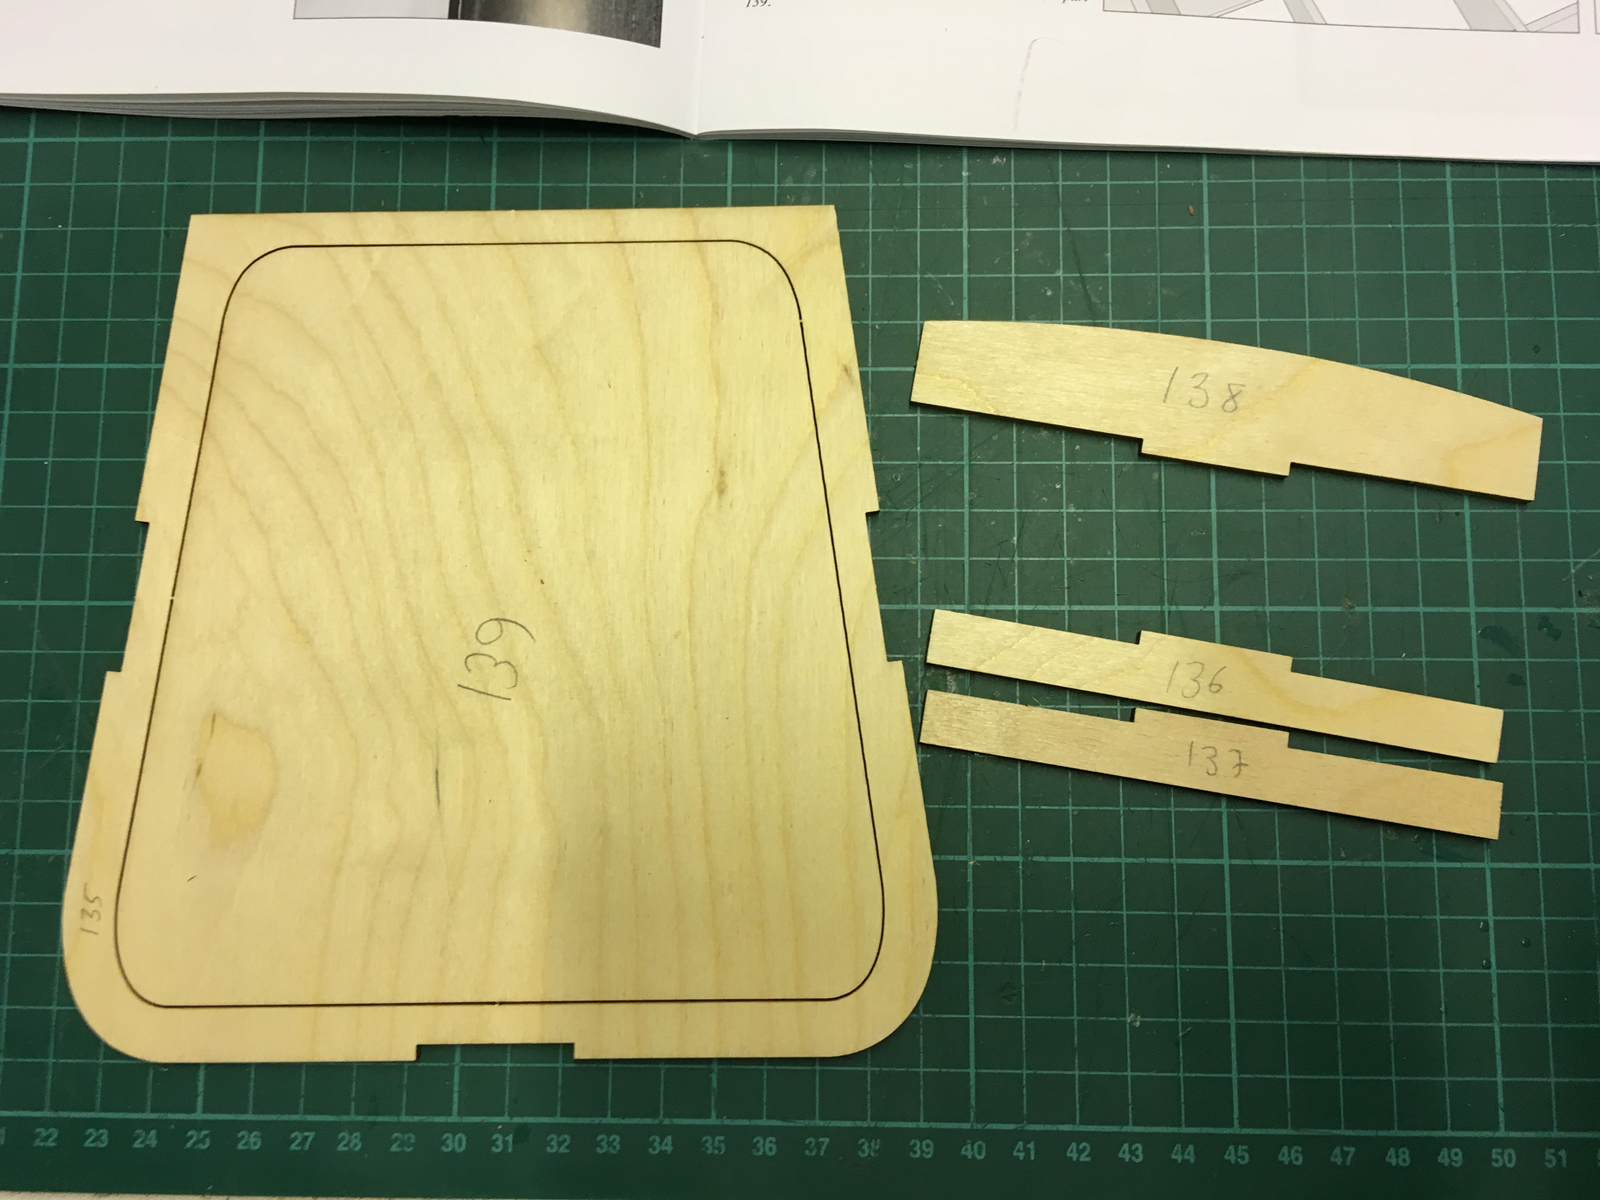
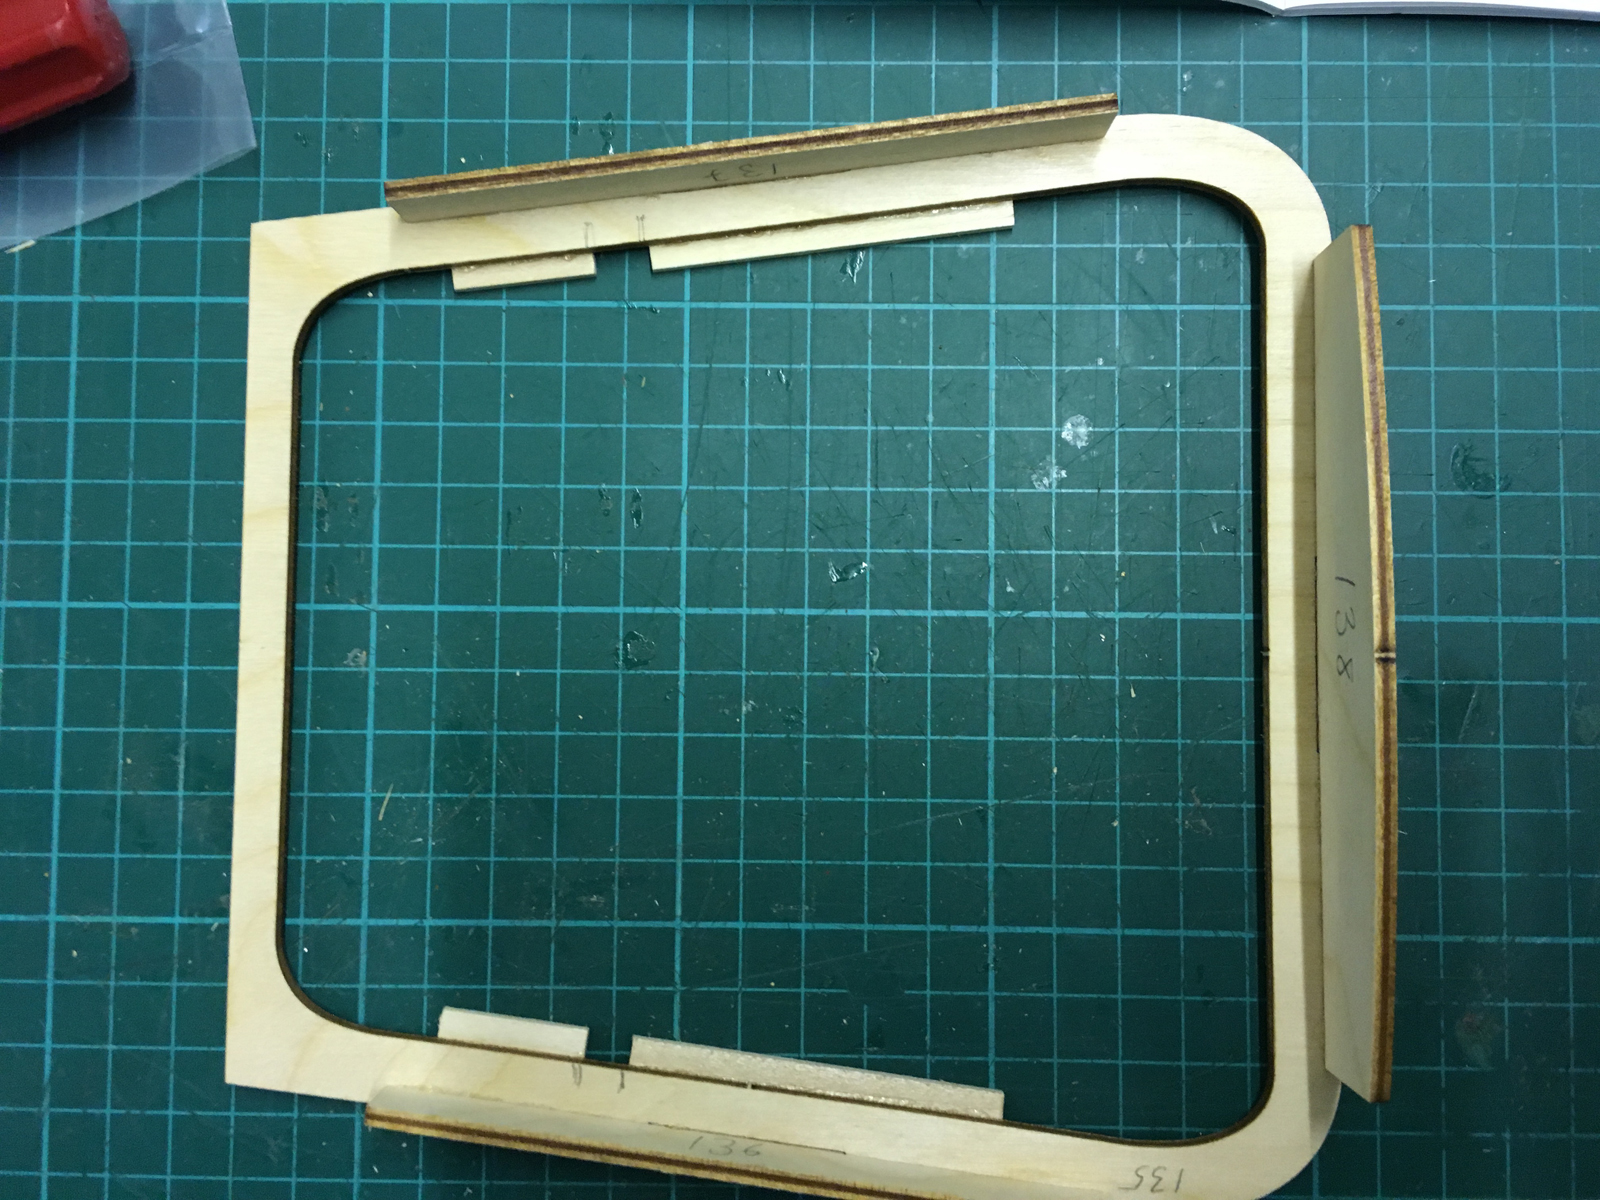
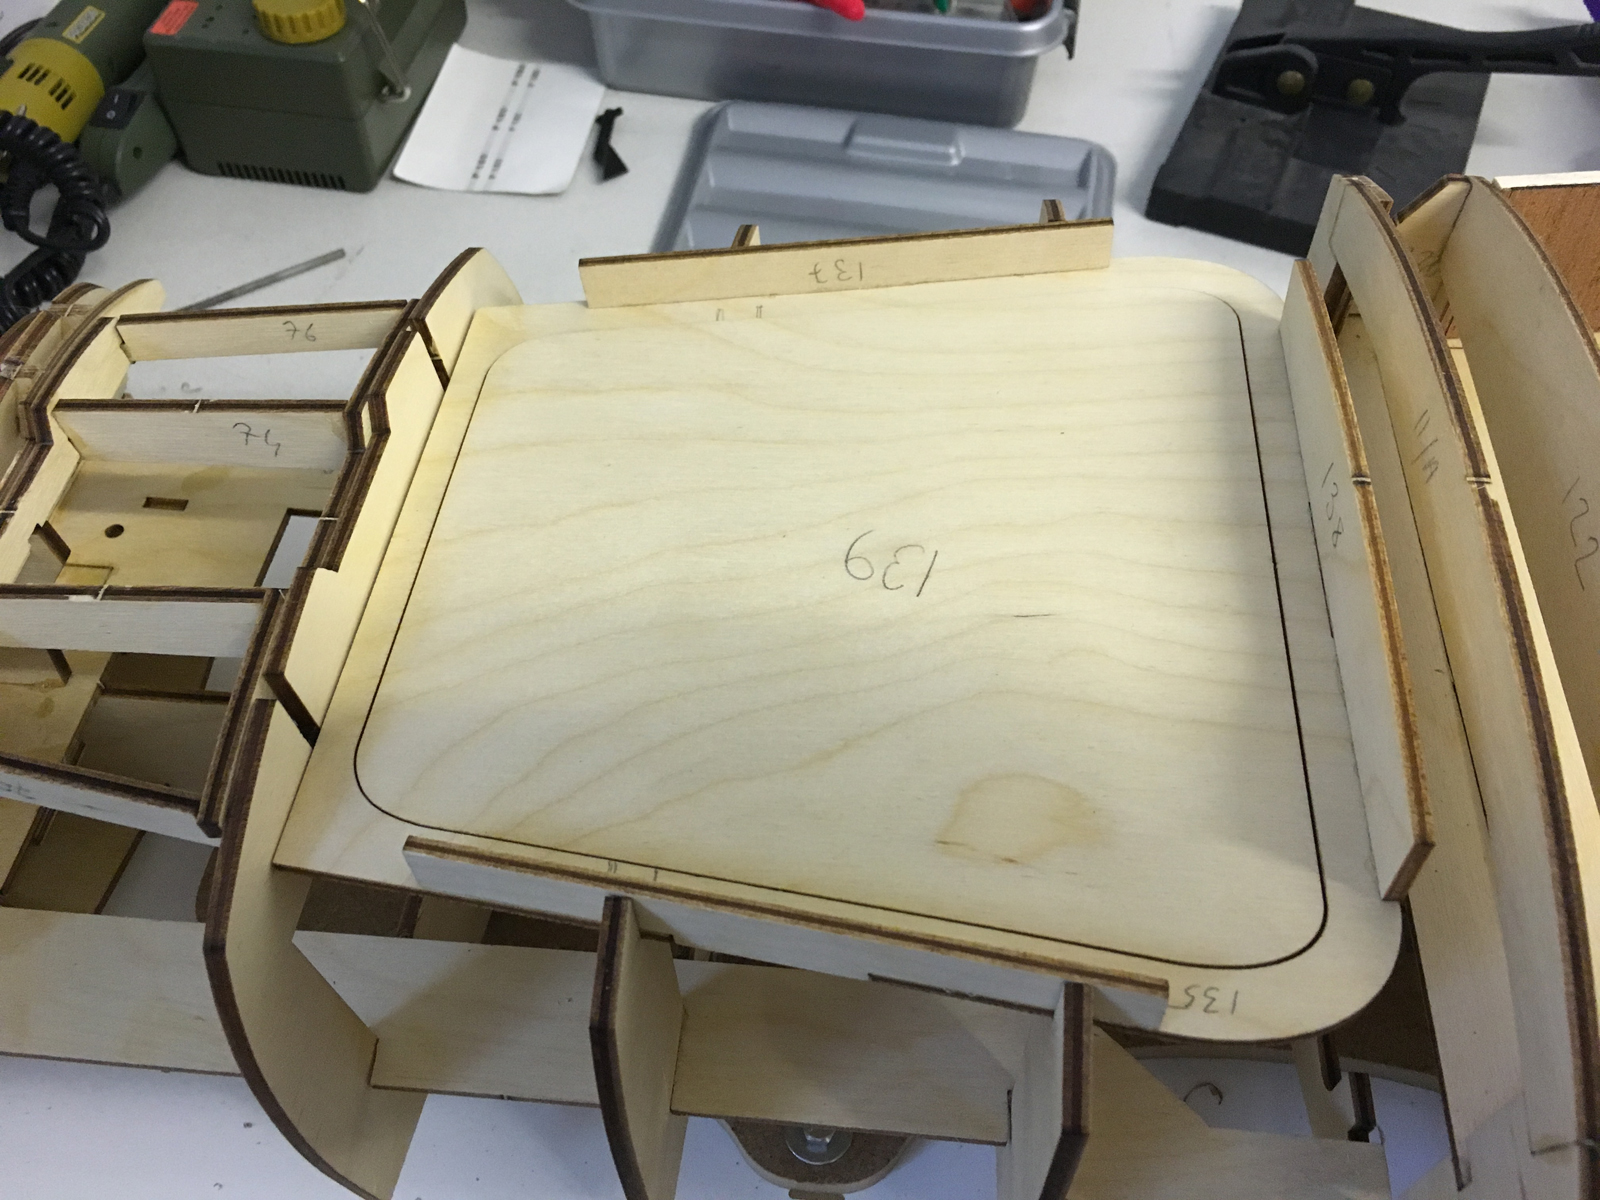
Sun deck. The lid (Part 139) will stay removable for R/C option:

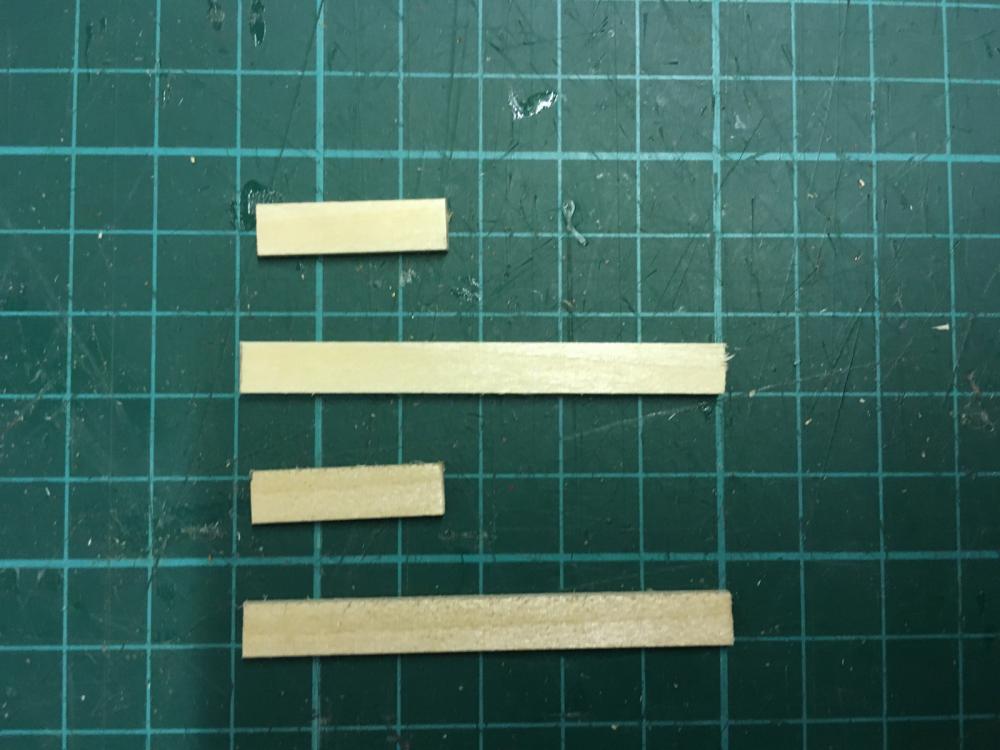
The parts:
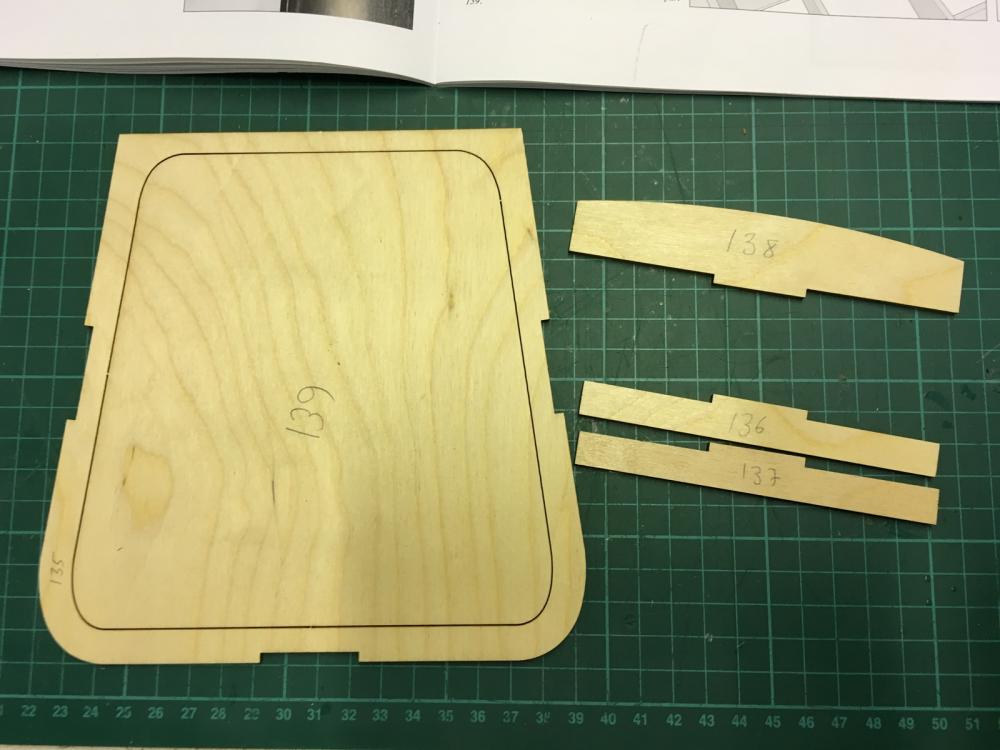
Assembly:
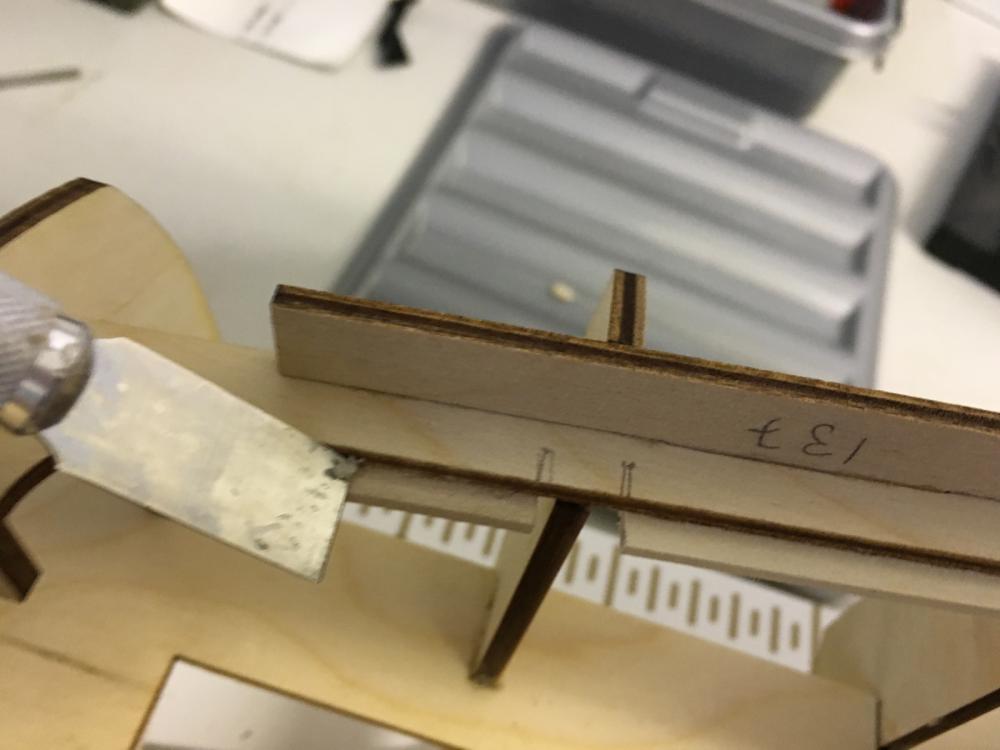
Supports from 2x6mm lime strip. Use plan to cut to the size:
Dry fit the sun deck to its place before installing the support strips to ensure that they don't hit the frames.
Supports installed:

Sun deck dry fitted to place:
Closed the lid temporarily:

Remember to scrape off any glue residues for smooth fit of the lid:
Sun deck glued in place:
-
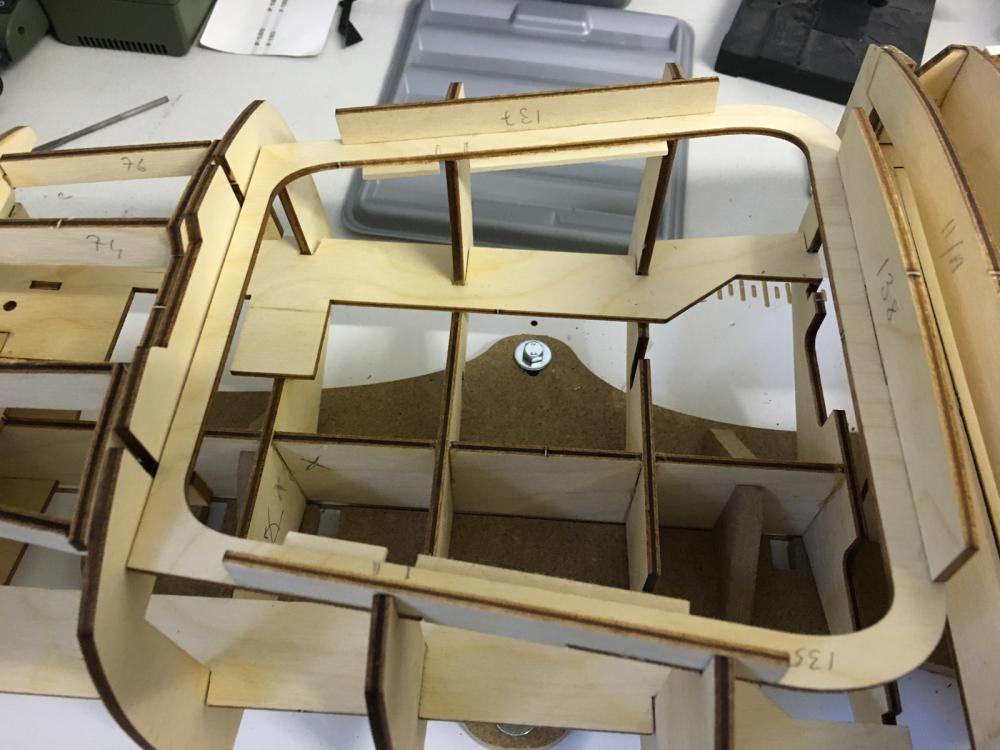
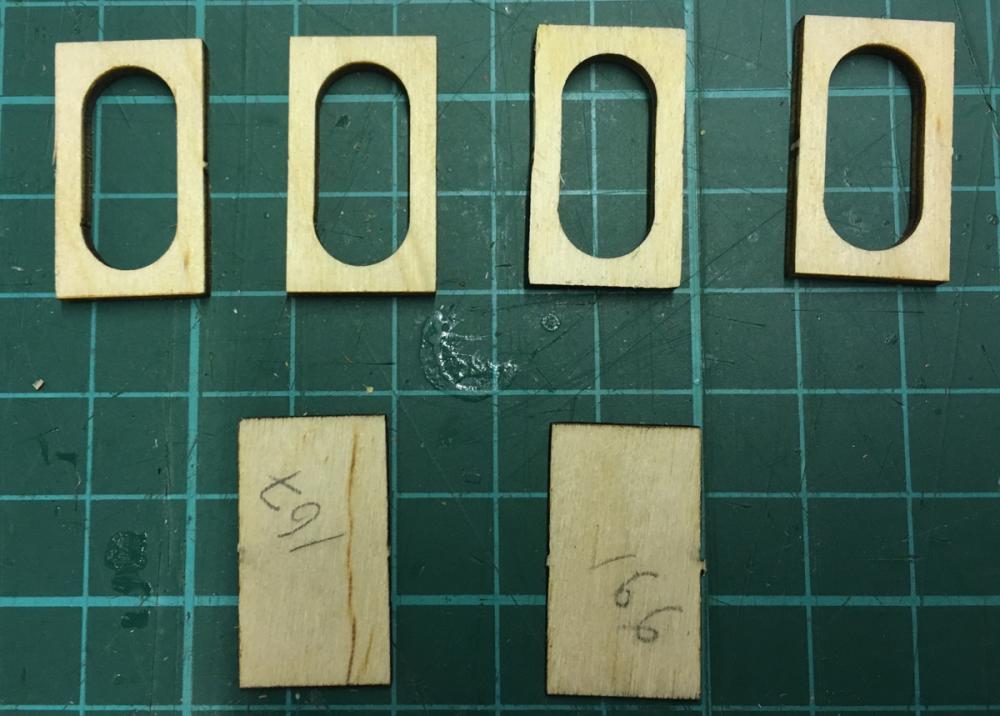
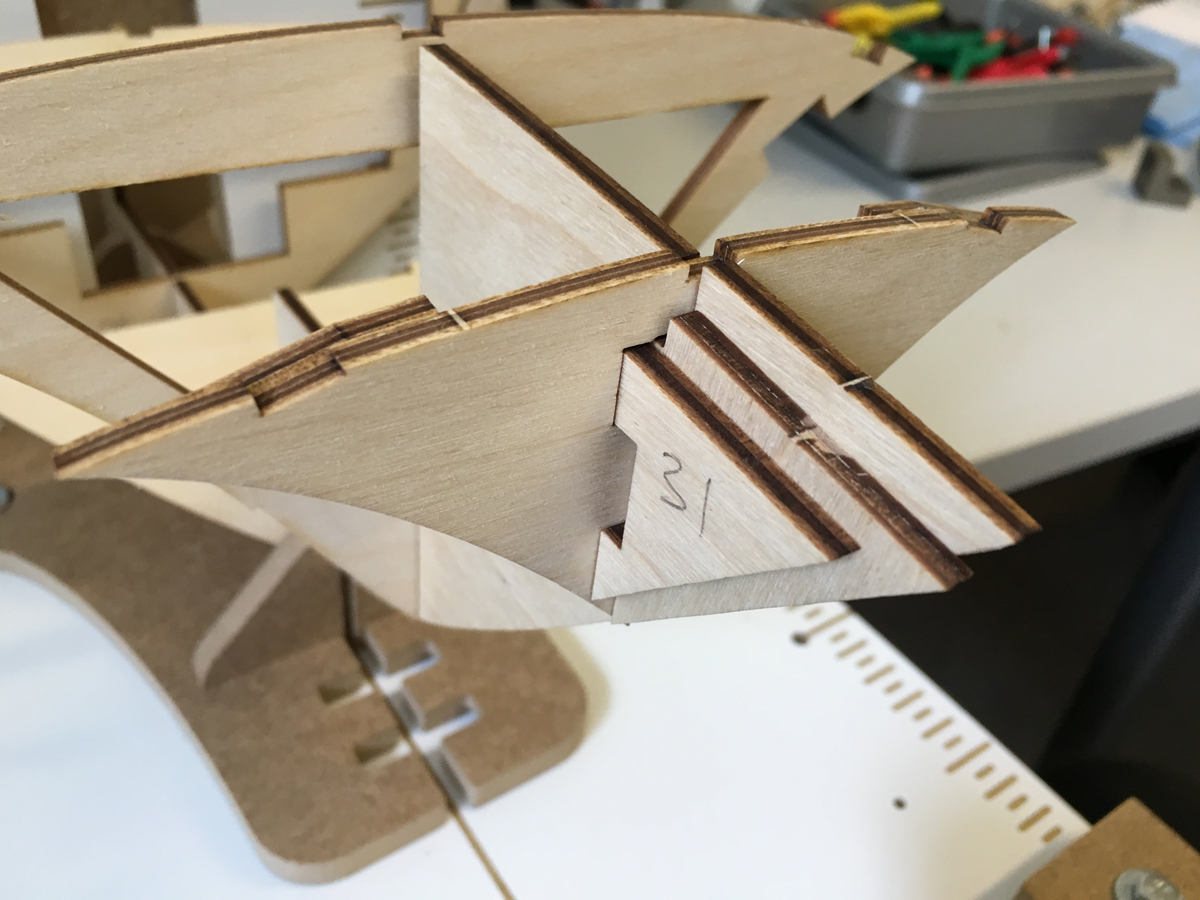
Moving on to next. Front light housings:

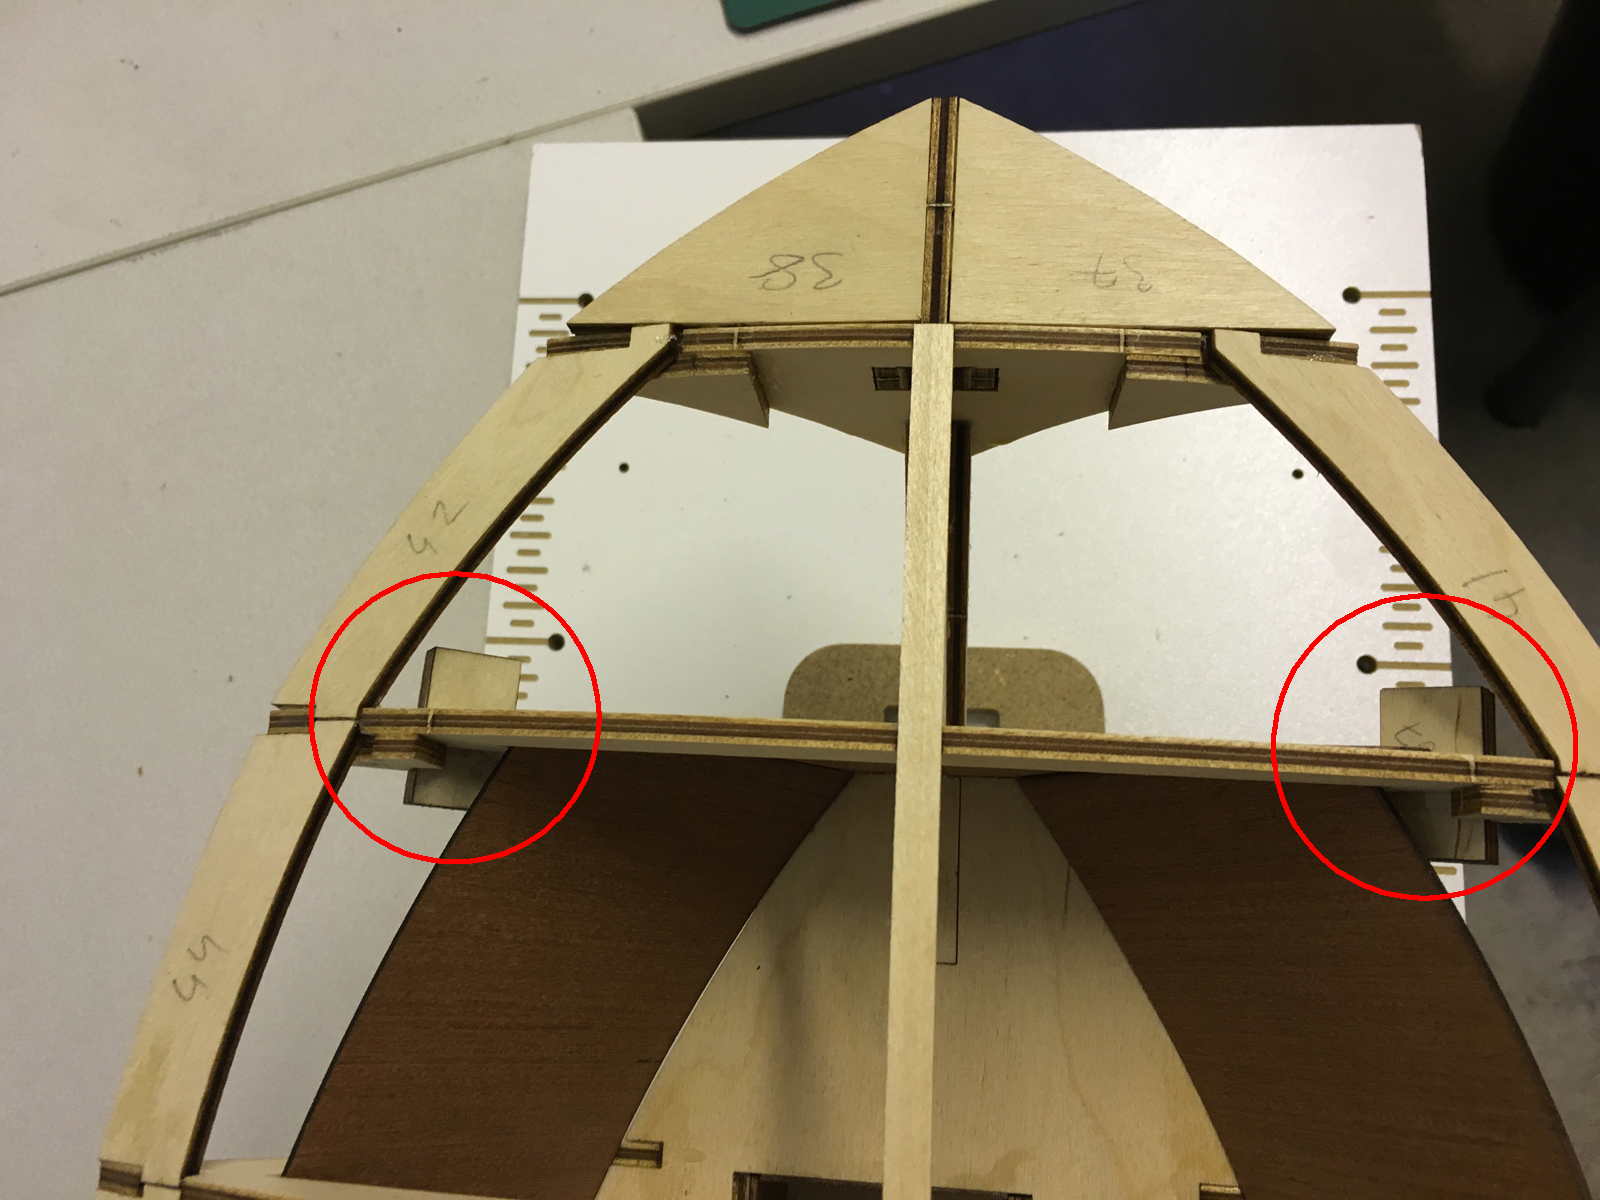
While checking the installation location, I noticed with a panic that I had glued the reinforcements of the frame 6 in wrong side
 . They should be in the front of the frame, not at the back. But looking ahead in the manual I figured out that this should not cause any problem in the future so I let them stay. No need to rip them and glue to the other side.
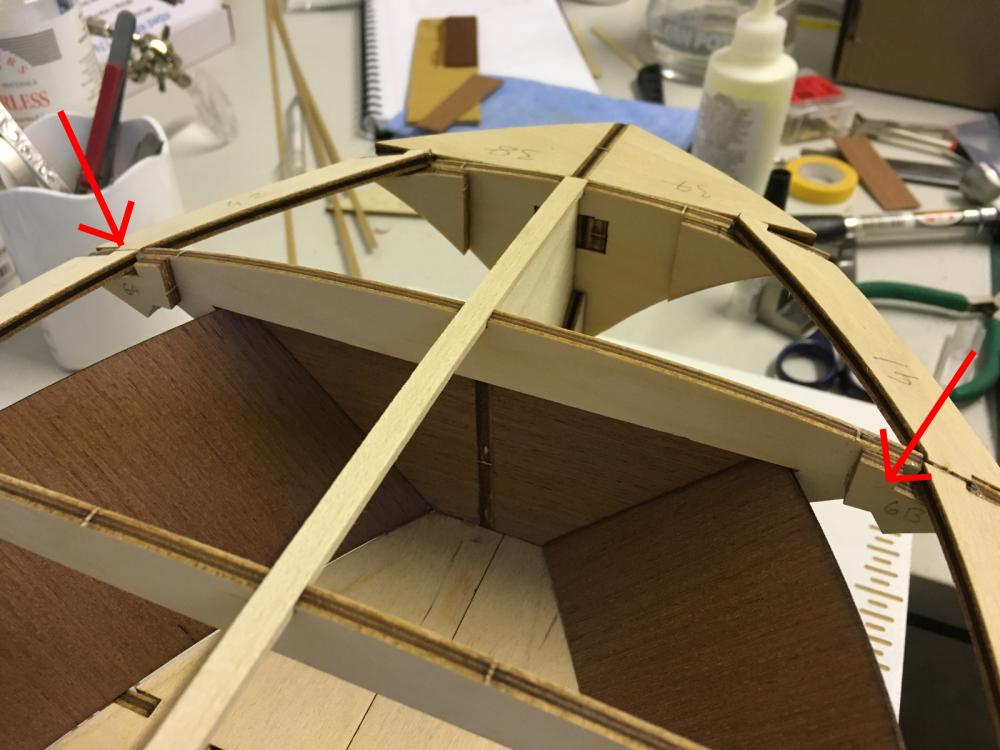
Front light nests are in place:

-
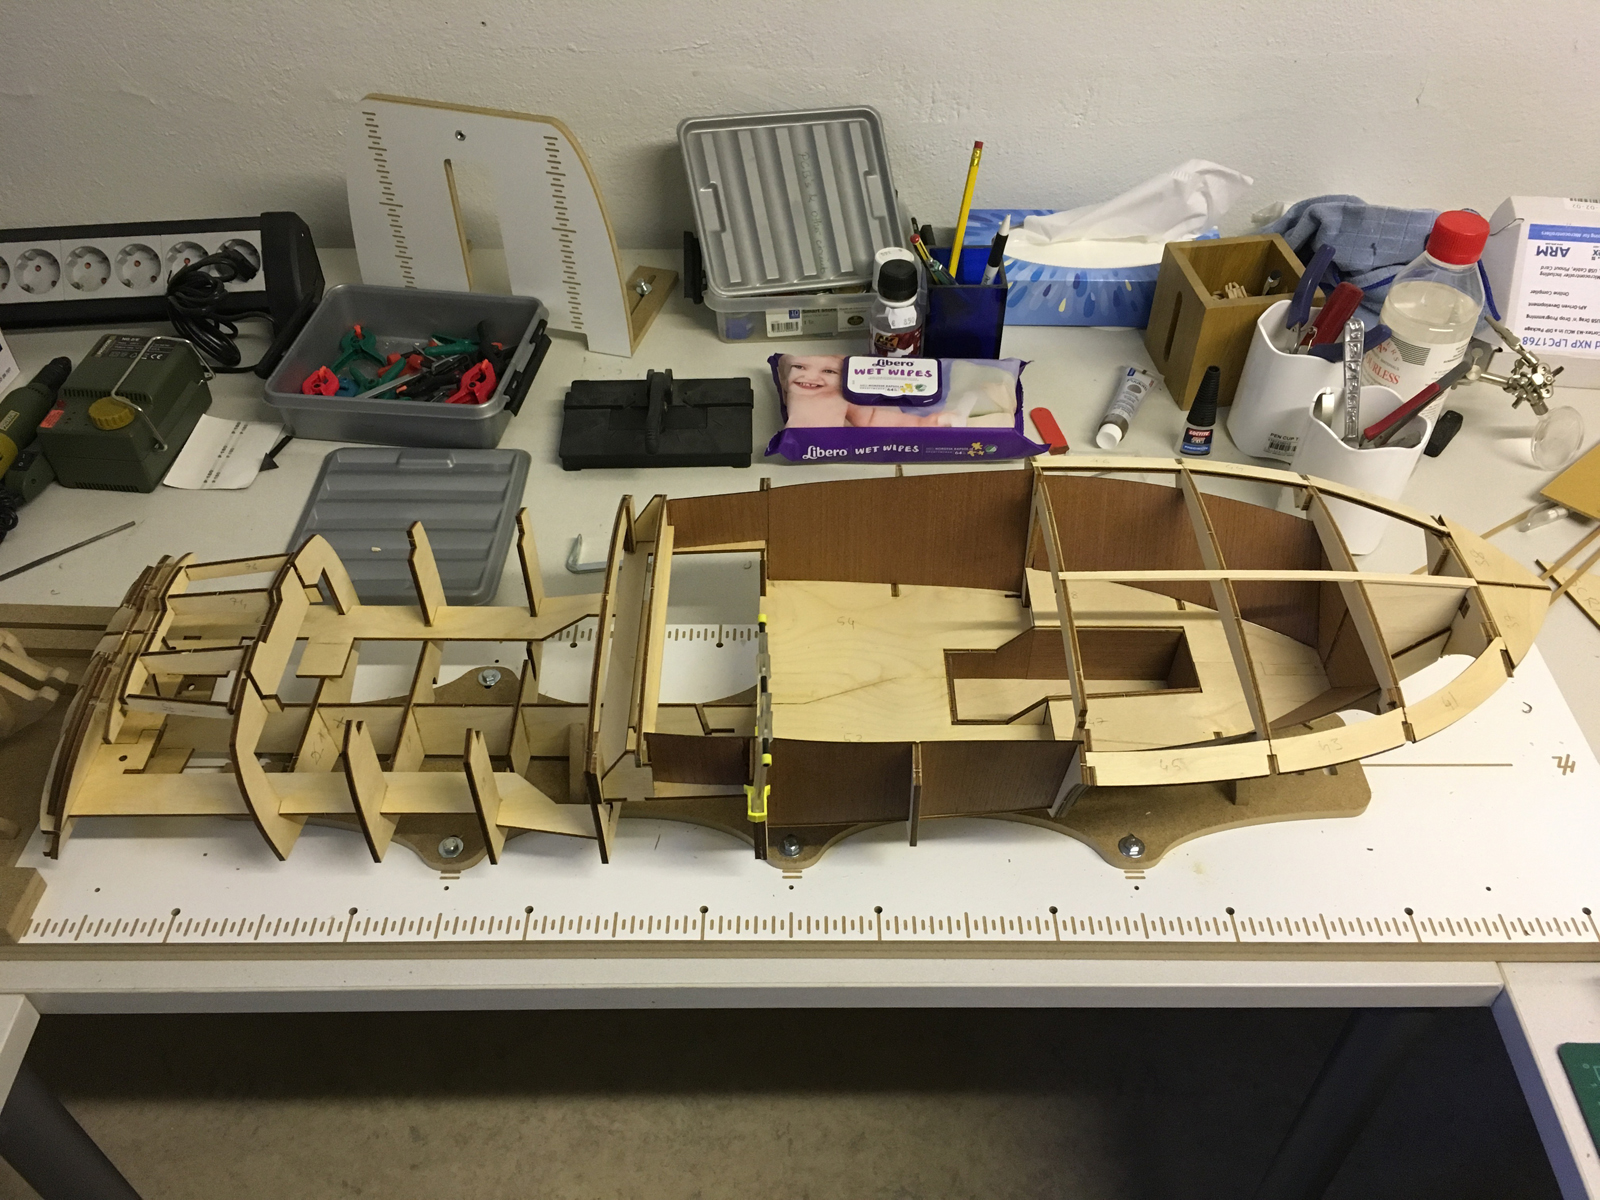
BUILD DAY 5. HULL CONSTRUCTION CONTINUED
As I mentioned above, I am skipping the upholstery step for now and continuing with the next steps.
But before moving ahead, I wanted to try varnishing on a piece of scrap mahogany. The mahogany plates on the interior of the hull (as seen in the earlier photos) are a bit tricky to sand, therefore I wanted to test if primary sanding actually will make any significant difference after heavy varnishing (I am thinking of all in all about 10 layers). The mahogany veneer is also very good quality and pretty smooth, that sanding may not be necessary at all. We'll see. Most of the mahogany veneer you see in the earlier photos in the interior will be either hidden under a hood or hardly visible thrgguh the seats so if I can save some sanding it will be good.
For this purpose I prepared the following test piece: Mahogany veneer, left half sanded with 400 grit and right half not sanded at all. The rightmost piece is a control piece to see the difference between varnished and dull surface. This is right after the 1st layer:
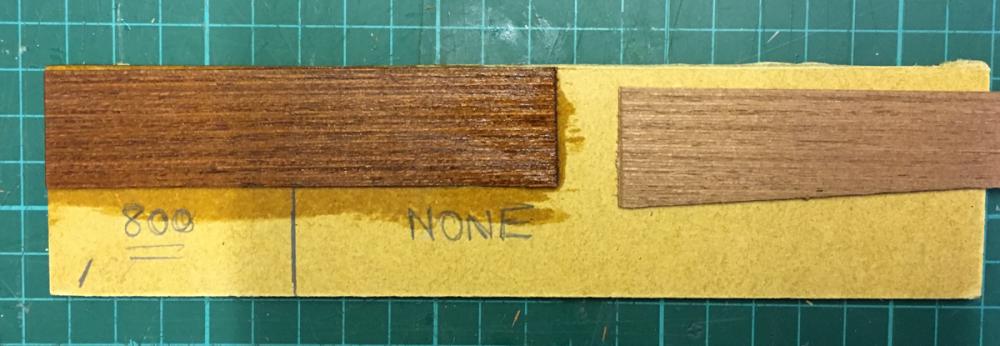
I use genuine boat varnish:

-
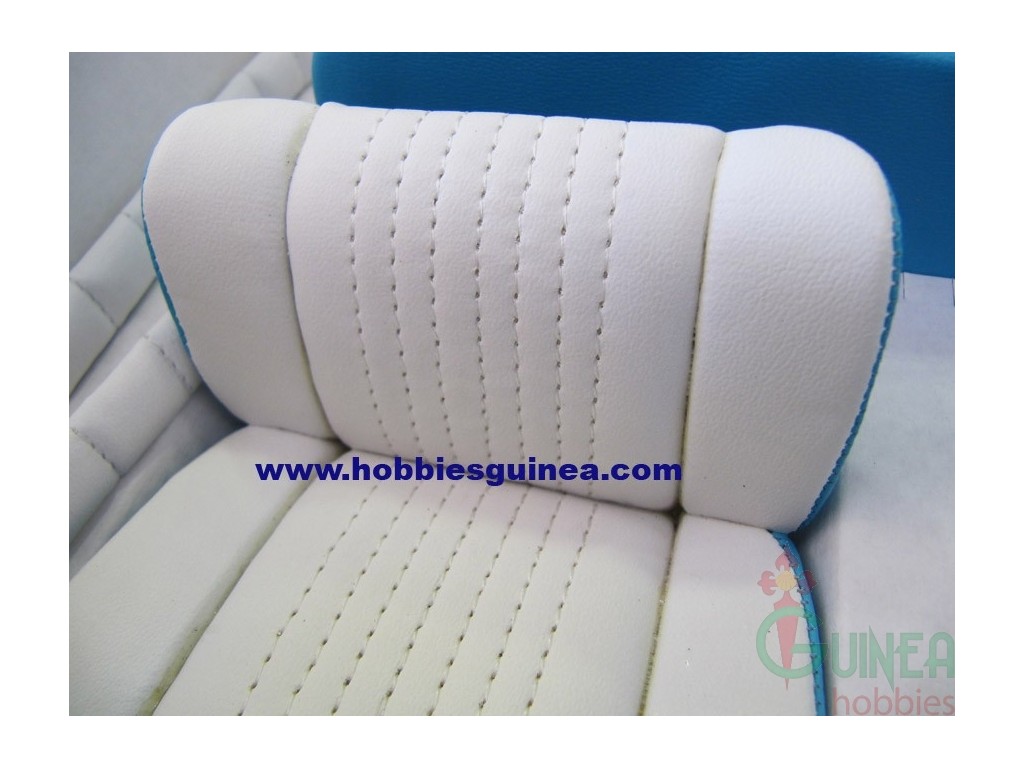
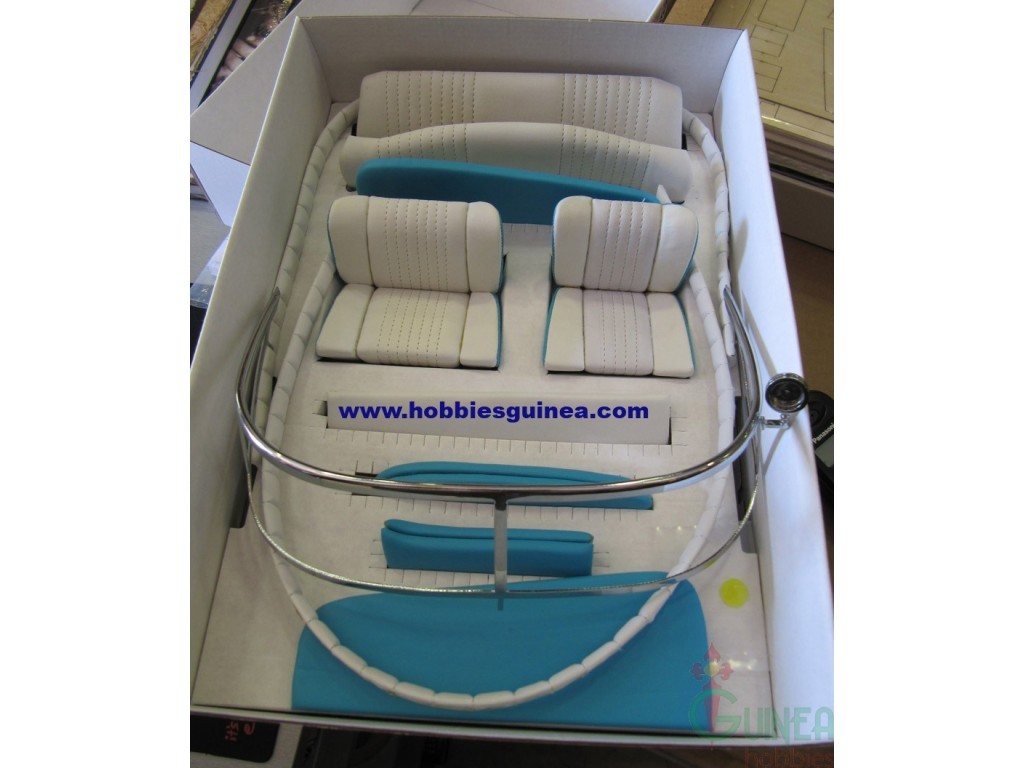
I have the feeling that the HobbiesGuinea.com picture is the result of a skilled amateur building these seats by hand.
There is no way a kit manufacturer could provide seats hand stitched like the ones on the picture, unless the kit was worth a small fortune.
You could do the same by placing some thin foam or rubber, a layer of leather on the plastic shells that you have and hand stitching them yourself.
Yves
Hi Yves,
At first I thought so, looking at the labor spent on those seats, but I confirmed it with the sales guy on snmodels.com, who is an authorized dealer of Amati and actually is located in the same town as Amati. Second, the photo on the kit box has similar fabric seats. One guy from another forum who built it wrote also that the seats came in the box like that. So it is quite possible. Also this upholstery kit costs around 150€ if you want to buy it separately and it is expensive.
I was thinking also to run stitches on a piece of white fabric (or leather) and cover the seats with it.
Though they look great, one problem is, though, that the stitches are too big for a 1:10 scale model. Even if they are, say, 1.5mm size (probably the smallest you can make using a sawing machine, it would correspond to 15mm in full scale which would not be so realistic in my opinion.
-
Hi Aydin, nice progress.
For gluing tricky parts I tend to use two glues - CA and epoxy (or CA and aliphatic wood glue like Titebond).
The problem with CA is that it gets everywhere, as you said. So I use gel CA, which does tend to stay in place. CA is also not very strong, and is brittle.
This is why I also use epoxy. Epoxy has strength, but takes time to set (even the 5 minute stuff).
To glue tricky parts, I cover most of the part in epoxy. I then apply tiny beads of CA around important areas of the part. It is important not to apply too much CA, because more CA takes longer to set, and increases the danger that it might get into areas where you don't want CA. I also leave a few mm margin towards the edge of the part to minimize the risk that the CA will leach out and discolour the joint.
Pick the part up with tweezers to avoid accidentally touching the glue, and place on the model. The CA will set almost immediately and work like a clamp, keeping the epoxy in place while it sets. This method works really well, try it.
Thanks for the tip Keith, I'll try that. Actually now you've mentioned using CA like a clamp, I remembered using the similar technique for planking: using CA in intervals between the wood glue to work like a clamp in tricky areas. Thanks for reminding it.
Hello Aydin,
Your project is proceeding nicely, you are making accurate work! I am sure your Riva will be a masterpiece when finished!
Concidering the upholstery, have you ever thought to use thin real leather? When building my car models, I made the benches out of real leather. The benefit is that it bends easily around the corners in two directions. Small pieces can be obtained cheaply from the shops specializing leather fabrication.
And according to my experience the best glue with leather is so called contact glue (kontaktiliima in Finnish). You apply it to both surfaces, let dry, and after ten minutes press the pieces together. But be sure it is right the first time, you cannot move the parts any more after they have sticked together.
And Moxis, using real leather would be great. I just ordered faux leather from eBay and will see when it arrives. Overall I think that I will skip this upholstery work for the time being (mainly due to varnishing work ahead) and handle it as a mini-project of its own, peacefully. Because that will make the main difference between a cheap look and expensive look
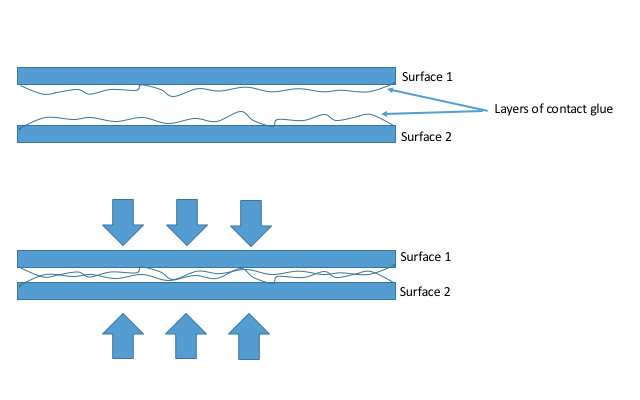
I have somewhat concerns with contact glue. I used it a lot in my other projects, such as loudspeaker cabinets and I have experience of using it in large surfaces. A small surface like this one would be a challenge combined with the very high make-no-mistake factor of using the contact glue. In addition, due to the nature of the contact glue which works by sticking to each other, there is always a layer of glue between the surfaces no matter how much you press. With one side being soft material like leather, I wonder how smooth the result will be:
But anyways, I will just try several options as a side-project and see.
By the way, Amati has apparently updated this kit recently. I bet that many things are for the better, but I have to say I am pretty disappointed with the upholstery kit. Looks like in the earlier editions the seats came like this. Great looking with real fabric and stitches, colors etc (photo credits hobbiesguinea.com):


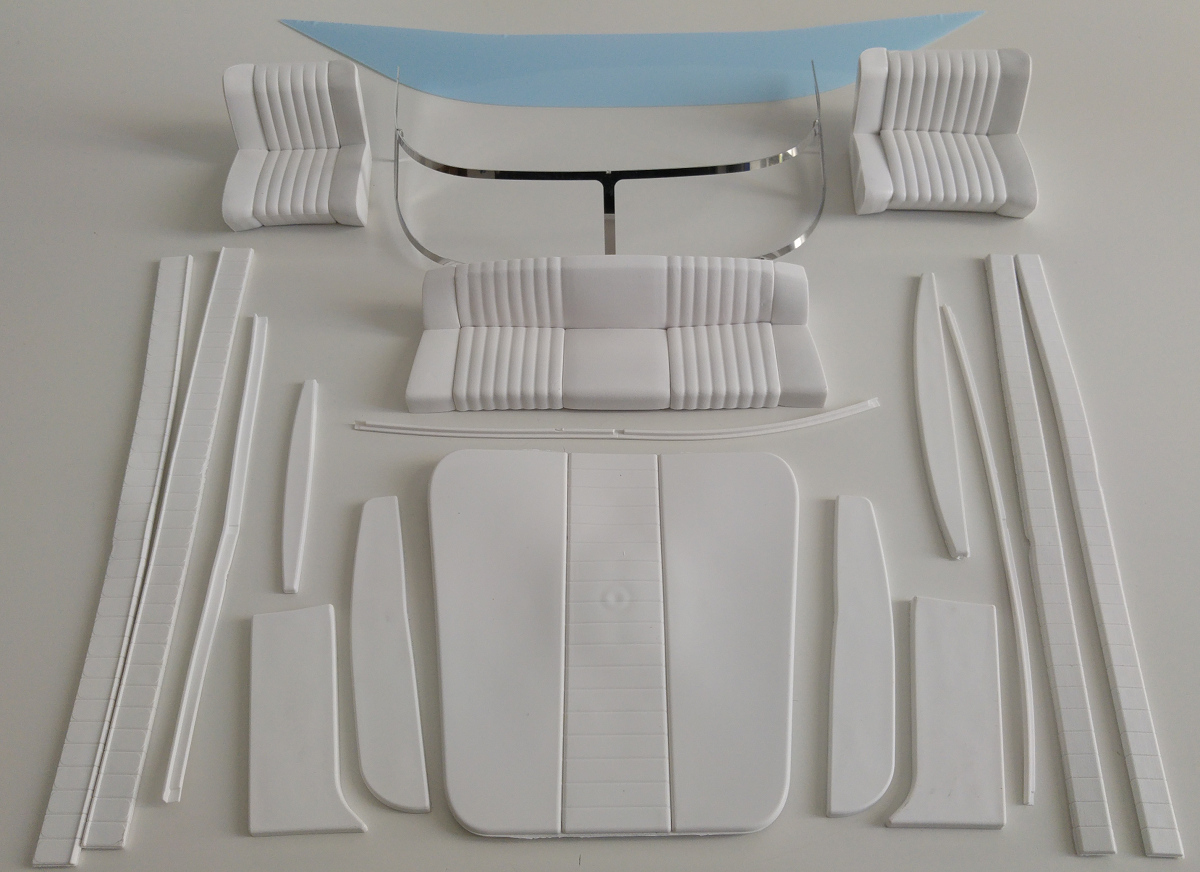
What I have is these plastic marshmallows (photo credits snmodels.com):
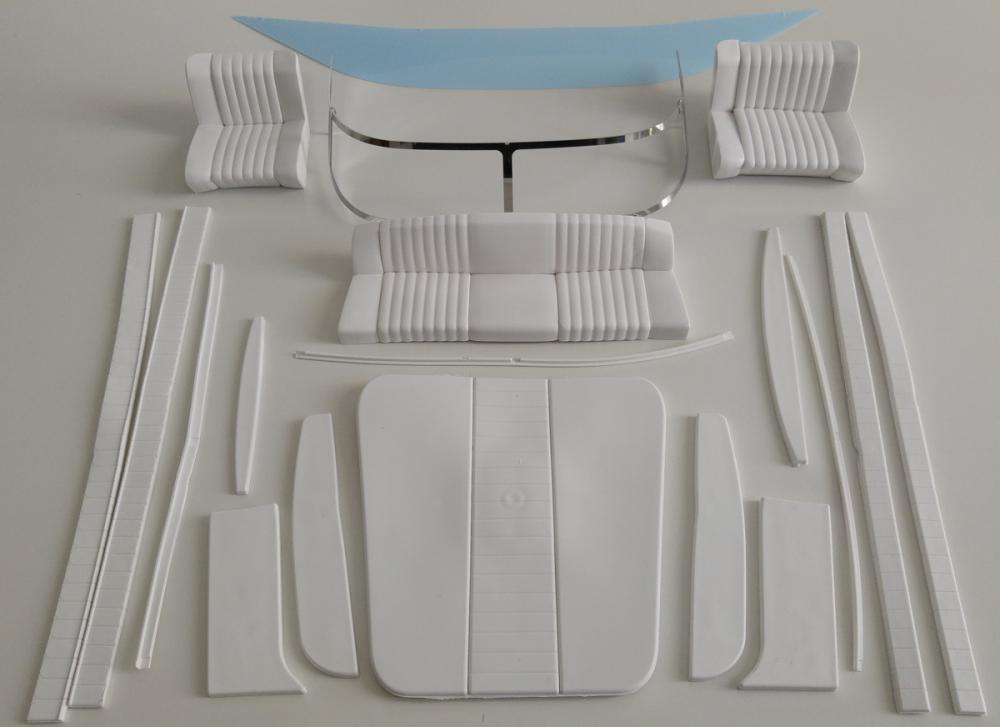
I somehow understand manufacturer's concern. They might have gone better solution against water splashing on those seats while it is running on water, sacrificing the looks.
(I also have to mention my great thanks to an Alberto from snmodels.com who explained this to me on online chat and provided photos. Great customer service even though I am not a customer yet, but this way I definitely will be)
Now I will look around for any shops which still have the old version of the upholstery kit.
-
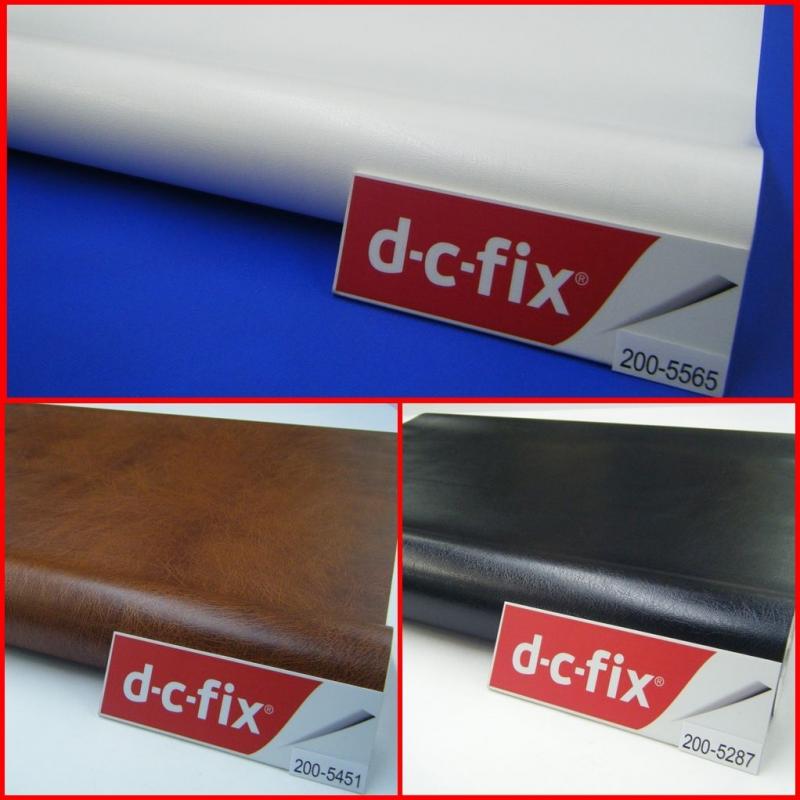
I found these DC-FIX self adhesive leather-effect sheets. I may try those as a replacement to the stock leather-like sheets. I will post once I've done that. I also ordered a few A4 size white and turquoise faux leather sheets from eBay. Will test all of them peacefully and decide.
-
Hi Aydin.
WOW you are moving on so fast... I missed a day somewhere.
Turning out to be a very nice kit.
Nice build log with lots of details and hints.
Well done.
Regards Antony.
Thanks Antony,
It just so happens that I have some free time in these days, so I take advantage of them.
-
-
And now I turn the page of the manual only to find out that I have to stop for today: Looks like it is time to apply some lacquer which I wasn’t expecting to come this quick. Well, actually the instructions are not calling for it just yet. According to the manual it is time to apply the “leather-like material” (that’s what the manufacturer keeps calling it throughout the manual) inside the cockpit. It sounds however wiser to apply the lacquer inside first in order to eliminate the risk of spilling lacquer on the upholstery.
I saw in another build log in another forum that the builder applied water proof lacquer all around inside, I think that’s what I will do. So I’ll go and buy a boat grade lacquer tomorrow.
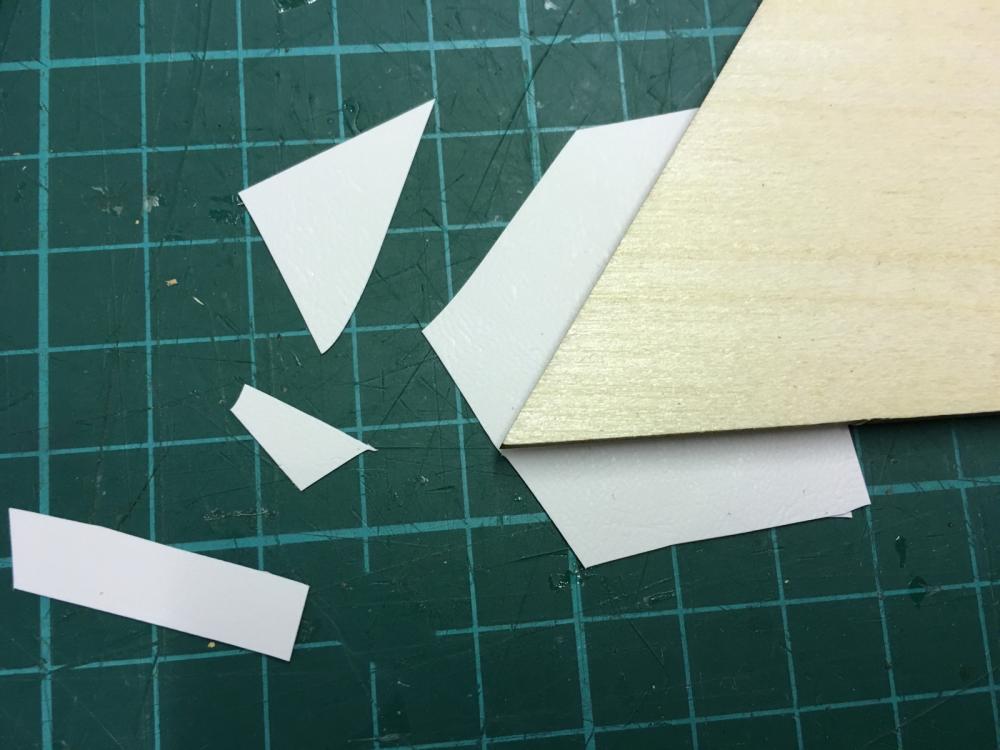
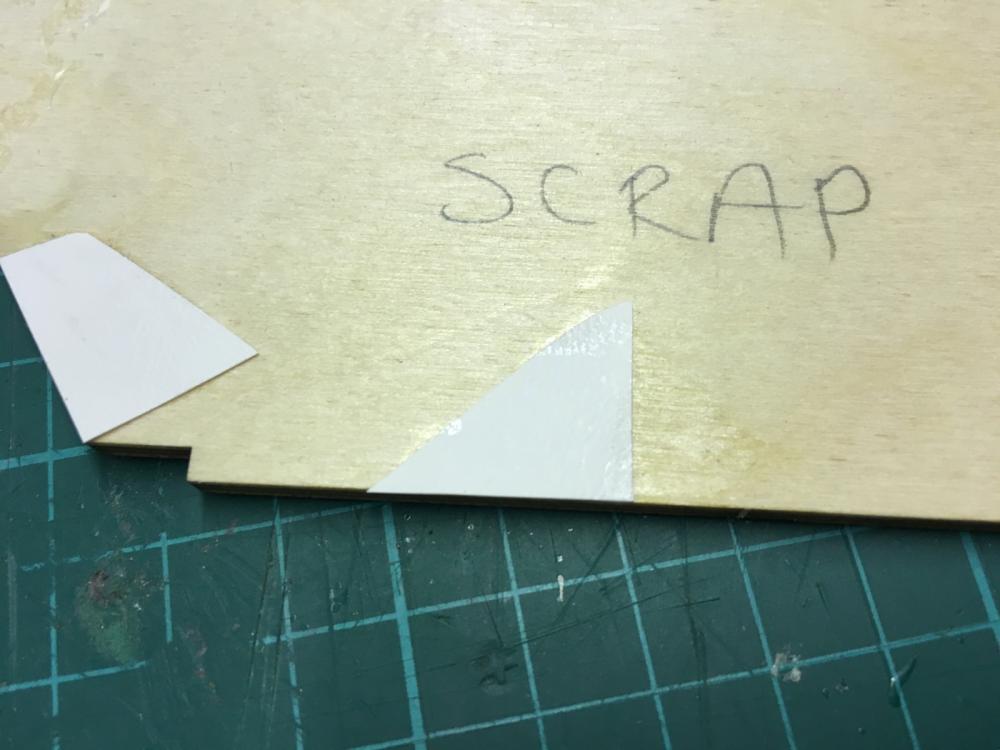
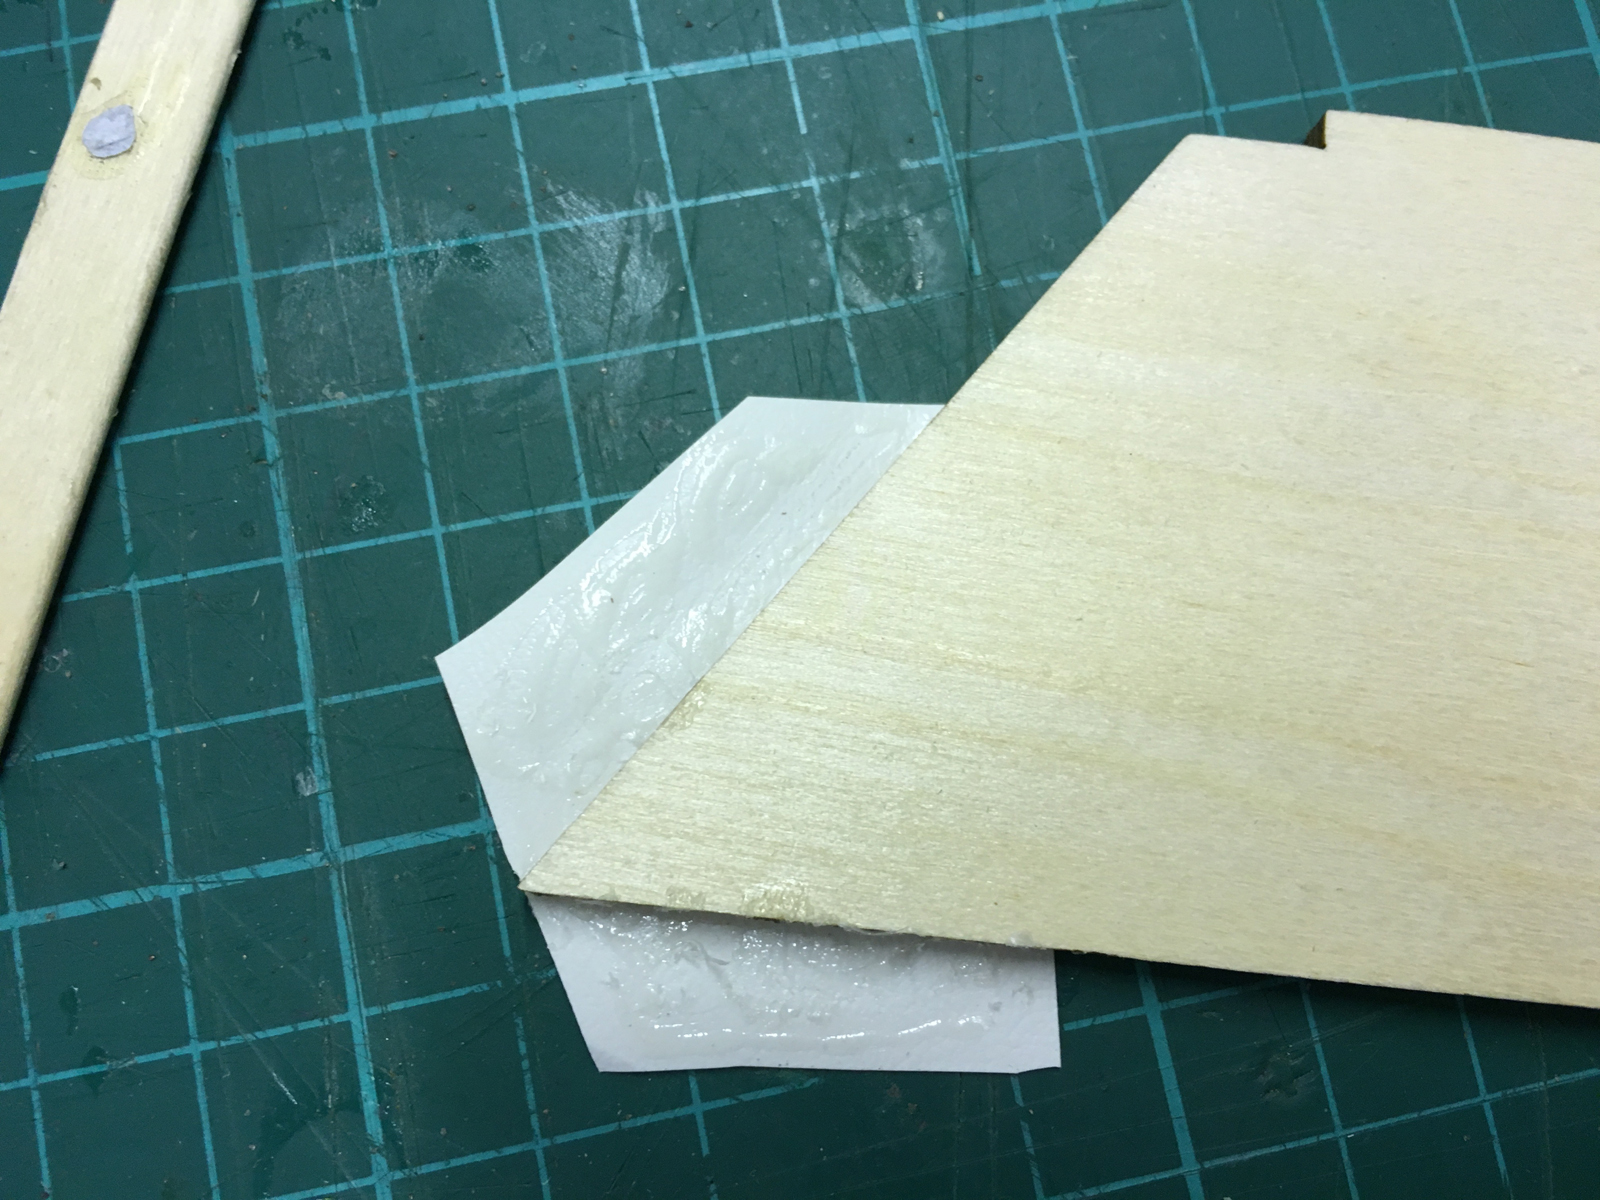
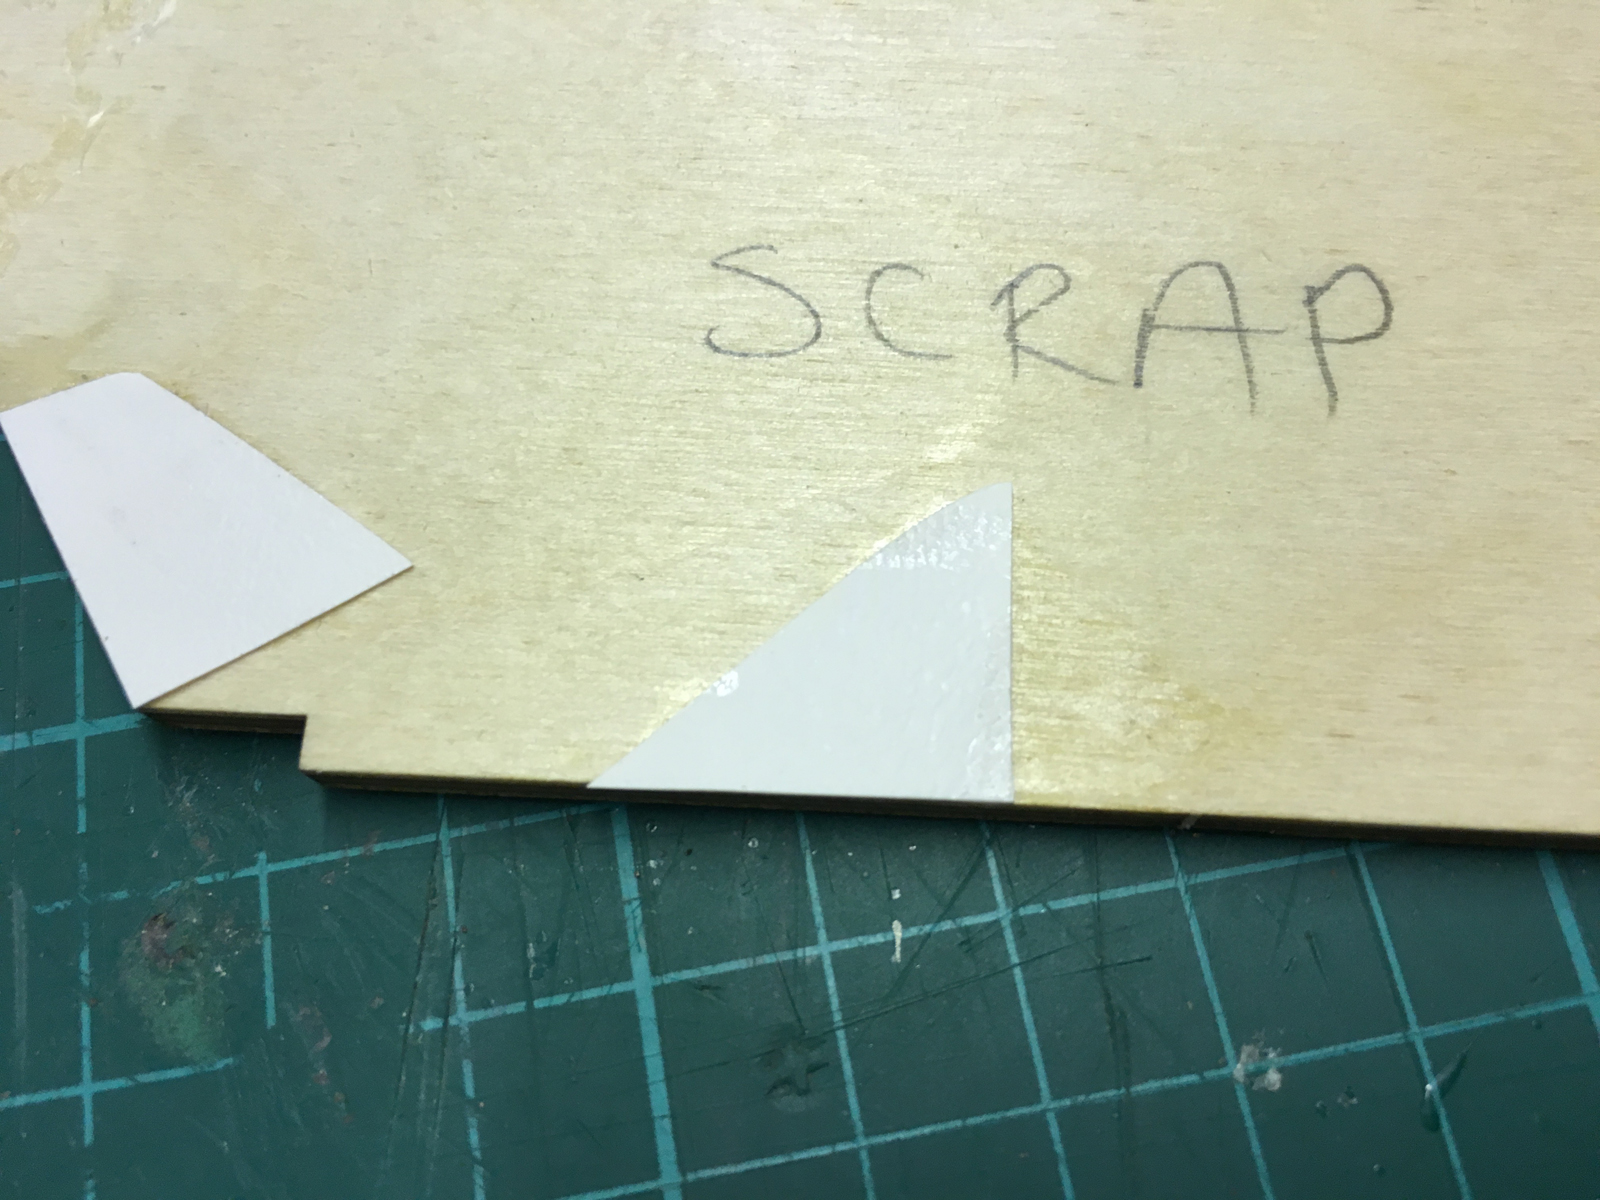
I also checked this “leather-like” material. It is totally plastic and feels a bit tricky to fold in the corners. I decided to try on a piece of scrap and first results was not promising:
Cut a test piece:
Apply glue (trying with UHU Hart just out of curiosity):
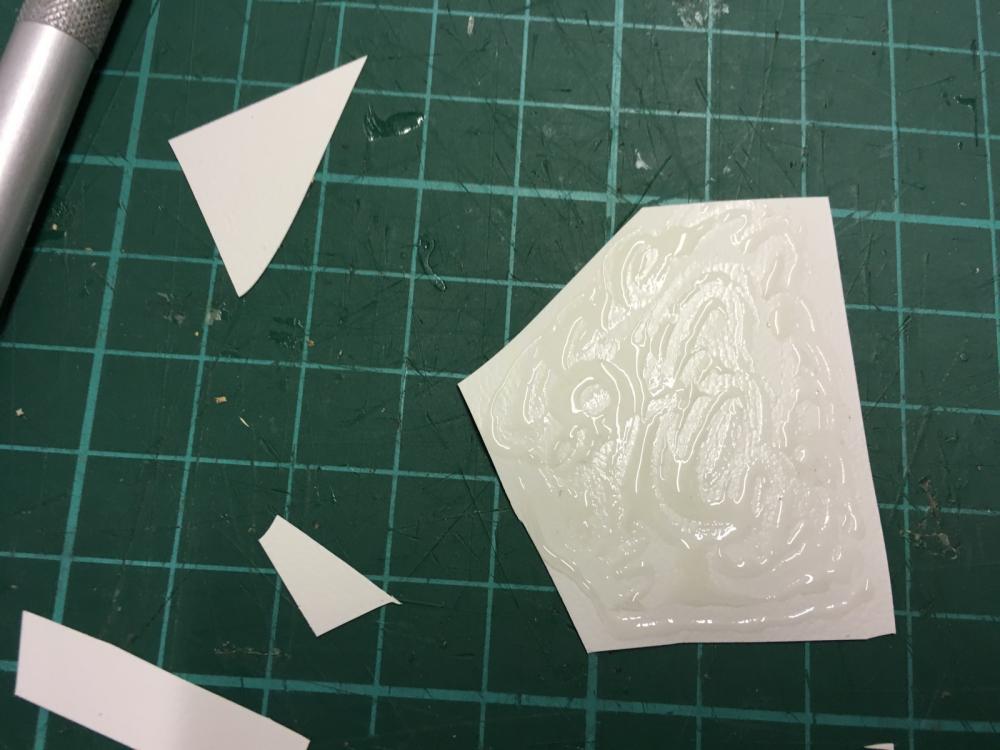
Put on the plywood, swipe with a piece of stick applying pressure:
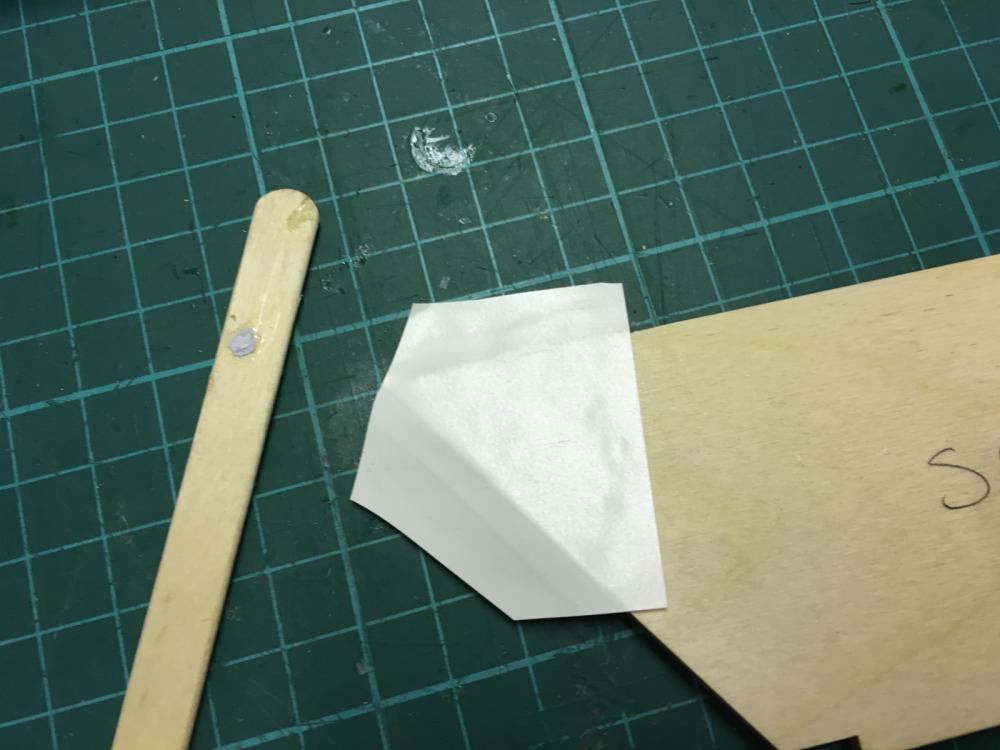
However it didn’t seem to work. There came air bubbles and eventually the glue came loose:
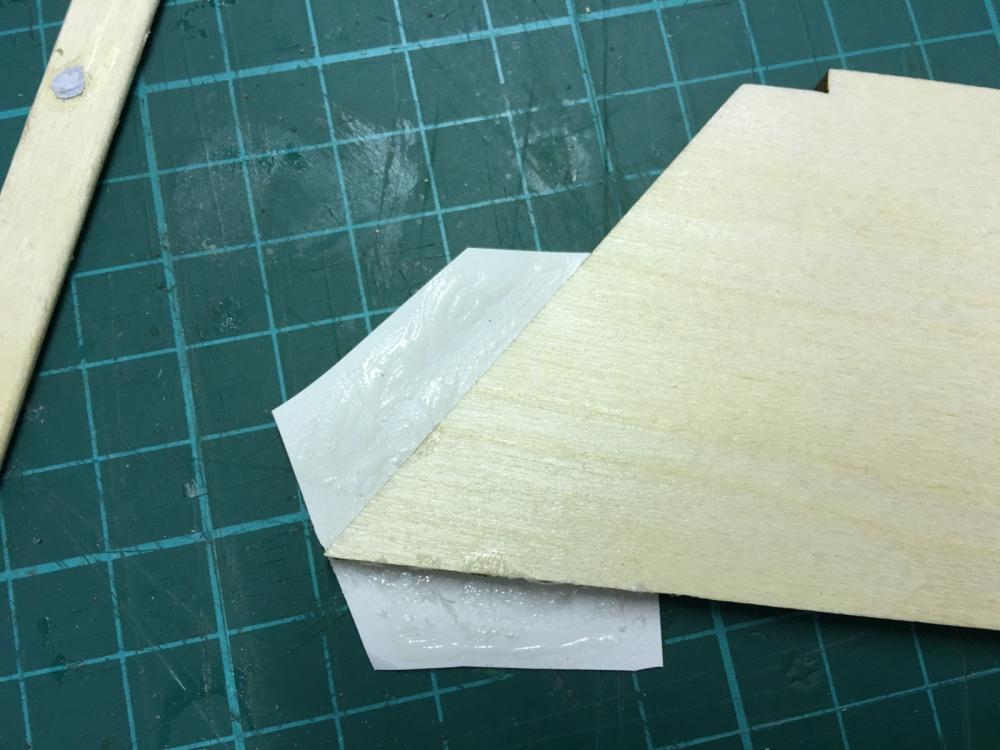
Then I tried with CA (super glue), which seemed to work well, except that the residues left stains here and there. Have to be very careful if I choose to use CA.
. It seems very tricky and make-no-mistake task to successfully apply the upholstery to the entire cockpit.
Right now I think this will be my plan:
- replace the leather-like plastic with thin faux leather sheet. It would look more realistic and be easier to work with.
- cut identical pieces from a very thin veneer (or from acetate sheet) using the plan sheets as guide
- glue the faux leather peacefully on these pieces
- and finally glue them in their places on the cockpit
Or any suggestions?
So, next, I will lacquer the interior and move on to the next task until I do the shopping above.
-
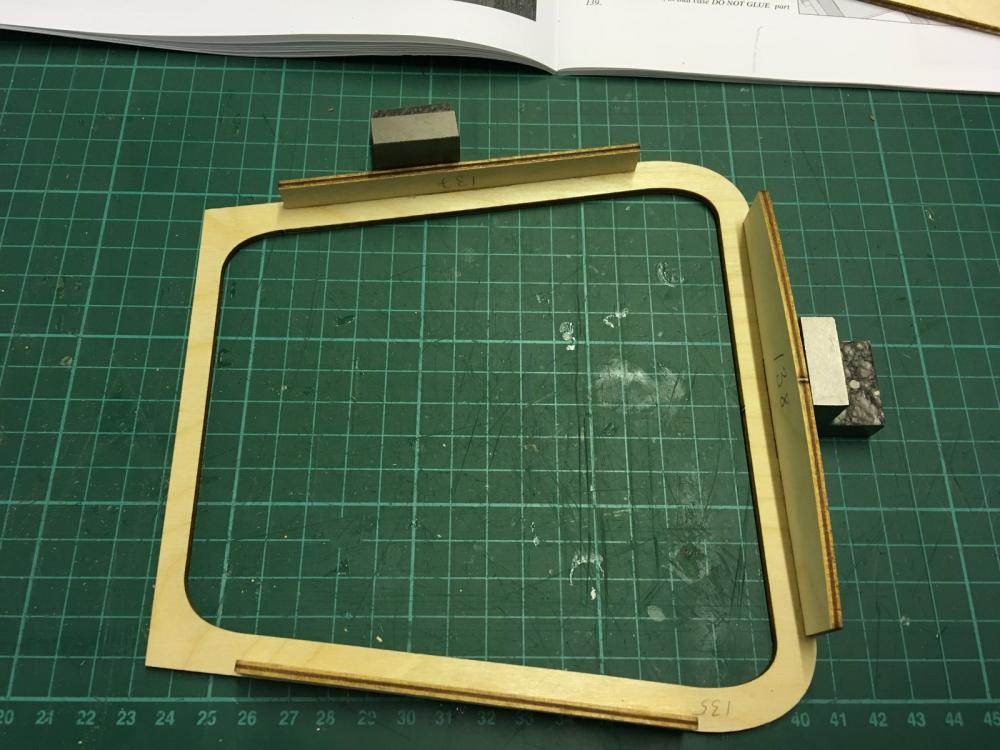
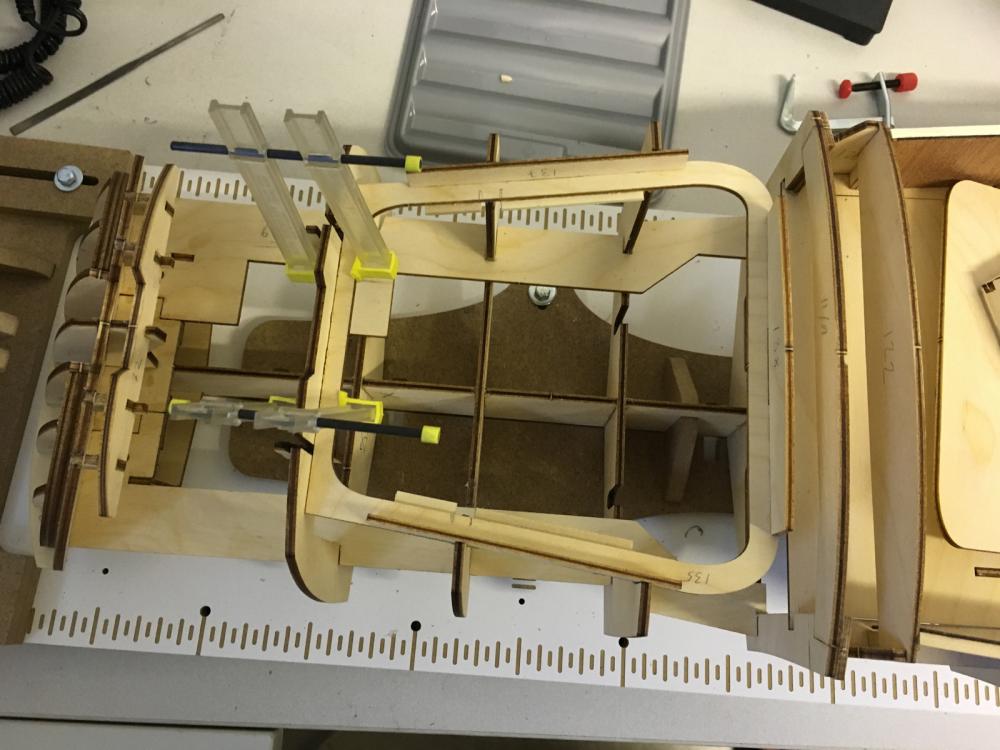
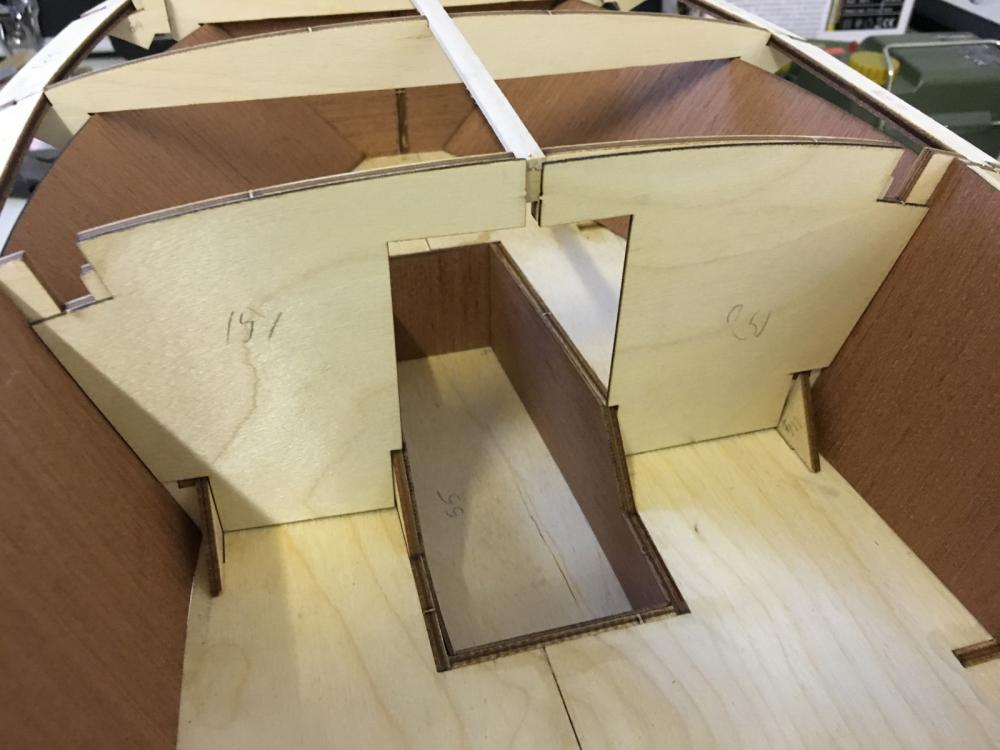
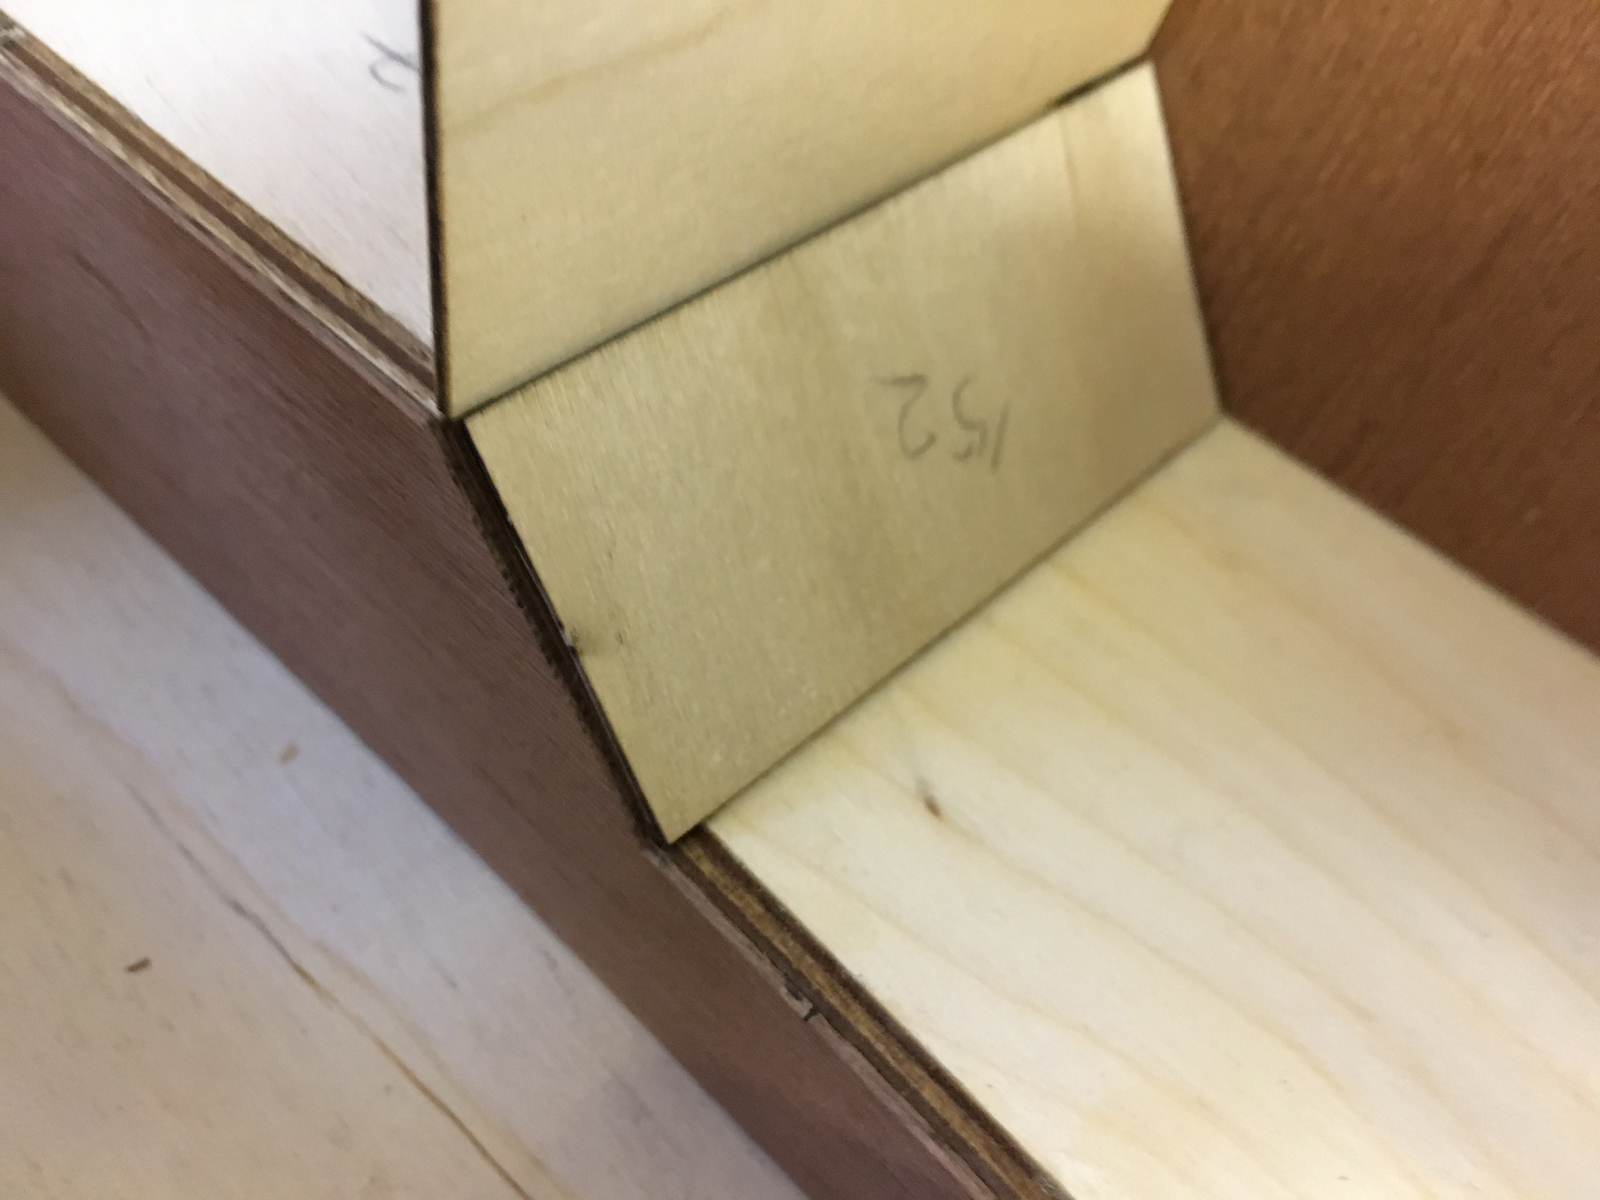
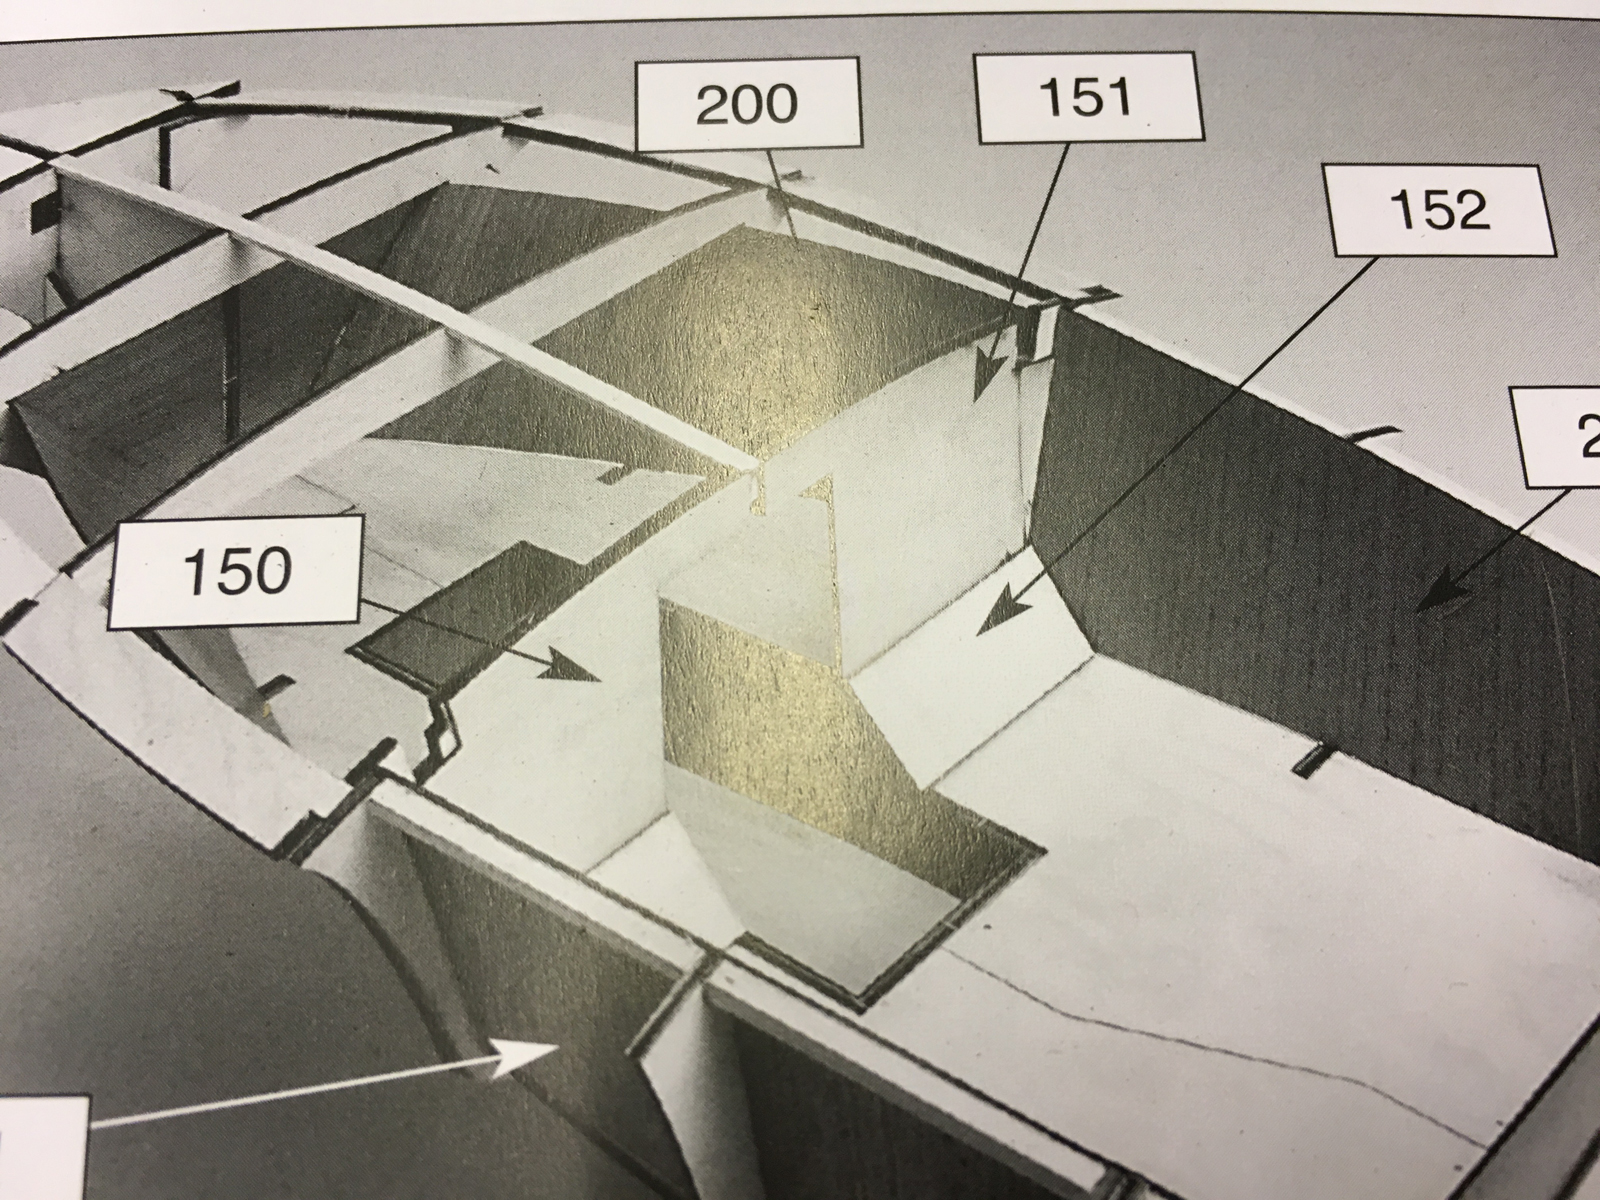
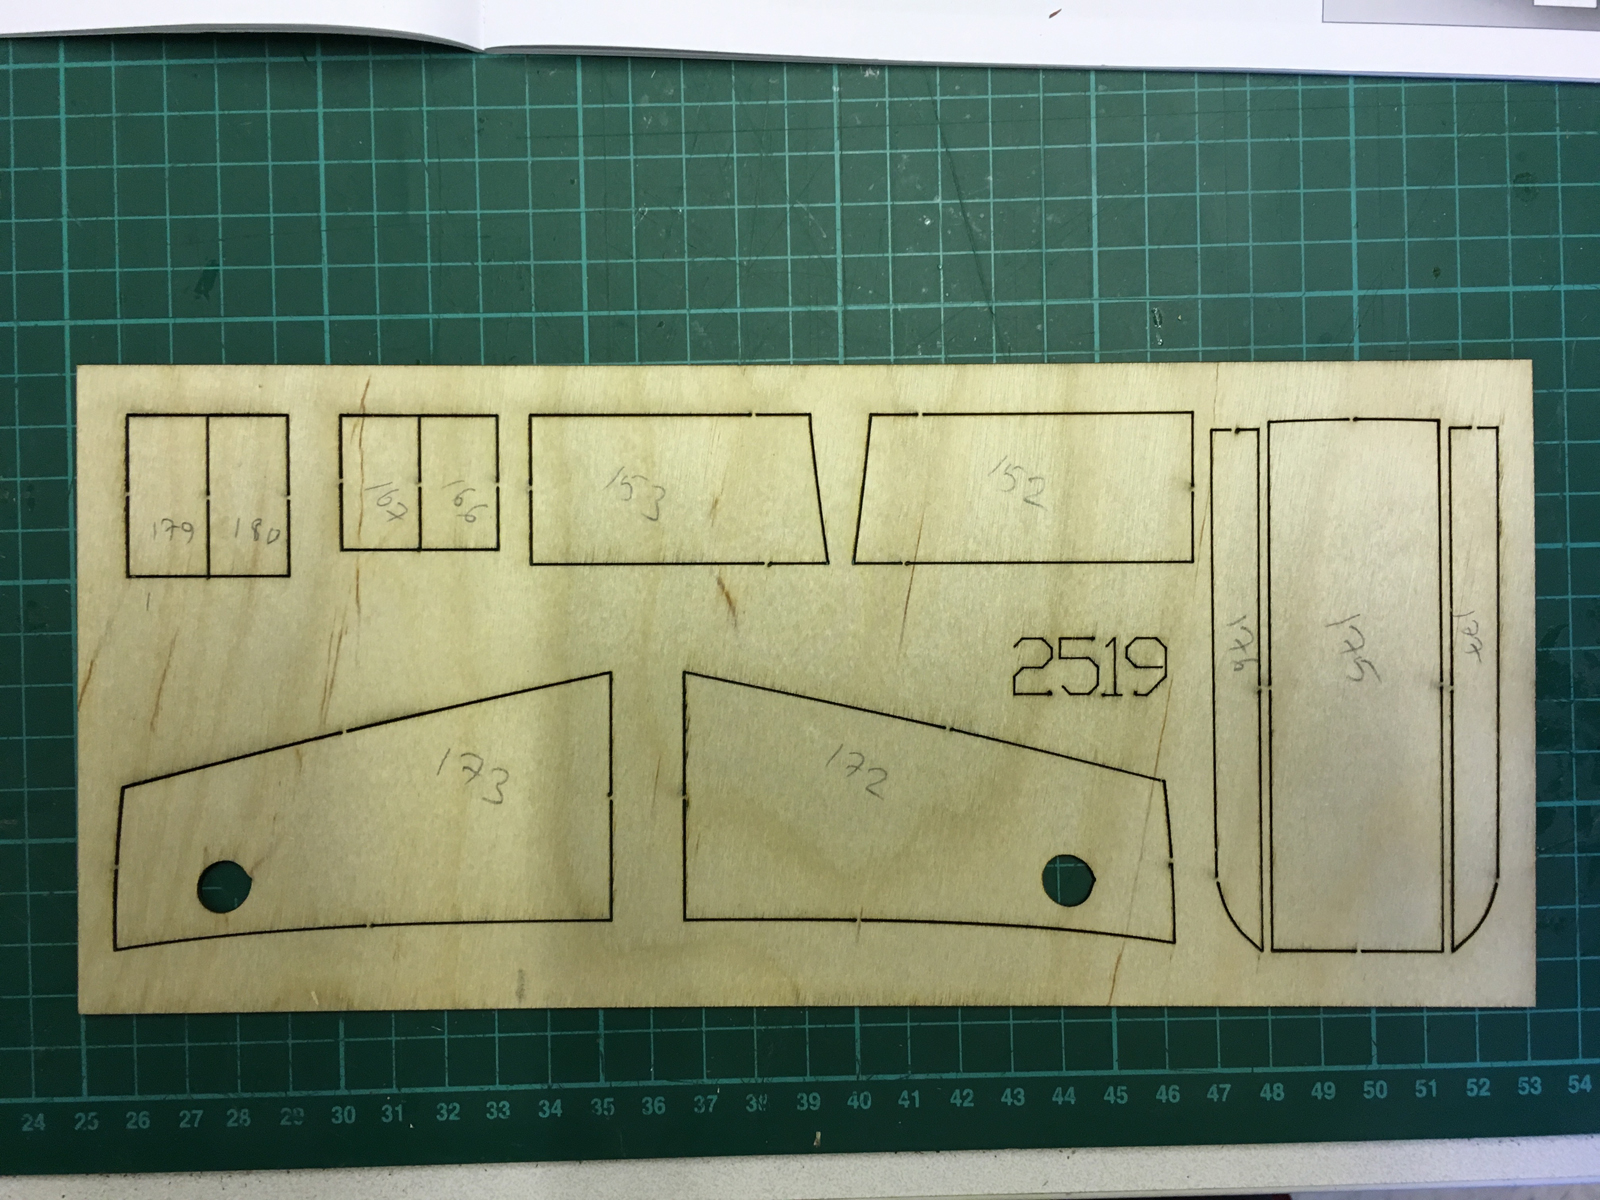
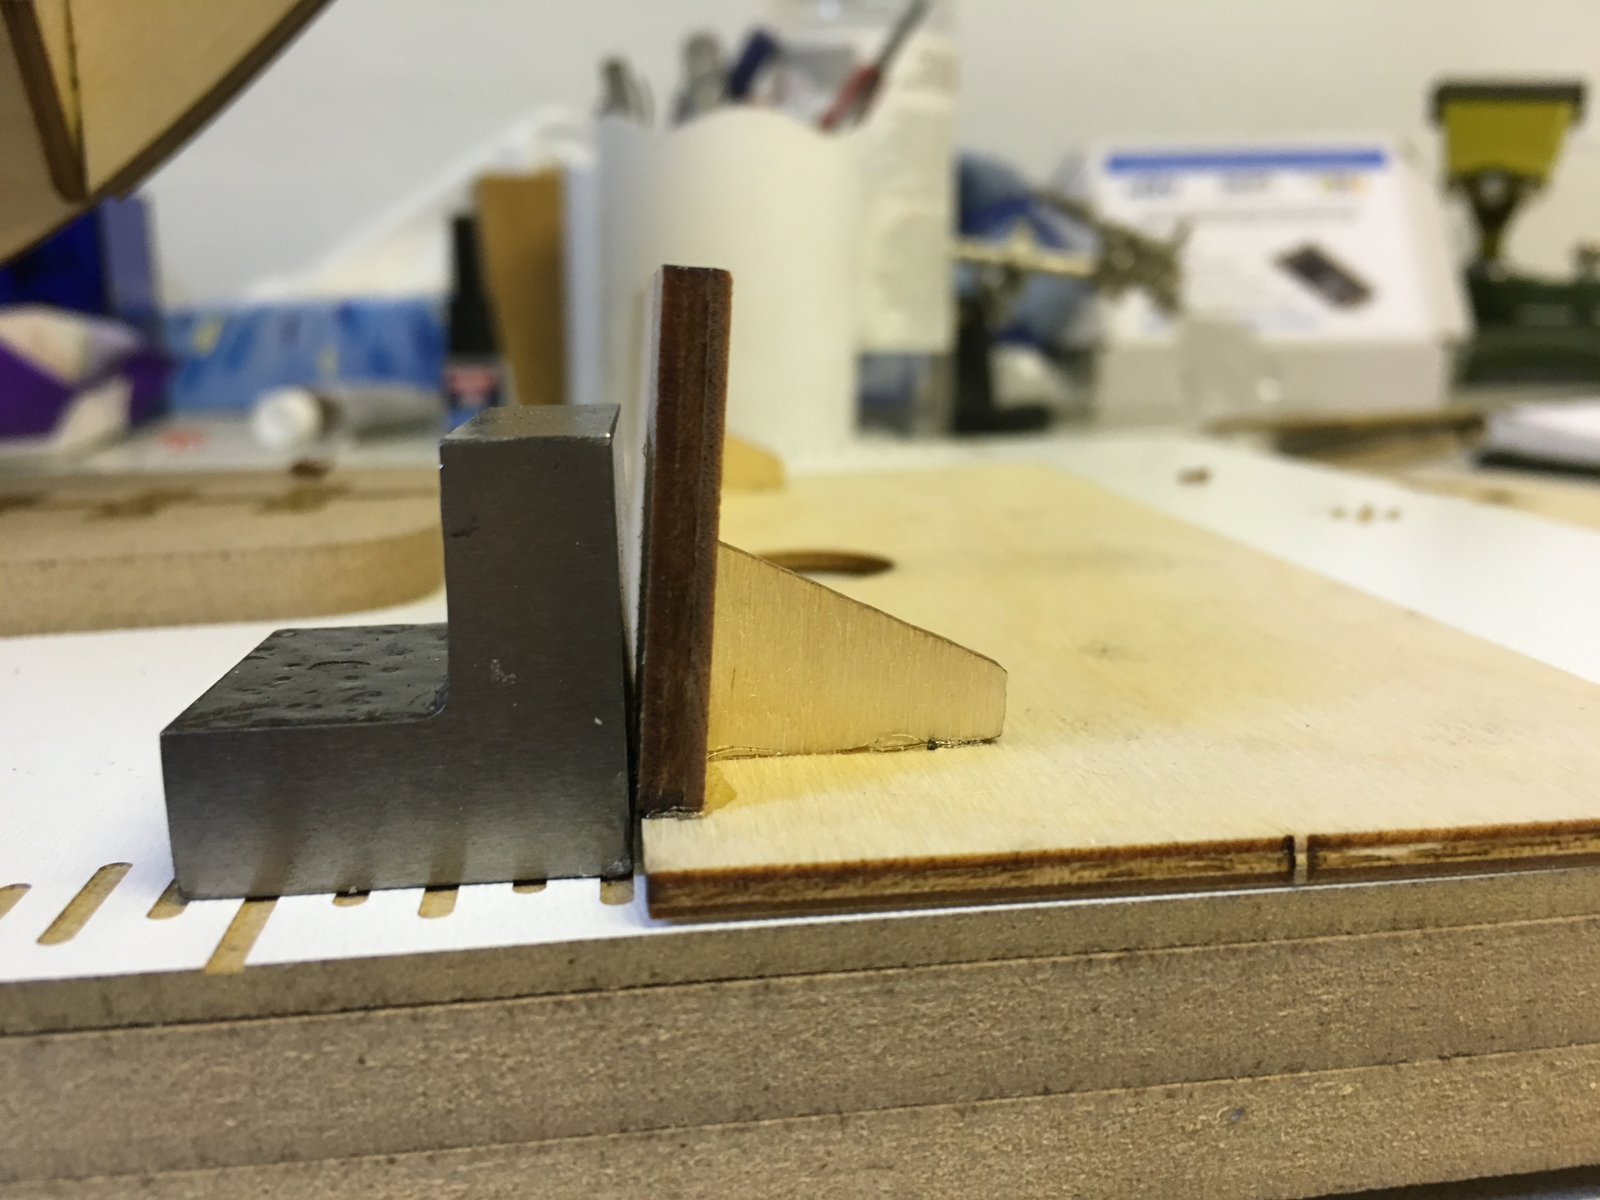
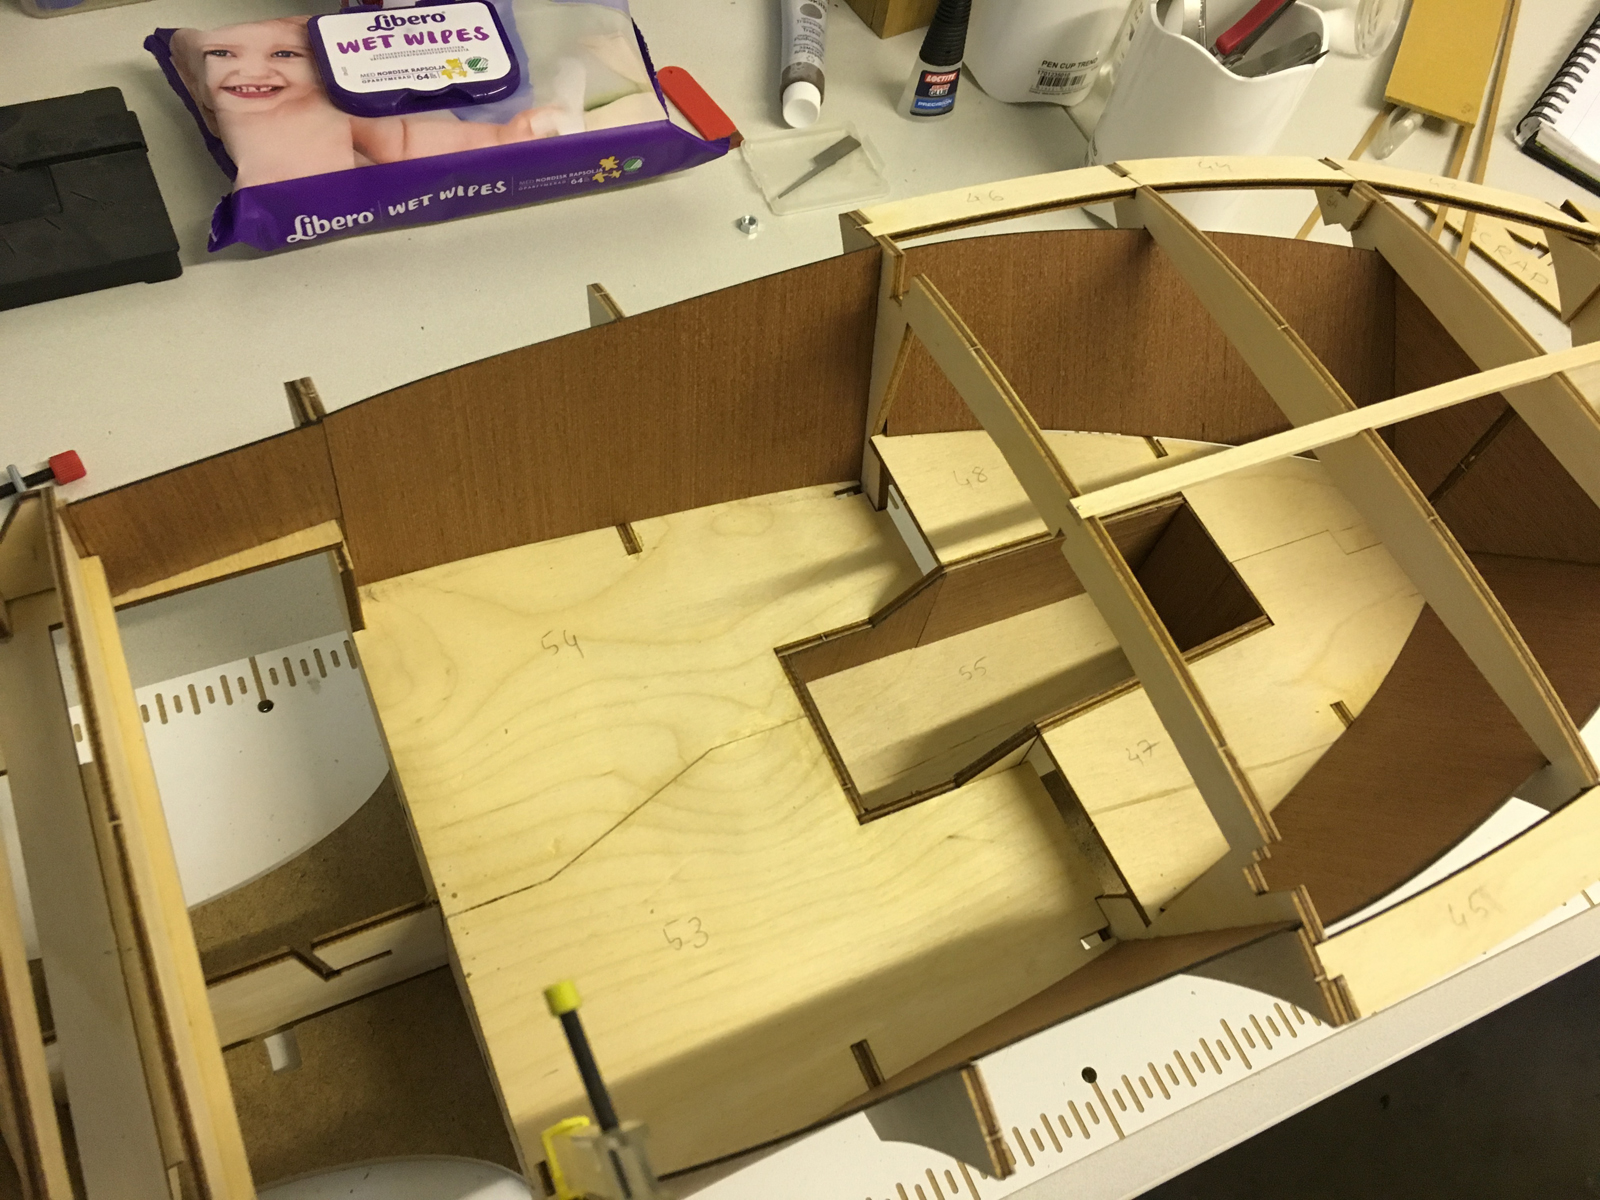
Parts 152 and 153 are the footrests which will be glued inclined. I used a piece of scrap wood (no glue) ensure that the triangular parts which will hold them dry at identical angle.
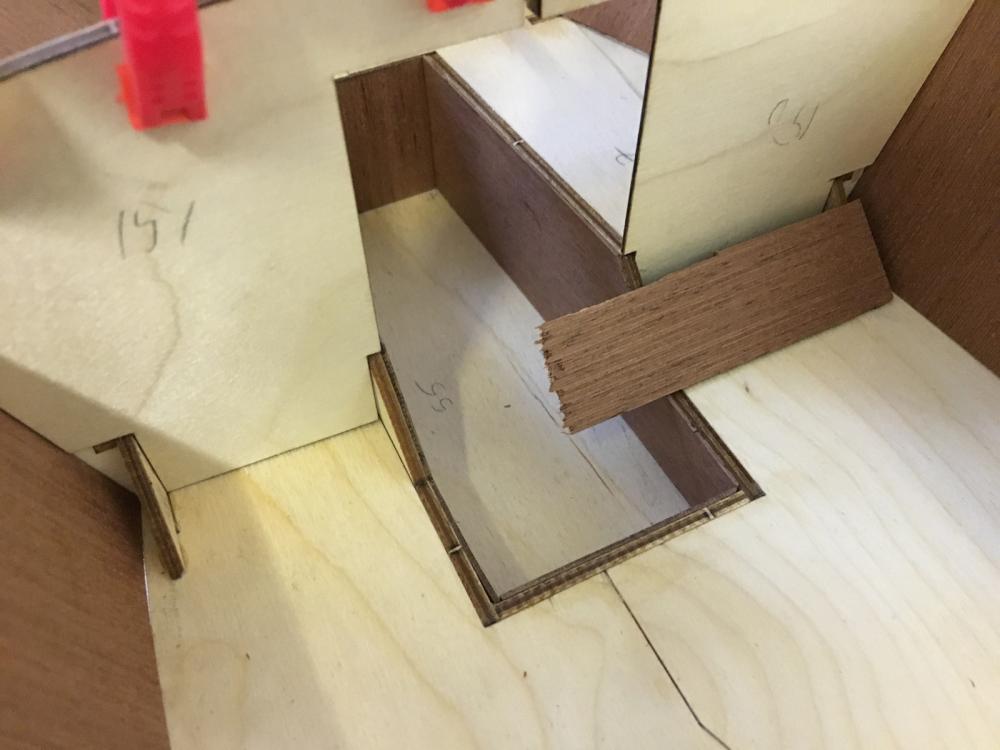
According to the specs the footrests are not flush with the mahogany plank (in this photo it is the plank on the left side. Similar thing is for the other footrest). They stop at the end of the plywood allowing the edge of the mahogany plank to show.

-
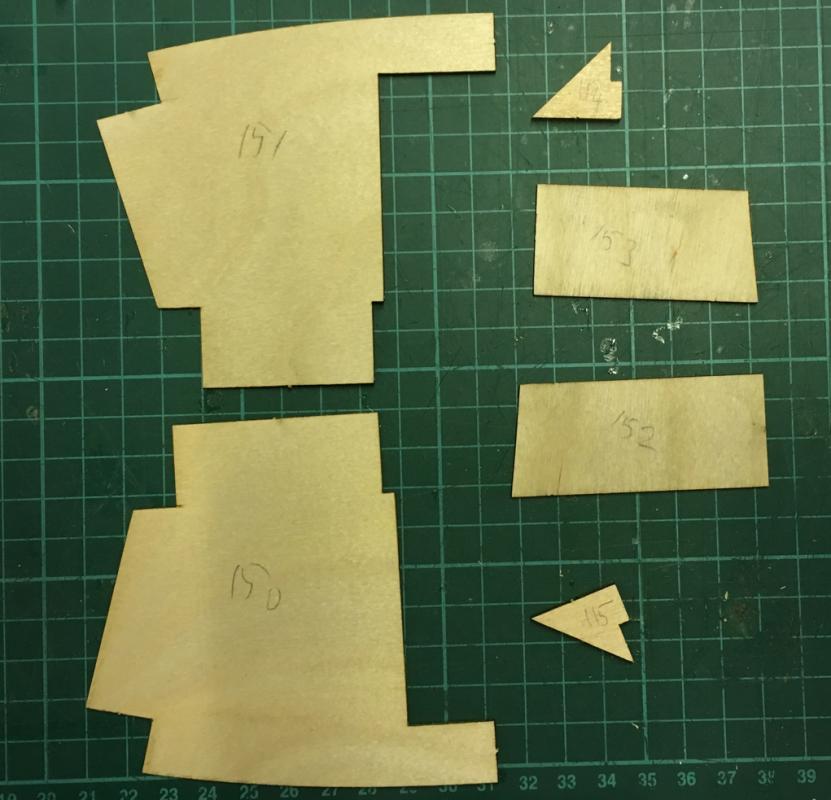
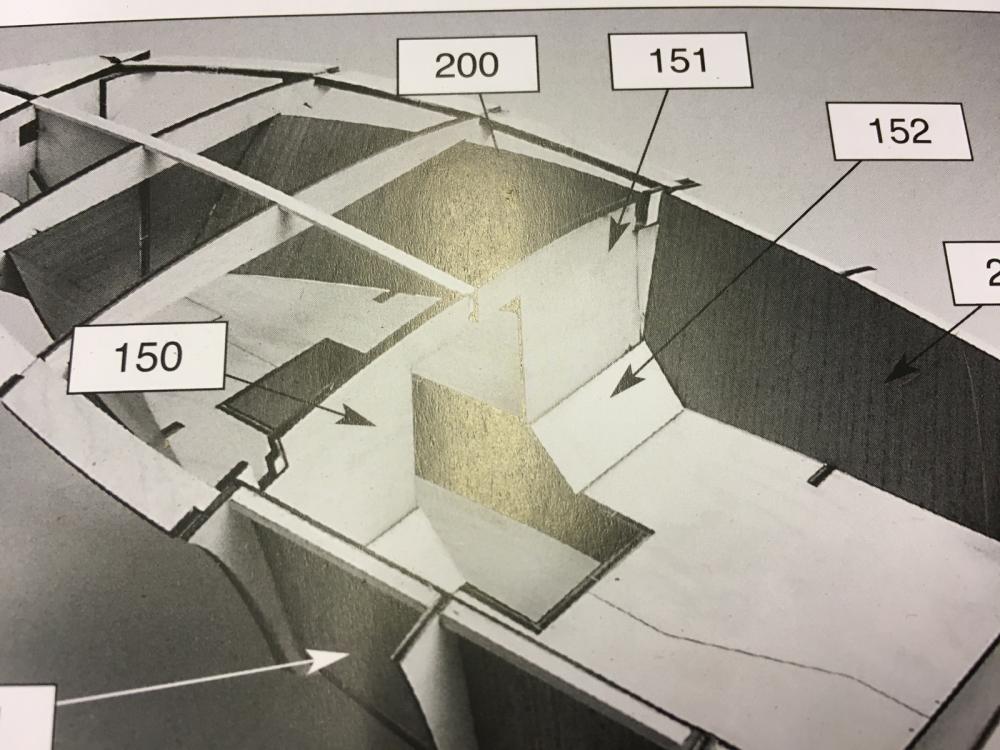
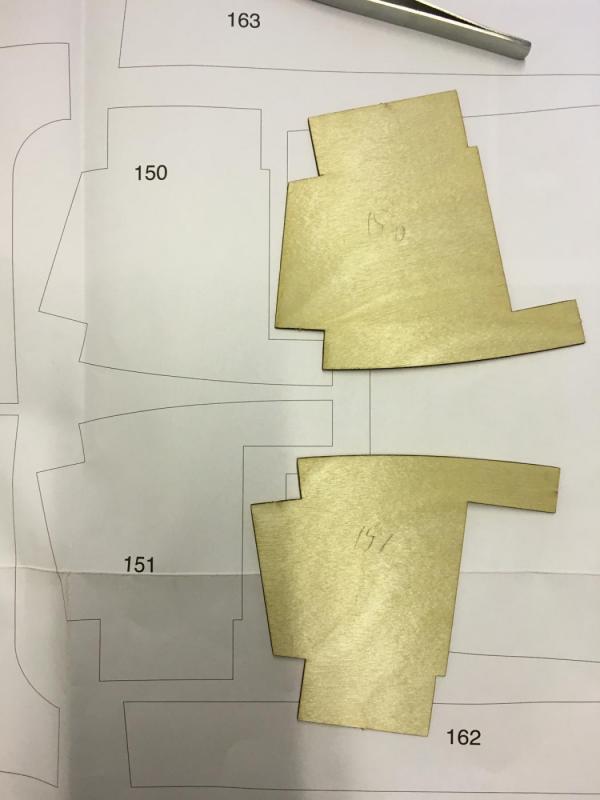
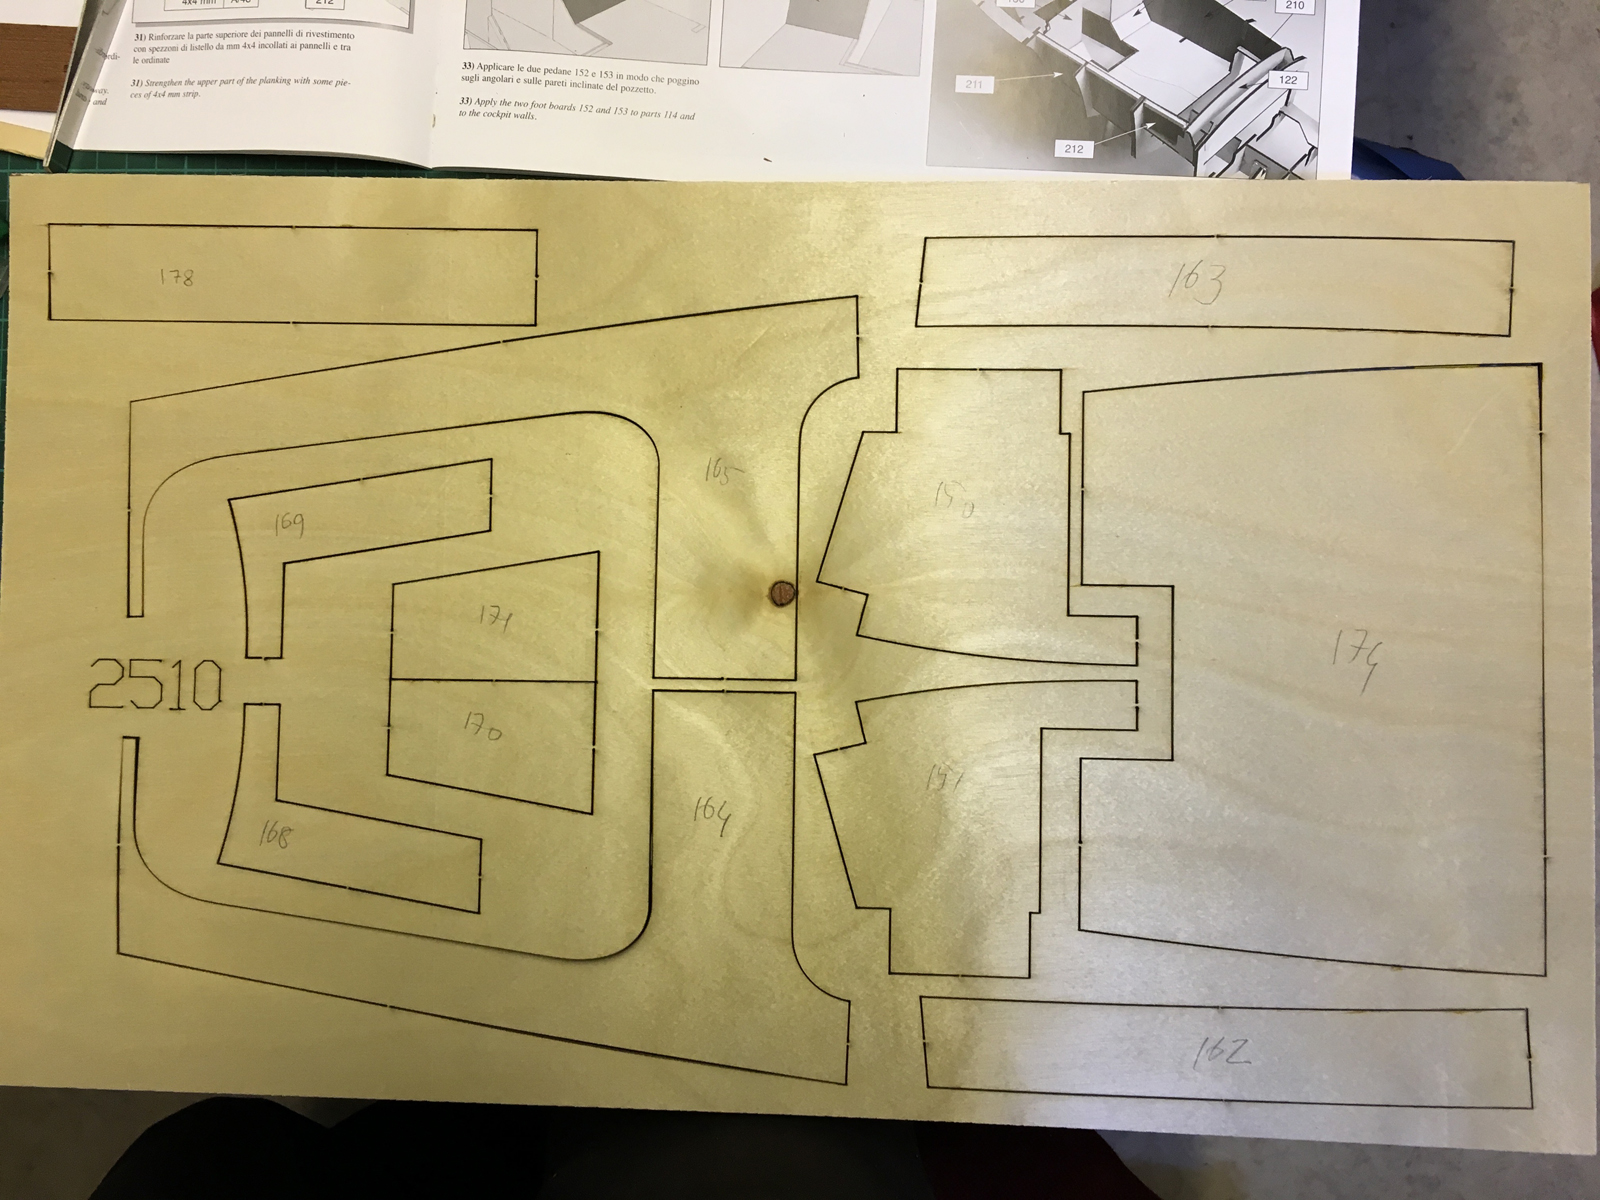
Cockpit cover parts from the sheet above. Here during dry-fit I noticed a mistake in the instruction manual. Parts 150 and 151 are labeled wrong in the photo in the manual. They should be vice versa. Otherwise they won’t fit. Or the numbering in the plan sheet is wrong, whichever. Well, this is the 2nd error in the instructions which puts me to 2-1 lead in the mistakes against the manufacturer!
-
-
-
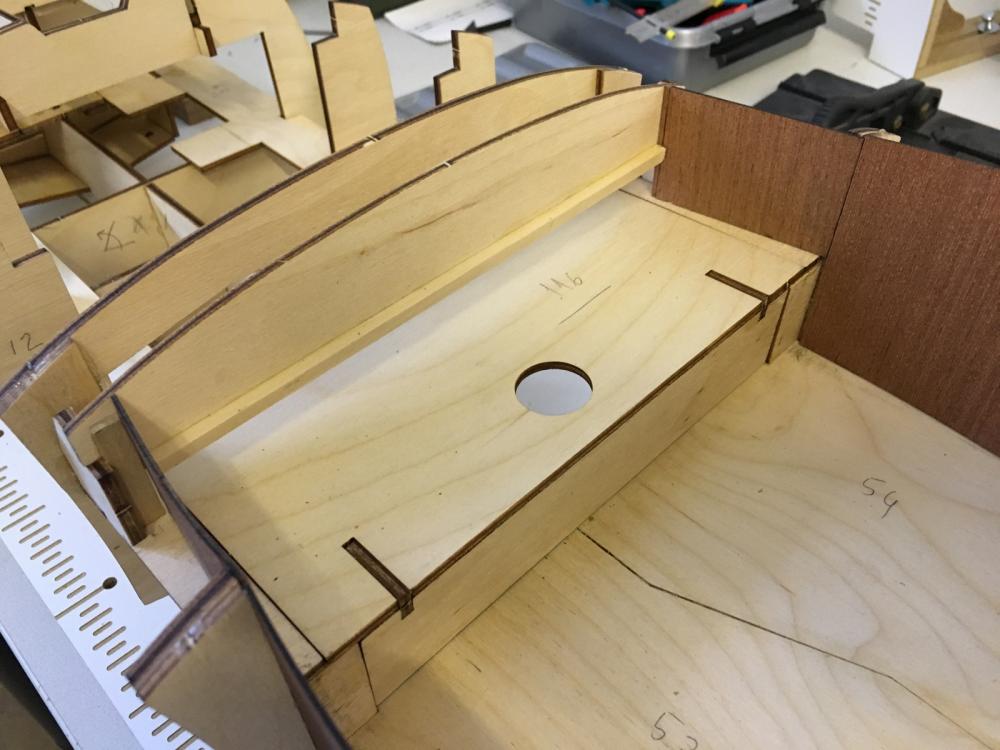
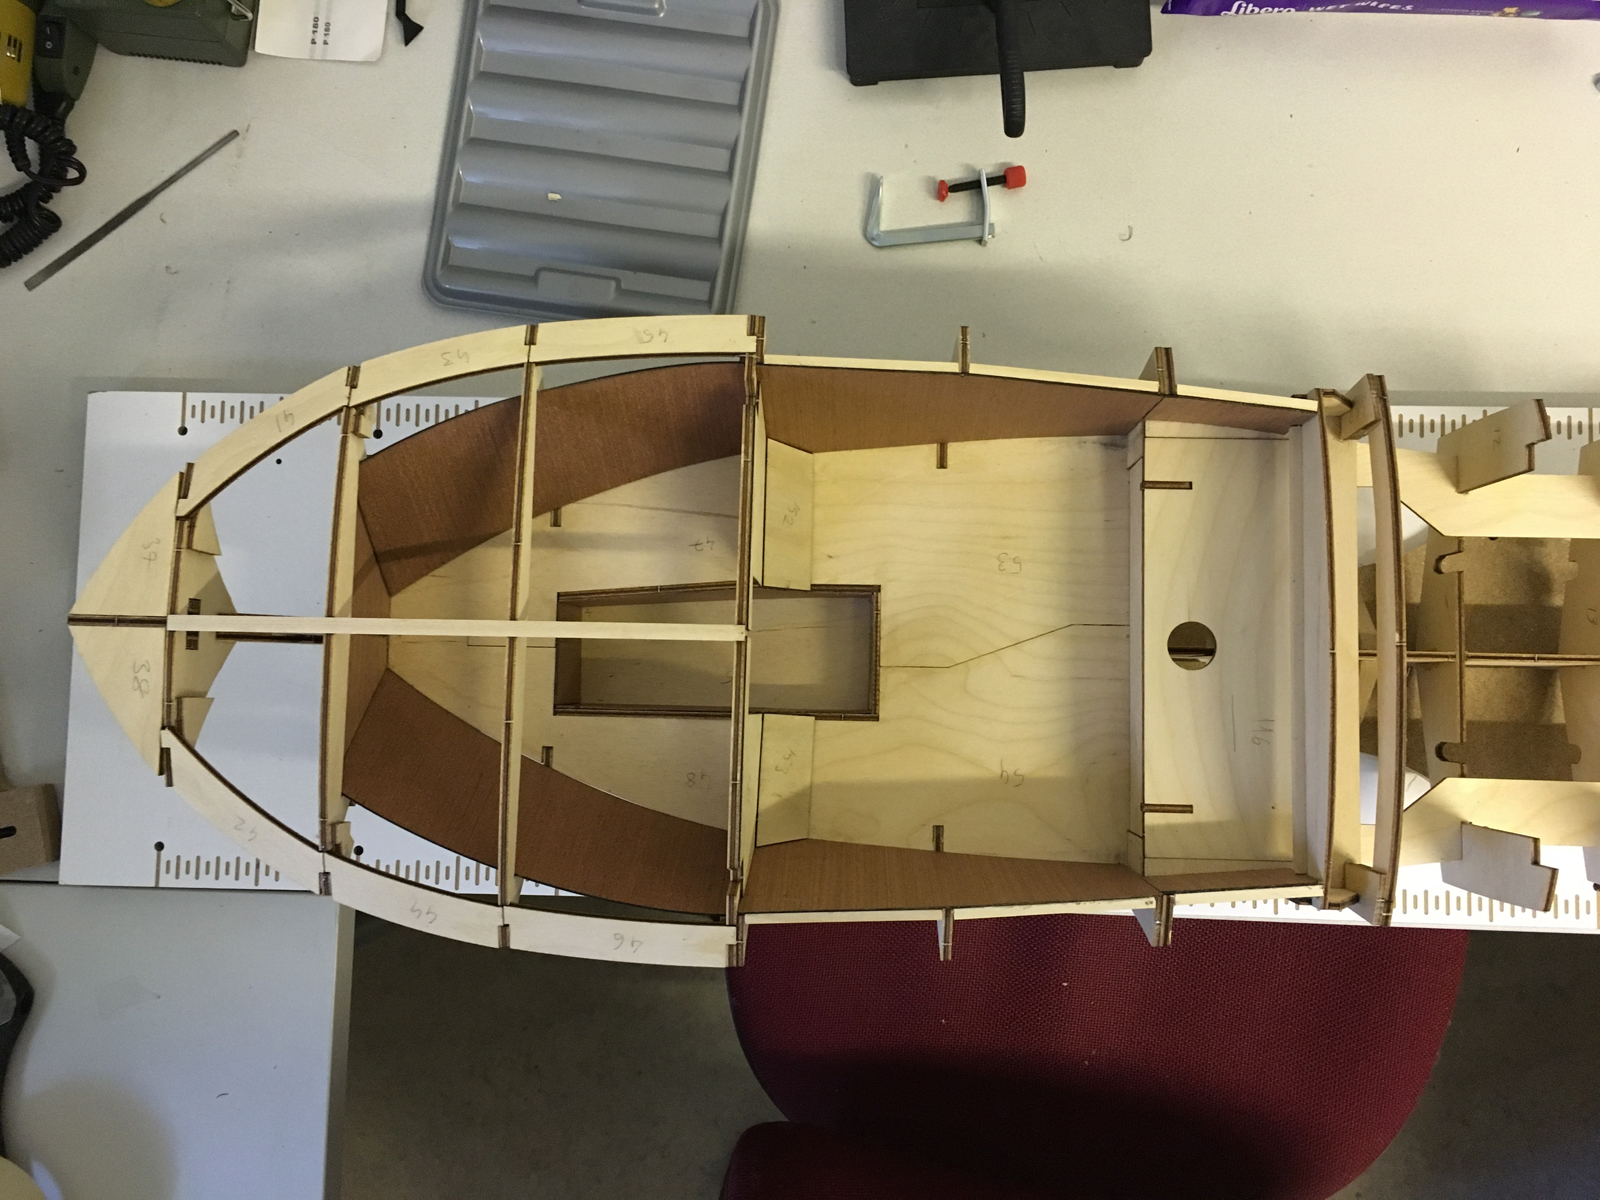
The rear seat panel, which I soaked and clamped yesterday to get it flat, is flat now and ready to be assembled.
Note that the two pieces are not aligned vertically:

The rear seat panel is in place. It is not glued to the place since it has to be removable (pulling by the help of the hole in the middle) to access the R/C compartment:
From top:
And from bottom:
-
BUILD DAY 4. HULL CONSTRUCTION CONTINUED
Today I had to stop earlier than I was planning for the reason I will tell later (nothing bad).
-
-
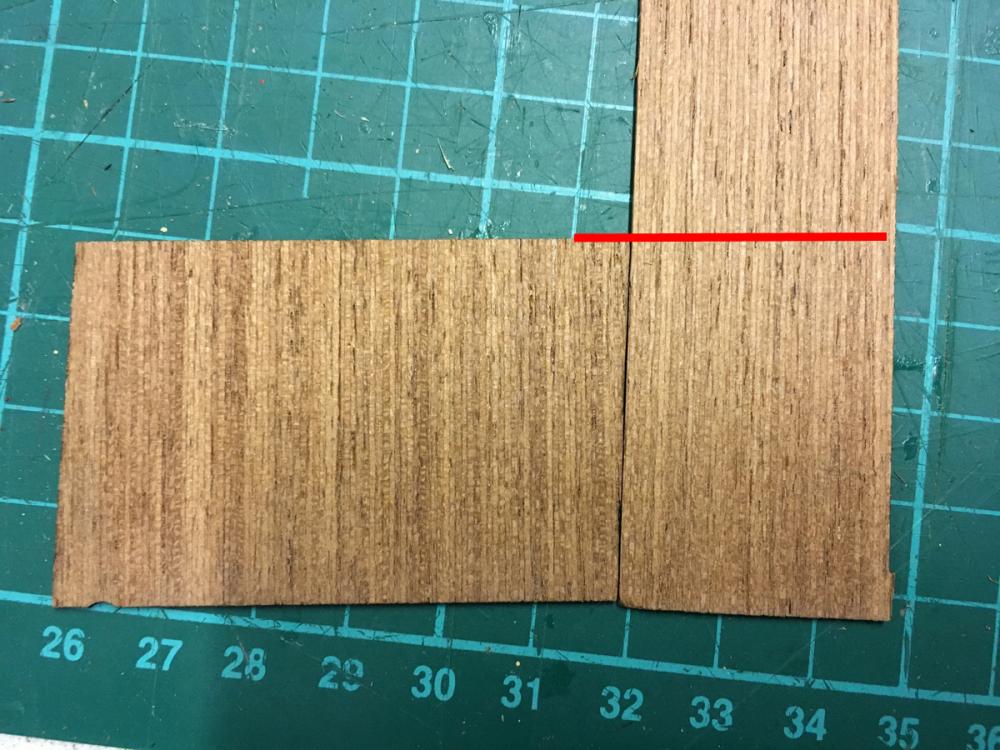
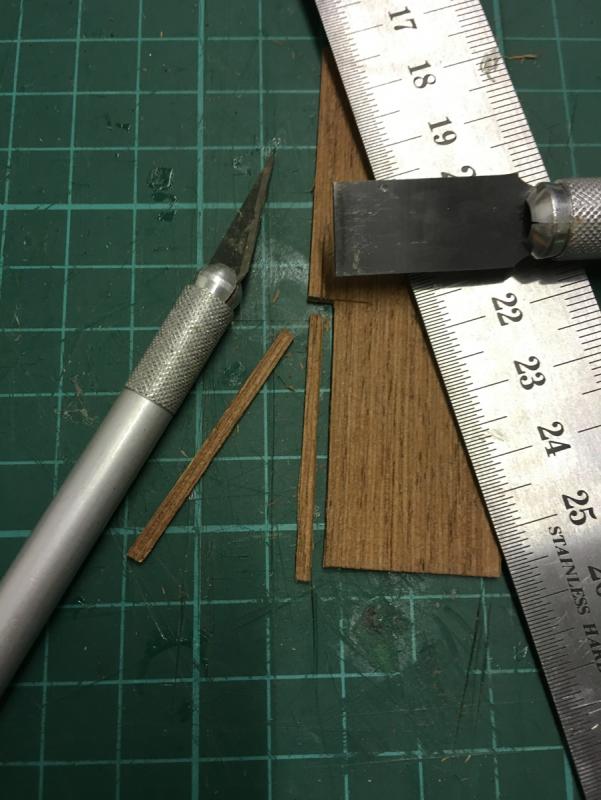
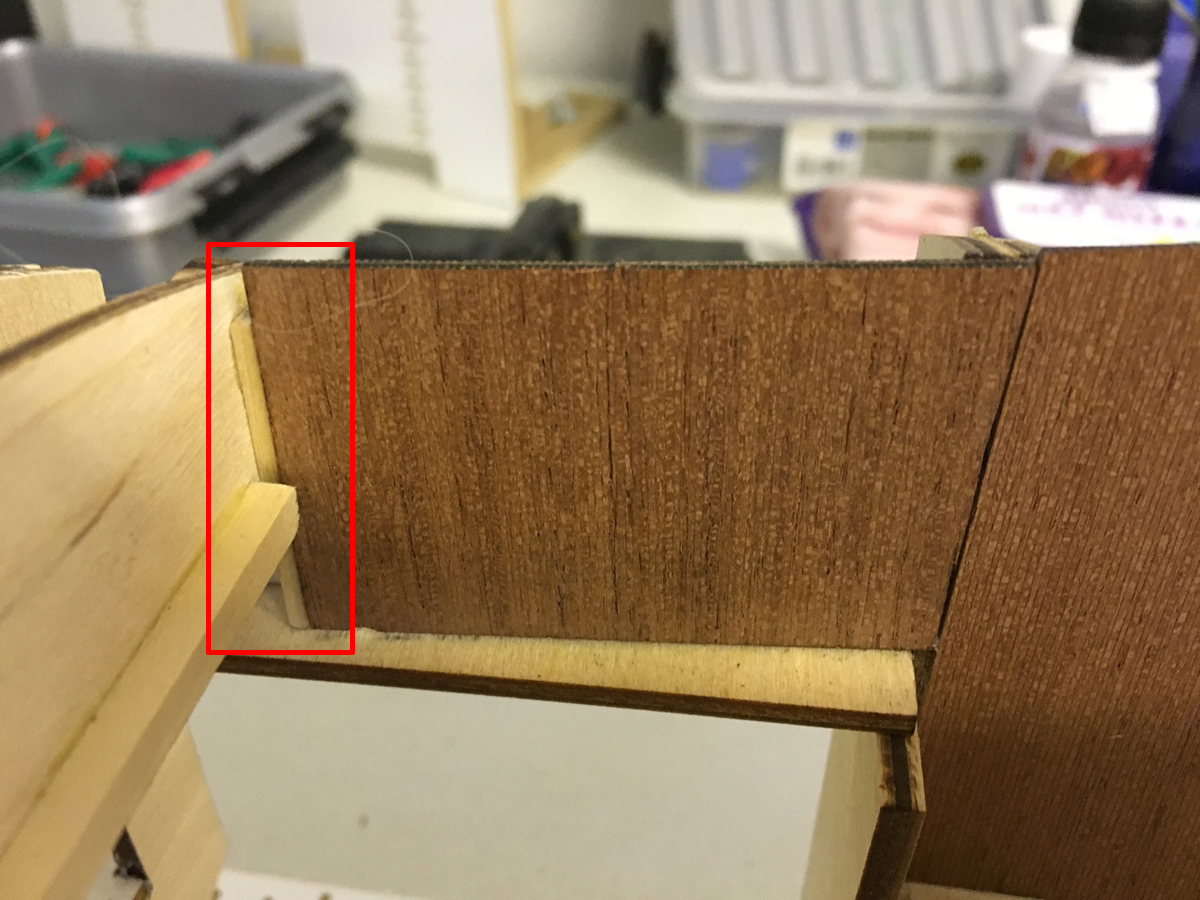
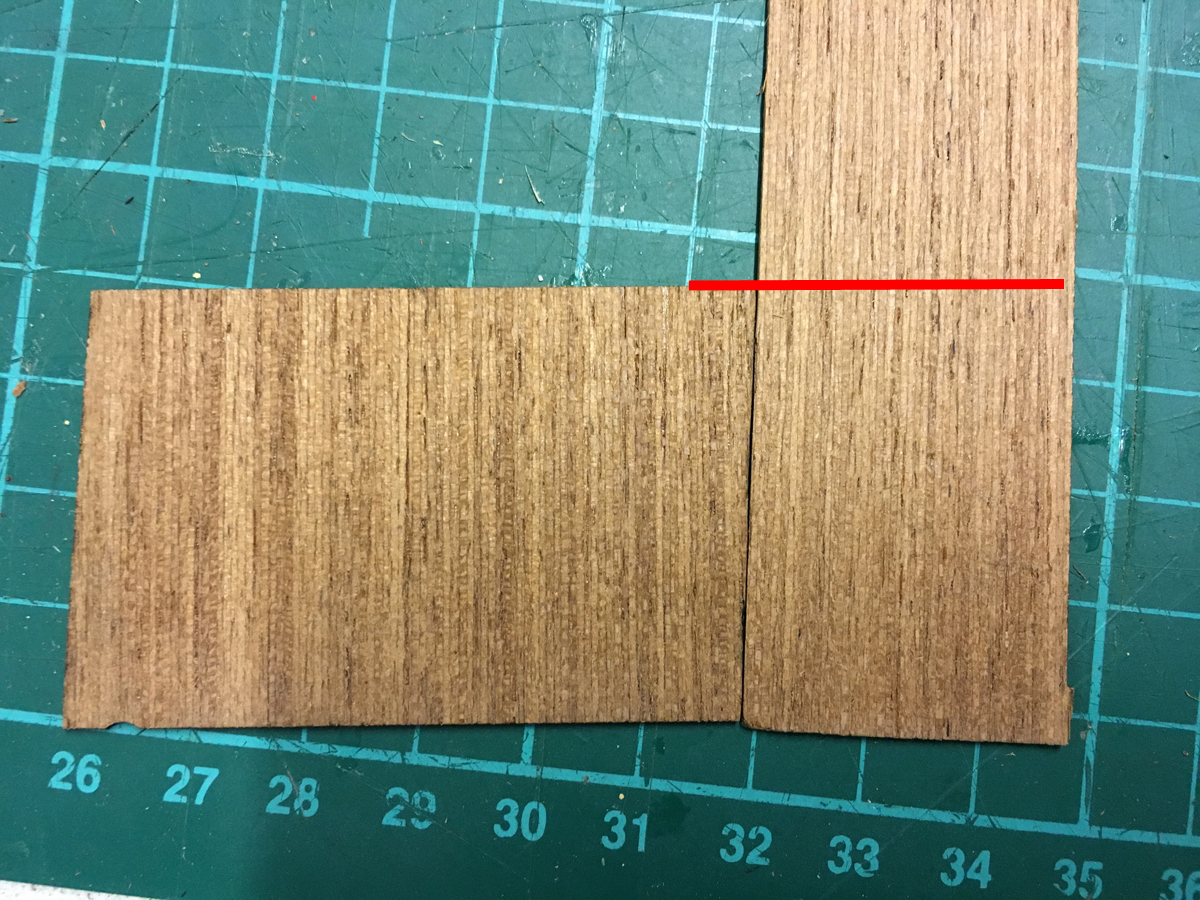
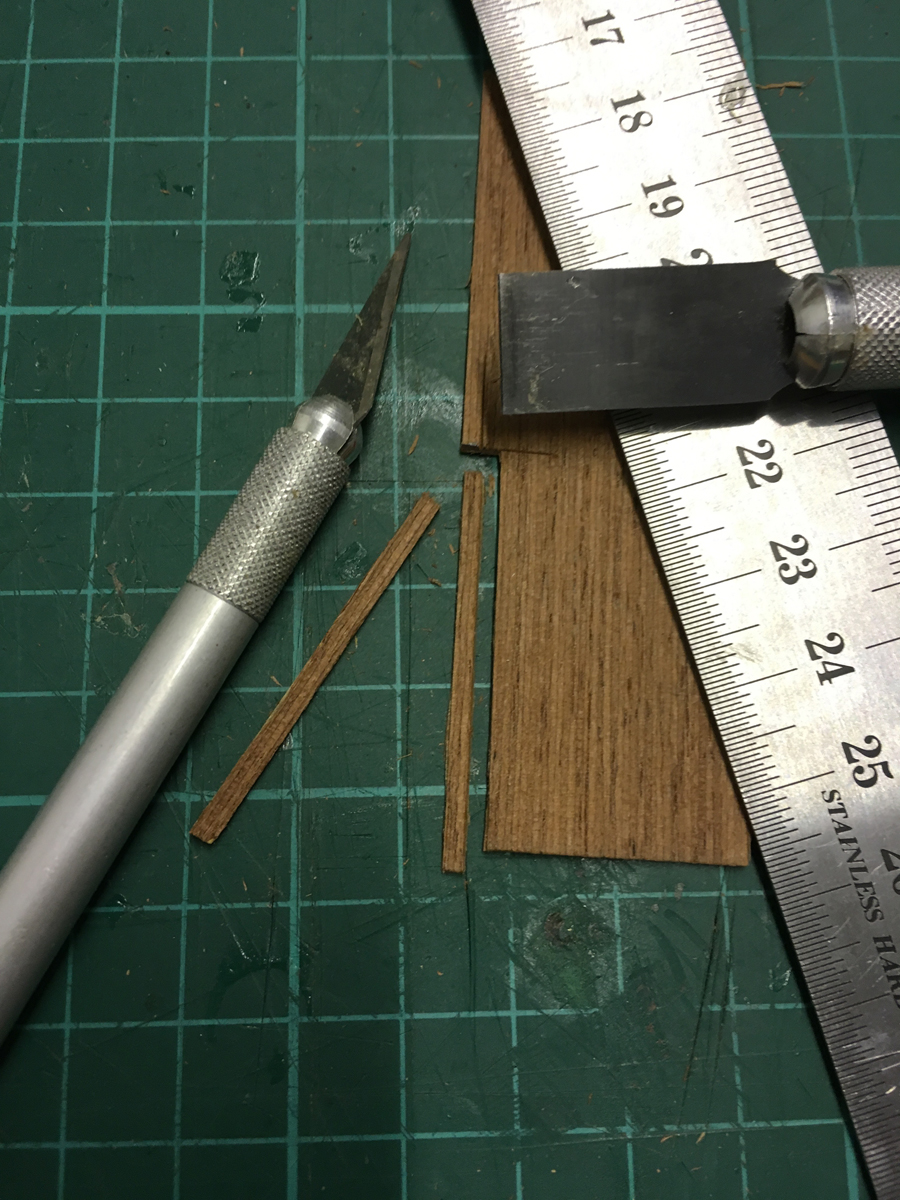
This piece came around 1mm too short, because of the adjacent sheet (on the right) which I had to trim. This will most probably not even going to be visible, but just to be a good sport, I measured and cut a thin strip from a scrap mahogany sheet and glued it in place to close the gap:

Watching the direction of the grain
:
- serkankepce, mtaylor, Keith_W and 1 other
-
 4
4


Riva Aquarama by aydingocer - FINISHED - Amati - RADIO - A new challenge for a so-far static ship builder
in - Kit build logs for subjects built from 1901 - Present Day
Posted · Edited by aydingocer
Jep, I am going for the reduction option!
EDIT: Actually I was first worried about the possible criticisms like "What! You choose reduction gear for a speedy boat like this!" so it was nice to hear that it is more realistic. Thanks for clearing my concerns