qwerty2008
-
Posts
552 -
Joined
-
Last visited
Content Type
Profiles
Forums
Gallery
Events
Everything posted by qwerty2008
-
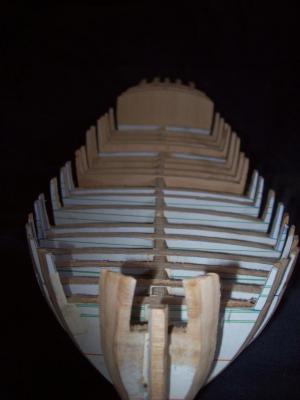
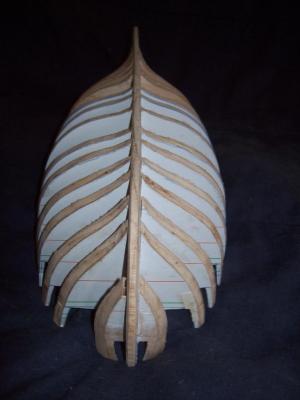
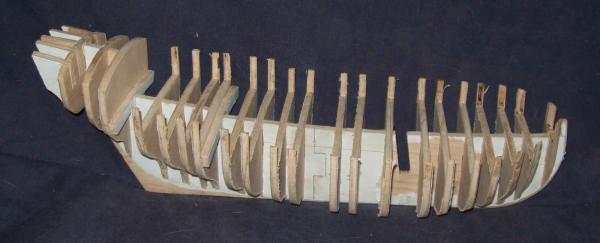
Fairing the Bulkheads: (4.00 hours) The fairing was done with a sanding drum on my Dremel rotary tool and I just beveled the bulkheads using the lines on the plans as a guide then used a strip of heavy card to check fairness and was pleasantly surprised that it ran flat against all the bulkheads the first time acting as a testament to the quality of the plans. There are still a few spots that need touchups but that shouldn't take long. Lextin.
-
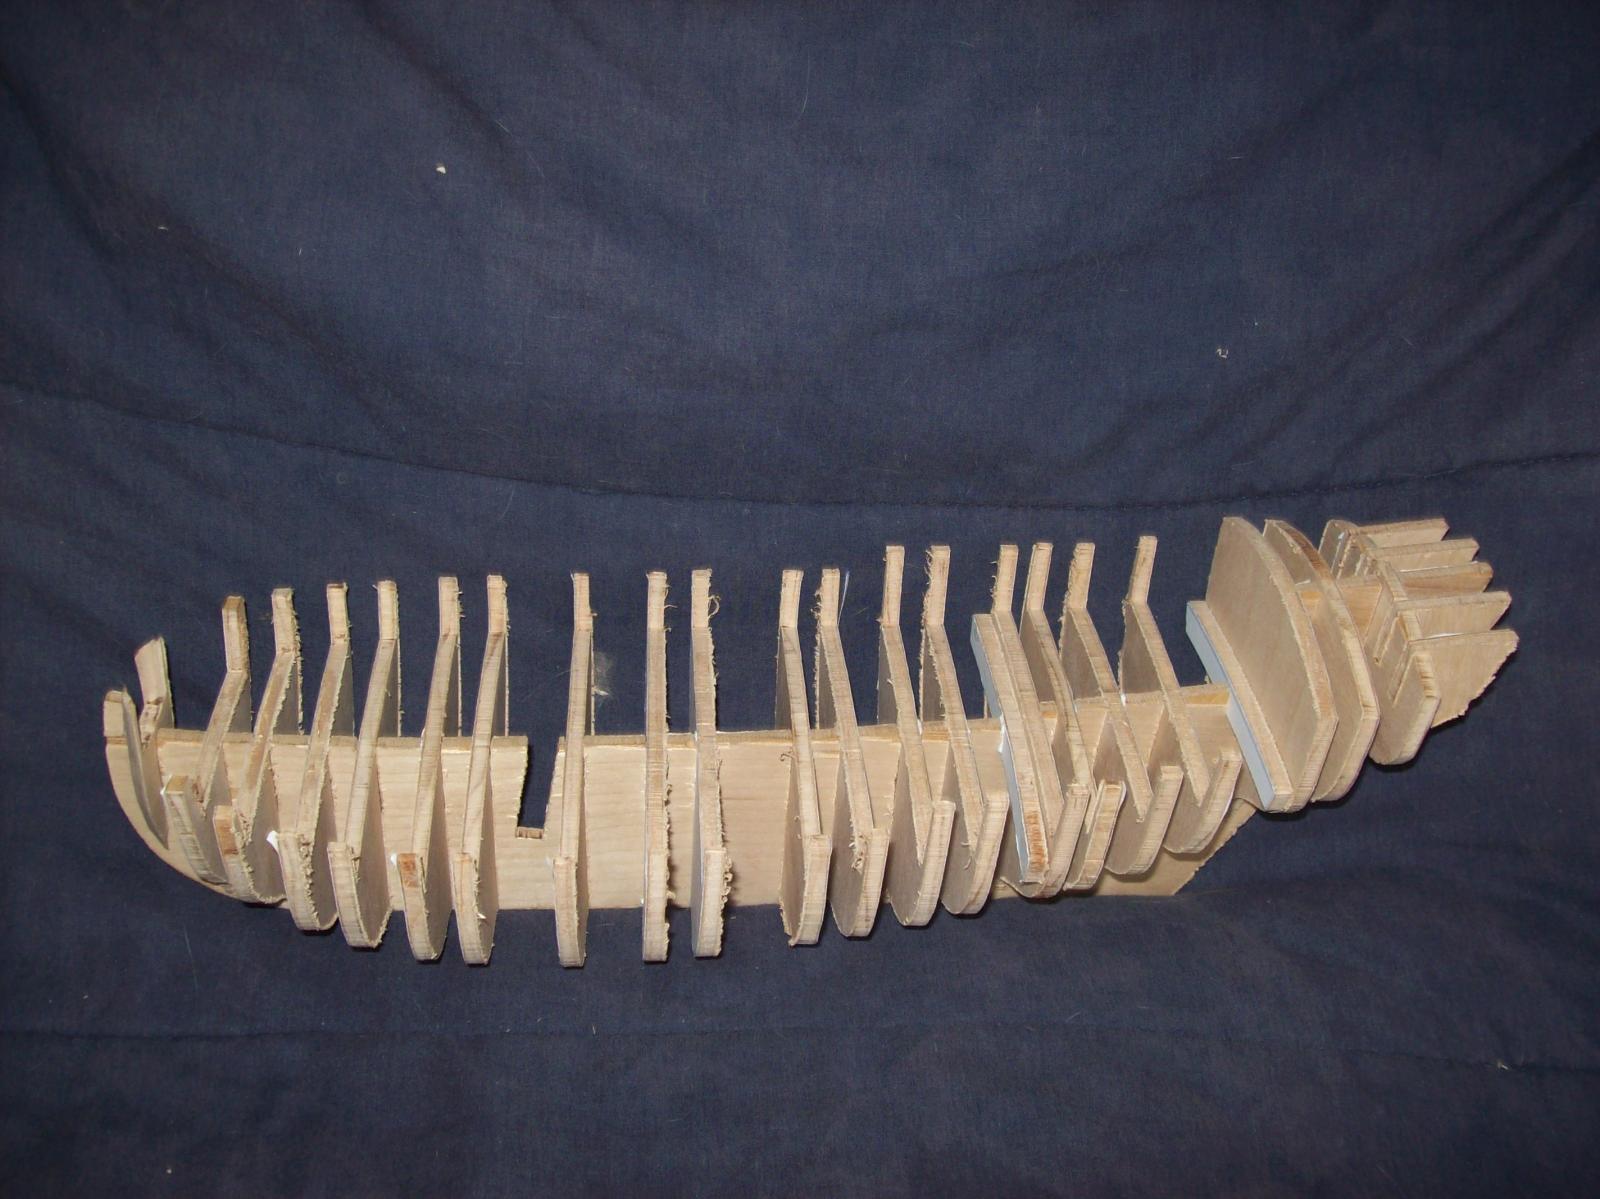
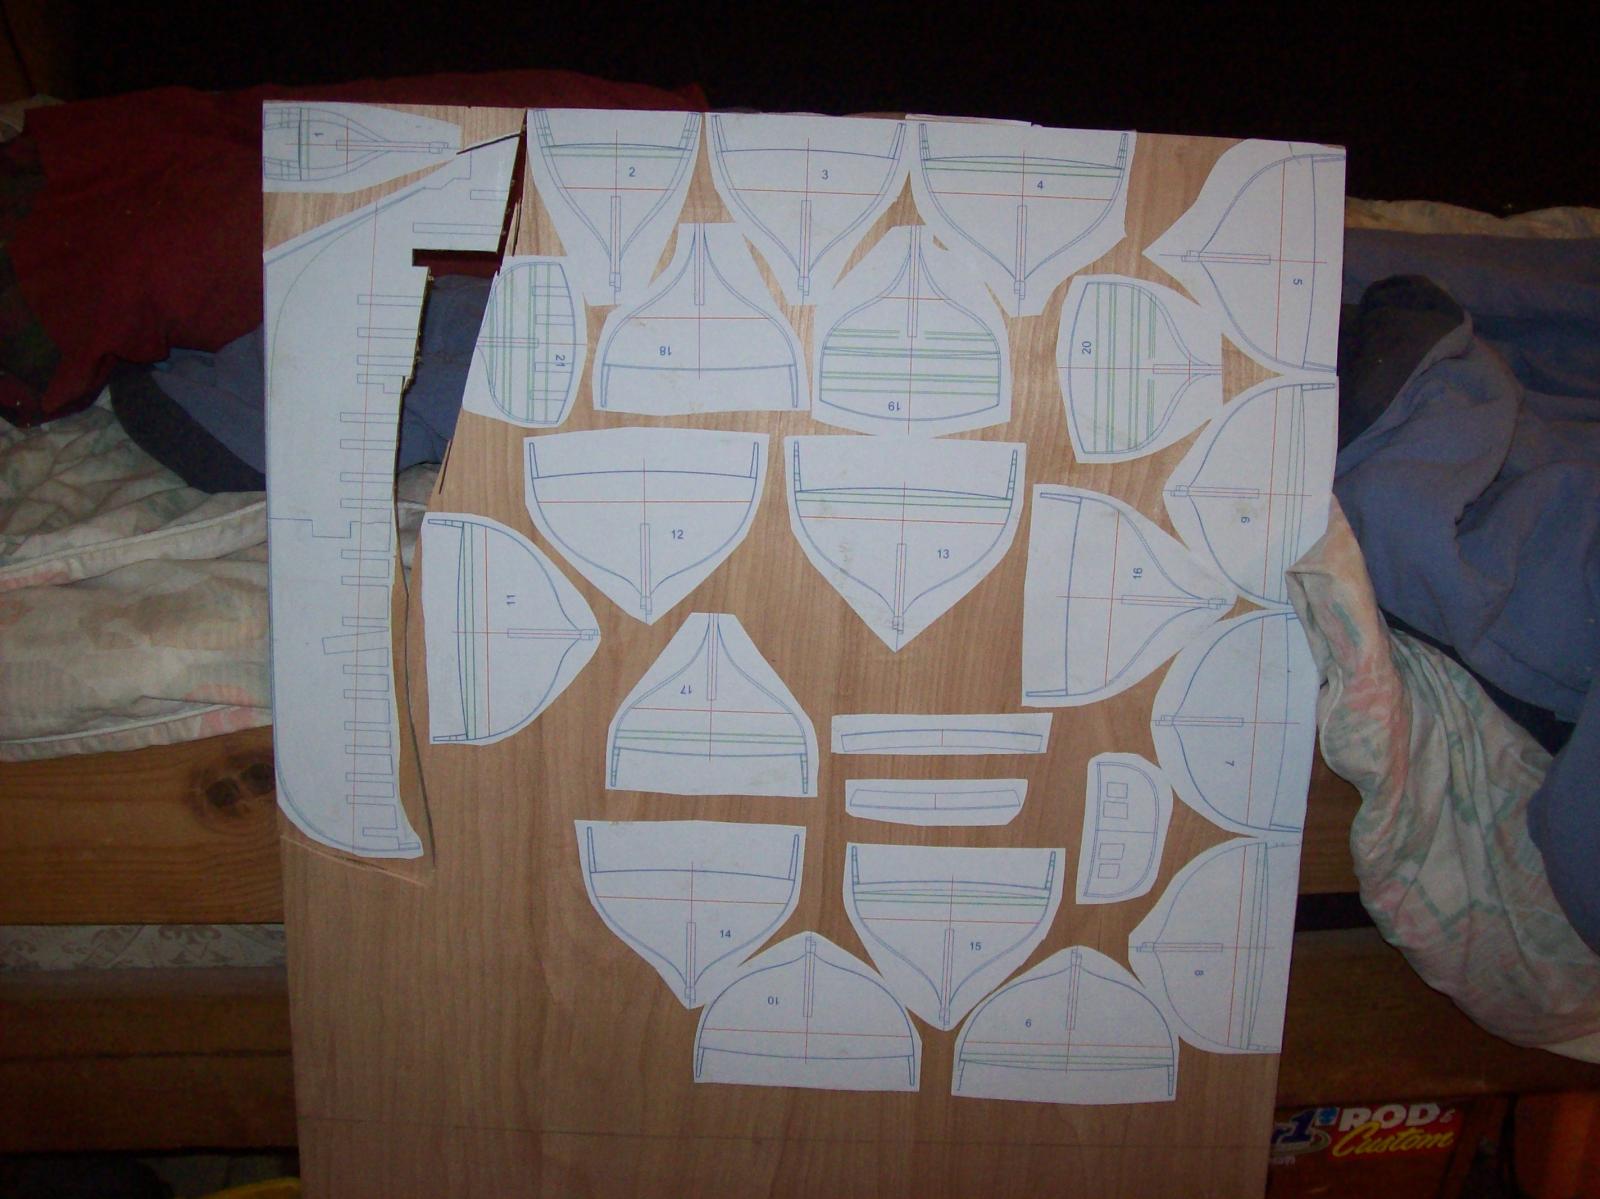
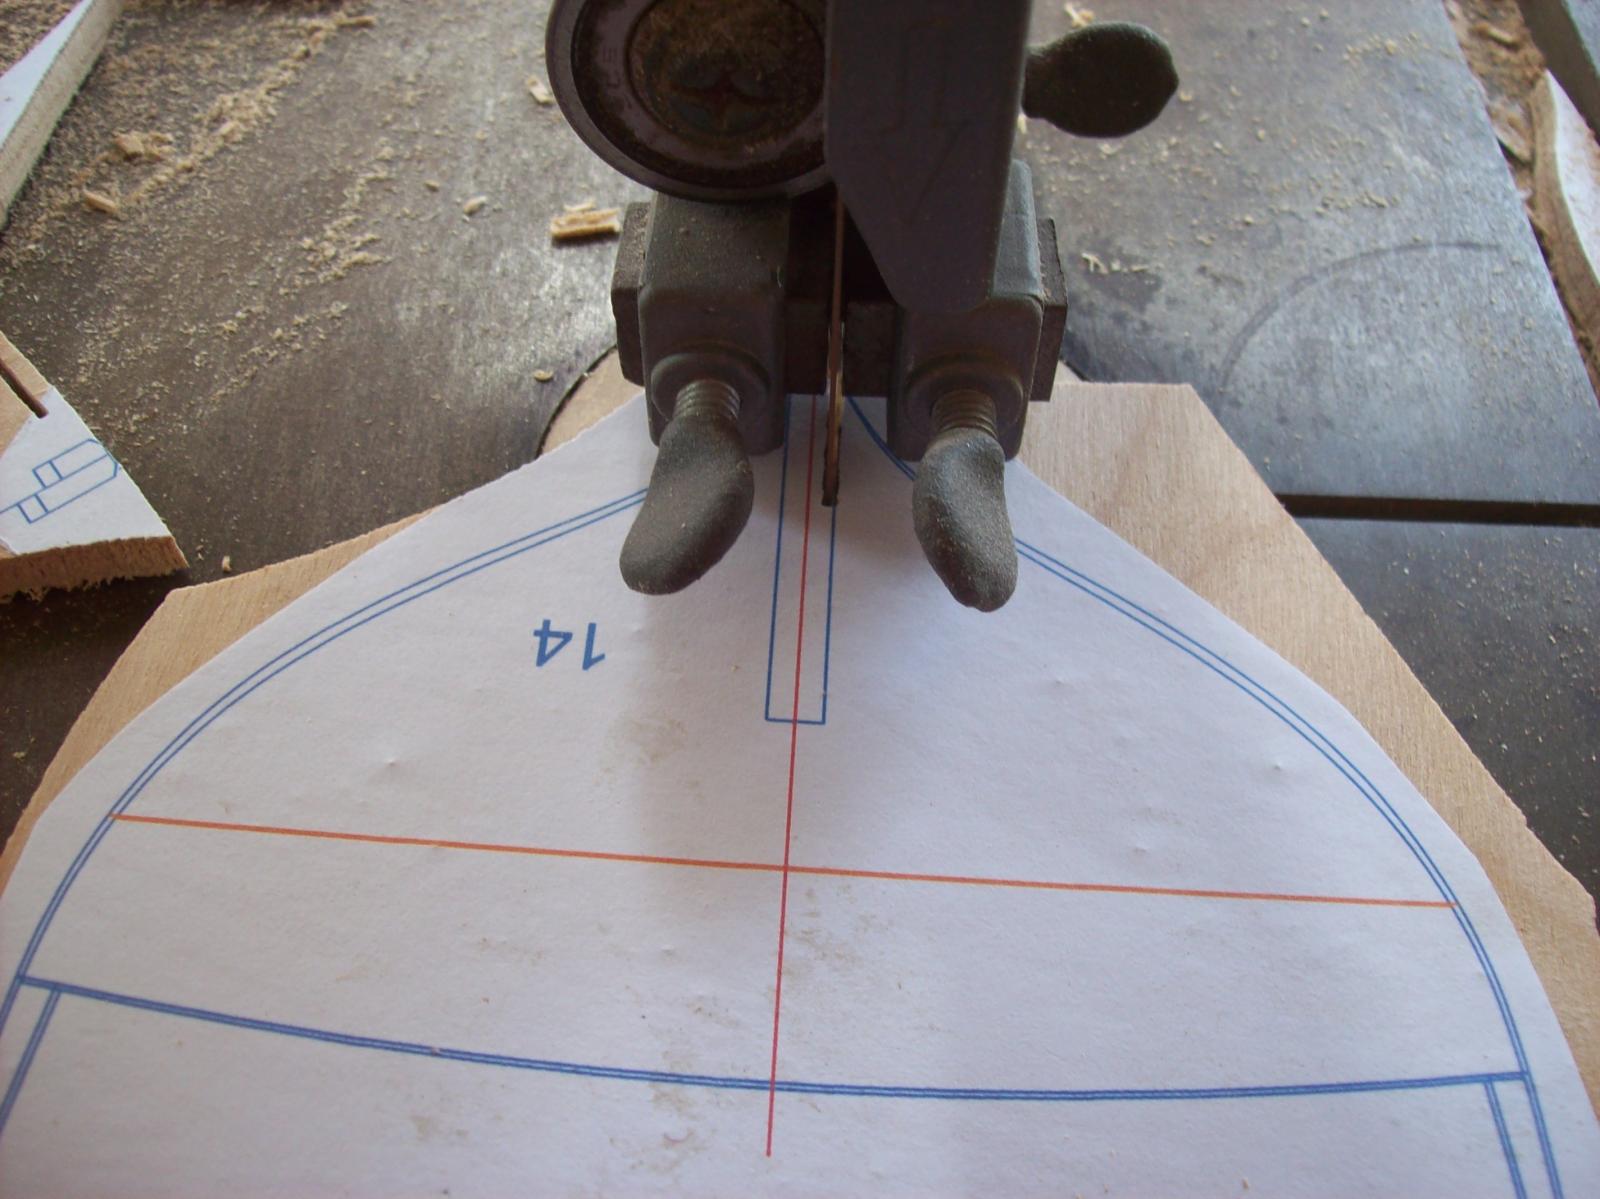
Cutting the Bulkheads: (3.00 hours) The plans (sheets 4-15) where printed then glued to a sheet of 1/4 inch Birch plywood which I then proceeded to cut on the bandsaw. As the plans were made for 5mm ply I had to cut the slots in the bulkheads a bit wider then they where men't to be, needless to say this took a bit of practice to get right so some fit a little loose and had to be shimmed with card stock. Lextin.


-
I kept telling myself that I should finish a model model before starting a new one but I just couldn't resist and started on the Mediator. The model is built using plans from carlosgf and will serve as a practice run for a 1:20 scale radio controled version that I will start on after I finish my Byzantium. Sloop Mediator 1745: Dimensions: Length of Gundeck 61' 4” Length of Keel 44' 0” Breadth 21' 2” Depth in Hold 9' 9” Burthen 104 74/94 Armament: Gundeck 10 British 4-Pounder Gundeck 18 British 1/2-Pound Swivel Service history: 1745........... Purchased at Antigua 1745/03/18. First commissioned 1745/05/09. Arrived at Portsmouth. Valued at £104.15.8d for the hull and £150.15.0d for the masts, yards, furniture and stores. 1745/06/04. Taken by La Naiade 1745/06/10. Refit at a cost of £571.4.11d 1745/07/29. Foundered in Ostend harbour 1745/07/31. Wreck abandoned This build log will hopefully have some more structure then my other logs starting with the index. Index 1. Cutting the bulkheads 2. Fairing the bulkheads 3. Filler blocks 4. Making the keel 5. Planking part I (above the wales) 6. Planking part II (below the wales port) 7. Port Side Paint (with question) Lextin.
-
I just upgraded to 7.0 and all the black lines are showing up now. Lextin.
-
Ok thanks for the information. I have Adobe Reader 6.0 and don't know if it the latest version but will try to update it. The MSB plans where the ones that I was referring to as having a square stern. Lextin.
-
A question: what made you go with a rounded stern rather than a square tuck? most the other models I've seen of this vessel seem to have a square tuck stern in fact I have another set of POB plans for this ship showing a square stern, is this just a matter of preference? or based on historic data?. I'm wondering because I may build the Mediator (or simelar vessel) in 1:20 scale RC once I am done with my Byzantium. Thanks. PS. Some of the drawings in the PDF aren't showing up properly such as the rudder which just shows up as the red lines for the table joint. Lextin.
-
I have got the deck painted and started making the scuppers which have been lined with brass tube harvested from spent .22 cal. shells. Lextin.
-
Matija: I have already figured out the hatch issue but thanks for the pics they may prove helpful down the road. Lextin.
-
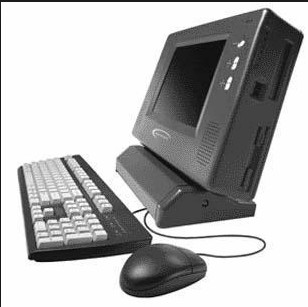
since were on the topic of old computers I will bring up my first computer, it was a Monorail which at the time (2000'ish) was a pretty cool computer flat screen and towerless, it even had a CD drive. as far as system it ran off of Windows Millennium Edition, it had a 1 gig hard drive and 16 meg of RAM. Lextin.
- 396 replies
-
- 1
-

-
- Idea
- Bright Idea
- (and 1 more)
-
I have been hard at work on the model today I made the stovepipe (last night) and now that I have the hatch thing sorted out I have been making the remaining hatch combings (one left). The beakhead grating was made out of some plastic from the window blinds at my last house which I drilled holes in then pressed a small file through them to make them square, the companionway grating was made the same way. The stove pipe was made from some spent shells and an old bolt, the top rotates freely due to a mechanism that involves the groove at the base of the shell and some well positioned dents. Lextin.
-
Truthfully anything within arms reach is at risk of going into one of my models, spent shells, old bolts, coins, toenail clippings.... Lextin.
-
I have a question about deck hatches, in the attached photo I have arrows pointing at the locations of several hatches and was wondering what the function of these hatches would be? also how would they be covered, grating, trapdoor, plank things like the main hatch...? Lextin.
-
I have been slowly chipping away at the Byzantium and have got the deck glued down and finally permanently installed the keel bolt tubes. I have also done some work on the bowsprit and other misc. details as well as making a new stand from a leftover piece of the build board and the keel bolts. The track for the 18 pounder and the main hatch are glued down in anticipation of sealing the deck with resin. Here is the new stand. The bowsprit flagpole. Lashings for the jib boom. Lashings for the bowsprit. And the set screw to hold the jib boom in place. Some battle damage (they have since been fixed). PS. I have applied at a local collage and if accepted I will start this fall. Lextin.
-
That looks so much nicer than last years March issue. I am so glad to see you get some recognition as you are an infinitely better SIB builder then myself. Lextin.
-
I decided to go with a wood bell after all, my first bell was made from poplar and was very "fuzzy" giving it a very non-metallic appearance, this new bell is made from cherry and came out with a very shiny surface (kinda hard to tell in the pictures) that when painted gold looks like bronze for some reason. Lextin.
-
David: I made the bell from paraffin wax which I had cast into a cylinder then turned with the drill press. Paraffin wax can be found at any grocery store in the canning section or you could just melt down a candle. I know that there are better waxes for casting but this is what I had so I made it work. I did try wood but I was unable to get a metallic appearance as I seem to have forgot how to polish wood, I may try again with cherry because I don't have much confidence that the lead casting will work. Lextin.
-
This morning I have been working on the carriages and have assembled three. The axles and transoms were made the same way as the sides. I am slowly refining the process and should have it down by the time I make the last one. Lextin.
-
Thanks Mark: I have since made the axles and transoms but have yet to sand and assemble them. I have also made a tool for rounding the ends of the axles to accept the wheels. Lextin.
-
Just to make sure I don't work in any particular order I decided to make the cannon carriage sides today. I have also made the test mold for the bell and the casting came out really nice except the lead didn't fill the mold properly and left an air pocket also the core was slightly off center so registration bumps and vents will be a must for the real one. In other news, between the different groups I asked for seal names on I am considering either Clara or Rose, both can be identified with the name of the vessel as their both character from Doctor Who and I named the Byzantium after a ship from Doctor Who. The Insert plate for my Band saw broke so I made a new one out of wood, this new one has a much smaller clearance making it easier to cut small parts. Lextin.
-
I painted the belfry and made a bell from wax to use as a plug for making a mold. I made two bells but one came out better than the other so I will be using the worse one to test a mold making method before using the good one. Lextin.
-
I did some digging and found its not a tracer but a Heavy ball here's a quote from the site I found "This cartridge with a solid yellow tip is a "Heavy Ball" produced in the Dominican Republic for "Light Armor Piercing" Most of the cartridges available have a head stamp that read: 50 (on the top) and 59(on the bottom). Minor spots on the cases, and clips on the yellow paint." the picture I based my tracer assumption off of was mislabeled so now I feel dumb for taking the first information I found and not cross checking. there is no date just the above mentioned 50(top) 59(bottom) headstamp. Lextin.
-
@ MTaylor: Nope not inert but a live .50 cal tracer, a friend found a bunch of them in a field, to bad I don't have the gun that fires them. I have completed the main structure of the belfry and the pinrails associated with it, I still need to finish the details and paint. The bell is a tad small (approx 10 scale inches)so I will make a new one sometime later on down the road. Lextin.
-
I started on the belfry and promptly got distracted by another component, the mast hoops and found an alternate method of making them. Instead of using hoops I am thinking of making a loop and parrel setup that would allow me to detach the sails with the use of a lobster clasp on one end of the loop. Lextin.
-
I have started on the mainsail but took a break to work on the main pinrail and belfry I also decided to replace the barrel on the 18 pounder with one that I think is much nicer, who liked the old one anyways. Here is a paper mockup I made for the belfry and the ships mascot, a small seal which I still haven't named and am looking for suggestions. The new barrel . Lextin.