Erik W
-
Posts
470 -
Joined
-
Last visited
Content Type
Profiles
Forums
Gallery
Events
Everything posted by Erik W
-

Cutter Cheerful 1806 by rafine - FINISHED
Erik W replied to rafine's topic in - Build logs for subjects built 1801 - 1850
Bob, You're moving right along. Looks great! You're getting to that advanced stage of the build where you're probably thinking, "Um, I'm almost done . . . I wonder what my next project will be". Erik- 525 replies
-
- 4
-

-
- cheerful
- Syren Ship Model Company
- (and 1 more)
-
Jerry, Nice job! I'm enjoying following the progress on your build. Also, I've recently ordered from Ancre, and have had it go as easily as your experience. Erik
-
Bob, Long build time = getting your money's worth! Erik
- 277 replies
-
- 6
-
-
- model shipways
- 18th century longboat
- (and 1 more)
-
Bob, I think you win the award for cleanest longboat build! Truly. Your longboat is flawless. Erik
- 277 replies
-
- 1
-
-
- model shipways
- 18th century longboat
- (and 1 more)
-
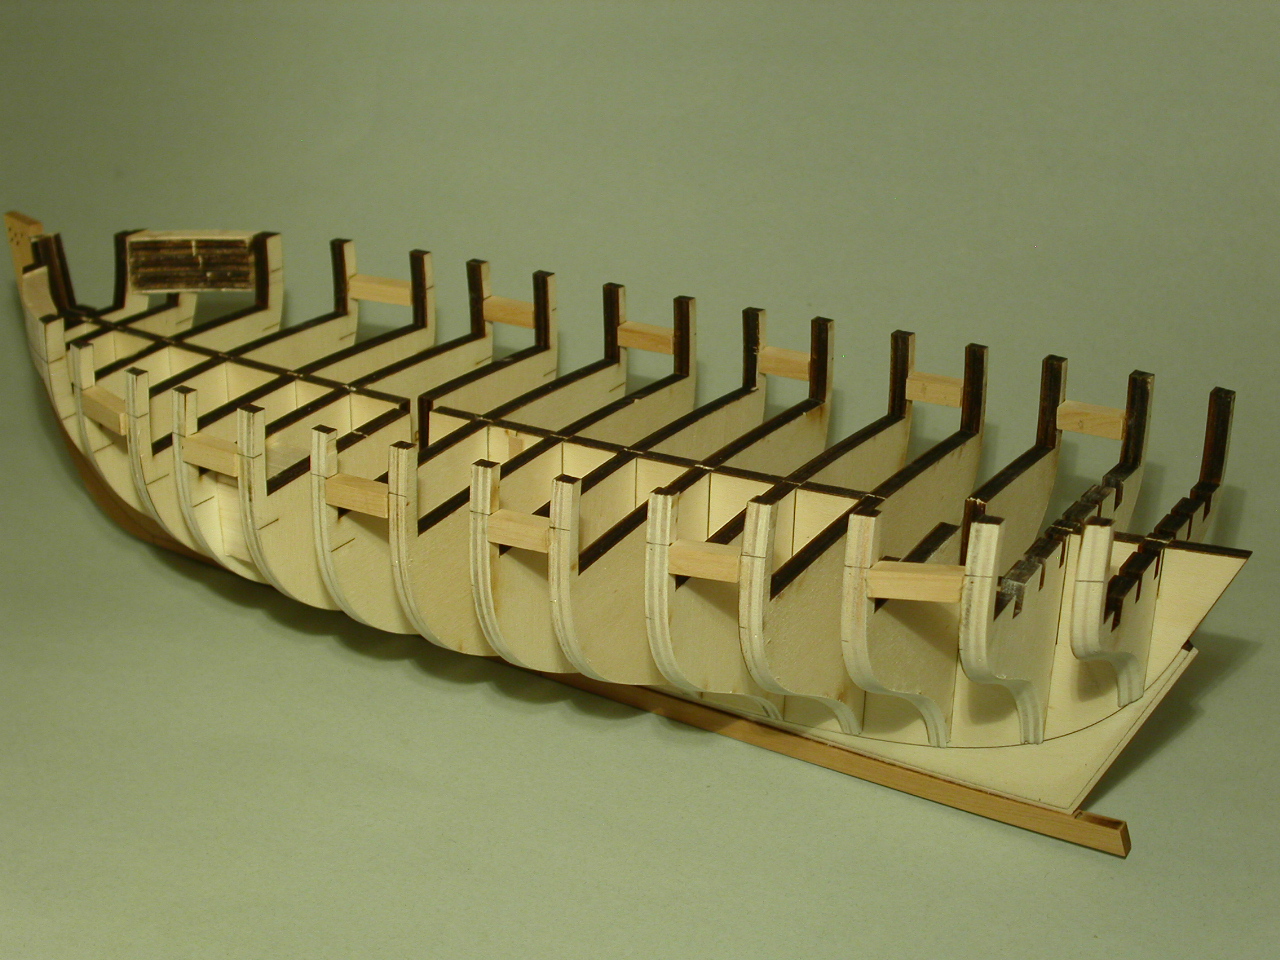
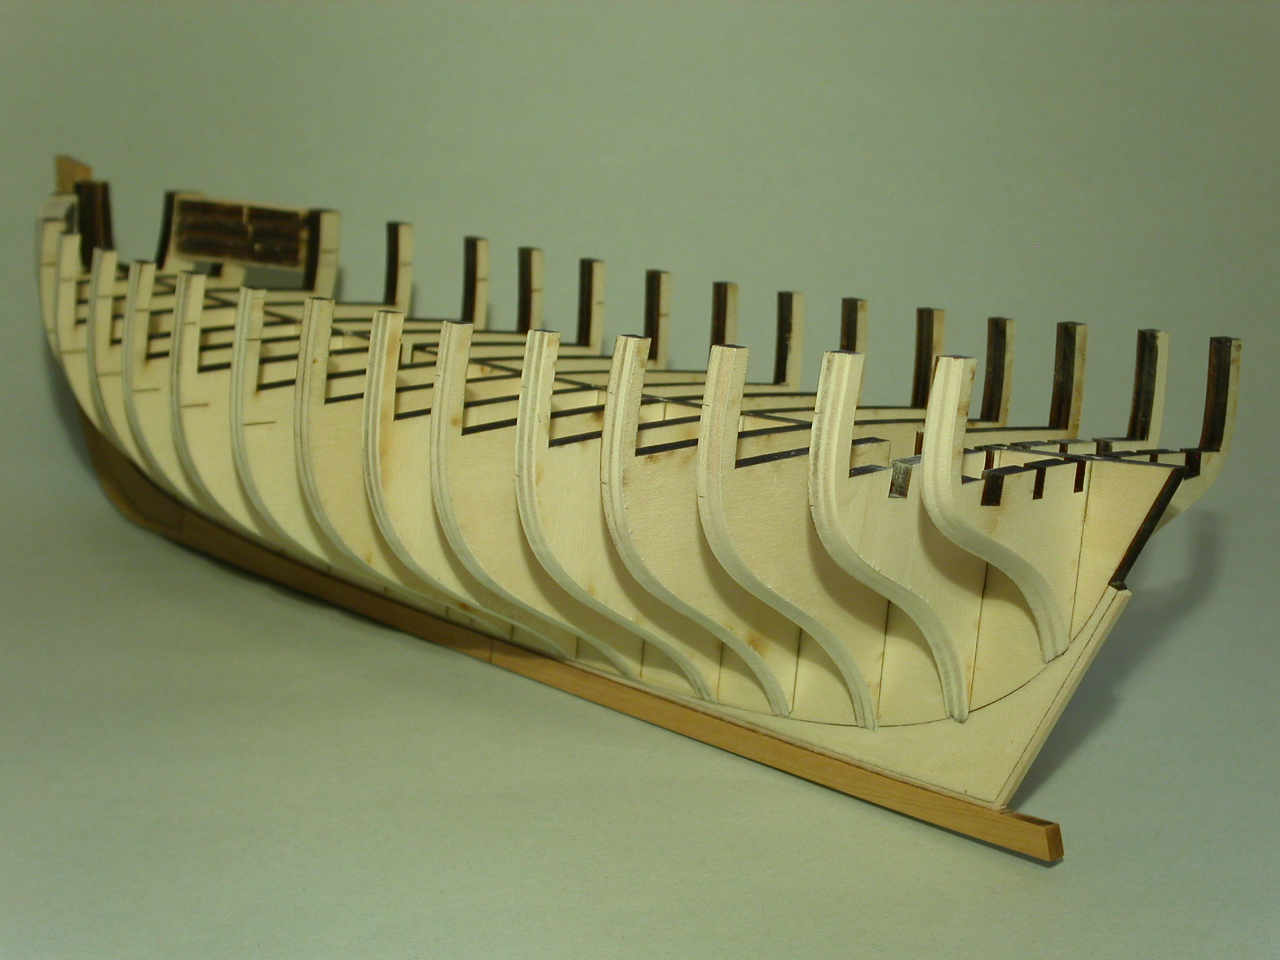
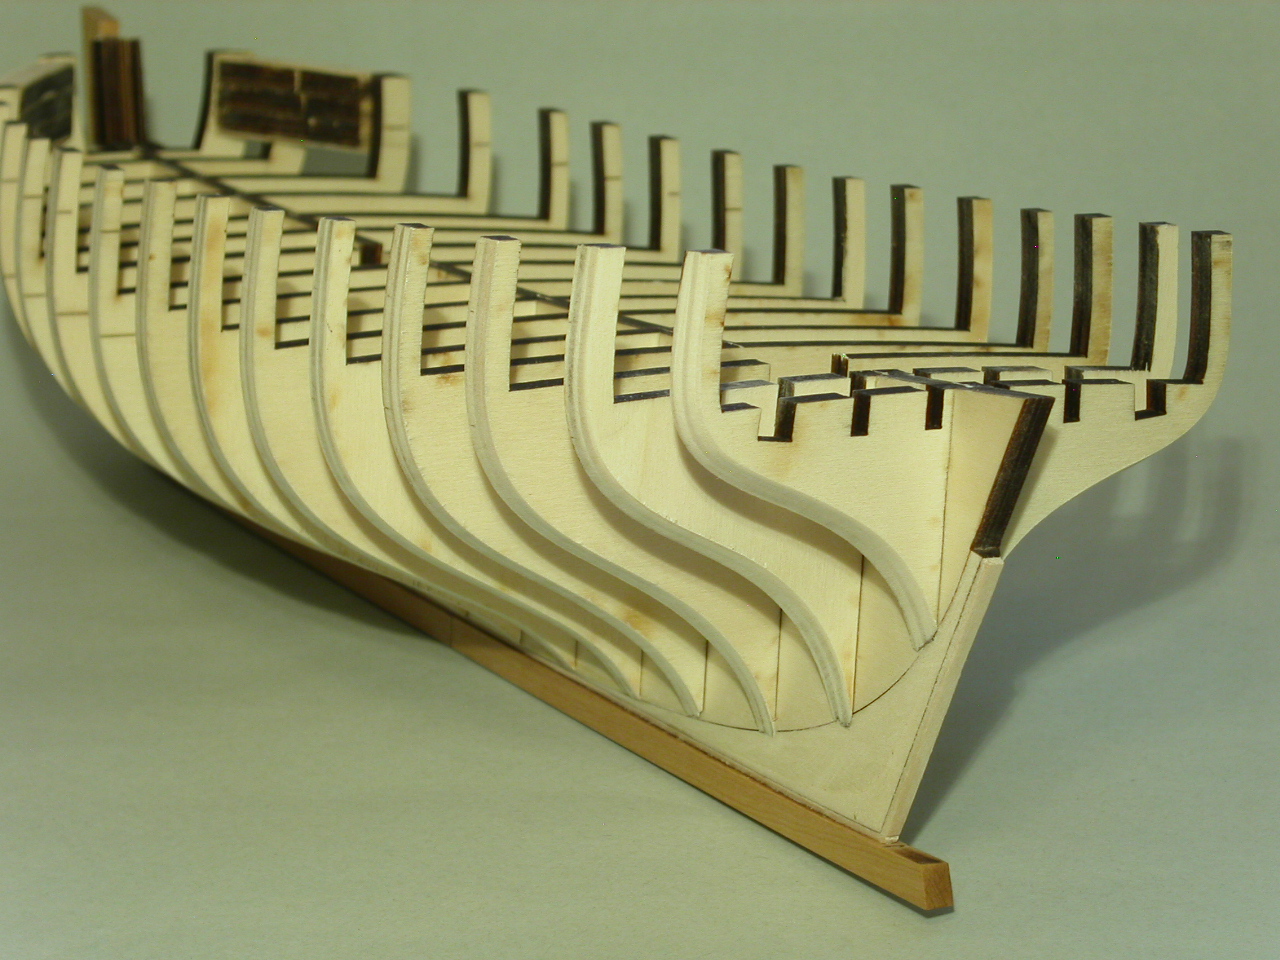
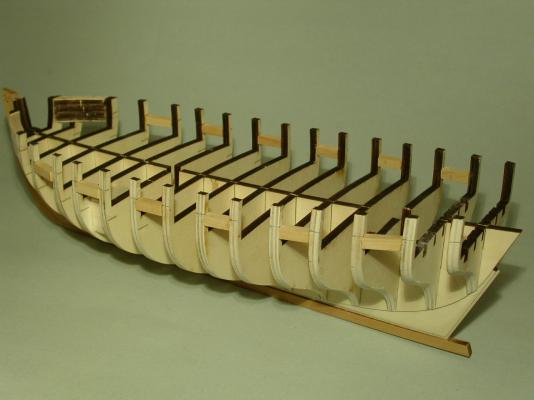
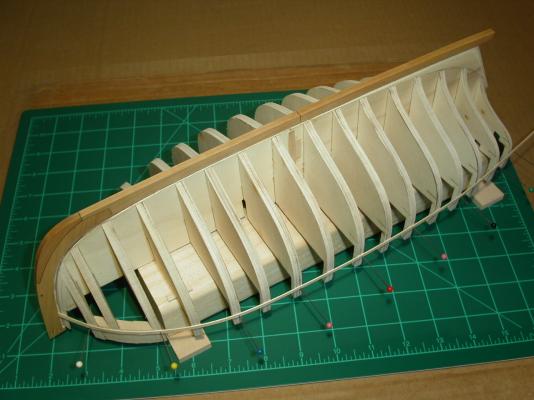
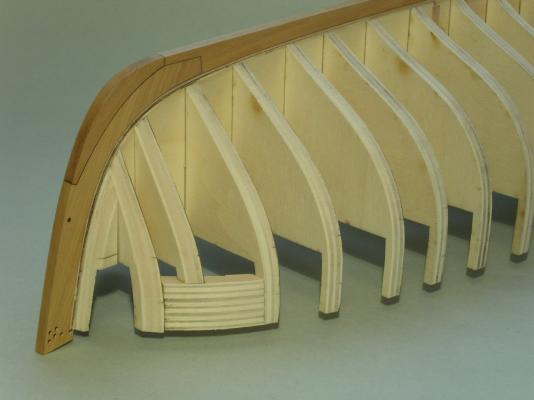
I'm heading out of town for a week, but managed to get the gun port sills installed. When I installed bulkhead "B" (the one where the mast will go) I had noticed the bulkhead was warped a bit on the port side. You can see in the photo I added a balsa block between bulkhead "B" and bulkhead "D" in front of it (the second gun port sill from the front). This made it possible for the gun port sill to be the same length as the one on the starboard side. Also, the spacing between the bulkheads is now the same on both sides. Erik
-
Cutter Cheerful 1806 by rafine - FINISHED
Erik W replied to rafine's topic in - Build logs for subjects built 1801 - 1850
Bob, Your Cheerful is looking awesome! I can see what you mean about the cannons being a tight fit once the bowsprit is added. You're nearly to the rigging phase of the build!! Erik- 525 replies
-
- 4
-
-
- cheerful
- Syren Ship Model Company
- (and 1 more)
-
That is a gorgeous ship Dave! And no worries about hijacking the topic. You're just showing how good cherry can look. You're using cherry as I had envisioned it, on the lower hull. I like the look of bare wood enough that I've though if I ever build a ship that would have had a coppered bottom, I'd use a darker wood rather than copper plates to visually separate the below-the-waterline portion from the rest of the hull. Erik
-
"The sapwood plank on Dave's hull adds character, interest, and makes it evident that the hull is indeed made up of individual planks. A story could be told about the need to replace a damaged plank while on a distant voyage - using local lumber. Certainly not a far fetched scenario." Jaager, I was thinking the same thing. Erik
-
Greg, I wonder if in the case of Dave's photo above, of the light color cherry plank, if he had let the wood sit out for a while before he used it, if it would have darkened enough to tell ahead of time that some of it (the sap wood?) wouldn't darken like the rest? Erik
-
Greg, That's interesting. Does it continuously darken over time, or does it get to a point it doesn't darken any more? Thanks, Erik
-
Dave, Your build looks great, but wow, I see what you mean about certain planks not darkening. Is there any way you can remove the the lighter planks and re-plank with wood closer to the color of the other planks? That's a beautiful planking job. It would be a shame to paint over it. What ship is that? It looks like a Swan class sloop. Erik
-
what is the ship at the backdrop of the forum?
Erik W replied to Eibwen's topic in Nautical/Naval History
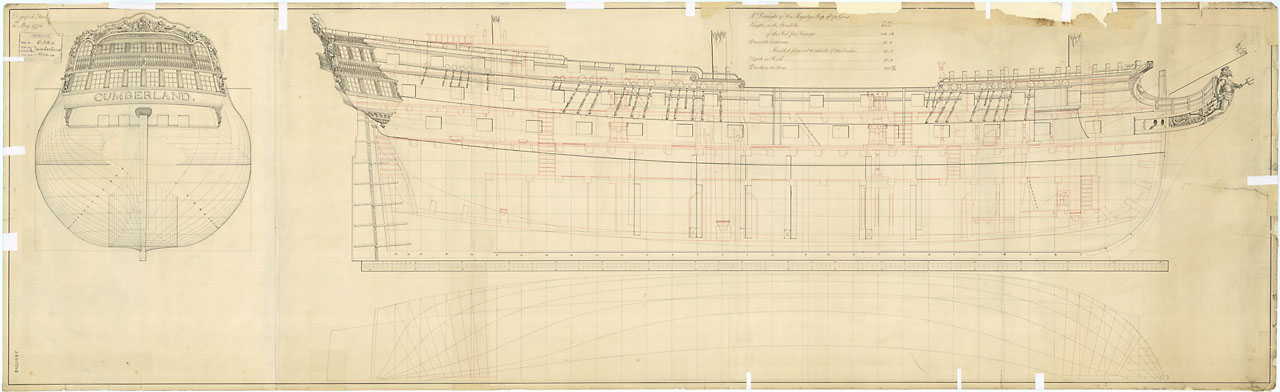
Eibwen, It's the 74 gun 1774 HMS Cumberland of the Elizabeth class. Here is a link to an amazing model of her: http://modelshipworld.com/index.php/topic/3338-hms-cumberland-by-alexbaranov-1774-136/?hl=cumberland Erik -
Thanks Mark! I keep hearing things about ebony. Being a wood-type neophyte, what are the issues with it? Thanks, Erik
-
Oh! And regarding hobby time and progress on the ship. I was divorced a few years ago, don't have kids, . . . and it's winter here in Colorado . . . so to avoid going crazy, I need to be working on something daily. I can foresee slowing down as the days get longer and the temperature warmer though. Erik
-
This particular build is hard to define. I'd call it a scratch-kit . . . Or maybe an ala-carte kit . . . Or scratch-build light. Chuck offers the laser cut keel, false keel, and bulkheads, and offers others parts as mini kits. The modeler can buy all, some, or none. The buyer then sources the timber themselves. In this case, I bought a timbering package from Crown Timberyard. So, in a way, as I'm building it, it's a kit . . . but with me buying the components individually from different sources. I would say, realistically that both the terms kit-built, and scratch-built are both on a continuum from one end of the spectrum to the other. I think specifically these Cheerful builds are in the scratch-built section of this forum because that's where Chuck's initial scratch build of the Cheerful started, and other's early on had cut the keel, false keel, and bulkheads themselves. For me, it doesn't really matter what I call it, it's just an enjoyable build, and seems to me anyway, like a good transition between a full kit (everything in one box), and a true scratch build. Erik
-
Thanks Chuck. That does seem to be a trend the world over. Fewer trees + more humans using wood = more difficult time finding quality lumber. Erik
-
Ed, I think my lack of clutter can be attributed to a my tool collection being on the light side. It seems that every step of the way, I need to purchase something in order to complete the step! One of the things I like about the Cheerful is I'm able to get started with a minimum of tools, particularly expensive power tools, and acquire things as money allows . . . and it clarifies in my mind how involved I want to get into the hobby. Per, Once you get moved in and set up again, you'll be ready to start on your next project! Eirk
-
I'm currently using Castello Boxwood on my Cheerful build, and am happy with it. It does seem like a harder-to-come-by wood than some of our native North American wood species. I'm curious, has anyone used Cherry (aka Black Cherry, American Cherry - Prunus serotina) for a ship build? How was it to work with? How does the finished build look? Thanks! Erik
-
what is the ship at the backdrop of the forum?
Erik W replied to Eibwen's topic in Nautical/Naval History
I always thought it was HMS Cumberland 1774, since it has Posidon as the figurehead. Scanned from the National Maritime Museum website. http://collections.rmg.co.uk/collections/objects/80776.html Erik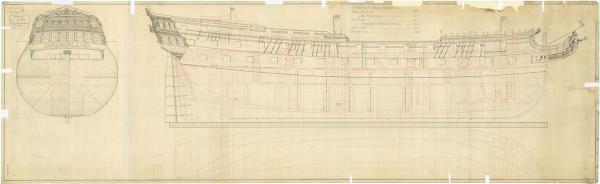
-
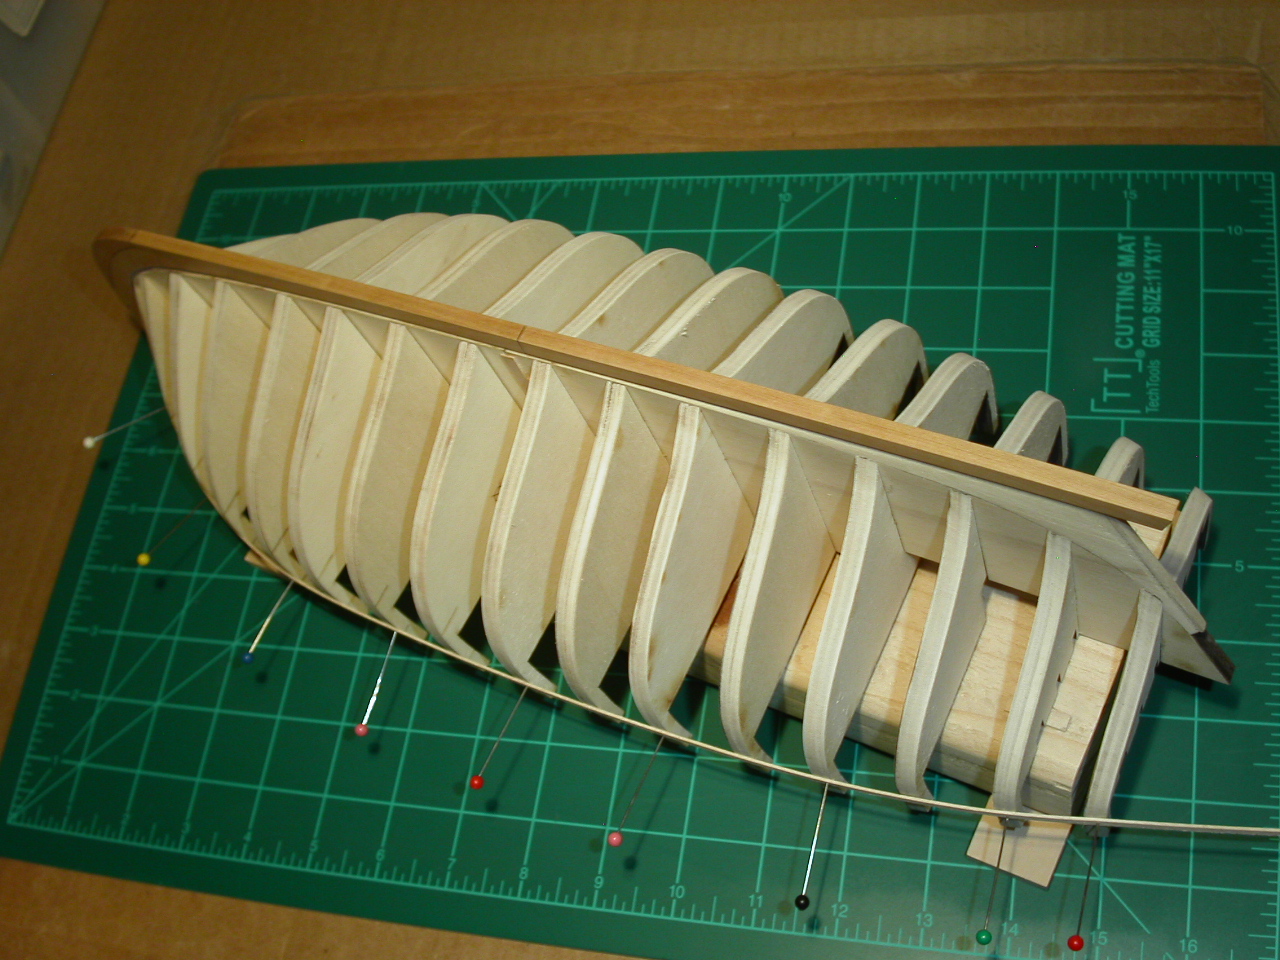
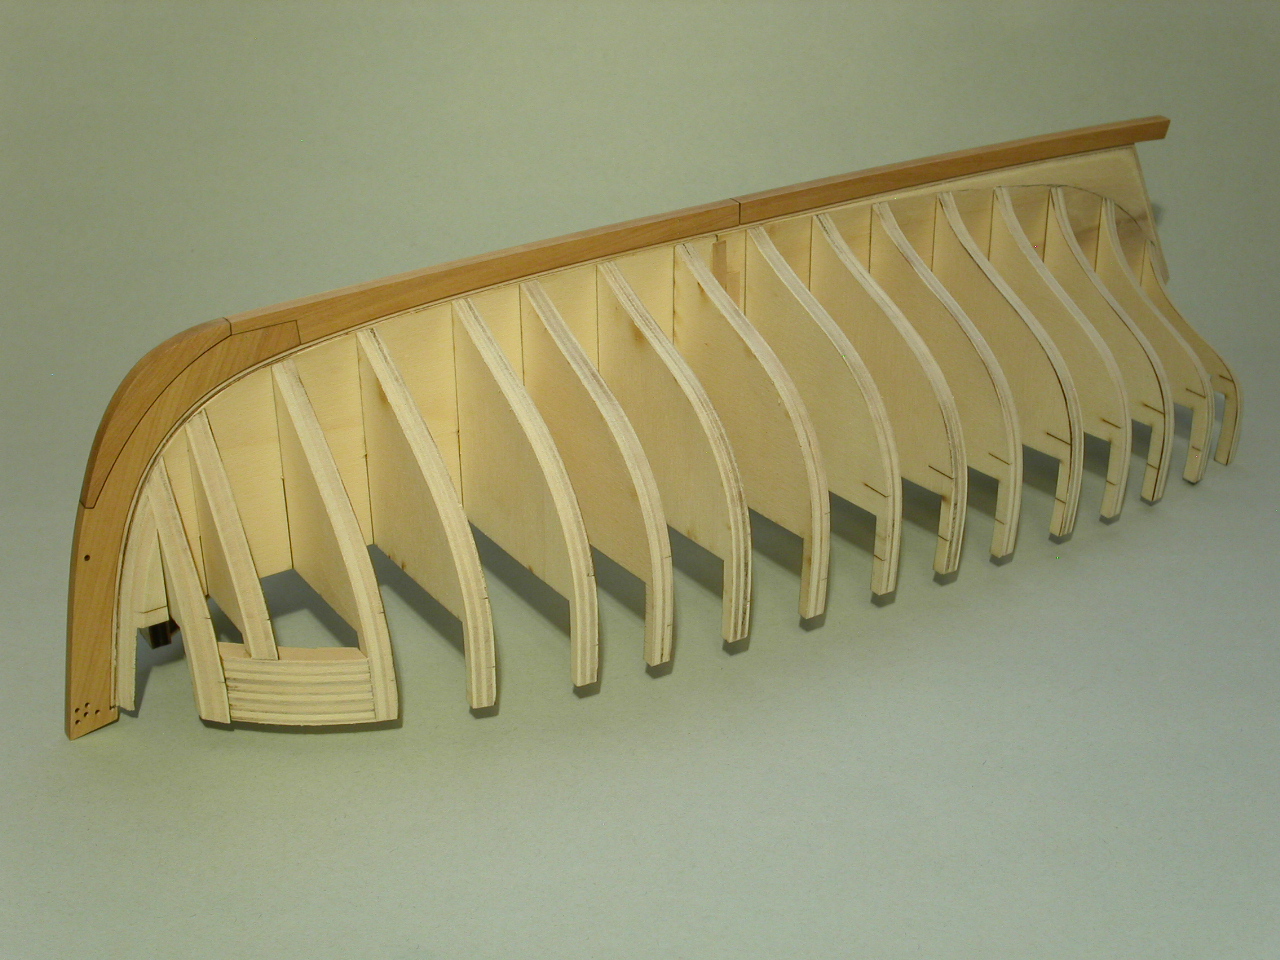
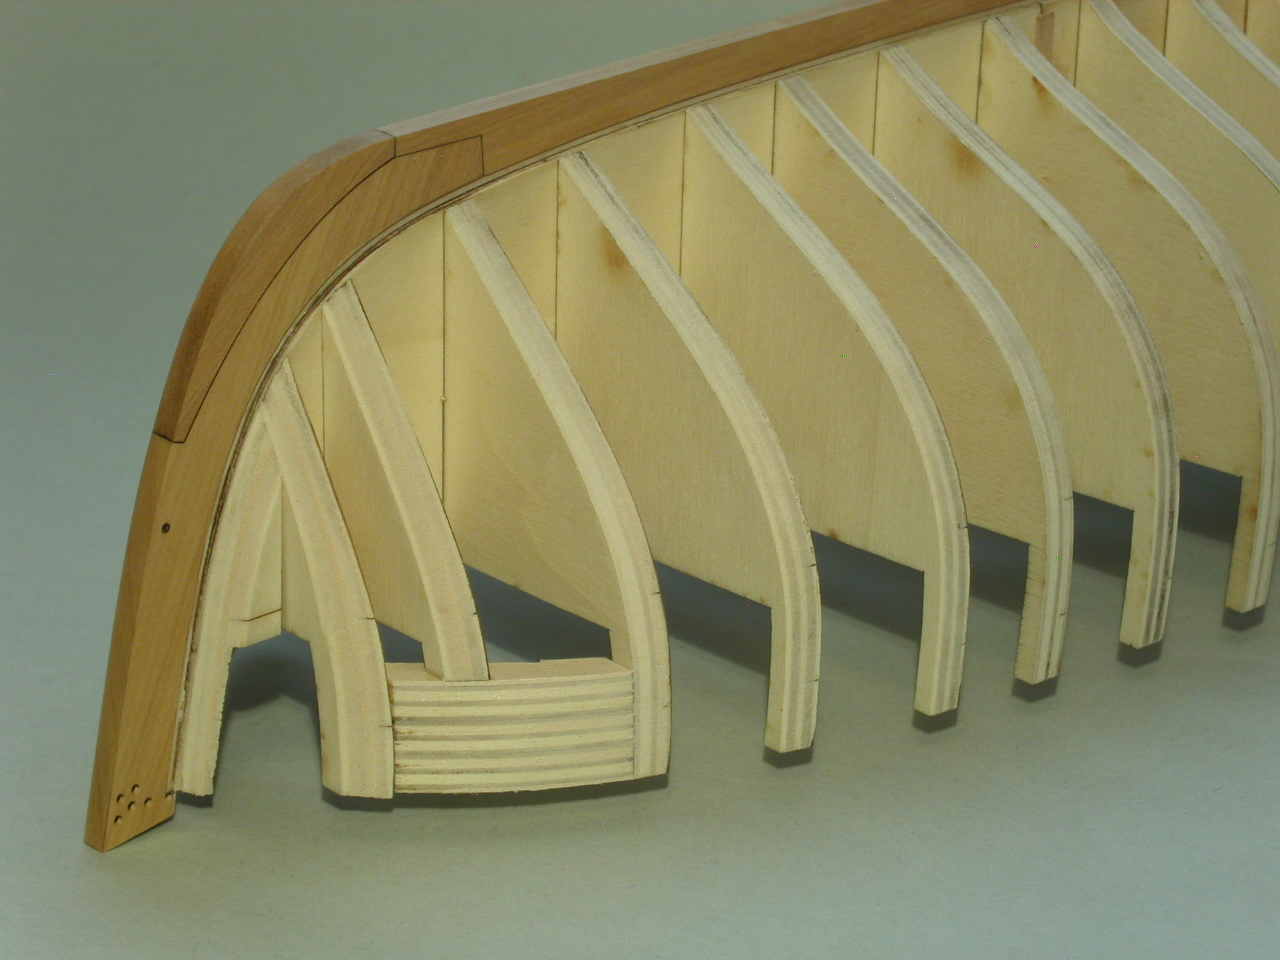
A couple of quick grab shots. I tested the smoothness of my fairing job by temporarily fastening a batten strip at various positions on the hull. It's smooth! Erik

-
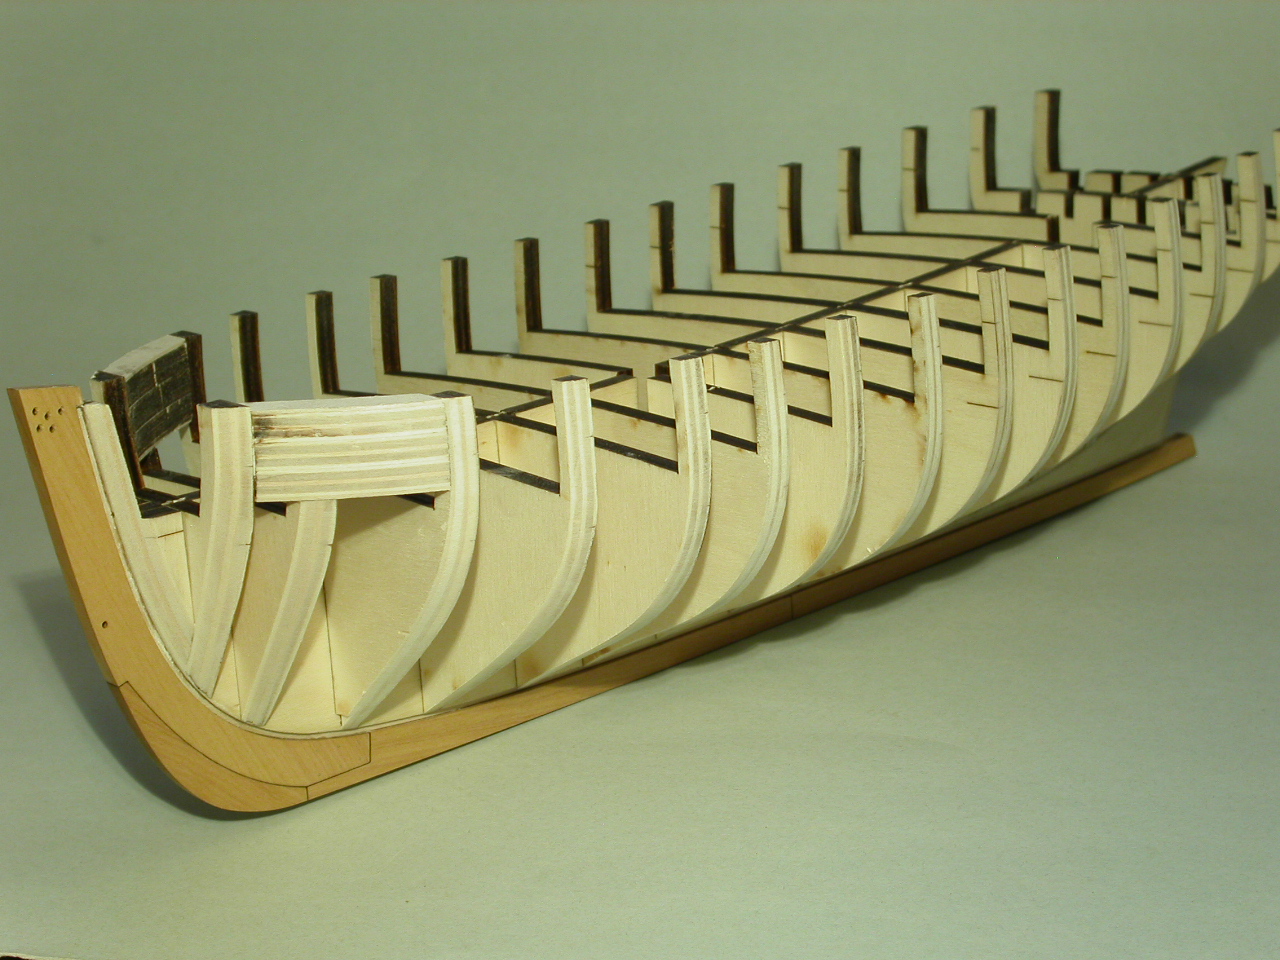
I finished the first rough fairing on the port side. I've done a whole lot of sanding over the last week!! There are spots I need to touch up, particularly at the bow, but I'll wait to address those until I do the fairing after I frame the gun ports. Erik

-
Mike, Thanks! I did hold the batten strip down in several areas. The run is smooth, and it lays flat on all the bulkheads. I'm waiting to tack it down until I do the other side. I know I need to remove a little more material at the bow. I'll wait to tweak the bow area when I have both sides faired. That way I can make sure both sides are symmetrical. I'm a little paranoid about removing too much material, so I'll really go over everything meticulously after the gun ports are framed, and I do that final fairing. Erik
-
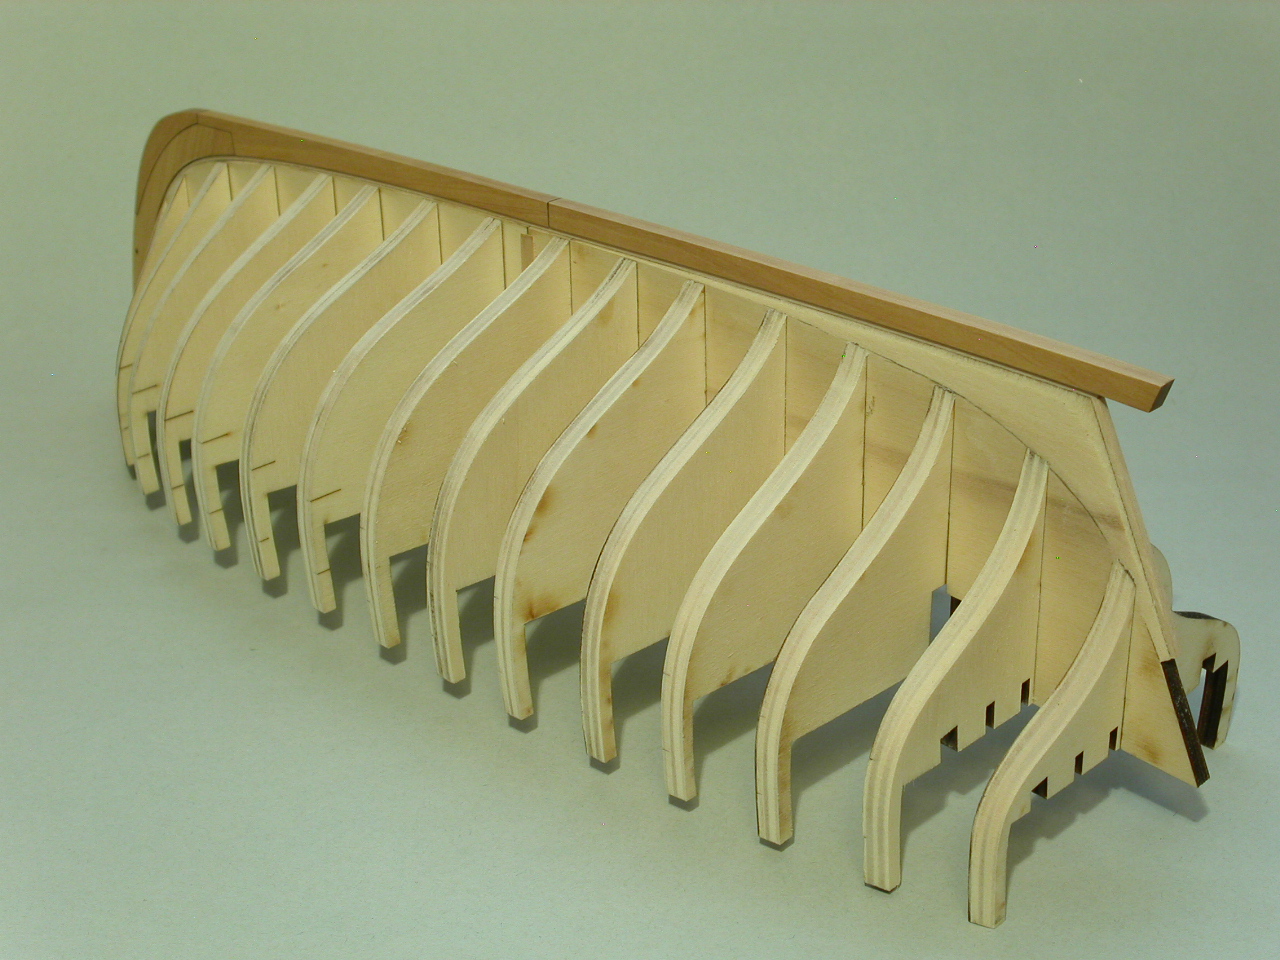
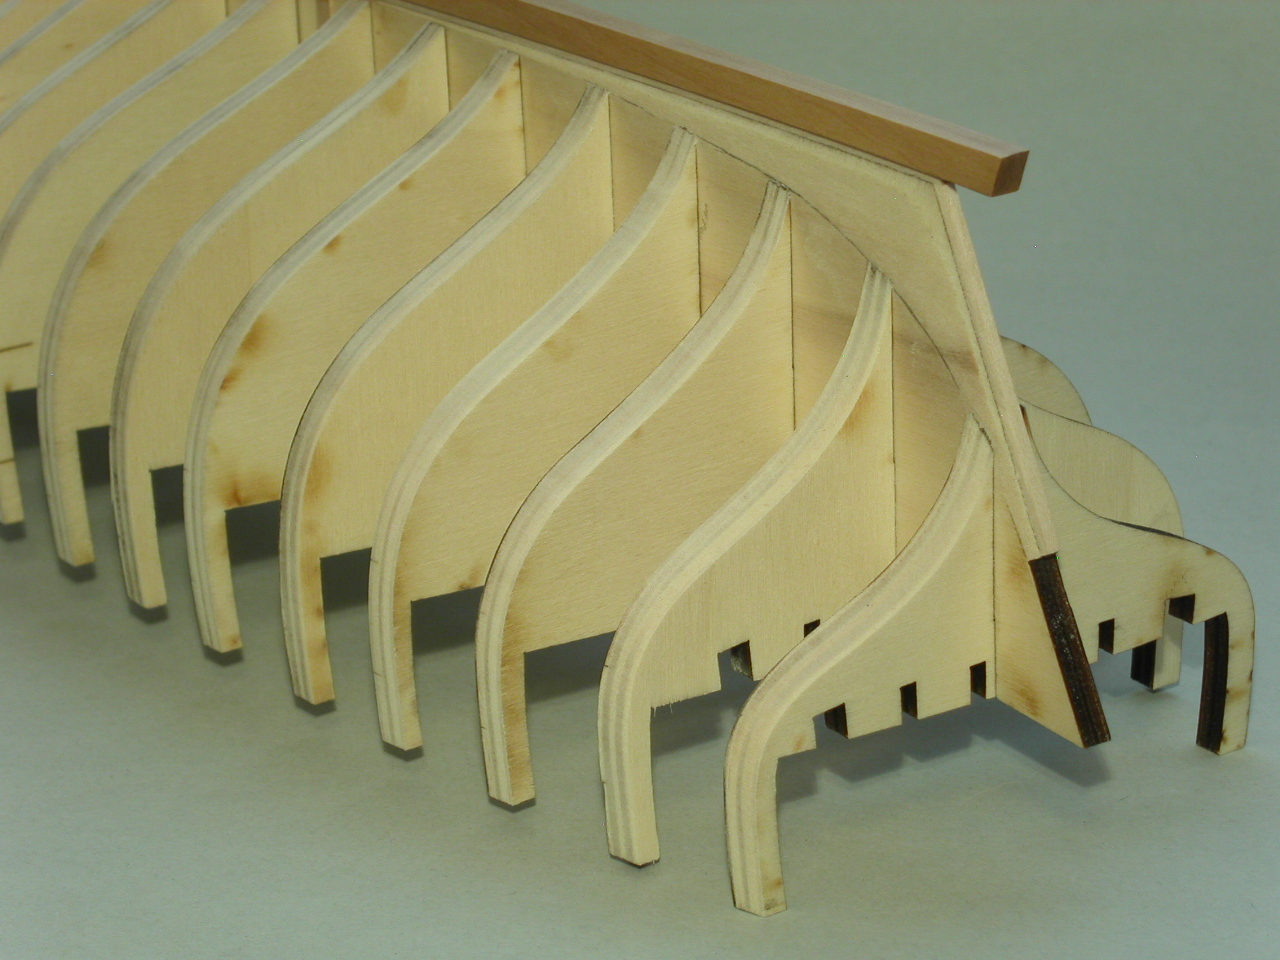
I did the first rough fairing of one half of the Cheerful hull. There are a couple spots that need more work. I'll touch those up when I do the final fairing after framing the gun ports. It was quite an undertaking compared to fairing the much smaller longboat. Sanding the 5-ply plywood that constitutes the bulkheads makes for some slow sanding! After initial material removal with a 60 grit sanding block, I did wind up mainly using the 7" long flexible nail files that are 120 grit. I also made a sanding block out of a 1" dowel with 150 grit sandpaper glued to it to sand the concave rear part of the hull. The two curved sanding blocks I made I didn't wind up using. The flexible nail files did a better job. Now . . . on to the other side . . . Erik


-
Deon, Great!! I'm glad to see that you can finally get started. I'll be following your progress. Erik
-
Copyright - beware
Erik W replied to dvm27's topic in Using the MSW forum - **NO MODELING CONTENT IN THIS SUB-FORUM**
One good rule of thumb for members of MSW is, if it's not a photo you took yourself, post a link to the photo, rather than the photo itself. While not as visually pleasing as clicking into a topic with the photos already there, as a viewer you're still only a click away from seeing the photo. And it saves the hassle of potential copyright issues. Erik- 26 replies
-
- 23
-