

liteflight
-
Posts
205 -
Joined
-
Last visited
Reputation Activity
-

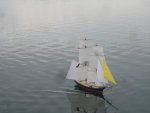
 liteflight got a reaction from thibaultron in HMAS AUSTRALIA II by AKRYPTO - FINISHED - 1:72 - RADIO - PLASTIC - tribute build
Hi, Akrypto
Does that make your father a marine, or is that not what happens in the RAN?
I’m enjoying your build and your style in relating it. I shall be sitting in and consuming the Lamingtons
andrew
-
 liteflight got a reaction from GrandpaPhil in Oseberg Viking Ship by liteflight - Billing Boats - 1/25 Scale - 9th Century
I am in the middle of a major tidy and sort of the entire house and garden, triggered by the death of a modelling buddy. He died leaving a VAST air-conditioned modelling shed packed with 40 years of many fields of modelling hardware. I and flying colleagues have sought to clear the shed, convert the contents to cash, and return the proceeds to his widow.
Among the relevant items are two electric covering irons, photos attached, which I expect to be a neater and more manageable heating tool. Both of these are sealing irons used for the smaller corners and seams of heat- shrink covering for model aircraft. Normally they would be temperature-controlled, but these may be the “economy” models. Easily rectified with a mains dimmer in the supply.
I included the household iron Originally used for the first strakes. Not easy to use among a line of clamps!
Now to make progress!
1) Test the new heat sources on scrap materials
2) Obtain dimmer if required - the household iron was set to “max” if I remember right so dimmer may not be required
3) clamp up and carefully reheat the strake which is not fully stuck down
4) Prepare next half- strake, scarf end where it joins existing strake
5) Mark, mask and apply coloured PVA ( carpenters) glue to the fat 1mm overlap
I think five steps is sufficient for now
andrew
-
.thumb.jpeg.fc5d633a7b34428fcf19419a73d56d55.jpeg) liteflight got a reaction from EricWilliamMarshall in Oseberg Viking Ship by liteflight - Billing Boats - 1/25 Scale - 9th Century
liteflight got a reaction from EricWilliamMarshall in Oseberg Viking Ship by liteflight - Billing Boats - 1/25 Scale - 9th Century
Thanks Steven, I have now! Thank you for that.
Warm thanks, too, to everyone who contacted me with messages of sympathy and support. Much appreciated and very valuable to me at a difficult time.
So, as I was saying.......
I have reviewed Oseberg as she is and I find good news and less good news.
I had commenced the clinker planking, having decided that “my” overlap would be a thick 1mm
Easy decision, but how do I do that precisely and repeatable?
+
the current state of play: both garboard strakes fitted with scarf joint between the two ( precut) parts of each strake
(just for reference, the clamps are merely parked where they are)
i have added a second full strake on one side, using a method which I have not seen before, so probably worth describing ( even if only to give you a larf)
I aimed to scribe my fat 1mm overlap on the garboard strake.
First attempt was using compasses, of which as a former Engineer I have a modest plethora. None of them were designed to work or be rigid with a 1 mm gap.
Most were designed to use a lead about 2.5 mm dia, sharpened to a chisel point by arcane methods known (only) to draughtspeople. However sharp the lead it gave a bad result!
I then remembered cutting thin styrene sheet using a hard pin pushed through a balsa sheet with a ply edge guide.
So postage stamp size bit if hard 1/8 balsa with a length of thin ply sticking down 2mm to slide along the edge of the plank to be marked.
Lay it on its back and put a strip of fat 1mm width against the shoulder.
Push pin through touching the strip
replace pin with 0.5mm drawing pencil lead and adjust till it barely protrudes ( or if you prefer - till it sticks out a wee bit)
Viola! You have a cunning device which marks a fat 1mm from an edge
And yes, it works only when the curvature of the edge is very gentle.
And also yes, this concept can be developed to work with sharper curves, both concave and convex - but no need here.
So the edges of both garboard strakes are clearly marked with the overlap.
A cardinal principle of my build is that I don’t want glue anywhere but in a joint, because it would require clean-up. IMHO even a careful clean up of a wood glue is likely to afffect any subsequent finish, so I aim to avoid that by removing the possibility of glue being squooged out of joints.
My strakes will be fixed by heat-activated wood glue.
I believe it would be helpful to know Exactly where the glue is, so I mixed acrylic paint with neat PVA wood glue ( I seem to remember it was an umber)
Like this
i had masked to the pencil line with fine masking tape and applied two coats of the coloured glue
Reason for that type of colour - the future holds dark staining of some sort - and any accidents of a generally wood-like hue should be unobtrusive.
The less good news
On careful inspection, I found that a part of the glued strake is not stuck.
I’m not downcast, however because:
I activated the heat sensitive adhesive with a full size family steam iron I cannot be sure that these areas were ever stuck - this was nearly 18 months ago. I have since been given not one, but two neat little devices intended for applying delicate heat shrink film to model aircraft ( airplanes to American friends) photos to follow Please feel free to guide me in matters of technique or writing style.
I have written at length in this post to catch up with where the ship sits today, and because the PVA/ acrylic ( or watercolour) trick may help someone else.
andrew
-
 liteflight reacted to Louie da fly in Henry Grace a Dieu (Great Harry) by Louie da fly - FINISHED - Scale 1:200 - Repaired after over 50 yrs of neglect
It's been awhile since I posted - I've been doing a lot of fiddly stuff. First, the mizzen shrouds:
Threading the lanyards between the upper and lower deadeyes and fixing the assemblies to the channels -
Threading the shrouds through the bottom of the fighting top. (Yes, I know I should be threading through first and then adding the deadeyes at each end of the doubled shroud, but at this scale it wasn't realistic. However, it's more accurate than the way I did it on the fore and main.
Pulling tight, with tiny pegs as weights to maintain tension, and a dab of glue at the back to keep them in place.,
I seem to have forgotten to take photos of putting on the lower ratlines. But what the hey, you saw me doing it on the other masts. So here instead are the topmast and topgallant shrouds and ratlines going on -
I hadn't been happy with how the fore topmast and topgallant shrouds came out - I cut the ends off the ratlines while they were in place, and it didn't work too well (looked untidy). So I've since been using a different technique - I add the ratlines in place, remove the shroud/ratline assembly and trim off the ratlines with a scalpel blade on the cutting board, then glue the shroud/ratline assembly back on.
So here are the new shrouds and ratlines for the fore topmast and topgallant.
At this point the shrouds are removed and the ratlines trimmed.
And put back in place. The tiny pegs used again to tension the shrouds while the glue dries. Then the shrouds are trimmed to length.
All done!
Now for the bonaventure mizzen!
Steven
-
liteflight got a reaction from GrandpaPhil in Oseberg Viking Ship by liteflight - Billing Boats - 1/25 Scale - 9th Century
Thanks Steven, I have now! Thank you for that.
Warm thanks, too, to everyone who contacted me with messages of sympathy and support. Much appreciated and very valuable to me at a difficult time.
So, as I was saying.......
I have reviewed Oseberg as she is and I find good news and less good news.
I had commenced the clinker planking, having decided that “my” overlap would be a thick 1mm
Easy decision, but how do I do that precisely and repeatable?
+
the current state of play: both garboard strakes fitted with scarf joint between the two ( precut) parts of each strake
(just for reference, the clamps are merely parked where they are)
i have added a second full strake on one side, using a method which I have not seen before, so probably worth describing ( even if only to give you a larf)
I aimed to scribe my fat 1mm overlap on the garboard strake.
First attempt was using compasses, of which as a former Engineer I have a modest plethora. None of them were designed to work or be rigid with a 1 mm gap.
Most were designed to use a lead about 2.5 mm dia, sharpened to a chisel point by arcane methods known (only) to draughtspeople. However sharp the lead it gave a bad result!
I then remembered cutting thin styrene sheet using a hard pin pushed through a balsa sheet with a ply edge guide.
So postage stamp size bit if hard 1/8 balsa with a length of thin ply sticking down 2mm to slide along the edge of the plank to be marked.
Lay it on its back and put a strip of fat 1mm width against the shoulder.
Push pin through touching the strip
replace pin with 0.5mm drawing pencil lead and adjust till it barely protrudes ( or if you prefer - till it sticks out a wee bit)
Viola! You have a cunning device which marks a fat 1mm from an edge
And yes, it works only when the curvature of the edge is very gentle.
And also yes, this concept can be developed to work with sharper curves, both concave and convex - but no need here.
So the edges of both garboard strakes are clearly marked with the overlap.
A cardinal principle of my build is that I don’t want glue anywhere but in a joint, because it would require clean-up. IMHO even a careful clean up of a wood glue is likely to afffect any subsequent finish, so I aim to avoid that by removing the possibility of glue being squooged out of joints.
My strakes will be fixed by heat-activated wood glue.
I believe it would be helpful to know Exactly where the glue is, so I mixed acrylic paint with neat PVA wood glue ( I seem to remember it was an umber)
Like this
i had masked to the pencil line with fine masking tape and applied two coats of the coloured glue
Reason for that type of colour - the future holds dark staining of some sort - and any accidents of a generally wood-like hue should be unobtrusive.
The less good news
On careful inspection, I found that a part of the glued strake is not stuck.
I’m not downcast, however because:
I activated the heat sensitive adhesive with a full size family steam iron I cannot be sure that these areas were ever stuck - this was nearly 18 months ago. I have since been given not one, but two neat little devices intended for applying delicate heat shrink film to model aircraft ( airplanes to American friends) photos to follow Please feel free to guide me in matters of technique or writing style.
I have written at length in this post to catch up with where the ship sits today, and because the PVA/ acrylic ( or watercolour) trick may help someone else.
andrew
-

 liteflight got a reaction from Ryland Craze in Oseberg Viking Ship by liteflight - Billing Boats - 1/25 Scale - 9th Century
Hi, Eric and other shipbuilders
The ship has progressed quite a lot, but the build log not at all
My lovely Admiral, who bought me the ship as a Christmas present, died in my arms in November.
i have not felt able to post since then, indeed my brain has turned to mush.
Recall has become elusive, concentration brief and typing has become difficult as I am dyslexic and rely on a photographic memory for the images of words.
To me all words are images and I just type letters till it looks like the image.
Added to this is a huge workload of paperwork as Executor and the obvious loneliness without Bette
I WILL return to the blog and bring it up to date with the build.
just not now
-
liteflight got a reaction from thibaultron in Battle of Aegates artifacts
I went hunting for Illustrations of the rostra
And this is what I have so far
-
liteflight got a reaction from thibaultron in Battle of Aegates artifacts
My Admiral used to refer to this as his “ row of pink tents” voice
And we digress!
I am sure none of us has ever done that before
Having looked at the resource on rams, I went on to check out the rest of the site - interesting stuff and a great resource
andrew
-
 liteflight got a reaction from Canute in Battle of Aegates artifacts
I went hunting for Illustrations of the rostra
And this is what I have so far
-
liteflight got a reaction from Canute in Battle of Aegates artifacts
My Admiral used to refer to this as his “ row of pink tents” voice
And we digress!
I am sure none of us has ever done that before
Having looked at the resource on rams, I went on to check out the rest of the site - interesting stuff and a great resource
andrew
-
 liteflight got a reaction from druxey in Battle of Aegates artifacts
I went hunting for Illustrations of the rostra
And this is what I have so far
-
liteflight got a reaction from druxey in Battle of Aegates artifacts
My Admiral used to refer to this as his “ row of pink tents” voice
And we digress!
I am sure none of us has ever done that before
Having looked at the resource on rams, I went on to check out the rest of the site - interesting stuff and a great resource
andrew
-
 liteflight got a reaction from Louie da fly in Battle of Aegates artifacts
I went hunting for Illustrations of the rostra
And this is what I have so far
-
 liteflight got a reaction from MateuszPL in Oseberg Viking Ship by liteflight - Billing Boats - 1/25 Scale - 9th Century
Thanks Steven, I have now! Thank you for that.
Warm thanks, too, to everyone who contacted me with messages of sympathy and support. Much appreciated and very valuable to me at a difficult time.
So, as I was saying.......
I have reviewed Oseberg as she is and I find good news and less good news.
I had commenced the clinker planking, having decided that “my” overlap would be a thick 1mm
Easy decision, but how do I do that precisely and repeatable?
+
the current state of play: both garboard strakes fitted with scarf joint between the two ( precut) parts of each strake
(just for reference, the clamps are merely parked where they are)
i have added a second full strake on one side, using a method which I have not seen before, so probably worth describing ( even if only to give you a larf)
I aimed to scribe my fat 1mm overlap on the garboard strake.
First attempt was using compasses, of which as a former Engineer I have a modest plethora. None of them were designed to work or be rigid with a 1 mm gap.
Most were designed to use a lead about 2.5 mm dia, sharpened to a chisel point by arcane methods known (only) to draughtspeople. However sharp the lead it gave a bad result!
I then remembered cutting thin styrene sheet using a hard pin pushed through a balsa sheet with a ply edge guide.
So postage stamp size bit if hard 1/8 balsa with a length of thin ply sticking down 2mm to slide along the edge of the plank to be marked.
Lay it on its back and put a strip of fat 1mm width against the shoulder.
Push pin through touching the strip
replace pin with 0.5mm drawing pencil lead and adjust till it barely protrudes ( or if you prefer - till it sticks out a wee bit)
Viola! You have a cunning device which marks a fat 1mm from an edge
And yes, it works only when the curvature of the edge is very gentle.
And also yes, this concept can be developed to work with sharper curves, both concave and convex - but no need here.
So the edges of both garboard strakes are clearly marked with the overlap.
A cardinal principle of my build is that I don’t want glue anywhere but in a joint, because it would require clean-up. IMHO even a careful clean up of a wood glue is likely to afffect any subsequent finish, so I aim to avoid that by removing the possibility of glue being squooged out of joints.
My strakes will be fixed by heat-activated wood glue.
I believe it would be helpful to know Exactly where the glue is, so I mixed acrylic paint with neat PVA wood glue ( I seem to remember it was an umber)
Like this
i had masked to the pencil line with fine masking tape and applied two coats of the coloured glue
Reason for that type of colour - the future holds dark staining of some sort - and any accidents of a generally wood-like hue should be unobtrusive.
The less good news
On careful inspection, I found that a part of the glued strake is not stuck.
I’m not downcast, however because:
I activated the heat sensitive adhesive with a full size family steam iron I cannot be sure that these areas were ever stuck - this was nearly 18 months ago. I have since been given not one, but two neat little devices intended for applying delicate heat shrink film to model aircraft ( airplanes to American friends) photos to follow Please feel free to guide me in matters of technique or writing style.
I have written at length in this post to catch up with where the ship sits today, and because the PVA/ acrylic ( or watercolour) trick may help someone else.
andrew
-
 liteflight got a reaction from Cathead in Oseberg Viking Ship by liteflight - Billing Boats - 1/25 Scale - 9th Century
I am in the middle of a major tidy and sort of the entire house and garden, triggered by the death of a modelling buddy. He died leaving a VAST air-conditioned modelling shed packed with 40 years of many fields of modelling hardware. I and flying colleagues have sought to clear the shed, convert the contents to cash, and return the proceeds to his widow.
Among the relevant items are two electric covering irons, photos attached, which I expect to be a neater and more manageable heating tool. Both of these are sealing irons used for the smaller corners and seams of heat- shrink covering for model aircraft. Normally they would be temperature-controlled, but these may be the “economy” models. Easily rectified with a mains dimmer in the supply.
I included the household iron Originally used for the first strakes. Not easy to use among a line of clamps!
Now to make progress!
1) Test the new heat sources on scrap materials
2) Obtain dimmer if required - the household iron was set to “max” if I remember right so dimmer may not be required
3) clamp up and carefully reheat the strake which is not fully stuck down
4) Prepare next half- strake, scarf end where it joins existing strake
5) Mark, mask and apply coloured PVA ( carpenters) glue to the fat 1mm overlap
I think five steps is sufficient for now
andrew
-
 liteflight got a reaction from mtaylor in Battle of Aegates artifacts
I went hunting for Illustrations of the rostra
And this is what I have so far
-
liteflight got a reaction from mtaylor in Battle of Aegates artifacts
My Admiral used to refer to this as his “ row of pink tents” voice
And we digress!
I am sure none of us has ever done that before
Having looked at the resource on rams, I went on to check out the rest of the site - interesting stuff and a great resource
andrew
-
 liteflight got a reaction from bruce d in Battle of Aegates artifacts
I went hunting for Illustrations of the rostra
And this is what I have so far
-
liteflight got a reaction from bruce d in Battle of Aegates artifacts
My Admiral used to refer to this as his “ row of pink tents” voice
And we digress!
I am sure none of us has ever done that before
Having looked at the resource on rams, I went on to check out the rest of the site - interesting stuff and a great resource
andrew
-
liteflight got a reaction from thibaultron in Battle of Aegates artifacts
Thanks, Steven
it was the Atlit ram that I remember being found and discussed
The list is interesting and the thumbnail pictures take you to high-quality illustrations
When people addressed the crowds in the forum of Rome, they did so from the “rostra”. I was always taught that these were the bows of warships captured by the Romans ( presumably complete with ram).
And I assumed that they were the whole bow of the ship, with enough deck to orate from.
Does anyone know of any illustrations of a rostrum in the forum?
My main source is the film “ Carry on, Cleo” and I would hardly claim it to be authoritative ( although it did ascribe to the dying Julius Caesar the memorable line “ Imfamy! Infamy! They’ve all got it infamy”)
sorry
andrew
-
liteflight got a reaction from bruce d in Battle of Aegates artifacts
Thanks, Steven
it was the Atlit ram that I remember being found and discussed
The list is interesting and the thumbnail pictures take you to high-quality illustrations
When people addressed the crowds in the forum of Rome, they did so from the “rostra”. I was always taught that these were the bows of warships captured by the Romans ( presumably complete with ram).
And I assumed that they were the whole bow of the ship, with enough deck to orate from.
Does anyone know of any illustrations of a rostrum in the forum?
My main source is the film “ Carry on, Cleo” and I would hardly claim it to be authoritative ( although it did ascribe to the dying Julius Caesar the memorable line “ Imfamy! Infamy! They’ve all got it infamy”)
sorry
andrew
-
liteflight got a reaction from druxey in Cargo ship ( possibly a cog) found in Estonia
Came across this while scanning the general news
https://www.livescience.com/medieval-cargo-ship-estonia
First picture in the article seems to me to show thwartship beams passing through the sides, and generally the parts pictured seem to be complete and intact. Interesting to see how the investigation proceeds
andrew
-
liteflight got a reaction from mtaylor in Battle of Aegates artifacts
Thanks, Steven
it was the Atlit ram that I remember being found and discussed
The list is interesting and the thumbnail pictures take you to high-quality illustrations
When people addressed the crowds in the forum of Rome, they did so from the “rostra”. I was always taught that these were the bows of warships captured by the Romans ( presumably complete with ram).
And I assumed that they were the whole bow of the ship, with enough deck to orate from.
Does anyone know of any illustrations of a rostrum in the forum?
My main source is the film “ Carry on, Cleo” and I would hardly claim it to be authoritative ( although it did ascribe to the dying Julius Caesar the memorable line “ Imfamy! Infamy! They’ve all got it infamy”)
sorry
andrew
-
liteflight got a reaction from Canute in Cargo ship ( possibly a cog) found in Estonia
Came across this while scanning the general news
https://www.livescience.com/medieval-cargo-ship-estonia
First picture in the article seems to me to show thwartship beams passing through the sides, and generally the parts pictured seem to be complete and intact. Interesting to see how the investigation proceeds
andrew
-
liteflight got a reaction from Canute in Battle of Aegates artifacts
Thanks, Steven
it was the Atlit ram that I remember being found and discussed
The list is interesting and the thumbnail pictures take you to high-quality illustrations
When people addressed the crowds in the forum of Rome, they did so from the “rostra”. I was always taught that these were the bows of warships captured by the Romans ( presumably complete with ram).
And I assumed that they were the whole bow of the ship, with enough deck to orate from.
Does anyone know of any illustrations of a rostrum in the forum?
My main source is the film “ Carry on, Cleo” and I would hardly claim it to be authoritative ( although it did ascribe to the dying Julius Caesar the memorable line “ Imfamy! Infamy! They’ve all got it infamy”)
sorry
andrew