
dsmith65
-
Posts
36 -
Joined
-
Last visited
Content Type
Profiles
Forums
Gallery
Events
Everything posted by dsmith65
-
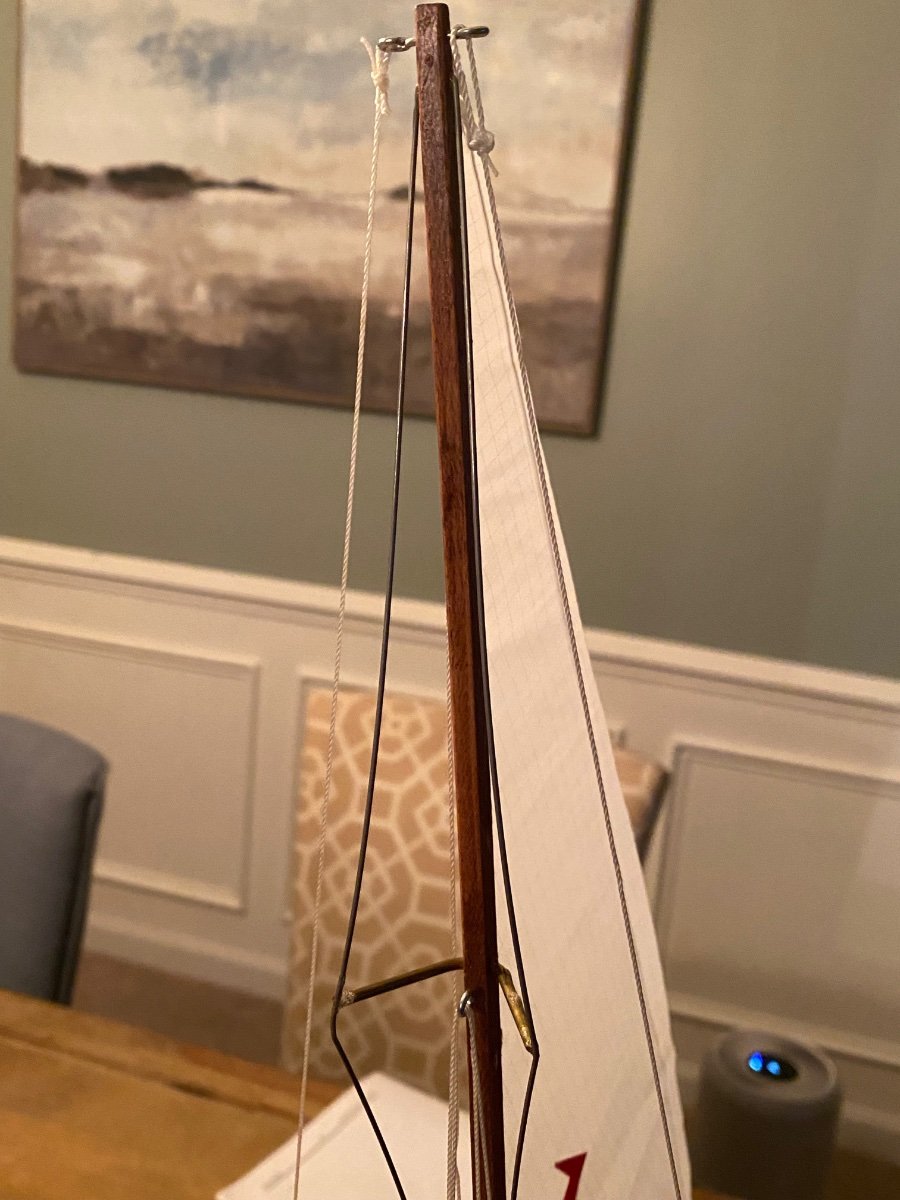
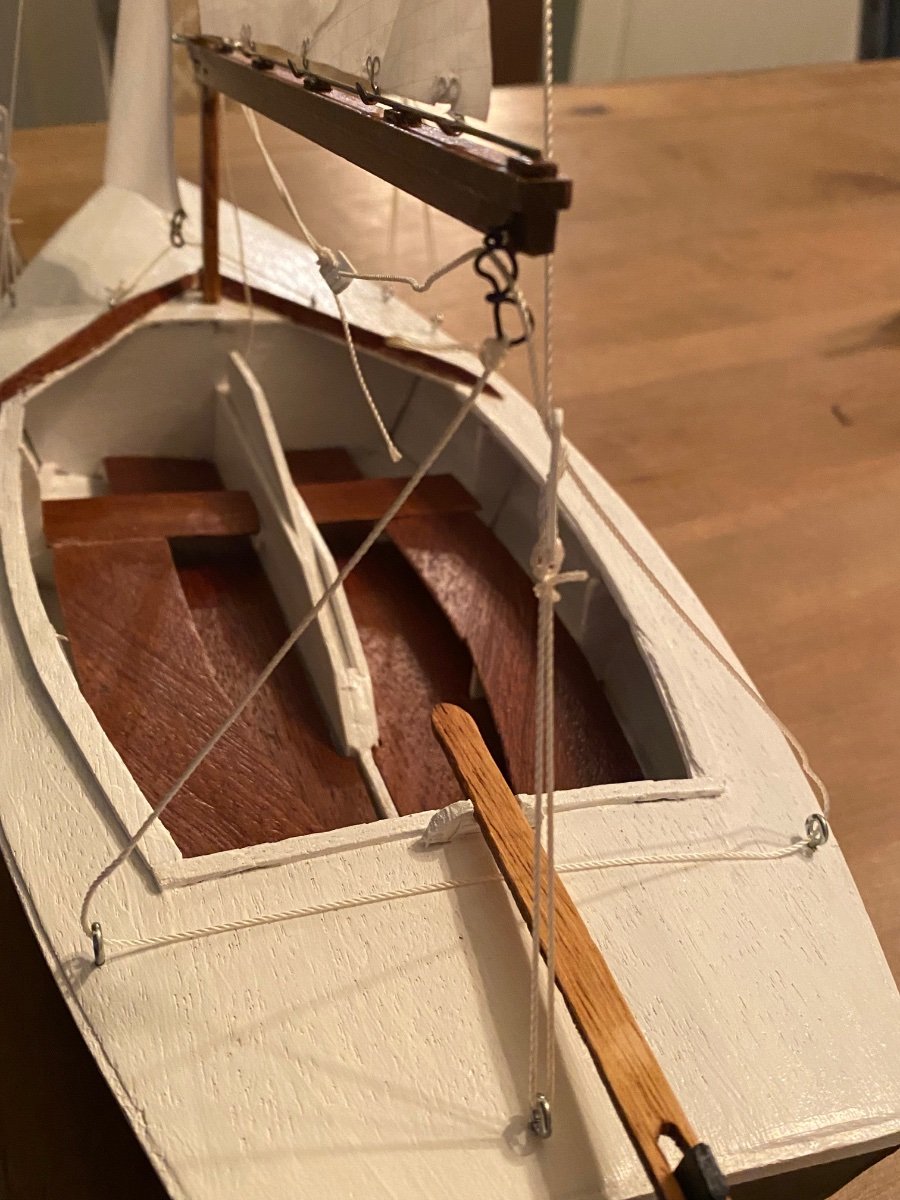
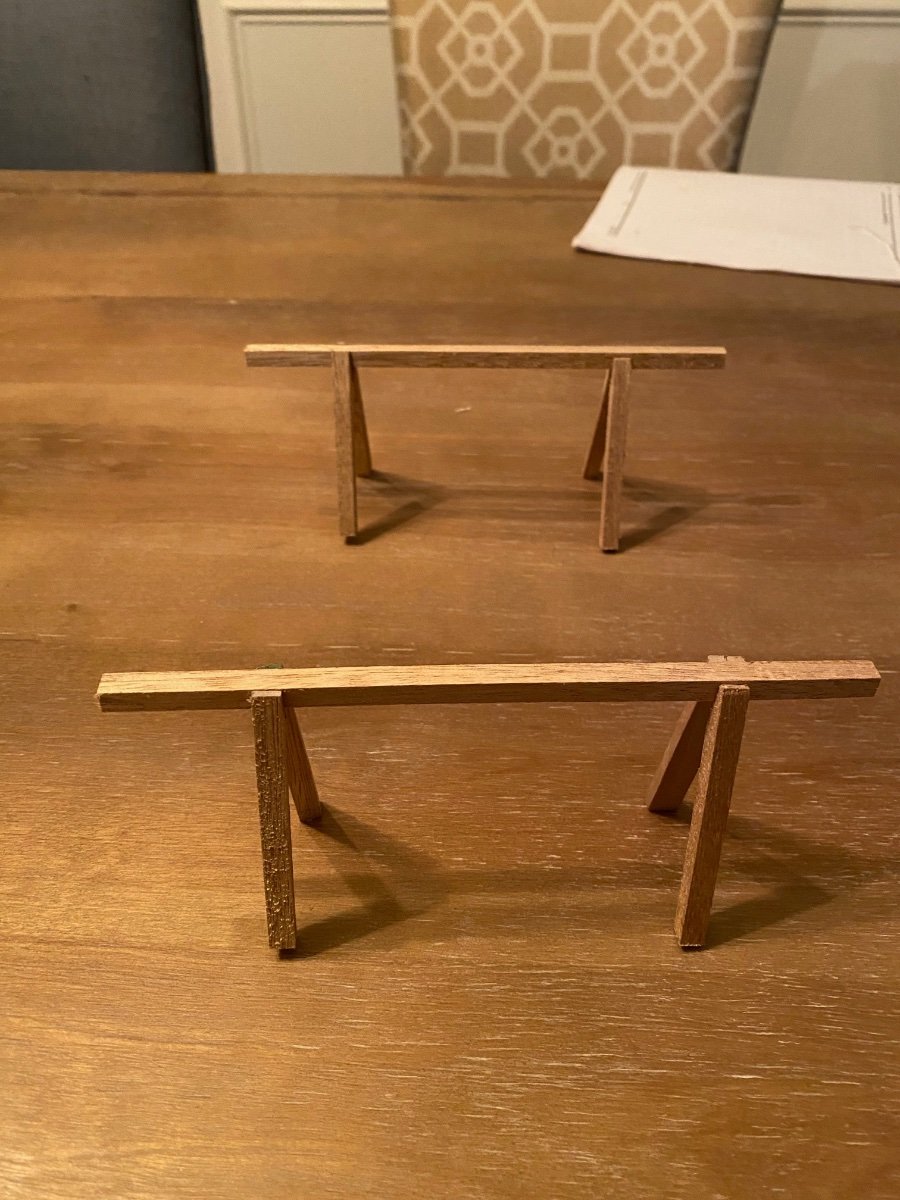
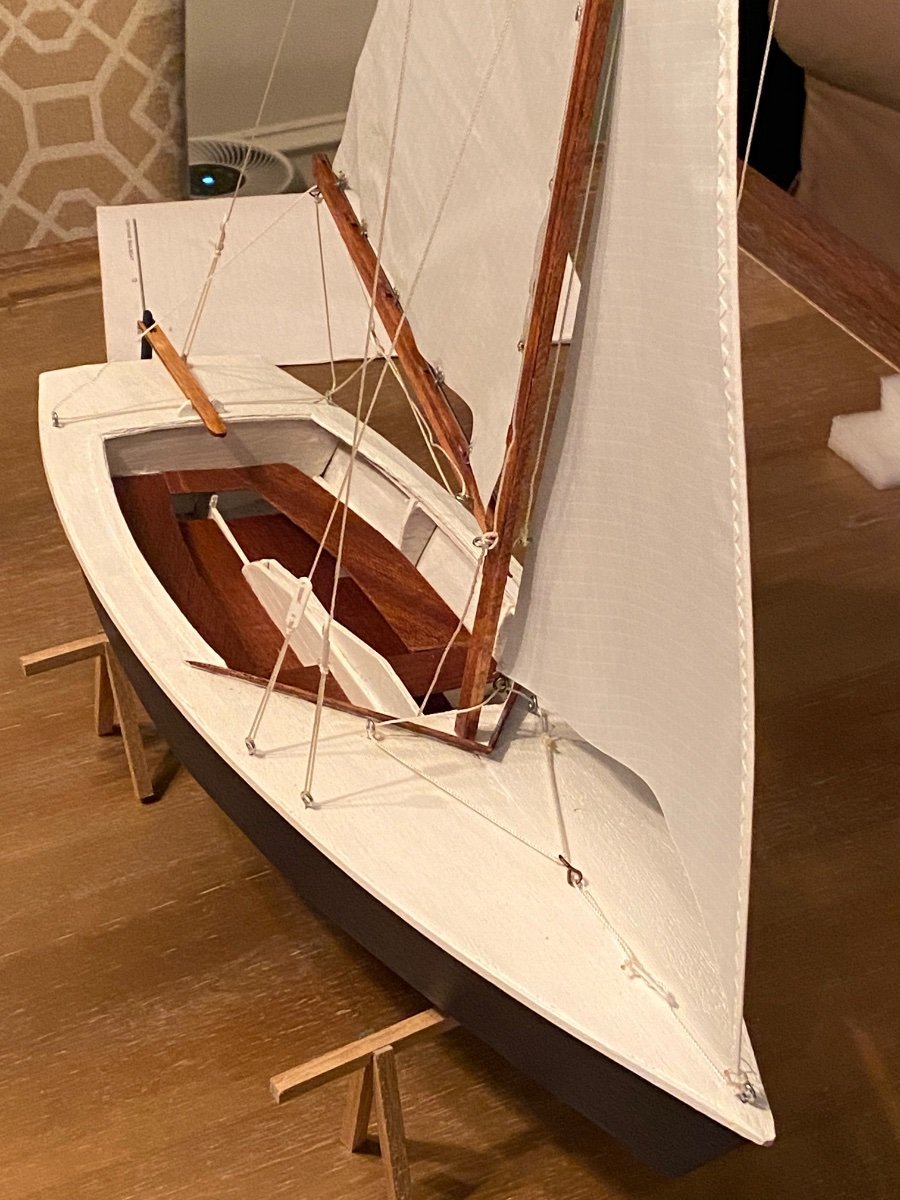
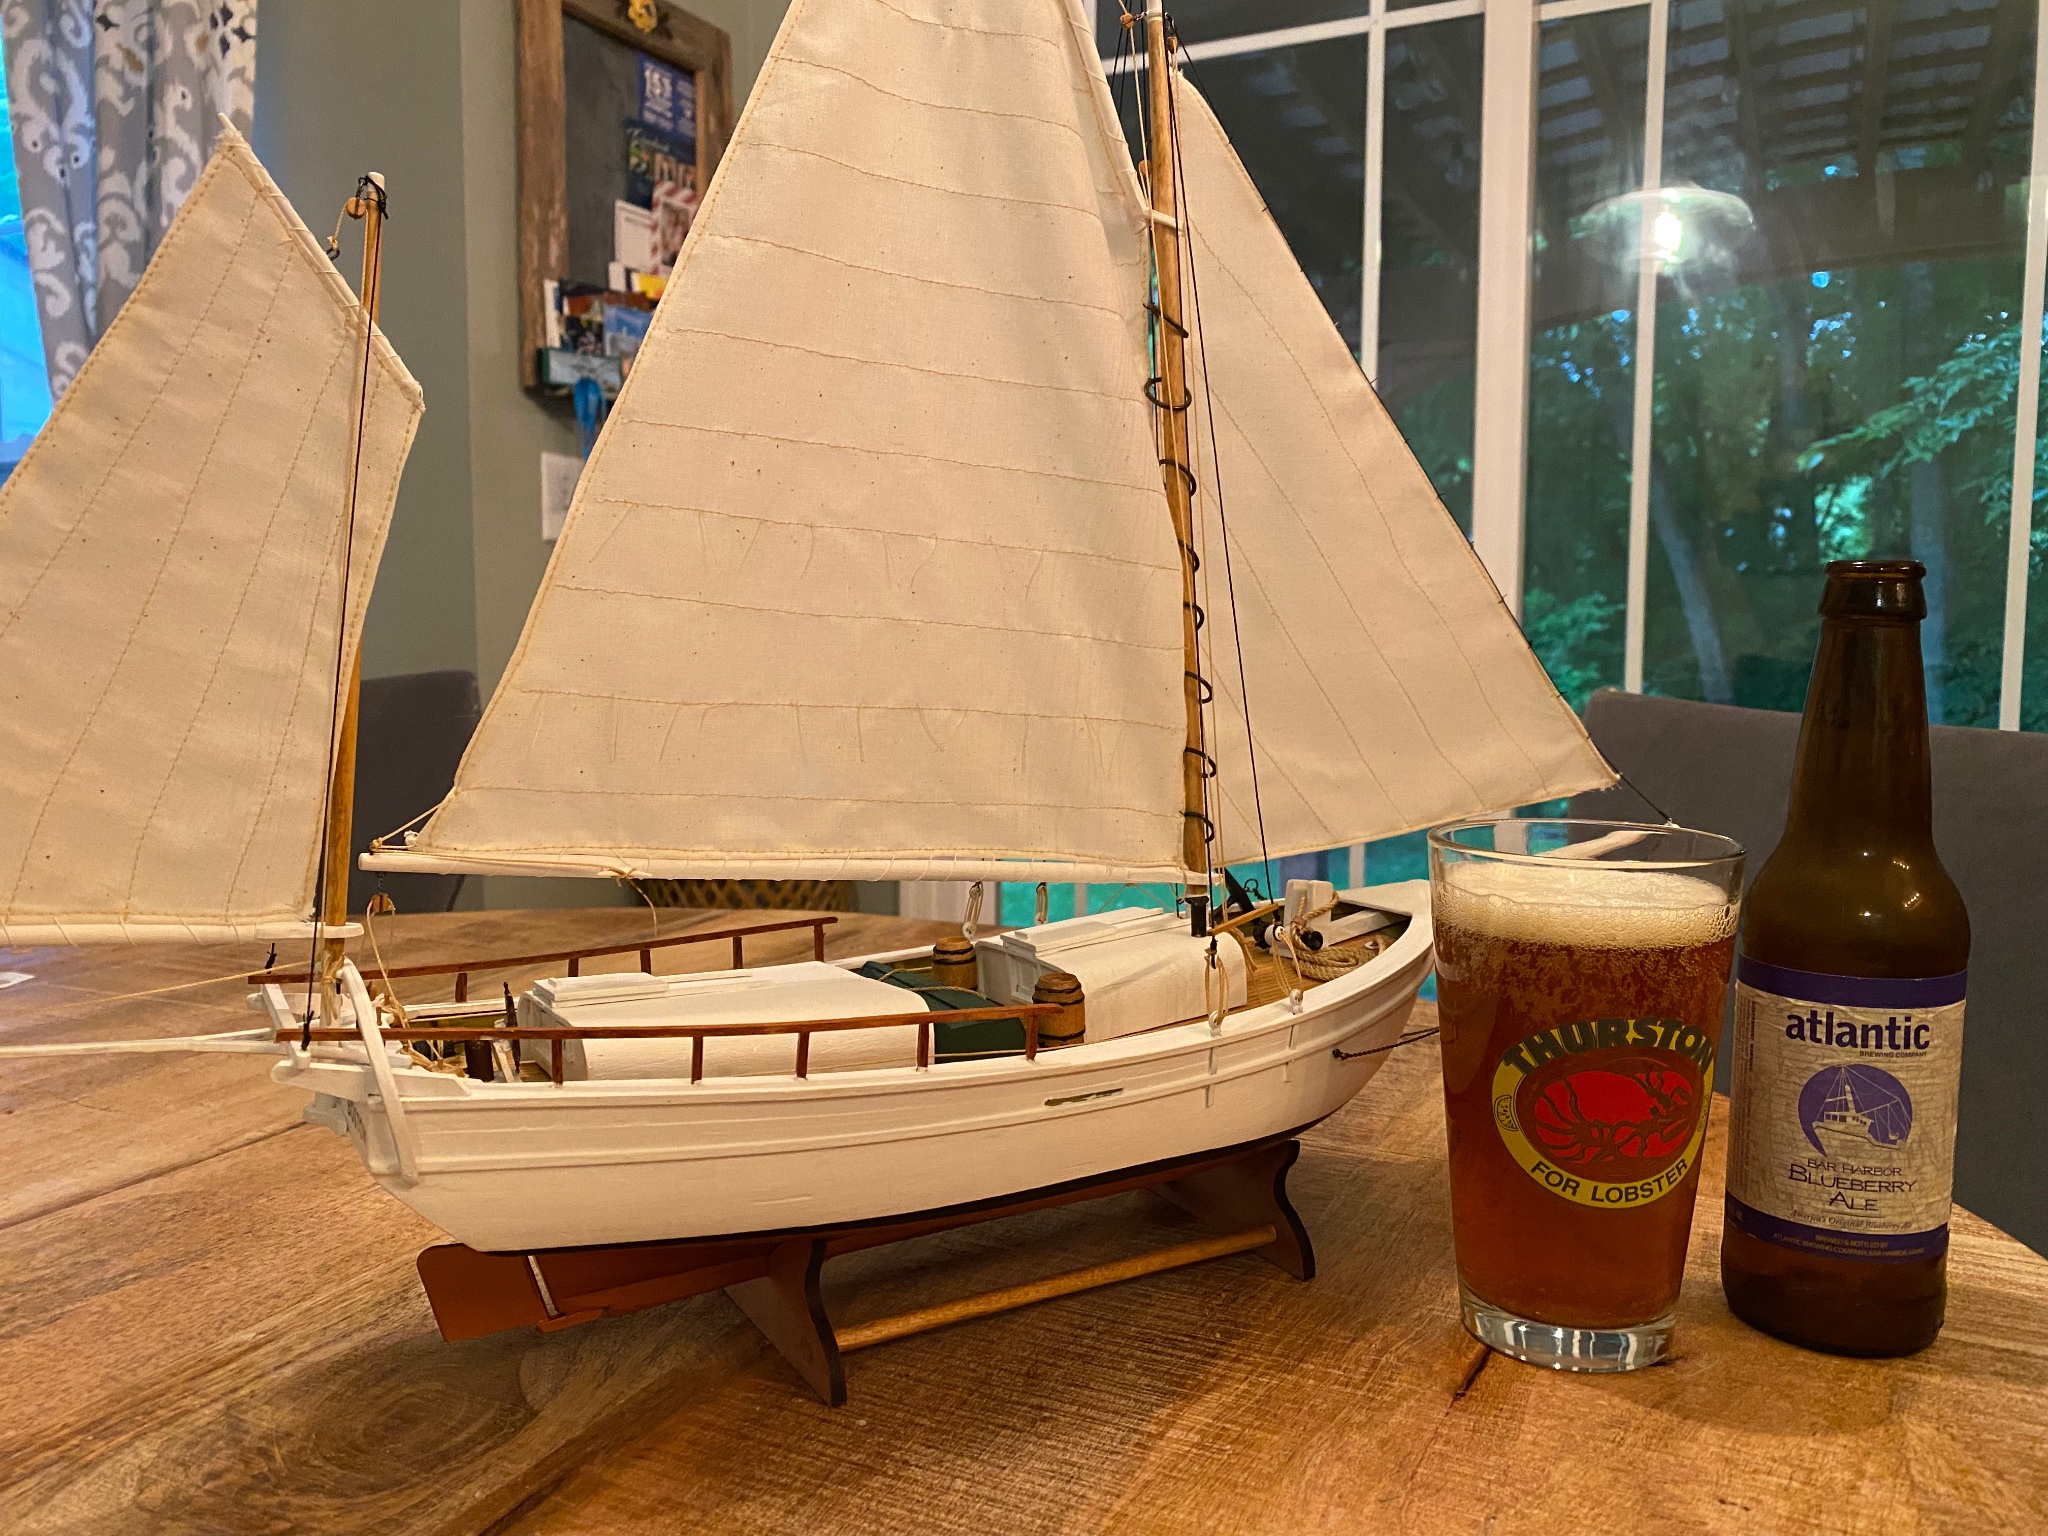
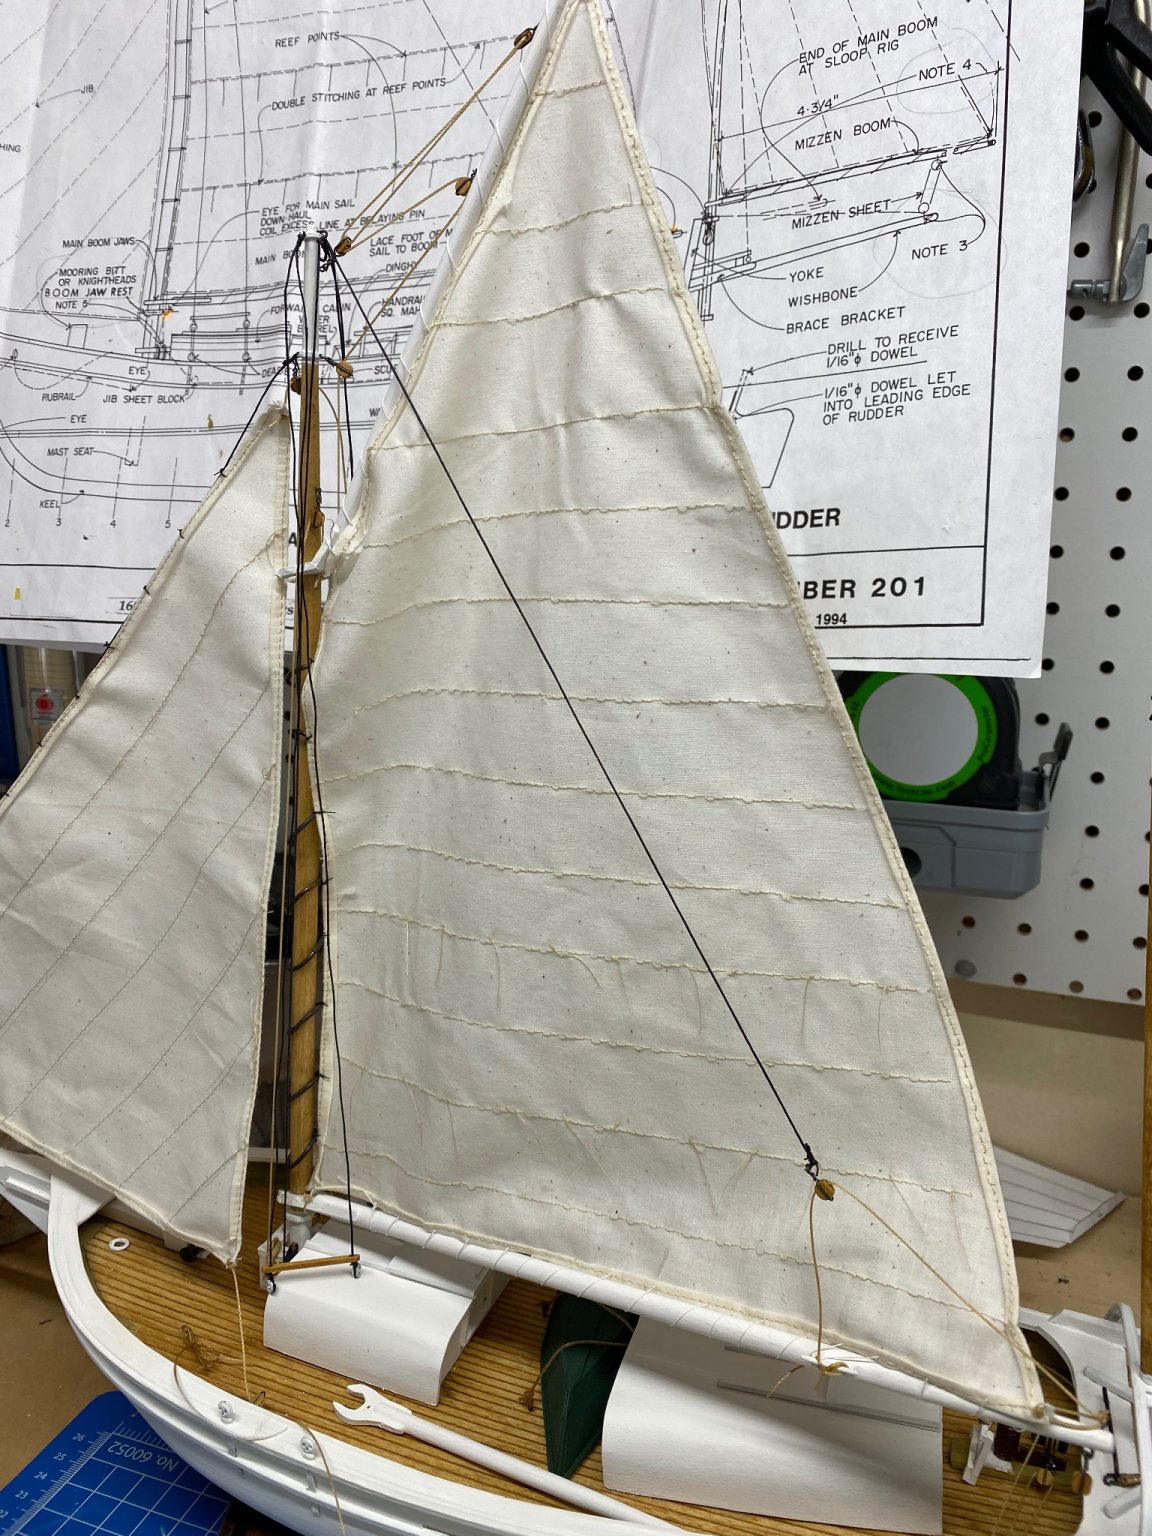
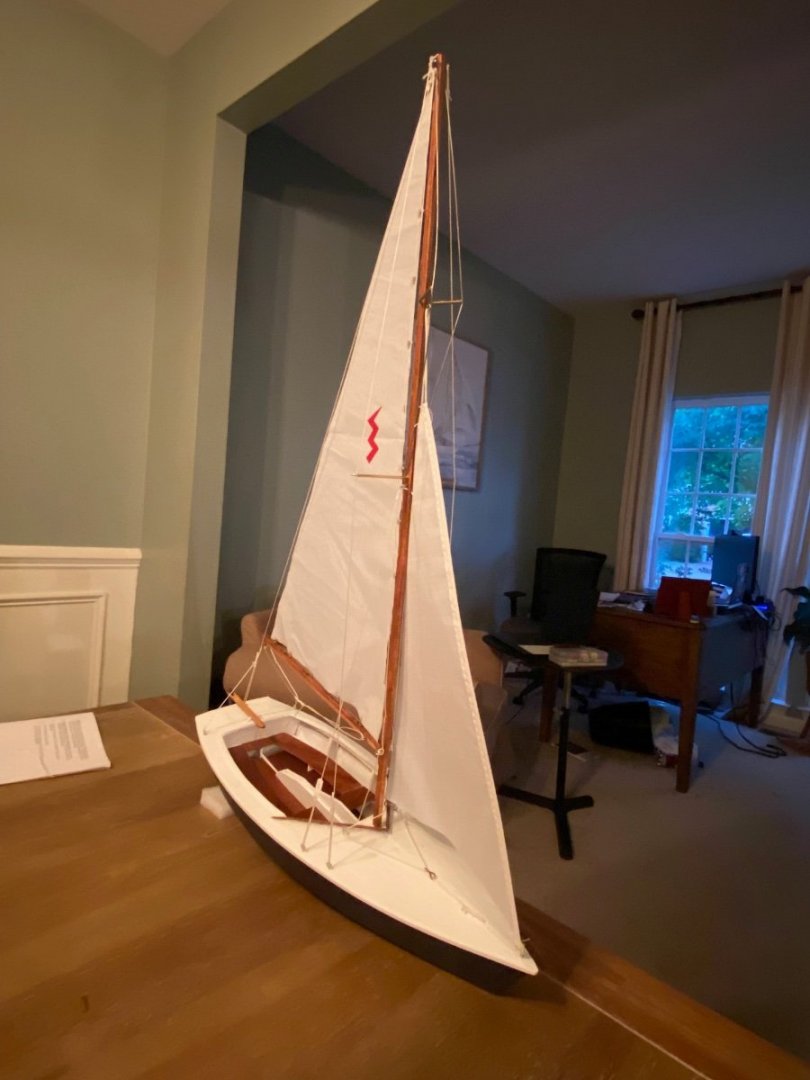
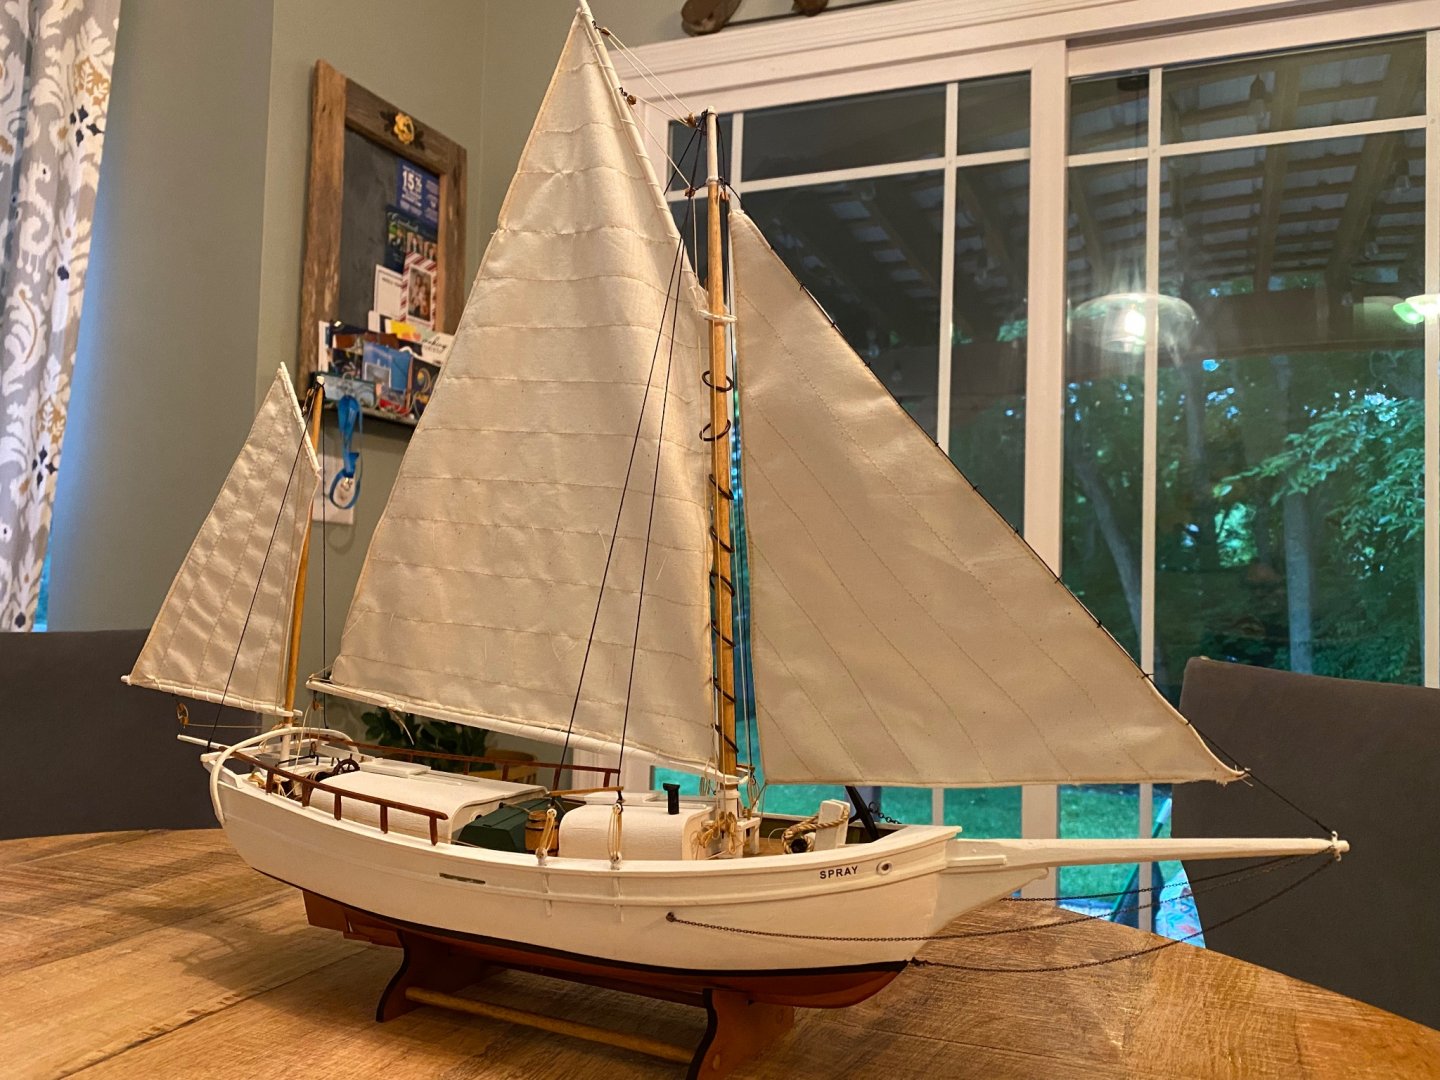
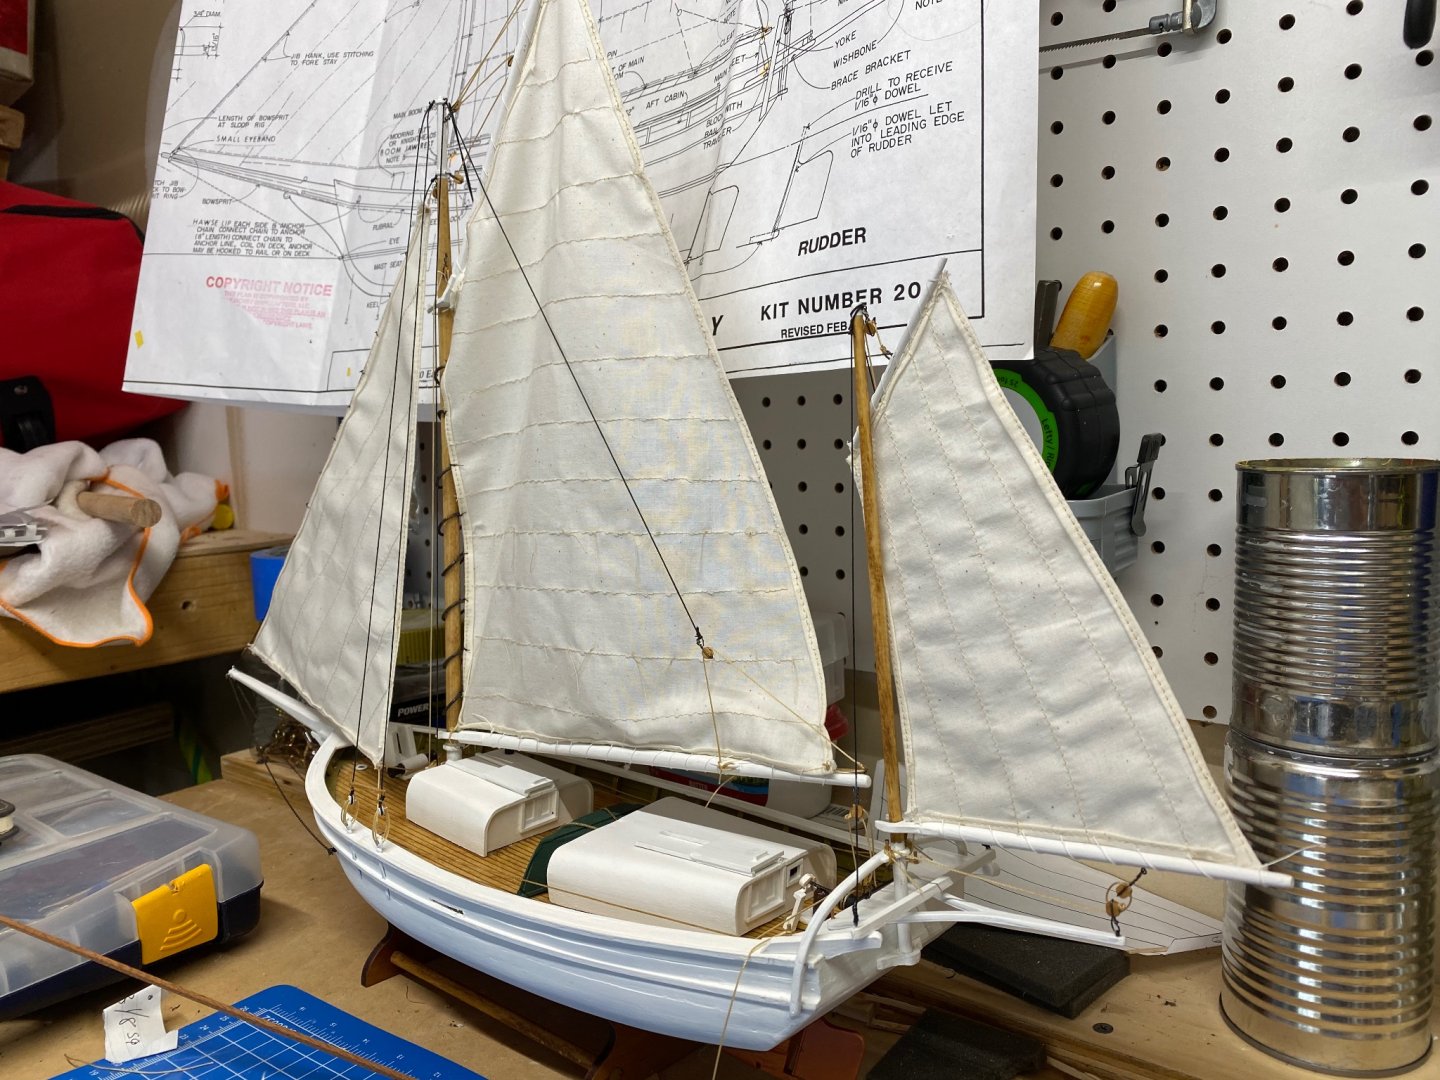
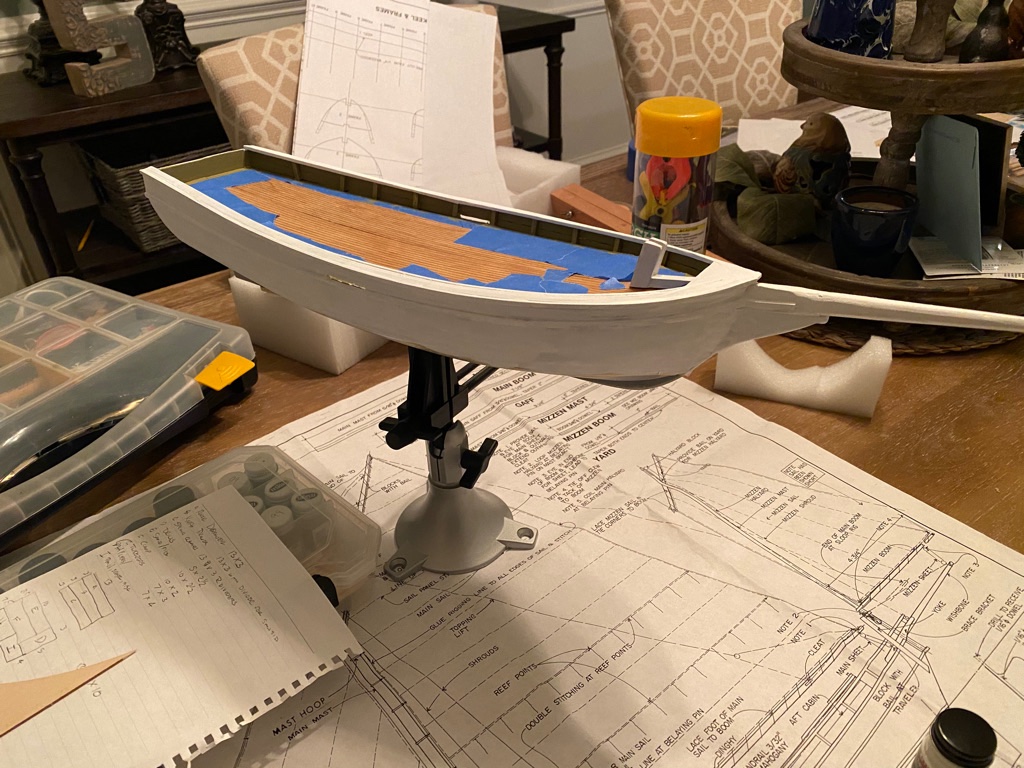
Well, another 3 months have gone by, grand kids and kids visiting for an extended period, and new job got in the way of model building, but it is finally done save for the lettering for the name. I tried some of those printer decals, but I must have the wrong ink, as it washed right off. I got the mast and boom built and was quite proud of how the jack stays turned out, and surprised how well CA worked on them. As you can see I also decided to try and size the sheets to the hardware rather than tie knots, it look marginally better. The sail fastens to the mast and boom with dress hooks and after I got them on the sail I discovered some had CA in them. None of them were open enough to go over the wire on the mast, so I little bit of leveraging with a palate knife and a screw driver opened them enough. Rigging was fairly straight forward compared to what I've done in the past. The instructions called for tying the main sheet to the boom then running it through the eyelets and and the hardware on the boom, but in the life size boat there is hardware at the base of the boom, that you tie on to, and then run back through, so I made my own. It came out all right. The boat doesn't come with a stand, and I thought about making a diorama or it beached on a lake shore, and someday I may do that. But for now I made some saw horses for it to be stored on. Here are a few final shots, this is a large boat, and overall I think it is the tallest one I've built, finding a home for it other than the dining room table is going to be a challenge. If you've made it this far, thanks for following along. I have Blue Jacket's Lobster Boat I bought last summer to do next, but probably not until the fall. I'll be up their way in August, so I plan on stoping in for my annual fix, and find something interesting to buy.


-
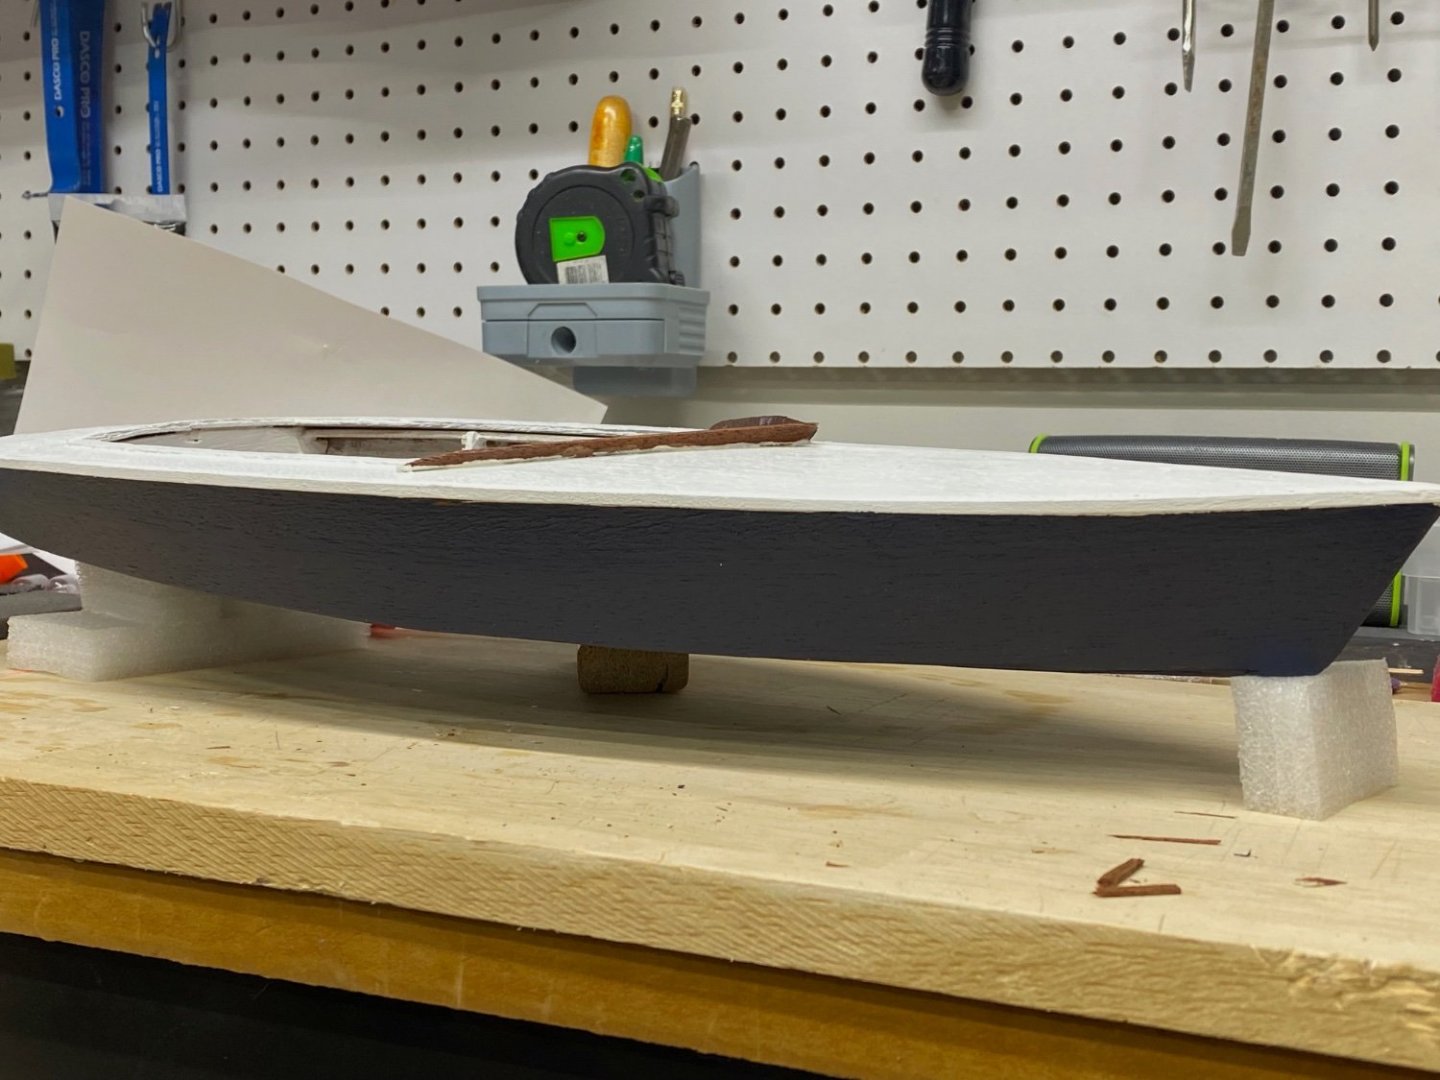
I haven't had much time to work on the boat, so I do a little when I can. First order of business was patching the holes and priming the boat for paint. This was then followed by making a new rub rail for the transom, using the spare one as a guide. I soaked the wood and used an iron to heat it and bend it into place. Also had to make a new skeg, because I kept breaking off the original when handling the boat. While all the seats were out of the cockpit I gave them 3 coats of varnish with a light sanding in-between coats. After the rub rail was installed I painted the deck and rub rails white, and the hull blue. Before reinstalling the seats, I added little tabs underneath where they but up against each other to glue them. When I built them the first time I tried to glue the joints of this super thin mahogany, so I have CA glue residue everywhere. A couple shots of the painted hull, and the new transom Next I will move on to the tiller rudder assembly and then the start of the spars. I am trying to decide on a color for the rudder, and if I want to maybe add a boot stripe, which I have seen on some Lightnings. I'm pretty pleased with how things are going at this point, it is looking so much better. The one thing I'd do different is seal the mahogany first with a wood sealer. The primer didn't get that even, and the white paint isn't as "smooth" as I'd like after 3 coats.


-
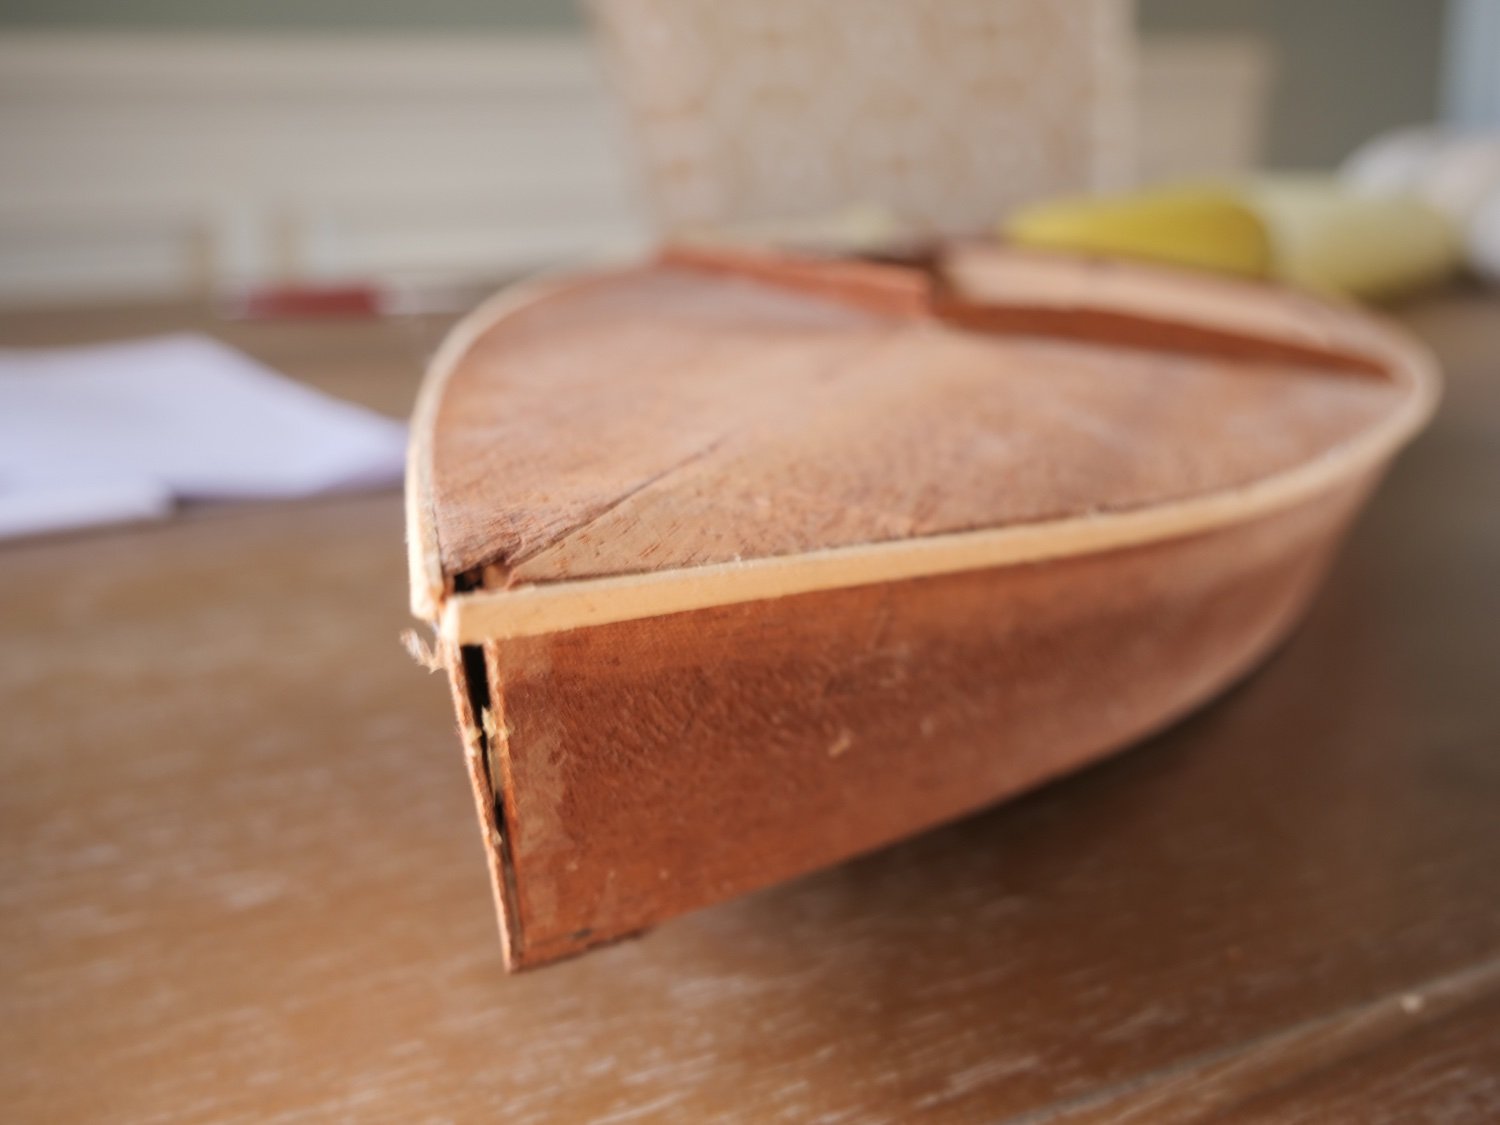
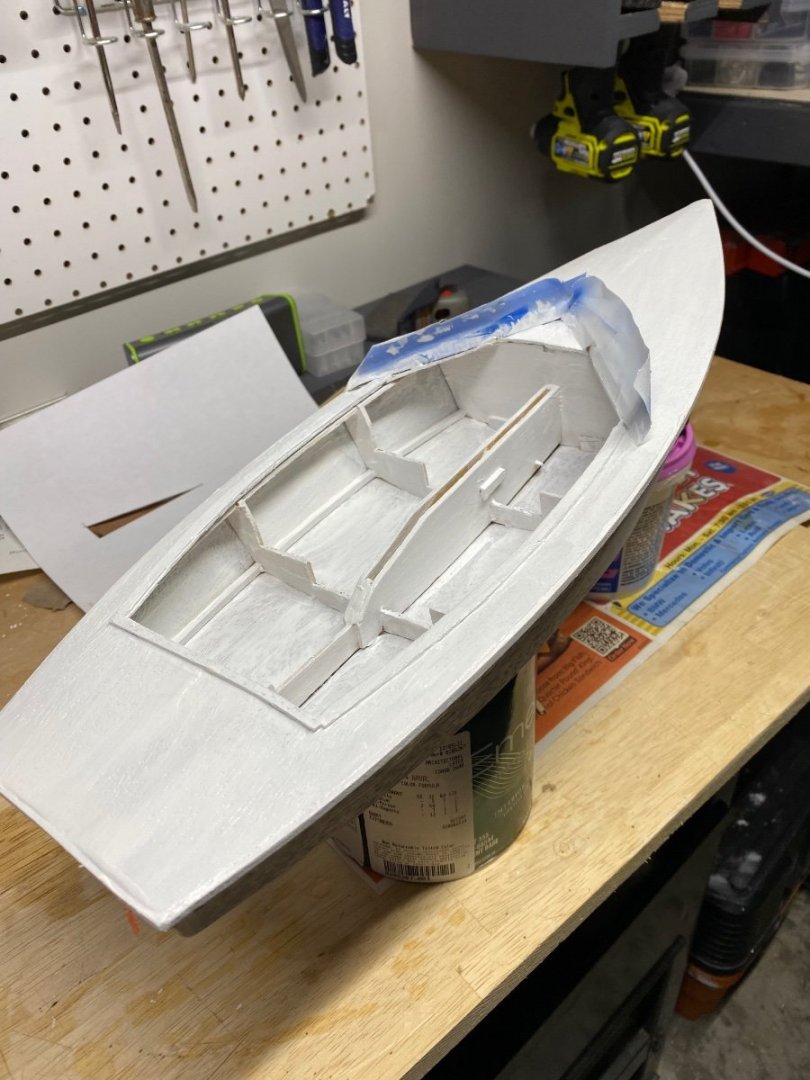
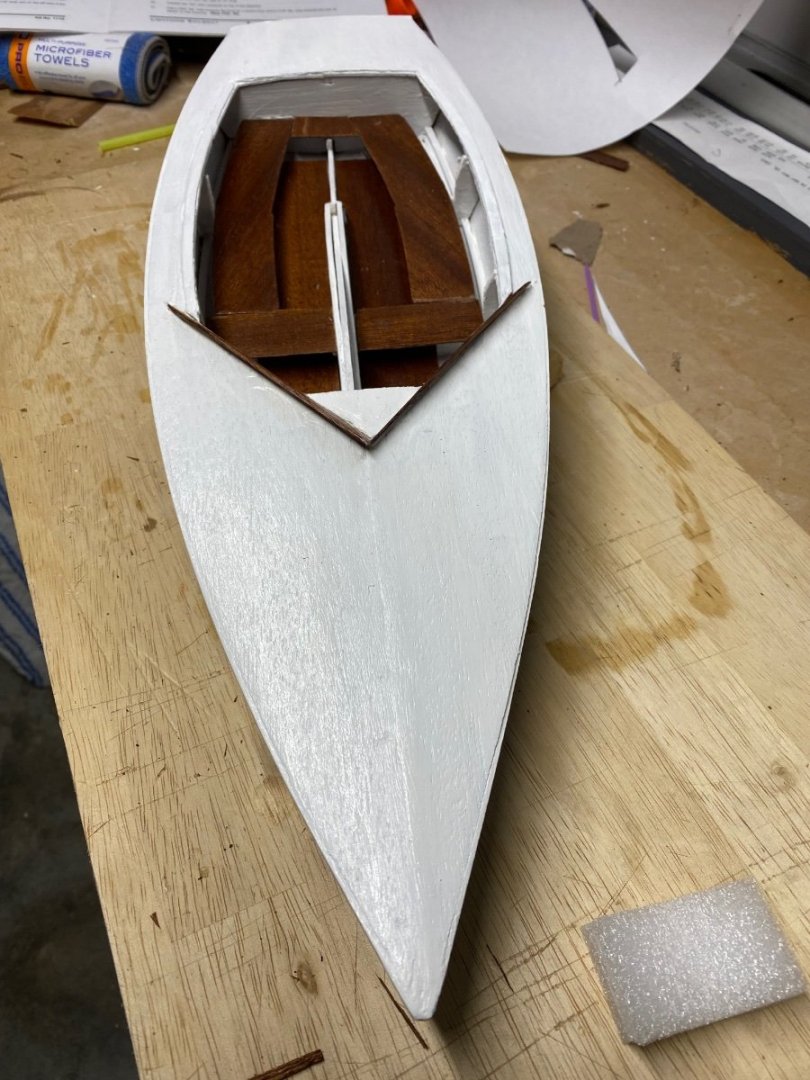
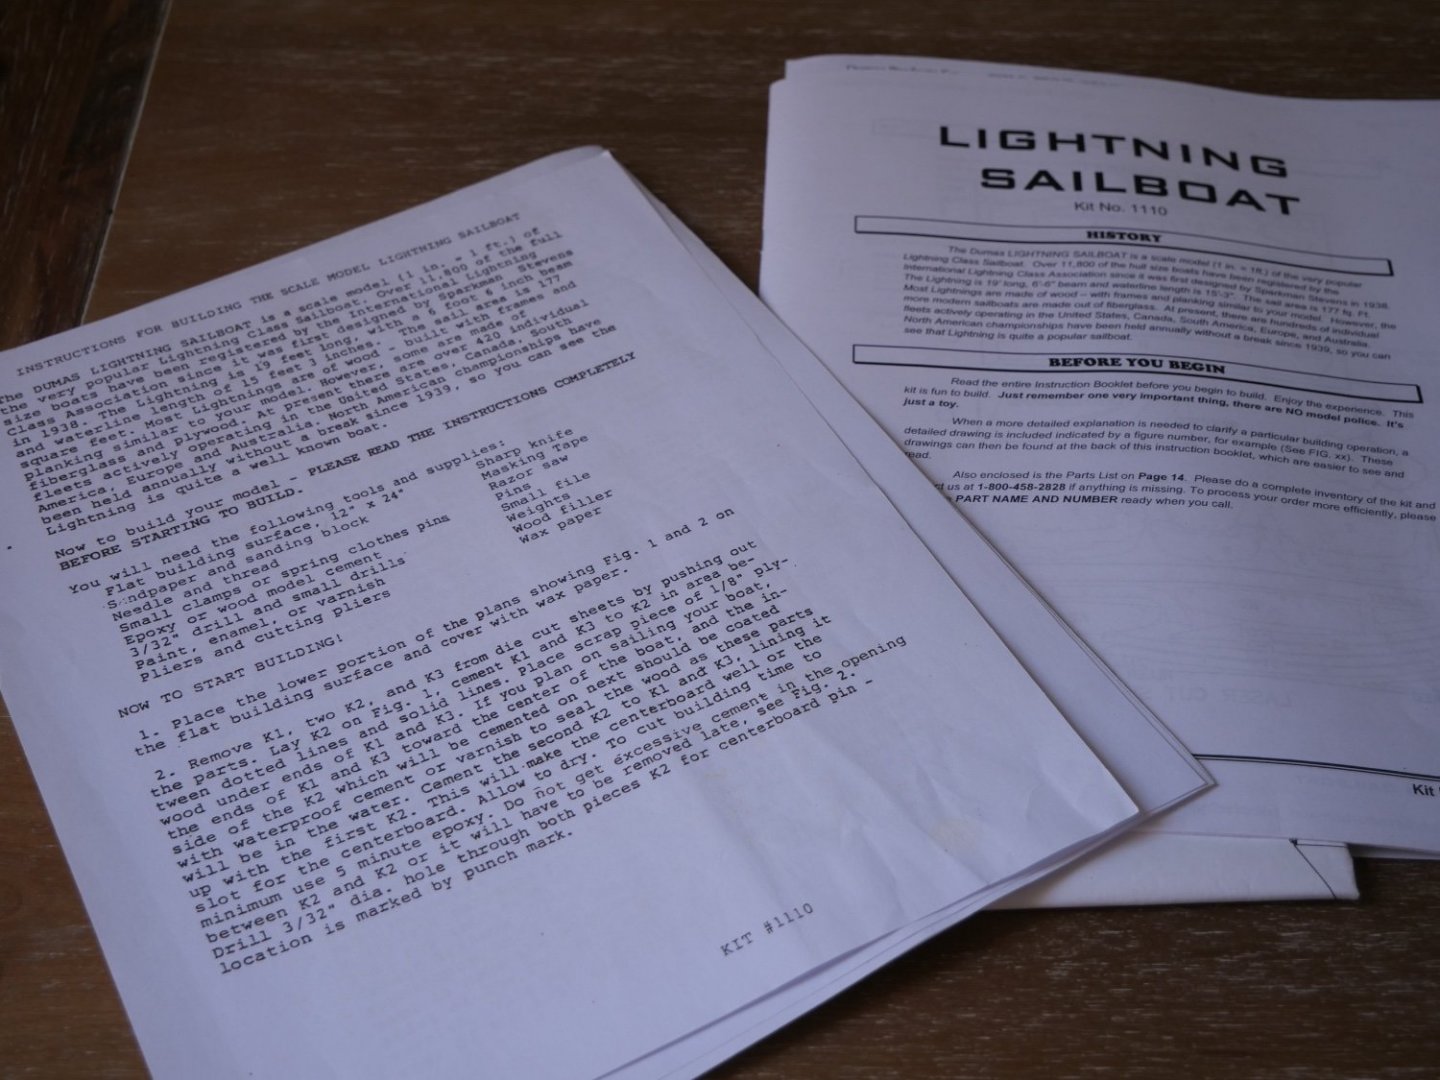
I first started the build at least 16 years ago. It was my first attempt at building a wooden model, and I struggled. When I accidentally cut the mast in half, thinking I was trimming down the boom, the model went on the shelf. Seven years ago, I went on line and reordered the plans and instructions for it, in case I decided to try and finish it. Then while on vacation in Maine I discovered Bluejacket, and have now built 3 boats of increasing difficulty, and have also watched a ton of YouTube. Now I feel like I have the skills to repair what I sptarted and finish the boat. I reached out to Dumas and was able to order a replacement mast, their customer service was first rate. I recently stepped down from being involved in a Scout Troop, and now have some extra time to work on this boat. I originally chose the Lightning all those years ago, because when I was in college I worked at a summer camp for a summer on the water front. We had a Lightning I'd sail on my days off. My son latter went to that camp, and so we are going to name the boat after his favorite cabin "BEAR". I haven't figure out yet how I'm going to display it, but I have a few ideas. Here are some pictures of where things stand. First tasks are to fill all the holes and gaps, redo the rub rail around the transom. Re glue loose boards, especially in the cockpit, and get the hull painted. I found the original instructions I thought were lost. As you can see it was so long ago they were typed up, the new nice booklet is underneath them. There are gaps in the joins, and holes near the bow. The foredeck also isn't glued down in spots. More gaps to fix. Although it is hard to see, I could never get the rub rail to match the curve of the transom. I didn't know you could steam or heat wood to bend it back then. I'm going to remove the rub rail and steam a new one and put it in place. I'm not sure how long this build is going to take or how often I'll post, but I enjoy doing these build logs, even if it is for my own satisfaction.

-
Very nice Josh, looking forward to following your next build.
-
That base looks sharp.
-
Thanks Nic, we'll see you in August. Don
-
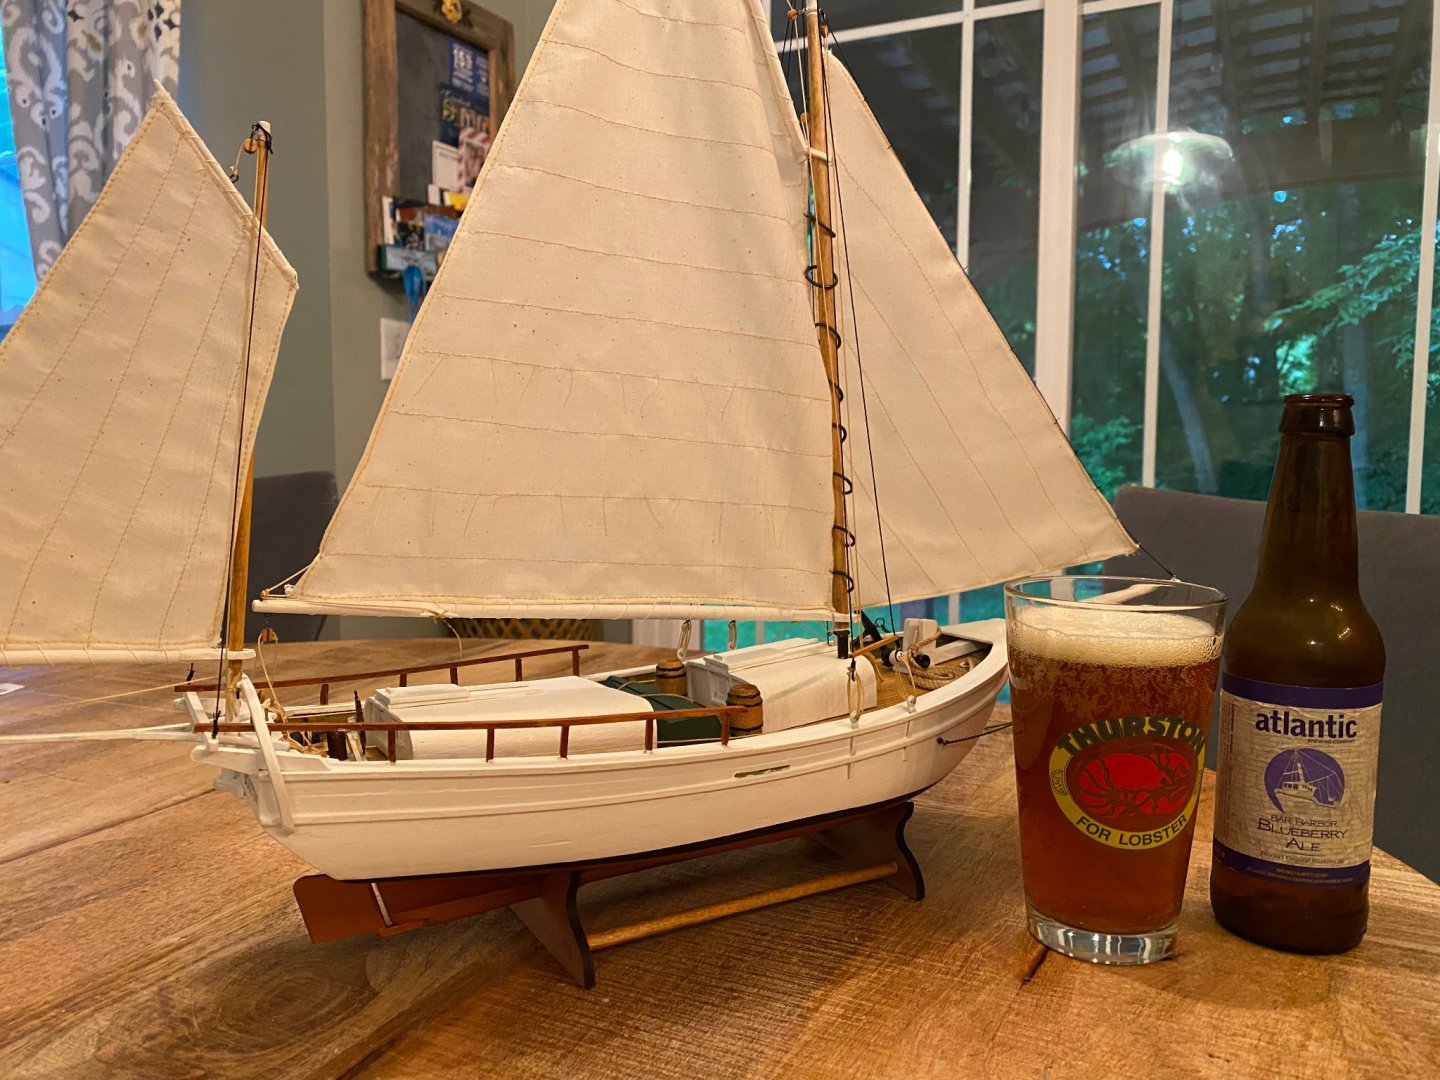
Finished at last. Using a method I copied from Ken_2, I made the stanchions but cutting them off and placing them in my drill, holding a file underneath and treating it like a lathe. Got the stanchions on and the rail installed. Then I stained and coated them with varnish. Of course I managed to get stain on the cabin and rail, but it was easy enough to paint over what didn't wipe off. Then the anchor and the mooring line were put in place, along with the decals. Here she is finished. Finally since Bluejacket is a Maine company, I've been saving this celebratory beer from Bar Harbor for now, and am enjoying it in a glass from my favorite place to eat Lobster in Maine. This has been a fun and challenging build. I've learned lots, like new curse words, CA glue goes bad, new modeling techniques, always use sharp blades, and it has built my confidence when it comes to this hobby. This is a great kit, and the Nic and his team at Bluejacket have done a great job with it, and helping me when I was stuck. I've also taken inspiration from Tomculb, Josh Williamson, and Ken_2 who have been building at the same time. I am now confident enough in my skills to attempt to finish this Laser from Dumas, that I started over 15 years ago. I got discouraged, by my crappy skills at making things come together, and when I sawed the mast in half thinking it was the boom, I gave up. I'm not sure if I'll document this boat or not. Thanks for following along, now to figure out how to change my title to say Finished.


- 23 replies
-
- 2
-

-
- Spray
- BlueJacket Shipcrafters
- (and 1 more)
-
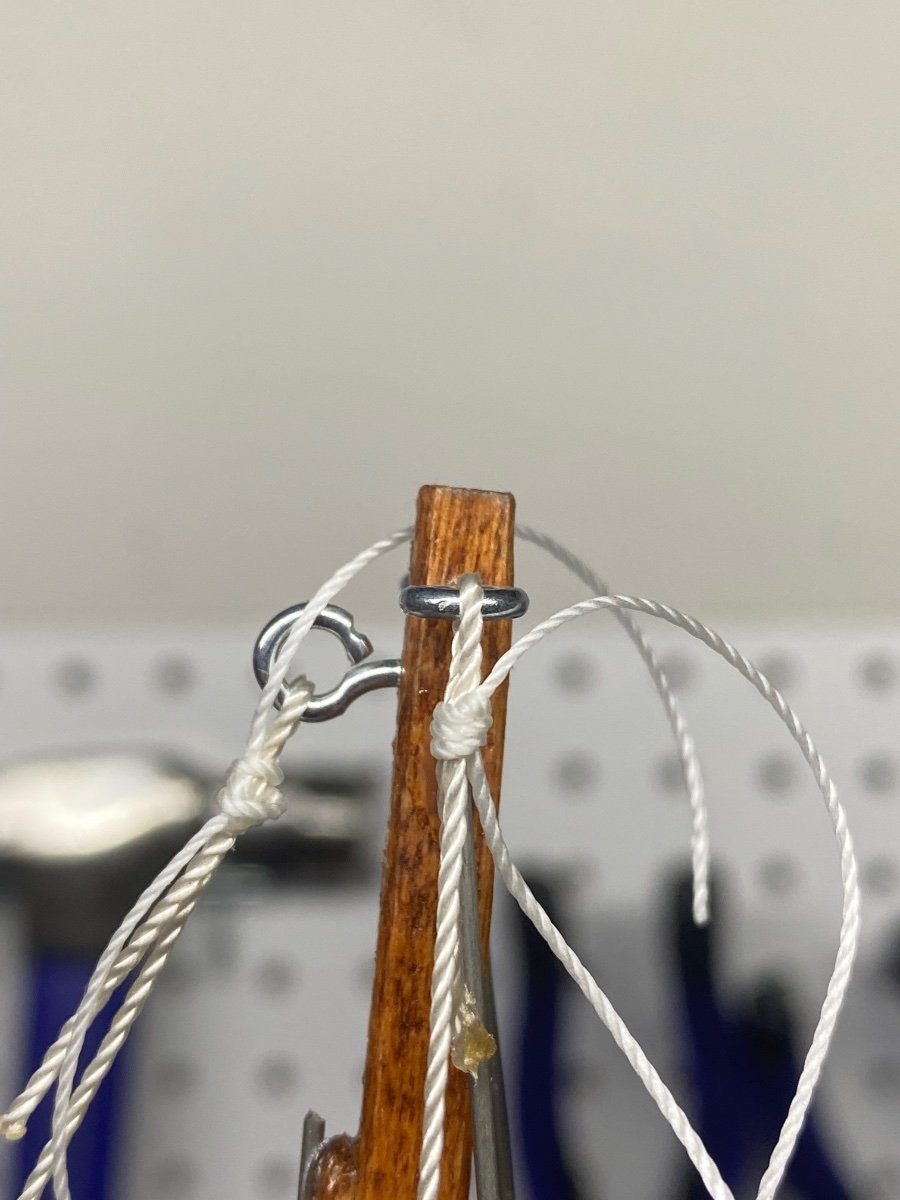
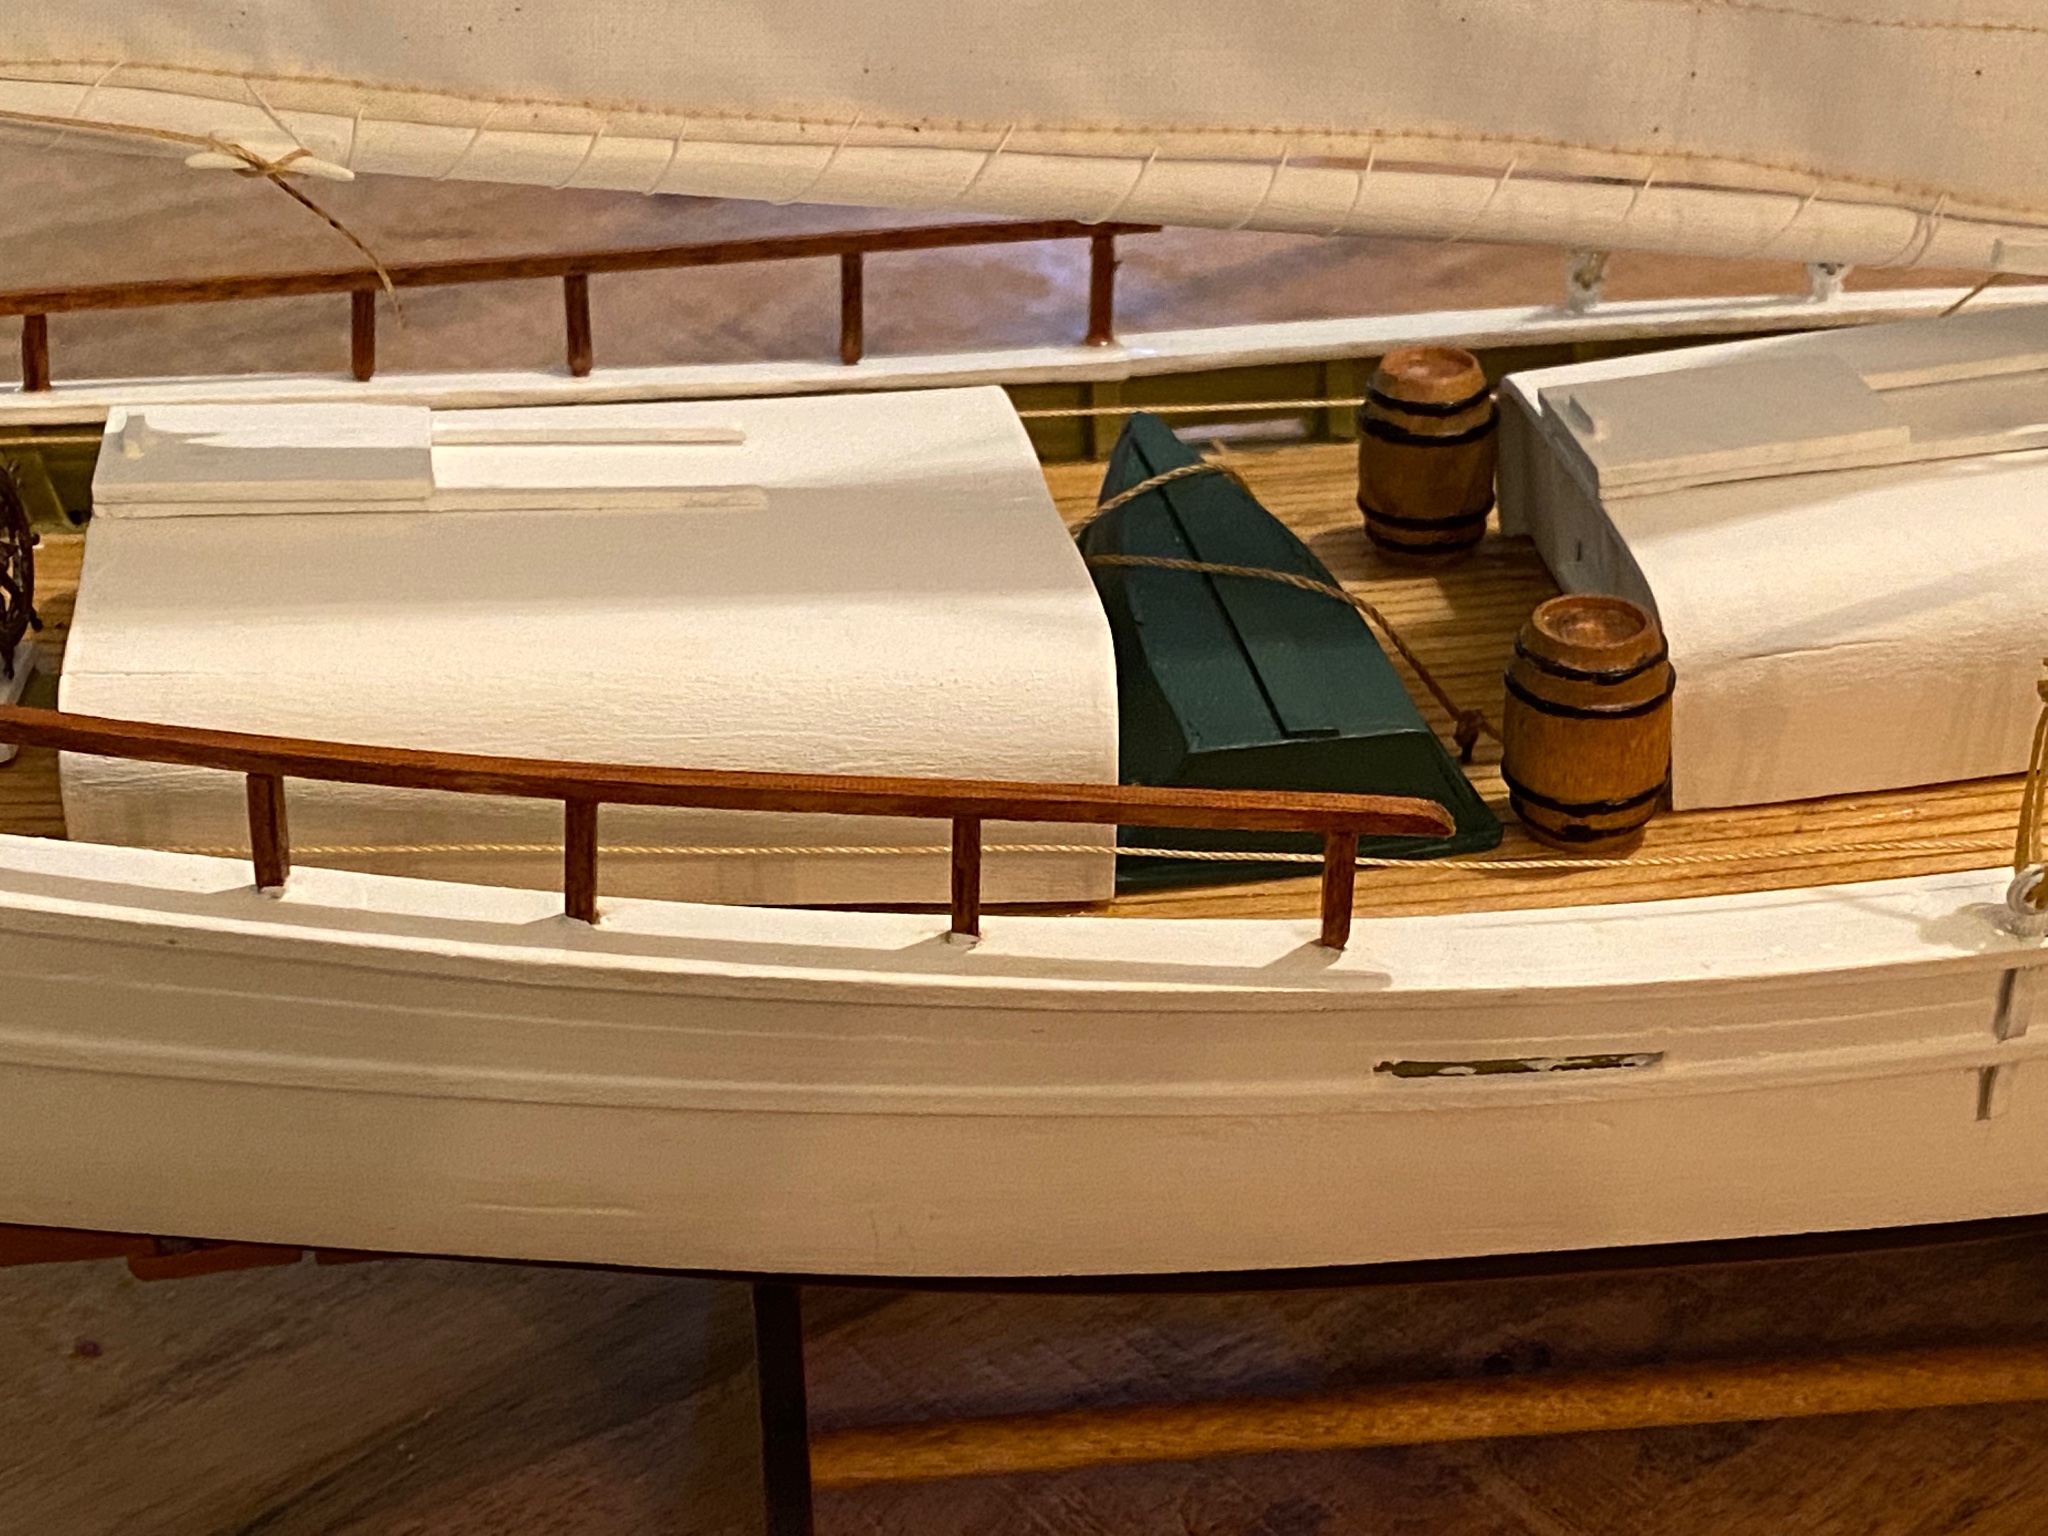
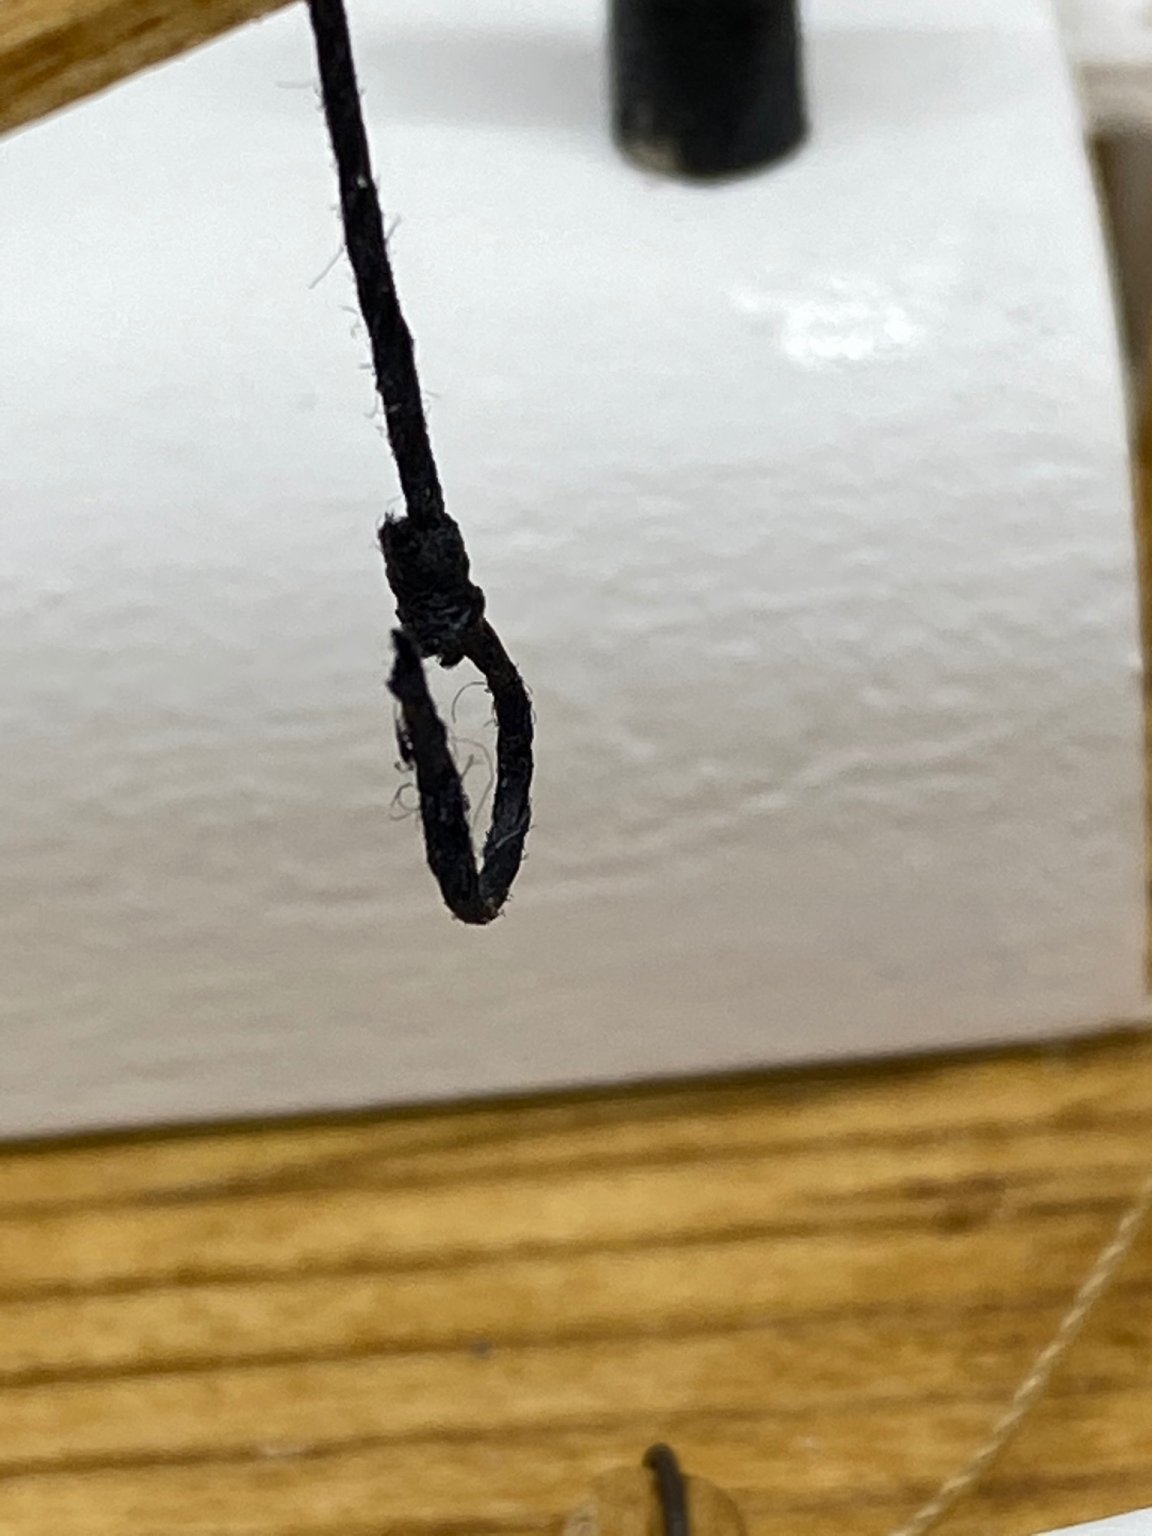
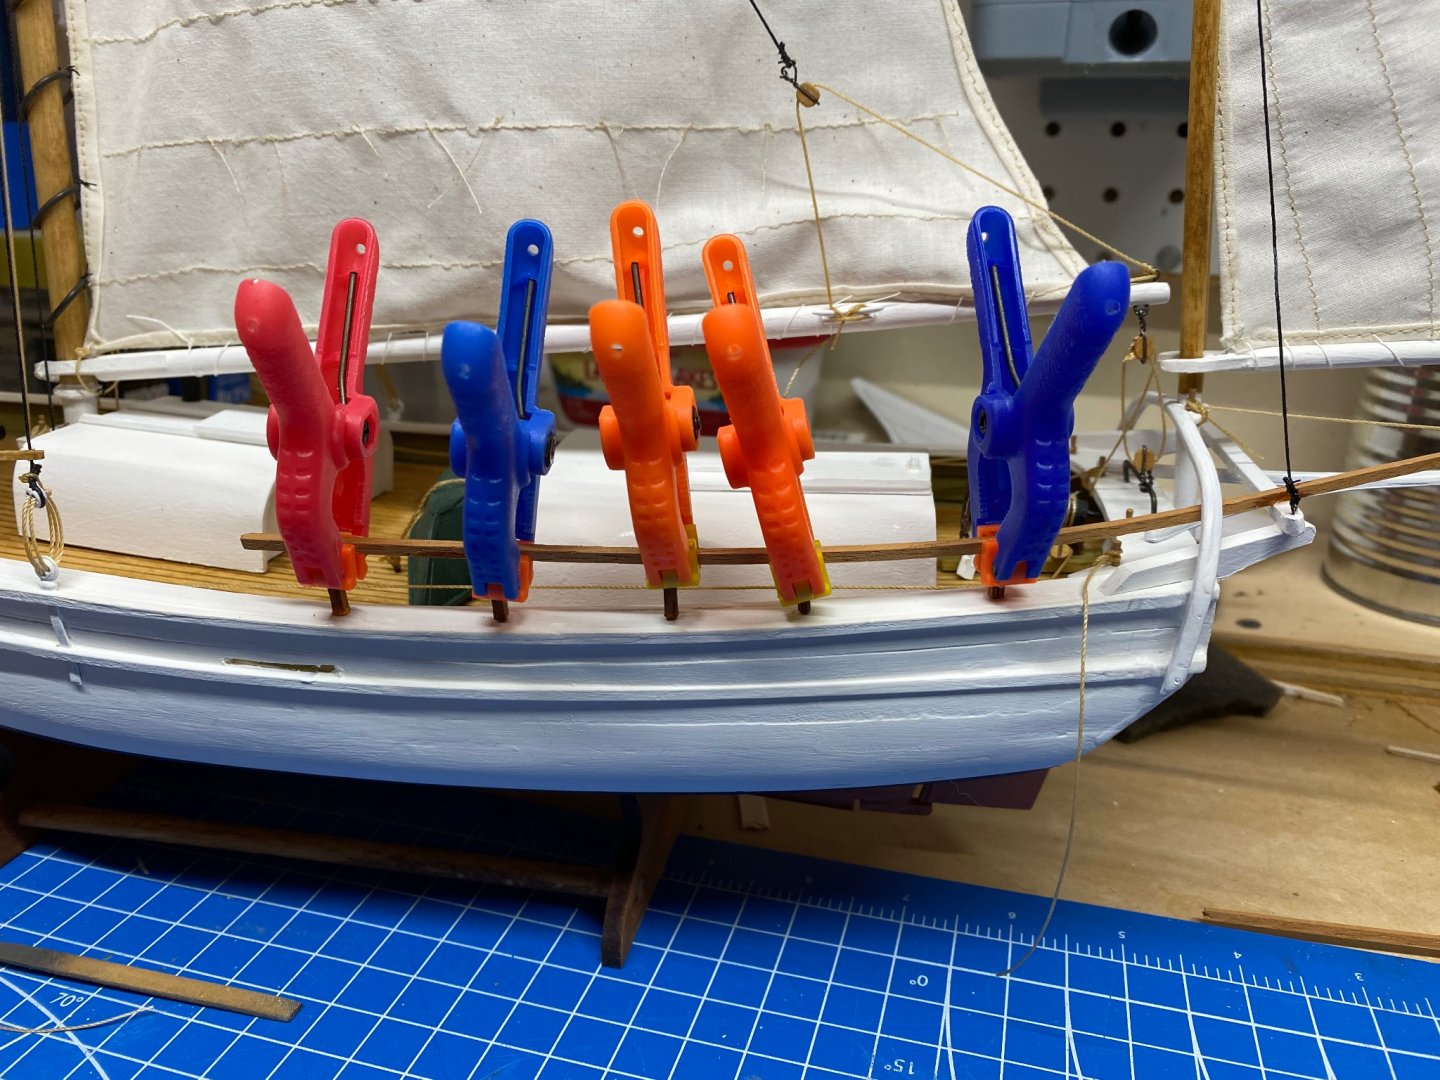
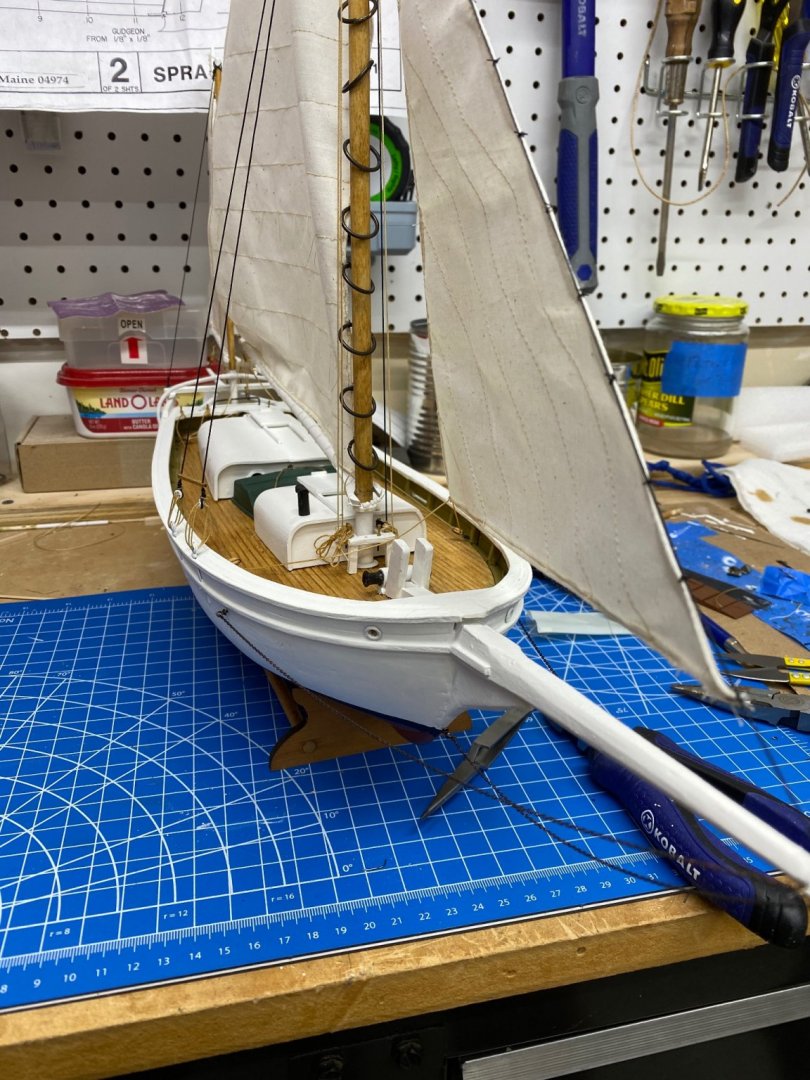
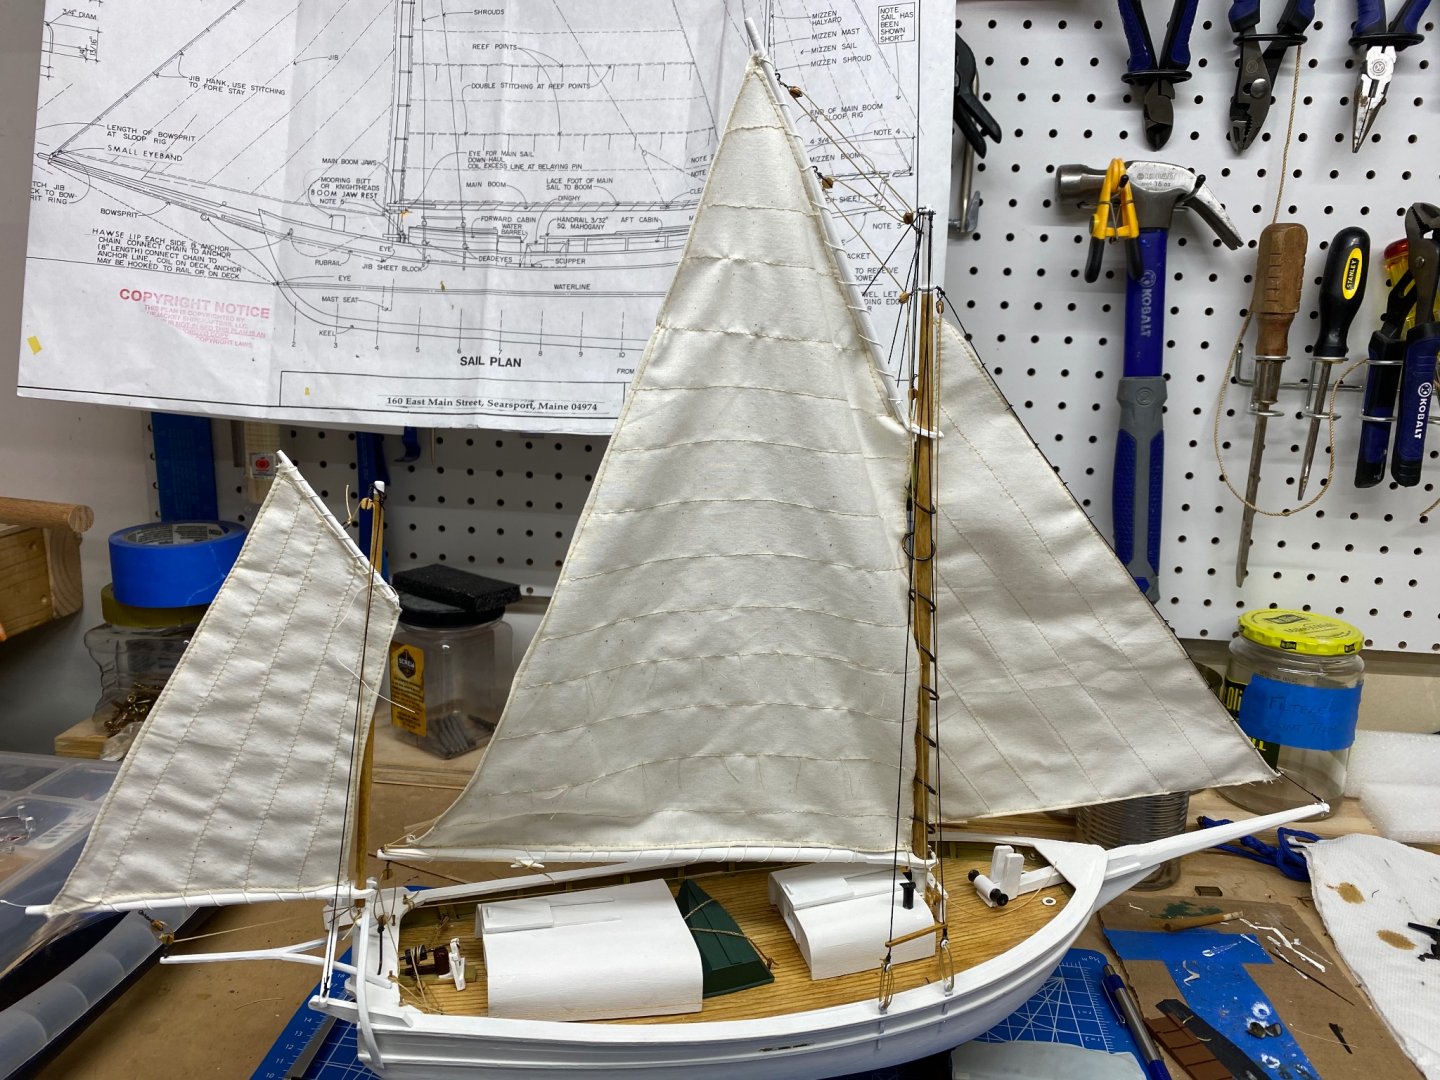
I've made some great progress this week. Got the sails, running rigging, and standing rigging in done. Not real happy with my sails, they are just a little to big in some areas, and to small in others. But I am happy with how they attached to the boat for the most part. Then this afternoon while I was working on the last deadeye, disaster, I tugged a little too hard, and it came free from the line. This picture doesn't show it so well, but the line slipped through the whipping I had done around it. So I had to redo it which was tough since I'd already trimmed everything back. But it doesn't look to bad. Got the mizzen in place, and added 4 belay pins to the taft rail. 2 each for the mainsail, and jib, I probably could have gotten by with just 2, but that is OK. Added the chains from the bow sprit to the hull, and that is it for the rigging. I've started making the stanchions for the rear rail, and I hope to have that done this week. There isn't much left on my punch list, the end is truly in sight. I have a special bottle of beer I've been saving for the end, and am looking forward to opening it.


-
Very nice, I like your saw horses for displaying it. I'm going to steal that idea for whenever I finish my Lightning.
-
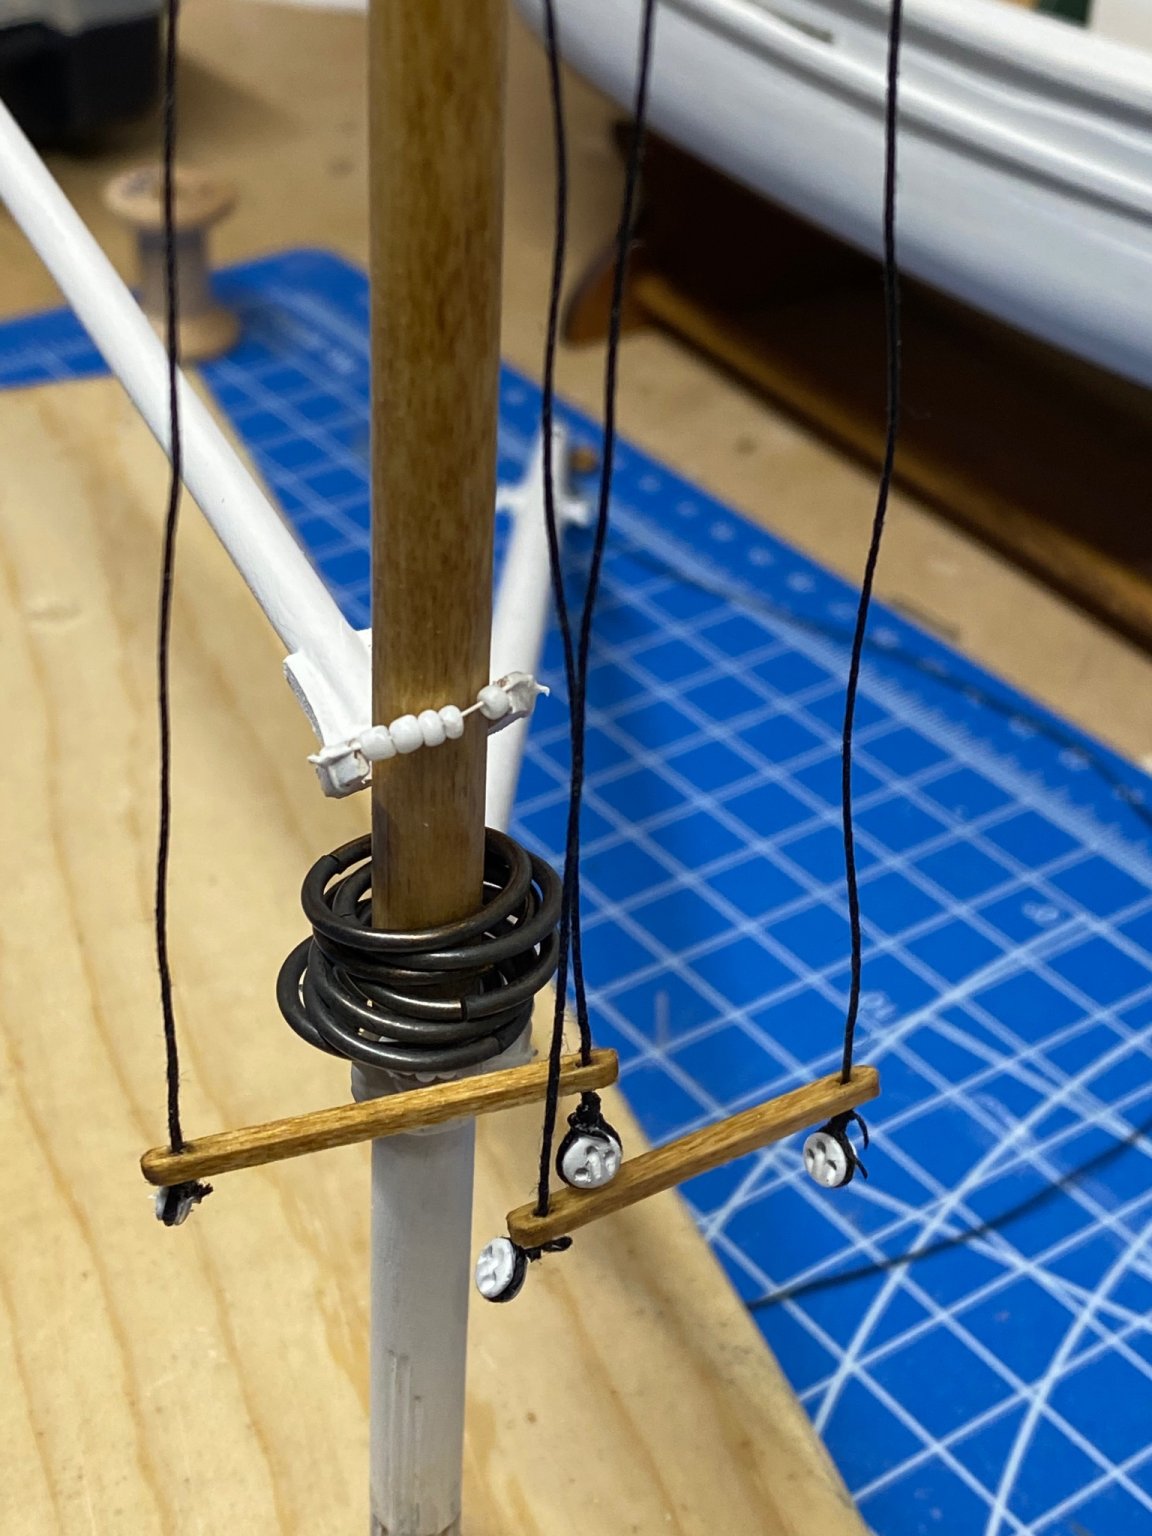
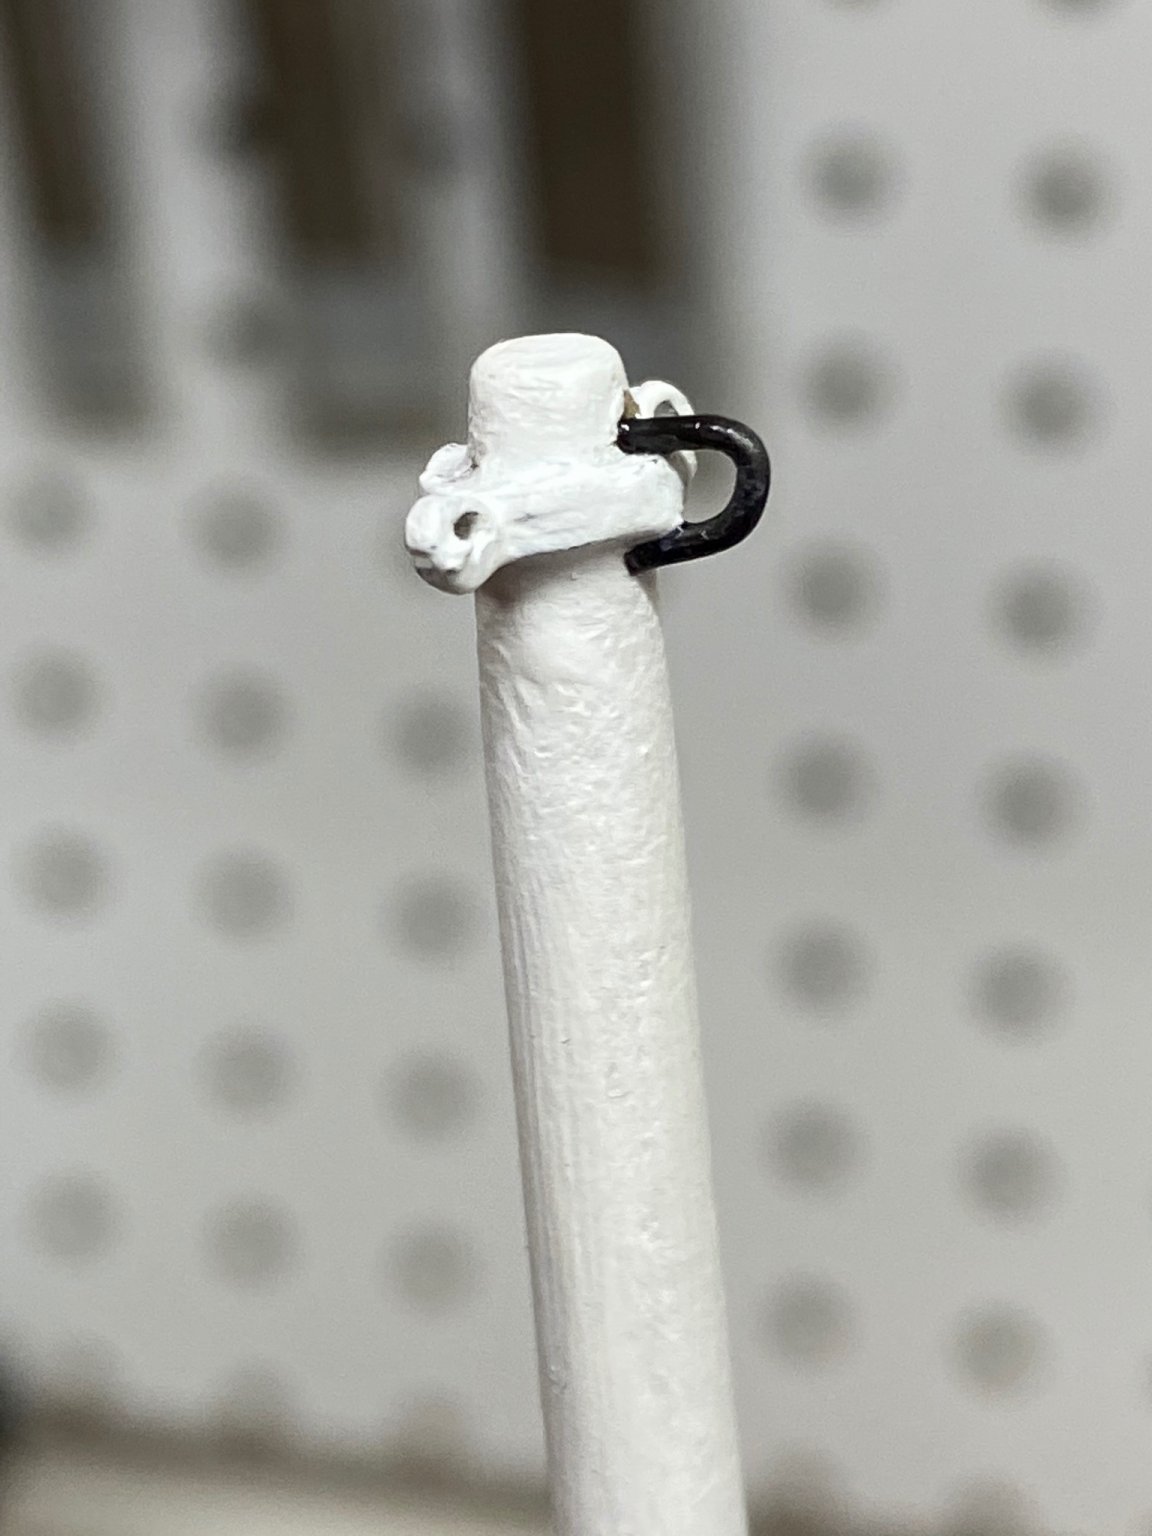
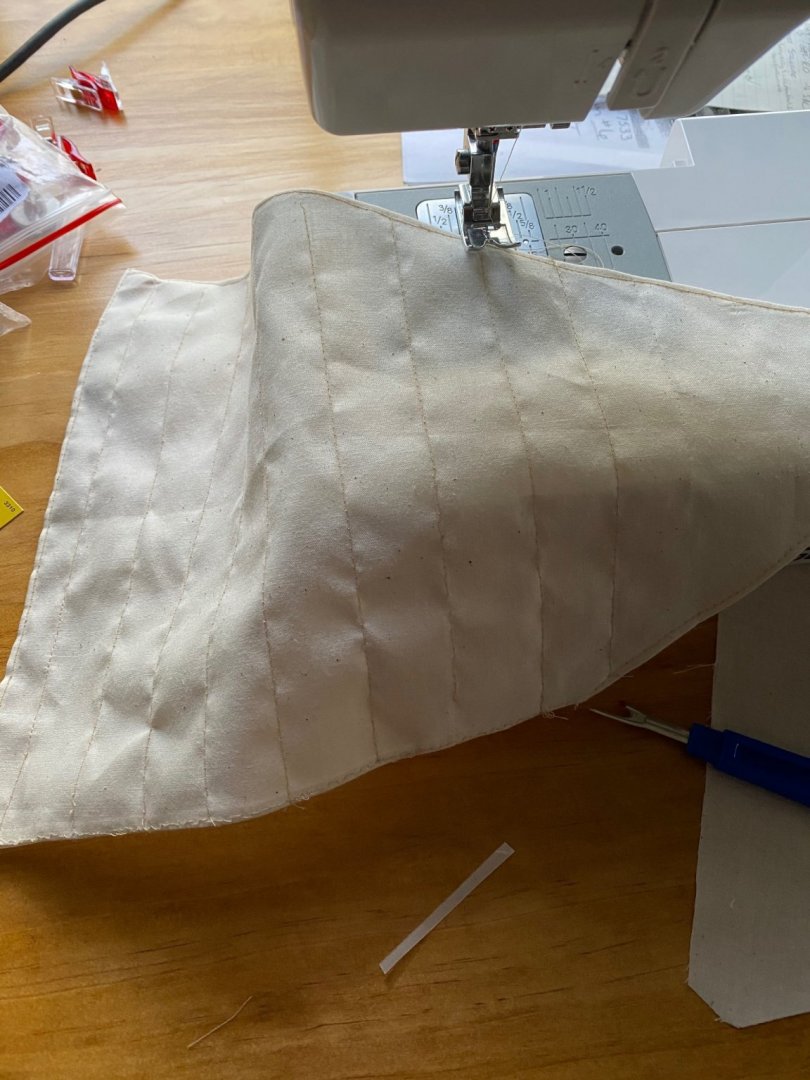
More slow progress. I managed to drop the mast hoops on the garage floor and found all but one, I decided I'd pick more up from Blue Jacket when I made my annual pilgrimage, I mean visit to them this summer when we're in Maine. But I got them and all the remaining metal blackened. I installed the stove pipe, and tried blackening a piece of tin can. It developed a cool look, that looked like it had been aged by the smoke, but mostly rubbed off while gluing it. So I ended up paining it black. Got the mizzen mast installed along with with the yoke, I'd ben dreading doing that, but it ended up not being so bad. I started working on the standing rigging, and all those years of teaching scouts how to whip a rope paid off. Unfortunately I didn't get the port and starboard side of the dead eyes even. I tried twice and both times it came out wrong. I make the loop and seize it then insert the dead eyes. Before inserting them I made sure they were the same length, but when I insert them I must have been shortening things. Unfortunately I didn't double check before adding glue. At this point I was out of thread, and I still had the lazy jack to do. So I decided to go ahead and order more mast hoops and thread from Blue Jacket. While waiting on that to arrive, I painted all the belaying pins, and started making the sails. I got all the sails done few mistakes but I was able to fix them. I'm not a sewer, and have my moms old machine, and can get by. I messed up the rolled hems on the jib, and it ended up a smaller than it should be. I have enough material to redo it which I'll do next. The new parts have arrived so once I'm done with the jib, I'll get back to rigging. I don't have a lot of free time these days, I'm trying to get in shape for a backpacking trip, and the grand kids are coming for a week. So it may be a little bit before I can finish this.


- 23 replies
-
- 1
-
-
- Spray
- BlueJacket Shipcrafters
- (and 1 more)
-
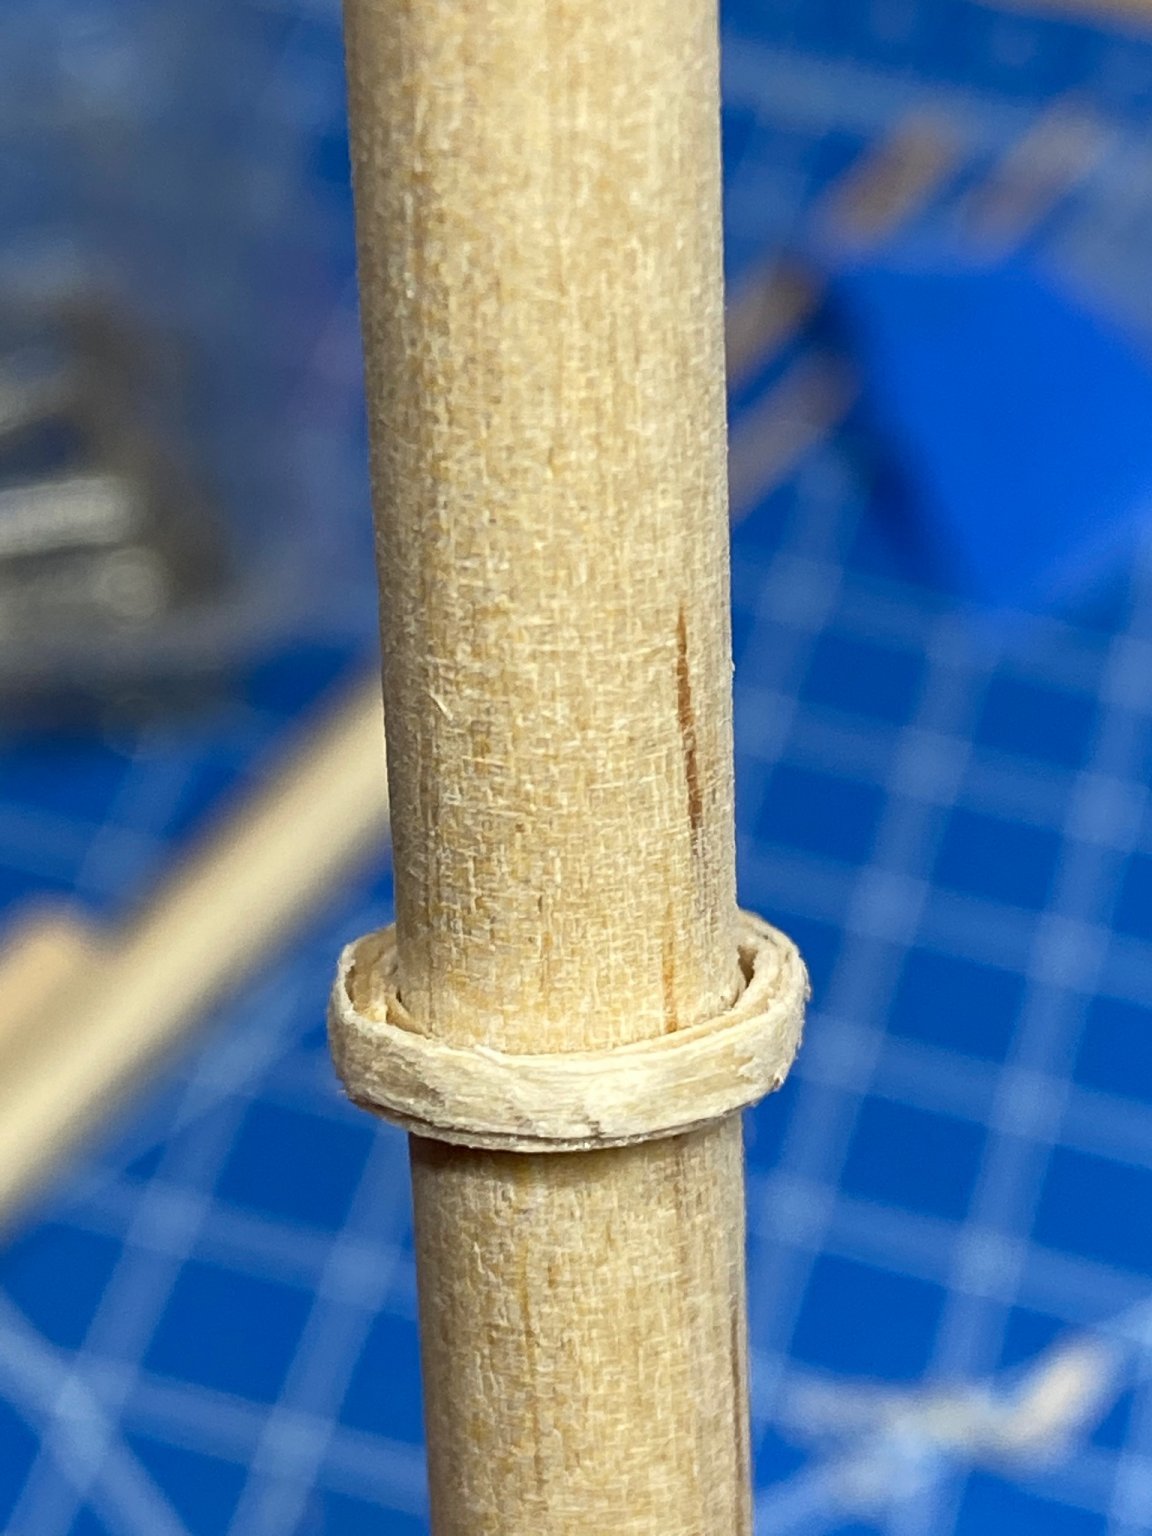
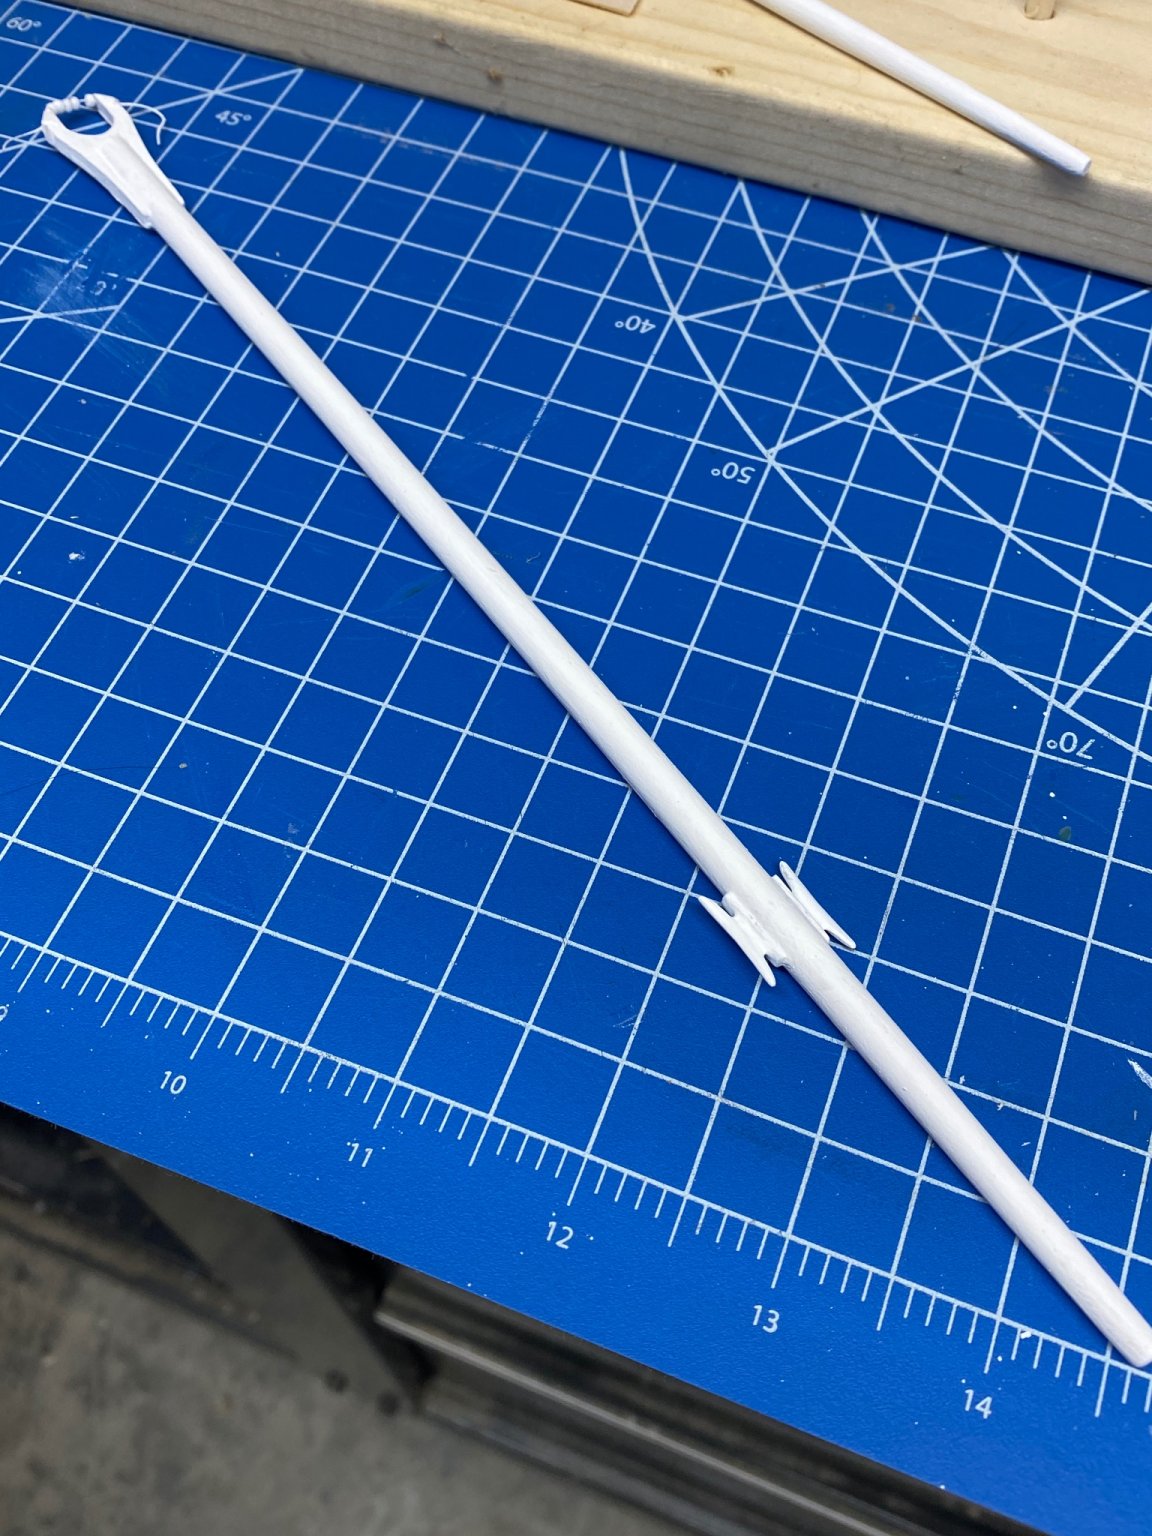
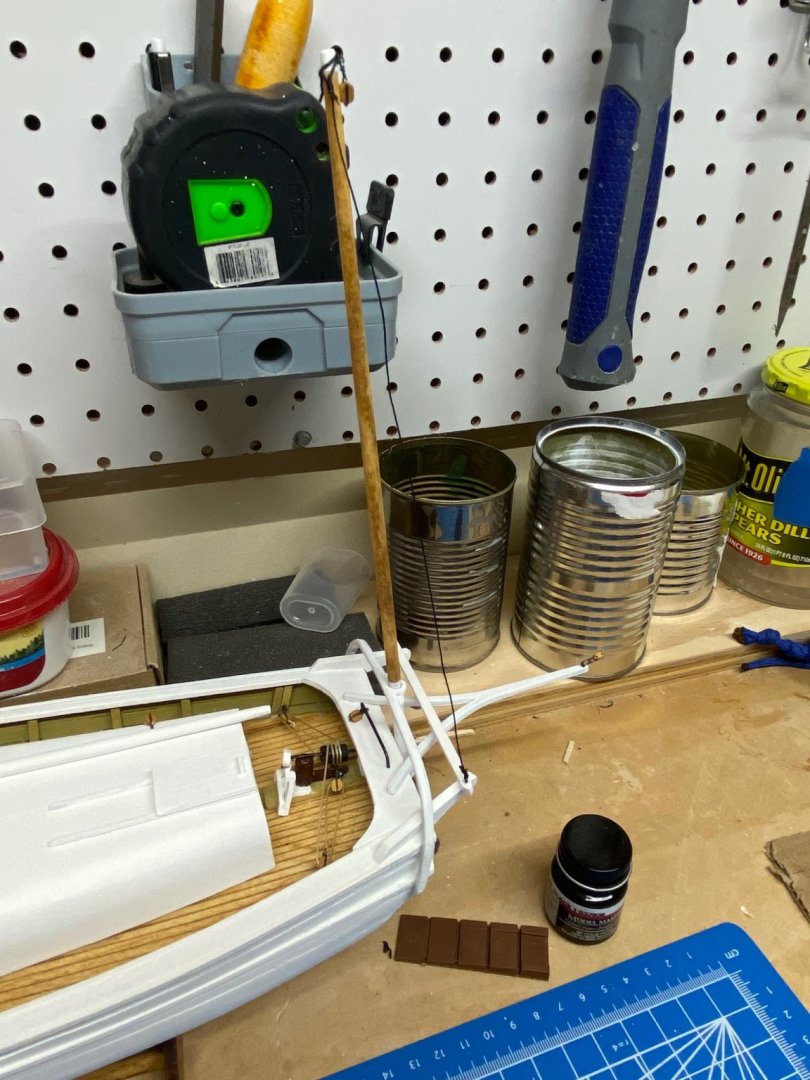
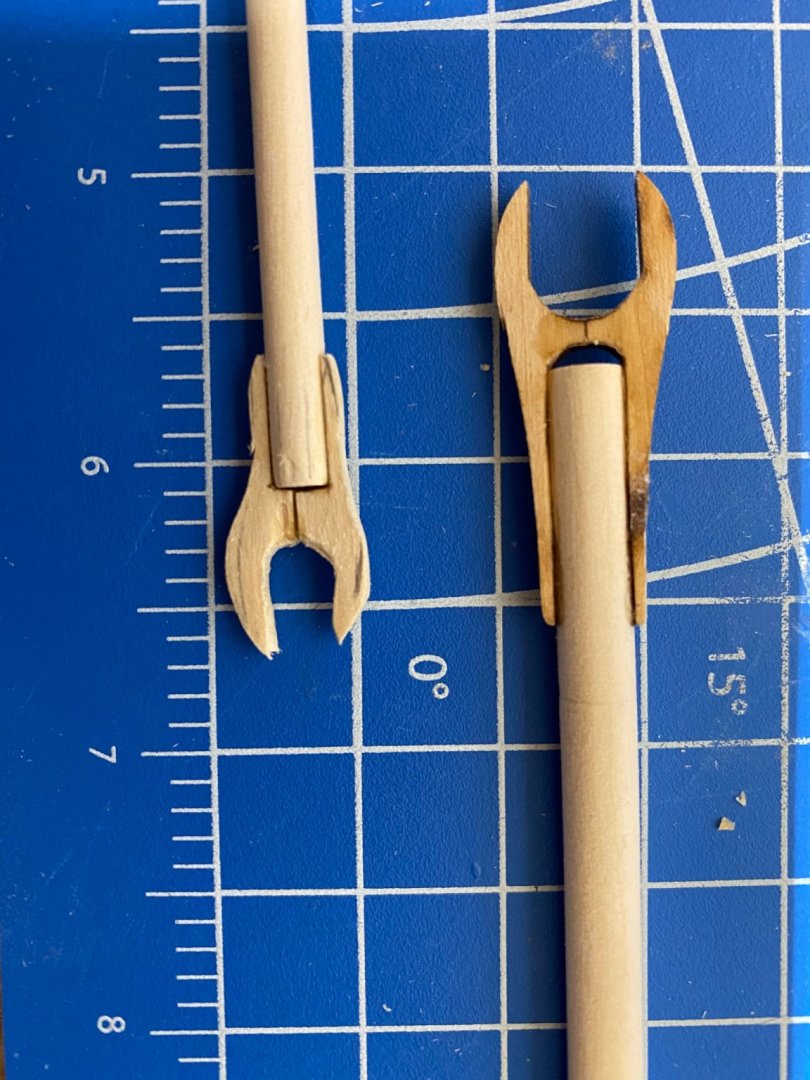
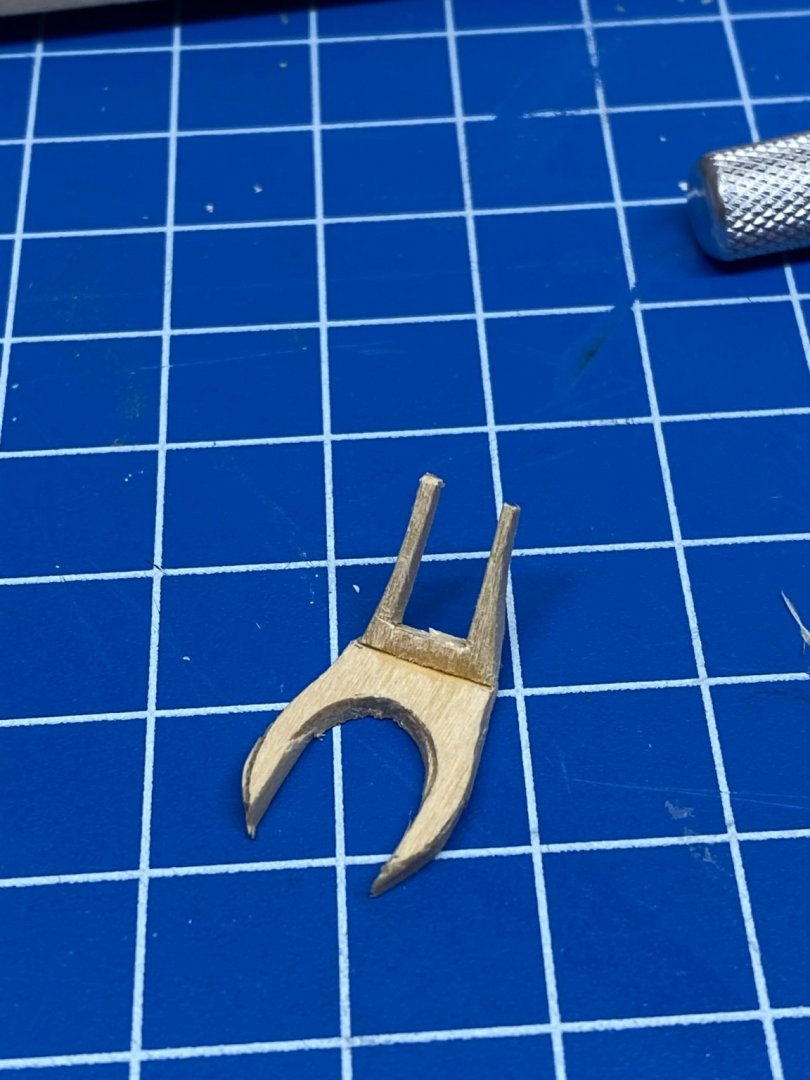
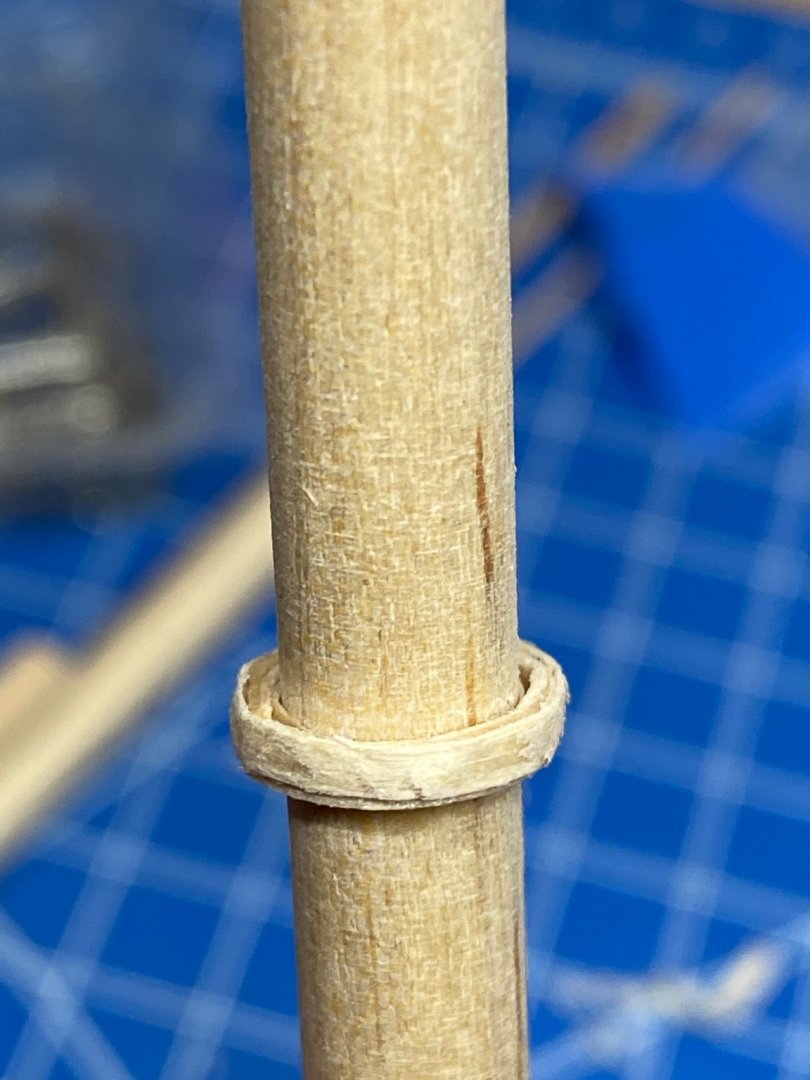
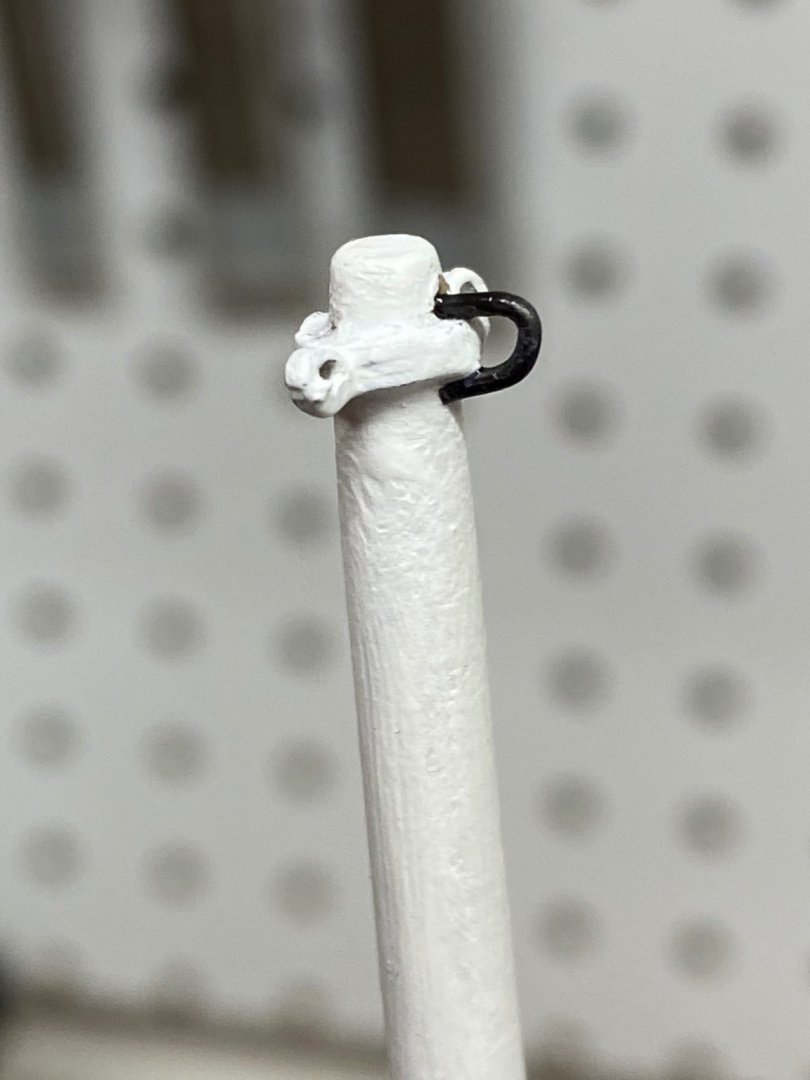
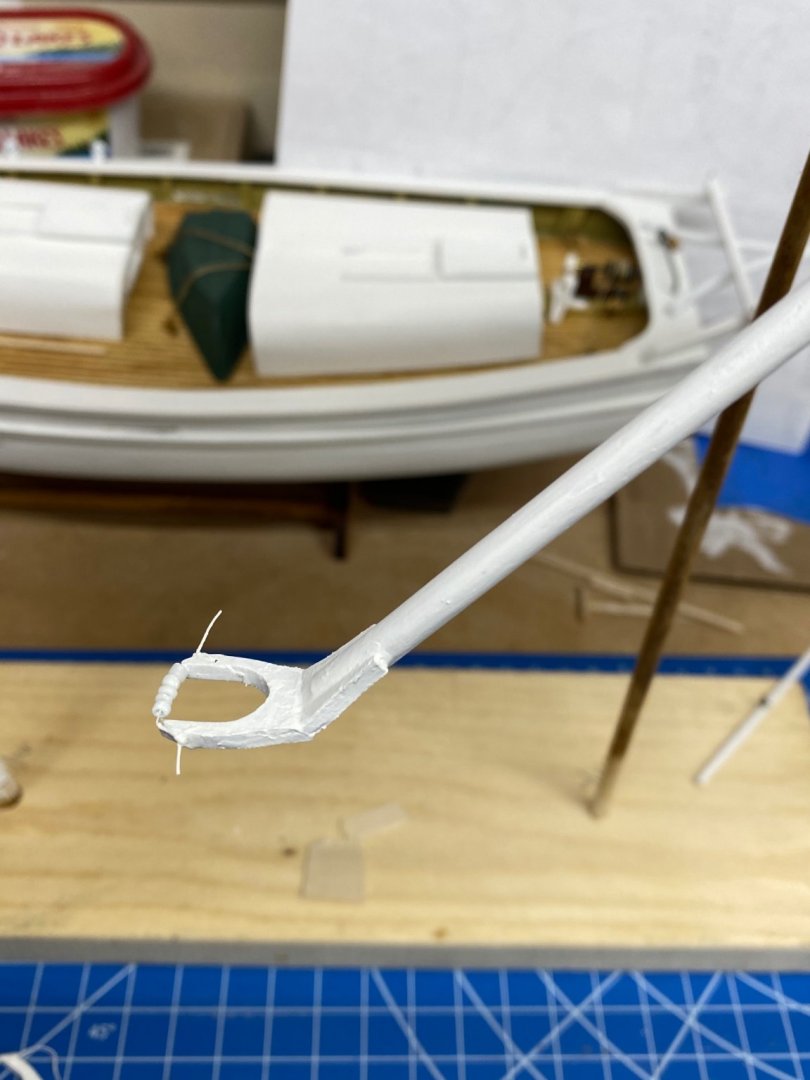
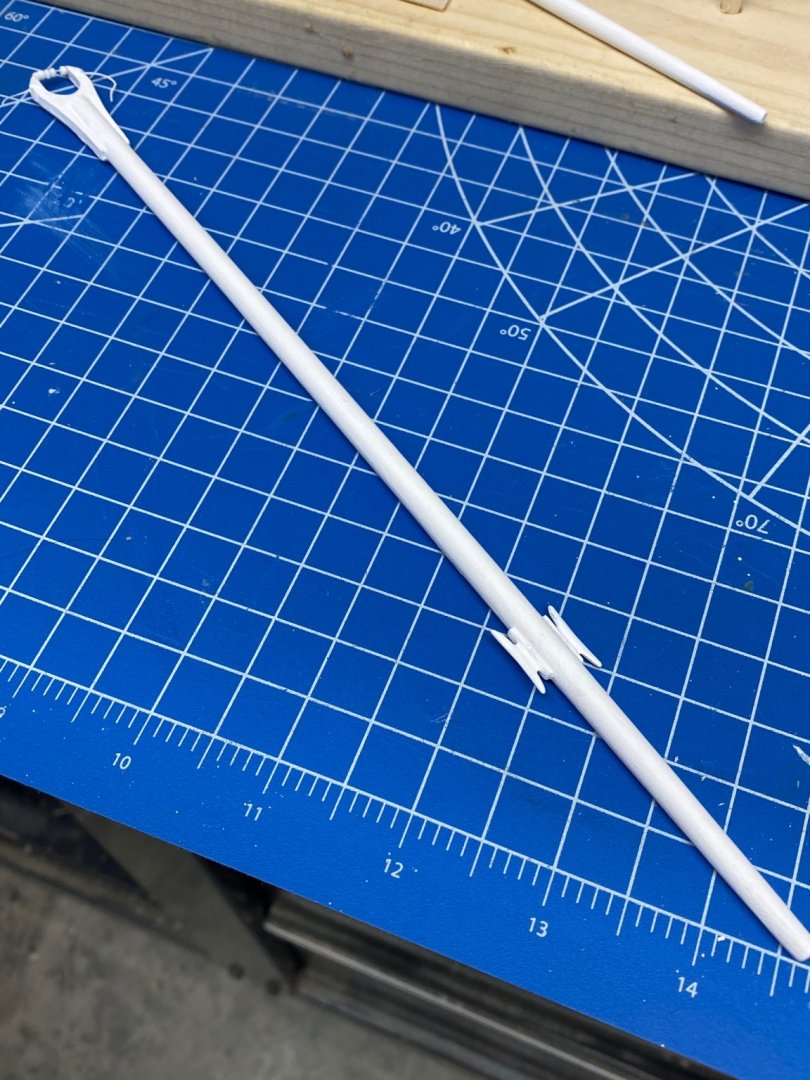
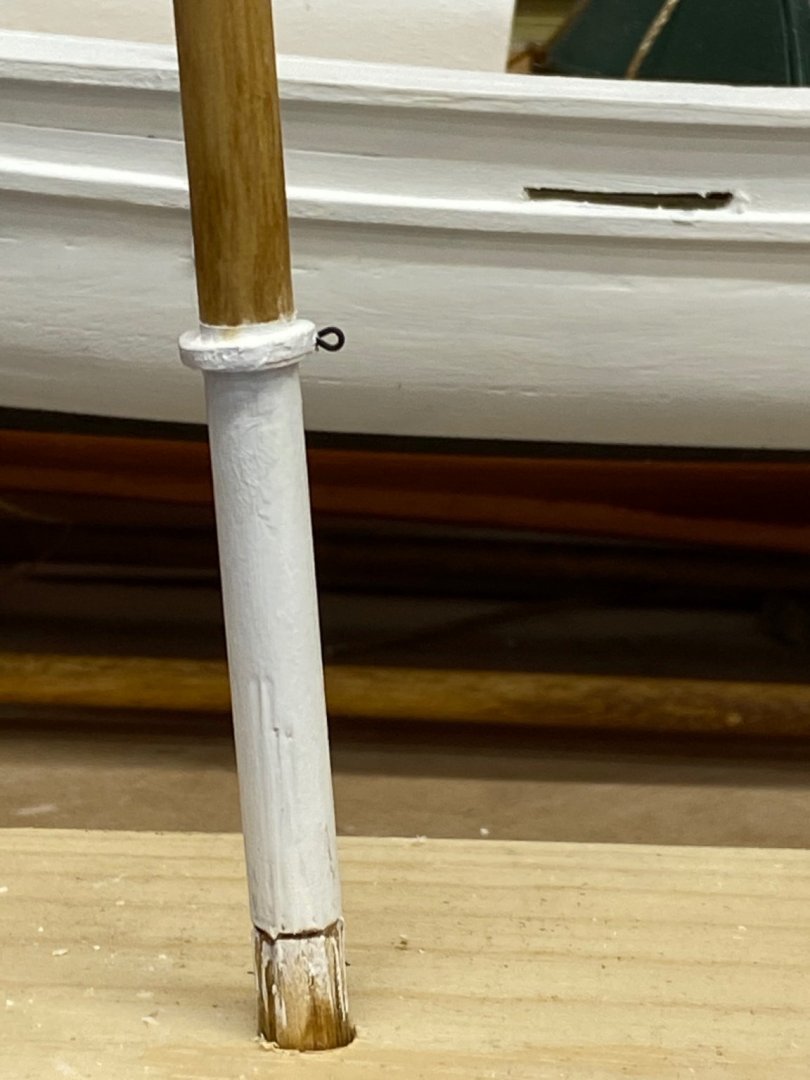
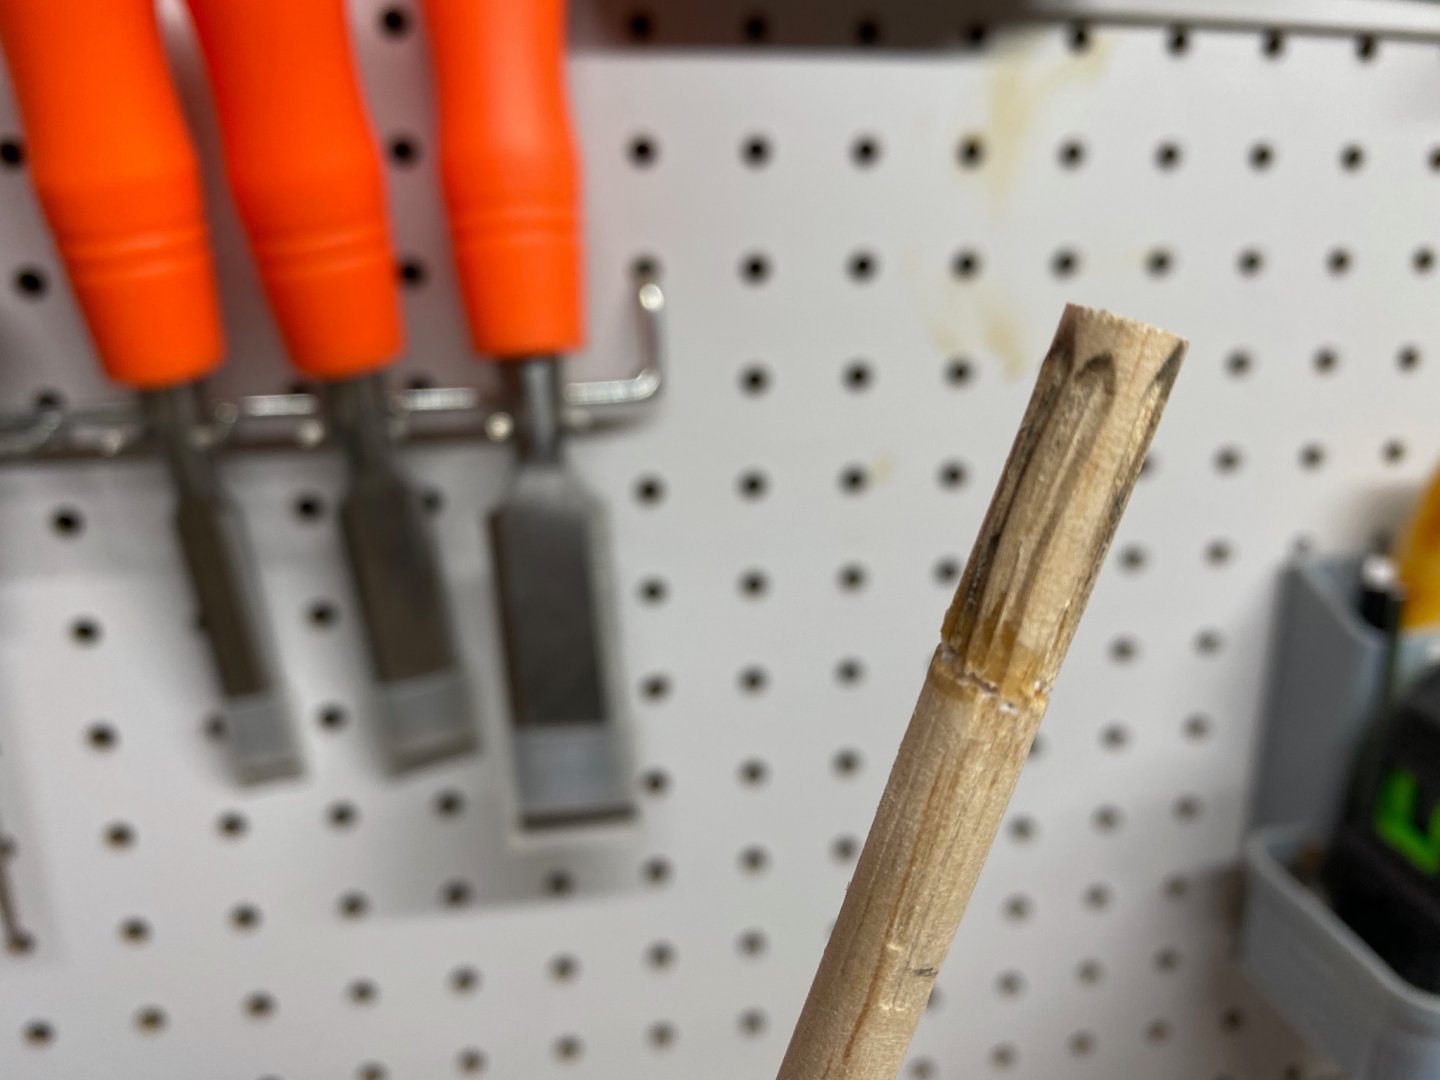
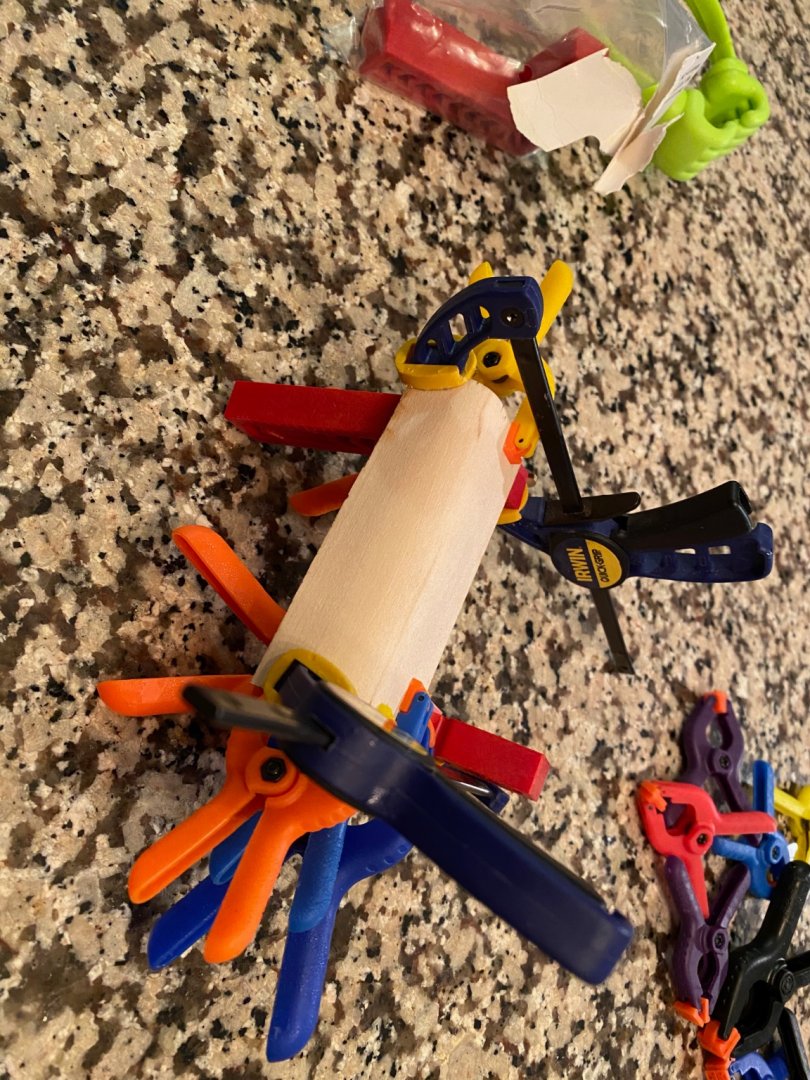
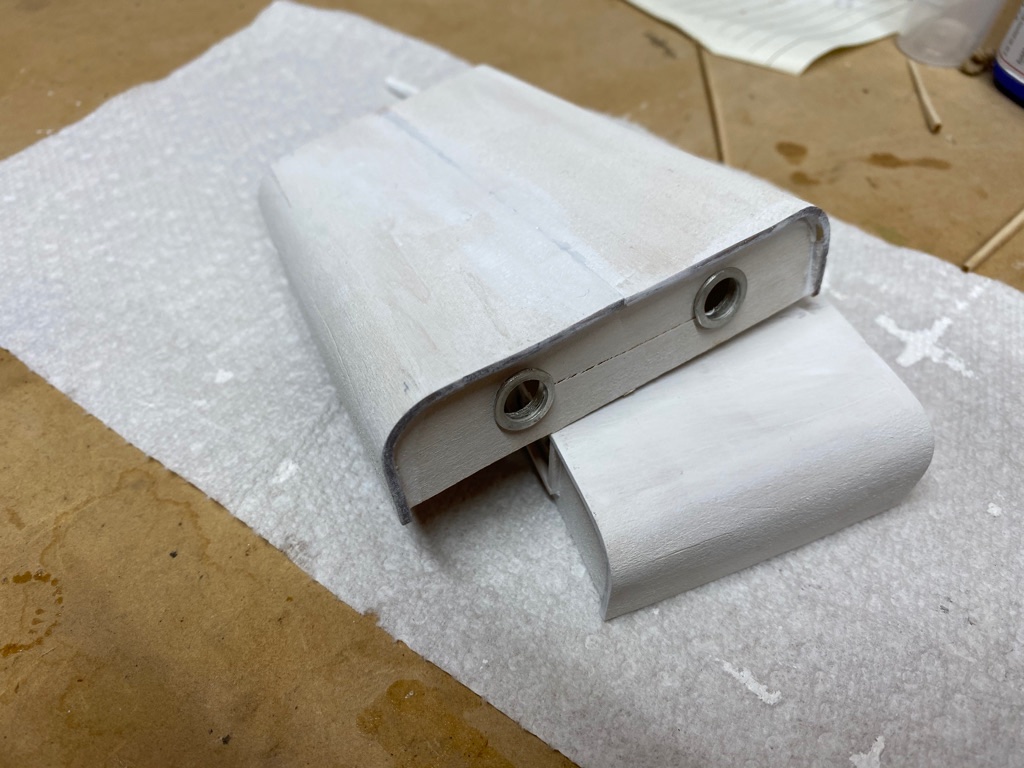
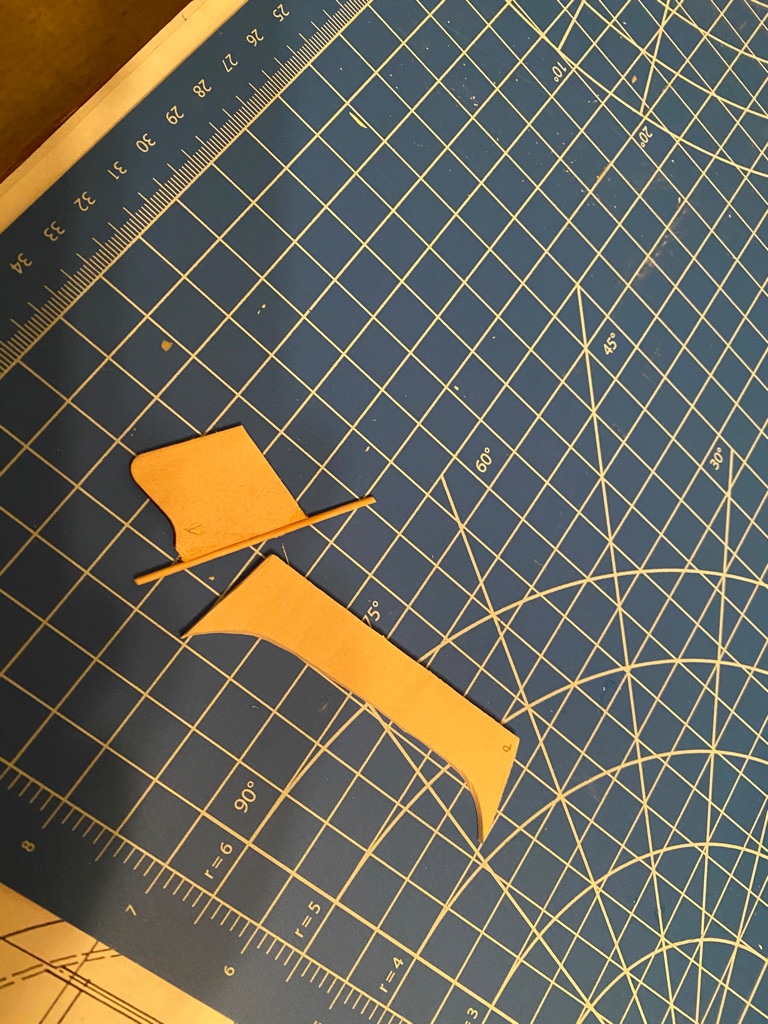
Started working on the spars, and the jaws all split, in part by me putting too much pressure on them trying to get them to fit. Then I glued the jaws for the mizzen boom to gaff by accident. So I ended up having to make a new one. That took about 4 attempts, and I split that one too, nothing wood filler and paint won't cover. I used the piece that held the main boom jaws as a template to trace out for the gaff jaws. Drilled out where the mast goes, and just took my time cutting it out and sanding it. I am fairly pleased with how it turned out. For the boom cradle the instructions say to use card stock, I didn't have any so I thought if I get a thin enough piece of wood I can steam it and wrap it around the mast. I planed down a strip steamed it and wrapped it. It had some kinks in it, when I got what I thought was a bright idea. I used the shavings from when I planed it to wrap around, and that worked well. I am pretty pleased with it. I then added the mast rings, and like a dummy cut one to many off, and so had to add a bail at the top of the main mast. Added that parcel beads, and got everything painted. I feel like if I had 2 days to myself, I could finish this.

-
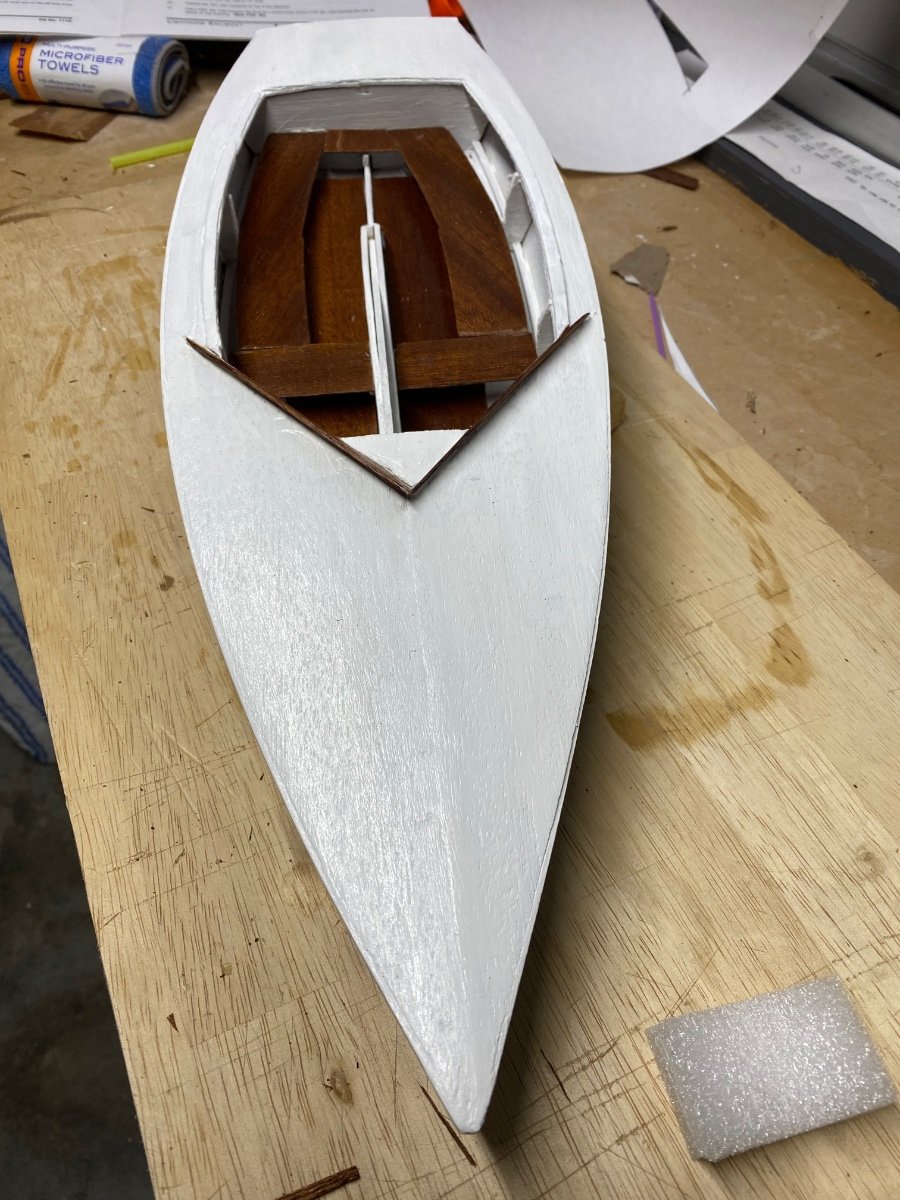
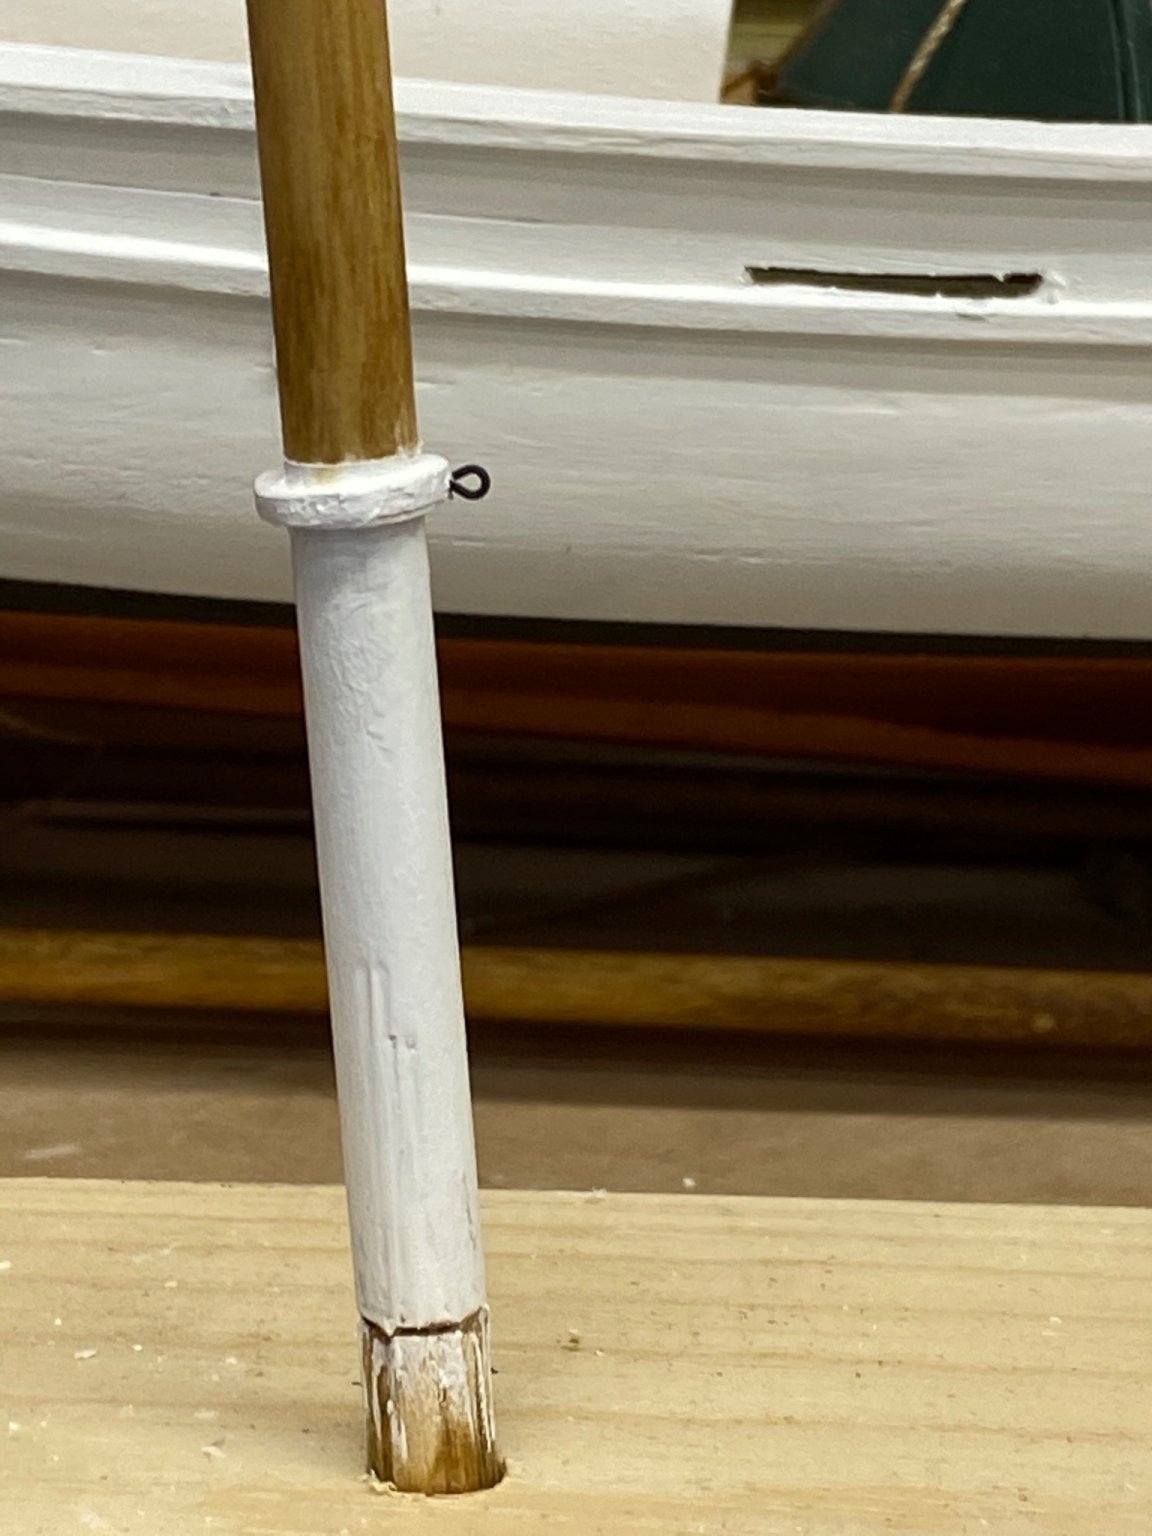
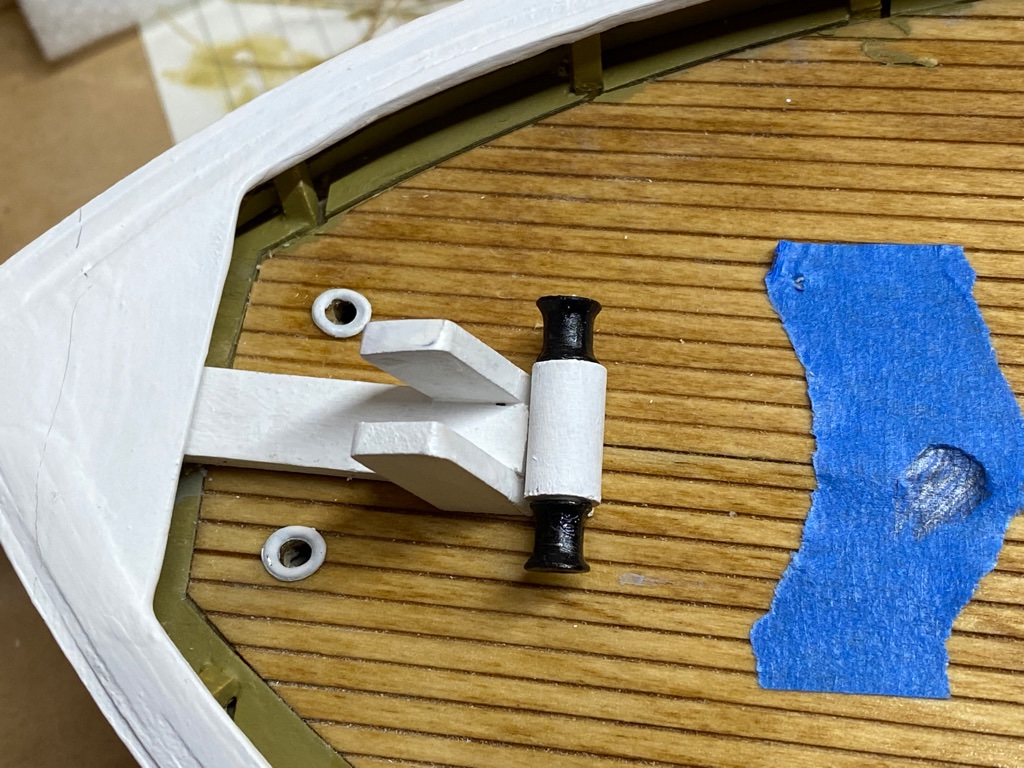
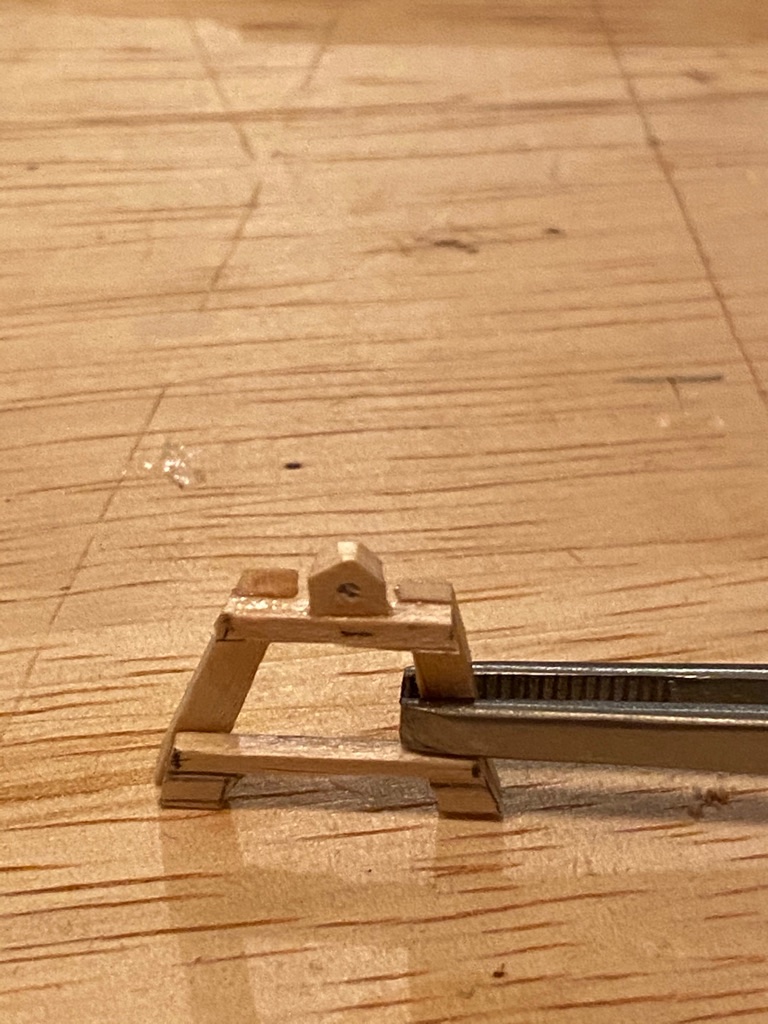
More progress, I've finally finished the hull, and am moving on to the spars and rigging. I don't think it is going to be too much longer until she is done but we'll see. I used a combination of steaming the rear cabin and sanding to get it to sit fairly flat and glued it in place. I then added the eyes in front of the dingy and for now have it loosely tied in place. I'll fasten it down just before the mast is installed, trying to leave room for my fat fingers. Also got the wishbone, brace brackets and tie brace installed. I am happy with how they came out, I had kept my sanding discs and drums that came with my Dremmel which has since died, and but them in my drill at low speed to help with the rounding. I also got the mizzen mast step made, but am going to wait to instal that and the yoke until I am ready to install the mizzen mast. Using my pin drill I carefully drilled out the holes for the dead eyes and installed them too. Right now it is just a friction fit, and I may go back and add pin heads to make it look like they are bolted on. Now I'm on to the spars. I'm starting with the main mast and woking aft. I put the mast in my drill and holding sandpaper started shaping the top end. Unfortunately when I was about 3/4 of the way there, I put to much pressure and snapped the mast at the chuck. Fortunately that is below the deck, and I finished shaping the mast and glued in place. And that seems to have worked. I also got the main boom shaped. What I learned from the mast, was first to keep the drill sitting on my work bench. Second take a small piece of sand paper and wrap it around the dowel, grit side in, then put it in the chuck. I don't have a picture to show, but this method didn't leave any marks on boom. I truly feel like the end is in sight, which is good as spare time is at a premium these days. By the next post I hope to have all the spars done, painted and blocks installed.


- 23 replies
-
- 1
-
-
- Spray
- BlueJacket Shipcrafters
- (and 1 more)
-
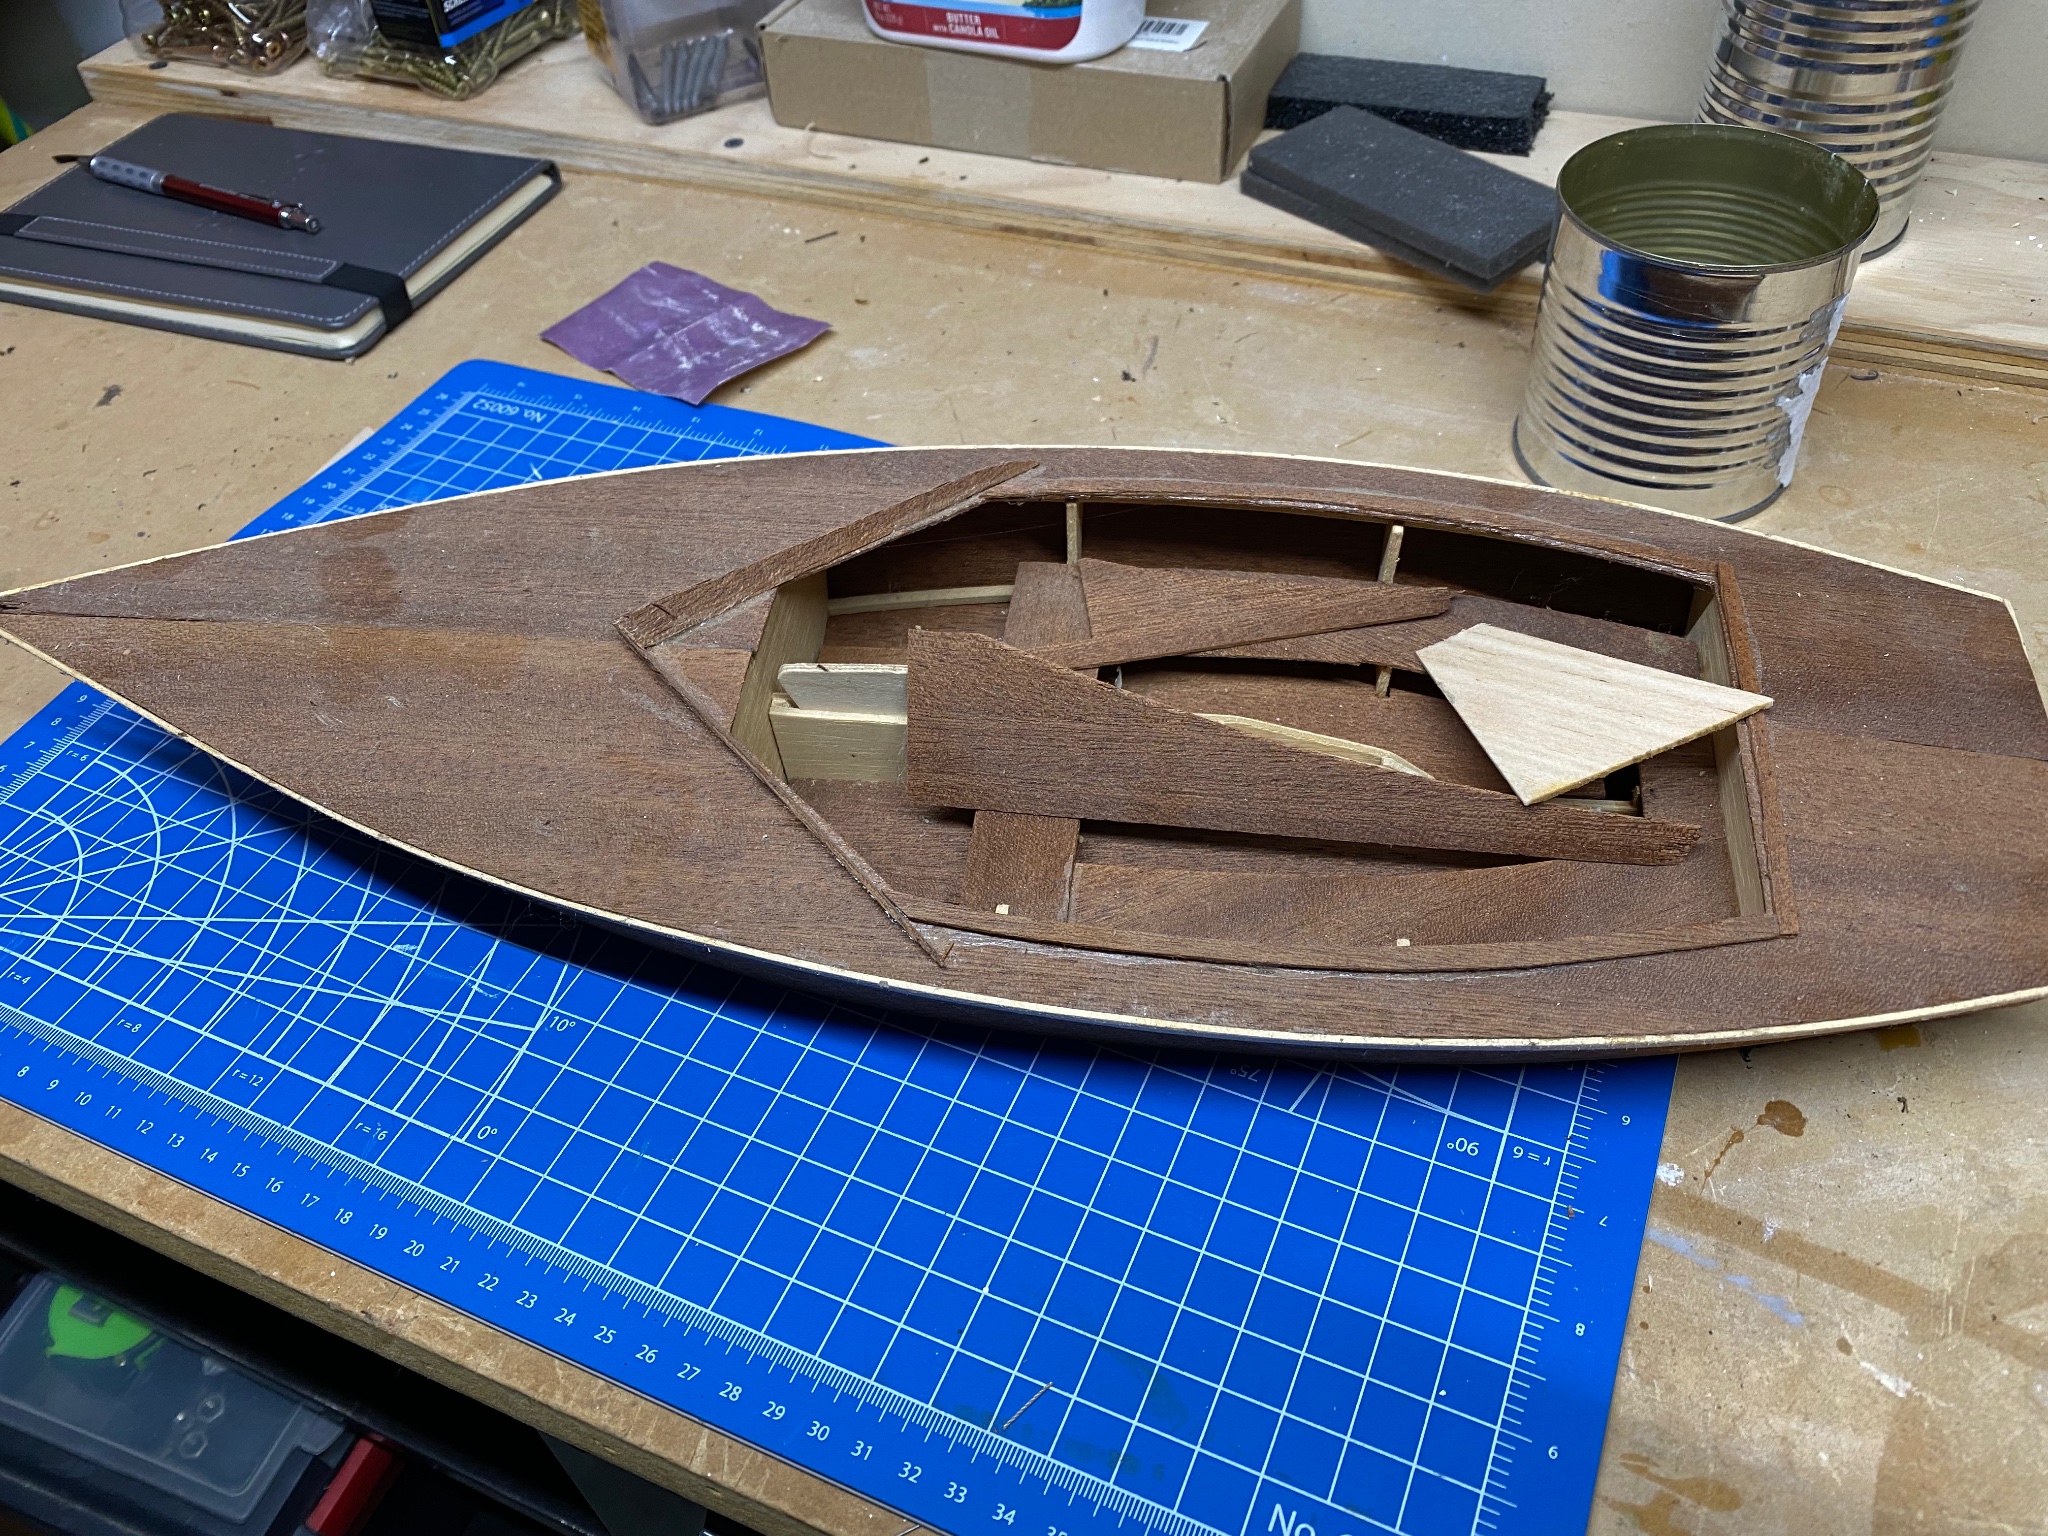
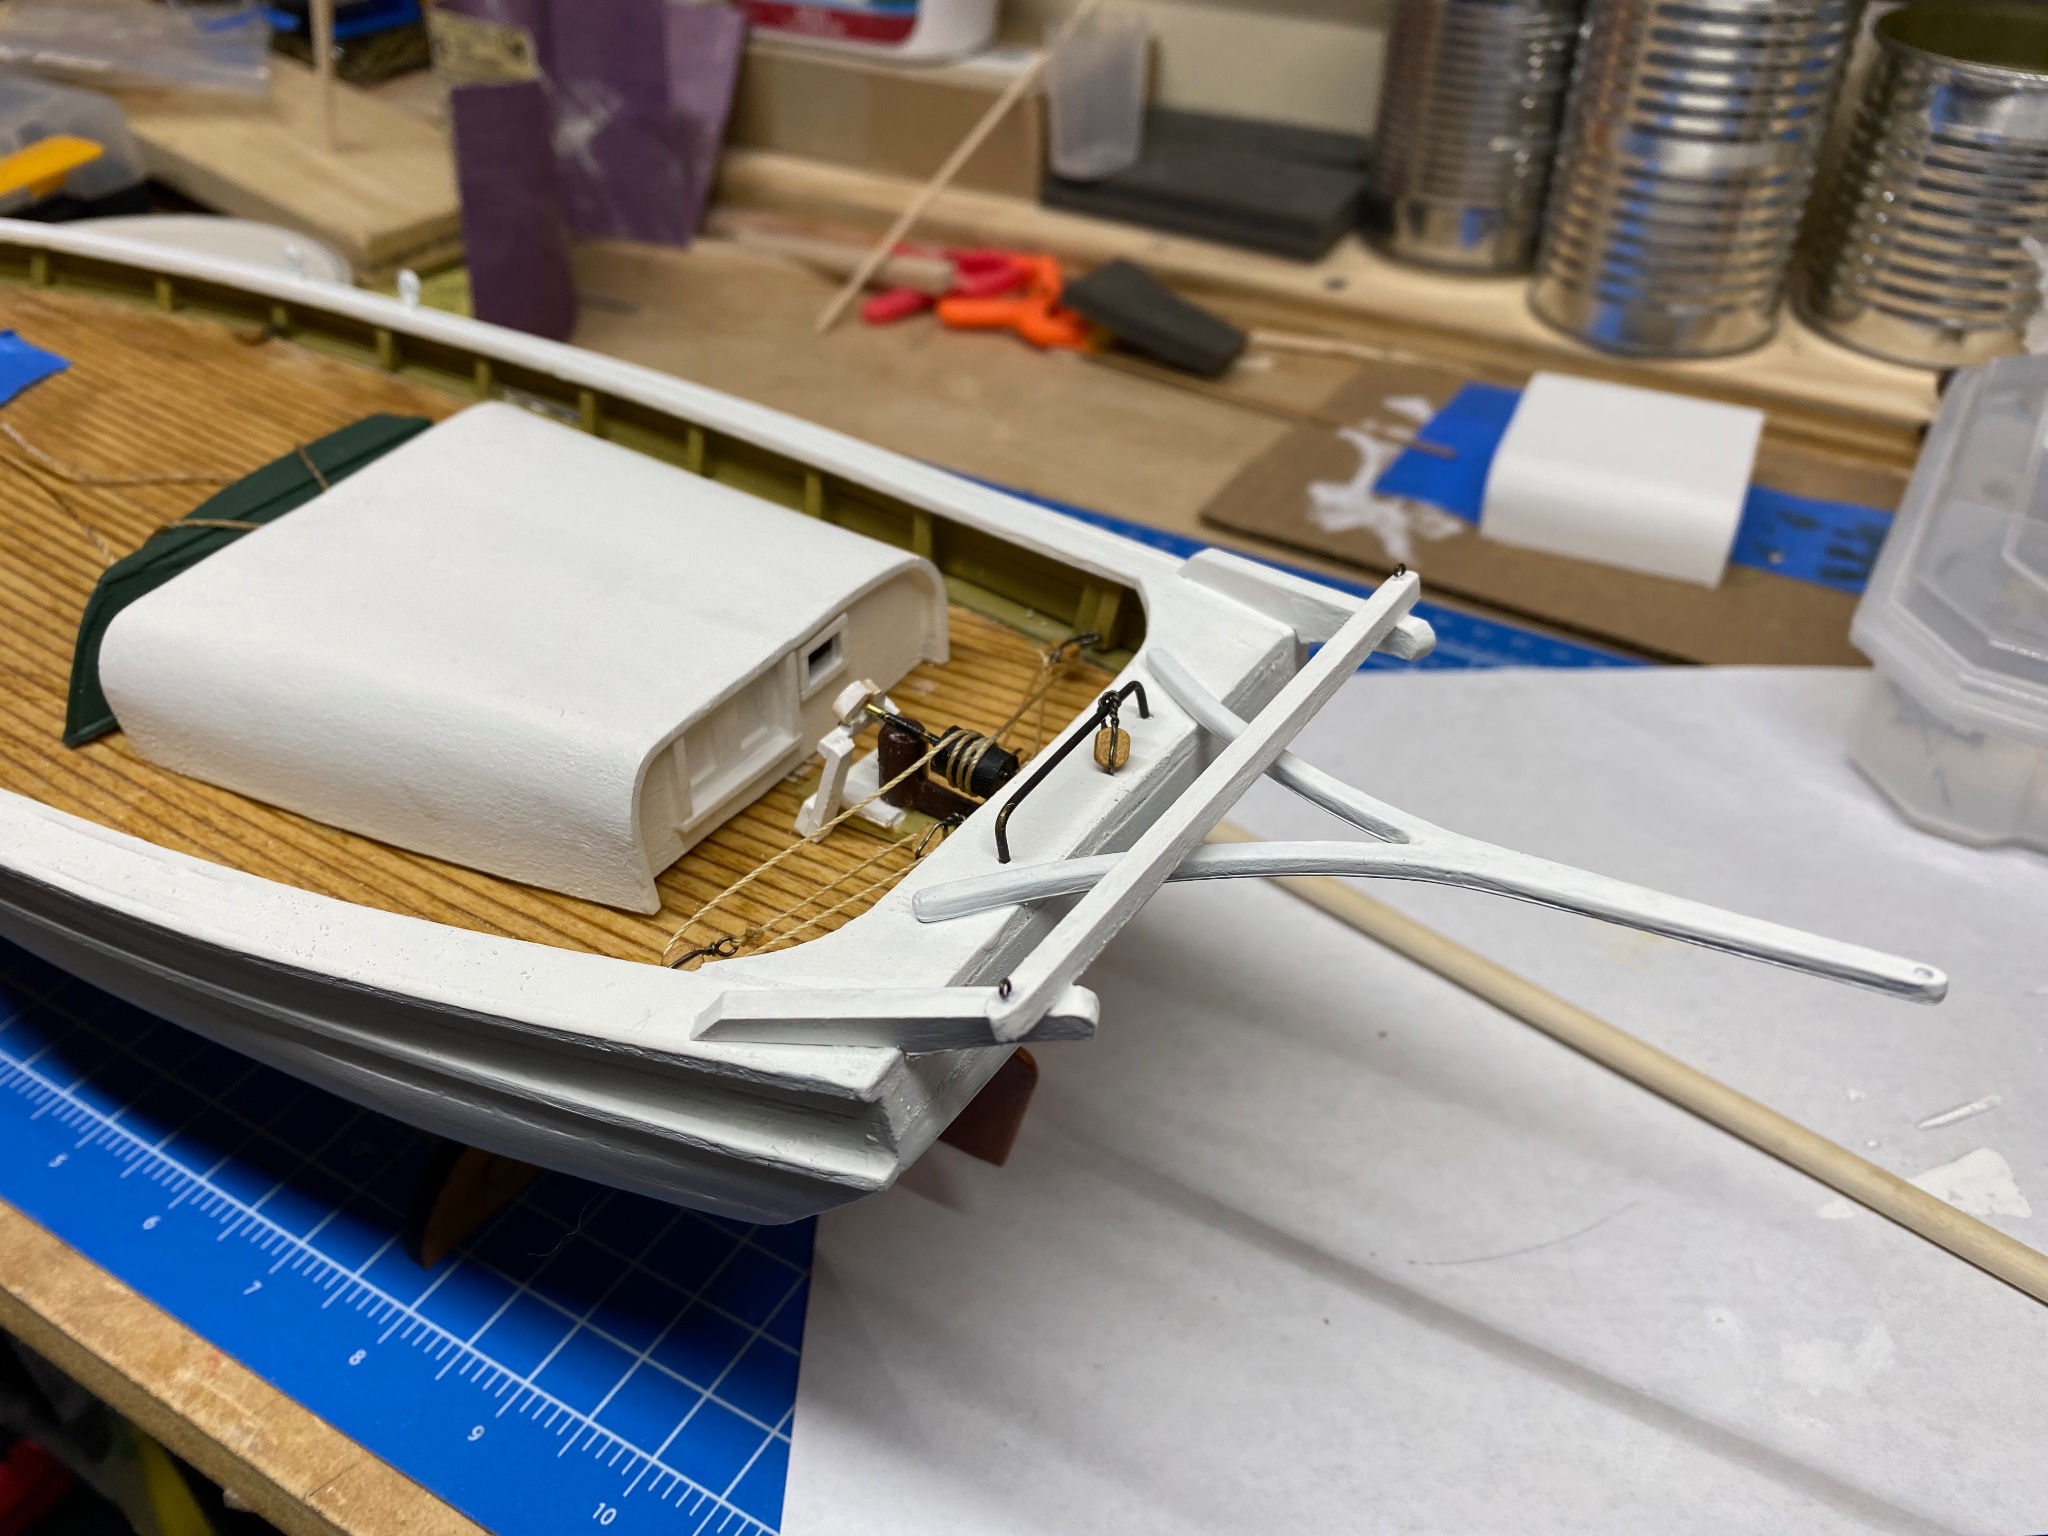
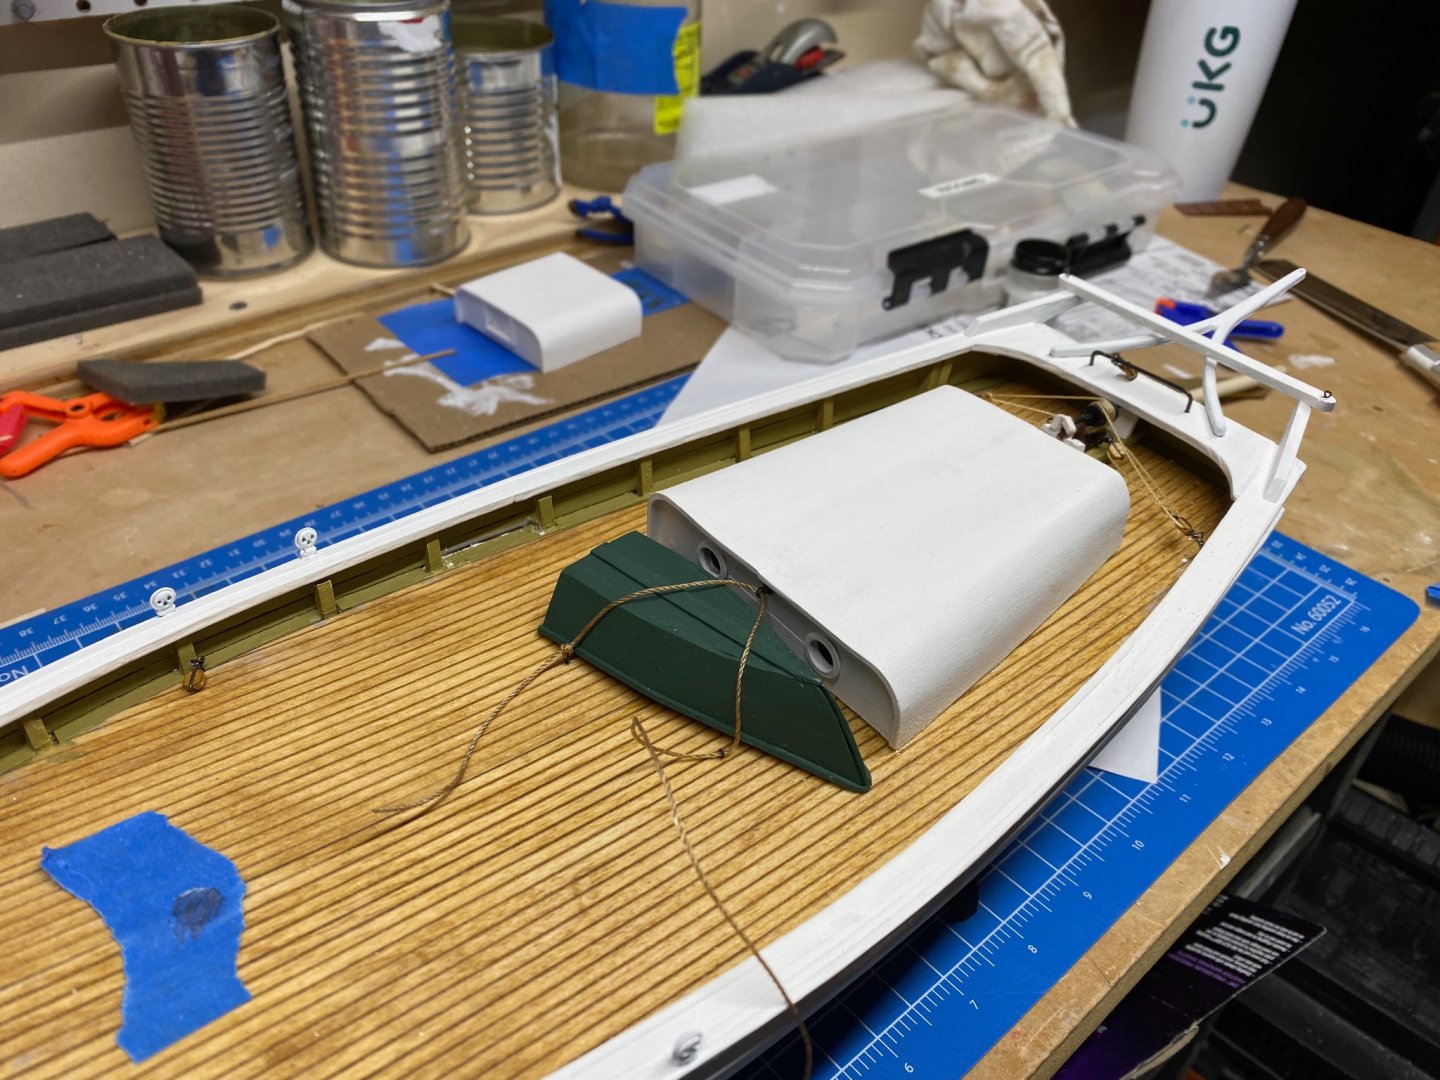
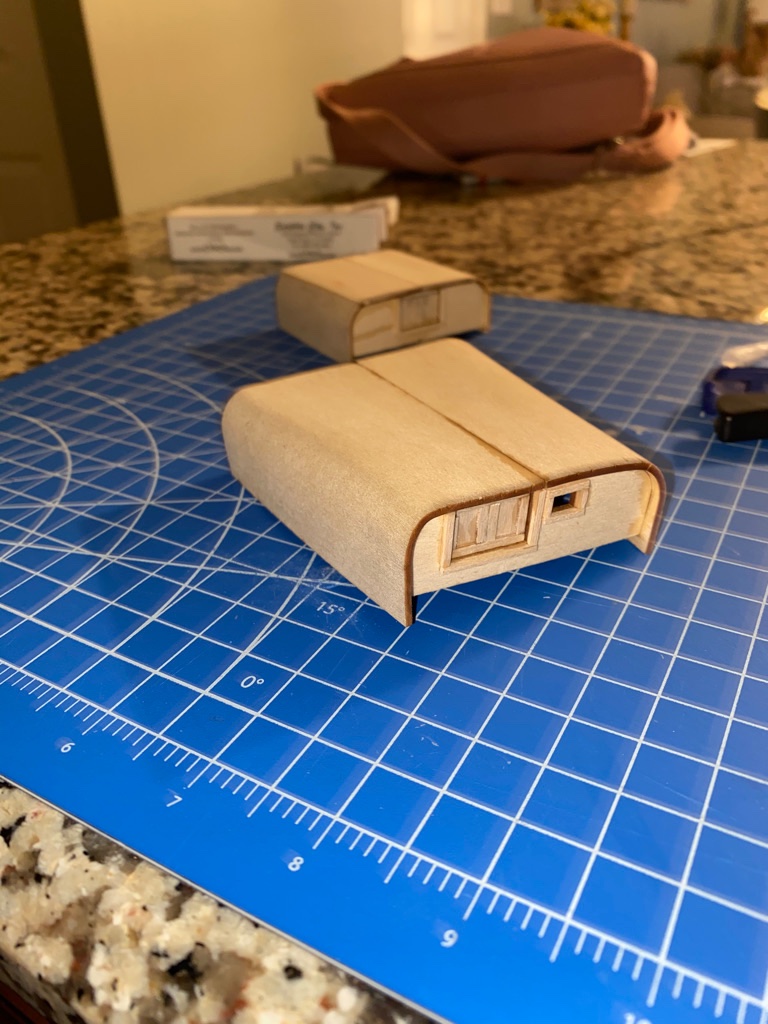
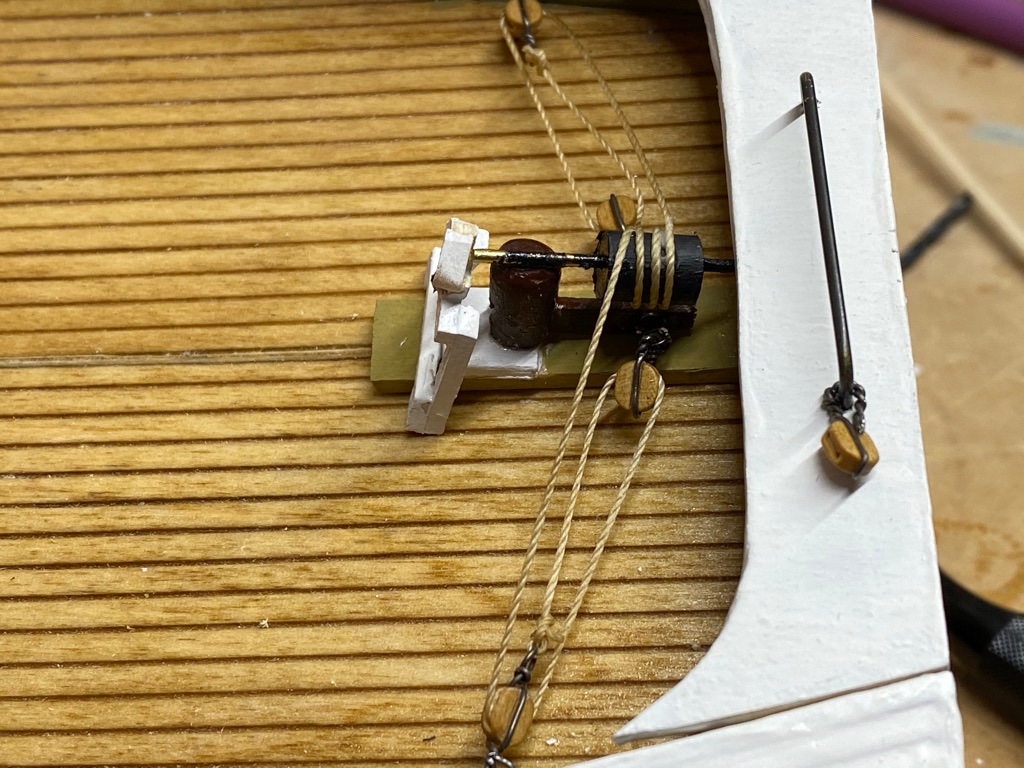
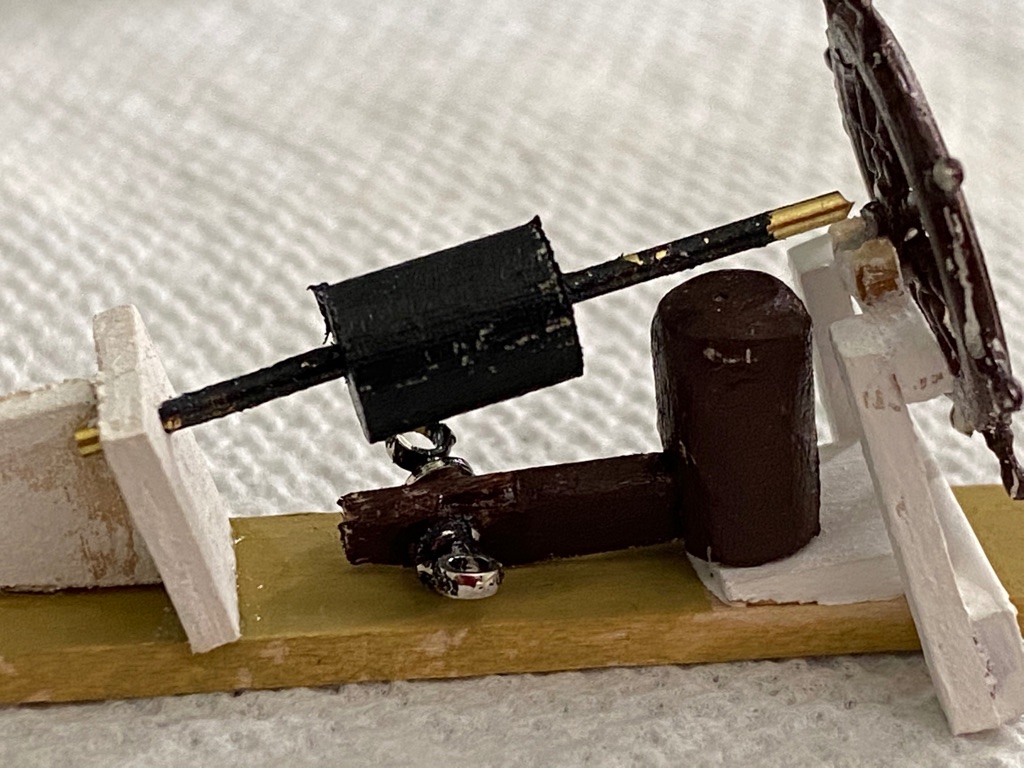
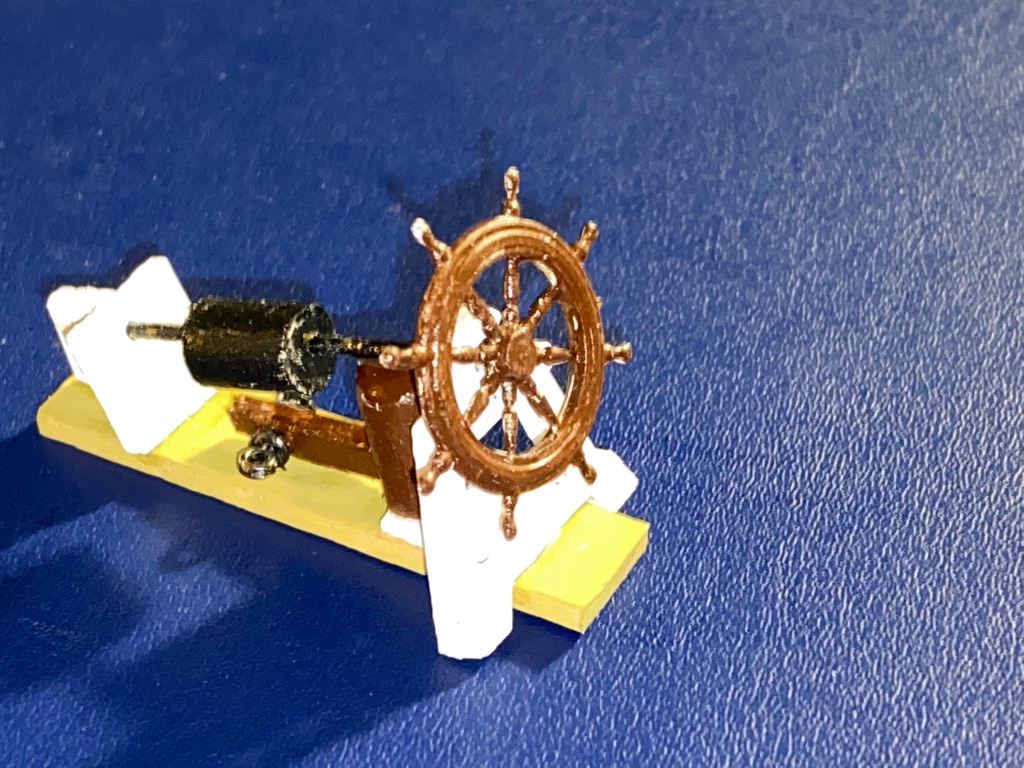
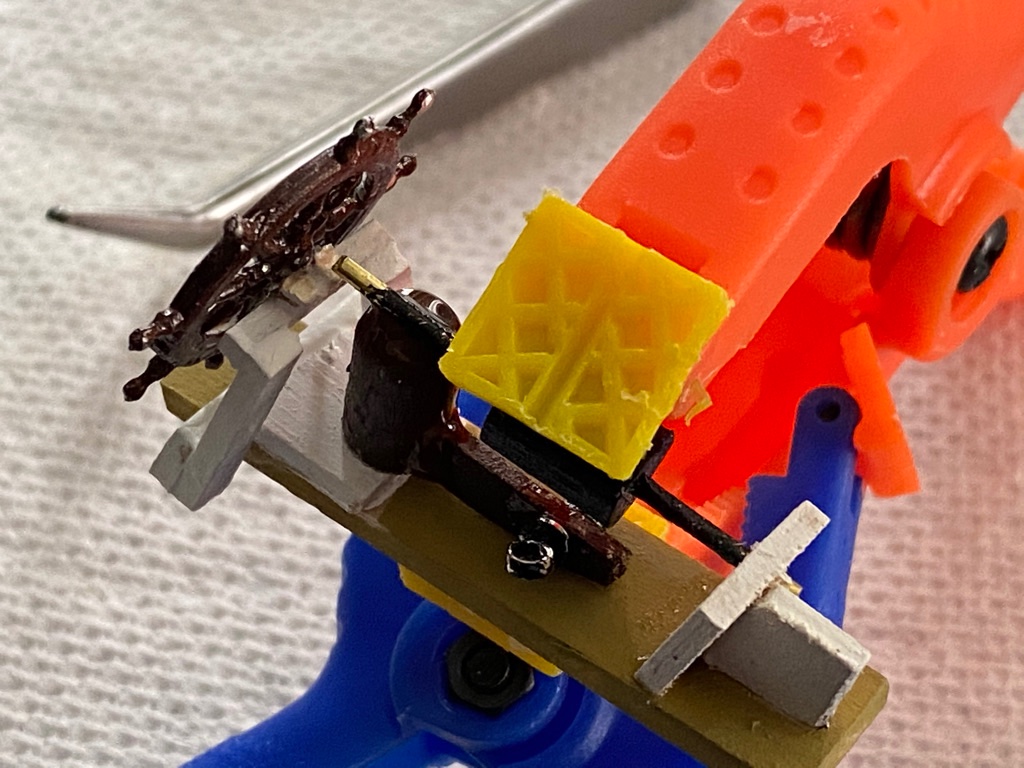
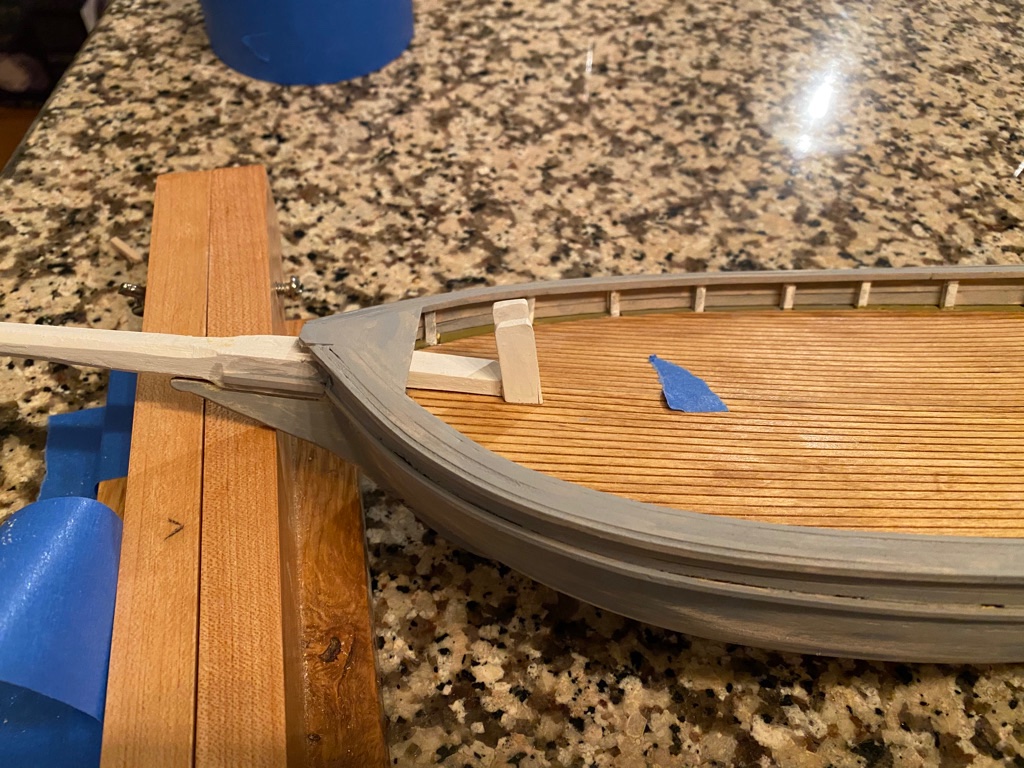
I am slowly making progress. I bought some blacken and used it to blacken some of the metal parts like pad eyes and the traveler rail. To soften the wood for the roofs, I put them in a ziplock baggie that I put around the head of a clothes steamer my wife was about to give away. I've seen a couple videos of full sized boat builds where they use a wall paper steam, and plastic bags to steam full size planks. I figured I give it a shot, and it worked awesome. I then used some right angle clamping jigs to help with clamping the bends in the roof and it turned out fairly well. I'll be using this technique on future models. Unfortunately the glue up didn't go quite as well on the large cabin, I got the roof a little off center. As a result it doesn't sit level and is warped. I tried gluing it down tonight and the CA wouldn't hold. I'm going to have to get something stronger. But the cabins are done, I'm waiting for them to be installed before placing the hatches on them which have also been built and painted. Got the taft rail, and steering gear done as well. Happy how it turned, bumped off the wheel in the process, will attach it later. And the hawse holes, and winch brings us up to date. Its turning into a busy spring, but I'd like to get this done by early summer. Next on the to do list is to finish the dinghy, and cabins mounted on the deck, and I am starting to work on the mizzen mast fixtures and wish bone

-
Sorry don't know the answer to the head question, but I'm building the SPRAY as well from a kit. I showed what you'd done to my wife, and she wanted to know why I wasn't putting in the same amount of detail
-
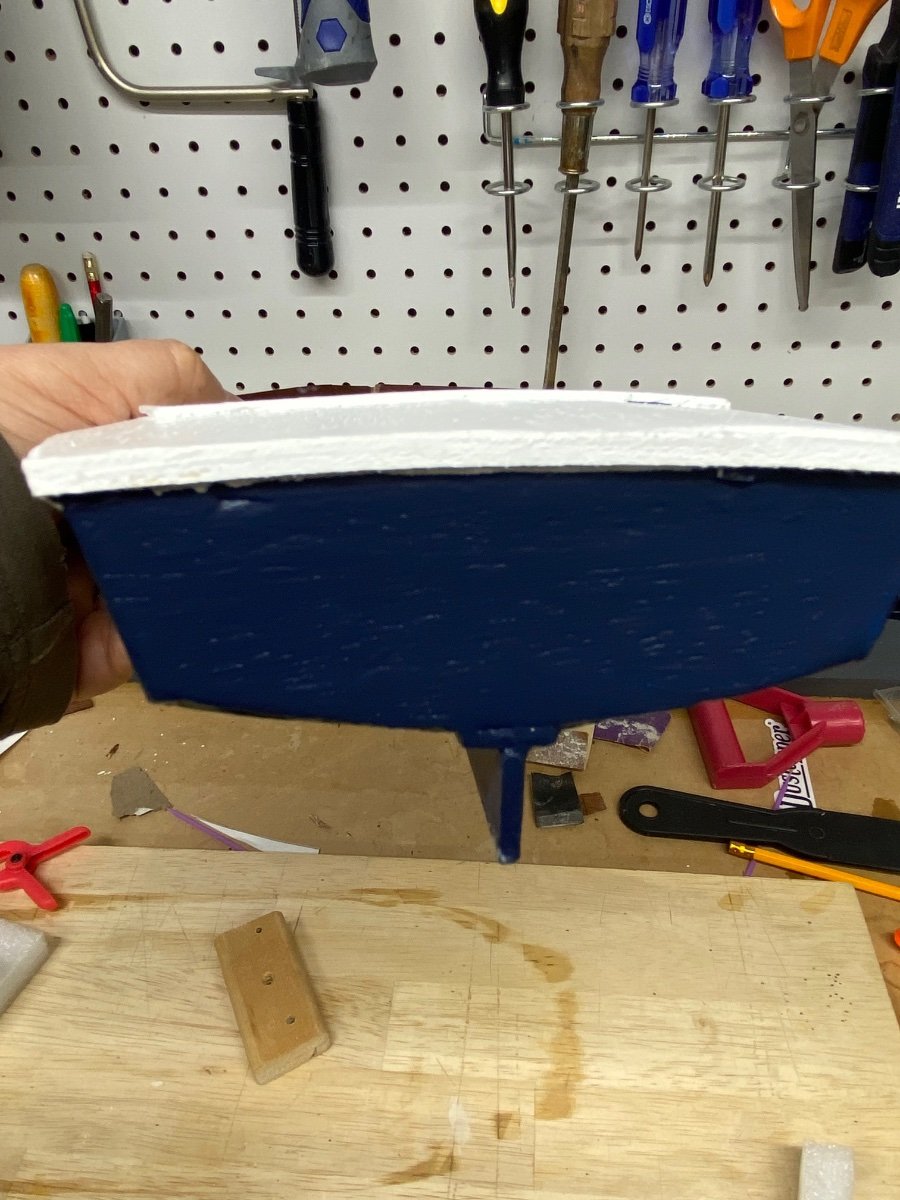
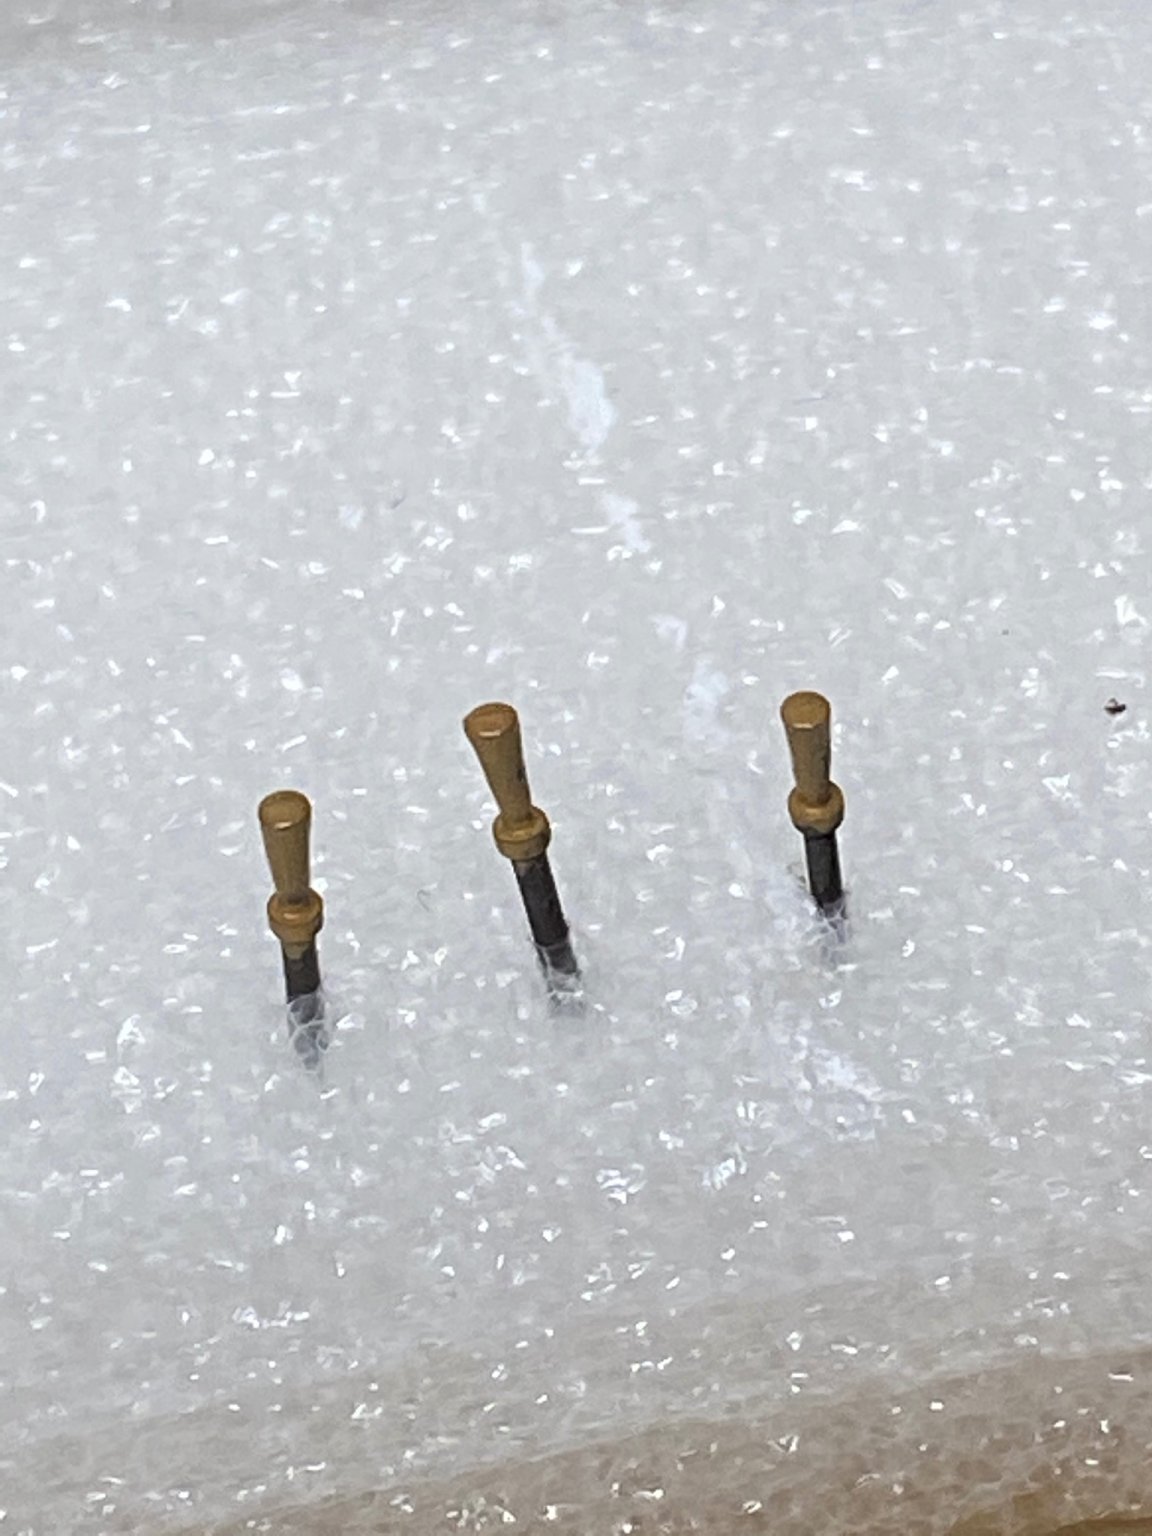
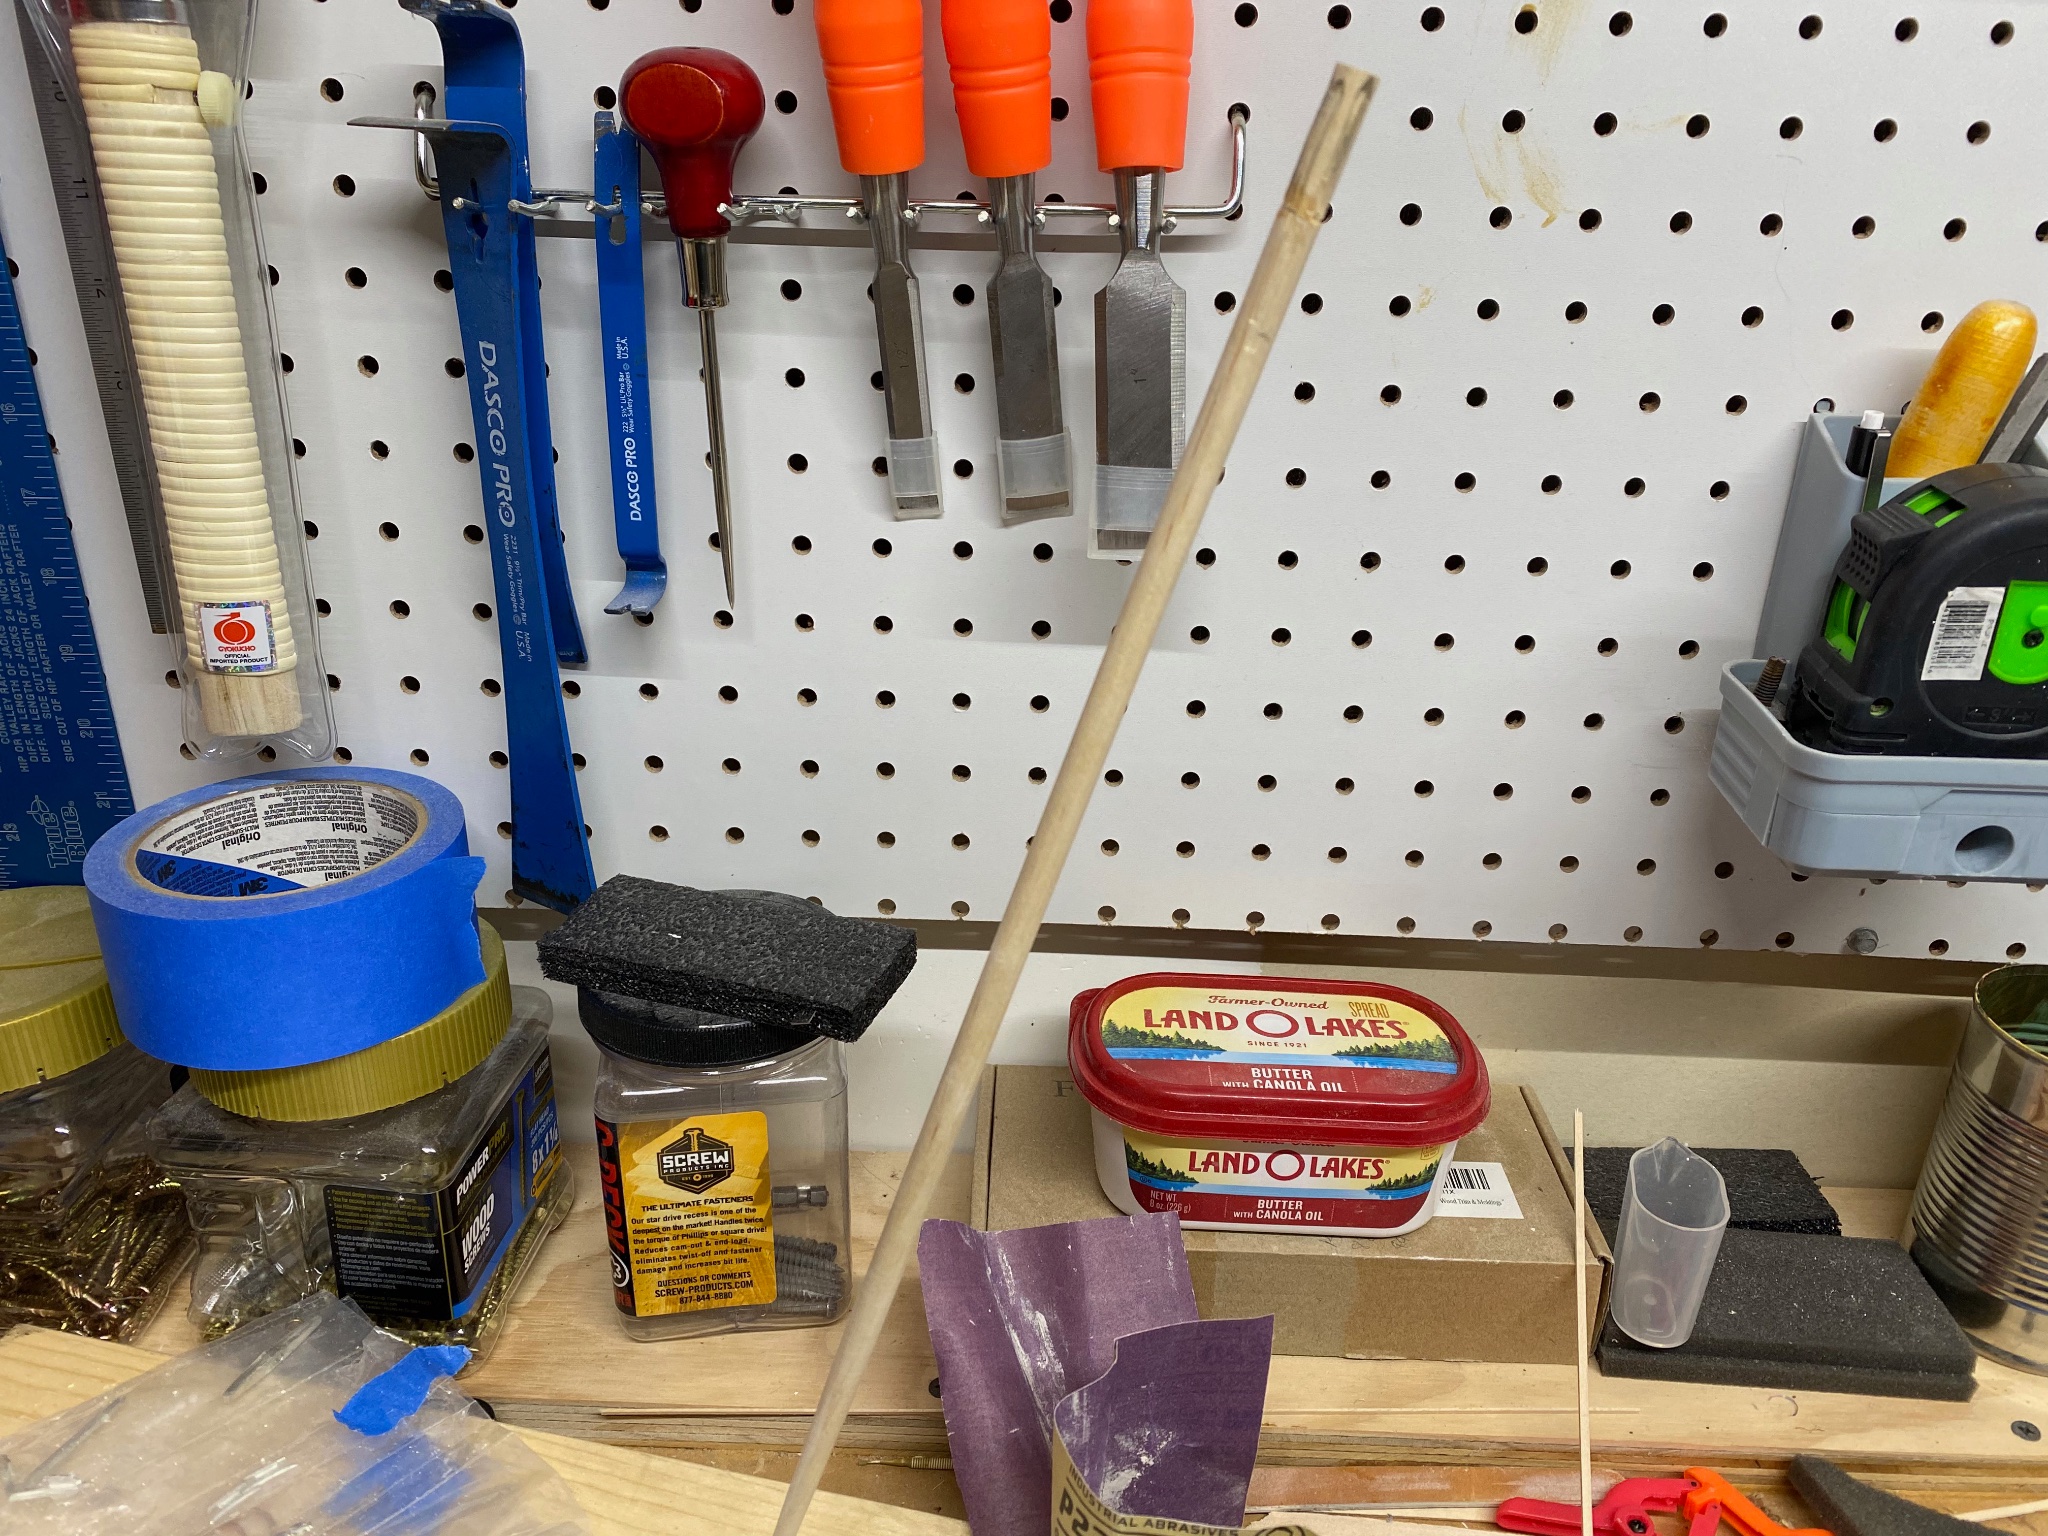
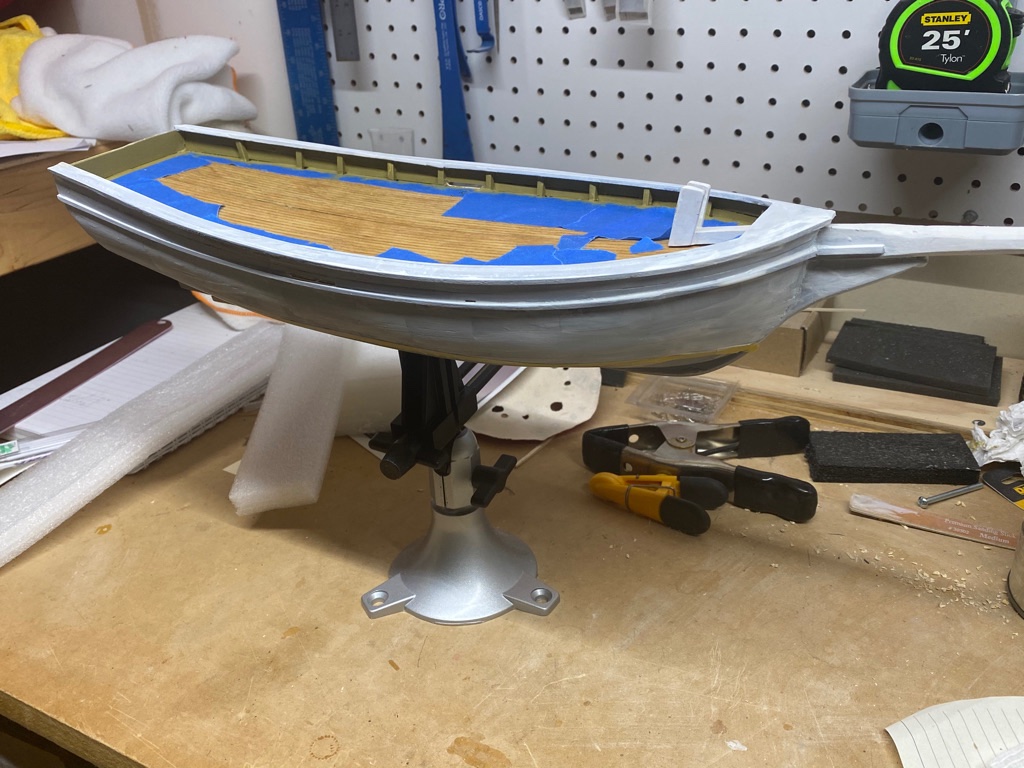
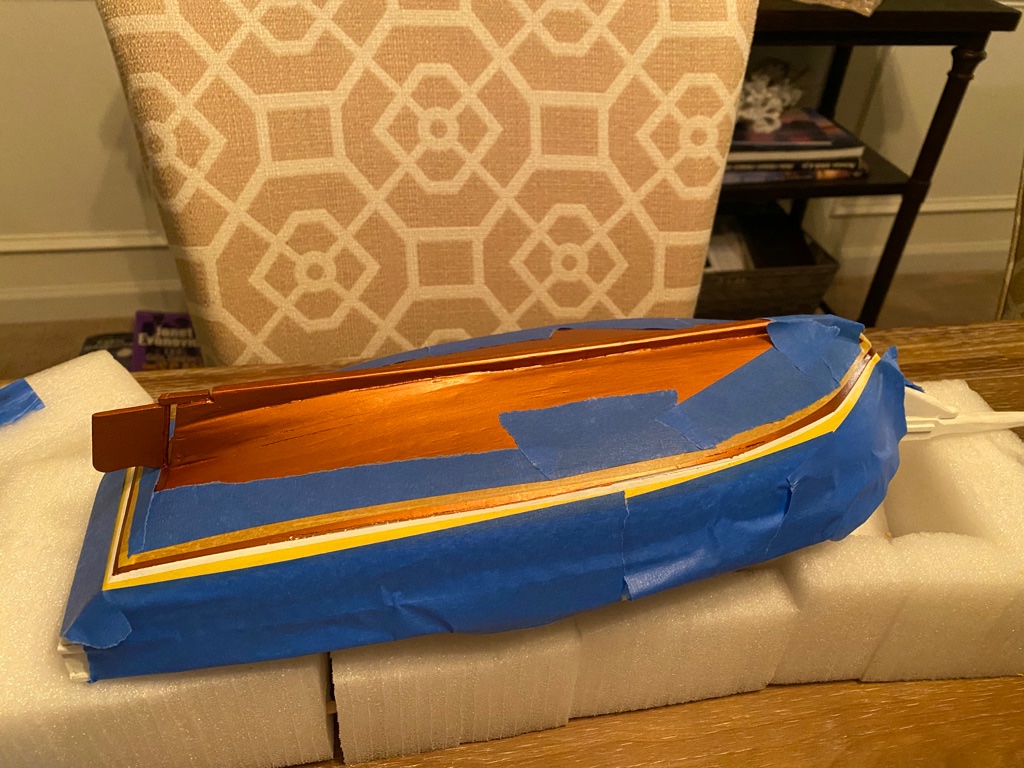
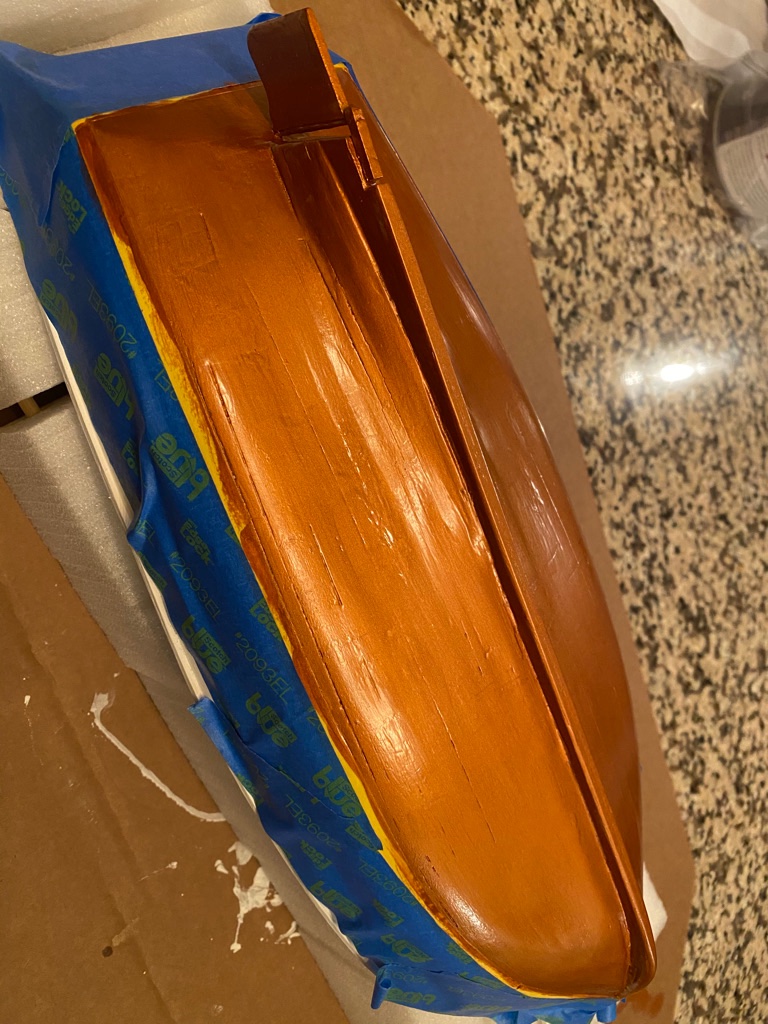
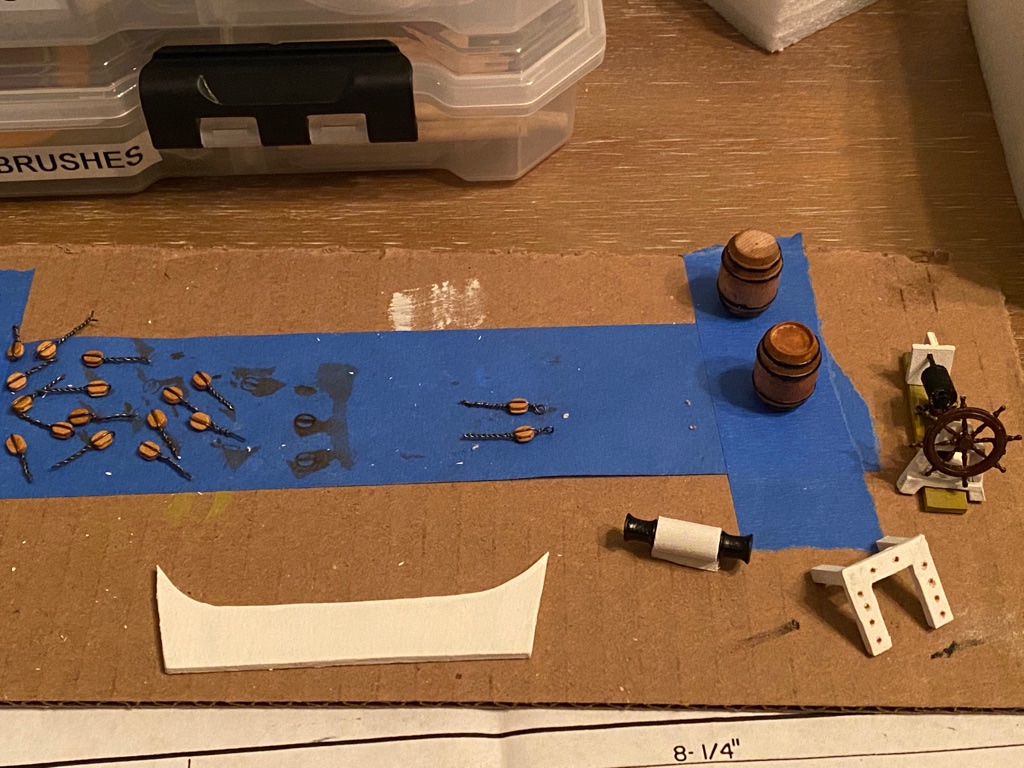
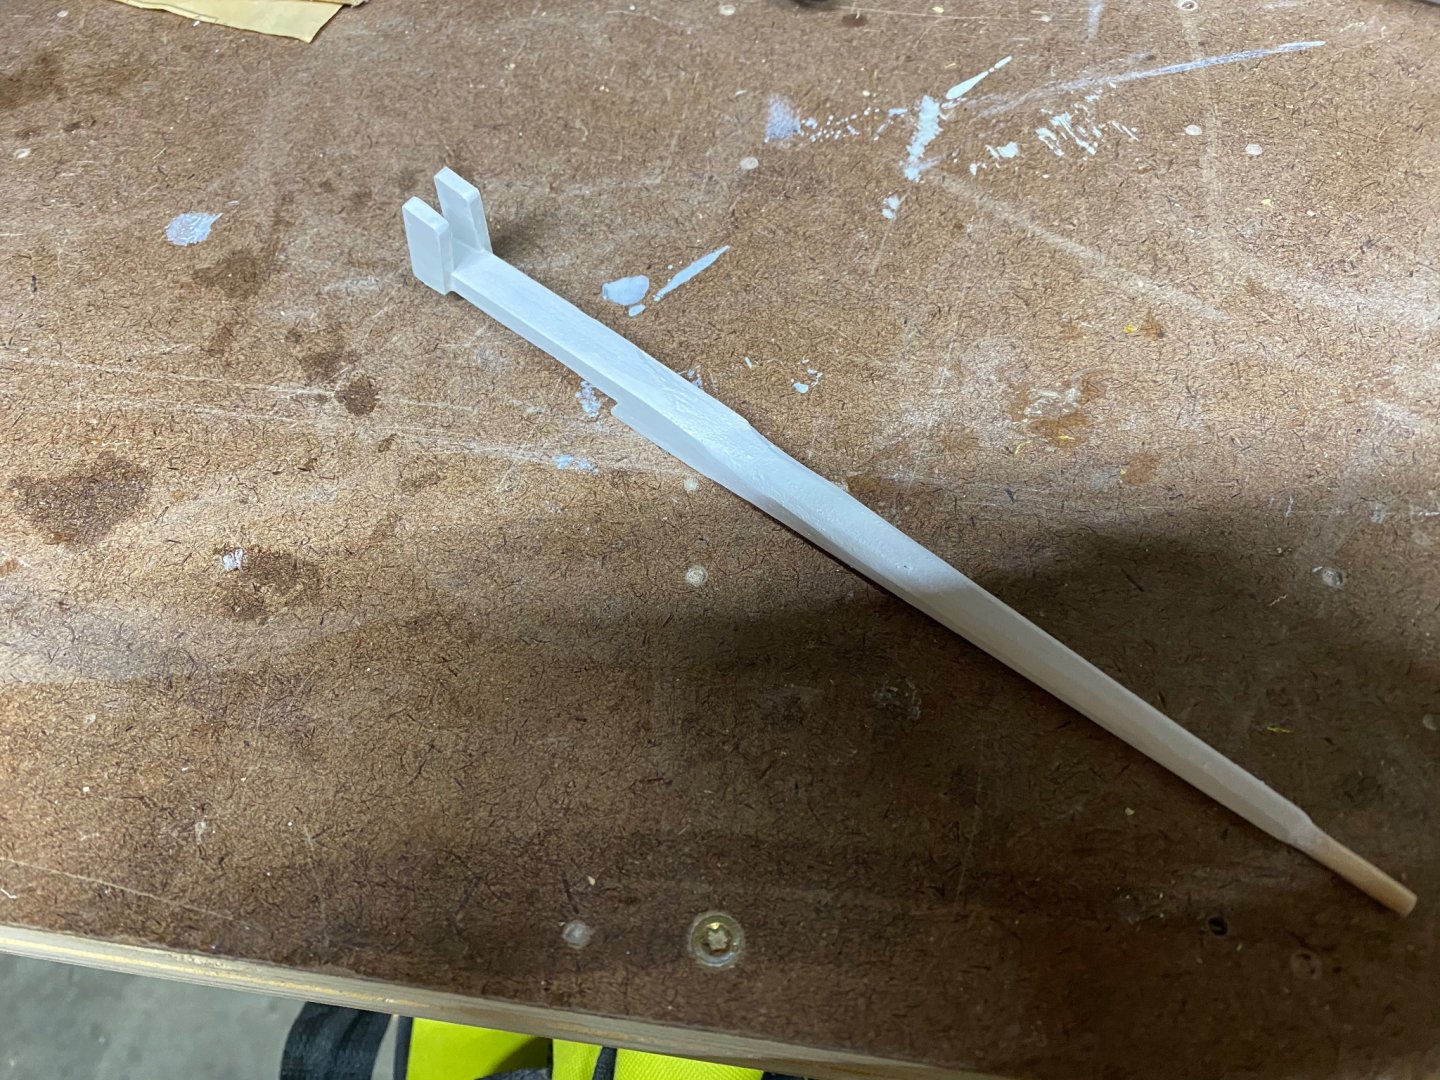
In the past couple weeks I have managed to get the hull painted, it took forever I don't remember how many coats of white paint I put on. But the copper took 5. I have it taped off for the boot stripe and will start painting that today. Glad to have this part done as I kept knocking off the rudder, boot strip masked. I'm having good luck so far with the masking I'm using. The blue tape is incase I spill, or get too Bob Ross with my technique The nice thing about boot stripes is you can correct any waterline wavers. The instructions call for a 3/16 wide stripe, so I cut a small piece of wood, and used that as a guide for putting on the second piece of tape. While I've been waiting on paint to dry, I've started working on other small pieces that go on deck. First I did the steering assembly. I was real proud of the piece the wheel attaches to and then the piece that holds the rod snapped in half. You can see that in this next picture of it partially assembled. Also at this point I discovered that it didn't sit flush. So I put some CA glue on it and clamped it down. I tried unsuccessfully several times to create a new piece to go over it, but they kept breaking. In the end I got something on, and I'm OK with it. I had bought some wooden blocks, and stained them and got ahead on stropping them. I also did the barrels, belay pin rack, and winch. Today I'll start on the cabins and the rest of the deck furniture. I'm holding off on the dingy until the cabins are done, so I can see how much room it will have, incase I need to make it a little narrower. I'm waiting on some blackening solution so I can dip all the metal parts in it. I am going to see if I can work with the blocks that came with the kit, they are just so small and I end up butchering them filing them and working with them.
- 23 replies
-
- 4
-
-
- Spray
- BlueJacket Shipcrafters
- (and 1 more)
-
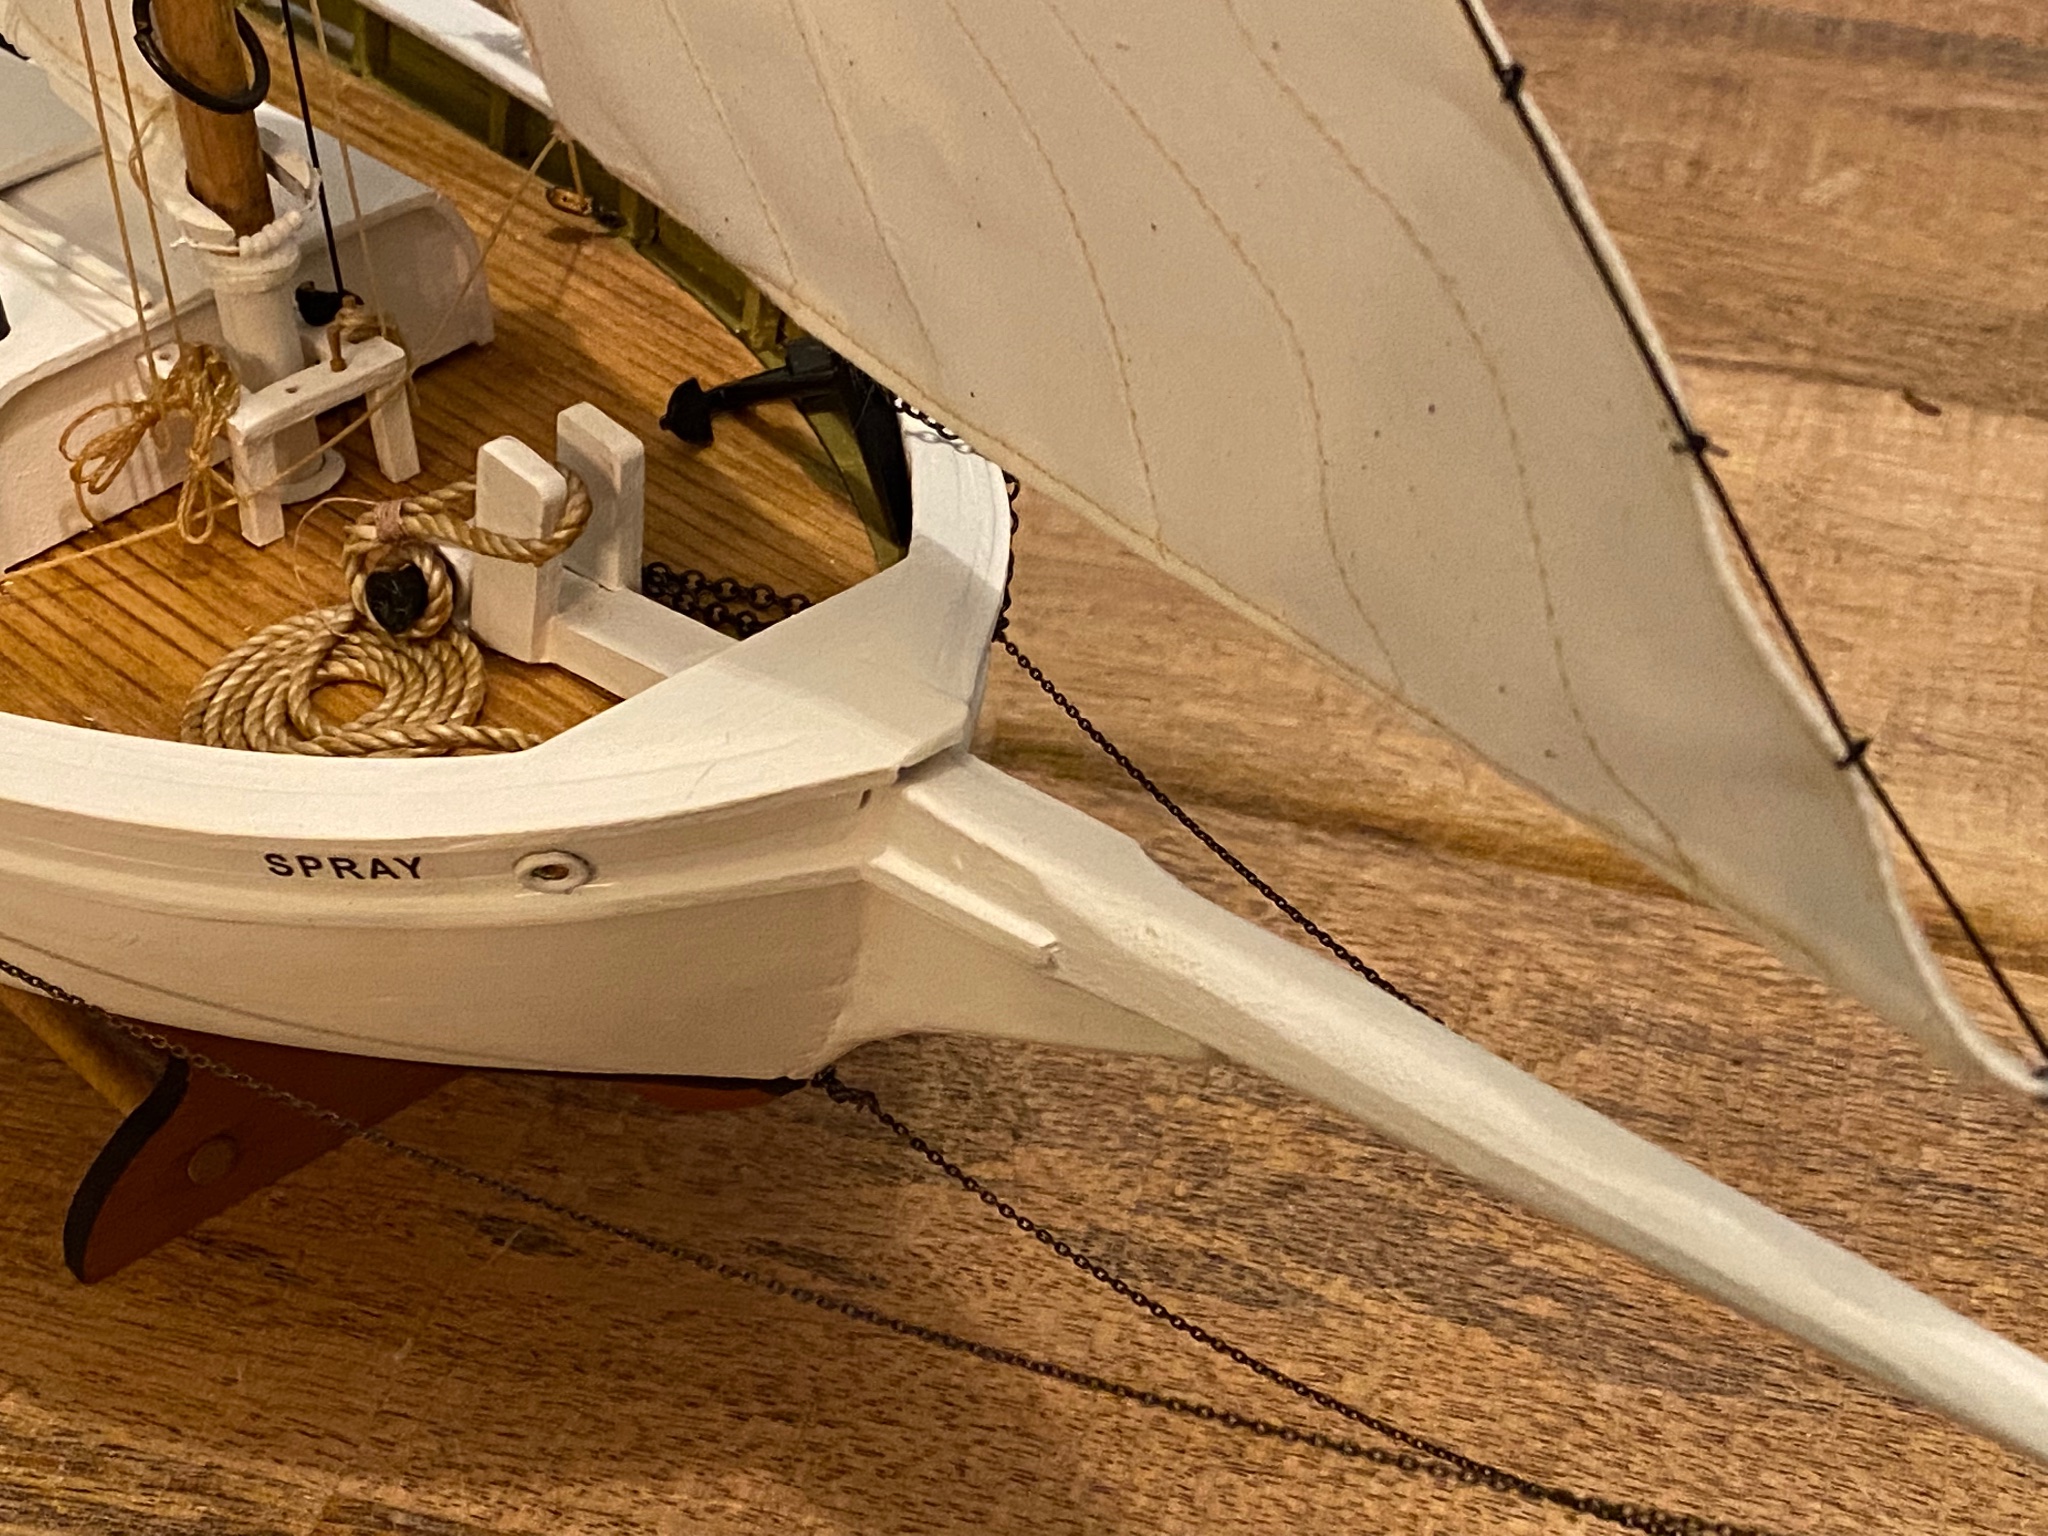
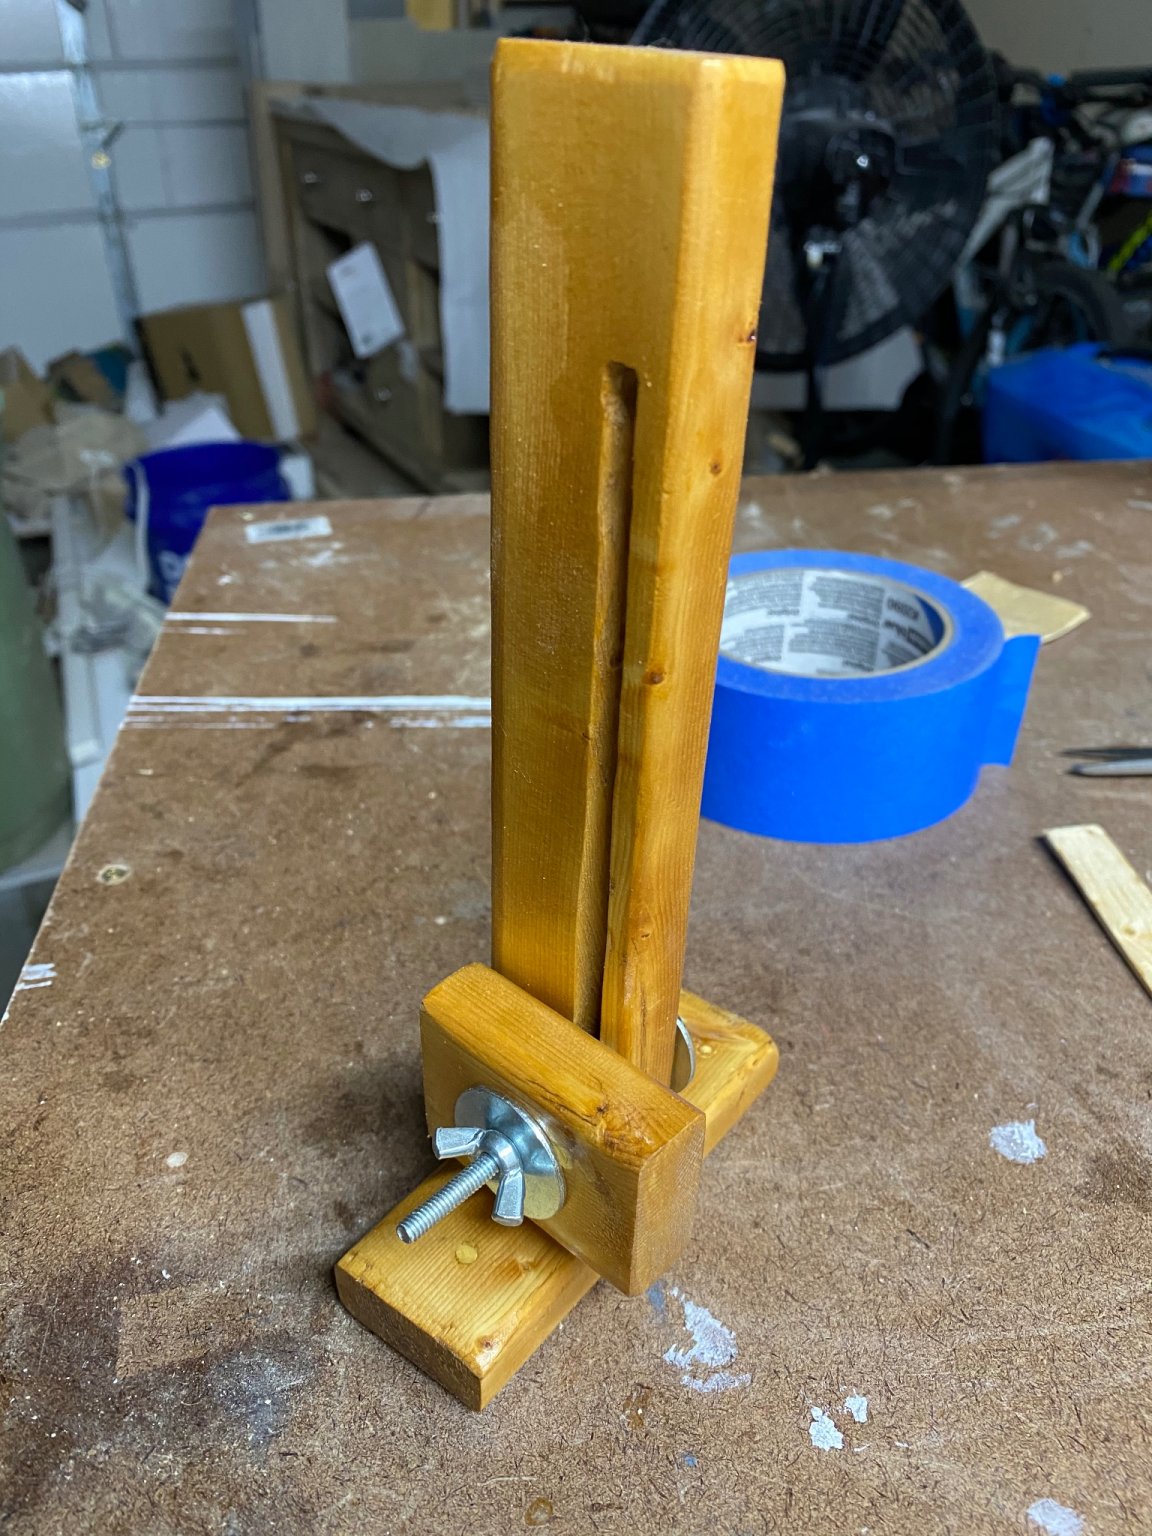
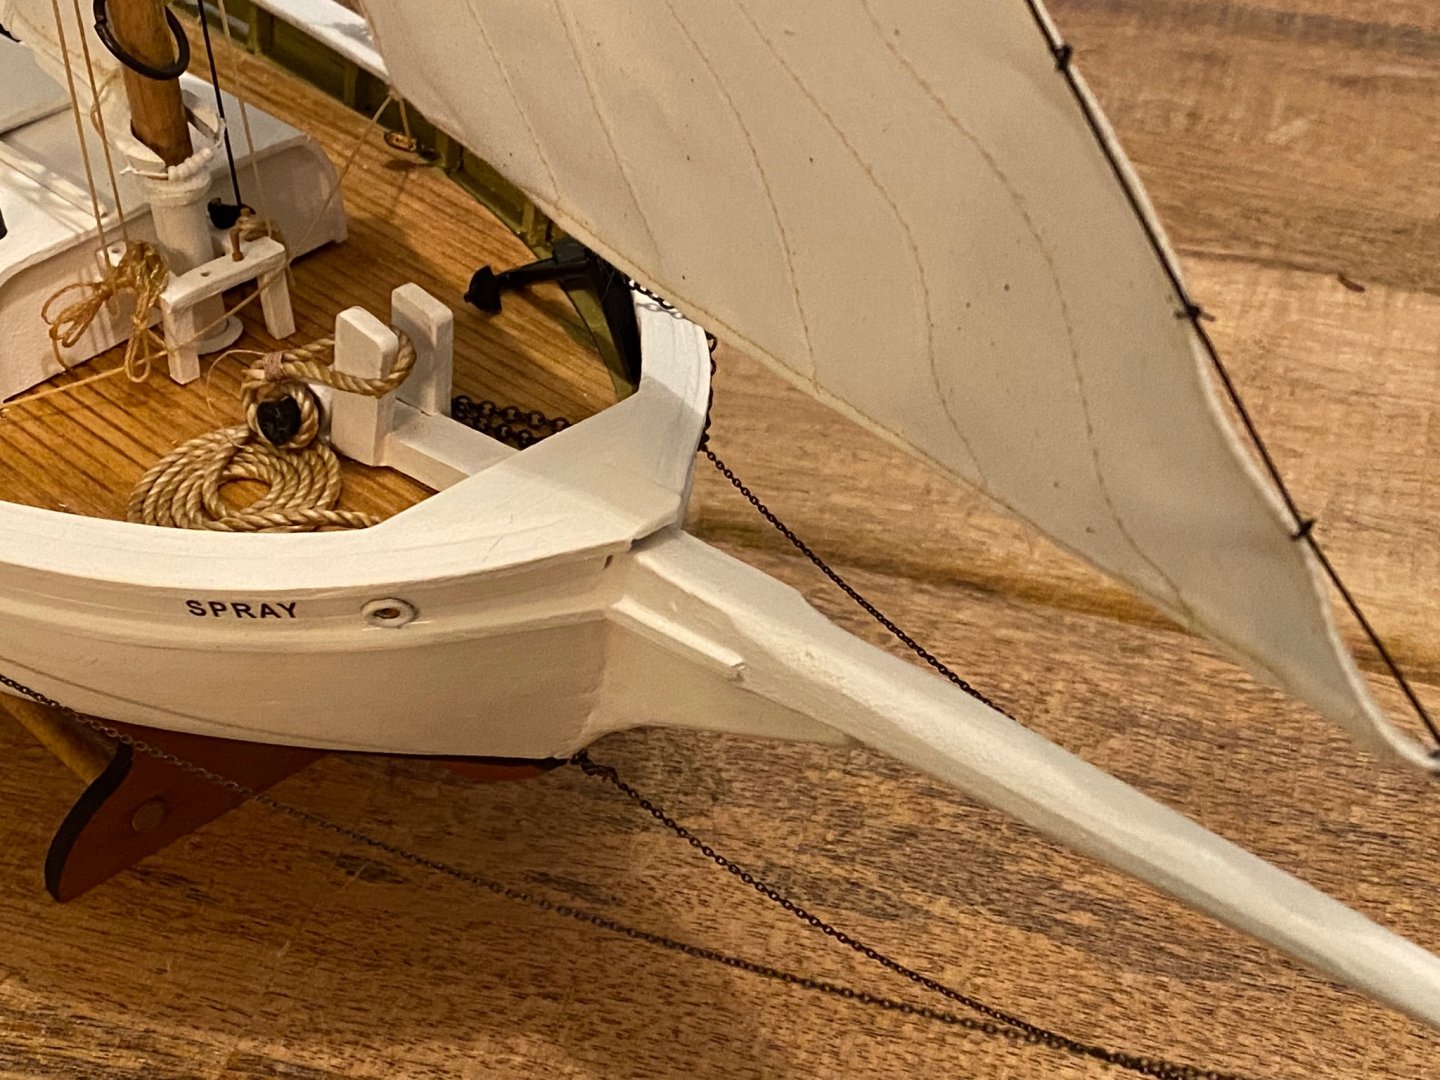
Slow and steady more work is getting done on SPRAY. I got the rails and bulwarks on, and was pretty happy how they turned out. I had done the rub rail before the rails, and didn't realize they extended on to the bowsprit. I was able to find just enough scrap to do the bowsprit, and I think it turned out OK. Next I built the rudder, being real careful using a round file to create the grove in the rudder, for the rudder post. This took way longer than it should have, because I couldn't find the rudder post, after about 20 minutes going between the kit box out in my cold garage, and the pieces on the dining room table that has been commandeered for the build right now, I finally found it. I was pleased with my gudgeon, and wish I could have got the hole in the bottom of the boat, a little closer to the closer to the trailing edge of the keel. At this point I also cut out and shaped the Taff rail. Then I used my new water line marking jig to mark the waterline. This one went way better than my Friendship Sloop, both sides are almost at the same place on the hull. They meet together at the bow and stern too which is a plus. I just need to get a better way to fasten the pencil to the jig. Keel was installed after the water line was drawn so it wouldn't be in the way. I'm using Tamia 6mm masking tape to tape off the water line, I'm going to paint the top half first tomorrow evening after my paint warms back up from being in the garage. I really need to come up with a way to store the wood while working on the model. I have some ideas of trays to build to hold it, using PVC pipe. Thanks for reading and following along.
- 23 replies
-
- 1
-
-
- Spray
- BlueJacket Shipcrafters
- (and 1 more)
-
Lots of helpful tips in there. I didn't know about the thread and water either, I really like your mast hoops.
-
I wouldn't think so, unless his dad was doing most of the work. Check out Blue Jacket Shipbuilders, they have some great entry level kits.
-
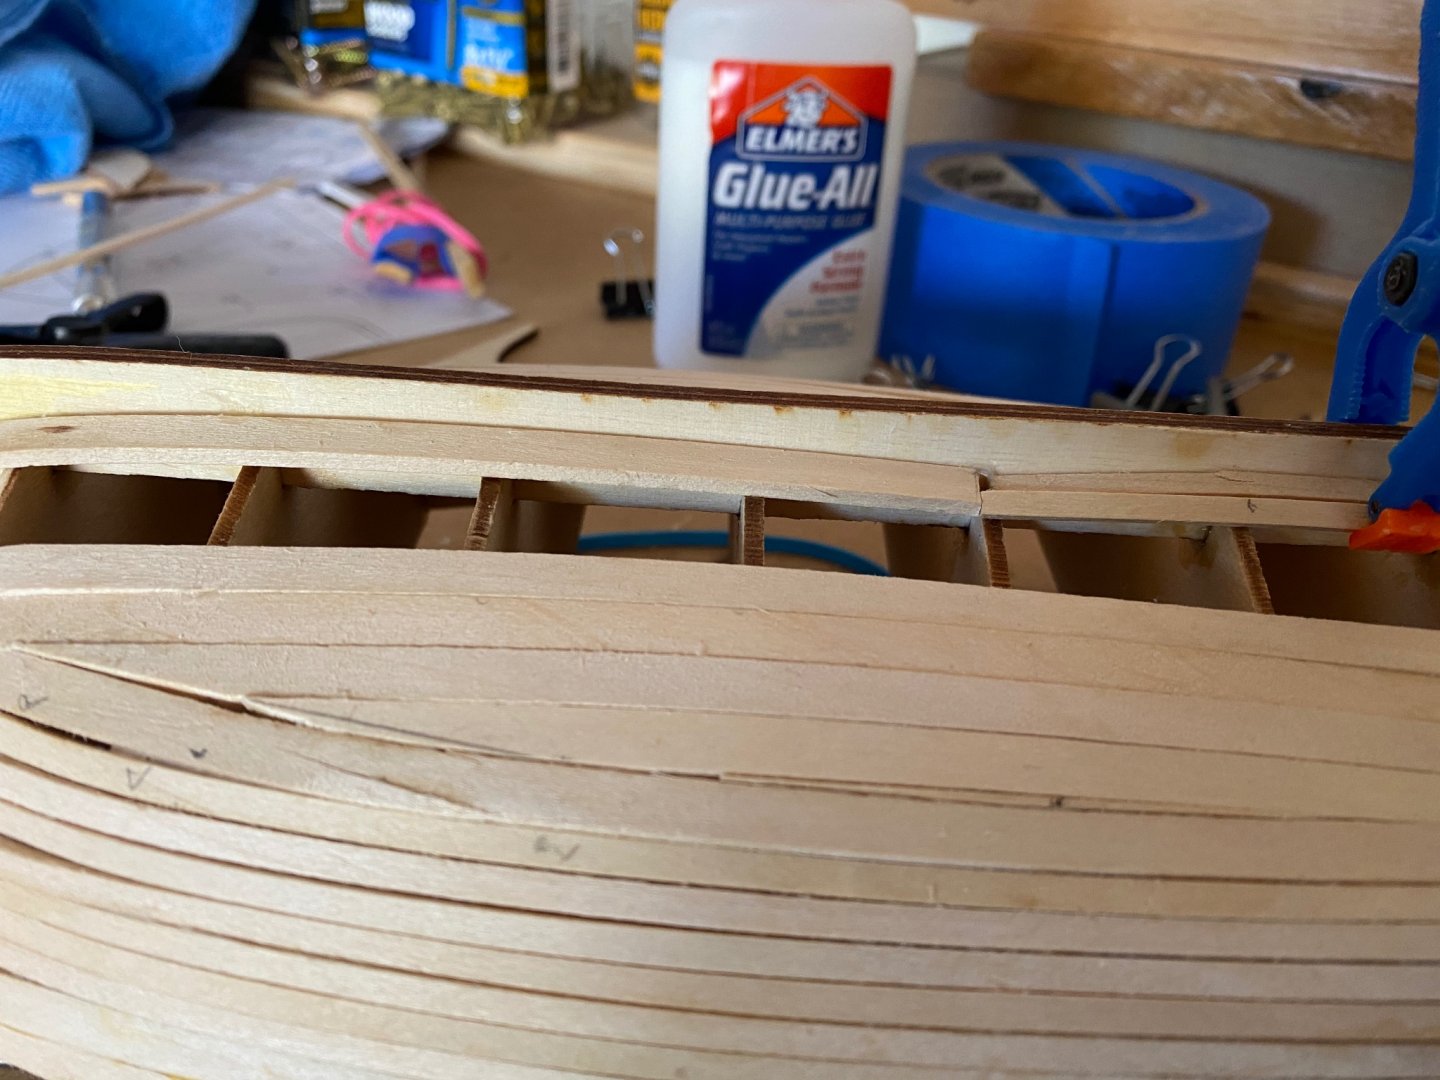
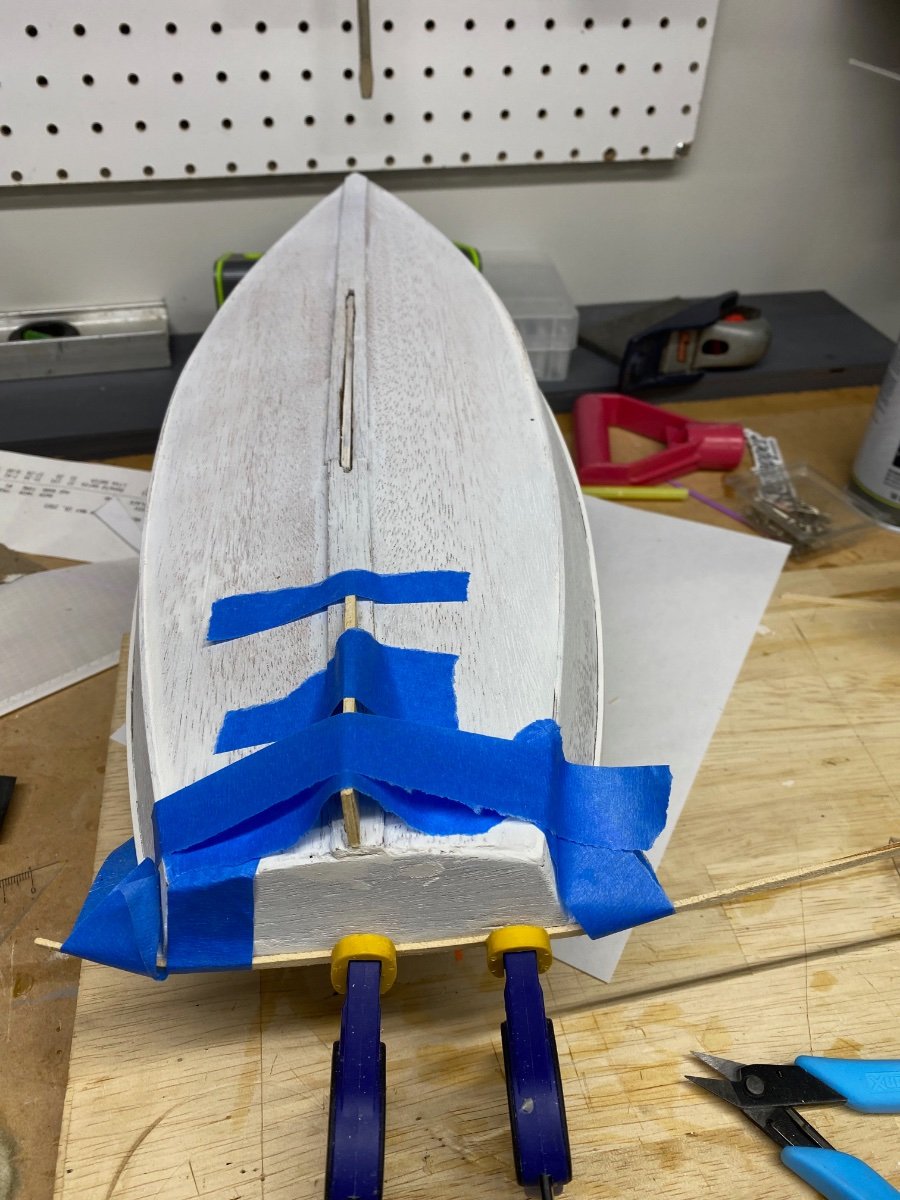
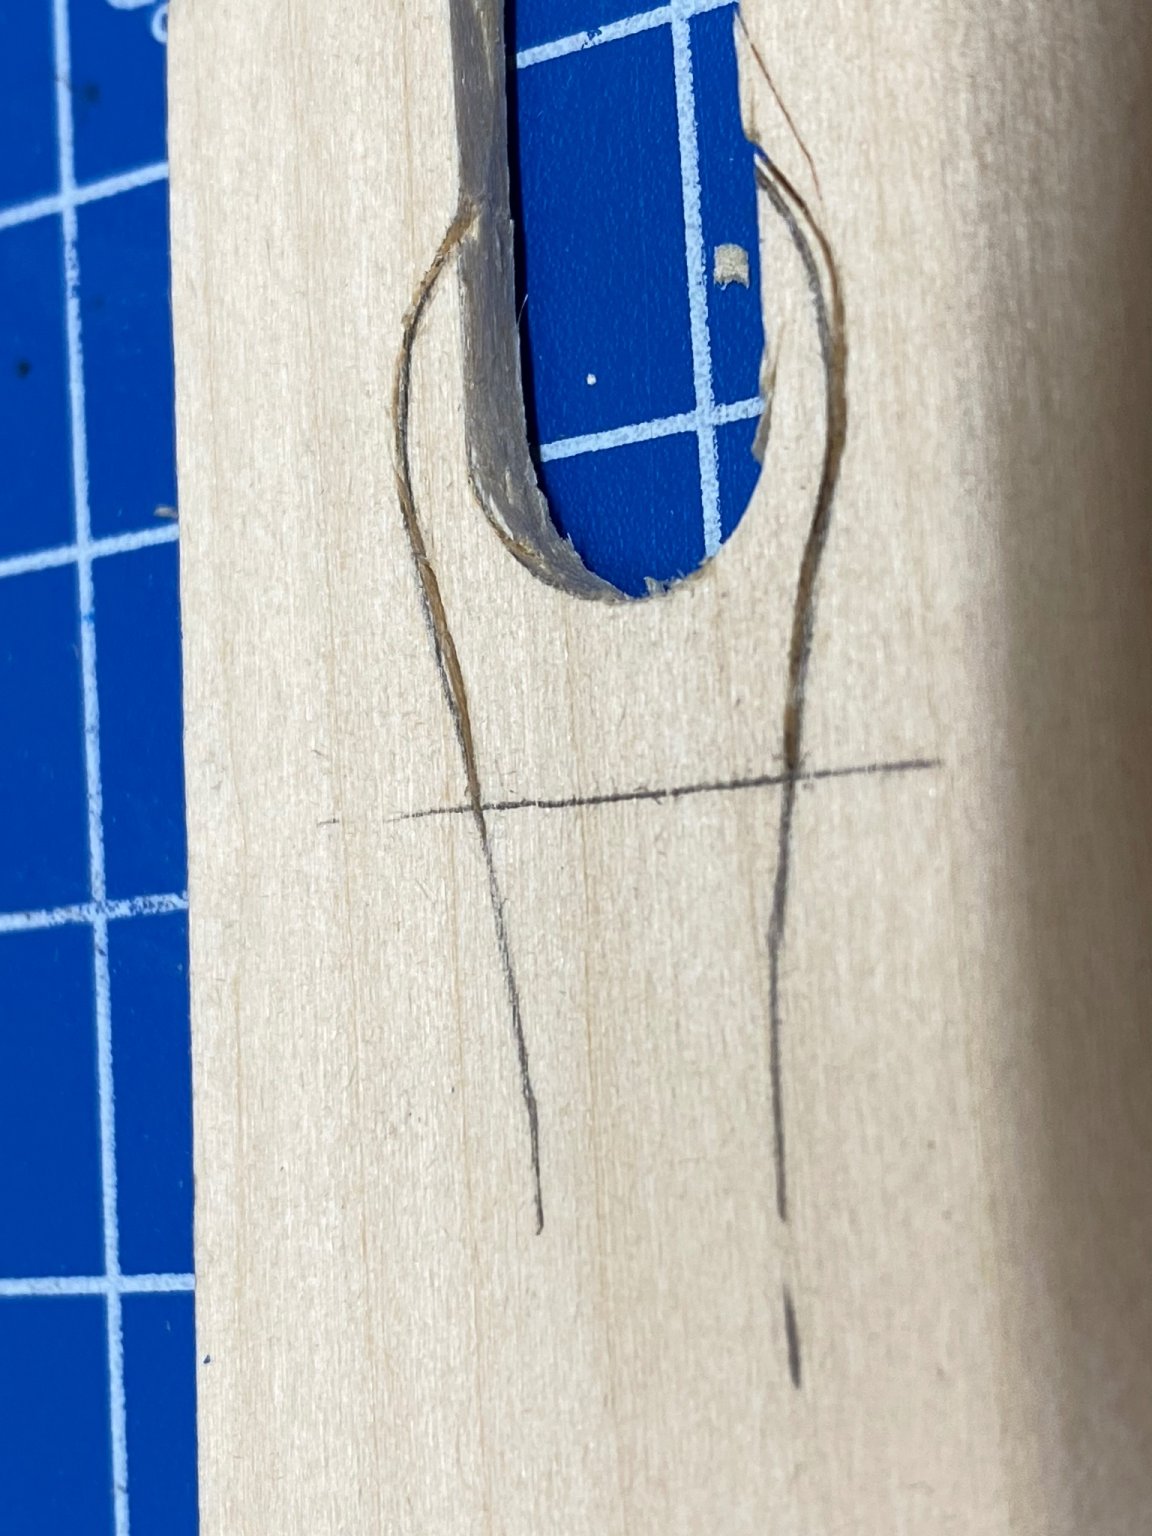
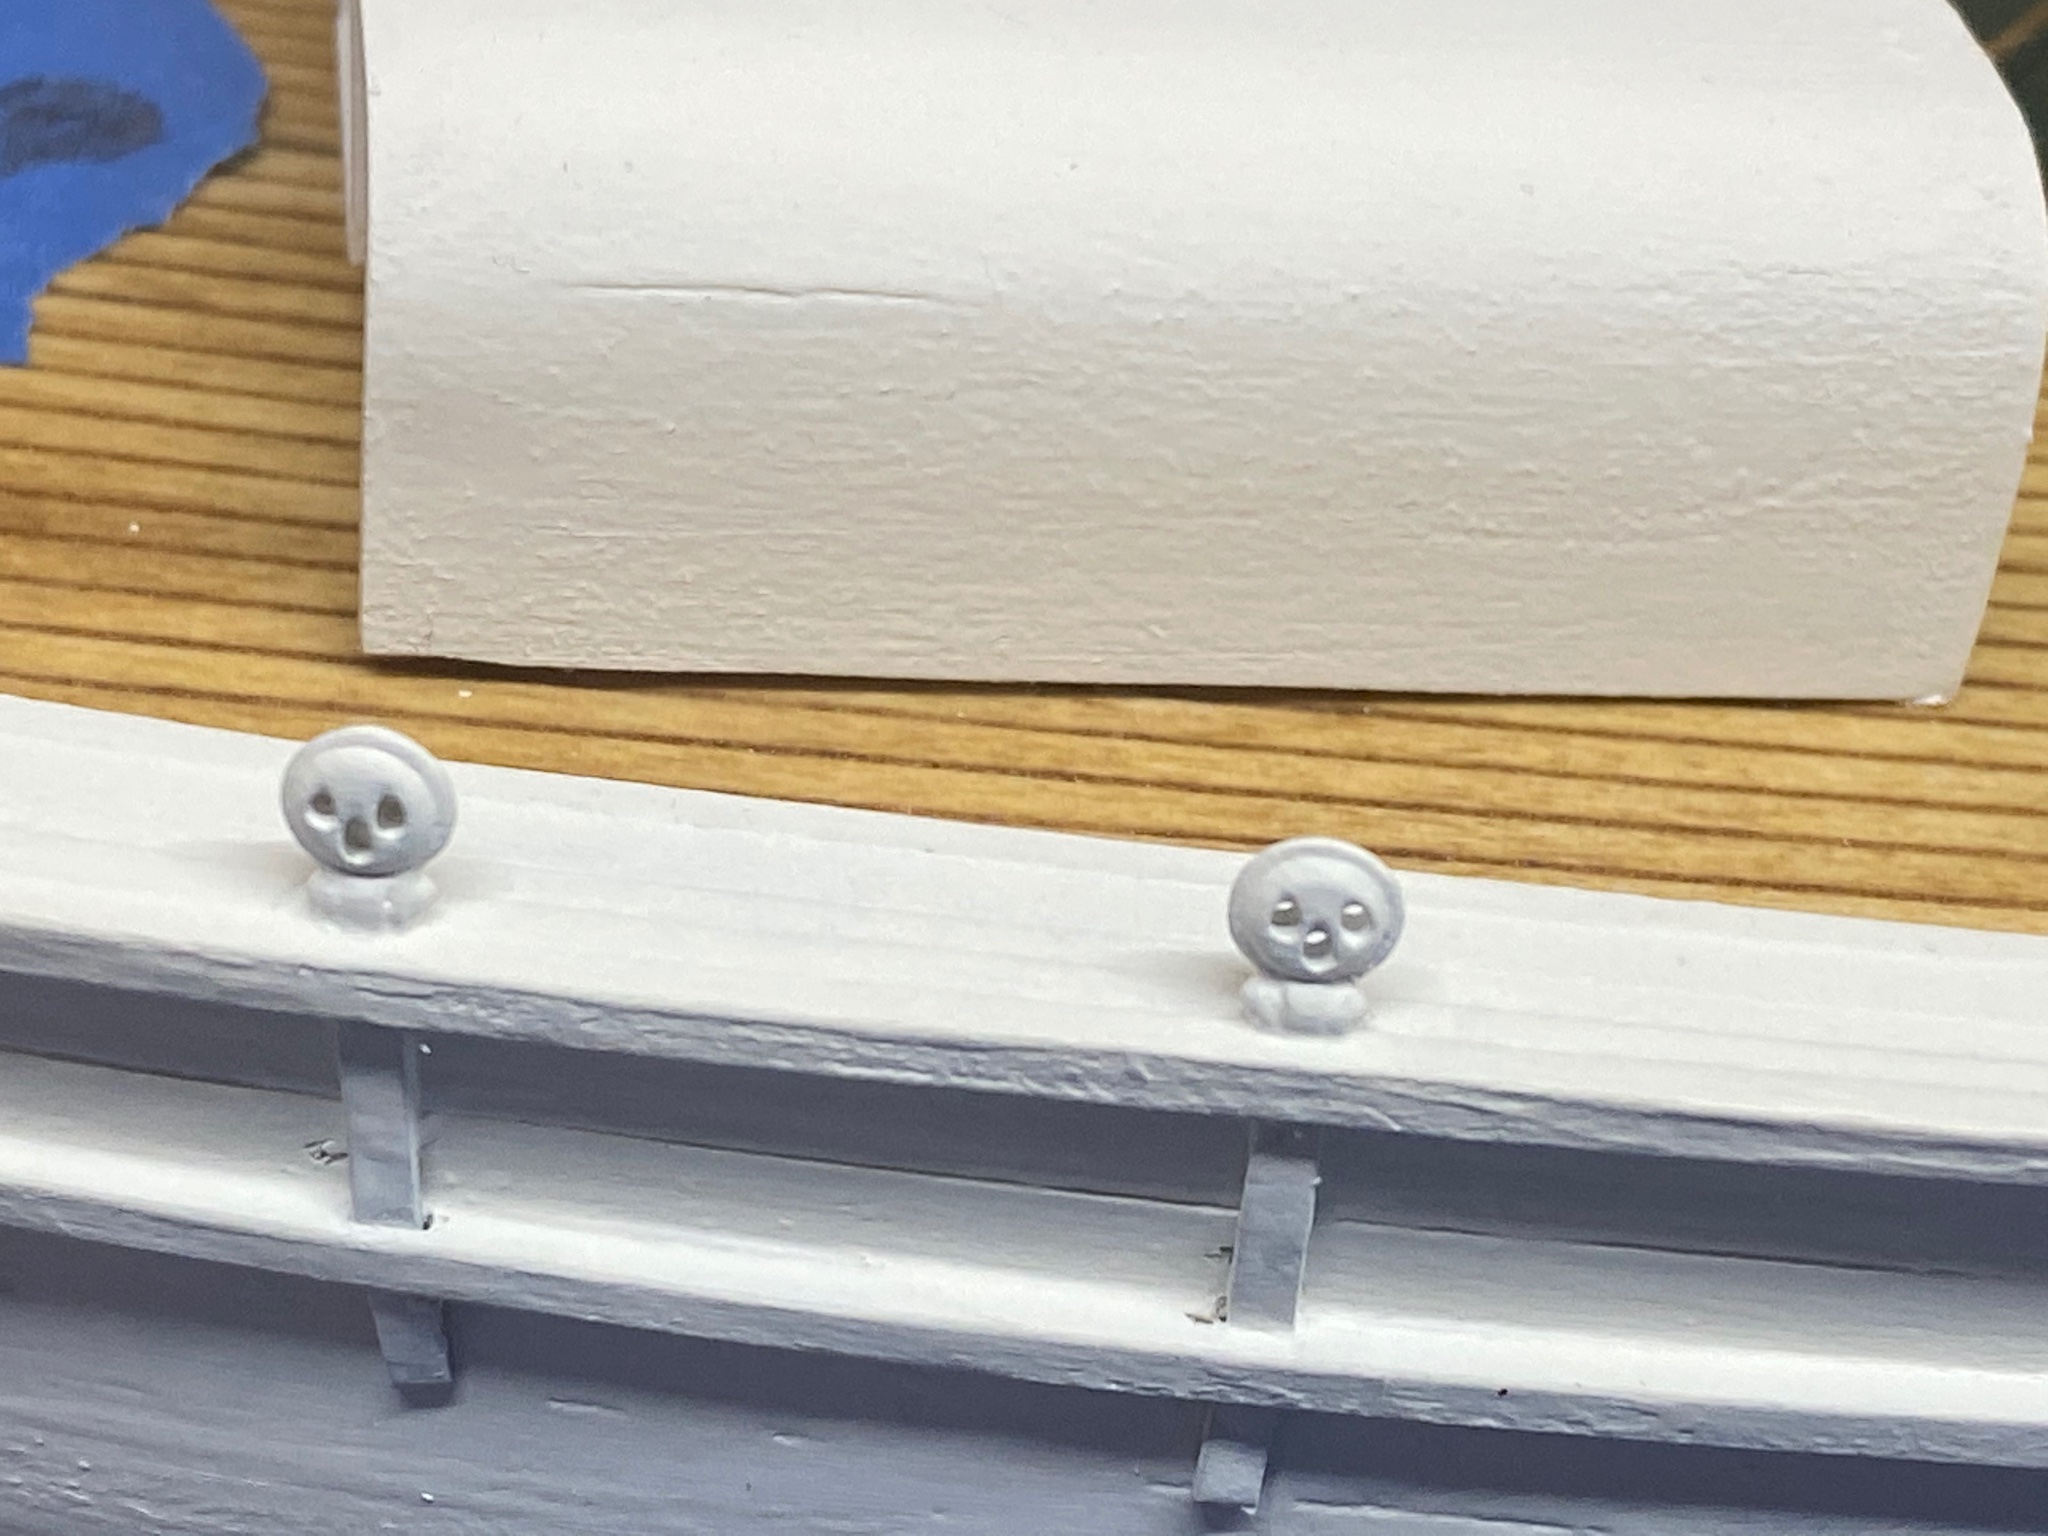
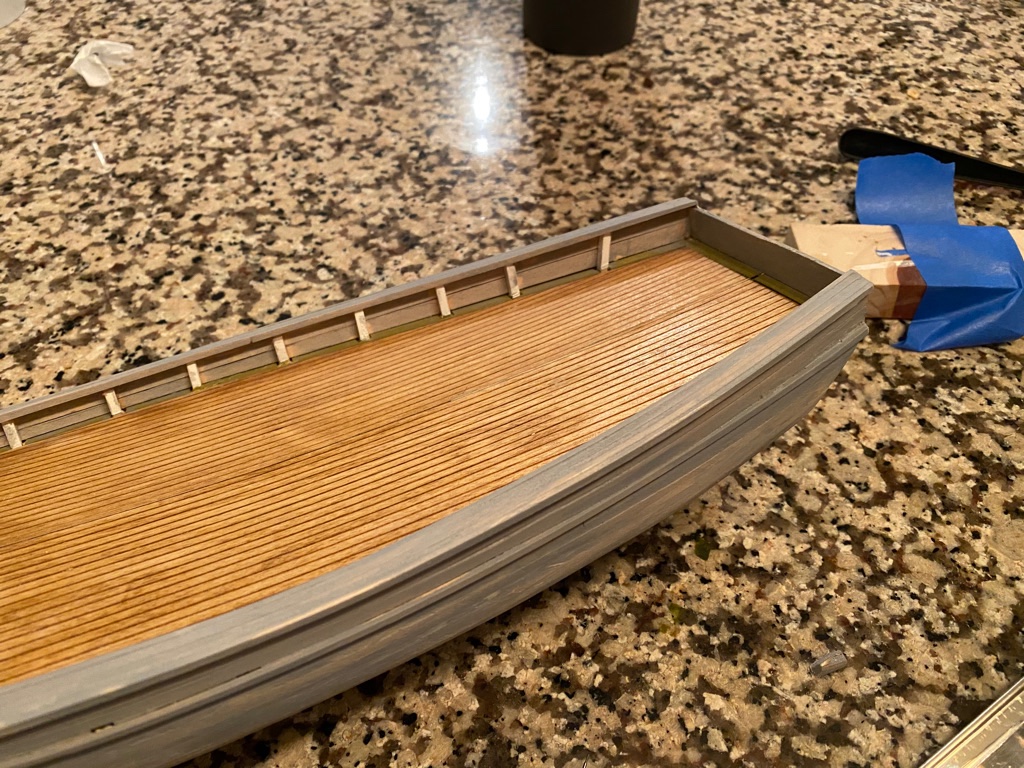
I can't believe a month has gone by and I haven't posted. Happy New Year. I am making slow progress on the model. I added the stanchions and then the carefully notched the sub deck and margin plank. The instructions say to do the deck first then the stanchions, and I wish I had. Others do them earlier, I thought waiting until now would make them easier to line up. But I ended up with several that lent in towards the centerline. Also the margin has notches in spots, but that will be hidden under the rail. Used RAF Middleton as the paint for the margin plank. I put some wood sealer on the under side of the decking, and tried different stains. Settled on one, and then put the sealer on the other side and then stained it. The purpose of the sealer is to prevent blotches, and provide an even stain but it didn't quit work out that way. That's ok, I think it came out ok, and unless you are doing individual planks there is the potential for this. I'd originally painted the stanchions on the port side the same tannish color, but then I painted them white, I think I am going to go back to the same color for them and the inside of the bulwarks. Then I moved on to the bowsprit, I made a template and tried to follow it as closely as possible. It is sort of octagon shaped, I can live with it. Left the tip unpainted so I could hold it, I'll pain that when it is done right before rigging. Next I started working on the bulwarks. After a verification from Bluejacket on their height (thanks Nic) I marked off the heights on the stanchion. To bend the planks I used the sheet that had the sub deck in it as a form, after soaking/heating the plank I was able to bend them into the form. I let them sit over night and then installed them. I had purchased some padded sanding discs for my drill and at low speed used it to bevel some of the stanchions, then I attached the top bulwarks. It isn't visible in this picture but for the life of me I can't get the forward end of the planks to meet at the bowsprit. I mean I start at that end, glue it first, and slowly work aft, but when I come back there is a small gap. I can fill it of course but I'd like to learn how to get it right. So if anyone has any suggestions I'd appreciate it. The plan for the weekend is finish getting the bulwarks on and the then mark the water line and start painting the hull. Here is a picture of my home made waterline marking gauge, the pencil gets clipped to it.


- 23 replies
-
- 1
-
-
- Spray
- BlueJacket Shipcrafters
- (and 1 more)
-
This is going to be my next build. Following along to see how yours go. I'm still a fair bit away from being ready to start it, I'm working on their SPRAY kit.
-
Looking good, I think you made the right move in cutting the holes in the sub deck, it will be easier to get your stanchions to line up. I didn't do that and a couple didn't sit quite right. Oh well live and learn.
-
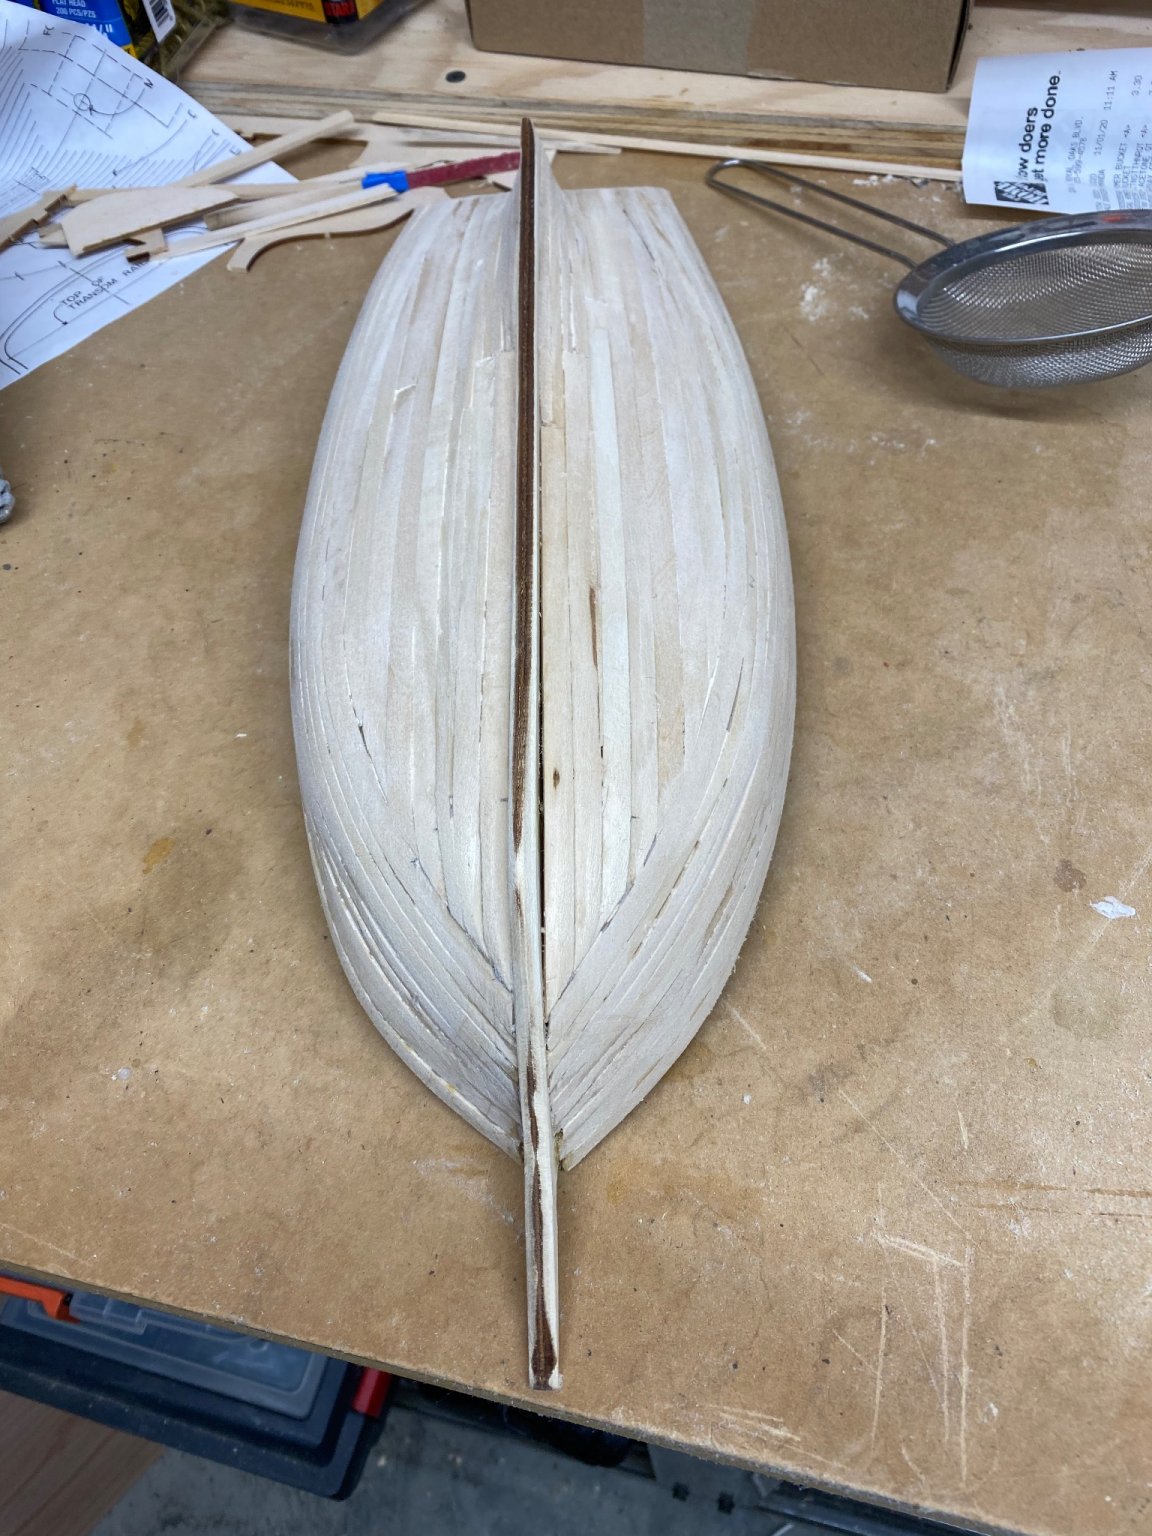
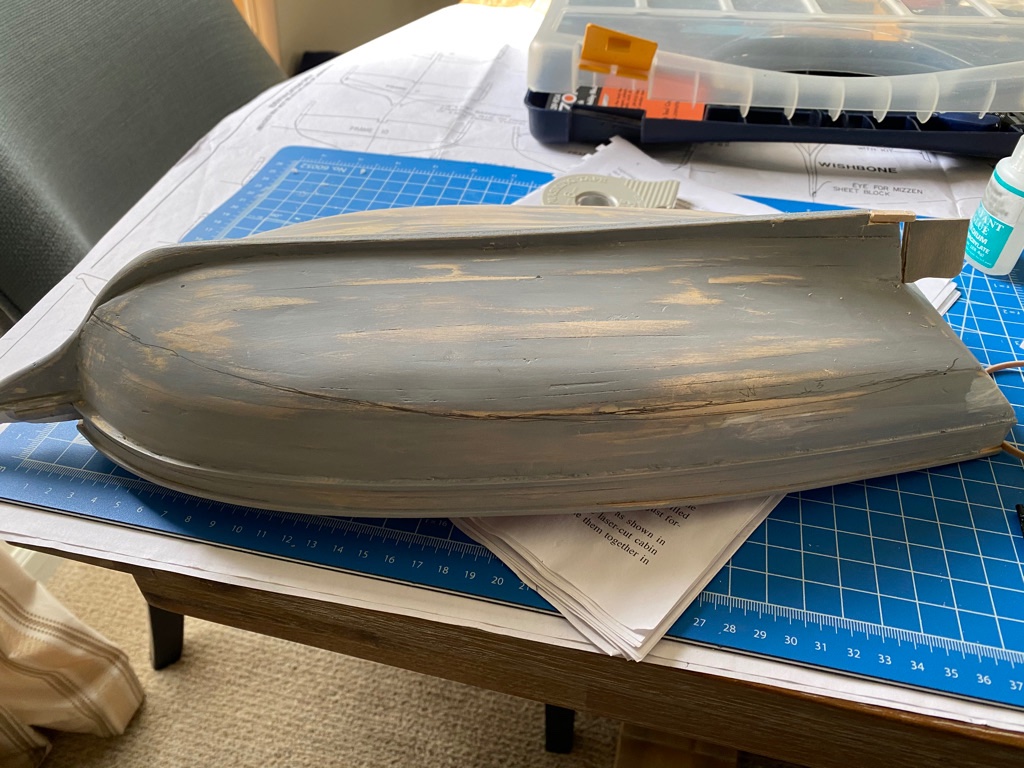
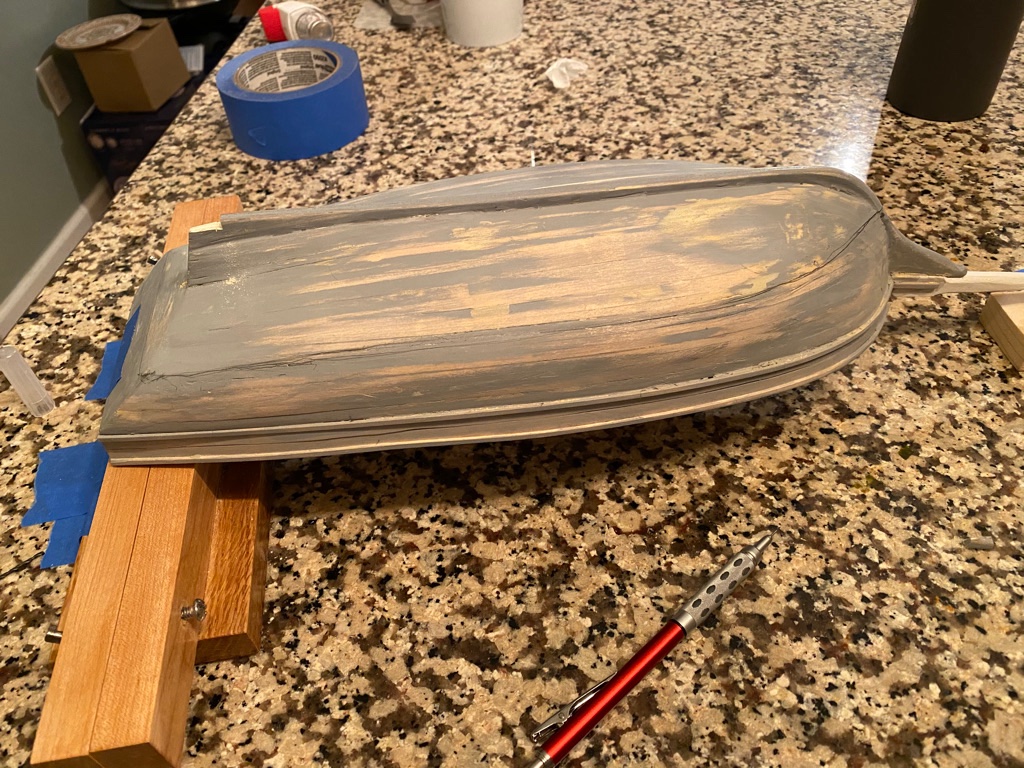
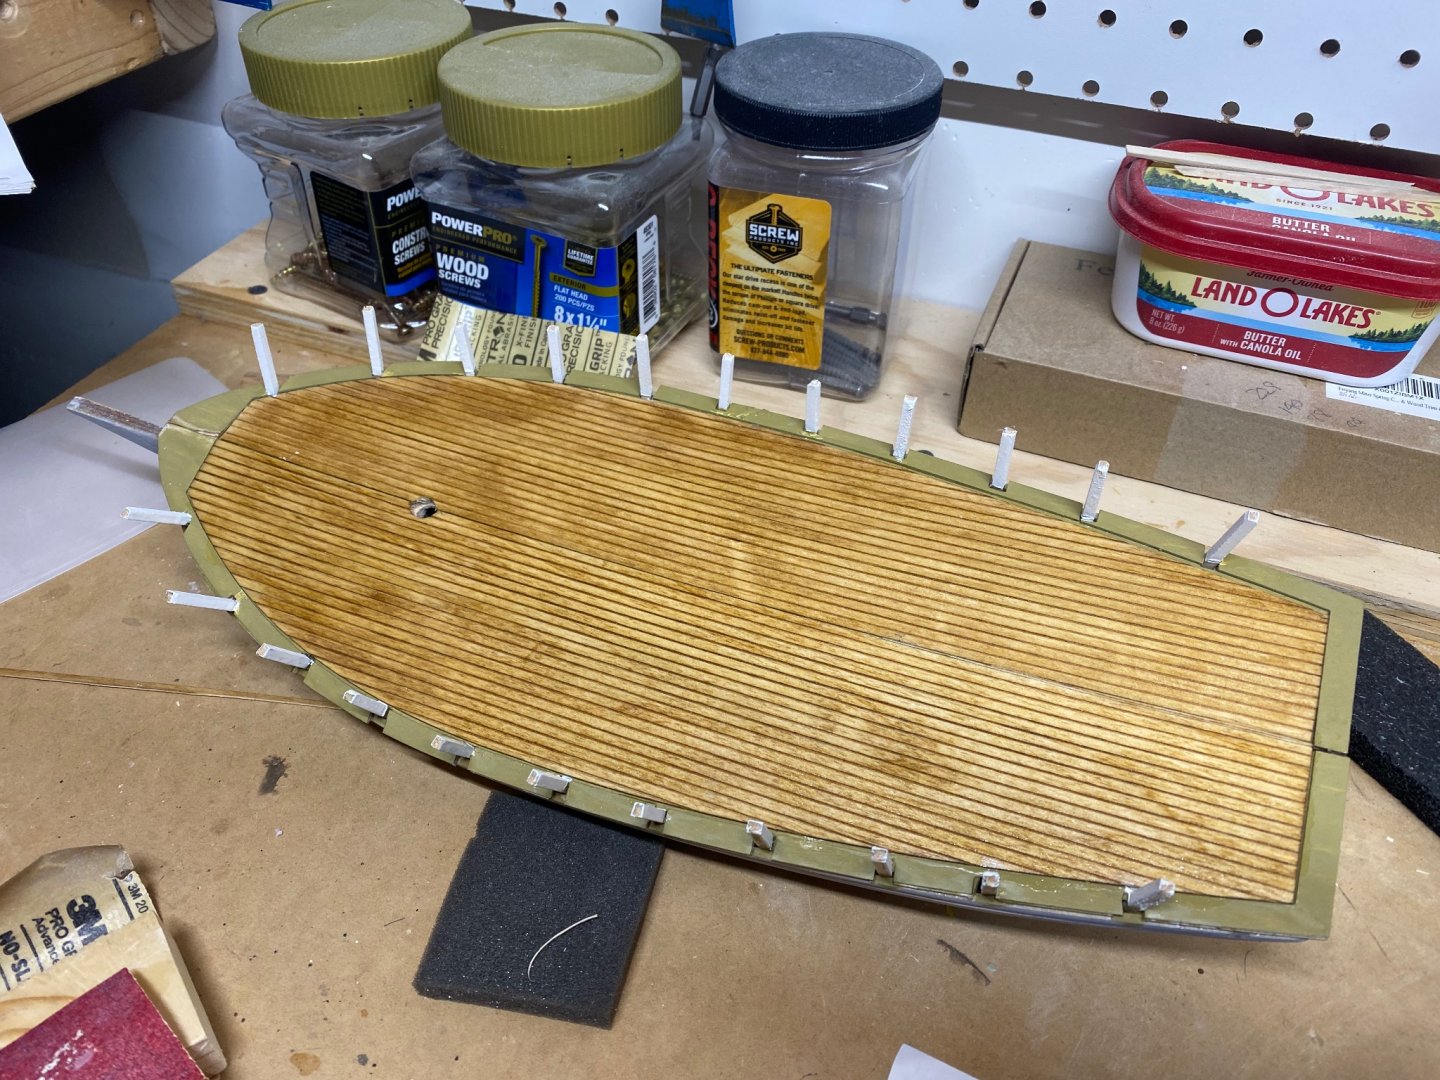
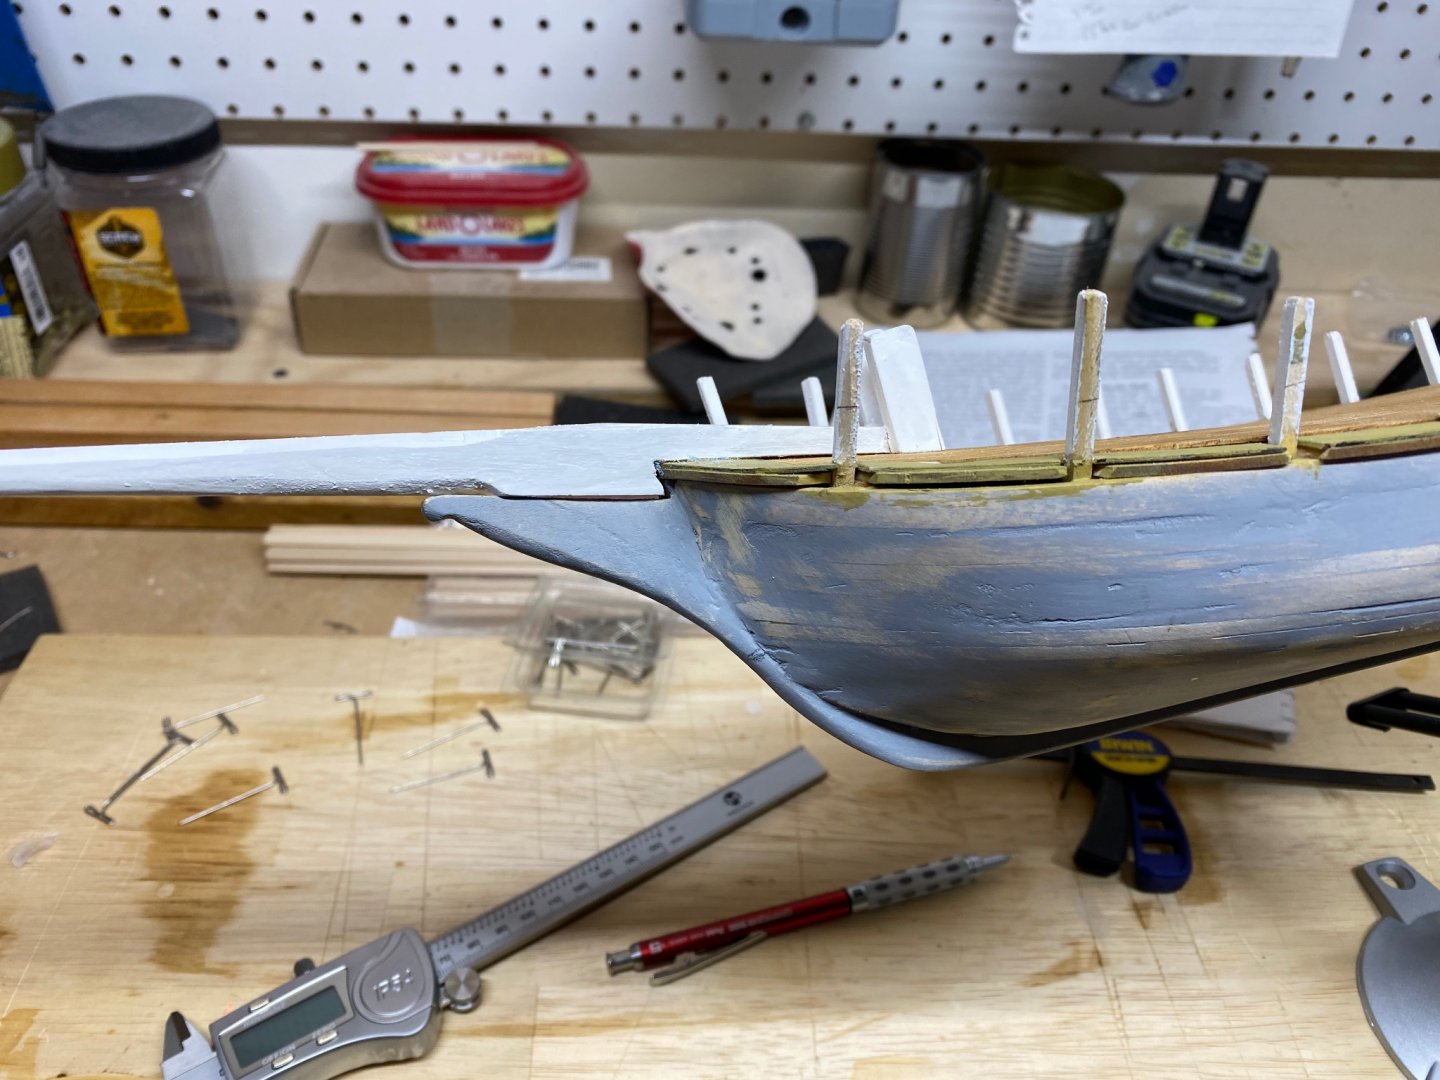
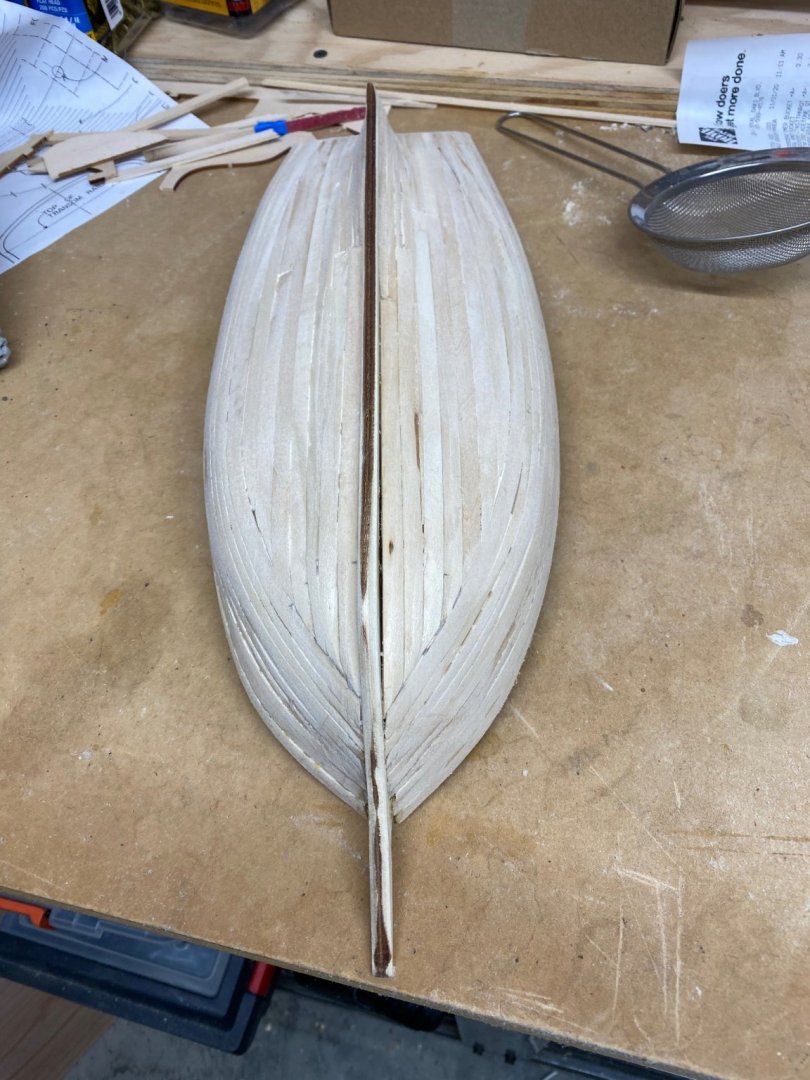
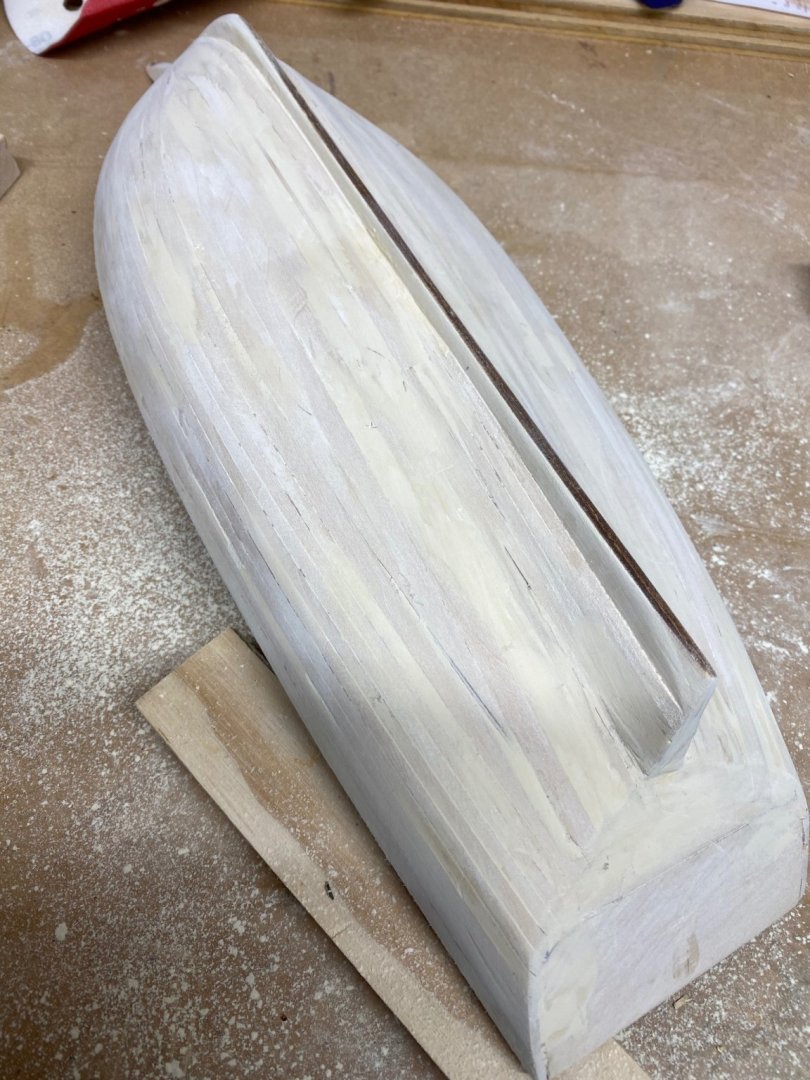
Spent time off and on over the last few weeks working on sanding and fairing the hull. Hopefully I am about done, and I can work in the house and not the unheated garage. Placed some blue painters tape across the transom to help protect it while using a razor saw to cut the planks close to flush with it. Biggest lesson learned here is to not leave them so long and cut them to fit, and at the correct angle where they meet the transom. When I built my Friendship Sloop, which was my first planked model, I slathered the entire hull in wood filler then had a sanding nightmare. This time I first sanded using 180 grit to try and get rid of high spots and fair out the hull. I also started shaping the stem a bit as others have done, and then tried using sawdust and glue to make my own filler. It worked ok, but shrunk a bit when it dried, so I went back to using the Elmers Wood Filler. I'll experiment more with it on the next boat. At this point I've switched to 220 and 400 grit sand paper. I'm going to now paint primer and see if it needs more shaping and fairing. I'm not going for a super smooth no seam finish, after all it is a wooden boat, not fiberglass

- 23 replies
-
- 1
-
-
- Spray
- BlueJacket Shipcrafters
- (and 1 more)
-
Very nice, I hope mine turns out half as good as yours.
-
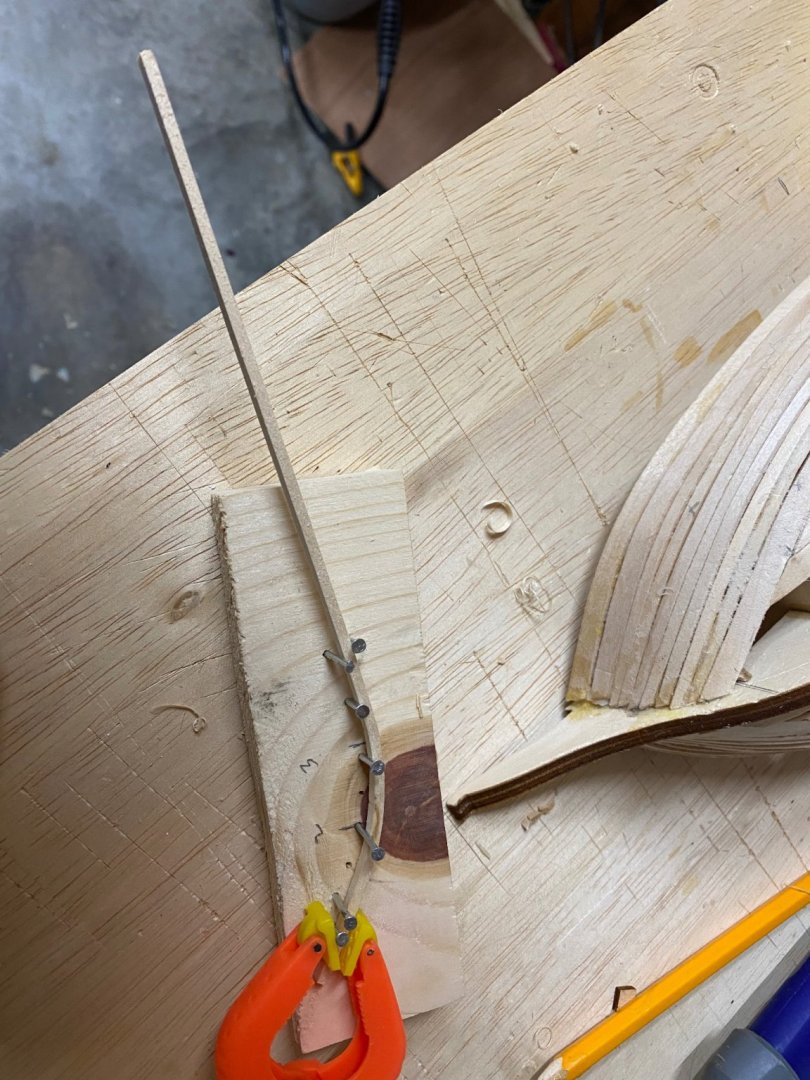
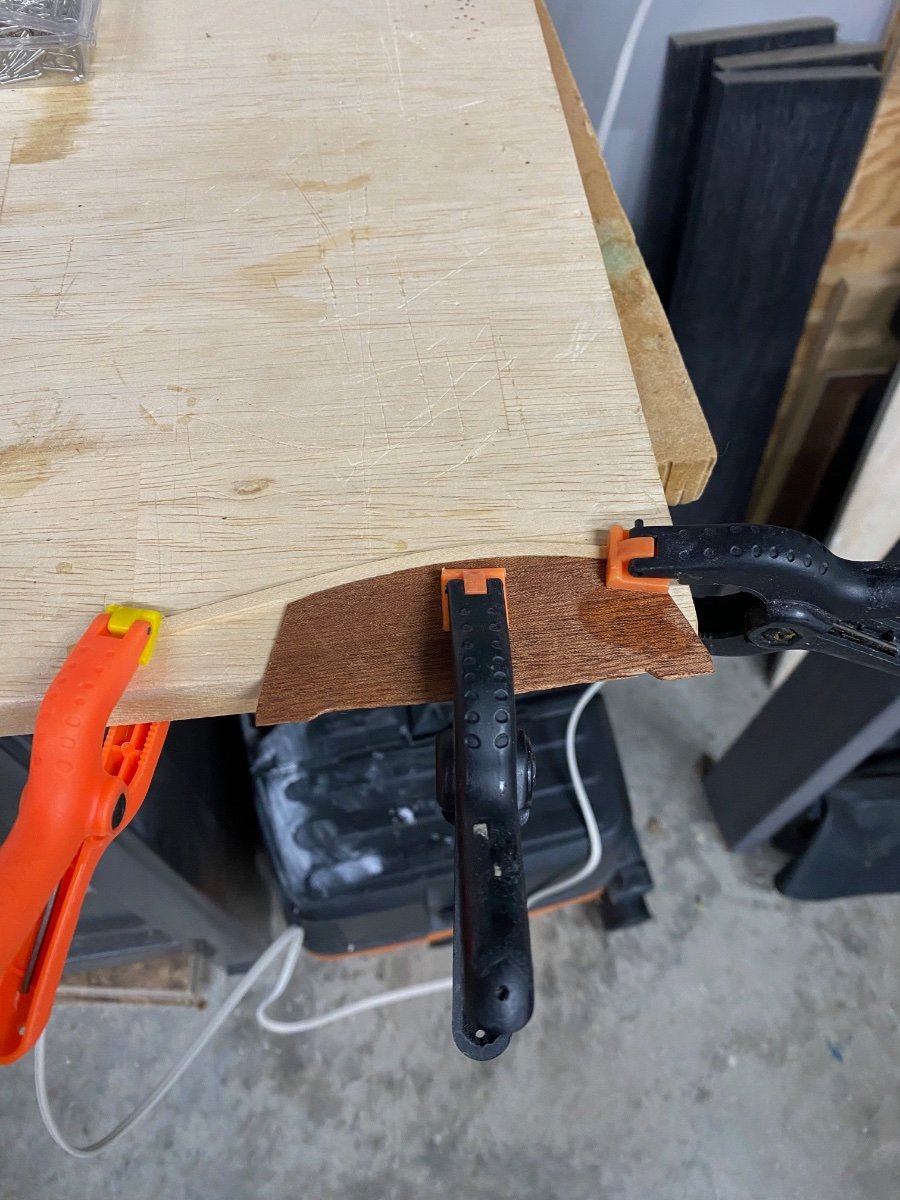
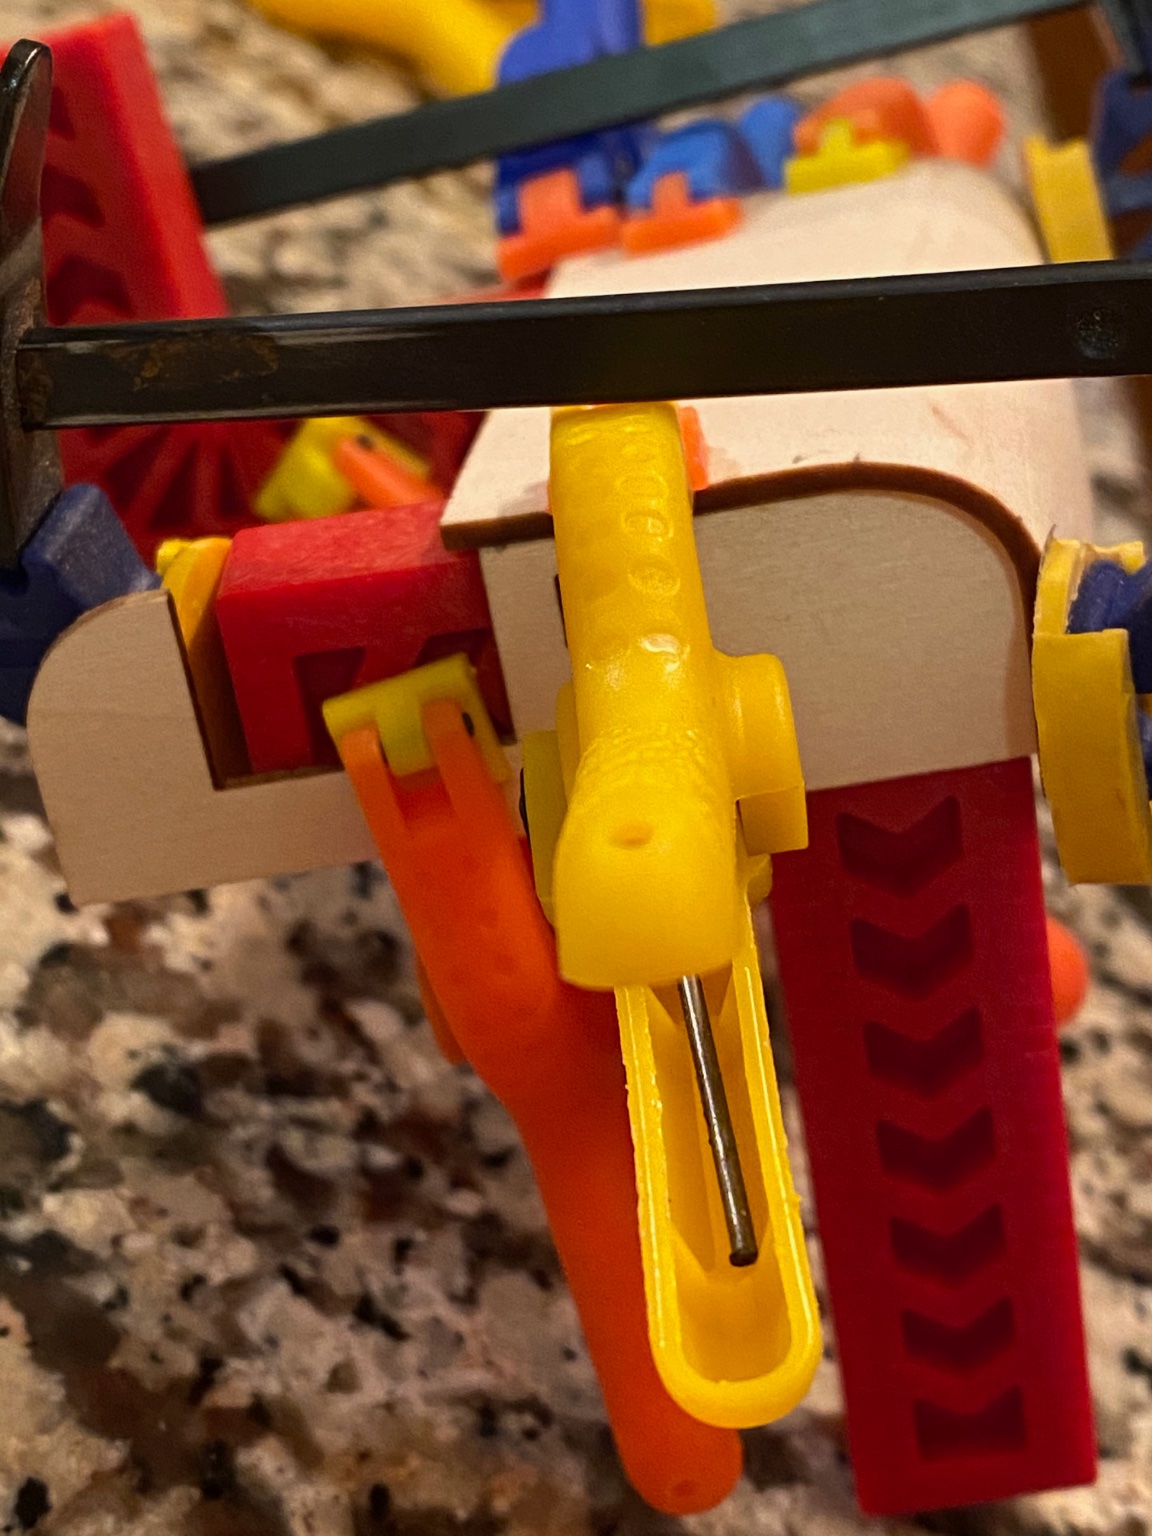
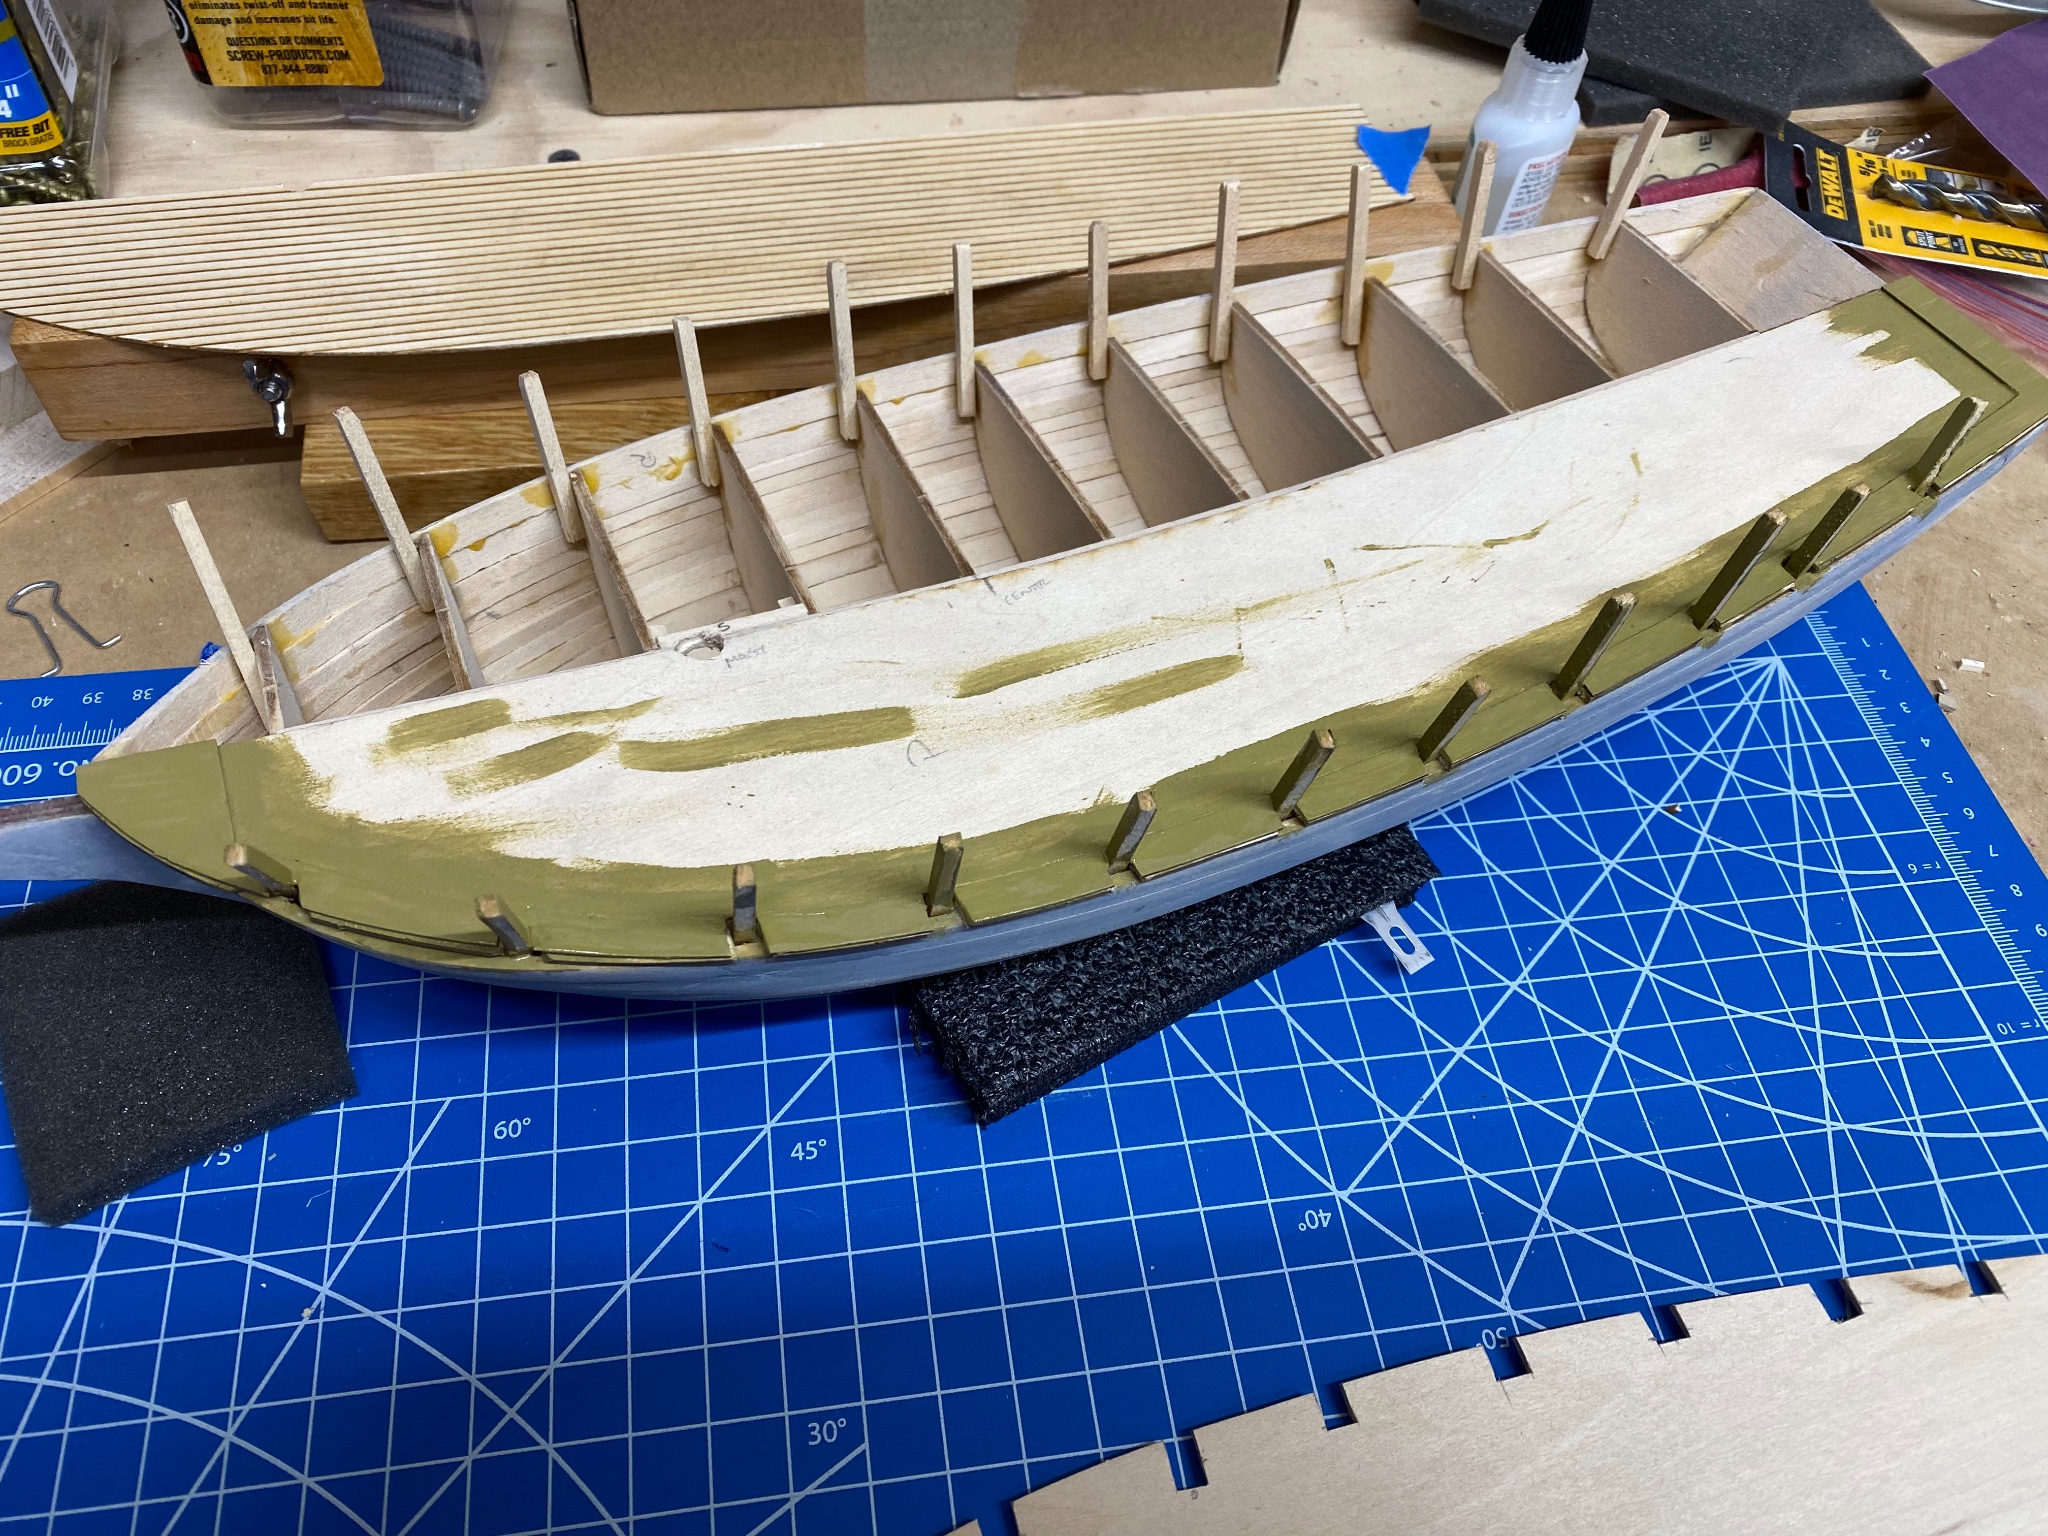
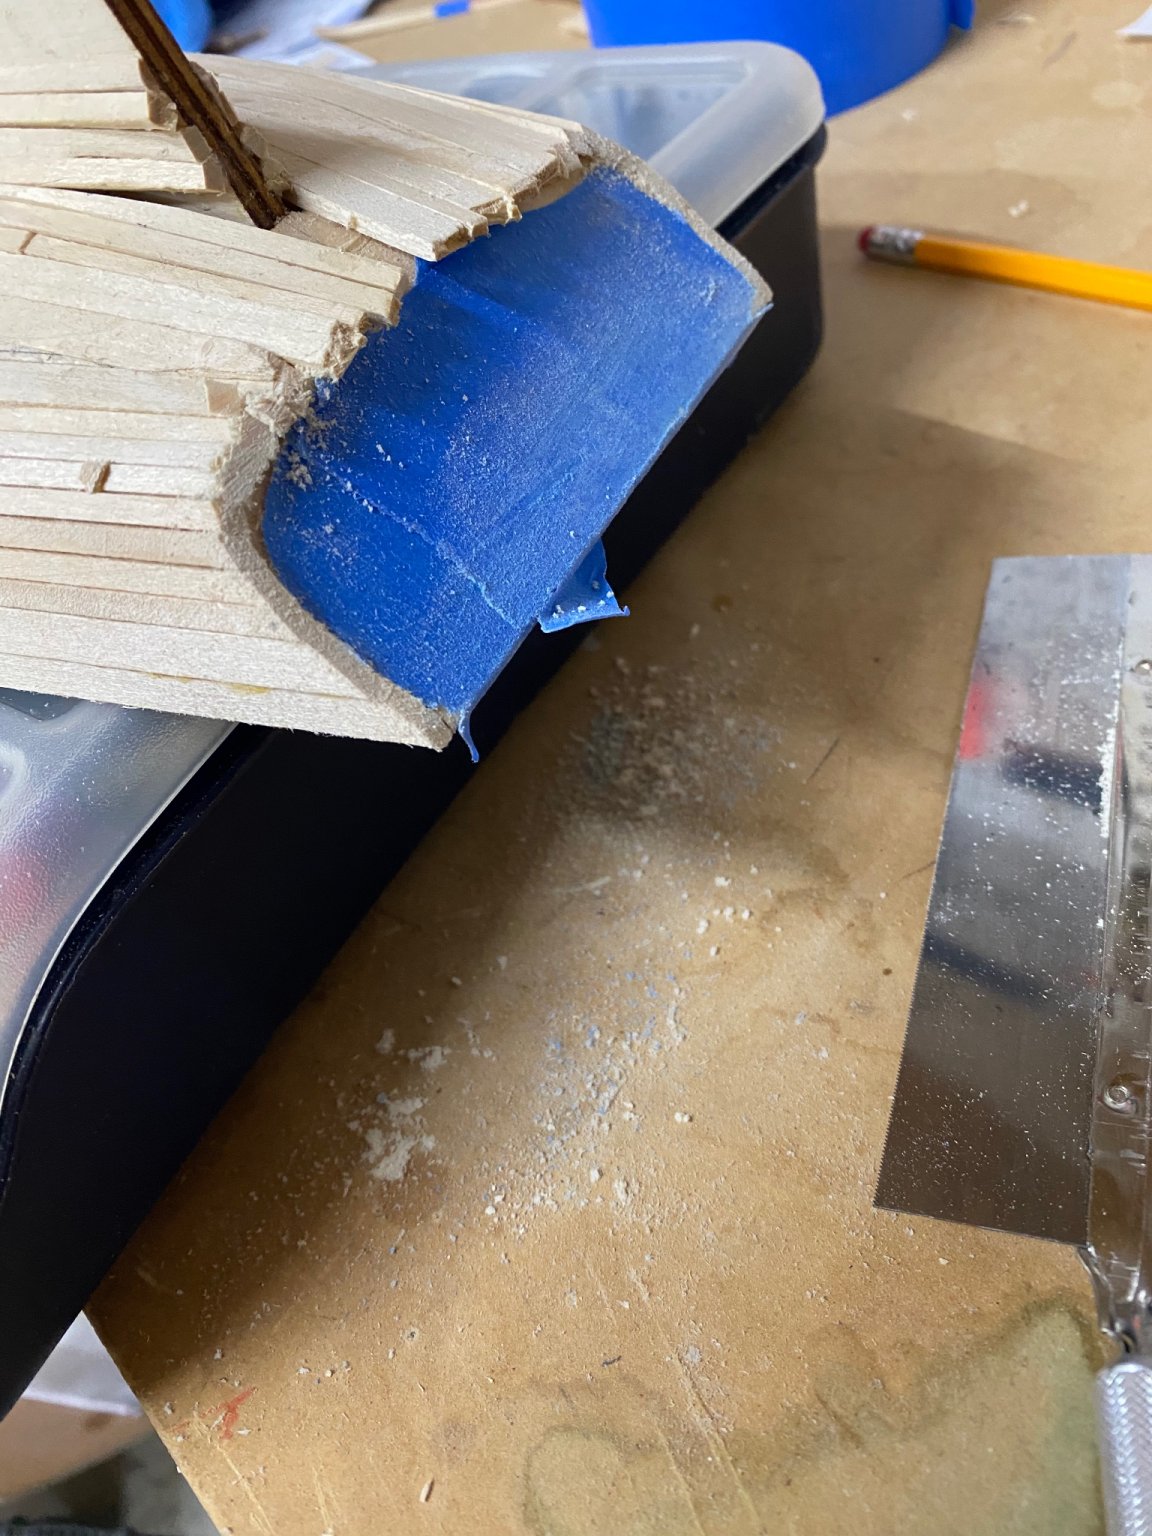
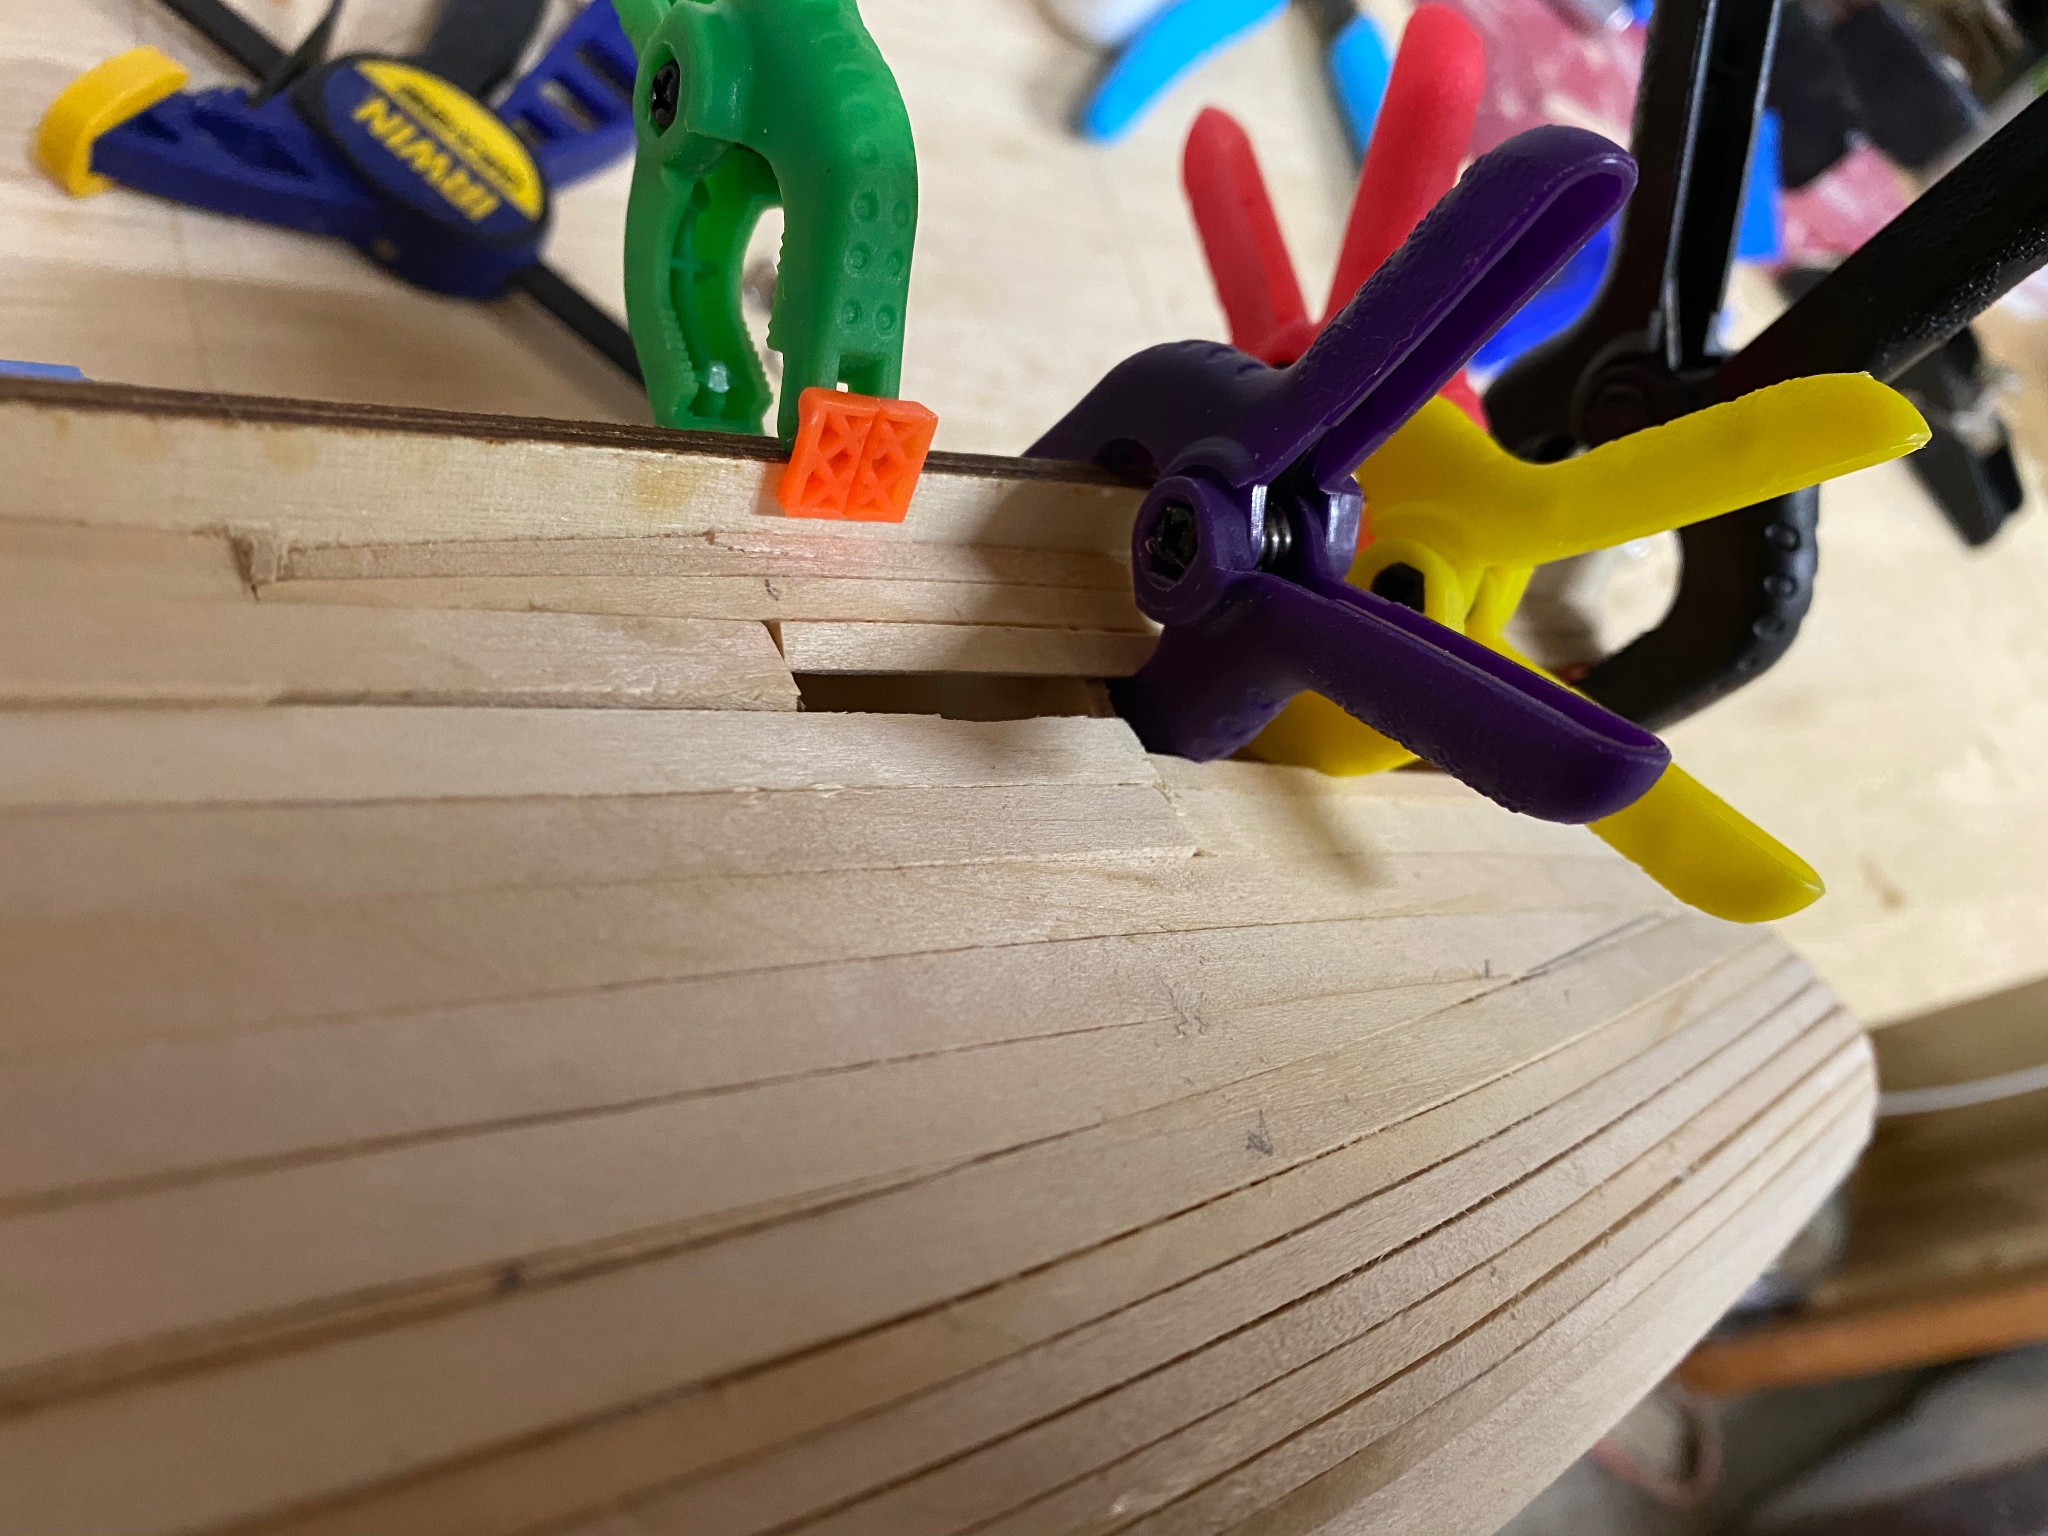
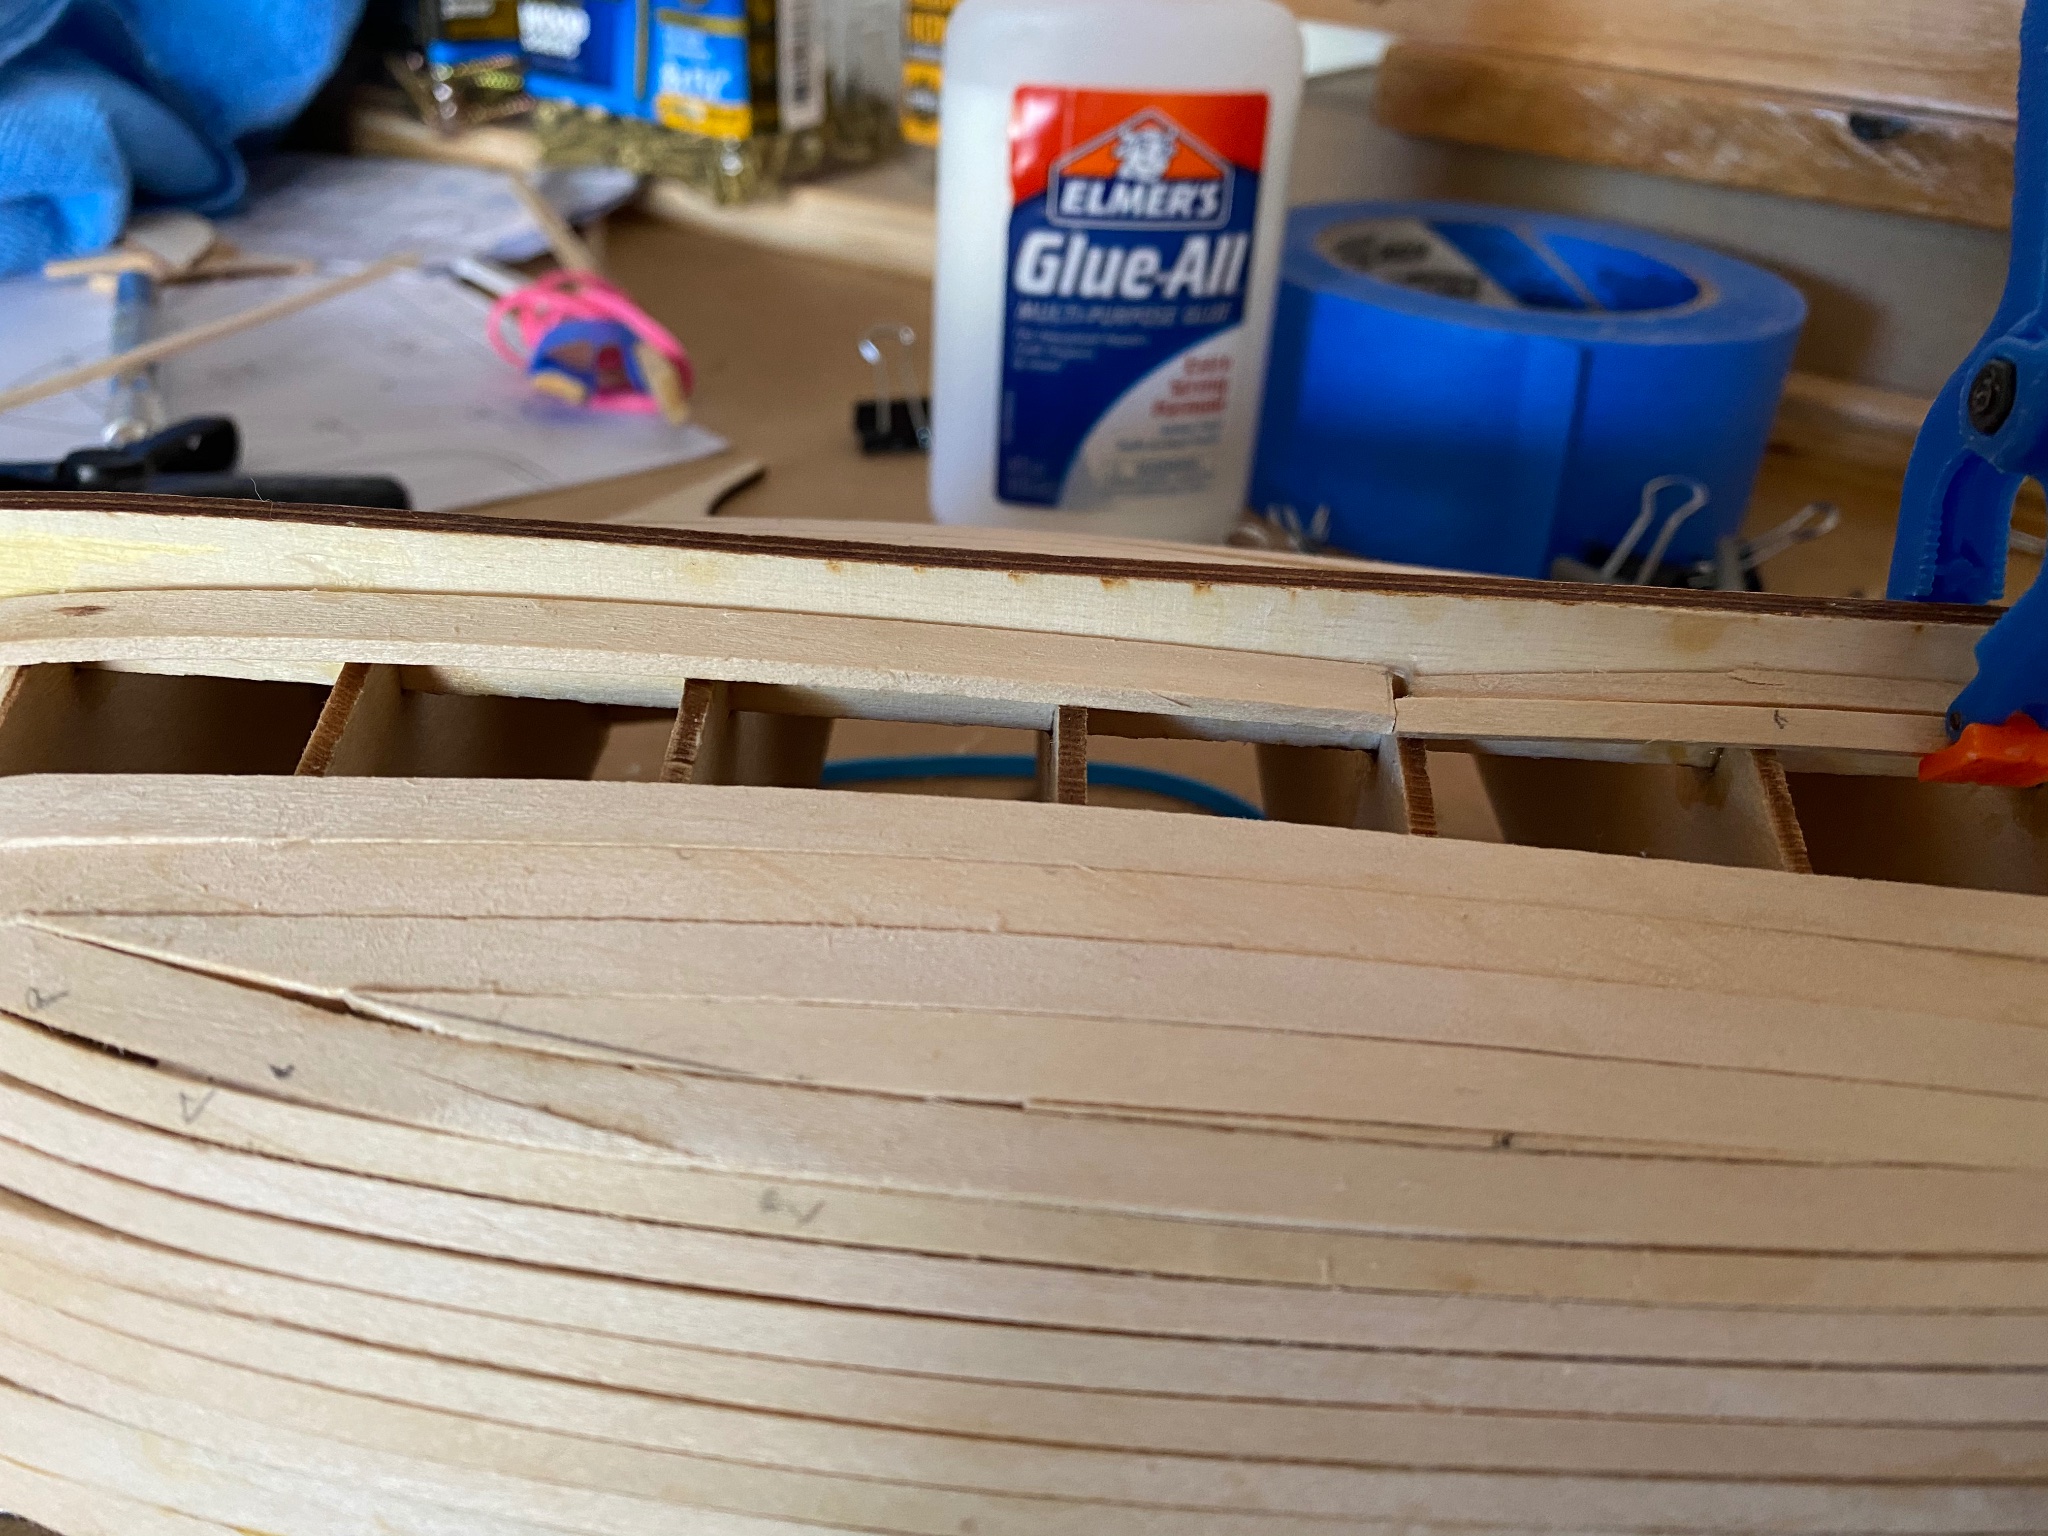
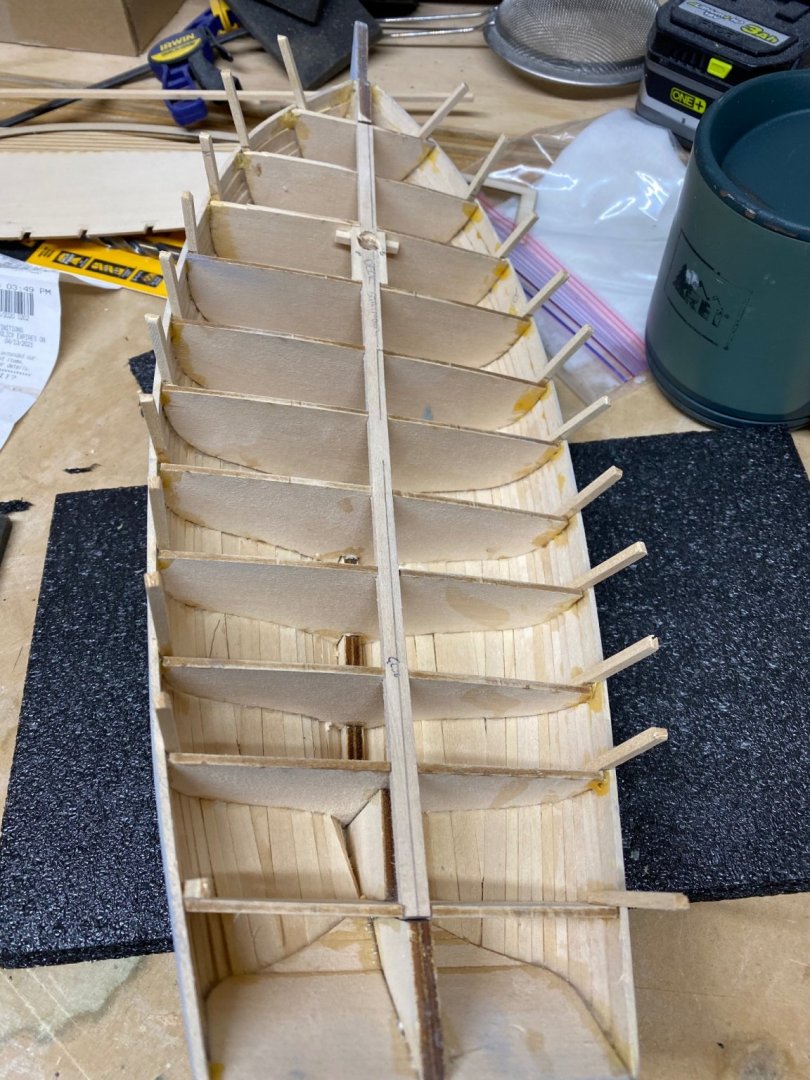
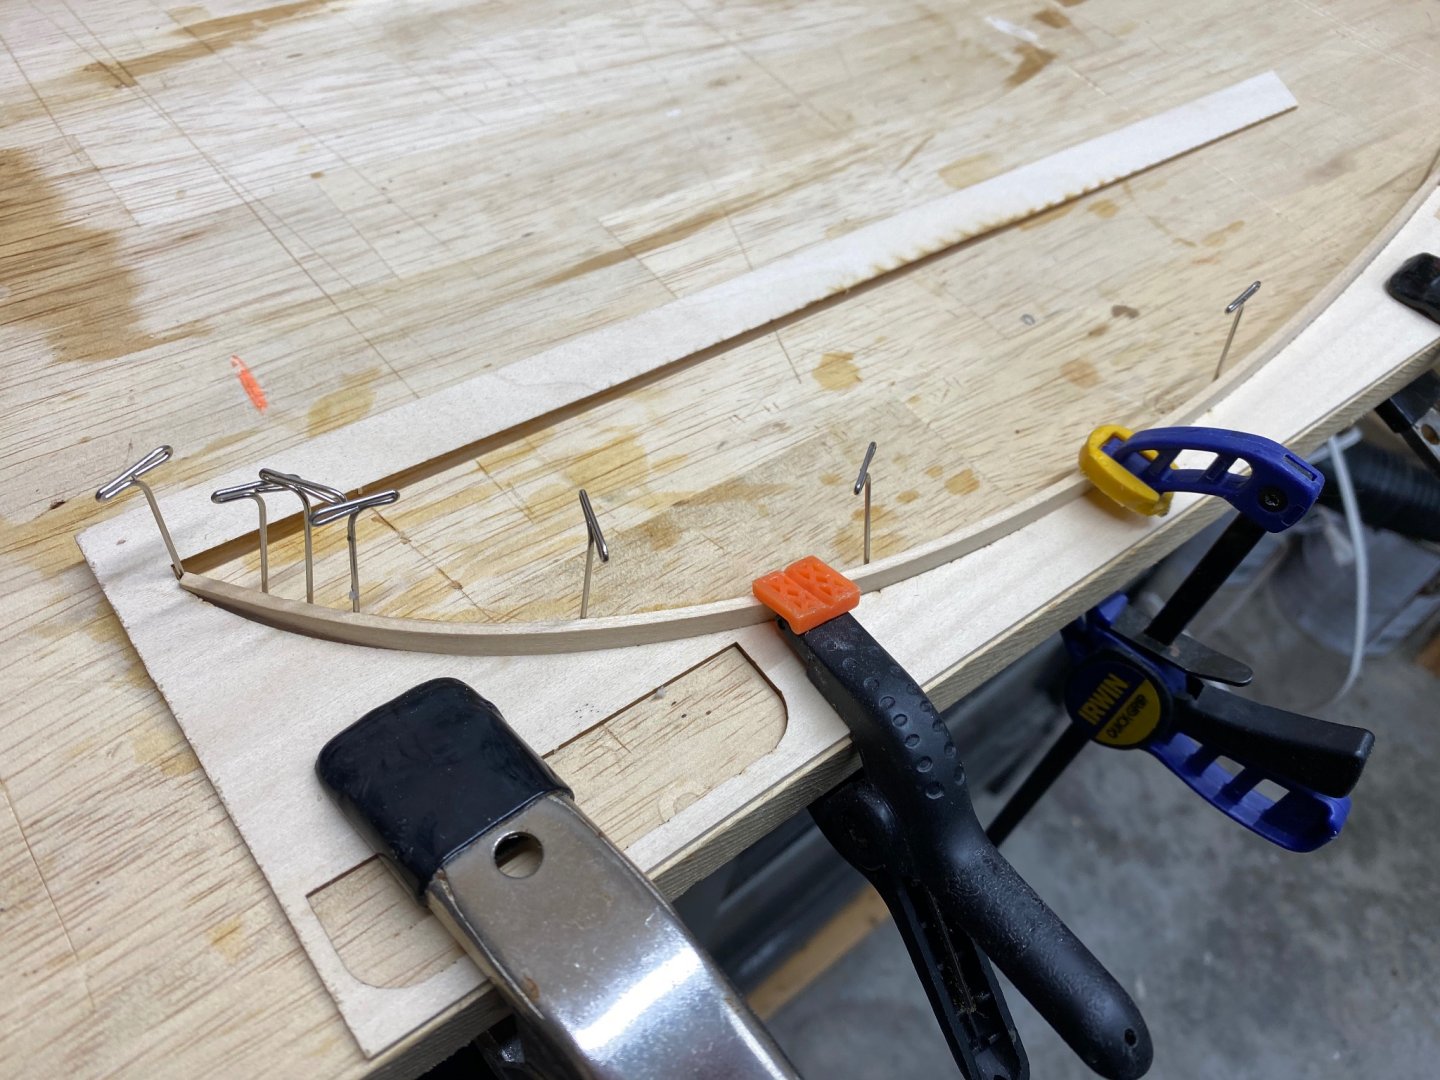
Slowly getting through the planking, wasn't able to work much this week as the grandkids were here. Started a plank at the keel, and afterwards discovered I needed to bevel more and there was a dip in my bulkhead. I obviously hadn't got it seated properly when initially installing it, and happened to but the joint on it. Lesson learned, pay closer attention when installing bulkheads, and don't put joints in those spots. I should be able to fair it out with wood filler when I sand the hull. I also had to make a small stealer to fill in the hole due to cutting twice and measuring once. Using the plans to mark out the curvature of the hull I placed some nails into a board to create a jig to bend the final few planks at the front of the hull. It worked fairly well. Besides clamping thins together clamps can be forced between things to push them against sides to hold things in place The purple and yellow clamps are actually applying pressure against the plan below them. I didn't get a picture, but also had similar success with the binder clamps. Squeezed the arms together and then placed the arms between the planks. This glue is taking to long to set, so last night I ordered some fresh CA glue, blades and a few other things from Bluejacket. I'm ready for planking to be over with, and move on to my next favorite part of building...sanding.