kmart
-
Posts
195 -
Joined
-
Last visited
Content Type
Profiles
Forums
Gallery
Events
Everything posted by kmart
-
Whats your plans for the spar deck guns. you leaving them off or covering up parts of the deck
-
Wow Jon. Looking Awesome. She has soo much going on on the Main deck. Looks like a working ship. Your main hatch with the Canopies.... All the hatches and Grating.
-
I'll try to be good and post more in something less than 6 months.
-
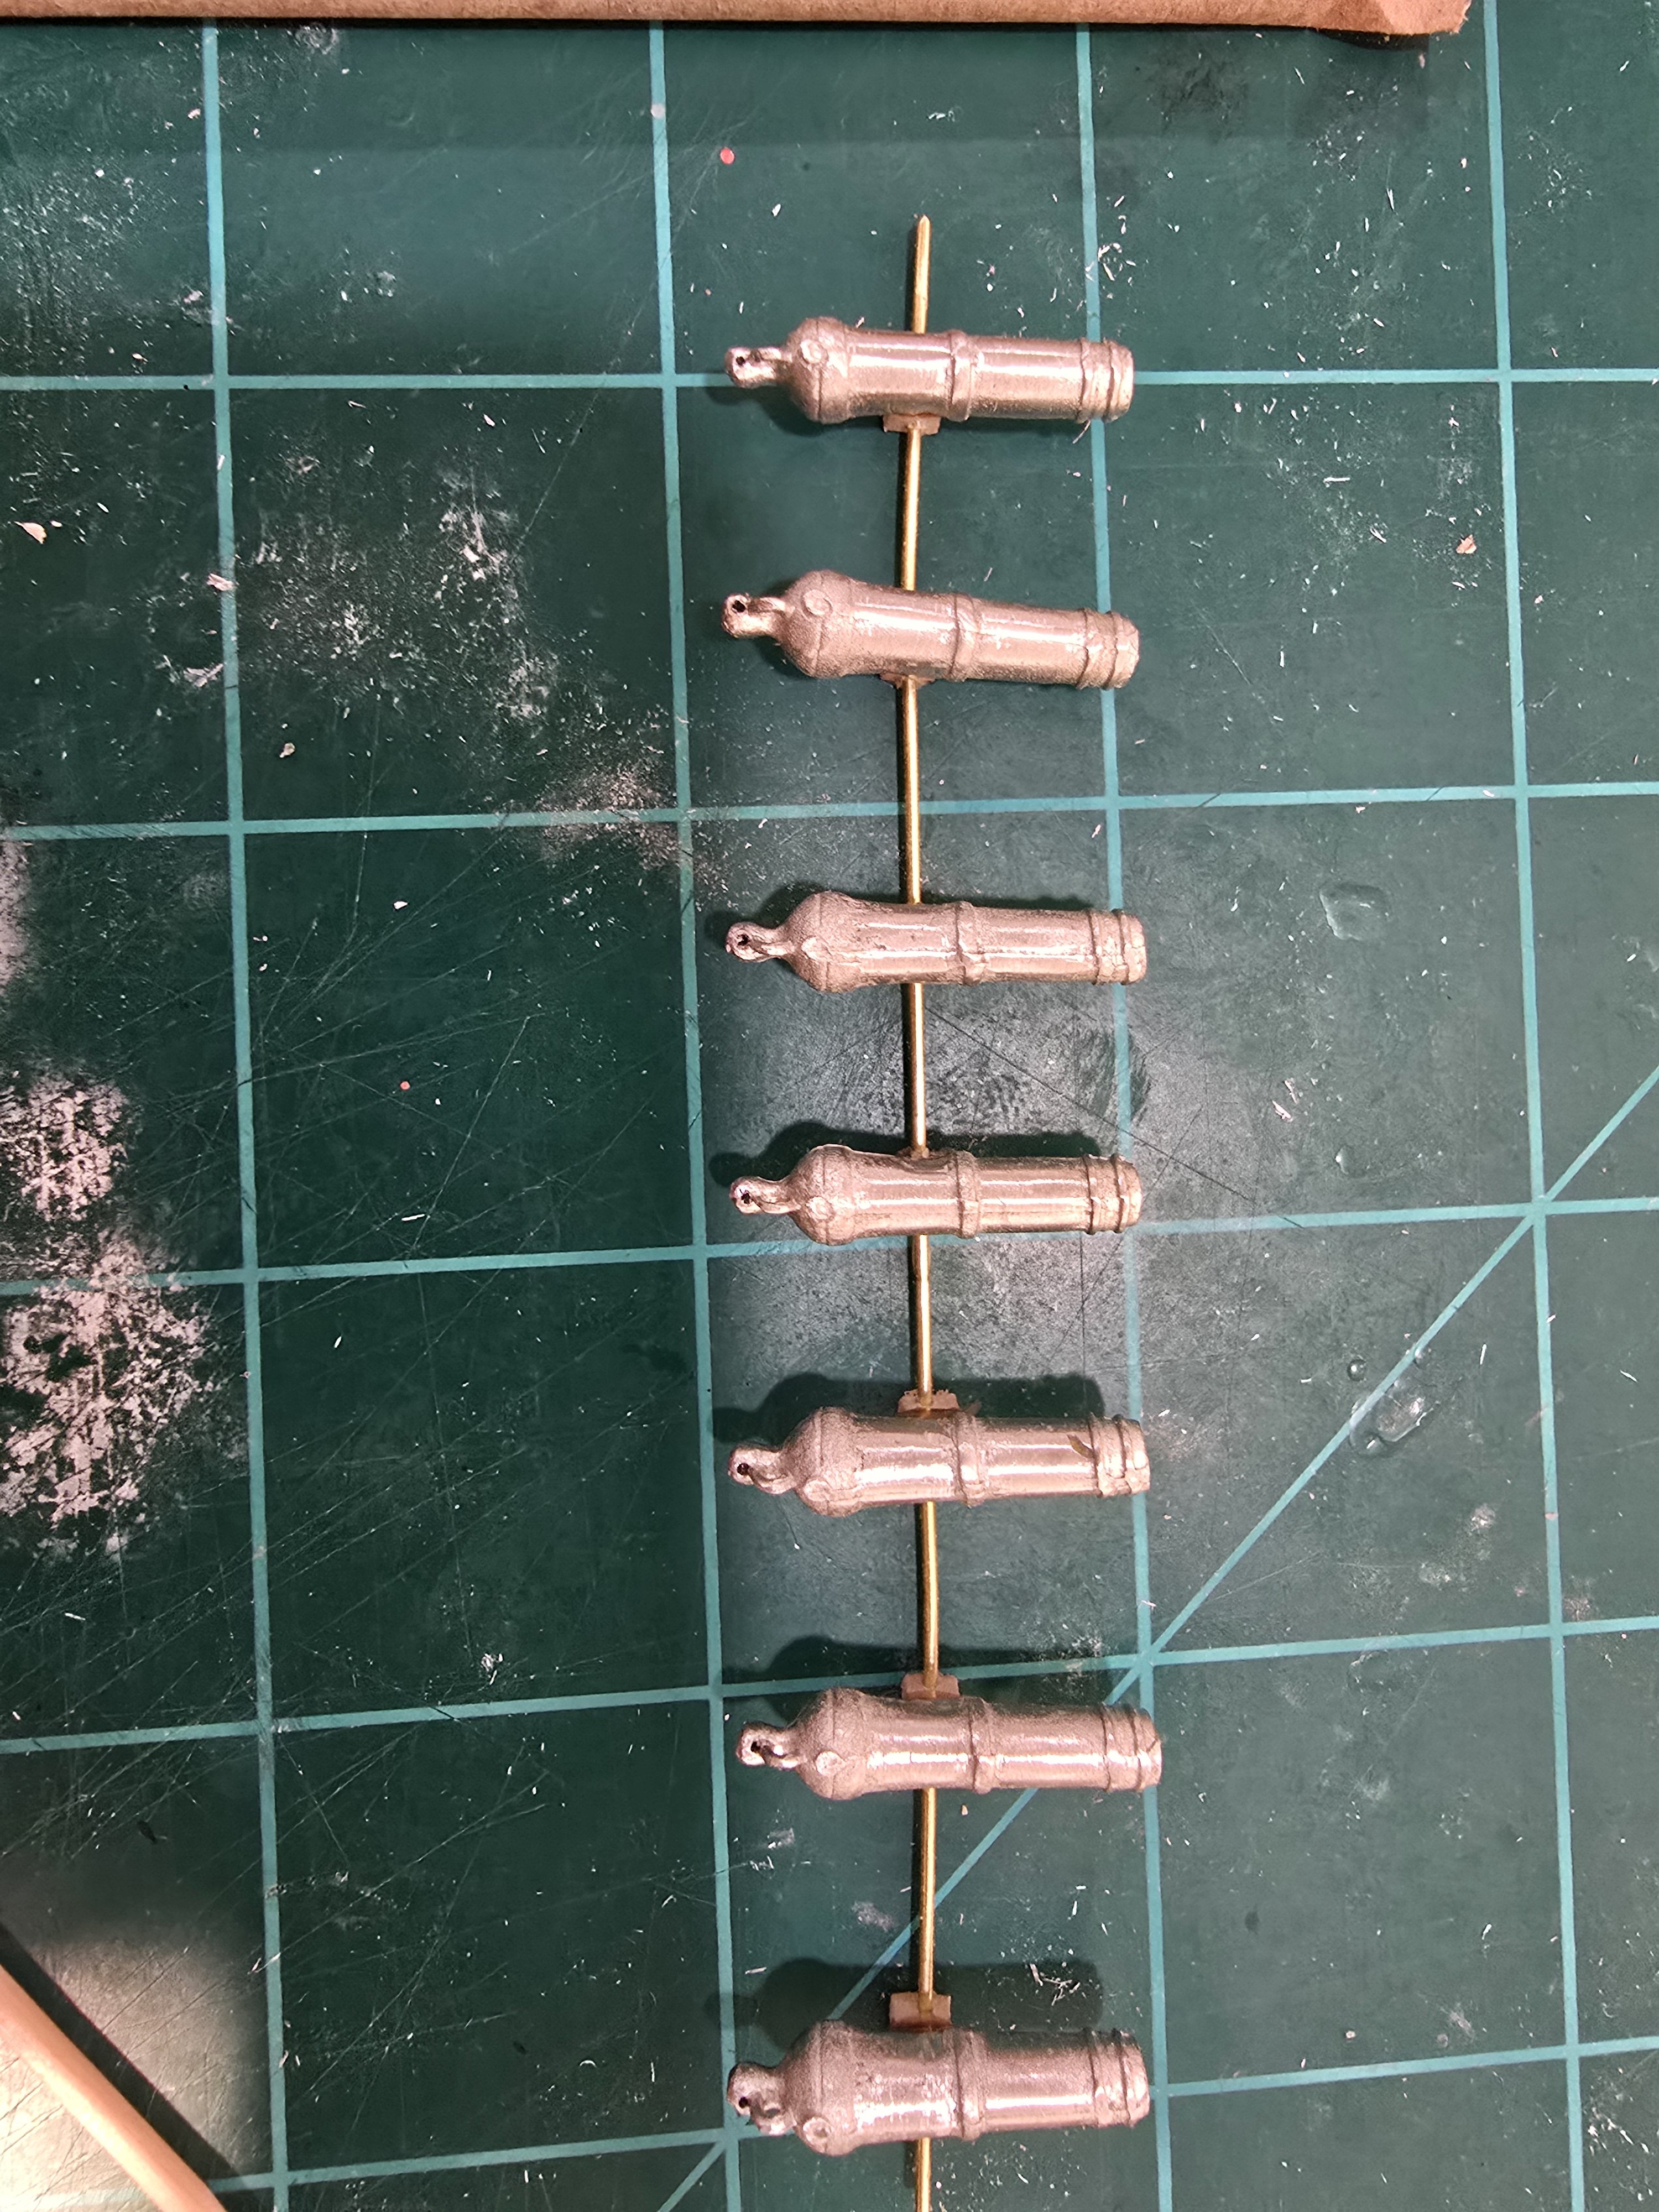
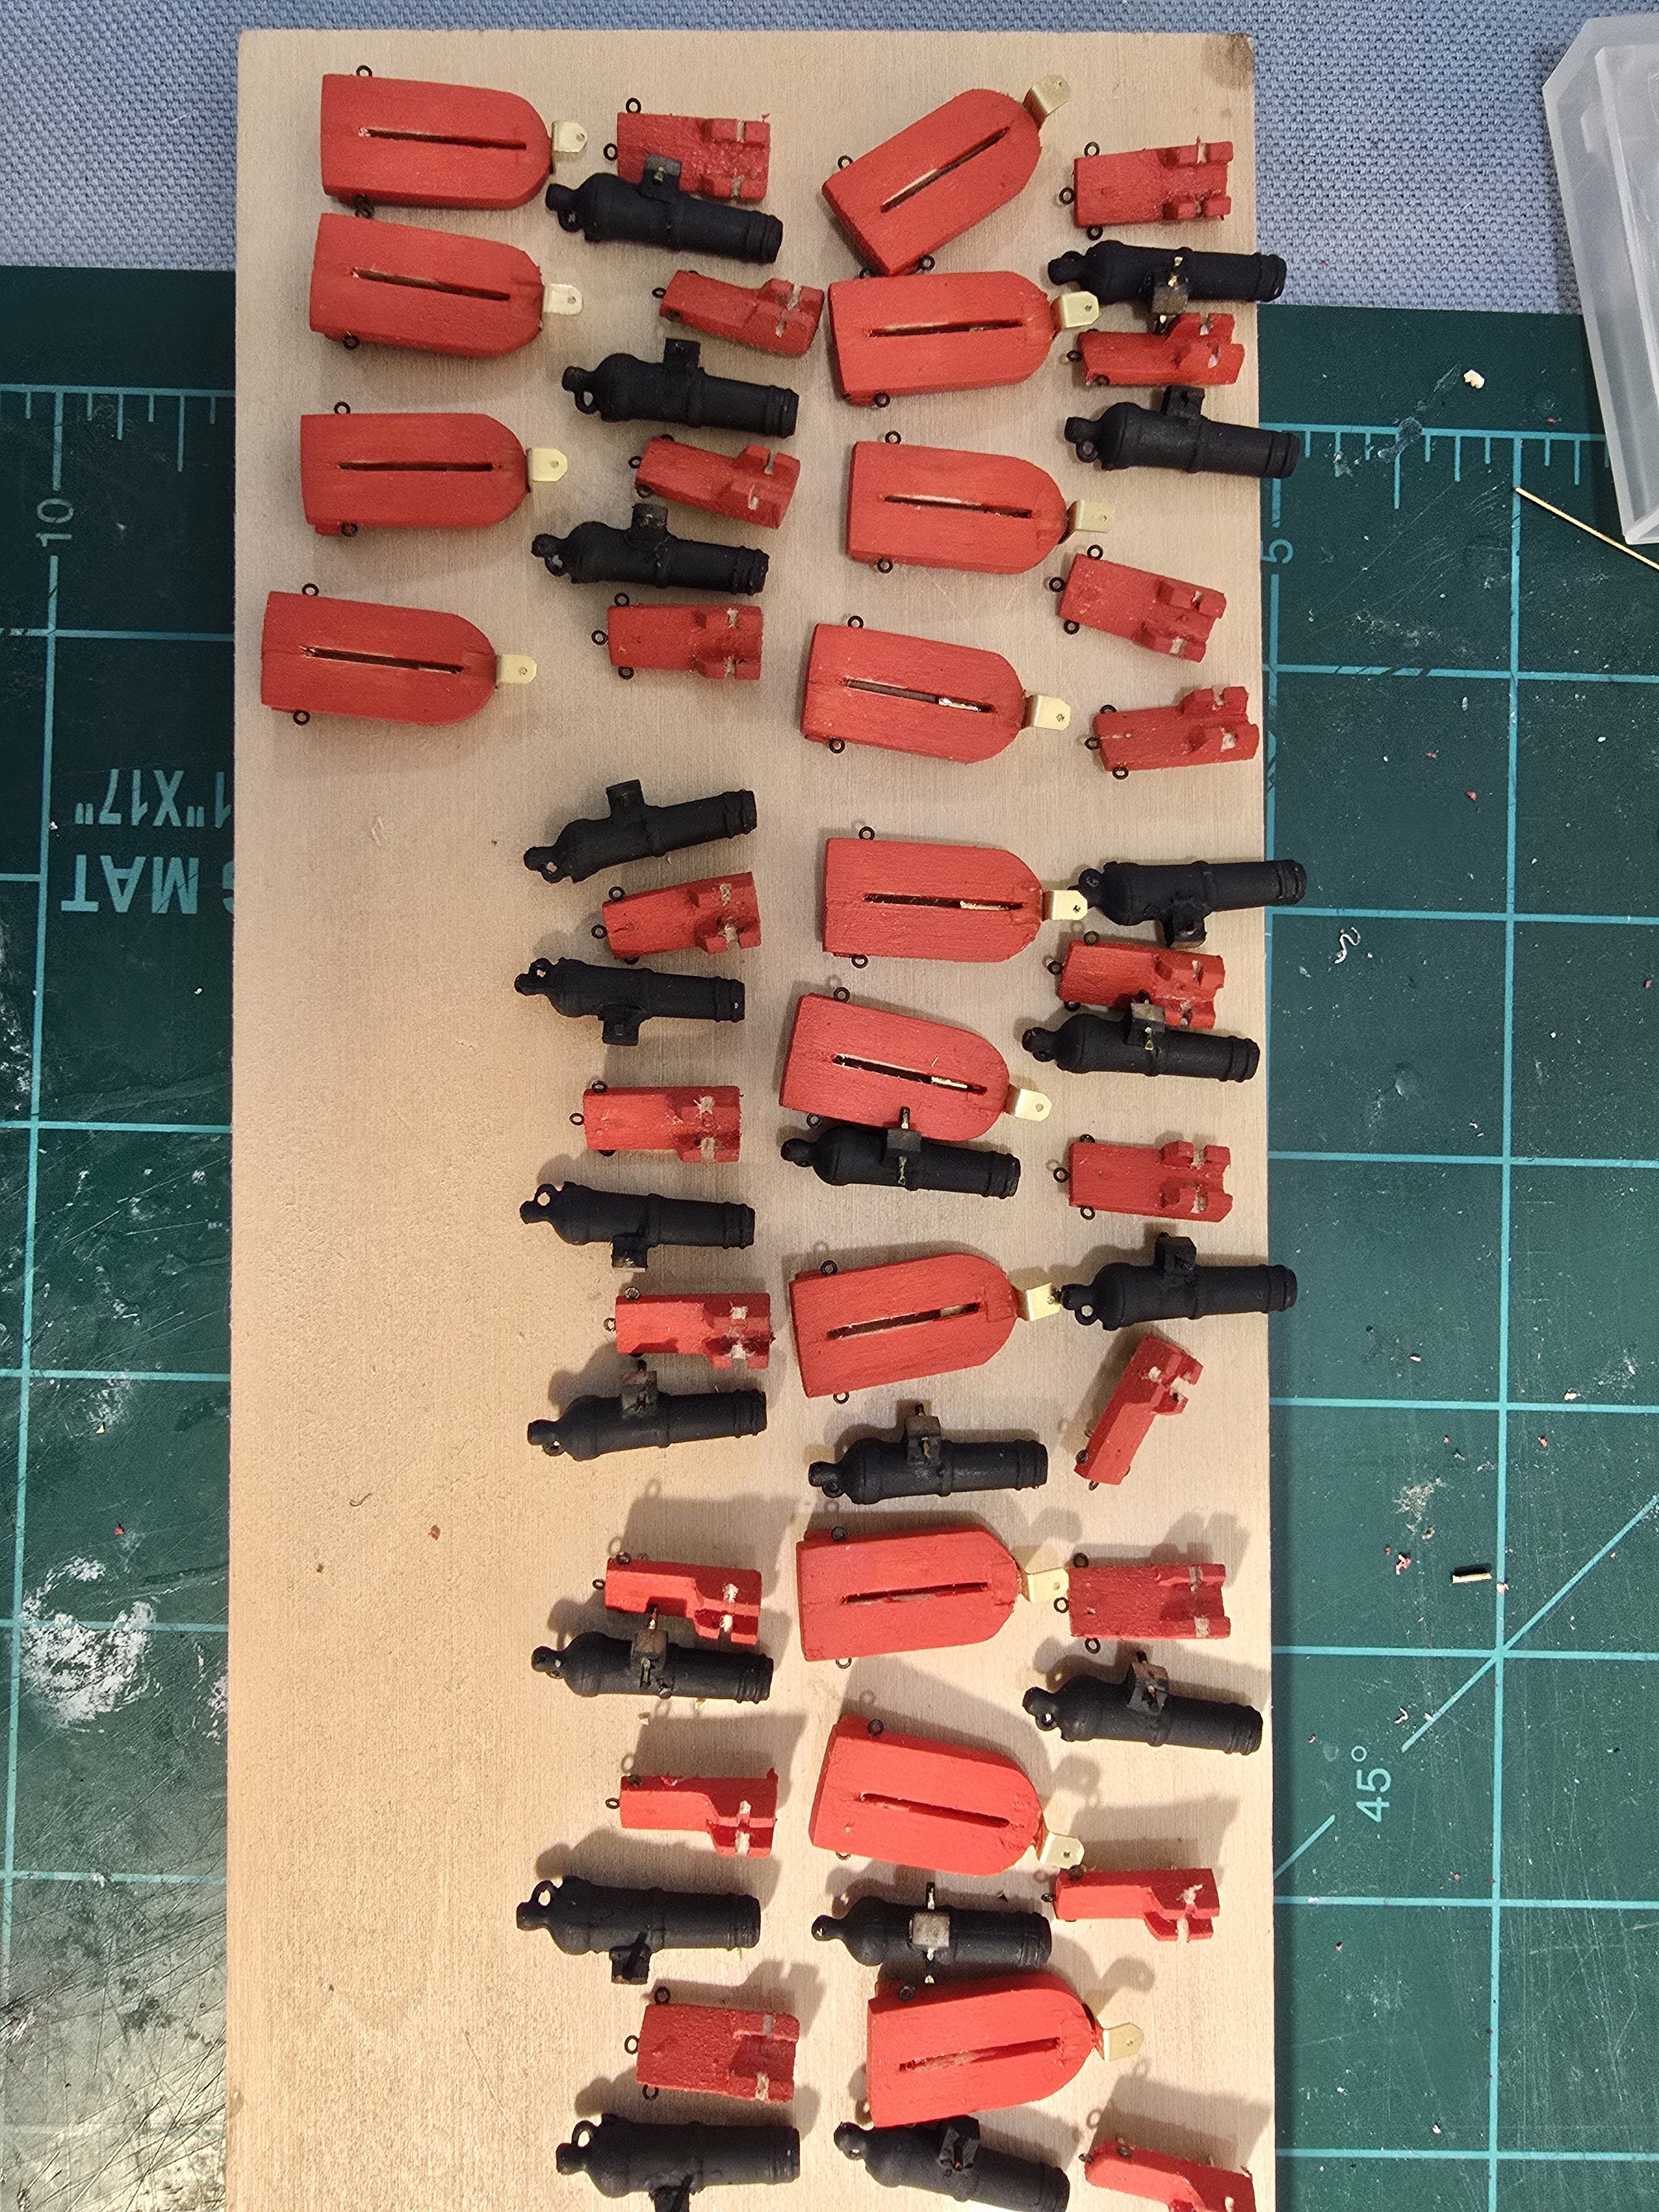
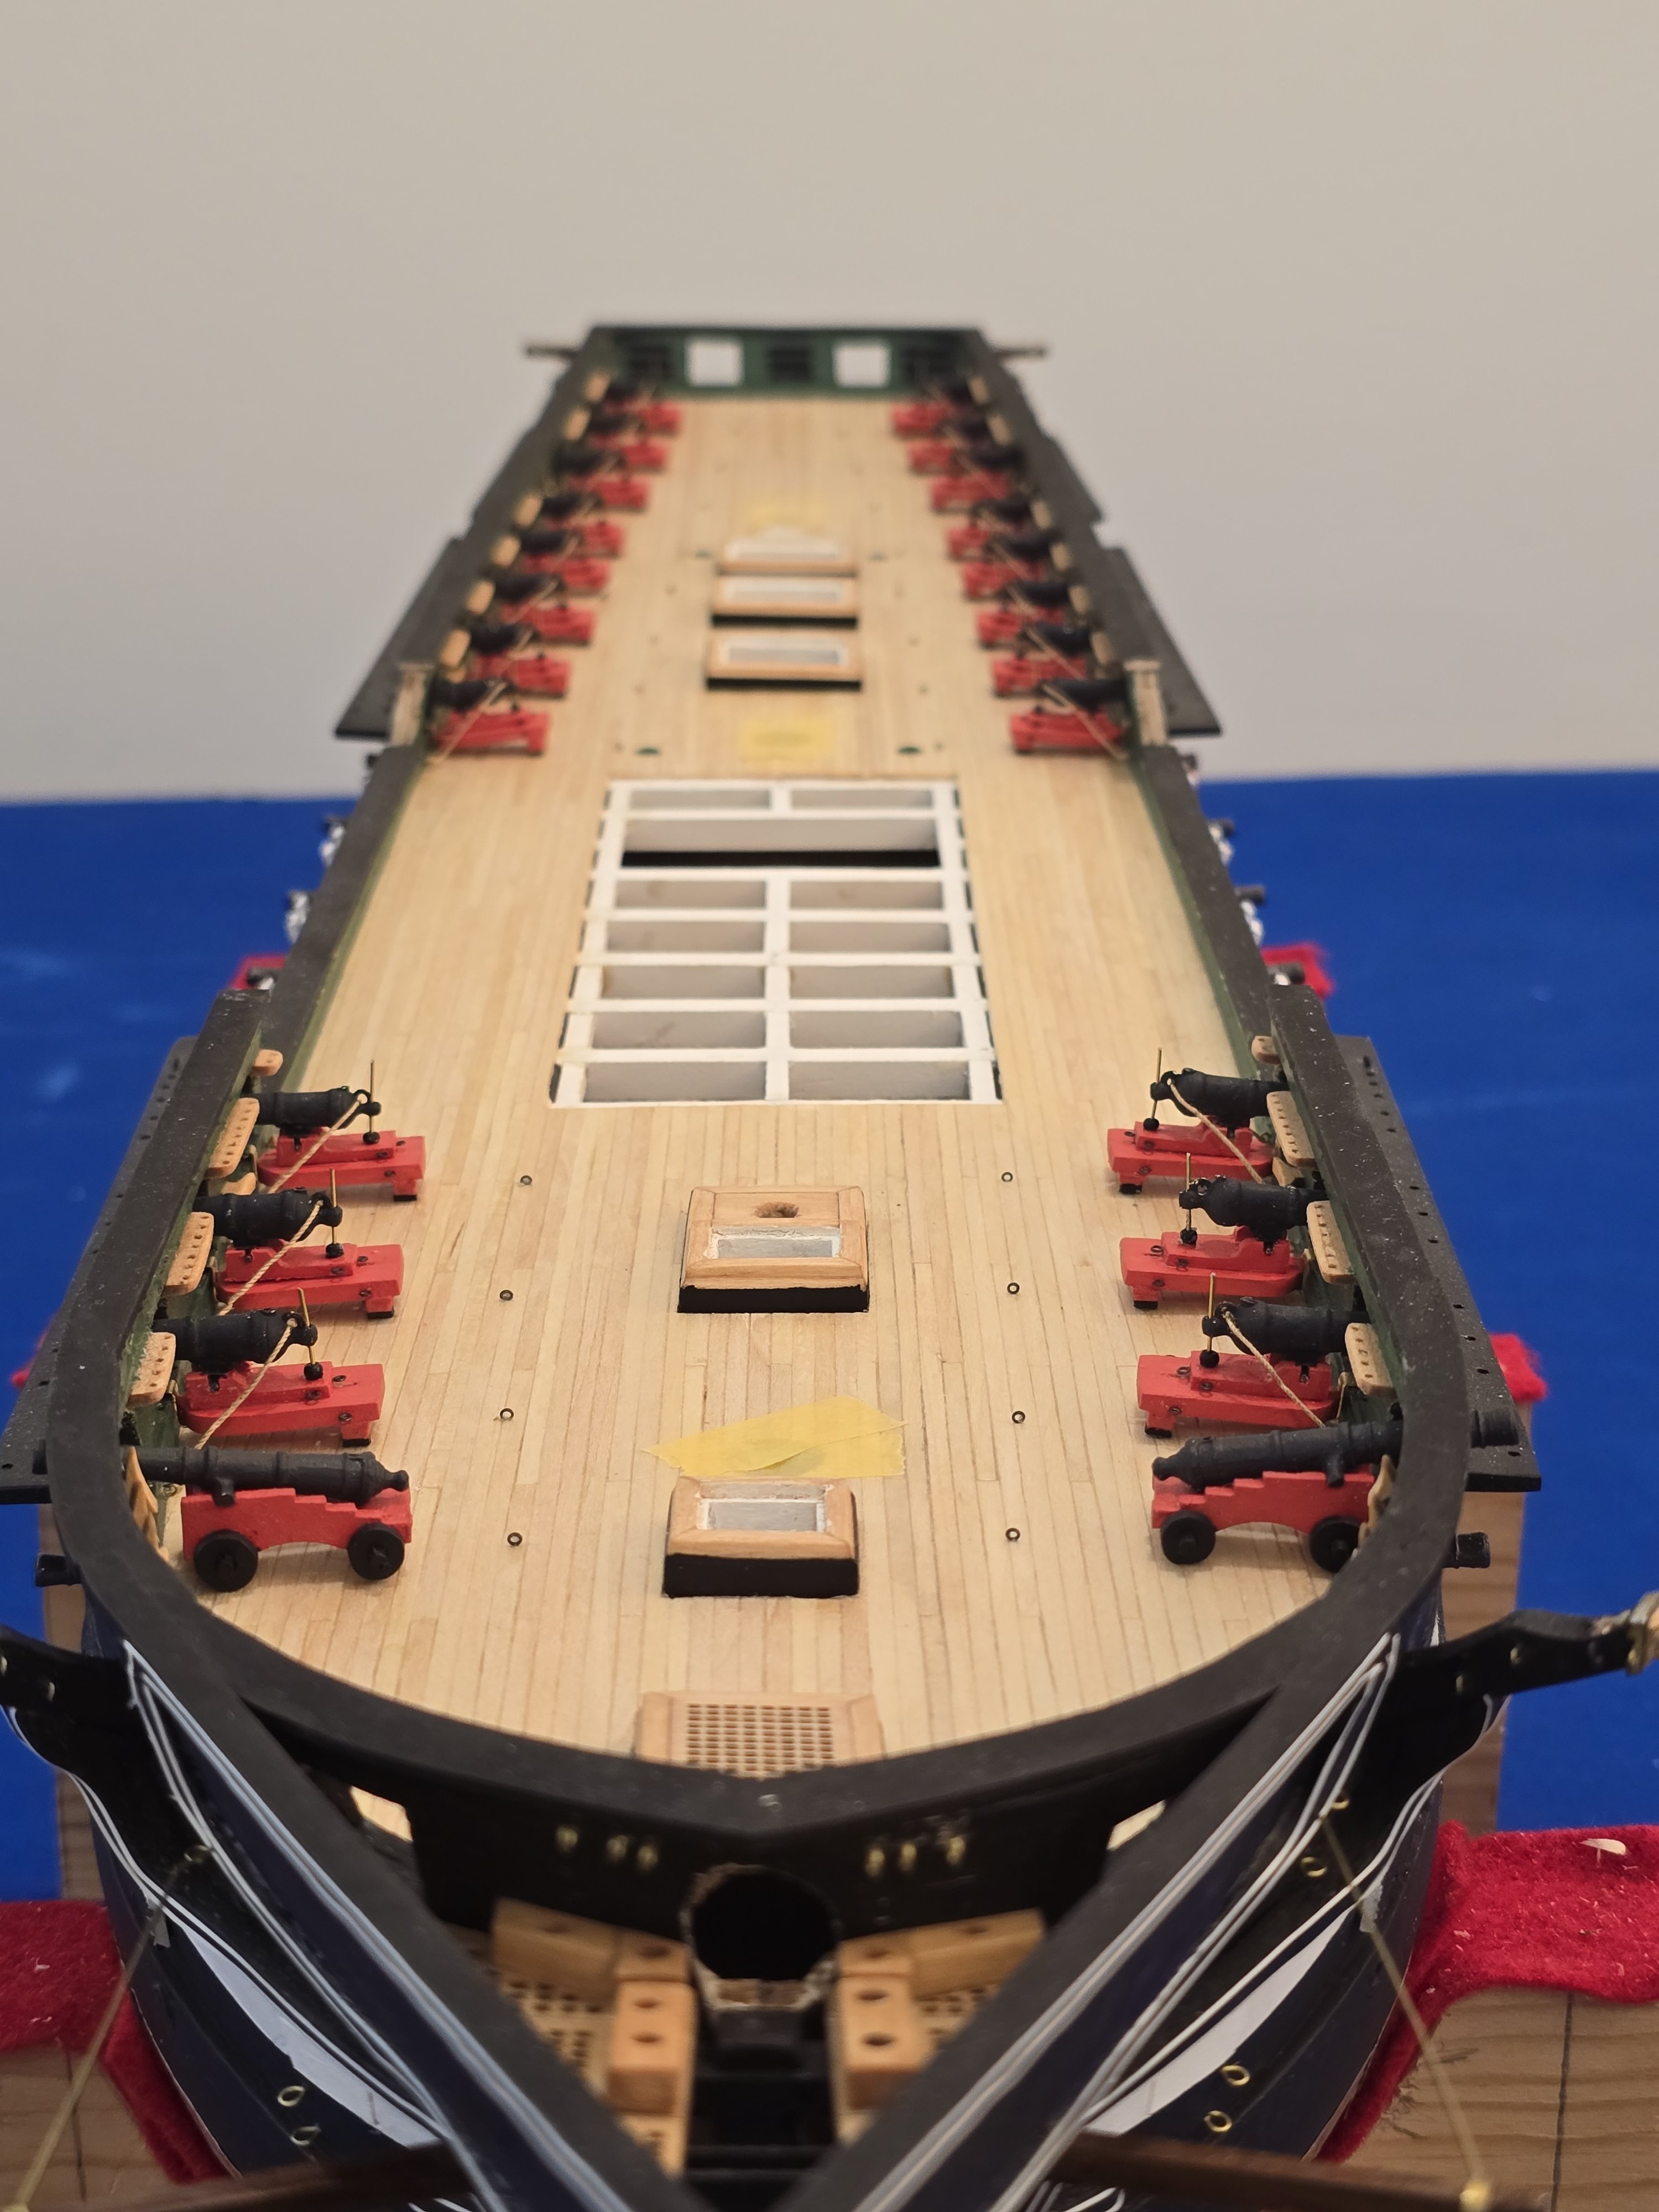
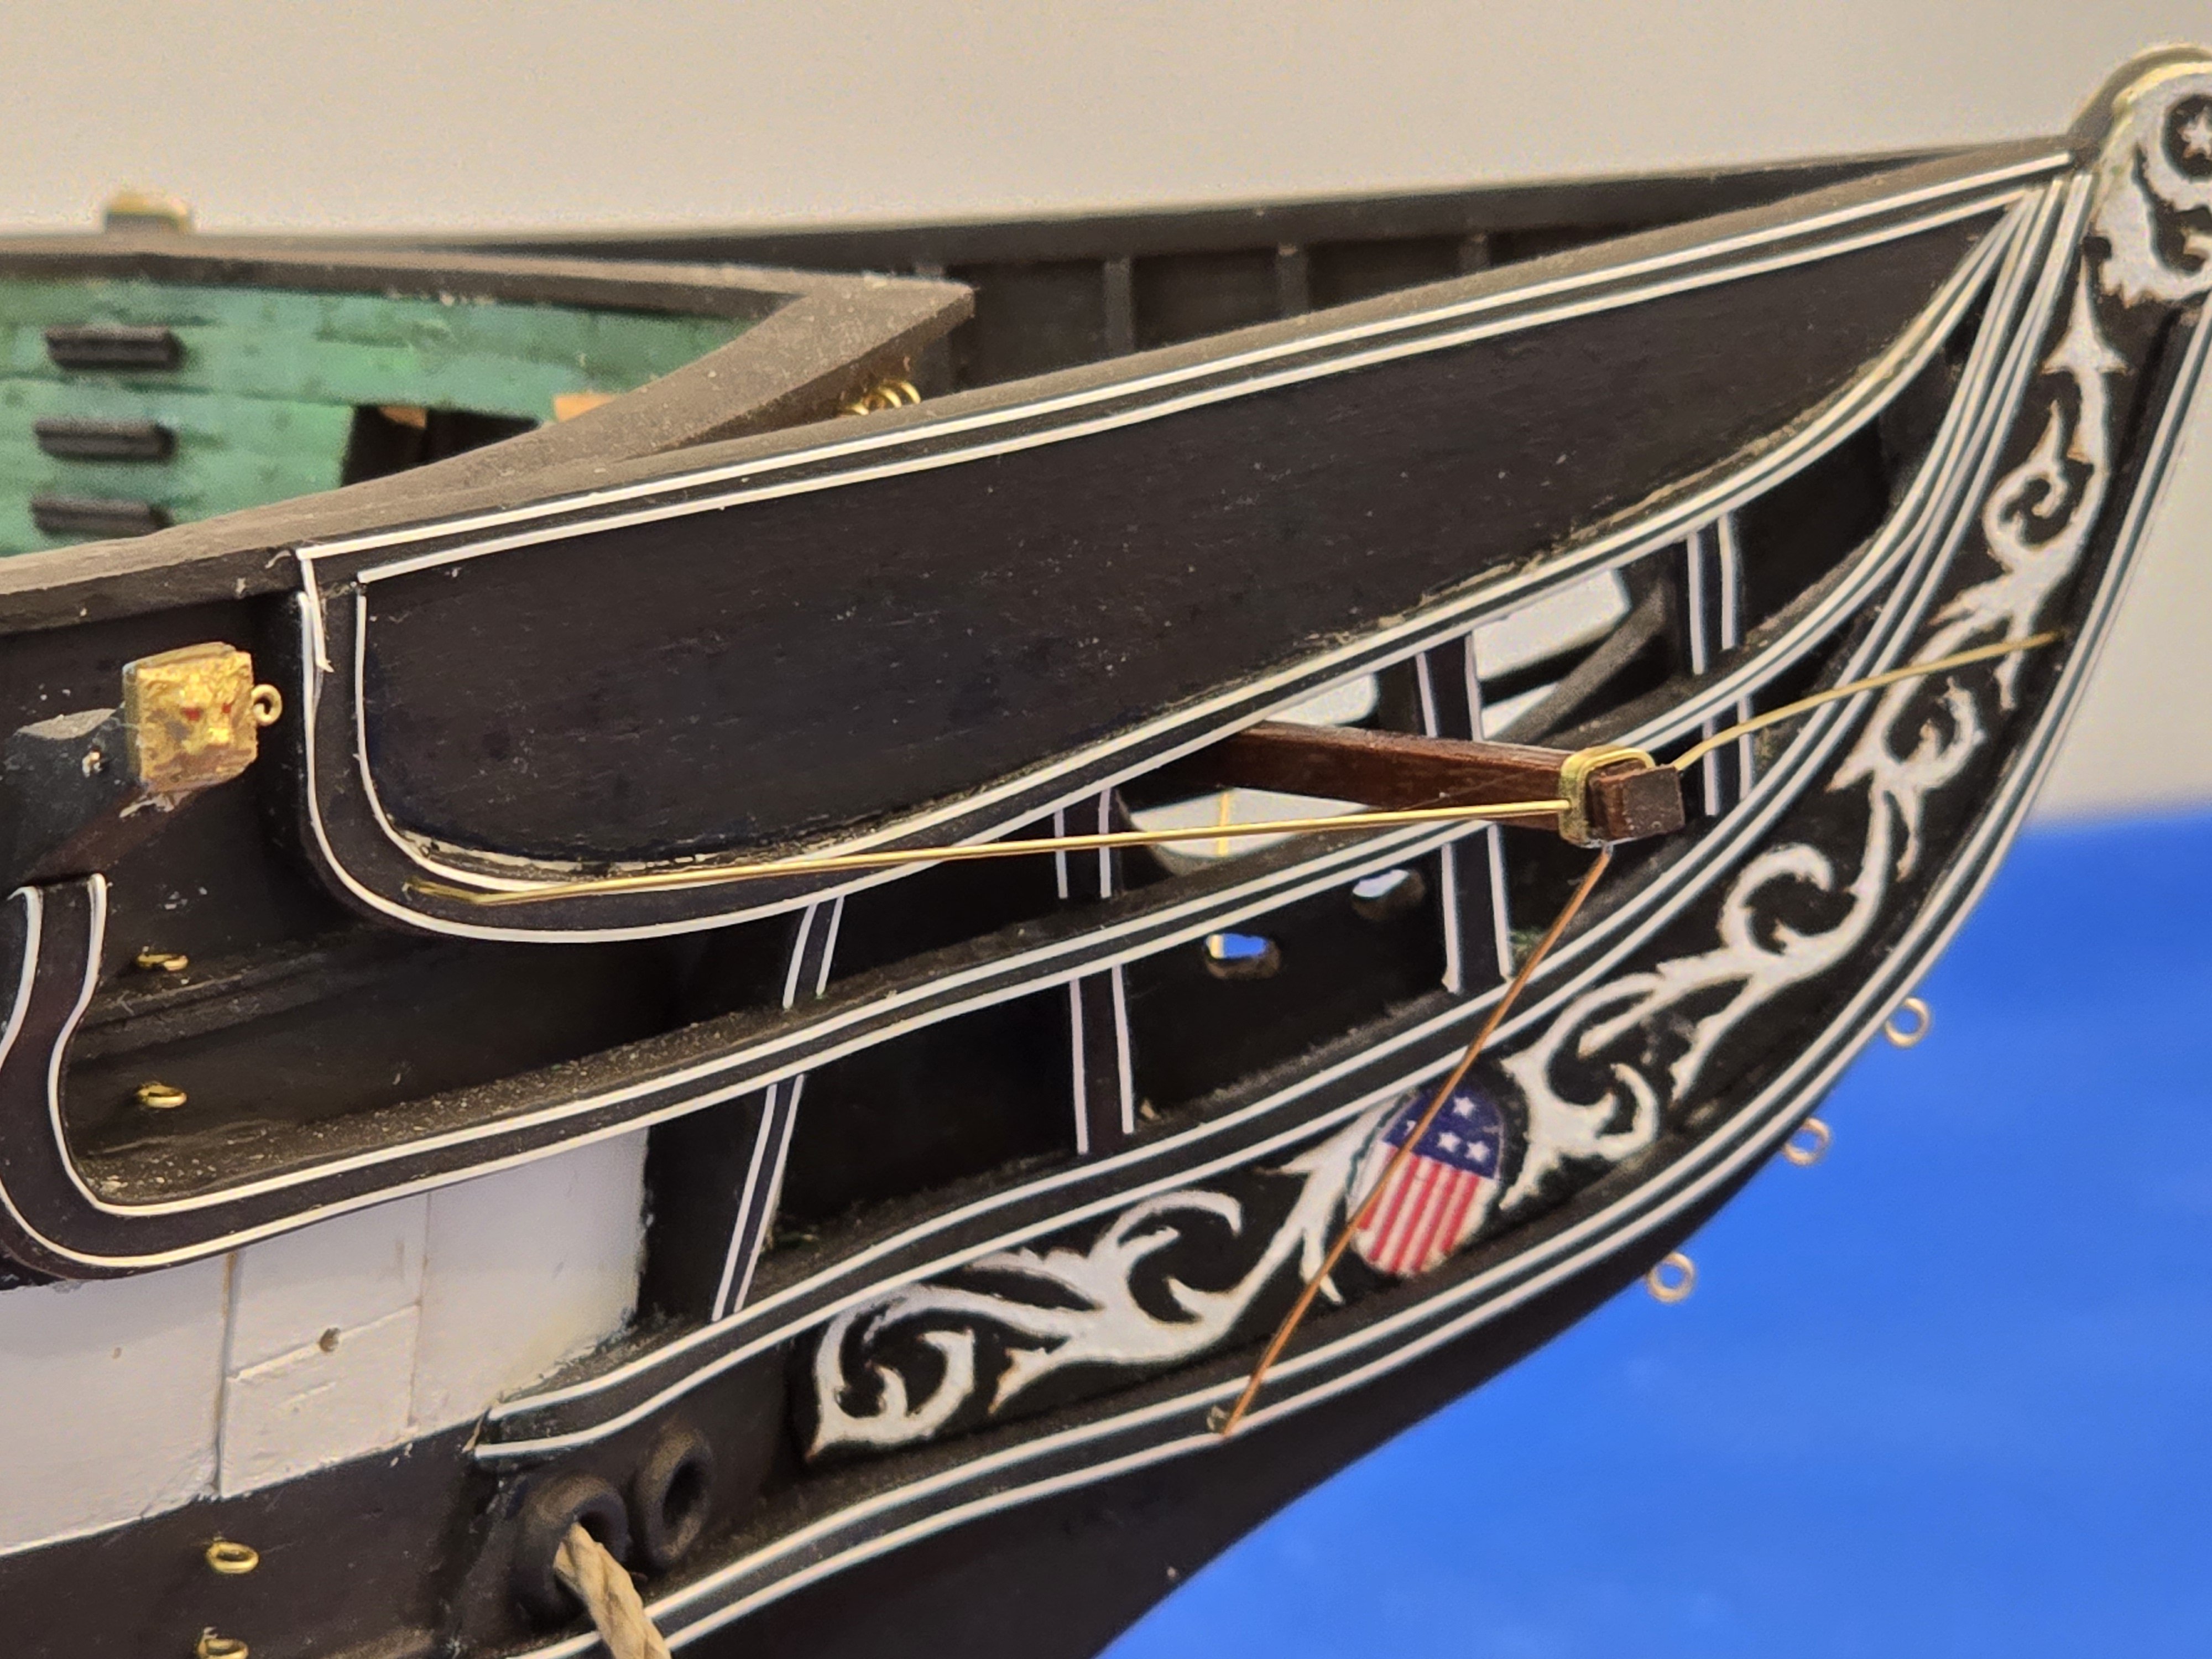
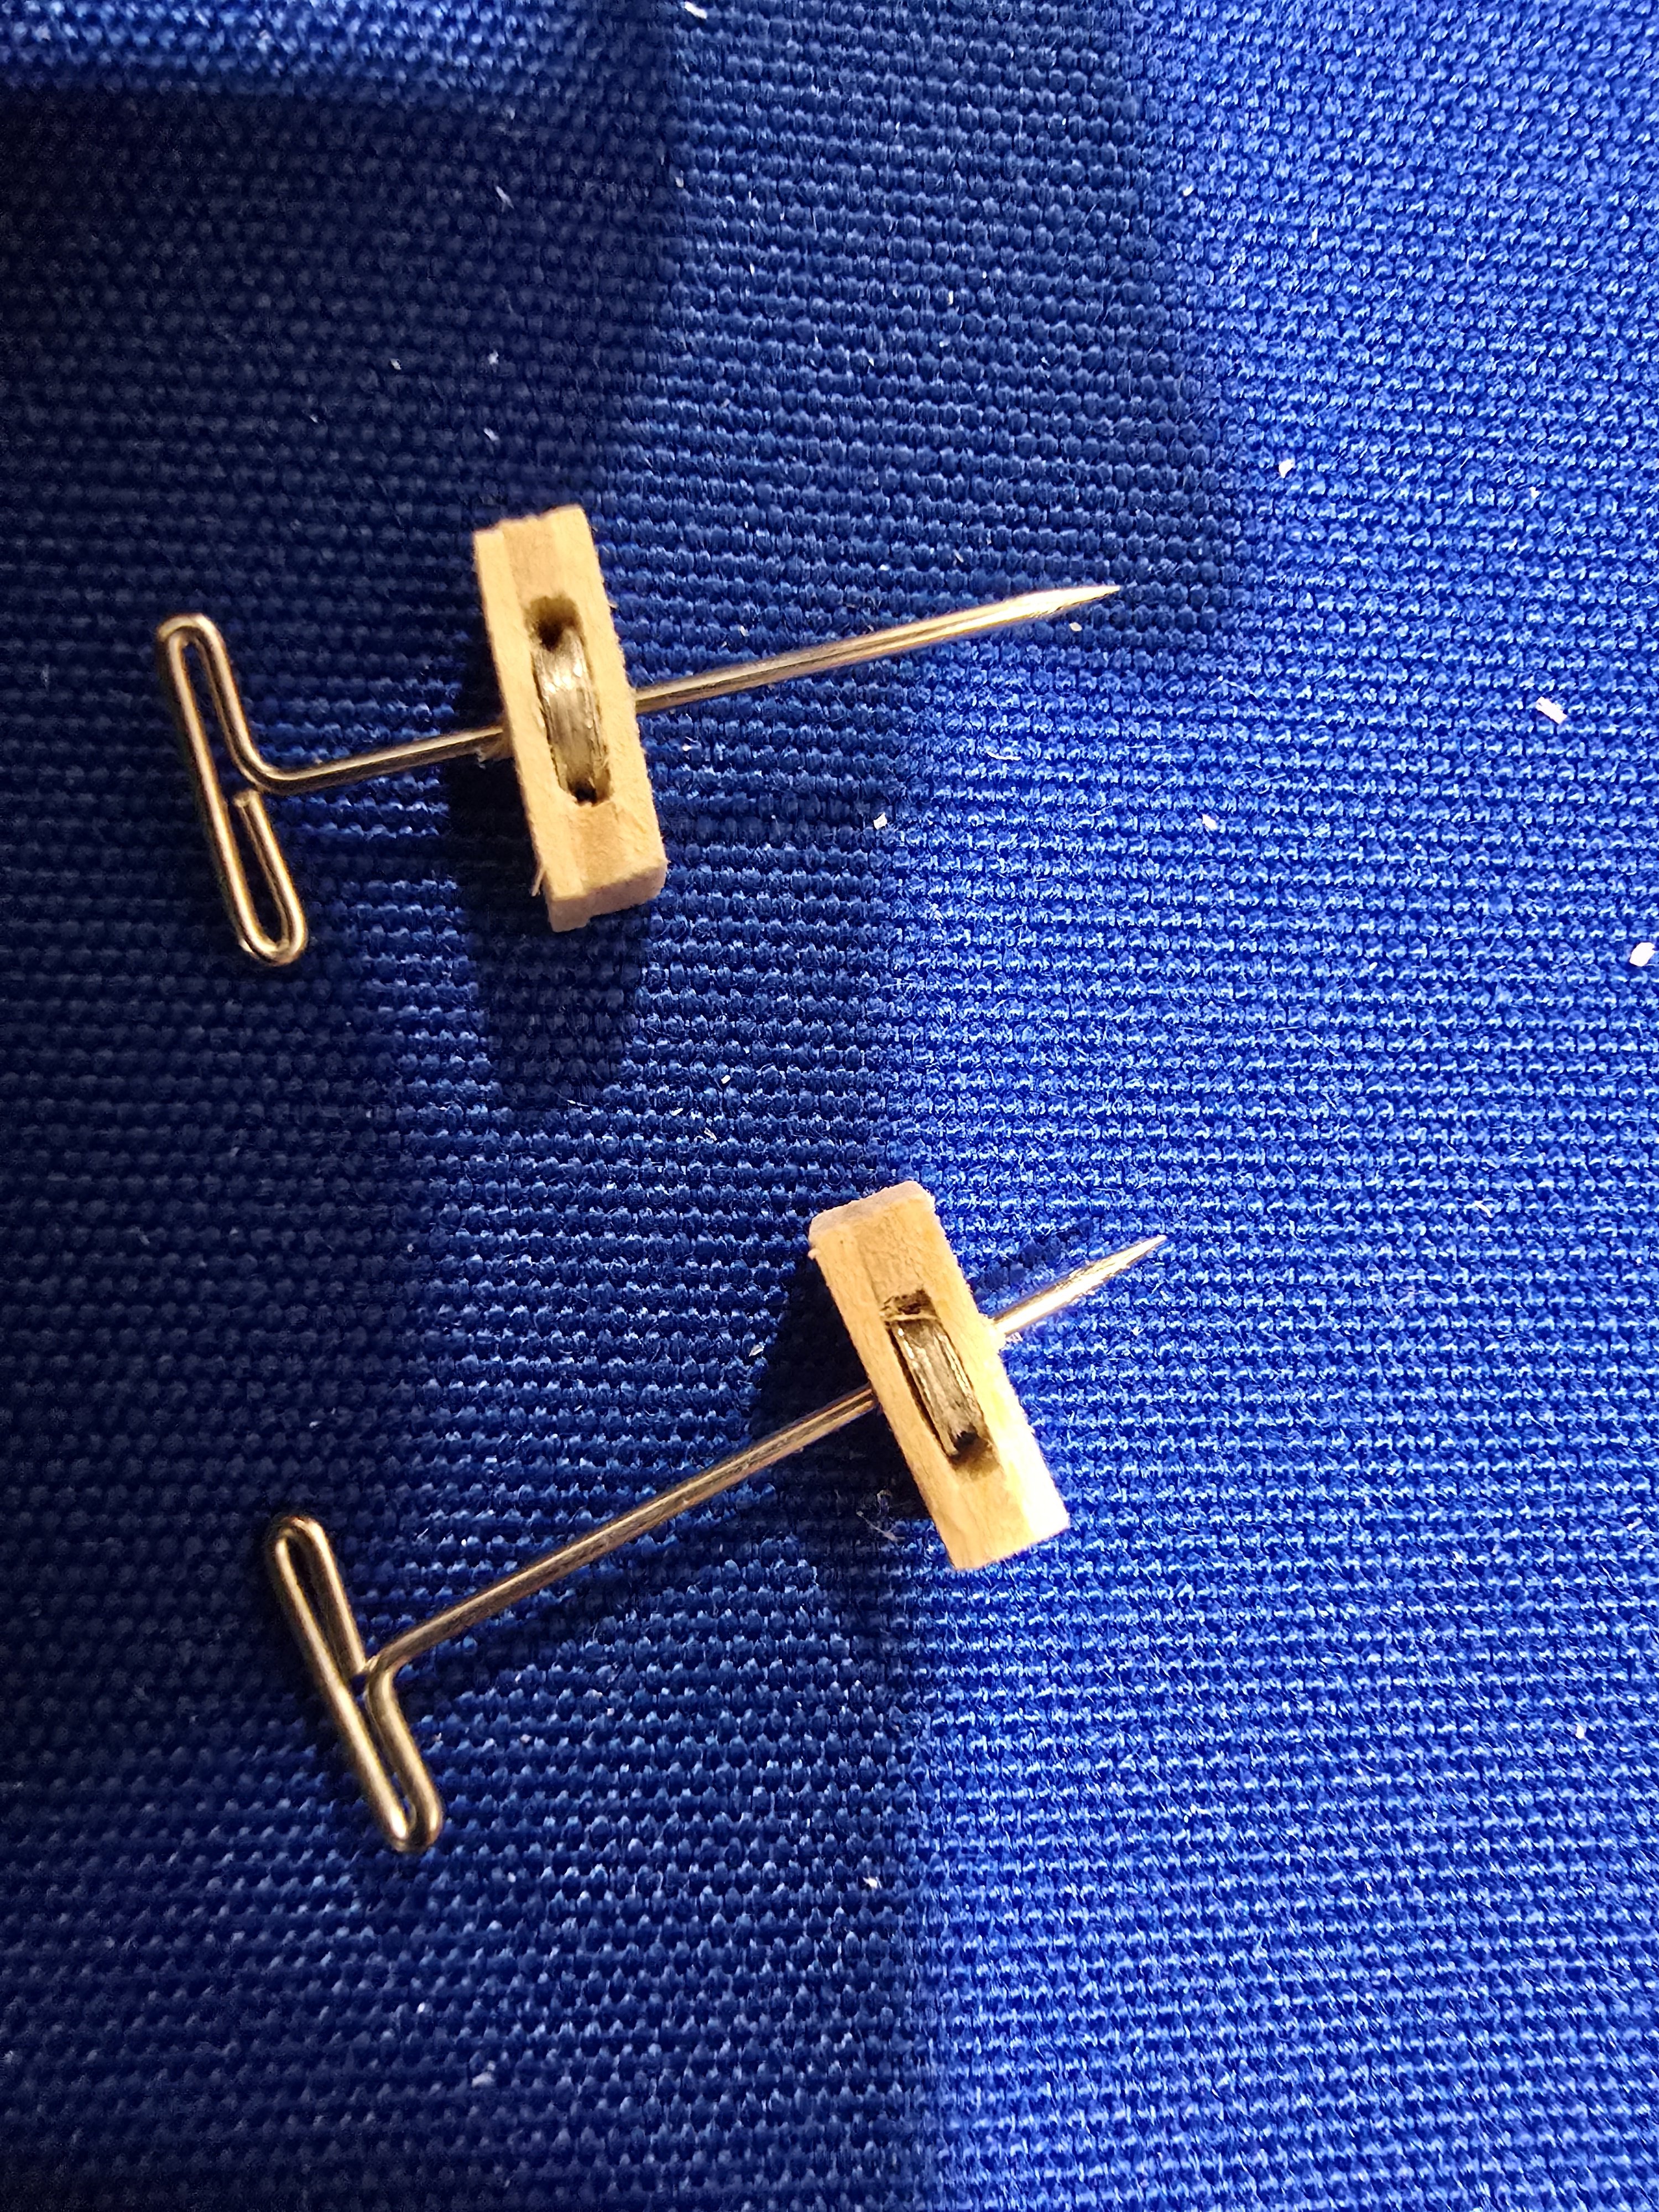
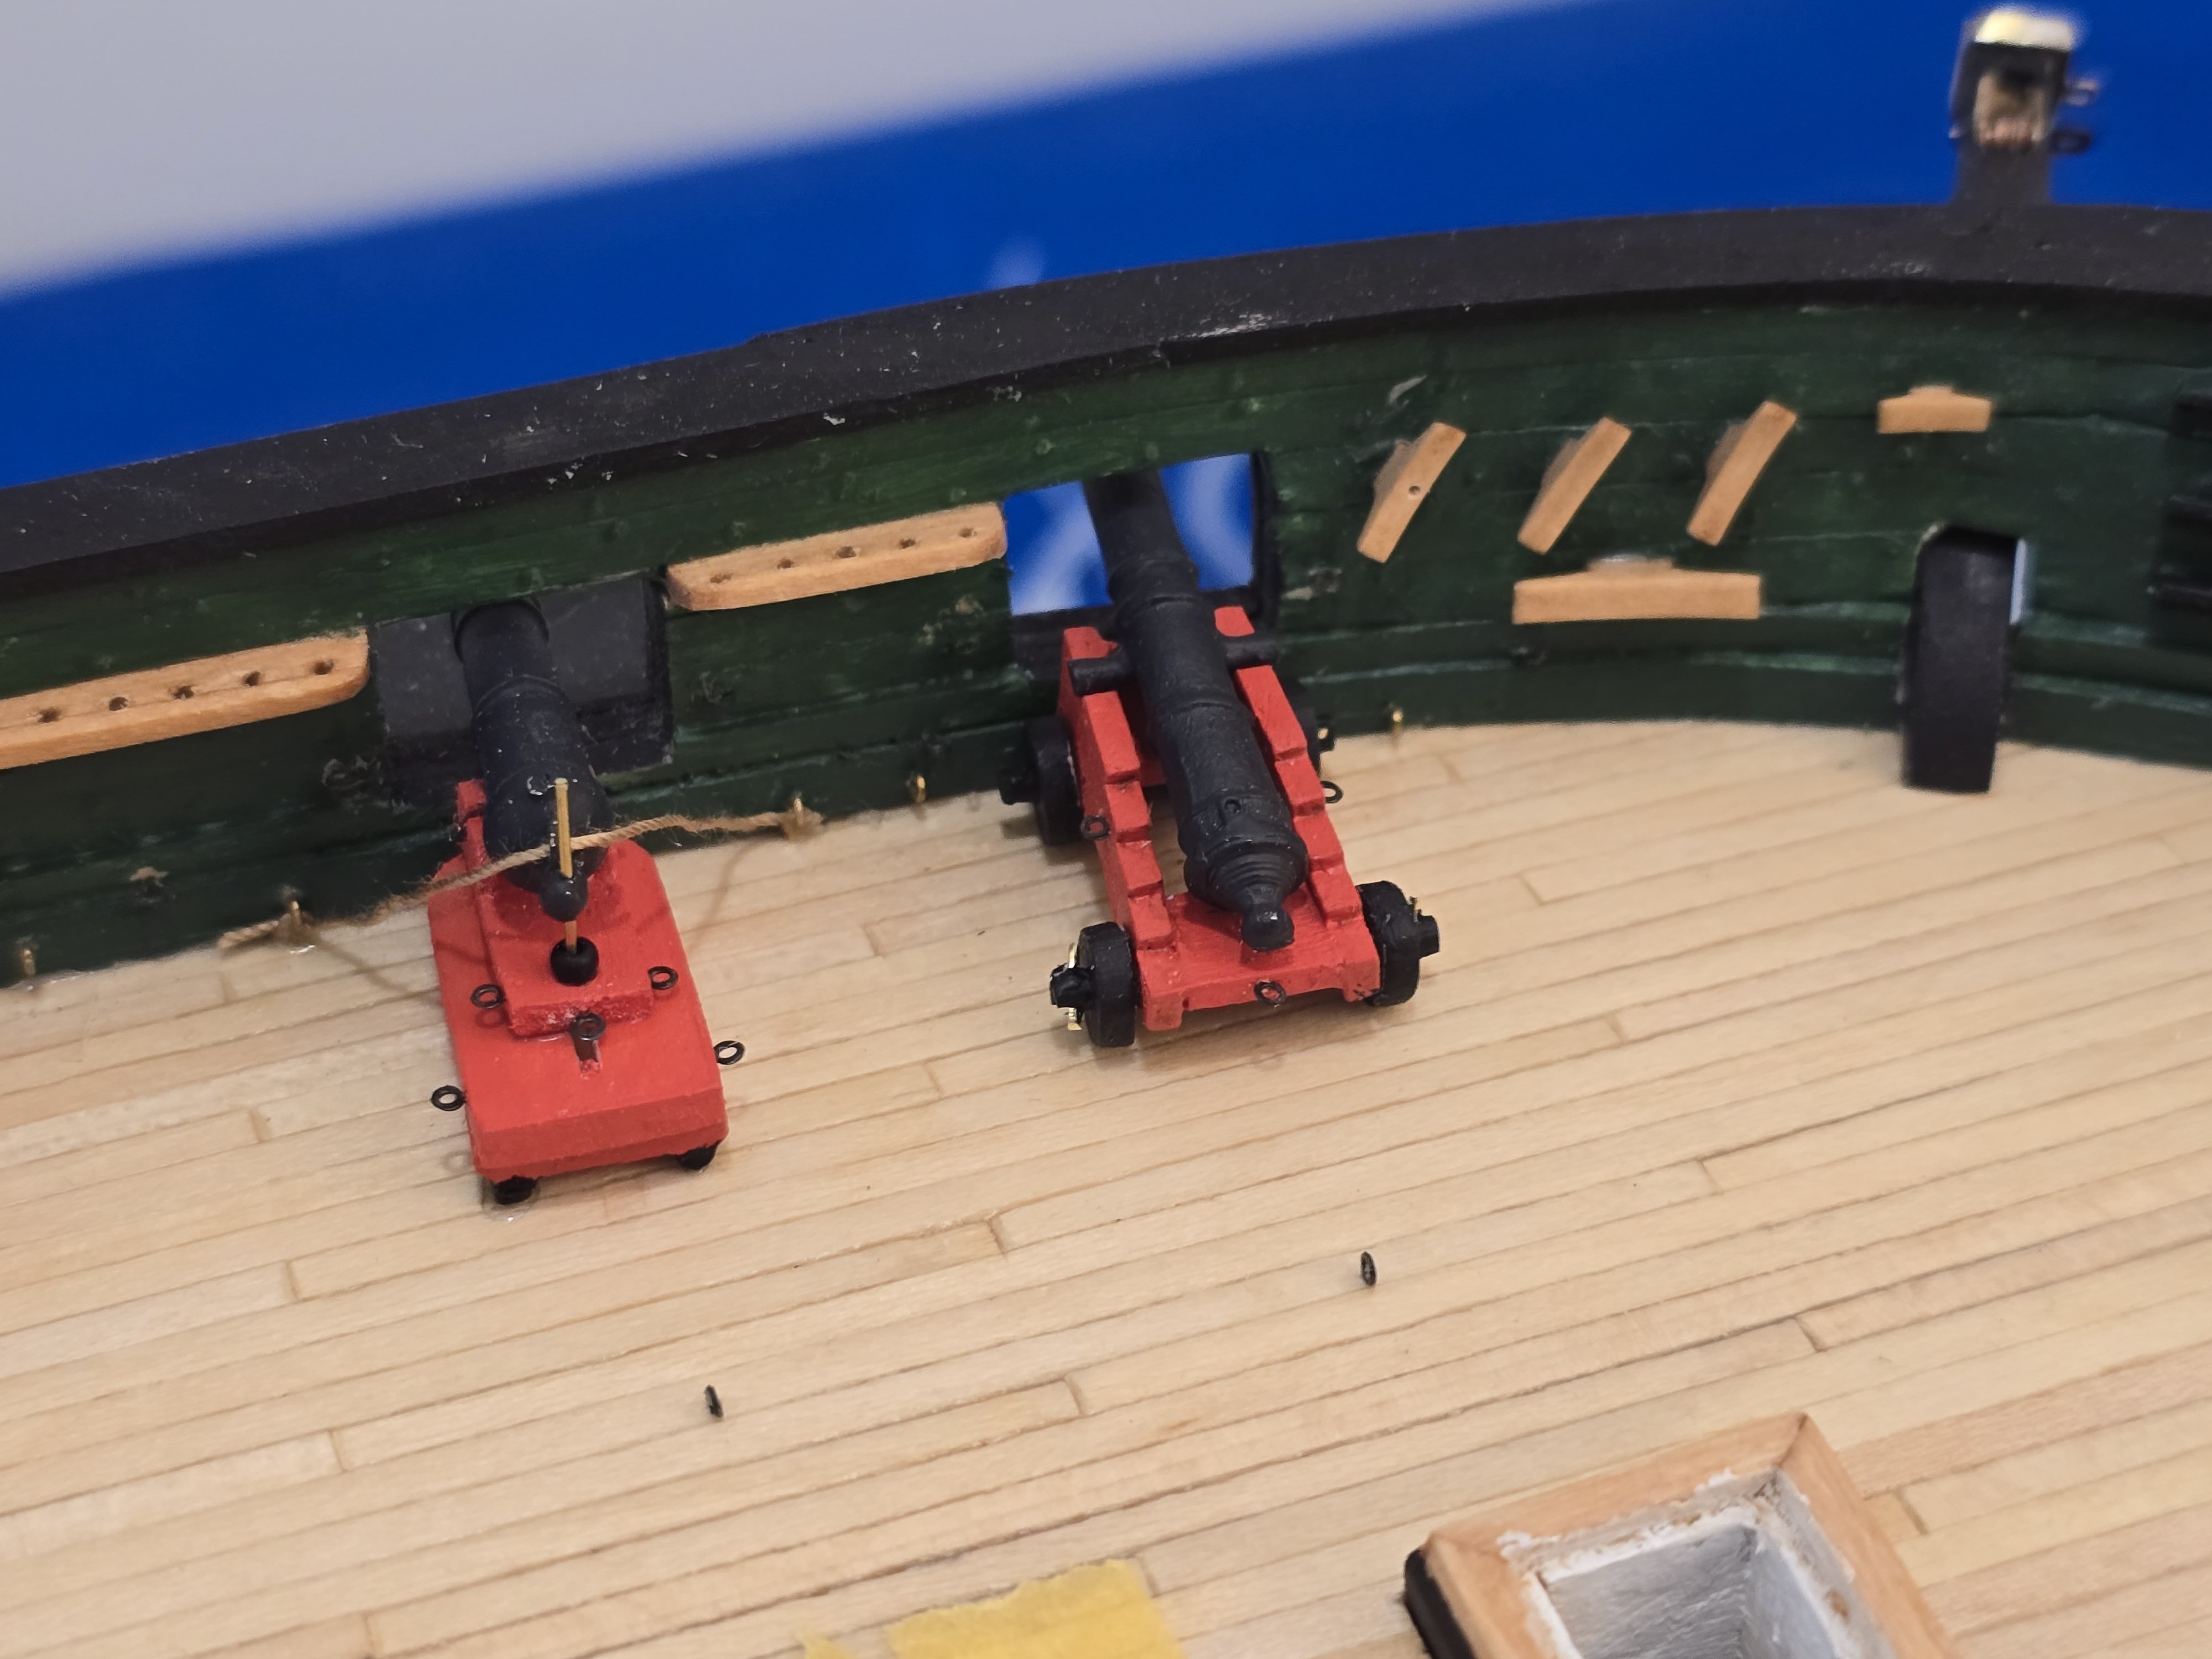
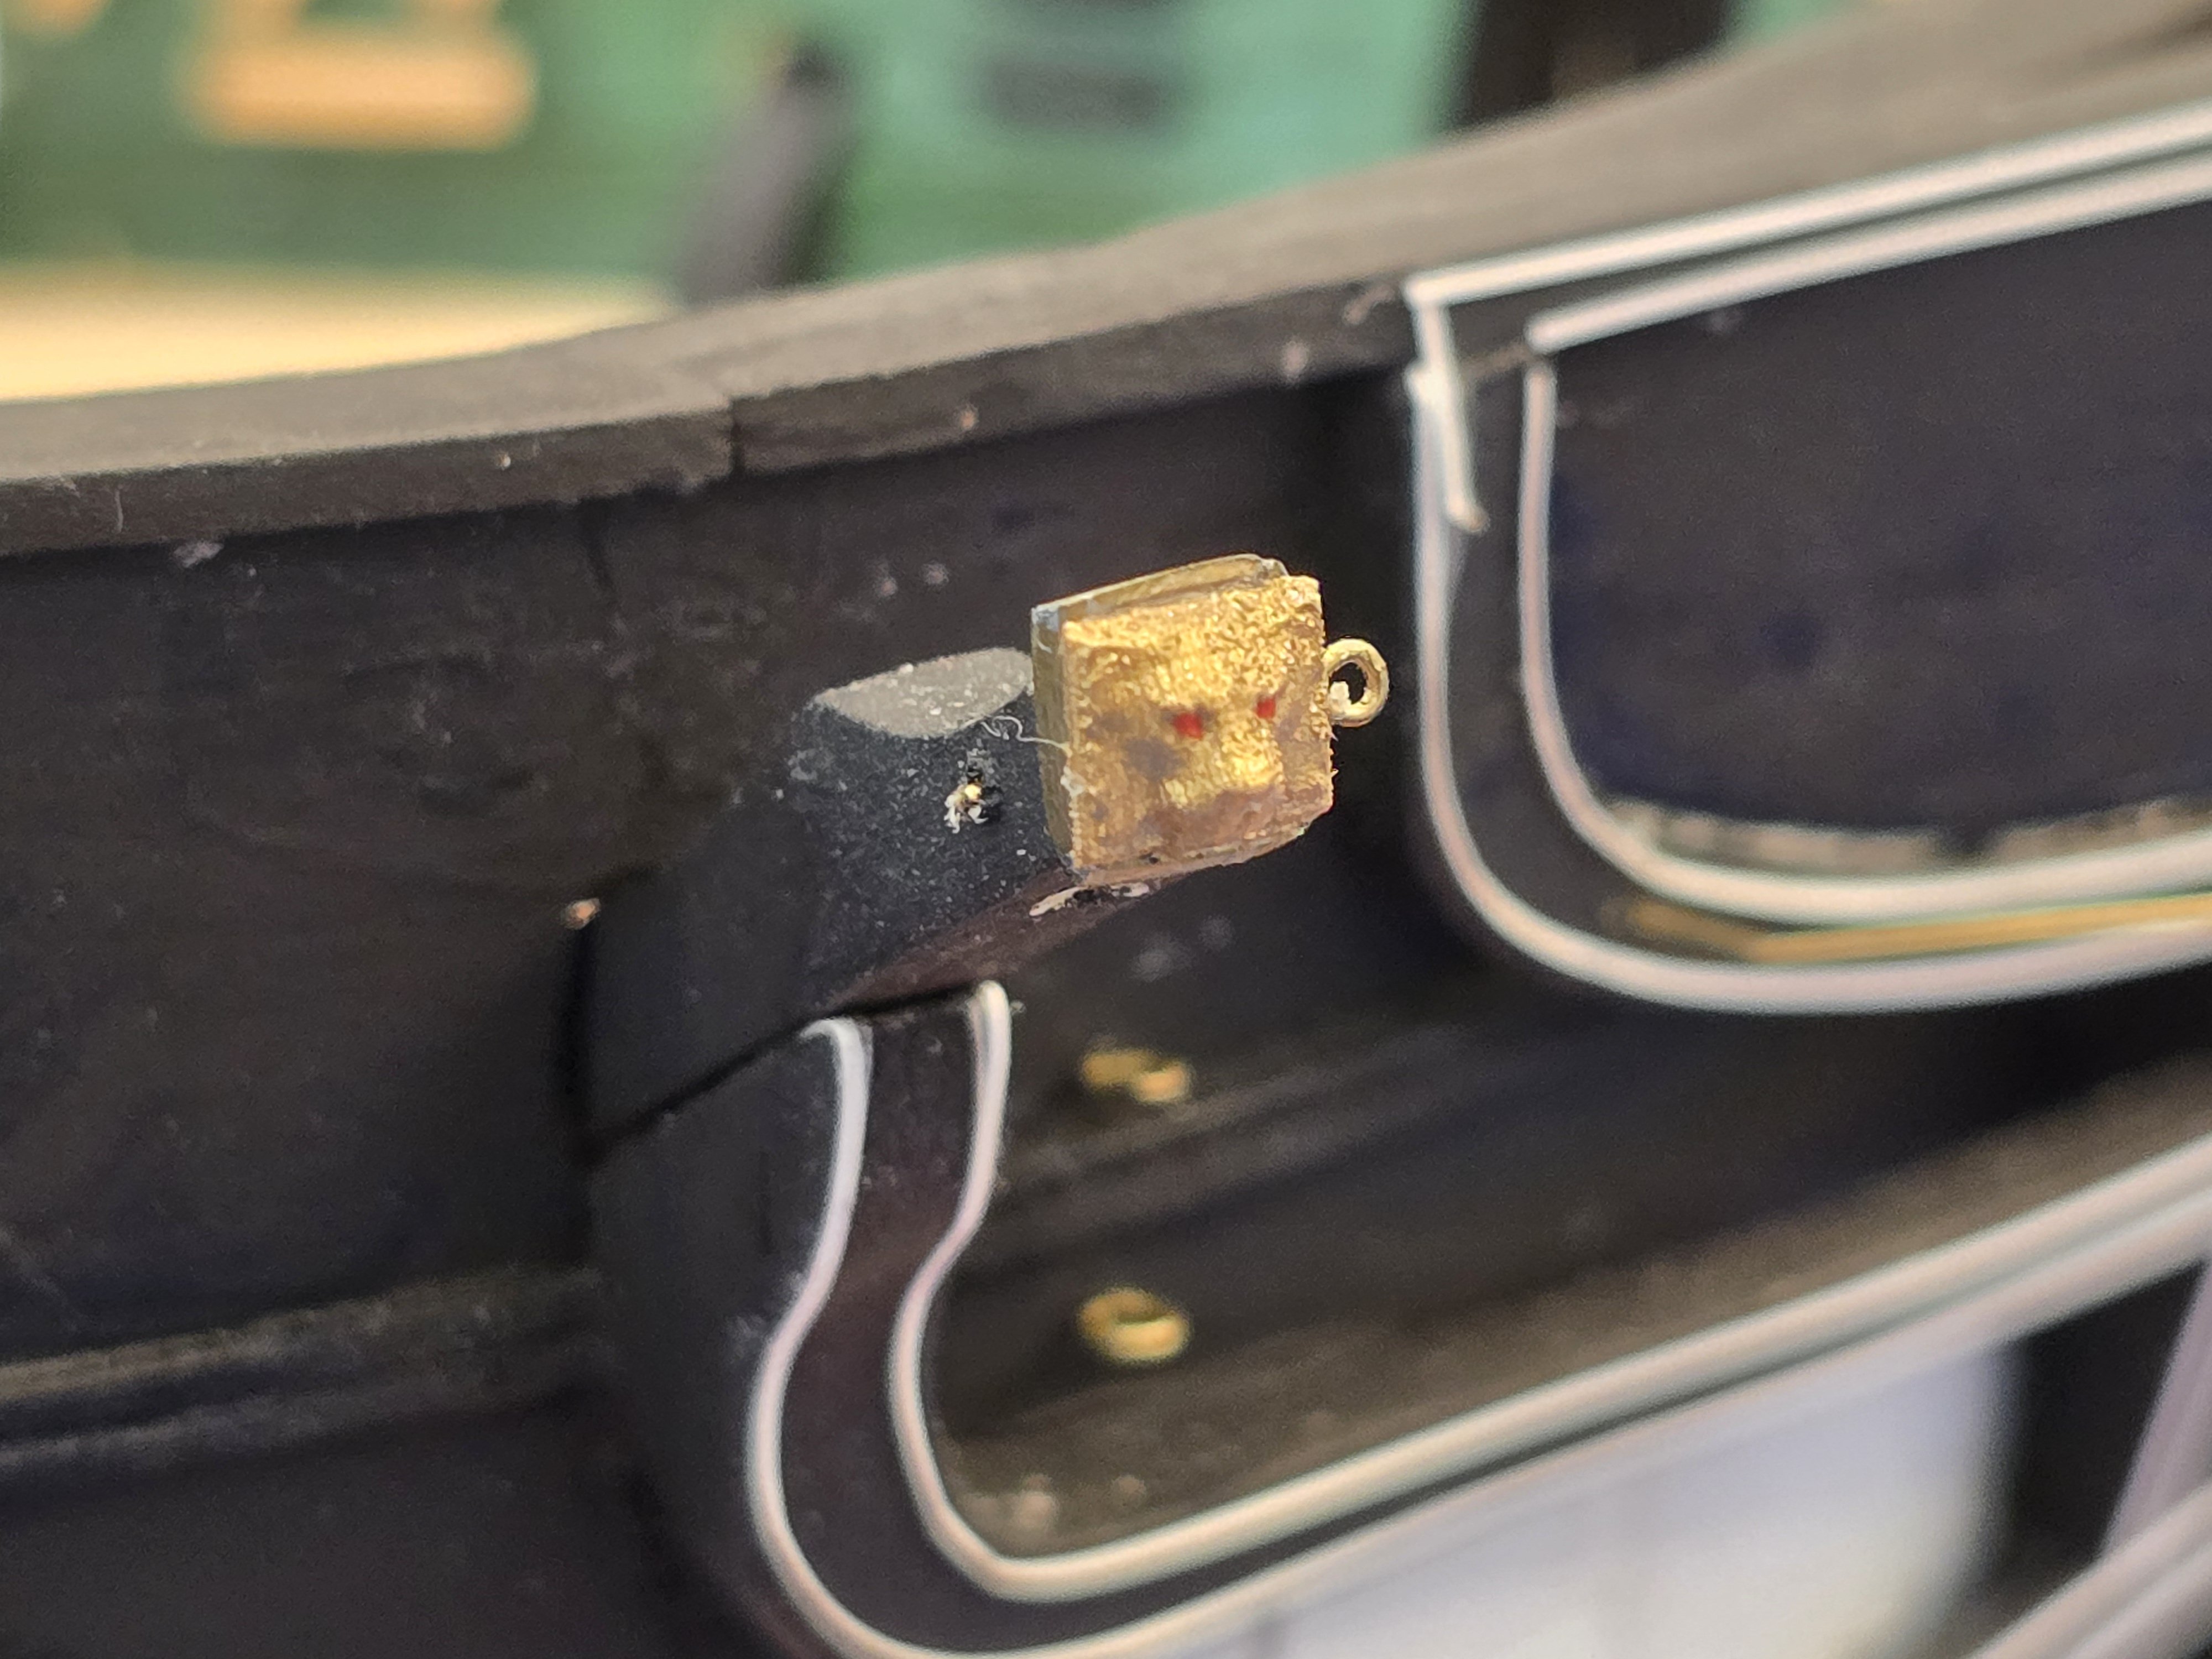
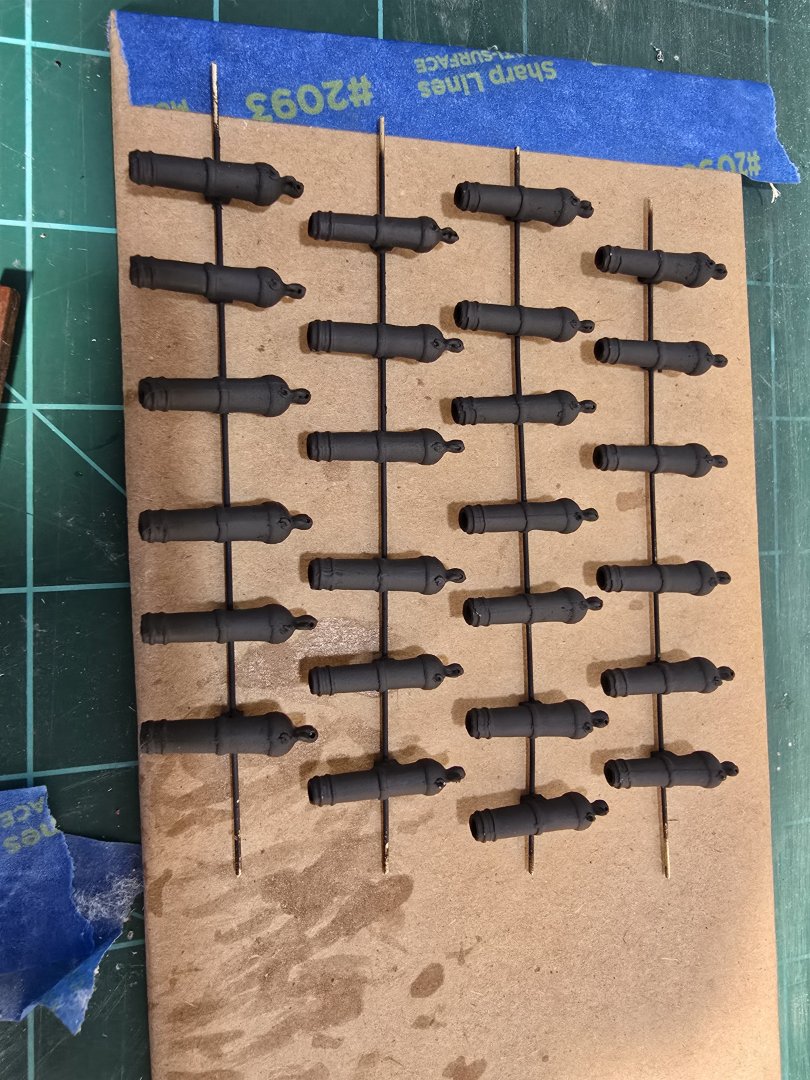
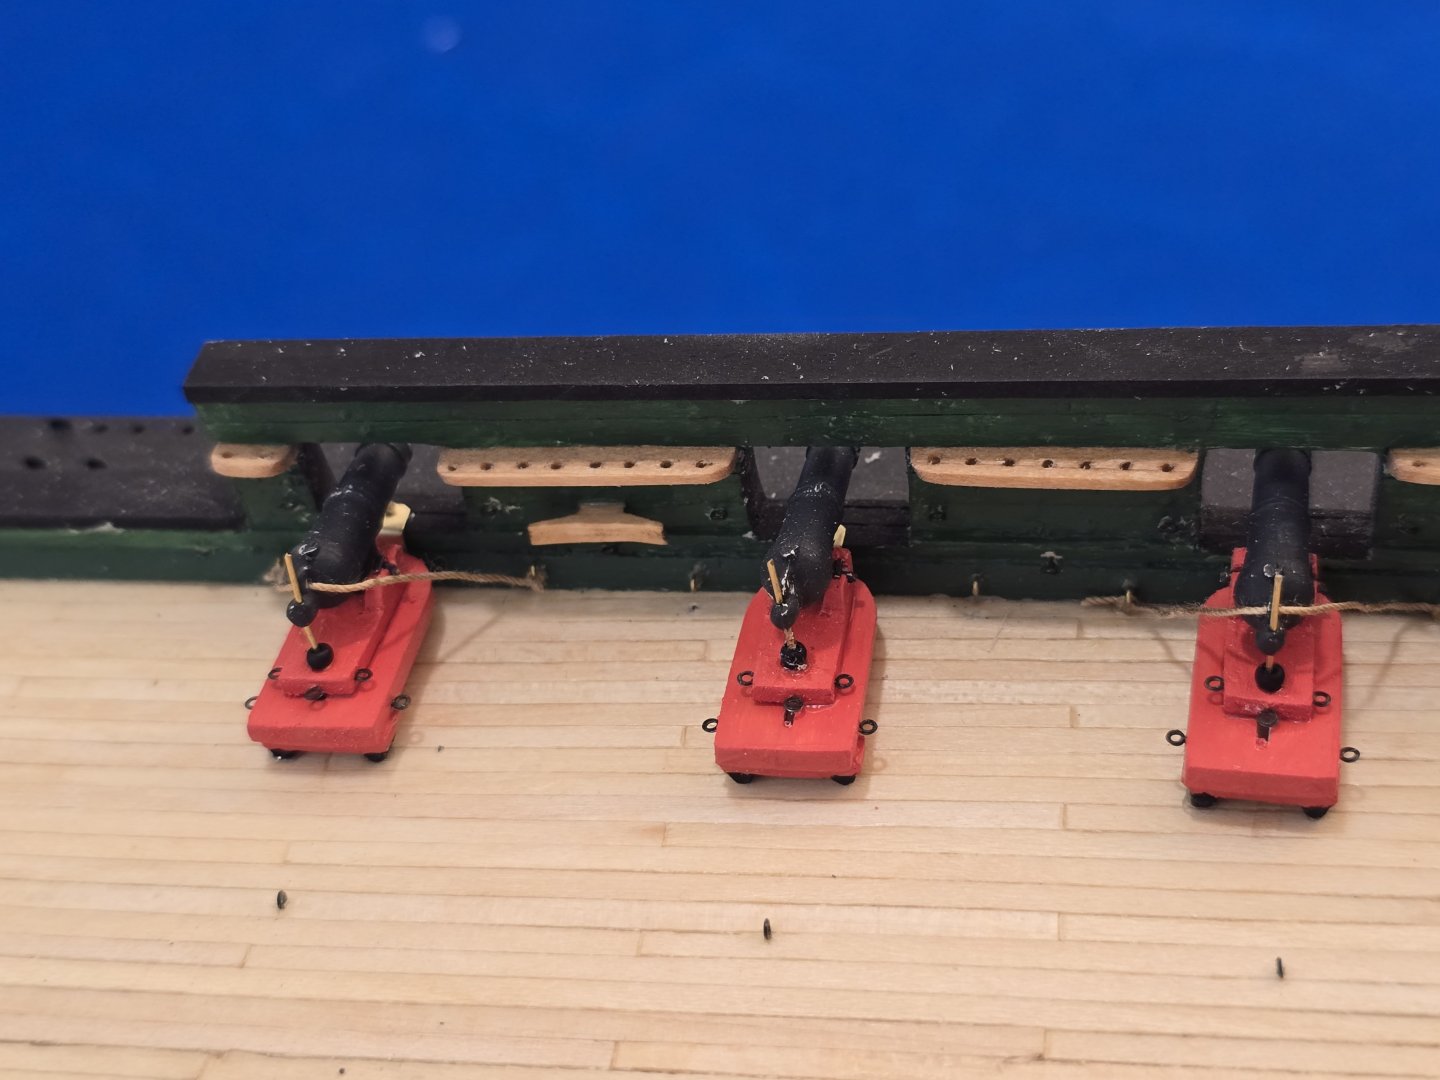
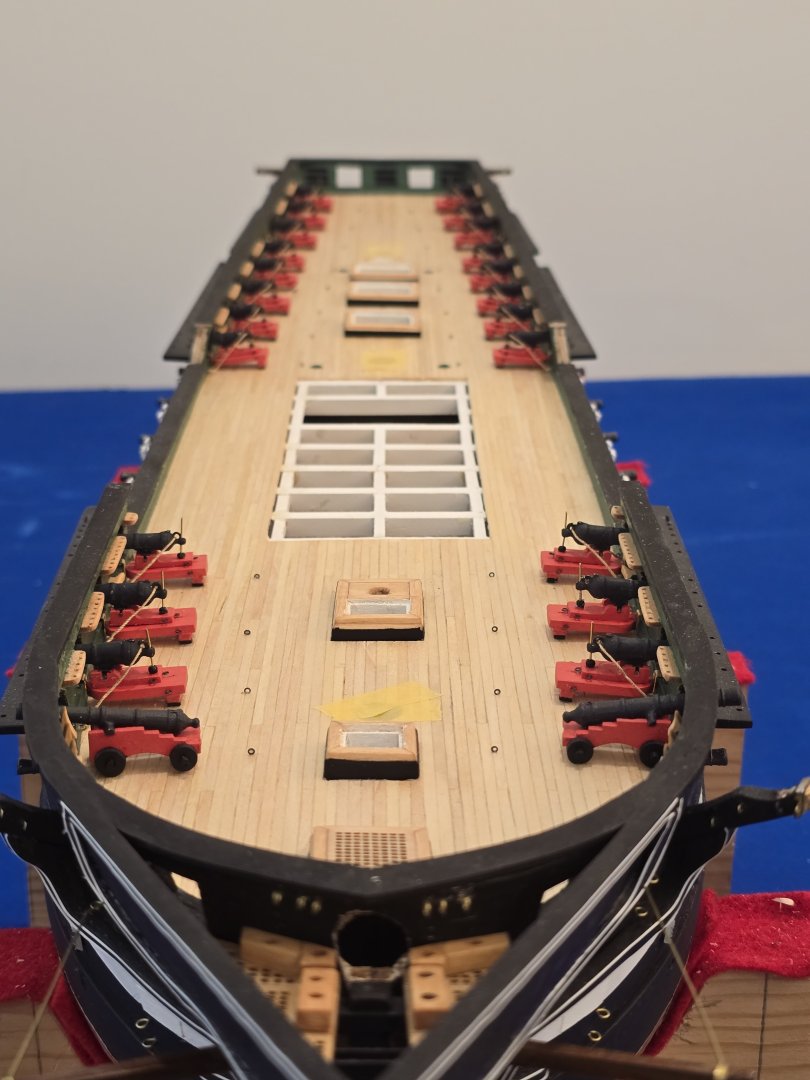
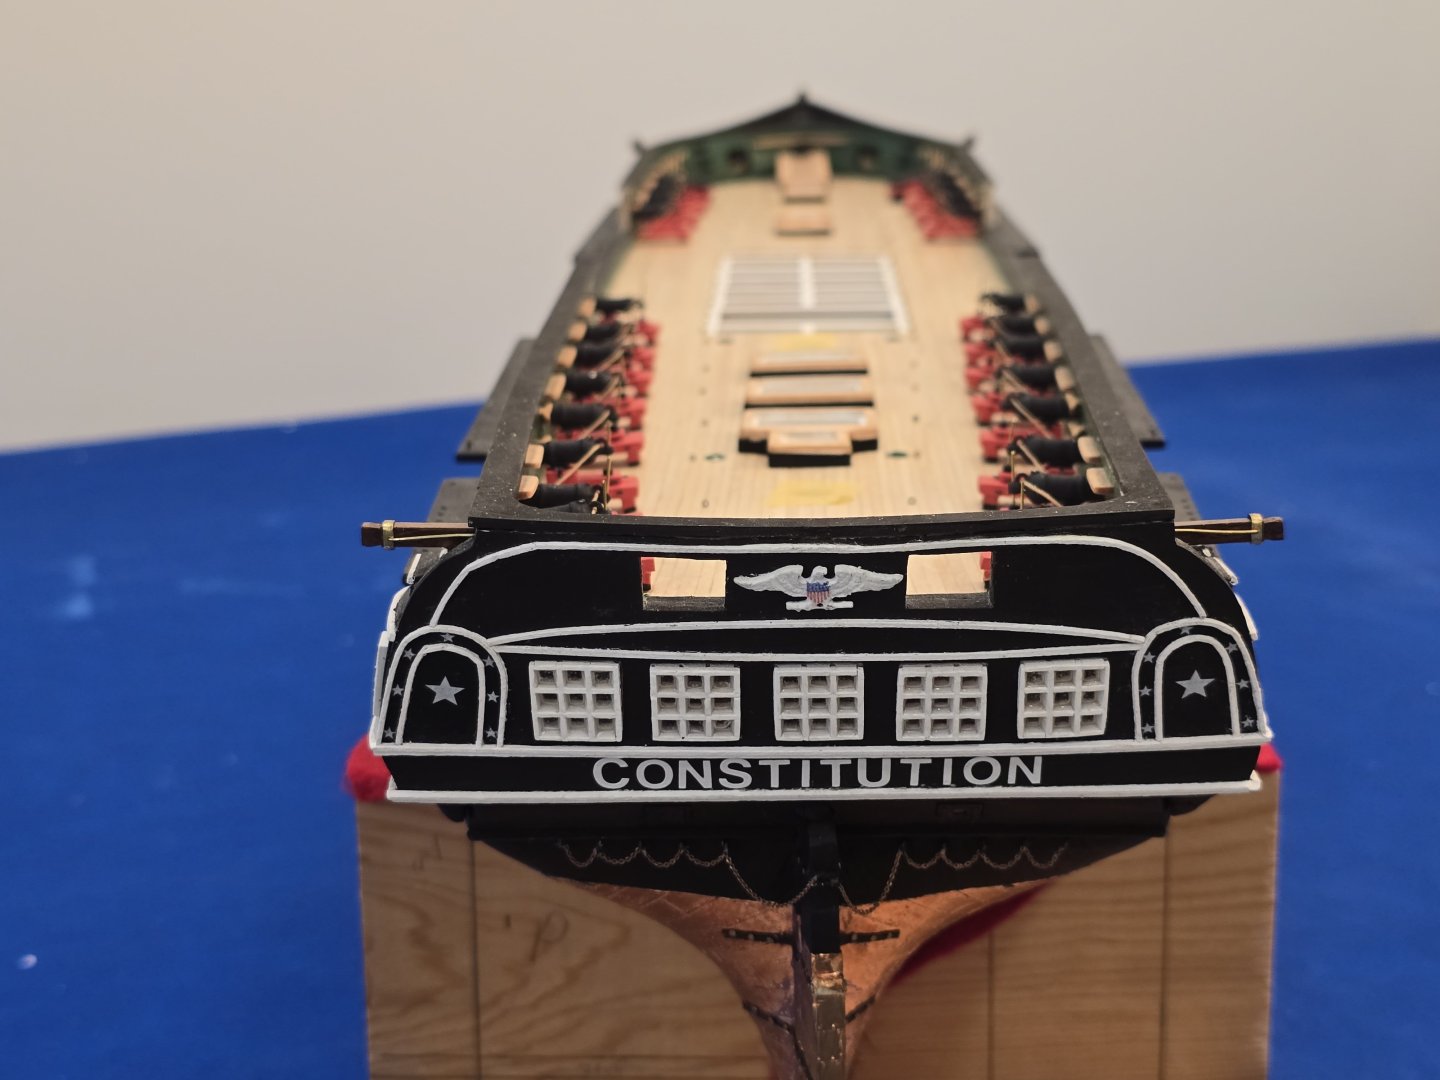
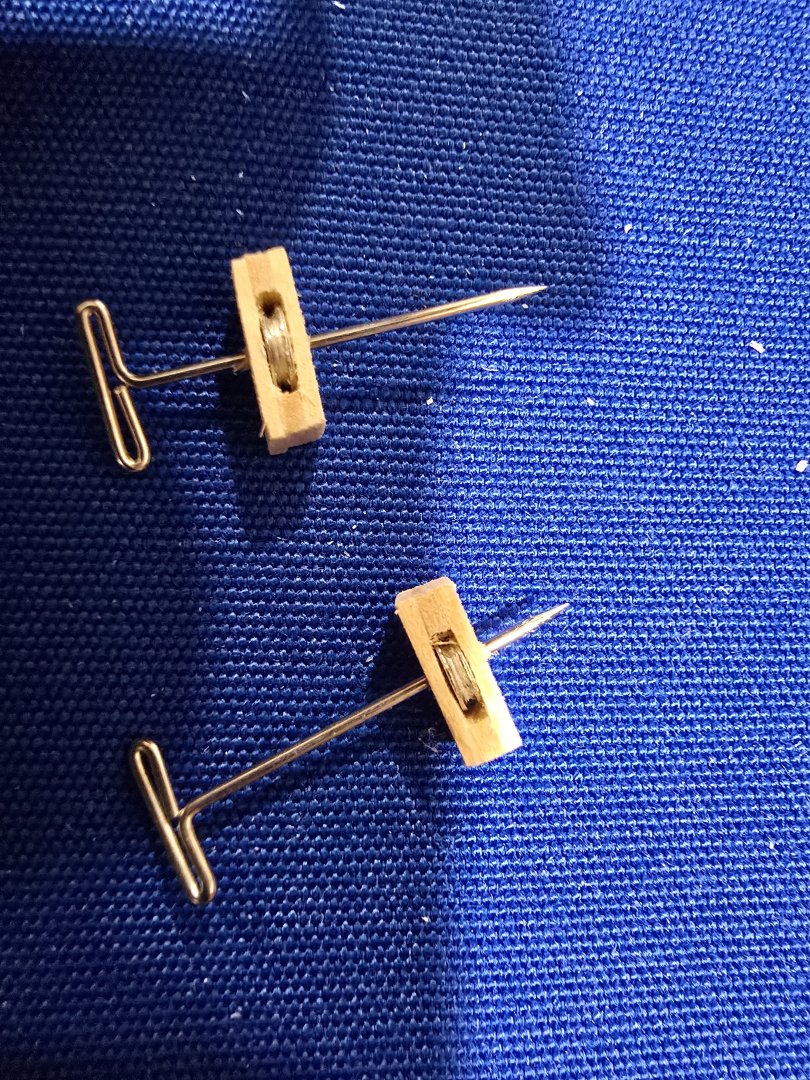
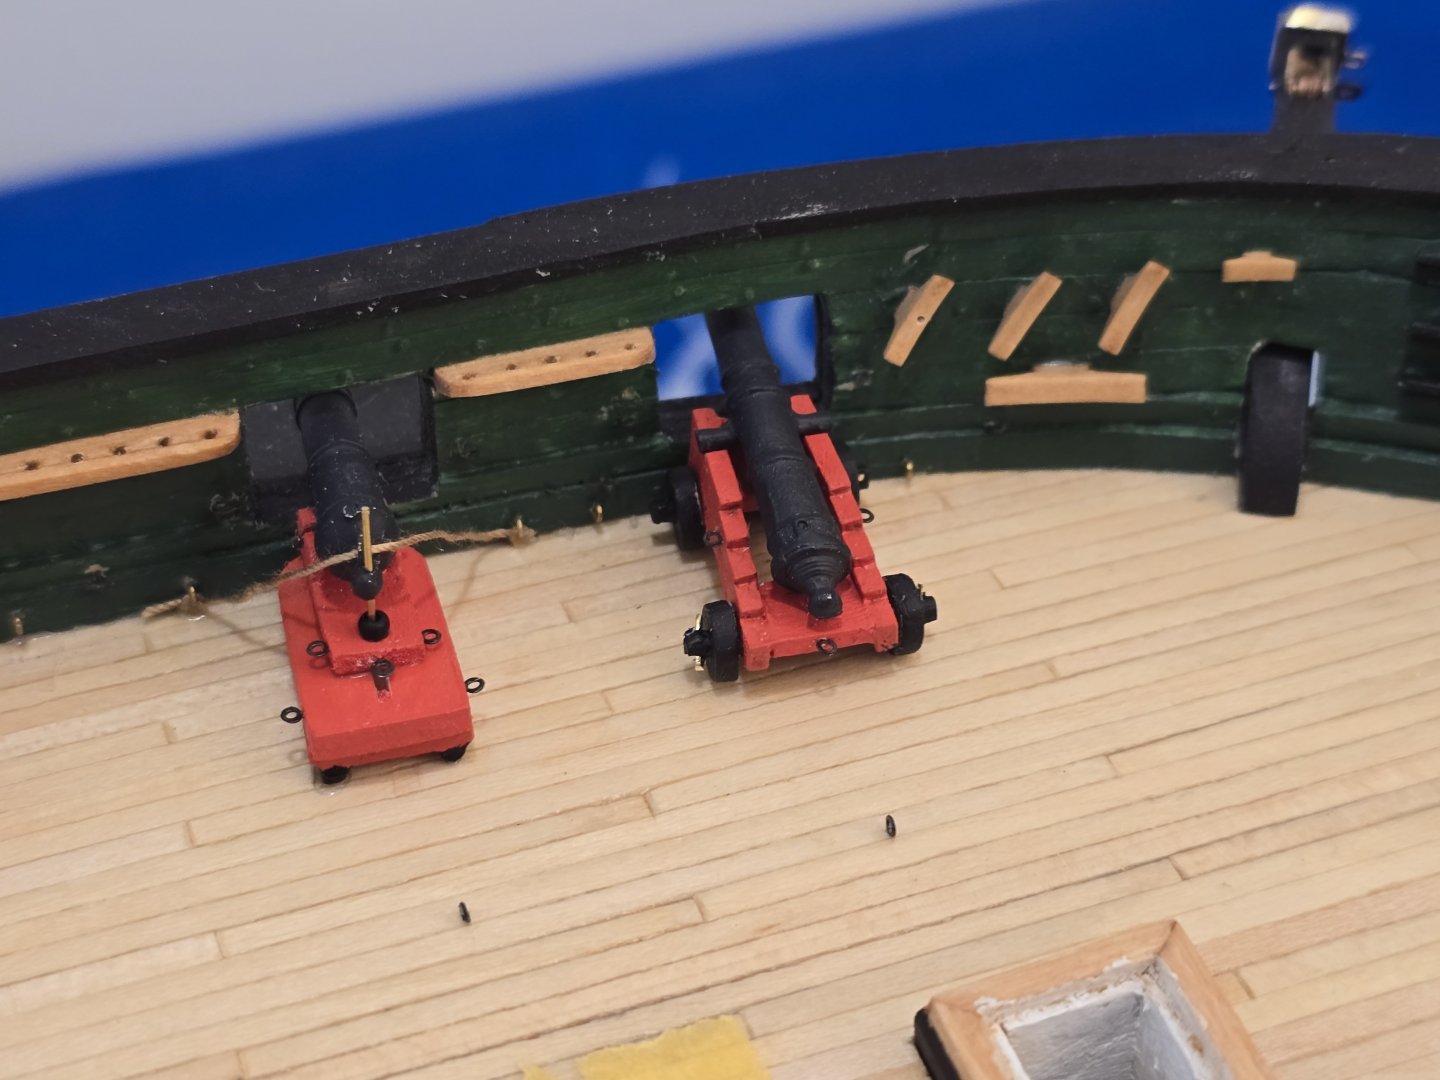
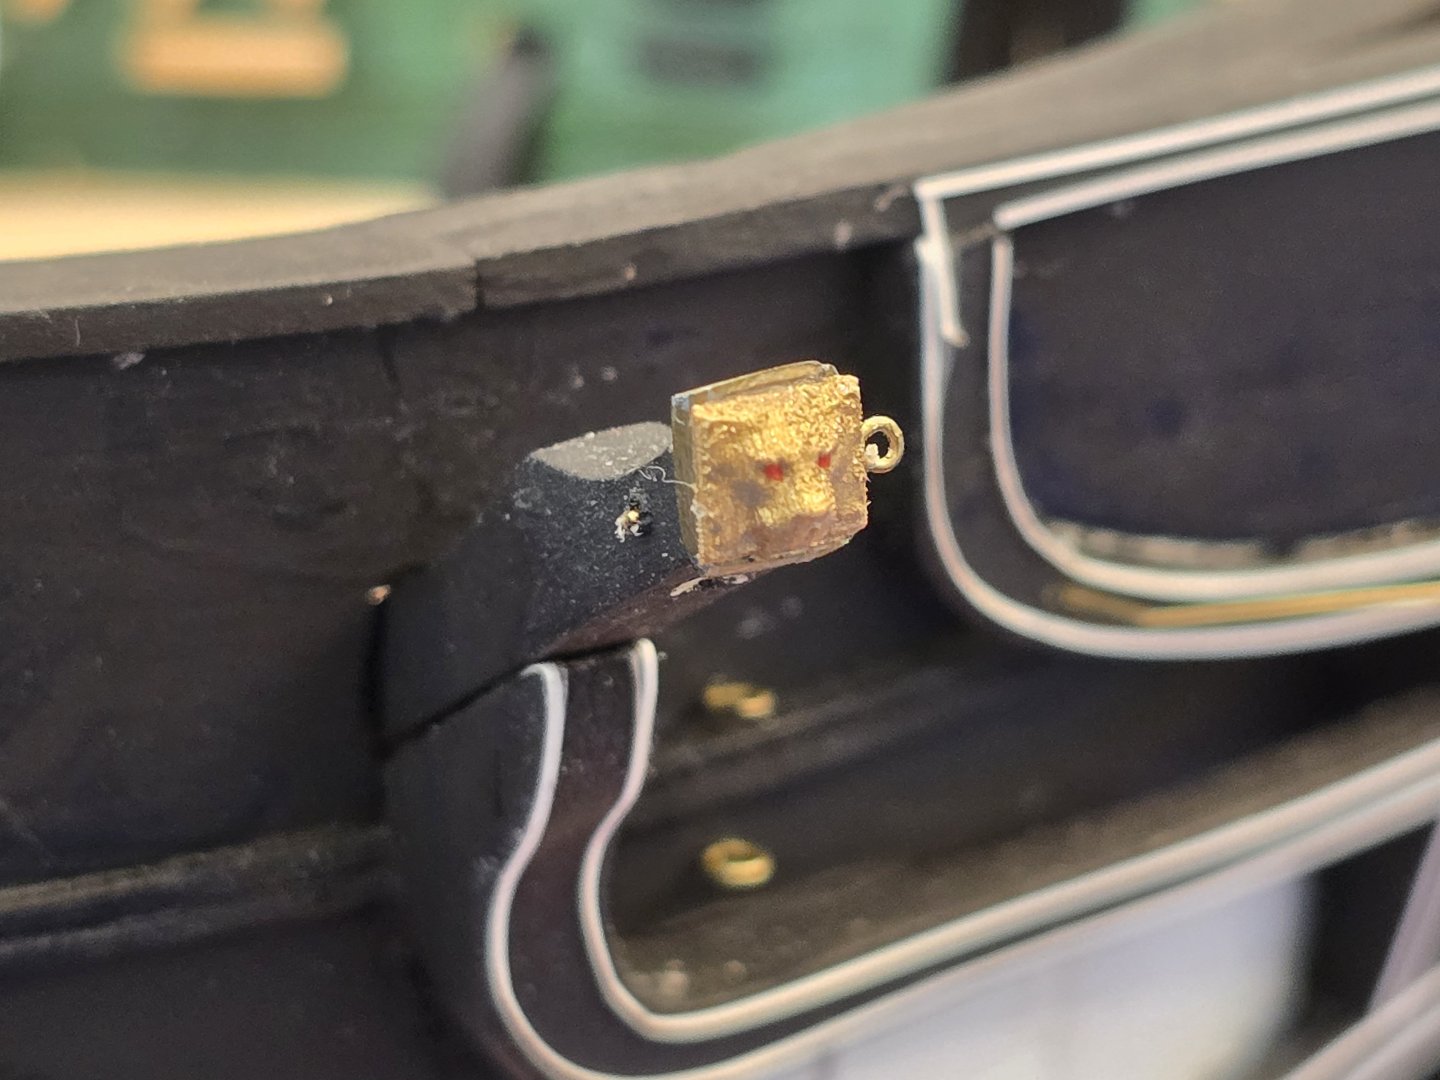
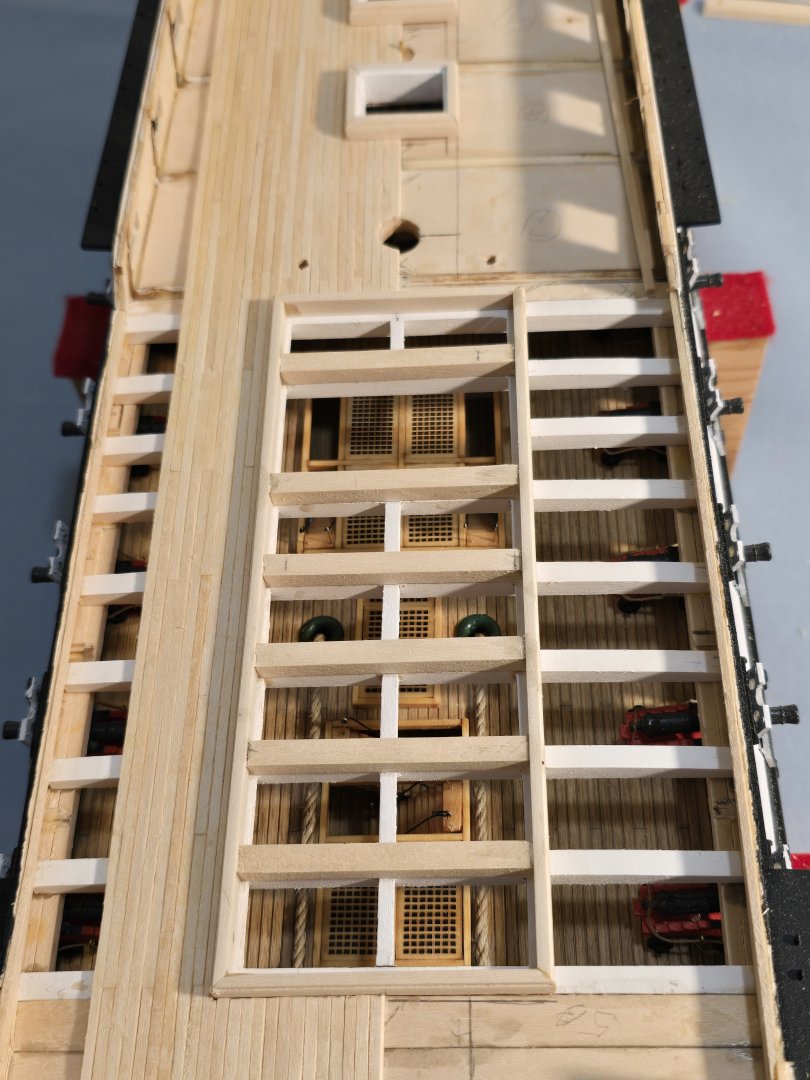
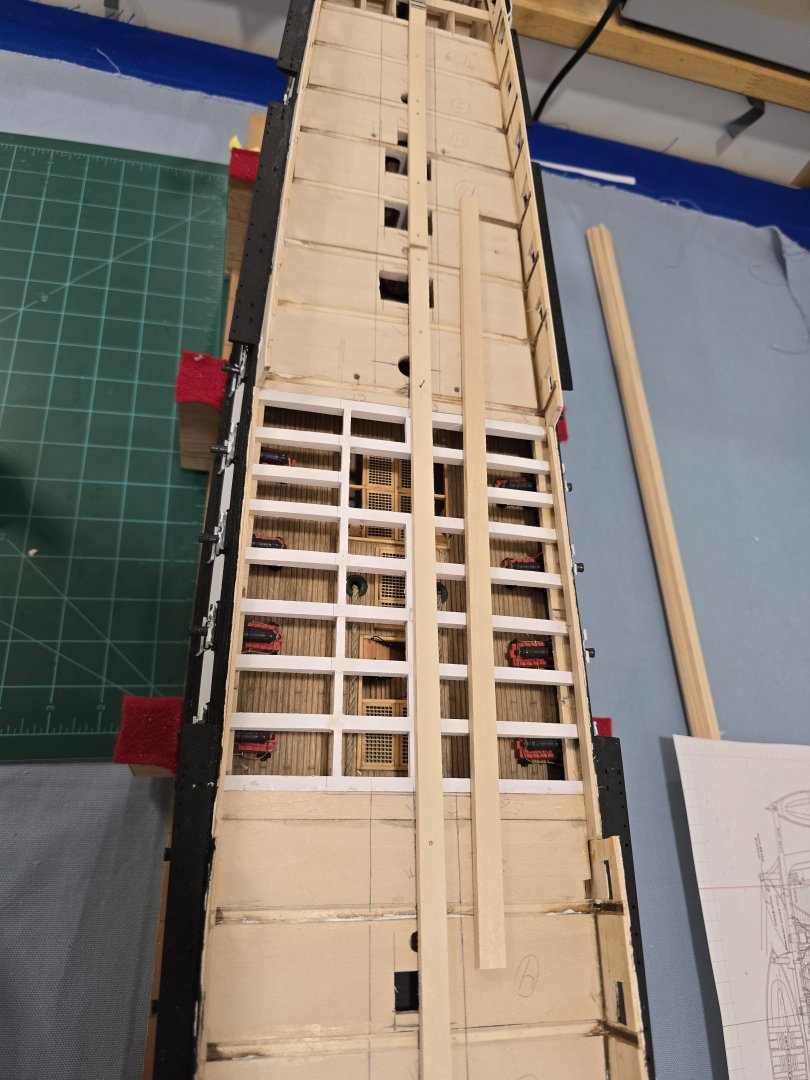
Cannondale.... I did want to go with the 1812 version. I looked at lots of other peoples logs, and lots of google to try i find something I like. I decided to use the barrels that came with the kit. modify them and build my own carriages. I cut of the piddles off the barrels. Cut very small wood blocks drilled a whole and put on copper rode. Then glued the barrel to the wood block. It gets it close to the 1812 barrel with the pindles under the barrel, not on the side Took multiple tries. I've been working on the cannons for 2+ months.... ugg. Just cleaning up the kit castings took forever Several attempts to make the custom carriages I did use the carriage wheels that came with the kit for the rear trucks For the front, i made with some brace to rest on the sill of the gunport I also drilled a small whole in the end of the barrel for the simulated screw. I ordered the properly scaled and blackened eyebolts from HIS Models. Installing the corresponding eyebolts on the bulk works was also a bear In the end, i think they came out ok. Right know only have the breach lines in. Will eventually get to the full rigging Connie has here Teeth Oh yeah. Also put the cap rail on as you can see above Also the bow and stern bumkins are installed. At least until i accidentally hit them and break em off From the stern. Love this view And a side beauty shot Bow Bumkins


-
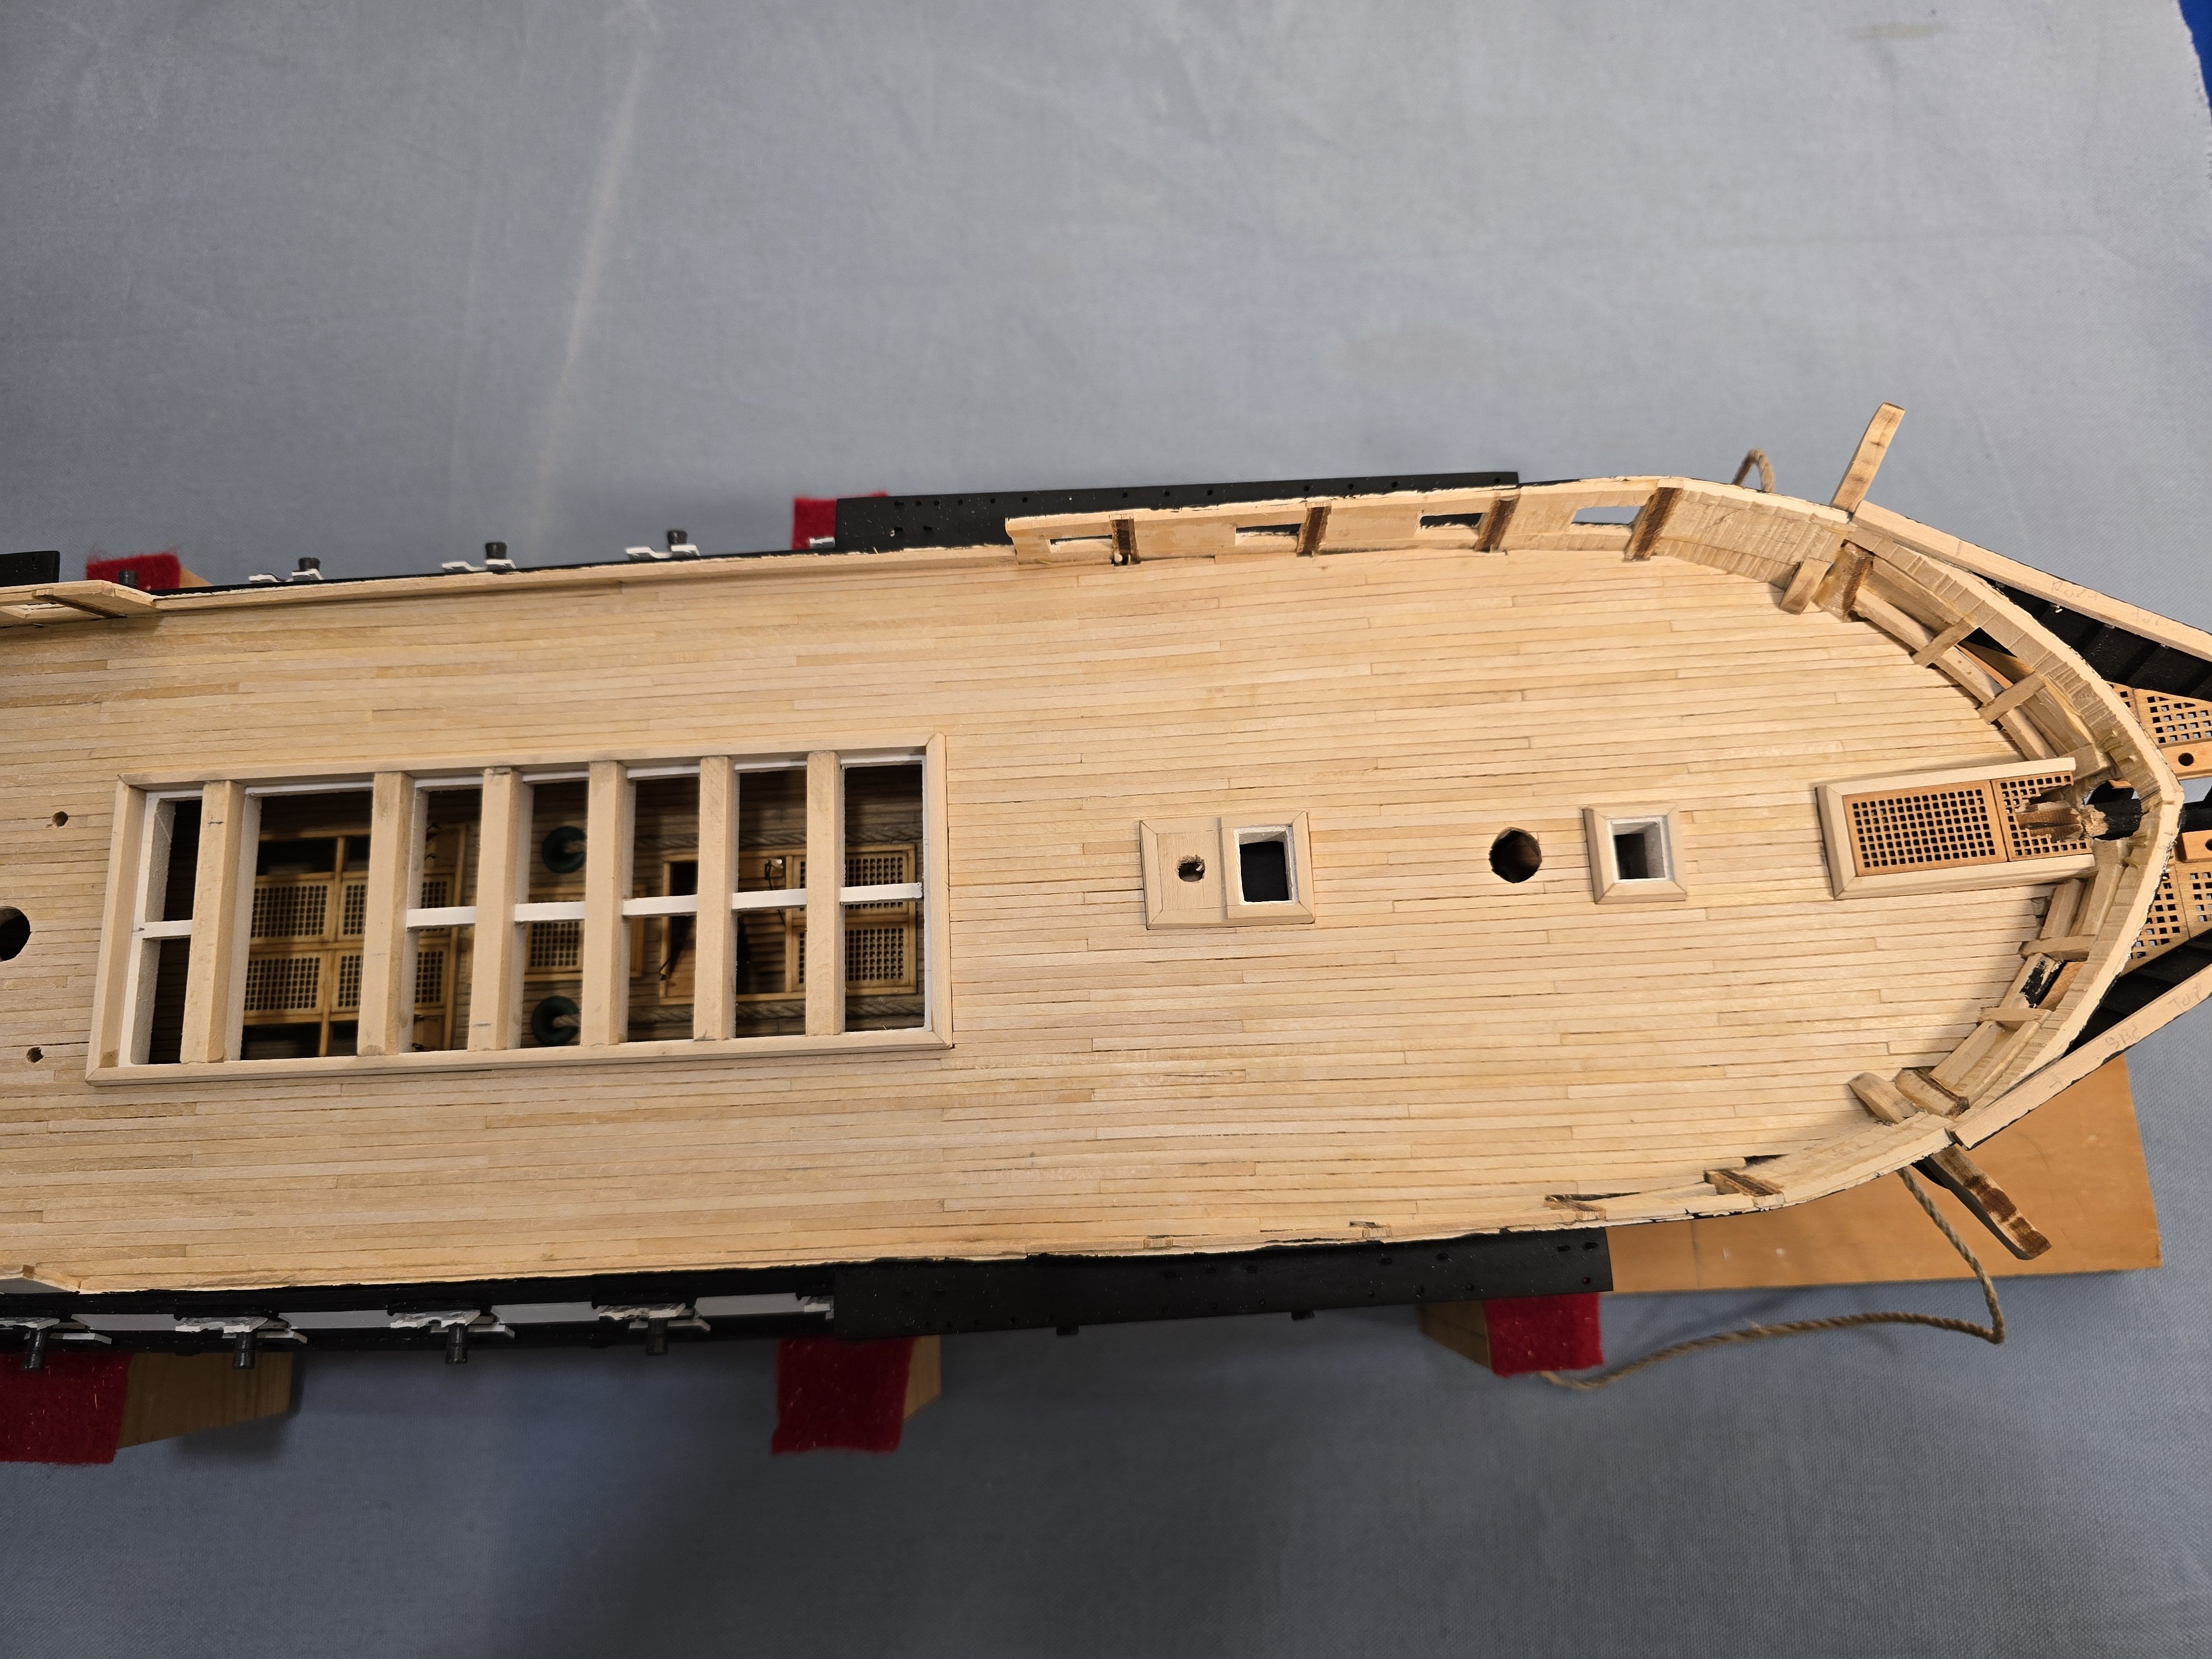
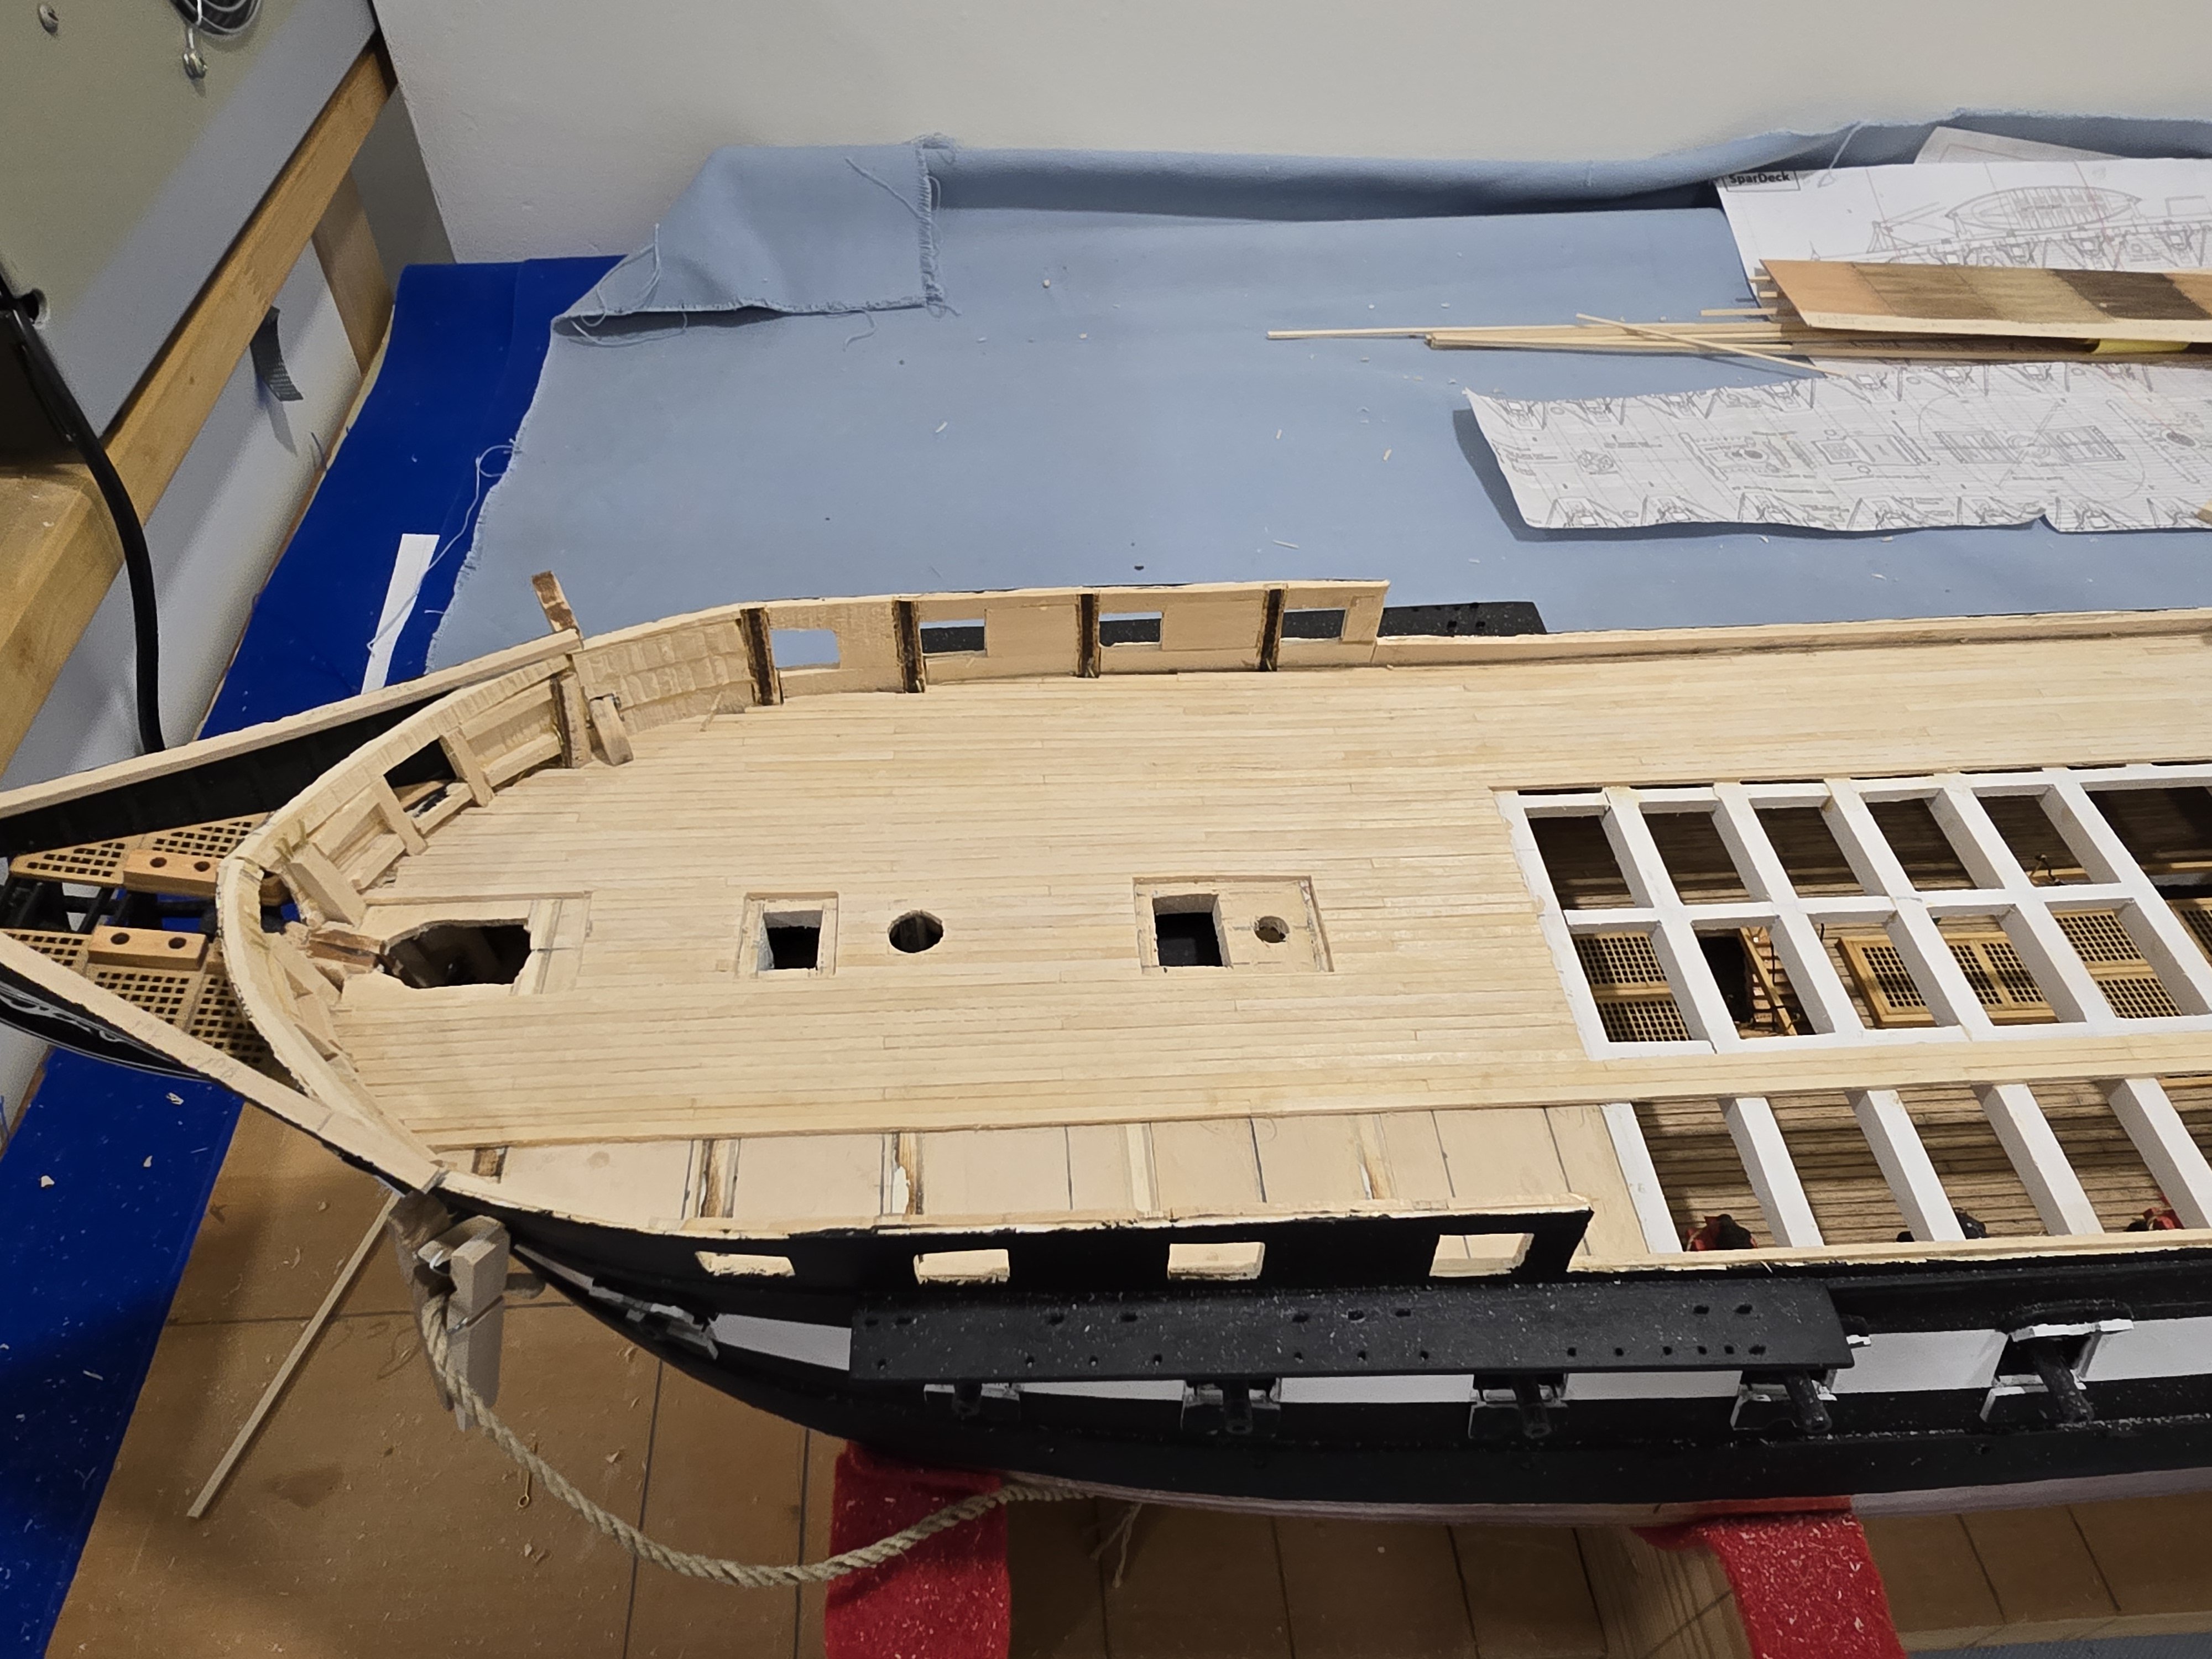
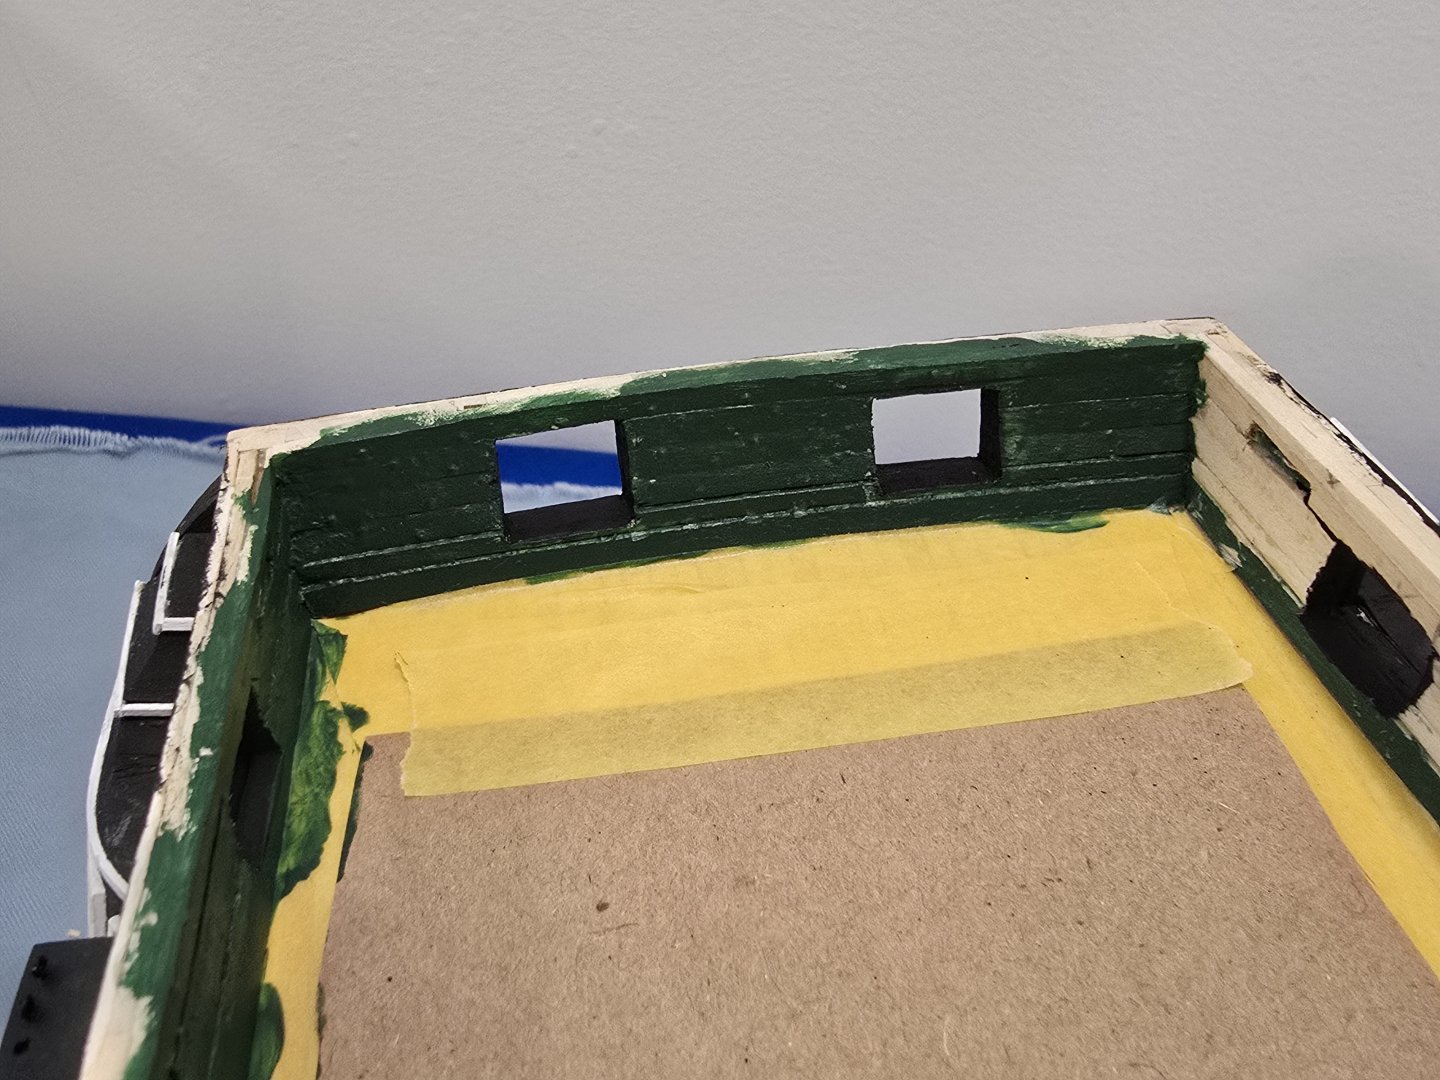
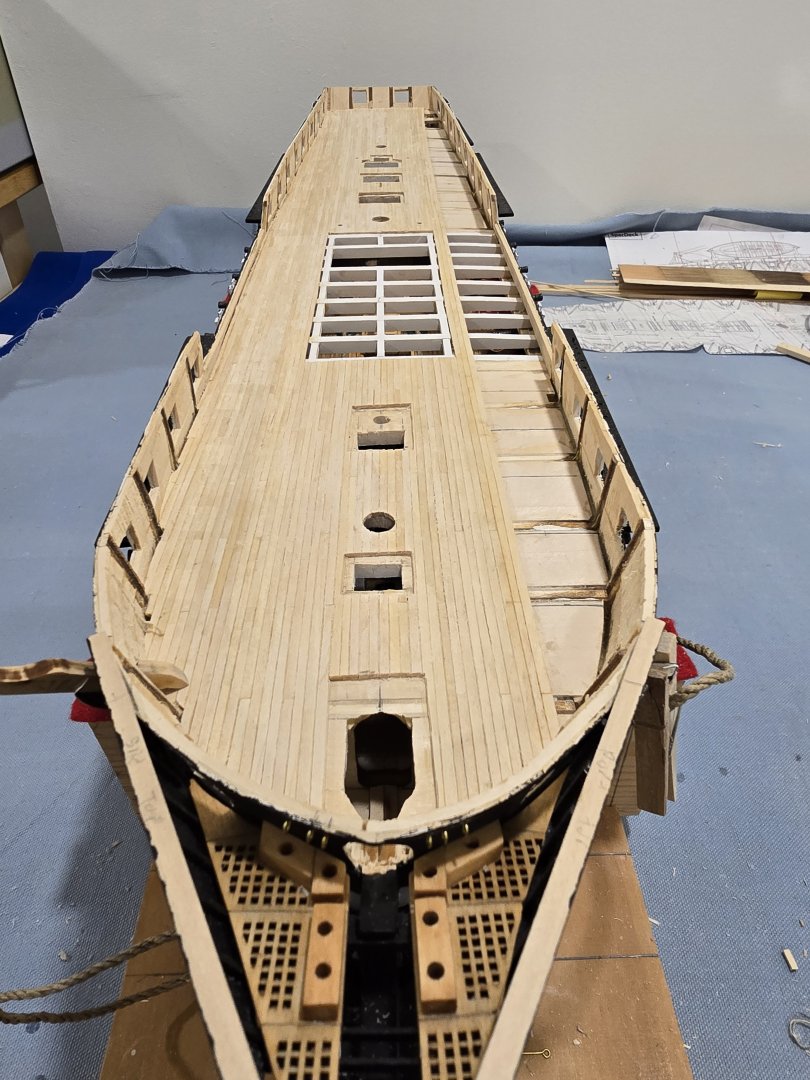
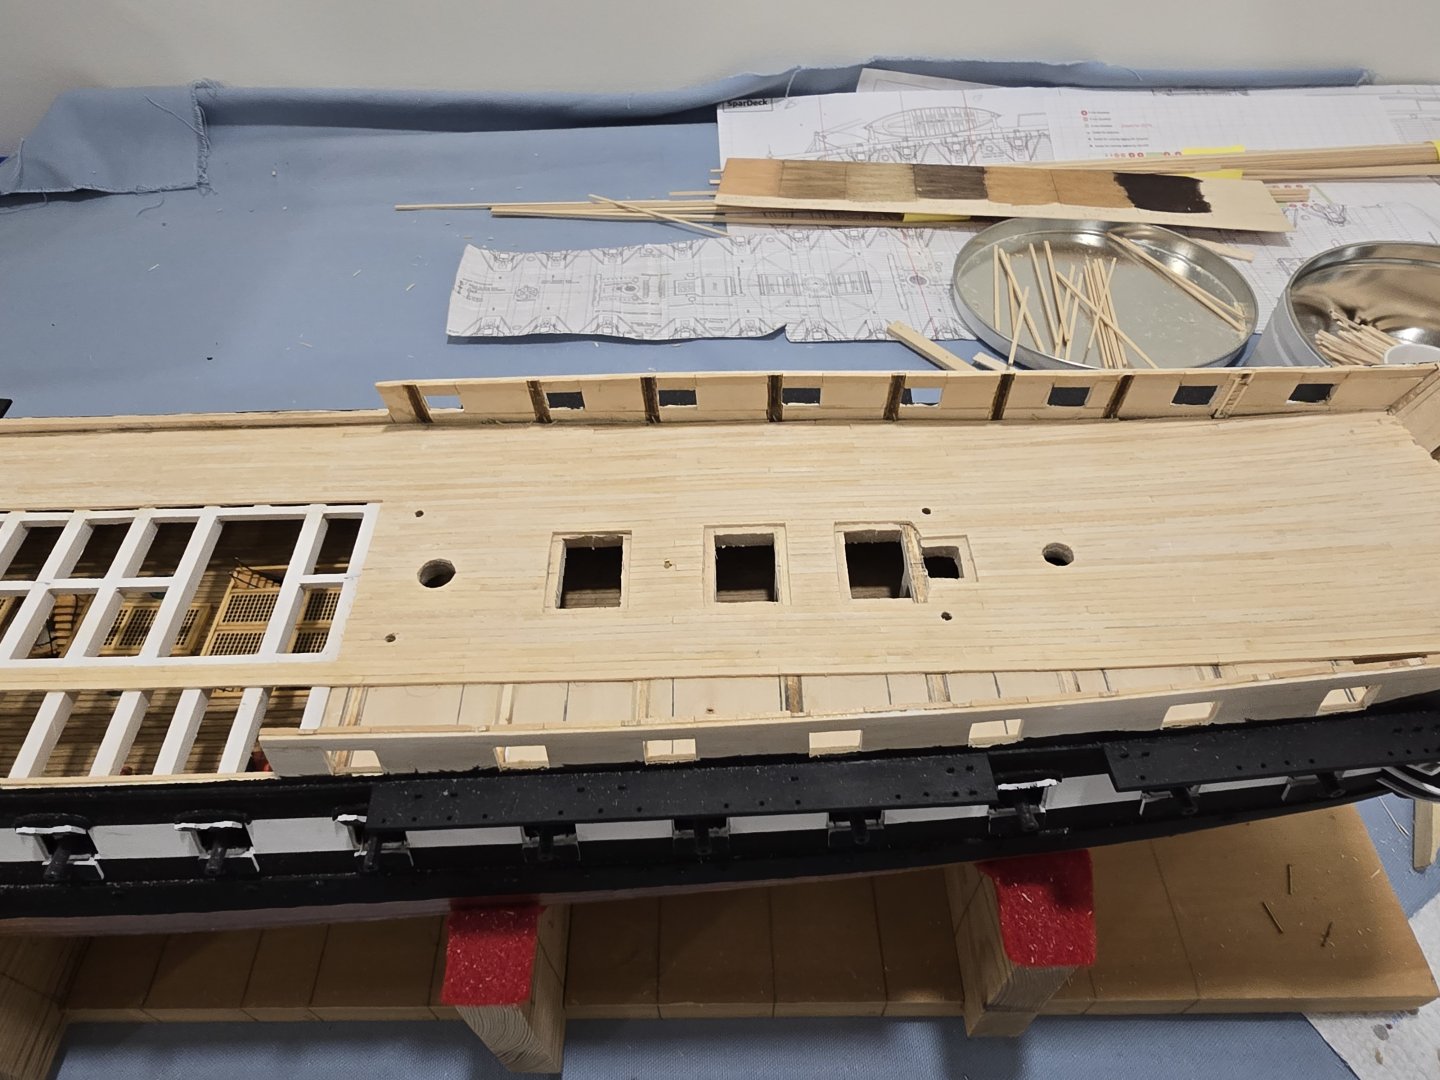
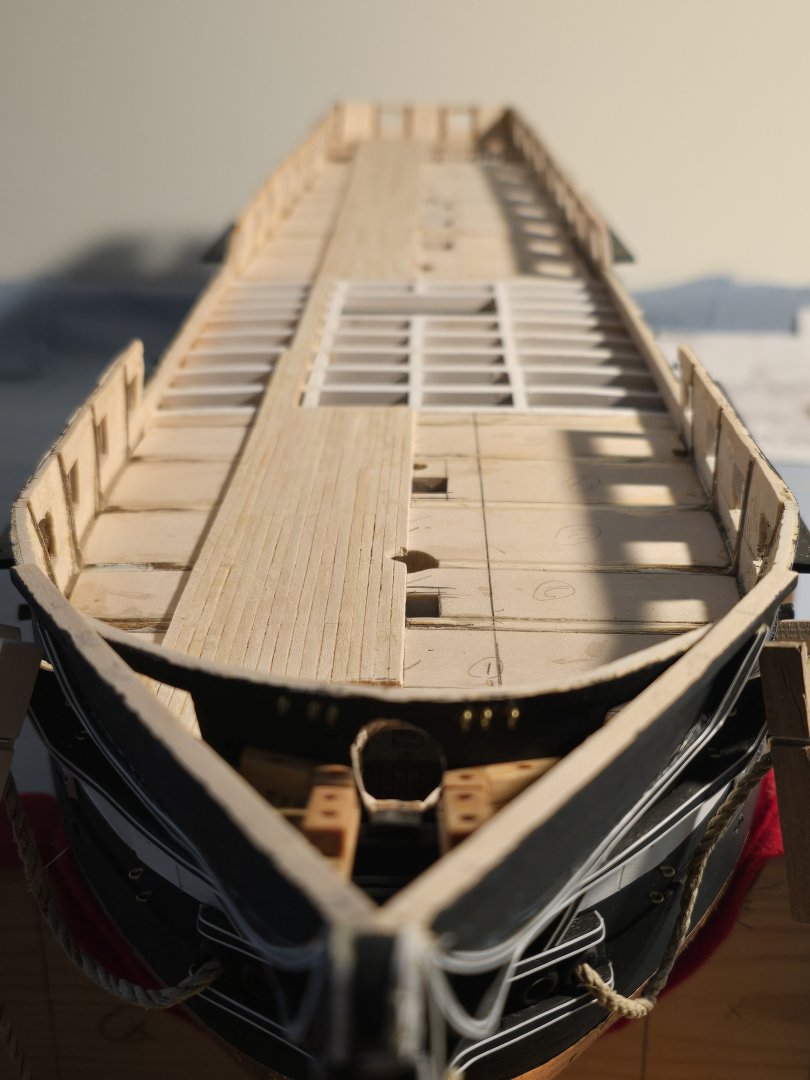
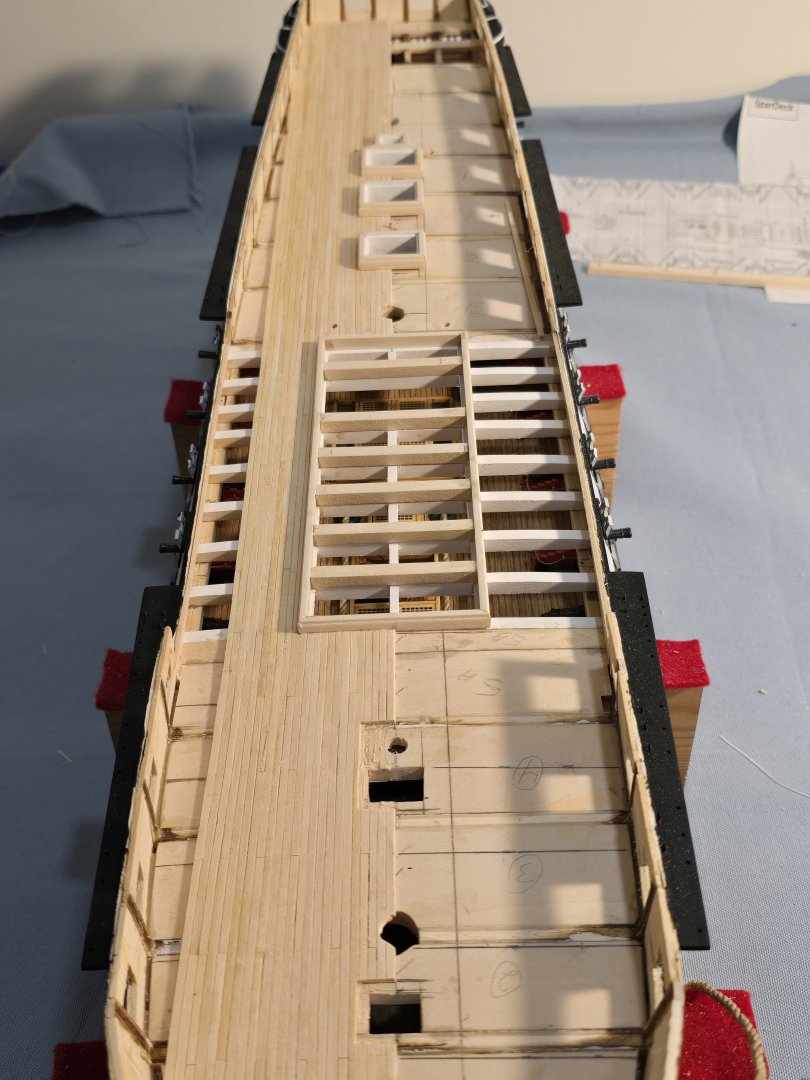
Well, cant believe its been 6 months since i posted. Have been in the shop working.. just neglect on posting. Unfortunately haven't taken as many in progress pics as i should have. But i'll bring you up to where I'm at. Posting the pics i do have. Sorry they are not great or as informative as my past posts. Since my last post. been working on spar deck. Added the bulwarks. and the green. Bolts were simulated with by applying a tiny drop of glue and eyedropper. I did this off the ship on the plank as i was preparing it. kept a very simple pattern evenly spaced drops alternating 1 high and next low edge of the plank. Did this for full length of plank Then when added to the ship, i made sure to stagger the high and low glue dots. Effect came out subtle. and there is a notable bolt pattern if you look. Also added in the sheeves on the side of the hull. Again made them off ship. Then cut rectangle in bulk work and slid it it. You can see it upper left of above pic. Also added all the cleats and pinrails Finished the Catheads
-
Gregg, Welcome to the Connie Club. I'm pulling up a chair It's a looong build but well worth it.!
-
Der Alte Rentner, You went and finished you heardrails before i responded to you question. Yours turned out looking great.
-
Der Alte Rentner Sorry. delayed response. Just seeing this now. Its been quite awhile since I did the headrails. I created the headrails first. I got the rails as close to mirror/ symmetrical as i could when dry fitted to hull. For the supports, I did start with the shape as per the plans. When they didn't really fit well.. I kept enlarging and adjusting to fit the rails. I the the pic you posted on the top supports, you can see the outline of the plan supports on my version. To get it to work, my supports are both a bit taller than the plan and wider wider. That helps get more surface area touching to the bow stem. making it slightly wider also helped from it breaking at the top where it really thin.
-
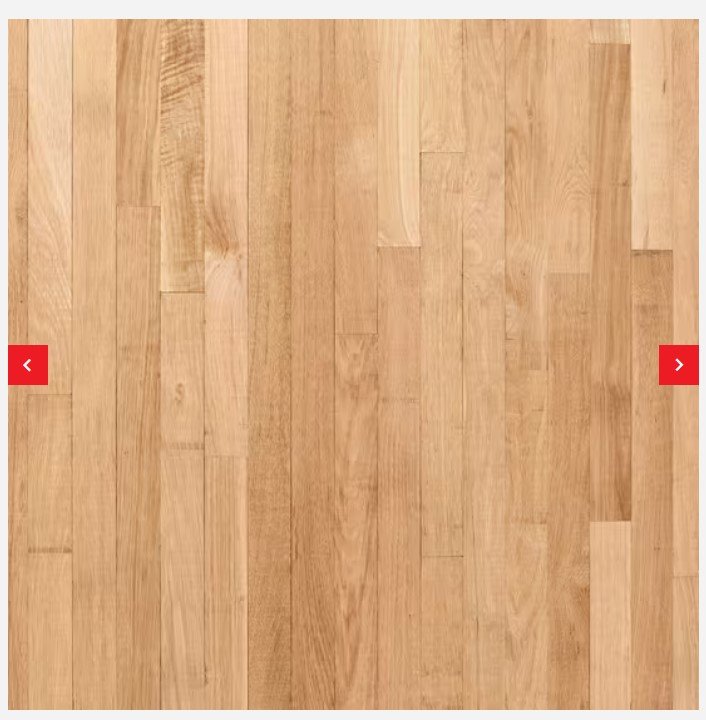
This was from google And this is "White oak planking" If you were to put hardwood floor in your house today So leaving mine bare, just matte clear coat seems to be the safest option at the moment Open to suggestions.
-
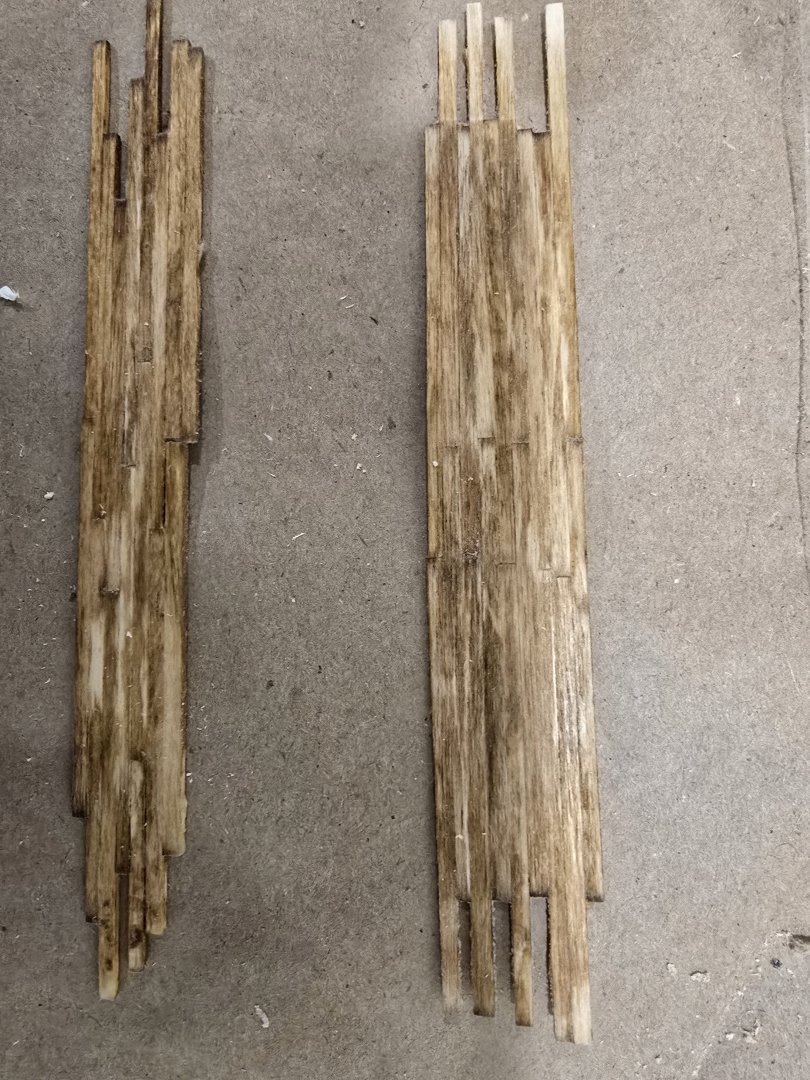
My plan for the spar deck was to use minmax golden oak stain. (oil based.) I made multiple test pieces. Basically glued leftover strips into small section... including butt ends and edge to edge. Scraped and then sanded them down with 220 grit. Basically the same as the planking on the model. Watched many utube videos by minwax on the propre application and techniques Treated with MinWax Pre stain wood conditioner and then stained. Did bout 5 separate attempts. Never got it to look even close to acceptable. Always splotchy. not a uniform color. Not sure if it was due to residual glue on the wood. (I did scrap and sand to bare wood) played with time of pre stain and stain on wood before wiping it off. All No joy. Still deciding how I want to move forward on the deck. Wont do anything until i test it successfully off the model Don't want to screw up the decks at this point. I'm considering leaving it bare or just matte clear coat polyurethane. Google did indicate some references that at some point early in her life...the deck was light color. ( It is "White oak" after all)
-
Gregg, I used bass wood that came in the kit. but then milled more, (as there wasn't nearly enough. Stuck with more basswood.
-
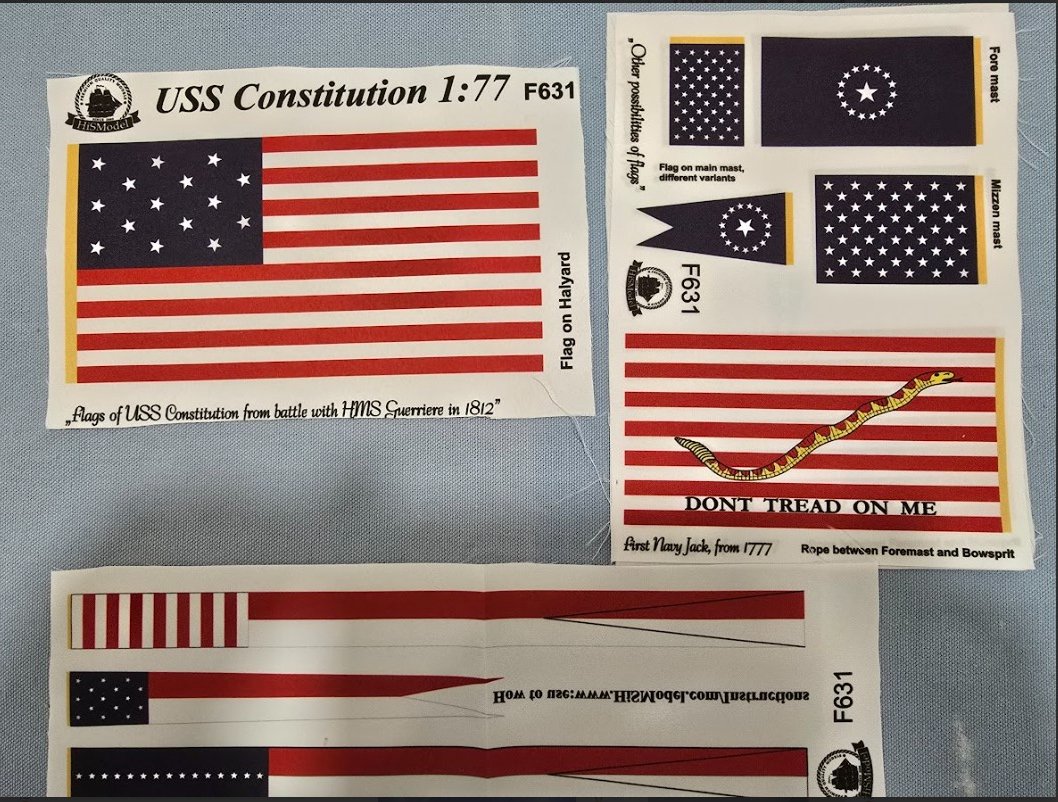
Found these by HISModels. Set of the flags and streamers for Connie circa 1812 and the right scale. Made specifically for the Model Shipways kit. He also has versions to scaled to the Revell 1/96.
-
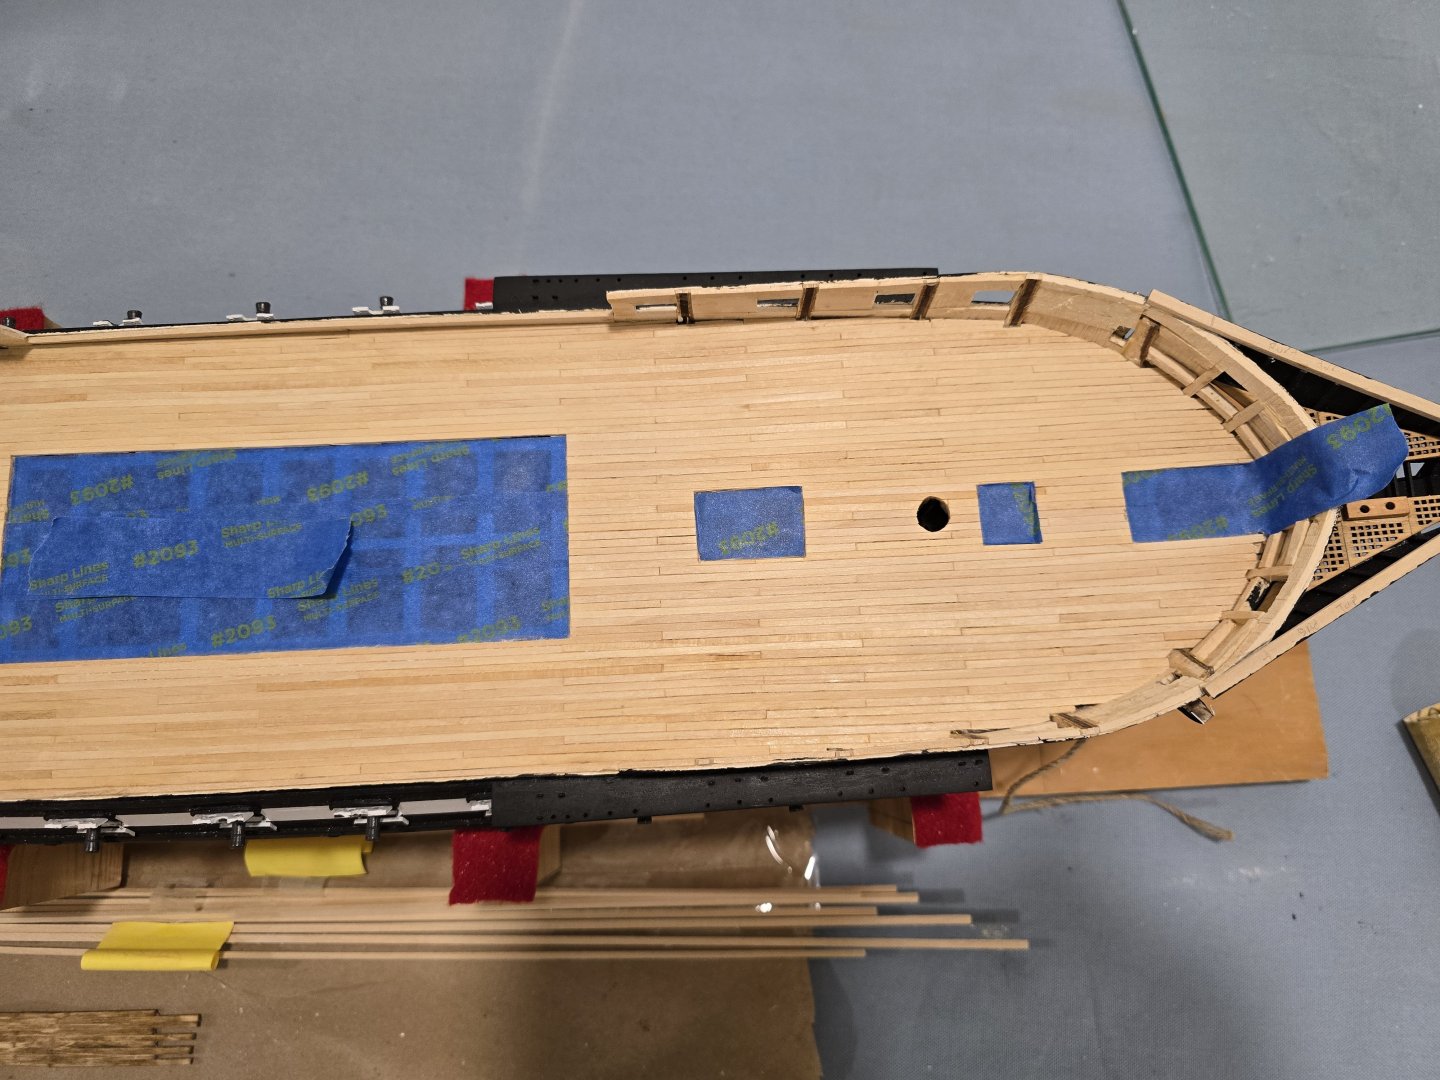
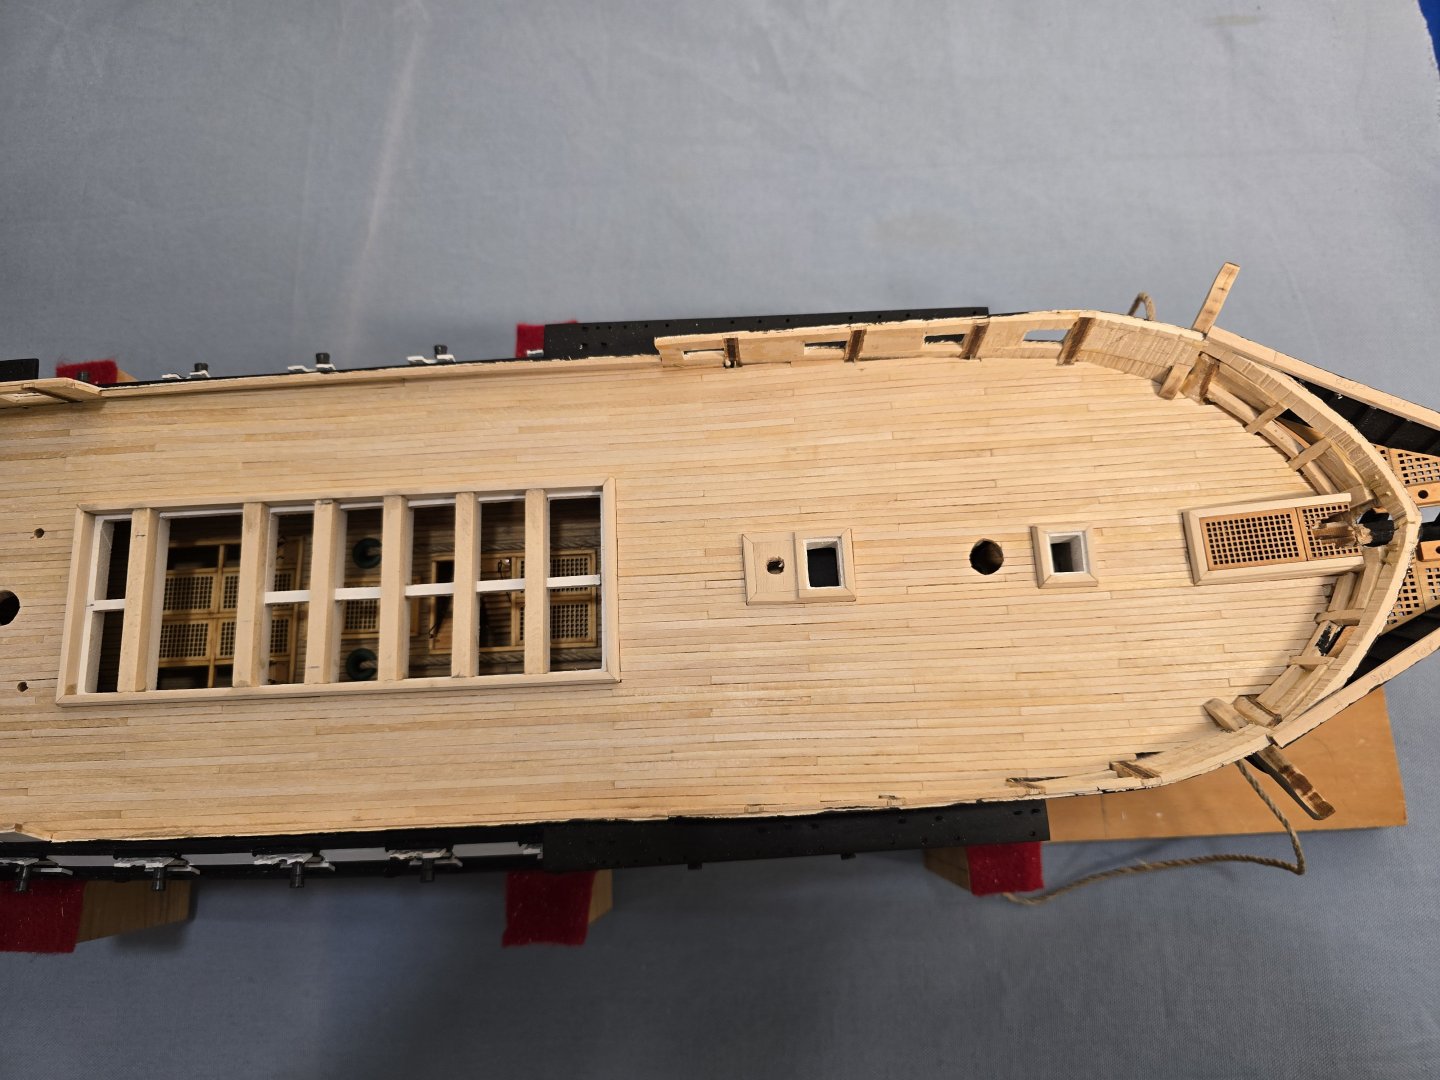
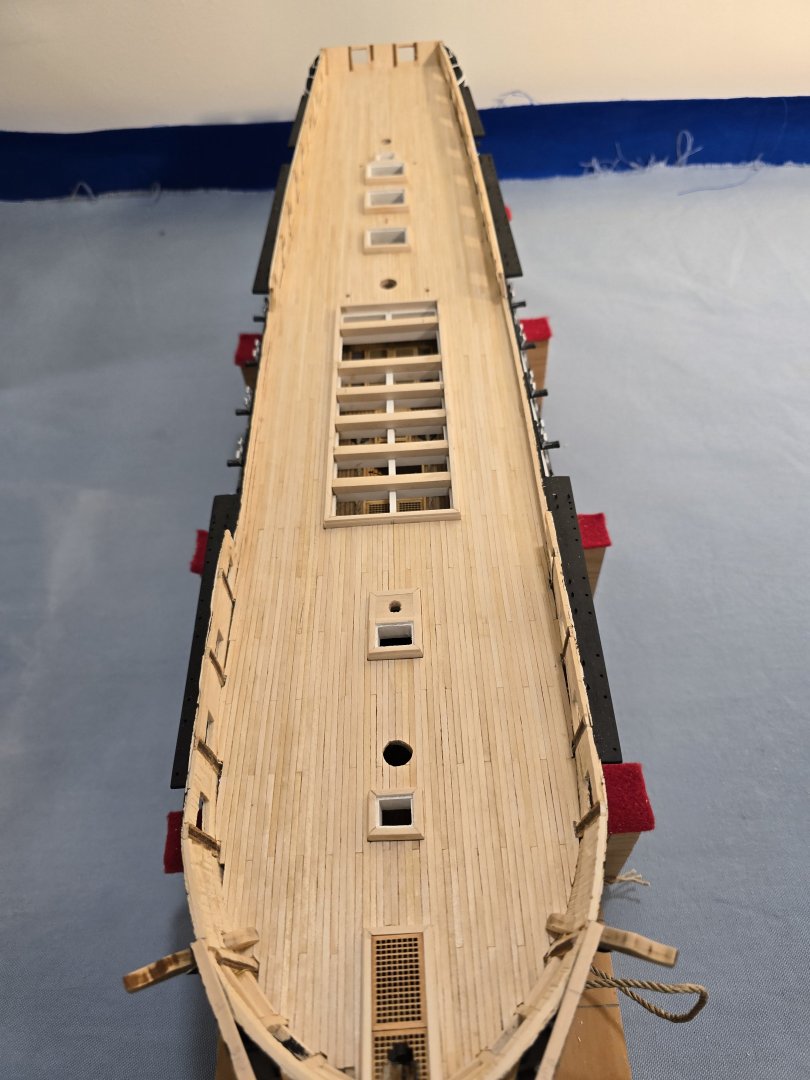
Spar Deck planking is finished Needs some cleaned up a bit then will be ready for some stain. Will use golden oak , same as on gun deck

-
Jon, you think Id say no to good ref pics; Would be great if you shared. Just post on my log so everyone interested to get as well. Thanks Much!
-
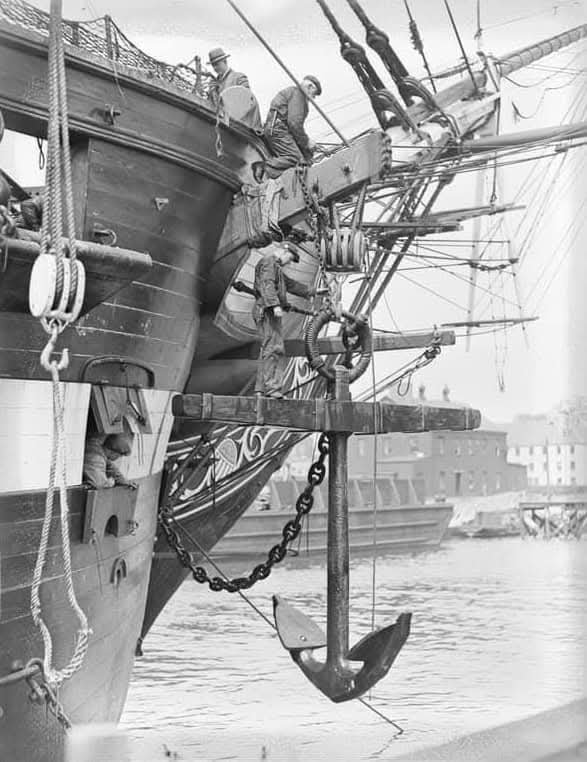
Oh, and i saw this pop up in one of the facebook groups I follow. Good picture of the last time they catted the anchor. The post staid this was recent pic, but looking at how everyone is dressed... and its B&W... I'm guessing this is very old picture. The one guy standing on the anchor and it doesn't even move/tilt at all.
-
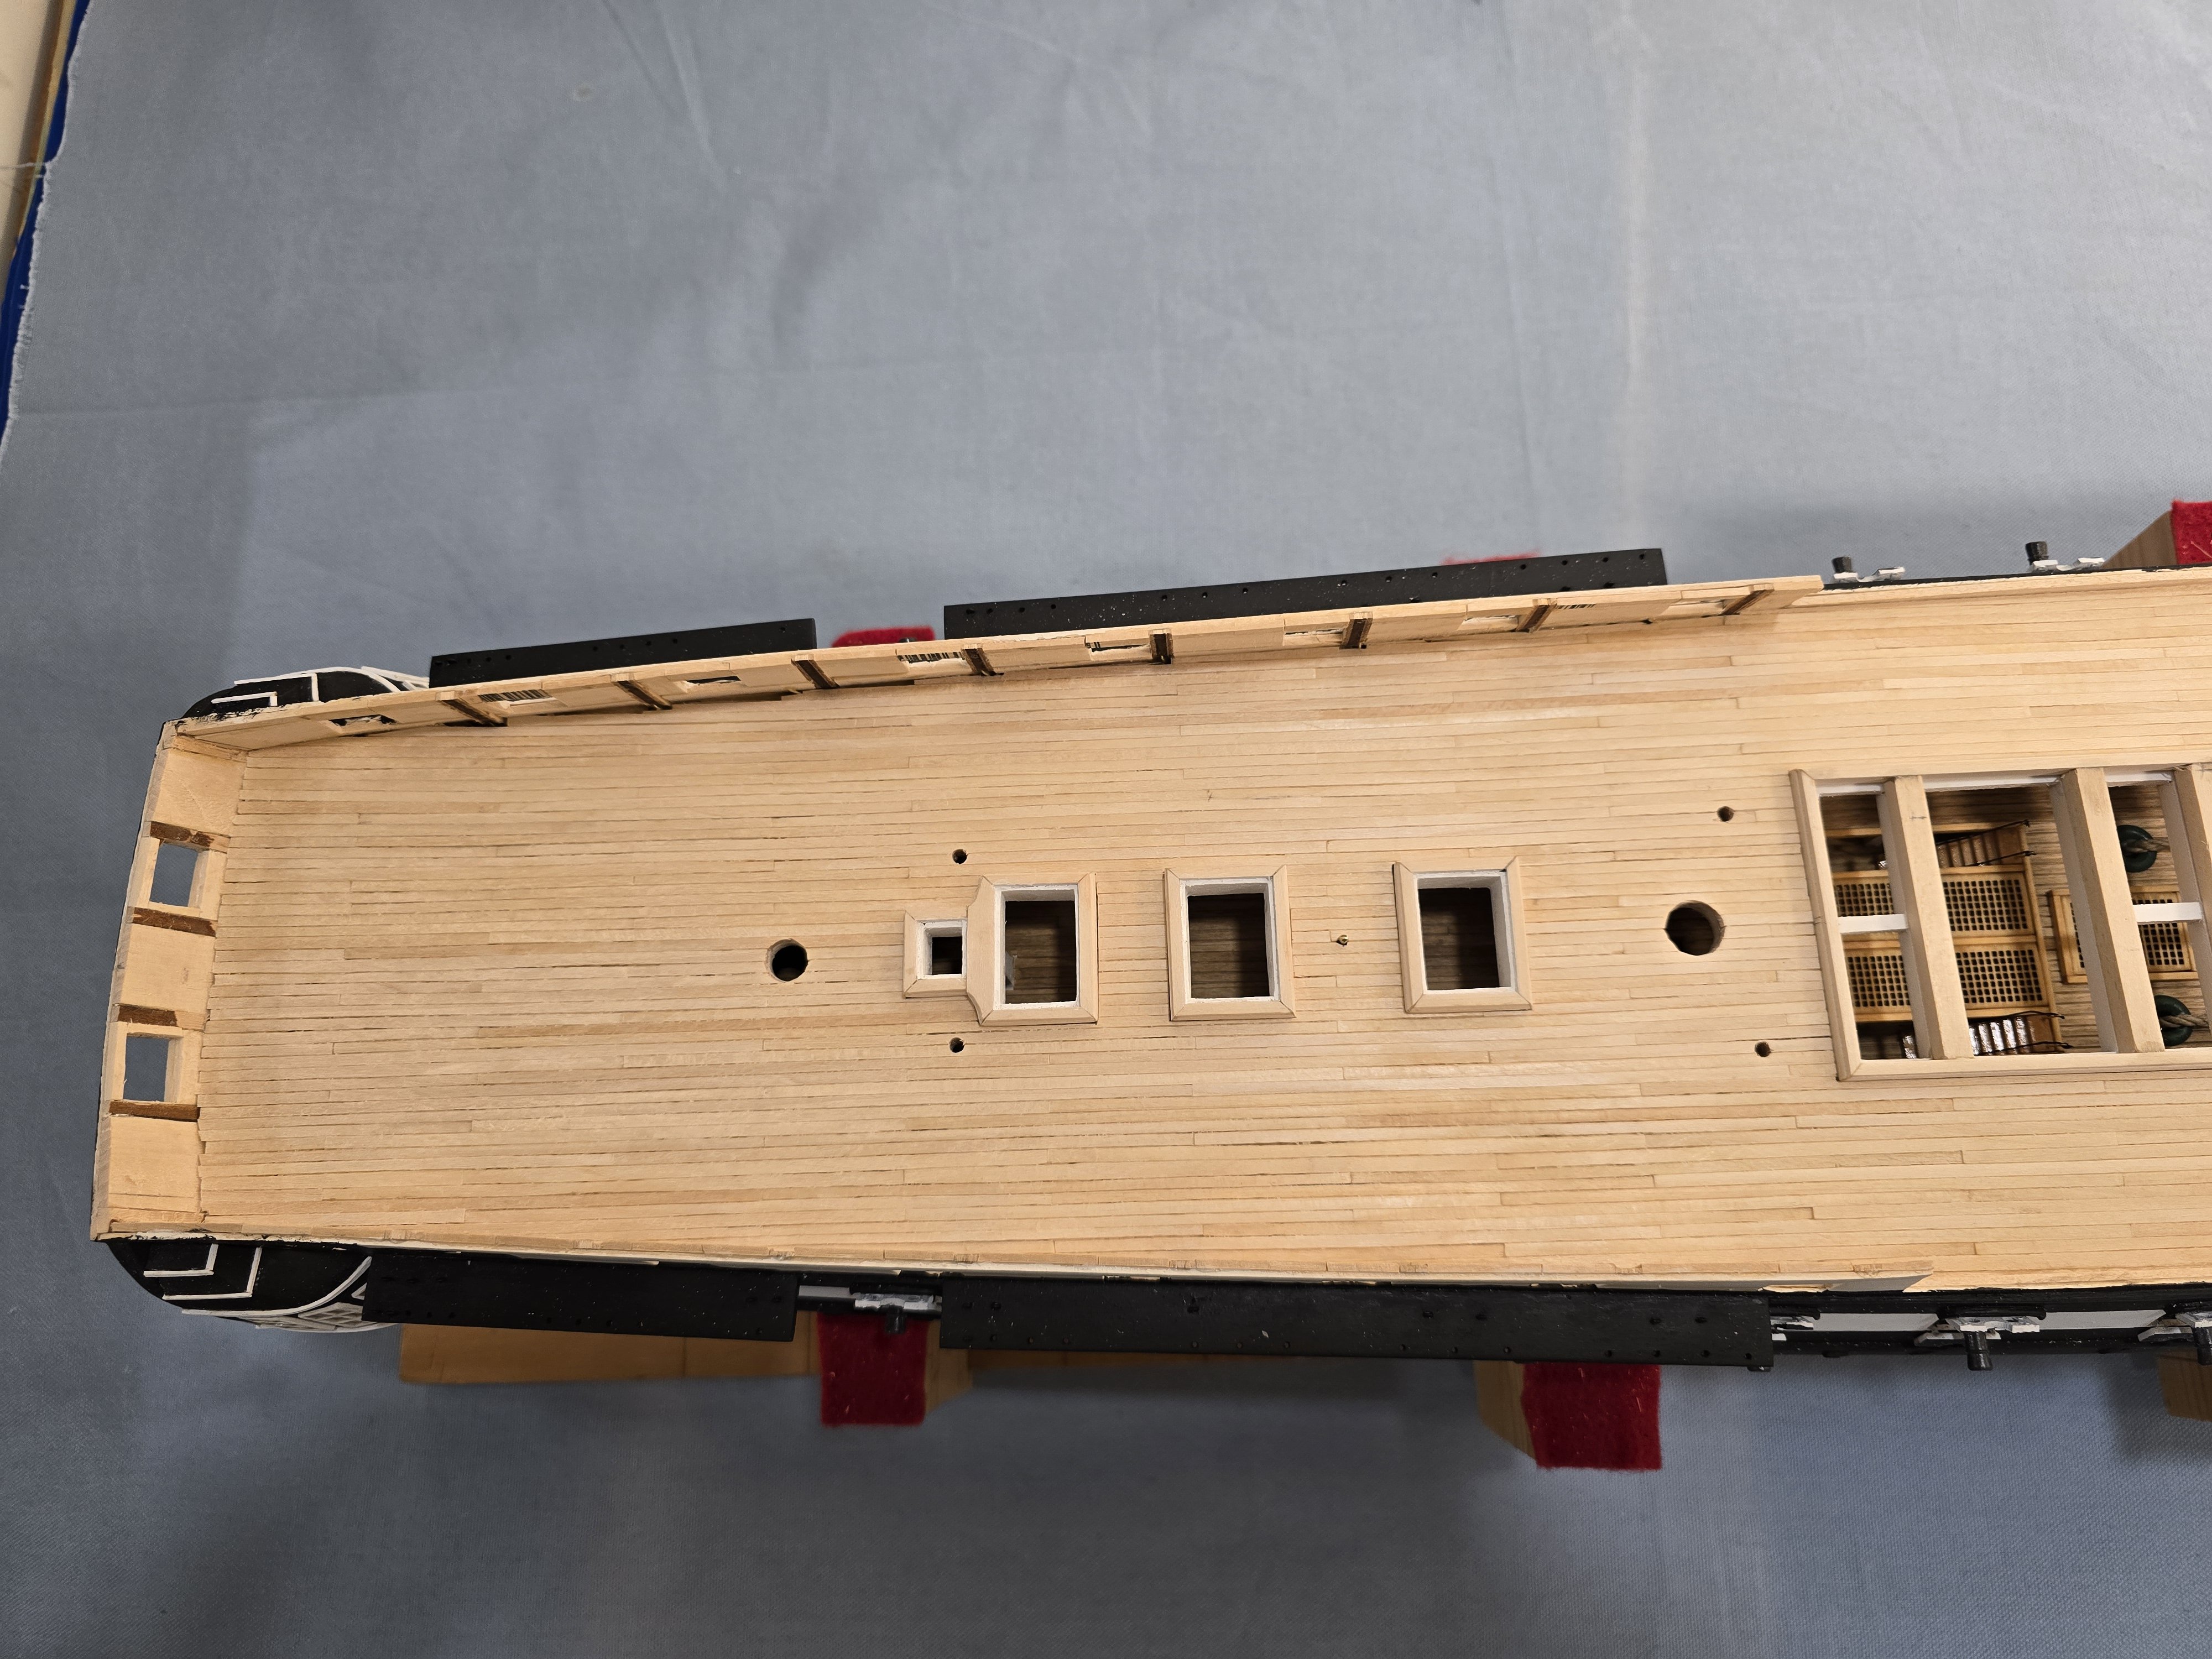
Der Alte, I did check out you logs. I see exactly what your talking about with the tapered planks. If I had seen that earlier. I would have tapered aft at least. As it is I'm far enough along... too late to re-do it. That said. I am have been progressing along. I'm ~75% of the way done. All the hatches are trimmed in (not shown in pic) maybe next time. Runs staying true so far. I did mess up some of the shift pattern. I sure you guys can find it. Port side, aft of the main hatch... There are two runs where the butts don't have the required 3 planks between. The open main hatched messed me up when figuring where the next butt was. Not too worried... Once all the deck fittings and guns in... no one will ever notice. (but it will bug me.) Now I am hoping that after the deck is sanded down and stained, the stain can seep into the plank edges and joins just enough to make it darker that the top of surface the deck. And accent the joints. That's what i did on the gun deck and it came out good. Well see.

-
Sorry Old Coasty and Thomas for delayed response. Have checked this log since I finished it a few years back. Thanks for the likes. Sure ask any questions you have. Do you both have build logs going that I can follow? Best Ken
-
Errr are the deck planks supposed to be tapered? I didn't realize that, I thought they stayed the same width entire run of the deck. Kind of late now... will complete mine as planned. But you have me curious. Can you elabare on how / where they would be tapered? Any pics would be helpful Thanks K
-
And one more... looking forward to following Gregg's build.
-
Bthoe, Just stumbled onto you log. (A bit late to as your been working on it a few years now) Your build it looking good! Will follow along as you progress. I'm also building ME Connie as well. (My interpretation of 1812 version) My build log is out there. Best KMart
-
USS Constitution by mtbediz - 1:76
kmart replied to mtbediz's topic in - Build logs for subjects built 1751 - 1800
Great work on your cathedral. They look awesome! -
Planking in progress. So far the runs are staying nice and straight Almost 1/2 way done. Started fitting in the hatchways. (Not glued) Looking down the main Hatch I did go back and forth on whether to put in the waterway and plank sheer first and then plank up to the waterway OR Plank all the way to the bulwarks. Then put waterway sitting on top of planks. I chose to go the later method. My reasoning is this. I will be staining the deck. and painting the waterway bulwark green. For me, it would be nearly impossible to not get stain on waterway or green on the deck... or at least keep a clean edge. This way I can stain the deck with no worries. Paint the waterway green before gluing them down. And if I feather the waterway down to very thin. no one will see that its actually sitting on the planks That's the plan. But first, I figure it will take me a couple of weeks to finish the rest of the planks. Thats it for now. K
-
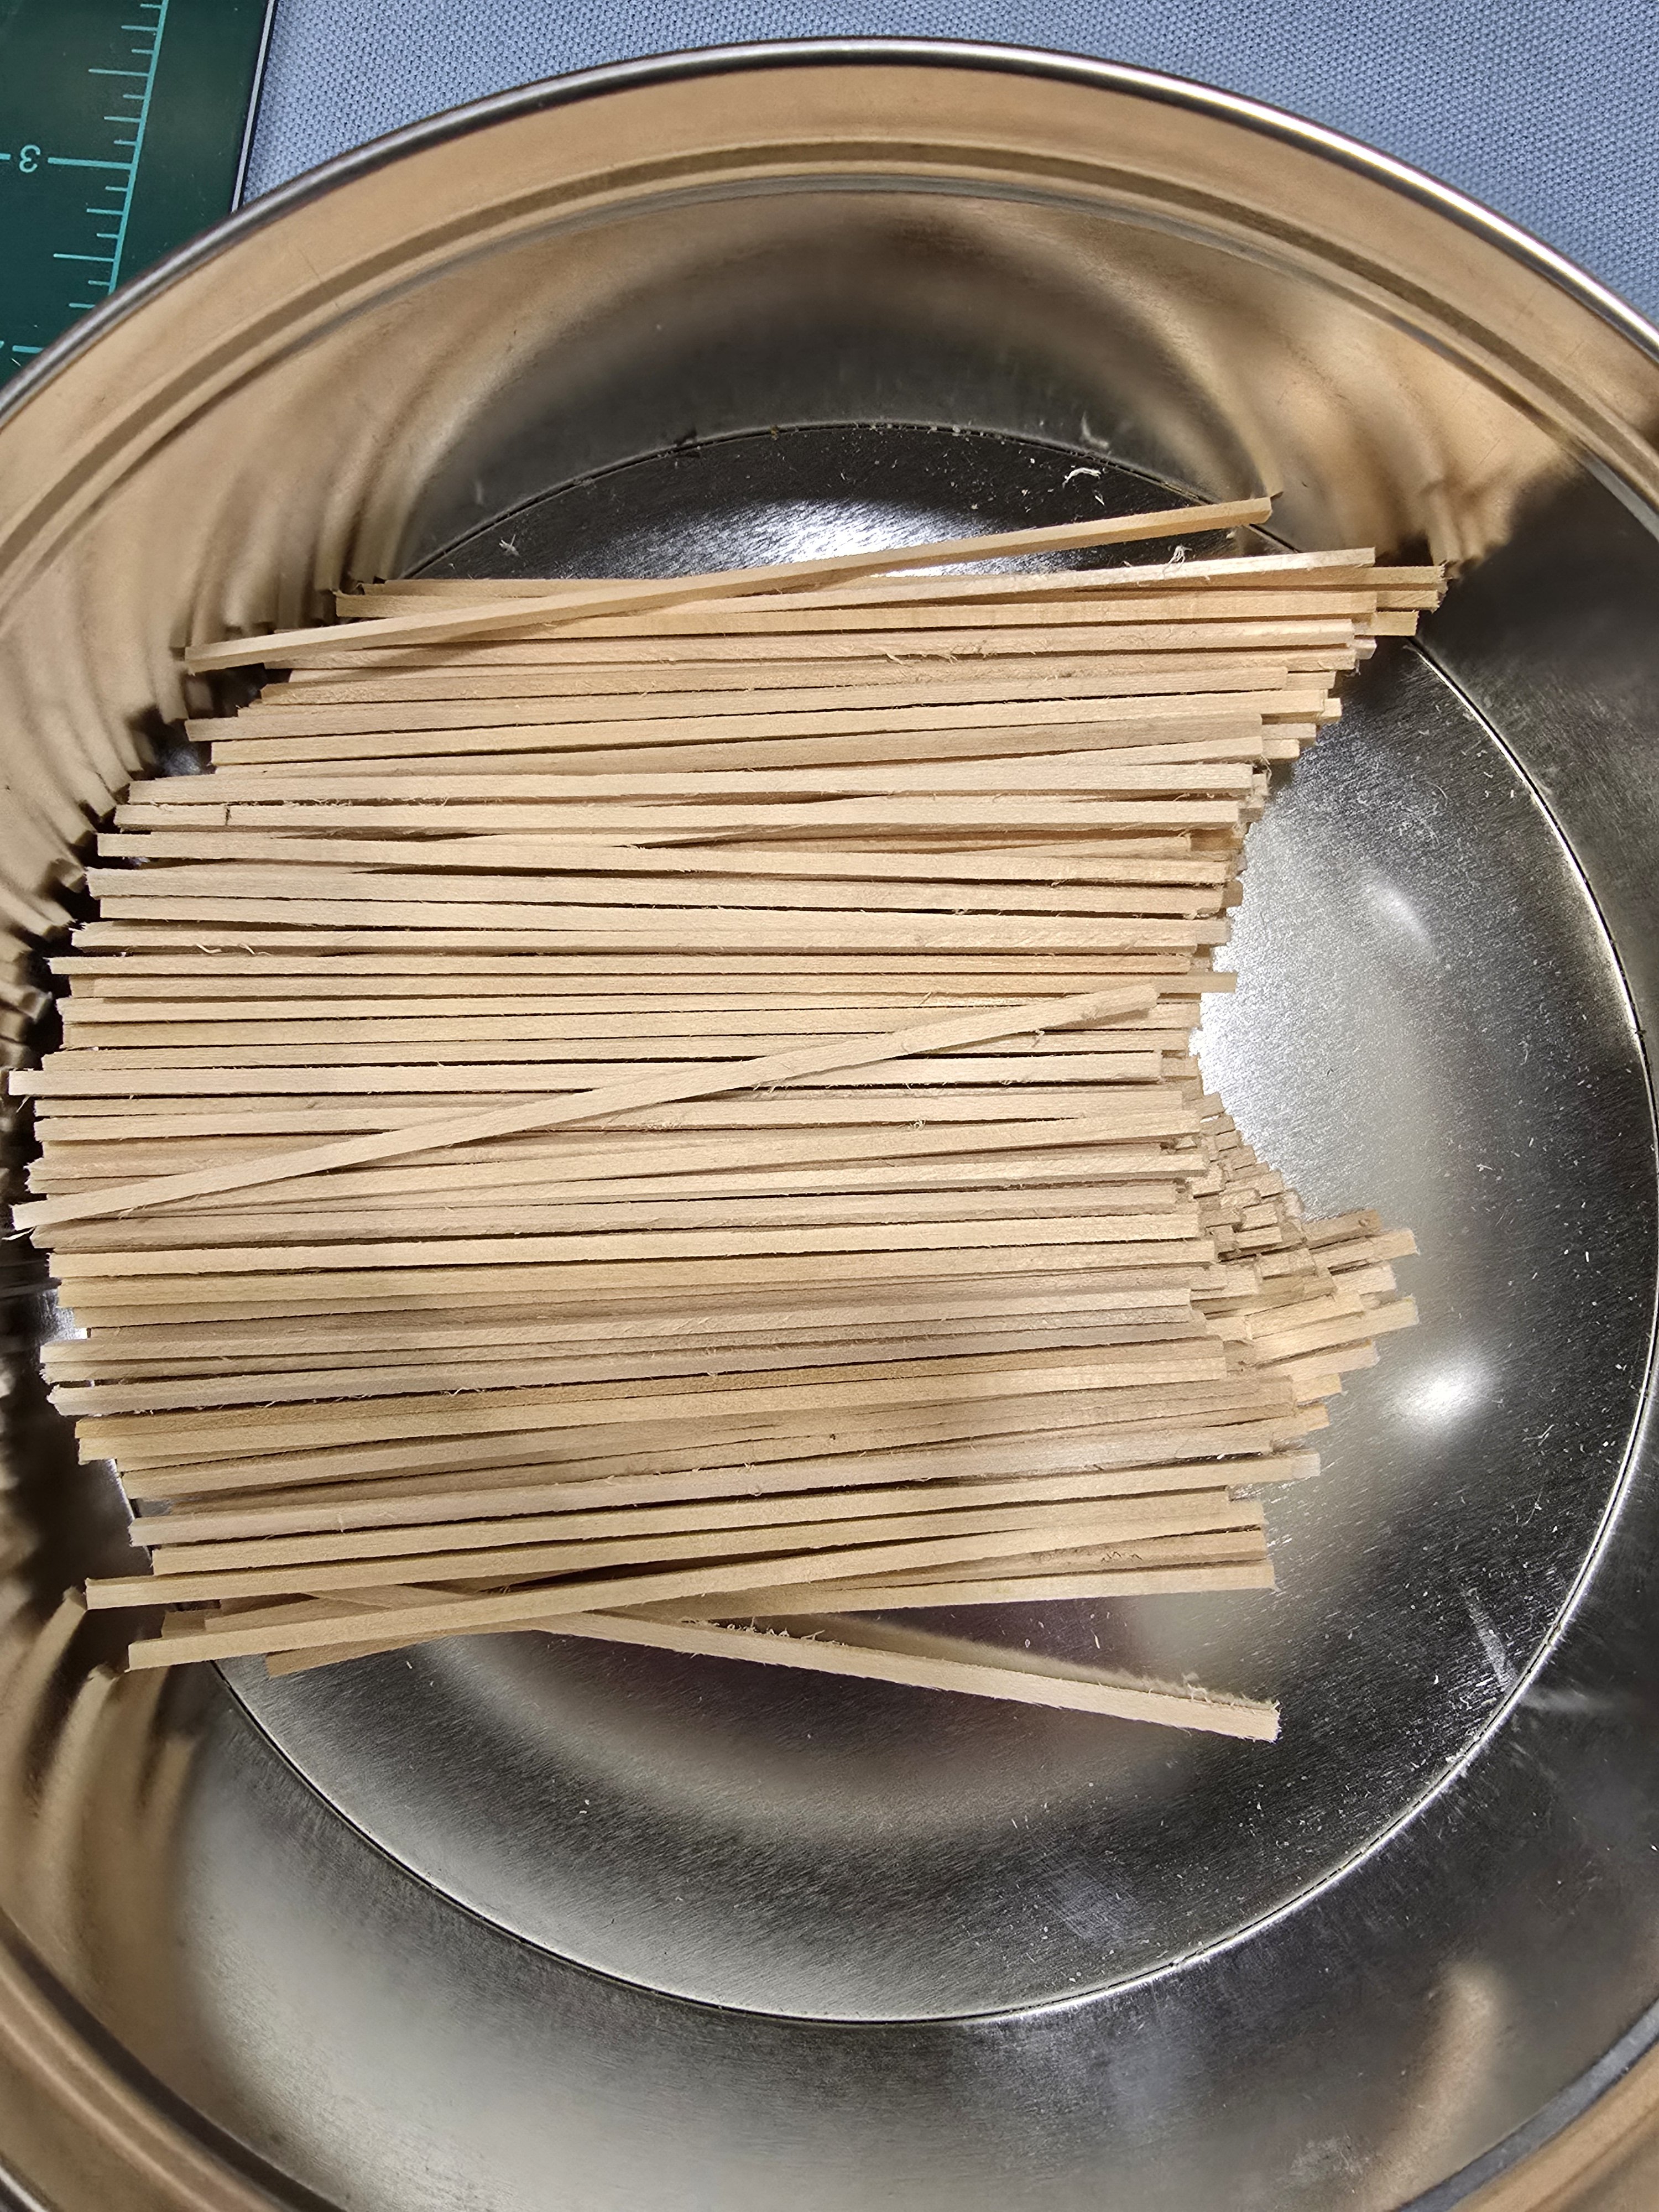
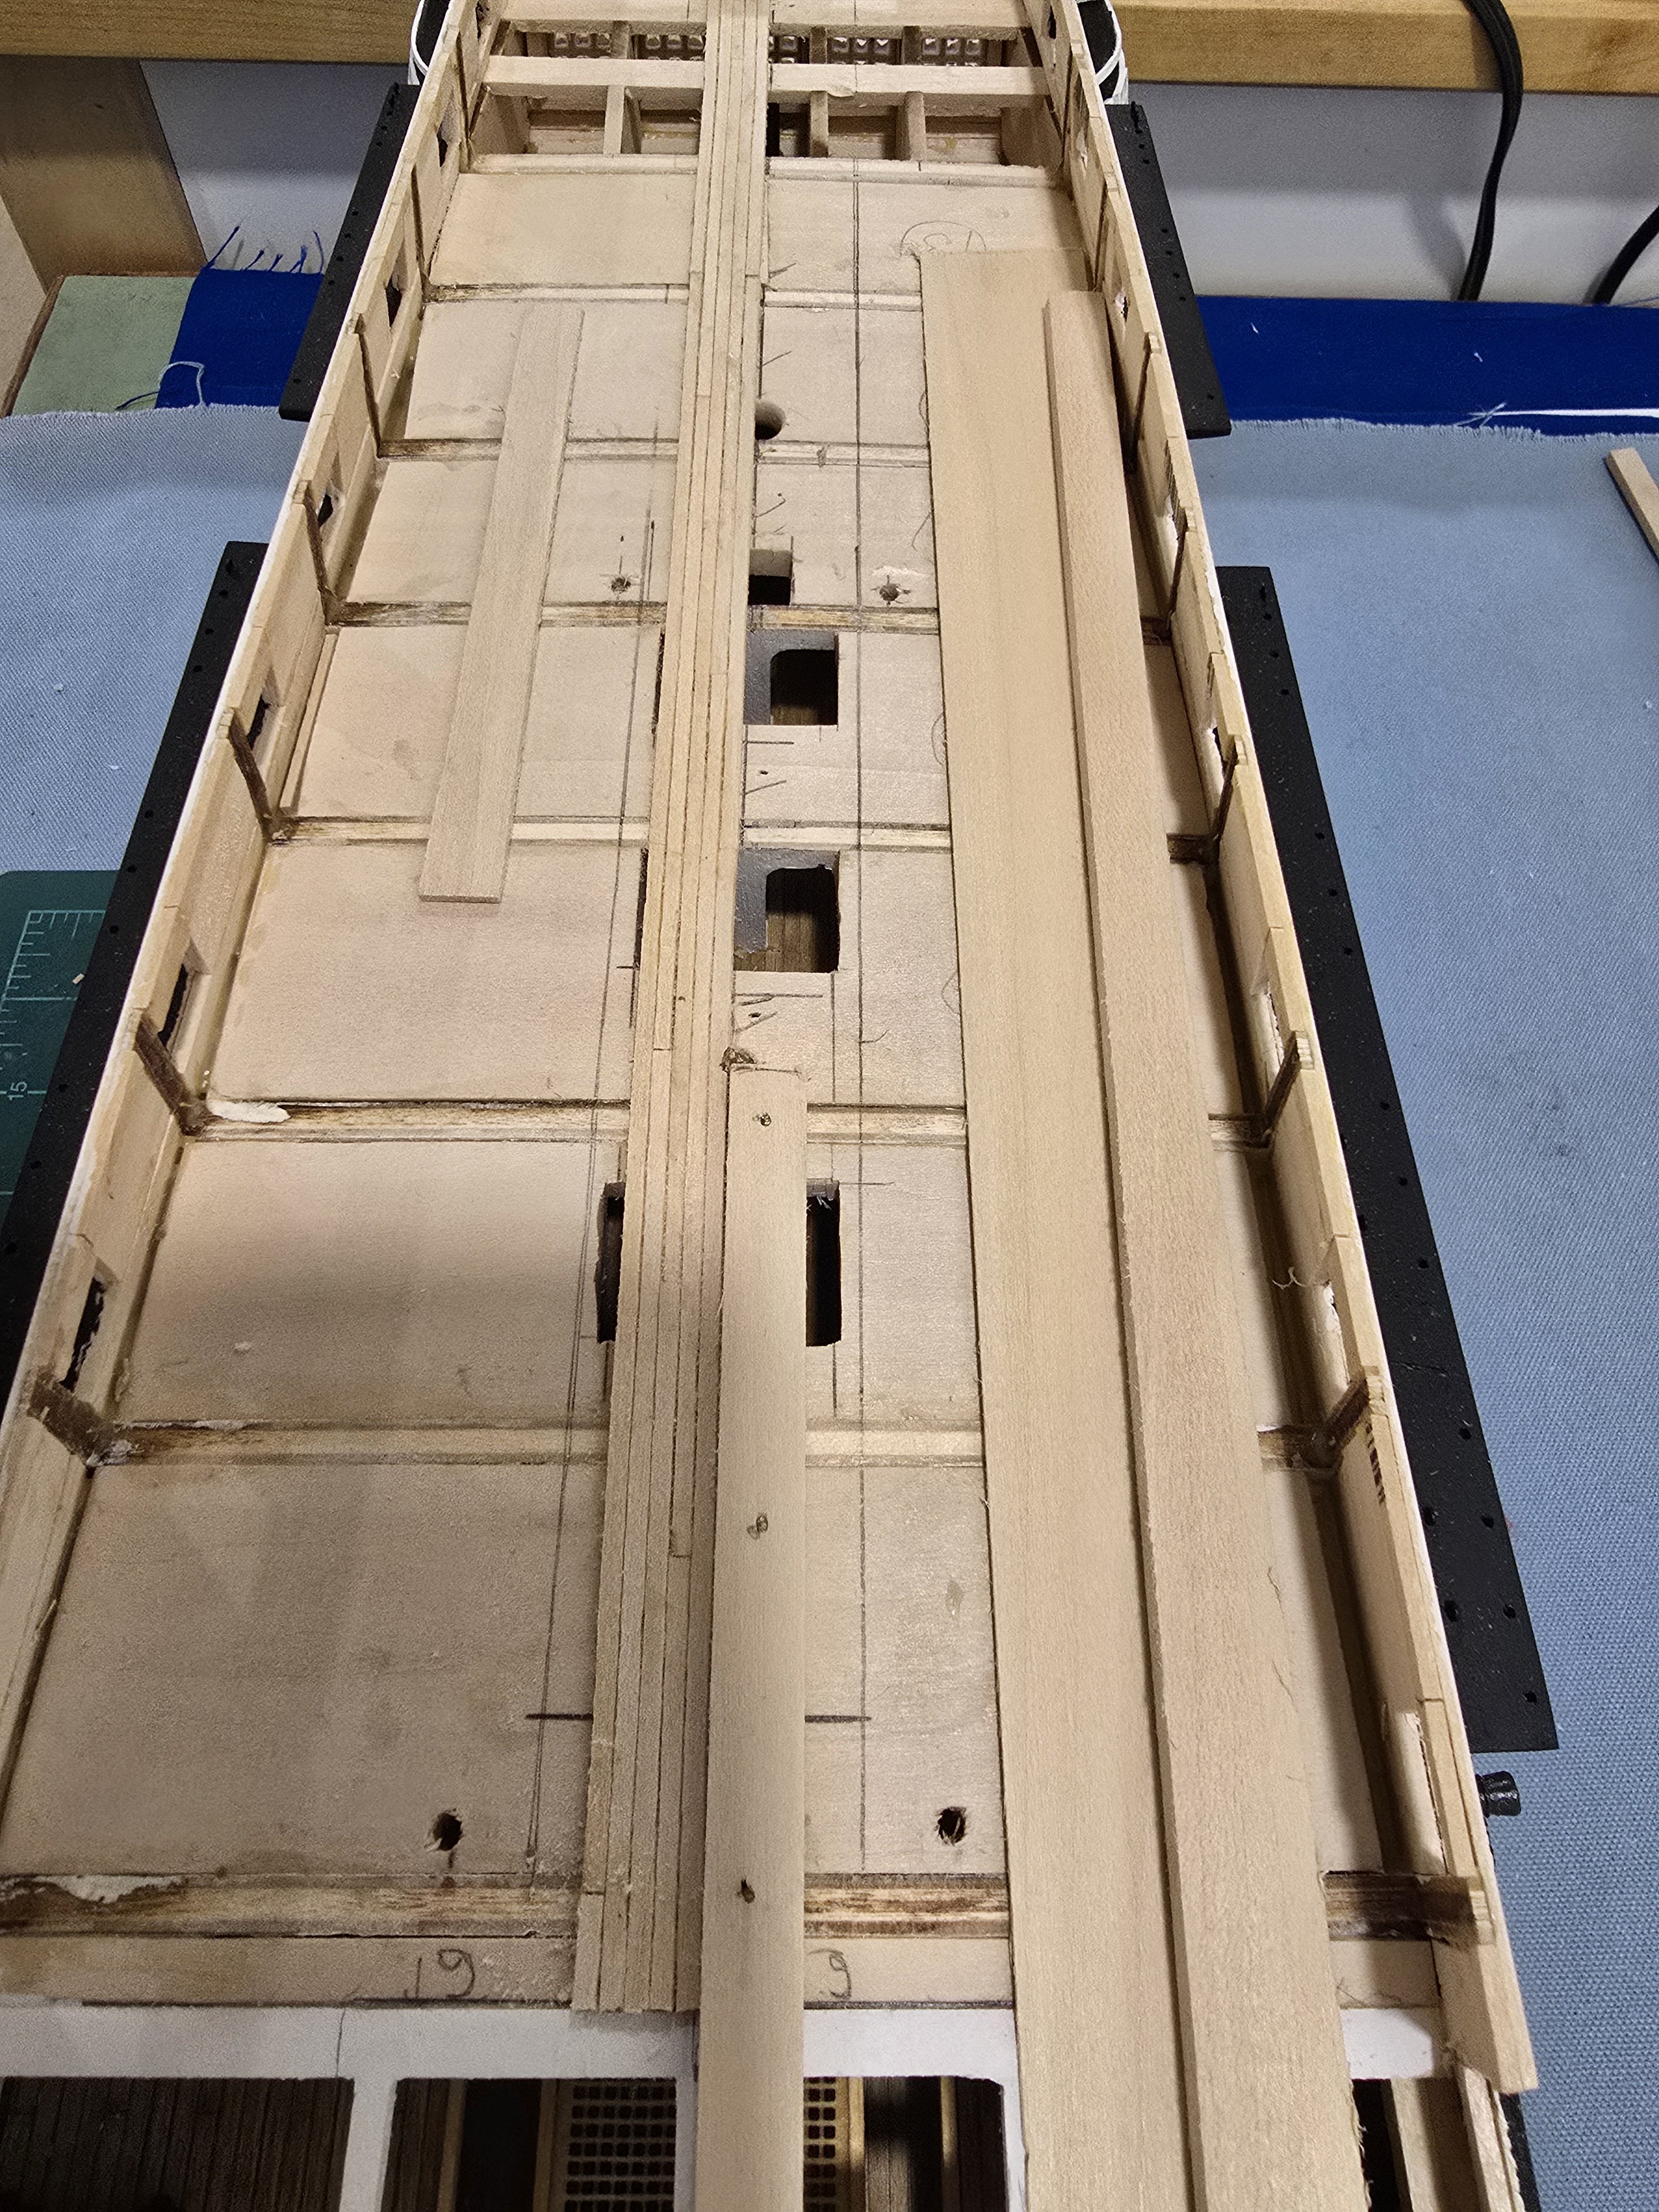
Time for next update. Not tons to show. Based on last Discussion I did buy the blueprints from Bluejacket. I already had the bluejacket Manual/booklet I'll base most on my mast and rigging from Bluejacket. So yes sky poles! but that's a ways off yet. Summary from last post I did finish the lower deck. All cannons with minimal rigging Replaced the Anchor rode with a more properly scaled line Yes, wrapped it around the ridding bits. not knotted. (Thanks Jon) All the deck supports were cleaned up and glued in. (same as last picture above Started planking the spar deck first ran a strip of wood, bow to stern right on centerline. Nailed it down This will be a guide to start the first few runs of the planking I will use a 4 shift pattern Each plank is 120mm long Shifts at 30, 60, 90 120mm Because I work in IT and over think everything... Used Microsoft Visio to lay out all the planks on the computer first My MS Visio layout of the planks By my math, need 6x 120mm planks per run. roughly 56 planks wide. So 336 planks need. Based on that I sawed up all the planks on mini table saw 1/16" x 3/32" That took awile Roughly about 1/3 of the planks I milled First 4 runs of planks


-
As always, you all are leading me in the right direction. I will go with the Arnot book as my primary source. (fortunately I already have it) I sent out a bunch of emails trying to track down where i can buy the corresponding plans. (Bluejacket, Taubman, USSCMSG) Hopefully I can find a source to buy from without spending a fortune on plans. I'll keep you posted if i find a source.