CDW
-
Posts
7,760 -
Joined
-
Last visited
Content Type
Profiles
Forums
Gallery
Events
Everything posted by CDW
-
 Thanks OC. It's a nicely molded piece from Pit-Road. At one time, they were on top of the plastic model ship range at 1:700 scale but have more recently been overtaken by others. More recent Pit-Road kits have also been very good but not quite as nice as Flyhawk. I have their latest 1:700 Yamato late war variant and it is good. More modern tooling than this kit.
- 127 replies
-
- 5
-

-
- Akitsushima
- Pit Road
- (and 2 more)
-
Well you're making it look like you are an "old pro". Your work is first rate. Complex models intrigue me most and it really helps build patience, something I sometimes lack. 1:700 scale has forced me to slow down because there is no practical way I can find to do it faster.
-
I have a dealer here state side that's getting one for me later this summer. From what he told me last month, it's due sometime around July-August unless some unforeseen difficulty comes up. There are other new Flyhawk releases coming out as well. He buys directly from Flyhawk. In the meantime, I already purchased the "I Love Kit" version of the Hood which came with a wood deck, photo etch, and metal barrels. It's based on the Trumpeter Hood kit and sold on Amazon for a reasonable price and I bought it before I knew Flyhawk was releasing one. I plan to start it very soon.
-
A rabbit hole indeed. The distributor for those Ammo Mig items is just a short drive away from my house, so the temptation to try everything is huge. Spraygunner.com
- 127 replies
-
- 4
-
-
- Akitsushima
- Pit Road
- (and 2 more)
-
Looks great Alan. You've done an outstanding job with the photo etch and painting it all. Not a simple task by any means. The molded on details look spectacular on this kit. Very sharp.
-
Have any of you ever used this painting method? It's very interesting and gives fabulous results. (20) How to Paint a Space Marine Rhino - YouTube
- 127 replies
-
- 3
-
-
- Akitsushima
- Pit Road
- (and 2 more)
-
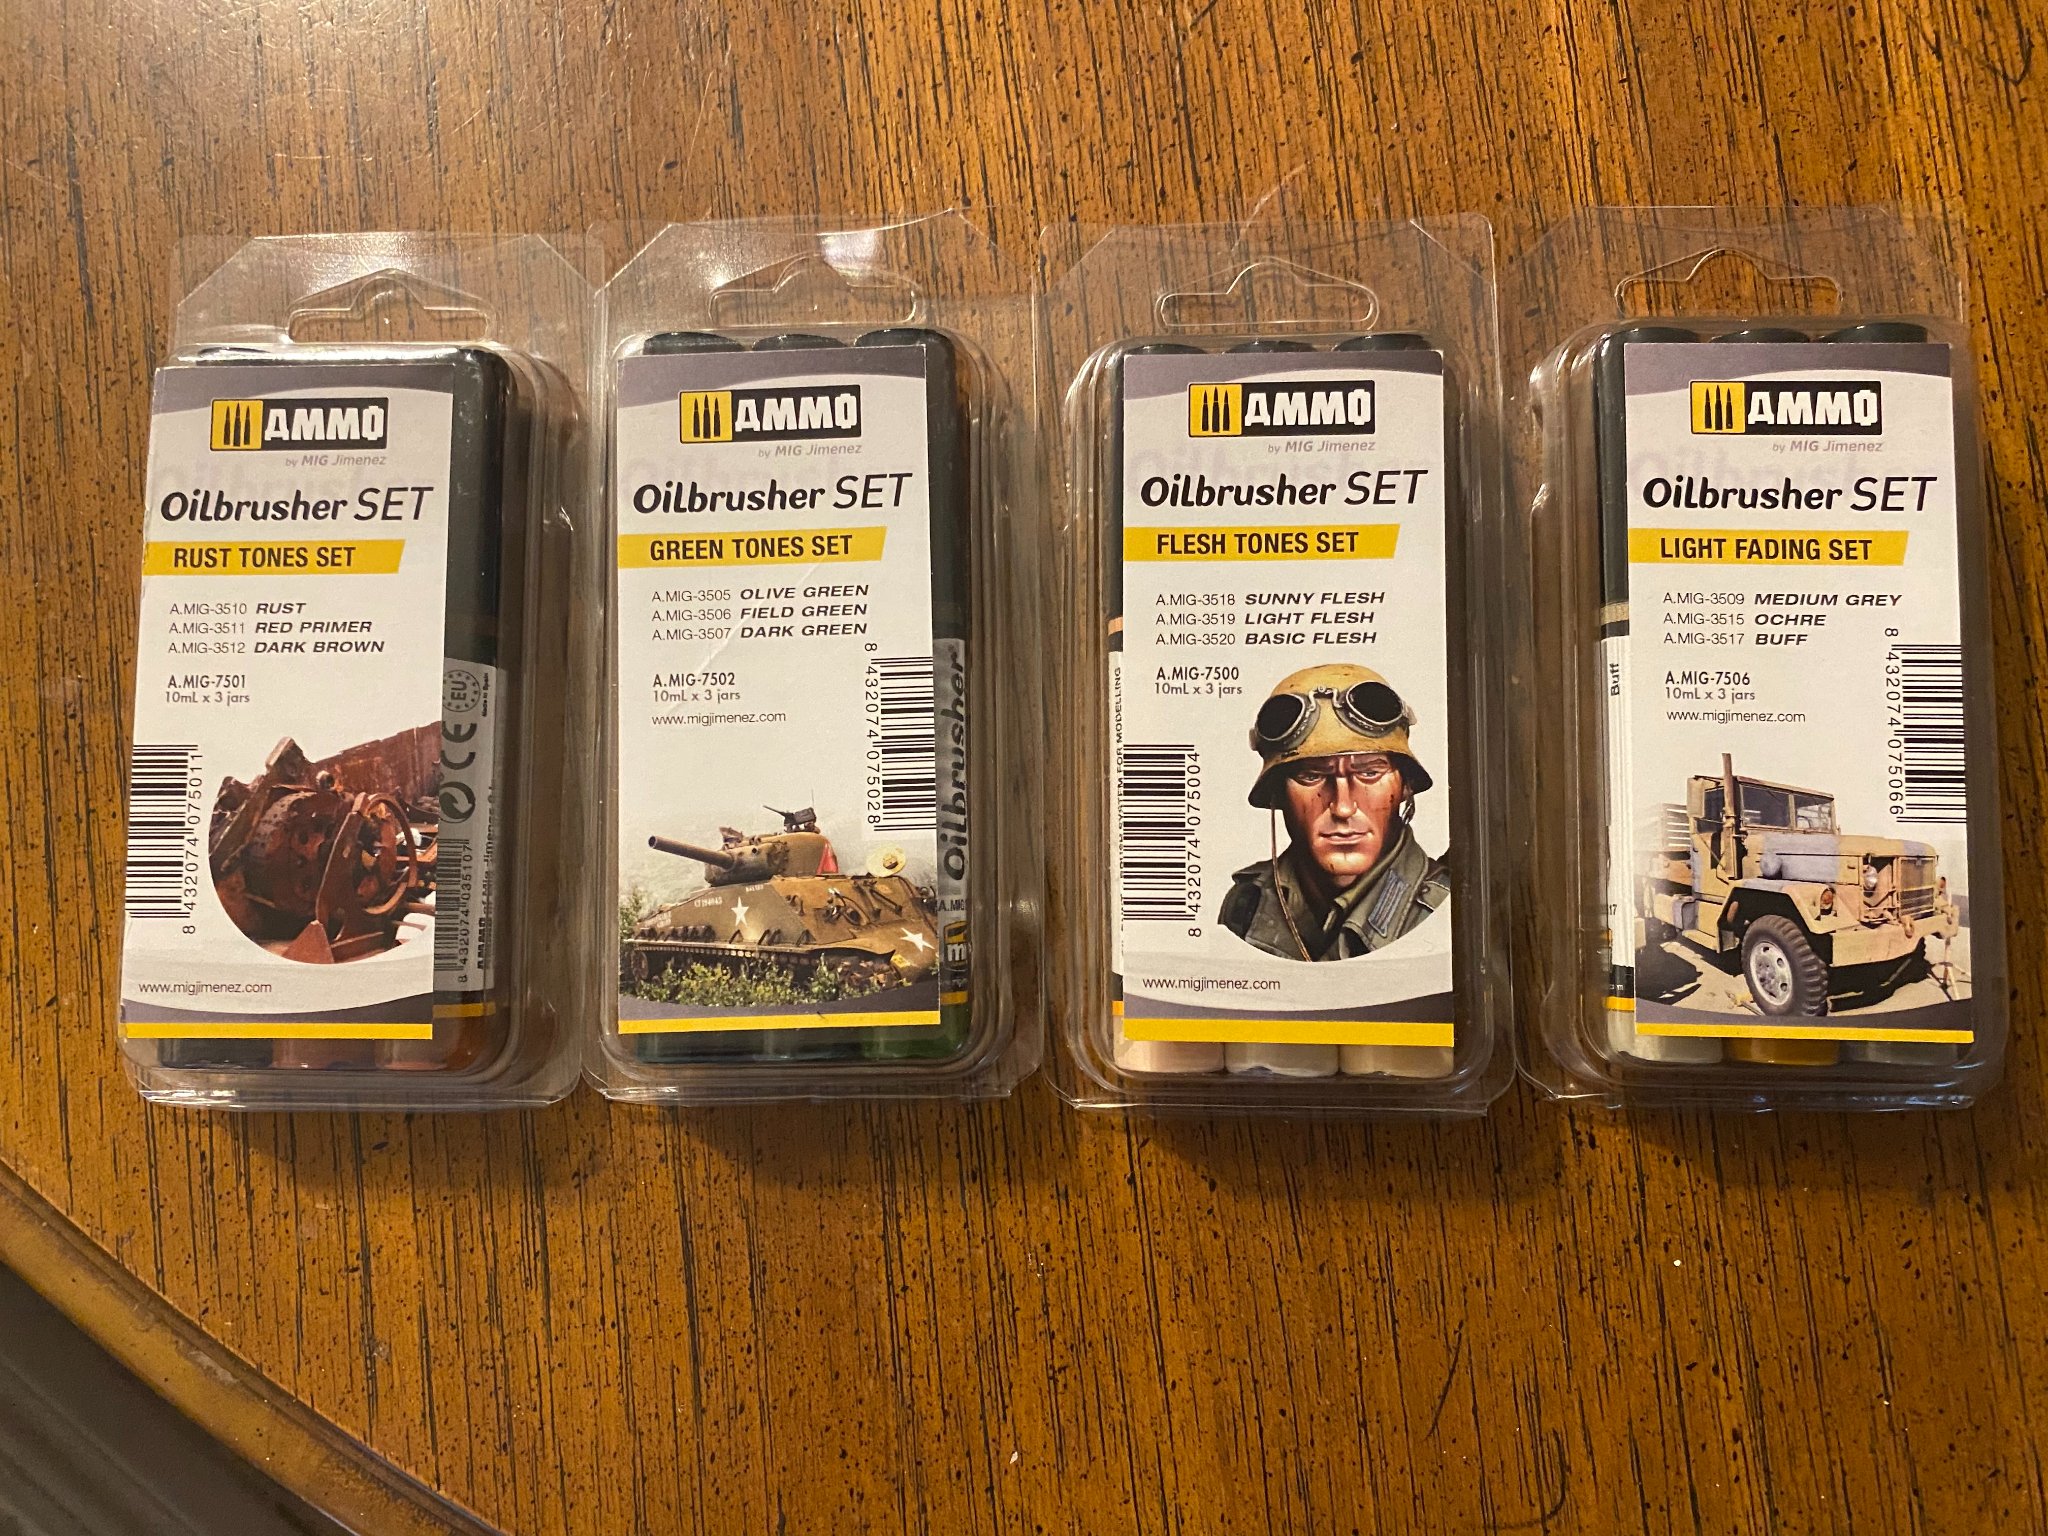
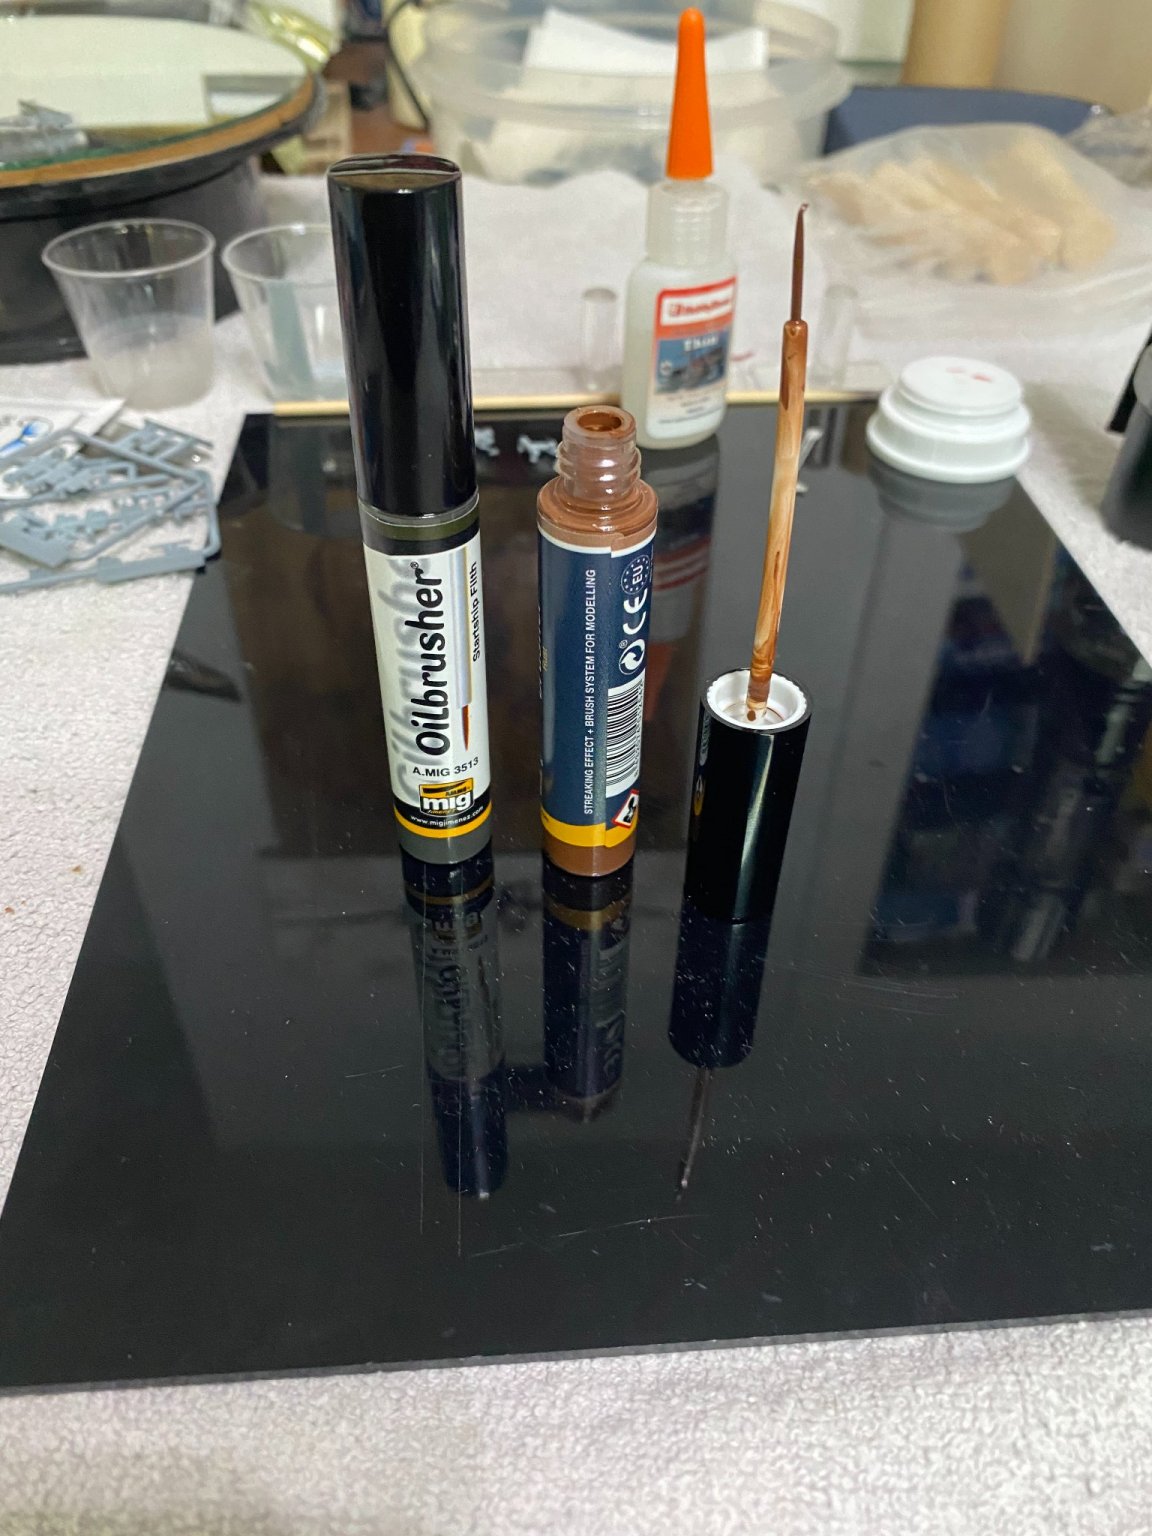
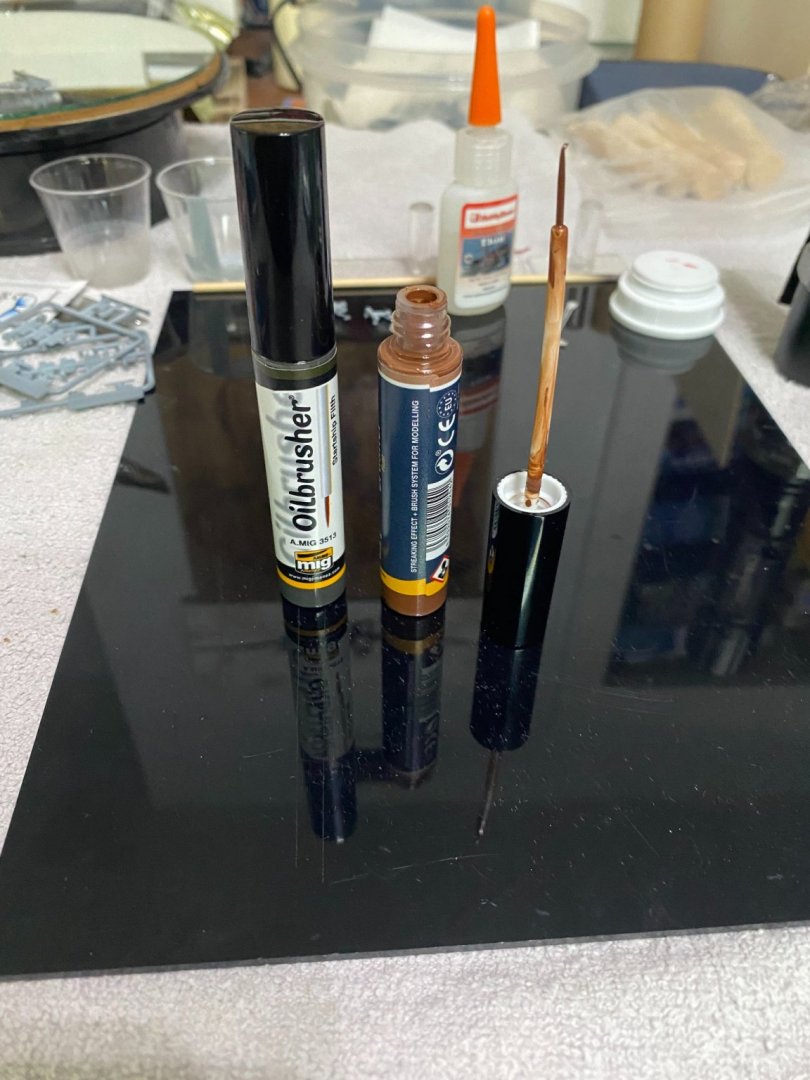
The Oilbrusher series can be bought singularly or in color matched sets for various effects. You save a dollar or two by buying the set vs: singles. I want to try out the flesh tones soon.

- 127 replies
-
- 3
-
-
- Akitsushima
- Pit Road
- (and 2 more)
-
Happy to help (4) How to use OIL colors: OILBRUSHER - YouTube
- 127 replies
-
- 3
-
-
- Akitsushima
- Pit Road
- (and 2 more)
-
Thanks for the comments and for looking in Gary. Welcome aboard.
- 127 replies
-
- 3
-
-
- Akitsushima
- Pit Road
- (and 2 more)
-
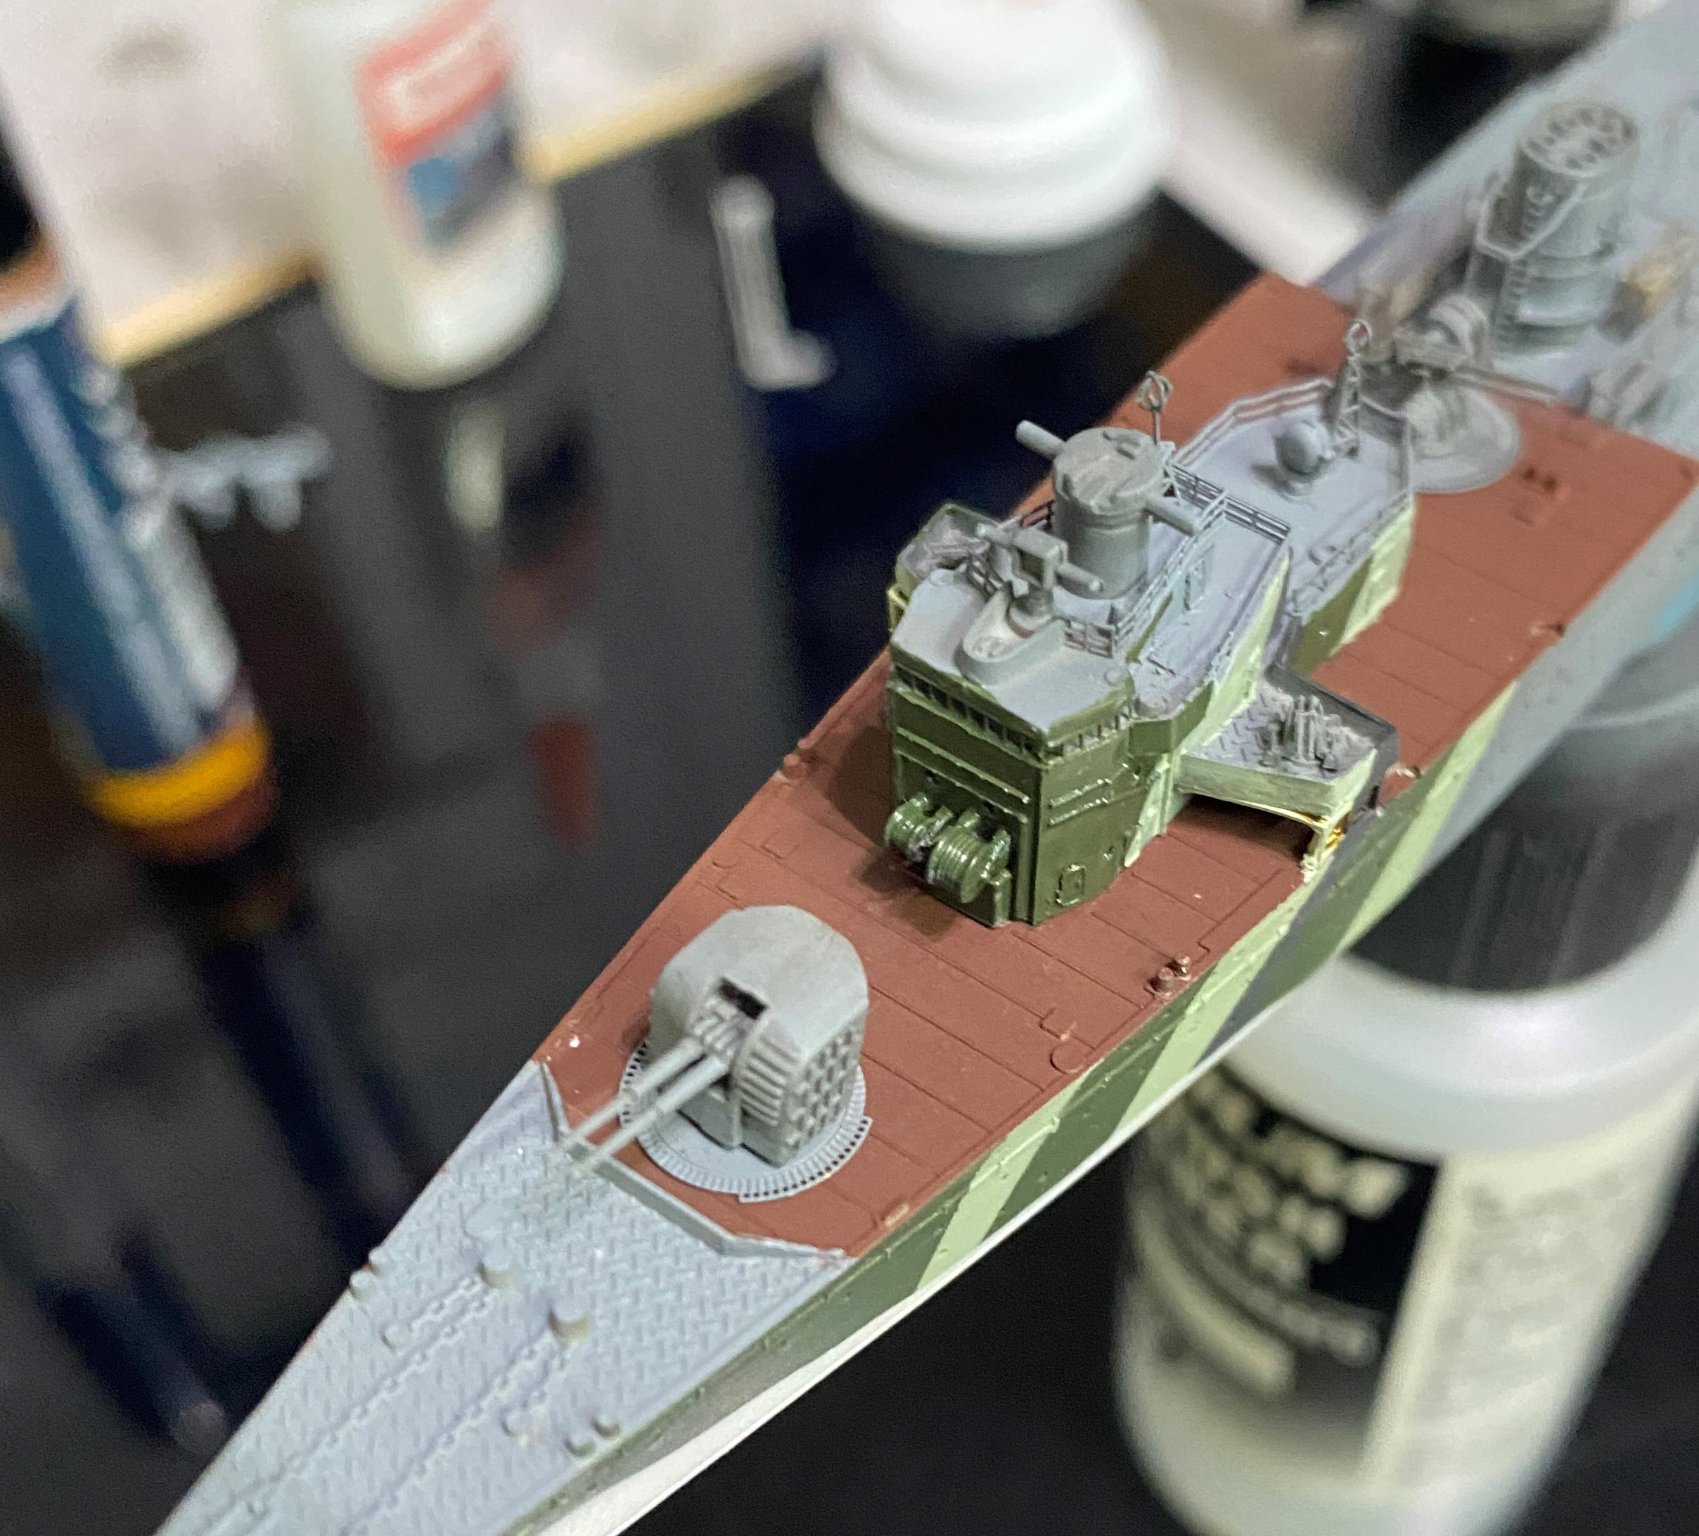
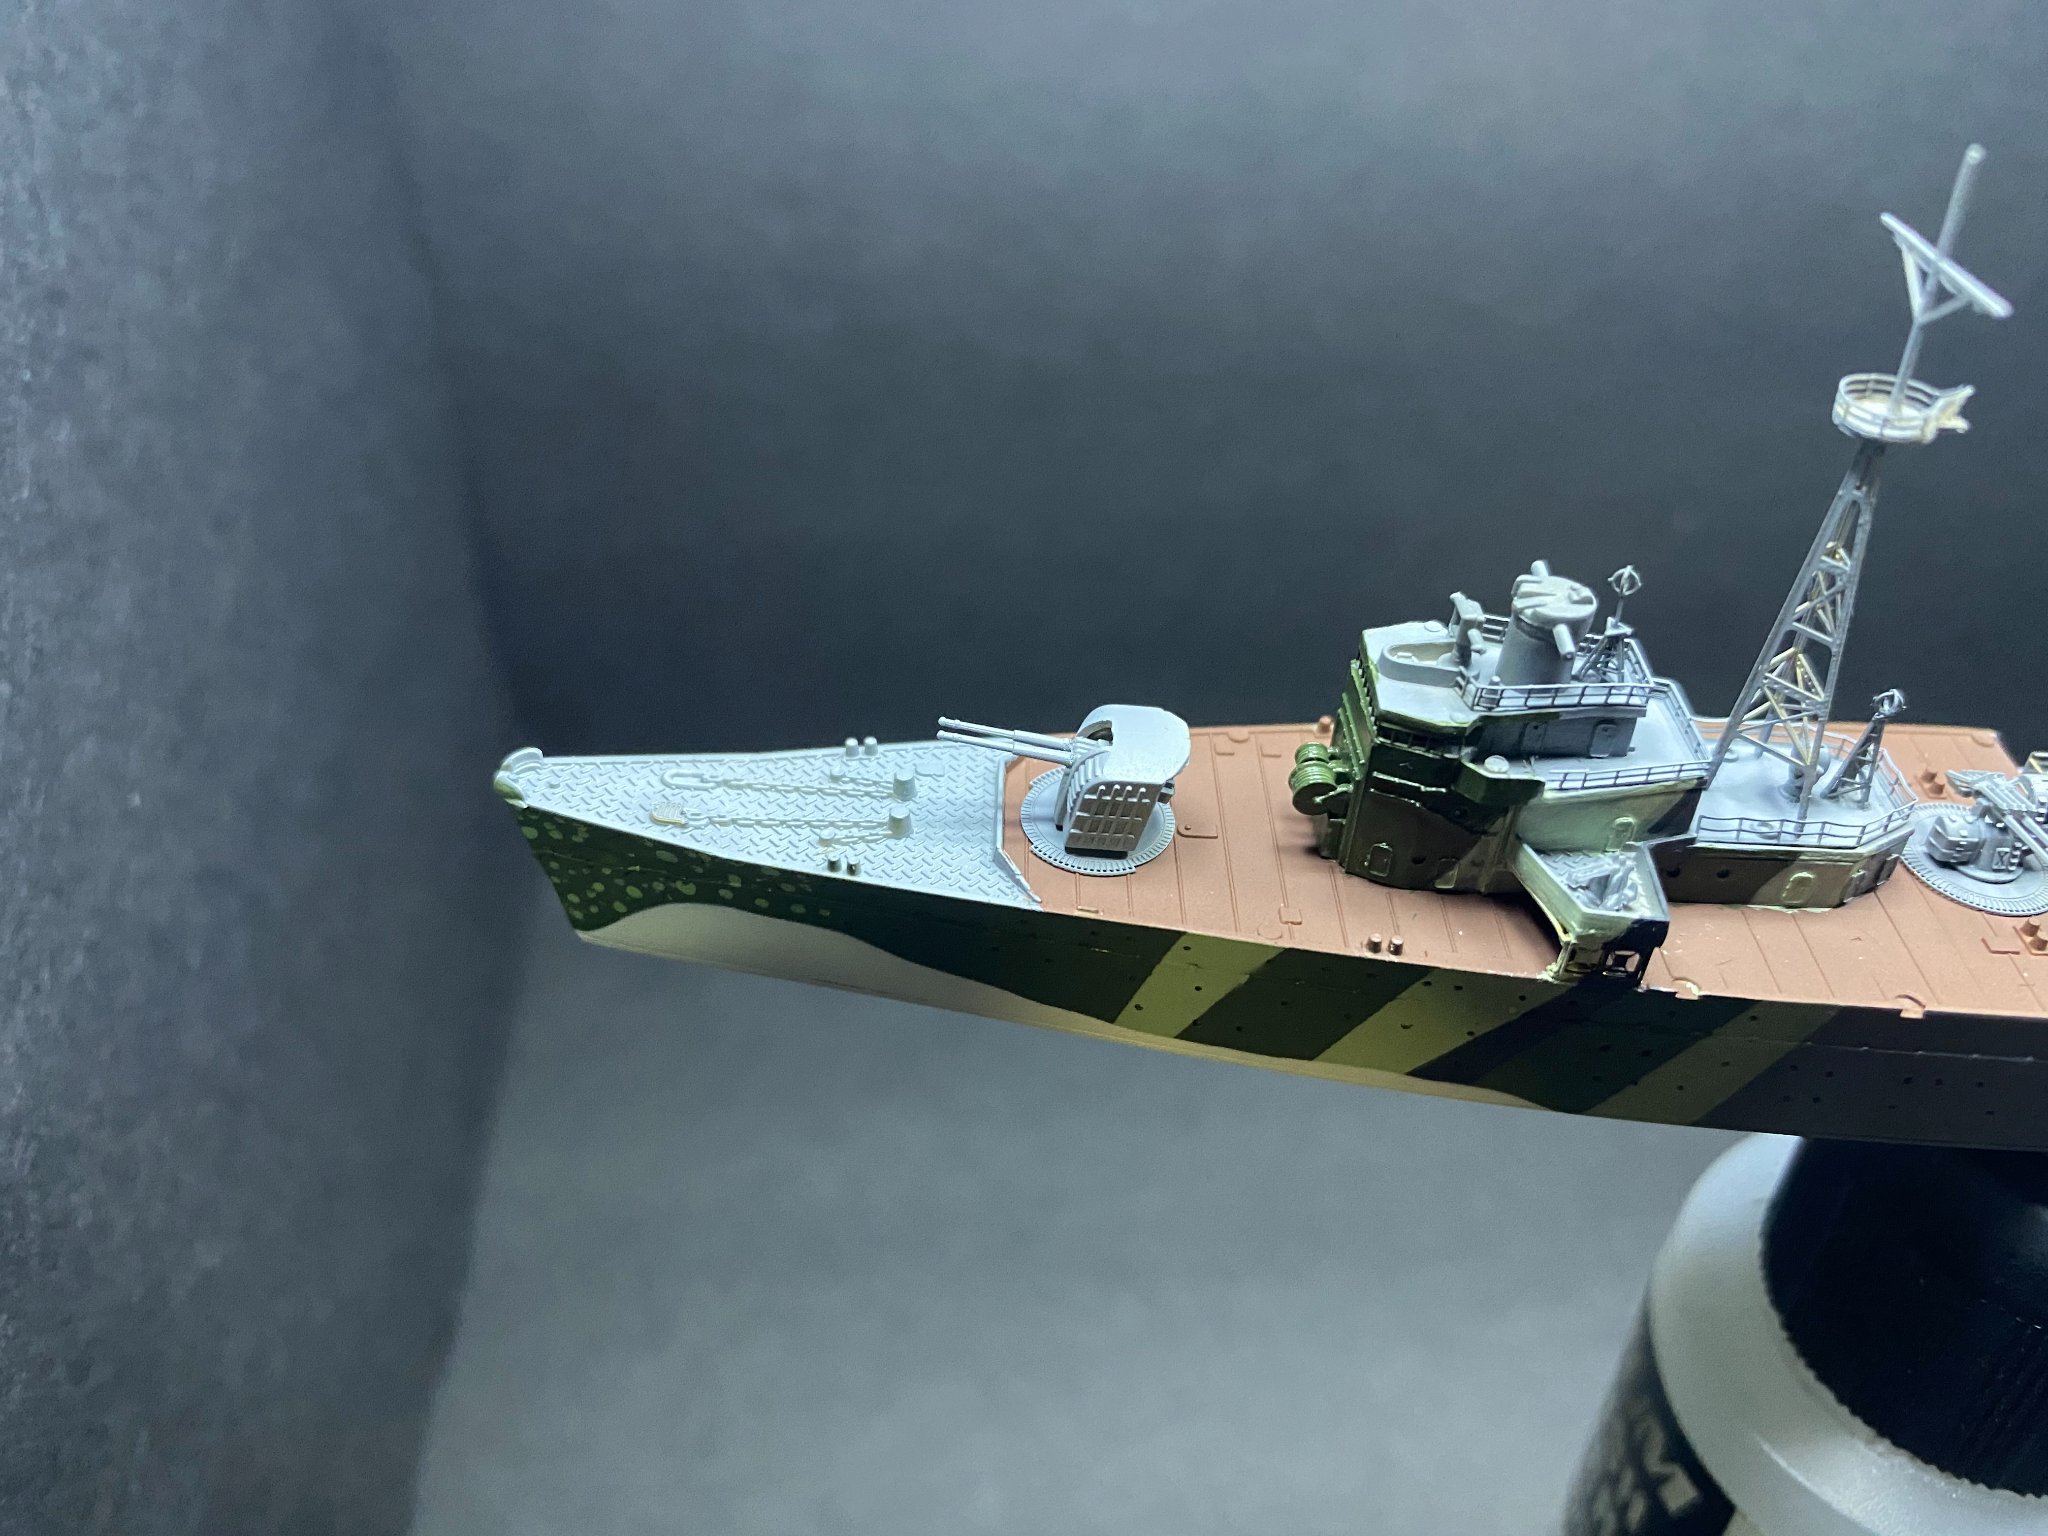
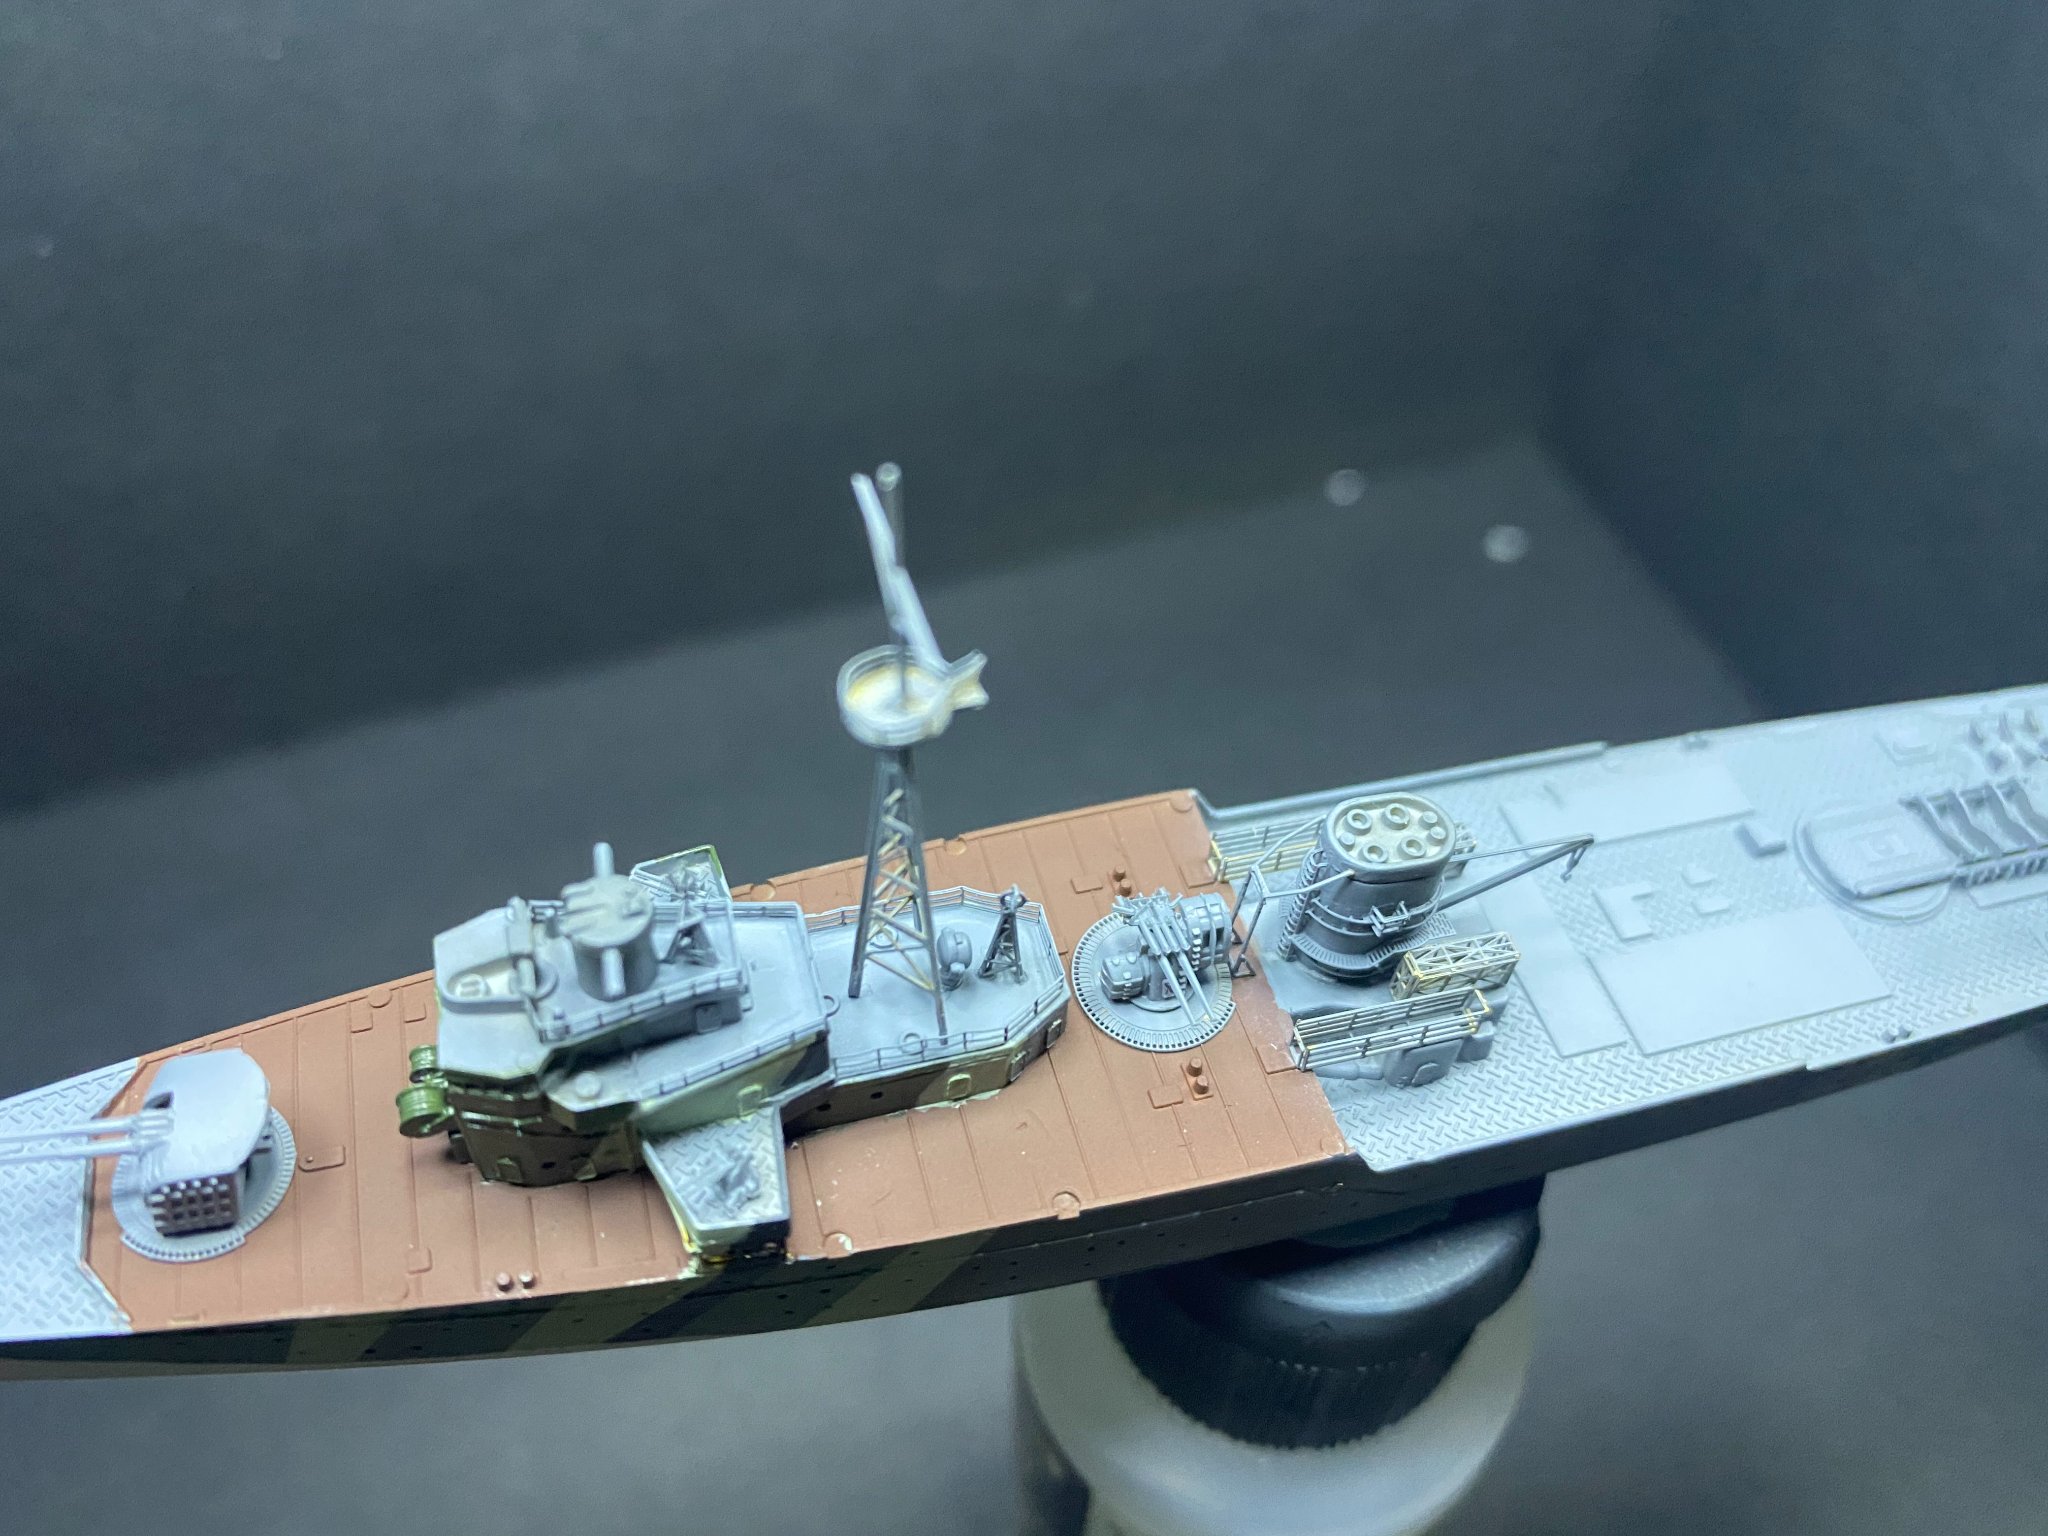
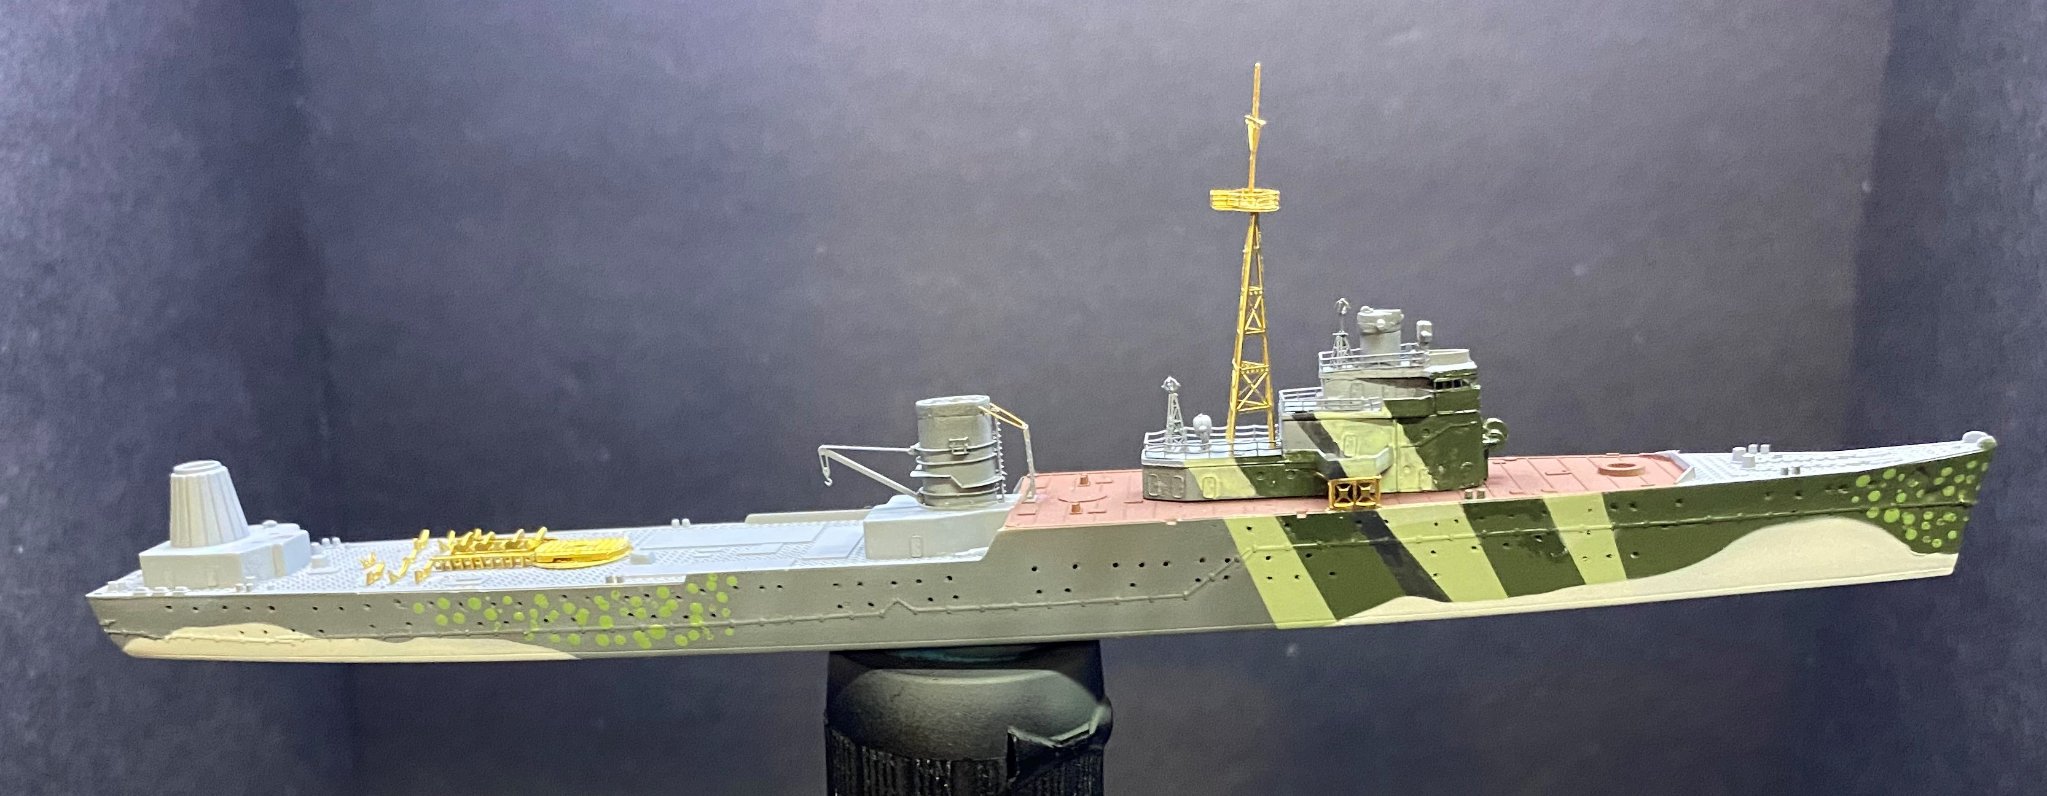
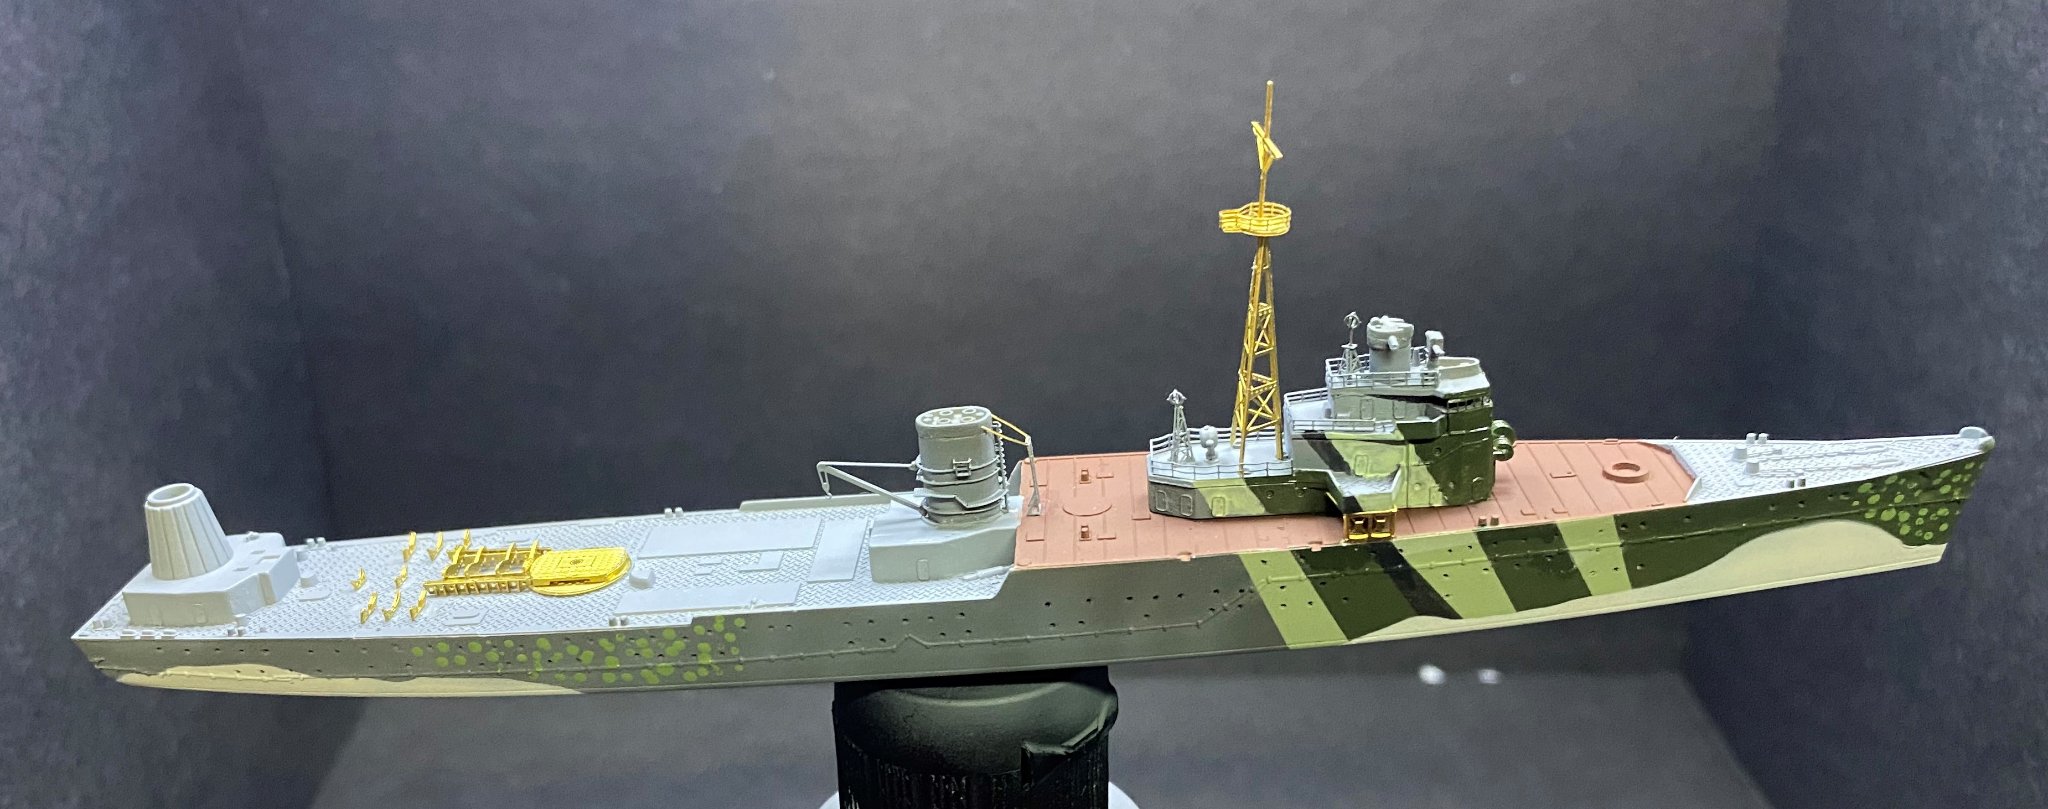
In that same Mig Ammo Oilbrusher line, there is a color called "starship grime" that I used to try and pick out some detail in the AA armament.


- 127 replies
-
- 9
-
-
- Akitsushima
- Pit Road
- (and 2 more)
-
I agree that what you used has a pronounced odor, but the product I wrote about is completely different. No-hardly any odor. They even have their own little brush inside each bottle.
- 127 replies
-
- 5
-
-
- Akitsushima
- Pit Road
- (and 2 more)
-
I didn't notice hardly any odor at all. Very mild "turpentine" type of odor to the oilbrusher, but the solvent used to create the streaking effect is completely odorless. A white spirits type of enamel thinner.
- 127 replies
-
- 4
-
-
- Akitsushima
- Pit Road
- (and 2 more)
-
Ginger beer sounds interesting. Love the progress on the little tank. Amazing how much detail they pack into small scale models. This scale makes it so much more practical to display them.
- 70 replies
-
- 10
-
-
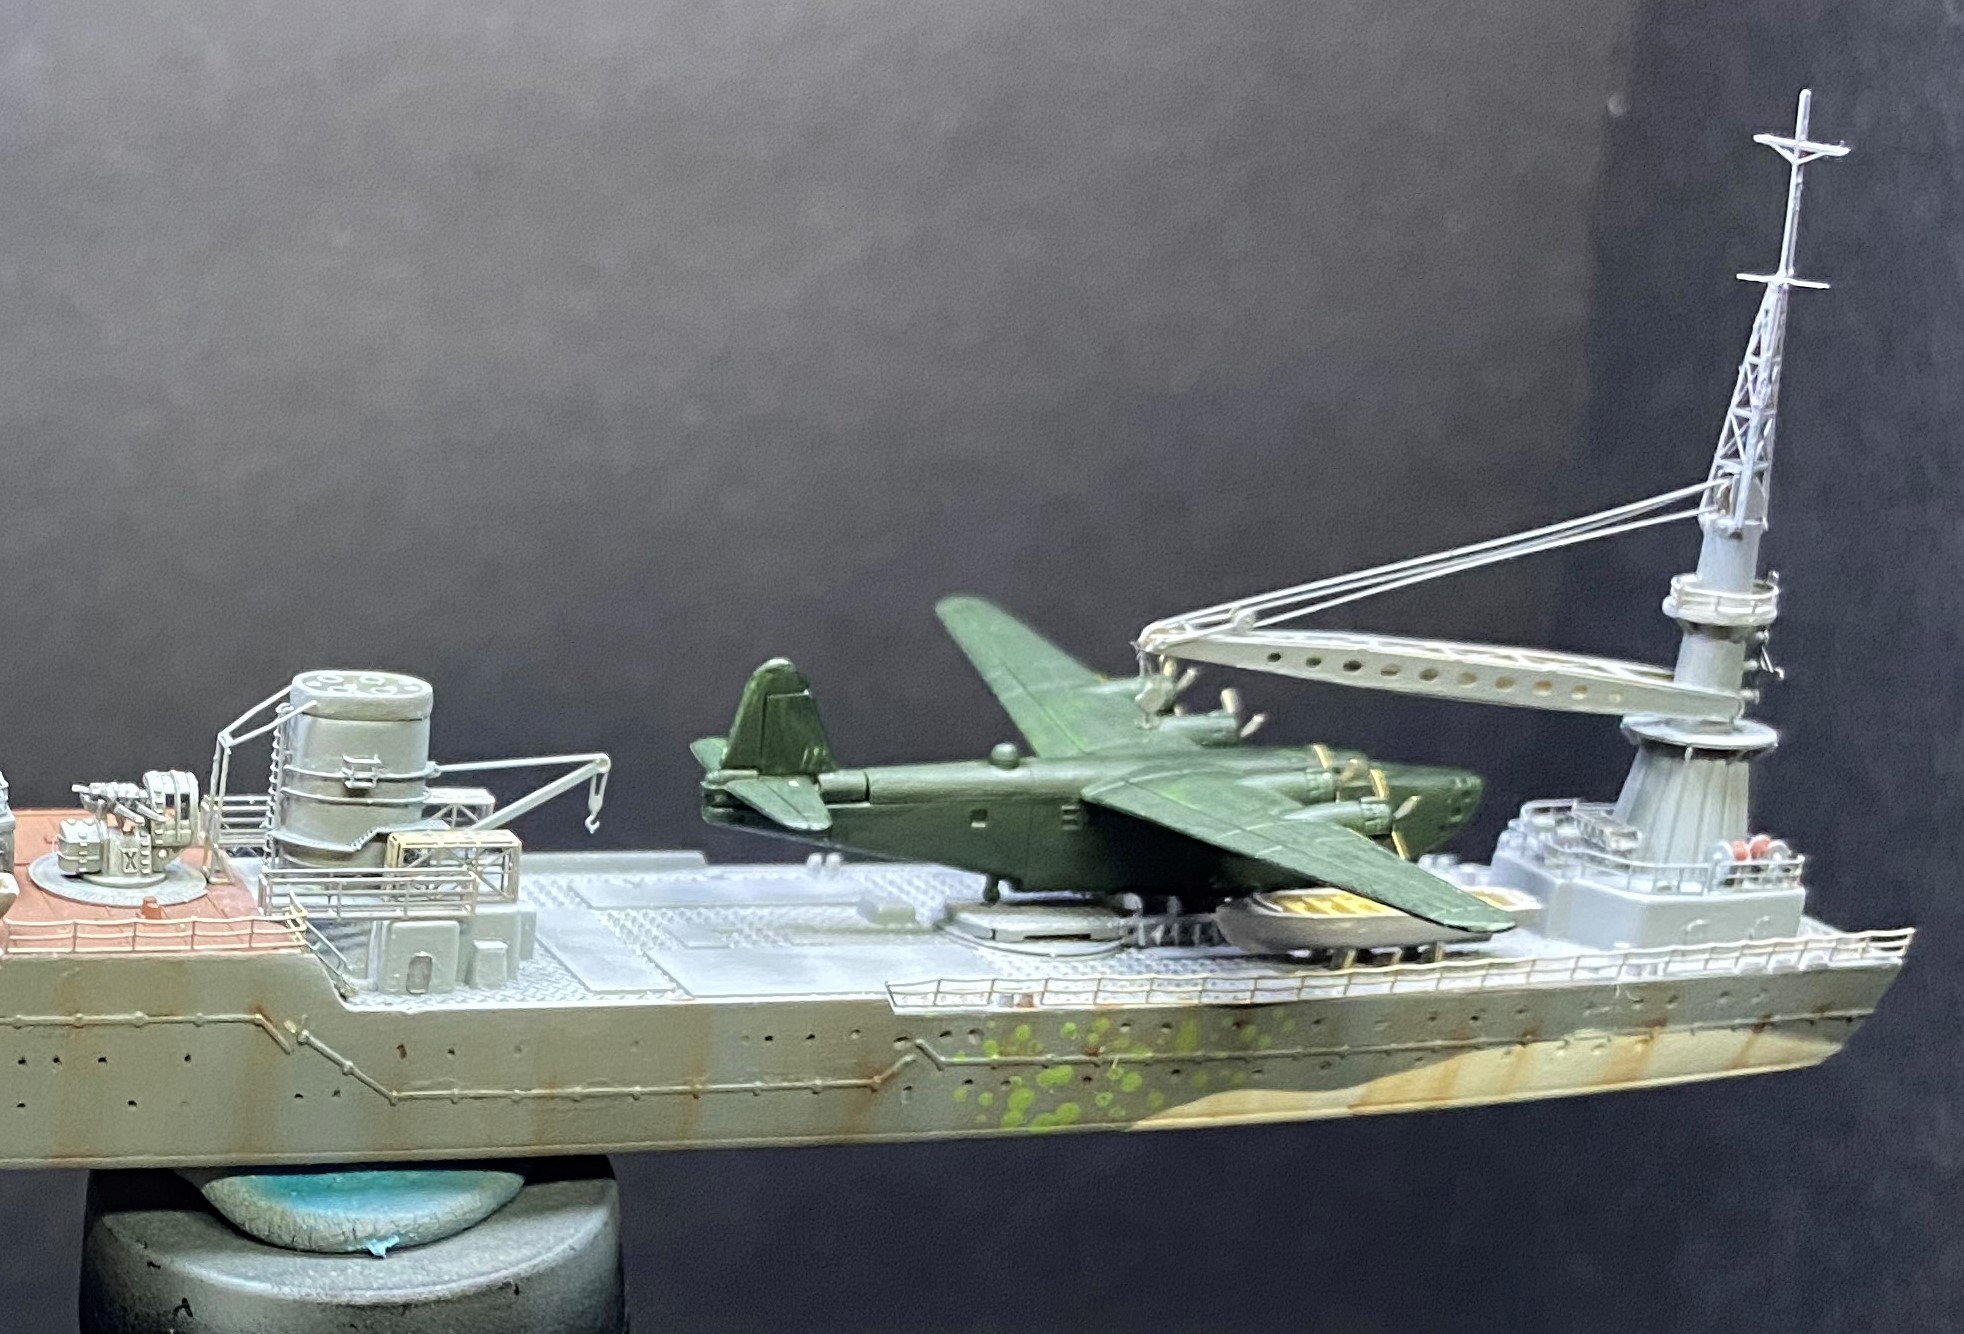
Ammo by Mig Streaking Oilbrusher has been out for a few years or more now, but this is the first time I got around to trying it. Here I used the rust colored streaking oilbrusher to see what kind of effect I could get with it.


- 127 replies
-
- 9
-
-
- Akitsushima
- Pit Road
- (and 2 more)
-
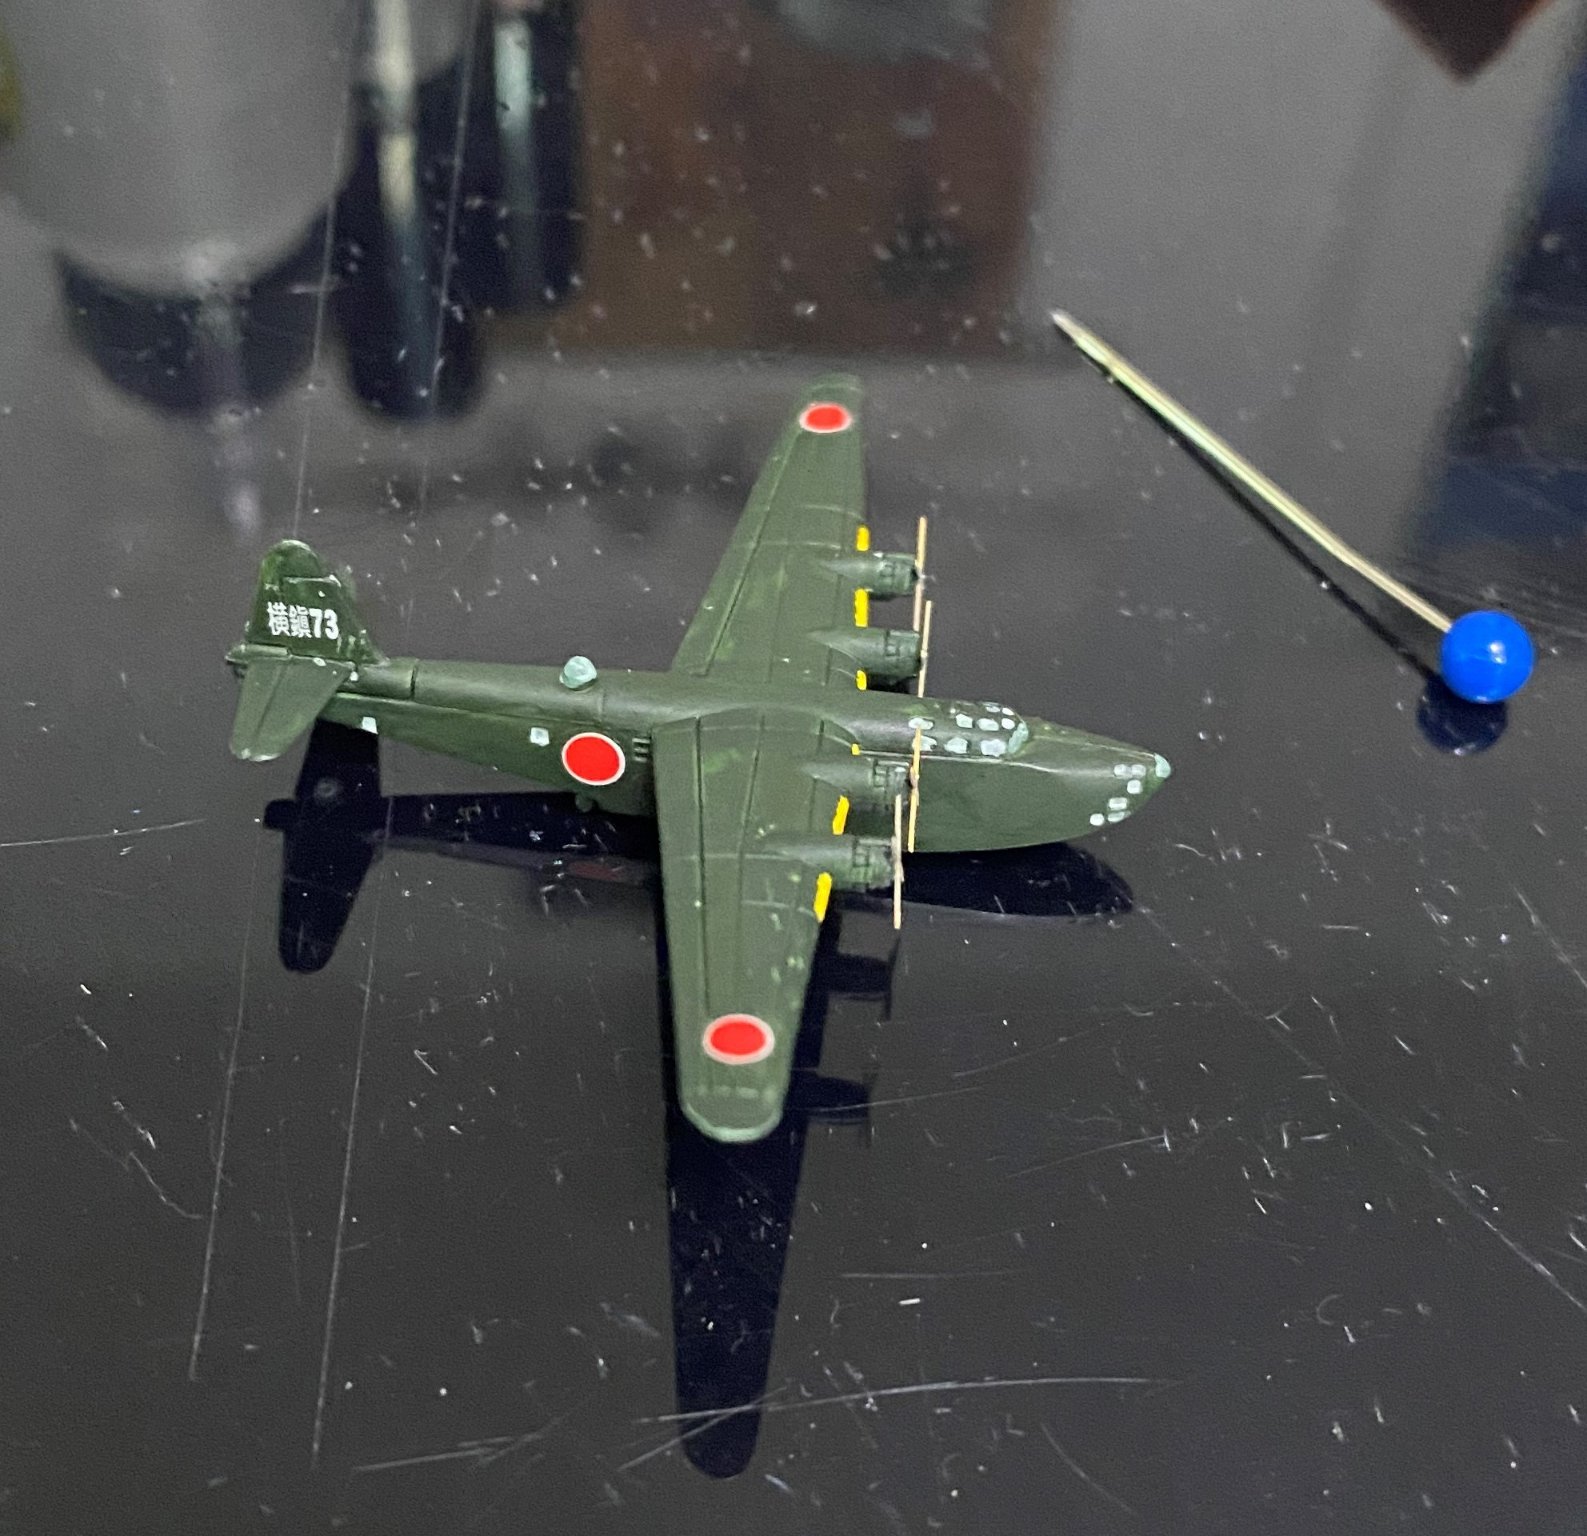
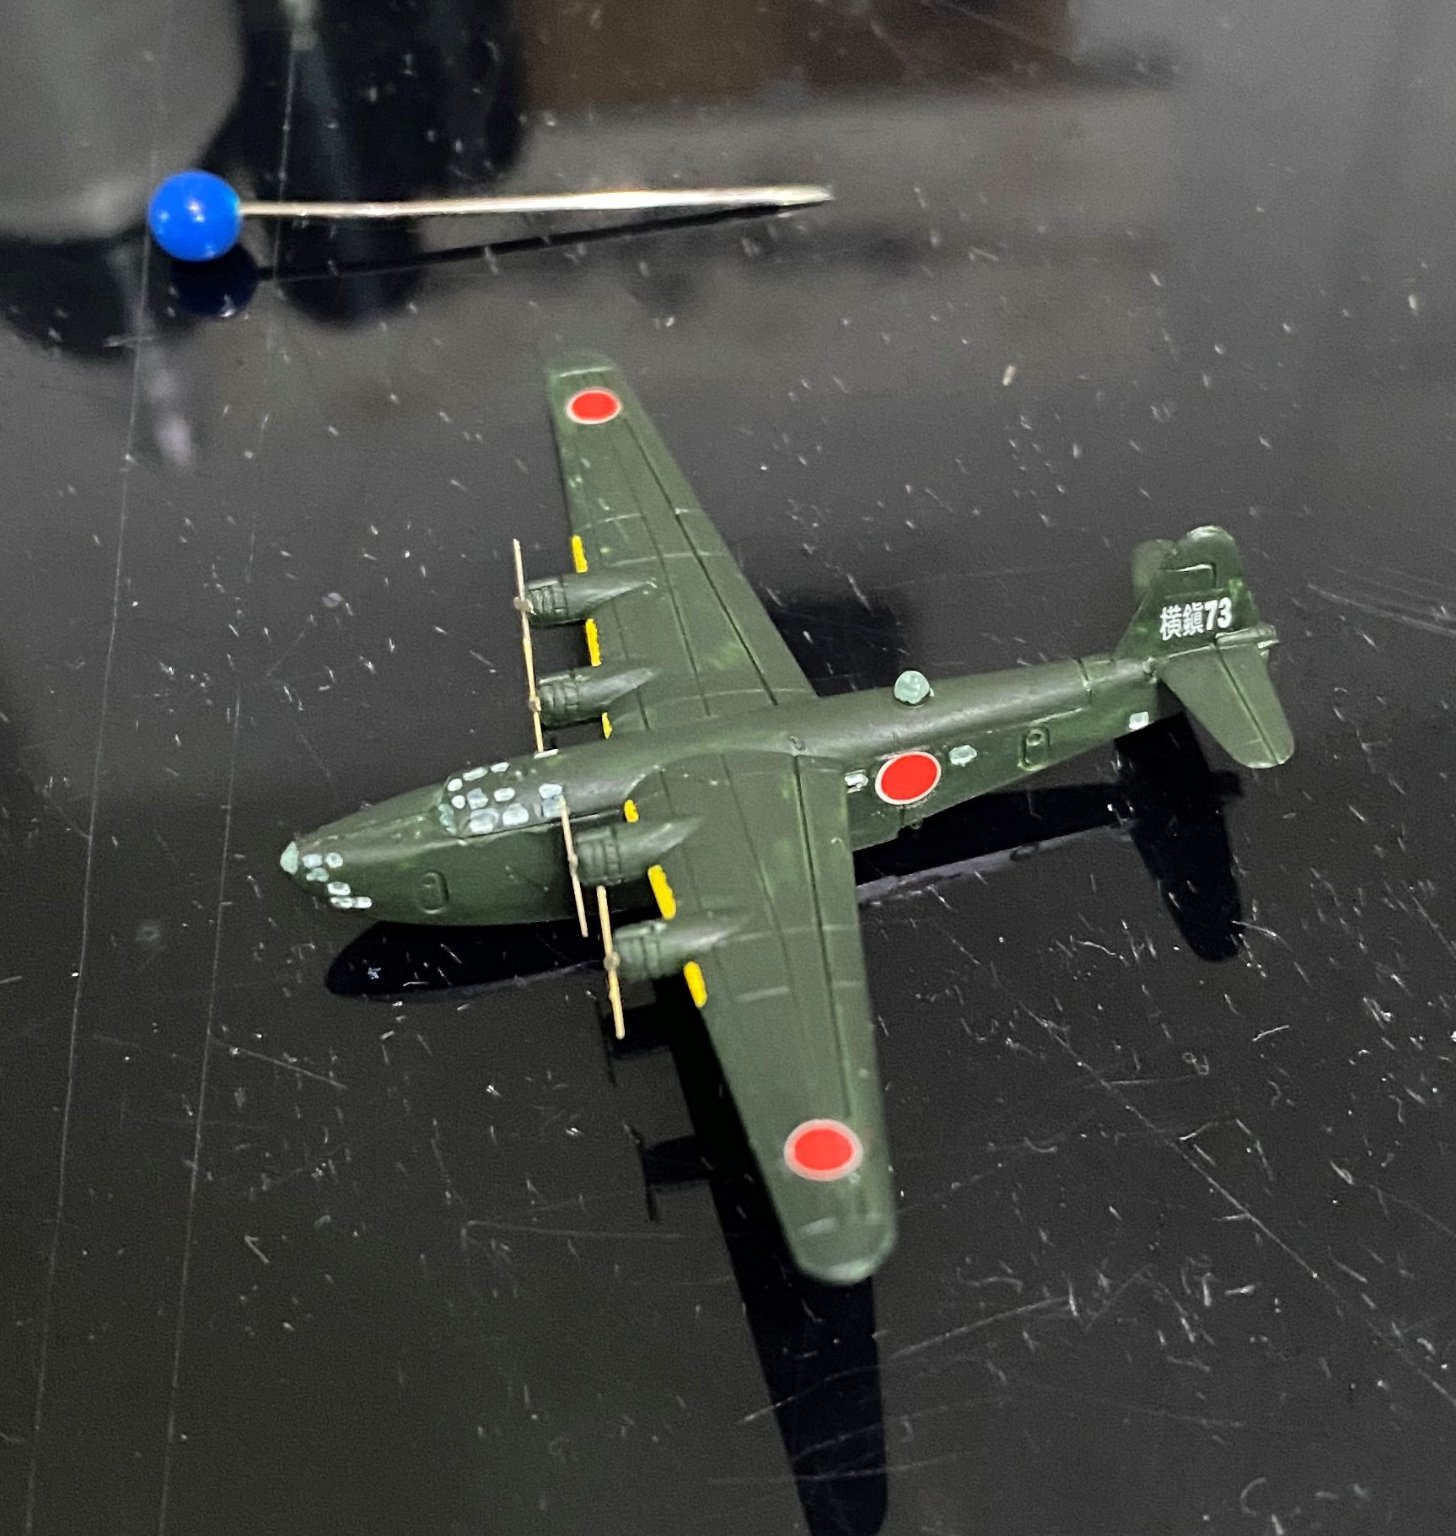
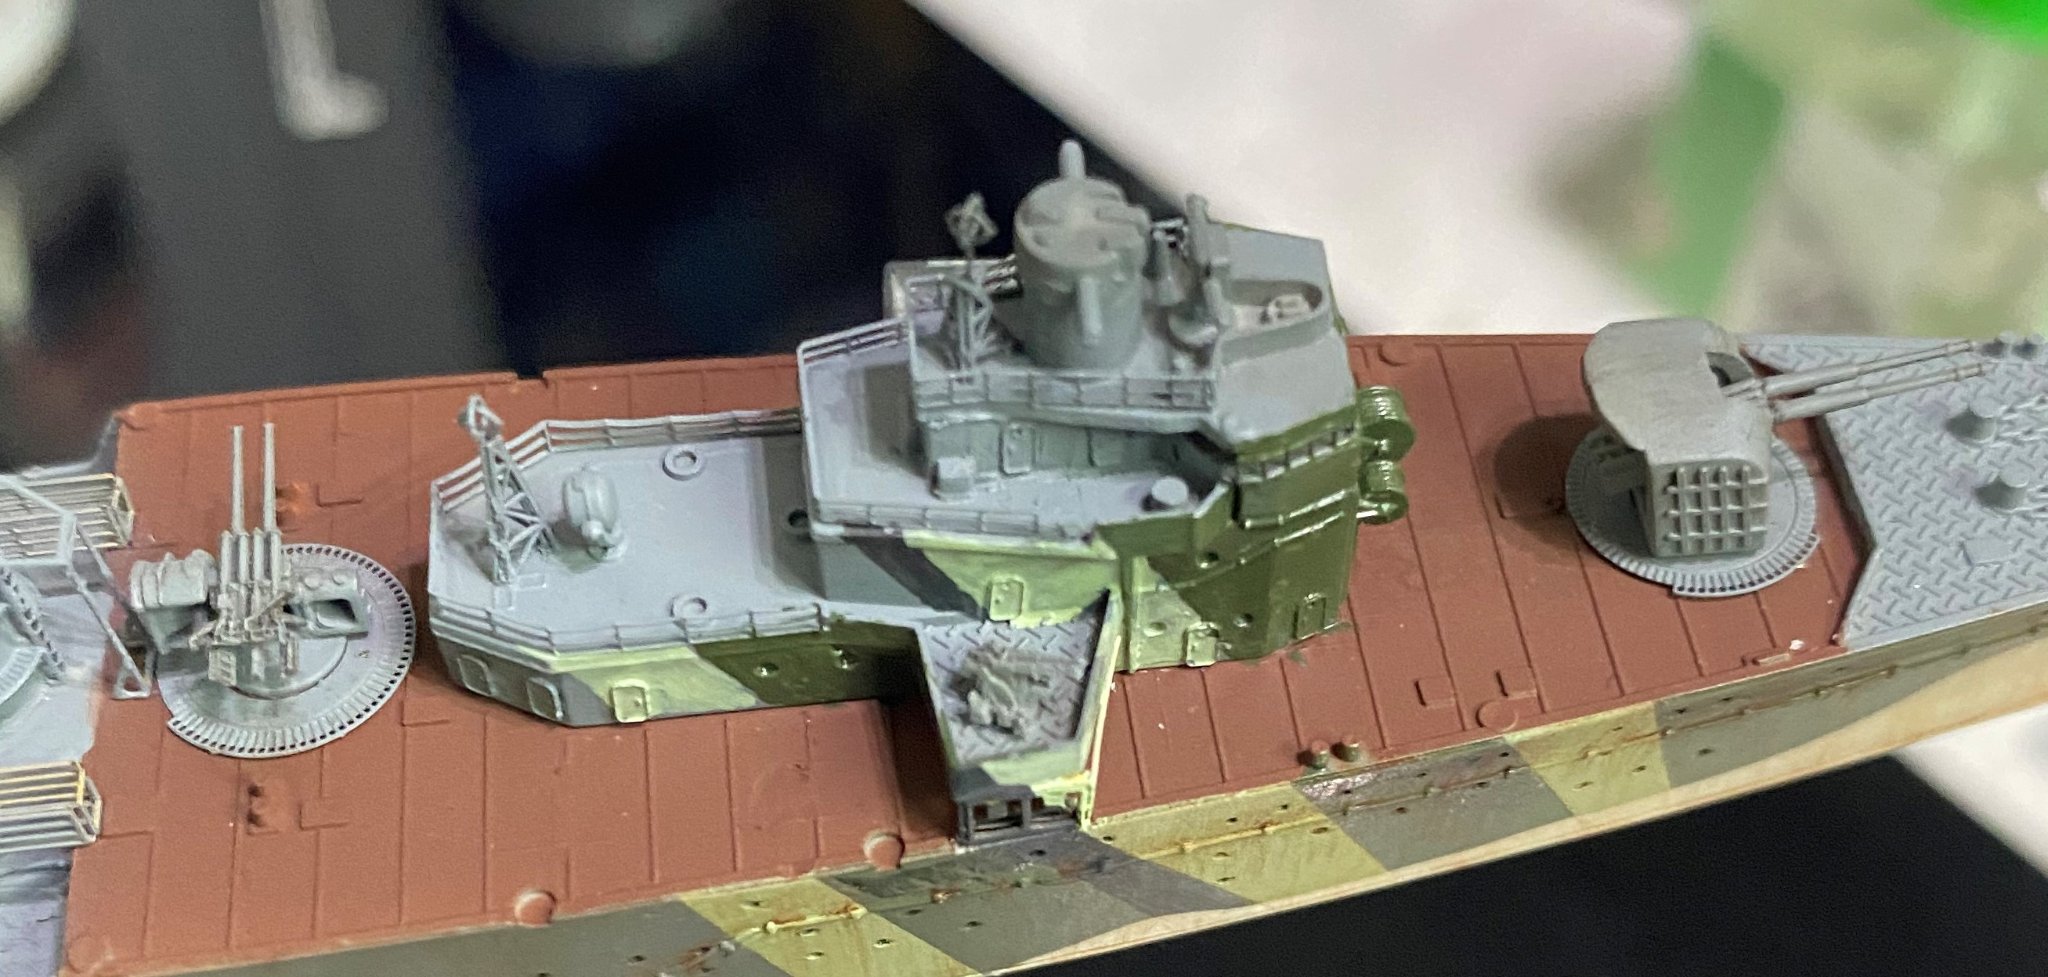
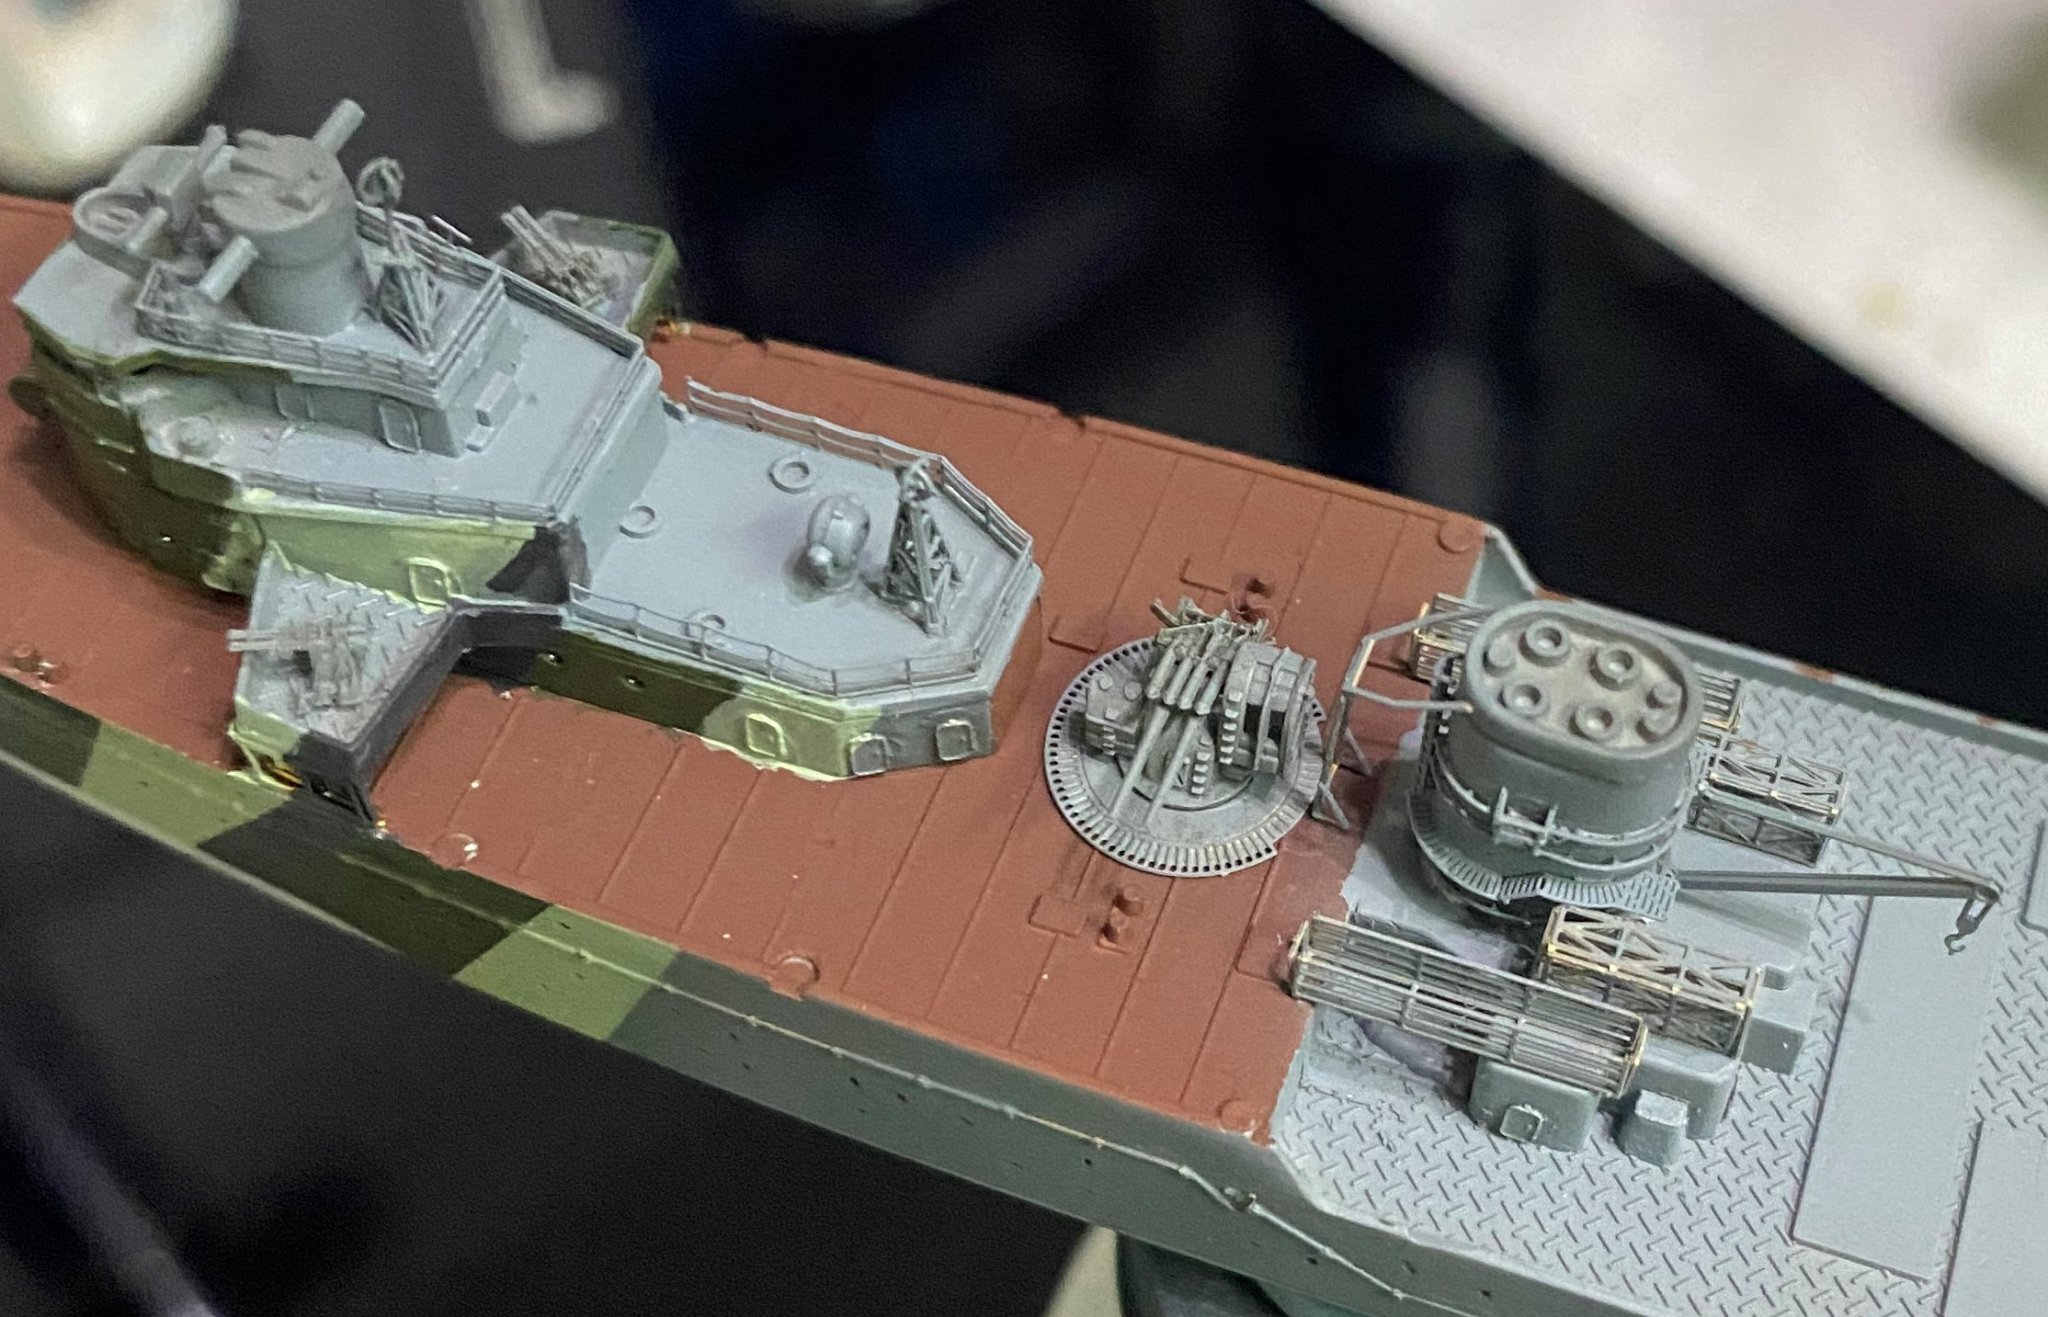
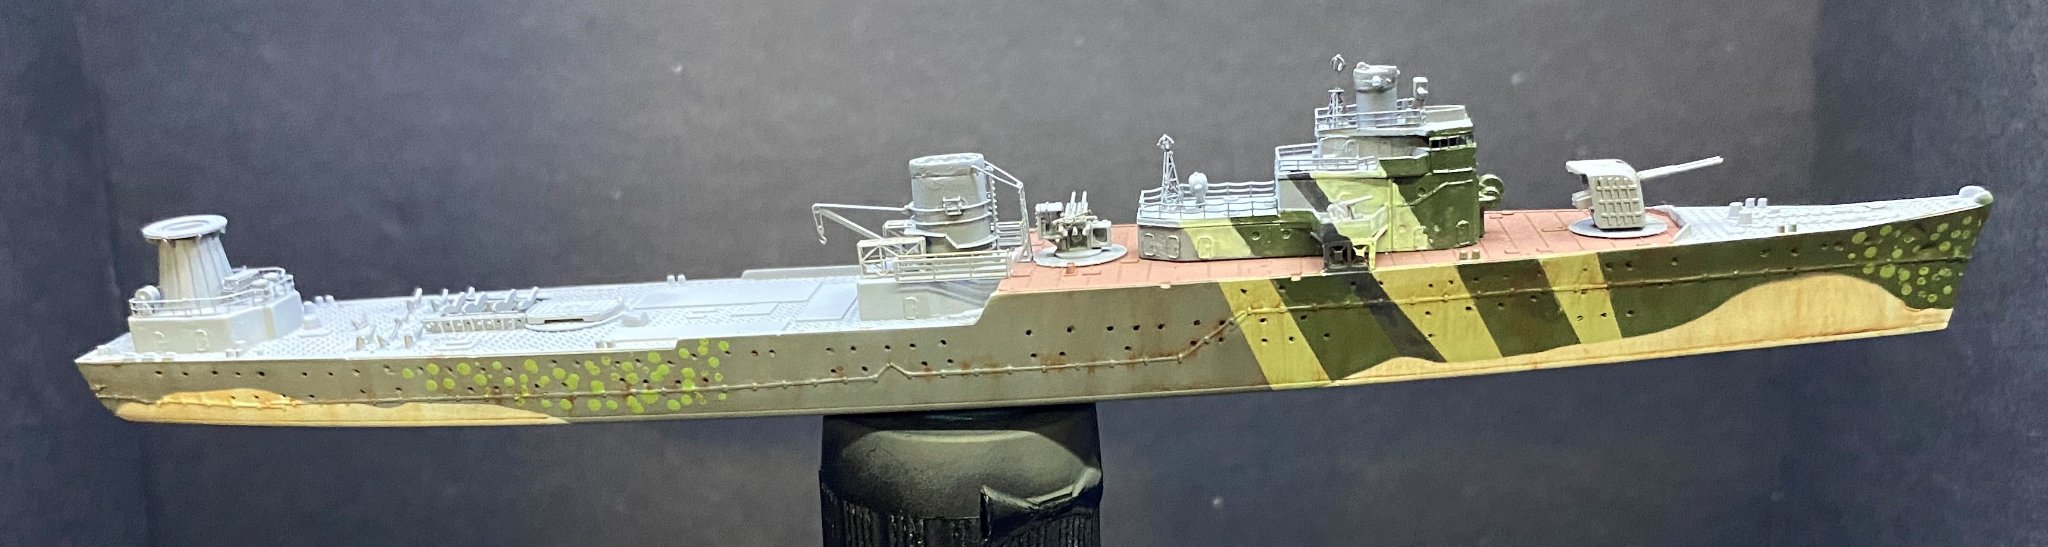
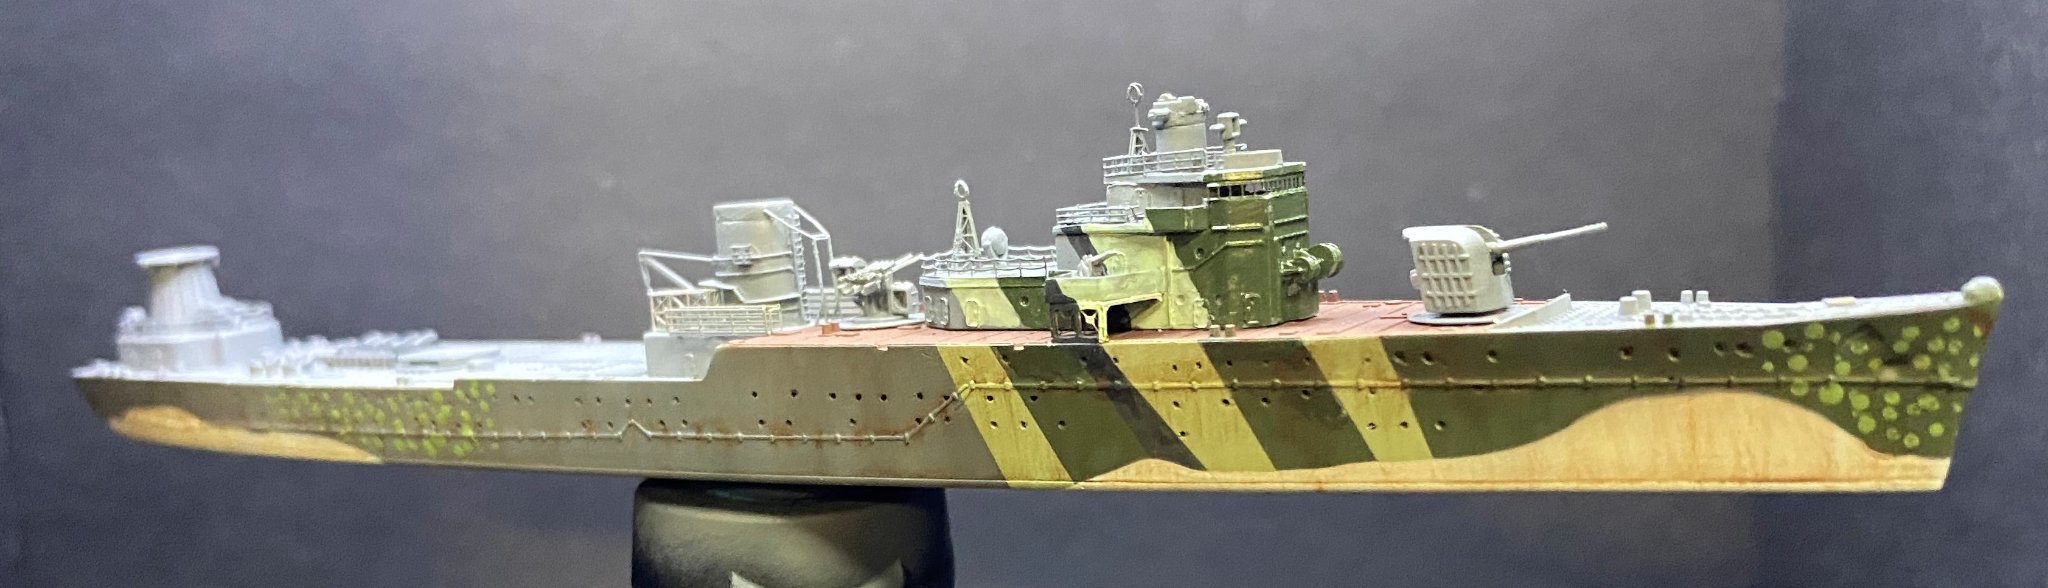
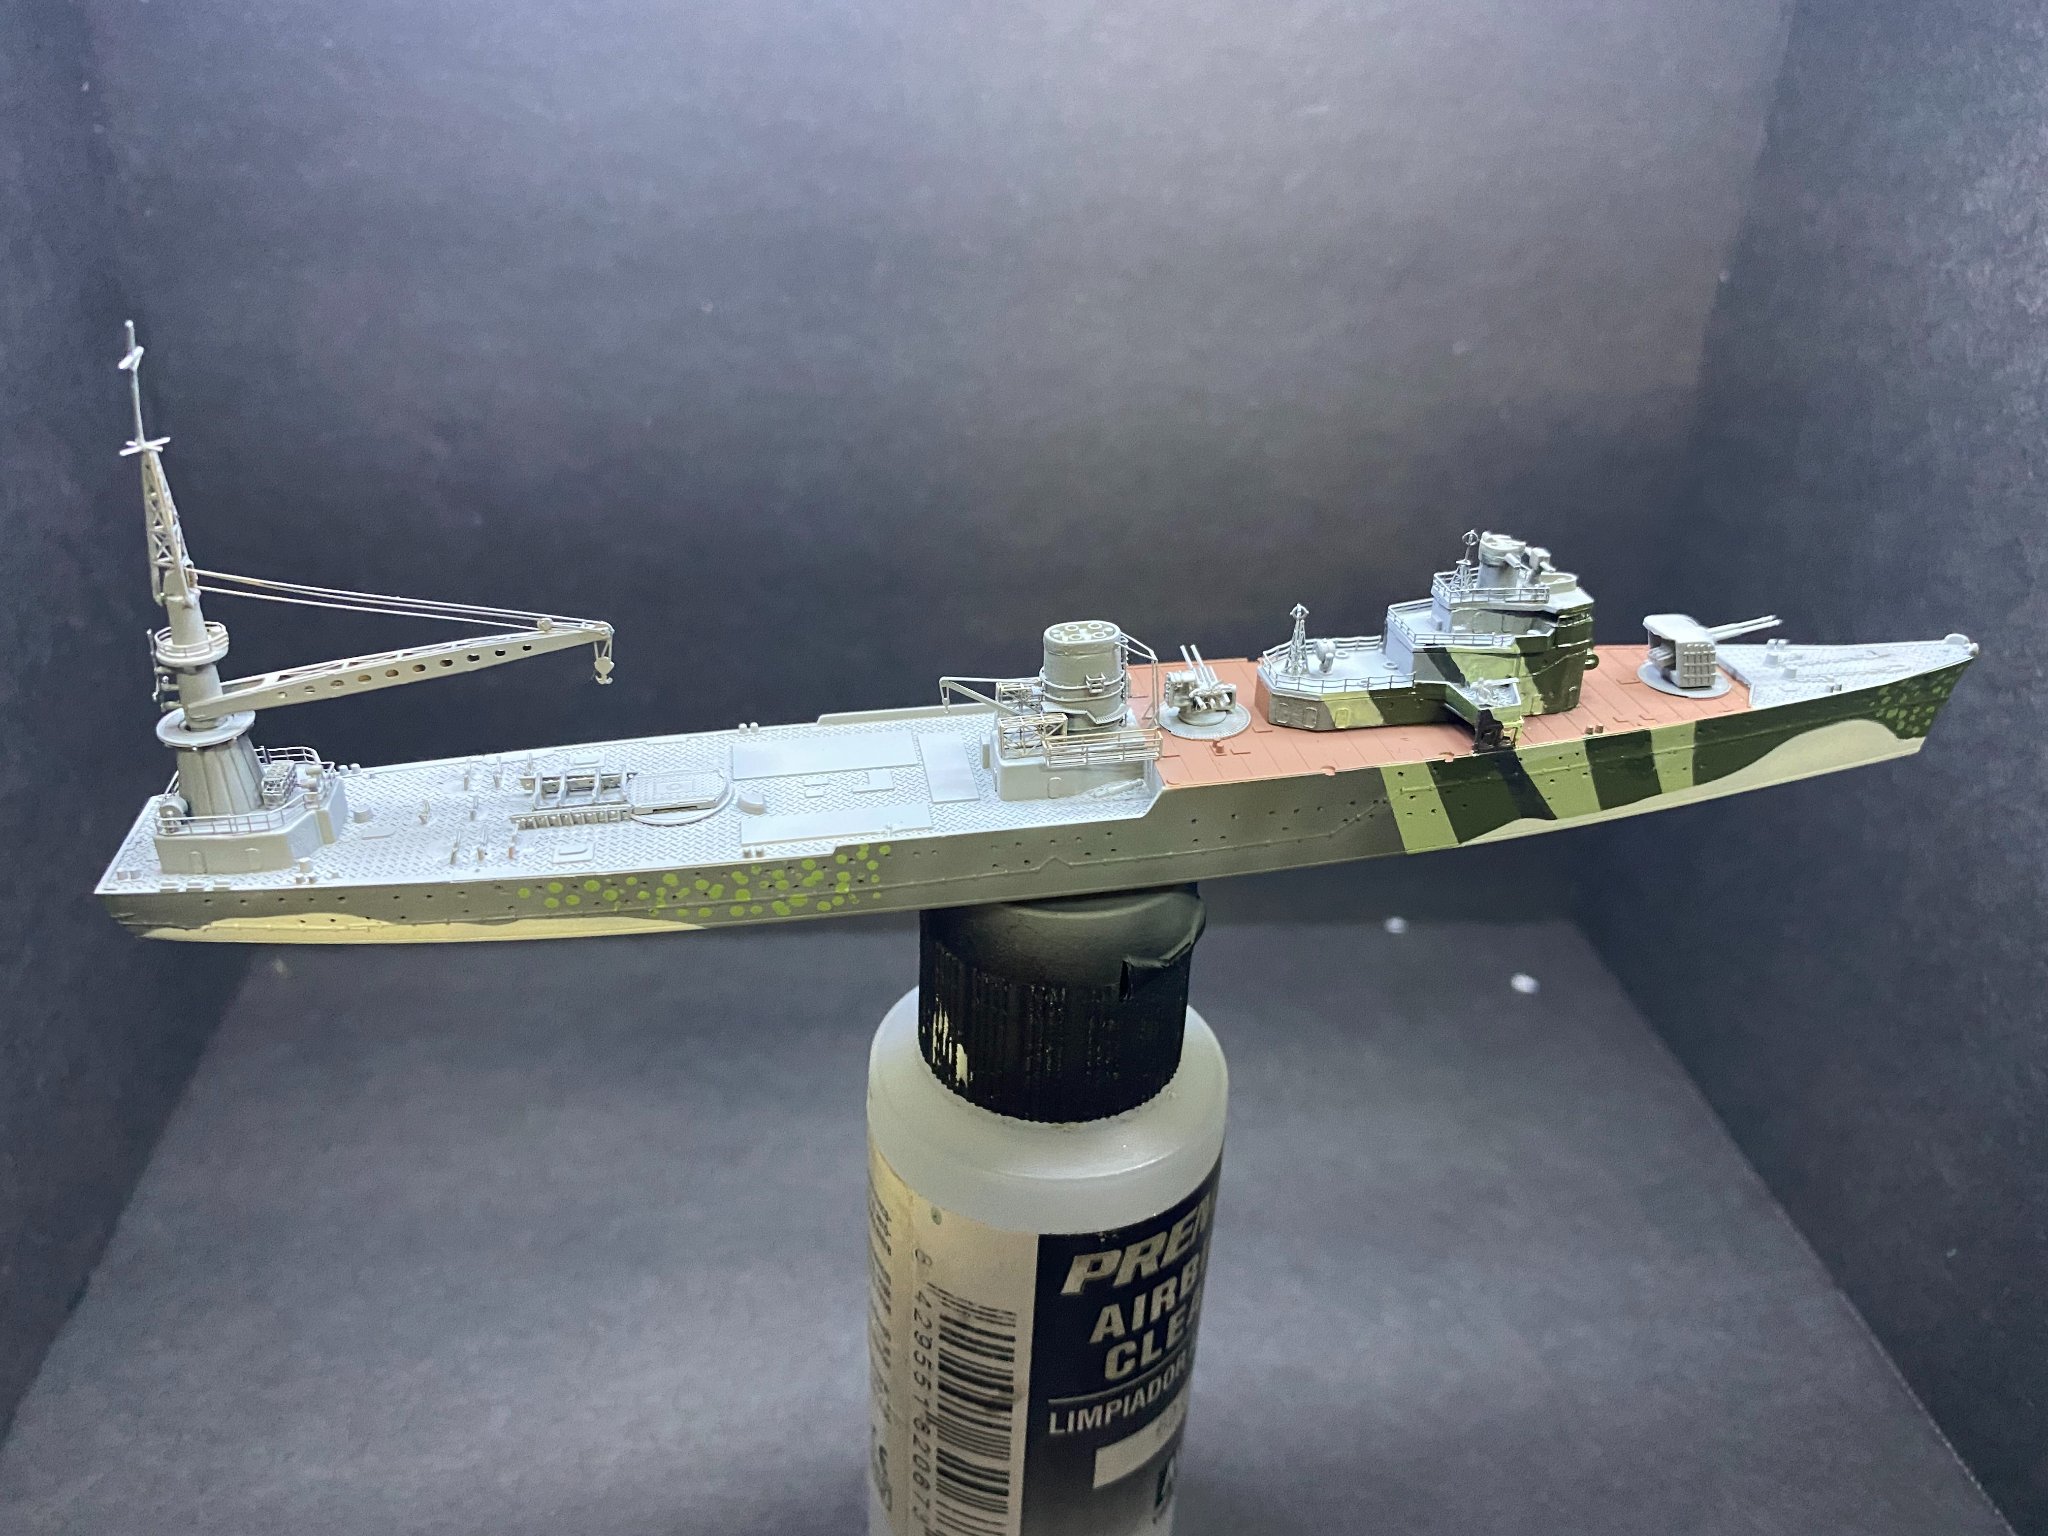
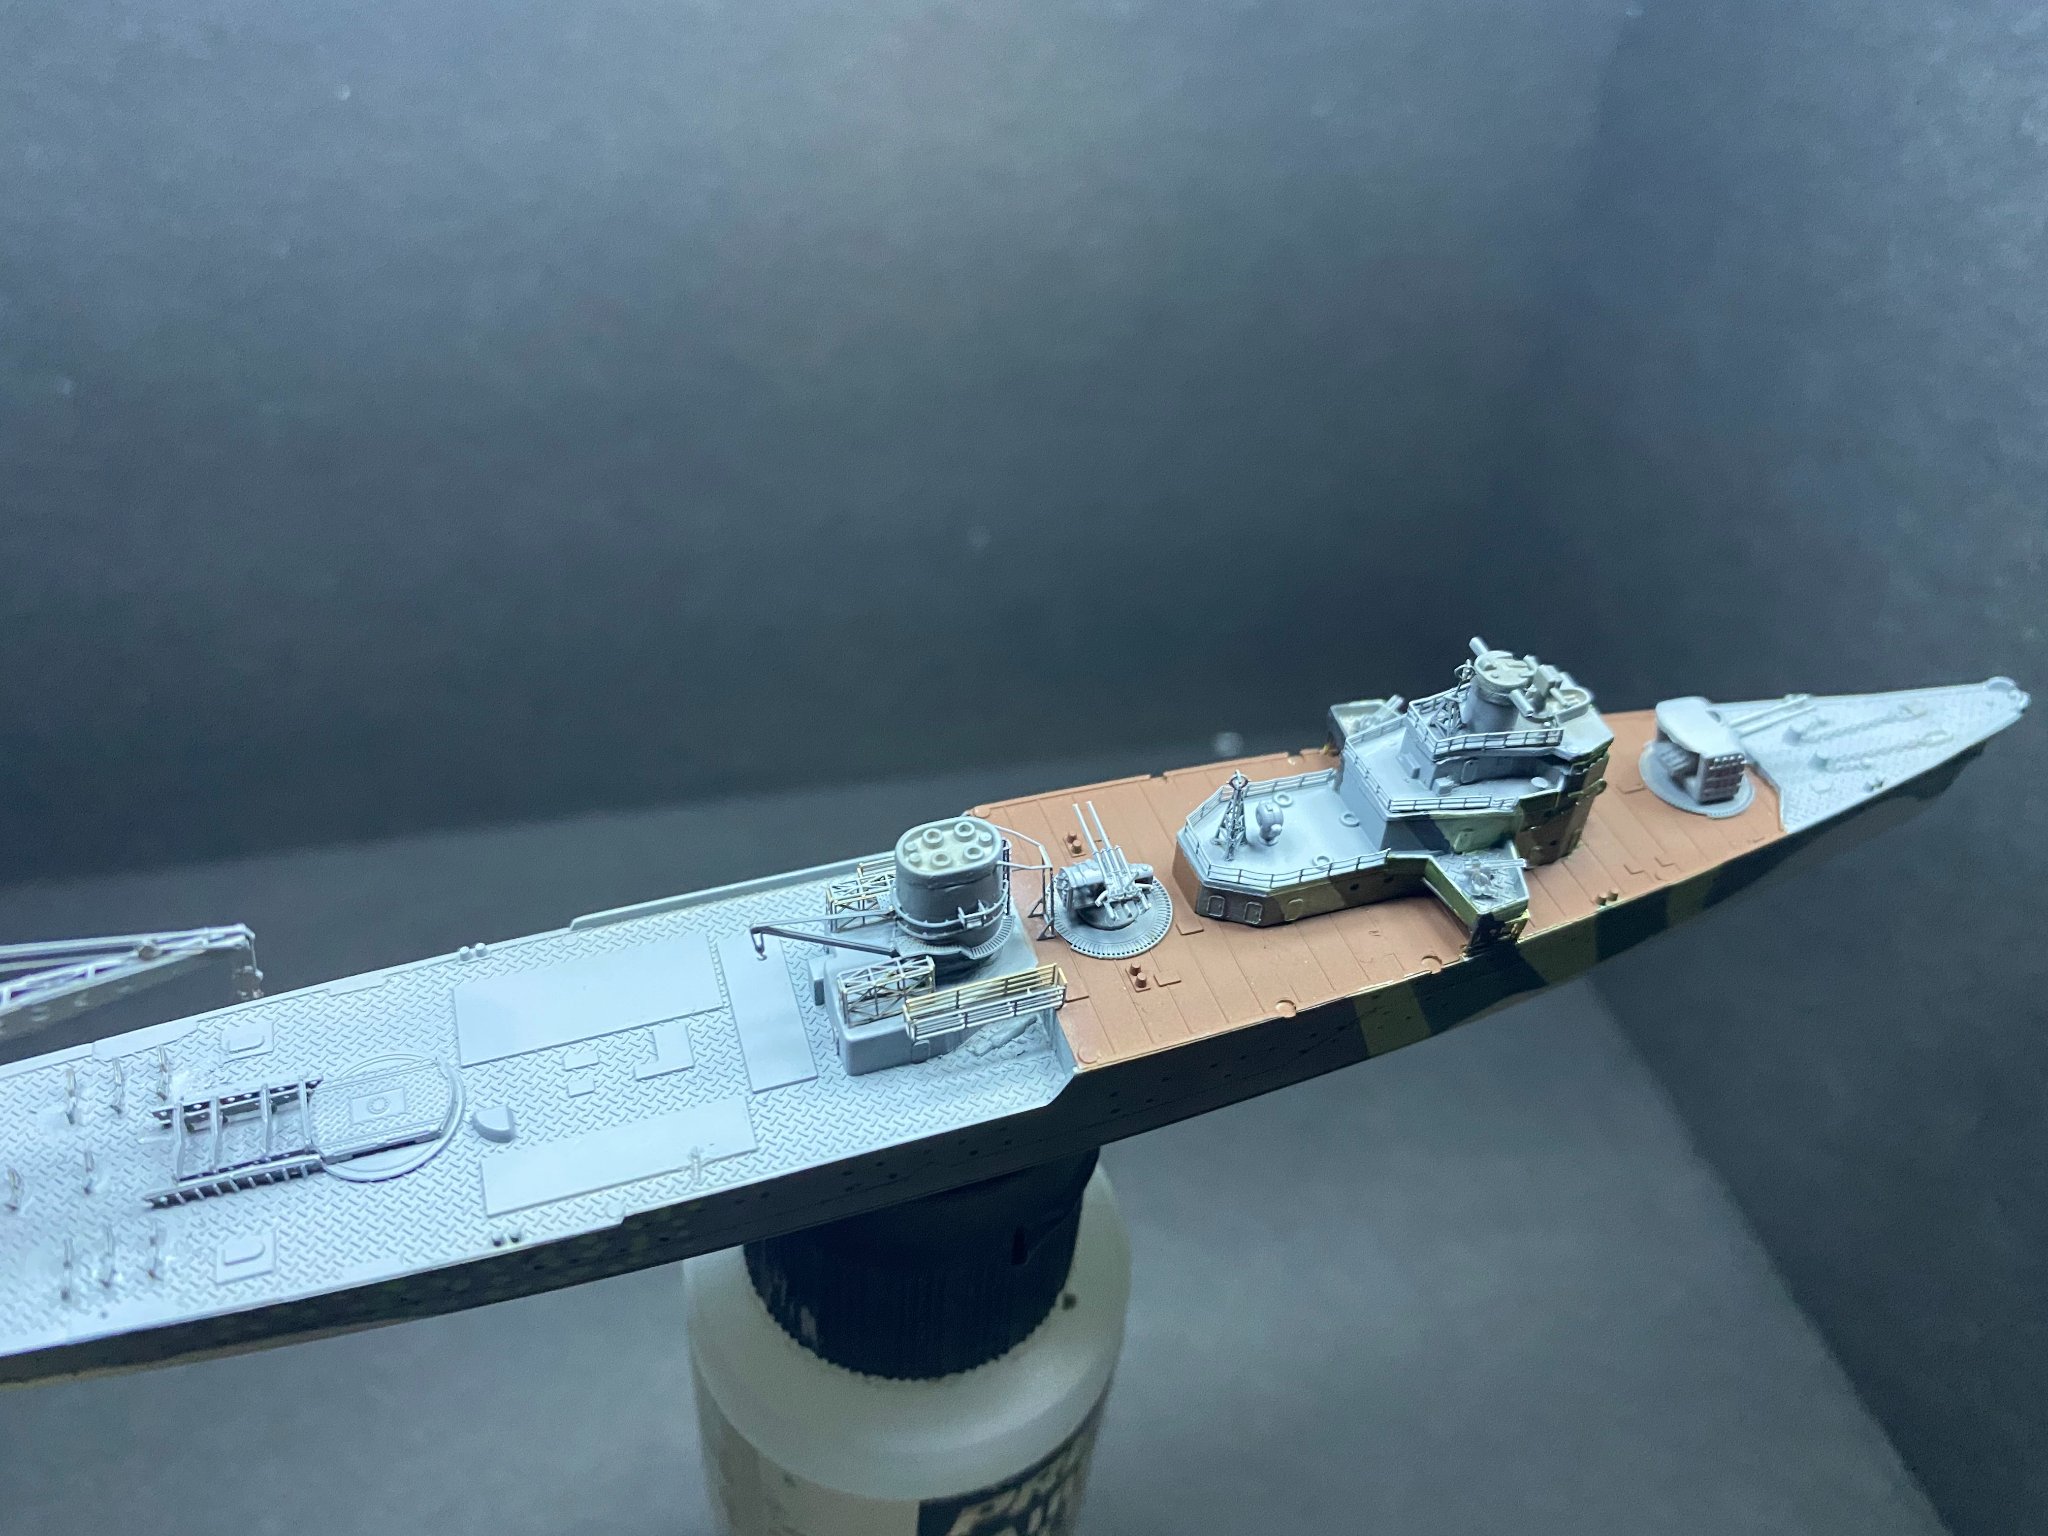
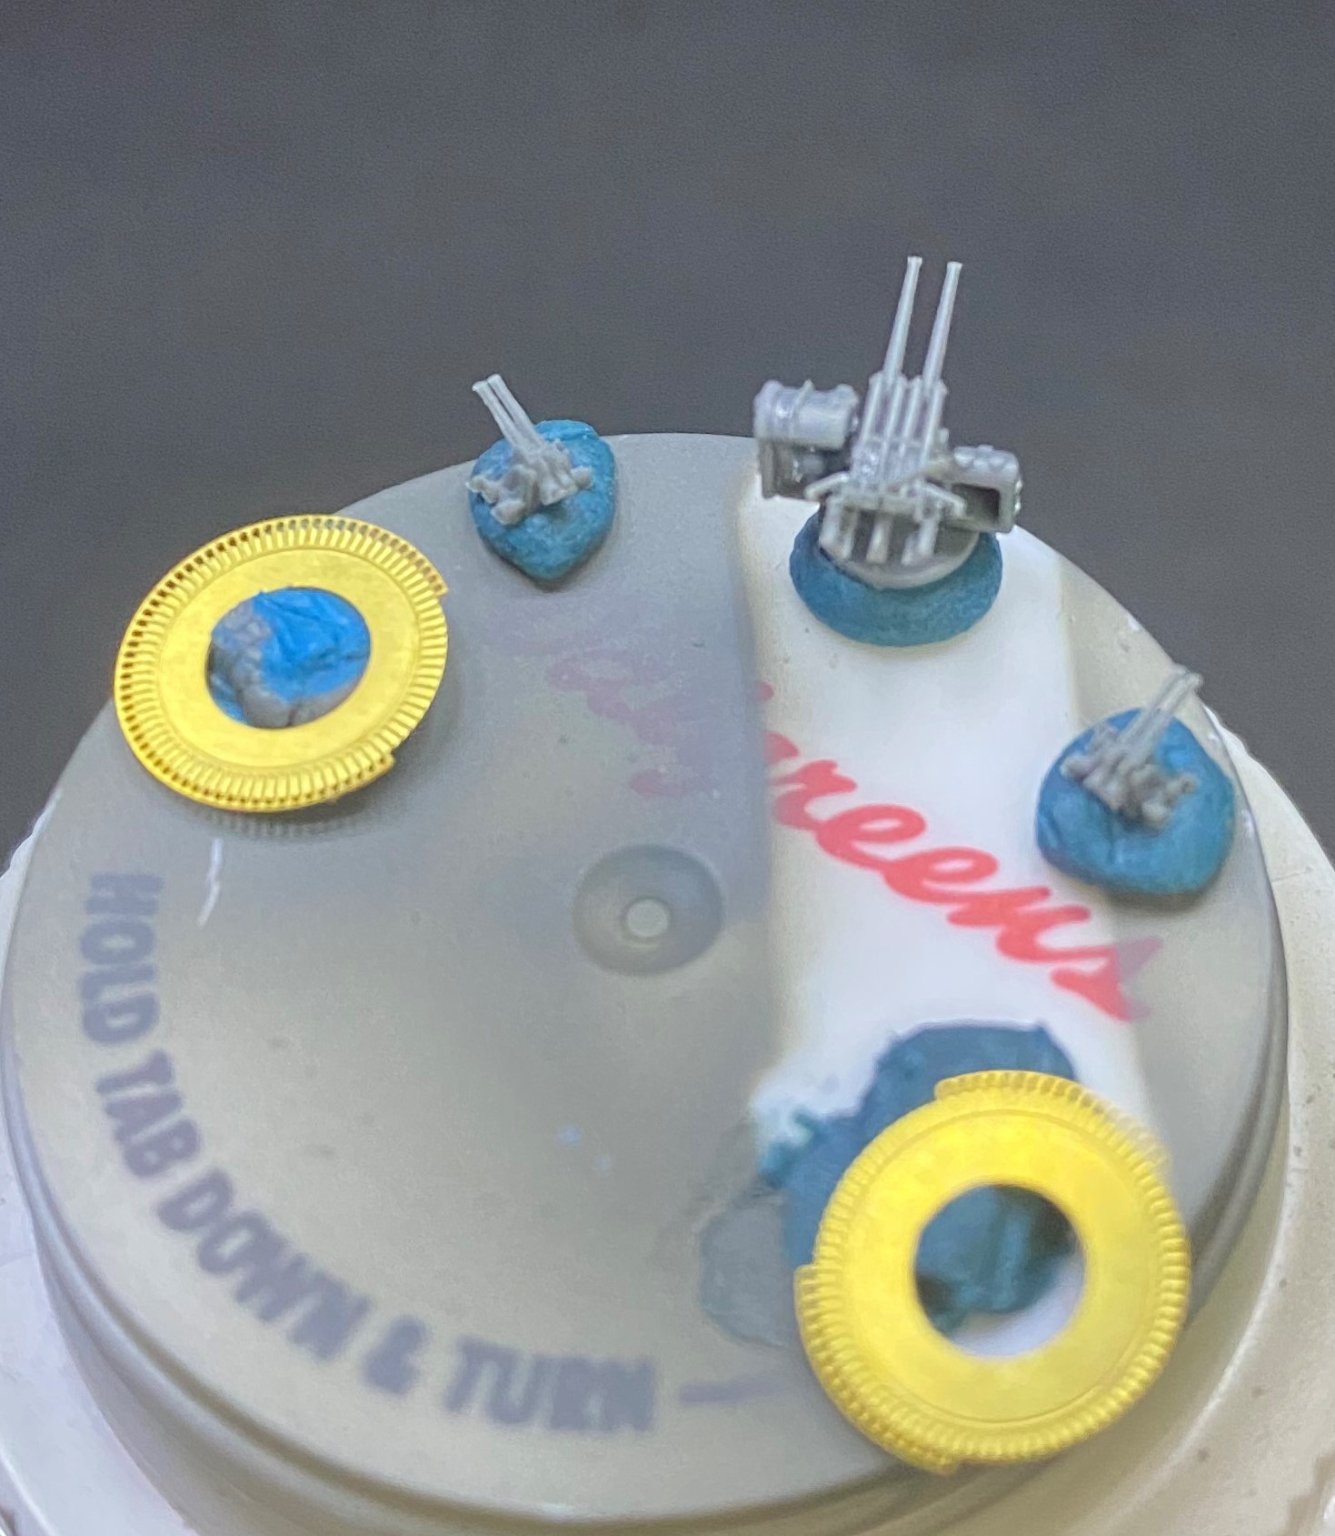
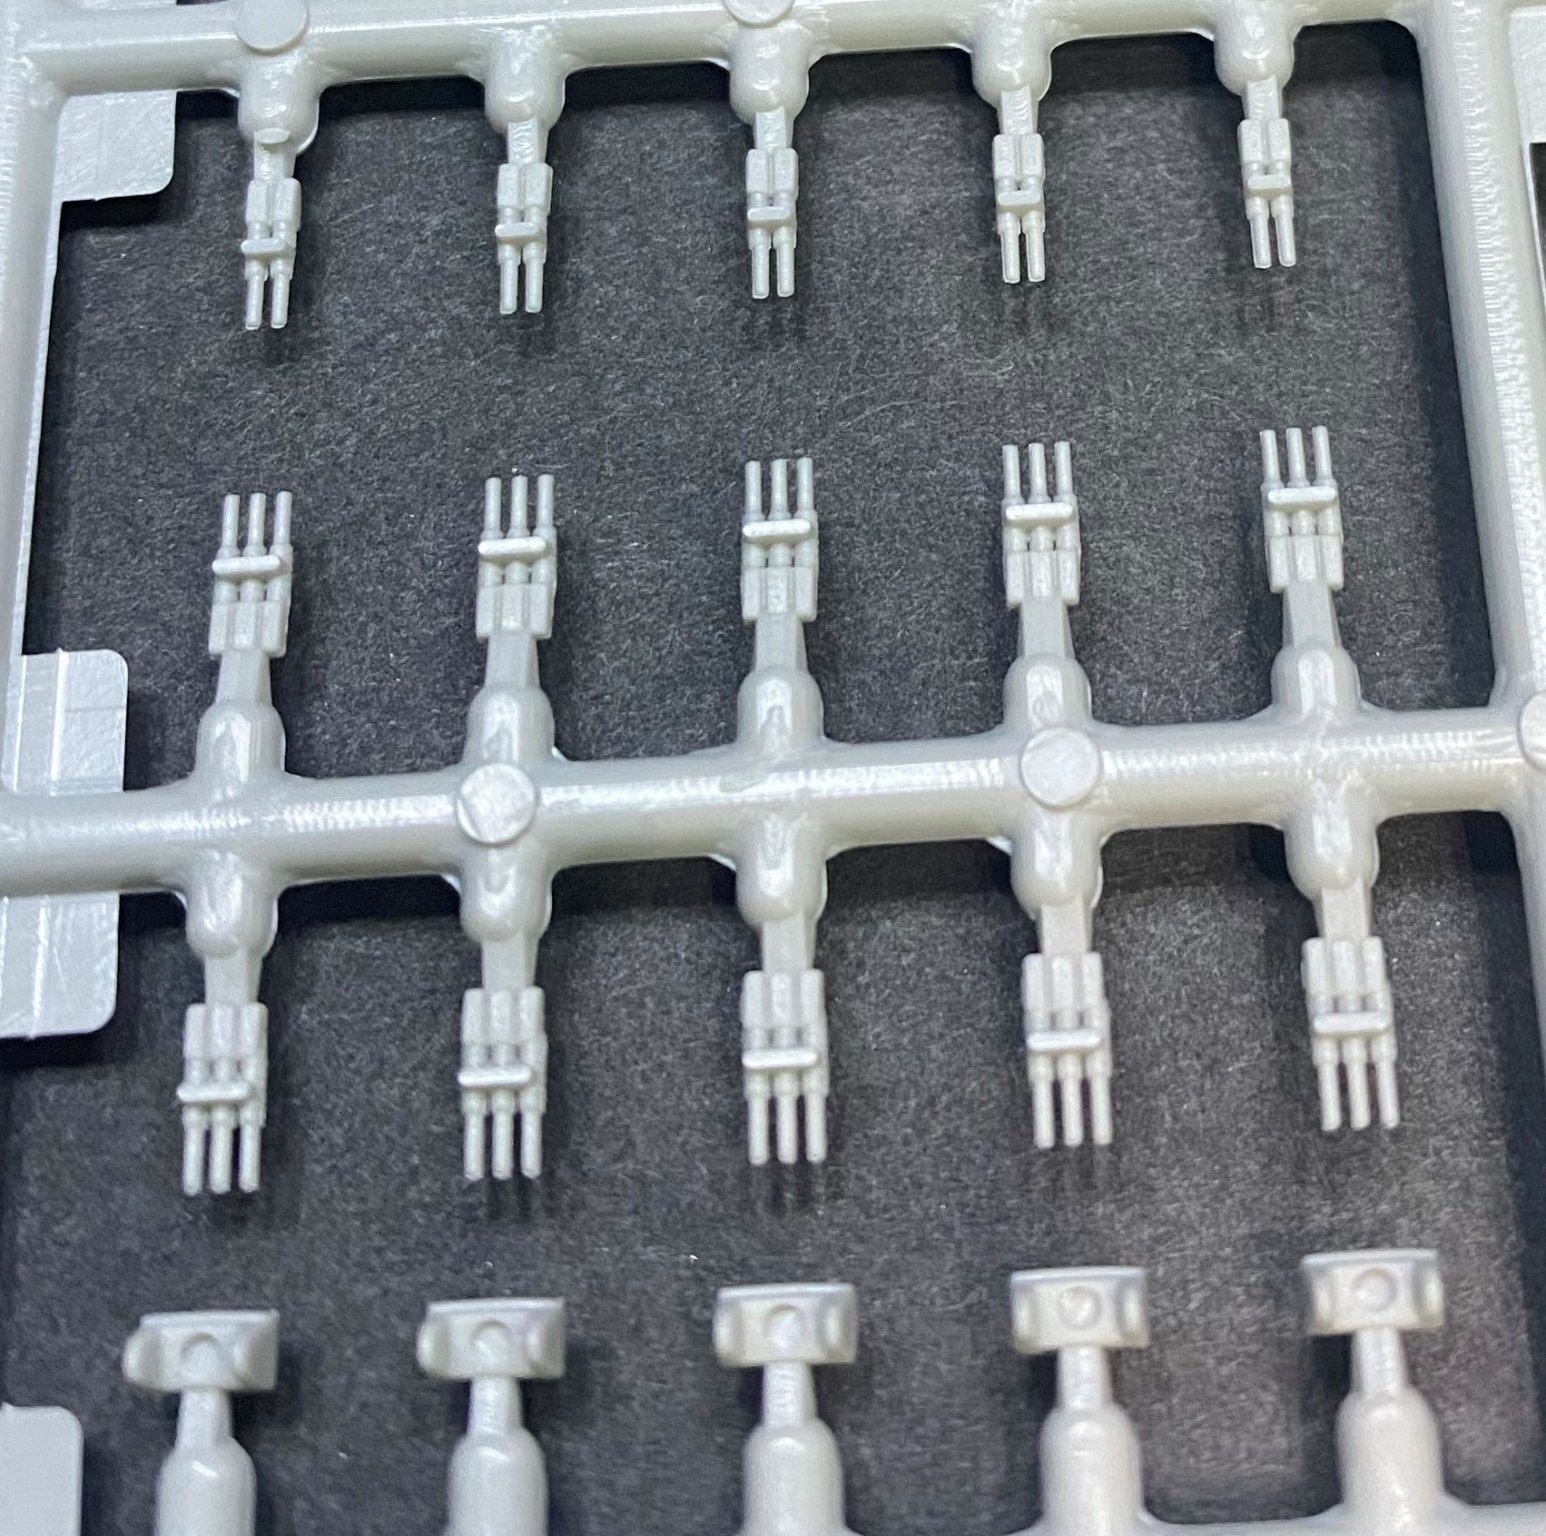
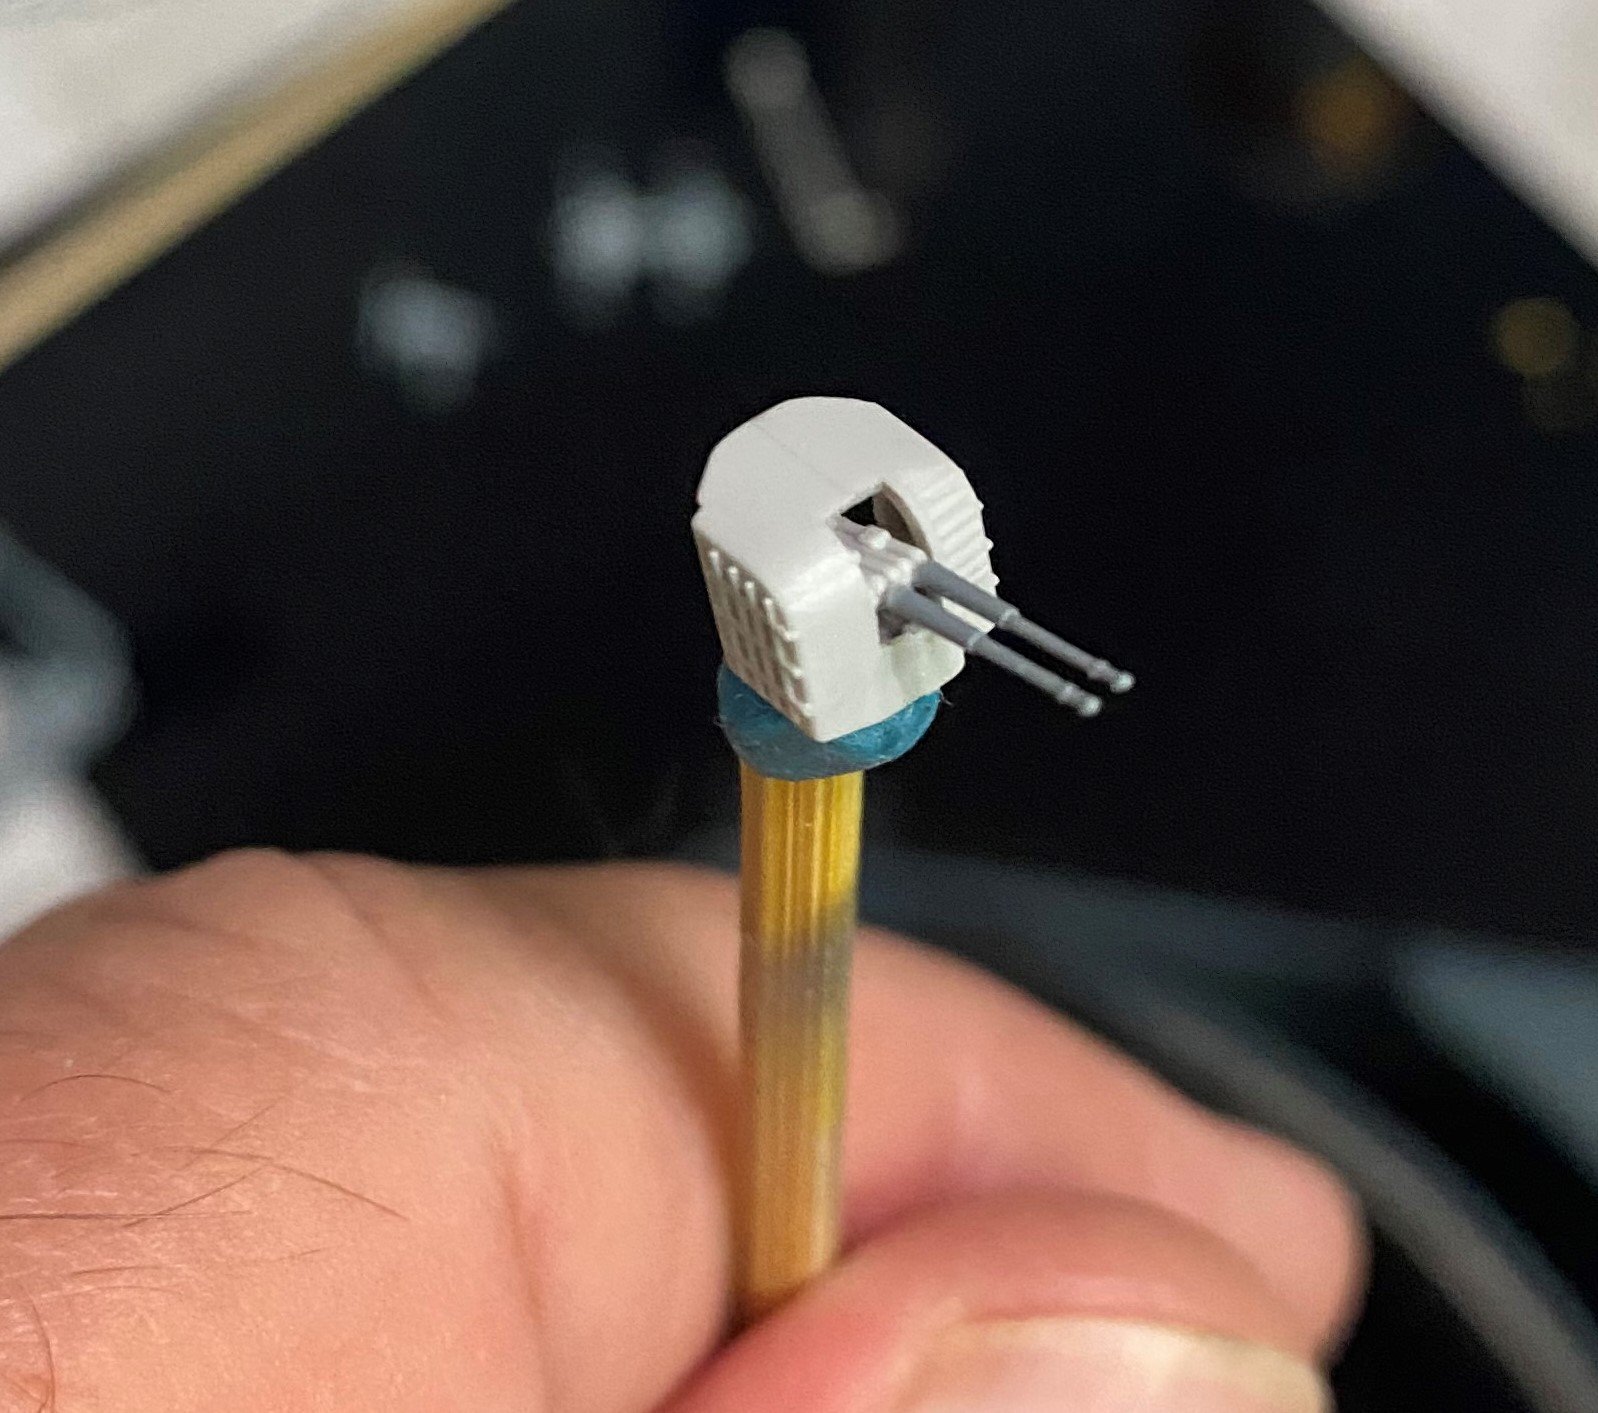
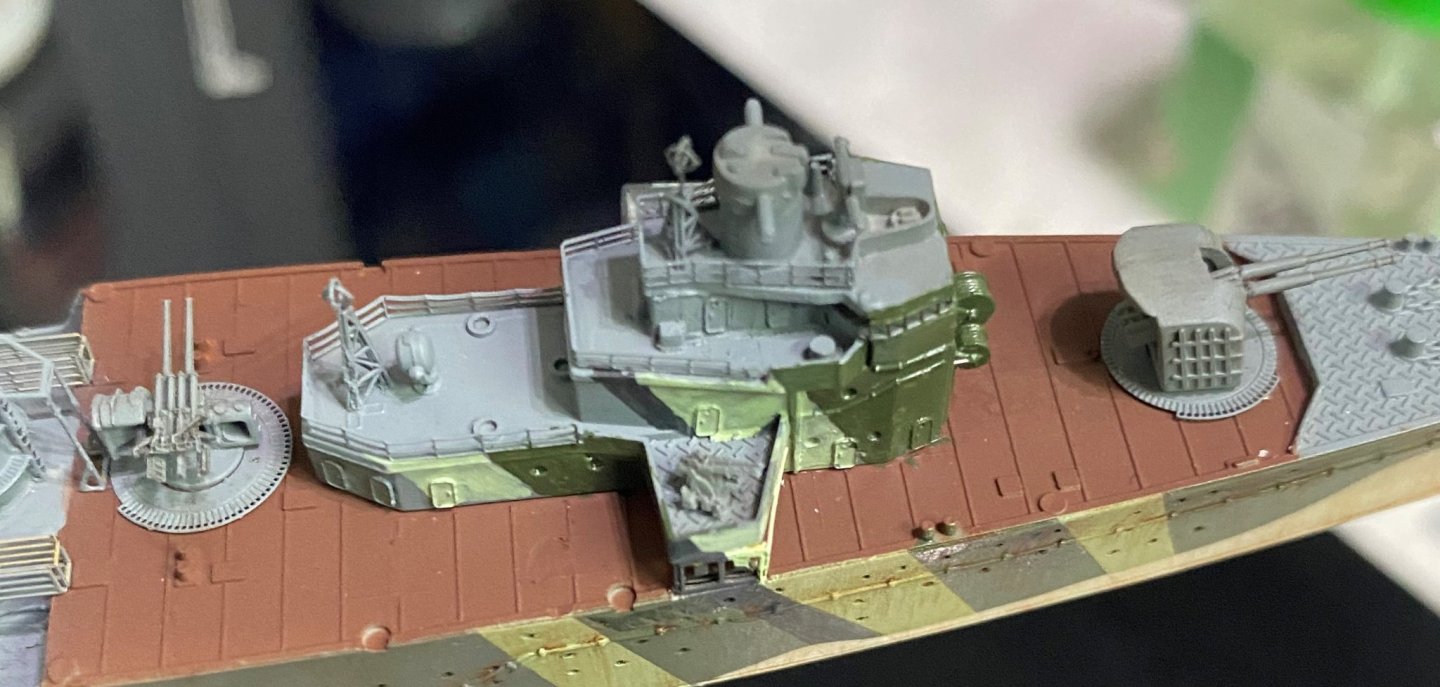
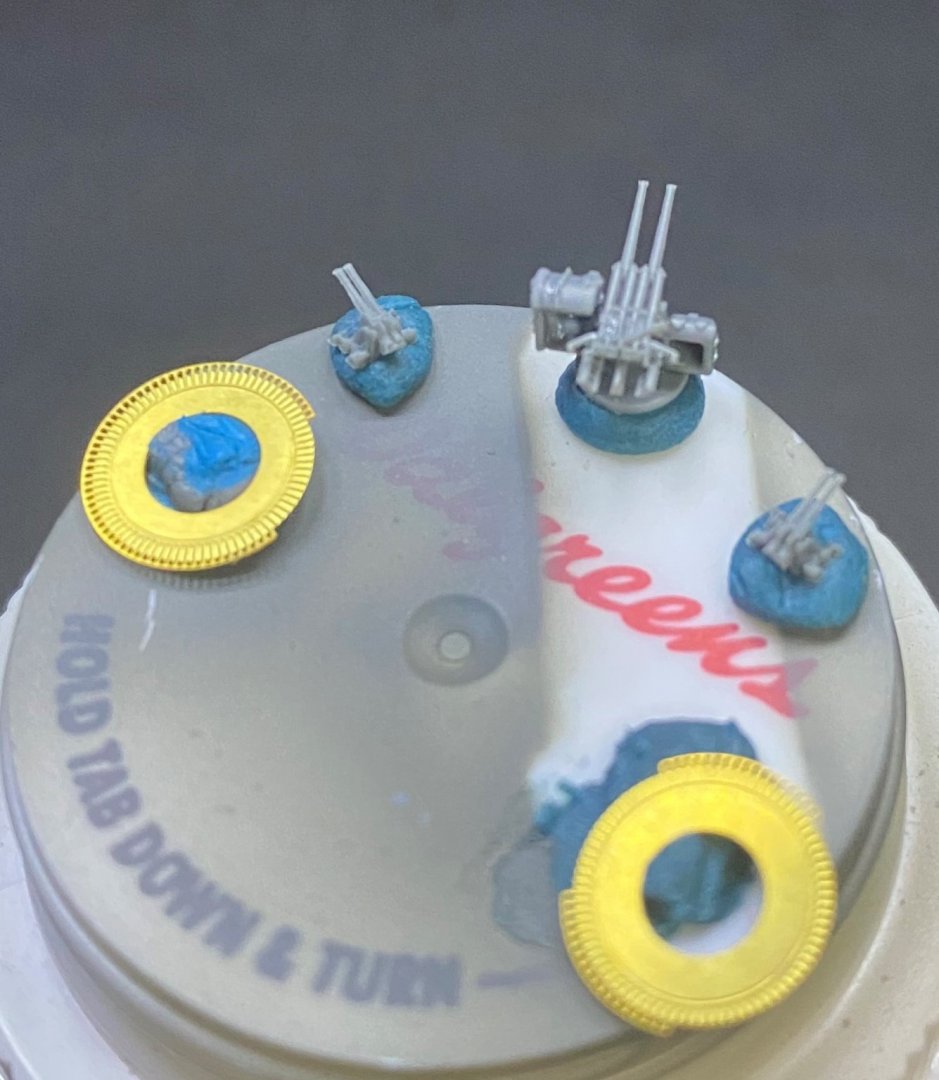
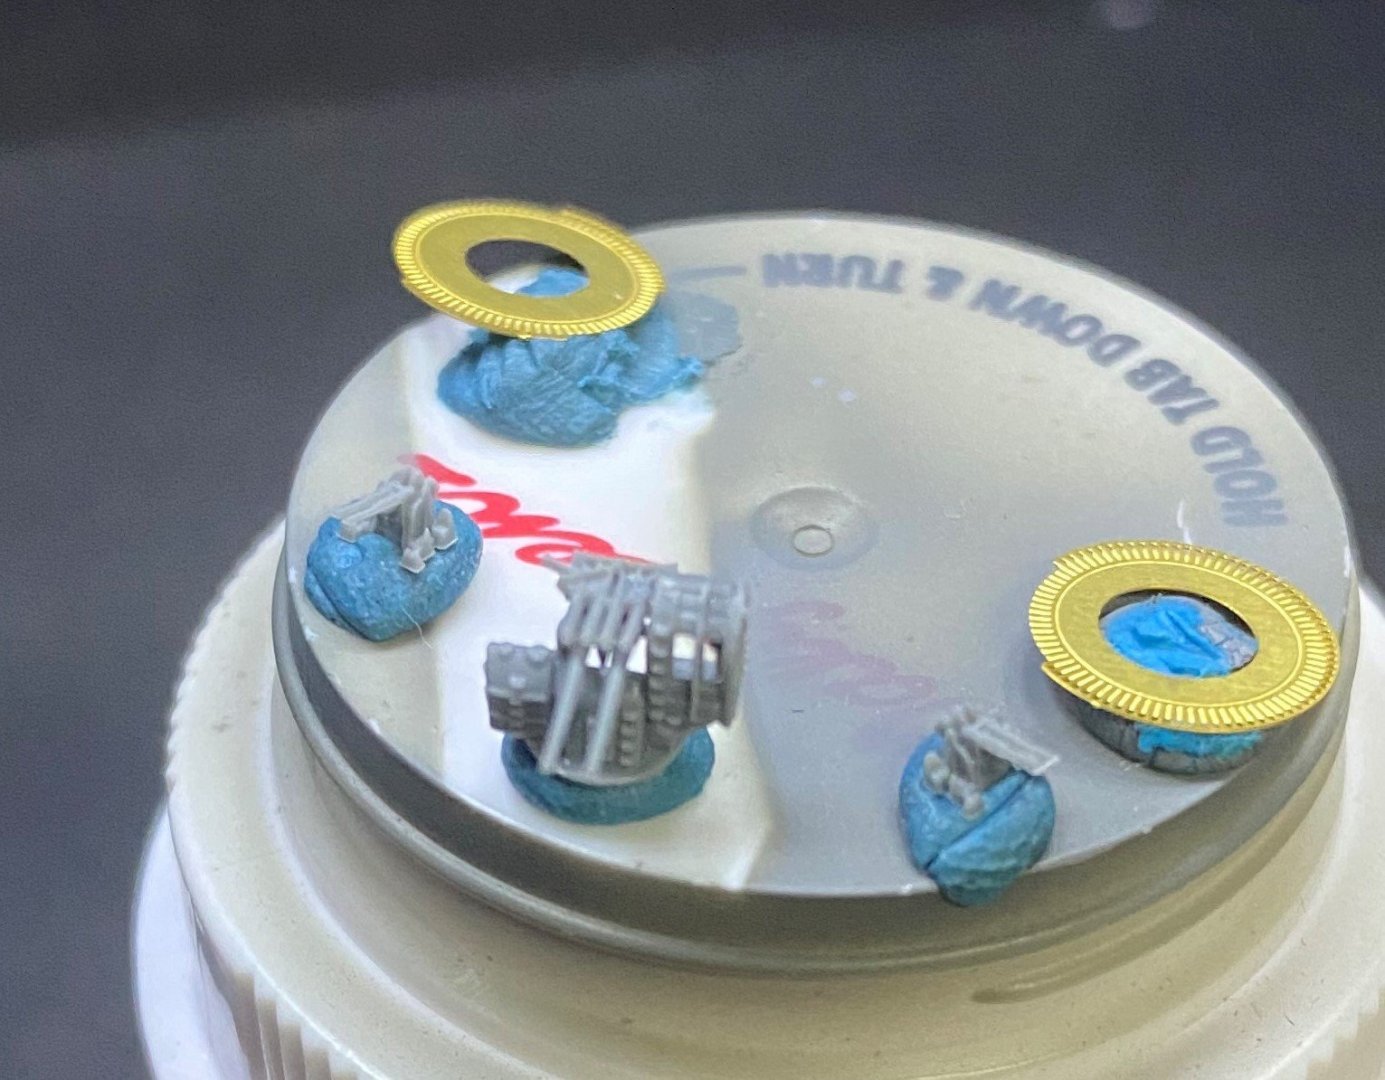
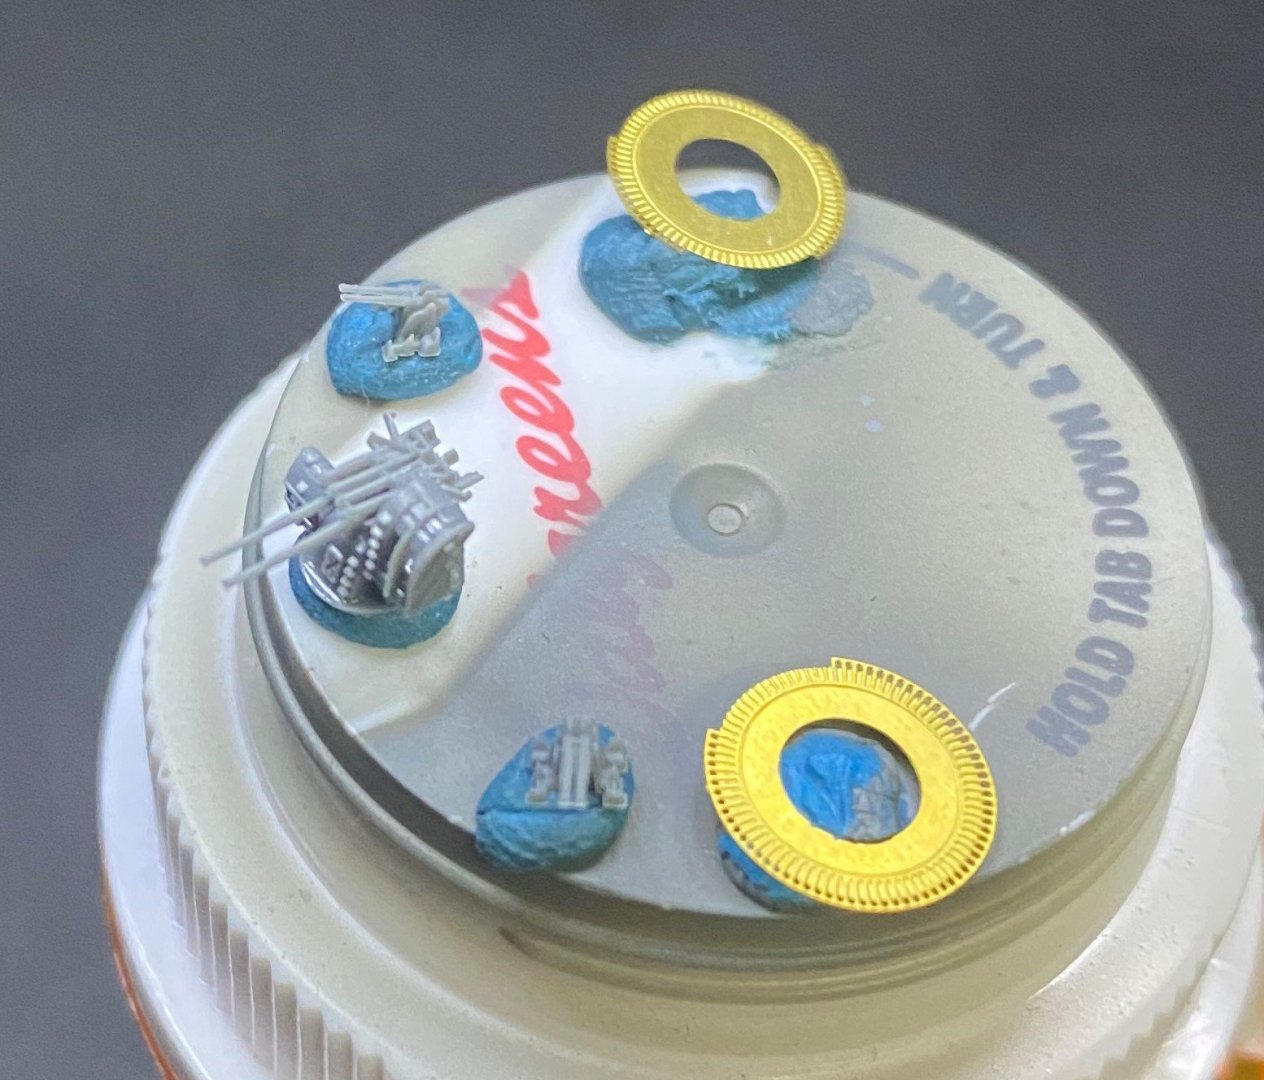
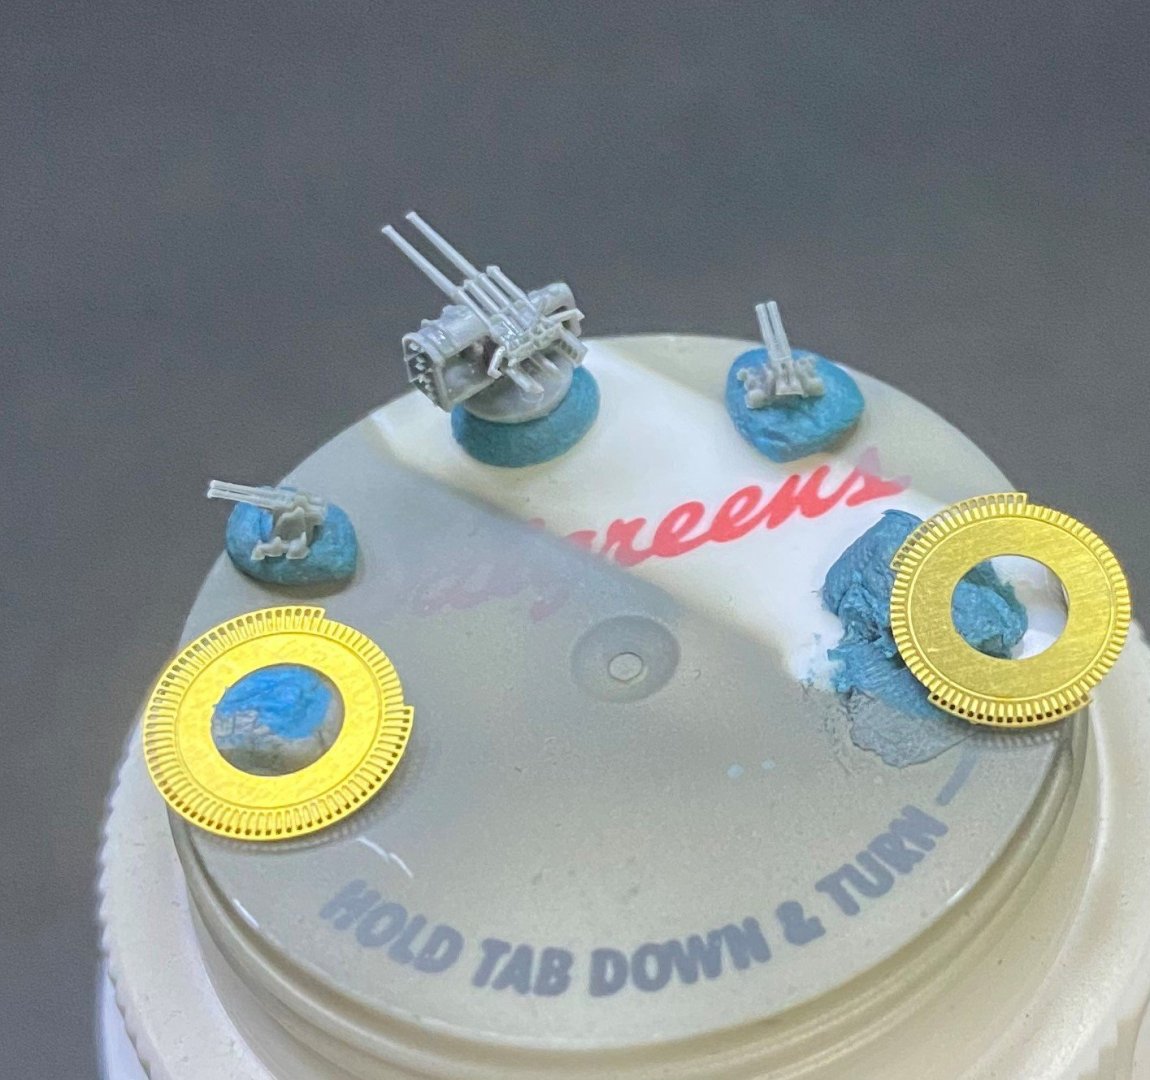
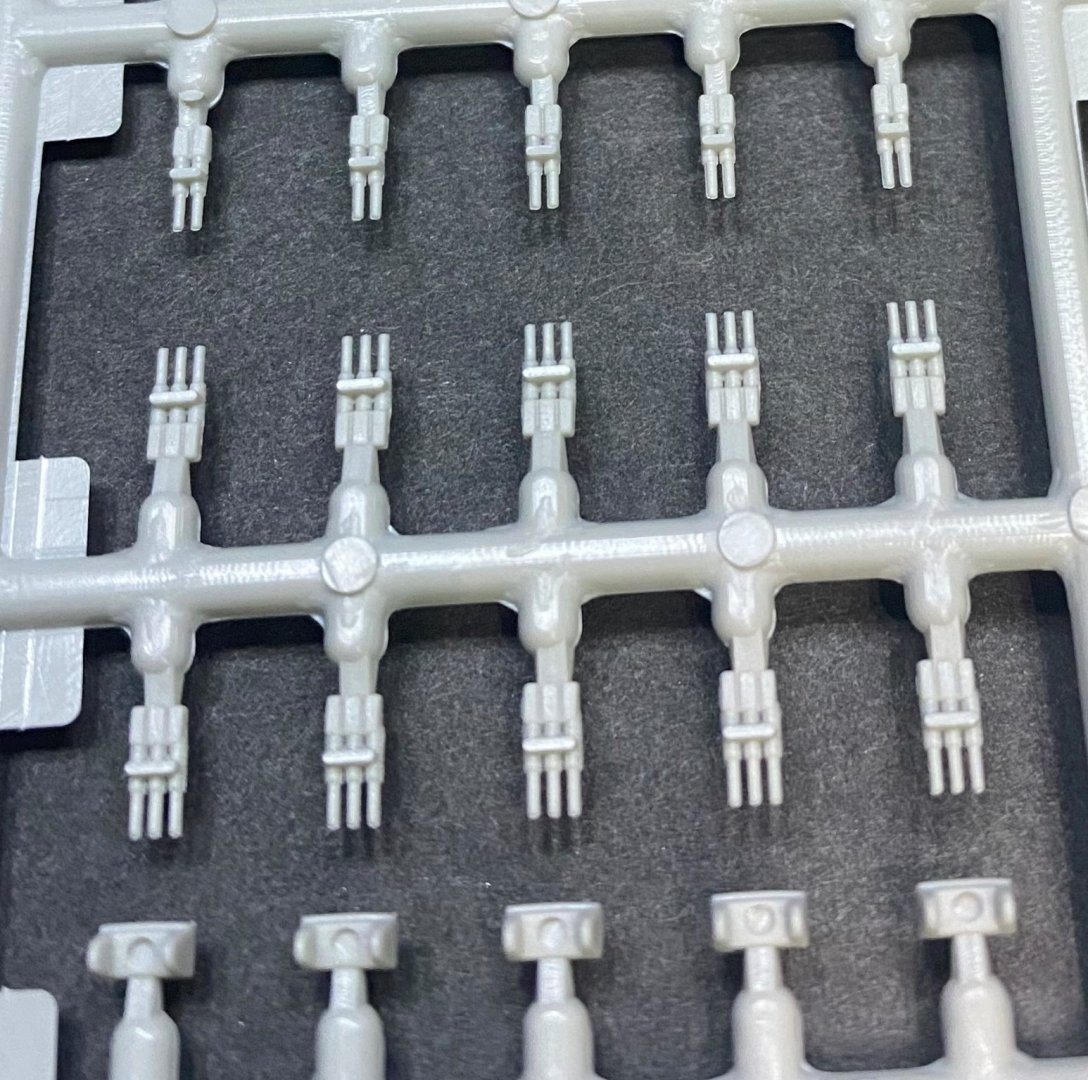
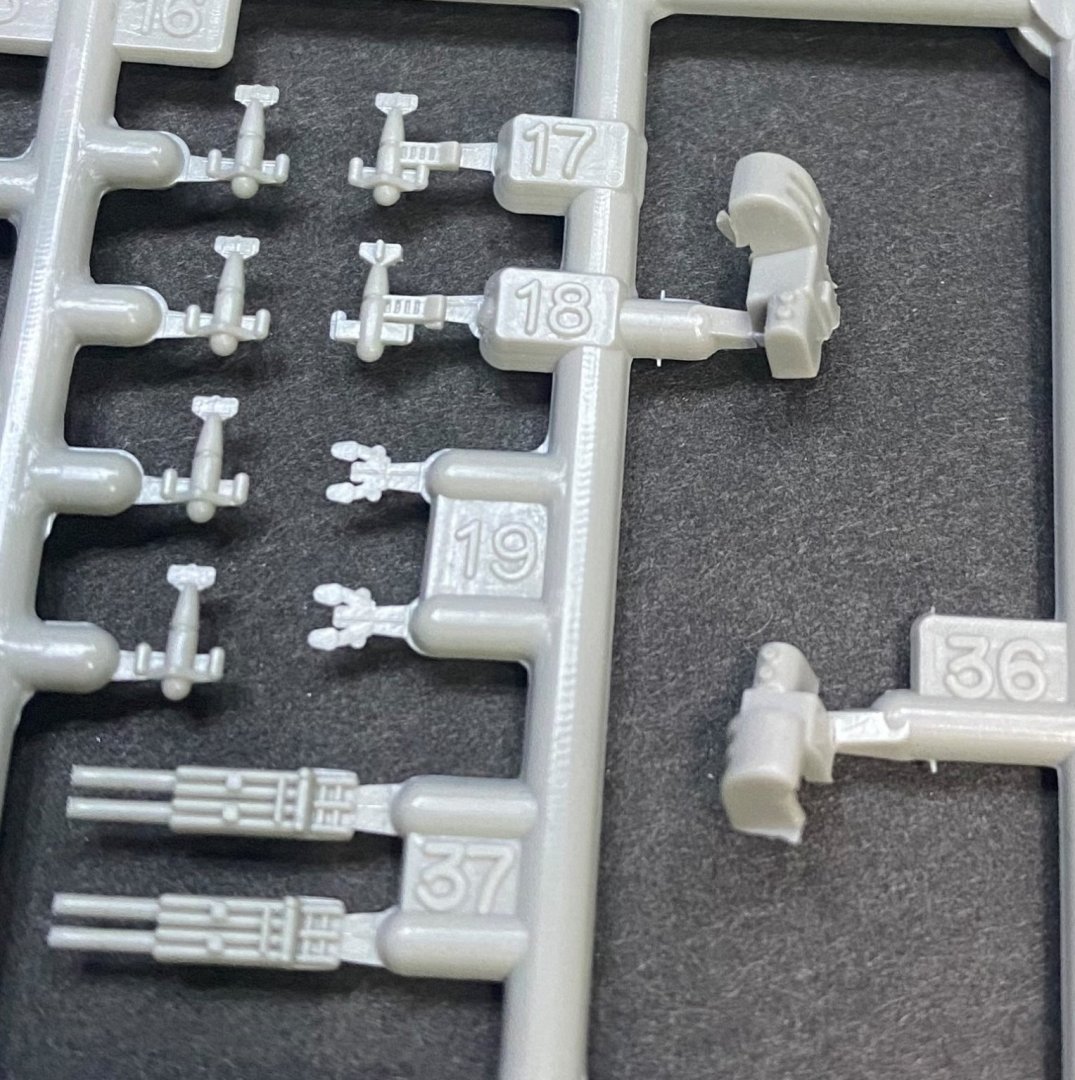
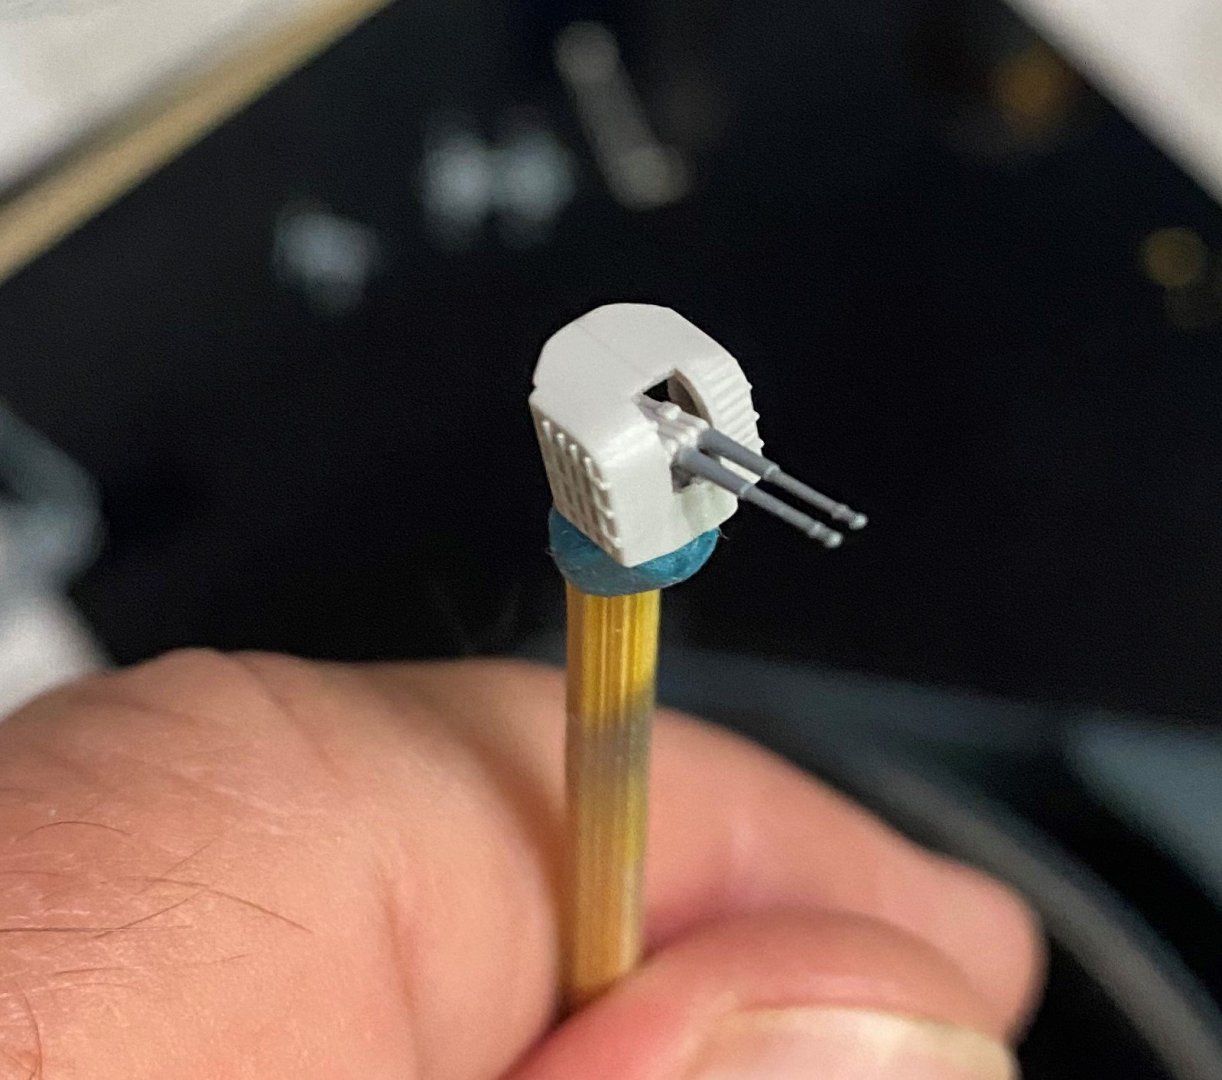
This photos are a comparison between the Pit-Road Akitsushima kit guns and the Fine Molds Nano Dread aftermarket guns. Pit-Road twin 25mm AA guns compared to the Fine Molds twin 25mm AA guns (stuck to the medicine bottle top) Pit-Road twin 127mm AA guns part # 36 & 37 compared to the Fine Molds twin 127mm AA guns I modified the Pit-Road main guns by grafting a different set of barrels onto the Pit-Road unit. Overall, the replacement barrels looked more realistic IMO
- 127 replies
-
- 11
-
-
- Akitsushima
- Pit Road
- (and 2 more)
-
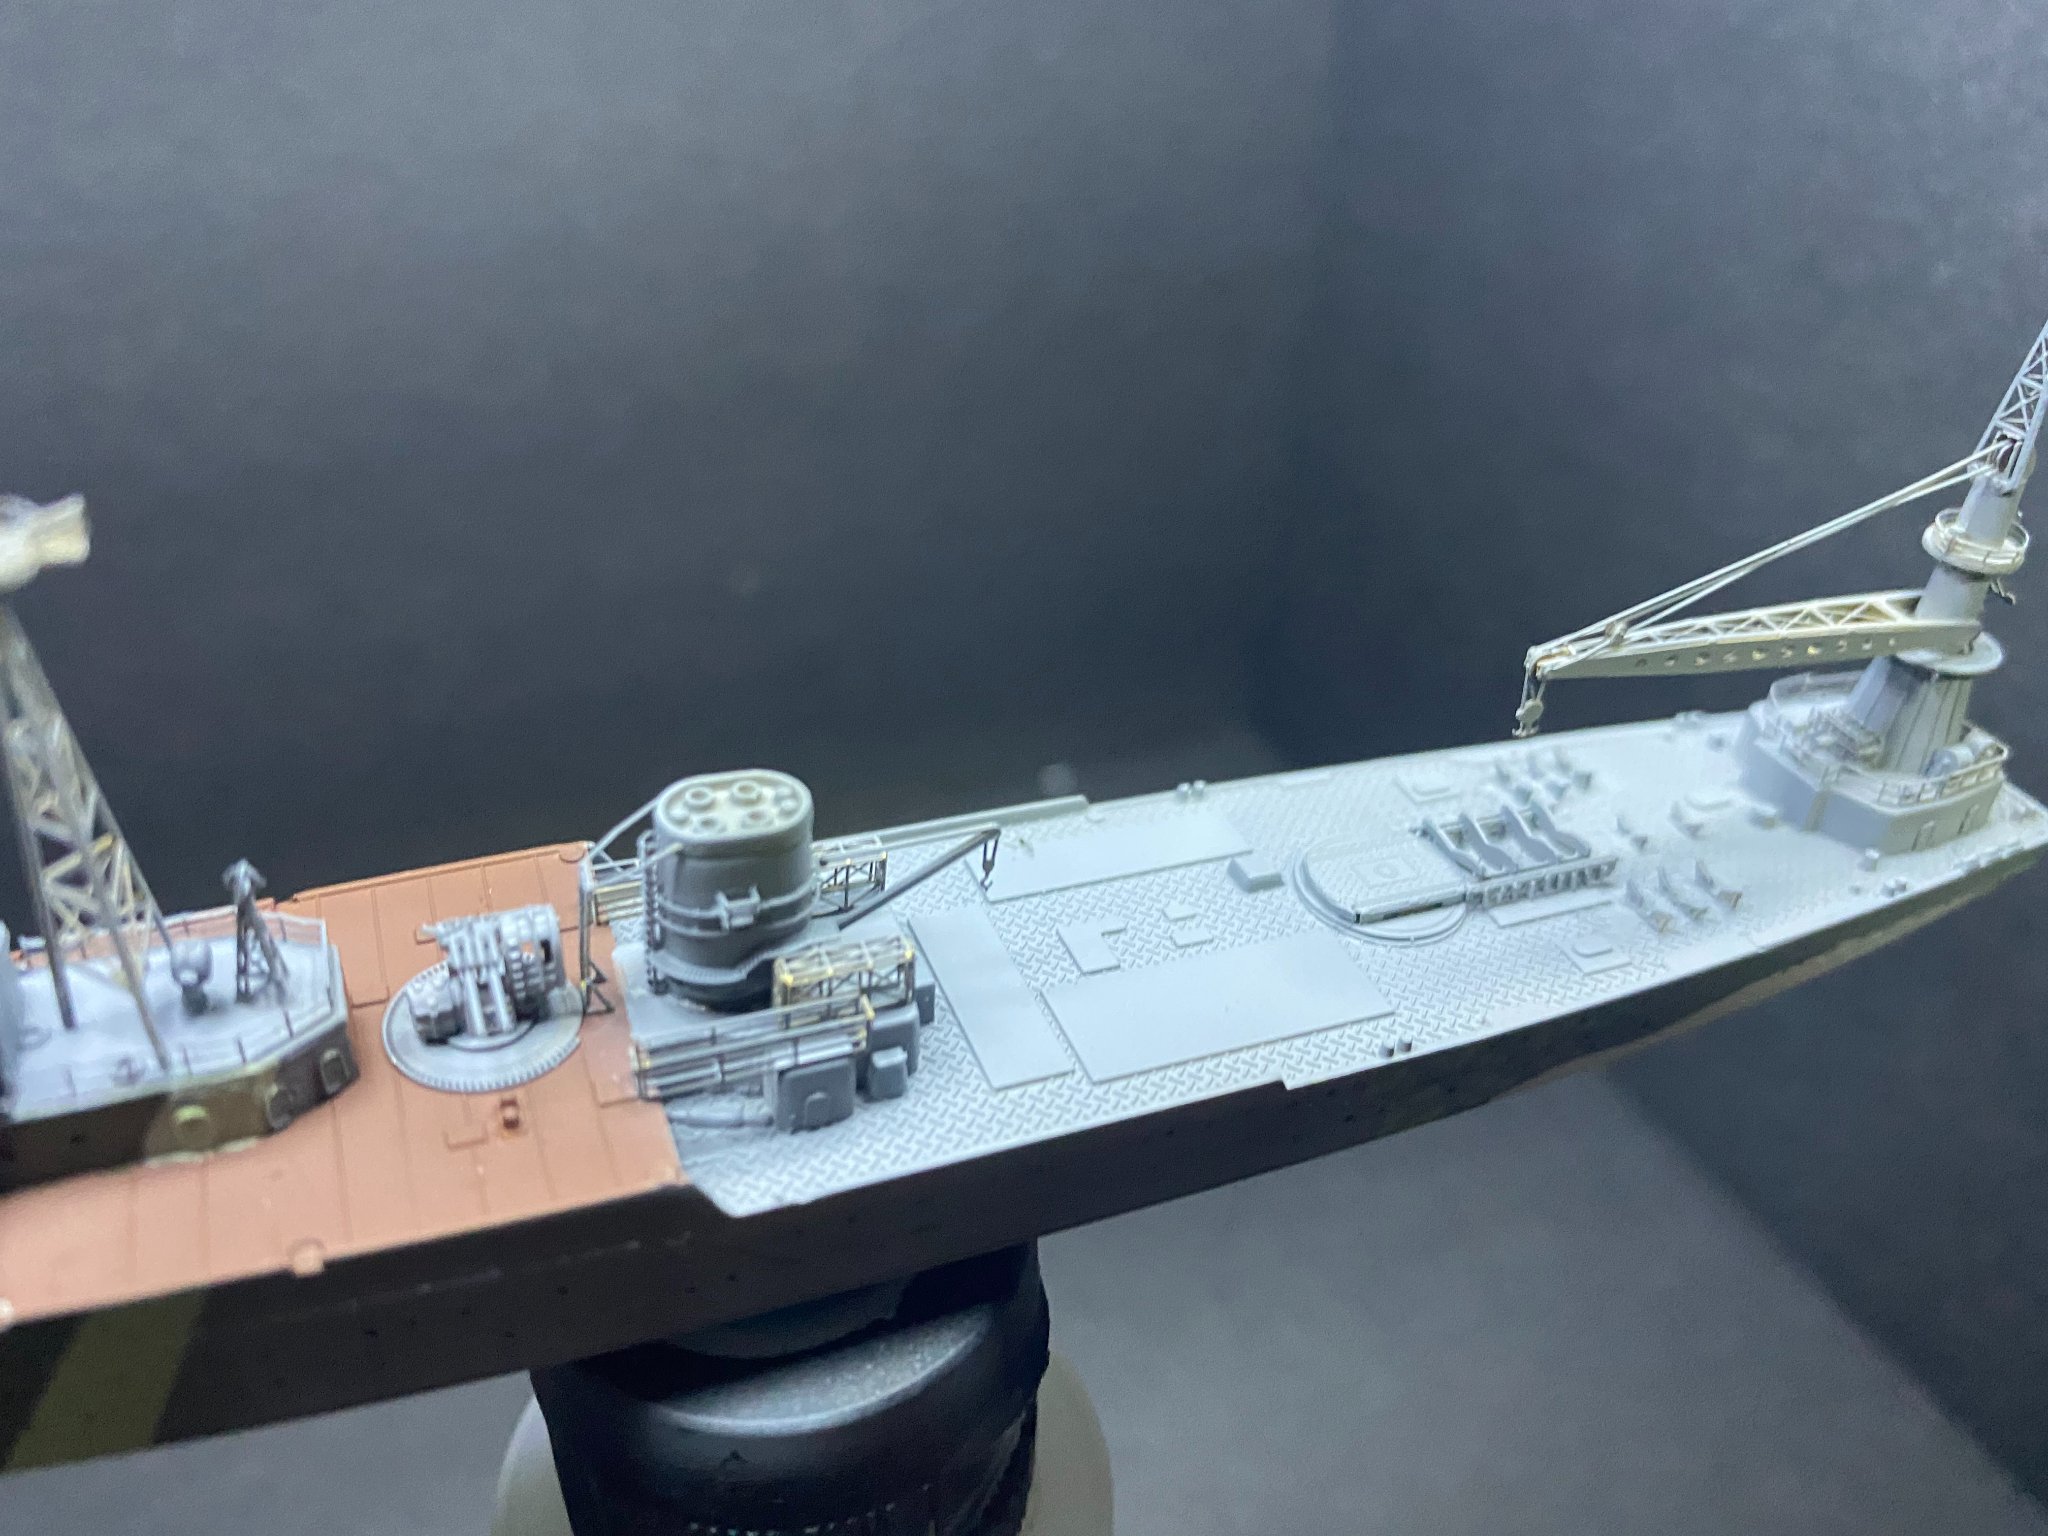
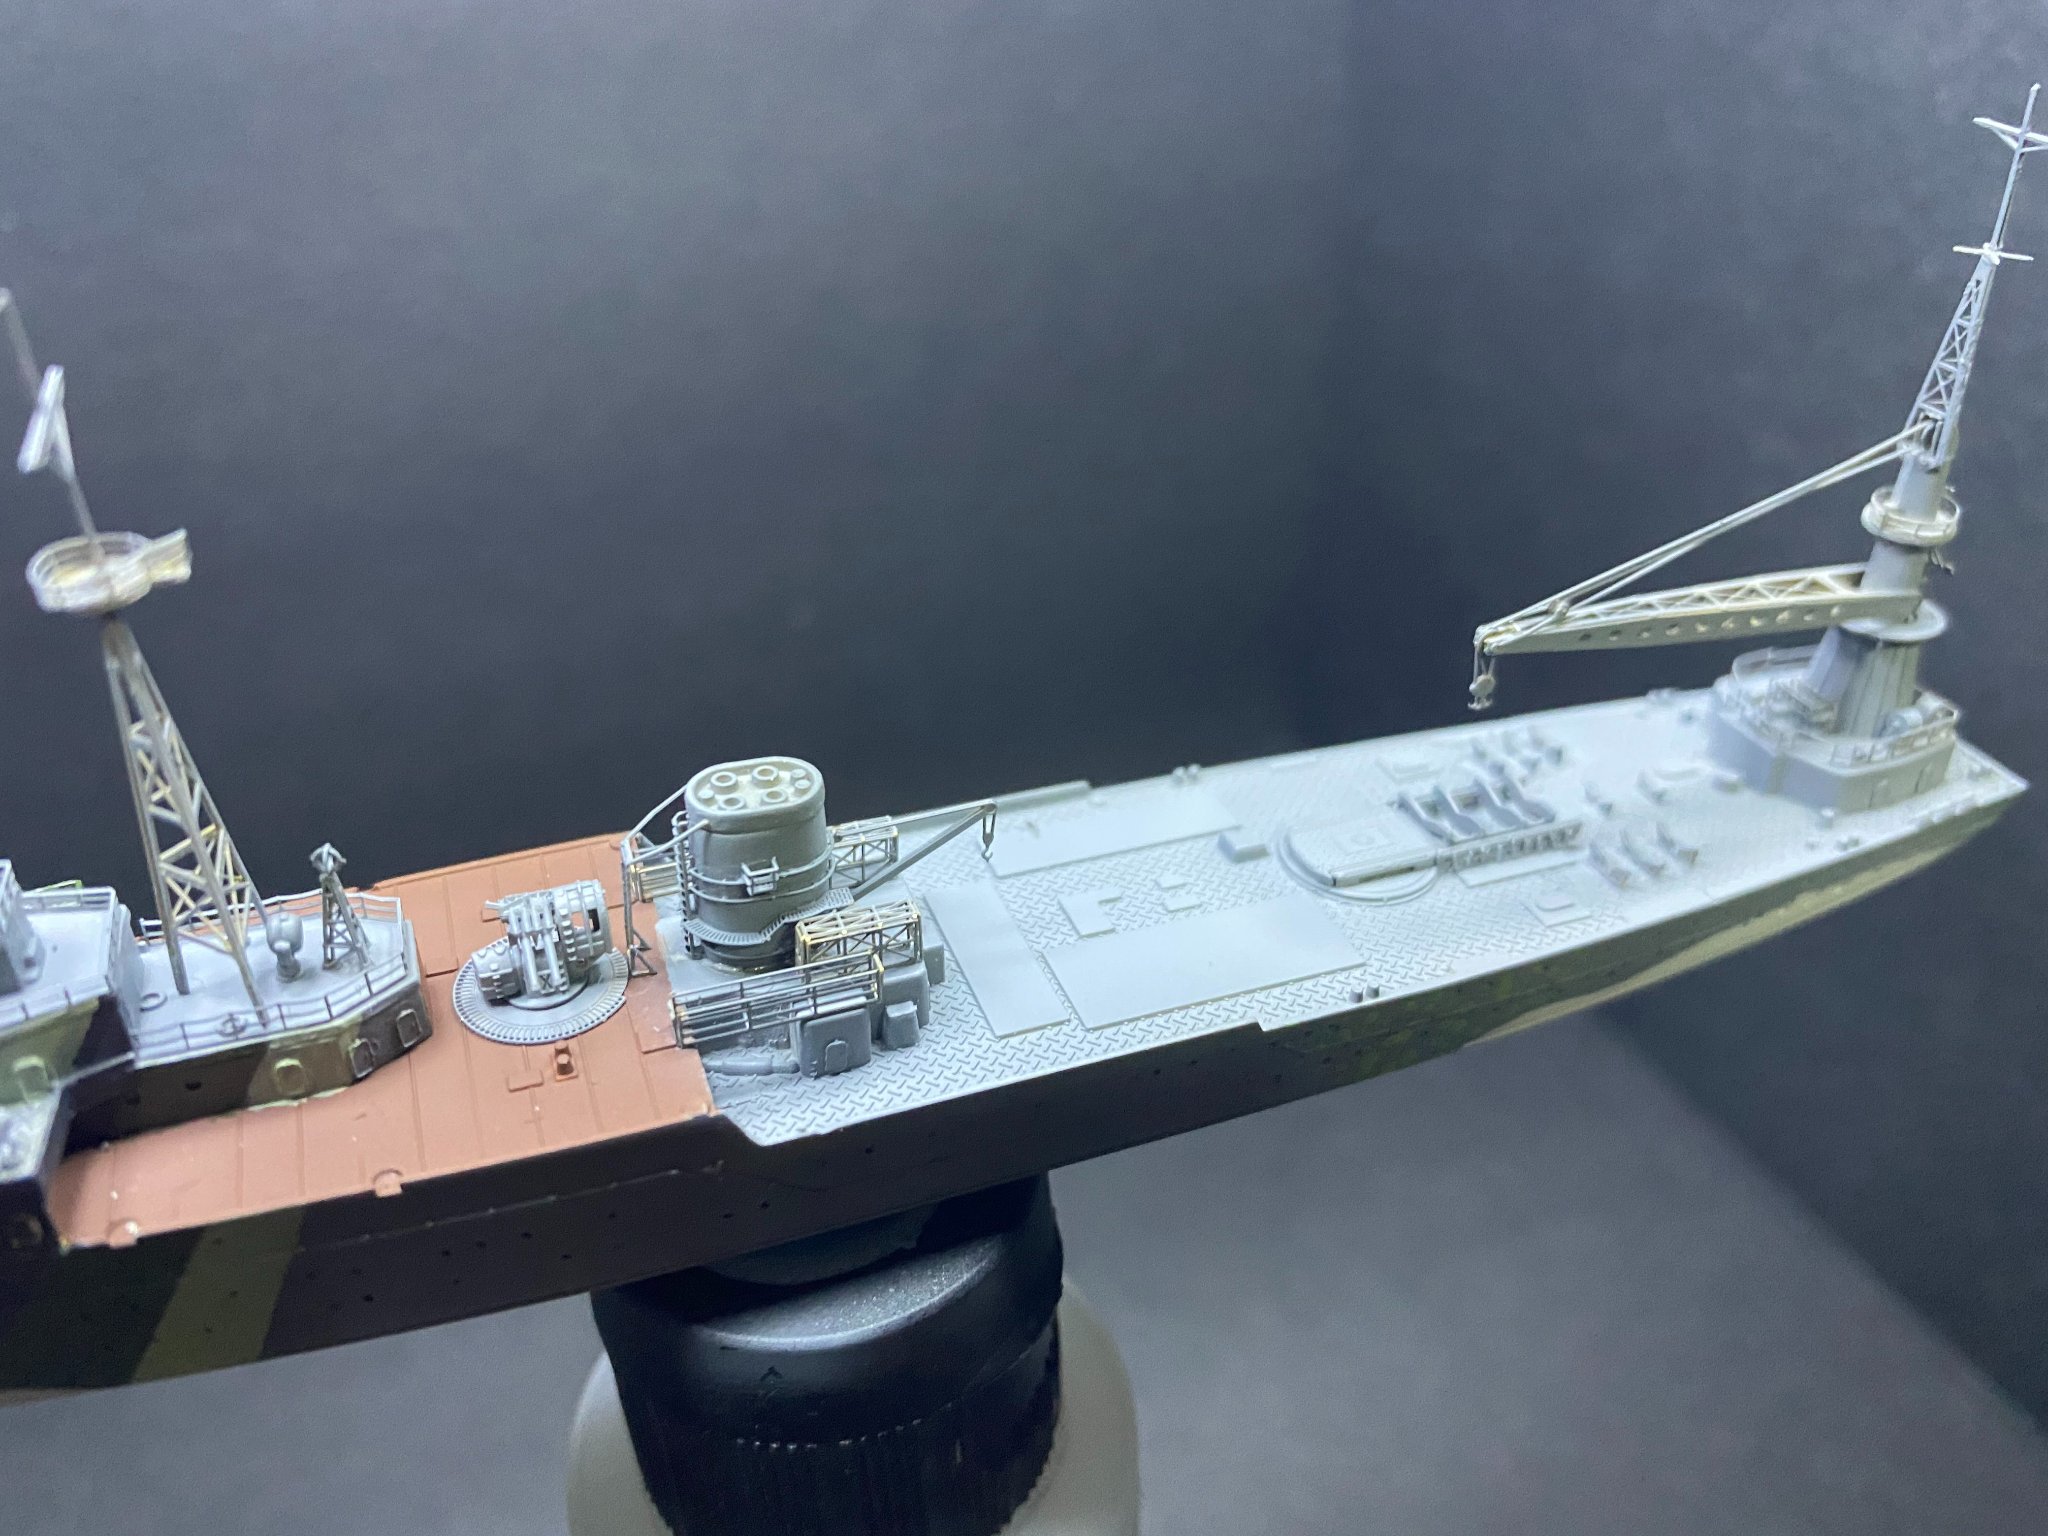
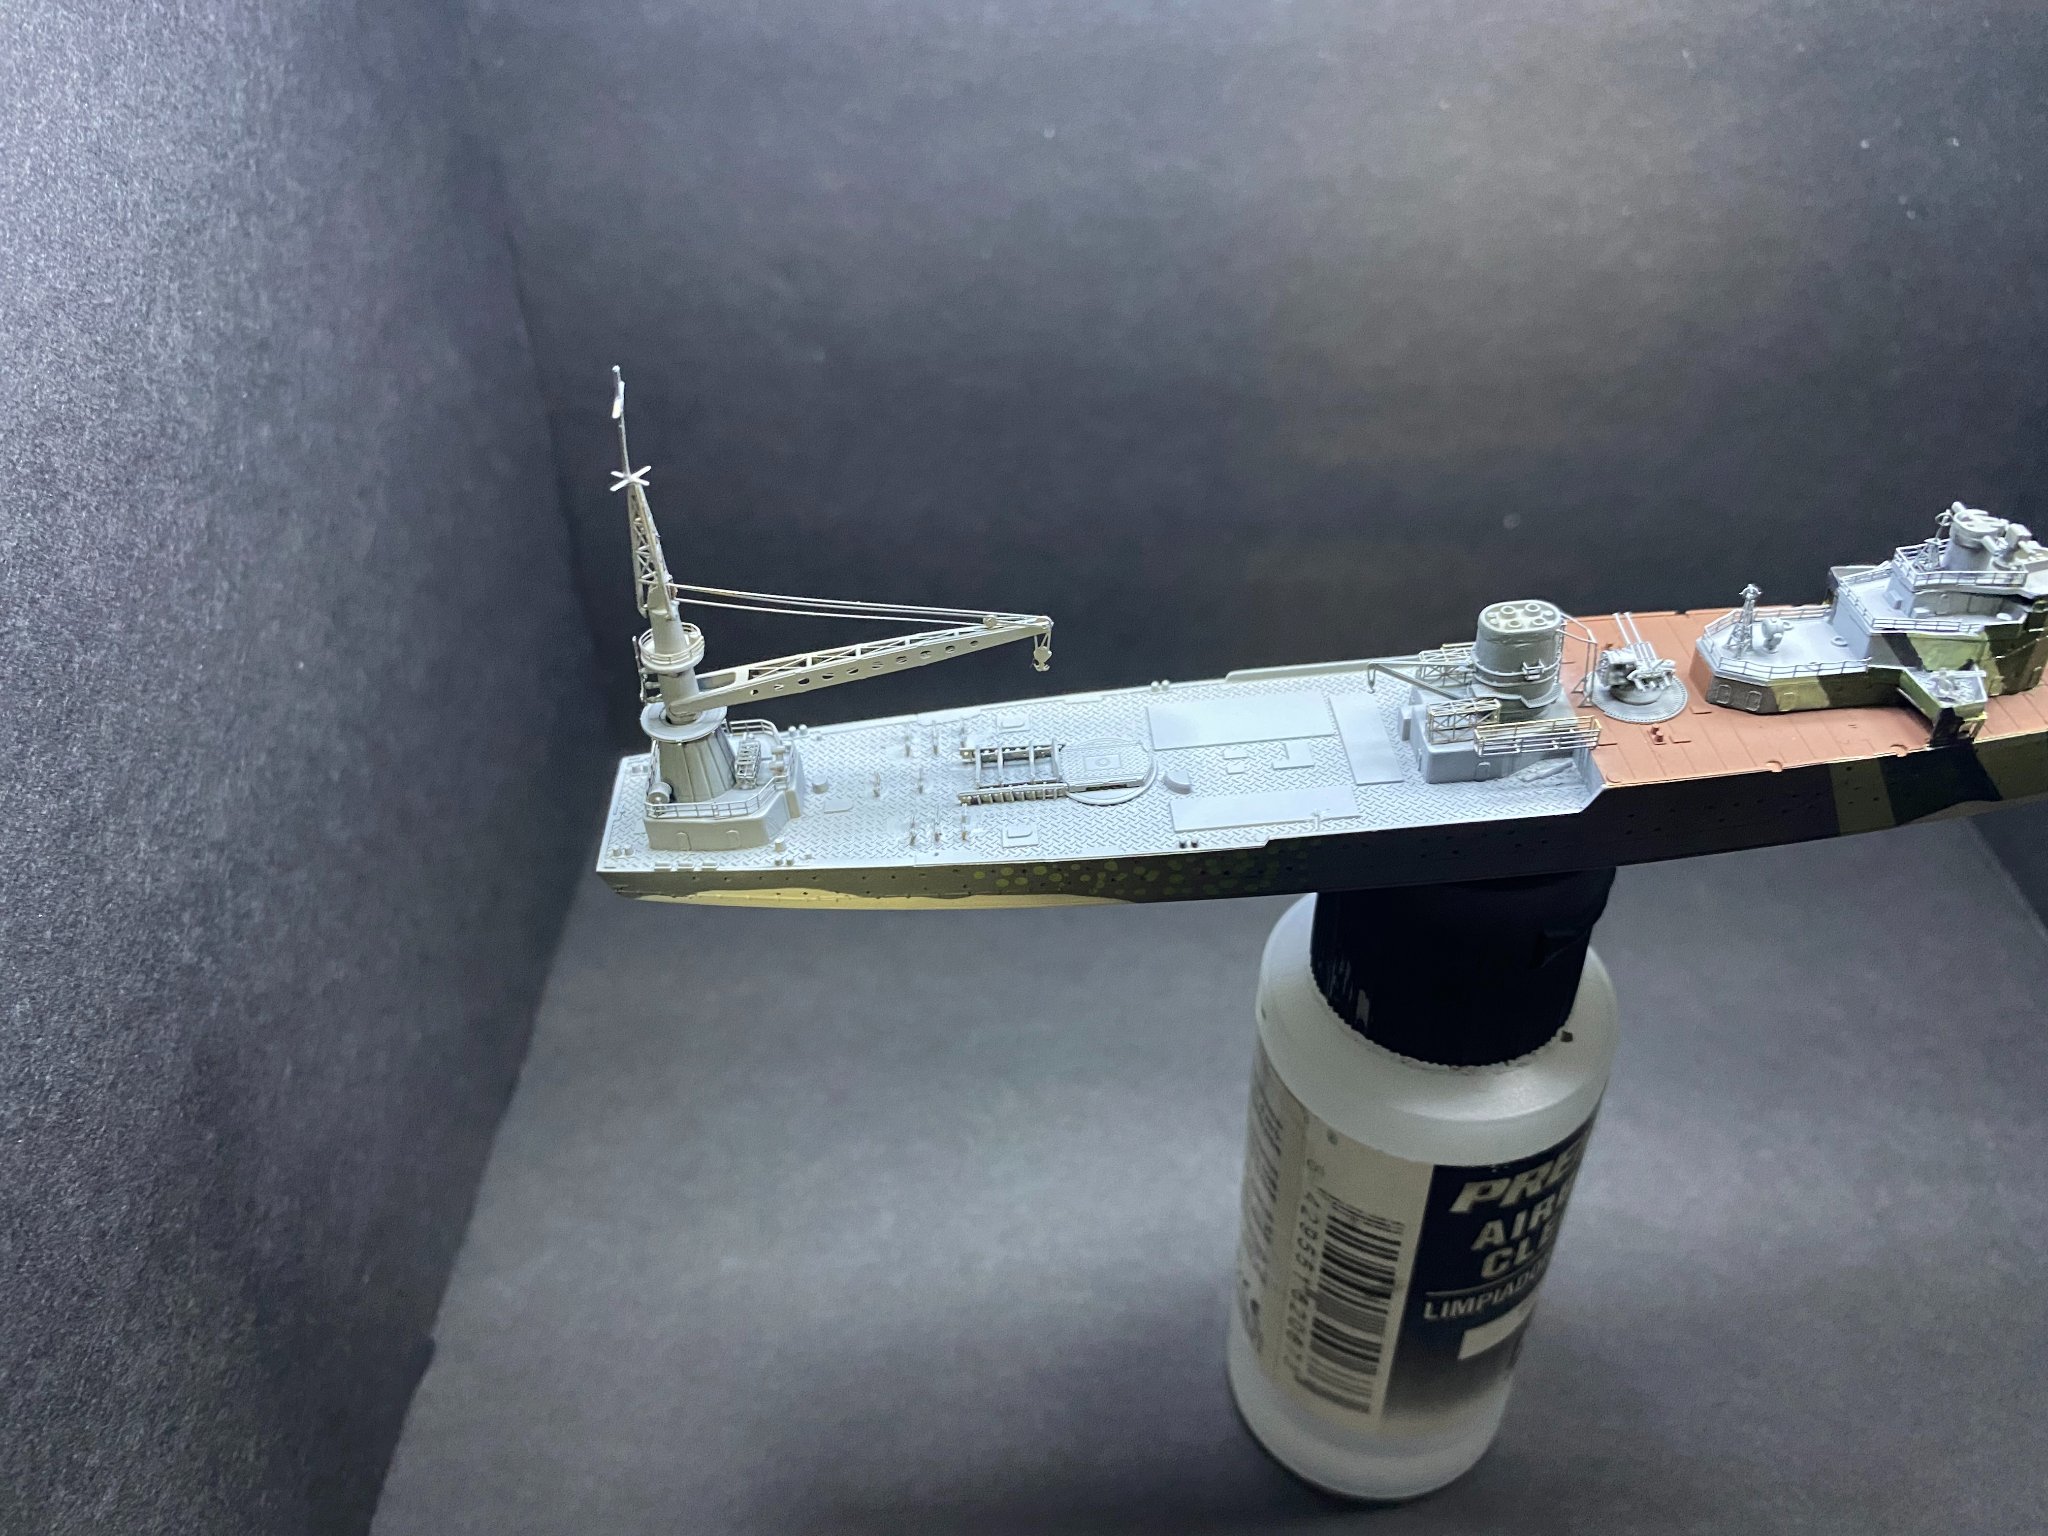
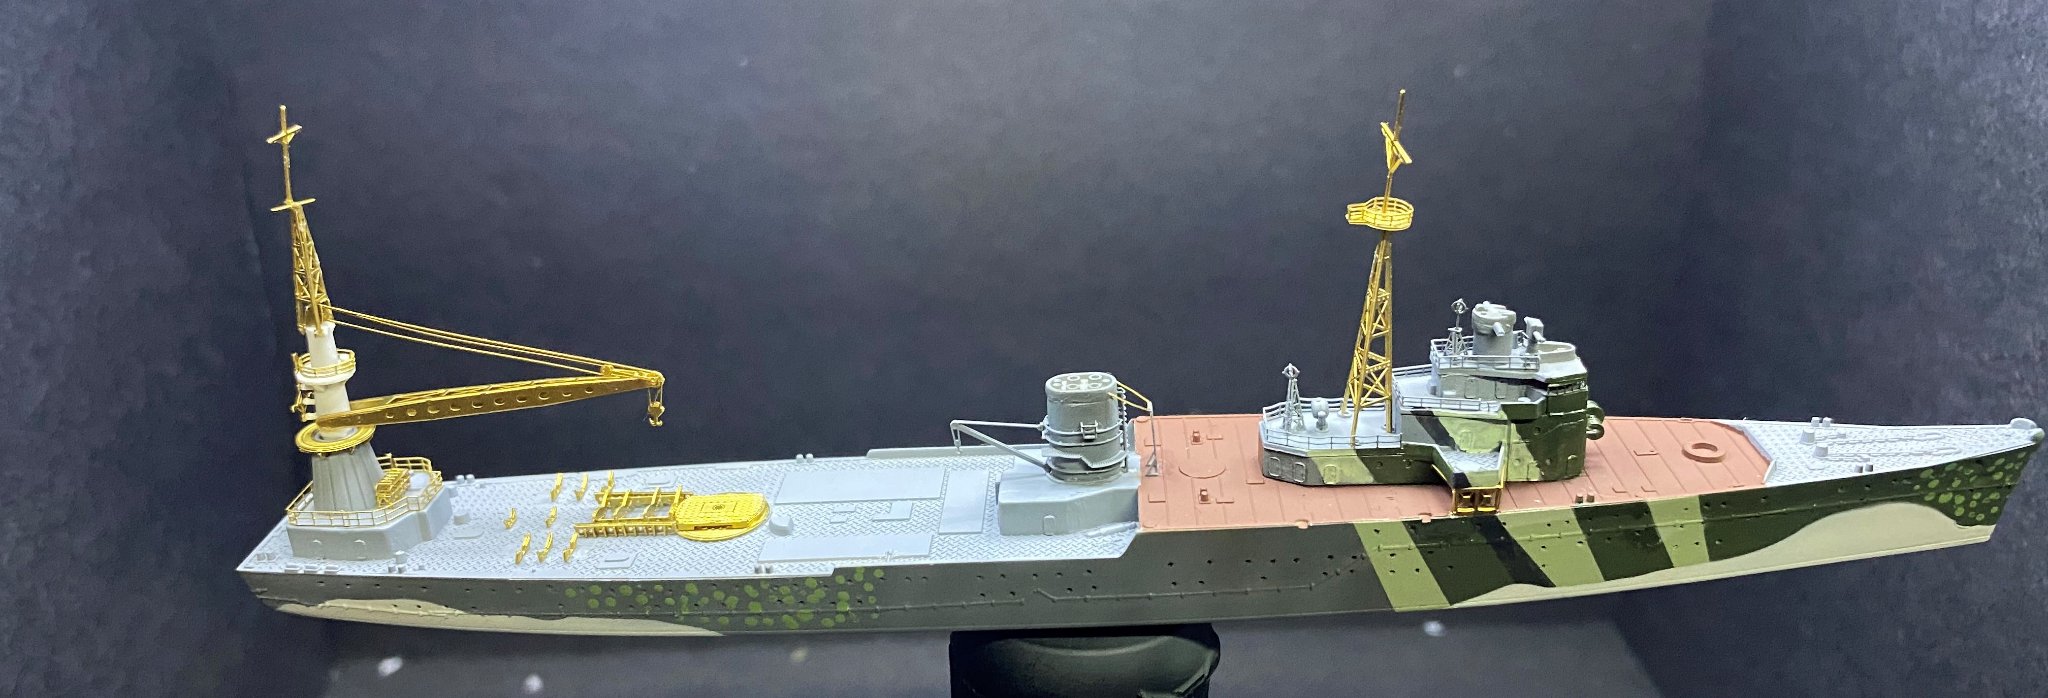
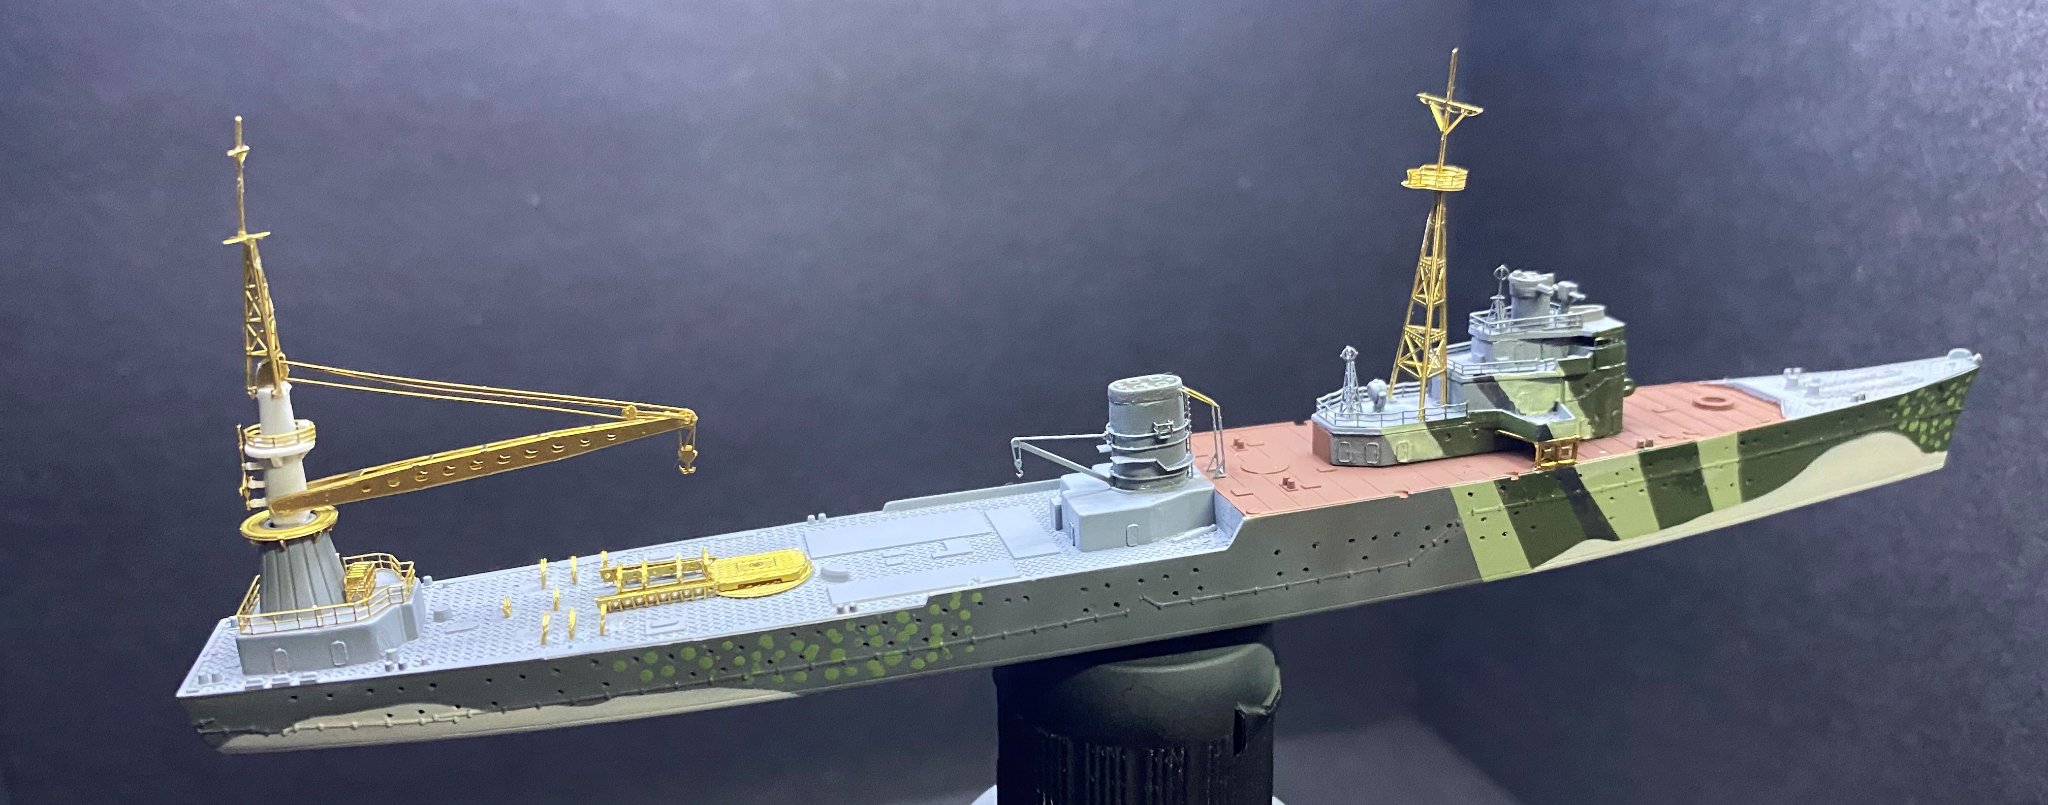
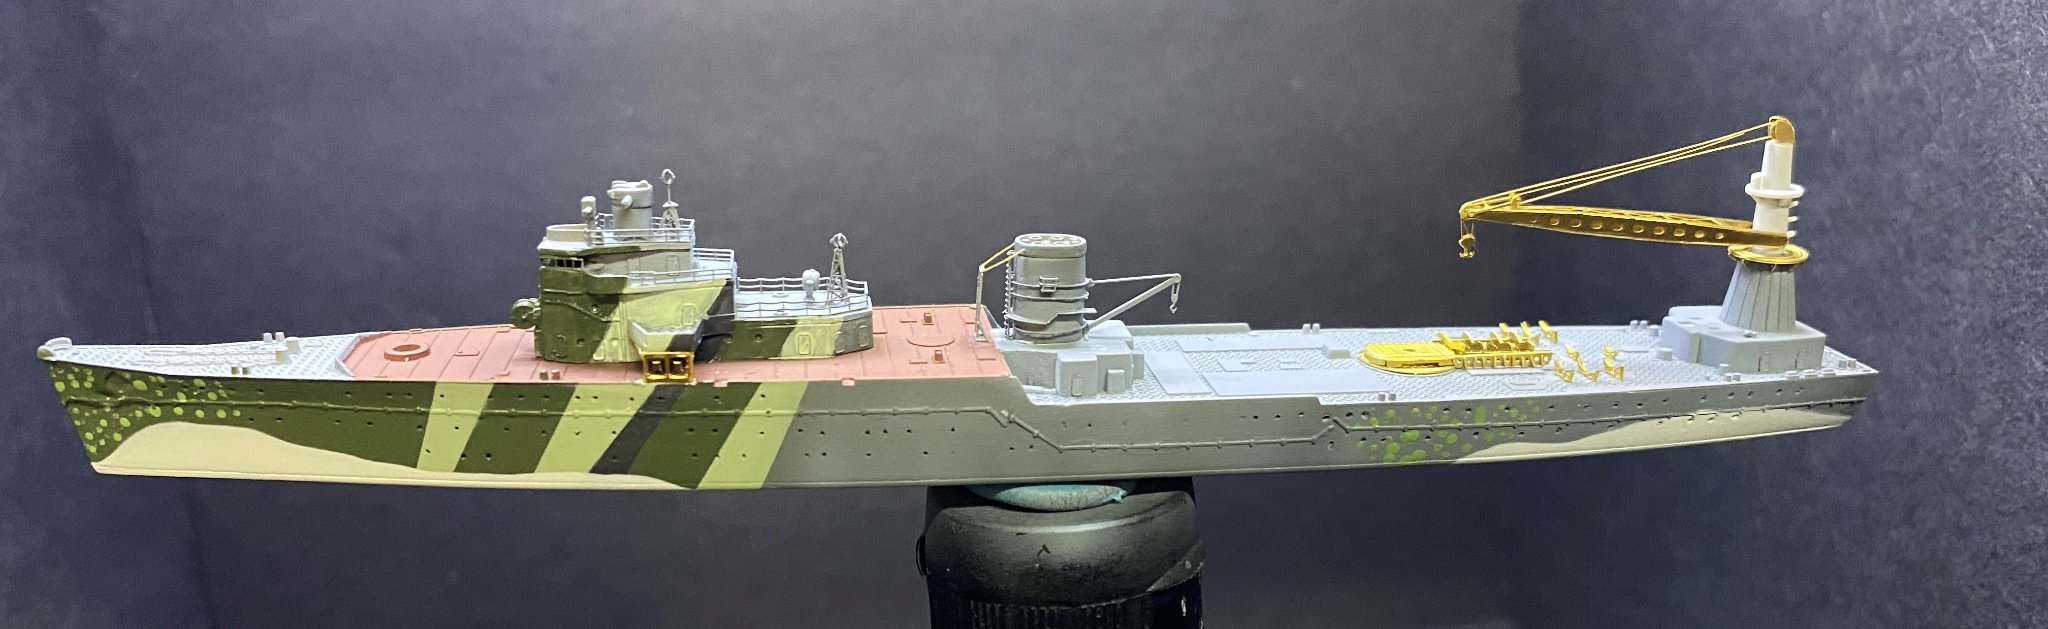
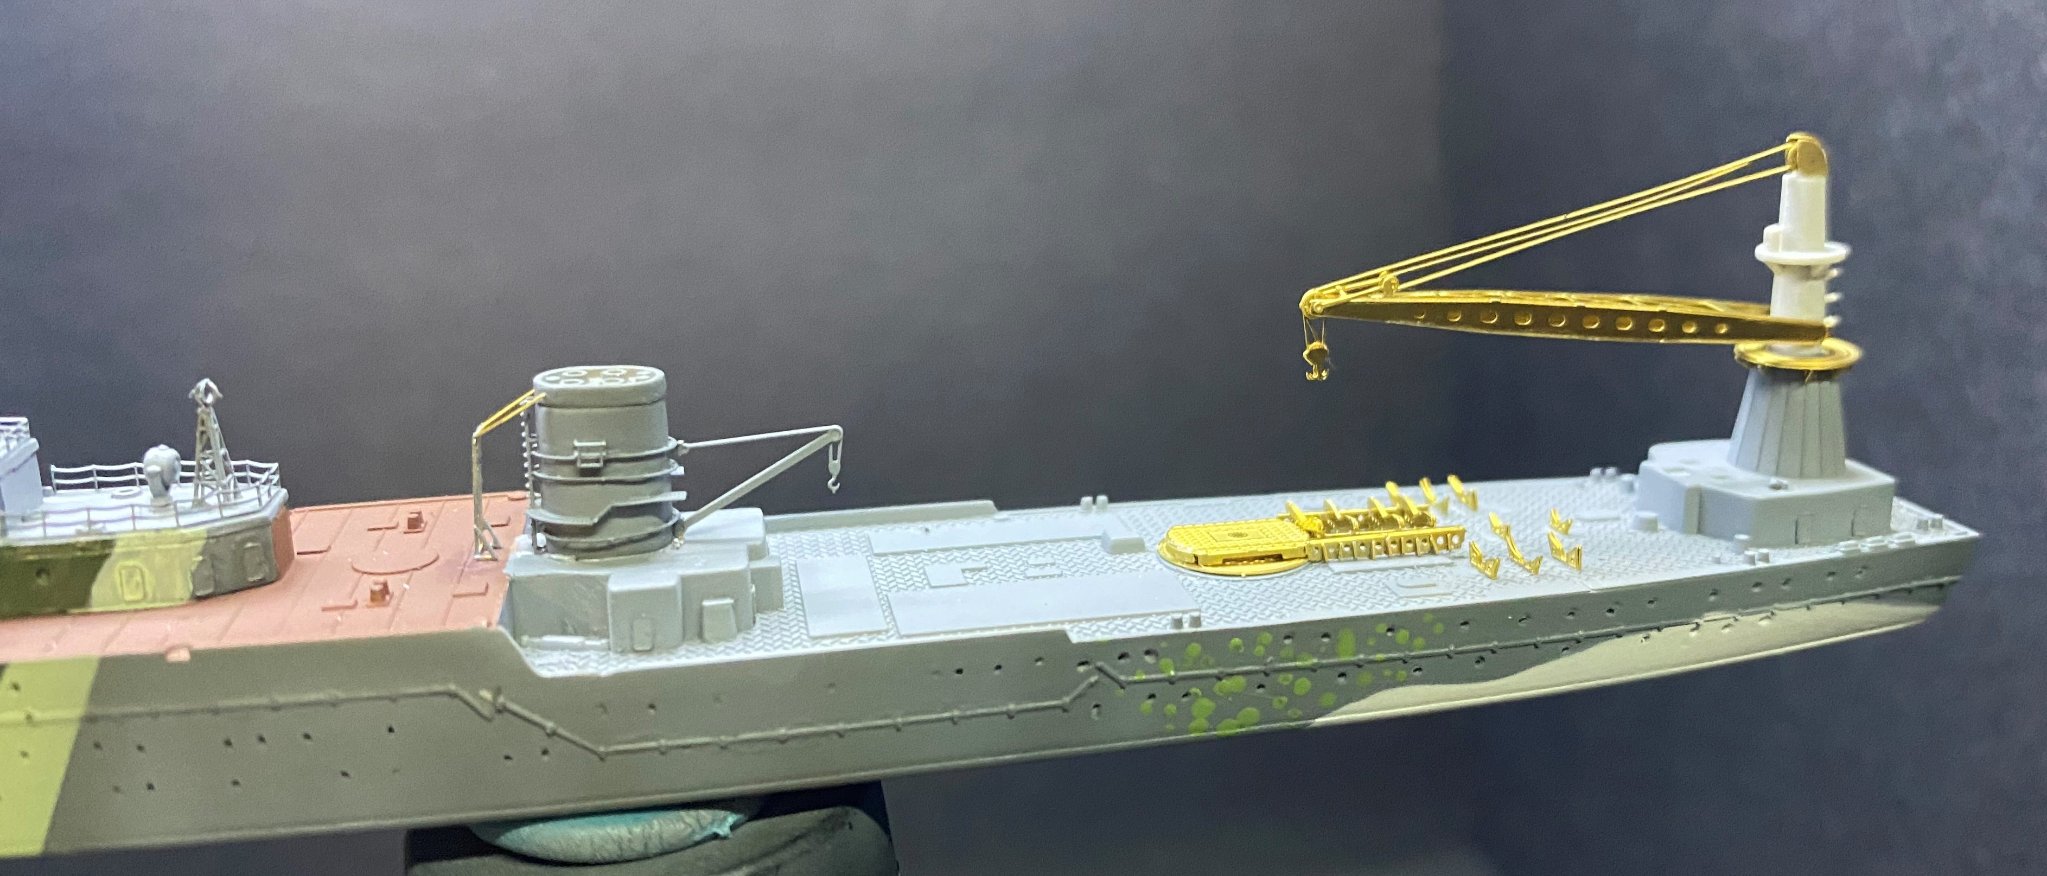
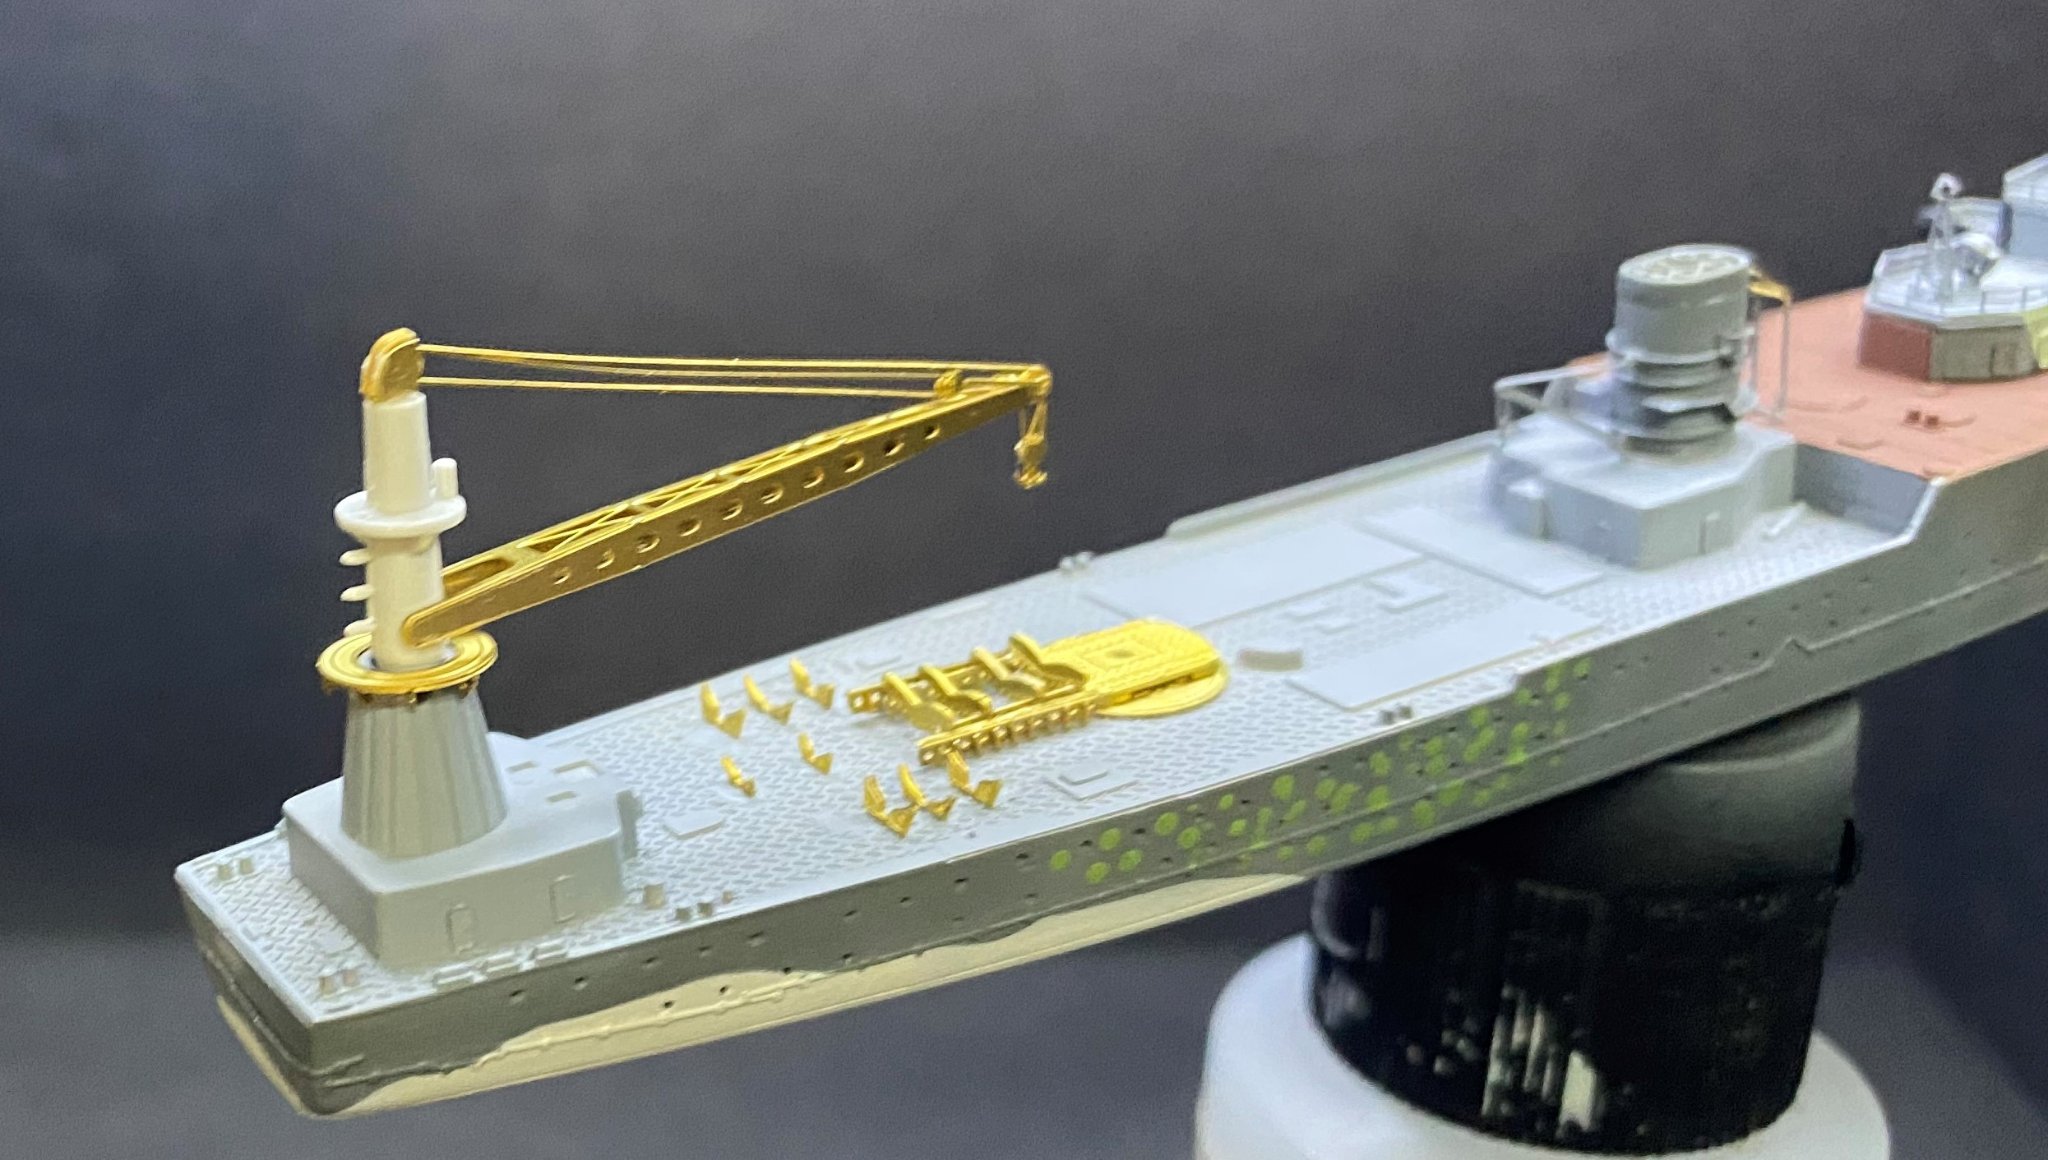
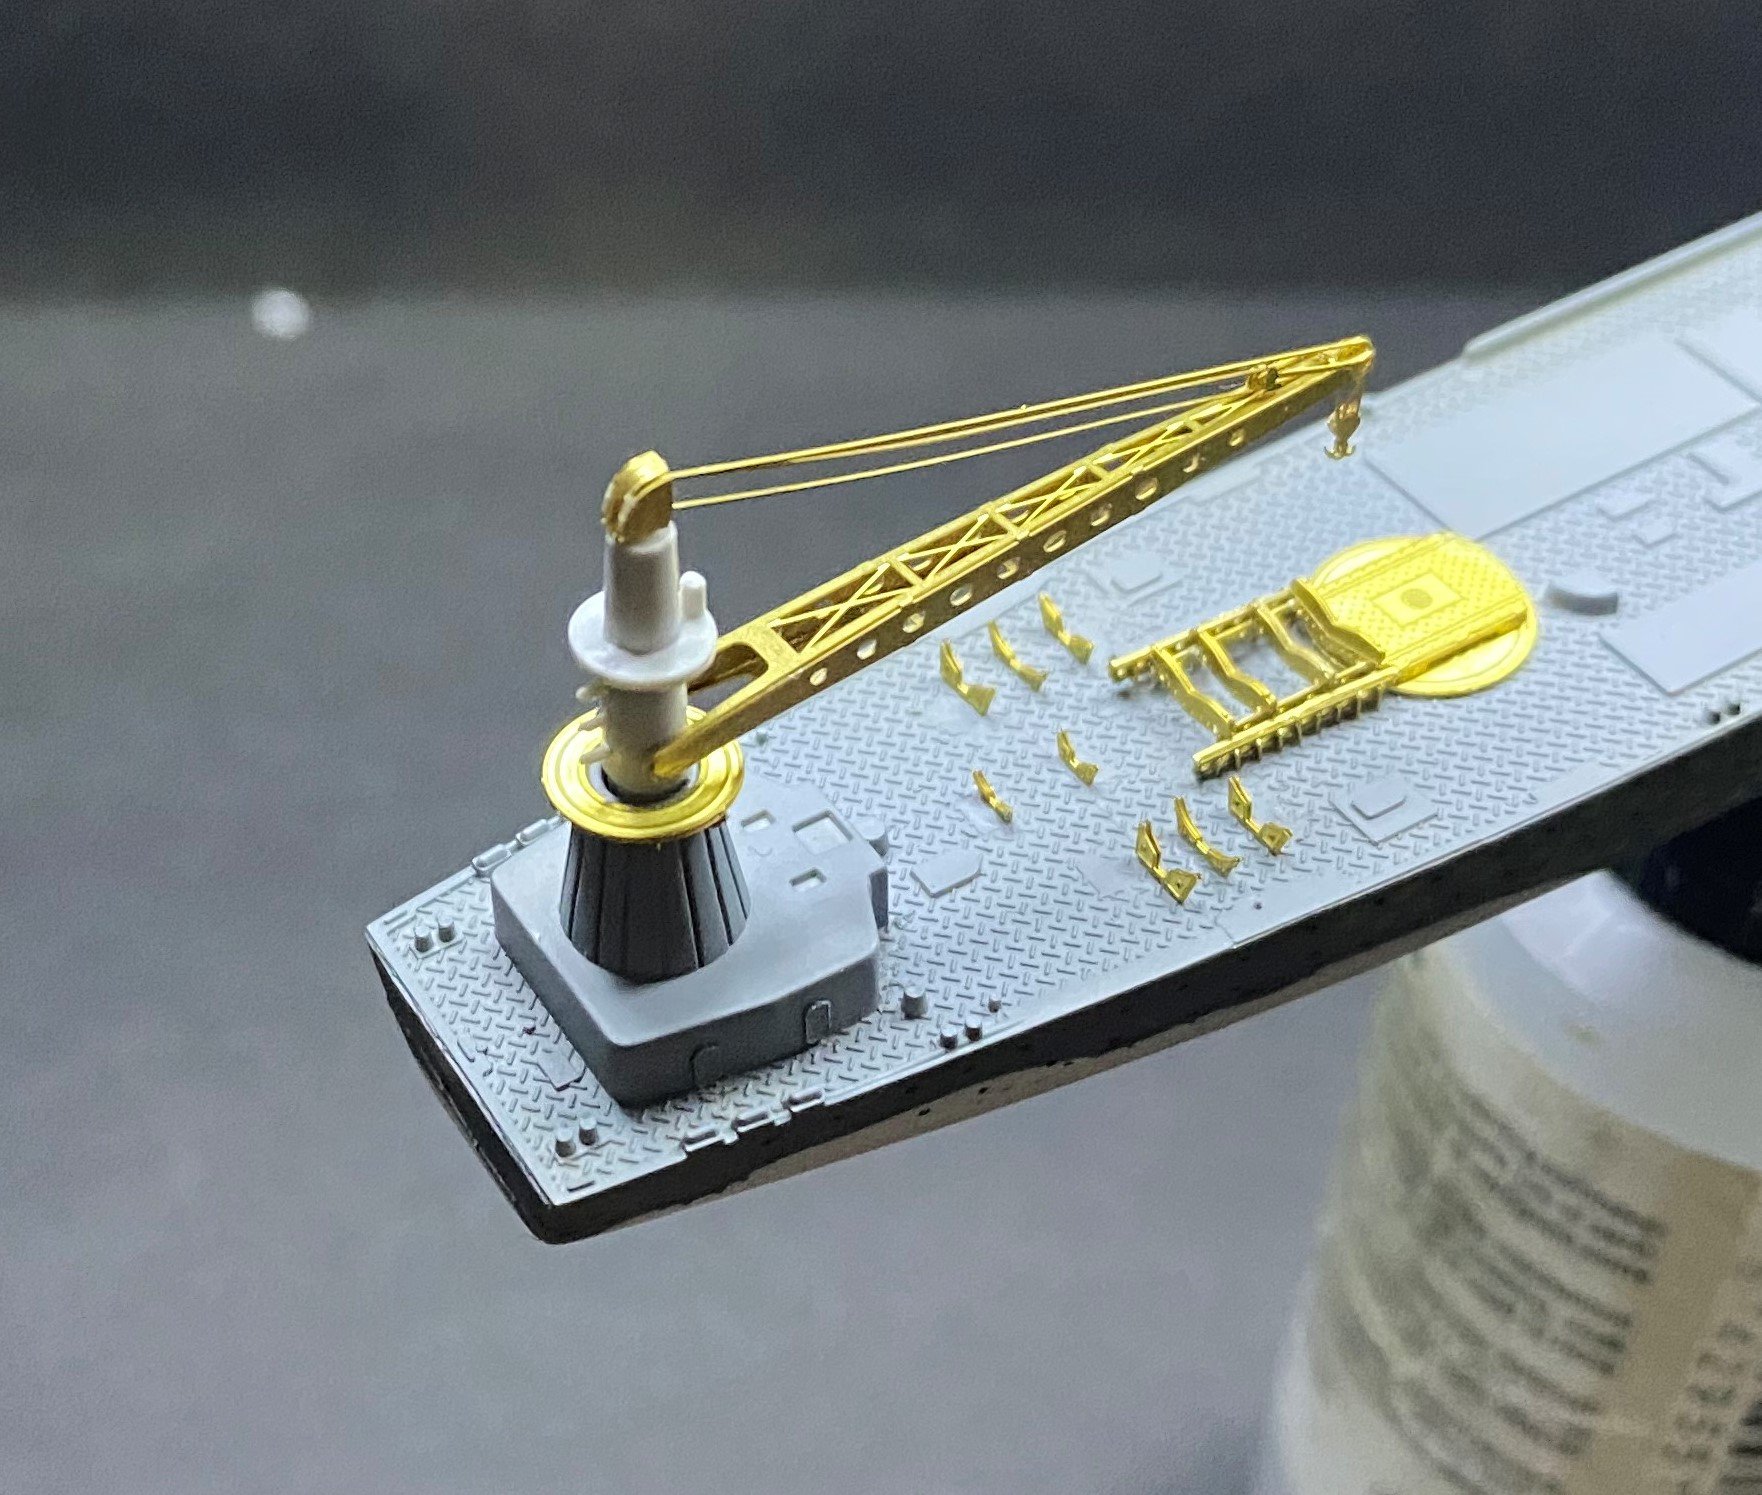
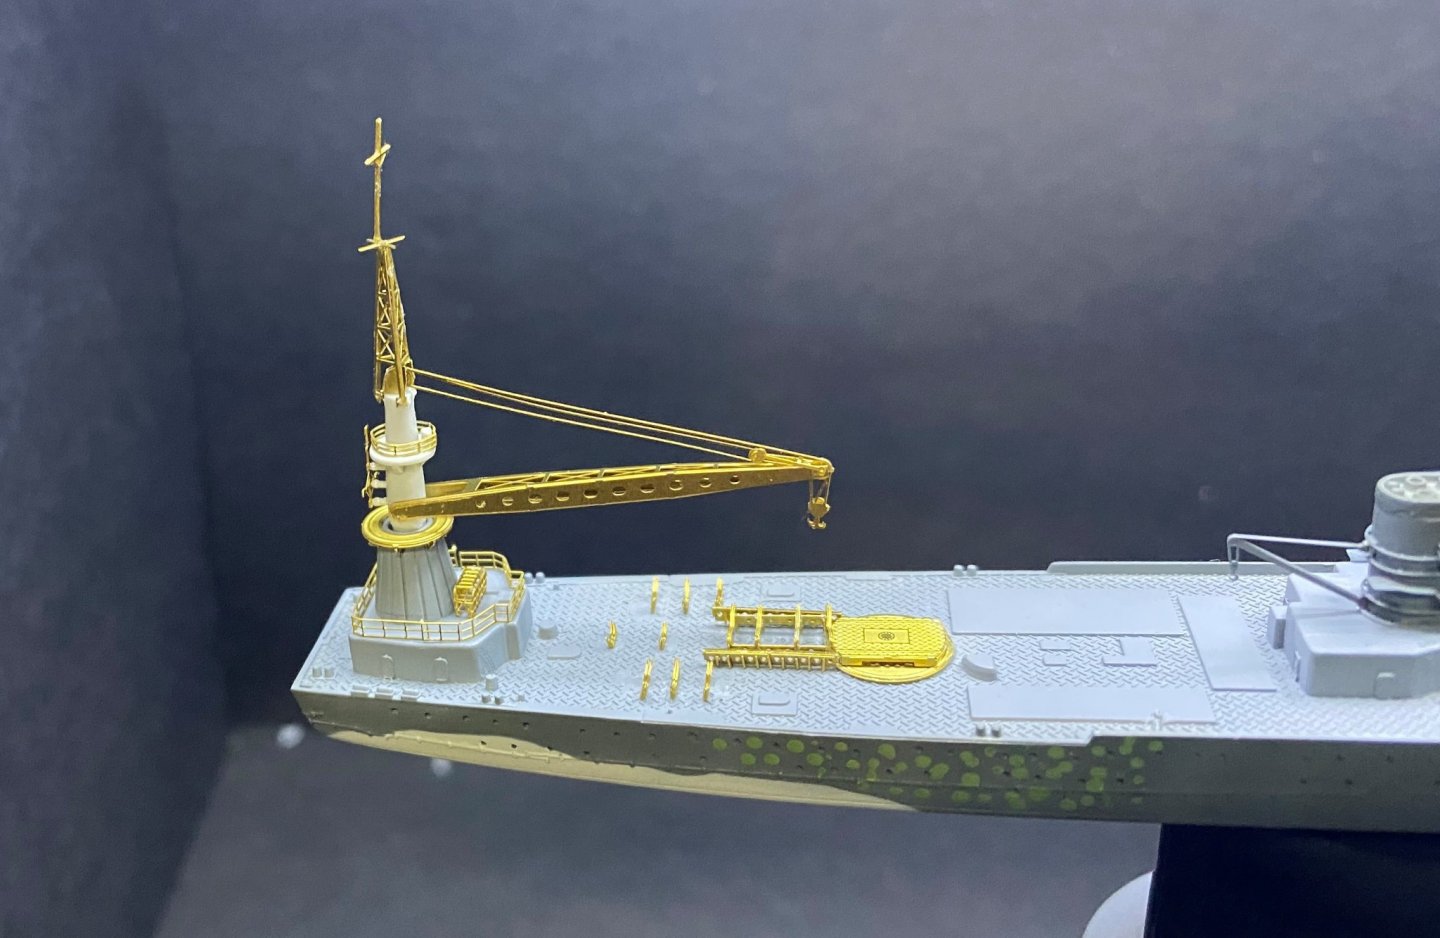
The photo etch keeps piling up, but there remains more to be done before I fire up the airbrush.


- 127 replies
-
- 12
-
-
- Akitsushima
- Pit Road
- (and 2 more)
-
Yes, I have a few 1:700 kits other than Flyhawk as well. I'll be starting a couple of them soon.
-
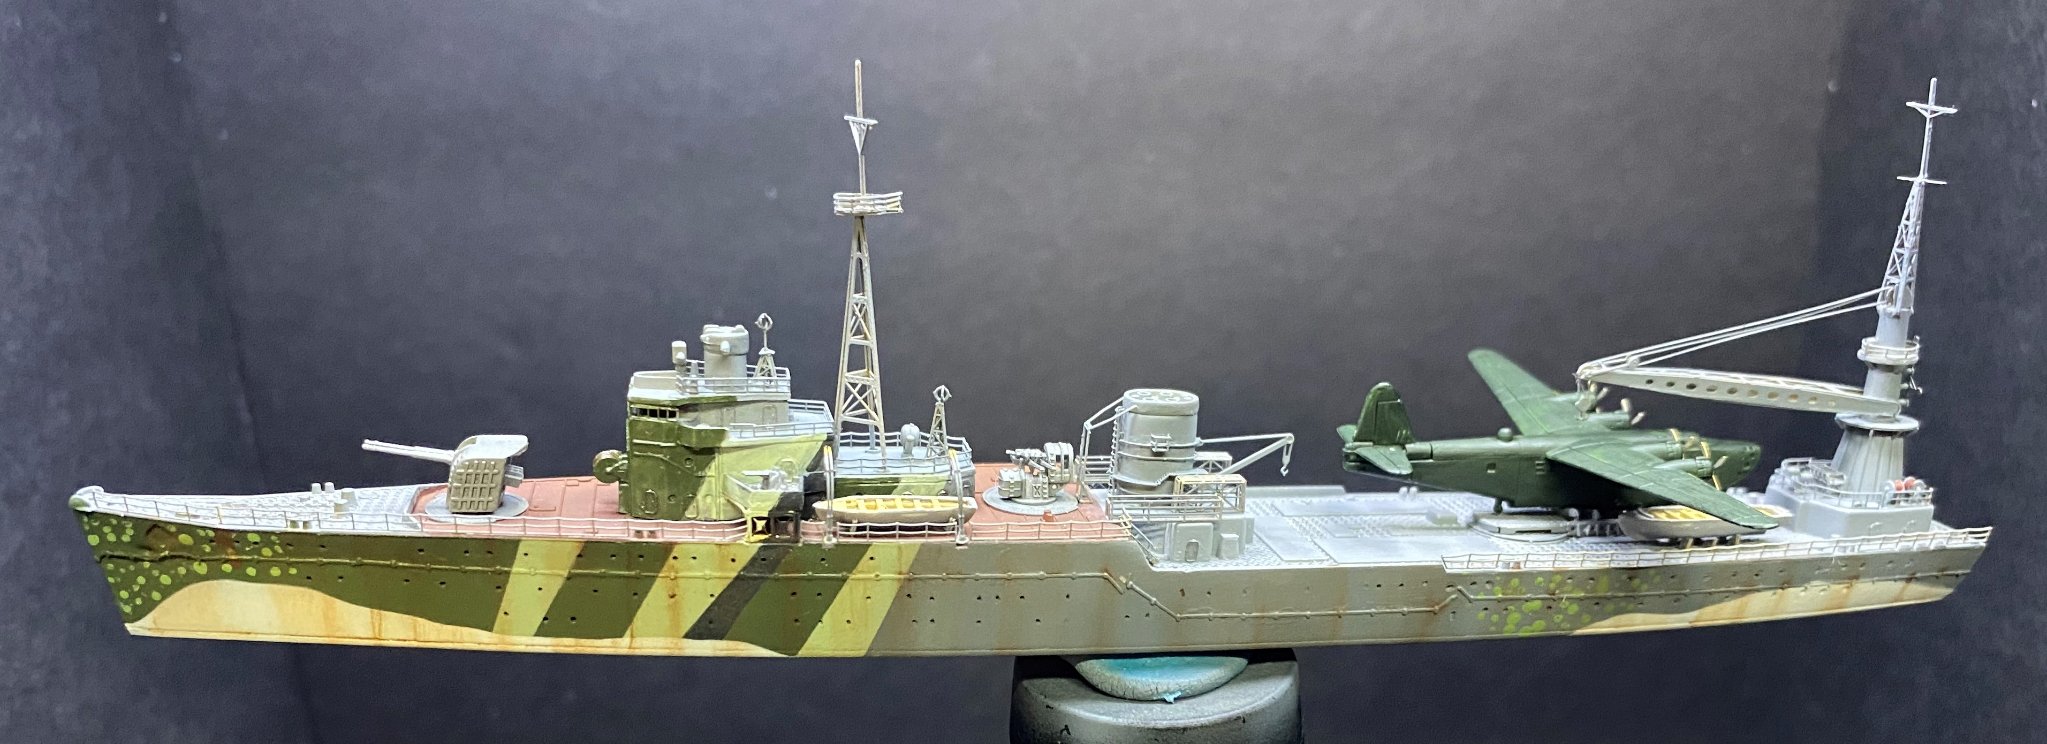
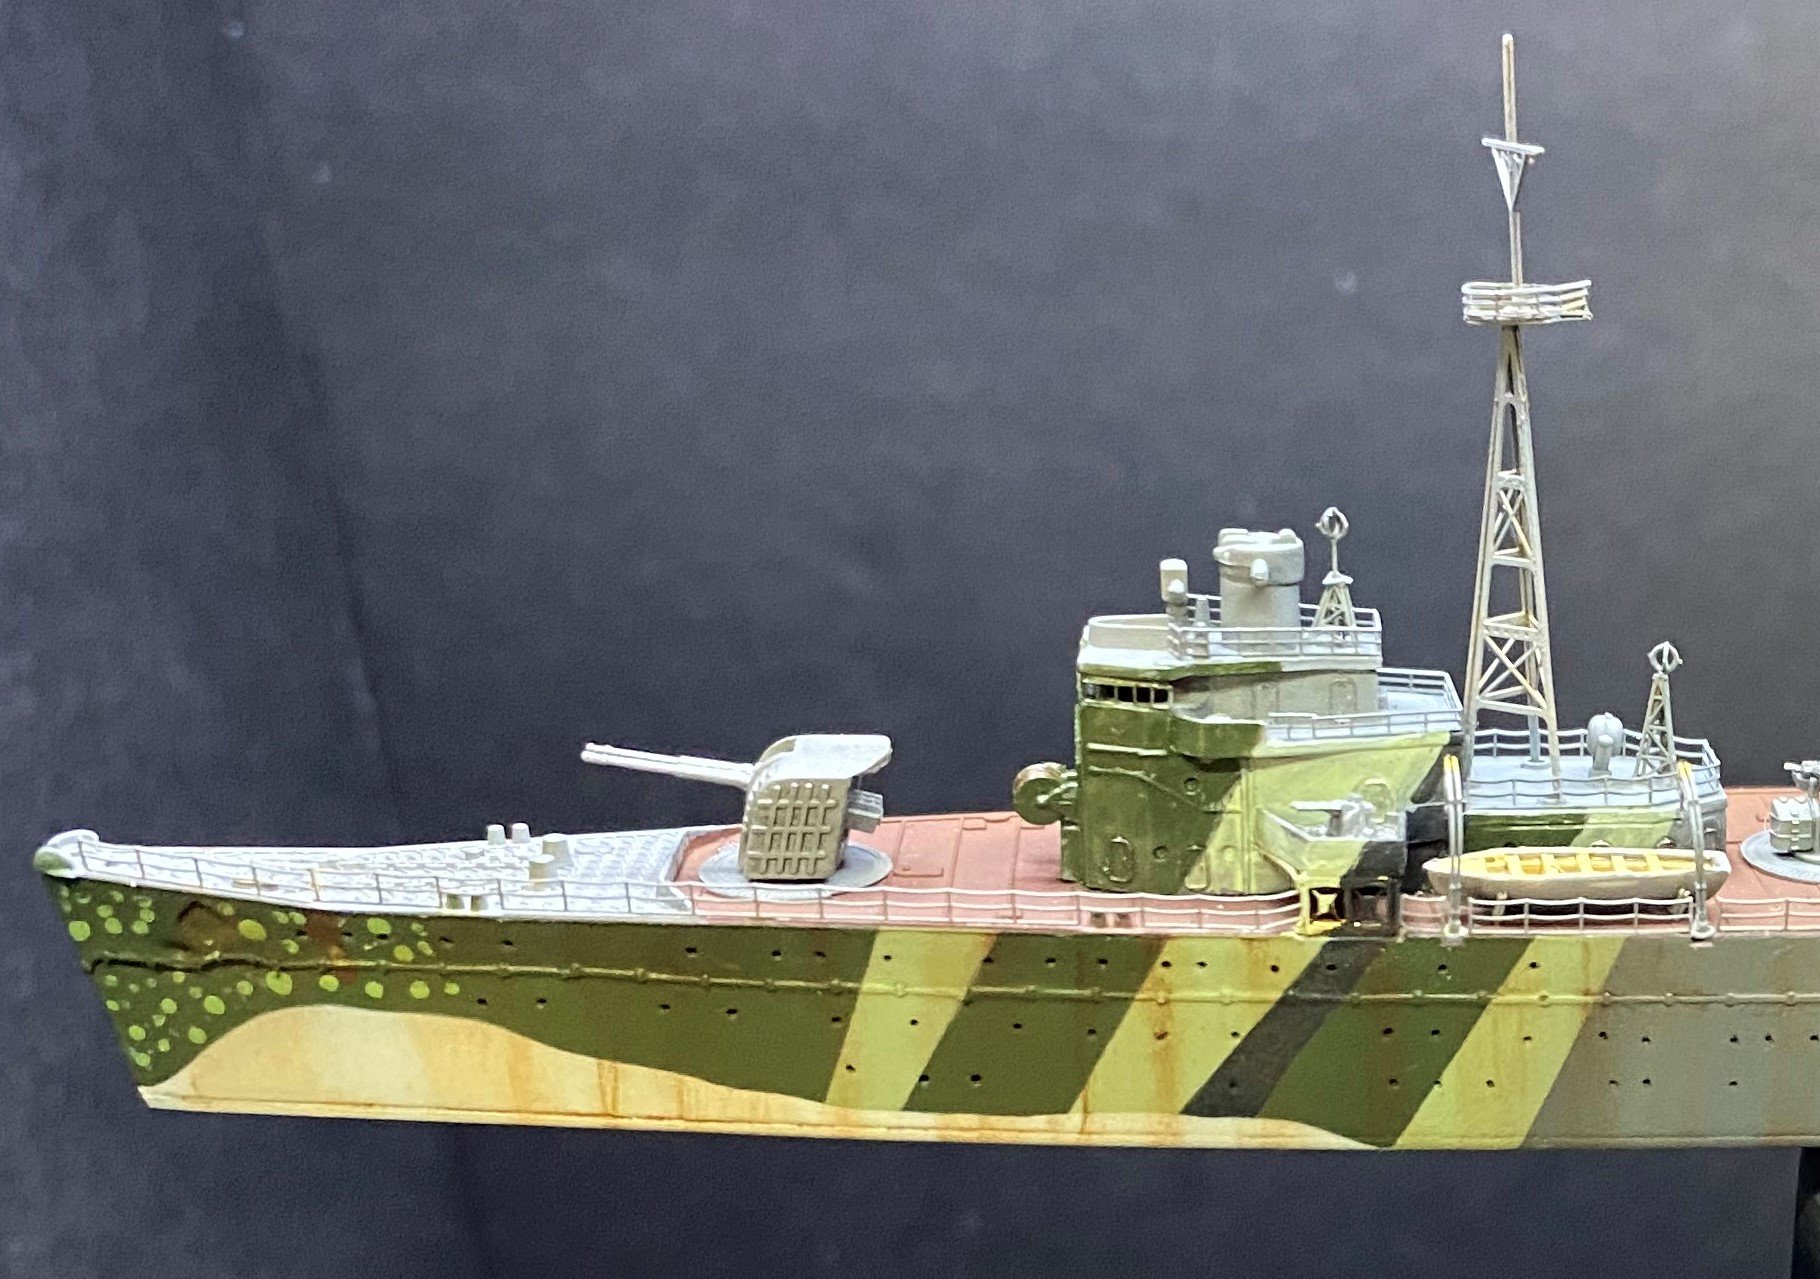
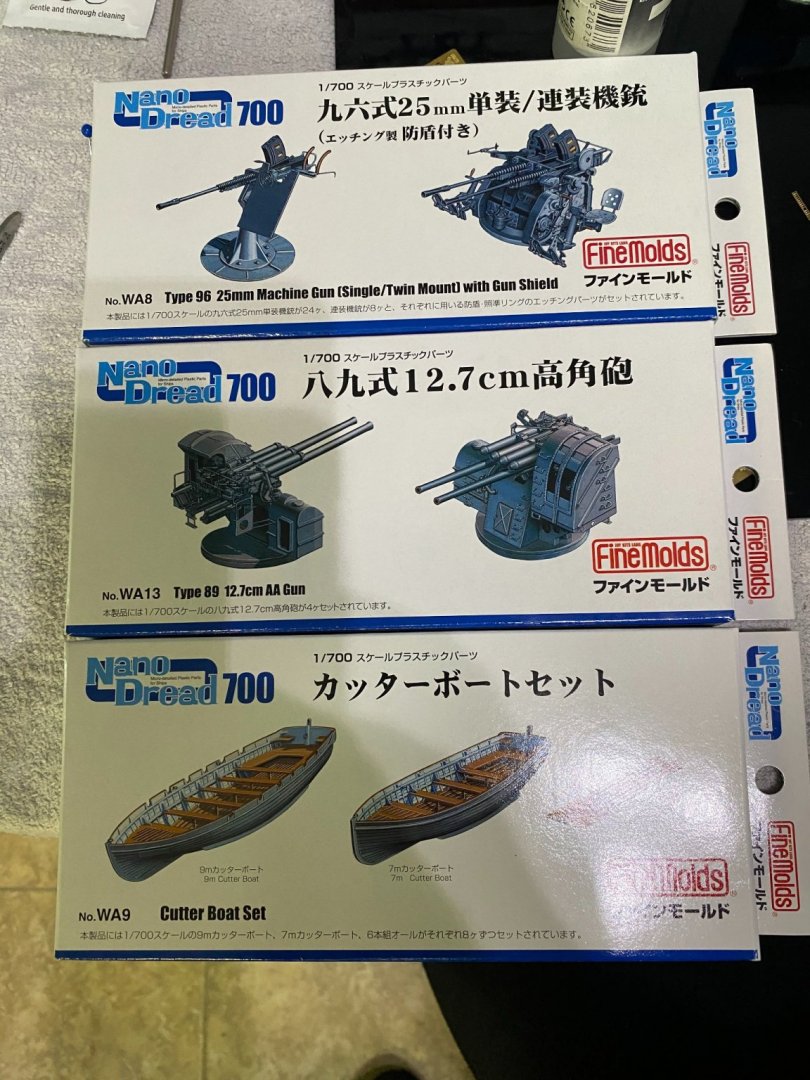
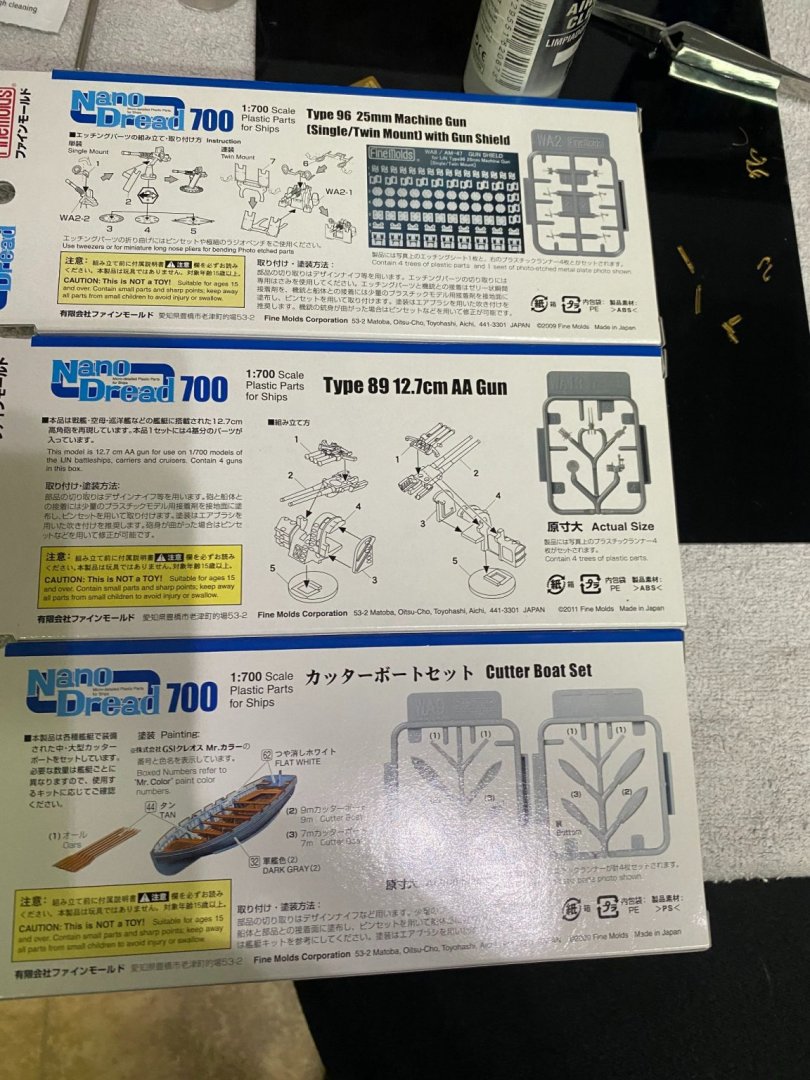
I thought the weakest links not addressed by the photo etch upgrade set were the ship's guns and boats. Bought the Fine Molds guns and boats in order to address those areas. They are much better than the items included with the kit. It's the first time I've used the upgrades from this series so will see how it goes from this point.
- 127 replies
-
- 9
-
-
- Akitsushima
- Pit Road
- (and 2 more)
-
Your masking and paint look great Alan. The Flyhawk kits in 1:700 scale spoil us. Once you've had the pleasure of building one of them, it makes everything else in this scale look like a bathtub toy, but that's why the sell detail sets just to dress up the kits that would otherwise be mundane.