CDW
-
Posts
7,760 -
Joined
-
Last visited
Content Type
Profiles
Forums
Gallery
Events
Everything posted by CDW
-
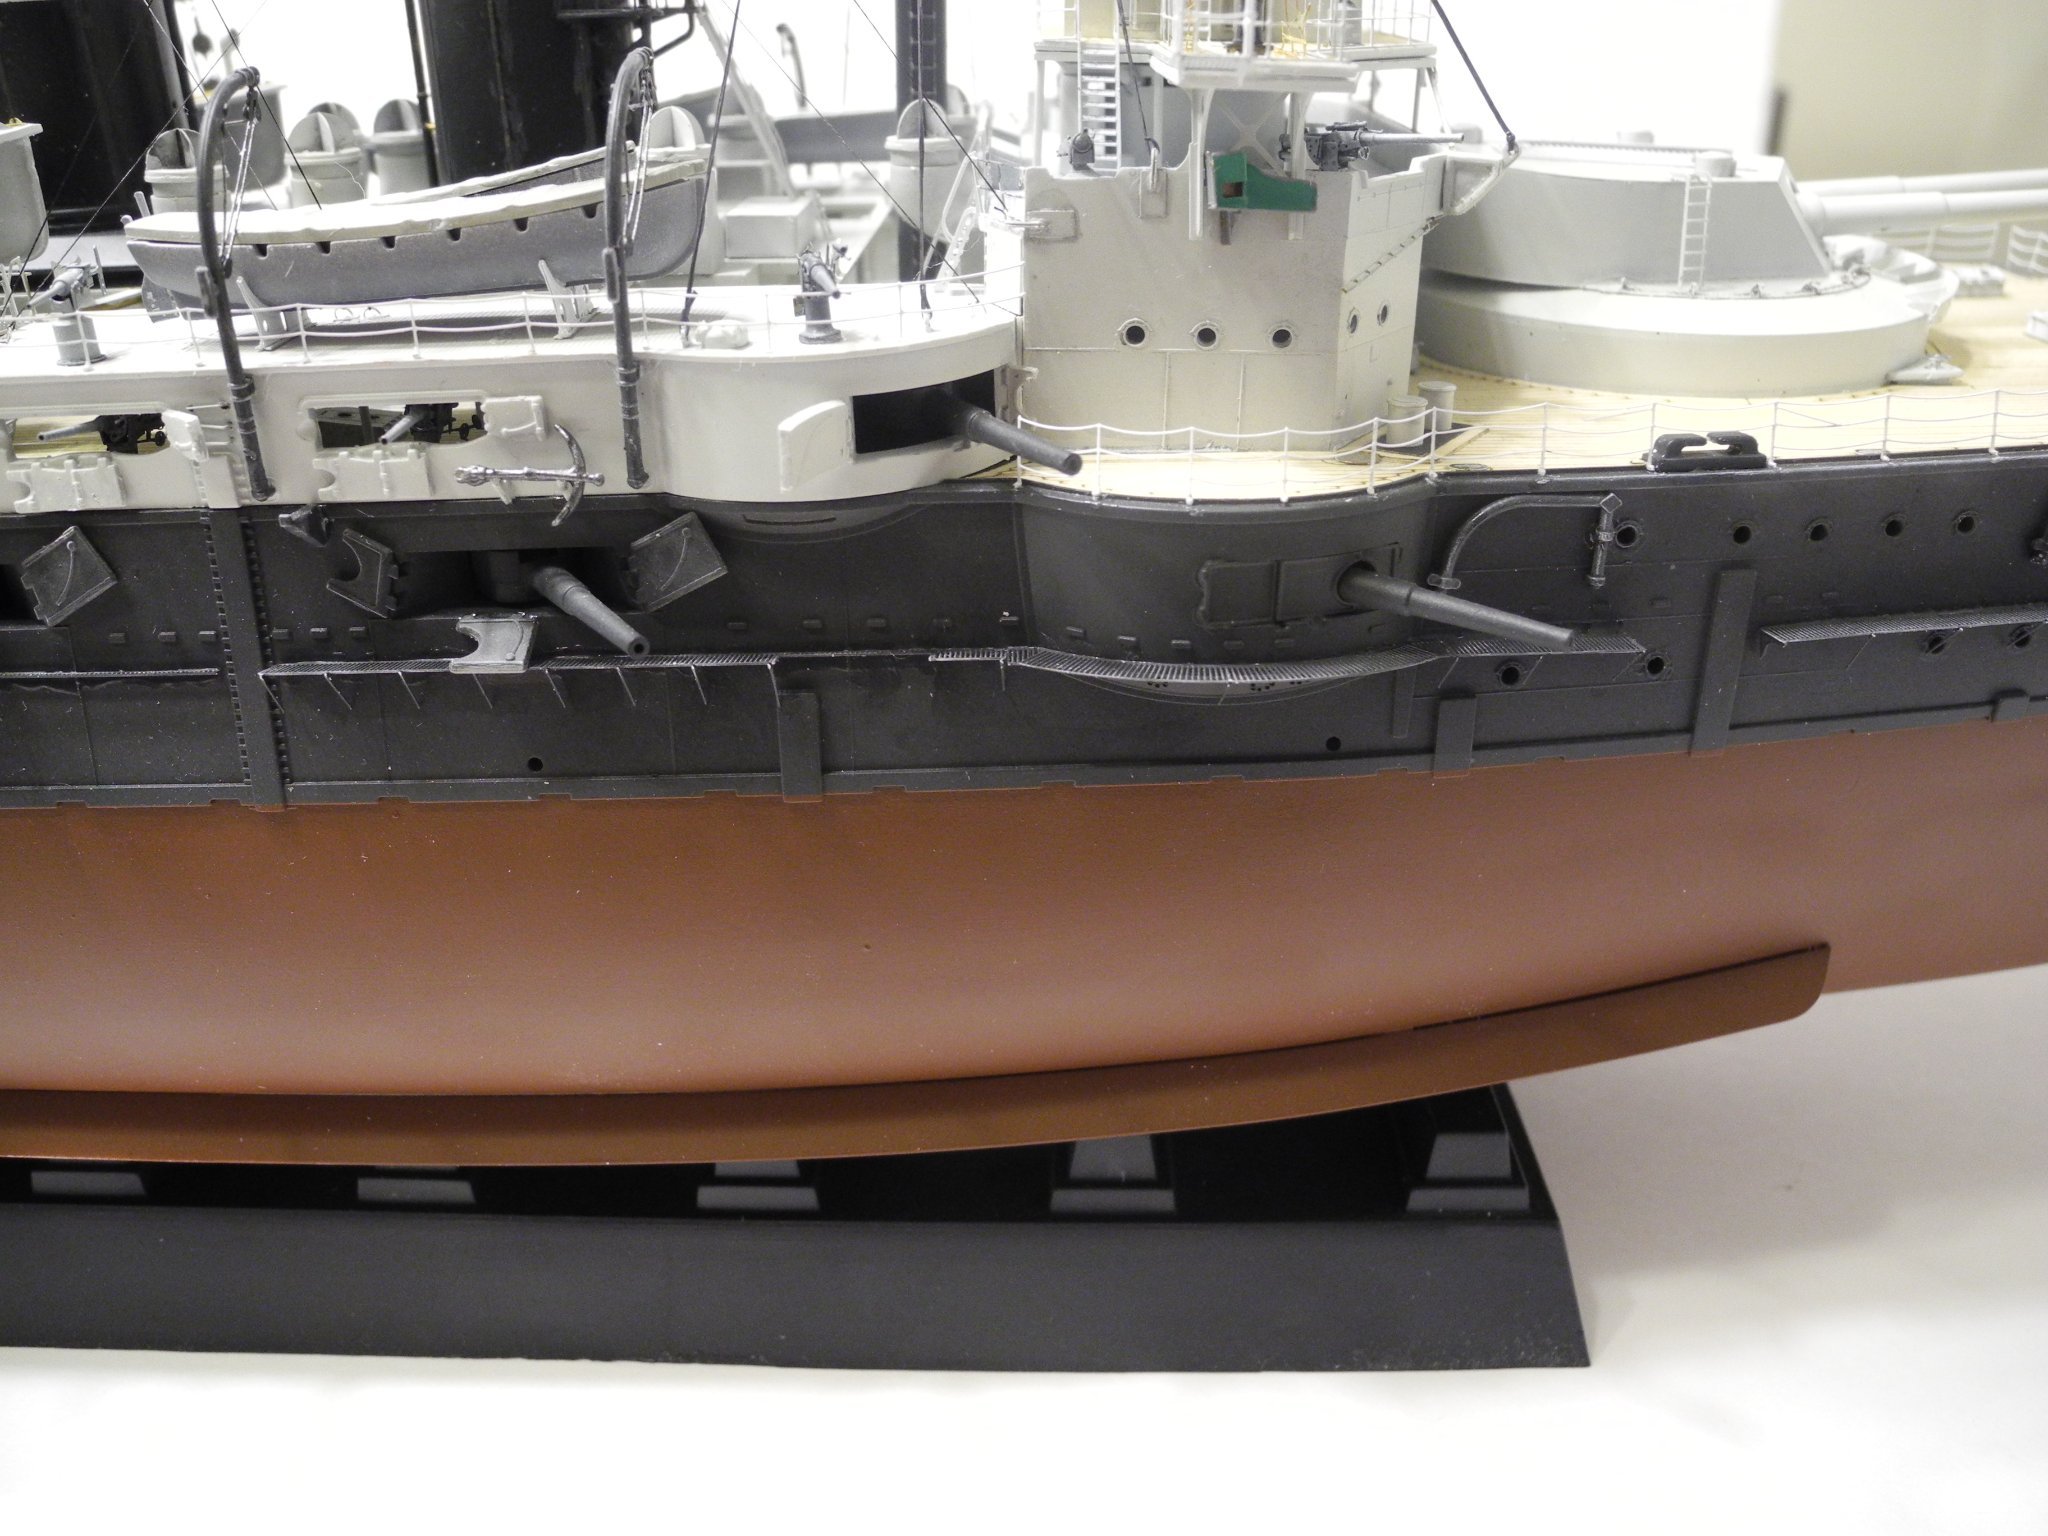
I started this IJN Mikasa several years ago and never finished it. Need to get back on it to call it done.

- 28 replies
-
- 13
-

-
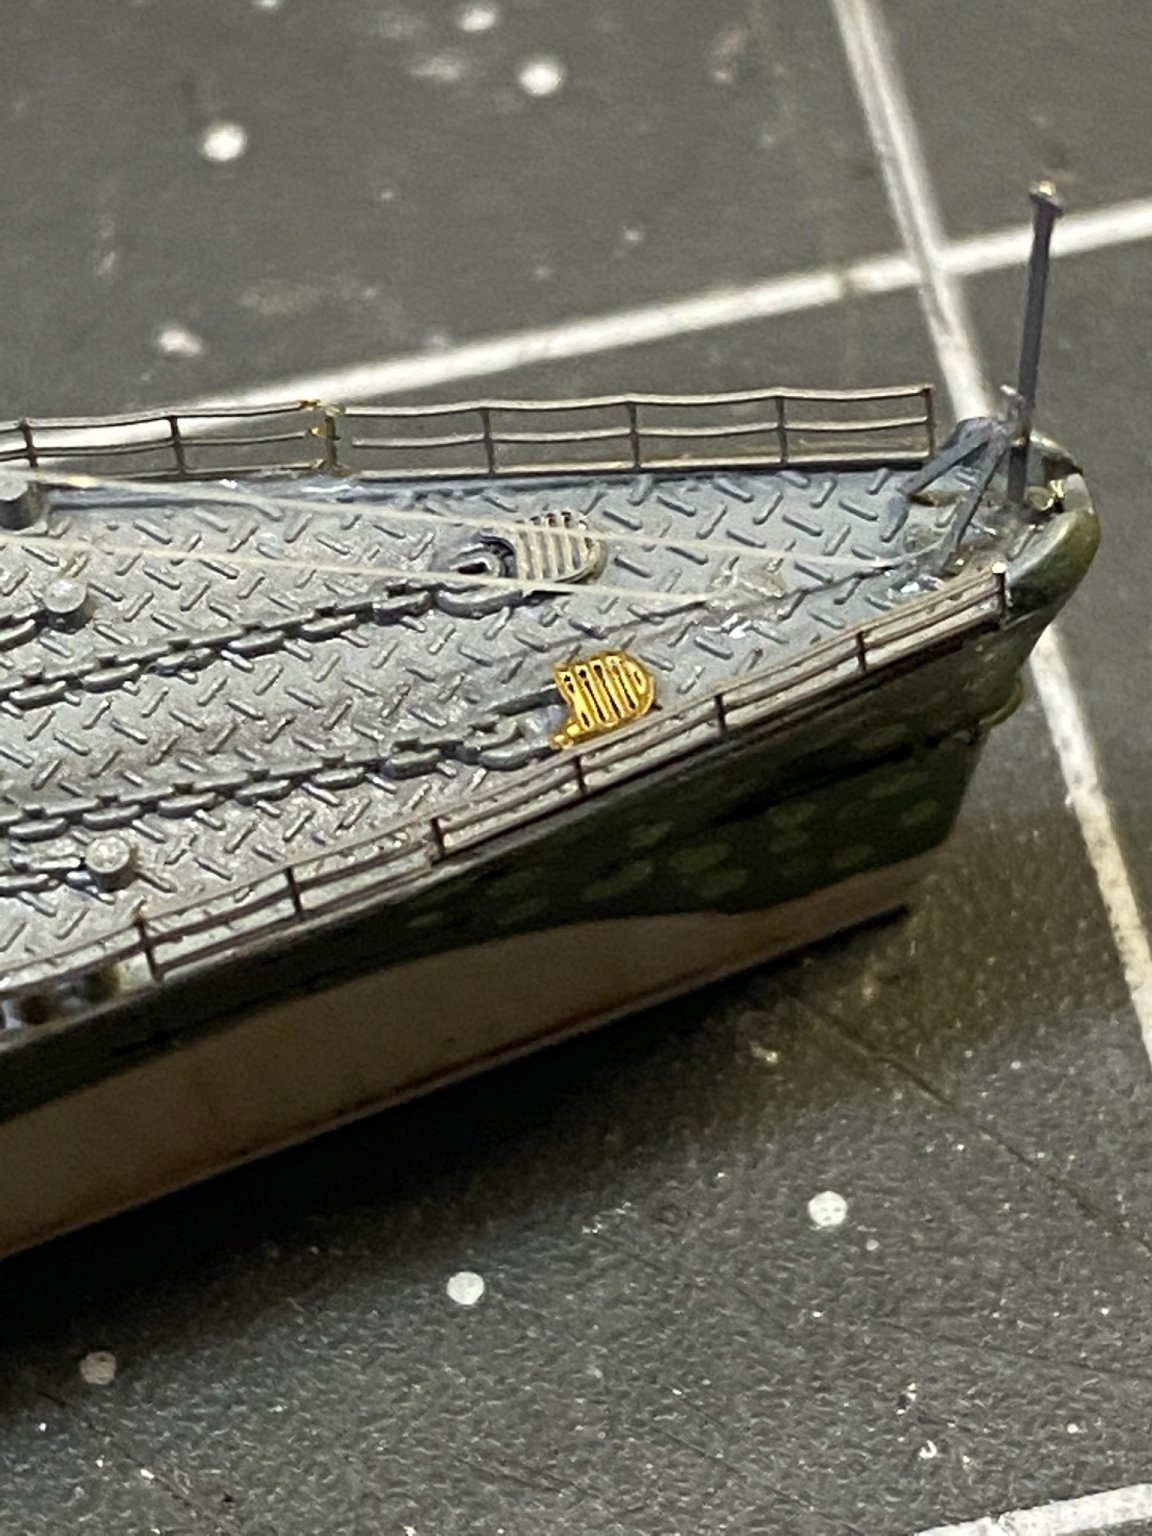
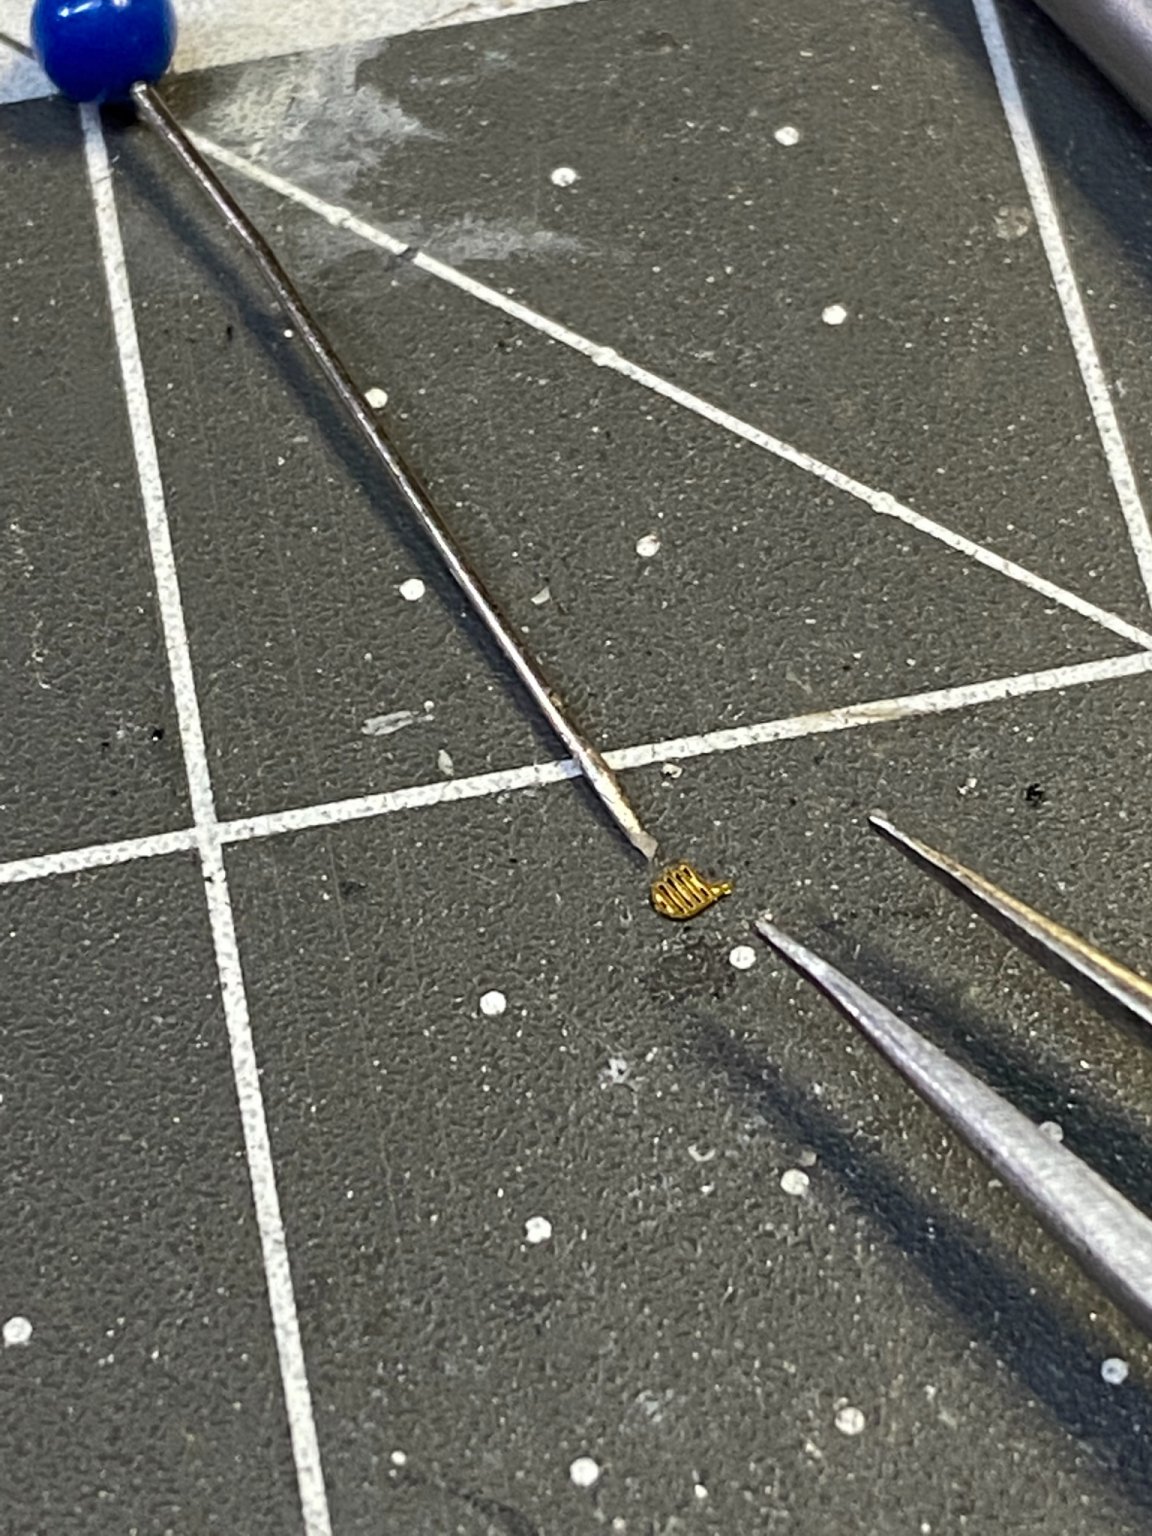
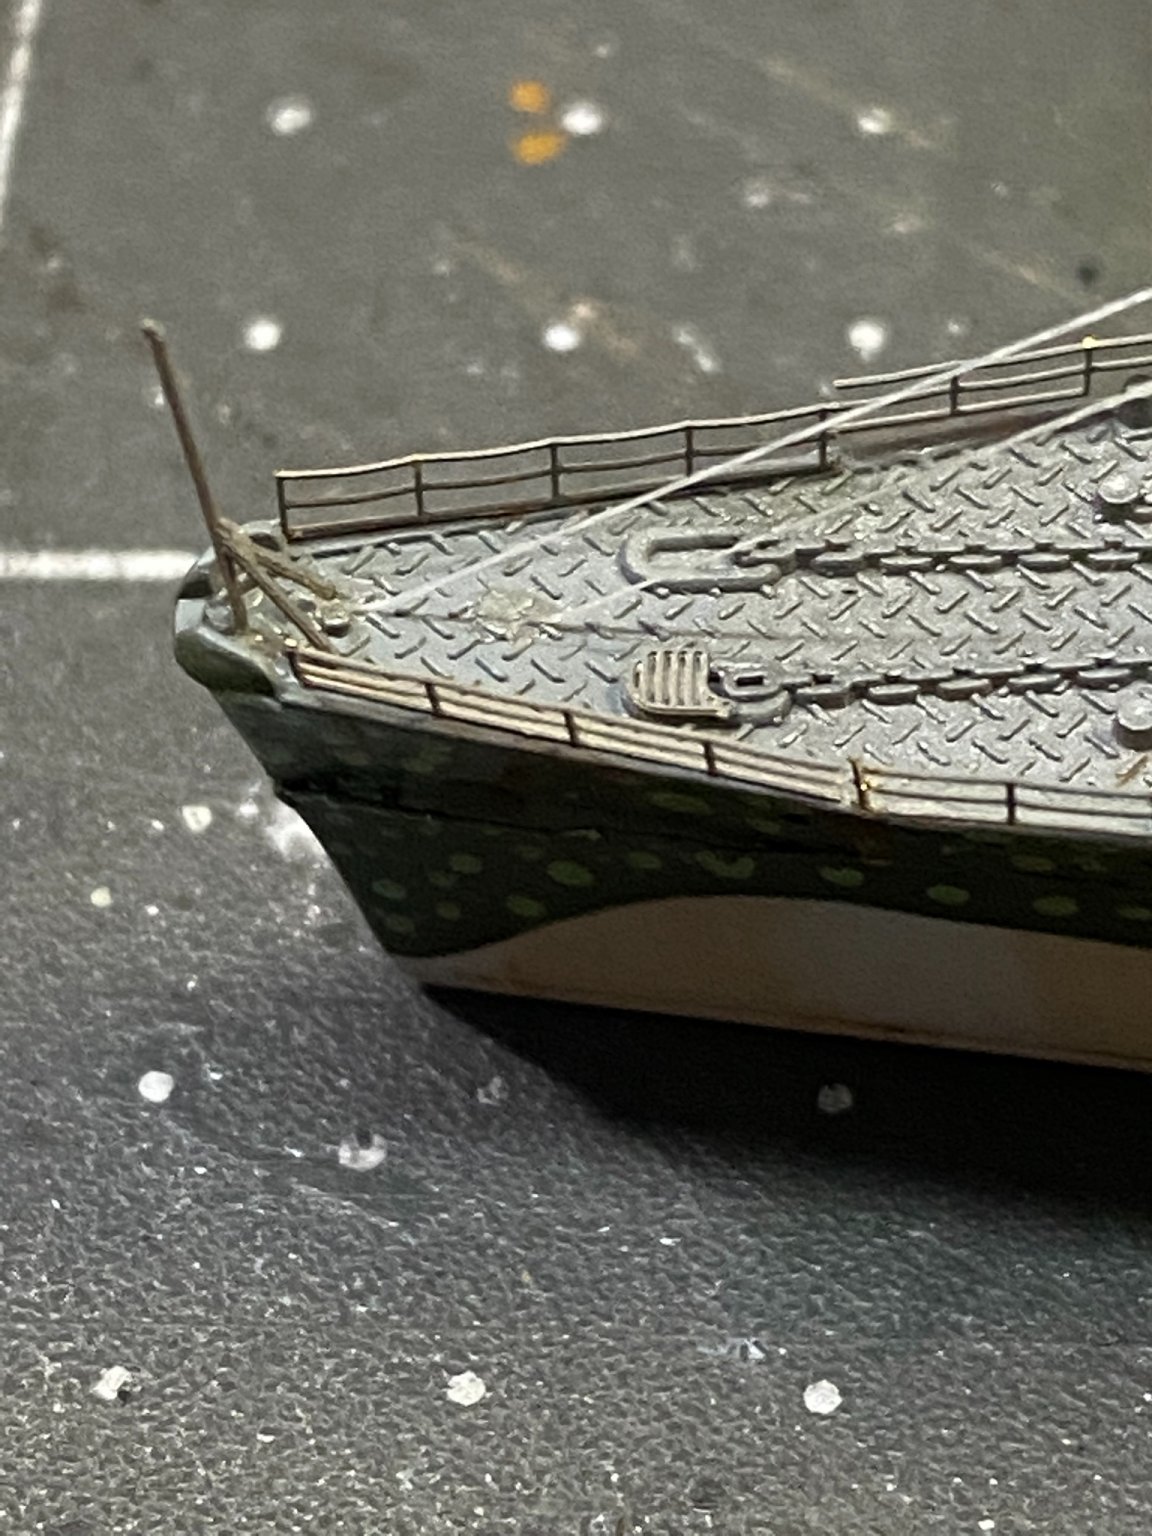
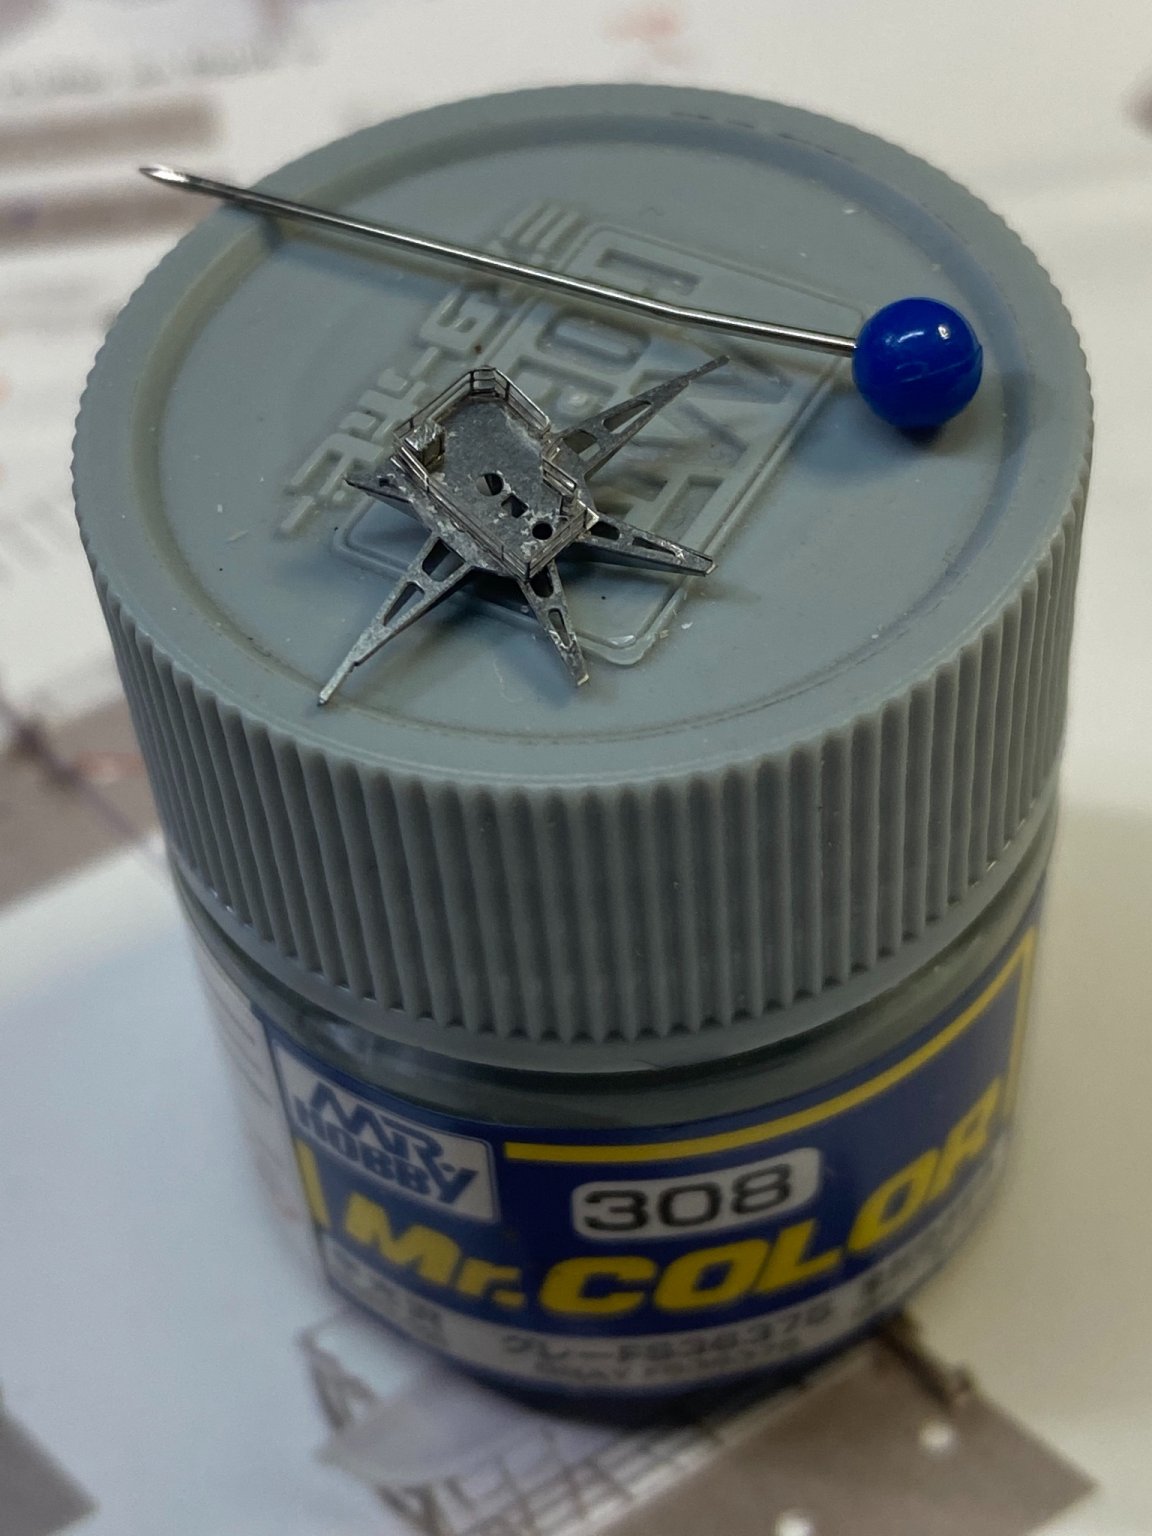
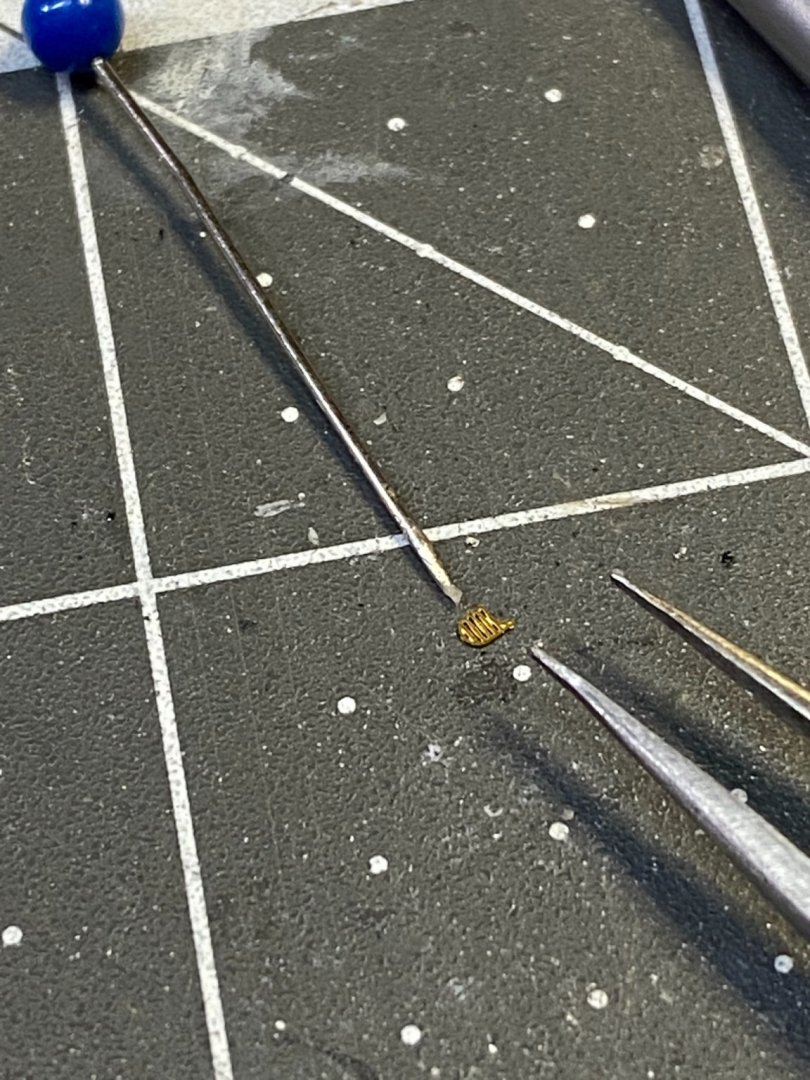
 During the course of completing my model, a very small part was lost while I was spraying paint with my airbrush. Today while working on my HMS Hood model, I looked down on my workbench , lo and behold there was my lost part. Never thought that would ever be found.
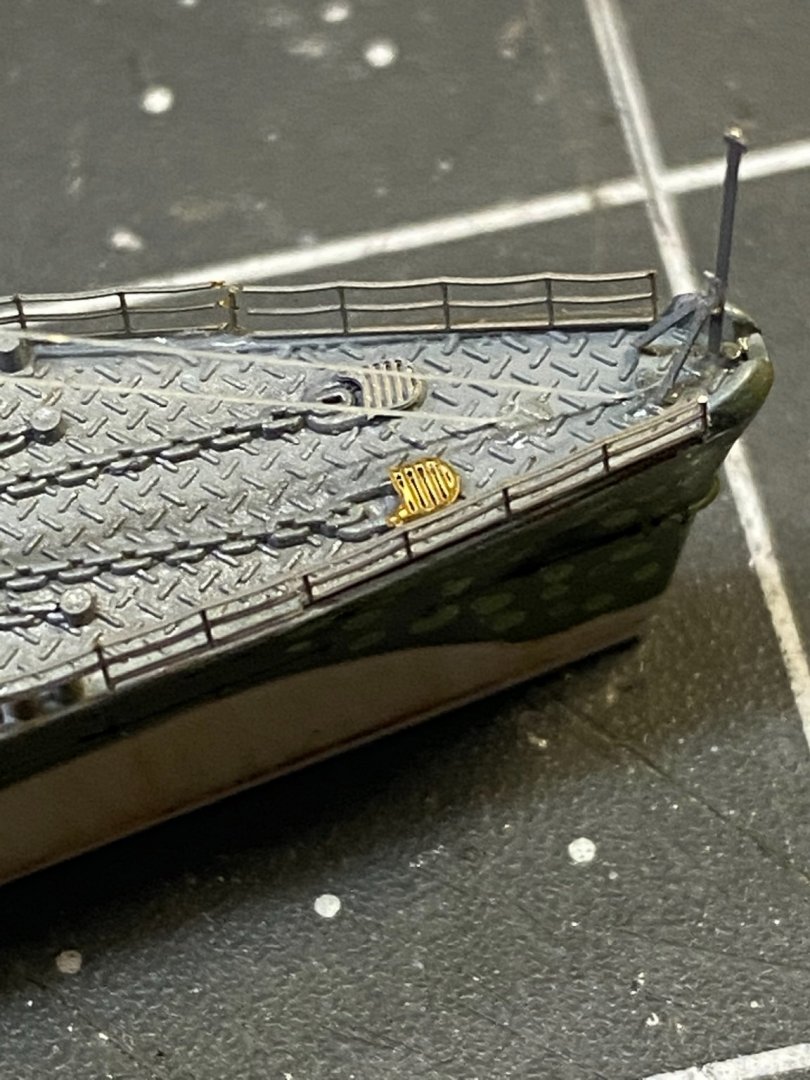

- 127 replies
-
- 10
-
-

-
- Akitsushima
- Pit Road
- (and 2 more)
-
When I first thought about doing a card model, someone suggested Rocket Glue to me and I bought some. Unfortunately it's just sat on my shelf as I never started a card model. Have you tried that brand? This I found to be an excellent glue for clear canopies when I was building and flying RC models. Does not fog and dries clear. Super strong bond, but I have never tried it on paper. It's water based, and I do believe it should work with paper. I have never tried this particular dealer, I just came across it in a random internet search. It's on the shelf at my local hobby shop. ZAP Formula 560 Canopy Glue – Strictly R/C Hobbies (strictlyrchobbies.com)
-
Your diorama is coming along beautifully Alan. I had missed your post that showed the acrylic case you built. Very nice indeed. Does TAP plastics also sell the little corner clamps? I'll have to search them out as I need a source for clear acrylic. Thanks for sharing that.
-
It's been released? Wow, I am slipping. All this home renovation business has totally interfered with my hobby the past few weeks. 🙂
-
I see several or more varieties of glue on the work surface, are all of these various types used in the construction of card models?
-
I love everything about these models, Chris. Beautiful!
-
Thanks Mike. The week leading up to the storm event was much worse for rainfall than the actual storm itself.
- 225 replies
-
- 6
-
-
- I Love Kit
- Hood
- (and 2 more)
-
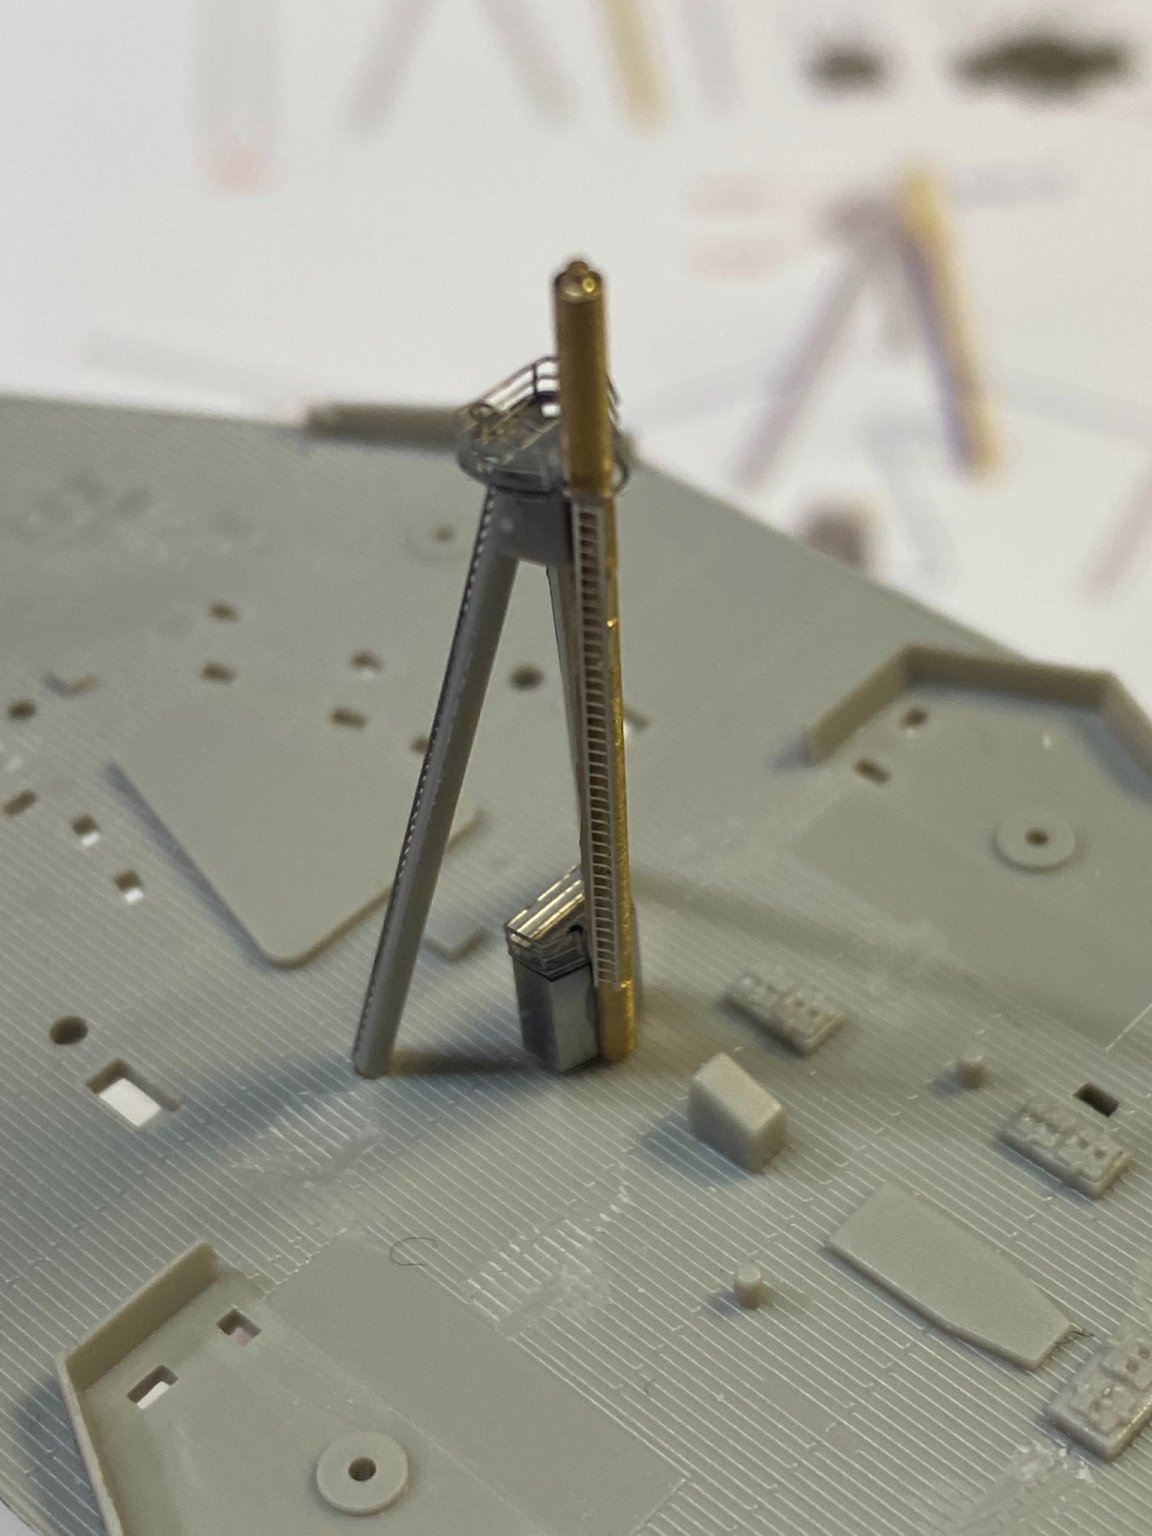
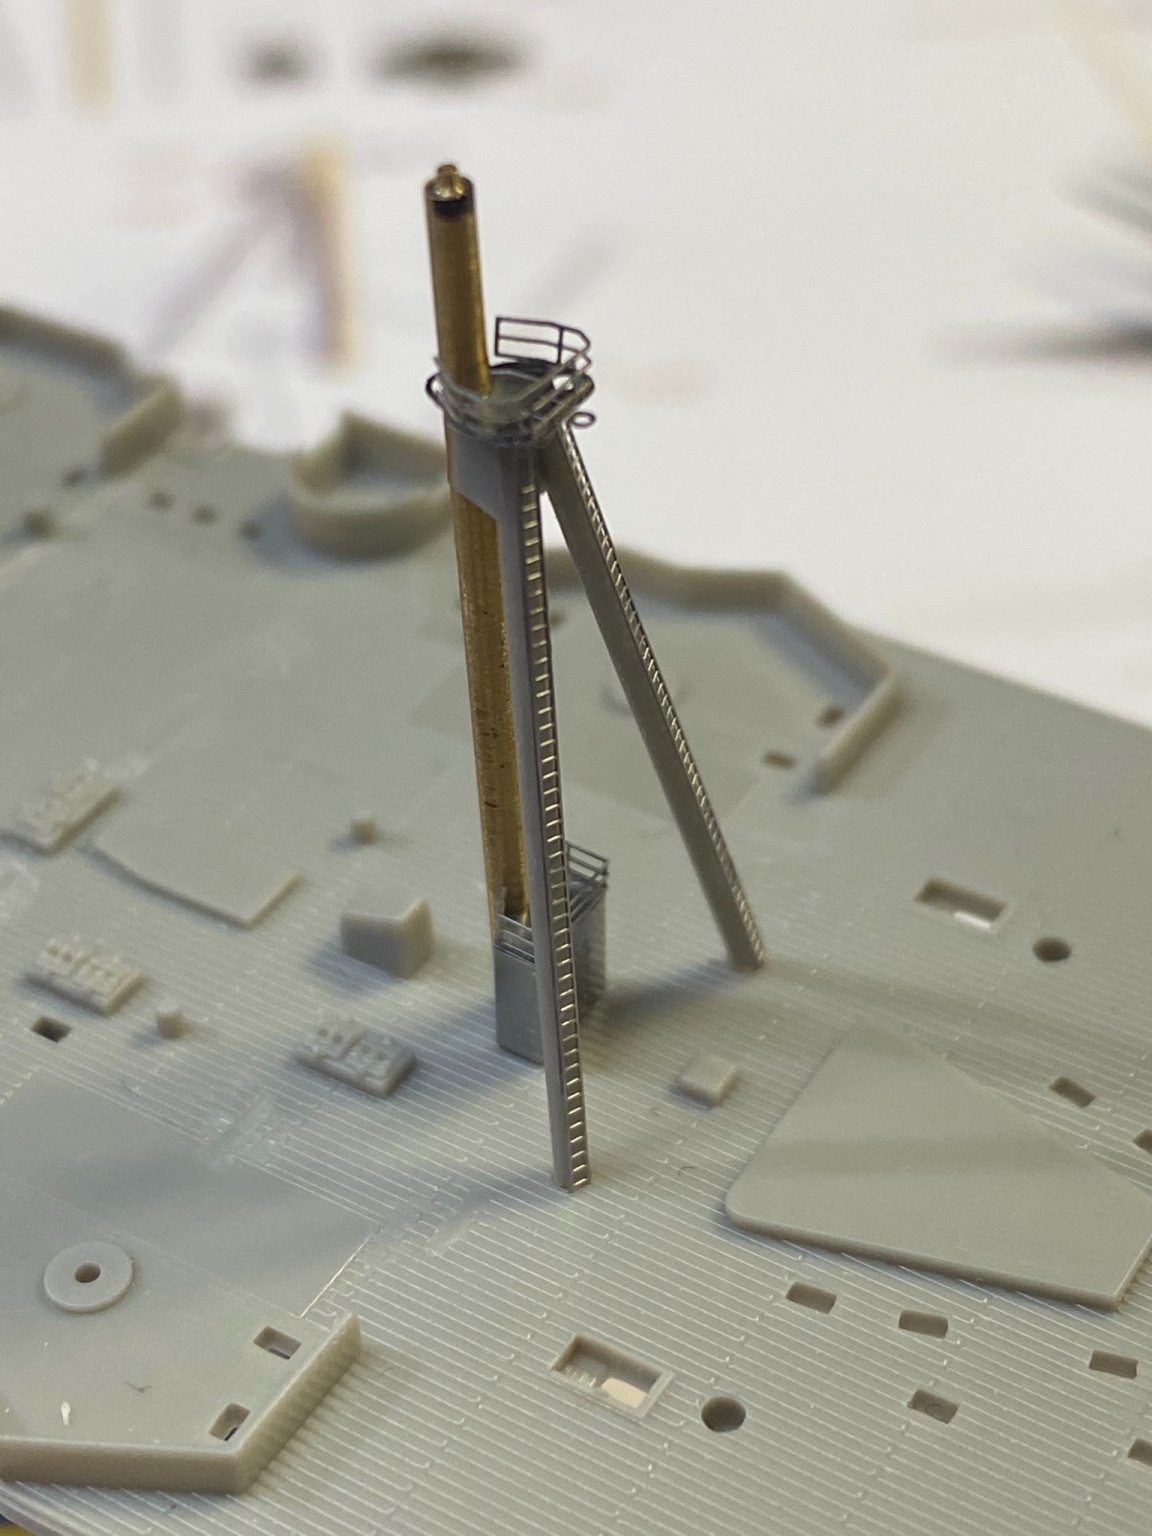
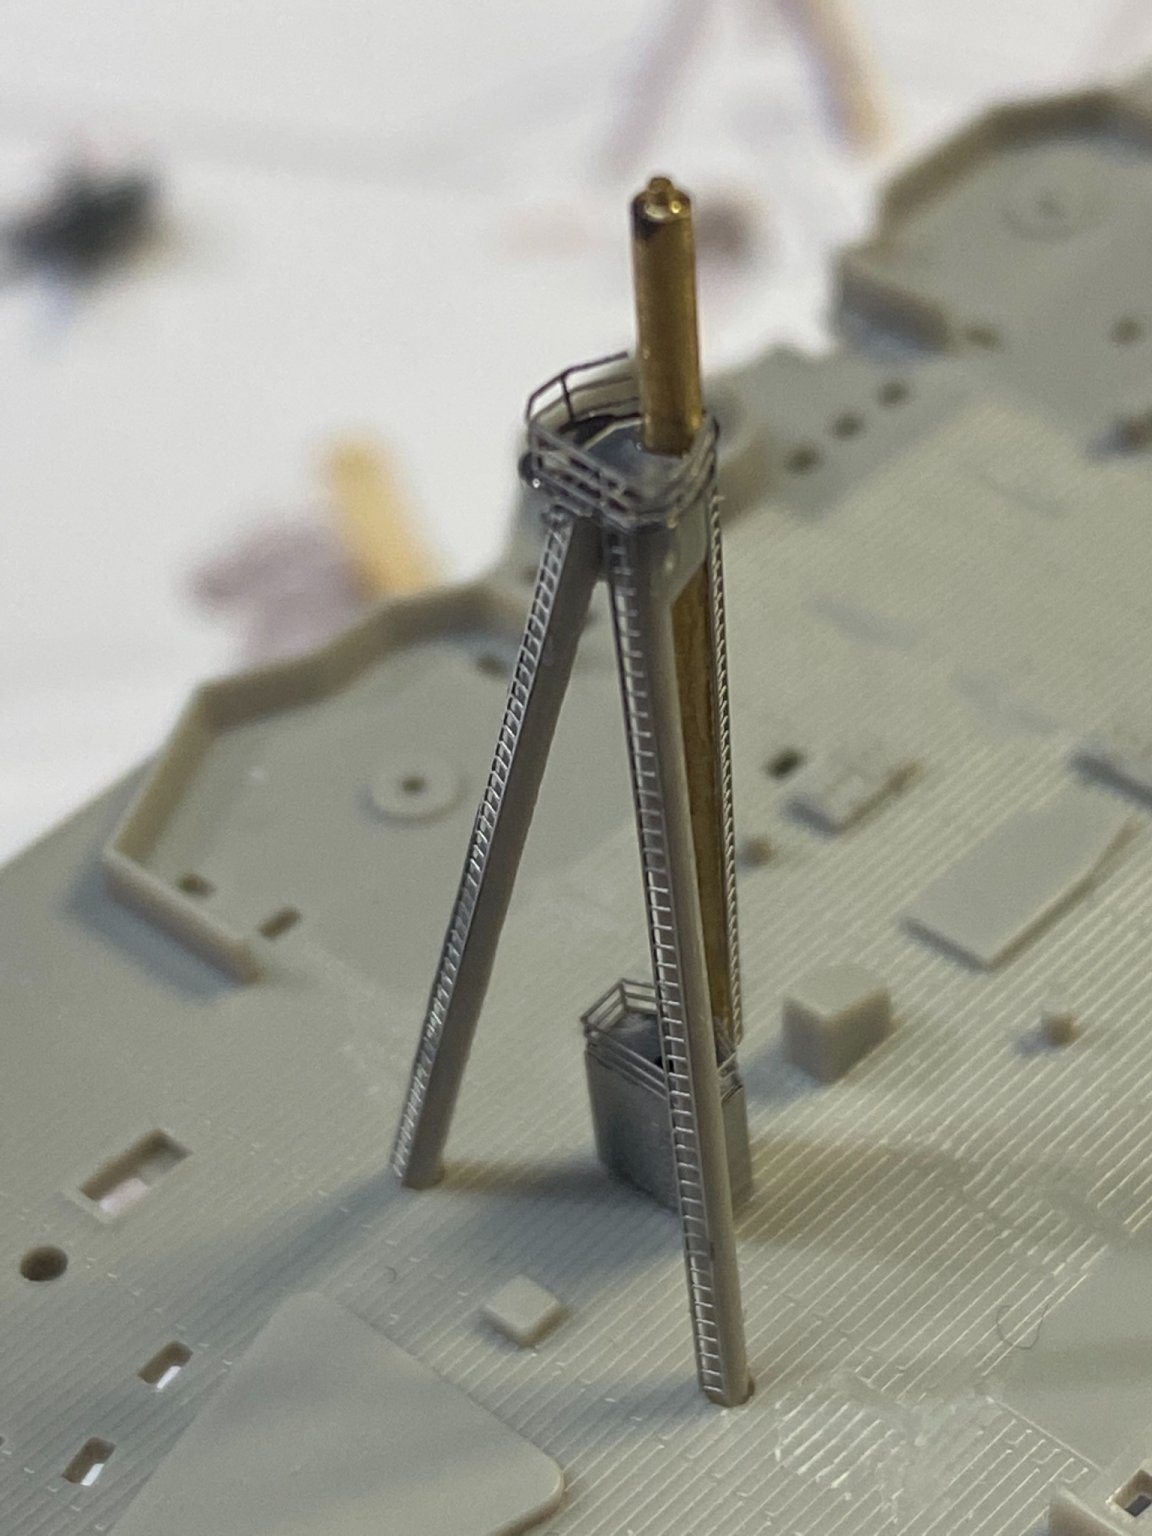
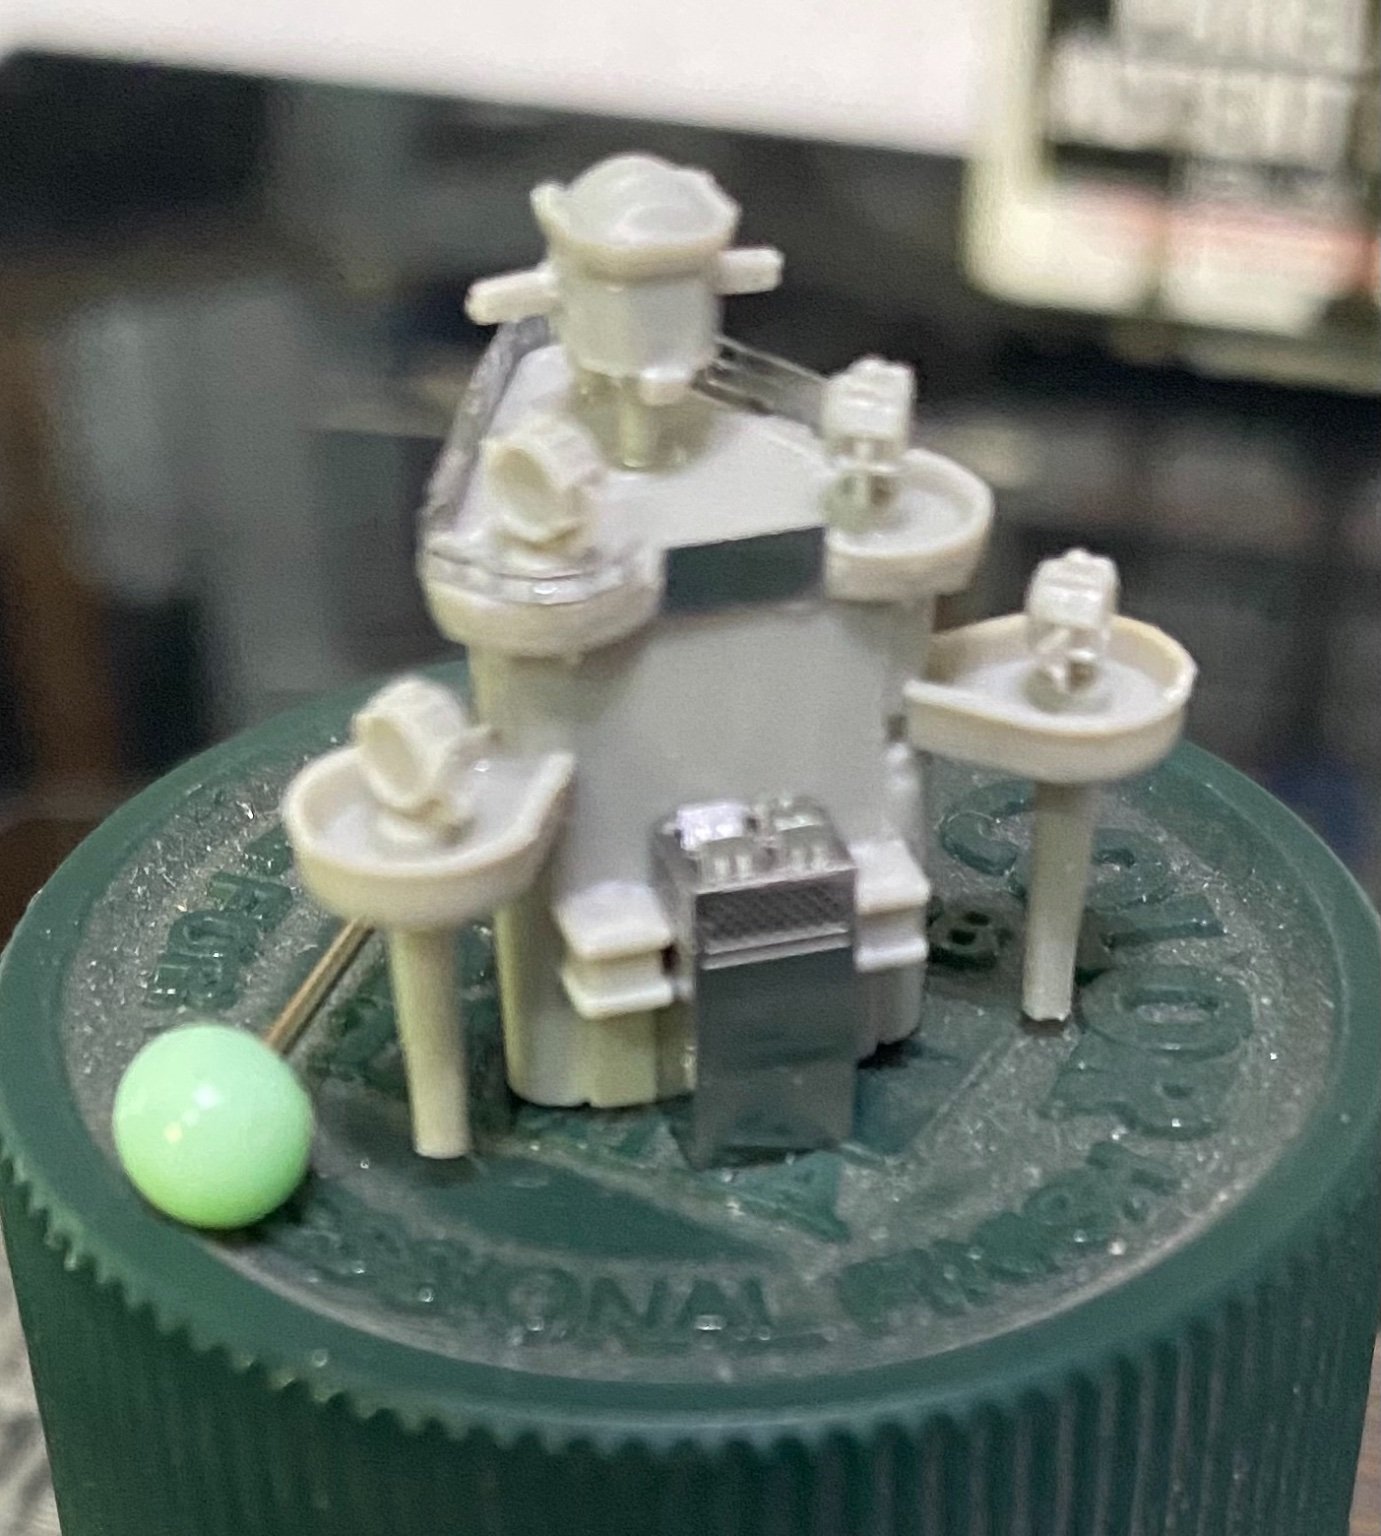
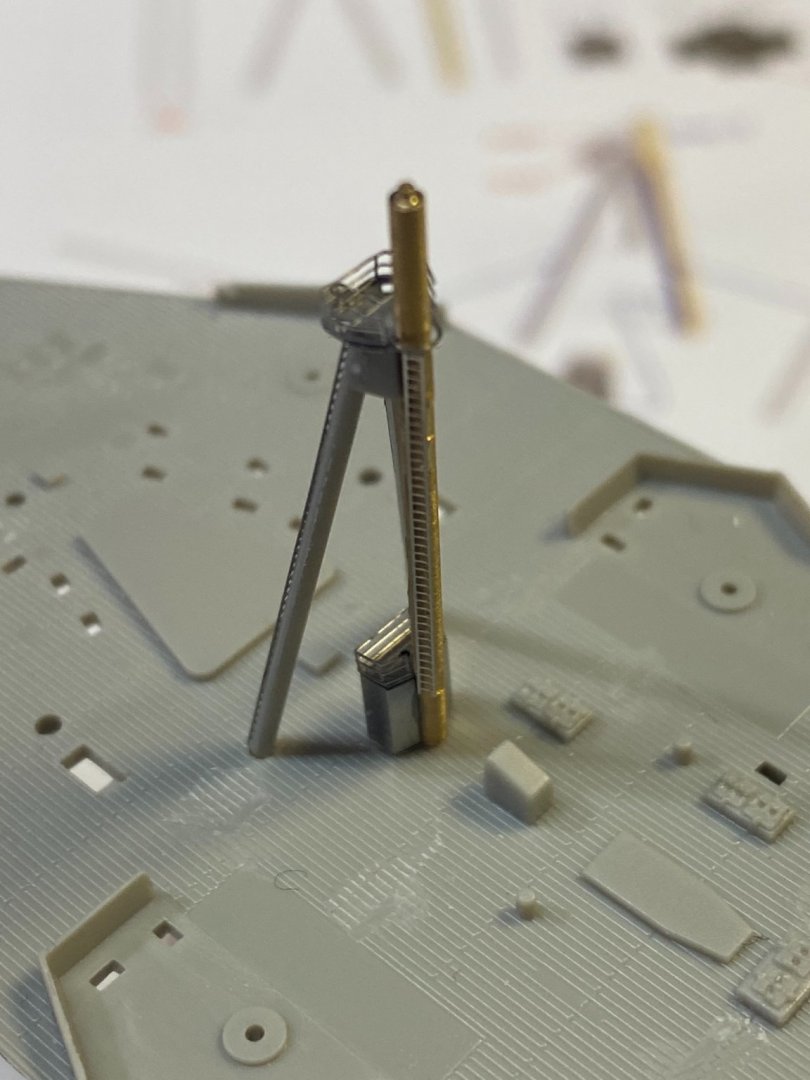
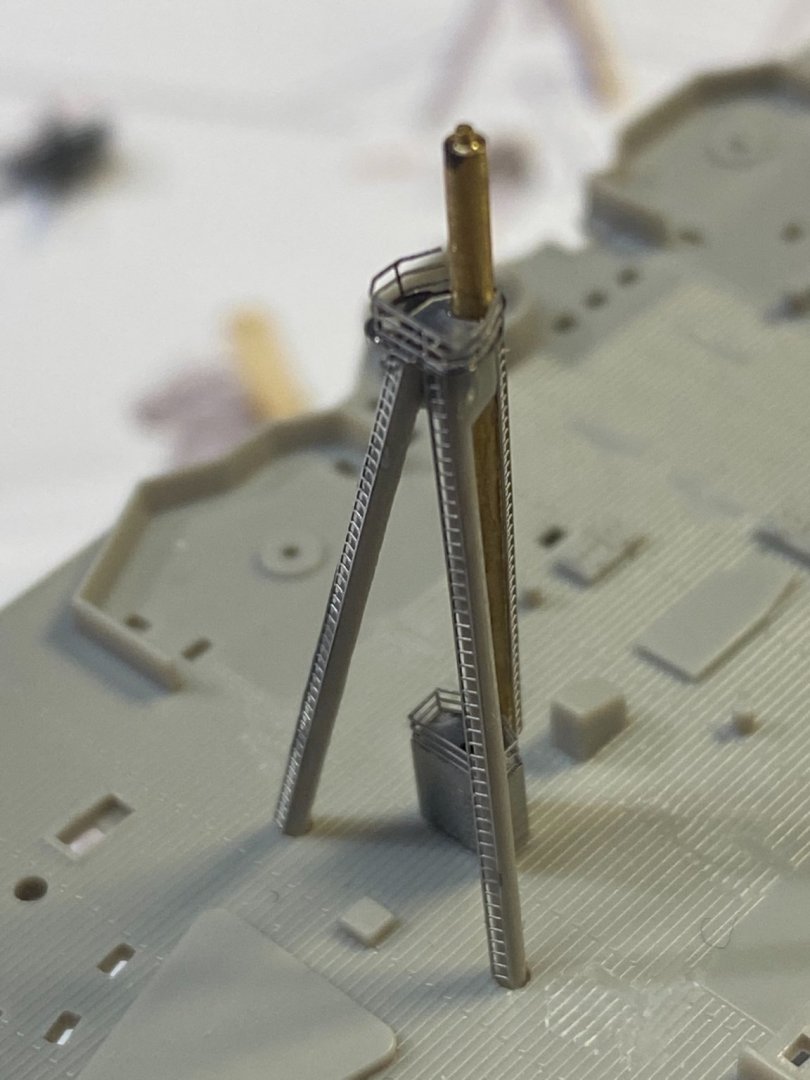
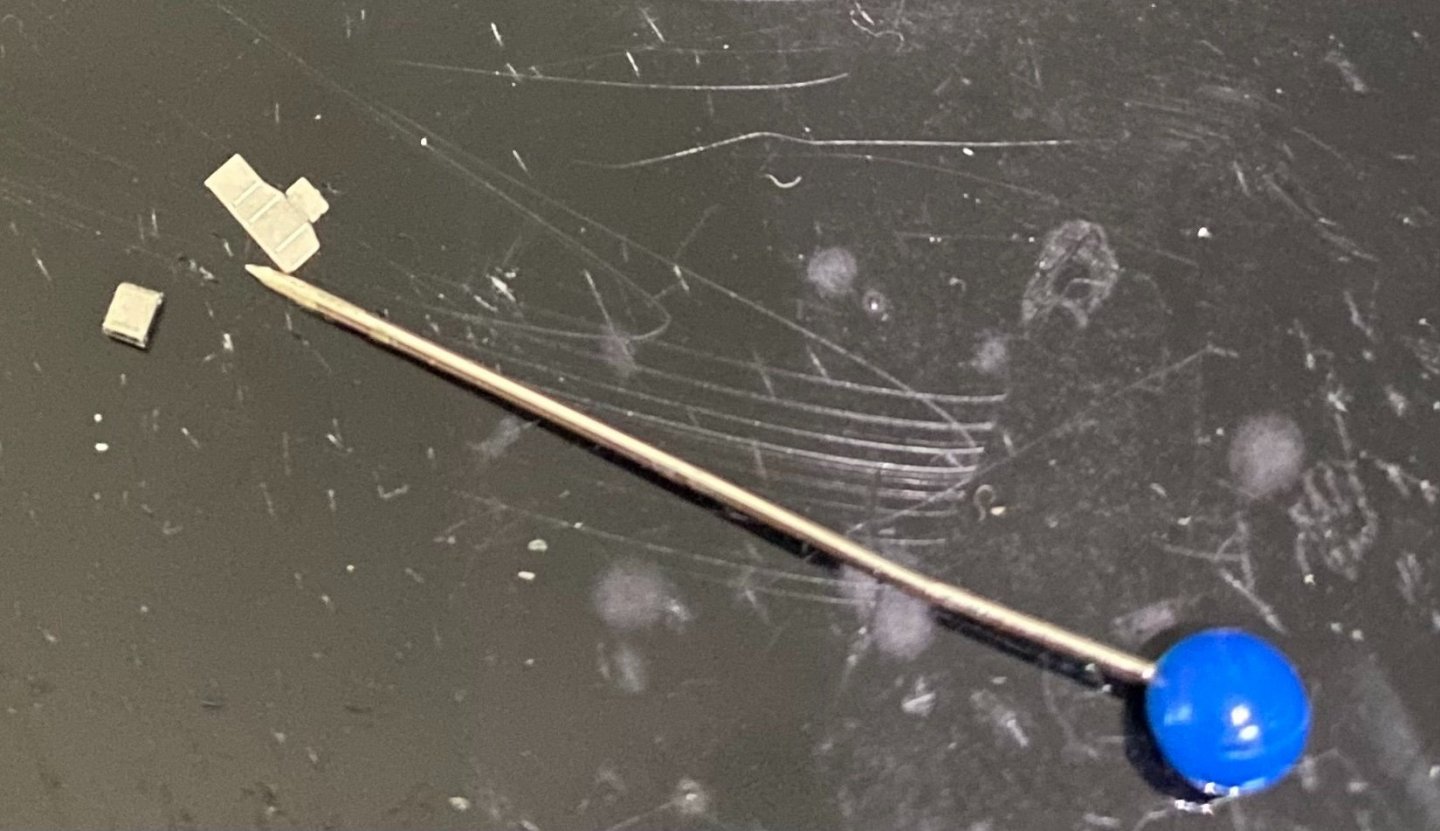
Bottom half of main mast. It’s important to temporarily align the mast legs in their appropriate deck locations as it’s glued together.

- 225 replies
-
- 11
-
-
- I Love Kit
- Hood
- (and 2 more)
-
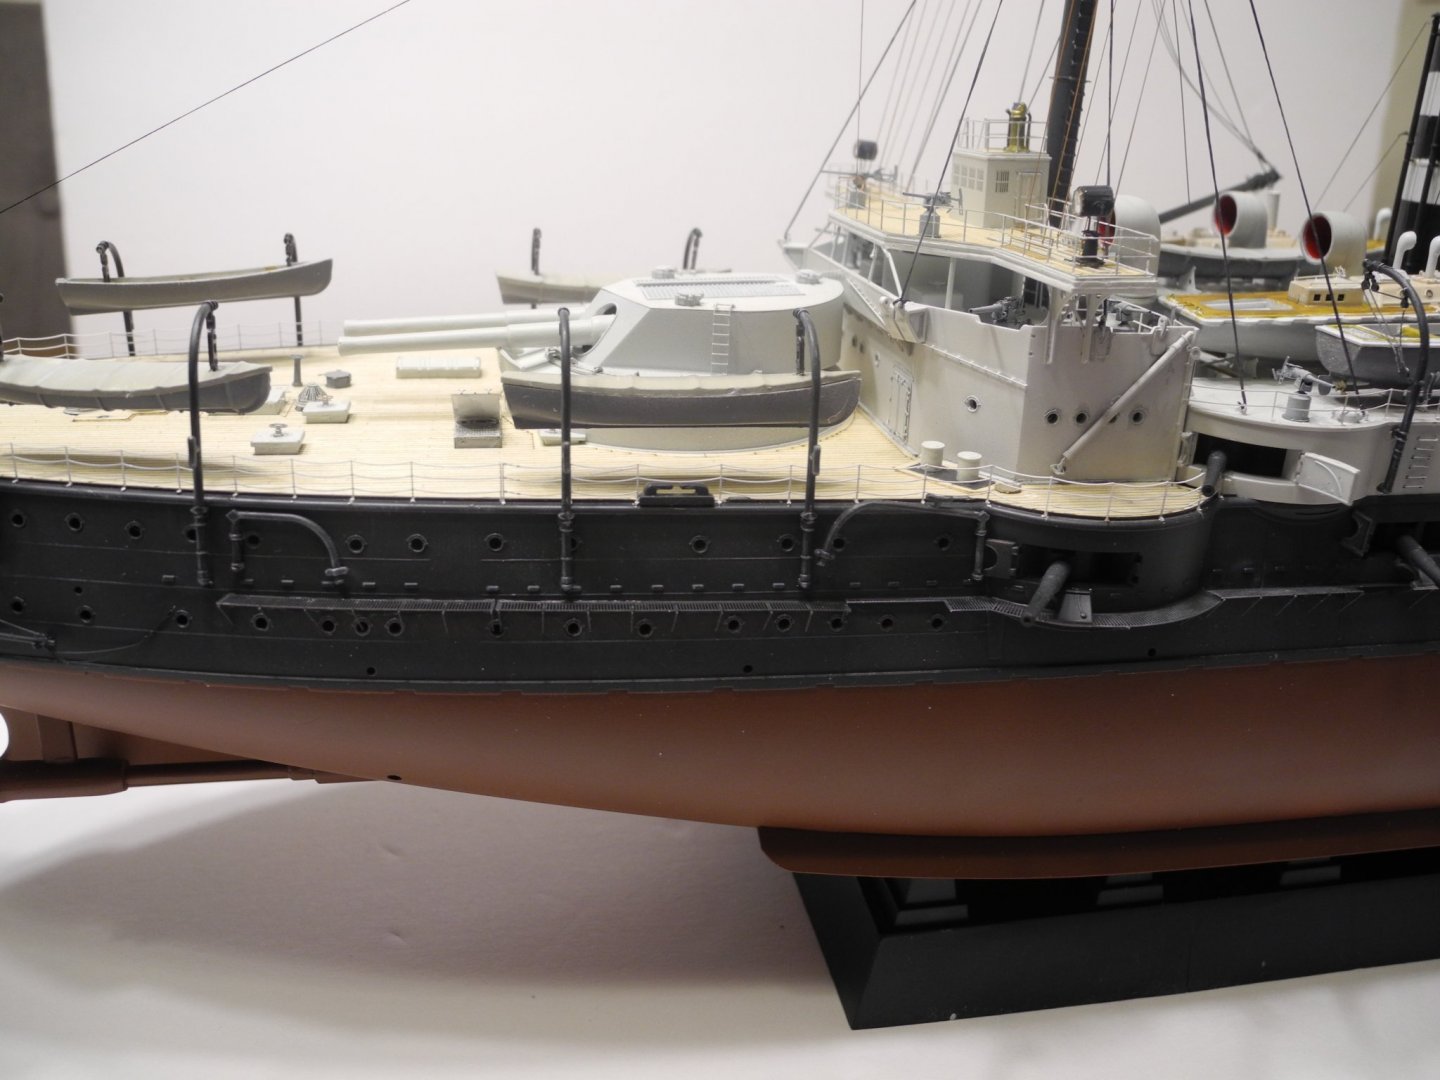
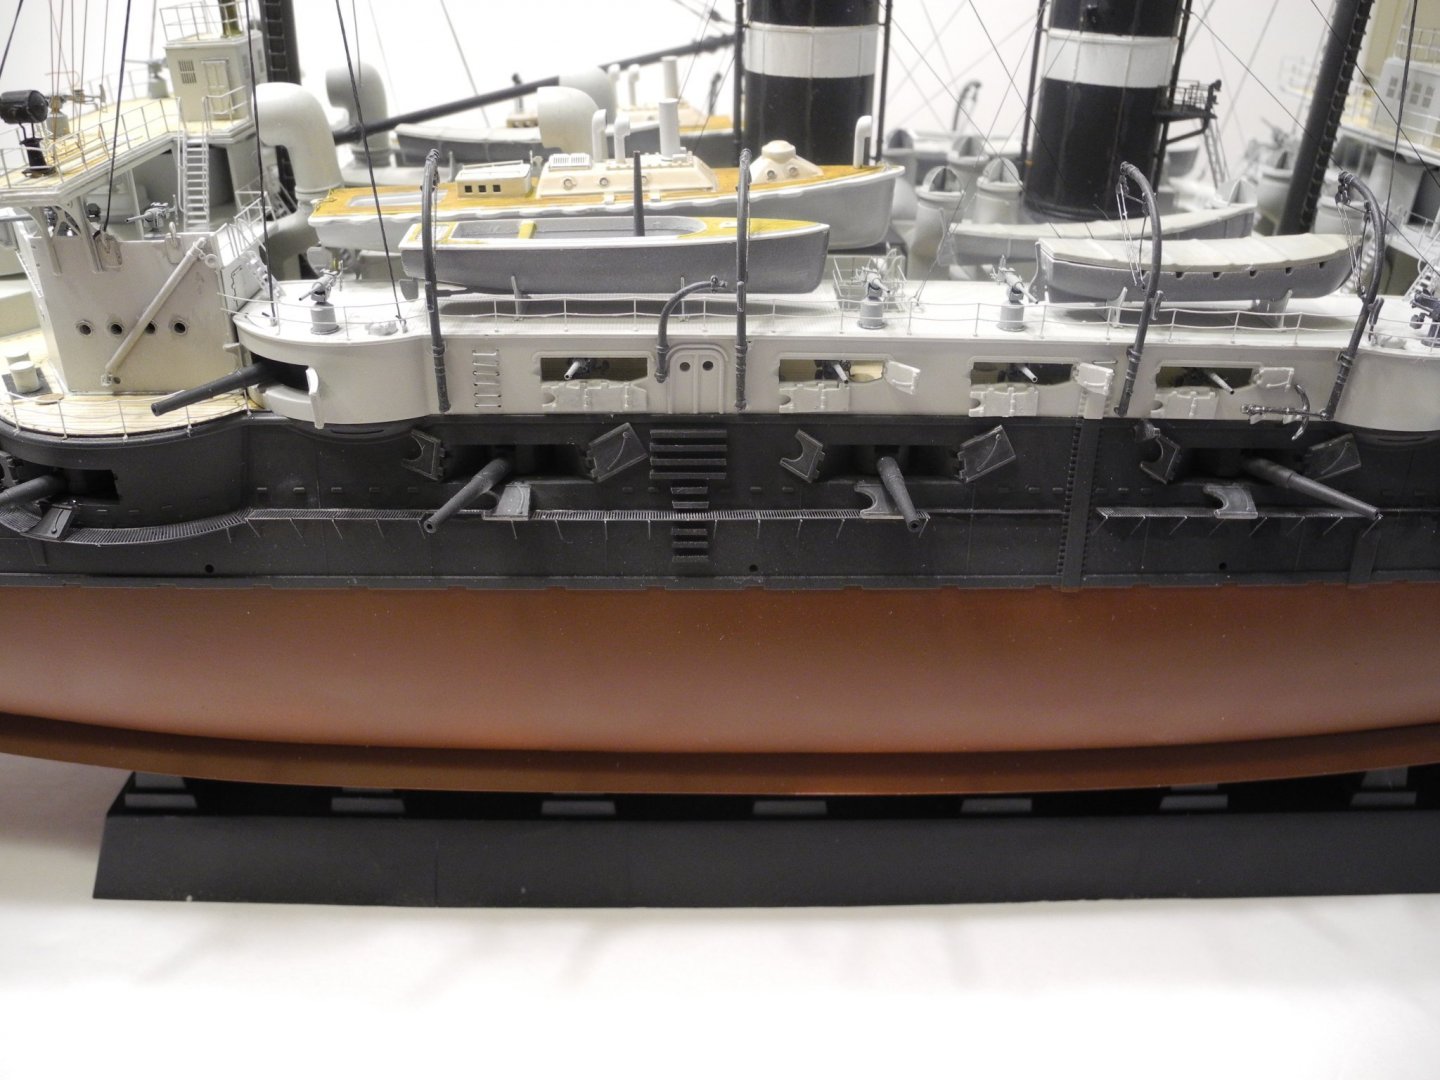
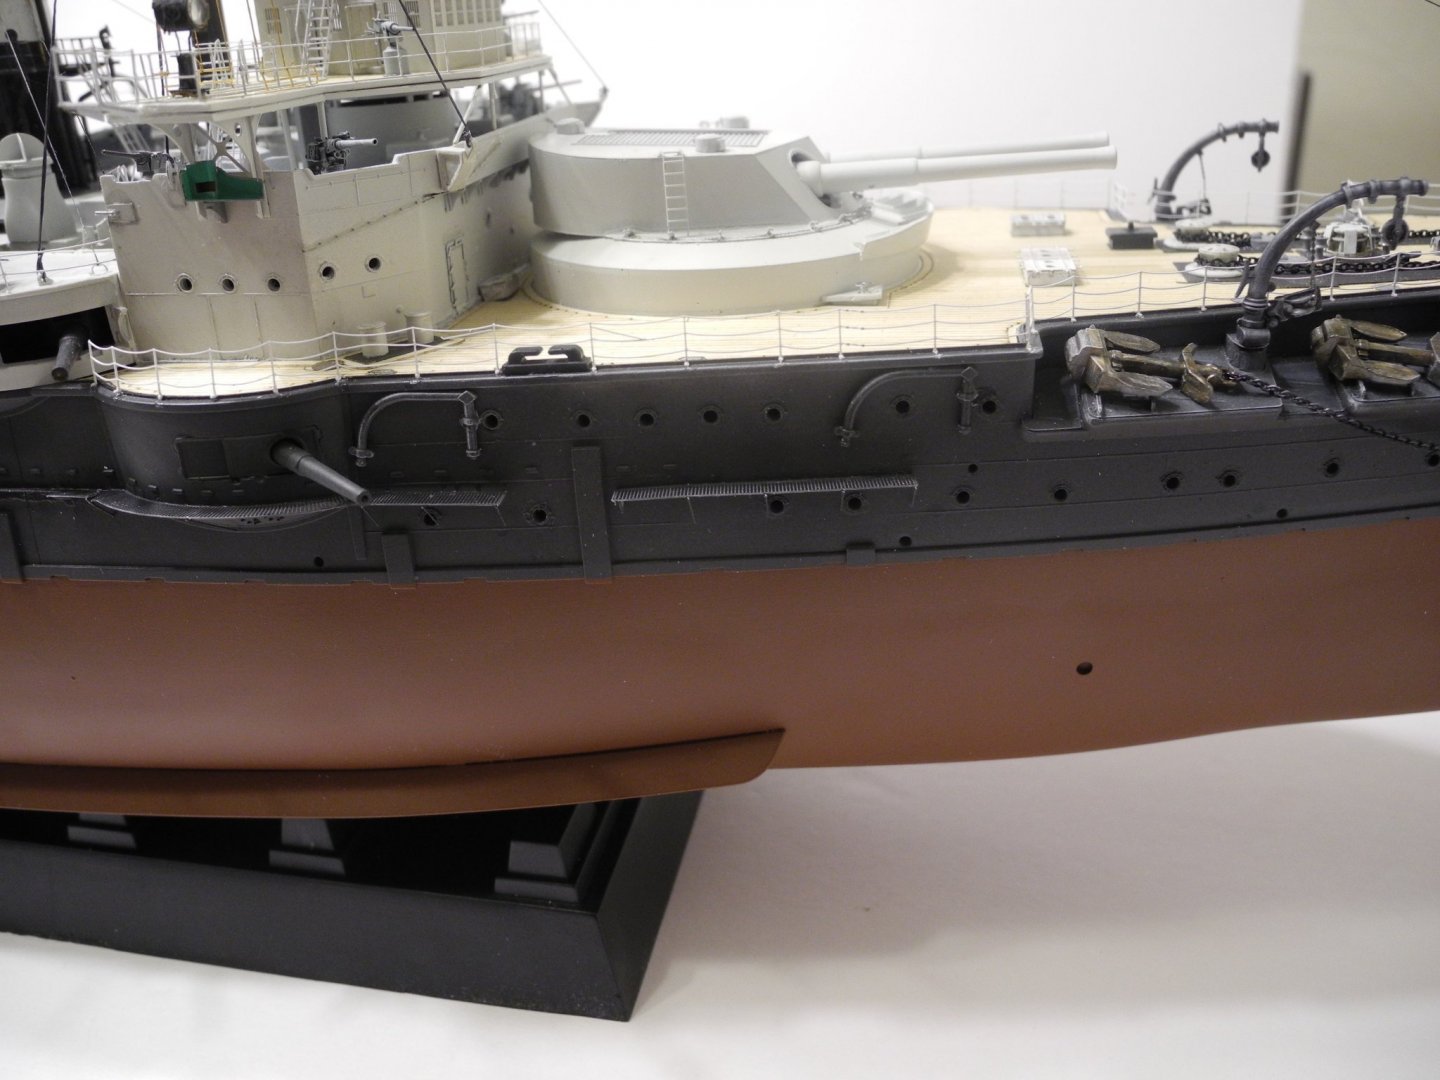
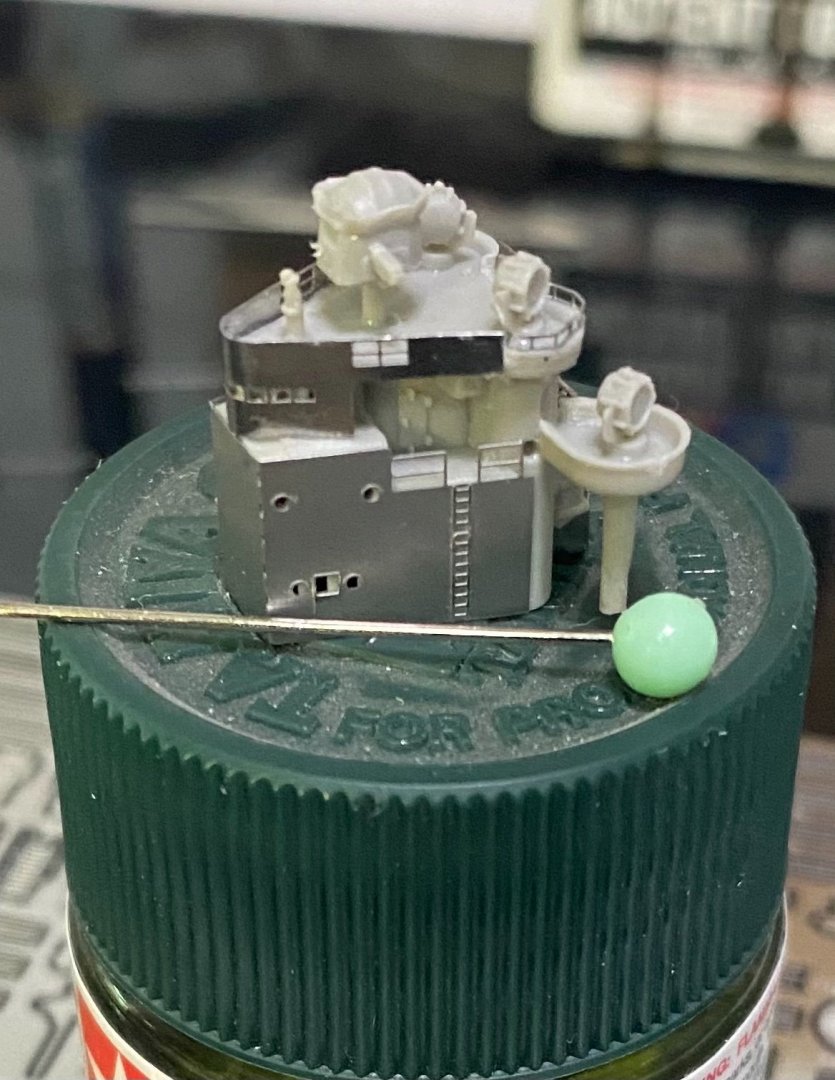
The main mast platform provided a nice exercise in patience, eye strain, and photo etch folding. There is a lot more of this sort of exercise with this kit. The photo etch sheets add hundreds and hundreds of parts to deal with but they all add up to enhance the basic Trumpeter kit.


- 225 replies
-
- 13
-
-
- I Love Kit
- Hood
- (and 2 more)
-
Battle of Dryfe Sands, Lockerbie Scotland, 1593. Clan Caruthers and Clan Pollock (Polk) joined opposing forces of Clan Johnstone and Clan Maxwell in a deadly battle. John Pollock was killed in this battle. John Pollock was my 10th great grandfather. My grandmother Julia Polk is a direct descendant of John Pollock. My grandfather Percy Caruthers is a direct descendant of the Caruthers Clan. What are the odds that a young pair of farmer's children from these warring clans in Scotland would meet each other in a little town called Newberry Florida hundreds of years later, fall in love and marry? Whatever the odds, it happened.
- 225 replies
-
- 8
-

-
-
- I Love Kit
- Hood
- (and 2 more)
-
Glad to hear you got one Roger! Welcome. I am enjoying my kit.
- 225 replies
-
- 5
-
-
- I Love Kit
- Hood
- (and 2 more)
-
Great model, love the progress. Do you have any info on the pilot of the plane that carried these markings? They had some very good pilots from what I have read with victory counts that rivaled the German aces in many cases.
-
For whatever it's worth, the kit color guide calls for Medium Gunship Gray for the sides above the waterline; Mr Color H305, Vallejo 868, Tamiya XF-58. Superstructure pieces Gray; Mr Color H308, Vallejo 990, Tamiya XF-19 They call for Cocoa Brown below the waterline, so their whole color callout may be "off" for all I know. I am going to do a shade of gray darker than Gunship Gray below the waterline in keeping with what OC said.
- 225 replies
-
- 6
-
-
- I Love Kit
- Hood
- (and 2 more)
-
Oh, I forgot to say: the storm named Ella passed by last night without hardly a wimper. I fell asleep around midnight and never woke up until 7 AM. Got up and looked around in the yard, found hardly a branch out of place so I guess we never got a whole lot of wind at all from it. Very thankful we were spared yet again.
- 225 replies
-
- 8
-
-
- I Love Kit
- Hood
- (and 2 more)
-
Despite all the dialogue that could go back and forth over a correct color of gray, I am going to take the easy way out and use a Mr Color gray modulation set to paint my Hood. It will allow me to start with a dark shade of gray then modulate to lighter shades of gray as I see fit to add depth and shading to my model. The gray modulation set consists of four shades of gray, from dark to light. Technically, it's labeled for German tanks. It might be a shade or hue off here and there but I am not enough of a purist to pursue a gray color down to the inth degree.
- 225 replies
-
- 5
-
-
- I Love Kit
- Hood
- (and 2 more)
-
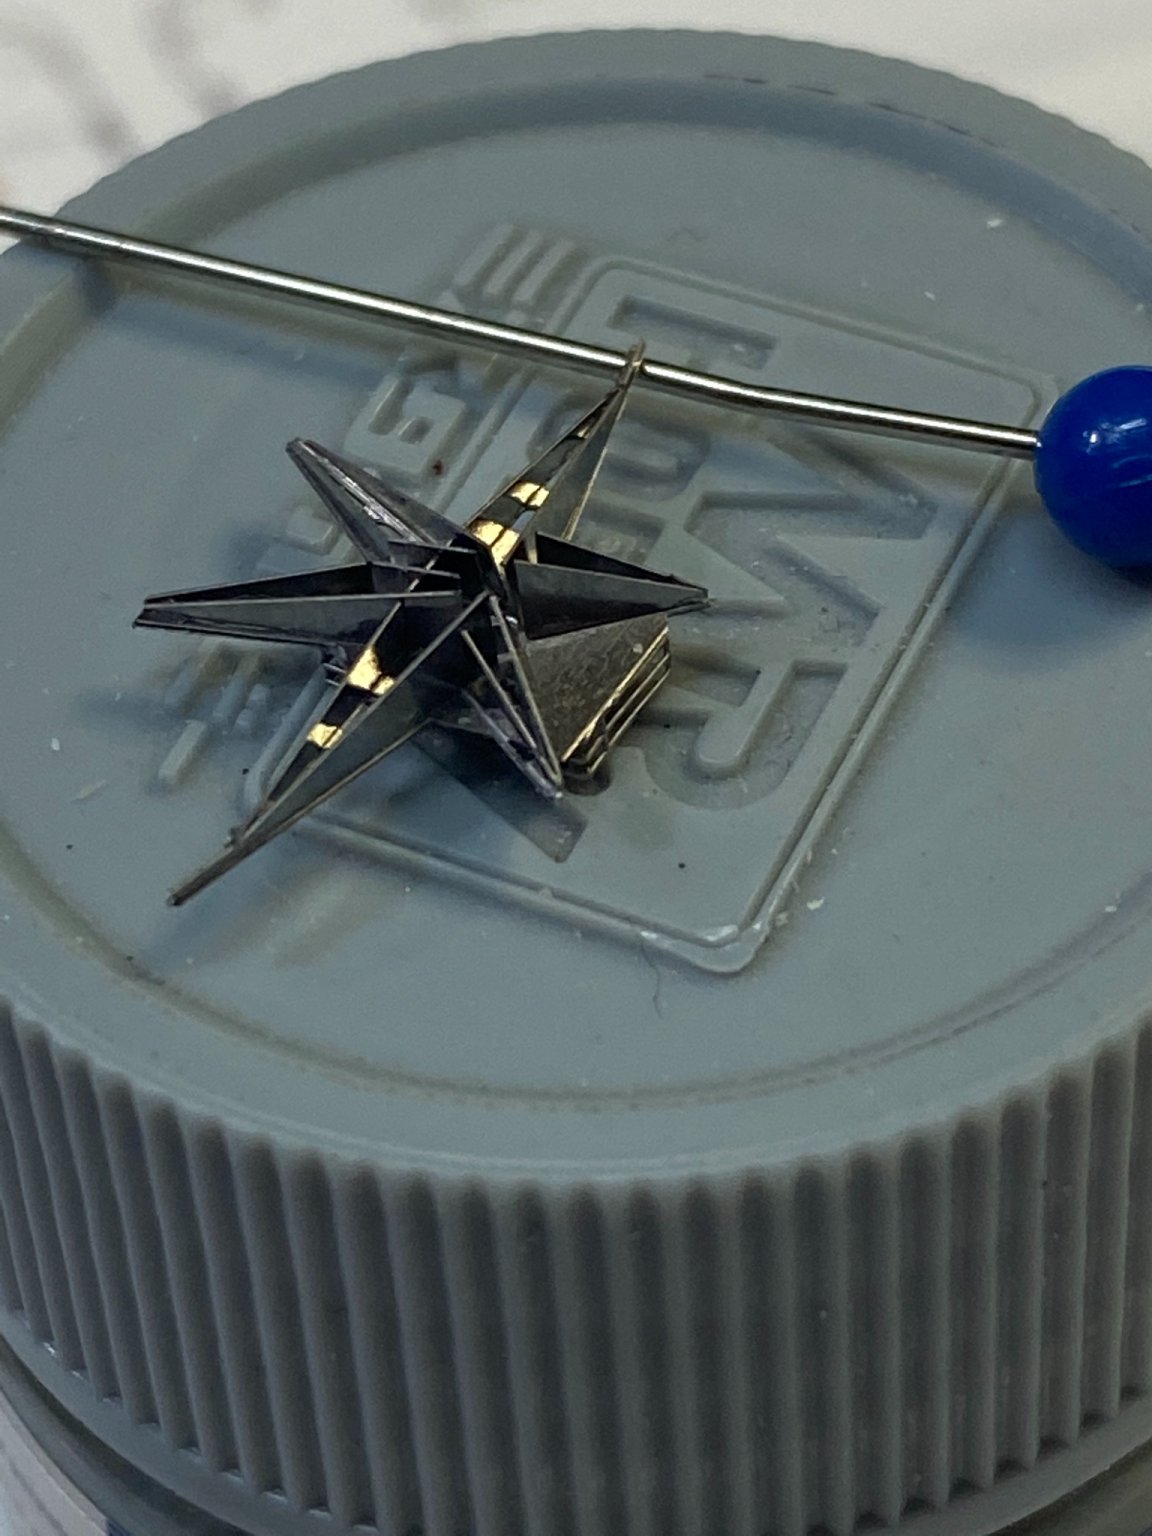
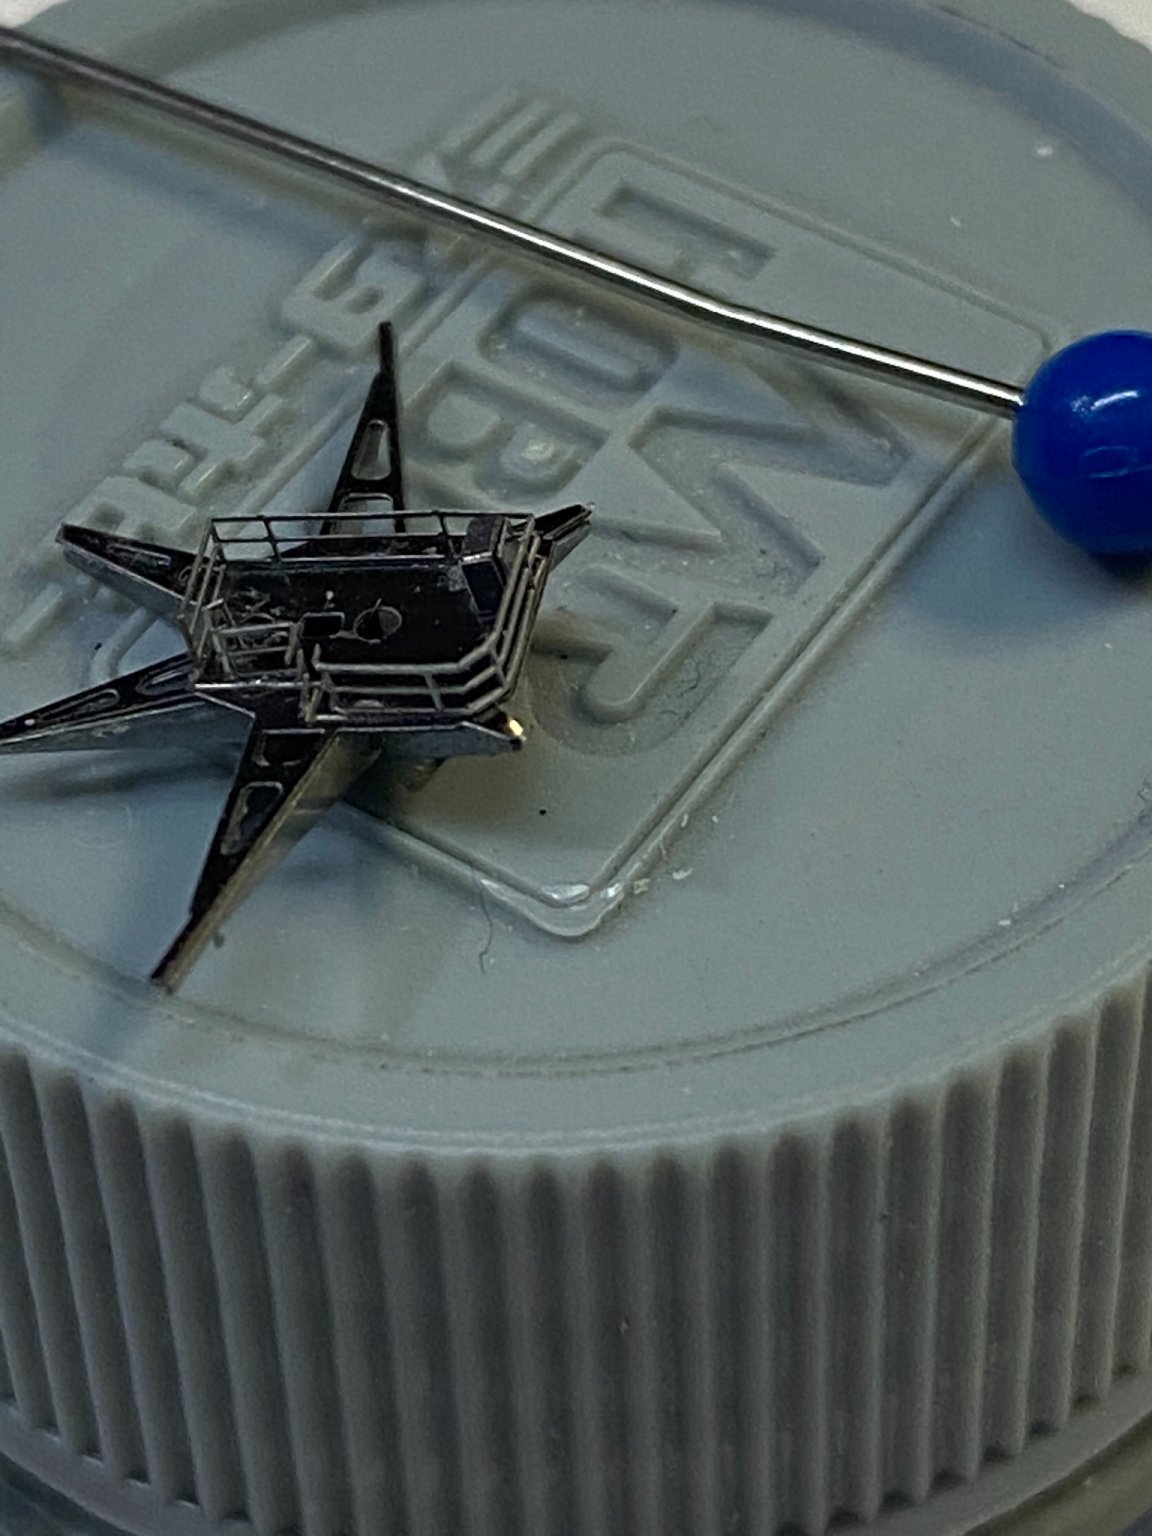
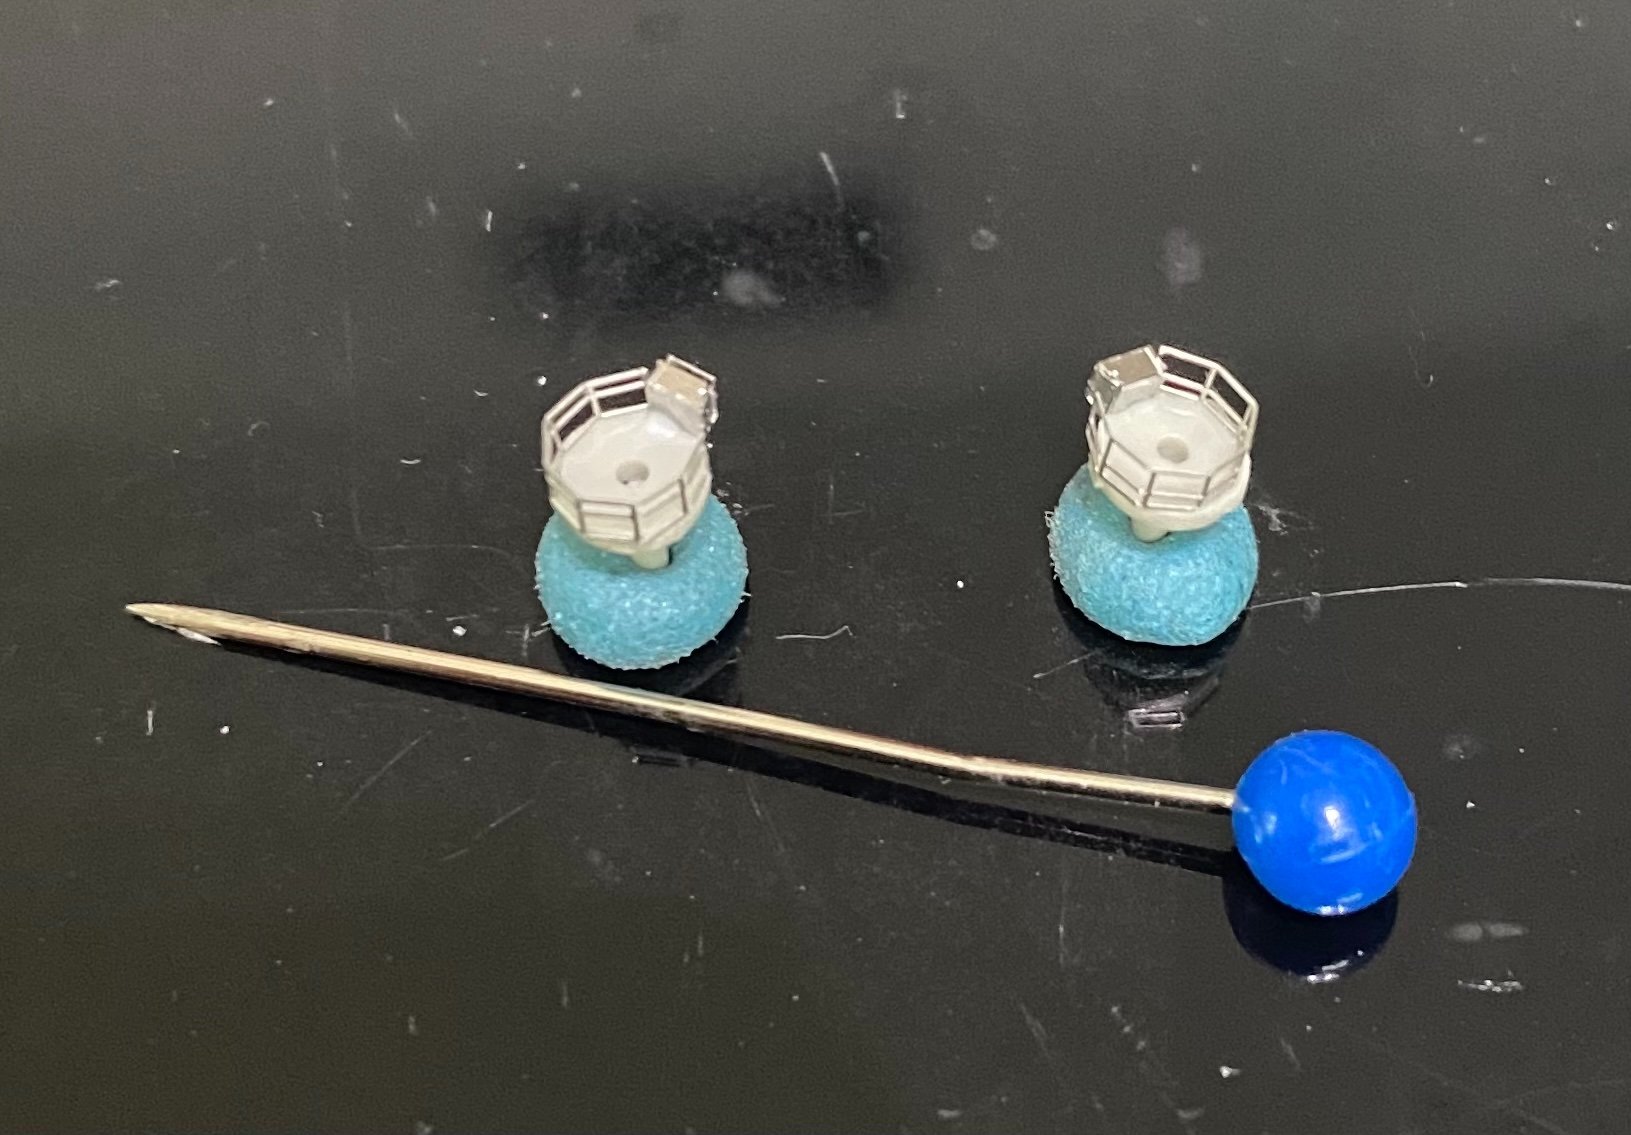
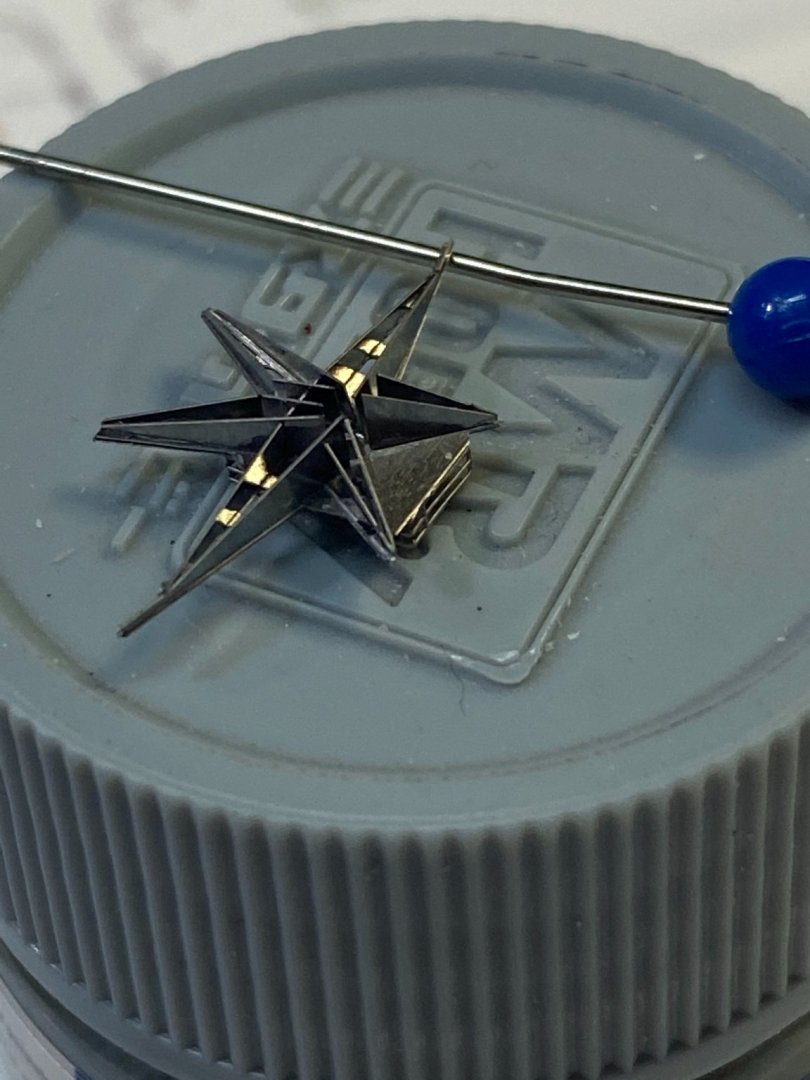
In this case the photo etch is way too fragile for double sided tape. It breaks it when you try and pull it off something it’s attached to. Yes there are sometimes pre etched fold lines but in this case no. You get a very small straight section of rail that must be bent to a radius that fits the searchlight platform. It was completely bent to a round shape when I was adjusting the size of the radius to fit the platform. While doing that, it sprung away from the tweezers and was gone. Unfortunately, a plastic bag distorts the view of a small part like this to an extent that blurs vision of it.
- 225 replies
-
- 4
-
-
- I Love Kit
- Hood
- (and 2 more)
-
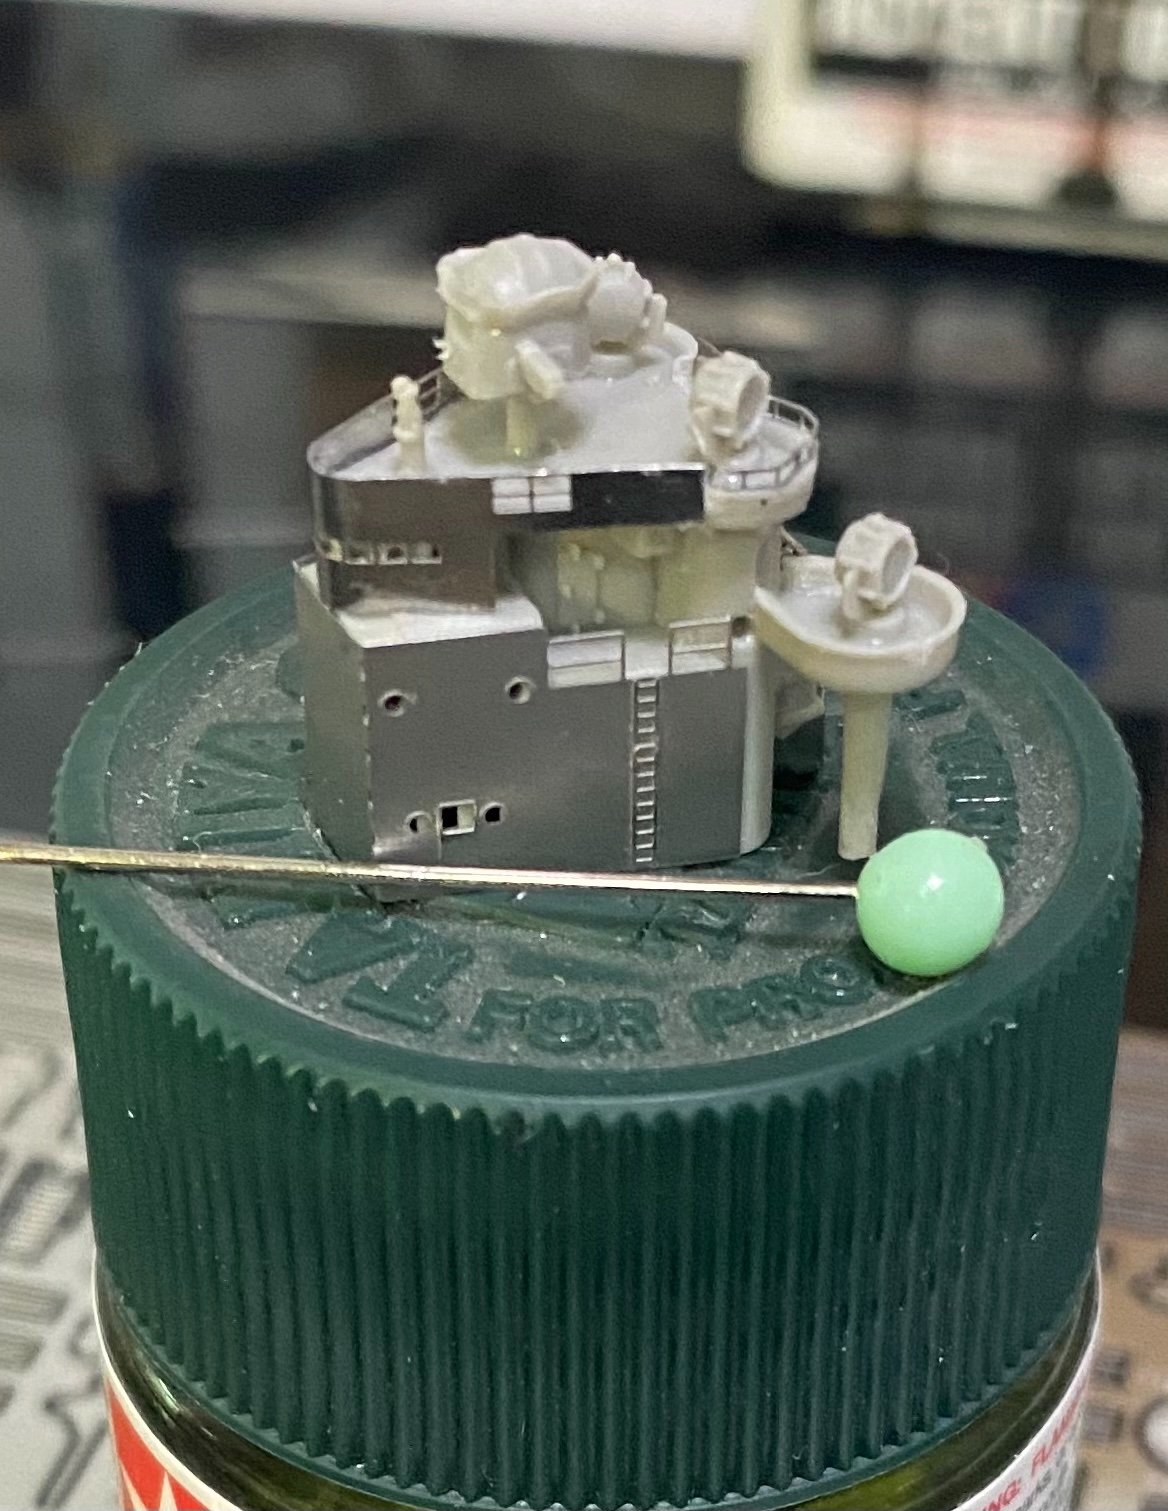
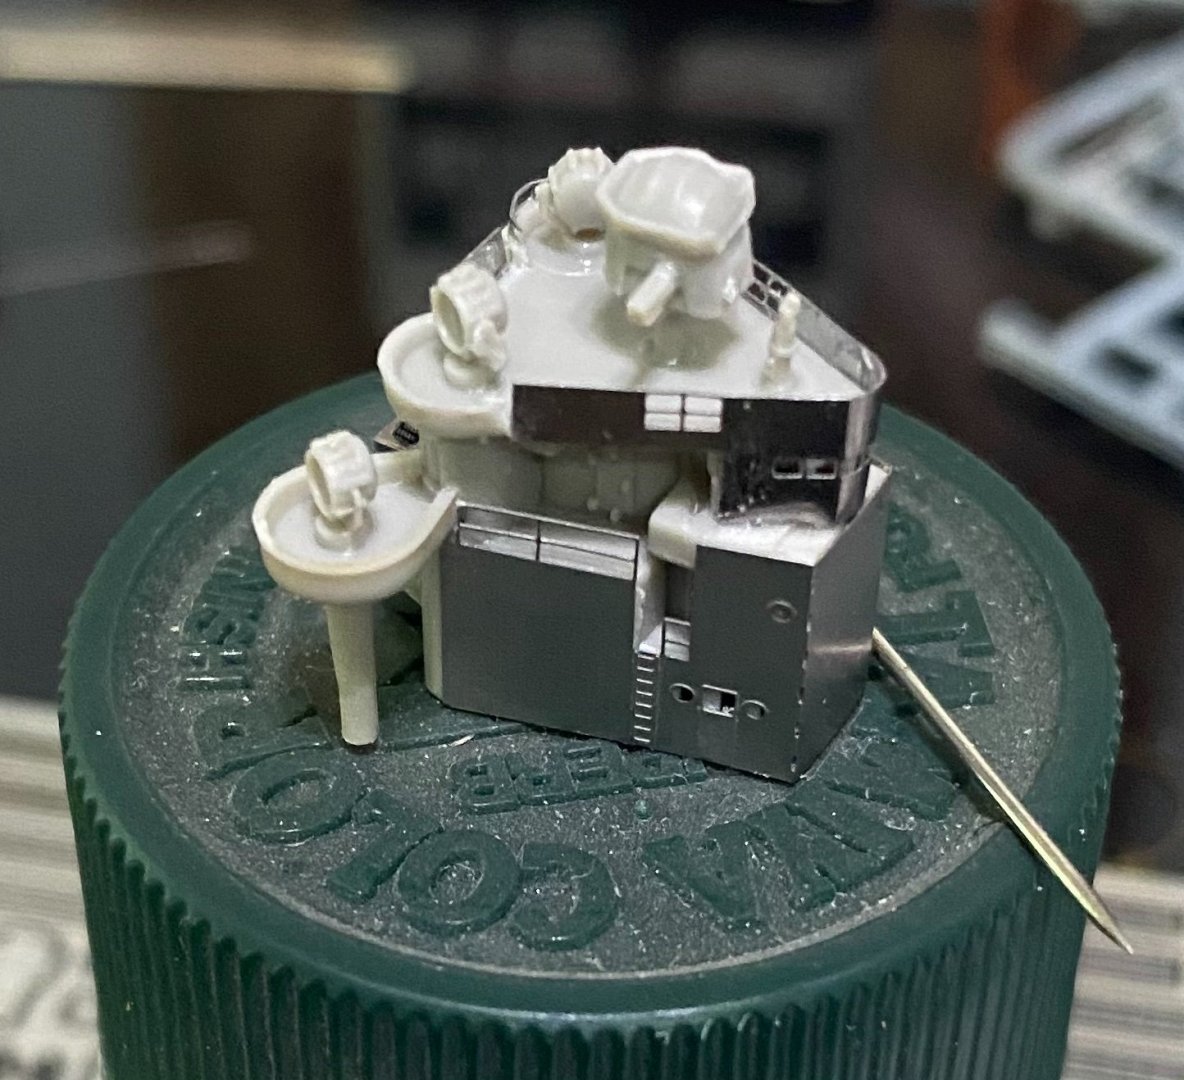
Another superstructure assembly, this one with the searchlight platforms. I dropped one of the top searchlight railing pieces and it must have went into the black hole of Calcutta. Will find a replacement piece from another photo etch sheet. starting to hear some gusts of wind now from Ella. It will increase through the night.

- 225 replies
-
- 10
-
-
- I Love Kit
- Hood
- (and 2 more)
-
Alan looks like one or both of us are getting some wind and rain in the next few days. It’s Already been like a monsoon here last week.
-
Beautiful paint work OC. Love that brick work, looks very authentic.
-
Photo etch pieces are folded into ammo boxes. The ammo boxes are mounted to the quad .5 inch AA gun platforms.

- 225 replies
-
- 12
-
-
- I Love Kit
- Hood
- (and 2 more)
-
My internet has been down since Wednesday. Technician not due until tomorrow. Learned to use my cell phone which is okay except fat fingers. Cell phone eliminates a step or two as I have been using my cell phone for pics and only since internet malfunction learned to edit my photos using my phone. A silver lining I guess.
- 225 replies
-
- 4
-
-
- I Love Kit
- Hood
- (and 2 more)
-
I bought some laser cut paint rack kits that had that smell. It goes away in a few days, or at least mine did. If the laser charred the edges, the smell may be more pronounced.
-
That’s going to look awesome! Seems like the perfect venue for it but will defer to the Mods.