HOLIDAY DONATION DRIVE - SUPPORT MSW - DO YOUR PART TO KEEP THIS GREAT FORUM GOING! (Only 69 donations so far out of 49,000 members - Can we at least get 100? C'mon guys!)
×

CDW
-
Posts
7,748 -
Joined
-
Last visited
Content Type
Profiles
Forums
Gallery
Events
Everything posted by CDW
-
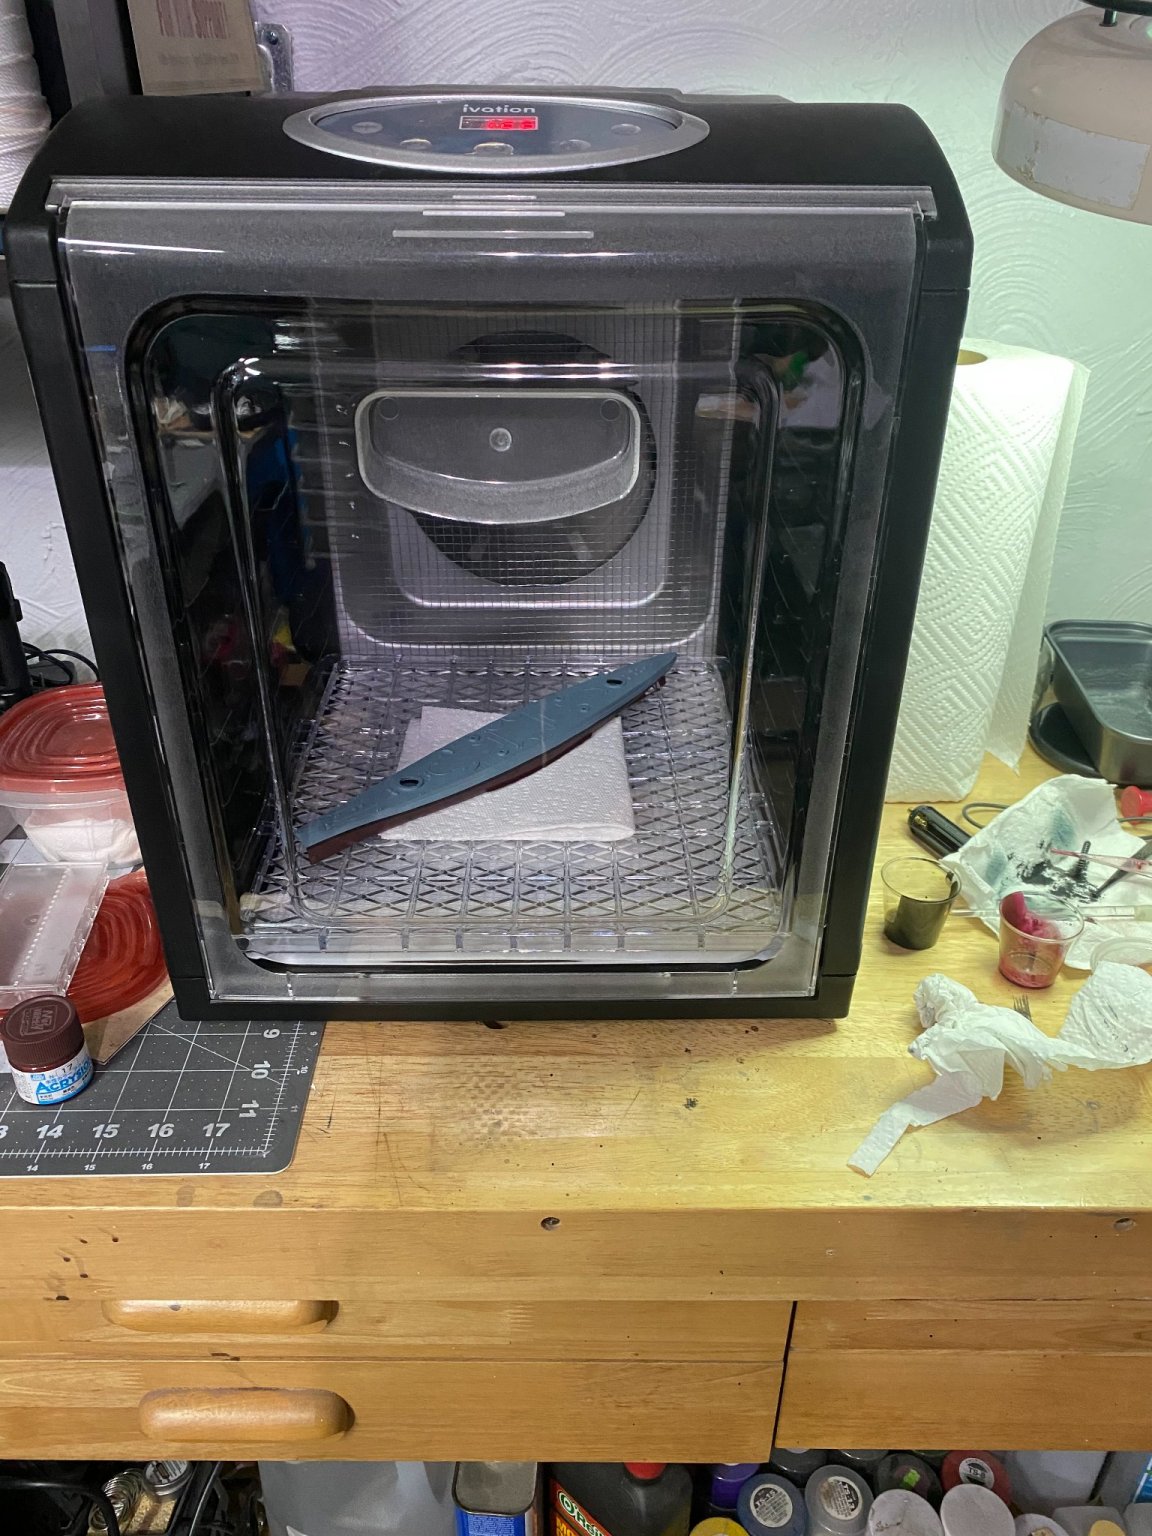
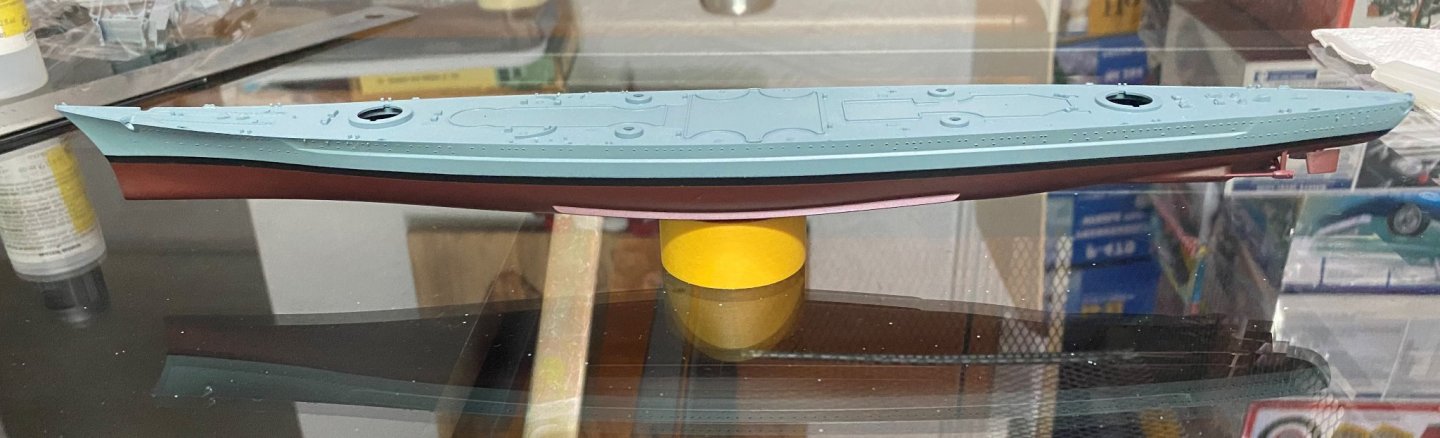
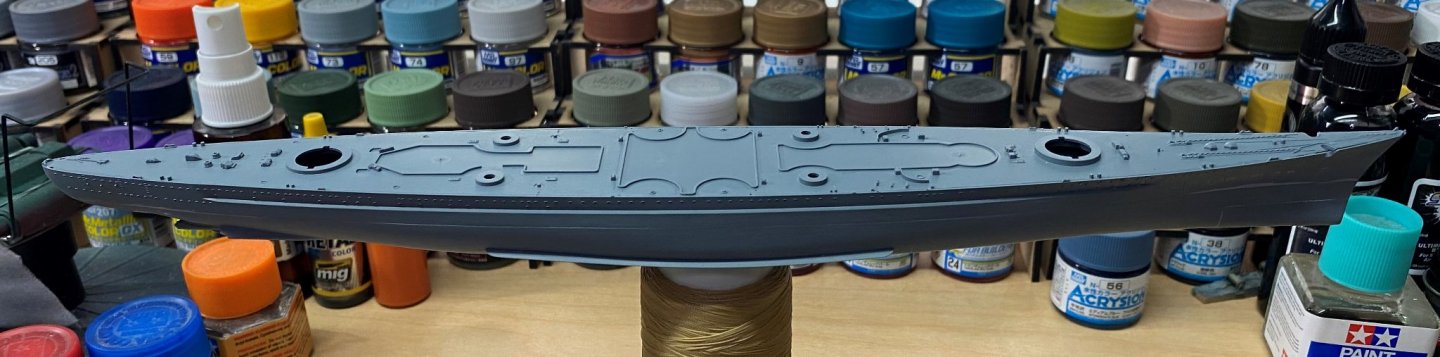
 Curing the new paint in the dehydrator at 105 degrees F. for a couple of hours. This makes the paint very durable and resistant to damage from handling later on.
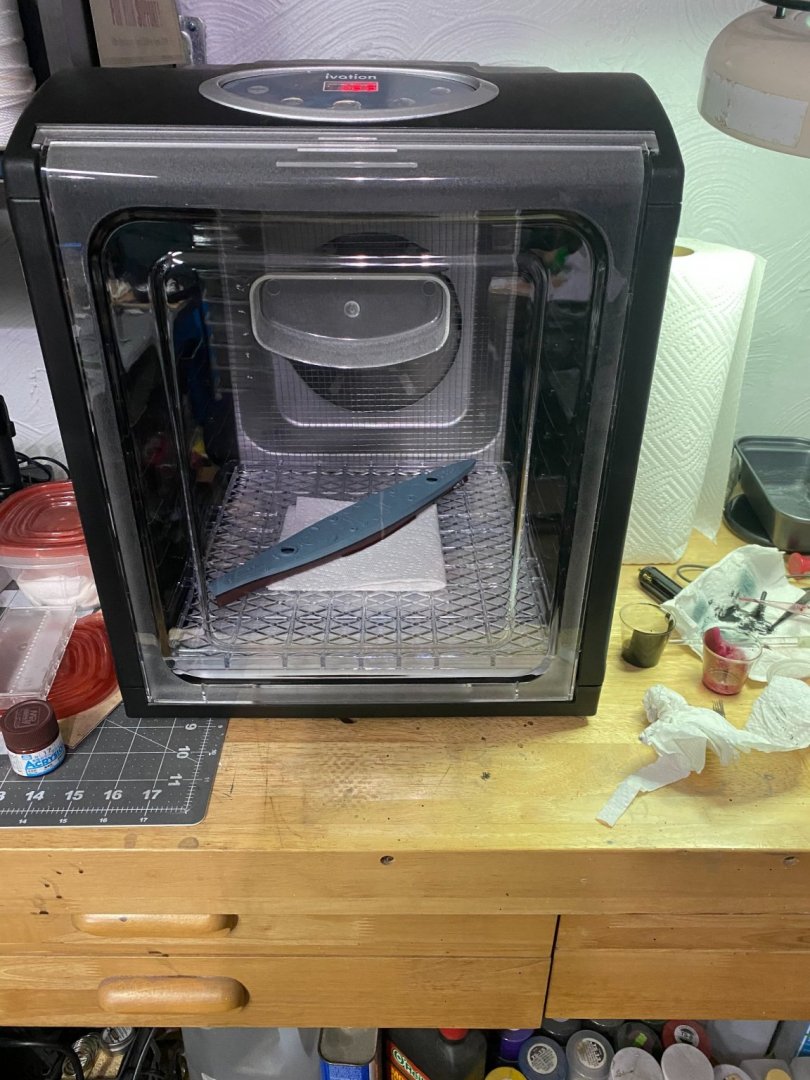
- 168 replies
-
- 8
-

-
- Scharnhorst
- Flyhawk
- (and 1 more)
-
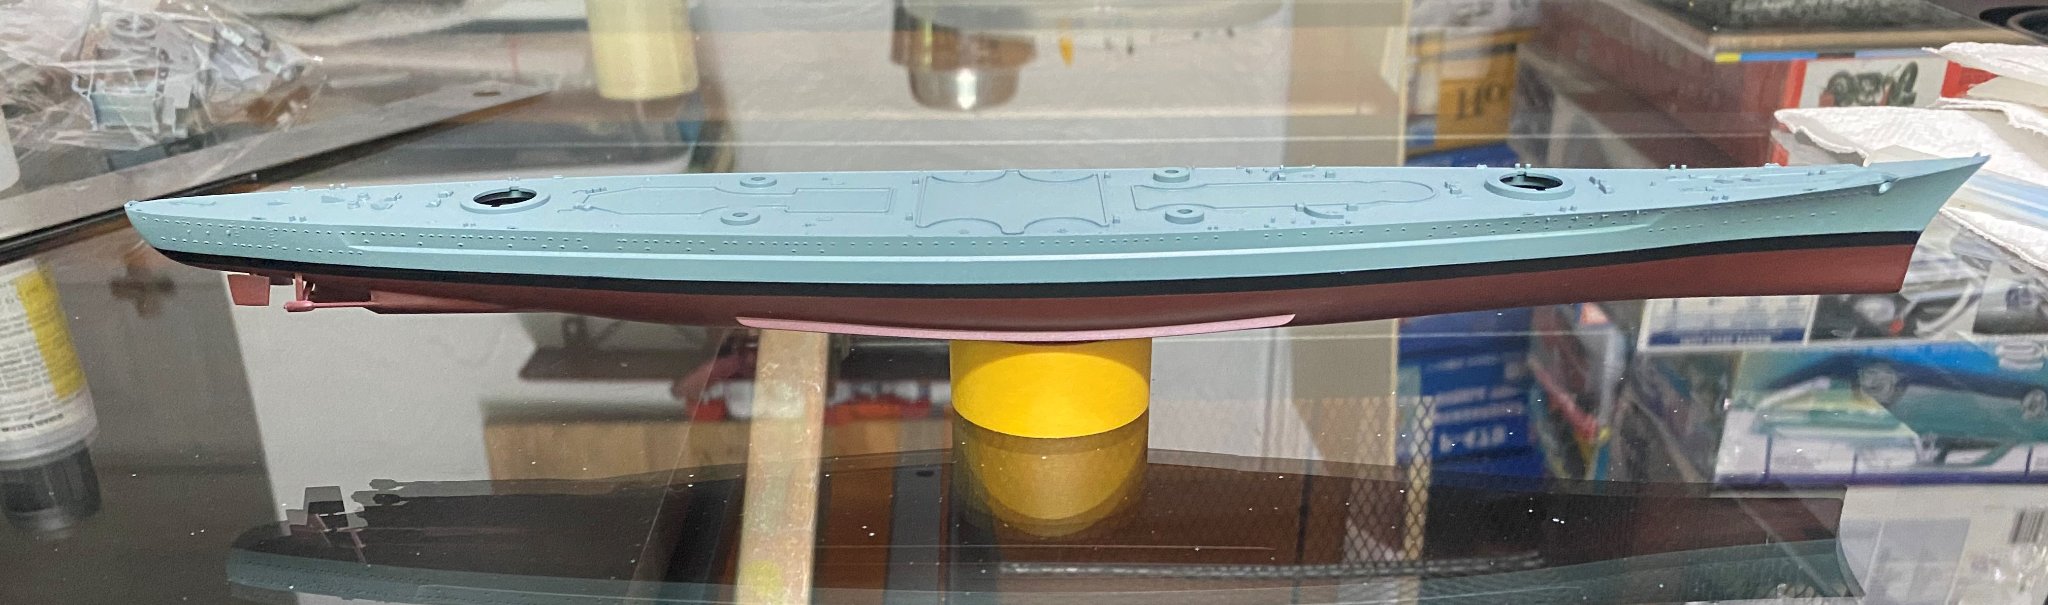
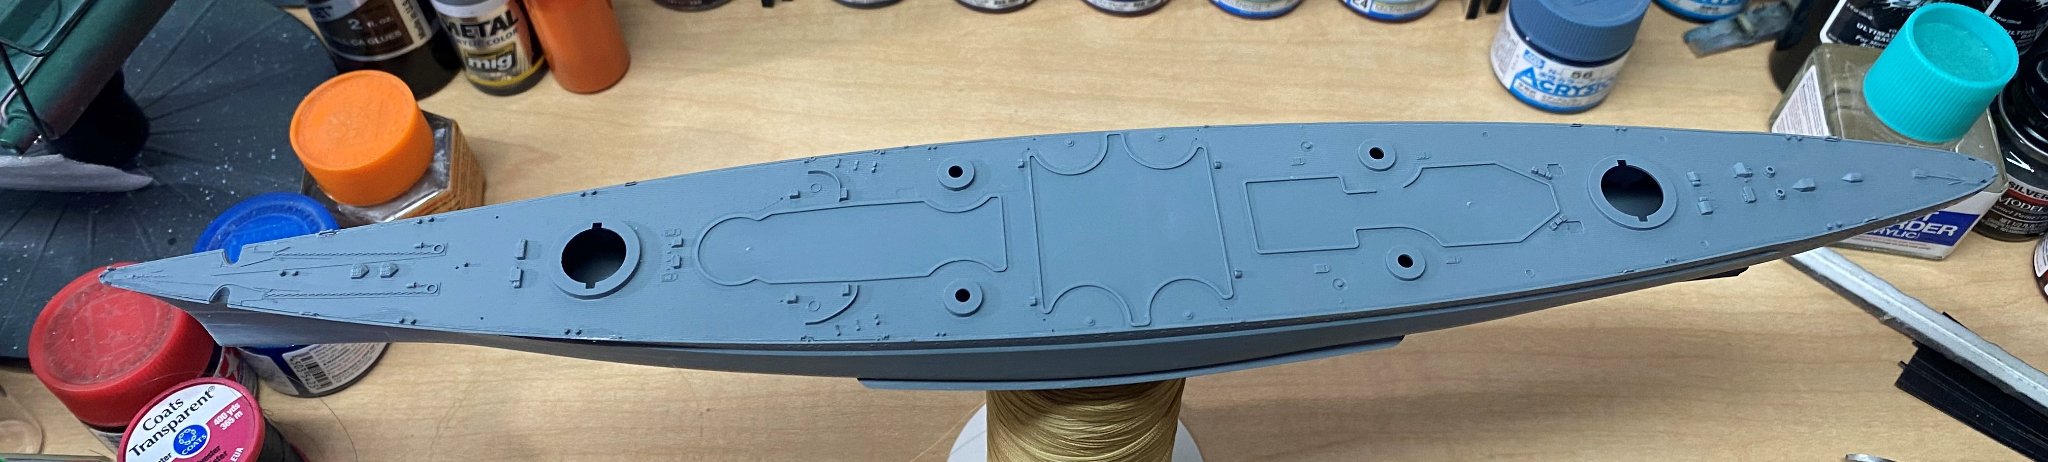
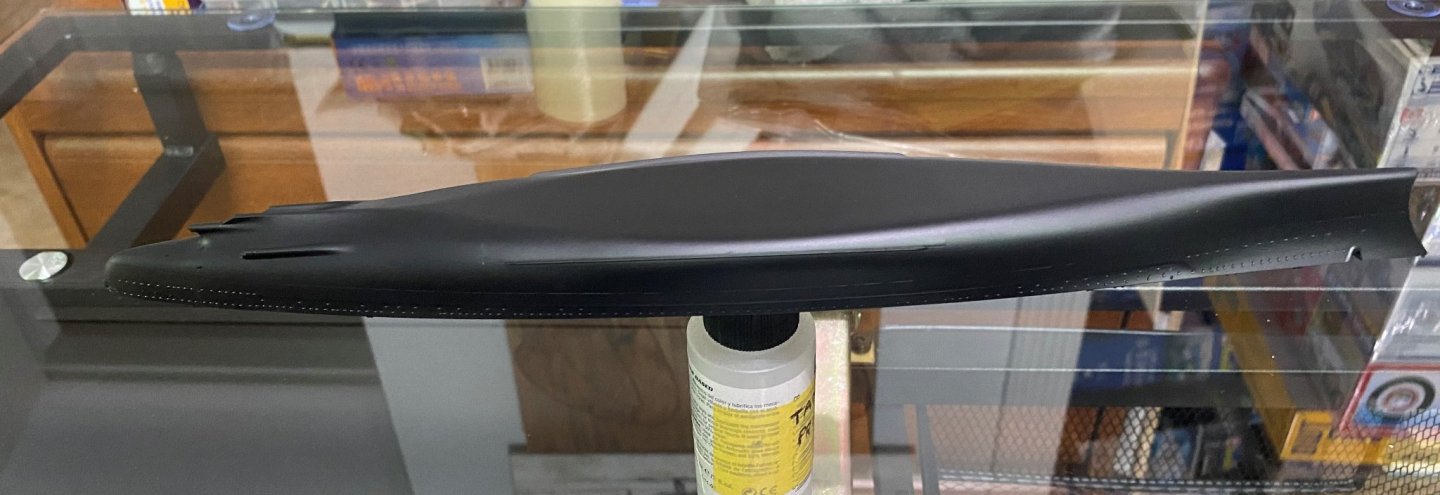
Finally got around to painting the hull. It's a start.


- 168 replies
-
- 9
-
-
- Scharnhorst
- Flyhawk
- (and 1 more)
-
Here is my chief model inspector and chowhound, Jasper. He's patiently waiting for me to get the black primer down on my hull.

- 168 replies
-
- 8
-
-

-
- Scharnhorst
- Flyhawk
- (and 1 more)
-
The PT Boat looks great Denis! Our daughter was telling us today that you guys in NH are going to be getting some more snow tonight or in the morning. Bummer.
-
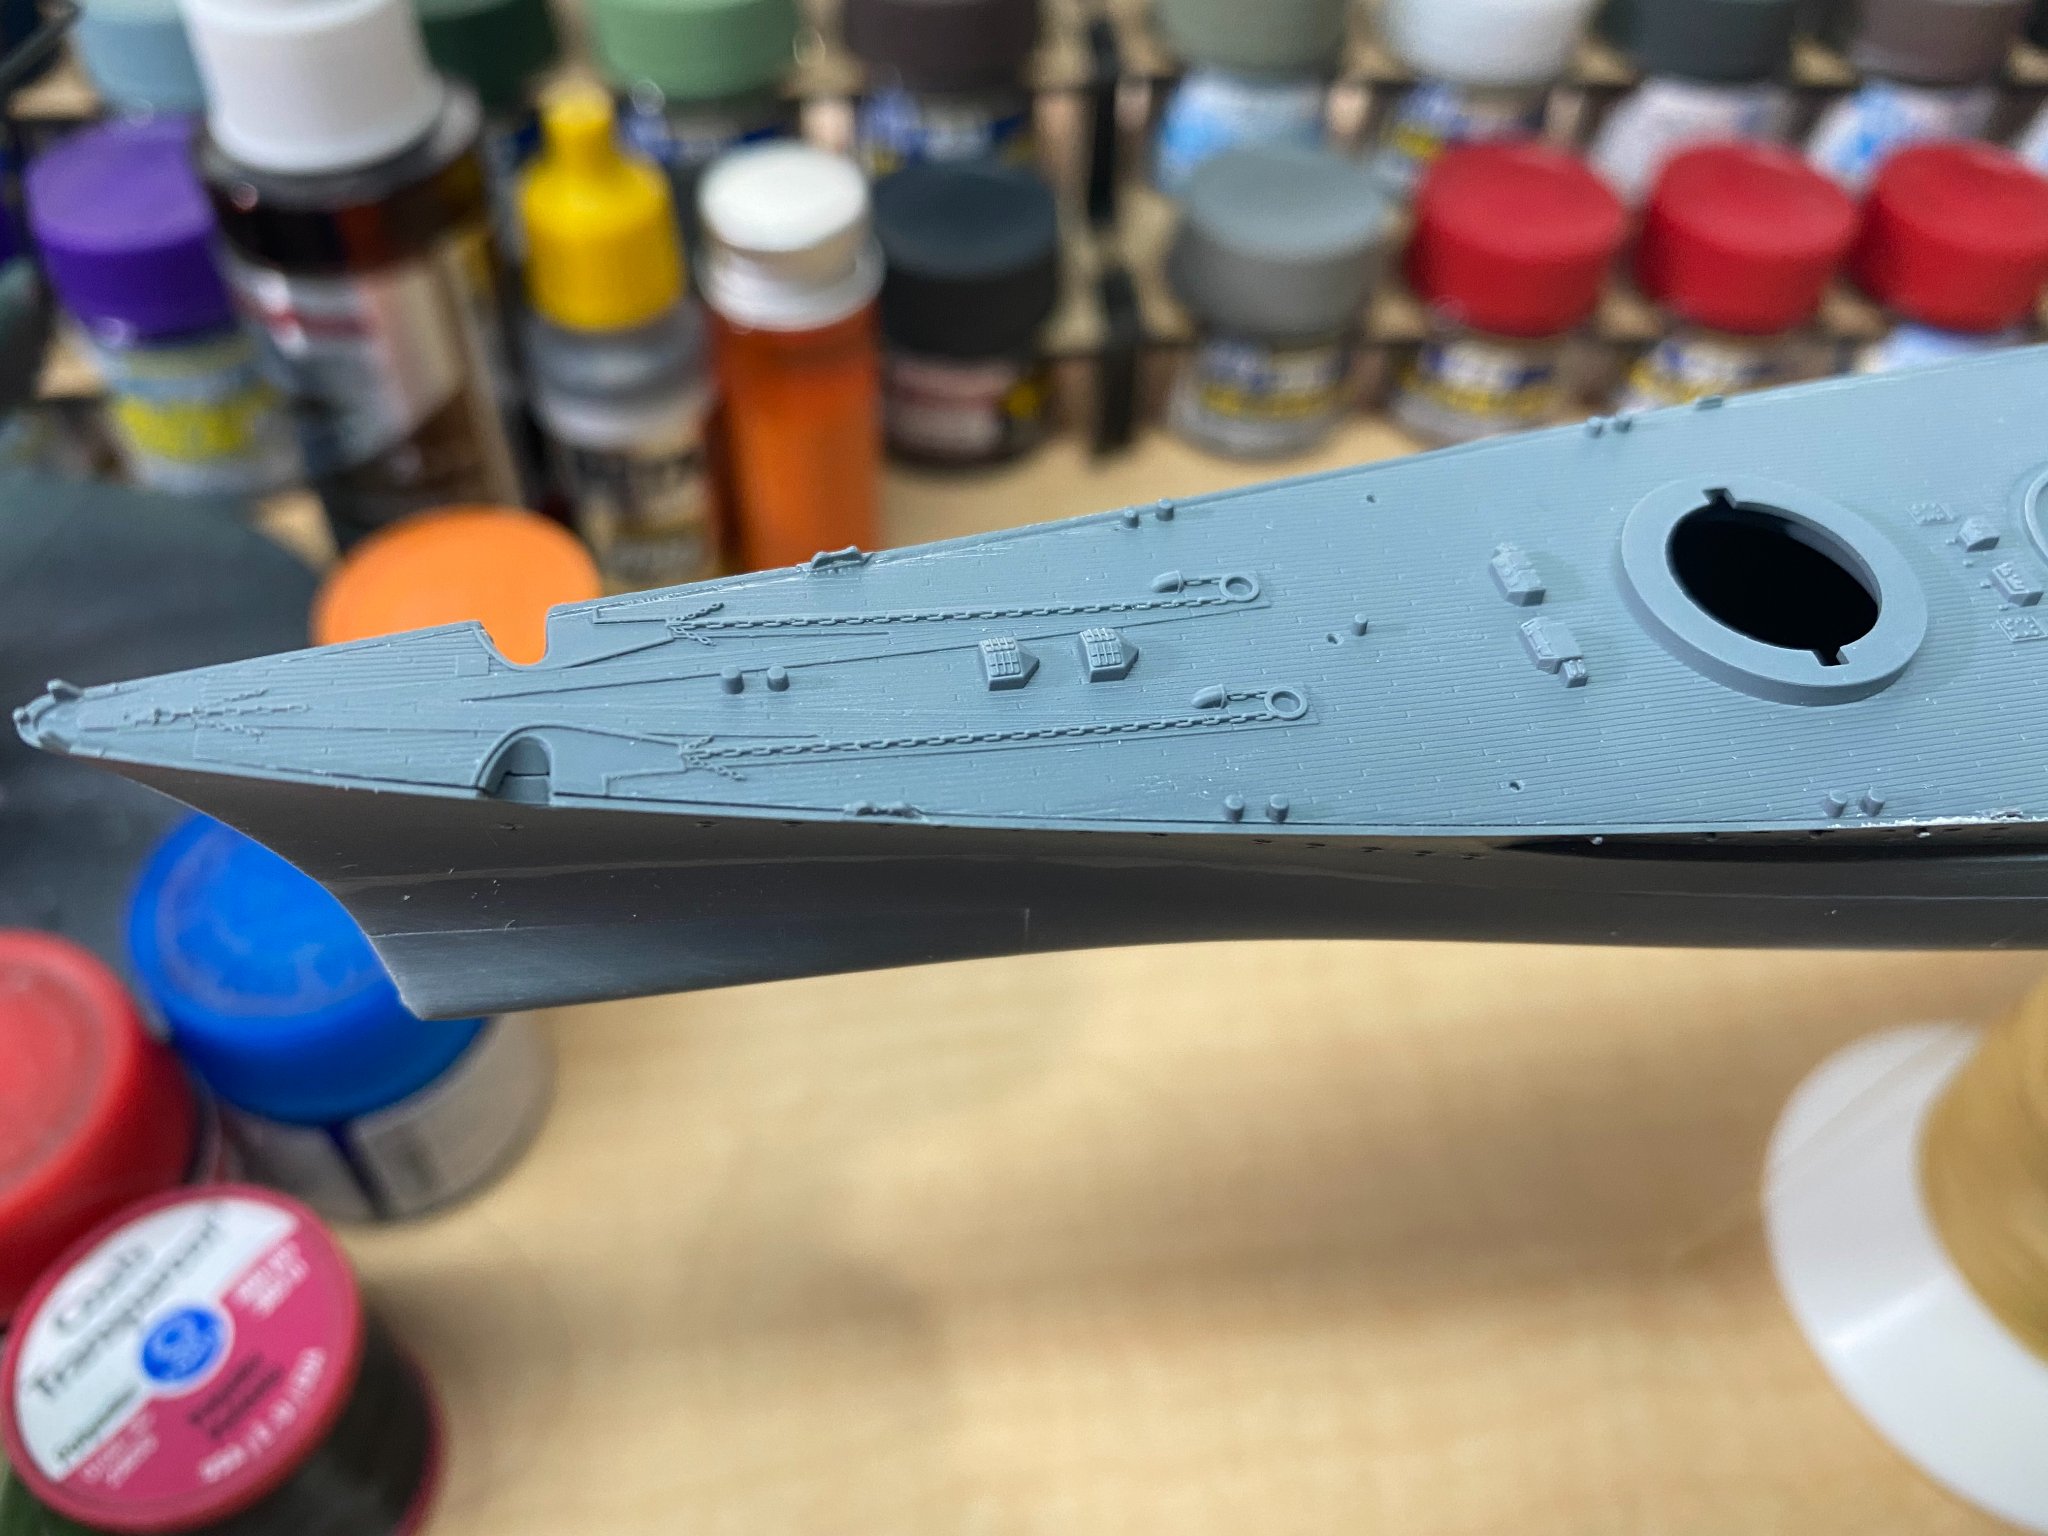
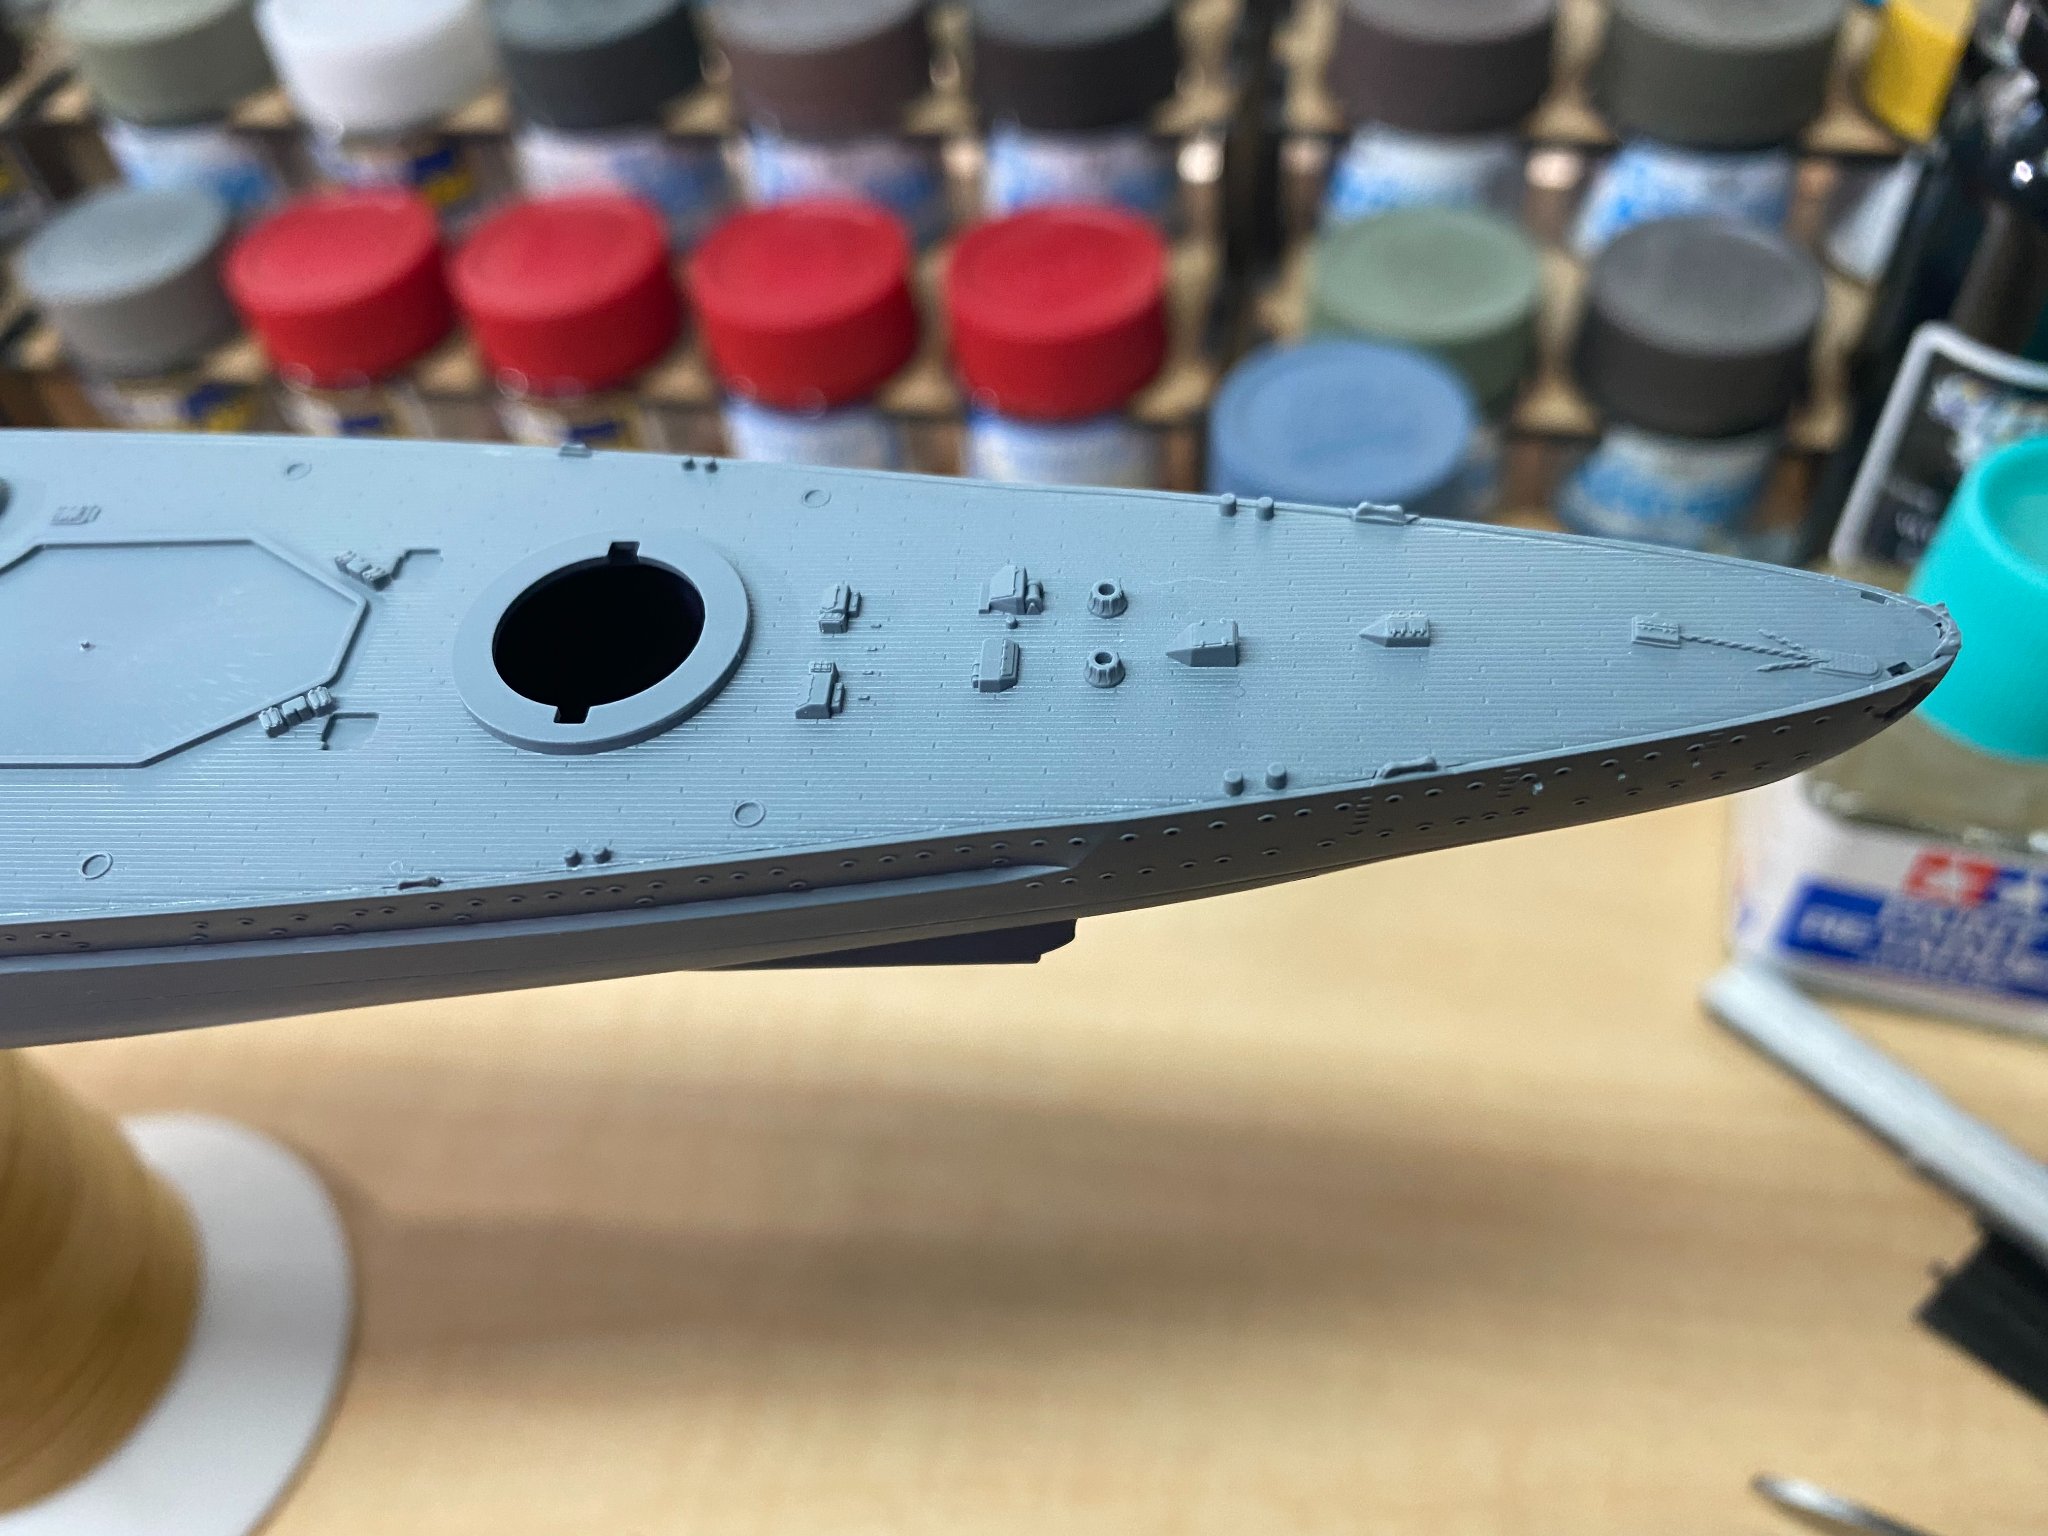
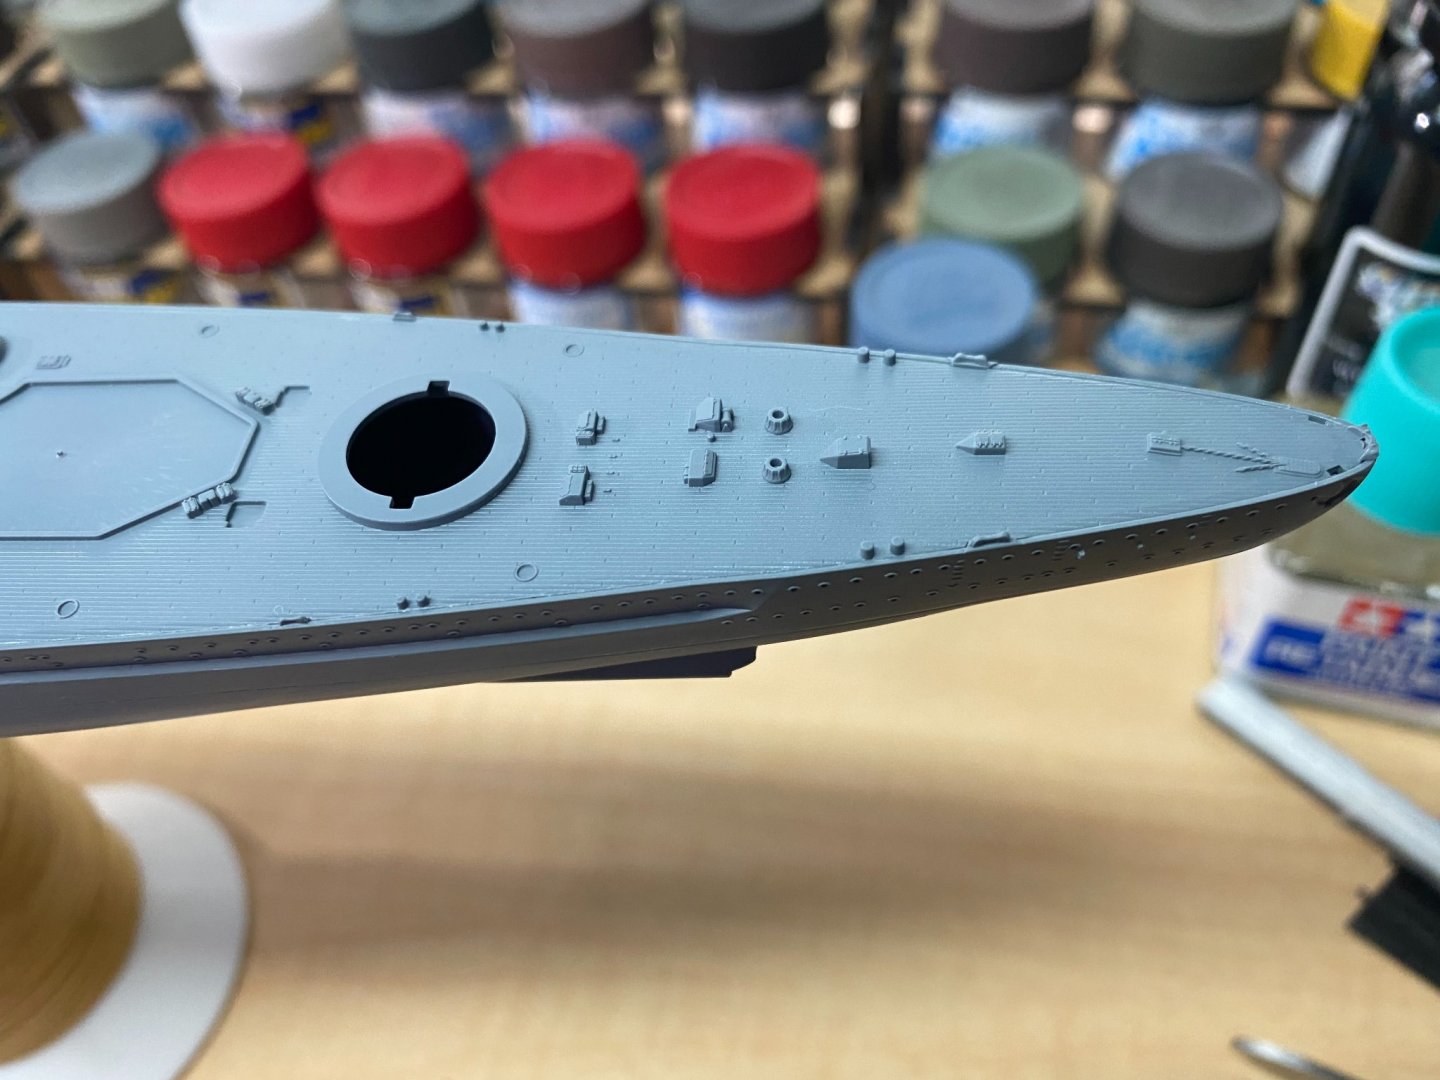
Overall hull length is about 13", maybe a little less. Plastic is on the soft side, making it easy to sand down. Molded on details very clean and crisp. Just wanted to capture some photos of it before laying down primer.


- 168 replies
-
- 13
-
-
- Scharnhorst
- Flyhawk
- (and 1 more)
-
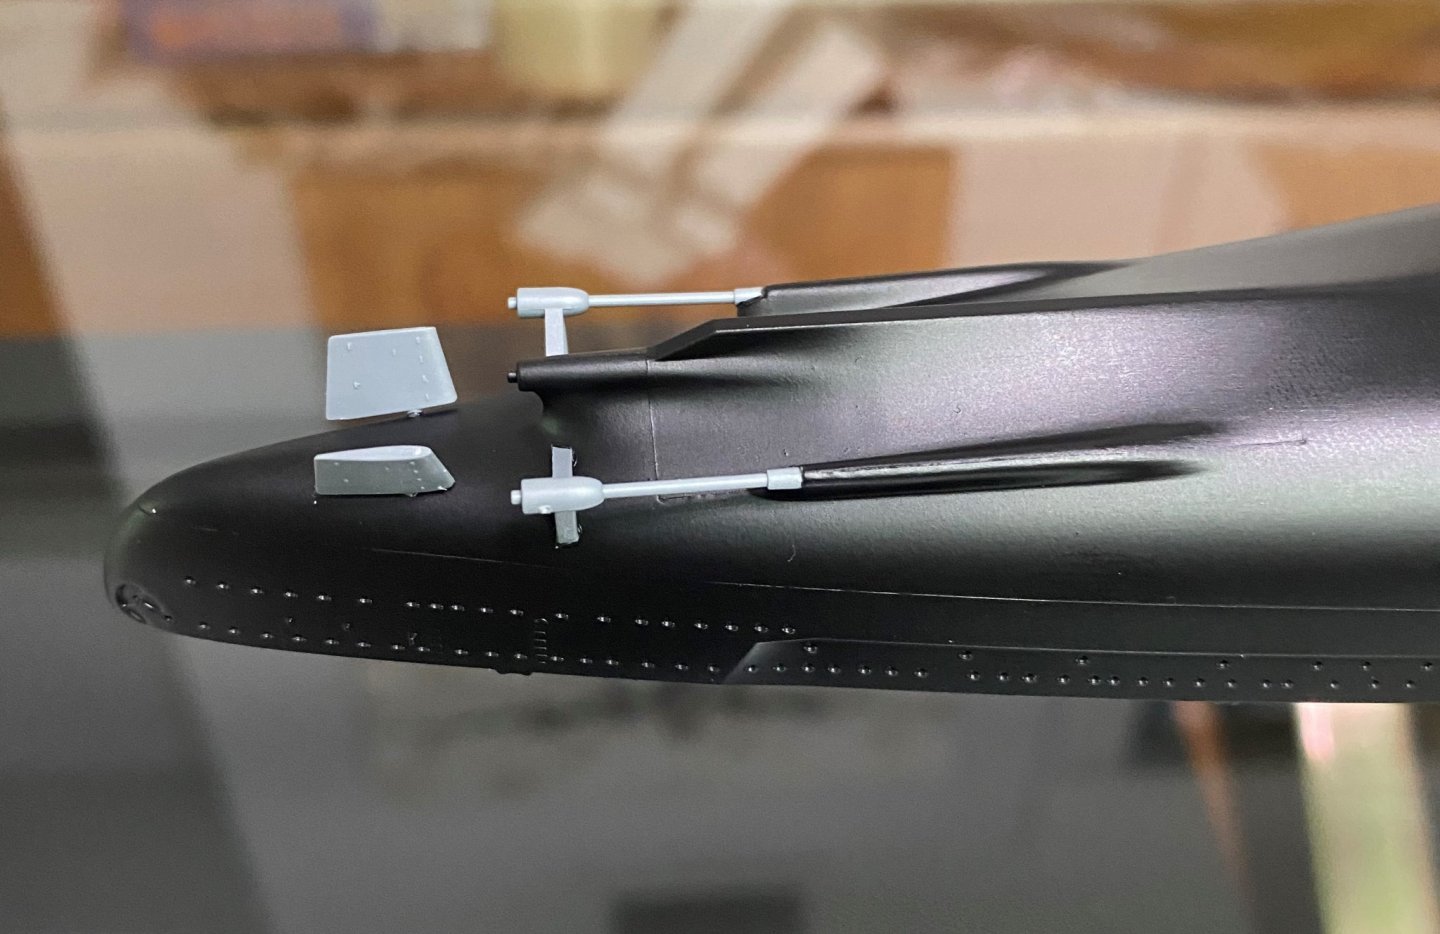
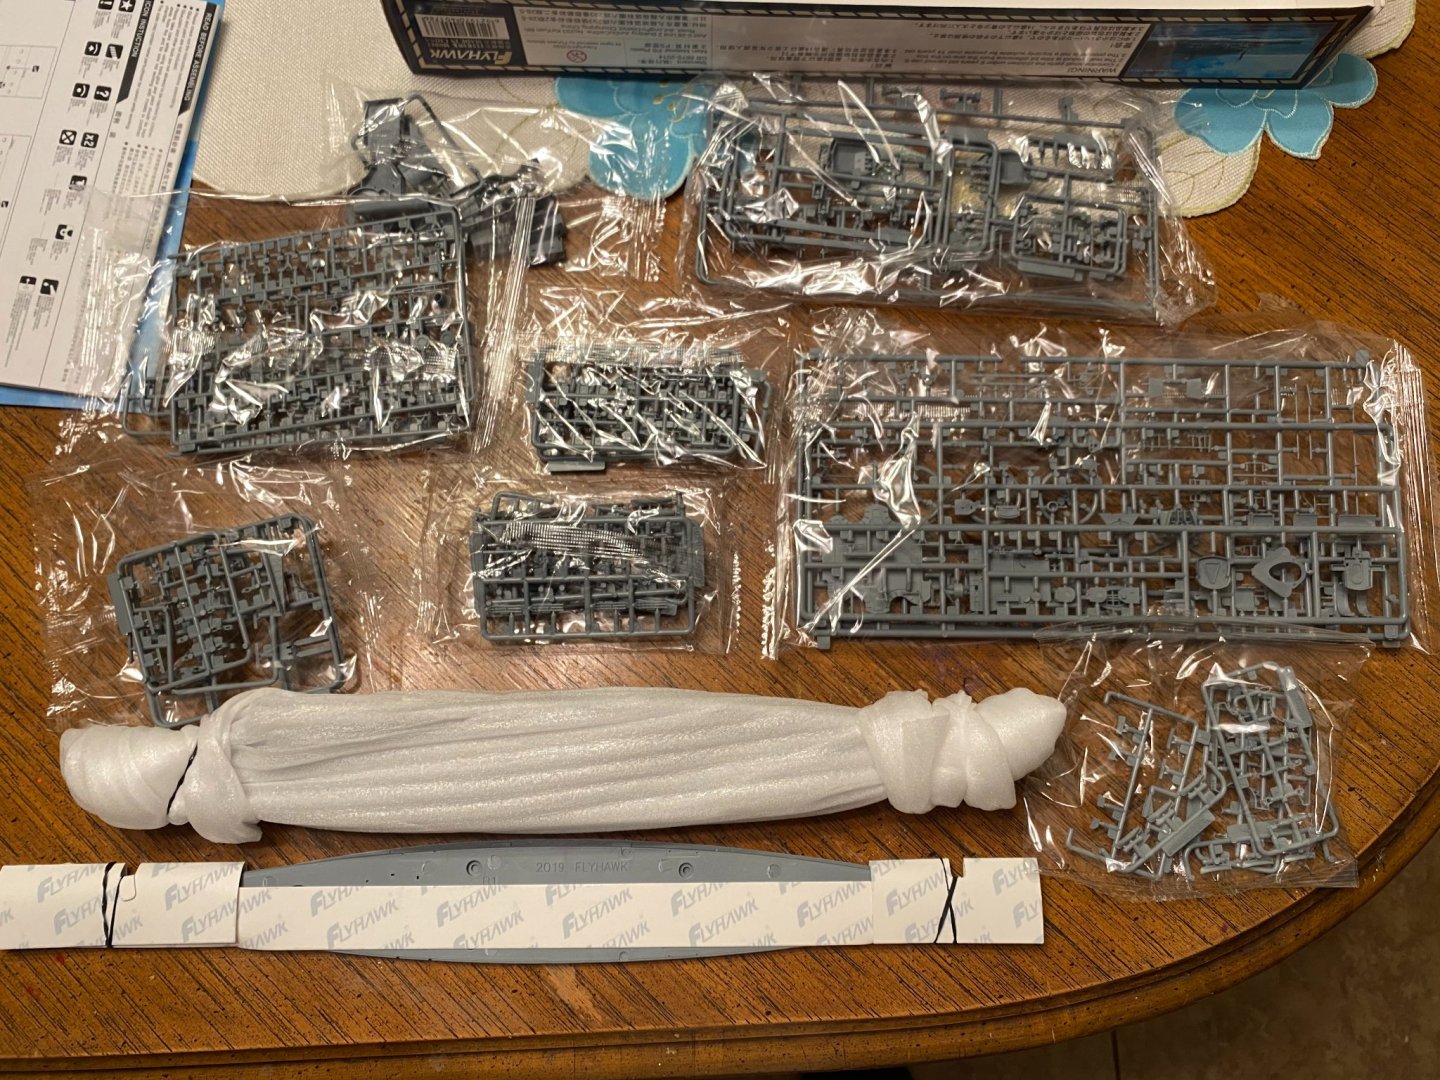
After I open the parts bags, I want to photograph the sprues. You won't believe the fine detail of the molded parts. Makes you realize how far this hobby has come in the past few years. The parts molds nowadays are light years ahead of what we thought was great 10 or 20 years ago. I didn't want to open the parts bags until I am ready to use them in fear of breaking and/or losing the parts. They are that small and delicate. With this one started, I am now interested in the other 1:700 ship models Flyhawk makes. I never much cared for 1:700 scale before because it was so small and often parts looked out of scale and cartoonish. Not with Flyhawk. Downside is, they are a little on the pricey side.
- 168 replies
-
- 7
-
-
- Scharnhorst
- Flyhawk
- (and 1 more)
-
Finally made a humble start on the shiny horse last night, gluing together the upper and lower hull parts then a little sanding and filling of the seams. Now that I look at this kit more in detail, it becomes obvious the model can be built quite nicely straight out of the box except you would need some photo etch railings. The plastic parts are extraordinary, fine details and molded very much to scale. Even the metal barrels are not entirely needed. I'm even thinking I may have been better off with a precut masking set for the deck (cheaper) rather than the wood deck. I'll wait until I have more done before taking some photos. I think this is going to be a fun little build and quite pleasing to the eye with the molded details.
- 168 replies
-
- 8
-
-
- Scharnhorst
- Flyhawk
- (and 1 more)
-
McLaren M8B by CDW - Accurate Miniatures - 1:24 Scale
CDW replied to CDW's topic in Non-ship/categorised builds
It is weird how bamboo sheds it’s bark like a lizard sheds it’s skin. -
McLaren M8B by CDW - Accurate Miniatures - 1:24 Scale
CDW replied to CDW's topic in Non-ship/categorised builds
There's a row of trees and vegetation that grows along the back fence line between me and my commercial property neighbor. I've got bamboo back there that rivals anything you ever saw in Vietnam. What you see is as high as this climber is going to climb and the wife says I have no business doing that, even. Women...what do they know? 😄 -
McLaren M8B by CDW - Accurate Miniatures - 1:24 Scale
CDW replied to CDW's topic in Non-ship/categorised builds
Thanks Denis. Tree trimming on top of me shed today. Spring has sprung, Fall has fell, and it's very very warm today.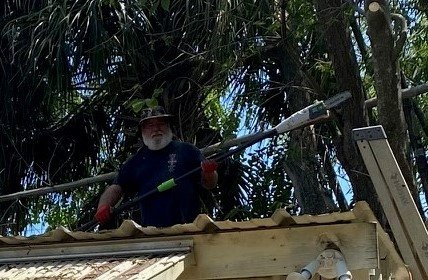
-
I've had those Small Shop pieces for several years now and they work great!
- 168 replies
-
- 8
-
-
- Scharnhorst
- Flyhawk
- (and 1 more)
-
Today I am going to search for an appropriate size piece of wood to mount the model. I am considering cutting off part of the full hull and mounting it on an ocean diorama.
- 168 replies
-
- 8
-
-
- Scharnhorst
- Flyhawk
- (and 1 more)
-
I've been quietly building a stash of IJN kits as well. But the Scharnhorst and Roma are two favorites.
- 168 replies
-
- 9
-
-
- Scharnhorst
- Flyhawk
- (and 1 more)
-
Hope I can pull this off at this micro scale. Time will tell.
- 168 replies
-
- 7
-
-
- Scharnhorst
- Flyhawk
- (and 1 more)
-
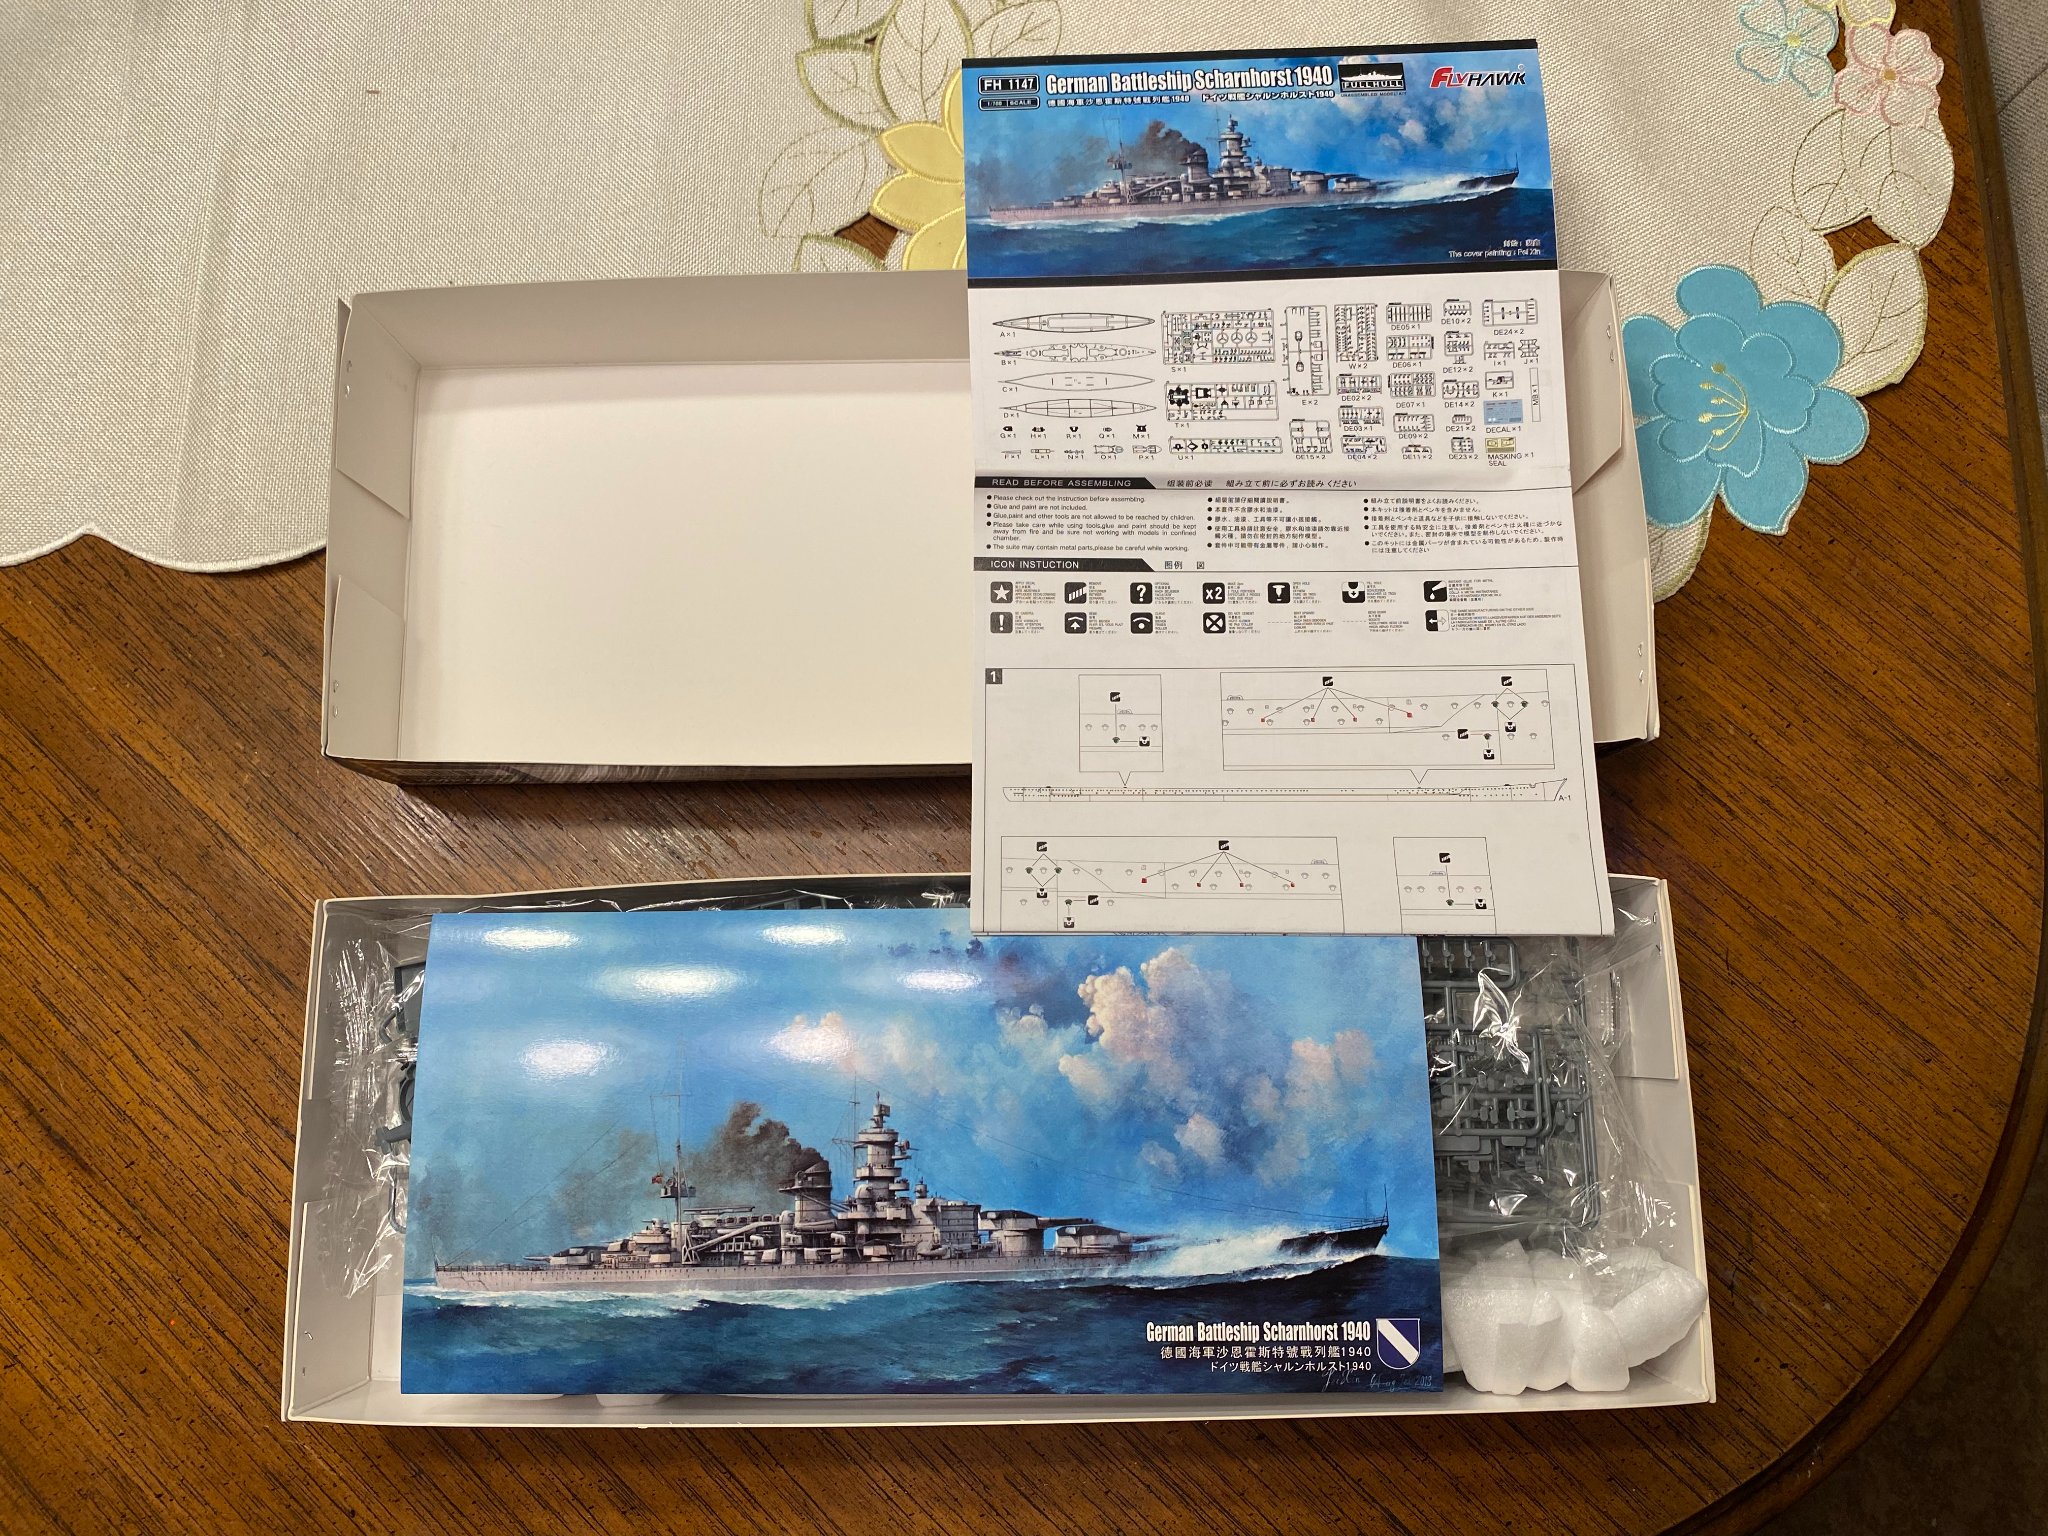
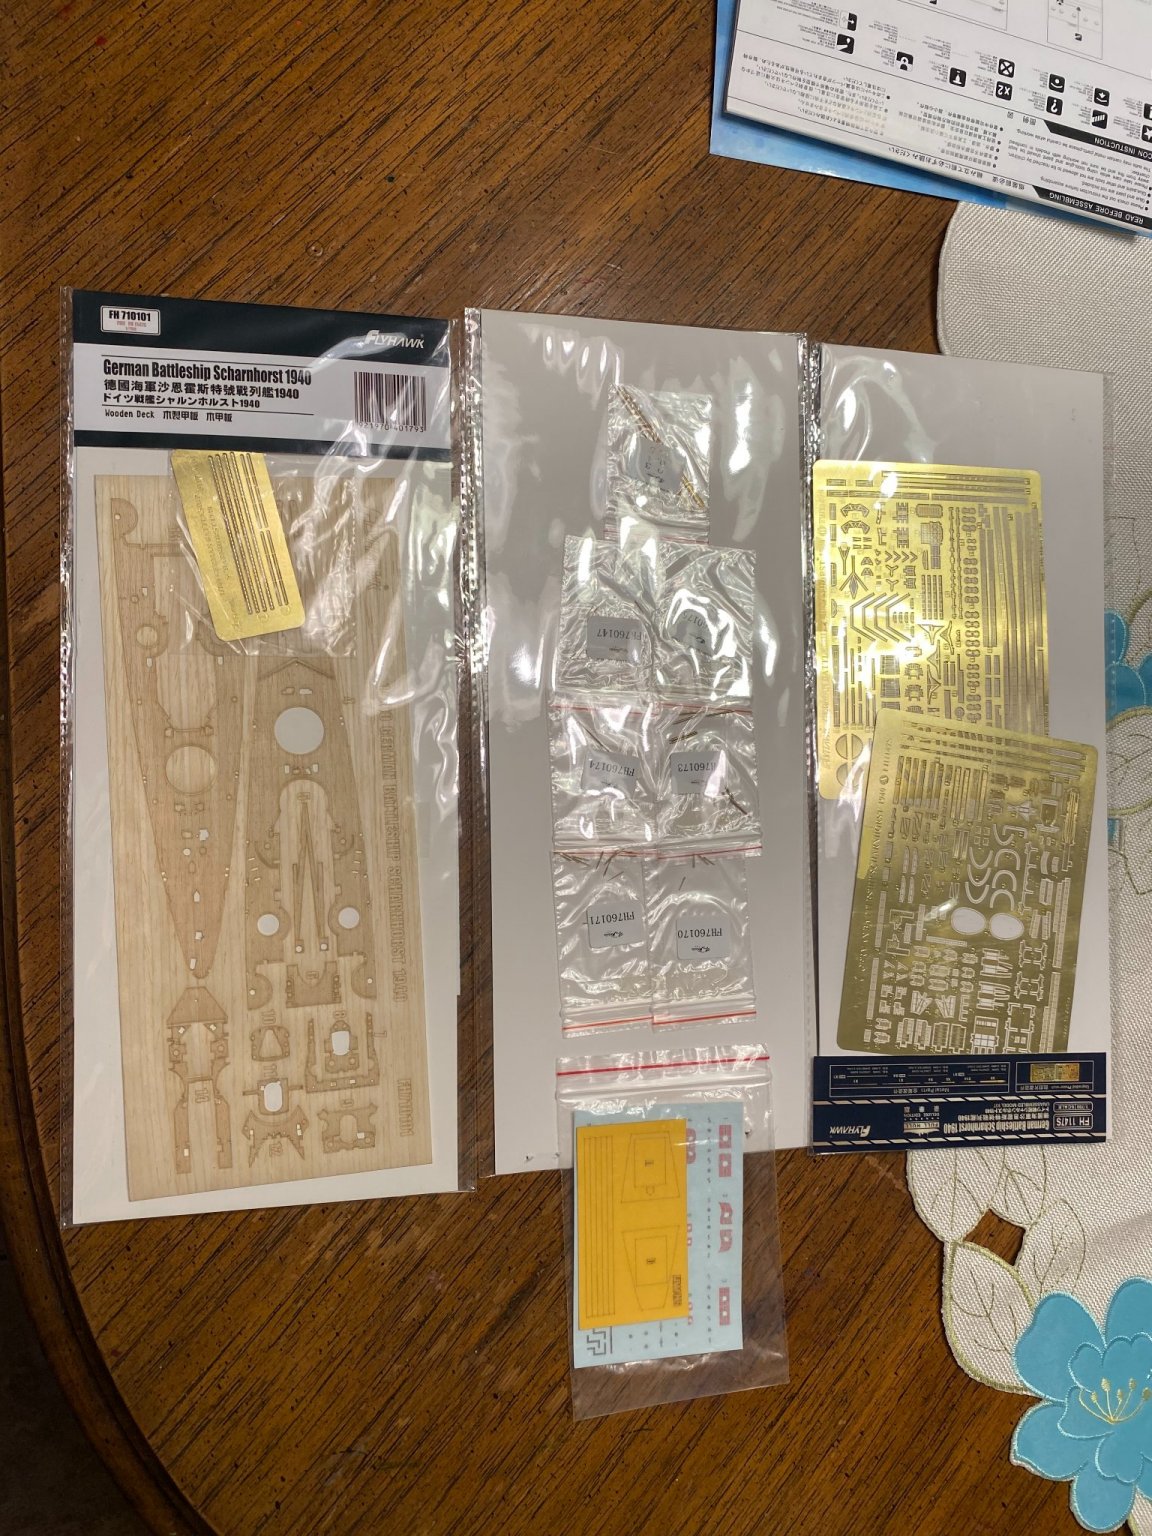
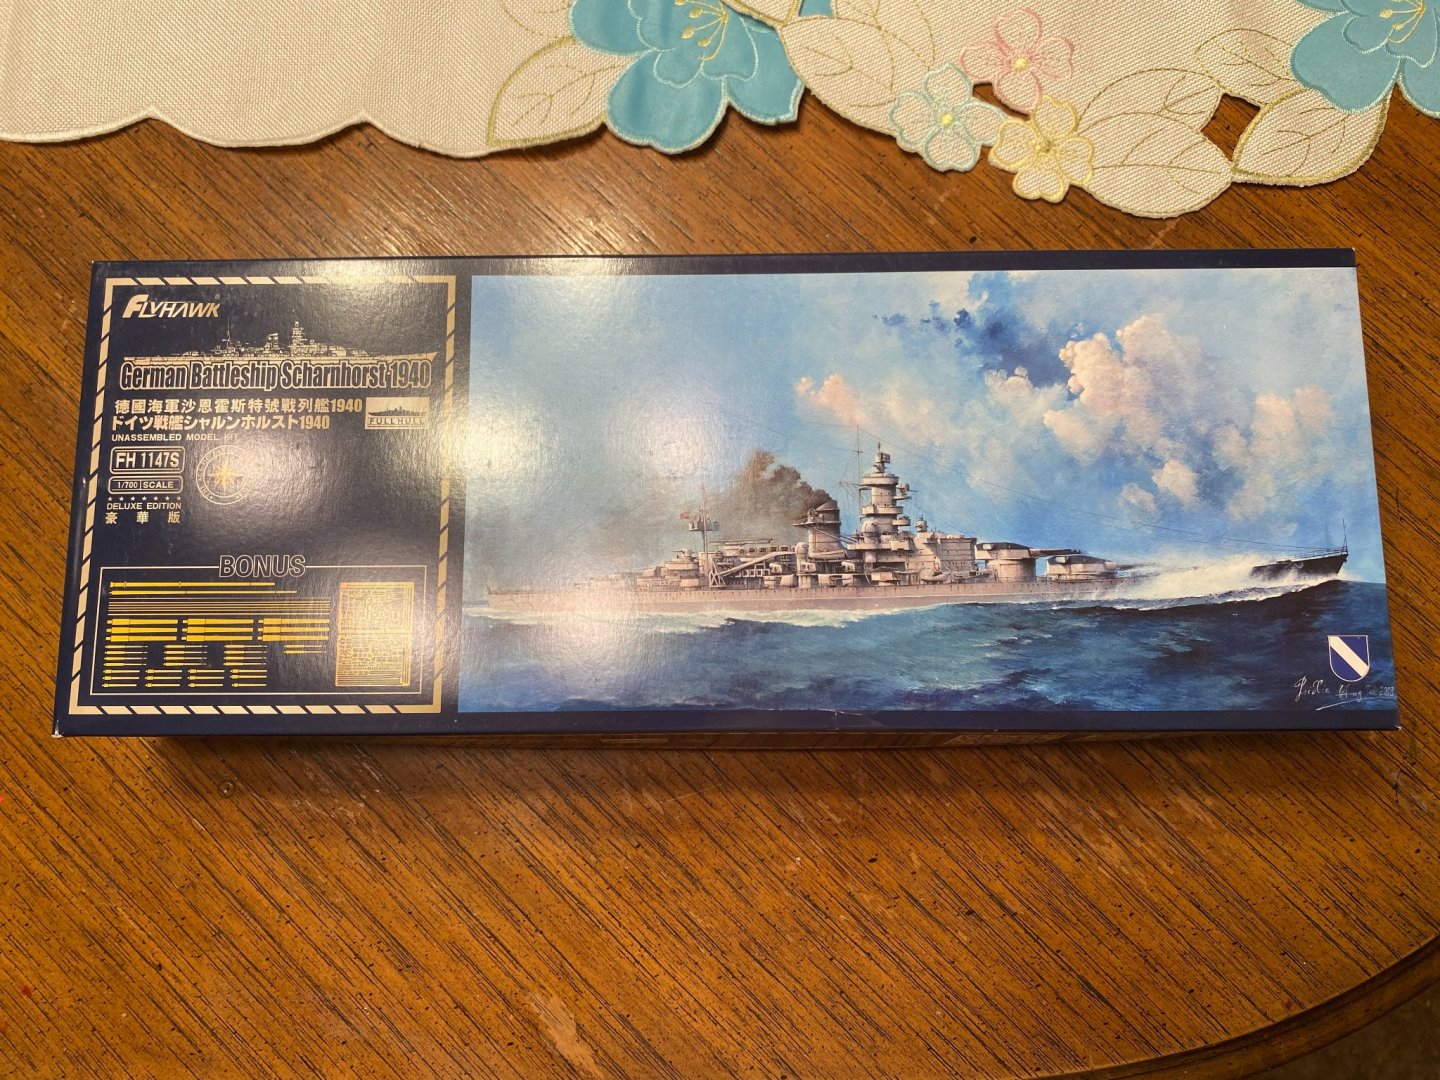
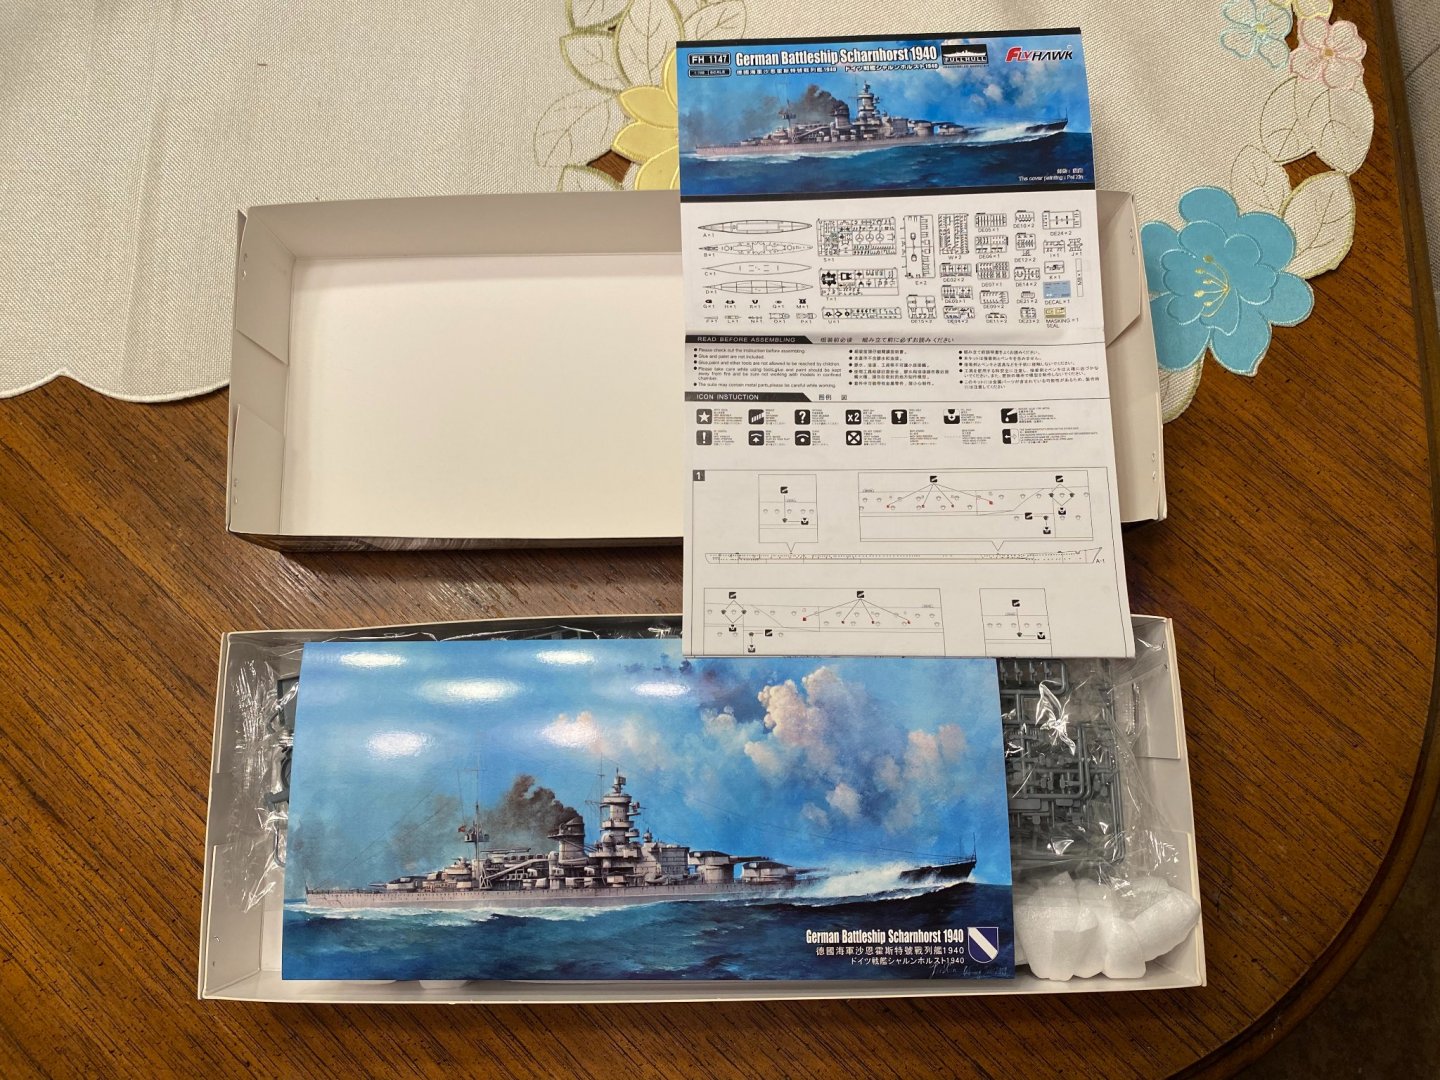
This will be the beginning of my build log for the 1:700 Flyhawk German Battleship Scharnhorst, 1940, full hull version. This version of the kit comes with two large photo etch sheets and brass gun barrels, ship masts. The parts count is quite high and the details very tiny, finely molded. I'll be ordering a much finer, cleaner cutting set of sprue cutters before I undertake building the kit as I will surely break parts just trying to cut them from the sprue without an appropriate set of cutters. Pictured are the kit contents, the exception being the wood deck which I purchased separately.


- 168 replies
-
- 11
-
-
- Scharnhorst
- Flyhawk
- (and 1 more)
-
McLaren M8B by CDW - Accurate Miniatures - 1:24 Scale
CDW replied to CDW's topic in Non-ship/categorised builds
Yes, the decals are 1:24, but the tire sidewall decals are WAY too big. You'll have to cut them to reduce the radius of the circle. A good decal solvent like Solvaset will make them lay down just fine, because after you cut the circle and reduce the radius, it will leave the decal a little "puckered". No problem at all on the color/version you choose. Do anything you like. -
McLaren M8B by CDW - Accurate Miniatures - 1:24 Scale
CDW replied to CDW's topic in Non-ship/categorised builds
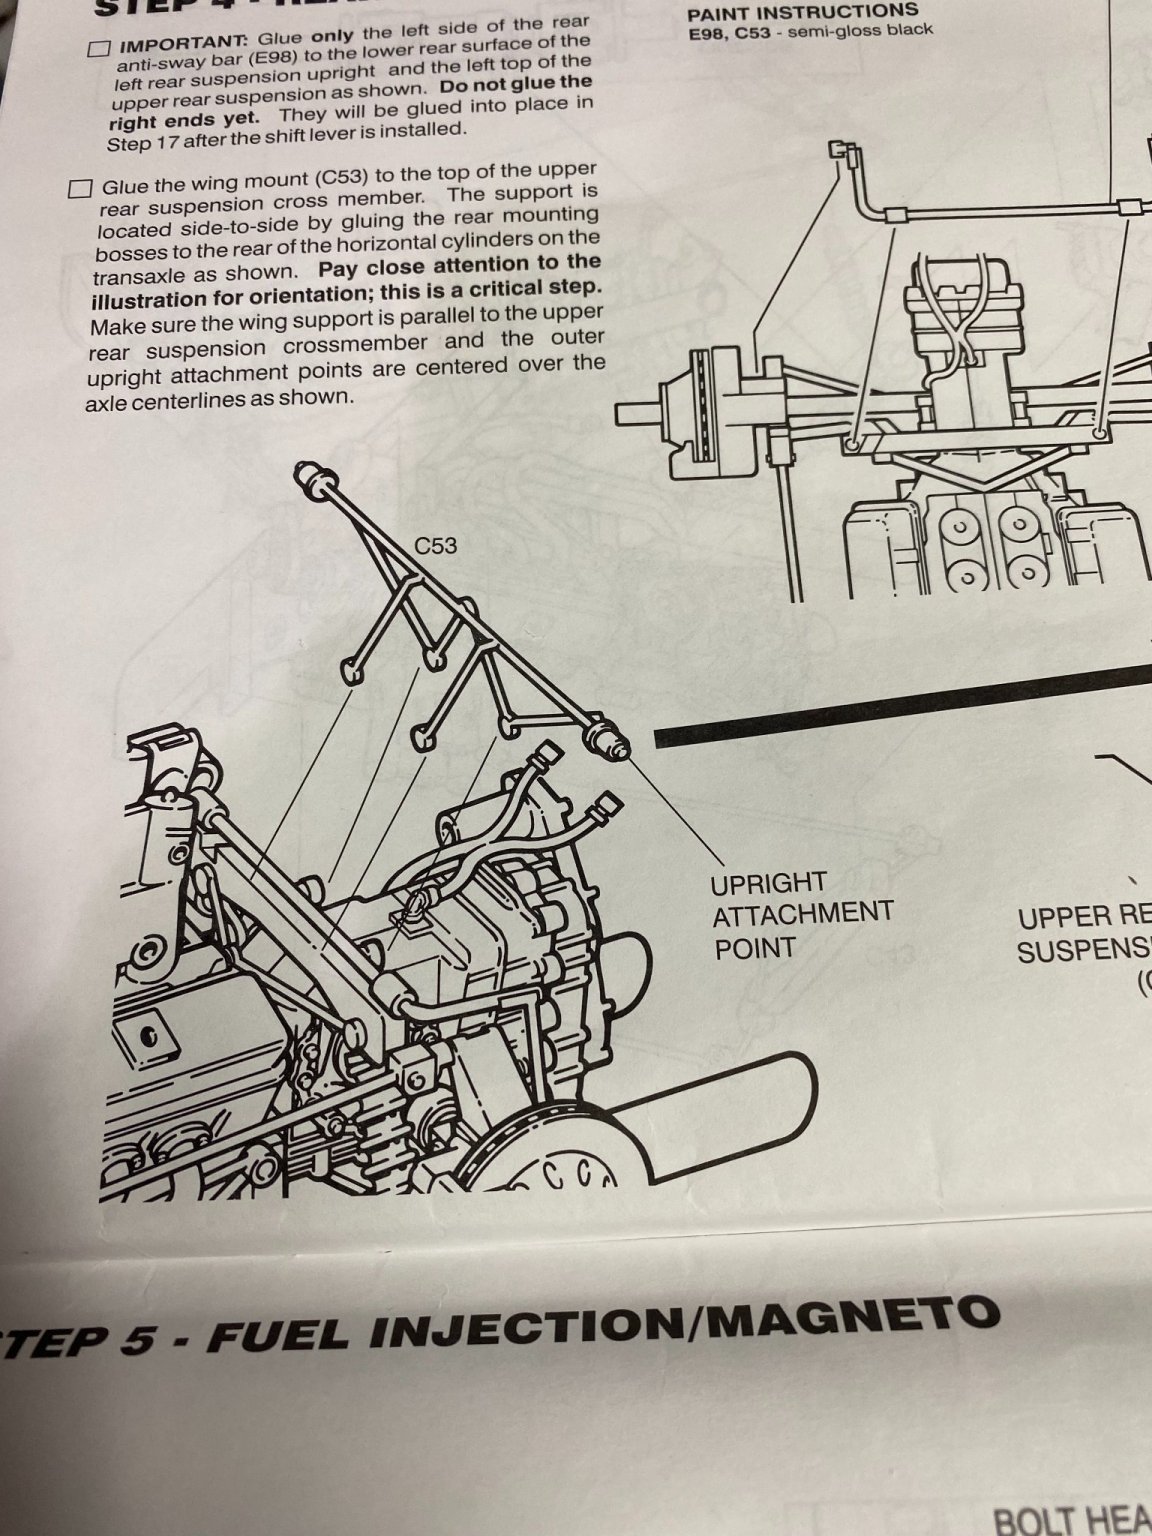
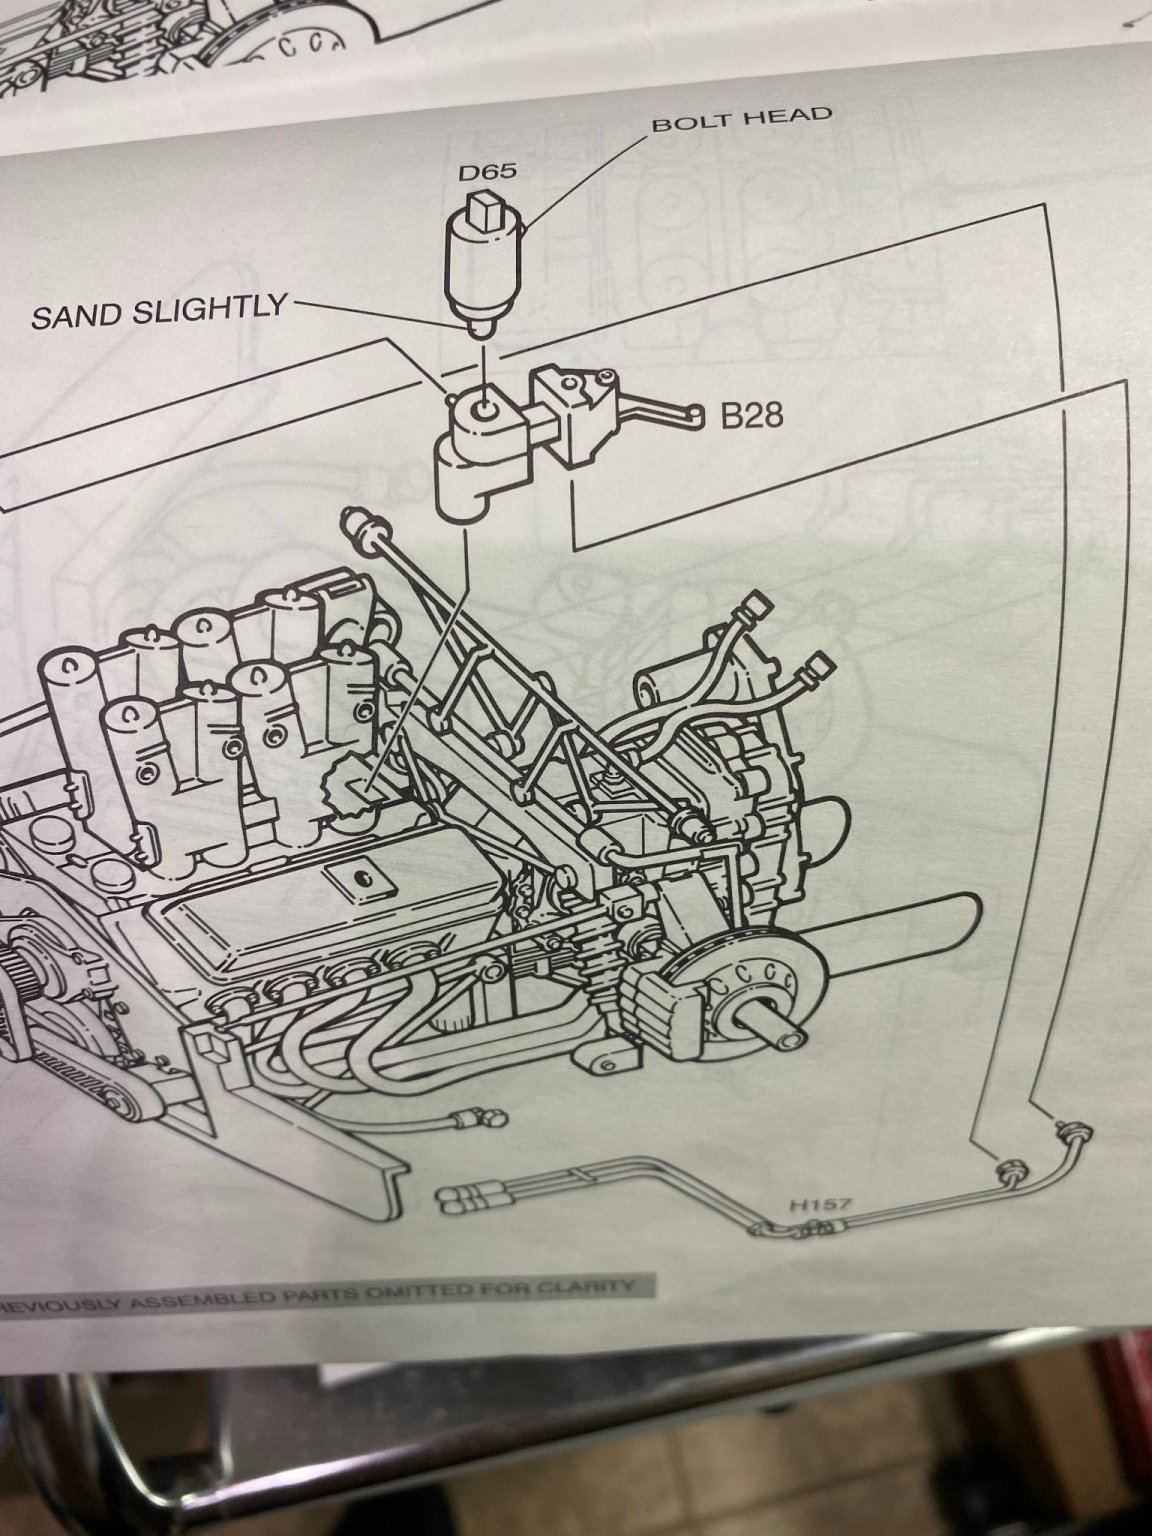
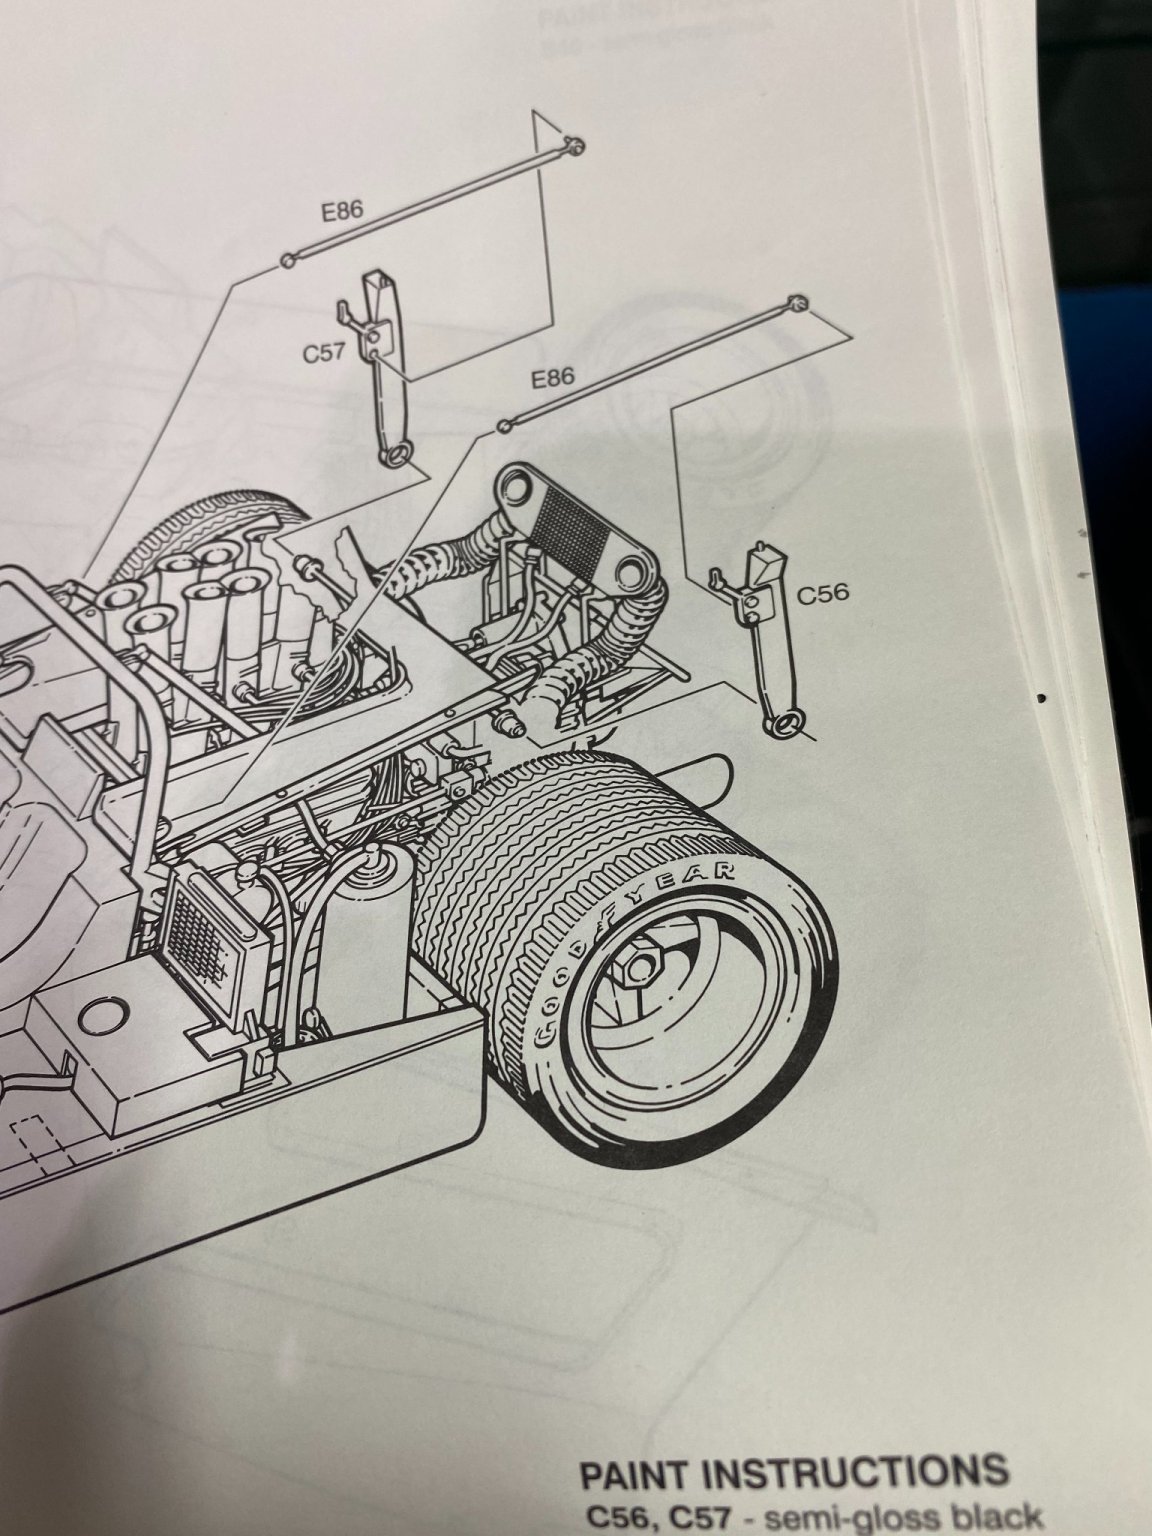
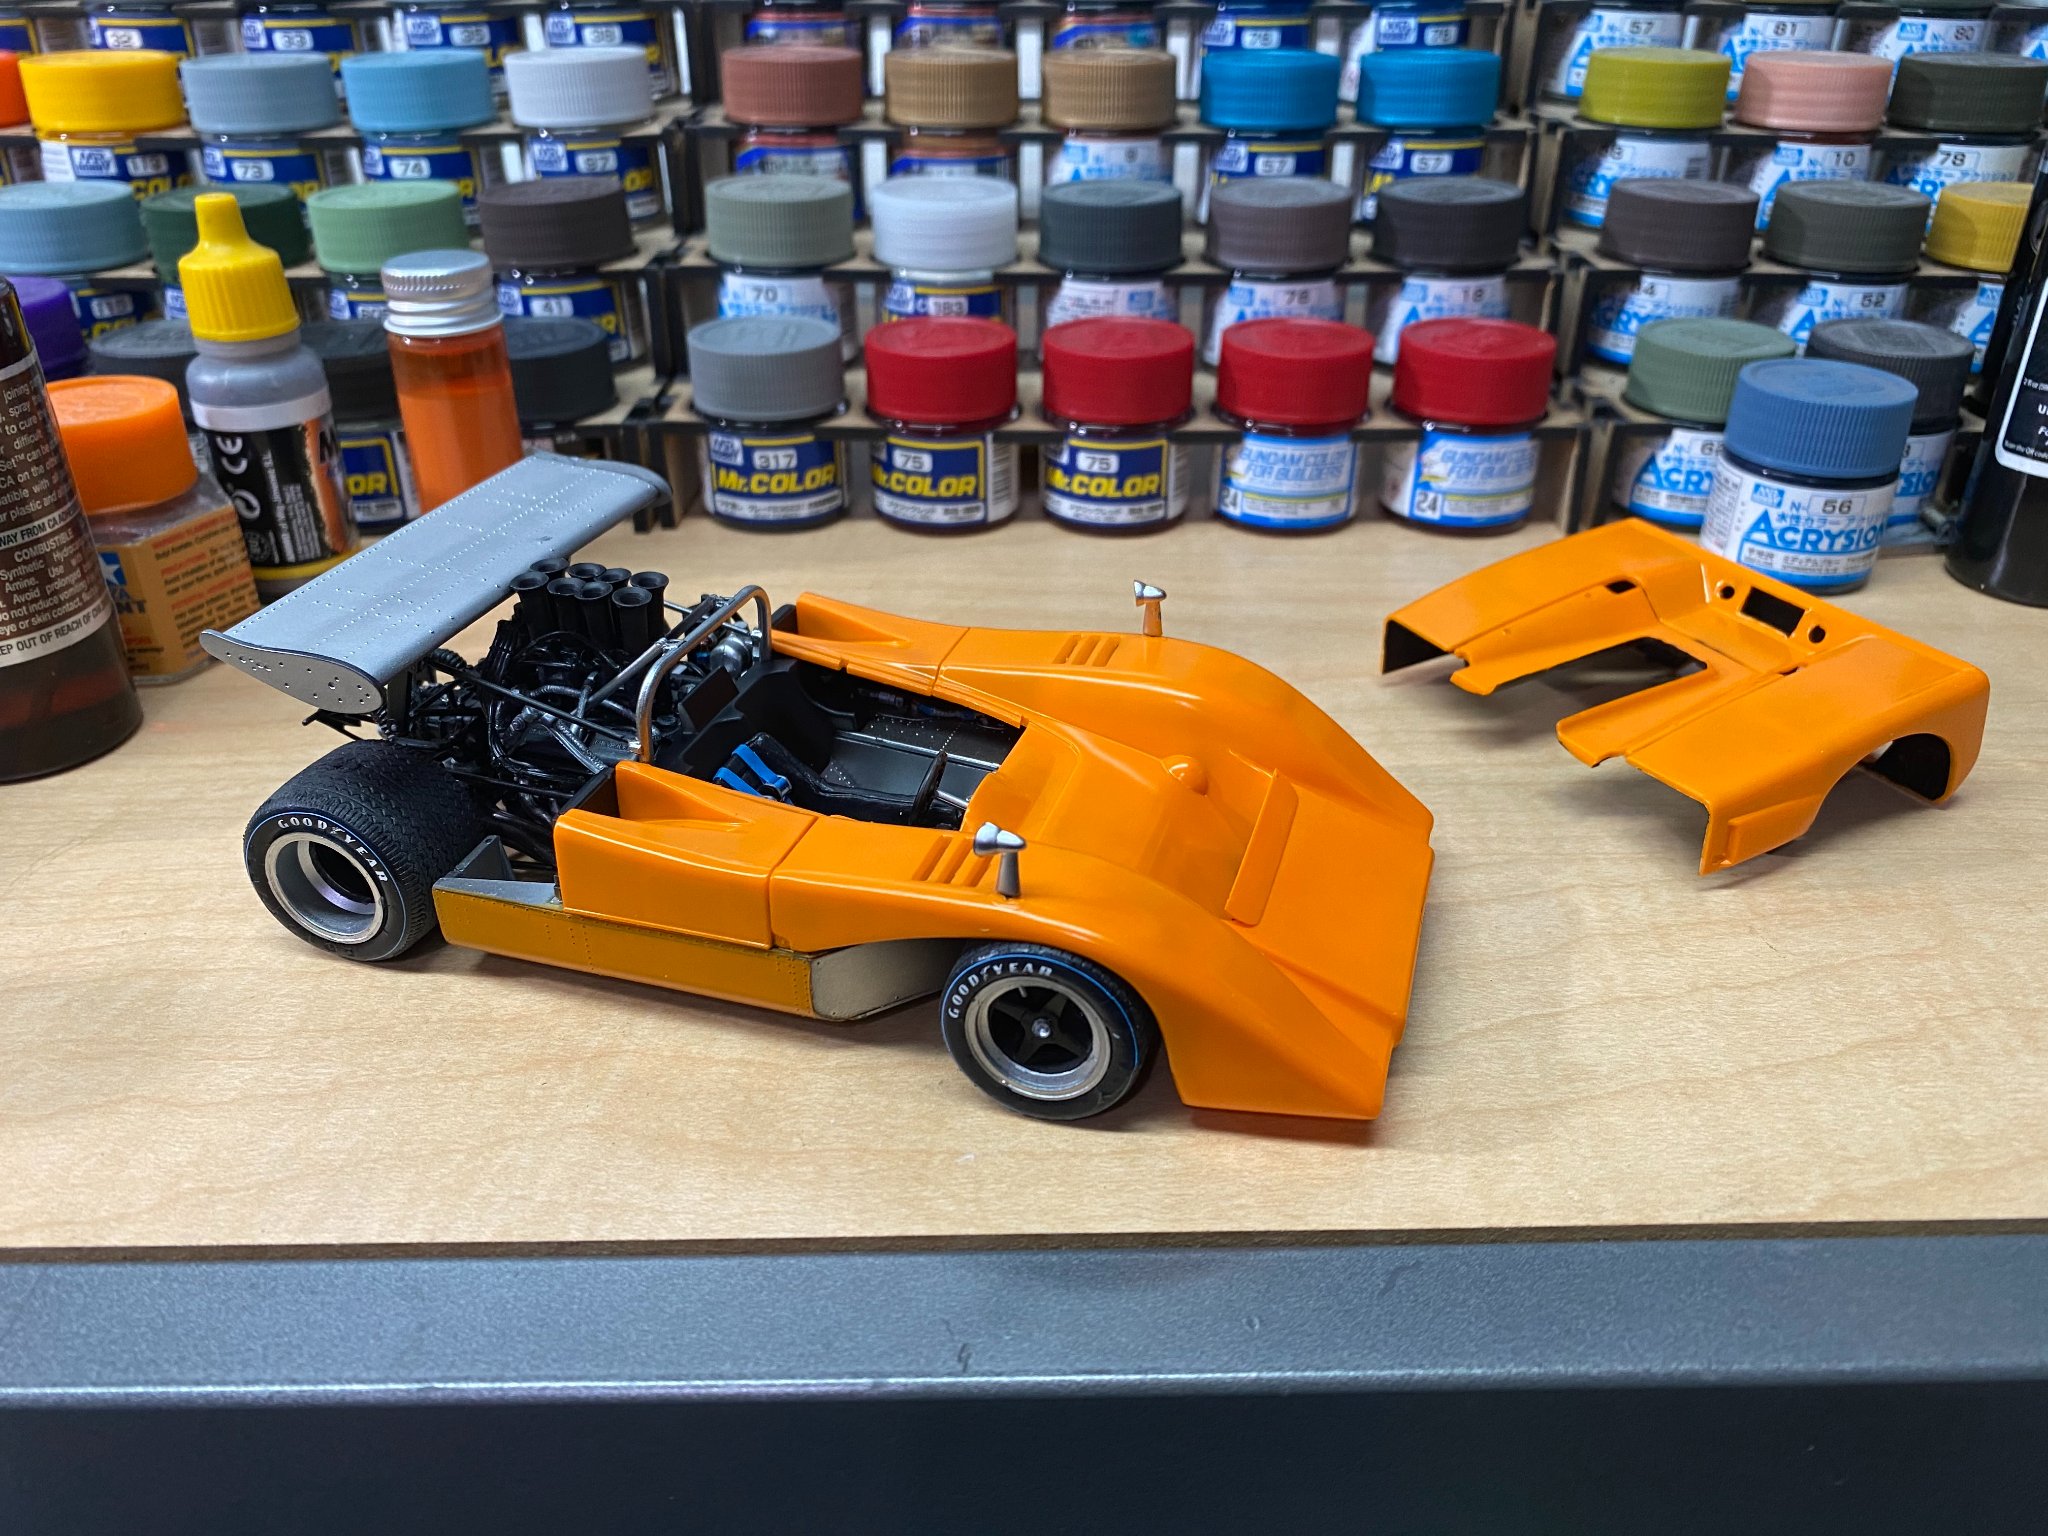
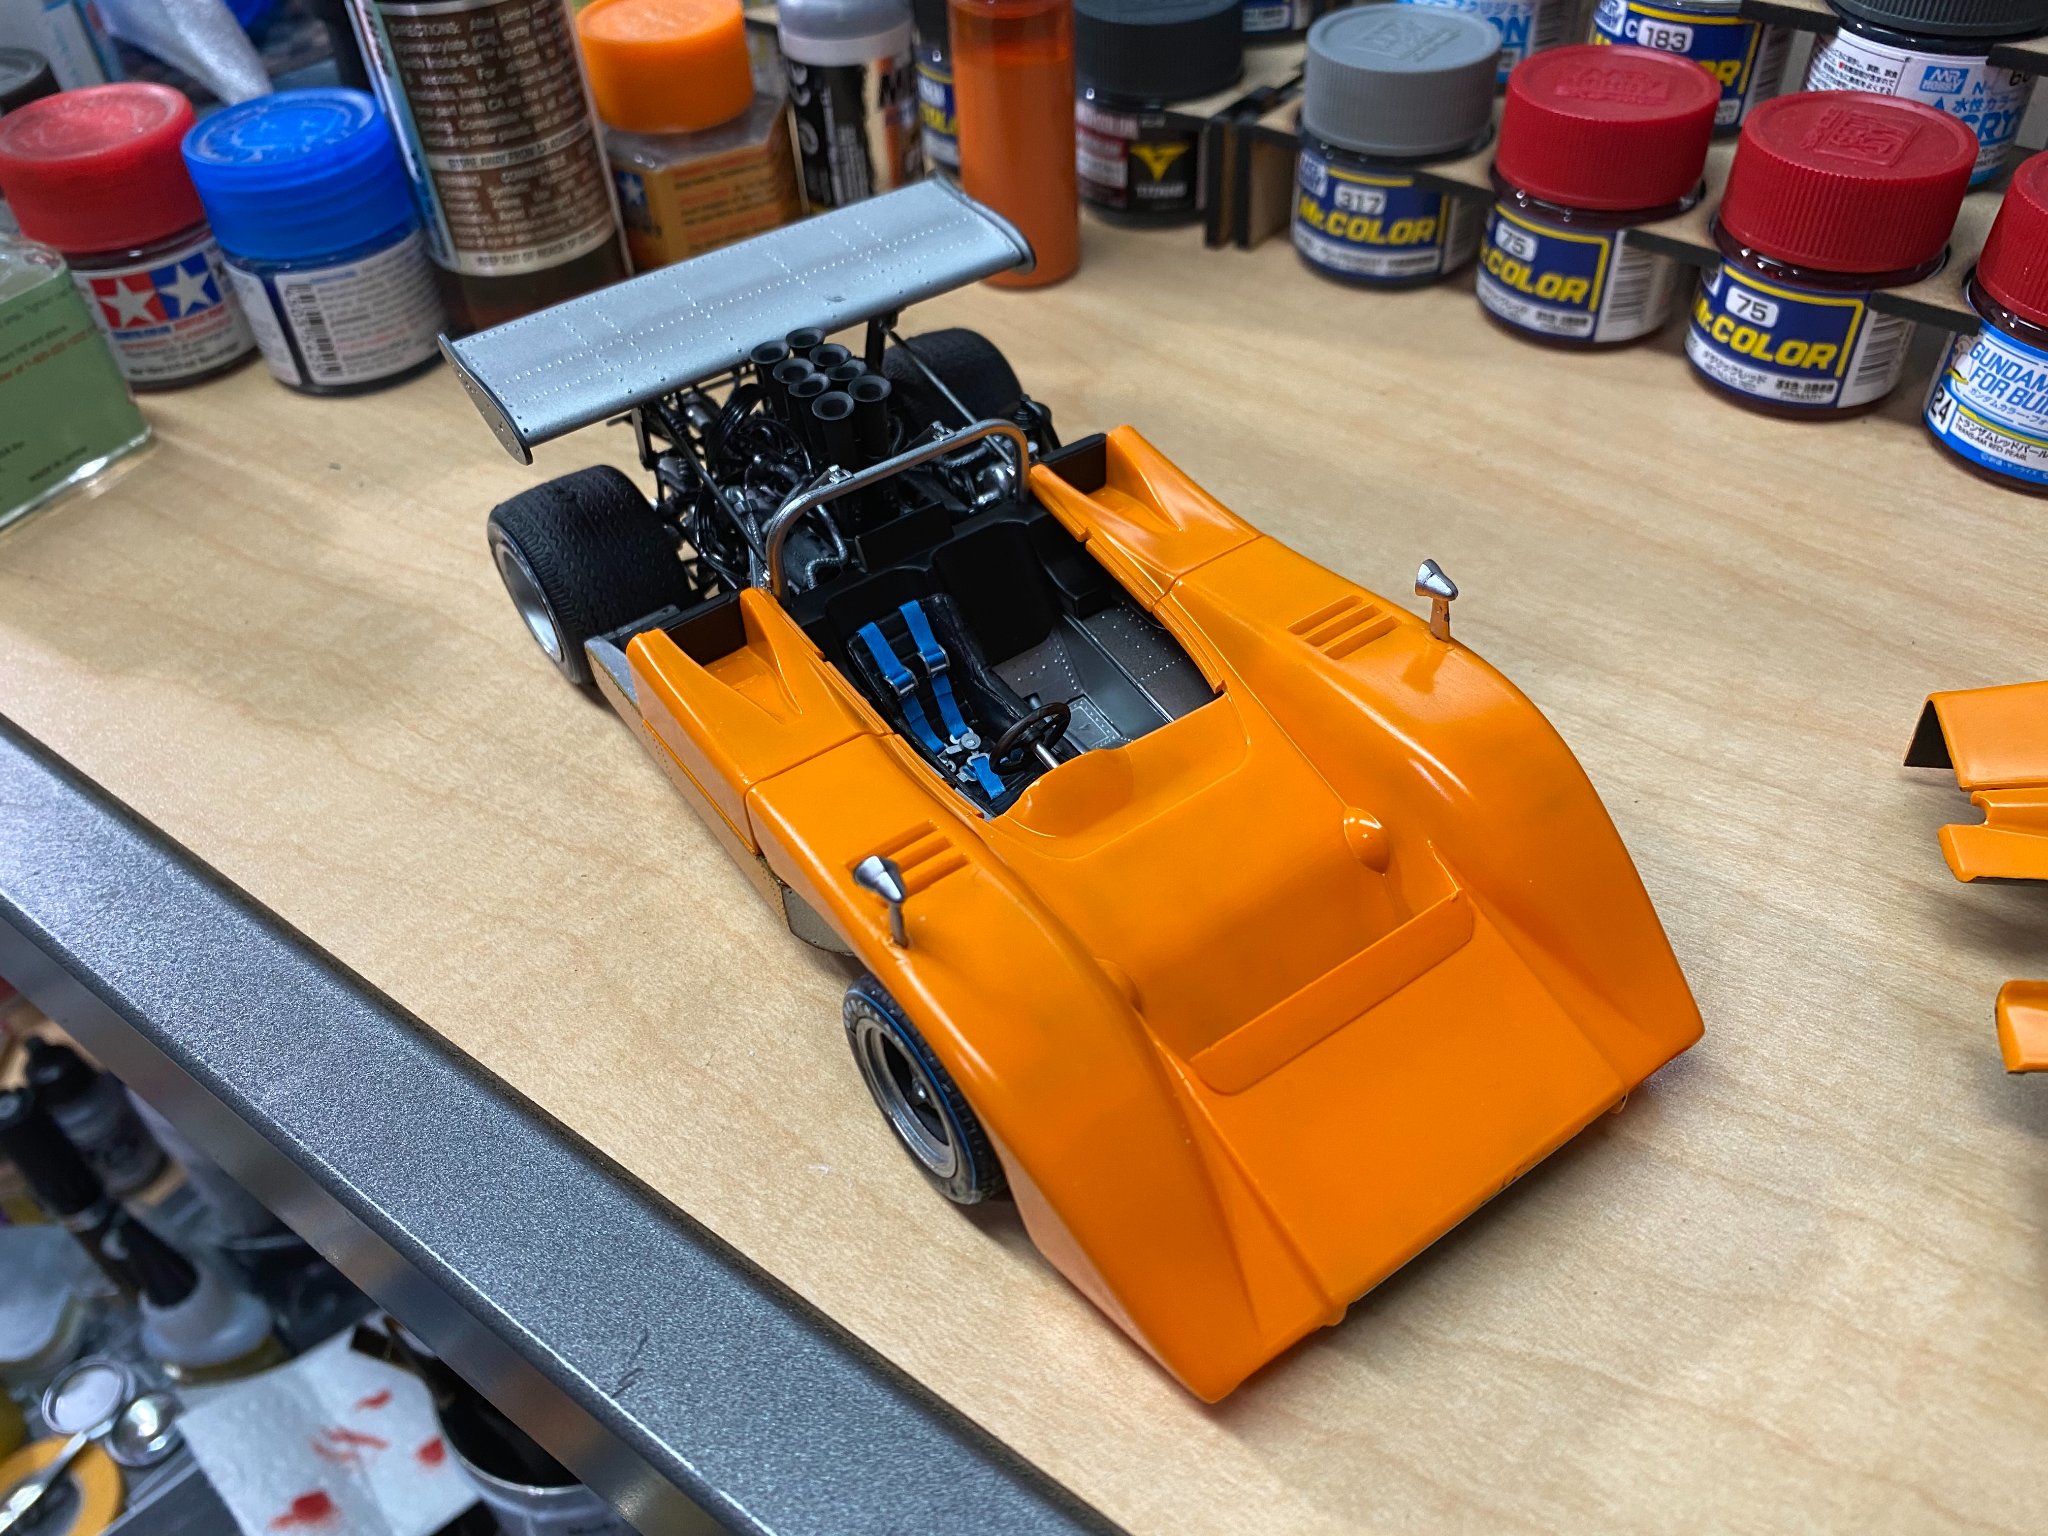
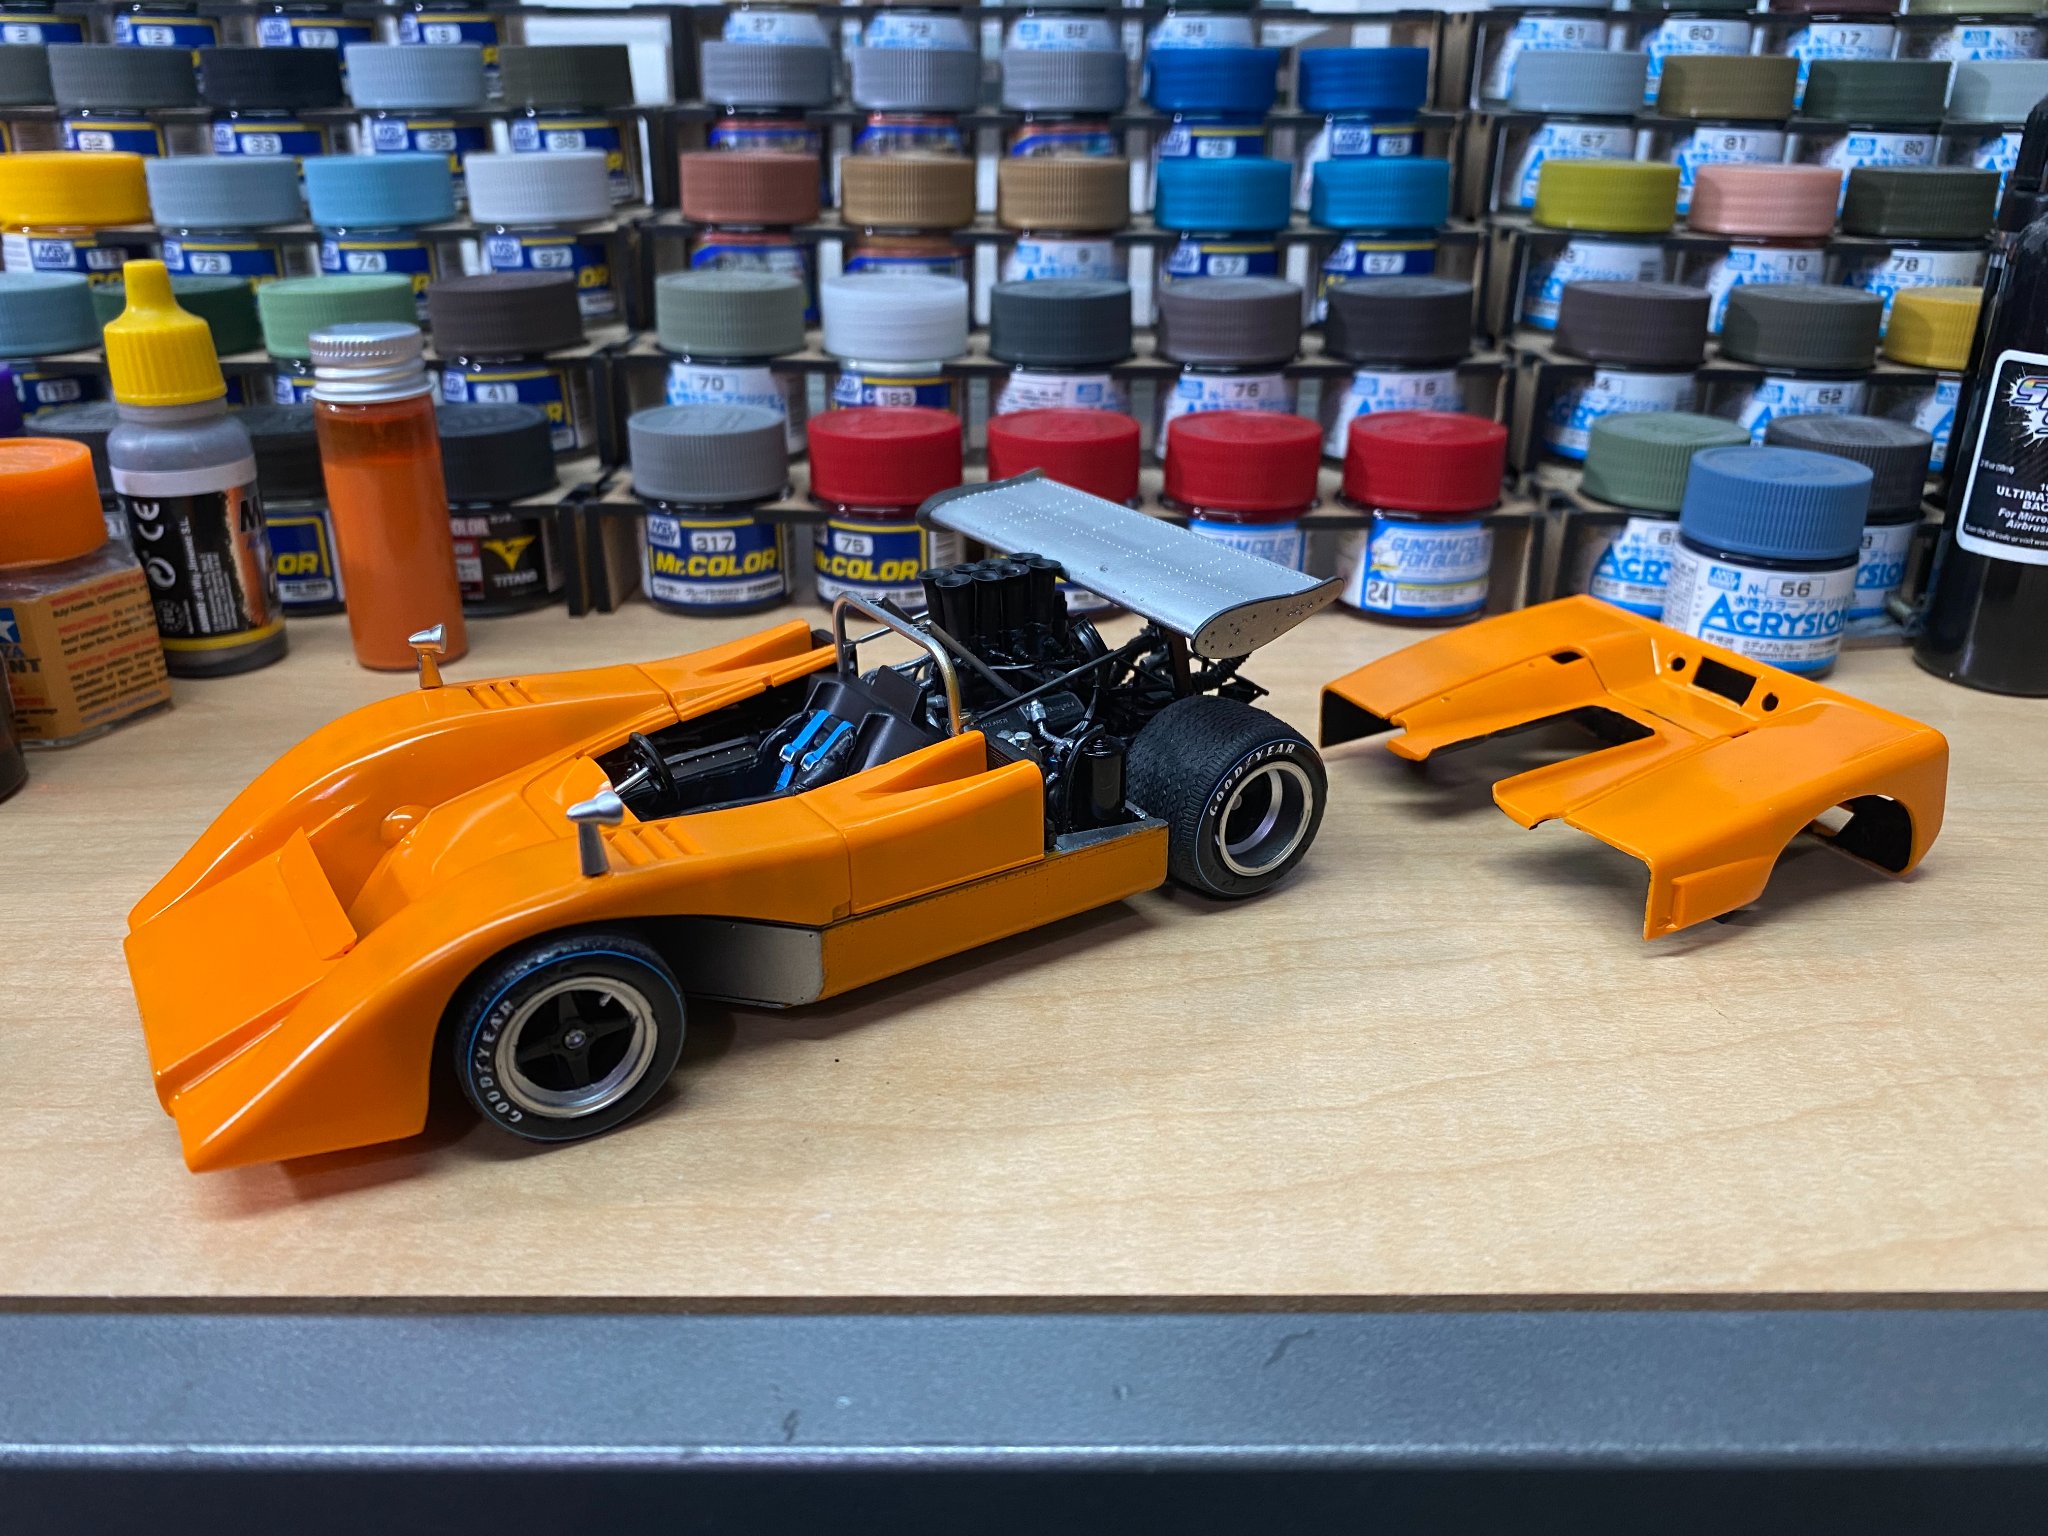
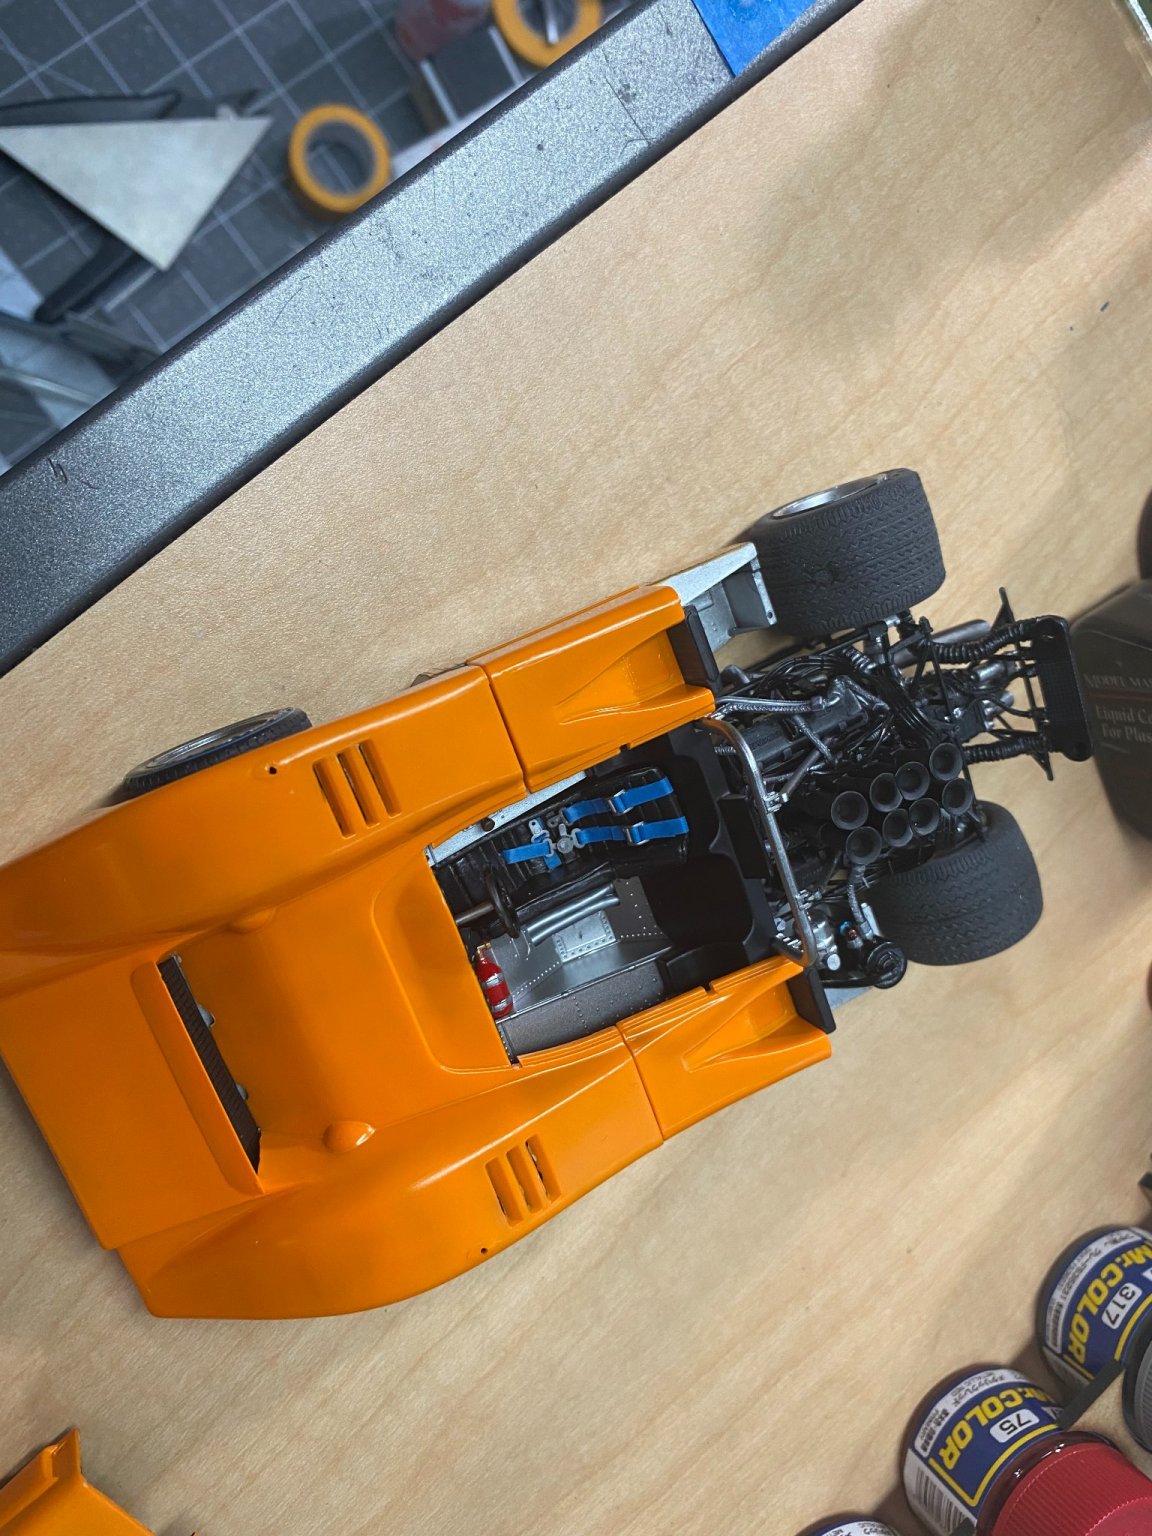
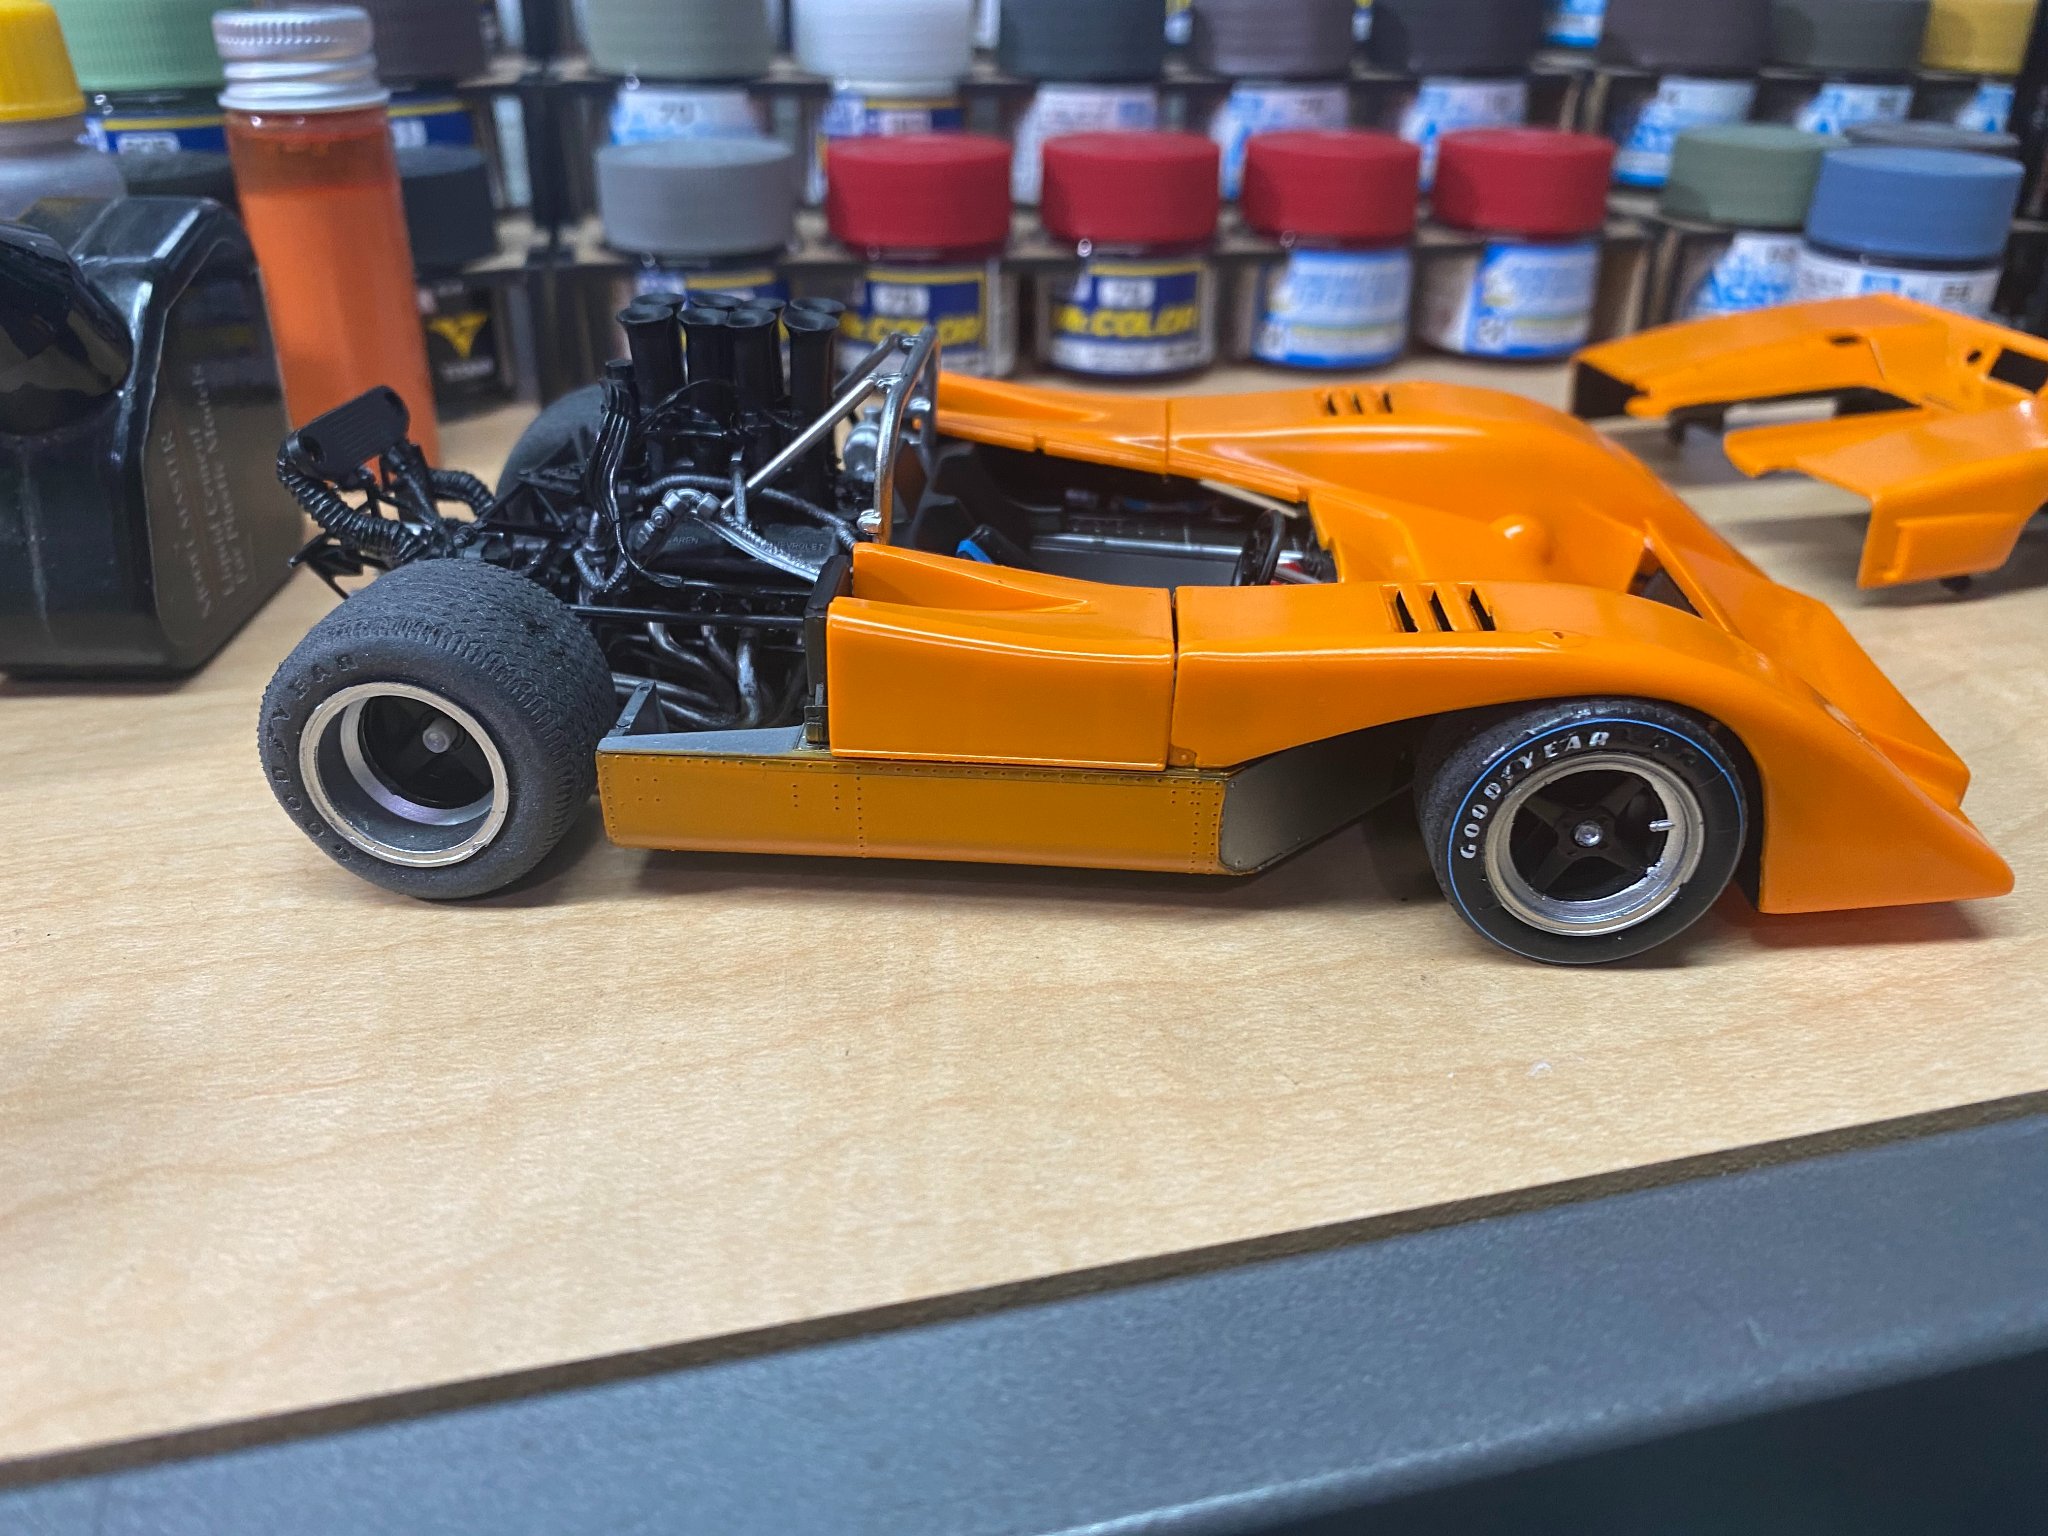
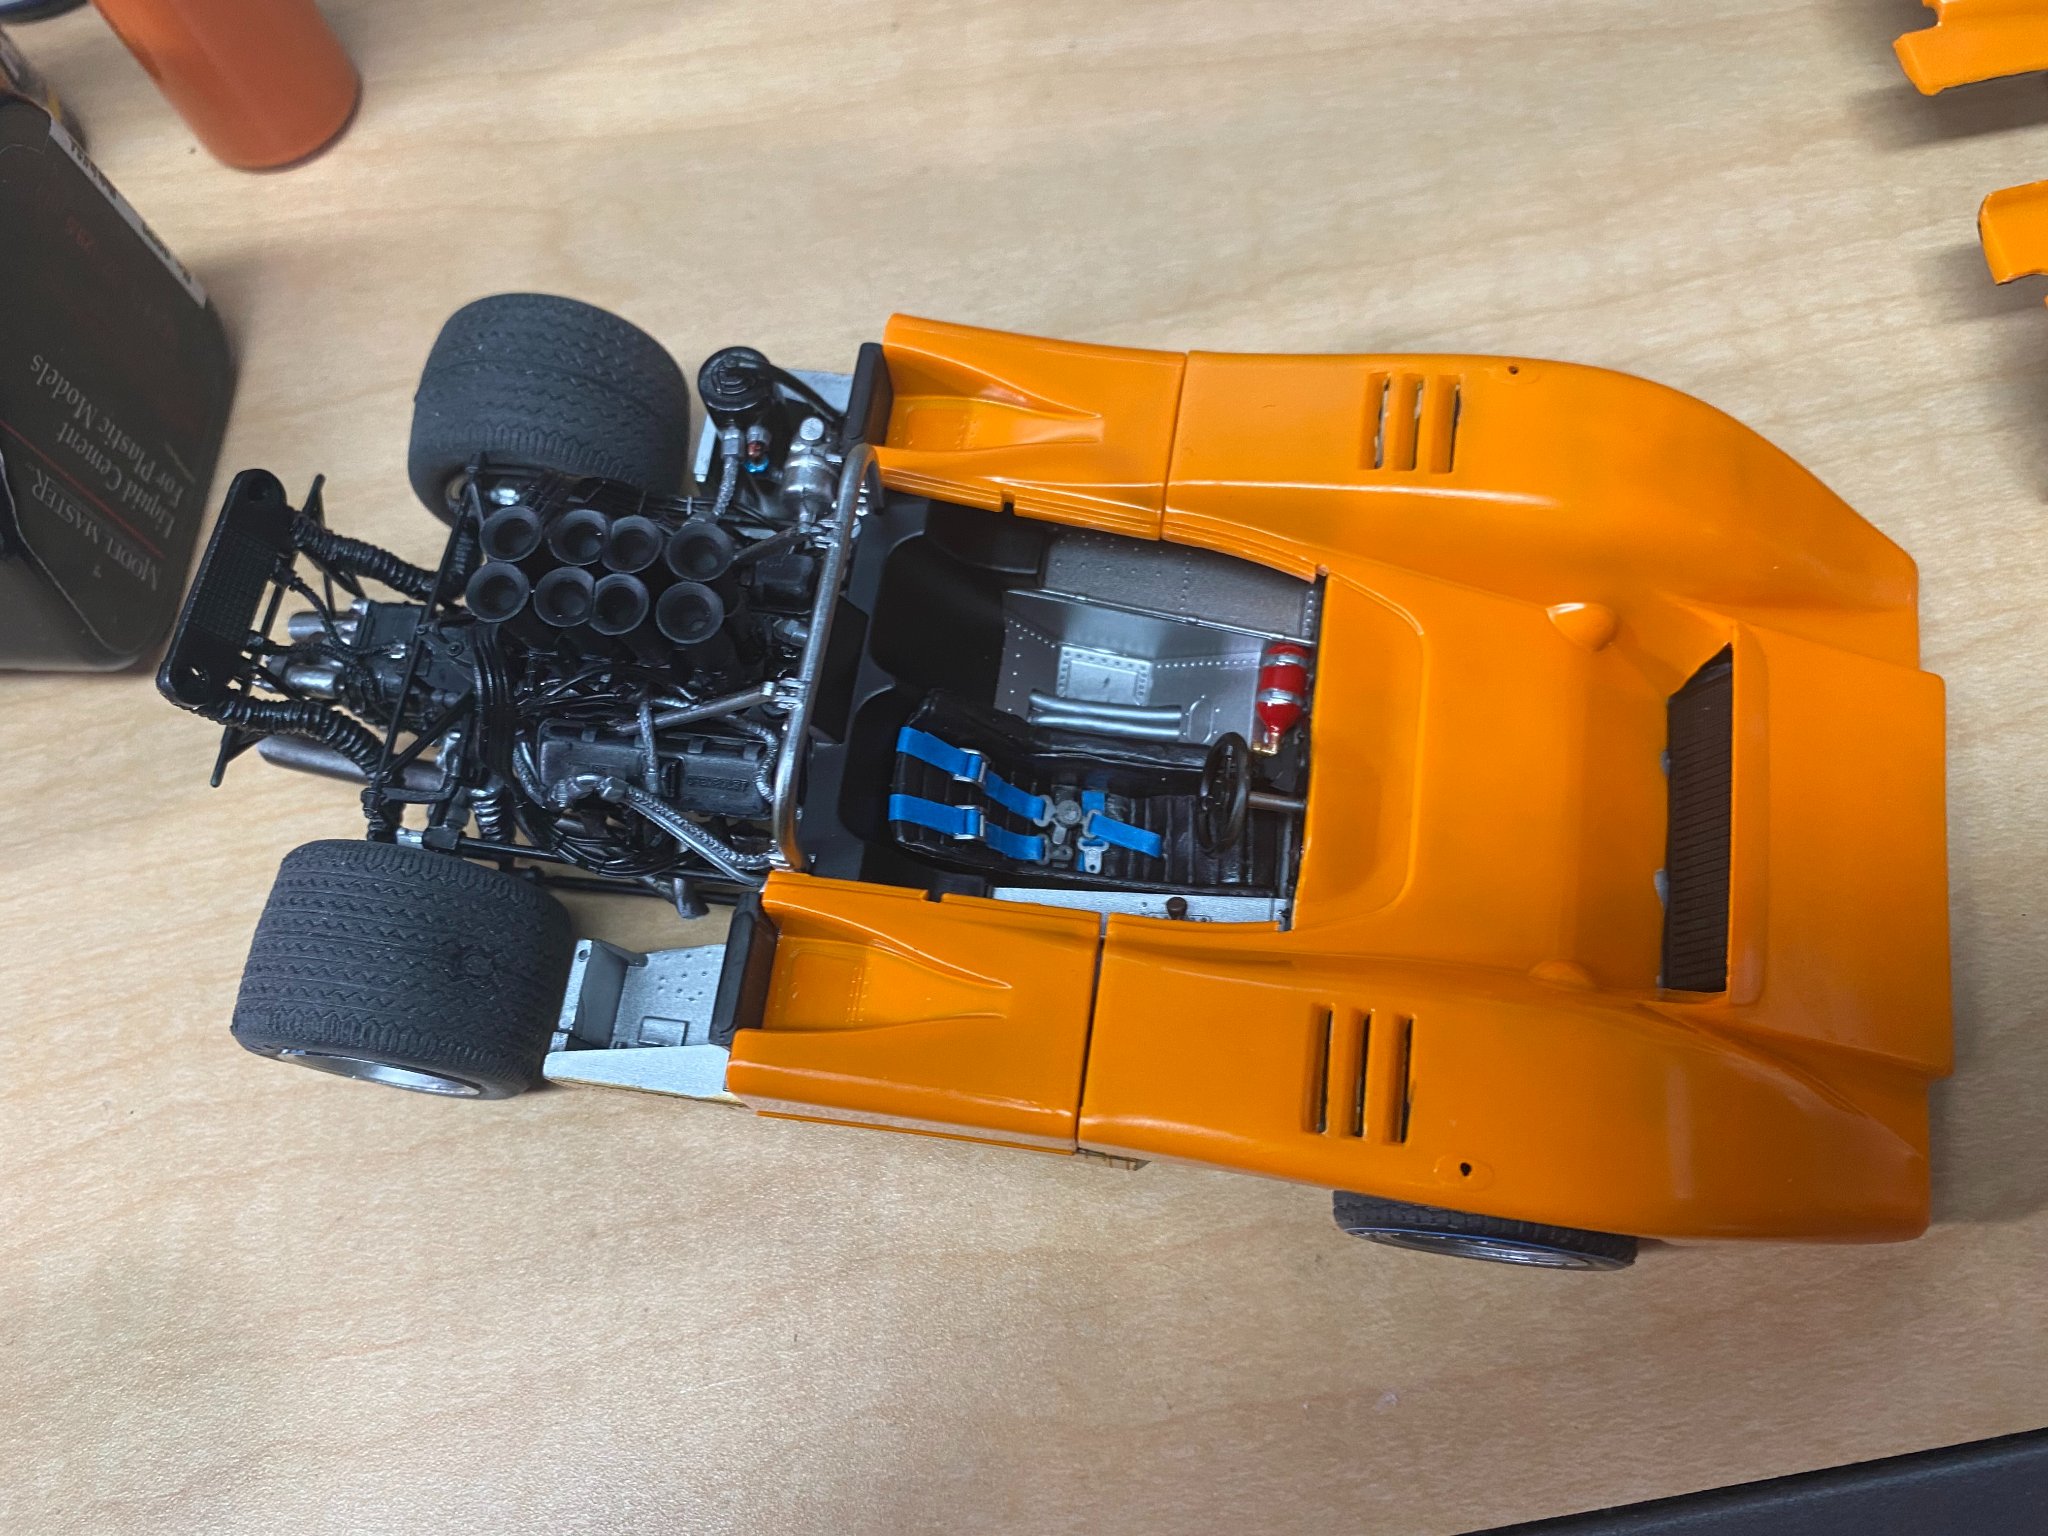
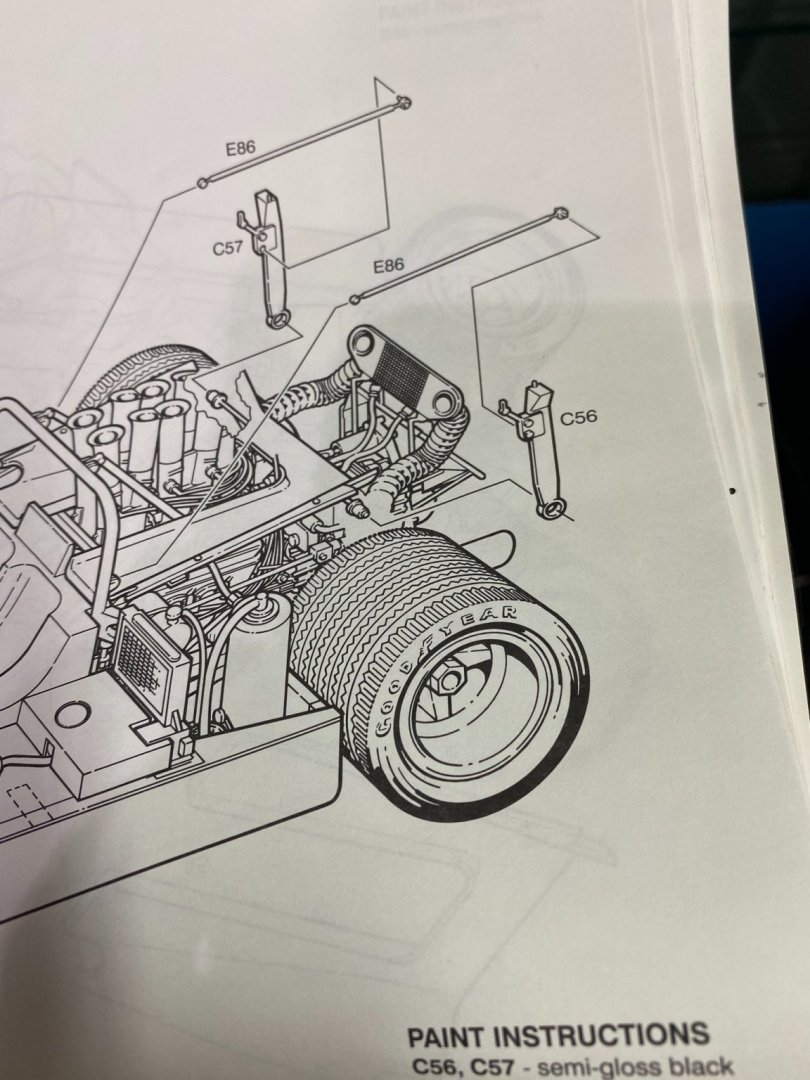
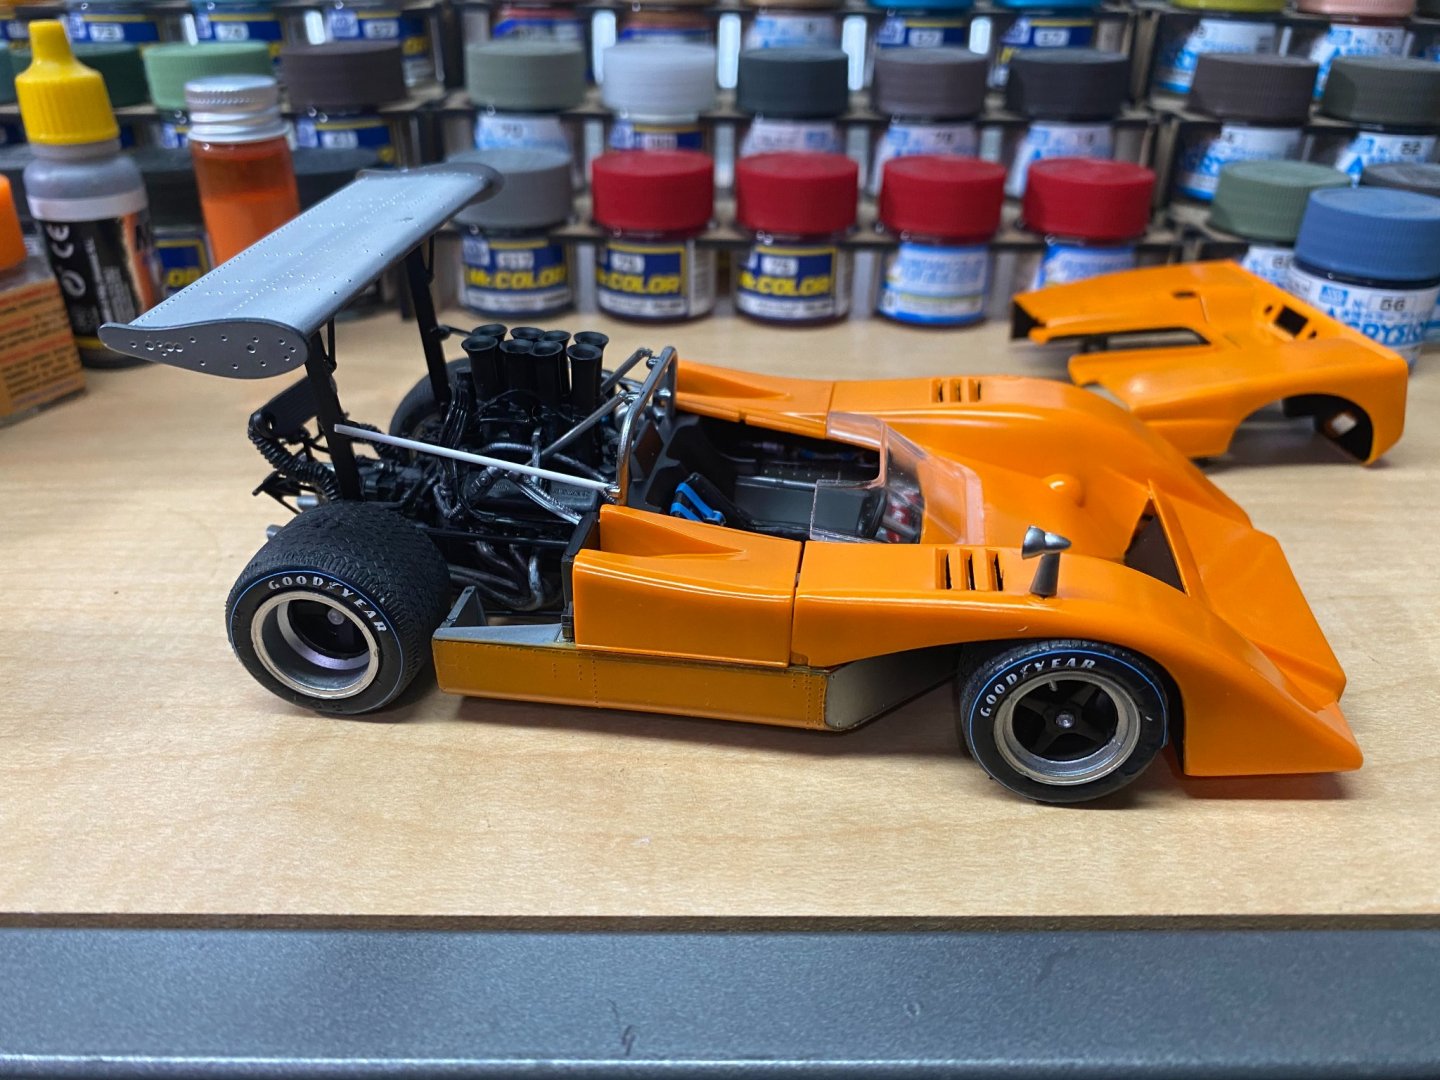
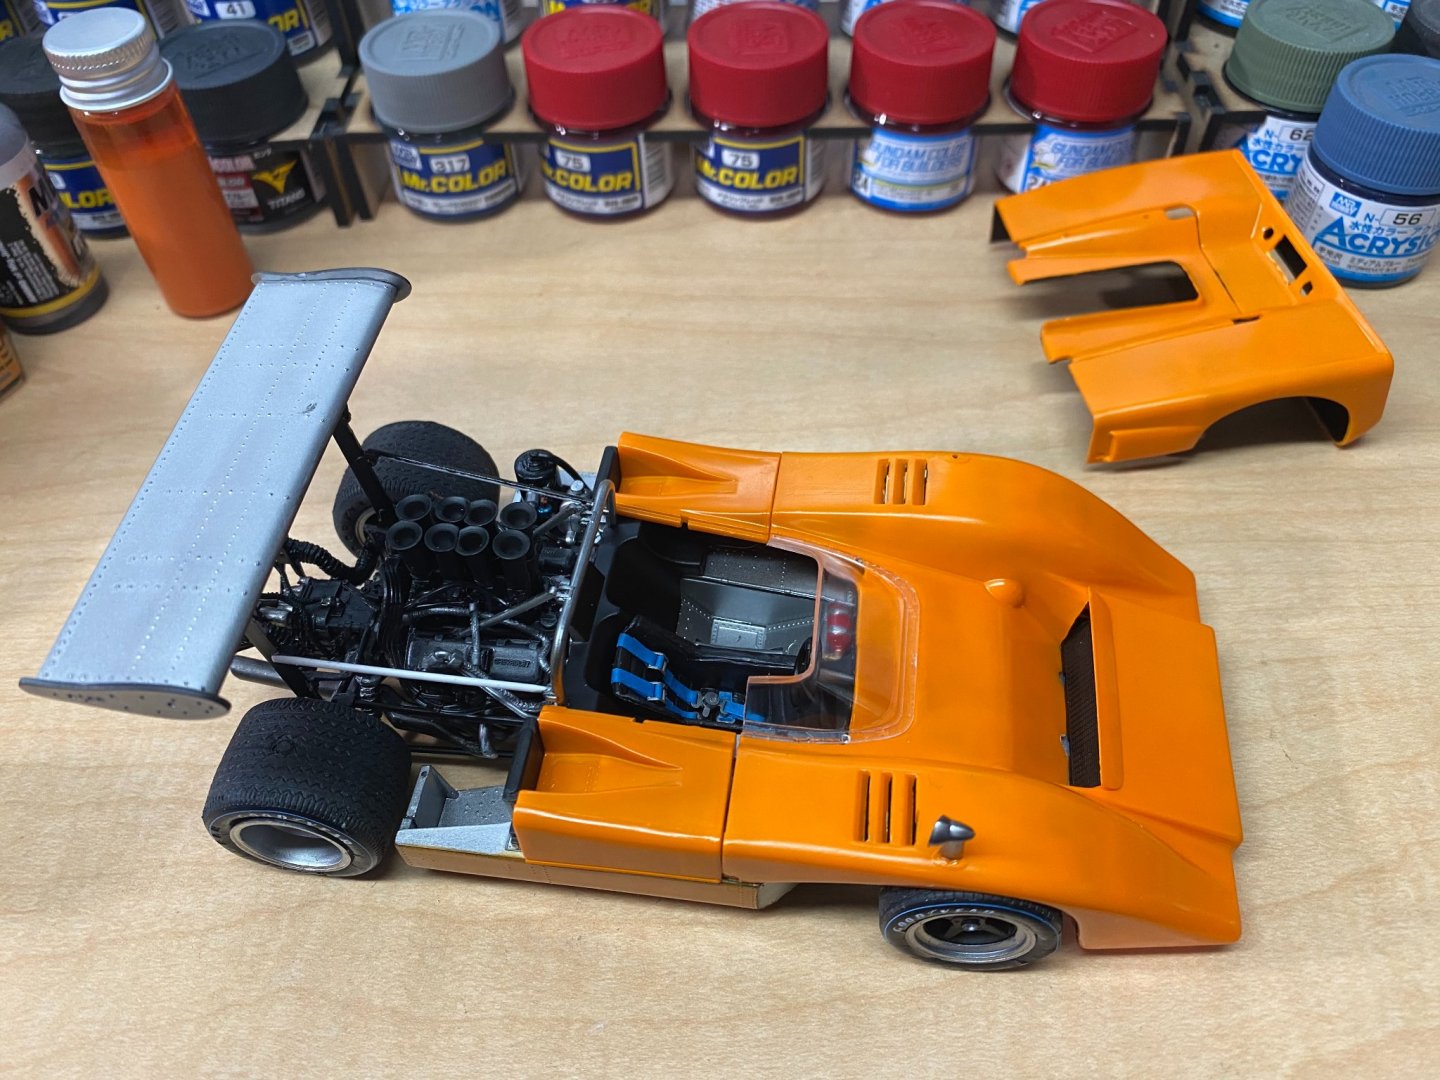
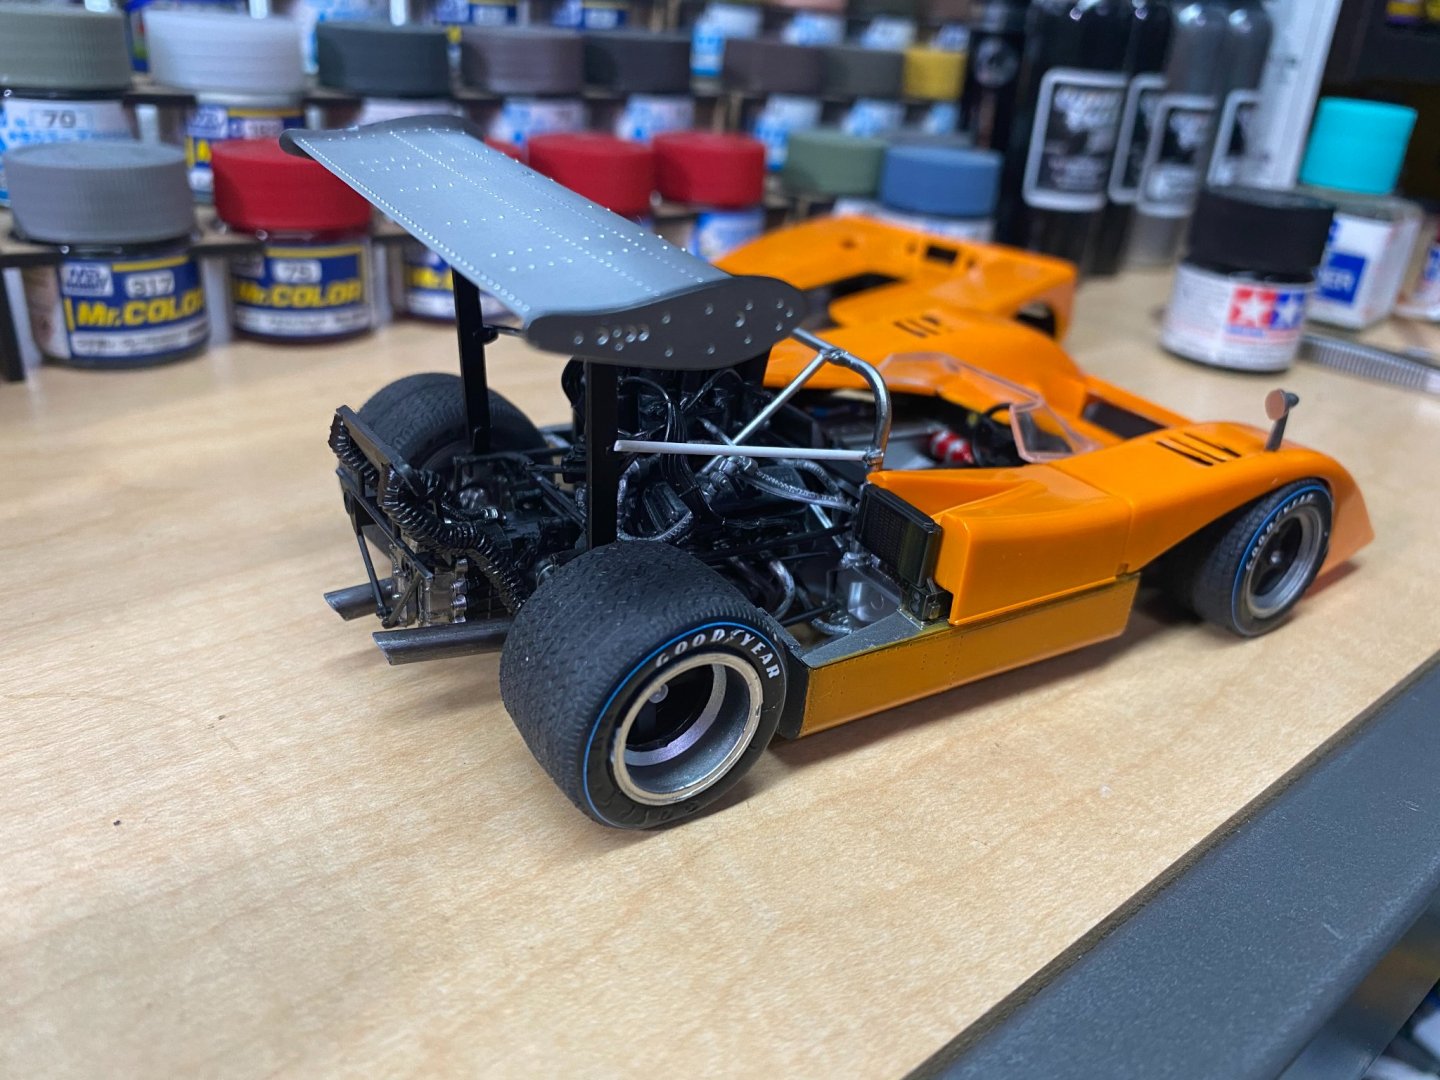
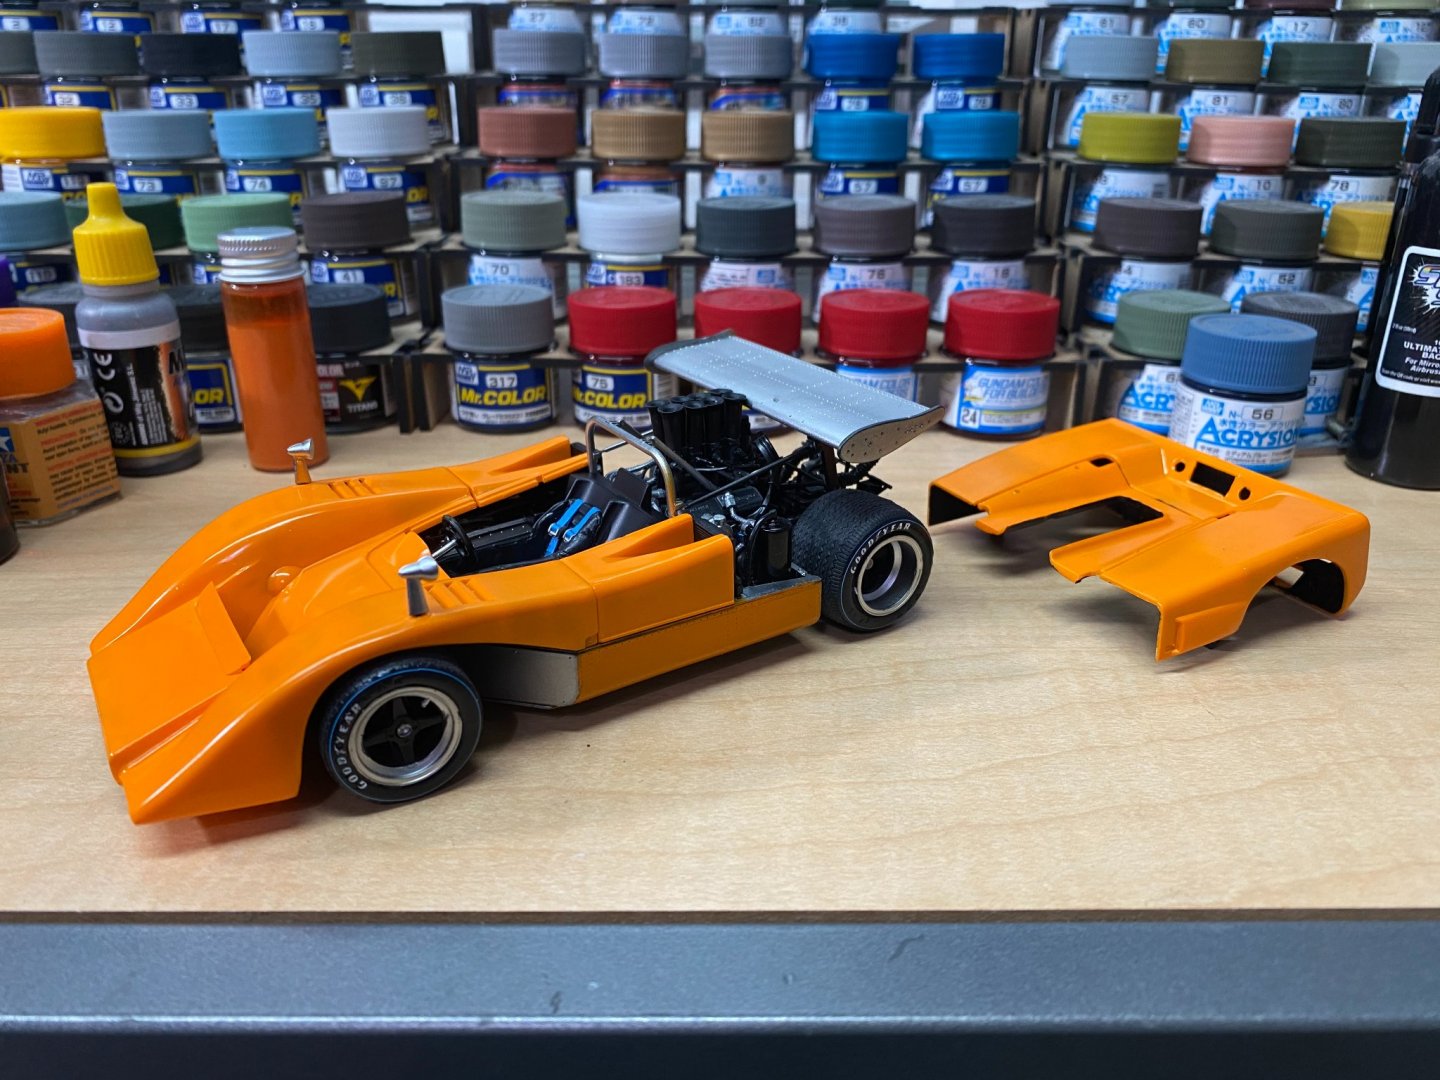
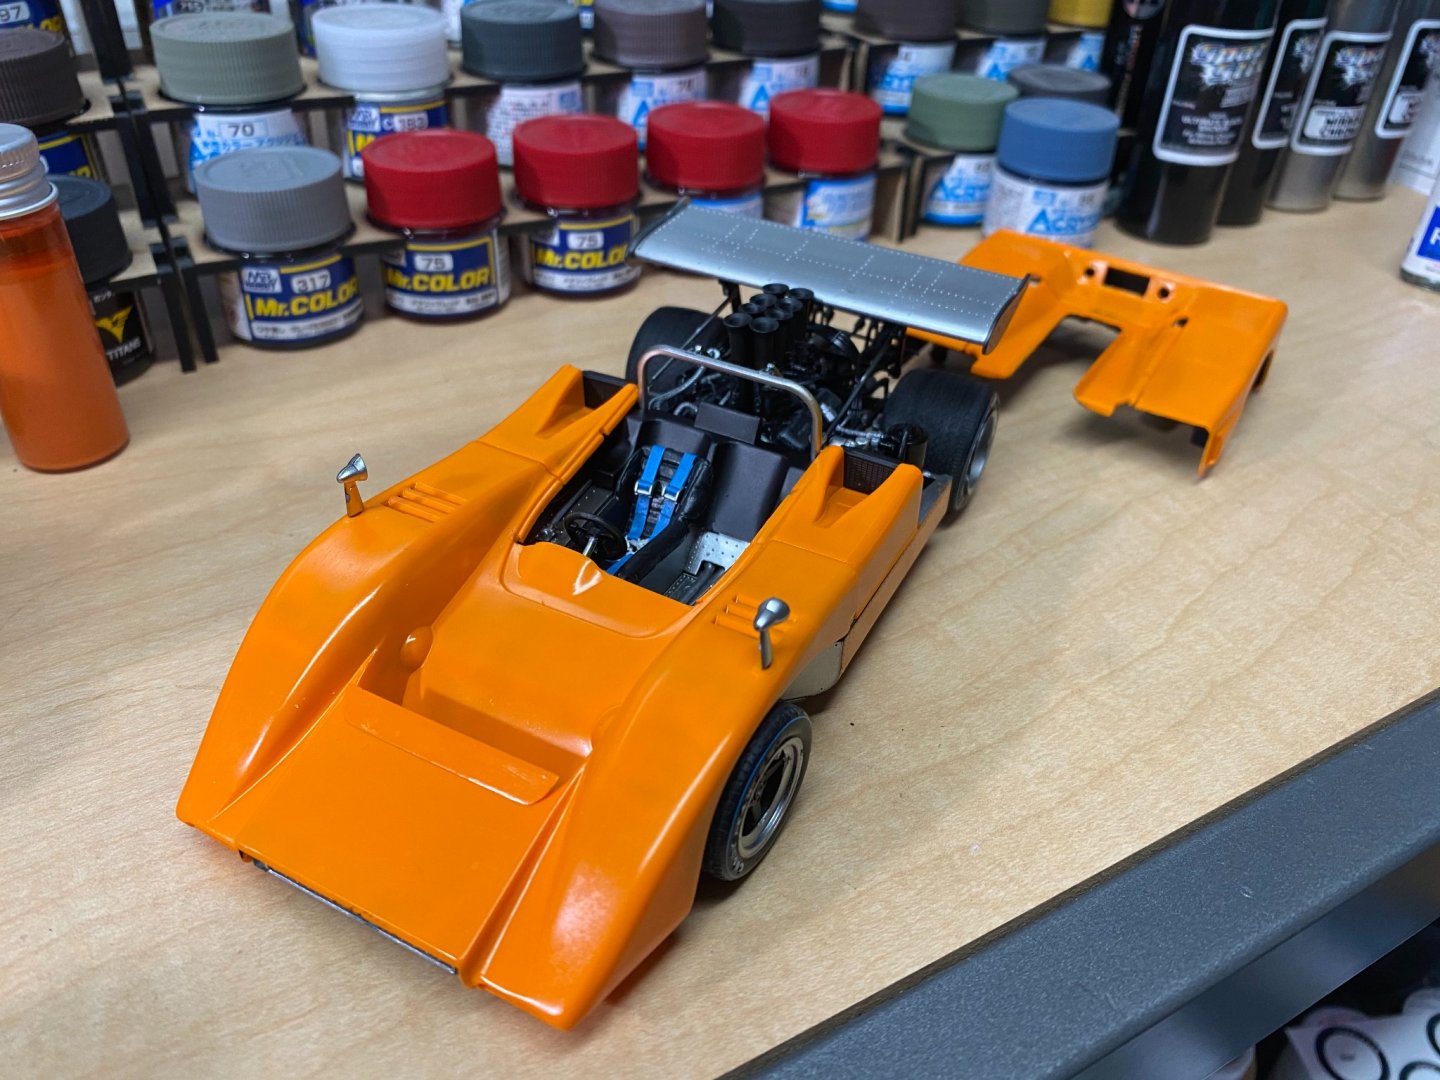
My kit version is for the 1970 edition McLaren. However, the kit contains parts to backdate this version to the 1969 version which had a high wing rather than the shorter wing struts seen in the previous photos on my last post. With Imagna's help, I learned my kit instructions showed the installation of parts that interfered with the optional installation of the high wing struts found in the 1969 team McLaren version which I want to model. Pictured are my kit instructions and then the photos of my kit with the correct long struts installed for the high wing. Note that I needed to make my own bracing rods that run from the roll bar to the long wing struts. My kit did not include bracing rods long enough for the high wing struts, but it's no big deal to make a longer pair of rods from styrene rod stock in the correct diameter. If you decide to build the high wing 1969 version like I did, leave out part numbers C53, C56, and C57, and attach the longer set of struts directly on top of the rear axle hubs.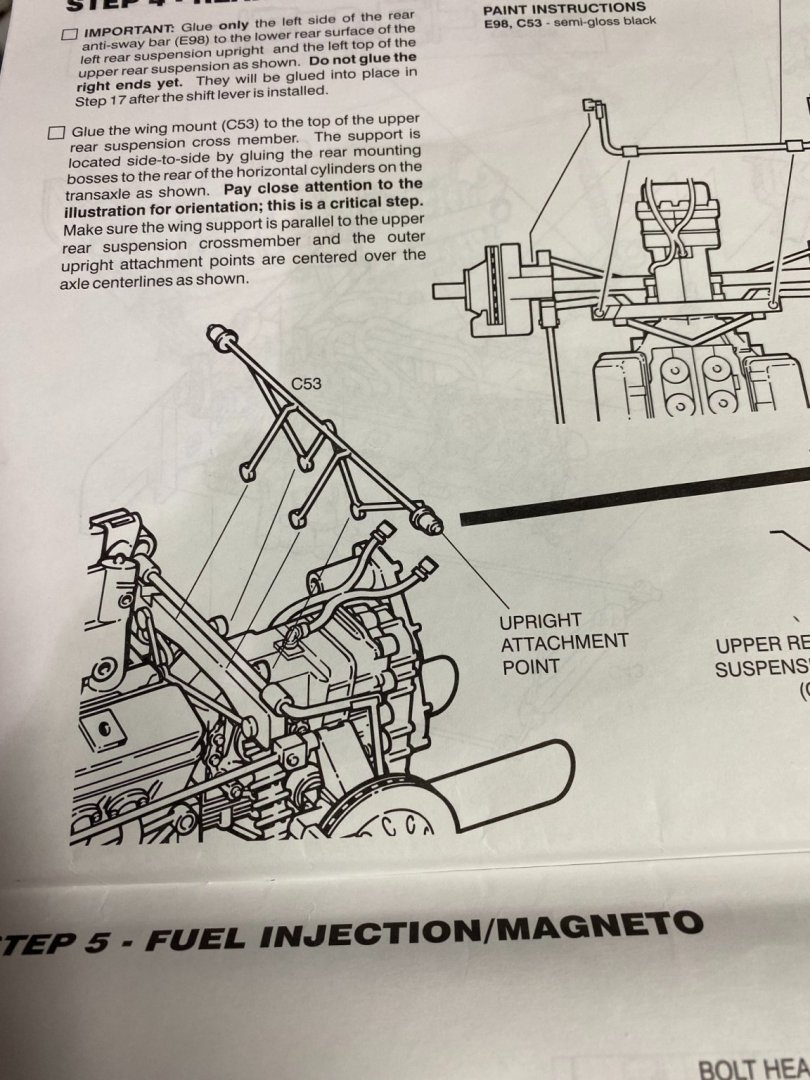

- 137 replies
-
- 13
-
-
1955 Chrysler 300 by CDW - Moebius - 1:25 Scale - PLASTIC
CDW replied to CDW's topic in Non-ship/categorised builds
The only thing I've done with it so far is in the photos except for the work I've been doing to cut open the doors and trunk lid. I'll be scratch building hinges and door jambs later on. Will provide some new photos soon. Thanks for dropping by. -
McLaren M8B by CDW - Accurate Miniatures - 1:24 Scale
CDW replied to CDW's topic in Non-ship/categorised builds
Need to add the decals, windscreen, and a few small parts then this one is done.

- 137 replies
-
- 12
-
-
Wow, that Rainbow set looks amazing. Probably would make my eyeballs bleed trying to do all that photo etch in 1:700 scale. I just ordered the Hasegawa full hull version in 1:700 scale off Amazon. Haven't ordered a detail set yet. Did you order the Rainbow set direct from them?
-
I've got the 1:250 DeAgostini Akagi kit for a potential future build, a composite model of wood, cast metal, and photo etch. Downside is the sheer size of it when finished. I am seriously considering the 1:700 Akagi kit and detail sets instead as it makes for a more practical model for display. Also, it's less than half the cost of the 1:350 with almost just as much detail packed in (with the update sets).
-
McLaren M8B by CDW - Accurate Miniatures - 1:24 Scale
CDW replied to CDW's topic in Non-ship/categorised builds
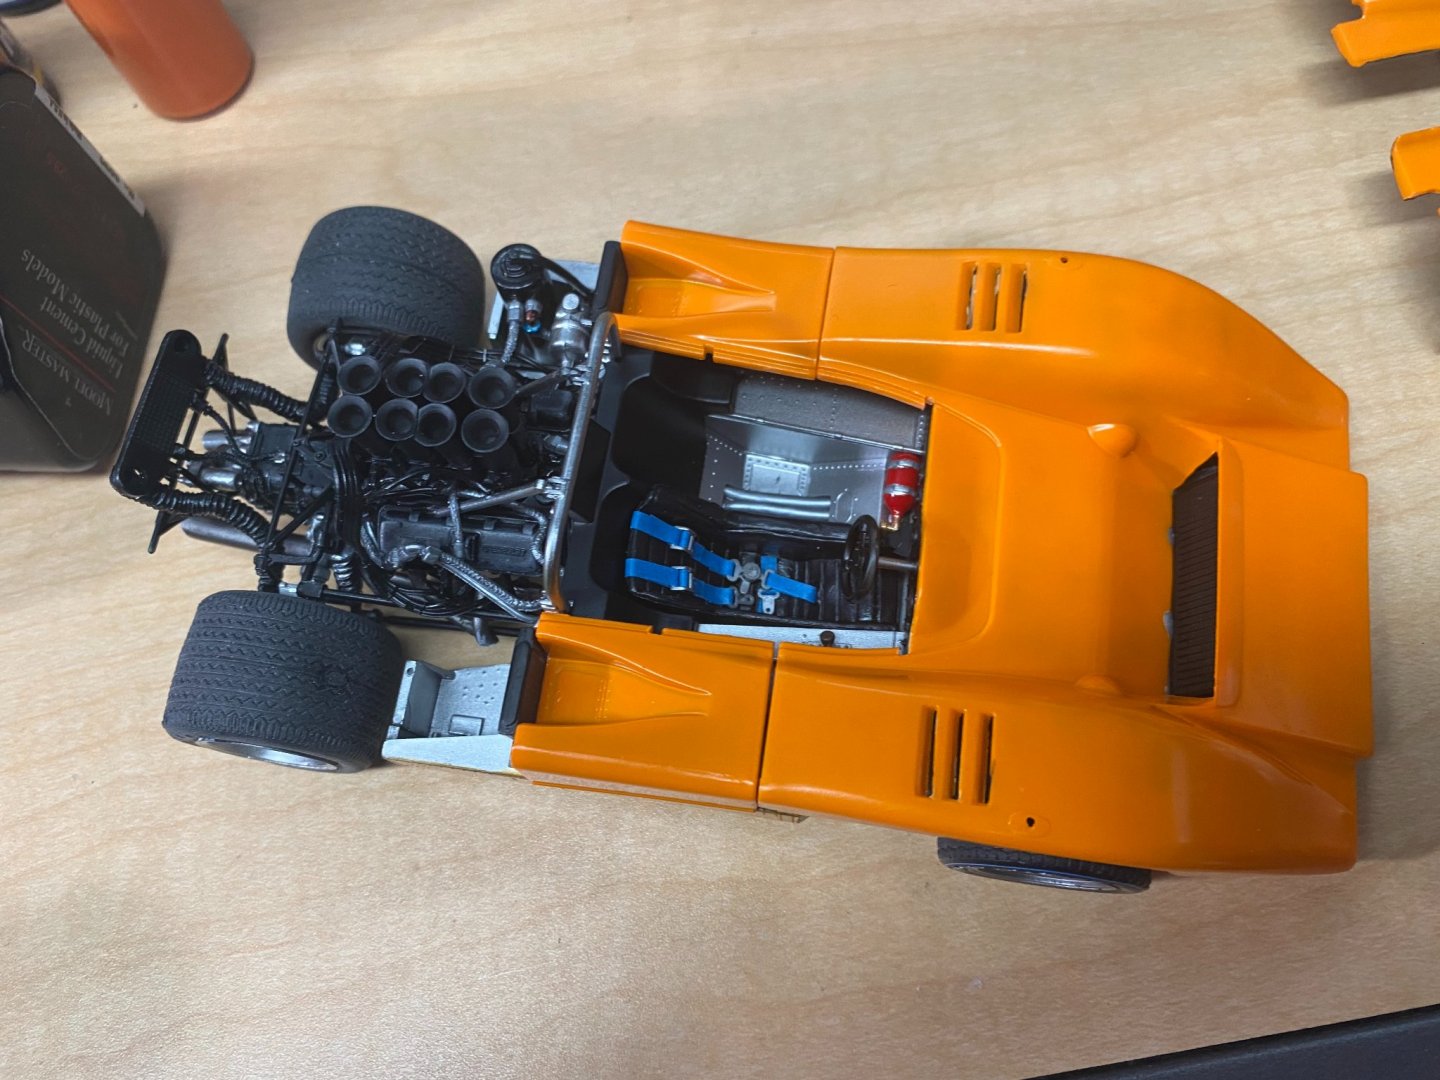
Here's what the aftermarket tire sidewall decal looks like in place. As is true with most all aftermarket decal sheets, each and every decal on the sheet must be carefully cut out individually as they are not "die cut" on the sheet. Three more to go. The kit comes with molded plastic racing harness buckles as well as material for the belts. I made my own belts in the color I wanted and used only the supplied buckles.

- 137 replies
-
- 13
-
-
McLaren M8B by CDW - Accurate Miniatures - 1:24 Scale
CDW replied to CDW's topic in Non-ship/categorised builds
I painted over the aluminum but I should have put down white primer first, just to keep a consistent shade of orange. It's a tad off, darker, but nothing that worries me over it. -
McLaren M8B by CDW - Accurate Miniatures - 1:24 Scale
CDW replied to CDW's topic in Non-ship/categorised builds
Thanks OC