CDW
-
Posts
7,760 -
Joined
-
Last visited
Content Type
Profiles
Forums
Gallery
Events
Everything posted by CDW
-

McLaren M8B by CDW - Accurate Miniatures - 1:24 Scale
CDW replied to CDW's topic in Non-ship/categorised builds
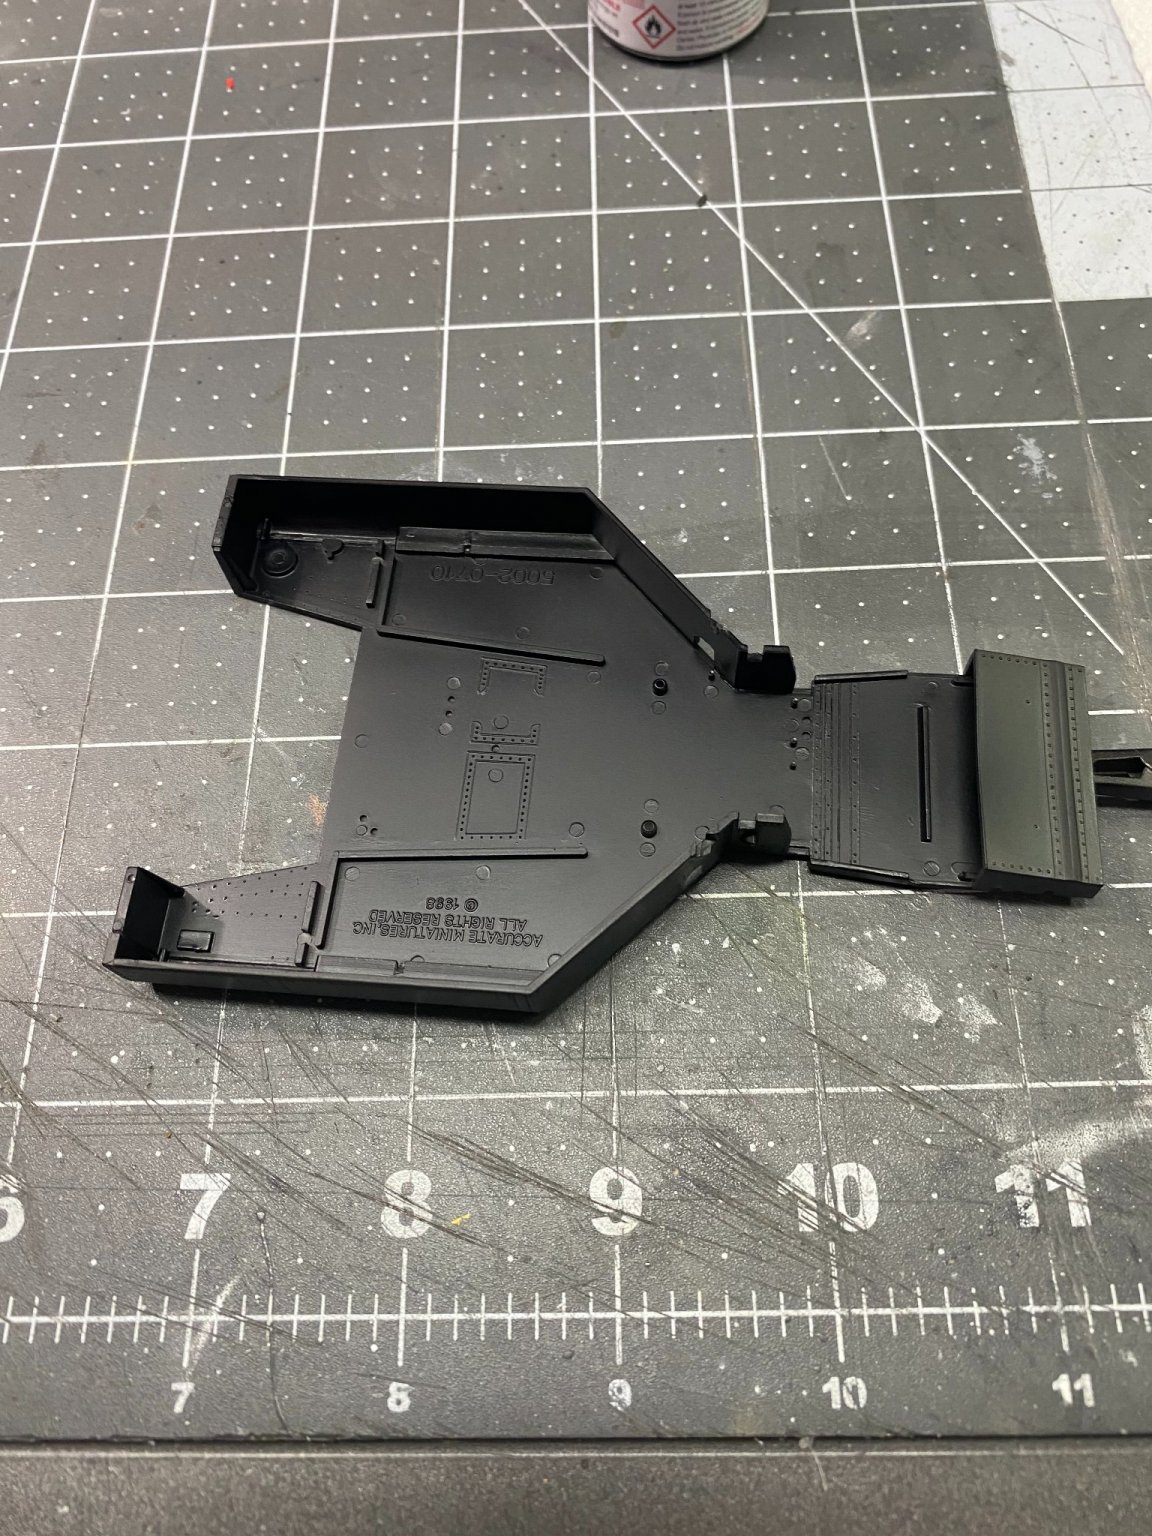
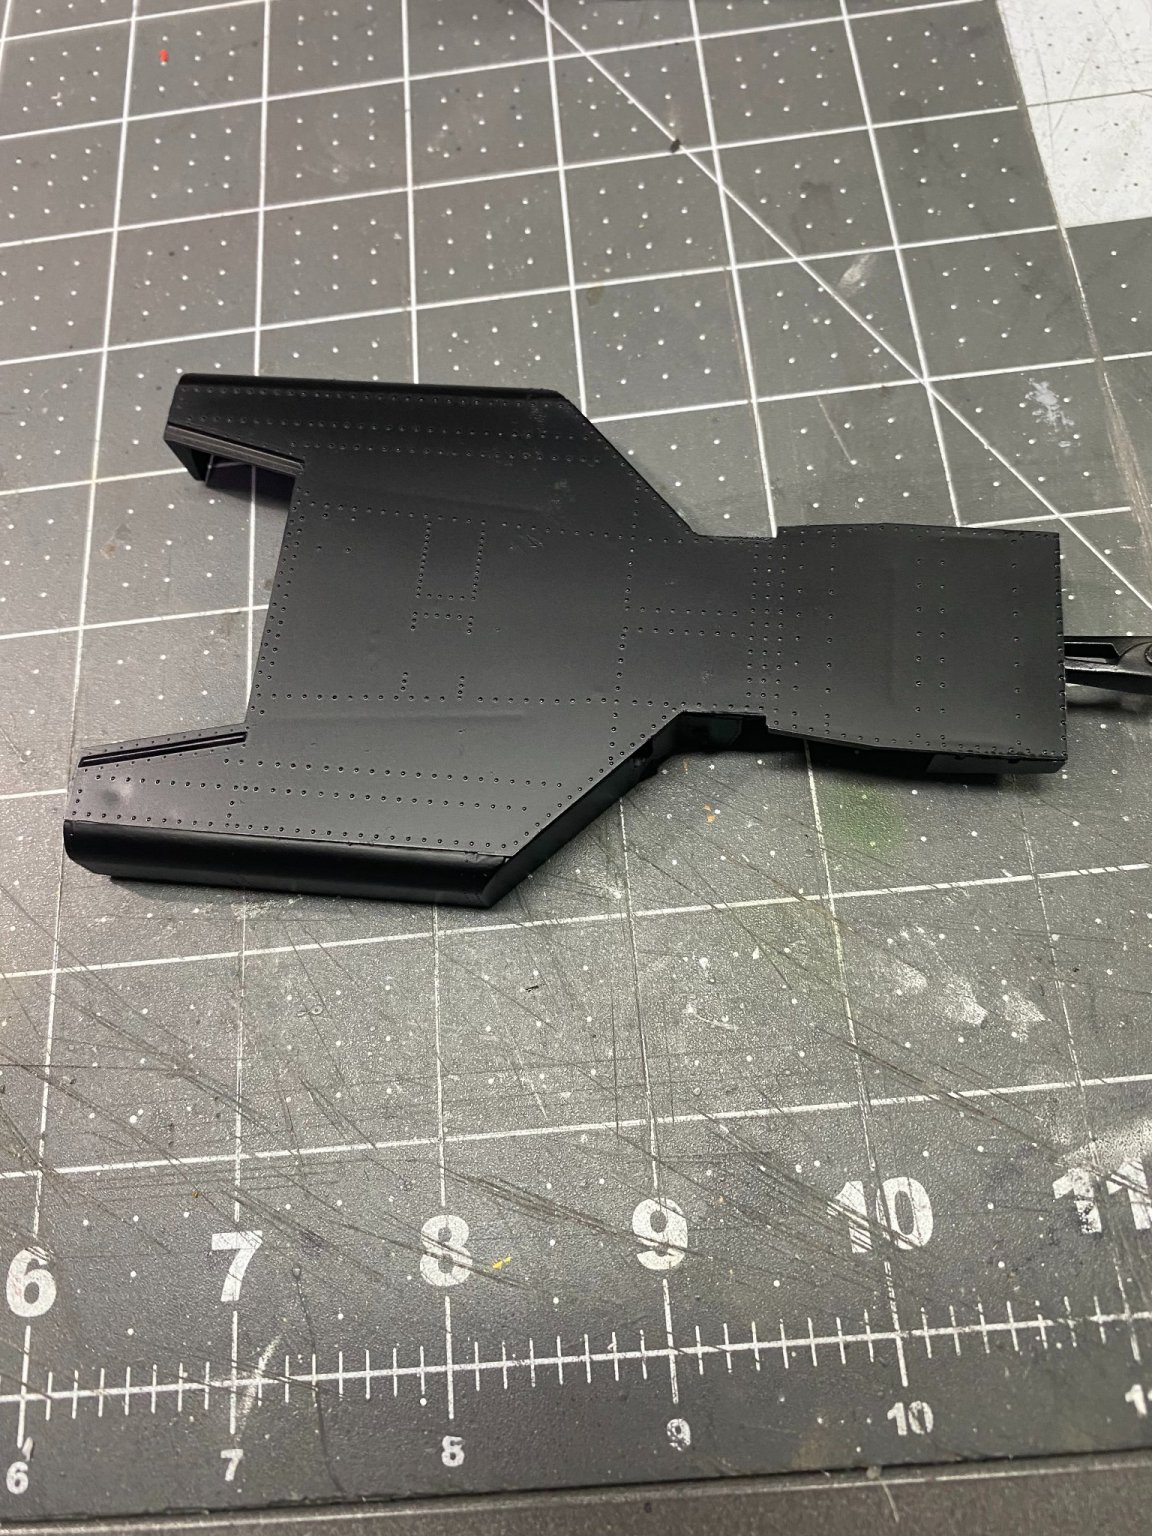
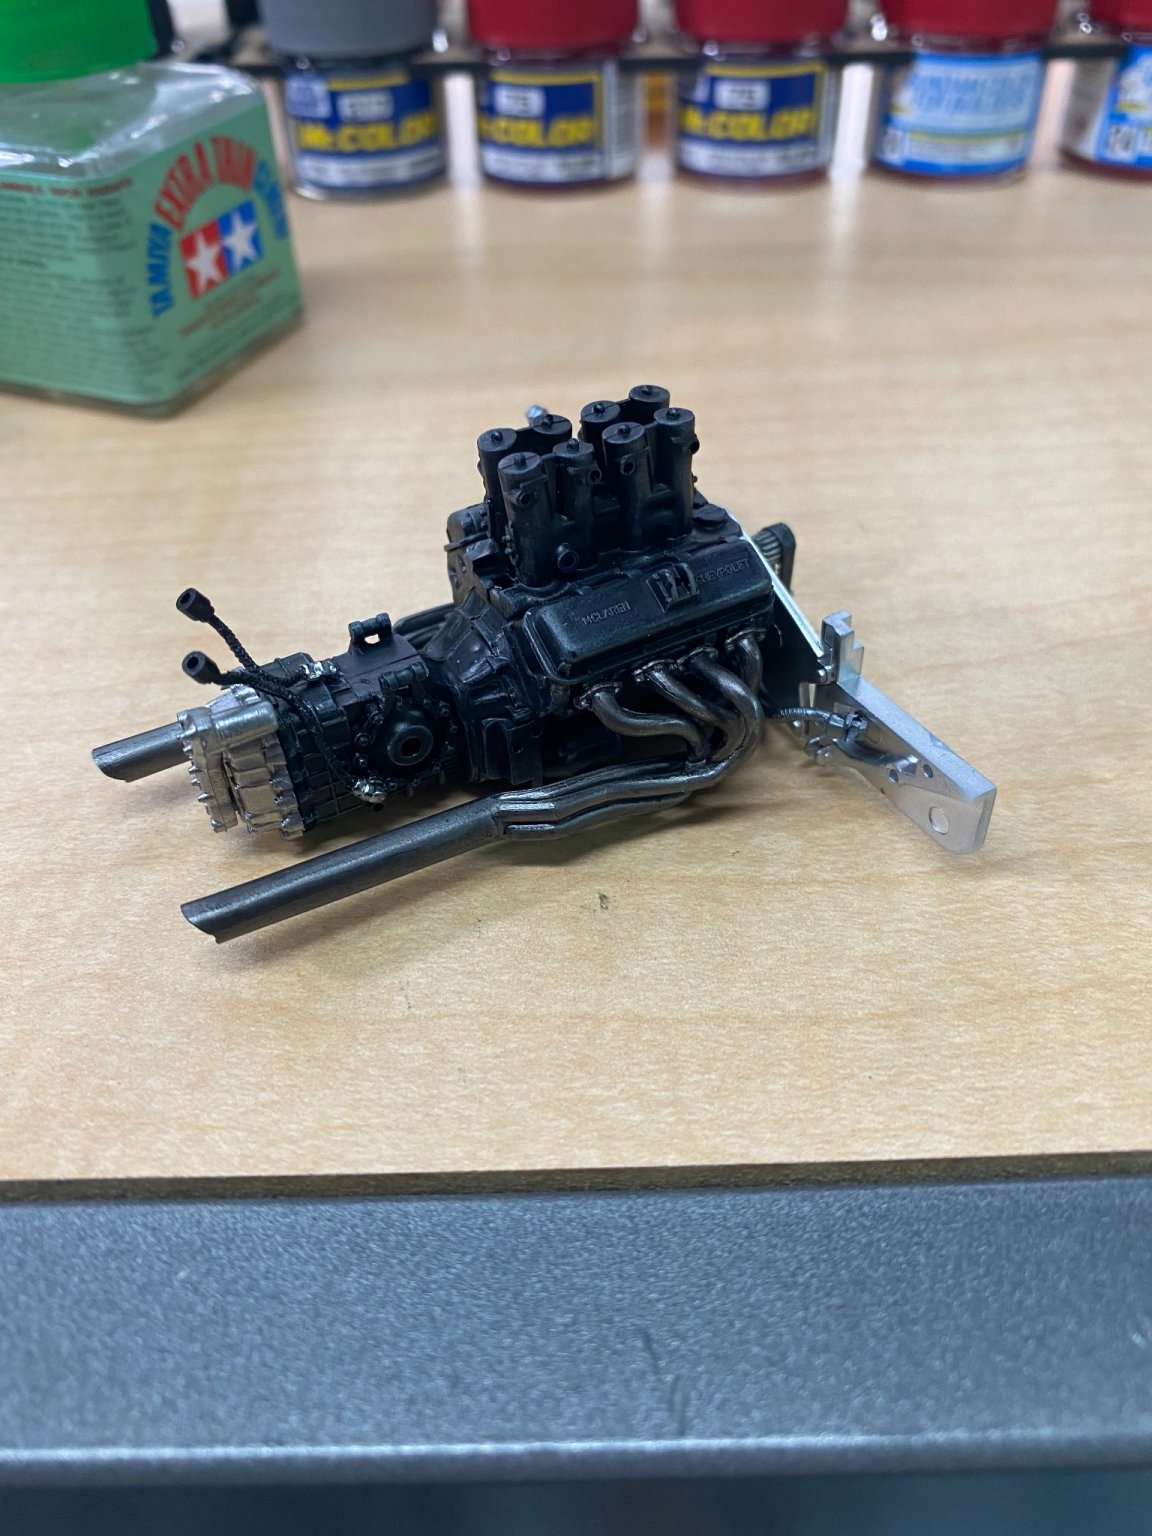
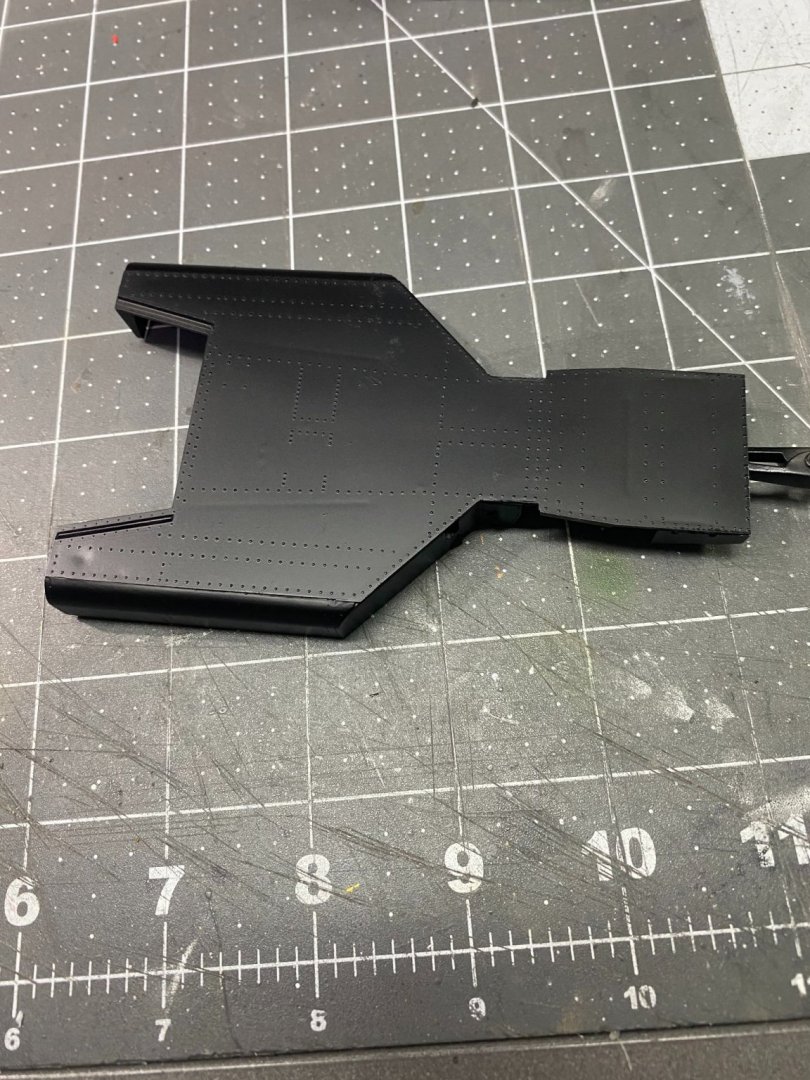
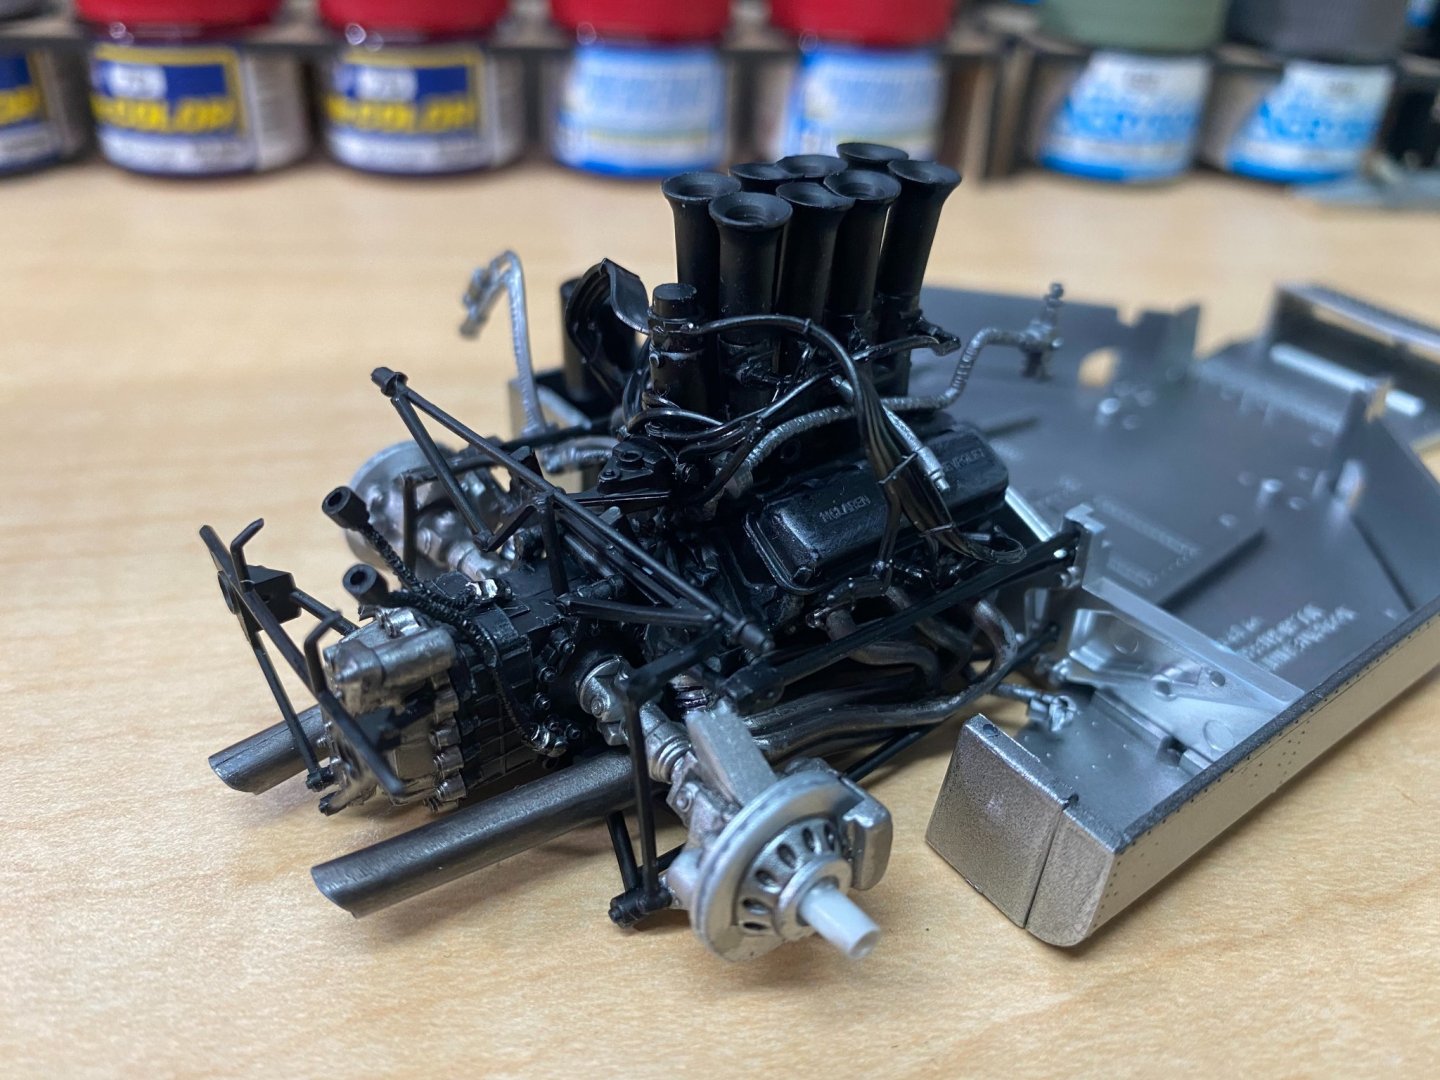
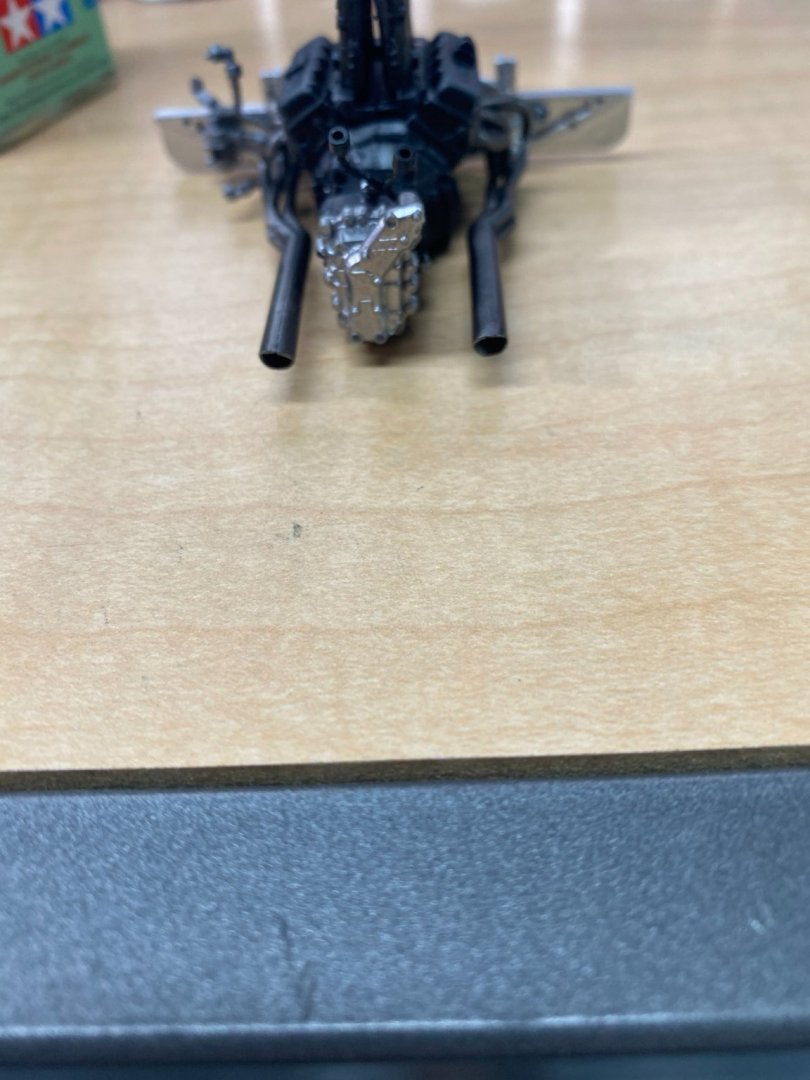
It rained on Saturday and that gave me a little bit of time to spend on the McLaren. Attention turned to finishing the engine/transaxle, then assembling and painting the chassis tub. It was first given a couple of coats of semi gloss black as a primer, then painted with a dull aluminum finish. Will add more detail to the assembly as time allows this week. Looking for scraps of decal to finish this car as the 1969 McLaren M8B of D. Hulme, the #5 car.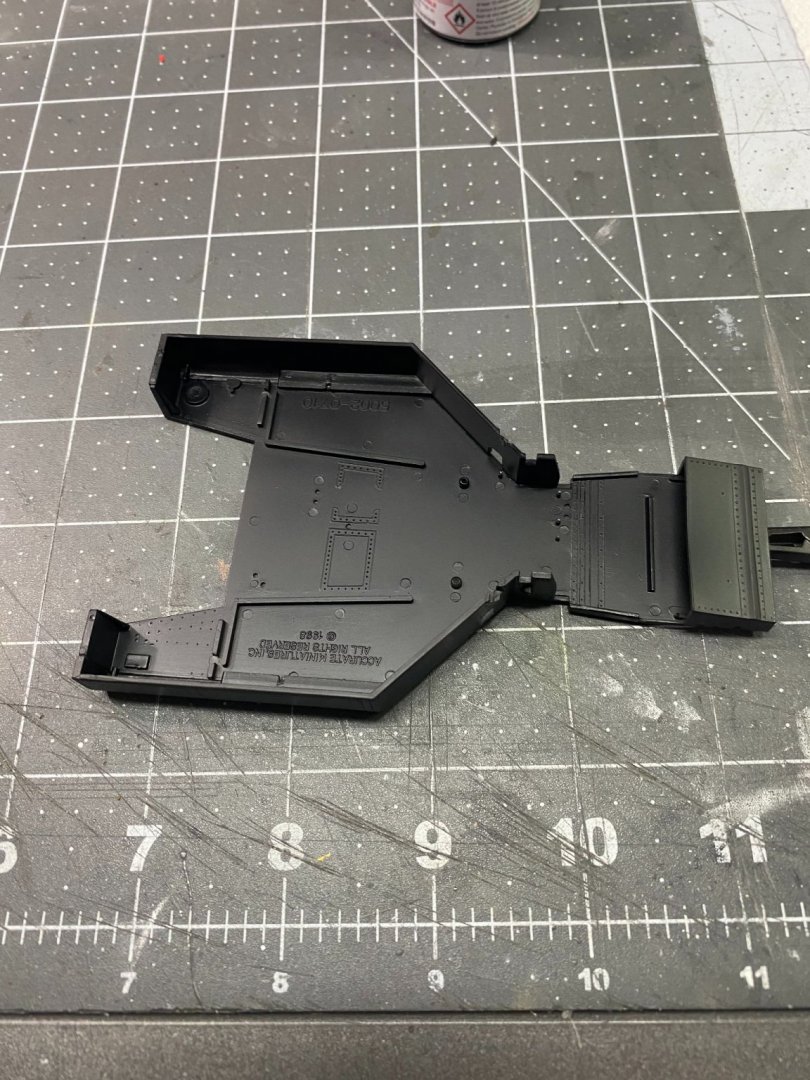

- 137 replies
-
- 12
-

-
McLaren M8B by CDW - Accurate Miniatures - 1:24 Scale
CDW replied to CDW's topic in Non-ship/categorised builds
You know, when you can find one, even the 1:24 scale model of the McLaren F1 street version is $100+. The race cars are less, but the street version is hard to find and expensive, like the 1:1 car. -
McLaren M8B by CDW - Accurate Miniatures - 1:24 Scale
CDW replied to CDW's topic in Non-ship/categorised builds
Sigh...dang Lou, that was a wet blanket. 🤔 I am tired and sore from the past two days of work. Still more to go so I better shape up. 🙂 -
McLaren M8B by CDW - Accurate Miniatures - 1:24 Scale
CDW replied to CDW's topic in Non-ship/categorised builds
Thanks!....great stories. Could not stop watching until they were over. -
McLaren M8B by CDW - Accurate Miniatures - 1:24 Scale
CDW replied to CDW's topic in Non-ship/categorised builds
Oh yeah, forgot to mention. Locked my keys in my car at a shopping mall Saturday. Believe it or not, first time ever I've done that. Called insurance company roadside assistance and 45 minutes later a locksmith arrived. Wondered how they managed getting a new car like mine unlocked. They use a small, approx 8" x 8", airbag to slip between the seal rubber and door window frame. They pump up the airbag to create an opening large enough to slip through a fiberglass specialty rod that flips open the door lock inside the car. Took not more than 5 minutes total. Easy money for a locksmith. Insurance paid it all. 🙂 -
McLaren M8B by CDW - Accurate Miniatures - 1:24 Scale
CDW replied to CDW's topic in Non-ship/categorised builds
Gonna be taking some days off to start and finish chores around the house. It's already spring, here. Lots of leaves and Oak Tree blooms to clean up. Putting up a new swimming pool and disposing of an old one. Getting the patio ready for summer nights to come. Probably just a little painting, too. Went to a great model swap meet yesterday, came home with about 20 kits I didn't have before with a few multiples of some I did have but could not pass up the bargains. All car/truck models, some paints. Passed up several nice steel hull ship models and a couple of live steam farm tractors. Tractors were tempting, the ships not as much. 1:400 scale odd balls. Heller. I'll be back when I get back, Duty calls. 🙂 -
McLaren M8B by CDW - Accurate Miniatures - 1:24 Scale
CDW replied to CDW's topic in Non-ship/categorised builds
I think the problem might be having paint that sticks to the vinyl without peeling away. I'll give it a try once I get finished handling it. Handling it will probably be the biggest threat to peeling paint on the vinyl. Maybe I can use colored markers since that's ink and won't peel. -
McLaren M8B by CDW - Accurate Miniatures - 1:24 Scale
CDW replied to CDW's topic in Non-ship/categorised builds
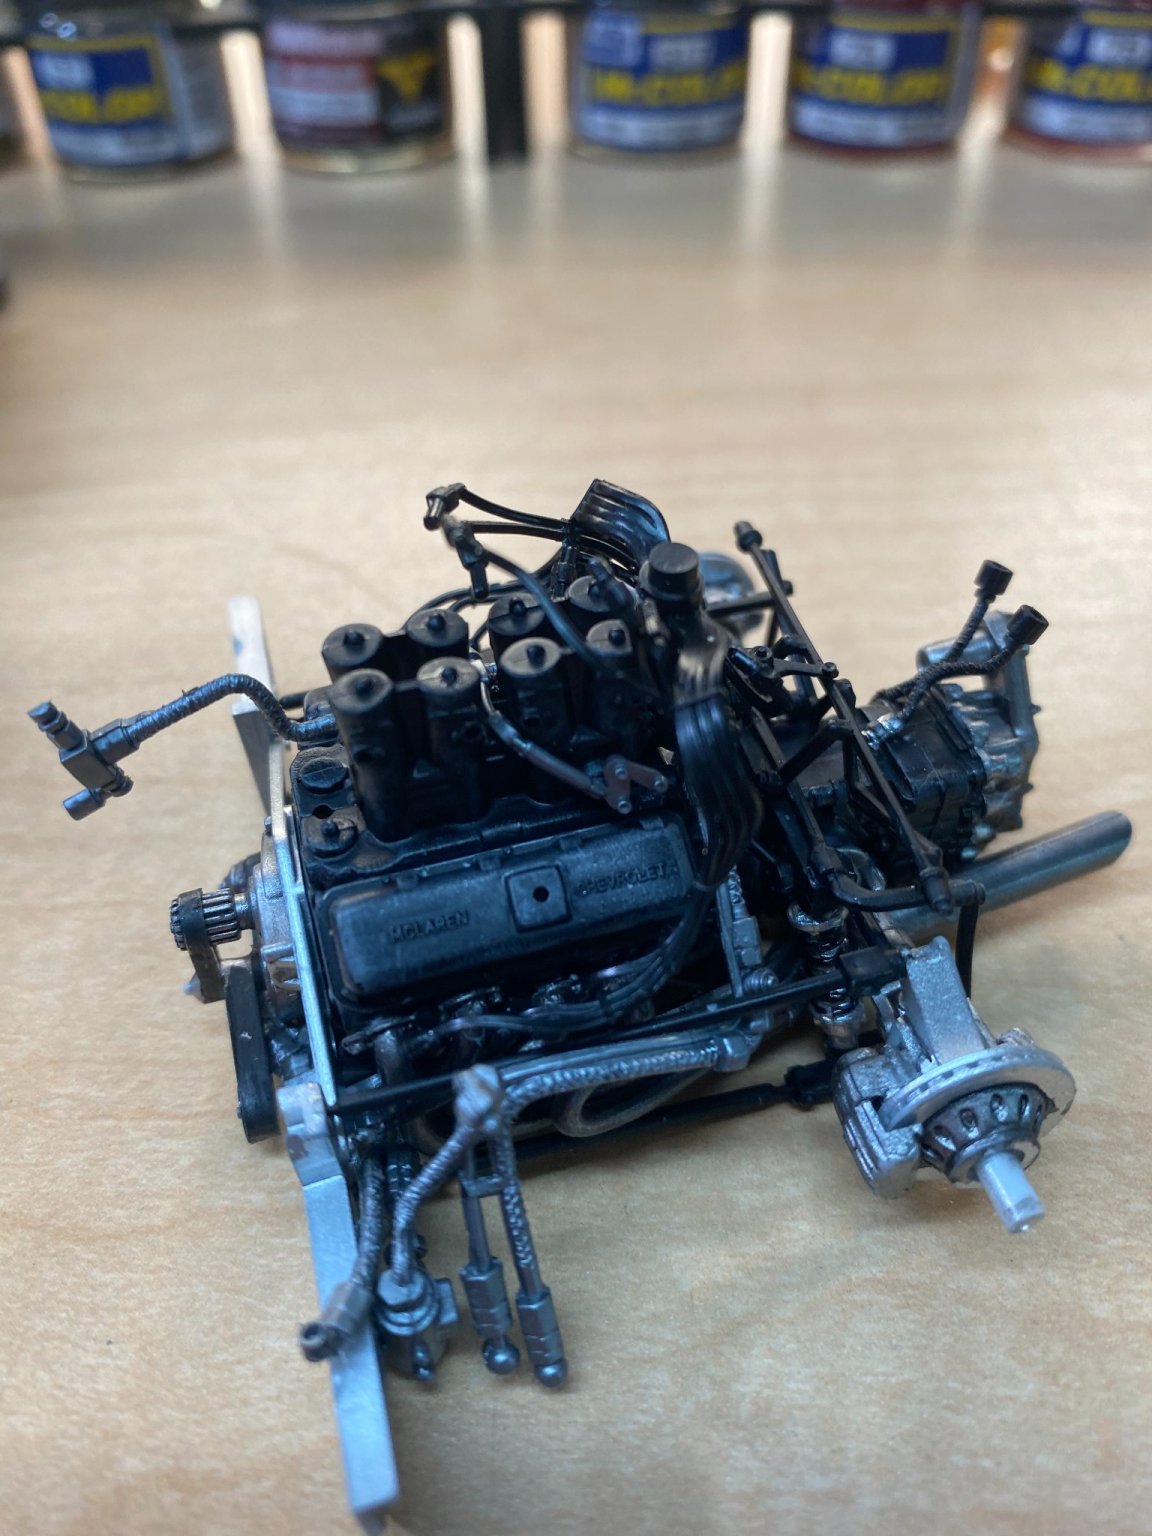
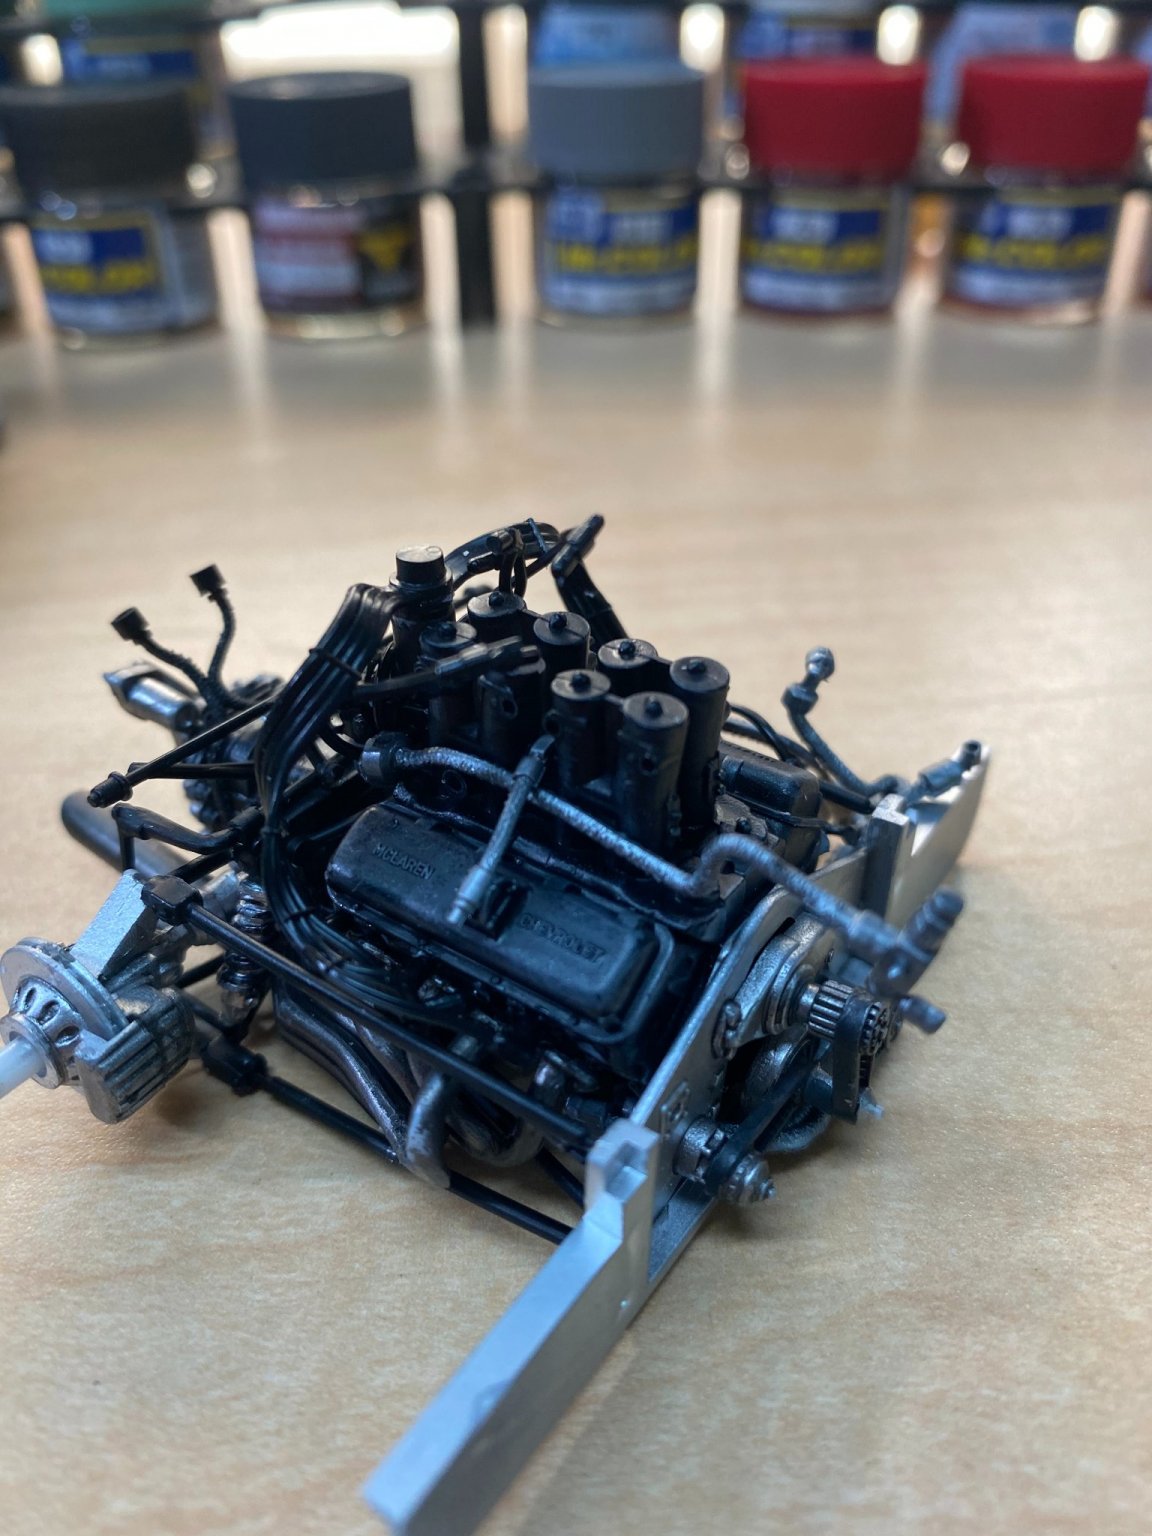
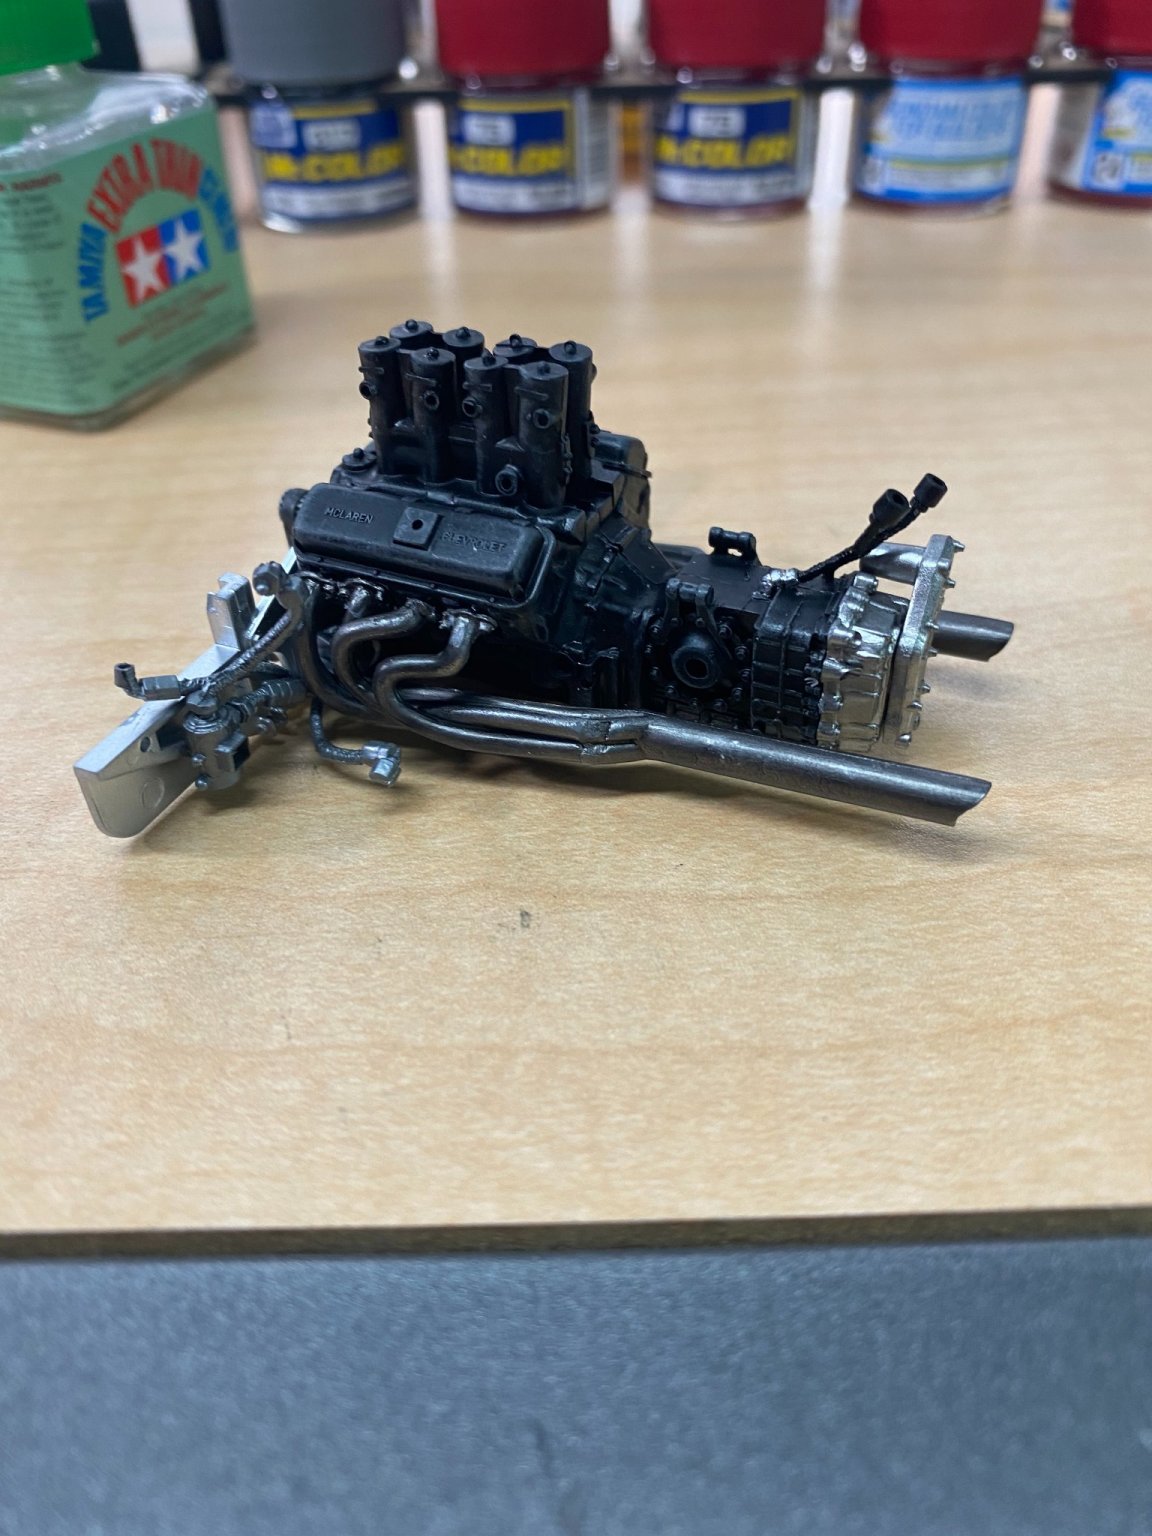
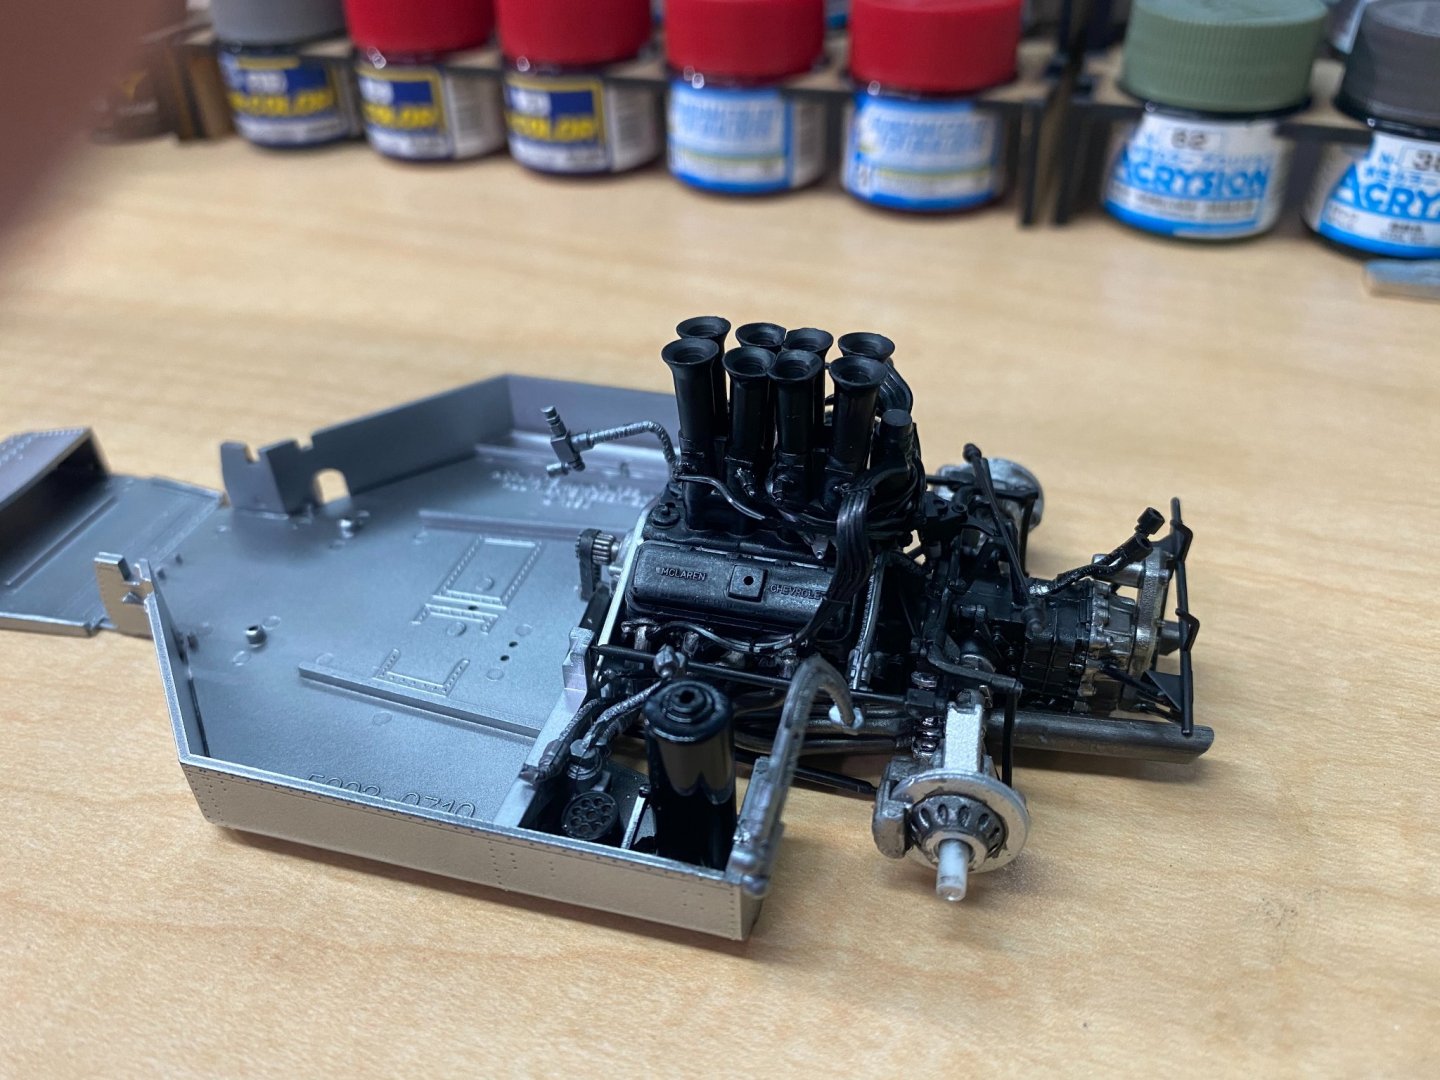
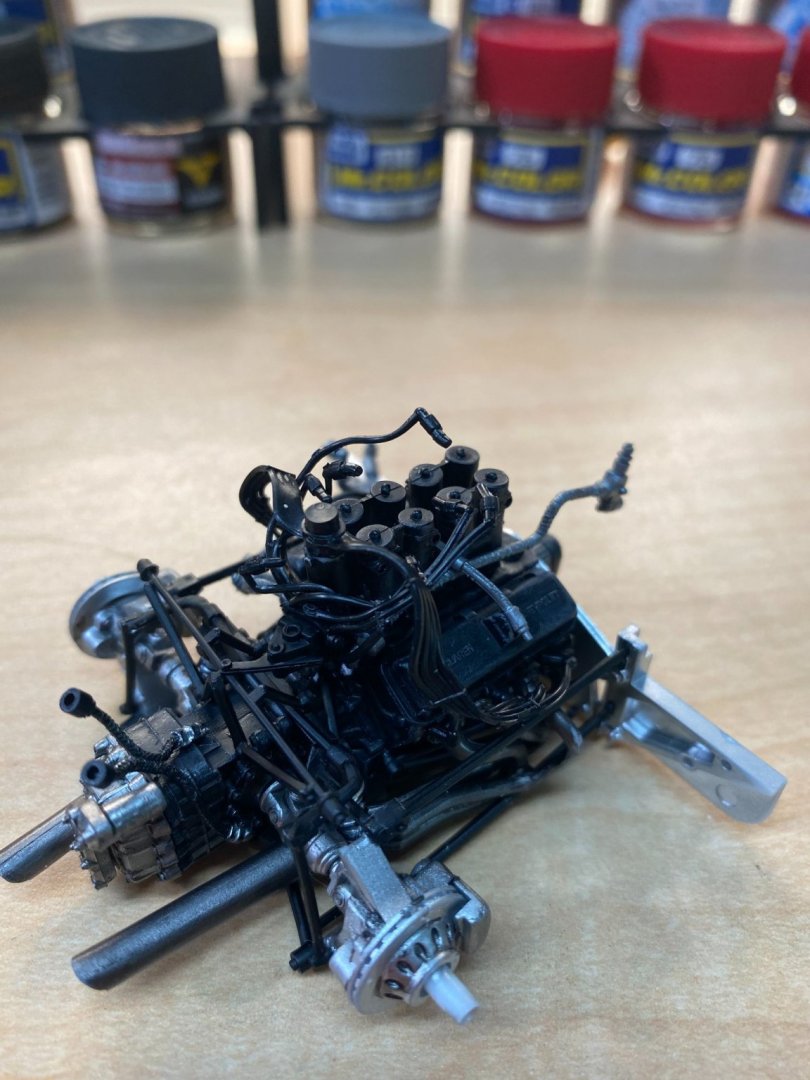
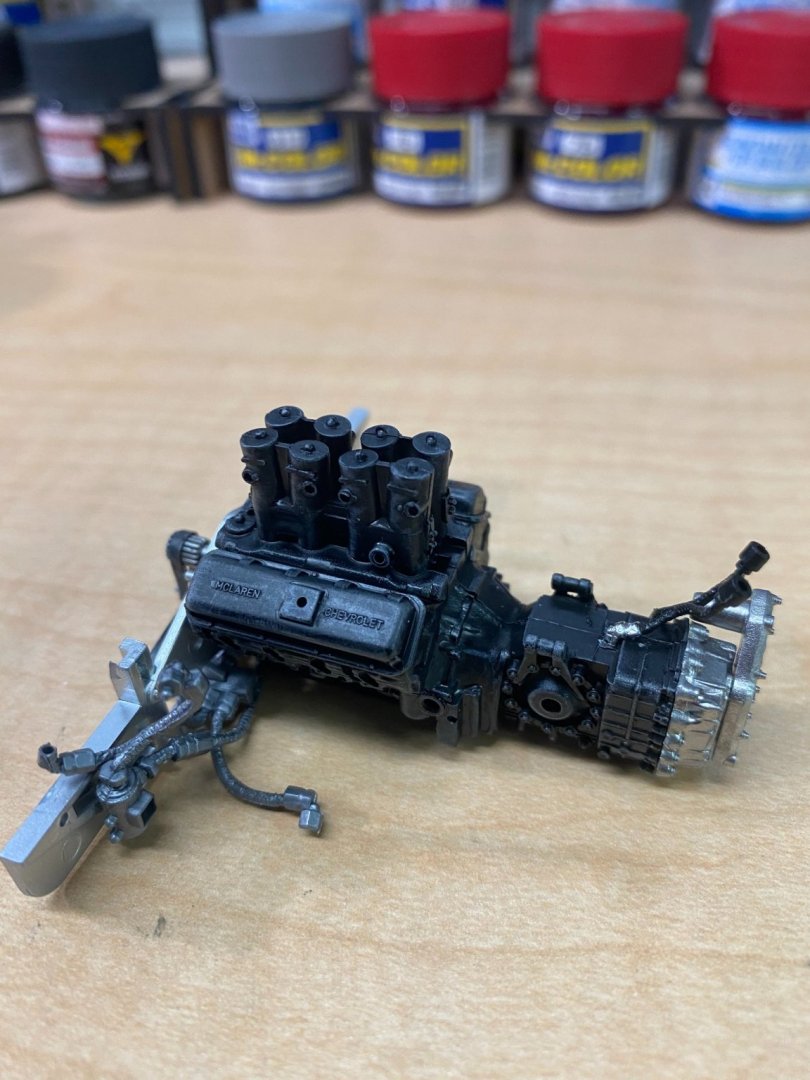
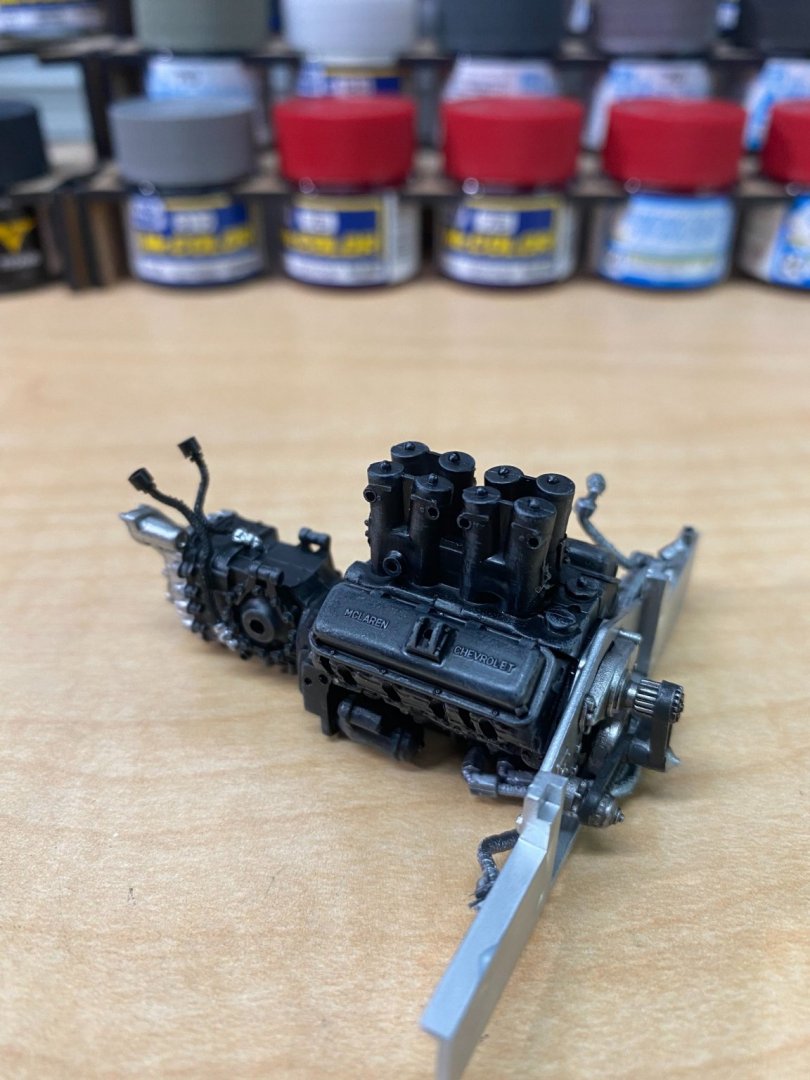
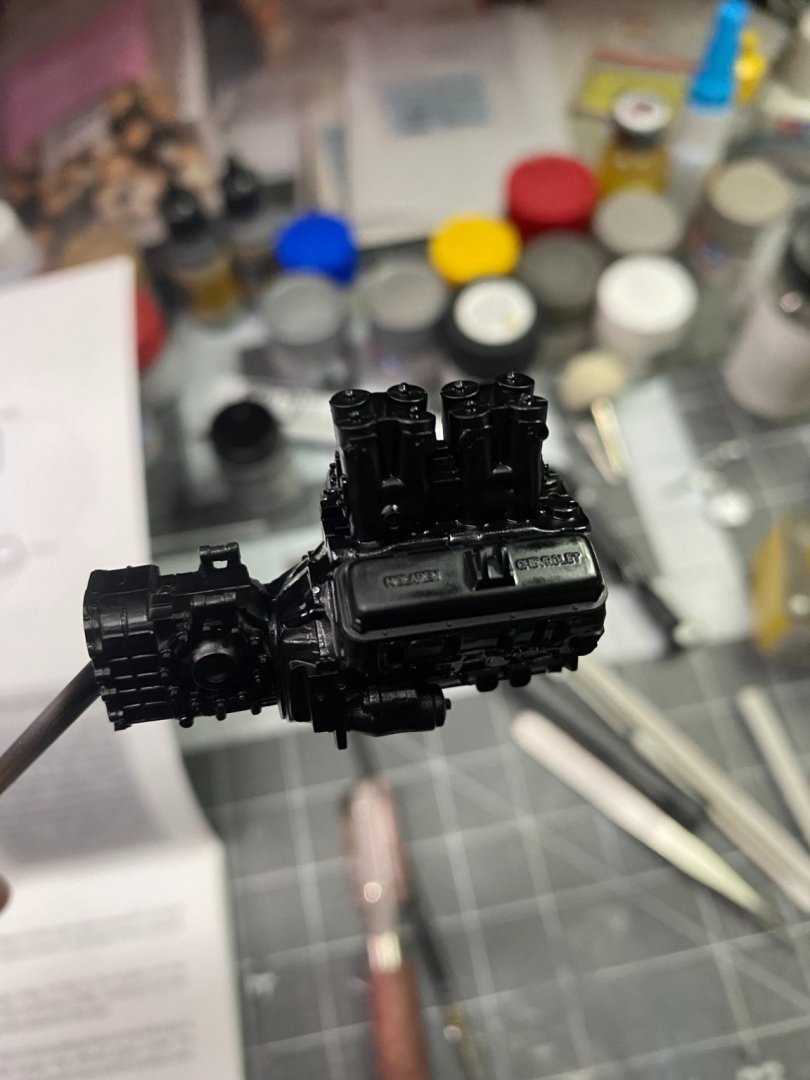
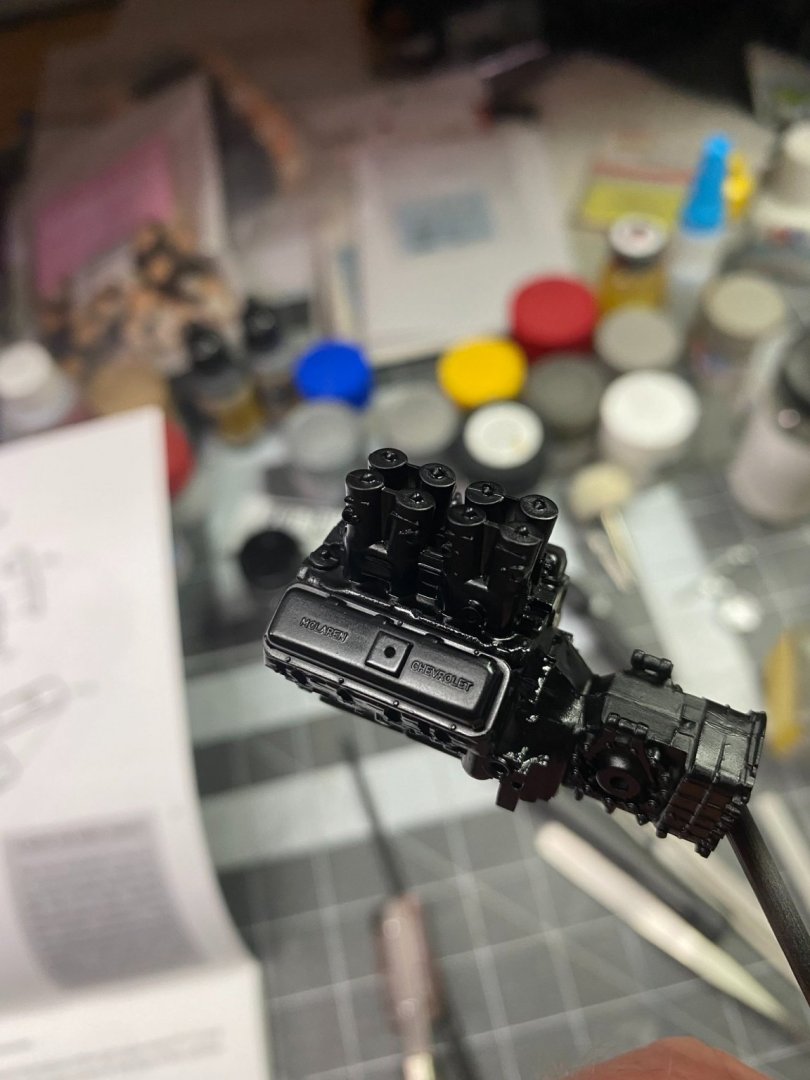
Here is more engine detail added including the ignition system and fuel tubing for the injectors. I left the fuel injection lines disconnected for the photos just so you could get a visual image of the "bird's nest" that's involved. I made up my mind to use everything from the box, no aftermarket or home made parts, before I started this project. In retrospect, this could have looked much better with some aftermarket wiring and fuel tubing. The kit instructions do not recommend painting the soft vinyl wiring/tubing, but I may try anyway before it's all done. I think it needs a little color to break it all up a bit.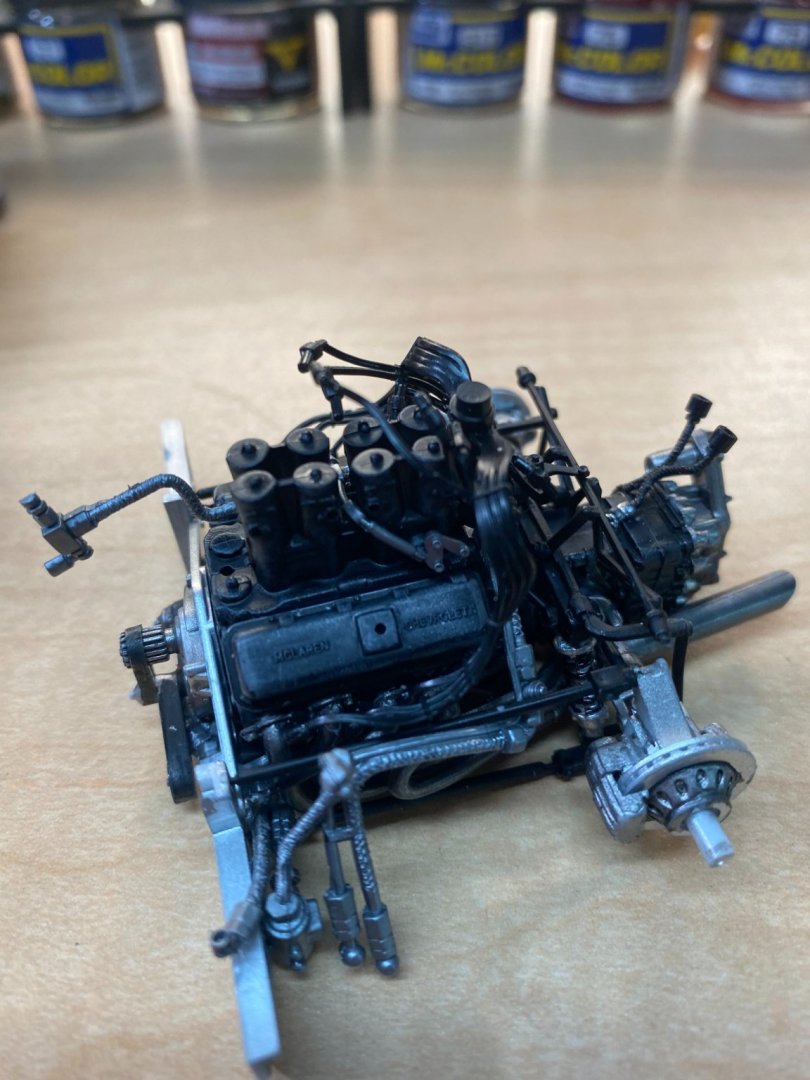

- 137 replies
-
- 10
-
-
McLaren M8B by CDW - Accurate Miniatures - 1:24 Scale
CDW replied to CDW's topic in Non-ship/categorised builds
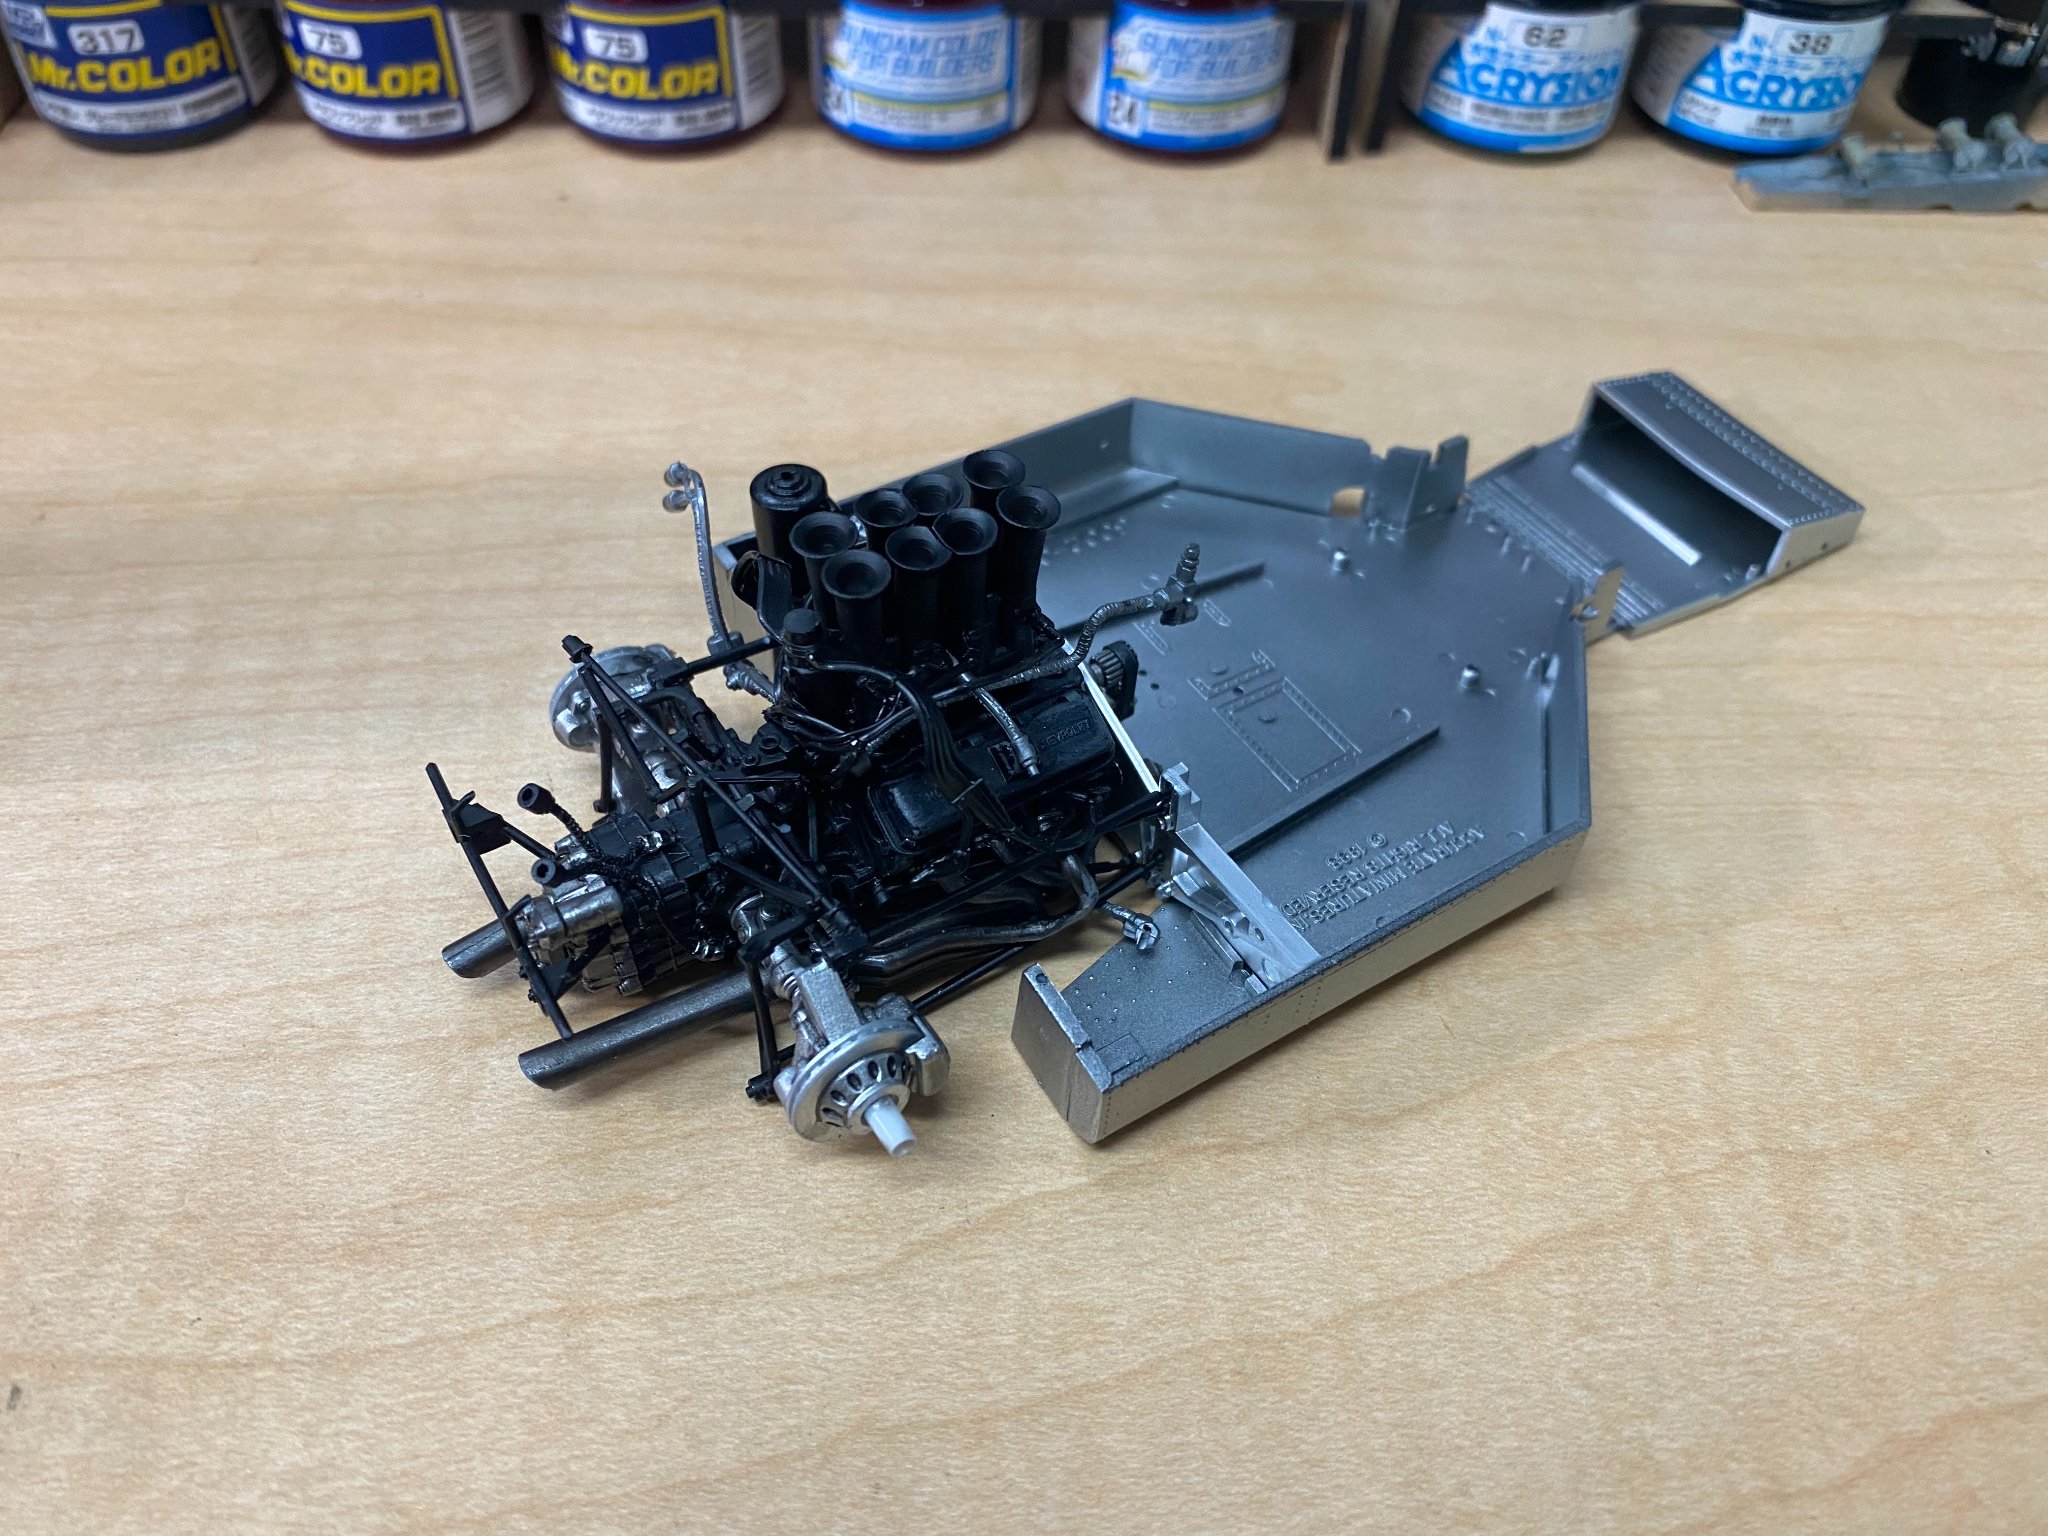
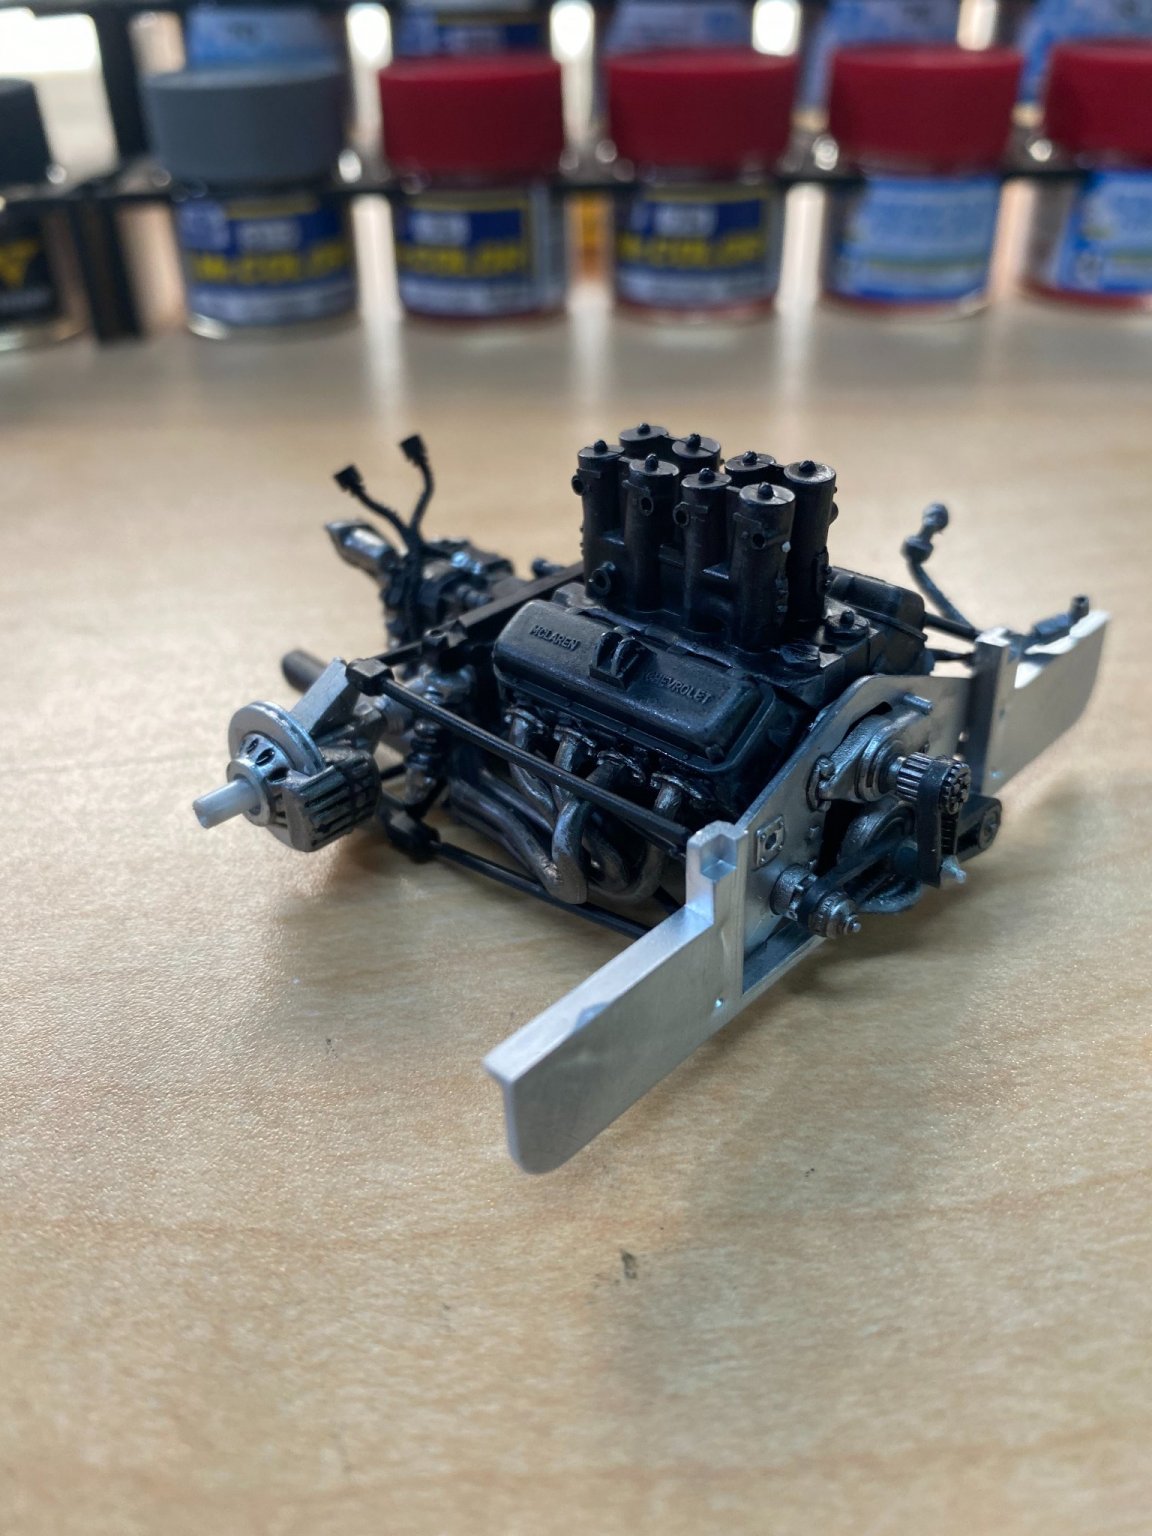
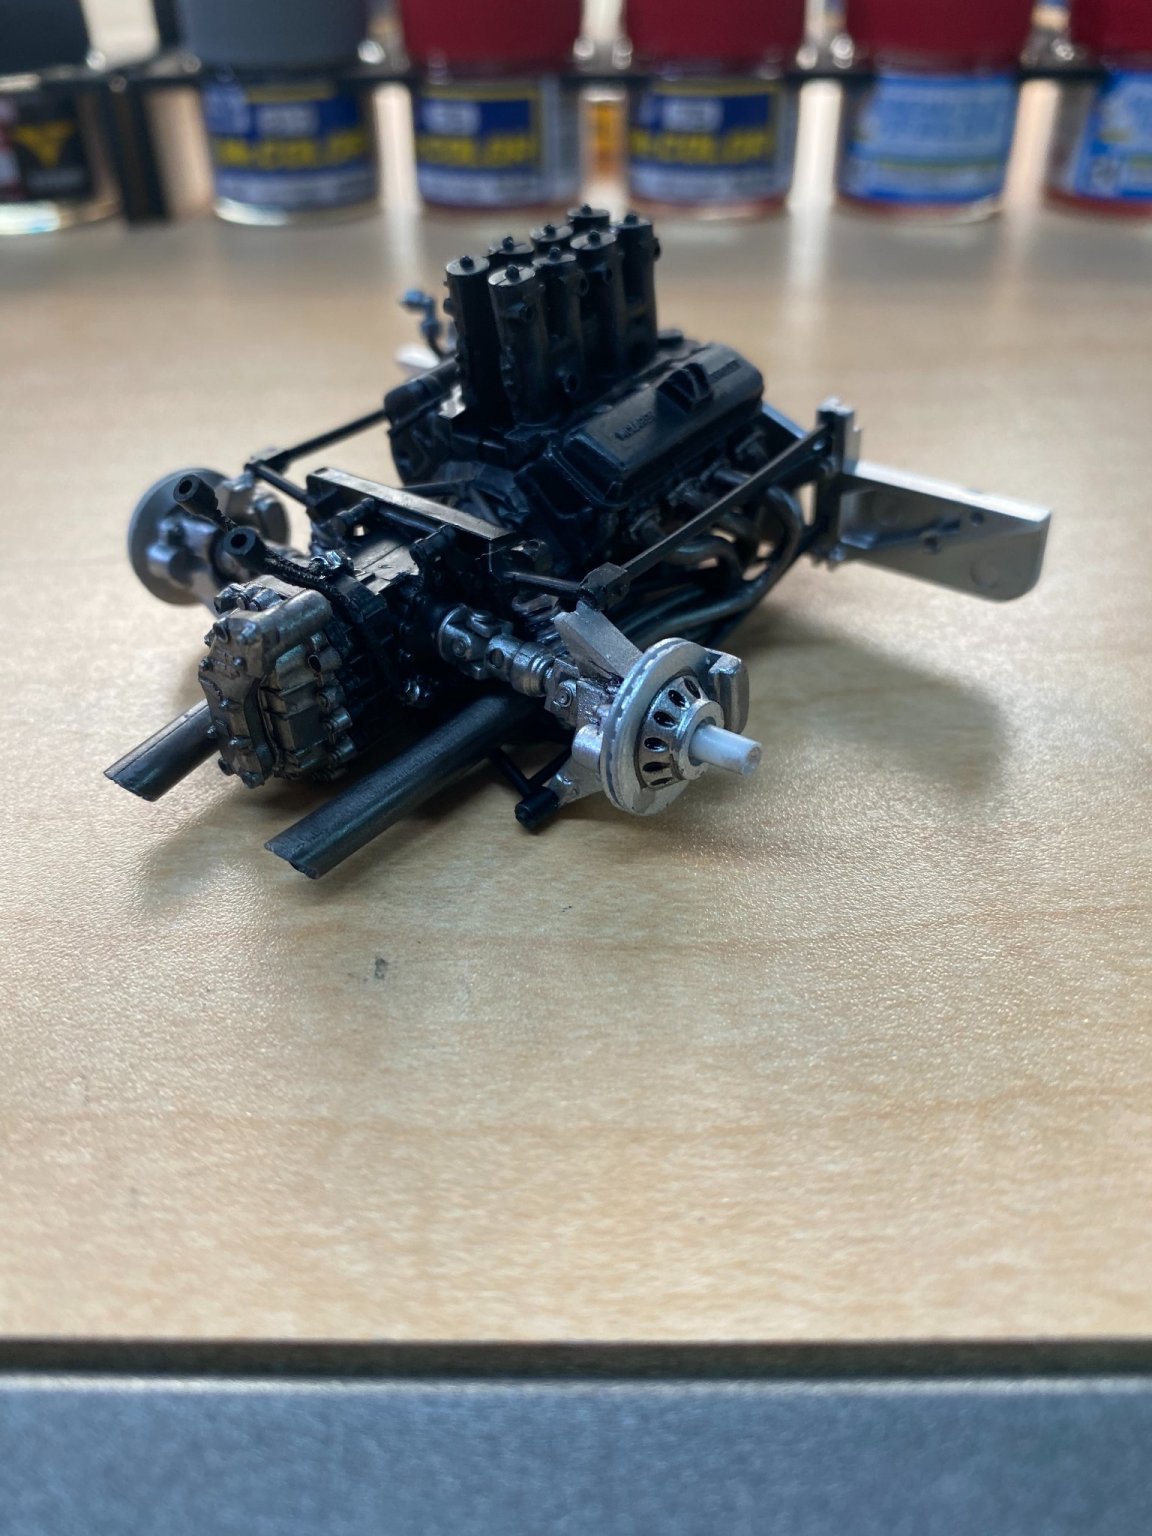
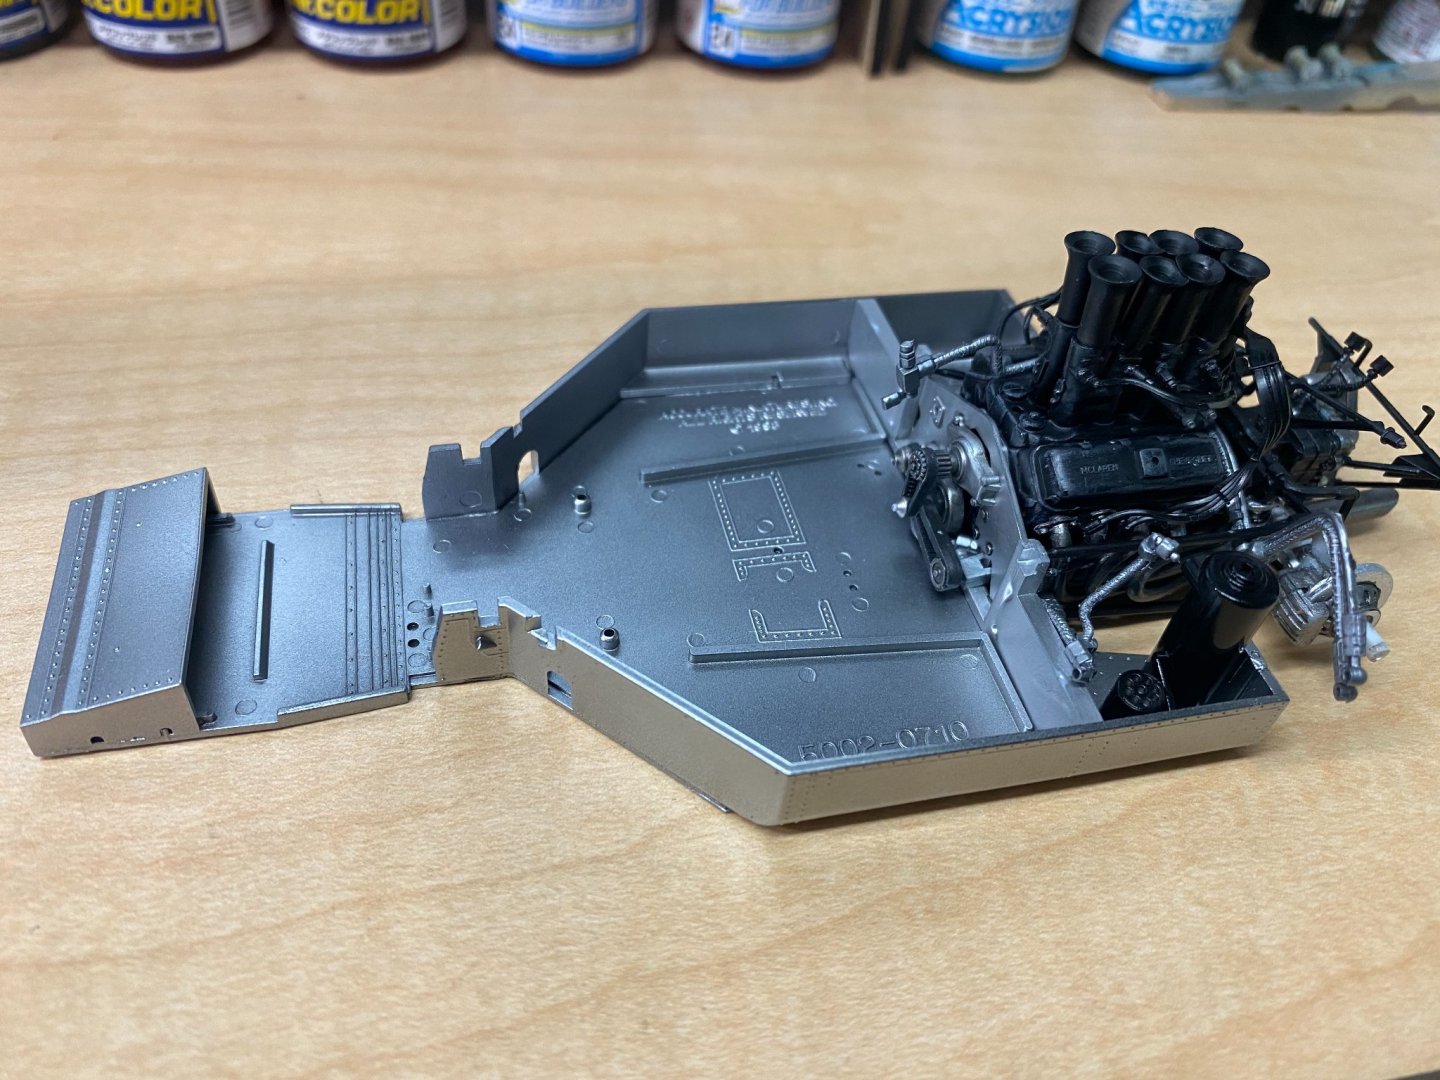
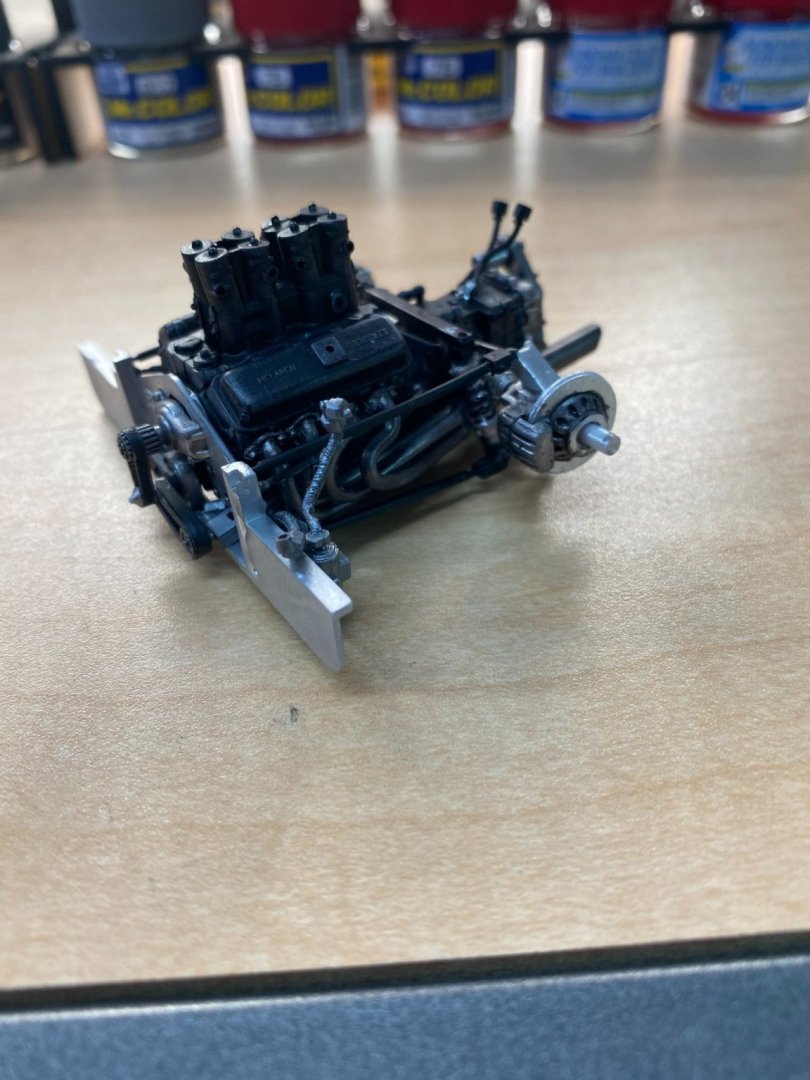
In these photos, the remainder of the engine/transaxle/suspension/brake system components have been painted and assembled. If you ever have the pleasure of building one of these kits, I recommend super glue for most of the construction of this entire assembly shown. While it's a well detailed kit, it's not a shake and bake kit. It does require a little coaxing to get everything into position and stay there. Super glue greatly aids this endeavor.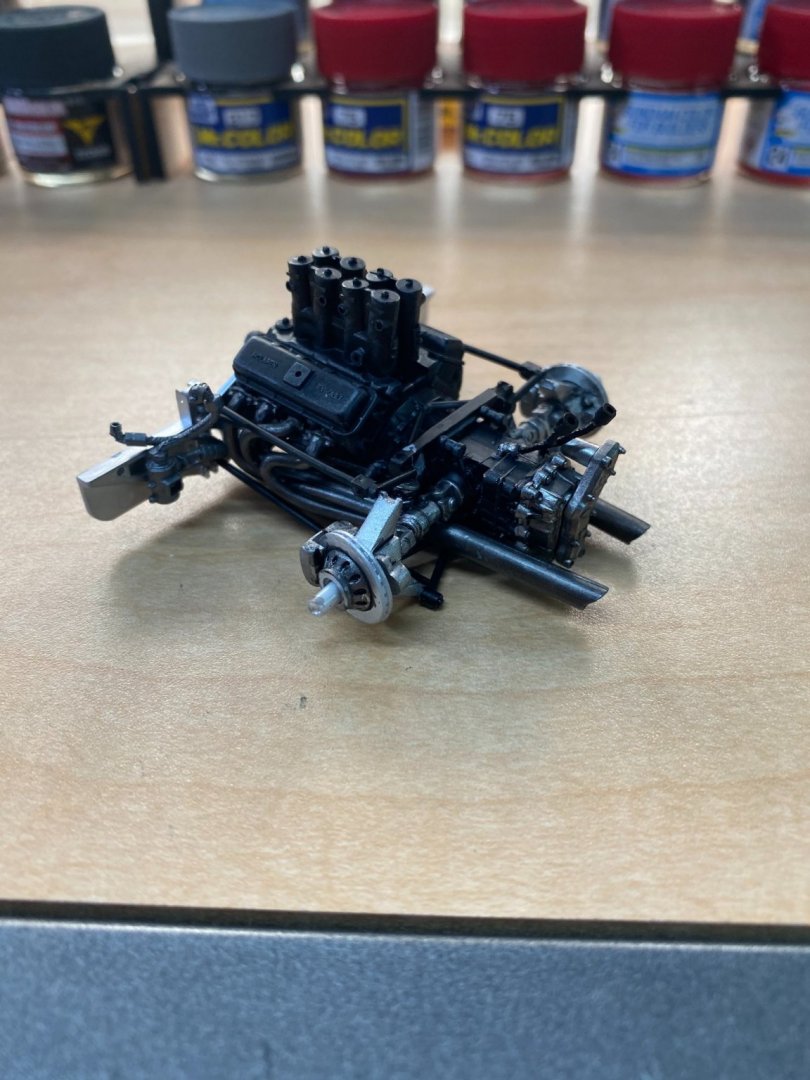

- 137 replies
-
- 12
-
-
McLaren M8B by CDW - Accurate Miniatures - 1:24 Scale
CDW replied to CDW's topic in Non-ship/categorised builds
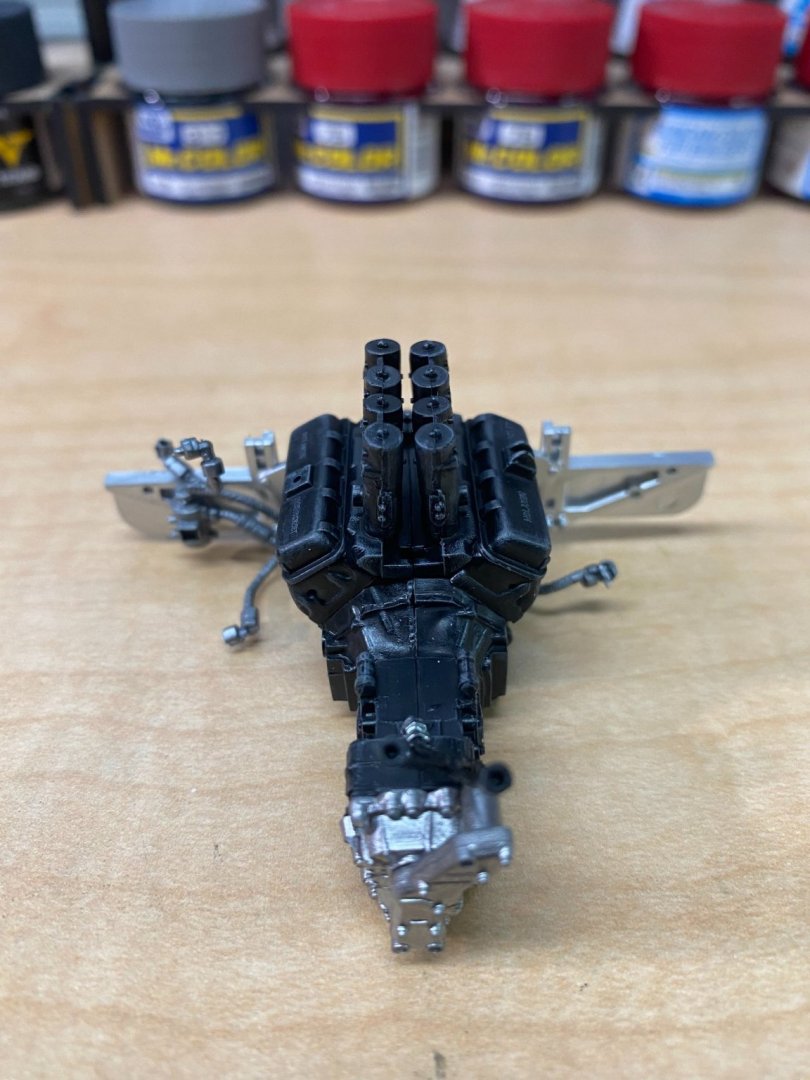
Something else I forgot to mention: Notice that the engine has no typical oil pan reservoir . Rather you'll see a pair of hoses attached at the bottom of the engine crank case. Those are oil lines. This engine is what's commonly called a "side oiler dry sump". The engine oil pump is located externally from the engine and oil is fed and returned through those two lines and connections you see at the bottom of the crank case. Just as an FYI on racing engines. -
McLaren M8B by CDW - Accurate Miniatures - 1:24 Scale
CDW replied to CDW's topic in Non-ship/categorised builds
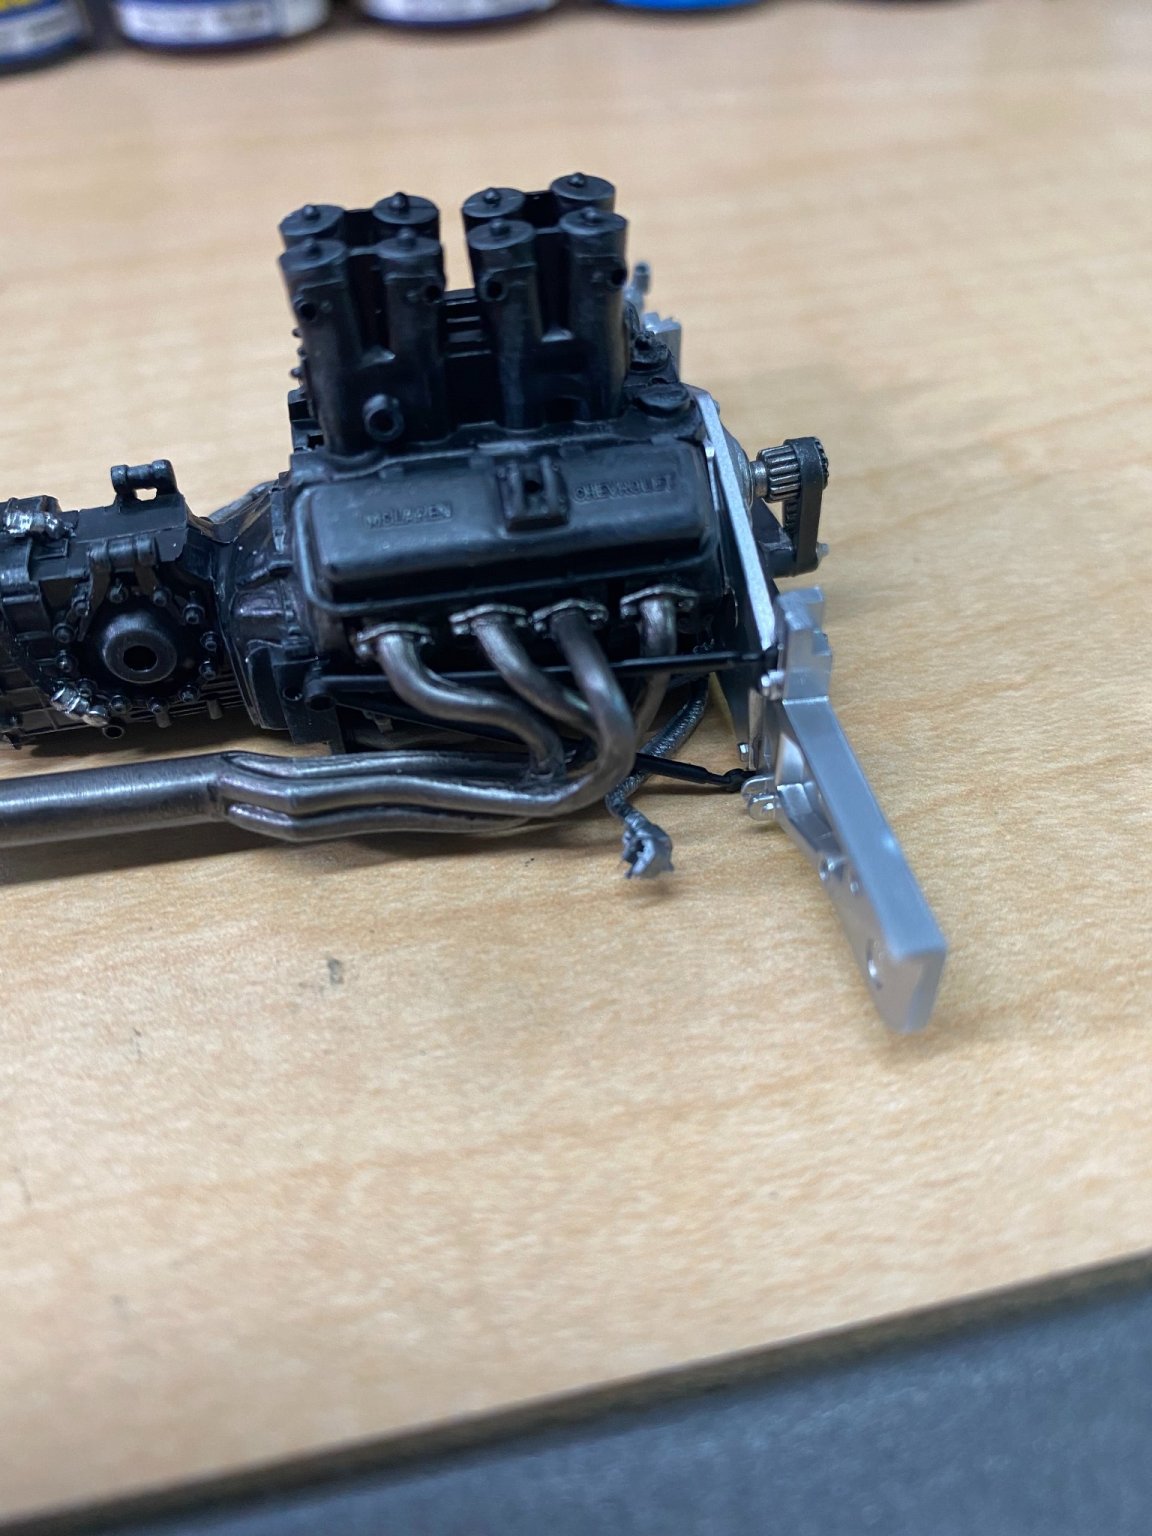
Since Mike is going to be building this same model, I am going to try to give him a heads-up on the little idiosyncrasies that might help since I am walking point on this mission. Notice on each side of the engine at the transaxle bell housing there are braces that attach and lead forward to the mounting panel at the front of the engine. One brace goes beneath the headers while the upper brace weaves it's way through the header pipes. The instructions call for installing these braces first, then fitting the header pipes around the brace on each side. It's much easier if you install the headers first, then fish the brace through the header pipes second, exactly opposite of what the instructions say. Just my 2 cents. 🙂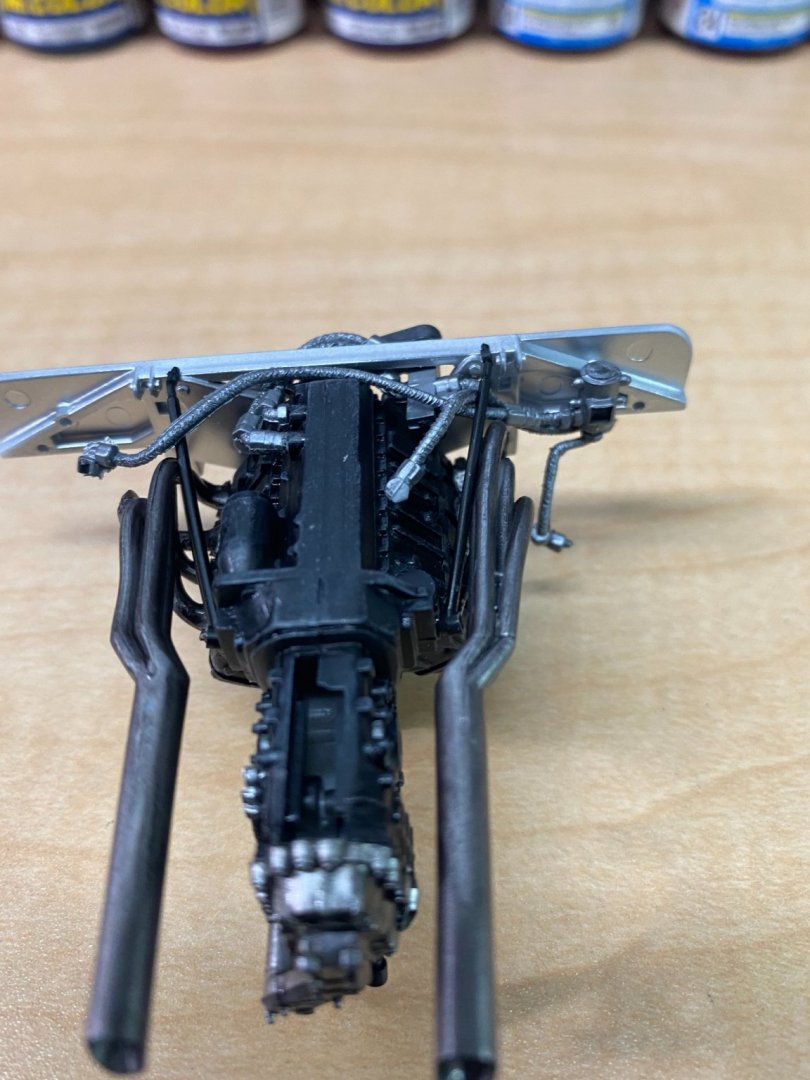


- 137 replies
-
- 11
-
-
McLaren M8B by CDW - Accurate Miniatures - 1:24 Scale
CDW replied to CDW's topic in Non-ship/categorised builds
Make sure to use a fresh scalpel blade to trim away the flash. Very soft and rubbery, so it's easy to work with. Use superglue to cement it in place. Thanks OC -
McLaren M8B by CDW - Accurate Miniatures - 1:24 Scale
CDW replied to CDW's topic in Non-ship/categorised builds
Great insight into the J Car, thanks Lou! Very nice looking set of multi-piece headers come with the kit.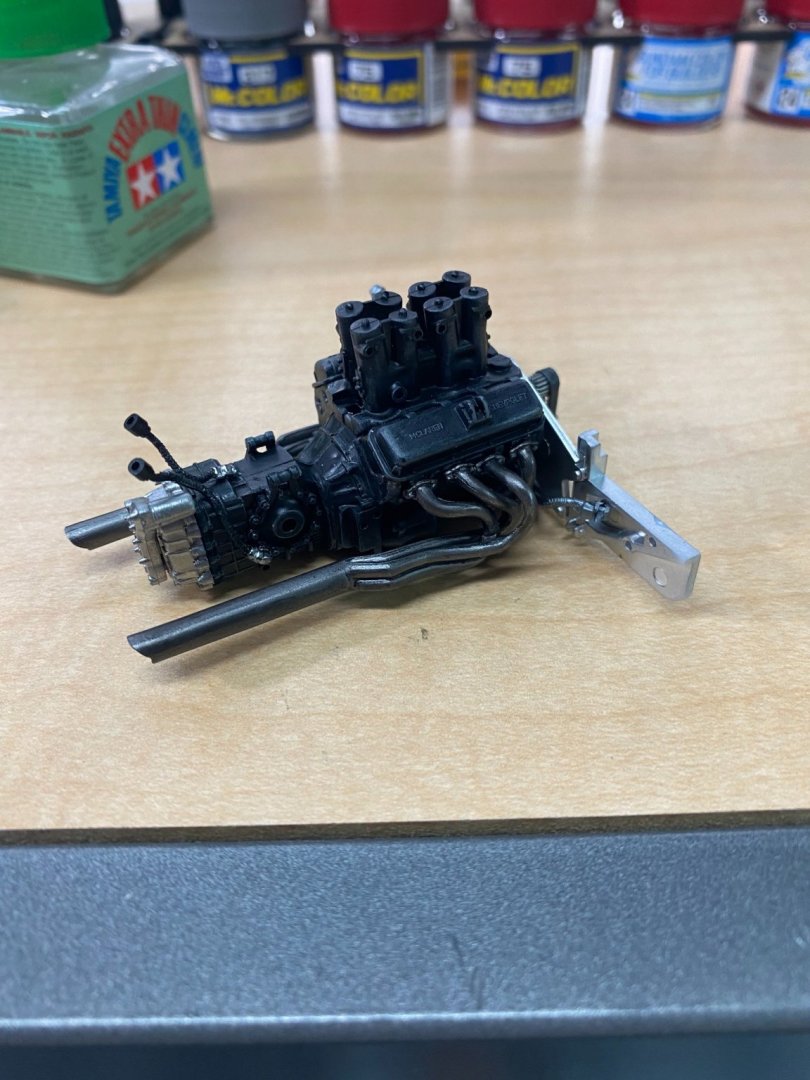

- 137 replies
-
- 11
-
-
McLaren M8B by CDW - Accurate Miniatures - 1:24 Scale
CDW replied to CDW's topic in Non-ship/categorised builds
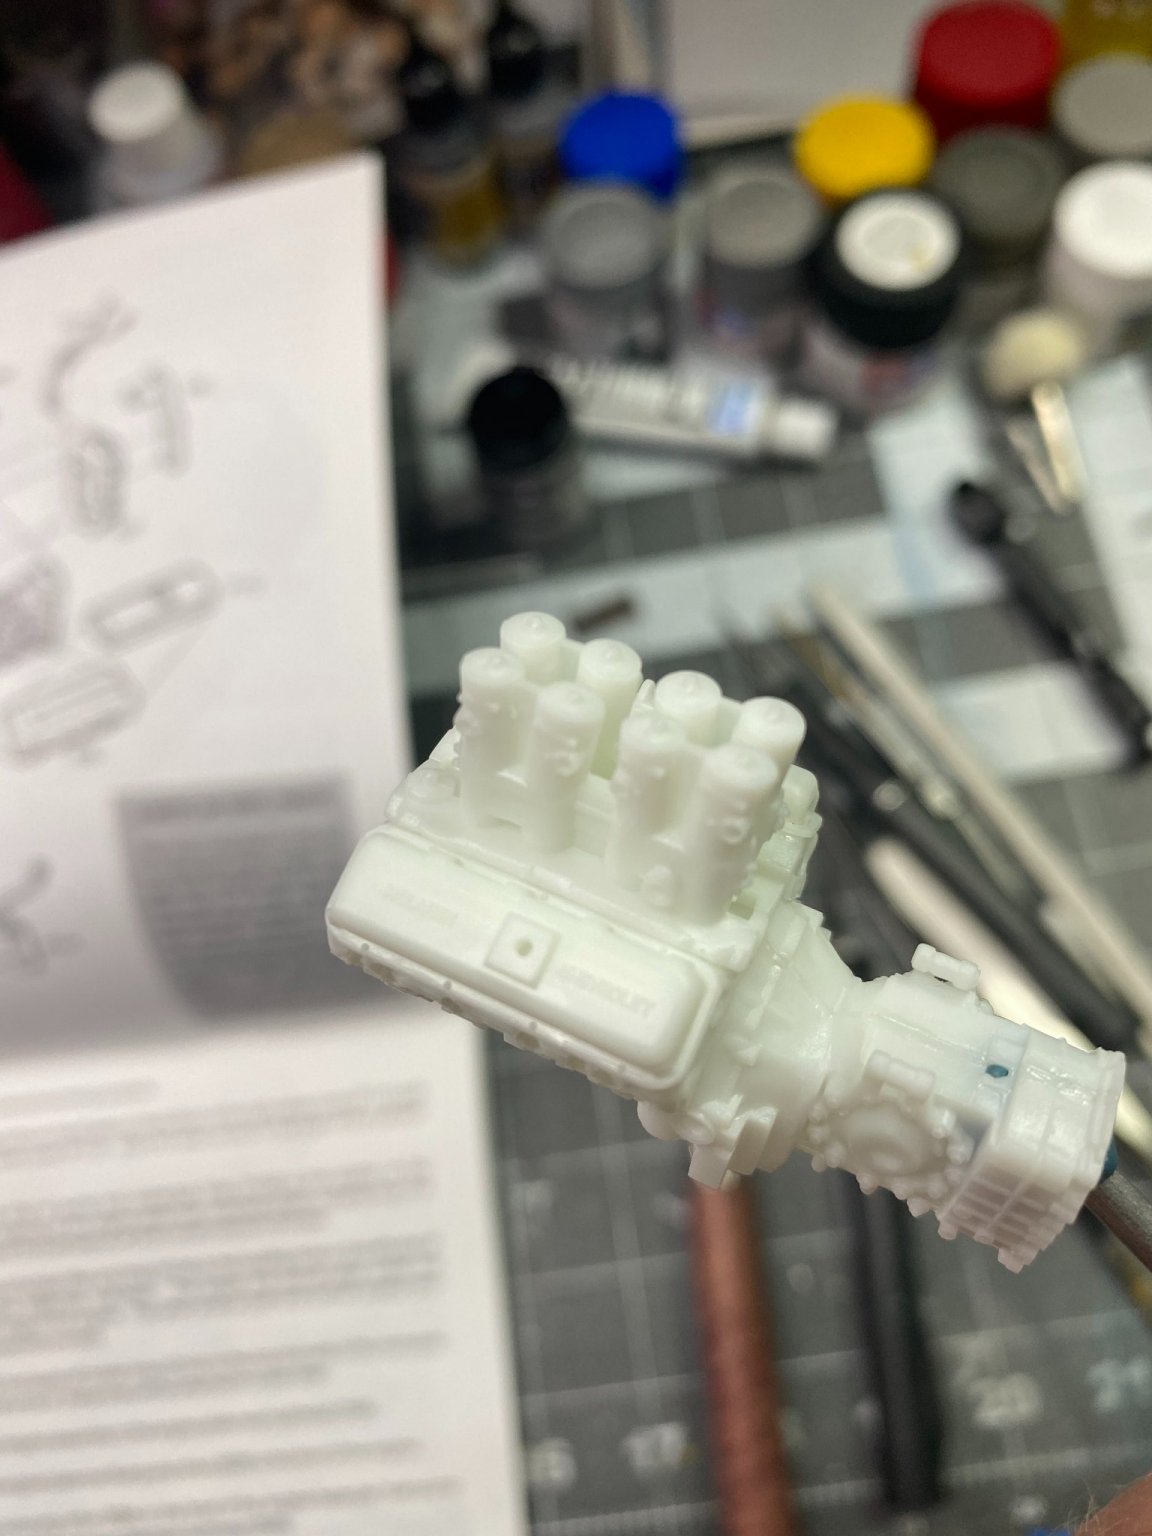
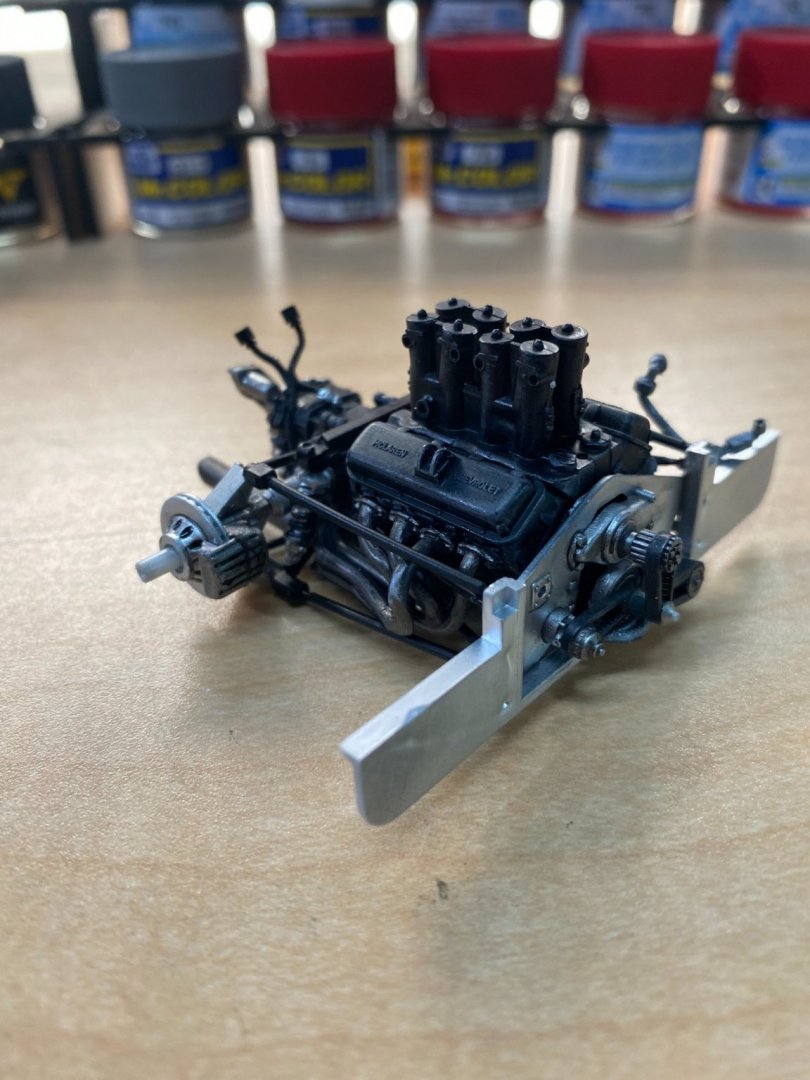
Did a little more work on the engine tonight. The kit provides soft molded vinyl hoses and ignition wiring. You can see some of the hoses attached to the engine and some loose ends that will attach further along in the assembly sequence. The powerplant is a Chevrolet 7 liter V-8, the fabled 427 ci "rat" motor. Aluminum block and heads.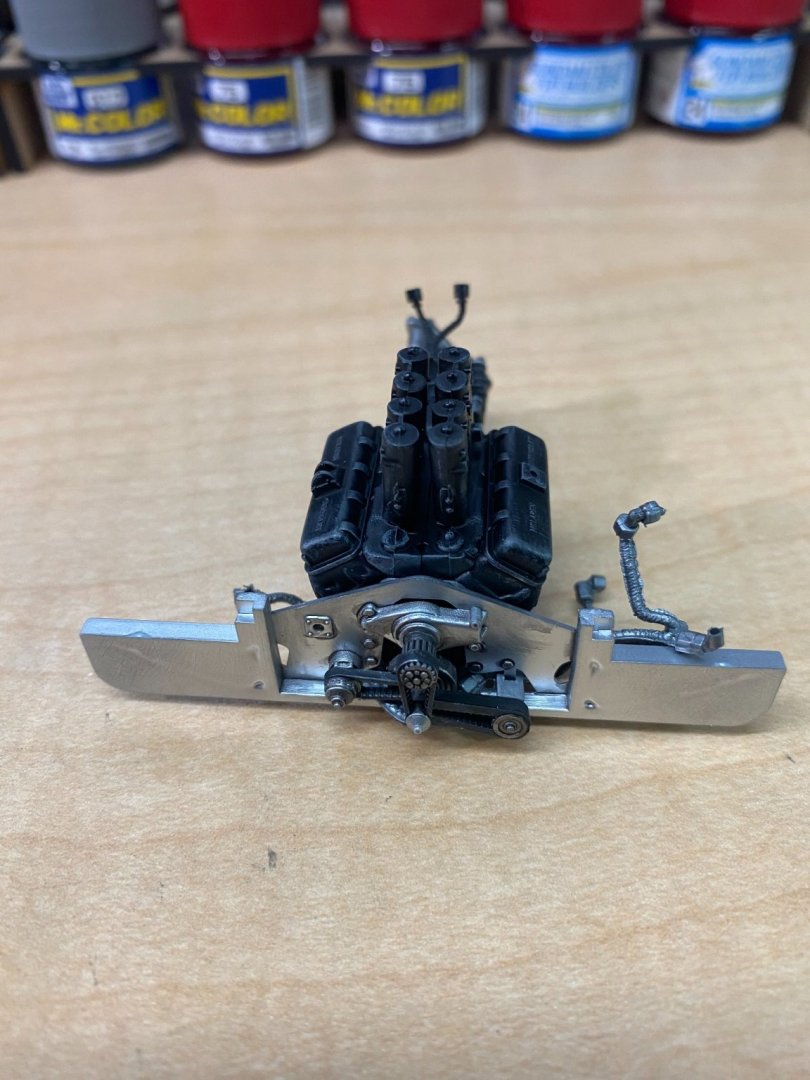
- 137 replies
-
- 12
-
-
McLaren M8B by CDW - Accurate Miniatures - 1:24 Scale
CDW replied to CDW's topic in Non-ship/categorised builds
That was a great video Lou. Jim Hall raced a giant hoover vacuum machine. -
McLaren M8B by CDW - Accurate Miniatures - 1:24 Scale
CDW replied to CDW's topic in Non-ship/categorised builds
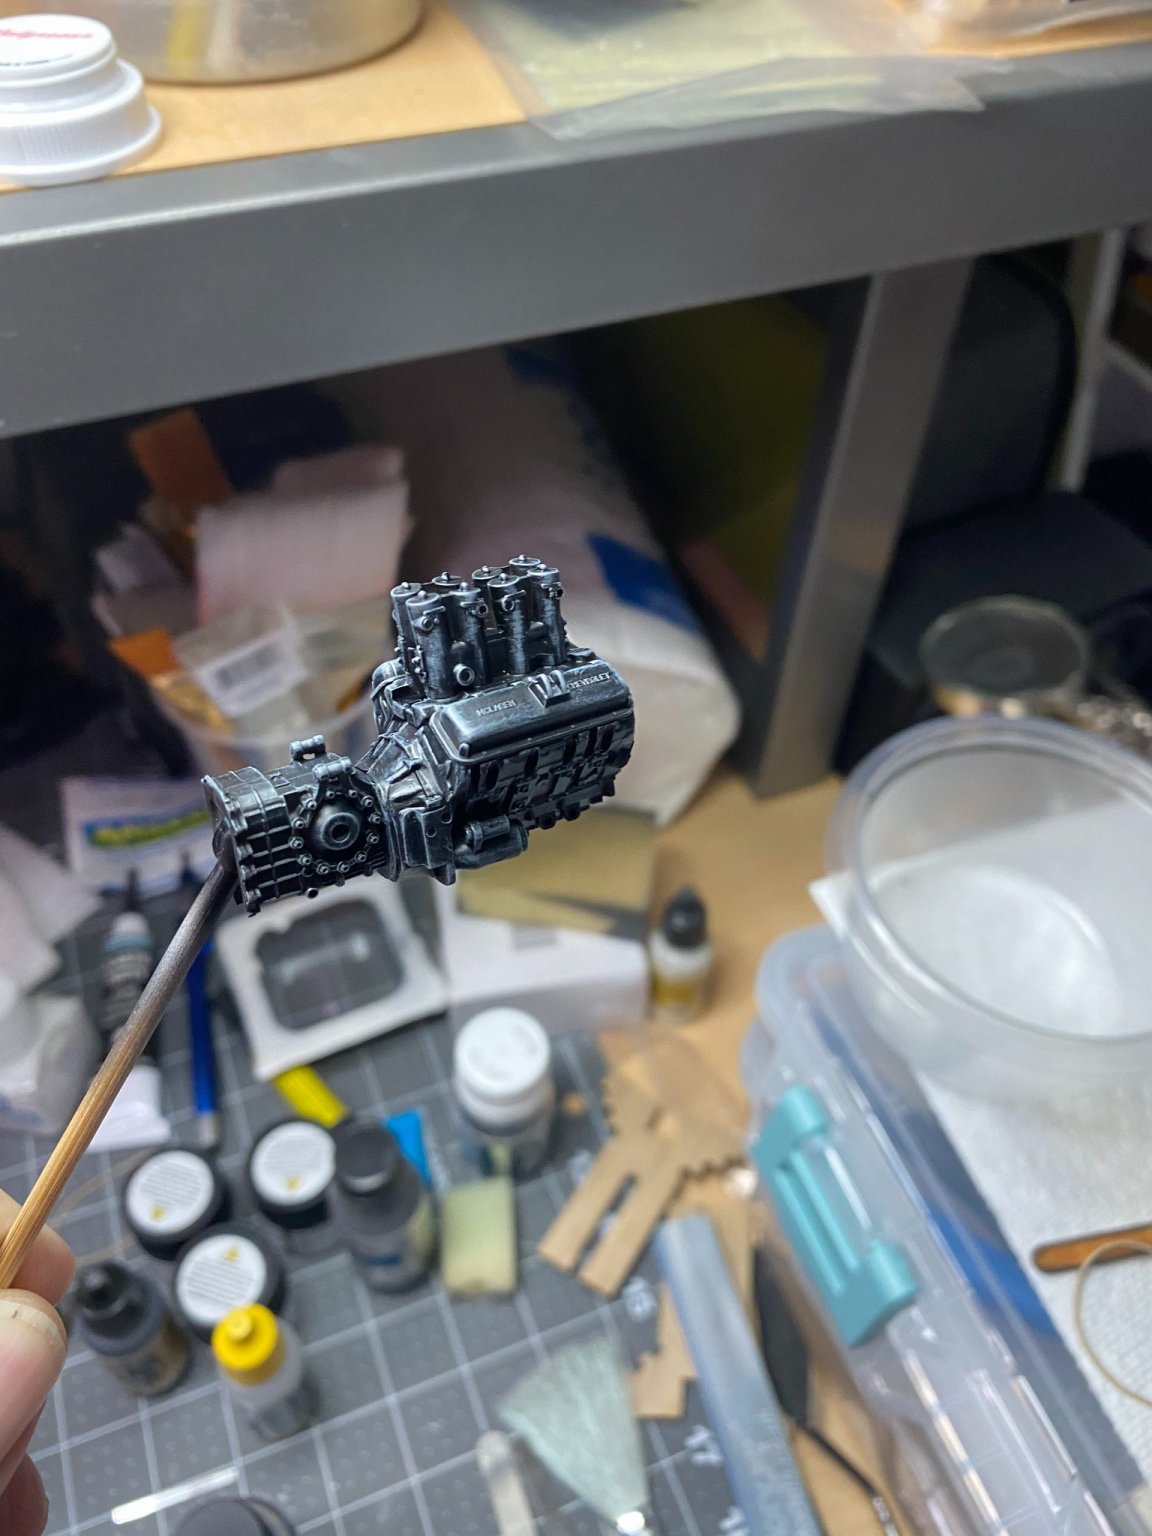
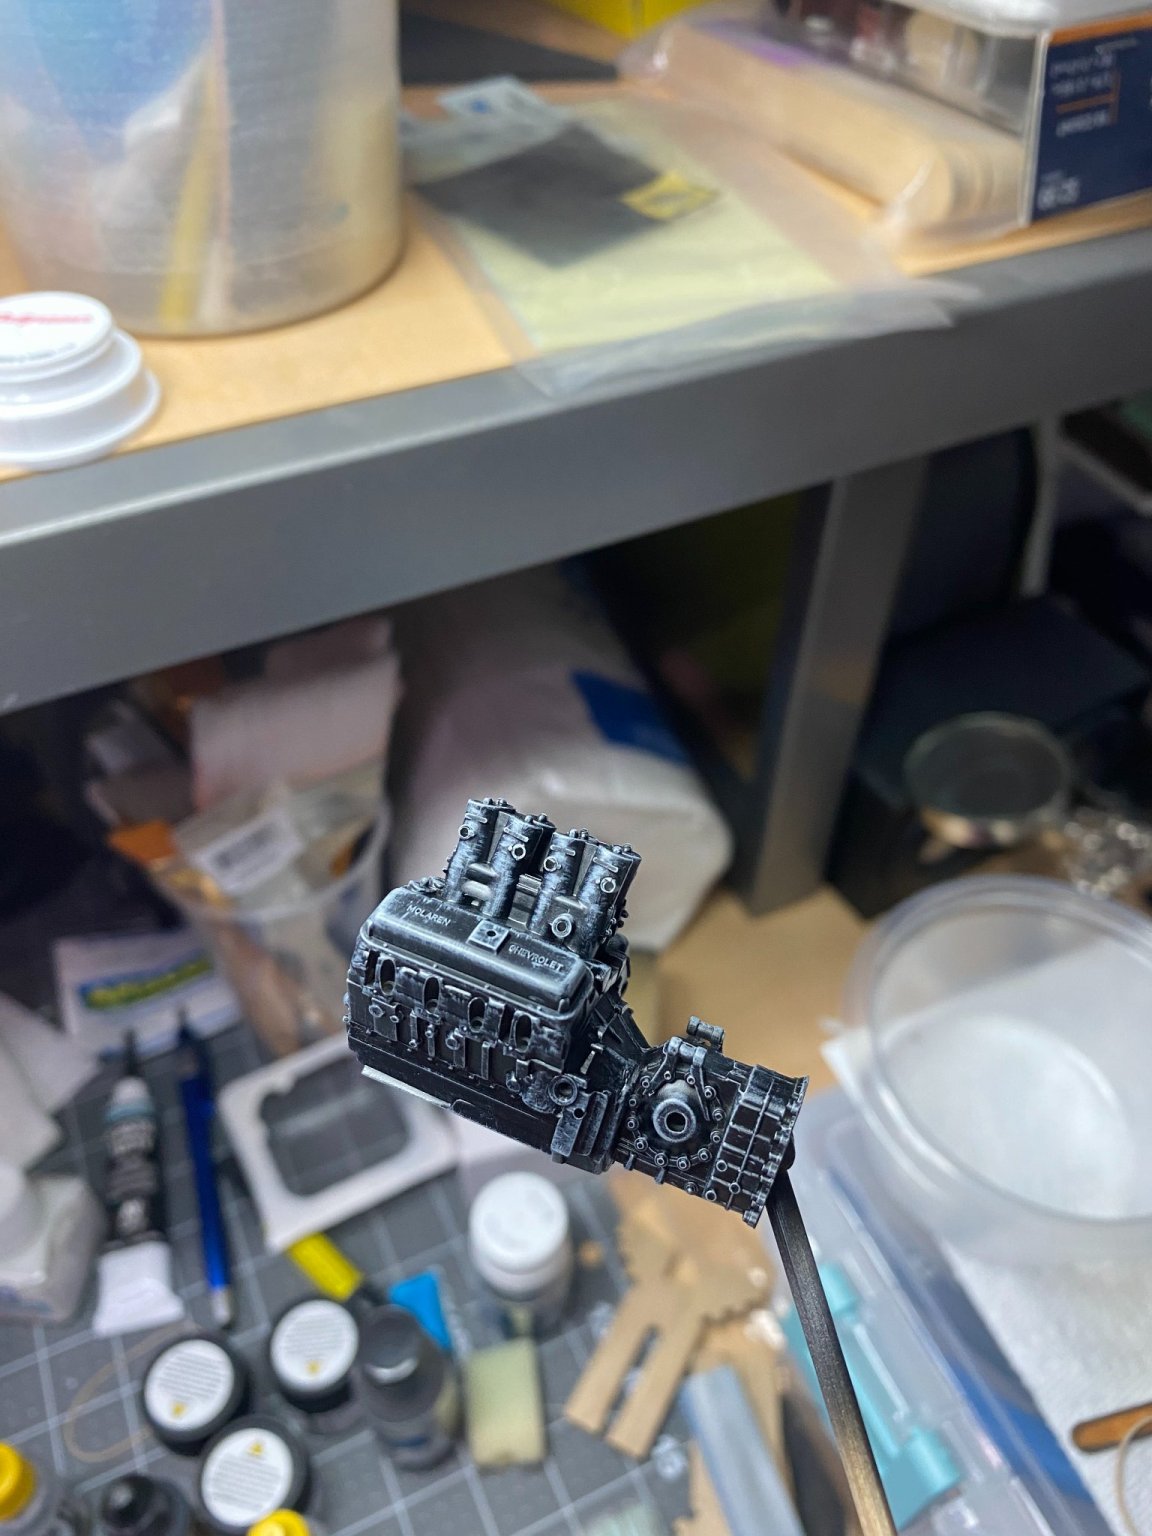
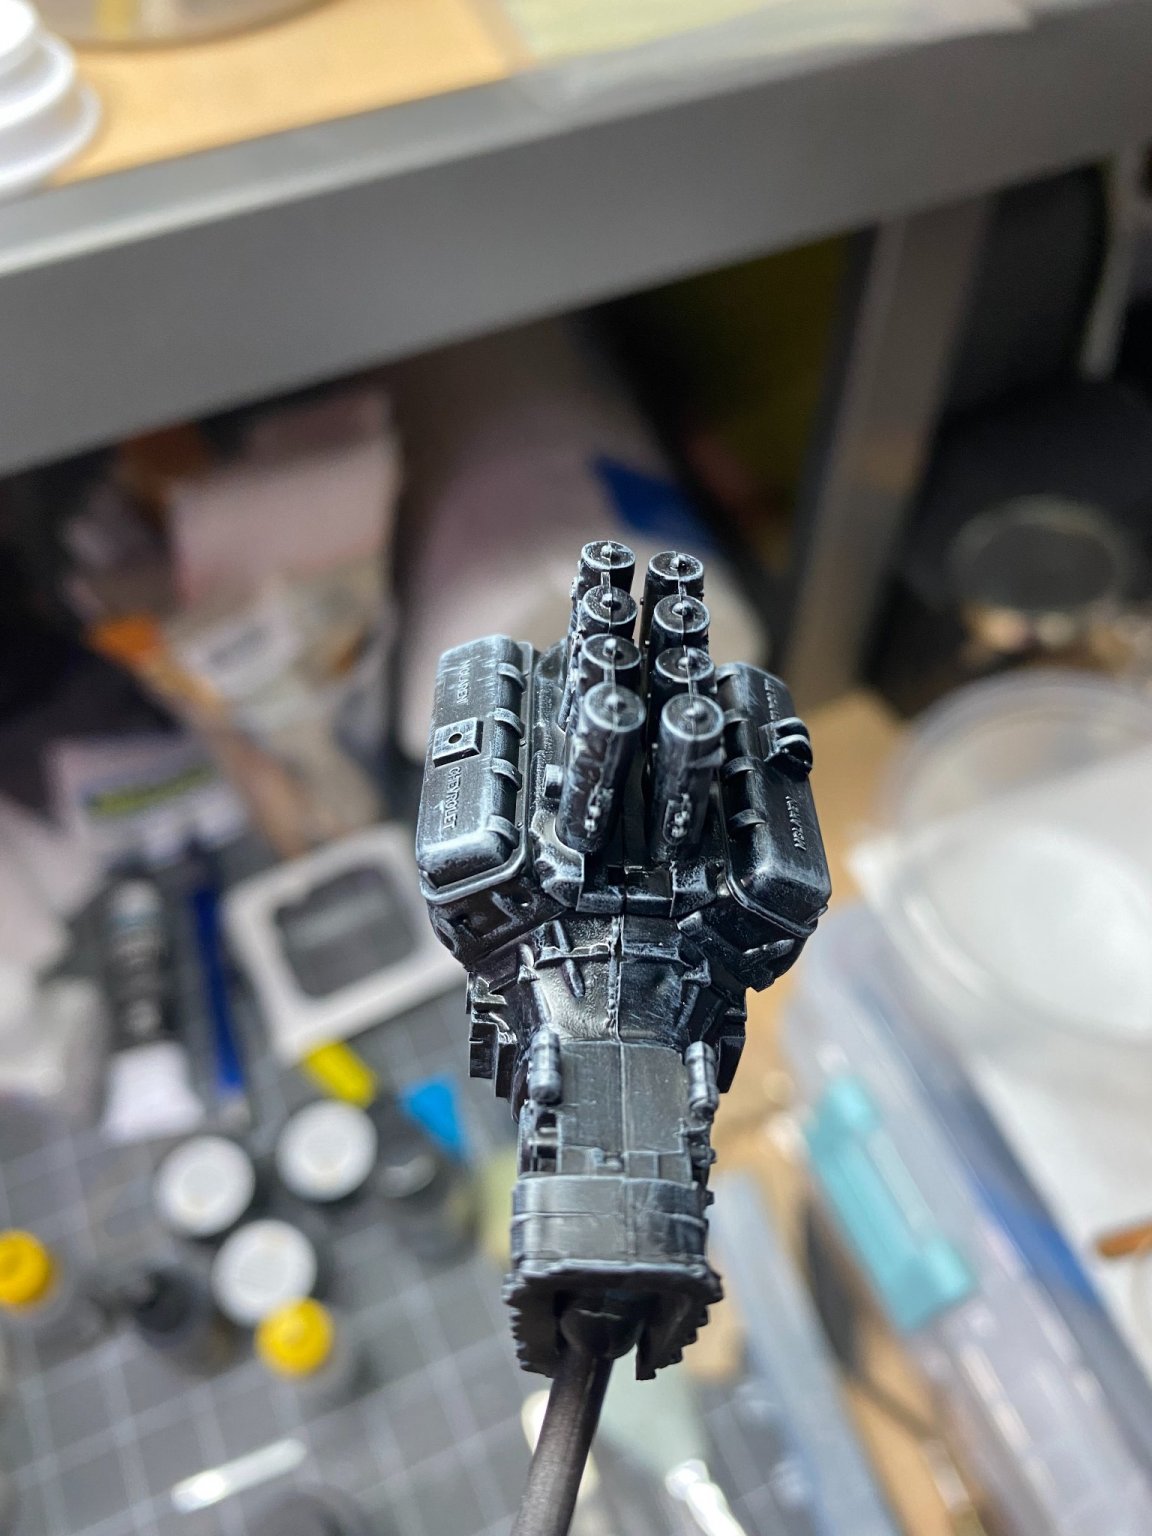
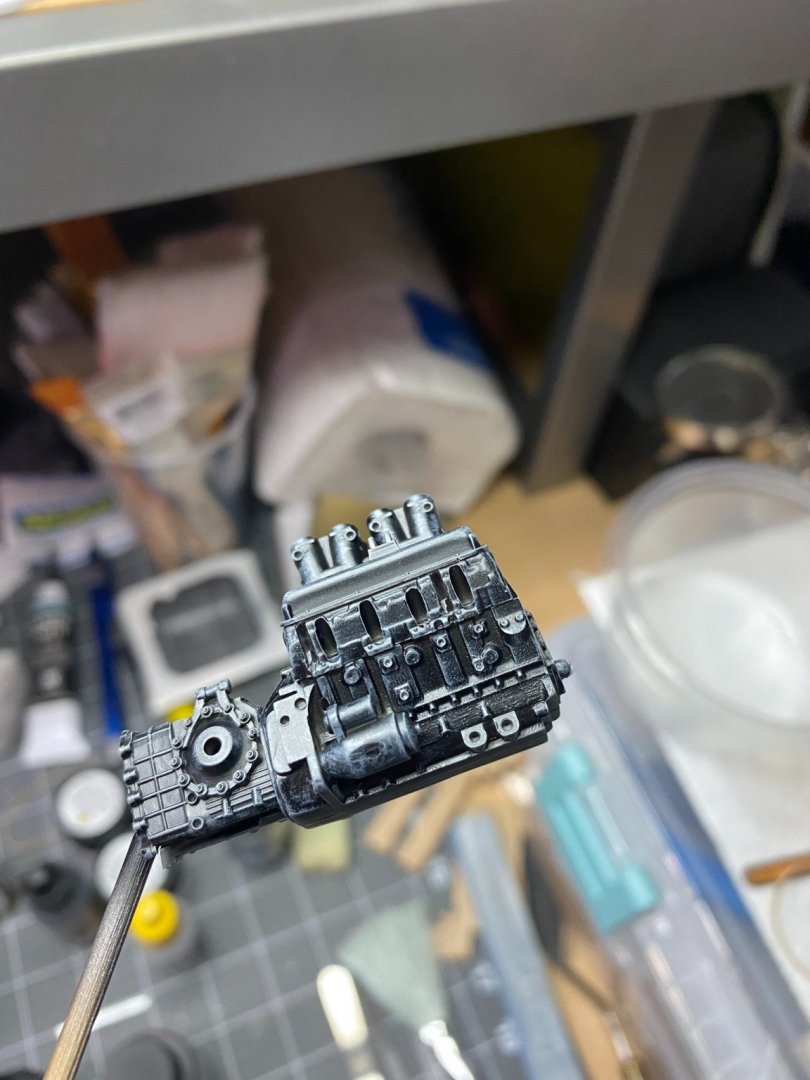
Accurate Miniatures put excellent molded detail into their kits, much higher quality than you will see in typical Revell or AMT kits. Because it has such good detail, decided to highlight it by giving the engine and transaxle assembly a dry brushing with neutral gray in order to bring out those molded in details. When it's all dry, will give everything a black wash to tone it down a bit. You can see the depth the dry brushing gives.


- 137 replies
-
- 13
-
-
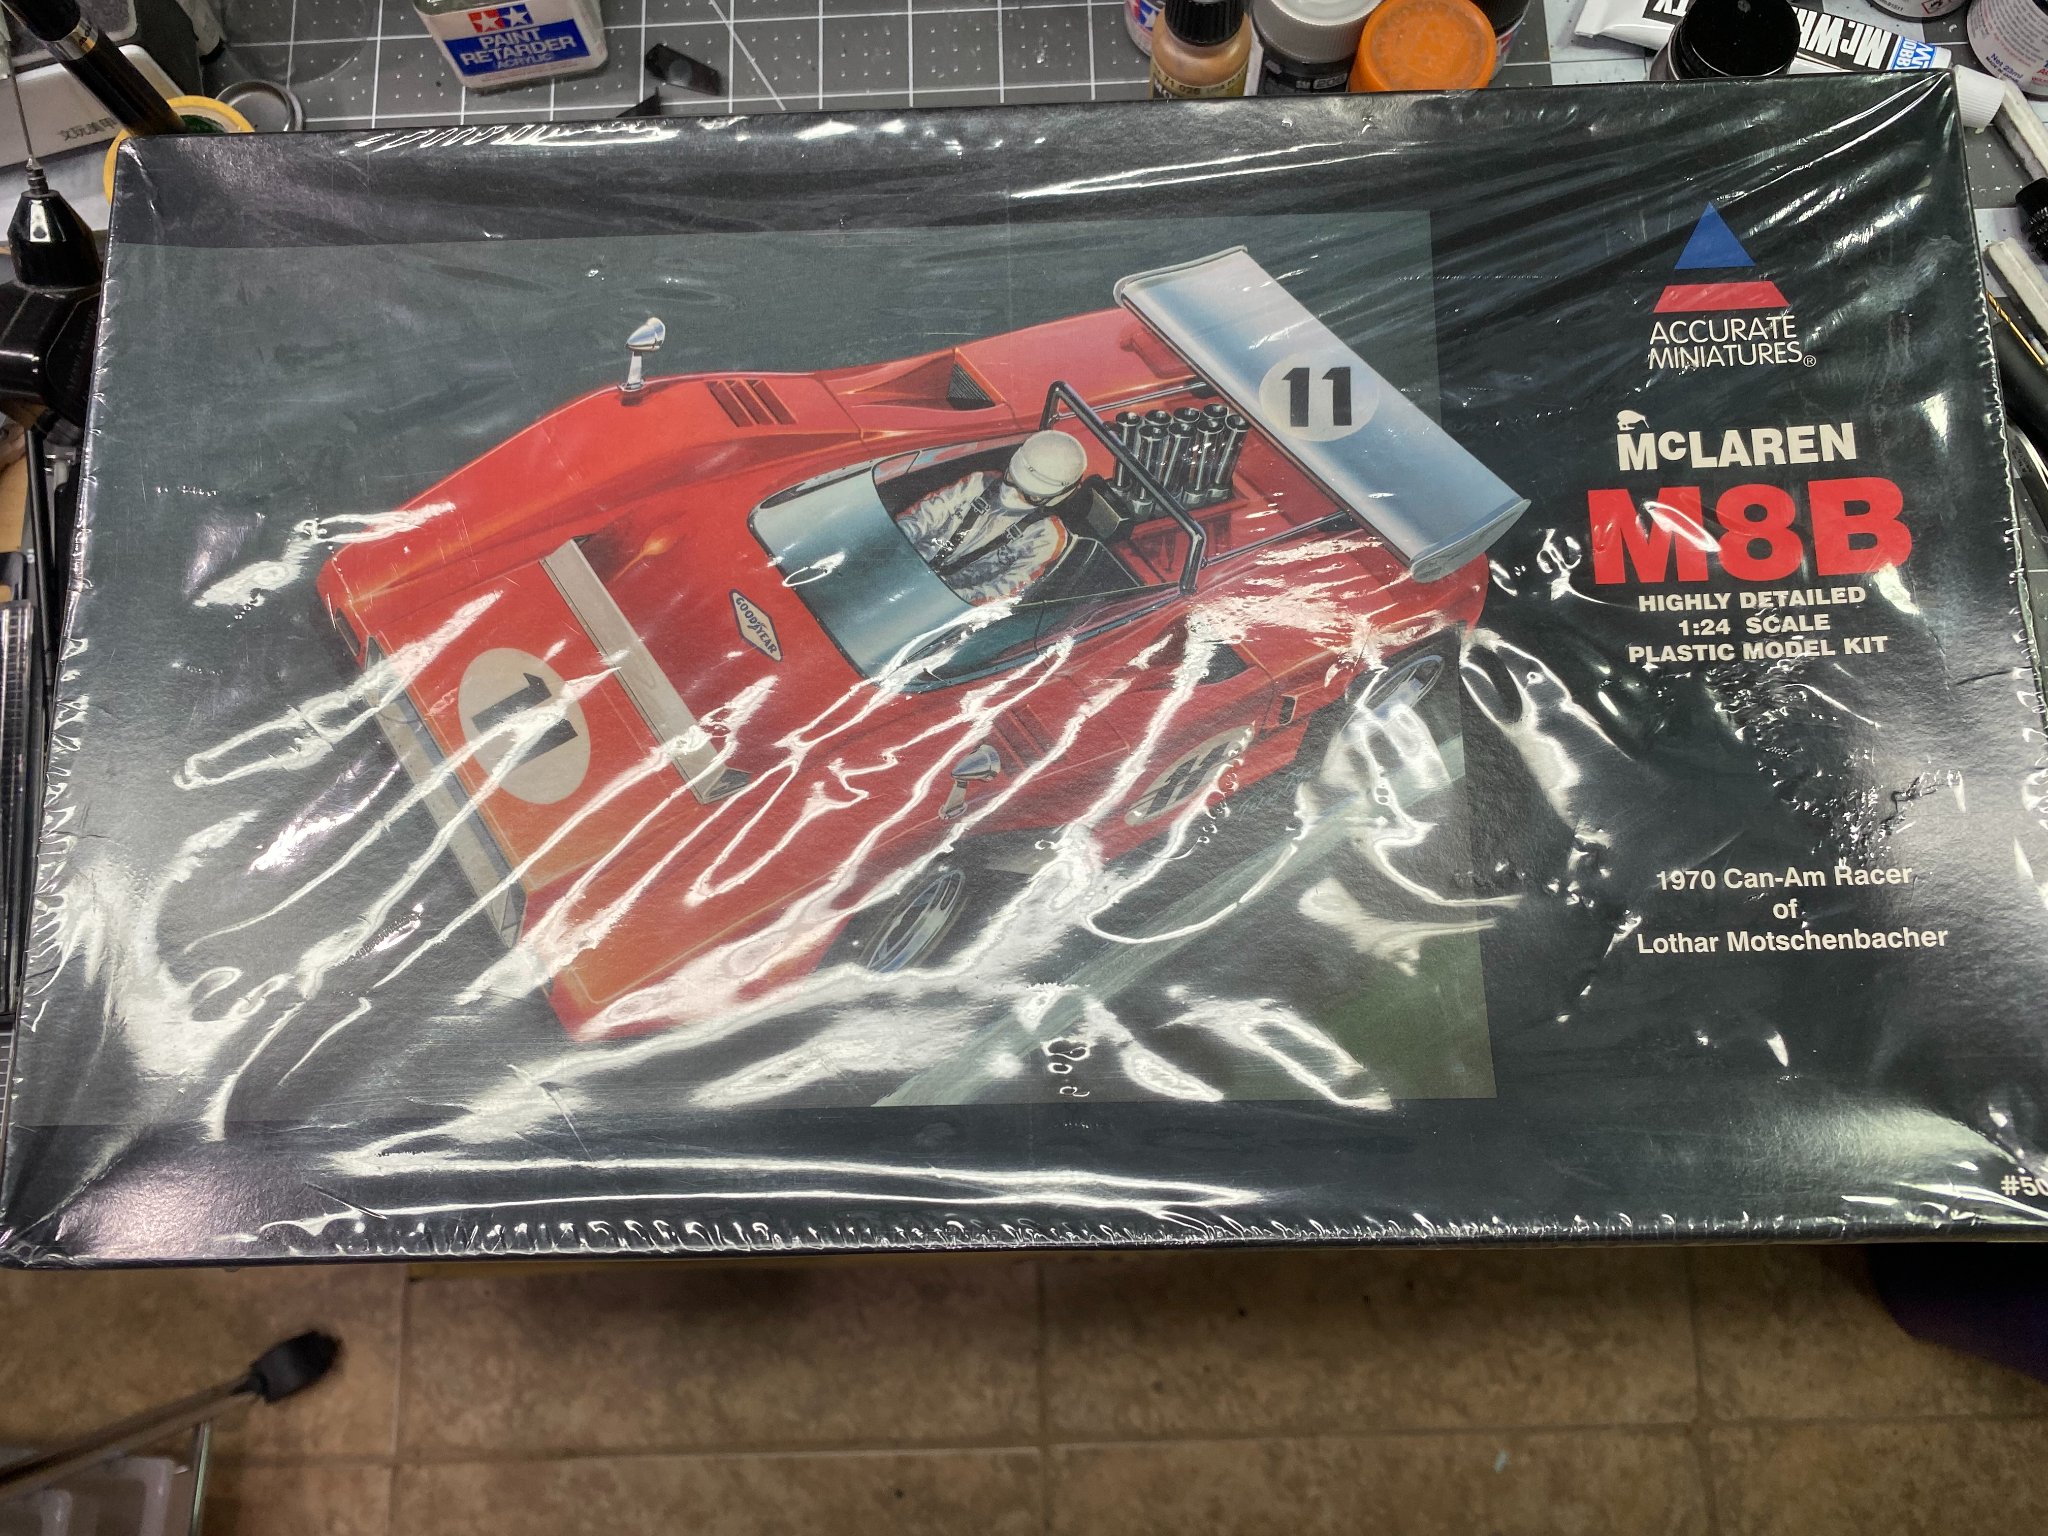
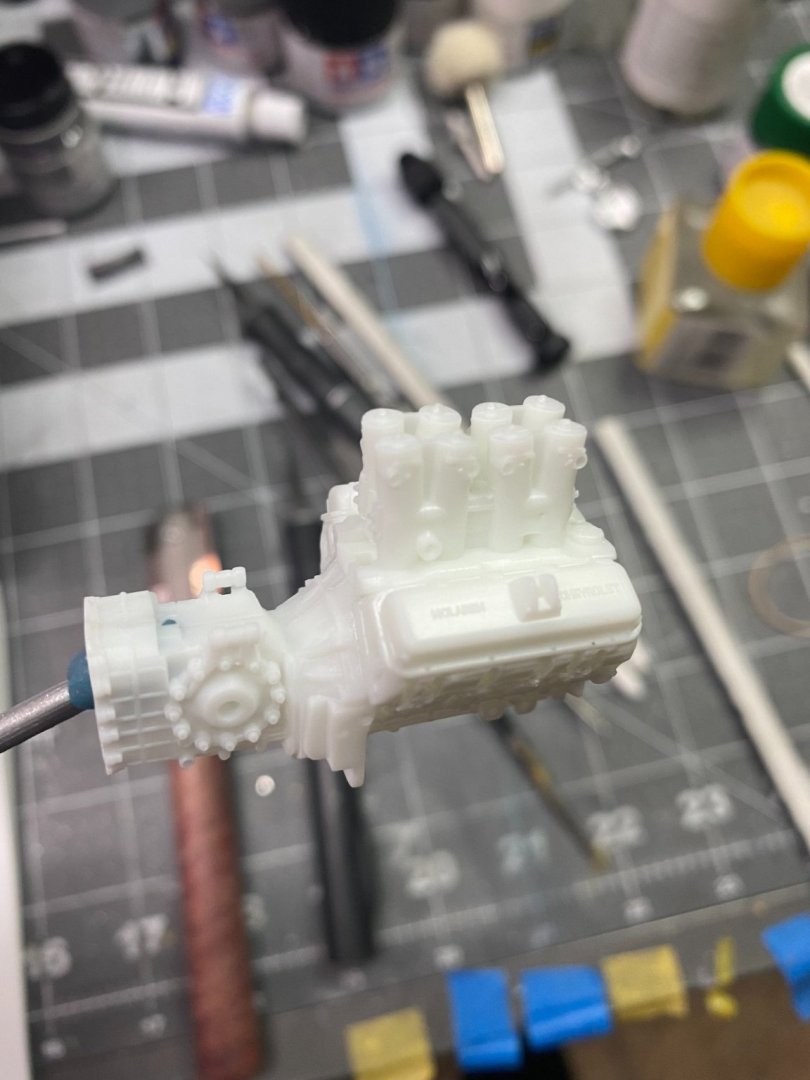
My friend Lou (Imagna) reached deep down into his collection of model race car kits and generously provided me with this beautiful Accurate Miniatures kit of the McLaren M8B CanAm Group 7 race car. There is at least one other modeler, Landlubber Mike, who will also eventually build this very same model in a build thread here on MSW. Mike gave me the go ahead to get started while he finishes tying up a few loose ends on build threads he currently has in progress. Without further delay, I got started on my kit tonight. It all starts with construction of the engine and transaxle assemblies. First, here is the kit box/box art: Here is the assembled engine with transaxle in bare plastic Here is the assembled engine with transaxle painted in semi gloss black I'm hoping Lou will chime in and provide some of his considerable knowledge about the history and highlights on this venerable vintage race car. He deserves the credit for making this build thread happen, as I may have never gotten my hands on one of these kits to build had it not been for Lou's generosity. The company who produced this kit has been out of business quite a few years now and these kits will soon be very hard to find without paying a large, premium price for one. Thanks Lou! Hope you enjoy the build and hope I can do it justice.


- 137 replies
-
- 14
-
-
The understatement of the day. This past week marked the 41st year since my father passed away, Feb 19, 1980. I was thinking about how much has changed since he passed. If he were suddenly alive today, he would not recognize much of what he would see or hear. When I grew up, my Dad would drive daily down to a specific corner in downtown Tampa to buy the evening newspaper, The Tampa Times, hot off the press. In the mornings, Our daily Tampa Tribune, would be waiting for us in our driveway. Today, Tampa no longer even has a daily newspaper. Both are gone, a thing of the past.
-
We can rearrange them as time goes by.
-
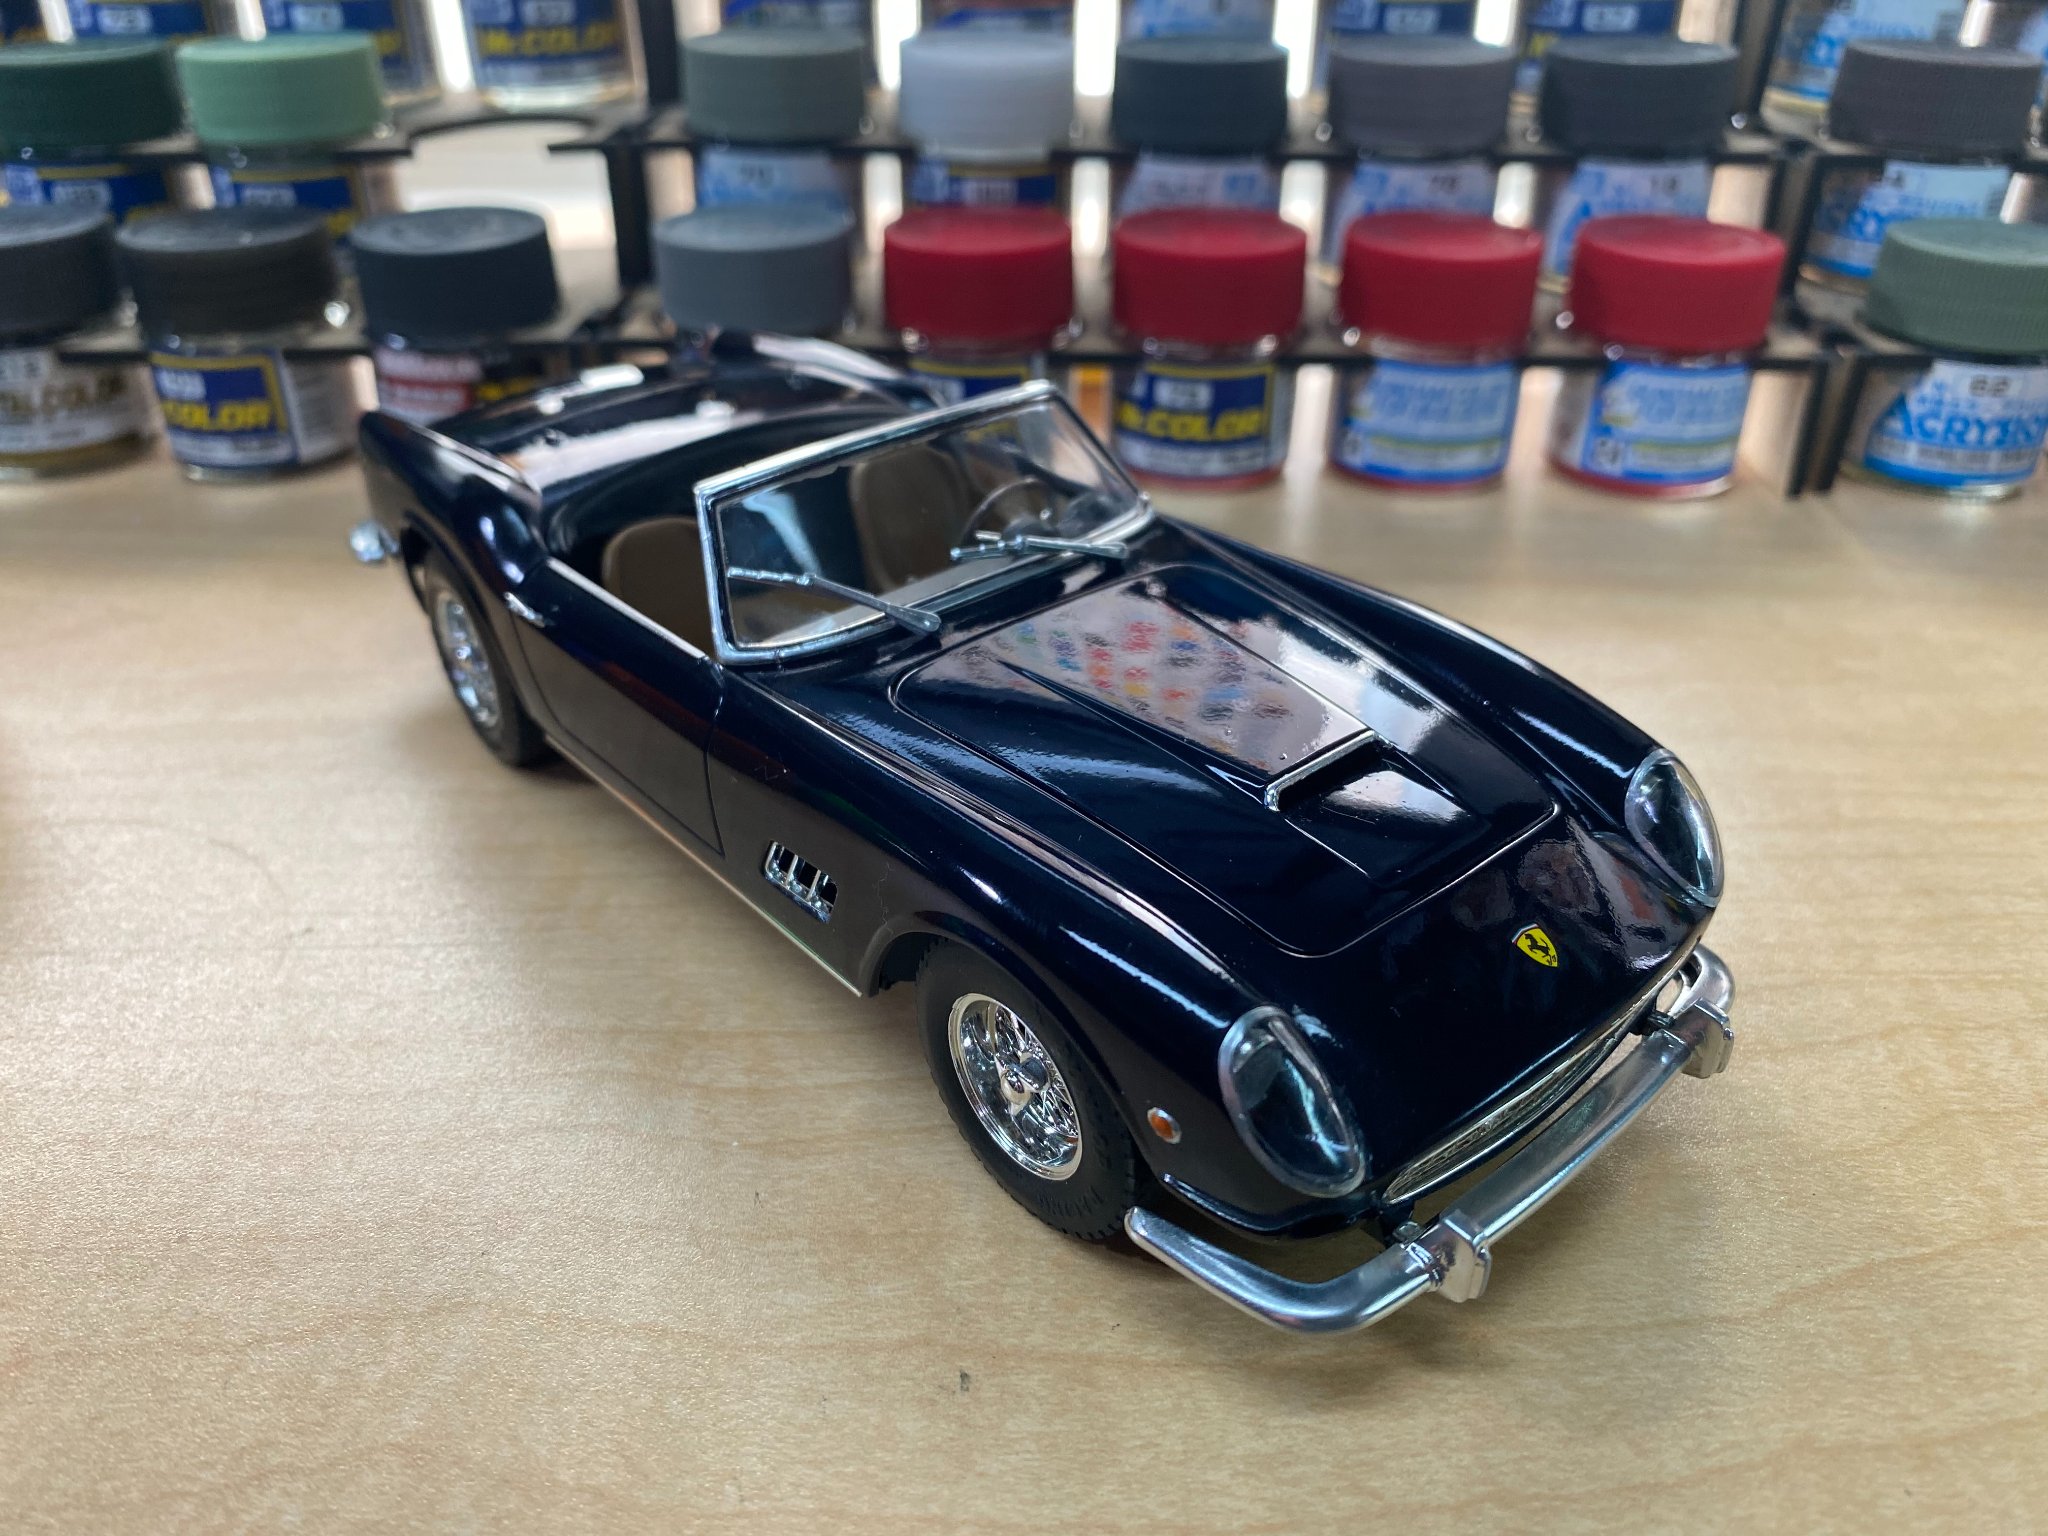
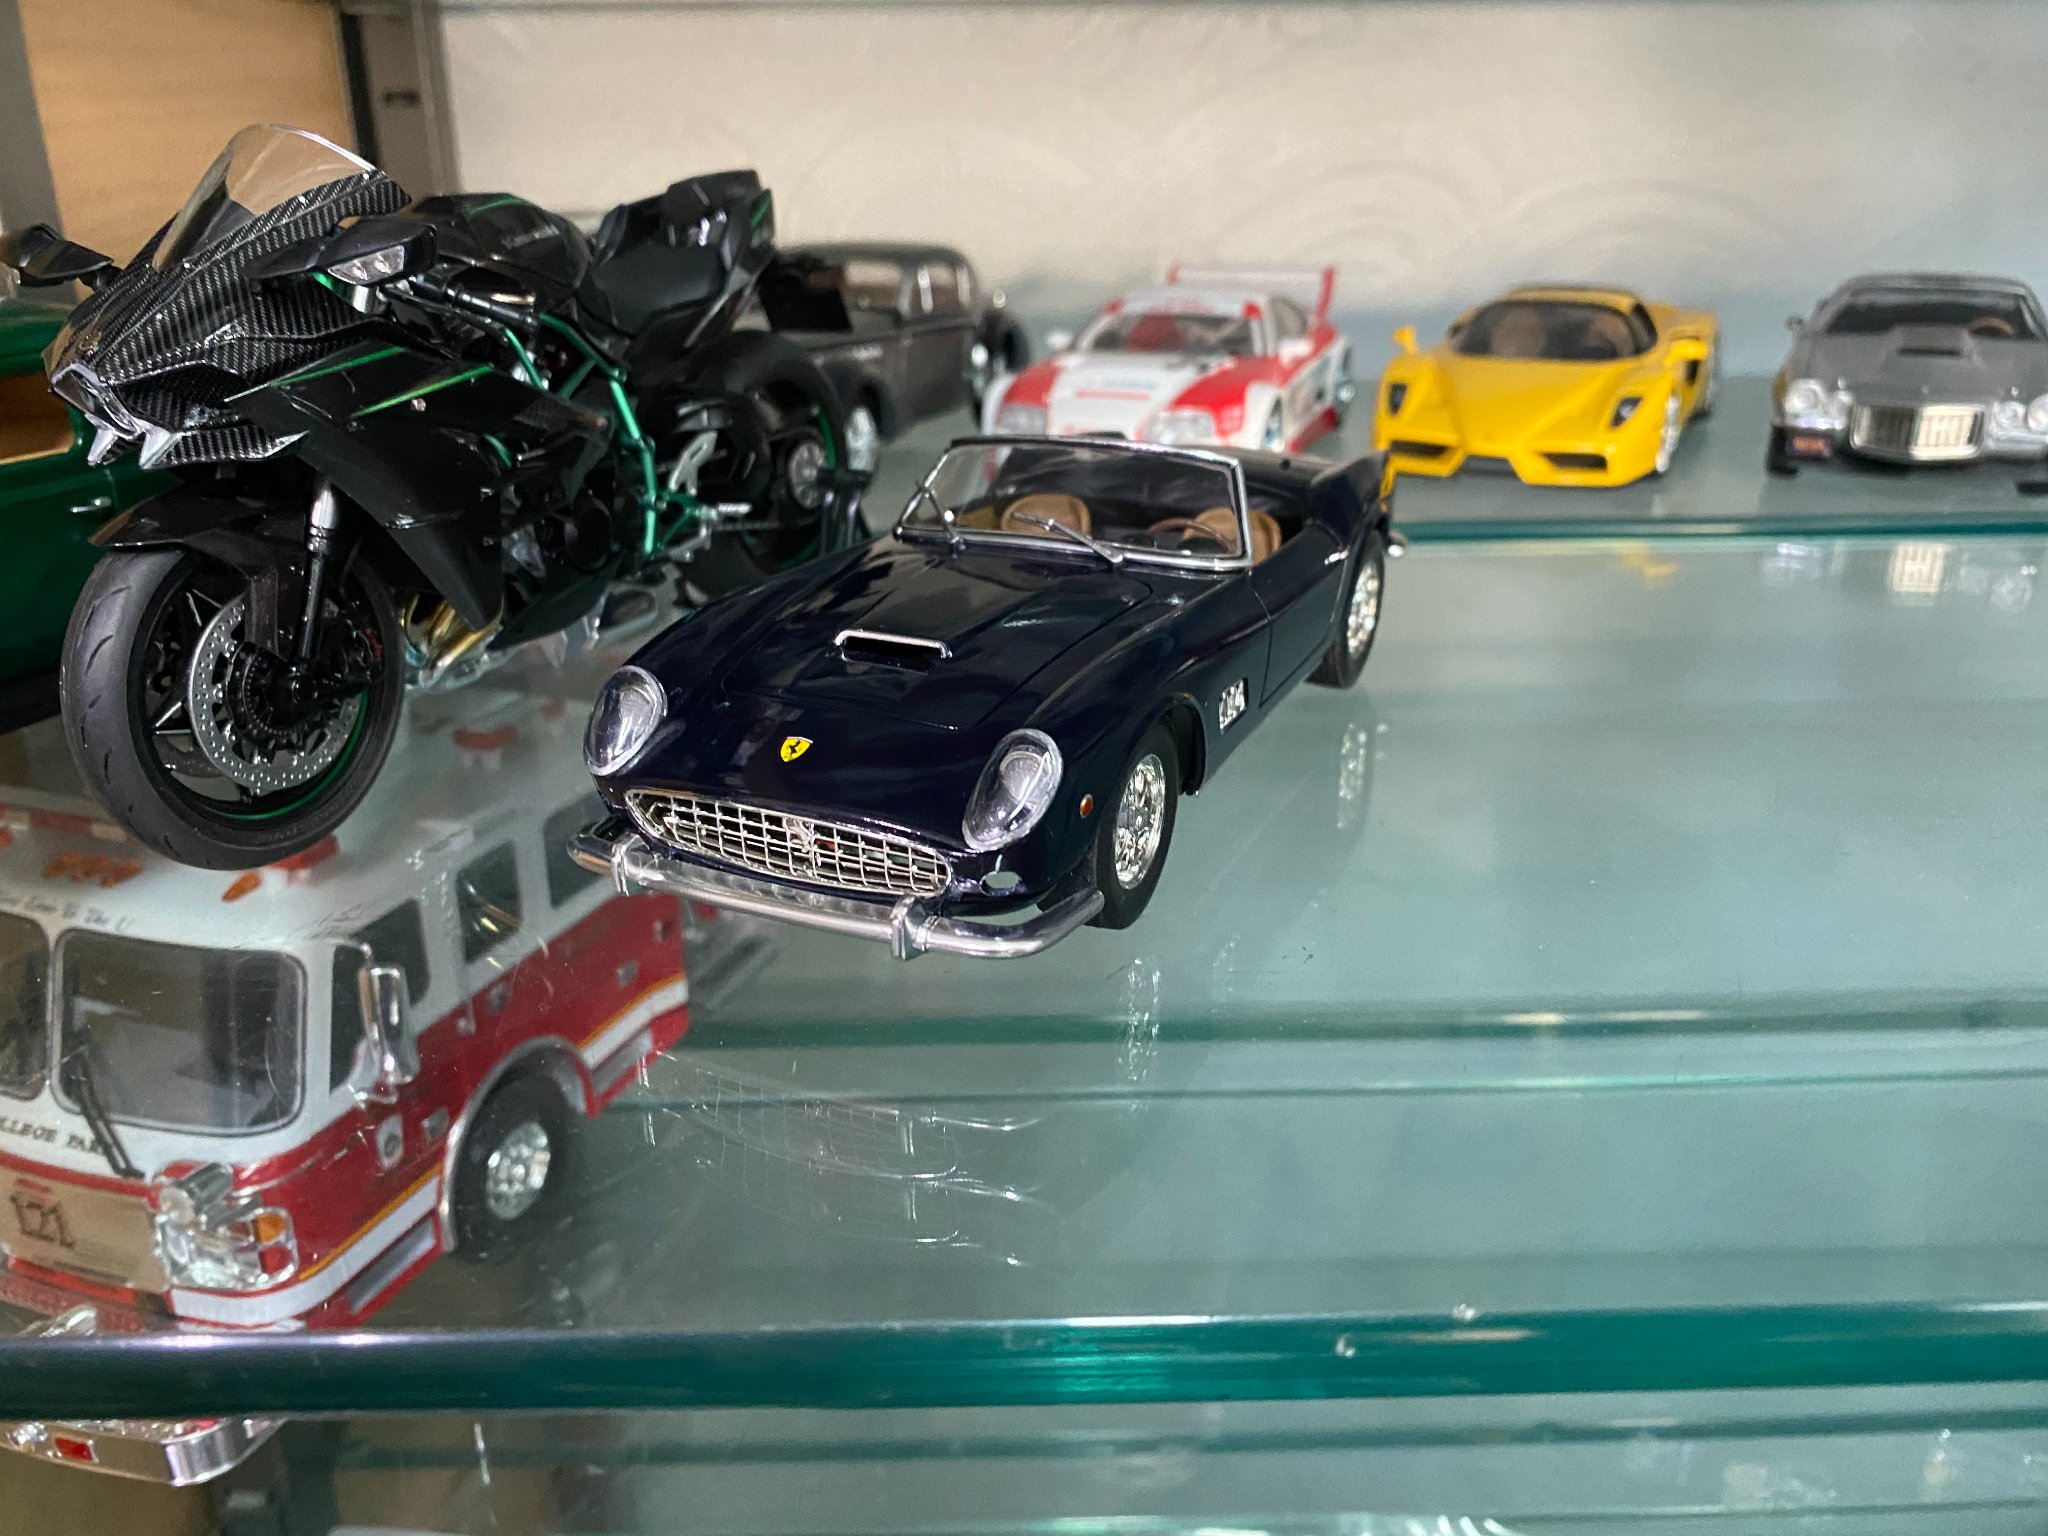
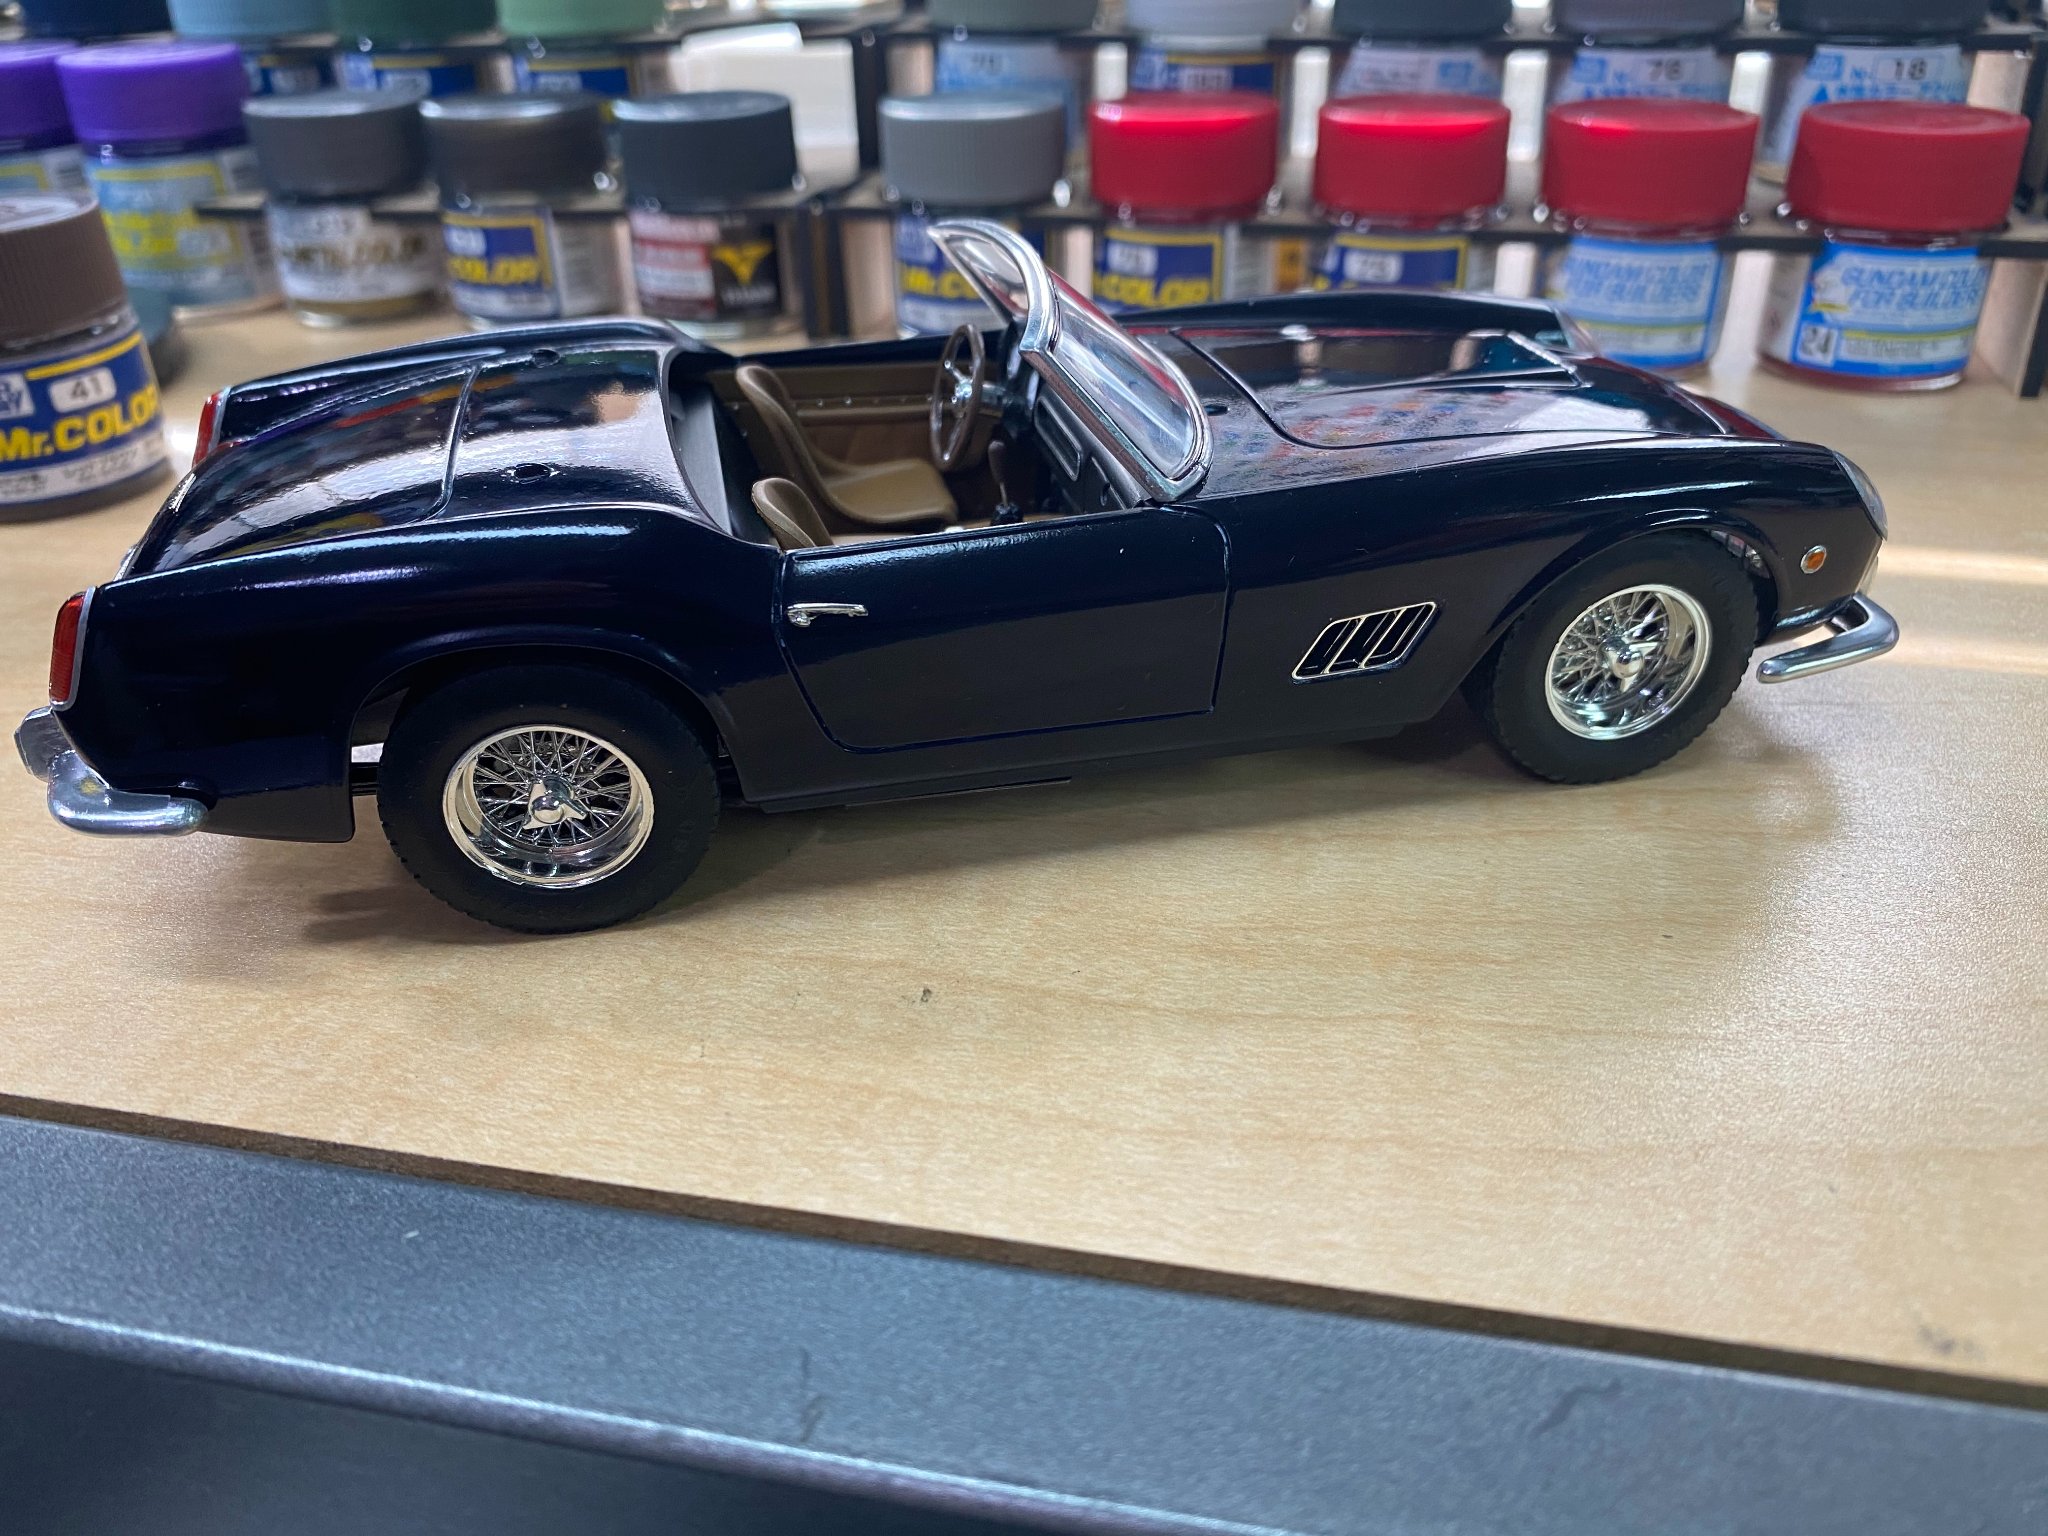
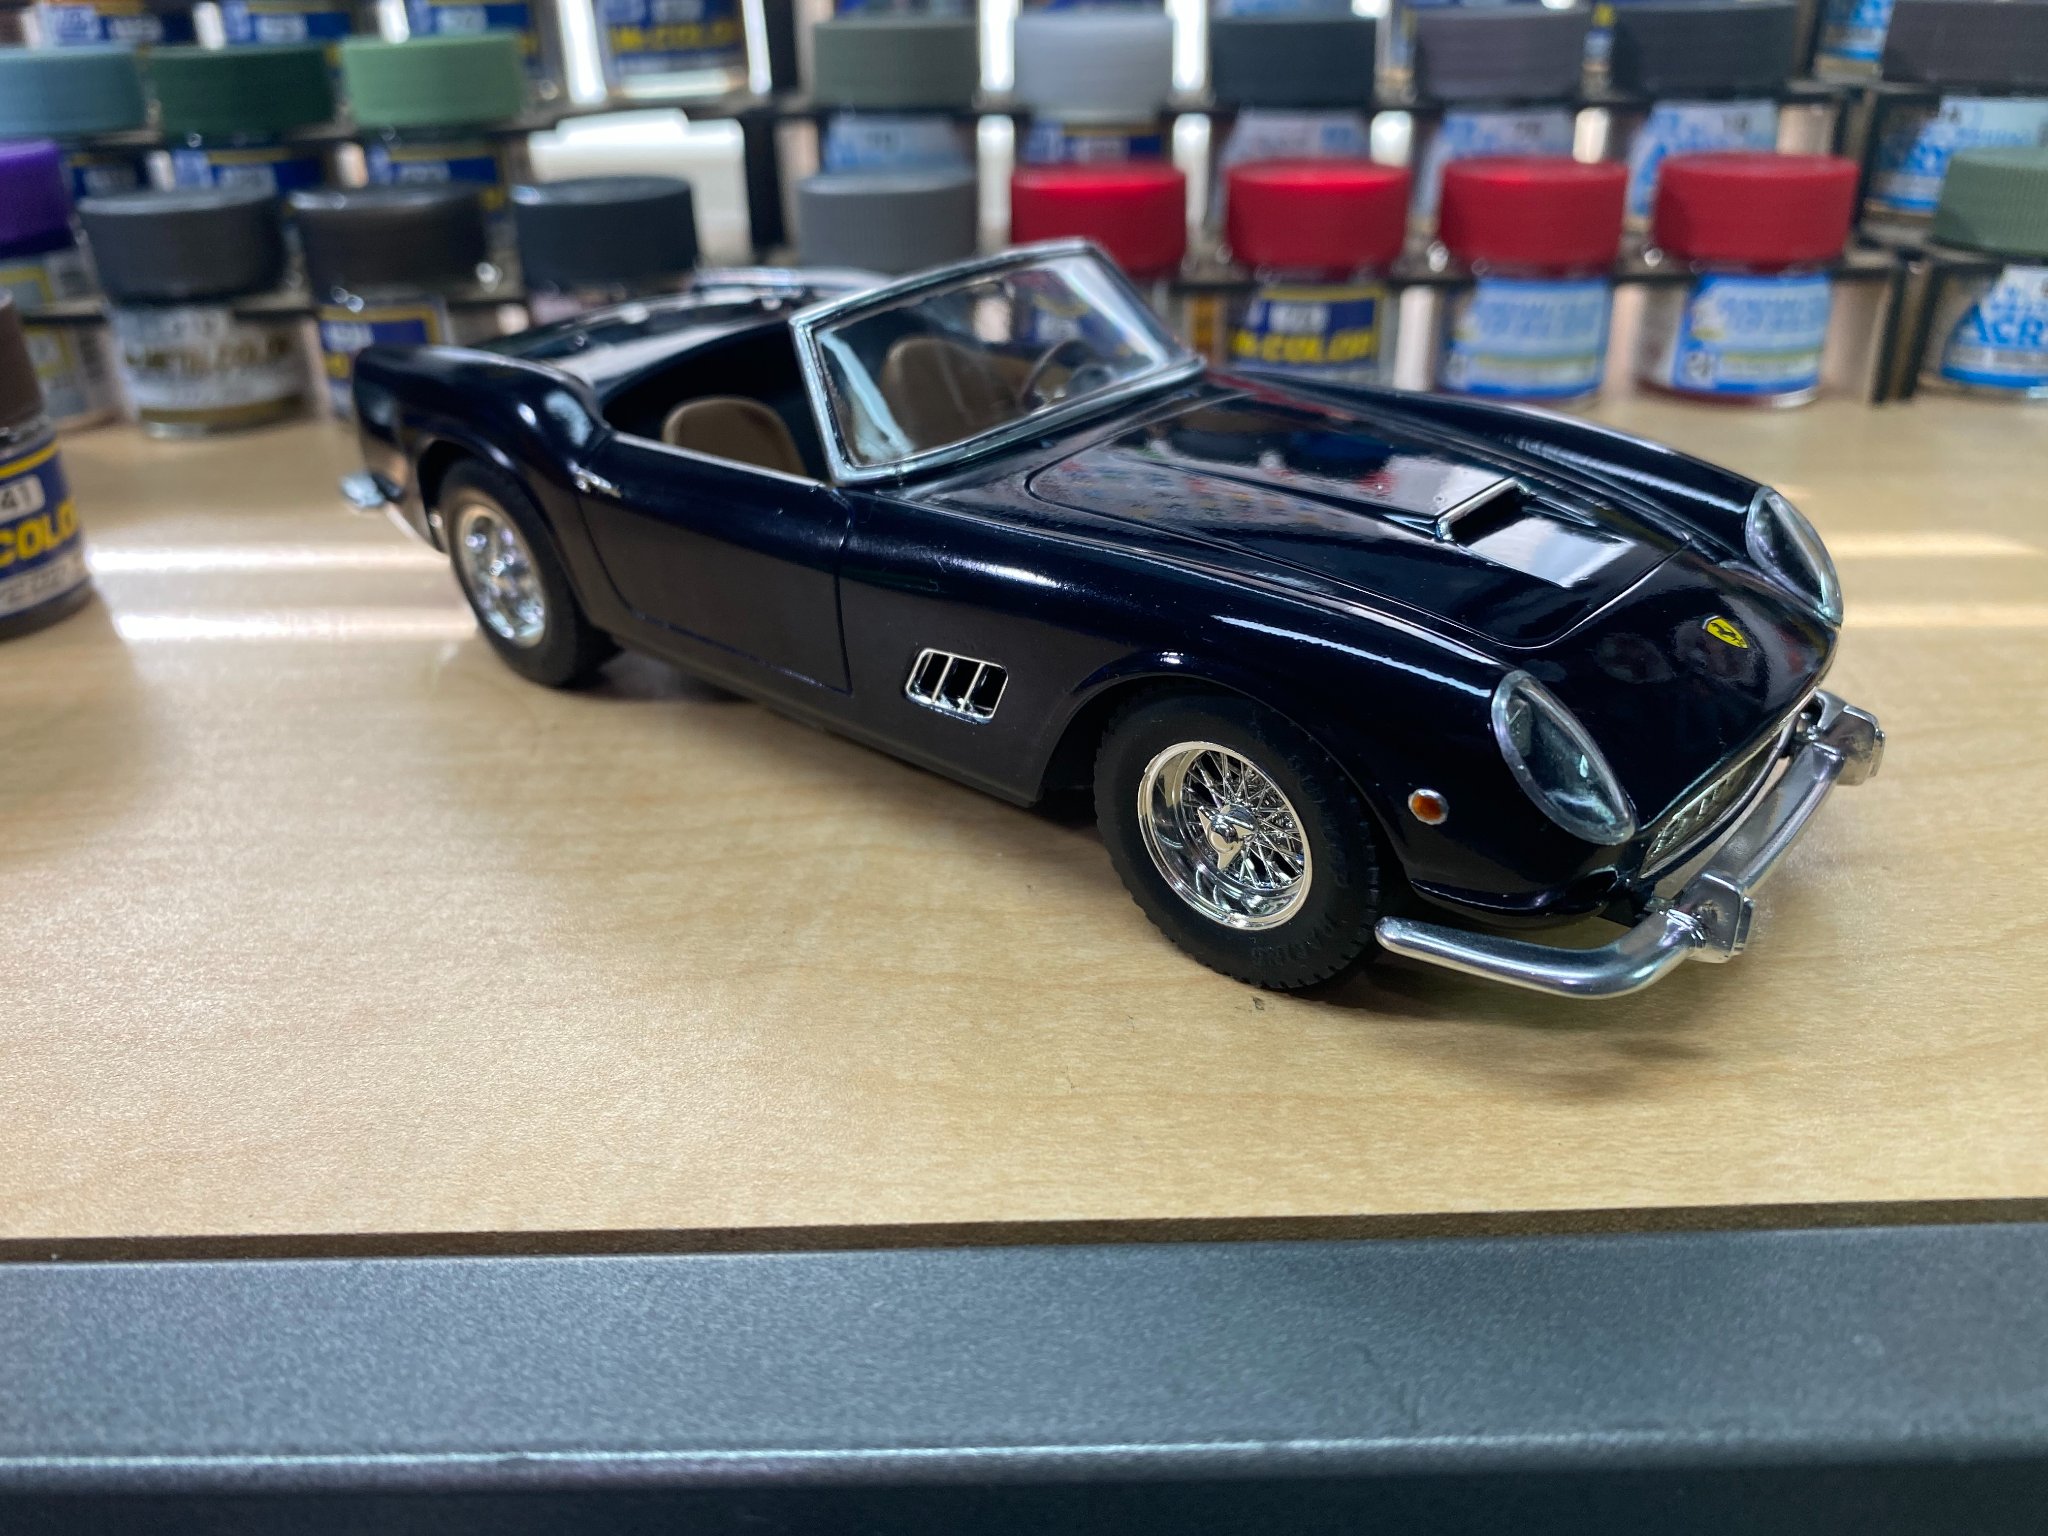
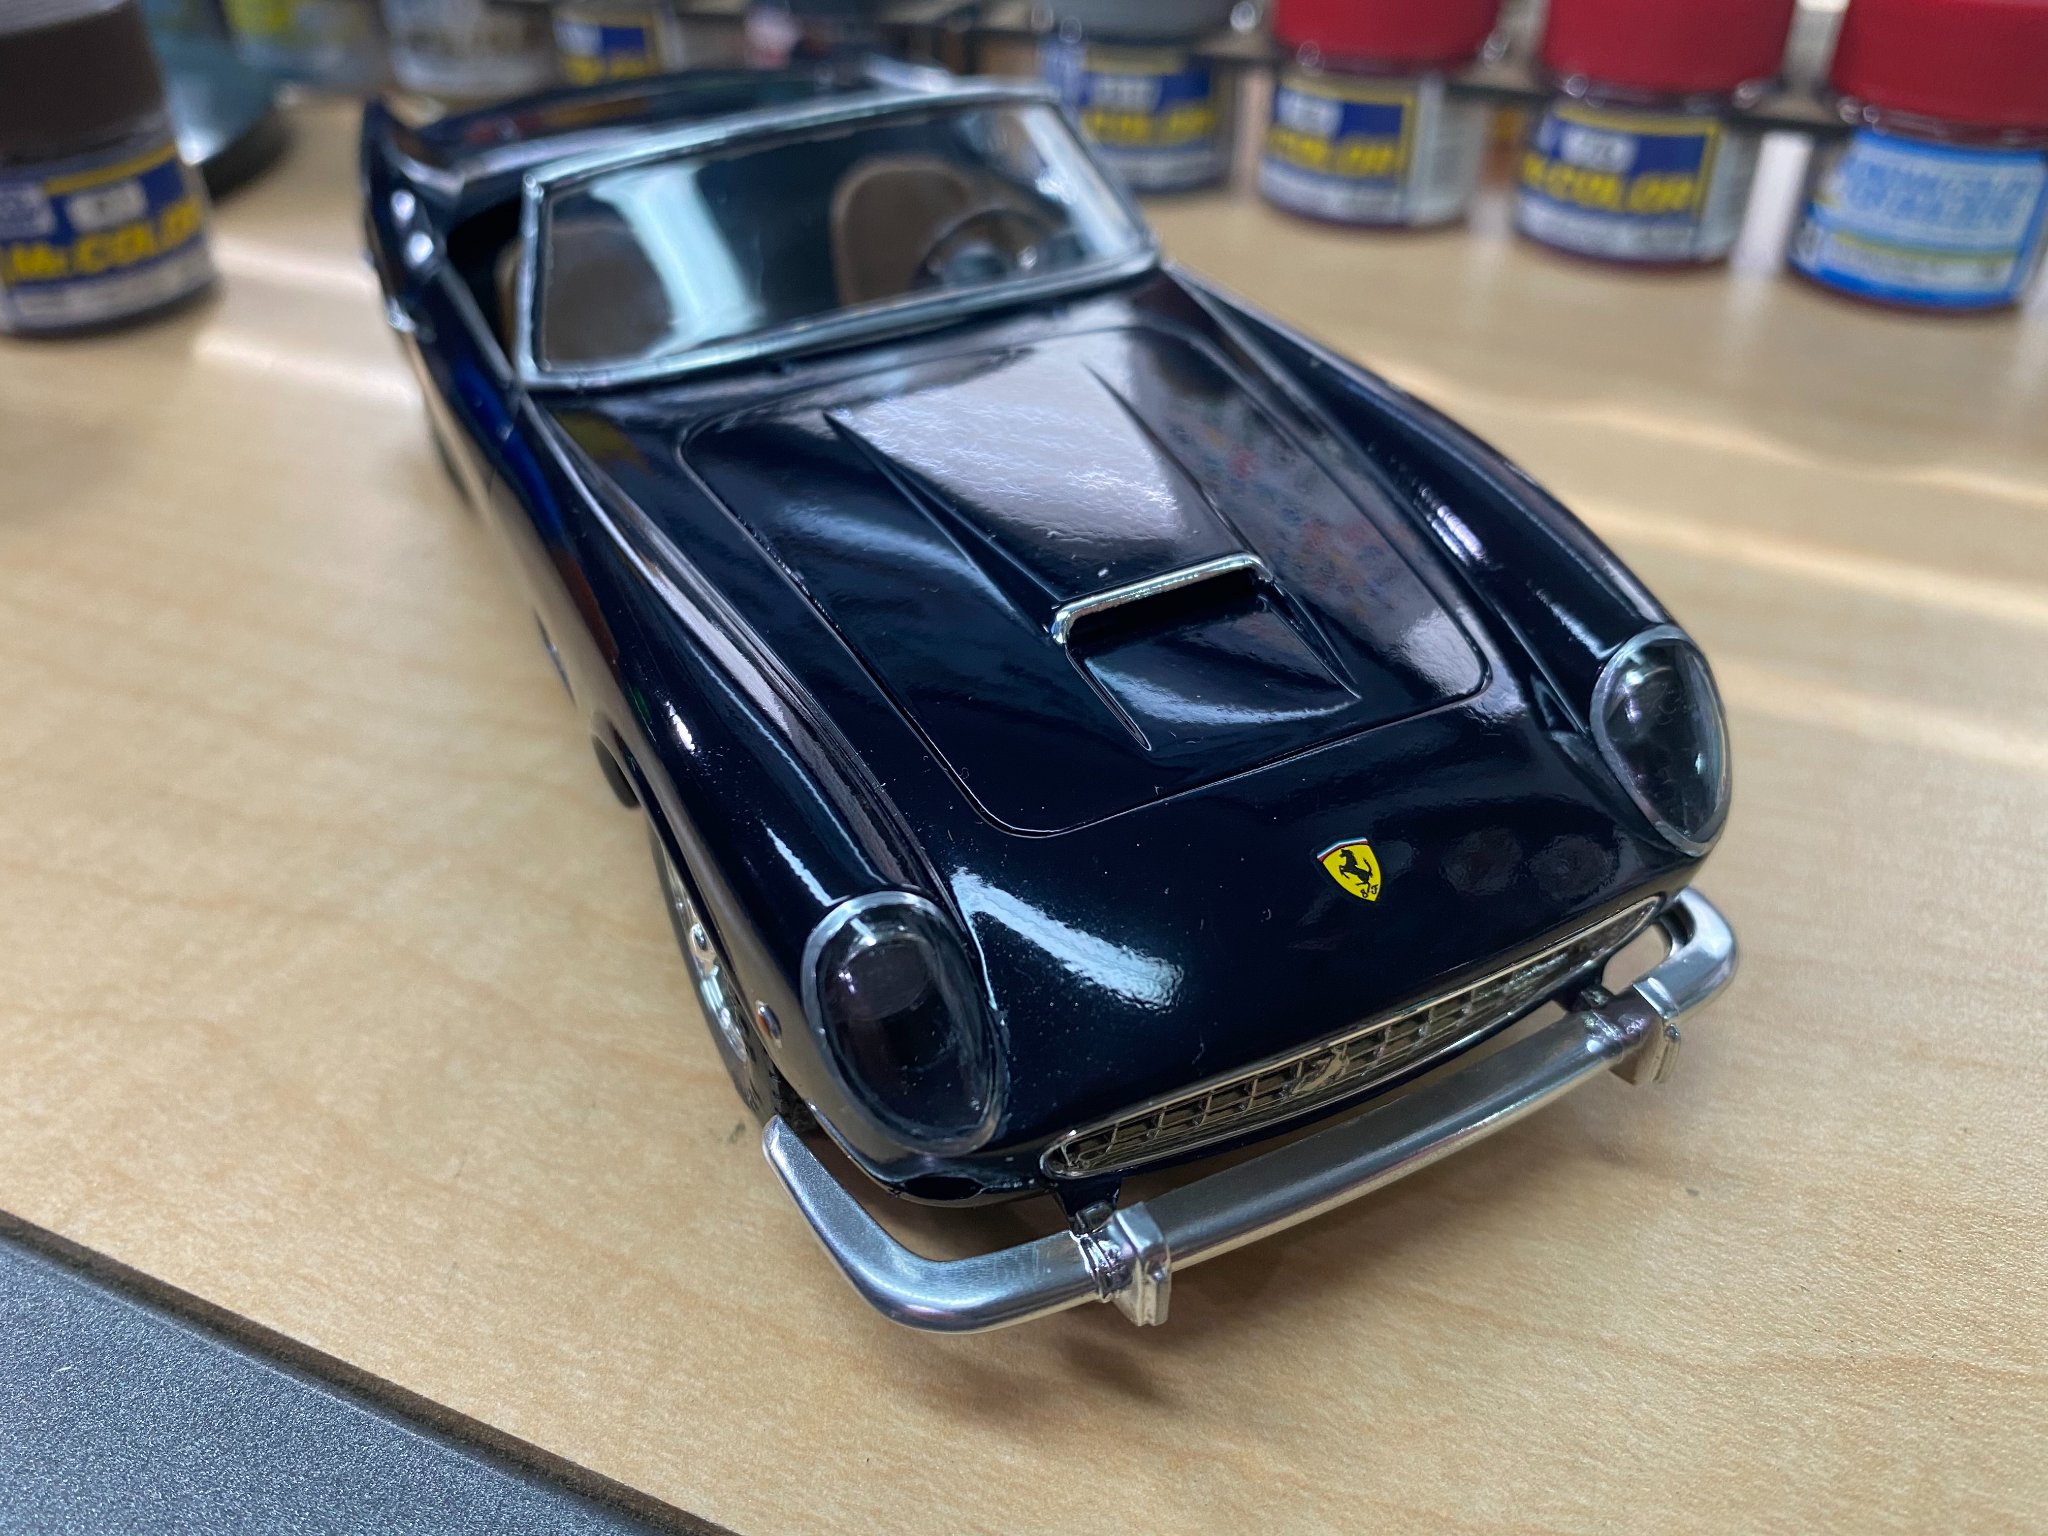
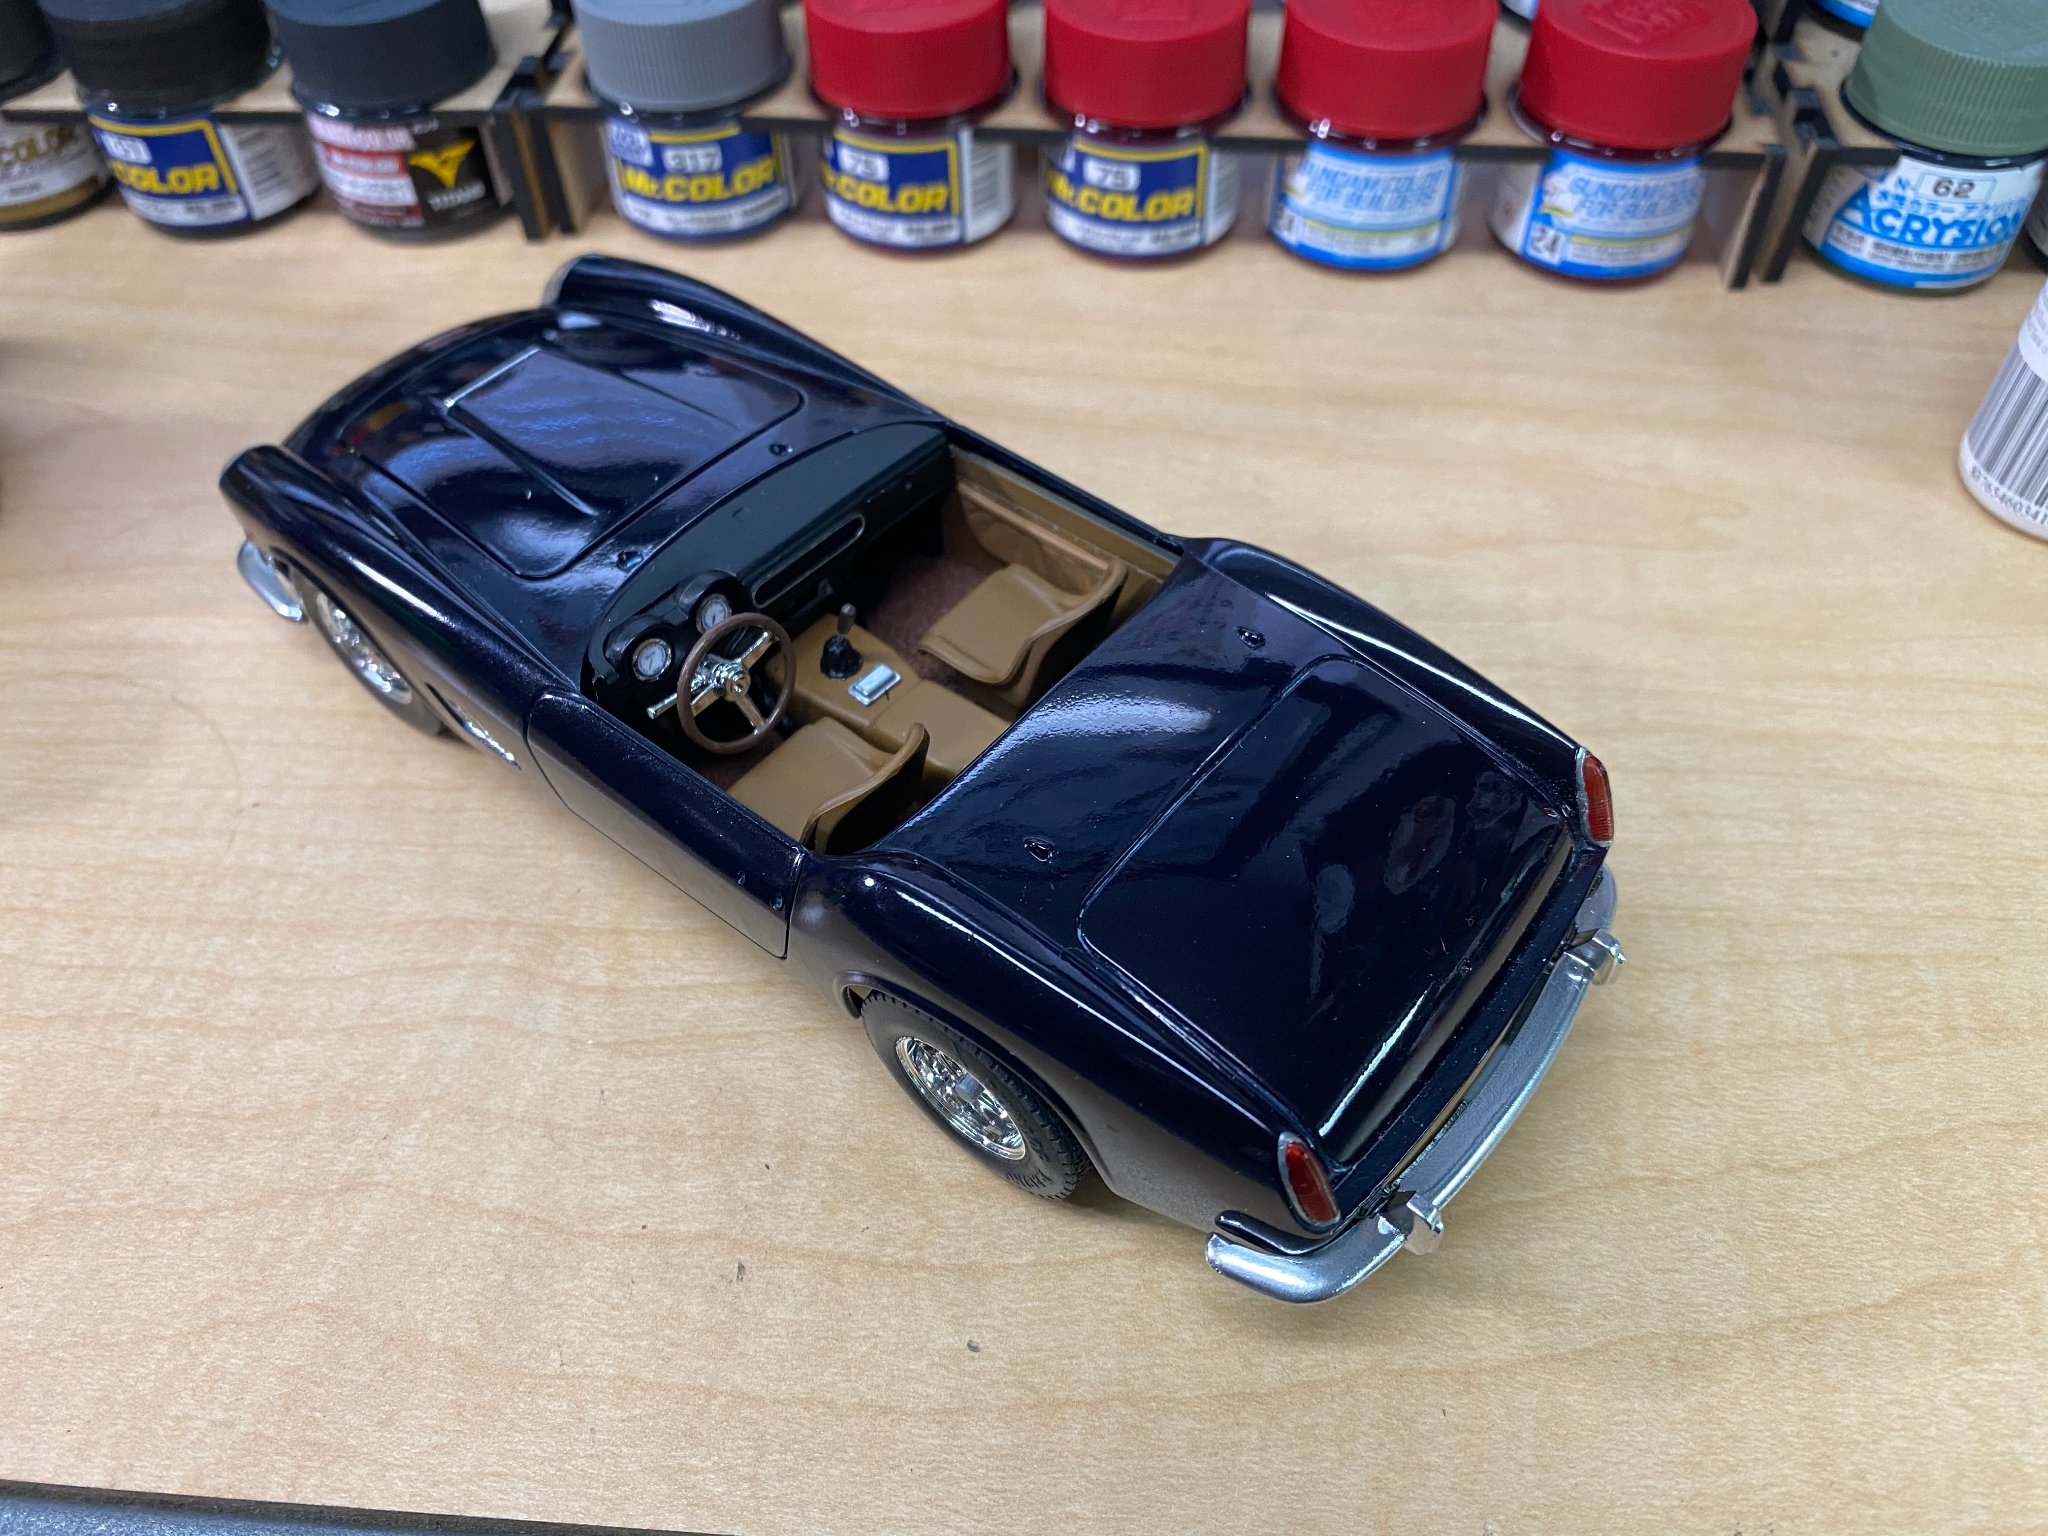
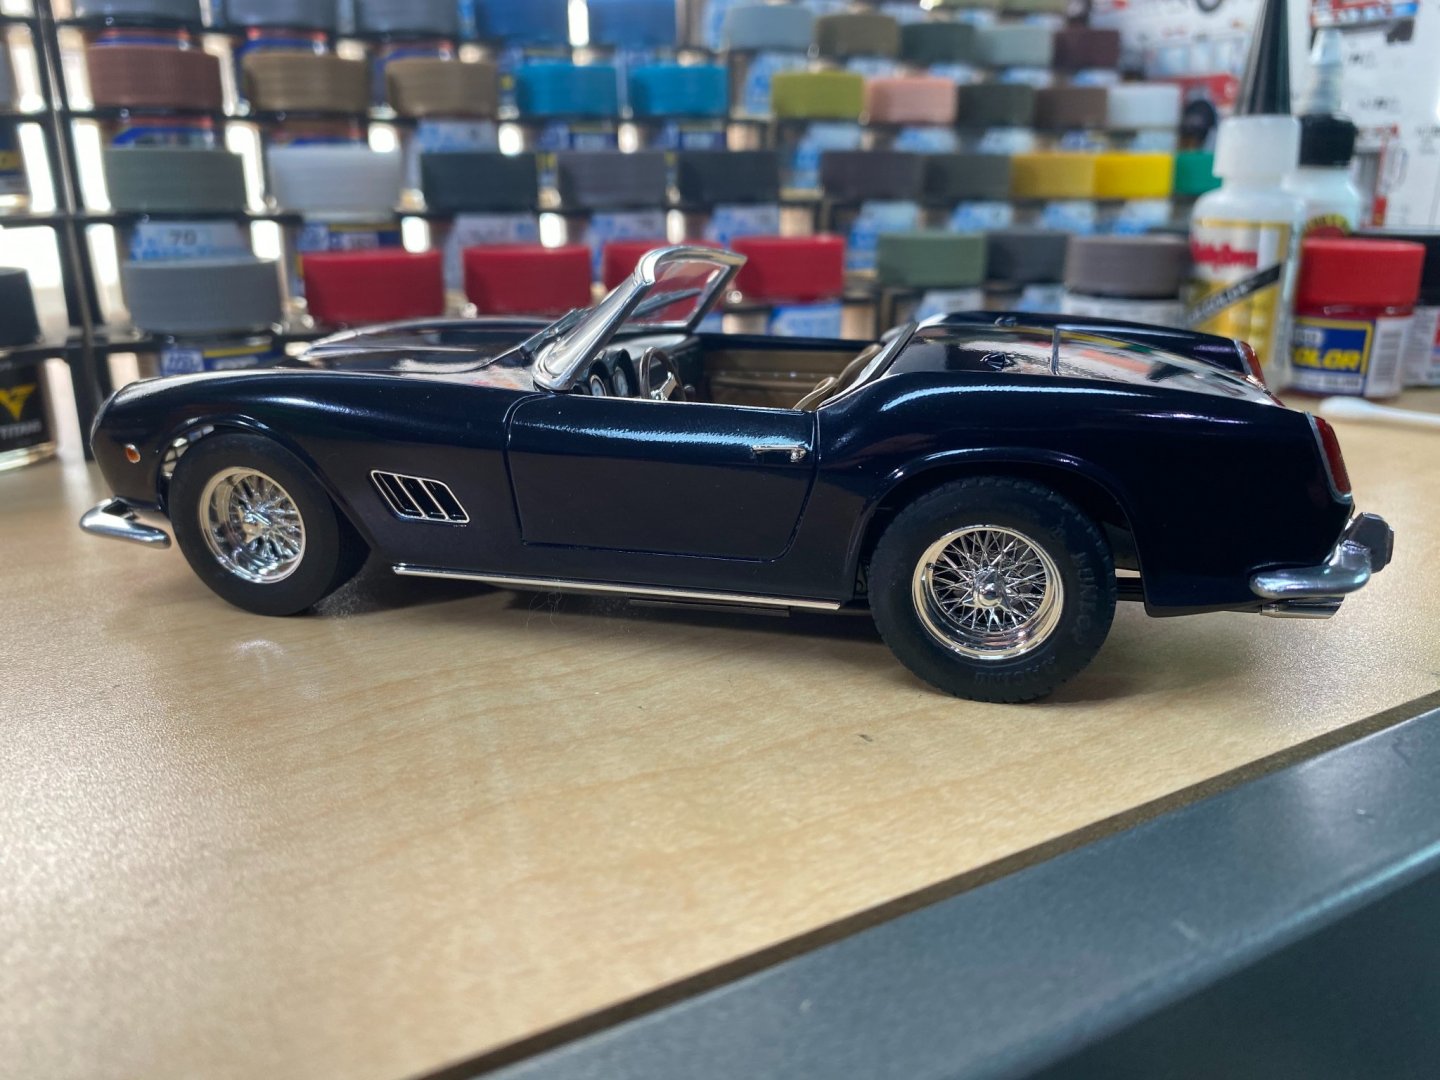
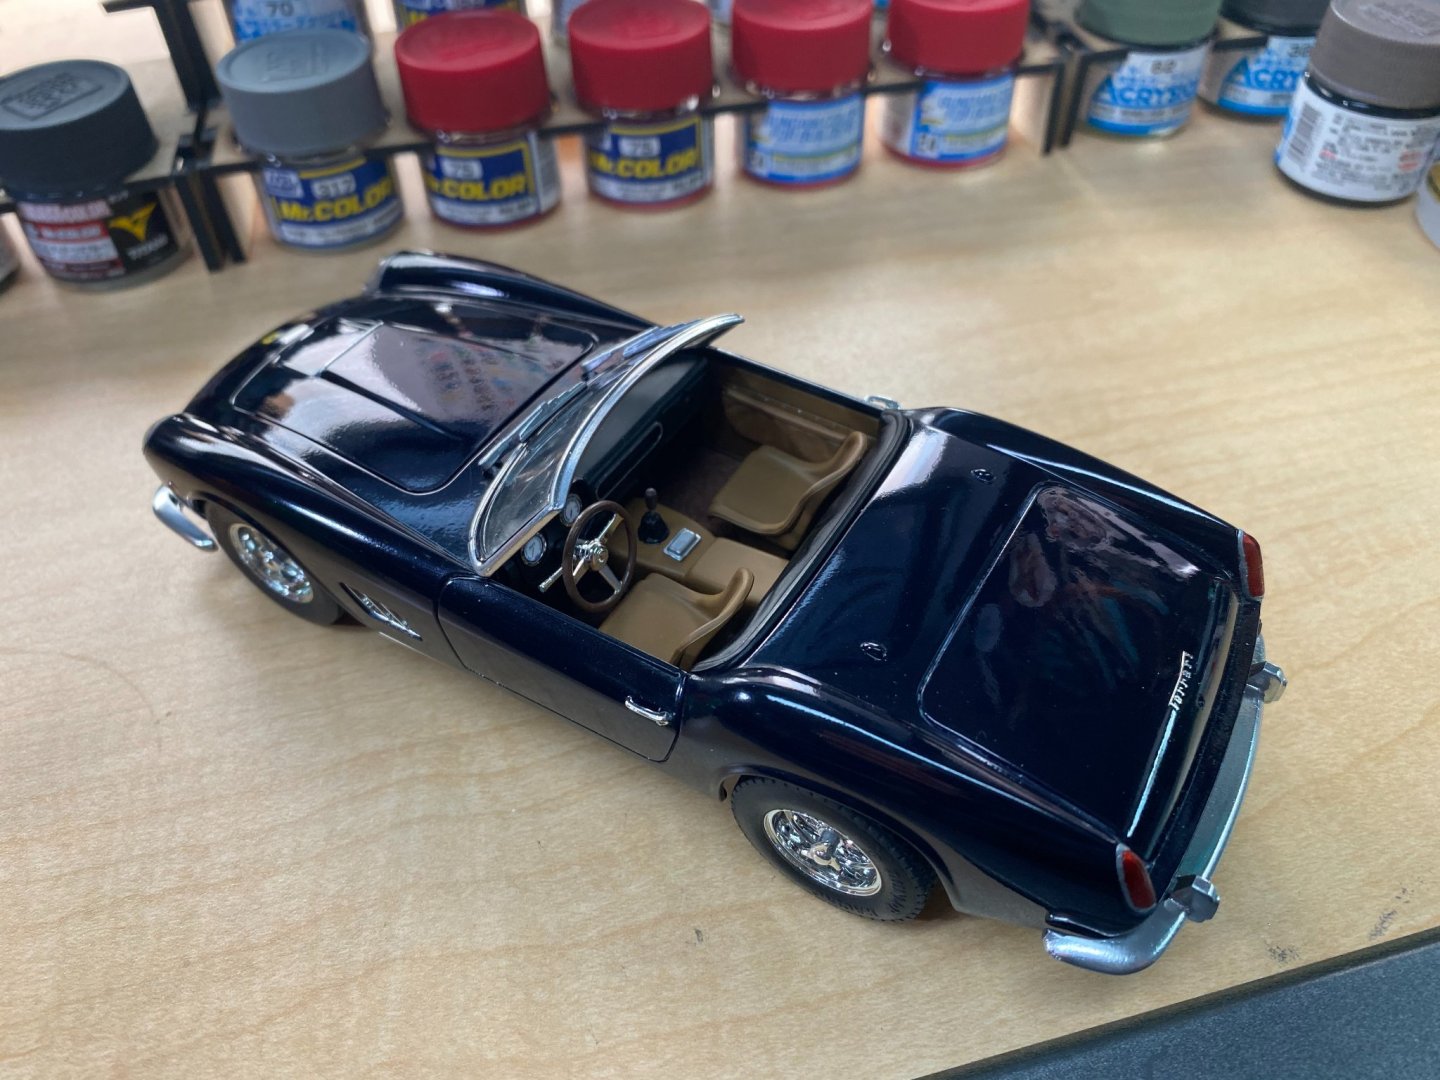
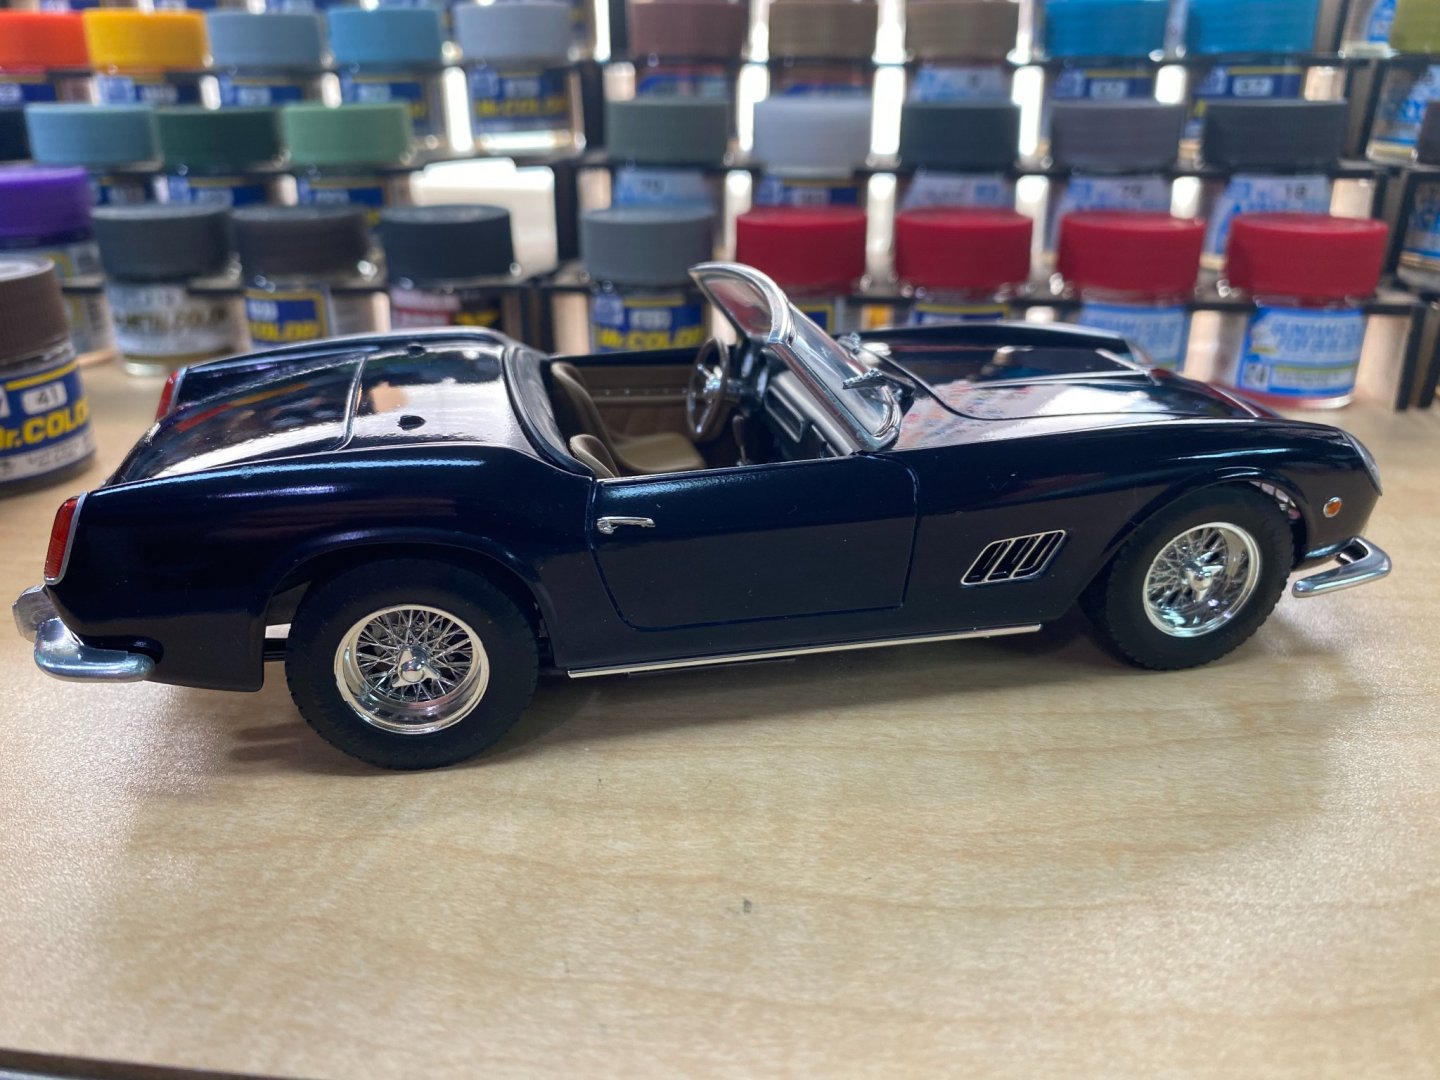
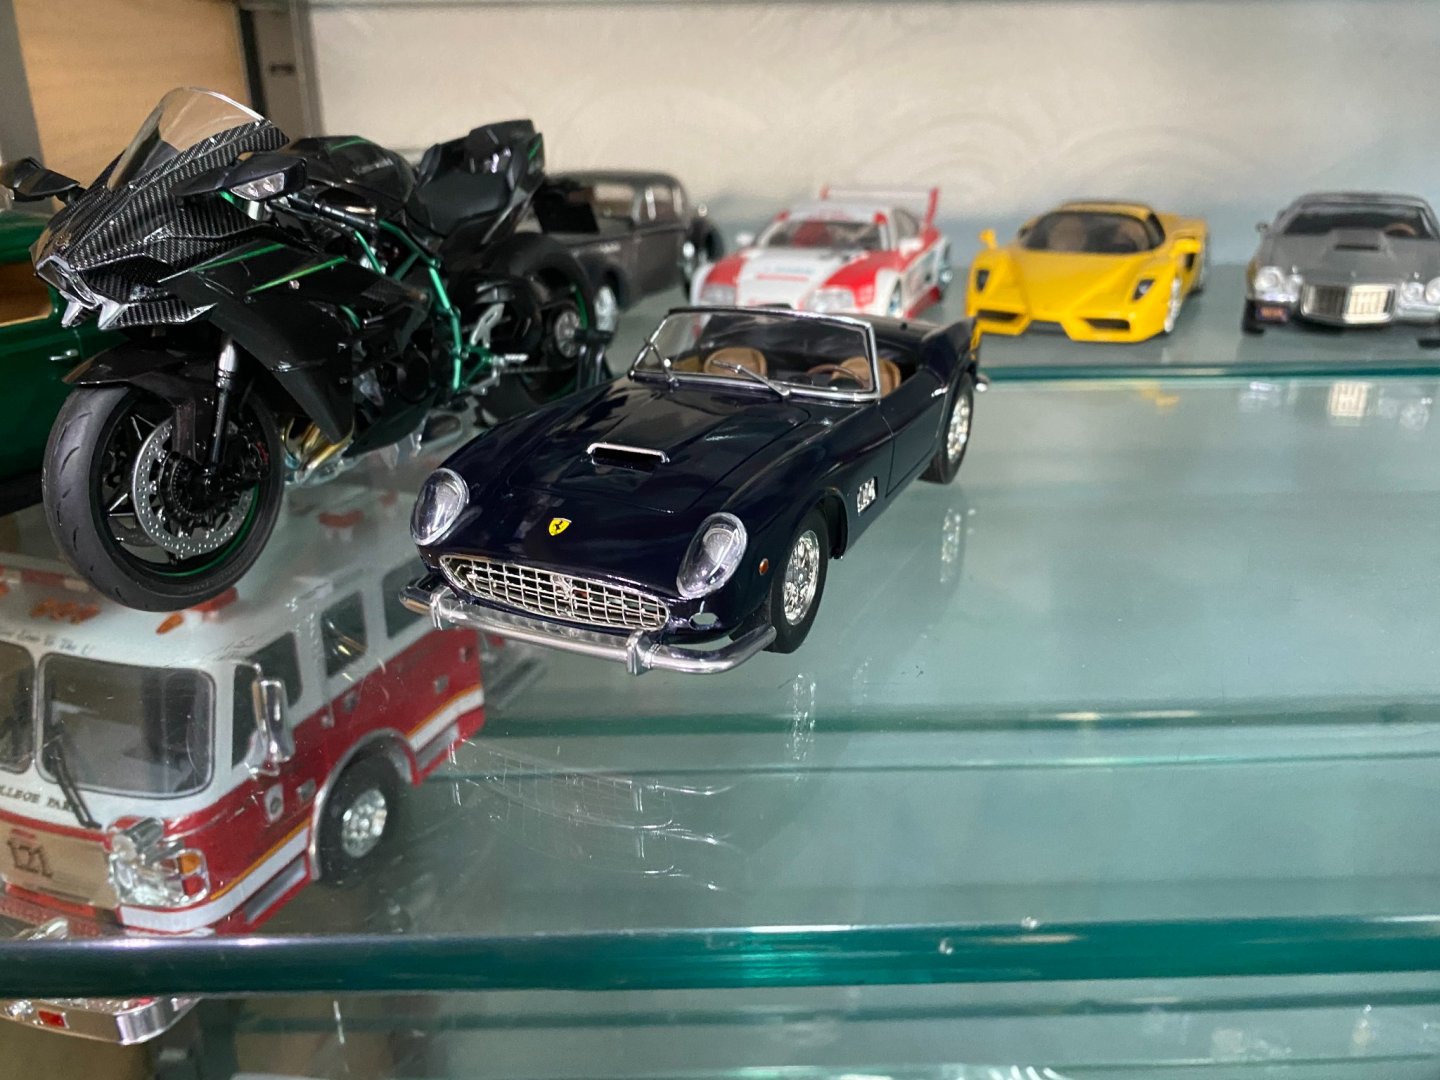
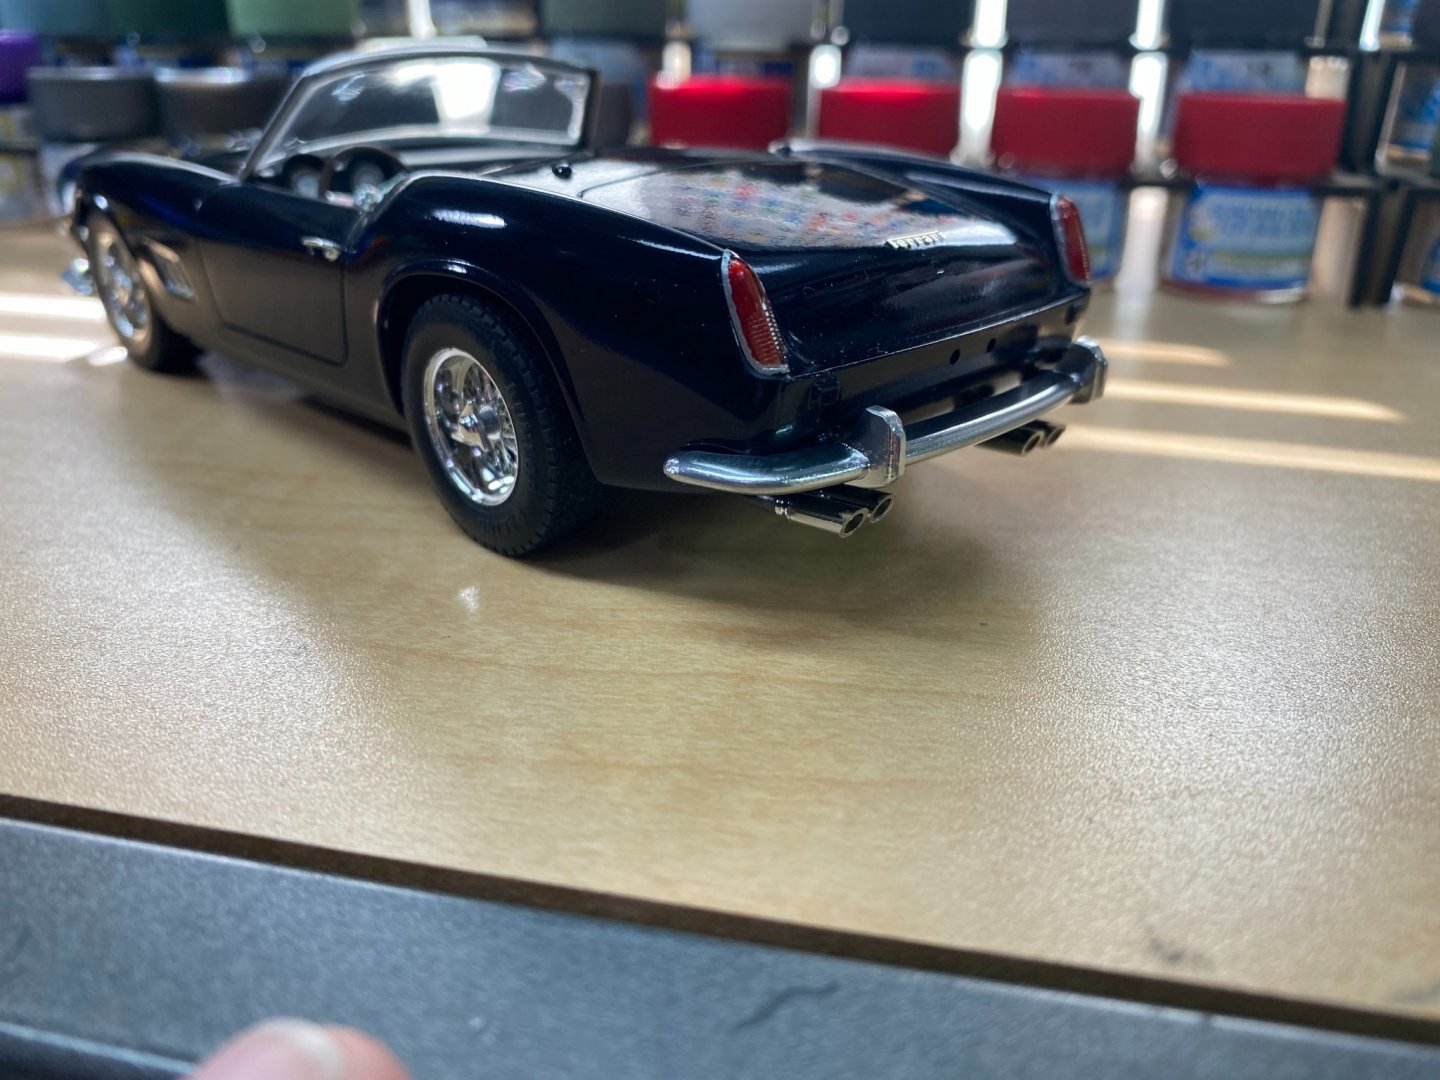
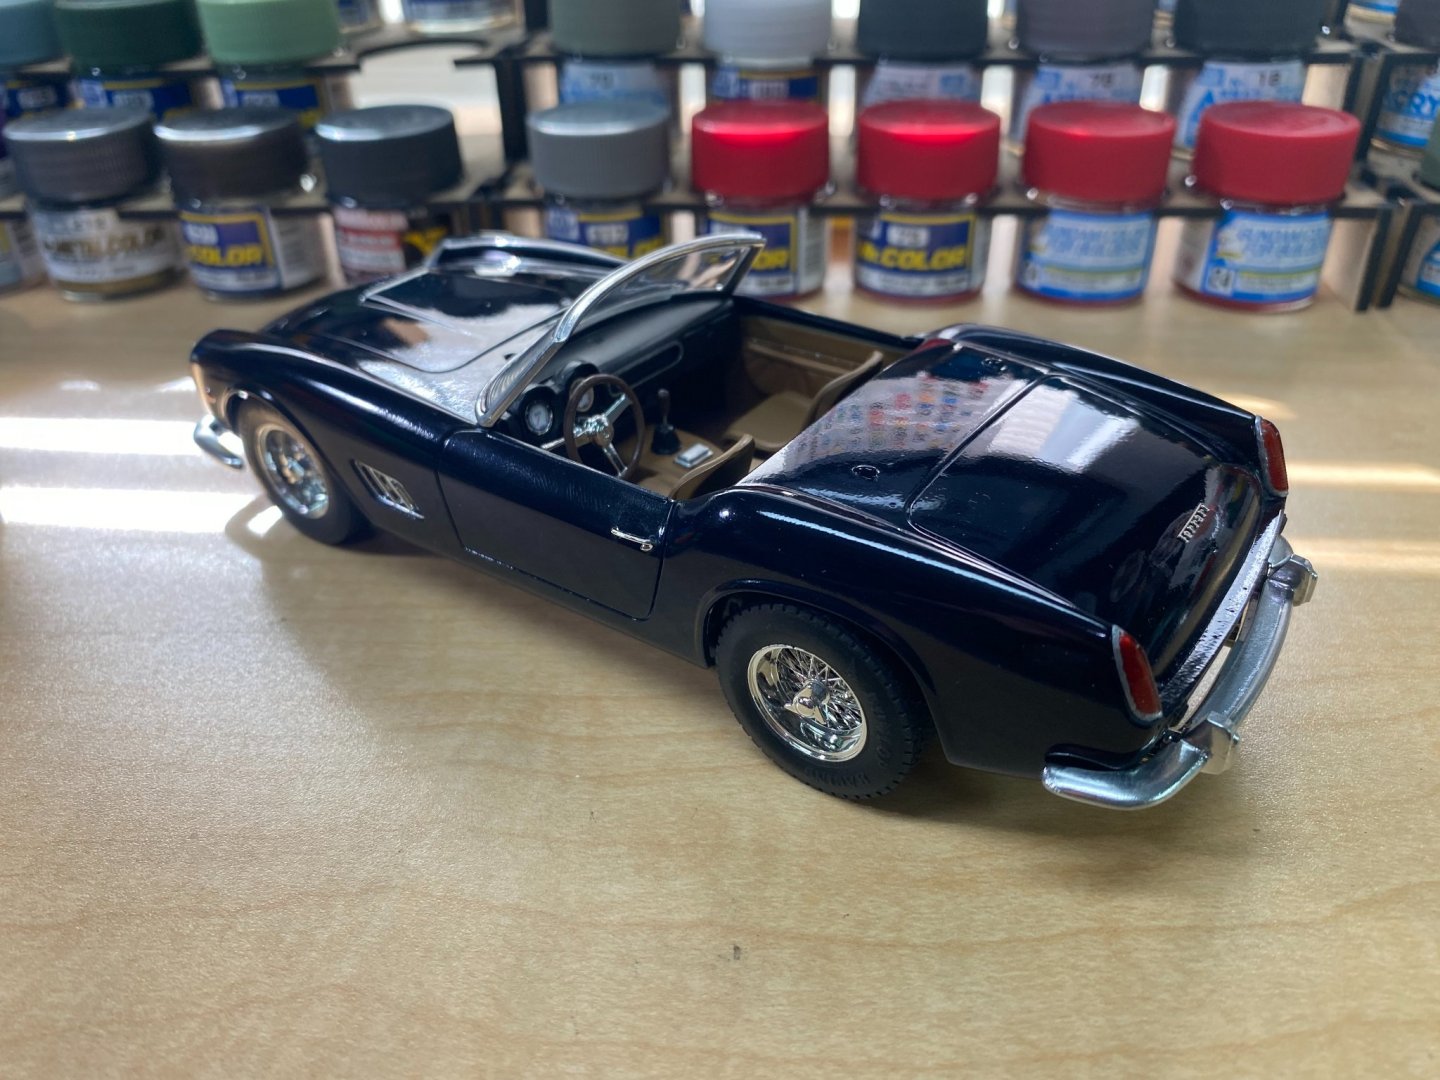
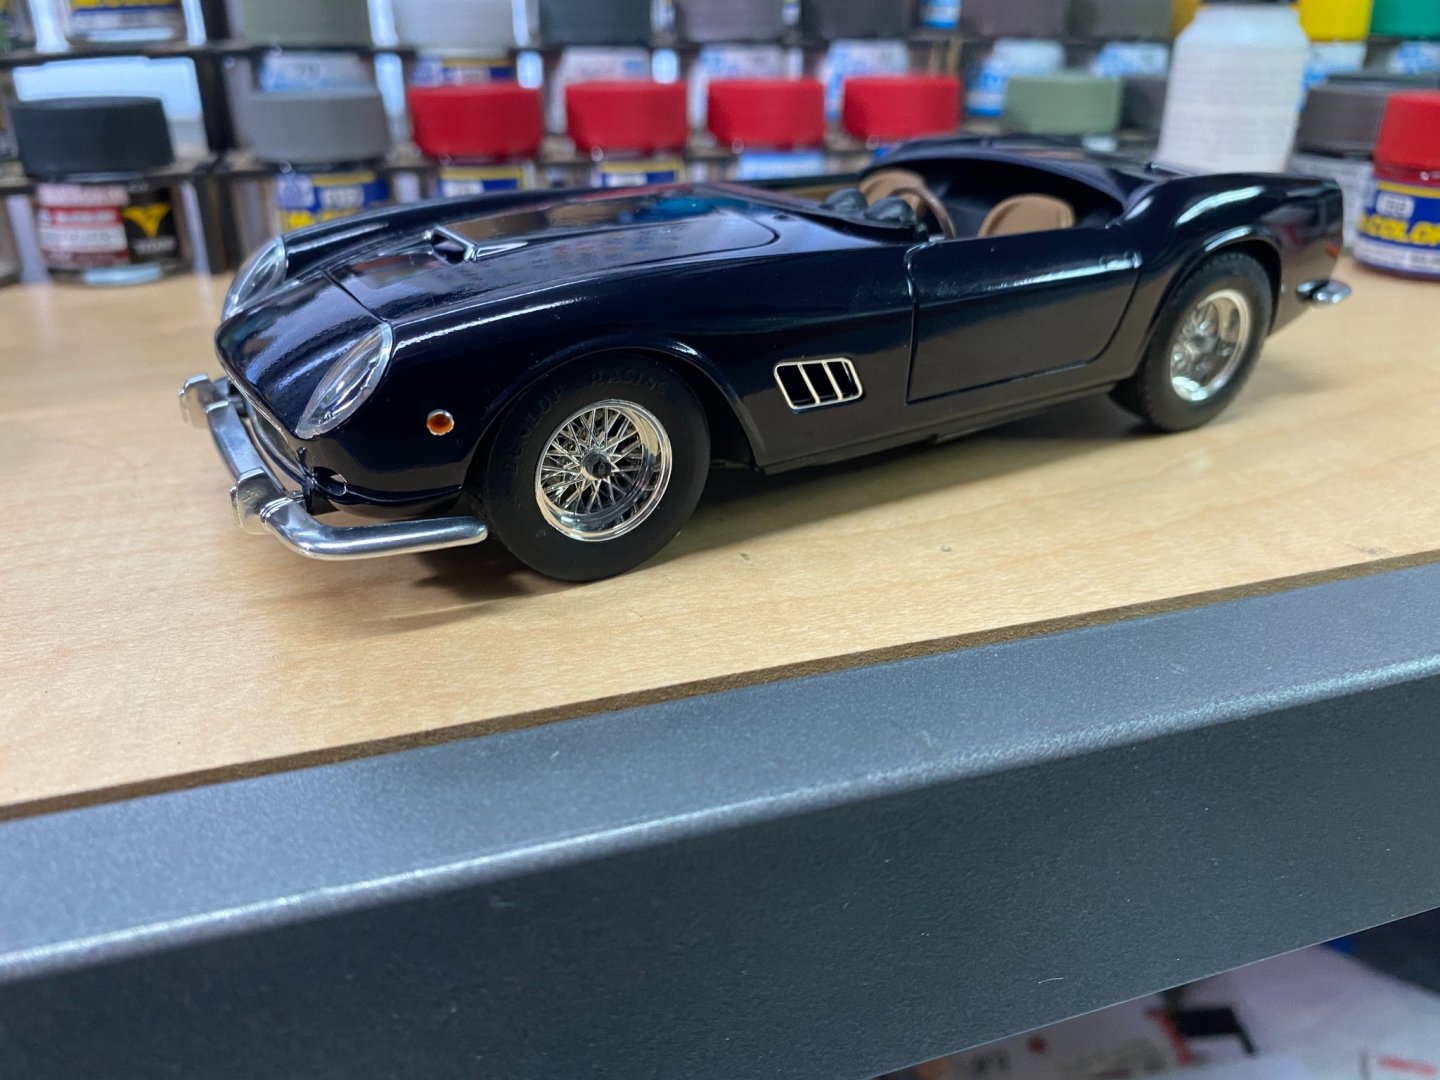
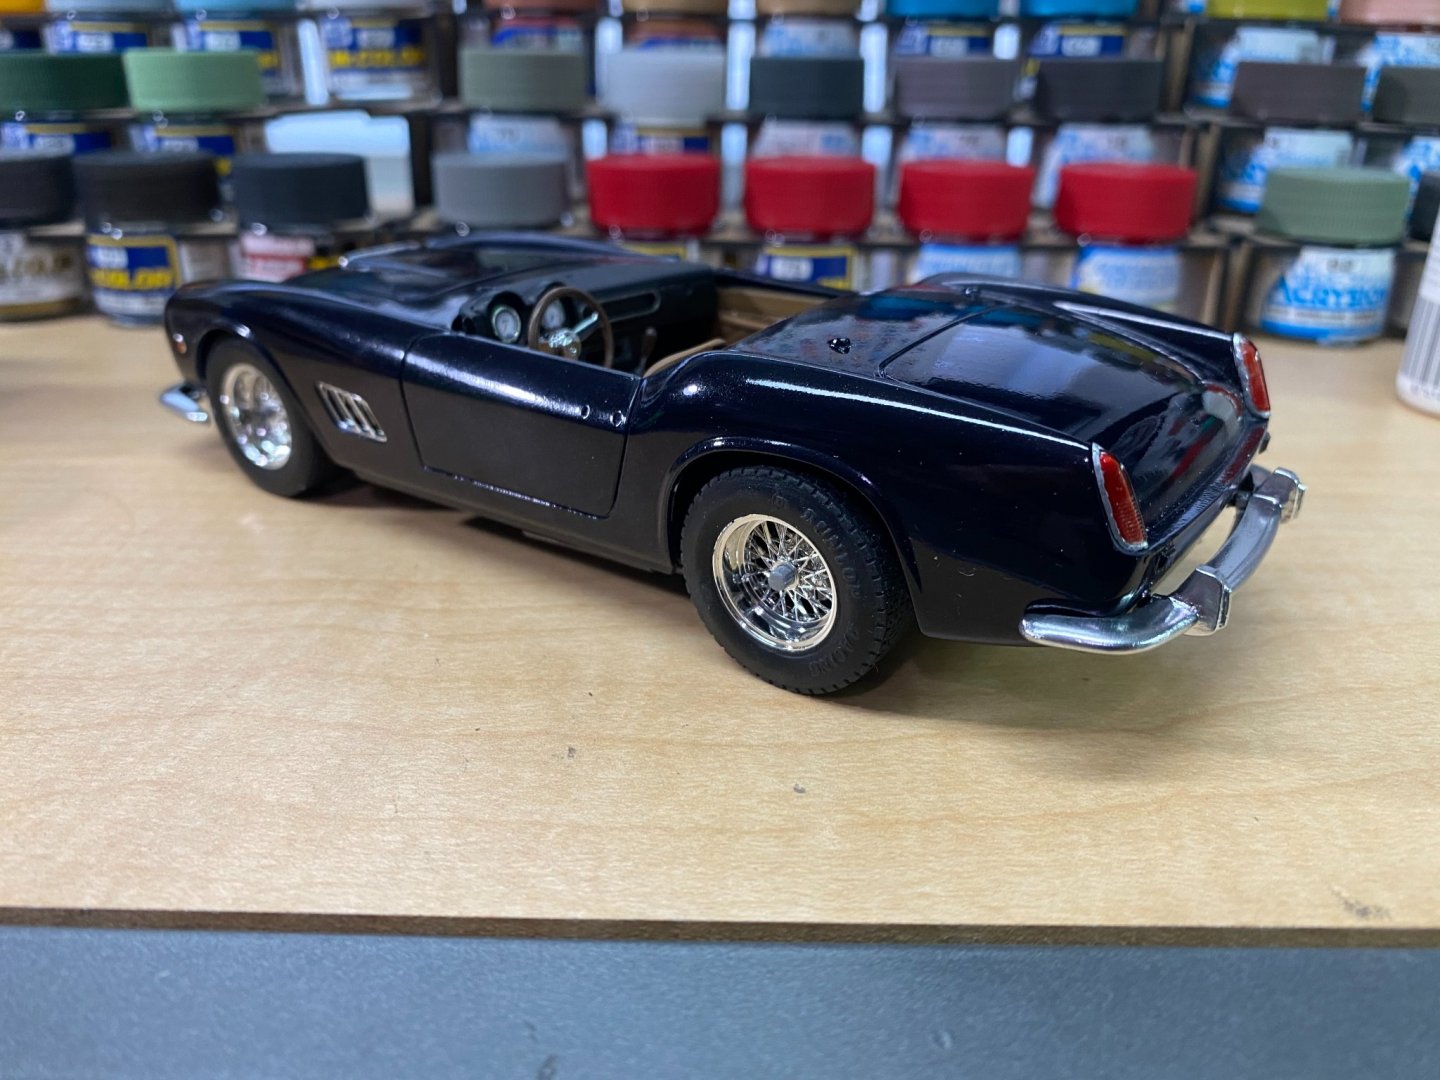
This one is all over, it's one for the books. She now rests in the cabinet with the rest of the stallions. Finished.


- 140 replies
-
- 12
-
-

-
Maybe I will finish this thing today...or tomorrow. Almost there now.


-
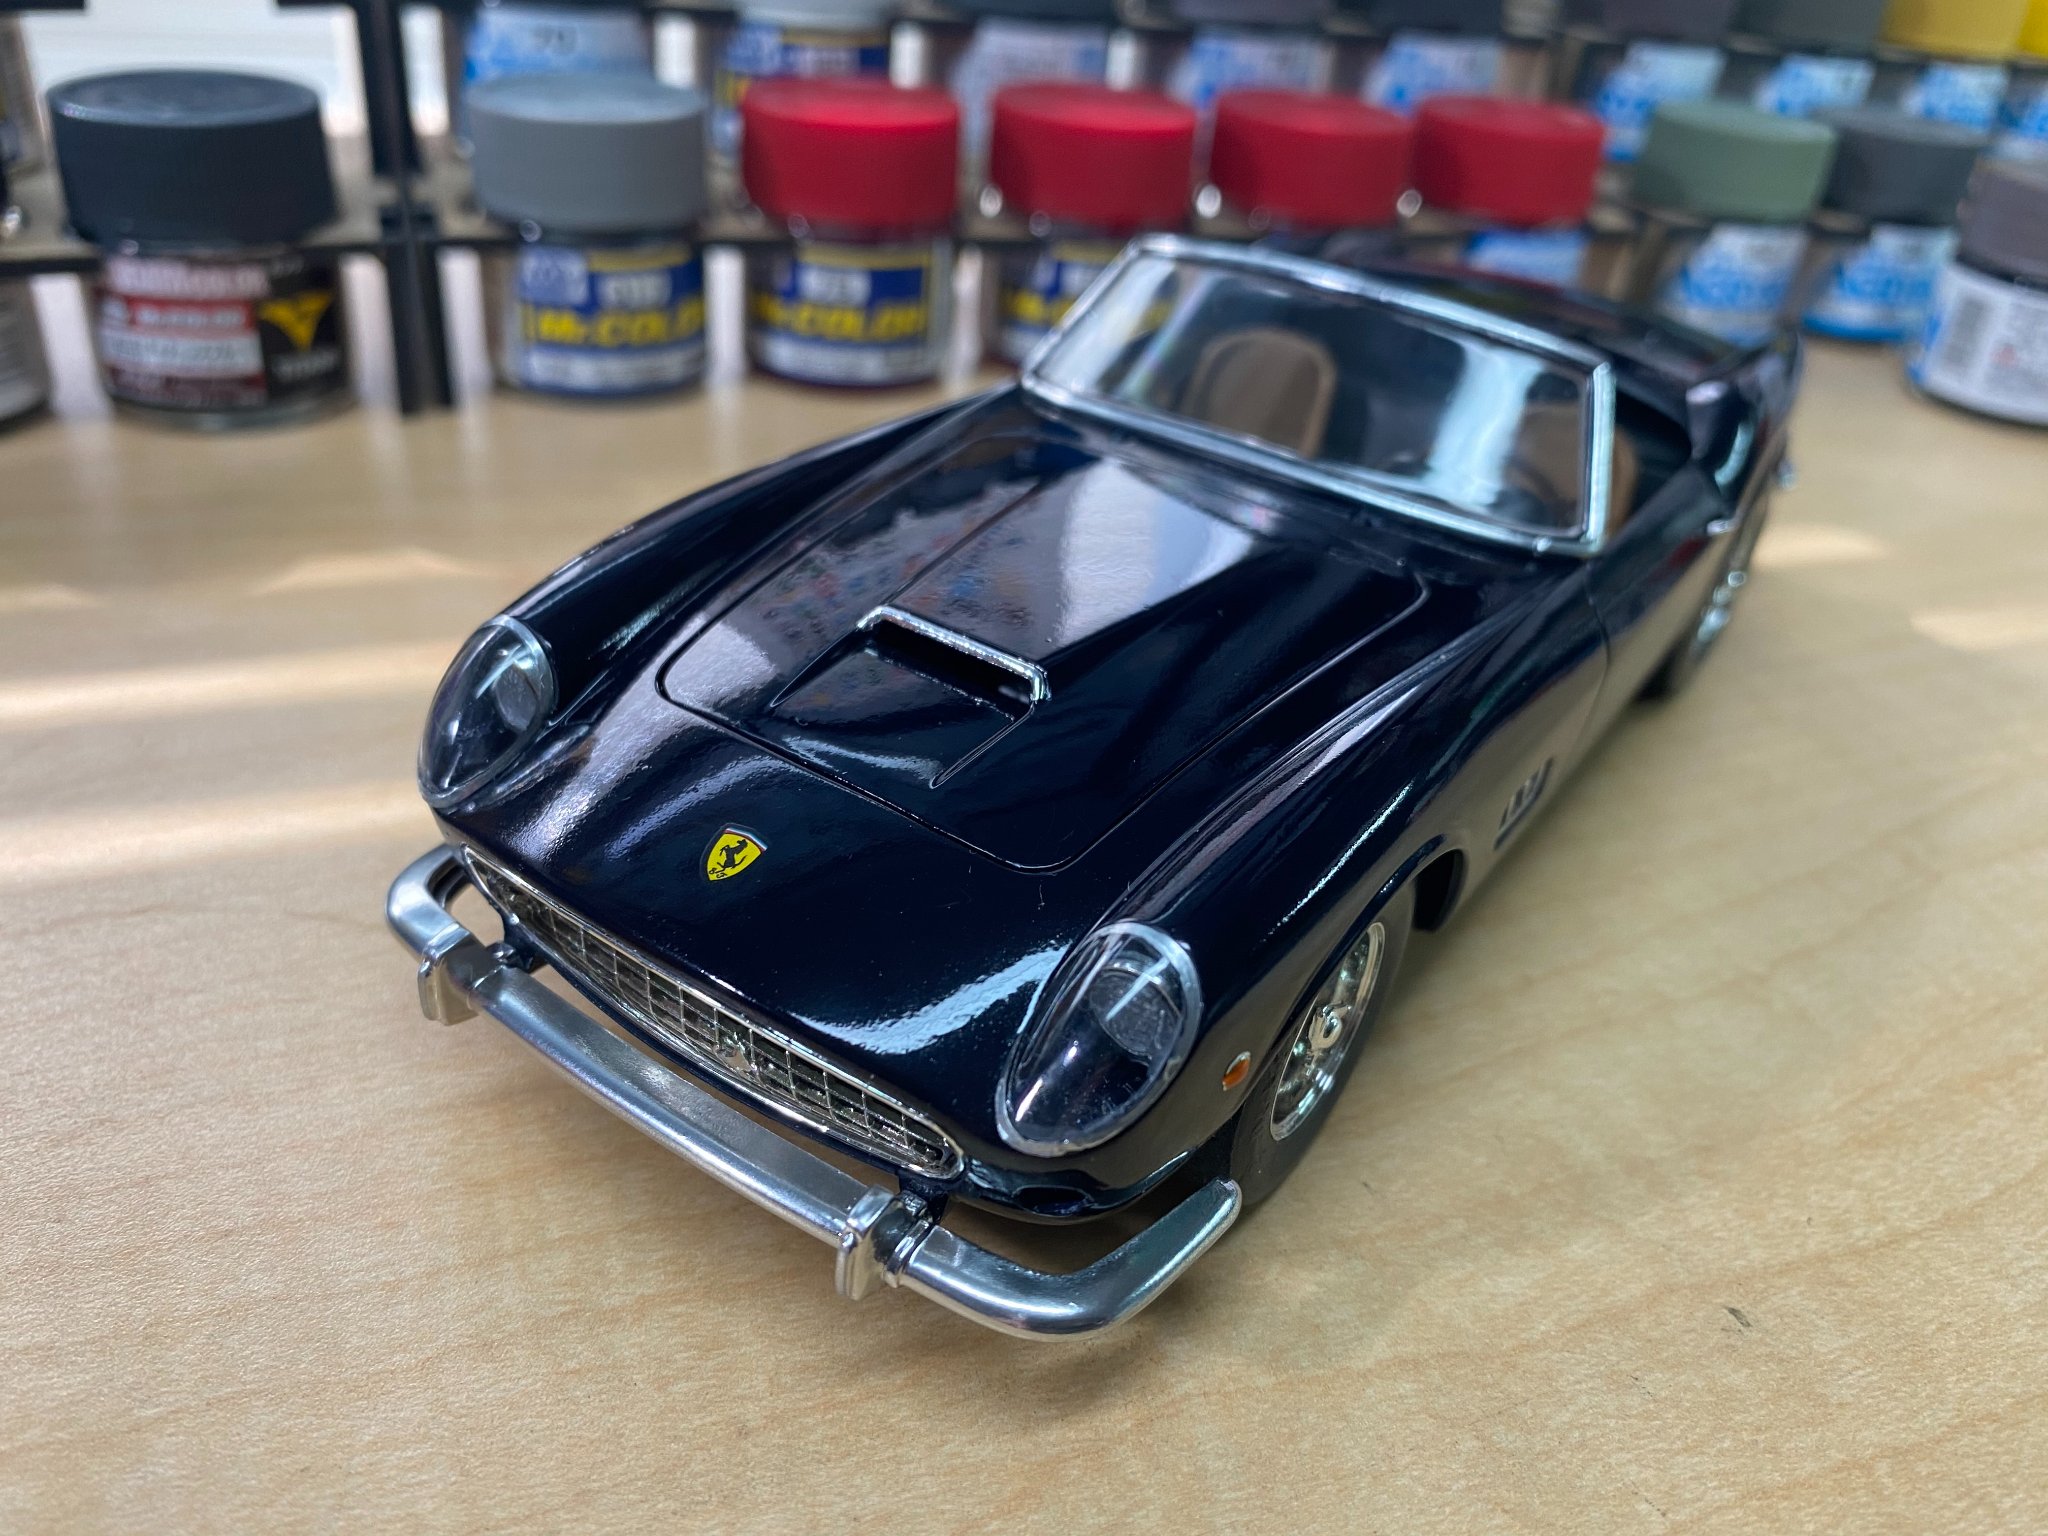
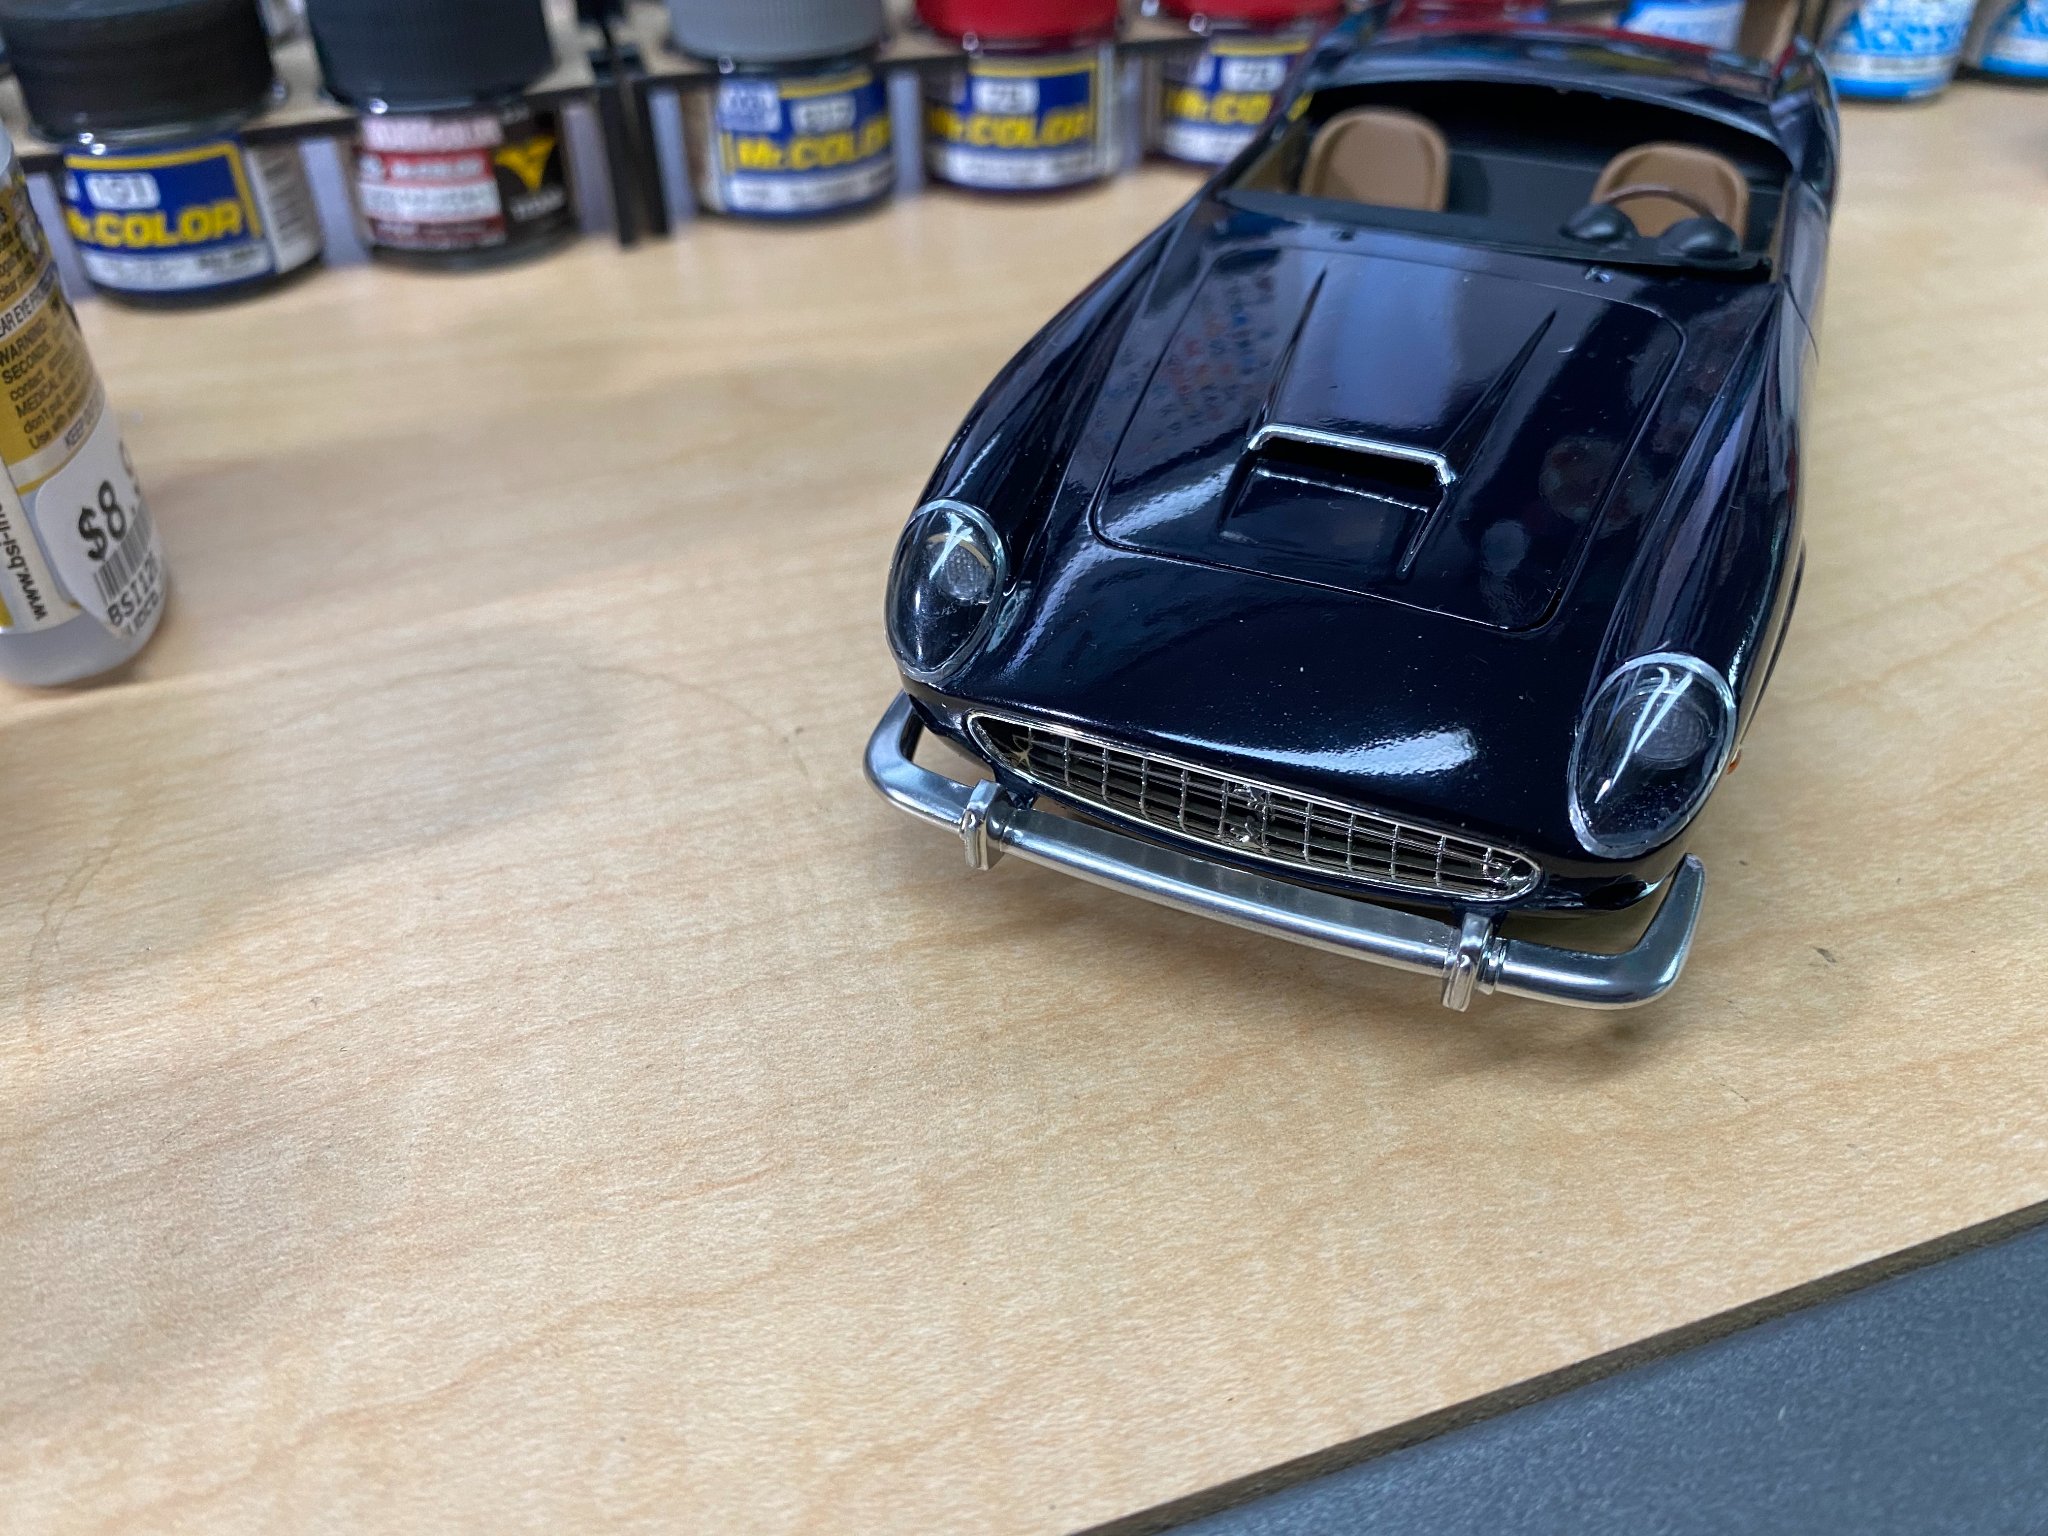
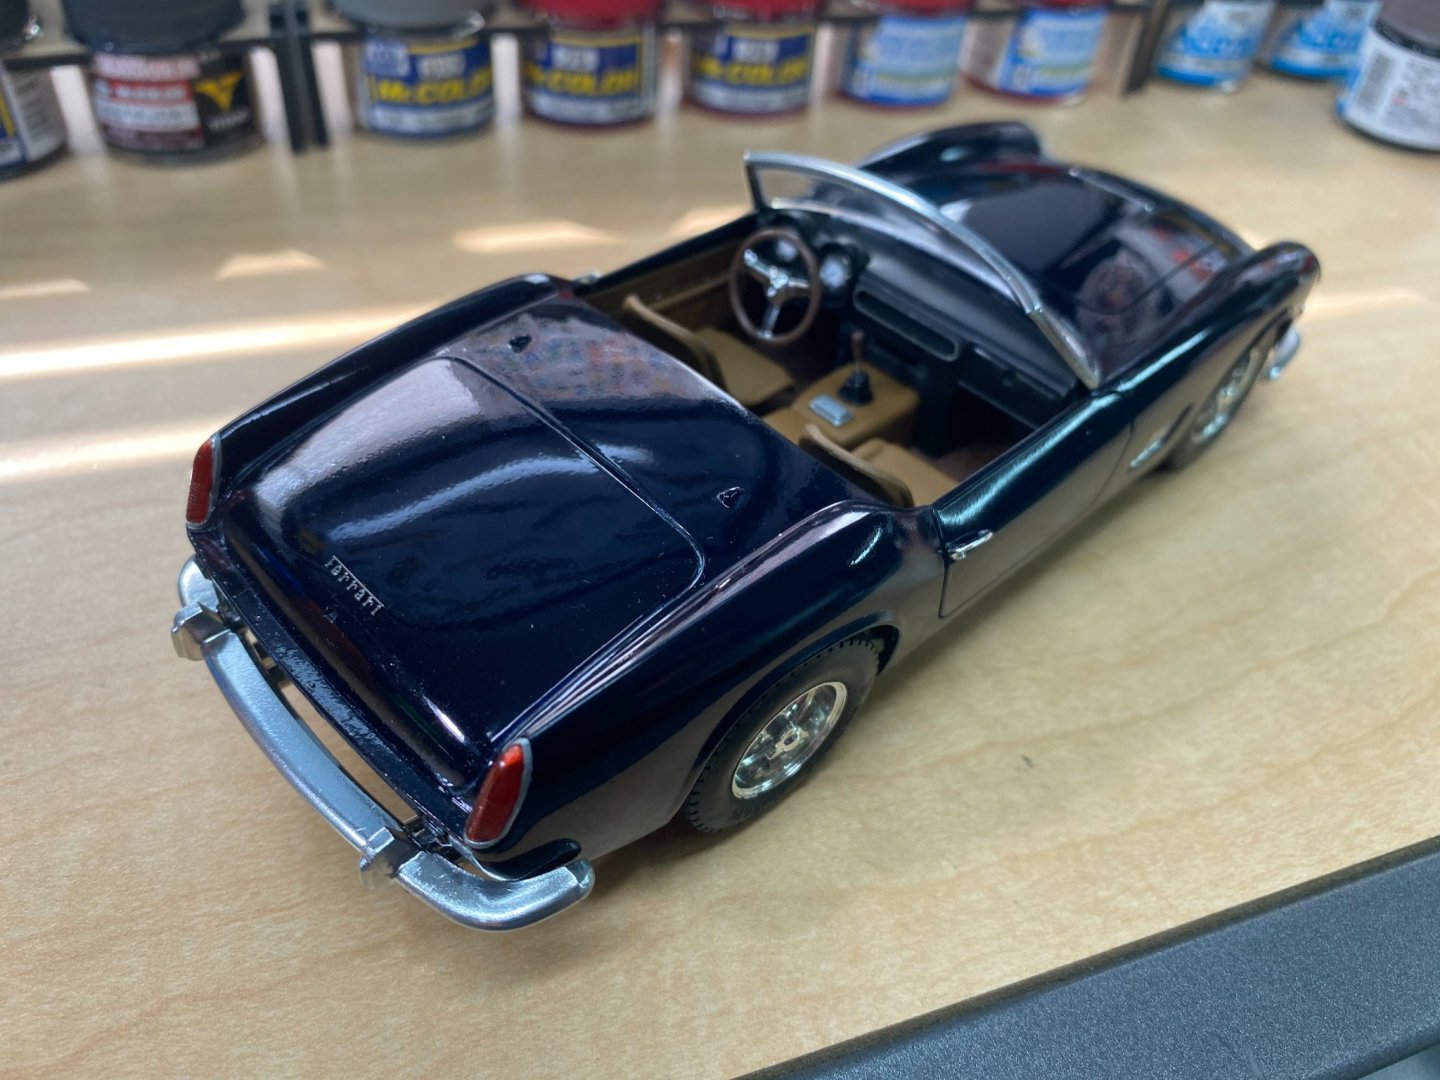
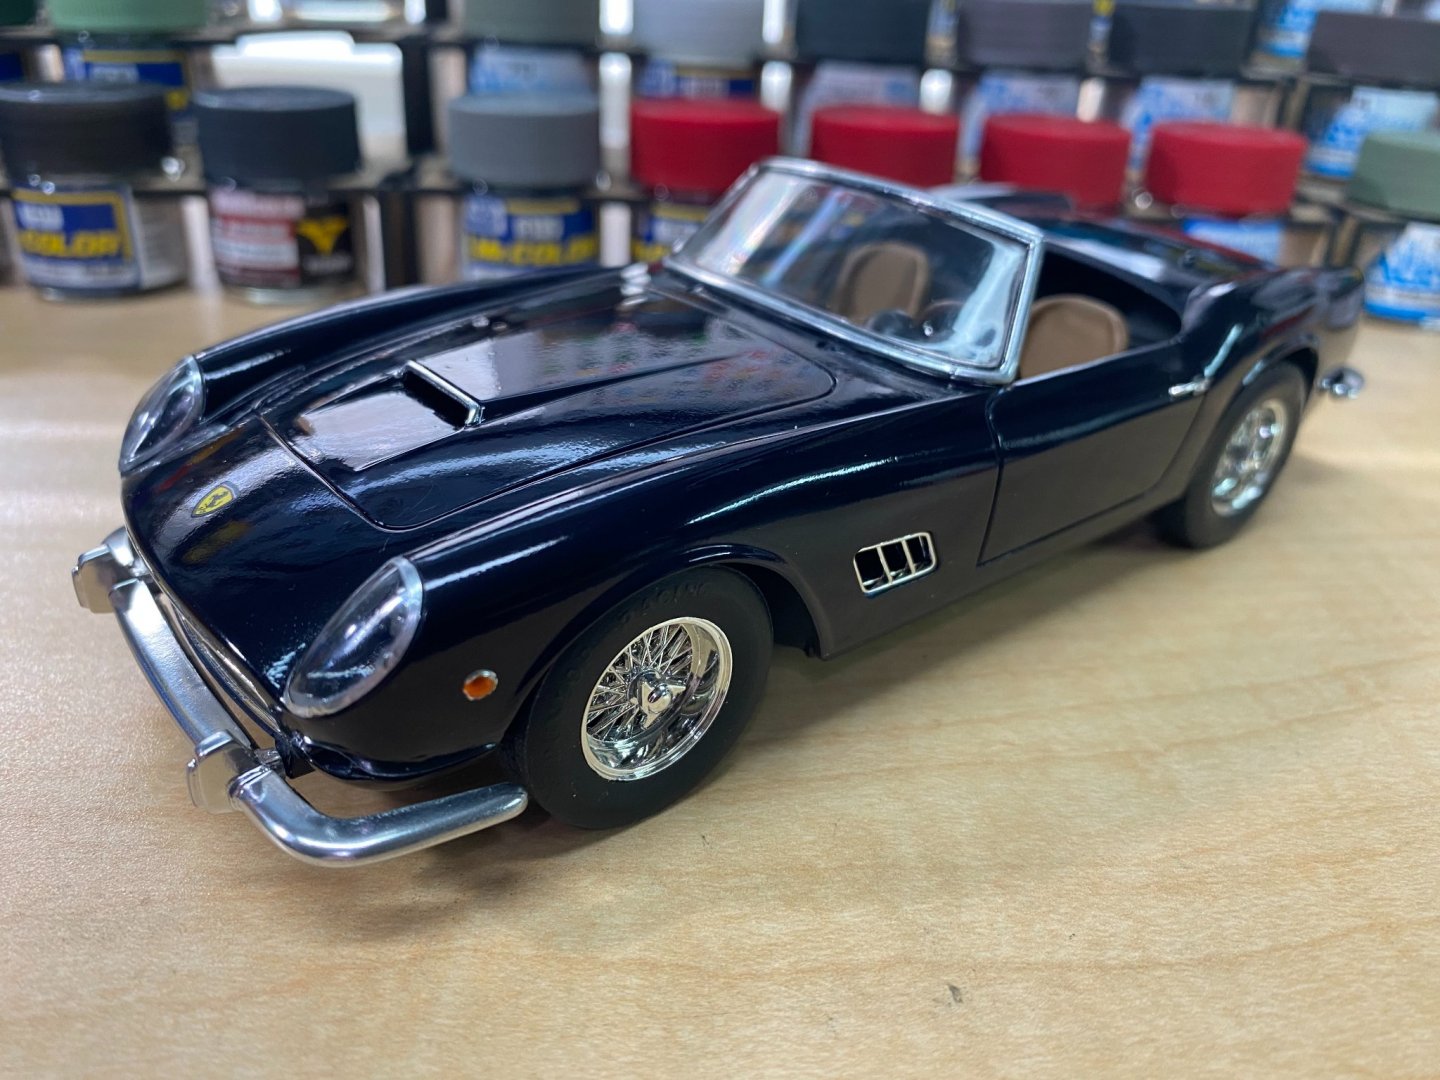
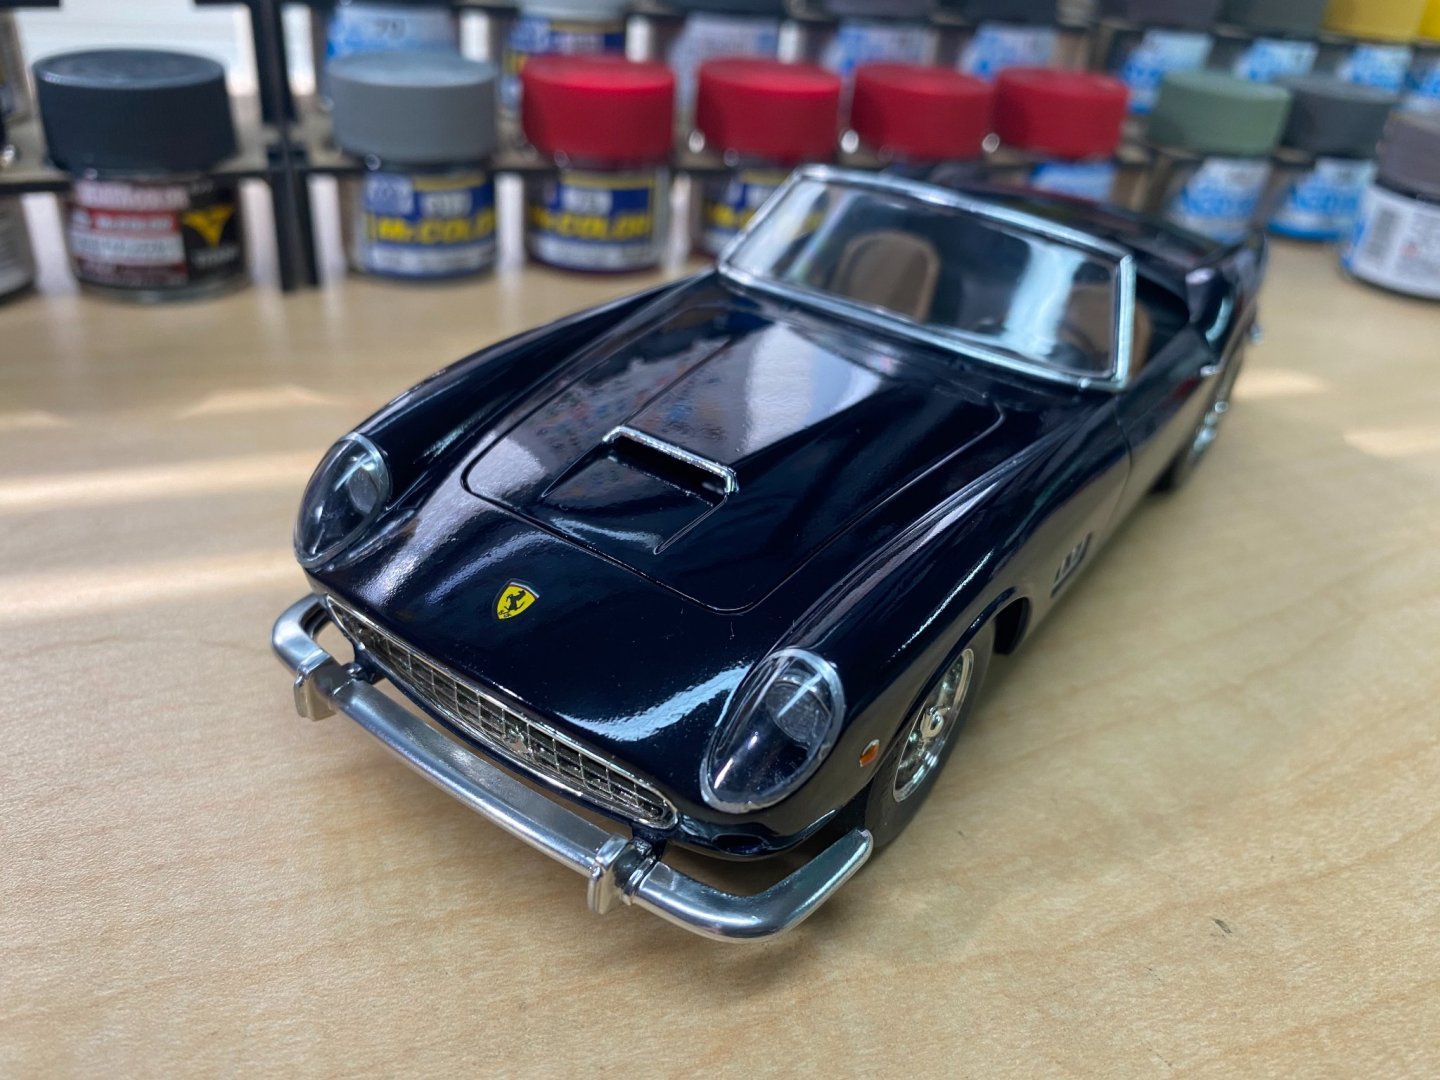
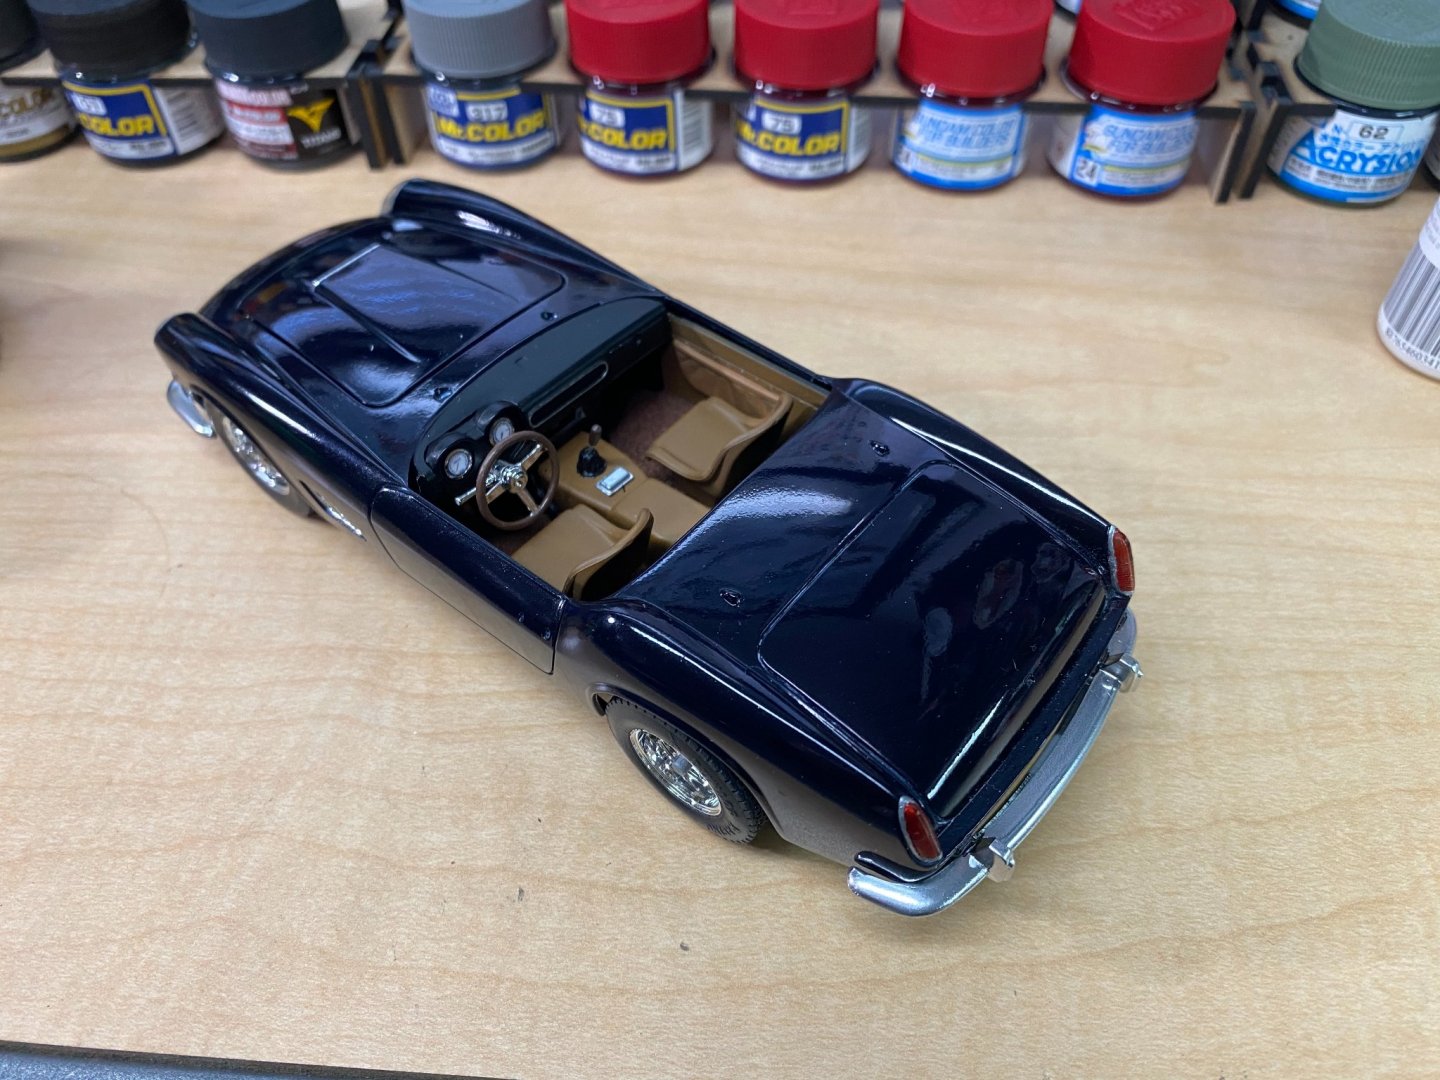
Overnight was sufficient for the Molotow ink to thoroughly dry, so I installed the bumpers. They look pretty decent I think and much much better than the sink-mark-ridden chrome plated bumpers that came inside the kit. PS: Molotow ink applied from the actual pen will not dry overnight. It's only because I applied it in very light coats using an airbrush. Molotow ink is very very slow to dry from the pen. Days, maybe even weeks.

- 140 replies
-
- 11
-
-
I don't know of even one model railroad shop in Tampa now. Not one. 😟