CDW
-
Posts
7,760 -
Joined
-
Last visited
Content Type
Profiles
Forums
Gallery
Events
Everything posted by CDW
-
 Ken, I was thinking about your model railroading hobby today when I visited the south side of town today with my wife. We used to own a house over on that side way back 40 years ago and there used to be a landmark model railroad shop just a couple of blocks from our old house known as Chester Holley's model railroad shop. He had everything you could imagine in that shop with a full line of Marklin and Lionel trains. Wasn't too far from MacDill AFB. Old fella passed away and I guess no one from his family was prepared to keep the business going. A shame, a wonderful thing of the past now gone.
 -
I bought 2 big refill bottles of Molotow chrome ink (I know that's not the proper term, or is it?) that should have been delivered today, but they stalled in the main post office here in Tampa instead of going out for delivery. I got impatient and took a pen apart to rob the ink. I can relace it when my order gets delivered. It's a waste of $$ to open a pen just to use the ink. A refill is a lot more economical, but still not cheap.
-
Thanks for that Ken. I'll try that out with gloss gray as a base. I never had good results with Alclad using a gloss black base. Maybe that's why?
-
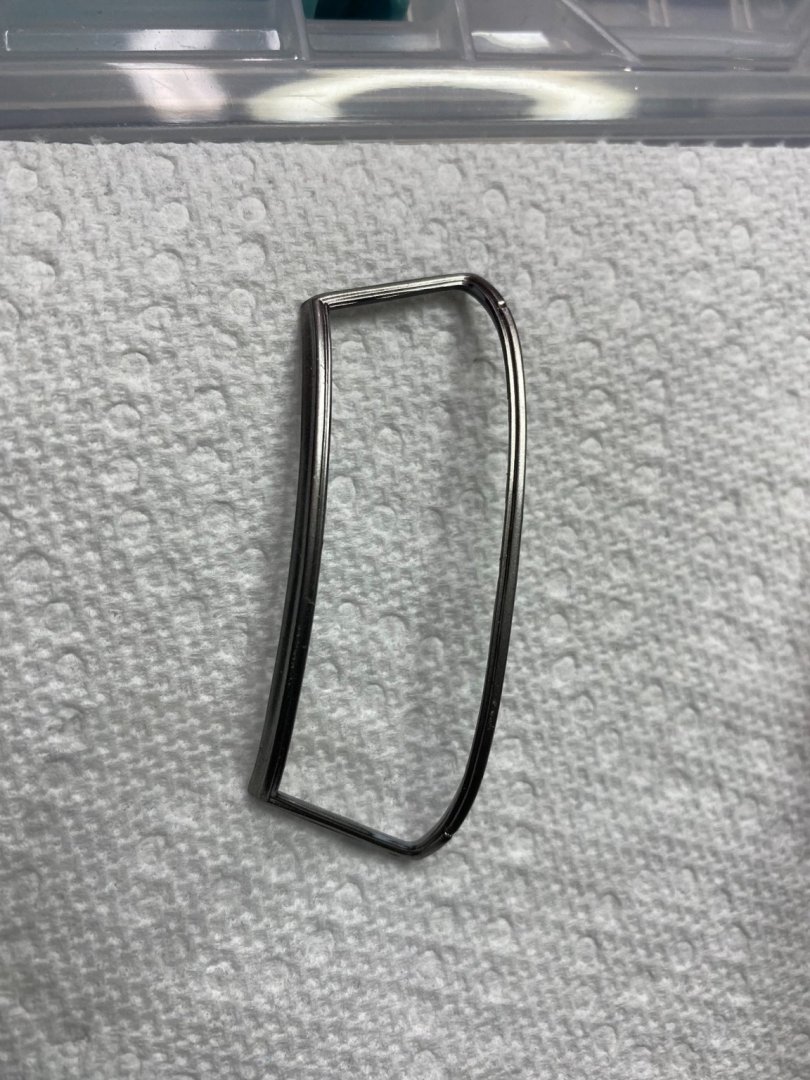
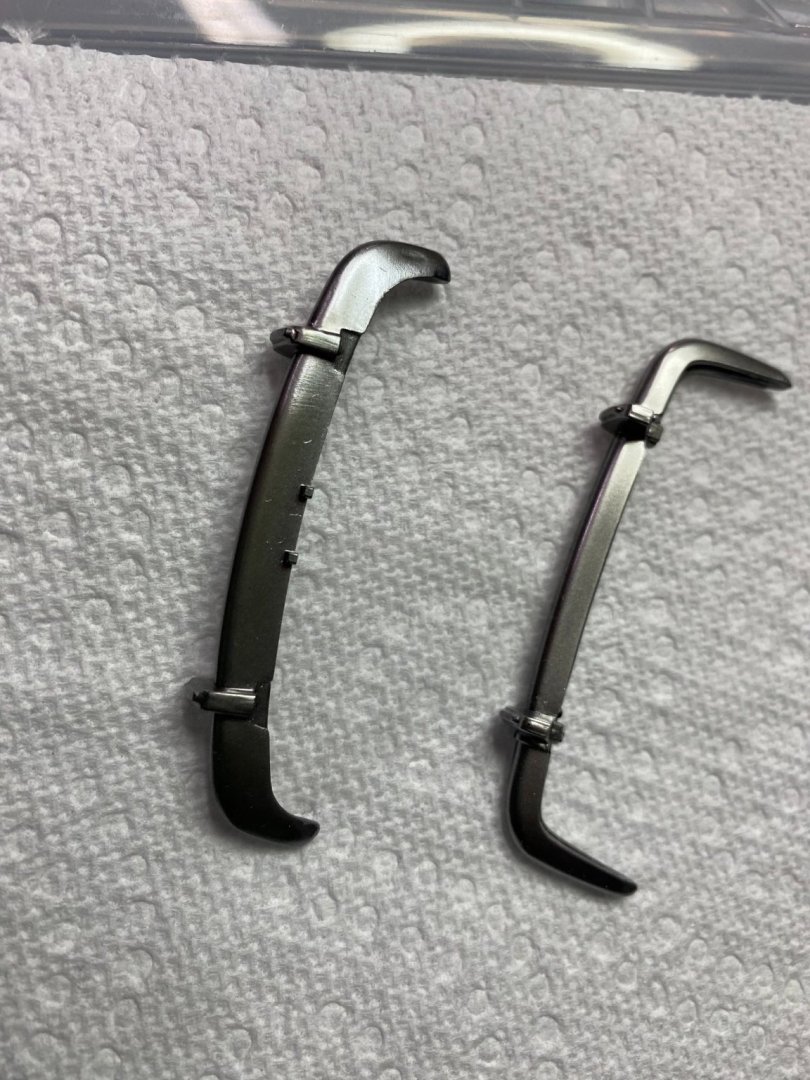
The kit bumpers had huge sink marks in both of them. I had to strip the chrome and fill the sink marks with putty, sand them down, then repaint them with chrome. To keep it looking uniform with the bumpers, I stripped the chrome from the windshield frame as well. At first, I primed the stripped parts with Tamiya gloss black, then shot them with Alclad Chrome. I didn't like the way that came out. Looked too dark. I decided to take apart a Molotow chrome marker and use the ink from it in my airbrush. I reshot the bumpers and windshield frame with Molotow chrome and am happier with the outcome. Will give this a day to cure before I handle them. Molotow chrome ink is alcohol based and takes longer to cure than Alclad, a lacquer based paint.

-
Thanks. That's me on the left and my brothers on the right. I could not squeeze my other brother into the crop. It cut him off.
-
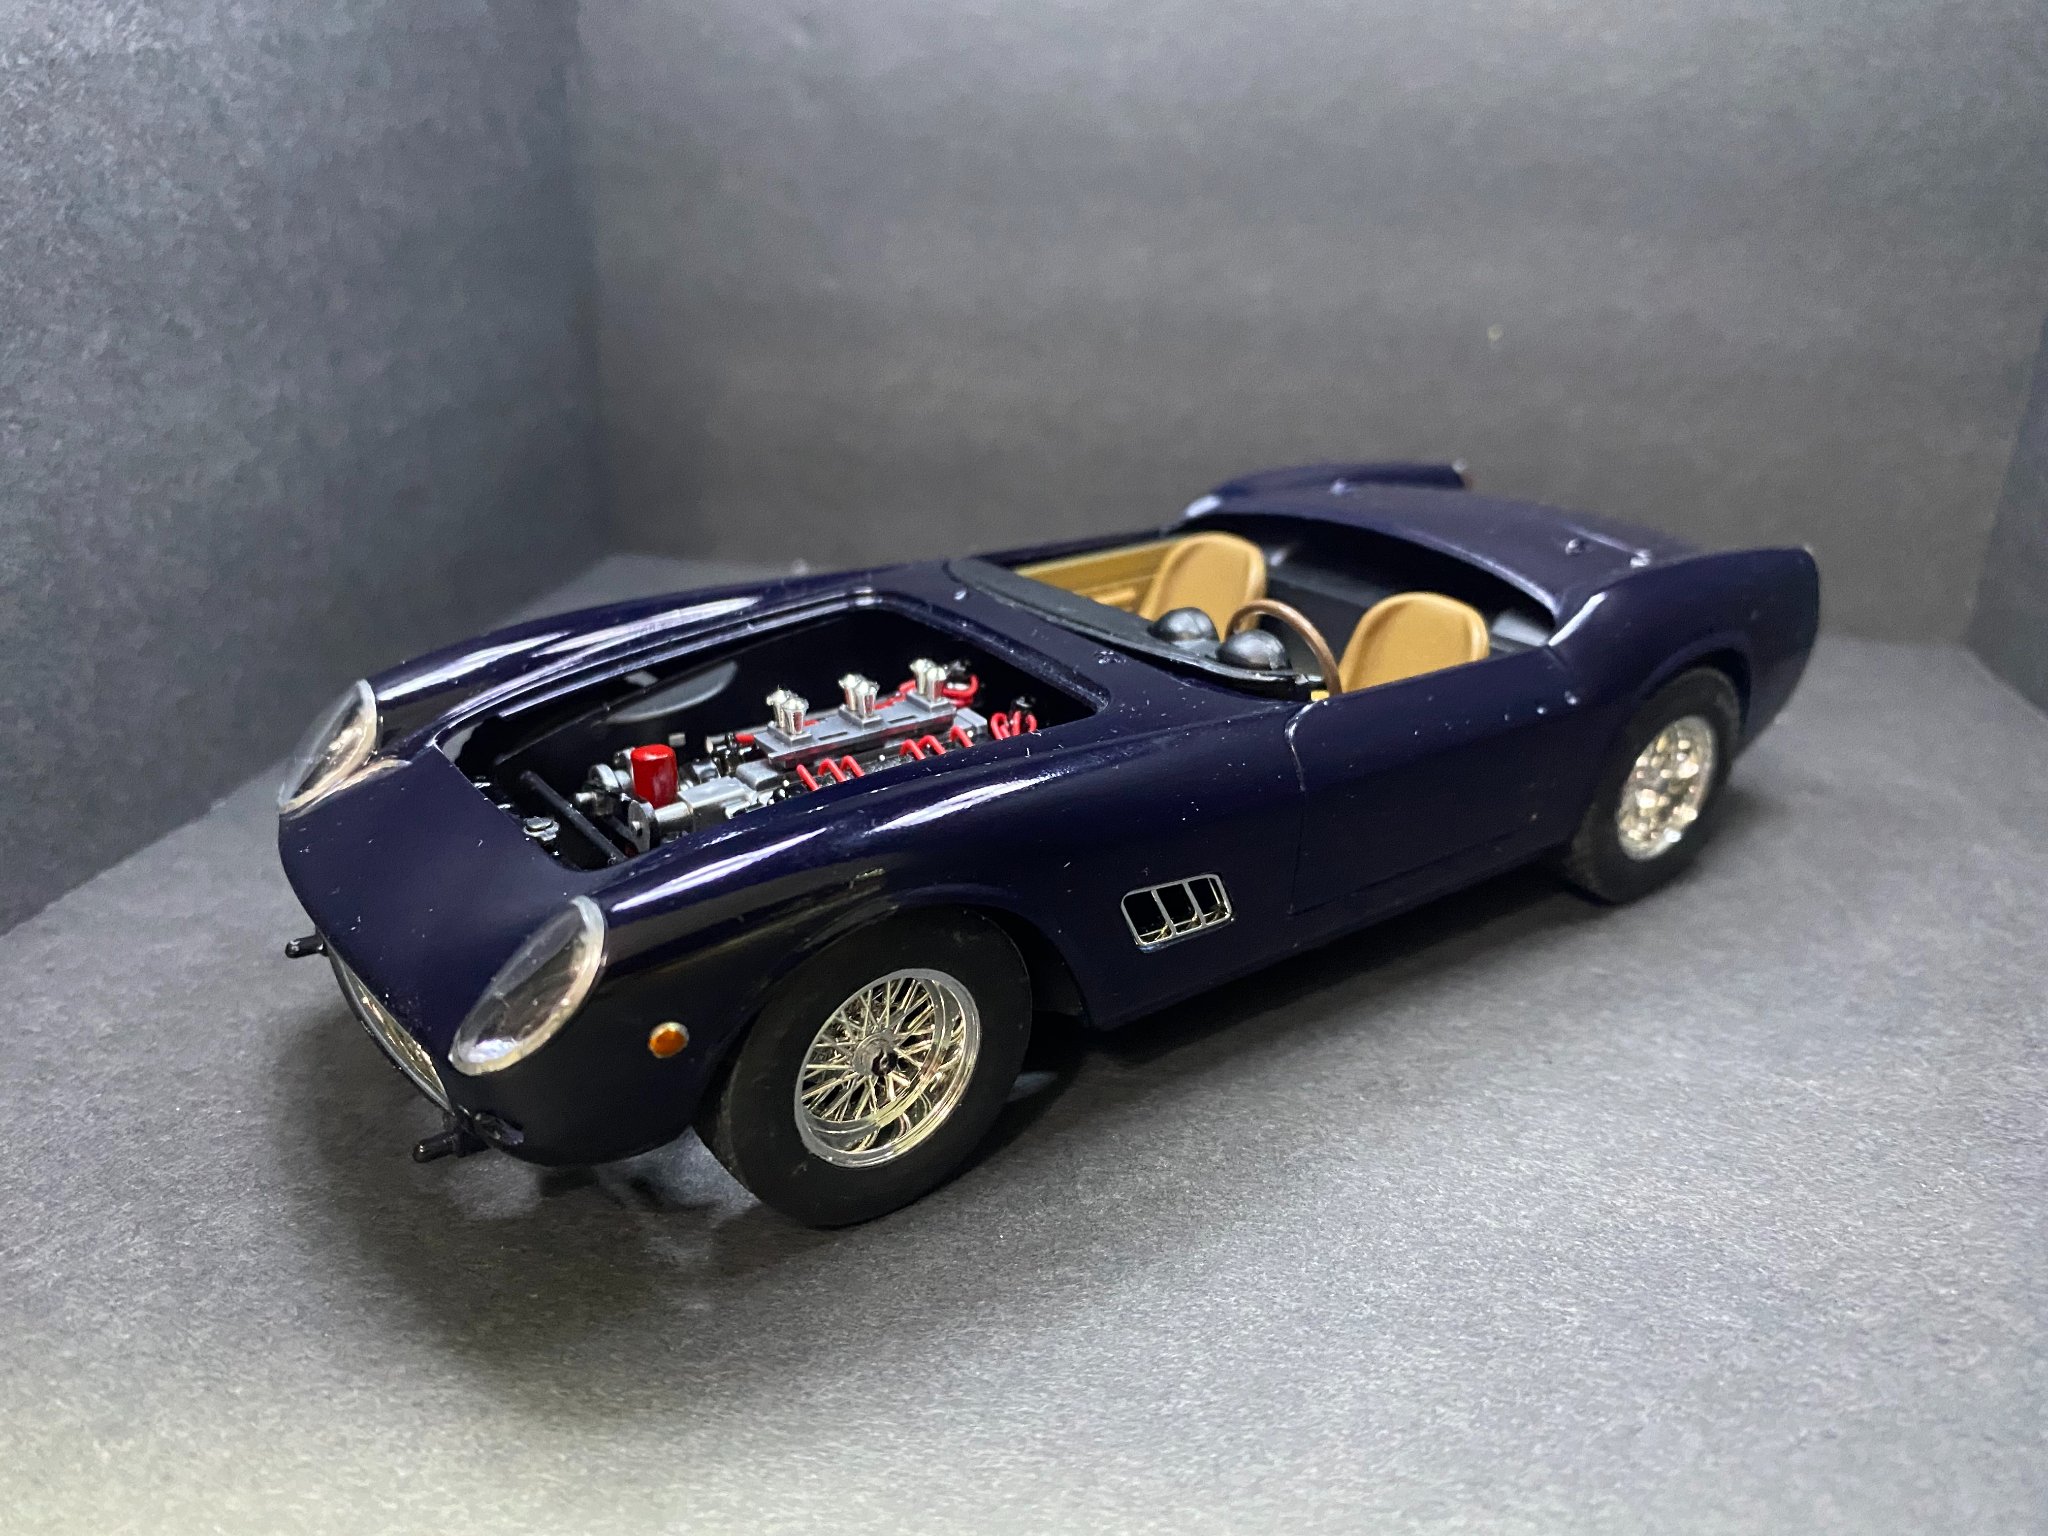
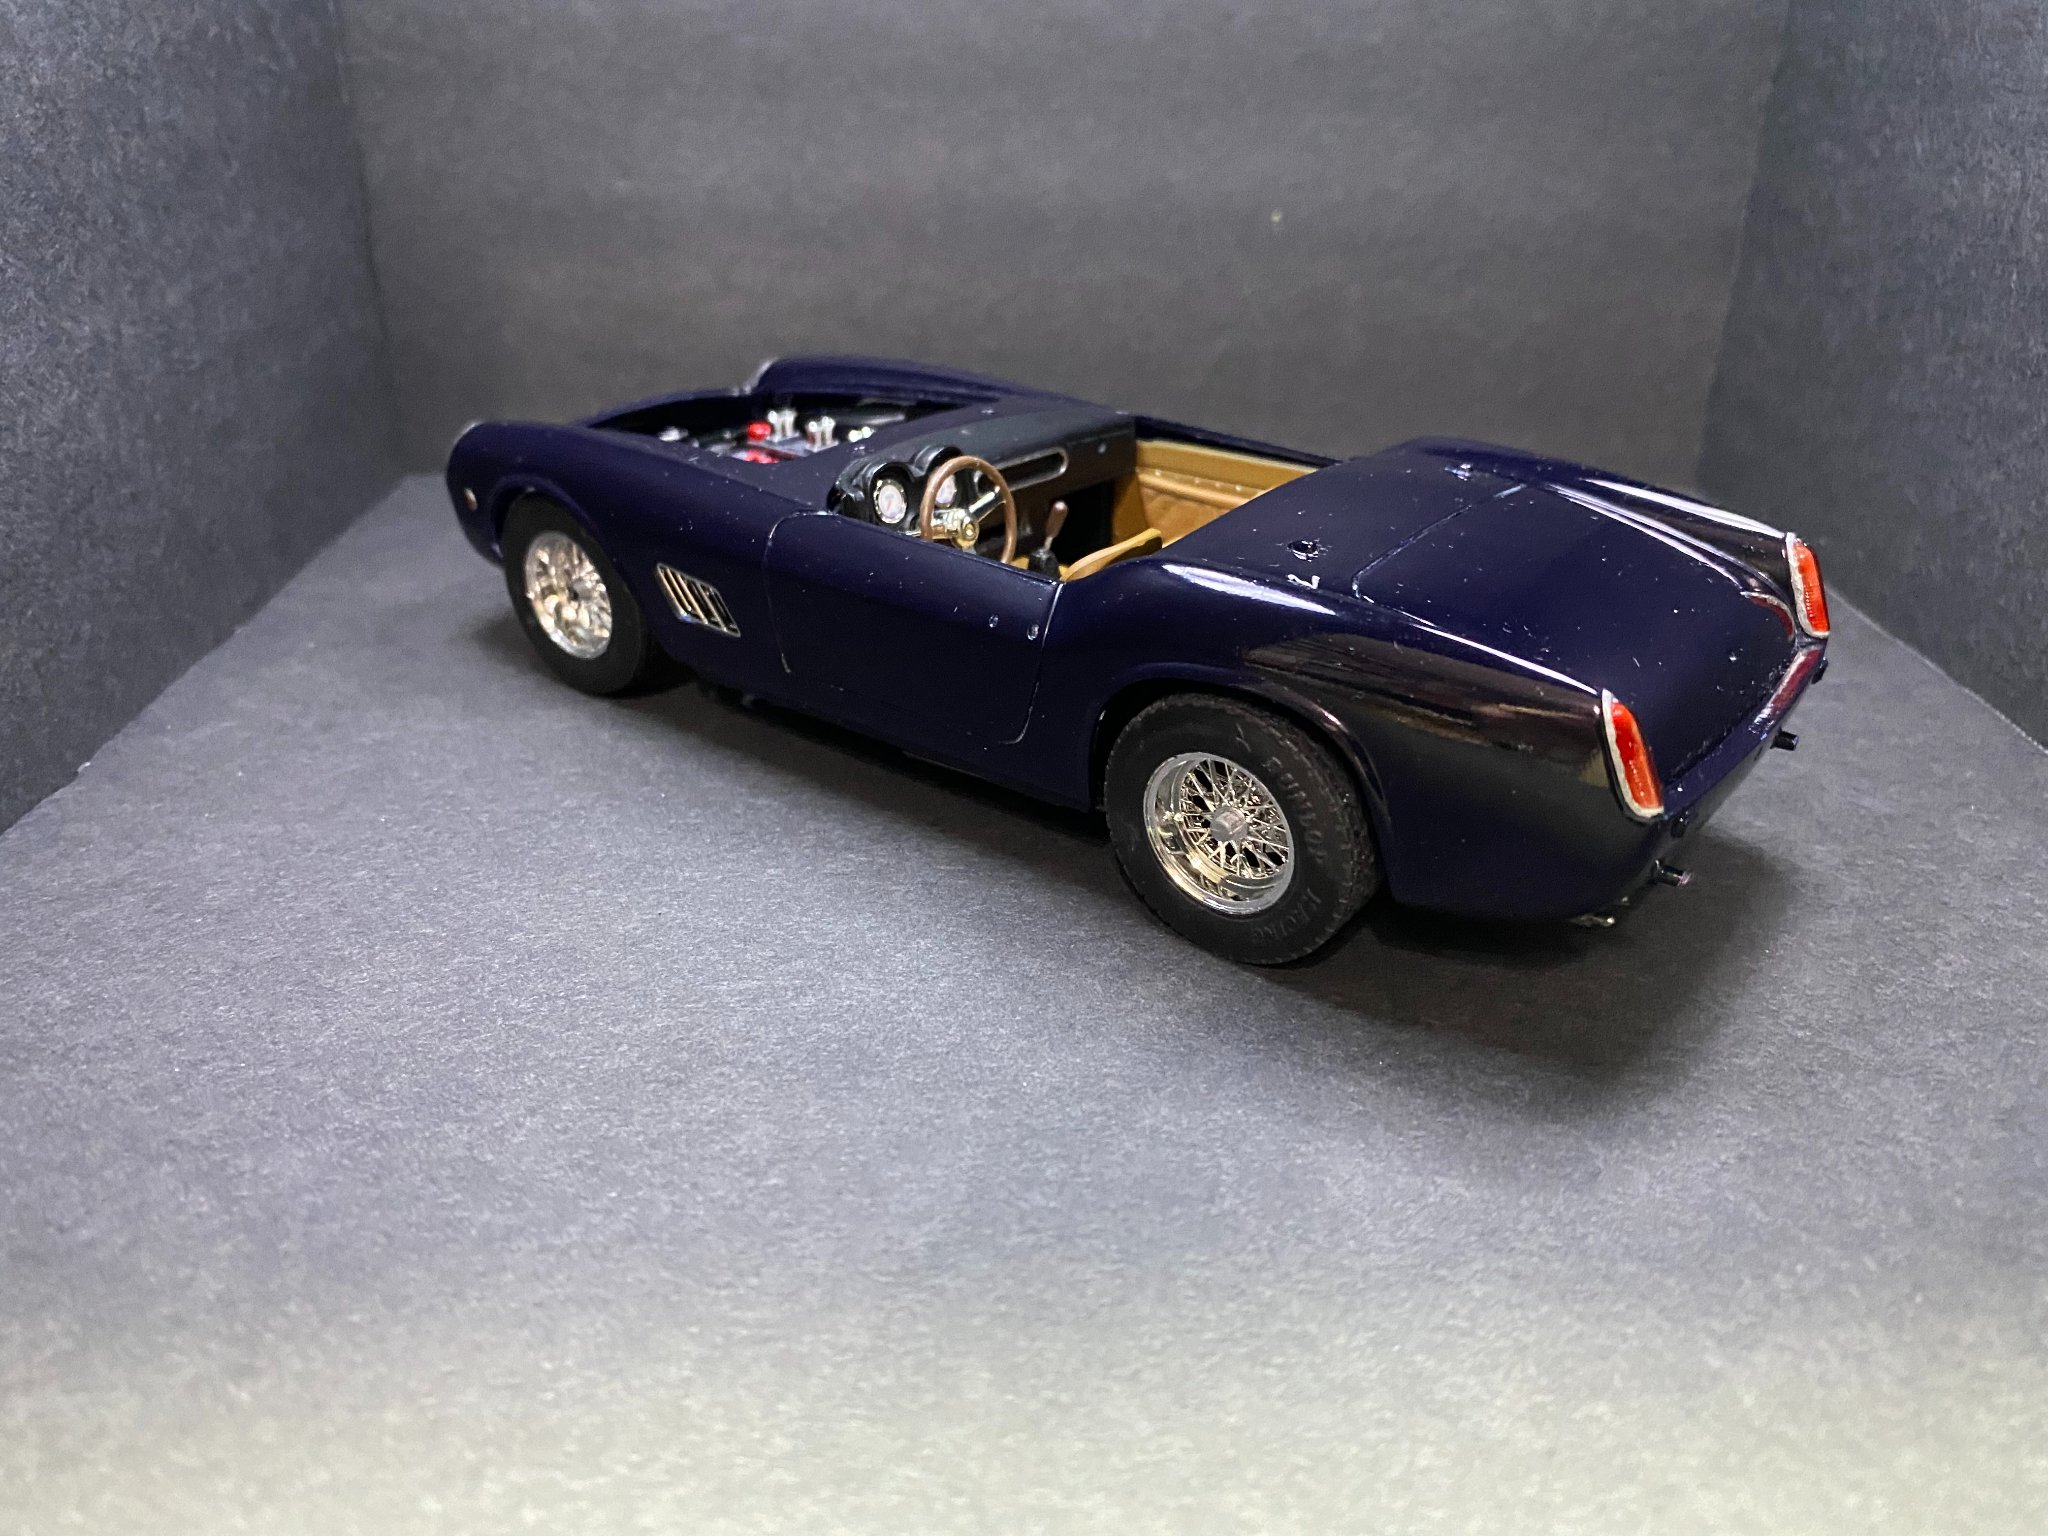
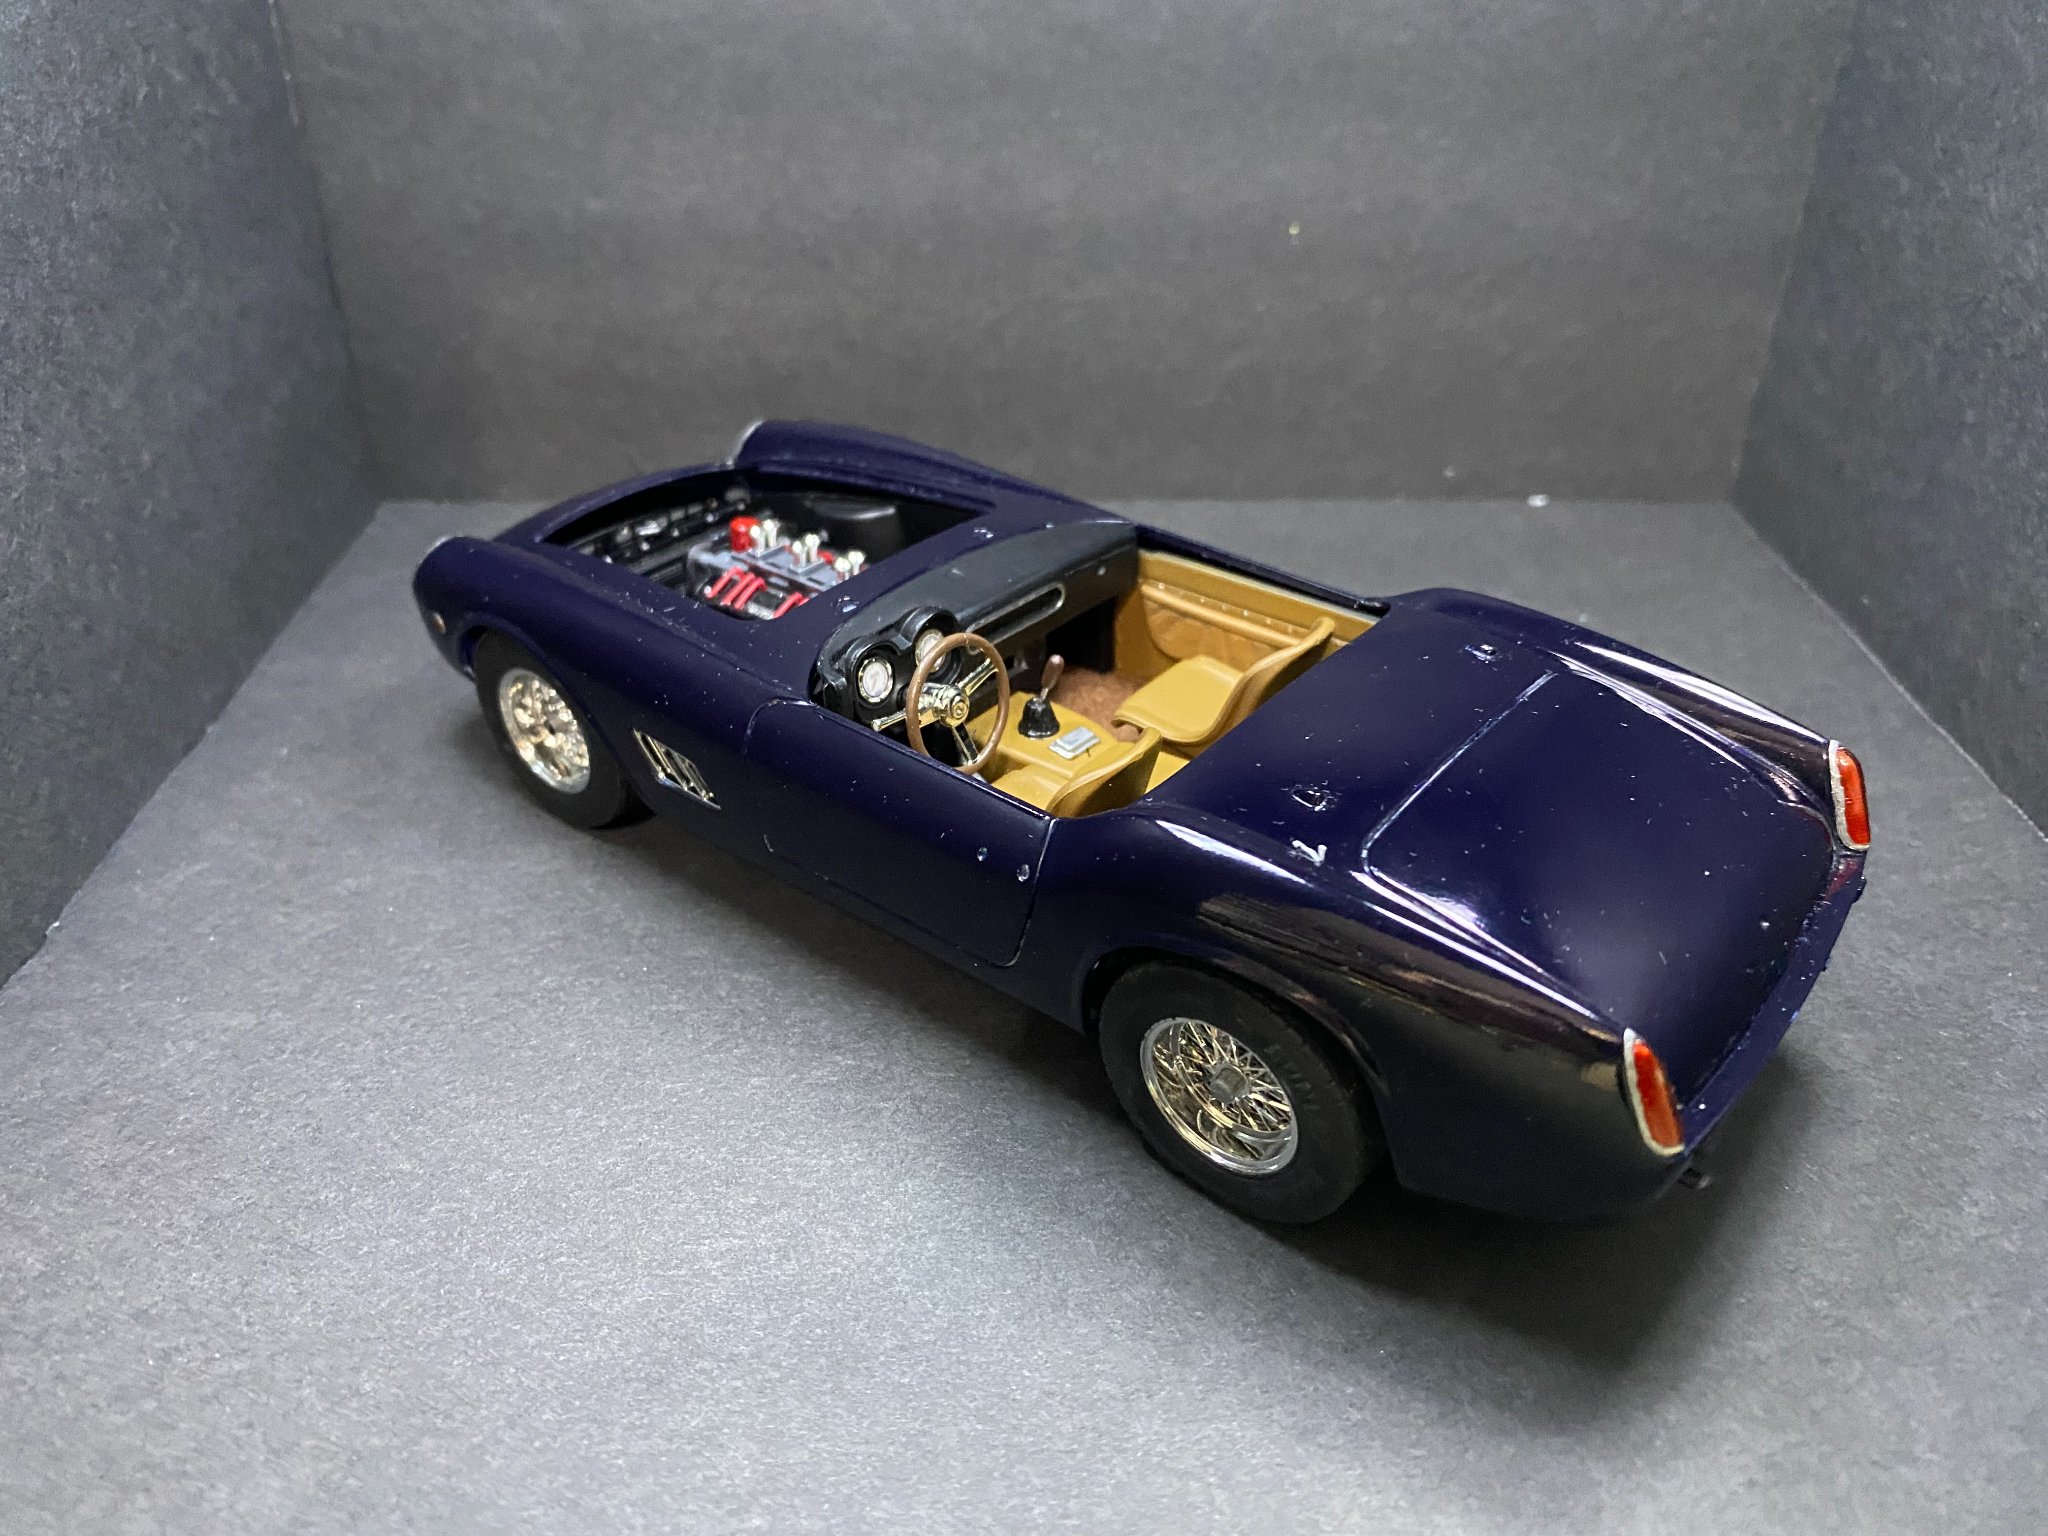
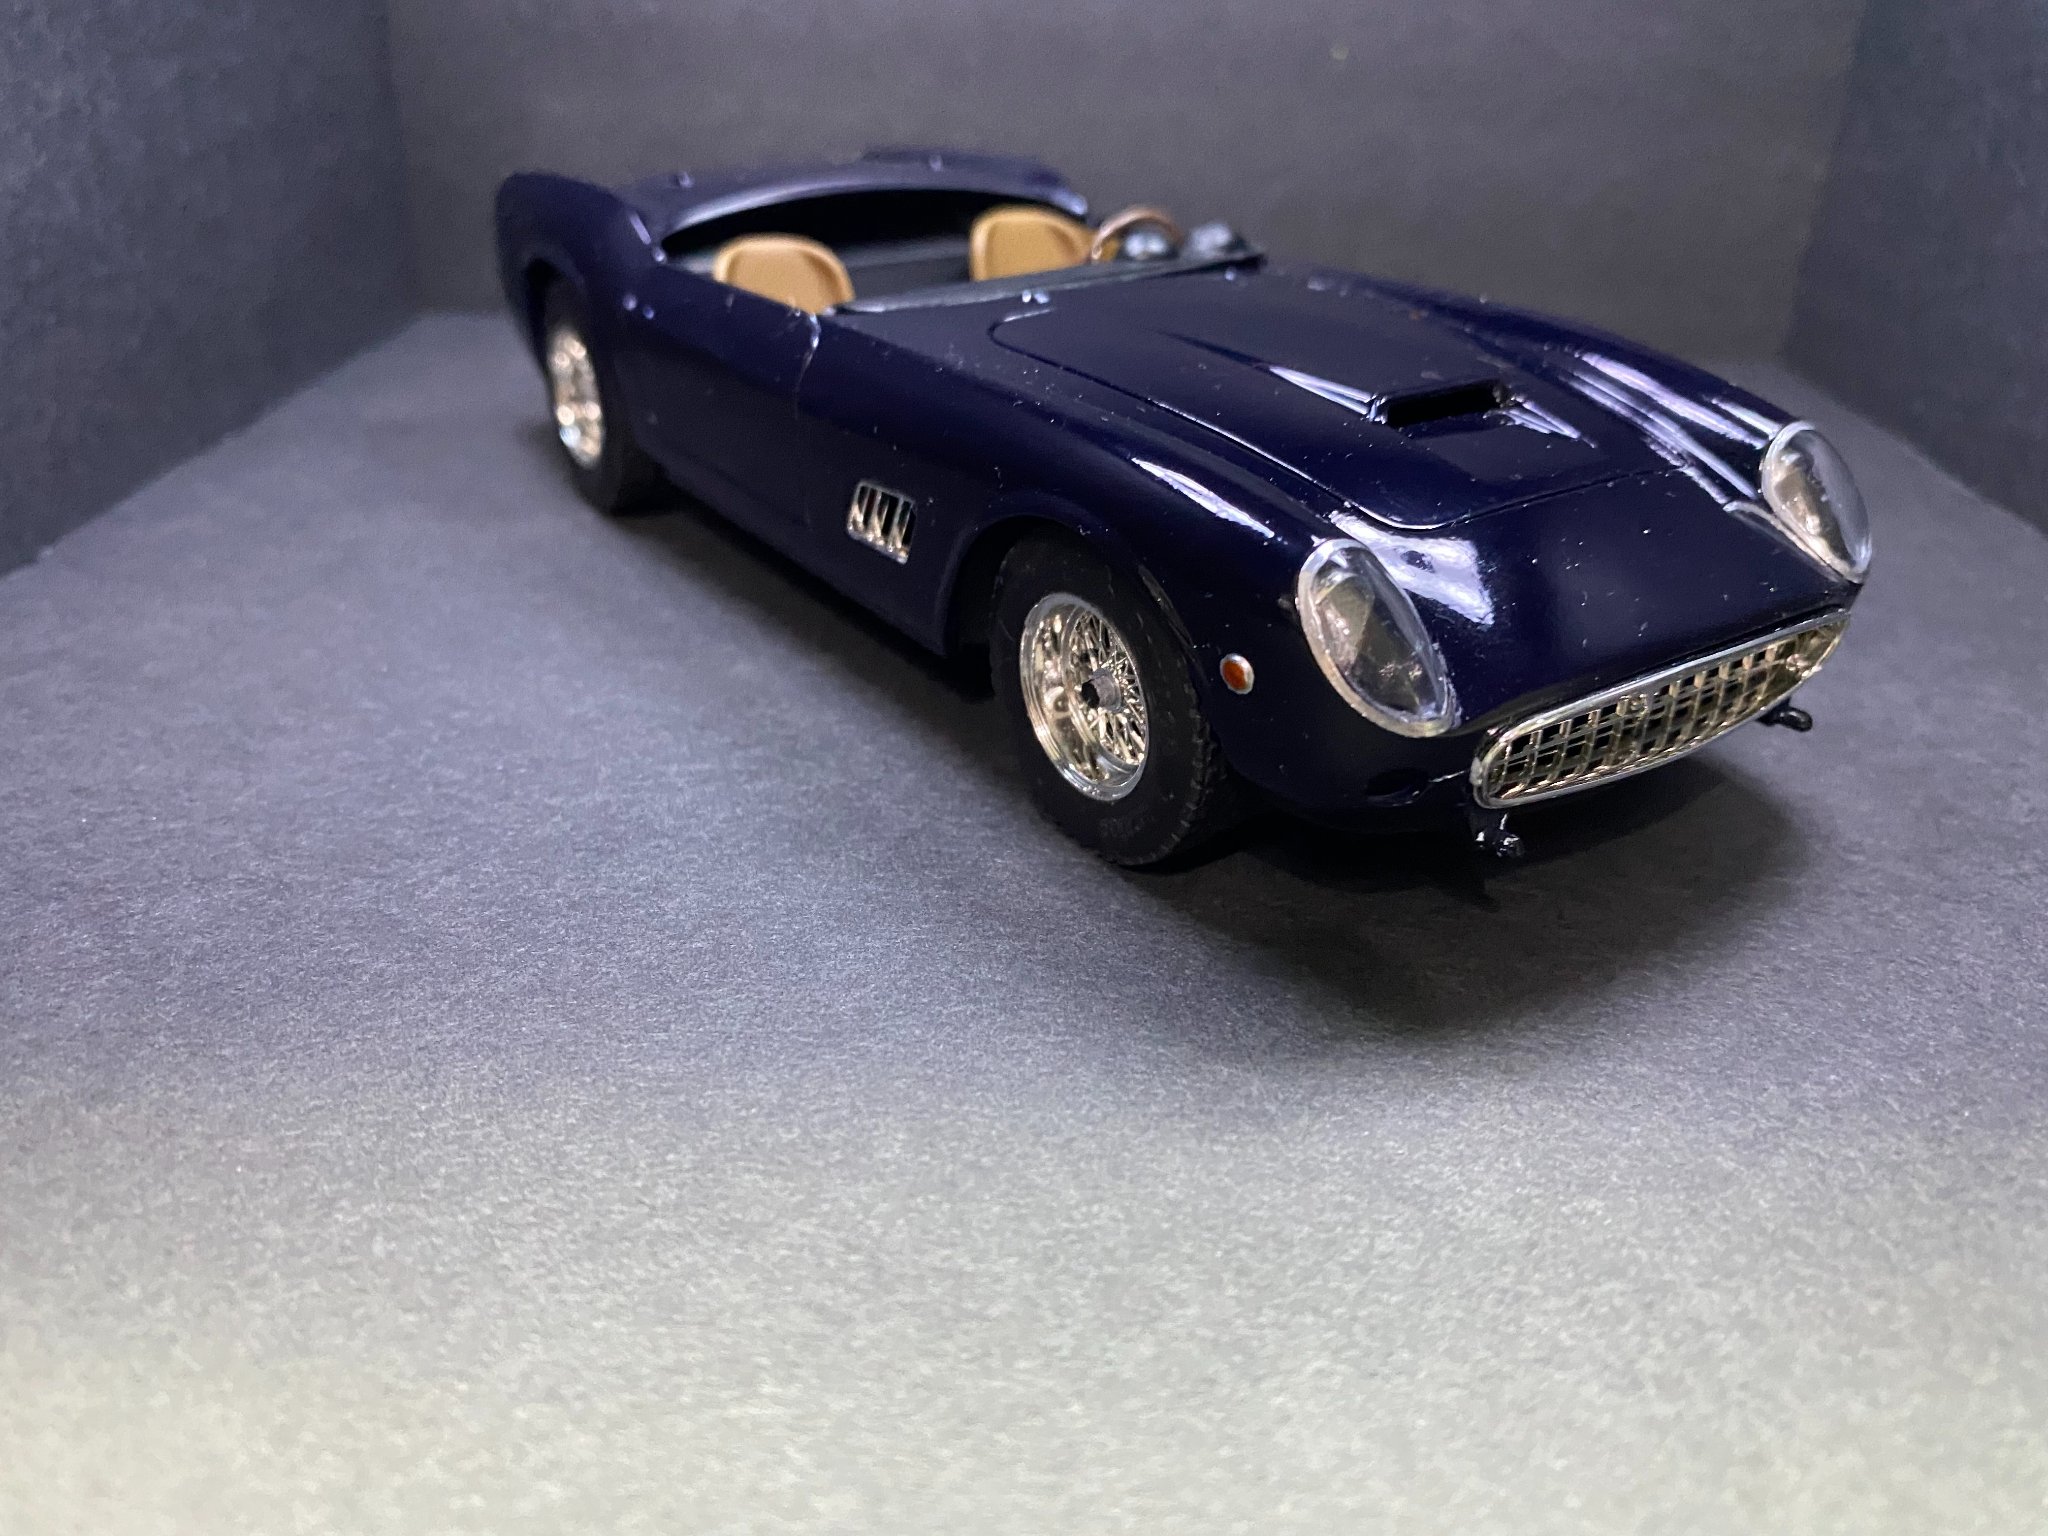
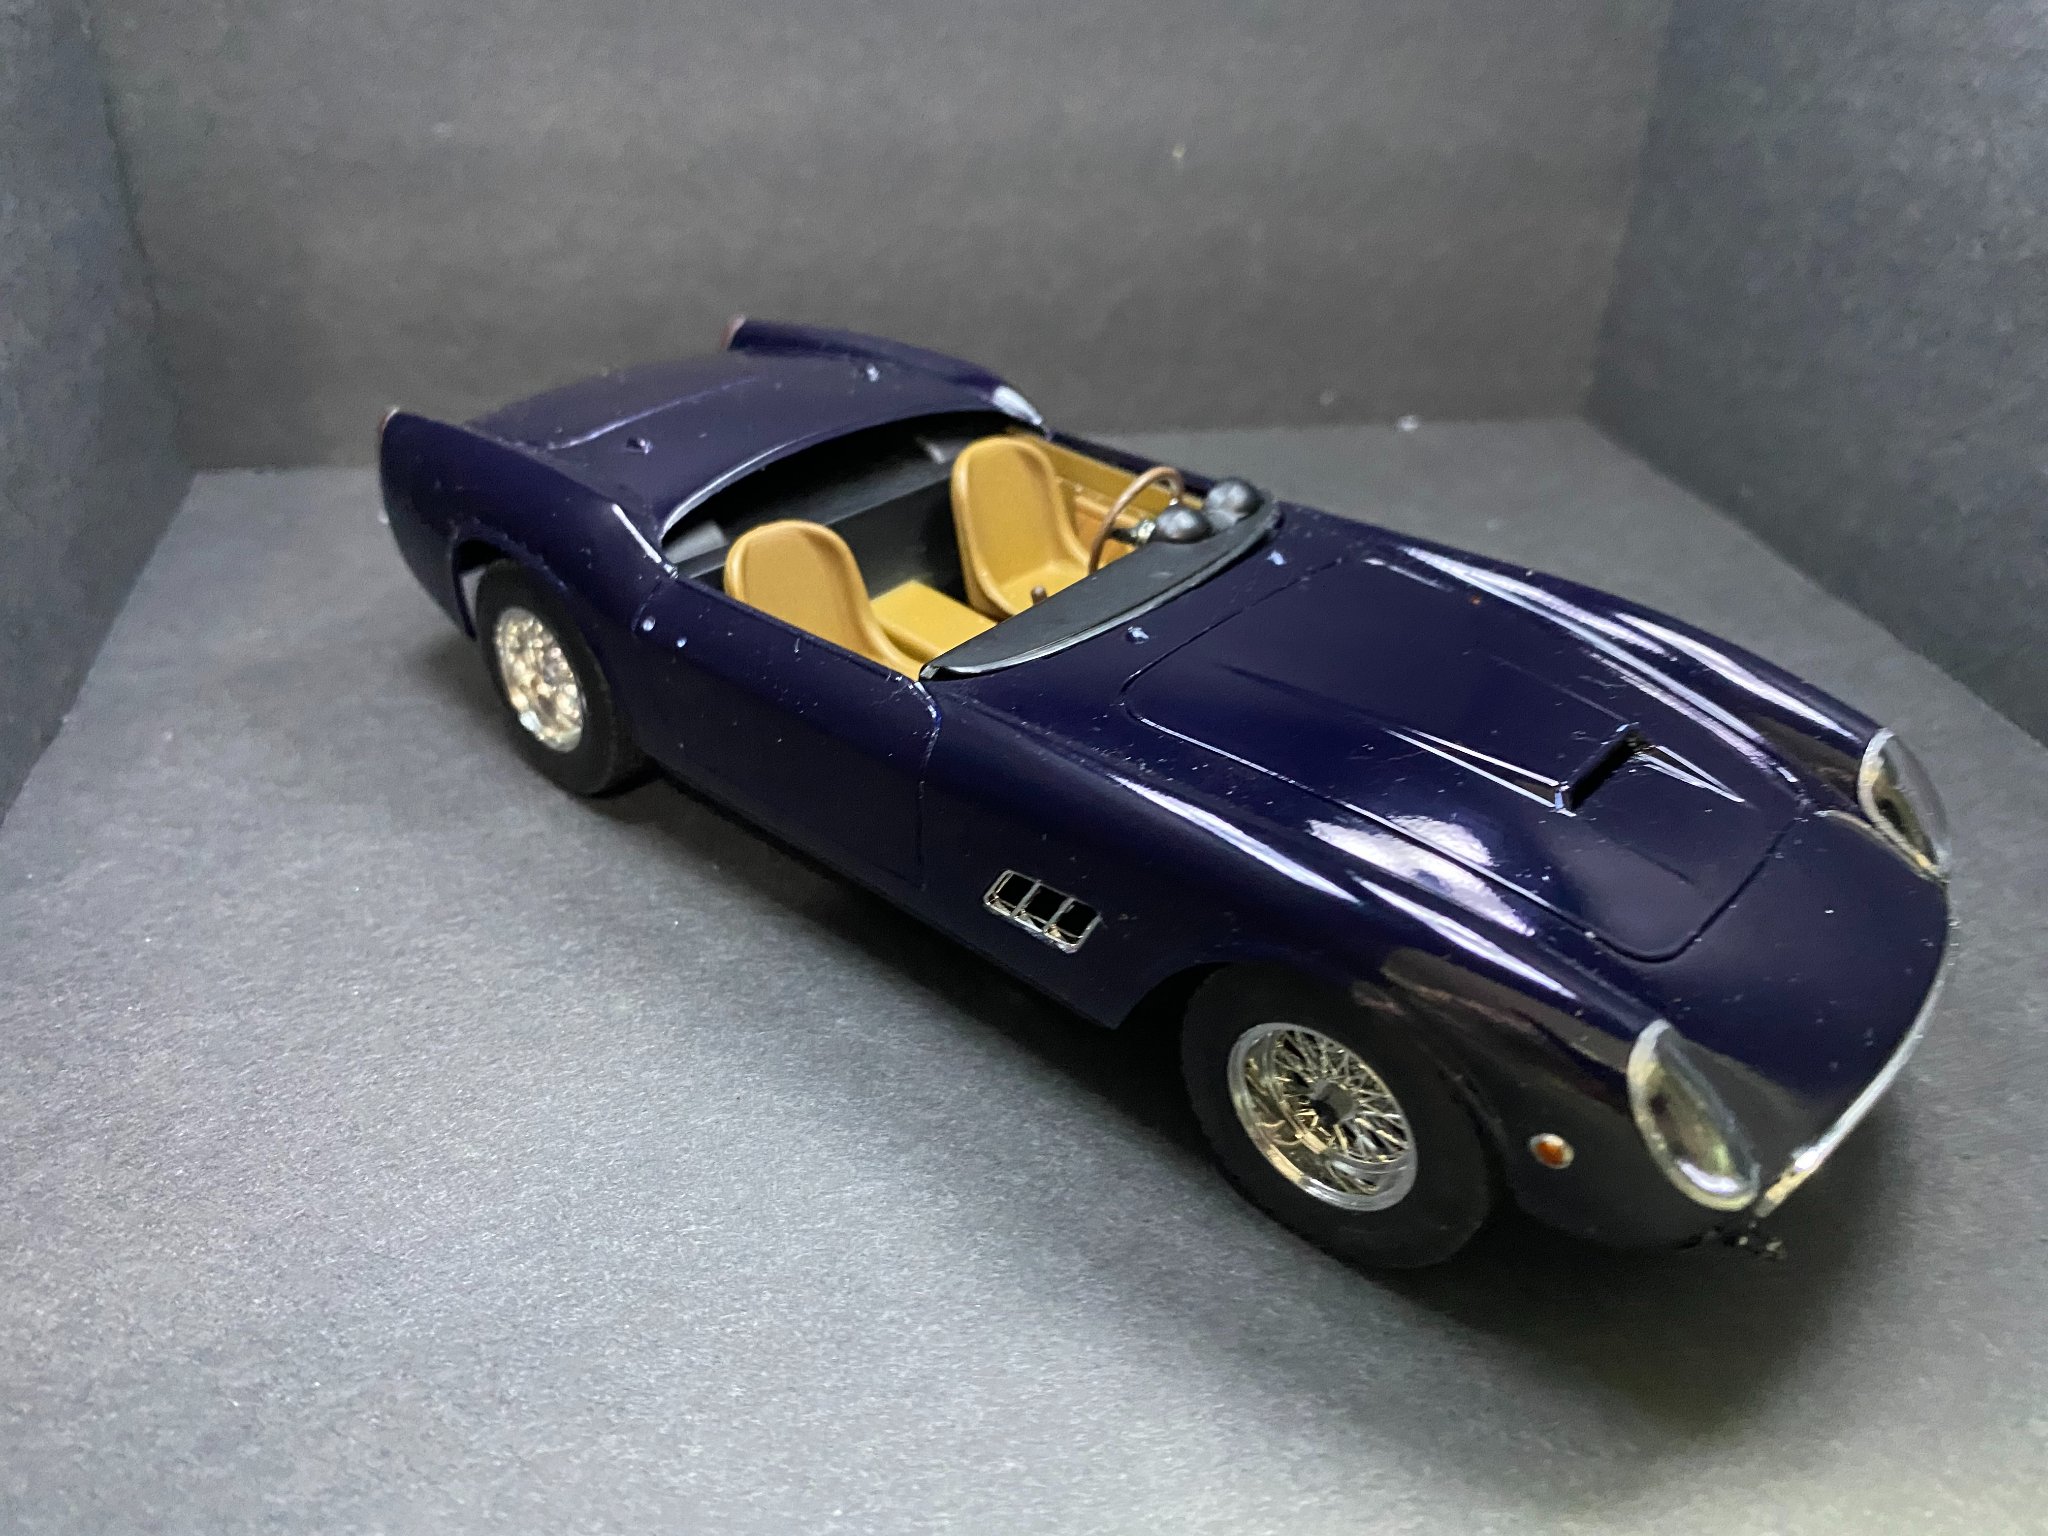
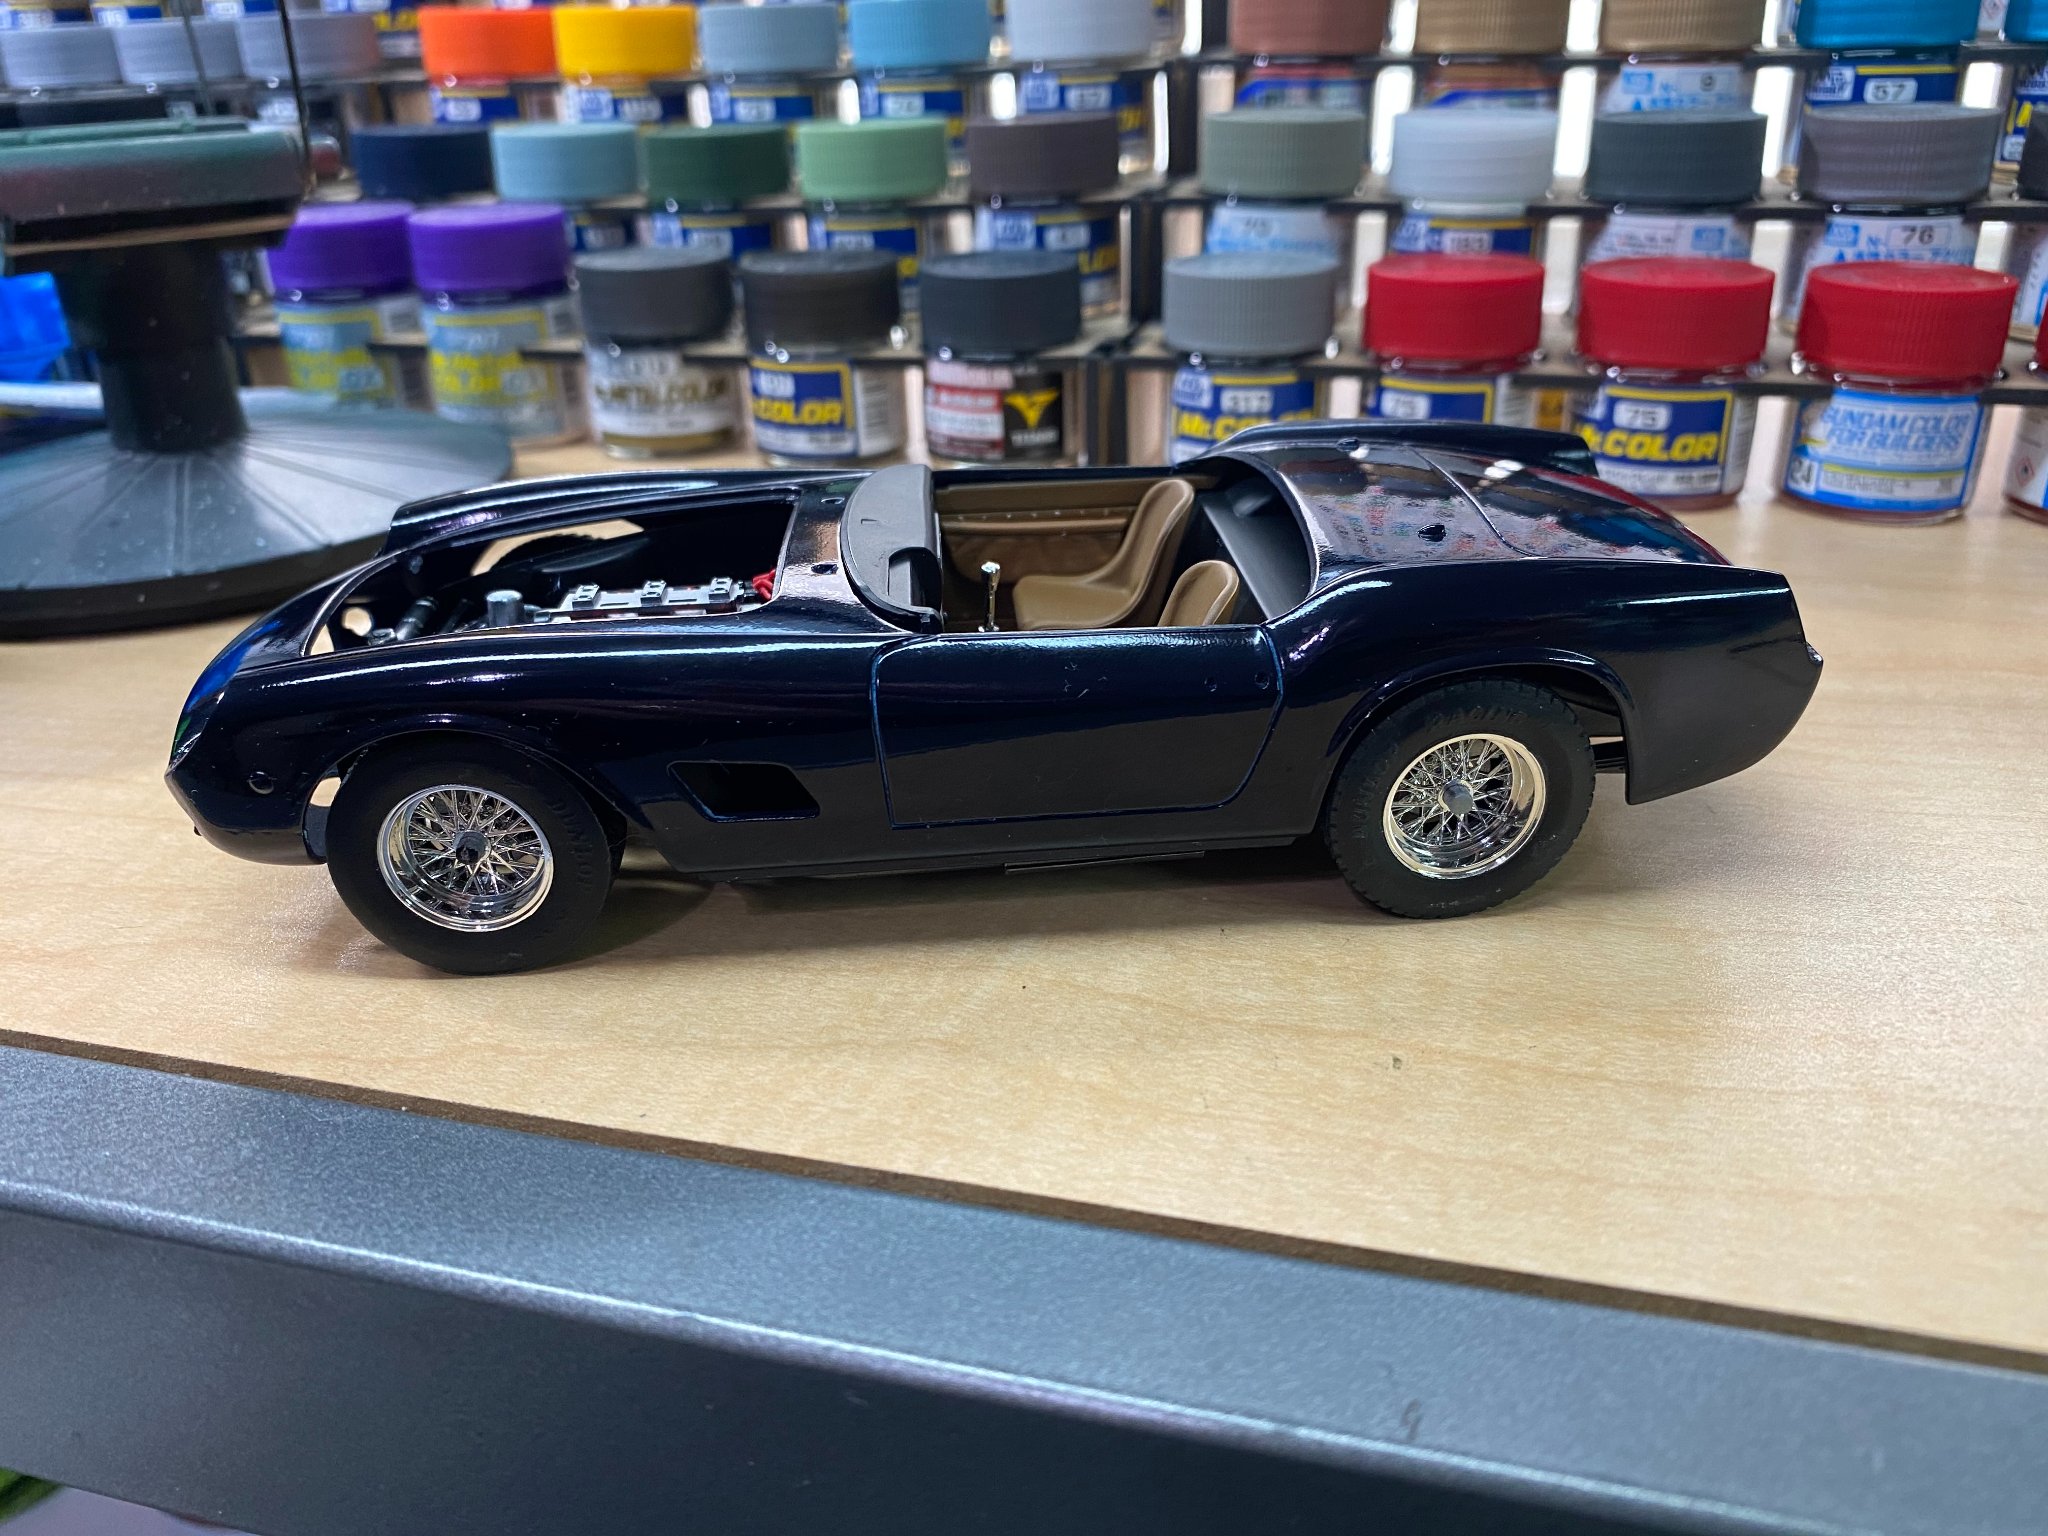
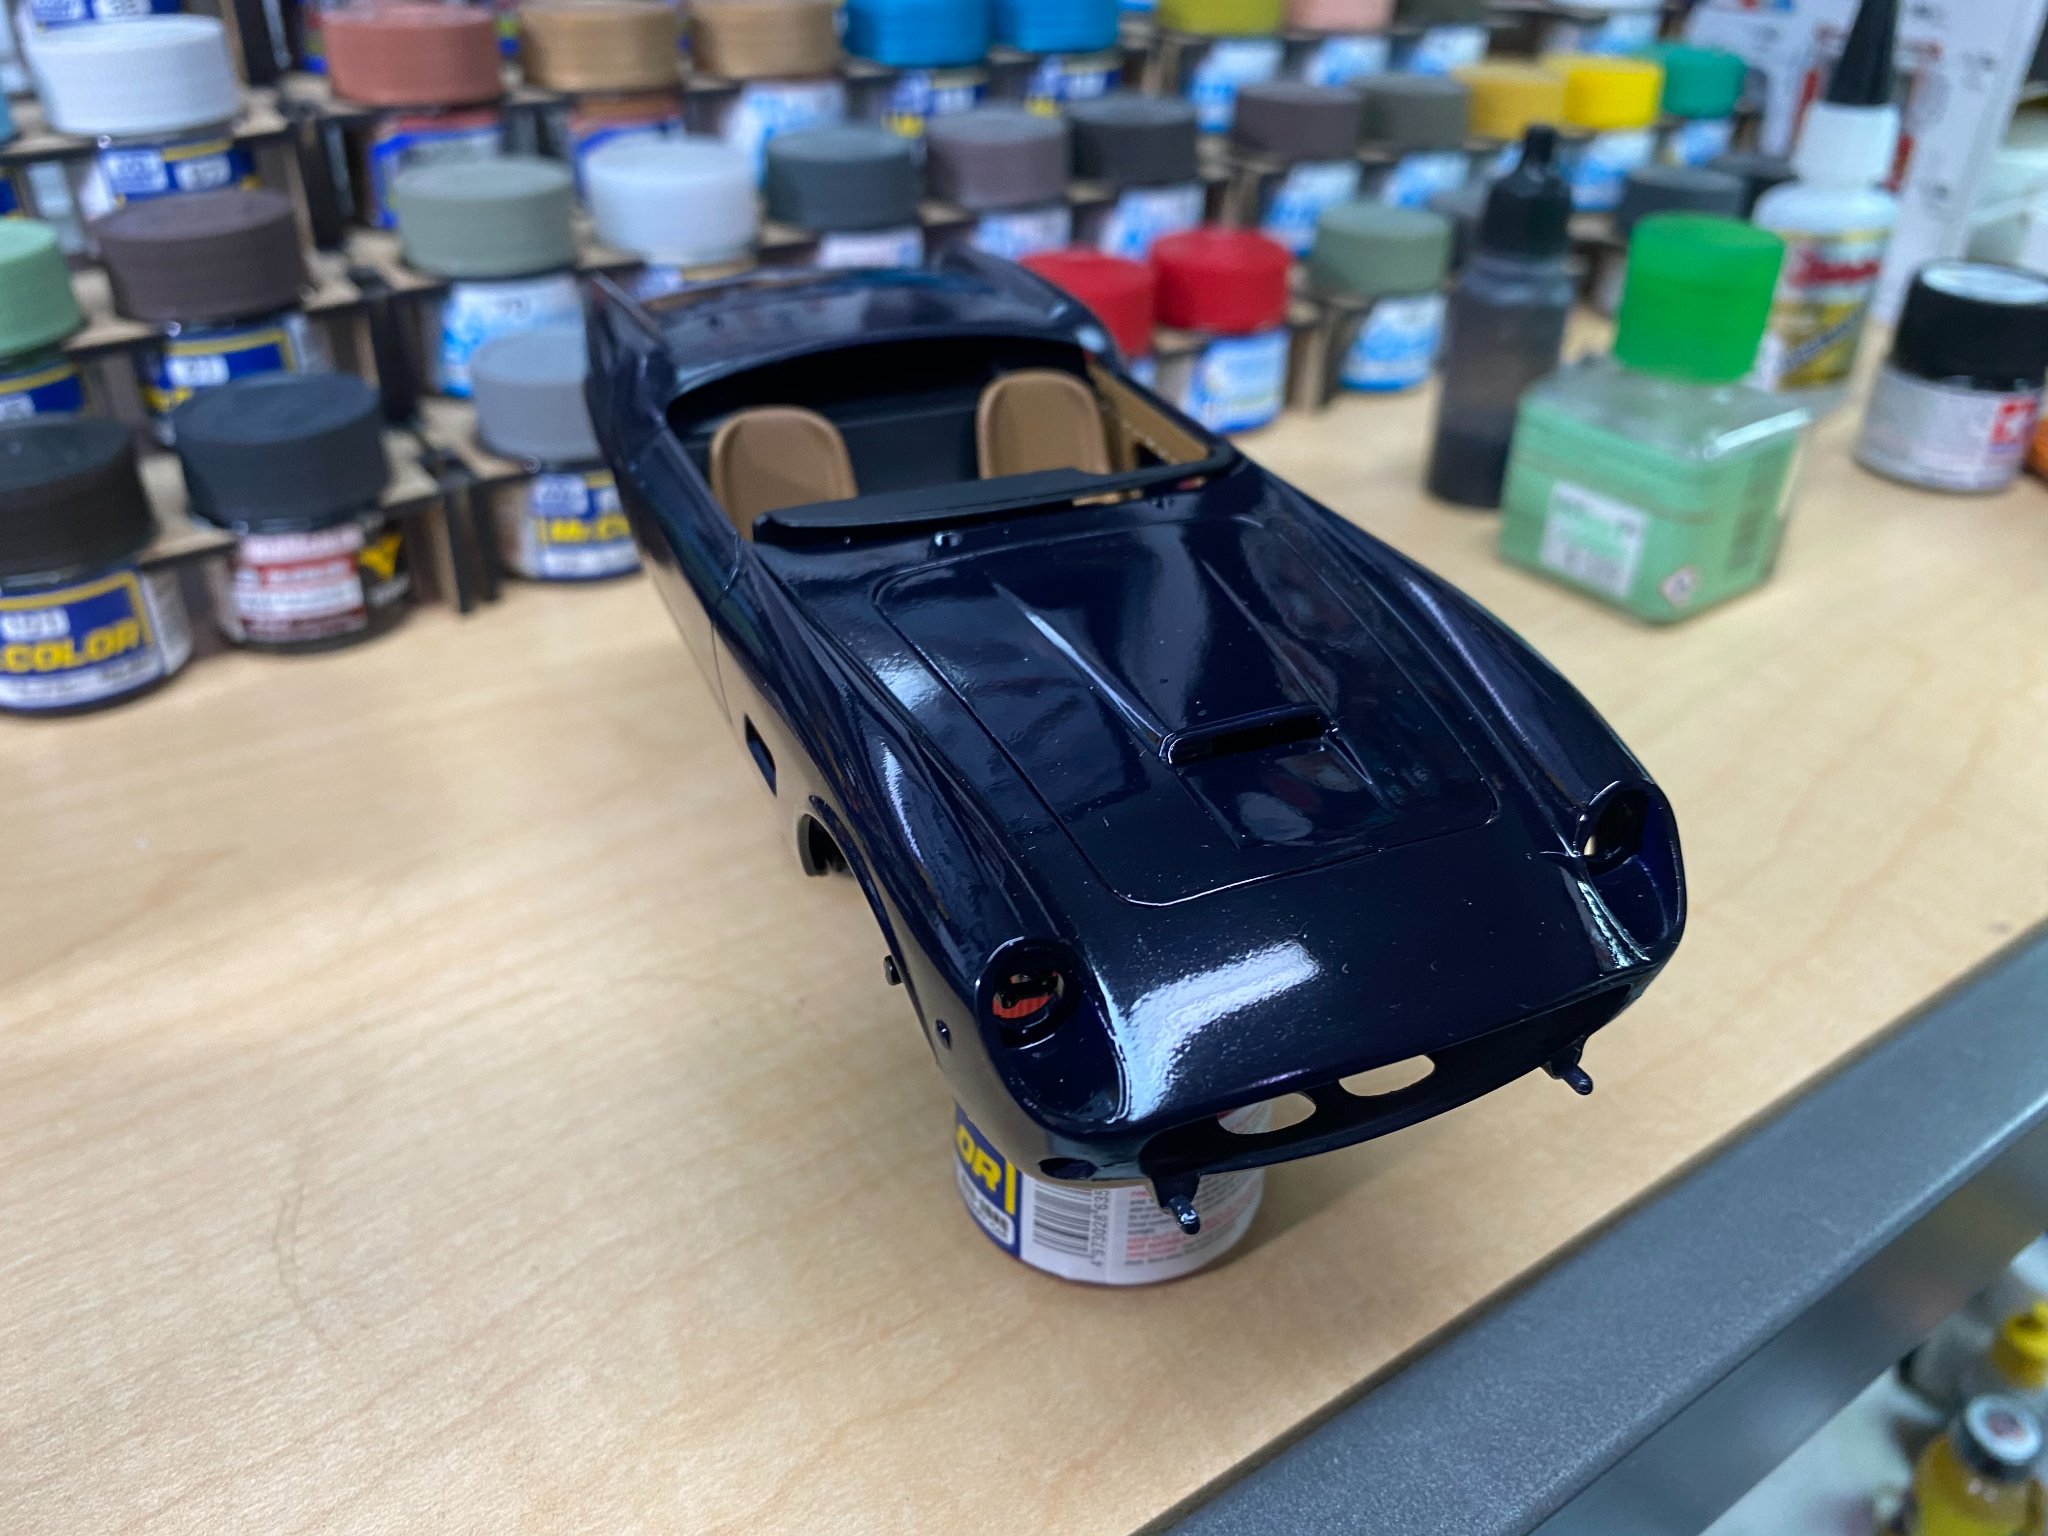
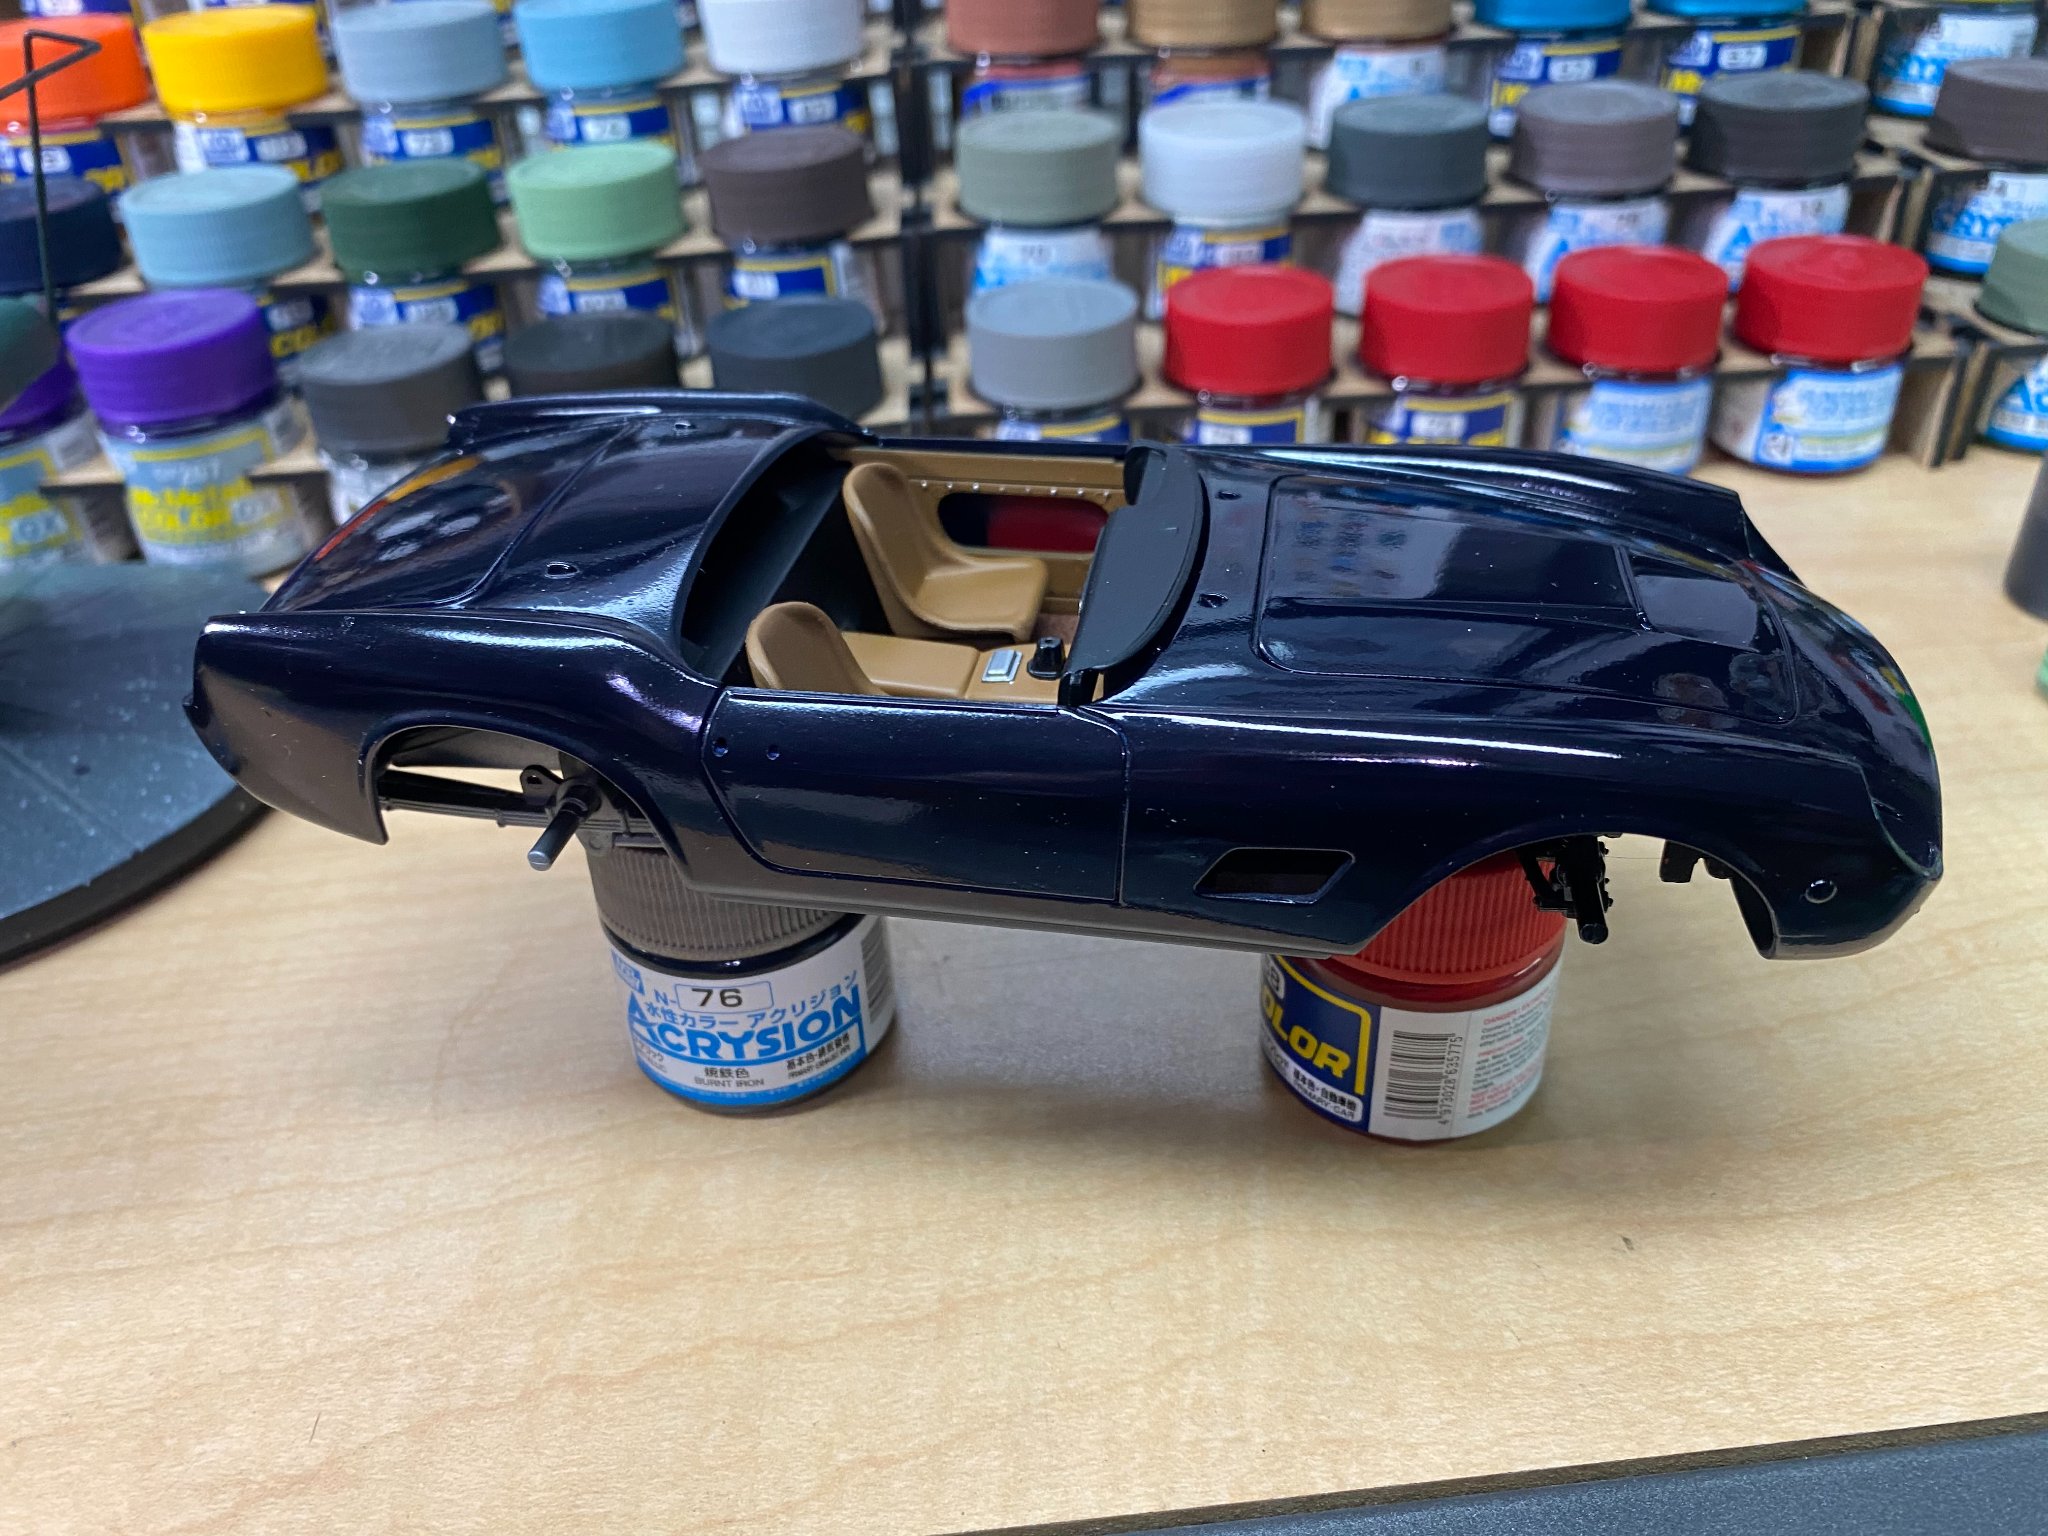
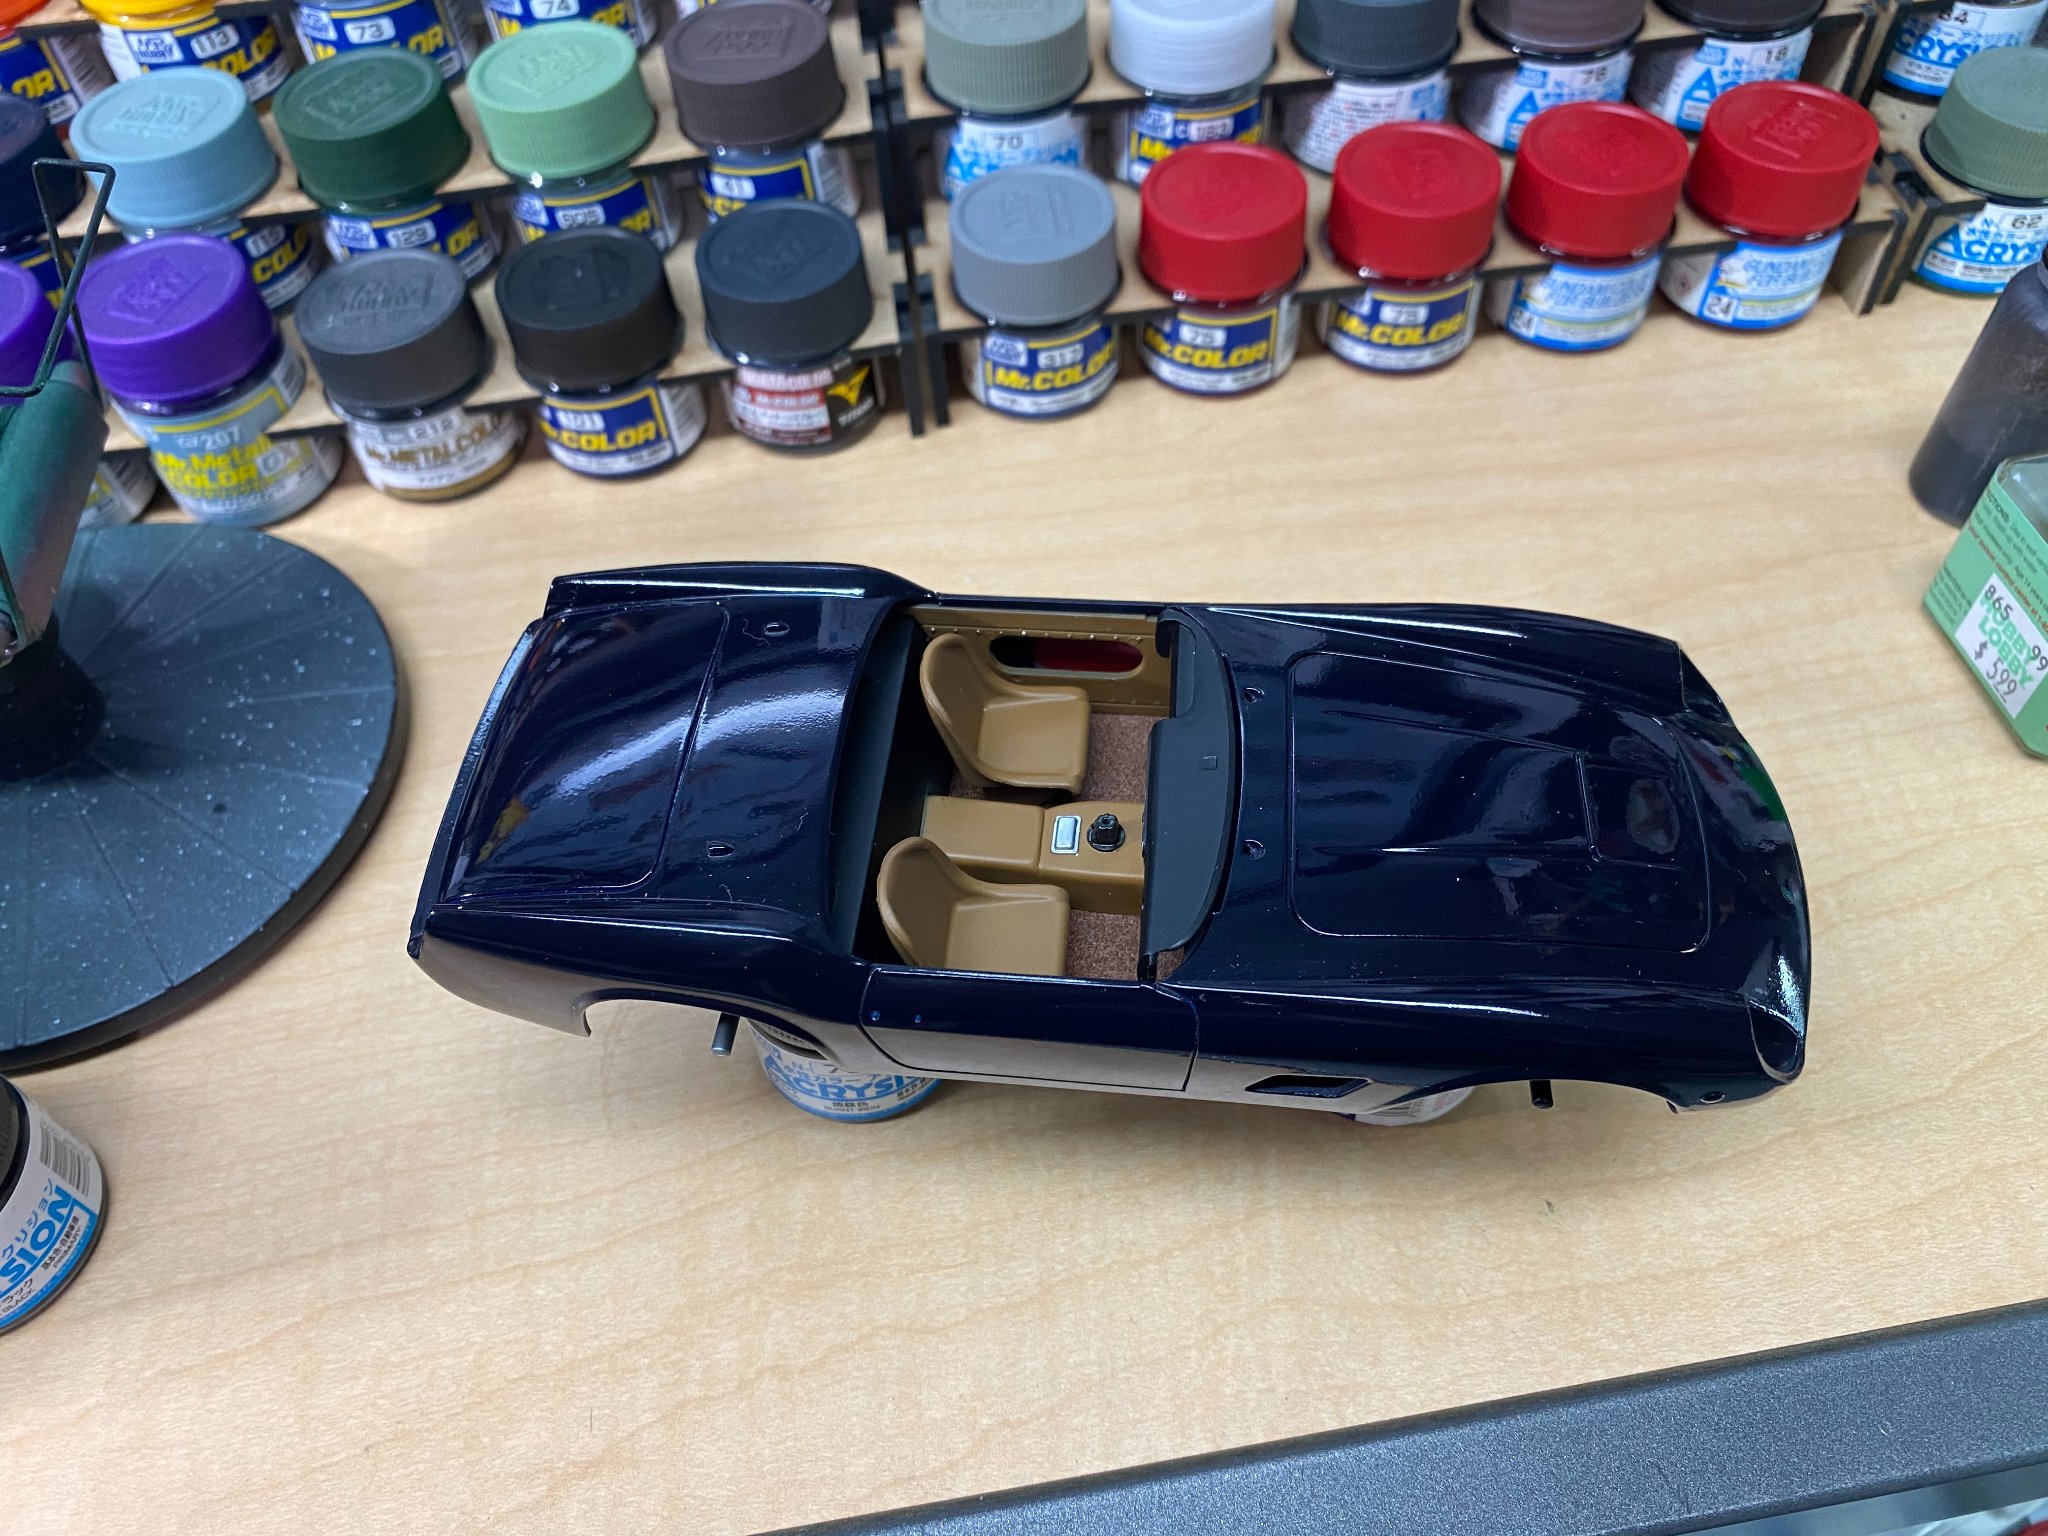
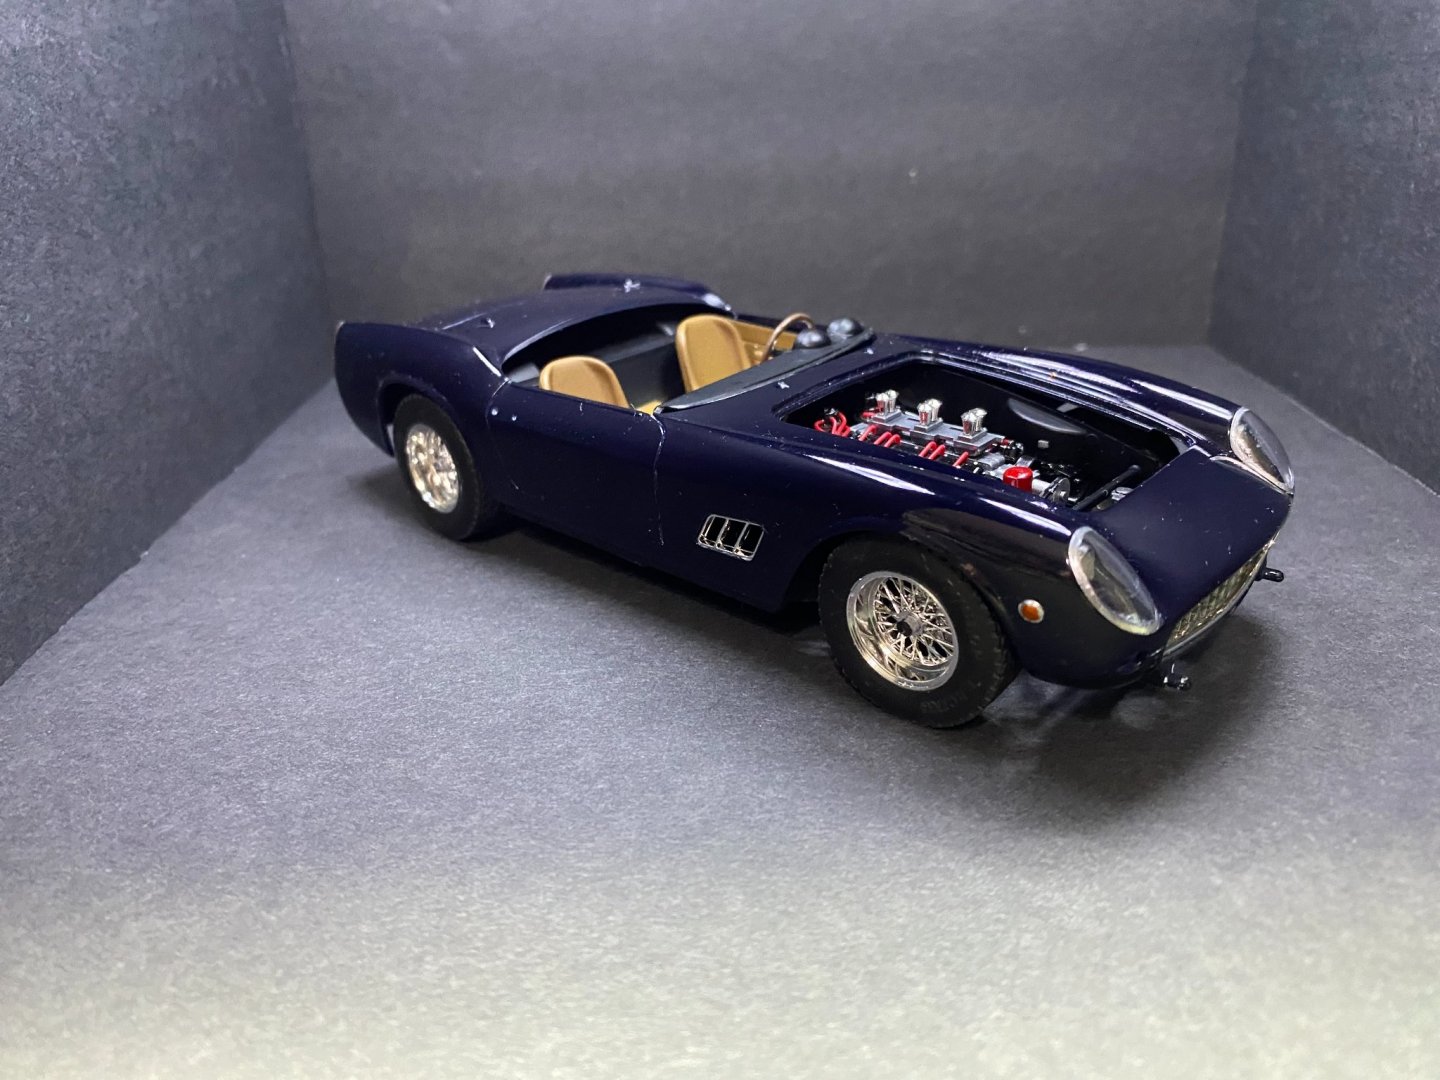
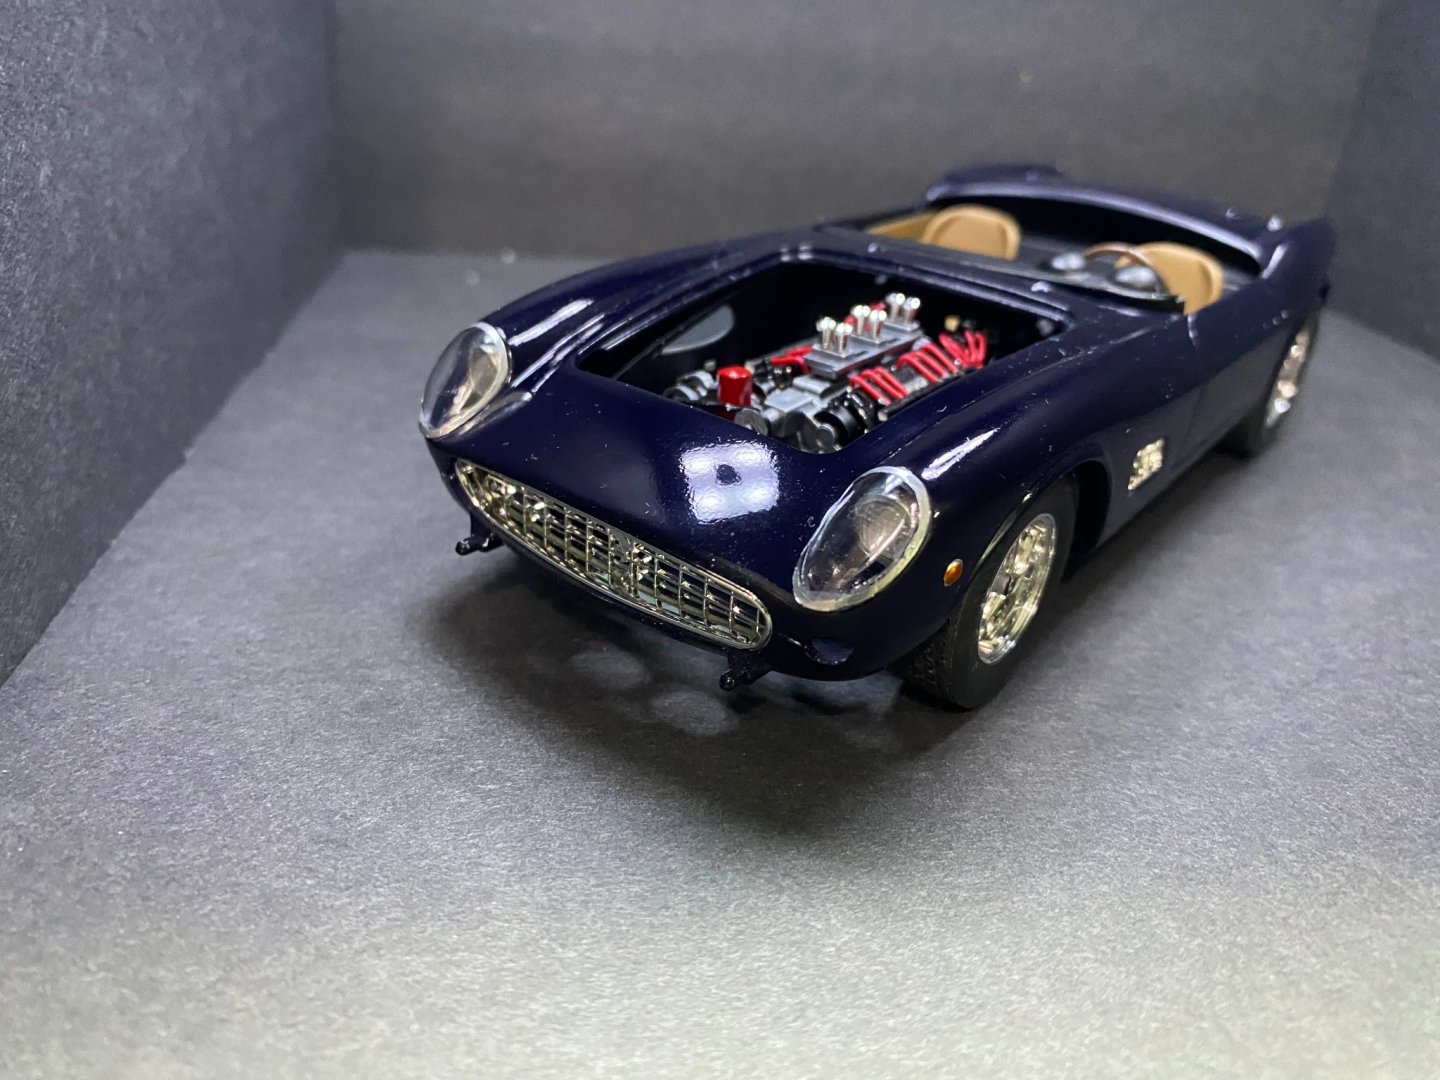
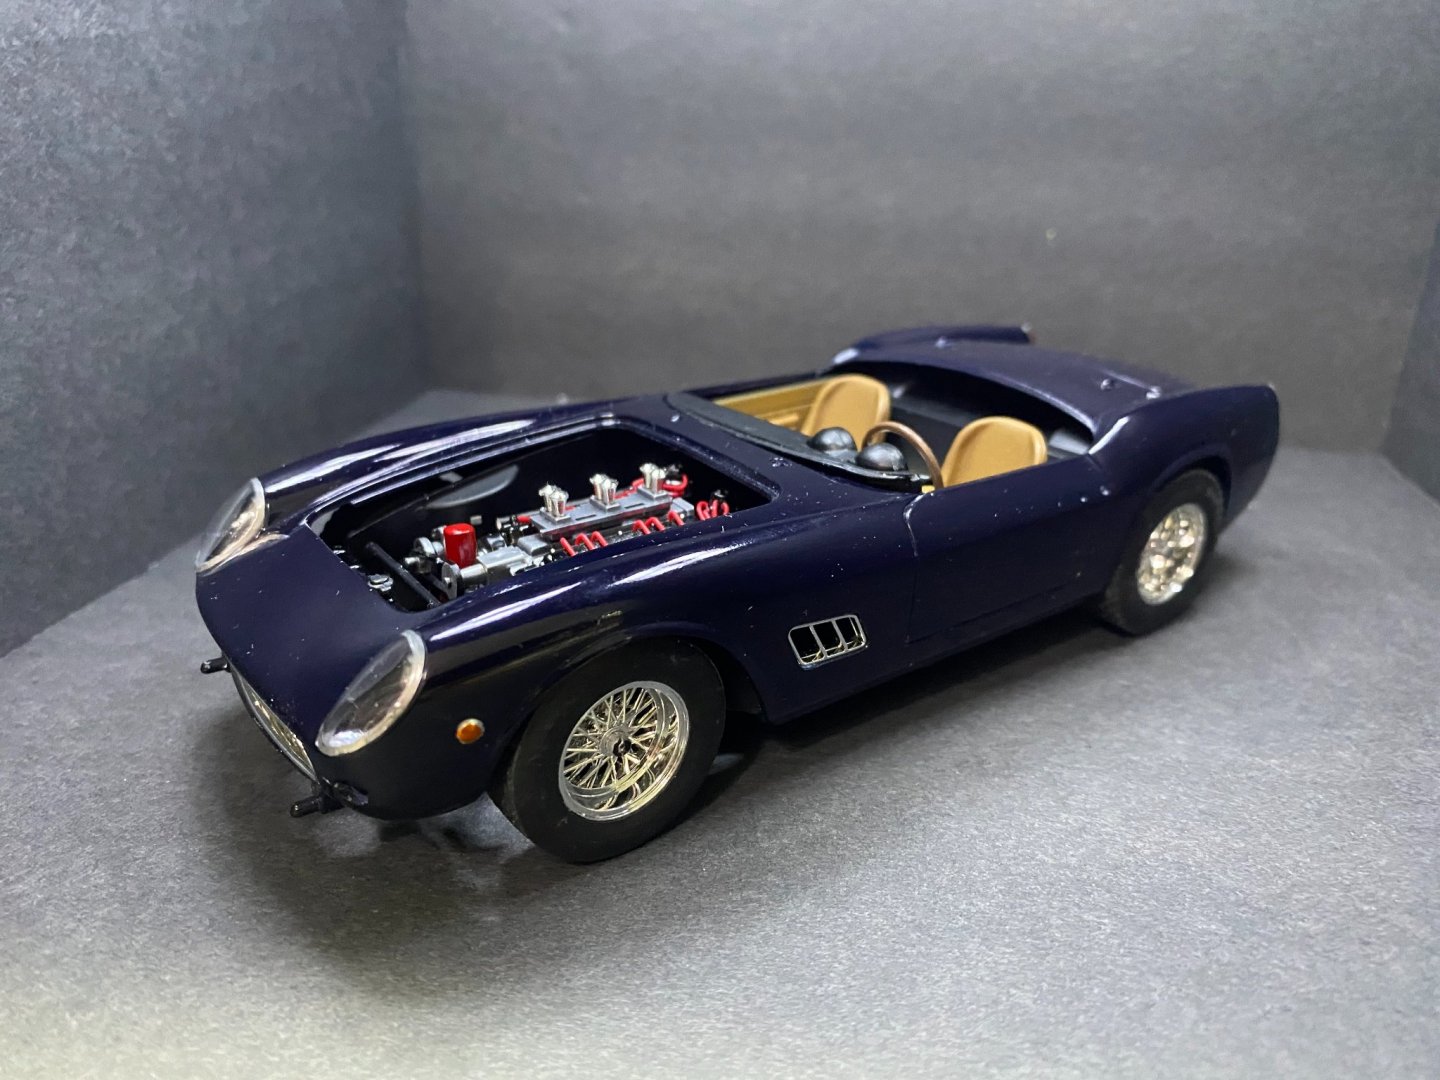
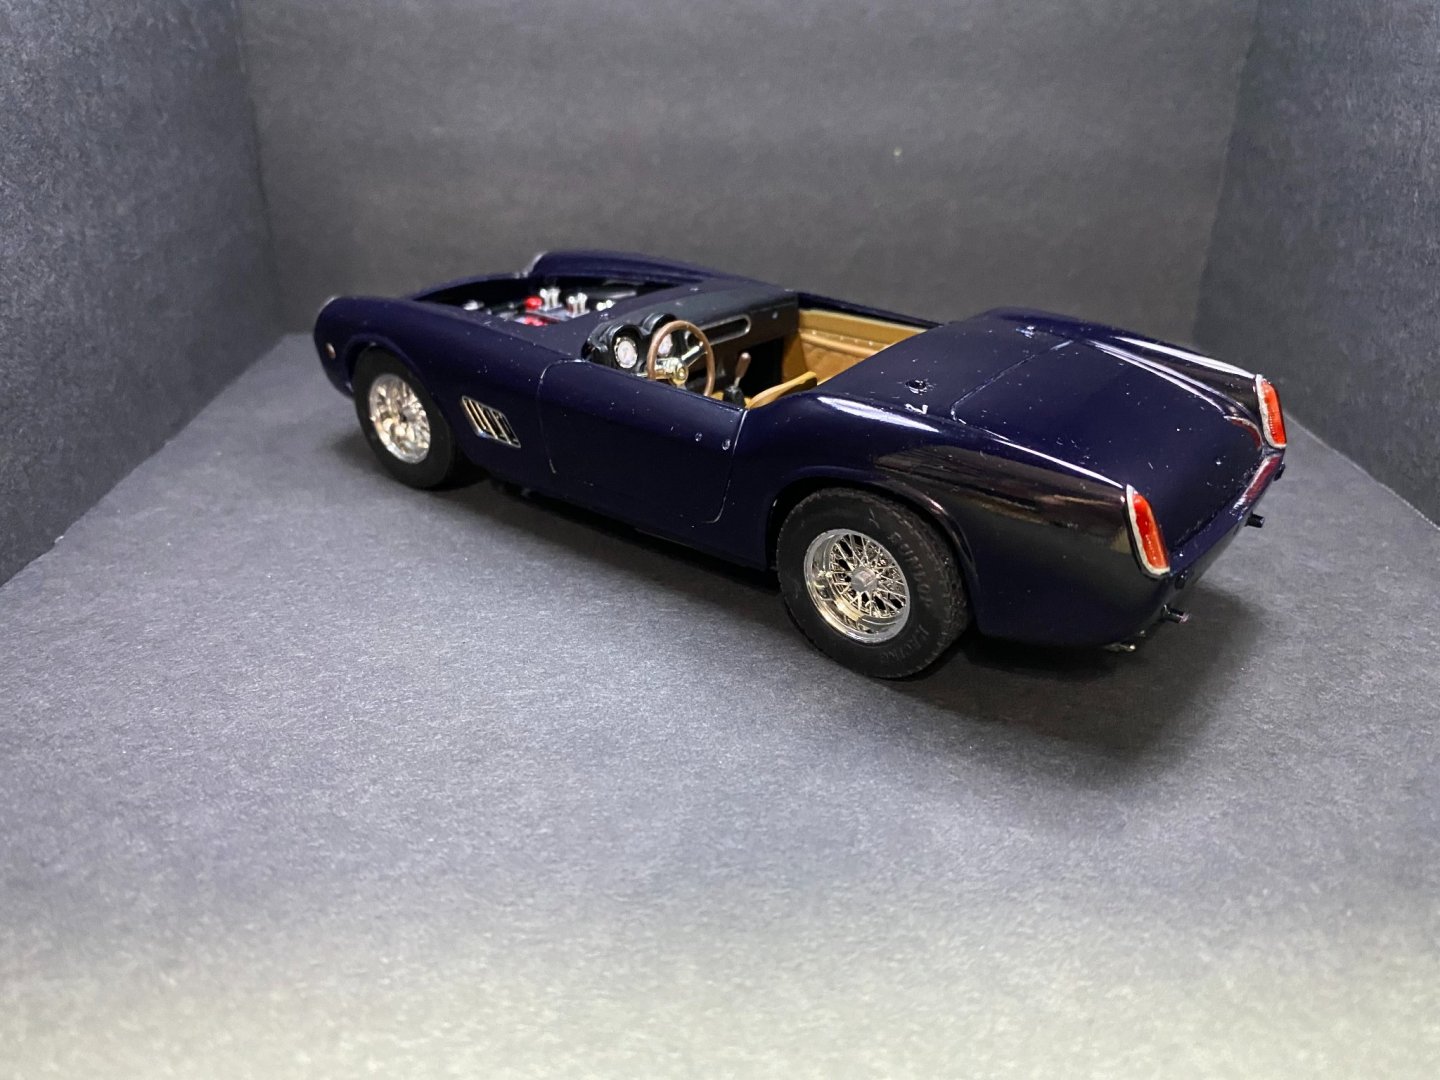
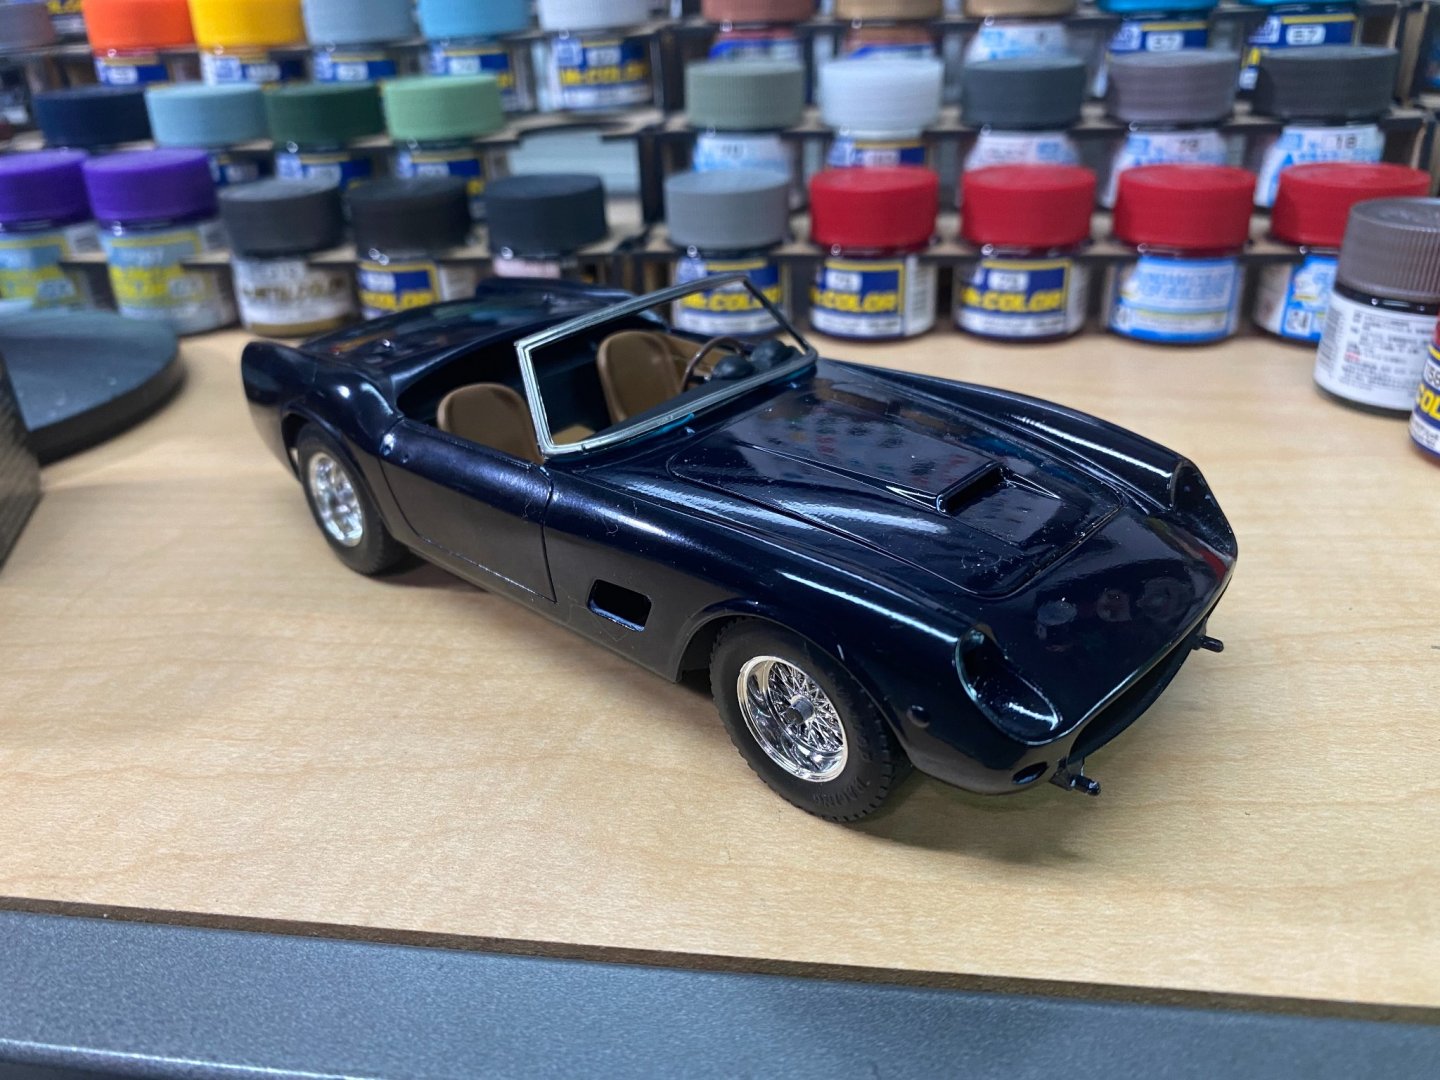
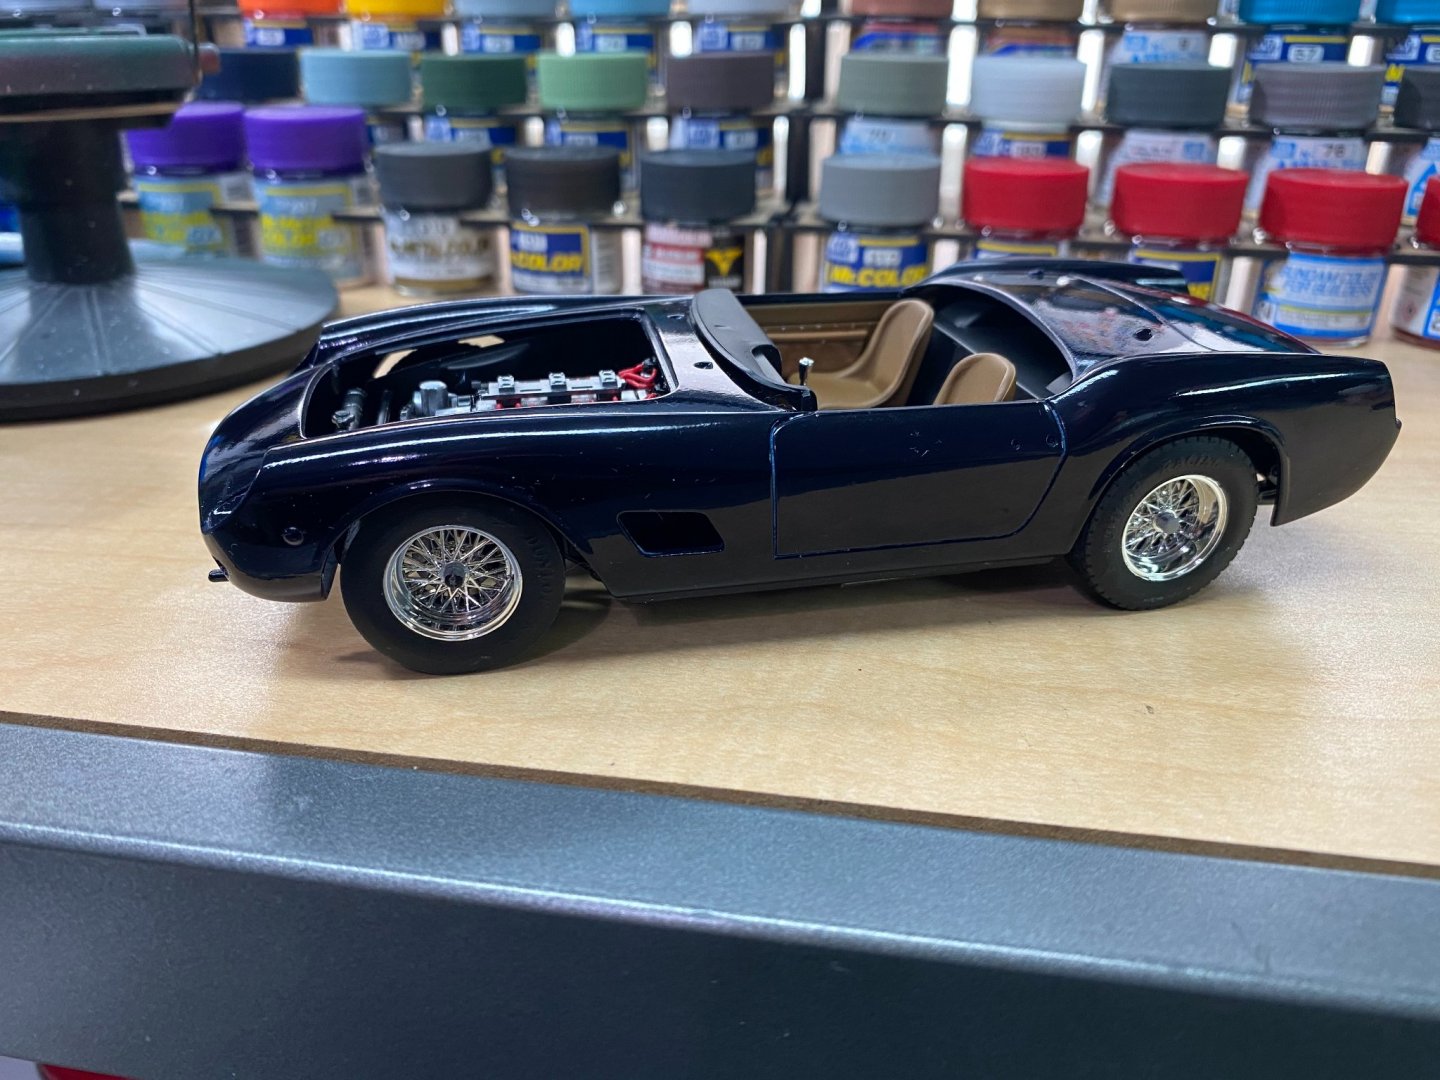
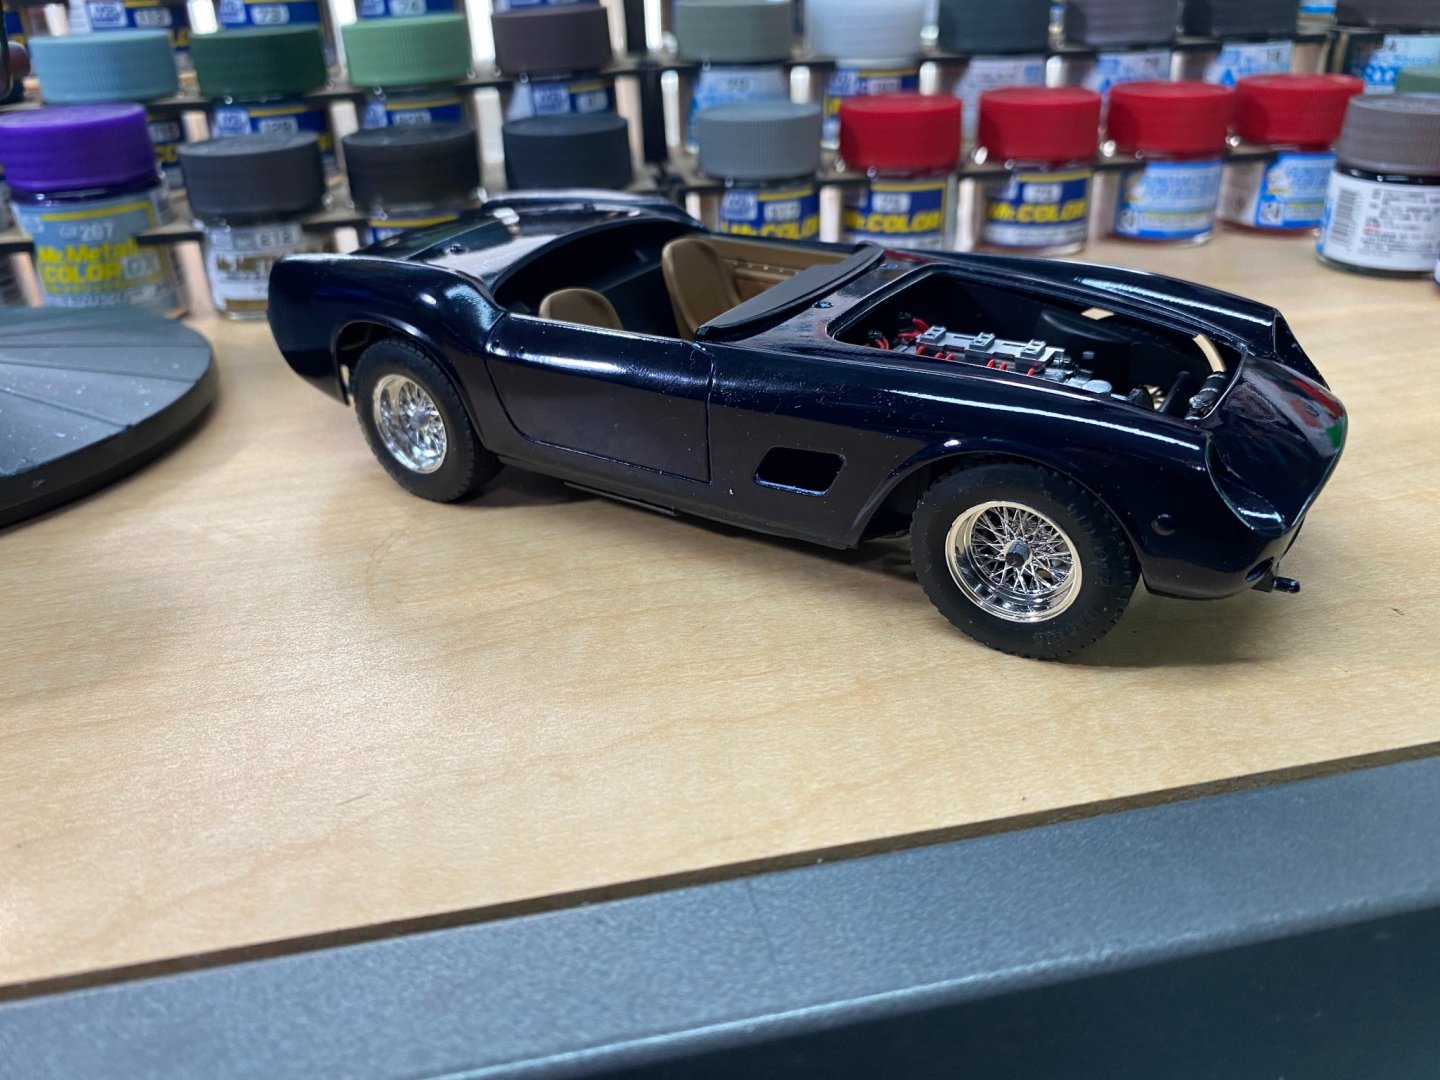
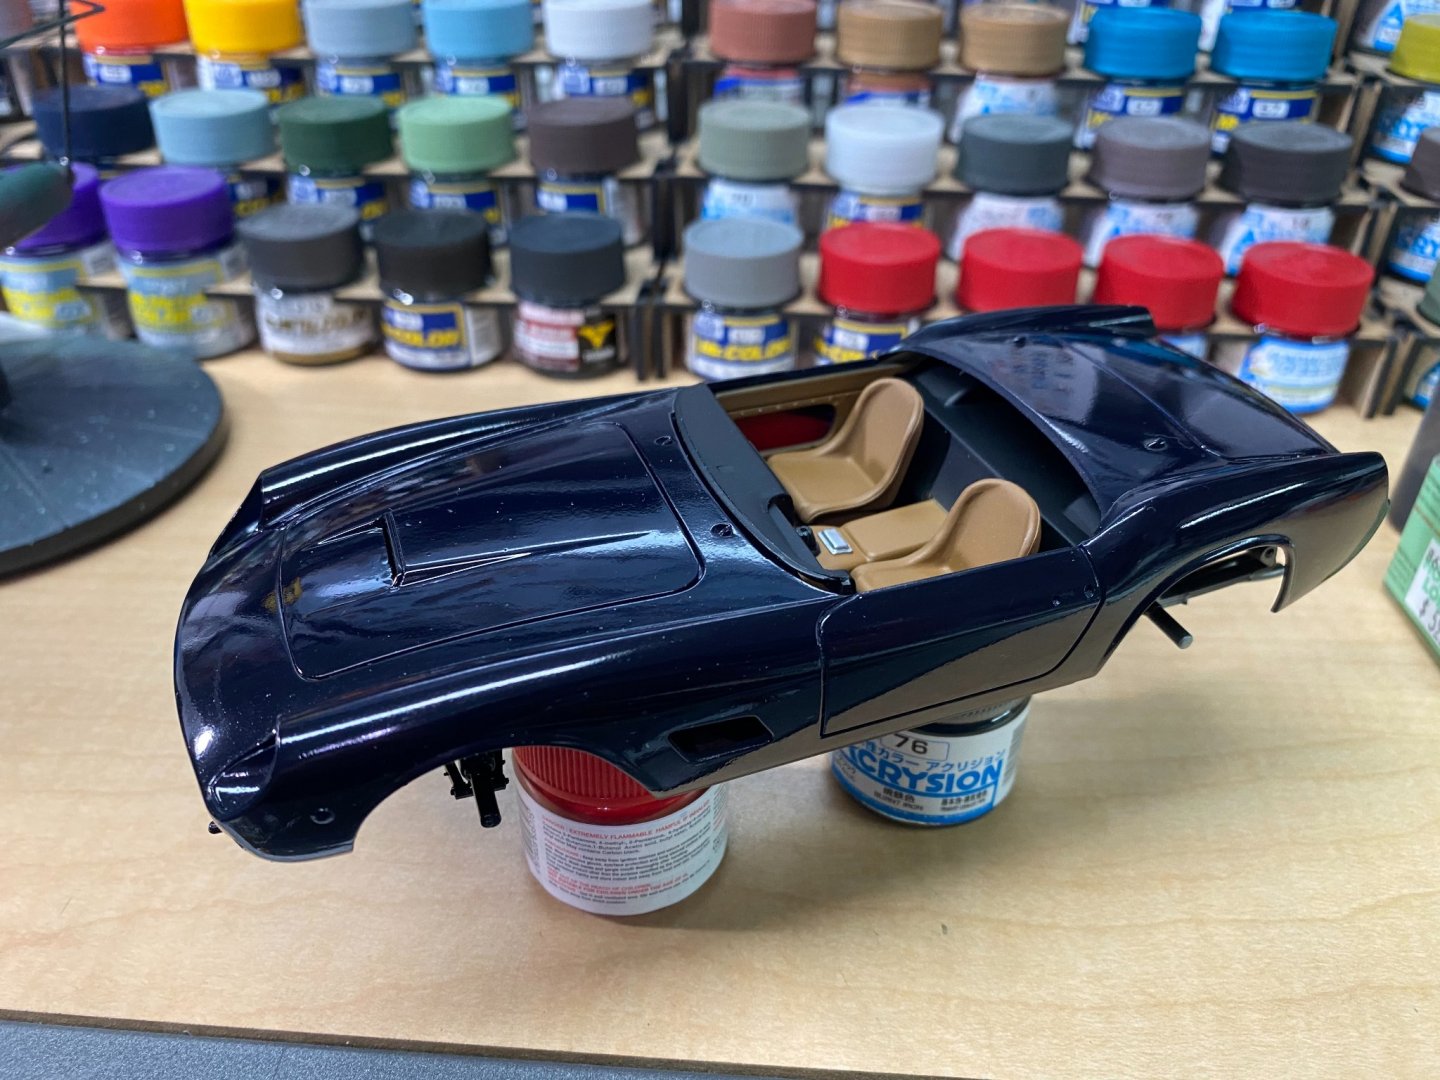
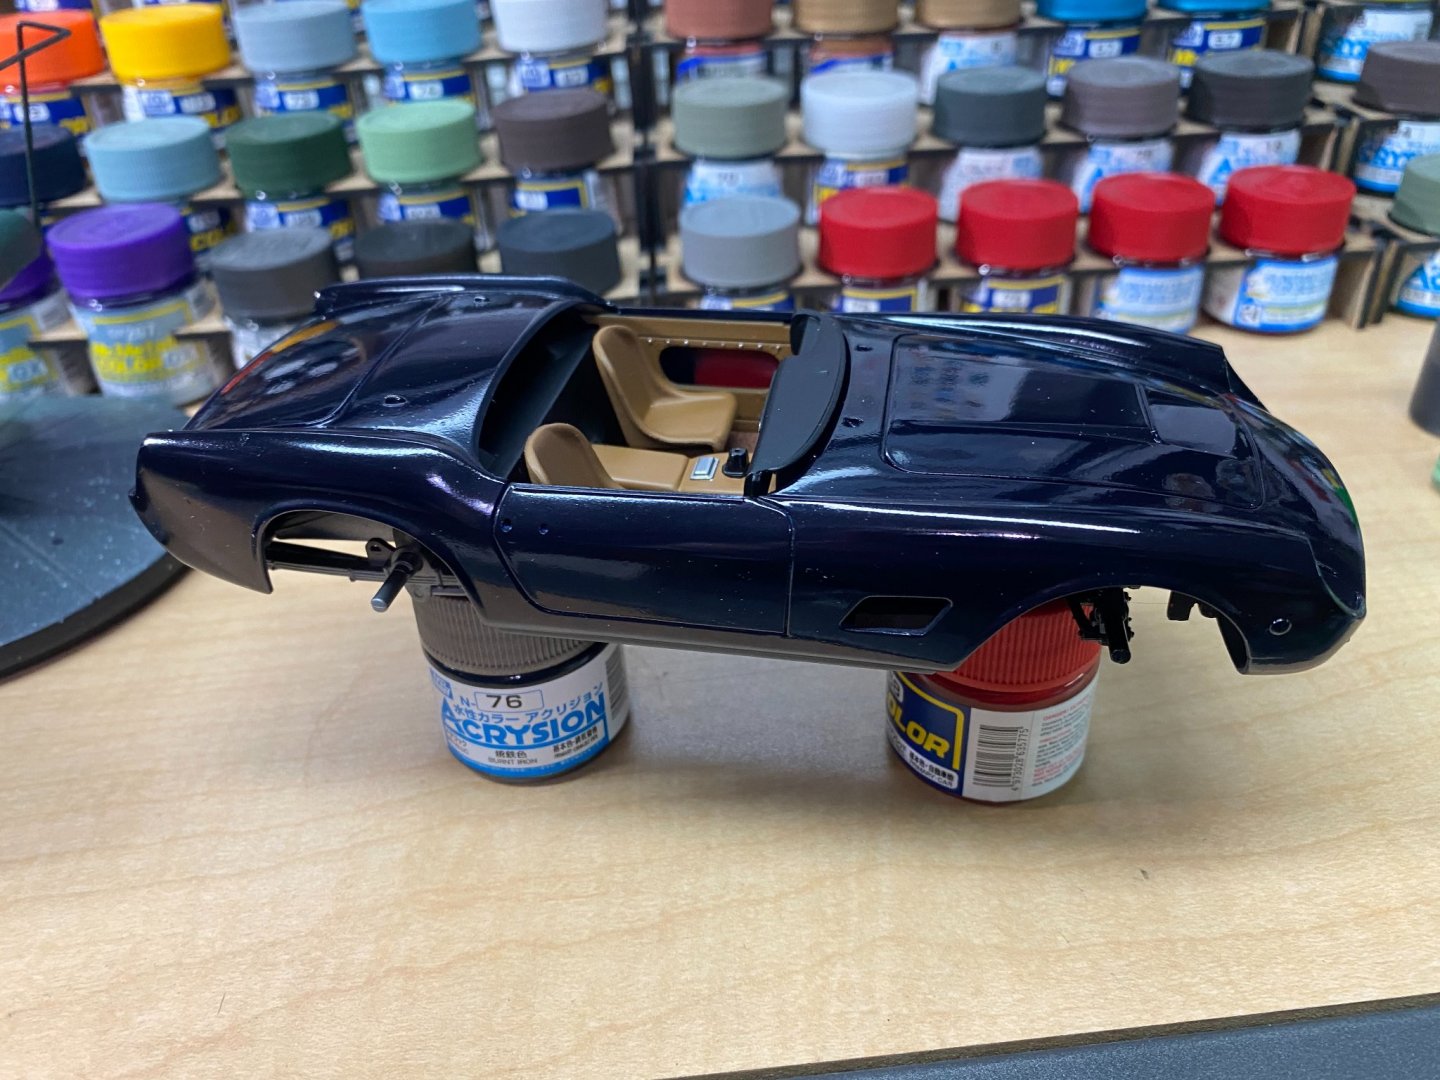
That dark blue shows up every speck of dust like it's lit up. Can't even see it until after I've taken the photo. Will hit it with my anti static brush for the final photos. 🤔
-
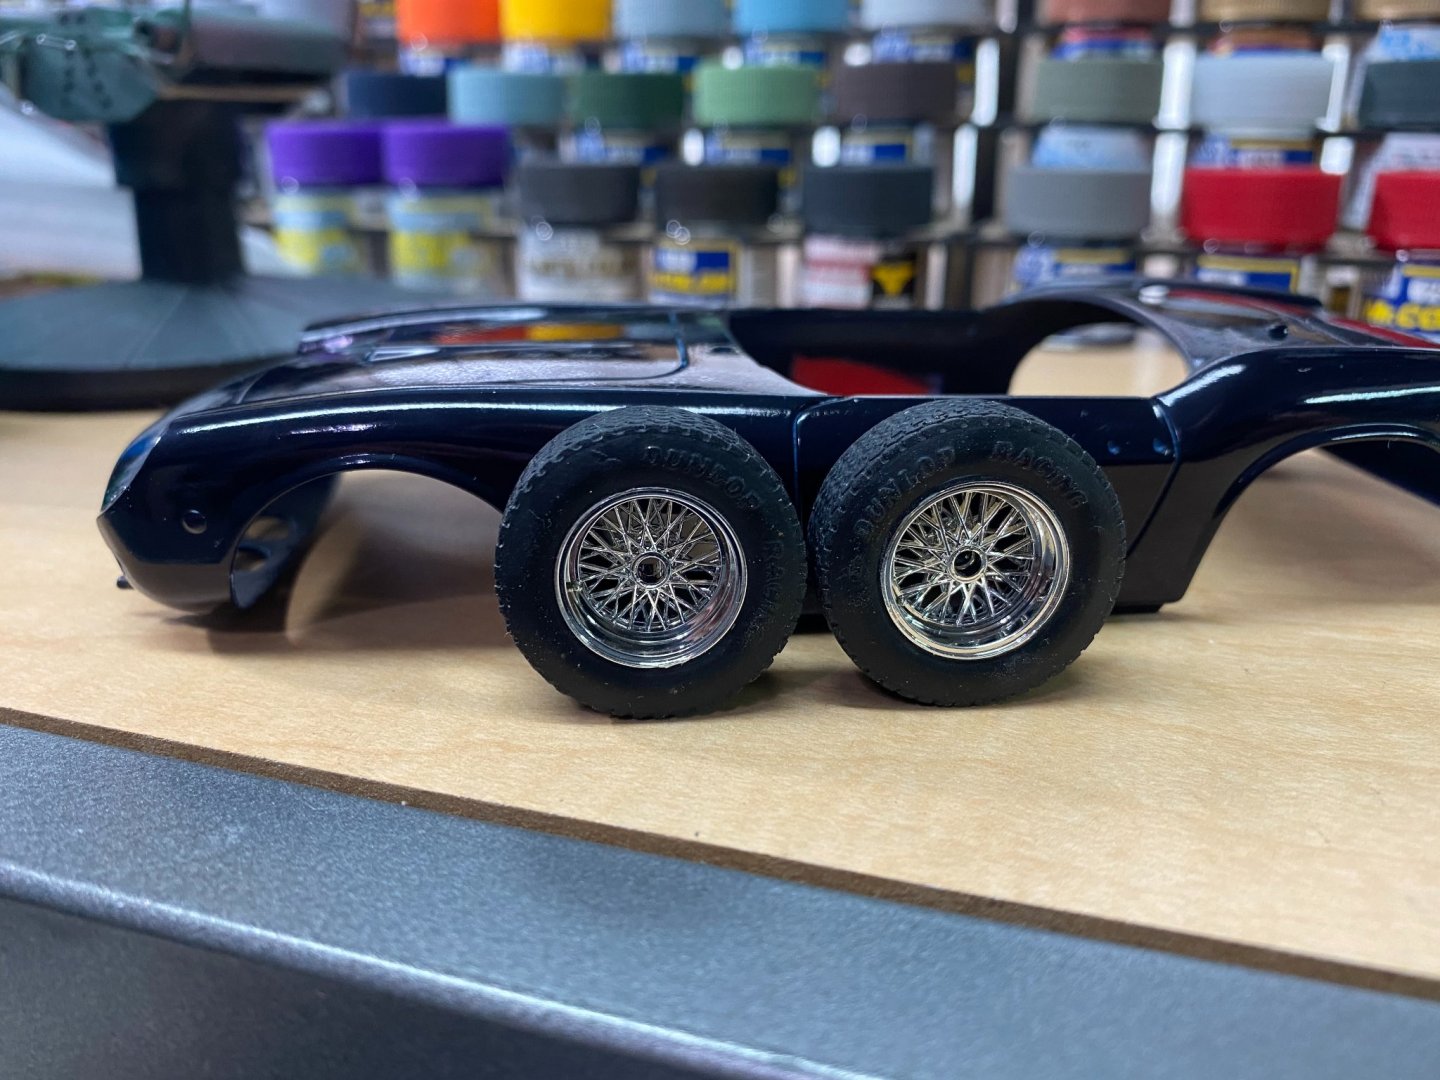
I'm going to do a deep dive into my spare tire stash. I have a box full of nothing but model car tires somewhere, I just have to find it. There's bound to be something that looks better, even if they don't say Dunlop (which is the correct brand for that year Ferrari).
-
That's because of my high tech Dollar Tree LED lights in the shadow box. 😄
-
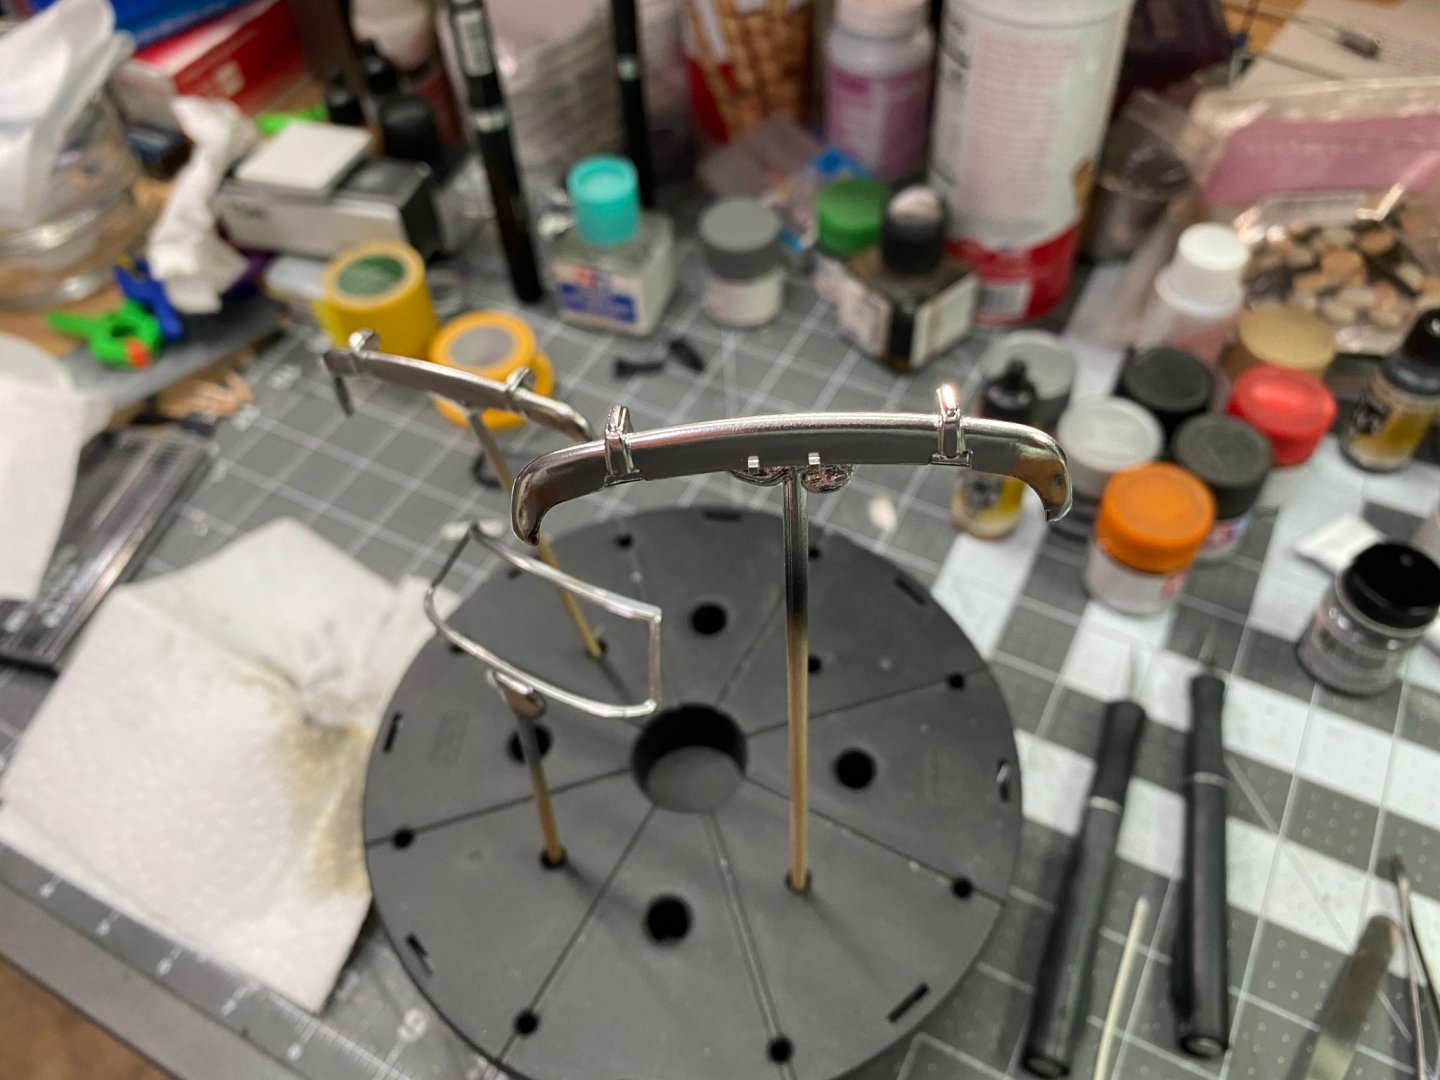
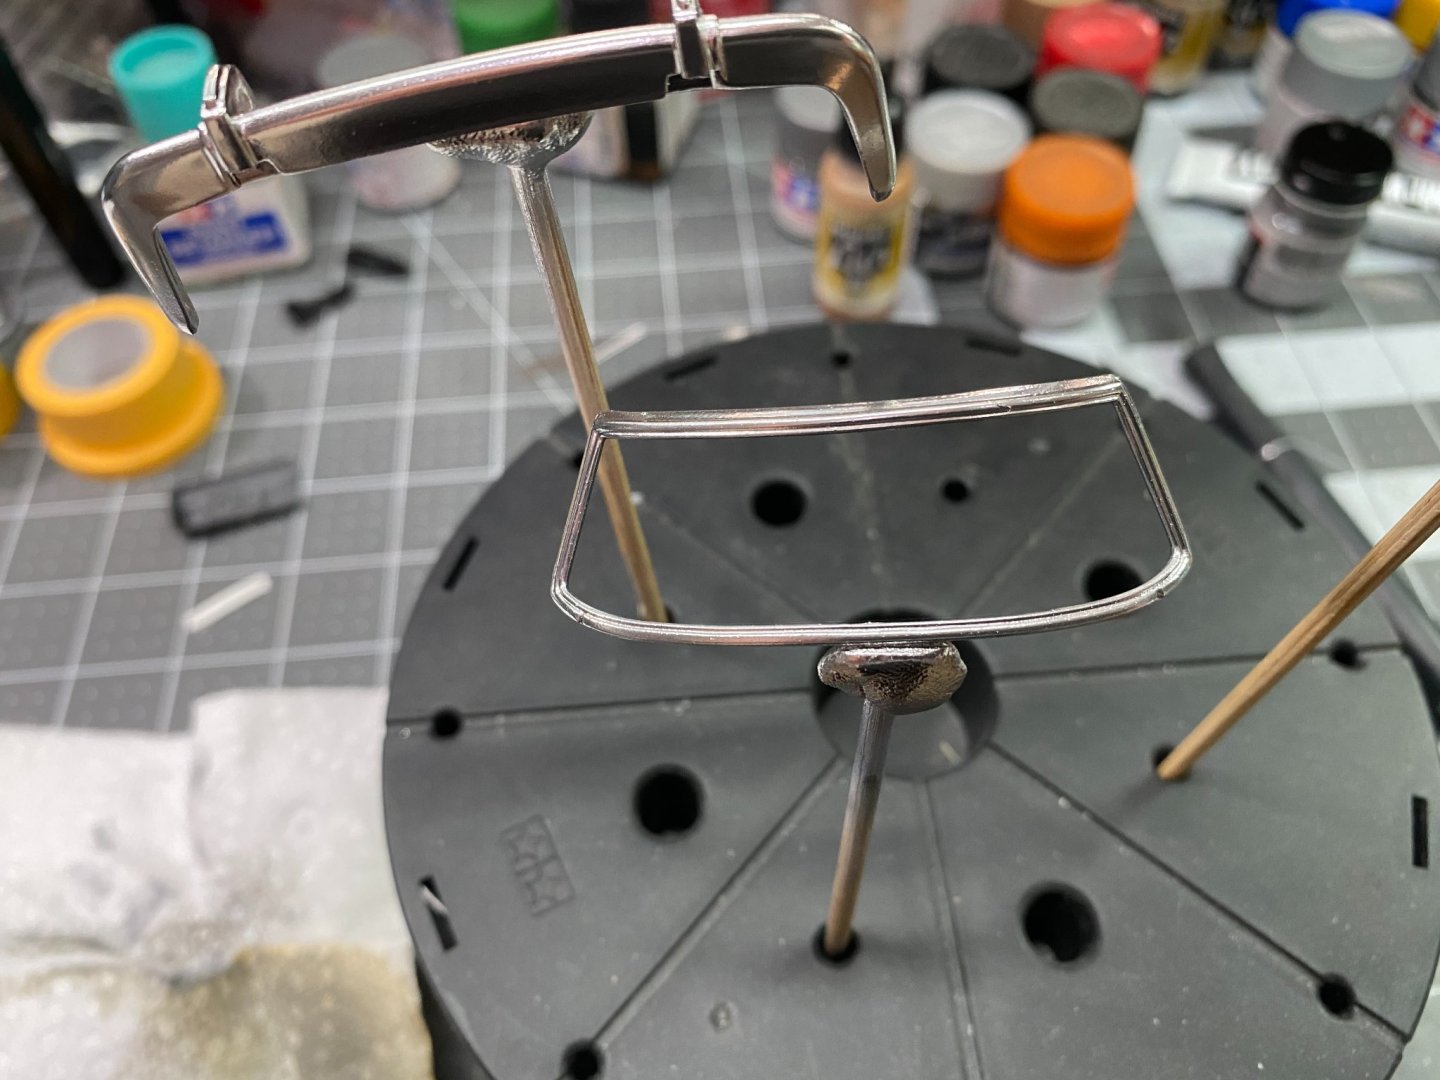
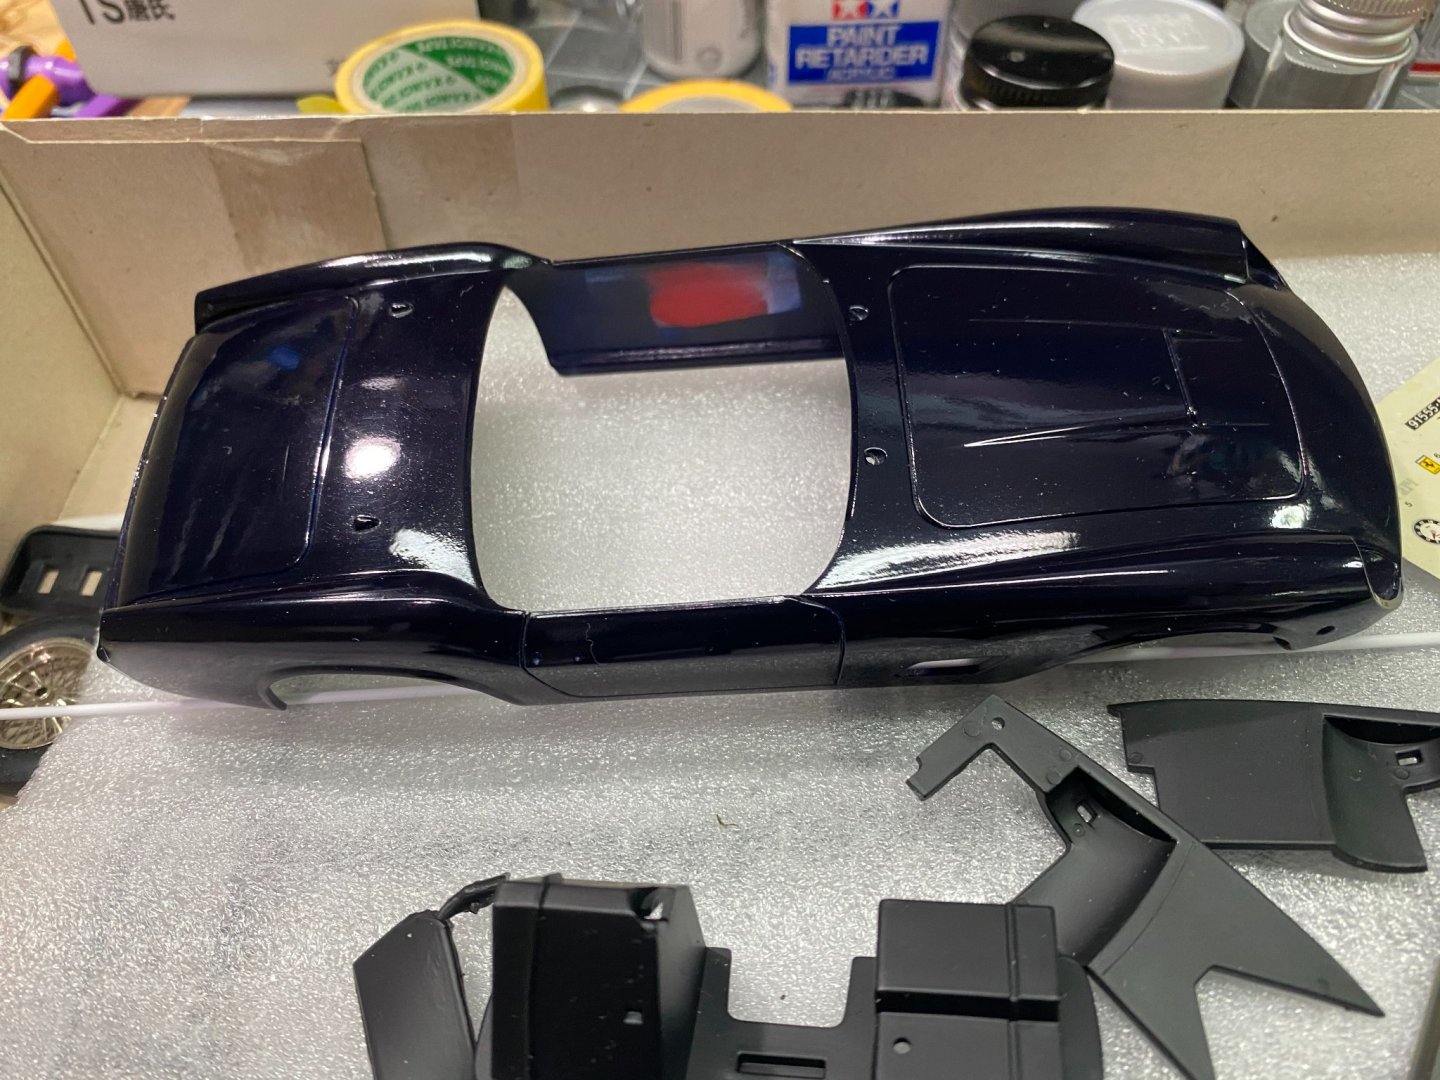
The little California Spyder begins to catch her stride once the little chrome bits begin to be added.


-
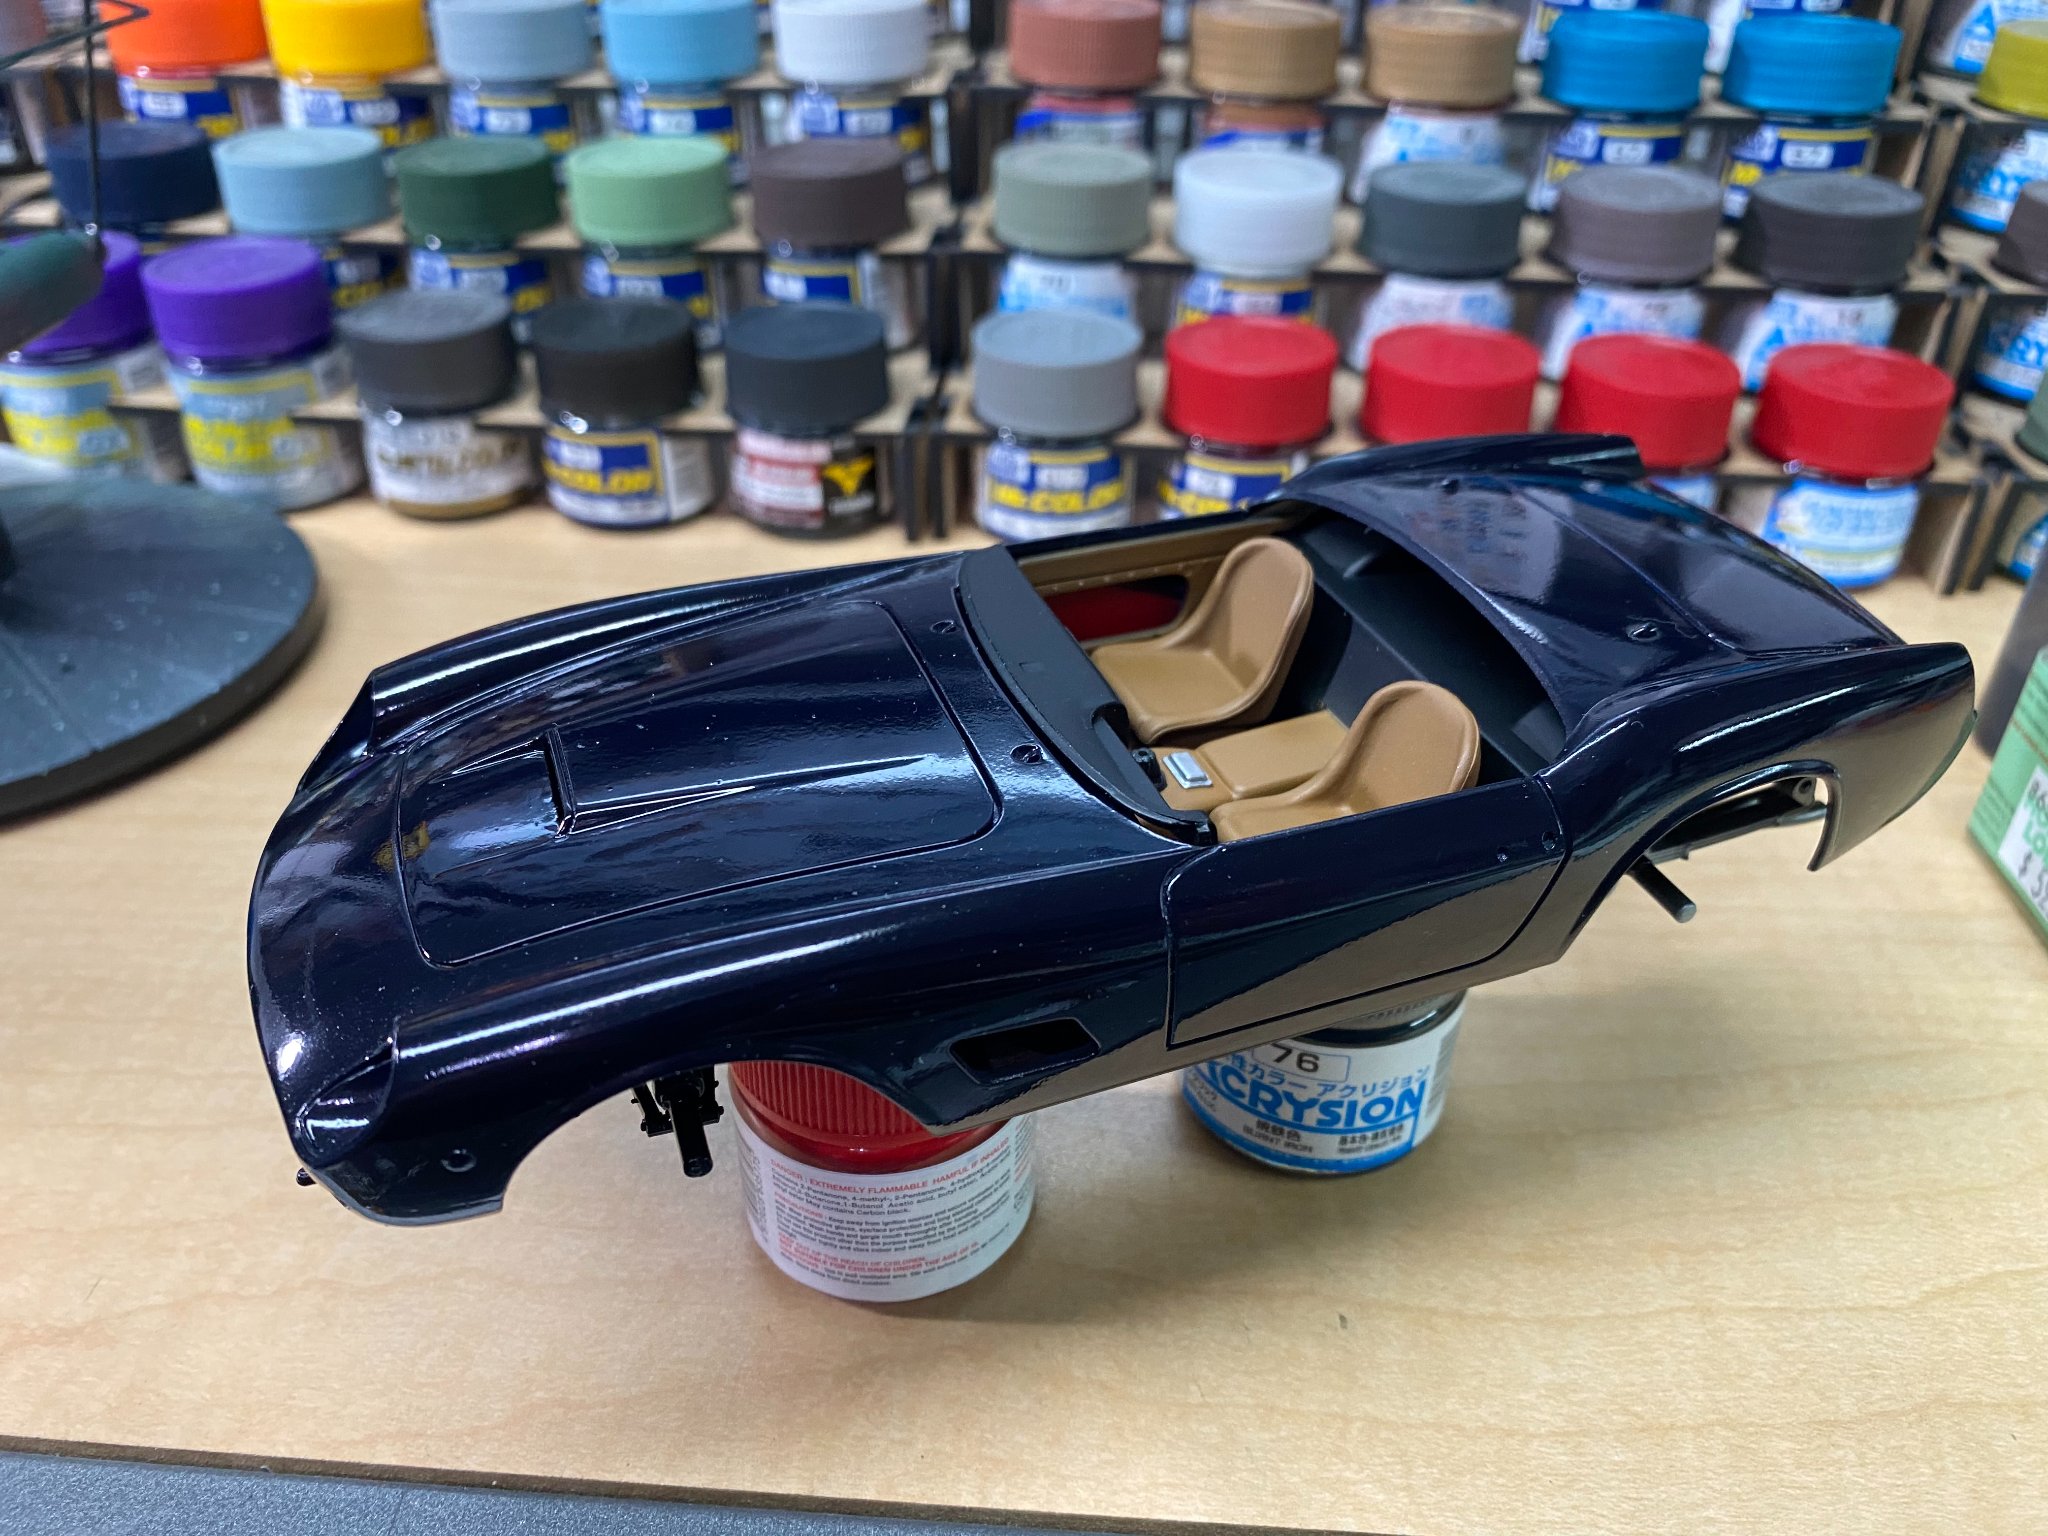
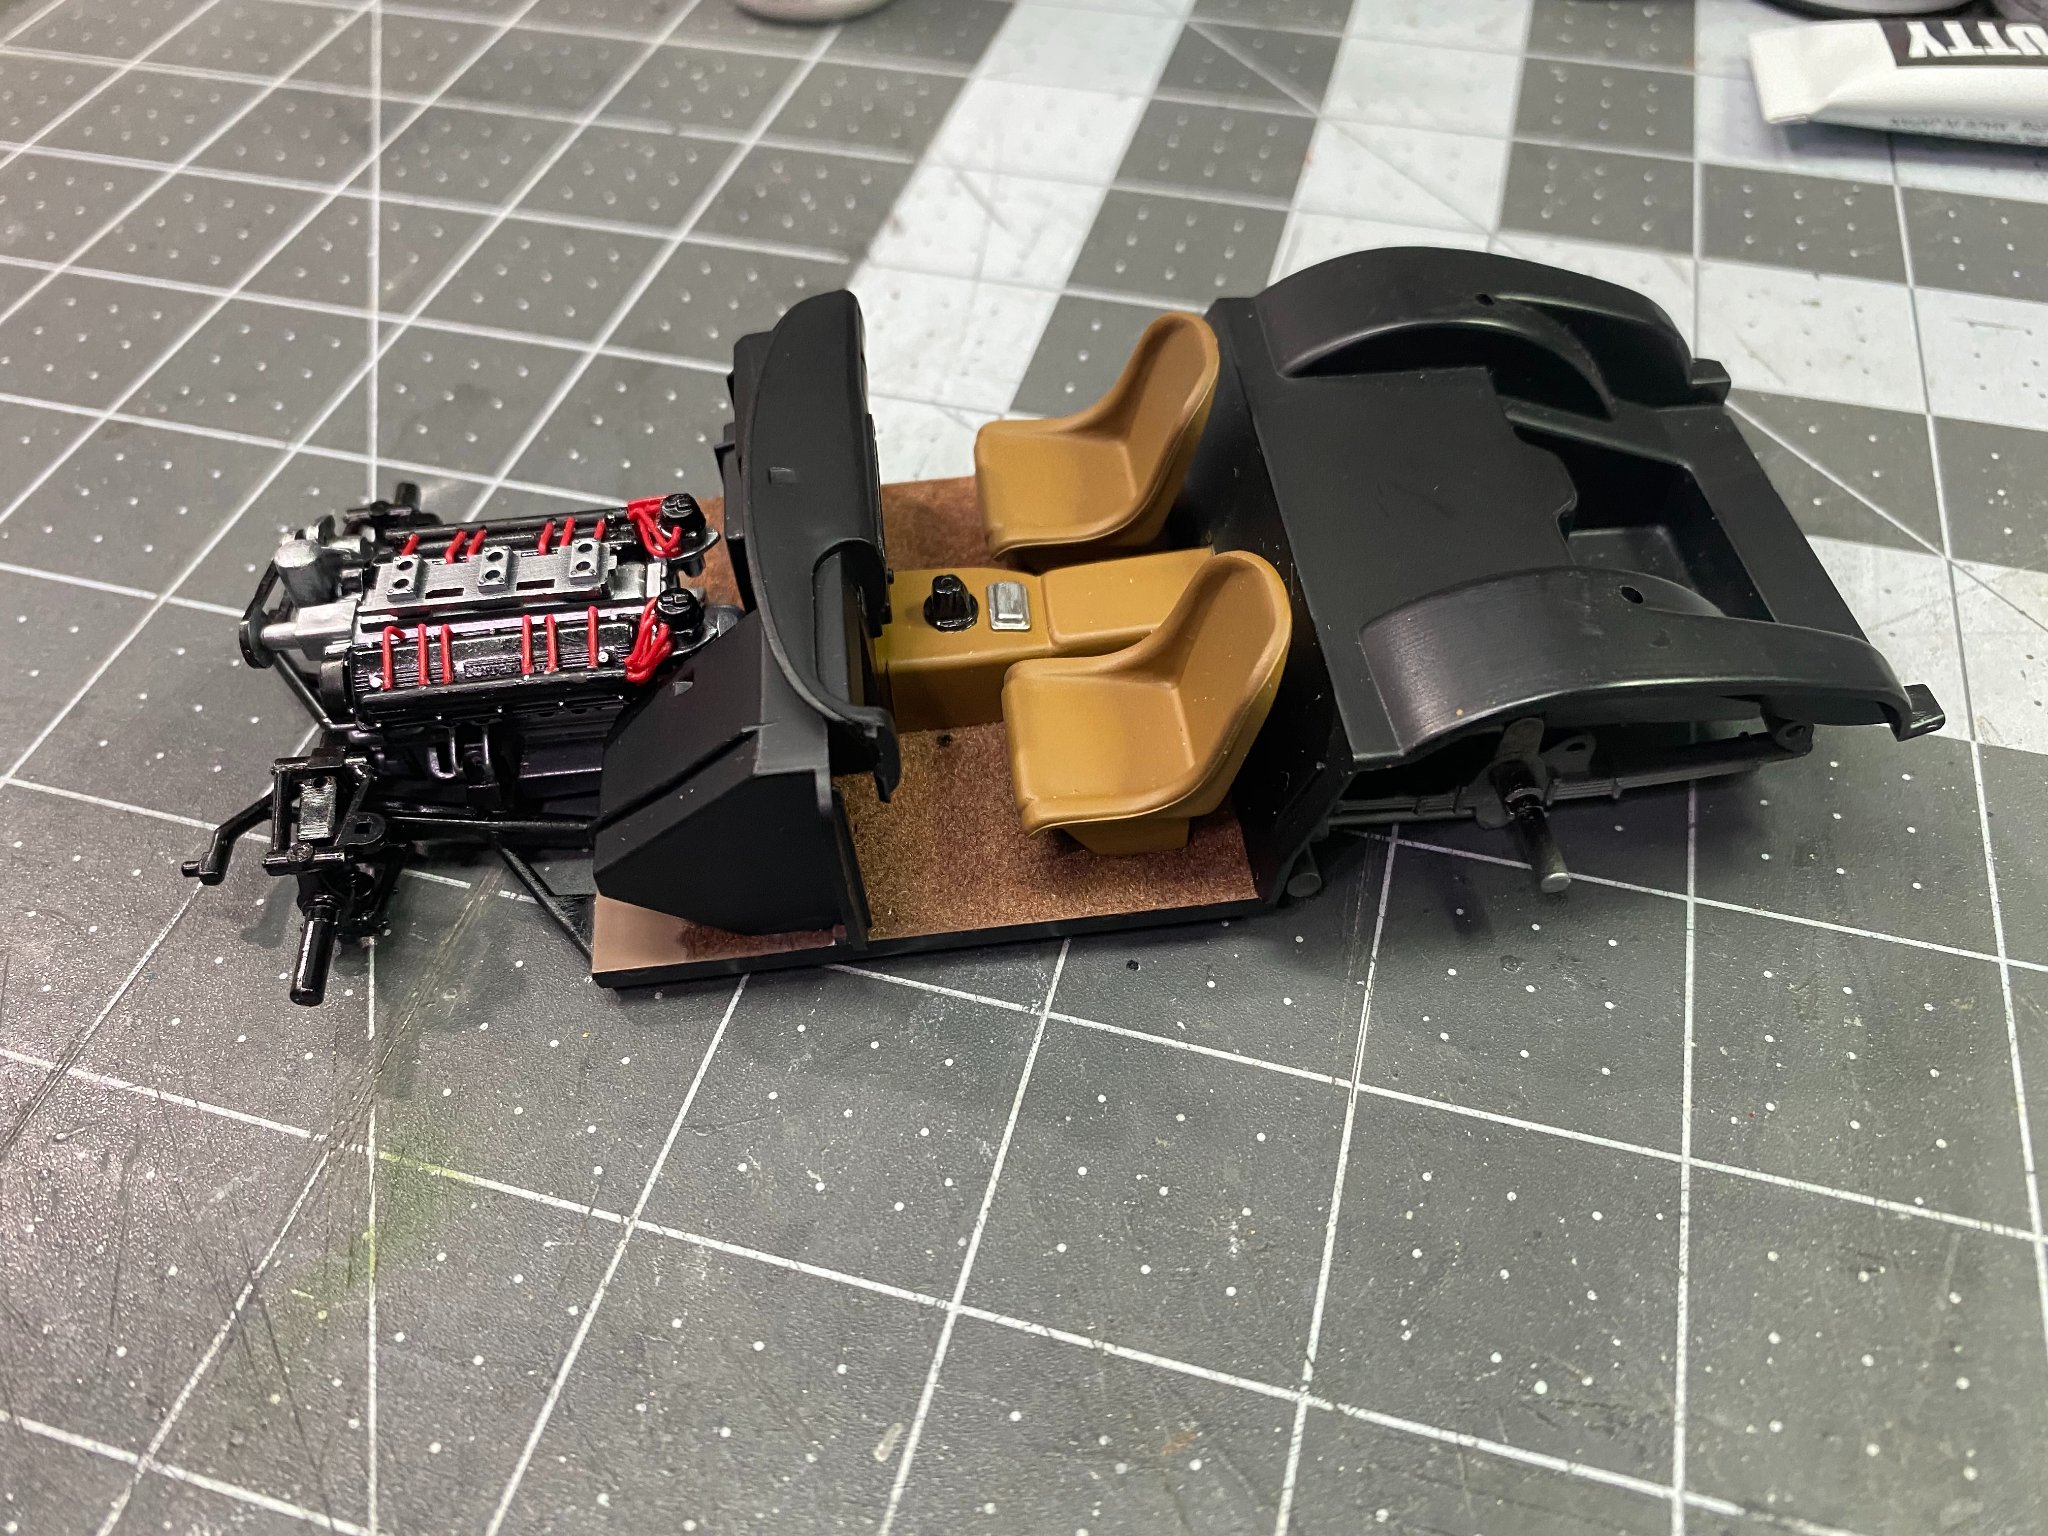
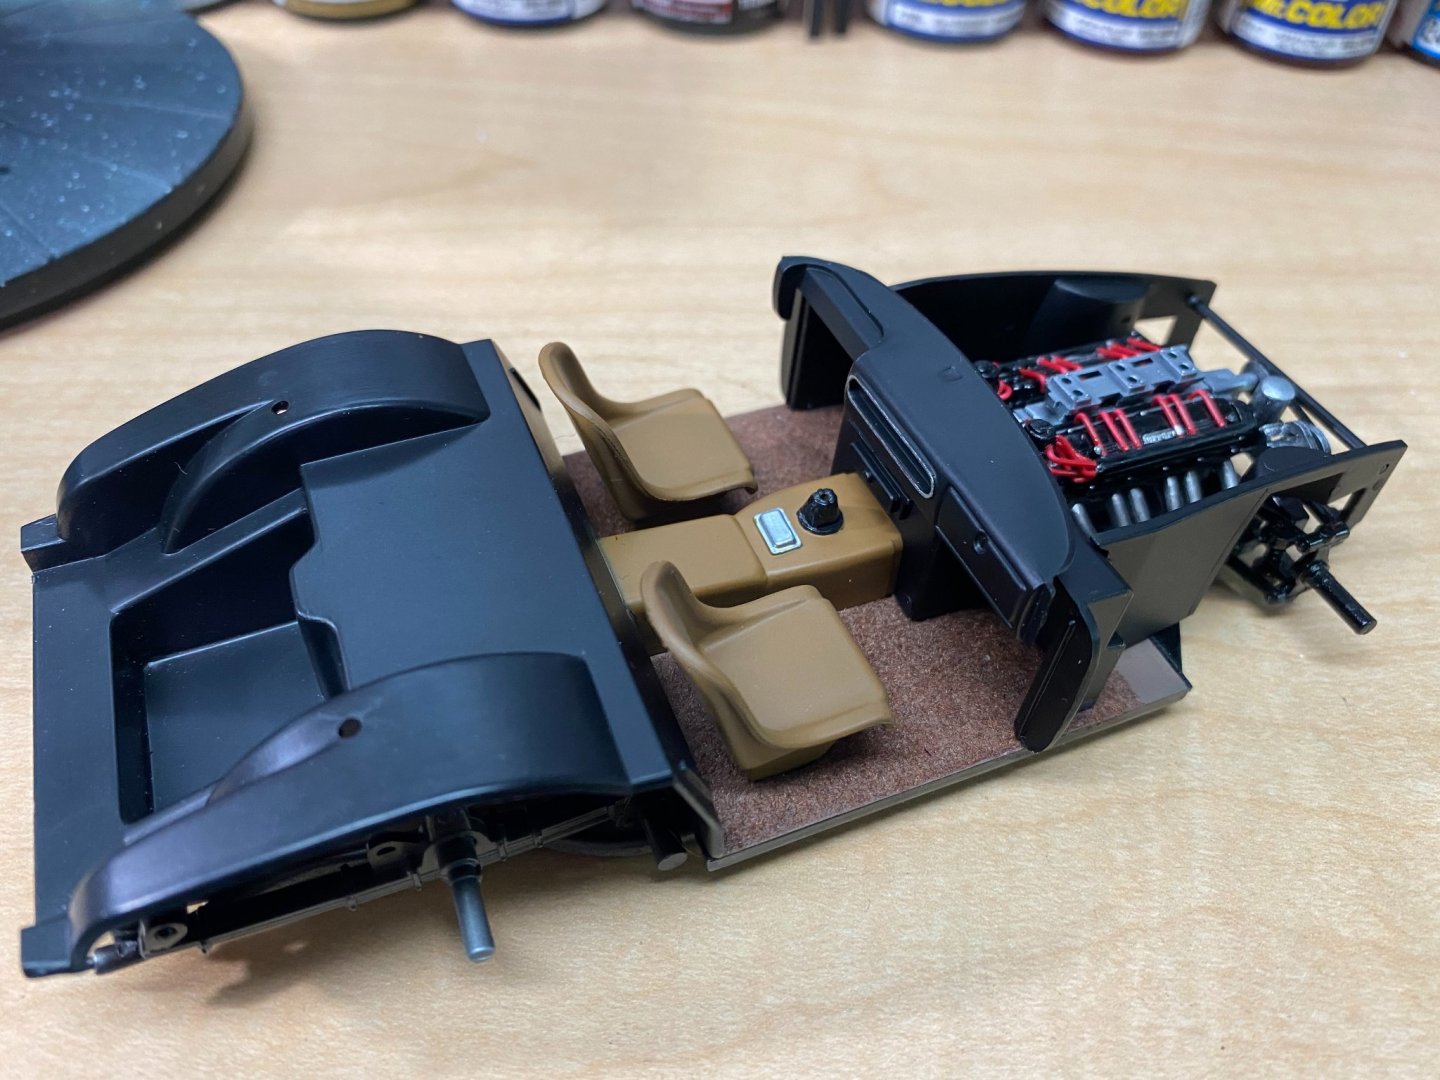
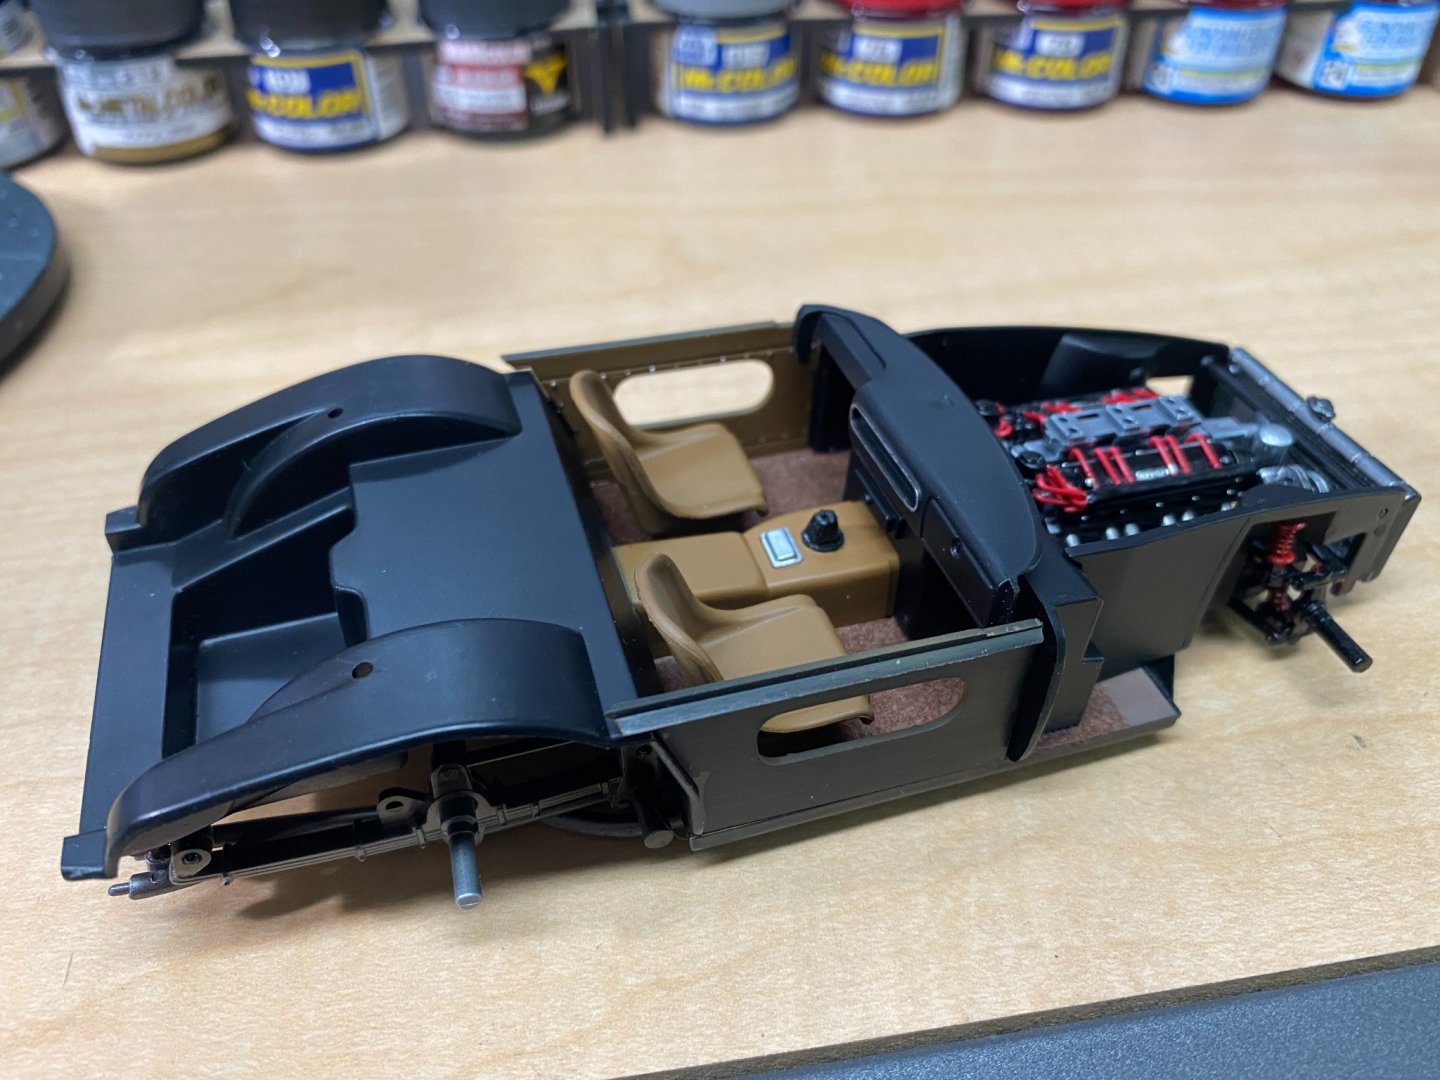
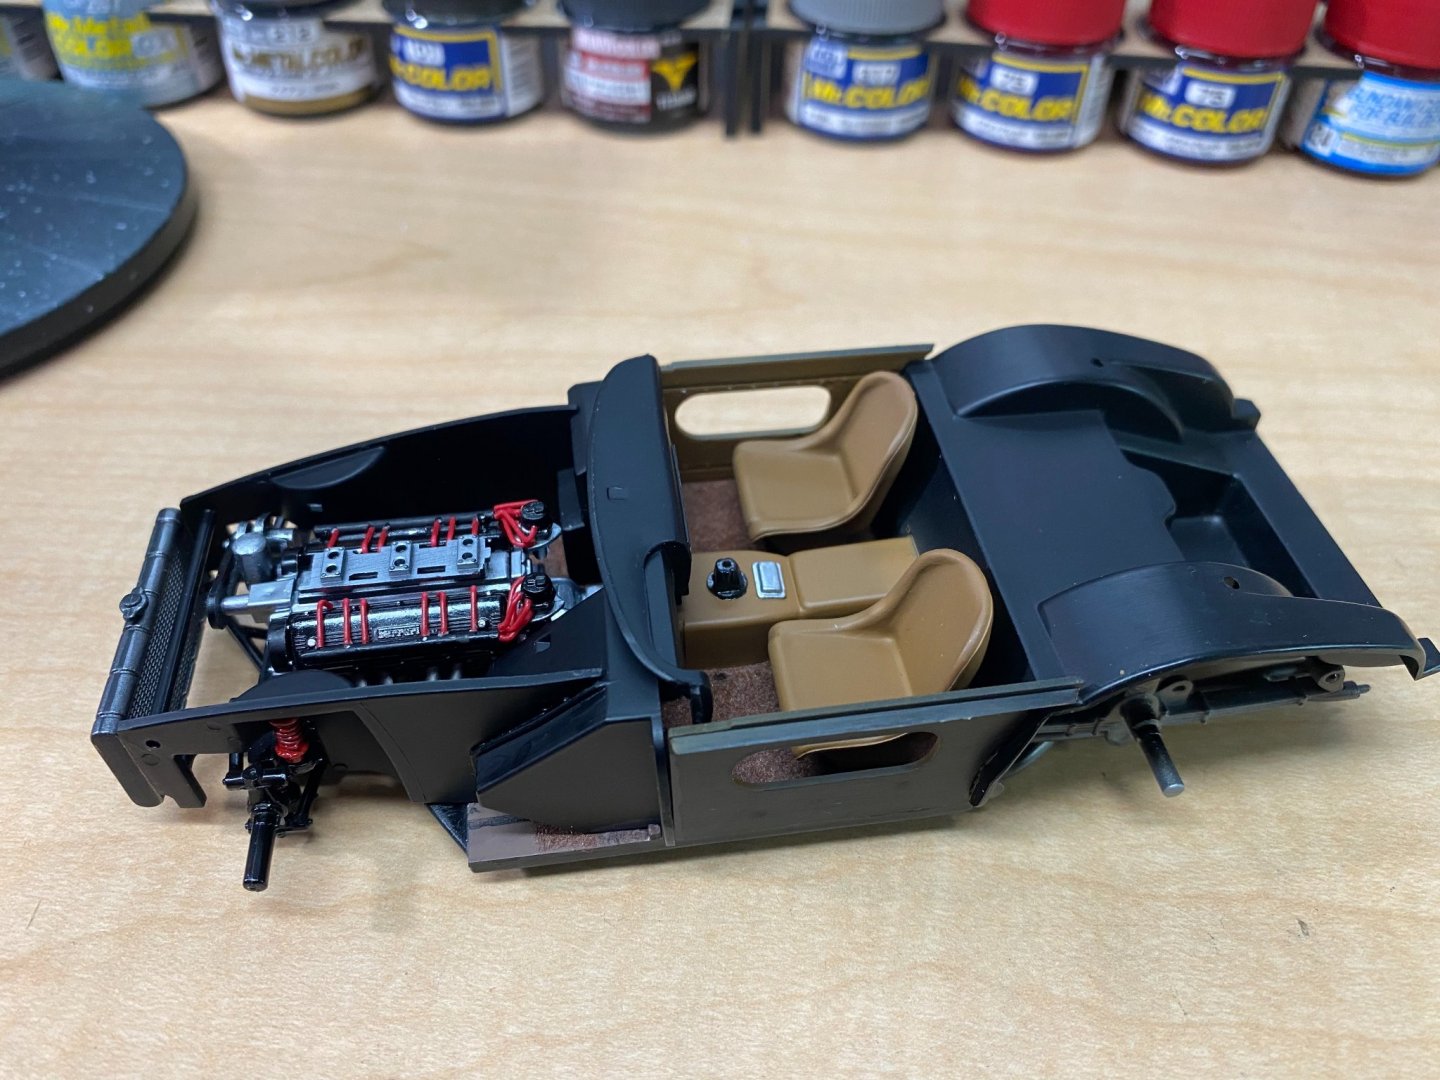
Performed some surgery and reconstructed the dash and door panels. I believe the adjustment will make this work out okay. The windshield frame is dry fitted with blue tack to check the fit against the dash.


- 140 replies
-
- 10
-

-

-
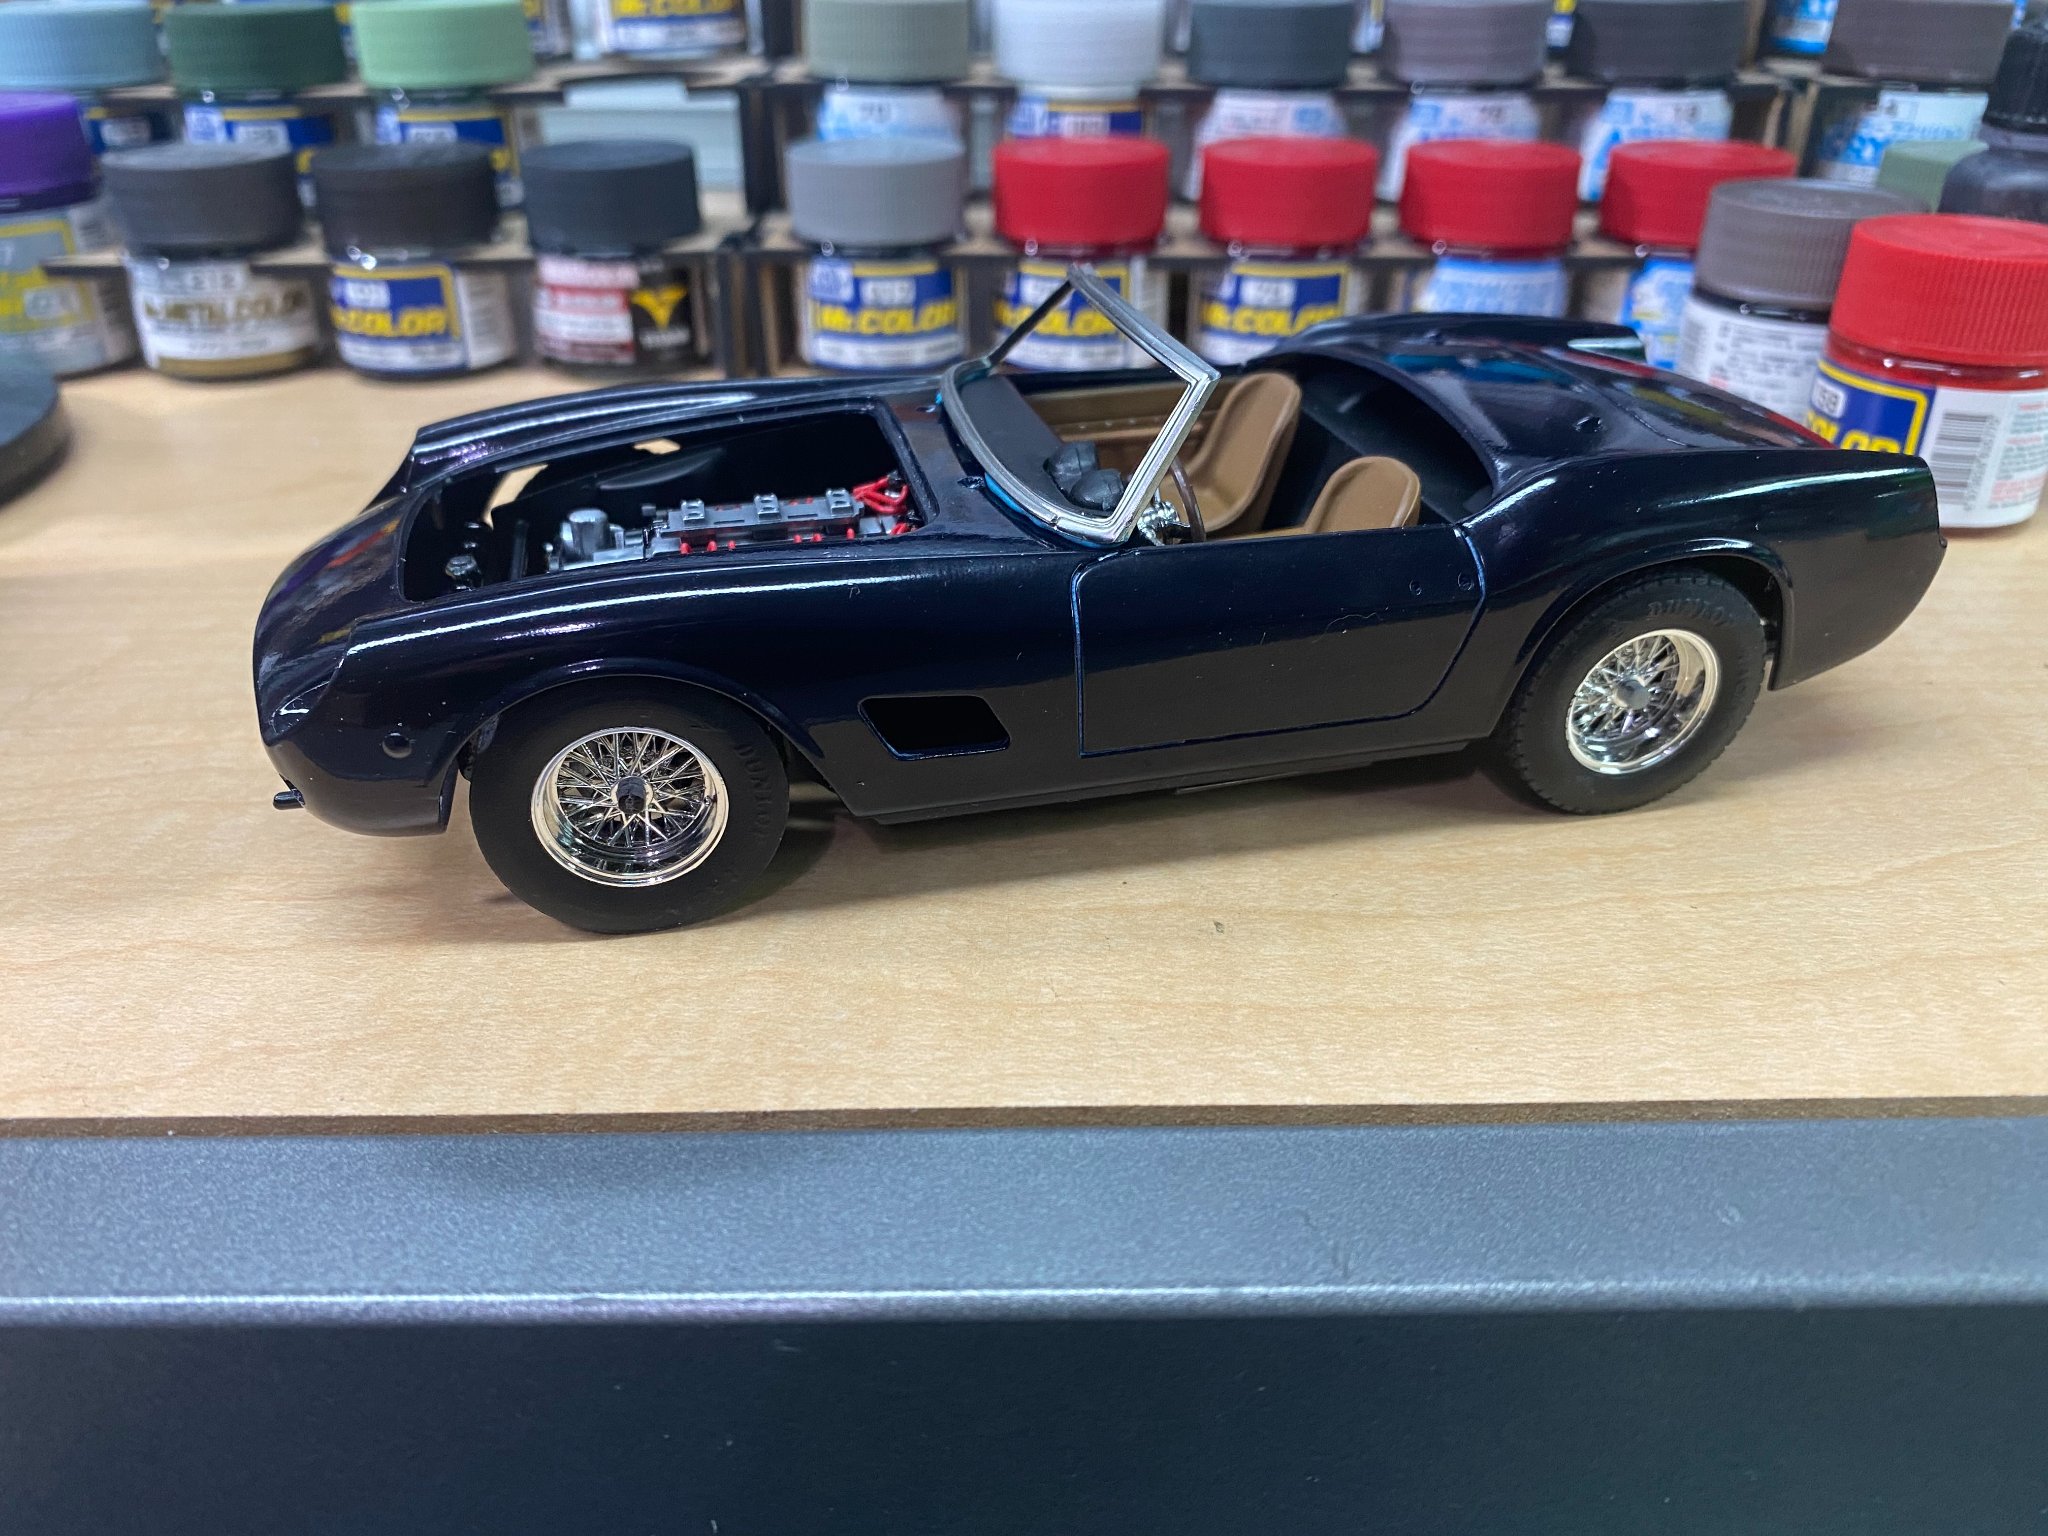
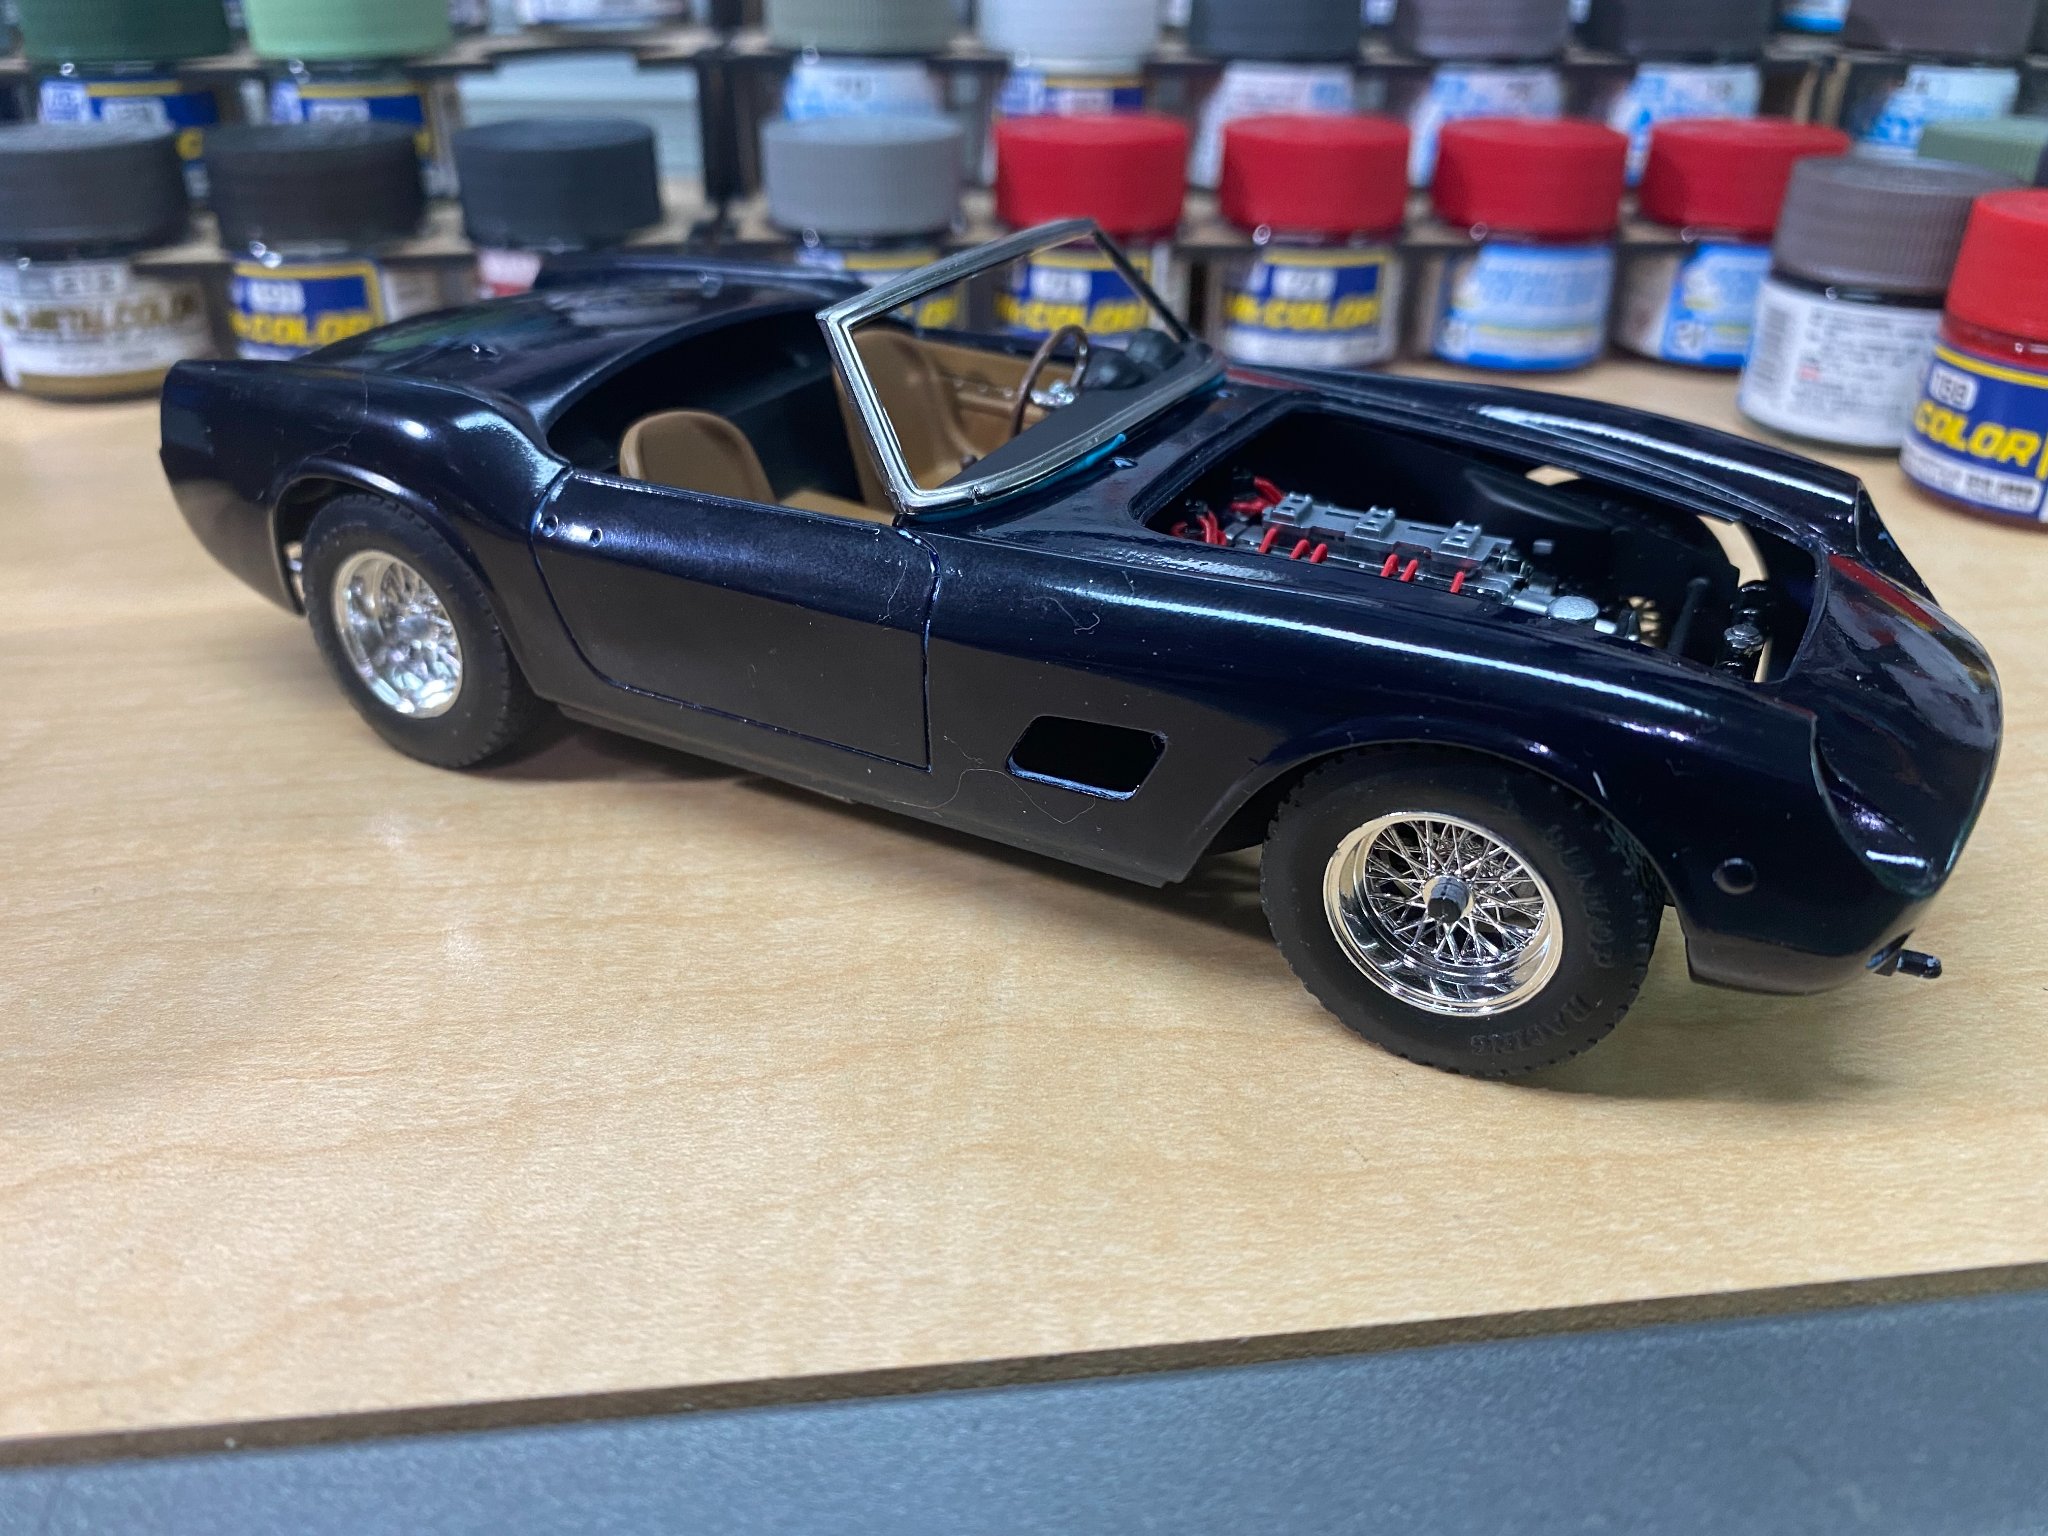
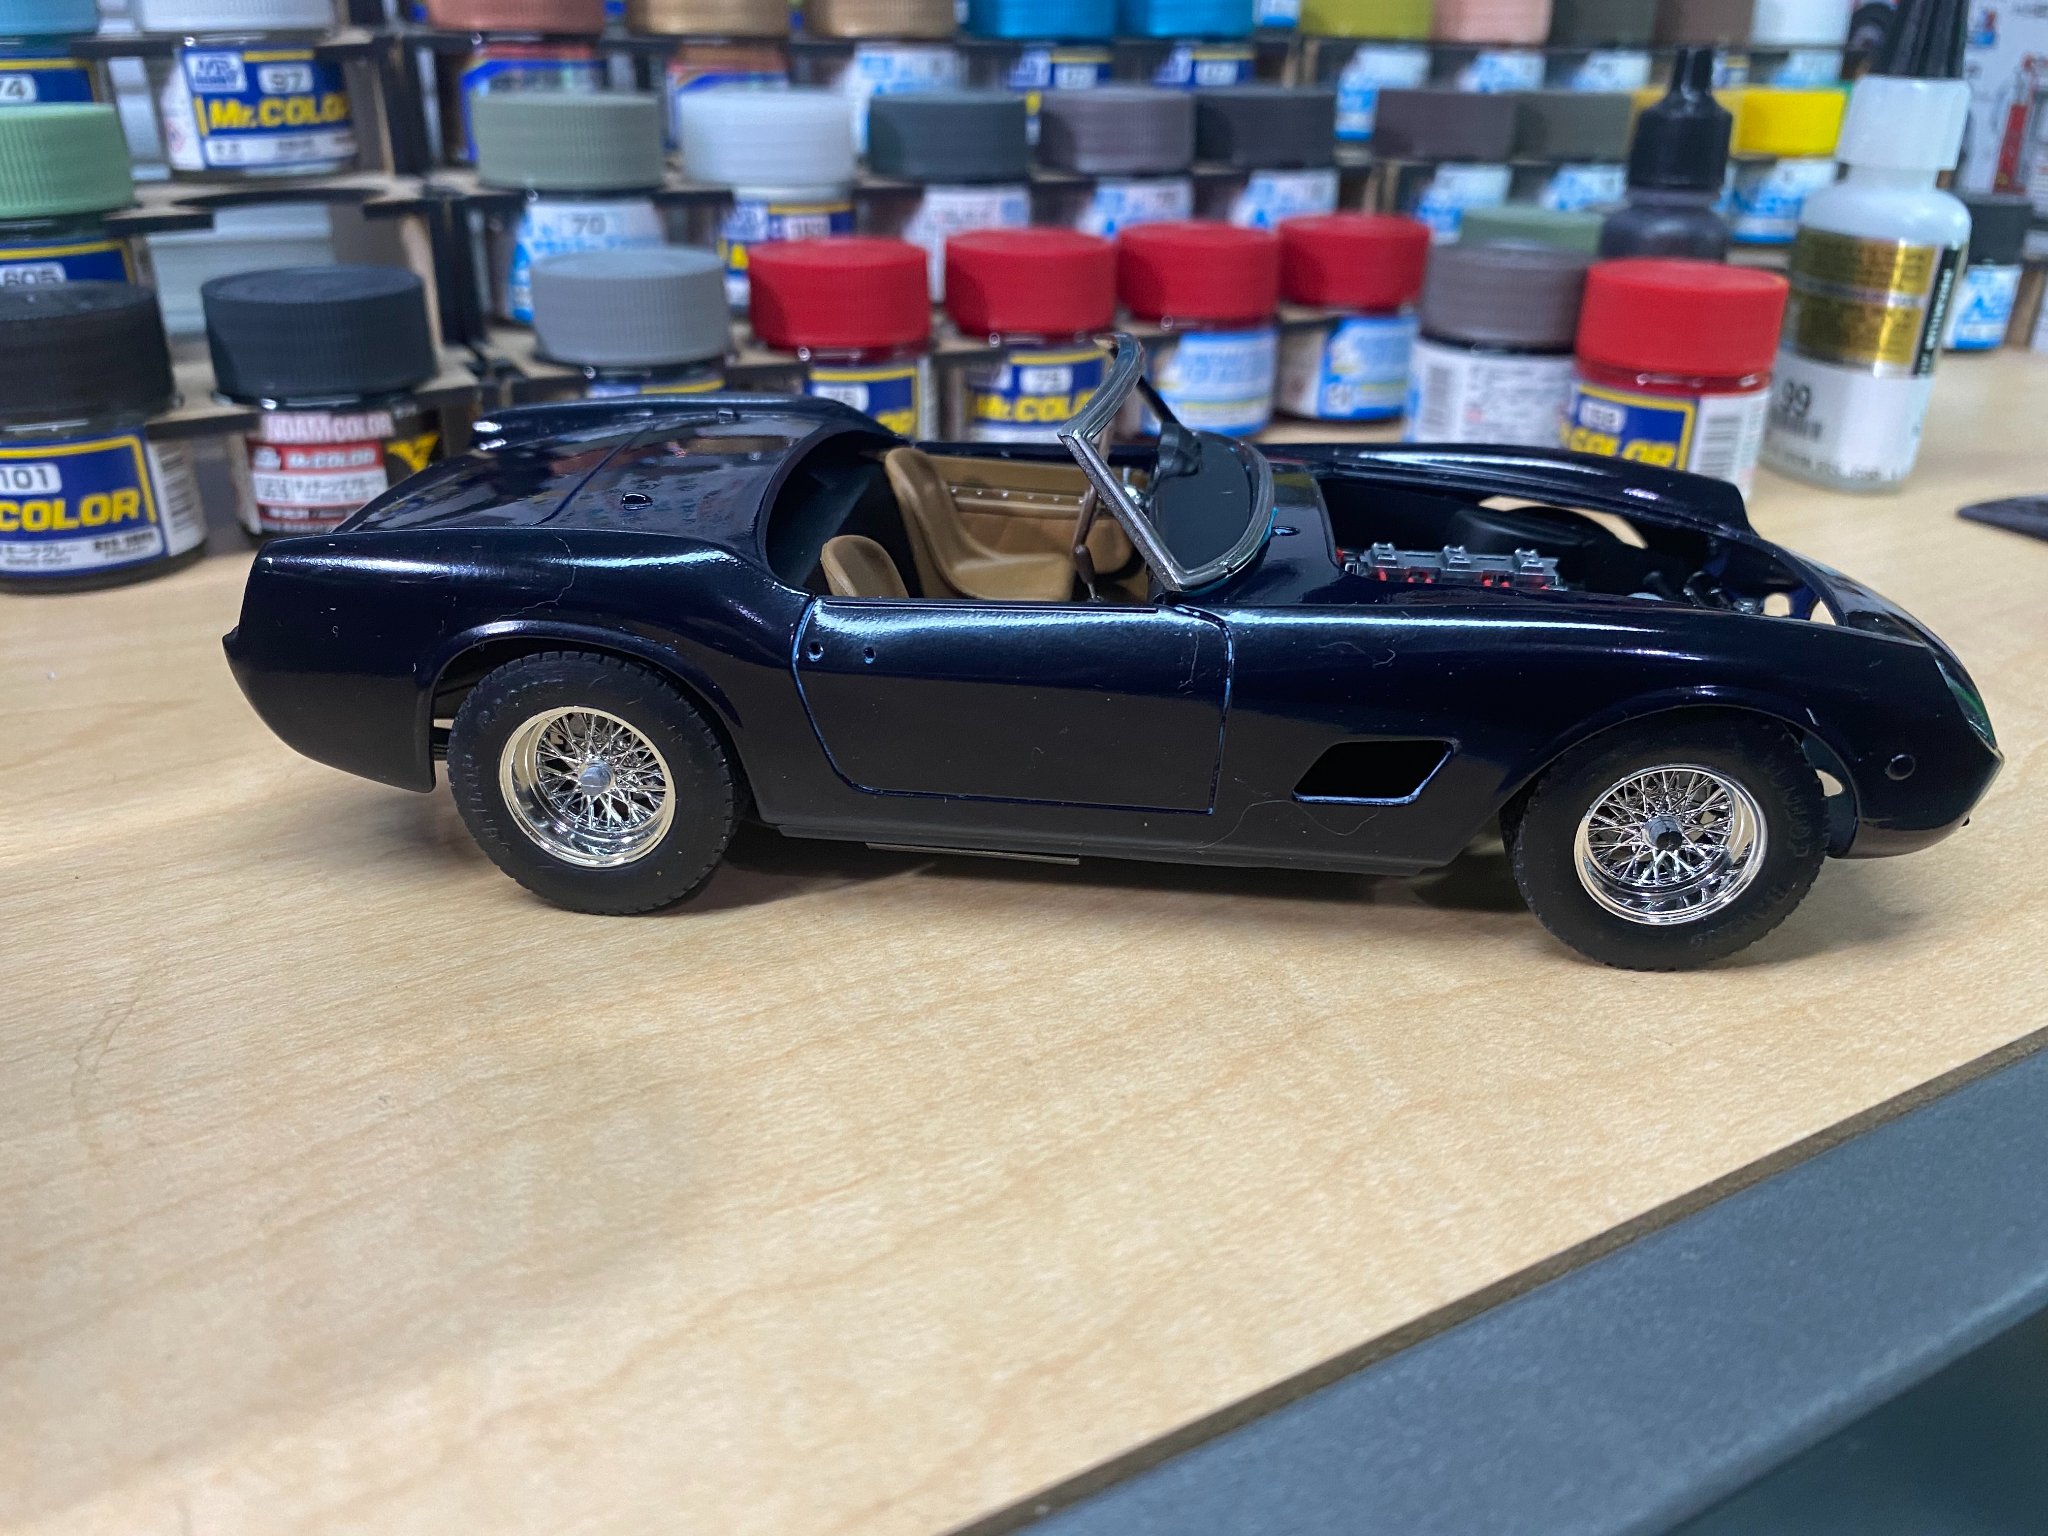
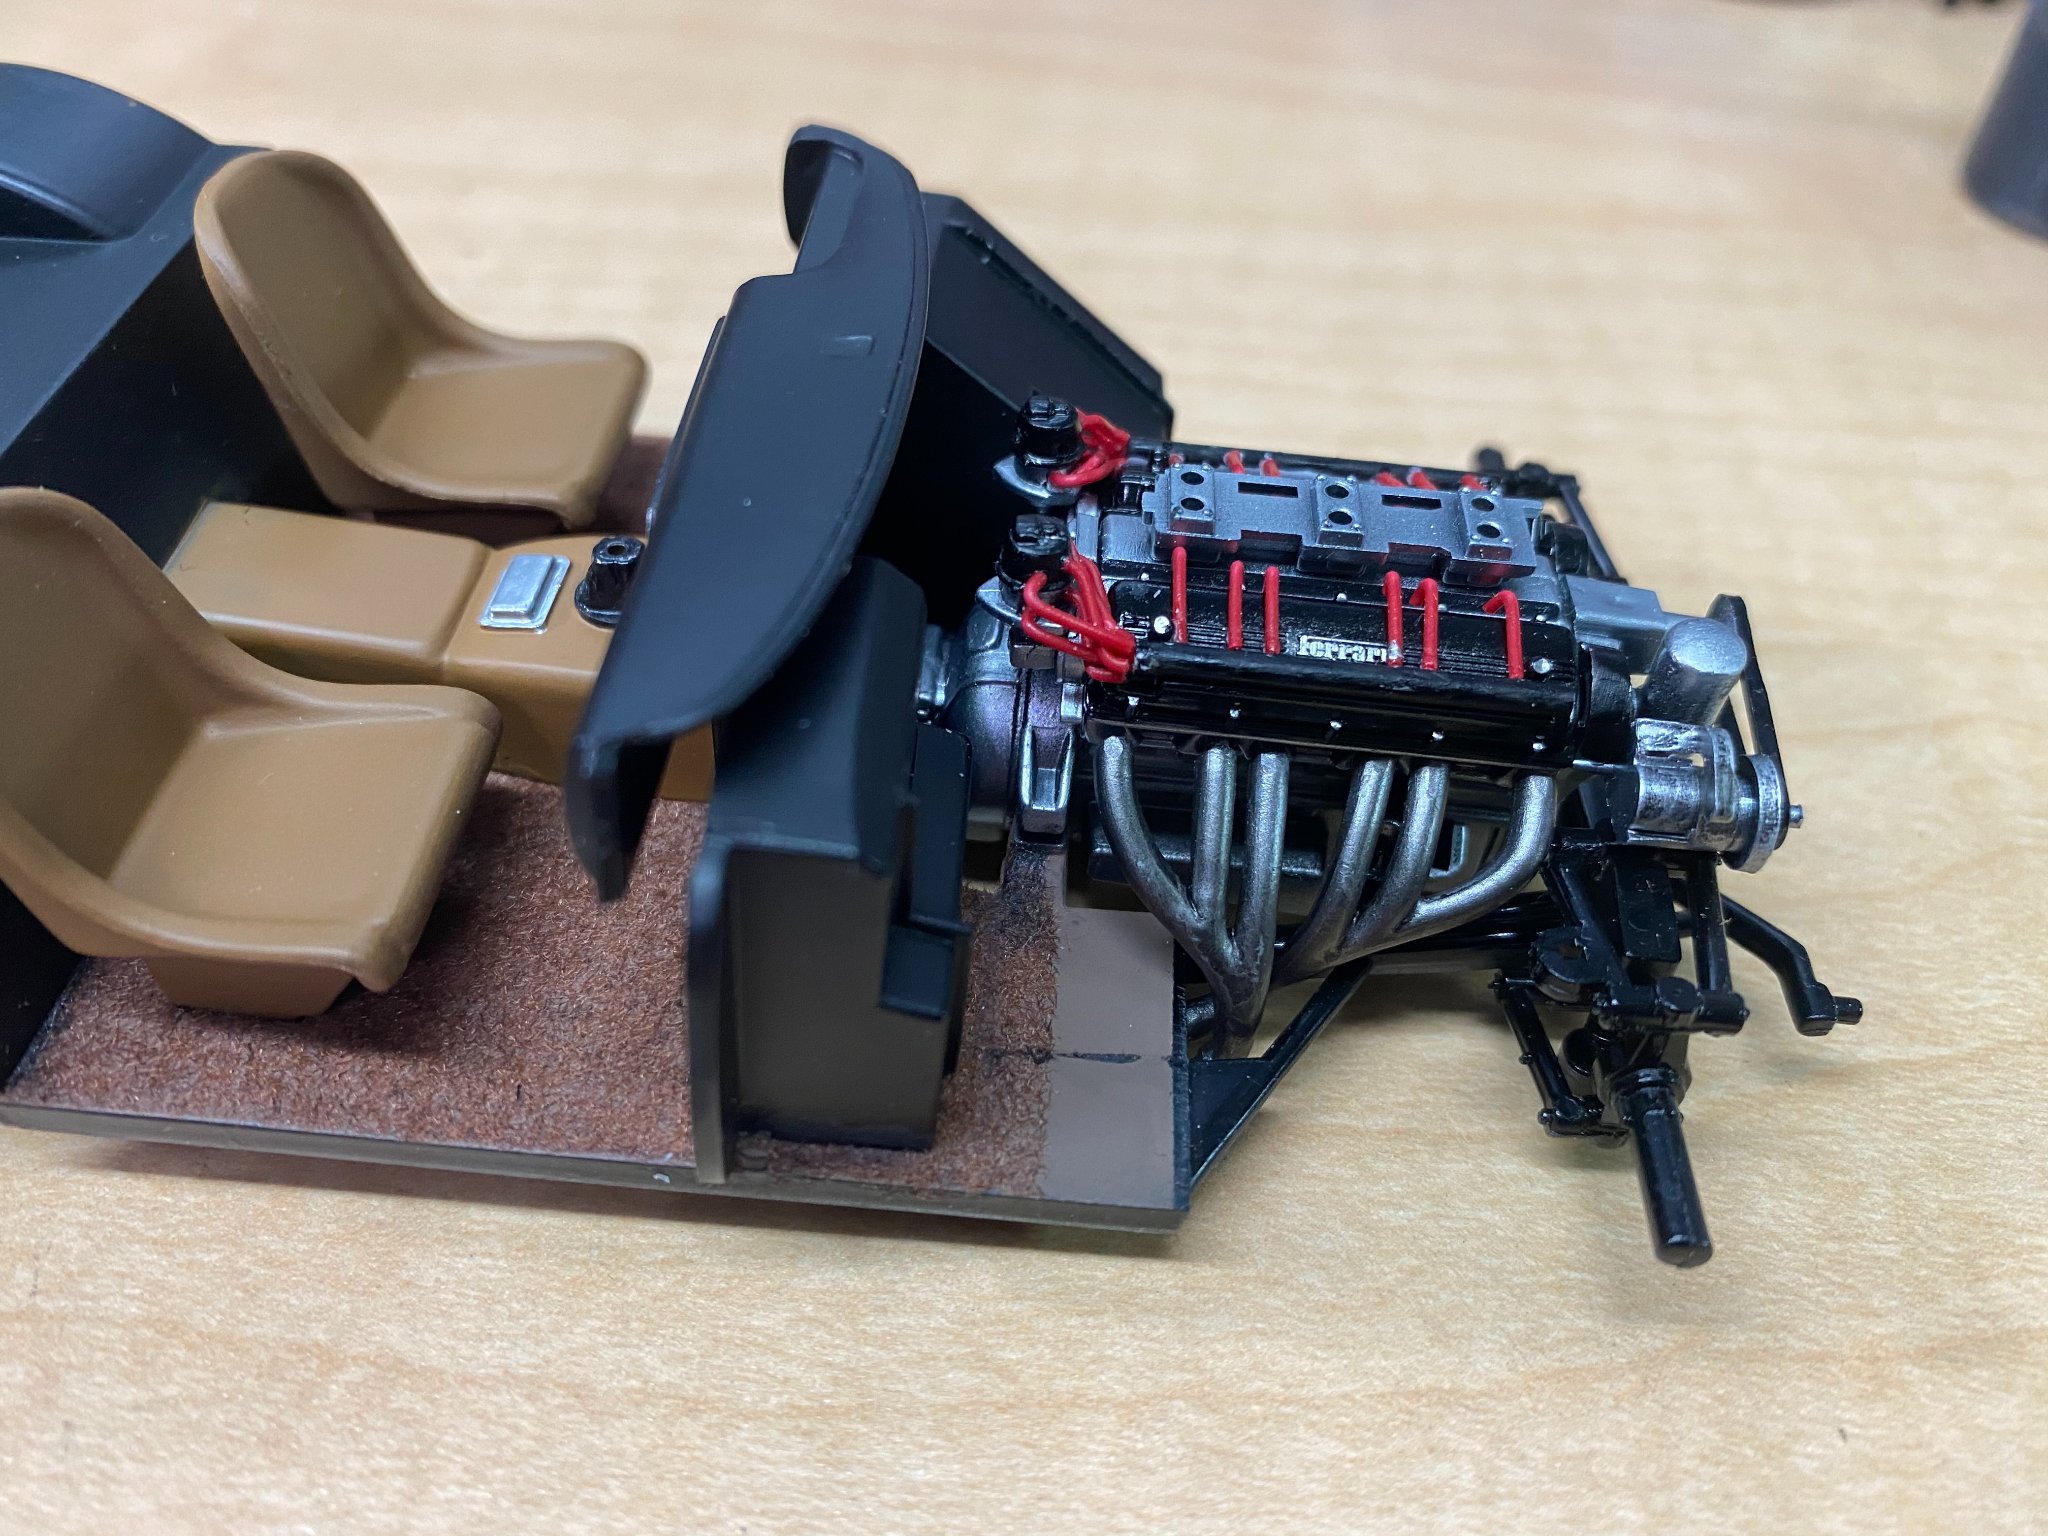
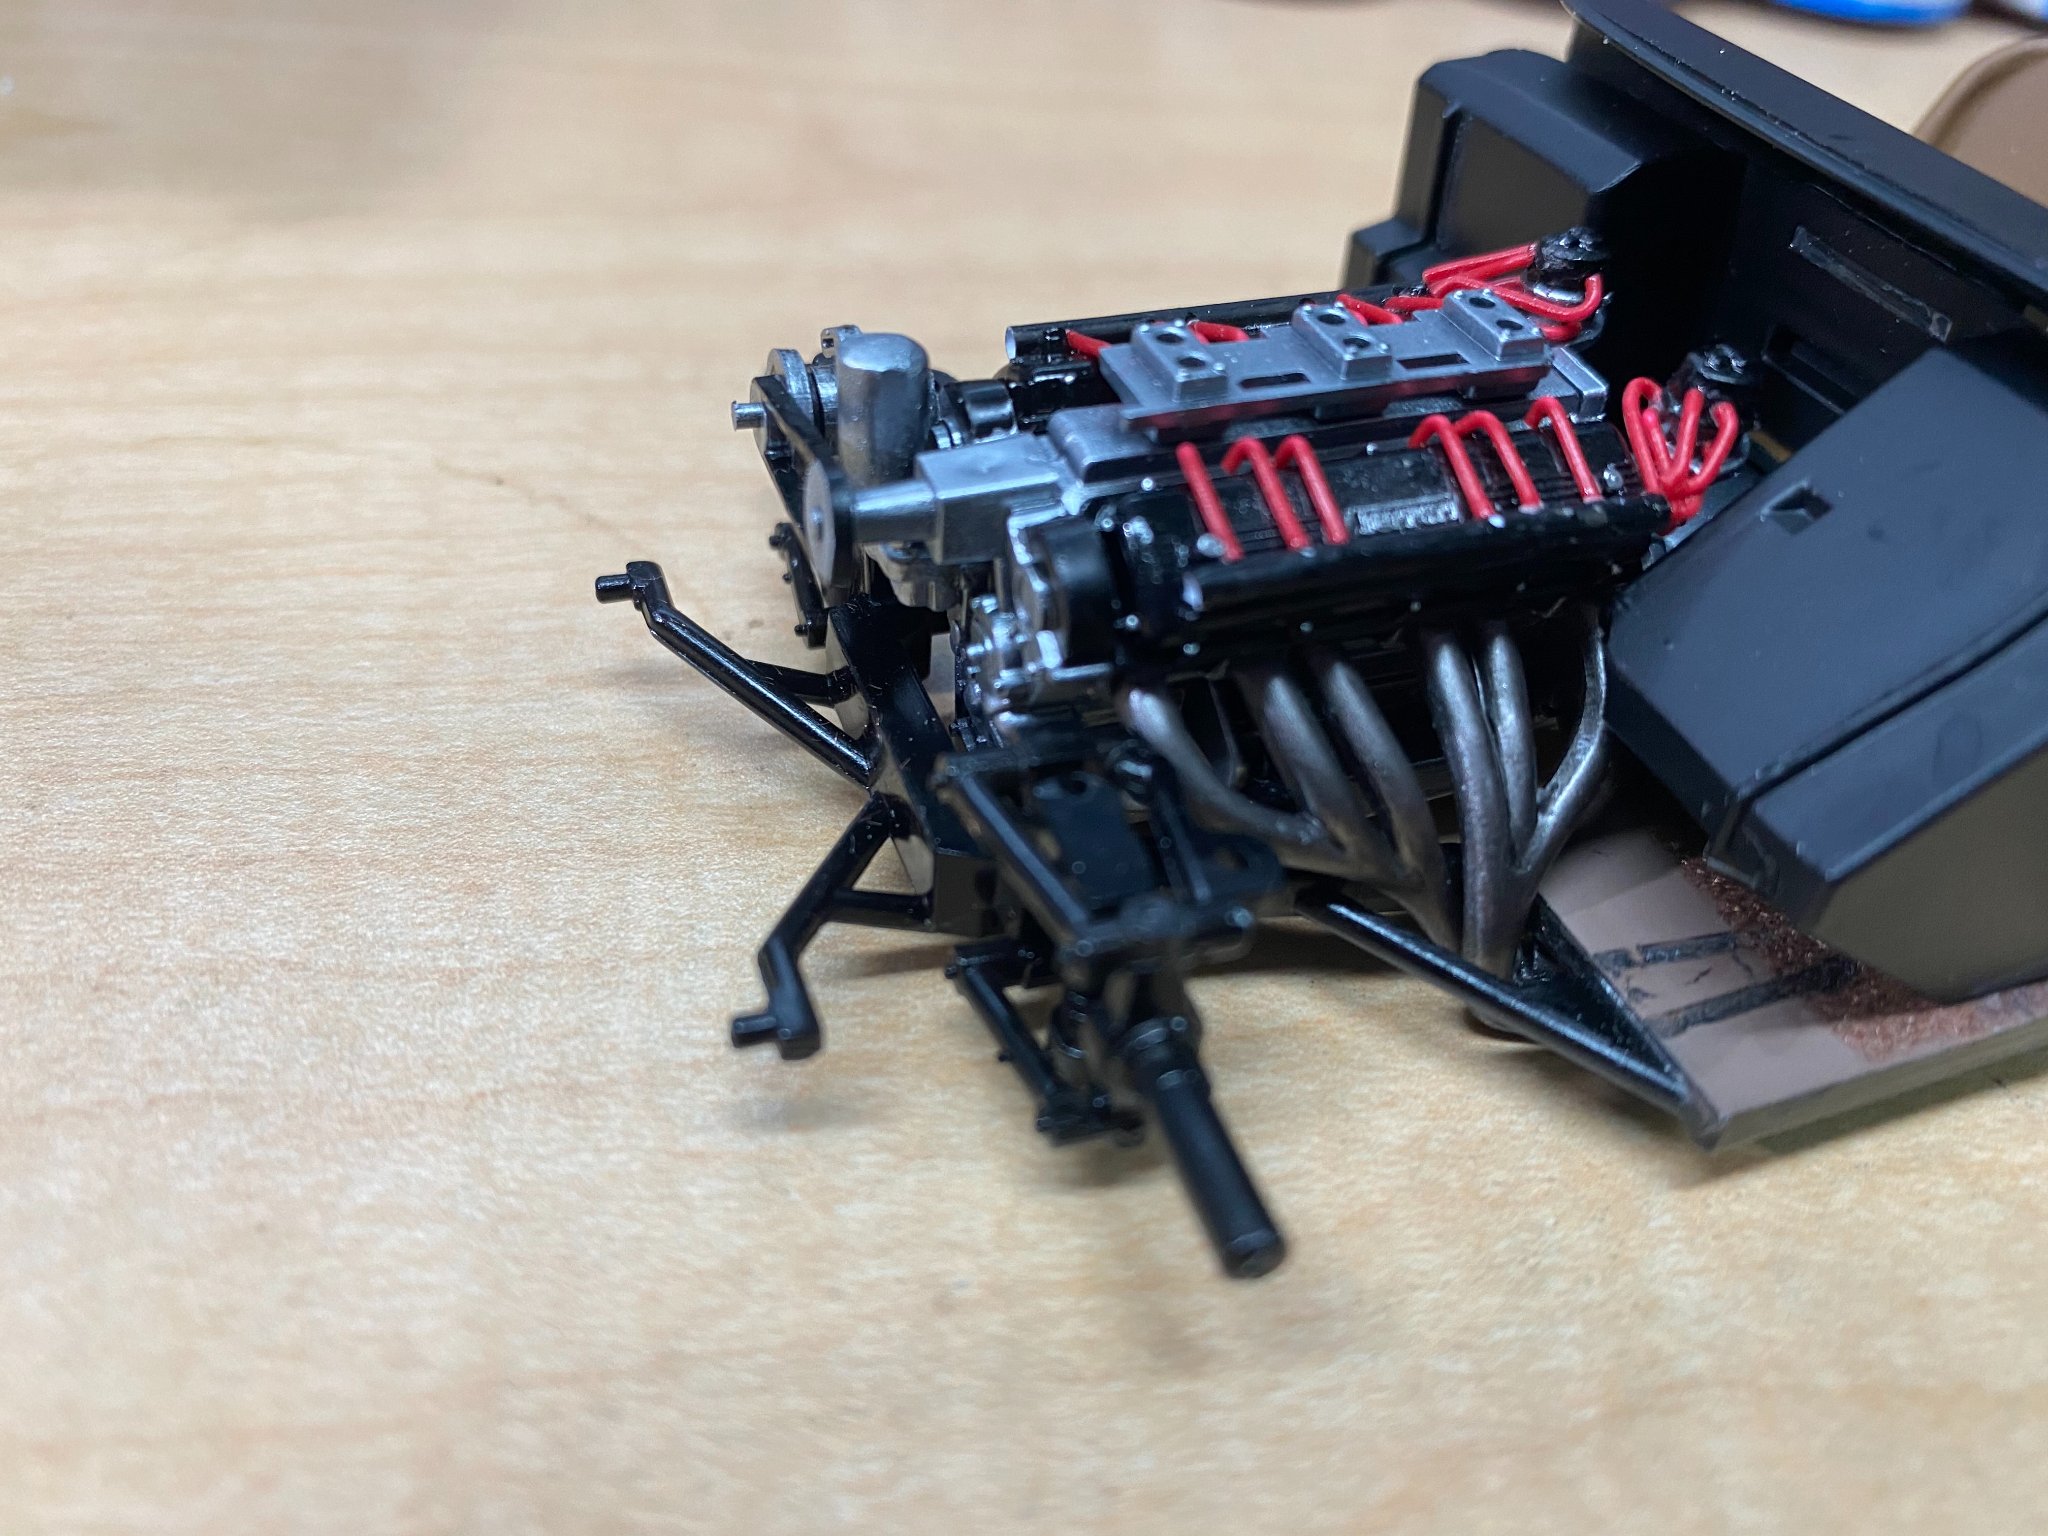
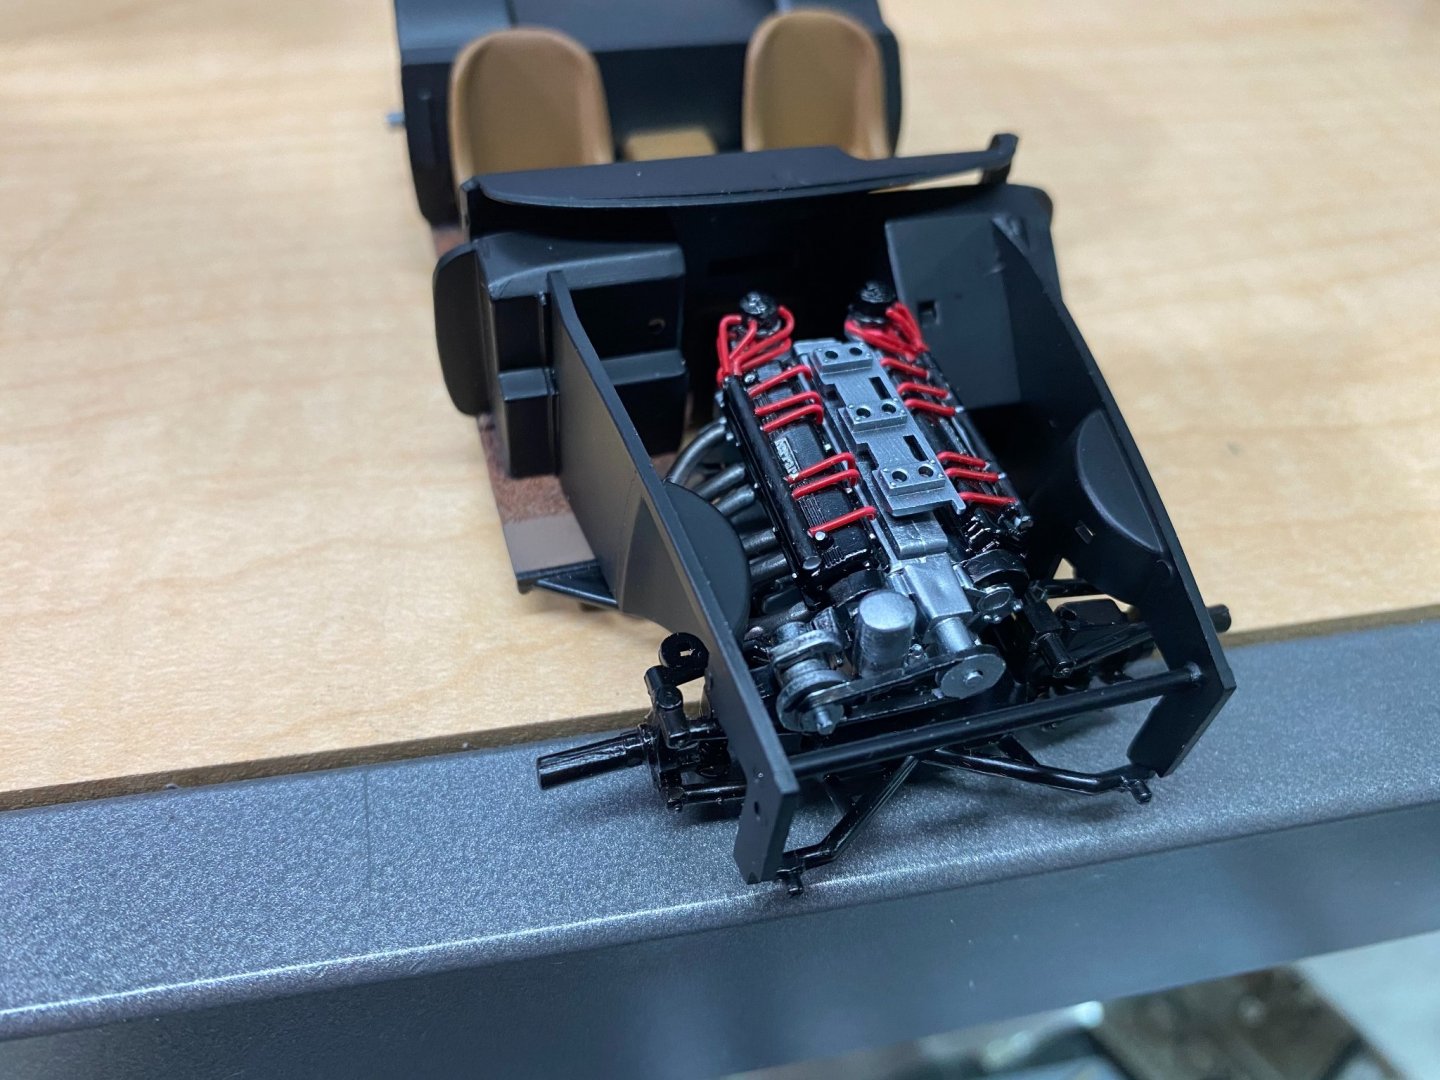
It's completely unrelated to the engine cover. Back when Italeri/Protar were producing these Ferrari kits there were several versions produced, including the 250 GTO and this 250 GT SWB (Short Wheel Base). Doing things on the cheap, they shared some common components in the kits rather than retooling for specific parts as it should have been. In this case, some of the interior pieces are not correct for the SWB and do not fit properly without modification. I'm also just now discovering I need to slightly modify the interior door panels as well. It's all good, it will get there. It's not a shake and bake kit like the Tamiya, Aoshima, and Hasegawa ones. Plus this kit is more than 30 years old.
-
My first "fit issue" has cropped up, where the dash rides higher than it should (I think). There are locator holes/pin arrangement that pre determines the height of it, but they seem to be off. Going to play with the dry fitting a bit more before I perform surgery on it, but the surgery should not be a problem if needed to lower it a bit. Here's what it looks like with the tires and wheels in place.


- 140 replies
-
- 11
-
-

-
One of the more decent-looking sets of molded plastic wire wheels I've found in a kit. Think I'll go with these over the aftermarket aluminum wire wheel sets I have on hand. The aluminum ones are a bit too narrow and I do not have a set of tires that fit the wheels properly. Not exactly crazy about the look of the kit stock tires, but they will have to do for now.
-
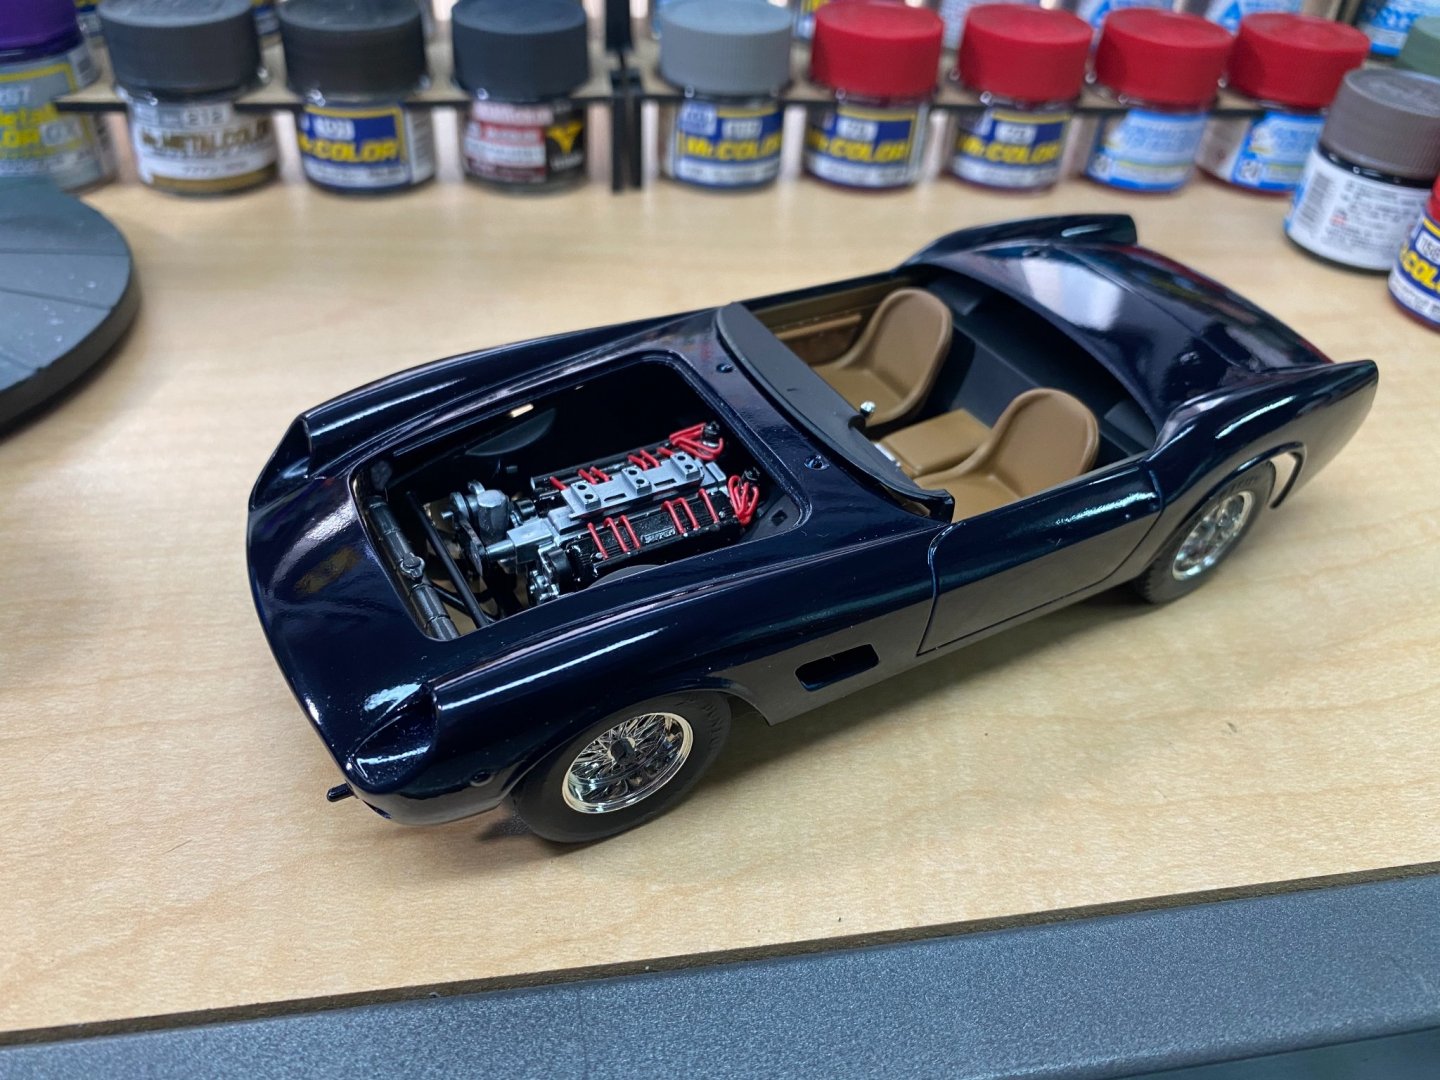
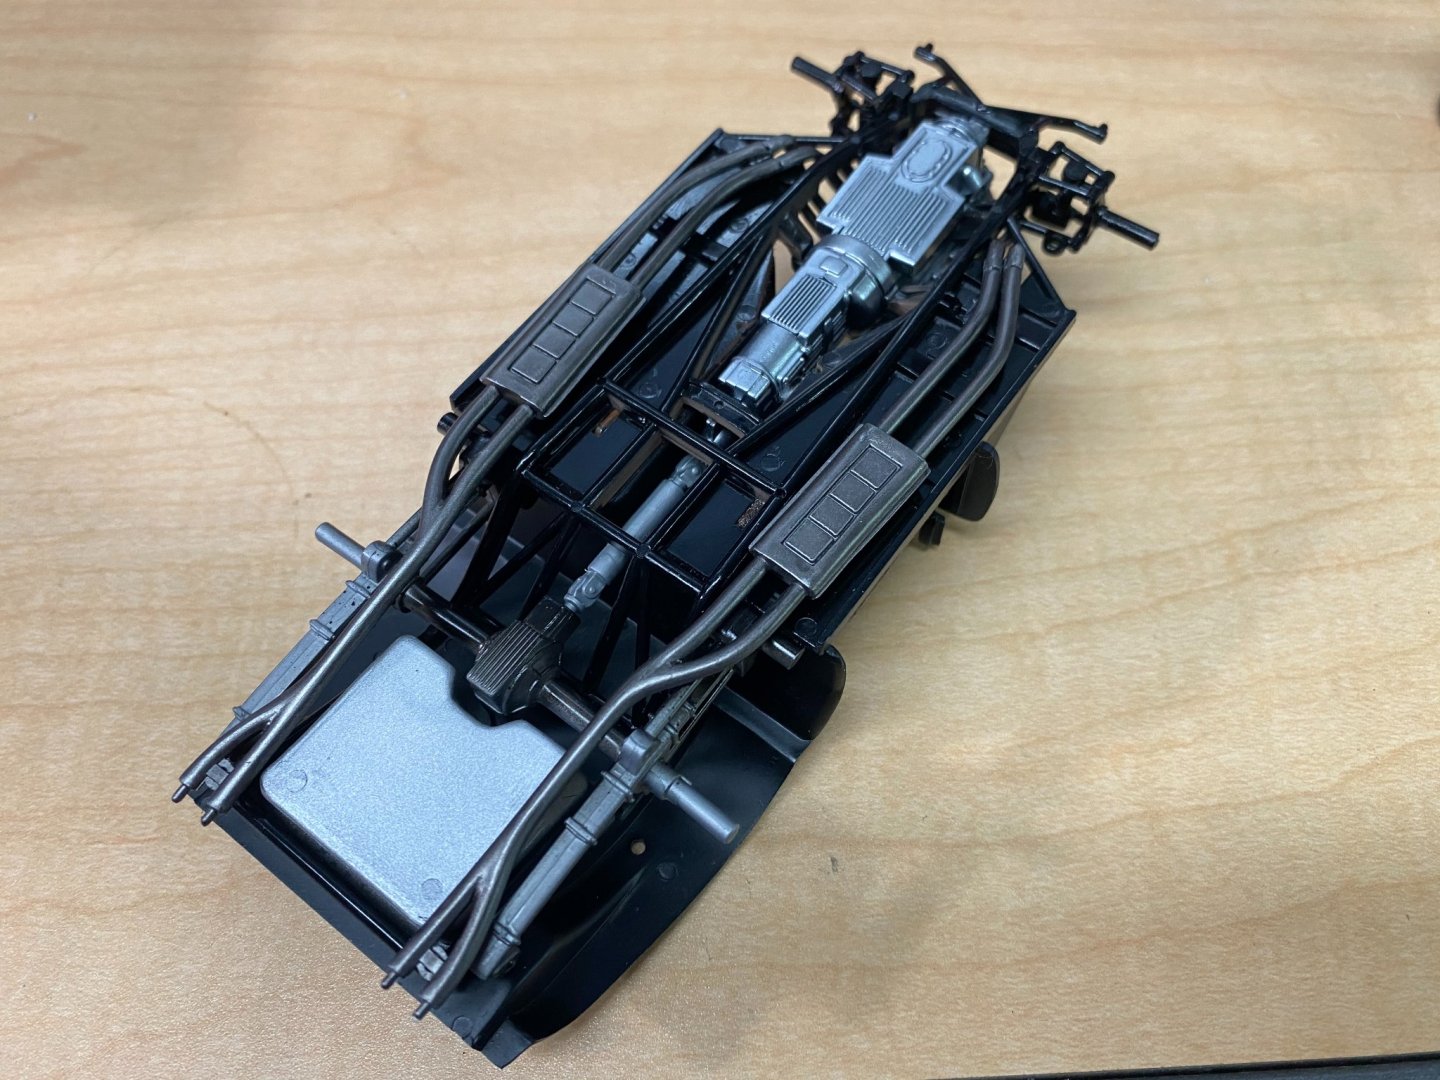
Thanks Mike. Later today I installed the exhaust headers, then the exhaust pipes and muffler assemblies. Then installed the engine well inner panels Installed the interior door panels And last, did my first body-to-chassis dry fit. Everything looks promising. No major fit issues so far.


- 140 replies
-
- 10
-
-
Lamborghini Veneno by CDW - Fujimi - 1:24 Scale - PLASTIC
CDW replied to CDW's topic in Non-ship/categorised builds
I once got to ride in one of these. Back in 1971, my brother had a friend he worked with who bought a brand new Pantera. The Pantera's were powered by a modified Ford 351 ci V-8, mid engine. The friend took me for a ride on the interstate in his new car. He leisurely accelerated over 120 mph and it steadily climbed faster while my pucker factor became intense. I had no idea what a car like that cost but I knew it had to be a lot. I asked my brother how he could afford a car like that on a plumber's salary and my brother laughed and said he bought it with drug money. The guy was smuggling drugs. Sheesh. Not too long after that, he was arrested, tried and convicted then incarcerated. I often wondered what became of his Pantera. Awesome car.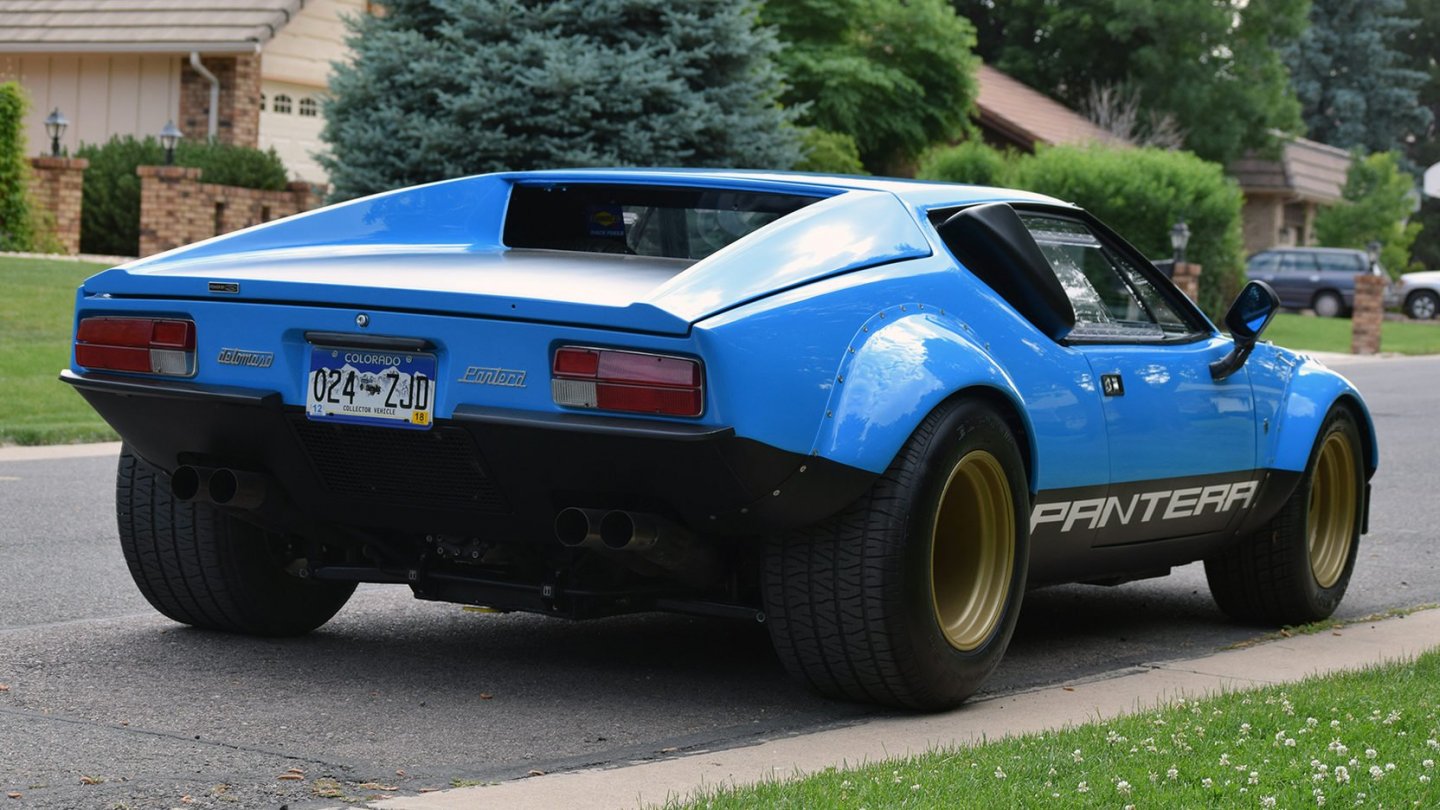
-
I boxed it up and shelved it when I left to take our daughter to live in New Hampshire last summer (June). I ended up taking the rest of the summer off from modeling while working on other projects around the house. Never got back to it until now.
-
Lamborghini Veneno by CDW - Fujimi - 1:24 Scale - PLASTIC
CDW replied to CDW's topic in Non-ship/categorised builds
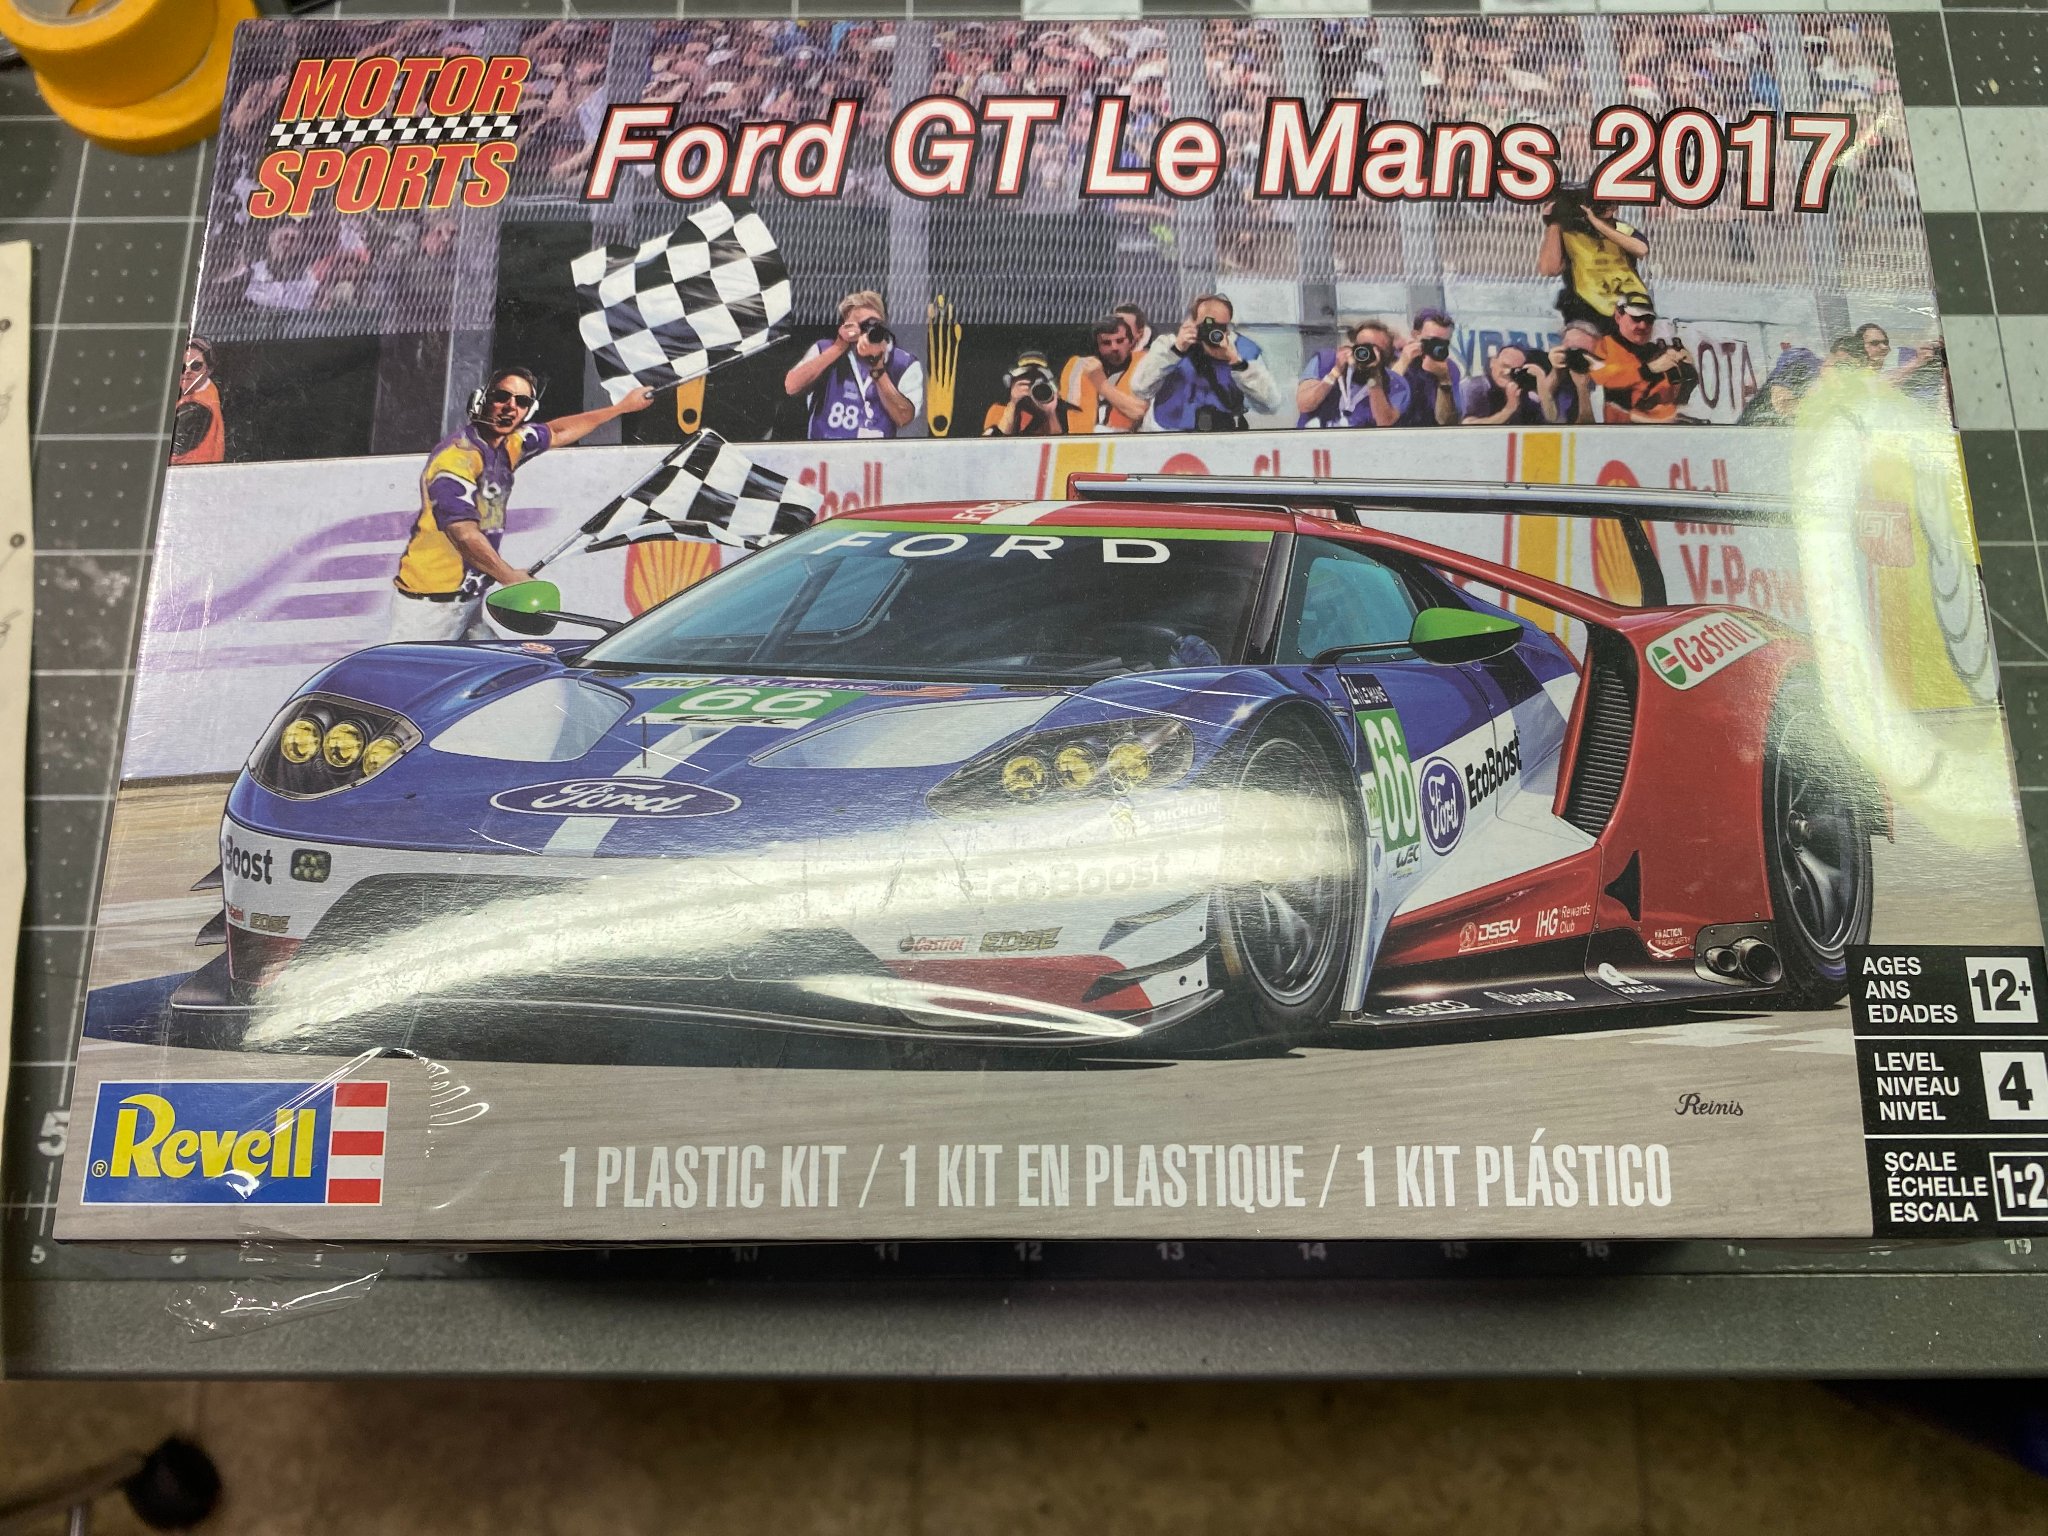
There are a couple of Ford GT's in my future. One is from Tamiya, the street version. The other is from Revell, the 2017 Le Mans version.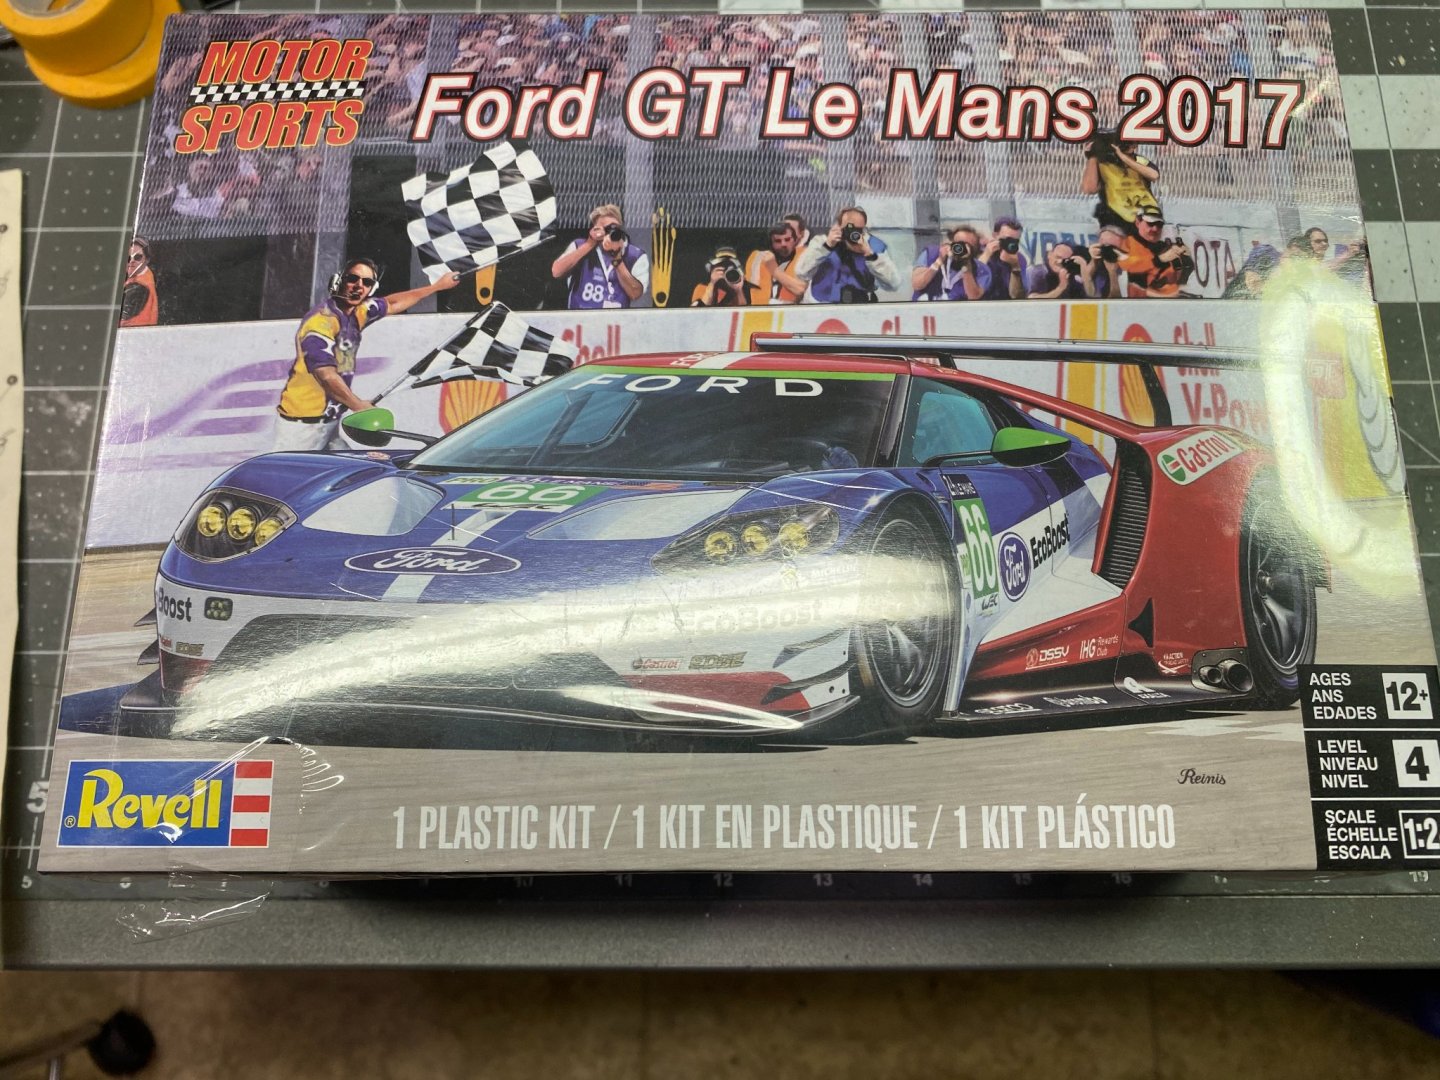
-
Lamborghini Veneno by CDW - Fujimi - 1:24 Scale - PLASTIC
CDW replied to CDW's topic in Non-ship/categorised builds
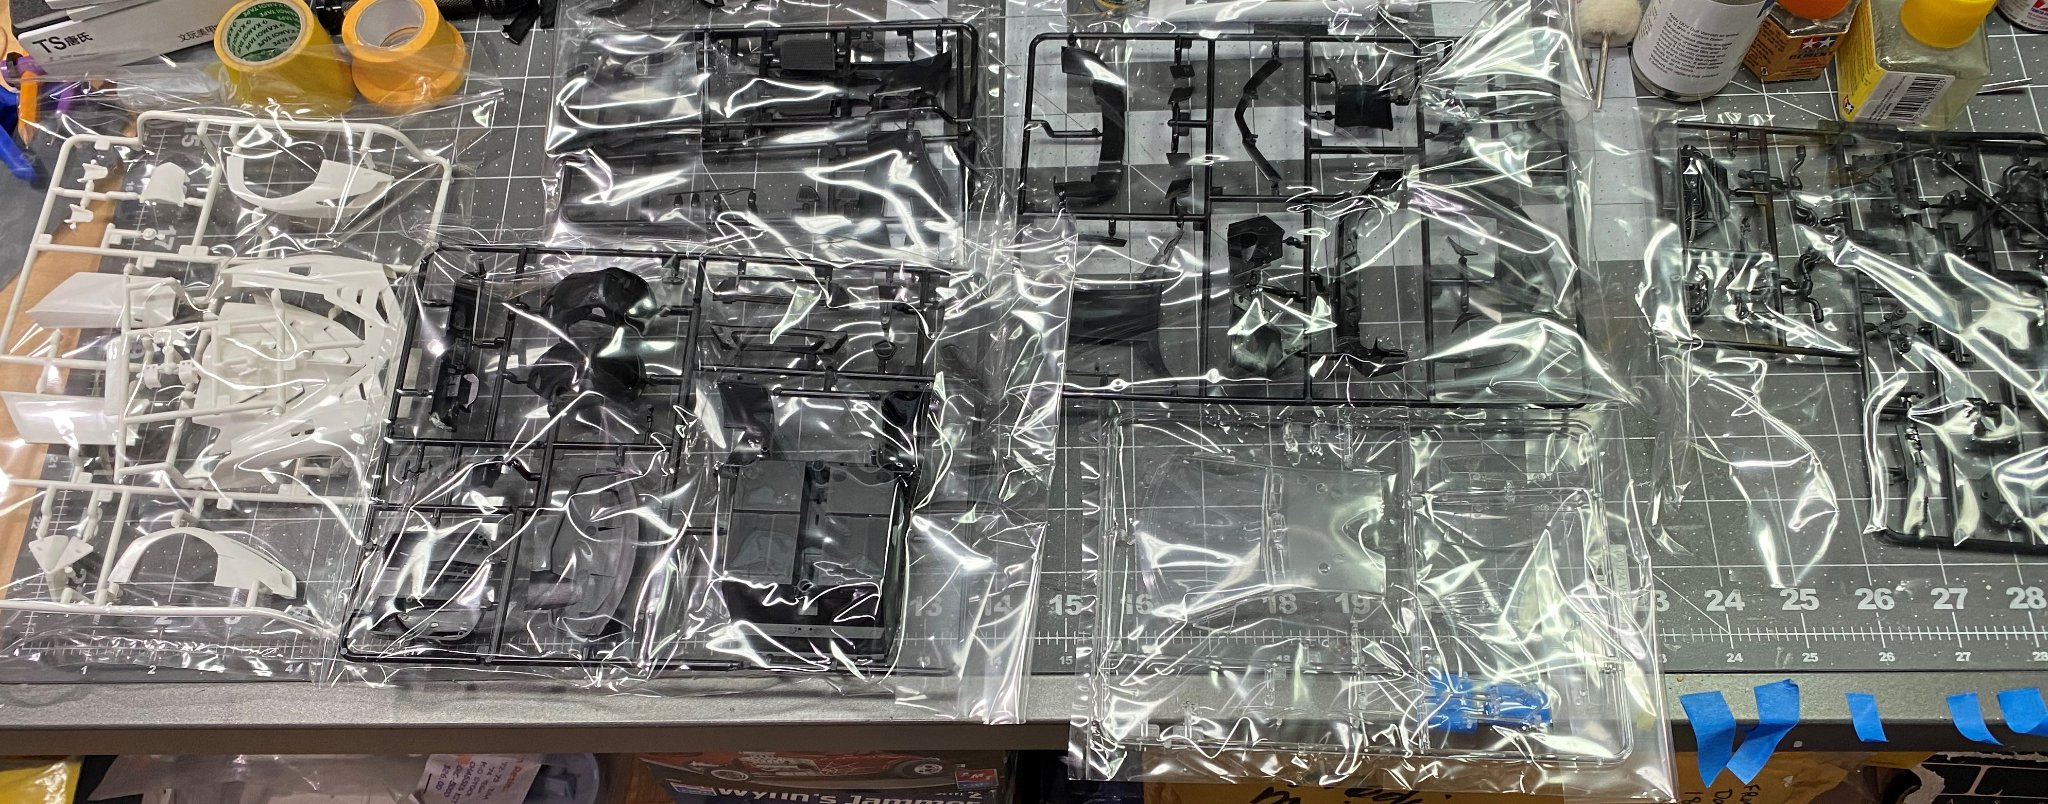
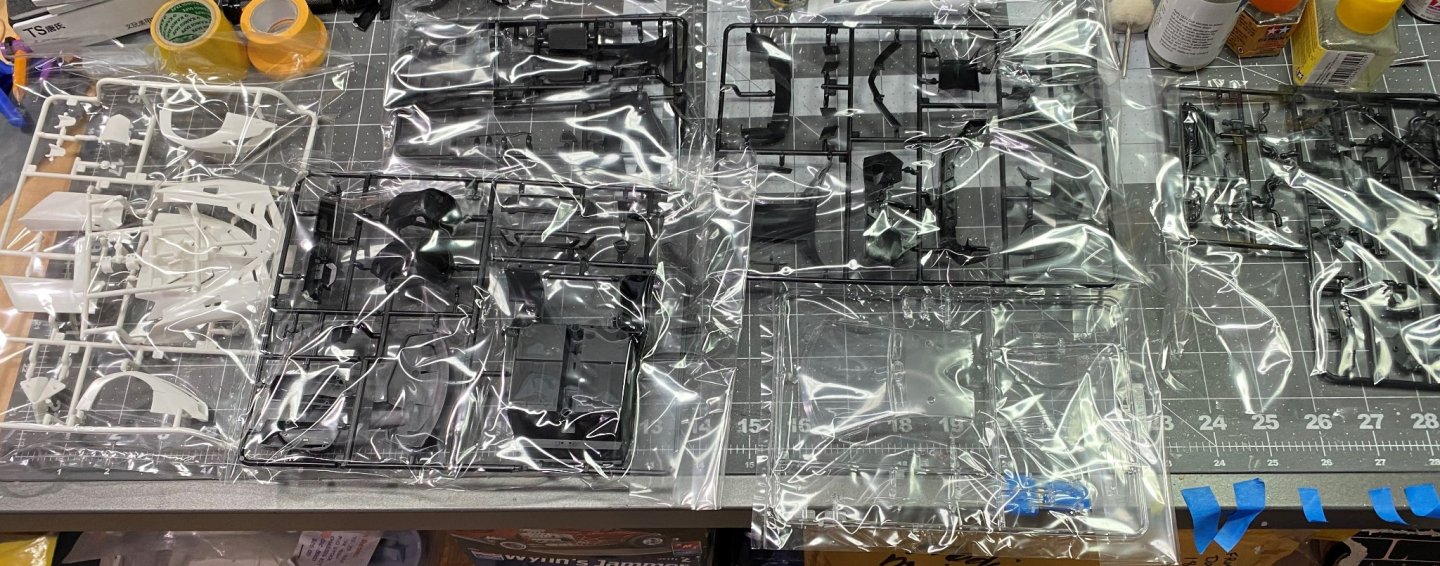
Thought it would be informative to give you a couple of photos showing all the unopened parts bags that come inside the kit box. Keep in mind, this is a just a curbside kit! Just imagine how many parts sprues would be required to produce a full drivetrain/suspension version of this model. It's very complex just as it is without anything extra.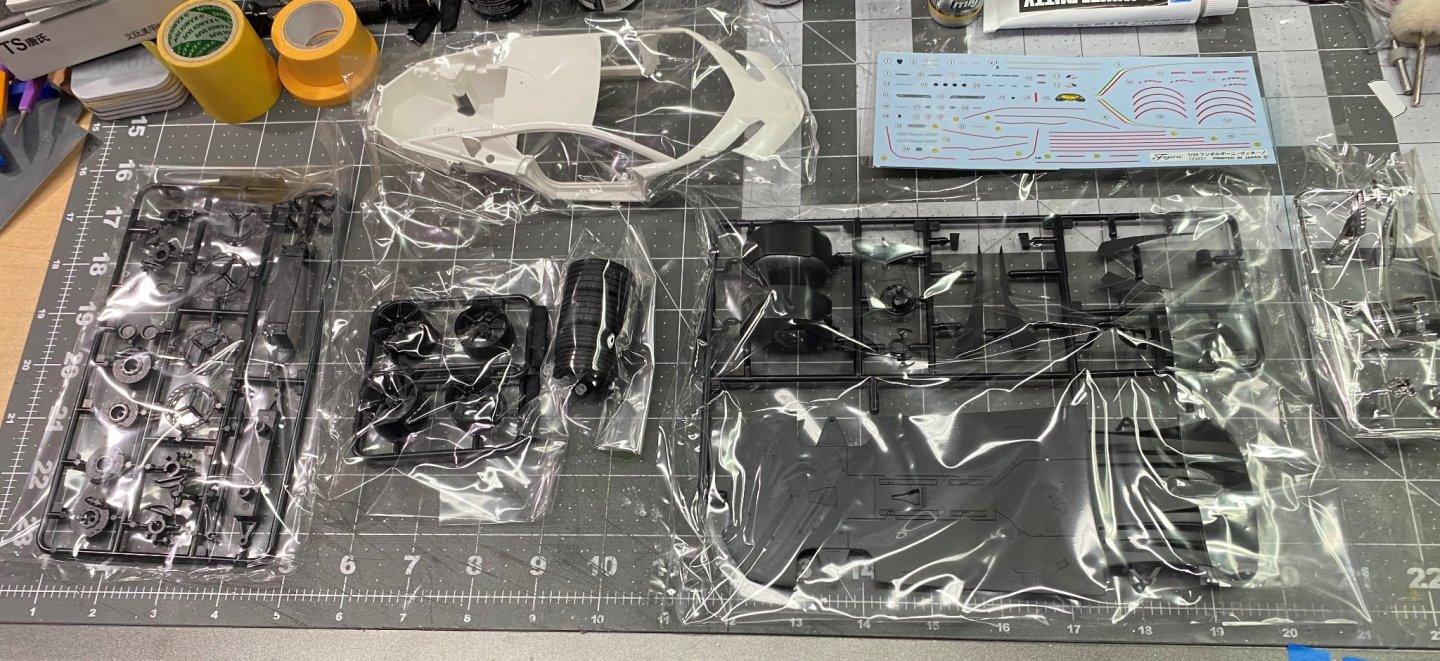
- 29 replies
-
- 12
-
-
Lamborghini Veneno by CDW - Fujimi - 1:24 Scale - PLASTIC
CDW replied to CDW's topic in Non-ship/categorised builds
I rather think it's like this: These days the cars for racing have to sacrifice aesthetics for aerodynamics and speed. Function over form. The older designs were much more pleasing to the eye in my opinion. Onward. -
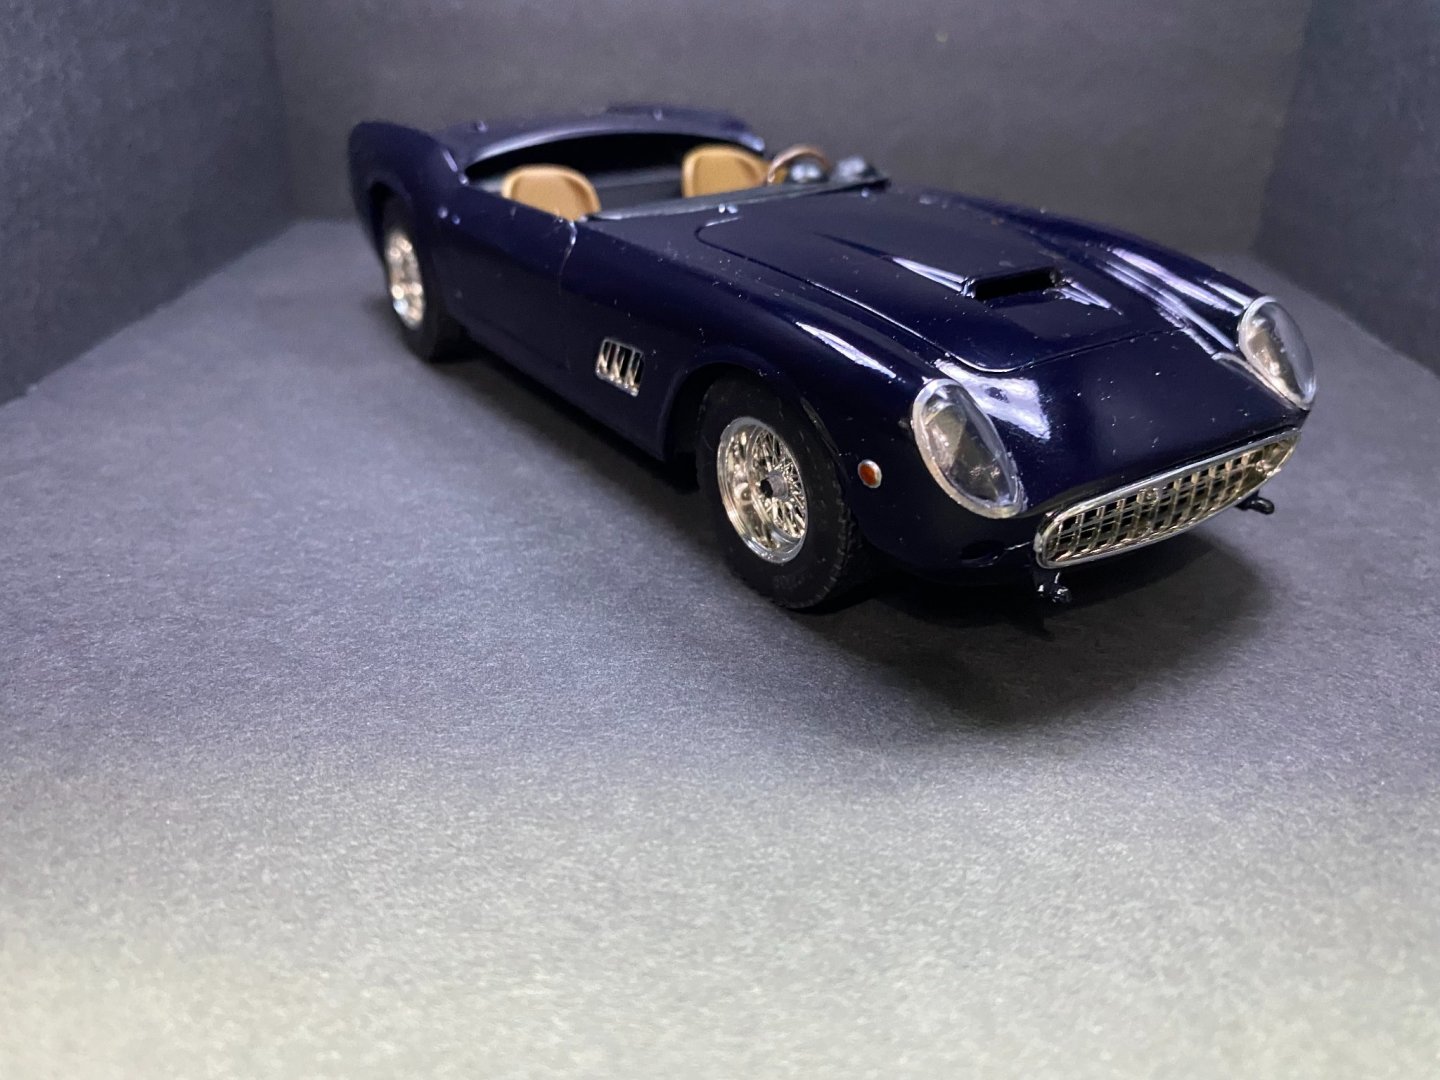
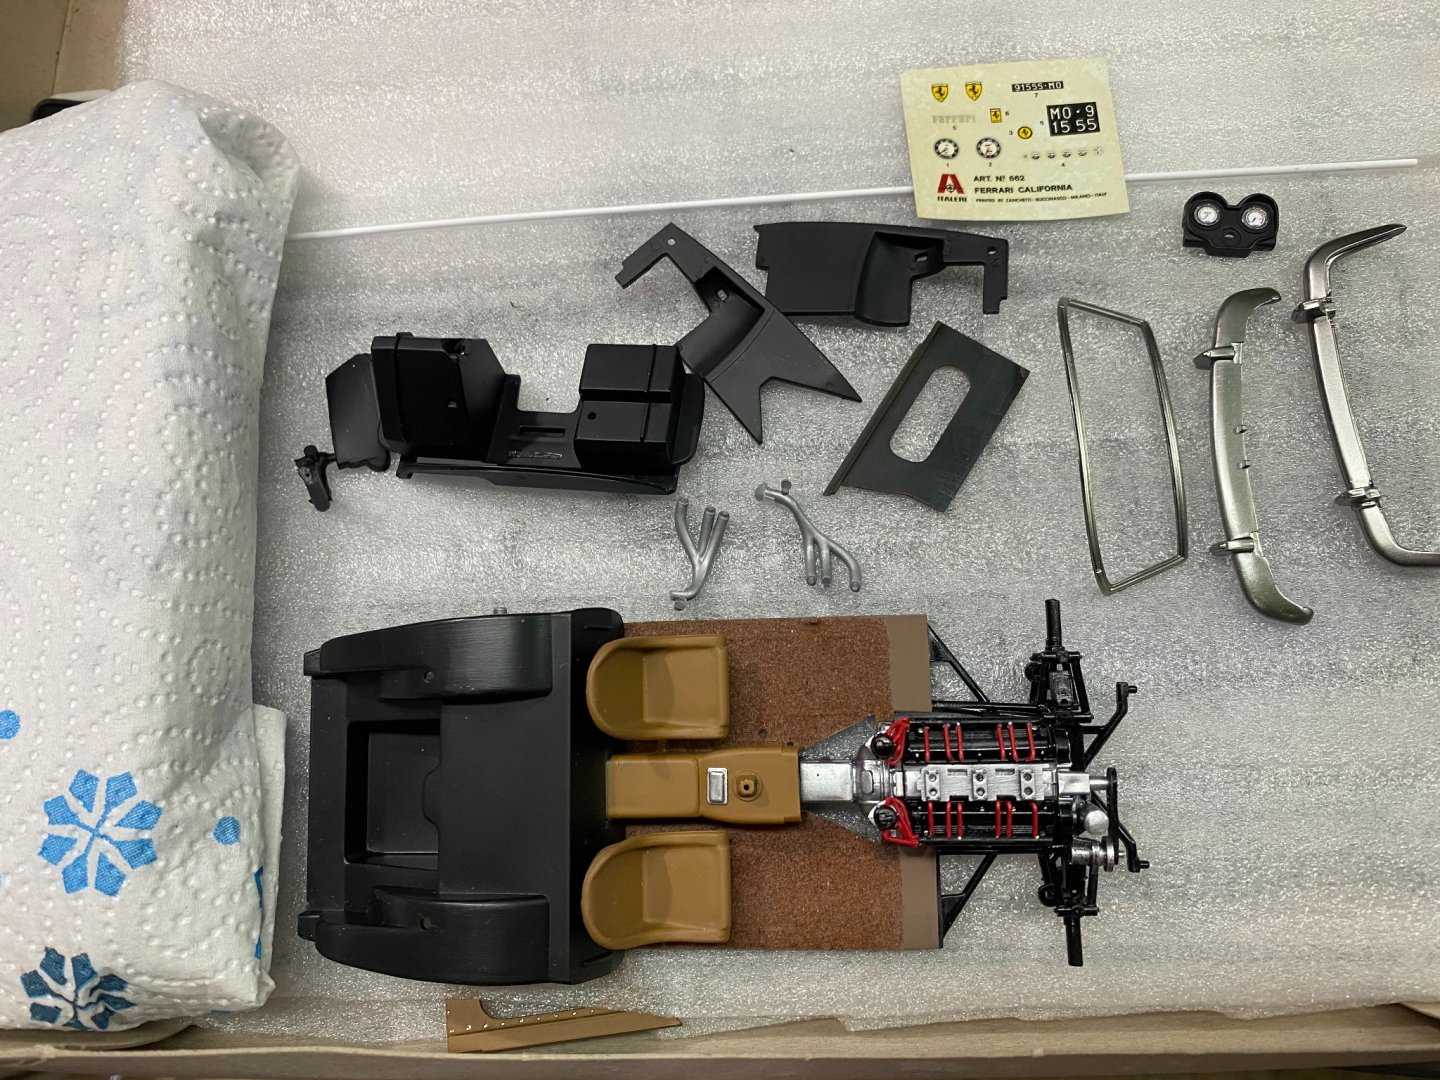
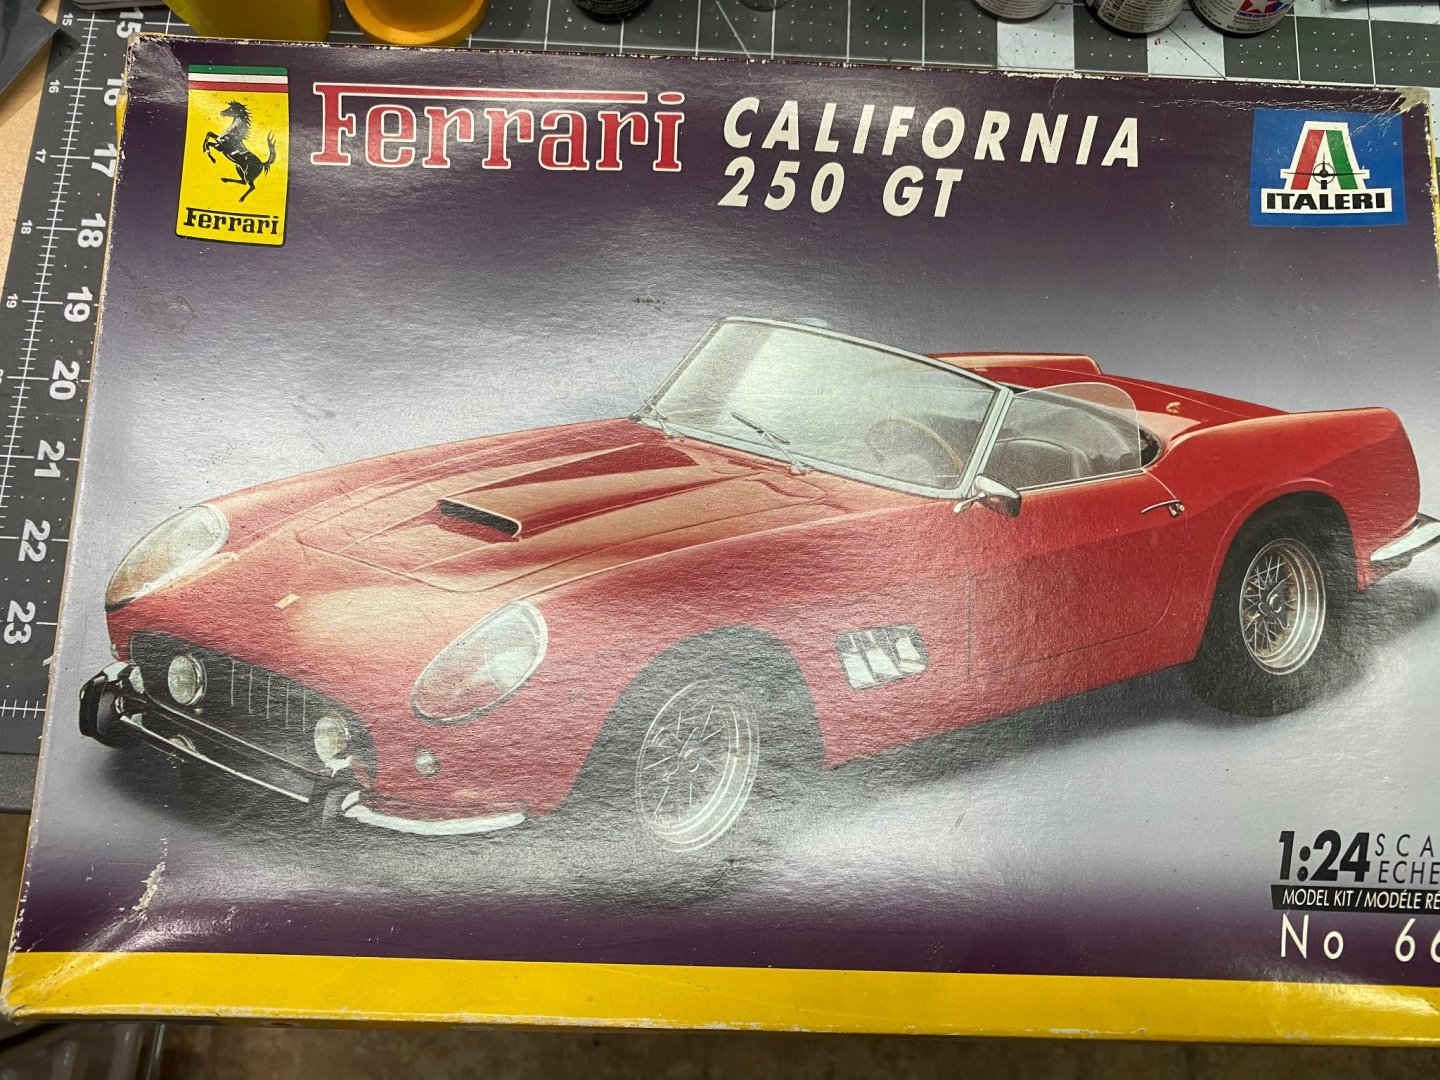
And this is the only kit I know of for this particular version of Ferrari, the 250 GT California Spyder. This kit went out of production a long time ago and I had two of the kits for well over 20 years. They were not new when I bought them, probably made in the 80's.
-
Excellent work Mike! If it was me, I would clear coat before the rigging.
- 179 replies
-
- 8
-
-
- hatsuzakura
- pit road
- (and 2 more)
-
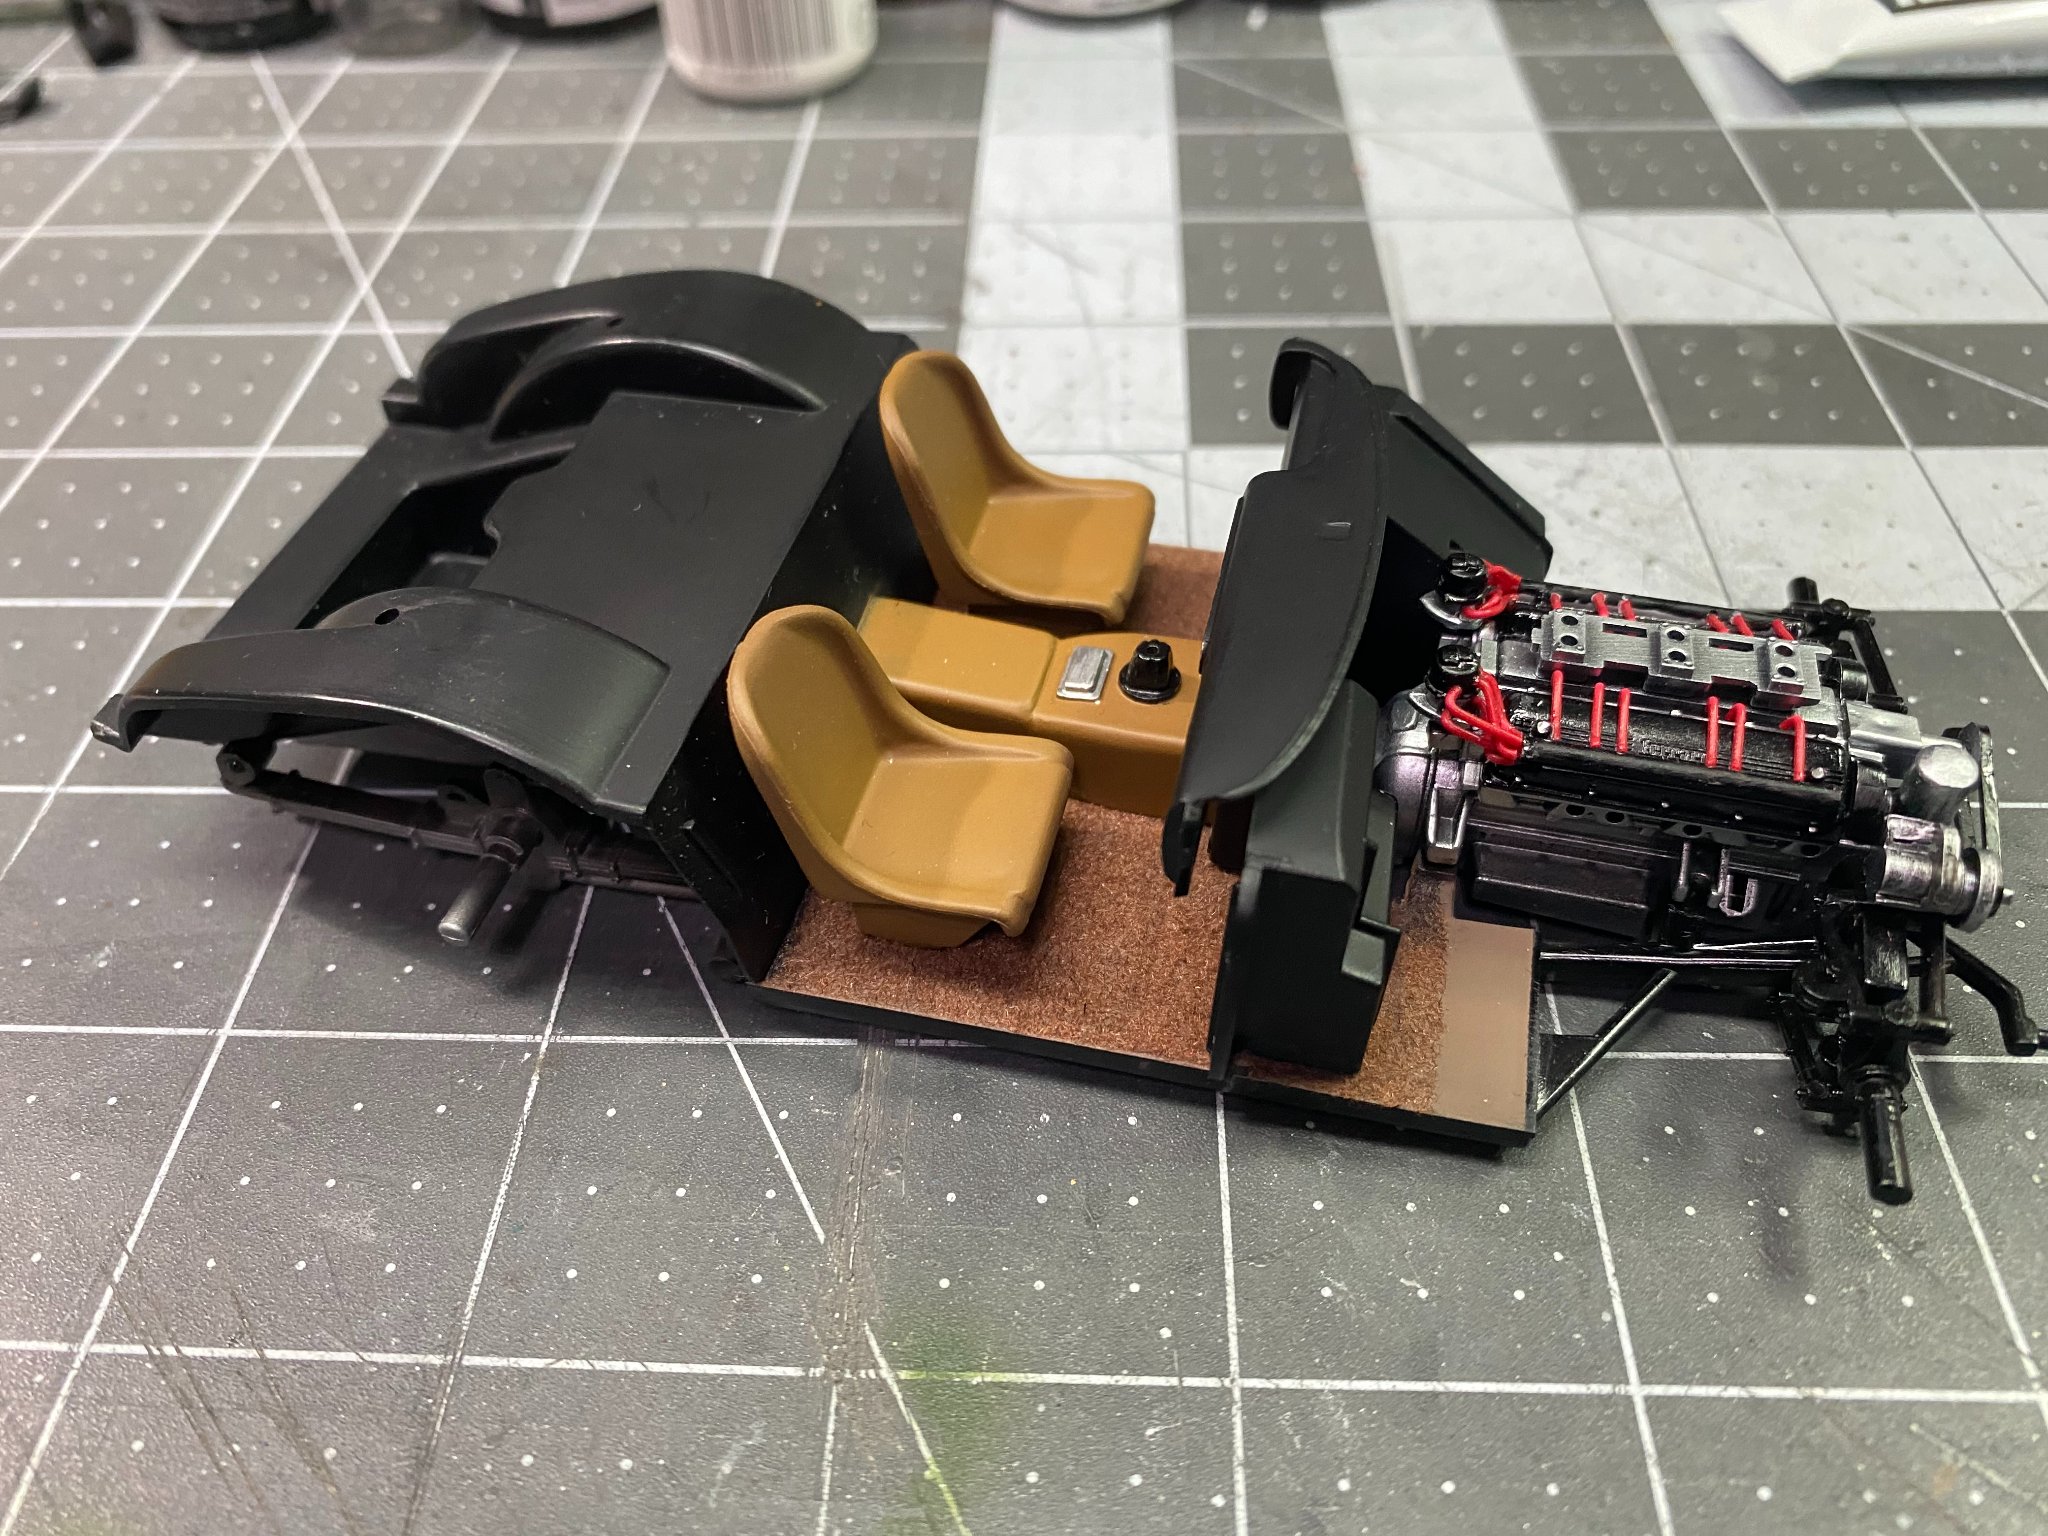
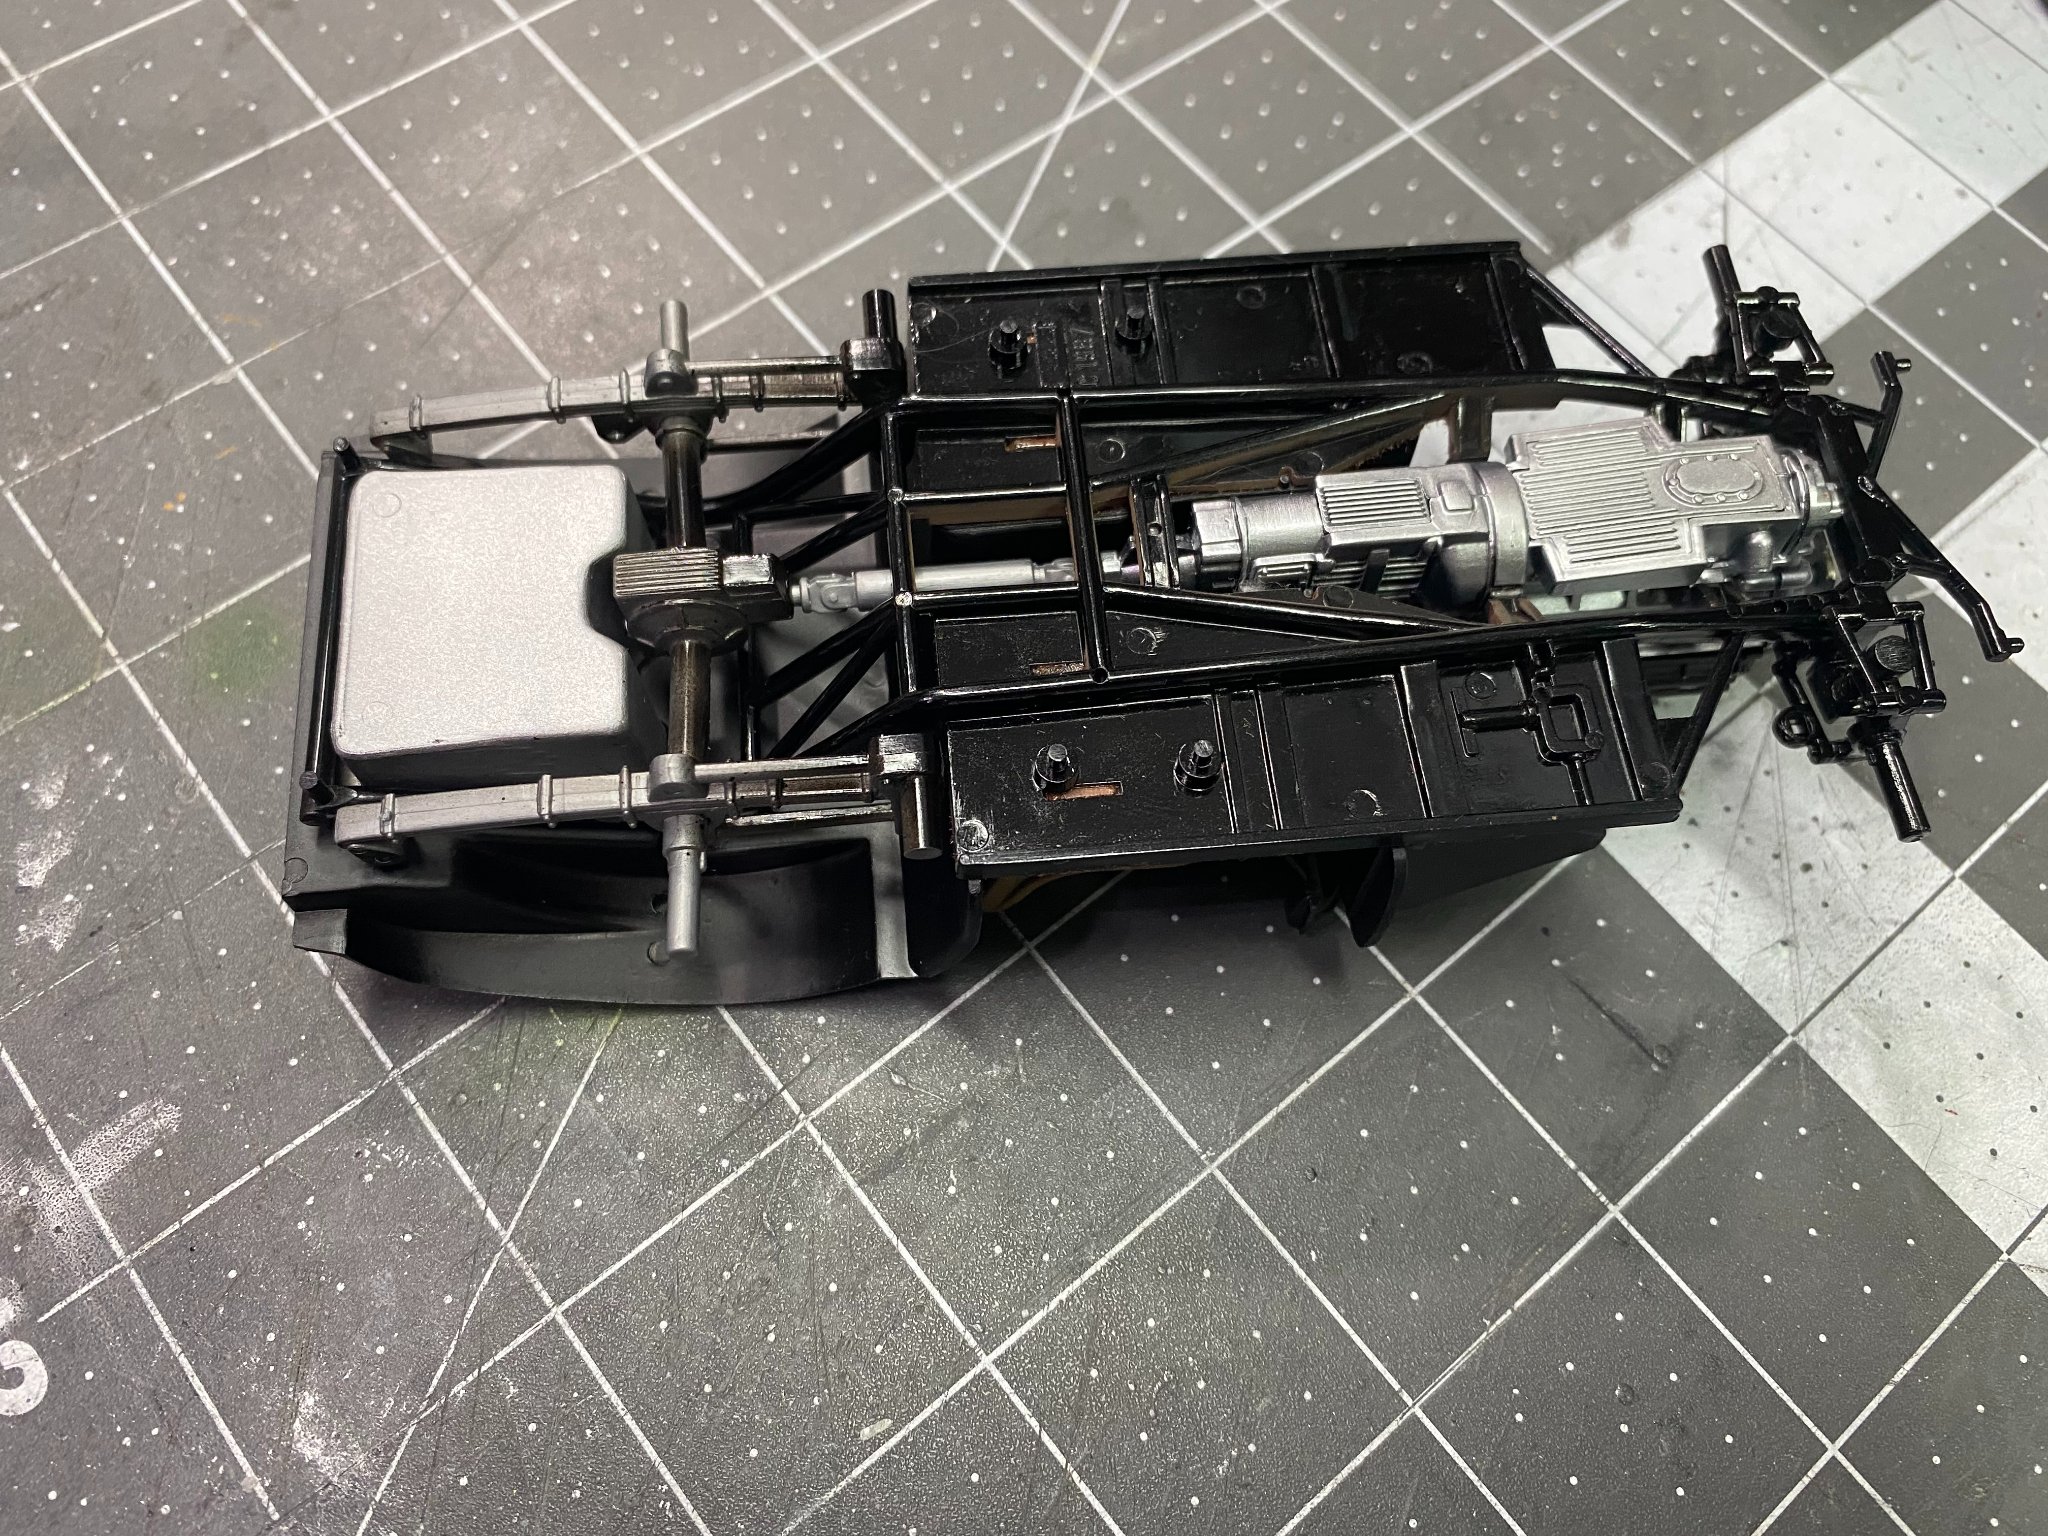
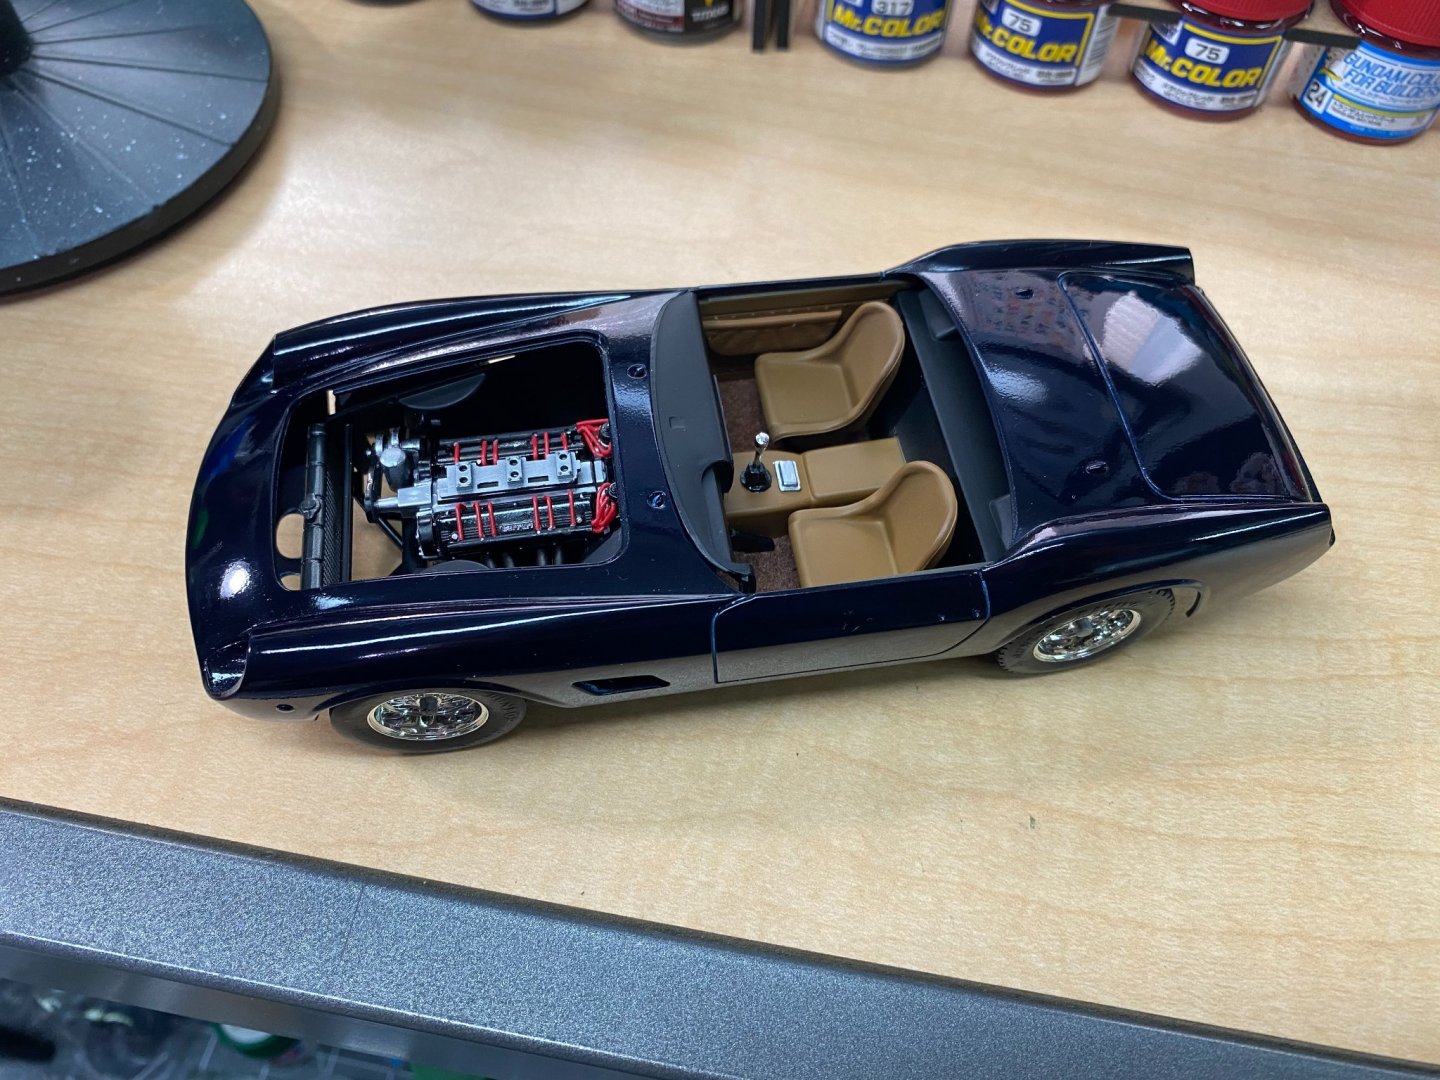
For reasons I don't recall, I let this project die on the vine. While I'm waiting for paint on my next project, decided to move forward to finish this little Ferrari 250 GT California Spyder. Here is where I left off. Much of the sub assembly construction has been completed. Just need to put it all together for the most part.
- 140 replies
-
- 10
-
-
Lamborghini Veneno by CDW - Fujimi - 1:24 Scale - PLASTIC
CDW replied to CDW's topic in Non-ship/categorised builds
Except for a brief period in the early 70's, the looks of most cars have gone downhill since the 60's in my opinion with some exceptions. The angular shape of this Veneno reminds me of a stealth bomber. Purpose designed in a wind tunnel no doubt. A car that's built to exceed 220 mph is not going to look normal. By the way, I need to pick up the paint colors I don't have on hand Monday before I can start this model. The way it's built, paint is needed almost straight out of the gate. -
Lamborghini Veneno by CDW - Fujimi - 1:24 Scale - PLASTIC
CDW replied to CDW's topic in Non-ship/categorised builds
I don't need to own a Lambo tractor for my baby to think I'm sexy. 😃 (129) Kenny Chesney- She Thinks My Tractor's Sexy - YouTube